
CN4 - Keyboard KAWAI - Free user manual and instructions
Find the device manual for free CN4 KAWAI in PDF.


| Product Type | Digital Piano |
| Brand | Kawai |
| Model | CN4 |
| Keyboard | 88 weighted keys, Graded Hammer Action |
| Touch Sensitivity | 5 levels (Light, Normal, Heavy, Off, User) |
| Polyphony | 256 notes |
| Internal Sounds | 192 sounds including pianos, organs, strings, etc. |
| Effects | Reverb (6 types), Chorus (6 types), Effects (24 types) |
| Pedals | 3 pedals (Damper, Soft, Sostenuto) |
| Speakers | 30W x 2, stereo speakers |
| Display | 7-segment LED display |
| Connectivity | USB to Host, USB to Device, MIDI In/Out, Audio In/Out, Headphones (2) |
| Bluetooth | Bluetooth MIDI and Audio (optional, not standard) |
| Dimensions (Width x Depth x Height) | 136 cm x 38 cm x 84 cm (approximately) |
| Weight | 45 kg (approximately) |
| Power Supply | AC adapter (included) |
| Power Consumption | 15 W |
| Accessories | Music rest, power adapter, owner's manual, warranty card |
| Maintenance | Clean with a soft, dry cloth. Avoid moisture and direct sunlight. |
| Safety | Do not disassemble. Use only the specified power adapter. |
Frequently Asked Questions - CN4 KAWAI
User questions about CN4 KAWAI
0 question about this device. Answer the ones you know or ask your own.
Ask a new question about this device
Download the instructions for your Keyboard in PDF format for free! Find your manual CN4 - KAWAI and take your electronic device back in hand. On this page are published all the documents necessary for the use of your device. CN4 by KAWAI.
USER MANUAL CN4 KAWAI
Alfred's Basic Piano Library
Owner's Manual
Important Safety Instructions
SAVE THESE INSTRUCTIONS
INSTRUCTIONS PERTAINING TO A RISK OF FIRE, ELECTRIC SHOCK, OR INJURY TO PERSONS

CAUTION
RISK OF ELECTRIC SHOCK DO NOT OPEN

WARNING
TO REDUCE THE RISK OF FIRE OR ELECTRIC SHOCK, DO NOT EXPOSE THIS PRODUCT TO RAIN OR MOISTURE.
AVIS : RISQUE DE CHOC ELECTRIQUE - NE PAS OUVRIR.
TO REDUCE THE RISK OF ELECTRIC SHOCK, DO NOT REMOVE COVER (OR BACK).
NO USER-SERVICEABLE PARTS INSIDE. REFER SERVICING TO QUALIFIED SERVICE PERSONNEL.

The lighting flash with arrowhead symbol, within an equilateral triangle, is intended to alert the user to the presence of uninsulated 'dangerous voltage' within the product's enclosure that may be of sufficient magnitude to constitute a risk of electric shock to persons.

The exclamation point within an equilateral triangle is intended to alert the user to the presence of important operating and maintenance (servicing) instructions in the literature accompanying the product.
Examples of Picture Symbols
| denotes that care should be taken.The example instructs the user to take care not to allow fingers to be trapped. | |
 | denotes a prohibited operation.The example instructs that disassembly of the product is prohibited. |
 | denotes an operation that should be carried out.The example instructs the user to remove the power cord plug from the AC outlet. |
Read all the instructions before using the product.
WARNING - When using electric products, basic precautions should always be followed, including the following.

WARNING
Indicates a potential hazard that could result in death or serious injury if the product is handled incorrectly.
The product should be connected to an AC outlet of the specified voltage.


- If you are going to use an AC power cord, make sure that its has the correct plug shape and conforms to the specified power voltage.
- Failure to do so may result in fire.
Do not insert or disconnect the power cord plug with wet hands.

Doing so may cause electric shock.
The chair must be used properly (it must be used only when playing the product).
● Do not play with it or stand on it.
● Only one person is allowed to sit on it.
● Do not sit on it when opening the lid.
● Re-tighten the bolts occasionally.
Doing so may cause the chair to fall over or your fingers to be trapped, resulting in injury.
When using the headphones, do not listen for long periods of time at high volume levels.
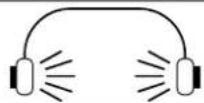
Doing so may result in hearing problems.
Do not lean against the keyboard.

Doing so may cause the product to fall over, resulting in injury.
Do not disassemble, repair or modify the product.

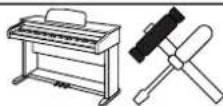
Doing so may result in product breakdown, electric shock or short-circuit.
When disconnecting the AC power cord's plug, always hold the plug and pull it to remove it.

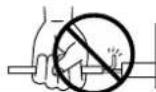
● Pulling the AC power cord itself may damage the cord, causing a fire, electric shock or short-circuit.
The product is not completely disconnected from the power supply even when the power switch is turned off. If the product will not be used for a long time, unplug the AC power cord from the AC outlet.

- Failure to do so may cause fire in case of lightning. - Failure to do so may over-heat the product, resulting in fire.
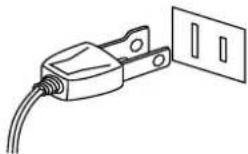
This product may be equipped with a polarized line plug (one blade wider than the other). This is a safety feature. If you are unable to insert the plug into the outlet, contact an electrician to replace your obsolete outlet. Do not defeat the safety purpose of the plug.

CAUTION
Indicates a potential hazard that could result in injury or damage to the product or other
Do not use the product in the following areas.
● Areas, such as those near windows, where the product is exposed to direct sunlight
● Extremely hot areas, such as near a heater
● Extremely cold areas, such as outside
● Extremely humid areas
● Areas where a large amount of sand or dust is present
● Areas where the product is exposed to excessive vibrations
Using the product in such areas may result in product breakdown. Use the product only in moderate climates (not in tropical climates).
When you close the keyboard cover, close it gently.

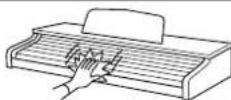
Closing it roughly may trap your fingers, resulting in injury.
Before connecting cords, make sure that the power to this product and other devices is turned OFF.


Failure to do so may cause breakdown of this product and other devices.
Take care not to allow any foreign matter to enter the product.

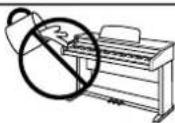
Entry of water, needles or hair pins may result in breakdown or short-circuit. The product shall not be exposed to dripping or splashing. No objects filled with liquids, such as vases, shall be placed on the product.
Do not drag the product on the floor. Take care not to drop the product.
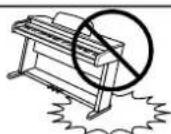
Please lift up the product when moving it. Please note that the product is heavy and must be carried by more than two persons. Dropping the product may result in breakdown.
Do not place the product near electrical appliances such as TVs and radios.

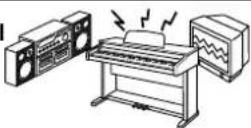
● Doing so may cause the product to generate noise.
- If the product generates noise, move the product sufficiently away from the electrical appliance or connect it to another AC outlet.
When connecting the AC power cord and other cords, take care not to get them tangled.


Failure to do so may damage them, resulting in fire, electric shock or short-circuit.
Do not wipe the product with benzene or thinner.
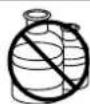
● Doing so may result in discoloration or deformation of the product.
- When cleaning the product, put a soft cloth in lukewarm water, squeeze it well, then wipe the product.
Do not stand on the product or exert excessive force.
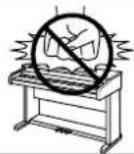
● Doing so may cause the product to become deformed or fall over, resulting in breakdown or injury.
The product should be located so that its location or position does not interfere with its proper ventilation. Ensure a minimum distance of 5cm around the product for sufficient ventilation. Ensure that the ventilation is not impeded by covering the ventilation openings with items, such as newspaper, table-cloths, curtains, etc.
Do not place naked flame sources, such as lighted candles on the product.
The product should be serviced by qualified service personnel when:
● The power supply cord or the plug has been damaged.
- Objects have fallen, or liquid has been spilled into the product.
● The product has been exposed to rain.
● The product does not appear to operate normally or exhibits a marked change in performance.
● The product has been dropped, or the enclosure damaged.
Notes on Repair
Should an abnormality occur in the product, immediately turn the power OFF, disconnect the power cord plug, and then contact the shop from which the product was purchased.
CAUTION:
To prevent electric shock, match wide blade of plug to wide slot, fully insert.
ATTENTION:
Instruction for AC power cord (U.K.)
Do not plug either terminal of the power cord to the ground of the AC outlet on the wall.
Declaration of Conformity according to FCC Part 15
Responsible Party: Kawai America Corporation
Address: 2055 East University Drive, Rancho Dominguez, CA 90220
Telephone: (310) 631-1771
declares that the product: Digital Piano CN4
complies with Part 15 of the FCC Rules.
This device complies with Part 15 of the FCC Rules. Operation is subject to the following two conditions: (1) this device may not cause harmful interference, and (2) this device must accept any interference received, including interference that may cause undesired operation.
NOTE: This equipment has been tested and found to comply with the limits for a Class B digital device, pursuant to Part 15 of the FCC Rules. These limits are designed to provide reasonable protection against harmful interference in a residential installation. This equipment generates, uses and can radiate radio frequency energy and, if not installed and used in accordance with the instructions, may cause harmful interference to radio communications.
If this equipment does cause harmful interference to radio or television reception, which can be determined by turning the equipment off and on, the user is encouraged to try to correct the interference by one or more of the following measures:
- Reorient or relocate the receiving antenna.
- Increase the separation between the equipment and receiver.
- Connect the equipment into an outlet on a different electrical circuit from the receiver.
- Consult the dealer or an experienced radio/TV technician for help.
FCC WARNING: Changes or modifications not expressly approved by the party responsible for compliance could void the user's authority to operate the equipment.
Canadian Radio Interference Regulations
This instrument complies with the limits for a class B digital apparatus, pursuant to the Radio Interference Regulations, C.R.C., c. 1374.
THANK YOU FOR PURCHASING A KAWAI DIGITAL PIANO!
The Kawai digital piano is a revolutionary new keyboard instrument that combines the latest in electronic advances with traditional craftsmanship inherited from Kawai's many years of experience in building fine pianos. Its keyboard provides the touch response and full dynamic range required for a superb performance on the piano, harpsichord, organ, and other instruments. In addition, the CN piano is equipped with reverb and a digital effect processor for an even fuller sound. Industry-Standard MIDI (Musical Instrument Digital Interface) jacks are included which allow you to play other electronic instruments at the same time—opening a whole new world of musical possibilities.
This Owner's Manual contains valuable information that will help you make full use of this instrument's many capabilities. Please read all sections carefully and keep this manual handy for further reference.
READ ME FIRST
Before beginning the assembly of your CN4 read and become familiar with the assembly instructions that follow. Then, carefully unpack the piano and check your unit against the parts list.
PARTS PROVIDED
Side Panel (A) 2 pcs. Back Board (B) 1 pc. Pedal Board (C) 1 pc. Screw (D) (M6 x 25) 4 pcs. Screw (E) (ø4 x 16) 6 pcs. Screw (F) (ø4 x 25) 2 pcs. Adjuster (G) 1 pc. Cord Clamp (H) 1 pc. Headphone Hook 1 pc.
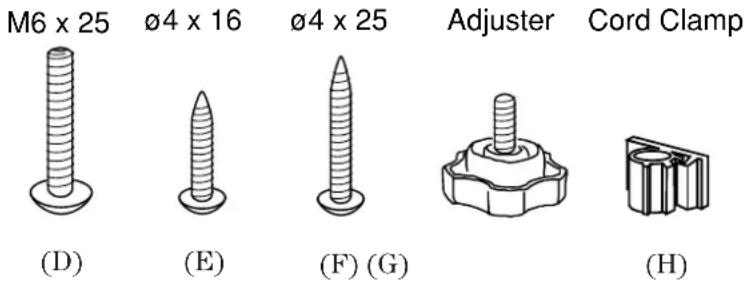


- Insert the Adjuster (G) on the Pedal Unit.
- Untie the pedal cable on the bottom of the Pedal Board (C).
-
Slide the metal bracket located at the end of Pedal Board (C) on to screws (a) and (b) of Side Panel (A). Install tighten screw (E) then tighten screws (a) and (b). Repeat this procedure on the other end of the Pedal Board, then raise the completed stand assembly.
-
Fasten Side Panel (A) and Back Panel (B) with two screws (F). Then fix Back Panel (B) to Pedal Board (C) with four screws (E).

CAUTION:
To prevent personal injury, do not handle the main unit from the ends.
-
The next step requires one person on each end of the main unit. Grasp the unit with both hands, one under the front, the other under the rear (remember, not the end) and carefully center the main unit on top of the stand so that the hook brackets located on the bottom rear of the main unit are inside the stand side panels (A) and approximately one-third of the rear, top edge of the side panels are exposed. (See the illustration to the right)
-
Maintaining a firm grasp under the front of the main, unit slide it toward the rear of the stand until the hook brackets engage the brackets at the rear top of the side panels (A). This hook arrangement is design to prevent the main unit from tilting forward while the screws are installed. Keep one hand under the front of the main unit, push down on the front to be certain that hooks are properly engaged.
-
Fasten the main unit and the stand with four screws (D).
CAUTION:
Be sure to secure the main unit to the stand with the screws. If you fail to do so, the unit could fall from the stand causing damage or personal injury.


- Insert the pedal connection cord that comes from Pedal Board (C) into the piano's pedal jack and fasten with cord clamps.
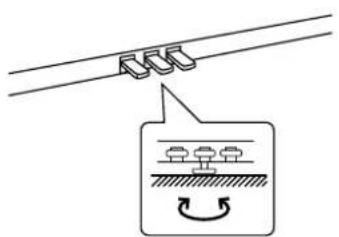
- Turn the adjuster (installed on the bottom of the Pedal Unit) down until it makes firm contact with the floor. If the floor is carpeted, place a spiked furniture cup under the adjuster so that it makes firm contact with the carpet backing. Press any pedal with your foot. If the pedal rail flexes, lower the adjuster until flexing is minimized.
CAUTION:
Before moving your piano, turn the adjuster up so that it clears the floor.
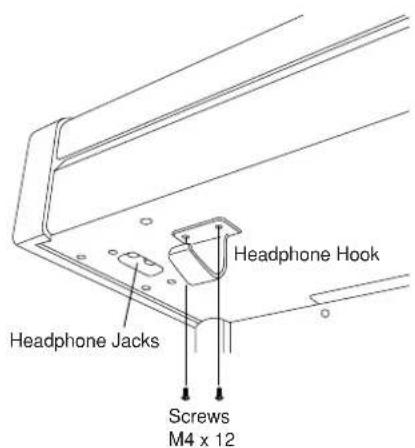
ATTACHING THE HEADPHONE HOOK (OPTION)
- Fix the headphone hook to the bottom of the piano with two screws packed in the same plastic bag.
1. Quick Start p. 6
1.1 SETTING UP THE PIANO 6
1.2 POWER SWITCH 6
1.3 VOLUME SLIDER 6
1.4 HEADPHONES 6
1.5 DEMO SONGS....6
1.6 PLAYING THE PIANO 7
1.7 PEDALS 8
1.8 PLAYING WITH MORE SOUNDS 8
2. Advanced Playing p. 9
2.1 VALUE BUTTONS 9
2.2 DUAL 9
2.3 SPLIT 9
2.4 DUAL/SPLIT BALANCE SLIDER 10
2.5 EFFECTS/REVERB.... 10
2.6 METRONOME/RHYTHM 12
3. Lesson Function p. 14
3.1 SELECTING A BOOK/SONG 14
3.2 PLAYING BACK A SONG.... 14
3.3 RECORDING YOUR PRACTICE 15
4. Playing with the Concert Magic p. 16
4.1 SELECTING A SONG 16
4.2 LISTENING TO THE SONG 16
4.3 PERFORMING A SONG 17
4.4 PART VOLUME BALANCE FOR CONCERT MAGIC 18
4.5 CONCERT MAGIC SONG ARRANGEMENT TYPES 18
4.6 STEADY BEAT 20
4.7 CONCERT MAGIC SONG DEMO 20
4.8 ADJUSTING THE PLAYBACK SPEED FOR THE CONCERT MAGIC SONGS ..... 21
5. Recorder p. 22
BASICS OF THE RECORDER.... 22
5.1 RECORDING (REC BUTTON) 23
5.2 PLAYING BACK A SONG (PLAY/STOP BUTTON) 25
5.3 ERASING A SONG 26
6. Disk Operations p. 28
6.1 DISK RECORDER 28
6.2 DISK MENU 31
7. Touch, Transpose and Menu Functions p. 34
7.1 TOUCH 34
7.2 TRANSPOSE 34
7.3 MENU BUTONS.... 35
BRILLIANCE 36
LOWER OCTAVE SHIFT 36
LOWER PEDAL ON/OFF 37
LAYER OCTAVE SHIFT 37
LAYER DYNAMICS 37
DAMPER HOLD 38
TUNING 38
TEMPERAMENT 38
KEY OF TEMPERAMENT 40
MIDI CHANNEL 41
LOCAL CONTROL ON/OFF 41
TTRANSMIT PROGRAM CHANGE ON/OFF 41
SENDING PROGRAM CHANGE NUMBERS 42
MULTI-TIMBRAL MODE 42
CHANNEL MUTE 42
MIDI CLCOK 43
USER MEMORY 43
FACTORY RESET 44
8. Using MIDI p. 45
MIDI EXAMPLES 45
9. Jacks p. 46
MIDI JACKS 46
USB JACK 46
LINE OUT JACKS 46
LINE IN JACKS 46
HEADPHONE JACKS 46
NOTES ABOUT USB 47
10. Appendices
p. 48

1. QUICK START
1.1 SETTING UP THE PIANO
The first thing you'll need to do before playing the piano is to set up the instrument.
ASSEMBLING THE STAND
First, you need to assemble the stand unit. Assemble the stand following the instructions at the beginning of this manual.
SUPPLYING AC POWER
The CN piano is equipped with stereo speakers and an amplifier. You do not need any other equipment to play your piano. You can enjoy the CN piano wherever AC power is available. Simply connect the power cable that comes with the CN piano to an AC outlet.
Connect the AC power cable to the piano's power jack and the other end of the cable to the AC outlet on the wall.
1.2 POWER SWITCH

Press this button to turn on the power. Pressing it again will turn off the power.
Pressing this button while holding down the REC and PLAY/STOP buttons will erase all the songs currently stored in the Recorder. (See page 27.)
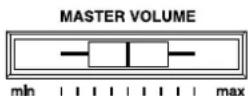
1.3 VOLUME SLIDER

This slider controls the master volume level of the piano's sound.
Move this slider to the right to increase the volume and move to the left to decrease the volume.
This slider also controls the headphone's volume and the LINE output level of the piano's sound.
1.4 HEADPHONES
For private performances you may want to use the headphones. The speakers will be turned off automatically when the headphones are plugged in, and the CN piano will only be heard through the headphones. The CN piano has two headphones jacks.
1.5 DEMO SONGS
The CN4 has 30 built-in sound demo songs. Each of the demo songs presents a musical piece to introduce the different preset sounds.
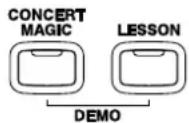
Press the CONCERT MAGIC and LESSON buttons simultaneously and the demo song for the Piano 1 category will start. After the Piano 1 demo songs are finished playing, the demo songs for another sound category will be selected at random.
If you would like to listen to the demos for a particular category, just press the desired SOUND SELECT button while the demo is playing. When you press the button, the demo will play the demo songs for the newly selected category. Then the demo songs for another category will be selected at random. See page 64 for the list of sound demo songs.
1.6 PLAYING THE PIANO

Turning on the power.
You will find the POWER SWITCH at the left end of the front panel. Press this button to turn on the power. Pressing it again will turn off the power.
Adjust the volume level.
The VOLUME SLIDER controls the volume level of the speakers and the headphones. Use this slider to set the volume to a comfortable listening level.
Now try playing the keyboard.
You will hear the CN's main piano sound. The name of the sound "Concert Grand" is shown in the LCD Display.
Concert Grand
The CN piano responds just like a real acoustic piano when you play it. It produces a louder sound when you play hard and a softer sound when you play soft. The volume level changes in relation to how fast the keys are pressed. This system is called “touch sensitivity” on an electronic musical instrument. The initial touch sensitivity setting has been adjusted to the standard of an acoustic piano. You can however, select a different type of touch sensitivity on the CN piano if you are not comfortable with the standard setting. For more detail, please read “7.1 Touch” on page 34.
1.7 PEDALS
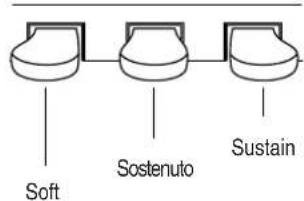
The CN piano has three pedals—just like a grand piano. They are Sustain, Soft and Sostenuto.
1.8 PLAYING WITH MORE SOUNDS
You have already heard the CN's main piano sound. The CN4 has a total of 305 sounds + 9 drum sets, not only different types of piano sounds but different instruments as well.
The different instrument sounds built into CN piano are called "preset sounds".
All of the preset sounds have been created through advanced digital sampling technology achieving as natural and realistic sound as possible. Let's try some of the preset sounds.
SELECTING ANOTHER PRESET SOUND
Press the SOUND SELECT button under the name of the instrument you would like to listen to. When the button is pressed, the LED indicator will be turned on to indicate that this sound is selected.
The name of the selected preset sound is also shown in the LCD Display.

The SOUND SELECT buttons are assigned with four preset sounds to select. To select the other sounds, press the button repeatedly.
You can also select any preset sounds by using the VALUE buttons.
NOTE
The OTHERS button is assigned with 278 sounds (including 9 drum sets). While holding down one of the VALUE buttons, pressing the other VALUE button will jump to the next sound category within the OTHERS button.
2.1 VALUE BUTTONS
These two buttons are used to change the value for certain functions.

First select the function or option you would like to change the value for by pressing the appropriate button(s), then use the VALUE buttons to change the value. “▲” button increases the value and “▼” decreases the value.
These buttons can also be used to select the various sounds. You can select all of the preset sounds assigned to the ten SOUND SELECT buttons.
However, sounds cannot be selected by using the Value buttons when you are in DUAL or SPLIT mode.
2.2 DUAL
Another feature of the CN piano is the ability to layer two preset sounds together to create a more complex sound. For example, piano layered with strings, electric piano with choir sound, and so on.
To layer two sounds, press the SOUND SELECT buttons for both sounds simultaneously. The LED indicators for each will be turned on to indicate the two sounds you have chosen. You will find the selected sound names are also shown in the LCD display.
Studio Grand String Ensemble
Both sound names are displayed.
If you want to layer two sounds assigned to the same SOUND SELECT button, while pressing the desired SOUND SELECT button use the VALUE buttons to select your desired layered sound.
ABOUT POLYPHONY
The CN piano is capable of playing up to 96 notes simultaneously (96-note polyphony). When playing in dual mode, or when playing the stereo piano sound, the polyphony will be reduced by half since the piano has to produce two sounds for each note.
2.3 SPLIT
SELECTING SPLIT SOUNDS
The split function divides the keyboard into two sections—upper and lower—and lets you play each part with a different sound.

First press the desired SOUND SELECT button to select the upper sound. Then, while holding down the SPLIT button, press the desired SOUND SELECT button to select the lower sound. The LED Indicator for the upper sound will be turned on and the LED for the lower sound will start flashing.
Studio Grand /Jazz Organ
The LCD Display shows you which sounds are selected for the upper and lower sections.
CHANGING THE SPLIT POINT
The default split point is set between B2 and C3. This point can be moved to anywhere on the keyboard.
Press the desired key while holding down the SPLIT button.
SplitPoint=C2
The LCD Display shows you which key you pressed
The key you pressed becomes the lowermost note for the upper section.
2.4 BALANCE SLIDER
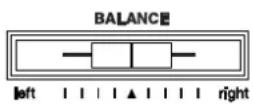
You can adjust the volume balance between the two sounds in Dual or Split mode. Use the BALANCE slider to adjust the balance. Move the slider to the right to increase the volume of the sound shown on the top line of the display and decrease the volume of the sound shown on the bottom line of the display. The balance changes in the opposite way when the slider is moved to the left.
2.5 EFFECTS/REVERB
You might have noticed that when you select some of the preset sounds, the LED indicator for the EFFECTS or the REVERB is turned on. The reason for this is some of the preset sounds are set up with an effect on as their initial setting.
Adding an effect to the sound enhances tonal quality and improves acoustical realism. The CN piano is provided with two separate groups of effects. The first is reverb and the second contains chorus, flanger, delay, tremolo and rotary speaker.
REVERB
Reverb adds reverberation to the sound, simulating the acoustic environment of a recital room, stage, or concert hall. There are six types of reverb available. They are Room 1&2, Stage, Hall 1&2 and Plate.
CHORUS
Chorus is an effect that simulates the rich character of a vocal choir or string ensemble, by layering a slightly detuned version of the sound over the original to enrich it. There are five types of chorus available. They are Chorus 1-4 and Feedback Chorus.
FLANGER
Flanger creates a shifting comb-filter, which adds motion and a “hollow” tone to the sound.
DELAY
Delay is an effect that adds echoes to the sound. There are three types of delay available (delay 1 - 3), each of which has a different length of delay between the echoes.
TREMOLO
Tremolo modulates the volume of the sound. This is a vibrato type effect.
ROTARY
This effect simulates the sound of the Rotary Speaker cabinet commonly used with electronic organs. Rotary 1 is normal rotary and Rotary 2 is with distortion effect.
The soft pedal is used to change the speed of the rotor between SLOW and FAST.
TO ADD REVERB
Press the REVERB button. The LED indicator will be turned on to indicate that reverb is in use. Press and hold the REVERB button and the currently selected reverb type will be shown in the LCD display.
Reverb Type amp; = Room 1
The LCD Display shows the currently selected reverb.
To change the reverb type, use the VALUE buttons.
TO ADD OTHER EFFECTS
Press the EFFECTS button. The LED indicator will be turned on to indicate that the effect is in use. Press and hold the EFFECTS button and the currently selected effect will be shown in the LCD display.
Effect Type amp; = Chorus 1
The LCD Display shows the currently selected effect.


To change the effect type, use the VALUE buttons.
To turn off the reverb or effects, press the REVERB or EFFECTS button again.
NOTE
Any changes you make to the reverb and the effects are stored with the preset sound in memory as long as the power is on. When you reselect a sound, your chosen reverb and effect settings will be recalled along with the preset sound. When the power is turned off the effects will be reset to the factory settings unless you use the “User Memory” function to save your current reverb and effect settings. For more information about the “User Memory” function please see page 43 in this manual.
2.6 METRONOME/RHYTHM
Rhythm is one of the most important elements when learning music. It is important to practice playing the piano at the correct tempo and with a steady rhythm. The CN piano's metronome is a tool that helps you to achieve this by providing a steady beat for you play along with.
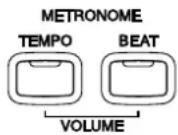
STARTING THE METRONOME
Press the TEMPO button. You will see the LED indicator turn on and hear the metronome begin counting with a steady beat. The LCD display shows the tempo in beats per minute.
TEMPO = 1 2 0
° ° °
Tempo is displayed in number of beats per minute.
To change the tempo, use the VALUE buttons to increase or decrease the tempo within the range of 10 - 400 beats per minute. (20-800 BPM with eighth note rhythms).
To stop the metronome, press the TEMPO button again.
CHANGING THE TIME SIGNATURE
You probably noticed that there are two types of clicks and the louder one comes every fourth beat. The metronome is capable of giving you a down beat to indicate the beginning of the measure. You are now hearing a 4-beat or 4/4 time signature.
You can select a different time signature, if you want to. There are ten different time signatures available on the CN piano—1/4, 2/4, 3/4, 4/4, 5/4, 3/8, 6/8, 7/8, 9/8 and 12/8. You can also select one of the 100 built-in rhythm styles instead of a simple metronome click.
To change the time signature, use the BEAT button.
Press the BEAT button. You will see the LED indicator turn on and hear the metronome begin counting. The LCD display shows the time signature and a visual indicator of beats per measure.
BEAT amp; = 4 / 4 +000
The selected time signature is displayed along with a visual indicator of beats per measure.
Use the VALUE buttons to select your desired time signature. You will see the time signature currently selected in the LCD display. The visual indicator will change to match the selected time signature.
RHYTHM METRONOME
You can also select from 100 additional rhythm styles instead of a simple metronome click.
Keep pressing the VALUE buttons to select the desired rhythm style number. See page 58 for the rhythm style list.
8 Beat 1 0 0 0
The selected Rhythm Style is displayed.
To stop the metronome, press the BEAT button again.
You can use either the TEMPO or BEAT button to turn the metronome on and off. Choose the appropriate button depending on whether you're adjusting the tempo or changing the time signature.
ADJUSTING THE METRONOME VOLUME
The volume level of metronome can be adjusted to any level you like independent of the main volume.
Press the TEMPO and BEAT buttons simultaneously. The LCD displays the volume level of the metronome in numbers from 1 (soft) to 10 (loud). The factory preset is 5.
VOLUME = 5 ° ° °
The volume level is displayed.
Use the VALUE buttons to change value.
NOTE
All the metronome settings will be reset to the factory preset values after turning off the power unless you use the “User Memory” function to save your current metronome settings. For more information about the “User Memory” function please see page 43 in this manual.

3. LESSON FUNCTION
The CN4's Lesson function helps you practice the piano with the popular Alfred's Basic Piano Library, lesson books level 1A, 1B and Adult. You can listen to any song from the books and practice along with them. You may practice each hand separately at various tempos, and even record your practice for self-evaluation.
(Alfred's Basic Piano Library lesson books are sold separately. Please check with your dealer or contact Alfred's Customer service at 818-892-2452
3.1 SELECTING A BOOK/SONG
The songs from Alfred's Lesson Books, Level 1A, Level 1B and Adult are installed in the CN4.

Press LESSON button. The LED indicator will be turned on and the LCD display will show the currently selected book and song number. To change the book, use the MENU buttons.
AlfredChildIA-01
Bar= 0- i J=100
To change the song, use the VALUE buttons. You can also select a song directly by pressing a key on the keyboard while holding down the LESSON button. See page 59-61 for the song list.
3.2 PLAYING BACK A SONG
Press the PLAY/STOP button to play your selected Alfred song. There will be a one bar count-in before the song begins playing. To adjust the volume of the count-in, press and hold the TEMPO and BEAT buttons simultaneously and use the VALUE buttons to adjust the volume. You can adjust the volume balance of right hand part and left hand part with the balance slider. For instance, placing the slider all the way to the left will remove the pre-recorded right-hand part, allowing you to practice your right hand with the pre-recorded left-hand part. You can also adjust the speed or tempo of the song by using the VALUE buttons while holding down the TEMPO button. The tempo is shown in the LCD display Press the PLAY/STOP button again to stop the song.
Pressing the REW button rewinds the song and pressing the FF button forwards the song. The bar number and beat number are shown in the display. Press the RESET button to go back to the beginning of the song.

A-B LOOP
You can play back a specific part of a song repeatedly. While playing back a song, press the LOOP button at the point you want to begin the playback from (point A) and press the LOOP button again at the point you want the playback to end (point B). The recorder will play back the song between point A and B repeatedly until you press the LOOP button again or the PLAY/STOP button to stop.
While in the Lesson function, you can record yourself for playback and evaluation. You will hear the pre-recorded left and right-hand parts as you record. You may use the BALANCE slider to mute either pre-recorded part.
Press the REC button (while the LESSON button is lit). The REC LED indicator will start flashing telling you that the piano is ready to record. The LCD display will show the bar and tempo information.
Record Bar = 0 - iJ = 100

Press the PLAY/STOP button and the recorder will give you one bar count-in then start recording. The LCD display will change to indicate that the recorder is now recording.
Recording Bar = 4 - 2 J = 100
You may wish to turn on the Metronome while recording.
Press the PLAY/STOP button again to stop the recording and automatically reset to the beginning. To listen to your recording, press the PLAY/STOP button. You may re-record at any time.
NOTE
The Lesson Recorder is a temporary recorder separated from the regular recorder. When you change the song, your recording will be erased. If you want to erase your recording without changing the song, press the PLAY/STOP button and REC button simultaneously. Recording again on the same song will also erase the previous recording.
NOTE
When in Lesson mode, you can not select Dual or Split sounds.

4. PLAYING WITH CONCERT MAGIC
The great German composer Johann Sebastian Bach once said, “Playing the keyboard is simple. Just strike the right keys at the right time.”
Many people wish it were that simple. The reality is very different of course. However, there is a way to make playing the keyboard very simple. You don't even have to strike the right keys thanks to Concert Magic.
With CONCERT MAGIC, absolutely anyone can sit at the CN piano and make real music... even if you've never taken a piano lesson in your life. To enjoy performing by yourself, you have only to select your favorite piece from 88 preprogrammed songs and tap any of the 88 piano keys with a steady rhythm and tempo. CONCERT MAGIC will provide the correct melody and accompaniment notes, regardless of which keys you press. Anybody, young or old, can enjoy CONCERT MAGIC from the moment they sit down at the CN piano.
Now let's see how CONCERT MAGIC works.
4.1 SELECTING A SONG
The 88 Concert Magic songs are assigned to each of the 88 piano keys.
The songs are also classified in eight groups by song category such as Children's Songs, American Classics, Christmas Songs.
All of the song titles are listed on page 65 in the appendices section of this manual.

To select a song, press the key to which your desired song is assigned while holding down the CONCERT MAGIC button.
i Twinkle Twinkle
The LCD display shows you the song number and abbreviated song title.
If you have selected a song you are familiar with, you may want to play by yourself right away. However you may want to listen to the song first before playing it.

To listen, press the PLAY/STOP button. The CN piano will start playing back the selected song. You can adjust the speed or tempo of the song by using the VALUE buttons while holding down the TEMPO button. While you are listening you can select a different Concert Magic song by using the VALUE buttons.
You probably noticed that the circles in the LCD display turn into smaller plus signs as the song is played back. This is called the Note Navigator.
These circles and plus signs provide a visual guide that shows you when to press the next key. The space between the circles and position of the circles in the LCD shows you the approximate timing between each key press.

The circles turn into small plus signs as the song is playing.
The key to performing using Concert Magic is to know the rhythm of the song. The Note Navigator provides a rough outline of the songs rhythm, that will help you to learn the song's rhythm and then perform it by yourself.
If you want to listen to a different song, press the key to which your desired song is assigned while holding down the CONCERT MAGIC button. To listen, press the PLAY/STOP button.
When you are finished listening to the song, press the PLAY/STOP button again to stop.
4.3 PERFORMING A SONG
Now you're ready to play yourself.
Tap out the rhythm of the selected song on any one of the 88 black or white keys on the piano's keyboard.
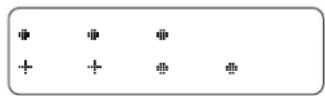
Use the Note Navigator (the circles and plus signs) to learn the rhythm of the Concert Magic song.
As you tap harder, the notes will get louder; as you tap softer, the notes will get quieter. As you tap faster, the notes speed up; as you tap slower, they will slow down correspondingly, just like regular piano playing.
Isn't it fun? You can sound like you've been playing for years just by pressing one key with one finger.
Concert Magic is a perfect method for small children to learn music, especially to develop a sense of rhythm. For older people who may think it is too late to learn the keyboard, Concert Magic is a good first step for them to begin with. With Concert Magic, your CN piano can be enjoyed by anyone in the family, even those who have never touched a musical instrument in their life.
4.4 PART VOLUME BALANCE FOR CONCERT MAGIC
When used with Concert Magic, the balance slider adjusts the volume balance of the melody part and the accompaniment.
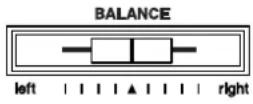
As the slider is moved to the right, the sound of the melody becomes louder and the accompaniment becomes softer. The balance changes in the opposite way when the slider is moved to the left.
4.5 CONCERT MAGIC SONG ARRANGEMENT TYPES
After playing for a while with Concert Magic you may think that it's too easy and there is very little to learn.
While it is true that some of the songs are very easy to play, even for beginners, there are also some which will challenge you and require practice to play beautifully. Each of the 88 Concert Magic songs falls into one of three different arrangement types depending on the skill level required to perform them.
EASY BEAT
These are the easiest songs to play. To perform them, simply tap out a constant steady beat on any key on the keyboard.
Look at the following example, “Für Elise”. The Note Navigator indicates that you should keep a constant steady rhythm all the way through the song. This is the distinguishing character of an Easy Beat song.
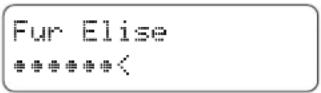
Press any key with a steady rhythm.
Key on xxxxxxxxxxxxxxxxxxxx
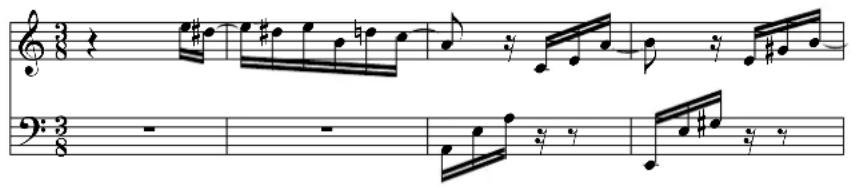
MELODY PLAY
These songs are also quite easy to play, especially if they are familiar to you. To perform them, tap out the rhythm of the melody on any key on the keyboard. Singing along as you tap the rhythm can be helpful.
Play “Twinkle, Twinkle, Little Star” for example. Follow the melody’s rhythm as shown.
Key on xxxxxxxxxx
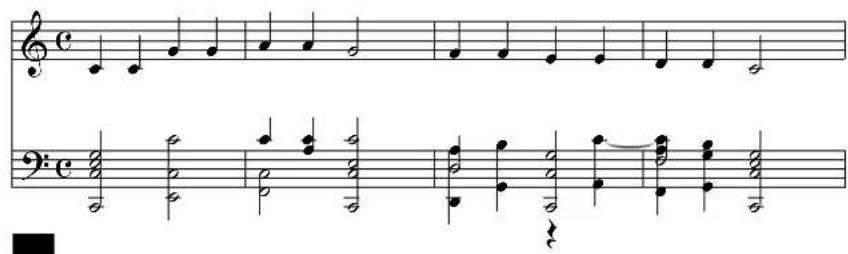
When performing fast songs with Concert Magic, it is sometimes easier to tap two different keys with two fingers alternating. This allows you to play twice as fast as you can using only one finger on one key.
SKILLFUL
These songs range in difficulty from moderately difficult to difficult. To perform them, tap out the rhythm of both the melody and the accompaniment notes on any key on the keyboard, like “Waltz of the Flowers” shown below. The Note Navigator will be very helpful with the Skillful songs.
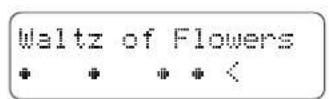

It may take some practice to get them just right. A good way to learn these songs is to listen to them first, and then try to tap out the rhythms that you hear.
NOTE
In the song list on page 65, the arrangement type is marked next to each song title as "EB" for Easy Beat, "MP" for Melody Play and "SK" for Skillful.
4.6 STEADY BEAT
Regardless of which arrangement type a Concert Magic song is, with Steady Beat you can play any Concert Magic song by simply tapping any key with a constant steady beat.
Press and hold the CONCERT MAGIC button. The LCD display will change to show the current Concert Magic mode in the second line.
Twinkle Twinkle NORMAL
The current mode is NORMAL.
While still holding the CONCERT MAGIC button, use the VALUE button to change the Concert Magic mode to STEADY BEAT.
Twinkle Twinkle STEADY BEAT
The mode is changed to STEADY BEAT.
Start by tapping any key with a constant steady beat. Your tapping will set the tempo for the song. Both the accompaniment and melody parts will be played automatically in time with the tempo you tap.
4.7 CONCERT MAGIC SONG DEMO
There are three ways to listen to the Concert Magic songs in the DEMO mode.
ALL PLAY
Press the CONCERT MAGIC button and then press the PLAY/STOP button without selecting a song. The CN piano will play back all of the Concert Magic songs in order.
RANDOM PLAY
Press the CONCERT MAGIC button and then press the LESSON button. The CN piano will play back all of the Concert Magic songs in random order.
CATEGORY PLAY
Press the piano key to which the desired song is assigned while holding down the CONCERT MAGIC and LESSON buttons. The CN piano will play back the selected song and, then play the rest of the songs in the same song category one after another.
To stop the demo, press the PLAY/STOP button.
The TEMPO button is also used to adjust the playback speed for the Concert Magic songs.

After selecting a Concert Magic song to play back, hold down the TEMPO button. The LCD display will show the tempo value. While holding down the TEMPO button, use the VALUE buttons to change the tempo.
You can adjust the tempo, either before playing back a song or while the song is playing back.
The CN piano's recorder records your playing much like a tape recorder, and it is just as easy to use. The CN piano records a song as digital data instead of audio data and stores the song inside the instrument. Because the song is stored as digital information you can modify the song when you play it back. You can, for example, adjust the tempo without changing the pitch or use a different effect setting from one you have recorded.
Once you understand the recorder, you will find it to be a useful tool for both practicing and playing the piano.
BASICS OF THE RECORDER
Let's take a brief look at the recorders features.
TWO-TRACK THREE-SONG RECORDER
The CN piano's recorder is a 2-track 3-song recorder. This means you can record up to three different songs, store them in memory, and play them back as you like.
Each song has two separate tracks called “Parts” that can be recorded separately. This lets you record for example, the left hand part first on one track, then record the right hand part next on the other track while listening to the first track.
When you record or play back a song, you can select which part (track) of which song you are going to record or play back. When you are recording, selecting the same part again to record will erase any previous recordings on that part. Because of this it's important to remember; when recording both parts separately, after recording the first part be sure to select the second part to record, otherwise you will end up recording over the first part of the song.
RECORDED INFORMATION
The CN piano records the following:
Note information
Sound selection
Pedal movements
Balance settings Set the dual/split balance as desired before you start recording. The balance setting and the balance changes made during the recording will be recorded.
Transpose..... When you record in a different key using the transpose function, the CN piano will record the actual transposed notes you hear, not the notes as you play with the keyboard.
RECORDING CAPACITY
The total recording capacity is about 30,000 notes per song, 90,000 notes total. Pressing any buttons or pedals is counted as one note.
When the recorder reaches its maximum capacity, the CN piano will stop recording at that point.
RECORDER AND METRONOME
When playing back a song with the metronome turned on, the metronome always restarts with the down beat.
5.1 RECORDING (REC BUTTON)
The REC button is used for recording.

Press the REC button when you are ready to record. The LED indicator will start flashing telling you that the piano is ready to record.
Songi Part=1
Record J=120
The LCD Display shows the Song and Part number, Bar and Tempo information.
Now play some music on the piano. The recorder will automatically start recording with the first note you play.

Press the PLAY/STOP button when you are finished recording. The piano will stop recording and save your song to memory.
Saving to memory may take a few moments and during this time the piano will not perform any other operations.
You can start recording by pressing the PLAY/STOP button instead of pressing a key. In this way, you can insert a blank bar at the beginning of the song.
If you make a mistake, you can record your piece again. Just repeat the same procedure. The second recording will completely erase the first one.
The CN piano is capable of recording and storing up to three different songs. Let's try recording a second song.
If you followed the procedure in the previous section you have already recorded Song 1, so now let's record Song 2.

MENU
Press the REC button to enter the song/part selection menu. Use the MENU buttons to change the song number to Song 2.
Song2 Part = 1 Record _ j = 1 2 0
The LCD display shows the song number 2 is selected to be recorded.
When you are ready to record, just start playing the keyboard.
The CN piano will start recording automatically with the first note you play.
Press the PLAY/STOP button when you are finished recording.
RECORDING A SECOND PART
You can record a second part in the second track (part) of the same song. After recording the first part, select the other track and record your second part.
Press the REC button to enter the song/part selection menu. Use the MENU buttons to select song 3.
Song3 amp; Part = 1 Record amp; J = 120
The LCD display shows the song number 3 is selected to be recorded.
Record the first part just the same as in the previous sections and press the PLAY/STOP button when you're finished recording.

Now press the REC button to enter the song/part menu then select Part 2 to record. Use the VALUE buttons to select part 2.
Song3 amp; Part = 2 Record amp; j = 1 2 0 .
The LCD display shows the part number 2 is selected to be recorded.
If you want to start recording the second part from the beginning of the song, just play the keyboard. You will hear the first part playing back while you record the second part.
If you would like to play back the first part and then start recording the second part from a certain point later in the song, press the PLAY/STOP button instead of playing the keyboard to start playback of the first part and then begin recording the second part from any point you like.
When you are finished recording, press the PLAY/STOP button again.
STATUS OF SONG AND PART
In the LCD display an asterisk (*) after the part number means that the part has been already recorded.
Song3 Part=1&2*
Bar= 1-1 J=120
“*” indicates that this part has already been recorded.
5.2 PLAYING BACK A SONG (PLAY/STOP BUTTON)
The PLAY/STOP button is used to select a song and part to play, and to start and stop play back of the recorded songs.

Press the PLAY/STOP button one time to select a specific song and part you would like to play back. Use the MENU buttons to select a song and use the VALUE buttons to select a part.
Songi Part=1&2*
Bar= 1-1 J=120
The LCD Display shows that both parts of song 1 are selected to play back
Press the PLAY/STOP button again and the recorded song will start playing.
Playing
Bar= 2-1 j=120
The LCD Display shows that the selected song is playing.
Press the PLAY/STOP button again to stop play back and return to the song select display.
Pressing the REW button rewinds the song and pressing the FF button forwards the song. The bar number and beat number are shown in the display. Press the RESET button to go back to the beginning of the song.
PLAYING BACK THE PARTS SEPARATELY
While you are in the playback menu, use the VALUE buttons to select the desired part number you want to listen to.
Song3 Part=2*
Bar= i - 1 j=120
An asterisk indicates that the part has been recorded.
You can select between, "Part 1", "Part 2", and "Part 1&2". To check that you have recorded on both tracks, select "Part 1", then select "Part 2".
You will see an asterisk after each part, this means you have successfully recorded both parts.
To listen to both parts together select "Part 1&2".
To play back an individual part, select the desired part using the VALUE button first, then press the PLAY/STOP button to listen.
NOTE
If you don't see an asterisk after each part you recorded or if your song does not play back correctly, carefully reread the previous section on recording to make sure you're recording properly. You can use the LCD display to help determine if you have a problem.
USING THE PLAY/STOP BUTTON TO START RECORDING
The PLAY/STOP button can also be used to start recording. In this way, you can insert a blank bar at the beginning of the song.
Press the REC button to enable the piano to record first, then press the PLAY/STOP button. On pressing the PLAY/STOP button, the CN piano starts recording regardless of whether you press a key or not.
5.3 ERASING A SONG

This function allows you to erase any song you do not want to listen to.
To erase a specific song or part, first press both the REC and PLAY/STOP button. The LCD display will display the erase menu where you select a song or a part to erase.
To Del Press REC SONG1 Part=1&2
Select the song and the part to erase.
Use the MENU buttons to select the desired song, and use the VALUE buttons to select the desired part to erase.
Press the REC button to erase. The LCD display will ask you if you're sure.
Sure? Press REC SONG1 Part=1&2
Confirmation to erase the song.
If you are sure you want to erase the song and part, press the REC button again.
If you want to cancel the erase procedure, press the PLAY/STOP button.
Deleting SONG1 Part=1&2
The data is being erased (deleted).
ERASING ALL THE SONGS
To erase all the songs at once, first turn off the power then turn it back on again while holding down both the REC and PLAY/STOP buttons.
The CN4's floppy disk drive provides a convenient way to playback songs recorded in Standard MIDI File (SMF) format. There are many sources of SMF songs, including disks for sale from professional musicians and publishers, songs shared among musicians and hobbyists, and Internet sites that feature SMF songs available for download. Also the Disk Recorder gives you the ability to record on up to 16 independent tracks separately.

Insert a floppy disk in the drive and press the DISK button. The LCD display shows as follows.
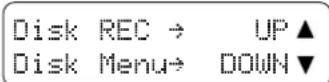
Press the VALUE UP button to go to the Disk Recorder mode. Press the VALUE DOWN button to go to Disk Menu.
6.1 Disk RECORDER
PLAYING BACK A SONG
If the disk in the drive contains any SMF song data, the LCD display will show the first song/file name on the disk.

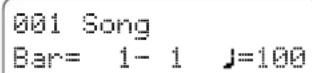
The file "001 Song" is selected.
Use the MENU buttons to select other song files.
Press the PLAY/STOP button to playback a song. You can adjust the speed or tempo of the song by using the VALUE buttons while holding down the TEMPO button. The tempo is shown in the display. Press the PLAY/STOP button again to stop the song.
Pressing the REW button rewinds the song and pressing the FF button forwards the song. The bar number and beat number are shown in the display. Press the RESET button to go back to the beginning of the song.

A-B LOOP
You can play back a specific part of a song repeatedly. While playing back a song, press the LOOP button at the point you want to begin the playback from (point A) and press the LOOP button again at the point you want the playback to end (point B). The recorder will play back the song between point A and B repeatedly until you press the LOOP button again or the PLAY/STOP button to stop.

MUTING A PART
You can mute each part separately. Press one of the VALUE buttons. The LCD display will show the part mute screen.
1234567891011234516

Move the cursor by using the MENU buttons and use the VALUE buttons to switch between play and mute.
▶: The part is played.
X: The part is muted.
—: The part is empty.
NOTE
The LCD display will automatically return to the previous screen after two seconds if no buttons are pressed.
RECORDING A SONG
You can also record a song with up to 16 parts on a floppy disk. Insert a floppy disk in the drive and press the DISK button. Press the VALUE UP button to go to the Disk Recorder mode. If the disk is empty, then an empty song will automatically be selected and the LCD display will show "EmptySong".
EmptySong Bar = 1 - 1 J = 120
"EmptySong" is selected.
NOTE
If the disk already contains any song files, after the first file is selected pressing the MENU DOWN button will select "EmptySong".

Press the REC button. The LCD display will show the part selection screen.
Rec Part = 1 Bar = 1 - 1 j = 100
The LCD display shows which part will be recorded.
Use the VALUE buttons to select a part to record.
NOTE
Part 10 is reserved as the Drum track. When you select Part 10, you can record Drum sounds only. Drum sounds can only be recorded on Part 10, you can not choose Drum Sounds to be recorded on any other part.
NOTE
When the Rec Part is set to MIDI, any MIDI data coming in via MIDI IN jack is recorded in Parts 1 through 16 according to MIDI channel.
Start recording by playing the keyboard or by pressing the PLAY/STOP button. When you are finished recording, press the PLAY/STOP again button to stop.
To continue recording other parts, Press the REC button again and use the VALUE buttons to select another part to record. If an asterisk (*) appears after the part number, that part has already been recorded. If you record on a part that has already been recorded your new recording will completely erase the previous recording on that part.
Rec Part= 1*
Bar= 1-1 j=120
Part 1 is already recorded.
This is useful for balancing the volume when you play the CN piano along with a song from the Disk Recorder.
Press and hold the DISK button. The LCD display will show the total volume screen.
Disk Recorder
Total Volume=100
Use the VALUE buttons to adjust the volume level of Disk Recorder. The value can be changed from 0 to 100.
SAVING THE RECORDED SONG TO THE DISK
When you select another song, or press the DISK button to exit the Disk Recorder, the CN piano will ask you if you want to save the recorded song to the disk.
Save to Disk?
Yes→REC No→STOP
Press the REC button to save the recorded song to the disk. The LCD display will show the Song Name screen.
SongName
NEWSONG001 →REC
To name the song, move the cursor by using the MENU buttons and choose a character by using the VALUE buttons.
After you have named the song, press the REC button again to save the song. The LCD display will show “Executing...” and then “Complete!”.
If you do not want to save the song, press the STOP button and the recorded song data will be erased.
6.2 Disk MENU
To access the Disk Menu, make sure you have a floppy disk in the drive then press the DISK button. Press the VALUE DOWN button to go to the Disk Menu. There are five functions in the Disk Menu. Use the MENU buttons to select the various functions and press one of the VALUE buttons to enter the selected Disk function.
1. INTERNAL SONG SAVE
You can save a song recorded in the CN's internal recorder to a floppy disk.
Select the song you want to save by using the VALUE buttons and press the REC button.
Int Song Save Songi →REC
Song1 is selected.
To name the song, move the cursor by using the MENU buttons and choose a character by using the VALUE buttons.
Int Song Rename NewSong →REC
The song is renamed as "NewSong".
After you have named the song, press the REC button again to save the internal song to disk. The LCD display will show “Executing...” and then “Complete!”.
2. SONG RENAME
You can change the name of a song in the floppy disk.
Select a song you want to rename by using the VALUE buttons and press the REC button.
Disk Song Rename Song1 -REC
Song1 is selected.
To rename the song, move the cursor by using the MENU buttons and choose a character by using the VALUE buttons.
Disk Song Rename
Song2 →REC
The song is renamed as "Song2".
After you have renamed the song, press the REC button again to save the renamed song to disk. The LCD display will show "Executing..." and then "Complete!".
3. SONG DELETE
You can delete a song from the floppy disk.
Select the song you want to delete by using the VALUE buttons and press the REC button.
Disk Song Delete
Song1 →REC
Song1 is selected.
The LCD display will ask you for confirmation.
Sure?
Yes→REC No→STOP
If you want to cancel, press the PLAY/STOP button. Press the REC button to delete the song. The LCD display will show "Executing..." and then "Complete!".
4. SONG COPY
You can make a copy of a song on the same floppy disk or copy a song to another floppy disk.
Select the song you want to copy by using the VALUE buttons and press the REC button.
Disk Song Copy
Song1 REC
Song1 is selected.
The LCD display will show “Reading...” and then show “Write to Disk?”.
Write to Disk?
Song001 →REC
If you want to copy the song to another disk, simply remove the floppy Disk from the drive and insert the new floppy disk you want
to copy the song to. To rename the song, move the cursor by using the MENU buttons and choose a character by using the VALUE buttons. After you have renamed the song, press the REC button again to save the renamed song to disk. The LCD display will show "Executing..." and then "Complete!".
5. DISK FORMAT
The CN4 disk drive is compatible with 3.5" 2HD or 2DD floppy disks formatted to the Dos/V format (Windows format). If you want to use a floppy disk that does not conform to this format with the CN4 you must first format the disk. Formatting a disk will erase all of the data on the disk.
Insert the floppy disk to be formatted in the drive and select the disk type by using the VALUE buttons.
Format Disk 2HD ▲
200 ▼
Press the REC button and the LCD display will ask you for confirmation.
Format Disk 2HD
Yes→REC No→STOP
Press the REC button to format the disk. The LCD display will show "Formatting..." and then "Complete!".
7. Touch, TRANSPOSE AND MENU FUNCTIONS
7.1 Touch
Touch lets you select a different touch sensitivity for the keyboard from the standard touch of an acoustic piano. You can change the sensitivity to one of five different settings: Light, Light+, Heavy, Heavy+ and Off.
Light For those still developing finger strength. A louder volume is produced even when playing with a soft touch.
Light+ For players with a delicate touch. Requires less striking force to achieve a forte note.
Heavy Perfect for those with strong fingers. Requires a heavier touch to produce a loud volume.
Heavy+ Requires more striking force to achieve a loud volume.
Off A constant volume is produced regardless of how hard the keys are struck. This setting is suitable for sounds that have a fixed dynamic range such as Organ and Harpsichord.

To change from the standard touch, press the TOUCH button. The LED indicator above the TOUCH button will be turned on to indicate that the piano is now using a different touch setting.
To select the Touch type, press and hold the TOUCH button. The LCD display will show the currently selected touch type.
Touch = Light
The LCD display shows the touch type currently selected.
Use the VALUE buttons to change the Touch type.
Press the TOUCH button again to get back to the standard touch setting.
Touch selection is global for all the preset tones. You can not have an individual setting for each tone.
NOTE
LIGHT and HEAVY do not represent the physical weight of the keys. These are settings that affect the sensitivity of the keys, which determines the volume level in response to the key movement.
7.2 TRANSPOSE
The transpose function lets you raise or lower the piano's key in half steps. This is especially useful when you have learned a song in one key and have to play it in another key. The transpose feature allows you to play the song in the original key, but hear it in another key.

Press and hold the TRANSPOSE button.
Transpose = amp; HC
The LCD display shows you the current value. The value is always set to "0" when the power is turned on.
While still holding the TRANSPOSE button, use the VALUE buttons or the keyboard from C3 to C5 to specify the transposition amount.
Transpose amp; = - 5 G
The LCD display shows you a number telling you how many half steps up or down you have transposed the piano. -5, for example, represents a transposition that is 5 half steps lower. "0" indicates no transposition.
The piano can be transposed up to 12 half steps higher or 12 half steps lower.
Pressing TRANSPOSE button again turns the TRANSPOSE function off.
The TRANSPOSE function remembers the current setting as long as the power is on.
7.3 MENU BUTTONS
These buttons are used to access the various functions that control the CN piano's tuning, system and MIDI functions. They are:
- Brilliance 16. MIDI Clock
- Lower Octave Shift 17. User Memory
- Lower Pedal On/Off 18. Factory Reset
- Layer Octave Shift
- Layer Dynamics
- Damper Hold
- Tuning
- Temperament
- Key of Temperament
- MIDI Channel
- Local Control On/Off
- Transmit Program Change On/Off
- Sending Program Change Numbers
- Multi-Timbral Mode On/Off
- Channel Mute (MIDI Ch. On/Off)

▲
MENU
▼

COMMON OPERATION
To select a function that you want to adjust, press either of the MENU buttons. The LCD will display “1 Brilliance”, the first item in the menu.
i Brilliance = + 3
Press the MENU buttons again to select a different function to edit.
Use the VALUE buttons to change value.
To exit the function menu, press any SOUND SELECT button.
NOTE
Once the power is turned off, all settings will be reset to the factory preset values unless you use the "User Memory" function to save your current settings. For more information about the "User Memory" function please see page 43 in this section of the manual..
1. BRILLIANCE
Brilliance lets you adjust brightness of the preset sounds.
After selecting the “Brilliance” function by pressing the MENU buttons, use the VALUE buttons to change the value to the desired amount.
1 Brilliance = + 3
The LCD display shows the brilliance setting with a number. "0" indicates the standard setting.
Brilliance can be set between -10 to +10. Plus settings produce a brighter tone, minus settings produce a mellower tone.
Brilliance settings are global for all the preset sounds. You can not have an individual setting for each sound.
2. LOWER OCTAVE SHIFT
This allows the octave of the lower part to be shifted up one, two, or three octaves higher when you use the split function.
After selecting the “Lower Octave Shift” function by pressing the MENU buttons, use the VALUE buttons to select your desired shift range.
2 LowerOctShift = i
The LCD display shows the lower part is shifted one octave up.
Lower Octave Shift can be set between 0 to 3.
3. LOWER PEDAL ON/OFF
This determines if the sustain pedal will be active for lower sound when in SPLIT mode. The default setting is Off which means the sustain pedal is not active for the lower sound.
After selecting the “Lower Pedal” function by pressing the MENU buttons, use the VALUE buttons to turn it on and off.
3 Lower Pedal
= On
The LCD display shows whether Lower Pedal is on or off.
4. LAYER OCTAVE SHIFT
This allows the octave of the layered part to be shifted up or down when you use the dual function.
After selecting the “Layer Octave Shift” function by pressing the MENU buttons, use the VALUE buttons to select your desired shift range.
4 LayerOctShift = 1
The LCD display shows the layered part is shifted one octave up.
Layer Octave Shift can be set between -2 to 2.
5. LAYER DYNAMICS
In Dual mode sometimes simply adjusting the volume balance between the two layered sounds is not enough to create the desired sound character if both sounds are very dynamic. Two equally dynamic sounds can be difficult to control and play comfortably. The Layer Dynamics function allows you to limit the overall dynamic sensitivity of the layered sound to create a perfect blend between both sounds in a layer. In addition to reducing the volume of the layered sound, limiting the dynamic sensitivity of the layered sound also makes the layered sound easier to control in relation to the main sound as you play. With this function, you can comfortably play as dynamically as you like with the main sound while maintaining control of the layered sound.
After selecting the “Layer Dynamics” function by pressing the
MENU buttons, use the VALUE buttons to select the desired Dynamics level.
5 LayerDynamics = 10
The LCD display shows the dynamics of the layered sound is 10 (dynamics of the layered sound are unchanged).
You can select the level of dynamics from 1 to 10. A value of 1 produces the greatest reduction in dynamics and a value of 10 produces no change in the dynamics. The default value is 10.
6. DAMPER HOLD
This determines if the sound such as organ or strings should be held (on) or gradually decayed (off) when the damper pedal is depressed.
After selecting the “Damper Hold” function by pressing the MENU buttons, use the VALUE buttons to turn it on and off.
6 Damper Hold = Off
The LCD display shows the damper hold is off.
The default setting is off.
7. TUNING
Tuning allows you to adjust the piano's pitch. You may need to adjust the tuning when you play with other instruments.
After selecting the “Tuning” function by pressing the MENU buttons, use the VALUE buttons to adjust the tuning.
7 Tuning = 449.0
The LCD display shows the current pitch setting.
The LCD display shows the pitch for “A” in Hz (Hertz). The range of adjustment is from 427.0 to 453.0 Hz. The factory preset value is set to the modern standard A = 440.0 Hz.
8. TEMPERAMENT
The CN piano offers not only equal temperament (the modern standard) but also immediate access to temperaments popular during the Renaissance and Baroque periods. It should be interesting and educational to try some of the different temperaments, although the equal temperament is dominant today.
After Selecting the “Temperament” function by pressing the MENU buttons, use the VALUE buttons to select your desired temperament.
8 Temperament = Equal (P. only)
The LCD display shows the type of temperament currently selected.
BRIEF EXPLANATION OF TEMPERAMENTS
8 Temperament = Equal (P. only)
EQUAL TEMPERAMENT (PIANO ONLY)
This is the default temperament. If a piano sound is selected the tuning is stretched like an acoustic piano (EQUAL TEMPERAMENT). If any other type of sound is selected the tuning will be EQUAL (FLAT). An explanation of EQUAL TEMPERAMENT and EQUAL TEMPERAMENT (FLAT) is provided later in this section.
NOTE
If a piano sound is used in a layer with any other sound then both sounds will use the EQUAL TEMPERAMENT (Stretched) tuning.
8 Temperament = Pure ( Major )
MERSENNE PURE TEMPERAMENT (MAJOR) MERSENNE PURE TEMPERAMENT (MINOR)
This temperament, which eliminates dissonance's for thirds and fifths is still popular for choral music because of its perfect harmony.
You need to be aware what key you are playing in with this temperament.
Any key modulation will result in dissonance's. When you play music in a particular key, you need to match the key of the temperament as well. When playing in a major key select Pure (Major) and when playing in a minor key select Pure (minor).
8 Temperament = Pythagorean
PYTHAGOREAN TEMPERAMENT
This temperament, which uses mathematical ratios to eliminate dissonance for fifths, is very limited for use with chords, but it produces very characteristic melodic lines.
8 Temperament = Meantone
MEANTONE TEMPERAMENT
This temperament, which uses a mean between a major and minor whole tone to eliminate dissonance for thirds, was devised to eliminate the lack of consonance's experienced with certain fifths for the Mersenne pure temperament. It produces chords that are more beautiful than those with the equal temperament.
8 Temperament = Werckmeister
8 Temperament = Kirnberger
WERCKMEISTER III TEMPERAMENT KIRNBERGER III TEMPERAMENT
These two temperaments are placed in between Meantone and Pythagorean. For music with few accidentals, this temperament produces the beautiful chords of the mean tone, but as accidentals increase, the temperament produces the characteristic melodies of the Pythagorean temperament. It is used primarily for classical music written in the Baroque era to revive the original characteristics.
8 Temperament = Equal(flat)
EQUAL TEMPERAMENT (FLAT)
This is “unstretched” equal temperament that divides the scale into twelve equal semitones. This produces the same chordal intervals in all twelve keys, and has the advantage of limitless modulation of the key. However the tonality of each key becomes less characteristic and no chord is in pure consonance.
8 Temperament = Equal
EQUAL TEMPERAMENT
This is the most popular piano temperament. The hearing ability of a human is uneven and is not as accurate with high frequency and low frequency as it is with the middle range. This temperament's tuning is stretched to compensate for this so the sound will be heard naturally to the ears. This “Stretched” equal temperament is a practical variation of the “unstretched” equal temperament which was invented on a mathematical basis.
NOTE
After you have selected the desired temperament, please read the following section on selecting a key signature for the temperament before continuing.
9. KEY OF TEMPERAMENT
Limitless modulation of the key became available only after the invention of Equal temperament. When we use a temperament other than Equal temperament, we must carefully choose the key signature to play in. For example, if the song you are going to play is written in D major, choose "D" as the temperament key.
After selecting the “Key Signature” function by pressing the MENU buttons, use the VALUE buttons to set the desired key.
9 Key of Temper amp; = C
The LCD display shows the currently selected key signature.
Please note that changing the key of the temperament will only change the “balance” of the tuning, the pitch of the keyboard remains unchanged.
Use the TUNING or TRANSPOSE functions to change the pitch of the whole keyboard.
NOTE
This function is not displayed when Equal temperament is selected.
10. MIDI CHANNEL
This determines on which MIDI channel the CN piano will exchange MIDI information with an external MIDI instrument or a personal computer.
After selecting the “MIDI Channel” function by pressing the MENU buttons, use the VALUE buttons to select your desired number.
1 0 MIDI Channel = 1 ( TRS / RCU ) .
The LCD display shows the currently selected channel number.
This determines whether the CN piano's sound will be played from the piano's keyboard ("ON") or only from an external MIDI instrument ("OFF").
Even with local control “off” the piano’s keyboard will still transmit to an external MIDI instrument or personal computer.
After selecting the “Local Control” function by pressing the MENU buttons, use the VALUE buttons to turn on and off.
1 1 Local Control = On
The LCD display shows whether Local Control is on or off.
12. TRANSMIT PROGRAM CHANGE ON/OFF
This determines whether or not the CN piano will transmit program change information when pressing the SOUND SELECT buttons. When this is turned on, pressing the SOUND SELECT buttons will send the program change numbers as listed in page 48-55.
After selecting the “Transmit PGM” function by pressing the MENU buttons, use the VALUE buttons to turn it on and off.
1 2 Transmit PGM amp; = On
The LCD display shows whether or not program change numbers will be transmitted.
13. SENDING PROGRAM CHANGE NUMBERS
This function allows the CN piano to transmit program change numbers. You can send any number from 1 to 128.
After selecting the "Send PGM #" function by pressing the MENU buttons, use the VALUE buttons to select your desired number.
1 3 Send PGM # = 1 2 4 ( UP + DOWN )
The LCD display shows the program change number.
To send the program change number, press both VALUE buttons simultaneously.
14. MULTI-TIMBRAL MODE
Multi-timbral mode allows the CN piano to receive data on more than one MIDI channel simultaneously. In this mode, the CN piano can play different musical parts with different sounds for each part.
Multi-Timbral On (On1 and On2)
This is a flexible 16 part multi-timbral setup. You can turn individual MIDI channels on and off, and assign any program number to any channel in the way you like. The CN piano's normal program change numbers are assigned in On1 and General MIDI program change numbers are assigned in On2. (Please see page 48-55 for a list of the program change numbers.)
Multi-Timbral Off
This turns off the multi-timbral capability. Only one MIDI channel will be active and only the preset sound currently selected will be heard when a MIDI signal is received.
After selecting the “Multi-Timbre” function by pressing the MENU buttons, use the VALUE buttons to turn it on and off.
1 4 Multi Timbre = amp; 0 n 2
The LCD display shows the selected Multi-timbral mode.
15. CHANNEL MUTE
This determines which MIDI channels are activated to receive MIDI information when the Multi-Timbral mode is set to on. You can activate or deactivate each of the 16 channels individually.
Select the “Channel Mute” function by pressing the MENU buttons. Keep pressing the MENU buttons to select each of the sixteen channels
15 Channel Mute Channel 1=Play
The LCD display shows the selected MIDI channel number.
Use the VALUE buttons to switch between PLAY and MUTE.
15 Channel Mute Channel 1= Mute
Select "Play" to turn the channel on or "Mute to turn it off.
NOTE
When the Multi-timbral mode is set to off, the “Channel Mute” function will not be displayed in the function menu.
16. MIDI CLOCK
MIDI Clock is a data code that a MIDI instrument uses as the reference for its Tempo setting. When it is set to Internal, the CN piano uses its own built-in clock to control tempo settings. When set to External, the CN piano reads the clock data it receives via MIDI and uses this data to control the Tempo.
After selecting the “MIDI Clock” function by pressing the MENU buttons, use the VALUE buttons to select the desired setting.
16 MIDI Clock = Int.
The LCD display shows the selected MIDI Clock source.
17. USER MEMORY
This function allows the CN piano to save the user-definable settings when the power is turned off. Once written to the memory, the saved settings will be recalled every time you turn the power on.
The following settings can be saved—Effect settings, Metronome settings (tempo, time signature and volume), starting sound, primary sound for each sound category and the menu functions 1 through 16 described in the previous pages.
Select the "User Memory" function by pressing the MENU buttons.
17 User Memory Save →Press REC
Press the REC button to memorize your desired settings.
17 User Memory Save completed
The LCD display briefly shows the above message and the current settings are saved.
NOTE
The “User Memory” function does not automatically save any changes made to the settings every time the power is turned off. You must use the User Memory function each time you want to save your current settings.
18. FACTORY RESET
This function resets the CN piano to the factory settings. All parameters you saved in “User Memory” will be reset to the factory preset values.
Select the "Factory Reset" function by pressing the MENU buttons.
18 Factory Reset Reset+Press REC
Press the REC button to reset the CN piano.
NOTE
SONG data in RECORDER, User Touch and User Temperament will not be reset by this function.
The term MIDI is an acronym for Musical Instrument Digital Interface, an international standard for connecting synthesizers, sequencers (MIDI recorders) and other electronic instruments so that they can exchange performance data.
The CN4 is equipped with three MIDI jacks for exchanging data: MIDI IN, MIDI OUT and MIDI THRU. Each uses a special cable with a DIN connector.
MIDI IN : For receiving note, program change and other data.
MIDI OUT : For sending note, program change and other data.
MIDI THRU : For passing along MIDI data received to another MIDI instrument without processing.
MIDI EXAMPLES
(1) Connection to another MIDI compatible keyboard or sound generator module
When connected as shown in the illustration, data on how the digital piano is played (which keys are struck) can be sent to another MIDI instrument. Plus, the sound from the CN4 can be layered over the sound of the other instrument.
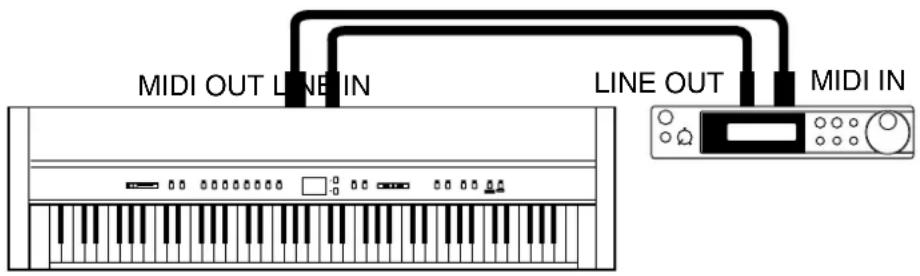
(2) Connection to an external sequencer
When connected as shown in the illustration, you can record songs played on the CN4 with a MIDI recorder, and use the CN4's tones (such as piano, harpsichord and vibraphone, etc.) controlled by the CN4's MULTI-TIMBRAL MODE function to create a multi-layer MIDI recording.

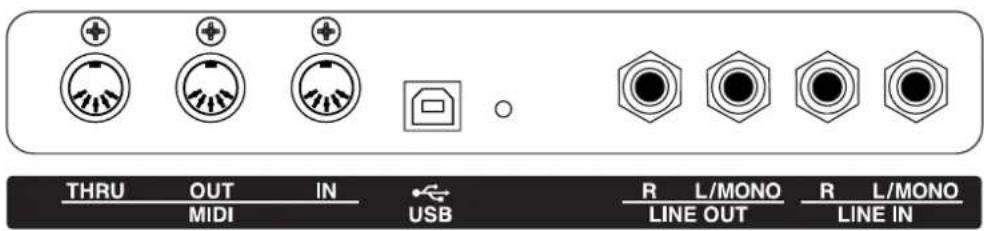
MIDI JACKS
These jacks are used to connect external MIDI devices with the CN piano. There are three terminals: MIDI IN, MIDI OUT, and MIDI THRU.
USB JACK
This jack is used to connect with a personal computer and exchange MIDI data.
LINE OUT JACKS
These jacks provide stereo output of the piano's sound to amplifiers, tape recorders or similar equipment.
The audio signal coming through the LINE IN jacks is also routed to these jacks. The piano's sound is mixed with the LINE IN signals.
The CN piano's VOLUME slider can control the output level of its own sound while it does not control the LINE IN signal.
LINE IN JACKS
These jacks are used to connect a pair of stereo outputs from other audio equipment or electronic instruments to the piano's speakers.
The audio signal coming through these jacks bypasses the piano's volume control. To adjust the volume level, use the output control of the external device.
HEADPHONE JACKS
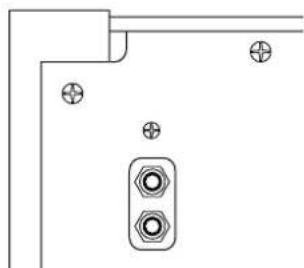
BOTTOM VIEW
There are two jacks for headphones provided at the left end on the bottom of the piano.
You can hear the piano's sound as well as any audio signal that is coming through the LINE IN.
NOTES ABOUT USB
The CN piano can be connected with a personal computer with a USB cable for exchanging MIDI data. You need a USB driver installed in your computer.
[For Windows XP/Me users]
A standard USB driver is already installed in your computer. You don't need to install a new driver.
[For Windows 2000/98SE users]
You need to install the designated driver in your computer. Visit the KAWAI web site a http://www.kawai.co.jp/english/Download1.html and download the program.
[For Macintosh users]
Macintosh OSX automatically recognizes our USB interface. No special driver is needed. Older Macintosh OS are not supported by us. If you have an older Macintosh OS, please use an appropriate MIDI interface and MIDI cables when connecting the CN piano to a Macintosh computer.
NOTE:
When both MIDI jacks and USB jack are connected, USB has priority.
When connecting USB cable to the CN piano, first connect the USB cable and then turn the power of the CN piano on.
It may take some time to start communication when the CN piano is connected to the computer via USB.
When USB communication is unstable with connection via hub, connect the USB cable directly to the USB port of the computer.
Turning the power of CN piano on/off or disconnecting the USB cable while the following actions may cause unstable communication.
while installing USB driver
while booting up the computer
while MIDI application is working
while communicating with the computer
while the computer is in energy saver mode
* If you have any problem with USB communication, consult the instruction manual of your computer and check your computer set up.
* The USB-MIDI conversion board TID10000934 used in the CN piano is approved to show the USB logo. The USB logo can be used only for the product which is approved by USB-IF (USB Implements Forum Inc.) test.
* Windows is registered trademark of Microsoft Corporation.
* Macintosh is registered trademark of Apple Computer, Inc.

PROGRAM CHANGE NUMBER MAPPING
| Multi-Timbral mode | ||||
| Sound Off, On 1 On 2 | ||||
| Bank LSB Prog # Bank MSB | Bank LSB Prog # | |||
| Concert Grand 0 1 121 | 0 1 | |||
| Studio Grand 0 2 121 | 1 1 | |||
| Mellow Grand 0 3 121 | 2 1 | |||
| Jazz Grand 0 4 95 8 1 | ||||
| Modern Piano 0 5 121 | 0 2 | |||
| Honky Tonk | 0 6 121 0 4 | |||
| Rock Piano | 0 7 121 1 2 | |||
| New Age Piano | 0 8 95 9 1 | |||
| Classic E.P. | 0 9 121 0 5 | |||
| Modern E.P. | 0 10 | 121 0 6 | ||
| 60's E.P. | 0 11 | 121 3 5 | ||
| Modern E.P. 2 0 12 | 121 1 6 | |||
| Jazz Organ 0 13 | 121 0 | 18 | ||
| Drawbar Organ | 0 14 | 121 0 17 | ||
| Drawbar Organ 2 | 0 15 | 121 1 17 | ||
| Be 3 | 0 16 95 | 2 | 17 | |
| Church Organ 0 17 | 121 0 | 20 | ||
| Diapason | 0 18 95 | 7 | 20 | |
| Full Ensemble 0 19 95 | 1 | 21 | ||
| Principal Oct. | 0 20 95 24 | 20 | ||
| Harpsichord | 0 21 | 121 3 7 | ||
| Vibraphone | 0 22 | 121 0 | 12 | |
| Clavi | 0 23 | 121 0 8 | ||
| Harpsichord Oct. | 0 24 | 121 1 7 | ||
| Slow Strings | 0 25 95 | 1 | 45 | |
| String Pad | 0 26 95 | 8 | 49 | |
| Warm Strings 0 27 95 | 1 | 49 | ||
| String Ensemble | 0 28 | 121 0 49 | ||
| Choir | 0 29 | 121 0 58 | ||
| New Age | 0 30 | 121 0 89 | ||
| Atmosphere | 0 31 | 121 0 100 | ||
| Itopia | 0 32 | 121 1 92 | ||
| Wood Bass | 0 33 | 121 0 33 | ||
| Electric Bass | 0 34 | 121 0 | 34 | |
| Fretless Bass 0 35 | 121 0 | 36 | ||
| W. Bass & Ride | 0 36 95 | 1 | 33 | |
| New Age Piano 2 | 0 37 95 10 | 1 | ||
| New Age Piano 3 | 0 38 95 11 | 1 | ||
| Piano Octaves | 0 39 95 | 1 1 | ||
| Electric Grand 0 40 | 121 0 8 | |||
| Multi-Timbral mode | |||||
| Sound Off, On 1 On 2 | |||||
| Bank LSB Prog # Bank MSB | Bank LSB Prog # | ||||
| Electric Grand 2 0 41 | 121 1 3 | ||||
| Wide Honky Tonk 0 42 | 121 1 4 | ||||
| Dolce E.P. 0 43 | 95 | 2 5 | |||
| Crystal E.P. | 0 44 | 95 | 1 6 | ||
| Tremolo E.P. | 0 45 | 95 | 1 5 | ||
| Classic E.P. 2 | 0 46 121 | 1 5 | |||
| Classic E.P. 3 | 0 47 121 | 2 5 | |||
| New Age E.P. | 0 48 | 95 | 2 6 | ||
| Modern E.P. 3 0 49 | 121 2 6 | ||||
| Legend E.P. | 0 50 121 | 3 6 | |||
| Phase E.P. | 0 51 121 | 4 6 | |||
| Harpsichord 2 | 0 52 121 | 0 7 | |||
| Wide Harpsichord | 0 53 121 | 2 7 | |||
| Synth Clavi | 0 54 121 | 1 8 | |||
| Celesta | 0 55 121 | 0 9 | |||
| Glockenspiel | 0 56 121 | 0 | 10 | ||
| Music Box | 0 57 121 | 0 | 11 | ||
| Wide Vibraphone | 0 58 121 | 1 | 12 | ||
| Marimba | 0 59 121 | 0 | 13 | ||
| Wide Marimba | 0 60 121 | 1 | 13 | ||
| Xylophone | 0 61 121 | 0 | 14 | ||
| Hand Bells | 0 | 62 | 95 | 1 | 15 |
| Tubular Bells | 0 63 121 | 0 | 15 | ||
| Church Bells | 0 64 121 | 1 | 15 | ||
| Carillon | 0 65 121 | 2 | 15 | ||
| Dulcimer | 0 66 121 | 0 | 16 | ||
| Soft Solo | 0 | 67 | 95 | 8 | 17 |
| Drawbar Organ 3 | 0 | 68 | 95 | 1 | 17 |
| Jazzer | 0 | 69 | 95 | 1 | 18 |
| Hi-Lo | 0 | 70 | 95 | 3 | 17 |
| Drawbar Organ 4 | 0 71 121 | 3 | 17 | ||
| Electronic Organ | 0 | 72 | 95 | 9 | 17 |
| 60's Organ | 0 73 121 | 2 | 17 | ||
| Perc. Organ | 0 74 121 | 1 | 18 | ||
| Perc. Organ 2 | 0 75 121 | 2 | 18 | ||
| Tibia Bass | 0 76 | 95 14 | 18 | ||
| Rock Organ | 0 77 121 | 0 | 19 | ||
| Theater Organ | 0 | 78 | 95 | 1 | 20 |
| 8' Celeste | 0 | 79 | 95 | 5 | 20 |
| Small Ensemble | 0 | 80 | 95 | 8 | 20 |
| Reeds | 0 81 | 95 10 | 20 | ||
| Chiffy Tibia | 0 | 82 | 95 | 17 | 20 |
| Principal Pipe | 0 83 | 95 22 | 20 | ||
| Church Organ 2 | 0 84 121 | 1 | 20 | ||
| Sound Off, On 1 On 2 | |||||
| Bank LSB Prog # Bank MSB | Bank LSB Prog # | ||||
| Church Organ 3 0 85 | 121 2 20 | ||||
| Reed Organ 0 86 121 | 0 21 | ||||
| Puff Organ 0 87 121 | 21 | ||||
| French Accordion 0 88 | 121 0 22 | ||||
| Fr. Accordion 2 0 89 | 95 | 1 | 22 | ||
| Accordion | 0 90 121 | 1 22 | |||
| Accordion 2 | 0 91 | 95 | 2 22 | ||
| Blues Harmonica | 0 92 | 95 | 2 23 | ||
| Harmonica | 0 93 121 | 0 23 | |||
| Tango Accordion | 0 94 121 | 0 24 | |||
| Finger Nylon Gtr | 0 95 | 95 | 4 25 | ||
| Nylon Acoustic | 0 96 121 | 0 25 | |||
| Nylon Acoustic 2 | 0 97 121 | 2 25 | |||
| Nylon Acoustic 3 | 0 98 121 | 3 25 | |||
| Ukulele | 0 99 121 | 1 25 | |||
| Steel Guitar | 0 | 100 121 0 | 26 | ||
| Steel Guitar 2 | 0 | 101 121 3 | 26 | ||
| 12 String | 0 | 102 121 1 | 26 | ||
| Mandolin | 0 | 103 121 2 | 26 | ||
| Jazz Guitar | 0 | 104 121 0 | 27 | ||
| Pedal Steel | 0 | 105 121 1 | 27 | ||
| Rhythm Guitar | 0 | 106 121 2 | 28 | ||
| Electric Guitar | 0 | 107 121 0 | 28 | ||
| E. Guitar 2 | 0 | 108 121 1 | 28 | ||
| E. Guitar 3 | 0 | 109 121 2 | 29 | ||
| Muted Electric | 0 | 110 121 0 | 29 | ||
| Cutting Guitar 0 | 111 121 | 1 29 | |||
| Country Lead | 0 | 112 121 3 | 29 | ||
| Overdrive Guitar | 0 | 113 121 0 | 30 | ||
| Dynamic Ov. drive | 0 | 114 121 1 | 30 | ||
| Distortion | 0 | 115 121 0 | 31 | ||
| Dist Feedback 0 | 116 121 | 1 31 | |||
| Dist Rhythm | 0 | 117 121 2 | 31 | ||
| E. Gtr Harmonics | 0 | 118 121 0 | 32 | ||
| Guitar Feedback | 0 | 119 121 1 | 32 | ||
| Wood Bass 2 | 0 | 120 95 | 5 33 | ||
| Fingerslap Bass | 0 | 121 121 1 | 34 | ||
| Pick Bass | 0 | 122 121 0 | 35 | ||
| Slap Bass | 0 | 123 121 0 | 37 | ||
| Slap Bass 2 | 0 | 124 121 0 | 38 | ||
| Synth Bass | 0 | 125 121 0 | 39 | ||
| Synth Bass 2 | 0 | 126 121 0 | 40 | ||
| Synth Bass 3 | 0 | 127 121 2 | 39 | ||
| Synth Bass 4 | 0 | 128 121 1 | 40 | ||
| Sound Off, On 1 On 2 | |||||
| Bank LSB Prog # Bank MSB | Bank LSB Prog # | ||||
| Warm Synth Bass 1 1 | 121 1 39 | ||||
| Clavi Bass 1 2 121 3 39 | |||||
| Hammer Bass 1 3 121 | 4 39 | ||||
| Rubber Bass 1 4 121 | 2 40 | ||||
| Attack Bass 1 5 121 3 | 40 | ||||
| Violin | 1 6 121 0 | 41 | |||
| Slow Violin | 1 7 121 1 | 41 | |||
| Viola | 1 8 121 0 | 42 | |||
| Cello | 1 9 121 0 | 43 | |||
| Contrabass | 1 | 10 | 121 0 44 | ||
| Tremolo Strings | 1 | 11 | 121 | 0 | 45 |
| Strings & Brass | 1 | 12 | 121 1 49 | ||
| 60's Strings | 1 | 13 | 121 | 2 | 49 |
| String Ensemble 2 | 1 | 14 | 121 0 50 | ||
| Synth Strings | 1 | 15 | 121 0 51 | ||
| Synth Strings 3 | 1 | 16 | 121 1 51 | ||
| Synth Strings 2 | 1 | 17 | 121 0 52 | ||
| Pizzicato | 1 | 18 | 121 0 46 | ||
| Harp | 1 | 19 | 121 0 47 | ||
| Celtic Harp | 1 | 20 | 121 1 47 | ||
| Timpani | 1 | 21 | 121 0 48 | ||
| Choir Aahs 2 | 1 | 22 | 121 1 53 | ||
| Voice Oohs | 1 | 23 | 121 0 54 | ||
| Humming | 1 | 24 | 121 1 54 | ||
| Synth Vocal | 1 25 | 121 0 55 | |||
| Analog Voice | 1 | 26 | 121 1 55 | ||
| Orchestra Hit 1 | 27 | 121 0 56 | |||
| Bass Hit Plus 1 28 | 121 1 56 | ||||
| 6th Hit | 1 | 29 | 121 2 56 | ||
| Euro Hit | 1 | 30 | 121 3 56 | ||
| Trumpet | 1 | 31 | 121 | 0 | 57 |
| Solo Trumpet | 1 | 32 | 121 | 1 | 57 |
| Flugel Horn | 1 | 33 95 | 1 57 | ||
| Sentimental Bone | 1 | 34 95 | 7 58 | ||
| Trombone | 1 | 35 | 121 | 0 | 58 |
| Trombone 2 | 1 | 36 | 121 | 1 | 58 |
| Bright Trombone | 1 | 37 | 121 | 2 | 58 |
| Tuba | 1 | 38 | 121 | 0 | 59 |
| Cup Mute Trumpet | 1 | 39 | 95 | 1 | 60 |
| Cup Mute Trombone | 1 | 40 | 95 | 2 | 60 |
| Muted Trumpet | 1 | 41 | 121 | 0 | 60 |
| Muted Trumpet 2 | 1 | 42 | 121 | 1 | 60 |
| French Horns | 1 43 | 121 0 61 | |||
| Warm French Horn | 1 | 44 | 121 1 61 | ||
| Sound Off, On 1 On 2 | |||||
| Bank LSB Prog # Bank MSB | Bank LSB Prog # | ||||
| Brass Section 1 45 12 | 1 0 62 | ||||
| Brass Section 2 1 46 | 121 1 62 | ||||
| Synth Brass 1 47 121 | 0 63 | ||||
| Synth Brass 3 1 48 121 | 1 63 | ||||
| Synth Brass 2 1 49 121 | 0 64 | ||||
| Synth Brass 4 1 50 121 | 1 64 | ||||
| Jump Brass | 1 51 121 | 3 63 | |||
| Analog Brass | 1 52 121 | 2 63 | |||
| Analog Brass 2 1 53 | 121 2 64 | ||||
| Oboe & Strings | 1 54 | 95 | 5 69 | ||
| Soprano Sax | 1 55 121 | 0 65 | |||
| Alto Sax | 1 56 121 | 0 66 | |||
| Soft Tenor Sax | 1 | 57 | 95 | 2 | 67 |
| Tenor Sax | 1 58 121 | 0 67 | |||
| Baritone Sax | 1 59 121 | 0 68 | |||
| Oboe | 1 60 121 | 0 69 | |||
| English Horn | 1 61 121 | 0 70 | |||
| Bassoon | 1 62 121 | 0 71 | |||
| Clarinet | 1 63 121 | 0 72 | |||
| Flute & Strings | 1 64 | 95 | 8 74 | ||
| Piccolo | 1 65 121 | 0 73 | |||
| Jazz Flute | 1 66 | 95 | 1 74 | ||
| Big Band Winds | 1 67 | 95 | 2 74 | ||
| Orchestral Winds | 1 68 | 95 | 3 74 | ||
| Flute | 1 69 121 | 0 74 | |||
| Ballad Flute | 1 70 | 95 13 | 74 | ||
| Recorder | 1 71 121 | 0 75 | |||
| Pan Flute | 1 72 121 | 0 76 | |||
| Blown Bottle | 1 73 121 | 0 77 | |||
| Shakuhachi | 1 74 121 | 0 78 | |||
| Whistle | 1 75 121 | 0 79 | |||
| Ocarina | 1 76 121 | 0 80 | |||
| Square | 1 77 121 | 0 81 | |||
| Square 2 | 1 78 121 | 1 81 | |||
| Sine | 1 79 121 | 2 81 | |||
| Classic Synth | 1 80 121 | 0 82 | |||
| Classic Synth 2 | 1 81 121 | 1 82 | |||
| Lead | 1 82 121 | 2 82 | |||
| Classic Synth 3 | 1 83 121 | 3 82 | |||
| Sequenced Analog | 1 84 121 | 4 82 | |||
| Caliope | 1 85 121 | 0 83 | |||
| Chiff | 1 86 121 | 0 84 | |||
| Charang | 1 87 121 | 0 85 | |||
| Wire Lead | 1 88 121 | 1 85 | |||
| Voice 1 89 121 0 86 | |||||
| Fifth 1 90 121 0 87 | |||||
| Bass & Lead 1 91 121 | 0 88 | ||||
| Soft Wire Lead 1 92 1 | 21 1 88 | ||||
| New Age 2 1 93 95 | 1 89 | ||||
| New Age 3 1 94 95 | 2 89 | ||||
| New Age 4 1 95 95 | 3 89 | ||||
| Warm Pad | 1 96 121 0 90 | ||||
| Sine Pad | 1 97 121 1 90 | ||||
| Polysynth | 1 98 121 0 91 | ||||
| Choir | 1 99 121 0 92 | ||||
| Bowed | 1 100 | 121 0 93 | |||
| Metallic | 1 101 | 121 0 94 | |||
| Halo | 1 102 | 121 0 95 | |||
| Sweep | 1 103 | 121 0 96 | |||
| Rain Pad | 1 104 | 121 0 97 | |||
| Soundtrack | 1 105 | 121 0 98 | |||
| Crystal | 1 106 | 121 0 99 | |||
| Synth Mallet 1 107 | 121 1 99 | ||||
| Brightness 1 108 | 121 0 | 101 | |||
| Goblin | 1 109 | 121 0 | 102 | ||
| Echoes | 1 110 | 121 0 | 103 | ||
| Echo Bell | 1 111 | 121 1 | 103 | ||
| Echo Pan | 1 112 | 121 2 | 103 | ||
| Sci-Fi | 1 113 | 121 0 | 104 | ||
| Sitar | 1 114 | 121 0 | 105 | ||
| Sitar 2 | 1 115 | 121 1 | 105 | ||
| Banjo | 1 116 | 121 0 | 106 | ||
| Shamisen | 1 117 | 121 0 | 107 | ||
| Koto | 1 118 | 121 0 | 108 | ||
| Taisho Koto | 1 | 119 | 121 | 1 | 108 |
| Kalimba | 1 120 | 121 0 | 109 | ||
| Bag Pipe | 1 121 | 121 0 | 110 | ||
| Fiddle | 1 122 | 121 0 | 111 | ||
| Shanai | 1 123 | 121 0 | 112 | ||
| Tinkle Bell | 1 124 | 121 0 | 113 | ||
| Agogo | 1 125 | 121 0 | 114 | ||
| Steel Drums | 1 126 | 121 0 | 115 | ||
| Woodblock | 1 127 | 121 0 | 116 | ||
| Castanet | 1 128 | 121 1 | 116 | ||
| Taiko Drums 2 | 1 121 0 | 117 | |||
| Concert BD | 2 | 2 121 1 | 117 | ||
| Melodic Toms 2 | 3 121 0 | 118 | |||
| Melodic Toms 2 | 2 | 4 | 121 | 1 | 118 |
| Multi-Timbral mode | |||||
| Sound Off, On1 On2 | |||||
| Bank LSB Prog # Bank MSB | Bank LSB Prog# | ||||
| Synth Drum 2 5 121 0 119 | |||||
| Rhythm Box Tom 2 6 | 121 1 119 | ||||
| Electric Drum 2 7 121 | 2 119 | ||||
| Reverse Cymbal | 2 8 121 0 120 | ||||
| Gtr Fret Noise | 2 9 121 0 121 | ||||
| Gtr Cutting Noise | 2 | 10 | 121 1 121 | ||
| Ac Bass Slap | 2 | 11 | 121 2 121 | ||
| Breath Noise 2 | 12 | 121 0 122 | |||
| Flute Key Click | 2 | 13 | 121 1 122 | ||
| Seashore | 2 | 14 | 121 0 123 | ||
| Rain | 2 | 15 | 121 1 123 | ||
| Thunder | 2 | 16 | 121 2 123 | ||
| Wind | 2 | 17 | 121 3 123 | ||
| Stream | 2 | 18 | 121 4 123 | ||
| Bubble | 2 | 19 | 121 5 123 | ||
| Bird Tweet | 2 | 20 | 121 0 124 | ||
| Dog Barking | 2 | 21 | 121 1 124 | ||
| Horse Gallop | 2 | 22 | 121 2 124 | ||
| Bird Tweet 2 | 2 23 | 121 3 124 | |||
| Telephone | 2 | 24 | 121 0 125 | ||
| Telephone 2 2 | 25 | 121 1 125 | |||
| Door Creak | 2 | 26 | 121 2 125 | ||
| Door Slam | 2 | 27 | 121 3 125 | ||
| Scratch | 2 | 28 | 121 4 125 | ||
| Wind Chime | 2 | 29 | 121 5 125 | ||
| Helicopter | 2 30 | 121 0 126 | |||
| Car Engine | 2 | 31 | 121 1 126 | ||
| Car Stopping | 2 | 32 | 121 2 126 | ||
| Car Passing | 2 | 33 | 121 3 126 | ||
| Car Crash | 2 | 34 | 121 4 126 | ||
| Siren | 2 | 35 | 121 5 126 | ||
| Train | 2 | 36 | 121 6 126 | ||
| Jet Plane | 2 | 37 | 121 7 126 | ||
| Starship | 2 | 38 | 121 8 126 | ||
| Burst Noise | 2 | 39 | 121 9 126 | ||
| Applause | 2 | 40 | 121 0 127 | ||
| Laughing | 2 | 41 | 121 1 127 | ||
| Screaming | 2 | 42 | 121 2 127 | ||
| Punch | 2 | 43 | 121 3 127 | ||
| Heartbeat | 2 | 44 | 121 4 127 | ||
| Foot Step | 2 | 45 | 121 5 127 | ||
| Gunshot | 2 | 46 | 121 0 128 | ||
| Machine Gun 2 | 47 | 121 1 128 | |||
| Laser Gun | 2 | 48 | 121 2 128 | ||
| Explosion 2 49 121 3 | 128 | ||||
| Standard Set 2 50 120 0 1 | |||||
| Room Set 2 51 120 0 9 | |||||
| Power Set 2 52 120 0 17 | |||||
| Electronic Set | 2 53 120 | 0 25 | |||
| Analog Set | 2 54 120 | 0 26 | |||
| Jazz Set | 2 55 120 | 0 33 | |||
| Brush Set | 2 56 120 | 0 41 | |||
| Orchestra Set | 2 57 120 | 0 49 | |||
| SFX Set | 2 58 120 | 0 57 | |||
Standard Set Room Set Power Set Electronic Set Analog Set
D# High Q High Q High Q High Q High Q
E Slap Slap Slap Slap Slap
F Scratch Push Scratch Push Scratch Push Scratch Push Scratch Push
F# Scratch Pull Scratch Pull Scratch Pull Scratch Pull Scratch Pull
G Sticks Sticks Sticks Sticks Sticks
G# Square Click Square Click Square Click Square Click
| A | Metronome Click | Metronome Click | Metronome Click | Metronome Click | Metronome Click | |
| A# | Metronome Bell | Metronome Bell | Metronome Bell | Metronome Bell | Metronome Bell | |
| B | Acoustic Bass Drum | Acoustic Bass Drum | Acoustic Bass Drum | Acoustic Bass Drum | Acoustic Bass Drum | |
| C2 | C | Bass Drum 1 | Bass Drum 1 | Power Kick Drum | Electric Bass Drum | Analog Bass Drum |
| C# | Side Stick | Side Stick | Side Stick | Side Stick | Analog Rim Shot | |
| D | Acoustic Snare | Acoustic Snare | Power Snare Drum | Electric Snare 1 | Analog Snare 1 | |
| D# | Hand Clap | Hand Clap | Hand Clap | Hand Clap | Hand Clap | |
| E | Electric Snare | Electric Snare | Electric Snare | Electric Snare 2 | Electric Snare | |
| F | Low Floor Tom | Room Low Tom 2 | Power Low Tom 2 | Electric Low Tom 2 | Analog Low Tom 2 | |
| F# | Closed Hi-hat | Closed Hi-hat | Closed Hi-hat | Closed Hi-hat | Analog CHH 1 | |
| G | High Floor Tom | Room Low Tom 1 | Power Low Tom 1 | Electric Low Tom 1 | Analog Low Tom 1 | |
| G# | Pedal Hi-hat | Pedal Hi-hat | Pedal Hi-hat | Pedal Hi-hat | Analog CHH 2 | |
| A | Low Tom | Room Mid Tom 2 | Power Mid Tom 2 | Electric Mid Tom 2 | Analog Mid Tom 2 | |
| A# | Open Hi-hat | Open Hi-hat | Open Hi-hat | Open Hi-hat | Analog OHH | |
| B | Low-Mid Tom | Room Mid Tom 1 | Power Mid Tom 1 | Electric Mid Tom 1 | Analog Mid Tom 1 | |
| C3 | C | High-Mid Tom | Room Hi Tom 2 | Power Hi Tom 2 | Electric Hi Tom 2 | Analog Hi Tom 2 |
| C# | Crash Cymbal 1 | Crash Cymbal 1 | Crash Cymbal 1 | Crash Cymbal 1 | Analog Cymbal | |
| D | Hi Tom | Room Hi Tom 1 | Power Hi Tom 1 | Electric Hi Tom 1 | Analog Hi Tom 1 | |
| D# | Ride Cymbal 1 | Ride Cymbal 1 | Ride Cymbal 1 | Ride Cymbal 1 | Ride Cymbal 1 | |
| E | Chinese Cymbal | Chinese Cymbal | Chinese Cymbal | Reverse Cymbal | Chinese Cymbal | |
| F | Ride Bell | Ride Bell | Ride Bell | Ride Bell | Ride Bell | |
| F# | Tambourine | Tambourine | Tambourine | Tambourine | Tambourine | |
| G | Splash Cymbal | Splash Cymbal | Splash Cymbal | Splash Cymbal | Splash Cymbal | |
| G# | Cowbell | Cowbell | Cowbell | Cowbell | Analog Cowbell | |
| A | Crash Cymbal 2 | Crash Cymbal 2 | Crash Cymbal 2 | Crash Cymbal 2 | Crash Cymbal 2 | |
| A# | Vibra-slap | Vibra-slap | Vibra-slap | Vibra-slap | Vibra-slap | |
| B | Ride Cymbal 2 | Ride Cymbal 2 | Ride Cymbal 2 | Ride Cymbal 2 | Ride Cymbal 2 | |
| C4 | C | High Bongo | High Bongo | High Bongo | High Bongo | High Bongo |
| C# | Low Bongo | Low Bongo | Low Bongo | Low Bongo | Low Bongo | |
| D | Mutc Hi Conga | Mutc Hi Conga | Mutc Hi Conga | Mutc Hi Conga | Analog Hi Conga | |
| D# | Open Hi Conga | Open Hi Conga | Open Hi Conga | Analog Mid Conga | Analog Mid Conga | |
| E | Low Conga | Low Conga | Low Conga | Analog Low Conga | Analog Low Conga | |
| F | High Timbale | High Timbale | High Timbale | High Timbale | High Timbale | |
| F# | Low Timbale Low Timbale | Low Timbale Low Timbale | Low Timbale Low Timbale | |||
| G | High Agogo | High Agogo | High Agogo | High Agogo | High Agogo | |
| G# | Low Agogo | Low Agogo | Low Agogo | Low Agogo | Low Agogo | |
| A | Cabasa | Cabasa | Cabasa | Cabasa | Cabasa | |
| A# | Maracas | Maracas | Maracas | Maracas | Analog Maracas | |
| B | Short Whistle | Short Whistle | Short Whistle | Short Whistle | Short Whistle | |
| C5 | C | Long Whistle | Long Whistle | Long Whistle | Long Whistle | Long Whistle |
| C# | Short Guiro | Short Guiro | Short Guiro | Short Guiro | Short Guiro | |
| D | Long Guiro | Long Guiro | Long Guiro | Long Guiro | Long Guiro | |
| D# | Claves | Claves | Claves | Claves | Analog Claves | |
| E | Hi Wood Block | Hi Wood Block | Hi Wood Block | Hi Wood Block | Hi Wood Block | |
| F | Low Wood Block | Low Wood Block | Low Wood Block | Low Wood Block | Low Wood Block | |
| F# | Mute Cuica | Mute Cuica | Mute Cuica | Mute Cuica | Mute Cuica | |
| G | Open Cuica | Open Cuica | Open Cuica | Open Cuica | Open Cuica | |
| G# | Mutc Triangle | Mutc Triangle | Mutc Triangle | Mutc Triangle | Mutc Triangle | |
| A | Open Triangle | Open Triangle | Open Triangle | Open Triangle | Open Triangle | |
| A# | Shaker | Shaker | Shaker | Shaker | Shaker | |
| B | Jingle Bell | Jingle Bell | Jingle Bell | Jingle Bell | Jingle Bell | |
| C6 | C | Bell Tree | Bar Chimes | Bar Chimes | Bar Chimes | Bar Chimes |
| C# | Castanets | Castanets | Castanets | Castanets | Castanets | |
| D | Mutc Surdo | Mutc Surdo | Mutc Surdo | Mutc Surdo | Mutc Surdo | |
| D# | Open Surdo | Open Surdo | Open Surdo | Open Surdo | Open Surdo | |
| E |
Jazz Set Brush Set Orchestra Set SFX Set
D# High Q High Q Closed Hi-hat 2
E Slap Slap Pedal Hi-hat
F Scratch Push Scratch Push Open Hi-hat 2
F# Scratch Pull Scratch Pull Ride Cymbal 1
G Sticks Sticks Sticks
G# Square Click Square Click Square Click
A Metronome Click Metronome Click Metronome Click
A# Metronome Bell Metronome Bell Metronome Bell
B Jazz Kick 2
Jazz Kick 2
Concert BD 2
C2 C Jazz Kick 1
Jazz Kick 1
Concert BD 1
C# Side Stick
Side Stick
Side Stick
D Acoustic Snare
Brush Tap
Concert SD
D# Hand Clap
Brush Slap
Castanets
E Electric Snare
Brush Swirl
Concert SD
F Low Floor Tom
Low Floor Tom
Timpani F
F# Closed Hi-hat
Closed Hi-hat
Timpani F#
G High Floor Tom
High Floor Tom
Timpani G
G# Pedal Hi-hat
Pedal Hi-hat
Timpani G#
A Low Tom
Low Tom
A# Open Hi-hat
Open Hi-hat
Timpani A#
B Low-Mid Tom
Low-Mid Tom
Timpani B
C3 C High-Mid Tom
High-Mid Tom
Timpani c
C# Crash Cymbal 1
Crash Cymbal 1
Timpani c#
D Hi Tom
Hi Tom
Timpani d
D# Ride Cymbal 1
Ride Cymbal 1
Timpani d#
E Chinese Cymbal
Chinese Cymbal
Timpani e
F Ride Bell
Ride Bell
Timpani f
F# Tambourine
Tambourine
Tambourine
G Splash Cymbal
Splash Cymbal
Splash Cymbal
G# Cowbell
Cowbell
A Crash Cymbal 2
Crash Cymbal 2
Cowbell
A# Vibra-slap
Vibra-slap
Vibra-slap
B Ride Cymbal 2
Ride Cymbal 2
Concert Cymbal 1
C4 C High Bongo
High Bongo
High Bongo
C# Low Bongo
Low Bongo
Low Bongo
D Mute Hi Conga
Mute Hi Conga
Mute Hi Conga
D# Open Hi Conga
Open Hi Conga
Open Hi Conga
E Low Conga
Low Conga
Low Conga
F High Timbale
High Timbale
High Timbale
F# Low Timbale
Low Timbale
Low Timbale
G High Agogo
High Agogo
High Agogo
G# Low Agogo
Low Agogo
Low Agogo
A Cabasa
Cabasa
Cabasa
A# Maracas
Maracas
Maracas
B Short Whistle
Short Whistle
Short Whistle
C5 C Long Whistle
Long Whistle
Long Whistle
C# Short Guiro
Short Guiro
Short Guiro
D Long Guiro
Long Guiro
Long Guiro
D# Claves
Claves
Claves
E Hi Wood Block
Hi Wood Block
Hi Wood Block
F Low Wood Block
Low Wood Block
Low Wood Block
F# Mute Cuica
Mute Cuica
Mute Cuica
G Open Cuica
Open Cuica
Open Cuica
G# Mute Triangle
Mute Triangle
Mute Triangle
A Open Triangle
Open Triangle
Open Triangle
A# Shaker
Shaker
Shaker
B Jingle Bell
Jingle Bell
Jingle Bell
C6 C Bell Tree
Bar Chimes
Bar Chimes
C# Castanets
Castanets
Castanets
D Mute Surdo
Mute Surdo
Mute Surdo
D# Open Surdo
Open Surdo
en Surdo
E
Applause
High Q
Slap
Scratch Push
Scratch Pull
Sticks
Square Click
Metronome Click
Metronome Bell
Guitar Fret Noise
Guitar Cutting Noise Up
Guitar Cutting Noise Down
String Slap of Double Bass
Fl. Key Click
Laughing
Scream
Punch
Heart Beat
Footsteps 1
Footsteps 2
Applause
Door Creaking
Door
Scratch
Wind Chimes
Car-Engine
Car-Stop
Car-Pass
Car-Crash
Siren
Train
Jetplane
Helicopter
Starship
Gun Shot
Machine Gun
Lasergun
Explosion
Dog
Horse-Gallop
Birds
Rain
Thunder
Wind
Seashore
Stream
Bubble
RHYTHM STYLE LIST
| 1 8 Beat 1 26 Rim Beat 51 Hip Hop 3 76 Jazz Waltz 1 | |||||||
| 2 8 Beat 2 27 Slow Jam 52 Hip Hop 4 77 Jazz Waltz 2 | |||||||
| 3 8 Beat 3 28 Pop 1 53 Techno 1 78 5/4 Swing | |||||||
| 4 16 Beat 1 29 Pop 2 54 Techno 2 79 Tom Swing | |||||||
| 5 16 Beat 2 30 Electro Pop 1 55 Techno 3 80 Fast 4 Beat | |||||||
| 6 16 Beat 3 31 Electro Pop 2 56 Heavy Techno 81 H.H. Bossa Nova | |||||||
| 7 16 Beat 4 32 Ride Beat 1 57 8 Shuffle 1 | 82 Ride Bossa Nova | ||||||
| 8 16 Beat 5 33 Ride Beat 2 58 8 Shuffle 2 | 83 Beguine | ||||||
| 9 16 Beat 6 34 Ride Beat 3 59 8 Shuffle 3 | 84 Mambo | ||||||
| 10 Rock Beat 1 | 35 Ride Beat 4 60 Boogie | 85 Cha Cha | |||||
| 11 Rock Beat 2 | 36 | Slip Beat | 61 | 16 Shuffle 1 | 86 | Samba | |
| 12 Rock Beat 3 | 37 | Jazz Rock | 62 | 16 Shuffle 2 | 87 | Light Samba | |
| 13 Hard Rock | 38 | Funky Beat 1 | 63 | 16 Shuffle 3 | 88 | Surdo Samba | |
| 14 Heavy Beat | 39 | Funky Beat 2 | 64 | T Shuffle | 89 | Latin Groove | |
| 15 Surf Rock | 40 | Funky Beat 3 | 65 | Triplet 1 | 90 | Afro Cuban | |
| 16 2nd Line | 41 | Funk 1 | 66 | Triplet 2 | 91 | Songo | |
| 17 50 Ways | 42 | Funk 2 | 67 | Triplet 3 | 92 | Bembe | |
| 18 Ballad 1 43 Funk 3 | 68 Triplet 4 | 93 African Bembe | |||||
| 19 Ballad 2 44 Funk Shuffle 1 69 Triplet Ballad 1 | 94 Merenge | ||||||
| 20 Ballad 3 45 Funk Shuffle 2 70 Triplet Ballad 2 | 95 Reggae | ||||||
| 21 Ballad 4 46 Buzz Beat | 71 Triplet Ballad 3 | 96 Tango | |||||
| 22 Ballad 5 47 Disco 1 | 72 Motown 1 | 97 Habanera | |||||
| 23 Light Ride 1 | 48 | Disco 2 | 73 | Motown 2 | 98 | Waltz | |
| 24 Light Ride 2 | 49 | Hip Hop 1 | 74 | Ride Swing | 99 | Ragtime | |
| 25 Smooth Beat | 50 | Hip Hop 2 | 75 | H.H. Swing | 100 | Country & Western | |
ALFRED'S LESSON SONG LIST
LEVEL 1A
- Right & Left A0
- Left & Right A#0
- Merrily We Roll Along/ O'er the Deep Blue Sea B0
- Hand-Bells C1
- Jolly Old Saint Nicholas C#1
- Old MacDonald D1
- Batter Up! D#1
- My Clever Pup E1
- The Zoo F1
- Playing in a New Position F#1
- Sailing G1
- Skating G#1
- Wishing Well A1
- Rain, Rain! A#1
- A Happy Song B1
- Position C C2
-
A Happy Song C#2
-
See-Saws D2
-
Just a Second! D#2
-
Balloons E2
-
Who's on Third? F2
-
Mexican Hat Dance F#2
-
Rock Song G2
24.Rockets G#2
-
Sea Divers A2
-
Play a Fourth A#2
-
July the Fourth! B2
-
Old Uncle Bill C3
-
Love Somebody C#3
-
My Fifth D3
-
The Donkey D#3
-
Position G E3
-
Jingle Bells! F3
-
Willie & Tillie F#3
-
A Friend Like You G3
-
My Robot G#3
-
Rockin' Tune A3
-
Indian Song A#3
39.Raindrops B3
-
It's Halloween! C4
-
Horse Sense C#4
LEVEL 1B
- Step Right Up! A0
- The Carousel A#0
- Hail to Thee, America! B0
- Brother John C1
- Good Sounds C#1
- The Cuckoo D1
- Money Can't Buy Everything! D#1
- Ping-Pong E1
- Granpa's Clock F1
- When the Saints Go Marching In F#1
- G's in the "BAG" G1
- Join the Fun G#1
- Oom-Pa-pa! A1
- The Clown A#1
- Thumbs on C! B1
- Waltz Time C2
- Good King Wenceslas C#2
- The Rainbow D2
- Good Morning to You! D#2
- Happy Birthday to You! E2
- Yankee Doodle F2
- The Windmill F#2
- Indians G2
- New Position G G#2
- Pedal Play A2
- Harp Song A#2
- Concert Time B2
- Music Box Rock C3
- A Cowboy's Song C#3
- The Magic Man D3
- The Greatest Show on Earth D#3
- The Whirlwind E3
- The Planets F3
- C Major Scale Piece F#3
- G Major Scale Piece G3
- Carol in G Major G#3
- The Same Carol in C Major A3
- French Lullaby A#3
- Sonatina B3
- When Our Band Goes Marching By! C4
ALFRED'S LESSON SONG LIST
ADULT
- Ode to Joy A0
- Aura Lee A#0
- Rock-Along B0
- Mexican Hat Dance C1
- Au Claire De La Lune C#1
- Tisket, A Tasket D1
- Rockin'n Intervals D#1
- Good King Wenceslas E1
- My Fifth F1
- Jingle Bells F#1
- Brother John G1
- Here's A Happy Song! G#1
- Merrily We Roll Along A1
- Largo (from The "New World") A#1
- Mary Ann B1
- Rockets C2
- What Can I Share? C#2
- When The Saints Go Marching In (With RH Melody & LH Chords) D2
- When The Saints Go Marching In (With LH Melody & RH Chords) D#2
- Love Somebody! E2
- A Friend Like You F2
- The Donkey F#2
- Money Can't Buy Ev'rything! G2
- The Cuckoo G#2
- Harp Song A2
- Beautiful Brown Eyes A#2
- Alpine Melody B2
- Thumbs on C! C3
- Waltz Time C#3
- Good Morning To You! D3
- Happy Birthday To You! D#3
- Standing In The Need Of Prayer E3
- The Gift To Be Simple F3
- Alouette F#3
- Lavender's Blue G3
- Kum-Ba-Yah! G#3
- London Bridge A3
- Michael, Row The Boat Ashore A#3
- Blow The Man Down! B3
-
Lone Star Waltz C4
-
Café Vienna C#4
- Rock It Away! D4
- Joy To The World D#4
- Cockles And Mussels E4
- Got Those Blues! F4
- On Top Of Old Smoky F#4
- The Can-Can G4
- The Marine's Hymn G#4
- Why Am I Blue? A4
- Little Brown Jug A#4
- Chiapanecas A0
- O Sole Mio! A#0
- Jericho B0
- Greensleeves C1
- Go Down, Moses C#1
- Scarborough Fair D1
- Raisins And Almonds D#2
- He's Got The Whole World In His Hands E1
- The Entertainer F2
- Amazing Grace F#2
CLASSICAL PIANO COLLECTION SONG LIST
Tambourin ....J.P. Rameu
The harmonious blacksmith ....G.F. Händel
Menuette BWV. Anh.114 J.S. Bach
Menuette BWV. Anh.115 J.S. Bach
Menuette BWV. Anh.116 J.S. Bach
Le Coucou J.S. Bach
Gavotte ......F.J. Gossec
Menuette ....L. Boccherini
Good Morning To You F1 MP
Hickory Dickory Dock D#1 EB
I'm A Little Teapot A#0 MP
Itsy, Bitsy Spider A1 MP
London Bridges C#1 MP
Mary Had A Little Lamb C1 MP
Pop Goes The Weasel E1 MP
Row, Row, Row Your Boat D1 MP
The Farmer In The Dell G1 MP
This Old Man B0 MP
Twinkle, Twinkle, Little Star A0 MP
CHRISTMAS SONGS
Deck The Halls C2 MP
Hark The Herald Angels Sing A#1 MP
Jingle Bells B1 MP
Joy To The World D2 MP
O Come All Ye Faithful C#2 MP
Silent Night E2 MP
The First Noel D#2 MP
We Wish You A Merry Christmas F2 MP
What Child Is This? (Greensleeves) F#2 MP
PATORIOTIC SONGS
America The Beautiful A2 MP
Battle Hymn Of The Republic G#2 MP
Hail To The Chief B2 MP
My Country 'Tis Of Thee G2 MP
Yankee Doodle A#2 MP
AMERICAN CLASSICS
Auld Lang Syne C#4 MP
Beautiful Dreamer A#4 EB
Bicycle Built For Two F4 EB
Bill Bailey Won't You Please Come Home G3 EB
Camptown Races F#4 MP
Clementine A3 MP
Danny Boy C3 EB
Down In The Valley C#3 EB
Fascination A#3 SK
For He's A Jolly Good Fellow F#3 EB
Give My Regards To Broadway G#3 SK
Home On The Range B3 MP
Home Sweet Home D#3 EB
In The Good Old Summertime F3 EB
Let Me Call You Sweetheart
Michael Row The Boat Ashore D4 MP
My Bonnie Lies Over The Ocean E3 EB
Oh Susanna D#4 SK
On Top Of Old Smokey E4 EB
Take Me Out To The Ballgame C4 EB
The Band Played On G4 EB
When Johnny Comes Marching Home G#4 MP
When The Saints Go Marching In A4 EB
FAVORITE HYMNS
A Mighty Fortress D6 MP
Amazing Grace C5 MP
Doxology C#5 MP
Fairest Lord Jesus B4 MP
For The Beauty Of The Earth D5 MP
Gloria Patri C#6 MP
Holy, Holy, Holy F5 MP
It Is Well With My Soul C6 MP
Jesus Loves The Little Children B5 MP
Just As I Am A#5 MP
O Worship The King D#5 MP
Rock Of Ages G5 MP
Sweet Hour Of Prayer A5 MP
The Old Rugged Cross E5 MP
Trust And Obey G#5 MP
What A Friend We Have In Jesus F#5 MP
CLASSICAL SELECTIONS
An Die Freude (Ode To Joy) F6 MP
Andante (Haydn) D#6 MP
Blue Danube Waltz B6 SK
Clair De Lune F#6 SK
Fledermaus E7 EB
Für Elise E6 EB
Gavotte (Gossec) C#7 SK
Skater's Waltz G6 SK
Sleeping Beauty Waltz C7 EB
Toreador Song ("Carmen") D#7 SK
Waltz Of The Flowers D7 SK
SPECIAL OCCASIONS
Bridal Chorus F7 MP
Wedding March F#7 SK
INTERNATIONAL SONGS
Chiapenacas C8 SK
Funiculi Funicula A#7 SK
Hatikvah G#7 MP
La Marseillaise B7 MP
My Wild Irish Rose A7 EB
When Irish Eyes Are Smiling G7 EB

Front Panel


Specifications
| CN4 | |
| Keyboard 88 Weighted Keyboard with Advanced Hammer Action IV | |
| Polyphony Maximum 96 | |
| Number of Sound 305 + 9 Drum Sets | |
| Sound Categories Piano 1, Piano 2, Electric Piano, Drawbar, Church Organ, Harpsi&Mallets, Strings, Choir&Pad, Bass, Others | |
| Effects Reverb (6), Chorus (5), Flanger, Tremolo, Delay (3), Rotary (2) | |
| Temperaments Equal (Piano Only), Mersenne pure (Major), Mersenne pure (minor), Pythagorea, Meantone, Werckmeister III, Kirnberger III, Equal (flat), Equal | |
| Internal Recorder 3 Songs, 2 TracksThe total memory capacity of the recorder is approximately 90,000 notes. | |
| Disk Recorder 16 Tracks, Realtime Recording | |
| Other Features Concert Magic (88 Preset Songs), Volume, Dual, Split, Balance Slider, Lesson Function, Metronome, Transpose, Tune, Lower Octave Shift, Lower Pedal On/Off, Touch Curve (Light, Light+, Normal, Heavy, Heavy+, Off), MIDI (16 part multi-timbral capability) | |
| Pedals Sustain, Sostenuto, Soft | |
| Jacks Headphones (2), LINE IN (L/MONO, R), LINE OUT (L/MONO, R), MIDI (IN, OUT, THRU), USB | |
| Output Power 40 W x 2 | |
| Speakers 16 cm x 2 | |
| Power Consumption | 80 W |
| Finish Rosewood, Mahogany, European Cherry | |
| Dimensions (WxDxH)(without Music Rack) | 1405 x 469 x 858 mm55" x 19" x 34" |
| Weight (without bench) | 50 kg, 110 LB's |
MIDI EXCLUSIVE DATA FORMAT
| 1st byte | 2nd byte | 3rd byte | 4th byte | 5th byte | 6th byte | 7th byte | 8th byte | 9th byte | 10th byte |
| 1 | 2 | 3 | 4 | 5 | 6 | 7 | 8 | 9 | 10 |
1 F0 .... Start code
2 40. . . . . . . . Kawai's ID number
3 00 - OF ..... MIDI channel
4 10, 30. . . . . . Function code (30 when setting MULTI TIMBRE ON/OFF)
5 04. . . . . . . Indicates that the instrument is Electronic Piano
6 08..... Indicates that the piano is "CN4"
7 data 1
8 data 2 ..... (See the table below.)
9 data 3
10 F7 .... End code
| data 1 | data 2 data 3 Function | |||
| 00 00 | — | Multi Timbre Off | ||
| 00 01 | — | Multi Timbre On 1 | ||
| 00 02 | — | Multi Timbre On 2 | ||
| 0D | 00-0C | — | 00: Effect Off, 01: Chorus 3, 02: Delay 1, 03: Delay 2, 04: Delay 3, 05: Tremolo, 06: Rotary 1, 07: Rotary 2, 08: Chorus 1, 09: Chorus 2 0a: Chorus 4, 0b: FB Chorus, 0c: Flanger | |
| 0E | 00-03, 06-08 | — | 00: Reverb Off, 01: Room 2, 02: Stage, 03: Hall 1, 06: Room 1, 07: Hall 2, 08: Plate | |
| 14 | 00-7F | — | Dual/Split balance | |
| 16 | 1F-60 | — | Tune, 40: 440 Hz | |
| 17 | 00, 7F | — | 00: Program Change Off, 7F: Program Change On | |
| 18 | 00-07 | — | 00: Light, 01: Normal, 02: Heavy, 03: Off, 04: Light+, 05: Heavy+, 06: User 1, 07: User 2 | |
| 19 | 00-03 | — | Lower Octave Shift | |
| 20 | 00-7F | 00-7F | Dual Program Change, data 2: Right sound, data 3: Left sound | |
| 21 | 00-7F | 00-7F | Split Program Change, data 2: Upper sound, data 3: Lower sound | |
| 25 | 00-08 | 00-0B | data 2: Temperament, data 3: Key | |
| 26 | 00, 7F | 00-0F | Multi Timbre, data 2: 00 (On), 7F (Off), data 3: channel | |
| 27 | 00-02 | 00-02 | Dual/Split, Right (Upper)/Left (Lower), sound Bank LSB | |
| Function Transmit Receive | Remarks | |||
| Basic Default 1 1-16 Channel Changes | 1-16 | 1-16 | ||
| Mode | Default 3 | 3 | ||
| Messages | × | 3,4 | ||
| Altered | ********** | |||
| Note Number | True voice | 21-108* | 0-127 | *9-120 w/Transpose |
| ********** | 0-127 | |||
| Velocity | Note ON | ○ 9nH v=1-127 | ○ | |
| Note OFF | × 9nH v=0 | × | ||
| After Touch | Key's | × | × | |
| Ch's | × | ○ | ||
| Pitch Bend | × | ○ | ||
| Control Change | 0, 32 | ○ | ○ | Bank Select |
| 1 | × | ○ | Modulation | |
| 5 | × | ○ | Portament Time | |
| 6, 38 | × | ○ | Data Entry | |
| 7 | ○ | ○ | Volume | |
| 10 | × | ○ | Panpot | |
| 11 | × | ○ | Expression Pedal | |
| 64 | ○ (Right pedal) | ○ | Sustain Pedal | |
| 65 | × | ○ | Portament | |
| 66 | ○ (Center pedal) | ○ | Sostenuto Pedal | |
| 67 | ○ (Left pedal) | ○ | Soft Pedal | |
| 69 | ○ | ○ | Hold 2 | |
| 70 | × | ○ | Sustain Level | |
| 71 | × | ○ | Resonance | |
| 72 | × | ○ | Release Time | |
| 73 | × | ○ | Attack Time | |
| 74 | × | ○ | Cutoff | |
| 75 | × | ○ | Decay Time | |
| 76 | × | ○ | Vibrato Speed | |
| 77 | × | ○ | Vibrato Depth | |
| 78 | × | ○ | Vibrato Delay | |
| 84 | × | ○ | Portament Control | |
| 91 | ○ | ○ | Reverb Send Level | |
| 93 | ○ | ○ | Chorus Send Level | |
| 98, 99 | × | ○ | NRPN LSB, MSB | |
| 100, 101 | × | ○ | RPN LSB, MSB | |
| Program Change :True # | ○ 0-127 | ○ | ||
| System Exclusive | ○ | ○ | ||
| Common : Song Position | × | × | ||
| × | × | |||
| × | × | |||
| System Real Time : Clock | ○ | ○ | ||
| ○ FA, FB, FC | ○ | |||
| Aux : All Sound Off | × | ○ (120) | ||
| × | ○ (121) | |||
| × | × | |||
| × | ○ (123-127) | |||
| ○ | ○ | |||
| × | × | |||
| Notes | ||||
Mode 1: OMNI ON, POLY Mode 2: OMNI ON, MONO O: Yes
Mode 3: OMNI OFF, POLY Mode 4: OMNI OFF, MONO X: No
KAWAI
- IMPORTANT SAFETY INSTRUCTIONS
- SAVE THESE INSTRUCTIONS
- AVIS : RISQUE DE CHOC ELECTRIQUE - NE PAS OUVRIR
- WARNING
- CAUTION
- NOTES ON REPAIR
- ATTENTION
- INSTRUCTION FOR AC POWER CORD (U.K.)
- DECLARATION OF CONFORMITY ACCORDING TO FCC PART 15
- CANADIAN RADIO INTERFERENCE REGULATIONS
- THANK YOU FOR PURCHASING A KAWAI DIGITAL PIANO
- READ ME FIRST
- PARTS PROVIDED
- ATTACHING THE HEADPHONE HOOK (OPTION)
- QUICK START P. 6
- ADVANCED PLAYING P. 9
- LESSON FUNCTION P. 14
- PLAYING WITH THE CONCERT MAGIC P. 16
- RECORDER P. 22
- DISK OPERATIONS P. 28
- TOUCH, TRANSPOSE AND MENU FUNCTIONS P. 34
- USING MIDI P. 45
- JACKS P. 46
- APPENDICES
- QUICK START
- 1.1 SETTING UP THE PIANO
- ASSEMBLING THE STAND
- SUPPLYING AC POWER
- 1.2 POWER SWITCH
- 1.3 VOLUME SLIDER
- 1.4 HEADPHONES
- 1.5 DEMO SONGS
- 1.6 PLAYING THE PIANO
- TURNING ON THE POWER
- ADJUST THE VOLUME LEVEL
- NOW TRY PLAYING THE KEYBOARD
- 1.7 PEDALS
- 1.8 PLAYING WITH MORE SOUNDS
- SELECTING ANOTHER PRESET SOUND
- NOTE
- 2.1 VALUE BUTTONS
- 2.2 DUAL
- ABOUT POLYPHONY
- 2.3 SPLIT
- SELECTING SPLIT SOUNDS
- CHANGING THE SPLIT POINT
- 2.4 BALANCE SLIDER
- 2.5 EFFECTS/REVERB
- REVERB
- CHORUS
- FLANGER
- DELAY
- TREMOLO
- ROTARY
- TO ADD REVERB
- TO ADD OTHER EFFECTS
- TO TURN OFF THE REVERB OR EFFECTS, PRESS THE REVERB OR EFFECTS BUTTON AGAIN
- 2.6 METRONOME/RHYTHM
- STARTING THE METRONOME
- CHANGING THE TIME SIGNATURE
- RHYTHM METRONOME
- ADJUSTING THE METRONOME VOLUME
- LESSON FUNCTION
- 3.1 SELECTING A BOOK/SONG
- 3.2 PLAYING BACK A SONG
- A-B LOOP
- PLAYING WITH CONCERT MAGIC
- 4.1 SELECTING A SONG
- 4.3 PERFORMING A SONG
- 4.4 PART VOLUME BALANCE FOR CONCERT MAGIC
- 4.5 CONCERT MAGIC SONG ARRANGEMENT TYPES
- EASY BEAT
- MELODY PLAY
- SKILLFUL
- 3
- 4.6 STEADY BEAT
- 4.7 CONCERT MAGIC SONG DEMO
- ALL PLAY
- RANDOM PLAY
- CATEGORY PLAY
- BASICS OF THE RECORDER
- TWO-TRACK THREE-SONG RECORDER
- RECORDED INFORMATION
- RECORDING CAPACITY
- RECORDER AND METRONOME
- 5.1 RECORDING (REC BUTTON)
- RECORDING A SECOND PART
- STATUS OF SONG AND PART
- 5.2 PLAYING BACK A SONG (PLAY/STOP BUTTON)
- PLAYING BACK THE PARTS SEPARATELY
- USING THE PLAY/STOP BUTTON TO START RECORDING
- 5.3 ERASING A SONG
- ERASING ALL THE SONGS
- 6.1 DISK RECORDER
- PLAYING BACK A SONG
- MUTING A PART
- RECORDING A SONG
- SAVING THE RECORDED SONG TO THE DISK
- 6.2 DISK MENU
- INTERNAL SONG SAVE
- SONG RENAME
- SONG DELETE
- SONG COPY
- DISK FORMAT
- TOUCH, TRANSPOSE AND MENU FUNCTIONS
- 7.1 TOUCH
- 7.2 TRANSPOSE
- PRESS AND HOLD THE TRANSPOSE BUTTON
- WHILE STILL HOLDING THE TRANSPOSE BUTTON, USE THE VALUE BUTTONS OR THE KEYBOARD FROM C3 TO C5 TO SPECIFY THE TRANSPOSITION AMOUNT
- PRESSING TRANSPOSE BUTTON AGAIN TURNS THE TRANSPOSE FUNCTION OFF
- 7.3 MENU BUTTONS
- COMMON OPERATION
- BRILLIANCE
- LOWER OCTAVE SHIFT
- LOWER PEDAL ON/OFF
- LAYER OCTAVE SHIFT
- LAYER DYNAMICS
- DAMPER HOLD
- TUNING
- TEMPERAMENT
- BRIEF EXPLANATION OF TEMPERAMENTS
- EQUAL TEMPERAMENT (PIANO ONLY)
- MERSENNE PURE TEMPERAMENT (MAJOR) MERSENNE PURE TEMPERAMENT (MINOR)
- PYTHAGOREAN TEMPERAMENT
- MEANTONE TEMPERAMENT
- WERCKMEISTER III TEMPERAMENT KIRNBERGER III TEMPERAMENT
- EQUAL TEMPERAMENT (FLAT)
- EQUAL TEMPERAMENT
- KEY OF TEMPERAMENT
- AFTER SELECTING THE “KEY SIGNATURE” FUNCTION BY PRESSING THE MENU BUTTONS, USE THE VALUE BUTTONS TO SET THE DESIRED KEY
- MIDI CHANNEL
- TRANSMIT PROGRAM CHANGE ON/OFF
- SENDING PROGRAM CHANGE NUMBERS
- MULTI-TIMBRAL MODE
- MULTI-TIMBRAL ON (ON1 AND ON2)
- MULTI-TIMBRAL OFF
- CHANNEL MUTE
- USE THE VALUE BUTTONS TO SWITCH BETWEEN PLAY AND MUTE
- MIDI CLOCK
- USER MEMORY
- FACTORY RESET
- MIDI EXAMPLES
- CONNECTION TO ANOTHER MIDI COMPATIBLE KEYBOARD OR SOUND GENERATOR MODULE
- CONNECTION TO AN EXTERNAL SEQUENCER
- MIDI JACKS
- USB JACK
- LINE OUT JACKS
- LINE IN JACKS
- HEADPHONE JACKS
- NOTES ABOUT USB
- STANDARD SET ROOM SET POWER SET ELECTRONIC SET ANALOG SET
- JAZZ SET BRUSH SET ORCHESTRA SET SFX SET
- RHYTHM STYLE LIST
- ALFRED'S LESSON SONG LIST
- LEVEL 1A
- LEVEL 1B
- ADULT
- CLASSICAL PIANO COLLECTION SONG LIST
- CHRISTMAS SONGS
- PATORIOTIC SONGS
- AMERICAN CLASSICS
- FAVORITE HYMNS
- CLASSICAL SELECTIONS
- SPECIAL OCCASIONS
- INTERNATIONAL SONGS
- FRONT PANEL
- SPECIFICATIONS
- MIDI EXCLUSIVE DATA FORMAT
- KAWAI
Brand : KAWAI
Model : CN4
Category : Keyboard