
Z1000 - Keyboard KAWAI - Free user manual and instructions
Find the device manual for free Z1000 KAWAI in PDF.


| Product Type | Digital Keyboard |
| Number of Keys | 88 weighted keys |
| Touch Sensitivity | Adjustable (Light, Normal, Heavy) |
| Sound Engine | Harmonic Imaging sound technology |
| Maximum Polyphony | 192 notes |
| Number of Voices | 19 internal sounds |
| Reverb & Chorus | Yes, adjustable depth |
| Built-in Speakers | 2 x 12 cm, 20W total |
| Pedal Inputs | 1 x damper pedal (included) |
| Connectivity | USB MIDI, Headphone jack (6.35mm), Audio In/Out |
| Dimensions (W x D x H) | 1360 x 370 x 840 mm |
| Weight | 46 kg |
| Power Supply | AC adapter (included), 12V DC |
| Power Consumption | 15 W |
| Cleaning | Wipe with soft dry cloth; avoid solvents |
| Maintenance | Keep in stable environment; avoid extreme temperatures |
| Safety | Use only supplied adapter; do not disassemble |
| Repairability | Contact authorized service center for parts and repair |
| Included Accessories | Power adapter, damper pedal, music rest, user manual |
Frequently Asked Questions - Z1000 KAWAI
User questions about Z1000 KAWAI
0 question about this device. Answer the ones you know or ask your own.
Ask a new question about this device
Download the instructions for your Keyboard in PDF format for free! Find your manual Z1000 - KAWAI and take your electronic device back in hand. On this page are published all the documents necessary for the use of your device. Z1000 by KAWAI.
USER MANUAL Z1000 KAWAI
IMPORTANT SAFETY INSTRUCTIONS (For Noth American Countries)
WARNING - when using electric products, basic precautions should always be followed, including the following:
- Read all the instructions before using the product.
- To reduce the risk of injury, close supervision is necessary when a product is used near children.
- Do not use this product near water - for example, near a bathtub, washbowl, kitchen sink, in a wet basement, or near a swimming pool, or the like.
- Do not touch the power plug with wet hands. There is a risk of electrical shock. Treat the power cord with care as well. Stepping on or tripping over it can break or short-circuit the wire inside.
- This product should be used only with a cart or stand that is recommended by the manufacturer.
- This product, either alone or in combination with an amplifier and headphones or speakers, may be capable or producing sound levels that could cause permanent hearing loss. Do not operate for a long period of time at a high volume level or at a level that is uncomfortable. If you experience any hearing loss or ringing in the ears, you should consult an audiologist.
- The product should be located so that its location or position does not interfere with its proper ventilation.
- The product should be located away from heat sources such as radiators, heat registers, or other products that produce heat.
- Keep the instrument away from electrical motors, neon signs, fluorescent light fixtures, and other sources of electrical noises.
- The product should be connected to a power supply only of the type described in the operating instructions or as marked on the product.
- This product may be equipped with a polarized line plug (one blade wider than the other). This is a safety feature. If you are unable to insert the plug into the outlet, contact an electrician to replace your obsolete outlet. Do not defeat the safety purpose of the plug.
- Always turn the power off when the instrument is not in use. The power supply cord of the product should be unplugged from the outlet when left unused for a long period of time.
- Care should be taken so that objects do not fall and liquids are not spilled into the enclosure through openings.
- The product should be serviced by qualified service personnel when:
The power supply cord or the plug has been damaged; or
Objects have fallen, or liquid has been spilled into the product; or
The product has been exposed to rain; or
The product does not appear to operate normally or exhibits a marked change in performance; or The product has been dropped, or the enclosure damaged.
- Do not attempt to service the product beyond that described in the user-maintenance instructions. All other servicing should be referred to qualified service personnel.



WARNING
TO REDUCE THE RISK OF FIRE OR ELECTRIC SHOCK, DO NOT EXPOSE THIS PRODUCT TO RAIN OR MOISTURE.
AVIS : RISQUE DE CHOC ELECTRIQUE - NE PAS OUVRIR.
TO REDUCE THE RISK OF ELECTRIC SHOCK, DO NOT REMOVE COVER (OR BACK). NO USER-SERVICEABLE PARTS INSIDE. REFER SERVICING TO QUALIFIED SERVICE PERSONNEL.

The lighting flash with arrowhead symbol, within an equilateral triangle, is intended to alert the user to the presence of uninsulated "dangerous voltage" within the product's enclosure that may be of sufficient magnitude to constitute a risk of electric shock to persons.

The exclamation point within an equilateral triangle is intended to alert the user to the presence of important operating and maintenance (servicing) instructions in the literature accompanying the product.
This musical instrument should be not commercial use but household use.
FCC Information
Note: This equipment has been tested and found to comply with the limits for a Class B digital device, pursuant to Part 15 of the FCC Rules. These limits are designed to provide reasonable protection against harmful interference in a residential installation. This equipment generates, uses and can radiate radio frequency energy and, if not installed and used in accordance with the instructions, may cause harmful interference to radio communications. However, there is no guarantee that interference will not occur in a particular installation. If this equipment does cause harmful interference to radio or television reception, which can be determined by turning the equipment off and on, the user is encouraged to try to correct the interference by one or more of the following measures:
- Reorient or relocate the receiving antenna.
- Increase the separation between the equipment and receiver.
- Connect the equipment into an outlet on a circuit different from that to which the receiver is connected.
- Consult the dealer or an experienced radio/TV technician for help.
Canadian Radio Interference Regulations
This instrument has been certified to comply with the limits for a class B digital apparatus, pursuant to the Radio Interference Regulations, C.R.C., c. 1374.

KAWAI Z1000 Introduction
Thank you for purchasing the KAWAI Z1000 Keyboard. Over the past few years technological developments of electronic keyboards have been swift. In the course of these rapid developments, Kawai has defined three goals for fulfilling our customers' needs: performance, universality and easy operation. Regarding performance, we have opted to provide the Z1000 with the up-to-date RISC processor architecture, on which the instrument's operating system is based. 200 instrumental sounds and 120 styles are accessible. The sequencer, mixer, and effect sections make the Z1000 a stand-alone production tool which does not require peripheral musical devices. An advanced registration memory allows convenient recall of settings in live performance situations. Regarding universality, the substructure was laid with the General MIDI Standard in order to set up different formats for broad communication capabilities when exchanging songs between units. Looking to the future, Kawai has, by means of a conversion process, set up the Z1000 to allow access to other manufacturer's styles. We have also opened possibilities in the areas of automatic accompaniment, an expandable music library of styles and increased opportunities for creativity. We have made a concerted effort to bring the complex structure of the functions and sound possibilities into a simple framework with a transparent structure. The Z1000 is meant to serve as a tool to support your plan of making music. The technical side is, therefore, secondary. You will quickly realize that in working with the Z1000 you are not being forced to translate musical goals into technical procedures before making music. Take your time in getting to know the keyboard—even
KAWAI Z1000 Introduction

with minimal knowledge you will be able to obtain impressive musical results. We wish you much fun and success in implementing your musical ideas using the Z1000.
Important Safety Precautions

The operating instructions contain important information which will enable you to make optimal use of the instrument's numerous functions. Please read and observe all safety precautions and operating instructions before using the instrument for the first time. These operating instructions should be kept for future reference.

Important Safety Precautions
A. General
1. Humidity/Short Circuit
- Do not operate the instrument with wet hands, as you risk causing electrical shock or damage.
- Keep foreign objects away from the instrument. Do not insert objects through openings in the instrument, since this may lead to high-voltage components being touched or parts being short-circuited. This could result in electrical shock, fire or other hazards.
- Keep liquids away. Do not spill liquids on the instrument and avoid operating and storing the instrument near water or in a humid environment, such as a bathroom, kitchen, laundry room, basement, or at a swimming pool, etc.
2. Volume Damage
When this keyboard is used in combination with loudspeakers or headphones, sound levels may be generated of an intensity sufficient to cause permanent hearing damage. Do not operate the instrument over long periods at high volumes, particularly when using headphones or earphones. If you notice any deterioration of your sense of hearing, or if your ears are ringing, see a doctor immediately.
3. Temperature/Environment/Handling
- Protect the instrument from direct sunlight and strong shocks (particularly during transport), do not leave it at a location with high temperatures such as a hot car, and avoid operation in an excessively humid or dusty environment.
Important Safety Precautions

- Keep the instrument away from hot, dry locations (such as near a heating appliance).
- Protect your keyboard against strong shocks and vibrations.
- Make sure to turn down the volume on all instruments completely before connecting or disconnecting another instrument (such as an electric guitar or a second keyboard).
4. Accessories
- Do not place this keyboard on an unstable or slanted surface (such as a rolling rack, stand, pedestal, cart or table). The Z1000 might may drop causing serious injury to persons and to the product. Use only with a stand recommended by Kawai, or sold with the product. If malfunctions occur as a result, please refer service to a Kawai factory authorized service technician.
B. Repairs
- WARNING—do not attempt to repair or service the keyboard yourself. Do not disassemble or attempt to modify the product. Opening or removing covers may expose you to dangerous voltage. Refer all servicing to qualified service personnel.
- Unplug this product and AC power cord from the wall outlet immediately and refer servicing to qualified service personnel under the following conditions:
A) When the power plug or cable have been destroyed.
B) If liquid has spilled, or a foreign object has fallen into the product
C) When the keyboard has been exposed to rain or moisture.

Important Safety Precautions
D) If all operating instructions were followed correctly and the instrument still does not work normally, be sure to adjust only those controls which are described in the instructions, since improper adjustment can cause damage requiring extensive repairs.
E) When the keyboard has been dropped or damaged in any way.
F) When the product exhibits a distinct change in performance - this indicates a need for service.
- In case of necessary service use only Kawai authorized service technicians and replacement parts recommended by Kawai. Use of incorrect or inadequate replacement parts may lead to fire, shock or further damage or injury.
C. Power Supply
- Make sure that the local AC voltage falls within the range indicated on the name plate.
- If the keyboard will not be used for long periods of time, it is recommended that the plug be disconnected from the AC outlet to prevent damage due to lightening or other transient power surges.
Important Safety Precautions

- Power cables should be routed so that they are not likely to be walked on or pinched by items placed upon or against them, paying particular attention to cords at plugs, convenience receptacles, and the point where they exit from the product.
- Do not connect the keyboard to an electrical line already overloaded or to the same AC outlet to which a noise-generating appliance is connected.
D. Cleaning
- Unplug the keyboard from the AC outlet before cleaning it. Do not use liquid detergents or aerosol cleaners. Use a damp cloth for cleaning. (Clean the instrument with a soft cloth, a mild detergent, and lukewarm water.) Never use harsh or abrasive cleansers or organic solvents as this may permanently damage the finish.
3) Parts and names
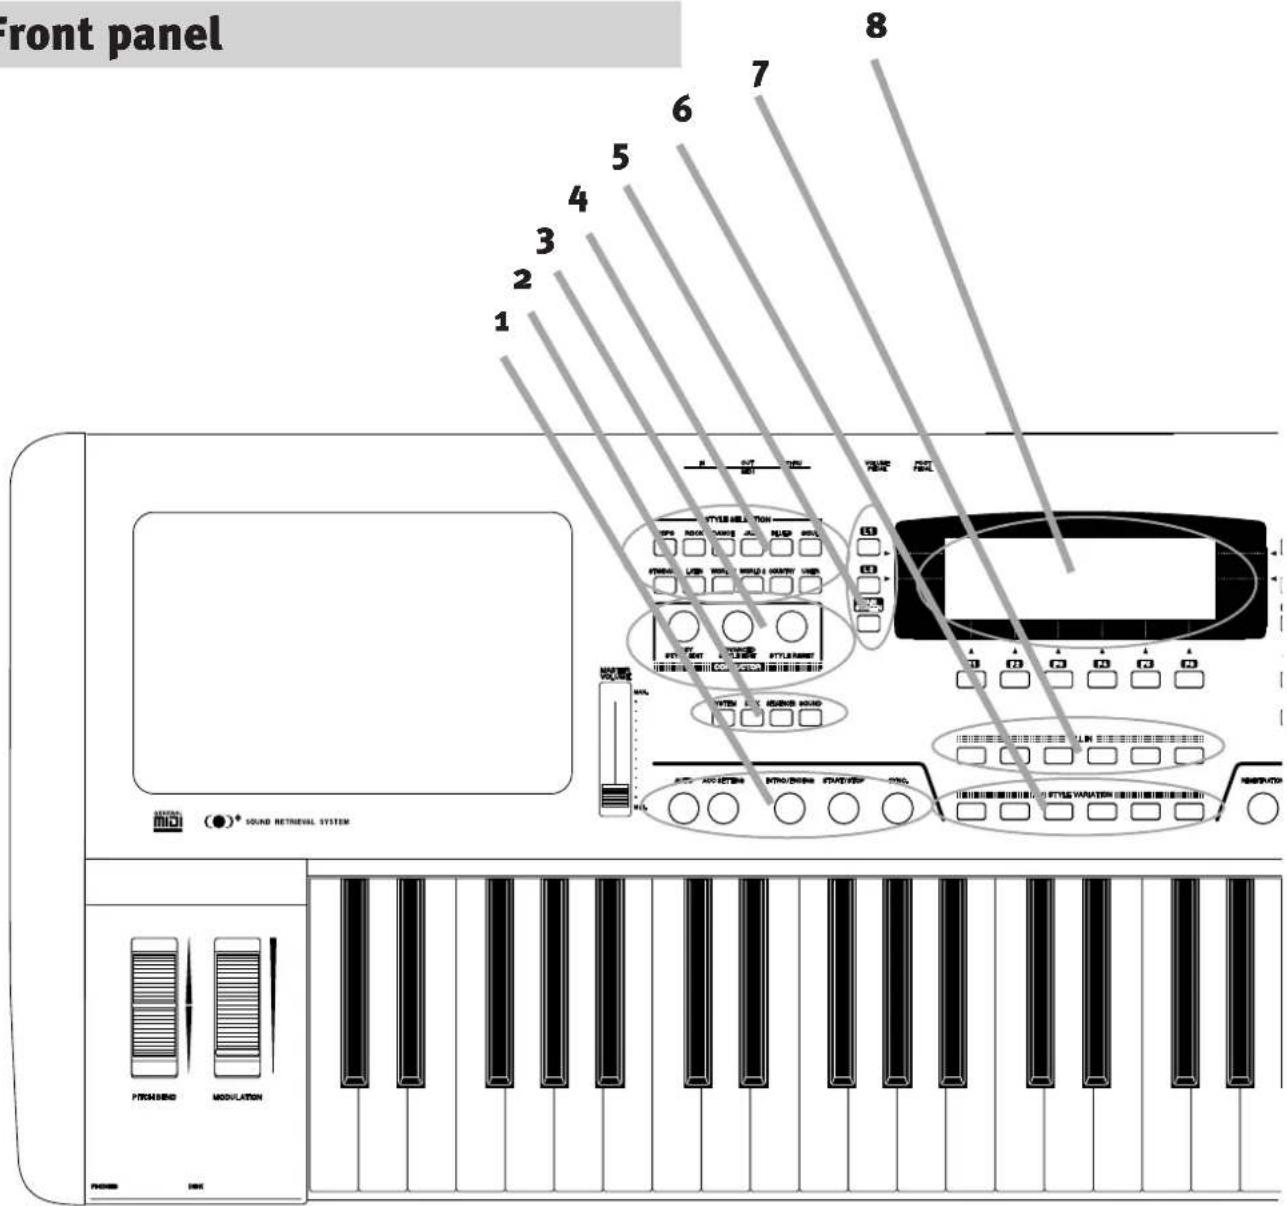
1 Auto, ACC Setting, Intro/Ending, Start/Stop Sync.
2 System, Disk Sequencer, Sound
3 Conductor Easy Style Edit
Advanced Style Edit
Style Reset
4 Style Selection
5 L-Buttons L1 / L2 / Main Screen
6 Style Variation
7 Fill In
8 Display
Parts and names


9 F-Button F1-6
10 R-Button R1 / R2 / Exit
11 Sound Selection
12 More Sounds
13 Sustain/Duet
14 Registration One-Two Play, 3 D, Transpose
15 Left, Right 2 / 1
16 Selector Ziffernblock +/- Tasten
17 Dial

Parts and names
Rear Panel

1 Power switch
2 Power cable jack
3 Audio output jack (Right)
4 Audio output jack (L/MONO)
5 Volume pedal jack
6 Foot pedal jack
7 MIDI THRU jack
8 MIDI OUT jack
9 MIDI IN jack
Accessories
The Z1000 are shipped with the following items:
• AC Power Cable (1 pc.)
• Music Rack (1 pc.)
Used to hold the music sheets.
Place the rack into the holes on the front panel of the keyboard.
Parts and names

• Style Convert Disk (1 pc.)
Used to read the style data made for other manufacturers' keyboard. (See page 83)
- System Disk (1 pc.)
Used to install the system software.
It is not necessary to install every time you play the keyboard. Use this disk only when the Z1000 gives you a message for installation. (See page 122)
There are some accessories sold separately from Kawai that will enhance the Z1000's performance.
- F-1 Foot pedal
Used to control the sustain of the sound with your foot.
• V-20X Expression pedal
Used to control the volume level with your foot.
Please ask your local Kawai dealer for availability.

Basic Operations
A. The Display/Multi-Function Monitor Screen

The LCD display provides various information, largely through the use of function menus.
These menus allow the user to select the desired item and alter values. Menus and functions are selected using the buttons located along the edges of the panel. Use the nearest button guided by the dotted line. Most of the functions and items appear highlighted when selected.
L1, L2, R1, R2 Left/Right Multi-Function Buttons
Four buttons marked with the indications L1, L2, R1 and R2 are at both sides of the display and are used for direct selection of a source if changes need to be made. These buttons are also used to shift the highlight up and down in a given selection menu.
![graph TD A["L1"] --> B["..."] C["L2"] --> D["..."] E["MAIN"] --> F["..."] G["Left"] --> H["Style"]](/content/2026/06/1352816/images/fab20d03680cd97a8dce9ddde7e57e062f7feb3cf04ae6b5d574f083245fc0ff.jpg)
F1 - F6 Multi-Function Buttons
6 buttons marked with the indication F (short
for "function") are located below the display. Use these buttons to access a specific function for further menu items in which settings can be created.
![graph TD A[" "] --> B["F1"] B --> C["F2"] C --> D["F3"] D --> E["F4"] E --> F["F5"] F --> G["F6"] style A fill:#f9f,stroke:#333 style G fill:#f9f,stroke:#333](/content/2026/06/1352816/images/3f8dd900551cd2c25bd250f1f59817bd6de35507060483c0232061f2a1575b08.jpg)
Basic Operations

EXIT
To exit a menu page, press the EXIT button located below R2. This returns you to the previous menu; if a submenu is currently called up on the display, you will need to press the button several times in accordance with the number of menu branches in order to return to the initial functions.
![c [Demo] EXIT](/content/2026/06/1352816/images/f67c2f20fac53da49b5ea80448a368915dbb57c3d42c0fd1063ac58207a926e4.jpg)
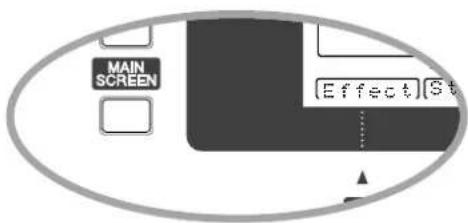
MAIN SCREEN
The MAIN SCREEN button located below L2 can be used to shorten the return through the submenus. Pressing it returns you directly to the functions of the main menu.
B. Input
After you have selected the desired function, the settings can be created or changed in several ways, 3 methods are available: using the dial, using the numerical keyboard, or using either the "+" or "-" buttons. The keyboard may also be used to set the values contained within certain parameters. Choosing the most suitable input method depends on the required precision and your preferred routine in working with the Z1000.
Multi-Function Dial
When no function has been selected, the multi-function dial generally serves as a tempo control for accompaniment and sequencing operation. When an editing function has been selected, however, the dial may also be used for inputting values. The item highlighted in the display can be set to the desired value by using the dial.


Basic Operations

Selector
The selector section enables direct input of a value using either the numerical keyboard or the "+" and "-" keys, thus changing the current value in discrete steps.

Demos
The on-board demos is included as a simple way to monitor the quality and variety of sounds in the Z1000. There are two types of demos: Song and Concert Magic. There are 5 preset songs included in the the Song demo and 100 well-known pieces in Concert Magic format. By pressing the DEMO button (F6) you are able to choose between these 2 by selecting the desired demo using the L buttons.
SONG CONCERT MAGIC
1 SHOW TIME 1 CHILDREN'S
2 CARLOS 2 FOLK
3 COCKTAIL 3 HYMS & XMAS
4 UP TOWN 4 OCCASIONS
5 TECH. FOR TWO 5 INT'L
6 CLASSICAL
A. Song Demo
You can opt to play a single song or a medley. Press the F1 button to alternate between a single demo (Normal) and chained sequence mode (Chain). Press the PLAY button (F5) to start the demo, and press STOP (F6) to quit the demo.
B. Concert Magic
In the Concert Magic section you can choose between playback of the songs of the same group, such as Christmas songs, children's songs with F1 (Group) and playback of all songs, one after the other in a randomly selected sequence with F2 (Random).
![L1 L2 MAIN SCREEN Demonstration Songs ConcertMasic L1 L2 MAIN SCREEN [ Mode PLAY STOP ] F1 F2 F3 F4 F5 F6](/content/2026/06/1352816/images/3e0942e964e9f0a8d76df67ba9838dd6ebfdd07e6488d5e576152c7c2fc5768c.jpg)
The First Steps
A. Selecting a Sound
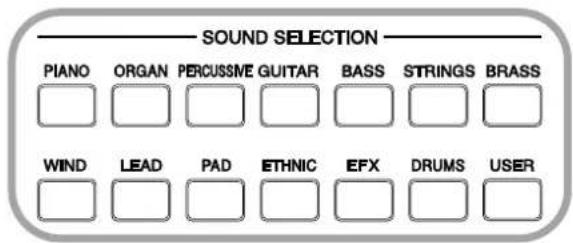
You can select up to 3 different sounds and assign them to different keyboard sections: Left, Right 1 and Right 2. You must first decide which section you are going to select a sound for. To choose a section, press either L1 (Left), R1 (Right 1) or R2 (Right
2). In order to change the sounding melody for the section, you must select the group within the desired category (e.g. keyboard instruments, wind instruments) in Sound Selection. After pressing a selection button, a list of the available sounds will appear in the display with the currently selected sound highlighted. You can choose a sound using the numeric keys. (Example: Press 05 to choose the sound E.Piano 1.) Alternatively, you can select the desired sound by using the Dial or the "+" and "-" buttons.
B. Selecting a Style

The L2 button is used for selecting the style (rhythmic pattern).
The title of the currently selected style appears in the display beside the button. As just one style is active at any given time, the desired style group may also be selected directly in the Style Selection. Selecting a style from within a style group is done in the same manner as for sounds, i.e. by using the Dial, direct input with the numeric keys, or changing the style number in discrete steps by using the "+" and "-" buttons in the selector.
The First Steps

C. Quick Select (last used preset)
The last selected sound or style is preselected for each group even after switching to another group. When you go back to the previous group menu, you will find the last selection remains selected. The last selected style or sound is activated simply by pressing the group button. The Z1000 remembers the selection as long as the power supplied. Once the power is turned off, the Z1000 selected the first one at the top of the menu.

Hint: In order to shorten the selection procedure it is possible to skip the return to the main menu: when a sound list is opened on the display for sound selection, you can directly select the sound for Left with L1, the style with L2, the sound for Right 1 with R1, and the sound for Right 2 with R2. The section active for selection is indicated in the upper left corner of the display.
Using Styles
A. Getting Started Quickly
Before providing a detailed description of the rhythmic accompaniments, we encourage you to experiment with the styles of the Z1000. You might start by pressing one of the style selection buttons, as you may wish to hear the variety of music available there. Turning the Dial and thus moving the cursor to the desired style will highlight the selection in the display. Press the EXIT button in order to return to the main page.
7) Using Styles
![L1 Left GrandPiano Style Pop1 C =120 Right1 GrandPiano Right2 GrandPiano ---Mixer--- Effect[Style] [Sound] C. Magic [Demo] R1 R2 MAIN SCREEN EXIT F1 F2 F3 F4 F5 F6](/content/2026/06/1352816/images/71c1bd028e9ae801708793fddc4feb448e3df5657b5e7a229d137d1e21b79dfa.jpg)
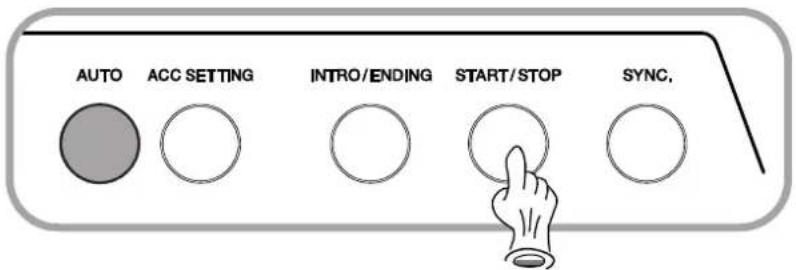
Press the AUTO button (the LED button will light up) and then the START/STOP button. The auto accompaniment will begin playing the selected style in the key of C major. If you have played a different chord with the left hand before pressing the START/STOP button, the music starts in accordance with your chord. The Z1000 is capable of chord recognition and begins to interpret the chords you play. You will notice that the new harmony is integrated into
the accompaniment and that the chord name currently recognized is indicated in the center section of the display. When you press the START/STOP button again, the accompaniment stops.
Using Styles
B. Intro Start
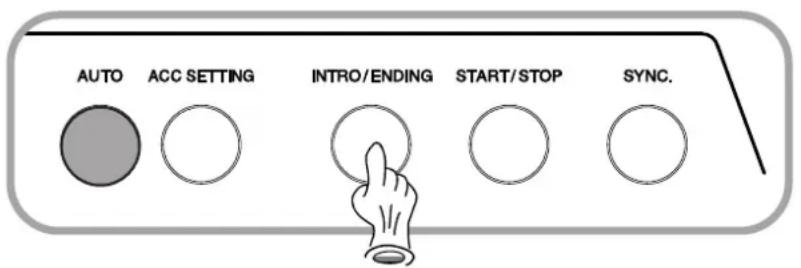
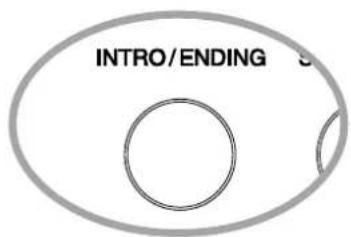
If you press the INTRO/ENDING button while there is no music playing, the accompaniment arrangement begins with a short introduction. The musical key corresponds to the chord that was last recognized. You will notice that the Intro function takes into account whether the last chord was in a minor or a major key. The same applies to stopping an accompaniment by pressing the INTRO/ENDING button, for the arrangement will then close with a short ending phrase with the last recognized chord processed in either a major or minor key.
C. Structure of the Styles
The accompaniment styles available with the Z1000 consist of 6 instrumental tracks: the drum part, the bass part and 4 distinct accompaniment parts (ACC1 - 4), the latter for use with chord or obbligato phrasing. Each track is setup in the stereo panorama (Panpot) with control of volume, position and effects all available. You can control settings in a similar manner as though operating a mixing console. Each track contains a single instrumental sound. On the drum track, for example, all percussion sounds
7) Using Styles
(Drum Kit, Latin Percussion etc.) may be combined, and Acc 1 can include an additional effect from the GM programs (such as sliding over the strings of a guitar).

D. Style Selection
The accompaniment styles found in the Style Selection section are grouped according to musical types. Each group (Pops, Rock, Dance, etc.) contains up to 15 different accompaniment arrangements. Each arrangement, when selected, gives a descriptive name at the top of selection menu in the LCD display. The groups Rock, Jazz and Standard Dance contain more than 12 styles each. Since the display can show only 12 styles at a time, these groups are subdivided into two further groups each (Page 1 and Page 2), which are selected using the P.1 (F1) and P.2 (F2).
buttons. The User group allows you to select from among the accompaniment arrangements you have created yourself. Information on how to create your own styles is found in the chapters entitled "Conductor 1" and "Conductor 2".
Style Variation/Fill-In 1-6
Each style is provided with 6 variations and 6 fill-ins. You may want to select several styles and try out all versions of each
style. The LED shows you which variation is in use for playback. You will notice with many rhythmic styles that although the individual variations generally increase in complexity, some of them possess very

different characteristics within a given style. In some cases variations of the same style may be suited for completely different songs or a medley in a certain genre. Furthermore, the sequences of variations and fill-ins can be exchanged. You can combine any desired fill-in with any variation.
When you press the Fill-In button, a musical transition is performed according to the rhythmical position of the accompaniment at that particular moment. A fill-in can be up to 2 measures in length and always provides a transition phrase to the first beat of the next measure of the accompaniment. If the Fill-in is selected earlier, it is held over until the correct metrical position is reached; if selected later, only the last part of the
Using Styles
phrase is played. The LED lights up to indicate that a fill-in has been activated and goes out when completed. For information concerning additional settings for fill-ins please refer to the section "Fill-In Mode".
E. Control

Several functions are available for controlling the accompaniment. They are grouped in the lower left section of the front panel: Auto, Auto/Split Setting, Intro/Ending, Start/Stop and Synchronization.
Start/Stop
As soon as the START/STOP button is pressed, the Z1000 provides a rhythmic pattern consisting of percussive instruments and/or drums. At this stage of the playback you can already switch between style and fill-in variations. The use of the new variation then begins either at the first metrically appropriate moment (i.e. at the end of the measure or after a quarter note) or with a metrically appropriate duration. This prevents a fill-in from continuing past the end of the measure and ensures that only the last part of the transition is heard.

Hint: Pressing the START/STOP button again causes the rhythm to be interrupted immediately. If you want to end the accompaniment in this way, it is recommended that you wait for a metrically suitable moment.
Intro/Ending
The chosen style can also be started and stopped by pressing the INTRO/ENDING button. In this case the music begins with an introduction (Intro), the length of which can vary from 1 to 5 measures. When the accompaniment is stopped by pressing the INTRO/ENDING button, an ending is added which also has a variable length.

Hint: You do not always have to start the accompaniment with Variation 1. If you pre-select any variation prior to pressing the Intro-Ending button, the selected variation will begin after the introduction is completed.
Sync
If the SYNC button is pressed before beginning the playback of a rhythm, this causes its beginning to be synchronized. The accompaniment then starts as soon as you play the first note on the keyboard. In this case the accompaniment would begin directly with the first measure of the currently selected style, i.e. without any introduction. You may also combine the synchronization with the intro function, thus starting the introduction as soon as you play something on the keyboard: To do so, press the SYNC button followed by the INTRO/ENDING button and then play the first chord on the keyboard.


Using Styles
Auto
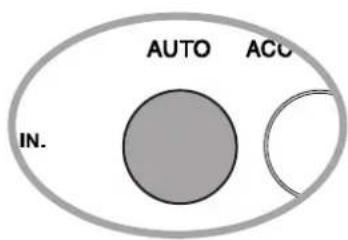
When the Auto Mode is activated (the LED is lit), the complete instrumental arrangement is available for the accompaniment. The chord progression depends on what you specify with your playing. The auto accompaniment interprets the key in which you play by distinguishing between major and minor thirds and recognizing alterations between triadic or more complex chords. The recognition of chords normally depends on what you play with the left hand (the Fingered Auto Mode setting can be extended to cover the entire keyboard in menu item Auto/Split Setting). After pressing the AUTO button, a new section opens in the display in which the interpreted chord is shown. To start the accompaniment with an introduction, it is necessary to specify the key and quality (i.e. major or minor). If the desired key is C major this is not necessary. To synchronize the start of the intro, first press the SYNC button and then the INTRO/ENDING button. It is then possible to start the arrangement by playing the first notes in the left hand.

Hint: Pressing the AUTO button allows you to switch at any time between a full accompaniment and one consisting exclusively of drums and percussion. By turning off the chord bass parts you can obtain a percussion interlude.
Using Styles

Auto/Split Setting (ACC SETTING)
The function Auto/Split Setting offer access to a display page on which additional settings for the melody voice can be made. Refer to the chapter "Sounds in Practice" for details concerning Split Mode and Right Mode.

F. Auto Mode
The settings selected with the L1 button determine the way in which the chord recognition function works:
"Fingered" limits the harmonic specifications to the chords actually played in the left keyboard zone. To change a chord in the Fingered Mode, at least 3 voices must be specified for the Left keyboard. The Left keyboard (also called "Lower keyboard") is used only for chord recognition and you do not hear the sound. If no settings of the Split function have been made after turning on the instrument, the note F2 represents the upper limit for chord recognition. Refer to the chapter "Sounds in Practice" for details on changing the range of the Left keyboard.

7) Using Styles
"Whole Key" activates the chord recognition for all active keyboard zones. In this mode at least 3 voices are required for the interpretation of a chord.
"One Finger" uses the same Split conditions as the Fingered Mode does for chord recognition. It is sufficient in this mode to specify a single note or two with the left hand (Left keyboard) in order to cause a change in harmony. Single notes are interpreted as major chords built on the note played, which become the root of the chord. With 2 notes, major, minor and seventh chords can be recognized by specifying the major third, minor third or major seventh, respectively.
![graph TD A["L1"] --> B["Auto mode"] C["L2"] --> D["OneFinger"] E["MAIN SCREEN"] --> F["Memory"] G["R1"] --> H["Right mode"] I["R2"] --> J["Split"] K["EXIT"] --> L["Fill mode"] M["Split"] --> N["Auto"] B --> O["F1"] D --> P["F2"] F --> Q["F3"] H --> R["F4"] I --> S["F5"] J --> T["F6"]](/content/2026/06/1352816/images/a58ad04bd5fc7ddc2bd45555ec711da683afcbf92bf2a05ac14295b8cf82c31d.jpg)
Using Styles
G. Memory
The L2 button is used to select the Memory function. This can be considered a "chord memory". When it is on, the Z1000 will keep playing the accompaniment in the key that has been most recently recognized after releasing your fingers from the keys. It will stop when another chord is entered. The normal setting of this function is "On"; it is automatically activated when the instrument is turned on. By choosing the setting "Off" you can specify that the accompaniment of the harmonic instruments is active only while keys are played which enter a chord.
H. Right Mode
You can make further setting in order to fine-turn the way in which the 3 components of the melody voice work with each other. With the R1 button you activate the setting for the 2 Right sounds:
- Split causes the keyboard to be divided into the zones Right 1 and Right 2.
- Layer, the default setting, determines that they are sounded together.
I. Fill-In Mode
Fill-In Mode lets you choose the way in which the transition is performed from one to the next. There are 2 settings:
Using Styles
Normal: No fill-in is played when the variation is changed.
Auto: By choosing the Auto setting you can determine that changing to a different style variation is always preceded by a fill-in. The start of the fill-in again depends on the metrical position at the time you made the change; if the change was made early, the transition is held over, if late, only the end of the fill-in phrase is played. The Automatically starting fill-in corresponds to the associated style variation (i.e., the change to Variation 3 is preceded by Fill-In 3, etc.).
J. Split
With the F6 button you can reach a further display page, on which the limits of the individual keyboard zones can be set.

Left/Right Point
The button L1 is used to determine the split point between the Left and the two Right zones. You can make this setting by using the Tempo/Value dial, the "+" or "-" buttons, or by pressing the key of the corresponding note on the keyboard. The value indicates the lowest note of the Right zone.
Right 1/Right 2 Point
With R1 the zone division for the two Right sounds is determined. This setting is effective only when the Split Mode is activated for Right 1 and Right 2. You can make this setting also by using the Tempo/value dial, the "+" or "-" buttons, or by pressing the key of the corresponding note on the keyboard. The value indicates the lowest note of the zone Right 1.
Octave Shift
Using the buttons F4, F5, and F6 you can carry out an octave transposition for the three zones (Left, R2 and R1). The default setting can be raised by one octave or lowered by one octave.
![L1 L2 MAIN SCREEN L/R point F#2 R1/R2 point C 4 Octave Shift -> +1 0 0 [Left] [R2] [R1] F1 F2 F3 F4 F5 F6 EXIT](/content/2026/06/1352816/images/f12f7b5e9ffdf42596e157fd6ec9d5c9eb5299fc9ad17ec8b20a41786c3290eb.jpg)

Using Styles
K. One-Two Play

You are now acquainted with the basic functions in 2 separate areas: the Style page as a preset accompaniment arrangement, for which additional editing capabilities will be explained in detail later, and the Sound page, where you have learned about the setting of the 3 components for the melody voice. In practice, of course, the 2 areas must be combined. It is therefore possible to store the settings you have made for a certain style with your individual sound selection as a registration, which enables you to call up this combination at any time. This feature allows you to assign your individual melody voices to a certain style and has other convenient uses. The structure of a registration will be explained in greater detail later. In addition to recalling your own registrations, the One-Two Play button may be used to recall the preset combinations of styles and melody voice groupings. After pressing the One-Two Play button, the message "1-2 PLAY" appears in the display, and the factory-present registration for the current style is used. The One-Two Play specification remains activated for the new style as well. Press the One-Two Play button again to cancel the One-Two Play function.
After pressing the One-Two Play button, the message "1-2 PLAY" appears in the display, and the factory-present registration for the current style is used. The One-Two Play specification remains activated for the new style as well. Press the One-Two Play button again to cancel the One-Two Play function.
Conductor (Part 1)
Easy Style Edit
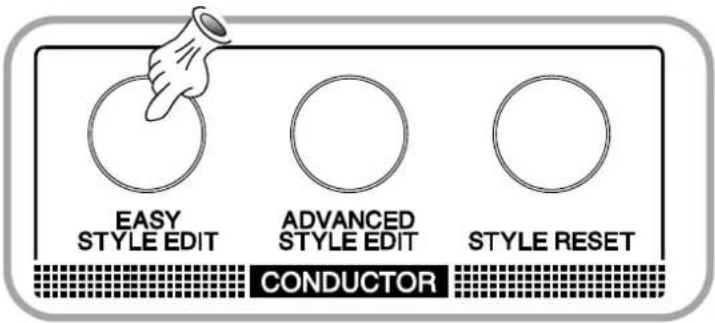
You will find the Easy Style Edit button in the CONDUCTOR section. When you press this button, the Style Edit page pops up, on which you see a matrix table of 7 rows and 7 columns. Press one of the STYLE VARIATION buttons and then another, noticing that cursors move up each column. The example shown in the figure indicates that in variation 1 the drum arrangement 1 is coupled with bass arrangement 1 and the first variations of ACC 1 through 4. This table represents the combination of instrumental arrangements, called "phrase" used in the tracks for the style.
You can change the combination for the currently selected style as follows: the individual phrases of the accompaniment are indicated in the columns of the table. If you press one of the F (function) buttons you will see that the corresponding cursor shifts upward, moving into the phrase of the next variation. Therefore, if in the first style variation (Ph1 - Phrase 1) you want to use the drum arrangement of the third (Ph3), press the F1 button twice to move the cursor to phrase 3. In this manner the variation of arrangement can be programmed for greater

operating ease. The variation is selected directly with the associated F buttons, whereas cycling through the instrumental arrangements is possible by repeatedly pressing a button. Only upward movement is possible during this setting procedure; after the cursor has reached the top line it returns automatically to the
bottom line. When the cursor comes to the bottom of the column which is labeled "OFF" (in this case only the
track name is highlighted), the corresponding arrangements is set to Mute (no sound).
If a bar mark appears in the display for a part, no phrase is available. The oval marking skips this position. The settings can be made in two ways: 1) Temporary and 2) Stored.
1) Temporary
Start the style in the usual way and then press the Easy Style Edit button. Now you can change the composition of the variations in real time. These changes are reset to the previous settings after a style has been changed, that is they remain active until you select a different style. This procedure is suitable for making changes during a performance or while a style is being played. Changes made while a style is being played are updated at every new measure.
2) Stored
First press the Easy Style button and then start the style. After, you have made the changes and exiting the Easy Style Edit mode by pressing the Exit button, the new settings are automatically saved under the name of the current style. During the storing process the message "Wait..." appears in the display. Your changes can now be recalled at any time by calling up the style in the usual way and are retained after the power is turned off. Of course, afterwards you can save all 120 Easy Conductor styles prepared in this way to floppy disk as well.

Conductor (Part 1)
Style Reset for Easy Edit Style
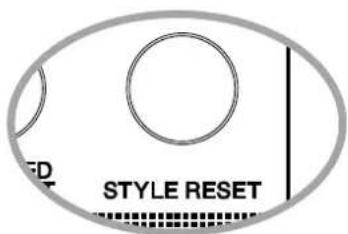
Press the STYLE RESET button to restore style variations you have edited to their original settings. This function is available both for temporary changes and for stored changes. Because the settings are made separately for each of the 6 variations, it is necessary to select the desired variation before it can be reset. If you want to restore all 6 variations to their preset conditions you have to carry out the resetting procedure for each style variation separately. The Style Reset function applies equally to Easy and Advanced Style Edit.
A. Concert Magic Performance
The Concert Magic function enables anyone, even those who have never touched a keyboard, to perform music. Concert Magic allows you control 2 elements of music: rhythm and dynamics. You simply press a key to indicate the tempo you like, controlling the force with which you strike a key. Concert Magic does the rest and plays a song. Concert Magic has preprogrammed song data that gives correct notes no matter which key you press. All you need to do is keep striking a key in the desired tempo and control the level of the sound. A song is made up of 2 parts: melody and accompaniment. You can even perform an orchestral piece with the tip of one finger. There are 100 preprogrammed songs built into the keyboard. Select your favorite song from the variety of musical selections: Children's songs, Christmas music, traditional folk songs and famous classical pieces. There are also Song Disks available specially made for the Concert Magic function so you can expand your music repertoire.
B. Basic Operation
On the main screen you find "C.Magic" above the F4 and F5 buttons. You can go into the Concert Magic menu pressing either of these buttons. In the Concert Magic page, you find the song title, tempo, sound names and control buttons. Use the "Down" button (F2) and "Up" button (F3) to select a song you like to play. Song names come up one after another. Each song is preset with the sounds used to perform it. One (R1) is for the melody, while the other (R2) is for the accompaniment. You can change sound assignments if you prefer at any time.

Concert Magic
It is now prepared for performance. Just start pressing a key with a certain rhythm and hear the music play. If you are not sure what the song sounds like, it is a good idea to begin by rehearsing. Press the PLAY button (F5) and the keyboard will automatically play the entire song for you. You can control the tempo by turning the dial. When you become familiarized with it, press the STOP button (F6).
![L1 ConcertMagic Rondeau Right1 Violin Right2 Strings1 L2 =080 Preset --- Song -- [ Mode Down Auto Play STOPU ] F1 F2 F3 F4 F5 F6 MAIN SCREEN EXIT](/content/2026/06/1352816/images/4fc559f87c6021538cee7e38a4ae92527f9dbfc2710d7a09e9763be690b168a7.jpg)
C. Playing Mode
Although Concert Magic is primarily for those who are not keyboard players, it is designed to be attractive and expressive when performing. There are 3 types of songs programmed in different styles and available for performance. They are called Easy Beat, Melody Play and Skillful. Each of these requires a different level of musical ability and playing skill, providing fun for players of all levels. Easy Beat songs are very simple to play.
Keep tapping a key at a steady tempo. Melody Play songs are also easy to perform if they are familiar to you. Press a key in the rhythm of the melody. Songs requiring more skill range in difficulty from moderately difficult to difficult. Tap out the rhythm of both the melody and the accompaniment. You might need a little practice to become familiar with the arrangement.
There are also 2 modes in which to perform the Concert Magic songs. The F4 button toggles the mode between "Auto" and "Legato".
Auto mode automatically controls the note duration regardless of the user's key control. In this mode, the Z1000 sustains the sound until you play the next note. The music, as a result, is always played "legato", or smoothly. This mode is more for beginners and small children who do not need to learn key control yet.
In a "Legato" mode, the notes you play will produce sound as long as you hold a key down. When you release it, the keyboard stops the sound. You must play smoothly from one note to the next to avoid breaking the melodic line. You could, on the other hand, play "staccato" (short notes) if you press and release a key quickly. You are in complete control of note durations, enabling delicate expression in performance.
D. Playing a Song From a Concert Magic Disk
In addition to 100 on-board Concert Magic songs, you can play additional Concert Magic songs from a floppy disk. The Z1000 companion learning materials, "Music to Go", contain 20 Concert Magic songs under the title "Appetizer". Other Concert Magic

Concert Magic
format disks are available from Kawai and third party vendors. Concert Magic, however, may bring unexpected results when played back. For the best result, songs should be designed to conform to the Concert Magic data structure. Generally speaking, the songs in which each part has notes on the beat will perform better. First load the song data into the keyboard using the disk drive. Please refer to the chapter "Floppy Disk Operations 2" for details concerning loading song data from a floppy disk. Press the "Mode" button (F1) to toggle from "Preset" to "Song". You are now ready to perform.
A. Assigning Sounds/Sound Effects to Keyboard Zones
3 separate sounds can be assigned to separate parts, or zones, of the keyboard. By using the Auto/Split Setting you can specify the way in which the sounds work together. The following 6 keyboard modes can be used to assign sounds/sound effects in distinct configurations:
- Alternative assignment: The entire keyboard is used either with Right 1 or Right 2.
- Split: The keyboard is divided between the Left sound and one of the two Right sounds.
- Two-way split: Either the Left zone is used in combination with one of the two Right zones, or the Split function assigns the left half of the keyboard to Right 1 and the right half to Right 2.
- Three-way split: For division into the 3 zones Left, Right 1 and Right 2.
- Layer: The sounds assigned to Right 1 and Right 2 are played simultaneously.
- Split & Layer: For division between Left and the layered sounds of Right 1 and Right 2.
If you do not make any changes to the Auto/Split Setting, just one of the 3 possible timbres, or sound components, is active over the entire keyboard: Right 1 (right half/sound 1). The LED indicates the sound sources activated for the buttons Left, Right 1 and Right 2 at any one time. The same buttons are used to activate the individual timbres. The Right buttons allow you to activate 2 different melody voices, while the Left button provides an additional timbre for the left half of the keyboard.

10) Sounds in Practice
LEFT

2 - RIGHT - 1


You can choose between the following options:
- Activation of Right 1 or Right 2 for the entire keyboard
- Simultaneous activation of Right 1 and Right 2
- Activation of Left in addition to the 2 Right modes
To change the sound assigned to a certain zone, select the desired zone with the corresponding S button (i.e. L1, L2, R1, R2). If you now select the first instrument group, "Piano", its contents are listed in the display.
Layer
Right 2
Right 1
Split
Left Right 2
Right 1

Sounds in Practice
Sound Selection/Alternate Sounds
You can choose from a total of 14 instrumental groups and the names of the sound categories are printed on the front panel (e.g. "Piano", "Organ/Accordion", "Mallet/Percussion", "Guitar). This division groups the timbres according to the General MIDI Standard (GM). You can select an additional memory area for 14 alternate instrumental groups by pressing the Alternate Sounds button; the LED lights up to indicate that this area has been activated. The arrangement of the timbres corresponds to the same instrumental groups that are listed on the front panel. Each of the first 13 memory areas form a fixed part of your sound library; being stored in ROM (Read-Only Memory), they cannot be overwritten. In each memory area 10 locations are available for storing your own sound programs. These are designated with the term "User" (user sounds) and can be rewritten.
![graph TD A["1"] --> B["SOUND SELECTION"] B --> C["Piano"] B --> D["ORGAN"] B --> E["PERCUSSIVE GUITAR"] B --> F["BASS"] B --> G["STRINGS"] B --> H["BRASS"] I["2"] --> J["SOUND SELECTION"] J --> K["Piano"] J --> L["ORGAN"] J --> M["PERCUSSIVE GUITAR"] J --> N["BASS"] J --> O["STRINGS"] J --> P["BRASS…](/content/2026/06/1352816/images/e1a19a65b55ca2cf1763bad5842f0c43b9e44b79bc1521ee1c528640a240a2f2.jpg)
10) Sounds in Practice
B. Performance Modes of Sounds
When Right 1 or Right 2 contains the active timbre, you can play with that timbre on the entire keyboard. If the Left button is turned on as well, an additional timbre is added that is available in the form of a split. The keyboard is divided into 2 zones, Left for the left hand, Right 1 or Right 2 for the right hand. The active timbres are indicated by the LED.
Of course, if the sounds for the active Left and Right timbres are identical, a difference will not be heard.

Hint: If you want to be able to switch quickly between two sounds, you should assign different timbres to Right 1 and
Right 2. In this way you can change sounds simply by switching between Right 1 and Right 2.
C. Dual Sound

Next to the buttons indicating the Left, Right 1 and Right 2 zones, you will find 2 buttons used for effects that apply to the performance of the melody voice. These are not be confused with the global and individual effects of the sound or style mixer.
Sustain
This function sustains the notes of the melody voice in the same way as a sustaining pedal connected to the instrument would do. Because the sustain takes effect after a key is released, the correct term for this function would be "release", but the sustain effect works independently of the release time preprogrammed for the respective sound. The difference between this function and the effect of a conventional sustaining pedal consists of the fact that the decay of each struck note has the same duration. This makes it possible to apply an automatic "pedal performance" to sounds such as organs and strings, which do not decay naturally when the pedal is depressed. The fixed decay time is designed to prevent a dissonant cluster from being generated, as would be the case if the sounds of all struck keys gradually added up.
Duet
In the Duet mode (duet performance) the melody line receives a second voice. This function automatically adds intervals of thirds, fourths and sixths from the respective scale to the melodies you play, thus providing a second voice. The scale on which these intervals are based depends on the harmony in which the automatic accompaniment currently functions.
Transpose
The Transpose function allows you to raise or lower the pitch of the Z1000 in half-tone steps within a range of two octaves.
This function is activated by pressing 1 of the 2 Transpose

11) Performance Effects
buttons: the message "Transpose o" appears in the display. Each time the left button is pressed it transposes the key down by a half-tone, while pressing the right button raises the pitch by a half-tone. When the instrument is turned on, the Transpose function is automatically reset to "o".
12) Mixer
A. Sound Mixer (F3)
![graph TD A["L1"] --> B["Pan"] C["L2"] --> B D["MAIN SCREEN"] --> B B --> E["Vol"] E --> F["Left"] E --> G["R2"] E --> H["R1"] E --> I["ACC"] J["Effect"] --> K["R1"] J --> L["R2"] J --> M["EXIT"]](/content/2026/06/1352816/images/ed1683747199a67998bcfd88877c80defbbb7068a2f981703453c45160cefd64.jpg)
When you call up the Mixer using the F3 button, a new arrangement appears in the display: you can now access each of the 3 components of the melody voice as well as the volume of the accompaniment. In order to make changes, the F-buttons can be used to select directly: Left (F1), Right 2 (F2), Right 1 (F3) and ACC (F4). The highlighted display indicates the currently active sound source. You can adjust the overall volume of the style using the F4 button (Accompaniment). This function enables a quick balancing between relative volumes of the 3 sounds and the selected style. You can make settings for the volumes of the 3 sounds (Vol. with the L2 button) and their positioning in the stereo panorama (Pan with the L1 button). Because the individual instruments of the accompaniment are provided with their own distribution in the stereo image, no panorama control is provided in the Sound Mixer. However, it can be changed in the Style Mixer. If you now operate the Tempo/Value dial you access a further function for editing your melody voice, the effects section of the Mixer. For further details please read the section "Effect Assignments".
Mixer
B. Style Mixer (F2)
With the F2 button you reach the Mixer function for the automatic accompaniment. You will notice that the basic functions for making settings are the same as those on the Mixer page for the sounds. 6 accompaniment instruments are assigned to the "channels" of your mixer: Drums, Bass, and 4 additional harmony or melody instruments using the buttons F1 through F6. Use the buttons L1 and L2 to switch between the functions Panorama
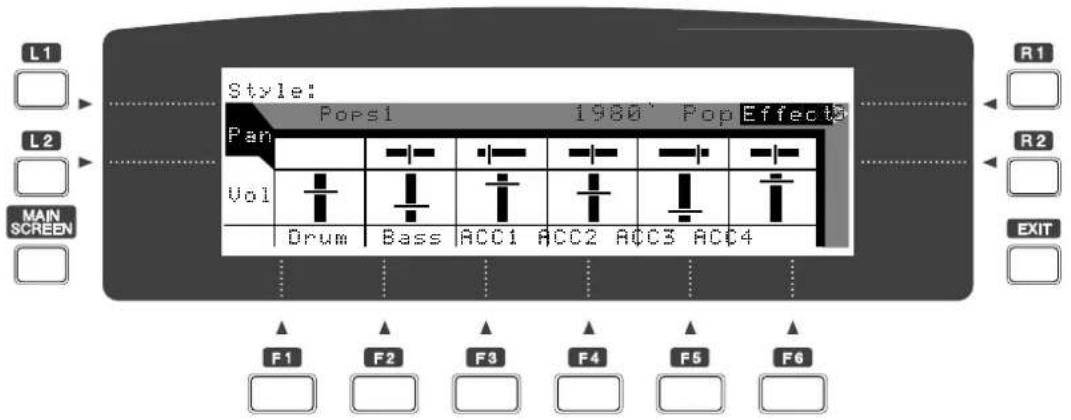
(positioning in the stereo image) and Volume (volume level). The panorama function of the Drums cannot be adjusted because Drums and percussion instruments have preassigned positions in the stereo image which cannot be changed. With the R2 button you reach a submenu in which you can make changes to the effect assignments of the accompaniment instruments. For further details please read the section "Effect Assignments".
A. Presets
The basic settings determine the way in which the effects respond to program changes and you can choose between them. To make selections in the System category press button L1 then use the L2 button to highlight the desired effect.

- Preset (using the preset assignments for sound and style) Individual effect assignments have been prepared for each sound/style, and can also be set up for styles/sounds you have created yourself. With the setting Preset the effects prepared for each style/sound are used. When the style is changed, the effect assignments of the accompaniment tracks change as well. When changing sounds the corresponding effects are also updated. Each newly selected style/sound is activated together with its preset effect assignments. Changes made to the current effect assignment which have not been stored as part of a registration are lost when the style/sound is changed. When the power is turned on, the "Preset" is activated.
13) Effect Settings
2. Panel (current settings of the Z1000)
Specifying Panel determines that the current effect settings are retained when changing to a different style/sound.
B. Global Effects
![graph TD L1["Main Screen"] --> EFFECT_Settings["Effect setting"] L2["Main Screen"] --> EFFECT Settings EFFECT Settings --> Reverb["Reverb"] EFFECT Settings --> 3D/EQ["3D/EQ"] EFFECT Settings --> On["On"] On --> Reverb["Reverb"] Reverb --> EFX_R1/2/L["EFX R1/2/L"] Reverb --> EFX_Style["EFX Style"] On…](/content/2026/06/1352816/images/343fe5a32f65870c6e8b0151e3572330cd2a30900b66a48429202936e95a5ba7.jpg)
Pressing the F1 button in the main menu provides access to the display page on which you can create settings for effects (Effect Setting). Reverb is a global effect that can be applied to the three keyboard zones and to the style. The effect is turned On and Off by pressing the F1 button. Other global effects available are EQ (Equalizer), which is activated and deactivated using the
F4 button, and the Super 3D effect whose switch is located above the keyboard. Additional effects are available for sound and style. The switches used to control it are F2 for the 3 keyboard zones (L/R1/R2) and F3 for the style. A toggle function for the Rotary Speaker effect, also known as the "Leslie" or "Doppler" effect, is assigned to the F6 button. This effect electronically simulates the acoustic impression of a rotating loudspeaker, which has become an obligatory means of expression in organ sounds. If you have connected a pedal (switch-type, to the Foot Pedal jack), this effect can be controlled with the pedal. You can produce additional settings for the various effects on a new display page by using the L1, L2, R1 and R2 buttons.
C. Reverb
The display page Reverb allows you to select the reverb type under the L2 button. You can choose between Halls 1 through 3 (large room to concert hall), Room (small room) and Plate (characteristics of a reverb plate). To speed up the settings of the reverb intensity (Depth) in the mixer settings for styles and sounds, 2 intensities are provided which you can select in advance: High Depth and Low Depth.
1. High Depth (F1)
With the F1 button you select the value for High Depth, the greater intensity of the reverb effect. This value appears on the Effect page of the Sound and Style Mixers as R: Hi.
13) Effect Settings
2. Low Depth (F2)
With the F2 button the Low setting, i.e. the lesser intensity, can be selected. This value appears on the Effect page of the Sound and Style Mixers as R: Lo.
3. Time (F3)
Time allows you to set the reverb duration in seconds.
- Pre-Delay (F4) applies to the pre-delay required by the reverb until the reflections become audible. You can employ the pre-delay to obtain a clearer original signal so that notes played on the keyboard are initially sounded without the reverb signal being

mixed in. Please note, however, that making such a change causes a change in the size of the reverb space as well: when the sound source is subsequently reflected, the space in which the instrument is played increases in size. Therefore, you should adjust the characteristics of the reverb space by balancing Time and Pre-Delay.
5. High Dump (F5)
High Dump causes the high frequencies of the reflections to be attenuated. Although this parameter works like a tone control (filtering) of the reverb effect, it also contributes to the defining of characteristics of the reverb space: the greater the degree of attenuation (high value), the more effectively the high reflections are absorbed, i.e. the space contains surfaces that swallow these frequencies.
D. 3D/Equalizer
This display page lets you choose between creating settings for the Super 3D effect (L1) and the equalizer (L2).

Before creating the setting you should activate the effect by pressing the 3D button (located above the keyboard). Using the F1 button, you select the parameter Length (effect intensity), which can be set in 3 steps. Use the F2 button to select Width, i.e. the effect of broadening the base in the stereo image. 3 settings are also available here. The strongest intensity results in the acoustic impression that the stereo signal enters the room from beyond the loudspeakers. The 3D symbol is intended to provide you with a visual aid in estimating the degree of signal dispersion. The most reliable indication of how this effect works, however, can be obtained only by listening to the sound.

Effect Settings
2. EQ (L2)
After you press the Exit button to return to the display page 3D/EQ Setting, the L4 button gives you access to the display page for the equalizer settings (EQ Setting). The equalizer offers you extensive possibilities for controlling the tone: a total of 7
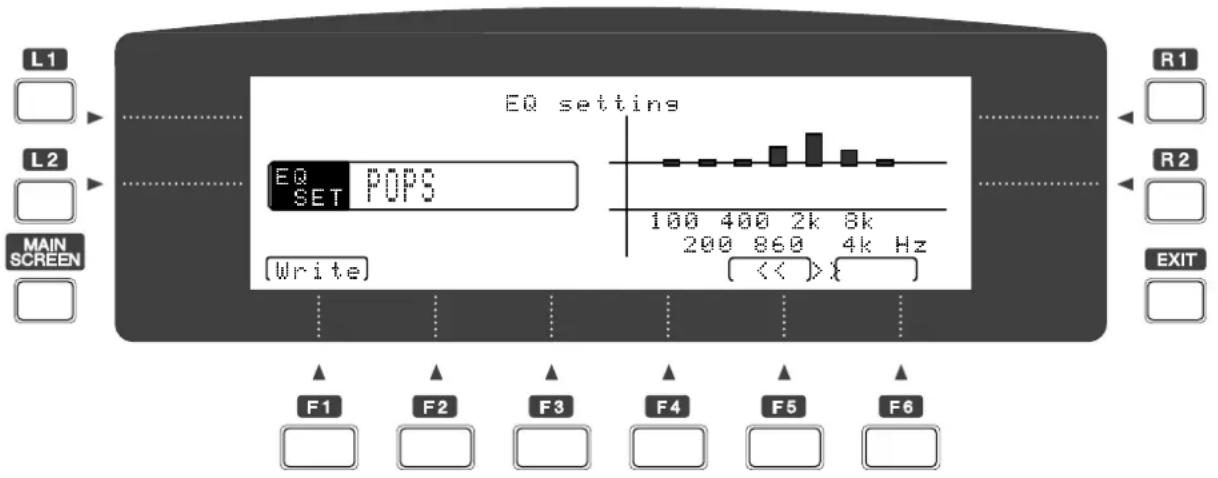
frequency bands (100, 200, 400, 860, 2000, 4000 and 8000 Hz) are available, and the volume of each frequency band can be set individually. This model is a graphic equalizer. The buttons F5 and F6 are used to select the desired frequency band. We recommend that you use the Tempo/Value dial as the input method for attenuating or boosting the selected frequency band. The L2 button is used to select equalizer presets.
The instrument comes pre-programmed with 4 different sound spectrums named according to their basic musical genre: Pops, Rock, Jazz and Classic. You can use each of these presets as a base for creating your own tone control combinations. 2 memory locations designated as "User" are available for storing your own equalizer settings. Use the F1 button to store your settings for
the current application. After pressing the button, a display page opens where you are asked to specify a user memory location: Write to USERo1 POPS. Specify the desired memory location using the dial or the "+" and "-" buttons. You can use the buttons L2 and R2 to move the cursor through the names of the equalizer settings. To change the marked letter you also operate the dial or the "+" and "-" buttons. Execute (F6) controls the write command, Cancel terminates the write process. The EXIT button returns you to the equalizer page.
E. EFX R1/2L Settings (R1)
Used to set the effect for the melody voices, which applies to R1/2 and Left, whereby the ON/OFF setting is made separately in the Sound Mixer under Effect.
F. EFX Style Setting (R2)
Used to set the effect type for the accompaniment arrangement. The type selected here applies to all parts. The ON/OFF is set separately in the Style Mixer under Effect.
Below you will find a summary of the different effect types and parameters available: the switching between Slow and Fast can be done in the global effects (Main Screen, F1 through F6). In addition, it is possible to switch between effects by using a pedal. In this case a foot switch (e.g. Kawai model F1 foot switch) must be connected to the Foot Switch jack and the parameter Pedal Function of the system settings must be set to "ROTARY slow/fast".

Effect Settings
G. Effect Setting (individual effects)
The R1 button gives you access to the display page for setting effects for the 3 zones of your melody voice; pressing R2 button leads you to the edit page for the stylistic effect. On each display page called Setting there are 15 effect types available, each selected using the L2 button. The instructions for setting the effect parameters apply equally to setting the sound and style effects. The F buttons are used to select the effect parameter you want to edit.
1. Early Reflections (first reflections or short echo in the room)
F1 Level: Balance effect/original signal
F2 Slope: Control density of the reflections
F3 Pre Delay: Pre-delay before the start of the reflections
F4 Feedback: Return of the original signal with effect applied through the effect channel
2. Tap Delay (individual echo pulses)
F1 Level: Balance effect/original signal
F2 Delay 1: Delay of the first echoes
F3 Tap Level: Level of the echo signals
F4 Delay 2: Delay of the second echoes
F5 Feedback: Return of the mixed signal to obtain stronger diffusion
3. Auto Pan (stereo tremolo)
F1 Length: Balance effect/original signal
F2 Speed: Process speed
F3 Amount: Depth of amplitude
F4 Pre Delay: Pre-delay
F5 Wave: Sine and triangle waveforms are available for amplitude modulation.
4. Chorus (doubling the signal by means of pitch modulation)
F1 Length: Balance effect/original signal
F2 Speed: Modulation rate (frequency)
F3 Amount Effect intensity
F4 Pre Delay: Pre-delay
F5 Wave: Sine and triangle waveforms are available for amplitude modulation.
5. Ensemble (diffuse multiplication of the signal by means of pitch modulation)
F1 Length: Balance effect/original signal
F2 Amount: Effect intensity
F3 Pre Delay: Pre-delay
6. Tremolo (amplitude modulation/tremolo effect)
F1 Length: Balance effect/original signal
F2 Speed: Modulation rate (frequency)
F3 Amount: Effect intensity
F4 Pre Delay: Pre-delay
F5 Wave: Sine and triangle waveforms are available for amplitude modulation.
7. Phaser (doubling of the signal by means of phase modulation)
F1 Length: Balance effect/original signal
F2 Speed: Modulation rate (frequency)
F3 Amount: Effect intensity
F4 Pre Delay: Pre-delay
F5 Feedback: Return of the mixed signal
13) Effect Settings
8. Rotary Speaker (Leslie effect)
F1 Length: Balance effect/original signal
F2 Slow Speed: Slow rotation
F3 Fast Speed: Fast rotation
F4 Acceleration: Starting up the Leslie
F5 Slow/Fast: Setting the normal position (before pedal or switching in the display page Effect Setting take effect)
9. Distortion
F1 Length: Balance effect/original signal
F2 Equalizer Low: Tone control for low frequency range
F3 Equalizer High: Tone control for high frequency range
F4 Pre Delay: Pre-delay
F5 Drive: Degree of distortion
10. Dual Delay (stereo echo)
F1 Length: Balance effect/original signal
F2 Time Left: Echo duration left
F3 Feedback: Left Return of mixed signal left
F4 Time Right: Echo duration right
F5 FeedbackRight:Return of mixed signal right
11. Single Delay (mono echo)
F1 Length: Balance effect/original signal
F2 Fine: Fine adjustment of the delay time
F3 Coarse: Coarse adjustment of the delay time
F4 Feedback: Return of the mixed signal
12. Cross Delay (crossing echo signal)
F1 LengthBalance:Effect/original signal
F2 Time: Time of echo duration
F3 Feedback: Return of the mixed signal
13. Flanger (doubling the signal by means of delayed pitch modulation)
F1 Length: Balance effect/original signal
F2 Speed: Modulation rate (frequency)
F3 Amount: Modulation intensity (amplitude)
F4 Pre Delay: Pre-delay
F5 Feedback: Return of the mixed signal
14. Celeste: (frequency modulation similar to Chorus effect)
F1 Length: Balance effect/original signal
F2 Speed: Modulation rate (frequency)
F3 Amount: Modulation intensity (amplitude)
F4 Pre Delay: Pre-delay
15. Exciter (psycho-acoustic frequency intensification)
F1 Length: Balance effect/original signal
F2 Equalizer Low: Control range for low frequencies
F3 Equalizer High: Control range for high frequencies
F4 Exciter Level: Effect intensity
Effect Assignment
A. Sound Effect
From the Sound Mixer press the R1 button to reach the display page for effect assignment. This is where the path is determined by which each of the 3 sounds constituting the melody voice passes through the effects. Select the desired components: Left, Right 2, or Right 1 with buttons F1 through F3. On this page the display provides you with information about further assignments. On the left side of the reverb type (e.g. Reverb:Room) and the current sounds for the 2 zones of your melody voice. The following settings are available for each sound:
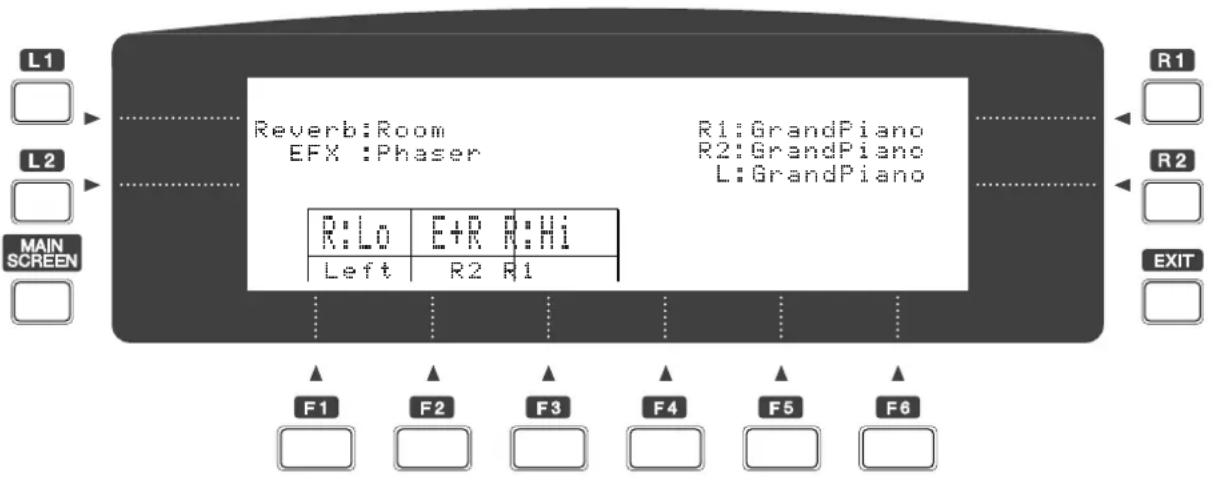
1. R: Hi
Reverb is the only effect used. The intensity corresponds to the preset High value. The setting applies to the degree of intensity determined for the reverb under Hi Depth. For further information about its assignment please refer to the section "Reverb Effect Setting".
Effect Assignment

2. R: Lo
Reverb is the only effect used. The intensity corresponds to the preset Lo value. The setting applies to the degree of intensity determined for the reverb under Lo Depth. For further information about its assignment please refer to the section "Reverb Effect Setting".
3. E + R
Reverb and the additional sound effect are used simultaneously. For further information about the sound effect please refer to the section "EFX R1/2/L Setting".
4. General Conditions for Sound Effects
The assignment for the zones Right 1 and Right 2 applies to the set effect, provided Right 1 and Right 2 are selected exclusively (alternately) or are used in the Split mode. If Right 1 and Right 2 are used in the Layer mode (both LEDs are lit), the assignment of Right 1 applies to both Right zones.

Hint: In practice this can be used to obtain the following effect: select a flute sound as the sound program for Right 1 and use the program clean guitar for Right 2. You can also specify the Layer mode for the Right zones in the section ACC setting. You can assign distortion to the individual effects. In the Effect Mixer set Right 1 to Reverb: High, Right 2 to Effect+Reverb. Now you can switch between the two melody voices of flute (with high reverb content) and distorted guitar. If you use both Right sounds layered simultaneously, both are sounded in unison without distortion.


Effect Assignment
B. Style Effect
Here also, the basic functions correspond to the options of the sound effects: the path is determined by which each instrument comprising the style passes through the effects. Using the buttons F1 through F6 you select the corresponding part: Drums, Bass, Acc. 1 through 4. On this display page the following settings are available for each part:
1. R: Hi
Reverb is the only effect used. The intensity corresponds to the present High value. the setting applies to the degree of intensity determined for the reverb under Hi Depth. For further information about its assignment please refer to the section "Reverb Effect Setting".
2. R: Lo
Reverb is the only effect used. The intensity corresponds to the preset Lo value. The setting applies to the degree of intensity determined for the reverb under Lo Depth. For further

Effect Assignment

information about its assignment please refer to the section "Reverb Effect Setting".
3. E+R
Reverb and the additional sound effect are used simultaneously. For further information about the sound effect please refer to the section "EFX R1/2/L Setting". On this page the display provides you with information about further assignments. On the left side the reverb type (e.g. Reverb:Room) and the current sound effect (e.g. EFX:Phaser) are shown.

Quick Play (Floppy Disk Operations 1)
The playback of Standard MIDI song files (SMF formats o and 1) takes place directly from floppy disk. It is therefore not necessary to write the songs into internal memory. Insert a DOS-formatted disk into the disk drive. Press the Disk button. The explanations in this section will be confined to the Quick Play function. When you call up the Quick Play function with the F4 or F5 button, the disk drive begins to search for the MIDI files on the floppy disk. The first song is shown in the framed display line. If you want to check the remaining contents of the floppy disk or select a different song for playback, you can scroll through the list by using the buttons F1 (Down) and F2 (Up). Playback is started with the F3 button and stopped with the F4 button. F6 (Mute) allows you to select a track to be omitted during playback of the song. It corresponds to the MIDI channel of the GM file. This function is designed to let you filter the melody out of the song so that you can play it yourself. The OFF position represents the complete song. The F6 button (Repeat) allows you to switch between playback of the selected songs (One) and playback of all songs in a continuous sequence (All). The "jukebox" then starts
![L1 DISK Quick Play TE01-PR1 J=088 --- Sons -- [↓Down]MutePLAYSTOPPLP Off Off (Repeat) MAIN SCREEN R1 R2 EXIT F1 F2 F3 F4 F5 F6](/content/2026/06/1352816/images/5fe3fe39b98bf621e1008aa42e6777f4f1616c3b06e90df60ec577912b528565.jpg)
Quick Play (Floppy Disk Operations 1)
the sequence from the current song. The position OFF causes the selected song to be played back once.
If the song includes the song text, it is shown in the right half of the display. Use this feature for karaoke or for singing along with your performance on the keyboard.

Hint: If you have purchased a song disk of SMF Format 1 and want to use it together with Quick Play, you can load the songs into the Z1000 sequencer and save them directly poppy disk again as SMF. In this way the songs are converted in Format 1 to Format o.
16
Registration
In discussing One-Two Play we mentioned that the Z1000 manages several different musical environments: the important elements for the registration are styles, sounds and effects. You have already learned that these three areas are variable in the performance of any piece of music. The basic setup of the styles provides first an assignment of the melody voices and the corresponding effects, but can be changed according to your wishes. During a live performance you will usually not have sufficient time for making all new settings for sounds, styles, effects, tempo, etc. In order to prepare the repertoire for a performance with plenty of time beforehand, the registration memory can be set up not only as a program list of the sequence of songs, but also as an individual setup for each style.
The following settings can be stored:
- ACC Setting
- Active Sounds (L/R1/R2)
- Tempo
- Style
- Mixer Settings for Sound and Style
- All Effect Settings
- Presets for Sound Group
A. Recalling
Press the Registration button and select the desired registration using the dial or the Selector buttons. A total of 50 registrations are available. The display shows the name of the registration and the assignments of Right 1, Right 2, Left, and Style.

B. Storing
to prepare a registration it is recommended that the check of all the settings mentioned above any desired changes be made. Press the Registration button only after you have done this, followed by F1 (Write). The number of a memory location appears in the display. Use the dial or the Selector buttons to select a free memory location or one whose previous data are no longer required. If you now move the mark to the right using the R2 button, you can change the first letter of the registration name using the dial. To input a complete name, move through the line using the buttons L2 and R2. When you press F6 (Exec), the new registration is stored in the specified memory location. Of course, you can also save these 50 registration to floppy disk. For details please read the section "Floppy Disk Operation 3".
Conductor (Part 2)

Advanced Style Edit
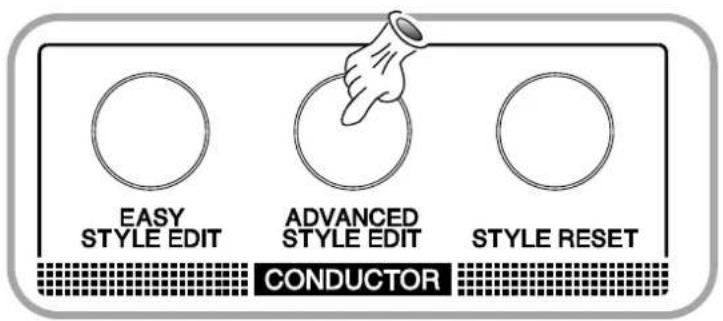
The section Conductor offers access to the Advanced Style Edit function. The changes you can make here are primarily related to the capability of the Z1000 to let you create your own "style production". Several of the parameters available here are already familiar to you from the functions of the Style Mixer. With regard to customizing and modifying styles, these parameters do not, however, apply only to arrangements you have created yourself. We encourage you to experiment freely with the presets of your Z1000. This applies both to styles and to editing your own sounds. You will soon notice that even a few minor changes can have impressive effects on the existing material.
Conductor (Part 2)
A. Groove (L1)
Press the L1 button to call up the Groove display page. This function may be familiar to you if you have experience using a sequencer, where it is sometimes known as "Swing". Groove is related to the rhythmic feel during performance. The factor of the parameter Groove causes gradual changes in the rhythmic positions to which individual beats are set. The control range lies between the "straight" performance based on sixteenth notes and a "swinging" performance based on triplets. Groove drags sixteenth notes forward or backward in such a way that the quantization which initially seems precise becomes less and less so as the value is increased, until at the other end of the scale it has become a quantization based on 12th or 24th notes.
1. Groove No. (L1)
This is where you select the Groove type.
o: OFF; no Groove
1-8: 8 Triplet; quantization based on eight-note triplets
9: 16 Triplet; quantization based on sixteenth-note triplets
10: Swing; typical swing quantization
2. Intensity (F1-F6)
You can set the intensity for each part individually in 10 steps using the buttons F1 through F6.

Hint: Begin by setting the intensity of all parts to 5 and then change the Groove type. In this way you can gain a quick impression of the characteristic differences between the individual Groove types.
Conductor (Part 2)
Please refer to the section "Quantize" for further details on the subject of Groove. It is possible to assign completely different sounds to each variation. To set sounds of a style variation, simply select the desired variation.
B. Pan/Volume
The L2 button brings you to a display page with whose operation you are already familiar: the Style Mixer. In contrast to the temporary settings of the Style Mixer, which are reset to their initial values when the instrument is turned off, the settings made here can be stored in the form of new style programs. If you have questions on how to operate the Mixer with Style Edit, please refer to the section "Style Mixer".
C. Effect
The R2 button opens another display page familiar to you: the effect assignments of the Style Mixer. If you have questions on how to use the effect assignments with Style Edit, please refer to the section "Style Effect Mixer".
D. Program
On the display page "Program", which you call up using the R1 button, you can input program change commands for each of the 6 tracks of the accompaniment. On one hand, a program change command allows you to define the sound for the respective
Conductor (Part 2)
accompaniment track. On the other hand, the command switches to the corresponding number when you want to transfer the accompaniment to an external MIDI tone generator. This may be a MIDI expander, such as the GMega, or a synthesizer; you can also transfer the song in which you are using the accompaniment to an external sequencer (a hardware sequencer, such as the Q-80, or a software sequencer running on a personal computer), in order to record the accompaniment. Use the F (function) buttons to select the desired track for the style. Above the tracks you will find information about the program set for the selected track. The program change numbers and the name of the instrument are shown. Note that instruments with chromatic assignment (Bass and ACC 1 through 4) have a program change range of 199 steps (in the case of the Drums track you can switch between 9 drum kits). The General MIDI Standard (GM) defines 128 program switches and 1 drum kit, unless it has been expanded by a manufacturer-specific addition. In order to maintain compatibility for future export of the style, you should make sure to select instruments only in the program range from 001 and 128 and to use only the first drum kit (001). Of course, if compatibility is not required you can freely select the sounds best suited to your accompaniment tracks from the entire set of 200 programs. The remaining indications in the display provide information about the current style.

Conductor (Part 2)
E. Write (F1)
The store command (F1) allows you to reach a submenu in which you can determine details concerning the memory location and name of the new Conductor style. The number of the memory location appears in the display. Use the dial or the Selector buttons to select a free memory location or one whose data are no longer required. A total of 40 Conductor locations are available. If you move the mark to the right using the R2 button, you can change the first letter of the style name using the dial. To input a complete name you move through the line using the buttons L2 and R2. When you press F6 (Exec), the new style is stored in the specified memory location.
F. Style Make
The buttons F3 and F4 give you access to the setting options for your own style production. You can scroll through the individual functions on this display page by pressing the buttons L1 and L2.
1. Settings
In Beat you can create settings related to the meter. You can change the preset 4/4 meter to other values that range up to a 32/16 meter. The remaining settings are related to the length of the measure (Bar Length) for each individual part of the style. The setting made for Basic applies to the general bar pattern of
Conductor (Part 2)

the entire accompaniment. The length set applies to all 6 variations, which you can then call up using the Style Variation buttons. The maximum number of bars here is 32. A maximum length of 5 bars is available for the introduction. In effect, you are programming the INTRO/ENDING button, with which you can then start your style. In Ending you define the length for the ending, which also can then be called up using the INTRO/ENDING button.
2. Recording
The F6 button takes you to the next function of the section Style Make (Next). At the top of the page Style Make Record you will find the information about your specifications: Bar (number of measures) and Beat. As on the previous display page you select the functions shown in the box by using the buttons L1 and L2 to scroll through the different menu items.
1) Pattern
Here you set the part of the style you want to edit. At this point, it may be useful to reconsider the structure of a style:
- The style consists of an introduction which should occur once in a major key (Major) and once in a minor key (Minor).
- The Basic Pattern comprises 6 variations (Basic 1 through 6).
- You can program up to 6 Fill-ins (Fill 1 through 6).
- For the ending both a major and a minor version are provided.
This function allows selection of the track you want to edit. At this point a closer look at the individual tracks is in order:
1. Drum 1
With regard to future changes made in the Conductor it is recommended that you consider this track the main track for the drum kit. You should assign primarily those instruments usually found in a drum kit, i.e. bass drum, snare drum, rim shot, toms, claps, cowbell and cymbals.
2. Drum 2
Here the Latin Percussion group should be used (congas, timbale, splash cymbals, shaker, agogo bells, whistle, etc.) as well as other percussion instruments. Note that it is also possible to use different drum programs for the two drum tracks. For example, you can switch between the snare drums of 2 drum kits across the tracks Drum 1 and Drum 2.
3. Bass
Although this track is called Bass, this does not mean that you have to confine yourself to instrument voices of the Bass group in making your selection for this track. You may use any desired instrument for the Bass track, such as an acoustic guitar or a wind instrument. The only difference in the case of the Bass track is that the number of voices is limited to monophonic operation.
4. Acc 1 main
All 4 tracks of the accompaniment, Acc 1 through 4, are used in the same way. An exception is provided by the division into a main track (main) and subtrack (sub) with an additional application.
5. Acc 1 sub
The subtrack is controlled by the same MIDI channel as the
Conductor (Part 2)
main track. It can be used for simultaneous recording of the effects for the main track. For example, the sliding on the strings of a guitar (main: Steel Guitar1/Sub: Gt.FretNoise).
6. Acc 2, 3 and 4
With the 3 remaining parts you select the other tracks for accompaniment instruments.
3) Quantize
The Quantize functions let you define the desired type of quantization for the style. During the process of quantization the timing of rhythmically imprecise notes is adjusted to their adjacent ("straight") count based on the selected adjustment unit. The type of quantization you choose dictates the type of adjustment unit used to round off the notes. You can start your recording immediately with the preset quantization type. The following settings are available:
1. Off: No quantization
The adjustment unit has the highest resolution (1/96th per quarter note) and approaches most closely the timing of your original performance (real-time mode).
2. ♪: Quarter notes
This corresponds to the coarsest adjustment unit, also used to shift all notes to the nearest quarter note.
3. ♩: Quarter note triplets
Adjusts the timing between notes within a quarter note and corresponds to a quantization in 12ths.
4. ♪: Eighth notes
The notes are moved to the nearest eighth note.
5. ♩3 : Eighth-note triplets
Corresponds to a resolution of 24ths.
6. ♩: Sixteenth notes
The adjustment unit is sixteenth notes.
7. ♩3: Sixteenth-note triplets
Corresponds to a resolution of 48ths.
4) Sound
You can input the program number for the sound of the part. Use the R1 button to select the tempo of your style.
5) Tempo
Use the R1 button to select the tempo of your style.
6) Input
The R2 button lets you define the key in which you want to record the arrangements. If your input is made in the default key of C major, it is not necessary to define transposition at this time. During playback of the accompaniment the new user style is played in the selected key. It is necessary to record the arrangements for style variations and fill-ins in a major key. During playback of the accompaniment the Z1000 automatically converts the corresponding minor harmonies.
7) Delete
The F3 button can be used to erase a style from the User bank. Use the Dial or the "+" and "-" buttons to select the memory location whose contents are to be deleted.
8) Copy
The F4 button gives you access to the copy function of the Style Make section. The display page provides boxes for copying
Conductor (Part 2)
purposes: in the left box you input the source for the arrangement to be copied from, while in the right box you define the work area of the target. As usual, you can scroll through the options using the buttons L1 and L2. The following individual sections are available for defining the source:
- Style You can select memory locations within the entire style.
- Pattern Presents the individual components of the respective style: Intro (major/minor), Ending (major/minor), Basic 1-6, Fill 1-6, as well as the option "All" for copying all components.
- Part Here you select the individual track of the pattern: Drum 1 & 2, Bass, Acc 1 Main & Sub, Acc 2 through 4, as well as the option "All" for copying all tracks.
The 2 definitions of the target area are selected directly with the buttons R1 and R2.
- Pattern: Defines the musical function.
- Part: Defines the instrumental track.
As you will notice, selecting the setting "All" causes the target to be set automatically to the same. This is intended to prevent you from accidentally copying the entire contents of a style to one segment (Basic 1) of the target pattern. The F6 button (Execute) is used to confirm the execution of the copying process. Use the F5 button (Cancel) and the Exit button to cancel the copy command. Exit returns you to the Style Make menu.
9) Write
The store command of the F5 button takes you to a submenu in which you can define details concerning the memory location and the name of the new user style.
The number of the current memory location appears in the display. Use the dial or the Selector buttons to select a free memory location or one whose data are no longer required. A total of 10 User locations are available. The display shows you the name of the selected location in order to prevent you from accidentally overwriting memory locations already in use. If you move the mark to the right using the R2 button, you can change the first letter of the style name using the dial. To input a complete name you move through the line using the buttons L2 and R2. When you press F6 (Exec), the new style is stored in the specified memory location.
10) Control (F6) - voicing specifications
The Control function is used to set various specifications for the currently selected instrumental part. The F6 button takes you to a display page where you can define harmonic and melodic details for the progression of the accompaniment in the part. Depending on which instrumental track of the style is currently selected, the Control parameter provides you with special setting options:
Part: Drum 1/Drum 2/Part 1 Sub
Neither a harmonic or melodic definition for drums and percussion instruments nor for the subtrack of Part 1 is required. The Control button is not active.
Conductor (Part 2)

Part: Bass
In this submenu you can define the limit for the lowest bass note. If the arrangement reaches a point in the harmony where the bass line goes below this limit, the corresponding notes are automatically transposed upward by one octave.
Part: Acc. 1 - Acc. 4
Harmonic rules can be defined for the remaining instrumental voices. Move the cursor through the functions of this display page by using the buttons L1 and L2.
Acc System
The harmonic progression of the chord system is determined with this function. It applies to the 6 variations as well as the fill-ins and can be defined for the harmony instruments Acc. 1 through 4. (Intro and Ending are the exceptions for the style parts, Drums and Bass are instrumental tracks not covered by this definition).
You can specify Chordal (chord-related preset) or Scalic (scale-related preset). In both Chordal specifications it is necessary to form the harmonies of the accompaniment from the notes of the C major chord.
If you use 4 voices in C major from the start, the following chord versions are possible as basic harmonies:
- C major with interval doubling (i.e. C-E-G-C)
- C major7 (C major with a major seventh, i.e. C-E-G-B)
- C7 (C major with minor seventh, or dominant seventh chord, i.e. C-E-G-B-flat)
If you want to use phrases with notes not found in the chord (such as diatonic or chromatic notes) for the instruments Acc. 1 through 4, it is necessary to specify Scalic for the corresponding track. Within this subdivision four different voicing modes are available:
Chordal Close
The first specification voices chord in close harmony, also known as "close voicing". Using suitable inversions, the voices move through the chord progression in as even a position as possible. This voicing roughly corresponds to a chordal accompaniment as played with the left hand and stays mainly in the range of intervals playable with one hand (approx. within one octave). You can vary the setting of the keyboard register range (see "Turn Range" below).
Chordal Open
With open voicing, also known as "open harmony", which produces a relatively wide harmonization, chords can be formed in a range that exceeds the intervals playable with one hand. Chordal open voices the harmonic progression by using transpositions. You can specify a transposition limit for the root notes (see "Transpose Limit" below).
Scalic Chord
Use this preset is you want to use notes in the accompaniment phrase that do not occur in the C major chord (C-E-G). It would be possible, for instance, to create an accompaniment pattern in the blues or jazz style, in which the major seventh or other fourth or fifth chord voices are sounded already together with the basic chords.
Conductor (Part 2)

Scalic Phrase
Use the phrase-related scale setting to voice diatonic or chromatic lines in the accompaniment for harmonic changes of the style. In this case you let the automatic accompaniment interpret existing melody lines (e.g. string melodies) in a way that is largely identical to the chords played on the keyboard. This setting is suitable for playing with a single voice.
Turn Range
This parameter works in conjunction with the setting made for Chordal close/open and is used to determine the keyboard register for the chords of the accompaniment. You can choose between 3 voicing models:
- Low
- Mid
- High
Transpose Limit
This parameter works in conjunction with the setting made for Scalic chord/phrase. You can determine the range (in half-tones) up to which the melody line may move downward; when the limit is reached, the line is transposed to the next higher octave. This is the only voicing option available for the bass track as a monophonic accompaniment part.
3. Starting the Recording
The recording begins after the countdown in the display has finished (the countdown indication appears next to the tempo indication).
4. Erase (F1)
Using F1 you can make corrections in the recorded phrase in real time (during the recording). F1 erases the respective passage on the count where you press the button. To erase a complete track you keep the F1 button depressed until no more notes are being played back. You can also erase single notes from a track. Press the corresponding key on the keyboard and keep F1 (Erase) depressed until the note has been erased. Example: If you have already recorded 3 instruments of the Drums part (bass drum, snare, hi-hat) and afterwards you want to erase the snare track, press the key to which the snare sound has been assigned (D1 or E1) and keep F1 depressed until the incorrect snare beats have been erased. You can also erase single beats by briefly pressing F1 (Erase) at the beat of the undesired note—in this case, too, you can press the key corresponding to the note to be erased on the keyboard in order to specify individual notes.
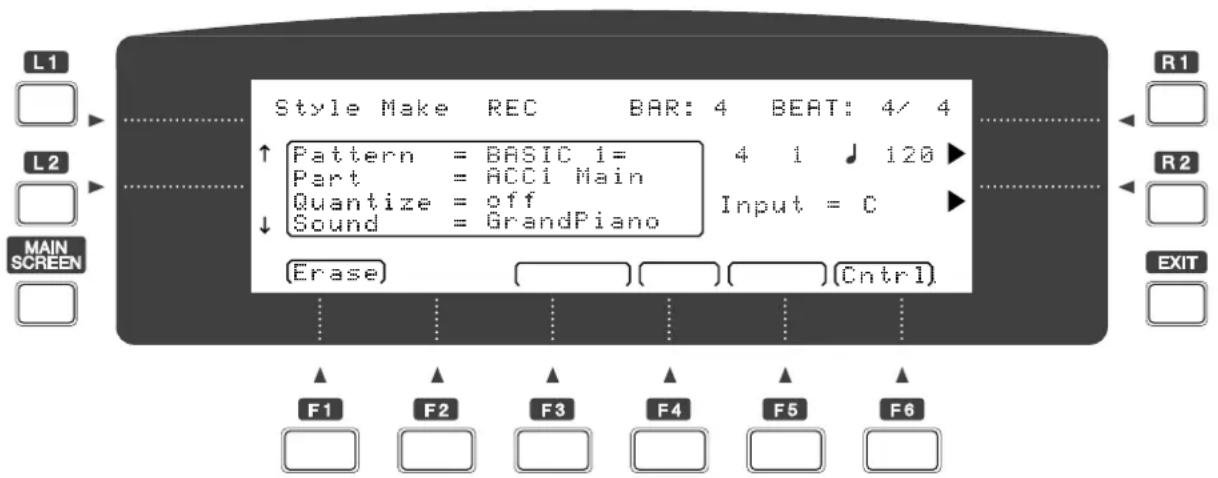
Style Convert (Floppy Disk Operations 2)

The style conversion function is a unique feature which enable the Z1000 to play the style data made not only for Kawai's other instruments, but for many other manufacturers' keyboards as well. The Style Convert Software was developed for the personal computers by EMC Software company, which has been the recent leader in this type of technology. In collaboration with EMC, Kawai has made it possible to run this software on the Z1000. When the Style Convert Software is installed, the Z1000 becomes capable of reading many style data disks currently available on the market and converting them into Kawai's data format without losing musical quality. The converted style data may be edited and stored as the Z1000's own style data. With this feature, you can expand your library of style data. Please read the instruction sheet that comes with the Style Convert Software disk for information on the format that works on the Z1000.
Operation
Begin by selecting a free memory location in the style group User. the converted will be written to this memory location. After pressing the Disk button, you access the Style Convert menu with the buttons F2 and F3. The message INSERT STYLE CONVERT DISK asks you to insert the disk containing the Style Convert module into the floppy disk drive. At this time please insert the STYLE CONVERT DISK supplied with the Z1000 and then press F6 (Execute). The Z1000 begins to check the contents of the disk and lists the titles of the modules. Use the buttons L1 and L2 to select the module for t6he desired unit and input the load command by pressing F6 (Execute). After the conversion format has been loaded, the message "Continue?" appears in the display. Confirm by pressing F6 again. You are now asked to insert the style disk: "Please Insert xxx Style Disk", where "xxx" corresponds to the unit's name. After the
18) Style Convert (Floppy Disk Operations 2)
contents of the disk have been checked, a list appears showing the styles contained on the disk. Use the buttons L1 and L2 to select the desired style. Confirm again by pressing F6 (Execute). The name of the converted style is used as is. In most cases the conversion of the styles of other manufacturers will lead to sounds on the Z1000 that are slightly different from the ones you are familiar with from the original unit, since the components are designed for different system requirements. Please use the functions available in Easy Style Edit and Advanced Style Edit to match the acoustic results or adjust them internally, for example by adjusting the panorama positions and volumes of the individual tracks of the accompaniment afterwards or to assign effects to the style.
19) Sound Edit

Use the Sound button to call up the Editor when you want to modify existing sounds or create your own melody voices. On the left side of the display you can select the waveform for a sound you want to create from scratch by using the L1 button (Reference). The first 128 options in the list provide the digitalized waveforms (or samples) defined for the GM standard, followed by alternative waveforms that are primarily used in the second sound bank. Use the L2 button to call up individual effects for the sound; the effect is stored with the sound as part of the sound program. Refer to the section "Effect Setting Style & Sound" for details on how to program the individual effects. The individual synthesizer functions are selected with the buttons F5 and F6. You can create the desired envelope for the progression of the sound generation here.

A. CutOff
This parameter provides a low-pass filter. You can use it to define the frequency range above which the filter limits cuts off the harmonics and allows only the lower frequencies to pass. The center line is the zero position. As you can see, the sign of the setting value (in the upper right corner) changes to a minus sign when you move the filter frequency below the line. The Dial offers the most convenient method for setting the synthesizer

Sound Edit
parameters. If you move the filter value downward, the sound becomes muddier. It still can, however, be varied dynamically by adjusting the velocity. When the keys are struck more forcefully, the filter opens again, thus letting you control the variations in timbre by way of the force with which you play the keyboard.
B. Attack
On the Z1000 the parameter Attack applies to both the filter and the amplitude. When set to a positive value this parameter causes a delay in the attack. For example, this allows you to eliminate the attack noise of the sample waveform or, with a higher setting, to apply the attack characteristics of strings to waveforms with a percussive attack. When the Cutoff value is in the positive range, the attack is employed only for delaying the amplitude (the fade-in of the attack takes place in the volume). When the Cutoff value is in the negative range, the attack also modulates the attack response of the filter.
C. Decay
The parameter Decay lets you apply typical decay characteristics to the sound. The effect of the decay pertains to the key pressed on the keyboard: in the positive range the note is held as long as the selected sample allows (organ envelope), the zero position corresponds approximately to the decay time of a stringed instrument, and in the negative range the decay time gradually becomes shorter.
D. Release
The final parameter pertains to the characteristics of the sound after the key is released: in the positive range the sound is sustained and provided with a type of reverb, while in the negative range the sound is muted.
E. Write
Use the F1 button to open the display page on which you can create settings for the writing operation. The cursor position indicates the memory location of the User section in which the new sound is to be stored. Use the dial or the "+" and "-" buttons to select an appropriate location. Using the buttons L2 and R2 you can move through the individual characters of the sound's name to change it for your new sound. Execute confirms that the storing operation, Cancel, or the Exit button cancel the writing operation and return you to the Edit menu.


Sequencer

The Sequencer button takes you to the display page with the recording functions. You will also find these recording functions on the pages Mixer and Track, so you can operate them from those pages as well. As you will notice, these functions work in the same way as the operating buttons of a tape recorder.
![graph TD A["L1"] --> B["Track"] C["L2"] --> D["Edit"] E["MAIN SCREEN"] --> F["RECACT"] B --> G["Right1:GrandPiano"] B --> H["Right2:BrightPiano"] B --> I["Left :E.GrandPiano"] B --> J["Style :Honkeytonk"] G --> K["Mixer"] H --> L["Setup"] I --> M["SETUP"] J --> N["L:001"] K --> O["F1"] L --> P["F2"]…](/content/2026/06/1352816/images/2a81f1257ddb43b4662a3674257dd75b465ad0c891a843a7e43f850a23c633f0.jpg)
A. Recording functions
1) Record (F 1)
In the same way as a tape recorder, the Record button can be pressed simultaneously with the Play button, but also activates the recording function when pressed alone. All function boxes are used for selecting the operating mode. The actual recording is started with the Start/Stop button or the operating buttons, which also control the functions of the styles. You can therefore either start a sequencer recording with Sync or let the intro begin.
2) Stop (F 2)
Stop ends the recording, but it is still necessary to stop it using the Start/Stop button.
3) Play (F 3)
Play specifies the play mode. Playback of the recording is controlled with the Start/Stop button.
4) Rewind (F 4)
It is possible, using Rewind, to quickly move backwards through the recorded sequence; this is similar to using the rewind function of a tape recorder.
5) Forward (F 5)
In the same way, Fast Forward can be used to move forward quickly through the recorded sequence. This allows you to select a certain bar from which to start the sequence, for example in order to start the next recording at a certain point of the present sequence.
6) Reset (F 6)
Reset is used to return to the beginning of the sequence.
(20) Sequencer
7) ♩ = Tempo (dial)
Tempo indications appear above these boxes. You can change the tempo by using the Dial or the "+" and "-" buttons
8) Position Display
The indication L (Location) of the position of the sequencer's current bar appears next to the tempo indication. The indication "L:002-03", for example, would inform you that the sequencer is on the third quarter-note of the second bar. This indication also serves to determine the positions during rewind and fast-forward.
B. Track (L1)
The Track page provides you with an overview of the status of the sequencer's 16 tracks, the accompaniment track (Acc), and the tempo track (Temp). Use the S buttons to move through the individual sequencer tracks. For each track the status is shown as follows:
- empty track
▶ recorded track - recording status
✗ mute status (the track is recorded and muted)
When Record (F1) has been specified (mark or highlighted indication), you can set the functions of the selected track.
C. Mixer (R1)
The mixer functions volume (Volume) and stereo balance (Panorama) are available for the sequencer as well. The operating procedures are similar to those of the Sound and Style Mixers. To
Sequencer (20)
make the setting for the respective function, you move through the tracks using the corresponding L and R buttons as follows: with L1 and R1 you select the desired track for creating Panorama settings, with L2 and R2 you select the track for the Volume settings to be made. The settings can be made using either the dial or the numeric keypad.
D. Setup (R2)
The Setup page offers you three options for settings pertaining to the operation of the sequencer.
1. Setup Record Mode (L1)
In Record Mode you create settings related to recording:
1) Mode
The Erase mode specifies the recording method with simultaneous erasing of previous data. When a new recording is made, the previous contents of the track are overwritten. In the Merge mode recording takes place as a complement—the previous contents of the track and the new sequence are combined on the track. This method is also known as Dub mode and can also be found in the Style Sequencer (Style Maker functions). This method is suitable for creating drum and percussion tracks when the individual instruments are to be recorded successively.

Hint: in leading your melody and chords you should avoid overlapping tones since doubly recorded notes always cause erasures, which adversely affect the sound of the respective instrumental voice.)
Step Record specifies the mode for recording in individual steps. In this mode the internal clock is "decoupled", and the notes can be placed on specific positions within the measure without concurrent playback of the sequence. Step input is also available in the Merge mode, making it possible to add newly input notes to the previous notes.
2) ACC Reserve
ON - 8 MIDI channels are reserved for ACC and cannot be used during a sequencer recording. This specification takes into consideration a sequencer recording with style accompaniment. If you want to convert the style that was used in the completed recording into track data, you can assign these data to tracks 4 through 11. Subsequent conversion of the accompaniment into MIDI events offers the following possibilities:
- The tracks of the accompaniment can be edited. Just as in the case of "recorded" tracks, you can make changes for each track on a case by case basis.
- When saving the song in a different format (Q-80 or Standard MIDI), the tracks of the accompaniment are "physically" present and the sequence can be played back using a tone generator without that device having to be equipped with the automatic accompaniment feature of the Z1000 in order to play back the corresponding style in parallel. OFF - The default setting OFF allows unrestricted use of all tracks.
3) Metronome
The setting Record is the normal position used for the built-in metronome. The metronome tone can be heard only during recording. If you select the setting All, the metronome tone also sounds during playback of the sequence. In the OFF position the metronome is turned off. It may be necessary, for example, to
Sequencer (20)
turn off the metronome during a recording with automatic accompaniment, because the style affords sufficient rhythmical orientation.
4) Record Bar/Measure
Here you can select the time signature for recording. By using the dial to make the selection, you can scroll continuously through all values available for time signatures in units of quarter notes, eighth notes and sixteenth notes.
2. Setup Input Quantize (L2)
The OFF setting specifies the normal recording mode for input quantization. The notes played on the keyboard are recorded and played back without quantization, i.e. in real time.
1) Input Quantize
The ON setting causes the notes played on the keyboard to be quantized. During this process rhythmically imprecise notes are "straightened" and written on the track after their rhythmic timing has been adjusted (quantized). If you have selected the ON setting for input quantization, you must specify the type of note used as resolution in quantizing:
2) Resolution
The Resolution parameter, selected with the L2 button, offers you a choice between adjustment units of quarter notes, eighths, sixteenths, and thirty secondths. In addition, quantization using triplets of these note values is also available; in this case "3" is indicated behind the respective note symbol. Please refer to "Style Maker" in the section "Quantize" for further information concerning the quantization procedure.
(20) Sequencer
3. Setup Effect (R1)
The page for assigning effects is an extension of the Mixer page. Here you can determine for each track the way in which the effects are applied to the respective sequencer track.
E+R specifies both effect types for the track: the sound effect for the respective track and the reverb effect. Reverb Low (R: Lo) and Reverb High (R: Hi) use reverb exclusively.
The respective reverb intensity corresponds to the settings made for Low Depth and High Depth on the Reverb page. Use the buttons L1 and R1 to move the mark through the upper line (Track 1-8), and the buttons L2 and R2 to move it through the lower line (Track 9-16). You can change the effect assignment using the dial or the "+" or "-" buttons.
E. Edit (L2)
In the Edit function you can choose between the two working areas Bar Edit (L1) and Event Edit (R1). Bar Edit allows the entire sequence to be edited according to musical criteria, such as song and track editing, changing notes, mixing, erasing, copying, and quantizing. Event Edit is related to the subject of MIDI events. Here you can edit each recorded event individually. MIDI events can be note changes, program changes, tempo data, or controller data; editing these events can include erasing, inserting (generating), or changing these data.

1. Bar Edit
On the display page Bar Edit you select the desired function with the corresponding L and R buttons: L1 and L2 are used to move the mark in the left column, R1 and R2 are used to move the mark in the right column. The Execute function (F6) activates the editing mode and opens a further display page on which you define the exact working area and the type of change. When you press Execute (F 6) again, the actual editing of the sequence takes place. After the operation has been completed, the Undo box appears above F5.
If you want to undo the last operation, you can now return to the previous version. Please note that the memory in which the old version is stored contains only the last step of the previous operation. If you make more than one change, only the previous version of the currently changed item is buffered.
20 Sequencer
The following operations are available in Bar Edit:
1) Delete: deleting data (cut and paste)
The first specification applies to the range. Using the dial or the "+" or "-" buttons you can delete each of the 16 tracks (Trk01 through Trk16), the tempo track (TEMPO), the accompaniment (CHORD), the pattern (PTN), or the entire sequence (ALL). To define the range to be deleted use R1 to move the mark to the position in the bar that will be the beginning of the deleted section, then define the second value for the end of the section. If a track is empty, the range of bars cannot be set. The Delete function cuts out the defined section and pulls the rest of the track's contents to the position of the cut.

Hint: You can also use the Delete function to shift the contents of tracks. For example, by deleting bars 001 through 003 in order to shift the phrase of bar 4 to position 001.
2) Insert: inserting data
This function allows you to insert empty bars or, as in deleting, to shift sections of a track. You can also use this function to choose between tracks 1 through 16, Tempo, Chord, Pattern, and ALL. After you have made your selection, move the mark (using R1) to the beginning (the position at which the insertion of empty bars is to begin) and carry out the setting with the dial. The next item concerns the end position of the inserted bars.
3) Bar Insert: inserting bar by bar
In Length you specify the number of bars to be inserted. Use L1 and L2 to move the mark to the desired track (Tracks 1 through 16, Tempo, Chord, Pattern, or ALL) and select the item. The
indication Bar/Measure (B/M=4/4) informs you of the current time signature.
4) Erase: erasing data (preserving the remaining contents of the track)
As in the Delete function, the beginning and end positions of the range to be erased must be defined. Using the dial or the "+" or "-" buttons, you can erase each of the 16 tracks (Trko1 through Trk16), the tempo track (TEMPO), the accompaniment (CHORD), the pattern (PTN), or the entire sequence (ALL). In contrast to Delete, the remaining track's contents are not shifted to the position of the erased section, but the erased range remains empty.
5) Mix
This function is used to combine the contents of two tracks by specifying "from" (source track) and "to" (target track). The mixed data are stored together on the target track. In this way you can, for example, record drums and percussion tracks separately and mix them afterwards.
During mixing please pay attention to matching the instrumental voices of the channel. If necessary, change the channel of the target track or select a target track which ensures matching with the added instrumental voice.
6) Copy
In copying tracks or sections of tracks "from" denotes the source and "to" the target where the combined contents are to be stored. Specify the desired bar position for the source track (from) by moving the mark to the right with R1 or to the left with L1.
20 Sequencer
7) Quantize
The Quantize function is used to change the quantization of the recorded track.
The quantization adjusts the timing of rhythmically imprecise notes to their adjacent ("straight") count based on the selected adjustment unit. The type of quantization you choose determines the type of adjustment unit used to round off the notes. If you have already recorded your sequence with a specified quantization (please refer to the section "Input Quantize" below), you can edit it again using this function. In item "at" (position) you can select the track and the range of bars. By specifying the note range you can quantize individual events. The specification C1 - C1 for example would affect only the bass drum of a drums track while leaving the other instruments unquantized. The next setting, "width" (resolution) applies to the adjustment unit used for quantization. The following options are available:
- 4 Corresponds to the coarsest unit, in which all notes are shifted to the nearest quarter note.
- 6 Adjusts the note spacing within a bar to a quantization in 1/6ths and corresponds to an extended quantization in triplets.
- 8 The notes are shifted to the nearest eighth note.
- 12 Corresponds to a quantization in 1/12ths or a resolution of quarter-note triplets.
- 16 The adjustment unit is the sixteenth note.
- 24 Corresponds to a quantization in 1/24ths or a resolution of eighth-note triplets.
- 32 Resolution of 1/32ths
-
48 Resolution of 1/48ths or sixteenth-note triplets
-
64 1/64ths
-
96 This is the adjustment unit with the highest resolution (1/96ths); this quantization comes closest to the recorded original (real time mode).
The Range parameter provides you with a function for determining the step width, in which you can specify the sensitivity of the quantization unit. The two range values can be compared with a sort of detection radius around the specified width value: each imprecisely timed note falling into the range before or behind the next possible adjustment unit (into the left or right range of the value) is detected by the quantization. Notes outside of these two zones are ignored in the quantizing process and remain on their "real time positions". The steps available in the Range parameter correspond to the specified quantization resolution. Please note that in addition to the sign (+ or -), the width of the left and right positions can be input independently. In practical application it is advantageous for obtaining optimal quantization results to set the Range values as widely as possible, since in this way all notes are detected. For quantizing rhythmically complex tracks a narrower detection radius is suitable, both to retain the vitality of the performance and to obtain an accurate beat.
8) Velocity Modify
You can use this parameter to change the velocity used during the recording afterwards.
20 Sequencer
The parameter Velocity comprises 128 steps in accordance with the MIDI specifications. Therefore you can decrease the velocity in the negative range by the specified value or increase it in the positive range by the corresponding amount. This setting causes changes both in the volume and in the timbre of the corresponding instrumental voice. Select the track and the range of bars on the line "at" (L1/R1) and input the value under "modify" (L2).
9) Gate Time Modify
Gate Time is the specified note length in the recorded sequence. Input the track and the range of bars for editing as usual on the line "at". The parameter Modify allows you to make changes in the lengths of the recorded notes in the form of percentages. Any change made applies to all notes and makes it possible to shorten or extend the lengths by the specified percentage. 100% means that there is no change to the note length; values of less than 100% shorten the notes, values of more than 100% lengthen them.

Hint: if you intend to unify the note lengths of a track, you can use the Gate Time changes in several stages: first you shorten all note lengths to the minimal value (10% - if widely differing note lengths occur, you may have to press Execute several times). Then you lengthen the entire track again with a new Gate Time. In this way you obtain identical lengths for all notes of the track. It may be necessary to repeat the lengthening procedure several times, since the maximum lengthening by 30% does not lead to a significant change for notes that have been shortened to the minimum.
10) Clock Move
Each of the 16 tracks can be delayed or advanced separately in order to achieve an exact timing in the case of sounds with widely differing responses or in order to compensate for differences in the responses of different devices in synchronized operation. Select the track to be shifted with L1 and then specify the amount of the shift with L2. The minus sign means that the track is advanced, the plus sign means that all notes are delayed.
11) Groove Quantize
The subject of Groove has already been mentioned in the section "Advanced Style Edit". Groove provides 10 preset quantization patterns whose effects have been explained in that section. Generally speaking, the term "Groove" can be thought of as a type of interpretation that lies between a "straight" and a "swinging" phrasing of the rhythm. On the upper line you select the track and the range of bars. The parameter "strength" lets you specify the intensity. Use the buttons L1 and R1 for selecting the parameters for the upper display line, and L2/R2 for the lower line.
12) Open ACC
To be able to edit the ACC track using Event Edit it is necessary to convert the pure control data of the track in actual notes and other MIDI data. With Open ACC the data of the ACC track are converted and transferred to tracks 4 through 11, after which they are available for further editing.
To make the musical sequence data of the style tracks availablein the form of note events after a recording, it is not necessaryto record them at the same time as the other data, because they
20 Sequencer
can be converted afterwards. You can reserve in advance the sequencer tracks required for this subsequent operation for all ACC tracks. Use the ACC Reserve function in the Sequencer Setup as preparation.
The Reserve setting is not a necessary requirement for converting the accompaniment events into track data. It merely serves to make it impossible to use tracks 4 through 11 for recording. If you exclude these tracks in advance from the track selection, the accompaniment data can be transferred to them without problems. If you have already used these tracks, you should copy their contents to other, empty tracks. If the conversion function (Open ACC) encounters a recorded track, its contents are overwritten with the data of the accompaniment track.
2. Event Edit
On the Event Edit page you can edit the MIDI events of the recorded tracks.
Use the button L1 to select the track to be edited from tracks 1 through 16, Tempo, Chord, and Pattern.
With L2 you can search for the desired position. Indications appear for Bar, Beat, Clock, Event, and Value. The lines below those indications provide you with an overview of the current contents of the track, where the uppermost line (with
Use the dial to move through the events; you can scroll forwards and backwards.
The F buttons are used for editing these items, L2 and R2 are used to move the mark through the setting values.
Delete (F1) deletes the current event.
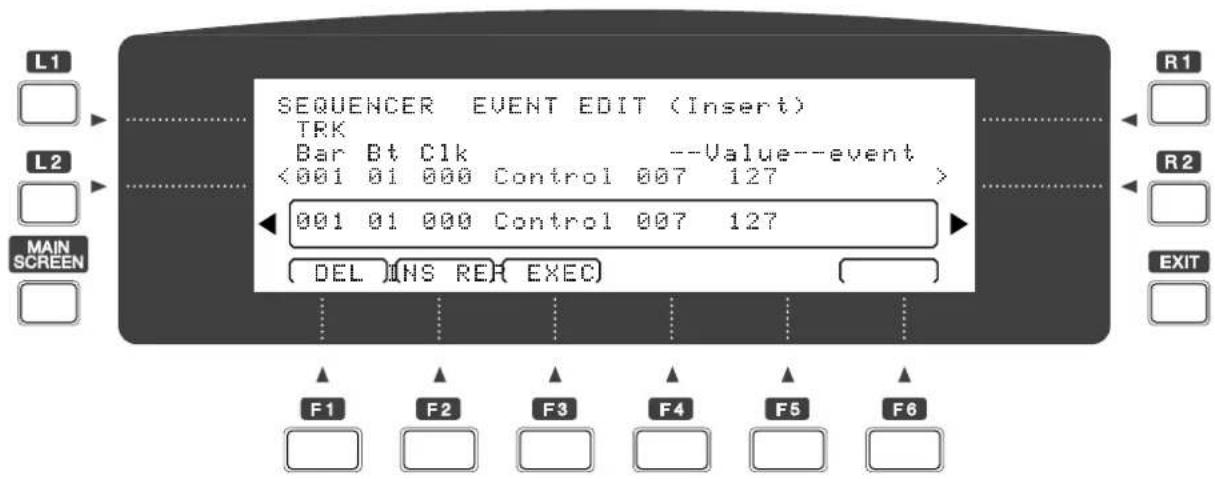
Insert (F2) makes it possible to insert any event in the current position. A frame opens in which you can specify the bar position again with the first three values: bar, quarter note, and 1/96th position. The next box allows you to specify the type of event to be inserted.
The following events are possible:
NT = Note
This requires specification of three additional settings: the first value specifies the note (C2 through G8), the next one the velocity (0 - 127), the one on the right side indicates the note length. Each quarter-note is divided into 96 parts. The value 0096 corresponds to a quarter note; accordingly, the length 0048 designates an eighth note, and you would input 0192 to specify a half note. If you keep the F4 button (x100) pressed at the same time, the values are changed in units of 100 to speed up the setting procedure.
KeyPres = Pressure per note or polyphonic aftertouch This requires specification of two additional events: the first value specifies the note, the second one the intensity.
20 Sequencer
Control = MIDI Controller
Any controller according to MIDI specifications. This requires specification of the controller number for the value on the left and a specification of the controller value for the value on the right.
Program = Program Change number
Values between o and 127 can be specified for changing sounds.
ChPres = Channel Pressure or monophonic aftertouch
Only a specification of the intensity is required for Channel Pressure.
Bender = Pitch Wheel event
The value for the center position is ooooo. Negative values mean that the pitch is lowered, positive values that the pitch is raised.
Replace (F3) applies to the currently displayed value and allows the value to be changed. The procedure is the same as for Insert.

Hint: You can also use the Replace function for shifting events.
The sequencer in practice

A. Quick recording start
The conventional recording process using the sequencer can be activated immediately; in this case all tracks are recorded one after the other. Below we will mention several specifications to be taken into consideration when recording with automatic accompaniment, but first we will discuss the "spontaneous" recording method.
After the Z1000 is turned on, the sequencer can be used immediately, for example for quick recording of a musical idea. For the current sound settings the first three tracks are activated (Record F1) for Right 1, Right 2, and Left, as soon as the recording function is selected. The recording mode itself works with a synchronized start: the recording begins as soon as you play the first note on the keyboard. In this case you start the recording directly, i.e. without using a countdown.
1. Automatic recording start
Press the Sequencer button followed by the Record button and begin to play.
2. Manual recording start
The synchronized recording start may be unsuitable for songs that begin with an upbeat. In addition, sequencer recordings using the countdown function to gain an orientation of the recording tempo can quickly become a habit. If you therefore prefer to start the recording without synchronization, press the Play button (F3) to start the recording and begin playing the notes of the melody voice at a later count. (Of course, the Record function must be activated!) Press F2 to stop the recording.

The sequencer in practice
3. Playback of the recording
By pressing F3 you can play back the recorded sequence. If you interrupt the playback and then press Play again, playback of the sequence continues from the current position.
If you want to continue from a certain position, you can use Rewind (F4) and Forward (F5) to move through the recorded sequence. Reset (F6) resets the sequence to the beginning.
4. Additional recording tracks
If you press Record (F1) again, the Track page of the display now opens to provide you with an overview of the current status of the sequence and to allow additional settings to be made. You will notice that the first three tracks are now assigned the status "recorded" and show the symbol ▶. If during the recording only one of the sound components (for example Right 1) was activated, sequencer data are present only on the corresponding track (track 1 in the example).
On the display page Track you can now make settings for another recording on each track. Use the buttons L1 and R1 to move through tracks 1 through 9, and the buttons L2 and R2 to select the tracks on the lower line (10 through 16, Accompaniment, and Tempo). The settings are made using the dial or the buttons "+" and "-".
The possible settings are:
✗ (muting the track during playback),
▶ ( playback mode), and
- (recording mode).
The symbol ■ indicates an unrecorded track. If you want to activate a free track for another recording, move the mark to the desired track and use the dial to select ● for recording.
The sequencer in practice
To select a different sound for this track you leave the Track page with Exit and press any button in Sound Selection. If you now operate the dial you will notice that the sounds for Right 1 are being scrolled. The sound specified for Right 1 is now assigned to the track ready for recording. Reset the sequence to the beginning (F6 Reset) and start the recording by playing the first note on the keyboard.
Repeat this procedure for other tracks as desired.

Hint: in order to re-record a track it is not necessary to erase it first using Bar Edit. Instead, you simply activate the recording mode for the track to be overwritten and start a new recording.
5. Merge mode during recording
If you intend to record several times on a track, for example in order to overdub drums and percussion instruments successively, it is recommended that you select a recording mode in which the previously existing notes (or events) are not overwritten, but are combined on the track with the newly recorded data. After turning on the Z1000 the default setting for the sequencer's recording mode is "Erase". Proceed as follows to change the recording mode:
- Select Setup (R2 on the sequencer's main page).
- Select Rec Mode (L1 button).
- Set Mode= to "Merge".
- Press the Exit button twice to return to the sequencer's main page.
21) The sequencer in practice
B. Recording with accompaniment
During a recording with automatic accompaniment the operation of the style functions is recorded first: Start/Stop, Intro/Ending, switching the style variation, and calling up fill-ins.
1. Preparing the tracks
Make the following preparations for a recording with automatic accompaniment:
- Select a style by pressing any key in Style Selection and using the dial to select the desired style.
- Open the Track page.
- Operate the Record function (F 1). The sound tracks 1 through 3 are activated for recording. In addition, set ACC and TMP to the recording mode.
- Activate the Auto mode for the accompaniment (the LED lights up).


- Specify a synchronized start for the accompaniment (by pressing the SYNC button), then start the accompaniment and the recording at the same time.
If required, you can start the recording with an introduction—in this case you would also press the Intro/Ending button before playing the first note on the keyboard (i.e. prior to the actual start of the recording). If you prefer to have the rhythm begin later, you would start the recording with Play (F3) without pressing the Sync button first. The accompaniment can be separated, started or ended at any time (even during the recording). The switches used for these operations are recorded on the ACC track. In unsynchronized operation, however, you should ensure an accurate start of the accompaniment.
The sequencer in practice

2. Transferring MIDI events
The conversion of the event data of the style is called up using the Edit function (L2). In Bar Edit (L1) select the option Open ACC. Confirm the operation with Execute (F6). To make doubly sure, the display informs you again of the impending overwriting of tracks 4 through 11 ("Open accompaniment data onto TRK 04 - TRK 11"), which you confirm again by pressing Execute (F6). After successful conversion the message "Execute" disappears, and you can return to the sequencer's main page by pressing the Exit button three times. If you now look at the display's Track page, you will see that tracks 4 through 11 are recorded with the transferred accompaniment data and show the symbol ▶.
3. Saving
A volatile memory is available for recording with the sequencer; the recorded sequencer song must be saved to floppy disk before the power of the Z1000 is turned off; otherwise the data are lost. You will be reminded of this fact, however, before you exit the sequencer. In fact, for safety's sake we recommended saving the recorded material immediately after exiting from the sequencer, so that you don't have to remind yourself of the current status of data management each time you terminate a session at the Z1000.
Press the Disk button to save the data. Two formats are available for saving your song: Song (recommended, this is the Z1000's sequencer song format) and SMF (Standard MIDI File for conversion).
C. Track assignment/track management
At the start of the first recording of a sequencer session the first three tracks are automatically activated. To ensure the most convenient recording procedure, this default setting takes into consideration the most complex assignment for the melody voice, namely the activation of all three components: Right 1 for track 1, Right 2 for track 2, and Left for track 3.
If, as is usually the case, the track has been recorded exclusively with Right 1, the first recording indicates track 2 and track 3 as "recorded", even though they remained empty during the recording.
Regarding the recording procedure you should keep in mind, therefore, that in the case described above a new recording can be immediately made on tracks 2 and 3. If you want to prevent tracks 2 and 3 from running concurrently with the recording on track 1, you can deactivate the Rec. function for these tracks in the Track window.
The uniform method of assigning the symbol > to a track which was activated during the recording but does not contain any MIDI events may confuse you at first when checking the actual contents of the tracks. This method, however, offers a practical advantage during the editing of tracks: since it is not possible to edit an unused track, a track can be provided "pro forma" with contents in this way, thus preparing it for subsequent edit operations.
If, for example, you intend to edit a track by manually inserting notes or other MIDI events, you prepare this track by activating it for recording and then briefly starting the recording.
System/MIDI (22)
System/MIDI
The System/MIDI button allows you create settings related to the general operation of the Z1000, the channel assignments and the transmit and receive filters for MIDI data.
These settings are automatically saved when exiting the menus. For a brief moment the message "WAIT..." appears. After calling up the System/MIDI functions you can access the desired function by pressing the corresponding L or R buttons.
A. System (L1)
The buttons L1 and L2 are used to move the cursor through the individual menu items. To create the setting please use the Tempo/Value dial or the "+" and "-" buttons.
1. Setting 1
1) System Tune
This parameter is used to adjust the overall pitch of the Z1000. You can raise or lower the pitch in 63 half-tone steps.
22 System / MIDI
2) Program Mode
You can specify here whether the Z1000 works in its own mode or according to the General MIDI specifications. This setting pertains primarily to the program changes of the 128 defined sounds and of the standard drum kit. The setting GM is effective only for the defined instruments in order to ensure compatibility with other formats or tone generators. When you transmit, receive or store in the GM mode, the data are "understood" across systems.
By specifying the Z1000D mode the number of possible program changes and the use of the sounds is expanded by the memory locations of the User section, by the other 10 drum kits and by the Bank Alternate Sounds. Program changes stored or transmitted in this mode are interpreted differently by the MIDI units of other manufacturers, so that compatibility is not assured.
3) Effect
Here you can specify whether the effect assignments for styles and sounds are to match the settings that were stored for them (Preset) or whether the combination called up works with the effects currently set (Panel).
4) Velocity Curve
With 2 curve types and the OFF switch you define the sensitivity of the Z1000's keyboard response by the force with which you strike the keys. OFF switches the velocity off; while the highest level is obtained regardless of the force with which the keys are struck.
Curve 1 is the normal setting and offers a linear curve with full dynamic range.
Curve 2 is exponentially compressed, so that a pianissimo can
extend to a value of o and the fortissimo value matches the maximum of the other settings.
5) Wheel Function
You can assign different control functions to the modulation wheel. The normal setting is Modulation and assigns an LFO pitch modulation (vibrato) to the wheel. Volume lets you use the modulation wheel as a volume control for the melody voice. Panpot assigns the movement of the melody voice through the stereo panorama (left/right) to the wheel. Expression can be used to assign the function of an expression pedal to the wheel when no expression pedal is connected to the Z1000. Reverb Depth allows you to control the reverb intensity using the wheel. This function applies to the global reverb effect located in the main menu next to the mixer functions. Chorus Depth lets you control the intensity of the individual chorus effect.
2. Setting 2
Next/Back
The F6 button opens another display page on which the system settings are continued. You can return to the first Setting menu by using either the F5 button (Back) or Exit.
1) Liquid Crystal Display Contrast
You can adjust the display contrast here to your viewing angle; 20 steps are available.
2) Pedal Assignment
The settings made here pertain to a connected foot switch (Foot Pedal input). The normal setting assigns the hold function to the pedal, which accounts for the common designation "sustain pedal".
If you change this assignment you can use the pedal for controlling the style functions, such as for calling up fill-ins, starting and stopping the accompaniment, beginning a performance with an intro or closing it with an ending, and specifying the synchro-start of the rhythm.
The function Registration Increment (increasing the registration numbers) is used to specify moves through the different registrations; using the pedal lets you call up the registrations in a chained sequence with your foot.
The setting Rotary slow/fast lets you assign the switching between slow and fast Leslie effect to the foot switch.
3) Pedal Polarity
The settings Normal and Reverse (reverse polarity) can be used to switch the characteristics of the connected foot switch. Some manufacturers use different connections for the phase and neutral lines of the switch. This function enables you to connect the pedals of other manufacturers to the Z1000 and to set them to the correct operating mode by a simple reversal of their polarity.
4) Clock
The Clock function allows you to change the timing used for the Z1000's MIDI synchronization. The normal setting, Internal, specifies that the Z1000's internal clock is used for controlling the timing of sequencer or styles. The Z1000 operates in the control or master mode and indicates the clock speed. If it is necessary to match the Z1000 as the receiving (or slave unit) to an external
timing pulse, such as for synchronized reception of sequences, please select the External mode.
5) Bender Range
Using the pitch bend wheel, you can specify how many half-tone steps may be varied. The maximum control range is one octave, while the most convenient value is usually considered to be the interval of a major second (2 half-tones, setting "2").
B. MIDI (L2)
From the System/MIDI function you reach the display page for the MIDI settings by pressing the L2 button. The functions are divided among 3 pages. Using the buttons F6 (next) and F5 (back) you can move back and forth between the pages. The Exit button returns you to the display page System/MIDI. All settings made here apply both to transmitting (send) and receiving (receive) MIDI data.
1. Setting 1
On the first page you can change the assignments of the MIDI channels to the sounds and styles.
In the default setting the 3 components, or zones of the melody voice are assigned to the first 3 MIDI channels as follows:
Channel 1 is assigned to Right 1,
Channel 2 to Right 2,
Channel 3 to Left.
The GM standard assigns channel 10 to the drums; MIDI channel 11 is preset for your work with a second drum kit.
In a preset state the tracks of the styles are numbered in the following sequence:
Bass on channel 4,
Acc. 1 main on channel 5,
Channel 6 is reserved for the coupled track Acc. 1 sub.
The assignments of the other tracks of the accompaniment continue analogously:
Acc. 2 on channel 7,
Acc. 3 on channel 8,
Acc. 4 on channel 9.
When you change the channel assignments be sure to avoid a doubling of channel numbers, since in such a case 2 tracks would access the same sound.
2. Setting 2
NEXT
On the next MIDI page you can activate (on) or deactivate (off) the reception and transmission of data for the internal tracks. The track assignments are the same for the 3 melody components and the 8 style channels.
3. Setting 3
NEXT
On the last display page you activate (or deactivate) the transmission and reception of program change data and of the MIDI controllers which the Z1000 can transmit to external units.
The setting "off" is used to filter out the respective data type, the setting "on" allows for transmission.
As a result of the assignment options for hand wheels and pedals, the data type generated during reception and transmission is the effective factor here, not the controller, i.e. lever, pedal or wheel used to generate the data.
When information for a volume change (Volume) is transmitted or received, the effect of these events is the same regardless of whether the data were generated with a slider control, a wheel or a pedal. The filter of page 3 therefore applies to the transmitted controller number, which identifies the respective events. For this reason, we distinguish between only 2 data types:
- Switches, which consist of few data (On and Off or program number) and which hold information and program changes are associated,
- Continuous controllers, which register continuous changes in the position of a control. These include the data of the expression pedal, modulation and pitch bender movements.
The data that can be filtered here are listed according to the controller numbers in the MIDI definition and according to the hardware with which they are mainly generated:
| Name | Event | Hardware | |
| Program change: Program Program buttons/foot switch | |||
| Modulation: | 1 | Modulation | wheel |
| Volume: 7 | Pedal (expression type) | ||
| Panpot: | 10 | Continuous control (variable) | |
| Expression: | 11 | Continuous control (variable) | |
| Hold: | 64 | Sustain ON/OFF pedal (switch type) | |
| Bender: | Pitchwheel | Pitch Bend wheel | |
Floppy Disk Operations 3

The Disk button takes you into the display page where you can make settings related to floppy-disk operations (Disk Command). The topic Quick Play has been dealt with in "Floppy Disk Operations 1", the Style Convert function in chapter 2 of the floppy disk operations. Here the four basic functions will be described, in which respect the floppy-disk drive of the Z1000 is hardly different from that of a computer: Load, Save, Delete, and Format. Each function is accessed using the corresponding L and R button.
A. Format (R2)
Since the other three functions are related to working with the same type of data, the formatting process is something of an exception: this operation consists of a single process: it serves to prepare a standard 3.5" floppy disk for the data format of the Z1000, so that its different file types files can be saved there and recognized later. If your floppy disks are already formatted in the DOS format, new formatting is not necessary because the disk format of the Z1000 corresponds to the DOS format.
You can choose to format a disk as double-sided with double density (2 DD). This yields a storage capacity of 720 KB. You can also prepare disks in the double-sided format with high density (2 HD). In this case a storage capacity of 1.44 MB is obtained. Please check the required format on the disk's label and select the corresponding density with the L1 or L2 button. Use the F6 button (Execute) to confirm the formatting process.
Floppy Disk Operations 3


Caution!
If you are working with disks already containing data, make sure that the previous data are no longer required before formatting the disk in question, since all existing data will be erased during the process! After formatting has been completed, the Execute message displayed during the process disappears.
B. Load (L1)
Use the L1 button to access the Load operation. You can select the desired file type with the buttons L1 and L2. After pressing F6 (Load), the disk drive starts searching for the files present on the disk and lists the found names of the file type. To load a song, select it with the buttons L1 and L2, then confirm with F6 (Execute).
C. Save (L2)
To save a file (L1 button of the page Disk Command) you select the file type as usual with the buttons L1 and L2, then confirm with F6 (Execute). Use the buttons L2 and R2 to move the cursor through the letters in order to input the name under which the file is to be saved. In the case of saving a User style the additional input of the number of a memory location is necessary.

Floppy Disk Operations 3
D. Delete (R1)
The Delete function is designed to help you make room on your floppy disks. You can use it to delete data of certain types so that the freed space is available for saving new data. Select the data type as usual with the buttons L1 and L2, then confirm with F6 (Execute). The contents of the disk will be shown on the display. Move the cursor to the file to be deleted and confirm with F6 (Execute).
E. File types
As you can see from the lists of each individual function, the Z1000 generates a maximum of 8 file types, which you can deal with individually or in conjunction with the floppy disk. Identical procedures are used for the commands Load, Save, and Delete. To load or delete a song make a selection from the list using the buttons L1 and L2. For this reason we will again list the features of the possible file types below:
1. Song
The Song format saves the contents of the sequencer memory in the Z1000 format or loads a song into the working memory of the sequencer.
2. Conductor
This file format is used for settings made in Easy and Advanced Style Edit. All 120 Easy Conductor styles and all 40 Advanced Conductor styles are saved/loaded together as a single file.
Floppy Disk Operations 3

3. Style
User styles are saved and loaded individually. The saving of User styles does not only apply to styles you have created yourself, but should also be performed when data have been converted with the Style Converter for use with the Z1000. In saving converted styles please keep in mind that it is advantageous to adjust the balance of the volumes of the individual tracks and to assign effects to the tracks.
4. Registration
The 50 registrations are saved and loaded as a single file.
5. Sound
This format can be used to save all 10 User sounds to floppy disk and to later load them from disk.
6. SMF
The Standard MIDI File format applies exclusively to the sequencer. The Z1000 is capable of loading the formats 0+1 and saves in the format 0. The SMF format ensures system-independent compatibility of the sequence. A prerequisite for compatibility with the instrument sounds of other GM devices is the use of the first sound bank and of the drum set Standard 1.
7. Q-80
The Q-80 format allows you to load songs of the hardware sequencer KAWAI Q-80 into the sequencer of the Z1000.
8. All
To save or load all data that can be stored in the Z1000 please use the All function by pressing the R1 button.

System updates
A. System data management
The operating system is stored in a memory capable of being overwritten in order to allow updates of the system software by using a floppy disk.
B. Data backup
In rare cases voltage fluctuations may cause problems during some loading or saving processes.
It is recommended to make regular backups on floppy disks each time you update important User files.
C. Loading the system software
If the message "User data may be broken. Shut down the power and install the system software" appears, you need to install the system software, using the System Disk that comes with the Z1000.
Turn off the power of the Z1000. Insert the System Disk into the floppy-disk drive and keep the Style Selection button "Pops" depressed while you turn on the power again. The following messages appear in the display after the Z1000 is turned on: "Find System", soon followed by "Loading System". While the system software is being loaded, the dotted line indicates the progress of the loading process. Please wait until the loading process is finished. When the system has been loaded completely and is ready for operation, the main screen appears in the display.
If the message "File In? Err o8h" appears, this means that the inserted disk does not contain a suitable or intact operating system. In this case please exchange the disk with the correct one.
Table of Contents
25
- Kawai Z1000 Introduction....4
- Important Safety Precautions .... 5
A. General....6
B. Repairs 7
C. Power Supply....8
D. Cleaning....9
- Parts and names ..... 10
Front Panel....10
Rear Panel....12
Accessories....12
- Basic Operations ..... 14
A. The Display/Multi-Function Monitor Screen ..... 14
B. Input 15
- Demos .... 16
A. Song Demo .... 17
B. Concert Magic....17
- The First Steps ..... 18
A. Selecting a Sound ..... 18
B. Selecting a Style....18
C. Quick Select (last used preset) ..... 19
- Using Styles....19
A. Getting Started Quickly .... 19
B. Intro Start 21
C. Structure of the Styles 21
D. Style Selection 22
E. Control 24
F. Auto Mode....27
G. Memory 29
25) Table of Contents
H. Right Mode 29
I. Fill-In Mode 29
J. Split....30
K. One-Two Play 32
8. Conductor (Part 1)....33
9.Concert Magic. 37
A. Concert Magic Performance 37
B. Basic Operation 37
C. Playing Mode....38
D. Playing a Song From a Concert Magic Disk .... 39
10. Sounds in Practice....41
A. Assigning Sounds/Sound Effects to Keyboard Zones. 41
B. Performance Modes of Sounds .... 44
C. Dual Sound .... 44
11. Performance Effects. 45
12. Mixer 46
A. Sound Mixer (F3) 46
B. Style Mixer (F2) 48
13. Effect Settings....49
A. Presets 49
B. Global Effects .... 50
C. Reverb 51
D. Effect/Equalizer 53
E. EFX R1/2L Settings (R1) 55
F. EFX Style Setting (R2)....55
G. Effect Setting (individual effects). 56
14. Effect Assignment....60
A. Sound Effect 60
B. Style Effect 62
15. Quick Play (Floppy Disk Operations 1) ..... 64
Table of Contents
25
16. Registration....66
A. Recalling 66
B. Storing 67
17. Conductor (Part 2)....68
A. Groove (L1)....69
B. Pan/Volume 70
C. Effect....70
D. Program....70
E. Write (F1) 72
F. Style Make ....72
- Settings 72
- Recording....73
- Starting the Recording....82
- Erase (F1) 82
18. Style Convert (Floppy Disk Operations 2) ..... 83
19. Sound Edit ....84
A. CutOff....85
B. Attack....86
C. Decay 86
D. Release....87
E. Write 87
20. Sequencer 88
A. Recording functions 89
B. Track (L1) 90
C. Mixer (R1) 90
D. Setup (R2) 91
- Setup Record Mode (L1) 91
- Setup Input Quantize (L2) 93
- Setup Effect (R1) 94
25) Table of Contents
E. Edit (L2) 94
- Bar Edit 95
- Event Edit ....102
21. The sequencer in practice ..... 105
A. Quick recording start ..... 105
- Automatic recording start ..... 105
- Manual recording start ..... 105
- Playback of the recording ..... 106
- Additional recording tracks ..... 106
- Merge mode during recording ..... 107
B. Recording with accompaniment ..... 108
- Preparing the tracks ..... 108
- Transferring MIDI events ..... 109
- Saving 109
C. Track assignment/track management.....110
22. System/MIDI 111
A. System (L1) 111
- Setting 1....111
- Setting 2....113
B. MIDI (L2)....115
- Setting 1....115
- Setting 2....116
- Setting 3....116
23. Floppy Disk Operations 3 ..... 118
A. Format (R2) 118
B. Load (L1) 119
C. Save (L2) 119
D. Delete (R1) 120
E. File types ..... 120
Table of Contents

24. System updates....122
A. System data management ..... 122
B. Data backup .... 122
C. Loading the system software ..... 122
25. Table of Contents.....123
26. Index 128
27. Appendix ..... 131
A. Chord Form Chart .... 131
B. Concert Magig Song List .... 134
C. Style List (Intros & Endings)....136
D. Specifications .... 138
E. MIDI Implementation Chart .... 139
26 Index
3D Effect 51; 53; 54
A
Accompaniment 21; 22; 33; 47; 48; 58; 62; 75; 78; 80; 91; 93; 115
Acceleration 58
Alternate 43; 71; 112
Amount - Effect Amount 56; 57; 59
Auto Mode 20; 24; 26; 27; 29; 30; 39; 42; 56; 61
B
Bar 73; 93; 94; 95; 96
Basic 73; 74; 78
Beat 72; 73
C
Celeste 59
Chorus 57; 59; 113
Coarse 59
Concert Magic 16; 17; 37; 38; 39
Delete 77; 96; 118; 120
Depth 51; 53; 56; 57; 58; 59; 94; 113
Dial 15; 18; 19; 31; 36; 38; 47; 54; 55; 77;
86; 87; 89; 80; 91; 93; 96; 97; 112
Display - LCD 14; 15
Distortion 58; 62
Drum - Drums, Drumkit 21; 22; 24; 27; 29;
33; 34; 48; 62; 71; 74; 78; 79; 82; 73; 112; 115; 121
Dual 58
Duet 45
E
Early Reflections 56
Effect 45; 49; 50; 53; 60; 61; 62; 63; 70;
85; 94; 112
Ending ☐ Intro / Ending
Ensemble 57
Equalizer - EQ 51; 53; 54; 55; 58; 59
Erase 83; 91; 97
Exciter 59
Execute 55; 77; 78; 84; 87; 95; 119; 120
Exit 15; 54; 55; 77; 79; 87; 113; 115
F
Fast 58; 89
Feedback 56; 57; 58; 59
Fill In 23; 24; 74; 77; 78; 113
Fine 59
Fingered 27; 28; 29
Flanger 59
G
GM / General MIDI 22; 43; 65; 71; 87; 112;
115; 121
Groove 69; 70; 101
H
High, Hi 51; 53; 57; 59; 60; 62; 63; 82; 94; 118
High Dump 53
|
Input 77; 93
Intro/Ending 21; 24; 25; 26; 27; 73
L
Layer 29; 41; 44; 51; 62
Left 27; 28; 31; 32
Level 56; 59
Limit 28; 82
Low, Lo 52; 58; 59; 61; 63; 85; 94
M
Main Screen, Main Display 15
Major, Major 7 74
Memory 29
Menu 14; 15
Mid 82
MIDI (Musical Instrument's Digital
Interface) 43; 64; 65; 71; 94; 111; 112; 114; 115; 116; 117; 121
Minor 74
Mixer 21; 45; 47; 48; 51; 60; 62; 68; 70;
88; 90; 94; 113
Mute 34
0
Octave Shift 32
Off 29; 50; 65; 76
One-Two Play 32; 66
P
Pan (Stereo-Panorama) 47; 48; 85; 90; 91
Part 74; 75; 76; 78; 79; 80
Pattern 73
Percussion 71
Program (Program number) 22; 34; 47; 61;
70; 71; 76; 85; 94; 112; 116; 117
Q
Quantize 70; 75; 93; 94; 98; 101
Quickplay 64;118
R
Registration 32; 66; 113; 121
Repeat 65
Reverb 50; 51; 60; 61; 62; 63; 94; 113
Right 1 (R1), Right 2 (R2) 29; 31; 37; 41;
42; 44; 45; 47; 60; 61; 62; 115
ROM 43
Rotary 51; 58; 114
S
Selector 16; 17
Sequencer 88; 105
Slope 56
Slow 58
SMF, Standard MIDI File 64, 65
Song 16; 17; 26; 37; 38; 39; 40; 64; 65; 71; 94; 120
Sound 14; 18; 27; 29; 31; 32; 37; 41; 42;
43; 44; 45; 47; 48; 51; 56; 60; 61; 62; 63;
70; 71; 85; 87; 90; 92; 94; 112; 115; 121
Speed 56; 57; 58; 59
Split 24; 26; 27; 28; 29; 31; 41; 42; 44; 61
Start/Stop 20; 24; 25; 82
26 Index
Style 14; 18; 19; 20; 21; 22; 23; 24; 25; 32; 33; 34; 45; 47; 48; 50; 51; 56; 62; 68; 70; 71; 72; 73; 74; 75; 76; 77; 78; 82; 83; 83; 84; 85; 90; 91; 93; 94; 112; 113; 114; 115; 116; 118; 121 Sustain 45; 113; 117 Swing 69 Sync, Synchronisation 24; 25; 26; 113; 114
T
Tempo 15; 18; 31; 37; 38; 47; 54; 76; 89; 90; 95; 96; 97 Time 52; 53; 58; 59; 100 Transpose 45; 46; 77; 82 Tremolo 57
U
User 23; 43; 55; 72; 75; 78; 79; 83; 87; 111
V
Variation - Style Variation 33; 36 Vol - Volume 47
W
Wave - Waveform 56; 57 Whole Key 28 Width 53 Write 55; 72; 78; 87
A. Chord Form Chart
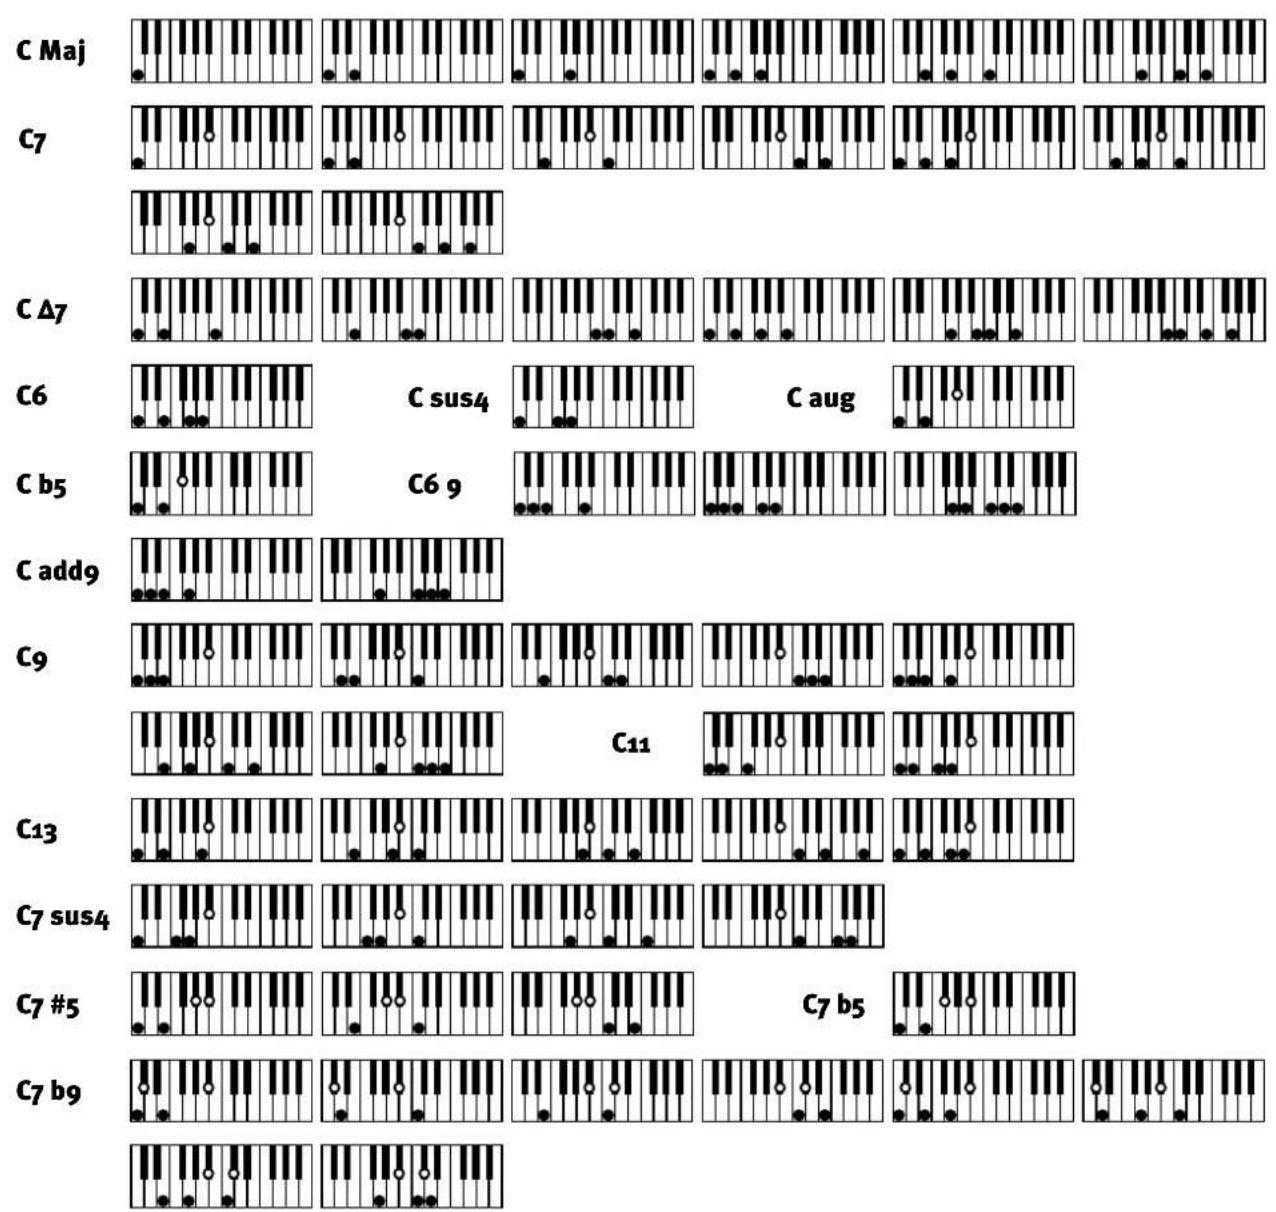
Appendix

Appendix
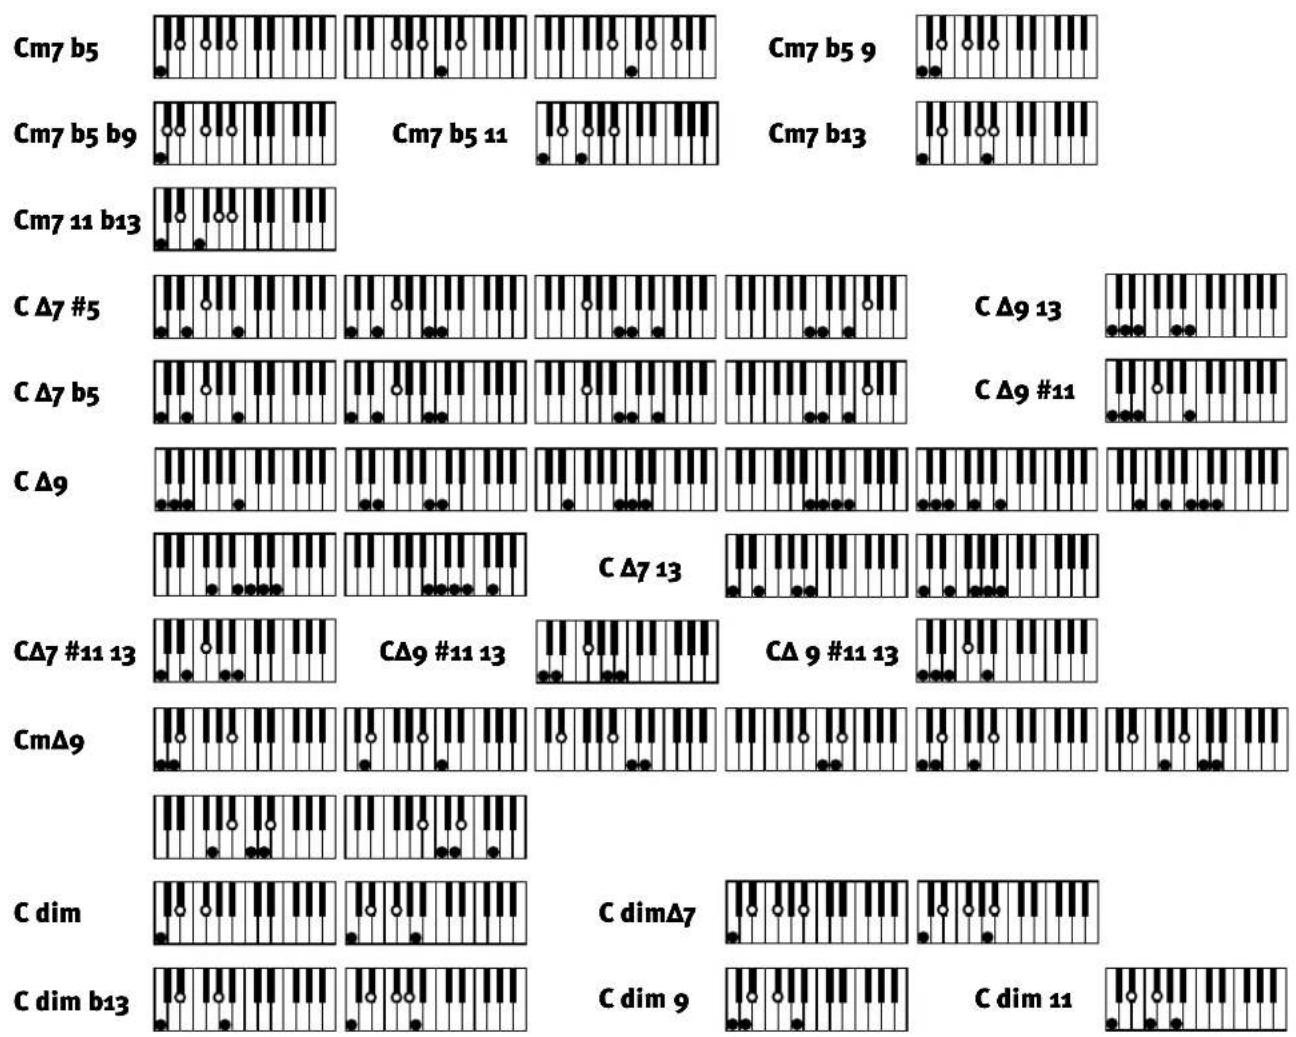
B. Concert Magic Song List
CHILDREN'S SONGS ARRANGEMENT NO.
Brahms' Lullaby .... Skillful 56
Frère Jacques .... Melody Play 25
Hickory Dickory Dock.... Easy Beat 6
Little Brown Jug. . . . . . . . . . . . . . . . . Melody Play 32
London Bridge ..... Melody Play 33
Mary Had A Little Lamb ..... Melody Play 34
Mulberry Bush. . . . . . . . . . . . . . . . . . Melody Play 36
Old MacDonald Had A Farm.....Melody Play 39
Rock A Bye Baby. . . . . . . . . . . . . . . . . . Easy Beat 13
Row, Row, Row Your Boat ..... Melody Play 42
Ten Little Indians. . . . . . . . . . . . Melody Play 45
Twinkle Twinkle Little Star.....Melody Play 47
FOLK SONGS
Campton Races....Skillful 57
Clementine....Skillful 61
Danny Boy.... Easy Beat 2
Dixie....Skillful 62
Down By The Riverside .... Skillful 63
For He's A Jolly Good Fellow . . . . . . . Easy Beat 4
Grandfather's Clock .... Skillful 67
I've Been Working On The Railroad . . . Easy Beat 8
Maple Leaf Rag. .... Skillful 74
My Bonnie Lies Over The Ocean ..... Skillful 76
Oh Susanna .... Skillful 79
Old Kentucky Home....Skillful 81
Red River Valley .... Easy Beat 12
The Entertainer....Skillful 88
Turkey In The Straw....Skillful 92
Wabash Cannonball....Skillful 93
YankeeDoodle. . . . . . . . . . . . . . . . . . . . . . . . . . . . . . . . . . . . . . . . . . . . . . . . . . . . . . . . . . . . . . . . . . . . . Skillful 99
Yellow Roses Of Texas .... Skillful 100
HYMNS AND CHRISTMAS SONGS
Amazing Graze .... Skillful 51
Angels We Have Heard On High. . . . . . . . Skillful 52
Ave Maria .... Skillful 54
ARRANGEMENT NO.
Deck The Halls .... Melody Play 23
First Noël .... Melody Play 24
Hark! The Herald Angels Sing. . . . . Melody Play 28
It Came Upon A Midnight Clear .... Melody Play 30
Jingle Bells .... Melody Play 31
Joy To The World.... Skillful 70
Wedding March, "A Midsummer Night's Dream"
Skillful 96
INTERNATIONAL SONGS
Annie Laurie....Skillful 53
Chiapenecas....Skillful 59
Funiculi Funicula....Skillful 65
Hava Nagilah .... Easy Beat 5
Emperor Waltz .... Skillful 64
Fledermaus .... Easy Beat 3
French Can Can. .... Skillful 58
Grand March, "Aida" .... Skillful 66
Gymnopédie. . . . . . . . . . . . . . . . . . . . . . . . . . . . . . . . . . . . . . . . . . . . . . . . . . . . . . . . . . . . . . . . . . . . . . Skillful 91
Gypsy Chorus, "Carmen"....Skillful 68
Habanera, "Carmen" .... Skillful 69
Largo, "From The New World" .... . . . Skillful 73
Military March....Skillful 75
Norwegian Dance .... Skillful 77
Peter And The Wolf .... Skillful 82
Unfinished Symphony .... Skillful 50
Voice Of Spring .... Easy Beat 15
Waltz Of The Flowers .... Skillful 94
Whistler And His Dog....Skillful 97
Overture, "William Tell" .... Skillful 98
ROMANTIC SONGS
Beautiful Dreamer.... Easy Beat 1
Blue Bells Of Scotland ..... Melody Play 21
Green Sleeves....Melody Play 26
Home Of The Range. . . . . . . . . . . Melody Play 29
Home Sweet Home .... Easy Beat 7
Michael, Row The Boat Ashore. . . . Melody Play 35
Old Folks At Home .... Skillful 80
She Wore A Yellow Ribbon .... Easy Beat 14
C. Style List (Intros & Endings)
| GROUP | STYLE | NAME | INTRO | ENDING | GROUP | STYLE | NAME | INTRO | ENDING |
| POPS | 1 | Pops1 | 4 | 2 | JAZZ | 1 | Fusion1 | 4 4 | |
| 2 | Pops2 | 5 | 5 | 2 | Fusion2 | 5 4 | |||
| 3 | Pops3 | 4 | 2 | 3 | Fusion3 | 5 3 | |||
| 4 | Pops4 | 5 | 5 | 4 | Modern_Jazz1 | 4 4 | |||
| 5 | Pops5 | 5 | 5 | 5 | Modern_Jazz2 | 4 4 | |||
| 6 | Pops6 | 5 | 5 | 6 | Swing1 | 4 4 | |||
| 7 | Pop_Ballad1 | 4 | 3 | 7 | Swing2 | 5 4 | |||
| 8 | Pop_Ballad2 | 4 | 5 | 8 | Big_Band1 | 5 5 | |||
| 9 | Big_Band2 | 4 2 | |||||||
| ROCK | 1 | Soft_Rock1 | 5 | 5 | 10 | Jazz_Waltz1 | 4 5 | ||
| 2 | Soft_Rock2 | 4 | 4 | 11 | Jazz_Waltz2 | 4 4 | |||
| 3 | Hard_Rock1 | 5 | 5 | 12 | Dixieland1 | 4 3 | |||
| 4 | 50's_Rock | 5 | 5 | 13 | Dixieland2 | 5 5 | |||
| 5 | 50's_Rock2 | 5 | 4 | 14 | Latin_Jazz1 | 4 4 | |||
| 6 | 60's_Rock1 | 4 | 5 | 15 | Latin_Jazz2 | 4 4 | |||
| 7 | 60's_Rock2 | 5 | 5 | ||||||
| 8 | Boogie | 4 | 4 | ||||||
| 9 | R&R | 5 | 4 | ||||||
| 10 | BritishRock1 | 5 | 4 | ||||||
| 11 | BritishRock2 | 4 | 4 | ||||||
| 12 | SouthernRock | 4 | 5 | ||||||
| 13 | Rock_Ballad1 | 5 | 5 | ||||||
| 14 | Rock_Ballad2 | 4 | 4 | ||||||
| DANCE | 1 | Acid1 | 4 | 4 | BLUES | 1 | Blues1 | ||
| 2 | Acid2 | 4 | 4 | 2 | Blues2 | ||||
| 3 | Acid3 | 4 | 3 | 3 | Blues3 | ||||
| 4 | Acid4 | 4 | 4 | 4 | Blues4 | ||||
| 5 | House | 4 | 4 | 5 | R&B1 | ||||
| 6 | R&B2 | ||||||||
| 7 | R&B3 | ||||||||
| 1 | Acid1 | 4 | 4 | ||||||
| 2 | Acid2 | 4 | 4 | ||||||
| 3 | Acid3 | 4 | 3 | ||||||
| 4 | Acid4 | 4 | 4 | ||||||
| 5 | House | 4 | 4 | ||||||
| 6 | Disco1 | 3 | 5 | ||||||
| 7 | Disco2 | 2 | 2 | SOUL | 1 | Gospel | |||
| 8 | Rap1 | 4 | 4 | 2 | Motown1 | ||||
| 9 | Rap2 | 5 | 4 | 3 | Motown2 | ||||
| 4 | Soul1 | ||||||||
| 10 | Techno1 | 4 | 4 | 5 | Soul2 | ||||
| 11 | Techno2 | 4 | 4 | 6 | Funk1 | ||||
| 12 | Hiphop | 4 | 5 | 7 | Funk2 | ||||
| STAN-DARD | 1 | Bossanova1 5 4 | WORLD1 | 7 | March1 | 4 4 | |||
| 2 | Bossanova2 5 5 | 8 | March2 4 4 | ||||||
| 3 | Tango1 5 4 | 9 | Jamaican | 1 | 1 | ||||
| 4 | Tango2 4 5 | 10 | Pop_Reggae1 2 1 | ||||||
| 5 | Chacha1 5 4 | 11 | Pop_Reggae2 | 2 1 | |||||
| 6 | Chacha2 5 2 | 12 | Ska | 4 2 | |||||
| 7 | Rhumba 5 3 | ||||||||
| 8 | Vienna_Waltz 5 4 | ||||||||
| 9 | English_Waltz 5 4 | ||||||||
| 10 | Foxtrot | 4 4 | |||||||
| 11 | Slow_Fox | 4 4 | |||||||
| 12 | Jive | 4 4 | |||||||
| 13 | Quick_Step | 4 4 | WORLD2 | 1 | Polonaise | 4 4 | |||
| 14 | Paso_Double 4 4 | 2 | French_Waltz | 4 4 | |||||
| 3 | Flamenco | 4 2 | |||||||
| 4 | Polka | 2 2 | |||||||
| LATIN | 1 | Samba1 | 4 4 | 5 | Irish Folk | 4 4 | |||
| 2 | Samba2 4 4 | 6 | Oriental | 4 3 | |||||
| 3 | Mambo1 4 4 | 7 | Bavarian | 4 4 | |||||
| 4 | Mambo2 | 4 4 | 8 | Sirtaki | 2 2 | ||||
| 5 | Merengue1 | 4 4 | 9 | Italo | 4 4 | ||||
| 6 | Merengue2 | 4 4 | 10 | Schlager 1 | 5 4 | ||||
| 7 | Socca1 | 4 2 | 11 | Schlager 2 | 4 4 | ||||
| 8 | Socca2 | 4 4 | |||||||
| 9 | Salsa1 | 4 4 | |||||||
| 10 | Salsa2 | 4 4 | |||||||
| 11 | Beguine1 | 4 4 | |||||||
| 12 | Beguine2 | 4 4 | |||||||
| COUNTRY | 1 | Traditional1 | 5 5 | ||||||
| 2 | Traditional2 2 5 | ||||||||
| WORLD1 | 1 | Lambada1 | 4 4 | 3 | Traditional3 5 5 | ||||
| 2 | Lambada2 | 4 4 | 4 | Traditional4 5 3 | |||||
| 3 | Bolero1 | 4 4 | 5 | Modern_1 | 2 5 | ||||
| 4 | Bolero2 | 4 3 | 6 | Modern_2 | 5 5 | ||||
| 5 | Hawaiian1 | 4 4 | 7 | Modern_3 | 5 5 | ||||
| 6 | Hawaiian2 | 4 4 | 8 | Modern_4 | 4 5 |
Specifications
| Keyboard | 61 Touch sensitive, Weighted keys |
| Sound | 200 Presets, 10 Drum Kits, General MIDI compatible, 10 User Memory, 16 bit PCM Samples |
| Polyphony | 64 |
| Styles | 120 |
| Conductor | 120 Easy Conductor, 40 Advanced Conductor, 10 User Memory |
| Style Control | Start/Stop, Intro/Ending, Sync., Variation 1-6, Fill-in 1-6 |
| Chord | One-Finger, Fingered, Whole-Keyboard, 64 types |
| Split | 3 Zones (Left, Right 2, Right 1), Variable Split point |
| Registration | 50 User Registrations, 120 One-Two-Play presets |
| Sequencer | 16 Tracks, 40.000 Notes, Accompaniment Track, Tempo Track, Realtime and Step recording, Event Edit, Bar Edit, Groove Design, etc. |
| Style Maker | Bar Length, Sound Assign, Mixer, Groove, Quantize, Copy, Preset Tempo, etc... |
| Style Converter | 7 modules (provided by EMC Software) |
| Sound Edit | ADSR Envelop, Filter |
| Effects | 1 Reverb with 5 Algorhythm, 2 Effect processors (Rotary Speaker, 5 Delays, Auto Pan, Chorus, Flanger, Ensemble, Celeste, Tremolo, Phaser, Exciter, Distortion), Duet, Sustain, 3D |
| Concert Magic | 100 Songs |
| Quick Play | Direct playback of SMF data from floppy disk |
| Disk Drive | Load/Save (Easy Conductor Styles, Advanced Conductor Styles, User Styles, Registrationen, Sequencersongs (SMF 0+1), User Sounds) |
| Display | 240 x 64 Full Dot LCD (Backlit) |
| Output | 2 x 15W |
| Speaker | 2 x 12cm + 2 x 5cm |
| Terminals | Line Out (L/Mono,R), Foot pedal, Expression pedal, MIDI (In/Out/Thru), AC-In |
| Controllers | Pitch Bend Wheel, Modulation Wheel (also assignable) |
MIDI Implementation Chart
Date: July 1996
MODEL: KAWAI DIGITAL KEYBOARD Z1000 Version: 1.1
| Function ... TRANSMITTED RECOGNIZED REMARKS | |||||
| Basic Default 1—16 1—16Channel Changed 1—16 1—16 | |||||
| Default 3 ×Mode Message ×Altered * * * * * * * * * * * * * * * * * * * * * * * * * * * * * * * * * * * * * * * * * * * * * * * * * * * * * * * * * * * * * * * * * * * * * * * * * * * * * * * * * * * * * * * * * * * * * * * * * * * * | |||||
| NoteNumber True Voice | 0—127* * * * * * * | 0—127 | |||
| Velocity Note OnNote Off | ○× 9n V=00 | ○× 8n, 9n V=00 | |||
| After Key'sTouch Ch's × | ×○ | × | |||
| Pitch Bend | ○ | ○ | |||
| Control Change | 0, 321671011649192, 93100, 101120121 | ○○×○○○○○○○×○××× | ○○○○○○○○○○○○○○○○○○○○○○○○○○○○○○○○○○○○○○○○○○○○○○○○○○○○○○○○○○○○○○○○○○○○○○○○○○○○○○○○○○○○○○○○○○○○○○○○○○○○ ○○○○○○○○○○○○○○○○○○○○○○○○○○○○○○○○○○○○○○○○○○○○○○○○○○○○○○○○○○○○○○○○○○○○○○○○○○○○○○○○○○○○○○○○○○○○○○○○○○○○-○○○○○○○○○○○○○○○○○○○○○○○○○○○○○○○○○○○○○○○○○○○○○○○○○○○○○○○○○○○○○○○○○○○○○○○○○○○○○○○○○○○○○○○○○○○○○○○○○○○△○○○○○○○○○○○○○○○○○○○○○○○○○○○○○○○○○○○○○○○○○○○○○○○○○○○○○○○○○○○○○○○○○○○○○○○○○○○○○○○○○○○○○○○○○○○○○○○○○○○ | ||
| ProgramChange True# | ○* * * * * * | ○ | |||
| System Exclusive | ○ | ○ | |||
| Common : Song Pos ×: Song Sel : Tune | ×××× | ××××× | |||
| System : ClockRealtime : Command | ○○ | ○ | |||
| Aux : Local: All note offMessages : Active sense : Reset | ××○(123-127)○×××××××××××××××××××××××××××××××××××××××××××××××××××××××××××××××××××××××××××××××××××××××××××××××××××× ××××××××××××××××××××××××××××××××××××××××××××××××××××××××××××××××××××××××××××××××××××××××××××××××××××√√√√√√√√√√√√√√√√√√√√√√√√√√√√√√√√√√√√√√√√√√√√√√√√√√√√√√√√√√√√√√√√√√√√√√√√√√√√√√√√√√√√√√√√√√√√√√√√√√√√ √√√√√√√√√√√√√√√√√√√√√√√√√√√√√√√√√√√√√√√√√√√√√√√√√√√√√√√√√√√√√√√√√√√√√√√√√√√√√√√√√√√√√√√√√√√√√√√√√√√√□□□□□□□□□□□□□□□□□□□□□□□□□□□□□□□□□□□□□□□□□□□□□□□□□□□□□□□□□□□□□□□□□□□□□□□□□□□□□□□□□□□□□□□□□□□□□□□□□□□□ □□□□□□□□□□□□□□□□□□□□□□□□□□□□□□□□□□□□□□□□□□□□□□□□□□□□□□□□□□□□□□□□□□□□□□□□□□□□□□□□□□□□□□□□□□□□□□□□□□□□○○○○○○○○○○○○○○○○○○○○○○○○○○○○○○○○○○○○○○○○○○○○○○○○○○○○○○○○○○○○○○○○○○○○○○○○○○○○○○○○○○○○○○○○○○○○○○○○○○○●○○○○○○○○○○○○○○○○○○○○○○○○○○○○○○○○○○○○○○○○○○○○○○○○○○○○○○○○○○○○○○○○○○○○○○○○○○○○○○○○○○○○○○○○○○○○○○○○○○○怨怨怨怨怨怨怨怨怨怨怨怨怨怨怨怨怨怨怨怨怨怨怨怨怨怨怨怨怨怨怨怨怨怨怨怨怨怨怨怨怨怨怨怨怨怨怨怨怨怨怨怨怨怨怨怨怨怨怨怨怨怨怨怨怨怨怨怨怨怨怨怨怨怨怨怨怨怨怨怨怨怨怨怨怨怨怨怨怨怨怨怨怨怨怨怨怨怨怨怨愿怨怨怨怨怨怨怨怨怨怨怨怨怨怨怨怨怨怨怨怨怨怨怨怨怨怨怨怨怨怨怨怨怨怨怨怨怨怨怨怨怨怨怨怨怨怨怨怨怨怨怨怨怨怨怨怨怨怨怨怨怨怨怨怨怨怨怨怨怨怨怨怨怨怨怨怨怨怨怨怨怨怨怨怨怨怨怨怨怨怨怨怨怨怨怨怨怨怨怨恨怨恨怨恨怨恨怨恨怨恨怨恨怨恨怨恨怨恨怨恨怨恨怨恨怨恨怨恨怨恨怨恨怨恨怨恨怨恨怨恨怨恨怨恨怨恨怨恨怨恨怨恨怨恨怨恨怨恨怨恨怨恨怨恨怨恨怨恨怨恨怨恨怨恨怨恨怨恨怨恨怨恨怨恨怨恨怨恨怨恨怨恨怨恨怨恨怨恨怨根怨根怨根怨根怨根怨根怨根怨根怨根怨根怨根怨根怨根怨根怨根怨根怨根怨根怨根怨根怨根怨根怨根怨根怨根怨根怨根怨根怨根怨根怨根怨根怨根怨根怨根怨根怨根怨根怨根怨根怨根怨根怨根怨根怨根怨根怨根怨根怨根怨根怨恨怨恨怨恨怨恨怨恨怨恨怨恨怨恨怨恨怨恨怨恨怨恨怨恨怨恨怨恨怨恨怨恨怨恨怨恨怨恨怨恨怨恨怨恨怨恨怨恨怨恨怨恨怨恨怨恨怨恨怨恨怨恨怨恨怨恨怨恨怨恨怨恨怨恨怨恨怨恨怨恨怨恨怨恨怨恨怨恨怨恨怨恨怨恨怨恨怨欠怨欠怨欠怨欠怨欠怨欠怨欠怨欠怨欠怨欠怨欠怨欠怨欠怨欠怨欠怨欠怨欠怨欠怨欠怨欠怨欠怨欠怨欠怨欠怨欠怨欠怨欠怨欠怨欠怨欠怨欠怨欠怨欠怨欠怨欠怨欠怨欠怨欠怨欠怨欠怨欠怨欠怨欠怨欠怨欠怨欠怨欠怨欠怨欠怨欠怨大空空空空空空空空空空空空空空空空空空空空空空空空空空空空空空空空空空空空空空空空空空空空空空空空空空空空空空空空空空空空空空空空空空空空空空空空空空空空空空空空空空空空空空空空空空空空空空空空空空空空无空空空空空空空空空空空空空空空空空空空空空空空空空空空空空空空空空空空空空空空空空空空空空空空空空空空空空空空空空空空空空空空空空空空空空空空空空空空空空空空空空空空空空空空空空空空空空空空空空空空天心心心心心心心心心心心心心心心心心心心心心心心心心心心心心心心心心心心心心心心心心心心心心心心心心心心心心心心心心心心心心心心心心心心心心心心心心心心心心心心心心心心心心心心心心心心心心心心心心心心心悦悦悦悦悦悦悦悦悦悦悦悦悦悦悦悦悦悦悦悦悦悦悦悦悦悦悦悦悦悦悦悦悦悦悦悦悦悦悦悦悦悦悦悦悦悦悦悦悦悦悦悦悦悦悦悦悦悦悦悦悦悦悦悦悦悦悦悦悦悦悦悦悦悦悦悦悦悦悦悦悦悦悦悦悦悦悦悦悦悦悦悦悦悦悦悦悦悦悦悦欣光光光光光光光光光光光光光光光光光光光光光光光光光光光光光光光光光光光光光光光光光光光光光光光光光光光光光光光光光光光光光光光光光光光光光光光光光光光光光光光光光光光光光光光光光光光光光光光光光光光光无空空空空空空空空空空空空空空空空空空空空空空空空空空空空空空空空空空空空空空空空空空空空空空空空空空空空空空空空空空空空空空空空空空空空空空空空空空空空空空空空空空空空空空空空空空空空空空空空空空无实实实实实实实实实实实实实实实实实实实实实实实实实实实实实实实实实实实实实实实实实实实实实实实实实实实实实实实实实实实实实实实实实实实实实实实实实实实实实实实实实实实实实实实实实实实实实实实实实实实实 实实实实实实实实实实实实实实实实实实实实实实实实实实实实实实实实实实实实实实实实实实实实实实实实实实实实实实实实实实实实实实实实实实实实实实实实实实实实实实实实实实实实实实实实实实实实实实实实实实实实无实实无实无实无实无实无实无实无实无实无实无实无实无实无实无实无实无实无实无实无实无实无实无实无实无实无实无实无实无实无实无实无实无实无实无实无实无实无实无实无实无实无实无实无实无实无实无实无实无实无实无实 0.0000000000000000000000000000000000000000000000000000000000000000000000000000000000000000000000000000 0.000000000000000000000000000000000000000000000000000000000000000000000000000000000000000000000000 0.12222222222222222222222222222222222222222222222222222222222222222222222222222222222222222222222222222 0.122222222222222222222222222222222222222222222222222222222222222222222222222222222222222222222222 0.15555555555555555555555555555555555555555555555555555555555555555555555555555555555555555555555555555 0.155555555555555555555555555555555555555555555555555555555555555555555555555555555555555555555555 0.16666666666666666666666666666666666666666666666666666666666666666666666666666666666666666666666666666 0.166666666666666666666666666666666666666666666666666666666666666666666666666666666666666666666666 0.17666666666666666666666666666666666666666666666666666666666666666666666666666666666666666666666666666 公允允允允允允允允允允允允允允允允允允允允允允允允允允允允允允允允允允允允允允允允允允允允允允允允允允允允允允允允允允允允允允允允允允允允允允允允允允允允允允允允允允允允允允允允允允允允允允允允允允允允充充充充充充充充充充充充充充充充充充充充充充充充充充充充充充充充充充充充充充充充充充充充充充充充充充充充充充充充充充充充充充充充充充充充充充充充充充充充充充充充充充充充充充充充充充充充充充充充充充充充补充充充充充充充充充充充充充充充充充充充充充充充充充充充充充充充充充充充充充充充充充充充充充充充充充充充充充充充充充充充充充充充充充充充充充充充充充充充充充充充充充充充充充充充充充充充充充充充充充充充元充充充充充充充充充充充充充充充充充充充充充充充充充充充充充充充充充充充充充充充充充充充充充充充充充充充充充充充充充充充充充充充充充充充充充充充充充充充充充充充充充充充充充充充充充充充充充充充充充充充 充充充充充充充充充充充充充充充充充充充充充充充充充充充充充充充充充充充充充充充充充充充充充充充充充充充充充充充充充充充充充充充充充充充充充充充充充充充充充充充充充充充充充充充充充充充充充充充充充充充充 | ||||
Mode 1: OMNI ON, POLY
Mode 2: OMNI ON, MONO
○: YES
Mode 3: OMNI OFF, POLY
Mode 4: OMNI OFF, MONO
×:NO
KAWAI
- IMPORTANT SAFETY INSTRUCTIONS (FOR NOTH AMERICAN COUNTRIES)
- WARNING
- AVIS : RISQUE DE CHOC ELECTRIQUE - NE PAS OUVRIR
- FCC INFORMATION
- CANADIAN RADIO INTERFERENCE REGULATIONS
- KAWAI Z1000 INTRODUCTION
- IMPORTANT SAFETY PRECAUTIONS
- GENERAL
- HUMIDITY/SHORT CIRCUIT
- VOLUME DAMAGE
- TEMPERATURE/ENVIRONMENT/HANDLING
- ACCESSORIES
- REPAIRS
- POWER SUPPLY
- CLEANING
- PARTS AND NAMES
- REAR PANEL
- STYLE CONVERT DISK (1 PC.)
- SYSTEM DISK (1 PC.)
- F-1 FOOT PEDAL
- V-20X EXPRESSION PEDAL
- BASIC OPERATIONS
- THE DISPLAY/MULTI-FUNCTION MONITOR SCREEN
- L1, L2, R1, R2 LEFT/RIGHT MULTI-FUNCTION BUTTONS
- F1 - F6 MULTI-FUNCTION BUTTONS
- EXIT
- MAIN SCREEN
- INPUT
- MULTI-FUNCTION DIAL
- SELECTOR
- DEMOS
- SONG CONCERT MAGIC
- SONG DEMO
- CONCERT MAGIC
- THE FIRST STEPS
- SELECTING A SOUND
- SELECTING A STYLE
- QUICK SELECT (LAST USED PRESET)
- USING STYLES
- GETTING STARTED QUICKLY
- INTRO START
- STRUCTURE OF THE STYLES
- STYLE SELECTION
- STYLE VARIATION/FILL-IN 1-6
- CONTROL
- START/STOP
- INTRO/ENDING
- SYNC
- AUTO
- AUTO/SPLIT SETTING (ACC SETTING)
- AUTO MODE
- MEMORY
- RIGHT MODE
- FILL-IN MODE
- SPLIT
- LEFT/RIGHT POINT
- RIGHT 1/RIGHT 2 POINT
- OCTAVE SHIFT
- ONE-TWO PLAY
- CONDUCTOR (PART 1)
- EASY STYLE EDIT
- TEMPORARY
- STORED
- STYLE RESET FOR EASY EDIT STYLE
- CONCERT MAGIC PERFORMANCE
- BASIC OPERATION
- PLAYING MODE
- PLAYING A SONG FROM A CONCERT MAGIC DISK
- ASSIGNING SOUNDS/SOUND EFFECTS TO KEYBOARD ZONES
- SOUNDS IN PRACTICE
- SOUND SELECTION/ALTERNATE SOUNDS
- PERFORMANCE MODES OF SOUNDS
- DUAL SOUND
- SUSTAIN
- DUET
- TRANSPOSE
- PERFORMANCE EFFECTS
- MIXER
- STYLE MIXER (F2)
- PRESETS
- EFFECT SETTINGS
- PANEL (CURRENT SETTINGS OF THE Z1000)
- REVERB
- HIGH DEPTH (F1)
- LOW DEPTH (F2)
- TIME (F3)
- HIGH DUMP (F5)
- 3D/EQUALIZER
- EQ (L2)
- EFX R1/2L SETTINGS (R1)
- EFX STYLE SETTING (R2)
- EFFECT SETTING (INDIVIDUAL EFFECTS)
- EARLY REFLECTIONS (FIRST REFLECTIONS OR SHORT ECHO IN THE ROOM)
- TAP DELAY (INDIVIDUAL ECHO PULSES)
- AUTO PAN (STEREO TREMOLO)
- CHORUS (DOUBLING THE SIGNAL BY MEANS OF PITCH MODULATION)
- ENSEMBLE (DIFFUSE MULTIPLICATION OF THE SIGNAL BY MEANS OF PITCH MODULATION)
- TREMOLO (AMPLITUDE MODULATION/TREMOLO EFFECT)
- PHASER (DOUBLING OF THE SIGNAL BY MEANS OF PHASE MODULATION)
- ROTARY SPEAKER (LESLIE EFFECT)
- DISTORTION
- DUAL DELAY (STEREO ECHO)
- SINGLE DELAY (MONO ECHO)
- CROSS DELAY (CROSSING ECHO SIGNAL)
- FLANGER (DOUBLING THE SIGNAL BY MEANS OF DELAYED PITCH MODULATION)
- CELESTE: (FREQUENCY MODULATION SIMILAR TO CHORUS EFFECT)
- EXCITER (PSYCHO-ACOUSTIC FREQUENCY INTENSIFICATION)
- EFFECT ASSIGNMENT
- SOUND EFFECT
- R: HI
- R: LO
- E + R
- GENERAL CONDITIONS FOR SOUND EFFECTS
- STYLE EFFECT
- E+R
- QUICK PLAY (FLOPPY DISK OPERATIONS 1)
- 16
- REGISTRATION
- RECALLING
- STORING
- CONDUCTOR (PART 2)
- ADVANCED STYLE EDIT
- GROOVE (L1)
- GROOVE NO. (L1)
- INTENSITY (F1-F6)
- PAN/VOLUME
- EFFECT
- PROGRAM
- WRITE (F1)
- STYLE MAKE
- SETTINGS
- RECORDING
- PATTERN
- DRUM 1
- DRUM 2
- BASS
- ACC 1 MAIN
- ACC 1 SUB
- ACC 2, 3 AND 4
- QUANTIZE
- OFF: NO QUANTIZATION
- ♪: QUARTER NOTES
- ♩: QUARTER NOTE TRIPLETS
- ♪: EIGHTH NOTES
- ♩3 : EIGHTH-NOTE TRIPLETS
- ♩: SIXTEENTH NOTES
- ♩3: SIXTEENTH-NOTE TRIPLETS
- SOUND
- TEMPO
- DELETE
- COPY
- WRITE
- CONTROL (F6) - VOICING SPECIFICATIONS
- PART: BASS
- PART: ACC. 1 - ACC. 4
- ACC SYSTEM
- CHORDAL CLOSE
- CHORDAL OPEN
- SCALIC CHORD
- SCALIC PHRASE
- TURN RANGE
- TRANSPOSE LIMIT
- STARTING THE RECORDING
- ERASE (F1)
- STYLE CONVERT (FLOPPY DISK OPERATIONS 2)
- OPERATION
- SOUND EDIT
- CUTOFF
- ATTACK
- DECAY
- RELEASE
- SEQUENCER
- RECORDING FUNCTIONS
- RECORD (F 1)
- STOP (F 2)
- PLAY (F 3)
- REWIND (F 4)
- FORWARD (F 5)
- RESET (F 6)
- ♩ = TEMPO (DIAL)
- POSITION DISPLAY
- TRACK (L1)
- MIXER (R1)
- SEQUENCER (20)
- SETUP (R2)
- SETUP RECORD MODE (L1)
- MODE
- ACC RESERVE
- METRONOME
- RECORD BAR/MEASURE
- SETUP INPUT QUANTIZE (L2)
- INPUT QUANTIZE
- RESOLUTION
- SETUP EFFECT (R1)
- EDIT (L2)
- BAR EDIT
- 20 SEQUENCER
- GATE TIME MODIFY
- CLOCK MOVE
- GROOVE QUANTIZE
- OPEN ACC
- EVENT EDIT
- THE SEQUENCER IN PRACTICE
- QUICK RECORDING START
- AUTOMATIC RECORDING START
- MANUAL RECORDING START
- PLAYBACK OF THE RECORDING
- ADDITIONAL RECORDING TRACKS
- MERGE MODE DURING RECORDING
- RECORDING WITH ACCOMPANIMENT
- PREPARING THE TRACKS
- TRANSFERRING MIDI EVENTS
- SAVING
- TRACK ASSIGNMENT/TRACK MANAGEMENT
- SYSTEM/MIDI (22)
- SYSTEM/MIDI
- SYSTEM (L1)
- SETTING 1
- SYSTEM TUNE
- 22 SYSTEM / MIDI
- PROGRAM MODE
- VELOCITY CURVE
- WHEEL FUNCTION
- SETTING 2
- NEXT/BACK
- LIQUID CRYSTAL DISPLAY CONTRAST
- PEDAL ASSIGNMENT
- PEDAL POLARITY
- CLOCK
- BENDER RANGE
- MIDI (L2)
- NEXT
- SETTING 3
- FLOPPY DISK OPERATIONS 3
- FORMAT (R2)
- CAUTION
- LOAD (L1)
- SAVE (L2)
- DELETE (R1)
- FILE TYPES
- SONG
- CONDUCTOR
- STYLE
- SMF
- Q-80
- ALL
- SYSTEM UPDATES
- SYSTEM DATA MANAGEMENT
- DATA BACKUP
- LOADING THE SYSTEM SOFTWARE
- TABLE OF CONTENTS
- 25
- CONDUCTOR (PART 1)....33
- 9.CONCERT MAGIC. 37
- SOUNDS IN PRACTICE....41
- PERFORMANCE EFFECTS. 45
- MIXER 46
- EFFECT SETTINGS....49
- EFFECT ASSIGNMENT....60
- QUICK PLAY (FLOPPY DISK OPERATIONS 1) ..... 64
- REGISTRATION....66
- CONDUCTOR (PART 2)....68
- STYLE CONVERT (FLOPPY DISK OPERATIONS 2) ..... 83
- SOUND EDIT ....84
- SEQUENCER 88
- EDIT (L2) 94
- THE SEQUENCER IN PRACTICE ..... 105
- SYSTEM/MIDI 111
- FLOPPY DISK OPERATIONS 3 ..... 118
- SYSTEM UPDATES....122
- TABLE OF CONTENTS.....123
- INDEX 128
- APPENDIX ..... 131
- 26 INDEX
- A
- B
- C
- E
- F
- G
- H
- L
- M
- 0
- P
- Q
- R
- S
- T
- U
- V
- W
- CHORD FORM CHART
- APPENDIX
- CONCERT MAGIC SONG LIST
- CHILDREN'S SONGS ARRANGEMENT NO
- FOLK SONGS
- HYMNS AND CHRISTMAS SONGS
- ARRANGEMENT NO
- INTERNATIONAL SONGS
- ROMANTIC SONGS
- MIDI IMPLEMENTATION CHART
- KAWAI
Brand : KAWAI
Model : Z1000
Category : Keyboard