
M Coupe (1999) - Automotive BMW - Free user manual and instructions
Find the device manual for free M Coupe (1999) BMW in PDF.


User questions about M Coupe (1999) BMW
0 question about this device. Answer the ones you know or ask your own.
Ask a new question about this device
Download the instructions for your Automotive in PDF format for free! Find your manual M Coupe (1999) - BMW and take your electronic device back in hand. On this page are published all the documents necessary for the use of your device. M Coupe (1999) by BMW.
USER MANUAL M Coupe (1999) BMW
Owner's Manual for the vehicle. With a quick reference guide for your convenience.
natural_image
Exterior view of a BMW car on display with abstract red and blue background (no visible text or symbols)Online Edition for Part-No. 01 41 0 155 149 - © 08/99 BMW AG
Z3 roadster 2.3
Z3 roadster 2.8
Z3 coupe 2.8
M roadster
M coupe
Congratulations, and thank you for choosing a BMW.
Thorough familiarity with your vehicle will provide you with enhanced control and security when you drive it. We therefore have this request:
Please take the time to read this Owner's Manual and familiarize yourself with the information that we have compiled for you before starting off in your new car. It contains important data and instructions intended to assist you in gaining maximum use and satisfaction from the unique range of technical features on your BMW. The manual also contains information on care and maintenance designed to enhance operating safety and contribute to maintaining the value of your BMW throughout an extended service life.
This manual is supplemented by a Service and Warranty Information Booklet (US models) or a Warranty and Service Guide Booklet (Canadian models). We recommend that you read this publication thoroughly.
Your BMW is covered by the following warranties:
– New Vehicle Limited Warranty
- Limited Warranty Rust Perforation
– Federal Emissions System Defect Warranty
– Federal Emissions Performance Warranty
– California Emissions Control System Limited Warranty
Detailed information about these warranties is listed in the Service and Warranty Information Booklet (US models) or in the Warranty and Service Guide Booklet (Canadian models).
We wish you an enjoyable driving experience.
BMW AG
Notes on the Owner's Manual
We have made every effort to ensure that you are able to find what you need in this Owner's Manual as quickly as possible. The fastest way to find certain topics is by using the detailed index at the end. If you wish an initial overview of your vehicle, this can be found in the first chapter. The detailed list of contents that directly follows the summary of contents is intended to stimulate your curiosity regarding your BMW and to encourage you to read the manual.
Should you wish to sell your BMW at some time in the future, please remember to pass the Owner's Manual on to the new owner – the manual represents a legally-required element of the vehicle.
If you have additional questions, a BMW center will be glad to advise you.
Symbols used
These sections contain vital information – please read the accompanying text passages carefully, both for the your own safety and to prevent damage to your BMW.
These passages contain information on special and unique features of your vehicle.
Indicates special information concerning recycling.
Indicates the end of a note.
* Indicates special equipment, country-specific equipment and optional extras.
The individual vehicle
On buying your BMW, you have decided in favor of a model with individualized equipment and features. This Owner's Manual describes all models and equipment that BMW offers within the same group.
We hope you will understand that equipment and features are included which you might not have chosen for your vehicle. Any differences can easily be identified, since all optional accessories and special equipment are marked with an asterisk *.
If your BMW features equipment which is not described in this Owner's Manual (a car radio or telephone, for instance), Supplementary Owner's Manuals are enclosed. We ask you to read these manuals as well.
© 1999 BMW AG
Munich, Germany
Reprinting, including excerpts, only with the
written consent of BMW AG, Munich.
Order no. 01 41 0 155 149
US English IX/99
Printed in Germany
Printed on environmentally friendly paper
(bleached without chlorine, suitable for recycling).
Status at time of printing
BMW pursues a policy of continuous, ongoing development which is conceived to ensure that our vehicles continue to embody the highest quality standards combined with advanced, state-of-the-art technology. For this reason, it is possible that the features described in this Owner's Manual could differ from those on your vehicle. Nor can errors and omissions be entirely ruled out. You are therefore asked to appreciate that no legal claims can be entertained on the basis of the data, illustrations or descriptions in this manual.
For your own safety

Use unleaded gasoline only. Fuels containing up to and including 10% ethanol or other oxygenates with up to 2.8% oxygen by weight (i.e. 15% MTBE or 3% methanol plus an equivalent amount of co-solvent) will not void the applicable warranties respecting defects in materials or workmanship. Field experience has indicated significant differences in fuel quality (i.e. volatility, composition or additives, etc.). among gasolines offered for sale in the United States and Canada. The use of poor-quality fuels may result in driveability, starting and stalling problems especially under certain environmental conditions such as high ambient temperature and high altitude.
Should you encounter driveability problems that you suspect could be related to the fuel you are using, we recommend that you respond by switching to a recognized high-quality brand. Failure to comply with these recommendations may result in unscheduled maintenance.
Follow the relevant safety rules when you are handling gasoline.

Important safety information!
For your own safety, use genuine parts and accessories approved by BMW. When you purchase accessories tested and approved by BMW and Original BMW Parts, you simultaneously acquire the assurance that they have been thoroughly tested by BMW to ensure optimum performance when installed on your vehicle.
BMW warrants these parts to be free from defects in material and workmanship.
BMW will not accept any liability for damage resulting from installation of parts and accessories not approved by BMW.
BMW cannot test every product made by other manufacturers to verify if it can be used on a BMW safely and without risk to either the vehicle, its operation, or its occupants.
Original BMW Parts, BMW Accessories and other products approved by BMW, together with professional advice on using these items, are available from all BMW centers.
Installation and operation of non-BMW approved accessories such as alarms, radios, amplifiers, radar detectors, wheels, suspension components, brake dust shields, telephones (including operation of any portable cellular phone from within the vehicle without using an externally mounted antenna) or transceiver equipment (such as C.B., walkie-talkie, ham radio or similar) may cause extensive damage to the vehicle, compromise its safety, interfere with the vehicle's electrical system or affect the validity of the BMW Limited Warranty. See your BMW center for additional information.

Maintenance, replacement, or repair of the emission control devices and systems may be performed by any automotive repair establishment or individual using any certified automotive part.
Symbol on vehicle parts

Indicates that you should consult the relevant section of this Owner's Manual for information on a particular part or assembly.
The following only applies to vehicles owned and operated in the US.
REPORTING SAFETY DEFECTS
If you believe that your vehicle has a defect which could cause a crash or could cause injury or death, you should immediately inform the National Highway Traffic Safety Administration (NHTSA) in addition to notifying BMW of North America, Inc., P.O. Box 1227, Westwood, New Jersey 07675-1227, Telephone (201) 307-4000.
If NHTSA receives similar complaints, it may open an investigation, and if it finds that a safety defect exists in a group of vehicles, it may order a recall and remedy campaign. However, NHTSA cannot become involved in individual problems between you, your dealer, or BMW of North America, Inc.
To contact NHTSA, you may either call the Auto Safety Hotline toll-free at 1-800-424-9393 (or 202-366-0123 in Washington, D.C. area) or write to: NHTSA, U.S. Department of Transportation, Washington, D.C. 20590. You can also obtain other information about motor vehicle safety from the Hotline.
natural_image
Close-up of a car wheel and a syringe, no visible text or symbols on the main subjectsOnline Edition for Part-No. 01 41 0 155 149 - © 08/99 BMW AG
gauge
| Scale | | :--- | | 180 | | 200 | | 220 | | 240 |Overview
Controls and features
Operation, care and maintenance
Owner service procedures
Advanced technology
Technical data
Index
Contents
Overview
Cockpit 16
Instrument cluster – Z3 roadster, Z3 coupe 18
Instrument cluster – M roadster, M coupe 20
Indicator and warning lamps 22
Hazard warning flashers 26
Warning triangle 26
First-aid kit 27
Refueling 27
Fuel specifications 28
Tire inflation pressure (table) 29
Controls and features
Opening and closing:
Keys 34
Electronic vehicle immobilizer 35
Central locking system 36
Opening and closing from the outside 36
Opening and closing from the inside 37
Luggage compartment lid 38
Electric power windows 39
Sunroof, coupe 40
Convertible top 41
Adjustments:
Seats 50
Mirrors 51
Safety systems:
Safety belts 53
Airbags 55
Child restraint systems 57
Driving:
Steering/Ignition lock 59
Starting the engine 60
Switching off the engine 61
Parking brake 61
Manual transmission 62
Automatic transmission 63
Turn signals/High beams 65
Wiper/Washer system 66
Rear window defroster 67
Cruise Control 68
Everything under control:
Odometer 69
Tachometer 69
Fuel gauge 69
Temperature gauge 70
Service Interval Display 70
Auxiliary instruments, M roadster, M coupe 71
Digital clock, Z3 coupe 72
Analog clock, Z3 roadster 72
Onboard computer 73
Technology for safety and convenience:
Automatic Stability Control plus Traction (ASC+T)/Dynamic Stability Control (DSC) 76
Lamps:
Parking lamps/Low beam 77
Fog lamps 78
Interior lamps 78
Reading lamps 79
Controlling the climate for pleasant driving:
Heating and ventilation 80
Heating and ventilation/ Air conditioning 84
Seat heating 89
Cabin convenience:
Glove compartment 90
Additional storage areas 90
Storage boxes 90
Beverage holder 91
Ashtray 91
Cigarette lighter 92
Loading and transporting:
coupe:
Roll-up cover 93
Separation net 93
Cargo loading 94
Roof-mounted luggage
rack 95
Operation, care and maintenance
Special operating instructions:
Break-in procedure 98
Driving notes 99
Catalytic converter 100
Antilock Brake System (ABS) 101
Disc brakes 103
Brake system 104
Winter operation 105
Power steering 106
Cellular phone 107
Radio reception 107
Hardtop – roadster 108
Wheels and tires:
Notes on inflation pressure 110
Tire condition 110
Tire replacement 111
Tire rotation 113
Wheel and tire combinations 114
Snow chains 115
Winter tires 115
Approved wheel and tire specifications 116
In the engine compartment:
Hood 119
Engine compartment 120
Fluids for the washer systems 124
Washer nozzles 124
Engine oil 125
Coolant 128
Brake fluid 130
Vehicle Identification 130
Care and maintenance:
The BMW Maintenance System 131
Caring for your car 132
Airbags 139
Storing your vehicle 140
Laws and regulations:
Technical modifications to the vehicle 141
OBD connector 142
Contents
Replacement procedures:
Onboard tool kit 146
Windshield wiper blades 146
Lamps and bulbs 147
Master key with battery lamp 154
Tire change – Z3 roadster, Z3 coupe 155
Repairing a flat tire, M roadster, M coupe 162
Battery 166
Fuses 169
In case of electrical malfunction:
Power convertible top 170
Assistance, giving and receiving:
Jump-starting 170
Towing the vehicle 172
Adaptive Transmission Control (ATC) 176
Airbags 176
Automatic Stability Control plus Traction (ASC+T)/Dynamic Stability Control (DSC) 177
Radio reception 177
Safety belt tensioner 178
Interior rearview mirror with automatic dimmer 178
Limited slip differential 179
Engine specifications 182
Dimensions 183
Weights 184
Capacities 185
Electrical system 186
Drive belts 186
Everything from A to Z 190
Owner service procedures 195
natural_image
Close-up of a steering wheel and a circular gauge (no visible text or symbols)Online Edition for Part-No. 01 41 0 155 149 - © 08/99 BMW AG
Cockpit 16
Instrument cluster – Z3 roadster, Z3 coupe 18
Instrument cluster - M roadster, M coupe 20
Indicator and warning lamps 22
Hazard warning flashers 26
Warning triangle 26
First-aid kit 27
Refueling 27
Fuel specifications 28
Tire inflation pressure (table) 29
Overview
Controls and features
Operation, care and maintenance
Owner service procedures
Advanced technology
Technical data
Index
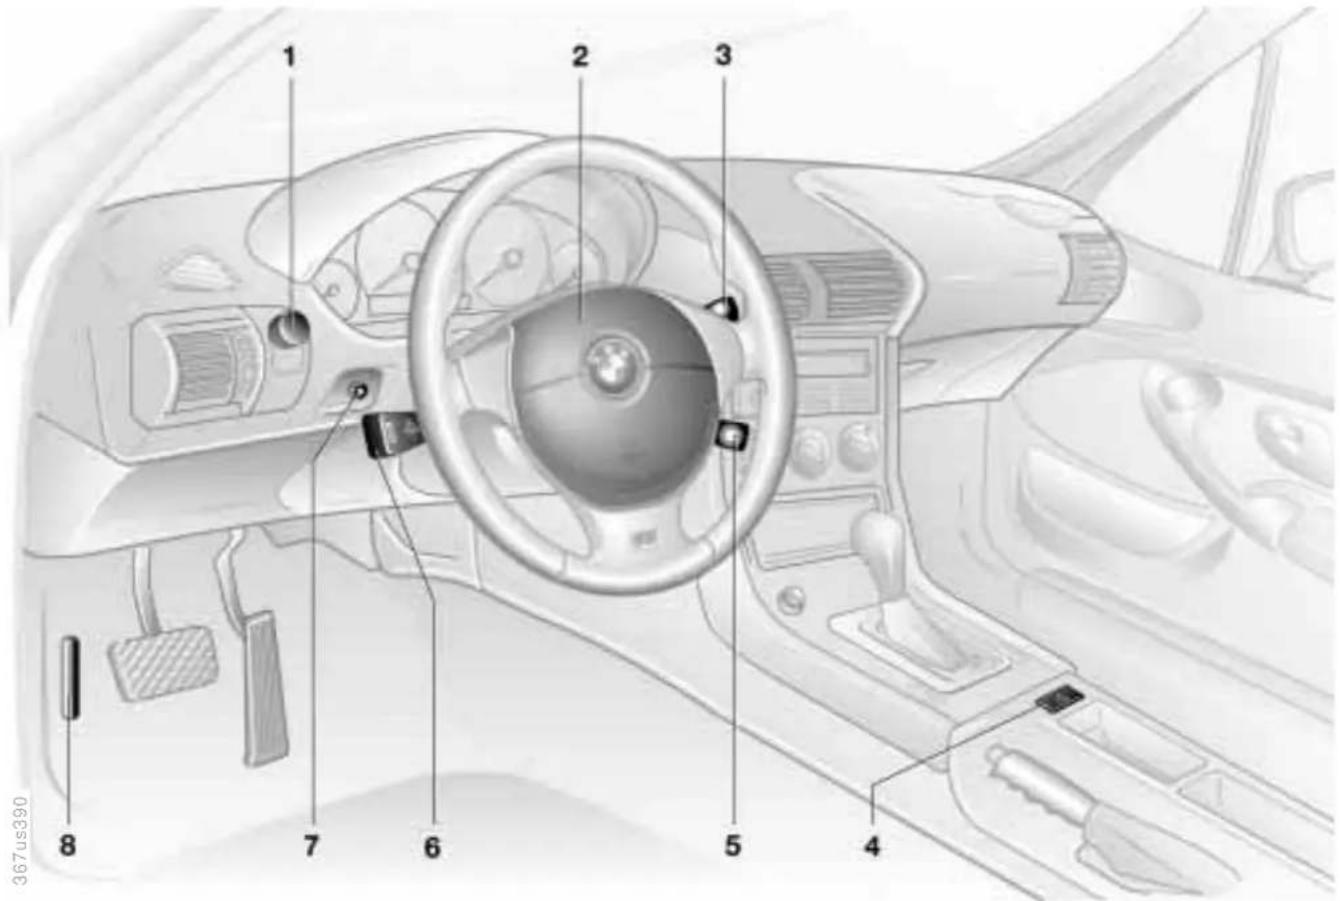
Cockpit
text_image
1 2 3 4 5 6 7 8 367 us 390Online Edition for Part-No. 01 41 0 155 149 - © 08/99 BMW AG
Cockpit
1 Parking lamps/Low beam 77
2 Horn
3 Wiper/Washer system 66
4 Hazard warning flashers 26
5 Cruise control* 68
6 ▷ Turn signals 65
▷ High beam 65
▷ Headlamp flasher 65
Onboard computer* 73
7 Fog lamps 78
8 Hood release 119
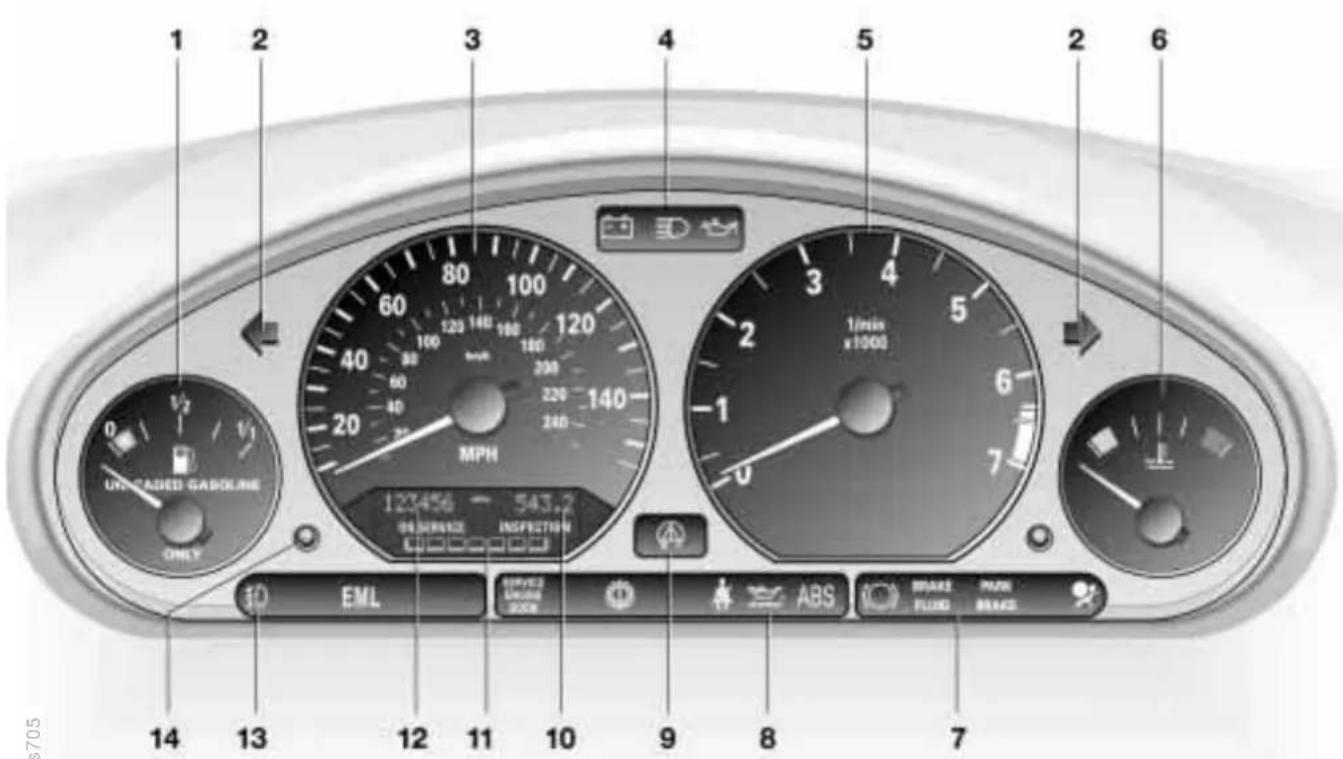
Instrument cluster – Z3 roadster, Z3 coupe
text_image
1 2 3 4 5 2 6 UNI CADED GASOLINE ONLY MPH 123456 - 543.2 0 EML SVEZ DAUSE SOCK ABS BRASS FLUO PANE BRASS 1/min x1000367us705
Instrument cluster – Z3 roadster, Z3 coupe
1 Fuel gauge with indicator lamp for reserve range 69
2 Indicator lamp for turn signals 25
3 Speedometer
4 Indicator and warning lamps for:
▶ Battery charge current 22
▷ High beam 25
▶ Engine oil pressure 22
5 Tachometer 69
6 Coolant temperature gauge 70
7 Indicator and warning lamps for:
▶ Brake pad wear 24
▶ Brake hydraulic system 22, 23
Parking brake 23
Airbags 23
8 Indicator and warning lamps for:
Service Engine Soon 24
▶ Automatic transmission* 24
Safety belts 23
▷ Engine oil level 23, 24
Antilock Brake System (ABS) 23, 24
9 Indicator lamp for Automatic Stability Control plus Traction (ASC+T)/Dynamic Stability Control (DSC)* 23, 24
10 Trip odometer 69
11 Service Interval Display 70, 131
12 Odometer 69
13 Indicator and warning lamps for:
▷ Front fog lamps* 25
Electronic Engine Power Control (EML) 24
14 Trip odometer reset button 69
The illustration shows the instrument cluster in the US version. In the Canadian models, some of the indicator and warning lamps have a different appearance. Refer to pages 22 to 25.
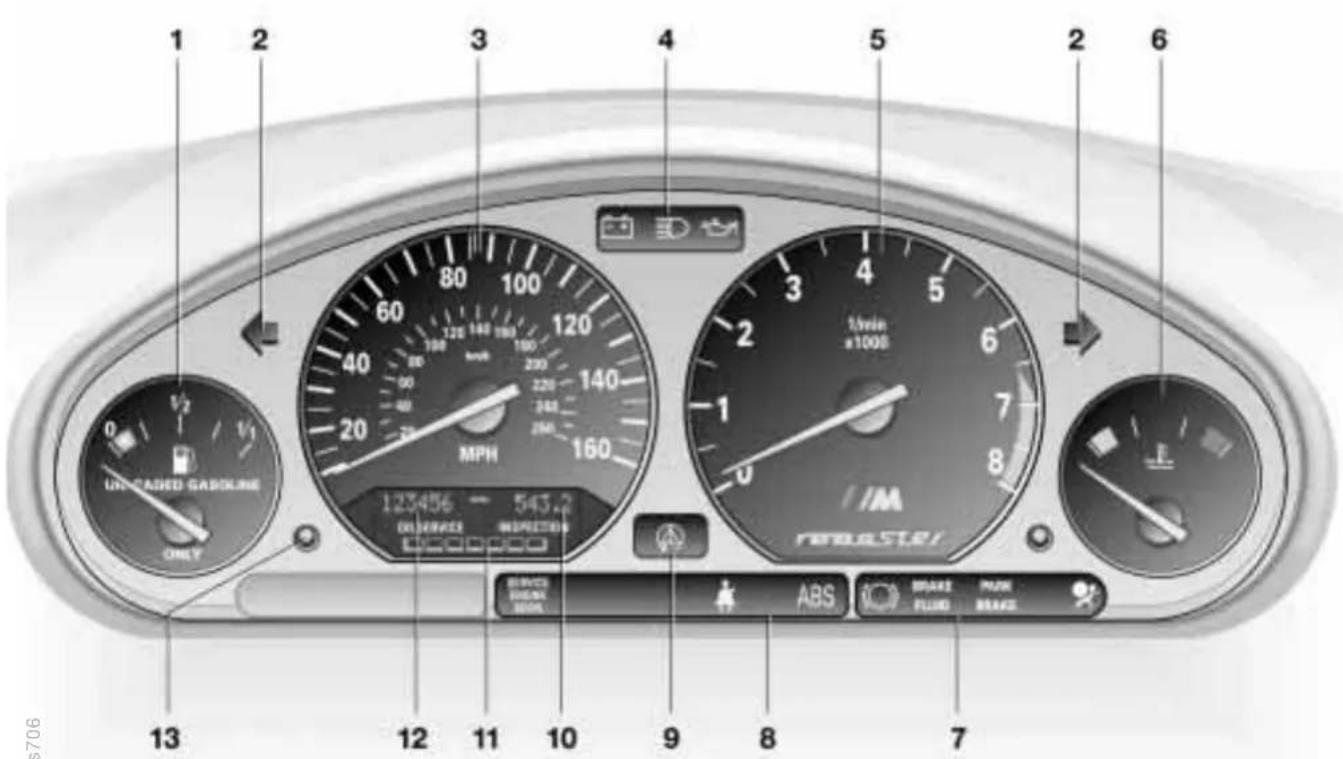
Instrument cluster - M roadster, M coupe
text_image
1 2 3 4 5 2 6 UN CAGED GASOLINE ONLY MPH 123456 - 545.2 01/00000000000000000000000000000000000000000000000000000000000000000000000000000000000000000000 1/1win x1008 1/M REBASTER SINCO BEACH SINCO ABS BRAKE FLOOD PANE SMRGE S7-7-7-7-7-7-7-7-7-7-7-7-7-7-7-7-7-7-7-7-7-7-7-7-7-7-7-7-7-7-7-7-7-7-7367us706
M roadster
Instrument cluster - M roadster, M coupe
1 Fuel gauge with a lamp for the reserve tank 69
2 Indicator lamp for turn signals 25
3 Speedometer
4 Indicator and warning lamps for:
▶ Battery charge current 22
▷ High beam 25
▶ Engine oil pressure 22
5 Tachometer 69
6 Engine coolant gauge 70
7 Indicator and warning lamps for:
▶ Brake pad wear 24
▶ Brake hydraulic system 22, 23
Parking brake 23
Airbags 23
8 Indicator and warning lamps for:
Service Engine Soon 24
Safety belts 23
Antilock Braking System (ABS) 23, 24
9 Indicator lamp for Automatic Stability Control plus Traction (ASC+T)/Dynamic Stability Control (DSC)* 23, 24
10 Trip odometer 69
11 Service Interval Display 70, 131
12 Odometer 69
13 Trip odometer reset button 69
The illustration shows the instrument cluster in the US version. In the Canadian models, some of the indicator and warning lamps have a different appearance. Refer to pages 22 to 25.
Indicator and warning lamps
Technology that monitors itself
Many of the systems of your BMW monitor themselves automatically, both during engine starts and while you are driving. Indicator and warning lamps that are identified by "●" are tested for proper functioning whenever the ignition key is turned. They each light up once for different periods of time.
If a fault should occur in one of these systems, the corresponding lamp does not go out after the engine is started or it lights up while the vehicle is moving. You will see how to react to this below.
Red: Stop immediately

Battery charge current • The battery is no longer being charged. The alternator drive
belt is defective or there is a malfunction in the charging circuit of the alternator. Please contact the nearest BMW center.

If the drive belt is defective, do not continue driving. The engine could be damaged due to overheating. In-sed force is required to steer the sole if the drive belt is defective.

Engine oil pressure • Stop the vehicle and switch off the engine immediately. Check
the engine oil level. Top up as required. If oil level is correct: Please contact the nearest BMW center.

Do not continue driving. The engine could be damaged because of inadequate lubrication.

Brake hydraulic system • The brake fluid level is too low. Before driving further, be sure to e notes on pages 104 and 130.

Warning lamp, brake hydraulic system for Canadian models.
Indicator and warning lamps
Yellow: Stop immediately

Engine oil level*
Comes on while driving: Stop the vehicle and switch off the
engine immediately. The oil level is at the absolute minimum.

Do not continue driving. If you do, the engine could be damaged due
to inadequate lubrication.
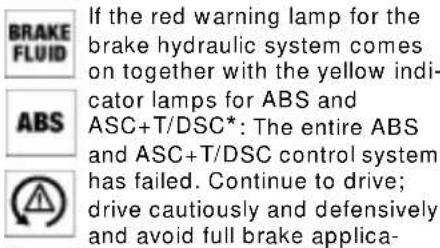
Red and yellow: Continue to drive; drive cautiously
text_image
BRAKE FLUID If the red warning lamp for the brake hydraulic system comes on together with the yellow indi- cator lamps for ABS and ASC+T/DSC*: The entire ABS and ASC+T/DSC control system has failed. Continue to drive; drive cautiously and defensively and avoid full brake applica-tions. Have the system checked by your BMW center as soon as possible. For additional information: Refer to pages 76 and 102.

Warning lamps for Canadian models.


Red: An important reminder

Parking brake Comes on when the parking brake is applied.
For additional information: Refer to page 61.

Parking brake warning lamp for Canadian models.

Please fasten your safety belt • Together with an acoustic signal. Comes on until the safety belts tened. For additional information,ety belts: Refer to page 53.

Airbags • Please have the system in- spected by your BMW center.
For additional information: Refer to pages 55 and 176.
24 Indicator and warning lamps
Yellow: Check as soon as possible

Antilock Brake System (ABS) • Comes on during normal vehicle operation: ABS has been deactivated in response to system malfunction. Conventional braking efficiency is available without limitations. Please have the system inspected by your BMW center. For additional information: Refer to page 101.

Antilock Brake System warning lamp for Canadian models.

Engine oil level*
Comes on after the engine has been shut off: Check the engine oil level. For additional information: Refer to page 125.

Automatic transmission ^* Because of a malfunction, the automatic transmission shifts only in the emergency program. Please consult the nearest BMW center. For additional information: Refer to page 64.

Brake pads • Have the brake pads checked. For additional information:
Refer to page 104.

Automatic Stability Control plus Traction (ASC+T)/Dynamic Stability Control (DSC)*
ASC+T/DSC has been switched off or has been deactivated because of a malfunction. In the event of a malfunction, have the system checked as soon as possible by your BMW center. For additional information: Refer to page 76.

Service Engine Soon • If the indicator lamp comes on either continuously or intermittently, this indicates a fault in the emissions-related electronic systems. Although the vehicle remains operational, you should have the systems checked by your BMW center at the earliest possible opportunity.
For additional information: Refer to page 142.

"Service Engine Soon" warning lamp for Canadian models.

Electronic Engine Power Control (EML)* Malfunction in the EML*. During braking, greater pedal pressure may be required and pedal travel may be increased. Please have the system inspected by your BMW center.
Indicator and warning lamps
Green: For your information

Turn signals
Flashes when the turn signals are in operation. Rapid flashing
indicates a system malfunction.
For additional information: Refer to page 65.

Front fog lamps*
Lights up whenever you switch on the front fog lamps.
For additional information: Refer to page 78.
Blue: For your information

High beams
Lights up when the high beams are on or the headlamp flasher
is actuated.
For additional information: Refer to page 65.
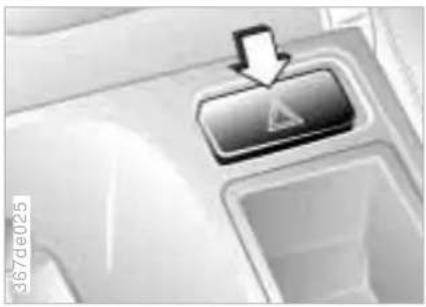
Hazard warning flashers Warning triangle\*
text_image
367de025The push-button flashes rhythmically when the hazard flashers are on.
To help you locate the switch in an emergency, the button is also illuminated whenever the car lamps are on.
natural_image
Black-and-white photo of a mechanical tool set with components and a labeled part 'Z3 coupe' (no readable text or symbols on the main objects)Z3 coupe
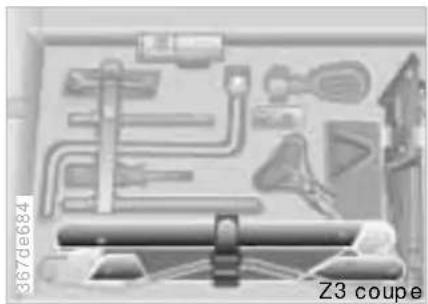
The warning triangle is located in the luggage compartment under the floor mat so that it is readily accessible (refer to the illustration).
Grasp the floor mat by the straps on the left and right. Pull it upward and remove it.
Z3 roadster, M roadster
The warning triangle is located in the luggage compartment in the area of the sill.
natural_image
Diagram of a mechanical component with labeled parts and directional arrows, no readable text or symbols present.M coupe
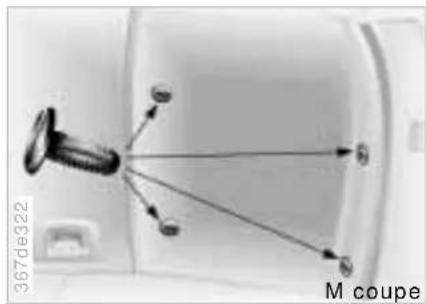
The warning triangle is located at the right in the luggage compartment behind a trim panel.
Loosen the cover panel:
1 Fold the luggage compartment floor mat up.
2 To loosen, turn the four mounting clips (arrows) of the right-hand trim panel on the rear wall of the luggage compartment approx. 1/4 of a turn with a coin or screwdriver.
3 Pull out the clips and remove the trim panel.

Comply with legal requirements which cover the availability of a
hazard warning triangle in the car.
First-aid kit\* Refueling
Z3 coupe, M coupe
In the luggage compartment at the left rear. Release the Velcro® fasteners.
Z3 roadster
In the luggage compartment on the right in a storage tray.
M roadster
In a storage tray in the luggage compartment at the left. Swing the retaining bar upward.

Some of the articles in the first-aid kit may be used within a limited
time only. For this reason, check the expiration dates of each of the items regularly, and replace any whose expiration dates have passed.
You can acquire replacements in any drugstore or pharmacy.
Comply with legal requirements which cover availability of a first-aid kit in the car.
natural_image
Close-up of a mechanical component with a circular housing and a bracket, showing no visible text or symbols.
Before filling the tank, shut off the engine. If you do not, fuel cannot into the tank and the "Service
Engine Soon" warning lamp may come on. Refer to page 24.
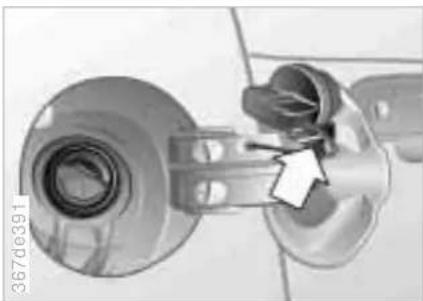
Open the fuel filler cap:
Open the fuel filler door, turn the fuel filler cap counterclockwise and remove the cap. Place the filler cap in the bracket attached to the fuel filler door.

Open the filler cap carefully. If you do not, fuel could spray out.
When refueling, insert the filler nozzle completely into the filler pipe. Pulling the nozzle out of the pipe during refueling
results in premature shutoff and will reduce the effect of the vapor recovery system.
If the filler nozzle is operated correctly, the fuel tank is full when it shuts off the first time.
Tank capacity: Refer to page 185.
Close the fuel filler cap: Position the cap on the neck. Turn the cap clockwise to the stop.

Close the fuel filler cap carefully. If you do not, fuel may escape and
the "Service Engine Soon" warning lamp may come on. Refer to page 24.
Close the fuel filler door.

When handling fuels, comply with all of the applicable safety pre-
cautions and regulations pertaining to fuels.
Never carry spare fuel containers in your vehicle. Whether they are empty or full, these containers can leak, cause an explosion, or lead to fire in the event of a collision.
Fuel specifications
Z3 roadster, Z3 coupe
The engine uses lead-free gasoline only. However, you can refuel with different fuel qualities since the engine is equipped with a knock sensor.
In order to achieve rated values for engine performance and fuel consumption:
Super lead-free premium gasoline (91 AKI).
The minimum fuel quality is:
Regular lead-free gasoline (87 AKI)
Because of the engine's design, you should refuel with this gasoline only as an exception.

Do not use leaded fuels. The use of leaded fuels will cause perma-
nent damage to the system's oxygen sensor and the catalytic convertor.
M roadster, M coupe
The engine uses lead-free gasoline only. However, you can refuel with different fuel qualities since the engine is equipped with a knock sensor.
In order to achieve rated values for engine performance and fuel consumption:
▶ Super lead-free premium gasoline (91 AKI).
The minimum fuel quality is:
Lead-free premium gasoline (89 AKI)
Because of the engine's design, you should refuel with this gasoline only as an exception.

Do not use leaded fuels. The use of leaded fuels will cause perma-
nent damage to the system's oxygen sensor and the catalytic convertor.
AKI = Anti Knock Index
AKI = Anti Knock Index
Tire inflation pressure
natural_image
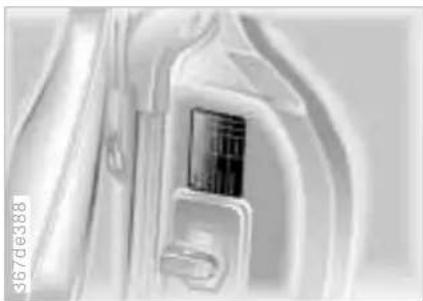
Close-up of a mechanical component with internal components and a visible part (no text or symbols)The inflation pressures are indicated on a label attached to the B-pillar behind the driver's door (visible with door open).
Check tire pressures
All pressure specifications are indicated in psi (Kilopascal [kPa]) with the tires at ambient temperature (refer also to the next pages).
Check tire inflation pressures regularly – at least every two weeks and before beginning a longer trip. Incorrect tire pressure can otherwise lead to tire damage and accidents. Check the air pressure of the spare tire (Z3 roadster, Z3 coupe) as well. Refer to the following tables and page 110.
Comply with tire approval specifications
The inflation pressures in the table apply to tires made by BMW-approved manufacturers. Your BMW center is familiar with these pressures. Higher pressures may be specified for tires made by other manufacturers. You will find a list of approved tires beginning on page 116.
Your vehicle is equipped with tires that meet both US standards and European standards. We recommend the exclusive use of BMW-approved tires.
Tire inflation pressure
| BMW Tires | All tire pressures are in psi(kilopascals [kPa]) | 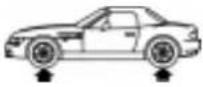 |
| Z3 roadster 2.3 | 225/50 R 16 92 V225/50 ZR 16 | 29 (200) 32 (220) |
| Front: 225/45 ZR 17Rear: 245/40 ZR 17 | 29 (200)-32 (220) | |
| 205/60 R 15 91 Q M+S205/55 R 16 91 Q M+S225/50 R 16 92 Q M+S225/45 R 17 91 Q M+S | 32 (220) 35 (240) | |
| Spare tire:T 125/90 R 15 96 M | 60 (420) 60 (420) | |
| Z3 roadster 2.8Z3 coupe 2.8 | 225/50 ZR 16225/50 R 16 92 W | 29 (200) 32 (220) |
| Front: 225/45 ZR 17Rear: 245/40 ZR 17 | 29 (200)-32 (220) | |
| 205/60 R 15 91 Q M+S205/55 R 16 91 Q M+S225/50 R 16 92 Q M+S225/45 R 17 91 Q M+S | 32 (220) 35 (240) | |
| Spare tire:T 125/90 R 15 96 M | 60 (420) 60 (420) |
Tire inflation pressure
| BMW | TiresAll tire pressures are in psi (kilopascals [kPa]) | 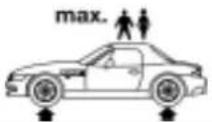 | 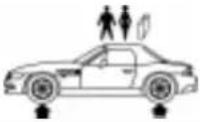 | ||
| M roadsterM coupe | Front: 225/45 ZR 17 | 32 (220) | - | 35 (240) | - |
| Rear: 245/40 ZR 17 | - | 32 (220) | - | 38 (260) | |
| 225/45 R 17 91 H M+S 32 (220) 35 (240) 35 (240) 38 (260) | |||||

Have the winter tires changed at your BMW center or at a tire
service.
Opening and closing:
Keys 34
Electronic vehicle immobilizer 35
Central locking system 36
Opening and closing from the outside 36
Opening and closing from the inside 37
Luggage compartment lid 38
Electric power windows 39
Sunroof, coupe 40
Convertible top 41
Adjustments:
Seats 50
Mirrors 51
Safety systems:
Safety belts 53
Airbags 55
Child restraint systems 57
Driving:
Steering/Ignition lock 59
Starting the engine 60
Switching off the engine 61
Parking brake 61
Manual transmission 62
Automatic transmission 63
Turn signals/High beams 65
Wiper/Washer system 66
Rear window defroster 67
Cruise control 68
Everything under control:
Odometer 69
Tachometer 69
Fuel gauge 69
Temperature gauge 70
Service Interval Display 70
Auxiliary instruments,
M roadster, M coupe 71
Digital clock, Z3 coupe 72
Analog clock, Z3 roadster 72
Onboard computer 73
Technology for safety and convenience:
Automatic Stability Control
plus Traction (ASC+T)/Dynamic
Stability Control (DSC) 76
Lamps:
Parking lamps/Low beam 77
Fog lamps 78
Interior lamps 78
Reading lamps 79
Controlling the climate for pleasant driving:
Heating and ventilation 80
Heating and ventilation/
Air conditioning 84
Seat heating 89
Cabin convenience:
Glove compartment 90
Additional storage areas 90
Storage boxes 90
Beverage holder 91
Ashtray 91
Cigarette lighter 92
Loading and transporting cargo:
coupe:
Roll-up cover 93
Separation net 93
Cargo loading 94
Roof-mounted luggage
rack 95
Overview
Controls and features
Operation, care and maintenance
Owner service procedures
Advanced technology
Technical data
Index
Keys
text_image
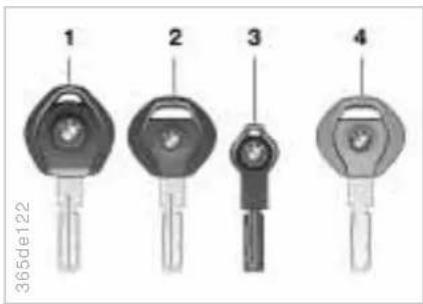
365de122 1 2 3 41 Master key with battery-powered lamp (switch on by pressing the BMW symbol)
2 Master key without lamp
3 Spare key for storage in a safe place such as your wallet. This key is not intended for continuous use
4 Door and ignition key
The luggage compartment lid and the storage boxes* cannot be opened with this key – this is useful for valet parking, for instance
Replacement keys
Replacement keys are available exclusively through your BMW center. Your BMW center is obligated to ensure that a person requesting a key is authorized to do so since the keys belong to a security system (refer to "Electronic vehicle immobilizer" on the following page).

Whenever you receive a new replacement key, turn that key to
position 2 in the ignition lock once (ignition switched on) and then back. This allows the electronic vehicle immobilizer to "learn" the new key.
Electronic vehicle immobilizer
The key to security
The electronic vehicle immobilization unit increases the anti-theft protection of your BMW – you do not have to adjust or activate anything. This electronic immobilization system is designed to reduce the susceptibility of the vehicle to theft by making it impossible to start the engine using any means other than the special keys furnished with the vehicle.
Your BMW center can cancel the electronic system authorization for individual keys (in the event a key is lost, for instance). A deactivated key can no longer be used to start the engine.
How the electronics work
At the heart of this system is an electronic chip which is integrated into the key. The lock mechanism itself is actually a dual-function device, simultaneously serving as a communications interface designed to allow the security system to maintain a continuous stream of variable, vehicle-specific signals with the electronic circuitry in the key. The system will not release the ignition, fuel injection and starter unless it recognizes an "authorized" key.
Force applied to the key can damage the integrated electronic circuitry. A damaged key can no longer be used to start the engine.
For US owners only
The transmitter and receiver units comply with part 15 of the FCC (Federal Communications Commission) regulations. Operation is governed by the following:
FCC ID: LX8EWS
Compliance statement:
This device complies with part 15 of the FCC Rules. Operation is subject to the following two conditions:
This device may not cause harmful interference, and
this device must accept any interference received, including interference that may cause undesired operation.

Any unauthorized modifications to these devices could void the
user's authority to operate the equipment.
Central locking system Opening and closing from the outside
The concept
The central locking system becomes operational when the doors are closed. The system simultaneously engages and releases the locks on the
doors
luggage compartment
fuel filler door.
The central locking system can be operated
from outside via the door locks and the luggage compartment lock (M coupe: Open only)
from inside via the safety lock buttons (locks doors only).
The alarm system is automatically armed whenever you activate the central locking system from outside the vehicle. It prevents the doors from being unlocked with the lock buttons or release handles.
The central locking system unlocks automatically in the event of an accident. In addition, the hazard warning flashers and interior lamps come on.
natural_image
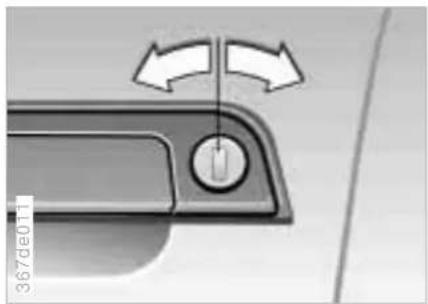
Close-up of a car handle panel with directional arrows indicating rotation (no text or symbols)With the key
If the vehicle has been locked from the outside, persons remaining inside the vehicle cannot unlock it.
Convenience locking mode
Electrically powered windows can also be closed from the door locks: When the doors are closed, hold the key in the "Lock" position.
Watch the closing process carefully and be sure that no one is trapped by the closing motion. The movement stops when you release the key.
Manual operation
(in the event of electrical failure) Turn the key all the way to the extreme left or right to unlock/lock the door.
Opening and closing from the inside
To unlock and open the doors
▶ Pull the door handle of a door twice (the initial pull unlocks the door, and the second opens it).
Children might be able to lock the doors from the inside. For this reason, take the vehicle's keys with you so that the vehicle can be opened again from the outside at any time.
To engage the locks
When the lock button of any door is pressed down, the doors and luggage compartment are locked. The anti-theft system is not activated. The fuel filler door also remains unlocked to allow refueling.
To avoid being accidentally locked out of the car:
The vehicle cannot be locked with the lock button when the driver's door is open.
The lock button on the passenger's door only operates the central locking system if both doors are closed.
Luggage compartment lid
text_image
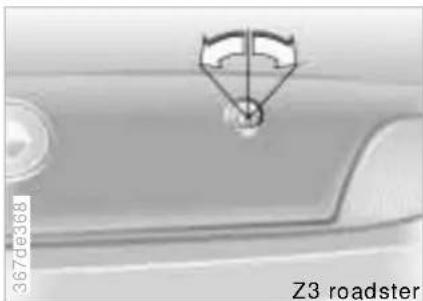
3679e368 Z3 roadsterThe lock
The illustration depicts the luggage compartment lock of the Z3 roadster as an example.
The controls and function for the Z3 coupe, M coupe (open only) and the M roadster are the same as for the Z3 roadster.
Only the master keys (refer to page 34) will fit in the luggage compartment lock.
Locking separately
Turn the master key to the right until the slot is horizontal, then remove the key.
This locks the luggage compartment and disengages it from the central locking system. If you then surrender only the door and ignition key (refer to page 34), access to the vehicle through the luggage compartment is not possible (for valet parking, for instance).
Manual operation
(in the event of electrical failure)
Turn the master key in the lock of the luggage compartment lid to the left to the stop – the luggage compartment opens easily.
The luggage compartment is locked again as soon as it is closed.
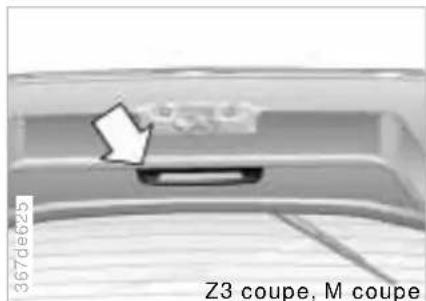
The illustration depicts the luggage compartment lid of the Z3 coupe or M coupe.
The handle recess in the interior trim panel of the luggage compartment lid (arrow) makes it easier to pull the lid down.
On the Z3 roadster and M roadster, the handle recess is located to the left of the lock mechanism.

To avoid injuries, be sure that the travel path of the luggage com-
partment lid is clear when it is closed, as with all closing procedures.
Luggage compartment lid Electric power windows

Do not drive with the luggage compartment lid open, since exhaust fumes could penetrate the interior of the vehicle. Should it be absolutely necessary to operate the vehicle with the luggage compartment lid open (coupe; roadster with closed convertible top):
▷ Close all windows. On the coupe, close the sunroof.
▶ Increase the air supply of the heating and ventilation system to a high level. Refer to page 80 or 84.
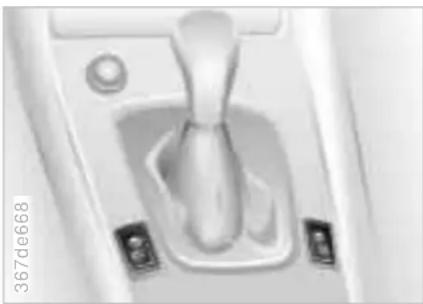
natural_image
Close-up of a car gear shift lever with buttons and a handle (no visible text or symbols)Opening and closing windows
From ignition key position 1 and up:
▶ Depress the rocker switch until you feel resistance.
The window continues moving for as long as you maintain pressure on the switch.
Press the rocker switch beyond the pressure point (one-touch mode):
The window moves automatically. Press the switch a second time to stop the window.
After the ignition has been switched off:
Actuation is still possible for up to 15 minutes in ignition key position 0 or if the ignition key has been removed, as long as no doors have been opened.

Because the power windows are sealed at high pressure to prevent noise when closed, a powerful or is required for efficient closing.
When closing the windows, always ensure that they are not obstructed in any way. Unsupervised use of these systems can result in serious personal injury. Remove the ignition key to deactivate the electric power windows whenever you leave the car. Never leave the keys in the car with unsupervised children.
Never place anything that could obstruct the driver's vision on or next to the windows.
For convenience closing via the door lock, refer to page 36.
Electric power windows Sunroof\*, coupe
Jam protection
If one of the windows comes into contact with an object between the window and roof frame when it is closing, the closing cycle is interrupted immediately and the window will open again slightly.

You can override this jam protection function (if there is an at-
tempted unauthorized entrance from the outside, for instance) by pressing the switch beyond the resistance point and holding it.
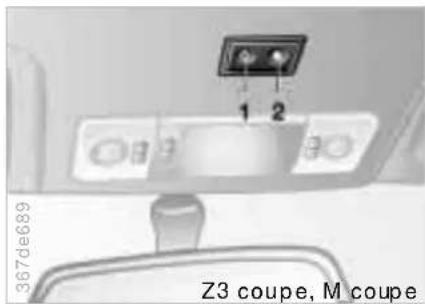
From ignition key position 1 and up:
To lift: Press button 1.
To close: Press button 2.

To prevent injuries, exercise care when closing the sunroof. Keep it ur field of vision until it is closed.
To avoid pressure or drafts in the passenger compartment when the sunroof is open, keep the air vents in the dashboard open and increase the air supply if necessary. Refer to pages 82 and 86.
Manual convertible top, roadster
Weather protection
The convertible top combines reliable protection from the elements with simple, convenient operation. Here are a few tips to ensure that you have pleasure with your roadster.
It is advisable to close the convertible top when the vehicle is parked. The closed convertible top not only protects the passenger compartment from unforeseeable damage from the weather, it also provides a certain degree of theft protection. In addition, keep valuables only in the locked luggage compartment, even with the convertible top closed.
Never mount a roof-mounted luggage rack on the convertible top. Please contact your BMW center for suitable securing devices and additional accessories.
To prevent damage, do not operate the convertible top at temperatures below 32 °F (0 °C).
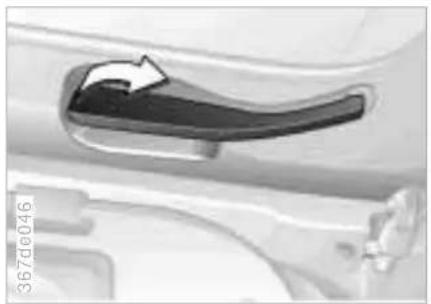
natural_image
Close-up of a car door handle with an arrow indicating direction (no text or symbols)To open
1 With the doors closed, lower the side windows a few inches (centimeters).
2 Releasing the convertible top: Pull the levers outward on the left and the right of the convertible top frame (refer to the illustration).
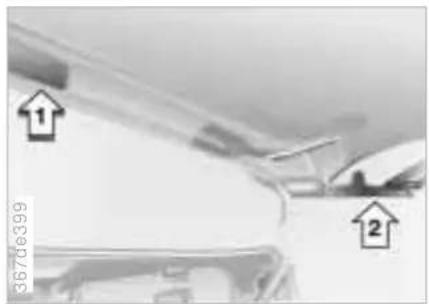
text_image
3676e399 1 23 Raise the convertible top approx.
8 inches (20 cm) from the convertible
top frame on the inside to relieve ten-
sion on the top. Refer to arrow 1.
Be sure that the convertible top folds at the front linkage joints first (refer to arrow 2). If it does not, the convertible top linkage could be bent.
4 Continue to raise the top at the front and push it toward the rear into the convertible top well.
In the process, make sure the rear window is laid down evenly and free of creases. To prevent the rear window from being scratched, a soft cloth should be laid in the window fold.
42 Manual convertible top, roadster
5 Fold the release lever against the convertible top frame.

In order to avoid subsequent moisture damage, do not open
and store the convertible top when it is wet (refer also to the chapter on vehicle care).
natural_image
3D diagram of a mechanical component with two downward arrows and a small human figure at the base (no text or symbols)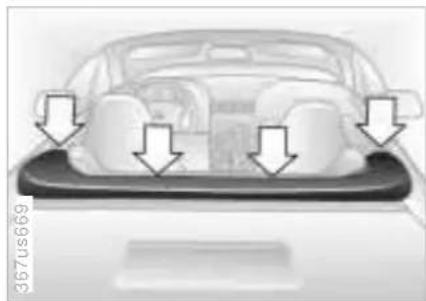
natural_image
Top-down view of a car showing rear seats and side seats with directional arrows indicating movement (no text or symbols)To mount the cover
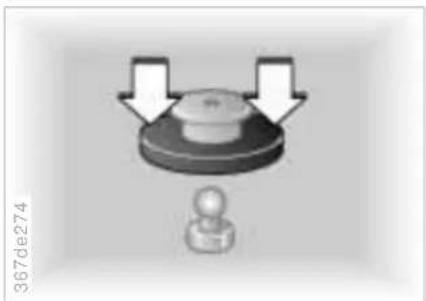
The illustration depicts a representative schematic of the fasteners for the convertible cover.
To secure, press the outer ring of the cover fastener onto the mating piece on the vehicle (refer to the arrows).
The attachment points of the cover are indicated by the four arrows in the illustration.
1 Position the convertible cover on the convertible top well and align the upper portions of the fasteners with the lower portions on the vehicle.
2 Lift the cover at the rear, reach underneath it and engage the two middle fasteners.
3 Attach the front fasteners.
Manual convertible top, roadster
natural_image
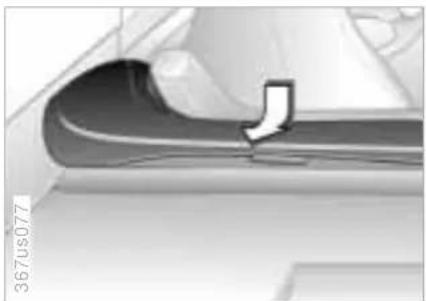
Close-up of a curved mechanical component with a white arrow pointing to a feature, no visible text or symbols.4 Push the peripheral frame of the cover under the edge of the convertible top well.
5 Check the convertible cover to be sure it is properly secured.

In order to avoid soiling of the inside of the convertible top, always
drive with the cover secured in place.

Be sure that the cover is secured properly on the vehicle. If it is not
firmly secured, the flow of air while driving could loosen the cover at higher speeds.
natural_image
Close-up of hands holding a circular mechanical component with an upward arrow, no visible text or symbolsTo close
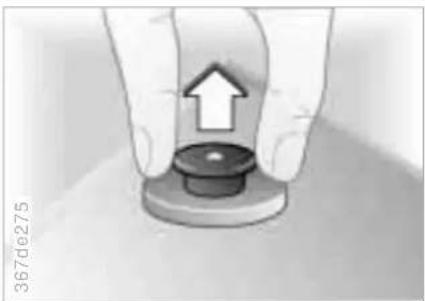
1 To remove the convertible top cover:
Loosen the fasteners. Pull the cap of the latch upward. Refer to the arrow.
natural_image
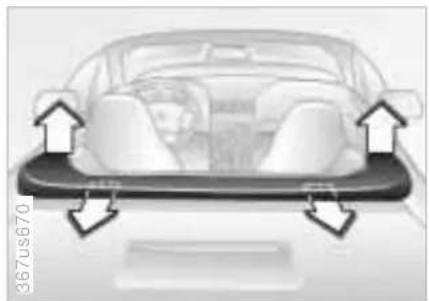
Top-down view of a car showing rear seats and side-mounted dashboard (no text or symbols)Loosen the front fasteners (outer arrows).
▶ Pull the outer frame of the cover under the edge of the convertible top well.
Lift the cover from the rear and release the middle fasteners (middle arrows).
Manual convertible top, roadster
natural_image
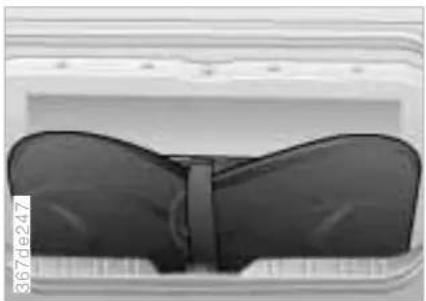
Close-up of a dark, textured object resembling a butterfly or cushion, with no visible text or symbols.To avoid damage, carefully fold the cover and store it in the luggage compartment.
text_image
1 2 367de047
Do not position heavy objects on the cover.
If you store the cover away from the vehicle, the cover should be spread out.
2 When the doors are closed, lower the side windows slightly.
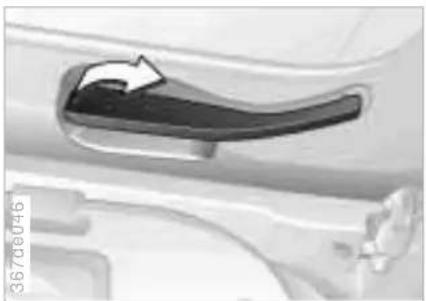
3 Pull the release lever away from the frame as far as possible.
4 Holding the convertible top at the front convertible top frame, lift it out of the convertible top well and fold it forward.

When folding the convertible top forward, do not grasp it by the
side linkage. If you do so, there is a risk of injury to your hands and fingers.
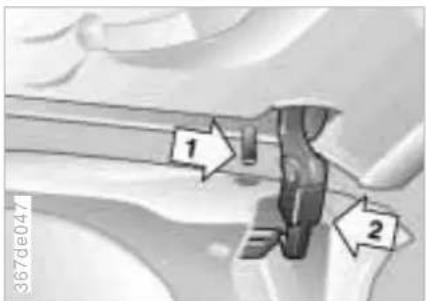
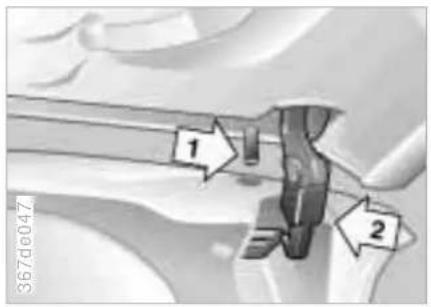
5 Insert the pins 1, on the left and the right, into the guides in the windshield frame. Using the handle recess in the center of the convertible top frame, pull the convertible top down. Hold the top in this position and secure both fasteners (refer also to page 109).

Be sure that the fastener hooks 2 on the left and right are securely aged in the frame of the windshield. They are not, the convertible top could be while the vehicle is moving.

At higher speeds, it may occur that the lower air pressure which heated in the passenger compartment will cause the top or the rear wind-to flutter. Increase the air supply of ventilation controls so that a maximum does not occur in the vehicle.
Power convertible top, roadster\*
Weather protection
The convertible top combines reliable protection from the elements with simple, convenient operation. Here are a few tips to ensure that you have pleasure with your roadster.
It is advisable to close the convertible top when the vehicle is parked. The closed convertible top not only protects the passenger compartment from unforeseeable damage from the weather, it also provides a certain degree of theft protection. In addition, keep valuables only in the locked luggage compartment, even with the convertible top closed.
Never mount a roof-mounted luggage rack on the convertible top. Please contact your BMW center for suitable securing devices and additional accessories.
To prevent damage, do not operate the convertible top at temperatures below 32 °F (0 °C).
To conserve the battery, it is advisable to operate the top only with the engine running.
Operate the convertible top only when the vehicle is stationary.
Do not lay objects on the convertible top, since they would fall off when the convertible top is operated and cause damage or injuries.
Do not reach into the convertible top mechanism during opening and closing. Keep children away from the moving parts of the convertible top during operation.
The automatic sequence is interrupted immediately if the button for actuating the top (page 46 and 49) is released. The sequence can be continued in the desired direction by pressing the button.
natural_image
Close-up of a car door handle with an arrow pointing to the interior area (no text or symbols visible)To open
1 With the doors closed, lower the side windows a few inches (centimeters).
2 Releasing the convertible top: Pull the levers outward on the left and the right of the frame of the top (refer to the illustration).
Power convertible top, roadster\*
text_image
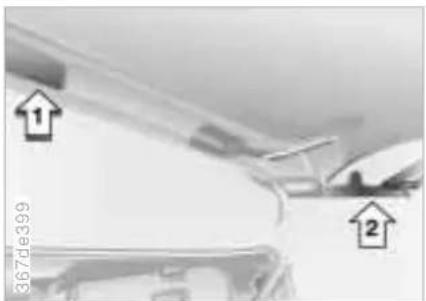
367de399 1 23 Raise the convertible top approx. 8 inches (20 cm) from the convertible top frame on the inside to relieve tension on the top. Refer to arrow 1.
Be sure that the convertible top folds at the front linkage joints first (refer to arrow 2). If it does not, the convertible top linkage could be bent.
4 Press the release lever against the frame of the top.
natural_image
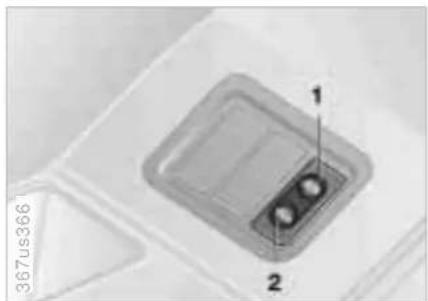
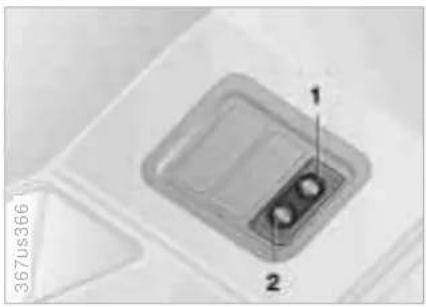
Close-up of a small electronic component with two circular features, labeled 1 and 2, placed on a flat surface (no text or symbols beyond labels)5 Hold the footbrake down during the entire opening procedure.
6 Lift the convertible top frame. Press and hold the button for convertible top operation in the "Open" direction (2) until the opening process is completed and the convertible top is folded into the convertible top well. Depending on the vehicle model, the arrangement and appearance of the buttons may vary. Please refer to the individual symbols for selecting the desired function.
If the convertible top has not been lifted far enough, or if the foot-brake is not applied, the motor which operates the convertible top will not operate.
In order to avoid subsequent moisture damage, do not leave the convertible top open when it is wet (refer also to the chapter on vehicle care).
Power convertible top, roadster\*
natural_image
3D diagram of a mechanical component with arrows indicating direction, no text or symbols presentTo mount the cover
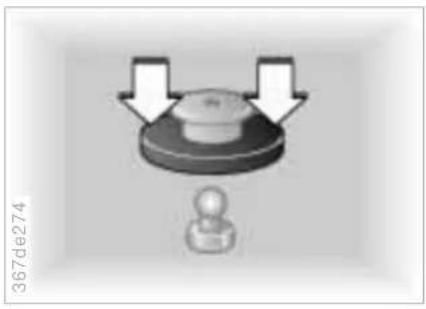
The illustration depicts a representative schematic of the fasteners for the convertible cover.
To secure, press the outer ring of the cover fastener onto the mating piece on the vehicle (refer to the arrows).
natural_image
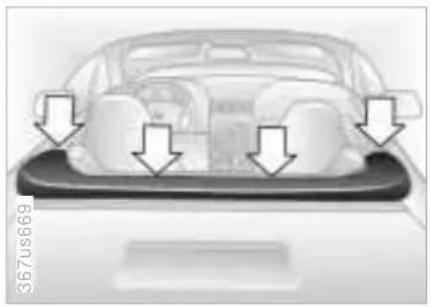
Top-down view of a car showing three seats with arrows pointing to the front panel (no text or symbols)The attachment points of the cover are indicated by the four arrows in the illustration.
1 Position the convertible cover on the convertible top well and align the upper portions of the fasteners with the lower portions on the vehicle.
2 Lift the cover at the rear, reach underneath it and engage the two middle attachments.
3 Attach the front fasteners.
natural_image
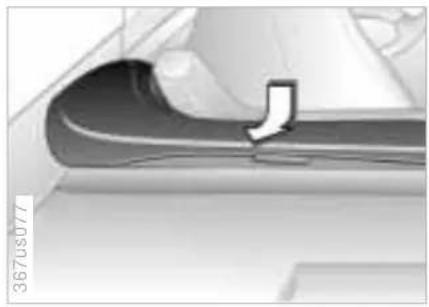
Close-up of a curved mechanical component with a white arrow pointing to a feature (no text or symbols visible)4 Push the peripheral frame of the cover under the edge of the convertible top well.
5 Check the convertible cover to be sure it is properly secured.
In order to avoid soiling of the inside of the convertible top, always drive with the cover secured in place.
Be sure that the cover is secured properly on the vehicle. If it is not firmly secured, the flow of air while driving could loosen the cover at higher speeds.
Power convertible top, roadster\*
natural_image
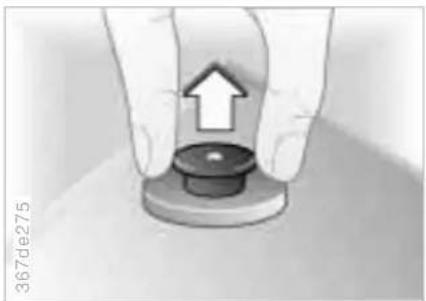
Close-up of hands holding a circular mechanical component with an upward arrow, no visible text or symbolsTo close
1 To remove the convertible top cover:
Loosen the fasteners. Pull the cap of the latch upward. Refer to the arrow.
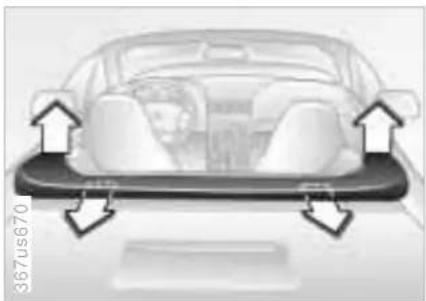
natural_image
Top-down view of a car showing front seats and seatbelt structure with directional arrows (no text or symbols)Release the front fasteners (outer arrows).
▶ Pull the outer frame of the cover under the edge of the convertible top well.
Lift the cover from the rear and release the middle fasteners (middle arrows).
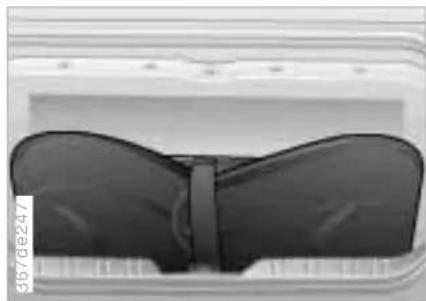
natural_image
Close-up of a dark, butterfly-shaped object with a horizontal bar, placed on a textured surface (no visible text or symbols)To avoid damage, carefully fold the cover and store it in the luggage compartment.

Do not position heavy objects on the cover.
The cover should be spread out if you store it away from the vehicle.
Power convertible top, roadster\*
natural_image
Close-up of a small electronic component with labeled parts (1 and 2), no readable text or symbols beyond labels2 When the doors are closed, lower the side windows slightly.
3 Pull the release lever away from the frame as far as possible.
4 Hold the footbrake down during the entire closing procedure.
5 Press and hold the button for convertible top operation in the "Close" direction (1) until the closing process is completed and the convertible top frame has docked against the windshield frame.
Depending on the vehicle model, the arrangement and appearance of the buttons may vary. Please refer to the specific symbols for selecting the desired function.
text_image
367de047 1 26 Insert the pins 1, on the left and the right, into the guides in the windshield frame. Using the handle recess in the center of the convertible top frame, pull the convertible top down. Hold the top in this position and secure both fasteners (refer also to page 109).
If the footbrake is not applied, the motor which operates the convertible top will not operate.
Be sure that the fastener hooks 2 on the left and right are securely engaged in the frame of the windshield. If they are not, the convertible top could open while the vehicle is moving.
At higher speeds, it may occur that the lower air pressure which is created in the passenger compartment will cause the top or the rear window to flutter. Increase the air supply via the ventilation controls so that a vacuum does not occur in the vehicle.
Seat adjustment
For maximum safety, please comply with the following:

Never try to adjust your seat while operating the vehicle. The seat could respond with an unexpected movement, and the ensuing loss of vehicle control could result in an accident. Be sure that the safety belt is fastened firmly against your body at all times. In the event of a frontal impact, a loose lap belt could slide over your hips, leading to abdominal injury. In addition, the safety belt's restraint effectiveness is reduced if the belt is worn loosely. When adjusting your seat, select a position that provides the maximum distance between you and the steering wheel, instrument panel and door while still allowing comfortable and safe access to all vehicle controls.
Correct sitting posture
To reduce strain on your spinal column, sit all the way back in the seat and rest your back fully against the backrest. In the ideal sitting posture, your head extends along a straight line from your spine.
For long-distance driving, you may wish to increase the backrest tilt angle slightly to reduce muscular tension. You should also be able to grasp the highest point of the steering wheel with your arms slightly bent.
After a seat adjustment in the coupe, adjust the height of the safety belt also. Refer to page 53.
text_image
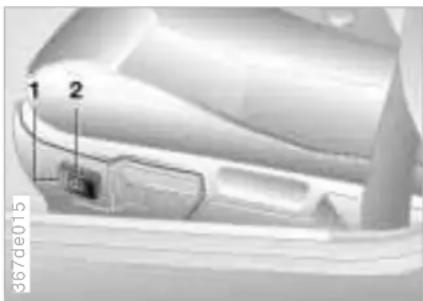
1 2 367de0151 Height*
2 Backward/Forward adjustment
Seat adjustment Mirrors
natural_image
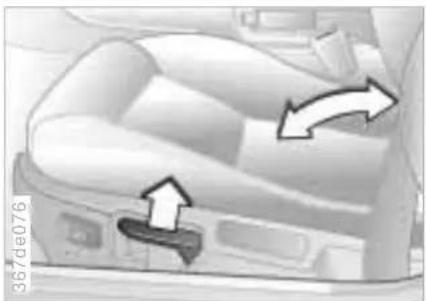
Top-down view of a vehicle interior with directional arrows indicating movement or flow (no text or symbols)Backrest angle
Pull the lever and apply or remove weight as required.

Read and comply with the adjustment instructions on page 50.
Failure to do so can result in diminished personal safety.
Head restraints
The head restraints are integrated into the backrests.
Head restraints reduce the risk of spinal injury in the event of an accident.
natural_image
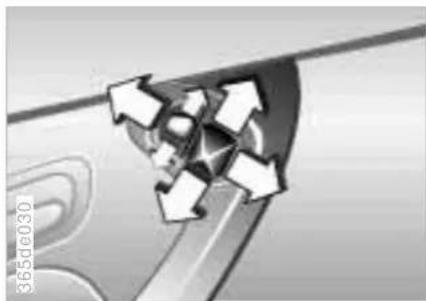
Close-up of a mechanical component with directional arrows indicating motion (no text or symbols)Exterior mirrors
Make adjustments with the large, four-directional mirror switch.
Change to the other rearview mirror with the smaller switch.
▶ Push the switch up – mirror on the driver's side.
▶ Push the switch down – mirror on the passenger's side.
You can also adjust the mirrors manually by pressing against the outer edges of their lenses.
The mirror on the passenger's side features a lens with a more convex surface than the mirror installed on the driver's side. When estimating the distance between yourself and other traffic, bear in mind that the objects reflected in the mirror are closer than they appear. This means that estimations of the distance to following traffic should not be regarded as precise.
Electric defrosting\*
Both mirrors are defrosted automatically when the ignition key is in position 2.
Mirrors
text_image
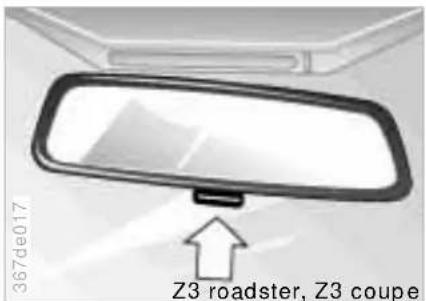
367de017 Z3 roadster, Z3 coupeInterior rearview mirror - Z3 roadster, Z3 coupe
To reduce the glare effect from the rear while driving at night, tilt the mirror by moving the small lever.
text_image
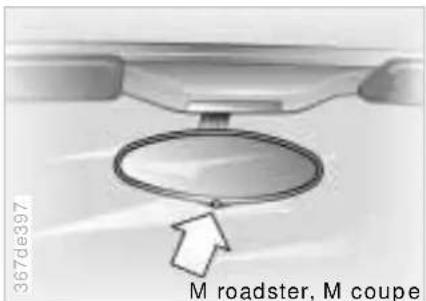
367de397 M roadster, M coupeInterior rearview mirror - M roadster, M coupe
This mirror dims automatically through an infinitely-variable range by responding to the effects of light (ambient light and headlamp glare).
The mirror automatically reverts to its clear, undimmed setting whenever you select "Reverse."
The two photocells should be kept clean and unobstructed to ensure that the mirror continues to operate properly. One photocell (arrow) is on the lower edge, while the other is on the opposite side of the mirror.
For an explanation of the electrochromic technology used in this mirror, refer to page 178.
Vanity mirrors
Fold the sun visors down and push the cover (coupe only) to the side.
Safety belts
natural_image
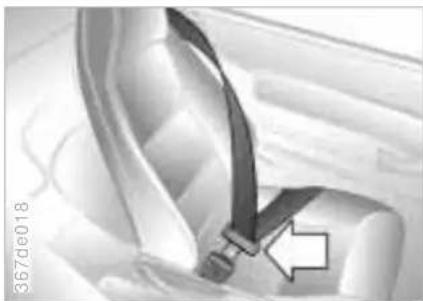
Close-up of a car seatbelt buckle being adjusted, showing no text or symbols on the belt (labeled '367de018')Fasten your safety belt before beginning every trip.
To fasten: Make sure you hear the catch engage in the belt buckle.
To release: Press the red button in the buckle. Hold the belt and guide it back to its reel.
The safety belt locks also:
In an abrupt stop or a collision
When you pull it sharply
During sudden braking or acceleration
In curves
When the vehicle is at an extreme angle.
text_image
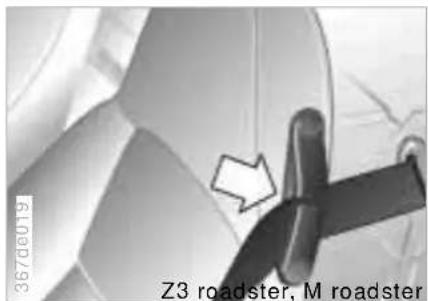
3670e019 Z3 roadster, M roadsterZ3 roadster, M roadster
Make sure the safety belts are routed through the belt guide loops on the seat backrests.
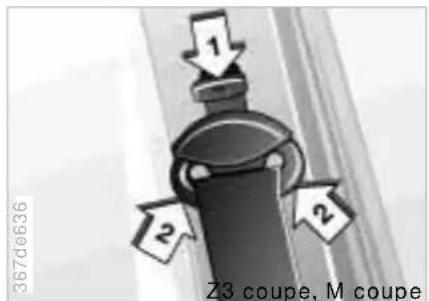
Safety belt height adjustment - Z3 coupe, M coupe
You can adjust the safety belts to fit your own physical dimensions by using the safety belt height adjustment mechanism.
Downward adjustment:
Press the button down (arrow 1).
Upward adjustment:
Grasp the deflection fitting on the side and slide it upward (arrows 2).
Safety belts

Comply with the following instructions for wearing safety belts. If you do not, maximum personal protection will not be provided and the safety function of the belt is limited. These instructions also apply for vehicle passengers:
Never allow more than one person to wear a single safety belt. Never allow infants or small children to ride in a passenger's lap.
Avoid twisting the belt while routing it firmly across your hips and shoulder. Do not allow the belt to rest against hard or fragile objects in your pockets.
Do not route the belt across your neck, or run it across sharp edges. Be sure that the belt does not become caught or jammed.
Be sure that the safety belt is fastened firmly against your body at all times. For this reason, avoid wearing bulky clothing which will prevent proper belt fit.
Pull the safety belt across your shoulders frequently to re-tension it. In the event of a frontal impact, a loose lap belt could slide over your hips, leading to abdominal injury. In addition, the safety belt's restraint effectiveness is reduced if the belt is worn loosely.
Expectant mothers should also wear their safety belt at all times, taking care to ensure that the lap belt fits against the lower hips and does not exert pressure on the abdominal area.
For care and cleaning, refer to page 137.

If the safety belt system has been stressed as a result of an accident or if it has been damaged in any other way: Have the belt system, including the safety belt tensioner replaced by an BMW center. In addition, have your BMW center inspect the safety belt anchors.
If a child restraint system was in your vehicle during an accident, consult the manufacturer's instructions regarding replacement.
Airbags
text_image
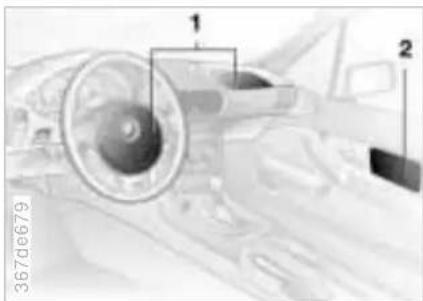
1 2 367de6791 Front airbags for driver and front passenger
2 Side airbags
Protective effect
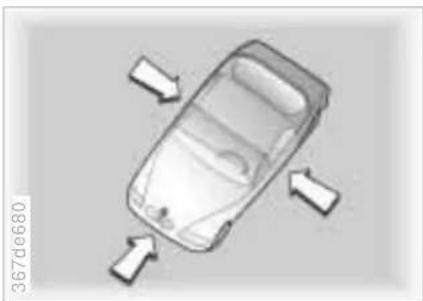
The front airbags help protect the driver and passenger in the event of a head-on collision where the protection provided by the safety belt alone would not be adequate. The side airbags help provide protection in the event of a side collision. Each side airbag provides support to the side chest area.
natural_image
Top-down view of a car with four directional arrows indicating orientation (no text or symbols)The illustration depicts schematically the primary directions of vehicle impact which initiate airbag deployment.
Indicator lamp

The indicator lamp displays the operational readiness of the air-bag system from ignition key
position 1 and up.
System operational:
The indicator lamp comes on briefly.
System malfunction:
The indicator lamp fails to come on. The indicator lamp comes on briefly before going out and then lighting up again.
A system malfunction could prevent the system from responding to a high-intensity frontal impact occurring within its normal response range.
Please have your BMW center inspect and repair the system as soon as possible.
Airbags
Sitting correctly with airbags

For your safety, comply with the following instructions for the airbags. If you do not, the airbags may not be able to provide their maximum protection. All passengers in the vehicle should be aware of and comply with this information:
The airbags are supplemental restraint devices designed to provide extra protection; they are not a substitute for safety belts. Wear your safety belt at all times. The airbags will not be triggered in the event of a minor accident, a vehicle roll-over, or collisions from the rear. In these instances, the safety belt provides optimal protection.
Airbags are located under cover panels in the steering wheel, in the dashboard and in the side trim panels of the doors. Adjust your seat to a position that provides maximum distance between you and the steering wheel, the instrument panel and the door while still allowing comfortable and safe access to all vehicle controls.
To avoid sustaining hand and arm injuries, always grasp the steering wheel on the rim with the hands at the 9 and 3 o'clock positions. Do not place your hands on the center pad. Never allow any objects to obstruct the area between the airbag and an occupant.
Do not use the cover panel above the passenger-side airbag as a storage area.
If you use a child restraint system, read carefully and comply with the instructions on page 57.
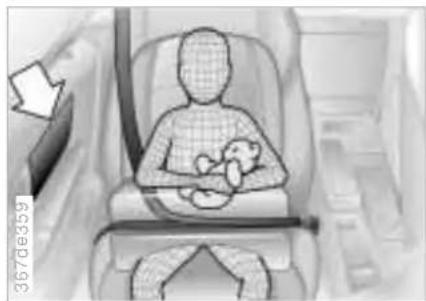
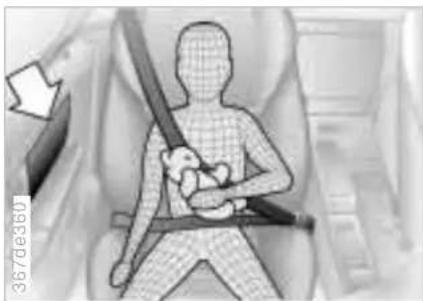
Be sure that child restraints are mounted correctly and provided with the greatest-possible distance between the airbags in the side trim panels. Do not allow children to lean out of the child's seat in the direction of the side trim panels. If they do so, serious injuries can occur if the airbag is triggered.
Even when you have complied with all of these guidelines, there is still a small residual risk of minor facial, hand and arm injuries from airbag deployment occurring in isolated instances.
The ignition and inflation noise may cause a mild temporary hearing loss in extremely sensitive individuals.
Corresponding airbag safety precautions are provided on both sun visors and the instrument panel (US models).
For additional information concerning the airbag system, refer to pages 139 and 176.
natural_image
Interior view of a car seat with a person seated and a teddy bear on the back, no visible text or symbolsThis is the correct way for a child to sit in a child restraint when side airbags (arrow) are provided.
Airbags Child restraint systems\*
natural_image
Illustration of a person wearing a seatbelt and holding a weight, with no visible text or symbols.This is the correct way for a larger child to sit wearing the safety belt when side airbags (arrow) are provided.
Before installing any child restraint device or child seat, please read the following:
Never install a rearward-facing child restraint system in the passenger seat of this car.
If the airbag deploys and hits the back-rest of the rear-facing child seat (of the kind designed for infants under 1 year and 20 lbs./9 kg), it is likely that the child sitting in the rear-facing child seat will be seriously injured or killed.
If it is necessary for a child (not an infant) to ride in the car, certain precautions should be taken. First, move the passenger seat as far away from the dashboard as possible. This important precaution is intended to maximize the distance between the airbag and the child. Older children should be tightly secured with the safety belt. Younger children should be secured in an appropriate forward-facing child restraint system that has first been properly secured with a safety belt.
In the interest of the child's safety, please read carefully and comply with the instructions for installation and use provided by the child restraint's manufacturer whenever your use such a device.
Do not allow children to lean out of a child restraint system toward the door or dashboard, as otherwise serious injuries may result if the airbag deploys. Always ensure that all occupants (of all ages) remain properly and securely restrained at all times.
Read carefully and comply with the safety precautions covering safety belts on pages 53 and 54. If you do not, the protective function of the safety belts will be limited.
Child restraint systems\*
natural_image
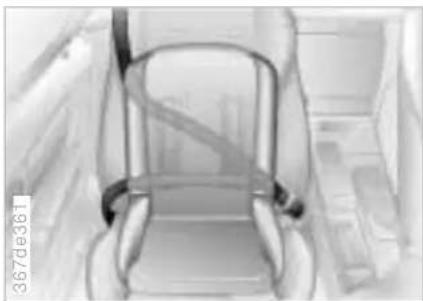
Top-down view of a car seat with visible frame and side arm (no text or symbols)Child restraint installation
The safety belt on the passenger side can be locked for mounting and securing child restraint systems.
A label with operating instructions is attached to the belt next to the sliding latch plate.
To lock the belt
Extract the entire length of the belt from the inertia reel mechanism. Allow the reel to retract the belt somewhat and engage the buckle, then tighten the belt against the child restraint system. The retraction mechanism is now locked. The belt cannot be retracted further. Comply with the installation instructions provided by the manufacturer of the child restraint system.
To release the belt
Release the buckle, remove the child restraint system and allow the inertia reel to retract the belt completely.
natural_image
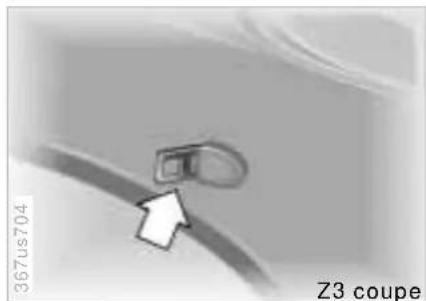
Close-up of a mechanical component with an arrow pointing to a circular feature, labeled 'Z3 coupe' (no readable text or symbols beyond label)Z3 coupe, M coupe
For the use of child restraint systems with a tether strap, an additional mounting point is provided in the coupe at the right rear on the roof frame. Attach the tether strap hook to the mounting point. Adjust the tether strap according to the child restraint manufacturer's instructions.
Steering/Ignition lock
text_image
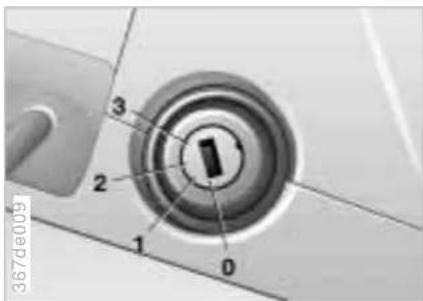
3 2 1 0 S87604060 Steering lock engaged
This is the only position in which the ignition key can be inserted and removed.
An acoustic warning sounds when you fail to remove the ignition key after opening the driver's door.
After removing the key, turn the steering wheel slightly to the left or right until you hear the lock engage.
Vehicles with automatic transmission*: Your vehicle is equipped with an interlock. This means that the ignition key can not be turned to position 0 and removed until the selector lever is in position "P."
Furthermore, the selector lever is locked in position "P" when the ignition key is in position 0 or removed from the ignition switch.
To turn the key back to position 0 or to remove it, first move the selector lever to position "P."
1 Steering lock disengaged
You will often find that it is easier to turn the ignition key from position 0 to 1 if you move the steering wheel slightly to help disengage the detent. Individual electrical equipment and accessories are available for use.
2 Ignition on
All electrical equipment and accessories are available for use.
3 Starting the engine
Vehicles with manual transmission: When starting, depress the clutch, since a lock otherwise prevents the engine from being started.
Starting the engine
Before starting
Engage the parking brake.
Be sure that the transmission selector is in "Neutral" (or "Park" if vehicle is equipped with automatic transmission).
Depress the clutch pedal.

Do not run the engine in enclosed spaces. The exhaust gases contain carbon monoxide, an odorless and colorless, but highly toxic gas. Breathing the exhaust gases poses an extreme health risk, and can lead to unconsciousness and death.
Do not leave the car unattended with the engine running. An unattended vehicle with a running engine represents a potential safety hazard.
Starting the engine
Start the engine. Do not press the accelerator pedal.
Do not actuate the starter for too short a time. Do not turn it for more than approx. 20 seconds. Release the ignition key immediately after the engine starts. Do not allow the engine to warm up by allowing it to run while the vehicle remains stationary. Instead, begin driving immediately at a moderate engine speed.
Should the engine fail to start on the first attempt (if it is very hot or cold, for instance):
Press the accelerator pedal halfway down while engaging the starter.
Cold starts at very low temperatures, from approx. +5 °F (-15 °C) and at altitudes above approx. 3,300 ft (1,000 meters):
On the first start attempt, engage the starter for a longer period (approx. 10 seconds).
Press the accelerator pedal halfway down while engaging the starter.
If these temperature conditions are anticipated for a longer period, have the engine oil changed to a special oil (see page 126). Please contact your BMW center for additional information.
Usually, it is not necessary to depress the accelerator pedal. However, at high altitudes or in very hot or very cold weather, depress the pedal halfway down when starting the engine.
Engine idle speed is controlled by the engine computer system. Increased speeds at start-up are normal and should decrease as the engine warms up. If engine speed does not decrease, service is required.
To prevent the battery from discharging, always switch off any accessories which are not required. Switch off the ignition when the vehicle is not being driven.
Switching off the engine Parking brake
Turn the ignition key to position 1 or 0.

Never withdraw the ignition key while the vehicle is rolling. The steering locks and it is impossible to steer the vehicle.
Always remove the ignition key and engage the steering lock before leaving the vehicle.
Vehicles with manual transmission: Always engage the parking brake when parking on slopes and inclined surfaces, since placing the lever in 1st gear or reverse may not provide adequate resistance to rolling.
Vehicles with automatic transmission: Place the selector lever in "Park."
natural_image
Interior view of a vehicle showing a car seatbelt with a black plastic clip inserted, no visible text or symbolsTo engage
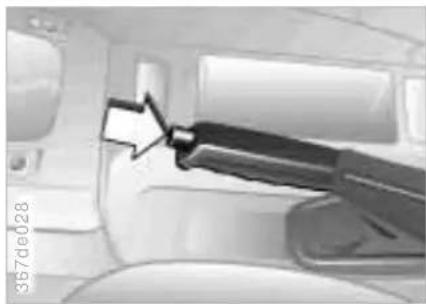
The lock engages automatically when you lift the lever, and the indicator lamp in the instrument panel comes on when the ignition key is in position 2. Refer to page 23.
To release
Pull up slightly on the lever, press the button and lower the lever.
The parking brake is designed primarily to prevent the vehicle from rolling when parked. It operates against the rear wheels.

If, in exceptional circumstances, it should be necessary to engage the parking brake while the vehicle is in motion, do not pull it with excessive pressure. Keep your thumb pressed against the release button while carefully pulling up the lever to apply moderate pressure. Excessive pressure can lead to overbraking and loss of traction (fishtailing) at the rear.
The brake lamps do not come on when the parking brake is engaged.
Vehicles with manual transmission: Always engage the parking brake when parking on slopes and inclined surfaces, since placing the lever in 1st gear or reverse may not provide adequate resistance to rolling.
Vehicles with automatic transmission: Place the selector lever in "Park."
To avoid corrosion, apply the parking brake lightly from time to time when coasting to a standstill (at a traffic signal, for instance), provided that it is safe to do so.
Manual transmission
text_image
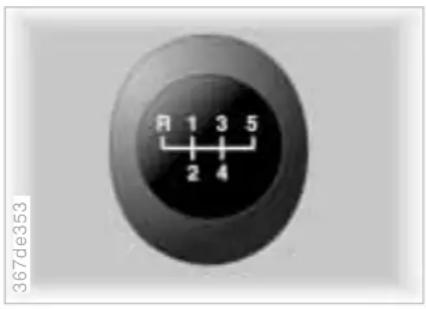
R 1 3 5 2 4 367de353The shift lever's neutral plane is located between 3rd and 4th gear.
When shifting from each gear into "Neutral," the shift lever returns automatically to this neutral position because of its spring loading.
Reverse
Select reverse only when the vehicle is stationary. Press the shift lever to the left to overcome the resistance.
As you do this, the backup lamps will turn on automatically when the ignition key is in position 2.

Do not hold the vehicle in place on slopes by slipping or "riding" the h. Use the parking brake instead. A ting clutch increases clutch wear.
Automatic transmission\*
Adaptive Transmission Control ATC\* (Z3 roadster 2.3, 2.8, Z3 coupe)
The automatic transmission of your BMW is equipped with an Adaptive Transmission Control (ATC). This system reacts with precision to your individual driving style and the current driving conditions. Different shift programs are utilized to achieve this.
For details concerning ATC, please refer to the chapter describing "Advanced technology" on page 176.
natural_image
Interior view of a vehicle gear shift control panel with mode dial and control buttons (no visible text or symbols)Selector lever positions
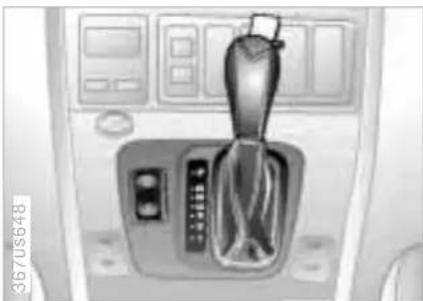
PRND321
Shift programs
Press the switches:
E (Economy)
M (Manual)
Selector lever in position 3:
S (Sport Program)
Starting the engine
The engine can only be started in positions "P" or "N."
Range selection
A detent prevents inadvertent shifts to the "Reverse" or "Park" selector lever positions. To disengage the detent, press the button on the front side of the shift knob (arrow in the illustration on the left).

While the vehicle is stationary and before shifting out of "Park" or
"Neutral," depress the footbrake in order to disengage the selector lever's lock mechanism (Shiftlock).
Hold the footbrake down until starting off. The vehicle will otherwise "creep" when a drive position is engaged.

Before exiting the vehicle when the engine is running, place the
selector lever in the "Park" or "Neutral" position and apply the parking brake. If you do not, the vehicle can move. Do not leave the car unattended with the engine running. An unattended vehicle with a running engine represents a potential safety hazard. If you should accidentally select "Neutral" while traveling at high speed, remove your foot from the accelerator pedal immediately. Allow the engine speed to drop to idle before selecting the desired drive position. Damage could otherwise occur due to excessive engine speed.
64 Automatic transmission\*
P - Park
Select "Park" only when the vehicle is stationary. The transmission locks to prevent the rear wheels from turning.
R - Reverse
Select "Reverse" only when the vehicle is stationary.
N - Neutral
Select "Neutral" only if your journey is interrupted for a longer period.
D – Drive (automatic shift program)
This position is designed for driving under all normal operating conditions. All forward gears are available; the ATC* is fully operational.
3 - Sport Program
This program is designed for performance-oriented driving. It employs delayed shift points for full utilization of the vehicle power reserves.
2 and 1 - Mountain ascents and engine braking
Select these ranges to prevent undesired shifts and use the engine braking effect to maximum advantage on mountain roads or extended uphill and downhill stretches. The transmission shifts up only as far as the selected gear.
Kickdown (automatic downshift)
In the "Kickdown" mode, you achieve the maximum engine performance in position "D."
Press the accelerator pedal past the increased resistance point at the full-throttle position.
E - Economy
For economical driving. This is the initial position whenever the engine is started.
M - Manual program
This program is for driving conditions under which the selected gear is to be retained. The transmission then remains in this gear both when starting off and during acceleration. With this program, you drive only in 4th gear when in position "D."
Electronic transmission control module

If the indicator lamp comes on, there is a malfunction in the transmission system.
Bring the vehicle to a stop, select transmission position "Park," set the parking brake and turn the engine off (ignition key to position 0). Wait a few seconds, then start the engine.
If the indicator lamp goes out again after a few seconds, normal transmission performance has been restored. Continue to drive normally.
If the indicator lamp does not go out, all selector lever positions can still be selected. However, the vehicle has limited performance in the forward drive positions because the transmission utilizes only 3rd gear (position 1 or 2) or 4th gear (position 3 or "D").
In this situation, avoid severe loads and take the car to the nearest BMW center without delay.
Automatic transmission\* Turn signals/High beams

Do not perform service operations in the engine compartment with a position engaged. If you do so, vehicle could move.
For towing and jump-starting, refer to pages 170 and 172.
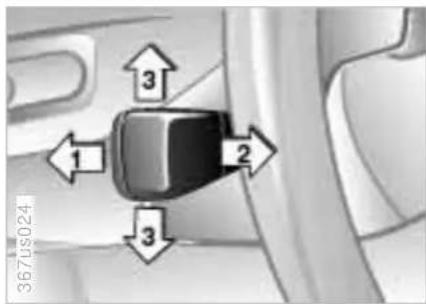
text_image
367us024 1 2 31 High beam (blue indicator)
2 Headlamp flasher (blue indicator)
3 Turn signal indicator (green indicator lamp and rhythmic clicking of the blinker relay)
If the indicator lamp and the clicking from the relay are both faster than normal, one of the turn indicators has failed.
To signal briefly
Press the lever up to but not beyond the detent. It then returns to the center position when released.
Wiper/Washer system
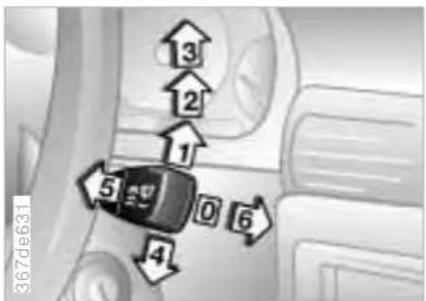
text_image
3 2 1 5 0 6 4 367de631Windshield
0 Wipers retracted
1 Intermittent wipe
2 Normal wipe
3 Fast wipe
4 Brief wipe
5 Automatic window washer
Rear window -
6 Intermittent wipe/ Automatic window washer
0 Wipers retracted
The wipers are partially hidden behind the hood. To bring the wipers up into their vertical position (important when changing the blades, or folding up when frost is expected):
Switch on the wipers and switch off the ignition when the wipers are approximately vertical.

Fold the wipers down onto the windshield before turning on the ignition key. Failure to do this could result in damage to the wiper/washer system and hood.
1 Intermittent wipe
The length of the interval is varied automatically according to the car's actual road speed.
2 Normal wiper speed
The wipers automatically revert to intermittent operation when the vehicle is stationary.
3 Fast wiper speed
When the vehicle is stationary, the system does not switch to a lower wiper speed.
4 Brief wipe
The wipers move once across the wind-shield.
5 Automatic windshield washer
The system sprays washer fluid against the windshield and activates the wipers for a brief period.
If you only pull the lever briefly, the system sprays washer fluid onto the wind-shield without activating the wipers.
Wiper/Washer system Rear window defroster
6 Intermittent wipe/ Automatic rear window washer
Press the lever briefly: The intermittent setting of the rear window wiper is switched on or off.
Press and hold the lever: The system sprays washer fluid against the rear window and activates the wiper. After the lever is released, the wiper continues to cycle for a few seconds.
To change the wiper blades, refer to page 146.
Headlamp washers\*
If the headlamps are on, they will also be cleaned every fifth time you activate the automatic windshield washer.
Do not use the washers if there is any danger that the fluid will freeze on the windshield, otherwise vision could be obscured. For this reason, use an antifreeze agent. Refer to page 124. Do not use the washers when the reservoir is empty, otherwise damage to the washer pump could result.
Windshield washer jets
The windshield washer jets are heated automatically* when the ignition key is in position 2.
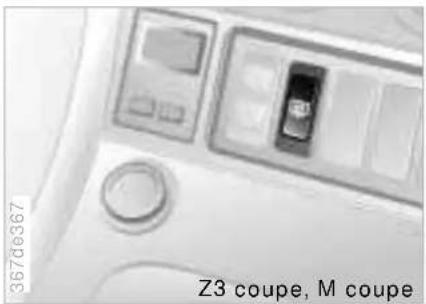
natural_image
Close-up of a car air conditioner unit with control panel and door (no visible text or symbols)The Z3 coupe (illustration) and M coupe both have a rear window defroster. Depending on the vehicle model, the arrangement and appearance of the switches may vary. Please refer to the individual symbol for selecting the desired function.
To activate
Press the button, the indicator lamp comes on.
To deactivate
Press the button if the indicator lamp is on.

M coupe: Activation duration: 8 minutes maximum.
Cruise control\*
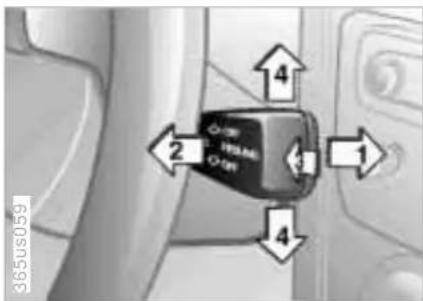
text_image
365000 4 2 1 4You can store and automatically maintain any desired vehicle speed above approx. 25 mph (40 km/h).
The system is switched off and the stored speed deleted from its memory when you turn the ignition key to position 0.
To store and maintain speed/ to accelerate
Press the lever briefly in direction 1: The system records and maintains the current vehicle speed. Every time you briefly press the lever, the speed increases by approx. 0.6 mph (1 km/h).
Hold the lever in position 1:
The vehicle accelerates without pressure on the accelerator pedal. When you release the lever, the system memorizes and maintains the current speed.
If, on a downhill gradient, the engine braking effect is not sufficient, the controlled speed can be exceeded. Speed can drop on uphill grades if the engine output is insufficient.
To decelerate
Press the lever briefly in direction 2: If you are already driving with active cruise control, the speed is decreased by approx. 0.6 mph (1 km/h) every time you briefly touch the lever.
Hold the lever in position 2:
With the cruise control active, the system automatically reduces the throttle opening to slow the vehicle. When you release the lever, the system memorizes and maintains the current speed.
Activate stored setting (resume)
Press the lever briefly in direction 3: The vehicle accelerates to and maintains the last speed stored.
To cancel
Press the lever briefly in direction 4: The cruise control is deactivated immediately.
In addition, the system is also automatically deactivated in response to the following conditions:
When you apply the brakes
When you depress the clutch or move the automatic transmission selector lever from "D" to "N"
If you exceed or fall below the programmed speed for an extended period (by depressing the accelerator, for example).
Do not use cruise control on twisting roads, when high traffic density prevents driving at a constant speed, when the road surface is slick (snow, rain, ice), or when the road surface is loose (rocks or gravel, sand).
Odometer Tachometer Fuel gauge
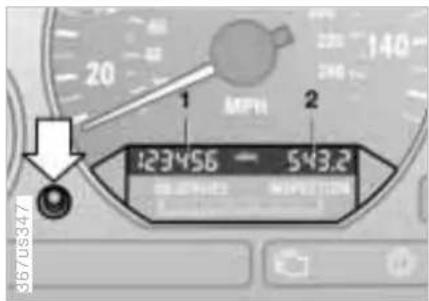
text_image
MPH 123456 - 543.2 00:00:00:00 367us3471 Odometer
You can activate the displays shown in the illustration with the ignition key in position 0 by pressing the button in the instrument cluster (arrow).
2 Trip odometer
To reset the trip odometer to zero, press the button (arrow) with the ignition key in position 1 and up.
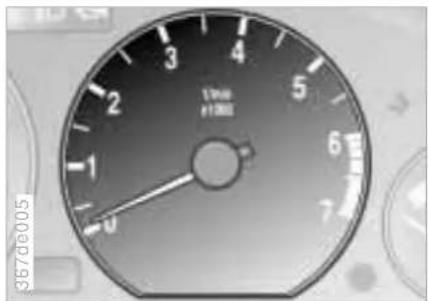
text_image
367de005 1900 ±1300 -1 -0Never allow the engine to operate with the needle in the red overspeed sector of the gauge.
To protect the engine, the Engine Management system automatically interrupts the fuel supply in this range; you will notice a loss of power.
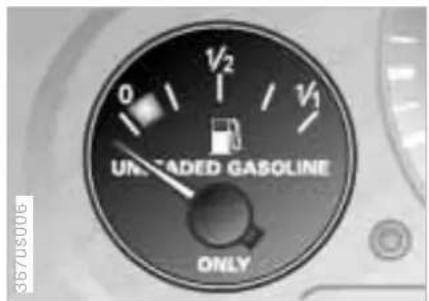
text_image
UNTADED GASOLINE ONLYWhen you switch on the ignition, the indicator lamp comes on briefly to confirm that the system is operational.
Once the indicator lamp stays on continuously, there are still approx. 2.1 gallons (8 liters) of fuel in the fuel tank.
Tank capacity: Page 185.
If the tilt of the vehicle varies (extended driving in mountainous areas, for example), the needle may fluctuate slightly.

Please refuel early, since driving to the last drop of fuel can result in
damage to the engine and/or catalytic converter.
70 Temperature gauge Service Interval Display
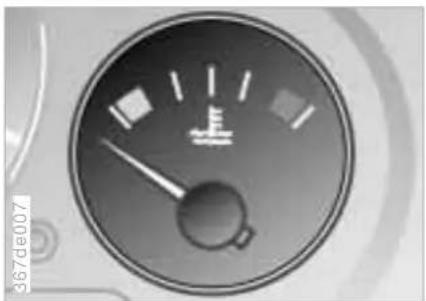
natural_image
Circular gauge or indicator with a pointer and tick marks, no readable text or symbolsBlue
The engine is still cold. Drive at moderate engine and vehicle speeds.
Red
When you switch on the ignition, the warning lamp comes on briefly to confirm that the system is operational.
Comes on while driving: The engine is overheated. Switch off the engine immediately and allow it to cool down.
Between the blue and red zones
Normal operating range. It is not unusual for the needle to rise as far as the edge of the red zone in response to high outside temperatures or severe operating conditions.
Checking coolant level: Page 128.

text_image
MPH 123456 - 543.2 OILSERVICE INSPECTIONGreen lamps
The number of illuminated lamps decreases as the time for your next maintenance visit approaches.
Yellow lamp
This field appears together with OILSERVICE or INSPECTION.
This alerts you that maintenance is due. Please arrange for an appointment with your BMW center.
Red lamp
Maintenance is overdue.
Auxiliary instruments, M roadster, M coupe
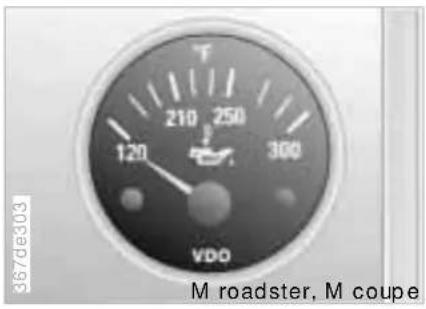
text_image
3670e303 M roadster, M coupeMotor oil temperature
Under normal operating conditions, the temperature of the engine oil is between 175 °F and 250 °F (80 °C and 120 °C). During performance-oriented driving, do not exceed the maximum temperature of 265 °F (130 °C).
Until the oil temperature reaches 140 °F (60 °C), do not exceed an engine speed of 4,000 RPM.
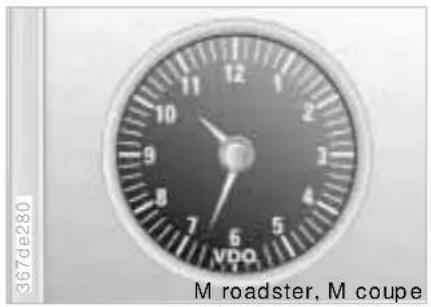
text_image
367de280 M roadster, M coupeAnalog clock
To adjust the time on the clock, simultaneously press and turn the button in the center.
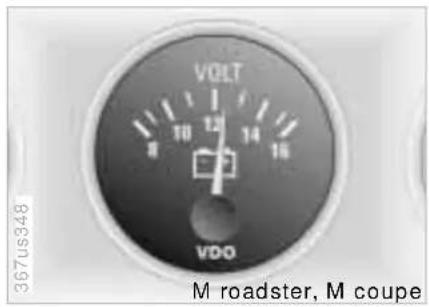
text_image
VOLT 8 10 12 14 16 VDO M roadster, M coupeVoltmeter
The display is provided at ignition key position 1 and above.
72 Digital clock, Z3 coupe Analog clock, Z3 roadster
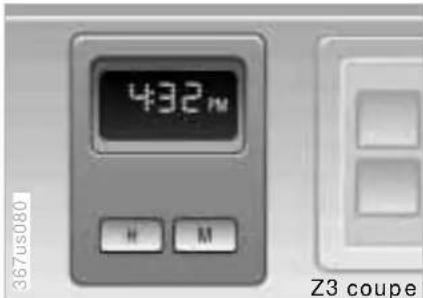
text_image
432m H M 367us080 Z3 coupeThe display is provided at ignition key position 1 and above. In ignition key position 0 and when the vehicle lighting is off, the display is not illuminated.
After a power loss, 0:00 appears in the display.
Time entries are made with the key for setting the hour and with the key for setting the minutes.
Each time a key is pressed, the display is increased by one. Holding down the key starts the rapid advance. The time begins to run exactly on the second each time is pressed.
To correct the time:
Depending on the correction, press the key for hours or the key for minutes.
Switching the time display into the 12 or 24-hour mode:
If you press the and keys simultaneously, the display converts from the 12-hour mode to the 24-hour mode.
When you select the 12-hour mode, AM or PM will appear to the right of the time.
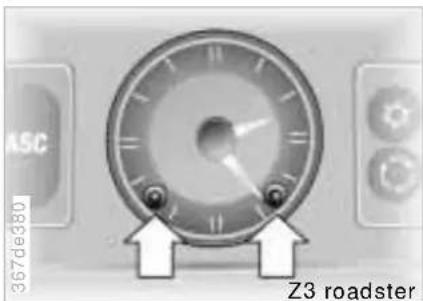
text_image
ASC 367de380 Z3 roadsterYou can correct the time by pressing the buttons (arrows) with a sharp object such as a ball-point pen.
Set the clock forward by pressing the right button; set the clock back by pressing the left button.
Onboard computer\*

natural_image
Close-up of a car seatbelt buckle with a white arrow pointing to it, no visible text or symbolsMode selection
You can call up the onboard computer data in the display from ignition switch position 1 with the turn indicator lever. Press the button briefly to select the next display mode.
In addition, you can change the time by pressing the key.
With the key, the calculations for average fuel consumption and speed are reset and begin again.
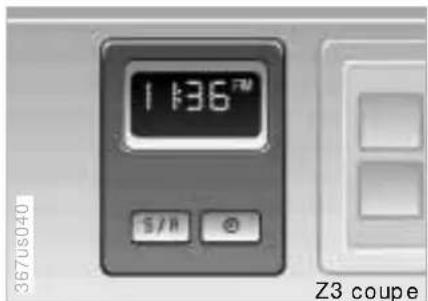
text_image
1:36° S/H O 367us040 Z3 coupeThe illustration depicts the onboard computer of the Z3 coupe as an example. The onboard computer of the Z3 roadster has minor differences in appearance.
Time
The display is provided at ignition key position 1 and above. In ignition key position 0, the time is displayed for approx. 8 seconds by pressing the key.
Following a power loss, the clock automatically switches to the setting mode: The colon flashes. Two dashes are displayed for entering the hour.
To enter the time
Enter the numbers for hours and minutes by pressing the key.
Enter the hour first. Each time the key is pressed, the hour display increases by one. Pressing and holding the key starts the rapid advance.
Confirm the time set with the key. Now enter the minutes when two zeros appear.
Enter the minutes in the same manner as the hours.
Press the save key the time is started exactly on the second. The two dots stop flashing.
To reset the time
Press and hold the key for approx. 3 seconds: Enter the hour when the colon begins to flash.
Enter the numbers by pressing the key in the same manner as when entering the time.
74 Onboard computer\*
Setting the 12-hour or 24-hour mode
Press and hold the 1 keys simultaneously for approx. 1 second.
Then press the key. Now, the mode changes from 12 to 24 hours whenever you press the key.
When you select the 12-hour mode, AM or PM will appear on the right-hand side of the display panel.
The last mode selected is adopted when you press automatically stored approx. 5 seconds after the last setting.
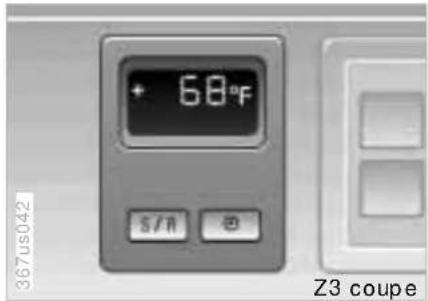
text_image
+ 68°F S/A @ Z3 coupeOutside temperature
If the outside temperature drops to approx. +37.5 °F (+3 °C), a warning signal sounds (ice warning). The temperature display appears automatically and flashes for 8 seconds.
The warning is repeated whenever the temperature climbs to at least +43 °F (+6 °C) and then drops to +37.5 °F (+3 °C) again.
The ice warning does not alter the fact that surface ice can form at temperatures above +37.5 °F (+3 °C), on bridges or shaded road surfaces, for instance.
Onboard computer\*
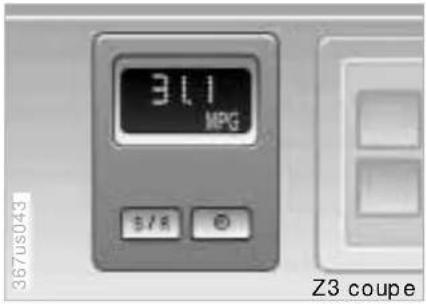
text_image
367us043 3.11 MPG S/R O Z3 coupeAverage fuel consumption
The computation is made when the engine is running. Periods when the vehicle is parked and the engine is not running are not included.
New computation:
When this function has been activated and you press the key, the fuel consumption is recalculated from that point in time.
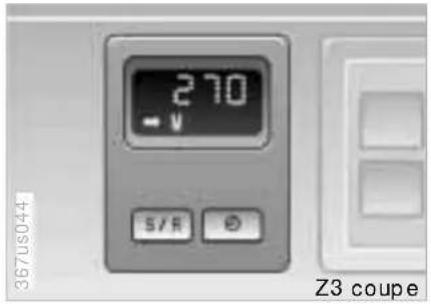
text_image
270 - V S/R O 367US044 Z3 coupeEstimated cruising range
The computer bases its calculations of the cruising range on the rate of fuel consumption in the period immediately preceding your data request.
When three dashes flash in the display, the cruising range is below 9 miles (15 km). You should refuel as soon as possible.
Refueling is registered by the onboard computer with the ignition key in position 1 or higher.
If the vehicle has been parked at an angle, the cruising range cannot be displayed accurately. The display will be corrected while the vehicle is moving.
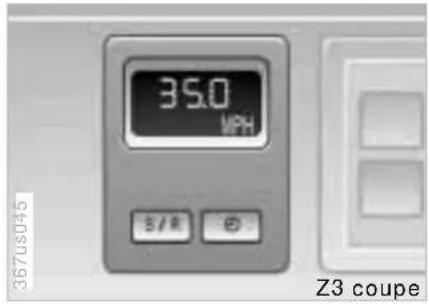
text_image
367us045 35.0 MPH S/R E Z3 coupeAverage speed
Periods when the vehicle is parked and the engine is not running are not included in the computation.
At speeds below 100 mph (100 km/h), the display includes decimals.
New computation:
When this function has been activated and you press the key, the average speed is recalculated from that point in time.
Automatic Stability Control plus Traction (ASC+T)/Dynamic Stability Control (DSC)\*
This system helps provide additional dynamic stability, particularly when accelerating and cornering.
The DSC enhances the benefits of the ASC+T. In addition to optimizing vehicle stability and traction during acceleration or when starting from a standstill, a further benefit is realized in cornering. This, of course, is true only within physically feasible limits.
The system activates automatically each time you start the engine.
Indicator lamp

The indicator lamp in the instrument cluster goes out shortly after you switch on the ignition.
Refer to page 24.
Indicator lamp flashes:
The system is actively regulating drive torque in response to monitored vehicle operating conditions.
If the indicator lamp fails to go out after the engine is started, or comes on during the course of normal vehicle operation:
There is a system fault or the system has been switched off. The vehicle remains operational, but without ASC+T/DSC.
For repairs, please consult your BMW center.
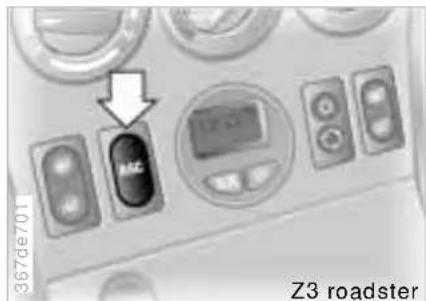
text_image
967de701 ASC Z3 roadsterTo deactivate the system
Press the switch (arrow) – the indicator lamp comes on and stays on.
Depending on equipment options, the button is marked with ASC or DSC.

The illustration depicts the button for the Z3 roadster. Depending on
the vehicle model, the arrangement and appearance of the button may vary.
Please refer to the specific switch symbols for selecting the desired function.
ASC+T/DSC\* Parking lamps/Low beam
In the following exceptional circumstances, we recommend that you deactivate the ASC+T/DSC system:
When "rocking" the vehicle to free it or when starting from a full stop in deep snow or on loose surfaces
or when driving with snow chains.
Refer also to page 105.
To reactivate the system
Press the button again; the indicator lamp goes out.

Not even ASC+T/DSC can suspend the normal laws of physics.
A driving style that is appropriate for the conditions is always the responsibility of the driver. For this reason, do not take risks, using the additional safety margin provided by the system as an excuse.
For additional details concerning ASC+T/DSC, please refer to the chapter titled "Advanced technology" on page 177.
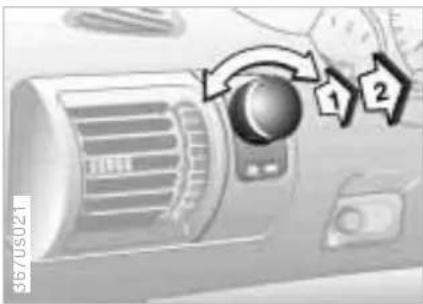
text_image
3670S021 1 2Parking lamps (position lamps/ side marker lamps)

Position 1
With the switch in this position, vehicle lighting on both sides is on.
Low beam headlamps

Position 2
When you switch the ignition off while the low beams are still on,
only the parking lamps (position lamps/ side marker lamps) remain on.
Instrument panel lighting
With the lamp switch in the "On" position, turn the switch to adjust the illumination intensity.
"LIGHTS ON" warning
When you open the driver's door after turning the ignition key to position 0, a warning signal sounds for a few seconds to remind you that the headlamps have not been switched off.
Daytime running lamps\*
The headlamps are automatically switched on for daylight driving at ignition key position 2.
78 Fog lamps Interior lamps
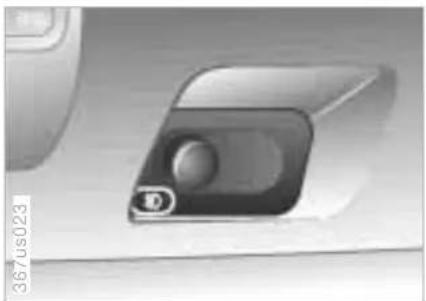
natural_image
Close-up of a computer mouse with a small circular head and a small letter 'D' on the screen (no visible text or symbols)Front fog lamps\*

A green indicator lamp appears in the instrument cluster to indicate that the front fog lamps
are on.
It is not possible to switch on the front fog lamps together with the high beams.
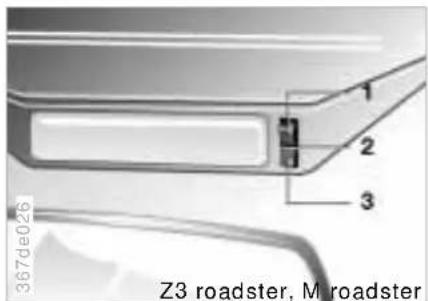
text_image
1 2 3 367de026 Z3 roadster, M roadsterZ3 roadster, M roadster
1 Continuously off
2 Automatically controlled
3 Continuously on
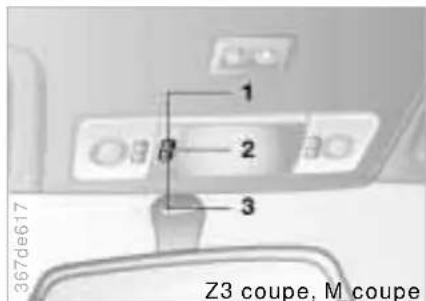
1 Continuously on
2 Continuously off
3 Automatically controlled
Interior lamps Reading lamps
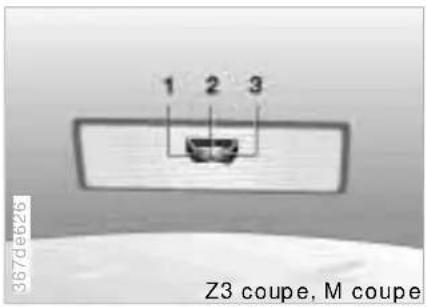
1 Continuously on
2 Continuously off
3 Automatically controlled
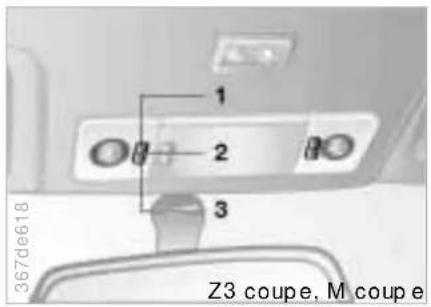
The Z3 coupe and M coupe have reading lamps:
1 Continuously on
2 Continuously off
3 Automatically controlled
In order to conserve the battery, all of the lamps in the vehicle are switched off automatically about
15 minutes after the ignition key is turned to position 0.
Heating and ventilation
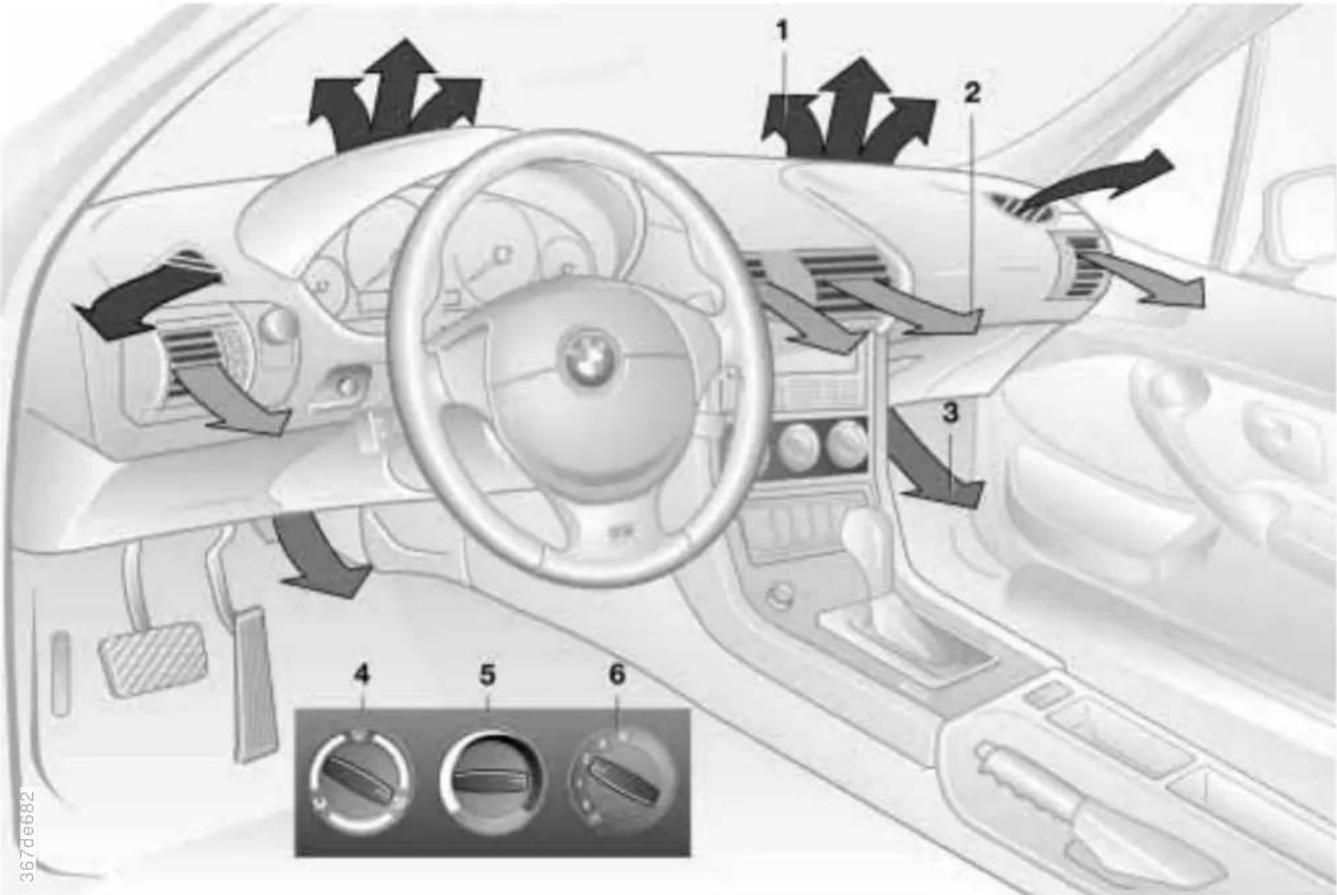
text_image
Diagram of a car interior with numbered directional arrows and labeled controls, likely illustrating vehicle dynamics or airflow patterns.Online Edition for Part-No. 01 41 0 155 149 - © 08/99 BMW AG
Heating and ventilation
1 Air flow toward the windshield and side windows
2 Air flow toward upper body
The rotary dials allow infinitely-variable regulation of the air supply. You can change the airflow direction with the lever in the center of the vent or by rotating the vent grille 82
3 Front footwell ventilation
4 Air distribution onto the ▷ windows ▷ upper body ▷ footwell All intermediate positions are possible 82
5 Temperature 82
6 Air supply The heating and ventilation are operational beginning with position 1 82
Heating and ventilation
Air distribution

You can direct the flow of air onto the windows, toward the upper body and into the footwell. Any intermediate setting is possible. In this position, a small volume of air is directed onto the windows in order to keep them free of condensation.
A "6 o'clock" position is recommended as the normal operating setting.
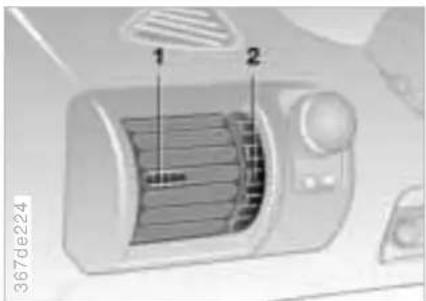
text_image
367de224 1 2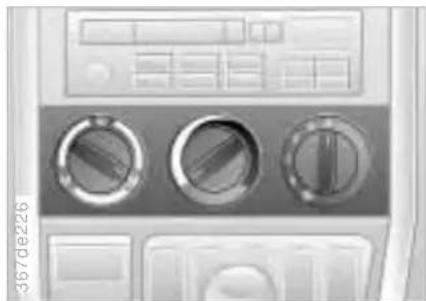
natural_image
Close-up of a control panel with three circular buttons and a numeric keypad (no visible text or symbols)Temperature

In order to increase the temperature of the passenger compartment, turn to the right (red). For rapid heating, turn completely to the right. Then select an interior temperature which is comfortable for you.
Draft-free ventilation
The outlets for the occupants' upper body area can be adjusted to suit your personal preferences:
Use the rotary dial (2) to open and close the vent throughout an infinitely-variable range. With the levers (1), you can direct the air flow to the side. Adjust the air flow up or down by rotating the vent grill.
Set the outlets so that the air flows past you and is not directed straight at you.
Rapid ventilation
1 Set the blower speed control for the air flow rate to position 4.
2 Turn the rotary temperature control completely to the left (blue). Then select an interior temperature which is pleasant for you.
3 Rotary control for air distribution in position ↗.
4 Open the outlets for the upper body area.
Air supply

You can select blower speeds from 1 to 4. Both heating and ventilation become more effective as the air flow rate is increased. In position 0, the blower and the heater are switched off.
Heating and ventilation
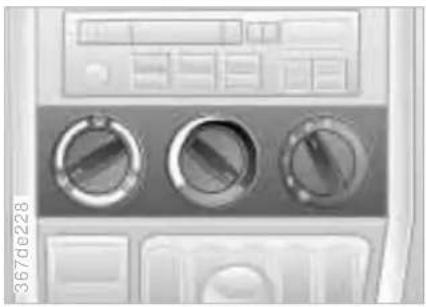
natural_image
Close-up of a control panel with three rotary dials and buttons (no visible text or symbols)Rapid heat-up
1 Set the blower speed control for the air flow rate to position 3.
2 Turn the rotary temperature control completely to the right (red). Then select an interior temperature which is pleasant for you.
3 Rotary dial for air distribution in position
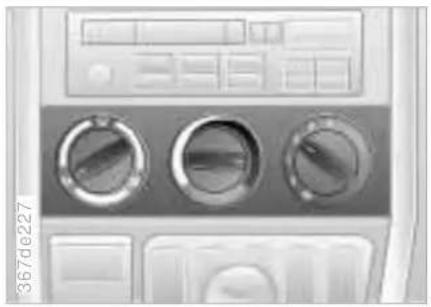
natural_image
Close-up of a vintage refrigerator control panel with three rotary dials and buttons (no visible text or symbols)Heating
This setting is recommended if the windows are free of ice or condensation:
1 Set the blower speed control for the air flow rate to position 2.
2 Use the rotary temperature control to select an interior temperature which is comfortable for you.
3 Rotary control for air distribution in position ↗.
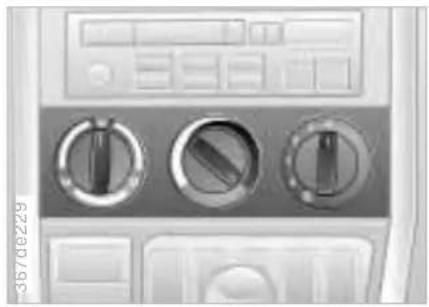
natural_image
Close-up of a kitchen air conditioner unit with three rotary controls (no visible text or symbols)To defrost the windshield and side windows
1 Set the blower speed control for the air flow rate to position 4.
2 Turn the rotary temperature control completely to the right (red).
3 Rotary control for air distribution in position 📋.
4 To defrost the rear window on the coupe, switch on the rear window defroster.
84 Heating and ventilation/Air conditioning*
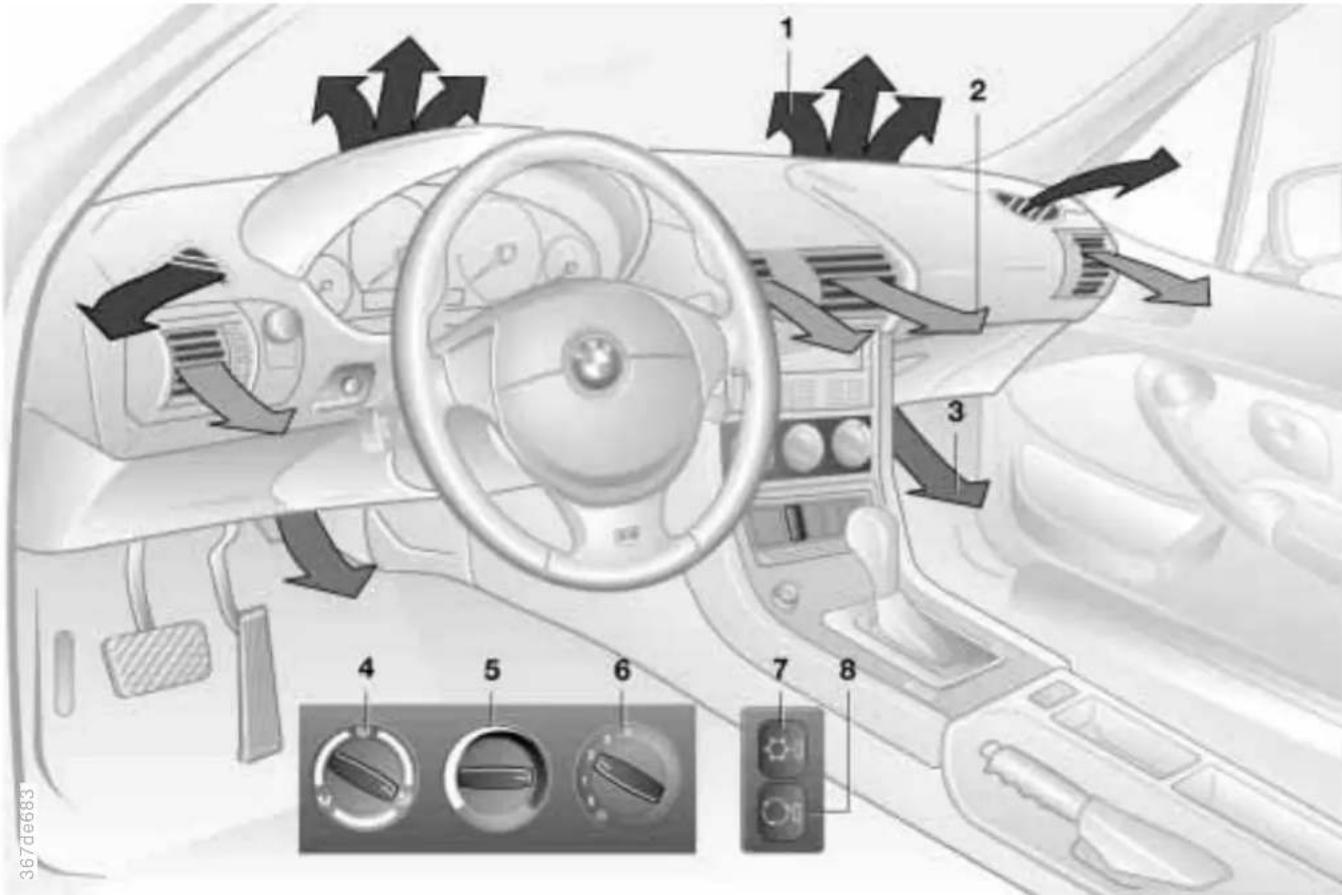
text_image
Diagram of car interior with numbered directional arrows and control switches, likely for vehicle air or air conditioning system.Online Edition for Part-No. 01 41 0 155 149 - © 08/99 BMW AG
Heating and ventilation/Air conditioning\*
1 Air flow toward the windshield and side windows
2 Air flow toward upper body
The rotary dials allow infinitely-variable regulation of the air supply. You can change the airflow direction with the lever in the center of the vent or by rotating the vent grille 87
3 Front footwell ventilation
4 Air distribution onto the ▷ windows ▷ upper body ▷ footwell All intermediate positions are possible 86
5 Temperature 86
6 Air supply The heating and ventilation are operational beginning with position 1 86
7 Air conditioning 86
8 Recirculated air mode 86
Heating and ventilation/Air conditioning\*
Air distribution

You can direct the flow of air onto the windows, toward the upper body and into the footwell. Any intermediate setting is possible. In this position, a small volume of air is directed onto the windows in order to keep them free of condensation.
A "6 o'clock" position is recommended as the normal operating setting.
Temperature

In order to increase the temperature of the passenger compartment, turn to the right (red). For rapid heating, turn completely to the right. Then select an interior temperature which is comfortable for you.
Air supply

You can select blower speeds from 1 to 4. Both heating and ventilation become more effective as the air flow rate is increased. In position 0, the blower and the heater are switched off.
Depending on the vehicle model, the arrangement and appearance of the switches may vary. Please refer to the specific switch symbols for selecting the desired function.
Air conditioning
The air is cooled and dehumidified and – depending on the temperature setting – warmed again when the air conditioner system is switched on. Depending on the weather, the windshield may fog over briefly when the engine is started. At outside temperatures below approx. 41 °F (+5 °C), switch off the air conditioning. This will help to prevent the windows from fogging up. If the windows fog over after switching the air conditioning off, switch it back on.
Condensation forms in the air conditioner system during operation, which then exits under the vehicle. Traces of condensed water of this kind are thus normal.
Recirculated air mode
If there are unpleasant odors in the outside air, you can temporarily block the flow of air. The system then recirculates the air currently within the vehicle.
If the windows fog over in the recirculated air mode, switch this mode off and increase the air supply as required.
Heating and ventilation/Air conditioning\*
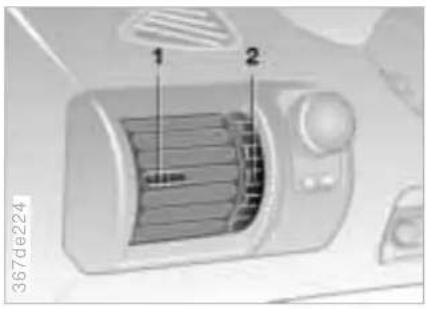
text_image
1 2 367de224Draft-free ventilation
The outlets for the occupants' upper body area can be adjusted to suit your personal preferences:
Use the rotary dial (2) to open and close the vent throughout an infinitely-variable range. With the levers (1) you can direct the air flow to the side, and up or down by rotating the vent grill.
Set the outlets so that the air flows past you and is not directed straight at you.
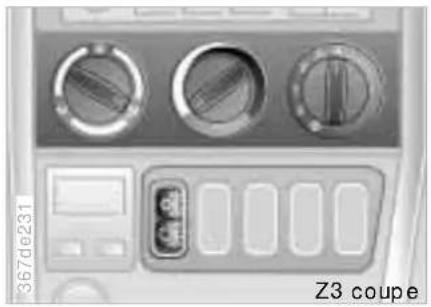
natural_image
Close-up of a car air conditioner panel with three rotary gauges and a control panel (no visible text or symbols)The illustration depicts the switches of the Z3 coupe an example. Depending on the vehicle model, the arrangement and appearance of the switches may vary. Please refer to the specific symbols for switch functions.
Rapid ventilation
1 Set the blower speed control for the air flow rate to position 4.
2 Switch on the air conditioning ^* .
3 Turn the rotary temperature control completely to the left (blue). Then select an interior temperature which is pleasant for you.
4 Rotary control for air distribution in position ^9 .
5 Open the outlets for the upper body area.
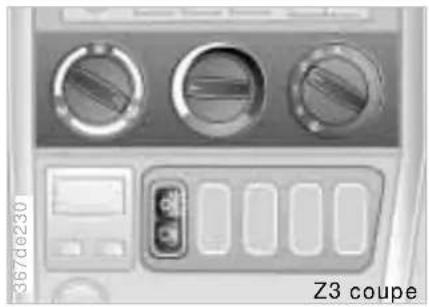
natural_image
Front panel of a vehicle air conditioner unit showing three rotary controls and a control panel (no visible text or symbols)Cooling
1 Set the blower speed control for the air flow rate to position 2.
2 Switch on the air conditioning *.
3 Use the rotary temperature control to select an interior temperature which is comfortable for you.
4 Rotary control for air distribution in position ♦.
5 Open the outlets for the upper body area.
Heating and ventilation/Air conditioning\*
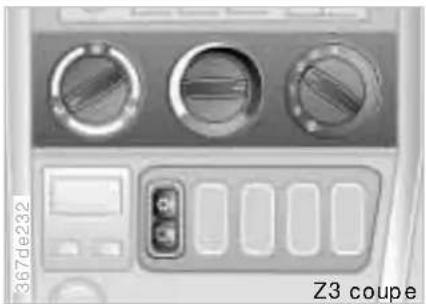
natural_image
Close-up of a car air conditioner panel with three rotary controls and a control panel (no visible text or symbols)Heating
This setting is recommended if the windows are free of ice or condensation:
1 Set the blower speed control for the air flow rate to position 2.
2 Use the rotary temperature control to select an interior temperature which is comfortable for you.
3 Rotary control for air distribution in position ♦.
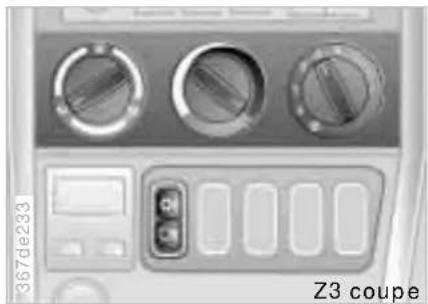
natural_image
Front panel of a vehicle air conditioner unit showing three rotary controls and a control panel (no visible text or symbols)Rapid heat-up
1 Set the blower speed control for the air flow rate to position 3.
2 Turn the rotary temperature control completely to the right (red). Then select an interior temperature which is pleasant for you.
3 Rotary dial for air distribution in position.
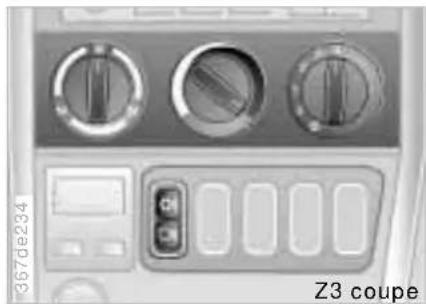
natural_image
Front panel of a car air conditioner unit showing three rotary controls and a control panel (no visible text or symbols)To defrost the windshield and side windows
1 Set the blower speed control for the air flow rate to position 4.
2 Turn the rotary temperature control completely to the right (red).
3 Rotary control for air distribution in position 📋.
4 To defrost the rear window on the coupe, switch on the rear window defroster.
Seat heating\*
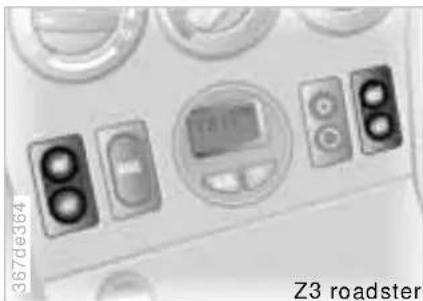
natural_image
Close-up of a roadster control panel with multiple display screens and buttons (no readable text or symbols)The illustration depicts the switches of the Z3 roadster as an example. Depending on the vehicle model, the arrangement and appearance of the switches may vary. Please refer to the specific switch symbols for the desired function.
The seat cushion and backrest can be heated at ignition key position 2.
Press the switches with the heating symbols:

Rapid heat-up as long as the switch comes on brightly. Automatic changeover to regular heating.


Heating as long as the switch comes on brightly. Heating switches off automatically.

To switch over while heating: Press the section of the switch that is dimly lit.
To switch off early: Press the section of the switch that is brightly lit.
Glove compartment Additional storage areas Storage boxes\*
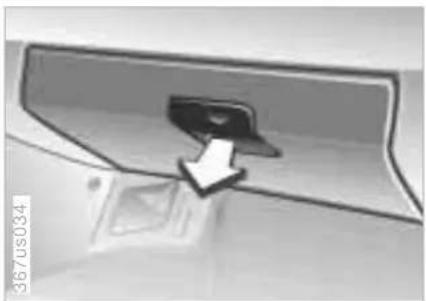
natural_image
Close-up of a door handle with a white arrow pointing to a small object, no visible text or symbolsTo open
Pull the handle and push down the door.
To close
Push the door up.

To prevent injury in the event of an accident, close the glove comment immediately after use.
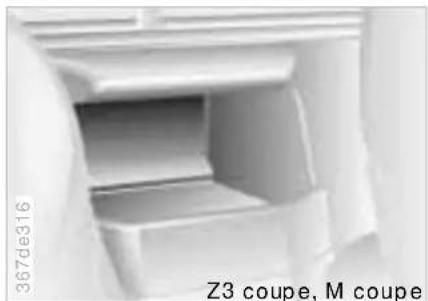
natural_image
Close-up of a white plastic or ceramic container with visible internal structure, no text or symbols present.Storage compartments are located in the center console, in the doors and, on the Z3 coupe and M coupe, between the backrests (refer to the illustration).
A coin box* is located in the door pocket on the driver's side.
A storage net is mounted on the passenger side of the center console.
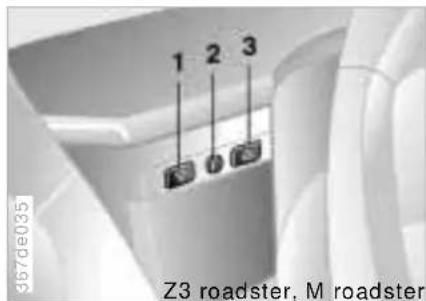
text_image
1 2 3 0 Z3 roadster, M roadsterThe Z3 roadster and M roadster have locking storage boxes*:
Small storage box
Press button 1 to open the box.
Large storage box
Press button 3 and lift the lid of the box.
Both of the storage boxes can be locked with the master keys (refer to page 34) at lock 2.
Beverage holder\* Ashtray\*
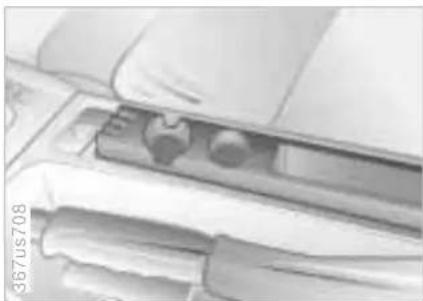
natural_image
Close-up of a mechanical component with no visible text or symbolsThe beverage holder is located in the center console next to the parking brake.
You will find a coin box* in front of the beverage holders.
In the M roadster and M coupe, the coin box is located in the door pocket on the driver's side.
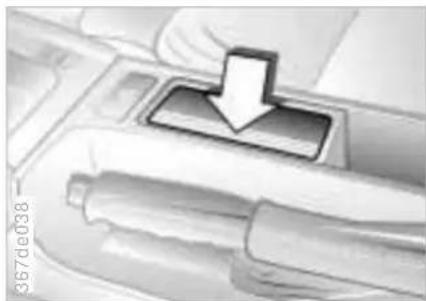
natural_image
Close-up of a mechanical component with a downward arrow indicating a process or operation (no visible text or symbols)To open
Press down on the left of the lid (arrow).
To extinguish a cigarette, tap off the ash and gently press the tip into the funnel.
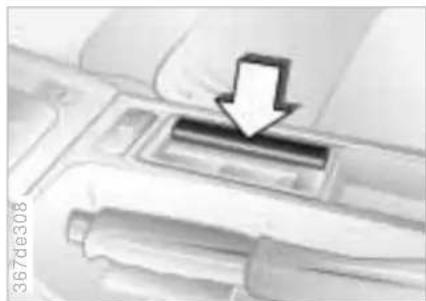
natural_image
Close-up of a car interior with a white arrow pointing to a rectangular object, no visible text or symbols.To empty
Open the lid and press down (arrow): The ashtray insert pops up and can be removed.
Cigarette lighter\*
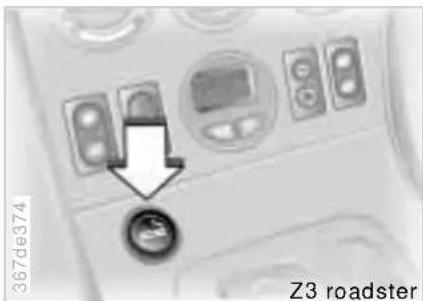
text_image
367de374 Z3 roadsterPress in. Remove as soon as the lighter pops up.

Hold or touch the hot cigarette lighter by the knob only. Holding
or touching it in other areas could result in burns.
The cigarette lighter remains operational when the ignition key has been removed. For this reason, children should never be left in the car unattended.
Cigarette lighter socket
This socket can be used for connecting a flashlight, car vacuum cleaner, or other appliances up to approx. 200 watts at 12 volts. Do not damage the socket by inserting plugs of a different shape or size.
natural_image
Close-up of a vehicle's front panel with control buttons and a circular vent (no readable text or symbols)Non-smoker's equipment package\*
On vehicles with the non-smoker's equipment package, the socket is concealed by a cover.
For access to the socket: Lift the cover off.
Roll-up cover Separation net\*
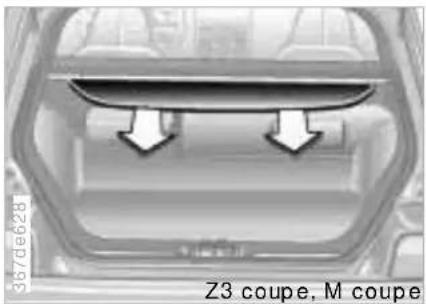
Pull out the roll-up cover and hook it into the holders at the rear.
The roll-up cover can carry light items such as articles of clothing.
Do not place heavy or hard objects on the roll-up cover. These objects could endanger vehicle occupants during heavy brake applications and evasive action or in a crash. Do not allow the roll-up cover to snap back when it is retracted. This could damage it.
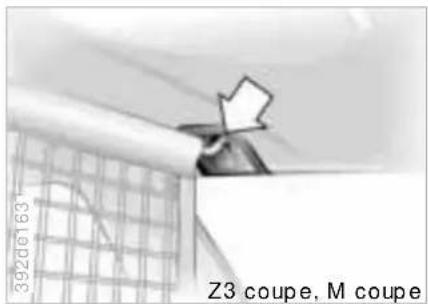
Pull the separation net out by the strap. Grasp the bar on both sides and engage it in the holders.
Do not allow the separation net to snap back when it is retracted. If this is done, there is a risk of personal injury, and the separation net could be damaged.
Cargo loading
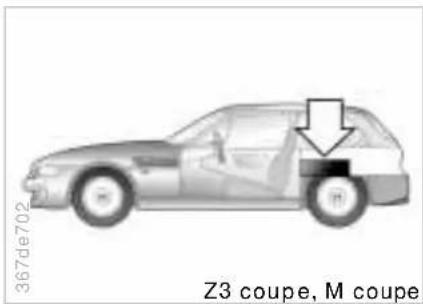
If you are transporting cargo in your coupe:
Load heavy cargo as far forward as possible – directly behind the luggage compartment partition – and as low as possible.
Cover sharp edges and corners.
Do not pile objects higher than the top edge of the backrest.
Pull the separation net out (refer to page 93). Be sure that no items are able to penetrate the separation net.
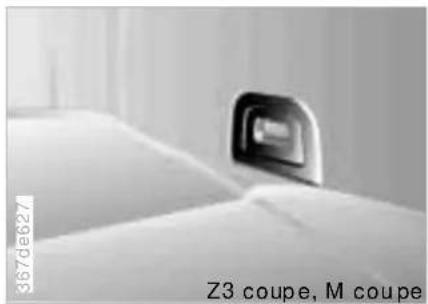
natural_image
Close-up of a white bed with a black camera lens on top, labeled 'Z3 coupe, M coupe' (no other text or symbols visible)Securing the load
For securing suitcases, you can obtain load-securing devices* from your BMW center. The lashing eyes located in the luggage compartment serve for mounting these load-securing devices.
Comply with the information enclosed with the load-securing devices.
Always position and secure the load correctly. If you do not, it can endanger the passengers during braking or evasive maneuvers, for example. Do not exceed the permissible gross weight and the permissible axle loads (refer to page 184). If you do so, the operating safety of the vehicle is no longer ensured, and you are in violation of the law.
Do not carry hard or heavy objects unsecured in the passenger compartment. If you do so, they may be projected through the air during braking and evasive maneuvers, for example, thus endangering vehicle occupants.
Roof-mounted luggage rack
A special luggage system is available for your coupe as an optional accessory. Please comply with the precautions included with the installation instructions.
Because roof racks raise the center of gravity of the car when loaded, they exercise a major effect on its handling and steering response.
You should therefore always remember not to exceed the approved roof weight, the approved gross vehicle weight or the axle weights when loading the rack. You will find the specifications for this under "Technical Data" on page 184.
Make sure that the load is not too heavy, and attempt to distribute it evenly. Always load the heaviest pieces first (on the bottom). Be sure that adequate clearance is maintained for raising the sunroof, and that objects do not project into the opening path of the luggage compartment lid.
Lash the roof luggage down correctly and securely to prevent it from shifting or being lost during driving – this would endanger following traffic.
Drive smoothly and avoid sudden acceleration or braking. Do not corner at high speeds.
The roof load increases the aerodynamic resistance. Increased fuel consumption and additional stresses on the vehicle's body result from this.
natural_image
Close-up of a car wheel with chain links, no visible text or symbolsOnline Edition for Part-No. 01 41 0 155 149 - © 08/99 BMW AG
Special operating instructions:
Break-in procedure 98
Driving notes 99
Catalytic converter 100
Antilock Brake System (ABS) 101
Disc brakes 103
Brake system 104
Winter operation 105
Power steering 106
Cellular phone 107
Radio reception 107
Hardtop-roadster 108
Wheels and tires:
Notes on inflation pressure 110
Tire condition 110
Tire replacement 111
Tire rotation 113
Wheel and tire combinations 113
Winter tires 115
Snow chains 115
Approved wheel and tire specifications 116
In the engine compartment:
Hood 119
Engine compartment 120
Fluids for the washer systems 124
Washer nozzles 124
Engine oil 125
Coolant 128
Brake fluid 130
Vehicle Identification 130
Care and maintenance:
The BMW Maintenance System 131
Caring for your car 132
Airbags 139
Storing your vehicle 140
Laws and regulations:
Technical modifications to the vehicle 141
OBD connector 142
Overview
Controls and features
Operation, care and maintenance
Owner service procedures
Advanced technology
Technical data
Index
Break-in procedure
To ensure that your vehicle provides maximum economy throughout a long service life, we request that you observe the following:
Engine and differential
Up to 1,200 miles (2,000 km):
Drive with varying engine and road speeds, but do not exceed 4,500 RPM or 100 mph (150 km/h).
Comply with local and state maximum speed limits.
Refrain from using full throttle and avoid pressing the accelerator beyond the kickdown point.
After you have driven 1,200 miles (2,000 km), you can gradually increase the engine and road speeds.
You should also comply with these break-in procedures if the engine or differential is replaced later in the course of the vehicle's service life.
Tires
Due to technical factors associated with their manufacture, tires do not achieve their full traction potential until an initial break-in period has elapsed. You should therefore drive with extra caution during the initial 200 miles (300 km).
Comply with local and state maximum speed limits.
When the vehicle is operated on wet or slushy roads, a wedge of water may form between the tire and the road surface. This phenomenon is referred to as aquaplaning or hydroplaning, and can lead to partial or complete loss of traction, vehicle control and braking effectiveness. Reduce your speed on wet roads.
Brake system
Approximately 300 miles (500 km) must elapse before the brake pads and rotors achieve the optimal surface and wear pattern.
To break in the separate parking brake drums, apply the parking brake lightly when coasting to a standstill (at a traffic signal, for instance), provided that traffic conditions allow you to do so. To avoid corrosion, repeat this procedure from time to time.

The brake lamps do not light up when the parking brake is applied.
Vacuum for the brake system booster on your BMW is available only when the engine is running. When you move the car with the engine off – for instance, by towing – substantially higher levels of pedal force will be required to brake the vehicle.
Driving notes

Brakes:
Do not drive with your foot resting on the brake pedal. Even light but consistent pedal pressure can lead to high temperatures, brake wear and possibly even brake failure.
Aquaplaning:
When driving on wet or slushy roads, reduce vehicle speed. If you do not, a wedge of water may form between the tires and the road surface. This phenomenon is referred to as aquaplaning or hydroplaning. It is characterized by a partial or complete loss of contact between the tires and the road surface.
The ultimate results are loss of steering and braking control.
Driving through water:
When there is water on the roads, do not drive in it if it is deeper than 1 foot (30 cm). If the water is at that depth, drive only at walking speed, otherwise the vehicle can sustain damage to the engine, the electrical systems and the transmission.
Hang items of clothing on the hooks in such a manner that they do not obstruct the driver's vision. Do not hang heavy objects on the hooks. If you do so, they could cause personal injury during braking and evasive maneuvers or in a crash, for example.
Catalytic converter
The catalytic converter reduces harmful exhaust emissions.
It is designed for use with unleaded fuel only.
Even minute quantities of lead would be enough to permanently damage both the catalytic converter and the system's oxygen sensor.
To ensure efficient, trouble-free engine operation and avoid potential damage:
Be sure to comply with the scheduled maintenance requirements.
Fill the fuel tank well before it is empty.
If the engine runs roughly, shut it off as soon as possible.
Tow-start the vehicle only when the engine is cold. Tow-starting when the engine is warm could cause unburned fuel to ignite in the catalytic converter, resulting in significant damage. It is better to start the vehicle with an outside starting aid.
Avoid any other situations in which the fuel would not be (completely) burned, for instance:
Frequent or consecutive extended starting attempts or repeated starting attempts when the engine fails to start. (Shutting down and restarting an engine which is running properly does not present a problem.)
Never let the engine run with any of the spark plug cables disconnected.

Be sure to comply with the instructions above to prevent unburned fuel from reaching the catalytic converter. This could cause overheating, leading to serious damage of the catalytic converter.
Extreme temperatures occur at the catalytic converter on this and every catalyst-equipped vehicle. Heat shields are installed adjacent to some sections of the exhaust system. Never remove these shields; do not apply undercoating to their surfaces.
When driving, standing while the engine is idling, or when parking, be careful to avoid contact between the hot exhaust system and easily-flammable materials (hay, dry grass, leaves, etc.). Such contact could cause a fire, resulting in personal injuries and property damage.
Antilock Brake System (ABS)
The concept
ABS increases active safety by preventing the wheels from locking when braking. The reason: Locked wheels are dangerous. When the front wheels slide, the driver loses steering control over the vehicle. Traction loss at the rear wheels can cause the rear end to break into an uncontrolled skid.
ABS is designed to meet two essential requirements during every brake application:
To help provide vehicle stability.
Assured ability to steer and maneuver on the various road surfaces – (asphalt, concrete, dirt, wet conditions, snow, ice).
The system can achieve the shortest braking distances possible under most conditions (on straight-aways and in curves, on asphalt, ice, wet road surfaces, etc.).
Braking with ABS
The system is operative once the vehicle exceeds a speed of approx. 6 mph (10 km/h). It is inactivated once again below approx. 4 mph (6 km/h). Therefore, the wheels could theoretically tend to lock in the final phase of a braking action, but this is insignificant in actual practice.
If you are in a situation which requires full braking, you will exploit the full benefits of the ABS system if you apply maximum brake pressure ("panic stop"). Since the vehicle maintains steering responsiveness, you can avoid possible obstacles with a minimum of steering effort, despite the full brake application.
Depress the brake pedal with steady pressure and do not release it. Do not pump the brakes.
The ABS closed-loop control circuit cycles in fractions of a second. The pulsation at the brake pedal, together with sounds generated by the hydraulic control system, indicate to you that the vehicle is approaching its maximum braking range. It is a reminder to you that you must adapt the vehicle's road speed to existing road conditions.
On road surfaces that have a loose surface layer on a firm base with good traction (on gravel, deep sand or snow, for example), braking distances may be longer than with locked wheels. This also applies for driving with snow chains. However, ABS continues to provide enhanced vehicle stability and steering response under these conditions.
Antilock Brake System (ABS)
Information for your safety
Not even ABS can suspend the laws of physics. ABS alone cannot prevent accidents if the brakes are applied without an adequate, safe distance between vehicles or if the speed limit has been exceeded in curves. Nor can it prevent the hazards of aquaplaning. Responsibility for these types of situations remains in the hands (and at the feet) of the driver. You should never allow the added safety of ABS to lull you into a false sense of security, or mislead you into taking increased risks that could affect your own safety and that of others.

Do not make any modifications to the ABS system.
Service procedures on ABS are to be performed by authorized technicians only.
In the event of a fault

If the ABS warning lamp in the instrument cluster comes on, refer to page 24. The brake system then reverts to conventional operation as on vehicles without ABS. However, have the brake system checked by your BMW center as soon as possible. To prevent undetected defects and cumulative faults from adversely affecting the brake system, refer any problems to your BMW center at the earliest opportunity.

If the red warning lamp for the brake hydraulic system comes on together with the yellow indicator lamps for ABS and ASC+T/DSC* (refer to page 24), the entire ABS and ASC+T/DSC control system has failed. Continue to drive; drive cautiously and defensively. Avoid full brake applications because the vehicle could become unstable and go out of control. Have the system checked by your BMW center as soon as possible.


Warning lamps for Canadian models.


Disc brakes
Disc brakes furnish optimum deceleration and braking control and greater fade resistance under heavy use.
When the vehicle is driven only occasionally, during extended periods when the vehicle is not used at all, or in operating conditions where brake applications are less frequent, there is an increased tendency for corrosion of the rotors and accumulation of contamination on the brake pads. This occurs because the minimal pressure which must be exerted by the pads to clean the rotors by brake applications is not reached.
The pads must exert a minimal pressure against the rotors for the brakes to clean themselves effectively; under the conditions described above, this may not happen. If the brake rotors are corroded, they will tend to respond to braking with a pulsating effect which even extended application will fail to cure.

For your own safety: Use only brake pads that BMW has ap-
proved for your specific vehicle model. BMW cannot evaluate non-approved brake pads to determine if they are suited for use, and therefore cannot ensure the operating safety of the vehicle in the event of their use.
Driving notes
While driving in wet conditions and in heavy rain, it is a good idea to apply light pressure to the brake pedal every few miles – watch traffic conditions to ensure that this maneuver does not endanger other road users. The heat generated in this braking process helps dry the brake pads and rotors.
Maximum braking force is obtained while the wheels continue to rotate, peaking when the wheels remain on the verge of locking without actually doing so. ABS maintains this state automatically. If the ABS fails, you should revert to the staggered braking technique described below on page 106.
Extended or steep mountain descents do not necessarily have to lead to reduced braking efficiency; shift down to a gear in which only minimal periodic brake applications are required (you can move the selector lever to the appropriate lower range if your car is equipped with an automatic transmission).
You can continue to increase the engine's braking effect by selecting progressively lower gears, shifting down as far as 2nd or 1st for extreme descents, or position 1 or 2 with automatic transmission.
Should engine braking prove inadequate, you should still avoid extended, continuous braking. Instead, decelerate the vehicle with increased pressure on the brake pedal (watch for following traffic), release the pedal and then repeat the brake application (staggered braking). This staggered braking technique allows the brakes to cool in the intervals between active braking phases, preventing overheating and ensuring that full braking capacity remains available at all times.

Do not allow the vehicle to coast when the clutch is depressed or shifting into neutral while moving. Do drive when the engine is switched the engine provides no braking rol when the clutch is depressed or transmission is in neutral and there power assist for the brakes when engine is shut off.
Never allow floor mats, carpets or any other objects to protrude into the area around the accelerator, clutch and brake pedals and obstruct their movement.
Brake system
Brake fluid level

If the warning lamp for the hydraulic brake system comes on: The brake fluid level is too low in the reservoir (refer to page 130). If the brake fluid level is too low and brake pedal travel is notice-
ably longer, there may be a defect in one of the two hydraulic brake circuits.

Proceed to the nearest BMW center. Higher brake application presmay be necessary under these conditions, and brake pedal travel may be significantly longer. Please remember to adapt your driving style accordingly.
Brake pads

If the warning lamp for the brake pads comes on:
The brake pads have reached their minimum pad thickness. Proceed to the nearest BMW center as soon as possible to have the pads replaced.

For your own safety: Use only brake pads that BMW has ap-ed for your specific vehicle model. BMW cannot evaluate non-approved brake pads to determine if they are suited for use, and therefore cannot ensure the operating safety of the vehicle in the event of their use.
Winter operation
The onset of winter is often accompanied by rapid changes in weather. Adaptations in driving style should be accompanied by preparations on the vehicle itself to ensure that your vehicle operation through the winter remains safe and trouble-free.
Coolant
Ensure that the coolant contains the year-round 50:50 ratio of water and antifreeze with corrosion inhibitor. This mixture provides protection against freezing down to approximately -34 °F (-37 °C). Replace the coolant every three years.
Locks
BMW door lock deicer can be used to free the doors if they are frozen. This deicer also contains lubricant. After using deicer, treatment with BMW lock cylinder grease is recommended.
Rubber seals and components
In order to prevent freezing, apply rubber treatment or silicone spray to weather-stripping on the doors, hood, luggage compartment and to convertible top seals.

A full range of car-care products is available from your BMW center.
Snow chains
BMW snow chains* can be mounted on both summer and winter tires. Mount them in pairs on the rear wheels only. Comply with the manufacturer's safety precautions. Do not exceed a maximum speed of 30 mph (50 km/h) when driving with chains. As an exception in this situation, we recommend that you deactivate the ASC+T/DSC* system when snow chains are mounted. Refer to page 76.
Starting off
When starting from a full stop or "rocking" free in deep snow, we recommend that you deactivate the ASC+T/DSC ^* system. Refer to page 76.
Driving on low-traction road surfaces
Use smooth, gentle pressure to control the accelerator pedal. Avoid excessive engine speeds and shift to the next higher gear at an early point. Shift down into the next lowest gear when approaching uphill or downhill grades. Maintain an adequate distance between yourself and the car ahead.
Brakes
Winter road conditions substantially reduce the traction available between the tires and the road surface. Remember that – in every situation – braking distances will be significantly longer as a result of this.
ABS is intended to prevent the wheels from locking during brake applications, thus helping to maintain vehicle stability and steering response.
Winter operation Power steering
If it should occur that the ABS does not respond in a critical braking situation and the wheels lock: Reduce the pressure on the brake pedal until the wheels just start to roll again while still maintaining enough force to continue braking. Following that, increase pedal pressure again. Reduce the pressure as the wheels lock, then reapply pressure. Repeat this process.
This type of staggered braking will lower the braking distance, and the vehicle still remains responsive to steering.
You can still attempt to steer around hazards once you have reduced the pressure on the brake pedal.

Do not shift down on slick road surfaces. Doing so could cause
the rear wheels to lose traction and skid, which could result in the loss of vehicle control.

Depress the clutch during hard braking on road surfaces which
provide only poor or uneven traction.
Skid control
Release the accelerator pedal and depress the clutch pedal. Countersteer carefully and attempt to regain control of the vehicle.
Parking
Engage 1st or reverse gear. If your car is equipped with an automatic transmission, place the selector lever in Park. On vehicles with manual transmission, also apply the parking brake when parking on inclined surfaces. In order to prevent the parking brake pads from locking due to frost or corrosion, dry them by gently applying the parking brake as the vehicle is coming to a stop. Make sure that following traffic is not endangered.

The brake lamps do not light up when the parking brake is
applied.
Changes in steering response (high steering effort, for example): Consult a BMW center to have the system checked.

If the power steering fails, increased effort will be required
to steer the vehicle.
Cellular phone\* Radio reception
Mobile communications systems (cellular phones, two-way radios, etc.) are approved only up to a power output of 10 watts. Nonetheless, they may cause interference in the operation of your vehicle if they are not specifically designed for use in your vehicle. BMW can neither test nor assume responsibility for every individual product being offered on the market. We recommend that you consult your BMW center before purchasing any device of this kind. To ensure that your BMW continues to provide reliable and trouble-free operation, refrain from using a cellular phone or other radio device with an antenna located inside the passenger compartment. The antenna should always be fitted on the outside of the vehicle.

Before loading the vehicle on a car-carrier train or driving it through a car-wash, remove the antenna.
The reception and sound quality obtained from mobile radios varies according to a variety of factors, including the broadcast range of the transmitter and the directional orientation of the antenna. Interference factors such as high-tension power lines, buildings and natural obstructions can all lead to unavoidable reception interference, regardless of how well the vehicle's sound system is operating. Climatic factors such as intense solar radiation, fog, rain and snow can also interfere with reception.
Cellular phones without official BMW approval can also generate interference during use. This phenomenon assumes the form of a low-pitched hum emanating from the speaker system.
Please refer to the Owner's Manual provided with your sound system for detailed information on its use.

Whenever necessary (when entering a car wash, for instance), remove the rod antenna* (refer also to page 132). To remove the antenna, grasp the rod at the bottom and unscrew it to the left from the antenna base.
Hardtop\* – roadster
The fabric top does not have to be removed even in winter, when the hardtop is normally in constant use. In order to prevent water spots and mildew stains, the fabric top must be completely dry before it is stored in the convertible top well.
Two people are necessary for the installation and removal of the hardtop. Work with extreme caution during this operation to avoid paint damage and damage to the body and hardtop.
You may purchase a Hardtop Lift* from your BMW center. This accessory is especially designed to facilitate installation and removal of the hardtop.
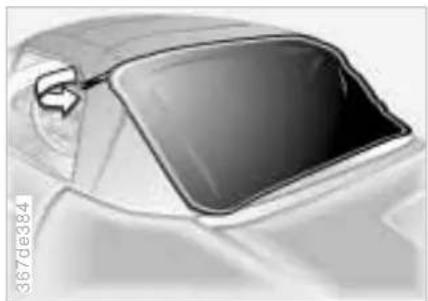
natural_image
Close-up of a car's front wheel and windshield (no visible text or symbols)Installation
Hook the protective fabric on the convertible top linkage (arrow).
Open the convertible top and fold it down in the convertible top well. Refer to pages 41 and 45.
When doing this, make sure the rear window is laid down evenly and free of creases. To prevent the rear window from being scratched, position the protective fabric in the window fold.
Do not install the convertible cover.
Lower the side windows and remove the rod antenna if necessary to avoid damage.
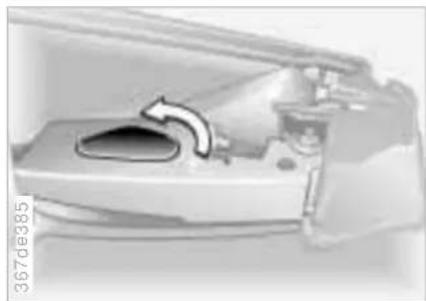
natural_image
Close-up of a mechanical component with a curved cutout and internal structure (no visible text or symbols)Rotate the cover panel which is located in the right and left trim panels behind the seats in the direction of the arrow until the opening for the hardtop mount is completely free.
Remove the hardtop from the protective cover. Clean any dirt and dust from the contact surfaces between the hard-top and the vehicle body in order to protect against abrasion.
Position the hardtop on the mounts with the assistance of a second person.
Hardtop\* – roadster
natural_image
Close-up of a car door handle with a white arrow pointing to a small circular object on the side (no text or symbols visible)Using the wrench from the onboard tool kit (fastened to the jack with a Velcro® strip), turn the screw (arrow) two to three turns into the windshield frame on the right and left sides.
natural_image
Mechanical device with rotating arm and base, no visible text or symbolsTurn the right and left locking levers of the rear hardtop mounting fasteners in the direction of the arrow to the stop.
The rear mounting fasteners are locked correctly when the locking levers engage audibly and point to the rear of the vehicle.
Finally, tighten the screws in the windshield frame (refer to the left column) and secure the wrench in the onboard tool kit.
After you have driven approx. 30 to 60 miles (50 to 100 km), check the front hardtop fasteners to be sure that they are seated securely.
Removal
Reverse the above procedure for removal of the hardtop.
The two screws of the front hard-top fasteners remain permanently in the windshield frame of your vehicle to prevent their loss.
Following the initial delivery of the vehicle, or after the hardtop has been in use for an extended period, closing the convertible top requires increased effort. You may find this operation easier with the assistance of a second person. Following that, the convertible top should remain closed for at least 12 hours.
110 Notes on inflation pressure Tire condition
Information for your safety
The factory-approved radial tires are matched to the car and have been selected to provide optimum safety and driving comfort on your car.
In a very real sense, both tire life and your own safety are riding on correct tire specifications and inflation pressures. Refer to page 29.
Incorrect inflation pressure is a frequent cause of tire damage. It also significantly influences the roadholding ability of your BMW.

Check the tire pressures – including the spare tire* – regularly (at least every two weeks and before you begin an extended journey). If this is not done, incorrect tire pressures may cause tire damage and accidents.
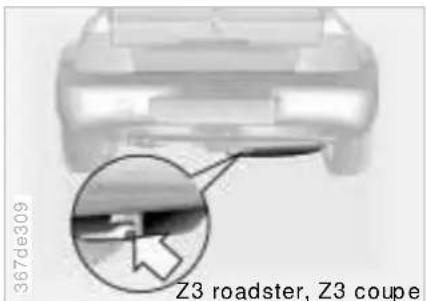
text_image
367de309 Z3 roadster, Z3 coupeCheck the inflation pressure of the spare tire\*
For checking tire pressures on the Z3 roadster and Z3 coupe, there is a valve extension (arrow) on the storage tray of the spare wheel which is accessible from outside.
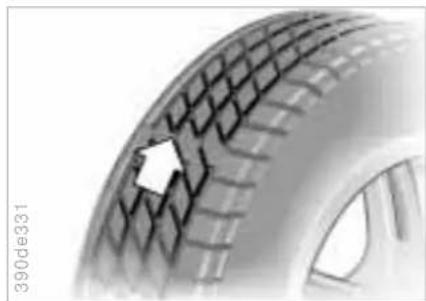
natural_image
Close-up of a car tire with visible tread pattern and a white arrow pointing to a specific area (no text or symbols)Tire tread - Tire damage
Inspect your tires frequently for tread wear, signs of damage and for foreign objects lodged in the tread.
The tread depth should be at least 0.12 in (3 mm), although the legally permissible minimum tread depth is 0.063 in (1.6 mm). Wear indicators appear in the tread at 0.063 in (1.6 mm) to indicate that the legally permissible wear limit has been reached. There is a significantly increased risk of aquaplaning at higher speeds when the tread depth is below 0.12 in (3 mm), even if there is only a small amount of water on the road surface.
Tire condition Tire replacement

Never continue driving on a deflated (flat) tire. A flat tire greatly impairs steering and braking response, and can lead to complete loss of control over the vehicle.
Avoid overloading the vehicle so that the permitted load on the tires is not exceeded. This can lead to overheating and increases the rate at which damage develops inside the tires. The ultimate result can assume the form of a sudden air loss.
Unusual vibrations encountered during normal vehicle operation can indicate tire failure or some other vehicle defect, as can variations in normal vehicle response, such as a pronounced tendency to pull to the left or right. Should this occur, respond by reducing your speed immediately. Drive carefully to the nearest BMW center or professional tire dealer, or have the vehicle towed in to have it and its tires inspected.
Tire damage (up to and including sudden and complete air loss) can pose an extreme hazard for both vehicle occupants and other road users.
To maintain good handling and vehicle response, use only tires of a single tread configuration from a single manufacturer. BMW tests and approves wheel-tire combinations. Refer to page 116.
DOT Quality Grades
Tread wear
Traction AA A B C
Temperature A B C

All passenger car tires must conform to Federal Safety Require-
ments in addition to these grades.
Tread wear
The tread wear grade is a comparative rating based on the wear rate of the tire when tested under controlled conditions on a specified government test course.
For example, a tire graded 150 would wear one and one-half (1- 12 ) times as well on the government course as a tire graded 100. The relative performance of tires depends upon the actual conditions of their use, however, and may depart significantly from the norm due to variations in driving habits, service practices and differences in road characteristics and climate.
Traction
The traction grades, from highest to lowest, are AA, A, B and C.
Those grades represent the tire's ability to stop on wet pavement as measured under controlled conditions on specified government test surfaces of asphalt and concrete. A tire marked C may have poor traction performance.

The traction grade assigned to this tire is based on straightahead braking traction tests, and does not include acceleration, cornering, hydroplaning, or peak traction characteristics.
112 Tire replacement
Temperature
The temperature grades are A (the highest), B and C, representing the tire's resistance to the generation of heat and its ability to dissipate heat when tested under controlled conditions on a specified indoor laboratory test wheel.
Sustained high temperature can cause the material of the tire to degenerate and reduce tire life, and excessive temperature can lead to sudden tire failure. The grade C corresponds to a level of performance which all passenger car tires must meet under the Federal Motor Vehicle Safety Standard No. 109. Grades B and A represent higher levels of performance on the laboratory test wheel than the minimum required by law.

The temperature grade for this tire is established for a tire that is
properly inflated and not overloaded. Excessive speed, under-inflation, or excessive loading, either separately or in combination, can cause heat buildup and possible tire failure.
Uniform Tire Quality Grading
Quality grades can be found where applicable on the tire sidewall between tread shoulder and maximum section width. For example:
Tread wear 200 Traction AA Temperature A

Do not use retreaded tires as this could negatively affect driving safety. This is due to the possible variations in casing structures and, in some cases, to their extreme age, factors which can lead to a decrease in their durability.
Tire age
The date on which the tire was manufactured is indicated by the code on the sidewall:
DOT ... 109 indicates that the tire was manufactured in Week 10 of 1999.
BMW recommends the replacement of all tires when the tires are no more than 6 years old, even if a tire life of 10 years is possible.
Spare tires over 6 years old should be used only in case of emergency. A tire of this age should be replaced by a new tire immediately, and should not be fitted together with new tires.
Tire rotation
Between the axles
The tread wear patterns at the front end differ from those at the rear – the actual patterns will vary according to individual driving conditions. In the interest of safety and optimal vehicle response, we advise against rotating tires from front to rear and vice versa.
If rotating the tires between the axles is under consideration for economic reasons, the costs for remounting the wheels must be calculated against any savings which might result from the anticipated extension in tire life. Rotation should always be carried out at short intervals, with a maximum of 3,000 miles (5,000 km). Consult your BMW center for more information.
Should you decide to rotate the tires, it is essential to comply with the following:
Rotate wheels on the same side of the car only, otherwise braking efficiency and road grip could be adversely affected.
Following rotation, correct the tire inflation pressure.

If tires with different sizes are mounted on the front and rear
axles (refer to the information beginning on page 116), the wheels may not be rotated from one axle to the other.
114 Wheel and tire combinations
The right choice
Use only tires which have been approved by BMW. Refer to the information beginning on page 116.
Because of the potential high speeds which this vehicle can reach, the use of specific brands, specifications and dimensions is mandatory. Consult any BMW center for details.
Comply with national, state or provincial regulations.

The correct wheel-tire combination affects different systems such as ABS and ASC+T/DSC*. The function of these systems is impaired if improper wheel-tire combinations are used.
For this reason, use only tires made by the same manufacturer which have the same tread configuration. If you must deviate from this (following a flat tire, for instance), restore the approved wheel-tire combination as soon as possible.
Codes on tires and wheels
The tire codes will aid you in selecting the correct tire.
Codes on radial tires:
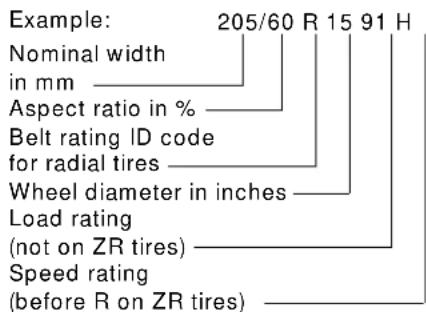
text_image
Example: 205/60 R 15 91 H Nominal width in mm Aspect ratio in % Belt rating ID code for radial tires Wheel diameter in inches Load rating (not on ZR tires) Speed rating (before R on ZR tires)The speed rating indicates the approved maximum speed for the tire.
Summer tires:
S = up to 112 mph (180 km/h)
T = up to 118 mph (190 km/h)
H = up to 130 mph (210 km/h)
V = up to 149 mph (240 km/h)
W = up to 167 mph (270 km/h)
Y = up to 186 mph (300 km/h)
ZR = over 149 mph (240 km/h)
All-Season and winter tires:
Q M+S = up to 100 mph (160 km/h)
T M+S = up to 118 mph (190 km/h)
H M+S = up to 130 mph (210 km/h)
Codes stamped on light-alloy wheels:
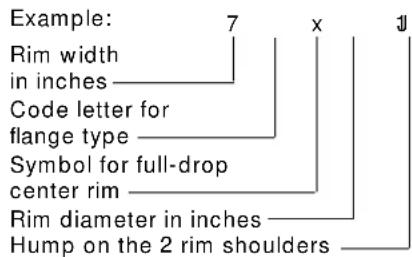
text_image
Example: Rim width in inches Code letter for flange type Symbol for full-drop center rim Rim diameter in inches Hump on the 2 rim shouldersProtect valve inserts against dirt by using valve caps. Dirt in the valves frequently leads to slow leaks.
5 H
Winter tires Snow chains\*
Choosing the right tire
BMW recommends winter tires (M+S radial tires) for driving in adverse winter road conditions. While tires known as all-season tires (M+S designation) provide better winter traction than summer tires with load ratings H, V, W, Y and ZR, they generally do not achieve the performance of winter tires.
In the interests of sure tracking and safe steering response, mount winter tires which are made by the same manufacturer and which have the same tread configuration at all four wheels.
Mount only winter tires which have been approved by BMW. Any BMW center will be glad to provide you with information on the best winter tires for your particular driving conditions.
Comply with recommended speed

Never exceed the maximum speed for which the tires are
rated
Unprofessional attempts by laymen to service tires can lead to damage and accidents.
Have this work performed by skilled professionals only. Any BMW center has the required technical knowledge and the proper equipment and will be happy to assist you.
Tire condition, tire pressure
Once the tire wears to below 0.16 in (4 mm), winter tires display a perceptible decrease in their ability to cope with winter driving conditions, and should be replaced in the interest of safety.
Comply with the specified tire inflation pressures – and be sure to have the wheel and tire assemblies balanced every time you change the tires.
Storage
Store tires in a cool, dry place, away from light whenever possible. Protect the tires against contact with oil, grease and fuel.
Small-link BMW snow chains* can be mounted on summer and winter tires. Install on the rear tires only. Do not install snow chains on the front. Always comply with the manufacturer's safety recommendations when mounting chains.
Approved wheel and tire specifications
| Tire specifications Suitable for snow chains | Steel rim (wheel rim) | Light-alloy wheel | |
| Z3 roadster 2.3 | |||
| Summer | |||
| 225/50 R 16 92 V | -7Jx16 | ||
| 225/50 ZR 16 | |||
| Front: 225/45 ZR 17 -- 7.5Jx17 | |||
| Rear: 245/40 ZR 17 -- 8.5Jx17 | |||
| Winter (M+S) | |||
| 205/60 R 15 91 Q 6.5Jx15 7Jx15 | |||
| 205/55 R 16 91 Q | -7Jx16 | ||
| 225/50 R 16 92 Q | |||
| 225/45 R 17 91 Q -7.5Jx17 | 8Jx17 | ||
Spare tire
T 125/90 R 15 96 M - 3.5Bx15 -
Use the spare tire only for short distances (to reach the nearest BMW center, for instance). Due to the altered handling characteristics, do not exceed a maximum speed of 50 mph (80 km/h). Mounting snow chains on the spare tire is not possible. Be sure that all tires are properly inflated. Refer to page 30.
Comply with the specifications for tires and wheels in the vehicle's manuals. If tires with specifications not approved by the factory are used, an entry in the vehicle documentation may be required.

The use of rims and lug bolts that do not meet the specifications of the original factory-installed equipment will affect the safe operation of your vehicle and may cause an accident and personal injury.
Never mix tires of different design, such as steel-belted radials with bias-belted or bias-ply tires, etc. Mixing tire types will adversely affect road-holding and can lead to loss of vehicle control.
Approved wheel and tire specifications
| Tire specifications Suitable for snow chains | Steel rim (wheel rim) | Light-alloy wheel | |
| Z3 roadster 2.8, Z3 coupe 2.8 | |||
| Summer | |||
| 225/50 R 16 92 W | -7Jx16 | ||
| 225/50 ZR 16 | |||
| Front: 225/45 ZR 17 -- 7.5Jx17 | |||
| Rear: 245/40 ZR 17 -- 8.5Jx17 | |||
| Winter (M+S) | |||
| 205/60 R 15 91 Q | 6.5Jx15 | 7Jx15 | |
| 205/55 R 16 91 Q | -7Jx16 | ||
| 225/50 R 16 92 Q | |||
| 225/45 R 17 91 Q -7.5Jx17 | 8Jx17 | ||
Spare tire
| T 125/90 R 15 96 M | - | 3.5Bx15 | - |
| Use the spare tire only for short distances (to reach the nearest BMW center, for instance). Due to the altered handling characteristics, do not exceed a maximum speed of 50 mph (80 km/h). Mounting snow chains on the spare tire is not possible. Be sure that all tires are properly inflated. Refer to page 30. | Comply with the specifications for tires and wheels in the vehicle's manuals. If tires with specifications not approved by the factory are used, an entry in the vehicle documentation may be required. | ||
The use of rims and lug bolts that do not meet the specifications of the original factory-installed equipment will affect the safe operation of your vehicle and may cause an accident and personal injury.
Never mix tires of different design, such as steel-belted radials with bias-belted or bias-ply tires, etc. Mixing tire types will adversely affect road-holding and can lead to loss of vehicle control.
118 Approved wheel and tire specifications
| Tire specifications Suitable for snow chains | Light-alloy wheel | |
| M roadster, M coupe | ||
| Summer | ||
| Front: 225/45 ZR 17 | - | 7.5Jx17 AH 2 |
| Rear: 245/40 ZR 17 | - | 9Jx17 AH 2 |
| Winter | ||
| 225/45 R 17 91 H M+S - Front: 7.5Jx17 AH 2 | Rear: 8Jx17 AH 2 | |

Have the winter tires changed at your BMW center or at a tire ser-shop.
Comply with the specifications for tires and wheels in the vehicle's manuals. If tires with specifications not approved by the factory are used, an entry in the vehicle documentation may be required.
Wheel with asymmetrical hump (AH)
If the rim has a so-called asymmetrical hump in place of the usual symmetrical hump, the tire will remain on the rim much longer if air pressure is lost, thus enabling the car to be braked to a standstill more easily. A further advantage of the asymmetrical hump wheel rim is that special tires are not needed.
Hood
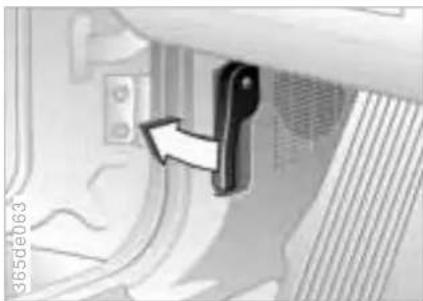
natural_image
Close-up of a mechanical component with an arrow indicating a directional movement (no text or symbols visible)To release
Pull the lever located under the left-hand side of the instrument panel.
Do not work on your vehicle without appropriate skills. Always switch off the engine and allow it to cool down before working in the engine compartment.
Always disconnect the battery before working on any electrical systems or equipment, especially when these are located within the engine compartment. Comply with all applicable instructions and warnings. If you are not familiar with all guidelines, have the work performed by your BMW center. Otherwise, safety hazards for vehicle occupants and other road users may occur as a result of improper handling of components and materials.
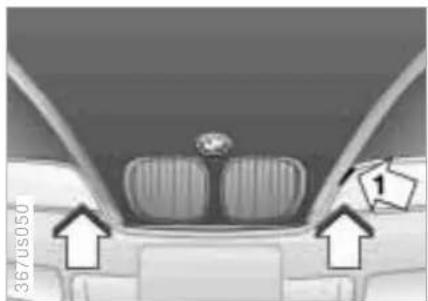
natural_image
Top-down view of a car's front dashboard and rear seats, showing structural details with arrows indicating directions (no text or symbols)To open
Grasp the hood on both sides on the level of the latch (arrow 1); press the latch upward and simultaneously lift the hood with both hands.
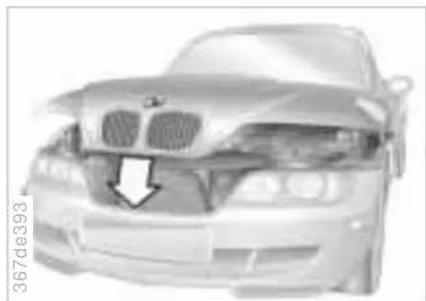
natural_image
Front view of a car with visible headlights and grille, showing no text or symbols on the car itself.To close
Allow the hood to fall from a height of about 12 inches (30 cm) so that it audibly engages.
To avoid injuries, be sure that the travel path of the hood is clear when it is closed, as with all closing procedures.
If it is determined that the hood is not completely closed while driving, stop immediately and close it securely.
120 Engine compartment - Z3 roadster 2.3, 2.8, Z3 coupe 2.8
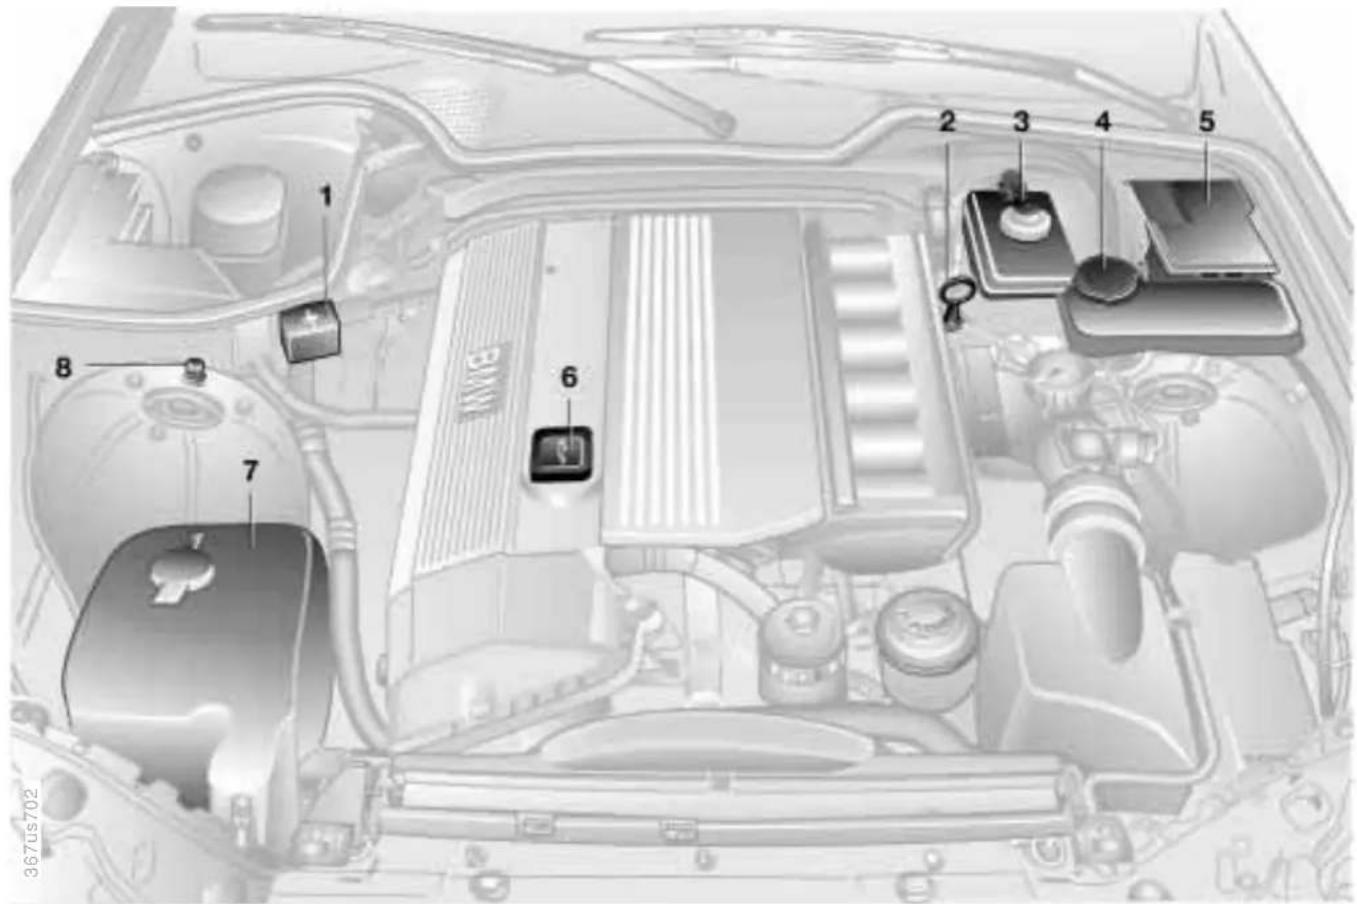
text_image
Technical diagram of a car engine bay with numbered components for identificationOnline Edition for Part-No. 01 41 0 155 149 - © 08/99 BMW AG
Engine compartment – Z3 roadster 2.3, 2.8, Z3 coupe 2.8
1 Auxiliary terminal for jump-starting – positive terminal 171
2 Engine oil dipstick 125
3 Brake fluid reservoir 130
4 Coolant expansion tank 128
5 Fuse box 169
6 Engine oil filler neck 125
7 Reservoir for windshield and headlamp* washer fluid 124
8 Auxiliary terminal for jump-starting - negative terminal 171
122 Engine compartment - M roadster, M coupe
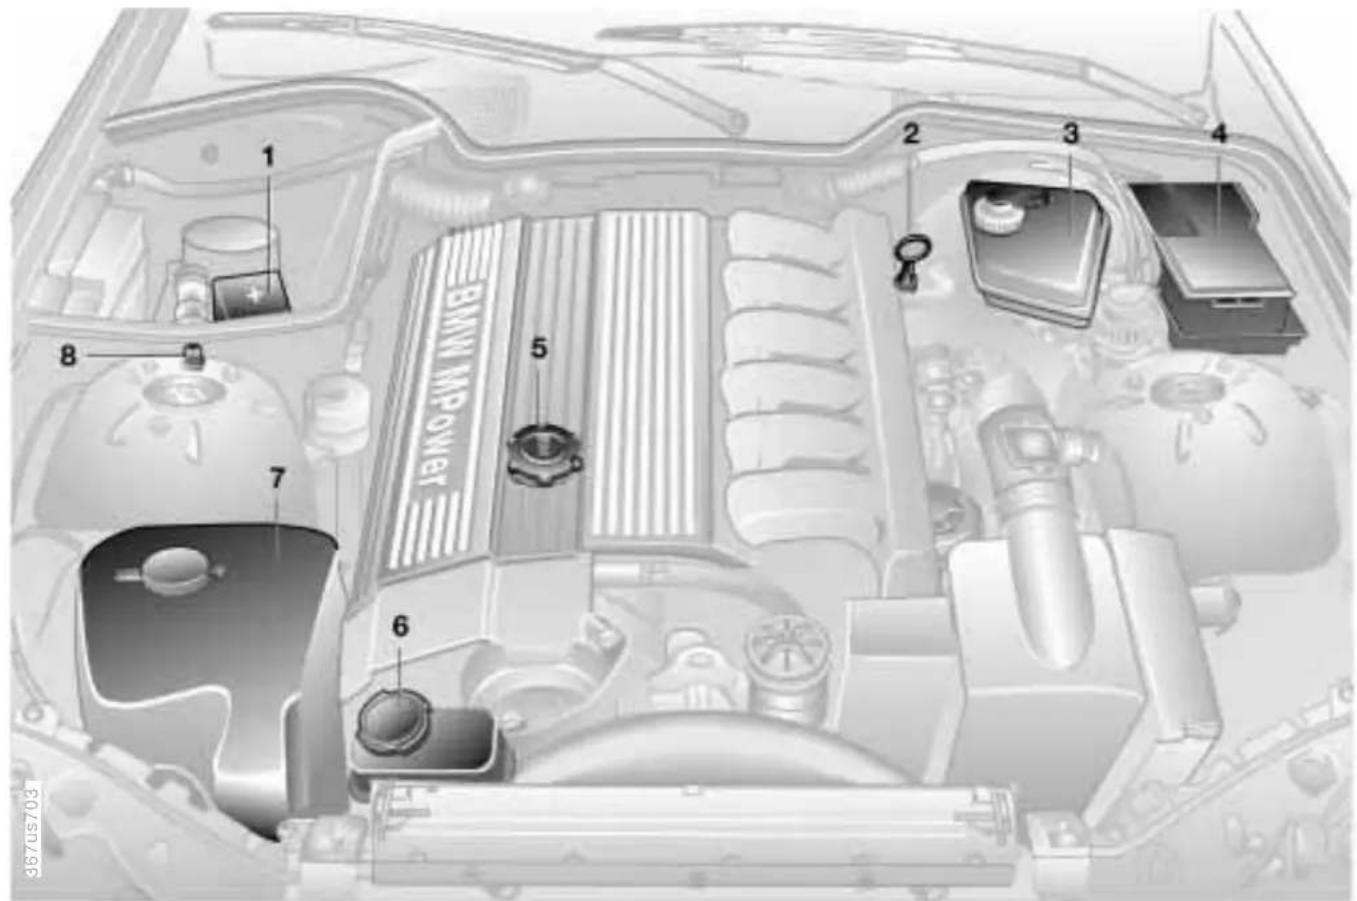
text_image
BMW MPOWER 1 2 3 4 5 6 7 8 9 10 11 12 13 14 15 16 17 18 19 20 21 22 23 24 25 26 27 28 29 30 31 32 33 34 35 36 37 38 39 40 41 42 43 44 45 46 47 48 49 50 51 52 53 54 55 56 57 58 59 60 61 62 63 64 65 66 67 68 69 70Online Edition for Part-No. 01 41 0 155 149 - © 08/99 BMW AG
Engine compartment - M roadster, M coupe
1 Auxiliary terminal for jump-starting – positive terminal 171
2 Engine oil dipstick 125
3 Brake fluid reservoir 130
4 Fuse box 169
5 Engine oil filler neck 125
6 Coolant expansion tank 128
7 Reservoir for windshield and headlamp* washer fluid 124
8 Auxiliary terminal for jump-starting - negative terminal 171
Fluids for the washer systems Washer nozzles
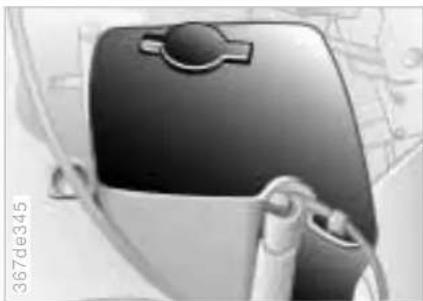
natural_image
Close-up of a black rectangular device with a handle and metallic ring, partially enclosed by a transparent plastic border (no visible text or symbols)Headlamp\* and windshield washer system
Capacity: Approx. 5.3 US quarts (5.0 liters).
Fill with water and – if required – with a washer antifreeze (according to the manufacturer's recommendations).

We recommend that you mix the washer fluid before adding it to
the reservoir.
Antifreeze agent for the washer systems is inflammable. For this reason, keep it away from sources of flame and store it only in its original container. Store it so that it is inaccessible to children. Comply with the instructions on the containers.
Windshield washer system
Windshield:
The spray from the nozzles should be directed so as to ensure effective cleaning, even at high speeds.
If necessary, correct the adjustment with a needle, or have the adjustment made by your BMW center.
Rear window - Z3 coupe, M coupe only:
Have this system adjusted by your BMW center as required.
Headlamp washer system\*
Have this system adjusted by your BMW center as required.
Engine oil
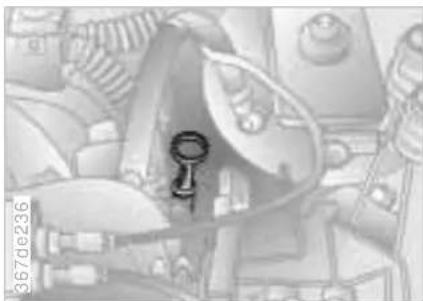
natural_image
Close-up of a mechanical component with no visible text or symbolsChecking oil level
1 Park the vehicle on a level surface.
2 Shut the engine off after it has reached normal operating temperature.
3 After approx. 5 minutes, pull the dipstick out and wipe it off with a clean lint-free cloth, paper towel, or similar material.
4 Push the dipstick carefully all the way into the guide tube and pull it out again.
5 The oil level should be between the two graduations on the dipstick.
As with fuel economy, oil consumption is directly influenced by your driving style and vehicle operating conditions.
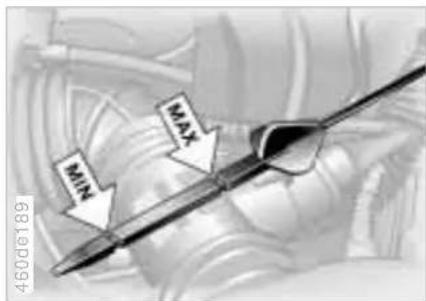
text_image
MIN MAY 460d0189The space between the two marks on the dipstick corresponds to approx.
1.1 US quarts (1 liter). Do not fill beyond the upper mark on the dipstick. Excess oil will damage the engine.
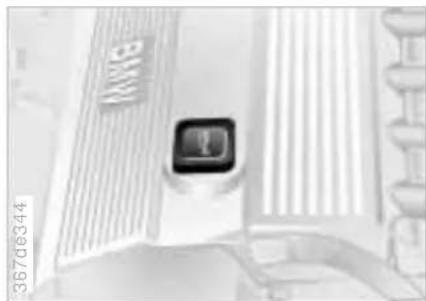
natural_image
Close-up of a white electronic device with a black T-shaped display and 'BANK' branding, no readable text or symbols on the device itself.To add oil
Wait until the level has dropped to just above the lower mark before adding oil. Do not wait until the oil drops below the lower mark.

BMW engines are designed to operate without oil additives; the use of additives could lead to damage in some cases. This also applies to the manual and automatic transmission, the differential and the power steering system.
Engine oil
The quality of the engine oil which is selected has critical significance for the operation and service life of an engine. Based on extensive testing, BMW has approved only certain engine oils.
Specified engine oils for the Z3 roadster and Z3 coupe
Use approved "BMW High Performance Synthetic Oil" only.
If you are unable to obtain "BMW High Performance Synthetic Oil," you may use small volumes of the "special oils" approved by BMW for topping up between oil changes. You may use synthetic oils with the specification API SH or higher only if the special oils are also not available.

Ask your BMW center for details concerning the specific "BMW
High Performance Synthetic Oil" or "special oils" that have been approved.
You can also call BMW of North America at 1-800-831-1117 or visit this website: www.bmwusa.com to obtain this information.
Specified engine oils for the M roadster and M coupe
Always refer to the API specifications when selecting oil.
Required quality:
API SH
API-SH/CD
API-SH/CE
Viscosity - Definition
Viscosity is the oil flow rating as established in SAE classes.
The selection of the correct SAE class depends on the climatic conditions in the area where you drive your BMW.
SAE classes for the Z3 roadster and Z3 coupe

Approved oils are in SAE classes 5W-40 and 5W-30.
These oils may be utilized in all ambient temperatures. Refer to right side of the chart.
SAE classes for the M roadster and M coupe
Refer to the left half of the chart for the correct SAE class.
You can continue to operate the vehicle for short periods of time at temperatures beyond the range for the SAE rating of the oil being used.
Engine oil
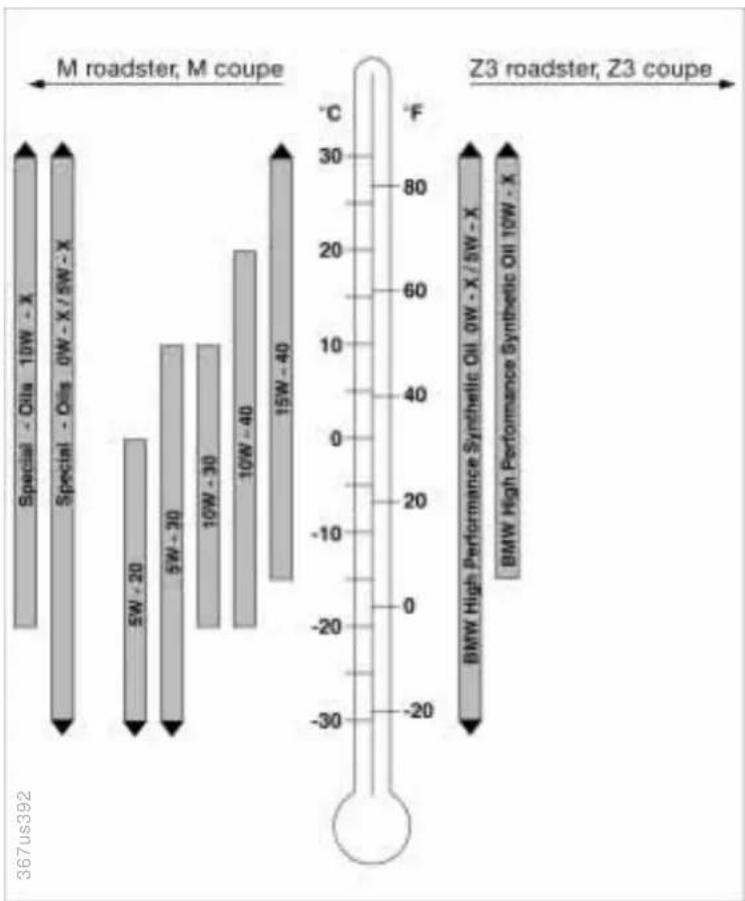
bar
| Roadster | Speed Range (W) | | :--- | :--- | | M roadster - Special | 5W - 20 | | M roadster - Special | 5W - 30 | | M roadster - Special | 10W - 30 | | M roadster - Special | 10W - 40 | | M roadster - Special | 15W - 40 | | Z3 roadster - BMW | 367us392 | | Z3 roadster - BMW High Performance Synthetic Oil | 367us392 | | Z3 roadster - BMW High Performance Synthetic Oil | 10W - X |
Comply with the applicable environmental laws regulating the dis- of used oil.
Recommendation: Have the oil changed by your BMW center only.

Continuous exposure to used oil has caused cancer in laboratory
testing. Any skin areas that come in contact with oil should thus be thoroughly washed with soap and water. Store oil, grease, etc., out of reach of children. Comply with warning labels and information on containers. If you use SAE 15W-40 engine oil in low temperatures (below 14 °F/-10 °C), the engine may become difficult to start. Special engine oils individually approved by BMW are preferred for use in your engine. Please contact your BMW center for details.
Coolant

Do not add coolant to the cooling system when the engine is hot. If you do, escaping coolant can cause burns.
To avoid the possibility of damage later on, do not use anything other than factory-approved, nitrite and amino-free extended-duty antifreeze with corrosion inhibitor which can be used with aluminum radiator cores. Your BMW center is familiar with the approved specifications.
Antifreeze and anti-corrosion agents are hazardous to health. Store them in their original containers. Keep the containers tightly closed and out of reach of children.
Extended-duty antifreeze with corrosion inhibitor contains the flammable substance ethylene glycol. For this reason, do not spill extended-duty antifreeze with corrosion inhibitor on hot engine components. If you do, it could be ignited and cause serious burns.

Comply with the applicable environmental laws regulating the dis- of extended-duty antifreeze with sion inhibitor.
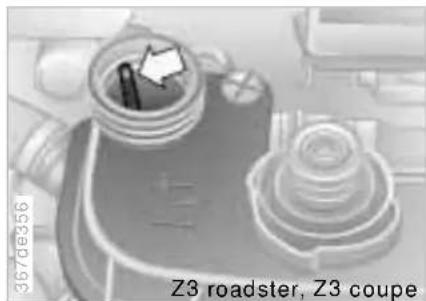
natural_image
3D mechanical component diagram with no visible text or symbols, labeled 'Z3 roadster, Z3 coupe' at bottom (no readable document content)Checking coolant level
Z3 roadster 2.3, 2.8, Z3 coupe 2.8: The correct coolant level when the engine is cold (approx. 68 °F/20 °C):
Unscrew the cap from the expansion tank.
The coolant level is correct when the upper end of the red float is at least even with the upper edge of the filler neck (refer to the arrow in the illustration), but no more than 0.8 inches (2 cm) above it – that is, up to the second mark on the float (refer also the schematic diagram next to the filler neck).
Coolant
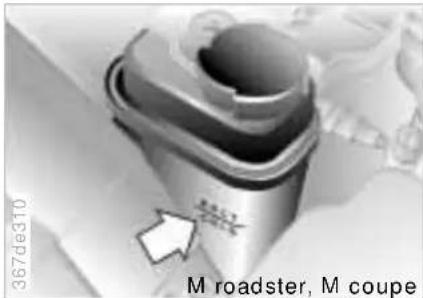
text_image
367de310 M roadster, M coupeM roadster, M coupe:
The correct coolant level when the engine is cold (approx. 68 °F/20 °C): Up to the KALT/COLD mark (arrow) of the transparent expansion tank.
To add coolant
Wait until the engine cools before removing the cap from the expansion tank. The needle of the coolant gauge in the instrument cluster must be located in the blue field; otherwise, there is a danger of scalding.
1 Turn the cap slightly counterclockwise in order to allow accumulated pressure to escape. Then open.
2 If the coolant is low, slowly add coolant until the correct level is reached - do not overfill.
The coolant is a mixture of water and extended-duty antifreeze with corrosion inhibitor. Always maintain the prescribed all-season 50:50 mixture ratio for year-round protection against internal corrosion. No other additives are required.
Replace the coolant regularly. Refer to the Service and Warranty Information Booklet (US models) or the Warranty and Service Guide (Canadian models).
Brake fluid Vehicle Identification
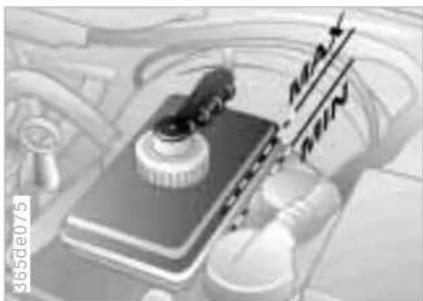
natural_image
Close-up of a mechanical component with no visible text or symbolsIf the warning lamp for the brake hydraulic system comes on:
Check the brake fluid level. Add brake fluid to the upper mark ("MAX") if necessary. For this, refer also to the instructions on page 104.
To eliminate the cause of the brake fluid loss, please consult a BMW center. You can also receive information concerning approved brake fluids (DOT 4) there.
Brake fluid loss may result in extended brake pedal travel. If this occurs, refer to the notes on page 104.
Brake fluid is hygroscopic, that is, it absorbs moisture from the air over time.
In order to ensure the operating safety and reliability of the brake system, have the brake fluid changed every two years by an BMW center. Refer also to the Service and Warranty Information Booklet (US models) or the Warranty and Service Guide (Canadian models). Brake fluid is toxic and will damage the vehicle's paint. You should always store it in its original container and in a location which is inaccessible to children. Avoid brake fluid spills. Do not fill brake fluid beyond the "MAX" level in the reservoir. The brake fluid could ignite upon contact with hot engine parts and cause serious burns.
Comply with the applicable environmental laws regulating the disposal of brake fluid.
text_image
367us053 #18ECJ100#1 A2948+The Vehicle Identification Number is located in the engine compartment below the windshield and on the top of the instrument panel.
The BMW Maintenance System
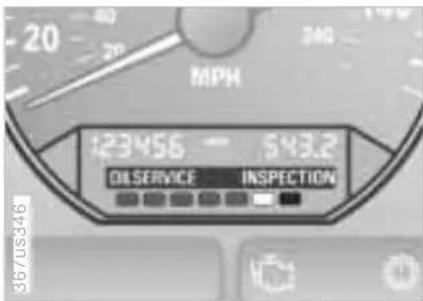
text_image
MPH 123456 - 543.2 OILSERVICE INSPECTION 3670S346The BMW Maintenance System has been designed as a reliable means of providing maximum driving and operating safety – and as cost-effectively as possible for you.
Please keep in mind that regular maintenance is not only necessary for the safety of your vehicle, but also plays a significant role in maintaining the resale value of your vehicle.
Service Interval Display
Advanced technology is employed to calculate the optimal maintenance intervals, which are then indicated in the Service Interval Display. While conventional systems rely solely on distance traveled to determine when service is due, the BMW Maintenance System considers the actual conditions under which the vehicle operates.
From the point of view of maintenance, 62,000 miles (100,000 km) accumulated in short-distance urban driving are not the equivalent of the same distance covered at moderate speeds in long-distance highway travel. In response to this fact, the BMW Maintenance System monitors operating conditions as the basis for determining the optimum service intervals for your individual vehicle.
The BMW Maintenance System includes the Engine Oil Service as well as Inspections I and II.
Determining the maintenance intervals according to the actual loads on the car covers every kind of operating situation. However, since oil deteriorates over time regardless of use, even those who drive only short distances – significantly less than 6,200 miles (10,000 km) annually – should have the engine oil changed regularly. Refer to the Service and Warranty Information Booklet (US models) or to the Warranty and Service Guide Booklet (Canadian models).
The BMW Maintenance System Caring for your car
Service and Warranty Information Booklet (US models)/Warranty and Service Guide (Canadian models)
For detailed information on required maintenance items and the work involved, please refer to the Service and Warranty Information Booklet (US models) or to the Warranty and Service Guide Booklet (Canadian models).
Depending upon operating conditions, it might be a good idea to have the body checked for damage from rocks or gravel at the same time as a precaution against rust.
Have your BMW center do the maintenance and repair. Your BMW center is always informed on the latest maintenance work and repair techniques and is equipped with the required special tools. In addition, checking parts known from experience to be subject to wear is a permanent part of the maintenance specifications. Be sure that all maintenance work is confirmed in the Service and Warranty Information Booklet (US models) or the Warranty and Service Guide Booklet (Canadian models). These entries will constitute your proof that the vehicle has received regular maintenance. They are also required for warranty claims.
Washing your car
You can wash your BMW by hand or in an automatic car wash – even when it is new. Car wash systems that do not employ brushes are preferable.
Wipe away tough dirt and loosen and remove dead insects before washing the car.
To prevent spots, avoid washing when the hood is still warm, or immediately after and during exposure to strong sunlight.
If a brushless car wash is unavailable and a brush car wash must be used, modern systems with soft brushes are preferable. In order to protect the convertible top, special waxing programs may not be selected for the Z3 roadster and the M roadster. The small amount of beading wax always used in automatic car washes will not harm your vehicle's finish.
Caring for your car
When using an automatic car wash, be sure that:
The car wash system is suited for the dimensions of your vehicle.
No damage will occur on vehicles with attached body accessories (such as spoilers or antennas). Consult the car wash operator if necessary.
The wheels and tires of your vehicle cannot be damaged by the conveyance devices of the car wash system.
The vehicle is cleaned with minimum brush pressure, and ample water is available for washing and rinsing.
Parts of the car which are inaccessible to the automatic washer – such as door sills, door and hood edges, etc. – should be cleaned by hand.
In the winter months, it is especially important to ensure that the car is washed on a regular basis. Large quantities of dirt and road salt are difficult to remove, and they also cause damage to the vehicle.
If spray wands or high-pressure washers are used, be sure to maintain an adequate distance between the spray source and the vehicle's surface. Inadequate clearance and excessive pressure can damage or weaken the finish, making it more susceptible to subsequent attack. In addition, moisture could penetrate to vehicle components, leading to long-term damage.
When cleaning the headlamps, please observe the following:
Do not clean by wiping with a dry cloth (this causes scratches). Never use abrasives or strong solvents to clean the covers.
Remove dirt and contamination (such as insects) by soaking with BMW Car Shampoo and then rinsing with plenty of water.
Always use a deicer spray to remove accumulated ice and snow – never use a scraper.
After washing the car, apply the brakes briefly to dry them. Braking efficiency might otherwise be reduced by the moisture and the brake rotors could also be corroded.
Caring for your car
Cleaning and care of the convertible top, Z3 roadster and M roadster
The appearance and life of the convertible top are highly dependent on its proper care and operation. You should pay particular attention to the following instructions if your car has a light-colored top.
Protect the vehicle from exposure to intense sunlight whenever possible by parking it in the shade. This will prevent the paint, rubber and fabric-covered parts from being attacked.
Never fold up the convertible top and store it in the convertible top well when wet, dirty or frozen, since mildew stains and rub spots may result.
To prevent the formation of creases in the rear window and mildew stains in the fabric, do not leave the top folded in the convertible top well for extended periods.
If the vehicle will be parked for lengthy periods in an enclosed space, be sure that the convertible top is dry and that there is adequate ventilation.
Clean off bird droppings immediately, since they attack the convertible top and cause the rubber seals to swell due to their caustic characteristics.
Besides water, treat rubber seals only with talcum powder, rubber care products or silicone spray, particularly when they feel dry or tend to stick.
Eliminate noises such as squeaks with lubricant spray.
Never use sharp-edged objects to clean snow or ice from the rear window. The use of deicing spray is not approved. Due to the danger of damage and discoloration, do not apply adhesive tape, stickers, etc., to the window or cover it with plastic film.
Depressions and discoloration may occur in the convertible top as a result of improper maintenance and cleaning or as the result of stresses from excessive use. The convertible top and its seams may also develop leaks. These occurrences are not covered by the warranty. For repairs, please consult your BMW center.
Special wash for the top
In the case of more extensive dirt, which is especially visible on light-colored top materials, clean the top with the BMW Convertible Cleaning Set. Please proceed as follows:
Spray the convertible top with the cleaning agent and then rub with a well-dampened sponge using circular motions until a foam develops. Then you can finish washing the vehicle in an automatic car wash. After three to five washings the convertible top should be treated with a special impregnating spray. Please follow the instructions on the spray can.

Use the cleaning and car-care products that you can obtain at BMW center.
Caring for your car
Rear window cleaning
While the roadster's rear window has the advantage of being extremely flexible, there is the disadvantage that it has a relatively-soft surface. For this reason, clean the rear window only with a soft, antistatic cloth or with BMW Convertible Rear Window Cleaner.
If you wash the vehicle frequently in brush car washes, and in particular in those with hard brushes, faint scratches in the rear window may result. With the window replacement system you can replace a heavily scratched window at a relatively low price. Please contact your BMW center for additional information.

Do not use spot removers, paint thinners, solvents, gasoline or
similar substances for removing spots from the convertible top or from the rear window. These materials destroy the rubber seals, which will lead to leaks. Use only BMW-approved cleaners.
Exterior finish
To provide effective corrosion protection, multilayer paintwork is applied at the factory. Cataphoretic immersion priming techniques are supplemented using special body-cavity protectants, with the application of specially-developed and extensively tested materials. A layer of flexible PVC is first applied to the undercarriage. Following this, a comprehensive undercoating treatment with a wax-based protectant is applied.
Regular maintenance makes an important contribution to maintaining the safety and value of your vehicle.
Increasing awareness of the effects of harmful environmental factors on vehicle finishes have led paint and vehicle manufacturers to initiate programs designed to further improve the durability of their finishes. Despite this, environmental factors which occur locally or regionally can have negative effects on the finish of your vehicle. These should guide you in determining the frequency and extent of your efforts to maintain the vehicle finish.
Depending upon material and type of impact (perforation of paint layer), physical stresses from sand, road salt, gravel, etc., can cause corrosion to start extending beneath the finish, starting at the point of impact.
Road dirt, tar spots, dead insects, animal droppings (strong alkali concentration) and tree excretions (resins and pollen) all contain substances capable of causing damage when allowed to remain on the finish of your car for any period of time (spots, etching, flaking, separation in the top coat).
In industrial areas, deposits of flue dust, lime, oily soot, precipitation containing sulfur-dioxide (acid rain) and other environmental pollutants will damage the car's finish unless adequate care is provided – even though this is generally limited to the outside horizontal surfaces.
In coastal regions, high levels of atmospheric salt and humidity promote corrosion.
In the tropics, in addition to ultra-violet radiation and high humidity, temperatures over 105 °F (40 °C) in the shade are common. Under those conditions, light paints can reach temperatures up to 175 °F (80 °C) and dark paints up to 250 °F (120 °C).
Caring for your car
Caring for the vehicle finish
Regular washing is a preventive measure against long-term effects from substances which are harmful to the vehicle's finish, especially if you drive your vehicle in areas with high levels of air pollution or aggressive natural substances (tree resins, pollen).
Nevertheless, you should immediately remove especially aggressive substances. Failure to do so can lead to changes in the paint's chemical structure or to discoloration. Gasoline spilled during refueling, oil, grease and brake fluid should always be cleaned away immediately, as should bird droppings (finish damage).
Any contamination remaining on the surface of the vehicle will be especially conspicuous after washing. Use cleaning fluid or alcohol with a clean cloth or cotton pad to remove. Remove tar spots with tar remover. After cleaning, the affected areas should be waxed to ensure continued protection.

Use the cleaning and car-care products that you can obtain at BMW center.
Waxing your car
Protect the finish using carnauba or synthetic-based waxes only.
The best way to determine when the finish needs to be waxed is by noting when water stops beading on the surface.
You can use a glass cleaner to remove any wax or silicone that may have been left on the windows during waxing.

Use the cleaning and car-care products that you can obtain at BMW center.
Paint damage
You can touch up minor paint flaws with BMW spray paint or a BMW touchup stick.
The color code for your vehicle is provided on a tag located near the vehicle data plate and on the first page of the Service and Warranty Information Booklet (US models) or the Warranty and Service Guide Booklet (Canadian models).
Damage caused by flying stones, scratches, etc., must be touched up without delay to prevent rust from forming.
If corrosion has started to form in an area with paint damage, remove all rust and clean the area. Finally, apply the finish coat. Wait a few days, then polish the repaired area. Finish by applying a wax preservative.
More extensive paint damage should be repaired professionally in accordance with the manufacturer's instructions. Your BMW center uses original BMW finish materials in accordance with approved repair procedures.
Caring for your car
Window care
You can use window and glass cleaner to clean inside window surfaces and mirrors without smearing and streaking. Never use polishing pastes or abrasive (quartz) cleansers on mirror lenses!
Clean the wiper blades with soapy water. The wiper blades should be replaced twice a year, before and after the cold season.

Use only wiper blades which have been approved by BMW.
Caring for other vehicle components and materials
Light-alloy wheels should be treated with alloy wheel cleaner, particularly during the winter months. Do not use aggressive products containing acids, strong alkalis or abrasives. Alloy wheels should not be cleaned with a steam jet operating at temperatures in excess of 140 °F (60 °C). Follow the manufacturer's instructions.
If your vehicle is equipped with chromed parts* such as window frames, door handles, etc., clean these parts thoroughly with plenty of water and, if they are exposed to the effects of salt, also with a shampoo additive. Use chrome polish for additional treatment.
Plastic components, vinyl upholstery, the headliner of the coupe, lamp lenses, the clear cover of the instrument panel and components with a sprayed dull black surface can be cleaned with water (add plastic shampoo as required). Do not allow moisture to soak through the seats or headliner. Never use solvents such as lacquer thinner, heavy-duty grease remover, fuels, etc.
Rubber components should be cleaned with water only; a rubber treatment or silicone spray may also be applied.
The safety belts should be cleaned with a mild soap and water solution without being removed from the car. Never attempt chemical or dry cleaning, since this could cause damage to the belt fabric.
After cleaning, never allow the inertia reel to retract the belts until they are completely dry. Dirty safety belts prevent the inertia reel mechanism from retracting the strap properly, and thus constitute a safety hazard.
Heavily soiled floor carpets and mats* can be cleaned with an interior cleaner. The floor mats can be removed from the vehicle for cleaning.
Please use only a damp cloth to clean wooden fascia panels and components. Follow up by drying with a soft cloth.

Use the cleaning and car-care products that you can obtain at BMW center.
Caring for your car
Care of upholstery materials
Depressions formed in the upholstered materials in the course of everyday use can be brushed up working with a lightly dampened brush "against the nap."
The tendency of the pile to lie in a particular direction on velour upholstery is not a quality defect, and, just as on home textiles or clothing, cannot be avoided.
Fuzz on upholstery materials, rubbed-in fabric or suede residues can be removed with a fuzz or Velcro® brush. A cleaning glove is available for particularly "stubborn" lint. Remove spots and larger soiled areas immediately with luke-warm water, an interior cleaner, or a spot remover. Brush the fabric afterwards to restore its appearance.
If the vehicle will be stored for an extended period or if it is exposed to intense sunlight, cover all the seats or the windows to prevent fading (roadster: Convertible top closed).

Use the cleaning and car-care products that you can obtain at BMW center.
The buildup of an electrostatic charge on the seat covers, particularly if atmospheric humidity is low, can give the occupants an unpleasant electric shock if they touch metal body parts after leaving the vehicle. Although this is not dangerous in any way, it can be avoided by touching a bare or polished metal part of the car while getting out. If necessary, antistatic products can be used to eliminate this effect to a large extent.
Leather care
The leather upholstery* used by BMW is a natural product of the highest quality, processed using state-of-the-art methods to ensure that it will maintain its high quality for years to come, provided that it is properly cared for.
As this product is manufactured using natural materials, you must make allowances for special characteristics and possible surface irregularities. You should also bear in mind that this kind of material requires special care and attention.
Regular cleaning and care are essential, since dust and road dirt act as abrasives in the pores and creases of the material. This leads to wear spots and premature brittleness on the surface of the leather. We therefore suggest that you clean the leather with a vacuum cleaner or dust cloth at frequent intervals.
For cleaning, use BMW leather cleaning foam.
Since dirt and grease gradually attack the protective layer of the leather, the cleaned surfaces should be treated with BMW leather care agent. This also acts as an antistatic agent.
Caring for your car Airbags
To protect the leather from dampness or moisture, you can treat it with a BMW impregnating agent.
We recommend that you perform this procedure twice a year on leather exposed to normal use.
Spilled liquids should be wiped up immediately, and greasy and oily stains dabbed with a stain remover.
If the upholstery is to be exposed to intense sunlight or if the vehicle is to be stored for an extended period, cover all leather surfaces (or, better yet, the windows) to prevent fading.

Use the cleaning and car-care products that you can obtain at BMW center.

Cleaning agents can contain sub- stances which are dangerous or h pose health risks. Therefore, ys comply with the warnings and er notices on the package.
Open the doors or windows on your vehicle when cleaning the interior (or when the roadster's convertible top is closed). Never clean your vehicle with solvents or other materials not specifically intended for this application.
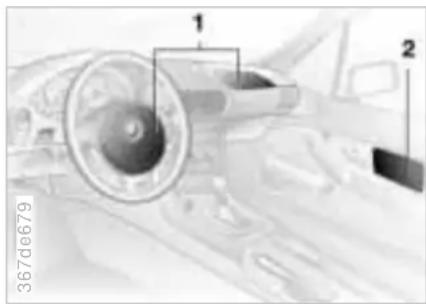
text_image
1 2 367de6791 Front airbags for driver and passenger
2 Side airbags
Important safety notices
Do not attempt to remove the gas generators of the airbag restraint system from the vehicle or to disassemble them.
Have inspection and service procedures performed by specially-trained personnel only.
If the airbag restraint system malfunctions, is deactivated or triggered as a response to an accident, have the system repaired by an BMW center only.
Do not make modifications of any kind to the individual components or system wiring. These include the upholstered covers on the steering wheel hub, in the instrument panel and in the side trim panels of the doors. Never apply adhesive materials to these components or cover or modify them in any way. Do not attempt to disassemble the steering wheel itself.
To ensure compliance with applicable safety regulations, have the airbag generators disposed of by an BMW center only.
Unprofessional attempts to service the system could lead to failure in an emergency or undesired airbag activation, either of which could result in personal injury.
Storing your vehicle

If you intend to store the vehicle for longer than three months, have the maintenance operations described on this page performed.
Preparation for storage
Have the following operations performed by your BMW center:
1 Clean and apply a rustproofing agent or other treatment to the engine, engine compartment, undercarriage, axles and major components in accordance with approved repair procedures. Wash the vehicle, clean the interior and treat painted and chromed parts. Clean the rubber seals around the hood, luggage compartment and doors.
2 Change the engine oil and oil filter with the engine at operating temperature. As an additional corrosion protection measure, an anticorrosive agent can be added to the engine in accordance with the manufacturer's instructions.
3 Check the coolant level and concentration and top up if necessary.
4 Check the fluid level of the windshield washer fluid reservoir; top up if necessary.
5 Fill the fuel tank completely to prevent the formation of condensation.
6 Increase the tire inflation pressure to 51 psi (350 kPa).
Before parking the vehicle for storage
1 Dry the parking brake and footbrake by brake applications to prevent the brake discs and drums from corroding.
2 Park the vehicle in a covered, dry, and well-ventilated room. Place the transmission in 1st gear or set the selector lever to the "P" position. Chock the wheels to prevent the vehicle from rolling if necessary. Do not set the parking brake.
3 Remove the battery, charge it completely and store it in a cool (but frost-free) room.
Z3 roadster/M roadster:
4 Remove the hardtop ^* and store it separately. Refer to page 109.
5 Close the convertible top.
During storage
Recharge the battery every six months. If it is not recharged, it will not be serviceable. Every time the battery is discharged, especially over extended periods, its service life is reduced.
Removing the vehicle from storage
Recharge the battery if the "Magic Eye" turns black. Refer to page 167.
Then have Inspection I performed by your BMW center, including a brake fluid replacement if necessary. Refer to the Service Manual.
Technical modifications to the vehicle
Any BMW center will be happy to advise you concerning the advisability, legal implications and factory recommendations for technical modifications to the vehicle. For this purpose, the BMW center will require the Vehicle Identification Number. The engine number is also required in some instances.
Light-Emitting Diodes (LEDs)
Light-emitting diodes installed behind translucent lenses serve as the light source for many of the controls and displays in your vehicle. These LEDs are similar to laser technology and are legally classified as "Class 1 light emitting diodes."
Do not remove the protective lens and avoid staring directly at the unfiltered beam for extended periods (several hours), since inflammation of the iris could result.
OBD connector
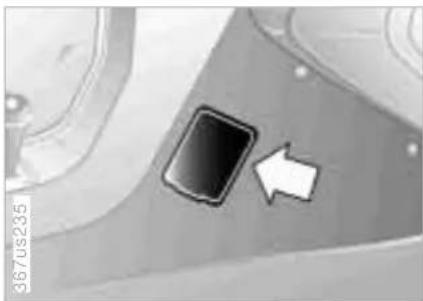
natural_image
Close-up of a black rectangular object with an arrow pointing to it, against a blurred background (no text or symbols)Access to the connector for the Onboard Diagnostic system (OBD): Lift off the side cover in the center console on the passenger's side (arrow).
The purpose of the OBD system is to ensure proper operation of the emission control system throughout the vehicle's lifetime by monitoring emission-related components and systems for deterioration and malfunction.
SERVICE ENGINE SOON An Illuminated indicator informs you of the need for service, but not of the need to stop the vehicle. However, the systems should be checked by your BMW center at the earliest possible opportunity.
Under certain conditions, the indicator will blink or flash. This indicates a rather severe level of engine misfire. When this occurs, you should reduce speed and consult the nearest BMW center as soon as possible. Severe engine misfire over only a short period of time can seriously damage emission control components, especially the catalytic converter.
"Service Engine Soon" warning lamp for Canadian models.
When the filler cap is not properly tightened, the OBD system can detect the vapor leak and the indicator will light up. If the filler cap is subsequently tightened, the indicator should go out within a few days.
natural_image
Three different wrenches shown in grayscale, no text or symbols visibleOnline Edition for Part-No. 01 41 0 155 149 - © 08/99 BMW AG
text_image
Replacement proced Onboard tool kit 146 Windshield wiper black Lamps and bulbs 147 Master key with batte lamp 154 Tire change - Z3 roadster, Z3 cou Repairing a flat tire, M roadster, M coup Battery 166 Fuses 169 In case of electrical malfunction: Power convertible top Fuel filler door 170 Assistance, giving an receiving: Jump-starting 170 Towing the vehicle 17Replacement procedures:
Onboard tool kit 146
Windshield wiper blades 146
Lamps and bulbs 147
Master key with battery lamp 154
Tire change -
Z3 roadster, Z3 coupe 155
Repairing a flat tire,
M roadster, M coupe 162
Battery 166
Fuses 169
In case of electrical malfunction:
Power convertible top 170
Assistance, giving and receiving:
Jump-starting 170
Towing the vehicle 172
Overview
Controls and features
Operation, care and maintenance
Owner service procedures
Advanced technology
Technical data
Index
Onboard tool kit Windshield wiper blades
The onboard tool kit is located in the luggage compartment, under the floor mat.
Z3 coupe, M coupe:
Grasp the floor mat by the straps on the left and right. Pull it upward and remove it.
Z3 roadster, M roadster:
Lift the floor mat from the rear by the strap and fold it forward.
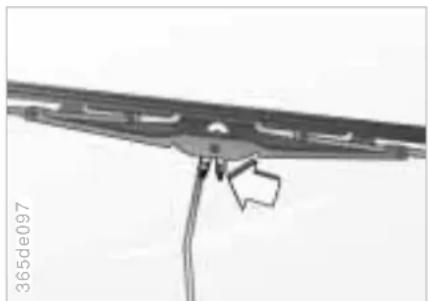
natural_image
Close-up of a mechanical component with a bracket and cable, no visible text or symbolsFront
1 Position the wipers vertically. To do this, switch on the wipers and switch off the ignition when the wipers are approximately vertical.
2 Raise the wiper arm completely.
3 Press the spring retainer (arrow) and extract the blade, pulling toward the wiper arm.
4 Insert a new wiper blade and apply pressure until you hear it engage.
Rear window wiper, Z3 coupe, M coupe
Follow the same procedure as that described for changing the front wiper blades, except that the wiper does not have to be positioned vertically.

Fold the wiper back onto the window before you turn the ignition o position 1 or 2.

Use only wiper blades which have been approved by BMW.
Lamps and bulbs
The lamps and bulbs make essential contributions to the safety of your vehicle. Therefore, comply fully with the following instructions during bulb replacement. If you are not familiar with any of the procedures, consult your BMW center.
Do not touch the glass portion of a new bulb with your bare hands since even small amounts of impurities burn in to the surface and reduce the service life of the bulb. Use a clean cloth, paper napkin, or a similar material, or hold the bulb by its metallic base.
A replacement bulb set is available from your BMW center.
Before performing any work on the electrical system, switch off the affected accessories or disconnect the cable from the negative terminal of the battery. Failure to do so could result in short circuits in the electrical system. To prevent injuries and damage, comply with any instructions provided by the bulb manufacturer.
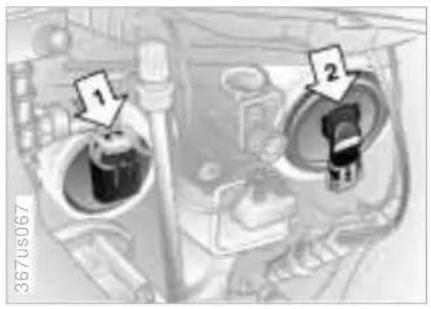
text_image
1 2 367us067The illustration depicts the right side of the engine compartment.
1 High beams
HB3, 65-watt bulb
2 Low beam headlamps
HB4, 55-watt bulb
The bulb is pressurized. Therefore, wear safety glasses and protective gloves. Failure to comply with this precaution could lead to injury if the bulb is accidentally damaged during replacement.
1 Turn the bulb holder with the bulb to the left and remove toward the rear.
2 Pull off the plug.
3 Push the new bulb holder with bulb onto the plug – ensure proper locking.
4 Reinstall in reverse order.
When cleaning the headlamps, please observe the following:
Do not clean by wiping with a dry cloth (this causes scratches). Never use abrasives or strong solvents to clean the covers.
Remove dirt and contamination (such as insects) by soaking with BMW Car Shampoo and then rinsing with plenty of water.
Always use a deicer spray to remove accumulated ice and snow – never use a scraper.
Lamps and bulbs
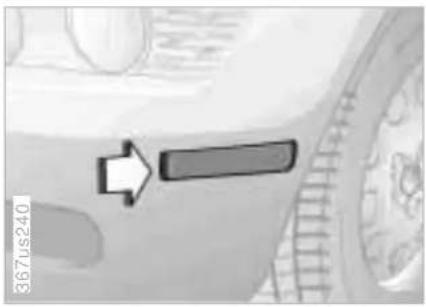
text_image
367us240Position lamps
5-watt bulb
1 Use finger pressure against the inner edge of the lens (arrow) to press it outward for removal.
2 Turn the bulb holder with the bulb to the right and remove it from the lamp.
3 Applying light pressure, turn the bulb to the left. Remove and exchange the bulb.
4 Install in the reverse order.

natural_image
Close-up of a car's side panel showing the wheel and seat, with no visible text or symbols.Front turn signals
21-watt bulb
1 Turn the bulb holder with the bulb to the left and remove toward the rear.
2 Applying light pressure, turn the bulb to the left. Remove and exchange the bulb.
3 Insert the bulb holder and turn to the right as far as possible.
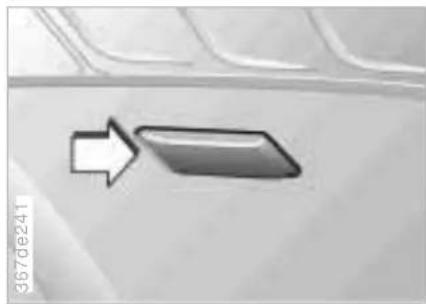
natural_image
Close-up of a car door with a pointing arrow (no text or symbols visible)Side turn signals
5-watt bulb
1 Use finger pressure against the rear edge of the lens (arrow) to press it toward the rear for removal.
2 Turn the bulb holder with the bulb to the right and remove it from the lamp.
3 Applying light pressure, turn the bulb to the left. Remove and exchange the bulb.
4 Install in the reverse order.
Lamps and bulbs
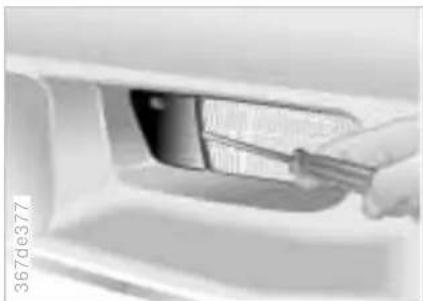
natural_image
Close-up of a hand using a tool to clean or store items inside a vehicle door (no visible text or symbols)Front fog lamps\*
H1, 55-watt bulb
1 Unclip the plastic cover (on the inside of the fog lamp) with a screwdriver.
2 Loosen two screws, tilt the fog lamp outward and remove it.
3 Release the plastic cap on the back of the fog lamp and remove it.
4 Remove the plug.
5 Detach the wire clamp.
6 Replace the bulb.
7 Install in the reverse order.
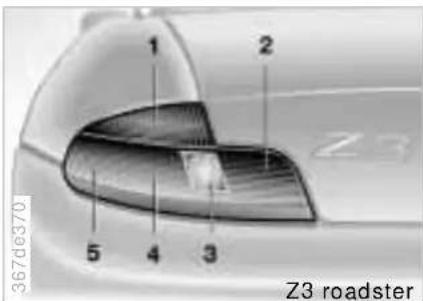
text_image
1 2 Z3 5 4 3 367de370. Z3 roadsterTail lamp assembly - Z3 roadster
Tail lamp, side marker lamp:
5-watt bulbs
Remaining bulbs: 21 watts
1 Turn signal yellow
2 Brake lamp red
3 Backup lamp white
4 Tail lamp, reflector red
5 Side marker lamp red
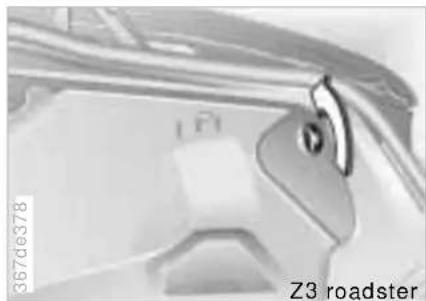
text_image
367de378 121 5 Z3 roadster1 Open the quick-release fastener (arrow) and remove the cover.
2 Turn the corresponding bulb holder to the left and remove it.
3 Press the defective bulb gently and turn it to the left. Remove the bulb and replace it.
4 Insert the bulb holder and turn to the right as far as possible.
5 Secure the cover.
Lamps and bulbs
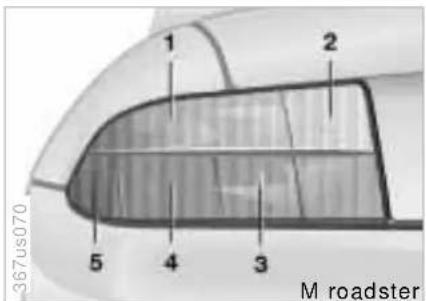
text_image
367us070 1 2 5 4 3 M roadsterTail lamp assembly - M roadster
Tail lamp, side marker lamp:
5-watt bulbs
Remaining bulbs: 21 watts
1 Turn signal yellow
2 Backup lamp white
3 Tail lamp, reflector red
4 Brake lamp red
5 Side marker lamp red
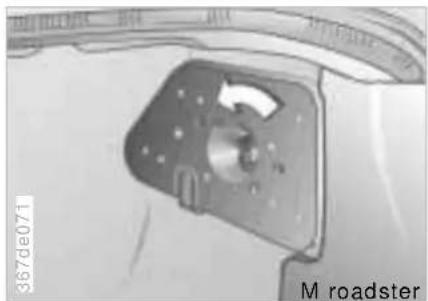
natural_image
Close-up of a roadster component with visible angle and scale markings (no readable text or symbols)1 Turn the bulb holder retainer to the left (arrow) and remove bulb holder.
2 Pull the bulb holder for the side marker lamp toward the front and out of the tail lamp assembly.
3 Press the defective bulb gently and turn it to the left. Remove the bulb and replace it.
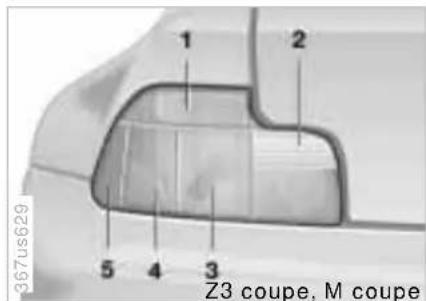
Tail lamp, side marker lamp:
5-watt bulbs
Remaining bulbs: 21 watts
1 Turn signal yellow
2 Backup lamp white
3 Tail lamp, reflector red
4 Brake lamp red
5 Side marker lamp red
Lamps and bulbs
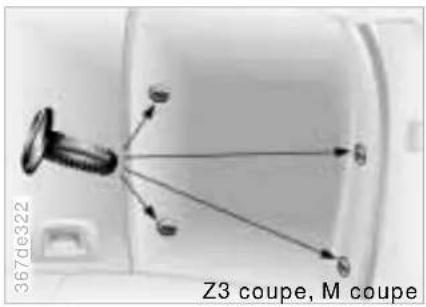
1 Lift up the luggage compartment floor mat.
2 To loosen, turn the mounting clips (arrows) of the right-hand trim panel on the rear wall of the luggage compartment approx. 1/4 turn with a coin or screwdriver.
3 Pull out the clips and remove the trim panel.
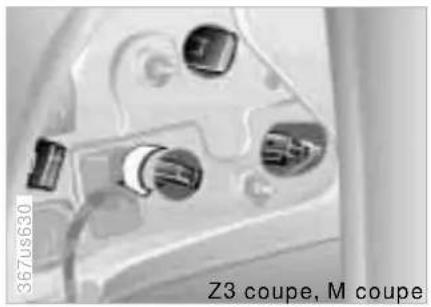
natural_image
Close-up of a mechanical component with multiple pins and mounting holes (no visible text or symbols)4 Turn the corresponding bulb holder to the left (arrow) and remove it.
5 Press the defective bulb gently and turn it to the left. Remove the bulb and replace it.
6 Insert the bulb holder and turn to the right as far as possible.
Side marker lamp:
Pull the bulb holder out of the tail lamp assembly toward the front.
7 Reinstall the trim panel in the opposite order:
Insert the clips and turn them approx. 1/4 turn to secure them.
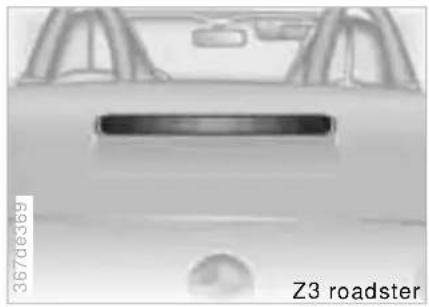
natural_image
Top-down view of a car's rear window and side door, labeled 'Z3 roadster' (no other text or symbols visible)Center (high-mount) brake lamp - Z3 roadster
In the event of a malfunction, please consult your BMW center.
Lamps and bulbs
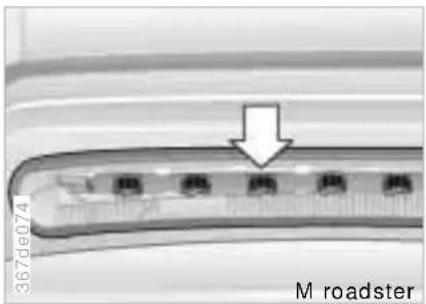
text_image
367 de074 M roadsterCenter (high-mount) brake lamp - M roadster
Seven 5-watt bulbs
1 Open the luggage compartment lid.
2 Remove the cover (use a screwdriver if necessary).
3 Press the defective bulb gently on the bulb socket, turn it to the left and remove.
4 Pull the bulb out of the bulb socket and replace.
5 Install in the reverse order.
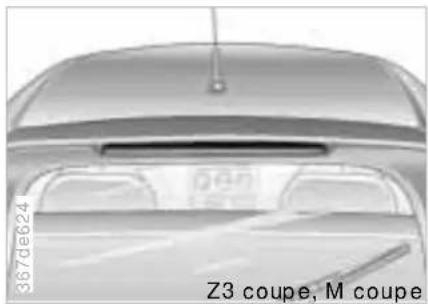
Center (high-mount) brake lamp - Z3 coupe, M coupe
In the event of a malfunction, please consult your BMW center.
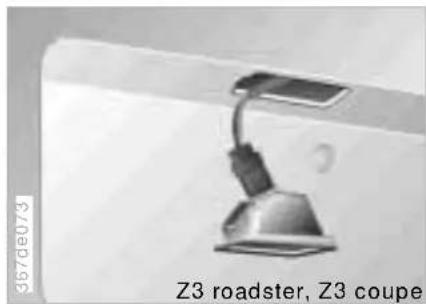
natural_image
Illustration of a desk lamp with adjustable arm and base, labeled 'Z3 roadster, Z3 coupe' (no other text or symbols)License plate lamps - Z3 roadster, Z3 coupe
5-watt bulb
1 Press the lamp to the left and remove it.
2 Turn the bulb holder with the bulb to the left and remove it from the lamp.
3 Pull the bulb out of the bulb socket and replace.
4 Install in the reverse order.
Lamps and bulbs
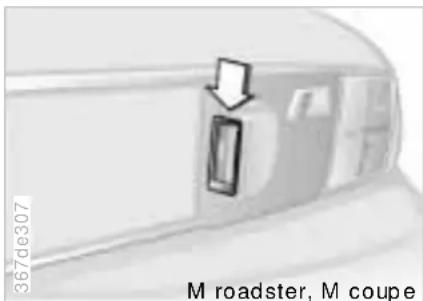
text_image
367de307 M roadster, M coupeLicense plate lamps - M roadster, M coupe
5-watt bulb
1 Press down and remove the lamp on the top side (see arrow).
2 Turn the bulb holder with the bulb to the left and remove it from the lamp.
3 Pull the bulb out of the bulb socket and replace it.
4 Install in the reverse order.
Interior lamp – Z3 roadster, M roadster
10-watt bulb
1 Use a screwdriver to press out the lens at the left recess.
2 Pull the bulb out of the contact lugs.
When reinstalling the lens, first position it on the left, then snap it into place.
Luggage compartment lamp - Z3 roadster, M roadster
5-watt bulb
The lamp is located above in the luggage compartment.
1 Use a screwdriver to pry out the lamp.
2 Pull the bulb out of the contact lugs.
Interior lamps – Z3 coupe, M coupe
Front:
15-watt bulb
1 Use a screwdriver to press out the lamp at the left recess.
2 Press back the plastic tab on the reflector, open the reflector and replace the bulb.
Rear:
10-watt bulb
1 Use a screwdriver to press out the lamp at the side recess.
2 Press back the plastic tab on the reflector, open the reflector and replace the bulb.
Reading lamps – Z3 coupe, M coupe
10-watt bulbs
1 Use a screwdriver to press out the lamp at the left recess.
2 Press the defective bulb gently and turn it to the left. Remove the bulb and replace it.
154 Master key with battery lamp
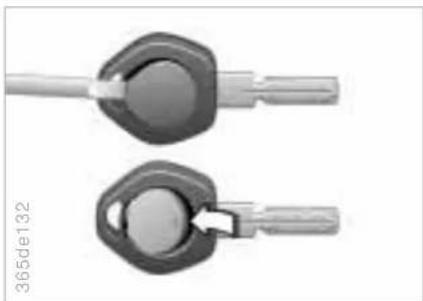
natural_image
Two mechanical components with hexagonal end caps and shafts, no visible text or symbolsReturn used batteries to a recycling point or to your BMW center.
If light intensity drops, renew the battery to safeguard against acid escaping.
Battery change
1 Remove the cover on the back of the key with a screwdriver.
2 Insert a new battery of the same type (CR 2025; refer to the illustration) so that it touches the contacts.
3 Snap the cover into place and apply uniform pressure to seat it.
Tire change – Z3 roadster, Z3 coupe

Safety measures in the event of a breakdown or flat tire:
Stop the vehicle on a firm, level surface as far as possible from the flow of traffic. Turn on the hazard warning flashers.
Turn the steering wheel to the straight-ahead position, remove the key and engage the steering lock. Shift into 1st or reverse (selector lever in "Park" with automatic transmission) and engage the parking brake.
All passengers should be outside the car and well away from your immediate working area (for instance, behind the guardrail).
If a warning triangle or portable hazard warning lamp is available, set it up on the roadside at an appropriate distance from the rear of the vehicle. Comply with all safety guidelines and regulations.
Change the wheel only on a level, firm surface which is not slippery. Avoid jacking the car on a soft or slippery support surface (snow, ice, tiles, loose gravel, etc.), since it could slide sideways.
Place the jack on a firm support surface.
Do not place wooden blocks or similar objects under the jack. If this done, the jack might not be able to reach its full support capacity because of the limited height.
Do not lie under the vehicle or start the engine when the vehicle is supported by the jack. This creates the risk of fatal injury.
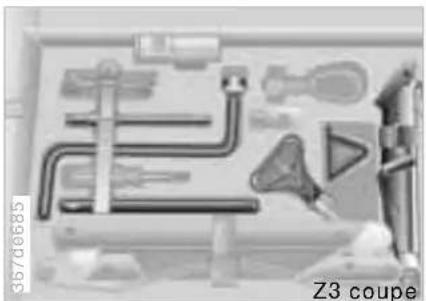
natural_image
Black-and-white photo of a mechanical tool kit with various components and no visible text or symbolsWhat you will need
The illustration depicts an example of the onboard tool kit of the Z3 coupe.
Other than the warning triangle, the same tools are arranged somewhat differently in the storage compartment of the Z3 roadster.
In order to avoid rattling noises later, note the position of the tools when you remove them and return them to their original position when you are through using them.
Car jack
Release the Velcro® fastener in the luggage compartment under the floor mat.
After use, wind down the jack completely.
Tire change – Z3 roadster, Z3 coupe
Wedge (wheel chock)
Next to the jack.
Lug wrench, centering pin, spark-plug wrench and lifting handle – In the luggage compartment under the floor mat.
Spare tire Stored under the luggage compartment on the vehicle floor and protected with a storage tray.
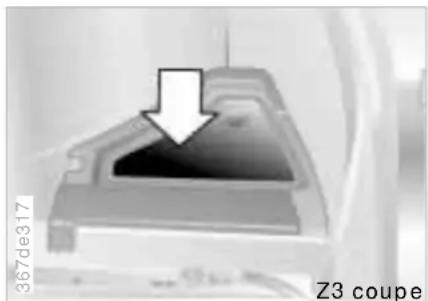
text_image
367de317 Z3 coupe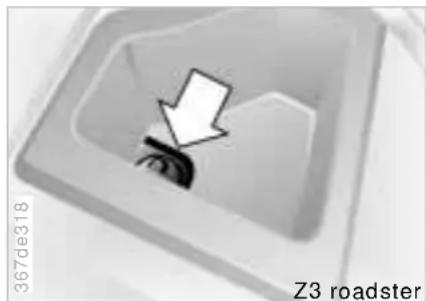
text_image
367de318 Z3 roadsterRemove the spare tire
Z3 coupe:
Remove the floor of the storage compartment (arrow) at the right in the luggage compartment.
Release the Velcro® fastener and remove the warning triangle.
Z3 roadster:
Loosen the screw connection on the floor of the storage tray (arrow) at the right in the luggage compartment and remove the compartment.
Tire change - Z3 roadster, Z3 coupe
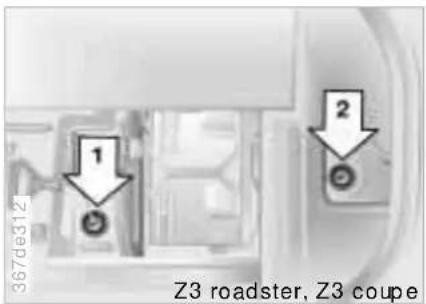
text_image
367de312 1 2 Z3 roadster, Z3 coupeRaise and secure the floor panel in the luggage tray.
The spare tire is secured at two mounting points.
Left-hand attachment point - arrow 1 Right-hand attachment point - arrow 2
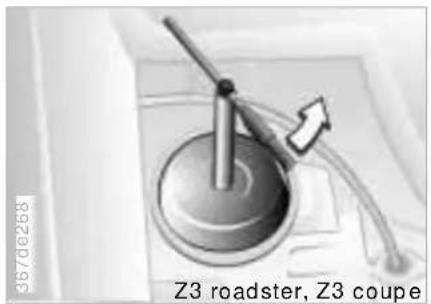
text_image
36700268 Z3 roadster, Z3 coupeRight-hand attachment point: Place the spark plug wrench on the hexagon nut and, using the alignment tool to assist you, loosen the hexagon nut. Remove the hexagon nut and the protective cap.

Place the hexagon nut in a secure location.

natural_image
Close-up of a mechanical lever component with no visible text or symbols on the device itselfLeft-hand attachment point: Take the lifting handle from the tool kit, lower it on the rope and fit it on the hexagon nut. Hold the rope at the top and unscrew the nut with the lifting handle.
Tire change – Z3 roadster, Z3 coupe
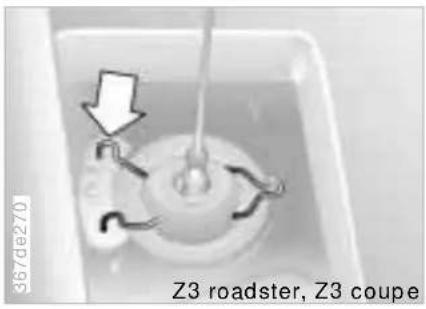
text_image
367de270 Z3 roadster, Z3 coupePull the lifting handle downward until the spare wheel tray is lifted slightly. At the same time, compress the locking spring (arrow). This releases the spare tire (weight: approx. 8.8 lb./4 kg). The spare tire must then be held with the lifting handle.
Using the lifting handle, lower the spare tire bracket with storage tray and spare tire and place it on the ground.

Do not put your feet beneath the rear of the vehicle because the spare tire could fall as it is being lowered.
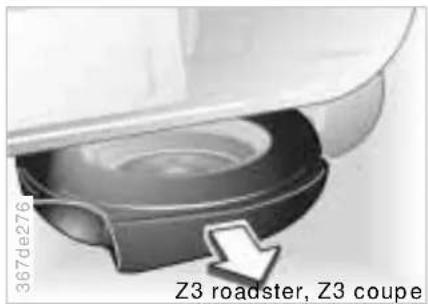
text_image
367de276 Z3 roadster, Z3 coupePull the storage tray with the spare tire completely out of the spare tire bracket toward the rear.
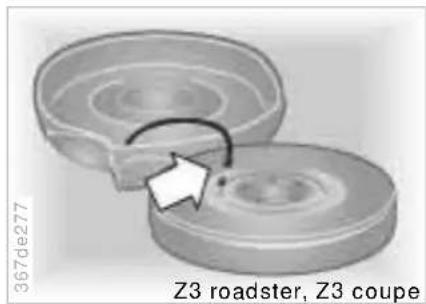
text_image
367de277 Z3 roadster, Z3 coupeLift the spare tire at the front. Lay it down toward the rear next to the storage tray and with the valve facing upward. Quickly unscrew the valve extension from the valve of the spare tire. Unscrew the valve cap from the storage tray and mount it on the spare tire.

When the valve extension is screwed onto or off of the spare tire, you may hear a brief hissing as air escapes.
The procedure for removing the spare tire is also illustrated with pictographs located on the floor mat of the luggage compartment.
Tire change – Z3 roadster, Z3 coupe

The wheel with the flat tire cannot be placed in the spare tire bracket, the place of the spare tire.
There is a plastic bag in the onboard tool kit. Put the flat tire and the storage tray into this bag.

Do not reposition the storage tray in the spare tire bracket without pare tire.
Using the lifting handle, pull the spare tire bracket upward until the spring retainer catches. Secure the bracket with the hexagon nut – ensure that it is snug.
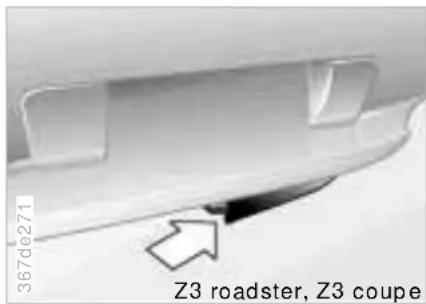
text_image
367de271 Z3 roadster, Z3 coupeThe spare tire is returned to its original position in the same manner as it is removed, however in the reverse order. When doing so, make sure that:
The valve extension is mounted on the spare tire valve.
The storage tray is facing toward the rear (see arrow) with the valve extension pointing to the inside left to ensure that it is possible to check the tire inflation pressure.
Mount the spare tire
1 Secure the vehicle to prevent it from rolling:
Place the wedge against the rear surface of the front tire on the side opposite the side being raised. If the vehicle is parked on a downward slope, place the wedge securely in front of the tire. If the wheel must be changed on a surface with a more severe slope, take additional precautions to secure the vehicle from rolling.
2 Wheels with full wheel covers ^* : Reach into the ventilation openings and pull the cover off.
3 For wheels equipped with hub covers*: Position a screwdriver in the slot and pry the hub cover off.
4 Loosen the lug bolts 1/2 turn.
Tire change – Z3 roadster, Z3 coupe
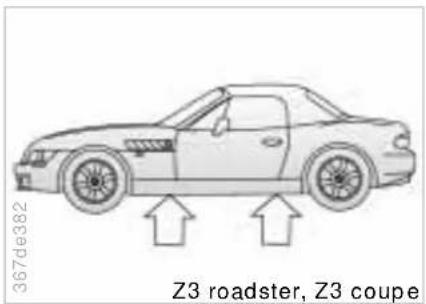
text_image
367de382 Z3 roadster, Z3 coupe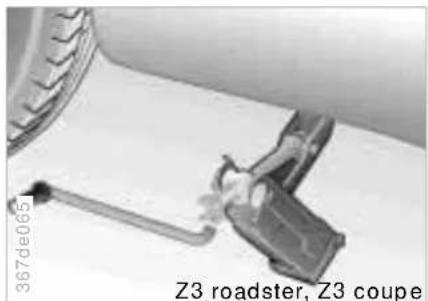
natural_image
Mechanical assembly diagram showing a Z3 roadster and Z3 coupe component (no text or symbols on the diagram itself)
natural_image
Close-up of a roadster with visible tire and wheel (no text or symbols on the diagram itself)5 Position the jack on the vehicle:
Plastic elements are mounted on the vehicle floorpan for positioning the car jack. These positions (refer to the arrows) are located approximately 16 inches (40 cm) from the front wheel opening and 10 inches (25 cm) from the rear wheel opening.
If necessary, remove snow, ice or mud from the plastic elements.
Screw the jack arm up until the car jack just fits under the vehicle.
Position the jack at the jacking point closest to the flat tire so that the jack base is vertically below the jacking point and the entire surface of the head of the jack will move squarely into the recess of the plastic element when the jack is cranked.
Crank the jack until the wheel you are changing is off of the ground.
6 Unscrew the lug bolts and remove the wheel.
7 Remove accumulations of mud or dirt from the mounting surfaces of the wheel and hub. Clean the lug bolts.
8 Take the centering pin from the vehicle tool kit. Insert the centering pin together with the plastic cap into one of the bolt sockets.
9 Position the spare wheel and screw at least two lug bolts into opposite bolt sockets. Remove the centering pin.
10 Screw in the remaining lug bolts.
Tighten all the bolts snugly.
11 Lower the jack and remove it from beneath the car.
12 Tighten the lug bolts in a diagonal pattern.
Tire change – Z3 roadster, Z3 coupe
13 Wheels with full wheel covers:
Place the wheel cover with the valve opening over the valve. Use both hands to press the cover securely onto the rim.
14 Check and correct the air pressure at the earliest opportunity.

Use only the full wheel cover installed by the factory. Other wheel
covers may not fit securely. The full wheel cover may not be installed on the spare wheel because the cover could be damaged.

The vehicle jack is designed for changing tires only. Do not at-
tempt to lift a different vehicle model or any other type of load with the jack. To do so could lead to property damage or personal injury.
To ensure continued safety, check the tightness of the lug bolts at the earliest opportunity (torque specification: 72 ft.lbs [100 Nm]).
If light-alloy wheels other than Original BMW light-alloy wheels have been mounted, it may be necessary to use different lug bolts for those wheels. Replace the defective tire as soon as possible and have the new wheel/tire balanced.
Driving with the spare tire
Drive cautiously and do not exceed a speed of 50 mph (80 km/h).
Be aware that vehicle handling will be altered. Slower brake response time, longer braking distances and changed steering characteristics may be anticipated when approaching limit conditions.

Only one spare tire may be mounted at any time. Mount a net and tire with the same size andifications as the others at the earliest possible opportunity. Maintain the unified tire pressures. Refer to 29.
Changing a tire, M roadster, M coupe
The M roadster and M coupe do not have a jack or lug wrench when they are shipped from the factory.
Have the winter tires changed at your BMW center or at a tire service shop.
For changing a flat tire, refer to page 162.
162 Repairing a flat tire, M roadster, M coupe

Safety measures in the event of a flat tire:
Stop the vehicle as far as possible from the flow of traffic. Turn on the hazard warning flashers.
Engage the steering lock with the wheels in the straight-ahead position.
Set the parking brake and engage either first gear or reverse gear.
All passengers should be outside the car and well away from your working area (behind a guard rail, for instance). If a warning triangle or portable hazard warning lamp is available, set it up on the roadside at an appropriate distance from the rear of the vehicle.
Comply with all safety guidelines and regulations.
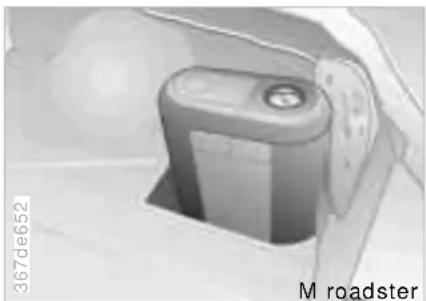
natural_image
Close-up of a roadster device with visible battery and sensor (no text or symbols on the device itself)M Mobility system
In place of a spare tire, the M roadster and the M coupe have the M Mobility System.
It is located at the right-rear of the luggage compartment. In the M coupe, it is below a cover panel. Refer to page 163.

Before using the M Mobility System, carefully read the warning danger information on the device.
Always wear the enclosed protective gloves and the protective goggles. Failure to comply with this information can lead to risks to personal safety.

The use of the M Mobility System is not effective if the damaged in the tire is larger than approx.
0.15 inches (4 mm). Please consult the nearest BMW center if the tire cannot be temporarily repaired with the M Mobility System or contact BMW Roadside Assistance at 1-800-332-4269.
Repairing a flat tire, M roadster, M coupe
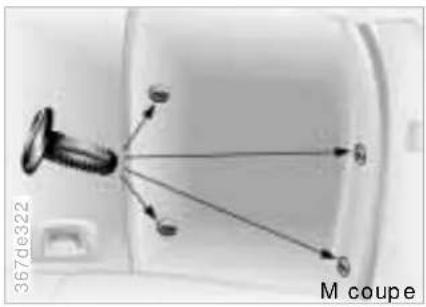
natural_image
Diagram of a mechanical component with labeled parts and directional arrows, no readable text or symbols present.Loosen the cover panel, M coupe:
1 Fold the luggage compartment floor mat up.
2 To loosen, turn the four mounting clips (arrows) of the right-hand trim panel on the rear wall of the luggage compartment approx. 1/4 of a turn with a coin or screwdriver.
3 Pull out the clips and remove the trim panel.
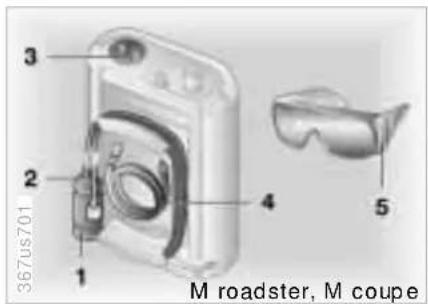
text_image
367us701 M roadster, M coupeTo apply the system, use the grab handle to remove it from the luggage compartment.
The system consists of:
1 Grip with button, cable and plug connector for the compressor actuator igniter.
2 Black connection hose from the compressor to the sealant bottle.
3 Pressure indicator.
4 Clear connection hose from the system to the wheel.
5 Protective goggles.
6 Protective gloves (no illustration).
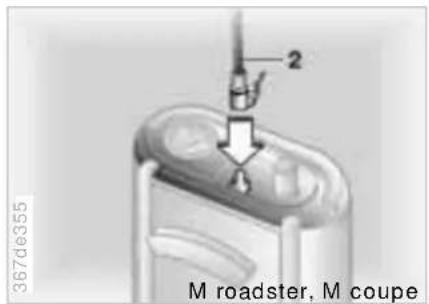
text_image
367de355 2 M roadster, M coupeUsing the M Mobility system

If possible, do not remove foreign objects that have penetrated the
tire.
1 Remove the maximum speed warning sticker from the top of the device and affix it to the steering wheel.
2 Remove the cables and hoses from the device.
3 Put on the protective gloves and goggles.
4 Connect the black hose (2) to the connection as shown in the illustration.
164 Repairing a flat tire, M roadster, M coupe
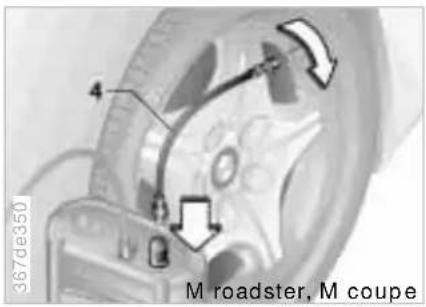
text_image
367de350 M roadster, M coupe5 Remove the clear hose (4) from the plastic bag. Unscrew the valve cap from the tire valve of the wheel with the defective tire and screw hose (4) onto the valve.
6 Attach the free end of the clear hose (4) to the connection on the device as shown in the illustration.
7 Plug the connector (1) into the cigarette lighter socket in the vehicle's interior. Refer to page 92.
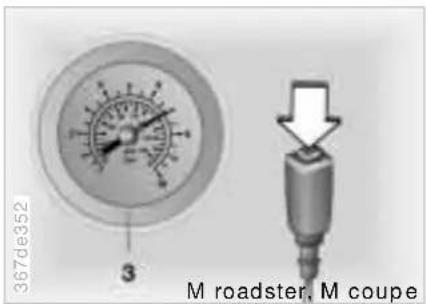
text_image
3670e352 M roadster, M coupe8 Press and hold the button for compressor actuation. While doing this, carefully monitor the pressure indicator. As long as the pressure indicator displays a value between approx. 75 to 120 psi (517 to 827 kPa), the system is forcing sealant into the tire. When the pressure indicator's displayed value falls significantly below approx. 75 to 120 psi (517 to 827 kPa) while the compressor is actuated, all of the sealant has been forced into the tire, and air is flowing in.
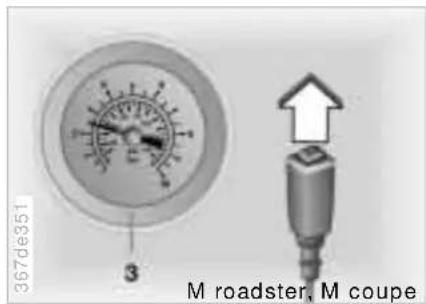
text_image
367de351 M roadster, M coupe9 Continue to inflate until the pressure reaches a reading of 35 psi (250 kP). This may require several minutes.
10 Release the button to check the tire inflation pressure that has been reached.
11 After the tire has been inflated, unplug the connector (1) from the cigarette lighter socket. Remove the black hose (2) from the device and detach the clear hose (4) from the device. To do this, press the outer ring of the connection toward the device.
Repairing a flat tire, M roadster, M coupe
12 Then unscrew the clear hose (4) from the tire valve. Screw the valve cap back onto the valve.
13 Place the clear hose (4) in the plastic bag and store the M Mobility System in the luggage compartment.

Following use of the M Mobility System, resume driving for a distance of at least 1.2 miles (2 km) so that the sealant will be distributed uniformly in the tire. Drive at a speed of at least 15 mph (20 km/h), but do not exceed 35 mph (60 km/h). Finally, check and correct the tire inflation pressure as soon as possible (at the nearest filling station, for example). Refer to page 29. If the tire does not retain inflation pressure, do not continue driving. Consult the nearest BMW center or tire dealer.
Replace the defective tire as soon as possible and have the new wheel/tire balanced. Have the M Mobility System refilled.
For this, please consult the nearest BMW center.
Please note that the sealant bottle of the system must be replaced every three years by your BMW center if the device is not used.
You will find corresponding instructions for the use of the M Mobility System on the device.
Battery
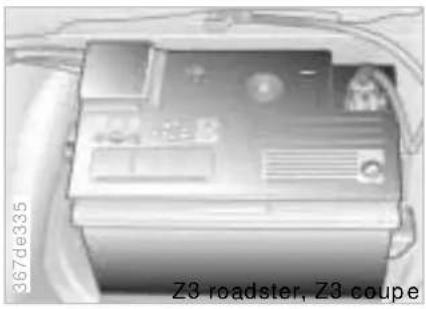
natural_image
Close-up of a car battery with visible circuitry and wiring, labeled 'Z3 roadster, Z3 coupe' (no other text or symbols)Installation location, Z3 roadster and Z3 coupe
The battery is located in the luggage compartment under the floor mat.
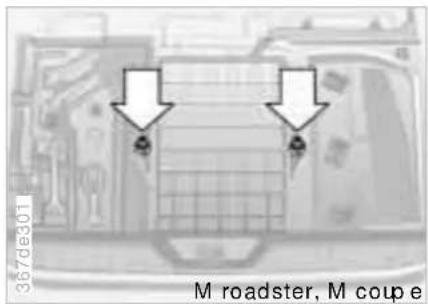
text_image
367de301 M roadster, M coupeInstallation location, M roadster and M coupe
The battery is located in the luggage compartment under the floor mat and a cover.
In order to gain access to the battery, lift up or remove the floor mat. Unscrew the nuts on the cover (arrows) and remove the cover.
Maintenance
The battery is completely maintenance-free. That means that the original electrolyte will normally last for the service life of the battery under moderate climatic conditions.
Symbols
You will find the following symbols on your car battery. To avoid injury, please comply with the corresponding precautions whenever you work with or near the battery.

Please read the following information before working with the battery.

Wear eye protection. Do not allow particles containing battery acid or lead to come into con-
tact with your eyes, your skin, or your clothing.

Battery acid is extremely corrosive. Wear eye protection and protective gloves. Do not tip the
battery. Battery acid can leak from the ventilation openings.
Battery

Ensure that children keep well away from batteries and battery acid.

Do not allow sparks or open flame near the battery. Do not smoke near the battery. Avoid sparks from electrical cables or electrical equipment. Turn the key to position 0 in the steering lock when the battery is disconnected or connected. Do not short circuit the battery terminals. This creates a risk of personal injury from high-voltage sparks.

A highly-explosive gas is generated when the battery is charged.

If acid is accidentally splashed into your eyes, rinse them thoroughly for 15 minutes with clear water. Following that, consult a physician immediately. If acid splashes onto your skin or clothing, rinse immediately with ample clean water. If acid is accidentally swallowed, consult a physician immediately.

In order to protect the battery case from ultraviolet radiation, do not place it in direct sunlight. A discharged battery can freeze. Store the battery in areas where temperature remains above freezing.
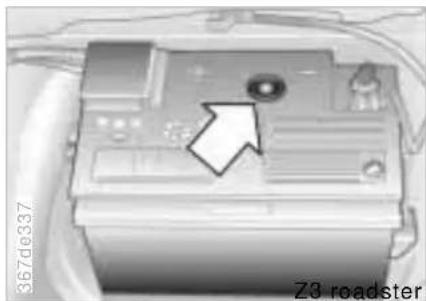
natural_image
Close-up of a Z3 roadster electronic device with an arrow pointing to its component (no visible text or symbols on the device itself)Charge condition
The illustration depicts the battery installation location in the Z3 roadster as an example.
You can read the charge condition of the battery with the "Magic Eye" (a hydrometer):
Green: Adequate charge.
Black: Not charged adequately. The battery must be recharged. Please contact your BMW center.
Yellow: Replace the battery.
The projected service life of the battery can only be reached if the battery is fully-charged at all times. Check the charge condition of the battery frequently if the vehicle is used primarily for driving short distances.
Charging the battery
Charge the battery in the vehicle only when the engine is off. Charge the battery using the auxiliary jump-start terminal and a ground in the engine compartment (refer to jump-starting on page 170).
Before performing any work on the electrical system, disconnect the cable from the negative terminal. If you do not, short circuits can create the risk of fire or personal injury.
If you plan to park the vehicle for longer than 4 weeks, disconnect the battery from the vehicle electrical system by disconnecting the cable at the negative terminal. Then recharge the battery with an appropriate battery charger.
Battery
If you intend to store your car for longer than twelve weeks: Remove the battery, charge it and store it in a cool (but frost-and dust-free) room. Every three months and before reinstalling the battery, have it recharged. If it is not recharged, it will not be serviceable. Every time the battery is discharged, especially over extended periods, its service life is reduced. Refer also to page 140.

Return used batteries to a recycling point or your BMW center. Maintain the battery in an upright position for transport and storage. Secure the battery against tilting when transporting.
Removal and installation
Do not disconnect the battery cables when the engine is running. Disconnecting the battery cables when the engine is running will cause a voltage surge which will damage the vehicle's onboard electronics. Do not make any modifications in the wires leading to the positive terminal. If you do so, the Battery Safety Terminal's safety function will no longer be guaranteed. Repair and disposal must be performed by trained technicians only.
When removing the battery, disconnect the negative terminal first, then the positive terminal.
Unscrew the battery retaining clamp.
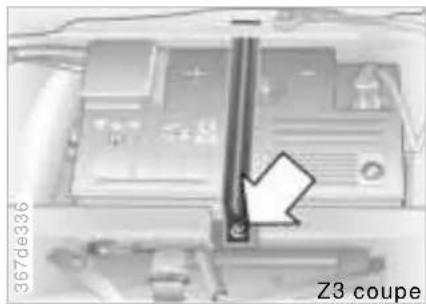
natural_image
Close-up of a mechanical component with a highlighted section and arrow, labeled 'Z3 coupe' (no readable text or symbols beyond label)Z3 coupe: Loosen the screw (arrow) on the battery safety bar and remove the bar.
When installing the battery, connect the positive terminal first, then connect the negative terminal.
When installing a battery, be sure that the battery, the safety bar (Z3 coupe) or the cover (M roadster, M coupe) are mounted properly. If this is not done, the battery will not be adequately secured in case of an accident.
Fuses
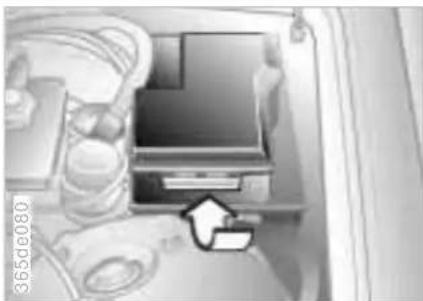
natural_image
Interior view of a cluttered room with furniture and a monitor (no visible text or symbols)If an electrical accessory should fail, switch it off and check the fuse.
The fuse box (electrical distribution center), which contains spare fuses, relays and plastic tweezers, is located on the left-hand side of the engine compartment. Refer to page 120 forward.
1 Press the retaining flap in and lift off the cover.
2 Use the plastic tweezers to remove the fuse for the accessory or equipment that has stopped working.
3 If the fuse is burned through ("blown"), the metal strip will have melted and separated. Replace the blown fuse with a new fuse of the same ampere rating (color code).
A listing of the fuses, their respective ampere ratings and the equipment in their circuits is provided on the cover of the fuse box.
When you close the fuse box, be sure that the cover is seated securely.
Do not attempt to repair a burned fuse or replace it with a fuse having a different color or amperage rating. To do this could cause a fire in the vehicle resulting from a circuit overload.
If a fuse burns through again, have the source of the fault checked and corrected by an BMW center.
Power convertible top\* Fuel filler door Jump-starting
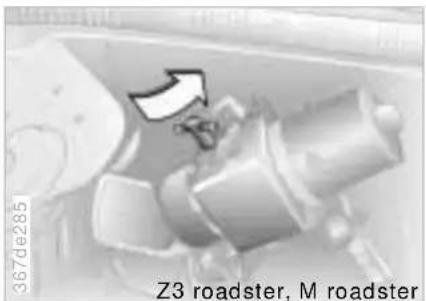
text_image
367de285 Z3 roadster, M roadsterManual closing
For roadsters with electrical power convertible top*, the convertible top drive unit is located in the luggage compartment behind the left side trim panel.
Turn the clip at the top of the trim panel to the left or right and swing the trim panel to the side.
Turn the T-pin a half turn to the left (refer to illustration).
The convertible top drive unit is disengaged and the convertible top can be operated manually. Refer to page 41.
Please have your BMW center eliminate the defect and re-engage the drive.
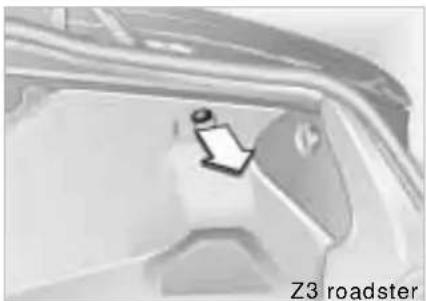
natural_image
Close-up of a car's side window with a small object on the door, labeled 'Z3 roadster' (no other text or symbols visible)Releasing manually
M roadster, M coupe: Remove the M Mobility System (see page 162) from the mounting.
Pull the button at the right in the luggage compartment sharply (arrow).
Please consult your BMW center to have the defect corrected.
Never use spray starter fluids to start the engine.
If the battery is discharged, the engine can be started with the use of two jumper cables and the battery of another vehicle. Always use jumper cables with fully insulated handles on the terminal clamps.

Do not touch voltage-carrying components when the engine is ing. To do so creates a risk of fatal y.
Carefully comply with the following instructions to avoid personal injury and damage to one or both vehicles:
1 Ensure that the battery on the support vehicle is also rated at 12 volts, and that the capacities of the two batteries (Ah) are roughly comparable (printed on casing).
2 Leave your battery connected to the car electrical system.
3 Make sure that there is no contact between the bodywork of the two vehicles. This creates the risk of short-circuiting.
Jump-starting
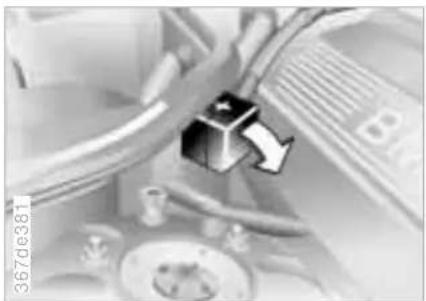
natural_image
Close-up of a mechanical component with wires and a small metallic component (no visible text or symbols)4 Start by connecting the jumper cable from the positive terminal of the support vehicle to the positive terminal connector located in your BMW's engine compartment. The cover of the auxiliary terminal for jump-starting is indicated by a "+" sign. Refer to the illustration. To open the cover on the M roadster, fold it forward; fold upward on the M coupe.
The illustration depicts the auxiliary terminal for jump-starting on the Z3 roadster and Z3 coupe as an example.
For the auxiliary terminal to jump-start the M roadster and M coupe, refer to Engine compartment, page 122.
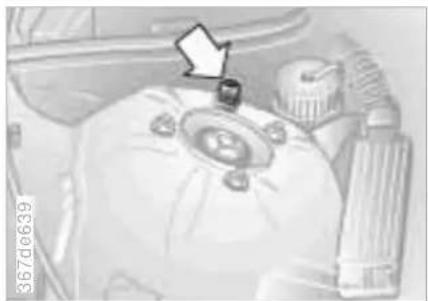
natural_image
Interior view of a car showing the engine compartment with a belt switch and exhaust pipe (no visible text or symbols)5 Then connect the negative terminals. First attach the cable to either the support vehicle's negative battery terminal (−), or to a suitable ground on its engine or body. Then connect the other terminal of the cable to a ground on the engine or on the body of the vehicle which is to be started. This a special nut which is provided on the suspension strut dome of the BMW. Refer to the arrow in the illustration.
Follow the same sequence when connecting jumper cables if you are assisting another vehicle. If you do not, there is a risk of personal injury from spark generation at the battery.
6 Start the support vehicle's engine and let it run.
7 Start the engine on the vehicle needing the jump-start, and allow it to run as usual. If the first start attempt is not successful, wait a few minutes before another attempt in order to allow the discharged battery to recharge.
8 Before disconnecting the jumper cables from your BMW, turn on the lamps, set the blower at the highest speed and run the engine for at least 10 seconds. This will prevent a voltage surge at the voltage regulator.
9 Then disconnect the jumper cables in reverse sequence.
Depending on the cause of the fault, recharge the battery.
Towing the vehicle
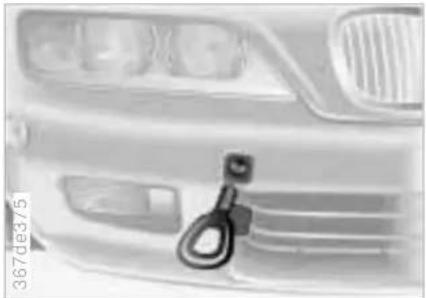
natural_image
Front view of a car with visible grille and front headlights (no text or symbols)Tow fitting
The screw-in tow fitting is stored in the onboard tool kit; be sure that it remains in the vehicle at all times. This fitting is designed for installation in the tow sockets located at the front and rear of the vehicle, and is intended for towing on paved road surfaces only. It should not be used to pull a vehicle out of deep snow, mud, sand, etc. Comply with all applicable towing laws and regulations at all times.
Access to tow sockets
Front:
Use a screwdriver to press the cover out.
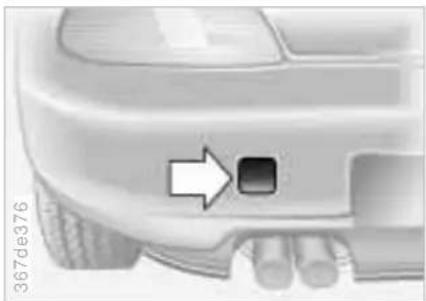
natural_image
Close-up of a car's front bumper with a white arrow pointing to a small square component (no text or symbols visible)Rear:
Use a screwdriver to press the cover out.

Screw the tow fitting in until it is tight against the stop. If you do the threads can be damaged.
Do not tow the vehicle by any components of the running gear, or lash them down in any way. If you do so, the components could be damaged, leading to possible accidents.
Use only a nylon towing strap to tow the vehicle, since the inherent resilience of this material helps protect both vehicles from sudden jerking movements.

The towed vehicle should always be the lighter of the two vehicles.
If this is not the case, it will not be possible to control vehicle handling.
Tow-starting
It is better to start the vehicle's engine by jump starting. For instructions on jump-starting, refer to page 170.
Never attempt to use your vehicle to push another vehicle. This could result in damage to the energy-absorbing bumpers.
Towing the vehicle
Towing a vehicle with automatic transmission
1 Place the shift lever into "Neutral."
2 Leave the ignition key at position 1 to ensure that the brake lamps, turn signals, horn and windshield wipers remain operational and to prevent the steering lock from engaging.
3 Switch on the hazard-warning system (comply with applicable legal regulations).
Find some means of identifying the vehicle in tow. Place a sign or warning triangle in the rear window, for instance.

Even when the electrical system
has failed, make sure that the igni-
tion key remains in position 1 to prevent the steering lock from engaging.
The steering and brakes are without power assist when the engine is off. This means that increased effort is required for steering and braking.

text_image
NO 367us124Towing with a commercial tow truck
Do not tow with sling-type equipment.
▶ Use a wheel-lift or flatbed equipment.
Comply with applicable towing laws.

Never allow passengers to ride in a towed vehicle for any reason.
Never attach tie-down hooks, chains, straps, or tow hooks to tie rods, control arms, or any other part of the vehicle suspension, as severe damage to these components will occur, leading to possible accidents.

natural_image
Exterior view of a modern office building (no signage)
natural_image
Close-up of a circular gauge or dial with measurement markings (no readable text or symbols)Online Edition for Part-No. 01 41 0 155 149 - © 08/99 BMW AG
Advanced technology:
Adaptive Transmission Control (ATC) 176
Airbags 176
Automatic Stability Control plus Traction ASC+T/Dynamic Stability Control DSC 177
Radio reception 177
Safety belt tensioner 178
Inside rearview mirror with automatic dimmer 178
Limited slip differential 179
Overview
Controls and features
Operation, care and maintenance
Owner service procedures
Advanced technology
Technical data
Index
ATC\* Airbags
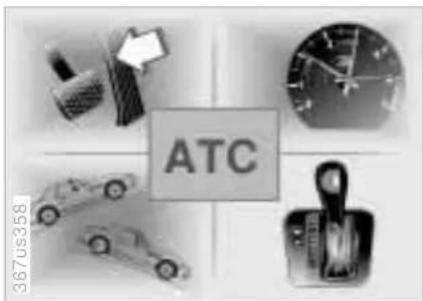
text_image
ATC 367us358For vehicles with automatic transmission, Adaptive Transmission Control (ATC) makes the optimum gear selection based on a number of factors. This system reacts to your individual driving style and the current driving conditions.
The ATC recognizes your individual driving style from the positions and movements of the accelerator pedal, delays during braking, and the vehicle's lateral acceleration when cornering. ATC makes the appropriate selection from different shift characteristics which range from comfort-oriented to performance-oriented.
In order to take driving conditions into account, ATC registers corners and road gradients. In order to exploit power reserves more fully, the transmission does not shift up until higher engine speeds are reached if you maintain speed through a curve.
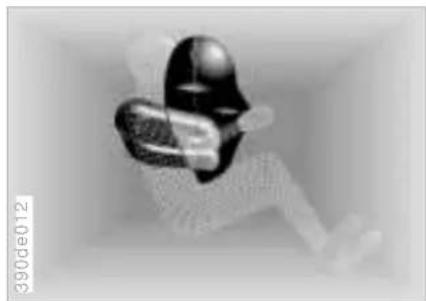
natural_image
Abstract 3D rendered figure in a minimalist pose, no text or symbols visibleDeceleration sensors continuously monitor the physical forces acting upon the vehicle. In the event of a severe frontal impact, the gas generators of the driver-side and passenger-side airbags are ignited simultaneously. However, the passenger-side airbag is only triggered if an additional sensor has recognized that the passenger seat is occupied.
In the event of a side collision, only side airbags are triggered if necessary. Only the side airbag located on the collision side is triggered.
Airbags ASC+T/DSC\* Radio reception
The airbags located under the marked covers inflate and unfold in a matter of a few milliseconds. In this process they tear through the designed breaking points of the upholstered covers or press them out.
Because the inflation process must be virtually instantaneous, it is necessarily accompanied by a certain amount of ignition and inflation noise. The gas required to inflate the airbags is not dangerous, and it dissipates together with the associated smoke.
The entire process is completed within one twentieth of a second.
Precision sensors monitor the number of revolutions of the wheels. When equipped with DSC, they also monitor steering angle, lateral acceleration, brake pressure and the movement of the vehicle around its vertical axis.
If differences in the wheel speeds occur, the system counteracts the danger of wheelspin by reducing the torque flow. If necessary, the system also responds with additional braking intervention at all four wheels.
In addition, DSC permanently monitors the vehicle's current operating condition and compares it with an ideal condition that is calculated from the sensor's signals. If deviations from this occur (understeering or oversteering, for instance), DSC can stabilize the vehicle in fractions of a second by reducing engine output and with the assistance of braking intervention at individual wheels. As a result, dangerous skids can be prevented even as they are just beginning.
You may need some time to become accustomed to this system's intervention. However, it provides optimum propulsive force and driving stability.
The braking intervention may be accompanied by a certain degree of noise.
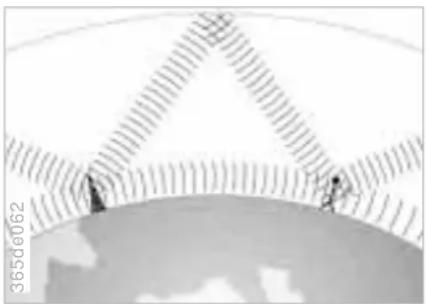
natural_image
Abstract geometric pattern with diagonal stripes and two human figures on a curved base (no text or symbols)The AM frequency bands (medium-wave, long-wave and short-wave) make it possible to receive stations from a great distance, because the broadcast signals travel not only along the ground as surface waves, but also as atmospheric waves that are reflected from the ionosphere.
Frequency-modulation (FM) provides substantially better sound quality than AM. However, because FM transmissions rely on line-of-sight broadcast waves, their effective reception range is limited.
The limitations which are inherent to radio reception in a moving vehicle have been minimized by the use of innovative systems.
Safety belt tensioner Inside rearview mirror with automatic dimmer\*
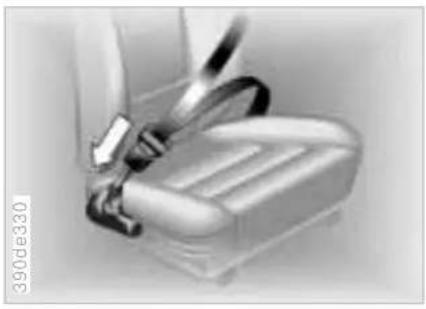
natural_image
Close-up of a car seatbelt with a black strap and lever mechanism (no text or symbols visible)The safety belt tensioner responds to severe collisions by tightening the belts to ensure that occupants remain firmly positioned in their seats. A gas-pressure system retracts the buckle assembly to tension the shoulder and lap belts within fractions of a second. This tends to reduce the tendency to slide under the lap belt even more.
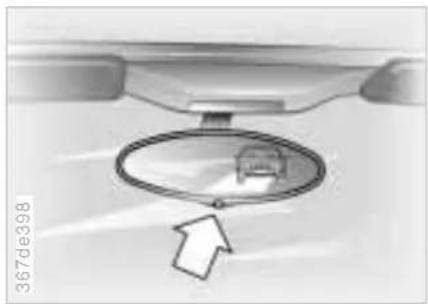
natural_image
Diagram showing a car inside a vehicle's dome with an arrow indicating direction (no text or symbols)The interior rearview mirror with automatic dimming feature reduces glare from following traffic by adapting the intensity of the reflected images to correspond to levels of light registered by the unit's sensors. The mirror reverts to its undimmed setting as soon as the light source disappears. One light sensor is mounted on the front of the mirror housing. This sensor, which is directed forward, measures light intensity in the area ahead of the vehicle. A second light sensor is located on the lower edge of the mirror. The electronic control system compares the light intensity from front and rear. The difference provides the basic parameter used to modulate an electrical current and induce chemical changes in a semisolid layer incorporated in the lens.
The semisolid reacts chemically to this electrical current, thus providing infinitely-variable dimming of the mirror (electrochromic technology).
As a result, it is no longer necessary to dim the mirror manually, and the driver can concentrate completely on traffic conditions.
Limited slip differential\*
With unfavorable road conditions, the drive forces that should be transferred may not accommodate by the traditional differential, and therefore one wheel spins. Such wheelspin is largely prevented by the limited slip differential (locking value approx. 25 %).
Under actual driving conditions, this means better traction characteristics when starting and accelerating under adverse road conditions as described as well as during performance-oriented driving on winding roads.
However, in the case of extremely dynamic driving, the vehicle may tend at the same time to spin around its vertical axis in the vehicle center of gravity on road surfaces with different adhesion characteristics. Controlling this rotation tendency places greater demands on the driver and therefore requires special alertness.
The limited slip differential is automatically activated under actual driving conditions.
natural_image
Front view line drawing of a car (no text or symbols)
natural_image
Front view line drawing of a car (no text or symbols visible)
natural_image
Side profile sketch of a sedan car with red racing wheel and star insignia (no text or symbols)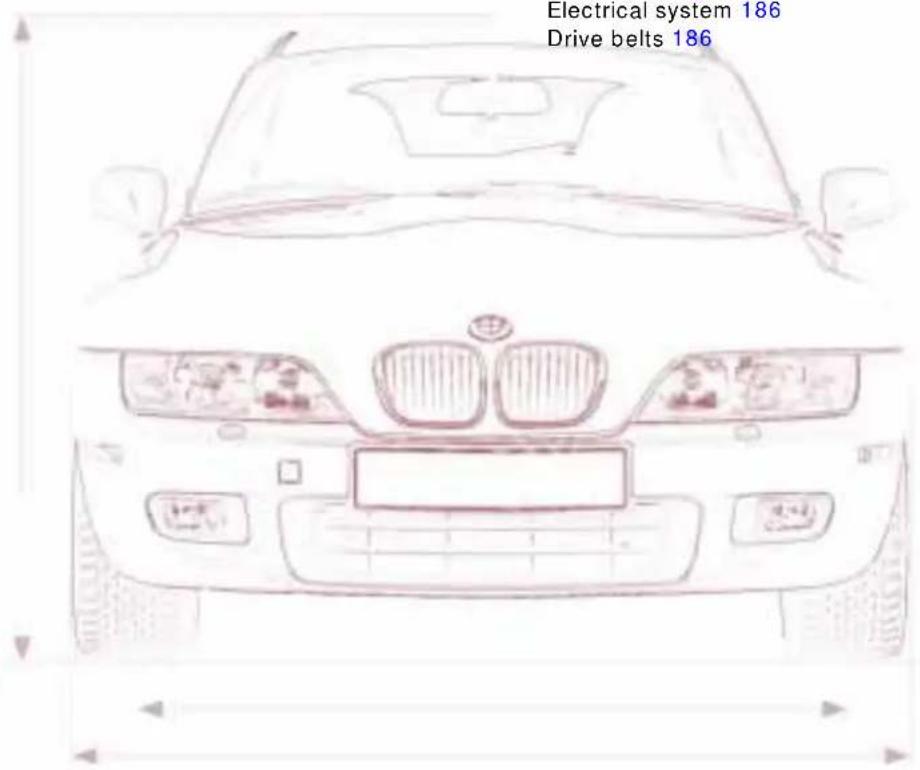
text_image
Electrical system 186 Drive belts 186Engine specifications 182
Dimensions 183
Weights 184
Capacities 185
Electrical system 186
Drive belts 186
Overview
Controls and features
Operation, care and maintenance
Owner service procedures
Advanced technology
Technical data
Index
Engine specifications
| Z3 roadster 2.3 Z3 roadster 2.8, Z3 coupe 2.8 | M roadster, M coupe | |||
| Displacement | cu in (cm3) 152.2 (2,494) | 170.4 (2,793) | 192.3 (3,152) | |
| Number of cylinders | 6 | 6 | 6 | |
| Max. output | hp | 170 | 193 | 240 |
| at engine speed | rpm | 5,500 | 5,500 | 6,000 |
| Max. torque | lb-ft (Nm) | 181 (245) | 206 (280) | 236 (320) |
| at engine speed | rpm | 3,500 | 3,500 | 3,800 |
| Compression ratio ε | 10.5 | 10.2 | 10.5 | |
| Stroke | in (mm) | 2.95 (75.0) | 3.31 (84.0) | 3.53 (89.6) |
| Bore | in (mm) | 3.31 (84.0) | 3.31 (84.0) | 3.40 (86.4) |
Fuel-injection system Digital-electronic Engine Management system
Dimensions
| Z3 roadster 2.3, 2.8 Z3 coupe 2.8 | ||
| Length in (mm) 159.4 (4,050) 158.5 (4,025) | ||
| Width in (mm) 68.5 (1,740) 68.5 (1,740) | ||
| Height (unloaded) in (mm) 50.9 (1,293) 51.4 (1,306) | ||
| Wheelbase in (mm) 96.3 (2,446) 96.3 (2,446) | ||
| Track, front in (mm) 55.6 (1,413) 55.6 (1,413) | ||
| Track, rear in (mm) 58.8 (1,494) 58.8 (1,494) | ||
| Min. turning circle dia. ft (m) | 32.8 (10.0) | 32.8 (10.0) |
| M roadster | M coupe | |
| Length in (mm) 158.5 (4,025) 158.5 (4,025) | ||
| Width in (mm) 68.5 (1,740) 68.5 (1,740) | ||
| Height (unloaded) in (mm) 49.8 (1,266) 50.4 (1,280) | ||
| Wheelbase in (mm) 96.8 (2,459) 96.8 (2,459) | ||
| Track, front in (mm) 56.0 (1,422) 56.0 (1,422) | ||
| Track, rear in (mm) 58.7 (1,492) 58.7 (1,492) | ||
| Min. turning circle dia. ft (m) | 34.1 (10.4) | 34.1 (10.4) |
Weights
| Z3 roadster 2.3 Z3 roadster 2.8 Z3 coupe 2.8 | ||||
| Curb weight (with one person, ready for operation, full tank of fuel, options not included) | ||||
| with manual transmission | lbs. (kg) | 2,899 (1,315) | 2,910 (1,320) | 2,943 (1,335) |
| with automatic transmission | lbs. (kg) | 2,987 (1,355) | 2,998 (1,360) | 3,031 (1,375) |
| Approved gross vehicle weight | ||||
| with manual transmission | lbs. (kg) | 3,450 (1,565) | 3,461 (1,570) | 3,494 (1,585) |
| with automatic transmission | lbs. (kg) | 3,538 (1,605) | 3,549 (1,610) | 3,582 (1,625) |
| Approved front axle weight lbs. (kg) 1,830 (830) 1,830 (830) 1,830 (830) | ||||
| Approved rear axle weight lbs. (kg) 1,918 (870) 1,918 (870) 1,918 (870) | ||||
| Approved maximum roof load lbs. (kg) 77 (35) 77 (35) 165 (75) | ||||
| Luggage compartment capacity cu ft (liters) 5.8 (165) 5.8 (165) 7.2-14.3 (205-405) | ||||
| M roadster M coupe | |||
| Curb weight (with one person, ready for operation, full tank of fuel, options not included) | |||
| with manual transmission | Ibs. (kg) | 3,086 (1,400) | 3,131 (1,420) |
| with automatic transmission | Ibs. (kg) | - | - |
| Approved gross vehicle weight | |||
| with manual transmission | Ibs. (kg) | 3,638 (1,650) | 3,682 (1,670) |
| with automatic transmission | Ibs. (kg) | - | - |
| Approved front axle weight Ibs. (kg) 1,808 (820) 1,874 (850) | |||
| Approved rear axle weight Ibs. (kg) 1,918 (870) 1,962 (890) | |||
| Approved maximum roof load Ibs. (kg) 77 (35) 165 (75) | |||
| Luggage compartment capacity cu ft (liters) 5.8 (165) 7.2-13.9 (205-395) | |||
Capacities
| Notes | |||
| Fuel tank reserve | gal. (liters) gal. (liters) | approx. 13.5 (approx. 51) approx. 2.1 (approx. 8.0) | Fuel specification: Page 28 |
| Windshield washer system/Headlamp washer system quarts (liters) approx. 5.3 (approx. 5.0) | For details: Page 124 | ||
| Cooling system including heater circuit quarts (liters) 11.1 (10.5) - Z3 roadster 2.3, Z3 roadster 2.8, Z3 coupe 2.811.4 (10.8) - M roadster, M coupe | For details: Page 128 | ||
| Engine oil and filter change quarts (liters) 6.9 (6.5) - Z3 roadster 2.3, Z3 roadster 2.8, Z3 coupe 2.86.3 (6.0) - M roadster, M coupe | Approved HD oil for gasoline enginesSpecifications: Page 126 | ||
| Manual transmission, automatic transmission | -Lifetime fluid, no fluid change required. | ||
| Differential quarts (liters) - Z3 roadster 2.3, | Z3 roadster 2.8, Z3 coupe 2.81.5 (1.4) - M roadster, M coupe | Lifetime fluid, no fluid change required.Approved hypoid gear oil (any BMW center can provide information on oil specifications) | |
Electrical system Drive belts
Battery
12 V, 70 Ah
Spark plugs
Z3 roadster, Z3 coupe:
NGK BKR 6 EQU P
M roadster, M coupe:
Bosch FGR 8 KQC
This spark ignition system meets all requirements of the Canadian Interference-Causing Equipment Regulations (ICES-2).
Z3 roadster 2.3, 2.8, Z3 coupe 2.8:
AC alternator – Water pump – Power steering
Drive belt, 6 PK x 1538
A/C compressor
Drive belt, 5 PK x 906
M roadster, M coupe:
AC alternator - Water pump - Power steering
Drive belt, 6 K x 1515
Compressor for air conditioning system and secondary air pump
Drive belt, 5 PK x 1125
Secondary air pump (without air conditioner) Drive belt, 5 K x 785

You can obtain Original BMW
Parts and Accessories, as well as professional advice from your BMW center.
text_image
188 A B C R Q Online Edition for Part-No. 01 41 0 155 149 - © 08/99Online Edition for Part-No. 01 41 0 155 149 - © 08/99 BMW AG

text_image
Everything Owner seeEverything from A to Z 190
Owner service procedures 195
Overview
Controls and features
Operation, care and maintenance
Owner service procedures
Advanced technology
Technical data
Index
Everything from A to Z
A
ABS (Antilock Brake System) 101
Accessories 6
Adaptive Transmission Control (ATC) 63, 176
Adding engine oil 125
Adding washer fluid 124
Adjusting the backrest 51
Adjusting the washer nozzles 124
Air conditioner 86
Air distribution 82, 86
Air outlets 80
Air pressure 29, 110
Air vents 84
Airbags 23, 55, 139, 176
Airflow rate 82, 86
All Season Traction (AST)/(ASC+T) 76, 177
Analog clock 71, 72
Antenna 107
Antifreeze 129
Antifreeze protection, radiator 105, 128
Antilock Brake System (ABS) 101
Anti-theft protection 36
Approved gross vehicle weight 184
Aquaplaning 99, 110
Ashtray 91
Automatic car wash 132
Automatic cruise control 68
Automatic rear window washer 66
Automatic transmission 63
Automatic windshield washer 66
Average fuel consumption 75
Average speed 75
Axle weights 184
B
Backup lamps 62
Bulb
replacement 149, 150
Battery 166, 186
Capacity 186
Charge condition 167
Charging 167
Discharged 170
Removal and
installation 168
Battery change, keys 154
Battery Safety Terminal (BST) 168
Body-cavity protectant 135
Brake fluid 130
Brake hydraulic system 22
Brake lamps, bulb
replacement 149, 150
Brake pads 24
Brakes 103
Break-in 98
Breaking in the vehicle 98
Bulb replacement 147
C
Capacities 185
Car care, exterior 132
Car care, interior 137
Car keys 34
Car radio
refer to the separate
Owner's Manual
Car radio
reception 107, 177
Car wash 132, 134
Care, exterior 136
Care, interior 137
Cargo loading 94
Caring for the vehicle finish 136
Cassette mode
refer to the Radio Owner's Manual
Catalytic converter 100
Cellular phone 107
refer to the separate
Owner's Manual
Center (high-mount) brake lamp 151, 152
Central locking system 36
Changing a tire 155
Charge condition of the
battery 167
Charge indicator light 22
Chassis number 130
Checking oil level 125
Checking tire
pressure 29, 110
Child restraints
Installation 58
Cigarette lighter 92
Clearing fogged
windows 83, 88
Clock 71, 72
Cockpit 16
Code
refer to the Radio Owner's
Manual
Cold start 60
Compartments 90
Computer 73
Connecting a car vacuum
cleaner 92
Controls 16
Convertible top care 134
Convertible top
operation 41, 45
Coolant 105, 129
Coolant temperature 70
Coolant, antifreeze
protection 105
Cover 42, 47
Cruise control 68
Cruising range 75
Curb weight 184
Everything from A to Z
D
Dashboard 16
Data link connector for Onboard Diagnostics 142
Date refer to the Radio Owner's Manual
Daytime-driving lamps 77
Deep water 99
Defrost position 83, 88
Defroster, rear window 67
Defrosting windows 83, 88
Digital clock 72
Dimensions 183
Dipstick, engine oil 125
Dirty spots on paintwork 135
Disc brakes 103
Displacement 182
Display lighting 77
Displays 18, 20
Door key 34
Doors Manual operation 36 Unlocking and locking 36
DOT Quality Grades 111
Drive belts 186
Driving through water 99
DSC (Dynamic Stability Control) 76, 177
Dynamic Stability Control (DSC) 76, 177
E
Electric convertible top operation 45
Electric power windows 39
Electrical system 186
Electronic immobilizer 35
Emergency operation Convertible top 170 Doors 36
Luggage compartment lid 38
Engine compartment 120
Engine coolant 129
Engine knock control 28
Engine oil grades 126
Engine oil level 23, 24
Engine oil pressure 22
Engine oil temperature 71
Engine oil temperature gauge 71
Engine output 182
Engine specifications 182
Estimated cruising range 75
Exterior finish 135
F
Failure of an electrical accessory 169
Fan 82, 86
Filler cap cover 27
Filling the washer reservoir 124
Filling the windshield washer reservoir 124
First-aid kit 27
Fittings for tow-starting and towing 172
Flat tire 111
Flat tire, M roadster, M coupe 162
Fog lamps 78
Folding top 41
Footbrake 103
Front fog lamps 78 Bulb replacement 149
Frost protection, radiator 105
Fuel 28
Fuel filler door Emergency operation 170
Fuel gauge 69
Fuel quality, M roadster, M coupe 28
Fuel quality, Z3 roadster, Z3 coupe 28
Fuel tank capacity 185
Fuses 169
G
Gasoline 28
Glass sunroof 40
Glove compartment 90
Grilles 80, 84
Gross vehicle weight 184
H
Hardtop 108
Hazard warning system 26
Hazard warning triangle 26
Head restraints 51
Headlamp cleaning system 124
Headlamp cover, care 133, 147
Headlamp flasher 65
Headlamp washers 67
Heated seats 89
Heating and
ventilation 80, 84
Heat-up, rapid 83, 88
Height 183
Height adjustment, seats 50
Help with jump starting 170
High beams 25, 65
Highbeam headlights Bulb replacement 147
High-performance synthetic oils 126
Horn 17
Hubcap 159
|
Ice warning 74
Identification number of the vehicle 130
Identification, tires 114
Ignition key 34
Everything from A to Z
Ignition switch 59
Indicator lamps 22
Inflation pressures 29, 110
INSPECTION 70
Instrument cluster 18, 20
Instrument lighting 77
Instrument panel lighting 77
Instruments 18, 20
Interior lamps 78
Bulb replacement 153
Interior rearview mirror 52
Interlock 59
Intermittent wipe switch 66
J
Jack 155
K
Keys 34
Kickdown 64
L
Lamp switch 77
Lashing eyes 94
Leather care 138
Length 183
License plate lamps
Bulb
replacement 152, 153
Light-alloy wheel 116
LIGHTS ON warning 77
Limited slip differential 178
Load-securing devices 94
Lock buttons 37
Locks, care 105
Low beam headlamps 77
Bulb replacement 147
Low-fuel indicator lamp 69
Lug bolts 159, 160
Lug wrench 156
Luggage compartment 38
Capacity 184
Locking separately 38
Manual operation 38
Luggage compartment lamp
Bulb replacement 153
Luggage compartment
lid 38
Manual operation 38
Luggage net 93
M
M + S tires 115
M Mobility System 162
Magic Eye
refer to Battery charge condition 167
Maintenance 131
Malfunction, cellular
telephone 107
Manual operation
Convertible top 41
Doors 36
Luggage compartment
lid 38
Manual transmission 62
Mirror defrosting 51
Mirrors 51
Mobile phones 107
Mobile telephone
refer to the separate
Owner's Manual
Modifications,
technical 6, 141
Multifunction switch 65
N
Net 93
Non-smoker's equipment package 92
Notes on driving 99
0
OBD data link
connector 142
Odometer 69
Oil additives 125
Oil change intervals, refer to the Service and Warranty
Information Booklet (US models) or the Warranty
and Service Guide
(Canadian models)
Oil consumption 125
Oil dipstick 125
Oil grades 126
Oil level, indicator
lamp 23, 24
Oil pressure, indicator
lamp 22
Oil temperature 71
OILSERVICE 70
Old batteries 168
Onboard computer 73
Onboard tool kit 146
Opening and closing
From outside 36
From the inside 37
Operation 140
Output 182
Outside mirrors 51
Outside temperature in the onboard computer 74
P
Paint damage 136
Paint, protection 136
Parking brake 23, 61
Parking lamps 77
Parking, winter 106
Please wear your safety belt warning lamp 23
Position lamps
Bulb replacement 148
Power seat adjustment 50
Power steering 106
Pressure, tires 29, 110
Protection, paint 136
Everything from A to Z
R
Radio
refer to the separate
Owner's Manual
Radio reception 177
Reading lamps 79
Rear window defroster 67
Rear window wiper 66
Wiper blade
replacement 146
Rearview mirrors 51
Recirculated air mode 86
Refueling 27
Releasing the hood 119
Remote control for onboard computer 73
Replacement, tires 111
Replacing windshield wiper blades 146
Reporting Safety Defects 7
Reservoir, washer
system 124
Restraint systems 56, 57
Reverse gear 62
Rims 114
Roll-up cover 93
Roof load capacity 184
Roof rack 95
Rubber seals and components 105, 137
s
Safety belt tensioner 178
Safety belts 53
Seat adjustment 50
Seat heaters 89
Securing cargo 94
Selector lever, automatic transmission 63
Separation net 93
Service and Warranty Information Booklet (US models) 132
Service Interval
Display 70, 131
Set temperature 82, 86
Shiftlock 63
Side airbags 55
Side marker lamps
Bulb replace- ment 149, 150, 151
Skid control 106
Slippery roads 105
Snow chains 105, 115
Socket 92
Spare keys 34
Spare tire 156
Spare wheel 156
Spark plugs 186
Special oils 126
Speed control 68
Speedometer 18, 20
Starting 60
Starting assistance 170
Starting prob- lems 60, 100, 170, 172
Starting the engine 60
Steel wheel 116
Steering 106
Steering wheel lock 59
Storage boxes 90
Storage trays 90
Storing the vehicle 140
Summer tires 114
Sunroof 40
Switching off the engine 61
Symbols 4, 166
T
Tachometer 69
Tail lamp assembly, bulb replacement 149, 150
Tail lamps 149, 150
Taillights 149, 150
Tank capacity 185
Technical Data 181
Technical modifications 6, 141
Telephone refer to the separate Owner's Manual
Temperature display, engine coolant 70
Temperature display, engine oil 71
Temperature display, outside temperature 74
Temperature layering 82, 87
Third brake lamp 151, 152
Tire codes 114
Tire condition 110
Tire damage 110
Tire failure, Z3 roadster, Z3 coupe 155
Tire inflation pressures 29, 110
Tire replacement 112
Tire rotation between front and rear 113
Tire size 116
Tire tread 110
Tools 146
Torque 182
Tow fittings 172
Towing 172
Tow-starting 172
Track width 183
Traction control system refer to ASC+T/DSC 76
Transmission 62, 63
Tread depth, tires 110
Trip odometer 69
Trunk
Capacity 184
Turn signals 25, 65
Bulb replace- ment 148, 149, 150
Everything from A to Z
Turning circle 183
Two-way radios 107
U
Uniform Tire Quality Grading 112
Upholstery care 138
v
Valve caps 114
Vanity mirrors 52
Vehicle battery 166, 186
Vehicle Identification Number 130
Vehicle immobilizer 35
Vehicle storage 140
Velour care 138
Ventilation 80, 82, 84, 87
Ventilation outlets, ventilation 80, 84
Ventilation, draft-free 82, 87
Vents 80, 84
Vinyl upholstery, care 137
Viscosity 126
Voltmeter 71
W
Warm feet – cool head 82, 87
Warning lamps 22
Warning triangle 26
Warranty and Service Guide (Canadian models) 132
Washing your car 132
Weights 184
Wheelbase 183
Wheels and tires 114, 116
Width 183
Wind blocker refer to the separate Owner's Manual
Windows, convenience closing mode 36
Windshield washer nozzles 124
Windshield wipers 66
Winter driving 105
Winter tires 115
Wiper/Washer system 66
Wipers 66
Working in the engine compartment 119
Owner service procedures
A
Adding brake fluid 130
Adding coolant 129
Adding engine coolant 129
Adding oil 125
Adding washer fluid 124
Adjusting washer nozzles 124
Air pressure 110
Antifreeze protection, radiator 129
B
Backup lamps Bulb replace- ment 149, 150
Battery change, keys 154
Battery charge condition 167
Battery, discharged 170
Brake lamps Bulb replacement 149, 150
Brakes, malfunctions 104
Bulb replacement 147
C
Changing a tire, M roadster, M coupe 161
Changing a tire, Z3 roadster, Z3 coupe 155
Charge condition of the battery 167
Charging the battery 167
Checking oil level 125
Checking tire pressure 29, 110
Clear fogged windows 83, 88
Convertible top, electrical defect 170
D
Defrosting windows 83, 88
Difficult steering 106
Doors, manual operation 36
E
Electrical defect Convertible top 170 Fuel filler door 170
Emergency operation Convertible top 170 Doors 36
Fuel filler door 170 Luggage compartment lid 38
Engine oil grades 126
F
Failure of an electrical accessory 169
Filling the windshield washer reservoir 124
First-aid kit 27
Fittings, tow-starting and towing 172
Flat tire, M roadster, M coupe 162
Flat tire, Z3 roadster, Z3 coupe 155
Front fog lamps Bulb replacement 149
Fuel filler door, electrical defect 170
H
Hazard warning flashers 26 Hazard warning triangle 26
Headlamp cover, care 133, 147
High beams Bulb replacement 147
Hood release 119
|
Indicator lamps 22
Inflation pressures 29
Interior lamps, bulb replacement 153
J
Jump-starting 170
K
Key, battery change 154
L
License plate lamps Bulb replace- ment 152, 153
Low beam headlamps Bulb replacement 147
Lug wrench 156
Luggage compartment lamp Bulb replacement 153
Luggage compartment lid, manual operation 38
M
M Mobility System 162
Maintenance 70, 131
Manual operation Convertible top 41 Doors 36
Luggage compartment lid 38
Master key, battery change 154
0
Oil grades 126
Onboard tool kit 146
Owner service procedures
P
Position lamps Bulb replacement 148
Pressure, tires 29, 110
R
Rear lamps 149, 150
Rear window wiper, wiper blade replacement 146
Releasing the hood 119
Repairing a flat tire, M roadster, M coupe 162
Replacement key 34
Replacing fuses 169
Reservoir, washer system 124
S
Side marker lamps Bulb replace- ment 149, 150, 151
Snow chains 105, 115
Spare key 34
Spare tire 156
Spare wheel 156
Starting assistance 170
Starting difficulties 170
Starting problems 60, 100, 172
T
Tail lamp assembly Bulb replace- ment 149, 150
Tail lamps Bulb replace- ment 149, 150
Thaw windows 83, 88
Tire change 155, 161
Tire damage 110
Tire inflation pressures 29, 110
Tools 146
Tow fittings 172
Towing 172
Tow-starting 172
Turn signals Bulb replace- ment 148, 149, 150
U
Use of antifreeze 129
W
Warning lamps 22
Windshield wiper blade replacement 146
Wiper blade replacement 146
Working in the engine compartment 119
So that you will have important specifications available when you stop to refuel, we recommend that you supplement this table with data which apply to your vehicle.
Refueling
Fuel
| Designation | ||
| AKI: minimum | ||
| AKI: for rated performance | ||
| AKI: for enhanced performance | ||
Engine oil
| Quality |
The space between the two marks on the dipstick corresponds to approx. 1.1 US quarts (1 liter).
| Tire inflation pressure | Summer Winter | |||
| Front Rear | Front Rear | |||
| 1 - 2 passengers | ||||
| 2 passengers plus luggage | ||||
We wish you an enjoyable driving experience.

The Ultimate Driving Machine
Online Edition for Part-No. 01 41 0 155 149 - © 08/99 BMW AG