
DD - Scooter SYM - Free user manual and instructions
Find the device manual for free DD SYM in PDF.


User questions about DD SYM
0 question about this device. Answer the ones you know or ask your own.
Ask a new question about this device
Download the instructions for your Scooter in PDF format for free! Find your manual DD - SYM and take your electronic device back in hand. On this page are published all the documents necessary for the use of your device. DD by SYM.
USER MANUAL DD SYM
- Contents ...... 1
- Control Location 3
- Before Riding 5
- Safety Riding 5
- Riding 6
- Use Genuine Spare Parts 6
- Use of Each Component 7
Gauges 7
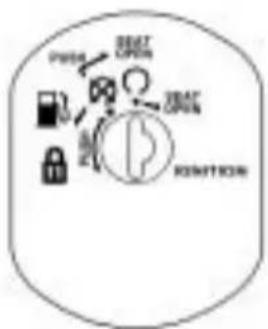
Operation of Ignition Switch 8
Use of Buttons 9
Saddle Lock 10
Safety Helmet Hook 10
Storage Box 10
Fuel Tank Cap 11
Brake 11
Parking Method 11 - Important Points and Cautions for Starting Engine 12
- The Best Way to Drive off 13
The Control of Throttle Valve Handle 13 - Inspection and Maintenance before Riding 13
Routine Inspection 13
Inspection and Replenishment of Engine Oil 13
Inspection of Fuel Level 14
Transmission Oil Inspection and Change 14
Inspection and Adjustment of Brake Free Play 14
Disc Brake Inspection [Depending on Models] 15
Throttle Valve Handle Clearance Adjustment 16
Inspection and Maintenance of Battery 17
Tire Inspection 17
Steering Handle Front Shock Absorbers Inspection 18
Checking and Changing Fuses 19
Checking the Turn Signal Lights and Horn 19
Checking the Front and Rear Lights 19
1. CONTENTS
Checking the Brake Light 20
Checking for Fuel Leakage 20
Checking the Lubrication of Body's Various Mechanisms 20
Checking the Spark Plug 20
Checking the Air Cleaner 20
- When there is an Abnormal Condition or a Trouble 21
Diagnosis when Engine does not Start 21
-
Periodical Maintenance Schedule 22
-
Specification 23
-
Postscript 24
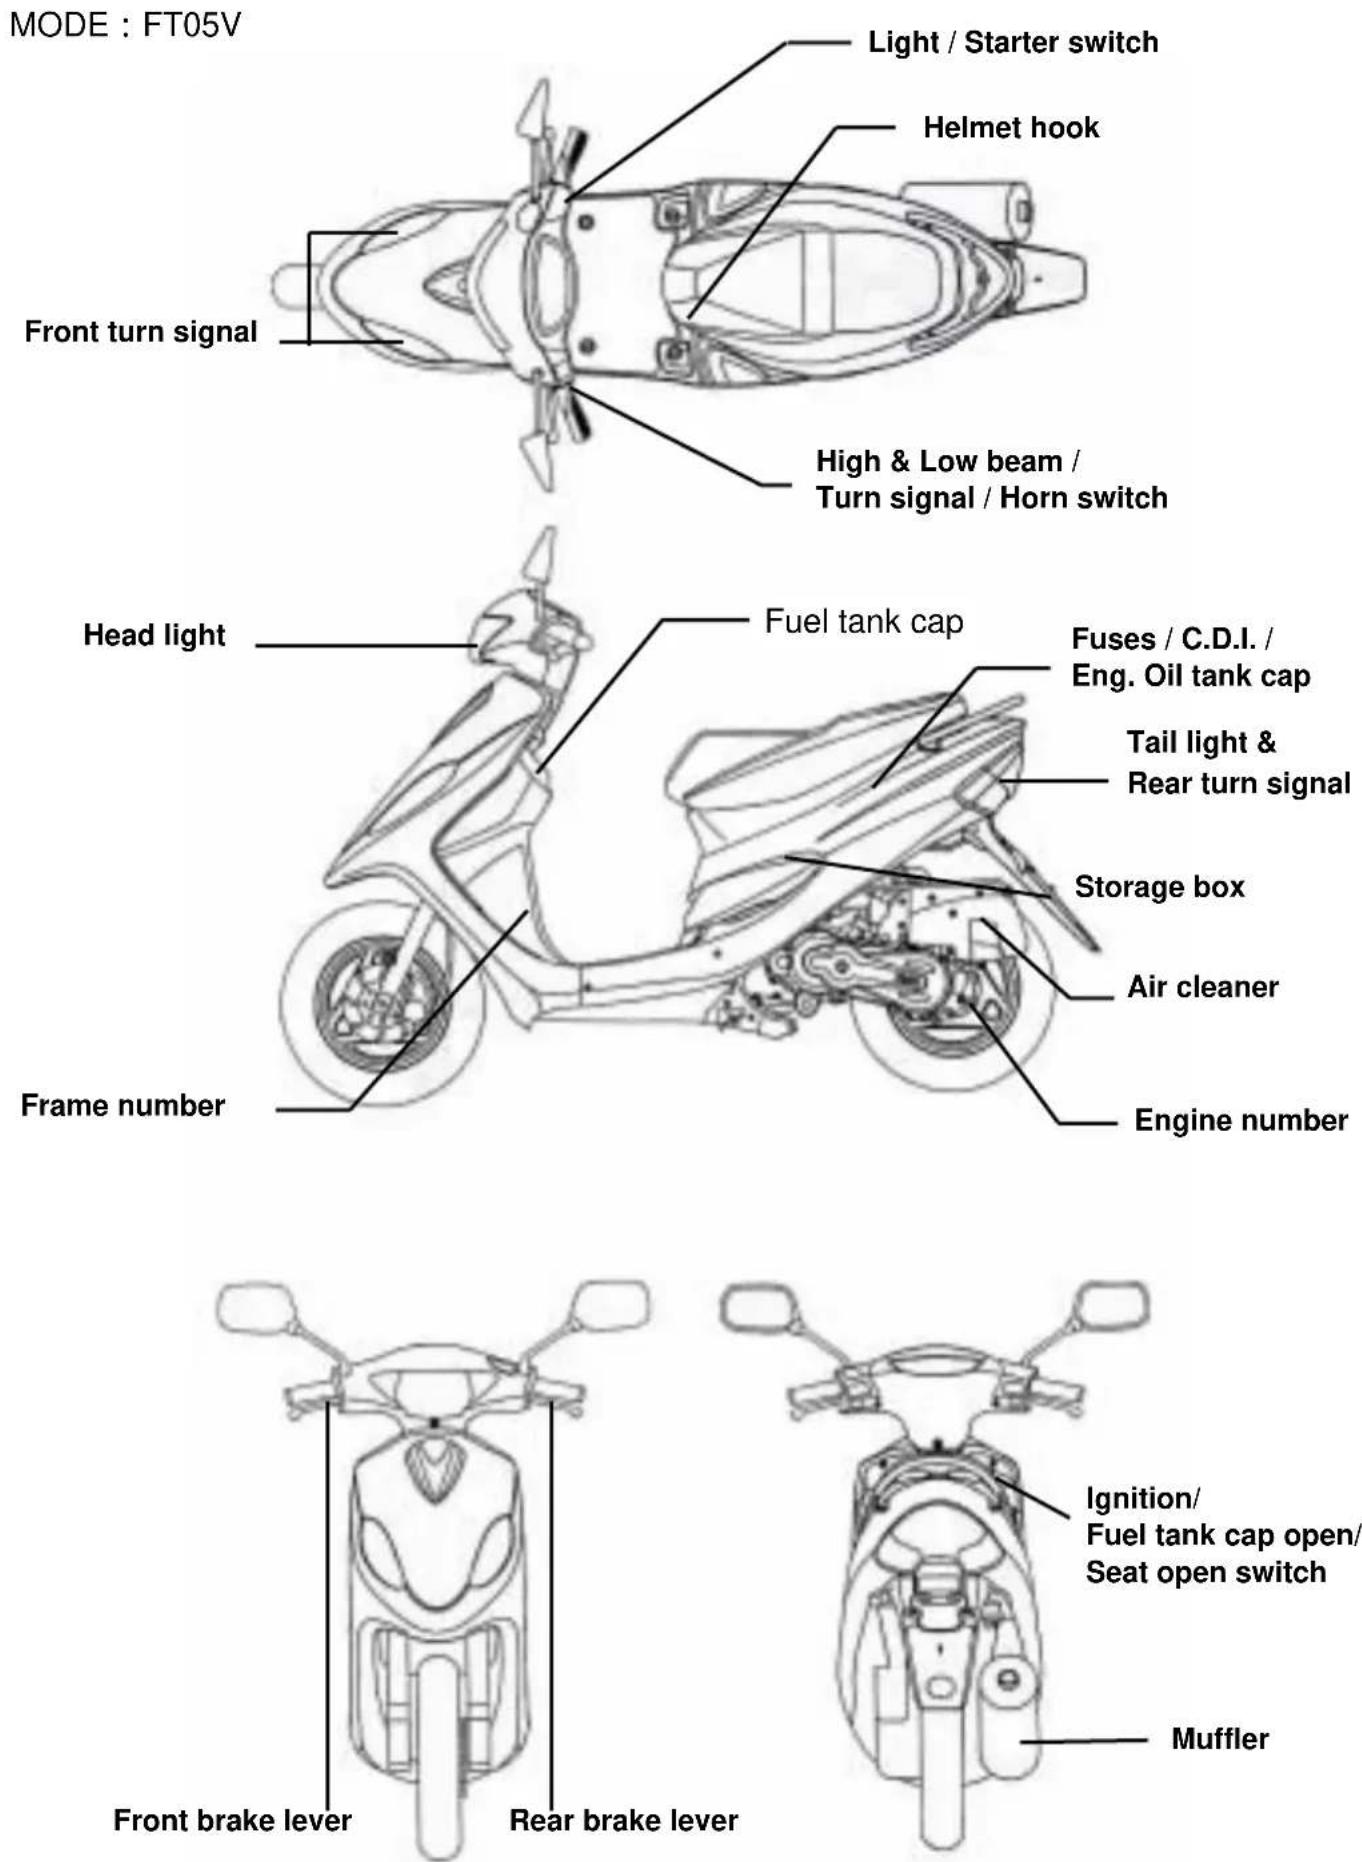
2.CONTROL LOCATION
text_image
MODE : FT05V Light / Starter switch Helmet hook Front turn signal High & Low beam / Turn signal / Horn switch Head light Fuel tank cap Fuses / C.D.I. / Eng. Oil tank cap Tail light & Rear turn signal Storage box Air cleaner Engine number Frame number Ignition/ Fuel tank cap open/ Seat open switch Front brake lever Rear brake lever Muffler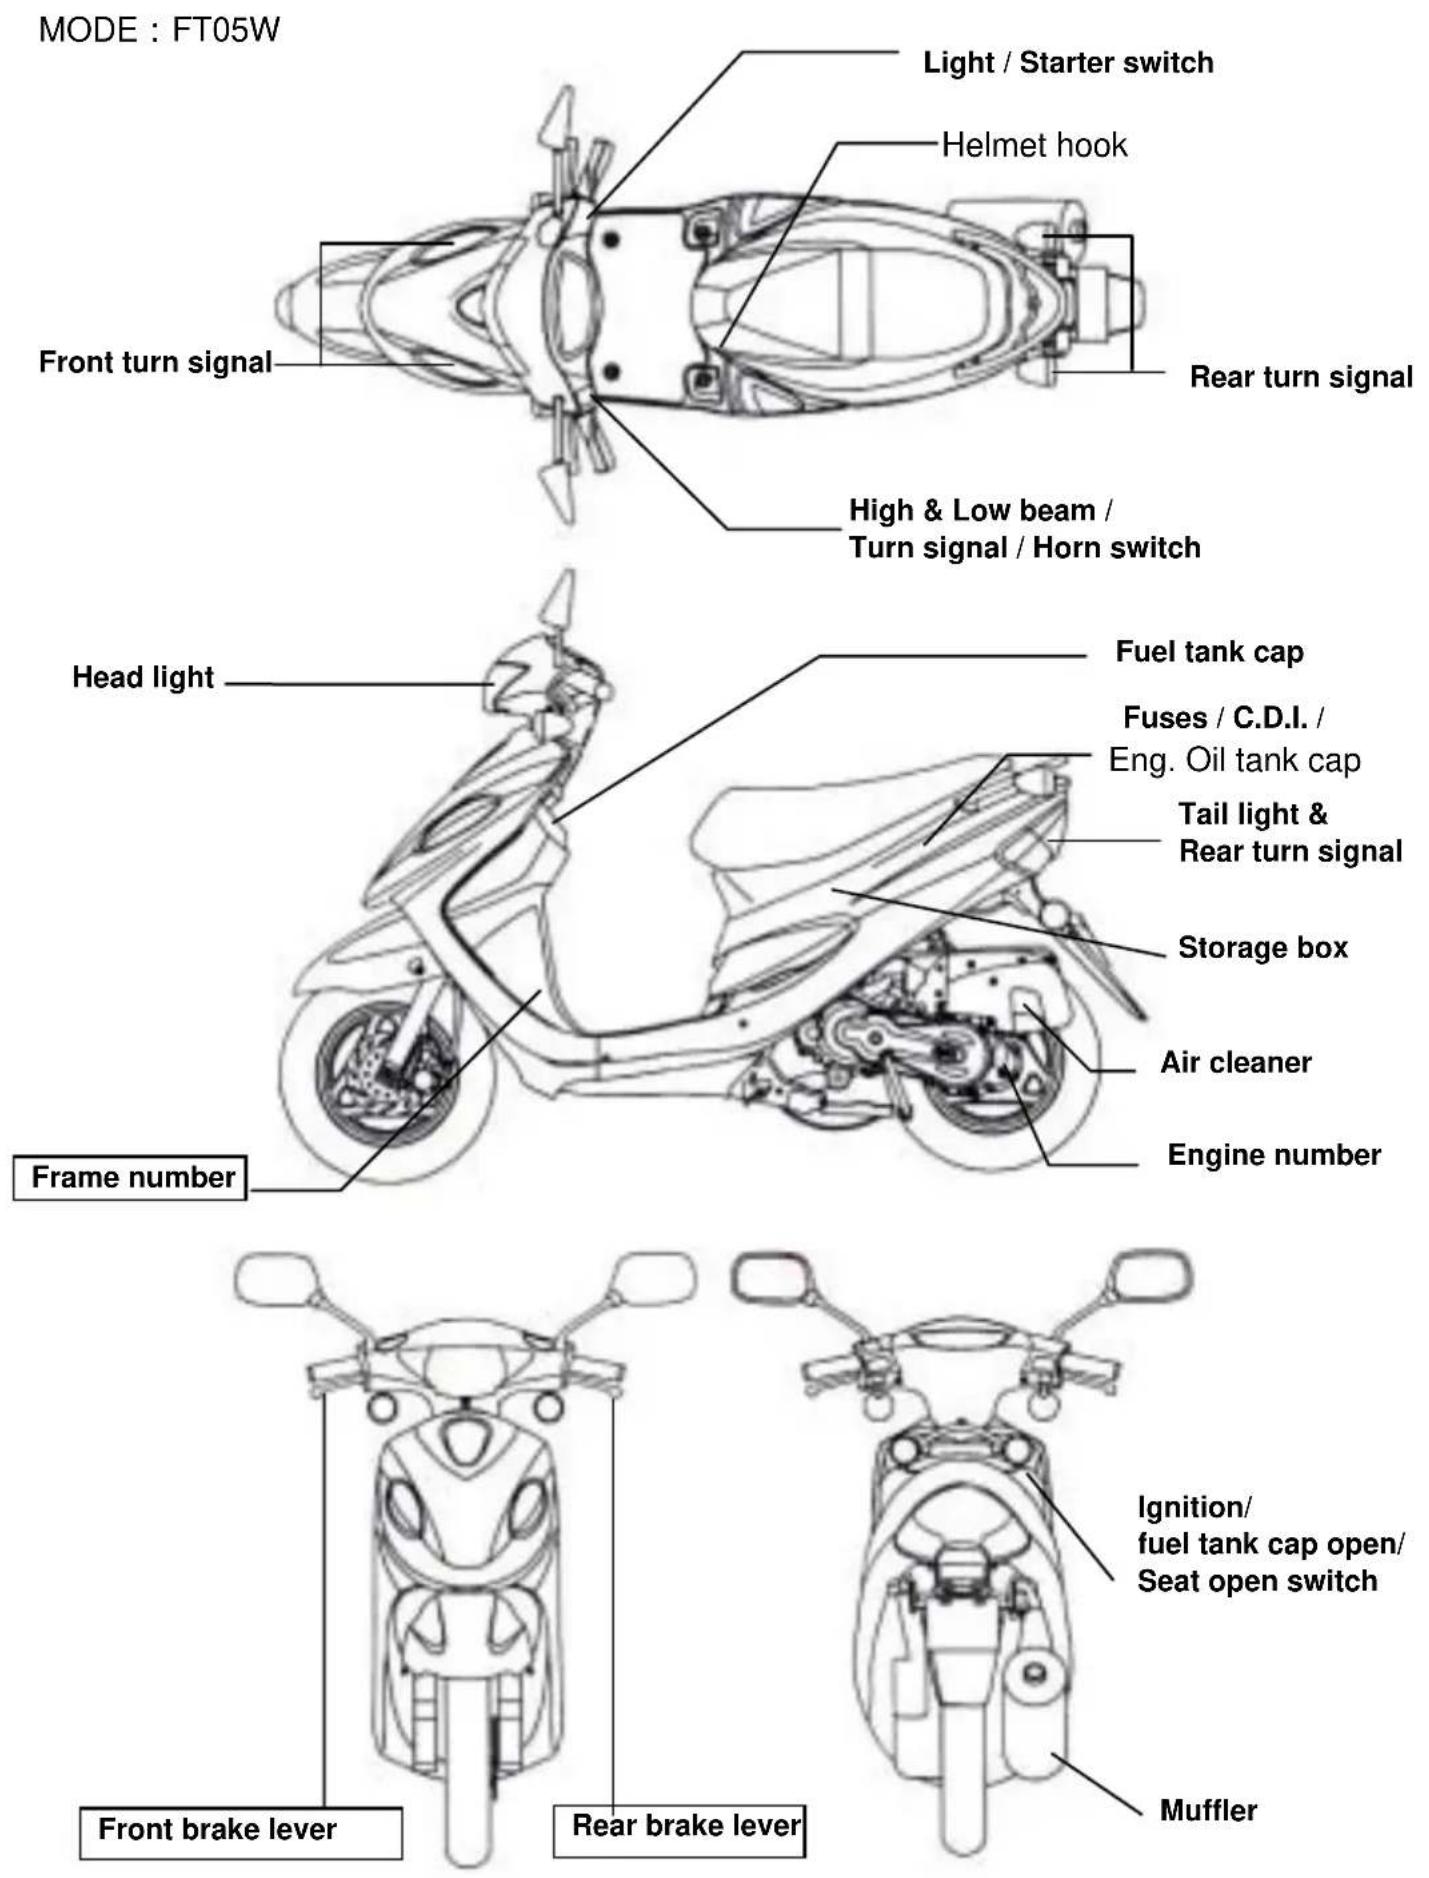
This manual describes the correct usage of this scooter including safety riding, simple inspection methods and so on.
For a more comfortable and safety riding, please read this manual carefully.
Thank you very much for your patronage
In order to maximize your scooter's performance, a periodical inspection and maintenance should be completely carried out. We recommend that after riding your new scooter for the first 300 kilometers, you should take your scooter to the original dealer for an initial inspection, and to have your scooter inspected periodically every 1,000 kilometers thereafter.
- In case the scooter's specifications and construction are modified and different from the photos and diagrams on the owner's manual/catalogues, the specifications and construction of the actual scooter shall prevail.
4 SAFE RIDING
It is very important to be relax and clothe properly when driving, observe traffic regulations, do not rush, always drive carefully and relaxed
Usually, most people would ride their newly bought scooter very carefully, but after they became familiar with their scooters, they tended to become reckless which may result in an accident.

To remind you:
- Please wear a safety helmet, and properly tighten the chin belt when riding a scooter.
- Clothes with open or loose cuffs may be blown by wind and cause the cuffs to get caught on the steering handle and thus affects riding safety. So, put on clothes with tight sleeves.
- Hold the steering handle by both hands when riding. Never ride with only one hand.
- Observe the speed limit.
● Perform periodical maintenance and inspection in accordance with the schedule.

WARNING!!
- To avoid getting burned by exhaust pipe when taking a passenger. Make sure your passenger has put his/her feet on the pedals.
- After running, the exhaust pipe is very hot, be careful not to get burned when conducting an inspection or maintenance.
- After running, the exhaust pipe is very hot, select a suitable location to park your scooter to avoid others getting burned by the exhaust pipe.

CAUTION:
Modified scooter will affect its structure or performance, and cause poor engine operation or exhaust noise, which will result in shortening the scooter's service life. Besides, modification is illegal and does not conform to the original design and specifications. A modified scooter will not be covered by warranty, therefore, do not modify your scooter at will.
5. RIDING
- Keep the related parts of your body such as arms, palms, lumbar, and toes relax and ride with the most comfortable posture in order to be able to react quickly whenever it is necessary.
- Rider's posture will great influent riding safety. As for the riding position, please always keep your body's gravity on the center of seat. If your body's gravity is placed on the rear of seat, the front wheel load will be reduced, this can cause steering handles shaking. Riding in this way is dangerous.
- It will be much easier to make a turn if rider inclines his body inward when turning. On the other hand, the rider will feel unstable if his body and the scooter do not incline.
- On bumpy, unleveled and slope road, the road condition may change often, driving on these roads may become very unstable. To drive safely and smoothly, know your road condition before hand, slow down, and hold the handle firmly with aid of your shoulder.
- Suggestion: Do not load objects on the front pedals unnecessarily, to avoid affecting the riding safety and the operation of steering handle.

CAUTION:
Feeling on the handle is different when the vehicle is with load or without load. Over-load will make steering handle swing and then influent riding safety. Thus, please be ware of load weight.

CAUTION:
- Please do not load cargo or luggage on places where are not designed for loading to prevent danger and damage.
- Do not place rags or similar objects between the storage compartment and engine to avoid engine seizure because of inadequate engine oil supply.
SUGGESTION
To maximize the scooter's performance and prolong its service life:
The first month or first 1000km is the wear-in period for the engine and components. Avoid rapid acceleration, and keep the speed below 60km/hr.
6. USE GENUINE SPARE PARTS
In order to maintain the scooter's best performance, each part's quality, material, and machined precision must conform with the design requirements. “SYM Genuine Spare Parts” were made from the same high quality materials used for the original scooter. No parts would be sold to the market until they could meet the designed specifications through sophisticated engineering and stringent quality control. Therefore, it is necessary to purchase “SYM Genuine Spare Parts” from “SYM Authorized Dealers or Franchised Dealers” when replacing spare parts. If you buy cheap, or fake substitute parts from the market, no guarantee can be provided either for the quality or durability. Also, it may result in unexpected troubles and lower the scooter's performance.
● Always use SYM Genuine Spare Parts to keep your scooters pure blood and to ensure its long service life.
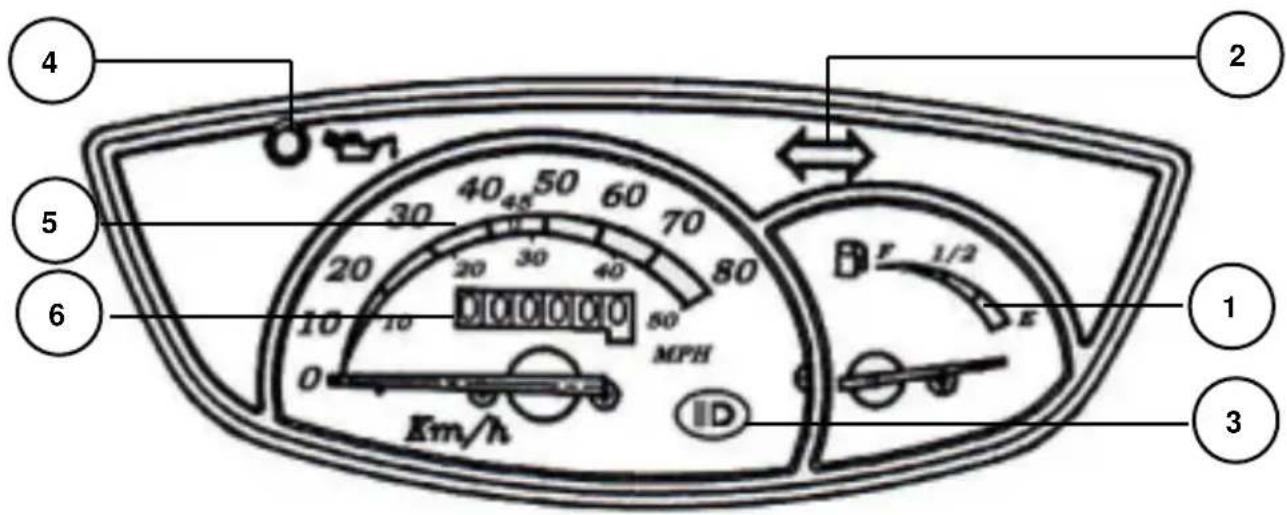
Gauges
text_image
4 2 5 6 10 10 MPH 30 40 45 50 60 70 80 1/2 E 0 0 Km/h ID ① ② ③
CAUTION:
Do not wipe plastic components, e.g. instrument panel, headlight, with organic solvents such as gasoline...etc to avoid damaging these components.
1. Fuel Gauge
The pointer in this gauge shows how much fuel remains in the tank.
The pointer stays in "E" position when key switch is turned to "OFF."
When key switch is turned to "ON", and the "pointer" also in "E" position (red area). Refuel immediately.
2. Turn Signal Indicator
The left or right Indicator will be flashing according to the operated directions of turn signal light switch when it is turned on.
3. High Beam Indicator
This indicator comes on with high beam headlight is turned on.
4. Engine Oil Warning Light
Turn the main switch to the "ON" position, if the oil warning light comes on continuously, this indicates the engine oil level is too low, add oil as required.

WARNING:
- To continue drive the vehicle under low oil level condition will result in an engine seizure due to lack of lubrication of engine parts. It is therefore very important to bring your vehicle to your dealer for an oil replenishment immediately whenever the warning light comes on continuously.
- Use only 2-cycle engine oil meeting Japanese Automobile Standard Organization FC specifications. Otherwise, this company will not assume any responsibility for damages resulted from using substandard engine oil.
※Recommended oil: SYM EXTRA 2X oil.
5.Speedometer
This shows your speed in kilometers per hour (km/h) and in mileage per hour(mph).
6.Odometer
This odometer shows the total kilometers this motor has been driven.

CAUTION:
Observe the speed limit to ensure drive safety.
● Engine can be started in this position.
● Ignition switch key can not be removed.

"OFF" position
● Engine is shut off and can not be started in this position.
● Ignition switch key can be removed.

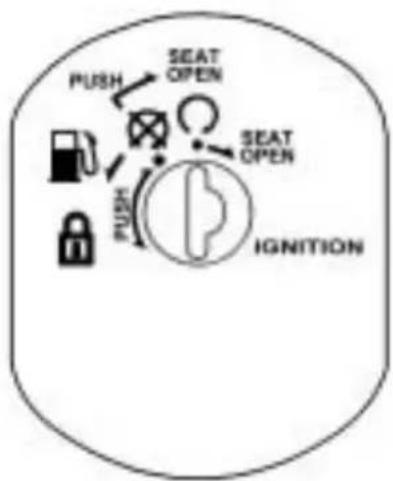
“FUEL CAP OPEN” position
- To unlock, simply turn the key from "OFF" to "FUEL CAP OPEN".
flowchart
graph TD
    A["PUSH"] --> B["SEAT OPEN"]
    B --> C["IGNITION"]
    D["PUSH"] --> E["SEAT OPEN"]
    E --> F["IGNITION"]
    G["FUEL"] --> H["SEAT OPEN"]
    H --> I["IGNITION"]

"LOCK" position
- Turn the handle all the way to left, then press down the key and turn the key to the "LOCK" position on the left.
- In this position, the handle is locked and the key can be removed.
- To unlock, simply turn the key from "LOCK" to "OFF".

"SEAT OPEN" position
- When engine stop: Without taking out the key from ignition switch, push down the key and turn right.
- When engine running: Without taking out the key from ignition switch, turn the key to right.

CAUTION:
- Never operate the ignition switch key when the scooter is running. To turn the ignition switch to "OFF" and "LOCK," will shut off the electrical system and that may result in a dangerous accident. Therefore, the ignition switch can only be turned off after the scooter has been completely stopped.
● Always remove the key and be sure to take the key away with you after locking the steering handle before leaving your scooter. - If ignition switch remains in the "ON" position for a prolonged period after the engine has been stopped, the battery's capacity will be reduced and this may affect the engine's start ability.
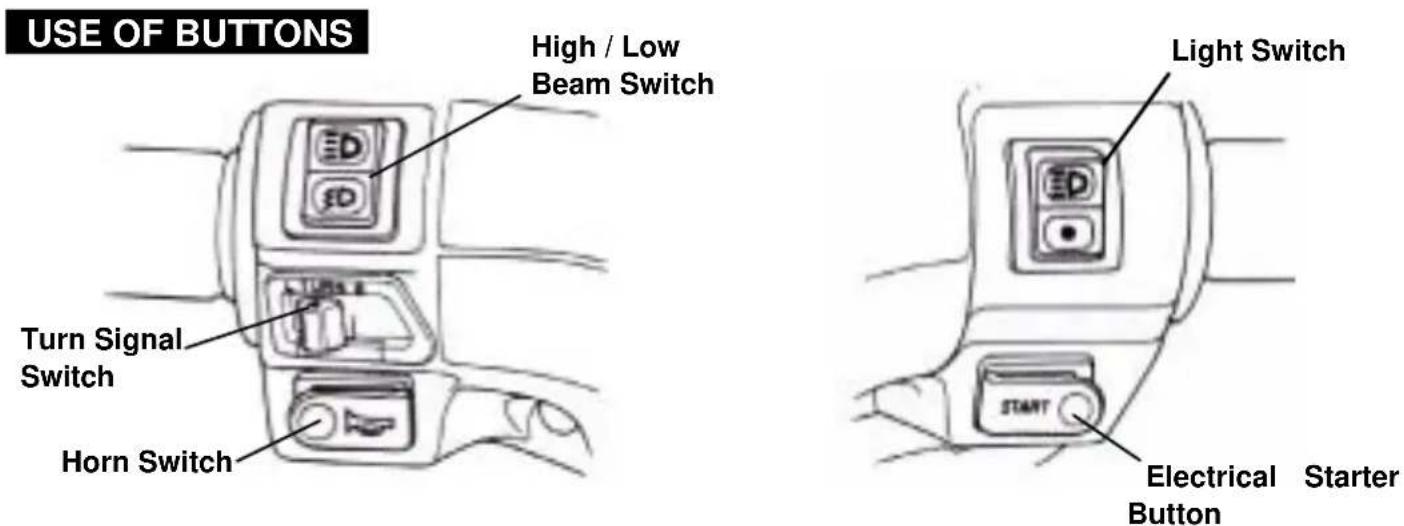
- Light Switches

When the switch is turned to this position, headlight, rear light, instrument panel light, and position light will go on.

When the switch is turned to this position, all lights will go off. (Depending on Models)
• Electrical Starter Button
This is the electrical starter button, it is used for starting the engine.
When the ignition switch key turns to "ON" and brake lever hold, and then press this button down to start engine.
《This mechanism is designed for safety. Thus, the front or rear brake lever must be hold before using this button so that engine can be started.》

CAUTION:
- Release this button immediately after engine has been started, and never press the button again to avoid damaging the engine.
- Do not use light system. Turn headlight and turn signal lights to the "OFF" position when the engine is being started.
● High/Low Beam Switch
This is the high and low beam of headlight switching switch. Press this switch to switch between high and low beams.

This is for high beam.

This is for low beam. (Please turn to low beam when riding in city)
- Turn Signal Switch
Turn signal lights are used when turning left/right or changing lane.
Turn ignition switch to "ON", and slide the turn signal switch to left or right. Then, the turn signal lights will flash.

Right-side turn signal light flashing means you intend to make a right turn.

Left-side turn signal light flashing means you intend to make a left turn.
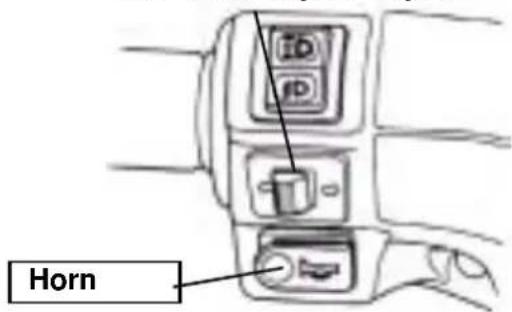
- Horn Switch

Press this button down when ignition switch is in the "ON" position, the horn will sound.

CAUTION:
- Do not press this button when you are in the no horn area.
SADDLE LOCK
- Unlock:
Engine stopping condition:
Insert your key into the ignition switch push the key, and turn it to the right. Then, the saddle can be lifted up.
Engine running condition:
Just turn it to the right then the saddle can be lifted up.

CAUTION:
- Please do not put the key into the storage compartment after saddle is unlocked to prevent the key from being locked inside and can not be removed when the saddle is locked.
- Be sure to remove the key after the saddle has been locked.
- Lock:
Press the saddle down and push it locks automatically.
SAFETY HELMET HOOK
- Open the saddle, and hook the safety helmet chin belt onto the hook, and then lock the saddle.

CAUTION:
- Please do not hang your safety helmet as usual on the hook when driving, to prevent it from damaging the vehicle and affecting your driving safety.
STORAGE BOX
- This box is located under the saddle.
◆ Maximum load capacity: 10kg. - Do not store valuables in the box.
-
Please make sure that seat cushion had been locked completely after it was down.
-
Take out valuables before washing to avoid wetting these objects.
- Do not place thermal sensitive objects in the box because of engine's heat and high temperature.
FUEL TANK CAP
- Insert your key into the ignition switch, turn it to the left, the fuel tank cap can be lifted up.
- Press the fuel tank cap down and push it locks automatically.

WARNING:
- Main stand should be put down on the ground, engine should be shut off and flames should be strictly prohibited to ensure safety when refueling.
- Do not fill above fuel upper limit when refueling. Otherwise, fuel will flow out through a hole on the cap that may damage the body's painting, in serious cases, it may cause a fire to burn down the scooter.
● Make sure the cap has been tighten properly.
BRAKE
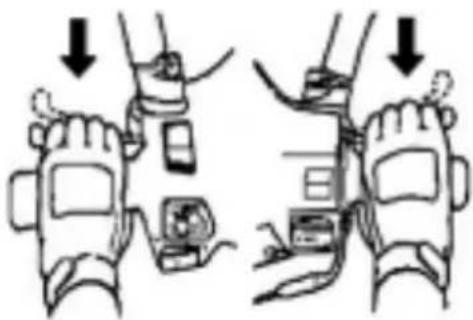
- Use front and rear wheel brakes simultaneously when braking.
- Avoid unnecessary sudden braking.
- Using only the front brake or the rear brake increases the risk of falling because the scooter is tend to pulled to one side.
- Avoid brake continuously for a long period of time because that may overheat the brakes and reduce its braking efficiency.
- Slow down and brake early when riding in rainy days on slippery roads. Never apply the brakes suddenly to prevent skidding and falling.
For Rear Wheel For Front Wheel
text_image
Diagram showing two hand gestures with arrows indicating downward motion, likely illustrating a manual or robotic device operation.PARKING METHOD
- When approaching the parking lot:
- Turn on the turn signal light early, and pay attention to the vehicles in front, from rear, left and right, then take the inner lane and approach slowly.
- Return the throttle valve handle back to its original position, and apply brakes in advance. (Brake light comes on when braking to warn drivers of vehicles behind.)
- When stop completely:
- Press the turn signal switch back to its original position, and turn the ignition switch key to "OFF" position to shut off the engine.
- Get off the scooter from left side after the engine has been stopped, and select a parking place where the scooter will not interfere with traffic and the ground is level, then put down scooter's main parking stand.
- Hold the steering handle with your left hand, and hold down the front end of saddle or hold the parking handle on the lower-left side of saddle with your right hand.
- Press the main parking stand with your right foot, put down the main parking stand firmly on the ground.

To remind you: Lock the steering handle and remove the key after parking to prevent the scooter from being stolen.

CAUTION:
● Park your scooter at a safe place where it will not interfere with traffic.

CAUTION:
- Please check the engine oil and fuel volume are adequate or not before starting engine.
-
To start engine the main parking stand must be firmly on the ground and the brake is applied on the rear wheel to prevent the scooter from moving forward suddenly.
-
Turn ignition switch key to the "ON" position.
- Apply hand (foot) rear wheel brake.
- Do not accelerate, press starter button when the brake is applied.
[We care for you! Before drive off, keep the hand (foot) brake applied on the rear wheel.]
flowchart
graph TD
    A["Push"] --> B["Monitor"]
    C["Lock"] --> D["Monitor"]
    E["Control"] --> F["Monitor"]
    G["Push"] --> H["Monitor"]
    I["Lock"] --> J["Monitor"]
    K["Monitor"] --> L["Control"]
text_image
1/8 1/4IGNITION SWITCH

CAUTION:
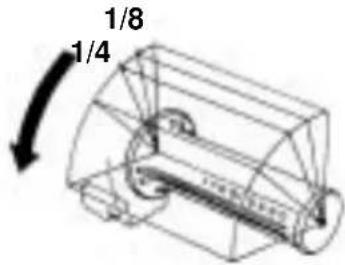
- If engine can not be started after starter motor running for 3\~5 seconds, turn the throttle valve handle 1/8\~1/4 turns, and then press starter button again for an ease start.
- In order to avoid damaging the starter motor, please do not press the starter button continuously over 15 seconds.
- It is harder to get the engine started after the scooter has been left idle for a long time or after refueling only after the fuel has been depleted. Then, it is necessary to press starting lever or starter button several times, and keep the throttle valve handle at the close position to start the engine.
- It may need several minutes to warm up engine if it is a cold start.
● Exhaust contains harmful gases (CO), therefore please start the engine at a well ventilated place.
[When starting engine with starting lever]
- Turn the main switch to ON, press the starting lever forcefully by foot with the throttle valve handle at the close position.
- If engine is difficult to start with the starting lever when the engine is cold, rotating the throttle valve 1/8\~1/4 turns will make the start easier.
● Put the starting lever back to its original position after the engine has been started.
![SYM DD - [When starting engine with starting lever] - 1](/content/2026/05/776088/images/f519e251ed1b1886e7f84ac7538135652a8d25fa14fd5c4f4ba6b82ba25f9cce.jpg)
CAUTION:
- Firmly support the scooter with the main parking stand before starting the engine with the starting lever.
- Start engine with the starting lever occasionally to prevent it from loosing its function because of unused for a long time.
THE CONTROL OF THROTTLE VALVE HANDLE
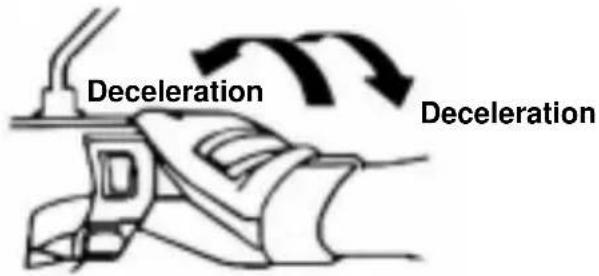
- Turn on the turn signal light before moving, and make sure no vehicle is coming from behind. Then, drive off.
● During driving, attention should be paid to vehicles ahead and behind and keep highly alert at all times.
text_image
Deceleration Deceleration10. INSPECTION AND MAINTENANCE BEFORE RIDING
ROUTINE INSPECTION
| Check Items Check | Key Points | |
| Engine oil Is there enough engine oil? | ||
| Fuel Is it enough? Is it Octane 90 or above | ||
| Brake | Front Braking condition? [Brake lever free play: 10~20mm] | |
| Rear Braking condition? [Brake lever free play: 10~20mm] | ||
| Tires | Front Is tire pressure normal? [Standard: 1.5kg/cm 2] | |
| Rear Is tire pressure normal? [Standard: 2.25kg/cm 2 | ||
| Steering handle Does the handle vibrate abnormally or is difficult to turn? | ||
| Speedometer, lights, and rearview mirror | Is it operated properly? Do lights come on? Can it be seen clearly from behind? | |
| Tightness of main components | Are screws, nuts loosen? | |
| Abnormal points Do the previous troubles still exist? | ||

CAUTION:
- If any problem founded during routine inspection, correct the problem before using the scooter again, have your scooter checked and repaired by the "SYM dealer or authorized service personnel" if necessary.
INSPECTION AND REPLENISHMENT OF ENGINE OIL
Inspection:
- Turn the main switch to the "ON" position, if the oil warning light comes on continuously, this indicates the engine oil level is too low, add oil as required.
- Check oil tank and oil lines for leakage.

WARNING:
- To continue drive the vehicle under low oil level condition will result in an engine seizure due to lack of lubrication of engine parts. It is therefore very important to bring your vehicle to your dealer for an oil replenishment immediately whenever the warning light comes on continuously.
- Use only 2-cycle engine oil meeting Japanese Automobile Standard Organization FC specifications.
Otherwise, this company will not assume any responsibility for damages resulted from using substandard engine oil.
※Recommended oil: SYM EXTRA 2X oil.
Replenishment:
- Using the main stand to support the vehicle on a level ground, lift up the saddle, and remove the oil tank cover.
- Turn the oil tank cap to the left to remove. Add oil until reaches to the standard level.
- Screw in the oil tank cap until properly tightened, then reinstall the tank cover and lower the saddle and press it down until locked.
Add oil note:
- Use only 2-cycle engine oil meeting Japanese Automobile Standard Organization FC specifications. Otherwise, this company will not assume any responsibility for damages resulted from using substandard engine oil.
- When adding oil, do not let foreign materials, dust, dirt enter into the oil system, do not use different brands mixed oil, because this will affect the engine's performance.
- Do not add oil above the standard level. Clean spilled oil around the oil tank cap.
- Be sure to tighten the oil tank cap properly after adding oil.
INSPECTION OF FUEL LEVEL
- Firmly support the scooter with its main stand on a leveled ground, turn the main switch to "ON" position, check if the fuel meter needle moves.
- Fuel gauge may be defective or electric circuit disconnected if there is some fuel in the tank, but the needle does not move. Please drive slowly to an authorized service station to have your scooter checked.
Note: It is not necessary to start engine to check the fuel level.
TRANSMISSION OIL INSPECTION AND CHANGE
Inspection:
- Use the main stand to support the scooter on a level ground, after the engine stops, wait for 3\~5 minutes. Remove the bolt for transmission oil access hole, and check if transmission oil reaches the lower edge of check screw hole (same as the access hole).
- Add oil until oil flows out from the check screw hole if oil level is under the lower edge of check screw hole.
Oil change:
- Use the main stand to support the scooter on a level ground. Remove the bolt for transmission oil access hole and oil drain bolt, and drain out the oil.
- Install the oil drain bolt and tighten it securely. Fill transmission oil through the access hole until oil reaches the lower edge (when oil flows out). Install the bolt and tighten it securely. (Make sure that the bolt had been tightened securely after adding oil, and check for oil leakage.)
※ Recommended Oil: Genuine SYM HYPOID GEAR OIL (SAE 85W-140)
INSPECTION AND ADJUSTMENT OF BRAKE FREE PLAY
INSPECTION: (Brake lever free play must be checked with the engine shut off.)
● Brake lever free play for front and rear wheels
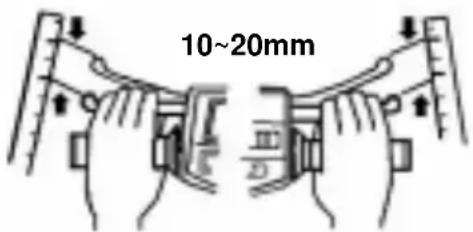
When checking the hand-braking lever for front and rear wheels, its free play (the stroke of hand-braking lever from no braking to initial braking) should be 10\~20mm.
It is abnormal if the feel is spongy when holding the hand-braking lever forcefully.
text_image
10~20mm10. INSPECTION AND MAINTENANCE BEFORE RIDING
Adjustment:
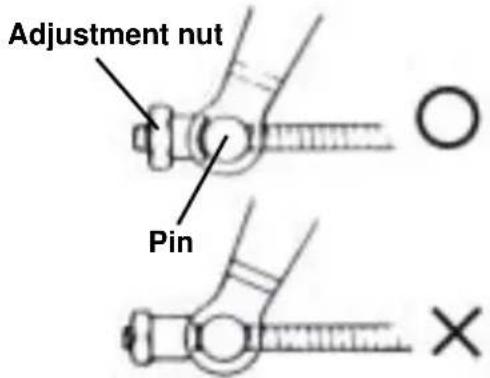
● The indentation of brake adjustment nut must be aligned with the pin. (see right figure)

CAUTION:
- When free play is between 10\~20 mm, check brake indicators of front and rear wheels. If the arrow on the brake arm aligned with the “△” marked on the brake disk, that means the brake lining has been excessively worn, and must be replaced immediately.
text_image
Adjustment nut Pin- Turn the adjustment nut on brake arm of front and rear wheels to adjust the free play of hand-brake lever.
- Hold the hand-brake levers after adjusting with both hands until there is effective brake feeling.
● Measure the free play with a rule.
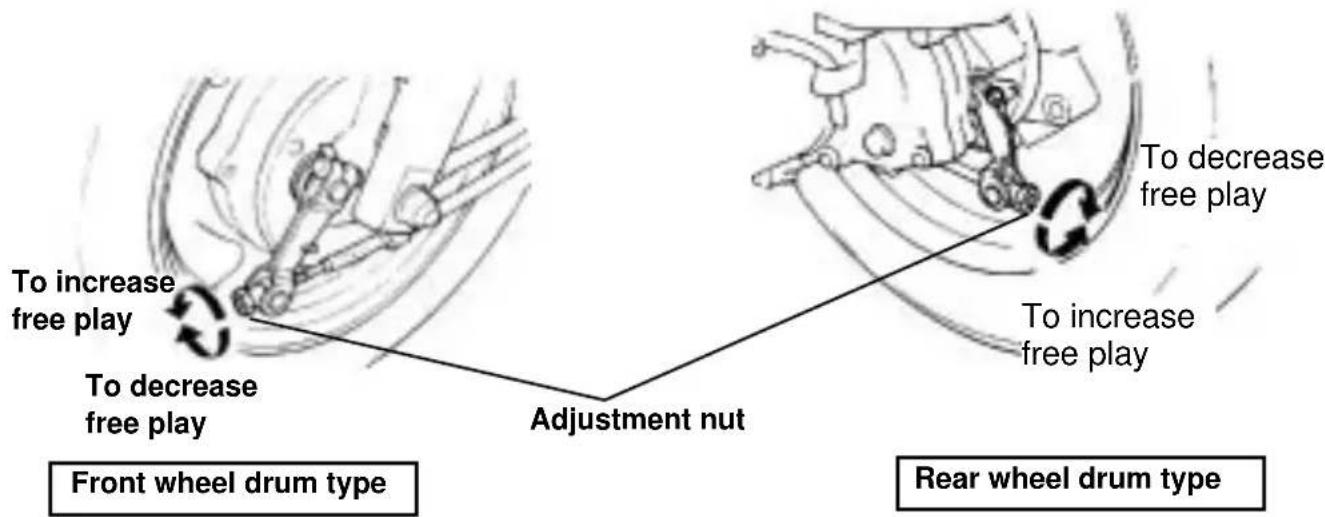
text_image
To increase free play To decrease free play Adjustment nut Front wheel drum type To decrease free play To decrease free play Rear wheel drum type[Applicable for model equipped with disc brake.]
natural_image
Illustration of a hand holding a cable with a tassel, alongside another hand holding a curved tube (no text or symbols present)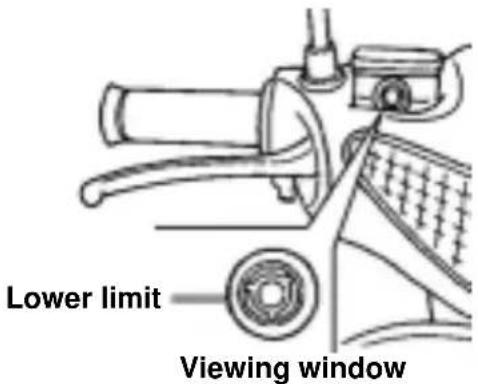
text_image
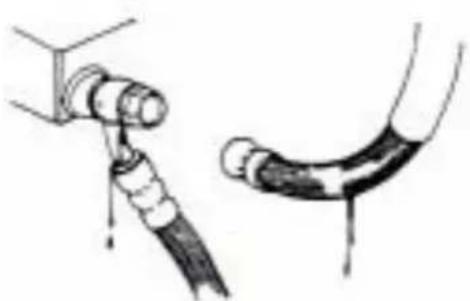
Lower limit Viewing window- Visual Inspection for leakage or damage. If there is any, take your scooter to SYM Authorized Dealer or Franchised Dealer for a check or repair.
- Park the scooter on a level ground, and check if fluid level is under the "LOWER" mark. Recommended Brake Fluid: WELL RUN BRAKE OIL (DOT 3).
10. INSPECTION AND MAINTENANCE BEFORE RIDING
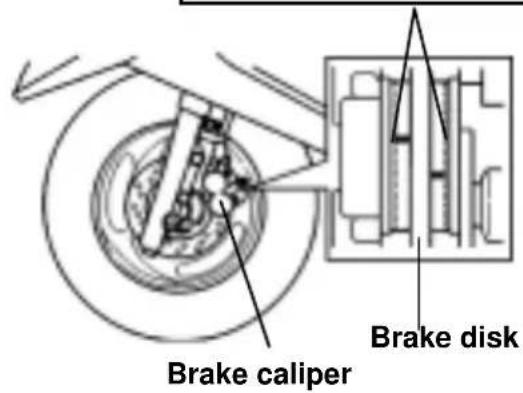
Brake pad wear limit grooves
text_image
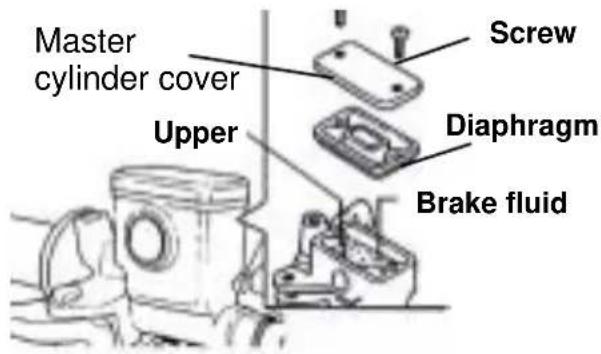
Brake caliper Brake disk[ADDING BRAKE FLUID]
text_image
Master cylinder cover Upper Screw Diaphragm Brake fluidCheck the brake from behind the brake caliper. The brake pad must be replaced with new lining when the brake pad wear limit reaches the brake disk.
- Loosen the screws and remove the master cylinder cover.
- Wipe clean foreign materials, dirt around the reservoir, being careful not to let foreign materials fall into the reservoir.
- Remove the diaphragm plate and the diaphragm.
- Add brake fluid to upper level.
- Install the diaphragm plate and the diaphragm, and install the master cylinder cover.
- Please note the diaphragm direction, and do not let foreign materials fall into the reservoir. And tighten the master cylinder cover securely.

CAUTION:
Do not fill above the upper limit when adding brake fluid and avoid dropping on painting or plastic components to prevent damage.
THROTTLE VALVE HANDLE CLEARANCE ADJUSTMENT
- Correct clearance allows throttle vale handle to rotate 2\~6mm.
- To adjust, first loosen the fixing nut, then turn the adjusting nut to the proper position and securely tighten the fixing nut.
Check Items:
- Check throttle valve cable to see if it can be moved smoothly from a closed position to a wide open position.
- Rotate steering handle from side to side to check if the throttle valve cable is interfered.
- Check to see if the throttle valve cable is obstructed by other cables preventing it from being operated smoothly.
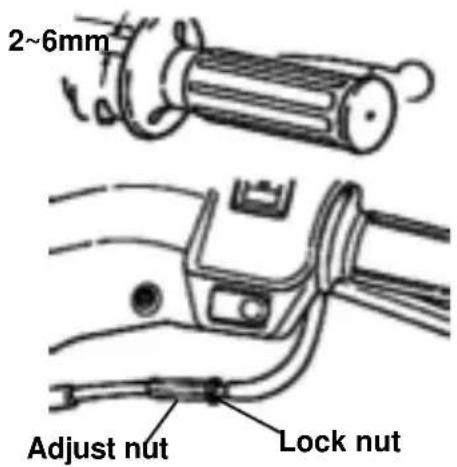
text_image
2~6mm Adjust nut Lock nutINSPECTION AND MAINTENANCE OF BATTERY
- This scooter is equipped with a maintenance-free type battery, so it is unnecessary to check and add electrolyte. Have your scooter checked by SYM Authorized Dealer or Franchised Dealer should any abnormality is found.
Remove the battery terminals and clean if there are dirt and corrosion on them.
Battery removal procedures are as follows:
Turn ignition switch "OFF," and remove negative cable screw firstly and disconnect the negative cable. Then, remove positive cable screw and positive cable.
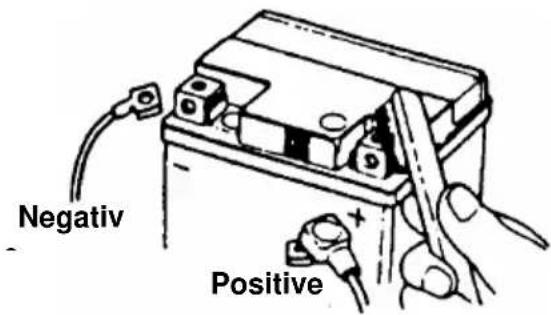
text_image
Negativ Positive
CAUTION:
- Clean the battery posts with warm water if the posts are eroded and have some white powders on them.
- If there is an obvious erosion on the terminals, disconnect the cables, then clean the erosion off with a steel brush or a piece of sandpaper.
● Install battery cable after cleaning and apply a thin coat of grease on the terminals.
● Install battery in reverse order of removal.

CAUTION:
● This is a closed type battery. Never remove the caps.
- In order to prevent electric leakage and self-discharge when the battery sits idle for long periods. Remove battery from scooter, store it in a well-ventilated and dimly lighted place after the battery has been fully charged. Disconnect battery's negative cable if the battery is still kept on the scooter.
- If the battery needs to be replaced, replace with a same closed-type battery (Maintenance-Free).
TIRE INSPECTION
● Tires should be checked and inflated with the engine shut off.
- If a tire's ground contacting curve is abnormal, check it with an air pressure gauge and inflate it to the specified pressure.
● Tires pressure must be checked with an air pressure gauge when cold.
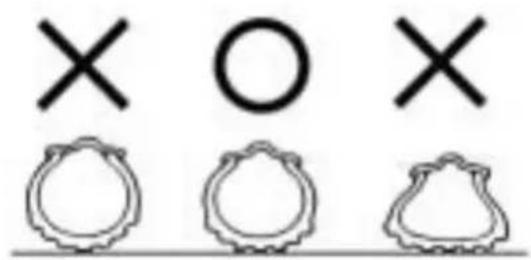
text_image
X O X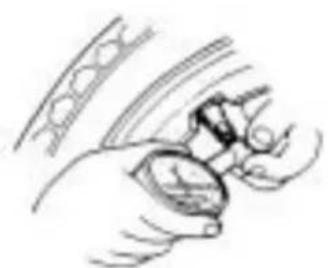
natural_image
Illustration of a hand holding a small object with motion lines indicating motion (no text or symbols)PLEASE REFER TO SPECIFICATIONS FOR STANDARD TIRE PRESSURE
10. INSPECTION AND MAINTENANCE BEFORE RIDING
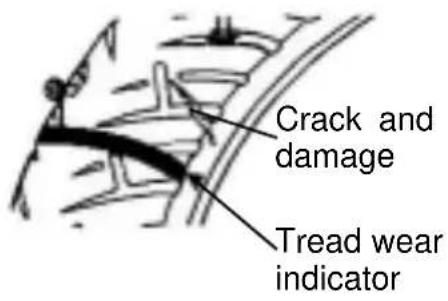
- Visual check tires for frontal and lateral side walls for crack or damage.
- Visual check tires for any nails or small stones wedged in the tread.
- Check the "tread wear indicator" condition to see if tread groove depth is insufficient.
● A tire with a wear bar showing is worn out and should be replaced immediately.
Foreign materials (nails or small stones)
text_image
Crack and damage Tread wear indicator
CAUTION:
Abnormal tire pressure, wear, or crack is the most important cause that results in the loss control of the steering handle and a punctured tire(s).
STEERING HANDLE FRONT SHOCK ABSORBERS INSPECTION
● Perform this check with engine shut off and ignition switch key removed.
● Visual check front shock absorbers for damage.
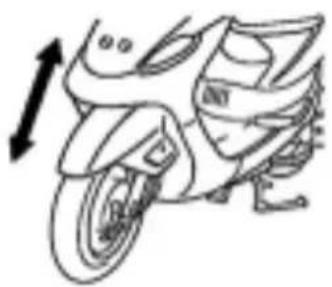
- Operate steering handle up and down, and check front shock absorbers for noises due to bends.
- Check the bolts and nuts of front shock absorbers with wrenches for tightness.
- Shake steering handle up & down, left & right, and front & rear to check if it is loosen, has too much resistance and pulls to one side.
- Check steering handle if it is being pulled too tight by the brake cables.
- Take your scooter to SYM Authorized Dealer or Franchised Dealer for a check or adjustment if any abnormal conditions are found.
【Figures on the right are for operation checks only】
natural_image
Line drawing of a scooter with an upward arrow indicating motion (no text or symbols)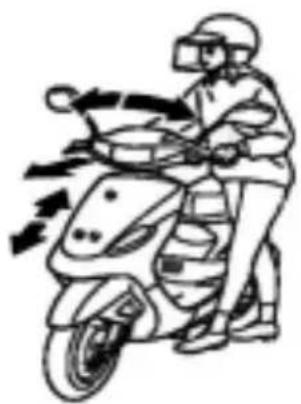
natural_image
Illustration of a person riding a scooter with motion arrows indicating speed (no text or symbols)CHECKING AND CHANGING FUSES
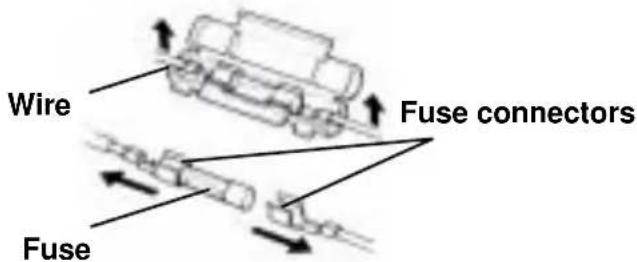
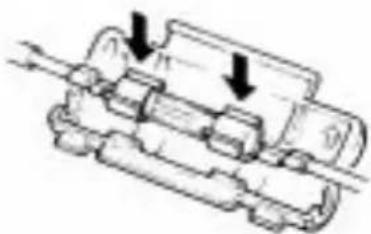
Turn off ignition switch, and check fuses if they are intact. Replace the blown fuse with a new one having the same specified amperage rating (7A). Using a fuse of more than 7 amperes, a brass or iron wire to replace a blown fuse is strictly prohibited to avoid damaging the electrical system and the circuit.
- Remove the battery cover screws, and open the battery cover. Fuses are installed in the fuse box located by the battery.
● Fuses must be firmly secured with wire connectors when replacing. - Use only parts having the specified specification to replace electrical components such as light bulbs. Using parts not having the specified specifications for replacement may cause the fuse to blow and over-discharge the battery.
- Avoid spraying water directly on or around fuse box when washing the scooter.
● Take your scooter to your dealer for an inspection if a fuse is blown by unknown causes.
【REMOVE】
text_image
Wire Fuse connectors Fuse【INSTALLATION】
natural_image
Mechanical assembly diagram showing two components with downward arrows indicating motion (no text or labels)CHECKING THE TURN SIGNAL LIGHTS AND HORN
- Turn the ignition switch key to "ON" position.
- Turn on the turn signal light switch, and make sure that the front & rear and left & right signal lights flashes and also check if the warning buzzer sounds.
- Check turn signal light covers if they are dirty, crack, or loosen.
- Press horn button to check if it works.

CAUTION:
- Specified specification bulbs should be used for turn signal lights. Otherwise, the normal operation of turn signal lights will be affected.
● Turn on the turn signal light before turning or switching lane to warn driver of vehicles behind. - Turn off the turn signal light immediately by pressing its button down after using. Otherwise, the flashing of twin signal lights may confuse the drivers of vehicles behind.
CHECKING THE FRONT AND REAR LIGHTS
- Turn the ignition switch key to "ON" position, start the engine and then turn on the front light switch. Check if front and rear lights come on.
- Check the brightness and direction of front light by projecting the light on the wall to see if it is correct.
- Check the front light cover if it is dirty, crack, or loosen.
- Turn the ignition switch key to "ON" position, hold the hand-braking levers for front and rear wheels. Check if the brake lights come on.
- Check the brake light cover if it is dirty, crack, or loosen.

CAUTION:
- Use only specified specification bulbs, do not use bulbs with different specifications to avoid damaging electrical system, burning out bulbs, and discharging the battery.
- Do not modify or add other electrical components to prevent over load or short circuit which may result in a fire and burn down the scooter in serious cases.
CHECKING FOR FUEL LEAKAGE
- Check fuel tank, fuel hoses, and carburetor...etc. for leakage.
CHECING THE LUBRICATION OF BODY'S VARIOUS MECHANISMS
- Check the body's pivot points if they have enough lubrication. (For example, the pivot points on the main stand, the side stand, and the brake lever...etc.)
CHECKING THE SPARK PLUG
- Remove the cap of high tension cable. (Use a plug wrench in tool box to remove the spark plug by turning it counterclockwise.)
- Check the electrode if it is dirty or fouled by carbon deposits.
- Remove the carbon deposits on the electrode with steel wire, and clean the spark plug with gasoline, then, wipe dry with a rag.
- Check the electrode, and adjust its gap to 0.6\~0.7mm. (Check it with a feeler gauge)
- Hand tight the spark plug as far as it can go and then tighten it another 1/2\~3/4 turns with a wrench.
WARNING: The engine is very hot after running. Pay attention not to get burned.
※ Use only spark plugs suitable for the engine specifications of this scooter recommended by the manufacturer. (Refer to specifications.)
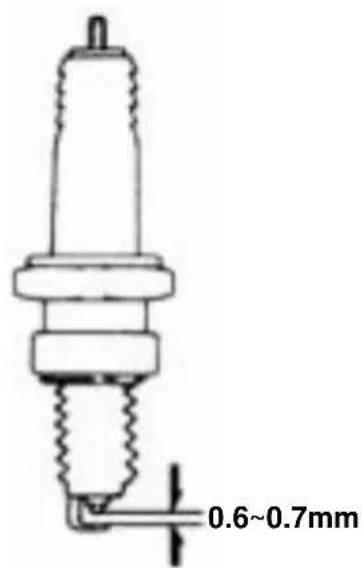
text_image
0.6~0.7mmCHECKING THE AIR CLEANER
- Remove the screw of air cleaner cover.
- Remove the air cleaner cover and then the cleaner's element.
- Clean or replace the element. (For checking interval please refer to maintenance schedule.)
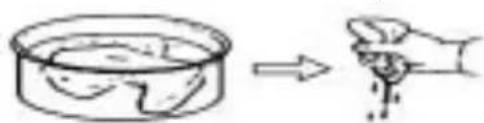
- Refer to figures shown on the right for air cleaner element cleaning steps.
Procedures for cleaning air cleaner element:

text_image
Diagram showing a hand pouring liquid into a container, illustrating a chemical or physical process.1.cleam.
2.squeeze dry.
natural_image
Simple line drawing showing a container with liquid being dropped by a hand (no text or symbols)- soak in engine oil.
4.squeeze dry
10. INSPECTION AND MAINTENANCE BEFORE RIDING
● Assemble the air cleaner in reverse order of disassemble.

CAUTION:
- Dust deposit is one of the major causes of reducing output horsepower and increasing fuel consumption.
- Change the air cleaner element more frequently to prolong the engine's service life if the scooter is driven on dusty roads very often.
- If air cleaner is installed improperly, dust will be absorbed into cylinders, which may cause a premature wear and reducing output power and engine life.
- Be careful not to soak the air cleaner when washing the scooter. Otherwise, it will cause engine hard to start.
11 WHEN THERE IS AN ABNORMAL CONDITION OR A TROUBLE
DIAGNOSIS WHEN ENGINE DOES NOT START
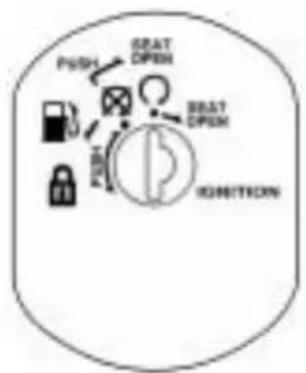
flowchart
graph TD
    A["PUSH"] --> B["BEAT OPEN"]
    B --> C["BEAT OPEN"]
    C --> D["IGNITION"]
    D --> E["OPEN"]
    style A fill:#f9f,stroke:#333
    style B fill:#ccf,stroke:#333
    style C fill:#cfc,stroke:#333
    style D fill:#fcc,stroke:#333
    style E fill:#ffc,stroke:#333
text_image
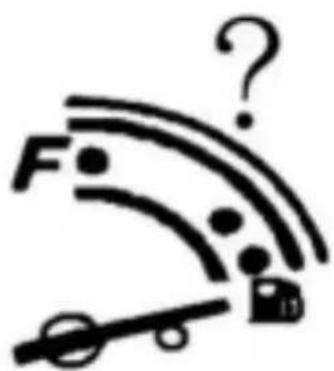
F ? 10- Does the ignition switch key turn to "ON" position? 2. Is there fuel in the fuel tank?
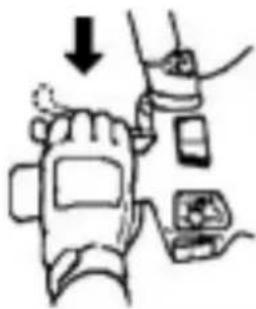
For Rear Wheel
natural_image
Illustration of a hand wearing a wristwatch with a device and a downward arrow indicating motion (no text or symbols)For Front Wheel
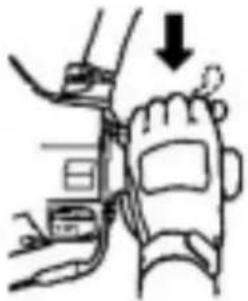
natural_image
Illustration of a hand wearing a wristwatch with a device and a downward arrow indicating motion (no text or symbols)The turn signal light
text_image
Horn3.Is the rear or front wheel brakes being hold when pressing starting button?
- Turn the ignition switch key "ON", and press horn button. The fuse may blow if horn not sounding.
【Please go to SYM authorized dealer or franchised dealer immediately if there are no problems on above conditions and engine still can not be started.】
| Item | Check Items\Maintenance kilometer | 300KM | Every 1000KM | Every 3000KM | Every 6000KM | Every 12000KM | Remarks |
| NEW 1 | Month 3 Months | 6 Months | Year | ||||
| 1 | Air cleaner element(Remark) | I | C | C | R | ||
| 2 | Fuel filter I | I | R | ||||
| 3 | Tire, pressure I I | ||||||
| 4 | Battery I I | ||||||
| 5 | Brake and brake clearance checking | I | I | I | I | I | |
| 6 | Spark plug | I | I | R | |||
| 7 | Carburetor(idle speed) | I | I | ||||
| 8 | Ignition timing | I | I | I | I | I | |
| 9 | Steering bearing and handles | I | I | ||||
| 10 | Check Transmission for leakage | I | I | ||||
| 11 | Check crankcase for leakage | I | I | ||||
| 12 | Transmission Oil | R | Replacement for every 5,000KM(5 Months) | ||||
| 13 | Drive Belt/roller | I | R | ||||
| 14 | Light / electrical / meters | I | I | I | I | I | |
| 15 | Fuel tank switch and lines | I | I | ||||
| 16 | Throttle valve operation and cable | I | I | ||||
| 17 | Engine bolts and nuts | I | I | ||||
| 18 | Cylinder head, cylinder, and piston | I | |||||
| 19 | Exhaust system/cleaning carbon | I | |||||
| 20 | Greasing on chassis | L | L | ||||
| 21 | Front/rear suspension | I | I | ||||
| 22 | Main/side stands | I | I/L | ||||
| 23 | Clutch disk | I | |||||
| 24 | Operation of oil pump rod | I | I | ||||
| 25 | Brake mechanism/brake lining (pad) | I | I | ||||
| 26 | Bolts/nuts for each components | I | I | ||||
The above maintenance schedule is established by taking the monthly 1000 kilometers as a reference which ever comes first.
* Have your scooter checked and adjusted periodically by your SYM Authorized Dealer or Franchised Dealer to maintain the scooter at the optimum condition.
Code: I \~ Inspection, cleaning, and adjustment R \~ Replacement
C \~ Cleaning (replaced if necessary) L \~ Lubrication
Remark: 1. Clean or replace the air cleaner element more often when the scooter is operated on dusty roads or in the Heavily-polluted environment.
- Maintenance should be performed more often if the scooter is frequently operated in high speed and after the scooter has accumulated a higher mileage.
13.SPECIFICATION
| Item\Specification\Model | FT05V | FT05W |
| length /width /Height | 1,660 mm / 630 mm / 1,020 mm | |
| Wheel base | 1,155 mm | |
| Net Weight | 80 kg | |
| Type | 2- stroke single cylinders engine | |
| Fuel | Unleaded gasoline(octane 90 or higher) | |
| Cooling type | Air-cooled | |
| Bore x stroke | ∅ 39 × 41.4 mm | |
| Displacement | 49.4 c.c. | |
| Compression ratio | 7.1:1 | |
| Max. HP | 2.1 kw / 6,750 rpm | |
| Max. torque | 3.5 Nm / 5,500 rpm | |
| Starting methods | Electrical & kick type | |
| Front shock absorber | Telescope | |
| Rear shock absorber | Unit swing | |
| Clutch | Dry/auto centrifugal clutch | |
| Transmission | C.V.T., auto speed change | |
| Primary reduction | Belt, 3.0~0.85 | |
| Final reduction | Gear, 11.09 | |
| Front tire | 3.00 – 10 42J | |
| Rear tire | 3.00 – 10 42J | |
| Wheel | Steel t2.3 (MT 2.15 X 10) | |
| Tire pressure | Front: STD 1.5kg/cm2, Rear: STD 2.25 kg/cm2 | |
| Front brake | Disc type (∅ 160 mm) | |
| Rear brake | drum type (∅ 95 mm) | |
| Front light bulb(high, low) | 12V 35W / 35W | |
| Brake light bulb(tail light) | 12V 5W / 21W | |
| Turn signal light bulb | 12V 10W | |
| Speedometer light bulb | 12V 1.7W | |
| Engine oil tank capacity | 1.2 L | |
| Transmission oil capacity | 100 cc. (80~90 cc. for change) | |
| Fuel tank capacity | 6.1 L | |
| Fuse | 7A | |
| Spark plug | BR 8HSA | |
| Battery capacity | 12V 3Ah (closed type, maintenance-free battery) | |
| Air cleaner | Sponge type | |
| Fuel tank cap | Open lock type | |
| Front light | General type (single lamp) | |
| Rear grab frame | Can not load cargo | |
SYMEN 2004/10