
GT-FRWE-06SB - Sound alarm Sempre - Free user manual and instructions
Find the device manual for free GT-FRWE-06SB Sempre in PDF.


| Product Type | Radio-Controlled Travel Alarm Clock |
| Model | GT-FRWE-06SB |
| Brand | Sempre |
| Power Supply | 2 x LR03 (AAA) 1.5 V batteries |
| Display | LCD with illumination (10 seconds on demand or during alarm) |
| Radio Control | Receives MSF (60 kHz), DCF77 (77.5 kHz), WWVB (60 kHz), JJY60 (60 kHz) |
| Alarm | Dual alarm with snooze (5 minutes) and auto-stop after 2 minutes |
| Countdown Timer | Up to 90 minutes, adjustable in 10-minute steps |
| Temperature Measurement | Indoor temperature (0°C to 50°C, -1°C tolerance) in °C or °F |
| World Time | 32 cities/regions stored, with summer/winter time toggle |
| Time Format | 12-hour or 24-hour display |
| Date Display | Day/Month/Year or Month/Day/Year, with weekday abbreviation |
| Language for Weekday | Selectable: German, English, Italian, French, Dutch, Spanish, Danish |
| Manual Setting | Time and date can be set manually when radio signal unavailable |
| Reset Function | Factory reset via RESET hole on back |
| Battery Change Indicator | Symbol flashes when batteries need replacement |
| Safety | Keep away from water; use only specified batteries; danger of swallowing |
| Cleaning | Wipe with soft dry cloth; do not use abrasives or immerse in water |
| Warranty | 3 years from date of purchase (subject to terms) |
Frequently Asked Questions - GT-FRWE-06SB Sempre
User questions about GT-FRWE-06SB Sempre
0 question about this device. Answer the ones you know or ask your own.
Ask a new question about this device
Download the instructions for your Sound alarm in PDF format for free! Find your manual GT-FRWE-06SB - Sempre and take your electronic device back in hand. On this page are published all the documents necessary for the use of your device. GT-FRWE-06SB by Sempre.
USER MANUAL GT-FRWE-06SB Sempre
Radio-Controlled Travel Alarm Clock
- Operating instructions
- Warranty
GT-FRWe-03sb
GT-FRWe-03sw
GT-FRWe-06sb
GT-FRWe-06sw
Table of Contents
Overview of parts and operating elements 4
Safety 6
This is how radio transmission works 9
Inserting batteries 10
First data reception 10
Other time signal transmitters .... 12
Improve reception 13
Use 14
Set up alarm clock 14
Switch on display illumination 15
Change temperature unit of measurement 15
Change time format 15
Start countdown 16
Stop/start radio transmission 17
Replacing batteries 18
Reset alarm clock to factory settings (RESET function) 19
Table of Contents
Alarm 20
Set alarm time 20
Switch off alarm signal 21
General information on the alarm function 23
Times of different world cities 23
Set time and date manually 25
Other settings 27
Cleaning 30
Technical data 31
Declaration of conformity 31
Troubleshooting guide 32
Disposal 33
Warranty card 34
Overview of parts and operating elements
text_image
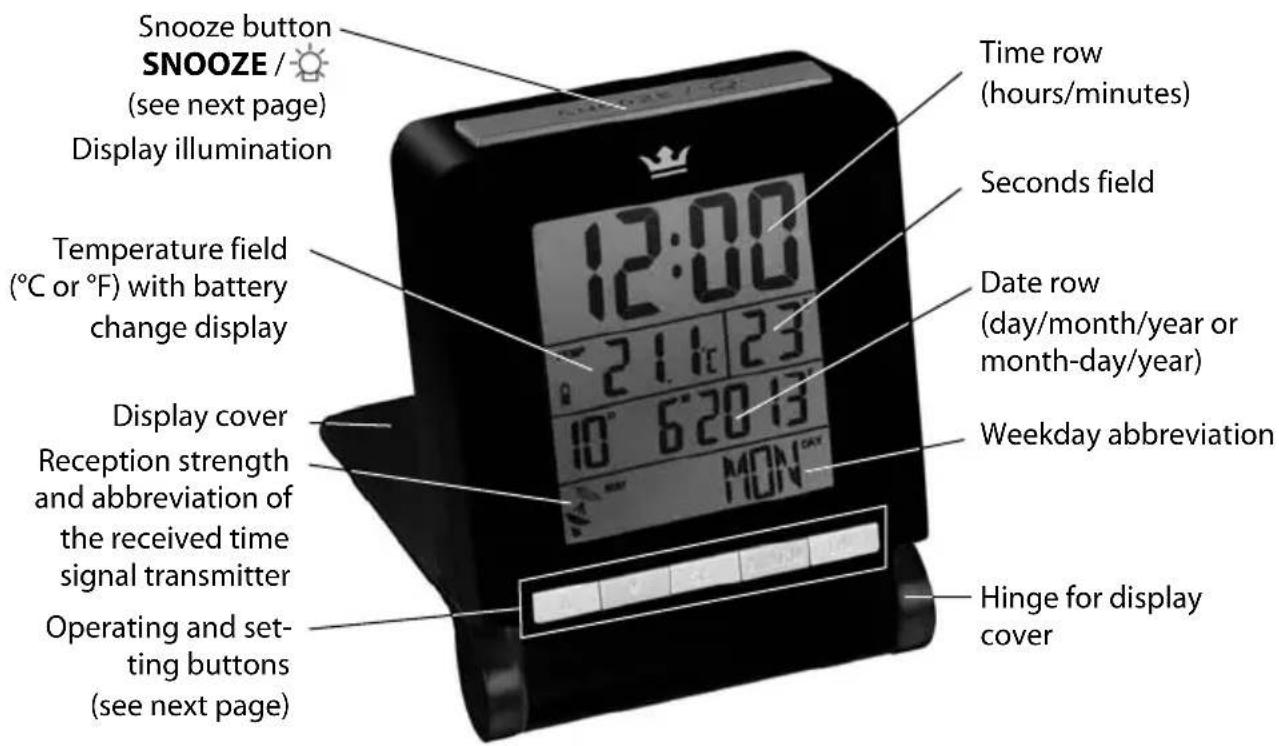
Snooze button SNOOZE / (see next page) Display illumination Temperature field (°C or °F) with battery change display Display cover Reception strength and abbreviation of the received time signal transmitter Operating and set- ting buttons (see next page) 12:00 21:00 6:20:13 MONDAY Time row (hours/minutes) Seconds field Date row (day/month/year or month-day/year) Weekday abbreviation Hinge for display coverSnooze button SNOOZE/
- Activate setting mode for alarm time
- Interrupt alarm signal for several minutes
- Interrupt countdown and restart
- Switch on display illumination
Operating and setting buttons (left to right)
Arrow button ▲- increase displayed values
- navigate through a list
- Activate setting mode for countdown
Arrow button ▼ - reduce displayed values
- scroll through a list
- start radio reception manually
- switch temperature unit of measurement
SET - activate setting mode and confirm entries
- switch between 12-hour and 24-hour display
- switch date display between D/M/Y and M/D/Y
ALARM - switch alarm function on an off
TIME - access list of times of different world cities
Safety

Please read carefully through the following information and keep these operating instructions in case you need to refer to them later. If you pass the product on to someone else, please also include these instructions.
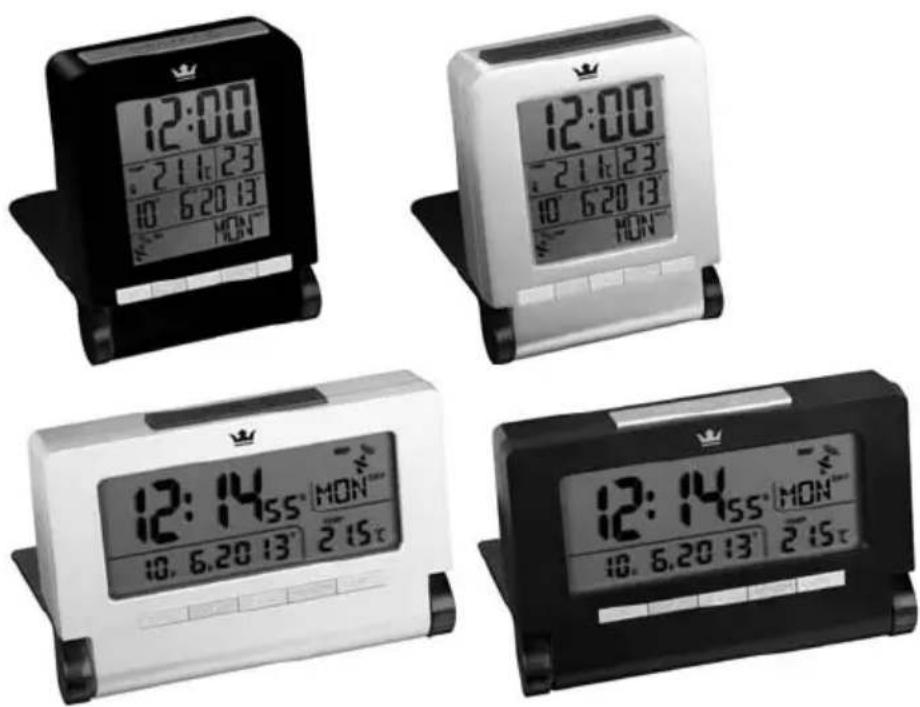
These operating instructions apply to all four radio-controlled alarm clocks that are illustrated on the title page. There is no difference between these devices, in terms of operation and functions.
Designated use
The radio-controlled travel alarm clock is for the purpose of displaying the time and setting an alarm. The alarm clock is exclusively designed for private use.
Hazards for children
- Batteries can be life-endangering if swallowed. Therefore, keep the batteries and radio-controlled alarm clock out of reach of small children. If a battery has been swallowed, medical assistance must immediately be sought.
-
Keep children away from packaging material and the display protective film. Suffocation hazard if swallowed. Ensure that the packaging bag is not put over the head.
-
This device is not intended for use by persons (including children) with limited physical, sensory or mental abilities or lacking experience and/or knowledge, unless they are supervised by a person responsible for their safety or have received instructions for use of the device from this person in advance.
- Children must be supervised in order to ensure that they do not play with the device.
Injury hazard
- Batteries must not be charged, reactivated with other means, dismantled, thrown into fire or short-circuited
- Avoid contact with skin, eyes and mucous membranes. When coming into contact with battery acid, immediately rinse the affected areas with plenty of clear water and immediately contact a physician.
Caution – property damage
- Never immerse the alarm clock in water or other liquids. Also do not place it next to a sink or in the direct vicinity of another source of moisture.
- Remove the battery from the alarm clock, if it is depleted or if you are not using the alarm clock for a longer period of time. This way, you avoid damage that could result from leakage.
-
Protect the alarm clock from impact and direct sunlight. Avoid major temperature fluctuations.
-
Do not expose the batteries to any extreme conditions by e.g. laying them on radiators. Increased leakage hazard!
- Always replace all batteries. Do not use different types of batteries, battery brands or batteries with different capacities. Pay attention to the correct polarity (+/-) of the batteries when inserting them. Incorrectly inserted batteries can damage the alarm clock.
- Clean the battery and appliance contacts prior to insertion, if required.
- Do not carry out any modifications to the device or its accessories. Only allow repairs to be carried out by a professional workshop and pay attention to the guarantee conditions.
- Never use hard, scratching or abrasive detergents or similar, for cleaning the alarm clock. This could scratch the surface.
Scope of delivery
●Radio-controlled alarm clock
- 2 x type LR03 (AAA) / 1.5 V batteries
- Operating instructions with warranty
This is how radio transmission works
The time signal channel MSF operates via the long wave frequency of 60 kHz, airing all information required for operating the radio-controlled alarm clock. The station is located in Anthorn (county of Cumbria, England).
As soon as the batteries power the clock, the device is ready for reception and searches the MSF channel signal. With the time signal being received via the internal ferrite rod antenna of the clock, the display then shows date and time.
The clock switches itself on several times a day for synchronising its time with the radio signal of the MSF channel. In case reception is impossible, e.g. during heavy thunderstorms, the clock precisely proceeds and automatically switches to reception at the next intended point of time.
Depending on the location, it can rarely occur that the radio-controlled alarm clock receives signal from another time signal transmitter or even alternately from two different time signal transmitters. This is not a device fault.
In this case:
- Change the location of the radio-controlled alarm clock.
- If the changed location does not rectify this, you may need to interrupt the radio transmission, see page 17.
Inserting batteries
- Slide the lid of the battery compartment on the back of the device downwards out of the housing.
- Insert the batteries as shown on the base of the battery compartment. Pay attention to the correct polarity (+/-) of the batteries.
- Slide the battery compartment lid on again.
As soon as the batteries are inserted, the radio-controlled alarm clock will switch to reception; see "First data reception" on page 10.
First data reception
When the batteries are inserted, all indications will briefly been shown in the display. The display will also briefly illuminate and sound a beep tone. After a few seconds, the room temperature will be displayed.
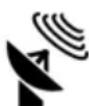
After this, the device switches to receiving, whereby the radio wave number shows the quality of the reception: The more radio waves are displayed, the better the reception.
As soon as the signal is received with sufficient strength, the relevant data will be shown in the display. This process can take a few minutes.
Effective immediately, the alarm clock switches to receiving several times a day and compares the displayed time with that from the time signal transmitter.
The duration of the receiving process depends on the respective time signal transmitter.
If a sufficiently strong signal has not been received, the radio-controlled alarm clock will stop the reception process and start is again later. In this case, the time continues to run normally, from the start time of "00:00".
- The alarm clock switches to receiving a signal several times a day, and updates the displayed time with that from the time signal transmitter.
- You can restart the receiving process again manually, see page 17, or
- wait until the radio-controlled alarm clock automatically switches to receiving again later. Reception is usually better during the night.
- If reception is not possible at your location, you can set the time and date manually, see page 25.
- The time signal transmitter from which the radio-controlled alarm clock receives its signal is shown in the bottom left-hand corner of the display.
Other time signal transmitters
Apart from the MSF transmitter, the following time signal transmitters can also be received:
Germany DCF - This transmitter transmits its time signals on the long wave frequency of 77,5 kHz and is situated in Mainflingen next to Frankfurt am Main. Display: DCF77
North America WWVB - This transmitter is situated in Fort Collins in the US state of Colorado. It transmits the time signal on the long wave frequency of 60 kHz. Display: Map symbol.
Japan JJY60 - The JJY60 transmitter is situated on Mount Hagane on the Island of Kyushu. It transmits on 60 kHz long wave. Display: JJY.
Proceed as follows:
-
Insert the batteries, see page 10. The device will switch to receiving and "MSF" will flash in the bottom left-hand corner of the display".
-
Press the ▼, arrow button repeatedly in order to select the required transmitter.
Pay attention to what is shown in the display.

Note
If you are travelling, you can set a different time signal transmitter manually by keeping the ▼ arrow button pressed down and then select the required transmitter by repeatedly pressing ▼ Or, simply wait until the radio-controlled alarm clock switches to receiving again. The device will then automatically find the strongest time signal transmitter and will synchronise the time and date according to the received data.
Improve reception
- Preferably set up the radio-controlled alarm clock near a window.
- Keep a distance to televisions, PCs and computer monitors. Base stations of cordless telephones should also not be in the direct vicinity of the radio-controlled alarm clock.
- Locations that move (caravan, train, etc.) generally have poor reception. Locations in the direct vicinity of airfields are usually also unsuitable.
Please note:
- Reception is usually better during the night. If the alarm clock should not have any reception during the daytime, it could be that the signal will immediately be received at night and at full strength.
- The weather, e.g. an intense lighting storm, can cause reception problems.
- The transmitter can occasionally be switched off temporarily, e.g. for maintenance works.
- You must not carry out any adjustments during data reception.
Use
Set up alarm clock
natural_image
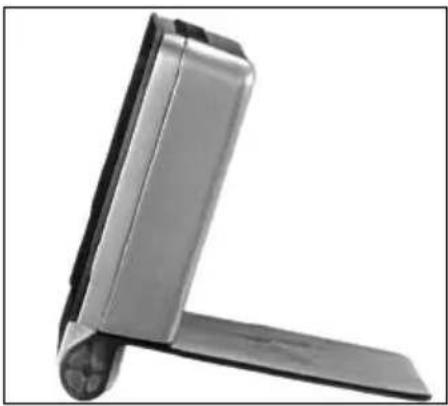
Exterior view of a modern office building (no signage)- Fold back the display cover.
- Remove the protective film from the display.
- Place the alarm clock on a solid, level surface.

Note
The folded-up display cover protects the display from scratches while travelling.
Switch on display illumination
▶ Press the Snooze/ button in order to switch on the display illumination for 10 seconds

Note
The display illumination is switched on when the alarm starts and illuminates automatically for 10 seconds when a countdown is ending.
Change temperature unit of measurement
The device can display the measured inside temperature in °Celsius or °Fahrenheit.
During the normal time display, briefly press the ▼ arrow button briefly 1x in order to set the other respective unit of measurement
Change time format
The time can be displayed in 12-hour or 24-hour format. With the 12-hour format, the afternoon hours are identified in the display with PM.
During the normal time display, briefly press the SET button briefly 1x in order to set the other respective time format

Note
If you select the 12-hour format, the date display will change and the month will be positioned in front of the day date.
Start countdown
You can use this function in the same way as a timer.
The countdown duration is a maximum of 90 minutes. The countdown is set in 10-minute steps. After the time runs out, the alarm tone will sound in the same way as for waking.
-
During the normal time display, keep the ▲ arrow button pressed down for a few seconds. "00.00" will be shown in the date row.
-
Set the required countdown duration using the arrow buttons:
- P r ▲ button: Each press of the button increases the value by 10 minutes.
- Press ▼ button: Each press of the button reduces the value by 10 minutes.
- Press the SNOOZE/ button to start the countdown.
As soon as the countdown has run out, alarm tones will sound for 2 minutes, which will increasingly speed up. The display will also illuminate for 10 seconds (same function as with the alarm).
-
Press the SNOOZE/ in order to switch off the alarm tone beforehand.
-
Keep the ▲ pressed down for several seconds, in order to have the date displayed again.
Please note:
- In order to have the date displayed during the countdown, keep the ▲ button pressed down for several seconds, until the date is shown in the display. The countdown will continue to run in the background. You can switch back to the countdown again by pressing the ▲ button again for several seconds.
- By pressing the SNOOZE/💡 button, you can interrupt the countdown and then continue it by pressing again.
- In order to reset the countdown to zero, interrupt it with the SNOOZE/💡 button and then press the ▲ or ▼ button repeatedly, until "00 00" is shown in the display.
Stop/start radio transmission

The reception signal shows that the alarm clock is ready to receive. In this status, it receives radio signals several times per day from the time signal transmitter.
- If you want to interrupt the regular transmission of the time signal temporarily, keep the ▼ arrow button pressed until the reception signal flashes.
- Press ▼ repeatedly until the reception signal is no longer flashing.
- In order to reactivate the reception of the time signal, keep the ▼ button pressed until the reception symbol is displayed again and the alarm clock is switched to reception.
Please note:
- If the reception was not successful, the reception symbol disappears after several minutes and the time in the display continues to run normally.
- With successful reception, the radio-controlled alarm clock sets itself to the time of the time signal transmitter. If you have already carried out manual time and date settings, these are automatically adjusted.
- It's not possible to stop the radio transmission completely.
Replacing batteries

When the symbol for battery change is shown/flashes in the display, you must replace the inserted batteries with new ones. Then, proceed as described on page 10.
Please note:
- With a battery change, the settings are all lost. Proceed with the battery replacement as described on page 10 under "First data reception".
- Always replace all of the batteries and only use those specified in the "Technical data".
- Pay attention to the correct polarity (+/-) of the batteries when inserting them.
Reset alarm clock to factory settings (RESET function)
If obviously incorrect values are being displayed, you should reset the alarm clock to its factory settings. Afterwards, it should function normally again.
For this, there is a small opening on the back of the alarm clock in the vicinity of the rotary joint of the protective cover, which is labelled with RESET.
Proceed as follows:
- Insert a thin object (e.g. a straightened paper clip) into the opening.
- Remove the object from the RESET opening.
The radio-controlled alarm clock is reset to its factory settings and then switches to reception, see "First data reception" on page 10.
Alarm
You can set two different alarm times with the radio-controlled alarm clock, e.g. an alarm time for weekdays and an alarm time for the weekend, which you activate as required. Or, set an alarm 2x per week, e.g. in the mornings and after an afternoon nap, by activating both.

Note
- Proceed quickly. If approx. 18 seconds pass between pressing buttons, the alarm clock will exit the setting mode and you must repeat the process.
- If you keep the ▲ or ▼ arrow button pressed down, the displayed values will scroll forward more quickly.
- You must not carry out any adjustments during data reception.
Set alarm time
Starting from the normal time display:
- Keep the SNOOZE/💡 button pressed down for a minimum of 3 seconds, until the date row flashes the hour time and A1 (= first alarm time) is also displayed.
- Use the ▲ or ▼ arrow key to set the required alarm hour. The alarm is now displayed.
-
Press the SNOOZE/💡 button and set the required alarm minute with the ▲ or ▼ arrow button.
-
Press the SNOOZE/💡 button again and repeat the described procedure, if you want to set a second alarm time or simply press SNOOZE/💡 repeatedly until the normal time is displayed again.
Switch off alarm signal
As soon as you have set an alarm, the alarm function is activated. You can identify this by the alarm symbol:
1
Alarm 1 is activated
2
Alarm 2 is activated
12
Alarm 1 + 2 are activated (the alarm clock sounds an alarm at both times)
At the set time, you will be woken up by an alarm signal, whereby the signal will increase in intensity, the longer the alarm sounds.
The display will be illuminated for approx. 10 seconds and the respective alarm signal for alarm 1 or 2 will also flash in the display

Note
The radio-controlled alarm clock has an auto-stop function. After two minutes, the alarm switches itself off automatically. You will be woken again after 24 hours have passed.
Snooze function
▶ Press the SNOOZE/💡 button 1x.
The alarm signal will switch off for 5 minutes. After this, the device switches itself back on and wakes you up again. This procedure can be repeated several times, whereas the alarm symbol of the respective alarm will flash.
Disrupt alarm for 24 hours
▶ Press the ALARM button 1x.
The respective alarm signal will continue to be shown in the display, but the alarm signal is muted. You will be woken at the same time the next day.
Switch off alarm function completely
▶ Press the ALARM button repeatedly until the alarm symbol of the required alarm time (or both alarm symbols) are switched off.
General information on the alarm function
- In order to check a set alarm, keep the SNOOZE/💡 button pressed down until Alarm 1 (A1) is displayed. Alarm 2 (A2) will be displayed by repeatedly pressing SNOOZE/💡.
- In order to reactivate a set alarm after switching off, press the ALARM button repeatedly until the alarm symbol is shown in the display.
- The alarm sequence with repeated pressing of the ALARM button when the alarm is switched off is: A1 on > A2 on > A1 + A2 on > both alarms off.
Times of different world cities / regions
With this function, you specify what time it currently is in many metropolises all over the world. The radio-controlled alarm clock has the time of 32 cities and regions stored in it.
- During the normal time display, press the TIME button.
Instead of the date display, the world time will appear, with the abbreviation of the city name respectively regionname on the bottom right, instead of the day abbreviation. - Press the ▲ or ▼ arrow buttons repeatedly, in order to have the times of the individual cities displayed consecutively.
When pressing the ▲ button, the following cities/regions appears:
| Abbreviation City Abbreviation City | |||
| LON London AMM Amman | |||
| DUB Dublin PAR Paris | |||
| WLG Wellington FRA Frankfurt | |||
| SYD Sydney CPH Kopenhagen | |||
| TYO Tokyo | BCN Barcelona | ||
| SIN | Singapur | AMS | Amsterdam |
| HKG Hongkong | ALA Alaska | ||
| PEK | Peking | LAX Los Angeles | |
| BKK | Bangkok | MEX | Mexiko City |
| DBX Dubai | CHI | Chicago | |
| MOW | Moskau YOW | Ottawa | |
| JRS | Jerusalem | WAS | Washington DC |
| IST | Istanbul | NYC New York City | |
| CAI Kairo | HAV | Havanna | |
| CPT | Kapstadt | FAL | Falkland Inseln |
| ATH Athen | RIO | Rio de Janeiro | |
- In order to return to the "normal" display with the date and weekday, press the TIME button again.

Note
- By pressing the SNOOZE/💡 button, you can switch back and forth between summer and winter time for the respective displayed world city. If the summer time is set, a sun symbol will appear in the display.
- Please note that not all countries in the world have summer time. Furthermore, the different countries have different regulations. While in most countries, summer time starts in March or April and ends in September, October or November, it is the opposite in countries in the southern hemisphere.
- The default setting of the radio-controlled alarm clock is that the programmed cities are based on the respective summer time regulation that applies to Europe. Find out, e.g. on the Internet about the correct summer time for the required city and set it manually, if necessary, see page 25.
Set time and date manually
If the alarm clock is outside of the range of a transmitter or if radio reception was not possible, you can set the alarm clock manually.

Note
- Proceed quickly. If approx. 18 seconds pass between pressing buttons, the alarm clock will exit the setting mode automatically and you must repeat the process.
- If you do not want to change a value, simply press SET, in order to directly reach the new setting option.
- If you keep the ▲ or ▼ arrow button pressed down, the displayed values will scroll forward more quickly.
-
During the reception procedure, see page 10, a manual setting is not possible.
-
Keep the SET button pressed down until the year number is flashing in the display.
- Use the ▲ or ▼ arrow key to select the current year.
- Press SET to confirm the entry. The month number will flash in the display.
-
Set the following values consecutively:
-
Month
- Date
- Language for weekday abbreviation (see page 29)
- Time zone (only with DCF reception, see page 28)
-
H o u r
-
Minute
- Automatic switch-over to summer time on/off (see page 27)
With the ▲ or ▼ button, change the settings/values, with the SET button, you confirm the set value.
- Finally, press SET. The procedure is completed if nothing is flashing in the display.
Other settings
Switching between summer and winter time
With normal radio reception through transmitter DCF77, the switch-over between summer and winter time takes place automatically.
If the summer time currently applies, a sun symbol will appear in the display
If you operate the radio-controlled alarm clock without time signal transmitter reception, you can nevertheless achieve an automatic switch-over from summer time and normal time.
- Keep the SET button pressed down until the year number is flashing in the display.
- Press SET repeatedly, until OFF is flashing in the bottom corner of the display.
- Set the display to ON using the ▼ button.
- Finally, press SET.
Set a time zone of a different city or region (time zone function)
This function is interesting if you would like to have the time of another world city or region displayed for the long term. The radio-controlled alarm clock will continue to receive the radio signals from the respective set time signal transmitter, and will add or subtract the time difference that you have entered.
Please note that the radio-controlled alarm clock already has numerous metropolises stored in it, so that you can directly access their times, see page 23. You can then use the time zone functions, if the required city/region is not among these.
- Keep the SET button pressed down until the year number is flashing in the display.
- Press SET repeatedly until "00" is shown in the top row.
- Use the ▲ or ▼ arrow key to select the required time zone:
Maximum settable range: -12 to +12 hours.
A time zone table with several metropolises in the world can be found on page 29.
- Press the SET button repeatedly until no display is flashing any more in the display.

Note
In order to enter the "normal time" again, repeat the described procedure and select "00". This value corresponds, inter alia, to the time of Paris, Rome and Berlin and is the default value.
Time Zone Table
The shows the hour value, based on Central European Time (CET). In the western hemisphere, it is earlier than in Europe, so it is later in the eastern hemisphere.
| Eastern hemisphere + Western hemisphere | |||
| Berlin (Germany) 0 Paria (Cape Verde Islands) 2 | |||
| Helsinki (Finland) 1 Montevideo (Uruguay) 4 | |||
| Moskau (Russia) 2 Halifax (Canada) 5 | |||
| Colombo (Sri Lanka) 4 Lima (Peru) 6 | |||
| Dhaka (Bangladesh) 5 Salt Lake City (USA) 8 | |||
| Tokio (Japan) | 8 Vancouver (Canada) | 9 | |
| Melbourne (Australia) | 9 Alaska (USA) | 10 | |
| Wellington (New Zealand) | 11 | Hawaii (USA) | 11 |
Set the language for the weekday abbreviation
You can set the language individually for the weekday abbreviation.
- Keep the SET button pressed down until the year number is flashing in the display.
-
Press SET repeatedly until a language abbreviation is shown in the bottom row.
-
Use the ▲ or ▼ arrow key to select the required language abbreviation:
GER (German) > ENG (English) > ITA (Italian) > FRE (French) > NET (Dutch) > ESP (Spanish) > DAN (Danish)
- Press the SET button repeatedly until no display is flashing any more in the display.
Cleaning

CAUTION
- Never immerse the alarm clock in water or other liquids.
- Never use hard, scratching or abrasive detergents or similar, for cleaning the alarm clock.
▶ Dust the radio-controlled alarm clock with a soft, dry cloth, if required.
Technical data
Power supply: 3 V / max. 19 mA (2 batteries type LR03 / 1,5 V)
Receiver: Ferrite rod antenna
Summer/ winter time: Automatic switch-over
Temperature: measuring range:
measurement tolerances:
Celsius: +/-1 °C, Fahrenheit: +/- 2 °F


Because our products are constantly being further developed and improved, design modifications and technical changes are possible.
Declaration of conformity
Globaltronics GmbH & Co. KG hereby confirms that the radio-controlled alarm clocks GT-FRWe-03sb, GT-FRWe-03sw, GT-FRWe-06sb and GT-FRWe-06sw comply with the fundamental requirements and other relevant provisions of the Directive 1999/5/EC. You can find the full conformity declaration on the Internet at www.gt-support.de.
This product is caught by the ROHS 2 Directive and should be declared compliant with Directive 2011/65/EU.
Troubleshooting guide
| Faults Possible causes and rectification | |
| No function. - Batteries inserted in the right direction? - Batteries depleted, insert new batteries | |
| No radio reception. - See "Improve reception" on page 13. | |
| In the field for the temperature display, LL.L or HH.H is shown. | - The temperature is below/above the measurement range of the alarm clock. |
| The alarm clock is not emitting an alarm at all or at the wrong time. | - Alarm time set correctly? - Correct alarm time (1 or 2) active? |
| Set time deviates by exactly one/several hours. | - Time zone set? |
| The incorrect values are obviously being shown in the display. | - Carry out a reset, see page 19. |
Disposal
Dispose of packaging in an environmentally friendly and separated manner in the designated collection containers.
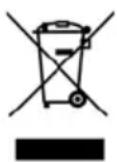
The device must not be disposed of with household waste.
If the appliance is no longer able to be used, ask the responsible waste disposal association about the necessary disposal measures. Remove the batteries from the device prior to disposal.
Batteries and rechargeable batteries are not permitted to be disposed of with household waste.
As a consumer, you are legally obligated to submit batteries and rechargeable batteries to the collection centre of his local municipality, district or to retailers. Only this way, can batteries and rechargeable batteries be disposed of in an environmentally compatible manner.
Cd Hg Pb
Batteries and rechargeable batteries with the listed letters contain, inter alia, the following harmful substances: Cd (cadmium), Hg (mercury), Pb (lead).
Product name: Radio-Controlled Travel Alarm
Model: GT-FRWe-03sb, GT-FRWe-03sw, GT-FRWe-06sb, GT-FRWe-06sw
Date-Code: 06/13
E-Number: E45402
Customer name: ____
Adress: ____
Email:
Daytime tel. no.: ____
Date of purchase: ____
Location of purchase: ____
Please send your completet
Warranty Card to:
Dario London Service Centre
PO BOX 1125
Bromley
BR1 9TW
UK
Hotline - UK: 0800 / 328 6020
Hotline - Ireland: 00800 / 4467 5888
Mail: info@globaltronicssupport.com
3
YEARS WARRANTY
Warranty card
The appliance has been manufactured with the greatest care. The warranty period is three years from the date of purchase. Please retain the sales receipt as proof of purchase as without it the warranty claim cannot be processed.
During the warranty period, the sales receipt and the completed warranty card with a description of the fault must be returned once you have contacted the service centre by phone. A new appliance will be returned. This warranty is in addition to your statutory rights. Your statutory rights are not affected. This warranty does not apply in cases of damage caused by accident, improper use, abuse and force majeure.
This warranty will be invalidated if the appliance is tampered with in any way whatsoever.
For warranty claims, please first contact us by telephoning the service centre free phone number or email:
Dario London Service Centre, PO BOX 1125, Bromley, BR1 9TW, UK
Hotline - UK: 0800 / 328 6020
Hotline - Ireland: 00800 / 4467 5888
Mail: info@globaltronicssupport.com
If the appliance has to be returned to us, it must be packed correctly as we cannot accept any responsibility for damage caused in transit.
Description of malfunction: