
GH688 - Mobile Phone ERICSSON - Free user manual and instructions
Find the device manual for free GH688 ERICSSON in PDF.


| Product Type | Mobile Phone |
| Brand | Ericsson |
| Model | GH688 |
| Dimensions | 130 x 49 x 23 mm |
| Weight | 135 g |
| Battery Type | NiMH, 600 mAh |
| Standby Time | Up to 70 hours |
| Talk Time | Up to 150 minutes |
| Charging Time | Approx. 2 hours |
| Display Type | Monochrome LCD |
| Display Resolution | 98 x 67 pixels |
| Network | GSM 900 / 1800 |
| SIM Card | Mini SIM |
| Phonebook Capacity | Up to 99 contacts |
| Messaging | SMS |
| Features | Calculator, Alarm, Call logs, Vibration |
| Security | PIN lock, Phone lock |
| Cleaning | Wipe with a dry, soft cloth |
| Spare Parts | Battery, charger, antenna available |
Frequently Asked Questions - GH688 ERICSSON
User questions about GH688 ERICSSON
0 question about this device. Answer the ones you know or ask your own.
Ask a new question about this device
Download the instructions for your Mobile Phone in PDF format for free! Find your manual GH688 - ERICSSON and take your electronic device back in hand. On this page are published all the documents necessary for the use of your device. GH688 by ERICSSON.
USER MANUAL GH688 ERICSSON
Mobile Phone for the GSM Network
User's Manual
ERICSSON

Second edition (June 1997)
This manual is published by Ericsson Mobile Communications AB, without any warranty. Improvements and changes to this manual due to typographical errors, inaccuracies of current information, or improvements to programs and/or equipment, may be made by Ericsson Mobile Communications AB at any time and without notice. Such changes will, however, be incorporated into new editions of this manual.
All rights reserved.
© Ericsson Mobile Communications AB, 1996.
Publication number: EN/LZT 126 1353 R1B
Printed in Sweden
INNOVATRON PATENTS
Congratulations...
and thank you for buying the GH688, a product specially suited the heavy user of mobile phones. The GH688 offers advanced data communication functions, up to six hours of uninterrupted talk time and comes with an extra large display.
Ericsson's mobile phones are produced to meet high quality standards and are marked with the Ⓔ symbol.
This manual introduces you to your mobile phone and shows you how to get the most out of your new product. The manual contains the following information:
• An introduction to your phone and how to make it ready for use.
• How to deal with phone calls and all the features available to you before, during and after a telephone conversation.
• How to personalize and set up the phone to meet your requirements in the every day use of your phone.
- An explanation of how network services can help you to always keep in touch with other people and the latest area information.
• How it is possible to keep track of and restrict phone calls.
We advise you to read the safety information before you start using your phone.
Table of Contents
Guidelines for Safe and
Efficient Use . . . . . . . . . . . . i v
The Phone. . . . . . . . . . . . . . . . 1
Preparing Your Phone for Use ..... 2
The SIM Card....2
The Battery....2
The Low Battery Alarm ..... 4
Turning On the Phone ..... 5
When No Network is Displayed 5
The Display Language ..... 5
The Time....5
How to Turn off the Phone...5
The Keypad and Display....6
Key Functions. 6
Indicators in the Display ..... 7
Making and Receiving Calls. . . . . 8
How to Make a Domestic Call . 8
How to Make an
International Call....8
How to Make an
Emergency Call....9
How to Receive a Call....9
During a Call. 10
How to Change the Volume. . . . . 10
How to Use the Display
as a Scratch Pad ..... 10
How to Send Tone Signals...10
The Phone's Menus ..... 1 1
The Menus ..... 1 2
Display Texts and Symbols .. 12
The CHECK and
SPECIAL CHARACTERS Menus, 13
The Phone Book. 14
How to Store a
Phone Number - Alt. 1 ..... 14
How to Store a
Phone Number - Alt. 2 . . . . 15
How to Recall a
Phone Number....15
How to Edit the Phone Book . 16
How to Erase a
Phone Number - Alt. 1 . . . . 16
How to Erase a
Phone Number - Alt. 2 . . . . 16
How to Erase All Phone
Numbers....17
How to Copy Phone Numbers 17
The Answered Calls Memory . 18
The Dialled Numbers Memory 18
Personalizing Your Phone ..... 1 9
How to Change the Ring
Volume....19
How to Change the
Far Piece Volume ..... 1 9
How to Change the Ring Type. 20
How to Edit a Melody ..... 20
How to Change the
Message Signal ..... 2 0
How to Select Key Lock....20
How to Select Key Sound . . . 20
How to Change the
Display Light. . . . . . . . . 2 0
How to Set the Minute Minder 21
How to Set Call Information. . 21
How to Select Answering Mode 21
How to Change the
Greeting Text. . . . . . . . . 2 1
How to Display Your
Phone Number ..... 2 2
How to Change the
Display Language. . . . . . . 2 2
How to Change the
Name of Two Lines ..... 2 2
How to Activate the Data
Menus....22
How to Reset the Phone....22
Protecting Your SIM
Card and Phone 23
The Card Lock....23
The Phone Lock....24
Call Barring....2 5
The Keypad Lock....26
Setting the Time, Date and Alarm. . 27
The Clock....27
The Date....27
The Alarm....27
Diverting Incoming Calls. ..... 2 9
How to Activate a Call Divert. 29
How to Check the
Status of a Call Divert ..... 29
How to Cancel a Call Divert. . 30
Other Networks 31
How to Select Search Mode . . 31
How to Select a Network . . . 31
Forbidden Networks ..... 3 2
List of Networks ..... 3 2
DTMF Tones 34
Automatic DTMF....34
The DTMF Pause Function .. 34
How to Make a Call and
Send a Code....3 4
Pre-programmed
DTMF Signalling ..... 3 4
Who Is Calling? 36
Incoming Calls 36
Answered Calls ..... 3 6
Unanswered Calls ..... 3 6
Hiding Your Phone Number. . 37
Showing Your Phone Number. 37
Handling More than One Call . . . . 38
How to Activate the
Call Waiting Service ..... 3 8
How to Make a
Second Call - Alt. 1 ..... 38
How to Make a
Second Call - Alt. 2 ..... 38
Receiving a Second Call ..... 38
How to Switch
Between Two Calls....39
How to End the Current Call . 39
Receiving a Third Call ..... 39
How to Connect Two Calls . . 39
Conference Calls. 40
How to Initiate a
Conference Call. . . . . . . 4 0
The Answering Service ..... 4 1
Voice Mail....4 1
Sending and Receiving Text
Messages 42
The Messages Memory. . . . . 4 2
The SIM Card Memory . . . 4 2
How to Set the Phone for Text
Messaging. 42
Area Information ..... 4 5
How to Turn On the
Area Information. 4 5
Arca Information
Message Types ..... 4 5
The Area Information
Message List....46
The Two Line Service. . . . . . . . 47
How to Select a Line . . . . . 47
How to Answer a Call on
Linc1 or Linc2 ..... 47
Different Settings for
Each Linc. 47
The Call Time/ Call Cost ..... 48
How to Check Time or
Cost of Last Call ..... 48
How to Check Total
Call Time or Call Cost ..... 48
How to Reset the
Total Call Time/Cost Meter .. 48
How to Determine the
Call Cost....48
How to Set a Credit
Limit for Calls....49
Fixed Dialling 50
How to Activate Fixed Dialling 50
How to Store Fixed Numbers. 50
How to Edit a Stored Number. 50
Data Menus 51
The Calculator 52
How to Use the Calculator. . . 52
Composing Your Own Ring Signal . 53
The Phone's Note System ..... 53
Problems You Can Solve ..... 55
The Phone Does Not Come On . . 55
Wrong PIN or PIN2
Has Been Entered ..... 5 5
The SIM Card Has Been
Blocked....5 5
Guidelines for Safe and Efficient Use
General
Since its introduction in the mid 1980s the mobile phone is one of the most exciting and innovative products ever developed. Your phone can help you to stay in touch with your office, your home, emergency services and others.
Your mobile phone is a radio transmitter and receiver. When the phone is turned on it receives and transmits radio frequency (RF) energy. Depending on the type of mobile phone you have purchased, it operates in different frequency ranges and employs commonly used modulation techniques. The system that handles your call when you are using your phone, controls the power level at which your phone transmits.
Exposure to Radio Frequency Energy
The International Commission on Non-Ionizing Radiation Protection (ICNIRP), sponsored by the World Health Organisation (WHO), published a statement in 1996 which sets limits for exposure to RF fields from handheld mobile phone. According to this statement, which is based on the available body of research, there is no evidence that mobile terminals meeting the recommended limits can cause any adverse health effects. All Ericsson telephones conform to the ICNIRP recommendations, and international exposure standards, such as:
• CENELEC European Pre-standard ENV50166-2
• ANSI/IEEE C95.1-1992 (USA, Asia-Pacific)
EN/LZT 126 1353 R1B iii
If you want to limit RF exposure even further, you may choose to control the duration of your calls and operate your phone in the most power efficient manner.
Efficient Phone Operation
How to use your phone for optimum performance with minimum power consumption:
- Hold the phone as you would any other telephone. While speaking directly into the mouthpiece, angle the antenna in a direction up and over your shoulder. If the antenna is extendable, it should be extended during a call.
- Do not hold the antenna when the phone is in use. Holding the antenna affects call quality, may cause the phone to operate at a higher power level than needed and shorten talk and standby times.
Antenna Care and Replacement
- Do not bend the antenna since it is sensitive and since this will reduce its performance.
- Do not use the phone with a damaged antenna. Consult your manual to see if you may change the antenna yourself. If so, use only an Ericsson approved antenna. Otherwise, take your phone to a qualified service center for repair. Use only the designated Ericsson antenna.
- Do not use an antenna designed for any other type of portable telephone than the telephone you have purchased. Unauthorized antennas, modifications, or attachments could damage the phone and may violate the appropriate regulations.
Driving
Check the laws and regulations on the use of telephones in the areas where you drive.
If you are going to use your mobile phone while driving:
- Give full attention to driving.
- Use hands-free operation, if available.
- Pull off the road and park before making or answering a call if driving conditions so require.
RF energy may affect some electronic systems in motor vehicles. In addition, some vehicle manufacturers forbid the use of mobile phones in their vehicles. Check with your vehicle manufacture's representative to be sure your phone will not affect the electronic systems of your vehicle.
Electronic Devices
Most modern electronic equipment, for example, equipment in hospitals and cars, is shielded from RF energy. However, RF energy from telephones may affect some electronic equipment.
- Turn off your phone in health care facilities when regulations posted in the areas instruct you to do so.
- Do not use your mobile phone near medical equipment without requesting permission.
iv EN/LZT 126 1353 R1B
Mobile telephones may affect the operation of some implanted cardiac pacemakers, equipment for people with hearing impairments and other medically implanted equipment. Pacemaker patients should be aware that the use of a mobile phone very close to a pacemaker may cause the device to malfunction. Avoid placing the phone over the pacemaker, i.e. in your breast pocket. When using the phone, place it at your ear opposite the pacemaker. If a distance of 15 cm. is kept between the phone and the pacemaker, the risk of interference is limited. Contact your cardiologist for more information.
Aircraft
- Turn off your phone before boarding any aircraft.
- Do not use it on the ground without crew permission
To prevent interference with communication systems, you must not use your phone while the plane is in the air.
Power Supply
- Connect AC (Power supply) only to designated power sources as marked on the product.
- To reduce risk of damage to electric cord, remove from outlet by holding onto AC adapter rather than cord.
• Make sure the cord is located so that it will not be stepped on, tripped over or otherwise subjected to damage or stress. - To reduce risk of electric shock, unplug unit from power source before attempting any cleaning, then use soft cloth dampened on with water.
Children
- Do not allow children to play with your phone since they could hurt themselves or others or accidentally damage the phone.
Blasting Areas
- Turn off your mobile phone when in a “blasting area” or in areas posted “turn off two-way radio” to avoid interfering with blasting operations. Construction crews often use remote control RF devices to set off explosives.
Potentially Explosive Atmospheres
- Turn off your phone when in any area with a potentially explosive atmosphere. It is rare, but your phone or its accessories could generate sparks. Sparks in such areas could cause an explosion or fire resulting in bodily injury or even death.
Areas with a potentially explosive atmosphere are often, but not always, clearly marked. They include fuelling areas, such as petrol stations, below deck on boats, fuel or chemical transfer or storage facilities, and areas where the air contains chemicals or particles, such as grain, dust, or metal powders.
- Do not transport or store flammable gas, liquid, or explosives in the compartment of your vehicle which contains your phone and accessories.
Product Care
- Do not expose your mobile phone to moisture or extreme temperatures.
- Do not use any other accessories but Ericsson originals. Failure to do so may result in loss of performance, fire, electric shock or injury, and will void the warranty.
- Do not attempt to disassemble the product. Doing so will void warranty. This product does not contain consumer serviceable components. Service should only be performed by Authorized Service Centers.
CE
The CE symbol on Ericsson's products signifies that they have been certified according to the EMC directive 89/336/EEC, the Telecommunications directive 91/263/EEC, and the Low Voltage directive 73/23/EEC when applicable. The products fulfil the requirements according to the following standards:
Cellular Phones and Accessories in Combination:
ETS 300 342-1 EMC for European digital cellular telecommunications.
Accessories Without Direct Connection to a Cellular Phone:
• EN 50081 Electromagnetic compatibility, Generic Emission Standard
- EN 50082 Electromagnetic compatibility, Generic Immunity Standard.
The Phone
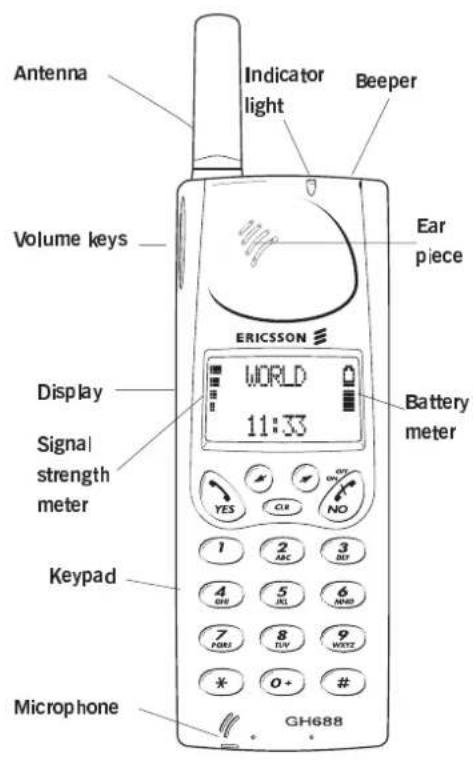
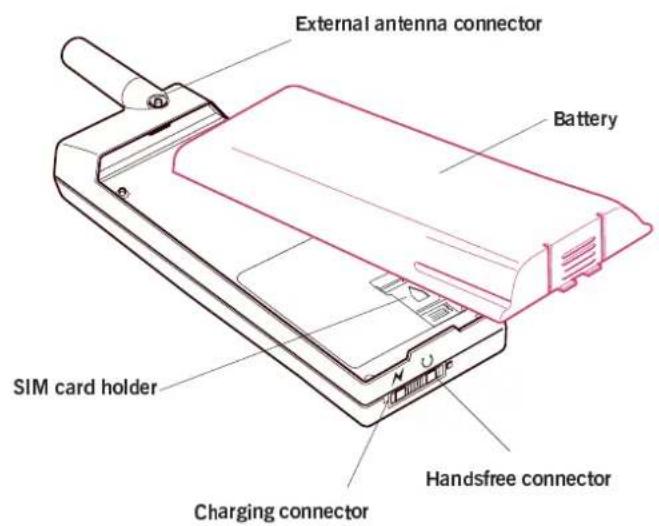
EN/LZT 126 1353 R1B 1
Preparing Your Phone for Use
The SIM Card
When you become a subscriber of a network you obtain a SIM (Subscriber Identity Module) card.
Your SIM card is supplied with a security code or PIN (Personal Identity Number) which you need in order to gain access to the phone and network.
The SIM card contains a computer chip that keeps track of your phone number, the services you have ordered from your network operator and your phone book information.
Before you are able to use your phone the SIM card must be inserted into the phone.
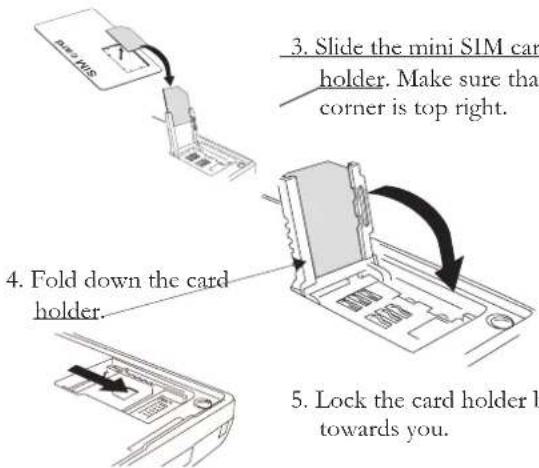
How to Insert the SIM Card
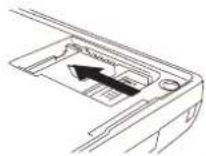
- Release the card holder by sliding the lid away from you.
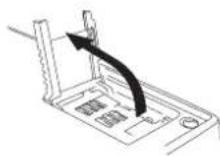
- Open the holder.
The Battery
Your mobile phone is supplied with a nickel metal hydride battery. The battery is not charged when purchased, however there may be enough power to turn on the phone.
The battery must be attached to the phone before it can be charged.
How to Attach the Battery to the Phone
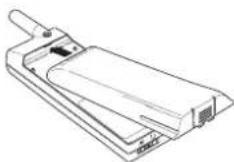
- Place the battery on top of the phone.
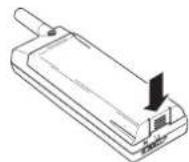
- Press until you hear a click.
How to Remove the Battery
Make sure that the phone is turned off before removing the battery.
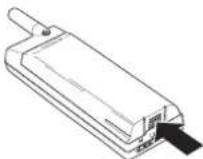
- Press the locking catch on the bottom of the battery.
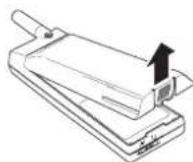
- Lift the battery up and away from the phone.
How to Charge the Battery
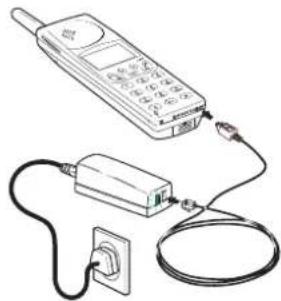
- Connect the charger to the phone as illustrated in the figure. You need to press hard to fit the plug into the phone. The flash symbol on the charger must face upwards.
- Connect the charger to the mains.
natural_image
Illustration of a mobile phone connected to a power cord and plug (no text or symbols)The phone will now start charging the battery. To indicate this the battery meter in the display is continuously filled and emptied and the indicator light on top of the phone shows a steady green light if the phone is turned on, or a steady red light if the phone is turned off. When the battery is fully charged, the battery meter in the display will show full.
Note! It is possible to use the phone while it is being charged. This will, however, increase the charging time.
How to Disconnect the Charger
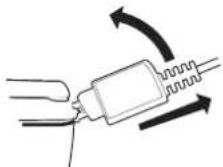
Disconnect the charger from the phone by pushing the plug upwards, see figure, and then pulling it out.
The Low Battery Alarm
As a reminder that the battery soon needs recharging or replacing, an alarm signal (a long beep) sounds and the message Battery low appears for ten seconds in the display.
In addition, the indicator light on top of the phone starts blinking red. If the phone is left on, the low battery alarm will be repeated several times and, finally, the phone will turn itself off when the battery is no longer able to power it satisfactorily. It is not possible to turn the phone on again. Instead the battery must be recharged or replaced with a charged one.
Turning On the Phone
- Press and hold down the NO key until you hear a click. The display will prompt you to enter your PIN code.
- Enter your PIN code. The digits appear as * in the display. If you make a mistake while entering your PIN code erase the faulty digit by pressing the CLR key.
- Press YES.
If you have entered your PIN code correctly, you will be welcomed by your phone. The phone will then search for a network.
When a network is found, the phone beeps three times. The indicator light on top of the phone flashes green once every second.
The display looks like this:
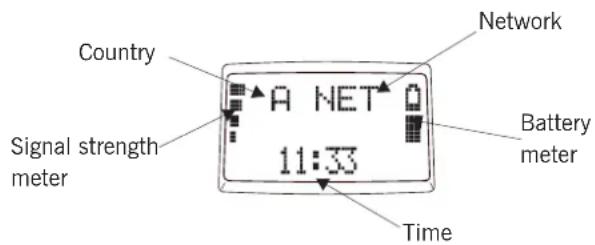
You can now make and receive calls. This is called standby mode.
When you are not using the phone, the illumination of the display and keypad is automatically turned off after 10 seconds. Pressing any key will turn the illumination on again.
EN/LZT 126 1353 R1B 5
If the message Emergency calls only is displayed, you are within rangeof a network but you are not allowed to use it. However, in an emergency, you can call the international emergency number 112. See chapter Making and Receiving Calls, p. 8.
When No Network is Displayed
If the message No network is displayed, there is no network within range or the received signal is too weak. You have to move to obtain a sufficiently strong signal.
The Display Language
The phone is normally, depending on SIM card, delivered with English text in the display. To select a different language, see Personalizing Your Phone, p. 19.
The Time
The time is shown at the bottom of the display. When the phone is delivered the time is normally not set. To set the time, see Setting the Time, Date and Alarm, p. 27.
How to Turn off the Phone
Press and hold down the NO key until the display is turned off.
The Keypad and Display
Key Functions
The keys have other functions when you have accessed the phone's menu system. See 'The Phone's Menus, p.12.

YES
To confirm selections and settings and to answer an incoming call.

ON/OFF
To turn the phone on or off.

NO
To cancel selections or reject incoming calls.


Left and right arrow keys
To access and navigate the menu system.

CLR (Clear)
To erase digits from the display and mute the telephone.


Numeric keys
To enter the digits 0-9. The 0 key enters the international character + if held down.

Star
To enter the * character. If held down it enters a 'p' – pause.

Hash
To enter the character #. If held down it enters the character □.
To terminate the input of PIN and security codes.
To confirm selection and settings.
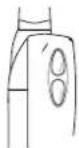
Volume keys
To increase or decrease the volume of the ear piece or handsfree loudspeaker. The keys are placed on the side of the phone.
Indicators in the Display
| Signal strength meterThe received signal strength displayed as bars. The more bars, the stronger signal. | |
| Battery meterThe current battery strength. The fuller the icon, the more power there is remaining. | |
| Keypad lockedThe keypad on your phone is locked. | |
| Alarm activatedThe alarm function is activated. |
| Diversion arrowAll incoming calls are diverted to another number. | |
| Silent ring signalThe ring signal is turned off. | |
| Text messageYou have received a text message. | |
| Two linesThe line currently selected if you have the 'Two Line service. |
Making and Receiving Calls
The instructions in this chapter assume that you have turned on your phone and that you are within range of a network.
Note! When you are abroad, you may use other networks, provided your home network has an agreement that allows you to do this. See Other Networks, p. 31.
How to Make a Domestic Call
- Enter the area code and phone number. The digits are shown in the display.
To erase a digit press CLR.
To erase all digits, press and hold down CLR until all digits have been erased.
- Press YES to make the call. The display shows Calling, followed by Connecting.
When the call is answered, a Call Time meter at the top of the display shows the elapsed time in minutes and seconds.
If nobody answers your call, the number is busy or you cannot get through, press NO. The number is now stored in a memory which makes it easy to repeat the call. See How to Re-dial Last Number.
How to End a Call
When you want to end the call, press NO and the Call Time meter shows the duration of the call for three seconds.
It is possible to check the duration of the call later on. See The Call Time/Call Cost, p. 48.
How to Re-dial Last Number
To re-dial the last number, recall the last called number from the memory and press YES. The display shows Call? together with the number. Press YES to make the call.
The Automatic Re-dialling Function
If the connection fails and the receiver's network admits it, the display shows Retry?. Press YES to re-dial the number, otherwise NO.
If you press YES the number will automatically be re-dialled until the call is answered but no more than 10 times. If you press any key or you receive a call, the re-dialling is interrupted. If the re-dialling is successful, the phone rings twice to inform you.
How to Make an International Call
- Press and hold down the 0 key until the international character + is displayed. The + will be replaced by the international prefix for the country you are calling from.
- Enter the country code, the area code (without the first zero) and the phone number.
- Press YES to make the call.
How to Make an Emergency Call
- Enter 112 (the international emergency number) and press YES. The display shows Emergency.
Some operators may require that a SIM card has been inserted into the phone, and in some cases that the PIN code has been entered as well.
How to Receive a Call
When you receive a call the phone will ring and the indicator light on top of the phone rapidly blinks green. The display will show Answer?.
-
Press YES to answer the call.
-
When the call is finished, press NO.
Note! The phone must be turned on before a call can be received.
How to Reject a Call
- Press the NO key or the volume key twice to reject an incoming call. The caller will hear a busy tone if the caller's network supports this function.
Unanswered Calls
If you have been unable to answer, the number of unanswered calls will be shown in the display until you press the CLR key.
During a Call
How to Change the Volume
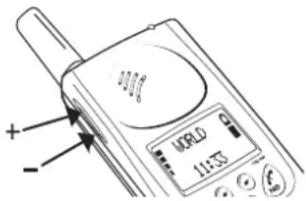
You can use the volume keys to increase or decrease the ear piece volume.
How to Mute the Microphone
- Press and hold down the CLR key. Mute is shown in the display.
- To resume conversation, release the CLR key.
How to Use the Display as a Scratch Pad
You can enter a phone number on the keypad during a call. When you end the call the number remains in the display.
• To call the number press YES.
You can also store the number in the phone book. See The Phone Book, p. 14.
How to Send Tone Signals
You can send DTMF tones by pressing the keys 0-9, * and # in order to perform banking by phone or to control an answering machine. Read more about DTMF tones in DTMF Tones, p. 34.
The Phone's Menus
This chapter describes how to navigate the menu system.
flowchart
graph TD
    A["Standby display"] --> B["Phone book"]
    A --> C["Mail"]
    A --> D["Keylock On?"]
    A --> E["Clock"]
    A --> F["Calculator"]
    A --> G["Settings"]
    A --> H["Access"]
    A --> I["Networks"]
    A --> J["Divert"]
    A --> K["Info"]
    A --> L["Change to Line 2?"]

    B -->|YES| M["Name recall\nPosition recall\nStore\nEdit\nErase\nErase all from phone\nCopy all\nCopy\nAnswered calls\nDialled numbers"]
    C -->|YES| N["*Voice mail\n*Read messages\nCard messages\nSend messages\nMissed calls\nSet VoiceM Area info"]

    D -->|YES| O["Set alarm\nSet clock\nSet date\nClock mode Date mode"]

    E -->|YES| P["Ring level\nEar volume\nRing type\nEditMelody\nMail Alert\nKeylock\nKey sound Light\nMin minder\nCall info\nAnswering mode\nGreeting\nPhone no Language Data menus\nLine 1 tag Master reset"]

    F -->|YES| Q["Barring\nCall Waiting\nLock/Unlock card\nChange\nPIN/PIN2 code\nPhone lock"]

    G -->|YES| R["Select net Searchmode\nEdit list New search"]

    H -->|YES| S["All calls\nOn busy\nNo reply\nUnreachabl Cancel all Check all"]

    I -->|YES| T["Last Call Tot calls"]

    J -->|YES| U["This menu only appears if your network offers the 2 Line service and you have subscribed to it."]
    K -->|YES| V["The Line 1 tag is only available if you have a SIM card with a double subscription."]
    L -->|YES| W["* If Set VoiceM and Area info have been activated."]
The Menus
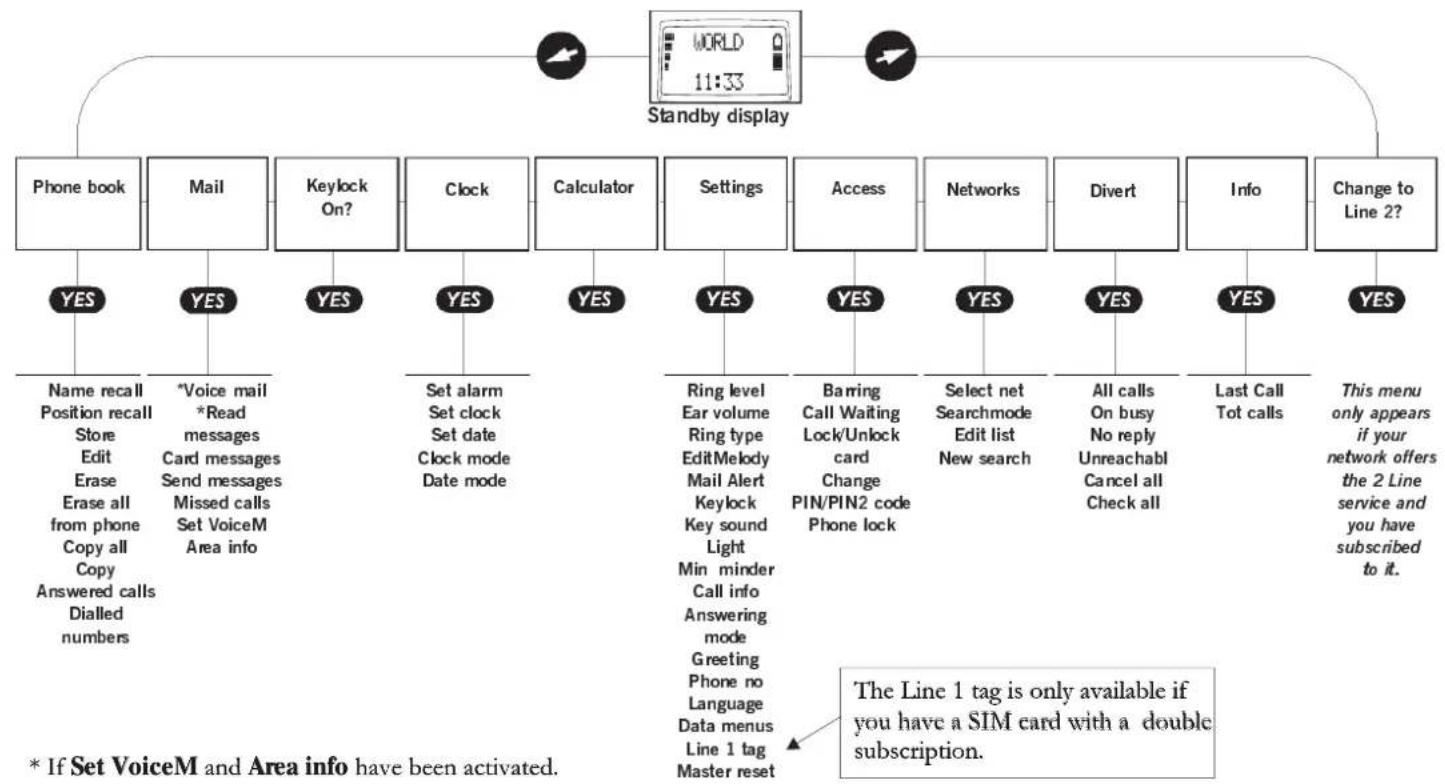
The menus are arranged in a continuous loop. The right and left arrows allow you to access the menu system and then scroll from menu to menu.
When you reach the desired menu, press YES to select it.
Most of the menus have a number of functions. Scroll with the right and left arrows until you reach the desired function. Press YES to select it.
Similarly a function has a number of different settings that you can reach by using the right and left arrows. Press YES to confirm the setting you have chosen.
The NO key allows you to leave a setting unchanged. It can also be used to move back from a function to a menu and from the menu to the standby display.
Use the CLR key to take you back to the standby display.
Note! You will leave the menu system automatically if you do not press any key within 60 seconds or if you receive a call.
Display Texts and Symbols
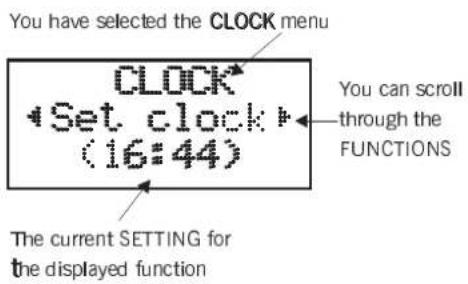
UPPER-CASE letters are used to indicate the menu or function selected. When and are displayed you can scroll with the right and left arrows. Text within brackets indicates the current setting for the displayed function.
How to Enter Letters
With some functions you can enter letters and other characters using the numeric keys.
Press the appropriate key, 1-9, 0 or # repeatedly until the desired letter, character or digit appears in the display. For example, to enter an A, press the numeric key 2 once. To enter a B, press the numeric 2 key twice.
1 Space - ? ! , . : " ' () 1
2 A B C Ä Ä / E à Ç 2 Γ
3 DEFè É 3 Δ φ
4 GH1i4
5 JKL5Λ
6 MNOÑÖ∅ò 6
7 P Q R S B 7 Π Σ
8 TUVÜü 8
9 WXYZ9
0 0 + & @ / \$ % £ Θ Ξ Ψ Ω
# # *
Note! To enter a digit, you can also press and hold down the numeric key.
How to Enter Lower-Case Letters
- Enter the letter, for example an 'A', and then press *. An 'a' appears.
Lower-case letters will now appear until you press * again.
The CHECK and SPECIAL CHARACTERS Menus
If you have entered characters into the display, the SPECIAL CHARACTERS MENU will appear in the display when you enter the menu system by pressing the right arrow. If you have entered more than 20 characters into the display, the CHECK menu appears when you enter the menu system by pressing the right arrow.
EN/LZT 126 1353 R1B 13
How to Check the First Characters
If you enter more than 20 characters (0 - 9 and *, #, + or p) into the display, the first characters will disappear from the display. Instead, a left arrow is shown to the left in the second line, in front of the characters.
Pressing the right arrow takes you to the CHECK menu, which lets you see the first characters you have entered.
If you wish to enter a special character, press the right arrow. To return to the standby display, press the left arrow.
How to Insert Special Characters
If you have entered fewer than 20 characters, pressing the right arrow takes you directly to the SPECIAL CHARACTERS menu.
This menu makes it possible to:
- Insert a pause character (p) to separate the phone number from a code that you wish to send as DTMF tones. See DTMF Tones, p. 34.
- Insert a code that shows your phone number in the receiver's phone display when making a call. See Who Is Calling?, p. 36.
- Insert a code that hides your phone number when making a call. See Who is Calling?, p. 36.
The Phone Book
This chapter describes how you can create a personal phone book by storing phone numbers and accompanying names on the SIM card (card memory) and in the phone (phone memory). The PHONE BOOK menu also includes functions for recalling the last dialled numbers. If you have the CLI (Calling Line Identification) service you can also recall the last answered numbers.
The Card Memory
The memory positions in the card memory are numbered from 1 onwards. The actual number of memory positions available depends on your SIM card.
The Phone Memory
The phone memory can hold up to 99 phone numbers. The memory positions are designated □1 - □ 99.
Note! In the PHONE BOOK menu, press # to enter the ☒ character. Outside the PHONE BOOK menu, you must press and hold down # to enter the ☒ character.
International Numbers
If you intend to use your phone both at home and abroad, you should store all phone numbers as international phone numbers, that is, with the international '+' character and the country code before the area code and the number.
To enter the '+' character, press and hold down 0.
Omit the leading zero in the area code.
The Speed Dialling Facility
The phone numbers that you store in positions 1 – 9 in the card memory can be called by entering the position number and then pressing YES. You should, therefore, save positions 1 – 9 for important numbers.
How to Store a Phone Number – Alt. 1
- Enter the phone number to be stored.
- Press the left arrow, followed by YES to select the PHONE BOOK menu.
- Press YES to select the Store function.
- The first free memory position in the card memory is suggested at the top of the display.
- If you wish to store the phone number in this position without an accompanying name, press YES or continue to the next instruction.
- To enter a name, enter the first letter of the name by pressing the appropriate numeric keys as many times as required. Enter the next letter when the cursor has moved to the next letter position.
• To change between upper-case and lower-case letters, press *.
• To enter a space press 1.
• To enter a hyphen press 1 twice.
• To erase a faulty letter press CLR.
- Use the right and left arrows to insert or erase letters.
- Press YES to store the name and number. If you wish to store the phone number in a different position continue to the next instruction.
-
Press the right arrow twice to move the cursor to the top line of the display. Enter the number of the required memory position and then the right arrow.
-
To enter the number of a memory position on the phone memory, for example 1 , press # to enter the character.
- If you press # twice, the first free memory position in the phone memory appears.
- Press YES to store the name and number on the required position in the phone memory.
How to Store a Phone Number – Alt. 2
Instead of entering the phone number before going to the PHONE BOOK menu, you can select the Store function from the PHONE BOOK menu and then enter the name and phone number.
Overwrite Protection
STORE 10 Used Overwrite?
This message appears if you try to store a phone number in a position which already contains a phone number.
You can then do one of the following:
- Store the number in a different position. Press NO and then the new number of the position.
- Store the number in the selected position, thus erasing the old number. Press YES.
When the Card Memory is Full
If you try to store a phone number when all positions are occupied, a position number in the phone memory will be suggested in the top line of the display.
When Both Memories are Full
If both memories become full, no position number will be suggested.
If you do wish to store the phone number, you have to enter the number of an already occupied position, thus erasing the old number.
How to Recall a Phone Number
Using the Name - Alt. 1
- Clear the display by pressing CLR.
- Press the left arrow followed by YES to select the PHONE BOOK menu.
- Press YES to select the Name recall function.
- Enter one or more letters of the name in the correct order and press YES.
- If the displayed name is not the required one, scroll through the phone book with the right and left arrows until you find the correct name.
- Press YES to call the name or NO to return to standby.
Using the Name - Alt. 2
-
Clear the display by pressing CLR.
-
Press the left arrow followed by a numeric key. For example, to recall a name beginning with 'A', press 2. To recall a name beginning with 'E', press 3 twice.
- If the name displayed is not the required one, scroll with the right and left arrows until you find the correct name.
- Press YES to call the name or NO to return to standby.
Using the Position
-
Clear the display by pressing CLR.
-
Press the left arrow followed by YES to select the PHONE BOOK menu.
-
Press the right arrow and then YES to select the Position recall function.
- To enter a number in the phone memory, for example 1 , press # to enter the character.
- If you entered the wrong position number, scroll through the card or phone memory using the right and left arrows until you find the phone number.
- Press YES to call the number or NO to return to standby.
How to Edit the Phone Book
- Select Edit from the PHONE BOOK menu.
- Enter the position number and press YES.
If you wish to enter the name, press the right arrow. Enter the full name and press YES.
You can now change the position number (in the top line), the name (in the middle line) or the phone number (in the bottom line).
When the cursor is positioned to the right of the characters in a line, you can move the cursor to the next line by pressing the right arrow and then make the changes in that line.
Press CLR (repeatedly) to erase the last character(s) in a line. Then enter the new characters.
You can also move the cursor back with the left arrow and erase characters to the left of the cursor, or insert characters in the cursor's position.
3. When you are finished with the changes, press YES.
How to Erase a Phone Number – Alt. 1
- Select Erase from the PHONE BOOK menu.
- Enter the position number and press YES, or scroll with the right and left arrows until you find the position and number you wish to erase.
- Press YES to erase the number.
How to Erase a Phone Number – Alt. 2
-
Recall the number using Name recall or Position recall.
-
Press and hold down CLR. 'The question 'Erase?' appears.
- Press YES to erase the number.
How to Erase All Phone Numbers
From the Phone Memory
- Select Erase all from phone from the PHONE BOOK menu.
- Press YES to erase all phone numbers.
How to Copy Phone Numbers
From Card Memory to Phone Memory
- Select Copy all from the PHONE BOOK menu.
- Select Card->Phone and press YES.
- Enter the number of the first positions in the card memory you wish to copy and press YES:
- Enter the number of the first position in the phone memory you wish to copy to and press YES.
- Press YES to start the copying.
From Phone Memory to Card Memory
- Select Copy all from the PHONE BOOK menu.
- Scroll to Phone->Card and press YES.
- Enter the number of the first positions in the phone memory you wish to copy and press YES.
-
Enter the number of the first position in the card memory you wish to copy to and press YES.
-
Press YES to start the copying.
From Card Memory to Phone Memory One by One
- Select Copy from the PHONE BOOK menu.
- Select Card->Phone and press YES.
- Enter the number of the first positions in the card memory you wish to copy and press YES:
- Enter the number of the first position in the phone memory you wish to copy to and press YES.
- Press YES to copy. The next position in the card memory is displayed.
Press:
- YES to copy.
- NO or right arrow to go on to the next position in the card memory.
- CLR to copy to another position in the phone memory. Enter the number of the position and press YES.
• CLR twice to interrupt copying.
From Phone Memory to Card Memory One by One
- Select Copy from the PHONE BOOK menu.
- Scroll to Phone->Card and press YES.
To copy from the phone memory to the card memory use the YES, NO, CLR and right and left arrows in the same way as in described in the previous paragraph.
The Answered Calls Memory
If you subscribe to the Calling Line Identification (CLI) service of your network, the numbers of the last 5 answered calls are stored in the phone.
To recall the last answered numbers, see Who Is Calling?, p. 36.
The Dialled Numbers Memory
If your SIM card supports this function and allocates 5 or more positions for last dialled numbers, the last numbers called are stored on the SIM. Otherwise, they are stored in the phone.
How to Recall the Last Dialled Numbers
- Press CLR to erase any digits from the display.
- Press the left arrow, followed by YES to select the PHONE BOOK menu. Then press the left arrow, followed by YES to select the Dialled Numbers function. The number last called is shown.
- Press YES to call the number, or scroll with the right and left arrows until you find the number you wish to call. Then press YES.
Without entering the PHONE BOOK menu
- Clear the display by pressing CLR.
- Press YES. The number last called is shown.
- Press YES to call the number, or scroll with the right and left arrows until you find the number you wish to call. Then press YES.
How to Erase Phone Numbers from the Dialled Numbers Memory
- Select Dialled numbers from the PHONE BOOK menu.
- Press and hold down CLR.
The display will show:
Erase a11?
- Press YES.
Personalizing Your Phone
The SETTINGS menu includes a number of functions which let you adapt your phone to your personal needs in different situations.
The functions in the SETTINGS menu are described in the order in which they appear when you scroll with the right and left arrows.
How to Change the Ring Volume
- Select Ring level from the SETTINGS menu.
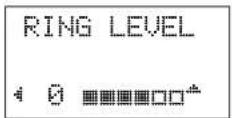
You can set the level of the ringing signal in six steps. The first step means that two clicks will be heard when you receive a call.
You can also turn the ringing signal off (0) or choose a ringing signal that rises in steps from the lowest to the highest level.
- Use the right and left arrows to decrease or increase the level.
If you increase the level with the right arrow you will hear the phone ring.
Note! Use the volume keys at the side of the phone to change the level silently if you do not wish to disturb other people.
If you turn the ringing signal off, all audible signals will also be turned off. You will, however, be informed of an incoming call by the indicator light on the top of the phone and the display.
As a reminder that the ringing signal is turned off, an icon in the shape of a crossed music symbol is shown on the right in the bottom line of the display.
Note! You can have one ring volume setting when the phone is used as a handheld unit and another setting when it is used with any Ericsson handsfree equipment.
How to Change the Ear Piece Volume
- Select Ear volume from the SETTINGS menu.
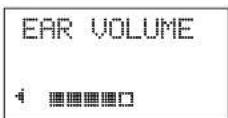
You can use the right and left
arrows or the volume keys at the side of the phone to adjust the volume.
During a call you can use the volume keys at the side of the phone to adjust the volume.
Note! You can have independent volume settings when you use the phone as a handheld unit and when you use it with any Ericsson handsfree equipment.
How to Change the Ring Type
- Select Ring type from the SETTINGS menu.
RING TYPE
4 Medium
You can set the tone of the ringing signal in three steps: low, medium or high. You can also choose a mixed tone or a melody.
If you scroll with the right and left arrows you will hear the various types of ringing signals. If you do not wish to disturb other people, use the volume keys at the side of the phone to scroll silently.
How to Edit a Melody
You can compose you own ring signal. See Composing Your Own Ring Signal, p. 53.
How to Change the Message Signal
- Select Mail alert from the SETTINGS menu.
MAIL ALERT
4 Tone
You can choose whether clicks, tones or nothing (silent) will be heard when you receive a text message (SMS).
How to Select Key Lock
- Select Keylock from the SETTINGS menu.
KEYLOCK
4 Manual
You can choose manual or automatic keypad lock.
In automatic mode the keypad is locked 25 seconds after the last key has been pressed. In manual mode you have to select the KEYLOCK menu to activate the lock.
See Protecting Your SIM card and Phone, p. 23.
How to Select Key Sound
- Select Key sound from the SETTINGS menu.
KEY SOUND
- Click
You can choose whether clicks, tones or nothing (silent) will be heard when you press the keys.
Note: The only sound available for the side keys is the click sound..
How to Change the Display Light
- Select Light from the SETTINGS menu.
LIGHT
- Auto
The display light can be set to automatic, turned off or turned on all the time.
In automatic mode, the display light is turned off automatically 10 seconds after the last key has been pressed. It will be turned on again when a key is pressed or when a call or message is received.
Note! You can have one setting when the phone is used as a handheld unit and another setting when the phone is used together with any Ericsson handsfree equipment.
How to Set the Minute Minder
- Select Min Minder from the SETTINGS menu.
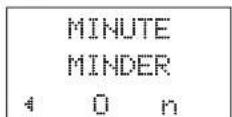
This function gives an indication of the time spent during conversation by entering a short beep every minute.
How to Set Call Information
- Select Call info from the SETTINGS menu.
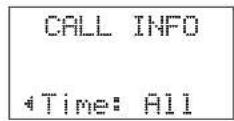
During an outgoing call the call time is shown in the display. The Last Call and Tot Calls functions in the INFO menu let you check the elapsed time of outgoing calls.
With the Call info function you can choose to have the call time display for all calls, both incoming and outgoing.
You can also have the call cost displayed, provided you subscribe to this feature.
How to Select Answering Mode
- Select Answering mode from the SETTINGS menu.
EN/LZT 126 1353 R1B 21
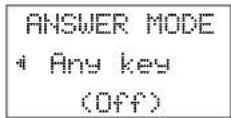
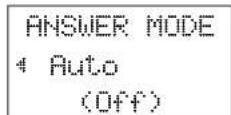
This submenu includes two functions. Any key and Auto which are useful when the phone is used with handsfree equipment.
The Any key function:
If you turn on this function, you can answer an incoming call by pressing any key except the NO key if the phone is used with handsfree equipment.
The Auto function:
If you choose automatic answering mode, an incoming call will be answered automatically after one ring signal if the phone is used with handsfree equipment.
How to Change the Greeting Text
Note! If the greeting text can be retrieved from your SIM card, you cannot change it.
- Select Greeting from the SETTINGS menu.
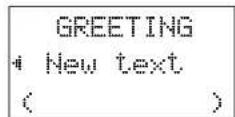
Instead of the greeting 'Welcome', you can have your phone display a welcome greeting that you have chosen yourself.
Enter the greeting text using the numeric keys. See the table in The Phone's Menus, 11.
The Greeting function also lets you turn the greeting text off.
How to Display Your Phone Number
If your phone number cannot be retrieved from your SIM card, you can enter it yourself.
- Select Phone no from the SETTINGS menu.
- Enter the number and press YES.
If your SIM card allows it, you can also enter your fax and/or data number.
How to Change the Display Language
- Select Language from the SETTINGS menu.
- Scroll to the required display language and press YES.
If you select the Auto alternative the display language will be determined by your SIM card.
Note! To reset to English you can enter the sequence *#0000# at any time.
SETTINGS 4 Phone no ( )
SETTINGS Language (English)
How to Change the Name of Two Lines
See The Two Line Service, p. 47.
SETTINGS 4 Line 2 Tas (Line 1)
Note! This feature is only available if you subscribe to the 2 Line service.
How to Activate the Data Menus
- Select Data menus from the SETTINGS menu.
SETTINGS • Data menus (Off)
This function lets you turn on two data menus, the Speech then FAX and Next call type menus. If you are going to use your phone with a Mobile Office Kit and PC these menus should be activated.
How to Reset the Phone
It is possible to reset all menu settings to their default values.
- Select Master reset from the SETTINGS menu.
SETTINGS Master 4 reset
To reset the phone, enter the same security code that is used to turn the phone lock on or off. See Protecting Your SIM Card and Phone, p. 24. The factory programmed security code is 0000.
Protecting Your SIM Card and Phone
The Card Lock
Your SIM card is protected by a card lock which is unlocked with a PIN code. The PIN code is obtained when you purchase your SIM card.
Each time you turn on your phone, the PIN code has to be entered to unlock the card.
If the PIN code is entered incorrectly three times in succession, the SIM card will be blocked. This is indicated by the message Card blocked Unblock?. Should this happen, see Problems You Can Solve, p. 55.
How to Change the PIN Code
-
Select Change PIN code from the ACCESS menu.
-
Enter the old (current) PIN code and press YES.
-
Next, enter the new PIN code and press YES.
-
Finally, at the prompt Repeat new PIN, enter the new PIN for the second time.
The message New PIN confirms that the PIN code has been changed.
If the message WRONG PIN appears in the display and the phone returns to standby mode, your PIN code has not been changed. Your old PIN code was entered incorrectly. Repeat the procedure above.
Note! If the message Matching error appears, the new PIN was entered incorrectly.
How to Change the PIN2 Code
Depending on the network you use, some services require that you enter a second PIN code, the PIN2 code.
- Select Change PIN2 code from the ACCESS menu.
Follow the same procedure as described in How to Change the PIN code.
How to Unlock the SIM Card
Note! This function only applies if your SIM card allows you to deactivate the card lock.
-
Select Unlock card from the ACCESS menu.
-
Press YES.
-
Enter your PIN code and press YES.
The message Unlocked confirms that the card lock is now deactivated.
How to Lock the SIM Card
- Select Lock card from the ACCESS menu.
- Press YES.
- Enter your PIN code and press YES.
The message Locked confirms that the card lock is now activated.
The Phone Lock
The phone lock protects the phone against unauthorised use in the event of theft. It is not activated when you purchase the phone. You should, however, activate the phone lock as soon as possible and also change the factory-programmed security code of 0000 to any 3-to 8-digit personalised code.
Note! If you forget your security code, you need to contact your dealer to unlock your phone. For security reasons, this may take some time.
There are two different types of phone locks - Full lock and Autolock.
Full Lock
If the Full Lock is activated, the message Phone locked is displayed briefly, each time the phone is turned on. The message is
followed by the prompt Enter lock code. The user then has to enter a security code and press YES to be able to use the phone.
Autolock
If the Autolock is activated, the message Phone locked and the prompt Enter lock code will not appear until a new SIM card is inserted into the phone. After the security code has been entered correctly, the phone can be used with the new SIM card. The user will not be asked to enter the security code until the original SIM card or a different SIM card is inserted.
How to Change the Security Code
- Select Phone lock from the ACCESS menu and follow the same procedure as when changing the PIN code.
How to Lock/Unlock the Phone
- Select Phone lock from the ACCESS menu.
The current setting Full lock, Autolock or Unlocked is shown between brackets. - Select the required setting.
- Enter the security code and press YES. PHONE LOCK is displayed together with the new setting.
Call Barring
Note! This service may not be available on all networks or may require a separate subscription.
The Call Barring service of the cellular network allows you to bar different types of outgoing and incoming calls to restrict the use of your phone.
The following calls can be barred:
- All outgoing calls
• All outgoing international calls - All outgoing international calls except to your home country
- All incoming calls
- All incoming calls when you are abroad (when roaming)
To ensure that a call bar is not changed by someone else, a password, which comes with your subscription, is necessary in order to activate or cancel a call bar.
How to Active Call Bars
- Select Barring from the ACCESS menu.
The first barring option is All outgoing calls. To chose another barring option use the right and left arrows to select another option.
- Select the required option and press YES.
- Select Activate, Get status or Cancel. Press YES.
- Enter your password and press YES.
There may be a short delay before the network responds. In the meantime the message Please wait is displayed. This is followed by a message which informs you whether the call bar is activated or not.
Note! If you divert incoming calls (see Diverting Incoming Calls, p. 29.) you cannot activate some barring options. Likewise, if you bar calls, you cannot activate some call divert options.
How to Cancel Call Bars
- Select Barring from the ACCESS menu.
- Select Cancel all and press YES.
The message Please wait appears followed by a message that confirms that all call bars are cancelled.
How to Change the Barring Password
The password for the Barring service comes with your subscription. You can easily change the password as often as you like.
- Select Barring from the ACCESS menu.
- Select the Change password option.
- Enter the old (current) password and press YES.
- Enter the new password and press YES.
- Enter the new password again and press YES.
The message Please wait appears followed by a message that confirms that the password has been changed.
The Keypad Lock
It is possible to lock the keypad so that unintentional key action has no effect if the phone is turned on.
An icon in the shape of a key to the left in the middle of the display informs you that the keypad is locked.
Note! Calls to the international emergency number 112 can be made when the keypad is locked. The phone's alarm can be turned off by pressing any key.
The keypad will remain locked until you:
• Answer an incoming call.
- Replace the battery.
- Unlock the keypad.
How to Lock the Keypad
- Select Keylock from the SETTINGS menu.
- Select Automatic or Manual keylock.
The automatic keylock locks the keypad 25 seconds after the last key has been pressed.
- Press YES.
How to Unlock the Keypad
- Press the left arrow followed by YES to unlock the keypad.
Setting the Time, Date and Alarm
The CLOCK menu lets you set the time and date. It also lets you activate the alarm function.
The Clock
The time is shown continuously at the bottom of the display when the phone is in standby mode.
The hours and minutes can be presented in either the 24-hour format or the 12-hour (a.m./p.m.) format.
How to Change the Time Format
- Select Clock mode from the CLOCK menu.
- Select the required clock mode and press YES.
How to Set the Clock
- Select Set clock from the CLOCK menu.
The right and left arrows can be used to change the hours.
- Enter the time in hours and minutes. Press YES.
If you have selected the 12-hour format in the Clock mode function you can alternate between a.m. and p.m. by pressing * or #.
The Date
It is possible to display the current date in the middle of the display when the phone is in standby mode.
How to Set the Date Format
- Select Date mode from the CLOCK menu.
- Scroll to the required date format by using the right and left arrows.
- Press YES to select a date format.
How to Set the Date
- Select Set date from the CLOCK menu.
- Enter the year (two digits) and press YES.
- Enter the month and the day in the same way. Press YES.
The Alarm
The phone has an alarm function. When it is activated, an icon in the shape of a bell ( ^4 ) is shown in front of the current time in the display.
The alarm will sound at the set time even if the phone is turned off. The illumination of the keys and the display will flash. The strength of the alarm signal depends on the setting of the ring signal.
The alarm will sound for 60 seconds and will be repeated every nine minutes if you do not turn it off. The alarm will automatically turn itself of after approximately one hour.
How to Set the Alarm
- Select Set alarm from the CLOCK menu.
- Scroll to the New time option by using the right and left arrows. Press YES.
- Enter the time in hours and minutes. Press YES.
Note! If you have chosen the 12-hour format in the Clock mode function you can alternate between a.m. and p.m. by pressing * and #.
How to Turn the Alarm Off
- Press any key to turn the alarm off when it sounds.
- Press YES if you do not want the alarm to be repeated.
Alarm
Turn off?
How to Turn the Alarm Function Off
- Select Set alarm from the CLOCK menu.
- Scroll to the Off option by pressing the right and left arrows. Press YES.
Diverting Incoming Calls
If you want to make certain that your incoming calls are taken care of when you are unable to answer them, you can use the Call Divert service of the cellular network to divert them to another phone number.
The Call Divert service lets you:
• Divert calls if you already are engaged in a call.
• Divert calls that you do not answer in 30 seconds.
- Divert calls when you have turned off your phone or you are unreachable.
You may want to use all three call diverts and you may divert calls to different phone numbers, depending on the situation.
You may also divert all calls regardless of whether your phone is turned on or off, or you are unreachable. If this function is activated the phone will not ring if a call is received.
If you have chosen to divert all calls, an arrow ( ÷ ) is shown at the bottom of the display.
Note! If you active the All calls divert, all other diverts will automatically be cancelled. They will, however, be activated again when you cancel the All calls divert.
How to Activate a Call Divert
- Select the DIVERT menu.
The first option in the DIVERT menu is All calls. To select another divert On busy, Unreachable or No reply, scroll with the right and left arrows.
- Select the required divert option. Press YES.
- Press YES to select Activate.
- Enter the phone number to which you want your calls to be diverted, including the area code. Press YES.
If you have used the divert option on an earlier occasion and then cancelled it, the phone number to which the calls were diverted will be suggested. Press CLR if you want to erase this number.
There may be a short delay before the network corresponds. In the meantime, the message Please wait is displayed. This is followed by the message On busy/ All calls/ No reply- Divert ON, depending on which divert option you have chosen. The selected phone number is also displayed.
As a reminder, the display will inform you about any activated call divert each time you turn on the phone.
How to Check the Status of a Call Divert
- Select the required call divert from the DIVERT menu.
- Press YES and scroll to the Get status option.
- Press YES and check the status.
The message Please wait appears followed by either the phone number and Divert On if the call divert is activated, or Divert Off if it is not activated.
How to Check the Status of All Call Diverts
- Select the Check all option from the DIVERT menu.
The message Please wait appears followed by information about all call diverts, whether they are activated or not.
How to Cancel a Call Divert
-
Select the required call divert from the DIVERT menu.
-
Press YES and scroll to the Cancel option.
- Press YES to cancel the divert.
The message Please wait appears followed by a message which informs you that the call divert has been cancelled.
How to Cancel All Call Diverts
- Select Cancel all from the DIVERT menu.
The message Please wait appears followed by a message which informs you that all call diverts have been cancelled.
Other Networks
When you turn on the phone, it normally selects its home network. If the home network is not within range, for example when you are abroad, you may use another network, provided your home network has an agreement that allows you to use the network. This is called roaming.
The NETWORKS menu includes a number of functions which you can use to determine how the phone searches for a network. You may also select a network yourself from those within range.
How to Select Search Mode
Automatic Search Mode
- Select Searchmode from the NETWORKS menu.
- Select Auto - automatic search mode. Press YES.
The phone will first search for its home network. If the home network is not available the phone will search for another available network within range.
The order of preference in which the phone will select a network is determined by a list of preferred networks on your SIM card.
Manual Search Mode
- Select Searchmode from the NETWORKS menu.
- Select Manual. Press YES.
The phone will first search for its home network and then for the network that was used last. If none of these networks are within range, the question Select network? appears.
- To select network, press YES.
How to Select a Network
-
Select Select net from the NETWORKS menu. The message Please wait is displayed briefly.
-
If the home network is within range and you are using it, the name of the network is displayed with the message Current.
- If you are using another network, the name of the home network is displayed with the message Home.
Note! Instead of the full name of a country and a network, an abbreviation is displayed when you use the NETWORKS menu. To see the full name of a network, press *.
- If the home network is not within range, the name of another network is displayed with the message Current, Preferred, Available or Forbidden.
- Current means that the network in your display is the one currently used.
- Preferred means that the name of the network is included in a list of preferred networks on your SIM card.
• Available means that you are enabled to use the network. You may still be rejected. -
Forbidden means that you are not allowed to use the network. You can, however, make emergency calls.
-
If no network is within range, the message No network is displayed.
- If more than one network is within range, the name of the other networks can be displayed by pressing the right arrow.
- When the network you wish to use is displayed, press YES to select it.
How to Start an Automatic Network Search
An automatic network search can be started at any time.
- Select New search form the NETWORKS menu.
Forbidden Networks
The names of the forbidden networks are stored in a list on your SIM card. If such a network is within range, it will be omitted when the phone searches for a network (automatic search mode).
If your home operator and an operator of a forbidden network come to an agreement that allows you to use the forbidden network, you can select this network even though the message Forbidden is displayed.
List of Networks
It is possible to create a list which defines the order of preference in which the phone will select a network during automatic network selection when the home network is not within range.
The numbers of networks that can be stored in the list depends on your SIM card.
The Edit list function lets you review the networks in the list, add networks to the list, delete networks from the list and rearrange the order of the networks.
How to Review the List of Networks
- Select Edit list from the NETWORKS menu.
The message Please wait is displayed briefly.
The name of the first network is displayed. If a network is within range a * i s also displayed.
Note! To see a network's full name, press *.
You can scroll through the other networks in the list by using the right and left arrows.
How to Add a Network to the List
- Select Edit list from the NETWORKS menu.
- Scroll to the first free position in the list. The question Add net? appears.
If you scroll to a position that already is occupied, you must press YES and then scroll with the right and left arrows until Add net? appears. - Press YES and scroll with the right and left arrows until you find the required network.
Note! If the the required network does not appear, press YES when the question Other? appears. Then enter the 3-digit country number and the 2-digit network number.
- Finally, press YES to add the network to the list.
How to Erase a Network from the List
- Select Edit list from the NETWORKS menu.
- Scroll to the network you wish to erase and press YES.
- Scroll until Erase appears.
- Press YES to delete the network from the list.
How to Rearrange the List
- Select Edit list from the NETWORKS menu.
- Scroll to the network you wish to move and press YES. Move is displayed.
- Press YES and enter the new position in the list.
DTMF Tones
You can use your phone to send DTMF (Dual Tone Multi Frequency) tones. This feature can be used for a variety of purposes, such as banking by phone or controlling an answering machine.
Automatic DTMF
You can send DTMF tones during a call. You can send the characters 0 - 9, *, and # as DTMF tones by pressing the corresponding keys.
The DTMF Pause Function
If you wish to send a code, for example your personal access number, it might be helpful to use the pause function. Before you make the call, enter both the phone number and the code, separated by a pause character.
How to Make a Call and Send a Code
- Enter the required phone number.
- Select the SPECIAL CHARACTERS menu by pressing the right arrow. Press YES.
- Enter a pause character by pressing YES or by holding down * . The letter 'p' appears in the display.
-
Enter the code you wish to send. The code can be a combination of the digits 0 - 9 and the characters * and #.
-
Press YES to make the call.
When the call has been connected, the phone number disappears from the display. The code is sent automatically, character by character, after a short delay. The message Sending is displayed while the code is being sent.
How to Use Several Pauses
It is possible to enter several pauses. For example:
Phone no 'p'. Code1 'p' Code2
- When the call has been connected, the code, following the first pause character, will be sent automatically. To send the next code, press YES.
Pre-programmed DTMF Signalling
You can store a code in the phone book in the same way as you store a phone number. The code can be any combination of the characters 0–9, * and #.
The maximum number of characters that you can store in the card memory depends on your SIM card. In the phone memory you can store up to 80 characters.
How to Send a Code - Alt. 1
- Call the required phone number and wait until the call has been connected.
- Recall the code from the phone book.
- Press YES to send the code.
The characters are sent one by one. In the meantime the message Sending is displayed.
How to Send a Code - Alt. 2
It is possible to store both a phone number and a code separated by a pause character in the phone book.
-
Recall the phone number and the code from the phone book.
-
Press YES to make the call.
When the call is connected, the code is sent automatically after 3 seconds.
Who Is Calling?
The Calling Line Identification (CLI) service allows you to see the caller's phone number in the display, giving you a chance to identify the caller. This service may not be available on all networks and may require a separate subscription.
Incoming Calls
When an incoming call is received, the caller's phone number appears in the display. If the caller's name and number is stored in the phone book, the name of the caller will be displayed too.
- Press YES to answer the call or NO to reject it.
Answered Calls
The phone numbers of the last answered calls are stored in the Answered Numbers memory. The number of calls are SIM card dependant.
How to Review Answered Calls
- Select Received calls from the PHONE BOOK menu.
The previous caller's number appears.
- To see the other numbers, scroll with the right arrow.
To call the number in the display, press YES.
How to Erase All Numbers from Dialled Numbers Memory
- Select Dialled numbers from the PHONE BOOK menu.
-
Press and hold down CLR.
-
At the prompt Erase all?, press YES.
How to Erase All Numbers from Answered CallsMemory
- Select Answered calls from the PHONE BOOK menu.
- Press and hold down CLR.
- At the prompt Erase all?, press YES.
Unanswered Calls
The phone numbers of the last 10 unanswered or rejected calls are stored in the Missed Calls memory.
How to Review Unanswered Calls
- Select Missed calls from the MAIL menu.
The previous caller's number appears together with the time the call was received.
If no information about a caller's number was received, the number is replaced by the message Unidentified. If a caller wanted to withhold his or her number, the message reads Restricted.
2. To see the other unanswered calls, scroll with the right arrow.
The day after a call has been received, the time of the call is replaced with the date. You can toggle between date and time by pressing *.
3. Press YES to call the number in the display.
Hiding Your Phone Number
Normally, your phone number will be sent when you make calls. If you do not wish your phone number to be sent on a particular call, the phone number can be hidden with the Hide Id function in the SPECIAL CHARACTERS menu.
Note! This function is operator dependant.
How to Hide Your Phone Number
- Enter the phone number you wish to call.
- Press the right arrow, followed by YES. The SPECIAL CHARACTERS menu appears.
- Scroll to Hide Id with the right arrow.
- Press YES to make the call. A special code is inserted in front of the phone number.
Showing Your Phone Number
If you subscribe to withhold your phone number when making calls, you can use the Send Id function in the SPECIAL CHARACTERS menu to send your phone number on a particular call.
Note! This function is operator dependant.
How to Show Your Phone Number
- Enter the phone number you wish to call.
- Press the right arrow, followed by YES. The SPECIAL CHARACTERS menu appears.
- Scroll to Send Id with the right arrow.
- Press YES to make the call. A special code is inserted in front of the phone number.
Handling More than One Call
The phone allows you to handle more than one call simultaneously. This means that you may hold a call in progress and make or answer a second call and then switch between the two calls.
How to Activate the Call Waiting Service
To be able to receive a second call, you must activate the Call Waiting service.
-
Select Call Waiting from the ACCESS menu.
-
Press YES to activate.
There may be a short delay before the network responds. In the meantime, the message Please wait is displayed. This is followed by the message Call waiting ON.
How to Cancel Call Waiting
-
Select Call Waiting from the ACCESS menu.
-
Scroll to Cancel.
-
Press YES to cancel Call Waiting.
The Get status option lets you check whether the service is activated or not.
How to Make a Second Call – Alt. 1
-
Clear the display by pressing CLR while the first call is in progress.
-
Press YES to put the current call on hold. The message 1 on hold is displayed.
38 EN/LZT 126 1353 R1B
- Enter the number you wish to call, or recall it from the phone book, and press YES.
How to Make a Second Call – Alt. 2
- Enter the number you wish to call while the first call is in progress.
- Press YES to make the call. The message 1 on hold is displayed.
Receiving a Second Call
You will hear a tone in the ear piece and the message Call wait appears in the display if the Call Waiting function is activated.
How to End Current Call and Accept Waiting Call
- Press NO to end the current call.
The question Answer? appears. - Press YES to answer the waiting call.
How to Put Current Call on Hold
- Press YES to put the current call on hold.
The message 1 on hold appears.
How to Reject Waiting Call
- Press '0' followed by YES to reject the waiting call and continue the current call.
The waiting call is cleared. If the caller's network supports it, the caller will hear a busy tone.
Note! If Divert On busy is activated, the waiting call is diverted to the number you have specified.
How to Switch Between Two Calls
- Press YES to switch between the active call and the call on hold.
How to End the Current Call
- Press NO to end the current call.
The message Retrieve held call? appears.
- Press NO to end the held call or press YES to return to the held call.
Note! If you do not press YES or NO within three seconds, the message Retrieve held call? disappears from the display. The held call is ended automatically.
Receiving a Third Call
Provided your Call Waiting function is activated, you may receive a third call when you are engaged in one call and have a second call on hold. You will hear a tone in the ear piece and the message Call Wait appears in the display.
How to Accept the Call
Only one call can be in hold at a time. If you wish to accept the third call you must end one of the existing calls or both.
If you end one of the existing calls:
- Press YES to accept the waiting call.
If you end both calls:
The phone rings and Answer? is displayed.
- Press YES to answer the waiting call.
How to Reject the Call
- Press '0' followed by YES.
The third call is cleared. Provided the caller's network supports this function, the caller will hear a busy tone.
Note! If Divert On busy is activated, the waiting call is diverted to the number you have specified.
How to Connect Two Calls
If you have one active call and one on hold, it is possible to connect the two calls.
- Press '4' followed by YES.
You are now disconnected from both calls.
Conference Calls
The Conference Call service allows you to have a joint conversation with up to five people. You may put an individual or a group of conference members on hold while you add other people to the conference call. You may also put conference members on hold while you talk to someone privately.
The Conference Call service may not be available on all networks.
How to Initiate a Conference Call
- Call the first person you wish to include in the conference call.
- Put this person on hold by pressing YES.
- Call the second person you wish to include in the conference call.
- Press '3', followed by YES to include the two people in the conference.
You can put the conference group on hold and then add a third member by repeating steps 2 and 4.
It is possible to add up to five members using the same method.
How to Have a Private Conversation
If you wish to have a private conversation with one of the members, you can put the other members on hold.
- Press '2' and the number of the member and then YES. For example, to talk to member number 3, press '2' '3' and YES.
How to Release One of the Members
- Press 1, the number of the member and then YES.
For example, to release member number 1, press '1' '1' YES.
How to End a Conference Call
- Press NO to end the conference call.
The Answering Service
The answering service of your network lets your callers leave a voice message when you cannot or do not wish to answer all calls. This service may not be available on all networks and may require a separate subscription.
Voice Mail
The Voice mail function makes it easy to call your answering service to listen to recorded voice messages. Before you can use the Voice mail function it must be activated.
How to Activate the Voice Mail
- Select Set VoiceM from the MAIL menu.
Note! If the number to your answering service can be retrieved from your SIM card, the number is displayed between brackets. (This also applies if you have entered the number yourself at an earlier occasion and then turned the Voice mail function off.)
- Press YES to activate the Voice mail function.
If no number is displayed between the brackets, press YES. - Enter the number.
- Press YES to activate the Voice mail function.
How to Call the Answering Service
You can call the answering service at any time to listen to recorded messages.
- Select Voice mail from the MAIL menu.
Follow the instructions given to you.
Further information about the use of the answering service is found in the operating instructions supplied by your network operator.
How to Change the Number to the Answering Service
- Select Voice mail from the MAIL menu.
- Scroll to New number and press YES.
- Enter the new number and press YES.
How to Turn off the Voice Mail
- Select Voice mail from the MAIL menu.
- Press YES to turn the Voice mail function off.
Sending and Receiving Text Messages
The Short Message Service (SMS) allows you to send and receive text messages. A message may contain up to 160 characters.
Text messages can be received when the phone is in standby mode, when you are engaged in a call or when incoming calls are diverted to another phone number. If the phone is turned off when somebody sends a message to you, a message will be displayed when you turn on the phone.
Note! This function may not be available on all networks.
The Messages Memory
When you receive a text message it can be read at once. However, the message is automatically stored in the Messages memory in the phone which allows you to read it later on.
A letter icon (☑) is shown to the left at the bottom of the display, as a reminder that one or more unread messages have been received.
The messages memory can hold up to 10 messages. When all memory positions are occupied, the oldest read message will be overwritten when a new message is received.
If the Messages memory becomes full with unread messages, new messages will automatically be stored in the SIM card memory. If the SIM card memory becomes full, the letter icon (☐) starts blinking.
Messages will remain in the Messages memory until you erase them or until you insert a different SIM card.
The SIM Card Memory
You can store important messages on your SIM card. This means that you can retrieve them regardless of which phone you are using.
How to Set the Phone for Text Messaging
If the phone number to your network service centre cannot be retrieved from your SIM card, you must specify the number yourself. Otherwise you cannot reply to received messages or send your own messages.
- Select Send messages from the MAIL menu.
- Press YES to select Options.
- Enter the number of the service centre and press YES.
- Press CLR to return to standby mode.
Your phone is now ready to send and receive messages.
Note! In some countries you are only able to send and receive messages within your operator's network.
How to Read a Message
When you receive a message a signal sounds. The indicator light on top of the phone blinks rapidly green.
The display shows:
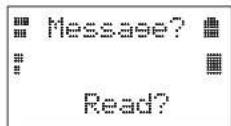
- Press NO if you want to read the message later on.
- Press YES if you want to read the message at once.
The date and sender will appear in the display.
- Press YES to read the message.
- Scroll forward through the message with the right arrow and back through the message with the left arrow.
• To move three lines forward, press '3'.
The message Reply? appears after the last line of the message. If the caller wants you to reply, the displayed message will say Reply Requested, Reply?, provided your network supports this.
How to Reply to a Message
- Press YES to reply to the message.
An empty display appears.
To send your message, proceed as described in How to Send Messages. - Press NO if you do not want to reply.
How to Erase a Message
- Press NO if you do not want to reply to a message.
The message Erase? appears. - Press YES to erase the message from the Messages memory.
EN/LZT 126 1353 R1B 43
You will now automatically come to the next message in the message list.
Note! You can press CLR anywhere within the menu to erase a message. When the message Erase? appears, press YES.
How to Store the Message
- Press NO if you do not wish to erase the message.
The message will remain in the Messages memory.
The message Store? appears.
- Press YES to store the message in the SIM card memory. The message is erased from the Messages memory.
The display will now show the position of the message.
Stored on card 3(5)
For example that it is the third of five messages that can be stored.
- Press NO if you do not want to store the message in the SIM card memory. The message will remain in the Messages memory.
How to Call a Phone Number in a Message
- Press YES to call a phone number found in the display to call the number direct.
After the number has been called, the message is considered read and it remains in the Messages memory.
How to Read Stored Messages
- Select Read messages from the MAIL menu to read messages from the Messages memory. Select Card messages to read messages stored in the SIM card memory.
- Press YES.
- Scroll with the right and left arrows until you find the message you are looking for.
- Press YES.
- Read the message as described in How to Read a Message, p. 42.
How to Send Messages
- Select Send messages from the MAIL menu.
- Press YES.
New appears in the display. - Press YES to enter a new message.
An empty display appears. - Enter your message.
You can backspace with the left arrow and erase characters to the left of the cursor or insert characters in the cursor's position. - Press YES when you have completed your message.
- Press YES if you wish the receiver to reply to the message. Press NO if you do not.
- Enter the receiver's phone number or recall it from the phone book. To access the phone menu, press the left arrow.
- Press YES to send the message now or NO to store the message for later use.
If you decide to send the message later, the message is labelled Written instead of Sent when you access the message.
How to Repeat a Message
Sometimes you may want to repeat a message when the receiver could not be reached. You can instruct you Service Centre to repeat a message for a certain amount of time: 1 hour, 12 hours, 1 day, 1 week or maximum (depending on your operator).
- Select Send messages from the MAIL menu.
- Scroll to Options and press YES.
- Press YES to select the Valid per option.
- Scroll to the desired repeat length and press YES.
How to Change a Message Type
The phone is prepared for sending other types of messages. Your Service Centre of your network may offer the facility to convert a text message into a format (fax, telex, voice, etc.) that suits the receiver of the message.
Consult your Service Centre for further information about the formats you can use.
- Select Send messages from the MAIL menu.
- Scroll to Options and press YES.
- Scroll to the Msg type option and press YES.
- Select the required format and press YES.
Note! Standard stands for an ordinary text message (SMS).
Area Information
The ordinary Short Message Service can be defined as a personal service with messages specifically and exclusively directed to you. The Area Information (AI) is another type of text message which is sent to all subscribers in a certain cell of a network at the same time. The information may be a local road report or a local taxi phone number.
Note! This feature may not be available on all networks.
How to Turn On the Area Information
- Select Area info from the MAIL menu.
- Press YES.
- Scroll to On and press YES.
AI messages will now be presented in your display.
How to Turn the Area Information Off
- Select Area info from the MAIL menu.
- Press YES.
- Scroll to Off and press YES.
Area Information Message Types
Each type of AI message is identified by a three digit code. At present the following message types exists:
Code AI Message Type
000 Index
010 Flashes
020 Hospitals
022 Doctors
024 Pharmacy
030 Long-distance road reports
032 Local road reports
034 Taxis
040 Weather
050 District (base station identity)
052 Network information
054 Operator services
056 Directory enquiries (national)
057 Directory enquiries (international)
058 Customer care (national)
059 Customer care (international)
Refer to the information supplied by your network operator for information about the AI services you can use.
The Area Information Message List
You can decide which types of AI messages you wish to receive. The phone's Area Info list can hold up to 9 codes.
How to Insert an Area Information Code
Provided you have turned on the presentation of AI messages, you can access the Area info list from the MAIL menu.
- Select Area info from the MAIL menu.
- Press YES.
- Scroll to Edit list and press YES.
The digits to the left indicate the position in the list. You can scroll forward and backward through the list with the right and left arrows. - To insert a code, scroll to the first empty location by using the right arrow. Press YES.
- Enter the new code. (You only need to enter 40 for 040, since the phone will add the leading zero automatically.)
How to Erase or Replace a Code
- Select Area info from the MAIL menu.
- Press YES.
-
Scroll to Edit list and press YES.
-
Scroll to the code you wish to erase. Press YES.
-
The message Erase? appears. Press YES.
-
To replace the code press the right arrow, followed by YES.
-
Enter the new code and press YES.
How to Receive Area Information
The last messages received of the type, specified by the code in positions 1 and 2 in the Area info list, are stored in the phone.
You can read the messages with the Area messages function in the mail menu.
- Select Area messages from the MAIL menu.
- Scroll from one message to another with the right and left arrows.
- Press YES to select a message.
The Two Line Service
Two voice lines with different phone numbers, Line1 and Line2, may be assigned to your phone. The ability to receive and send text messages (SMS), is only available on Line1. The Two Line service may not be available on all networks and may require a separate subscription.
How to Select a Line
- Select the menu that allows you to alternate between Line1 and Line2.
- Press YES.
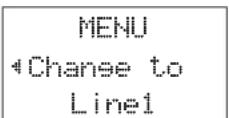
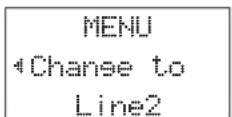
Note! Instead of accessing the menu system, you can press and hold down the 1 or 2 key to change line, provided the phone is in standby mode. Clear the display first by using the CLR key.
The selected line is indicated as L1 or L2 to the left at the bottom of the display.
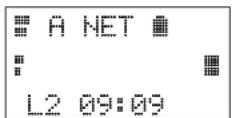
EN/LZT 126 1353 R1B 47
From now on, all outgoing calls are made on the selected line. You can however, be called on both lines.
How to Answer a Call on Line1 or Line2
When someone is calling you, the question Answer? is replaced by Line1 or Line2 depending on which line the call is received.
- If you are engaged in a call on one line, you must end this call first before answering the call on the other line.
Different Settings for Each Line
You can have different settings for each line, for example the tone of the ring signal, call diverts, call bars and waiting function.
The call meters in the INFO menu show the call times (call costs) for the line currently selected.
How to Change the Name of the Two Lines
In the SETTINGS menu there is a function, Line 1 or Line 2, depending on the line currently selected, that lets you give each line a new name. Twelve characters can be entered at the most.
The Call Time/Call Cost
During an outgoing call, the call time is shown in the display.
With the Call info function in the SETTINGS menu you can have the time displayed for all calls, both incoming and outgoing.
You can also have the call cost or the number of call units displayed provided your network and your SIM card support this feature.
How to Check Time or Cost of Last Call
You can check the time/cost of the last incoming (or outgoing) call with the Last call option in the INFO menu.
- Select the INFO menu.
Depending on the setting in the Call info function in the SETTINGS menu, you can check:
• The elapsed time of the last outgoing call.
- The elapsed time of the last incoming call provided you have chosen the Time:All option in the Call info function in the SETTINGS menu.
How to Check Total Call Time or Call Cost
- Select Tot calls from the INFO menu.
Depending on the settings in the Call info function in the SETTINGS menu, you can check:
• The elapsed time of all outgoing calls.
• The elapsed time of all incoming and outgoing calls.
- The cost (or the number of call units) of all incoming and outgoing calls.
How to Reset the Total Call Time/Cost Meter
- Select Tot calls from the INFO menu.
- The message Reset? appears. Press YES to reset the meter.
Note! If you have chosen the call cost option you must enter the PIN2 code to reset the meter.
How to Determine the Call Cost
This function only appears if you have selected the Cost option in the Call info function in the SETTINGS menu.
Note! Your SIM card must allow the call cost to be displayed.
- Select Price from the INFO menu.
The Home option means that the number of call units will be displayed during a call, and in the Last call and Tot calls functions.
The Price function lets you enter and vary the price per call unit. The price entered will be stored on your SIM card.
How to Enter the Price per Call Unit
- Select Price from the INFO menu.
- Press YES to select the Home option.
-
Press YES to select New price.
-
Enter the new currency with the numeric keys, for example GBP for Pounds Sterling, and press YES.
- Enter the price per call unit, for example 0.25, and press YES. To enter the decimal points, press * or #.
- Enter the PIN2 code and press YES.
How to Revert to Displaying Call Units
- Select Price from the INFO menu.
- Press YES to select the Home option.
- Press YES to revert to displaying call units.
How to Set a Credit Limit for Calls
Provided both your network and your SIM card support this feature, you can enter a total amount of money that can be used for making calls. After a call has been made, the call's cost will be deducted from this amount. When the amount has reached zero, no more calls can be made.
- Select Credit from the INFO menu.
- Press YES to select New credit.
- Enter the amount, for example 30 pounds, and press YES.
- Enter the PIN2 code and press YES.
Fixed Dialling
The Fixed Dialling function allows calls to be made only to fixed numbers stored on the SIM card. If an attempt is made to call other numbers, the message Number not permitted appears in the display.
It is possible to store partial numbers, for example an area code or an area code followed by the first digits common to several numbers. Storing 0123456 allows calls to be made to 012345600 and 012345625. Here you only need to add the last two digits.
Also numbers beginning with the international + character and country code can be stored, allowing calls to be made from abroad.
Numbers including question marks can be stored. For example, storing 0123456?0 allows calls to be made to 0123456701 and 0123456790. To enter a question mark, hold down #.
The Fixed Dialling function does not prohibit calls to the international emergency number 112 and the Service Centre of the cellular network. Network services such as Call Divert and Call Barring cannot be used.
The maximum fixed numbers that can be stored depends on your SIM card.
How to Activate Fixed Dialling
- Select Fixed dial from the ACCESS menu.
- Enter the PIN2 code and press YES.
- Scroll to On with the right and left arrows and press YES.
50 EN/LZT 126 1353 R1B
How to Cancel Fixed Dialling
- Select Fixed dial from the ACCESS menu.
- Enter the PIN2 code and press YES.
- Scroll to Off with the right arrow and press YES.
How to Store Fixed Numbers
- Select Fixed numbers form the PHONE BOOK menu.
- Scroll to Store with the right and left arrows and press YES.
- Enter the PIN2 code and press YES.
- Enter the name (optional) and the fixed number in the same way as when storing an ordinary phone number.
How to Edit a Stored Number
- Select Fixed numbers form the PHONE BOOK menu.
- Scroll to Edit with the right and left arrows and press YES.
After you have entered the PIN2 code you can change the position number, the name or the fixed number in the same way as you can for an ordinary phone number.
Data Menus
The phone can be used with the Ericsson Mobile Office kit. This links the phone to a desktop or laptop PC, allowing you to use data communication and fax services from the PC.
The Data menus function in the SETTINGS menu lets you activate two data menus.
SETTINGS 4 Data menus (On)
These data menus, SPEECH THEN FAX and NEXT CALL TYPE, must be activated if you have the same number for all types of calls to your mobile phone. This is called single numbering.
MENU Speech • then FAX
Menu Next 4 call type
If you have different numbers for speech, fax and data communication to your mobile phone the data menus do not have to be activated. This is called multi numbering.
The menu SPEECH THEN FAX will appear before the INFO menu when you scroll with the right and left arrows. The menu NEXT CALL TYPE will appear after the INFO menu.
See the User's manual for the Mobile Office kit for further information about the use of the two menus.
If you wish to divert incoming calls, you can divert phone calls, fax calls and data calls to different numbers in the DIVERT menu.
You can set different ring signals for incoming phone, fax and data calls in the Ring type function in the SETTINGS menu.
The Calculator
The phone's built-in calculator supports the four fundamental rules of arithmetic and percentages.
How to Use the Calculator
In this example we are going to divide 134 by 32.
- Scroll to the CALCULATOR menu and press YES.
- Enter 134.
-
Scroll with the right and left arrows to the division sign (/), and press YES.
-
Enter 32.
- Scroll with the right and left arrows to the equal sign (=) or press #.
- Press YES to get the result.
How to Enter a Decimal Point
Press * to get a decimal point.
Note! Press * twice to multiply.
Composing Your Own Ring Signal
The Phone's Note System
Your phone has the capability of handling a range of tones spreading over two octaves. See the table below to understand the relationship between the notes and the numeric keys on the telephone.
How to Enter a Simple Melody
The simple melody is Do-Re-Me. This song corresponds to the C, D and E notes on a music scale.
- Select EditMelody from the SETTINGS menu.
-
Clear the display by pressing CLR.
-
Press 1. The display will now show a c.
- Press 2. The display will now show c and d.
- Press 3. The display should now look like this.
EDITMELODY
CQE...
- Press YES to test the melody.
The phone plays the melody and asks you if you want to save it. - Press YES to save the melody as an alternative in the Ring type function in the SETTINGS menu.
| Press this: To: | |
| 1-9 | Insert notes. To get a short note press the key for a short time. To get a long tone, hold down the key. |
| # | Increase or decrease the pitch of the note to the left of the cursor in half tone steps. Press once for sharp, twice for flat and three times for normal pitch. |
| * Insert a short pause. | |
| The arrows | Scroll within the melody. Press and hold down to go the beginning or end of the melody. |
| 0 | Get a higher or a lower octave for the note you have inserted. A + in front of the note indicates a higher octave. |
| CLR | Erase the note to the left of the cursor. Press and hold down to erase the whole melody. |
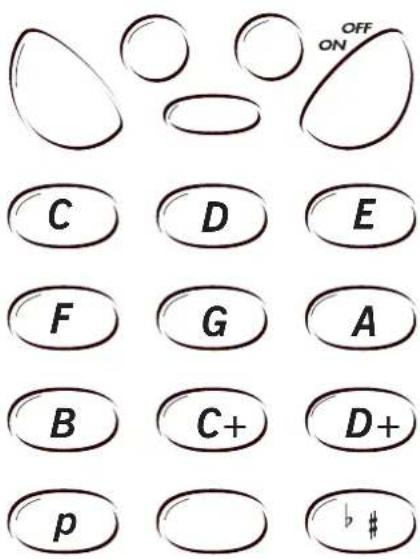
Problems You Can Solve
This chapter lists some simple things you should check before calling for service personnel. This could save you the cost of unnecessary service.
The Phone Does Not Come On
Handheld phone:
The battery may have to be charged or replaced.
Handsfree phone in vehicle:
Ensure that the phone is properly inserted in its holder.
Check the fuse. The fuse holder is fitted to the battery cable, near the vehicle's battery.
Wrong PIN or PIN2 Has Been Entered
Enter the correct PIN or PIN2, and press YES.
The SIM Card Has Been Blocked
If the PIN code has been entered incorrectly three times in succession the card will be blocked. The following message will appear:
PIN blocked Unblock?
EN/LZT 126 1353 R1B 55
- Press YES to unblock the SIM card.
Enter PUK to unblock
- Enter your personal unblocking key (PUK) and press YES.
The PUK is obtained from your network operator or service provider when you purchase your SIM card. - Enter a new PIN code and press YES.
You can of course also enter the PIN code you used previously.
If you have entered both the unblocking key and the PIN code correctly, the message New PIN appears.
Note! If the PUK is entered incorrectly 10 times in succession the SIM card will be permanently blocked. You need to contact your network operator or service provider.
The PIN2 Code
The procedure outlined above also applies to the PIN2 code. Use the PUK2 to unlock the code. The PUK2 code is obtained from your network operator or service provider.
Index
A
Alarm 27
How to set 28
How to turn off 28
Answered calls
How to erase 36
How to review 36
Answered calls memory 18
Answering mode
How to select 21
Answering service
How to call 41
Area information 45
How to receive 46
How to turn off 45
How to turn on 45
Message list 46
Message types 45
Area information code
How to erase 46
How to insert 46
How to replace 46
Autolock 24
B
Barring password
How to change 25
Battery 2
How to attach 3
How to charge 3
How to remove 3
The low battery alarm 4
C
Calculator
How to use 52
Call
How to end 8
How to make a domestic call 8
How to make an emergency call 9
How to make an international call 8
How to receive 9
How to reject 9
Put on hold 38
Call activate
How to cancel 38
Call barring 24
Call bars
How to activate 25
How to cancel 25
Call cost
How to determine 48
Call divert
How to activate 29
How to cancel 30
Call divert status
How to check 29
How to check all 30
Call diverts
How to cancel all 30
Call information
How to set 21
Call waiting
How to activate 38
CLI service
Calling Line Identification 36
Calls
How to connect two 39
How to switch
between two 39
Receiving a third 39
Card lock
Card memory
When full 15
Card Memory
Charger
How to connect 3
How to disconnect 3
Clock 27
How to set 27
Conference call
How to initiate 40
Cost of last call
How to check 48
Credit limit for calls
How to set 49
D
Data 51
Data menus
How to activate 22
Date 27
How to set 27
Date format
How to set 27
Dialled numbers memory 18
How to erase
phone numbers 18
Display 5
Display language 5
How to use as
scratch pad 10
Indicators 7
Time 5
Display call units
How to 49
Display language
How to change 22
Display light
How to change 20
Divert calls 29
DTMF
Automatic 34
How to send
code during call 34
How to use
several pauses 34
Pause function 34
Pre-programmed
signalling 34
DTMF tones 34
E
Ear piece volume
How to change 19
F
First characters
How to check 13
Fixed dialling 50
How to activate 50
How to cancel 50
Fixed numbers
How to store 50
G
Greeting text
How to change 21
K
Key sound
How to select 20
Keylock
How to select 20
Keypad
How to lock 26
How to unlock 26
Key functions 6
Keypad lock 26
L
Last dialled numbers
How to recall 18
Letter
How to enter lower-case 13
Letters
How to enter 12
Line
How to select 47
Line1/Line2
How to answer a call 47
Lines
Different settings 47
M
Melody
How to enter 53
Menus
How to navigate 12
Message
How to read 42
How to repeat 44
How to reply 43
How to store 43
Message signal
How to change 20
Message type
How to change 44
Messages
How to send 44
Messages memory 42
Minute minder
How to set 21
N
Network
Automatic search mode 31
Available 32
Current 31
Forbidden 32
How to select
search mode 31
Manual search mode 31
No network
can be found 5
Preferred 31
Network
How to select 31
Network list
How to add network 32
How to erase network 33
How to rearrange 33
How to review 32
Network search
How to start automatic 32
Networks
List of 32
Other 31
Note system 53
P
Phone
How to reset 22
Phone
How to lock 24
How to turn off 5
How to turn on 5
How to unlock 24
Phone book 14
How to edit 16
Phone Book
International numbers 14
Phone lock 24
Phone memory 14
Phone number
How to display 22
How to erase
How to hide 37
How to recall 15
How to show 37
How to store 15
Phone number in message
How to call 43
Phone numbers
How to copy 17
How to erase all 17
How to store 14
PIN code 2
How to change 23
How to enter 5
Wrong 55
PIN2 code
How to change 23
Wrong 55
Pre-programmed
DTMI signalling
How to send code 35
Price per call unit
How to enter 48
R
Rc-dial 8
Automatic re-dial 8
Ring signal
Compose your own 53
Ring type
How to change 20
Ring volume
How to change 19
S
Second call
How to make 38
How to receive 38
Security code
How to change 24
SIM card 2
Blocked 55
How to insert 2
How to lock 23
How to unlock 23
SIM card memory 42
Special characters
How to insert 13
Speed dialling 14
Stored messages
How to read 44
Stored numbers
How to edit 50
T
Text messaging
How to set the phone 42
Time format
How to change 27
Time of last call
How to check 48
Tone signals
How to send 10
Total call cost
How to check 48
Total call time
How to check 48
Total call time/cost meter
How to reset 48
Two line service 47
Two lines
How to change the name 47
Two Lines
How to change the name 22
U
Unanswered calls 9
How to review 36
V
Voice mail
How to activate 41
How to turn off 41
Volume
How to change 10
How to mute 10
W
Waiting call
How to accept 38
How to reject 38
- Congratulations...
- Table of Contents
- Guidelines for Safe and
- Preparing Your Phone for Use ..... 2
- Turning On the Phone ..... 5
- The Keypad and Display....6
- Making and Receiving Calls. . . . . 8
- During a Call. 10
- The Phone's Menus ..... 1 1
- The Phone Book. 14
- Personalizing Your Phone ..... 1 9
- Protecting Your SIM
- Card and Phone 23
- Guidelines for Safe and Efficient Use
- General
- Exposure to Radio Frequency Energy
- Efficient Phone Operation
- Antenna Care and Replacement
- Driving
- Electronic Devices
- Aircraft
- Power Supply
- Children
- Blasting Areas
- Potentially Explosive Atmospheres
- Product Care
- CE
- Cellular Phones and Accessories in Combination:
- Accessories Without Direct Connection to a Cellular Phone:
- Preparing Your Phone for Use
- The SIM Card
- How to Insert the SIM Card
- The Battery
- How to Attach the Battery to the Phone
- How to Remove the Battery
- How to Charge the Battery
- How to Disconnect the Charger
- The Low Battery Alarm
- Turning On the Phone
- When No Network is Displayed
- The Display Language
- The Time
- How to Turn off the Phone
- The Keypad and Display
- Key Functions
- YES
- ON/OFF
- NO
- Left and right arrow keys
- CLR (Clear)
- Numeric keys
- Star
- Hash
- Volume keys
- Indicators in the Display
- Making and Receiving Calls
- How to Make a Domestic Call
- How to End a Call
- How to Re-dial Last Number
- The Automatic Re-dialling Function
- How to Make an International Call
- How to Make an Emergency Call
- How to Receive a Call
- How to Reject a Call
- Unanswered Calls
- During a Call
- How to Change the Volume
- How to Mute the Microphone
- How to Use the Display as a Scratch Pad
- How to Send Tone Signals
- The Phone's Menus
- The Menus
- Display Texts and Symbols
- How to Enter Letters
- How to Enter Lower-Case Letters
- The CHECK and SPECIAL CHARACTERS Menus
- How to Check the First Characters
- How to Insert Special Characters
- The Phone Book
- The Card Memory
- The Phone Memory
- International Numbers
- The Speed Dialling Facility
- How to Store a Phone Number – Alt. 1
- How to Store a Phone Number – Alt. 2
- Overwrite Protection
- When the Card Memory is Full
- When Both Memories are Full
- How to Recall a Phone Number
- Using the Name - Alt. 1
- Using the Name - Alt. 2
- Using the Position
- How to Edit the Phone Book
- How to Erase a Phone Number – Alt. 1
- How to Erase a Phone Number – Alt. 2
- How to Erase All Phone Numbers
- From the Phone Memory
- How to Copy Phone Numbers
- From Card Memory to Phone Memory
- From Phone Memory to Card Memory
- From Card Memory to Phone Memory One by One
- From Phone Memory to Card Memory One by One
- The Answered Calls Memory
- The Dialled Numbers Memory
- How to Recall the Last Dialled Numbers
- Without entering the PHONE BOOK menu
- How to Erase Phone Numbers from the Dialled Numbers Memory
- Personalizing Your Phone
- How to Change the Ring Volume
- How to Change the Ear Piece Volume
- How to Change the Ring Type
- How to Edit a Melody
- How to Change the Message Signal
- How to Select Key Lock
- How to Select Key Sound
- How to Change the Display Light
- How to Set the Minute Minder
- How to Set Call Information
- How to Select Answering Mode
- The Any key function:
- The Auto function:
- How to Change the Greeting Text
- How to Display Your Phone Number
- How to Change the Display Language
- How to Change the Name of Two Lines
- How to Activate the Data Menus
- How to Reset the Phone
- Protecting Your SIM Card and Phone
- The Card Lock
- How to Change the PIN Code
- How to Change the PIN2 Code
- How to Unlock the SIM Card
- How to Lock the SIM Card
- The Phone Lock
- Full Lock
- Autolock
- How to Change the Security Code
- How to Lock/Unlock the Phone
- Call Barring
- How to Active Call Bars
- How to Cancel Call Bars
- How to Change the Barring Password
- The Keypad Lock
- How to Lock the Keypad
- How to Unlock the Keypad
- Setting the Time, Date and Alarm
- The Clock
- How to Change the Time Format
- How to Set the Clock
- The Date
- How to Set the Date Format
- How to Set the Date
- The Alarm
- How to Set the Alarm
- How to Turn the Alarm Off
- How to Turn the Alarm Function Off
- Diverting Incoming Calls
- How to Activate a Call Divert
- How to Check the Status of a Call Divert
- How to Check the Status of All Call Diverts
- How to Cancel a Call Divert
- How to Cancel All Call Diverts
- Other Networks
- How to Select Search Mode
- Automatic Search Mode
- Manual Search Mode
- How to Select a Network
- How to Start an Automatic Network Search
- Forbidden Networks
- List of Networks
- How to Review the List of Networks
- How to Add a Network to the List
- How to Erase a Network from the List
- How to Rearrange the List
- DTMF Tones
- Automatic DTMF
- The DTMF Pause Function
- How to Make a Call and Send a Code
- How to Use Several Pauses
- Pre-programmed DTMF Signalling
- How to Send a Code - Alt. 1
- How to Send a Code - Alt. 2
- Who Is Calling?
- Incoming Calls
- Answered Calls
- How to Review Answered Calls
- How to Erase All Numbers from Dialled Numbers Memory
- How to Erase All Numbers from Answered CallsMemory
- How to Review Unanswered Calls
- Hiding Your Phone Number
- How to Hide Your Phone Number
- Showing Your Phone Number
- How to Show Your Phone Number
- Handling More than One Call
- How to Activate the Call Waiting Service
- How to Cancel Call Waiting
- How to Make a Second Call – Alt. 1
- How to Make a Second Call – Alt. 2
- Receiving a Second Call
- How to End Current Call and Accept Waiting Call
- How to Put Current Call on Hold
- How to Reject Waiting Call
- How to Switch Between Two Calls
- How to End the Current Call
- Receiving a Third Call
- How to Accept the Call
- How to Reject the Call
- How to Connect Two Calls
- Conference Calls
- How to Initiate a Conference Call
- How to Have a Private Conversation
- How to Release One of the Members
- How to End a Conference Call
- The Answering Service
- Voice Mail
- How to Activate the Voice Mail
- How to Call the Answering Service
- How to Change the Number to the Answering Service
- How to Turn off the Voice Mail
- Sending and Receiving Text Messages
- The Messages Memory
- The SIM Card Memory
- How to Set the Phone for Text Messaging
- How to Read a Message
- How to Reply to a Message
- How to Erase a Message
- How to Store the Message
- How to Call a Phone Number in a Message
- How to Read Stored Messages
- How to Send Messages
- How to Repeat a Message
- How to Change a Message Type
- Area Information
- How to Turn On the Area Information
- How to Turn the Area Information Off
- Area Information Message Types
- Code AI Message Type
- The Area Information Message List
- How to Insert an Area Information Code
- How to Erase or Replace a Code
- How to Receive Area Information
- The Two Line Service
- How to Select a Line
- How to Answer a Call on Line1 or Line2
- Different Settings for Each Line
- How to Change the Name of the Two Lines
- The Call Time/Call Cost
- How to Check Time or Cost of Last Call
- How to Check Total Call Time or Call Cost
- How to Reset the Total Call Time/Cost Meter
- How to Determine the Call Cost
- How to Enter the Price per Call Unit
- How to Revert to Displaying Call Units
- How to Set a Credit Limit for Calls
- Fixed Dialling
- How to Activate Fixed Dialling
- How to Cancel Fixed Dialling
- How to Store Fixed Numbers
- How to Edit a Stored Number
- Data Menus
- The Calculator
- How to Use the Calculator
- How to Enter a Decimal Point
- Composing Your Own Ring Signal
- The Phone's Note System
- How to Enter a Simple Melody
- Problems You Can Solve
- The Phone Does Not Come On
- Handheld phone:
- Handsfree phone in vehicle:
- Wrong PIN or PIN2 Has Been Entered
- The SIM Card Has Been Blocked
- The PIN2 Code
- Index
- A
- B
- C
- D
- E
- F
- G
- K
- L
- M
- N
- P
- R
- S
- T
- U
- V
- W
Brand : ERICSSON
Model : GH688
Category : Mobile Phone