
T39 - Mobile Phone ERICSSON - Free user manual and instructions
Find the device manual for free T39 ERICSSON in PDF.


| Product Type | Mobile Phone |
| Brand | Ericsson |
| Model | T39 |
| Form Factor | Candybar |
| Dimensions (H x W x D) | 96 x 50 x 18 mm |
| Weight | 86 g |
| Battery Type | Li-Ion 600 mAh |
| Standby Time | Up to 200 hours |
| Talk Time | Up to 8 hours |
| Network Support | GSM 900 / 1800 / 1900 (Tri-band) |
| Display Type | Monochrome graphic, 4-level grayscale |
| Display Size | 101 x 54 pixels |
| Backlight | Blue |
| Wireless Connectivity | Bluetooth, Infrared |
| Data Services | WAP 1.2.1, CSD |
| Messaging | SMS, EMS |
| Phonebook | 500 entries with multiple numbers |
| Internal Memory | 1 MB shared |
| Polyphonic Ringtones | No (monophonic) |
| Vibration | Yes |
| Other Features | Alarm, Calculator, Timer, Stopwatch |
Frequently Asked Questions - T39 ERICSSON
User questions about T39 ERICSSON
0 question about this device. Answer the ones you know or ask your own.
Ask a new question about this device
Download the instructions for your Mobile Phone in PDF format for free! Find your manual T39 - ERICSSON and take your electronic device back in hand. On this page are published all the documents necessary for the use of your device. T39 by ERICSSON.
USER MANUAL T39 ERICSSON
Preparing Your Phone 6
Assembly 7
SIM Card 7
Battery 7
The Clip 10
Making Calls 11
Turning Your Phone On 11
Making a Call 11
Receiving a Call 14
Turning Your Phone Off .... 14
During a Call 15
Earpiece Volume 15
Microphone....15
Notepad.... 15
Sending Touch Tone Signals.....15
Ciphering 16
Key Functions 17
Menus 18
Moving through the Menus .....18
Instructions 18
Display Text 19
Help Texts 20
Menu Language ......20
My Shortcuts 20
Personalizing
Your Phone 22
Sounds 22
Pictures 25
Display....27
Time and Date 28
Flip settings 29
Master Reset 29
Entering Letters 30
Input Languages ....30
Multitap Text Input....30
T9 ^® Text Input 31
Phone Book
Saving Contacts 34
Calling a Contact 35
Editing the Phone Book ....36
Copy to and from the SIM Card .. 37
Business Cards......37
Groups 39
Touch Tone Services ....40
Checking the Memory ....40
Text Messages 41
Before Sending Messages......41
Sending Messages....43
Status Report...... 45
Receiving Messages ....45
List of Options ......46
Area Information ....48
Bluetooth™
Wireless Technology 49
Before You Start....49
Operation Modes ....51
Searching for Devices.... 52
Sending and Receiving 52
Infrared Port 54
Activating the IR Port....54
Connecting IR Devices....55
Calendar 56
Appointments and Tasks ....56
Viewing Your Calendar.... 57
Editing and Deleting....58
The List of Options....58
Calendar Settings....59
Exchanging Calendar Entries .....59
Synchronization 61
Starting the Synchronization ..... 61
Internet Calendar Synchronization62
Setting up WAP
and E-mail
Data Account Settings ......63
WAP Profile Settings.... 65
E-mail Account Settings ....67
WAP 69
Starting the WAP Browser......69
Exiting the WAP Browser .....69
Options When Browsing....70
Additional WAP Options......70
Security 71
WAP Push Messages ....73
E-mail 74
Sending and Receiving ....74
Writing and Sending ....74
Attaching Pictures....75
Receiving and Reading .....75
Replying....76
Deleting....76
Archiving 76
Data Calls 77
Making Data Calls ......77
Receiving Data Calls....77
Sending and Receiving E-mail from
Your PC 78
Profiles 79
Selecting a Profile 79
Changing the Profile Settings .....80
Accessories 80
Voice Control 82
Before Voice Dialling 82
Voice Dialling....83
Voice Answering ....83
Changing Profiles....84
Recording Voice Memos .....84
The Magic Word 85
Editing Your Voice Commands...85
Voice Memo 87
Recording Voice Memos .....87
Listening to Voice Memos......87
Editing Voice Memos ....88
Recording Quality 88
Settings......88
Voice Mail Service 89
Calling Your Voice Mail .....89
Message Alert Signal 89
Diverting Calls 90
Activating Divert Calls ......90
Cancelling Divert Calls....90
Checking Divert Status .....91
More than One Call 92
Call Waiting Service 92
Making a Second Call....92
Receiving a Second Call .....93
Handling Two Calls ......93
Receiving a Third Call 94
Conference Calls....94
Call Time and Call Cost 96
Checking the Time or Cost .....96
Setting the Call Cost 96
Credit Limit for Calls....97
Minute Minder 97
Networks 98
Searching for Networks .....98
Preferred Networks .....99
Search Modes....100
Security 101
Locking the SIM Card .....101
Locking the Phone 102
Restricting Calls....102
Fixed Dialling 103
Closed User Groups .....104
Accepting Calls....104
Code Memo 106
Checkword and Security .....106
Using Code Memo ......106
Deleting and Editing Codes .....107
Changing the Password....107
Forgot Your Password?......107
Two Voice Lines 108
Changing the Name......108
Changing Lines .....108
Locking One Line ....108
Calling Card Calls 110
Calling Card Service ....110
Saving Calling Card Numbers ...110
Choosing a Card ....111
Making a Calling Card Call.....111
Games 112
Tennis 112
Erix 113
Tools 114
Alarm Clock 114
Stopwatch 115
Timer 115
Calculator 116
Online Services 117
Ericsson
Mobile Internet 118
Troubleshooting 119
Error Messages ......119
Other Problems.... 120
Technical Data 121
Safe and Efficient Use 124
Limited Warranty 131
Regulatory Information 134
Icons 136
Quick Keys 140
Index 143
Ericsson T39
First edition (March 2001)
This User's Guide is published by Ericsson Mobile Communications AB, without any warranty. Improvements and changes to this User's Guide necessitated by typographical errors, inaccuracies of current information, or improvements to programs and/or equipment, may be made by Ericsson Mobile Communications AB at any time and without notice. Such changes will, however, be incorporated into new editions of this User's Guide.
All rights reserved.
©Ericsson Mobile Communications AB, 2001
Publication number: EN/LZT 108 4560 R1A
INNOVATRON PATENTS
Please note:
Some of the services described in this User's Guide are not supported by all networks. Such services are indicated by an icon in the left margin.
This also applies to the GSM International Emergency Numbers.
Please contact your network operator or service provider if you are in doubt whether you can use a particular service or not.
Please read the Safe and Efficient Use and the Warranty chapters before using your mobile phone.
The BLUETOOTH trademarks are owned by Telefonaktiebolaget L M Ericsson, Sweden.
T9 is a registered trademark of Tegic Communications.
T9 is licensed under one or more of the following: U.S. Pat. Nos. 5,818,437, 5,953,541, 5,187,480, 5,945,928, and 6,011,554; Canadian Pat. No.1,331,057;
United Kingdom Pat. No. 2238414B; Hong Kong Standard Pat. No.
HK0940329; Republic of Singapore Pat. No. 51383; Euro. Pat. No. 0 842 463(96927260.8) DE/DK, FI, FR, IT, NL, PT, ES, SE, GB; and additional patents are pending worldwide.

T39
T39 is a Triple Band mobile phone operating on GSM 900/1800/1900 networks. Its advanced functionality offers you a host of new and interesting features ensuring you remain efficient and productive, no matter where you are.
T39 supports GPRS (General Packet Radio Services), which are designed to keep you always online and facilitate rapid transmission of data – ideal when using E-mail or the WAP browser. Speed of data transmission is further enhanced by its High Speed Data functionality.
Advanced wireless connectivity is guaranteed with Bluetooth wireless technology that lets you connect with other Bluetooth devices such as a headset, PC, PDA or printer. For example, you can exchange business cards and synchronize your Calendar using Bluetooth wireless technology.
T39 contains many timesaving functions that are helpful and fun to use. T9 Text Input lets you write text messages quickly which can be enhanced with both music and pictures. Contacts in the phone book lets you save multiple numbers and voice commands for each person and Voice control enables complete handsfree communication, using the Magic word.
Preparing Your Phone
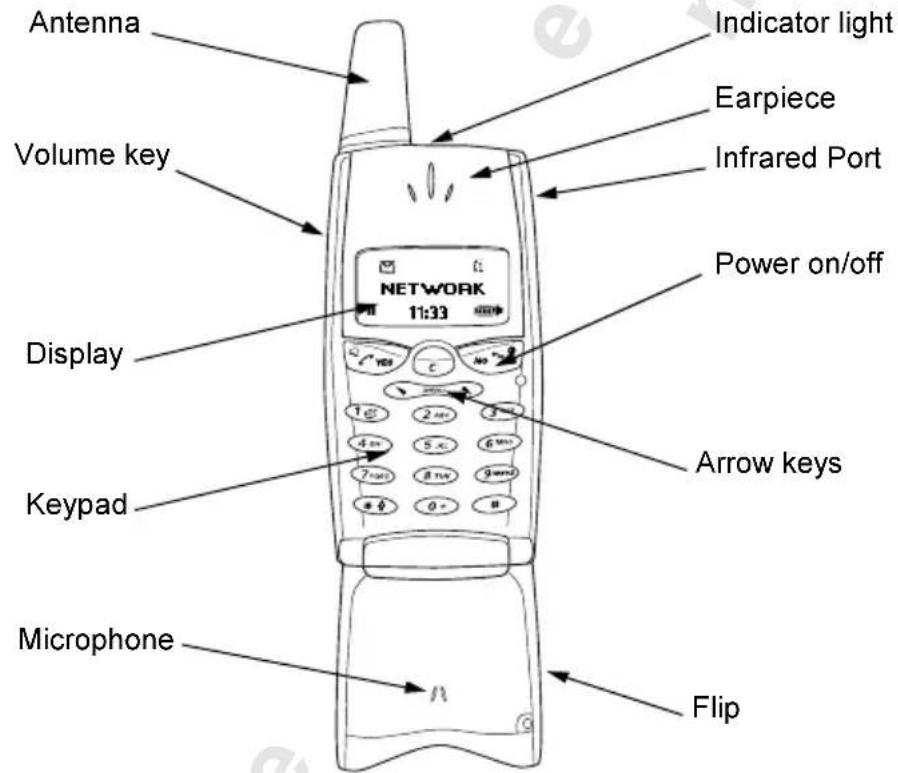
Front
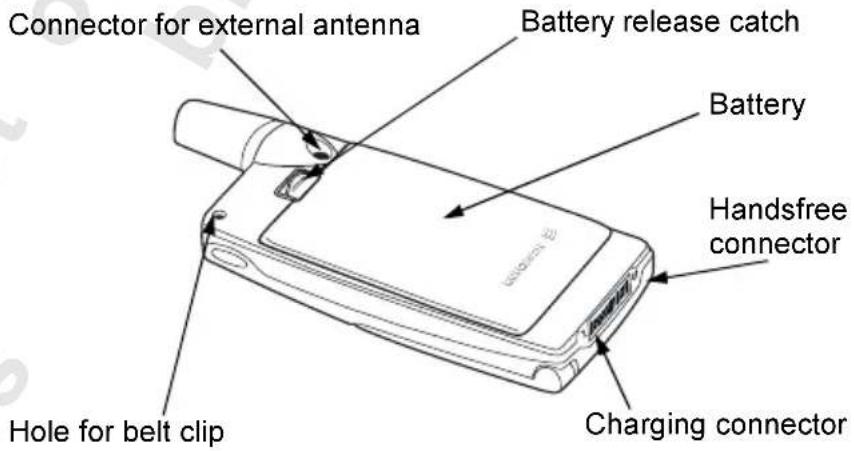
Back
Assembly
You need to do the following to use your phone:
- insert the SIM card.
- attach and charge the battery.
SIM Card
Your network operator provides you with a SIM (Subscriber Identity Module) card. The SIM card contains information about your phone number, the services included in your subscription, and your phone book, among other things.
Note: Turn off the phone and disconnect the charger and other accessories before you insert or remove your SIM card.
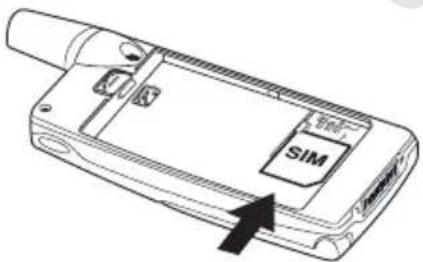
Inserting and Removing the SIM Card
natural_image
Line drawing of a mobile phone casing with SIM logo and arrow indicating location (no text or symbols beyond branding)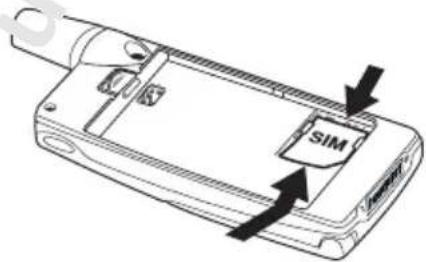
- Remove the battery if attached. Slide the SIM card into the slot, under the silvery holders, with the golden connectors facing down.
- To remove it, raise the edge of the SIM card and slide it out.
Battery
Your phone comes with a lithium battery. The battery is not charged when you buy your phone, but there may be enough power to turn the phone on.
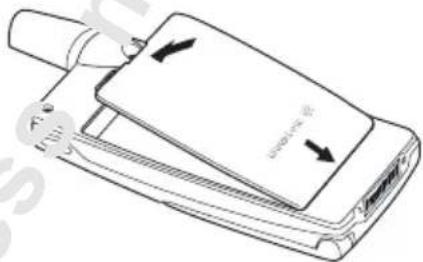
Attaching the Battery
natural_image
Line drawing of a mobile phone with USB port and cable (no text or symbols)- Place the battery on the back of the phone and push until you hear a click.
When to Charge the Battery
You can charge the battery that comes with your phone whenever you wish, without its performance being affected. You can also charge the battery when the phone is off. To remind you that you will soon need to charge the battery or replace it with a charged one:
- an alarm signal (a short beep) sounds and Attention! Battery low appears in the display.
- the indicator light on top of the phone starts flashing red.
With an Ericsson-approved battery, you can check the remaining talk time and standby time in the Status menu by sliding the volume key up or down in standby mode. The total remaining talk time and standby time may vary, depending on network conditions. Please note that these times are approximate and that you may have 10% less time than is shown in the display.
Charging the Battery
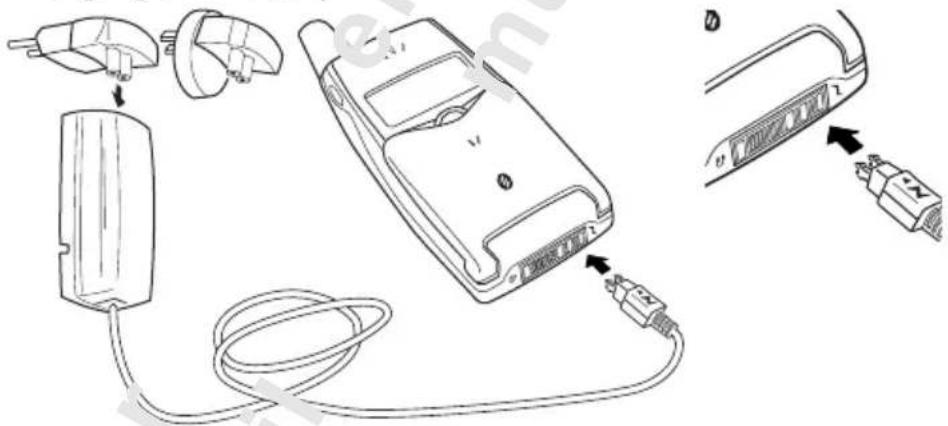
- Make sure that the battery is attached to the phone.
-
Connect the charger to the mains.
-
Connect the charger to the phone as shown. The flash symbol on the plug must face upwards.
Note: The mains plug may look different depending on the mains socket in your country. Do not connect it to any item other than your Ericsson Travel Charger CTR-10. Do not separate the charger from the plug when plugged into the mains socket.
To indicate charging:
- the battery meter in the display pulses continuously.
- the indicator on top of the phone shows a steady red light (or green, if the phone is switched on).
- Optimized charging is shown briefly in the display.
Note: It may take up to 30 minutes before you get an indication of charging in the display, if you are charging a new battery that is completely flat, or a battery that has not been used for a long time.
When the battery is fully charged, the battery meter in the display is full and the indicator on top of the phone shows a steady green light.
For the best charging, talk and standby times in the long run, we recommend that you use only Ericsson-approved batteries with your phone. Please note that use of non-Ericsson-approved batteries will invalidate your phone warranty.
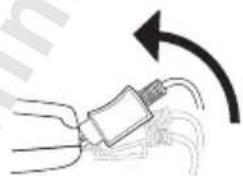
Disconnecting the Charger
Tilt the plug up.
natural_image
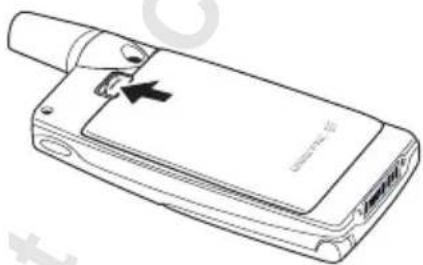
Diagram of a mechanical component with an arrow indicating rotational motion (no text or symbols)Removing the Battery
natural_image
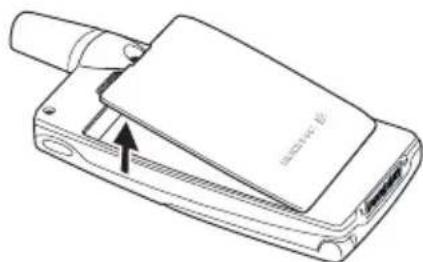
Line drawing of a mobile phone with a USB flash drive and a USB port (no text or symbols)- Slide the release catch up.
natural_image
Line drawing of a flip phone with an attached screen and a USB port (no text or symbols)- Lift the battery away from the phone.
The Clip
By using the clip with your phone, you can hang your phone, for example, on your trousers or shirt.
To use the clip with your phone
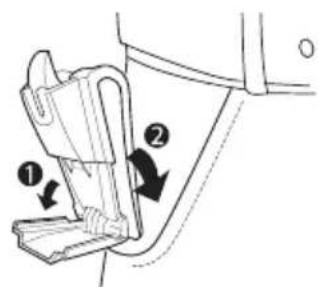
- Open the clip and slide it down.
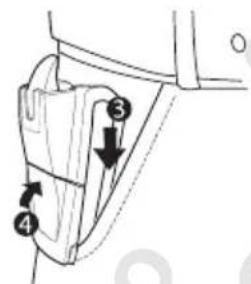
- Close the clip to attach it.
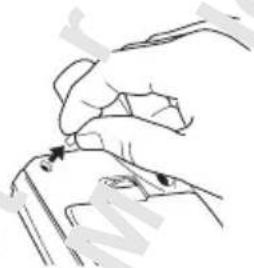
natural_image
Line drawing of a hand performing a medical or therapeutic procedure on a patient's arm (no text or symbols present)- Remove the rubber plug.
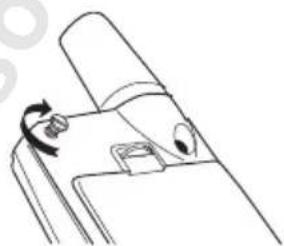
natural_image
Line drawing of a mechanical component with a curved arrow indicating rotation (no text or symbols)- Insert and fasten the screw.
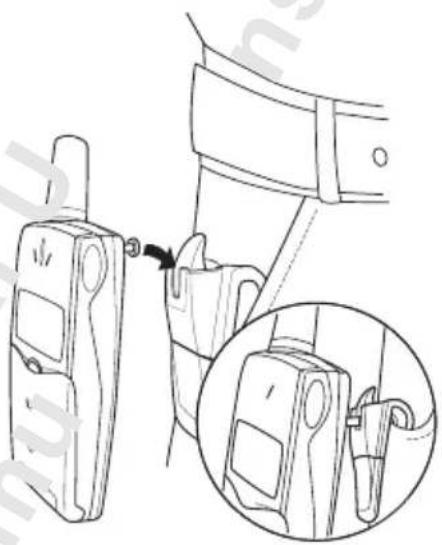
natural_image
Line drawing of a car seatbelt device with an inset close-up showing the handle (no text or symbols)- Slide the phone into the clip until you hear a click.
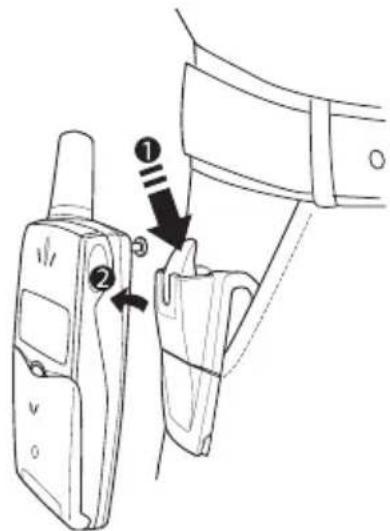
- Press the release catch and move the phone up to detach it from the clip.
Making Calls
Before you can make and receive calls, you need to turn on the phone and be within range of a network.
Turning Your Phone On
- Open the flip.
- Press and hold the NO key until you hear a tone.
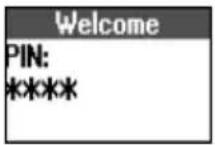
The PIN
Most SIM cards are protected with a PIN (Personal Identity Number), which you get from your network operator and which you need in order to access the network. If PIN: appears in the display after you have turned on the phone:
-
Enter your PIN. If you make a mistake while entering your PIN, delete the wrong number by pressing c
-
Press YES.
If your PIN is entered incorrectly three times in a row, the SIM card is blocked. If this happens, you can unblock it by using your PUK (Personal Unblocking Key), which you also get from your network operator. See “Locking the SIM Card” on page 101.
If Phone locked appears in the display, enter your phone lock code. See “Locking the Phone” on page 102.
Network Search
After you have turned on the phone (and entered your PIN), the phone searches for a network. When a network is found, the phone beeps three times. The indicator light on top of the phone flashes green and your network operator's name (in most cases abbreviated) appears in the display. This is called standby mode. You can now make and receive calls.
Note: If you do not reach standby mode, see “Error Messages” on page 119 or “Searching for Networks” on page 98.
Making a Call
-
Enter the area code and phone number (note that some countries may not use area codes).
-
Press YES.
-
Press NO to end the call.
Using the Call List
The numbers that you have dialled are always saved in the Call list. If your subscription includes the Calling Line Identification (CLI) service and the caller's network sends the number, you will also find the numbers (together with a name if saved in your phone book) of answered and missed calls in the call list. If the incoming call is a restricted number, the display shows Withheld. If the incoming call is an unknown number, the display shows Unknown.
You can delete a number by pressing, YES.
The call list saves:

Dialled numbers

Answered calls

Missed calls
The last 30 incoming and outgoing calls are saved together in chronological order. The last call made is saved in first position. If the same number is called more than once, the latest call replaces earlier ones. If you check a call within 24 hours, the time of the call is displayed. Otherwise, the time is replaced by the date.
To call a number from the call list
- Press YES from standby mode.
- Press on until the number you want to call is highlighted.
- Press YES.
Note: You can also find the Call list in the Call info menu.
Depending on whether a call is ongoing or not, either the Call info menu or the Ongoing call menu is shown.
To clear the call list
- Press 📋 until you reach the Call info menu. press YES.
- Press ⏻ until the Options sub-menu is highlighted, press YES.
- Press ⬇ until the Clear call list sub-menu is highlighted, press YES.
- The question Call list Clear? appears. Press YES to clear the call list.
In the Call listing sub-menu in Options, you can turn the call list on or off. If you select Off, you are asked to clear the call list.

Automatic Re-Dialling
If the connection failed when you first called, the display shows Retry?. You can now re-dial the number by pressing YES. Your phone automatically re-dials (up to ten times):
- until the call is successfully connected. You hear a ring signal.
- until you press a key or receive a call.
Note: Automatic re-dialling is not available for fax and data calls.
Making International Calls
- Press and hold the 0 key until a + sign appears. The + replaces the international prefix of the country from which you are calling.
- Enter the country code, area code (without the leading zero) and phone number.
- Press YES.
Making Emergency Calls
- Enter the international emergency number 112 and press YES.
Your Ericsson phone supports the international emergency numbers, 112, 911 and 08. This means that these numbers can normally be used to make an emergency call in any country, with or without a SIM card inserted, if a GSM network is within range.
Note: Some network operators may require that a SIM card is inserted, and in some cases that the PIN has been entered as well.
In some countries, other emergency numbers may also be promoted. Your operator may therefore save additional local emergency numbers on the SIM card.
To view your local emergency numbers
- Press to go to the Phone book menu, press YES.
- Press ⬇ until Special numbers is highlighted, press YES.
- Press ⚙ until SOS numbers is highlighted, press YES.
Showing and Hiding Your Number
Some operators offer subscriptions where your phone number can be hidden. You can choose to show or hide your number for a particular call, if your subscription supports the Calling Line Identification Restriction (CLIR) service.
To hide or show your phone number
- Enter the phone number you wish to call.
- Press ◀ until you reach the Call info menu, press YES.
- Press ◀ until Next call is highlighted, press YES.
- Press ◀ until Hide my number or Show my numb. is highlighted.
- Press YES to make the call.
Receiving a Call
When you receive a call, the phone rings and the display shows Answer? If your subscription includes the Calling Line Identification (CLI) service and the caller's network sends the number, the caller's number appears in the display. If the incoming call is a restricted number, the display shows Withheld. If the incoming call is an unknown number, the display shows Unknown. If the number has a name associated with it in the contacts list, then the name will also be displayed.
Answering a Call
- Open the flip or press YES to answer the call.
Rejecting a Call
- Slide the volume key on the side of the phone twice.
The display shows Busy tone. The caller hears a busy tone if this is supported by the caller's subscription. If the When busy divert function is on, the call is diverted to the number you have specified. See “Diverting Calls” on page 90.
Missed Calls
If you have missed a call, the message Missed calls: 1 appears in standby mode, where the number, in this case 1, indicates the number of missed calls.
- Press YES to display the missed calls.
- Press YES to call the number.
Tip: You can also see the missed calls list in the Call info menu. Missed calls are also saved in the call list.
Turning Your Phone Off
- In standby mode, press and hold the NO key until you hear a tone.
During a Call
Earpiece Volume
During a call, you can change the earpiece volume by sliding the volume key on the side of the phone.
- Slide up to increase the volume.
- Slide down to decrease the volume.
Microphone
During a call, you can turn off the microphone.
- Press and hold until Muted appears in the display.
- Press and hold again to resume the conversation.
Tip: Instead of pressing and holding (you can put the call on hold by pressing YES.
Notepad
If you want to make a note of a phone number during a call, you can use your phone display as a notepad. Use the number keys to enter the number. When you end the call, the number remains in the display. You can call the number by pressing YES.
Turn Off Tones
If you use the phone display as a notepad, the person you are talking to hears the tone signals when you press the keys.
To turn the tone signals on or off
- Press (A) to go to the Ongoing call menu, press YES.
- Press √ until Turn off tones or Turn on tones is highlighted, press YES.
Sending Touch Tone Signals
To use touch tone services such as telephone banking or controlling an answering machine, you need to use codes. These codes are sent as touch tone signals (also known as DTMF – Dual Tone Multiple Frequency tones). If you press 0–9, *# and # during a call, these numbers and characters are sent as tone signals. You can save codes in your phone book, and during a call, you can send the codes by pressing Find and send. See also “Touch Tone Services” on page 40.


Ciphering
Ciphering is a built-in feature that encodes your calls and messages to provide additional privacy. An exclamation mark is shown in the display during a call to indicate that ciphering is currently not being provided by the network.
Key Functions
The table below explains some of the key functions. See also “Quick Keys” on page 140.
Press...To
| YES | make and answer calls.choose a menu, sub-menu or setting.voice dial, press and hold the key.enter the Call list, briefly press the key from standby. |
| NO | turn the phone on or off, press and hold the key.end a call.go back one level in the menus, to leave a setting unchanged.get back to standby mode, press and hold the key. |
enter and move within the main menus, briefly press

move (scroll) up or down through menus, lists and text.
c Clear delete numbers and letters from the display.
delete an item from a list.
turn off the microphone during a call, press and hold the key.
set the phone to silent, press and hold the key from standby.
Number keys enter the numbers 0-9.
enter the international prefix (+), press and hold 0.
call your voice mail, press and hold 1.
enter letters.

enter *.
enter a pause (p).
shift between capital and lower-case letters.

enter #.
Volume key increase or decrease the volume of the earpiece or handsfree loudspeaker during a call. reject an incoming call, slide the key twice. enter the Status menu, slide the key briefly.
Menus
There are seven main menus. Each menu has several sub-menus. You enter the menus by briefly pressing or. You also use these keys to move from left to right in the main menus and up and down in the sub-menus. Your phone includes pop-up help texts. See “Help Texts” on page 20.
Moving through the Menus
There are two ways of moving through the menus:
• scrolling by using the keys.
- using shortcuts.
Scrolling by Using the Keys
Press...to...
or enter and move through the main menus and sub-menus.
YES select a menu, sub-menu or setting.
NO go back one level in the menus or leave a setting unchanged.
Press and hold NO to go back to standby.
Tip: When in the menus, instead of pressing the keys repeatedly to reach the sub-menu that you want, you can press and hold the arrow keys or slide and hold the volume key.
Using Shortcuts
A quicker way to move through the menus is to use the shortcuts. First briefly press or to enter the menus, then enter the number of the menu or sub-menu to which you want to go. To get back to standby, press and hold NO. See the example on the following page.
Instructions
In the instructions in this User's Guide, we use the arrow keys to describe the functions and settings, since the shortcut numbers may vary between phones according to your subscription and network.
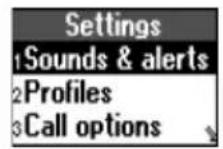
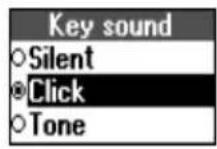
In this example of how to interpret the instructions, we are going to set the key sound to Tone.

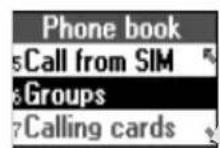
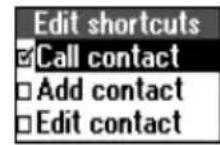
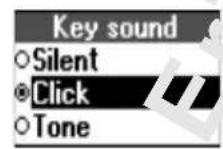
To set the key sound
- Scroll to Settings, YES, Sounds & alerts, YES, Key sound, YES.
- Select Tone and press YES.
Interpret the instructions as follows:
- From standby mode, use ▼ or ◀ to scroll to the Settings menu.
- Press YES to select the menu.
You are now in the Settings menu.
The name of the menu that you have selected is shown at the top of the display.
- Press YES to select the Sounds & alerts sub-menu.
- Use ▼ or ◼ to scroll to the Key sound sub-menu.
Press YES to select the sub-menu.
- Use ▼ or ◀ to scroll to Tone.
Press YES to select the Tone alternative.
You have now set the key sound to Tone.
To go back to standby mode, press and hold the NO key.
When using shortcuts, interpret the instructions as follows:
To set the key sound
- From standby mode, press or to enter the menus.
- Press 4 to select the Settings menu.
- Press 1 to select the Sounds & alerts sub-menu.
- Press 8 to select the Key sound sub-menu.
- Select Tone and press YES.
Display Text
When you move through the menus, the display changes.
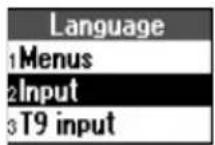
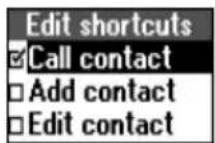
- White text on a grey background at the top indicates the menu you have selected.
- White text on a black background indicates your position in the menus. Press YES to enter this menu or select this setting.
- Grey text indicates a function that is temporarily unavailable, for example due to your subscription or a certain setting which is not on.
- Text marked with a tick indicates the current setting or settings selected.
- Text marked with a filled button indicates the current setting selected.
Help Texts
Your phone includes pop-up help texts that explain the sub-menus.
To turn the help texts on or off
- Scroll to Settings, YES, Display, YES, Menu help, YES.
- Select On or Off and press YES.
Menu Language
Most modern SIM cards automatically set the menu language to the language of the country where you bought your SIM card, Automatic. If this is not the case, the pre-set language is English.
To change the menu language
- Scroll to Settings, YES, Language, YES, Menus, YES.
- Select a language and press YES.
To select a language that you want to use when writing text, see "Input Languages" on page 30.
Tip: You can always select Automatic by pressing ,8888, in standby, and English by pressing ,0000, in standby.

My Shortcuts
To reach your favourite functions and settings quickly and easily, you can place them in the menu My shortcuts. You place them there by selecting them in the list of Edit shortcuts.
To select your favourite settings for My shortcuts
- Scroll to My shortcuts, YES, Edit shortcuts, YES.
- Select or clear a setting from the list by scrolling to it and pressing (*)
- If you select a new setting, enter the position number you want for it in this menu. Press YES.
- Press YES to save your settings and exit the list.
When you buy your phone, the menu My shortcuts contains a few settings which you can delete if you wish.
Tip: Press and hold from standby to reach the shortcut saved in the first position in My shortcuts.
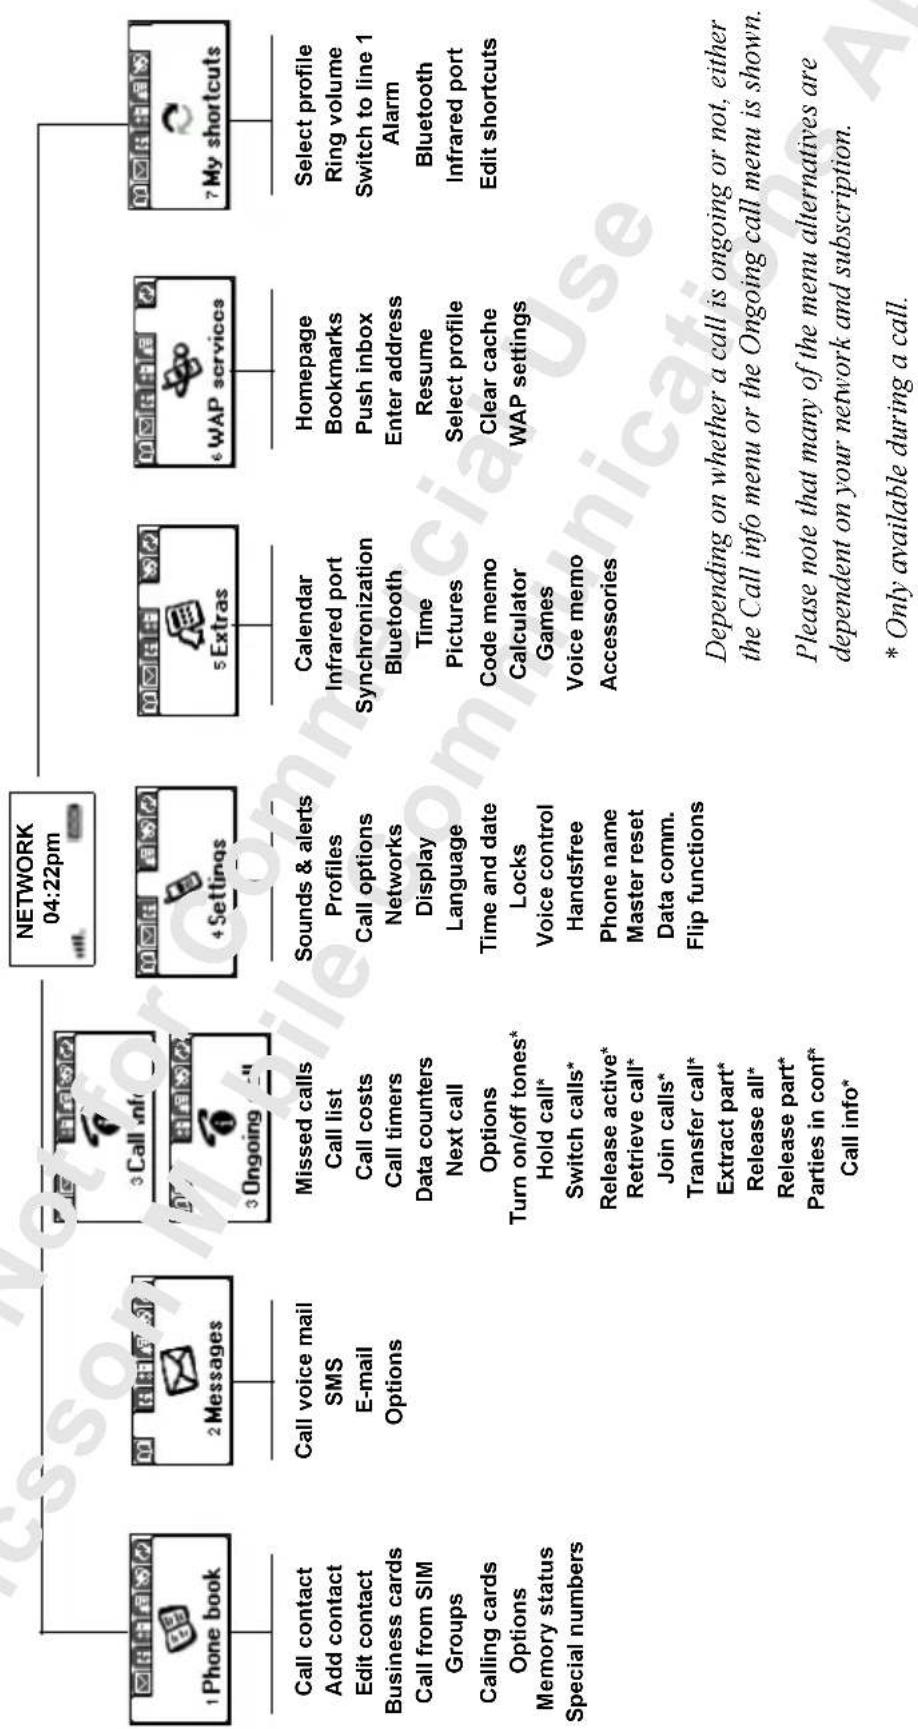
flowchart
graph TD
    A["Call contact\nAdd contact\nEdit contact\nBusiness cards\nCall from SIM Groups\nCalling cards\nOptions\nMemory status\nSpecial numbers"] --> B["Phone book"]
    C["Call voice mail\nSMS\nE-mail\nOptions"] --> D["Missed calls\nCall list\nCall costs\nCall timers\nData counters\nNext call\nOptions\nTurn on/off tones*\nHold call*\nSwitch calls*\nRelease active*\nRetrieve call*\nJoin calls*\nTransfer call*\nExtract part*\nRelease all*\nRelease part*\nParties in conf*\nCall info*"]
    E["NETWORK 04:22pm"] --> F["Settings"]
    G["Sounds & alerts\nProfiles\nCall options\nNetworks\nDisplay\nLanguage\nTime and date\nLocks\nVoice control\nHandsfree\nPhone name\nMaster reset\nData comm.\nFlip functions"] --> H["Extras"]
    I["Calendar\nInfrared port\nSynchronization\nBluetooth\nTime\nPictures\nCode memo\nCalculator Games\nVoice memo\nAccessories"] --> J["WAP services"]
    K["Homepage\nBookmarks\nPush inbox\nEnter address\nResume\nSelect profile\nClear cache\nWAP settings"] --> L["My shortcuts"]
    M["Select profile\nRing volume\nSwitch to line 1\nAlarm\nBluetooth Infrared port\nEdit shortcuts"] --> N["Depending on whether a call is ongoing or not, either the Call info menu or the Ongoing call menu is shown."]
    N --> O["Please note that many of the menu alternatives are dependent on your network and subscription."]
    O --> P["* Only available during a call."]

Personalizing Your Phone
Sounds
You can change the volume, ring signal and key sound according to your preferences. You can set a specific ring signal for a specific person so that you know who is calling by the ring signal. You can also compose your own melody and send it to another phone.
Note: If you change a setting which is included in a profile, the profile is also changed. See “Profiles” on page 79.
Ring Volume
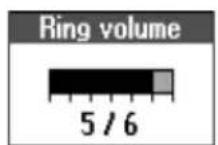
You can set the volume to six levels. The first level means that only two clicks are heard when you receive a call. You can also turn the ring signal off (0). An icon then appears when in standby mode.
To set the ring volume
- Scroll to Settings, YES, Sounds & alerts, YES, Ring volume, YES.
- Use or to increase or decrease the volume.
- Press YES to save the setting.
Tip: Use the volume key to change the volume silently.
Silent
You can set your phone to silent so that all signals, except the alarm and timer signals, are turned off.
To set the phone to silent
- From standby, press and hold .c
- Silent on? appears. Press YES. An icon appears when in standby mode. To cancel, repeat step 1 and press YES at Silent off?
Increasing Ring
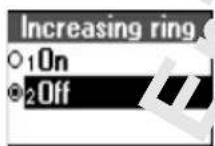
You can select a ring signal, Increasing ring, that rises in steps from the lowest volume to the highest.
To turn the increasing ring on or off
- Scroll to Settings, YES, Sounds & alerts, YES, Increasing ring, YES.
- Select On or Off and press YES.
The increasing ring must be Off for the ring signal volume to apply.
Vibrating Alert
You can select to be notified of an incoming call by the buzzing of the Vibrating alert. You can set the phone's vibrating alert to one of the following:
• O n (all the time)
- On if silent (on when the ring volume is turned off or when you have set the phone to silent)
• O f f (all the time)
To set the Vibrating Alert
- Scroll to Settings, YES, Sounds & alerts, YES, Vibrating alert, YES.
- Select a setting and press YES.
Note: When your phone is placed in a desktop charger or a car handsfree kit, the vibrating alert is automatically turned off.
Ring Signal Type
You can select a ring signal from a list of different sounds and melodies. See also “Composing Your Own Melodies” on page 24.
To select a ring signal
- Scroll to Settings, YES, Sounds & alerts, YES, Ring signals, YES, Voice calls, YES.
- Select the ring signal type that you want and press YES.
Tip: Use the volume key to change the ring signal silently. The Low Pitch ring signal has been specially developed for people with hearing disabilities.
Specific Ring Signals
If you subscribe to the Two Line Service, you can set different ring signals for the two lines. Line 1 and Line 2 are displayed instead of Voice calls. If your SIM subscription supports Fax and Data calls, you can set different ring signals for voice, fax and data calls respectively.
If your subscription includes the Calling Line Identification (CLI) service, you can assign a Personal ring signal to up to ten callers.
To set a specific ring signal for a caller
- Scroll to Settings, YES, Sounds & alerts, YES, Ring signals, YES, Personal rings, YES, Add new?, YES.
- Enter the first letter of the contact name and press YES.
- Select a contact and press YES.
- Select a ring signal and press YES.
To delete a caller's number
- Scroll to Settings, YES, Sounds & alerts, YES, Ring signals, YES, Personal rings, YES.
- Scroll to the number you wish to delete and press YES.
- Select Delete and press YES.
Composing Your Own Melodies
You can compose eight different melodies to use as your ring signal.
To compose a melody
- Scroll to Settings, YES, Sounds & alerts, YES, My melodies, YES, Edit, YES.
- Select one of the melodies and press YES.
- Press to clear the display.
- The keypad now works as a keyboard (see figure).
Use the keypad to enter notes:
- Press and hold a key to enter a long note.
The longer you press a key, the longer that note will be. There are four different lengths of notes.
- Press to raise the note an octave.
- Press twice to raise the note two octaves.
- Press once to raise the note a semitone.
- Press twice to lower the note a semitone.
-
Press to enter a pause.
-
To listen to your melody, press YES.
- Press YES again to save it or press NO to continue composing.
Tip: You can also download existing melodies from the Ericsson Mobile Internet: http://mobileinternet.ericsson.com. See also "Starting the WAP Browser" on page 69.
Exchanging Melodies
You can transfer your melodies to and from another similar phone or download your new melody from a computer or the Ericsson Mobile Internet. You can send and receive melodies using Bluetooth wireless technology, the infrared port or a text message.
To send a melody
- Scroll to Settings, YES, Sounds & alerts, YES, My melodies, YES, Send, YES.
-
Scroll to the melody that you want to send. Press YES.
-
Select a transfer method and press YES.
- Continue as described in “Sending and Receiving” on page 52, “Connecting IR Devices” on page 55 or “Sending Messages” on page 43.
To receive a melody via a text message, see “To save a melody found in a message” on page 47. To be able to receive a melody using the infrared port or Bluetooth wireless technology, the recipient first needs to select the Receive menu in order to activate the infrared port or to make the phone discoverable.
To receive a melody
- Scroll to Settings, YES, Sounds & alerts, YES, My melodies, YES, Receive, YES.
- Select a transfer method and press YES.
- When you receive a melody, New melody Play? appears. Press YES to hear the melody before you save it.
- Save melody? appears. Press YES.
- Select the position in the melody list in which you want to save the new melody, press YES.
Key Sound
You can choose which sound you want the keys to make when you press them. You can choose between clicks, tones or silent.
To set the key sound
- Scroll to Settings, YES, Sounds & alerts, YES, Key sound, YES.
- Select a key sound and press YES.
Pictures
Your phone contains several pictures which you can send in a text message. See “To insert a picture in a text message” on page 43. You can edit the pictures and save them in My pictures.
To edit and save a picture in My pictures
- Scroll to Extras, YES, Pictures, YES.
- Select a picture group and press YES.
- Press or to scroll through the pictures. Select a picture and press YES to view the editing tools. You can now start to edit the picture. See the table below.
- Press YES again to view the Options menu.
- Select Save and press YES. The picture is saved in My pictures.
How to use the keys when editing a picture:
Press... to...
| 1 | move the cursor up and left. |
| 2 | move the cursor up. |
| 3 | move the cursor up and right. |
| 4 | move the cursor left. |
| 5 | lift up or put down the pen. Press and hold to switch between zoom and full size view. |
| 6 | move the cursor right. |
| 7 | move the cursor down and left. |
| 8 | move the cursor down. |
| 9 | move the cursor down and right. |
| 0 | switch line thickness. |
| YES | view the Options menu. |
| NO | exit the Picture editor. |
| C | press and hold to clear the picture. |
| *∅ | move the cursor 1, 5 or 10 spaces. |
| # | switch between black and white pen colour. |
The pictures can also be added to My favourites.
To add a picture to My favourites
- Scroll to Extras, YES, Pictures, YES.
- Select a picture group and press YES.
- Select a picture and press
- Press YES to add the picture.
To remove a picture from My favourites, scroll to it and press
c. YES.
You can delete the edited pictures from My pictures, but you cannot delete the original pictures that were in the phone when you bought it.
To delete a picture from My pictures
- Scroll to Extras, YES, Pictures, YES, My pictures, YES.
- Scroll to a picture and press, YES.
Display
You can personalize your phone display with a number of settings.
Display Light
You can set the display light to automatic, off or on. In automatic mode, the display light switches off a few seconds after you have pressed the last key.
To set the display light
- Scroll to Settings, YES, Display, YES, Light, YES.
- Select a display light setting and press YES.
Sleeping Display
To save battery power, you can turn on the sleeping display. The text in standby mode is reduced to one row at the bottom of the display a few minutes after you have pressed the last key.
To turn the sleeping display on or off
- Scroll to Settings, YES, Display, YES, Display sleep, YES.
- Select On or Off and press YES.
Contrast Setting
You can change the display's contrast.
To set the display contrast
- Scroll to Settings, YES, Display, YES, Contrast, YES.
- Use or to increase or decrease the contrast.
- Press YES to save the setting.
Greeting Text
When you turn on your phone, a text or an image appear as a greeting in the display. You can write your own greeting instead.
To write a new greeting
- Scroll to Settings, YES, Display, YES, User greeting, YES.
- Select Custom and press YES.
- Write your new greeting.
- Press YES to confirm your setting.
To set the standard greeting
- Scroll to Settings, YES, Display, YES, User greeting, YES.
- Select Standard and press YES.
To turn the greeting off
- Scroll to Settings, YES, Display, YES, User greeting, YES.
- Select Off and press YES.
My Numbers
My numbers shows your phone number(s). If your phone number cannot be retrieved from your SIM card, you can enter it yourself.
To enter your phone number
- Scroll to Phone book, YES, Special numbers, YES, My numbers, YES, Voice, YES.
- Enter the number and press YES.
Tip: You can also enter your fax and/or data number and the different numbers for Line 1 and Line 2, if these are supported by your subscription.
Text Size
You can change the size of the letters and thus the number of visible rows in the display.
To change the text size and the number of rows
- Scroll to Settings, YES, Display, YES, Text size, YES.
- Select a text size and press YES.
Time and Date
The time is always shown when the phone is in standby mode.
To set the time
- Scroll to Settings, YES, Time and date, YES, Set time, YES.
- Enter the time in hours and minutes (you can move from number to number by pressing or), and press YES.
You are now asked whether you want to enter more time information, such as time zone and daylight saving time. Press YES.
- Select a time zone and press YES.
- Select a daylight saving time and press YES.
To set the time format
- Scroll to Settings, YES, Time and date, YES, Time settings, YES, Time format, YES.
- Select the 24-hour or 12-hour (am/pm) clock and press YES. If you select the 12-hour clock, you can alternate between am and pm by pressing. #

Automatic Time Zone
Your phone is equipped with an automatic time update function. When your phone changes network, and the time sent out from the operator deviates from the time in your phone, you are asked whether you want to update the time. If you press YES, the time is automatically updated.
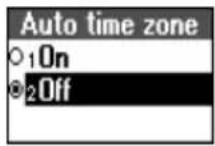
To turn the Automatic Time Zone on or off
- Scroll to Settings, YES, Time and date, YES, Time settings, YES, Auto time zone, YES.
- Select On or Off and press YES.
Date
When the phone is in standby mode, you can slide the volume key up or down to see today's date in the Status menu.
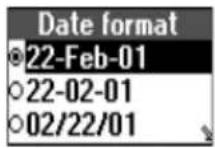
To set the date format
- Scroll to Settings, YES, Time and date, YES, Date format, YES.
- Select a date format and press YES.
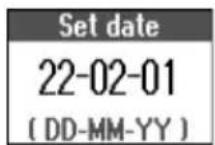
To set the date
- Scroll to Settings, YES, Time and date, YES, Set date, YES.
- Enter the date according to the format you have chosen and then press YES.
Flip settings
The flip of your phone is active, which means that you can answer a call or voice dial by just opening the flip.
To change the flip setting
- Scroll to Settings, YES, Flip functions, YES.
- Select Answer call, Answer&Voice or Off and press YES.
Master Reset
You can reset the phone's settings to the way they were when you bought your phone.
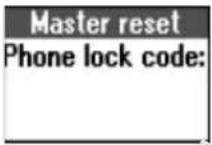
To reset the phone
- Scroll to Settings, YES, Master reset, YES, Reset settings, YES.
- Enter the phone lock code (0000) or the number you have changed it to. See “Changing the phone lock code” on page 102. Press YES.
Note: The Reset all option deletes all contacts, e-mail messages, text messages and WAP settings.
Entering Letters
You can enter letters, for example, when you add names to the phone book, write text messages or enter WAP addresses.
Apart from the way you normally enter letters in your phone, using multitap text input, you can use T9 Text Input for entering text messages and e-mail, for example, if the input language you select supports this. T9 Text Input is a predictive input method and is a quicker way to write texts. See “T9® Text Input” on page 31.
Input Languages
Before you start entering letters, you need to select the input languages that you want to use when writing.
To select input languages
-
Scroll to Settings, YES, Language, YES, Input, YES.
-
Scroll to the language that you want to use for entering letters and press ⓐ.
Repeat step 2 if you want to use another language.
- Press YES to exit the menu.
When writing, you can switch to one of your selected input languages by pressing and holding and then selecting Input language. See “The List of Options” on page 32.
Multitap Text Input
When saving names in the phone book or when writing WAP addresses, you enter letters using multitap text input. You press each key as many times as needed to show the letter you want.
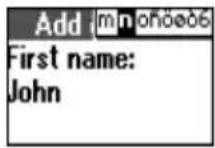
In the following example, we are going to write a name:
To enter letters using multitap text input
-
Scroll to Phone book, YES, Add contact, YES. Press YES again.
-
Press the appropriate key, -1, or repeatedly until the character you want appears in the display. See the table of the Latin alphabet below:
Press... to get...
1 Space - ? ! , . : ; " ' <= > () _ 1
2 A B C Ä Ä Æ à Ç 2 Γ
3 D E F è É 3 Δ Φ
4 G H I i 4
5 J K L 5 Λ
6 M N O Ñ Ö Ø ð 6
7 P Q R S β 7 Π Σ
8 T U V Ü ù 8
9 W X Y Z 9
0 + & @ / α % $ € £ ¥ \S ¿ i 0 Θ Ξ Ψ Ω
# * ↓
C to delete letters and numbers * ◊ to shift between capital and lower-case letters o - press and hold to enter numbers
Example:
• To enter an 'A', press once.
• To enter a 'B', quickly press twice.
- To shift between capital and lower-case letters, press , *φ then enter the letter.
Tip: You can also use the volume key as a shortcut to certain letters: To enter a 'B', slide the volume key up and press 2 To enter a 'C', slide the volume key down and press 2.
T9® Text Input
You can use T9 Text Input when entering text for example in text messages and e-mail. The T9 Text Input method uses a built-in dictionary to recognize the most commonly used word for every sequence of key presses. This way, you press each key only once, even if the letter you want is not the first letter on the key.
When you press the keys, different words are suggested. If the word you want is not suggested, you can edit the word (press and hold #). The word is then added to the dictionary so that it is suggested the next time.
In the following example, we will start writing a text message:
To enter letters using T9 Text Input
-
Scroll to Messages, YES, SMS, YES, Write new, YES.
-
For example, if you want to write the word "How", press, 4
6, 9.
The word "How" appears.
- If the word shown is the one you want:
- press to accept and add a space. (To accept a word without adding a space, press ↗)
If the word shown is not the one you want:
- press repeatedly to view alternative words (candidates). Accept a word and add a space by pressing 1
If you do not find the word you want by pressing :○
- press and hold to go to a list of options.
- Select Edit word, YES.
- Delete the entire word by pressing, or delete one letter at a time by pressing and then repeatedly.
- Write the new word using multitap text input and press YES. The word is added to the dictionary. The next time you enter ____, ____ the word you just added to the dictionary will appear as one of the alternative words.
- Continue writing your message. See also “Sending Messages” on page 43.
Tip: Press to enter a full stop. To enter other punctuation marks, press and then repeatedly. Accept by pressing. Press and hold to select an input method.
The List of Options
If you press and hold when writing, you enter a list of options:
- Edit word – for T9 Text Input only Edit the suggested word by using multitap text input.
- Add symbol
Symbols and punctuation marks such as ? and , are shown. Move between the symbols by using the arrow keys. Press YES to select a symbol.
- Accept word – for T9 Text Input only Accept the suggested word.
- Candidates – for T9 Text Input only A list of alternative words is shown. Scroll to a word and press YES.
- Rel. caps lock/Caps lock Switch between capital and lower-case letters.
- Input Language A list of the input languages that you selected earlier is shown. If you want to change the input language for the text you are writing, scroll to a language and press YES.
- Input method
A list of input methods is shown. If you want to change the input method for the text you are writing, scroll to an input method and press YES.
• H e l p
Turning off the T9 Text Input
If you wish, you can turn off the T9 Text Input. This setting is valid for all input of texts – not only for the text you are currently entering.
To turn the T9 Text Input on or off
- Scroll to Settings, YES, Language, YES, T9 Input, YES.
- Select On or Off.
PhoneBook
You can create your personal phone book by saving information about your friends and colleagues as a contact. In a contact, you can save details such as name, title, phone numbers and e-mail address – all in one place.
Saving Contacts
For each contact, you can fill in the following information: first name, last name, company, title, home phone number, work phone number, mobile phone number, fax number, other phone number and e-mail address. The contacts are saved in the phone. To save the numbers to the SIM card, see “To copy contacts to the SIM card” on page 37.
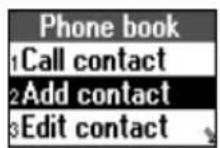
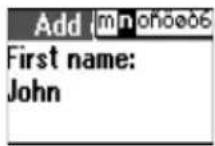
To add a new contact
- Scroll to Phone book, YES, Add contact, YES.
- Press YES and enter a first name. Press YES and enter a last name, and so on.
When you enter phone numbers, you can press and hold YES to retrieve a phone number from the phone book, the SIM card or from a list of unsaved numbers.
- When you have filled in the information you want, scroll to Save and exit? and press YES.
If voice dialling is on, you are asked if you want to save a voice command for the contact.
Note: Each phone number saved occupies one position in the memory. You can save around 500 positions in the phone. Please contact your network operator to find out how many numbers you can save on the SIM card.
Ask to Save
If you make or receive a call from a number that is not saved in your phone book, you are asked if you want to save the number. If you do not want to be asked, you can turn the Ask to save function off.
To turn the Ask to save function on or off
- Scroll to Phone book, YES, Options, YES, Ask to save, YES.
- Select On or Off and press YES.
Calling a Contact
To call a phone number saved in a contact, use the Call contact function. You can find the contact by searching for either first or last name, depending on which sort order you have set.
To select a sort order
-
Scroll to Phone book, YES, Options, YES, Sort order, YES.
-
Select a sort order and press YES.
To call a contact
-
Scroll to Phone book, YES, Call contact, YES.
-
Enter the first letter of the contact name and press YES.
-
If the default phone number of the contact is the number you want to call, press and hold YES.
If you want to call another phone number, press YES to go to the contact.
Press ⬇ or ⬇ to go to the phone number you want to call.
Press YES to make the call.
Tip: A quicker way to enter the Call contact menu is to press and hold ⏻ from standby.
Shortcuts to Contacts
When in standby, you can find a contact by:
- pressing and holding one of the keys 2-9 to find a contact beginning with a specific letter.
For example, pressing and holding 2 takes you to the first contact beginning with the letter A (or closest following).
Shortcuts to Phone Numbers
When in standby, you can find a phone number on the SIM card by:
- entering its position number followed by .#
Once you are in the list of contacts you can use ▼ or to scroll through the list, or a letter to go to a certain name.
To see the position of the phone numbers that you have saved, go to Phone book, YES, Options, YES, Position list, YES.
Speed Dialling
You can call the phone numbers that are saved in positions 1–9 on the SIM card.
- From standby, enter the position number and press YES.
See also “To change position numbers” on page 37. To copy contacts in your phone to your SIM card, see “To copy contacts to the SIM card” on page 37.
Editing the Phone Book
You can edit a contact in the phone book with the Edit contact function.
To edit a contact
- Scroll to Phone book, YES, Edit contact, YES.
- Enter the first letter of the contact you want to edit. Press YES.
If the contact shown is not the one you want, press

until you find the correct contact.
- Press YES.
Select Edit name or Edit numbers and press YES.
You can edit the voice command for the contact name by selecting Edit voice. You can edit the position for a phone number by selecting Edit positions.
- Press ⬇ or ⬇ to go to the details that you want to edit.
- When editing phone numbers, you can press and hold YES to retrieve a phone number from the phone book, the SIM card or from a list of unsaved numbers.
- When you have made your changes, press YES. Scroll to Save and exit? at the bottom of the list and press YES.
If you scroll to a certain contact in your phone book and then press and hold YES, the default phone number of the contact is dialled. You can select another default phone number for a contact, if you wish.
To set a default number
- Scroll to Phone book, YES, Edit contact, YES.
- Enter the first letter of the contact you want to edit. Press YES.
- Press YES to select a contact.
- Select Default number and press YES.
- Select the number you want as the default phone number. Press YES.
To delete a contact
- Scroll to Phone book, YES, Edit contact, YES.
- Enter the first letter of the contact you want to delete.
- Press to delete the contact.
- Press YES to confirm.
To delete all contacts select Phone book, YES, Options, YES, Delete all, YES.
Tip: Your contacts can be synchronized with a program running on a PC or a PDA. See “Synchronization” on page 61.
You can organize your phone book so that the phone numbers you use most frequently are easily available. You can, for example, have certain numbers saved in positions 1-9 to be able to speed dial them.
To change position numbers
- Scroll to Phone book, YES, Options, YES, Position list, YES.
- Scroll to the phone number you want to move, press YES.
- Scroll to the position to which you want to move the phone number and press YES. The phone numbers switch positions.
- When you have finished, press NO.
A question appears. Press YES if you want to copy the changes to the SIM card.
Copy to and from the SIM Card
Your contacts are saved in the phone. If you want to speed dial or if you want to use your contacts in another phone, you first need to copy the contacts to the SIM card. The contacts on the SIM card are then replaced by the contacts in the phone.
To copy contacts to the SIM card
- Scroll to Phone book, YES, Options, YES, Copy to SIM, YES.
If you insert a SIM card with saved contacts into your phone, you can call the contacts on the SIM card by selecting Call from SIM. To be able to edit the contacts saved on the SIM card, you first have to copy the SIM card contacts to the phone by selecting Copy from SIM.
To copy contacts to the phone
- Scroll to Phone book, YES, Options, YES, Copy from SIM, YES.
To call a contact saved on the SIM card
- Scroll to Phone book, YES, Call from SIM, YES.
- Enter the first letter of the contact name and press YES.
- Press YES to call the contact.
Business Cards
You can add your own business card as a contact in the phone book. You can then exchange business cards with your colleagues via your phone.
To add or edit your business card
- Scroll to Phone book, YES, Business cards, YES, My own, YES.
- Select Add my own and press YES.
- Proceed as in "To add a new contact" on page 34.
If you have already entered your own details as a contact, you may want to use this contact as your business card.
To use a contact as your business card
- Scroll to Phone book, YES, Business cards, YES, My own, YES.
- Select Use contact and press YES.
- Enter the first letter of the contact you want to use as your business card. Press YES.
- If the highlighted contact is not the one you want, scroll through the list until you find the correct contact. Press YES.
To delete your business card
- Scroll to Phone book, YES, Business cards, YES, My own, YES.
- Select Delete my own and press YES.
The entry is still available in the phone book as an ordinary contact.
Exchanging Business Cards
You can exchange contacts and business cards between your phone and another similar phone, a PDA or a PC using Bluetooth wireless technology, the infrared port or a text message.
To send your own business card
- Scroll to Phone book, YES, Business cards, YES, Send my own, YES.
- Select a transfer method and press YES.
- Continue as described in “Sending Messages” on page 43, “Sending and Receiving” on page 52 or “Connecting IR Devices” on page 55.
When you receive a business card via a text message, you accept the card by pressing YES. To be able to receive a business card using the infrared port or Bluetooth wireless technology, the recipient first needs to select the Receive menu in order to activate the infrared port or to make the phone discoverable.
To receive a business card
-
Scroll to Phone book, YES, Business cards, YES, Receive, YES.
-
Select a transfer method and press YES.
-
When you receive the business card, press YES to save the card in your phone book.
-
Add all to phone book? appears. Press YES.
-
Reply with own business card? appears. Press YES if you want to reply.
To send a contact
- Scroll to Phone book, YES, Business cards, YES, Send contact, YES.
- Enter the first letter of the contact and press YES.
- Select the contact you want to send, YES.
- Select a transfer method and press YES.
- Continue as described in “Sending Messages” on page 43, “Sending and Receiving” on page 52 or “Connecting IR Devices” on page 55.
To send the complete phone book, select Send all. You can send the complete phone book using the infrared port or Bluetooth wireless technology.
Tip: You can send business cards and contacts to a specific Bluetooth printer and have them printed out.
Groups
You can create groups of contacts. In this way you can send a text message to several recipients at the same time. See “Sending Messages” on page 43.
To create a new group
- Scroll to Phone book, YES, Groups, YES.
- Select Add group and press YES.
- Enter a name for the group and press YES.
- Scroll to Add member, YES.
- Enter the first letter of the contact you want to add. Press YES.
If the contact shown is not the one you want, press until you find the correct contact. Press YES.

- Select a number and press YES.
- To add the next member, scroll back to Add member and press YES.
To add a new member to an existing group
- Scroll to Phone book, YES, Groups, YES.
- Select the group that you want to edit and press YES.
- Scroll to Edit, YES, Add member, YES. Continue the same way as when you add a new member to a new group (see above).
To edit the name of a group
- Scroll to Phone book, YES, Groups, YES.
- Select the group name that you want to edit and press YES.
- Select Edit group name and press YES.
- Enter the new name of the group and press YES.
To delete a member from a group
- Scroll to Phone book, YES, Groups, YES.
- Select the group that you want to edit and press YES.
- Select Edit and press YES.
- Scroll to the member that you want to delete and press
- Press YES to confirm your choice.
To delete a group
- Scroll to Phone book, YES, Groups, YES.
- Select the group that you want to delete and press YES.
- Select Delete group and press YES.
- Press YES to confirm your choice.
Touch Tone Services
You can save a phone number together with tone signals and codes in your phone book. When you call this entry, the phone number and all the tone signal codes are then dialled automatically. This could be useful, for example, when accessing an answering machine or when using telephone banking services.
Note: Saving personal codes in the phone book involves a risk if your phone is stolen. It is safer to save personal codes in the Code memo. See “Code Memo” on page 106.
To save a phone number together with tone signals and codes
- Scroll to Phone book, YES, Add contact, YES.
- Press YES and enter the name that you want to associate with the phone number and code. Press YES.
- Scroll to Other and press YES.
- Enter the phone number. Press and hold until the pause character p appears in the display. Enter the code, if needed, enter another pause, another code and so on. Press YES.
- Scroll to Save and exit? and press YES.
Checking the Memory
With the Memory status function in your phone book, you can check how many positions you have left in your memory.
To check the status of your phone book memory
- Scroll to Phone book, YES, Memory status, YES.
- Use ▼ or ◀ to scroll through the list.
Text Messages
You can send and receive text messages with the Short Message Service (SMS) using your mobile phone. You can also send and receive e-mail. See “E-mail” on page 74.
Before Sending Messages
Before you send a text message for the first time, make sure you have made the settings below.
Service Centre
If you want to send or reply to a text message, your network operator's service centre number must be set. Most SIM cards already contain the service centre number. In some cases you may have to activate it. You must obtain the number from your network operator.
To activate a service centre number on the SIM card
- Scroll to Messages, YES, Options, YES, SMS, YES, Service centres, YES.
- Scroll to the number you want and press YES.
- Select Activate and press YES.
If no number is found in the list, you have to enter the number yourself.
To enter the phone number of your service centre
- Scroll to Messages, YES, Options, YES, SMS, YES, Service centres, YES, Add new?, YES.
- Enter the number, including the international sign (+) and country code and press YES.
To send a text message as an e-mail message, you first need to enter your e-mail gateway number. For details, please contact your network operator. See also “Message Options” on page 42.
To enter an e-mail gateway number
- Scroll to Messages, YES, Options, YES, SMS, YES, E-mail gateways, YES, Add new?, YES.
- Enter the e-mail gateway number and press YES.


Using GPRS
You can send a text message using GPRS as the access type. For more details, please check with your network operator.
To select GPRS as the access type
- Make sure you have created a data account and selected GPRS&GSM as the preferred service. See “Data Account Settings” on page 63 and “GPRS and GSM Data Settings” on page 65.
- Scroll to Settings, YES, Data comm., YES, SMS access, YES.
- Select GPRS preferred and press YES.
Message Options
You can create the settings below as default for all your messages, or you can turn on the option Set on send, which means that you choose the settings each time you send a message.
- Message type
You can select how you want your text message to be interpreted by the recipient, for example, as a text message, or as a fax or e-mail message.
- Validity period
If your message cannot be delivered because the recipient has turned off the phone, your service centre can save the message to send it later, within a certain time period.
- Request reply
If you want the recipient of your message to reply, you can turn on the Request reply option. You are usually charged for the reply. Please contact your network operator for details. When you send a message, you are asked whether you want the recipient to reply or not.
- Status request
With this option on, you can view the status of a sent message. For more information, see “Status Report” on page 45.
To set a default value for the options above
- Scroll to Messages, YES, Options, YES, SMS, YES.
- Select the option you want and press YES.
- Select Set default and press YES.
- Select your default value from the list and press YES.
To turn Set on send on or off
- Scroll to Messages, YES, Options, YES, SMS, YES.
- Select the option you want and press YES.
- Select Set on send and press YES.
- Select On or Off and press YES.
Sending Messages
You can send your message to one person or to a pre-defined group, specified and saved in the phone book. For more information on how to create groups, see “Groups” on page 39. When you send text messages to a group, you are charged for each member included in the group.
You can insert pictures and melodies in a text message. When you send text messages containing pictures or melodies, you use the Long messages function. See “Long messages” on page 44.
To send a message
- Scroll to Messages, YES, SMS, YES, Write new, YES.
- Enter your message and press YES. See "Entering Letters" on page 30.
- Enter the recipient's number or press ⬇ to retrieve the number from the phone book, the list of groups or the call list.
- Press YES to send the message.
If you want to send the message later, press NO after you have entered your message. The message is saved in the Unsent menu.
To send a message later
- Scroll to Messages, YES, SMS, YES, Unsent, YES.
- Select the message you want to send and press YES.
- Press YES again.
- Select Send and press YES. You may now edit your message.
- Press YES and send the message as described above.
To insert a picture in a text message
- Make sure the long messages function is on.
- Scroll to Messages, YES, SMS, YES, Write new YES.
- While entering your message, press and hold #
- Scroll to Insert object, YES, Picture, YES.
- Select one of the picture groups and press YES.
- Select the picture you want to insert in your message and press YES.
Tip: To edit a picture, see “To edit and save a picture in My pictures” on page 25.
To insert a melody in a text message
- Scroll to Messages, YES, SMS, YES, Write new, YES.
- While entering your message, press and hold #
- Scroll to Insert object, YES, Melody, YES.
- Select the melody you want to insert in your message and press YES.
Tip: To edit a melody saved in your phone, see “Composing Your Own Melodies” on page 24.
Long messages
A short text message can contain up to 160 characters, depending on the language. You can send a longer message, but it is automatically divided into several shorter messages (up to six messages) and you are charged for each message.
To turn long messages on or off
- Scroll to Messages, YES, Options, YES, SMS, YES, Long messages, YES.
- Select On or Off and press YES.
To send a long message
- Scroll to Messages, YES, SMS, YES, Write new YES.
- Enter your message. The display shows how many parts the message is divided into. Press YES.
- Enter the recipient's number or press ⬇ to retrieve the number from the phone book or the call list.
- Press YES to send the message.
Note: If the recipient's phone does not support long messages, the messages are received one at a time.
Templates
If you have one or more standard messages that you often use, you can save these as templates in your phone. You can save up to ten templates consisting of up to 30 characters each.
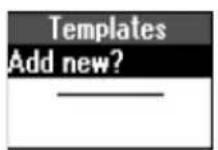
To create a template
- Scroll to Messages, YES, SMS, YES, Templates, YES, Add new?, YES.
-
Enter the message and press YES.
-
To send the message now, press YES when Send message? appears in the display, and proceed as described in “Sending Messages” on page 43. The message is saved in the list of templates.
- If you do not want to send the message now, press NO. The message is saved as a template for later use.
If you want to use a template as a message, scroll to Messages, YES, SMS, YES, Templates, YES, select the template you want from the list and then select Write new.
To delete a template, scroll to Messages, YES, SMS, YES, Templates, YES. Select the template you want to delete and press ⓒ, YES.
Status Report
You can request a status report for a sent text message, providing your network supports the status report service. In the status report you can see if the message has been delivered or not.
To request a status report for a sent message
- Scroll to Messages, YES, SMS, YES, Sent items, YES.
- Scroll to the message you want a status report for and press YES.
- Press YES again.
- Select Status request and press YES.
To check the status of a sent message
- Scroll to Messages, YES, SMS, YES, Sent items, YES, View status, YES.
Receiving Messages
When you receive a message, the phone beeps (see “Message Signal” on page 48), the indicator light on the top of the phone rapidly flashes green and the message New message Read now? appears in the display.
To read the message at once
-
Press YES when you see the question New message Read now?. If you have received several messages, and you press YES at the question above, you enter a list of new messages. Select the message that you want to read and press YES.
-
Scroll through the message by using the and keys. An arrow in the bottom right-hand corner of the display indicates that there is more text in the message. All parts of a long message may not be received at the same time. ... indicates that part of the message has yet to be received.
Note: If the sender of the message wants you to reply, the display shows 'Reply requested Reply?' when you press YES at the end of the message. Press YES again to reply. If you do not want to reply, press NO.
To read a message later
- Press NO when you see the question New message Read now?. The message is saved in the phone and an envelope icon appears at the top of the display. If you want to read the message, you can retrieve it from the Inbox menu.
- means an unread message. - means that the message is saved on the SIM card.
List of Options
If you select a message in the Inbox by pressing YES and then press YES again, you can see a list of options: Delete, Reply, Forward, Save, Call, Mail to, Save [number], Save picture, Save melody, Send to printer, Go to [WAP address], Read next.
Tip: You can also reach a list of options in the Unsent or Sent items menus, by pressing YES after selecting a message.
To delete a message
• There are two ways to delete a message:
- Select Delete in the list of options and press YES.
- In the Inbox menu, scroll to a message and press, ⓒ YES.
To reply to a message
- Select Reply in the list of options and press YES.
- Select the way you want to reply to the message:
- enter a new message
- include the message you want to reply to and enter a reply
- use a template and enter a reply and press YES.
- Enter your reply and press YES to send the message.
To forward a message
- Select Forward in the list of options, press YES.
- You can now edit the message. Press YES.
- Enter the recipient's phone number, or press ⬇ to retrieve the number from the phone book or the call list. Press YES to send.
To save a received message
- Select Save in the list of options and press YES. The message is saved on the SIM card. Messages that are saved on the SIM card remain there until you delete them.
To call the sender of a message
- Select Call in the list of options and press YES.
Tip: To call a phone number found in a message, press YES when the number is highlighted and then press YES again.
To send a message to an e-mail address found in a message
- Make sure you have set the e-mail gateway number, see "To enter an e-mail gateway number" on page 41.
- Select Mail to in the list of options and press YES.
- Enter a message and press YES.
- Press YES again to send the message.
To save a phone number found in a message
- When the number is highlighted, press YES.
- Select Save [number] and press YES. You can find the number in a list of unsaved numbers. To add the number to the phone book, see “To add a new contact” on page 34.
To save a picture found in a message
- When the picture is highlighted, press YES.
- Select Save picture and press YES. The picture is saved in My pictures.
To save a melody found in a message
- When the melody icon is highlighted, press YES.
- Select Save melody and press YES. The melody is saved in the My melodies list. To set the melody as your ring signal, see “To select a ring signal” on page 23.
You can send a message to a specific Bluetooth printer and have the text in the message printed out.
To send a message to a printer
- Select Send to printer in the list of options, press YES.
- Select Via Bluetooth, YES.
- Select the relevant printer in the list of devices, YES.
To go to a WAP address found in message
- When the WAP address is highlighted, press YES.
- Select Go to [WAP address] and press YES.

Message Signal
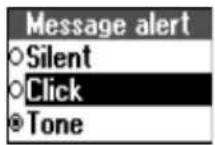
You can choose the signal you want to hear when you receive a message. You can choose between clicks, tones or silent.
To set the message signal
- Scroll to Messages, YES, Options, YES, SMS, YES, Message alert, YES.
- Select a signal and press YES.
Area Information
The ordinary Short Message Service is a personal service that carries your private messages. Area Information is another type of text message, for example a local traffic report or the phone number of a local taxi company, that is sent to all subscribers in a certain network area. Please contact your network operator for further details.
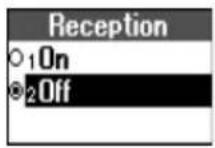
To turn area information on or off
- Scroll to Messages, YES, Options, YES, SMS, YES, Area info, YES, Reception, YES.
- Select On or Off and press YES.
Area Information Message List
You can decide which types of area information messages you wish to receive. The number of area information codes that can be saved depends on your SIM card.
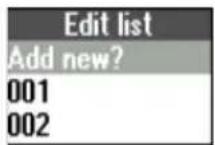
To enter an area information code
- Scroll to Messages, YES, Options, YES, SMS, YES, Area info, YES, Edit list, YES, Add new?, YES.
- Enter the new code and press YES.
To delete an area information code
- If you want to delete a code, scroll to the code and press.
Cell Information
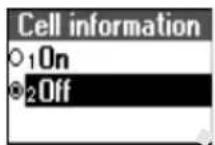
The cell information channel is used by some network operators for sending messages to their subscribers within a certain network area.
To turn cell information on or off
- Scroll to Messages, YES, Options, YES, SMS, YES, Cell information, YES.
- Select On or Off and press YES.
Bluetooth™ Wireless Technology
Your phone has built-in Bluetooth wireless technology. Short-range radio links operate in a globally available frequency band and make it possible for you to connect your phone wirelessly to different Bluetooth devices such as a headset, PC, PDA or printer. You can have a conversation via a cordless Bluetooth headset or browse the Internet on a PC wherever you are, wirelessly connected via a mobile phone. You can exchange information such as your business card, contacts, calendar appointments and tasks, ring melodies and game commands. You can automatically synchronize information in your phone and your PC. You may connect to several Bluetooth devices, but only one at a time.
Note: For best performance, we recommend that your phone and the Bluetooth device you are communicating with are within a range of 10 metres. In some situations, avoiding solid objects in between your phone and the other Bluetooth device may improve the connection.
Before You Start
Before you start communicating with a Bluetooth device, an accessory such as a cordless Bluetooth headset or a PC, you need to:
- pair your phone with the device – you do this by adding the device to a list of paired devices in your phone.
- set your computer for Bluetooth communication – for communication between your phone and a PC.
Note: To browse the Internet via Bluetooth wireless technology on a PC, you need to install the Bluetooth installation software which you can find on the Ericsson CD that comes with your mobile phone.
To exchange melodies, business cards, calendar entries or play games using Bluetooth wireless technology, you do not need to pair your phone with the other device. You only need to make sure that the devices are within range of each other, and that the operation mode is set to Automatic or On. See “Operation Modes” on page 51.
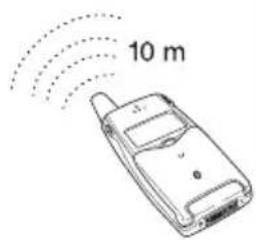
Pairing
Pairing is the process of associating Bluetooth devices with each other so that they connect as soon as they get within range of each other. Your phone can be paired with up to ten Bluetooth devices. You can initiate the pairing between two Bluetooth devices from your own phone or you can accept a request for pairing from the other device. After having paired your phone with the other Bluetooth device, the operation mode is automatically set to On. See “Operation Modes” on page 51.
To initiate pairing with a device
- Scroll to Extras, YES, Bluetooth, YES, Paired devices, YES, Add device?, YES, Phone initiates, YES.
- A list of device types that can be paired with your phone is shown. Scroll to a device type and press YES. If you are not sure about what type of device you want to pair with your phone, you can choose All.
- The phone starts to search for Bluetooth devices. When the search is finished, the display shows available devices of the type you selected. Select the device that you want to pair with your phone by pressing YES.
- Enter a passkey (up to 16 digits) for both your phone and for the other device. (If a passkey does not come with the Bluetooth device when you buy it, you need to create one yourself.)
- When the pairing has been completed, you may edit the name tag for the device and press YES.
Tip: Grey icons are Bluetooth devices that have not yet been paired with your phone. See “Icons” on page 136 for information about icons that may appear in the phone display.
To accept pairing with a device
- Scroll to Extras, YES, Bluetooth, YES, Paired devices, YES, Add device?, YES, Phone accepts, YES.
The phone waits for the other device. This may take a while.
- A question appears. Press YES to confirm the pairing.
- Enter an identical passkey on the phone and on the other device.
- When the pairing has been completed, you may edit the name tag for the device and press YES.
You can edit the list of paired devices, for example by editing the name tag of a device, deleting a device from the list or by editing the order of the devices in the list.
To edit the name tag of a device
- Scroll to Extras, YES, Bluetooth, YES, Paired devices, YES.
- A list of paired devices is shown. Scroll to the device you want to edit and press YES.
- Scroll to Edit and press YES.
- Edit the name tag and press YES.
To delete a device from the list
- Scroll to Extras, YES, Bluetooth, YES, Paired devices, YES.
- Scroll to the device and press Ⓞ. Delete? appears. Press YES.
To edit the order of the devices in the list
- Scroll to Extras, YES, Bluetooth, YES, Paired devices, YES.
- Scroll to the device whose position you want to change and press YES.
- Enter the position number (2 - 10) you want for the device. (Position 1 is always for the headset.)
Phone Name
You can choose a name for your phone. This name is shown in other devices when your phone is discovered.
To enter a name for your phone
- Scroll to Settings, YES, Phone name, YES, Edit, YES.
- Enter a name and press YES.
The phone name is also used for the infrared port.
Operation Modes
There are four different operation modes, depending on what you want the phone to do:
- Off – the phone cannot send or receive any information.
- Automatic – The Bluetooth function is activated automatically when you start sending information such as a business card or when you answer an incoming call by pressing the Bluetooth headset button.
- On – the Bluetooth function is activated all the time (until you change the mode). The phone can send and receive information to and from a paired Bluetooth device.
- Discoverable – the phone can receive information from any Bluetooth device and can accept pairing.
Note: In countries where the use of Bluetooth wireless technology is not allowed, you must ensure that the Bluetooth function is set to Off.
To change the operation mode
- Scroll to Extras, YES, Bluetooth, YES, Operation mode, YES.
- Select Off, Automatic or On and press YES.
In order to be detected by Bluetooth devices searching for other Bluetooth devices in the vicinity, you must make your phone discoverable.
To make the phone discoverable
- Scroll to Extras, YES, Bluetooth, YES, Discoverable, YES.
Your phone is discoverable for a few minutes. It then returns to the operation mode that it was in before.
Searching for Devices
You can choose first to search for Bluetooth devices and then, for example, to pair the device with your phone, or to exchange business cards.
To discover devices
- Scroll to Extras. YES, Bluetooth, YES, Discover, YES.
A list of discovered devices appears.
- You can now choose to add the device to the list of paired devices as long as the list is not full.
Note: Other Bluetooth devices are not shown in the list of devices unless they are discoverable.
Sending and Receiving
To send an item such as a business card, a calendar appointment or a melody using Bluetooth wireless technology, you need to make sure that the devices are within range of each other.
The procedure of sending items via Bluetooth wireless technology differs depending on the item you want to send. See “Exchanging Melodies” on page 24, “Exchanging Business Cards” on page 38 and “Exchanging Calendar Entries” on page 59.
To send an item
- After you select Bluetooth as the transfer method, the phone searches for devices. A list of devices appears. Select the device you want to send the item to and press YES.
There are certain items in your phone that you can send to specific Bluetooth printers and have printed out. This can be useful if, for example, you want to print an overview of all the meetings that you have scheduled in your phone. Select the relevant printer in the list of devices.
These are items you can send to printers using Bluetooth wireless technology:
• Monthly, weekly and daily overviews
- Appointments and tasks
- Contacts
- Business cards
- Text messages
To receive an item
• To be able to receive an item, do one of the following:
- scroll to the Receive menu and press YES. For example, to receive a calendar appointment, scroll to Extras, YES, Calendar, YES, Receive, YES.
• set the phone to Discoverable mode.
Infrared Port
Your phone is equipped with a port using infrared (IR) as a communications link. With IR you can connect your phone to another similar phone, a PDA or a PC. You can send and receive, for example, calendar appointments and tasks, business cards, melodies and game commands.
Before you start communicating with another IR device, you need to ensure that:
- the IR port is on.
- the IR devices are placed so that the IR ports are facing each other.
- the software for infrared communication is installed.
You can find the software installation on the Ericsson CD that comes with your mobile phone.
Note: To be able to use the e-mail and browsing services, you have to have programs for the respective services installed on your PC.
Activating the IR Port
The IR port has three settings:
- On. The phone keeps searching for other IR devices until the port is turned off. When the IR port is set to on, an icon appears in the display.
- Off. The port is not active.
- 10 minutes. The port is automatically turned off 10 minutes after the last data transmission, in order to preserve battery life.
To set the IR port
-
Scroll to Extras, YES, Infrared port, YES.
-
Select On, Off or 10 minutes and press YES.
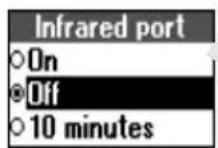
Connecting IR Devices
Place your phone and the other device so that the IR ports are facing each other. Make sure that the IR function is activated on both devices.
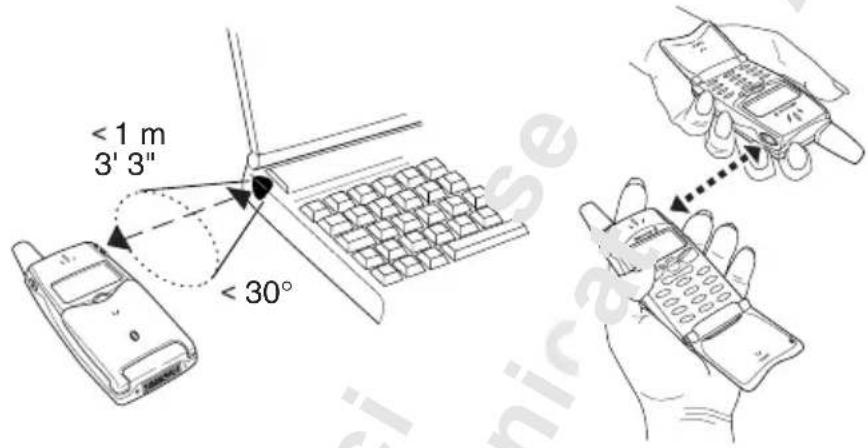
You can move the devices out of line for a short while (approximately 15-20 seconds) without interrupting the connection.
Strong sunlight can interfere with infrared light.
Phone Name
You can choose a name for your phone. This name is shown in other devices when they are connected to your phone.
To enter a name for your phone
-
Scroll to Settings, YES, Phone Name, YES, Edit, YES.
-
Enter a name and press YES.
This name is also shown when you use Bluetooth wireless technology as the transfer method.


Calendar
You can use the calendar to keep track of important meetings that you need to attend, phone calls that you need to make or tasks that you need to do.
Appointments and Tasks
You can save up to 200 appointments and tasks in your calendar, depending on the size of each item. You can choose to add a new appointment or task, or use an old appointment or task as a template by copying and editing it.
- Appointments: meetings, vacation, phone call.
- Tasks: make a phone call, send a message, pay bills.
You can fill in different types of information about the appointments or tasks.
To add a new appointment
- Scroll to Extras, YES, Calendar, YES, Add appointm., YES.
- Select the type of appointment and press YES.
- Press YES and enter a subject.
- Scroll to Location:, press YES, enter a location, and so on.
- Scroll to Continue? and press YES.
- Press YES and enter a start date. Scroll to Time, press YES, enter a start time, and so on.
- Scroll to Continue? and press YES.
- Select the reminder interval you want, for example 5 min before, and press YES.
If you select Other reminder, enter a reminder date and press YES. Enter a reminder time and press YES.
- A list of options appears.
If the appointment is recurrent:
- Select Recurrent app. and press YES.
- Select the recurrence you want and press YES.
- If you want to set an end date, select Set end date and press YES. Enter a date and press YES.
If you want to change the class for your appointment:
- Select Class and press YES.
- Select the class you want and press YES.
If you want to set the time zone for a meeting:
- Select Time zone and press YES.
- Select the time zone, in which the meeting is to be held, and press YES. Your meeting time will be adjusted automatically according to the time zone you are in.
- Confirm with Save and close, YES.
To add a new task
- Scroll to Extras, YES, Calendar, YES, Add task, YES.
- Select a task and press YES.
If you select phone call, enter a number and press YES. If you select message, select a type of message and press YES. If you select miscellaneous, select a type and press YES.
- Press YES and enter a subject. Scroll to Descr.:, press YES and enter a description.
- Scroll to Continue? and press YES.
- If you want to set a reminder, scroll to Set reminder and press YES. Enter a reminder date and press YES.
- A list of options appears. Confirm with Save and close, YES.
Viewing Your Calendar
To view your calendar content, scroll to Extras, YES, Calendar, YES and then select one of the following:
- View today. This shows all the appointments for the current day and the tasks that have not been completed. An icon appears next to those appointments that cover the whole day. Scroll to the appointment or task you want to view and press YES. Press YES again to see options for the appointment or task.
- View all tasks. This shows all your entered tasks. Scroll to the task you want to view and press YES. Press YES again to see options for the task.
- View month. This shows a whole month, with the current day in a square. Move among the weeks by using the arrow keys. Press YES to enter a certain week. You enter a certain day by pressing YES when that day is highlighted. Days on which you have appointments are marked in bold.
- View week. This shows a whole week. All your appointments and tasks are shown as grey boxes. You enter a certain day by pressing YES when that day is highlighted.
Tip: In the monthly or weekly views, you can go to next week by pressing 3, to next month by pressing 6 and to next year by pressing 9. You can go back a week, a month or a year by pressing 1,4 or 7 respectively. To reach the current day, press c.
Editing and Deleting
You may wish to edit an appointment or a task, for example, by changing the date or location.
To edit or delete an appointment
- In the calendar, scroll to the day of the appointment you want to edit and press YES.
If you want to delete the appointment, press ⓒ. Delete? appears, press YES. - To edit, press YES again to open the appointment.
- Press YES again to go to the list of options.
- Select Edit and press YES.
- Proceed as described in "To add a new appointment" on page 56.
- When you have finished, scroll to Save and close and press YES.
To edit or delete a task
-
Scroll to Extras, YES, Calendar, YES, View all tasks, YES.
-
Scroll to the task you want to edit. If you want to delete the task, press . Delete? appears, press YES.
-
To edit, press YES again to open the task.
-
Press YES again to go to the list of options.
-
Select Edit and press YES.
-
Proceed as described in "To add a new task" on page 57.
-
When you have finished, scroll to Save and close and press YES.
The List of Options
When you have scrolled to an appointment or a task in one of the calendar views, and pressed YES, you can press YES again to view a list of options. You may now choose one of the following options:
- Edit. Enter the correct date, time and so on and press YES after each entry. When you have finished editing the appointment or task, scroll to Save and close and press YES.
- Delete. Press YES to delete an appointment or a task.
- Send. See “Exchanging Calendar Entries” on page 59.
- Reschedule. You can re-schedule an appointment. Select a week in the monthly view and press YES. Select a day in the weekly view and press YES to re-schedule the appointment to the selected day. Edit and press YES.
- Copy. You can use an old appointment or task as a template by copying and editing it. Enter a category, description and so on, and confirm each entry by pressing YES.
- Call. Select a task or an appointment that contains a phone number in the subject, and press YES to make the phone call.
Calendar Settings
To view your calendar options, scroll to Extras, YES, Calendar, YES, Options, YES, and then select one of the following:
- Status. Use this to check when you last synchronized your calendar, how much space is left for new appointments and tasks.
- Class view. You can choose whether to see only the private calendar entries, only the public ones or both.
- Reminders. Turn on this function if you want your phone to remind you even though the phone is turned off.
- Profile switch. If you set the profile switch reminder function to On, the question Switch profile? appears when a meeting is about to start. Press YES to view the list of profiles and select a profile. After the meeting, you are asked to switch profile again.
- Delete all. Deletes all appointments and tasks in the calendar.
Exchanging Calendar Entries
You can send and receive appointments and tasks using Bluetooth wireless technology, the infrared port or a text message.
To send an appointment or a task
- Select Send in the list of options.
- Select a transfer method.
Continue as described in “Connecting IR Devices” on page 55, “Sending Messages” on page 43 or “Sending and Receiving” on page 52.
You can send appointments and tasks to a specific Bluetooth printer and have them printed out. Select the relevant printer in the list of devices.
You can also send daily, weekly and monthly overviews to specific Bluetooth printers and have the overviews printed out.
To send calendar views to a printer
- Scroll to Extras, YES, Calendar, YES, Send, YES.
- Select a view: View today, View week or View month and press YES.
- Scroll to the day, week or month you want to print and press YES.
- Scroll to Send, YES, Via Bluetooth, YES.
- Select the printer in the list of devices and press YES.
When you receive an appointment or a task via a text message, you accept it by pressing YES. To be able to receive calendar items using the infrared port or Bluetooth wireless technology, you first need to select the Receive menu in order to activate the infrared port or to make the phone discoverable.
To receive an appointment or a task
- Scroll to Extras, YES, Calendar, YES, Receive, YES.
- Select a transfer method and press YES.
- When you receive a calendar item, press YES to save it in the calendar.
If your calendar is full, you must remove calendar items before saving any new ones.
Synchronization
You can synchronize the calendar and contacts in your phone with the calendar and contacts in your PC. To do this, you first need to install on your PC the synchronization program found on the Ericsson CD that comes with your mobile phone.
If you have an Internet calendar or phone book, you can also synchronize that with your phone calendar and contacts, using WAP.
Starting the Synchronization
Before you start the synchronization, decide which synchronization method you want to use:
- For synchronization with nearby devices:
use the Bluetooth wireless technology, the infrared port or a cable. If you want to use the Bluetooth wireless technology, you must first pair your mobile phone with the other device. See “To initiate pairing with a device” on page 50. If you use a cable, the synchronization starts as soon as you connect the cable.
- For synchronization with your Internet calendar or phone book: use WAP.
The first time you want to synchronize your phone with your Internet calendar or phone book you must make settings for this, see “Internet Calendar Synchronization” on page 62.
To start the synchronization
-
Scroll to Extras, YES, Synchronization, YES, Synchronize, YES.
-
Select the synchronization method you wish to use and press YES.
- If you select Use Bluetooth: Select Synchronize with. Select a device in the list, for example your PC.
- If you select Use IR: Make sure the infrared port of the phone and the other device are facing each other.
- If you select Use WAP: See “Internet Calendar Synchronization” on page 62.
Synchronization Sound
You can select whether you want the phone to make a sound when the synchronization is finished.
To turn the synchronization sound on or off
- Scroll to Extras, YES, Synchronization, YES, Sound, YES.
- Select On or Off and press YES.
Internet Calendar Synchronization
Via WAP you can synchronize your mobile phone calendar or contacts with a calendar or phone book on the Internet. To do this you must have:
- an Internet calendar and phone book program. Contact your operator for more information about the program. You need a user id, password and Internet address for the calendar and phone book.
- a WAP profile set in your mobile phone. For information on how to set a WAP profile, see “WAP Profile Settings” on page 65.
To make the WAP synchronization settings
- Scroll to Extras, YES, Synchronization, YES, Server settings, YES.
- Select WAP profile, YES.
In the list of WAP profiles, select the one you want to use for synchronization.
- Select Server user id, YES.
Enter your user id for the Internet calendar and phone book.
- Select Server pwd, YES.
Enter your password for the Internet calendar and phone book.
- Select Server URL, YES.
Enter the Internet address of the Internet calendar and phone book.
- Select Phone book path, YES.
Enter the Internet address, user id and password for your phone book on the Internet.
- Select Calendar path, YES.
Enter the Internet address, user id and password for your calendar on the Internet.
Setting up WAP and E-mail
In order to browse via WAP or use the e-mail program in your phone, you must enter settings for a data account in your phone. The settings specify all the information your phone needs to communicate with a certain server on the Internet, for example, the address of that server. You can have several data accounts saved in your phone, with different settings for different purposes. For fast and efficient access, try the General Packet Radio Service (GPRS) as the access type.
In order to browse via WAP, you also need to enter settings for a WAP profile and select which WAP profile you want to use when browsing.
In order to use the e-mail program in your phone, you also need to enter settings for an e-mail account and select which e-mail account you want to use when sending and receiving e-mail messages.
Note: The settings may already be entered when you buy the phone, or you can receive the settings from your network operator or your Internet service provider. You can also receive settings from http://mobileinternet.ericsson.com.
Data Account Settings
The main setting for a data account is the access type (connection method). You can choose between two access types:
- GPRS (General Packet Radio Service) data GPRS allows you to be always online, yet pay only for the amount of data transmitted and not for the time you are connected. You need a subscription that supports GPRS. Please contact your network operator for charging and subscription details.
- GSM data Normally, you pay for the time you are connected.
To create a data account
- Scroll to Settings, YES, Data comm., YES, Data accounts, YES, Add account?, YES.
- Enter a name for the data account.
- Select an access type: GPRS data or GSM data.


- Enter the settings that you have received from your operator.
For GPRS: access point name, user id and password.
For GSM data: phone number, user id and password.
Confirm each setting by pressing YES.
- Scroll to Save?, press YES.
To enter additional settings for a data account
- Scroll to Settings, YES, Data comm., YES, Data accounts, YES.
- Select a data account and press YES.
- Select Edit.
- Select the setting you want to edit and press YES. Edit the setting, press YES.
- Repeat step 4 for all the settings you want to edit.
Settings for GPRS:
APN (Access point name address) – the address of the external data network you want to connect to, either an IP address or a text string.
User id – your user id to log on to the external data network.
Password – your password to log on to the external data network.
Passwd. request (Password request) – if this setting is on, you are asked for a password each time you log on to the external data network.
Allow calls – if you want to allow incoming calls during a GPRS session, select On. If not, select Off. ✗.
IP address – the IP address that the phone uses when communicating with the network. If you do not enter a value, the network provides you with a temporary IP address.
Advan. settings (Advanced settings) – these are optional. Consult your network operator.
Settings for GSM data:
Phone number – the phone number of your Internet service provider.
User id, Password, Passwd. request. Same as for GPRS above.
Data rate - select the speed you want for the connection.
Dial type – select analogue or ISDN connection.
If you want to change access type, you have to create a new data account and select the access type you want to use.
GPRS and GSM Data Settings
If you have selected GPRS as the access type, the Preferred service should be set to GPRS&GSM. An icon may then appear in the display telling you that GPRS is within range. See “Icons” on page 136. If you have selected GSM data as the access type, you should select GSM only as the preferred service. This setting is valid for all data accounts.
To select a preferred service
- Scroll to Settings, YES, Data comm., YES, Pref. service, YES.
- Select GPRS&GSM or GSM only.
Tip: To see the status of GPRS coverage and connection, slide the volume key up or down from standby to enter the Status menu and then scroll to GPRS.
Data Counters
To check how much data you have sent and received, using GPRS, scroll to Call info, YES, Data counters, YES, and select Last session or Total data.
WAP Profile Settings
When you browse WAP pages, you use a certain WAP profile. A WAP profile is a collection of settings that determines, for example, how you connect to the mobile Internet. You could, for example, have one WAP profile for mobile e-commerce and another one for general WAP browsing. You can have five WAP profiles. By switching WAP profile, you also switch settings in a simple way.
There are three ways in which WAP profile settings can be entered into your phone:
- The settings are already entered when you buy the phone.
- You receive the settings in a text message, for example, from http://mobileinternet.ericsson.com.
- You enter the settings manually.
Note: You may not need to enter all the settings below. Contact your network operator or service provider (a distributor of WAP pages) before you start changing the settings yourself.
To enter WAP profile settings manually
- Make sure you have created a data account between your phone and the WAP gateway.
- Scroll to WAP services, YES, WAP settings, YES.
-
Select the profile that you want to edit and press YES.
-
Scroll to Rename, YES. Enter a name for the profile.
- Scroll to Chg homepage, YES. Enter the address of the WAP page you want to have as homepage.
-
Scroll to Save to, YES. Select if the bookmarks that you add during browsing should be available for all your WAP profiles or only for the WAP profile you are currently using.
-
Scroll to Gateway, YES.
-
For GPRS and GSM data, select IP settings, YES. Continue as described in "To enter IP settings" below.
For SMS, scroll to Change type, YES, SMS, YES. Then select SMS settings, YES. Continue as described in "To enter SMS settings" below.
To enter IP settings
- Select Connect using, YES. Select the data account you want to use when browsing.
- Scroll to IP address, YES. Enter the IP address of the WAP gateway.
- Scroll to User id, YES. Enter your user id for the WAP gateway.
- Scroll to Password, YES. Enter your password for the WAP gateway.
- Scroll to Data mode, YES. Select a data connection mode, YES.
- Scroll to Security, YES. Select On if you want a secure connection, or Off if you do not want a secure connection.
- Scroll to Show images, YES. Select On if you want to view images while browsing, or Off if you do not want to view images while browsing.
- Scroll to Response timer, YES. Enter a time limit in seconds after which a download attempt will stop.
Note: An IP address consists of four groups of digits, with a maximum of three in each group, for example 136.225.37.163. If any of the digit groups consists of only one or two digits, enter a leading zero (0) for each digit that is missing, 136.225.037.163.
To enter SMS settings
- Select Service centre, YES. Enter the phone number of your network operator's service centre.
- Scroll to SMS gateway, YES. Enter the phone number of your network operator's SMS gateway.
-
Scroll to User id, YES. Enter your user id for the WAP gateway.
-
Scroll to Password, YES. Enter your password for the WAP gateway.
- Scroll to Security, YES. Select On if you want a secure connection, or Off if you do not want a secure connection.
- Scroll to Show images, YES. Select On if you want to view images while browsing, or Off if you do not want to view images while browsing.
- Scroll to Response timer, YES. Enter a time limit in seconds after which a download attempt will stop.
Before you start using the WAP browser, you must select which of your WAP profiles you want to use when browsing.
To select a WAP profile
- Scroll to WAP services, YES, Select profile, YES.
- Select a WAP profile and press YES.
E-mail Account Settings
An e-mail account specifies, for example, the server that is used for your e-mail messages. Your network operator provides you with the settings, for example, in a text message.
To create an e-mail account
- Scroll to Messages, YES, Options, YES, E-mail, YES.
- Select Edit account.
- Select Add account and press YES.
- Enter a name for the account, for example, Home or Office for your home e-mail or your office e-mail.
- Select Connect using and press YES.
A list appears with the data accounts that you have saved in your phone.
- Select the data account you want to use with this e-mail account and press YES.
- Enter the rest of the settings in the list. You use the same e-mail settings in your phone as in your PC e-mail program. If you do not have an e-mail service, contact your operator to get all the necessary settings.
There are two optional settings:
- Copy outgoing
- On: e-mail messages sent from your phone are also sent to an e-mail address of your choice. This way, your sent messages are copied and can be saved for future reference. Press YES to specify the e-mail address.
- Off: e-mail messages sent from your phone are not copied to an e-mail address.
- Check interval
Select how often you want the phone to connect to your e-mail server and check for incoming e-mail messages.
You can have more than one e-mail account in your phone: for example, one for your business e-mail and one for your private e-mail. You can set which e-mail account you want to use as default.
To set an e-mail account as default
-
Scroll to Messages, YES, Options, YES, E-mail, YES, Set account, YES.
-
Select the e-mail account you want to use as default and press YES.
WAP
WAP (Wireless Application Protocol) is a global standard for advanced mobile services, for example, mobile Internet communication, mobile e-commerce and telephony services. WAP allows you to access certain services on the Internet such as banking services, news and reservation services from your mobile phone.
Note: In order to access WAP services, you need a subscription that supports data transmission and WAP browsing.
Before you start using the WAP browser, make sure you have created a data account, entered the WAP profile settings and selected a WAP profile. See “Setting up WAP and E-mail” on page 63. For fast and efficient browsing, try the General Packet Radio Service (GPRS) as the access type.
Starting the WAP Browser
To start browsing
- Scroll to WAP services and press YES.
-
Select one of the following ways to start browsing:
-
Open your homepage. Ericsson Mobile Internet is the homepage which is set when you buy your phone.
- Go to one of your bookmarks. Scroll to Bookmarks, YES. Select a bookmark from the list and press YES.
- Enter the address of a WAP page. Scroll to Enter address, YES, New address?, YES. Enter the WAP address, for example: mobileinternet.ericsson.com. (You only need to enter a prefix if you want to use a protocol other than http, such as ftp://.)
Exiting the WAP Browser
To exit the browser
- Press and hold NO. Remain connected? appears. Press NO. If you want to leave the browser temporarily but stay on-line, press and hold YES and select Go to menu.

Options When Browsing
When browsing, you can reach different browsing options such as links or special features by pressing and holding YES until the Options menu appears. The options may vary depending on the WAP page you are visiting.
The following options are always found:
- Homepage – go to the homepage of the current WAP profile.
- Bookmarks – add the page you are currently browsing to your list of bookmarks, or view the list of bookmarks for the WAP profile you are currently using.
Bookmarks which have been saved in a WAP profile other than the one you are currently using are in grey. To view all bookmarks, exit the browser and go to WAP services, YES, Bookmarks, YES. - Enter address – enter the WAP address of a page you want to visit.
- Send as link – send a text message with a link to the current WAP page to another phone.
- Reload – refresh the contents of the WAP page.
- Go to menu – go back to the WAP services menu in order to access other phone menus. The connection to the Internet is not interrupted. When you want to start browsing again, scroll to WAP services, YES, Resume, YES.
- Exit – close down the WAP connection.
- Status – display the current status, for example how long you have been browsing.
- New homepg – set the current WAP page as the homepage for the WAP profile you are currently using.
Additional WAP Options
When not browsing, you can, for example, change the homepage, edit your bookmarks or clear the cache memory.
Changing the Homepage of a WAP Profile
When you buy your mobile phone, Ericsson Mobile Internet is set to be the homepage in each of the five WAP profiles that you have in your phone.
To change the homepage of a WAP profile
- Scroll to WAP services, YES, WAP settings, YES.
- Select the profile whose homepage you want to change, YES.
- Scroll to Chg homepage, YES.
- Enter the name of the homepage, YES.
- Enter the address of the homepage, YES.
Your List of Bookmarks
When you are not browsing, you can see all your WAP bookmarks in Bookmarks. You can have a maximum of 50 bookmarks.
To work with your bookmarks when not browsing
- Scroll to WAP services, YES, Bookmarks, YES.
- Select the bookmark you want to go to, edit or send, YES.
-
Select one of the following sub-menus and press YES:
-
Go to bookmark. Go to the marked WAP page.
- Edit bookmark. Edit the name and/or the WAP address of the bookmark.
- Delete. Delete the bookmark.
- Send as link. This creates a text message in which the WAP address is sent as a link. You can add a comment if you wish.
Clearing Cache
You can clear the cache memory which contains previously visited WAP pages. You may, for example, want to clear the information on your transactions.
To clear the cache memory
- Scroll to WAP services, YES, Clear cache, YES.
- Clear cache? appears. Press YES.
Security
When you use certain WAP services, for example mobile e-commerce, you need a secure connection between your phone and the WAP gateway. If you are connected securely while browsing, an icon appears in the display.
To establish secure connections, you need to have certificates saved in your phone. There are two types of certificates:
- A certificate that guarantees that a WAP site is genuine. If you have this type of certificate saved in your phone, it means you trust all WAP gateways that its supplier, for example, a network operator has certified. (Trusted certif)
- A personal certificate that verifies your identity. A bank that you have a contract with may issue this kind of certificate. (Client certif)
You can find and download trusted certificates from certain WAP pages. Ask your network operator or service provider for the WAP address. Trusted certificates may already be saved in your phone when you buy it.
To download a trusted certificate
- Browse to the WAP page where the certificates are.
- Click a suitable link and follow the instructions to download the certificate to your phone.
To check the certificates in your phone
-
Scroll to WAP services, YES, WAP settings, YES, Common, YES, Security, YES.
-
Select Trusted certif or Client certif and press YES.
A list of the available certificates is shown.
Locks (PIN codes)
There are two types of WAP security locks (PIN codes) in your phone. The locks protect your subscription from unauthorized use when browsing. You receive them from your operator when you buy the phone.
- Access lock. You may be asked to enter the access lock code when accessing certain WAP pages or when you want to see your certificates.
- Signature lock. Used for confirming transactions.
To change the lock codes
-
Scroll to WAP services, YES, WAP settings, YES, Common, YES, Security, YES, Locks, YES.
-
Select the lock you want to change, YES. The locks may have different names, depending on your network operator or your service provider.
-
Select Change PIN, YES.
-
Enter your new lock code (four to eight digits) and press YES.
If you do not want to be asked for your access lock code when browsing, you can set the access lock to off.
To set the access lock to on or off
- Scroll to WAP services, YES, WAP settings, YES, Common, YES, Security, YES, Locks, YES.
- Select Access lock, YES.
- Select Protection, YES.
- Select On or Off, YES.

Transaction Contracts
You can check which transactions you have made with your phone when browsing. Each time you confirm a transaction with your signature lock code, a contract is saved in your phone. The contract contains details of the transaction.
To check your transaction contracts
- Scroll to WAP services, YES, WAP settings, YES, Common, YES, Security, YES, Contracts, YES.
- A list of your contracts is shown. You can delete a contract by pressing c YES.
WAP Push Messages
A service provider can send, for example, updated news or new WAP settings to your phone in a push message.
There are two kinds of push messages:
- Text mess a ge s that inform you about a WAP page.
- WAP pages with the updated information appear. Press YES to start the WAP browser.
Accepting or Rejecting Push Messages
If you do not want to receive push messages, you can turn off the Push access. This setting is valid for all your WAP profiles.
To turn the push access on or off
- Scroll to WAP services, YES, WAP settings, YES, Common, YES, Push access, YES.
- Select On or Off.
Receiving Push Messages
When you receive a push message, it comes to the Push inbox.
When you have read the message, press YES and select one of the following:
- Postpone. Saves the push message so that you can load and see it later.
- Load. The browser starts and loads the pushed WAP page.
- Delete. Deletes the push message.


You can use the e-mail function in your phone to send and receive e-mail messages. Before using the e-mail program, make sure you have created a data account, an e-mail account and set which e-mail account to use. See “Setting up WAP and E-mail” on page 63.
Note: You must have a subscription that supports data transmission.
Sending and Receiving
The Send & Receive option in the E-mail menu offers the fastest way for you to check for new e-mail messages and send e-mail messages saved in your Outbox.
Writing and Sending
To write and send new e-mail messages
- Scroll to Messages, YES, E-mail, YES, Compose.
- Select To: and press YES. You can:
- select Add name: and press YES. Enter a name and e-mail address.
- press 📋 to enter the phone book and retrieve a saved e-mail address.
- If you want to send a copy of the message to someone, select Cc: and select the address as above.
- If you want to set a priority other than Normal to the message, scroll to Priority, YES. Select High or Low.
- Select Subject: and press YES. Enter a title and press YES. This is mandatory.
- Select Text: and press YES. Enter your message and press YES.
- Select one of the following:
- Send now
The message is sent at once.
- Send now with attachment
The phone's infrared port searches for an infrared camera in order to load pictures as attachments. See "Attaching Pictures" on page 75.
- Save to outbox
The message is saved in the Outbox. All e-mail messages in the Outbox are sent when you select the Send & Receive option in the E-mail menu.
If you compose an e-mail message and do not send it, it is saved in the Drafts folder. You can open these messages, edit them and send them, at any time.
You can copy sent messages to an e-mail address, see “E-mail Account Settings” on page 67.
Attaching Pictures
You can attach pictures, taken with a digital IR camera, to an e-mail message.
To attach a picture
- Open or create an e-mail message.
- Select Send now with attachment.
- Make sure the infrared ports of the phone and the camera are facing each other.
- Start transmitting the picture from the camera. An infrared connection is established between the phone and the camera and the picture is loaded to the e-mail message as an attachment.
When the picture has been loaded, the e-mail message is sent.
Receiving and Reading
To receive and read e-mail messages
- Scroll to Send&Receive, YES. Your e-mail messages are downloaded from the server.
- Scroll to Inbox, YES.
- Select the e-mail message you want to read and press YES.
Note: The phone can save up to 6 complete e-mail messages. All your e-mail messages are saved on your e-mail server.
You may not be able to see all your new e-mail messages at once, since the memory capacity of the Inbox is limited. An arrow in the top or bottom left corner, indicates that there are more e-mail messages on the server. To retrieve more e-mail messages, scroll to the arrow and press YES.
Replying
To reply to an e-mail message
- Open the e-mail message you want to reply to.
- Place the cursor in the text and press YES to view a list of options.
- Select Reply or Reply all and press YES.
- Write a message and press YES.
Deleting
To delete e-mail messages
- Go to the Inbox and select the e-mail message you want to delete.
- Press c
Archiving
You can archive an e-mail message in order to read it later or if you want to save important information. You can only archive as much text as the display shows.
To archive an e-mail message
- Open the e-mail message with the text you want to archive.
- Make sure the text that you want to archive is visible in the display.
- Place the cursor in the text and press YES to view a list of options.
- Select Copy to arch. and press YES. The text can now be found in Archive under the E-mail menu.
Data Calls
A data call is a call where information, for example, e-mail messages, is sent between computers or servers via the built-in modem in your phone. To be able to send and receive data calls, you need:
- the appropriate computer program, such as an e-mail program.
- a phone subscription that supports data transmission.
For detailed information, please consult your network operator.
WAP browsing is a data call sent between your phone and a mobile Internet server, not involving any computer program. See “WAP” on page 69.
Making Data Calls
Data calls are initiated from the appropriate computer program. To make data calls you need to connect your phone to a computer via Bluetooth wireless technology, an infrared port or a cable and then start the computer program.
Receiving Data Calls
If you have separate numbers for voice and data calls, your phone recognizes the type of call.
Receiving Data Calls – Separate Numbers
If your network and subscription support separate numbers for the different types of call, the display shows which type of call you are receiving.
To receive a data call
- Connect your phone to the computer.
- Answer the call from within the computer program (if it is not answered automatically).
Note: You cannot answer an incoming data call by pressing the YES key on the phone, but you can reject the call by pressing NO.
Receiving Data Calls – One Number
If you have a SIM card that does not support separate voice and data numbers, the phone does not recognize the type of incoming call. If you want to receive a voice or data call, you first have to set the phone to one of these options in the Next incoming sub-menu.

To receive a voice or data call
- Scroll to Call info, YES, Next call, YES, Next incoming, YES.
- Select the call type you want (Voice, Data or Fax) and press YES to confirm your choice.
- Connect your phone to the computer.
- Answer the call from within the program.
Once you have set your phone for a specific incoming call, it remains set until you change it.
Sending and Receiving E-mail from Your PC
You can use the phone's built-in modem to send or receive e-mail from your PC.
To send e-mail messages from your PC
- Install modem drives on your PC for your phone's built-in modem. You do this from the CD that comes with your phone.
- In the Dial-Up Networking service on your computer, select Ericsson T39 as the modem you wish to use.
- Place your mobile phone next to your computer. Make sure it is connected according to the instructions for the transfer method you are using.
- Start your e-mail program, then write and send a message.
To receive e-mail messages from your PC
- Follow steps 1 and 2 above.
- Start your e-mail program and open your Inbox to read your new e-mail messages.

Profiles
Your phone includes a number of pre-programmed profiles. A profile is a group of settings which suit a certain environment. Some phone accessories select a profile automatically. For example, when you place your phone in a car handsfree unit, the In car profile is chosen.
Selecting a Profile
There are seven pre-programmed profiles:
- Normal
- Meeting
• In Car - Outdoors
• Home
• Office
- Port h-free (portable handsfree)
When you buy your phone, it is set to the Normal profile. From standby mode, you can slide the volume key up or down to see which profile you are currently using. If you select a profile other than Normal, an icon is shown in standby.
A profile with no accessories associated, such as Meeting or Normal, must be chosen manually.
To select a profile
- Scroll to Settings, YES, Profiles, YES, Select profile, YES.
- Select a profile and press YES.
Using Your Voice
You can select a profile by using your voice, but first you need to activate the voice profile function and record a voice command. See "Changing Profiles" on page 84.
To select a profile using your voice
- Press and hold YES until you hear a tone.
- Release YES and say your voice command for the profile.
Tip: You can make the phone remind you to switch profile, for example, before a meeting begins. See "Calendar Settings" on page 59.

Changing the Profile Settings
You cannot create more profiles, but you can change the settings for a profile. Use the View profile function to see what settings are included in a certain profile.
To view your profiles
-
Scroll to Settings, YES, Profiles, YES, Select profile, YES.
-
Select the profile you want to view and press YES.
-
Scroll to View profile and press YES. The settings for the profile in use appear.
To change a profile setting
-
Scroll to Settings, YES, Profiles, YES, Edit profile, YES.
-
Select a setting and press YES.
-
Change the profile setting according to your wishes. The settings remain until you change them again.
To change the name of a profile
-
Scroll to Settings, YES, Profiles, YES, Edit profile, YES, Profile name:, YES.
-
Enter a new name and press YES.
With the Reset Profiles function, you can change all profile settings back to the way they were when you bought your phone.
To reset the profile settings
-
Scroll to Settings, YES, Profiles, YES, Reset profiles, YES.
-
Answer YES if you are sure you want to reset all profiles.
Accessories
A specific profile is chosen automatically when you use the phone together with a certain accessory. Every time you disconnect your phone from the accessory, the profile is changed to the one which was active before.
Note: Contact your local Ericsson retailer for more information about accessories.
Adding Accessories to a Profile
You can add one or more accessories to any profile, except the Normal profile. For example, if you usually use a portable handsfree together with a specific charger, you may add the charger to the Port h-free profile. When you connect the phone to the charger, the phone recognizes it and switches profile automatically.
When you want to add an accessory to a specific profile, you must first activate that profile. See “To select a profile” on page 79.
To add an accessory to a profile
- Scroll to Settings, YES, Profiles, YES, Edit profile, YES, Accessories, YES.
Now you are in the list of the accessories already associated with the profile.
- Select Add accessory? and press YES.
- Select an accessory and press YES.
Note: An accessory cannot be associated with more than one profile.
To remove an accessory from a profile
- Scroll to Settings, YES, Profiles, YES, Edit profile, YES, Accessories, YES.
- Scroll to the accessory that you want to remove and press ⓒ
- Delete? appears. Press YES.
Voice Control
With your phone, you can:
• voice dial - call someone by saying the name and number type
- answer and reject calls with your voice when using a handsfree kit
• change profile with your voice
- record or listen to voice memos by using voice commands
- activate the voice control by saying a “magic word”
You can save up to 50 voice commands altogether. When recording voice commands, make sure you are in a quiet environment.
Before Voice Dialling
Before you can start voice dialling, you need to turn on the voice dialling function and record your voice commands.
To turn voice dialling on and record number types
- Scroll to Settings, YES, Voice control, YES, Voice settings, YES, Voice dialling, YES,
- Select On and press YES. Now you are going to record a voice command for each number type you use with your phone book contacts, "home", "mobile", "work", "other".
- Instructions appear. Press YES.
- Select a number type and press YES.
- Lift the phone to your ear, wait for the tone and say the number type that you have selected. The voice command is played back to you.
- Press YES to save the voice command. If the recording is not OK, press NO and repeat step 5.
You also need to record voice commands for each contact, that is the name, for example “John”.
To record a contact name
- Scroll to Settings, YES, Voice control, YES, Voice commands, YES, Contacts, YES, Add voice, YES.
- Enter the first letter of the contact name and press YES.
- Select a contact and press YES.
- Follow the instructions in the display.
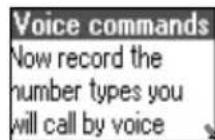
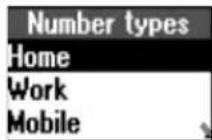
An icon appears next to the contact names which already have a voice command.
Caller Name
You can choose whether you want to hear the recorded voice command for a name when you receive an incoming call, from that contact.
To turn the caller name on or off
- Scroll to Settings, YES, Voice control, YES, Voice settings, YES, Caller name, YES.
- Select On or Off.
Voice Dialling
To make a call
- From standby, press and hold YES until you hear a tone.
- Release YES, lift the phone to your ear and say a name, for example "John". The name is played back to you.
If you have saved several numbers for that contact:
- After a second tone, say a number type that you have recorded earlier, for example “home”.
The number type is played back to you, and the call is connected.
From standby, you can also initiate voice dialling, voice profiles and voice control of voice memos by:
• sliding and holding the volume key.
- pressing and holding the handsfree button (when using a portable handsfree or a Bluetooth headset).
- saying the magic word. See “The Magic Word” on page 85.
Voice Answering
You can answer or reject incoming calls by using your voice, when using a portable handsfree or a car handsfree kit.
To turn on voice answering and record voice answer commands
- Scroll to Settings, YES, Voice control, YES, Voice settings, YES, Voice answer, YES.
- Select the accessories you want to be able to use with voice answering by pressing Ⓥ.
- Press YES to continue.
- Lift the phone to your ear, wait for the tone and say "Answer", or another word, and press YES if it sounds OK. If the recording was not OK, press NO and repeat step 4.
- After the next tone, say "Busy", or another word. Press YES to save your recordings.
After the tone, say: ANSWER
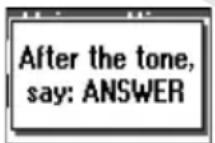
To answer an incoming call using voice commands
- When the phone rings, say “Answer”, or the alternative word you recorded. “Answer” is played back to you and the call is connected.
To reject an incoming call using voice commands
- When the phone rings, say “Busy”, or the alternative word you recorded. “Busy” is played back to you and the call is rejected. The caller hears a busy tone or if the call is diverted, the caller is diverted to the specified number.
Changing Profiles
If you record voice commands for your profiles, you can change profile with your voice.
To turn on and record profile commands
- Scroll to Settings, YES, Voice control, YES, Voice settings, YES, Voice profiles, YES.
- Select On and press YES.
- Instructions appear. Press YES.
- Select a profile and press YES.
- Lift the phone to your ear, wait for the tone and say the profile name. Repeat steps 4 and 5 to record voice commands for the other profiles, you use.
To change a profile using voice commands
- From standby, press and hold YES until you hear a tone.
- Release YES, lift the phone to your ear and say the profile command for the required profile. The profile command is played back to you and the current profile is changed.
Recording Voice Memos
Instead of using the Extras menu, you can record voice commands to start a voice memo recording or to listen to voice memos.
To turn on and record voice memo commands
- Scroll to Settings, YES, Voice control, YES, Voice settings, YES, Voice memo, YES.
- Select On and press YES.
- Instructions appear. Press YES.
- Lift the phone to your ear, wait for the tone and say "Record". Press YES if it sounds OK or NO to repeat the step.
- After the next tone, say "Play" and press YES to save your recordings.

To start a voice memo recording using a voice command
- From standby, press and hold YES until you hear a tone.
- Release YES, lift the phone to your ear and say "Record". The voice command is played back to you and a tone indicates that the recording has begun.
To end the recording, press YES.
To listen to voice memo recordings using a voice command
- From standby, press and hold YES until you hear a tone.
- Release YES, lift the phone to your ear and say "Play". The voice command is played back to you.
- Listen to your voice memo recordings. Press NO to stop.
The Magic Word
You can record a magic word and use it as a voice command to allow totally handsfree access to voice control. Instead of pressing and holding YES, you say the magic word and then one of your recorded voice commands. The magic word is especially suitable when driving a car with a car handsfree kit installed, because you use external power instead of the battery power of your phone. You can also use the magic word when the phone is connected to a portable handsfree.
Tip: Choose a long, unusual word which can easily be distinguished from ordinary background speech.
To turn on and record the magic word
- Scroll to Settings, YES, Voice control, YES, Voice settings, YES, Magic word, YES.
- Select the accessories you want to be able to use with the magic word by pressing Press YES.
- Lift the phone to your car, wait for the tone and say the magic word.
Turn off the magic word when you no longer need totally handsfree access, in order to save battery power.
Editing Your Voice Commands
In Voice commands you find all your voice commands. You can keep them up to date by re-recording them or deleting the ones you do not use.
To re-record a voice command
- Scroll to Settings, YES, Voice control, YES, Voice commands, YES.
- Select the type of voice command and press YES.
- Select a voice command and press YES.
To listen to the recorded voice command, select Play voice. - Select Replace voice and press YES.
- Lift the phone to your ear, wait for the tone and say the command.
You can also edit the voice command for a contact name in Edit contact in the Phone book menu.
Problems when Recording
If your phone cannot detect speech, one of the following might have happened:
- you spoke too softly – try speaking more loudly
- you held the phone too far away – hold it as you do during a call
- the voice command was too short – it should be around one second long
- you spoke too late or too soon – speak immediately after the tone and listen to the recording playback to check it was OK.
Voice Memo
With the voice memo function, you can record up to 90 seconds of your own messages or parts of calls.
Recording Voice Memos
The voice memo function is always available. The voice memos are saved in your mobile phone and can be accessed even if you change your SIM card.
To record a voice memo
- Scroll to Extras, YES, Voice memo, YES, Record, YES.
- When you hear a tone, the recording starts and the display shows Recording together with the remaining recording time.
To end the recording
- Press YES. The display shows Voice memo saved.
Tip: You can start recording or listening to voice memos with a voice command. See “Recording Voice Memos” on page 84.
The recording stops automatically if you receive an incoming call or, for call recordings, when the call ends. You hear a tone two seconds before the voice memory is full.
Who to Record During Calls?
If a call is in progress and you start recording a voice memo, your phone starts recording the other person by default. You can choose to record either yourself or the person you are talking to during a call.
To select who to record
-
Scroll to Extras, YES, Voice memo, YES, During calls, YES.
-
Select Record myself or Record other and press YES.
Note: In some countries you are required by law to inform the person you are talking to that you are recording him/her.
Listening to Voice Memos
You can listen to your voice memos at any time, except during a call.
To listen to your voice memos
-
Scroll to Extras, YES, Voice memo, YES, Memo list, YES.
-
Scroll to the voice memo you wish to hear.
-
Press YES to play. If you want to:
- pause, press YES. Press YES again to play.
- go to next or previous: press
- go fast forward or rewind: press and hold respectively.

respectively.

- Press NO to stop playback.
Tip: To see how many seconds you have left for recording, scroll to the memory indicator bar at the top of the Memo list and press YES.
Editing Voice Memos
To erase or rename a voice memo
- Scroll to Extras, YES, Voice memo, YES, Memo list, YES.
- Scroll to the voice memo you wish to erase or rename.
- Press YES to play and press YES again to reach a list of options.
- Select Erase or Rename and press YES.
To erase all voice memos
- Scroll to Extras, YES, Voice memo, YES, Erase all, YES.
Recording Quality
In standby mode, you can record your voice memos in two different modes. You can choose to record either 36 seconds of high quality sound, or 92 seconds of normal quality sound.
To set the recording quality
- Scroll to Extras, YES, Voice memo, YES, Set quality, YES.
- Select a recording quality and press YES.
Settings
You can choose to show the date, time or length of the voice memo.
To set the view of your voice memos
- Scroll to Extras, YES, Voice memo, YES, Set view, YES.
- Scroll to Date and press Ⓥ if you do not want this information to be shown. The tick in the box disappears.
Press again if you want the information to be shown. The tick reappears. Repeat the procedure for Time and Length.
- Press YES.


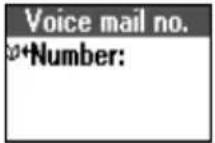
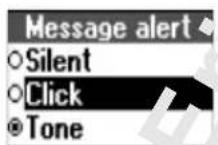
Voice Mail Service
The answering service of your network allows callers to leave a voice message when you cannot answer your calls.
Some operators inform you by sending a specific Voice mail indication. If this is the case, the voice mail icon appears in the display. Most operators, however, inform you by sending a text message, asking you to call your Voice mail service.
Calling Your Voice Mail
You can save the number of your voice mail service to be able to call your voice mail service by simply pressing and holding 1. The number is provided by your network operator.
To save your voice mail number
- Scroll to Messages, YES, Options, YES, Voice mail no., YES.
- Enter your voice mail number and press YES.
Note: The number of your voice mail service may be different if you are calling from a network that is not your home network.
When you receive a voice mail, your phone beeps and the message New voice mail appears in the display (only if you receive the specific voice mail indication). If you want to check your voice mail now, press YES to call your voice mail service.
If you press NO, you can call your voice mail service later to listen to your recorded messages.
To call your voice mail service
- Press and hold 1 from standby mode, or:
- Scroll to Messages, YES, Call voice mail, YES.
Message Alert Signal
You can change the signal that notifies you of a new message.
To change the message alert signal
- Scroll to Messages, YES, Options, YES, SMS, YES, Message alert, YES.
- Select a signal and press YES.


| Divert calls |
| 1 Voice calls |
| 2 Fax calls |
| 3 Data calls |
| Fax calls |
| 1Activate |
| 2Cancel |
| 3Get status |
| Activate |
| #+Number: |
Diverting Calls
You can use the Divert calls service to divert incoming calls to another phone number when you are unable to answer.
For voice calls, you can choose between the following divert alternatives:
- Divert always - divert all voice calls.
- When busy - divert calls if you are already on the phone.
- No reply - divert calls that you do not answer within a specified time limit.
- Not reachable - divert calls if your phone is turned off or if you are unreachable.
If you subscribe to the Two line service, you may set different divert phone numbers for your two voice lines, line 1 and line 2. You will then have two divert alternatives in the menu. All line 1 calls and All line 2 calls, instead of Divert always.
Tip: If you place your phone in an Ericsson Desktop Charger, your calls can be diverted automatically.
Activating Divert Calls
To turn on the Divert calls function
- Scroll to Settings, YES, Call options, YES, Divert calls, YES.
- Select a call type and press YES.
- Select a divert alternative and press YES.
- Select Activate and press YES.
- Enter the phone number, including the area code, to which you want your calls to be diverted and then press YES.
Note: When the Restrict calls function is on, some Divert calls options cannot be activated.
Cancelling Divert Calls
To cancel Divert calls
- Scroll to Settings, YES, Call options, YES, Divert calls, YES.
- Select a call type and press YES.
- Scroll to the divert you want to cancel and press YES.
- Select Cancel and press YES.
Checking Divert Status
To check the status of Divert calls
- Scroll to Settings, YES, Call options, YES, Divert calls, YES.
- Select a call type and press YES.
- Scroll to the divert you want to check and press YES.
- Select Get status and press YES.
To check the status of all Divert calls
- Scroll to Settings, YES, Call options, YES, Divert calls, YES, Check all, YES.


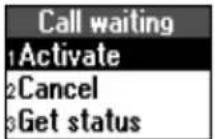
More than One Call
You can handle more than one call simultaneously. For example, you can put an ongoing call on hold, while you make or answer a second call, and then switch between the two calls.
You can also set up a Conference call to have a joint conversation with up to four other people.
Note: Depending on whether a call is ongoing or not, either the Call info menu or the Ongoing call menu is shown.
Call Waiting Service
If you wish to be able to receive a second call while another call is in progress, you must turn on the Call waiting service.
Note: If you are engaged in a fax or a data call, any other incoming calls are rejected.
To turn on the Call waiting service
- Scroll to Settings, YES, Call options, YES, Call waiting, YES, Activate, YES. There may be a short delay before the network responds.
To cancel the Call waiting service
- Scroll to Settings, YES, Call options, YES, Call waiting, YES, Cancel, YES.
To check whether the Call waiting service is on or not
- Scroll to Settings, YES, Call options, YES, Call waiting, YES, Get status, YES.
Making a Second Call
You can only put one call on hold while you make a second call.
To make a second call
-
Put the current call on hold by pressing YES.
-
Enter the number you wish to call and press YES or press and hold to retrieve the number from your phone book.
Receiving a Second Call
If the Call waiting service is on, you hear a tone in the earpiece if you receive a second call. The number or name of the caller is normally shown at the top of the display together with a list of the alternatives: Answer, Busy and Release&answer. If the incoming call is a restricted number, the display shows Withheld.
To put the ongoing call on hold and answer the waiting call
- Press YES to answer the waiting call.
The current call is now put on hold.
To continue the ongoing call and reject the waiting call
- Select Busy and press YES.
The waiting call is rejected.
Note: If Divert when busy is on, the waiting call is diverted to the number you have specified.
To end the ongoing call and answer the waiting call
- Select Release&answer and press YES.
Handling Two Calls
When you have one active call and one call on hold, you can do one of the following:
To switch between the two calls
- Press YES.
To end the active call and return to the call on hold
-
Press NO. The question Retrieve call? appears.
-
Press YES.
If you press NO, the call on hold is also ended.
To end both calls
- Scroll to Ongoing call, YES, Release all, YES.
To connect the two calls
- Scroll to Ongoing call, YES, Transfer call, YES.
The two calls are now connected to each other, and you are disconnected from both. Please contact your network operator for charging details.
To join the two calls into a Conference call
- Scroll to Ongoing call, YES, Join calls, YES.
See ‘Conference calls’ below.

Receiving a Third Call
If the Call waiting service is on, you may receive a third call when you have one active call and a second call on hold. From now on, you cannot answer any more calls without disconnecting one, unless you create a conference call. You hear a tone in the earpiece and Busy and Release&answer appear in the display.
To end the ongoing call and accept the waiting call
- Select Release&answer and press YES.
The waiting call becomes active and the call on hold remains on hold.
To reject the waiting call
- Select Busy and press YES. The caller hears a busy tone.
The third call is rejected.
Conference Calls
In a conference call, you can have a joint conversation with up to four other people.
Creating a Conference Call
To create a conference call, you must have one active call and one call on hold.
To join the two calls into a conference call
- Scroll to Ongoing call, YES, Join calls, YES.
Adding New Participants
You can put the conference group on hold and then add new participants.
To add a new participant
- Press YES to put the conference group on hold.
- Call the next person you wish to include in the conference group.
- Scroll to Ongoing call, YES, Join calls, YES.
To check the participants in the conference group
- Scroll to Ongoing call, YES, Parties in conf, YES.
The first participant's phone number is displayed, if available.
Otherwise the display shows part 1, 2 etc.
- Scroll with to check the other participants.

Having a Private Conversation
You can have a private conversation with one of the participants and put the other participants on hold.
To extract a participant
- Scroll to Ongoing call, YES, Extract part, YES.
- Select the participant and press YES.
You may now have a private conversation with the participant.
To rejoin the participant to the conference group
- Scroll to Ongoing call, YES, Join calls, YES.
Releasing Participants
You can release participants from the conference group one by one or all at once.
To release a participant
- Scroll to Ongoing call, YES, Release part, YES.
- Select the participant and press YES.
To release all participants
- Scroll to Ongoing call, YES, Release all, YES.
Making a Call during a Conference Call
You can put the conference group on hold and make another call. You can then switch between the new call and the conference call.
To put the conference group on hold and make a new call
- Press YES.
- Enter the number you wish to call and press YES.
To switch between the new call and the conference group
- Press YES.
To end the new call and return to the conference group
- Press NO and then YES.
Ending the Conference Call
- Press NO.

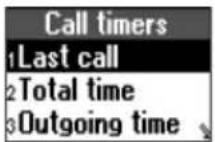


Call Time and Call Cost
During a call, the duration is shown in the display. If you subscribe to cost information, the call cost (or the number of call units) is displayed instead.
Checking the Time or Cost
The Call info menu allows you to check the total time or cost of your calls.
To check the call time of the last call
- Scroll to Call info, YES, Call timers, YES, Last Call, YES.
To check the call time of your outgoing calls
- Scroll to Call info, YES, Call timers, YES, Outgoing time, YES.
To check the total call time
- Scroll to Call info, YES, Call timers, YES, Total time, YES.
To reset the total call time
-
Scroll to Call info, YES, Call timers, YES, Reset timers, YES.
-
Select Total time or Outgoing time and press YES.
To check the cost of the last call
- Scroll to Call info, YES, Call costs, YES, Last call, YES.
To check the total call cost
- Scroll to Call info, YES, Call costs, YES, Total cost, YES.
To reset the total call cost
-
Scroll to Call info, YES, Call costs, YES, Clear total cost, YES.
-
Press YES to confirm your choice.
Note: If you subscribe to cost information, you must enter your PIN2 to clear the cost or time counter. For details about PIN2, please contact your network operator.
Setting the Call Cost
You can use the Tariff function to specify the price per call unit. The price entered is saved on your SIM card.
Note: If you do not specify a price per call unit, the number of call units is displayed during a call, and in Last call and Total cost in the Call info menu.

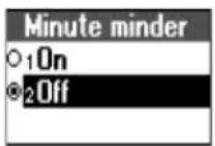
To enter the price per call unit
- Scroll to Call info, YES, Call costs, YES, Set tariff, YES.
- Enter your PIN2 and press YES.
- Select Change tariff and press YES.
- Enter the currency you want, for example GBP for Pounds Sterling, and press YES.
- Enter the price per call unit, for example 0.75, and press YES. To enter a decimal point, press *∅
To revert to call units
- Scroll to Call info, YES Call costs, YES, Set tariff, YES.
- Enter your PIN2 and press YES.
- Select Units and press YES.
Credit Limit for Calls
You can enter a total amount of money that can be used for making calls. When the amount reaches zero, no more calls can be made.
To set a specific credit limit
- Scroll to Call info, YES, Call costs, YES, Set credit, YES.
- Enter your PIN2 and press YES.
- Select Change credit and press YES.
- Enter the amount, for example 30 pounds, and press YES.
To set unlimited credit
- Scroll to Call info, YES, Call costs, YES, Set credit, YES.
- Enter your PIN2 and press YES.
- Select Unlimited and press YES.
Minute Minder
If you turn on the minute minder, you hear a beep once every minute during a call as a reminder of the duration of the ongoing call.
To turn the minute minder on or off
- Scroll to Call info, YES, Call timers, YES, Minute minder, YES.
- Select On or Off and press YES.
Networks
Searching for Networks
When you turn on the phone, it searches for the last accessed network. If this is not within range, you may use another network, provided your home network has an agreement that allows you to do so. This is called roaming.
To start an automatic network search
- Scroll to Settings, YES, Networks, YES, New search, YES.
The phone automatically starts searching for a network according to the list of preferred networks saved on your SIM card.
To select a network
- Scroll to Settings, YES, Networks, YES, Select network, YES.
- Select a network and press YES.
The network you are currently using is marked with a filled button. The following information is also shown:
The display shows... meaning...

Your home network is within range.

The name of the network is included in a list of preferred networks on your SIM card. You can use this network.

The name of the network is included in a list of forbidden networks on your SIM card, and can only be used for emergency calls.
All other networks without any icons are available.
If your home network and a forbidden network come to an agreement that allows you to use the forbidden network, you can select this network even though the message Forbidden is displayed.
Preferred Networks
You can create and edit a list that defines the order in which your phone selects a network during an automatic network search, when your home network is not within range.
The number of networks that can be saved in the list depends on your SIM card.
To view the list of networks
- Scroll to Settings, YES, Networks, YES, Preferred nets, YES.
The name of the first network is displayed.
Use or to scroll through the networks in the list.
To see a network's full name
-
Scroll to Settings, YES, Networks, YES, Preferred nets, YES.
-
Scroll to a network and press YES.
-
Select Full name and press YES.
To add a network to the list
-
Scroll to Settings, YES, Networks, YES, Preferred nets, YES, Add new?, YES.
-
Scroll to a network and press YES.
If the network you want does not appear in the list, scroll to Other and press YES. Enter the three-digit country number and the two-digit network number and press YES. For details, please contact your network operator.
- Enter a position number and press YES.
To delete a network from the list
-
Scroll to Settings, YES, Networks, YES, Preferred nets, YES.
-
Scroll to a network and press, c YES.
To rearrange the list
-
Scroll to Settings, YES, Networks, YES, Preferred nets, YES.
-
Scroll to a network and press YES.
-
Select Change priority and press YES.
-
Enter the new position within the list and press YES.

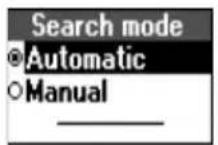
Search Modes
When you turn on your phone, it searches for a network. This can be done in two different ways:
Automatic search mode means that your phone first searches for the last accessed network. If this is not available, it automatically searches for another available network within range.
Manual search mode means that your phone first searches for the last accessed network. If this is not available, the question Select net? appears. You then need to choose a network as described in “Searching for Networks” on page 98.
To turn on the automatic or manual search mode
- Scroll to Settings, YES, Networks, YES, Search mode, YES.
- Select Automatic or Manual, and press YES.
Security
You can protect your phone and subscription from unauthorized use in several ways. For example, you can lock the phone or subscribe to specific services such as the Restrict Calls service.
Locking the SIM Card
The SIM card lock protects your subscription, but not your phone itself, from unauthorized use. If you change SIM cards, the phone still works with the new SIM card.
Most SIM cards are locked at the time of purchase. If the SIM card lock is on, you have to enter your PIN (Personal Identity Number) every time you turn on your phone. If you enter your PIN incorrectly three times in a row, the SIM card is blocked. This is indicated by the message PIN blocked. To unblock it you need to enter your PUK (Personal Unblocking Key). Your PIN and PIN2 and your PUK and PUK2 are supplied by your network operator.
To unblock your SIM card
- PIN blocked appears.
- Enter your PUK (or PUK2) and press YES.
- Enter a new four- to eight-digit PIN (or PIN2) and press YES.
- Re-enter the new PIN (or PIN2) to confirm and press YES.
Note: If you enter the wrong PUK ten times in a row, your card is permanently blocked. If this happens, you should contact your network operator.
To change your PIN
- Scroll to Settings, YES, Locks, YES, SIM lock, YES, Change PIN, YES.
- Enter your old PIN and press YES.
- Enter your new PIN and press YES.
- Re-enter your new PIN to confirm and press YES.
To change your PIN 2
- Scroll to Settings, YES, Locks, YES, SIM lock, YES, Change PIN2, YES.
- Proceed as described in "To change your PIN" above.
To turn the SIM card lock on or off
- Scroll to Settings, YES, Locks, YES, SIM lock, YES, Protection, YES.
- Select On or Off, enter your PIN and press YES. The message Locked or Unlocked confirms that the card lock has now been turned on or off.
Locking the Phone
The phone lock protects the phone against unauthorized use if it is stolen and the SIM card exchanged. It is not on when you buy the phone. We recommend that you change the phone lock code (0000) to any four- to eight-digit personal code. The phone lock can be On, Automatic or Off.
To set the phone lock to on, automatic or off
- Scroll to Settings, YES, Locks, YES, Phone lock, YES, Protection, YES.
- Select On, Automatic or Off. The current setting is not available in the list.
- Enter the phone lock code and press YES.
If the phone lock is On, the message Phone locked Phone lock code: appears each time you turn on the phone. You have to enter your code followed by YES to use your phone.
If the phone lock is set to Automatic, you do not need to enter your phone lock code until a different SIM card is inserted in the phone.
Changing the phone lock code
- Scroll to Settings, YES, Locks, YES, Phone lock, YES, Change code, YES.
- Follow the steps described in "To change your PIN" on page 101.
Note: If you should forget your new code, you have to hand in your phone to your local Ericsson retailer or service point to have the phone unlocked.
Restricting Calls
You can use the Restrict calls service to restrict certain types of calls that can be made and received. You need a password, which comes with your subscription from the network operator, to turn a call restriction on or off.
The following calls can be restricted:
• all outgoing calls, All outgoing
• all outgoing international calls. Outgoing Intl
- all outgoing international calls except to your home country, Outg Intl roam
• all incoming calls, All incoming
- all incoming calls when you are abroad (when roaming), Inc when roam
To turn a call restriction on or off
- Scroll to Settings, YES, Call options, YES, Restrict calls, YES.
- Scroll to an option and press YES.
- Select Activate or Cancel and press YES.
- Enter your password and press YES.
• To cancel all call restrictions, select Cancel all.
- To check the status of a call restriction, select the call restriction option and then Get status.
• To change the password, select Change passwd.
Note: If you divert incoming calls, you cannot turn on some Restrict calls options.
Fixed Dialling
The Fixed dialling function allows calls to be made only to certain numbers saved on the SIM card. If an attempt is made to call other numbers, the message Number not permitted appears in the display. Fixed dialling requires a SIM card that allows fixed numbers to be saved. The fixed numbers are protected by your PIN2.
Note: Emergency calls can still be made, even when Fixed dialling is on.
To turn Fixed dialling on or off
- Scroll to Phone book, YES, Options, YES, Fixed dialling, YES.
- Enter your PIN2 and press YES.
- Select On or Off and press YES.
To save fixed numbers
- Scroll to Phone book, YES, Special numbers, YES, Fixed numbers, YES, Add new?, YES.
- Enter your PIN2 and press YES.
- Enter the fixed number and press YES.
- Enter the name you want to associate with the number and press YES.

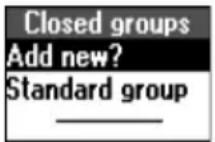
Closed User Groups
The Closed user group function is another way of lowering call costs. On some networks it is cheaper to make calls within a call group. Your network operator can place certain numbers in groups. You can have a maximum of 10 groups.
To add a closed user group
- Scroll to Settings, YES, Call options, YES, Closed groups, YES, Edit list, YES.
- Scroll to Add new? and press YES.
- Enter the name of the user group and press YES.
- Enter the index number of the group and press YES.
The index numbers are provided by your network operator.
To activate a closed user group
- Scroll to Settings, YES, Call options, YES, Closed groups, YES, Edit list, YES.
- Scroll to the group you want and press YES.
- Select Activate and press YES.
Calls can be made only within the selected user group.
To call outside closed user groups
- Scroll to Settings, YES, Call options, YES, Closed groups, YES, Open calls, YES.
- Select On and press YES.
Accepting Calls
With the Accept calls service, you can choose to receive calls only from certain numbers that you have in your phone book. Other calls are automatically rejected by a busy tone. You have to save the numbers that you want to receive in an Accepted list. The rejected calls are saved in the Call list in the Call info menu.
To add numbers to the list of accepted callers
- Scroll to Settings, YES, Call options, YES, Accept calls, YES, Edit list, YES, Add to list?, YES.
- Select Phone book (you can add a contact's number) or Groups (you can add a group).
- Enter the first letter of the contact or group and press YES.
- Scroll to the number or group you want to add and press YES.
To set the accept options
-
Scroll to Settings, YES, Call options, YES, Accept calls, YES, Accept options, YES.
-
Select one of the following:
-
From list - you only receive calls from callers in the Accepted list. All other incoming calls will be rejected. The caller hears a busy tone and you get no indication of incoming calls.
- From no one - All incoming calls are rejected.
- From all - You receive all calls as normal.

Code Memo
Instead of having to remember all the different security codes for credit cards etc, you can save them in the Code memo in your phone. Then all you need to remember is the password to open the Code memo. You can save a maximum of 10 codes in the Code memo.
Checkword and Security
To confirm that you have entered the correct password for the Code memo and to prevent unauthorized access to your codes, you must enter a Checkword. When you enter your password to open the Code memo, the checkword is shown for a short time. If the password is correct, the correct codes are shown. If you enter the incorrect password, the checkword and the codes that are shown are also incorrect.
Factors strengthening the security of the Code memo function are:
- You get no feedback about whether the password is correct, except for the checkword, and only you know the checkword.
- All codes are encrypted in the mobile phone.
- When you access your codes, they are shown for a limited time only.
Using Code Memo
To open Code memo for the first time
- Scroll to Extras, YES, Code memo, YES. A message with instructions appears.
- Press YES.
- Enter a four-digit password to open Code memo and press YES.
- Re-enter the new password to confirm.
- Enter a checkword (maximum 15 characters) and press YES. The checkword can consist of both letters and numbers. To enter a number, press and hold the key.
To add a new code
- Scroll to Extras, YES, Code memo, YES.
- Enter your password.
-
Select Add new code? and press YES.
-
Enter a name associated with the code, for example, the name of the credit card company, and press YES.
-
Enter the code and press YES.
To open Code memo
-
Scroll to Extras, YES, Code memo, YES.
-
Enter your password and press YES.
Your entered checkword appears. When the decryption process has finished, your codes are shown.
Deleting and Editing Codes
To delete a single code
-
Open Code memo as described above.
-
Scroll to the code you want to delete and press c
-
Delete? appears. Press YES.
To edit a code
- Open Code memo as described above.
- Scroll to the code you want to edit and press YES. Press YES again.
- Select Edit and press YES.
- Enter the name and press YES, enter the code and press YES.
Changing the Password
- Open Code memo as described above.
- Scroll to Options, YES, Chg password, YES.
- Enter your new password and press YES.
- Re-enter the new password and press YES.
- Enter a checkword and press YES.
Forgot Your Password?
If you forget your password, just enter any password to access the Code memo function. The checkword and codes that are then shown are incorrect. You must now reset the Code memo.
To reset Code memo
-
Scroll to Options, YES, Reset, YES.
-
Reset code memo? appears. Press YES.
The Code memo is reset and all entries are cleared. The next time you enter the Code memo, you must start at "To open Code memo for the first time" on page 106.


Two Voice Lines
If your subscription supports the Two line service, your phone has two voice lines with different phone numbers, separate bills and perhaps different subscription services. This is useful if, for example, you want to keep business calls and private calls on separate lines. You may have different settings for each line, for example, the ring signal or divert calls. You may also have separate voice mail numbers for each phone line, if this is supported by your subscription. Some operators may show the call time or call cost for each line separately.
Note: The Bluetooth headset does not work on line 2.
Changing the Name
When you buy your phone, the names of the lines are normally line 1 and line 2, but you can change their names.
To change the name of a line
- Scroll to Settings, YES, Display, YES, Edit line tags, YES.
- Select a line and press YES.
- Enter a new name and press YES.
Changing Lines
Once you have chosen a line, all outgoing calls are made on this line until you change it again. An icon indicates the line currently chosen for outgoing calls.
Note: Incoming calls can be received on both lines, irrespective of the line currently chosen.
To change phone lines
- Scroll to Call info, YES, Next call, YES.
- Select Switch to line 1 or Switch to line 2 and press YES.
Locking One Line
You can choose to lock one of the lines, so that it cannot be used unless you enter the PIN2.
To lock a phone line
- Scroll to Settings, YES, Locks, YES.
- Select the phone line you want to lock: Lock line 1 or Lock line 2. Press YES.
- Enter your PIN2 and press YES.
To unlock a phone line
- Scroll to Settings, YES, Locks, YES.
- Select the phone line you want to unlock: Unlock line 1 or Unlock line 2. Press YES.
- Enter your PIN2 and press YES.
Calling Card Calls
When making international or long distance calls, you may want to use the calling card service to redirect the charges to a credit card account, instead of your normal account.
Note: You cannot use the calling card service when making a fax or a data call.
Calling Card Service
To be able to make calling card calls, you need to turn on the service.
To turn on the calling card service
- Scroll to Phone book, YES, Options, YES, Set callingcards, YES.
- Enter your phone lock code (0000) and press YES.
- Select On and press YES.
The Calling card service is now on and the sub-menu Calling cards is available in the Phone book menu.
Saving Calling Card Numbers
You can save two calling card numbers in your phone.
To save a card number
- Scroll to Phone book, YES, Calling cards, YES.
- Enter your phone lock code and press YES.
- Select Add new? and press YES.
- Enter the access number of the calling card server and press YES.
- Enter a name that you want to associate with your calling card server and press YES.
- Enter the verification code of the calling card server and press YES.
- Select which you want to send first - the number that you want to call or the verification code - and press YES to confirm your choice.
Note: Verification codes are provided by your network operator.
To delete a card number
- Scroll to Phone book, YES, Calling cards, YES.
- Scroll to the card number that you want to delete and press
- Press YES.
To edit a card number
- Scroll to Phone book, YES, Calling cards, YES.
- Scroll to the card number that you want to edit and press YES.
- Select Edit and edit the card number.
- Press YES to confirm the new number.
Choosing a Card
If you have saved two card numbers, you must choose which card you want to use before making a calling card call.
To select a card
- Scroll to Phone book, YES, Calling cards, YES.
- Enter your phone lock code and press YES.
- Select the card that you want to use and press YES.
- Select Activate card and press YES.
Making a Calling Card Call
- Enter the phone number you wish to call or retrieve it from the phone book by pressing and holding 🙏
- Press and hold YES.
The access number of the calling card server is called. During the connecting phase, you are asked to send the phone number that you want to call and the verification code, in the order chosen earlier (see above). - Press YES when the display shows Send or wait a few seconds and the number and code are sent automatically.

Games
Your phone includes two games: Tennis and Erix.
Tennis
You can play Tennis by yourself or against a user of another T39 phone using Bluetooth wireless technology or the infrared port. You play seven sets.
Tip: Read about “Bluetooth™ Wireless Technology” on page 49 and “Infrared Port” on page 54.
To start Tennis
-
Scroll to Extras, YES, Games, YES, Tennis, YES.
-
To start a new game, press 1.
(Press 2 to resume a game and press 3 for help.)
-
If you want to have sound effects, press 1. If not, press 2.
-
Select how you want to play:
-
Single – you play against the phone: select difficulty level by pressing 1 or 2. Press 1 and start playing.
- Two, one phone – you and another person play against each other on the same phone: press 2 and start playing.
- Two, two phones – you and another person play against each other on your phones via Bluetooth wireless technology or via the infrared port: press 3.
If you select Two, two phones, proceed as follows:
-
Select a transfer method by pressing 1(IR) or 2 (Bluetooth).
-
Select if you want to initiate a game or if you want to join a game:
-
Invite others – your phone searches for other nearby players who have selected Accept others (see below): press 1. When a player is found, the game starts automatically.
-
Accept others – your phone waits to be found by another player who has selected Invite others to initiate a game: press 2.
-
When the phones have found each other, start playing.

To control Tennis
You are the tennis player on the left.
• 1 or 2 = move the tennis player up
• 4, 5, 7 or 8 = move the tennis player down
If two people play on the same phone, the tennis player on the right controls the game as follows:
• 3 = up
• 6 or 9 = down
Erix
The object of Erix is to fill the display. You draw a line and when the line is connected at both ends, the contained area is filled. When you have filled approximately 75% of the display you move up to the next level. If a ball hits you or the line you are drawing, you lose a life.
To start Erix
- Scroll to Extras, YES, Games, YES, Erix, YES.
- To start the game, press YES.
You can select difficulty level or resume the game by pressing ⏻. Instead of selecting Start, you can select Help or Highscores at step 2.
To control Erix
- 5=up, 0=down, 7=left, 9=right
Tools
Alarm Clock
The phone has an alarm clock that can be set to ring at a specific time within 24 hours. You can also set a recurrent alarm to ring at a specific time on several days. For example, it can ring at 8 am on Monday, Wednesday and Friday. You can have both these alarms set at the same time. Even if you have set your phone to silent the alarm and timer signal rings.
To set an alarm
- Scroll to Extras, YES, Time, YES, Alarms, YES, Alarm, YES.
- Enter the time.
- Press YES to confirm your setting.
To change the time of an alarm
-
Scroll to Extras, YES, Time, YES, Alarms, YES, Alarm, YES, New time, YES.
-
Enter the time and press YES to confirm your setting.
To turn the alarm signal off
- Press any key to turn the alarm signal off when it rings. If you do not want the alarm to be repeated, press YES.
To cancel an alarm
- Scroll to Extras, YES, Time, YES, Alarms, YES, Alarm, YES.
- Select Cancel and press YES.
To set a recurrent alarm
-
Scroll to Extras, YES, Time, YES, Alarms, YES, Recurrent alarm, YES.
-
Enter the time and press YES.
-
Select the days that you want the alarm to recur by scrolling and pressing Ⓞ. Press to exit the menu. You can view the days in the Recurrence rule sub-menu.
To change the time for a recurrent alarm
- Scroll to Extras, YES, Time, YES, Alarms, YES, Recurrent alarm, YES.
- Select New time and press YES.
- Enter the new time for your recurrent alarm and press YES.
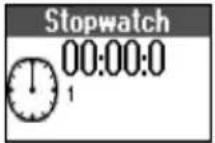
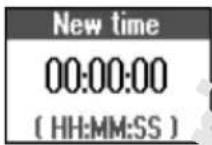
To turn the alarm signal off
- Press any key to turn the alarm signal off when it rings. If you do not want the alarm to be repeated, press YES.
To cancel a recurrent alarm
- Scroll to Extras, YES, Time, YES, Alarms, YES, Recurrent alarm, YES.
- Select Cancel and press YES.
Alarm Signal
To change the alarm signal
- Scroll to Settings, YES, Sounds & alerts, YES, Alarm signal, YES.
- Select a signal and press YES.
Stopwatch
The phone has a built-in stopwatch.
To run the stopwatch
- Scroll to Extras, YES, Time, YES, Stopwatch, YES.
- Press YES to start the stopwatch. Press YES again to stop it.
By pressing when the stopwatch is running, you can save up to nine lap times. Press or to check your saved lap times.
To reset the stopwatch
- Press when the stopwatch is not running.
Note: The stopwatch is turned off when you answer an incoming call or when you exit the stopwatch menu.
Timer
The phone has a built-in 24-hour timer.
To set the timer
- Scroll to Extras, YES, Time, YES, Timer, YES.
- Enter the hours, minutes and seconds and press YES. The countdown begins. The timer is shown in standby mode. When the alert sounds, press any key to turn it off.
To set a new time when the timer is running
- Scroll to Extras, YES, Time, YES, Timer, YES, New time, YES.
- Enter the time and press YES. The countdown begins. The timer is shown in standby mode. When the alert sounds, press any key to turn it off.
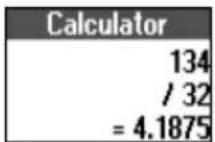
Calculator
The phone has a built-in calculator, which can add, subtract, divide and multiply.
- Press # to get +, -, x, l.
- Press to delete the figure.
- Press to enter a decimal point.
To use the calculator
In this example, we are going to divide 134 by 32.
- Scroll to Extras, YES, Calculator, YES.
- Enter 134.
- Press repeatedly until the division sign ( ) appears.
- Enter 32.
- Press YES to get the answer.
- To clear the display, press
Online Services
Online services are customized services offered by network operators, independently of mobile phones and mobile phone manufacturers.
A SIM card which supports Online services works in the same way as a normal SIM card. When you have inserted your SIM card and turned on your phone, your network operator can download data to your SIM card. After the first data download and after restarting your phone, a new menu appears in your phone as the first sub-menu under the Extras menu.
To enter your new menu system
- Scroll to Extras, YES, Online services, YES.
Note: This menu only appears if your SIM card supports this service. Some operators may not use the name “Online services”. Your phone may not support all of the services offered.
Your network operator can, at any time, download new data, for example a new feature, to your SIM card. You may be notified by a message in your display.

Ericsson Mobile Internet
When you are on the move and in need of communication and information, the Ericsson Mobile Internet is the answer.
The Ericsson Mobile Internet is a service supplied by Ericsson to make it easier for you to communicate and receive information quickly, wherever you are. It gives you access to various messaging services, on-line customer services, user manuals and other useful information. Some WAP profiles can be set up from your PC at the Ericsson Mobile Internet. You can also download communications software to ensure you get the best out of your Ericsson products.
You can access the Ericsson Mobile Internet via the WAP browser in your phone and via the Internet browser on your computer.
The Ericsson Mobile Internet address is: http://mobileinternet.ericsson.com
Troubleshooting
Here are some problems that you might have while using your phone. Some problems require that you call your service provider, but most of the problems you encounter you can easily correct yourself.
Error Messages
Insert Card
There is no SIM card in the phone or you may have inserted it incorrectly. Insert a SIM card. See “SIM Card” on page 7.
Insert Correct SIM Card
The phone may have been locked by the network operator to work only with a certain SIM card. Insert the correct SIM card.
SOS Calls Only
You are within range of a network but you are not allowed to use it. However, in an emergency, some operators allow you to make an emergency call. See “Making Emergency Calls” on page 13.
No Network
There is no network within range or the received signal is too weak. You have to move to get a signal that is strong enough.
Wrong PIN, Wrong PIN2
You have entered your PIN or PIN2 incorrectly. Enter the correct PIN or PIN2, and press YES. See “Locking the SIM Card” on page 101.
Codes Do not Match
When you want to change a security code (for example your PIN) you have to confirm the new code by entering it again. The two codes that you have entered do not match. See “Locking the SIM Card” on page 101.
PIN/PIN2 Blocked
You have entered your PIN or PIN2 incorrectly three times in a row. To unblock, see “Locking the SIM Card” on page 101.
PUK Blocked - Contact Operator
You have entered your personal unblocking key code (PUK) incorrectly 10 times in a row. Contact your network operator.
Phone Locked
The phone is locked. To unlock the phone, see “Locking the Phone” on page 102.
Phone Lock Code:
Your phone comes with the phone lock code, 0000. You can change it to any four- to eight-digit code. See “Locking the Phone” on page 102.
Number not Permitted
The Fixed Dialling function is on and the number you have dialled is not on your fixed numbers list. See “Fixed Dialling” on page 103.
Charging, Alien Battery
The battery you are using is not an Ericsson-approved battery and is charging slowly for safety reasons.
Other Problems
No Indication of Charging
When you start charging a battery that is completely flat or a battery that has not been used for a long time, it may take up to 30 minutes before the indicator on the top of the phone shows a red light and the battery meter appears.
Cannot Access a Certain Function
The function or service may be dependent on your SIM card or the network. Contact your network operator.
Cannot Receive Any Calls
- You may have diverted your incoming calls to another phone number. To cancel the Divert calls service, see “Cancelling Divert Calls” on page 90.
- You may have set the Accept Calls option to From no one or From list. Select From all. See “To set the accept options” on page 105.
- You may have selected Fax or Data as the next incoming call. Select Voice. See “To receive a voice or data call” on page 78.
- You may have set Allow calls to Off for a data account. Select On instead. See “To create a data account” on page 63. If you still cannot receive incoming calls, it could be due to network limitations.
Cannot Speed Dial
Your contacts are not saved on the SIM card. To copy the contacts to the SIM card, see “To copy contacts to the SIM card” on page 37.
Cannot Access My Contacts
Your contacts are not saved in the phone. To copy the contacts to the phone, see “To copy contacts to the phone” on page 37.


Technical Data
General
Product name T39
System GSM 900/GSM1800/GSM1900
SIM card Small plug-in card, 3V or 5V type
Type number 1130102-BV
Talktime (with an ultra slim battery) Up to 10 hours
Standby time (with an ultra slim battery) Up to 300 hours (>12 days)
Dimensions
Size 96 x 50 x 18 mm
Weight (with an ultra slim 86 g battery)
Ambient temperatures
Max +55°C
Min -10°C
GSM fax and data
Data transmission rate Up to 28.8 kb/s on networks
supporting HSCSD (High Speed Circuit Switched Data).
With V.42bis compression, you can reach data transmission rates up to four times higher, depending on the data type and the network.
Fax Up to 9.6 kb/s.
Group III, class 1 and 2. Class 2 is recommended.

GPRS (General Packet
Radio Services)
Data transmission rate Up to 53.6 kb/s.
Infrared communication
Coverage area Up to 1 metre (3.3 ft)
Standards for transfer T39 supports full implementation
of standard IrDA and IrDA-Ultra.
Data transmission rate Up to 1 Mb/s.
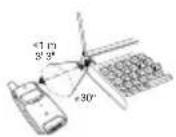
CLASS 1 LED PRODUCT.
The IrDA Feature Trademark is owned by the Infrared
Data Association and is used under licence therefrom.
Cable
Data transmission rate Up to 230.4 kb/s.
Bluetooth wireless technology
Coverage area Up to 10 metres (33 ft.)
Transmission power 1mW (0dBm)
Frequency band 2.4 GHz - the unlicensed ISM band
Power consumption Standby current: < 0.3 mA
Voice mode: 8-30 mA
Data mode average: 5 mA [0.3-30 mA,
20 kb/s, 25%]
Data transmission rate Up to 108.8 kb/s with one time slot.

Bluetooth Capability Statement
This product is manufactured to comply with the Bluetooth specification 1.1. However, since the qualification for the 1.1 specification is not yet available, this product has been formally qualified according to the Bluetooth specification 1.0b.
The following Bluetooth functions are supported:
- Generic Access Profile
- Serial Port Profile
- Headset Profile
• Dial-up Networking Profile - Fax Profile
- Generic Object Exchange Profile
- Object Push Profile
- Synchronization Profile
Safe and Efficient Use
Note: Please read this information before using your mobile phone.
Your mobile phone is a highly sophisticated electronic device. To get the most out of your mobile phone, please read this section about product care, and safe and efficient use.
Product Care
- Do not expose your product to liquid or moisture.
- Do not expose your product to extreme high or low temperature
- Do not expose your product to lit candles, cigarettes, or cigars or to open flames etc.
- Do not drop, throw or try to bend the product as rough treatment could damage your product.
- Do not paint your product as the paint could obstruct the earpin microphone or any moveable parts and prevent normal use.
- Do not attempt to disassemble your product. The product does not contain consumer serviceable components. Only Ericsson Service Points or Certified Service Centres should perform service.
- Do not use any accessories other than Ericsson originals, with exception of products approved by the Bluetooth Qualification Review Board. Use of non-Ericsson original accessories may result in loss of performance, damage to the product, fire, electric shock or injury. The warranty does not cover product failures which have been caused by use of non-Ericsson original accessories.
- Treat your product with care, keep it in a clean and dust-free environment.
Antenna Care
- To avoid impaired performance, please ensure your mobile phone's antenna is not bent or damaged.
- Do not remove the antenna yourself. If your mobile phone's antenna is damaged, please take it to an Ericsson Service Point or Certified Service Centre.
- Use only an antenna that has been specifically designed for your mobile phone. Use of unauthorized antennas, modifications, or attachments could damage the mobile phone and may violate the appropriate regulations, causing loss of performance and radio frequency (RF) energy above the recommended limits.
Efficient Use
For optimum performance with minimum power consumption please:
- Hold the mobile phone as you would any other telephone. While speaking directly into the mouthpiece, angle the antenna in a direction up and over your shoulder. If the antenna is extendable/retractable, it should be extended during a call.
- Do not hold the antenna when the mobile phone is in use. Holding the antenna affects call quality, may cause the mobile phone to operate at a higher power level than needed and may shorten talk and standby times. If your mobile phone is equipped with an infrared port, never direct the infrared ray at anyone's eye and make sure that it does not disturb any other infrared units.
Radio Frequency Energy
Your mobile phone is a low-power radio transmitter and receiver. When it is turned on, it intermittently receives and transmits radio frequency (RF) energy (radio waves). The system that handles the call controls the power level at which the phone transmits.
Exposure to Radio Frequency Energy
All Ericsson mobile phone models are designed to not exceed the limits for exposure to RF energy set by national authorities and international health agencies.* These limits are part of comprehensive guidelines and establish permitted levels of radio wave exposure for the general population. The guidelines were developed by independent scientific organizations such as ICNIRP (International Commission on Non-Ionizing Radiation Protection) through periodic and thorough evaluation of scientific studies. The limits include a substantial safety margin designed to assure the safety of all persons, regardless of age and health, and to account for any variations in measurements.
*Examples of radio frequency exposure guidelines and standards that Ericsson mobile phone models are designed to conform to:
- ICNIRP, “Guidelines for limiting exposure to time-varying electric, magnetic, and electromagnetic fields (up to 300 GHz)”, International Commission on Non-Ionizing Radiation Protection (ICNIRP), Health Physics, vol.74, pp.494-522, April 1998.
- 99/519/EC, EU Council Recommendation on the limitation of exposure to the general public to electromagnetic fields 0 Hz-300 GHz, Official Journal of the European Communities, July 12, 1999.
- ANSI/IEEE C95.1-1992. “Safety levels with respect to human exposure to radio frequency electromagnetic fields, 3kHz to 300 GHz”, The Institute of Electrical and Electronics Engineers Inc., New York, 1991.
• FCC Report and Order, ET Docket 93-62, FCC 96-326, Federal Communications Commission (FCC), August 1996. - Radiocommunications (Electromagnetic Radiation Human Exposure) Standard 1999, Australian Communications Authority (ACA), May 1999.
Driving
Check the laws and regulations on the use of mobile phones in the areas where you drive. If you are going to use your mobile phone while driving, please:
- Give full attention to driving.
- Use an Ericsson Vehicle Handsfree Solution, if available. Law in many countries/states requires drivers to use a Vehicle Handsfree Solution. Read the installation instructions carefully before installing a Vehicle Handsfree Solution.
- Pull off the road and park before making or answering a call if driving conditions so require.
RF energy may affect some electronic systems in motor vehicles such as car stereo, safety equipment etc. In addition, some vehicle manufacturers do not allow use of mobile phones in their vehicles, unless the installation is supported by a handsfree kit with an external antenna. Check with your vehicle manufacturer's representative to be sure that your mobile phone will not affect the electronic systems in your vehicle.
Vehicles Equipped with an Air Bag
An air bag inflates with great force. Do not place objects, including either installed or portable wireless equipment, in the area over the air bag or in the air bag deployment area. If in-vehicle wireless equipment is improperly installed and the air bag inflates, serious injury could result.
Electronic Devices
Most modern electronic equipment, for example equipment in hospitals and cars, is shielded from RF energy. However, certain electronic equipment is not, therefore:
- Do not use your mobile phone near medical equipment without requesting permission.
Mobile phones may affect the operation of some implanted cardiac pacemakers and other medically implanted equipment. Pacemaker patients should be aware that the use of a mobile phone very close to a pacemaker might cause the device to malfunction. Avoid placing the mobile phone over the pacemaker, e.g. in your breast pocket. When using the mobile phone, place it at the ear opposite the pacemaker. If a minimum distance of 15 cm is kept between the mobile phone and the pacemaker, the risk of interference is limited. If you have any reason to suspect that interference is taking place, immediately turn off your mobile phone.
Contact your cardiologist for more information.
Some hearing aids might be disturbed by mobile phones. In the event of such disturbance, you may want to contact your local Call Centre to discuss alternatives.
Aircraft
- Turn off your mobile phone before boarding any aircraft.
To prevent interference with communication systems, you must not use your mobile phone while the plane is in the air.
- Do not use it on the ground without permission from the crew.
Blasting Areas
Turn off your mobile phone when in a blasting area or in areas posted “turn off two-way radio” to avoid interfering with blasting operations. Construction crews often use remote control RF devices to set off explosives.
Explosive Atmospheres
Turn off your mobile phone when in any area with a potentially explosive atmosphere. It is rare, but your mobile phone or its accessories could generate sparks. Sparks in such areas could cause an explosion or fire resulting in bodily injury or even death.
Areas with a potentially explosive atmosphere are often, but not always, clearly marked. They include fuelling areas, such as petrol stations, below deck on boats, fuel or chemical transfer or storage facilities, and areas where the air contains chemicals or particles, such as grain, dust, or metal powders.
Do not transport or store flammable gas, liquid, or explosives in the same compartment of your vehicle that contains your mobile phone and accessories.
Power Supply
- Connect the AC power adapter only to designated power sources as marked on the product.
- To reduce risk of damage to the electric cord, remove it from the outlet by holding onto the AC adapter rather than the cord.
- Make sure the cord is positioned so that it will not be stepped on, tripped over or otherwise subjected to damage or stress.
- To reduce risk of electric shock, unplug the unit from any power source before attempting to clean it.
- The AC power adapter must not be used outdoors or in damp areas.
Children
DO NOT ALLOW CHILDREN TO PLAY WITH YOUR MOBILE PHONE SINCE IT CONTAINS SMALL PARTS THAT COULD BECOME DETACHED AND CREATE A CHOKING HAZARD.
Disposing of the Product
The product should never be placed in municipal waste. Please check local regulations for disposal of electronic products.
Emergency Calls
IMPORTANT!
This mobile phone, like any mobile phone, operates using radio signals, cellular and landline networks as well as user-programmed functions, which cannot guarantee connection under all conditions. Therefore you should never rely solely upon any mobile phone for essential communications (e.g. medical emergencies).
Remember, in order to make or receive calls, the mobile phone must be switched on and in a service area with adequate cellular signal strength. Emergency calls may not be possible on all cellular phone networks or when certain network services and/or mobile phone features are in use. Check with your local service provider.
Battery Information
Charging the Battery
The battery delivered with your phone is not fully charged. We recommend that you charge the battery for 4 hours before you use the phone for the first time. If you are charging a new battery, or a battery that has run out completely, it may take a while before you get any indication (the top indicator lights up and the battery meter appears in the display) that the battery is being charged.
Please note that you cannot turn on the phone before the indicator lights up and the battery meter appears in the display.
The battery can only be charged in temperatures between +5^ (+41°F) and +45^ (+113°F).
Battery Use and Care
A rechargeable battery has a long service life if treated properly. A new battery or one that has not been used for a long time could have reduced capacity the first few times it is used.
- The talk and standby times depend on the actual transmission conditions when using the phone. If the phone is used near a base station, less power is required and talk and standby times are prolonged.
- Use only Ericsson original batteries and chargers. Using other batteries and chargers could be dangerous, and the warranty does not cover product failures which have been caused by use of non-Ericsson original batteries and chargers.
- Do not expose the battery to extreme temperatures, never above +60^ (+140^) . For maximum battery capacity, use the battery at room temperature. If the battery is used in low temperatures, battery capacity will be reduced.
- Turn off your phone before removing the battery.
- Use the battery for the intended purpose only.
- Do not attempt to take the battery apart.
- Do not let the metal contacts on the battery touch another metal object. This could short-circuit and damage the battery.
- Do not expose the battery to open flames. This could cause the battery to explode.
- Do not expose the battery to liquid.
- Do not allow the battery to be put into the mouth. Battery electrolytes may be toxic if swallowed.

Disposing of the Battery
The battery should never be placed in municipal waste. Please check local regulations for disposal of batteries.
Limited Warranty
Thank you for purchasing this Ericsson Product. To get maximum use of your new Product we recommend that you follow a few simple steps:
- Read the Guidelines for Safe and Efficient use.
- Read all the terms and conditions of your Ericsson Warranty.
- Save your original receipt. You will need it for warranty repair claims. Should your Ericsson Product need warranty service, please return it to the dealer from whom it was purchased or contact your local Ericsson Call Centre to get further information.
Our Warranty
Ericsson warrants this Product to be free from defects in material and workmanship at the time of its original purchase by a consumer, and for a subsequent period of one (1) year.
Any Ericsson accessory is covered by a warranty period of one (1) year from the date of its original purchase by a consumer in accordance with the applicable terms and conditions stipulated herein.
What We Will Do
If, during the warranty period, this Product fails to operate under normal use and service, due to improper materials or workmanship, Ericsson subsidiaries, authorized distributors, Service Points or Certified Service Centres will, at their option, either repair or replace the Product in accordance with the terms and conditions stipulated herein.
Conditions
-
The warranty is valid only if the original receipt issued to the original purchaser by the dealer, specifying the date of purchase and serial number, is presented with the Product to be repaired or replaced. Ericsson reserves the right to refuse warranty service if this information has been removed or changed after the original purchase of the Product from the dealer.
-
If Ericsson repairs or replaces the Product, the repaired or replaced Product shall be warranted for the remaining time of the original warranty period or for ninety (90) days from the date of repair, whichever is longer. Repair or replacement may involve the use of functionally equivalent reconditioned units. Replaced faulty parts or components will become the property of Ericsson.
- This warranty does not cover any failure of the Product due to normal wear and tear, or due to misuse, including but not limited to use in other than the normal and customary manner, in accordance with Ericsson's instructions for use and maintenance of the Product. Nor does this warranty cover any failure of the Product due to accident, modification or adjustment, acts of God, improper ventilation or damages resulting from liquid.
- This warranty does not cover Product failures due to improper repair installations, modifications or service performed by a non-Ericsson Service Point or Certified Service Centre or opening of the Product by non-Ericsson certified persons.
- The warranty does not cover Product failures which have been caused by use of non-Ericsson original accessories.
- Tampering with any of the seals on the Product will void the warranty.
- THERE ARE NO EXPRESS WARRANTIES, WHETHER WRITTEN OR ORAL, OTHER THAN THIS PRINTED LIMITED WARRANTY. ALL IMPLIED WARRANTIES, INCLUDING WITHOUT LIMITATION THE IMPLIED WARRANTIES OR MERCHANTABILITY OR FITNESS FOR A PARTICULAR PURPOSE, ARE LIMITED TO THE DURATION OF THIS LIMITED WARRANTY. IN NO EVENT SHALL ERICSSON BE LIABLE FOR INCIDENTAL OR CONSEQUENTIAL DAMAGES OF ANY NATURE WHATSOEVER, INCLUDING BUT NOT LIMITED TO LOST PROFITS OR COMMERCIAL LOSS, TO THE FULL EXTENT THOSE DAMAGES CAN BE DISCLAIMED BY LAW.
Some countries/states do not allow the exclusion or limitation of incidental or consequential damage, or limitation of the duration of implied warranties, so the preceding limitations or exclusions may not apply to you. This warranty gives you specific rights, and you may also have other legal rights which may vary from country/state to country/state.
International Service
You can have your Ericsson Product serviced within the warranty period in any country/state where an identical Product is sold by an authorized Ericsson distributor. To find out if your Product is sold in the country/state you are in, please call the local Call Centre. In order to be granted service, you have to present your original receipt specifying the date of purchase and serial number. Please observe that certain services may not be possible elsewhere than in the country/ state of original purchase, for example due to the fact that your Ericsson Product may have an interior or exterior which is different from equivalent models sold in other countries/states. It may not be possible to repair SIM-locked Products.
Regulatory Information
Declaration of Conformity
We, Ericsson Mobile Communications AB of Torsha m nsgatan 27
S-164 80 Stockholm, Sweden
declare under our sole responsibility that our product
Ericsson type 1130102-BV
and in combination with our accessories, to which this declaration relates is in conformity with the appropriate standards 3GPP TS 51.010-1, ETS 300 342-1 and EN 60950, following the provisions of, Radio Equipment and Telecommunication Equipment directive 99/5/EC with requirements covering EMC directive 89/336/EEC, and Low voltage directive 73/23/EEC.
Kista February 23, 2001
Place & date of issue

Anders Torstensson, President BU GSM
CE 0682
We fulfil the requirements of the R&TTE Directive (99/5/EC).
FCC Statement
Before a phone model is available for sale to the public, it must be tested and certified to the FCC that it does not exceed the limit established by the government-adopted requirement for safe exposure. The tests are performed in positions and locations (i.e. at the ear and worn on the body) as required by the FCC for each model. Body worn measurements are made while the phone is in use and worn on the body with an Ericsson accessory. The design and composition of an accessory can affect the body worn SAR (Specific Absorption Rate) levels for the phone. Ericsson has not measured, and makes no representation about the body worn SAR levels when the phone is used with non-Ericsson accessories.

This device complies with Part 15 of the FCC rules. Operation is subject to the following two conditions: (1) This device may not cause harmful interference, and (2) This device must accept any interference received, including interference that may cause undesired operation.
Icons
The table below shows icons which may appear in standby or in the menus.
Icon Description
| Your personal phone book. | |
| Handling of text and voice messages. | |
| Handling of call time, call cost information and ongoing calls. | |
| Personal settings, profiles, divert calls, networks and voice control. | |
| Bluetooth, calendar, synchronization, voice memo, alarm clock and other extras. | |
| Gives you access to WAP services on the Internet. | |
| A selection of your most frequently used functions. | |
| Help text. | |
| Tells you the strength of the GSM network signal. | |
| GPRS is within range. | |
| GPRS is within range and can be used. | |
| You cannot receive any incoming calls. | |
| Tells you the status of the battery. | |
| You have missed an incoming call. | |
| All incoming calls are diverted to a defined number. No calls or only certain calls from numbers in a list are received. | |
| A profile other than Normal has been chosen. | |
| The ring signal is turned off. | |
| All signals are turned off, except the alarm and timer. |
Icon Description
The alarm clock has been set and is on.
You have received a text message.
You have received a voice message.
You have received an e-mail message.
You have received a WAP push message.
The Bluetooth function is on.
The Bluetooth function is in discoverable mode.
Bluetooth communication is in progress.
The infrared port is on.
Infrared communication is in progress.
Line 1 is in use for outgoing calls.
Line 2 is in use for outgoing calls.
Ciphering is currently not being provided by the network.
The card lock or phone lock is on.
A secure WAP connection is established.
An ongoing call.
A missed call in the call list.
An answered call in the call list.
A dialled number in the call list.
A group of contacts in the phone book.
A text message has not been read.
A text message is saved on the SIM card.
Melody inserted in a message.
A voice message has not been checked.
Icon Description
| You can enter the phone book by pressing | |
| A home number in the phone book. | |
| A work number in the phone book. | |
| A mobile number in the phone book. | |
| A fax number in the phone book. | |
| Another number in the phone book. | |
| An e-mail address in the phone book. | |
| A voice command has been recorded for a contact name. | |
| You have recorded a voice memo. | |
| An e-mail message has not been read. | |
| An e-mail message has been read. | |
| Only part of an e-mail message is saved in the phone. | |
| An e-mail message, not read, has been deleted. | |
| A Bluetooth headset, not paired with your phone. | |
| A Bluetooth headset, paired with your phone. | |
| A Bluetooth phone, paired with your phone. | |
| A Bluetooth PC, paired with your phone. | |
| A Bluetooth printer, paired with your phone. | |
| A Bluetooth PDA, paired with your phone. | |
| The appointment is a meeting. | |
| The appointment is a date. | |
| The appointment is to travel. | |
| The appointment is a vacation. | |
| The appointment is an anniversary. |
Icon Description

A miscellaneous appointment.

An all day calendar appointment.

A recurrent calendar appointment.

A reminder is set for a calendar appointment.

A task in your calendar.

A task of high priority.

A task of low priority.

The task is to make a phone call.

The task is to write a message.

The network is preferred and can be used.

The network is forbidden and cannot be used.

Your network is within range and can be used.
Quick Keys
The table describes some of the most useful key combinations.
To... Do this when in standby:
make an emergency call enter the international emergency
number112 and press YES
enter and move through the main
press


menus and sub-menus
enter the Call list press YES
voice dial press and hold YES
or say your
magic word
call your Voice mail press and hold

enter the + sign to make an
press and hold

international phone call
set the phone to silent press and hold

reach a contact beginning with
press and hold any of the keys
a specific letter

reach a phone number at
press the position number
a specific position.

speed dial press any of the number keys

enter Call contact press and hold

enter the first sub-menu of the
press and hold

My Shortcuts menu
see which profile you are using slide the volume key up or down
see today's date slide the volume key up or down
change the language
press


to Automatic
change the language
press


to English
reject a call
quickly slide the volume key up or
down twice when receiving a call
To... Do this during a call:
put a call on hold
press YES
retrieve a call
press YES again
turn off the microphone
press and hold

To... Do this when in the menus:
move through menus or lists slide (and hold) the volume key up or down
select a menu or setting press YES
delete an item press and hold when in lists
c
go back to standby press and hold NO
To... Do this when entering letters
using multitap text input:
| reach the second letter or character of a key | slide the volume key up and press any of the number keys |
| reach the third letter or character of a key | slide the volume key down and press any of the number keys |
| shift between capital and lower-case letters | press then the letter |
| enter numbers press and hold any of the number keys | |
| enter a question mark slide the volume key down and press 1 | |
| enter the @-sign slide the volume key down and press o | |
| enter a space press 1 | |
| delete letters and numbers press c | |
| shift between input methods or input languages press and hold *φ | |
| enter a p (pause) press and hold when saving codes *φ | |
| enter a p (pause) press when composing *φ melodies | |
To... Do this when entering letters
using T9 Text Input:
| view alternative words press | 0 | ||
| accept a word and add a space press | 1 | ||
| enter a full stop press | # | ||
| view alternative punctuation marks | press #, then | repeated | |
| shift between capital and lower-case letters | press ,then the letter | ||
| enter numbers press and hold any of the number keys | |||
| delete letters and numbers press | c | ||
| shift between input methods or input languages | press and hold *φ | ||
A quick way to move through the menus is to use shortcuts. You simply enter the number of the menu or sub-menu to which you want to go. See “Using Shortcuts” on page 18 and “Instructions” on page 18.
You can quickly and easily reach the settings you use most by placing them in the menu My Shortcuts. See “My Shortcuts” on page 20.
For more information about key functions, see “Key Functions” on page 17, “Moving through the Menus” on page 18 and “Entering Letters” on page 30.
Index
A
Accept calls service 104
Access lock 72
Alarm clock 114
Answered calls indicator 12
Answering calls 14, 16, 83
Answering service. See Voice mail
Antenna 6
Area information 48
Arrow keys 6
Ask to save 34
Assembling the phone 7
Attachment 75
Auto lock 102
B
Banking by phone. See Telephone banking
Battery 7
attaching 7
charging 8
no indication of charging 120
removing 9
Bluetooth 49
pairing 50
receiving 53
sending 52
Business cards 37
C
Calculator 116
Calendar 56
new appointments 56
new tasks 57
Call cost 96
setting a credit limit 97
specifying price per call unit 96
Call divert. See Diverting
incoming calls
Call forwarding. See Diverting incoming calls
Call list
calling from call list /2
Call time 96
Call Waiting service 92
Caller ID. See Calling Line
Identification 14
Calling cards
choosing card 111
making a call 111
saving card number 110
saving number 110
Calling Line Identification
(CLI) 12, 14
Calls
answering 14, 16, 83
making 11,83
putting a call on hold 92, 93
putting on hold 15
receiving 14
rejecting 14, 84
switching between calls 93
CB. See Area information
Cell broadcast (CB). See Area
information
Charging the battery 8
CLI 14
CLI Restriction (CLIR) 13
Code Memo
password 107
reset 107
using 106
Conference calls 94
adding new participants 94
creating 94
extracting a participant 95
putting conference on hold 94, 95
releasing a participant 95
reviewing participants 94
Contacts 34
D
Data account 63
Data counter 65
Date
format 29
setting 29
Declaration of Conformity 134
Dialled numbers indicator 12
Display 6
greeting text 27
light 27
Display icons 136
Diverting incoming calls 90
Elapsed time of calls. See Call time
E-mail 74
Emergency calls 13
Erasing and renaming voice memos 88
Error messages 119
F
Fax, sending and receiving 77
Fixed numbers dialling 103
Flip 6
Forwarding incoming calls. See
Diverting incoming calls
Full lock 102
G
Games 112
GPRS 63, 64, 65
Greeting text in the display 27
H
Hiding your number 14
/
Icons in display 136
Indicator light 6
Indicators in display
answered calls 12
dialled numbers 12
missed calls 12
International calls /3
International emergency number 13
IR link
activating 54
connecting IR devices 55
K
Key sound 25
Keypad 6
L
Locks
access lock 72
phone lock 102
signature lock 72
SIM card lock 101
Long message 44
M
Magic word 85
Making calls 11, 83
Melodies 24
composing or editing 24
saving from a message 47
Menus 18
Microphone 6
muting 15
Missed calls 14
Missed calls indicator 12
Muting microphone 15
N
Network
preferred networks 99
search 11
search modes 100
selecting 98
Note Pad 15
0
Online services 117
P
Pause 40, 141
Phone book 34
business cards 37
checking status of memory 40
contacts 34
creating 34
shortcuts to contacts 35
Phone lock
activating/cancelling 102
auto lock 102
changing security code 102
full lock 102
Phone number
displaying own 28
Phone number in SMS
replying to 47
Pictures 25
editing 25
saving from a message 47
PIN
changing 101
entering 11
PIN2
changing 101
Plus sign (+) 13
Profiles 79
changing settings 80
selecting 79
using accessories 80
PUK 101
Q
Quick keys 140
R
Receiving calls 14
Recording a voice memo 87
Rejecting calls 14, 84
Resetting phone 29
Ring signal 22
choosing 23
S
Scroll 17
Scrolling 18
Service centre (SMS) 41
Short Message Service. See SMS 41
Shortcuts
to contacts in phone book 35
Showing your number 14
Signature lock 72
SIM card 7,117
inserting 7
removing 7
unblocking 101
SIM card lock 101
activating, cancelling 102
SMS
deleting messages 46
forwarding messages 46
inserting a melody 44
inserting a picture 43
message types 42
reply requested 42
service centre 41
templates 44
SOS Calls only 119
SOS calls. See Emergency calls
Speed dialling 35
Standby 11
Stopwatch 115
Switching the phone on/off. See
Turning the phone on/off
T
T9 Text Input 31
Technical data 121
Telephone banking 40
Text messages. See SMS
Timer 115
Tools 114
Touch tones 40
Troubleshooting 119
Turning the phone off 14
Turning the phone on 11
Two Line service 108
changing phone lines 108
V
Vibrating alert 23
Voice control
answering calls 83
making calls 83
recording voice labels 82
rejecting calls 84
Voice mail 89
changing signal 89
entering voice mail number 89
Volume
changing 15
Volume key 6, 14, 17
W
WAP services 69
browsing 69
push messages 73
security 66, 71
- Preparing Your Phone 6
- Making Calls 11
- During a Call 15
- Key Functions 17
- Menus 18
- Personalizing
- Your Phone 22
- Entering Letters 30
- Phone Book
- Text Messages 41
- Bluetooth™
- Wireless Technology 49
- Infrared Port 54
- Calendar 56
- Synchronization 61
- Setting up WAP
- and E-mail
- WAP 69
- E-mail 74
- Data Calls 77
- Profiles 79
- Voice Control 82
- Voice Memo 87
- Voice Mail Service 89
- Diverting Calls 90
- More than One Call 92
- Call Time and Call Cost 96
- Networks 98
- Security 101
- Code Memo 106
- Two Voice Lines 108
- Calling Card Calls 110
- Games 112
- Tools 114
- Online Services 117
- Ericsson
- Mobile Internet 118
- Troubleshooting 119
- Technical Data 121
- Safe and Efficient Use 124
- Limited Warranty 131
- Regulatory Information 134
- Quick Keys 140
- Ericsson T39
- Please note:
- T39
- Preparing Your Phone
- Assembly
- SIM Card
- Inserting and Removing the SIM Card
- Battery
- Attaching the Battery
- When to Charge the Battery
- Disconnecting the Charger
- Removing the Battery
- The Clip
- To use the clip with your phone
- Making Calls
- Turning Your Phone On
- The PIN
- Network Search
- Making a Call
- Using the Call List
- The call list saves:
- To call a number from the call list
- To clear the call list
- Automatic Re-Dialling
- Making International Calls
- Making Emergency Calls
- To view your local emergency numbers
- Showing and Hiding Your Number
- To hide or show your phone number
- Receiving a Call
- Answering a Call
- Rejecting a Call
- Missed Calls
- Turning Your Phone Off
- During a Call
- Earpiece Volume
- Microphone
- Notepad
- Turn Off Tones
- To turn the tone signals on or off
- Sending Touch Tone Signals
- Ciphering
- Key Functions
- Press...To
- Menus
- Moving through the Menus
- Scrolling by Using the Keys
- Press...to...
- Using Shortcuts
- Instructions
- To set the key sound
- Display Text
- Help Texts
- To turn the help texts on or off
- Menu Language
- To change the menu language
- My Shortcuts
- To select your favourite settings for My shortcuts
- Personalizing Your Phone
- Sounds
- Ring Volume
- To set the ring volume
- Silent
- To set the phone to silent
- Increasing Ring
- To turn the increasing ring on or off
- Vibrating Alert
- To set the Vibrating Alert
- Ring Signal Type
- To select a ring signal
- Specific Ring Signals
- To set a specific ring signal for a caller
- To delete a caller's number
- Composing Your Own Melodies
- To compose a melody
- Exchanging Melodies
- To send a melody
- To receive a melody
- Key Sound
- Pictures
- To edit and save a picture in My pictures
- To add a picture to My favourites
- To delete a picture from My pictures
- Display
- Display Light
- To set the display light
- Sleeping Display
- To turn the sleeping display on or off
- Contrast Setting
- To set the display contrast
- Greeting Text
- To write a new greeting
- To set the standard greeting
- To turn the greeting off
- My Numbers
- To enter your phone number
- Text Size
- To change the text size and the number of rows
- Time and Date
- To set the time
- To set the time format
- Automatic Time Zone
- To turn the Automatic Time Zone on or off
- Date
- To set the date format
- To set the date
- Flip settings
- To change the flip setting
- Master Reset
- To reset the phone
- Entering Letters
- Input Languages
- To select input languages
- Multitap Text Input
- To enter letters using multitap text input
- # * ↓
- Example:
- T9® Text Input
- To enter letters using T9 Text Input
- The List of Options
- Turning off the T9 Text Input
- To turn the T9 Text Input on or off
- PhoneBook
- Saving Contacts
- To add a new contact
- Ask to Save
- To turn the Ask to save function on or off
- Calling a Contact
- To select a sort order
- To call a contact
- Shortcuts to Contacts
- Shortcuts to Phone Numbers
- Speed Dialling
- Editing the Phone Book
- To edit a contact
- To set a default number
- To delete a contact
- To change position numbers
- Copy to and from the SIM Card
- To copy contacts to the SIM card
- To copy contacts to the phone
- To call a contact saved on the SIM card
- Business Cards
- To add or edit your business card
- To use a contact as your business card
- To delete your business card
- Exchanging Business Cards
- To send your own business card
- To receive a business card
- To send a contact
- Groups
- To create a new group
- To add a new member to an existing group
- To edit the name of a group
- To delete a member from a group
- To delete a group
- Touch Tone Services
- To save a phone number together with tone signals and codes
- Checking the Memory
- To check the status of your phone book memory
- Text Messages
- Before Sending Messages
- Service Centre
- Using GPRS
- To select GPRS as the access type
- Message Options
- To set a default value for the options above
- To turn Set on send on or off
- Sending Messages
- To send a message
- To send a message later
- To insert a picture in a text message
- To insert a melody in a text message
- Long messages
- To turn long messages on or off
- To send a long message
- Templates
- To create a template
- Status Report
- To request a status report for a sent message
- To check the status of a sent message
- Receiving Messages
- To read the message at once
- To read a message later
- List of Options
- To delete a message
- To reply to a message
- To forward a message
- To save a received message
- To call the sender of a message
- To send a message to an e-mail address found in a message
- To save a phone number found in a message
- To save a picture found in a message
- To save a melody found in a message
- To send a message to a printer
- To go to a WAP address found in message
- Message Signal
- To set the message signal
- Area Information
- To turn area information on or off
- Area Information Message List
- To enter an area information code
- To delete an area information code
- Cell Information
- To turn cell information on or off
- Bluetooth™ Wireless Technology
- Before You Start
- Pairing
- To initiate pairing with a device
- To accept pairing with a device
- To edit the name tag of a device
- To delete a device from the list
- To edit the order of the devices in the list
- Phone Name
- To enter a name for your phone
- Operation Modes
- To change the operation mode
- To make the phone discoverable
- Searching for Devices
- To discover devices
- Sending and Receiving
- To send an item
- To receive an item
- Infrared Port
- Activating the IR Port
- To set the IR port
- Connecting IR Devices
- Calendar
- Appointments and Tasks
- To add a new appointment
- To add a new task
- Viewing Your Calendar
- Editing and Deleting
- To edit or delete an appointment
- To edit or delete a task
- Calendar Settings
- Exchanging Calendar Entries
- To send an appointment or a task
- To send calendar views to a printer
- To receive an appointment or a task
- Synchronization
- Starting the Synchronization
- To start the synchronization
- Synchronization Sound
- To turn the synchronization sound on or off
- Internet Calendar Synchronization
- To make the WAP synchronization settings
- Setting up WAP and E-mail
- Data Account Settings
- To create a data account
- To enter additional settings for a data account
- Settings for GPRS:
- Settings for GSM data:
- GPRS and GSM Data Settings
- To select a preferred service
- Data Counters
- WAP Profile Settings
- To enter WAP profile settings manually
- To enter IP settings
- To enter SMS settings
- To select a WAP profile
- E-mail Account Settings
- To create an e-mail account
- - Copy outgoing
- - Check interval
- To set an e-mail account as default
- WAP
- Starting the WAP Browser
- To start browsing
- Exiting the WAP Browser
- To exit the browser
- Options When Browsing
- Additional WAP Options
- Changing the Homepage of a WAP Profile
- To change the homepage of a WAP profile
- Your List of Bookmarks
- To work with your bookmarks when not browsing
- Clearing Cache
- To clear the cache memory
- Security
- To download a trusted certificate
- To check the certificates in your phone
- Locks (PIN codes)
- To change the lock codes
- To set the access lock to on or off
- Transaction Contracts
- To check your transaction contracts
- WAP Push Messages
- Accepting or Rejecting Push Messages
- To turn the push access on or off
- Receiving Push Messages
- Writing and Sending
- - Save to outbox
- Attaching Pictures
- To attach a picture
- Receiving and Reading
- To receive and read e-mail messages
- Replying
- To reply to an e-mail message
- Deleting
- To delete e-mail messages
- Archiving
- To archive an e-mail message
- Data Calls
- Making Data Calls
- Receiving Data Calls
- Receiving Data Calls – Separate Numbers
- To receive a data call
- Receiving Data Calls – One Number
- To receive a voice or data call
- Sending and Receiving E-mail from Your PC
- To send e-mail messages from your PC
- To receive e-mail messages from your PC
- Profiles
- Selecting a Profile
- To select a profile
- Using Your Voice
- To select a profile using your voice
- Changing the Profile Settings
- To view your profiles
- To change a profile setting
- To change the name of a profile
- To reset the profile settings
- Accessories
- Adding Accessories to a Profile
- To add an accessory to a profile
- To remove an accessory from a profile
- Voice Control
- Before Voice Dialling
- To turn voice dialling on and record number types
- To record a contact name
- Caller Name
- To turn the caller name on or off
- Voice Dialling
- To make a call
- Voice Answering
- To turn on voice answering and record voice answer commands
- To answer an incoming call using voice commands
- To reject an incoming call using voice commands
- Changing Profiles
- To turn on and record profile commands
- To change a profile using voice commands
- Recording Voice Memos
- To turn on and record voice memo commands
- To start a voice memo recording using a voice command
- To listen to voice memo recordings using a voice command
- The Magic Word
- To turn on and record the magic word
- Editing Your Voice Commands
- To re-record a voice command
- Problems when Recording
- Voice Memo
- To record a voice memo
- To end the recording
- Who to Record During Calls?
- To select who to record
- Listening to Voice Memos
- To listen to your voice memos
- Editing Voice Memos
- To erase or rename a voice memo
- To erase all voice memos
- Recording Quality
- To set the recording quality
- Settings
- To set the view of your voice memos
- Voice Mail Service
- Calling Your Voice Mail
- To save your voice mail number
- To call your voice mail service
- Message Alert Signal
- To change the message alert signal
- Diverting Calls
- Activating Divert Calls
- To turn on the Divert calls function
- Cancelling Divert Calls
- To cancel Divert calls
- Checking Divert Status
- More than One Call
- Call Waiting Service
- To turn on the Call waiting service
- To cancel the Call waiting service
- To check whether the Call waiting service is on or not
- Making a Second Call
- To make a second call
- Receiving a Second Call
- To put the ongoing call on hold and answer the waiting call
- To continue the ongoing call and reject the waiting call
- To end the ongoing call and answer the waiting call
- Handling Two Calls
- To switch between the two calls
- To end the active call and return to the call on hold
- To end both calls
- To connect the two calls
- To join the two calls into a Conference call
- Receiving a Third Call
- To end the ongoing call and accept the waiting call
- To reject the waiting call
- Conference Calls
- Creating a Conference Call
- Adding New Participants
- To add a new participant
- To check the participants in the conference group
- Having a Private Conversation
- To extract a participant
- Releasing Participants
- To release a participant
- Making a Call during a Conference Call
- Ending the Conference Call
- Call Time and Call Cost
- Checking the Time or Cost
- Setting the Call Cost
- To enter the price per call unit
- To revert to call units
- Credit Limit for Calls
- To set a specific credit limit
- To set unlimited credit
- Minute Minder
- To turn the minute minder on or off
- Networks
- Searching for Networks
- To start an automatic network search
- To select a network
- The display shows... meaning...
- Preferred Networks
- To view the list of networks
- To see a network's full name
- To add a network to the list
- To delete a network from the list
- To rearrange the list
- Search Modes
- To turn on the automatic or manual search mode
- Locking the SIM Card
- To unblock your SIM card
- To change your PIN
- To change your PIN 2
- To turn the SIM card lock on or off
- Locking the Phone
- To set the phone lock to on, automatic or off
- Changing the phone lock code
- Restricting Calls
- To turn a call restriction on or off
- Fixed Dialling
- To turn Fixed dialling on or off
- To save fixed numbers
- Closed User Groups
- To add a closed user group
- To activate a closed user group
- To call outside closed user groups
- Accepting Calls
- To add numbers to the list of accepted callers
- To set the accept options
- Code Memo
- Checkword and Security
- Using Code Memo
- To open Code memo for the first time
- To add a new code
- To open Code memo
- Deleting and Editing Codes
- To delete a single code
- To edit a code
- Changing the Password
- Forgot Your Password?
- To reset Code memo
- Two Voice Lines
- Changing the Name
- To change the name of a line
- Changing Lines
- To change phone lines
- Locking One Line
- To lock a phone line
- To unlock a phone line
- Calling Card Calls
- Calling Card Service
- To turn on the calling card service
- Saving Calling Card Numbers
- To save a card number
- To delete a card number
- To edit a card number
- Choosing a Card
- To select a card
- Making a Calling Card Call
- Games
- Tennis
- To start Tennis
- To control Tennis
- Erix
- To start Erix
- To control Erix
- Tools
- Alarm Clock
- To set an alarm
- To change the time of an alarm
- To turn the alarm signal off
- To cancel an alarm
- To set a recurrent alarm
- To change the time for a recurrent alarm
- To cancel a recurrent alarm
- Alarm Signal
- To change the alarm signal
- Stopwatch
- To run the stopwatch
- To reset the stopwatch
- Timer
- To set the timer
- To set a new time when the timer is running
- Calculator
- To use the calculator
- Online Services
- To enter your new menu system
- Ericsson Mobile Internet
- Troubleshooting
- Error Messages
- Insert Card
- Insert Correct SIM Card
- SOS Calls Only
- No Network
- Wrong PIN, Wrong PIN2
- Codes Do not Match
- PIN/PIN2 Blocked
- PUK Blocked - Contact Operator
- Phone Locked
- Phone Lock Code:
- Number not Permitted
- Charging, Alien Battery
- Other Problems
- No Indication of Charging
- Cannot Access a Certain Function
- Cannot Receive Any Calls
- Cannot Speed Dial
- Cannot Access My Contacts
- Technical Data
- General
- Dimensions
- Ambient temperatures
- GSM fax and data
- GPRS (General Packet
- Radio Services)
- Infrared communication
- Cable
- Bluetooth wireless technology
- Bluetooth Capability Statement
- Safe and Efficient Use
- Product Care
- Antenna Care
- Efficient Use
- Radio Frequency Energy
- Exposure to Radio Frequency Energy
- Driving
- Vehicles Equipped with an Air Bag
- Electronic Devices
- Aircraft
- Blasting Areas
- Explosive Atmospheres
- Power Supply
- Children
- Disposing of the Product
- Emergency Calls
- IMPORTANT!
- Battery Information
- Charging the Battery
- Battery Use and Care
- Disposing of the Battery
- Limited Warranty
- Our Warranty
- What We Will Do
- Conditions
- International Service
- Regulatory Information
- Declaration of Conformity
- Ericsson type 1130102-BV
- FCC Statement
- Icons
- Icon Description
- Quick Keys
- To... Do this when in standby:
- To... Do this during a call:
- To... Do this when in the menus:
- To... Do this when entering letters
- Index
- A
- B
- C
- D
- F
- G
- H
- /
- K
- L
- M
- N
- 0
- P
- Q
- R
- S
- T
- V
- W
Brand : ERICSSON
Model : T39
Category : Mobile Phone