ME485 - Vacuum Cleaner Moneual - Free user manual and instructions
Find the device manual for free ME485 Moneual in PDF.


User questions about ME485 Moneual
0 question about this device. Answer the ones you know or ask your own.
Ask a new question about this device
Download the instructions for your Vacuum Cleaner in PDF format for free! Find your manual ME485 - Moneual and take your electronic device back in hand. On this page are published all the documents necessary for the use of your device. ME485 by Moneual.
USER MANUAL ME485 Moneual
Robot Vacuum Cleaner with self-charging home dock
ME485
USER MANUAL
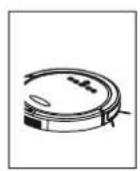
natural_image
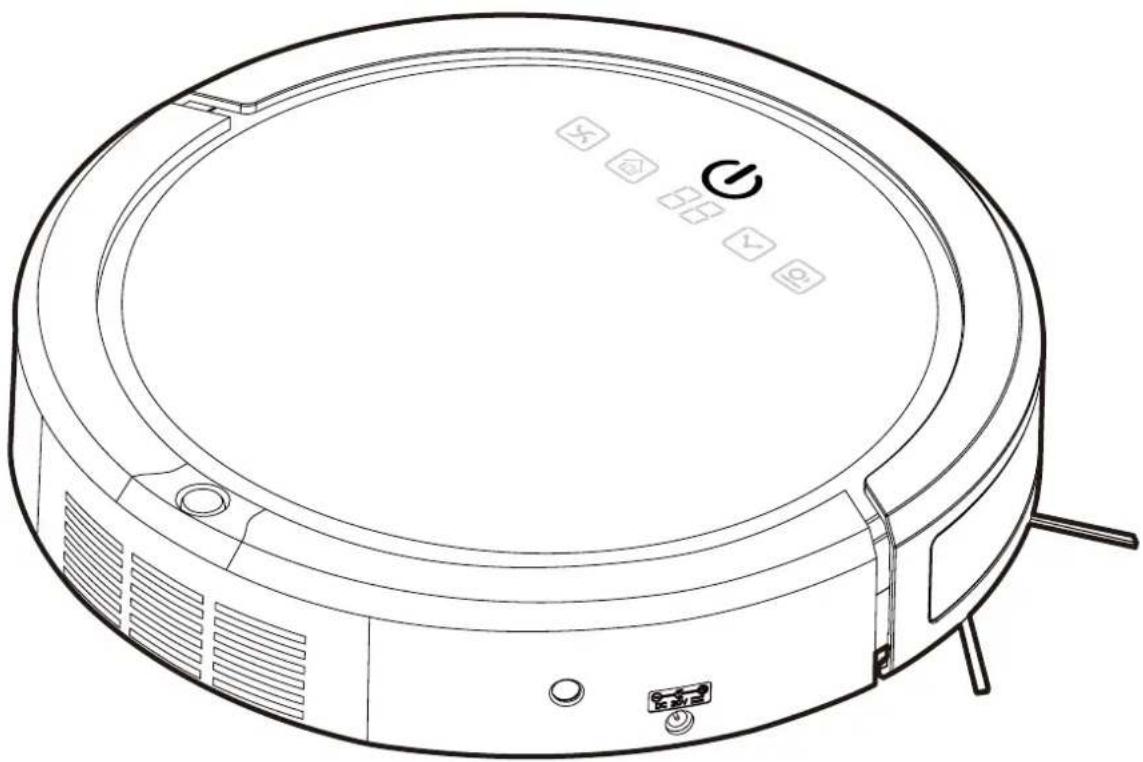
Line drawing of a circular vacuum cleaner with control buttons and ventilation slots (no text or symbols)CONTENTS
FEATURES 3
SAFETY INSTRUCTIONS 3
PARTS AND ASSEMBLY 5
FUNCTIONS 6
FEATURES AND CLEANING MODES 7
BATTETRY INSTALLATION AND CHARGING 8
ROOM LIMITER (OPTION ACCESSORIES) 10
CONTROL PANEL 13
SCHEDULING 15
CLEANING AND MAINTENANCE 16
MOP ASSEMBLY (OPTION ACCESSORIES) 18
TROUBLESHOOTING 19
FEATURES
We bring you an easy to use robot vacuum cleaner that works both on hard floor surfaces and carpets and also can be used for wet mopping operations.
This is not just sweeper but a real vacuum cleaner with powerful suction and the latest dual side brush system.
You can now enjoy your personal time while the robot will clean for you.
Slim profile at only 7.9cm height and 33cm diameter this time saving device will get in hard to reach places, including under furniture where other robots or vacuum cleaners will fail to operate.
Simple operation with touch controls and adjustable cleaning timer also features and advanced remote control.
Easy to use due to automated cleaning pattern, your robot benefits from an advanced cleaning algorithm that ensure that maximum effective cleaning is achieved with minimum iterations. There are five advanced programs in operation that will advance from spot cleaning, identifying the walls, pattern cleaning, around the wall cleaning, systematic inline cleaning and even an under bed / sofa program.
According to the set timer the programs will be intelligently combined for maximum cleaning efficiency.
Two extra-long side brushes around the outer edges ensure that dirt is gathered even from corners and borders. The middle suction vacuum will ensure dirt and debris are efficiently collected.
This robot features smart ultrasonic navigation sensors ensuring large 200 degrees beam in front of the robot to avoid collision ensuring it stops before bumping into objects. There are also cliff sensors that will stop the robot from falling of any steps. *
Great on hard floor and low and medium pole carpet. Easy to empty bagless side loading sealed dust container. This antibacterial robot features an easy to clean HEPA type filter that will improve air quality in your household during the cleaning operation.
SAFETY INSTRUCTIONS
Important
- Carefully read the instructions before operation the unit. Please retain the manual for future reference.
• This appliance is for indoor use only. - Rating: this unit must be only connected to a 220-240V / 50Hz earthed outlet. Always check the rating label against your electrical supply.
- If you are in any doubt about the suitability of your electrical supply have it checked and, if necessary, retested by a qualified electrician.
- This robotic vacuum cleaner been tested and is safe to use. However, as with any electrical appliances – use it with care.
- Disconnect the power plug from unit before dismantling, assembling or cleaning.
- Do not clean the unit by spraying it or immersing it in water. The device is not waterproof.
*In difficult lighting or dirty bottom sensors, errors could happen. Please clean the bottom sensors regularly and put an obstacle in front of high abysses (f.ex. stairs).
- Never operate this appliance if the cord or power supply is damaged. Ensure the power cord is not stretched or exposed to sharp object / edges.
- Do not use the appliance if any part or any accessory is damaged or defective.
- A damaged power supply should be replaced only with original parts from the manufacturer. Otherwise warranty is lost.
- Avoid touching any moving parts of the appliance.
- Never insert fingers, or any other objects while machine is in operation.
- This appliance is not intended for use by persons (including children) with reduced physical, sensory or mental capabilities. It is also not intended for use by those with a lack of experience and knowledge, unless they have been given supervision or instruction concerning the use of the appliance by a person responsible for their safety.
- Do not leave children or animals unsupervised with this appliance.
- Only use original battery or charger from manufacturer, any third party components may damage the unit.
- Any service other than regular cleaning should be only performed by an authorized service representative. Failure to comply could result in a voided warranty.
- Do not use the appliance for any other purposes than its intended use.
- Do not use the appliance in places with high humidity ( >80% RH – Relative Humidity)
- Do not immerse the robot in water or other liquids. If the robot is immersed in water or other liquids by mistake, do not touch it with your hands. If the appliance is immersed in water or other liquids, discard it. Do not use if you spilled liquids on the floor.
- Do not use to clean printer tonner spilled on the floor as this could cause fire.
- Before using the robot cleaner, remove any fragile objects from the floor e.g. glass pieces or any other objects that could block or damage the robot.
- Do not place any object on the top of the robotic cleaner.
- Do not leave any fragile objects on the side of the tables, cabinets etc. where the robot could bump into and cause them to fall.
Unit Safety Protection and Performance Tips.
- Make sure unit is assembled correctly before use.
- Charge for 24 hours before operating first time, If not using the robot for a long time please fully charge and remove the battery.
- Clean robot and brushes regularly. Empty and vacuum the dust container.
- If the robot become entangled, remove brushes, clean the debris and reassemble.
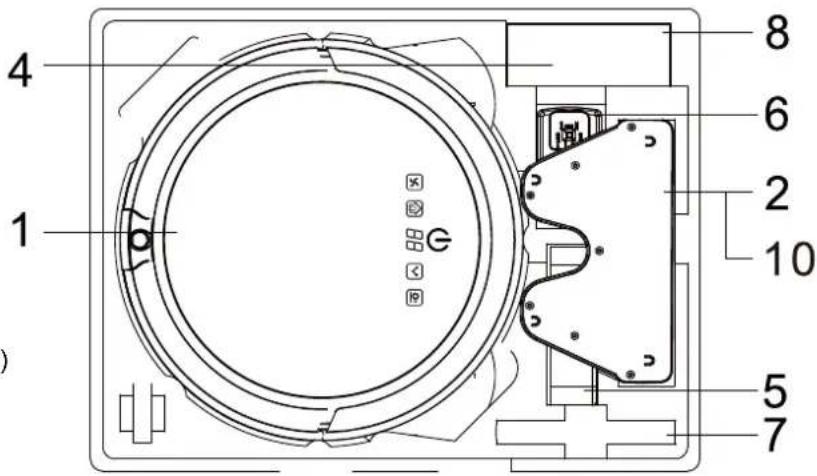
Parts
- The Robot
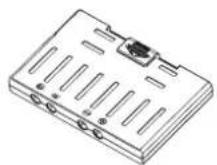
- Charging dock
- User Manual
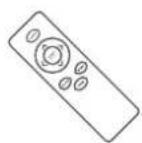
- Remote Control
- Room Limiter (Option accessories)
- Power supply adaptor
- Battery
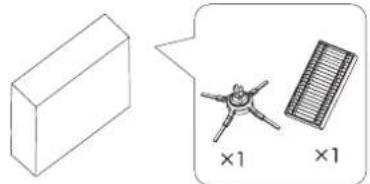
- Spare parts box
- Cleaning brush
- Hair Removal Tool (inside the dock)
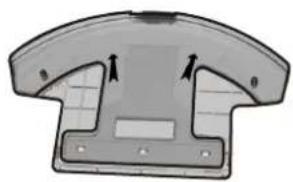
- Wet Mopping Base (Option accessories)
text_image
4 1 8 6 2 10 5 7Assembly
1
natural_image
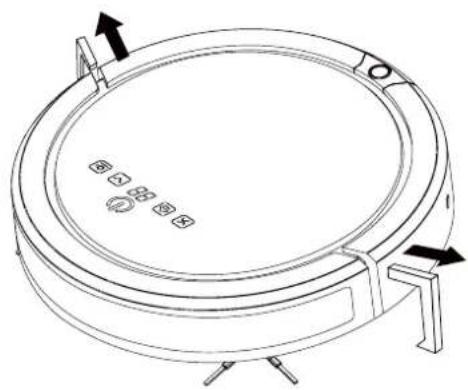
Line drawing of a circular robotic vacuum cleaner with control knobs and buttons (no text or symbols)2
natural_image
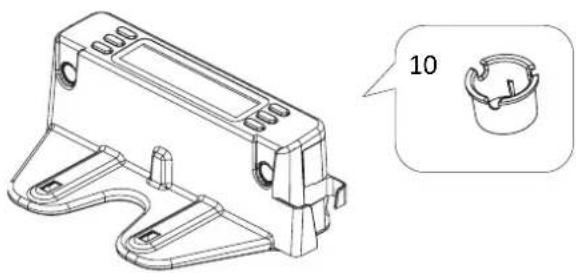
Technical line drawing of a mechanical housing component with a close-up inset showing a circular component (no text or symbols)3456

natural_image
Line drawing of a portable electronic device with attached cable and connector (no text or symbols)78911
natural_image
Simple line drawing of a 3D rectangular block and a small mechanical component with cross symbols, no text or labels present.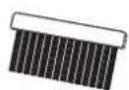
natural_image
Diagram of a mechanical component with two arrows indicating direction (no text or symbols)Functions
text_image
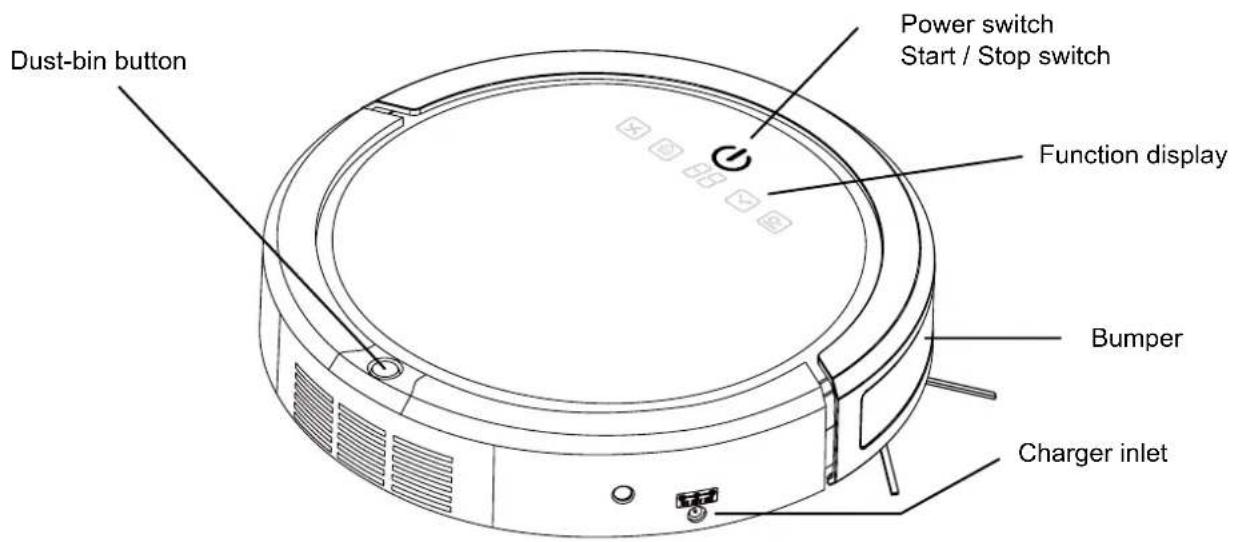
Dust-bin button Power switch Start / Stop switch Function display Bumper Charger inlet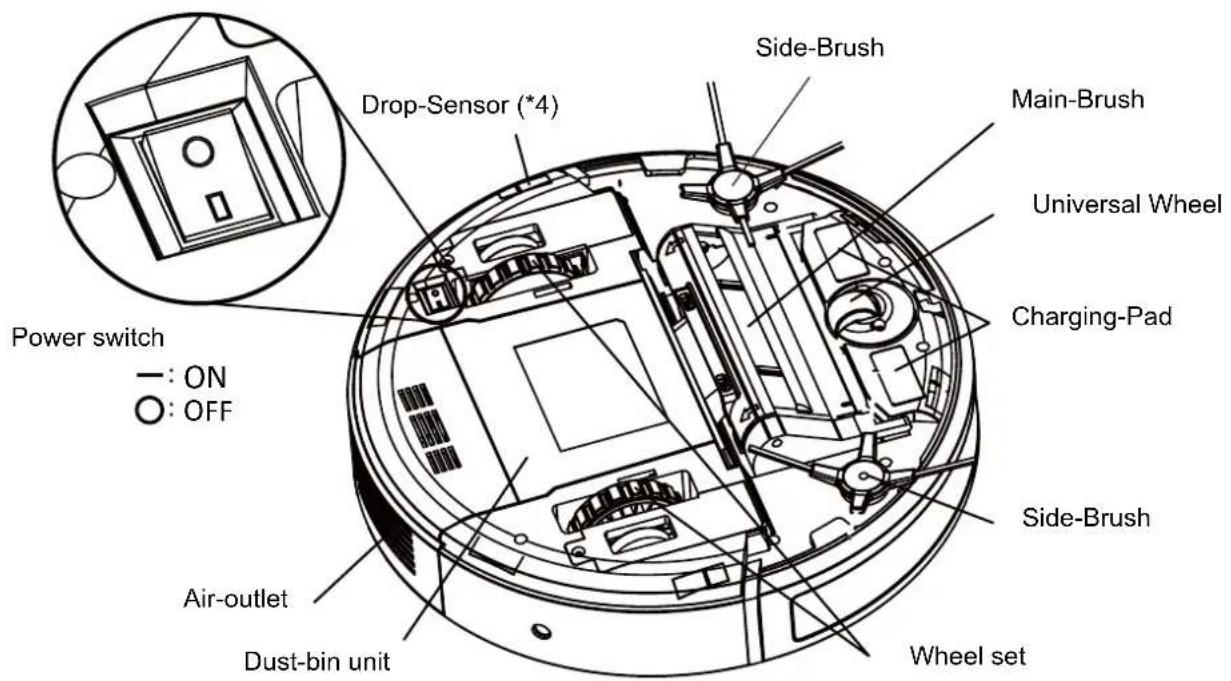
text_image
Power switch —: ON ○: OFF Dust-bin unit Air-outlet Drop-Sensor (*4) Side-Brush Main-Brush Universal Wheel Charging-Pad Side-Brush Wheel setFeatures & Cleaning Modes
Robotic Features
- Scheduler / Recharging Home Dock – Auto cleaning with scheduler & auto recharge when low on battery.
- Ultrasonic Obstacle Detection
- Ultrasonic collision Obstacle Detection
- Anti-falling cliff detection sensor
- Ultrasonic Room Limiter: can be use if needed to limit the access of the robotic vacuum cleaner in certain areas. (option accessories)
- Remote
Cleaning Features
- Side brushes and powerful suction inlet - powerful suction and full coverage of cleaning.
- Floating Roller Brush – allows the roller brush and suction to stay close to the ground, covers all the dead spot while having full suction power.
- Dust Filter & HEPA type Filter – Dust filter holds normal debris and extends HEPA filter life span. High efficiency particulate air filter traps the fine particles which trigger allergy and asthma symptoms.
- Wet Mopping Base : Uses wet mop with reservoir
Cleaning Modes
1. Auto mode
Once the robot is activated without specific cleaning instructions, it will automatically execute the auto function by repeating the five different modes. The combination of different cleaning patterns will ensure the robot finishes the cleaning of any given space or area.
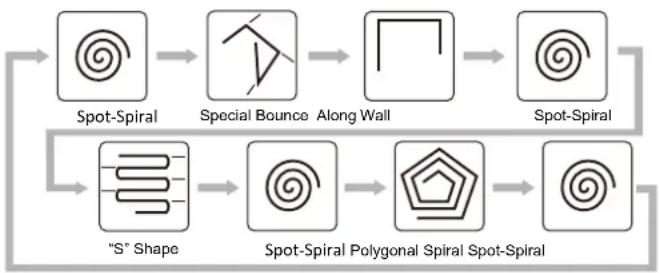
flowchart
graph LR
    A["Spot-Spiral"] --> B["Special Bounce"]
    B --> C["Along Wall"]
    C --> D["Spot-Spiral"]
    E[""S" Shape"] --> F["Spot-Spiral Polygonal Spiral Spot-Spiral"]
    F --> G["Spot-Spiral"]
2. Manual mode
User can manually instruct the robot to perform any specific cleaning patterns depending on different spaces to be cleaned.
Notes:
- The robot is suitable for hard floor and low to medium pile carpet.
- This robot is not suitable for very uneven surface. Do not use in long pile / tick carpet. Fold carpet fringes under the carpet before starting operation.
- Please note that this robot will collect dust and small particles. It will not clean paper, plastic bags and other large debris. It will get entangled in wires, so please declutter floor surfaces before using.
- Do not leave bottles, lamps or other breakables on the floor.
- Do not use in tight spaces less than 38cm wide as the robot may get blocked.
- Do not use on wet or greasy dust.
Battery installation and charging
The robot battery is user replaceable. If the battery stops keeping its hold please re-order replacement from the manufacturer or service center.
- When fully charged plug out the charger and power cord. An alarm sound will play.
- Push the dust-bin release button and pull out the dust-bin. Flip the robot over, and push the battery into the slot.
- Push the battery until clicks in.
- Flip the robot over again, and insert the dust bin back into the body.
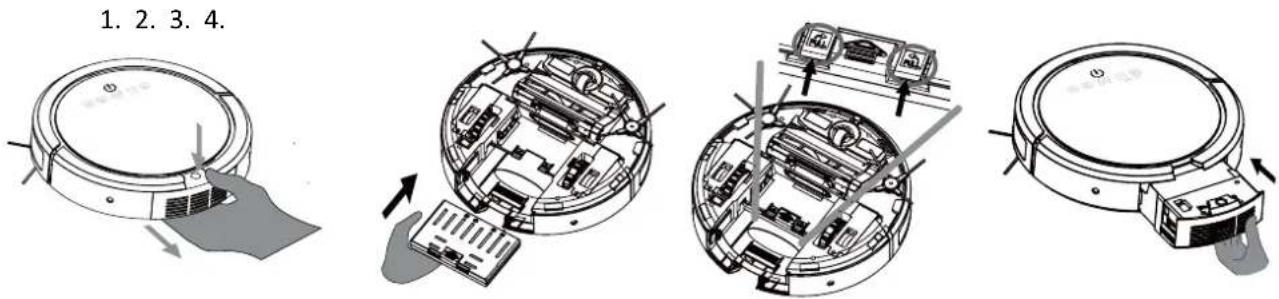
text_image
1. 2. 3. 4.Battery Removal
- Remove the dust-bin first and flip the robot over.
- Push the two battery hook buttons simultaneously. The battery will pop out automatically.
- Remove the battery.
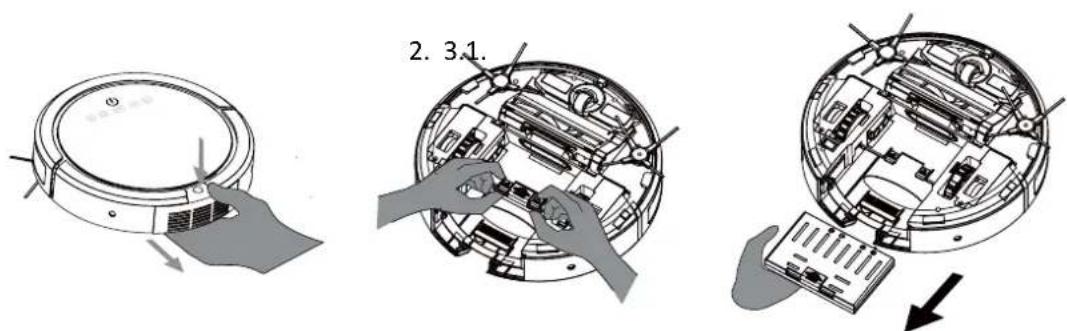
text_image
2. 3.1.Charging
If the robot shuts down while working or the battery indicator flashes, please charge the robot immediately. When the robot completes its cleaning cycle or the battery level is low, the robot will return to its dock automatically if there is enough power left to do this.
- Plug the charger in the power outlet. Insert the power cable into the docking station and place the robot to charge.
- The power plug can be inserted in the side of the robot. If the battery indicator flashes, it means the robot is charging normally.
Dock
The charging dock must be positioned on an even floor surface against a wall with at least a 60cm (2ft) clearance around. Connect the AC adaptor to the power socket on the rear side of the dock or robot. Only use the AC adaptor provided by the manufacturer. The LCD display on the charging dock will turn on when it is plugged in. Always keep the dock plugged in.
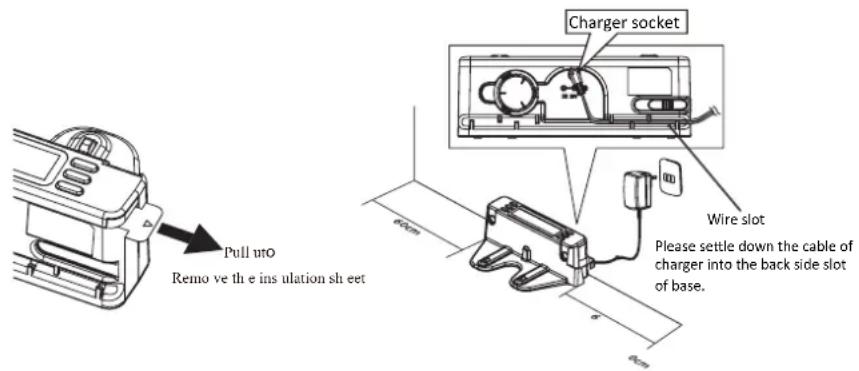
text_image
Pull uro Remo ve the ins ulation sheet Charger socket Wire slot Please settle down the cable of charger into the back side slot of base.Docking Test
Leave the robot on the floor somewhere near the dock. Press the “HOME” button on the remote control. The robot will return to the dock automatically. If the robot fails to dock, check the installation process to make the necessary adjustments to the docking station until the robot can dock properly.
Robot Battery Recharge
When the Power Button on the robot blinks red, this indicates that the battery level is low. The robot will shut down the vacuum engine and go back to the recharging home dock. The AC adaptor can plug into the robot directly to recharge the battery. When the battery is fully recharged, the Power Button will light up a solid blue. The recharging process is about 3 hours.
Robot Battery Care
High capacity rechargeable batteries are used in this robot. The batteries can last for hundreds of recharging cycles if it is properly cared for. Recharge the battery as soon as the robot is used. Keep the robot charged when not in use. If the robot will not be used for a longer period of time., remove the battery from the robot and store it in a cool and dry place.
Notes :
- Charge the robot for at least 24 hours before the first use.
- Each time the robot is fully depleted charge for at least 3 hours.
- Never use the robot in temperatures less than 0°C or over 40°C as this will reduce the battery life and performance.
- It is normal for the temperatures of the charger to increase during the charging process.
Notes : All the settings are disabled while battery is charging. LCD screen will be on and the timer and the battery icon is flashing and the charged percentage is showing.
Room Limiter (option accessories)
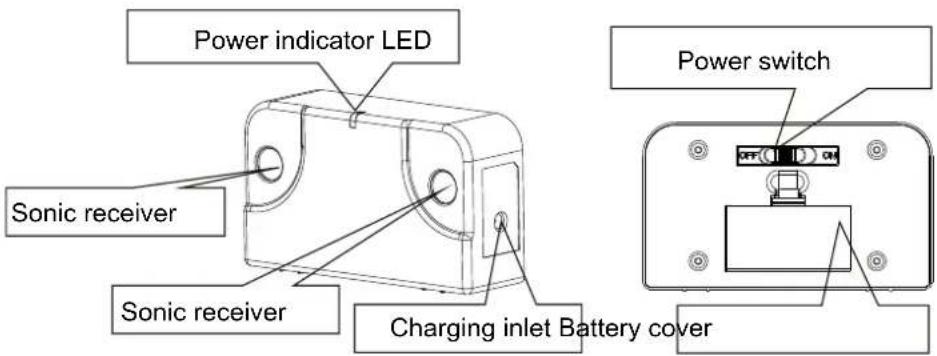
text_image
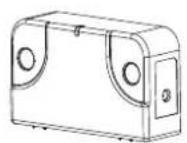
Power indicator LED Sonic receiver Sonic receiver Charging inlet Battery cover Power switchThe Room Limiter creates an invisible ultrasonic barrier that ME485 will not cross.
- The Room Limiter is powered by 2 AA batteries. Make sure to install the AA batteries with correct polarity.
- To turn on the Room Limiter, slide the power switch to 'ON' position.
- When turned on, the blue LED light blinks for 70 second, then turns into standby mode. When eiq-R900M starts working, the Room Limiter will turn on and shows blue LED light.
- The best effective distance of Room Limiter barrier is about 3M (10ft).
- The LED light will blink when the Room Limiter is low in battery.
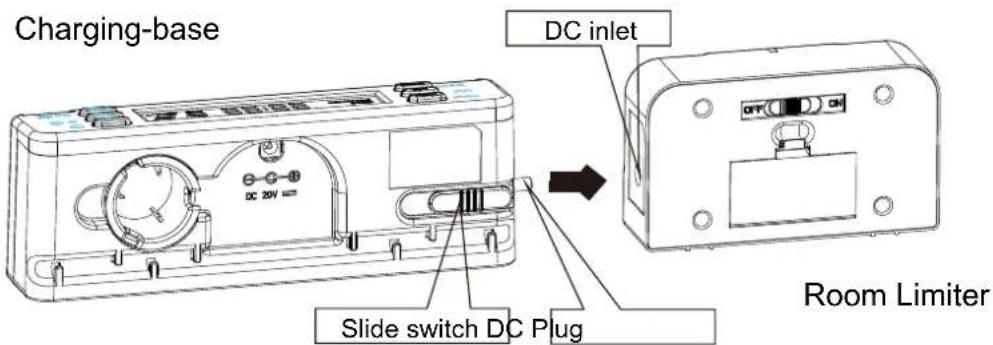
text_image
Charging-base DC inlet Slide switch DC Plug Room LimiterIf you use 2 rechargeable batteries, you could charge the Room Limiter by plugging the zone divider into charging base. (Please see the figure above)
Step 1: The power switch of Room Limiter must set to 'ON' position.
Step 2 : Press and slide out the DC Plug from charging dock.
Step 3: Plug the DC Plug into DC inlet, the LED light will blink.
Step 4: When recharge is complete, LED will glow continuously.
- When ME485 is cleaning, the Room Limiter must position at least 1m (3ft) away from charging dock and avoid facing towards it.
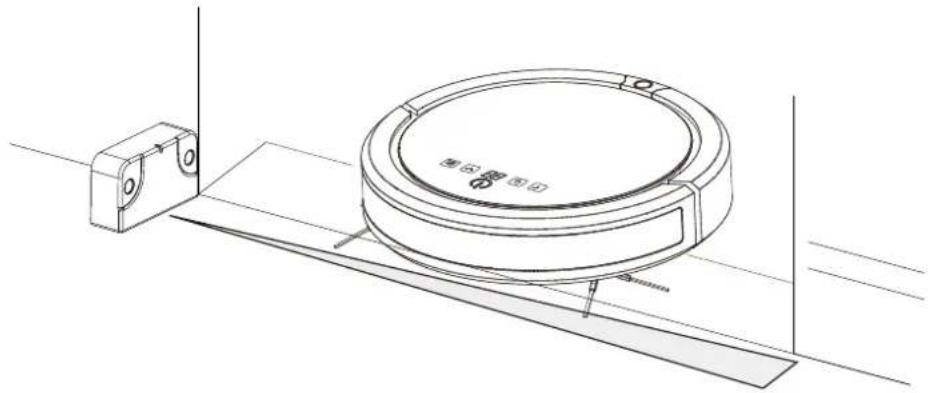
natural_image
Technical line drawing of a circular mechanical component mounted on a base plate, with no visible text or symbols.- When the robot completes the cleaning cycle you can power off the Room Limiter by sliding the power switch to 'OFF' position. When the robot detects the invisible barrier, it will turn around and move to another direction.
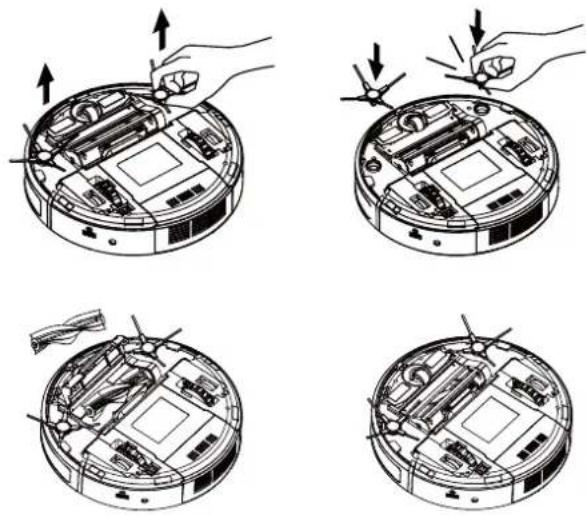
Spinning side brushes
Installation: Insert each side brush into the socket.
Press it firmly until it is properly locked.
Removal: Pull the side brush from the bottom.
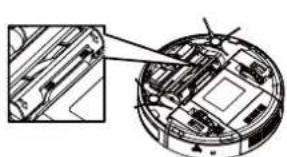
Main-Brush
Installation: Insert the main brush, then press the "Push" button and close the cover.
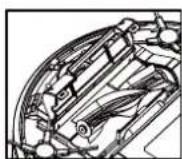
Removal: Press the "Pull" button, then pull out the main brush.
natural_image
Technical diagram of a mechanical assembly with an inset showing internal components (no text or labels)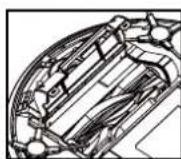

VAC
5

HOME
6

3
1

TIME
2

COLLIDED
4
Power Button:
Press the Power Button to activate the robot. The button will light up blue. The power button light indicates the status of the robot and its system.
| Power button Light | System Status |
| Red LED blinking | Battery Level is low |
| Blue LED blinking | The battery is recharging |
| Solid Blue | The battery is fully recharged |
1. Start / Stop Button:
Press this button and it will light up blue. The robot is activated to perform the cleaning cycle. Press the button again to stop the cleaning cycle.
2. Timer
Different cleaning time Settings options are available. Users may use their remote control to enter specific cleaning time settings. (e.g. 10 mins, 20 mins, ... 80mins etc.) the selected setting will be shown on the display. When the robot is activated the default cleaning time setting is last previous time set.
3. Display of Timer / Cleaning Mode
There are several patterns that the robot uses during the cleaning process.
- Spot Spiral
- Special Bounce
- Wall Following
- Zig-Zag
5. Polygonal Spiral
A. Automatic (the combination of patterns 1-5)
The user may use their remote control to select a specific cleaning pattern. The number or letter “A” will be shown on the display.
When the robot starts to return to the charging dock, the letter "H" will be shown on the display.
Users may also interrupt the cleaning cycle by pressing the "Home" button on the remote control. When the command is entered, the robot will stop cleaning and go back to the dock.
4. Collided
When this function is activated, the robot will slow down its moving speed in order not to collide with any objects when cleaning. This function is ideal on cluttered spaces.
5. Vacuum motor
The robot cannot perform the cleaning process without the activation of the vacuum motor function.
6. Home
When this function is activated, the robot will start searching for charging station to charge itself.
REMOTE CONTROL
All function buttons on the robot's front panel are available on the remote control. There are some additional unique buttons on the remote control shown below.
Power Button: Press this button to activate or to shut down the robot.
Start / Stop Button: Press this button to activate the robot to perform or to stop the cleaning process.
Direction Buttons: Left / Right / Reverse / Forward buttons for users to control the robot movement manually.
Timer Button: Set up the cleaning time.
Home Button: This function interrupts the cleaning cycle and to commands the robot to go back to the home dock.
Mode Button: Manually sets up the cleaning mode of the robot. Each press will command the robot to change its cleaning mode in the sequence of the following patterns. Users may also find the current pattern code on the robot's display panel.
- Spot Spiral
-
Zig-Zag
-
Special Bounce
-
Polygonal Spiral
-
Wall Following
- Automatic (the combination of patterns 1-5)
Collided Button: Press this button to activate or to shut down the function.
- Before the robot starts cleaning, it is suggested to clean up small items, like clothing, power cords, cables, and loose fringes of rugs.
- Check if the dust-bin is full and empty it out before starting the cleaning cycle.
- Press the Power Button to activate the robot.
- Use the remote control to set up the preferred cleaning time or cleaning cycle. The robot can clean a 6 to 8 square meters area in 10 minutes. However this ratio varies depending on types of floors and the complexity of the space.
- Users may interrupt the robot's cleaning cycle at any time by pressing the Start / Stop button either on the robot panel or the remote control. By pressing the button again, the robot will resume the previous cleaning cycle.
Scheduling the robot
text_image
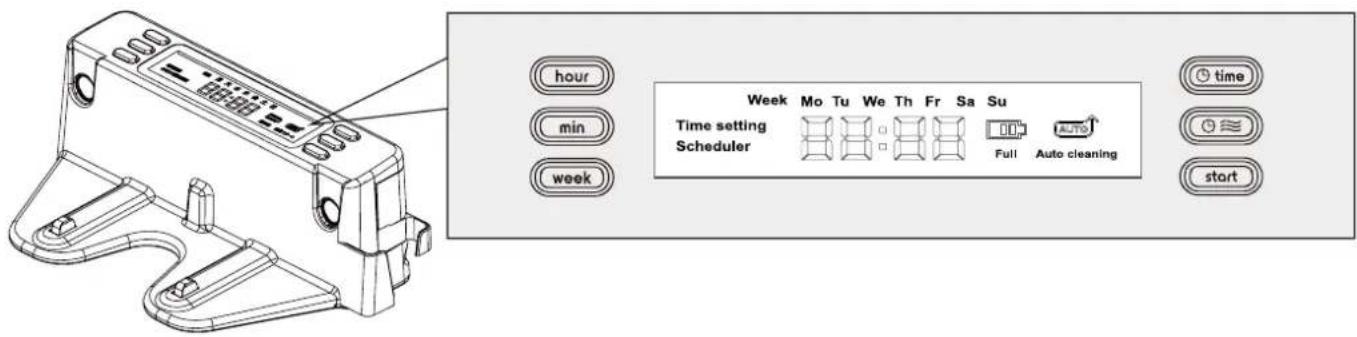
hour min week Week Mo Tu We Th Fr Sa Su Time setting Scheduler Full Auto cleaning time startUsers may program the robot to perform the cleaning cycle on any preferred day and time. This scheduling function is built – into the dock with the LCD display and several setting buttons. In order to perform this function, the docking station needs to be plugged in at all times.
Setting your local time
- Press the button "Time" first. The LCD display will show "Time Setting".
- Press the "Week" button to choose the correct weekday.
- Once the chosen weekday appears on the display, press the button again.
- Follow the previous steps to complete the settings of "Hour" and "Min"
Scheduling the robot
- Press the "Schedule" button first. The LCD display will show "Scheduler".
- Press the "Week" button. The LCD display will show "Mo (Monday)" blinking
- If Monday is the chosen day, press the "Week" button again. Then Monday will be programmed in.
- The setting function will automatically change to the next following weekday every 8 seconds. Press "Week" when the chosen day appears on the LCD display to complete the settings.
- Follow the previous steps until you have finished all cleaning day settings.
- Press the "Hour" button to complete the hour setting.
- Press the "Min" button to complete the minute setting.
- The schedule setting function will automatically quit if there is no input for more than 60 seconds.
- When all settings are finished, the selected cleaning date and time will be shown on the LCD display.
- After 10 seconds, the LCD display will go back to the clock display mode. Local current time will be shown on the display.
- The selected cleaning date will remain on the LCD display while the selected time is NOT.
- To check the programmed cleaning time, press and hold the "schedule" button.
- For changing or deleting the set schedule, repeat the precious setting process.
Auto Start
When the robot is docked and recharging.
- Press the "Start" button. The LCD display will show "AUTO". The robot will start one cleaning cycle as soon as the battery is fully charged.
- Press the "Start" button and hold it for 3 seconds. The robot will stop its recharging process and leave the dock immediately for one cleaning cycle.
Cleaning and Maintenance
- Make sure the unit is unplugged before performing any cleaning operation.
- Before first use and continuing after each use, wipe off unit with a damp cloth and dry thoroughly.
- Clean all the brushes and empty the rubbish container. Vacuum or wipe with a cleaning wipe the inside of the container.
- DO NOT immerse the robot or the power supply in any liquid.
- Reassemble the unit following the instructions and charge it before the next use.
- Store the robot in a cool and dry place.
text_image
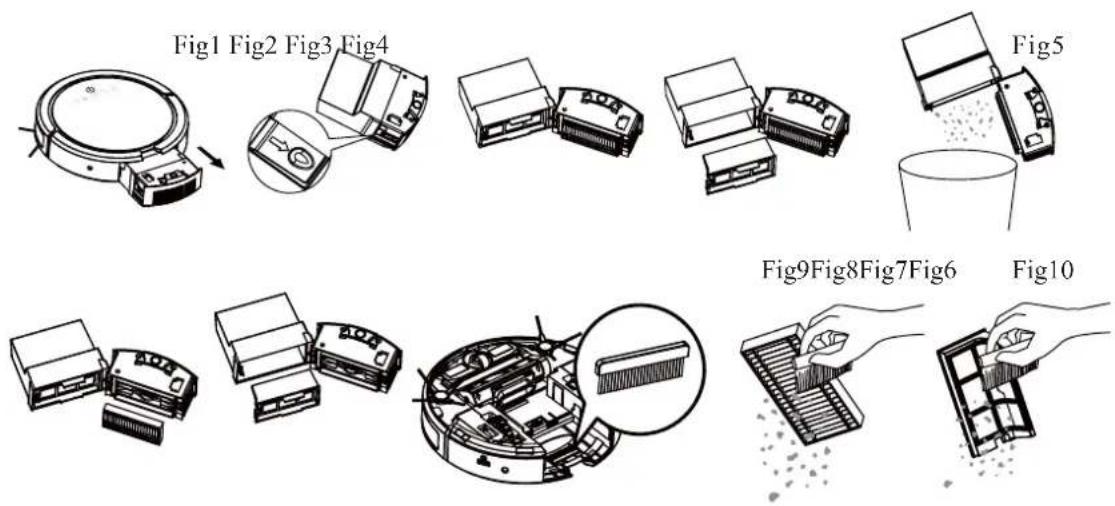
Fig1 Fig2 Fig3 Fig4 Fig5 Fig9Fig8Fig7Fig6 Fig10Dust bin and filter cleaning
Basic Cleaning
- Press the Dust Bin Release Button to remove the dust-bin.
- Press the side button to release the dust compartment.
- Remove the debris filter.
- Empty all dust and shake off all debris.
- Remove the dust filter.
- Use the included brush to wipe out the dust filter and debris filter.
Deep Cleaning
- Carefully separate the dust compartment from the robot body.
- Gently wash the dust compartment and debris filter.
- Wipe them thoroughly with a cloth and let it rest until completely dry.
Slot

text_image
Technical diagram showing exploded view of electronic device components with Chinese labels and arrows indicating assembly or installation steps.Main brush
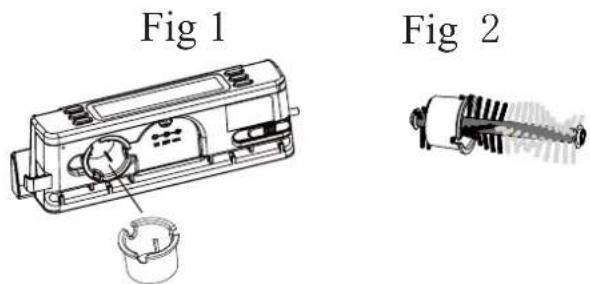
- Remove the Main Brush from its holder.
- Take out the cleaning tool included on the rear side of the dock.
- Slide the cleaning tool through the rolling brush.
text_image
Fig 1 Fig 2Side Brushes
- Remove the side brushes from their holders.
- Clean the side brush and install them back.
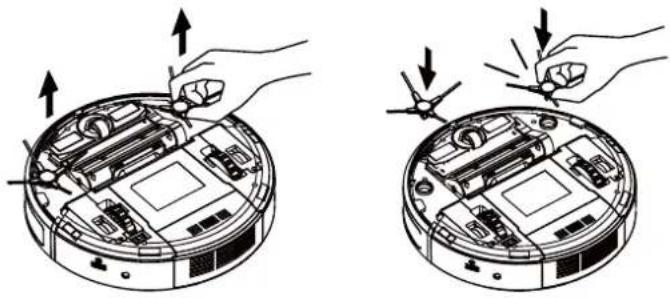
natural_image
Two-step diagram showing hand positioning of a device on a circular base, with arrows indicating movement direction (no text or symbols present)Wheels and Sensor
- Check and remove all debris and dirt.
- There are four ground sensors. Please clean them gently using a wet cloth or tissue. Do not use any solvents as they may damage the sensors.
- Please check the side brushes for damages and debris. If hair or other debris are trapped please unclick the brushes and remove them. Please change the side brushes if they are damaged. Only use the parts provided by the manufacturer.
MOP assembly (option accessories)
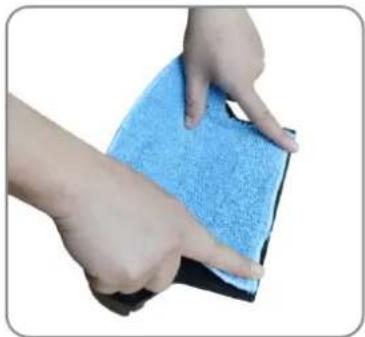
Only use the mop on hard surfaces such a wooden, laminate or tiled floors. Remove the mop attachment when cleaning carpets. Mop clothes are washable. Please wash at 40°C and do not spin dry.
- Press the cloth evenly to the face of water tank.
natural_image
Close-up of hands holding a blue textured fabric or towel, no visible text or symbols- Press all the corners of the rubber flange after injection of water.
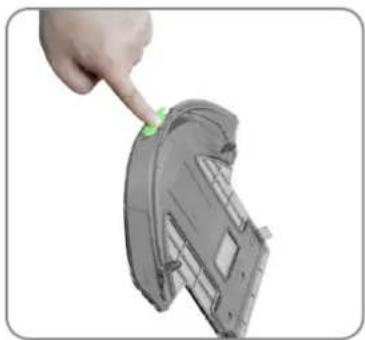
natural_image
Hand holding a green tool pointing to a 3D model of a mechanical component (no text or symbols visible)- Pose the tank vertically to allow air bubbles go to top of the tank.
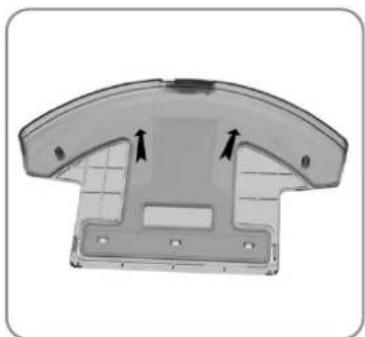
natural_image
3D rendering of a mechanical component with two arrows indicating direction (no text or symbols)- Open the rubber flange and inject water into tank.
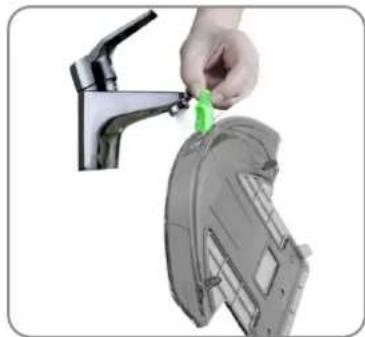
natural_image
Hand placing a green plastic clip into a gray sleeveless garment against a faucet (no text or symbols visible)- It is normal phenomenon that areas marked A and B at the bottom of tank appears air bubbles.
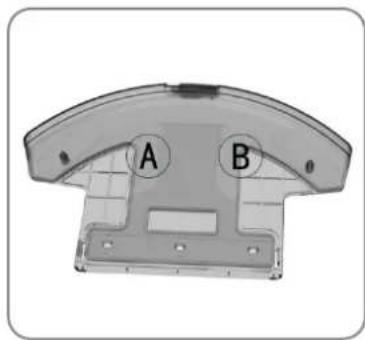
natural_image
3D rendering of a mechanical component with labeled points A and B (no text or symbols beyond labels)- To align the tank unit with the fixing holes at bottom of the machine then push the unit in.
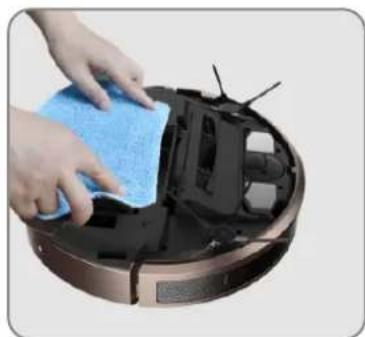
natural_image
Close-up of hands cleaning a robotic vacuum cleaner's air mask with a blue cloth (no text or symbols visible)Please read this instruction manual carefully before you send the robot to the service center.
| Problem Cause Solution | ||
| Error message | Sensor malfunction or system jammed. | Check the error messages on next section for correct action. |
| The Robot cannot power on | The battery is not installed or installed incorrectly. | Check if the battery is still in good condition and installed correctly. |
| Remote control malfunction | The transparent film is not taken off. The battery is not correctly installed or the battery strength is too low. | Tear off the transparent film. Check the installation of the battery or replace the battery. |
| The robot fails to return to the dock | The dock is not properly placed there are obstacles between the dock and the Robot. The robot is stuck or jammed. | Place the dock in a proper location and leave sufficient clearance space for the Robot to return to it. Remove any obstacles in front of the dock. Check and clean the Robot's wheels. |
| The Robot does not charge | AC power is not plugged in. The Robot is not correctly docked The battery is over-heating. | Plug the AC jacket onto the dock firmly. When the robot is docked, please make sure the Robot is properly placed. Do recharge for at least 60 minutes until battery cooled down. |
| Main brush or side brush do not work | Brushes get stuck by debris or hair. | Clean the brushes. |
| The Robot does not start cleaning after it is fully recharged | The “Auto” function is not set correctly. The battery is over-heating. | Check the schedule setting section and reset the “Auto” Function. Do recharge for at least 60 minutes until battery cooled down. |
| The Robot keeps moving backward or turning around | Cliff sensors are blocked or covered by dust. | Wipe all sensors with a dry clean cloth. |
Fehlermeldung
| Error Message Suggested Actions | |
| E1 Front Cliff sensor | The robot might be trapped in a specific area where there are stairs or floor edge. |
| E2 Charging Error | Please refer to the correct installation process of the charging dock and try it again. |
| E3 Front Bumper Error | The robots front bumper is stuck. Check the front bumper. |
| E4 Dust bin mounting Error | Dust bin mounting Error. |
| E5 Left Wheel Overloaded | Check the Left wheel, and remove any objects stuck. |
| E6 Right Wheel Overloaded | Check the right wheel, and remove any objects stuck. |
| E7 Side Brushes Overloaded | Check both side brushes to remove any jammed objects or debris. |
| E8 Main Brush Overloaded | Check the rolling brush to remove any jammed objects or debris. |
| E9 Vacuum Motor Overloaded | Stop using the robot for at least 60 min and then restart it again. If this message still shows up, please contact your local warranty center provider. |
Product specifications
| Power supply | Input: 100-240V AC 50-60Hz, 1AOutput: 20V DC, 1A |
| Rechargeable battery | Li-ion 14.8V, 2600mAh |
| Charging time | 2.5 hrs |
| Operating Time | 120 min. |
| Dustbin capacity | 0.5 l |
| Cleaning area diameter | 360 mm |
| Dimension (W x D x H) | 330x330x79 mm |
| Net weight | 2,5kg |
Disposal: Do not dispose this product as unsorted waste. Collection of such waste must be handled separately as special treatment is necessary.
Recycling facilities are now available for all customers at which you can deposit your old electrical products. Customers will be able to take any old electrical equipment to participating civic amenity sites run by their local councils. Please remember that this equipment will be further handled during the recycling process, so please be considerate when depositing your equipment. Please contact the local council for details of your local household waste recycling centers.
Limited Product Warranty
Moneual guarantees a one(1) year functionality of this product (except batteries), with exclusion of the following limitations. This warranty is only effective in the country in which it was bought.
Please keep following informations ready when contacting our service.

flowchart
graph LR
    A["Product Name"] --> B["One (1) year product warranty"]
    C["Purchase Date"] --> B
    D["Dealer"] --> B
    B --> E["Model Name"]
    B --> F["Serial Number"]
    B --> G["Invoice Number"]
MTG GmbH in Eschborn/ Germany is responsible for our customer service. Every customer request will be answered within 7 working days.
The warranty service takes place within 20 working days after first request. There's no warranty claim for any devices of other manufacturers or devices bought from non-authorised dealers.
Warranty Service
→ For warranty service please first contact your dealer.
Otherwise e-mail to: support@moneual.de
For devices in commercial use, there is no warranty claim.
| Defects | Service | |||
| Within warranty time After warranty time | ||||
| The Produkt works demonstrably incorrect within warranty time and without customer debt. | DOA (Dead on arrival)An error occurs while first commissioning, latest 7 days after delivery date. | The product will be replaced by a new one*** or refund. | ||
| An error occurs within 6 months after delivery date. | The product will be replaced by a new one or free repair. *** | |||
| Ein Defekt tritt innerhalb von 4 Wochen nach Austausch an einem Ersatzgerät auf. | Free repair*** | |||
| Es ist kein Ersatzgerät verfügbar. | Free repair**** or refund. | |||
| Multiple repair | three (3) times cause of same defect. | Product will be replaced*** or refund of utility value*** + 10% | Paid repair | |
| five (5) times cause of different defects. | ||||
| MTG GmbH lost the product. | Refund of utility value*** + 10% or offer for replacement product. | |||
| No spare parts available. | Offer for replacement product | |||
| Repair is economically unviable. | Paid repair, free disposal or offer for replacement product. | |||
| Defekte aufgrund von Absicht, unsachgemäßer Benutzung oder mangelnder Wartung des Kunden. | Irreparable | Offer for replacement product or free disposal. | Offer for replacement product or free disposal. | |
| Repairable | Paid repair or free disposal. | Paid repair or free disposal. | ||
(While warranty time, MTG GmbH got several redress possibilities discretion in their own.)
* except shipping costs.
** Subsequent exchange, resale or replacement or rather a subsequent repair of the product will not lead to a renewal of warranty or to the beginning of a new warranty period.
Each parts of the product or other devices, which have been replaced, become property of MTG GmbH. For repair or replacement, new, as new or refurbished products or parts can be used.
*** Value after use:
| Purchase date | Compensation for use(% Of purchase price) |
| Up to 6. Month | 100% |
| 7. – 12. Month | 90% |
| 13. – 18. Month | 70% |
| 19. – 24. Month | 50% |

If you submit a service application and no defect can be found, MTG GmbH will have the right to raise a handling fee. Please read the user's manual attentively before you contact customer service!
Cases without warranty claim:
| - Product without defect- normal wear (f.ex. batteries, filter, wheels, brushes, mops and water tank)- Use of inadmissible cleaning supplies- Use of replacement or exchange parts, which are not provided or recommended by us. | - Defects caused by misuse or lack of maintenance.- Connection to an inappropriate power grid.- Bumps or Falls- Use of inadmissible cleaning supplies- Damage caused by tried self-repair- Disregard of the user's manual's safety instructions.(water damage, stair fall, a.s.o.)- Damage caused by improper packing | - Other Cases- Force majeure- Life time of consumer goods is expired |