T313VW - Tumble drier Creda - Free user manual and instructions
Find the device manual for free T313VW Creda in PDF.


User questions about T313VW Creda
0 question about this device. Answer the ones you know or ask your own.
Ask a new question about this device
Download the instructions for your Tumble drier in PDF format for free! Find your manual T313VW - Creda and take your electronic device back in hand. On this page are published all the documents necessary for the use of your device. T313VW by Creda.
USER MANUAL T313VW Creda
Tumble Dryer Instruction Book
3kg Models
You must read these instructions prior to using the appliance and retain them for future reference.
Contents
Safety Advice 3 - 4
Electrical Requirements 5
Features - Get to know the main parts of your Dryer 6
Where to put and vent your Dryer 6
How to use your Dryer 7
Sorting your laundry 8
Items not suitable for drying 9
Items requiring special attention 10
The Controls 11
Guide to Drying Times 12
How to remove and clean the Fluff Filter 13
Caring for your Dryer 13
If something goes wrong 14
If it still won't work 15
Retention of this Instruction Book
This Instruction Book must be kept handy for reference as it contains important details on the safe and proper use of the appliance.
If you sell or pass the appliance to someone else, or move house and leave it behind, make sure this Book is also provided so the new owner can become familiar with the appliance and safety warnings.
For your safety
IMPORTANT
Using your Tumble Dryer is easy.
Nevertheless, for your own safety and to get the best results it is important to know your Dryer by reading right through this handbook before using your dryer for the first time.
NEVER ● Allow children to play with or otherwise interfere with the dryer.
NEVER ● Allow the air inlet at the back of the dryer, the air outlet or vent hose to be obstructed.
NEVER ● Direct the vent hose outlet towards the air intake at the back of the machine.
NEVER ● Allow the tumble dryer to recycle exhaust air.
NEVER ● Switch the machine off leaving a hot load in the drum.
NEVER ● Tumble dry without the filter in position.
NEVER ● Exceed the maximum load capacity recommended or place dripping wet items in the drum.
NEVER ● Use the dryer on a carpeted floor where the pile height would prevent air from entering the dryer from the base.
NEVER ● Allow lint to collect around the dryer.
NEVER ● Add liquid or sheet fabric conditioner to the dryer, use liquid conditioner in the final rinse of your wash.
NEVER ● Use the dryer for commercial drying, the dryer is only suitable for domestic use.
NEVER ● Dry Acrylics on the high heat setting.
NEVER ● Tumble dry articles that have NOT been well washed in water and detergent then well rinsed and spun.
NEVER ● Tumble dry articles that have had chemicals used for cleaning.
NEVER ● Dry articles that are contaminated with flammable substances such as: petrol, oil, paint, hair lacquer, creams, cooking fat or oil.
NEVER ● Tumble dry: rubber, foam rubber, plastic, plastic foam, nappy pants or liners, polythene or paper.
Large, very bulky items including duvets and sleeping bags.
NEVER ● Never attempt to stand on top of your dryer, it is not designed for such use and you could injure yourself or damage the dryer by such abuse.
NEVER ● Switch electricity On or Off with wet hands.
IMPORTANT
A CHILD COULD CLIMB INTO OR TAMPER WITH AN UNATTENDED TUMBLE DRYER.
WHEN THE MACHINE IS NOT IN USE SWITCH OFF, REMOVE THE PLUG AND CLOSE THE DOOR.
For your safety
ALWAYS ● When the dryer is not in use, switch off at the wall, remove plug and close the door.
ALWAYS ●Comply with the specified electrical requirements.
ALWAYS ● Ensure that your dryer is installed correctly and has adequate ventilation. (see, "Where to put and vent your dryer.")
ALWAYS ●Use the vent hose for optimum drying performance.
ALWAYS ● Finish every programme with the cool tumble cycle provided on the control.
ALWAYS ● Clean the filter, it is essential that the filter is kept clear of fluff after EACH drying cycle.
ALWAYS ●Observe the rules for drying garments:
In particular woollen articles should not be dried in a tumble dryer unless they are labelled ‘Superwash’, ‘Machine washable’ or have the ‘May be tumble dried’ symbol:
If in any doubt do not dry wool in the machine.
Unlike other materials, the mechanism of wool shrinkage is irreversible, i.e. it will not stretch back to the original size and shape.
ALWAYS ●Buy genuine accessories and spares.
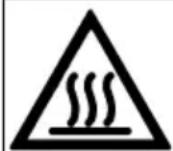
CAUTION: WHEN THE DRYER IS IN USE AVOID TOUCHING THE REAR OF THE DRYER AS IT MAY BE HOT.
Electrical Requirements
| Supply | WARNING:This appliance must be earthed! |
| REFER TO THE RATING PLATE FOR VOLTAGE AND CURRENT REQUIREMENTS. (see diagram for location.)The flexible mains lead is supplied fitted with a BS1363 plug and with a 13 amp BS1362 fuse.The plug should be connected to the mains supply via a suitable switched socket which is accessible after installing your dryer. | |
Changing the fuseMoulded plug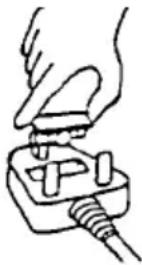 | If it is necessary to fit a replacement fuse, it must be a 13 amp ASTA approved to BS1362 type.WARNING:The plug must not be used without a fuse cover.If a replacement fuse holder/cover is required, it must be of the same colour coding or wording as shown on the base of the plug.Replacements are available from your Spares stockist. |
Changing the plugRewirable plugGREEN & YELLOW TO EARTH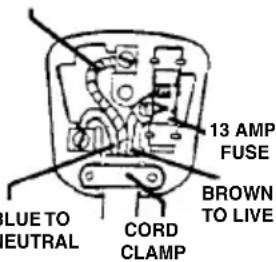 EN EN | The wires in the mains lead are coloured in accordance with the following:GREEN/YELLOW - EARTHBLUE - NEUTRALBROWN - LIVEIf a replacement plug is to be fitted, the appropriate wire must be connected to the correct terminal,as follows:Connect:Green/Yellow to terminal marked Earth or Green orBlue to terminal marked Neutral or N or BlackBrown to terminal marked Live or L or Red.If the plug being replaced is a non-rewirable type then the cut-off plug must be disposed of safely.DO NOTleave where it can be inserted into a socket and create a shock hazard. |
| Changing the mains cable | Should the mains lead ever require replacing at any time please contact your nearest Service Centre. A charge will be made for the replacement of the mains lead or if you require a longer lead.The mains lead must only be replaced by a specially prepared cable obtainable from your Spares Stockist and fitted by a qualified electrician. |
NOTE: IF IN DOUBT ABOUT ANY OF THE ABOVE CONSULT A QUALIFIED ELECTRICIAN.
Features - Get to know the main parts of your dryer
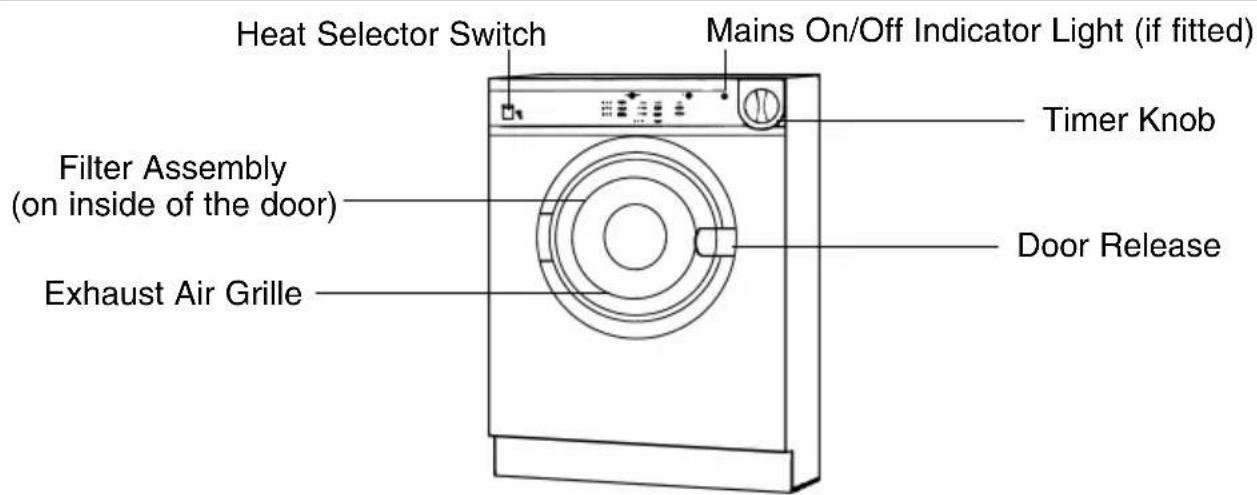
text_image
Heat Selector Switch Mains On/Off Indicator Light (if fitted) Filter Assembly (on inside of the door) Exhaust Air Grille Timer Knob Door ReleaseWhere to put and vent your dryer
- Your tumble dryer should NOT be located adjacent to a gas hob, cooker, heater, or eye level grill as flames from the burners could cause damage to your machine.
- The dryer should be placed where air can freely circulate around it, preferably near a window that can be opened to reduce the possibility of condensation occurring while the dryer is in use.
- When operating the dryer, there has to be adequate ventilation to avoid the back flow of gases into the room from appliances burning other fuels, including open fires.
- A vent hose is recommended for optimum performance.
- DO NOT operate the dryer in an enclosed environment, ensure the dryer is adequately ventilated.
- If the dryer is enclosed or fitted under a work surface, a gap of at least 50mm (2") must be allowed above the top across the full width of the dryer and at least 25mm (1") either side. This allows air to enter into the rear air inlet. The dryer must NEVER be run in a cupboard with a closed door.
- We do not recommend that the dryer is installed in a cupboard but the dryer must never be installed behind a lockable door, a sliding door or a door with a hinge on the opposite side to that of the dryer door.
- DO NOT allow clothes, towels etc., to hang down the front of the dryer into the airstream. This obstructs the airflow and may damage the dryer.
- Ensure that the end of the hose is not directed towards the air intake grille at the rear of the dryer.
- NOTE: The vent hose should not exceed 2.4 metres in length, and should be kept free of any possible accumulation of fluff lint (and water) by frequently shaking it out. Always ensure that the hose is not squashed.
Wall Hanging Kit This allows the dryer to be mounted on a wall of suitable strength to take the weight. Alternatively it should be used when the dryer is mounted on top of a work surface to secure the dryer to the wall.
WARNING: DO NOT DISCHARGE THE EXHAUST AIR INTO A FLUE WHICH IS USED FOR EXHAUSTING FUMES FROM OTHER APPLIANCES BURNING GAS OR OTHER FUELS.
How to use your dryer
- Plug in, switch on electricity.
WARNING: WHEN SWITCHING ON OR OFF, PLEASE ENSURE THAT YOUR HANDS ARE DRY
- Sort your laundry (see section "Sorting Your Laundry")
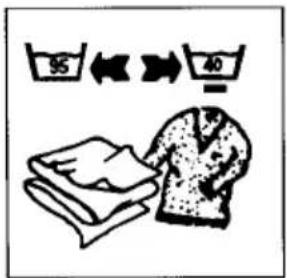
text_image
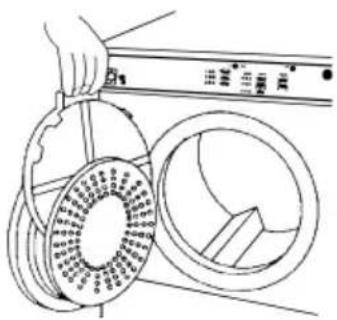
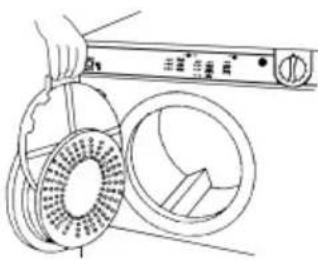
95 40- Open the door. Check that the fluff filter is clean (see section How to remove and clean the fluff filter).
natural_image
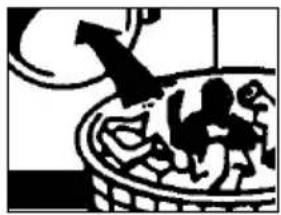
Line drawing of a hand holding a fan next to a circular component with internal parts (no text or symbols)- Load the dryer placing the clothes carefully in the drum, pushing them well towards the back and away from the door seal. Close the door.
natural_image
Black-and-white illustration of a person running in a basket with a large arrow above, no text or symbols present.- Select the relevant heat setting (see section "Sorting your Laundry").
Push IN for high heat, for cottons, linens and synthetics. Low setting - button OUT for acrylics and acrylic mixtures.

Button OUT LOW HEAT
Button IN HIGH HEAT
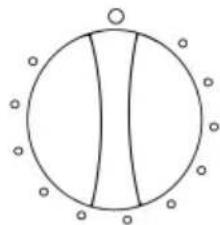
- Turn the Timer clockwise to select the required drying time. (See Section "The Controls".) The dryer will start
natural_image
Simple circular diagram with two vertical lines and surrounding dots (no text or symbols)- When finished open the door and take out the laundry.
Clean and replace the fluff filter.
natural_image
Line drawing of a hand holding a control panel next to a circular component with internal blades (no text or symbols)- Switch off electricity and remove plug from socket.
WARNING: WHEN SWITCHING ON OR OFF, PLEASE ENSURE THAT YOUR HANDS ARE DRY
Never switch the dryer off with a hot load in the drum. You must terminate every programme with the Cool Tumble Phase.
Sorting your laundry
- Always separate laundry into the correct fabric groups before washing and drying.
- See that all zips are closed, hooks and eyes are fastened and belt, strings etc. are tied loosely in bows, you will normally have done this for each item before the washing stage.
- It is important to extract as much water as possible from each item before drying. This saves you time and money.
WARNING: CLOTHES SHOULD NEVER BE LOADED DRIPPING WET
- Make sure that the items to be dried are suitable for tumble drying, or are not of a type requiring 'special attention' (see "Wash Care Labels" section).
Maximum load size
Your dryer will hold a load of 3kg (6.6lb) dry weight of natural fabrics. if you are drying items of man-made fibres (synthetic or acrylics), the maximum load should not exceed 2kg (4.4lb) dry weight.
This difference is that man-made fibres require more space to tumble-dry without creasing.
WARNING: DO NOT OVERLOAD AS THIS COULD RESULT IN REDUCED DRYING PERFORMANCE AND A POSSIBLE FIRE HAZARD.
Typical load
To help you estimate how many items it takes to make up a drying load, the charts below show the approximate weights of some everyday washing items.
| Clothes | |
| Blouse Cotton 150g 5ozOther 100g 31/2oz | |
| Dress | Cotton 500g 1lb 2ozOther 350g 12oz |
| Jeans | 700g 1lb 6oz |
| 10 Nappies | 1000g 2lb 3oz |
| Shirt | Cotton 300g 101/2ozOther 200g 7oz |
| T-Shirt | 125g 41/2oz |
| Household Items | |
| Duvet cover (Double) | Cotton 1500g 3lb 5ozOther 1000g 2lb 3oz |
| Large Tablecloth | 700g 1lb 6oz |
| Small Tablecloth | 250g 9oz |
| Tea Towel | 100g 31/2oz |
| Bath Towel | 700g 1lb 8oz |
| Hand Towel | 350g 12oz |
| Double Sheet | 500g 1lb 2oz |
| Single Sheet | 350g 12oz |
If you group small cotton or terry-towelling items with a synthetic fabric load they could be damp at the end of the drying cycle. If this happens simply give them an additional short period of drying to finish them off.
Wash Care Labels
Most of today's fabrics can be tumble dried in your Dryer with no trouble at all, but there are certain fabric finishes which should be dried away from direct heat.
The majority of garments now have wash-care labels on them, giving full washing and drying instructions. These should always be followed carefully especially when you are drying something for the first time.
Typical symbols are:
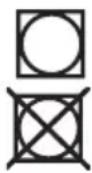
May be tumble dried
Do not tumble dry
Or:

Tumble dry at high heat setting

Tumble dry at low heat setting
Items not suitable for tumble drying
- Those containing foam rubber or rubber-like materials or plastic film (e.g. pillows, cushions, PVC rainwear), or any other articles which are inflammable or contain inflammable substances (e.g. towels contaminated with hair lacquer
- Fibreglass (e.g. some types of curtains)
- Items which have been dry cleaned
- Woollens. Woollen items need as much care in drying as they do in washing. The movement of the tumble-drying action causes the woollen fibre to shrink and distort.
- Garments with the ITCL Code (see ‘Items Requiring Special Attention’).

Do not tumble dry.
- Large bulky items e.g. continental quilts, sleeping bags, pillows, cushions, double blankets and large bedspreads. These expand when drying and would prevent airflow through the Dryer.
WARNING: THE DRYER IS INTENDED FOR USE ONLY WHERE WATER SOLUTION IS USED FOR THE CLEANING PROCESS. MISUSE OF A TUMBLE DRYER MAY CREATE A FIRE HAZARD.
Items requiring special attention
Blankets and Bedspreads
The drying requirements of blankets and bedspreads will, of course, vary tremendously according to size and weight. Some, however are simply too big. if you have difficulty getting them into the Dryer, the machine will have difficulty drying them properly. Blankets (and Garments) made from Acrylic fibres (e.g. Acilan, Courtelle, Orion and Dralon) must be dried with special care on Low heat setting. Overdrying should be avoided to ensure heat creasing does not occur.
Permanently pleated or creased garments
Your dryer will cope with such clothes very well, but you should always read the manufacturer's drying instructions attached to the garment before you begin.
Starched articles
Starched articles should be dried together in the same load to avoid the distribution of starch to non-starched items. You should use a slightly heavier starch solution than you would when drying the items on the washing line. Make sure that as much of the solution is removed from the load as possible before placing it in the Dryer. Remove the items from the dryer as soon as they reach ironing dampness. If they are overdried the starch will powder, leaving the fabric limp - which rather defeats the purpose of the exercise!
Fabric conditioner
To make sure all your tumble dried clothes come out really fresh and soft we recommend you use a liquid fabric conditioner in the final rinse of your wash. A liquid fabric conditioner restores bounce and softness and helps eliminate static cling.
WARNING: ON NO ACCOUNT SHOULD LIQUID FABRIC CONDITIONER BE ADDED TO THE DRYER ITSELF.
Home Dry Cleaning
Garments with the ITCL Code ☒ may be cleaned using one of the Home Dry Cleaning Kits available. The instructions supplied with the Home Dry Cleaning Kit must be strictly followed.
The Controls
Timer Control
radar
| Position | Value | |---|---| | 1 | 120 | | 2 | 110 | | 3 | 100 | | 4 | 90 | | 5 | 80 | | 6 | 70 | | 7 | 60 | | 8 | 50 | | 9 | 40 | | 10 | 30 | | 11 | 20 | The chart displays a single data point at position 70. The values are estimated based on the radial distance of the circle.Simplicity or Autodry models
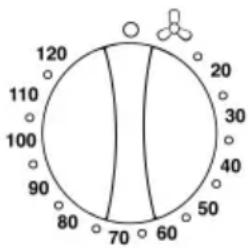
Turn the Timer clockwise to select the required drying time.
The drying time for both heat settings is controlled by the timer. All you have to do is turn the Timer Control clockwise slightly past the required time and then back to the required time.
Do not rotate the knob beyond 120 (maximum drying time) or past the zero stop. If you have selected more time than you require turn the knob anti-clockwise to select the correct time required.
This operation also starts the dryer, provided the door is closed and the machine is plugged in. The “Guide to Drying Times” section will tell you how much time you’ll need for various loads.
2-Way Tumble or Reverse Action models
Turn the timer clockwise to select the required drying time.
The timer controls the drying time for both heat settings. All you have to do is turn the Timer Knob clockwise until it lines up with the required time.
Never wind the timer control anti-clockwise.
This operation also starts the dryer, provided the door is closed and the machine is plugged in. The “Guide To Drying Times” section will tell you how much time you’ll need for various loads.
Door Release
To open door, grip the handle and pull towards you.
If the door is opened while the Dryer is in use, the drying programme cuts out automatically and the machine stops. When the door is closed the Dryer will restart but you will not need to reset the Timer Control.
You can however reset the Timer Control at any stage, should you wish.
WARNING: CHILDREN HAVE BEEN KNOWN TO CLIMB INTO TUMBLE DRYERS AND INJURE THEMSELVES. ALWAYS ENSURE THAT THE MACHINE IS SWITCHED OFF AT THE MAINS WHEN THE DRYER IS NOT BEING USED.
Heat Selection
Select the appropriate position for low heat or for high heat.
With the switch IN High Heat is selected
With the switch OUT Low Heat is selected
The choice of FULL HEAT or LOW HEAT depends upon the fabric you wish to dry (see section “Sorting your Laundry”).
Guide to Drying Times
| Please note that the Drying Times stated below and on appliance control panel are a GUIDE only and drying times are affected by: | |
| The amount of water remaining in the clothes after spinning | Items such as towelling retain a lot of water after spinning, also the suggested wash programme for small items such as T-Shirts may sometimes incorporate a low spin speed which has the same effect. |
| The type of fabric | Your drying load may contain the same type of fabric but of different thicknesses. Thinner items will take less time to dry. Some fabrics, such as those used for jeans are of closer texture than others and although light when dry will be heavy after washing and spinning. |
| The quantity of clothes to be dried | Single items of clothes or small loads may take disproportionately longer to dry. It is more energy efficient to dry larger loads. |
| How dry you want the clothes | As it takes longer to fully dry clothes than to have them ready for ironing, you may wish to remove some clothes when they are slightly damp, ready for ironing and then continue to dry the remainder until they are fully dry. |
| The heat setting you have selected | The label on the garment should tell you the correct heat setting to select. See ‘Wash Care Labels’. |
| The temperature of the room | If the room in which the dryer is situated is cold, your clothes will take longer to dry than if the room is warm. |
| Bulky items | Some bulky items such as padded jackets can be dried, with care, and we do advise that you remove these items several times, shake them and return them to the dryer.THERE ARE HOWEVER SOME ITEMS THAT WE DO NOT ADVISE YOU TO DRY: SEE ‘ITEMS NOT SUITABLE FOR TUMBLE DRYING’ |
Drying Guide - approximate drying time in minutes (weights specified are when dry)
| COTTONS | SYNTHETICS | ACRYLICS | ||||
| High Heat | High Heat | Low Heat | ||||
| Drying times 1000rpm in washing machine | Drying times on reduced spin in washing machine | Drying times on reduced spin in washing machine | ||||
| Half load | Full load | Half load | Full load | Half load | Full load | |
| 1 kg | 2 kg | 3 kg | 1 kg | 2 kg | 1 kg | 2 kg |
| 30 - 40 | 40 - 55 | 60 - 70 | 20 - 30 | 30 - 45 | 30 - 50 | 50 - 70 |
Be careful not to overdry
All fabrics contain a little natural moisture even when ‘dry’ and this natural moisture should not be lost if the clothes are to remain soft and fluffy. Clothes that are dried for too long tend to wrinkle and will need more ironing than usual giving you extra work that the dryer was designed to remove.
How to remove and clean the fluff filter
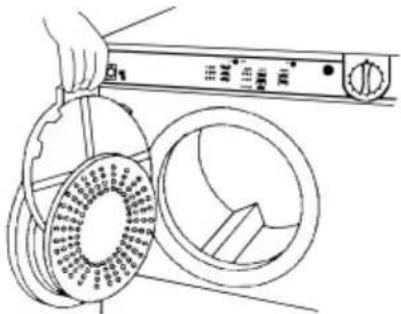
To remove the filter
natural_image
Line drawing of a hand holding a washing machine control panel next to a circular component with a spool (no text or symbols)A very important part of your dryer is the fluff filter at the front edge of the drum. It's there to trap the particles of lint and fluff which are normally blown away when clothes are dried on the washing-line. if the filter is allowed to become blocked, the passage of warm air through the drum will be severely restricted. This means your clothes will take much longer than normal to dry and the cost of drying them will be increased. it may also damage your dryer.
WARNING: DO NOT OPERATE THE DRYER WITHOUT CLEANING THE FILTER AFTER EACH DRYING CYCLE. FAILURE TO CLEAN THE FILTER MAY RESULT IN A FIRE HAZARD.
Wash or vacuum clean the filter occasionally.
Don't be alarmed by the amount of fluff you may find on the filter. It's part of the wearing, washing and drying process.
WARNING: DO NOT OPERATE THE DRYER WITHOUT THE FILTER IN POSITION.
Caring for your Dryer
| Your tumble dryer needs very little attention. The following simple steps will keep it performing well. | |
| When finished | Switch off electricity and remove plug. |
| After each load | Always clean the filter and turn the drum by hand to check that small items like handkerchiefs do not get missed. |
| As necessary | Clean exterior metal and plastic surfaces with a damp cloth or silicon polish only. Regularly check and clean if necessary, the vent hose and any permanent venting fixture to ensure that there has been no accumulation of fluff or lint during the drying process. Clean fluff from the area below the fluff filter and the rear vent tube.Do not use abrasive cleaners, scouring agents, acids, chlorine bleach or metal polish to clean any part of the machine. These could damage the machine. |
| Lubrication | Your tumble dryer uses special bearing components. Lubrication by the user is not necessary and must not be attempted.We strongly recommend that all appliances are regularly checked for electrical and mechanical safety. |
If something goes wrong
First, don't panic! There may be nothing wrong at all. Look for your problem below, then check the things we suggest. More often than not, this will give you the answer to your problem, and you'll be able to carry on without having to telephone your Service Office.
If after this you still cannot get your machine to work, follow the advice given on the next page.
| Problem | Check these things first |
| ‘It won’t start’ | 1. Is the machine plugged in and switched on at the socket?2. Is the Timer Control set to required time?3. Is the door securely closed?4. Has the fuse blown? (Try plugging in another appliance to check)5. Have you used an extension lead? Many are not suitable. Try plugging the dryer directly into a socket to check. |
| ‘It is taking a long time to dry’ | 1. Have you forgotten to clean the filter? It should be cleaned after each load.2. Have you selected the correct Heat setting for the type of fabric you are drying?3. Is the flexible Vent Hose blocked or kinked? Check it for foreign objects or condensate (water).4. Is the air inlet obstructed in any way?5. Permanent venting - is flap on the storm cover obstructed?6. Were the clothes ‘excessively wet’ when they were put in?7. Was the correct time selected?8. Have you overloaded the dryer? |
| Any other problem | Have you re-read this instruction book? |
This appliance conforms to the following EEC Directives.
Low Voltage Equipment
73/23/EEC
93/68/EEC
Electromagnetic Compatibility
89/336/EEC
92/31/EEC
93/68/EEC
If it still won't work...
Contact the Service Office (0870 6070805)
If something is still wrong with your machine after you've been through the check-list on the previous page:
- Switch off and unplug your machine from the mains.
- Call your nearest Service Office or local importer on the telephone number provided on the guarantee card.
When you contact us we will want to know the following:
- Your name, address and postcode.
- Your telephone number.
- Clear and concise details of the fault.
- The model number and the serial number of your dryer.
- The date of purchase enter the date here.
Please make sure you have all these details ready when you call.
Spare parts
Please remember your new appliance is a complex piece of equipment.
‘DIY’ repairs or unqualified and untrained service people may put you in danger, could damage the appliance, and might mean you lose cover under the Parts Guarantee.
If you do experience a problem with the appliance don't take risks, call in our Service Engineer. Our Spare Parts are designed exclusively to fit your appliance. Do not use them for any other purpose as you may create a safety hazard.
Recycling and Disposal Information
As part of our continued commitment to helping the environment, we reserve the right to use quality recycled components to keep down customer costs and minimise material wastage.
●Disposal of packaging materials: follow local regulations, so that packaging can be recycled.
- To minimise the risk of injury to children, remove the door and plug - then cut off the mains cable, flush with the appliance. Dispose of these parts separately to ensure that the appliance can no longer be plugged into a mains socket.
Disposal of old electrical appliances
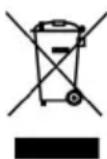
The European Directive 2002/96/EC on Waste Electrical and Electronic Equipment (WEEE), requires that old household electrical appliances must not be disposed of in the normal unsorted municipal waste stream. Old appliances must be collected separately in order to optimise the recovery and recycling of the materials they contain and reduce the impact on human health and the environment.
The crossed out “wheeled bin” symbol on the product reminds you of your obligation, that when you dispose of the appliance it must be separately collected.
Consumers should contact their local authority or retailer for information concerning the correct disposal of their old appliance.
Key Contacts
Service
We have the largest appliance manufacturer's service team in Europe, trained specialists directly employed by us to ensure your complete confidence.
Repair Service
UK: 08709 066 066
Republic of Ireland: 0818 313 413
You will be asked for the following information:-
Name, address and postcode.
Telephone number
Model / Serial number of the appliance
Clear and concise details of the query or fault
Place and Date of purchase
(Please keep the receipt as evidence will be required when the engineer calls).
Extended Warranty
UK: 08709 088 088
Republic of Ireland: 0123 002 333
Genuine Parts and Accessories Mail Order Hotline
UK: 08709 077 077
Republic of Ireland: 0818 313 413
All services are offered as an extra benefit and do not affect your statutory rights.