i-net MusicBox - Hi-Fi System Odys - Free user manual and instructions
Find the device manual for free i-net MusicBox Odys in PDF.


| Product Type | Hi-Fi System |
| Brand | Odys |
| Model | i-net MusicBox |
| Color | Black |
| Dimensions (W x H x D) | 300 x 200 x 150 mm |
| Weight | 2.5 kg |
| Power Output | 2 x 10W RMS |
| Power Supply | AC 100-240V, 50/60Hz |
| Connectivity | Bluetooth, AUX, USB, FM Radio |
| Functions | Music playback, radio, USB playback, Bluetooth streaming |
| Control | Buttons, Remote control |
| Display | LED |
| Speakers | Built-in stereo speakers |
| Audio Inputs | AUX, USB |
| Audio Output | Headphone jack |
| Material | Plastic |
| Cleaning | Wipe with dry cloth |
| Safety | Do not expose to moisture; use correct voltage |
| Spare Parts Availability | Contact manufacturer or authorized dealers |
| Repairability | Service by qualified technician |
Frequently Asked Questions - i-net MusicBox Odys
User questions about i-net MusicBox Odys
0 question about this device. Answer the ones you know or ask your own.
Ask a new question about this device
Download the instructions for your Hi-Fi System in PDF format for free! Find your manual i-net MusicBox - Odys and take your electronic device back in hand. On this page are published all the documents necessary for the use of your device. i-net MusicBox by Odys.
USER MANUAL i-net MusicBox Odys
1 Contents of package ....2
2 Copyright Description....3
3 Safety instruction ....3
4 Introduction 5
5 Installation....6
5.1 Wired Network Environment (Default Connection)....6
5.2 Wireless Network Environment....7
5.3 Wired Network Start Up....8
5.4 Startup with Network wizard 9
5.4.1 Wired Network 9
5.4.2 Wireless Network....10
5.4.3 Wireless network – first time installation ....10
5.5 First Time Installation (Settings) 12
5.5.1 Language Setting....12
5.5.2 Date and Time setting 12
5.6 General Settings....14
5.6.1 Setting the Alarm 14
5.6.2 Play Mode 15
5.6.3 Sleep Timer....15
5.6.4 Network 15
6 Internet Radio 22
6.1 Introduction....22
6.2 World Station....22
6.2.1 Listen to World Station 22
6.3 SHOUTCast 23
6.3.1 Listen to SHOUTCast....23
6.4 Add/Delete a Radio Station to your favorites list....24
6.5 Record A Song From Internet Radio Stations....24
7 Playing Songs on the USB Disk....25
8 Media Server....26
8.1 Supported Media Server....26
8.2 Setting Upnp Environment....26
8.2.1 UPnP Networked Environment Diagram 26
8.3 Playing Songs on UPnP Media Server 27
9 Troubleshooting 28
10Specifications....29
Warranty conditions....31
1 Contents of package
Please ensure that the following items are included in the box. If the package is not complete, please contact your dealer:
ODYS
i-net MusicBox

WiFi Dongle

Remote Control

USB extension cable

Power Supply
User manual
Warranty card
ODYS i-net MusicBox
2 Copyright Description
eMusic-ID – Gracenole Corporate Description and Proprietary Legends
[User documentation]
- Music recognition technology and related data are provided by Gracenote®. Gracenote is the industry standard in music recognition technology and related content delivery. For more information visit http://www.gracenote.com/.
CD and music-related data from Gracenote, Inc., copyright © 2006 Gracenote. Gracenote Software, copyright © 2006 Gracenote. This product and service may practice one or more of the following U.S. Patents: #5,987,525; #6,061,680; #6,154,773; #6,161,132; #6,230,192; #6,230,207; #6,240,459; #6,330,593, and other patents issued or pending. Some services supplied under license from Open Globe, Inc. for U.S. Patent: #6,304,523.
Gracenole and CDDB are registered trademarks of Gracenole. The Gracenole logo and logotype, and the "Powered by Gracenole" logo are trademarks of Gracenole.
[One-sheets]
- Music recognition technology and related data are provided by Gracenote®.
Gracenote® is a registered trademark of Gracenote, Inc. The Gracenote logo and logotype, and the "Powered by Gracenote" logo are trademarks of Gracenote.
Real Format Client Code – RealNetworks Copyright Statements
- RealNetworks, RealAudio and the Real logo is a trademark or a registered trademark of RealNetworks, Inc. Real Format Client Code is included under license from RealNetworks, Inc. Copyright 1995-2007, RealNetworks, Inc. All rights reserved.
• RealNetworks, RealAudio, and Real logo are trademarks of RealNetworks, Inc.
Windows Media – Microsoft Proper Trademark Notices
- Microsoft® and Windows Media® are either registered trademarks or trademarks of Microsoft Corporation in the United States and/or other countries.
- Microsoft® and Windows Media® are trademarks of Microsoft.
Windows Media – Acceptable Descriptors
• Windows Media® Technologies
- Windows Media® Player
• Windows Media® Tools
• Windows Media® Services
- Windows Media® Format
- Windows Media® file
3 Safety instruction
-
Place the set on a hard, flat and stable surface so that the system does not tilt;
-
Do not expose the set to humidity, rain, sand or excessive heat caused by heating equipment or direct sunlight;
-
The apparatus shall not be exposed to dripping or splashing;
-
Adequate ventilation with a minimum gap of 15cm between the ventilation holes and surrounding surface is necessary to prevent heat build-up;
-
The ventilation should not be impeded by covering the ventilation openings with items, such as newspapers, table-colths, curtains, etc.
-
No objects filled with liquids, such as vases, shall be placed on the apparatus;
-
No naked flame sources, such as lighted candles, should be placed on the apparatus
-
The mechanical parts of the set contain self-lubricating bearings and must not be oiled or lubricated
-
To clean the set, use a dry cloth, do not use any cleaning agents containing alcohol, ammonia, benzene or abrasives as these may harm the housing.
Power Supply
-
Check if the power/mains voltage as shown on the type plate located on the bottom of the set corresponds to your local power supply.
-
Connect the power cord to the switching adapter and the wall socket, and connect the DC jack to the set, The set in now ready to use.
-
To swithc the set off completely, withdraw the power cord form the wall socket.
Install the set near the AC outlet and where the AC power plug can be easily reached.
Disconnect the power cord from the wall socket to protect your set during heavy thunderstorms.
AC power cord is used as the disconnect device, it shall remain readily operatable and should not be obstructed during intended use.
Environmental information
All unnecessary packaging material has been omitted, the packaging can be easily separated into three materials: cardboard, polystyrene and plastic.
Your set consists of materials which can be recycled if disassembled by a specialized company, please observe the local regulations regarding the disposal of packaging, dead batteries and old equipment.
The type plate is located on the rear of the set.
Disposal of your old product
Your product is designed and manufactured with high quality materials and components, which can be recycled and reused.
When this crossed-out wheeled bin symbol is attached to a product it means the product is covered by the European Directive 2002/96/EC.
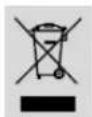
Please inform yourself about the local separate collection system for electrical and electronic products.
Please act according to your local rules and do not dispose of your old products with your normal household waste. The correct disposal of your old product will help prevent potential negative consequences for the environment and human health.
4 Introduction
Thank you for choosing our product. Please read this manual carefully before use to make best use of all functions of the product and to guarantee that it has a long service life. Please store the manual in a safe place for later reference.
i-net Music Box is a internet radio device integrated digital audio playback functions with network connectivity, which can play MP3/WMA audio files from USB disk and internet radio services such as World Stations and SHOUTCast which provide above 20,000 internet radio stations. Internet Radio also supports audio streaming via UPnP Media Server.

Caution
Please read the general safety instructions in Section 7 before using the Internet Radio.
Product properties
• Support MP3/WMA audio files(Included ID3V1,2)
• Support static lyrics and synced lyrics (.txt/.lrc/.smi)
• Support USB Flash drive, USB HD drive, MP3 Player
• World Station Internet Radio
• SHOUTCast Internet Radio (http://www.shoutcast.com)
- Be able to record audio data from internet radio stations online in MP3 format
- Support LAN (Ethernet) and WLAN (802.11b/g, using provided USB wifi dongle)
- Support dynamic IP via DHCP (Dynamic Host Configuration Protocol) and static IP
• Support Wi-Fi Encryption WEP64/128 and WPA-PSK
- Support UPnP
- Default setting is Ethernet and DHCP
• Support two alarm clock settings
- Support time sync technology (* network available)
Support
URL: http://www.odys.de
See our website for the latest information on this Internet Radio, on other products by our company and on our company itself. Any firmware updates for this Internet Radio are also made available on our website. If you have questions or problems, please read the FAQs on our website or contact our customer support service support@odys.de.
5 Installation
The device will start up automatically if you connect it to a power outlet. Press the power button shortly to toggle between Stand By Mode and On. Press the power button for about 4 Seconds to turn off the device completely.

The proper voltage for Internet Radio is AC 100V\~240V/50-60Hz. Be sure to the voltage in your area before plugging in the unit.
Make sure the internet environment is ready and the network setting is available (a DSL Broadband Connection is highly recommended).
5.1 Wired Network Environment (Default Connection)
The default setting of network in your Internet Radio is DHCP. This will use you're broadband router to get a valide network address automatically. (More network setting please check 7.4 Network)
The below illustrations shows a typical network environment. Connect your i-net Music Box to your Broadband Router as shown.
![graph LR A["ADSL or Cable Modem"] --> B["Broadband Router"] B --> C["Ethernet"] B --> D["Ethernet"] E["i-net MusicBox"] --> C E --> D F["PC (Media Server)"] --> D](/content/2026/05/770677/images/c35ae588acdb3aca1cf38f91461b1c1168fe6b3ca35aaaf1d73f81d88a5d30b6.jpg)

Please take care that your Broadband Router acts as a DHCP Server. This is the default setting of most of the available routers.
Please note that a network cable is not included!
If you want to listen audio contents from your PC, you can use Cross-over to connect your Internet Radio to your PC directly.
![graph LR A["PC (Media Server)"] -->|Cross-Over| B["i-net MusicBox"]](/content/2026/05/770677/images/75330c2f8ead544a424893ed36db53144f99ee460946661264d29c54018ae245.jpg)
5.2 Wireless Network Environment
Make sure the internet environment is ready and the network setting is available.
Plug-in Wifi Dongle into Internet Radio (More setting please see 7.4 Network)

Please note that the SSID of your Wireless Network must be vissibel while you are searching for wireless networks and during the initialization process after powering off the device! It is highly recommended to let the SSID be enabled the whole time.
In most cases you also will need to type in the encryption key of your wireless network as shown below. Please take care that you are using an encryption protocol that is supported by this device: WEP64/128 or WPA-PSK
The below illustrations shows a typical network environment.
Connect the provided WiFi Dongel to one of the USB jacks of your i-net Music Box.
If necessary you can use a USB extension cable to connect the dongle.
![graph LR A["ADSL or Cable Modem"] --> B["802.11 b/g Wireless Broadband Router"] B --> C["Ethernet"] D["WiFi Dongle"] --> E["Internet Radio"] F["WiFi Dongle"] --> G["PC (Media Server)"] H["PC (Media Server)"] --> I["PC (Media Server)"]](/content/2026/05/770677/images/76ff0023a51e1018e86d2c2857070c1905240afc0d6aa0151af0d54a13355461.jpg)
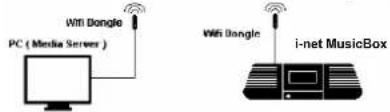
You can receive your audio contents from PC's in wireless environment by using Ad-hoc.
5.3 Wired Network Start Up
- Install the i-net MusicBox as shown in Chapter 4.1 or 4.2
Connet a standard Network Cable or the provided USB Wifi Dongle. - Connect the device to a power outlet using the provided power supply unit.
- The device starts up automatically.

Checking Network Device


Network Connecting ...
- If a proper wired network was connected the device starts to synchronize the time.
Time Sync ...

Because the correct time zone is not set until this moment the shown time could be wrong. Please follow this instructions guide to choose the correct time setting.
- Now the device is in standby mode and shows the synchronized time.


Every time the device was disconnected from power this procedure will start again. Made settings will not get lost if the power connection was removed.
The default of network setting for Internet Radio is LAN (or after you have chosen "Reset all setting"). You can choose WLAN for your Internet Radio's network device by insert WiFi dongle into USB slot. If you still have problems with network setting, please follow the instructions of network wizard on next page.

Please note that the network wizard only starts if no network connection could be established.
ODYS i-net MusicBox
5.4 Startup with Network wizard
If no network connection could be established the network guide starts automatically:

Connect to a wired network
Connect to a wireless network
Exit the network guide and return to the main menu.

You can change this settings later on at the devices system settings.
5.4.1 Wired Network
![graph TD A["Penbox"] --> B["Initial Device ..."] B --> C["Select Network Type\nWirelose / Donglo"] C --> D["Main\nL-Rain >\nUSB >\nMedia Server >"] C --> E["Please Plug-In Cable"] E --> F["Network Setting ..."] F --> G["Time Sync ..."] G --> H["U/MeIn\nL-Rain >\nUSB >\nMedia Server >"]](/content/2026/05/770677/images/5ddd4cdb6dab4e9f03ad53f8e10507bbdee6f49e547398be57b969c8a2358d1d.jpg)
Possible Errors during Network initialization:

The device can not get a valide network address from DHCP server or network router. Please take care that the network cable is properly connected and that DHCP is enabled on your network router. Retry...
5.4.2
i
Wireless Network
Please note that the network wizard only starts if no network connection could be established or was not set until now.
![graph TD A["Penbex"] --> B["Initial Device ..."] B --> C["Select Network Type Wireless / Bingle"] C --> D["Listen"] D --> E["Radio"] D --> F["USB"] D --> G["Media Server"] C --> H["Please Plug-In Bingle"] H --> I["Don't Remove The Bundle"] I --> J["Network Setting ..."] J --> K["Time Sync ..."] K --…](/content/2026/05/770677/images/0499615f8536f0bb3f91849a53393a2cae324b33401d67523601e05c81531e1f.jpg)
5.4.3
Wireless network - first time installation
![graph TD A["Get AP Timeout Run WiFi Wizard"] --> B["GO"] A --> C["EQT"] B --> D["Choose AP"] C --> E["Choose AP"] D --> F["Radio"] E --> G["PBbox MIS 100% Wireless 57%"]](/content/2026/05/770677/images/f6792f200c59bcd9e0fa48dcc7c436c4aadc91823d9c7315eaf883942224074c.jpg)
Select GO to run Wizard mode OR Select EXIT to quit. Please wait while the device is scanning for available networks.

Please note that the SSID of your Wireless Network must be vissibel while you are searching for wireless networks and during the initialization process after powering off the device! It is highly recommended to let the SSID be enabled the whole time. In most cases you also will need to type in the encryption key of your wireless network as shown below. Please take care that you are using an encryption protocol that is supported by this device: WEP64/128 or WPA-PSK
![graph TD A["Choose AP\nPasses MIS 100% Wireless 97%"] --> B["Encryption\n41231567898"] B --> C["Apply?\nSSD Wireless\nSync 22.04.0/2\nYes No"] C --> D["Network Setting"] D --> E["Time Sync..."] E --> F["Main\nRadio\nUSB\nMedia Server"]](/content/2026/05/770677/images/8618158a327d7d0ffbcb80ed913c2bb1eb0bd377c1af0cbc662c097b4e15f54f.jpg)
Press OK to choose one of the available networks.
Use the number keys of the remote control to enter the encryption password for your access point.
Alternatively you can use the ▲ /▼ keys to scrool through the available characters.
Use ▶ to enter the next or ◀ to modify the previous character.
To delete the active character press the ■ Button.
ODYS i-net MusicBox
Press Select/OK to set the encryption password.

Please take care that you have selected the correct accesspoint.
Some passwords containing Numbers, letters and capital letters. You have to type in them correctly.
After input the encryption, Select Yes to make a connection OR Select No to select other Access Points. Wait until the network is established.
Possible Errors during Network initialization:
![graph TD A["Choose AP"] --> B["Do not Find Selected AP or No AP Exit"] B --> C["RRSCAN: RDT"] C --> D["Can't Find AP Or Password Hot Match"] D --> E["RRSCAN: RDT"] E --> F["RRSCAN: RDT"] F --> G["RRSCAN: RDT"] G --> H["RRSCAN: RDT"] H --> I["RRSCAN: RDT"] I --> J["RRSCAN: RDT"] J --> K["RRSCAN: RDT"…](/content/2026/05/770677/images/150707894764571d2be048bf8e4932c633d7d8218c16156ff81cd6960f756aac.jpg)
CAN NOT FIND ANY ACCESS POINT
Select RESCAN to search AP again OR Select EXIT to quit.
CAN NOT FIND THE AP YOU WANT,
PRESS ESC TO ENTER PRESCAN MODE
Select RESCAN to search AP again OR Select EXIT to quit.
FAIL TO CONNECT TO ACCESS POINT
- Select Retry to connect again.
- or Select Wizard to search available Access Point.
- or Select EXIT to quit.
The device can not get a valide network address from DHCP server or network router.
Please take care that the network cable is properly connected and that DHCP is enabled on your network router. Retry...
- Select Retry to connect again.
- or Select Wizard to search available Access Point.
- or Select EXIT to quit.
5.5 First Time Installation (Settings)
5.5.1 Language Setting
Go to 「Setting」, then scroll up/down to [Language] and press 「SELECT/OK」 button to enter
[Language] submenu.
To scrolling Up/Down key to change the Language.
After finish setting, then press 「SELECT/OK」 button to confirm and save.
5.5.2 Date and Time setting
If the time synchronization was successful. It is only necessary to set up the Time Format, Time Zone and
European Winter or Summertime (DST).
-
Shortly press the power button to turn on the unit.
-
Now you are at the main menu.

-
Scroll down by using the ▼ key and choose "Setting". Press OK/Select to confirm.
-
Press OK/Select again to enter the "Date & Time" setting.
-
Now you have the following Options:
You can navigate and Select using the arrow keys and the OK/Select button.
Using the Stop button you can step back to the previous menu.
| Function | Values | Default | Description |
| Time Sync Yes No | Yes Time Synchronization with an internet time server at 00:00 and 12:00 or at every start-up. | ||
| Date Year Month Day - Setup the actual Date if Time Synchronization is not possible. | |||
| Time Hours : Minutes : Seconds - Setup the actual Time if Time Synchronization is not possible. | |||
| Time Format 24 / 12 24 Choose if the time should be prompted in 12 hours or 24 hours mode. | |||
| Time Zone | Values between -12 and +13 hours | +1 Choose the time zone you are living in. United Kingdom, Portugal and Ireland: 0 Dublin Rest of Europe: +1 Amsterdam | |
| DST | Yes / No | No Yes: Daylight Saving Time (Summertime) No: Normal Time (Wintertime) | |

Please remember that you should change the DST setting twice a year if necessary.

To take care that the automatic time synchronization works properly you should make the time zone and DST setting first.
In detail:
Setting the Time Sync
Go to 「SETUP」, then scroll up/down to [Date & Time] and press 「SELECT/OK」 button to choose if the automatic time synchronization should be enabled (yes) or disabled (no).
Setting the Date
Go to 「SETUP」, then scroll up/down to [Date & Time] and press 「SELECT/OK」 button to enter [Date] submenu.
To scrolling Up/Down key to change the year, month, and day. And Press 「SELECT/OK」 to shift from year, month, and day.
After finish setting, then press 「SELECT/OK」 button to confirm and save.
Setting the Time
Go to 「SETUP」, then scroll up/down to [Date & Time] and press 「SELECT/OK」 button to enter [Time] submenu.
To scrolling Up/Down key to change the hour and minute. And Press 「SELECT/OK」 to shift from hour and minute.
After finish setting, then press 「SELECT/OK」 button to confirm and save.

The Date and Time setting may be has no effect if Time Sync is enabled (Yes). We recommend to let the Time Sync function be enabled.
Setting the Time formation
Go to 「SETUP」, then scroll up/down to [Date & Time] and press 「SELECT/OK」 button to enter [Time FormScoat] submenu.
Press 「SELECT/OK」 button to select to 12-hour or 24-hour.
Setting the Time Zone
Go to 「SETUP」, then scroll up/down to [Time Zone] and press 「SELECT/OK」 button to enter [Time] submenu.
To scrolling Up/Down key to change the Time Zone.
After finish setting, then press 「SELECT/OK」 button to confirm and save.

United Kingdom, Portugal and Ireland: 0 Dublin Rest of Europe: +1 Amsterdam
Setting DST Time
Go to 「SETUP」, then scroll up/down to [Date & Time] and press 「SELECT/OK」 button to enter [DST] submenu.
Press 「SELECT/OK」 button to select DST Time (Summertime) (Yes) or Winter Time (No).

Yes: Daylight Saving Time (Summertime) No: Normal Time (Wintertime)
5.6 General Settings
5.6.1 Setting the Alarm
Overview: Support two alarm clock settings.
Support Daily alarm clock.
Support different alarm-clock sound (Beep / i.Radio / USB).
- Press 「SETUP」button, then scroll down to [Alarm] and press 「SELECT/OK」button.
- Select [Use Alarm 1] submenu and press 「SELECT/OK」 button to activate the alarm. The default [Use Alarm 1] is No.
- Press UP/DOWN button to set alarm time, and press 「SELECT/OK」 button shift from hour to minute.
- After finish setting, press 「SELECT/OK」 button to confirm.

The default [Use Alarm 1] is No.

Scroll to [Set Alarm 1] to set the alarm clock

Scroll Up/Down to set hours and minutes

After finishing, the changes will be saved
You can activate/disarm alarms by press Alarm 1/Alarm 2 button at the unit while this device is in Standby mode.
Setting the Alarm Sound
*Go to [SETUP], scroll down to [Alarm] and press 「SELECT/OK」 button.
*Select to [Alarm Source] and then press 「SELECT/OK」 button to enter.
*Press UP/DOWN button to determine an alarm sound, and then press 「SELECT/OK」 button to confirm.
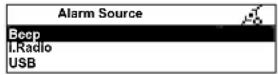
Press UP/DOWN button to determine an alarm sound, and then press 「SELECT/OK」 button to confirm
The default alarm sound is "Beep".
The alarm goes off with the sound source in the standby mode when time is up.
The default alarm source of i.Radio is the first radio station under the FAVORITE file.
ODYS i-net MusicBox
Disarming the Alarm
"When alarm time is up in the "Standby Alarm" mode, the screen will flash and the alarm source will be played.
"You can press any key to disarm the alarm under "Normal" mode."
*In some circumstances the screen of Internet Radio will blink to inform you as the alarm time is up.
5.6.2 Play Mode
*Go to [SETUP], scroll down to [Play Mode] and press 「SELECT/OK」 button to change the setting..
- Normal - Shuffle - Repeat One - Repeat All -
This setting takes only effect while playing MP3 or WMA files from USB memory.
5.6.3 Sleep Timer
Turn On/OFF
*Press 「SLEEP」button on your remote control.
-2z icon will show on the top side of the screen when the sleep timer is on.
Alternatively you can navigate through the system settings:
*Go to [SETUP], scroll down to [Sleep] and press 「SELECT/OK」 button.
*Select to [Sleep Timer] and then press 「SELECT/OK」 button enable (Yes) or disable Sleep Timer.
Change value
*Go to [SETUP], scroll down to [Sleep] and press 「SELECT/OK」 button.
*Select to [Sleep Timer] and then press 「SELECT/OK」 button to change the setting.
You can set different values between 5 Minutes and 120 Minutes.
After this time the device stops playing and turns to Standby Mode.
5.6.4 Network
Overview: *Support LAN (Ethernet) and WLAN (802.11b/g wifi Dongle is optional)
*Support Wi-Fi Encryption WEP64/128 and WPA-PSK
*Support dynamic IP via DHCP (Dynamic Host Configuration Protocol) and static IP.
'Support Upnp.
*Default setting is Ethernet and DHCP
Connect Menu
*Go to [SETUP], scroll down to [Network] and press 「SELECT/OK」 button.
*Select to [Connect] and then press 「SELECT/OK」 button to change the setting.
You can change between LAN ans WLAN Network connections.
Understanding the Networking Status
The network connectivity state icon will show on the upper-right corner of the screen.
LAN Status

→ 'No Ethernet cable detected.
→ 'Ethernet cable detected.
DHCP request failed.
Ethernet cable detected
DHCP request succeeded.
WLAN Status

No Wi-Fi dongle detected
→ 'Wi-Fi dongle detected. 'DHCP request failed.
→ 'Wi-Fi dongle detected DHCP request succeeded.
Setting the Wi-Fi Connectivity
Insert a Wi-Fi USB adapter into the USB connector. (The Wi-Fi USB adapter is optional)
Press 「SETUP」button, then scroll up/down to [Network] and press 「SELECT/OK」button.
Select [Connect] and switch [LAN] to [WLAN].
icon will show on the topside of the screen when the wireless setting is successful.
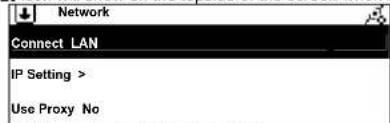
Select [Connect] and switch [LAN] to [WLAN].
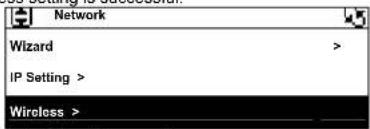
[Wireless] item will appear on the screen.

Set each necessary Wi-Fi setting item.

To will show when the setting is successful.
Setting the Wi-Fi Network via Wizard
Plug the Wi-Fi USB dongle into the USB port.
'Go to [SETUP], then scroll up/down to [Network] and press 'SELECT /OK」 button to enter.
'Press 「SELECT/OK」button to switch [Connect] to [WLAN].
Select [Wizard] and then press 「SELECT/OK」 button.
'Scroll up/down to an access point you want to connect, and then press 'SELECT/OK' button.
'If the access point that you are selecting is protected, press 'SELECT/OK」 button to select the protected AP.
*To input the encryption key, press UP/DOWN (or numbered key) button to change characters and press LEFT/RIGHT button to shift.
'Press 'SELECT/OK」 after you finish setting.
icon will show on the topside of the screen if the wireless setting is successful.

Select [Connect] and switch [LAN] to [WLAN].


Enter [Wizard], then all available AP and its signal strength will be shown on the screen.


Proofing the encryption key...

Select [Wizard] and press [SELECT/OK]
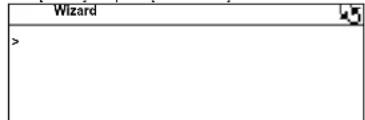
Use UP/DOWN (or numbered key) to input an encryption key to access the AP if necessary. After key-in the encryption key, press 'SELECT/OK' and press 'STOP/ESC' to exit

To will show when the setting is successful.
Inputting Static IP
Press 「SETUP」button, then scroll up/down to [Network] and press 「SELECT/OK」button.
Scroll up/down to [IP Setting] and then press 「SELECT/OK」 button to enter.
Select [IP Source] and press 「SELECT/OK」 button to switch [Dynamic] to [Static].
Scroll up/down to [TCP/IP] and then press 「SELECT/OK」 button to start editing..
Press UP/DOWN button to change characters, then press LEFT/RIGHT button to shift.
After finishing, press 「STOP/ESC」 button to confirm.
ODYS i-net MusicBox

Select [IP Setting], then press 'SELECT./OK'
| IP Setting | |
| IP Source Static | |
| TCP/IP > | |
| DNS | > |
Select [TCP/IP], then press 'SELECT./OK'

Press 「SELECT/OK」 to switch [IP Source] to [Static]
| TCP/IP | |
| IP 192.169.001.100 | |
| Mask | 255.255.255.000 |
| GW | 192.169.001.254 |
Press UP/DOWN (or numbered key) then LEFT/RIGHT to input IP.

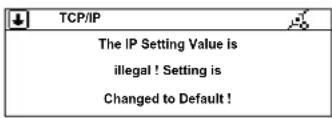
When IP setting value (including IP, Subnet Mask, or Gateway) is illegal, IP setting will change to default value.
Inputting DNS
Press 「SETUP」button, then scroll up/down to [Network] and press 「SELECT/OK」button.
Select [DNS] and press 「SELECT/OK」 button

Press UP/DOWN (or numbered key) then LEFT/RIGHT to input IP
ODYS i-net MusicBox
Inputting Proxy
Press 「SETUP」button, then scroll up/down to [Network] and press 「SELECT/OK」button.
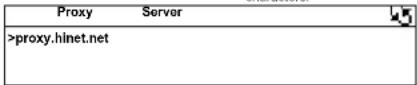
Scroll up/down to [Use Proxy] and then press 「SELECT/OK」 button to switch to [Yes].
Scroll up/down to [Proxy Server] and then press 「SELECT/OK」 button to input domain name or IP address.
Press 「SELECT/OK」 button, then press UP/DOWN button to change characters, press LEFT/RIGHT button to shift.
After finishing, press 「SELECT/OK」 button to confirm.
Scroll up/down to [Proxy Port] and then press 「SELECT/OK」 button to input port number.
Repeat the step 4\~5.
Input Method
| KEY DESCRIPTION | |
| OK / Select | End editing |
| STOP/ESC | Delete a character |
| Up | Change character 0-9, a-z ,A-Z, symbol |
| DOWN | Change character 0-9, a-z ,A-Z, symbol |
| LEFT | Shift to left |
| RIGHT | Shift to right |
| 1 | 1/_l@#$%^&*;; ' * / \()[]{} space |
| 2 | 2 abc ABC |
| 3 | 3 def DEF |
| 4 | 4 ehi EHI |
| 5 | 5 jki JKL |
| 6 | 6 mno MNO |
| 7 | 7 pqrs PQRS |
| 8 | 8 tuv TUV |
| 9 | 9 wxyz WXYZ |
| 0 | 0 |
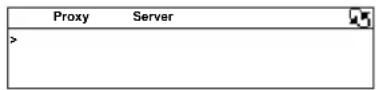
Ready to Editing

Press UP/DOWN (or numbered key) then LEFT/RIGHT to input characters.
*Select [Proxy Port] to input a proxy server port

Ready to Edit
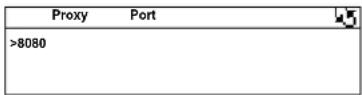
Press UP/DOWN (or numbered key) then LEFT/RIGHT to input characters

Press 'SELECT/OK' to confirm
Information
- Display the firmware version and network information.
Language
'Support 11 languages –
English、German、Spanish、Portuguese、French、Italian、Swedish、Finland、Dutch、Danish、Traditional Chinese. The default language of Internet Radio is English.
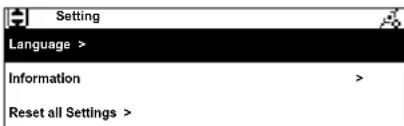
All settings will be reset to factory default.
Firmware Upgrade
'Support upgrade by using USB
Get an accurate firmware version (please check your model number) from manufactures. The firmware version file appears as .UPG file.
Copy the file [image.upg] to the root directory on a USB disk.
Insert the USB disk into the USB connector.
Press 「SETUP」button, then scroll up/down to [Firmware Upgrade] and press 「SELECT/OK」button.
Scroll up/down to [Yes] and then press 「SELECT/OK」 button to upgrade.
Internet Radio will restart automatically after finishing upgrade.
Internet Radio must not be switched off or press any function key during the upgrade procedure.

It strongly recommends resetting all setting after the firmware of Internet Radio is upgraded.


Select [Firmware Upgrade], then press 'SELECT/OK'
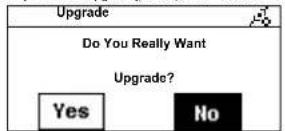

Select [Upgrade] and then press 「SELECT/OK」
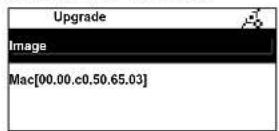
Press 'Yes' to confirm

Select the most updated .upg file to upgrade
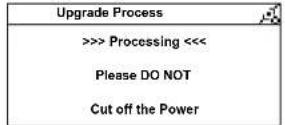
Checking file and prepare to upgrade
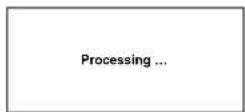
Firmware is upgrading

The upgrade is complete.
6 Internet Radio
6.1 Introduction
By using internet radio, listeners receive a continuous stream of audio from internet radio stations. Internet Radio supports many audio stream sources such as Microsoft (mms://..) and "SHOUTCast".
'SHOUTCast (http://www.shoutcast.com)
Today most traditional FM radio stations in the world offer on-line radio services or programs. Internet Radio via "World Station" portals can connect to those on-line radio services or programs. Moreover, "World Station" categorizes those stations by country, and sort them under World Station file. This makes it easy to search or find a particular radio station.
Please note that the radio stations you can find on this device are preset by the specific online portals. The stations list can not be edited.
This device can show title informations while playing a song if this is provided by the station. Please note that not all of the stations support this function. Sometimes you can see only some characters.
The online portals "World Station" and "SHOUTcast" are responsible for the actuality of the provided stations lists. It is possible that some stations are temporarily not accessible if the streaming address has changed or not useable any more if the station has stopped streaming.
6.2 World Station
System requirements: Recommend broadband internet connection (xDSL/Cable Modem). However, Internet Radio does not support PPPoE(ADSL) or ISP Proxy (cable modem). We strongly recommend connecting with a broadband router to have better quality of audio streaming. 'If there is no internet connection on your Internet Radio, Wizard mode will be automatically activated. Please follow the instructions shown on the screen to establish network connection.
6.2.1 Listen to World Station
- Go to[Main] menu, choose i.Radio and press 「SELECT/OK」 button.
- Choose [World Station] and then press 'SELECT/OK' button.
- Scroll up/down to a station and then press 「SELECT/OK」 button to play.
The available stations are sorted as following: Area -> Country -> Alphabet You will hear music after buffering reaches to 100%. - Press Stop (■) to exit to the previous menu page.
For fast search for an internet radio station, press 'Right' button to jump from radio stations started with alphabet A to alphabet B, alphabet B to alphabet C, and so on. Press 'Left' button to jump backward.
Press 「INFO」 to show the total amount of internet radio stations in a specific category and which one you are browsing.
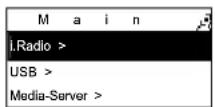
Select「i.Radio」

Press 「Right」button for fast search. The name of Areas change alphabetically.

Categorized by Radio Station
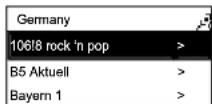
Choose a internet radio station

Choose「World Station」
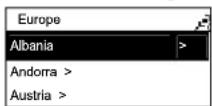
Categorized by Country.
Navigate as shown before.

Press 「INFO」

It shows the format and bitrates when Playing.

Categorized by Area
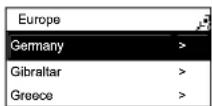
Choose the target country by pressing 「Select/OK」.
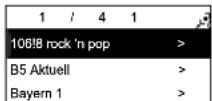
The amount of radio stations shows on the screen.
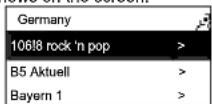
Press Stop (■) to exit to the previous menu page.
6.3 SHOUTCast
System requirements: Recommend broadband internet connection (xDSL/Cable Modem). However, Internet Radio does not support PPPoE(ADSL) or ISP Proxy (cable modem). We strongly recommend connecting with a broadband router to have better quality of audio streaming.
6.3.1 Listen to SHOUTCast
- Go to[Main] menu, choose [i.Radio] and press 「SELECT/OK」 button.
- Choose [SHOUTCast] and then press 「SELECT/OK」 button.
- The SHOUTCast Station List is sorted as following: Alphabet -> Genre
- Scroll up/down to a station and then press 「SELECT/OK」 button to play. You will hear music after buffering reaches to 100%.

Press 「INFO」 to show the total amount of internet radio stations in a specific category and which one you are browsing.
6.4 Add/Delete a Radio Station to your favorites list
‘Roll to your favorite radio station that you want to add into FAVORITE.
'Hold 'SELECT/OK」button for 2 seconds and the rolling bar will blink twice.
To delete an internet radio station from your FAVORITE file is to scroll to a radio station you want to delete and hold 「SELECT/OK」 for 2 seconds. Choose [Yes] to confirm.
*Internet Radio will inform you If a station you try to add into FAVORITE exists already.
*It may consume more than 1 storage space if the information of a radio station is extensive.

You can add at most 20 radio stations into your FAVORITE file.
6.5 Record A Song From Internet Radio Stations

The recording quality depends on the broadcast quality of the internet radio station. Please select a radio station that uses the mp3 format for broadcasting.
The contents of radio station can be recorded only with MP3 format. Those stations with WMA or REAL format are not supported for recording! ID3 Tag and Songlengh are NOT set automatically.
- Connect a USB mass storage device to one of the two USB jacks. If the connection is established a USB sign appears in the upper right corner ( i ).
- Choose a radio station for recording. The radio station you want to record must be playing.
- Press「REC」button while you are listening. ● will shown on your screen while it is recording.
- Internet Radio will check if the storage has enough space for recording.
- By pressing 「REC」 again you can pause the recording. II will shown on your screen.
- If you want to stop recording, press 'STOP/ESC' button.

Please note that a USB mass storage device must be connected for recording! This device has no internal memory!
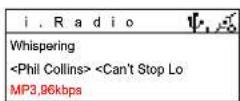
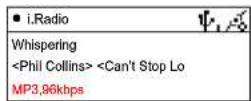
Press 'REC' button Preparing to Record
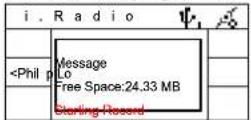
Check memory... Recording
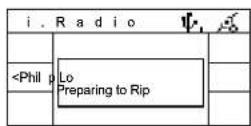
7 Playing Songs on the USB Disk
*Insert an USB Disk with MP3/WMA audio files into the USB connector
icon will show on the top side of the screen when USB is detected.
Select「USB」, and press「SELECT/OK」button
Scroll up/down to a song, folder or "○ All" then press 「PLAY」 button to play.

Press 'PLAY'

| KEY DESCRIPTION | |
| OK / Select No | Function while playing |
| ▶ II | Play /Pause the current song. |
| STOP/ESC Stop | Repaly and exit to previous menu |
| ▶ | Long press: fast forwardShort press: next song |
| ◀ | Long press: rewindShort press: 1x beginning of current song; 2x previous song |
| Mode | Change playback Mode (also possible in settings menu)Normal – Random – One – All |
| Info Toggle | between Song information display and lyrics display. |
| A-B | 1x cchoose Start position2x Choose end of partThe chosen part will be repeated until the A-B key was pressed a third time. |
| Mute Stop sound output | |

Song informations and Lyrics can only be prompted if this information already exist.
8 Media Server
8.1 Supported Media Server
'WMP11(Windows Media Player 11) (Windows XP SP2 / Vista Premium 32 Bits)
'Rhapsody URL:http://www.rhapsody.com/welcome.html
TwonkyMedia URL:http://www.twonkyvision.com/
'MediaTumb (Linux Platform) URL:http://mediatomb.cc/
NOTE: To making TwonkyMedia works normally, ID3v2 must be edited.
8.2 Setting Upnp Environment
NOTE:
Before you use your PC as a media server, make sure your PC (or the media serve you try to connect) has WMP11 (Windows Media Player 11) installed. Each media server has to have its WMP11 installed.
'Usually, the default of your PC firewall is to block not necessary connection. Make sure Upnp function is enabled on your PC (media server).
'Disable Proxy function in your INTERNET RADIO.'
8.2.1 UPnP Networked Environment Diagram
Please connect Internet Radio and UPnP Media Server on the same local LAN, and make sure the network setting is correct.
The UPnP networked environment diagram is as follows.
i-net MusicBox
or
ODYS i-net MusicBox
![graph LR A["ADSL or Cable Modem"] --> B["802.11 b/g Wireless Broadband Router"] B --> C["Ethernet"] C --> D["PC (Media Server)"] D --> E["PC (Media Server)"] F["i-net MusicBox"] --> G["WiFi Dongle"] G --> H["802.11 b/g Wireless Broadband Router"] I["WiFi Dongle"] --> J["802.11 b/g Wireless Broadband…](/content/2026/05/770677/images/6ea301c96626a30bfda8b3b776e0a0486e0de632bb85266046df998e80cfbfff.jpg)
8.3 Playing Songs on UPnP Media Server
- Select [Media Server] from the main menu and then press SELECT/OK button to enter Media Server function.
- Select one server from all available media servers.
- Scroll up/down to [All songs], [Artists], [Albums], [Genres] or other items, then press SELECT/OK button to enter.
- Scroll up/down to a song or folder, then press SELECT/OK button to play.
9 Troubleshooting
Q1 Why Connection Fails?
A1 • Make sure the internet environment is ready.
- Make sure the network setting is available.
- Make sure the network setting is correct.
- Check if the radio station still exists
- Check if the Proxy setting is correct.
Q2 Internet Radio freezes at Login ...?
A2 • Make sure the internet environment is ready.
- Make sure the network setting is available.
Q3 Internet Radio freezes Getting Station ...?
A3 • Make sure the internet environment is ready.
- Make sure the network setting is available.
Q4 There is a list of available radio station but I can not listen?
A4 • Make sure the network setting is available.
• Make sure Firewall is disabled.
- Check if the Proxy setting is correct.
- Some Stations are possibly not accesseable. Please try later or an other one.
Q6 What is No More Data?
A6 • Make sure the network setting is available.
- Check if possible bandwidth limitation issue.
10 Specifications
| LCD Specification 128 x 64 Dot Matrix LCD Display with Blue Backlight | |
| Supported Audio Formats MP3, WMA | |
| Streaming Formats Internet Radio Stream(MMS), MP2, WMA, Real Player, M3U, PLS | |
| Song Information's MP3 ID3 TAG, WMA TAG ( if existent) | |
| Network Connections Fast Ethernet (RJ45), 54Mbit Wireless LAN with UPnP WiFi Dongle | |
| WiFi USB Dongle | 54Mbit UPnP Dongle Supporting802.11 b/g Network Standards |
| Wireless LAN Encryption WPA2-AES and G4/128 Bit WEP | |
| Repeat-Function | Normal, Zufallswiedergabe, Einzelwiederholung, Alle wiederholenNormal, Shuttle, Repeat one, Repeat all |
| Internet Radio Portals Shoutcast, World Station | |
| Record format | MP3(The Recording Function is only Available while listening to MP3 Radio Stations.) |
| Interface 2x Universal Serial Bus 2.0, 1x Fast Ethernet (RJ45) | |
| Speaker 2x 2W RMS | |
| Power Supply | 100V-240V Netzell, 9V Eingangsspannung100V-240V Power Adaptor, 9V Input Voltage |
| Dimensions (W/D/H) 76.5 x 14.5 x 9 [mm] | |
| Weight | 1,295 kg |
| Features | Sleep timer, Two Different Alarm Times, Favourites List, Network Streaming, Autom.Timer Synchrobisation |
| Lieferunfang /Package Content | I-net MusicBox, USB-Extension Cable , Power Supply Unit, Remote Control, WiFiDongle, Manual |

Warranty conditions
EN
The following conditions comprise the requirements and scope of our warranty conditions and do not affect our legal and contractual warranty obligations.
We offer a warranty on our products in accordance with the following conditions:
-
We will remedy free of charge any product damage or defect that is proven to be based on a manufacturing fault. provided the end user reports this immediately upon noticing it and within a period of 24 months following the date of purchase. The warranty does not cover batteries and other parts, which are considered consumables, parts that break easily such as glass or plastic or defects based on normal wear and tear. There is no warranty obligation in the event of marginal differences compared to the target appearance and workmanship provided these have a negligible effect on the product's fitness for use, in the event of damage caused by chemical or electrochemical effects, by water or generally from abnormal conditions.
-
The warranty will be performed in such a way that we shall decide whether to repair the defective parts or to replace them with working parts free of charge. AXDIA reserves the right to exchange the product for a replacement product of equal value if the product that is sent in cannot be repaired within a reasonable time or at reasonable cost. The product can also be exchanged for a different model of the same value. Requests cannot be made for repairs to be carried out on site. Parts that have been replaced or exchanged become our property.
-
The warranty claim does not apply if repairs or other work is carried out by unauthorized persons or if our products are equipped with additional parts or accessories that are not approved for our products.
-
Warranties that have been activated do not cause the warranty period to be extended, nor do they trigger a new warranty period. The warranty period for any replacement parts installed ends with the warranty period for the entire product.
-
Any other or further claims are excluded, especially those for replacement due to damage caused outside of the product, provided there is no obligatory legal liability. We therefore accept no liability for accidental, indirect or other consequential damage of any kind, which leads to usage restrictions, data loss, loss of earnings or interruption to business.
Asserting a warranty claim
-
To make use of the warranty service, you must contact the AXDIA Service Center by e-mail, fax or phone (see below for contact details). You can also use the service form on our website or on the back of the warranty conditions.
-
AXDIA Service Center will try to diagnose and solve your problem. If it is determined that a warranty claim exists, you will be given an RMA number (Return Material Authorization) and you will be asked to send the product to AXDIA.
IMPORTANT: AXDIA will only accept parcels that have an RMA number.
Please observe the following when sending the product:
- Send the product suitably packaged with carriage and insurance paid. Do not enclose any accessories with the products (no cables, CD's, memory cards, manuals, etc.) unless the AXDIA Service Centre specifies otherwise.
- Mark the RMA number on the outside of the package in such a way that it is visible and clearly legible.
- You must enclose a copy of the sales slip as proof of purchase.
- Once AXDIA has received the product, it will meet its warranty obligations in accordance with the warranty conditions and will return the product to the sender with carriage and insurance paid.
Service outside of warranty
AXDIA can refuse any service claim made that is not covered by the warranty. If AXDIA agrees to provide a service outside the warranty, the customer will be invoiced for all repair and transport costs.
AXDIA will not accept any packages that have not first been approved by AXDIA by means of an RMA (Return Material Authorization). [International charges to Germany depend on the selected service provider]



- 1 CONTENTS OF PACKAGE
- ODYS I-NET MUSICBOX
- 2 COPYRIGHT DESCRIPTION
- [USER DOCUMENTATION]
- [ONE-SHEETS]
- 3 SAFETY INSTRUCTION
- POWER SUPPLY
- ENVIRONMENTAL INFORMATION
- DISPOSAL OF YOUR OLD PRODUCT
- 4 INTRODUCTION
- CAUTION
- PRODUCT PROPERTIES
- SUPPORT
- 5 INSTALLATION
- 5.1 WIRED NETWORK ENVIRONMENT (DEFAULT CONNECTION)
- 5.2 WIRELESS NETWORK ENVIRONMENT
- 5.3 WIRED NETWORK START UP
- 5.4 STARTUP WITH NETWORK WIZARD
- 5.4.1 WIRED NETWORK
- 5.4.2
- I
- WIRELESS NETWORK
- 5.4.3
- WIRELESS NETWORK - FIRST TIME INSTALLATION
- CAN NOT FIND ANY ACCESS POINT
- CAN NOT FIND THE AP YOU WANT
- PRESS ESC TO ENTER PRESCAN MODE
- FAIL TO CONNECT TO ACCESS POINT
- 5.5 FIRST TIME INSTALLATION (SETTINGS)
- 5.5.1 LANGUAGE SETTING
- 5.5.2 DATE AND TIME SETTING
- IN DETAIL
- SETTING THE TIME SYNC
- SETTING THE DATE
- SETTING THE TIME
- SETTING THE TIME FORMATION
- SETTING THE TIME ZONE
- SETTING DST TIME
- 5.6 GENERAL SETTINGS
- 5.6.1 SETTING THE ALARM
- SETTING THE ALARM SOUND
- DISARMING THE ALARM
- 5.6.2 PLAY MODE
- 5.6.3 SLEEP TIMER
- TURN ON/OFF
- CHANGE VALUE
- 5.6.4 NETWORK
- CONNECT MENU
- UNDERSTANDING THE NETWORKING STATUS
- SETTING THE WI-FI CONNECTIVITY
- SETTING THE WI-FI NETWORK VIA WIZARD
- INPUTTING STATIC IP
- INPUTTING DNS
- INPUTTING PROXY
- INPUT METHOD
- INFORMATION
- LANGUAGE
- FIRMWARE UPGRADE
- 6 INTERNET RADIO
- 6.1 INTRODUCTION
- 6.2 WORLD STATION
- 6.2.1 LISTEN TO WORLD STATION
- 6.3 SHOUTCAST
- 6.3.1 LISTEN TO SHOUTCAST
- 6.4 ADD/DELETE A RADIO STATION TO YOUR FAVORITES LIST
- 6.5 RECORD A SONG FROM INTERNET RADIO STATIONS
- 7 PLAYING SONGS ON THE USB DISK
- 8 MEDIA SERVER
- 8.1 SUPPORTED MEDIA SERVER
- 8.2 SETTING UPNP ENVIRONMENT
- NOTE
- 8.2.1 UPNP NETWORKED ENVIRONMENT DIAGRAM
- 8.3 PLAYING SONGS ON UPNP MEDIA SERVER
- 9 TROUBLESHOOTING
- Q1 WHY CONNECTION FAILS
- WARRANTY CONDITIONS
- EN
- WE OFFER A WARRANTY ON OUR PRODUCTS IN ACCORDANCE WITH THE FOLLOWING CONDITIONS
- ASSERTING A WARRANTY CLAIM
- IMPORTANT: AXDIA WILL ONLY ACCEPT PARCELS THAT HAVE AN RMA NUMBER
- SERVICE OUTSIDE OF WARRANTY
Brand : Odys
Model : i-net MusicBox
Category : Hi-Fi System