
T sonic 850 - Mp3 player TRANSCEND - Free user manual and instructions
Find the device manual for free T sonic 850 TRANSCEND in PDF.


User questions about T sonic 850 TRANSCEND
0 question about this device. Answer the ones you know or ask your own.
Ask a new question about this device
Download the instructions for your Mp3 player in PDF format for free! Find your manual T sonic 850 - TRANSCEND and take your electronic device back in hand. On this page are published all the documents necessary for the use of your device. T sonic 850 by TRANSCEND.
USER MANUAL T sonic 850 TRANSCEND
System Requirements | 7
Safety Precautions | 7
General Use 7
Backing Up Data....7
Caution: Risk of Deafness....7
Reminders....8
MP850 Controls | 9
Music Playback Screen | 10
Basic Operation | 11
Charging the Battery....11
Power ON....11
Power OFF 11
Play a Song....12
Pause a Song....12
Next Track....12
Previous Track....12
Fast Forward....12
Fast Rewind 12
Increase Volume....12
Decrease Volume 12
Main Menu....12
File Navigator....13
Deleting Files....13
Voice Recording 13
Repeat / Shuffle Functions ....14
A-B Repeat....14
Hold 14
Reset....14
MUSIC Mode | 15
Play MP3, WMA and WMA-DRM10 Music....15
Playlists....16
Adding a Song to My Playlist....16
Removing a Song from My Playlist....17
RADIO Mode | 19
Listen to the Radio....19
Selecting a Radio Station ....19
Adjusting the Volume....20
Saving a Radio Station....20
Recalling a Saved Station....20
Recording the Radio 20
RECORD Mode | 22
Making Voice Recordings With the Built-In Microphone 22
Playing Voice or FM Recordings....22
VIDEO Mode | 23
Playing MTV Files....23
PHOTO Mode | 24
Displaying JPG and BMP Photos....24
E-book Mode | 25
Reading E-books and Text files 25
Settings | 26
The Settings Menu....26
User EQ Customization....26
Repeat Mode....27
Play Speed 28
Record Quality....29
VAD (Voice Activity Detection)....30
Sleep Timer 31
Screen Saver....31
Slideshow Interval....32
Lyrics Sync 33
Date/Time Settings ....33
Time Zone 34
Daylight Saving Time....35
Language 35
FM Reset 36
Media Transfer Protocol (MTP) 36
Player Info....37
Driver Installation | 38
Driver Installation for Windows ^® Me, 2000, XP and Vista ....38
Driver Installation for Mac OS 10.0, or Later ....38
Driver Installation for Linux Kernel 2.4, or Later....38
Connecting to a Computer | 39
Transferring Files to the MP850....39
Disconnecting from a Computer....41
Removing the MP850 in Windows Me, 2000, XP and Vista....41
Removing the MP850 in Mac OS 10.0 or Later 41
Removing the MP850 in Linux Kernel 2.4 or Later.... 41
Included Software | 42
Software System Requirements....42
Installing the MP850 Software....42
Transcend MTV Converter....43
Slide Show Maker 45
Transcend Digital Music Player Utility....47
PC-Lock 48
Partition....49
Log In / Log Out 50
Password....51
Forgotten Passwords 52
Troubleshooting | 53
Specifications | 56
Ordering Information | 56
Recycling & Environmental Considerations | 57
Transcend Limited Warranty | 58
Introduction
Thank you for purchasing Transcend's MP850, an advanced MP3 Player that can play music and display videos and photos. The MP850 combines all the advantages of a great sounding portable MP3 player with the benefits of a USB flash drive, and includes many extra features such as a Recordable FM Radio, advanced digital voice recording karaoke-style lyrics display, A-B repeat functions and variable track playback speeds. Your MP850 can also be used to read E-books and supports High-speed USB 2.0 for faster uploading and downloading of files when connected to a computer. The A-B repeat and variable track playback speed features allows you to continuously replay specific sections of an audio file at slower or faster speeds – ideal for learning foreign languages and reviewing an important part of a song or recording. In addition, you can make personal memos and record meetings or class lectures using the advanced digital voice recorder with the built-in microphone.
Package Contents
The MP850 package includes the following items:
MP850
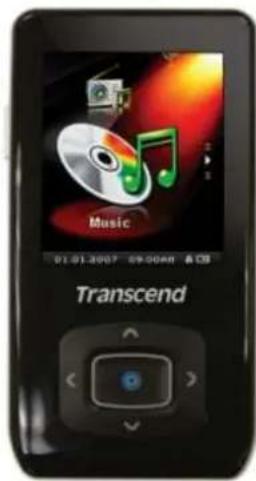
text_image
Music 01.01.2007 09:00AM & CS TranscendEarphones
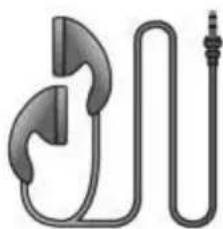
natural_image
Pure electrical circuit lines without any symbolsSoftware CD
USB cable

©
System Requirements
Desktop or notebook computer with a working USB port.
One of the following operating systems:
Windows® Me
Windows® 2000
Windows® XP
Windows Vista®
Windows® 7
Mac® OS 10.0 or later
Linux® Kernel 2.4 or later
Safety Precautions |
These usage and safety guidelines are IMPORTANT! Please follow them carefully.
General Use
- Unpack the contents of the MP850 package carefully.
- Ensure USB connectors are the same size and shape before connecting – never force them
- Always use the Transcend-provided power adapters and cables. Using incompatible cables may permanently damage your MP850.
- Do not allow your MP850 to get wet or come in contact with water or any other liquids
- Do not use a damp/wet cloth to wipe or clean the exterior case.
-
Do not use or store your MP850 in any of the following environments:
-
Direct sunlight
- Next to an air conditioner, electric heater or other heat sources
- In a closed car that is in direct sunlight
• Always unplug the player once it is fully charged. Avoid charging the player for more than 12 hours.
- Do not charge in high-temperature environments or while exposed to direct sunlight.
• To maintain battery health, be sure to complete at least one full discharge/charge cycle per month.
Backing Up Data
- Transcend does NOT take any responsibility for data loss, or damage during operation. If you decide to store data on your MP850 we strongly advise that you regularly backup the data to a computer, or other storage medium.
- To ensure Hi-Speed USB 2.0 data transfer rates when connecting to a computer, please ensure the computer has the necessary USB drivers installed. If you are unsure how to check this, please consult your computer or motherboard User's Manual for USB driver information.
Caution: Risk of Deafness
- Repeated or regular use of headphones or earphones at volume levels above 80 decibels can give a false impression that the audio level is not high enough. Users may try to progressively increase the volume control therefore risking a dangerous noise level for their ears.
• To protect your health and your hearing, keep the volume of your MP3 player below 80 decibels and do
not use for an extended period of time. Stop use if symptoms like headaches, nausea, or hearing disorders occur.
Your MP3 player is limited to a volume level of 100 decibels.
Both the MP3 player and its accompanying earphones are compliant with the French regulation concerning musical Walkmans (24 ^th July 1998 Order).
Before using other earphones, confirm that their technical specifications are compatible with the original set.
Reminders
Make sure the switch is not enabled before turning on the player.
Never use the "Quick Format" or "Full Format" functions in Windows® to format your MP850.
Follow the procedures in the “Disconnecting from a Computer” section to properly remove your MP850 from a computer.
Transcend occasionally releases firmware updates for certain products. We suggest you visit http://www.transcendusa.com and download the latest firmware version for your device.
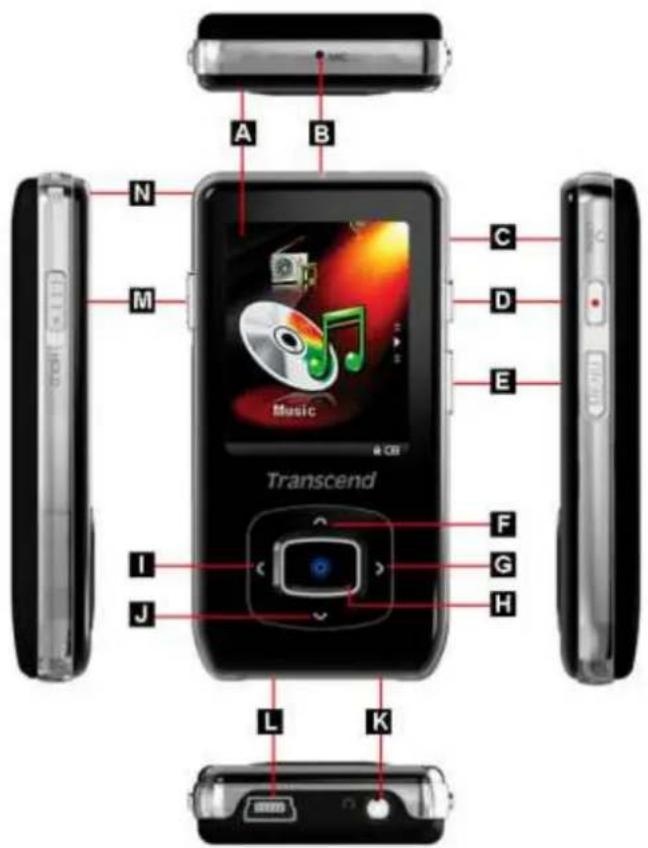
text_image
A B N M C D E Music Transcend I J F G H L K| A | 1.8” Full-Color TFT Display | |
| B | Microphone | |
| C |  | Reset Switch |
| D |  | Record Button |
| E |  | Menu Button |
| F |  | Volume Up |
| G |  | Next / Fast Forward |
| H |  | Power / OK Button |
| I |  | Back / Rewind |
| J |  | Volume Down |
| K |  | Headphone Jack |
| L | Hi-Speed Mini USB 2.0 Port | |
| M | HOLD | Hold Switch |
| N | Lanyard Attachment Hole | |
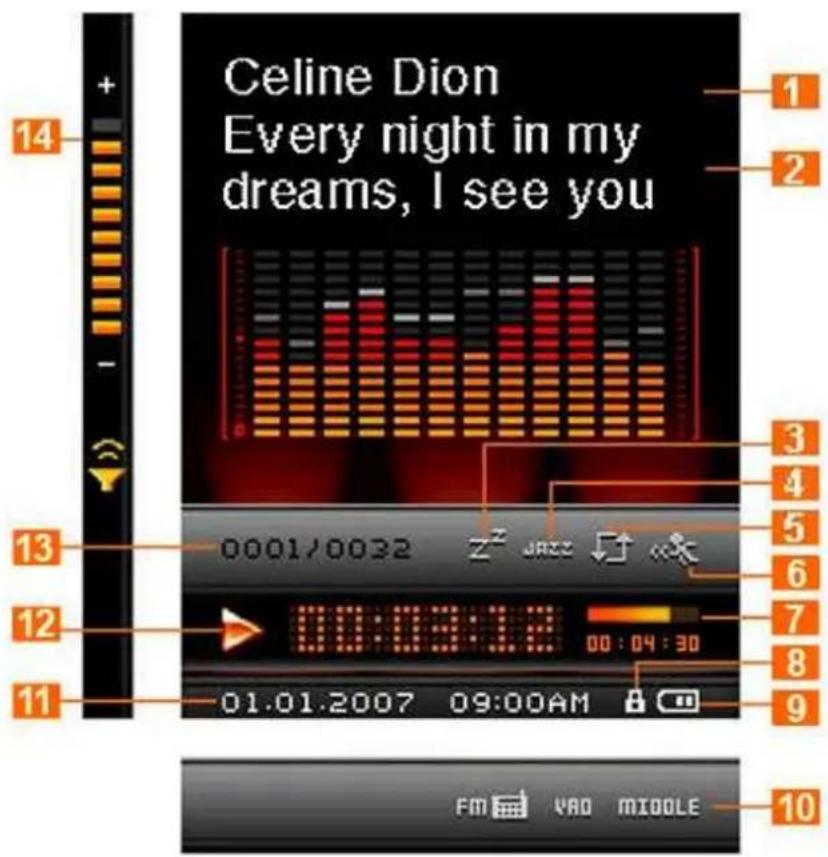
text_image
Celine Dion Every night in my dreams, I see you 14 + - 13 12 11 0001/0032 z² JACE 00:09:12 00:04:30 01.01.2007 09:00AM FM YAO MIDDLE 1 2 3 4 5 6 7 8 9 10Figure 1: Music Mode Interface
| ICON | INDICATION | |
| 1 | Album/Artist | Indicates the song/album title and artist name |
| 2 | Lyrics | Displays synchronized lyrics (if available) |
| 3 | Sleep | Indicates the Sleep Timer is enabled |
| 4 | EQ Mode | Indicates the Equalizer (EQ) mode: Normal (Blank), POP, Rock, Classical, Jazz, Bass or USER EQ |
| 5 | Repeat Modes | Indicates Normal, (Repeat One), (Repeat All), (Shuffle) (Normal in Folder), (Repeat in Folder), (Shuffle in Folder), or A-B |
| 6 | Play Speed | Indicates (Very Slow), (Slow), Normal, (Fast), or (Very Fast) |
| 7 | Track Time & Progress bar | Indicates the track length and current position |
| 8 | Lock | Indicates the Hold switch is enabled (controls are locked) |
| 9 | Battery | Indicates the battery power level |
| 10 | REC Settings | Indicates current record quality and VAD (Voice Activity Detection) status |
| 11 | Time & Date | Displays current time and date (RTC) |
| 12 | Play Status | Indicates ▶(Play), □(Pause), ▶(Fast Forward), ▼(Rewind), ▶(Record), or □(Stop) status |
| 13 | Track Info | Indicates the current track number and total tracks available |
| 14 | Volume | Indicates the current volume level |
Basic Operation
Charging the Battery
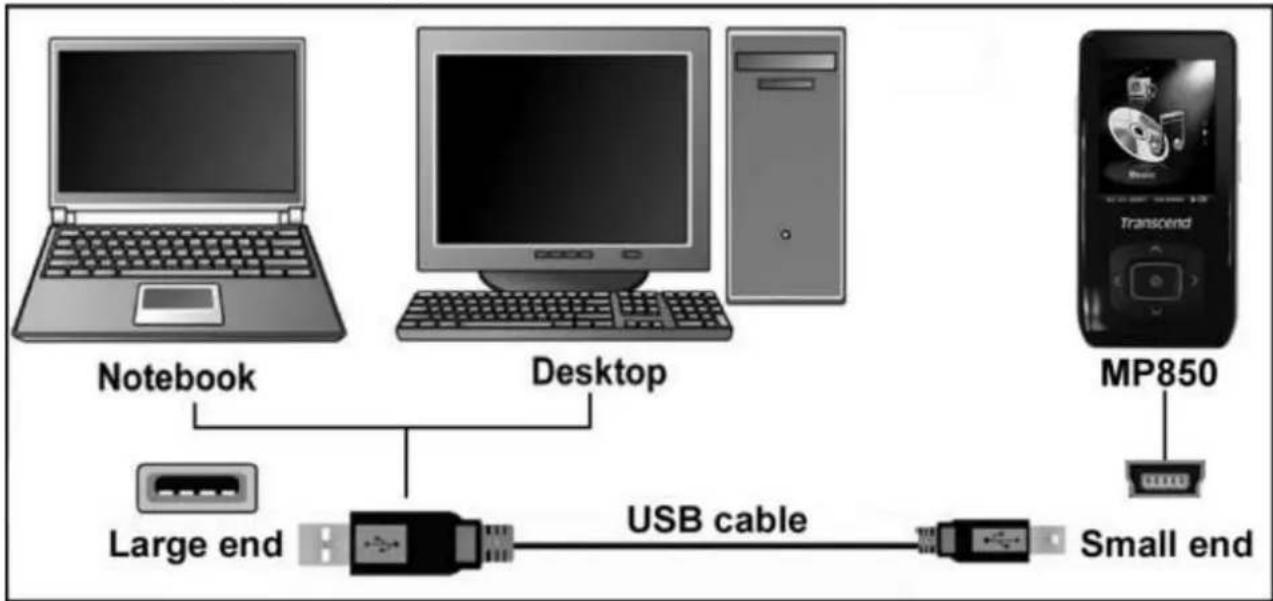
Plug the small end of the USB cable into the Mini USB port on the bottom of the MP850, and plug the large end of the cable into an available USB port on your desktop or notebook computer. The MP850's internal Li-ion battery will automatically begin charging.
flowchart
graph TD
    A["Laptop"] -->|Notebook| B["Desktop"]
    C["Computer"] -->|Notebook| B
    D["MP850"] -->|USB cable| E["USB cable"]
    E --> F["Small end"]
Figure 2: Connecting to a Computer
Power ON
Press and hold the button to turn on the player. An animated logo will appear, followed by the player status information. After the startup sequence, the Main Menu will be displayed, indicating the MP850 is ready for use.

text_image
Series of eight labeled light sources showing transverse and trans-circular patterns on black backgroundo It takes a few seconds for the MP850 to power up.
If the Hold icon 🔒 appears on the display while powering on the unit, this means that the MP850's switch is enabled. You must switch off the Hold mode before you can power on the player.
Power OFF
Press and hold the button to turn of MP850 f the 850.
o It takes a few seconds for the MP850 to completely power down.
o The power OFF animation will be displayed:

text_image
Transcend Transcend Transcend Transcend Transcend Transcend TranscendPlay a Song
Press the button to play a selected music, video, photo, E-book, or recording file.
Pause a Song
Press 📷 to pause and un-pause a song, recording, or video during playback.
Next Track
Press > to skip to the next available song.
Previous Track
Press < to go back to the previous song.
Fast Forward
Press and hold the > button to fast-forward.
Fast Rewind
Press and Hold the < button to rewind.
Increase Volume
Press once or press and hold the ⬠ button until you reach the desired volume level.
Decrease Volume
Press once or press and hold the √ button until you reach the desired volume level.
Main Menu
Press MENU in any mode to enter the Main Menu. The Main Menu gives you access to the MUSIC, RADIO, RECORD, VIDEO, PHOTO, E-book modes and the SETTINGS menu.
File Navigator
The File Navigator is a fast and convenient way of moving between tracks, files and folders.
- Press and hold the MENU button in the MUSIC, RECORD, VIDEO, PHOTO, or E-book mode to open the File Navigator.
- A list of available files for the current mode will be shown. (i.e. in E-Book mode only .TXT files will be shown)
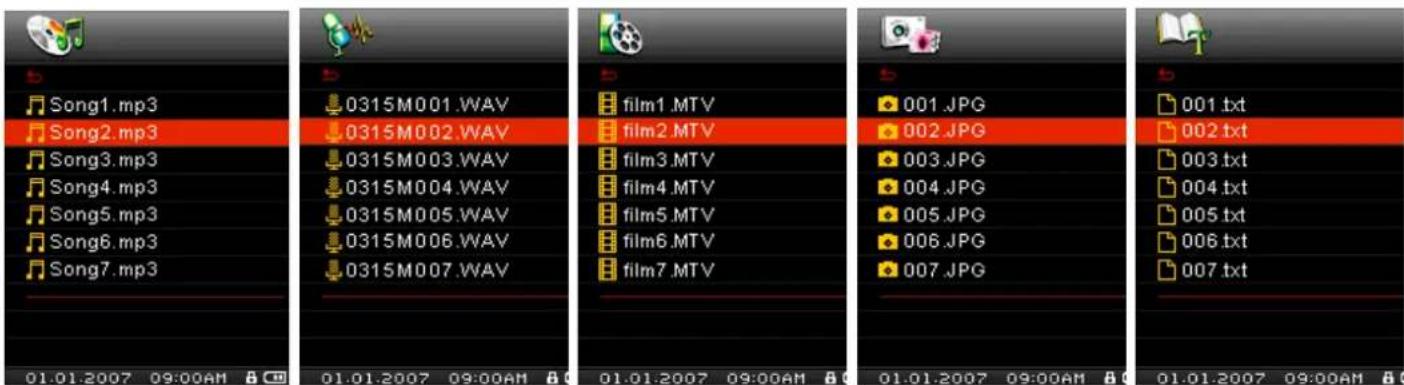
text_image
Song1.mp3 Song2.mp3 0315M001.WAV 0315M002.WAV 0315M003.WAV 0315M004.WAV 0315M005.WAV 0315M006.WAV 0315M007.WAV film1.MTV film2.MTV film3.MTV film4.MTV film5.MTV film6.MTV film7.MTV 001.JPG 002.JPG 003.JPG 004.JPG 005.JPG 006.JPG 007.JPG 001.txt 002.txt 003.txt 004.txt 005.txt 006.txt 007.txt- Use the ∧ and ∨ buttons to move up and down the list of files.
- Highlight the file you want to play and press
- To enter a folder or subfolder, highlight it and press either > or □.
- To exit a folder, press
- To close the File Navigator, press and hold the MENU button.
Deleting Files
- In the MUSIC, RECORD, VIDEO, PHOTO, or E-book mode, press and hold MENU to enter the File Navigator.
- Navigate to the file you want to delete with the < > and ^ ∨ buttons.
- With the file highlighted, press the button. A "Delete? Yes / No" message will appear.
- Use the √ button to highlight "Yes" and press 🔒 to permanently delete the file.
text_image
0001/0002 Remove from My Playlist? Delete?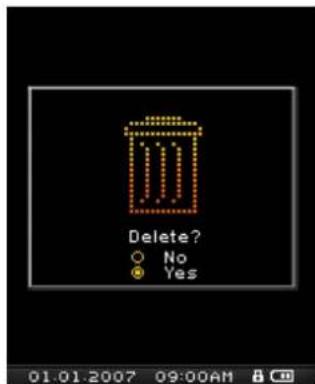
text_image
Delete? ○ No ● Yes 01.01.2007 09:00AMVoice Recording
- Press and hold the button for 2 seconds in any mode (except Radio) to activate the MP850's built-in microphone and begin voice recording.
- Press pause the recording, and press again to resume.
- Press and hold ● for 2 seconds again to finish the recording.
- Recordings can be found in the RECORD mode.
■ Repeat / Shuffle Functions
Please see the "REPEAT Mode" in the Settings section for detailed instructions.
A-B Repeat
- During playback In the MUSIC or RECORD modes, press once to mark the beginning of the section you want to repeat.
- Press ☐ again to mark the end of the section you want to repeat. The marked section of the song will playback in a continuous loop
- Press the button once more to stop the A-B repeat function.
Hold
When the 📄HOLD switch enabled, all of the MP850's buttons will be disabled, and cannot accidentally be pressed while in your pocket.
Reset
If the MP850 is not functioning properly, you can reboot by pressing RESET or 3 to 5 seconds.
MUSIC Mode

Before buying DRM (Digital Rights Management) protected music online, please be advised that the MP850 only supports WMA-DRM10 file protection.
Play MP3, WMA and WMA-DRM10 Music
- Press and hold to power ON the unit. The Main Menu will appear.
If the MP850 is already on, press the MENU button to enter the Main Menu.
natural_image
Digital music player interface showing CD/DVD disc and musical note icons (no readable text or symbols)-
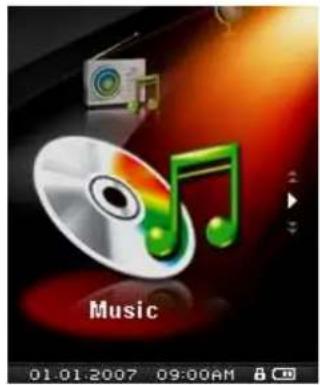
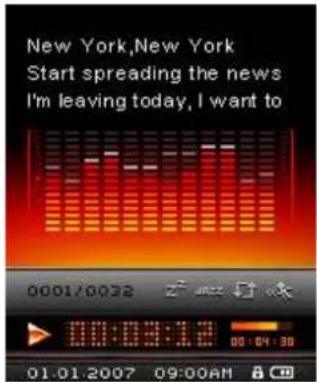
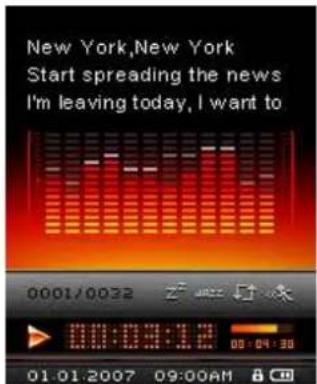
Use the ∧ and ∨ buttons to select "Music" mode and press ⓞ. The player will automatically find available music files.
-
Select the song you want to listen to with the < and > buttons, or use the File Navigator.
-
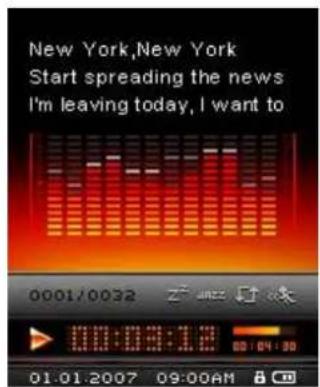
Press begin listening to a music file.
text_image
New York, New York Start spreading the news I'm leaving today, I want too MP850 supports Mpeg I Layer 3 and WMA files compressed at between 32Kbps – 320Kbps.
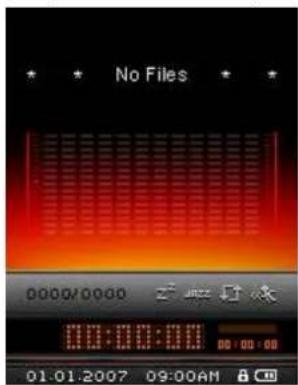
- If MP850 cannot find any MP3, WMA, or DRM10 files, a "No Files" message will be displayed.
text_image
No Files 0000/0000 00:00:00 01.01.2007 09:00AMPlaylists
For quick and easy playback of your favorite songs, the MP850 supports, M3U, PLA, and WPL playlist formats, and also includes a built-in user editable playlist (My Playlist).
- In the MUSIC mode, press and hold the MENU button, then highlight Playlists and press
text_image
New York, New York Start spreading the news I'm leaving today, I want to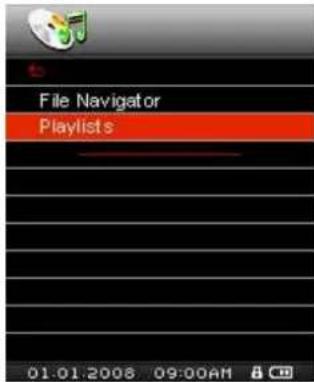
text_image
File Navigator Playlists 01:01:2008 09:00AM- Select either "My Playlist" or an imported playlist file (if available) and press
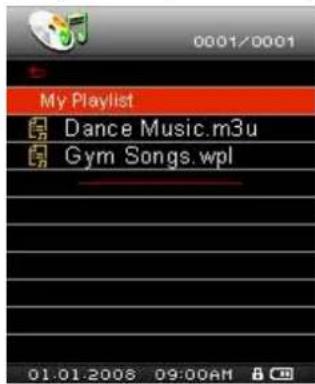
text_image
My Playlist Dance Music.m3u Gym Songs.wpl 01:01:2008 09:00AM- Use the ∧ and ∨ buttons to move up and down the list of available songs. Press 🔒 or ➤ to play the highlighted song. When the song ends, the rest of the files in the playlist will then be played.
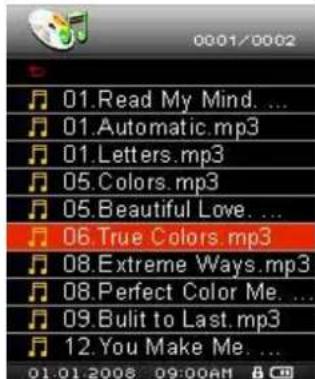
text_image
00:01/00:02 01.Read My Mind. ... 01.Automatic.mp3 01.Letters.mp3 05.Colors.mp3 05.Beautiful Love. ... 06.True Colors.mp3 08.Extreme Ways.mp3 08 PERFect Color Me. ... 09.Bulit to Last.mp3 12.You Make Me. ... 01:01:2008 09:00AM- To exit playlist playback, simply select a new music file from the File Navigator.
■ Adding a Song to My Playlist
- In the MUSIC mode, press and hold MENU, then highlight File Navigator and press
text_image
New York, New York Start spreading the news I'm leaving today, I want to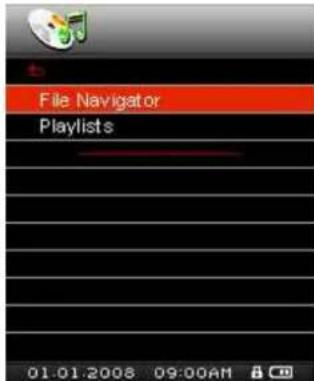
text_image
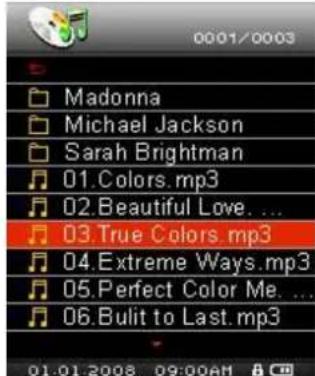
File Navigator Playlists 01:01:2008 09:00AM- Use the ∧ ∨ and < / > buttons to navigate to the song you want to add.
text_image
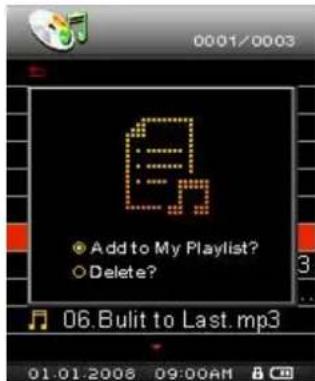
0001/0003 Madonna Michael Jackson Sarah Brightman 01.Colors.mp3 02.Beautiful Love. ... 03.True Colors.mp3 04.Extreme Ways.mp3 05 PERFECT Color Me. ... 06.Bulit to Last.mp3 01:01:2008 09:00AM- With the file highlighted, press the button and select "Add to My Playlist."
text_image
0001/0003 Add to My Playlist? Delete?■ Removing a Song from My Playlist
- In the MUSIC mode, press and hold MENU, then highlight Playlists and press
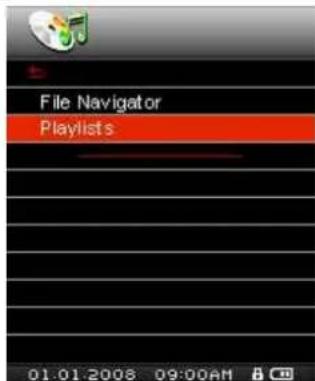
text_image
File Navigator Playlists 01.01.2008 09:00AM- Select "My Playlist" and press
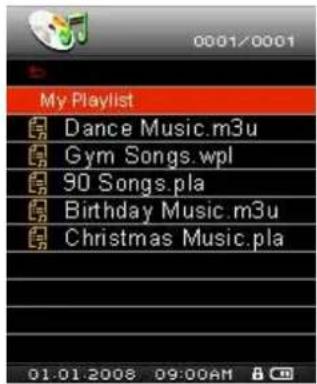
text_image
0001/0001 My Playlist Dance Music.m3u Gym Songs.wpl 90 Songs.pla Birthday Music.m3u Christmas Music.pla 01.01.2008 09:00AM- Use the


buttons to find the song you want to remove.
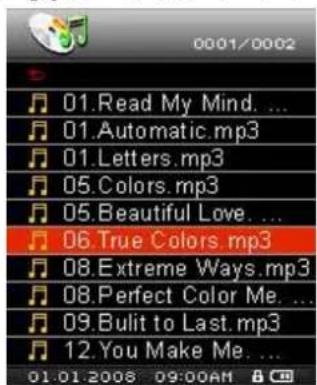
text_image
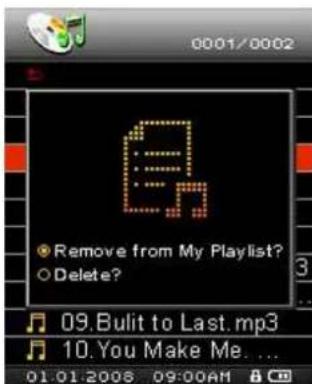
0001/0002 01.Read My Mind. ... 01.Automatic.mp3 01.Letters.mp3 05.Colors.mp3 05.Beautiful Love. ... 06.True Colors.mp3 08.Extreme Ways.mp3 08 PERFect Color Me. ... 09.Bulit to Last.mp3 12.You Make Me. ... 01:01:2008 09:00AM- With the file highlighted, press the ● button and select "Remove from My Playlist." A confirmation will appear.
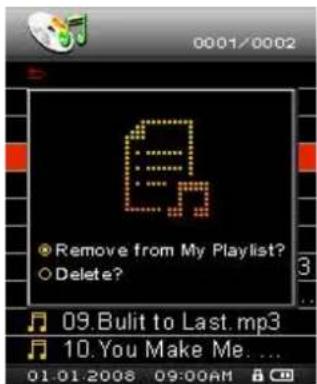
text_image
0001/0002 Remove from My Playlist? Delete?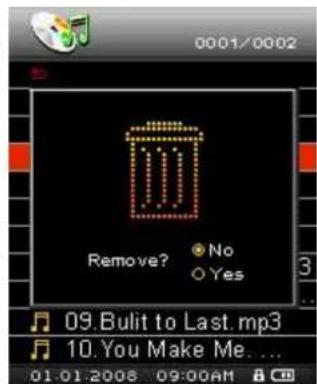
text_image
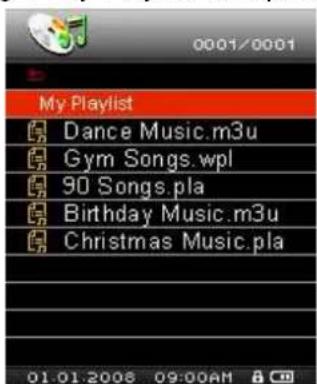
0001/0002 Remove? No Yes 09.Bulit to Last.mp3 10.You Make Me... 01.01.2008 09:00AM- To remove all songs, highlight "My Playlist" and press the button, then select "Yes" to confirm.
text_image
0001/0001 My Playlist Dance Music.m3u Gym Songs.wpl 90 Songs.pla Birthday Music.m3u Christmas Music.pla 01.01.2008 09:00AM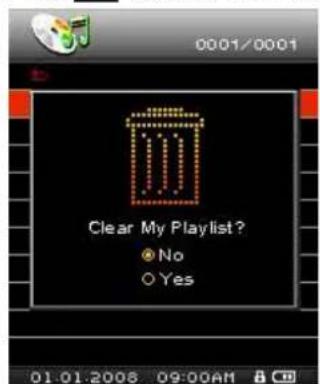
text_image
0001/0001 Clear My Playlist ? ● No ○ Yes 01 01 2008 09:00AMRADIO Mode
Listen to the Radio
- Plug in the earphones 🔍. (Earphones must be plugged-in to listen to the Radio)
- Press the MENU button to enter the Main Menu.
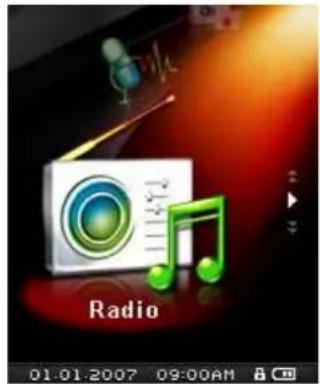
- Use the ∧ and ∨ buttons to select "Radio" and press 🔒.
text_image
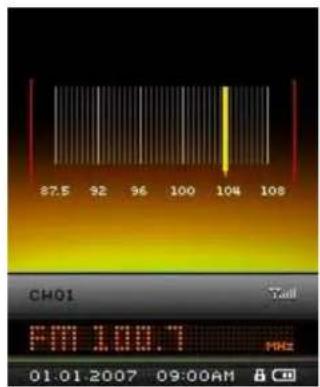
Radio 01.01.2007 09:00AM- The current FM Radio frequency will be displayed.
text_image
87.5 92 96 100 104 108 CH01 PM 100.7 MHz 01:01:2007 09:00AMThe first time you use the Radio, all the FM channels will be automatically scanned and the first 20 channels with a strong signal will be preset. This feature also works if you activate the "FM Reset" function in the SETTINGS menu.
Selecting a Radio Station
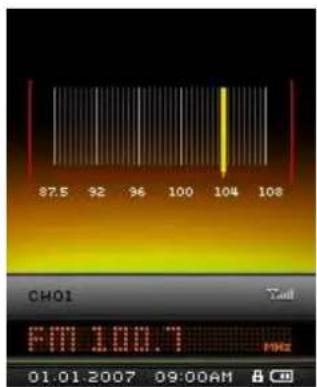
To manually select a radio station, press < or > (the FM frequency will increase or decrease in 0.1MHz increments) until you reach the desired station. Alternatively, you can press and hold either < or > to auto-scan for the next available station.
text_image
87.5 92 96 100 104 108 CH01 FM 100.7 01.01.2007 09:00AMAdjusting the Volume
- Press once or press and hold ∧ or √til you reach the desired volume level.
Saving a Radio Station
The MP850 lets you save (preset) your 20 favorite radio stations (CH01 to CH20).
To save a station:
-
Use < or > to select the radio station (FM frequency) that you want to save.
-
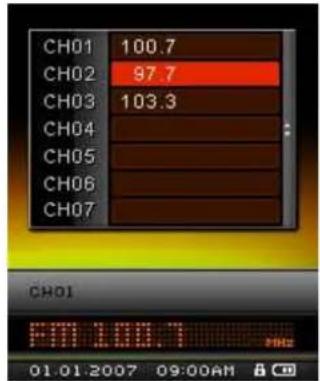
Press the ● button to bring up the saved channel list.
text_image
CH01 100.7 CH02 97.7 CH03 103.3 CH04 CH05 CH06 CH07 CH01 FAM 100.7 MHz 01.01:2007 09:00AM- Use the ∧ and ∨ buttons to select your desired channel number, and press ● again to save the current radio station to that channel.
■ Recalling a Saved Station
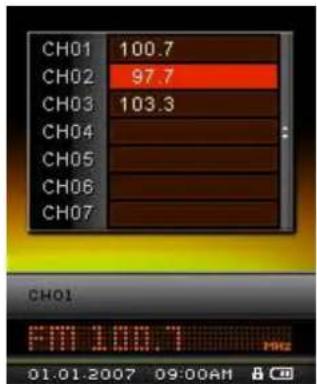
- In the RADIO mode press ● to display your saved stations (CH01 to CH20).
text_image
CH01 100.7 CH02 97.7 CH03 103.3 CH04 CH05 CH06 CH07 CH01 FAM 100.7 MHz 01.01.2007 09:00AM-
Use the ∧ and ∨ buttons to select a channel number.
-
Press listen to the selected channel.
Recording the Radio
- Select a radio station that you want to record.
- Press and hold the button for 2 seconds to begin recording the station.
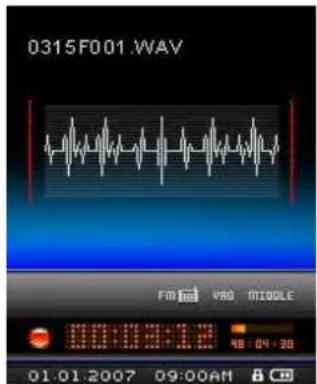
- An automatically generated file name for your recording will appear at the top of the screen.
text_image
0315F001.WAV FM 12 VAD MIDDLE 00:08:12 18:04:30 01:01:2007 09:00AMo FM Recordings are named and numbered in this format: "MonthDayF###.WAV" Ex: "0123F012.WAV" would be the twelfth FM recording made on January 23^rd
-
Press ☐ pause the recording, and press again to resume.
-
When finished, press and hold ● again to save the recording and return to the RADIO mode.
o FM recordings are saved in the /FMIN.DIR/ folder
o FM recordings can be accessed by using the File Navigator in RECORD mode
To adjust the recording sample rate, please see the "Record Settings" section of this manual.
RECORD Mode
The MP850 can record from 2 different sources: FM Radio or the built-in microphone. The RECORD mode is for creating voice recordings and playing back both FM and voice recordings. To record from the FM Radio, please see the previous section on “Recording the Radio.”
Making Voice Recordings With the Built-In Microphone
- Press and hold the button for 2 seconds in any mode (except Radio) to activate the MP850's built-in microphone and begin voice recording.
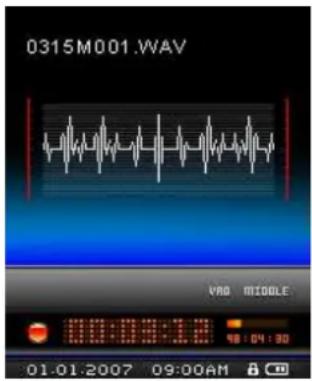
- An automatically generated file name for your recording will appear at the top of the screen.
text_image
0315M001.WAV VRQ MIDDLE 00:00:00:1.0 18:04:30 01:01:2007 09:00AMo Voice recordings are named and numbered in this format: "MonthDayM###.WAV"
Ex: 1216M003.WAV represents the third voice recording made on December 16 ^th
- Press to pause the recording, and press again to resume.
- When finished, press and hold ● again to save the recording and return to the RADIO mode.
o Voice recordings are saved in the /MICIN.DIR/ folder
o Voice recordings can be accessed by using the File Navigator in RECORD mode
To adjust the recording sample rate, please see the "Record Settings" section of this manual.
For best results, try to position the MP850's Microphone as close as possible to the source of the sound or voice you are recording.
Playing Voice or FM Recordings
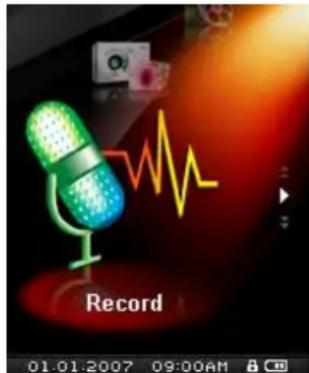
- Press to bring up the Main Menu.
- Use the ^ or ∨ buttons to select "Record" and press
text_image
Record 01.01.2007 09:00AM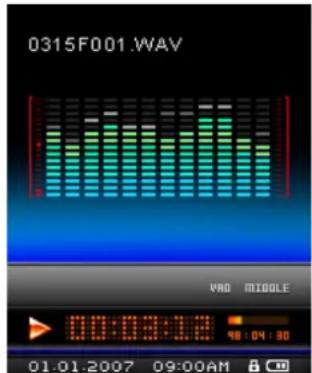
text_image
0315F001.WAV PRO MIDDLE 00:03:12 98:04:30 01:01:2007 09:00AM- All voice and FM radio recordings can be found in the RECORD mode. Use the < or > buttons to find your desired recording and press 🔒 to listen to it.

Video files must be converted to .MTV format before they can be played on the MP850
Playing MTV Files
-
Press the MENU button to enter the Main Menu.
-
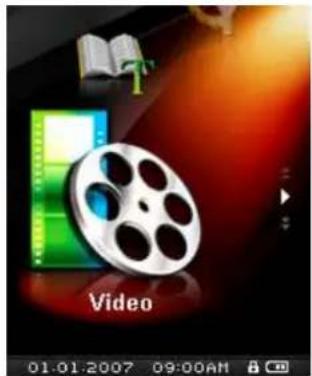
Use the ∧ and √ttons to select "Video" and press .
natural_image
Video player interface with film reel, CD, and playback controls (no readable text or symbols)-
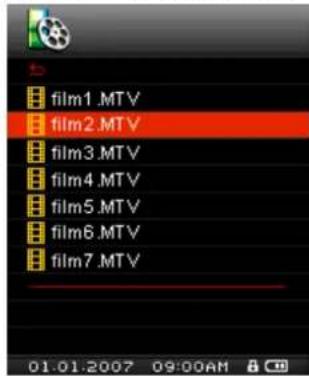
The File Navigator will open, and a list of available .MTV files will be shown.
-
Use the < > and ^ ∨ buttons to navigate to the video you want to play and press
text_image
film1.MTV film2.MTV film3.MTV film4.MTV film5.MTV film6.MTV film7.MTV 01:01:2007 09:00AM- Press pause the video, and press again to resume.

natural_image
Close-up of a bright yellow flower with green foliage in the background (no text or symbols visible)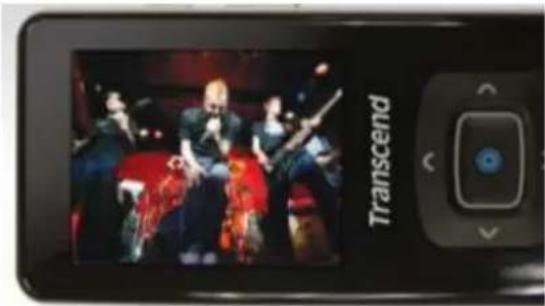
text_image
TranscendIn order to maximize the screen's resolution, video playback is displayed horizontally.
- The < > / ∧ ∨ directional controls will be adjusted to function horizontally.
-
During video playback press > to go to the next available video, and press < to go back.
-
To fast forward, press hold >. To rewind, press and hold <.
-
To adjust the volume, press ∧ and ∨
o MP850 only supports ".mtv" video files. You must use the "Transcend MTV Converter" Software to convert ".MPEG4," ".DivX," ".AVI" and ".xVID" video files to the ".mtv" format.
PHOTO Mode

To display photos on your MP850 you must first transfer a .JPG or .BMP to the player.
■ Displaying JPG and BMP Photos
-
Press the MENU button to enter the Main Menu.
-
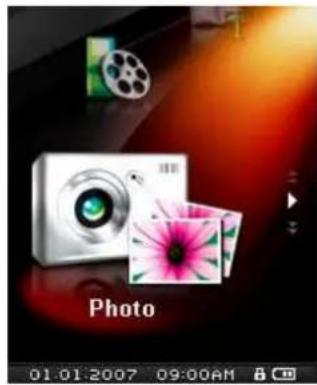
Use the ∧ and ∨ buttons to select "photo" and press 🔒.
text_image
Photo 01.01.2007 09:00AM-
The File Navigator will open, and a list of available .JPG and .BMP files will be shown.
-
Use the < > and ^ ∨ buttons to navigate to the photo you want to view and press
-
While viewing a photo, press > to go to the next available photo, and press < to go back.
o MP850 only supports ".jpg" and ".bmp" photo files.

natural_image
Close-up of a bright yellow flower with green foliage in the background (no text or symbols)E-book Mode

To read E-books on your MP850, you must first transfer .TXT files to the player
Reading E-books and Text files
-
Press the MENU button to enter the Main Menu.
-
Use the ∧ and ∨ buttons to select "E-book" and press

natural_image
Illustration of an open book with a large green 'T' and a gear symbol, set against a red background (no readable text or symbols)-
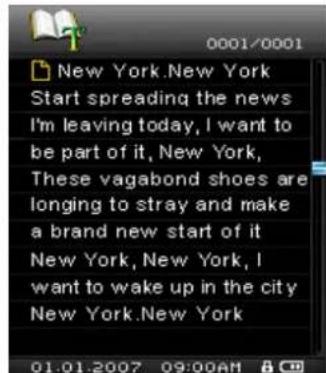
The File Navigator will open, and a list of available .TXT files will be shown.
-
Use the < > and ^ ∨ buttons to navigate to the file or E-book you want to read and press
text_image
0001/0001 New York.New York Start spreading the news I'm leaving today, I want to be part of it, New York, These vagabond shoes are longing to stray and make a brand new start of it New York, New York, I want to wake up in the city New York.New York- Press go to the next page. Press to go back one page.
o MP850 only supports ".txt" format text files.
Settings
The Settings Menu
- Press the MENU button to enter the Main Menu.
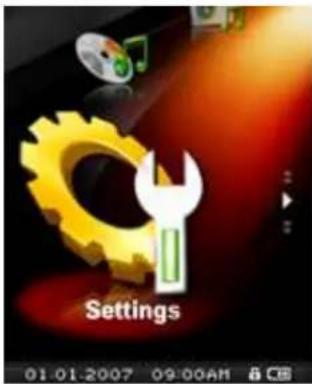
- Use the ∧ and ∨ buttons to select "Settings" and press 🔒.
- To exit the SETTINGS menu, press MENU or <.
text_image
Settings 01.01-2007 09:00AMEqualizer (EQ) Mode
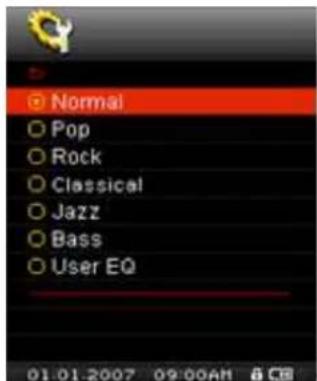
There are several EQUALIZER Modes to choose from: Normal, Pop, Rock, Classical, Jazz, Bass, User EQ.
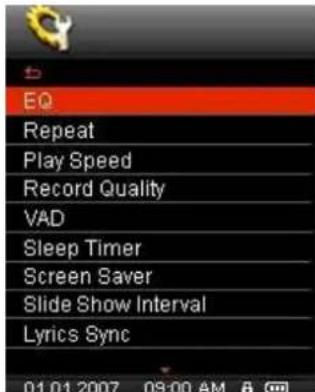
- In the SETTINGS menu, Use the ∧ and ∨ buttons to select "EQ" and press 🔒.
text_image
EQ Repeat Play Speed Record Quality VAD Sleep Timer Screen Saver Slide Show Interval Lyrics Sync 01.01.2007 09:00 AM- Use the 📂 and √ buttons to select an equalizer mode. If music is playing, you will instantly hear the difference between each mode through the earphones.
text_image
Normal Pop Rock Classical Jazz Bass User EQ 01 01 2007 09:00AM- Press to confirm the new EQ setting and return to the SETTINGS menu.
User EQ Customization
The User EQ allows you to customize the 5-band equalizer to your personal preference.
-
In the SETTINGS menu, Use the ∧ and ∨ buttons to select "EQ" and press 🔒.
-
Highlight "User EQ" and press
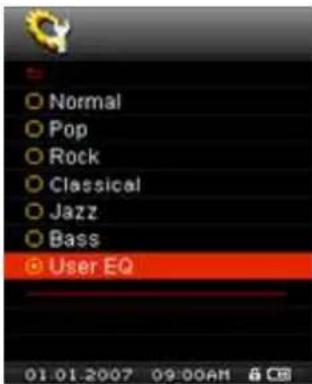
text_image
Normal Pop Rock Classical Jazz Bass User EQ 01 01.2007 09:00AM-
Use the
buttons to switch between 5 bands: 80Hz, 250Hz, 1KHz, 4KHz, and 12KHz. The "ALL" setting move all 5 bands up or down together. -
Press ∧ or ∨ to increase or decrease levels in 1.0dB steps (Adjustment range: +8dB to -7dB)
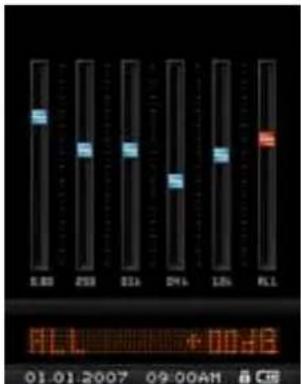
text_image
0.00 259 31h 24h 18h FL1 FLL • 00:00 01.01.2007 09:00AM GB- Press to save the new User EQ settings and return to the SETTINGS Menu.
Repeat Mode
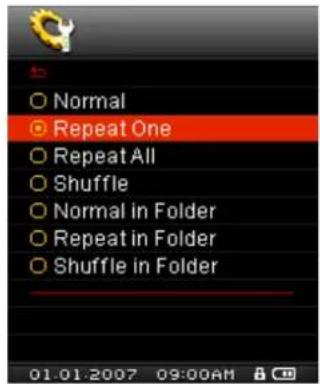
There are seven Repeat modes to choose from:
Normal (plays all music files available one time, in consecutive order)
Repeat One (continuously repeats the current song)
Repeat All (continuously repeats playback of all music files available, in consecutive order)
Shuffle (continuously repeats playback of all music files available, in random order)
Normal in Folder (plays all music files in a folder one time, in consecutive order)
Repeat in Folder (continuously repeats playback of all music files in a folder, in consecutive order)
Shuffle in Folder (plays all music files in a folder, in random order)
- In the SETTINGS menu, Use the ^ and √ buttons to select "Repeat" and press 🔒.
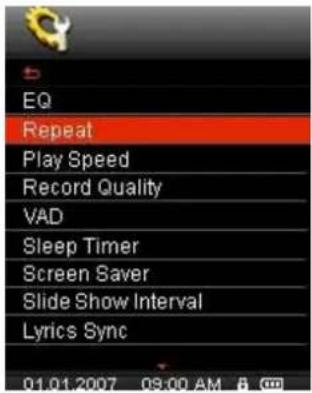
text_image
EQ Repeat Play Speed Record Quality VAD Sleep Timer Screen Saver Slide Show Interval Lyrics Sync 01.01.2007 09:00 AM- Use the 🔊 button to select a repeat mode and press 🔒 to confirm.
text_image
Normal Repeat One Repeat All Shuffle Normal in Folder Repeat in Folder Shuffle in FolderPlay Speed
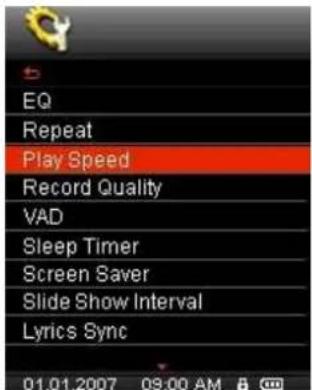
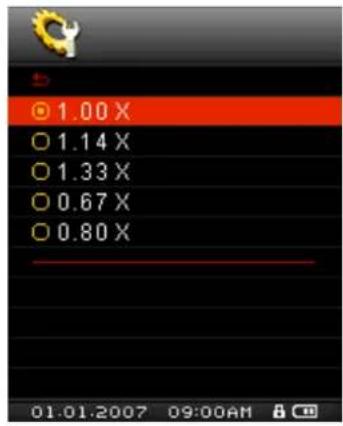
The speed at which an audio file is played can be increased or decreased. Playback speeds can be set to:
0.67X (very slow), 0.80X (slow), 1.00X (normal), 1.14X (fast), 1.33X (very fast).
- In the SETTINGS menu, Use the ^ and ∨ buttons to select "Play Speed" and press 🔒.
text_image
EQ Repeat Play Speed Record Quality VAD Sleep Timer Screen Saver Slide Show Interval Lyrics Sync 01.01.2007 09:00 AM- Use the 🗑️ button to select one of the five playback speeds and press to confirm. Default is 1.0x (normal speed)
text_image
1.00 X 1.14 X 1.33 X 0.67 X 0.80 X 01.01.2007 09:00AMRecord Quality
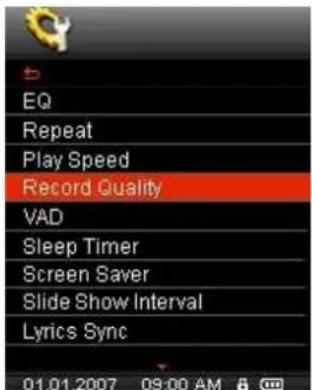
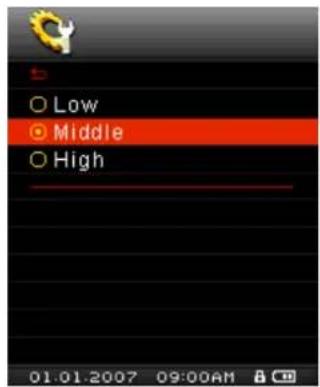
The quality of an audio recording can be set to Low (8,000Hz), Middle (16,000Hz), or High (32,000Hz). Higher recording quality settings require more memory space to save the recorded WAV files.
- In the SETTINGS menu, Use the ∧ and ∨ buttons to select "Record Quality" and press 🔒.
text_image
EQ Repeat Play Speed Record Quality VAD Sleep Timer Screen Saver Slide Show Interval Lyrics Sync 01.01.2007 09:00 AM- Use the 🔊 button to select Low, Middle, or High quality and press 🔒 to confirm.
text_image
Low Middle High 01.01.2007 09:00AMMaximum Record Time / Quality Table
| Voice Recording | Sample rate | Channels | 4GB | 8GB |
| Low (8KHz) | 1 (mono) | 256 hrs | 512 hrs | |
| Med (16KHz) | 1 (mono) | 128 hrs | 256 hrs | |
| High (32KHz) | 1 (mono) | 64 hrs | 128 hrs |
| FM Recording | Sample rate | Channels | 4GB | 8GB |
| Low (8KHz) | 2 (stereo) | 128 hrs | 256 hrs | |
| Med (16KHz) | 2 (stereo) | 64 hrs | 128 hrs | |
| High (32KHz) | 2 (stereo) | 32 hrs | 64 hrs |
Note: The above recording times may not be possible if space is limited or the battery power is low.
o FM Radio recordings are recorded in Stereo. MIC recordings are recorded in Mono.
For best voice recording results, try to position the MP850's microphone as close as possible to the source of the sound or voice you are recording.
VAD (Voice Activity Detection)
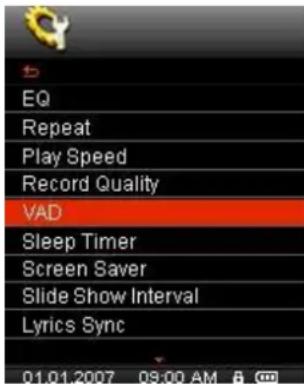
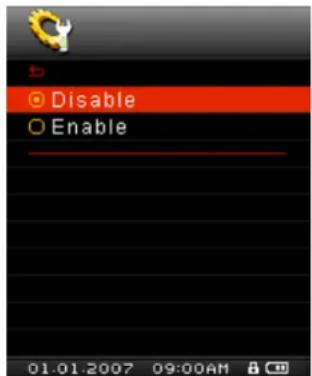
VAD allows the MP850 to make gapless audio recordings. This means that while making a voice recording, the player will only record when it detects voices. If the person(s) pauses or stops speaking, the MP850 will temporarily stop recording until the person(s) starts speaking again. This allows for more concise, easier to understand recordings and smaller recording files.
- In the SETTINGS menu, Use the

and

buttons to select "VAD" and press

text_image
EQ Repeat Play Speed Record Quality VAD Sleep Timer Screen Saver Slide Show Interval Lyrics Sync 01.01.2007 09:00 AM- Use the


buttons to select Disable or Enable and press

to confirm.
text_image
Disable Enable 01.01.2007 09:00AMSleep Timer
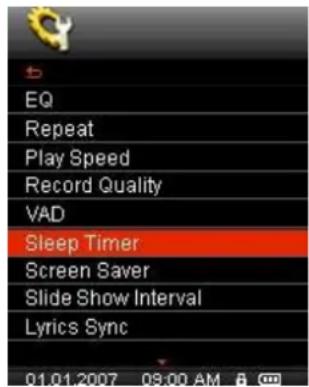
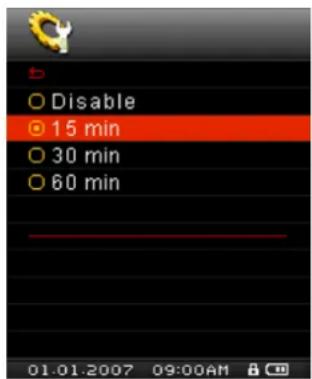
This function sets a time delay to automatically power OFF the MP850, regardless of playback status.
- In the SETTINGS menu, Use the ∧ and ∨ buttons to select "Sleep Timer" and press 🔒.
text_image
EQ Repeat Play Speed Record Quality VAD Sleep Timer Screen Saver Slide Show Interval Lyrics Sync 01.01.2007 09:00 AM- Use ∧ and ∨ to select a Sleep Timer delay and press ⚙. You can choose from "15 Min", "30 Min", "60 Min" or "Disable". When the selected time is reached, the unit will automatically power OFF.
text_image
Disable 15 min 30 min 60 min 01.01.2007 09:00AMScreen Saver
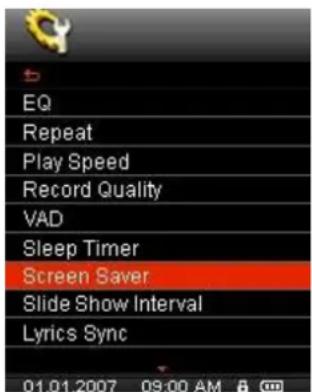
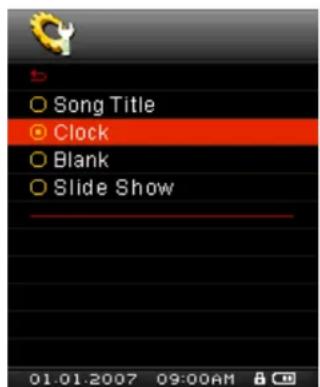
This function lets you enable/disable the screen saver, choose which screen saver you want to be displayed, and set the time delay for the screen saver to activate. Available screen savers are:
Song Title (Displays the title of the song currently being played)
Clock (Displays the current real time)
Blank (Displays a black screen to save battery life)
Slide Show (Displays a user-created picture slide show – See Slideshow Maker)
- In the SETTINGS menu, Use the ∧ and ∨ buttons to select "Screen Saver" and press 🔒.
text_image
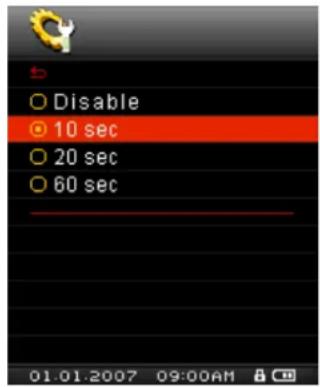
EQ Repeat Play Speed Record Quality VAD Sleep Timer Screen Saver Slide Show Interval Lyrics Sync 01.01.2007 09:00 AM- Use ⚠ and ⚡ select a Screen Saver delay time and press . The screen saver will commence whenever this amount of time passes with no button activity. The available delay times are: "Disable", "10 Sec", "20 Sec", and "60 Sec."
text_image
5 Disable 10 sec 20 sec 60 sec 01.01.2007 09:00AM- After you select a Screen Saver time delay, a list of available screen savers will appear.
text_image
Song Title Clock Blank Slide Show 01.01.2007 09:00AM- Use 📂 and 🕒 to select your desired screen saver and press 🔒 to confirm.
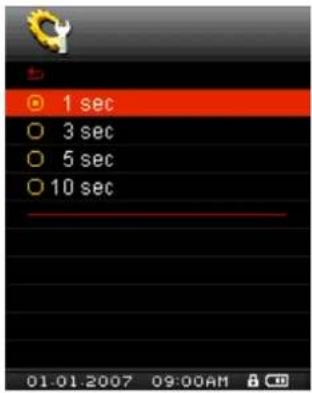
Slideshow Interval
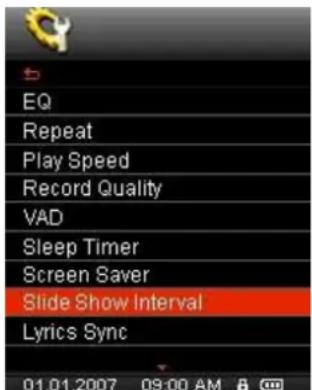
This function sets the time delay between photos that are displayed when the Slide Show screen saver is enabled. To create a slideshow, you must use the Slide Show Maker software application on your computer to create a photo slideshow ".SLS" file. Please see the "Slide Show Maker" section in Software Setup for more information.
- In the SETTINGS menu, Use the ∧ and ∨ buttons to select "Slide Show Interval" and press 🔒.
text_image
EQ Repeat Play Speed Record Quality VAD Sleep Timer Screen Saver Slide Show Interval Lyrics Sync 01.01.2007 09:00 AM- Use ∧ and ∨ to select the speed that you want your pictures to be displayed and press 🔒. Available interval times are.: “1 Sec”, “3 Sec”, “5 Sec”, “10 Sec.”
text_image
1 sec 3 sec 5 sec 10 sec 01:01.2007 09:00AMLyrics Sync
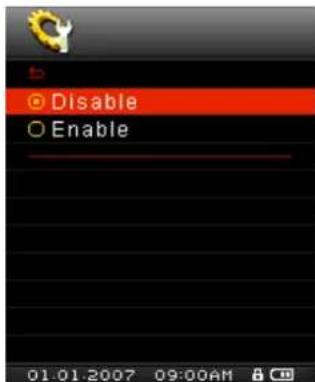
This function displays synchronized lyrics (if available) on the screen during music playback.
Note: For Lyrics Sync to work, an “.LRC” file with the exact same file name as its corresponding .MP3 song must be transferred to the MP850.
Ex: for the MP3 file "GM-Last_Christmas.mp3", the LRC lyrics file must be named "GM-Last_Christmas.lrc"
- In the SETTINGS menu, Use the ^ and √ buttons to select "Lyrics Sync" and press 🔒.

text_image
EQ Repeat Play Speed Record Quality VAD Sleep Timer Screen Saver Slide Show Interval Lyrics Sync 01.01.2007 09:00 AM- Select "Enable" to use Lyrics Sync, or "Disable" to turn the function off. Press to confirm.
text_image
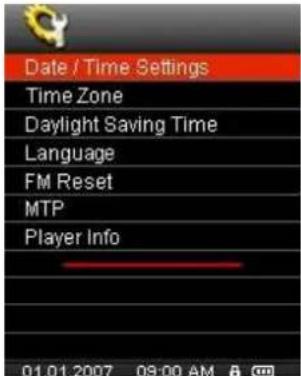
5 ● Disable ○ Enable 01.01.2007 09:00AMDate/Time Settings
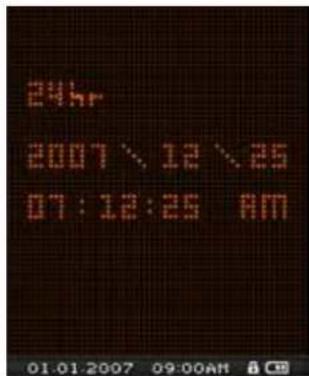
This setting lets you adjust the local time and date and choose your time zone.
- In the SETTINGS menu, Use the ∧ and ∨ buttons to select "Date/Time Settings" and press 🔒.
text_image
Date / Time Settings Time Zone Daylight Saving Time Language FM Reset MTP Player Info- Use < and > to move between 12hr/24hr, Year, Month, Day, Hour, Minute, Second, and AM/PM.
text_image
24:4 2007\12\25 07:12:25 AM 01.01.2007 09:00AM-
Adjust the values of each field with the ∧ and √tons.
-
Press to confirm your new time settings and choose a time zone (see below).
Time Zone
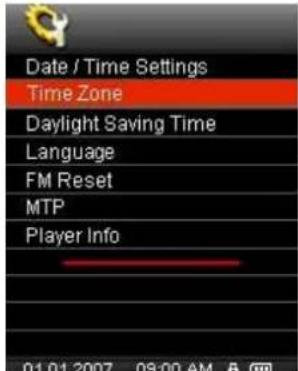
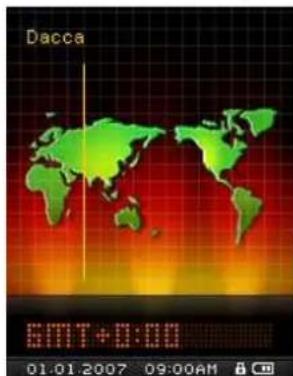
For convenience when traveling, the MP850 can display the local time for different time zones.
- In the SETTINGS menu, use the ∧ and ∨ buttons to select "Time Zone" and press (the Time Zone setting screen will also be displayed every time you set the date and time).
text_image
Date / Time Settings Time Zone Daylight Saving Time Language FM Reset MTP Player Info- Use ◀ and ▷ to select the appropriate time zone for your region and press 🔒 to confirm.
text_image
Dacca SMT+0:00 01.01.2007 09:00AMDaylight Saving Time
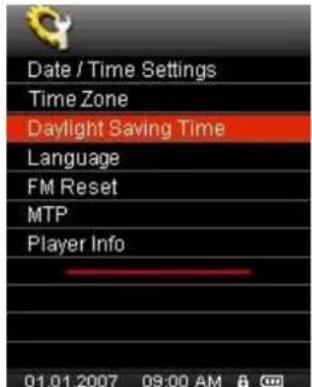
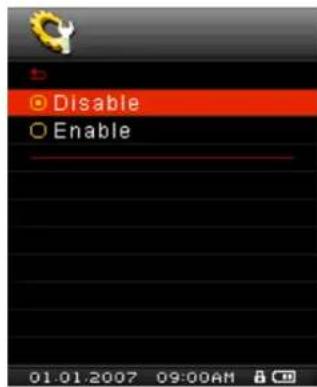
If your region uses Daylight Saving Time (DST), the MP850 can automatically adjust the clock one hour forward in Summer and one hour backward during Winter.
- In the SETTINGS menu, use the ∧ and ∨ buttons to select "Daylight Saving Time" and press 🔒.
text_image
Date / Time Settings Time Zone Daylight Saving Time Language FM Reset MTP Player Info- Select "Enable" to use DST, or "Disable" to turn the function off. Press to confirm.
text_image
Disable Enable 01:01.2007 09:00AMLanguage
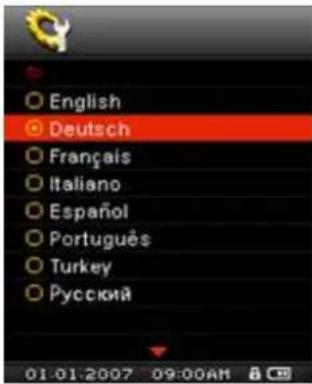
Sets the MP850's display language, which includes menus, song/album titles, artist names, and lyrics. The player supports 13 User languages.
- In the SETTINGS menu, use the ∧ and ∨ buttons to select "Language" and press 🔒.
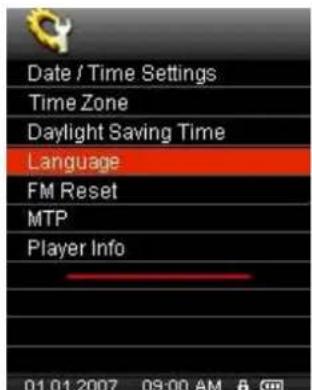
text_image
Date / Time Settings Time Zone Daylight Saving Time Language FM Reset MTP Player Info- Select your language with the ∧ and ∨ buttons and press 🔒 to confirm.
text_image
English Deutsch Français Italiano Español Português Turkey Русский 01.01.2007 09:00AMFM Reset
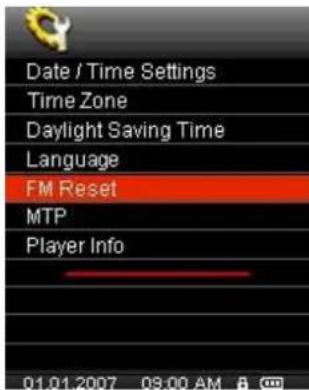
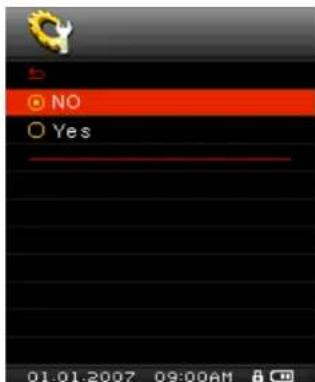
This function resets all saved radio stations (CH01 – CH20). If you use this feature, the next time you enter the RADIO mode, the MP850 will automatically scan and save the 20 strongest stations.
- In the SETTINGS menu, use the ^ and √ buttons to select "FM Reset" and press 🔒.
text_image
Date / Time Settings Time Zone Daylight Saving Time Language FM Reset MTP Player Info 01.01.2007 09:00 AM- Select "Yes" to reset your radio stations or "No" to keep them. Press to confirm.
text_image
NO Yes 01:01.2007 09:00AMMedia Transfer Protocol (MTP)
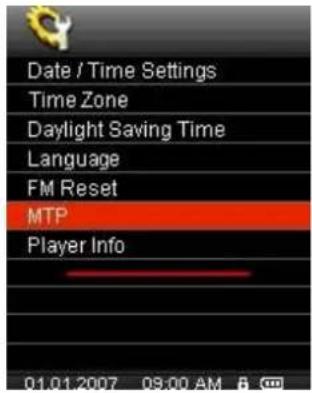
If you own WMA-DRM10 music files or if you want to use Windows Media Player 10 to synchronize music between your computer and the MP850, the Music Transfer Protocol (MTP) must be enabled. This function lets you switch between MTP or USB transfer modes.
MTP (Use this mode for transferring DRM10 music files with Windows Media Player 10)
USB (Use this mode for normal drag and drop transfer of all other files or if using a Mac Linux® computer)
^8 or
- In the SETTINGS menu, use the ∧ and ∨ buttons to select "MTP" and press 🔒.
text_image
Date / Time Settings Time Zone Daylight Saving Time Language FM Reset MTP Player Info 01.01.2007 09:00 AM- Use the ∧ and ∨ buttons to select either "MTP" or "USB" and press 🔒 to confirm.

text_image
MTP USB 01.01.2007 09:00AM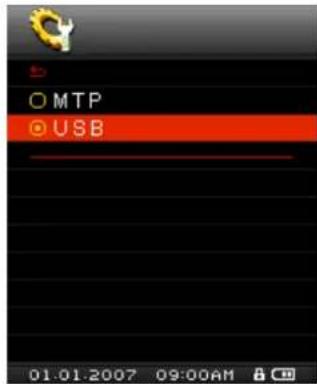
text_image
MTP USB 01:01.2007 09:00AMo Note: In MTP transfer mode, all files will be stored in the "Music" folder.
Player Info
Displays the MP850's firmware version and available memory capacity.
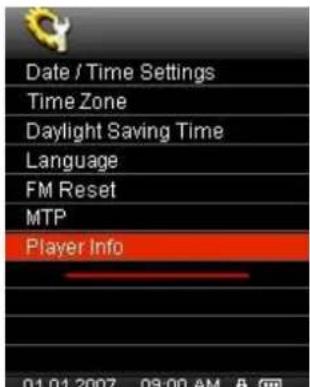
- In the SETTINGS menu, use the ∧ and ∨ buttons to select "Player Info" and press 🔒.
text_image
Date / Time Settings Time Zone Daylight Saving Time Language FM Reset MTP Player Info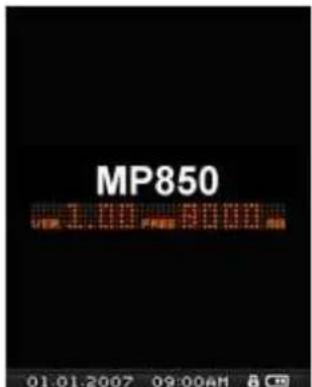
text_image
MP850 VER 1.00 FREE 9:00 AM 01.01.2007 09:00AM 8Driver Installation
Driver Installation for Windows® Me, 2000, XP and Vista
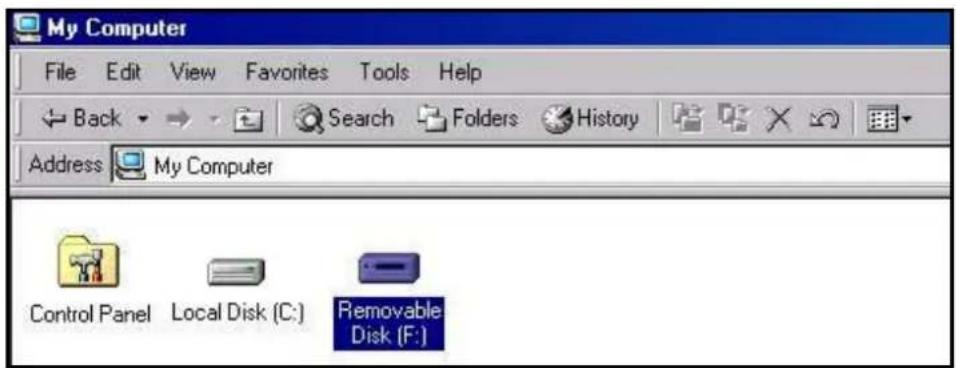
No drivers are required. These Windows ^® Operating Systems have built-in drivers to support the MP850. Plug your MP850 into an available USB port and Windows ^® will install the necessary files. A “Removable Disk” drive with a newly assigned drive letter will appear in the My Computer window.
Driver Installation for Mac® OS 10.0, or Later
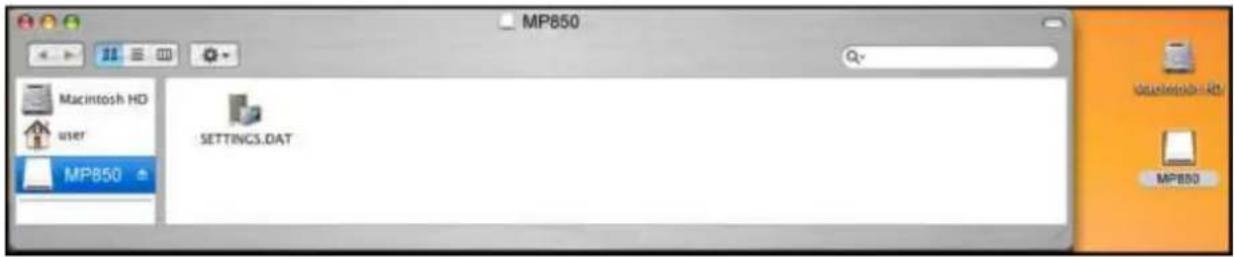
No drivers are required. Plug your MP850 into an available USB port and your computer will automatically detect it.
text_image
MP850 Macintosh HD user MP850 SETTINGS.DAT MP850Figure 3: Mac Driver Installation
Driver Installation for Linux® Kernel 2.4, or Later
No drivers are required. Plug your MP850 into a USB port and mount it.
- Create a directory for the MP850.
Example: mkdir /mnt /MP850
- Mount the MP850.
Example: mount -a -t msdos /dev/sda1 /mnt /MP850

NEVER use Windows to format your MP850.
Connecting to a Computer
Transferring Files to the MP850
If you want to use your MP850 to do more than listen to the radio, you must transfer MP3 / WMA / DRM10 music files, JPG / BMP pictures, MTV movies or TXT files to the MP850. You can also use the MP850 as a portable flash drive to transfer your important documents and other files.
Note: If you are using a Windows computer and want to listen to WMA-DRM10 music, please find out which version of Windows Media Player is installed on your computer. For Windows Media Player 10, please see "Music Transfer Mode"
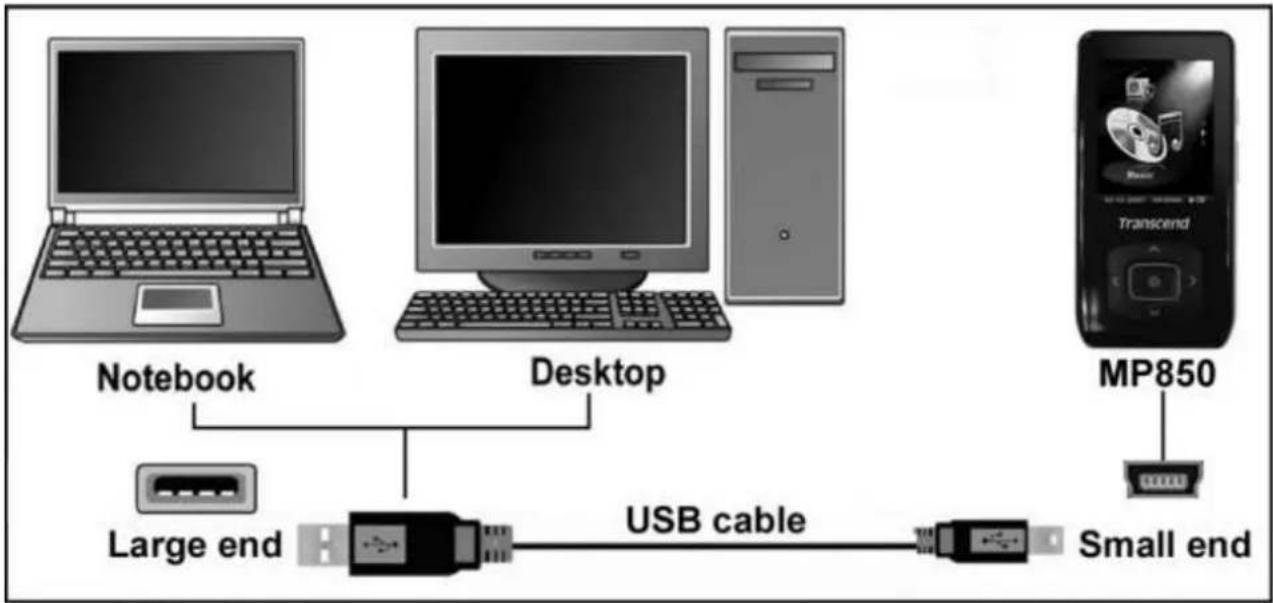
- Plug the small end of the USB cable into the Mini USB port on the MP850 and plug the large end of the cable into an available USB port on your desktop or notebook computer. The internal Li-ion battery will begin charging.
While the MP850 is connected to a computer, its audio and video functions will not be available.
flowchart
graph TD
    A["Laptop"] --> B["Notebook"]
    C["Desktop"] --> D["Large end"]
    D --> E["USB cable"]
    E --> F["Small end"]
    G["MP850"] --> H["Transcend"]
Figure 4: Connecting to a Computer
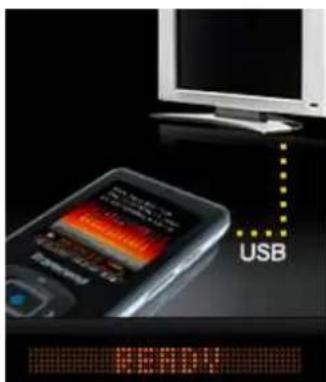
- When connected to a computer the MP850's screen will display a "READY" message, indicating that files can be loaded onto the player.
natural_image
Close-up of a mobile phone with a colorful LED display and a computer monitor in the background (no visible text or symbols on device)If you are using Windows®, a new Removable Disk drive with a newly assigned drive letter representing the MP850 will appear in the "My Computer" window.
text_image
My Computer File Edit View Favorites Tools Help Back Search Folders History Address My Computer Control Panel Local Disk (C:) Removable Disk (F:)Figure 5: The MP850 Removable Disk in the My Computer Window
*Note: (F:) is an example drive letter – your "My Computer" window may differ
- To transfer photos, videos, e-book text files, and standard-format MP3 and WMA music to the MP850, the MTP (Media Transfer Protocol) mode in the Settings menu must be set to "USB." In this mode, files can be transferred by simply dragging them onto the MP850's Removable Disk drive letter. You can also create your own folders within the MP850 and copy files directly to the folders.
- To transfer WMA-DRM10 music files to the MP850, please set the player's MTP (Media Transfer Protocol) mode in the Settings menu to "MTP." In MTP mode, please use Windows Media Player 10 to transfer and synchronize WMA-DRM10 music files with the MP850.
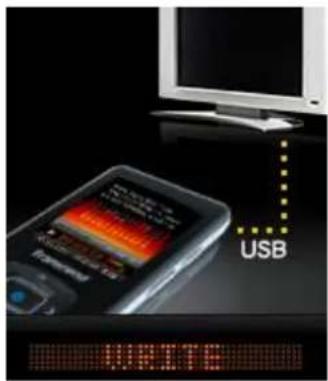
- While files are being transferred to the MP850, the screen will display a "WRITE" message. After files have been successfully transferred, the "READY" message will be displayed again.
text_image
USB WRITE
text_image
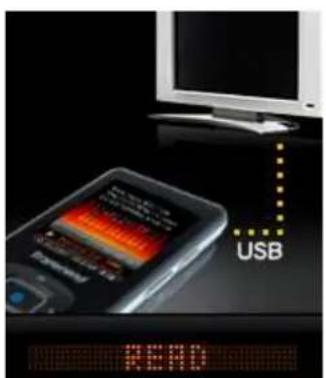
USB RECALL- If you choose to transfer files or folders to the computer, the MP850 will display a "READ" message indicating that the files are being transferred to the computer. After files have been successfully transferred, the "READY" message will be displayed again.
text_image
USB READ
text_image
USB RETURN- Always disconnect the MP850 from a computer by selecting and following the instructions for the "Safely Remove Hardware" icon that can be found on the Windows ^® Toolbar at the bottom of the computer screen.

text_image
Safely Remove Hardware EN 12:04 PMFigure 6: Safely Remove Hardware

NEVER unplug the MP850 during file transfer. Unplug the MP850 only when Windows informs it is safe (see Disconnecting from a Computer) and the "READY" screen disappears.

Audio files (MP3/WMA/WMA-DRM10/WAV) must be stored no more than 4 folder levels away from the root directory. The MP850 is limited to 128 character filename length.
■ Disconnecting from a Computer

Before disconnecting your MP850, always ensure the "READ" or "WRITE" screen is not displayed, as damage to your files or the MP850 may occur.
Removing the MP850 in Windows® Me, 2000, XP and Vista
-
Select the Hardware icon 📋 on the system tray.
-
The Safely Remove Hardware pop-up window will appear. Select it to continue.

text_image
Safely Remove Hardware EN 12:04 PMFigure 7: Safely Remove Hardware
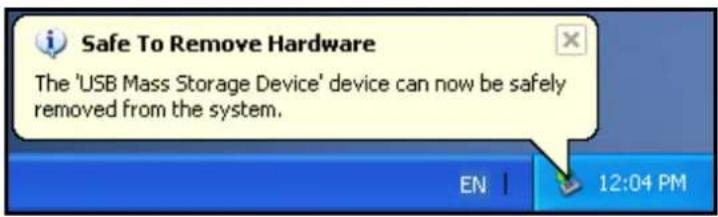
- A window will appear stating "The 'USB Mass Storage Device' device can now be safely removed from the system."
text_image
Safe To Remove Hardware The 'USB Mass Storage Device' device can now be safely removed from the system. EN | 12:04 PMFigure 8: Safe to Remove Hardware
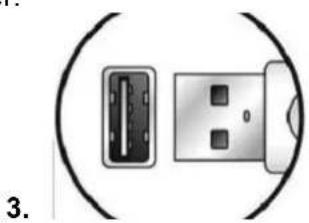
- Unplug the MP850 from your computer.
natural_image
Diagram of a USB connector with two pins, no text or symbols presentRemoving the MP850 in Mac® OS 10.0 or Later
-
Drag and drop the Disk icon that corresponds to your MP850 into the trashcan.
-
Unplug your MP850 from the USB port.
Removing the MP850 in Linux® Kernel 2.4 or Later
-
Execute umount /mnt /MP850 to un-mount the device.
-
Unplug your MP850 from the USB port.
Included Software
The bundled Software CD comes with some very useful software that can increase your productivity and enhance your entertainment experience. The two software applications that come with your MP850 are:
o Multimedia Converter
o Transcend Digital Music Player Utility
Before using any of these programs, please read the following instructions carefully.
Software System Requirements
-
Desktop or notebook computer with a working USB port
o One of the following Operating Systems: -
Windows ^® 2000
- Windows ^ XP
- Windows Vista®
Installing the MP850 Software
- Put the Software CD into your computer's CD-ROM drive (Auto-Run enabled).
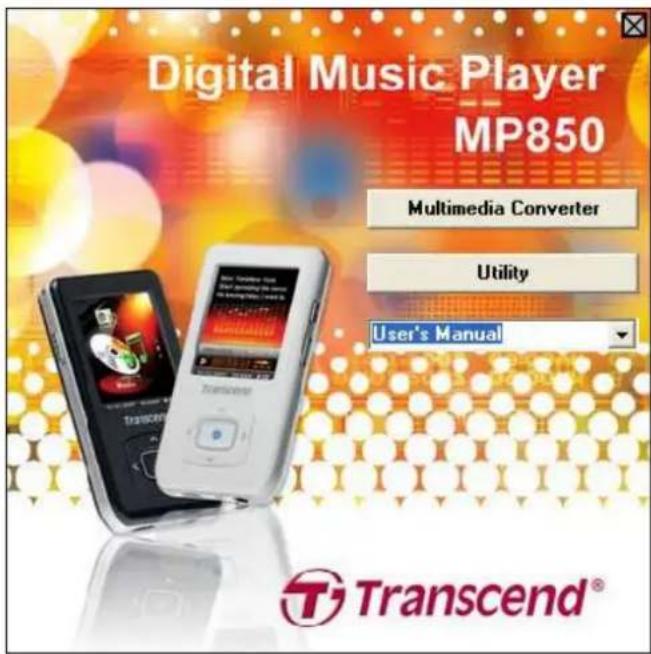
- The MP850 Main Menu window will appear.
text_image
Digital Music Player MP850 Multimedia Converter Utility User's Manual Transcend®Figure 9: MP850 Main Menu
- Select "Multimedia Converter" and follow the instructions that follow to install the MTV Converter and the Slideshow Maker, or click the "Utility" button to install extra functions for your MP850.
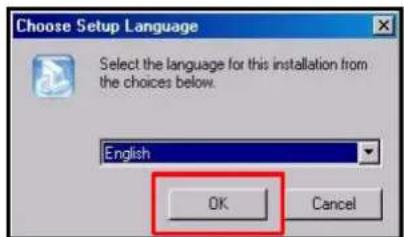
- Choose your setup language and click the "OK" button to continue.
text_image
Choose Setup Language Select the language for this installation from the choices below. English OK CancelFigure 10: Select a language
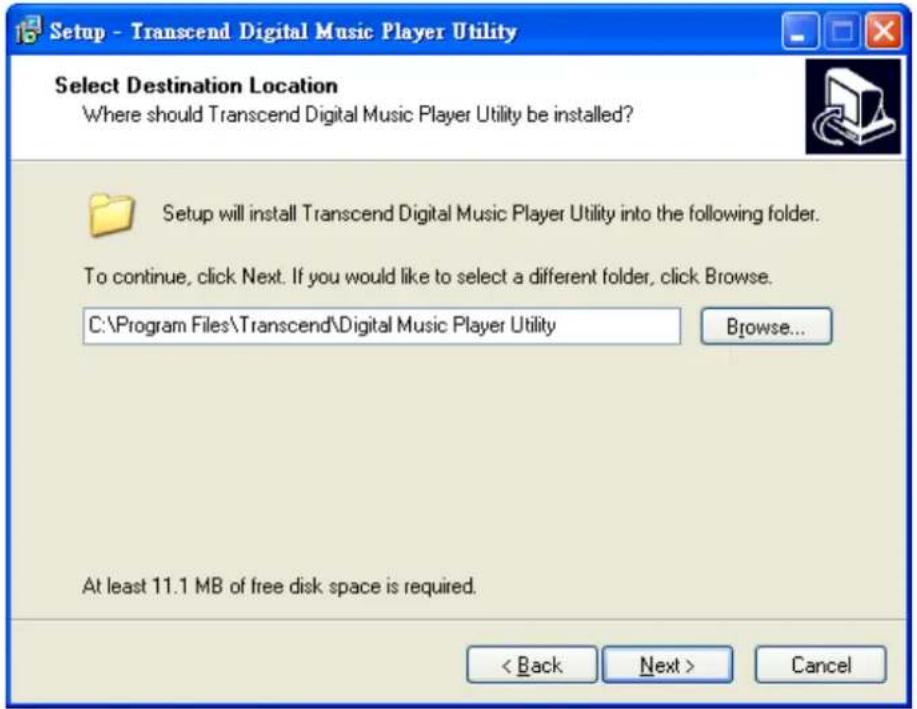
- The "InstallShield Wizard" window will appear. Click the "Next" button to continue. The InstallShield Wizard will guide you through the installation process.
text_image
Setup - Transcend Digital Music Player Utility Select Destination Location Where should Transcend Digital Music Player Utility be installed? Setup will install Transcend Digital Music Player Utility into the following folder. To continue, click Next. If you would like to select a different folder, click Browse. C:\Program Files\Transcend\Digital Music Player Utility Browse... At least 11.1 MB of free disk space is required. < Back Next > CancelFigure 11: Select a Software Program
- When the Transcend Digital Music Player Utility is finished installing, click the "Finish" button to exit the wizard.
- The Transcend Digital Music Player Utility, the MTV Converter, and the Slideshow Maker can all be found in:

Transcend MTV Converter
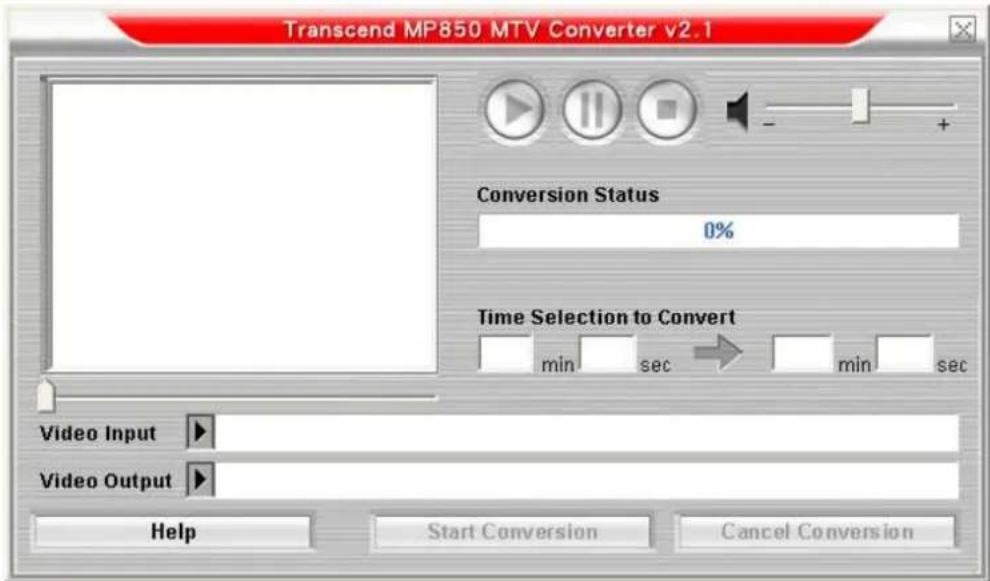
If you want to play videos on your MP850, you must first convert your video files to the ".mtv" file format using the Transcend MTV Converter.
- Run the program (Start > Programs > Transcend > MP850 > MTV Converter)
text_image
Transcend MP850 MTV Converter v2.1 Conversion Status 0% Time Selection to Convert min sec min sec Video Input ▶ Video Output ▶ Help Start Conversion Cancel ConversionFigure 12: MTV Converter main screen
- Click the triangle button next to "Video Input"
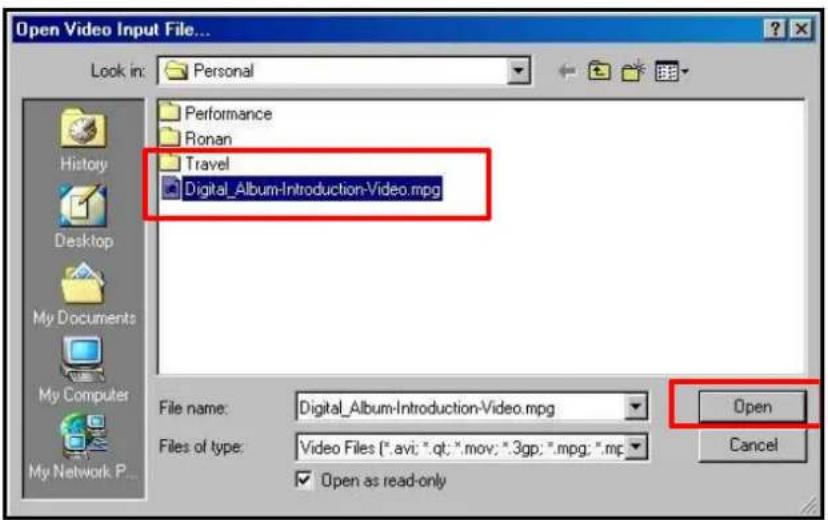
- The Open Video Input File window will appear. Select the "MPEG4," "DivX," "AVI," or "xVID" video file that you want to convert to the ".mtv" format. Click the "Open" button to continue.
text_image
Open Video Input File... Look in: Personal Performance Ronan Travel Digital_Album-Introduction-Video.mpg File name: Digital_Album-Introduction-Video.mpg Files of type: Video Files (*.avi; *.qt; *.mov; *.3gp; *.mpg; *.mpg) Open Cancel Open as read-onlyFigure 13: Select video files for conversion
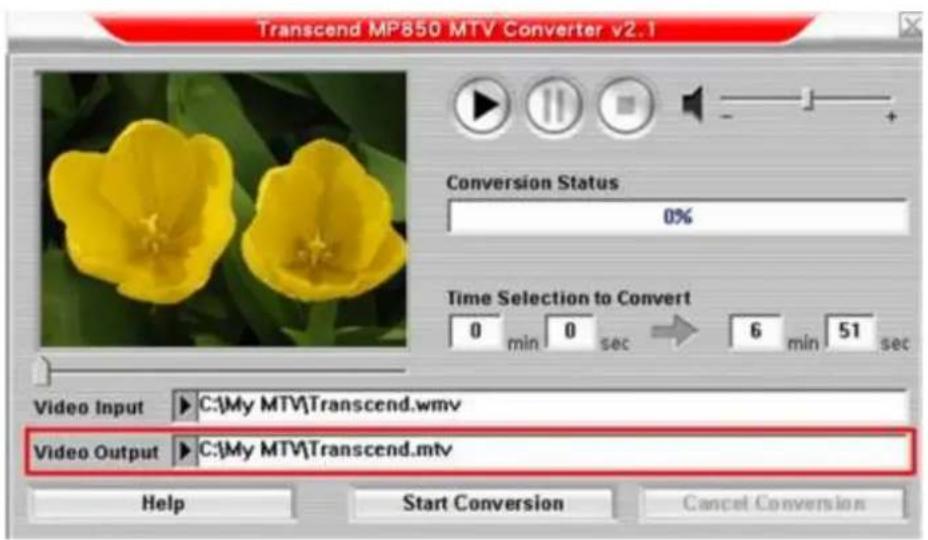
- Click the triangle button next to "Video Output" button to select a destination for the converted file.
text_image
Transcend MP850 MTV Converter v2.1 Conversion Status 0% Time Selection to Convert 0 min 0 sec → 6 min 51 sec Video Input ▶C:\My MTV\Transcend.wmv Video Output ▶C:\My MTV\Transcend.mtv Help Start Conversion Cancel ConversionFigure 14: Select a Destination for the '.mtv' file
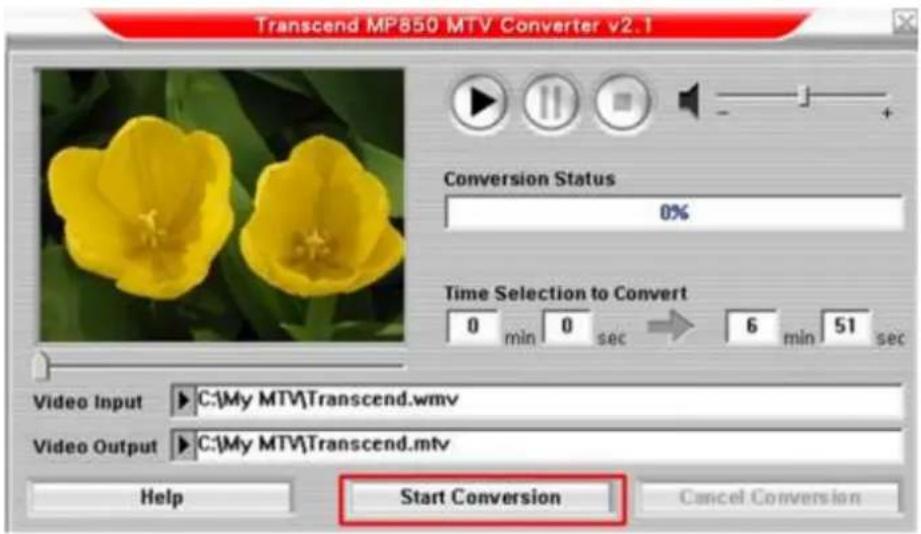
- Click "Start Conversion."
text_image
Transcend MP850 MTV Converter v2.1 Conversion Status 0% Time Selection to Convert 0 min 0 sec → 6 min 51 sec Video Input ▶C:\My MTV\Transcend.wmv Video Output ▶C:\My MTV\Transcend.mtv Help Start Conversion Cancel ConversionFigure 15: Start Conversion
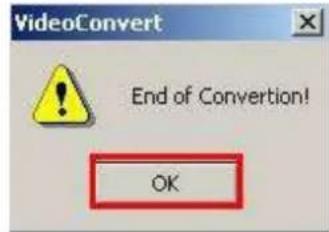
- When the process is finished, a "Conversion Complete" message window will appear. Click the "OK" button to return to the MTV Converter main window and convert another file.
text_image
VideoConvert End of Conversion! OKFigure 16: Conversion Complete
- Click the "X" in the upper-right hand corner of the MTV Converter window to exit.
- Transfer the newly created .MTV file to the MP850 (See Transfering Files to the MP850)

The MP850 only supports “.MTV” video files. You must use the Transcend MTV Converter to convert your MPEG4, DivX, AVI, or xVID video files to the “.mtv” format.
Slide Show Maker
To view slideshows on your MP850, you must first create an ".SLS" slideshow using the Slide Show Maker.
- Run the program (Start > Programs > Transcend > MP850 > Slide Show Maker)
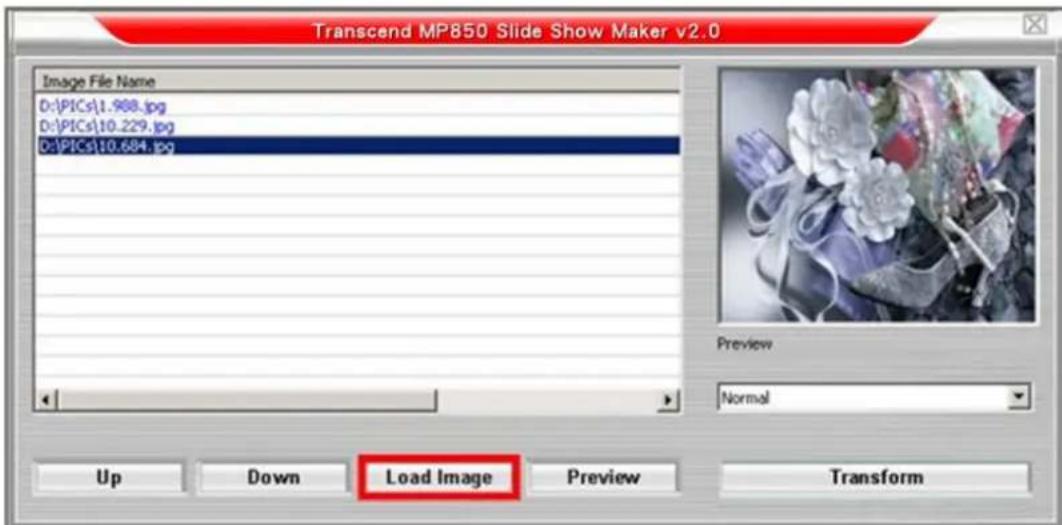
- Click the "Load Image" button.
text_image
Transcend MP850 Slide Show Maker v2.0 Image File Name D:\PICs\1.988.jpg D:\PICs\10.229.jpg D:\PICs\10.684.jpg Preview Normal Up DownLoad Image Preview TransformFigure 17: Slideshow Maker main screen
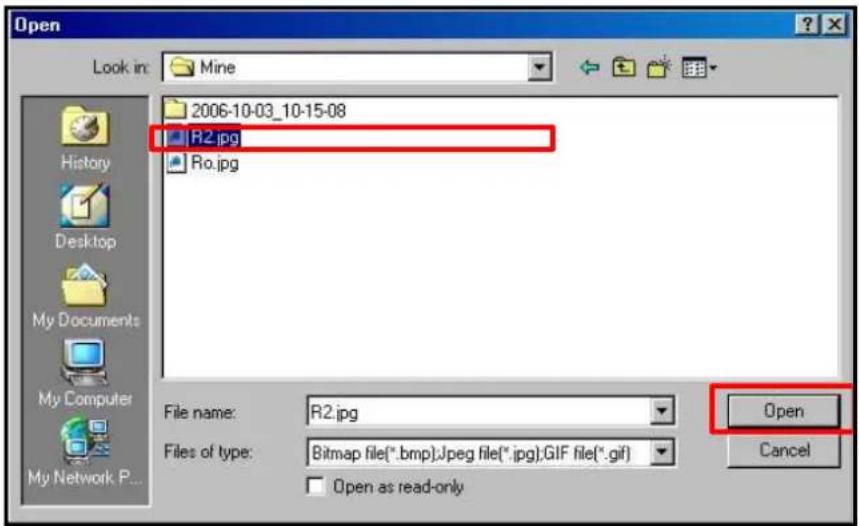
- Select the ".JPG," ".BMP," or ".GIF" image files that you want to include in your slideshow and click "Open."
text_image
Open Look in: Mine 2006-10-03_10-15-08 R2.jpg Ro.jpg File name: R2.jpg Files of type: Bitmap file(*.bmp);Jpeg file(*.jpg);GIF file(*.gif) Open Cancel Open as read-onlyFigure 18: Select image files for conversion
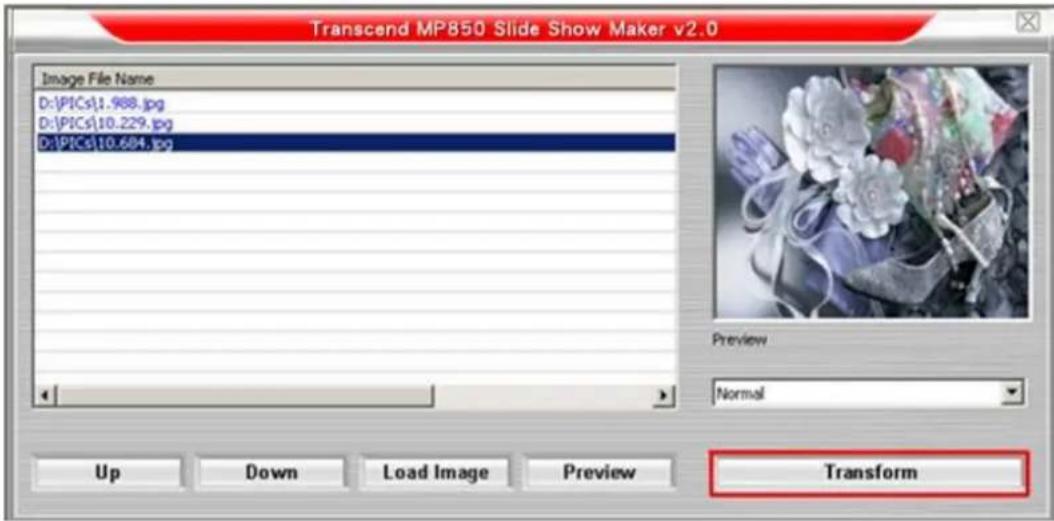
- Choose a slideshow transition effect from the drop-down menu underneath the Preview window. Available effects are "Circle," "Normal," "Shutter(Left to Right), and "Shutter(Right to Left)"
- Click the "Preview" button to see a preview slideshow of your selected images.
- Use the "Up" and "Down" buttons to change the display order of your images.
- After you have loaded all images that you want to include in the slideshow, click the "Transform" button.
text_image
Transcend MP850 Slide Show Maker v2.0 Image File Name D:\PICs\1.988.jpg D:\PICs\10.229.jpg D:\PICs\10.684.jpg Preview Normal Up DownLoad Image Preview TransformFigure 19: Preview and Start Converting
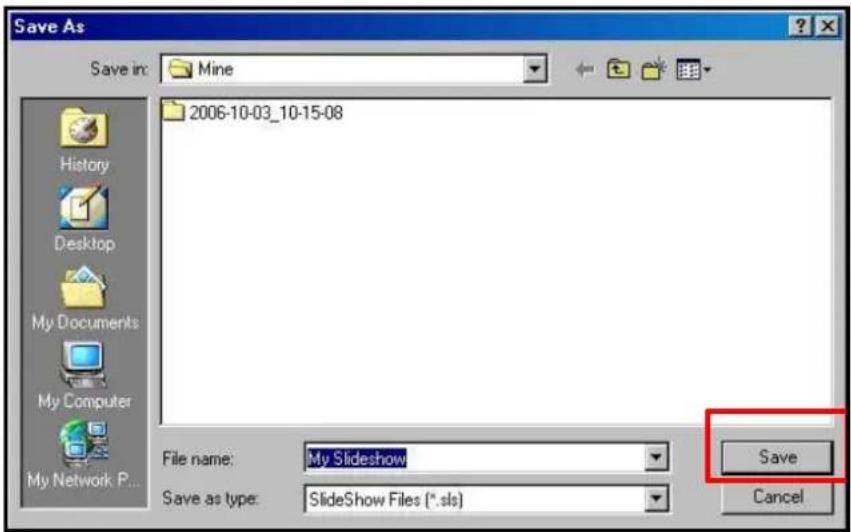
- The Save As window will appear. Choose a name for your slideshow and click "Save." The slideshow will be saved in the MP850's "SLS" folder. If your MP850 is not connected, you can choose a different save location and transfer the file to your MP850 at a later time.
The MP850 only supports one SLS slideshow at a time. To ensure the T.shoic finds your slideshow, remove all other .SLS files from the MP850's SLS folder except for your newly created .SLS file.
text_image
Save As Save in: Mine 2006-10-03_10-15-08 File name: My Slideshow Save as type: SlideShow Files (*.sls) Save CancelFigure 20: Select a Destination for the '.sls' file
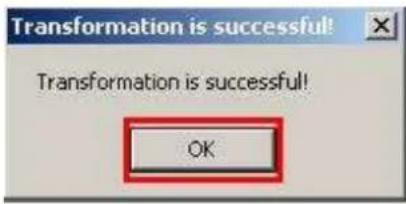
- After the slideshow is successfully created, a Transfer Complete message will appear. Click the "OK" button.
text_image
Transformation is successful! Transformation is successful! OKFigure 21: Transfer Complete
10. Click the "X" in the upper-right hand corner of the Slide Show Maker window to exit.
11. Transfer the newly created .SLS file to the MP850 (See Transfering Files to the MP850)

The MP850 will only display "sls" file format slideshows. You must use first the Slideshow Maker software to convert your ".JPG," ".BMP," or ".GIF" photo files to the ".SLS" format.
■ Transcend Digital Music Player Utility
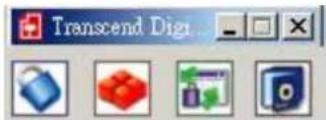
The Transcend Digital Music Player Utility has four functions:
| PC-Lock | (Use the MP850 to temporarily lock your computer) |
| Partition | (Divide your MP850's memory into Public and Private areas) |
| Login/out | (Log in to the Private area to access your personal files) |
| Password | (Change the password to the Private area on your MP850) |
text_image
Transcend DigitFigure 22: Transcend Digital Music Player Utility Menu
The Transcend Digital Music Player Utility is only supported in Windows® Me, 2000, XP and Vista
The Transcend Digital Music Player Utility is not supported on Mac™, or Linux™ Operating Systems
To use the Transcend Digital Music Player Utility, you must log in to the Windows® OS with Administrator rights.
PC-Lock
With PC-Lock, you can use your MP850 as a key to temporarily lock your computer while you are away.
- Start the Transcend Digital Music Player Utility (start -> Programs -> Transcend -> Digital Music Player Utility)
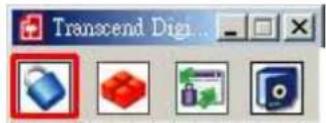
- Click on the "PC-Lock" button in the Transcend Digital Music Player Utility window.
text_image
Transcend Digi...Figure 23: Transcend Digital Music Player Utility – PC-Lock
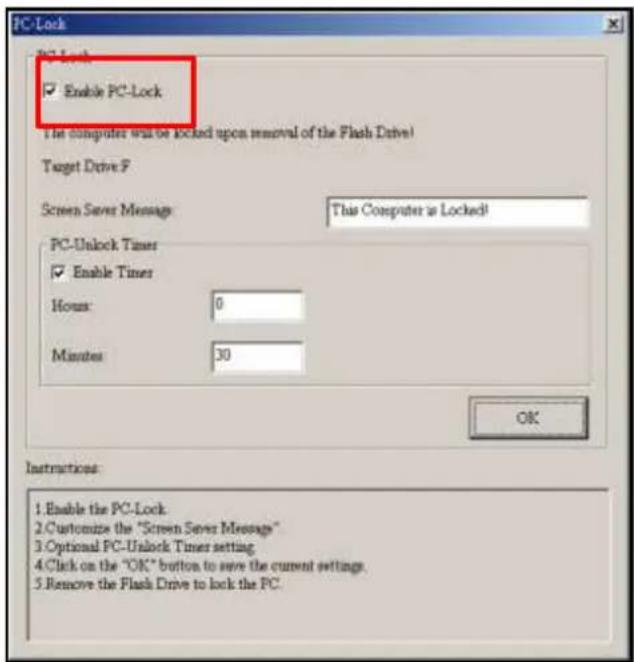
- The PC-Lock Settings window will appear. Select the "Enable PC-Lock" checkbox.
text_image
PC-Lock Enable PC-Lock The computer will be locked upon removal of the Flash Drive! Target Drive F Screen Save Messages This Computer is Locked! PC-Unlock Timer Enable Timer Hours: 0 Minutes: 30 OK Instructions: 1. Enable the PC-Lock. 2. Customize the "Screen Save Messages" 3. Optional PC-Unlock Timer setting 4. Click on the "OK" button to save the current settings. 5. Remove the Flash Drive to lock the PC.Figure 24: Enable PC-Lock
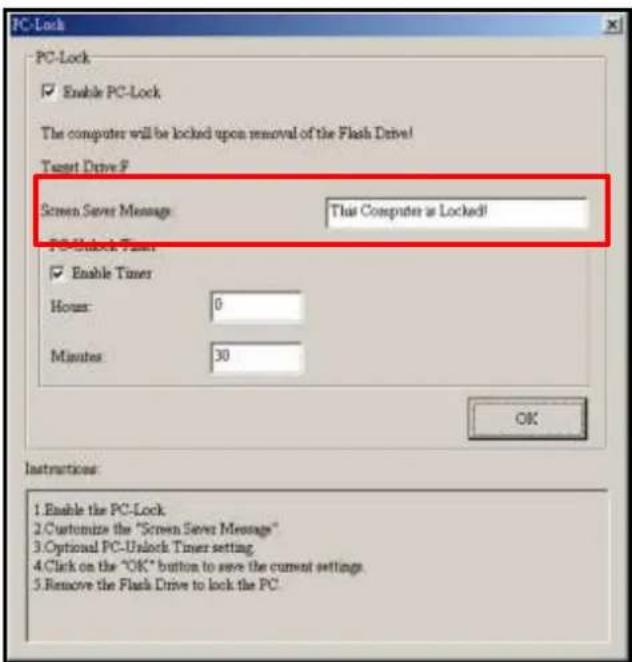
- You can change the text displayed on the screen while the computer is locked in the "Screen Saver Message" field.
text_image
PC-Lock PC-Lock Enable PC-Lock The computer will be locked upon removal of the Flash Drive! Target Drive F Screen Server Message This Computer is Locked! PC-Lock Timer Enable Timer Hours: 0 Minutes: 30 OK Instructions 1. Enable the PC-Lock. 2. Customize the "Screen Server Message" 3. Optional PC-Unlock Timer setting 4. Click on the "OK" button to save the current settings. 5. Remove the Flash Drive to lock the PCFigure 25: PC-Lock Screen Saver Text
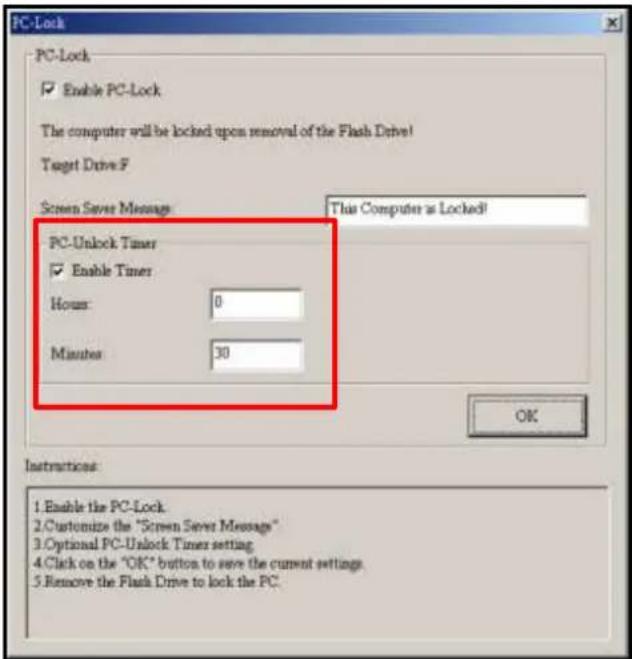
- You can adjust the period of time that your computer will be locked for by checking the "Enable Timer" box. Set the Unlock Timer in Hours and Minutes. When this time elapses, your computer will automatically unlock and be available for use.
text_image
PC-Lock Enable PC-Lock The computer will be locked upon removal of the Flash Drive! Target Drive F Screen Save Messages This Computer is Locked! PC-Unlock Timer Enable Timer Hours: 0 Minutes: 30 OK Instructions: 1. Enable the PC-Lock. 2. Customize the "Screen Save Messages" 3. Optional PC-Unlock Timer setting 4. Click on the "OK" button to save the current settings 5. Remove the Flash Drive to lock the PC.Figure 26: PC-Lock Timer
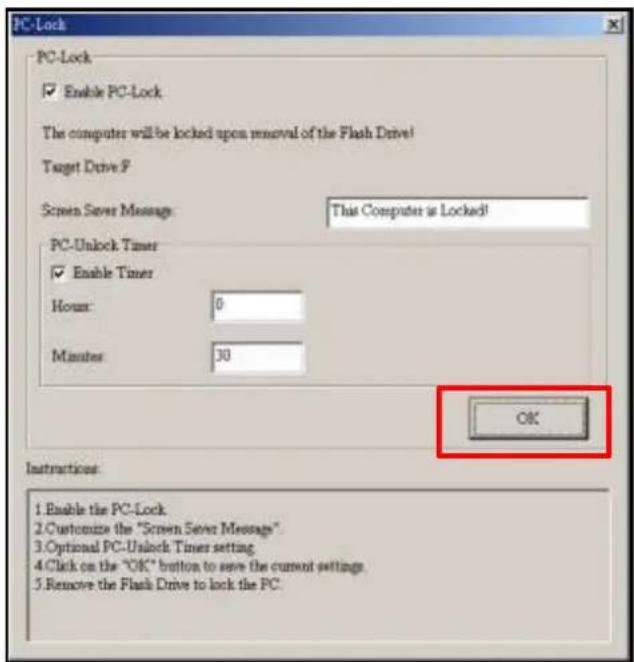
- Click on the "OK" button to start PC-Lock.
text_image
PC-Lock PC-Lock Enable PC-Lock The computer will be locked upon removal of the Flash Drive! Target Drive F Screen Save Message: This Computer is Locked! PC-Unlock Timer Enable Timer Hours: 0 Minutes: 30 OK Instructions 1. Enable the PC-Lock 2. Customize the "Screen Save Messages" 3. Optional PC-Unlock Timer setting 4. Click on the "OK" button to save the current settings 5. Remove the Flash Drive to lock the PC.Figure 27: Start PC-Lock
When PC-Lock is enabled, your computer will be locked when the MP850 is unplugged
While your computer is locked, the screen will display the "Screen Saver Message" text.
- To unlock the computer, you must reconnect your MP850 to your computer. The PC-Lock message text will disappear and you will be free to use your computer again. The computer will also unlock itself automatically when the lock timer expires.
Partition
This feature allows you to create a secure password-protected area on the MP850 for your personal files. You
can adjust the size of Public and Private areas, and add a password to protect the Private area. Data stored in the Private area will be kept secure and can only be accessed with your password.

WARNING! Creating a Private area or adjusting the Public/Private partition size will erase all data on MP850! Please back up your data before using this feature.
- Connect the MP850 to your computer.
- Start the Transcend Digital Music Player Utility (start -> Programs -> Transcend -> Digital Music Player Utility)
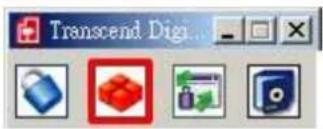
- Click on the "Partition" button in the Transcend Digital Music Player Utility window (or the Transcend Digital Music Player Utility icon in the Task Bar)
text_image
Transcend Digi...Figure 28: Transcend Digital Music Player Utility Partition
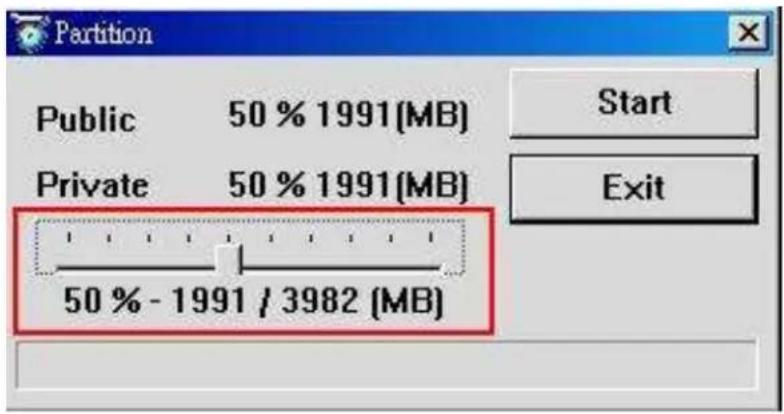
- The Partition window will appear. Move the slider left and right to adjust the size of the Public and Private areas on your MP850.
text_image
Partition Public 50 % 1991(MB) Private 50 % 1991(MB) 50 % - 1991 / 3982 (MB) Start ExitFigure 29: Create a Partition
- Click the "Start" button to complete the Partition & Security setup. The process may take a few minutes.
- You must unplug your MP850 when the process is finished.
Log In / Log Out
This function lets you access the files stored on the Private partition of your MP850. If you do not log in, Your protected files will be invisible.
- Connect the MP850 to your computer.
- Start the Transcend Digital Music Player Utility (start -> Programs -> Transcend -> Digital Music Player Utility)
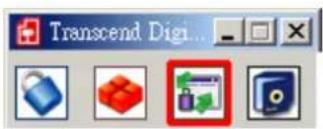
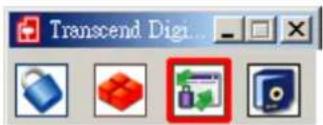
- Click on the "Login/Logout" button in the Transcend Digital Music Player Utility window.
text_image
Transcend Digi...Figure 31: Transcend Digital Music Player Utility Login/out
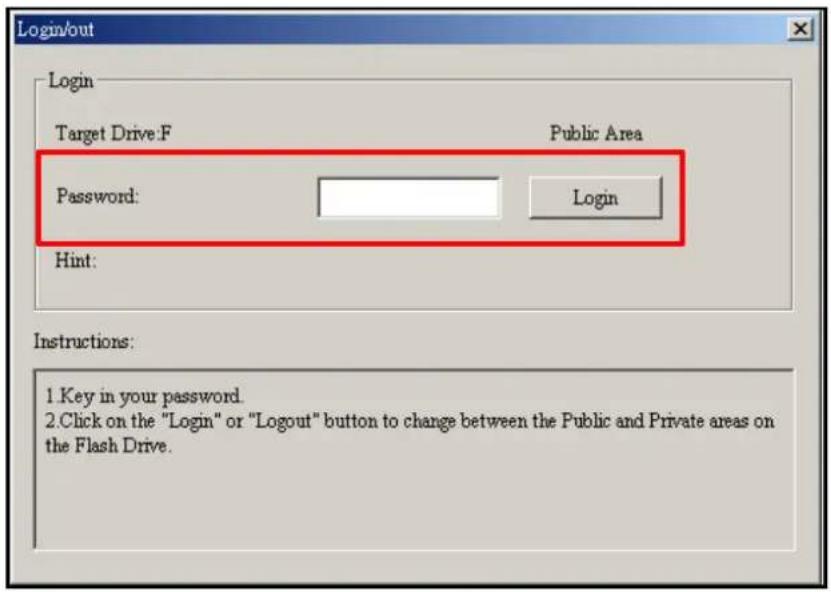
- The Login/out window will appear. Input your password and click "Login."
text_image
Login/out Login Target Drive:F Public Area Password: Login Hint: Instructions: 1.Key in your password. 2.Click on the "Login" or "Logout" button to change between the Public and Private areas on the Flash Drive.Figure 32: Enter your password
- When successfully logged in, the "Public Area" message will change to "Private Area." The files in your Private Area will no longer be hidden and can be accessed normally.
- When you are finished using the Private Area and no data is being transferred between the MP850 and the computer, click on the "Logout" button to switch back to the Public Area.
text_image
Transcend Digi...Figure 33: Transcend Digital Music Player Utility Logout
Password
- Start the Transcend Digital Music Player Utility (start -> Programs -> Transcend -> Digital Music Player Utility)
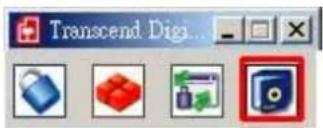
- Click on the "Password" button in the Transcend Digital Music Player Utility window.
text_image
Transcend DigiFigure 34: MP850Utility – Password
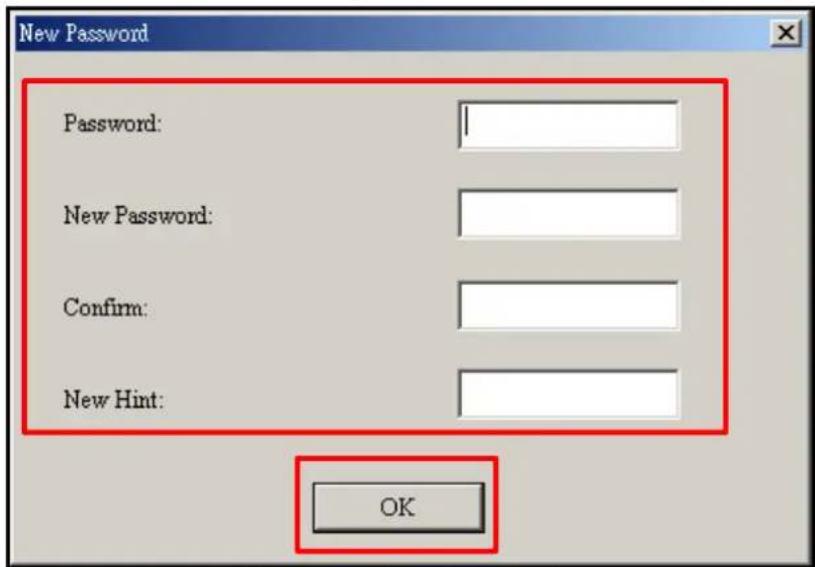
- The New Password window will appear. Input your current Password and New Password, then confirm the new password. Use the "New Hint" field to give yourself a hint in case you forget your new password.
text_image
New Password Password: New Password: Confirm: New Hint: OKFigure 35: Change Password
Forgotten Passwords
If you forget your password, use the password hint to help you remember your password. If you are still unable to remember your password, you will have to use the Partition function to reset the Public and Private areas. THIS WILL ERASE ALL DATA ON THE MP850. Although the data in the Private area will be lost, you can back up all data on the Public area before using the Partition function.
Troubleshooting
If a problem occurs with your MP850, please first check the information listed below before taking your MP850 for repair. If you are unable to remedy a problem from the following hints, please consult your dealer, service center, or local Transcend branch office. We also have FAQ and Support services on our websites.
Software CD does not auto-run in Windows®
Go to the Device Manager in the Control Panel and enable the Auto-Insert function for the CD-ROM drive. Alternatively, you can manually run the "MP850.EXE" file on the software CD.
Operating system cannot detect the MP850
Check the following:
- Is your MP850 properly connected to the USB port? If not, unplug it and plug it in again.
- Is your MP850 connected to the Mac keyboard? If yes, unplug it and plug it into an available USB port on your Mac Desktop.
- Is the USB port enabled? If not, refer to your computer (or motherboard) user's manual to enable it.
The MP850 will not Power ON
Check the following:
- Is the MP850 connected to your computer? If yes, unplug it.
- Is the LOCK switch set to "LOCK"? If yes, set it to the "OFF" position.
- Is the battery out of power? If yes, please recharge the battery.
Cannot transfer MP3, WMA, WMA-DRM10, or WAV files to the MP850
As required, uninstall and re-install the driver. If this doesn't work, try Resetting the unit.
Buttons aren't working
Is the LOCK switch set to "LOCK"? If yes, set it to the "OFF" position.
Cannot hear track playback
- Have you downloaded any music files onto the MP850? If no, then you must first do so from your computer or the Internet. (Only Mpeg I Layer 3 and WMA files compressed at a rate of 32Kbps–320Kbps are supported.)
- Are the earphones properly connected to the earphone jack? If not, reconnect them.
- Is the volume loud enough? If not, increase the volume level until the music can be heard.
Track name does NOT display correctly on the screen
- The default language of the MP850 is English. Please set the language option first.
- ID3 tag information has display priority on the screen of the MP850. You could modify the ID3 tag by using Windows Media Player or Winamp.
- If the ID3 tag is empty, just the file name will be displayed on the screen.
Cannot enter the RECORD Mode
To make sure the recorded file will not be lost, two safety mechanisms are provided.
- If the remaining battery capacity is less than 10%, you cannot enter the RECORD Mode.
- During recording, if the remaining battery capacity goes below 10% the MP850 will automatically save the recording.
Track playback sounds intermittent
Plug the earphones into the earphones jack again to make sure they are properly connected.
MP850 Powers OFF automatically
MP850 features a SLEEP Mode, which acts as a Power Saving feature. You can preset your MP850 to Power OFF automatically after 15, 30, or 60 minutes. Please refer to the "Sleep" section in SETTINGS.
MP850 just isn't working properly
If your MP850 ever stops working properly, or locks up, try Powering it ON and OFF a few times, if this does not correct the problem you can Reset the unit by pressing the "Reset" button for 3 to 5 seconds.
Cannot find the file that was just copied to the MP850
Re-copy the file and refer to the “Disconnecting from a Computer” section to remove the MP850 after the copy process is completed.
A File that was just deleted still appears
Re-delete the file and refer to the “Disconnecting from a Computer” section to remove the MP850 after the delete process is completed.
MP850 cannot operate after formatting in Windows®
Formatting the MP850 using the “Quick Format,” or “Full Format” option in Windows ^® erases the default format of the MP850. To retrieve the default format, you must link to http://www.transcendusa.com/ and download a Firmware Update for your MP850.
How do I find out what Windows Media Player version I am using?
- Open your Windows Media Player program.
- Click on the "Help" menu and select the "About Windows Media Player" option.
- The version of your Windows Media Player will be displayed on the computer screen.
Cannot listen to DRM music on my MP850
- The MP850 only supports WMA-DRM10 music files, is this the file type you are using?
- You must use Windows Media Player 10 to transfer and synchronize your WMA-DRM10 music files with the MP850's MTP Folder.
Cannot play a Video file on my MP850
The MP850 only supports “.MTV” Video files, please see the “Transcend Multimedia Converter” section on how to convert your videos to the MTV format.
Having problems converting Video files with the Transcend Multimedia Converter
First, download DirectX 9.0 (or later) onto your computer. Next, open the Video file on you computer that you had a problem converting and try playing it, if the Video does not play, then this means that the Video Codec you are trying to convert has a compatibility issue with your PC and cannot be converted using the Transcend Multimedia Converter.
Cannot view Photo files on my MP850
The MP850 only supports “.JPG,” “.BMP” Photo files, please ensure that the photo is one of these file types.
Cannot read E-book files on my MP850
The MP850 only supports “.TXT” E-book files, please ensure that the E-book is this file type.
Lyrics Sync: Why can't I see the words of the song I am listening to?
For detailed Lyrics Sync instructions, please link to the FAQ section on our website http://www.transcendusa.com/Support/FAQ/
| 1. Size (L x W x H): | 81.5 mm × 41.5 mm × 12.7 mm |
| 2. Weight: | 48g (with Li-ion battery) |
| 3. Music Formats: | MP3 WMA and WMA-DRM10 (Subscription music) |
| 4. Video Formats | MTV |
| 5. Photo Formats | JPG, BMP |
| 6. Recording Format: | IMA_ADPCM (WAV) |
| 7. Estimated Battery Life: | 22 hours Music playback (fully charged battery) |
| 8. Compression Rates: | 32Kbps to 320Kbps |
| 9. Data Retention: | Up to 10 years |
| 10. Erase Cycles: | ≥ 100,000 times |
| 11. Signal-to-Noise Ratio: | ≥ 90dB |
| 12. Certificates: | CE, FCC, BSMI |
| 13. Warranty: | 2-years |
Ordering Information
| Device Description | Memory Size | Transcend P/N |
| MP850 MP3 Music Player | 4GB | TS4GMP850 |
| MP850 MP3 Music Player | 8GB | TS8GMP850 |
Recycling & Environmental Considerations
natural_image
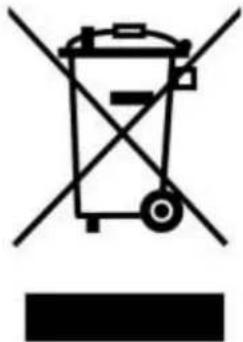
Symbol of a trash bin crossed with diagonal lines, no text or numbers presentRecycling the Product (WEEE): Your product is designed and manufactured with high quality materials and components, which can be recycled and reused. When you see the crossed-out wheel bin symbol attached to a product, it means the product is covered by the European Directive 2002/96/EC:
Never dispose of your product with other household waste. Please inform yourself about the local rules on the separate collection of electrical and electronic products. The correct disposal of your old product helps prevent potential negative consequences on the environment and human health.
natural_image
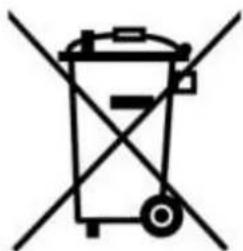
Simple line drawing of a trash bin with crossed x- and y-axes (no text or symbols)Battery Disposal: Your product contains a built-in rechargeable battery covered by the European Directive 2006/66/EC, which cannot be disposed of with normal household waste.
Please inform yourself about the local rules on separate collection of batteries. The correct disposal of batteries helps prevent potentially negative consequences on the environment and human health.
For products with non-exchangeable built in batteries: The removal of (or the attempt to remove) the battery invalidates the warranty. This procedure is only to be performed at the end of the product's life.
Transcend Limited Warranty
“Above and Beyond” is the standard we set ourselves for customer service at Transcend. We consistently position ourselves to be significantly above the industry norm, which is all part of our commitment to Customer Satisfaction.
All Transcend information, Inc. (Transcend) products are warranted and tested to be free from defects in material and workmanship and to conform to the published specifications. During the warranty period should your Transcend MP850 fail under normal use in the recommended environment due to improper workmanship or materials, Transcend will repair the product or replace it with a comparable one. This warranty is subject to the conditions and limitations set forth herein.
Duration of Warranty: The Transcend MP850 is covered by this warranty for a period of two (2) years from the date of purchase. Proof of purchase including the date of purchase is required to collect on the warranty. Transcend will inspect the product and decide whether to repair or replace it. Transcend reserves the right to provide a functional equivalent product, or a refurbished replacement product.
Limitations: This warranty does not apply to product failure caused by accidents, abuse, mishandling, improper installation, alteration, acts of nature, improper usage, or problems with electrical power. In addition, opening or tampering with the product casing, or any physical damage, abuse or alteration to the product's surface, including all warranty or quality stickers, product serial or electronic numbers will also void the product warranty. Transcend is not responsible for recovering any data lost due to the failure of a flash memory device. Transcend's MP850 must be used with devices that conform to the recommended industry standards. Transcend will not be liable for damages resulting from a third party device that causes the Transcend MP850 to fail. Transcend shall in no event be liable for any consequential, indirect, or incidental damages, lost profits, lost business investments, lost goodwill, or interference with business relationships as a result of lost data. Transcend is also not responsible for damage or failure of any third party equipment, even if Transcend has been advised of the possibility. This limitation does not apply to the extent that it is illegal or unenforceable under applicable law.
Disclaimer: The foregoing limited warranty is exclusive. There are no other warranties, including any implied warranty of merchantability or fitness for a particular purpose. This warranty is not affected in any part by Transcend providing technical support or advice. Please read Transcend's Warranty Policy in full to understand your rights.
Transcend Warranty Policy: http://www.transcendusa.com/Support/Warranty.asp
Online Registration: To expedite the warranty service, please register your Transcend Product within 30 days of purchase.
Register online at http://www.transcendusa.com/registration
o All specifications are subject to change without notice.