
Akoya E6412 - Laptop MEDION - Free user manual and instructions
Find the device manual for free Akoya E6412 MEDION in PDF.


User questions about Akoya E6412 MEDION
0 question about this device. Answer the ones you know or ask your own.
Ask a new question about this device
Download the instructions for your Laptop in PDF format for free! Find your manual Akoya E6412 - MEDION and take your electronic device back in hand. On this page are published all the documents necessary for the use of your device. Akoya E6412 by MEDION.
USER MANUAL Akoya E6412 MEDION
1. About these Instructions .... 5
1.1. Symbols and Key words used in these Instructions .... 5
1.2. Proper Use....6
1.3. Declaration of Conformity ....6
2. Safety Instructions
2.1. Dangers for children and people with reduced ability to operate electronics 7
2.2. Operational Safety....7
2.3. Never Carry Out Repairs Yourself 9
2.4. Data Backup....9
2.5. Setup Location....9
2.6. Environmental Requirements 10
2.7. Ergonomics....11
2.8. Connecting....12
2.9. Cabling....13
2.10. Information about the Touchpad....14
2.11. Notes on the integrated battery....14
2.12. Protecting the Display 15
3. Included with your Notebook.... 16
4. Views....17
4.1. Open Notebook....17
4.2. Front View....18
4.3. Left Side....18
4.4. Right Side....18
4.5. Operating and Status LEDs....19
5. First Use 20
6. Power Supply 21
6.1. On/Off Switch....21
6.2. Mains Power 21
6.3. Battery Mode....23
6.4. Power Management (Power Options) 24
7. Display 26
7.1. Opening and Closing the Display 26
7.2. Touch screen (optional) 26
7.3. Screen Resolution....28
7.4. Appearance and Customisation ....29
7.5. Connecting an External Monitor ....30
8. Data Input.... 31
8.1. Keyboard....31
8.2. Touchpad....33
9. Hard Drive 3
9.1. Important Directories 35
10. Optical Drive 36
10.1. Inserting a Disc 36
10.2. Playing/Reading Discs 37
10.3. Regional Playback Information for DVDs 37
10.4. Issues Relevant to the Burner 38
11. Sound System.... 39
11.1. External Audio Connections ....39
12. Network Operation 40
12.1. What is a Network? 40
12.2. Wireless LAN (Wireless Network) 40
12.3. Bluetooth....41
12.4. Flight Mode....42
13. Multimedia Card Reader 42
13.1. Inserting a Memory Card ....42
13.2. Removing Memory Cards ....42
- Webcam 43
- USB Port 43
- Securing Your Notebook 43
16.1. Password Setting (Power-on) 43
16.2. Kensington Security Lock 43
17. Software 44
17.1. Getting to Know Windows 8....44
17.2. Windows ^® Activation 44
17.3. Windows 8 – What's New ....45
17.4. Overview....47
17.5. Windows® 8 Start Screen ....49
17.6. Windows® 8 Desktop ....50
17.7. Using the Search Function 52
17.8. Windows ^® 8 Power On/Off Functions .....53
17.9. Control Panel Settings....53
17.10. Resetting the Notebook to its Factory Settings....54
17.11. UEFI firmware configuration....55
17.12. Windows ^® 8 – Help and Support ....55
18. FAQ – Frequently Asked Questions 56
19. Customer Service 57
19.1. What To Do In Case of Hardware Problems ....57
19.2. Faults and Possible Causes ....57
19.3. Do You Need More Help? 58
19.4. Driver Support 58
19.5. Transport....59
19.6. Maintenance....60
20. Upgrading/Modifying and Repair 60
20.1. Notes for Service Technicians ....60
20.2. Information on Laser Radiation 61
21. Recycling and Disposal....62
22. European EN 9241-307 Class II Standard 62
22.1. FCC Compliance Statement ......64
23. Legal Notice
24. Index 65
Personal Information
Please append the following to your proof of ownership:
Serial number
Date of purchase ....
Place of purchase ....
You will find the serial number on the underside of the Notebook. Where applicable, also copy the number on your warranty documents.
Target Group
This operating manual is intended to be read by both first-time and experienced users. Regardless of any possible professional use, this Notebook is designed for use in a private household. The entire family will be able to enjoy the wide variety of applications it offers.
Quality
We select our components with a close eye to functionality, ease of use, safety and reliability. Thanks to our ideally balanced hardware/software concept we are able to offer you a state-of-the-art Notebook that you will enjoy whether you are working or at play. Thank you for purchasing our products. We are delighted to welcome you as our new customer.
Trademarks: MS-DOS ^® and Windows ^® 8 are registered trademarks of the Microsoft ^® corporation. Intel, the Intel Logo, Intel Inside, Intel Core, Notebook, and Core Inside are trademarks of Intel Corporation in the U.S. and/or other countries.
HDMI® , the HDMI logo and the name High-Definition Multimedia Interface are registered trademarks of HDMI Licensing LLC.
Other trademarks are the property of their respective owners.
1. About these Instructions

Before using the device for the first time, please read these operating instructions carefully, paying special attention to the safety notices.
This device should only be used as designated and as described in these instructions.
Please keep these instructions in a safe place for future reference.
Always include these instructions if passing the device on.
1.1. Symbols and Key words used in these Instructions
 | DANGER!Warning of immediate risk of fatal injury!WARNING!Warning: possible mortal danger and/or serious irreversible injuries!CAUTION!Warning: possible light or moderate injuries! |
 | CAUTION!Please follow the guidelines to avoid injuries and/or property damage. |
 | PLEASE NOTE!Additional information on using the device |
 | PLEASE NOTE!Please follow the guidelines in the operating instructions. |
 | WARNING!Warning: danger of electric shock! |
 | WARNING!Warning: danger due to excessive volume! |
| • Bullet point/information on operating steps and results | |
1.2. Proper Use
This device is designed for the use, management and editing of electronic documents and multimedia content, as well as for digital communication. The device is intended for private use only and not for industrial/commercial use.
Please note that we shall not be liable in cases of improper use:
- Do not modify the device without our consent and do not use any auxiliary equipment which we have not approved or supplied.
- Use only spare parts and accessories which we have supplied or approved.
- Follow all the instructions in this instruction manual, especially the safety information. Any other use is deemed improper and can cause personal injury or damage to the product.
- Do not use the device in areas where there is a risk of explosion. This includes e.g. tank farms, fuel storage depots or areas in which solvents are processed. It is also not permitted to use this device in those areas where the air is polluted with fine particles (e.g. flour dust or sawdust).
- Do not use the device in extreme environmental conditions.
1.3. Declaration of Conformity
This product is supplied with the following wireless features:
• Wi-Fi
- Bluetooth
Medion AG hereby declares that this product conforms to the following European requirements:
• R&TTE Directive 1999/5/EC
• Ecodesign Directive 2009/125/EC
• RoHS Directive 2011/65/EU
Should your device work with a network connection in the 5 GHz frequency range of the inbuilt wireless LAN solution, then it can only be used inside buildings in all EU countries.*
Full declarations of conformity are available at www.medion.com/conformity.

text_image
C€2. Safety Instructions
2.1. Dangers for children and people with reduced ability to operate electronics
- This device is not intended for use by people (including children) with reduced physical, sensory or mental abilities or for those without experience and/or knowledge, unless they are supervised by a person responsible for their safety or they have been instructed in its use.
- Children should be supervised to ensure that they do not play with the device. Children should not be allowed to use this device without supervision.
- Keep the device and its accessories out of the reach of children.

DANGER!
Keep plastic packaging out of the reach of children. There is a risk of suffocation.
2.2. Operational Safety
Please read this section carefully and follow all instructions given. The instructions will help you to operate the Notebook reliably and increase its service life.
- Never open the housing of the Notebook, battery or mains adapter! This could result in an electric shock or even ignite a fire which will damage your Notebook.
- Optical drive (CD/CDRW/DVD) constitute class 1 laser equipment providing these devices are contained in a sealed Notebook housing. Do not remove the drive cover as invisible laser radiation may escape.
-
Do not insert anything into the Notebook through the slots and openings. This could result in an electric shock or even ignite a fire which will damage your Notebook.
-
The slots and openings on the Notebook are for ventilation purposes. Do not cover these openings as this could cause the device to overheat.
- The Notebook is not intended for use by companies in the heavy industry sector.
- To avoid damage from lightning strikes, do not operate the Notebook during thunderstorms.
- Do not place any objects on top of the Notebook and do not exert pressure on the display. Otherwise, there is a risk that the display may break.
- If the screen breaks, there is a danger of injury. If this happens, pick up the shattered pieces wearing protective gloves and send them to your service centre for professional disposal. Finally, wash your hands with soap, as the pieces may have been contaminated with chemicals.
- Do not fold the display back by an angle of more than 120^ . Exceeding this value may damage the housing or the Notebook. Always hold the display firmly by the middle when folding it back, adjusting the position and closing it. Failure to do so may damage the display. Never use force to open the display.
- To avoid damaging the screen, do not touch it with fingers or sharp objects.
- Never lift the Notebook up by the display as this could break the hinges.
- Should the below occur, switch the Notebook off immediately/do not switch the Notebook on, disconnect the mains plug and contact customer services if
- the mains adapter or the attached power cable or plug is burnt or damaged. Replace faulty mains cables/mains adaptors only with original parts. These parts should not be repaired under any circumstances.
– the Notebook housing is damaged or liquid has penetrated into the device. Have the Notebook inspected by customer services. Otherwise, it may not be possible to operate the Notebook safely. There may be a risk of electric shock and/or harmful laser radiation!
If the notebook gets wet,
- do not switch on.
- disconnect the power cable.
- not switch on until the notebook has dried off completely.
2.3. Never Carry Out Repairs Yourself

WARNING!
Never try to open or repair the device yourself. There is a risk of electric shock.
- If there is a fault, contact the Medion Service Center or other suitable specialist workshop.
2.4.
Data Backup

CAUTION!
Back up your data on external storage media before each update. We do not accept any liability for claims for compensation arising from loss of data or any consequential loss or damage.
2.5. Setup Location
- Keep your Notebook and all connected devices away from moisture and avoid dust, heat and direct sunlight. Non-compliance with these instructions can lead to faults or damage to the Notebook.
-
Do not use the Notebook outdoors because external elements, such as rain, snow, etc., could damage it.
-
Set up and operate all components on a stable, level and vibration-free surface to prevent the Notebook from falling down.
- Do not operate the Notebook or power adaptor for long periods on your lap or any other body part as the heat dissipation on the underside can result in uncomfortable overheating.
- In the first few hours of use new devices can give off a typical, unavoidable but totally harmless smell, which wears off with time. Ventilate the room regularly to prevent odour build-up.
- This device is not suitable for use with VDU workstations.
2.6. Environmental Requirements
- The Notebook is most reliably operated at an ambient temperature between 5^ (+41°F) and 30^ (+86°F) and at a relative humidity between 20% and 80% (without condensation).
- When powered off, the Notebook can be stored at temperatures between 0^ C and 60^ C (+32°F and 140°F).
- During a thunderstorm, disconnect the mains plug and the antenna plug. For extra safety, we recommend using an overvoltage protection device to prevent the Notebook from sustaining damage as a result of power surges or lightning strikes.
- After transporting the Notebook, wait until the device has reached room temperature before switching it on. Large changes in temperature or fluctuations in humidity can cause moisture build-up within the Notebook due to condensation. This can cause an electrical short circuit.
- Keep the original packaging in the event the device needs to be sent in the post.
2.7.
Ergonomics

E NOTE!
Avoid dazzle, reflections and strong bright-dark contrast in order to protect your eyes.
The Notebook should never be placed next to a window because this is the brightest part of the room in daylight. This brightness can make it more difficult for the eyes to adjust to the darker display. The Notebook should always be positioned so that the direction of vision is parallel to the window front. Setting up the Notebook with your back to the window is incorrect as reflections from the bright window on the screen will then be unavoidable. A position looking onto the window is also incorrect as the contrast between the dark screen and the bright daylight can cause problems for the eyes to adjust and result in problems.
The parallel line of vision should also be maintained in relation to artificial lighting equipment.
In other words, the same criteria and principles apply where the workspace is illuminated with artificial light. Where space restrictions make it impossible to set up the screen as described, then correct positioning (rotating, tilting) of the Notebook/screen can prevent dazzling, reflections and excessive bright-dark contrast, etc. In many cases, an improvement can also be achieved by using slats or vertical blinds on the windows, partition walls or by changing the artificial lighting equipment.
2.8. Connecting
Follow the instructions below to connect your Notebook correctly and safely:
2.8.1. Power Supply

DANGER!
Do not open the housing of the mains adapter. There is a risk of electric shock when the housing is open. It does not contain any parts requiring maintenance.
- The socket outlet must be close to the Notebook and easily accessible.
- To disconnect the power supply from your Notebook (via the mains adaptor), pull the mains plug from the power outlet.
- Plug the Notebook's mains adapter into AC 100–240 V\~, 50 - 60 Hz earthed sockets only. If you are not sure about the power supply at the set-up location, please ask your power supplier.
- Only use this notebook and accompanying mains adapter with each other.
- For extra safety, we recommend using an overvoltage protection device to prevent your Notebook from sustaining damage as a result of power surges or lightning strikes.

CAUTION!
Only use this notebook and accompanying mains adapter with each other.

WARNING!
Listening to a device at high volumes for an extended period via headphones/earphones can damage your hearing. Excessive volume when using headphones or earphones can damage your hearing. Before pressing play, set the volume to the lowest setting. Start playback and increase the volume to a comfortable level. Changing the basic settings of the equaliser can also increase the volume and thus cause permanent damage to your hearing. Changing the drivers, software, equaliser, operating system, etc., can also lead to an increase in the volume and thus cause permanent damage to your hearing.
2.9. Cabling
- Position the cables so that they cannot be stepped on or might cause a risk for tripping.
- To avoid damaging the cables, do not place any objects on them.
- Do not connect peripheral devices – such as keyboards, mouse and monitor, etc. – when the Notebook is switched on to avoid damage to the Notebook or the devices. Some devices may also be connected while the computer is running. This is generally the case for devices with a USB connection. In all cases, observe the relevant operating instructions.
- Maintain a distance of at least one metre from sources of high-frequency and magnetic interference (TV sets, loudspeakers, mobile phones, DECT telephones, etc.) in order to avoid malfunctions and data loss.
-
Please note that only shielded cables that are shorter than 3 metres may be connected to the external interfaces of this Notebook. Please only use double-shielded cables for printer cable connections.
-
Do not exchange the supplied cable for another one. Use only the supplied cable as this cable has been extensively tested in our laboratory.
- In addition, when connecting your peripherals only use the connecting cables supplied with those devices.
- Ensure that all connection cables are connected to their corresponding peripheral device to avoid any interference radiation. Disconnect any cables that are not required.
2.10. Information about the Touchpad
- The touchpad is operated with the thumb or another finger and reacts to the energy given out by the skin. Do not use pens or other objects as these can damage your touchpad.
- Dust or grease on the touchpad can affect its sensitivity. Remove the dust or grease from the surface of the touch pad with a strip of adhesive tape.
2.11. Notes on the integrated battery

CAUTION!
Danger of explosion if battery is incorrectly replaced. Replace only with the same or equivalent type recommended by the manufacturer. Dispose of used batteries according to the manufacturer's instructions. Never attempt to disassemble or reassemble. Do not heat up above 60°C (140°F). Do not dispose of in fire or directly short circuit.
This device contains an integrated battery. To increase the lifespan and performance of your battery and also to ensure reliable operation, you should also heed the following instructions:
- Use only the supplied mains adaptor to charge the battery. Make sure (via the notebook display or acoustic signal) that the battery is fully discharged before charging it again.
- Always charge the battery until the battery charging light goes out. Please also observe the information in “Charging the battery” to assess the charge status of your battery.
- The battery is built-in and cannot simply be replaced by the user.
2.12. Protecting the Display
- The display is the most sensitive component part of the notebook as it consists of thin glass. It can break if subjected to too much stress. Do not scratch the cover of the notebook, because it will not be possible to remove any scratches.
- Avoid contact between the display and hard objects (e.g. buttons, wristwatch).
- Do not place any objects on the display.
- Do not allow any objects to drop onto the display.
- Do not pour any fluids into the notebook, as this could damage it.
- Do not scratch the display with your fingernails or hard objects.
- Do not clean the display with chemical cleaning products.
- Clean the display with a soft, dry and lint-free cloth.

PLEASE NOTE!
The surfaces of the device are covered in protective film to prevent scratching during production and transport.
Remove the film once the device has been set up properly and before you use it.
3. Included with your Notebook
Please check that the contents are complete and notify us within 7 days of purchase if any of the following components are missing:
- Notebook
• AC Adapter with Power Cord - OEM version of operating system
• Instruction Manual

DANGER!
Keep packaging material such as plastic film away from children. There is a risk of suffocation if used improperly.
©
4.2. Front View

natural_image
Line drawing of a horizontal electronic device with labeled component 9 (no text or symbols beyond label)9) Multimedia Card Reader
4.3. Left Side
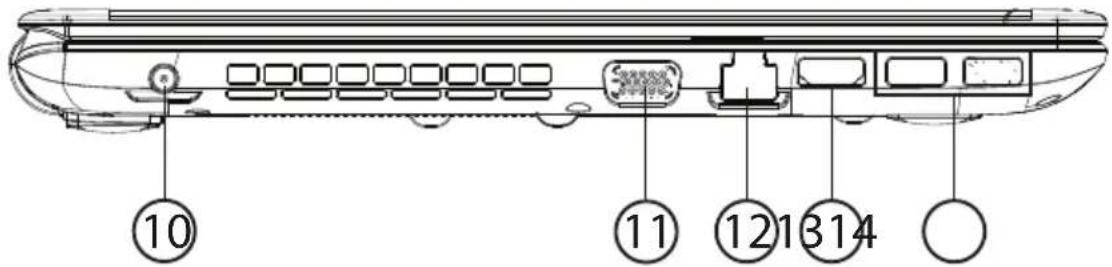
text_image
⑩ ⑪ ⑫ ⑬ ⑭ ⑮ ⑯ ⑰4.5. Operating and Status LEDs
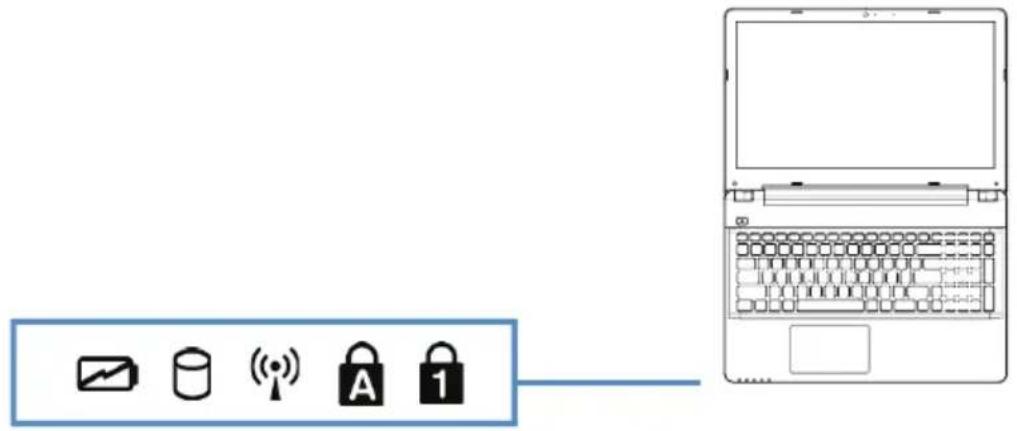
The system displays power supply status and operating modes via LEDs. The operating lights also light up during Notebook activity:
text_image
Diagram showing a laptop connected to icons for file, database, wireless signal, password, and lock, with a blue box containing a folder icon. | Operating IndicatorThis LED will shine if the system is switched on. |
 | Access IndicatorThis LED lights or flashes when the Notebook is accessing the hard disk or the optical drive. |
 | WLAN / Bluetooth LEDThis LED lights when the WLAN /Bluetooth function is activated. |
 | Capital LockThis LED lights when CAPS-Lock has been activated. This sets the keyboard to capital letters. |
 | Num LockThis LED lights when NUM-Lock has been activated. |
5. First Use
To operate your Notebook safety and ensure a long service life, you should read the "Operational safety" chapter at the beginning of this manual. All operating software is already fully preinstalled on the Notebook so there is no need for you to install any more drivers and you can get started right away.
Connect the supplied mains adapter to the Notebook (10). Next, connect the power cable to the adapter and then plug it into a mains socket.
▶ Open up the display to the desired position using your thumb and forefinger. The display should not be folded back by more than 120^ . Always hold the display firmly by the middle when folding it back, adjusting the position and closing it. Failure to do so may damage the display. Never use force to open the display.

PLEASE NOTE!
When first operating your Notebook please ensure that the mains adapter is connected. This is required for Windows ^® 8 to correctly work out the Windows ^® 8 performance index.
▶ Switch the Notebook on by pressing the on/off switch (8). The Notebook will now start and run through various steps.

PLEASE NOTE!
There should be no bootable disk (e.g. the recovery disc) in the optical drive as this will prevent the operating system from being loaded from the hard drive.
The operating system will be loaded from the hard drive. The loading process takes a little longer during the initial setup. Once all the necessary data has been entered, the operating system will be set up. The operating system is fully loaded once the Windows ^® 8 start-up screen appears.

PLEASE NOTE!
The initial installation may take a few minutes. Do not unplug the Notebook from the mains or switch it off during the initial installation. This may adversely affect the installation. Do not switch off the Notebook until after the installation has been completed successfully and the startup screen appears.
6. Power Supply
6.1. On/Off Switch
▶ Open the Notebook and hold the on/off switch down briefly to switch the Notebook on or off.
The operating light indicates the current operating mode. Regardless of the operating system, the Notebook will switch off if the switch is held down for longer than 4 seconds continuously.

CAUTION!
Do not switch your Notebook off while the hard drive or optical drive is being accessed. Otherwise data may be lost. To protect the hard drive, you should always wait for 5 seconds after switching off the Notebook before switching it back on again.
6.2. Mains Power
Your Notebook comes with a universal mains adapter for alternating current which automatically adapts to the available power source. The following values are supported: AC 100–240 V\~/50–60 Hz. Observe the safety information concerning the power supply on pages 12 ff.
The adapter is connected to an AC outlet via a mains cable. The mains adapter DC cable is connected to the left side of the Notebook (10).
The adapter supplies the Notebook with power and also charges the battery. The operating lights on the Notebook provide information about the operating mode. Your battery will also be charged while you work on your Notebook with the mains adapter connected. The mains adapter also consumes power when the Notebook is not connected to it. You should therefore always remove the mains adapter plug from the socket when it is not connected to the Notebook.

CAUTION!
Use only the mains adapter and power cable supplied.
6.2.1. Starting the Notebook
▶ Open up the display as described above and press the on/off switch.
▶ Follow the instructions on the screen. Step-by-step instructions will guide you through the process to be followed.
The welcome procedure takes you through several screens and dialogues.
▶ Select your desired language and then the corresponding country settings.
Licence Agreement
Please read through the licence agreement carefully. It provides important legal information about the use of your software product. To view the text in full, you must slide the scroll bar downwards using the mouse until you reach the end of the document. You accept the licence agreement by checking the I accept the agreement radio button. Only this entitles you to use the product in accordance with the terms and conditions.
After entering a computer name you can connect your Notebook to the Internet immediately on the "Wireless" page (if you already have an appropriate Internet connection set up).
If you choose to skip this point, you can connect to the Internet later via the Windows ^® 8 interface.
If you have already set up an Internet connection, you can now log in to your Notebook using a Microsoft account.
The Microsoft Store allows you to purchase new apps or update previously installed apps.
If you log in on a local account, you can set up a Microsoft account later at any time.
The following animated windows simply contain information about using the new Windows ^® 8 operating system.
No entries of any kind may be made during the animation.
The Windows ^® 8 interface appears after the login process.

PLEASE NOTE!
In the first few days following the initial installation, Windows ^® 8 may update and configure data (e.g. with new updates) which can result in delays in the Notebook shutting down and starting up. For this reason, do not switch the Notebook off prematurely. This may adversely affect the installation.
6.3.
Battery Mode

PLEASE NOTE!
Please charge and discharge the new battery completely two or three times consecutively to ensure that it reaches its optimum performance! Batteries store electrical energy in their cells and then release it again as required.
The service life and performance of your battery depends on careful handling.
The battery should always be completely discharged before charging and then fully charged again to optimise the service life and performance.
Please also take note of the safety instructions on „Safety Instructions“.
6.3.1. Charging the Battery
The battery is charged using the mains adapter. When the mains adapter is connected and switched on, the battery charges automatically regardless of whether or not the Notebook is switched on or not. A complete charge takes a few hours with the Notebook switched off. With the Notebook switched on, the charging process takes significantly longer.

PLEASE NOTE!
The charging process is interrupted if the battery voltage or temperature gets too high.
6.3.2. Discharging the Battery
Operate the Notebook on battery power until it turns itself off due to low battery charge.

PLEASE NOTE!
Be sure to save your open files promptly to prevent any data loss.
6.3.3. Battery Performance
The actual operating time varies depending on the configuration of the power-saving functions. You can configure these to suit your requirements in the Control Panel under System and Security, Power Options. Note: your Notebook consumes more power when running certain applications, e.g. when playing a DVD.
6.3.4. Checking the Battery Charge
To check the current battery charge status, move the cursor over the power icon in the task bar.
In battery mode, the icon is displayed as a battery.
You can obtain more information about settings by double-clicking the icon.

99% available (plugged in, charging)
Select a power plan:
● Balanced
Power saver
Adjust screen brightness More power options

PLEASE NOTE!
If you ignore the low battery warning, your Notebook will shut down.

CAUTION!
Never remove the battery while the Notebook is switched on or before the Notebook has shut down completely as this can lead to data loss.
6.4. Power Management (Power Options)
Your Notebook offers automatic and customisable power-saving and energy functions that can be used to optimise battery life and reduce the overall operating costs.
6.4.1. Power Management Settings
Follow the instructions below to adjust the power management settings:
Drag the mouse cursor to the left corner of the screen and Start icon will show up.
▶ Then click on Power Options.
▶ Select a power plan that meets your personal needs.
The Power icon will present various and relative options.
6.4.2. Sleep Mode
With this setting the content of your Notebook's RAM is preserved while practically all other components of your Notebook are disabled or their power consumption reduced to a minimum. If the notebook is flipped shut it will enter sleep mode. The notebook will automatically come out of sleep mode upon reopening.
▶ You can wake up your computer from power saving mode by pressing the On/Off button.

PLEASE NOTE!
Changes can be made to the sleep settings at any time in the power options.
6.4.3. Energy Saving Tips
- Utilize the Fn and F1 sleep mode keys to turn into power saving mode.
- Tune the settings in Power Options to optimize the computer's power management.
- Always disconnect the AC power cord or uninstall the battery pack or switch off the wall socket if the computer would be left unused for a certain time to achieve zero energy consumption.
The power management feature allows the computer to initiate a lower-power or "Sleep" mode after a period of user inactivity.
To take advantage of these potential energy savings, the power management feature has been preset to behave in the following ways when
the system is operating on AC power:
- Turn off the display after 10 minutes
- Initiate Sleep after 30 minutes
when the system is operating on DC power
- Turn off the display after 5 minutes
- Initiate Sleep after 15 minutes
The notebook exits Sleep when the On/Off button /Sleep button is pressed.
6.4.4. ECO Function
You will be able to save energy and extend the running time of your battery by deliberately activating functions. The ECO Function is switched on or off by means of the Fn + F4 key combination.
7. Display
7.1. Opening and Closing the Display
The special design of the display hinges keeps the display closed without the need for an additional catch.
To open the Notebook, fold the display up to the desired position using your thumb and forefinger.

CAUTION!
Open the display to not more than 120^ . Always hold the display firmly by the middle when folding it back, adjusting the position and closing it. Failure to do so may damage the display. Never use force to open the display.
Opening and closing the display can be assigned different functions in the power options.
7.2. Touch screen (optional)
Your notebook is supplied with a touch-sensitive screen. Please follow the instructions below in order to optimise its use:
7.2.1. Operation
- Do not touch the screen with sharp or pointed objects as these may damage the screen.
- Only touch the screen with a blunt implement or with your finger.
7.2.2. Touch screen gestures
These are the main gestures which allow you to run programs and access settings on your notebook:
| Diagram Command | ||
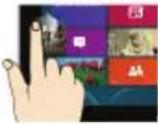 | Swipe from the left edge towards the centreSwipe from the left edge towards the centre and back | Swipe from the left edge towards the centre of the screen to display the last appSwipe from the left edge of the screen to the centre of the screen and back to the left edge again without letting go to display all the apps which are open |
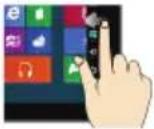 | Swipe from the right edge | Swipe from the right edge of the screen to the centre of the screen to open the Charms bar |
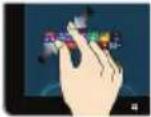 | Zoom out | Bring two fingers together on the touch screen |
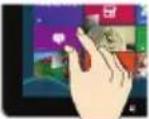 | Zoom in | Spread two fingers apart on the touch screen |
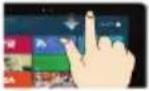 | Swipe down from the top edge | Swipe down from the top edge of the Start screen to display the All Apps barIf you swipe down from the top edge of the screen in an open application then the menu for the application will be displayed |
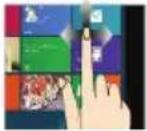 | Swipe in all directions | You can move the screen up and down and to the left and right with one finger |
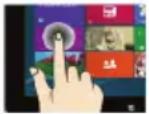 | Hold down | ▸ Press an app tile and hold it down to move the app to a new location▸ Press the top edge of an open app and hold it down to close it and drag the app to the bottom edge of the screen |
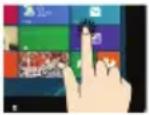 | Tap / double-tap | ▸ Tap on the required app to open it▸ Double-tap in desktop mode to open an application |
7.3. Screen Resolution
If you change to a display with different settings in the Windows® 8 Control Panel, Appearence and Personalisation wizard, the display may not, in certain circumstances, fill the entire screen area. Distortions can also occur, especially for fonts, when enlarging. You can work with a higher resolution, however, if you connect an external monitor with a higher resolution. The Windows® 8 Control Panel, Appearence and Personalisation wizard allows you to adjust the display to the modes supported.
7.4. Appearance and Customisation
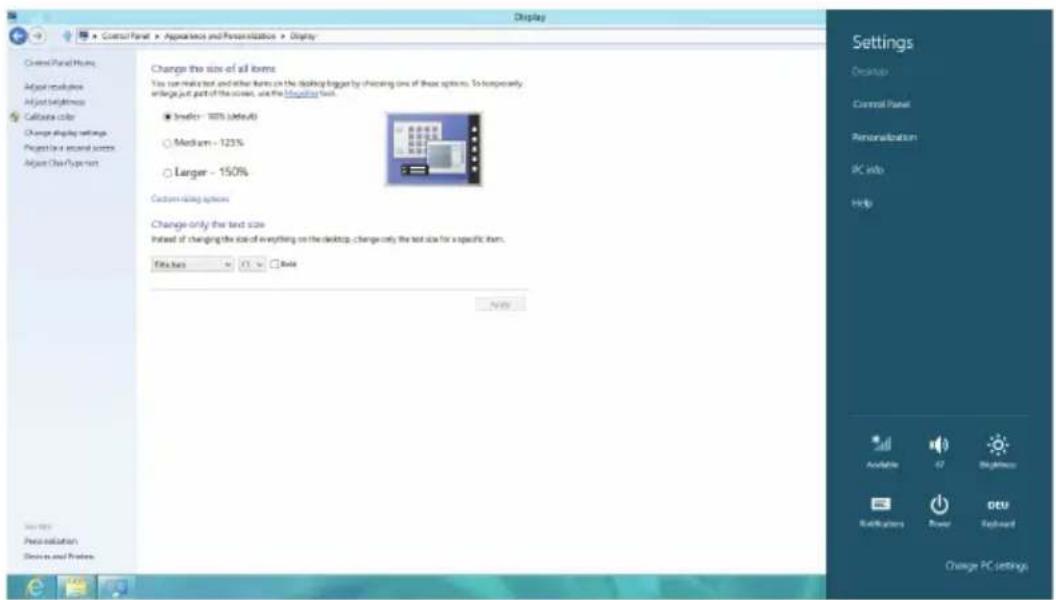
This program gives you the option of customising your desktop. This includes the background image, the screensaver and other settings for your monitor and your graphics card. The program can be started as follows:
- Right-click on the Windows desktop and left-click on Personalise .
or
- Via Settings, Personalisation, Display by double clicking with the left mouse button.
▶ Move the mouse pointer into the top right or bottom corner of the display and click Settings.
▶ Then click Personalisation.
▶ First select the Display option from the dialogue box.
text_image
Display Control Panel Style Adjust outline Adjust highlight Calculate color Change display settings Project to a local success Adjust Char/Paper Change the size of all items You can make text and other items on the desktop trigger by choosing one of these options. To temporarily include part of the screen, use the "Properties" tool. ■ Bluefly - 100% (default) ○ Medium - 125% ○ Larger - 150% Custom shipping options Change only the text size Instead of changing the size of everything on the desktop, change only the text size for a specific item. Filebars Add Remove Options Control Panel Personalization PC info Help Available 47 Brightness Ratikulations Power DTS Keyboard Change PC settingsThe following settings options are available:
- Set resolution
- Set brightness
- Calibrate colour
- Change display settings
- Display on second monitor
- Customise ClearType text
7.5. Connecting an External Monitor
The Notebook has a VGA connection socket (11) as well as an HDMI port (13) for an external monitor.
▶ Shut down your Notebook correctly.
Plug the external monitor's signal cable into the VGA socket on the Notebook (11). Alternatively, you can use the digital HDMI connection (High Definition Multimedia Interface) (13) to transmit picture and sound signals.
Connect the external monitor to the mains and switch it on.
Now switch your Notebook on.
Once the operating system has loaded, the external monitor will be detected. A number of options are available. You can access these as follows:
▶ Run the Desktop App.
▶ Move the mouse pointer into the top right or bottom corner of the display and click Settings.
▶ Then click Personalisation.
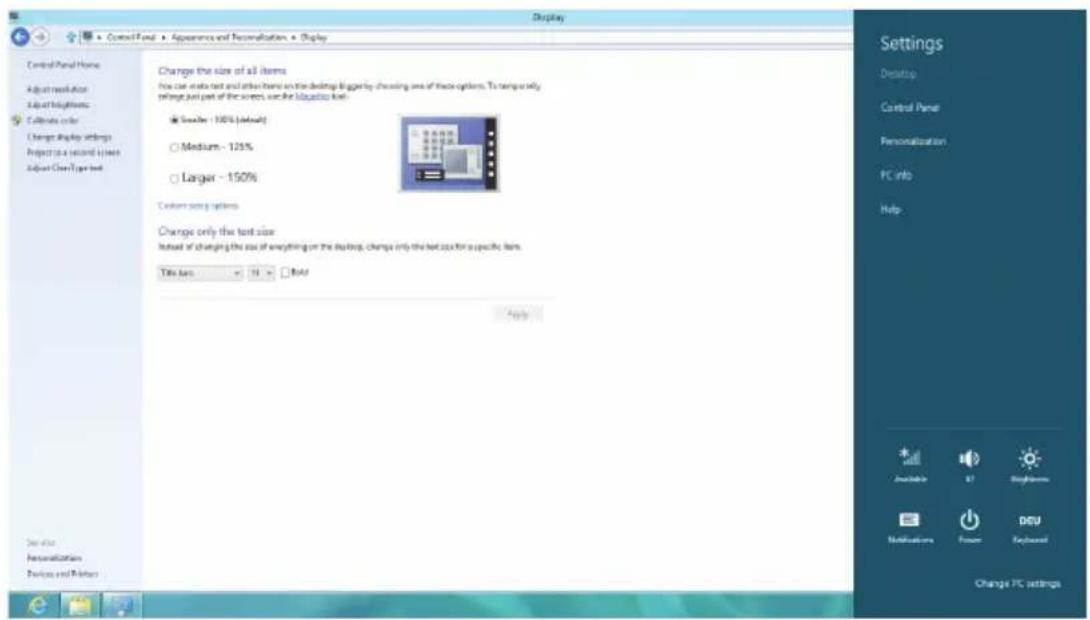
In the dialogue box, first select the Display option and then Project to a second screen.
▶ Press the 📁 + P buttons at the same time to open this menu quicker.
text_image
Display Control Panel Home Adjust notification Adjust brightness Calculate order Change display settings Project to a second session Adjust Clear Type text Change the size of all items How can write text and other items on the desktop bigger by choosing one of these options. To temporarily settings just part of the screen, use the biologics tool. ● Smaller - 100% (default) ○ Medium - 125% ○ Larger - 150% Custom size options Change only the text size Instead of changing the size of everything on the desktop, change only the text size for a specific item. Title Bars: 11 □ Hold Apply Settings Desktop Control Panel Personalization PC Info Help Available 87 High-Flow Modifications Power DESU Keyboard Change PC settings▶ Under Project to a second screen choose from the following options:
- PC screen only
- Duplicate
- Extend
- Second screen only
7.5.1. Duplicate
This mode duplicates the Notebook display on the external monitor.

PLEASE NOTE!
In this mode the same screen resolution must be configured for both devices.
7.5.2. Extend
In this mode, a blank desktop is displayed on the second (external) monitor. Windows on the first screen can be moved onto the second screen and vice versa. The screen resolution and colour quality can be configured individually for each of the display devices under Settings, Personalisation, Display.
7.5.3. PC Screen Only
The desktop will only be shown on main monitor 1.
7.5.4. Second Screen Only
The desktop will only be shown on the second (external) monitor.
8. Data Input
8.1. Keyboard
The double assignment of certain keys means that the range of functions available to you is the same as on a conventional Windows keyboard. Some functions are entered using the Fn key (standard on most Notebooks).
8.1.1. Notebook-Specific Keyboard Shortcuts
| Description | |
| Fn + F1 Sleep | |
| Fn + F2 | Flight Mode ➕ Opens the user interface for switching the WLAN and/or Bluetooth function on or off. |
| Fn + F4 | ECO Function This key combination activates / deactivates the ECO function. |
| Fn + F5 | Darker Reduces the brightness of the display. |
| Fn + F6 | Brighter Increases the brightness of the display. |
| Fn + F7 | Background lighting Turns off background lighting for the integrated display to save power. The lighting is turned back on by pressing Fn + F7. |
| Fn + F8 | Display Switches the screen display between LCD, external display and duplicate display. |
| Fn + F9 | Touchpad Switches the touchpad on and off. |
| Fn + F10 | Mute Switches the sound on or off. |
| Fn + F11 | Quieter Decreases the playback volume. |
| Fn + F12 | Louder Increases the playback volume. |
8.2. Touchpad
In normal mode, the cursor follows the direction specified by moving your fingers in the corresponding direction on the touchpad.

CAUTION!
Do not use pens or other objects as this can damage your touchpad.
The left and right mouse buttons are found in the lower section of the touchpad and can be used in the same way as those on a conventional mouse.
You can also perform a click or a double-click on the touchpad directly by tapping the touchpad surface once or twice briefly.
In the Windows®8 control panel, under the Mouse item, you will find a number of useful settings to simply your day-to-day tasks.
8.2.1. Two-Finger Touchpad Operation
Your touchpad supports two-finger operation which enables certain commands to be executed in some applications.
You can perform the following commands using your touchpad:
| Image Command Function | ||
 | Drag two fingers together or apart | zoom out from an object/ zoom in on an object |
 | Place one finger in the centre and trace a circle with the second finger | Rotate an object anti-clockwise |
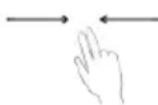 | Swipe from left to right/from right to left with two fingers simultaneously | Page forward/ page back |
 | Swipe down or up with two fingers simultaneously | Scroll function This function is used in most applications to scroll up and down the screen without having to move the cursor. |
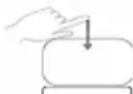 | Swipe from top to bottom on the touchpad | Opens the context menu on the start screen and the top and bottom tabs in Internet Explorer |
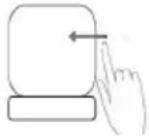 | Swipe from the far right across the touchpad | Opens the menu bar |
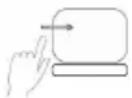 | Swipe from the far left across the touchpad | Scrolls through all open windows |
9. Hard Drive
The hard drive is your main memory medium and combines high storage capacity with rapid data access. You Notebook is supplied with an OEM version* of the Microsoft Windows®8 operating system which supports all of the Notebook's performance features. We have configured your Notebook's hard drive so that you will be able to work with it optimally without having to install any additional drivers yourself. The Windows®8 operating system requires part of the capacity to manage the hard drive therefore the hard drive's full capacity is not available. This explains any differences between the UEFI firmware configuration and the operating system display. The Notebook's operating system, other applications and security data are located on the hard drive meaning that the full capacity is already reduced.
The first partition (C:) contains the operating system, the applications and the "Documents" folder for the configured user.
The second partition (D:) is used for the data backup and also contains drivers (D:\Drivers) and utilities (D:\Tools) for your Notebook.

CAUTION!
The startup files for system restoration „Resetting the Notebook to its Factory Settings“ and the Windows® 8 installation files are located in non-rewritable partitions. These partitions cannot be deleted.
9.1. Important Directories
We have listed the most important directories below and described their contents.

CAUTION!
Do not delete or modify these directories or their content otherwise data may be lost or system functionality may be impaired.
C:\
The C: drive root directory contains important files required for Windows® 8 startup. On delivery these files are hidden for security reasons.
C:\Programs
As the name suggests, software programs install the files required for running the application into this directory.
C:\Windows
The main Windows ^® 8 directory. The operating system saves its files here.
D:\Drivers
You will find all the (preinstalled) drivers required for your Notebook in this folder.
D:\Tools
Here you will find the utility programs for your Notebook.
10. Optical Drive
10.1. Inserting a Disc
Unlike optical drives on a desktop PC, the Notebook uses a mount to hold the disc. When inserting the disc ensure that it is pressed into the mount correctly and that it clicks into position there.

PLEASE NOTE!
Do not stick protective film or other adhesive labels to the disc. To prevent damage to your drive, do not use any deformed or damaged discs.

CAUTION!
Do not use scratched, broken, dirty or poor quality discs. The high speeds in the drive can cause these to break destroying your data and damaging your device. Inspect discs carefully before inserting them. If damage or dirt is visible, do not use the disc. Damage caused by faulty media is not covered under warranty and repairs will be chargeable. Incorrectly positioning the disc in the mount can cause it to be damaged when closing the drive drawer.
- With the device switched on, press the eject button on the optical drive to open the drawer.
▶ Carefully pull the drawer out fully.
Remove the disc from its case, where possible without touching the unprinted side.
Insert the disc into the drawer with the label up and carefully press it down. The disc now lies flat in the drawer and audibly clicks onto the disc mount.
▶ Check that the disc can turn freely and then carefully slide the drawer back into the optical drive until it clicks into place.
On delivery, your optical drive is assigned the drive letter "E". You can easily access the data on your discs using Windows Explorer (Computer). Run Windows Explorer using the shortcut on the taskbar or by simultaneously pressing the Windows key and the "E" key. When accessing DVD videos (or audio and video files on conventional data CDs), the preinstalled media player is used automatically.
▶ If you wish to remove a disc, press the eject button.

CAUTION!
Do not try to remove the disc from the drive while the Notebook is accessing the optical drive.
10.1.1. Emergency Release of a Blocked Disc
In the event of the drawer no longer opening automatically, it can be opened manually providing your device has an emergency eject hole.
▶ Exit Windows® and switch off the Notebook.
Insert a long pointed object (e.g. straightened paperclip) into the emergency release until you feel some resistance.
▶ A slight push now opens the drawer.
Remove the disc and restart the Notebook.
10.2. Playing/Reading Discs
Your optical drive is capable of playing audio CDs, DVD films or data CDs/DVDs.
Once a disc has been loaded, a dialogue box opens containing various playback options. Normally, there will be a number of different options available.
If the dialogue box does not open, there is always the option of accessing the optical drive via Explorer.
10.3. Regional Playback Information for DVDs
Playback of DVD film titles includes decoding MPEG2 video, digital AC3 audio data and decoding CSS-protected content. CSS (sometimes also referred to as Copy Guard) is the name of a data protection program used by the film industry to protect against illegal copying.
Among the many controls for CSS licensees, the most important of the playback restrictions involve country-specific content.
To make it easier to create geographically separate film releases, DVD titles are coded for specific regions. Copyright laws required that each DVD film be limited to a specific region (usually the region where it is sold).
DVD film versions can be published in multiple regions but CSS rules require that each CSS decoder system may only be used for one region.

PLEASE NOTE!
The region setting can be changed up to five times via the viewing software before the last setting becomes permanent. If you then wish to change the region setting again, this must be carried out by the manufacturer. Any shipping and configuration costs must be borne by the user.
10.4. Issues Relevant to the Burner
This section only concerns devices supplied with a CD-RW, a combination CD/DVD read drive or a DVD-RW drive. First some information about blank discs
10.4.1. Blank CDs and DVDs
Normal CDs are pressed by a glass master and then sealed. With blank discs, digital information is burned onto them using the drive's laser. They are therefore more sensitive then conventional discs.
Because of this, it is essential to avoid, particularly in the case of unused blanks:
- exposure to direct sunlight (UVA/UVB radiation)
• scratches and damage
• extreme temperatures
11. Sound System
Your notebook comes with a high-definition audio system with 2 speakers (Dolby®*). Personal settings can be configured via the Dolby menu under the loudspeaker properties. This ensures optimum support for all current programs and games.
11.1. External Audio Connections
Your Notebook has an integrated stereo speaker so you can always reproduce sound without additional devices. Using the external connections provides you with an ideal opportunity to connect your Notebook to external devices.
The Fn + 11 and Fn + 12 keyboard shortcut enables you to adjust the volume.

WARNING!
Listening to a device at high volumes for an extended period via headphones/earphones can damage your hearing. Excessive volume when using headphones or earphones can damage your hearing. Before pressing play, set the volume to the lowest setting. Start playback and increase the volume to a comfortable level. Changing the basic settings of the equaliser can also increase the volume and thus cause permanent damage to your hearing. Changing the drivers, software, equaliser, operating system, etc., can also lead to an increase in the volume and thus cause permanent damage to your hearing.
| Audio output / Headset connection (15) | For sound playback via external stereo devices such as (active) speakers or headphones/headset, as well as for speech recording via an external recording device/headset. |
*Dolby is a registered trademark of Dolby Laboratories
12. Network Operation
12.1. What is a Network?
We talk about a network when multiple computers are directly connected to one another. This allows users to transfer information and data with one another and to share their resources (printers and drives).
Here are a few concrete examples:
- In an office, messages are exchanged by e-mail and appointments are managed centrally.
- Users share one printer on the network and back up their data to a central computer (server).
- Two or more computers are connected to one another to play network games or exchange data.
12.1.1. Network Connection (RJ45)
Connect one end of a cable with a RJ45 connection (western jack) to your Notebook's network interface and the other to a different computer or hub/switch. You can find more details about the network in the Windows® 8 help.
12.2. Wireless LAN (Wireless Network)
This function enables you to establish a network connection to a corresponding remote station. Please read about the necessary requirements.
The wireless LAN function is enabled and disabled via the Windows ^® 8 menu and is activated by default.

CAUTION!
Do not operate the WLAN function in locations (e.g.: hospitals, planes, etc.) where there is sensitive equipment. Do not switch the device unless you are sure it will cause no interference.
12.2.1. Requirements
A so-called WLAN access point may be used as a remote station. A WLAN access point is a radio transmitting device that communicates with your Notebook and controls access to the connected network.
WLAN access points are frequently found in large offices, airports, train stations, universities or Internet cafés. They provide access to particular services and networks or to the Internet.
Access permissions are generally necessary and often result in usage charges. Access points often have built-in DSL modems. These so-called routers establish the connection to the existing DSL Internet connection and the wireless LAN.
A connection can also be established to another end device with wireless LAN functionality without an access point. Without a router, however, the network is restricted to those devices directly connected to it.
If encryption is used for the transfer, the same procedure must be used for all devices. Encryption is a procedure to protect the network from unauthorised access. The transfer speed can vary depending on the distance and the number of users accessing the remote station.
12.3. Bluetooth
Bluetooth technology is used to wirelessly bridge short distances. Bluetooth devices transfer data via radio so that computers, mobile phones, printers, keyboards, mice and other devices can communicate with one another wirelessly. Bluetooth wireless technology has numerous possible applications. A few of them are listed below:
- Creating a wireless Internet connection using a mobile phone.
- Transferring files between computers or between a computer and another device.
- Printing using a Bluetooth printer.
• Using a Bluetooth keyboard and mouse. - Connecting to a PAN (Personal Area Network).
The Bluetooth wireless technology data transfer speed can vary depending on the device or environmental factors. Data can be transferred through walls, jacket pockets and briefcases using a Bluetooth device. The transfer between Bluetooth devices occurs at the high frequency of 2.4 Gigahertz (GHz). For Bluetooth high speed data transfer, WLAN must be enabled and the partner station must also support the high speed mode.

CAUTION!
Do not operate the Bluetooth function in locations (e.g.: hospitals, aeroplanes, etc.) where there is sensitive equipment. Do not switch the device unless you are sure it will cause no interference.
12.4. Flight Mode
In flight mode, all wireless connections (e.g. WLAN, Bluetooth) are disabled. Flight mode is disabled by default to ensure that all wireless connections are available.
Move the mouse pointer into the top right or bottom corner of the display and click Settings.
☐ Next, click Change PC settings.
□ Click Wireless.
Now enable or disable Flight mode here. Alternatively, use the Fn +→ keyboard shortcut to open flight mode.
Once flight mode is enabled, a small aeroplane is displayed in the traditional desktop task bar. You can also enable/disable flight mode by clicking this icon.
13. Multimedia Card Reader
Memory cards are media that are used, e.g. in the field of digital photography, and are gradually replacing the diskette. The shape and capacity of a memory card can vary depending on the manufacturer.
Your Notebook supports the following formats:
• MMC (MultiMediaCard)
• SD (Secure Digital), SDHC, SDXC
When inserting the memory cards, ensure that the contacts are pointing in the right direction, as specified in the list below. Inserting a card incorrectly may damage the card reader and/or the card.
| Card Type Connection Contacts | |
| SD (Secure Digital) pointing downwards | |
| MMC (MultiMediaCard) pointing downwards | |
13.1. Inserting a Memory Card

PLEASE NOTE!
The memory cards can only be inserted in one direction. Please observe the instructions in the section above.
☐ Slide the card in as far as it will go.
13.2. Removing Memory Cards
To remove SD/MMC cards, first push these into the socket to release the safety catch.
Now pull the card out of the slot and store it properly.
14. Webcam
The integrated webcam enables the use of various communication services.
15. USB Port
The universal serial bus is a standard for connecting input devices, scanners and other peripherals. The USB 3.0 ports are fully backwards compatible.
Your Notebook has 2 USB 3.0 connection sockets (14) and 2 USB 2.0 connection sockets (16).

PLEASE NOTE!
Where possible, always connect your USB devices to the same port that they were originally installed on. Otherwise they will be assigned a new ID and the drivers will need to be reinstalled.
16. Securing Your Notebook
Your new Notebook has software and hardware solutions for preventing unauthorised access.
16.1. Password Setting (Power-on)
You can protect your Notebook against unauthorised use with a power-on password. On switching on the Notebook, a password prompt will appear on the screen. The password is set up in the UEFI firmware configuration.

CAUTION!
Keep your password in a safe place. If you forget your password, you have no way of deleting it. If this happens, contact your service centre.
You can also use the Windows® 8 security options to protect your data against unauthorised access.
16.2. Kensington Security Lock
you can use a so-called Kensington security lock to protect your Notebook against theft. This security lock (complete with cable) is usually available as an accessory in specialist retailers.
To attach the security lock, wind the cable around a stationery object, e.g. a table leg. Plug the lock into the Kensington device and turn the key to lock it.
Keep the key in a safe place.
17. Software
This section deals with the subject of software. We distinguish here between the operating system, the software (the applications), the Windows activation and the UEFI firmware configuration.

PLEASE NOTE!
The current Windows family currently includes Windows 8 and Windows 8.1. Windows 8.1 is the first update of the Windows 8 generation.
17.1. Getting to Know Windows ^® 8
Windows ^® 8, the new operating system from Microsoft, contains a series of innovative functions and new technologies that your Notebook uses to work quickly and reliably. At the same time, it is also designed to be easy to use.
17.2.WindowsActivation
To protect against software piracy, Microsoft has introduced product activation. The Windows ^® 8 version installed on your Notebook and supplied with the Notebook must be activated to enable you to use of all Windows ^® 8 functions.
To do this, you require simply an Internet connection. The activation process is fully automatic; no personal data will be transmitted.
If no Internet connection is available, select telephone activation as follows:
▶ Move the mouse pointer into the top right or bottom corner of the display and click Settings.
▶ Next, click Change PC settings.
▶ Select the Activate Windows item.
Now click Activate by phone.
▶ Click Next after choosing your country.
▶ Call one of the specified hotlines on the telephone and read out the column of figures displayed when prompted to do so.
▶ You will then be given a confirmation ID over the telephone.
Enter this in the empty field and click Activate.

PLEASE NOTE!
If you have not activated Windows ^® 8, not all functions will be available to you under PC settings. A watermark will also continue to be displayed at the bottom right on the traditional desktop.
17.3. Window®- What's New
17.3.1. Microsoft Account
A Microsoft account is an e-mail address and password for logging in to Windows ^® 8. You can use any e-mail address. We recommend using the address you use to communicate with friends and log into your favourite web sites, however.
The Microsoft account also allows you to purchase or download apps from the Store and install them on up to five devices.
Once you have logged on to your Notebook using a Microsoft account, you also have access to the various services and programs provided by Microsoft.
- The contact information and status updates for your friends from services such as Hotmail, Facebook, Twitter and LinkedIn will be updated automatically as soon as you run these services using your Microsoft account.
- You can also access and share your photos, documents and other files via SkyDrive, Facebook and Flickr.
- Your personal settings, including designs, language settings, Internet favourites and apps will be synchronised with each PC running Windows ^® 8 that you log on to.
- You can obtain Apps from the Windows ^ 8 Store. You can use these on any PC running Windows ^ 8 that you log on to.
If you wish to create a Microsoft account in Windows ^® 8, proceed as follows:
▶ Move the mouse pointer into the top right or bottom corner of the screen and click Settings.
▶ Click Change PC settings. > Users > Switch to a Microsoft account.
Taskbar (Desktop Mode)
You can start programs from the taskbar at the bottom of the screen and switch between programs already running. In Windows® 8 you can place any program onto the taskbar, so that you can always open it with a single click. You can also rearrange the icons on the taskbar by simply clicking on them and dragging them to the desired position. Move the mouse pointer over the icons and thumbnails of each file or each open window and that program will be displayed. If you move the mouse pointer over the thumbnail, a full screen preview of the window in question appears. When you move the mouse pointer away from the thumbnail again, the full screen preview closes.
17.3.2. Jump Lists
Jump lists offer a practical way of calling up recently opened files. To display the recently used files, simply right-click on the application icon in the taskbar. Thus if you right-click on the Word icon, the recently used Word documents are displayed. You can also easily place other files you wish to have easily to hand in the jump list so that they are always displayed. This allows you to access documents that you use frequently in just a few mouse clicks.
The jump lists for certain programs such as Windows® 8 Media Player can be populated in advance with frequently used commands. Thus, for example, you will see options to play all music or to reopen the last playlist in the jump list for Windows® 8 Media Player.
The frequently visited and last visited websites are displayed in the jump list for Internet Explorer. This therefore allows you to quickly access commands for certain programs that could previously only be called up from the program itself, such as the command to compose a new e-mail message.
17.3.3. Improved Desktop
Windows® 8 simplifies working with windows on the desktop. You therefore have more intuitive options for opening and closing, changing sizes and rearranging. Windows® 8 makes completing everyday tasks even simpler. The locking function (snaps) makes it easier to compare two open windows, for example. You do not need to manually adjust the size of the opened windows to make a comparison. Simply drag the window to one of the screen margins using the mouse and it will fill half of the screen.
Click the window's title bar, "shake" it and all other opened windows are displayed as icons on the task bar. "Shake" the window once more and the other windows are displayed again.
17.3.4. Improved Device Management
Windows® 8 allows you to connect, manage and use all devices via the central "Devices" function.
All devices are shown in a central location.
With the new "Device Stage" technology, however, Windows® 8 goes one step further with device management. Device Stage helps you to use all compatible devices that are connected to the computer. Thanks to Device Stage you can now display the device status and perform frequently used commands within a single window. Here you will even find images of the devices so you can easily see which devices are connected. The device manufacturers can even adjust Device Stage. For example, if your camera manufacturer releases an updated version of Device Stage, you can see details such as the number of photos on the camera and get links to useful information when you connect the camera to your Notebook.
17.3.5. Home Group
With home network groups, a Windows ^ 8 function, connecting home computers becomes child's play. A home network group is set up automatically when you connect the first PC running Windows ^ 8 to the home network. Adding additional PC's running Windows ^ 8 to the home network group can be done very quickly. You can specify precisely what should be shared on each PC with all other PCs in the home network group. Sharing files on the various home PCs – and on many other devices – is then as easy as if all the data were located on a single hard drive. Thus, you can save digital photos on the computer in the study and then access them easily on a Notebook in any other room. Similarly, the printer in the study is
automatically shared among all PCs in the house once they are part of the home network group.
17.4. Overview
The greatest innovation with Windows ®8 is the Start screen.
This key element replaces the Start menu in Windows 8 .
Here you can run all the main programs and services.
As with previous versions, operation is by inputting commands using the mouse or keyboard.
The Start screen can be opened at any time using the (Win) key. This key also allows you to switch back and forth between the Start screen and an active application. To switch to an application other than the last one opened, press the Win+Tab keyboard shortcut.
A central feature of the Start screen are the tiles which each represent an application or function. They are shown in blocks and you can define the number of blocks and their columns yourself.
Drag & drop the tiles to the desired position using the mouse.
17.4.1. Logging in to Windows
To be able to work with Windows ^® 8, you must set up a Windows ^® 8 user account.
▶ Move the mouse pointer into the top right or bottom corner of the display, move the mouse down and click Settings.
▶ Next, select Change PC settings.
▶ Open the User category.
▶ Select Add a user, to set up additional user accounts.
Windows® 8 allows you to log in using 3 different login procedures. Windows ® 8 gives you the choice of standard login by password, a PIN or an image code. To set up a PIN or image code, you must first have set up a password for Windows ® 8.
17.4.2. Setting up a Password for Windows
▶ Move the mouse pointer into the top right or bottom corner of the display and click Settings.
▶ Next, click Change PC settings.
▶ Select the User item.
▶ Click Change your Password and follow the instructions.
17.4.3. Setting a PIN for Windows
▶ Move the mouse pointer into the top right or bottom corner of the display and click Settings.
▶ Next, click Change PC settings.
▶ Select the User item.
▶ Click Create a PIN and follow the instructions.
17.4.4. Setting Up an ImageCode for Windows
▶ Move the mouse pointer into the top right or bottom corner of the display and click Settings.
▶ Next, click Change PC settings.
▶ Select the User item.
▶ Click Create a Picture password and follow the instructions.
PLEASE NOTE!
The image code login has been specially designed for touch screen devices. In devices without a touch screen, use the mouse instead of finger movements or gestures. To be able to use all Microsoft services you need to log in using a Microsoft account.
Linking a User Account to a LiveID
You can link your user account to a LiveID. This enables you to log in to any computer or mobile device connected to the Internet using your LiveID.
▶ Move the mouse pointer into the top right or bottom corner of the display, move the mouse down and click Settings.
▶ Next, select Change PC settings.
▶ Open the User category.
▶ Select Switch to a Microsoft account.
Now enter your Windows Live ID e-mail address. If you have not yet created a Windows Live ID account or added an e-mail address to your Windows Live ID account, you can create and edit your Windows Live ID account at http://www.windowslive.com/.
▶ Follow the instructions on the screen to complete the link.
17.5. Windows® 8 Start Screen
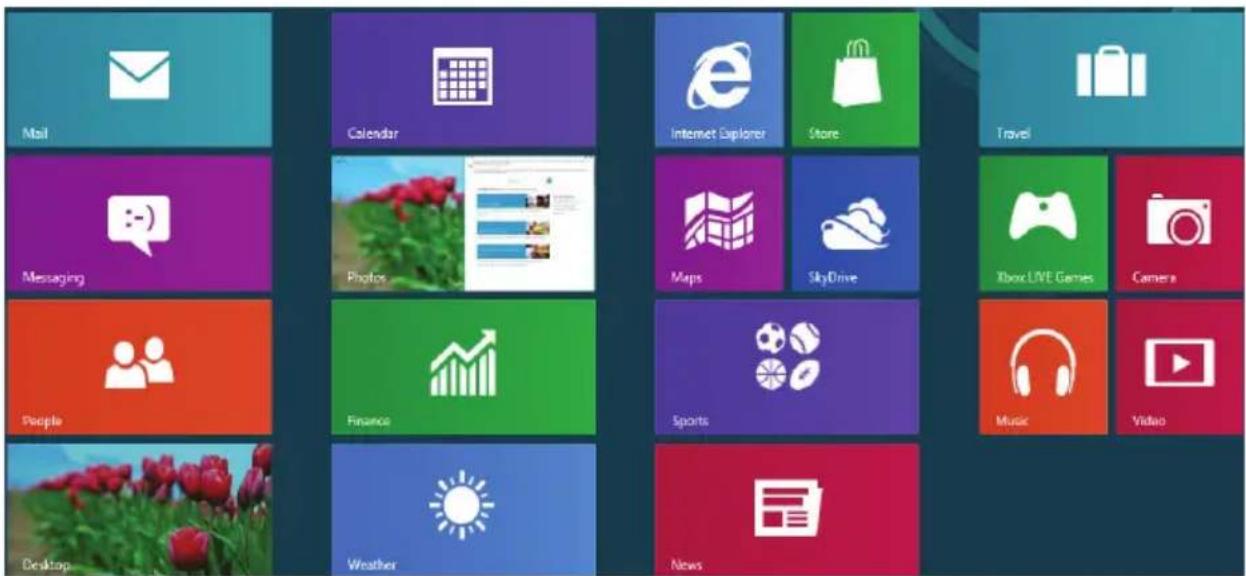
Once the operating system is running, you will see the new Windows® 8 Start screen.
text_image
Mail Messaging People Desktop Calendar Photos Finance Weather Internet Explorer Maps Sports News Internet Explorer Store SkyDrive Travel Music Video(image similar)
Information such as the following may be displayed here, for example:
| Windows® 8 App | Windows® 8 apps are executable programs. |
 | The “Desktop” tile opens the traditional Windows display. |
 | The Internet Explorer tile launches Internet Explorer |

PLEASE NOTE!
Apps are applications that are displayed on a desktop with a program thumbnail. The app thumbnails are bigger than the standard tiles.
17.6. Windows® 8 Desktop
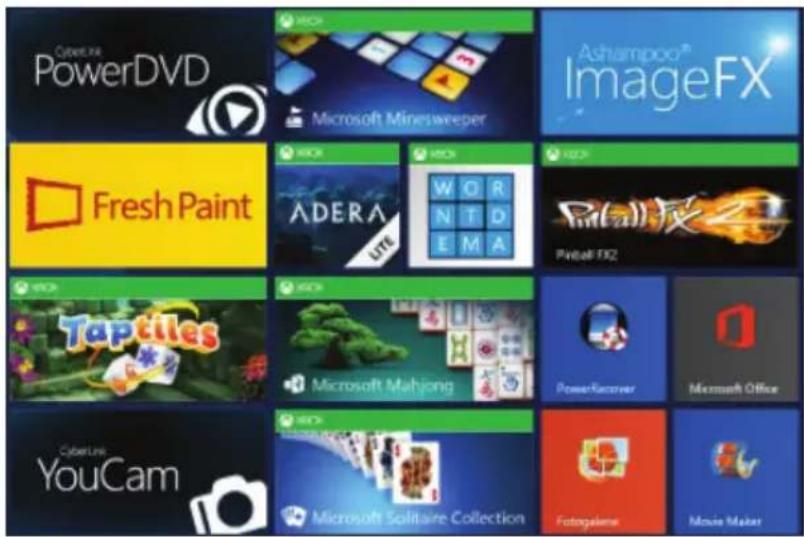
This image shows a symbolic representation of additional programs.
text_image
Cyber.ai PowerDVD Microsoft Minesweeper Fresh Paint ADERA W O R N T D E M A ImageFX® ASHAMPOO® ImageFX® Pintal FX2 TapCiles Microsoft Mahjong PowerRacover Microsoft Office CyberLine YouCam Microsoft Solitaire Collection Fotogaiems Movie Maker(image similar)
Information such as the following may be displayed here, for example:
| Classic desktop apps | Desktop apps are applications that are displayed on a desktop with a program thumbnail. The app thumbnails are bigger than the standard tiles. |
 | The classic “Power Recover” desktop app launches the system recovery program. |
 | The classic “Microsoft Office” desktop app launches the Microsoft Office program. |
Windows® 8 apps from third-party suppliers are displayed as follows.
Example:
| Windows® 8 apps from third-party suppliers | These Windows® 8 apps are executable programs from third-party suppliers. |
 | This Windows® 8 app launches the “PowerDVD” program. |
 | This Windows® 8 app launches the “YouCam” program. |
17.6.1. Working with Windows and Cassic Apps
| Menu Instructions | |
| Opening an app ▶ Click the desired app with the left mouse button. | |
| Closing an app | PLEASE NOTE! Not all apps need to be closed! Windows® 8 closes unused apps automatically.Press the Alt+F4 keyboard shortcut.Click on the top edge of the running app and drag the app down to the edge of the display. Not all apps need to be closed! Windows® 8 closes unused apps automatically.Press the Alt+F4 keyboard shortcut.Click on the top edge of the running app and drag the app down to the edge of the display. |
| Displaying all apps ▶ Right-click on the Start screen.Click All Apps in the bottom right-hand corner of the display. | |
| Linking apps to the Start screen | Right-click on the Start screen.Click All Apps in the bottom right hand corner of the display.Right-click on the desired app to highlight it.Click Pin to Start in the bottom left-hand corner of the display. |
| Linking apps to the taskbar | Right-click on the Start screen.Click All Apps in the bottom right-hand corner of the display.Right-click on the desired app to highlight it.Click Pin to Taskbar in the bottom left-hand corner of the display. |
| Installing an app ▶ Run the Store app. | Search for the desired app and click Install.The app will now be downloaded and installed in the background. |
Uninstalling an app ▶ Right-click on the Start screen.▶ Click All Apps in the bottom right hand corner of the display.▶ Right-click the desired app.▶ Click Uninstall at the bottom edge of the display.PLEASE NOTE! Not all apps can be uninstalled. If the Uninstall option is not displayed, this app can not be uninstalled. Not all apps can be uninstalled. If the Uninstall option is not displayed, this app can not be uninstalled. |
| Running apps as administrator(Only possible with desktop apps)▶ Right-click the desired app.▶ Now click Run as administrator on the bottom edge of the display. |
| Running an app in a new window(Only possible with desktop apps)▶ Right-click the desired app.▶ Click Open new window at the bottom edge of the display. |
| Searching for apps▶ Move the mouse pointer into the top right-hand corner of the display, move the mouse down and click Search.▶ Enter the name of the app. |
| Arranging apps ▶ Click and hold the left mouse button down on the desired app and drag it to the desired position. |
| Selecting multiple apps▶ Right-click the desired apps. |
17.7. Using the Search Function
Use the search function to find individual tasks, settings or apps quickly.
▶ Move the mouse pointer into the top right or bottom corner of the display and click Search.
▶ Enter the name of the app or file and select an entry from the results list on the left-hand side of the display.
The search results are arranged by Apps, Settings and Files. Choose the category (Apps, Settings or Files) in which the desired file is located.
17.8. Windows® 8 Power On/Off Functions
The new Windows ^® 8 allows you to restart your Notebook, put it into sleep mode or shut it down.
Changes can be made to the sleep settings at any time in the power options.
In sleep mode the content of your Notebook's RAM is preserved while practically all other components of your Notebook are disabled or their power consumption reduced to a minimum. For example, if you flip the Notebook shut, it puts it into sleep mode and it is automatically restarted upon opening.
| Restarting | ▸ Move the mouse pointer into the top right or bottom corner of the display, move the mouse down and click Settings.▸ Now click Power and select Restart.Your Notebook will now restart. |
| Sleep | ▸ Move the mouse pointer into the top right or bottom corner of the display, move the mouse down and click Settings.▸ Now click Power and select Sleep .Your Notebook will now switch to sleep mode. |
| Shut down | ▸ Move the mouse pointer into the top right or bottom corner of the display, move the mouse down and click Settings.▸ Now click Power and select Shut down. |
17.9. Control Panel Settings
You can change Windows ^® 8 settings using the control panel. These settings control virtually everything about how Windows ^® 8 appears and functions and enable you to customise Windows ^® 8 to meet your requirements.
When the control panel is run for the first time, some of the most frequently used control panel elements are displayed grouped together by category.
If you require additional information about a control panel element in the category view, you must hold the mouse pointer over the icon or category name and read the text shown there.
To run one of these elements, click on the associated icon or category name.
A list with executable tasks and a selection of individual control panel elements opens for some of these elements.
To launch the control panel, proceed as follows:
▶ Move the mouse pointer into the top right or bottom corner of the display and click Search.
▶ Enter Control Panel in the search field.
▶ Click on Control Panel.
17.10. Resetting the Notebook to its Factory Settings
In the event of problems with the installation or other software problems which make it necessary to reinstall the software, Windows ^® 8 offers three options for reinstalling Windows ^® 8 on your Notebook.
First ensure that you have backed up all important data and programs.
17.10.1. Running System Restore
▶ After restarting, press the F11 key or start up the Notebook with the F11 key held down to launch PowerRecover.
or
Click the PowerRecover Windows® 8 desktop app to run the program from the Windows® 8 desktop.
You will be offered 3 possible options:
– Burn Drivers and Tools to an Optical disc
Create a support disc
- Refresh your PC without affecting your files
Update your Notebook without deleting your data.
- Restore
Choose between two recovery options:
- Restore to HDD – no backup of user data
All data on the Notebook will be permanently deleted.
The factory settings will be restored.
- Restore to HDD – with backed up user data
The factory settings will be restored and all user data under C:\USER will be backed up.

PLEASE NOTE!
Always perform any type of recovery using mains power.

CAUTION!
The recovery process takes a long time when you select the option to back up user data. Only the data located in the folder C:\USER will be backed up. All other data will be deleted. It is therefore important to perform regular data backups to external data media. We do not accept any liability for claims for compensation arising from the loss of data or any consequential damages incurred.
▶ Click Next and follow the on screen instructions to restore the factory settings.
17.11. UEFI fi rmware confi guration
The UEFI firmware configuration (basic hardware configuration of your system) provides you with a number of options for the configuration and operation of your notebook. For example, you can modify the operating mode for interfaces, security features or power supply management. The Notebook has already been configured by the manufacturer to ensure optimum operation.

CAUTION!
Please only change settings where strictly necessary and if you are familiar with the configuration options.
17.11.1. Executing the UEFI firmware configuration
You can only run the configuration program upon system startup. If the Notebook has already started up, switch it off and restart it. Press the F2 key to run the UEFI firmware configuration.
17.12. Windows® 8 - Help and Support
Here you will find a comprehensive collection of instructions, help sections and troubleshooting suggestions.
This help covers the entire spectrum of the Windows ^® operating system.
It is recommended for both beginners and experts. The information is subdivided into topics and can be printed out or bookmarked. Start as follows:
▶ Move the mouse pointer into the top right or bottom corner of the display, move the mouse down and click Settings.
Now click on Help.
▶ Choose the topic you are interested in.
18. FAQ – Frequently Asked Questions
Do I need to install the discs supplied?
- No All programs are preinstalled. The discs are provided as backup copies only.
Where can I find the necessary drivers for my Notebook?
- The drivers can be found in the second hard drive partition in the Drivers and Tools folders.
What is Windows ^® 8 activation?
- You will find a relevant section in these operating instructions containing detailed information on this topic.
How do I activate Windows ^® 8?
- Windows® is activated automatically as soon as an Internet connection is established.
How do I activate Windows ^® 8 without an Internet connection?
- Windows ^® can also be activated over the telephone. Follow the instructions in the section “„Windows Activation“ to activate Windows ^® 8 by telephone.
When is restoring factory settings recommended?
- This method should only be selected as a last resort. Read about the alternatives in the System recovery section.
How do I perform a data backup?
- Perform a backup or backup synchronisation of selected data onto external media to familiarise yourself with the technology. A backup is of no use if you are unable to recover the data or if the medium is faulty or is no longer available.
Why do I need to reinstall my USB device even though I have already done it?
- If the device is not operated on the same USB port as the one it was installed in, it automatically receives a new identifier. The operating system then treats it like a new device and tries to reinstall it.
- Use the installed driver or connect the device to the port on which it was originally installed.
19. Customer Service
19.1. What To Do In Case of Hardware Problems
Malfunctions can sometimes have quite trivial causes, but they may also be the result of defective components. We have included a brief troubleshooting guide below which may help to solve any problems.
If these tips don't do the trick, then we'll be more than pleased to assist you. Just give us a call!
19.2. Faults and Possible Causes
Start by carefully checking all the cable connections. If the notebook is connected to peripheral devices, check all cable connections.

PLEASE NOTE!
Do not swap around the cables for the various devices, even if they look alike. The pin assignment within the cables may be different.
The notebook will not switch on.
If the notebook is in battery mode, connect the notebook to the mains adapter and check that the battery is charged or being charged.
If you are already operating the notebook using the mains adapter, disconnect the mains adapter from the socket and connect an electrical appliance such as a lamp to the same socket to test it. If the lamp does not work either, seek the advice of an electrician.
• The screen is black.
This fault can have various causes:
- The operating light (on/off switch) does not light up and the Notebook is in hibernation.
Solution:
Press the on/off switch.
- The sleep light is flashing. The Notebook is in sleep mode.
Solution:
Press the on/off switch.
- The background lighting has been disabled using the Fn+F7 keyboard shortcut.
Solution:
Reactivate the background lighting by pressing any key.
The Notebook turns itself off during operation.
The battery may be flat. Plug the Notebook in using the mains adapter and charge the battery.
The Notebook cannot be switched on.
▶ If you are running the Notebook on battery, check that it fully charged.
No data can be read by the optical drive.
▶ Check whether the disc has been inserted correctly.
The WLAN/Bluetooth connections do not work.
▶ Check that flight mode is disabled.
The touchpad is not working.
▶ To activate the touchpad, press the Fn + F9 keyboard shortcut.
Apps (e.g. the weather app) cannot be displayed as live tiles.
▶ Check the date, time zone and time.
19.3. Do You Need More Help?
You've checked through the suggestions in the previous section and you're still having problems with your device? Then call our hotline or contact us at www.medion.com. We'll be glad to help you.
Before contacting your technology centre, however, prepare the following information:
- Have you made any upgrades or modifications to the initial configuration?
• What peripheral devices do you use?
• What messages, if any, appear?
• What software were you using when the problem occurred?
• What steps have you already taken to try and rectify the problem?
19.4. Driver Support
The system has been thoroughly and successfully tested with the installed drivers in our test laboratory. It is normal in the computer sector, however, for the drivers to need updating from time to time. This is because there may be compatibility problems with other components (programs, devices) which have not yet been tested. You can find current drivers on the Internet at the following address:
http://www.medion.com
Please use the service address for the country where the device was purchased.
19.5. Transport
Please note the following information if you wish to transport the Notebook:
▶ Switch the Notebook off. This ensures that the hard drive heads are automatically moved to a safe area to avoid damage. Remove any inserted DVDs/CDs.
▶ After transporting the Notebook, wait until the appliance has reached room temperature before switching it on. Large changes in temperature or fluctuations in humidity can cause moisture build-up within the Notebook due to condensation. This can cause an electrical short circuit.
▶ Close the Notebook and check that the lid is firmly closed.
▶ Always use a Notebook carrying case to protect the Notebook from dirt, moisture, vibrations and scratches.
▶ Always use the original cardboard packaging to ship your Notebook and obtain advice on this from your carrier.
▶ Always charge your battery fully before embarking on longer trips and do not forget to take along your mains adapter.
▶ Find out about the power and communication options available in your destination before travelling.
▶ Where necessary, purchase the required power or communication adapter (LAN etc.) before departure.
When going through the hand luggage check at the airport it is recommended that you send the Notebook and all magnetic storage media (external hard drives) through the x-ray facility (the device that scans your bags). Avoid the magnetic sensor (the structure that you walk through) or the magnetic hand scanner (the manual device used by security personnel) as this may destroy your data, among other things.
19.6. Maintenance

CAUTION!
None of the parts inside the Notebook housing require cleaning or maintenance. In order to avoid any damage to the device, ensure that the plug contacts do not come into contact with water under any circumstances. If this should nevertheless occur, it is imperative that the plug contacts are rubbed dry before the device is used again.
You can increase the lifespan of your Notebook with the following measures:
▶ Always unplug the device and disconnect all cables before cleaning.
▶ Clean the Notebook with a damp, lint-free cloth.
Do not use solvents, corrosive or aerosol-based detergents to clean the device.
Do not use CD-ROM cleaning discs or similar products that clean the lens of the laser to clean your optical drive.
20. Upgrading/Modifying and Repair
- Upgrades and modifications to your Notebook should only be carried out by qualified specialists. If you do not have the necessary qualifications, have the work carried out by a qualified service technician. Please contact your customer service department if you have technical problems with your Notebook.
- If a repair must be carried out, please contact only our authorised service partners.
20.1. Notes for Service Technicians
- Only service technicians may open up the Notebook housing or upgrade or modify your Notebook.
- Use only original replacement parts.
- Before opening the housing, disconnect all power and connecting cables and remove the battery. If the Notebook is not disconnected from the power supply before being opened, there is a risk that components could be damaged.
- Internal components of the Notebook may be damaged by electrostatic discharge (ESD). Carry out repairs, as well as system enhancements or modifications, at an ESD workplace. If such a workplace is not available, wear an antistatic cuff or ensure you are touching an earthed, metallic object. We will charge for any repairs to damage caused by incorrect handling.
20.2. Information on Laser Radiation
- The Notebook can contain laser equipment classified as laser class 1 to laser class 3b. The equipment meets the requirements for laser class 1.
-
By opening the housing of the optical drive, you will have access to laser equipment classified up to laser class 3b.
The following should be observed when removing and/or opening this laser equipment: -
The integrated optical drive contains no parts that require repair or maintenance.
- Repairs to the optical drive should only be carried out by the manufacturer.
- Do not look directly into the laser beam, even when using optical instruments.
- Do not expose the laser beam. Avoid exposing your eyes or skin to the laser beam – either directly or through scattered laser radiation.
21.RecyclingandDisposal
Should you have any questions concerning the disposal please contact your dealer or customer service.

Packaging
Your device has been packaged to protect it against transportation damage. Packaging is raw material and can be re-used or added to the recycling system.

Device
The device is fitted with an integrated battery. At the end of its operating life, do not dispose of the device with your ordinary household rubbish. Consult your local authority to find out about collection centres for environmentally sound disposal of electrical and electronic scrap.
22. European EN 9241-307 Class II Standard
Due to the very high number of transistors and the associated extremely complex manufacturing processes used, occasionally one or more pixels can fail or become incorrectly controlled.
In the past, there were a number of approaches for defining the permitted number of pixel defects. However, these approaches were mostly very complicated and varied from one manufacturer to the next. When handling warranty issues for all of its display products, MEDION therefore adheres to the strict and transparent requirements of the standard ISO 9241-307, Class II; which has been briefly summarised below.
The EN 9241-307 standard defines, amongst other things, the generally applicable guidelines relating to pixel defects. Pixel defects are categorised into four fault classes and three defect types. Every individual pixel consists of three sub-pixels, each of which is assigned a basic colour (red, green, blue).
Pixel structure
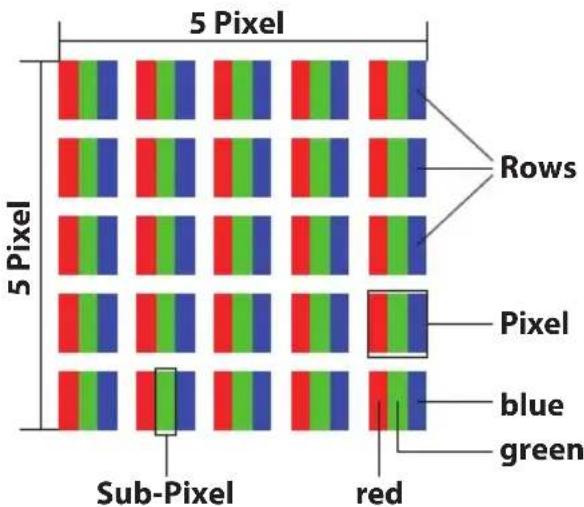
text_image
5 Pixel 5 Pixel Sub-Pixel red Rows Pixel blue greenPixel defect types:
- Type 1: permanently illuminated pixel (bright, white dot) even when not activated. A white pixel occurs due to the illumination of all three sub-pixels.
- Type 2: non-illuminated pixel (dark, black dot) even when activated.
- Type 3: abnormal or faulty red, green or blue sub-pixel (e.g. permanently illuminated at half brightness, one colour not illuminated, flashing or flickering but not type 1 or 2)
Supplement: Type 3 cluster (= failure of two or more sub-pixels within a 5 x 5 pixel block). A cluster is a field of 5 x 5 pixels (15 x 5 sub-pixels).
EN 9241-307, error class II
| Resolution Type 1 Type 2 Type 3 | ClusterType 1, type 2 | ClusterType 3 | ||
| 1024 x 768 2 2 | 4 0 2 | |||
| 1280 x 800 3 3 | 6 0 3 | |||
| 1280 x 854 3 3 | 6 0 3 | |||
| 1280 x 1024 3 3 | 7 0 3 | |||
| 1366 x 768 3 3 | 7 0 3 | |||
| 1400 x 1050 3 3 | 8 0 3 | |||
22.1. FCC Compliance Statement
This equipment has been tested and found to comply with the limits for a Class B digital device, pursuant to Part 15 of FCC Rules. These limits are designed to provide reasonable protection against harmful interference in a residential installation. This equipment generates, uses, and can radiate radio frequency energy and, if not installed and used in accordance with the instructions, may cause harmful interference to radio communications. However, there is no guarantee that interference will not occur in a particular installation. If this equipment does cause harmful interference to radio or television reception, which can be determined by turning the equipment off and on, the user is encouraged to try to correct the interference by one or more of the following measures:
- Reorient or relocate the receiving antenna.
- Increase the separation between the equipment and receiver.
- Connect the equipment into an outlet on a circuit different from that to which the receiver is connected.
- Consult the dealer or an experienced technician for help.
Changes or modifications not expressly approved by the party responsible for compliance could void the user's authority to operate the equipment. Shielded interface cables, if any, must be used in order to comply with the emission limits.
23. Legal Notice
Copyright © 2014
All rights reserved.
This operating manual is protected by copyright.
Mechanical, electronic and any other form of reproduction is prohibited without the written permission of the manufacturer.
Copyright is owned by the company:

text_image
QR code image containing encoded data, no visible human-readable textMedion AG
Am Zehnthof 77
45307 Essen
Germany
Subject to technical and optical changes as well as printing errors.
The operating manual can be reordered via the service hotline and is available for download via the service portal at www.medion.com/gb/service/start/.
You can also scan the QR code above and download the operating manual onto your mobile device via the service portal.
24. Index
B
Battery Mode 23
Charging the Battery 23
Discharging the Battery ....23
Inserting the Battery ......23
Battery Performance ......23
Blank CDs and DVDs 38
Bluetooth....41
C
Cabling 13
Connecting an External Monitor .....30
Connections....12
Control Panel....53
Customer Service 57
D
Data Backup 9
Data Input 31
Declaration of Conformity ......6
Driver Support ....58
E
Energy Star 64
Ergonomics....11
European Standard 62
External Audio Connections ....39
F
Factory Settings ....54
FAQ 56
H
Help and Support 55
HomeGroup......46
|
Improved Desktop 46
Improved Device Management .....46
J
Jump Lists 45
K
Kensington Security Lock 43
Konformitätsinformation......6
L
Logging in to Windows ......47
Setting a PIN for Windows .....47
Setting Up an Image Code for Windows 48
Setting Up a Password for Windows 47
M
Microphone Socket ....18
Multi-Card Reader
Inserting a Memory Card ....42
MMC....42
Removing Memory Cards ....42
SD 42
0
Operating Safety 7
Optical Drive
Emergency Release of a Blocked Disc 37
Inserting a Disc 36
Playing/Reading Discs ......37
Regional Playback Information for DVDs....37
P
Power Supply 12
R
Recycling and Disposal 62
Restarting....53
S
Safety Instructions
Batteries 14
Saving Energy 53
Sleep 53
Software....43
Getting to know Windows ^® 8 ......44
Windows® 8 – What's New .....45
Windows activation ....44
T
Taskbar 45
Touchpad....17
Two-Finger Touchpad Operation ....33
Transport 59
U
Upgrades/Modifications......60
Information on laser radiation .....61
Notes for service technicians .....60
W
Webcam....17
Windows® 8 Desktop ......49
Windows® 8 Start Screen ....48
Wireless LAN 40
Flight Mode 42
Requirements......40
Working With Apps ....51