
OP30C - Printer Océ - Free user manual and instructions
Find the device manual for free OP30C Océ in PDF.


| Product Type | Color Copier / Printer |
| Brand | Océ |
| Model | OP30C |
| Dimensions (approx.) | 600 mm (W) x 600 mm (D) x 500 mm (H) |
| Weight (approx.) | 75 kg |
| Power Supply | 120 V, 10 A |
| Paper Capacity | 500 sheets per drawer (2 drawers standard), 150-sheet multi-bypass tray |
| Copy Speed | Not specified |
| Zoom Range | 25% to 400% |
| Color Modes | Full Color, Auto Color Selection (ACS), Black & White, Mono-color (Cyan, Magenta, Yellow, Red, Green, Blue) |
| Image Quality Modes | Text & Photo, Text, Photo, Printed Photo, Map, Eco |
| Special Functions | Duplex (2-sided), Gloss mode, Color Balance, Color Hue, Sharpness, Booklet, Poster, Page Numbering, Margin, Erase, Invert, Mirror, Transparency backing, Insert sheets, Sort, Layout (2-in-1, 4-in-1), Program mode |
| Maintenance | Replace toner containers and waste toner tank; clean charger; replace oil roller after approx. 25,000 copies |
| Safety Features | Auto shut-off, energy-saving preheat, caution labels for high temperature and high voltage |
| Optional Equipment | Document Finisher, Paper Feeder, Memory Copy Board, Printer Kit, Fax Kit, Network Scanner Kit |
Frequently Asked Questions - OP30C Océ
User questions about OP30C Océ
0 question about this device. Answer the ones you know or ask your own.
Ask a new question about this device
Download the instructions for your Printer in PDF format for free! Find your manual OP30C - Océ and take your electronic device back in hand. On this page are published all the documents necessary for the use of your device. OP30C by Océ.
USER MANUAL OP30C Océ
Océ | Operations Guide
E n g l i s h v e r s i o n
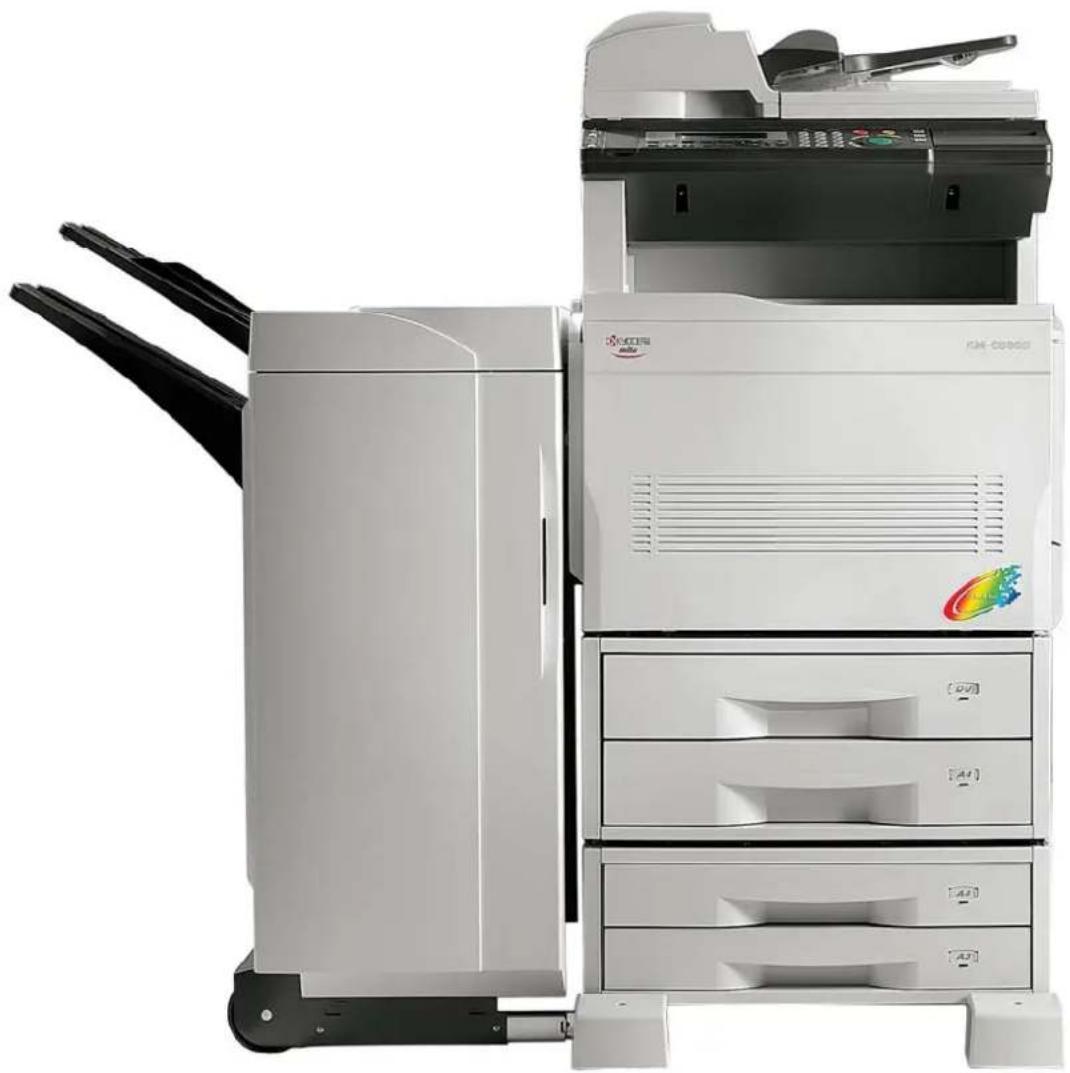
Océ OP30C
Operations Guide

This Operation Guide is for the KM-C830 and KM-C830D copiers.
The instructions contained herein are based on the KM-C830 standard copier (for 1-sided copies only) and KM-C830D duplex copier (for 2-sided copies).
- Standard equipment
KM-C830: Two 500-sheet capacity drawers
KM-C830D: Duplex Unit and one 500-sheet capacity drawer
NOTE:
This Operation Guide contains information that corresponds to using both the inch and metric versions of this copier. When the difference in a message is only one of upper- and lower-case spelling, we have listed the information as it specifically pertains to the inch version of this machine. When there is even a slight difference in the message, we have listed the information for the inch version followed, in brackets, by the corresponding information for the metric version.
All rights reserved. No part of this material may be reproduced or transmitted in any form or by any means, electronic or mechanical, including photocopying, recording or by any information storage and retrieval system, without permission in writing from the Publisher.
Legal Restriction On Copying
- It may be prohibited to copy copyrighted material without permission of the copyright owner.
- It is prohibited under any circumstances to copy domestic or foreign currencies.
- Copying other items may be prohibited.
Image quality adjustment samples
One-touch selection of the image quality, for example "Vivid" or "Calm", is possible according to the type of copy image you want.
(See "3. One-touch image quality adjustment" on page 5-3 for the actual setting procedure.)
● "Modulation" setting selected


● "Calm" setting selected


● "Light" setting selected


●Original ●Original ●Original




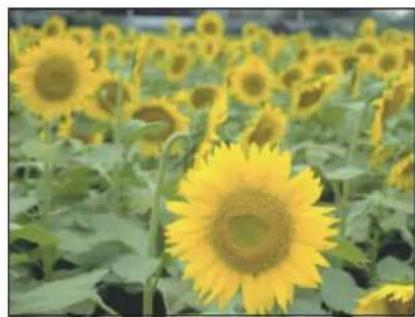

● "Smooth" setting selected

● "Vivid" setting selected

● "Heavy" setting selected

NOTE:
Samples in this operation guide were created in order simply to indicate the different effects of each function, and the resulting colors will, therefore, differ somewhat from the actual copies made with this copier.
Color balance adjustment samples
If the overall color of the copies appears reddish or yellowish, etc., the overall color balance can be fine-adjusted by increasing or decreasing the intensity of each of the colors: cyan, magenta, yellow or black.
(See "4. Adjusting the color balance" on page 5-4 for the actual setting procedure.)
●Original

●Yellow intensity increased

●Magenta intensity increased

●Cyan intensity increased

●Black intensity increased

●Yellow intensity decreased

●Magenta intensity decreased

●Cyan intensity decreased

●Black intensity decreased

NOTE:
Samples in this operation guide were created in order simply to indicate the different effects of each function, and the resulting colors will, therefore, differ somewhat from the actual copies made with this copier.
Gloss mode samples
Select the gloss mode when you want to make high-gloss copies.
(See "2. Gloss mode" on page 5-2 for the actual setting procedure.)
●Original

●Gloss mode selected


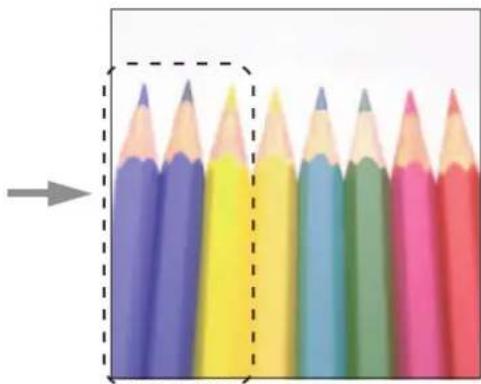
Color hue adjustment samples
It is possible for you the change the color hue and create copies of interesting colors. For example, turns reds into reddish-yellows or yellows into yellow-greens. (See “5. Adjusting the color hue” on page 5-5 for the actual setting procedure.)
①“Y-B” and a minus value selected... Greens near yellow are intensified towards yellow, and magentas near blue intensified towards blue.
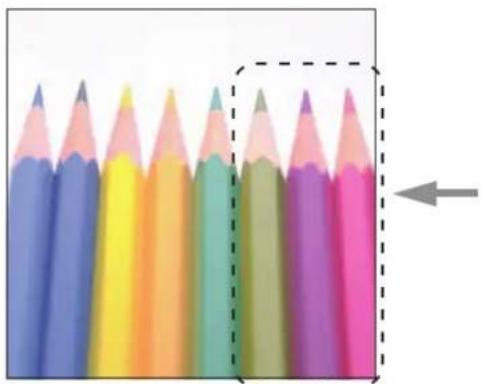
●Original
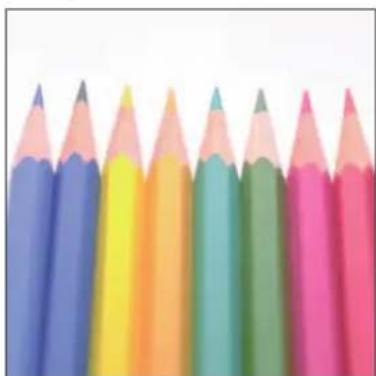
②“Y-B” and a plus value selected... Reds near yellow are intensified towards yellow, and cyans near blue intensified towards blue.
NOTE:
Samples in this operation guide were created in order simply to indicate the different effects of each function, and the resulting colors will, therefore, differ somewhat from the actual copies made with this copier.
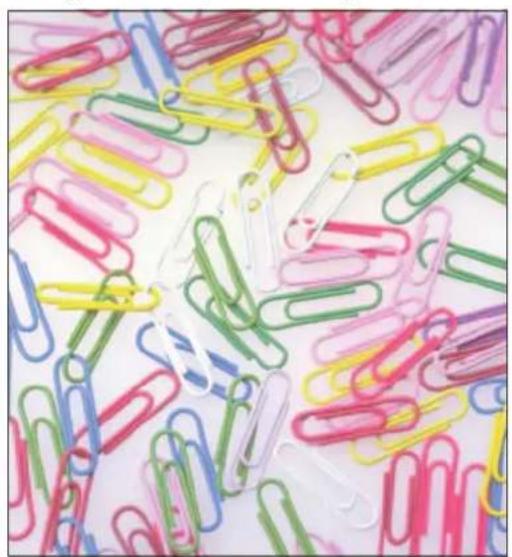
Sharpness adjustment samples
Adjusting the sharpness setting makes the contours of the image softer or sharper, as appropriate. (See “6. Adjusting the sharpness” on page 5-7 for the actual setting procedure.)
●Original
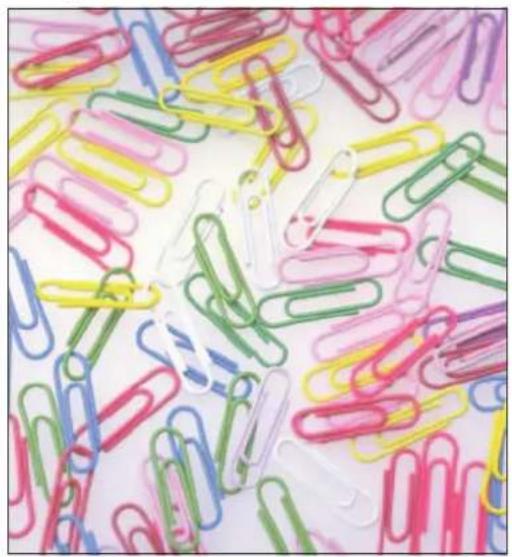
●Sharpness setting increased

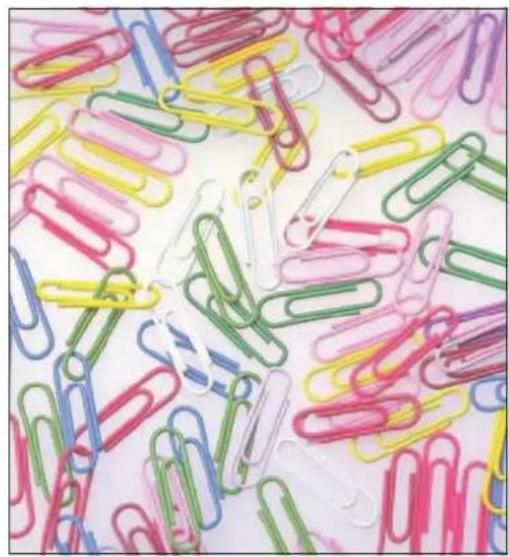
●Original ●Sharpness setting decreased

NOTE:
Samples in this operation guide were created in order simply to indicate the different effects of each function, and the resulting colors will, therefore, differ somewhat from the actual copies made with this copier.
Please read this Operation Guide before using the copier. Keep it close to the copier for easy reference.
The sections of this guide and parts of the copier marked with symbols are safety warnings meant to protect the user, other individuals and surrounding objects, and ensure correct and safe usage of the copier. The symbols and their meanings are indicated below.

DANGER: Indicates that serious injury or even death will very possibly result from insufficient attention to or incorrect compliance with the related points.

WARNING: Indicates that serious injury or even death may result from insufficient attention to or incorrect compliance with the related points.

CAUTION: Indicates that personal injury or mechanical damage may result from insufficient attention to or incorrect compliance with the related points.
Symbols
The symbol indicates that the related section includes safety warnings. Specific points of attention are indicated inside the symbol.

...... [General warning]

...... [Warning of danger of electrical shock]

...... [Warning of high temperature]
The ⊗ symbol indicates that the related section includes information on prohibited actions. Specifics of the prohibited action are indicated inside the symbol.

...... [Warning of prohibited action]

...... [Disassembly prohibited]
The ● symbol indicates that the related section includes information on actions which must be performed. Specifics of the required action are indicated inside the symbol.

...... [Alert of required action]

...... [Remove the power plug from the outlet]

[Always connect the copier to an outlet with a ground connection]
Please contact your service representative to order a replacement if the safety warnings in this Operation Guide are illegible or if the guide itself is missing. (fee required)
An original which resembles a bank note closely may not be copied properly in some rare cases because this copier is equipped with a counterfeiting prevention function.
Section 1
IMPORTANT! PLEASE READ FIRST. .. 1-1
CAUTION LABELS 1-1
INSTALLATION PRECAUTIONS 1-2
PRECAUTIONS FOR USE 1-3
Section 2
NAMES OF PARTS 2-1
-
Main body 2-1
-
Operation panel 2-3
●Initial mode 2-5
●Auto clear function .....2-5
●Automatic drawer switching function .....2-5
Section 3
PREPARATIONS 3-1
- Loading paper 3-1
(1) Note when adding paper....3-1
(2) Loading paper into a drawer ....3-1
(3) Setting paper on the multi-bypass tray .....3-3
- Setting the paper size for the multi-bypass tray ....3-4
- When setting OHP transparencies or thick paper on the multi-bypass tray ....3-5
●When printing onto envelopes ......3-6
-
Replacing the toner containers and the waste toner tank 3-8
-
Cleaning the charger 3-11
-
Replacing the oil roller 3-13
Section 4
BASIC OPERATION.... 4-1
- Basic copying procedure ....4-1
Section 5
COLOR COPY SETTINGS 5-1
-
Mono-color mode 5-1
-
Gloss mode....5-2
-
One-touch image quality adjustment .....5-3
-
Adjusting the color balance....5-4
-
Adjusting the color hue 5-5
-
Adjusting the sharpness 5-7
Section 6
FUNCTIONS 6-1
- Making enlarged and reduced copies ....6-1
(1) Auto magnification selection mode ......6-1
(2) Zoom mode 6-2
(3) Preset zoom mode....6-2
(4) XY zoom mode 6-3
-
Interrupt copying ....6-5
-
Making duplex (2-sided) copies from various types of originals [2-sided copy modes]....6-6
(1) Making duplex (2-sided) copies from a 2-sided original ....6-6
(2) Making duplex (2-sided) copies from an open-faced (books, etc.) original....6-6
(3) Making duplex (2-sided) copies from one-sided originals ....6-7
- Copying two-page originals onto separate sheets [Page separation modes] 6-9
(1) Page separation from book originals .....6-9
(2) Page separation from 2-sided originals .....6-9
- Making a margin space for binding [Margin mode] 6-11
(1) Left margin 6-11
(2) Top margin 6-11
(3) Front & back margin 6-11
- Making copies with clean edges [Border erase modes]....6-15
(1) Erasing blemishes from edges of copies (Sheet erase mode) 6-15
(2) Erasing blemishes from the edges and middle of copies made from books (Book erase mode)....6-15
(3) Selecting the erasing area
(Custom erase mode)....6-15
-
Inverting black and white AND colors [Invert mode] 6-17
-
Making mirror image copies [Mirror image mode]......6-18
-
Printing page numbers on copies [Print page numbers mode]....6-19
-
Feeding paper as a backing sheet for OHP transparencies
[Transparency + backing sheet mode]......6-21
(1) Copying onto the backing sheet ......6-21
(2) Leaving the backing sheet blank 6-21
- Preparing presentation materials to go with transparencies [Presentation mode]....6-23
(1) Copying onto the backing sheet ......6-23
(2) Leaving the backing sheet blank 6-23
- Adding covers and separation inserts to your copy sets [Insert sheet modes]....6-26
(1) Insert sheet modes 6-26
● Cover mode 6-26
●Separation insert mode....6-27
(2) Making copies with the insert sheet modes ...6-28
- Making one copy from either two or four originals [Layout modes] 6-32
● 2 in 1 6-32
● 4 in 1 ...... 6-32
-
Making booklets, etc. from sheet originals [Booklet mode] (Only available in duplex copiers)....6-34
-
Making booklets, etc. from book originals [Book to Book mode] (Only available in duplex copiers)....6-36
- Making both black & white AND color copies at the same time [BW/Selection mode]....6-38
- Enlarging the image and printing it out onto multiple sheets [Poster mode] 6-39
- Copying different sized originals onto one size of copy paper [Filing mode] 6-41
- Memorizing frequently used settings [Program function] ......6-43
(1) Registering a program 6-43
(2) Using programmed settings to make copies 6-44
- Confirming copy settings (Recall function) ......6-45
- Sorting automatically [Sort mode] 6-46
- Rotate copy function 6-47
- Energy-saving preheat function 6-47
- Auto shut-off function 6-48
●More about the auto shut-off function .....6-48
Section 7 COPIER MANAGEMENT .... 7-1
- Copy management ....7-1
(1) Copy management procedure table .....7-1
(2) Accessing the copy management procedures ....7-3
(3) Performing copy management procedures .....7-4
●Registering new department codes .....7-4
●Deleting department codes 7-5
●Changing copy limits 7-6
●Clearing copy counts 7-7
●Printing out the department code list .....7-8
●Checking the copy counts 7-9
●Printing out the copy management list .....7-10
●Turning copy management ON/OFF 7-10
(4) Making copies when copy management is turned ON 7-11
- Default settings 7-12
(1) Copy default settings 7-12
(2) Accessing the copy default settings .....7-16
① Exposure mode 7-17
② Exposure steps 7-17
③ Auto exposure adjustment (color) .....7-17
④ Auto exposure adjustment (b/w) .....7-17
⑤ Mixed original density 7-18
⑥ Text original density 7-18
⑦ Print original density 7-18
⑧ Photo original density 7-18
⑨ Map original density 7-19
⑩ Copy mode 7-19
⑪ Original quality 7-19
⑫ Default drawer (b/w) 7-19
⑬ Default drawer (color) 7-20
⑭ Copy limit 7-20
⑮ Margin width 7-20
⑯ Erased border width 7-20
⑰ Custom erase size 7-21
⑱ Insert tray 7-21
⑲ Sort mode ON/OFF (Output form) .....7-21
⑳ Eject destination .....7-22
②1 ACS adjustment 7-22
②2 Auto color adjustment 7-22
②3 Drum refresh 7-23
⑳ Rotate sort ON/OFF 7-23
(3) Machine default settings 7-24
(4) Accessing the machine default settings .....7-27
① Status report print out 7-28
② Auto drawer switching ON/OFF 7-28
③ Auto shut-off ON/OFF 7-28
④ Special paper location 7-28
⑤ APS for special paper ON/OFF 7-29
⑥ Color copy paper location 7-29
⑦ Auto preheat time 7-29
⑧ Auto shut-off time 7-29
⑨ Display contrast adjustment .....7-30
⑩ Management PIN code 7-30
⑪ Silent mode ON/OFF 7-30
⑫ Day & time 7-30
⑬ Checking the total counter 7-31
⑭ Counter report print out 7-31
⑮ Type of paper 7-31
- Changing the language used for messages .....7-32
Section 8 OPTIONAL EQUIPMENT .... 8-1
(1) SRDF (Sheet-thru Reverse Document feeder) ..... 8-1
●Acceptable originals 8-1
Notes on acceptable documents 8-1
- Names of parts ....8-1
●Setting originals in the SRDF 8-2
●Setting originals on the platen 8-3
●Auto selection mode 8-3
(2) Paper Feeder 8-4
(3) Document Finisher....8-4
(4) Memory Copy Board 8-4
(5) Key Counter 8-5
●Setting the Key Counter 8-5
(6) Printer Kit 8-5
(7) Fax Kit....8-5
(8) Network Scanner Kit 8-6
Section 9
TROUBLESHOOTING 9-1
- If one of the following messages is displayed....9-1
- If paper jams 9-4
(1) Misfeed location indicators 9-4
(2) Cautions....9-4
(3) Removal procedures....9-5
- If other trouble occurs .....9-16
Section 10
●Cleaning the original cover 10-1
●Cleaning the platen 10-1
- Specifications....10-2
- Installing the optional equipment .....10-3
Appendix: Functions and settings combination chart .....10-5
● MAKING FULL USE OF THE COPIER'S ADVANCED FUNCTIONS
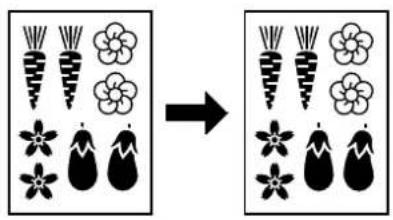
1 Having the copier automatically select paper of the same size as the original
2 Various functions for making enlarged and reduced copies
■Enlarging/reducing copies to a specified drawer size
![graph TD A["8½" X 11" (A4)"] --> B["11" X 17": 129%"] A --> C["5½" X 8½": 64%"] B --> D["(A3)"] B --> E["(A5)"] B --> F["(70%)"] C --> G["≥WW~"] C --> H["≥WW~"]](/content/2026/05/768513/images/348dba4b04c6570d29db09052eb2219755ff27a00d004a2f1caa193e0e61f745.jpg)
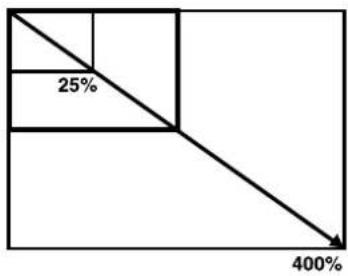
■Enlarging/reducing copies to a desired size between 25% and 400%
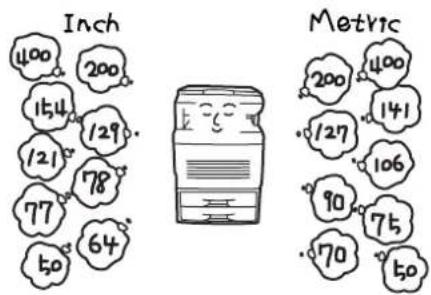
■Using the one-touch keys to select the magnification ratio
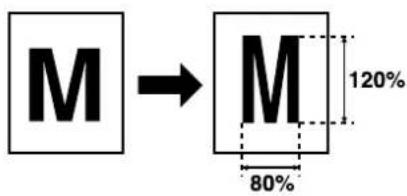
■Enlarging/reducing the length and width separately
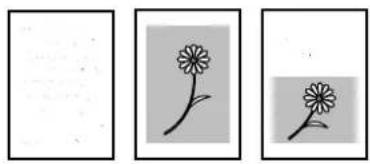
3 Making clear reproductions of photographs
4 Making duplex (2-sided) copies from various types of originals <2-sided copy modes> (Page 6-6)
![graph TD A["1"] --> B["2"] B --> C["3"] C --> D["4"] D --> E["5"] E --> F["1"] style A fill:#f9f,stroke:#333 style F fill:#bbf,stroke:#333](/content/2026/05/768513/images/288e22a56ac8527a1c1cd35c828a3658bccc73b89ce1b7f5314e0e15a2d3e122.jpg)
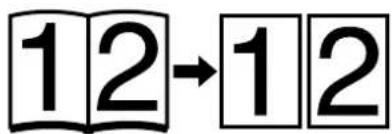
5 Copying two-page originals onto separate sheets
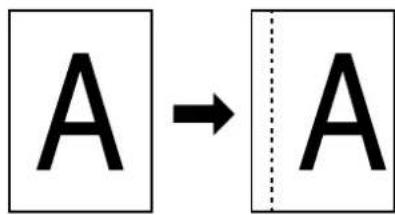
6 Creating a margin on the copies
7 Making copies with clean edges
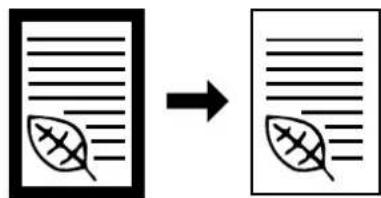
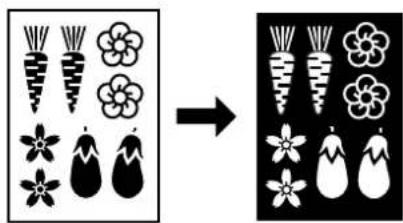
8 Inverting black and white AND colors
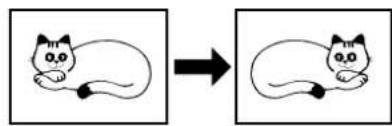
9 Making mirror image copies
MAKING FULL USE OF THE COPIER'S ADVANCED FUNCTIONS
10 Printing page numbers on copies
![graph TD A["A"] --> B["B"] A --> C["C"] A --> D["D"] B --> E["-->"] C --> E D --> E E --> F["1-"] E --> G["-2-"] E --> H["-3-"] E --> I["-4-"]](/content/2026/05/768513/images/bfe4299e96f6b95dd851ce47862e839f1f01b79cccb69312a097cd94df47a95c.jpg)
11 Feeding paper as a backing sheet for OHP transparencies
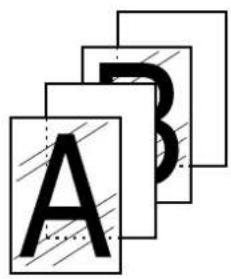
12 Preparing presentation materials to go with transparencies
![graph TD A["1"] --> C["1"] B["2"] --> C["1"] D["3"] --> E["2"] D["3"] --> F["3"] G["1"] --> H["2"] I["2"] --> H["2"] J["3"] --> K["1"] J["3"] --> L["2"] J["3"] --> M["3"]](/content/2026/05/768513/images/ea830f731c11a39a12a1942c2ba28a1516761892a061bdcb533829a2fba0c526.jpg)
13 Adding covers and separation inserts to your copy sets
![graph TD A["1"] --> C["2"] B["3"] --> C["4"] D["4"] --> E["5"] E["5"] --> F["1"] style A fill:#f9f,stroke:#333 style B fill:#f9f,stroke:#333 style C fill:#f9f,stroke:#333 style D fill:#f9f,stroke:#333 style E fill:#f9f,stroke:#333 style F fill:#f9f,stroke:#333](/content/2026/05/768513/images/08c137e0d2c93202ca41e190e24efa010e0eda5e87ed035a154ddf4633b76c74.jpg)
14 Making one copy from either two or four originals
![graph TD A["3D Card with Spades"] --> B["4D Card with Hearts and Clubs"] C["3D Card with Diamonds"] --> D["4D Card with Hearts and Clubs"]](/content/2026/05/768513/images/4849a5bd28431df99c443886cfb61036b21bbdfbf1b6b6eb4c197777d84ed40f.jpg)
15 Making booklets, etc., from sheet originals
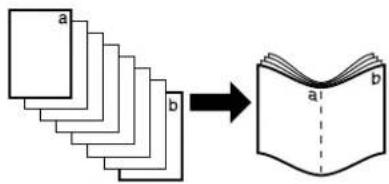
16 Making booklets, etc. from books
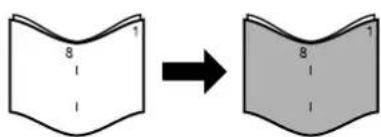
17 Making both black & white AND color copies at the same time
![graph TD A["Apple"] --> B["Image 1"] A --> C["Image 2"] A --> D["Image 3"] A --> E["Image 4"]](/content/2026/05/768513/images/8dc5436d1a640b4df34b13416419e2ebd68ae5b8f26f724fa15a505d713fdcc9.jpg)
18 Enlarging the image and printing it out onto multiple sheets
![graph TD A["Flower illustrations"] --> B["C carrot"] A --> C["Fruit icons"] B --> D["C carrot with five flowers"] B --> E["Fruit with six apples"] C --> F["C carrot with four apples"] C --> G["Fruit with four eggplants"]](/content/2026/05/768513/images/c144d399d35a55de67b9c3eea9e112cce23fef758b9f5f671ed09f607e248c1e.jpg)
19 Copying different sized originals onto one size of copy paper
![graph LR A["A"] --> B["B"] B --> A](/content/2026/05/768513/images/7626db42892cbd864c4d9e2977f989eedcbe02c6aaac8877dd7c29c1c9162b08.jpg)
20 Memorizing frequently used settings

21 Sorting automatically
![graph TD A1["A"] --> E1["A"] A2["B"] --> E1["B"] A3["C"] --> E2["C"] A4["D"] --> E2["D"] E1 --> F1["A"] E2 --> F2["B"] E3 --> F3["C"] E4 --> F4["D"]](/content/2026/05/768513/images/9abf4bc995fdc2735964792986b5d96dd6503e661ae8f798bc2351211c059da4.jpg)
MAKING FULL USE OF THE COPIER'S ADVANCED FUNCTIONS
22 Changing the language used for messages

23 Using department codes to manage copy use
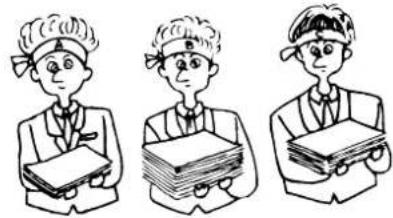
24 A full range of optional equipment is available
■SRDF (Sheet-thru Reverse Document Feeder) (Page 8-1)
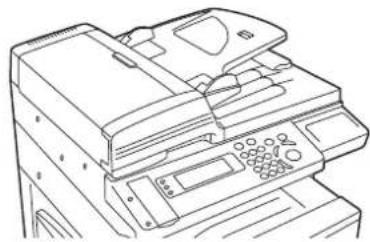
■Paper Feeder (Page 8-4)
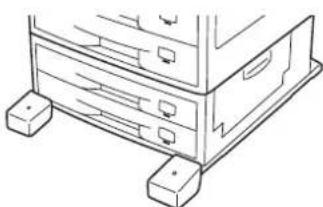
* To prevent the copier from tipping over because of weight in the copier and the upper paper drawers, the caster kit must be installed at the bottom-most paper feeder, when an optional paper feeder is installed with the copier.
CAUTION
To prevent the possibility of accidents due to tilting the copier body, always turn the desk's stopper bolts until they make firm contact with the floor during initial installation or whenever the machine is moved.
CAUTION
To prevent the copier from tipping over, the optional caster kit must be installed when the copier is installed with an optional paper feeder.
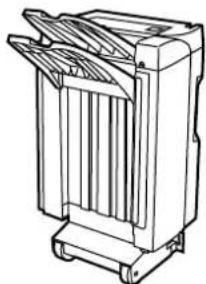
■ Document Finisher (Page 8-4)
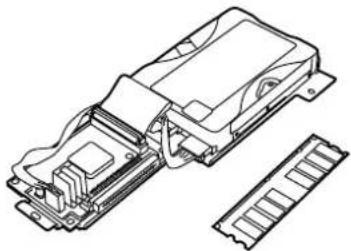
■ Memory Copy Board (Page 8-4)
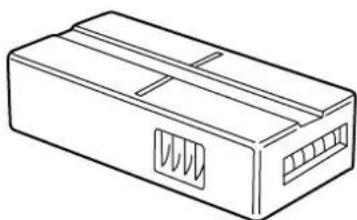
■ Key Counter (Page 8-5)
■Printer Kit (Page 8-5)
■Fax Kit (Page 8-5)
■Network Scanner Kit (Page 8-6)

CAUTION LABELS
Caution labels have been attached to the copier at the following locations for safety purposes. BE SUFFICIENTLY CAREFUL to avoid fire or electric shock when removing a paper jam or when replacing toner.
Label 1, 2
High temperature inside. Do not touch parts in this area, because there is a danger of getting burned.

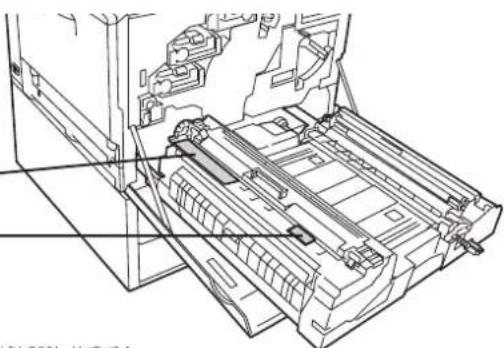
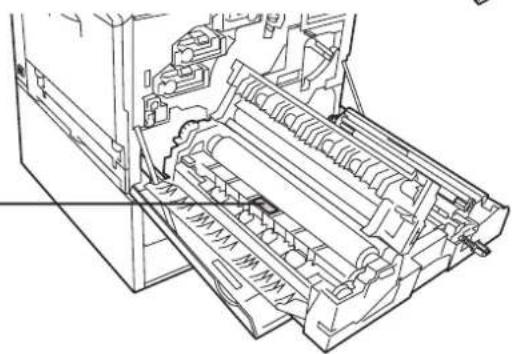
Label 3
High temperature inside. Do not touch parts in this area, because there is a danger of getting burned.

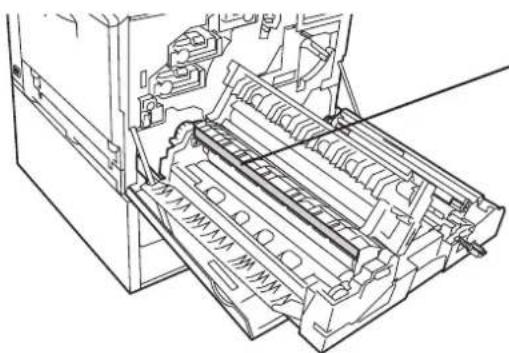
Label 4
High temperature inside. Do not touch parts in this area, because there is a danger of getting burned.

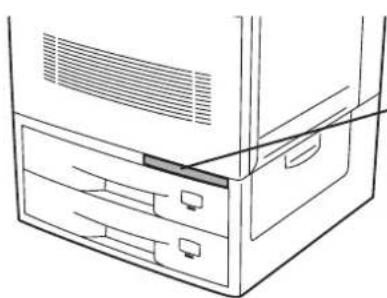
Label 5
To prevent the copier from tipping over, the optional caster kit must be installed when the copier is installed with an optional paper feeder.

NOTE: DO NOT remove these labels.
■Environment

CAUTION
- Avoid placing the copier on or in locations which are unstable or not level. Such locations may cause the copier to fall down or fall over. This type of situation presents a danger of personal injury or damage to the copier. ....

- Avoid locations with humidity or dust and dirt. If dust or dirt become attached to the power plug, clean the plug to avoid the danger of fire or electrical shock....

- Avoid locations near radiators, heaters, or other heat sources, or locations near flammable items, to avoid the danger of fire.

- To keep the copier cool and facilitate changing of parts and maintenance, allow access space as shown below.
Leave adequate space, especially around the rear cover, to allow air to be properly ventilated out of the copier....

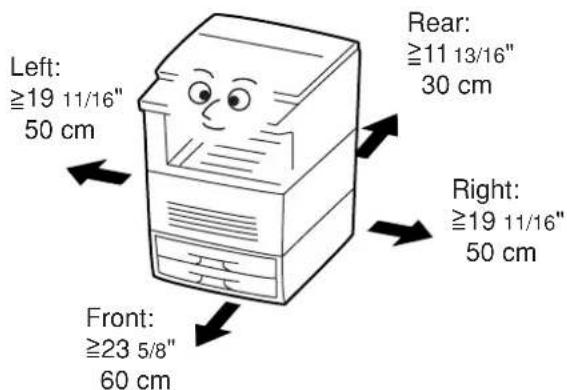
Other precautions
- Adverse environmental conditions may affect the safe operation and performance of the copier. Install in an air-conditioned room (recommended room temperature: around 68°F (20°C) , humidity: around 65% RH ) and avoid the following locations when selecting a site for the copier.
- Avoid locations near a window or with exposure to direct sunlight.
- Avoid locations with vibrations.
- Avoid locations with drastic temperature fluctuations.
- Avoid locations with direct exposure to hot or cold air.
- Avoid poorly ventilated locations.
- If the floor is delicate against casters, when this product is moved after installation, the floor material may be damaged.
- To prevent the possibility of accidents due to tilting the copier body, always turn the desk's stopper bolts until they make firm contact with the floor during initial installation or whenever the machine is moved.
- To prevent the copier from tipping over, the optional caster kit must be installed when the copier is installed with an optional paper feeder.
- During copying, some ozone is released, but the amount does not cause any ill effect to one's health. If, however, the copier is used over a long period of time in a poorly ventilated room or when making an extremely large number of copies, the smell may become unpleasant. To maintain the appropriate environment for copy work, it is suggested that the room be properly ventilated.
■Power supply/Grounding the copier

WARNING
- DO NOT use a power supply with a voltage other than that specified. Avoid multiple connections in the same outlet. These types of situations present a danger of fire or electrical shock. ....

- Plug the power cord securely into the outlet. If metallic objects come in contact with the prongs on the plug, it may cause a fire or electric shock.

• Always connect the copier to an outlet with a ground connection to avoid the danger of fire or electrical shock in case of an electric short. If an earth connection is not possible, contact your service representative.

Other precautions
- Connect the power plug to the closest outlet possible to the copier.
- The power supply cord is used as the main disconnect device. Ensure that the socket/outlet is located/installed near the equipment and is easily accessible.
■Handling of plastic bags

WARNING
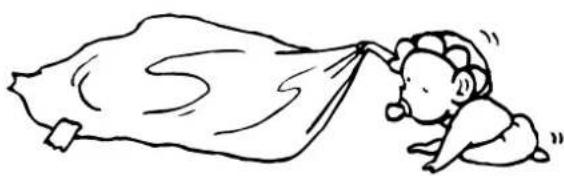
- Keep the plastic bags that are used with the copier away from children. The plastic may cling to their nose and mouth causing suffocation......

■Cautions when using the copier

WARNING
- DO NOT place metallic objects or containers with water (flower vases, flower pots, cups, etc.) on or near the copier. This of situation presents a danger of fire or electrical shock should they fall inside.
- DO NOT remove any of the covers from the copier as there is a danger of electrical shock from high voltage parts inside the copier. ....
- DO NOT damage, break or attempt to repair the power cord. DO NOT place heavy objects on the cord, pull it, bend it unnecessarily or cause any other type of damage.
These types of situations present a danger of fire or electrical shock.
- NEVER attempt to repair or disassemble the copier or its parts as there is a danger of fire, electrical shock or damage to the laser. If the laser beam escapes, there is a danger of it causing blindness....
- If the copier becomes excessively hot, smoke appears from the copier, there is an odd smell, or any other abnormal situation occurs, there is a danger of fire or electrical shock. Turn the main switch OFF ( φ ) immediately, remove the power plug from the outlet and contact your service representative.
- If anything harmful (paper clips, water, other fluids, etc.) falls into the copier, turn the main switch OFF ( φ immediately. Next, remove the power plug from the outlet to avoid the danger of fire or electrical shock. Then contact your service representative.
- DO NOT remove or connect the power plug with wet hands, as there is a danger of electrical shock.
- ALWAYS contact your service representative for maintenance or repair of internal parts.


CAUTION
- DO NOT pull the power cord when removing it from the outlet. If the power cord is pulled, the wires may become broken and there is a danger of fire or electrical shock. (ALWAYS grasp the power plug when removing the power cord from the outlet.)
- ALWAYS remove the power plug from the outlet when moving the copier. If the power cord is damaged, there is a danger of fire or electrical shock.
- If the copier will not be used for a short period of time (overnight, etc.), turn the main switch OFF (Φ)
If it will not be used for an extended period of time (vacations, etc.), remove the power plug from the outlet for safety purposes during the time the copier is not in use. ....

- ALWAYS hold the designated parts only when lifting or moving the copier.

- For safety purposes, ALWAYS remove the power plug from the outlet when performing cleaning operations.

- If dust accumulates within the copier, there is a danger of fire or other trouble. It is therefore recommended that you consult with your service representative in regard to cleaning of internal parts. This is particularly effective if accomplished prior to seasons of high humidity. Consult with your service representative in regard to the cost of cleaning the internal parts of the copier. ......


Other precautions
- DO NOT place heavy objects on the copier or cause other damage to the copier.
- DO NOT open the front cover, turn off the main switch, or pull out the power plug during copying.
- When lifting or moving the copier, contact your service representative.
- Do not touch electrical parts, such as connectors or printed circuit boards. They could be damaged by static electricity.
- DO NOT attempt to perform any operations not explained in this handbook.
- CAUTION : Use of controls or adjustments or performance of procedures other than those specified herein may result in hazardous radiation exposure.
- Do not open any cover or turn the power off while the motor inside can be heard regardless of the condition of the copier.
- Do not look directly at the light from the scanning lamp as it may cause your eyes to feel tired or painful.
- This product engages a cooling fan in order to cool off internal parts even after the main switch is turned OFF. In order to maintain its cooling effect, do not remove the power plug from the outlet or disconnect the power to the outlet itself.
* Removing the power plug from the outlet will cause the cooling fan to stop and may result in internal damage to the machine due to heat.
* If you are not going to use this product for a prolonged period of time, turn the main switch OFF and then wait about 30 minutes before removing the power plug from the outlet.
■Cautions when handling consumables

CAUTION
- DO NOT attempt to incinerate the toner containers or the waste toner tank. Dangerous sparks may cause burns.
- Keep the toner containers and the waste toner tank out of the reach of children. ....
- If toner happens to spill from the toner containers or the waste toner tank, avoid inhalation and ingestion, as well as contact with your eyes and skin.


- If you do happen to inhale toner, move to a place with fresh air and gargle thoroughly with a large amount of water. If coughing develops, contact a physician.
- If you do happen to ingest toner, rinse your mouth out with water and drink 1 or 2 cups of water to dilute the contents of your stomach. If necessary, contact a physician.
- If you do happen to get toner in your eyes, flush them thoroughly with water. If there is any remaining tenderness, contact a physician.
- If toner does happen to get on your skin, wash with soap and water.
- DO NOT attempt to force open or destroy the toner containers or the waste toner tank.

Other precautions
• After use, ALWAYS dispose of the toner containers and the waste toner tank in accordance with Federal, State and Local rules and regulations.
- Store all consumables in a cool, dark location.
- If you will not be using the copier for a prolonged period of time, remove all paper from the drawer(s) and the multi-bypass tray and seal in its original packaging.
1. Main body
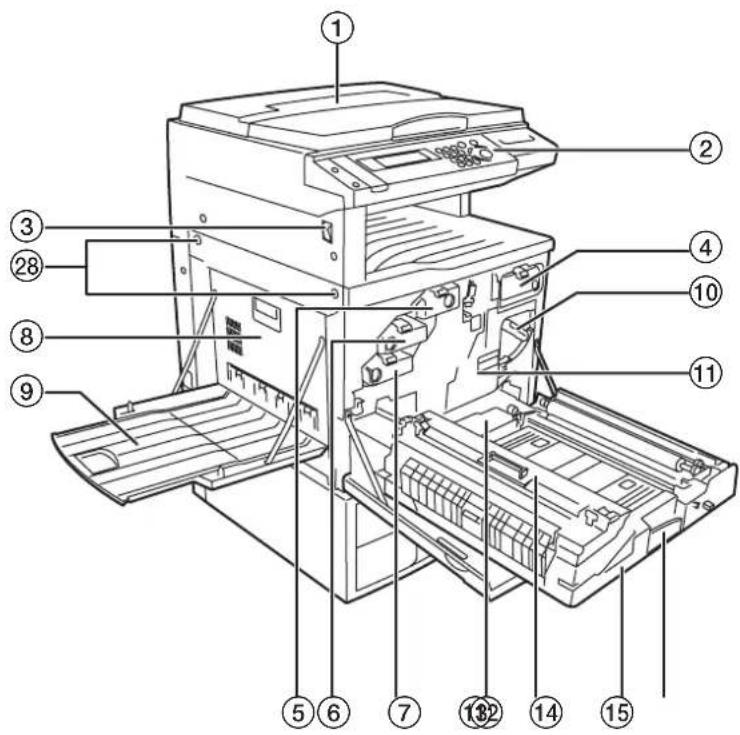
① Original cover
② Operation panel (Perform copy operations here.)
③ Main switch (Turn this switch ON ( | ) before copying.)
④ Toner container (black)
⑤ Toner container (yellow)
⑥ Toner container (magenta)
⑦ Toner container (cyan)
⑧ Left cover (Open this cover if a paper misfeed occurs in the paper conveyor section.)
⑨ Copy eject tray (Finished copies can be ejected and stored on this tray.)
⑩ Transfer unit release lever (Operate this lever if a paper misfeed occurs in the transfer section.)
⑪ Transfer unit
⑫ Waste toner tank
⑬ Oil roller unit
⑭ Paper conveyor
⑮ Paper conveyor release lever (Operate this lever if a paper misfeed occurs in the paper conveyor section or during cleaning operations.)
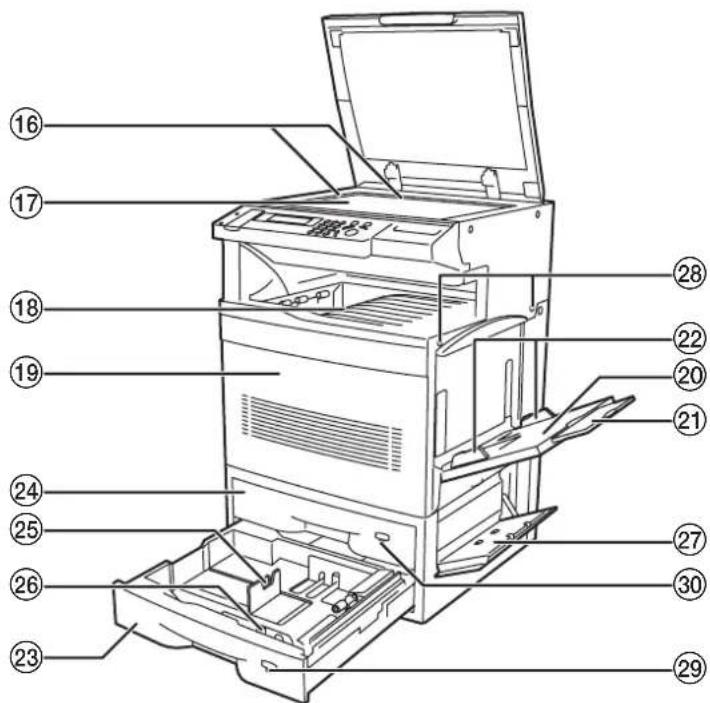
16 Original size indicator lines (Be sure to align the original with these lines when setting an original on the platen.)
⑰ Platen (Set originals here for copying. Lay originals face-down and align the edges with the size indicator lines located on the left and rear sides of the platen.)
⑱ Copy storage table (Finished copies can be ejected and stored on this table.)
19 Front cover (Open this cover if a paper misfeed occurs inside the copier, when you need to replace a toner container, the waste toner tank or the oil roller, as well as during cleaning operations.)
⑳ Multi-bypass tray
②1 Multi-bypass extension (Pull out this extension when copying onto 8 1/2" x 11" [A4R] size paper or larger.)
②2 Insert guides (Align these guides to fit the width of the paper that is to be set on the multi-bypass tray.)
②3 No.2 drawer (This drawer has a storage capacity of 500 sheets of copy paper.)
②4 No.1 drawer (in standard copiers [for 1-sided copies only]) (This drawer has a storage capacity of 500 sheets of copy paper.) Duplex Unit (in duplex copiers [for 2-sided copies]) (This unit allows you to make duplex [2-sided] copies.)
⑲ Paper length guide release levers (Pinch these levers and adjust the guide plate to fit the length of the paper that is to be loaded in that drawer.)
②6 Paper width guide release levers (Pinch these levers and adjust the guide plates to fit the width of the paper that is to be loaded in that drawer.)
⑳ Right side drawer cover (Open this cover if a paper misfeed occurs in the paper feed section.)
⑳ Handles for transport (Pull these bars out – there are two on both the left and right sides of the copier – in order to use them as handles.)
29 Paper size indicator (This indicator will remain out until the corresponding drawer has been selected. Once the drawer is selected, the indicator will light when there is paper loaded in that drawer, and it will blink when the drawer is empty or when a paper jam has occurred in that drawer.)
③0 Paper size indicator (in standard copiers [for 1-sided copies only]) (This indicator will remain out until the corresponding drawer has been selected. Once the drawer is selected, the indicator will light when there is paper loaded in that drawer, and it will blink when the drawer is empty or if a paper jam has occurred in that drawer.) Duplex Unit indicator (in duplex copiers [for 2-sided copies]) (This indicator will light when any one of the 2-sided copy modes is selected, and it will blink if a paper jam has occurred in the Duplex Unit. The indicator will remain out as long as the 2-sided copy modes are not in use.)
2. Operation panel
Inch specifications
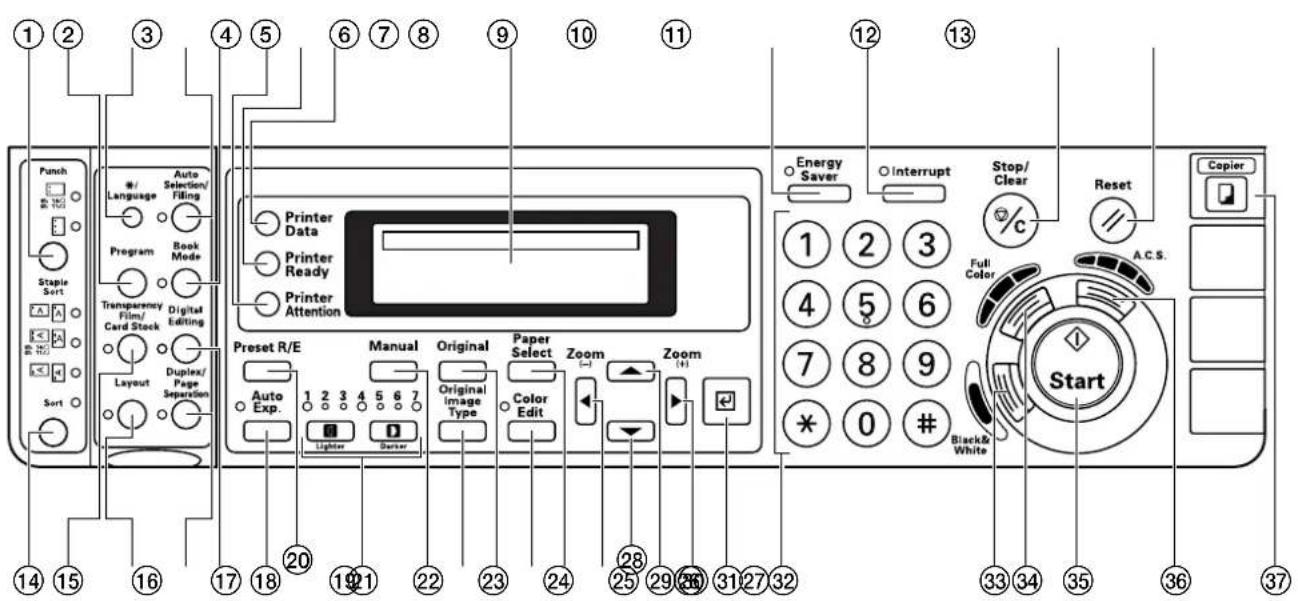
Metric specifications
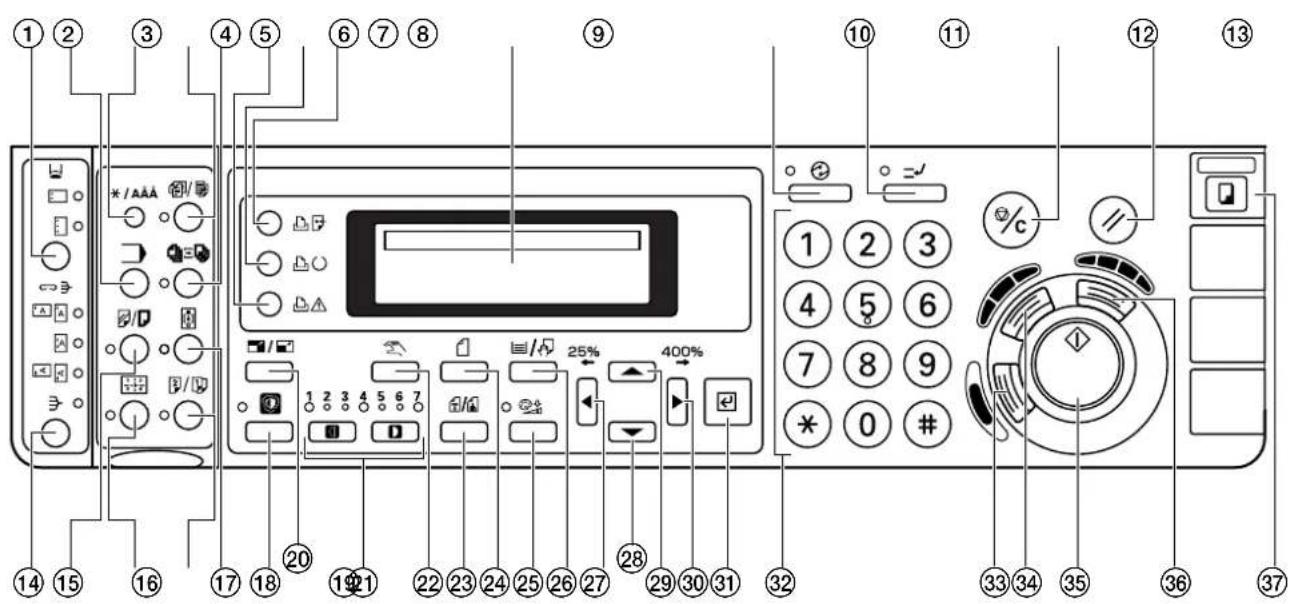
① Punch key
(Press this key when you want to use the hole punch function of the optional Document Finisher. See page 8-4.)
② Program key
(Press this key when you want to copy according to programmed settings. See page 6-43.)
③ */Language key
(Press this key when you want to perform default settings as well as those related to copy management, etc.)
④ Auto Selection/Filing key & indicator
(Press this key when you want to use the auto selection mode or the filing mode. The indicator to the left of the key will light. The optional DF must be installed in order to use these functions. See page 6-41 and 8-3.)
⑤ Book Mode key & indicator
(Press this key when you want to use the booklet mode, the BW/selection mode or the poster mode. The indicator to the left of the key will light. See pages 6-34, 6-36, 6-38 and 6-39.)
⑥ Printer Attention indicator
(This indicator lights if a printing error occurs when you are using the optional printer functions of this machine.)
⑦ Printer Ready indicator
(This indicator lights to indicate a "print-ready" state when you are using the optional printer functions of this machine.)
⑧ Printer Data indicator
(This indicator lights to indicate that data is being received when you are using the optional printer functions of this machine.)
⑨ Message display
(Display messages on how to operate the copier as well as when trouble occurs. It is possible for you to adjust the contrast of the LCD display. See “⑨ Display contrast adjustment” on page 7-30.)
⑩ Energy Saver key & indicator
(Press this key to light the indicator when you want to turn the energy-saving preheat mode ON. See page 6-47.)
⑪ Interrupt key & indicator
(Press this key to light the indicator when you want to perform Interrupt copying. See page 6-5.)
⑫ Stop/Clear key
(Press this key when you want to stop copying or change the number of copies to be made. Press this key as well to return to the previous setting screen, such as when setting copy functions, etc.)
⑬ Reset key
(See “● Initial mode” on page 2-5.)
⑭ Sort key
(Press this key to light the indicator when you want to sort copies into separate sets, or for sorting or grouping and/or stapling copies with the optional Document Finisher. See page 6-46.)
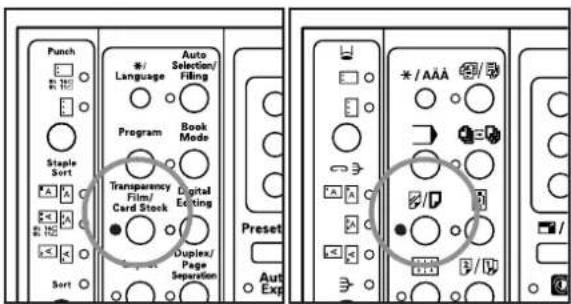
⑮ Transparency Film / Card Stock key & indicator
(Press this key to light the indicator when you want to copy use special paper, such as OHP transparencies or thick paper, or to use the insert sheet modes. See page 3-5, 6-21, 6-23 and 6-26.)
⑯ Layout key & indicator
(Press this key to light the indicator when you want to use the layout modes. See page 6-32.)
⑰ Duplex / Page Separation key & indicator
(Press this key to light the indicator when you want to use the 2-sided copy modes or the page separation modes. [The 2-sided copy modes are only available in duplex [2-sided copies] copiers.] See page 6-6 and 6-9.)
⑱ Digital Editing key & indicator
(Press this key to light the indicator when you want to use the mono-color mode, the margin mode, the border erase modes, the invert mode, the mirror image mode or the print page numbers mode. See page 5-1, 6-11, 6-15, 6-17, 6-18 and 6-19.)
⑲ Auto Exp. key & indicator
(Press this key to light the indicator when you want to select the auto exposure mode. See page 4-3.)
⑳ Preset R/E key
(Press this key when you want to use the preset zoom mode. See page 6-2.)
②1 Copy exposure adjustment keys & indicators
(Press these keys when you want to manually adjust the copy exposure. The lit indicator will show the present copy exposure. See page 4-3.)
②2 Manual key
(Press this key until "AMS" is shown in the message display when you want to manually select the copy magnification ratio.)
②3 Original Image Type key
(Press this key in order to select the image quality. See page 4-3.)
⑳ Original key
(Press this key in order to select the size of the original.)
⑲ Color Edit key & indicator
(Press this key in order to select the color quality. The indicator to the left of the key will light. See page 5-2, 5-3, 5-4, 5-5 and 5-7.)
②6 Paper Select key
(Press this key when you want to select a specific paper size and thereby change the drawer from which paper will be fed. See page 4-2.)
⑳ cursor key / Zoom(-)
(Press this key when you want to move the cursor in the message display to the left, as well as to decrease the copy magnification ratio in the zoom mode.)
⑳ cursor key
(Press this key when you want to move the cursor downward in the message display.)
⑲ cursor key
(Press this key when you want to move the cursor upward in the message display.)
③0 ▶ cursor key / Zoom(+)
(Press this key when you want to move the cursor in the message display to the right, as well as to increase the copy magnification ratio in the zoom mode.)
③1 Enter key
(Press this key when you want to confirm selected functions and other items in the message display.)
③2 Keypad
(Use the numeric keys, as well as the star (*and pound (#) keys, when you want to set the number of copies to be made or enter other values.)
③3 Black&White key
(Press this key when you want to make monochrome [B/W] copies. See page 4-1.)
③4 Full Color key
(Press this key when you want to make full color copies. See page 4-1.)
③5 Start key
(Press this key when the indicator is lit green and you want to start copying.)
③6 A.C.S. key
(Press this key when you want the copier to automatically make full color copies from color originals, and black and white copies from monochrome [B/W] originals. See page 4-1.)
③7 Copier key
(Press this key when you are using the optional printer functions, scanner functions and/or fax functions of this machine and you want to change to the copy operation mode.)
* The optional fax functions are only available for use in inch specification copiers.
●Initial mode (at the end of warm-up or when the Reset key is pressed)
Inch specifications
In the initial mode, paper of the same size as the original is selected automatically ("auto paper selection mode") and the magnification ration is set to "100%" (1:1), the number of copies to be made is set to "1", "manual exposure mode" is selected for the copy exposure and the image quality is set to "Mix" (text&photo mode).
* It is possible for you to change the default setting for the copy exposure in the initial mode from the "manual exposure mode" to the "auto exposure mode". (See “① Exposure mode” on page 7-17.)
Metric specifications
In the initial mode, paper of the same size as the original is selected automatically ("auto paper selection mode") and the magnification ration is set to "100%" (1:1), the number of copies to be made is set to "1", "auto exposure mode" is selected for the copy exposure and the image quality is set to "Mix" (text&photo mode).
* It is possible for you to change the default setting for the copy exposure in the initial mode from the "auto exposure mode" to the "manual exposure mode". (See “① Exposure mode” on page 7-17.)
●Auto clear function
About 90 seconds after copying stops, the auto clear function will automatically engage and the copier will return to the same settings as those after warm up (initial mode settings). (However, the copy exposure mode and the image quality mode will not change.) Copies can continually be made using the same settings (copy mode, number of copies and exposure mode) if the next batch of copying is started before the auto clear function engages.
● Automatic drawer switching function
If two drawers contain the same size and orientation of paper and the paper in one drawer runs out during copying, the automatic drawer switching function will switch paper feed from the empty drawer to the other drawer that still contains paper.
* The automatic drawer switching function can be turned OFF. (See “② Auto drawer switching ON/OFF” on page 7-28.)
* The automatic drawer switching function can also be used for drawers that contain special paper or color paper. (In order to use this function with those drawers, make sure that "On" has been selected under "⑤ APS for special paper ON/OFF" on page 7-29.)
1. Loading paper
Copy paper can either be loaded into the drawer(s) or set on the multi-bypass tray.
(1) Note when adding paper
After taking new paper out of its packaging, be sure to fan through them a few times to separate the sheets before loading the paper into a drawer or setting it on the multi-bypass tray.

(2) Loading paper into a drawer
Up to 500 sheets of standard paper (75 g/m 2 – 90 g/m 2 ) or color paper can be loaded into the drawer that is included with your copier. Up to 250 sheets of paper can be loaded into each drawer of the optional Paper Feeder.
- Standard accessory drawer(s) Standard copier (for 1-sided copies only): Two 500-sheet capacity drawers Duplex copier (for 2-sided copies): One 500-sheet capacity drawer
- Acceptable sizes of paper Inch specifications 500-sheet capacity drawers: 11" x 8 1/2", 8 1/2" x 14" and 11" x 17" 250-sheet capacity drawers: 8 1/2" x 11", 11" x 8 1/2", 8 1/2" x 14" and 11" x 17"
Metric specifications
500-sheet capacity drawers: A5R, B5R, A4, B4 and A3
250-sheet capacity drawers: A5R, B5R, A4R, A4, B4 and A3
* The 500-sheet capacity drawers will not accept 8 1/2" x 11" [A4R] size paper.
* Neither type of drawer will accept 5 1/2" x 8 1/2" or 8 1/2" x 5 1/2" size paper.
IMPORTANT!
- BE SURE to use paper that is specified for color copy use in order to make clear color copies.
- DO NOT use paper such as that designated for inkjet printers or any paper treated with special coating.
- Specify the type of paper that is loaded into each drawer (plain, recycled, etc.) under “⑮ Type of paper” on page 7-31.
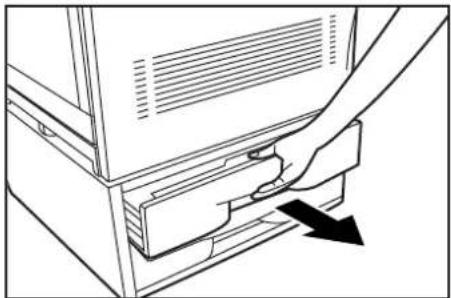
1 Pull the drawer out toward you as far as it will go. * DO NOT pull more than one drawer out at a time.
2 Open the paper feed unit (shown as ① in the illustration).
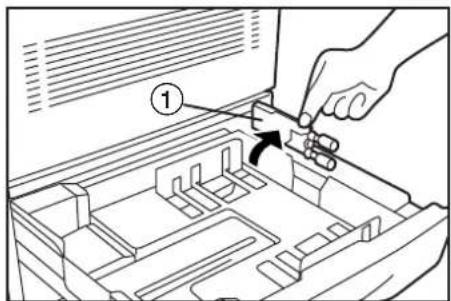
NOTE
DO NOT touch the rollers (shown as ② in the illustration).

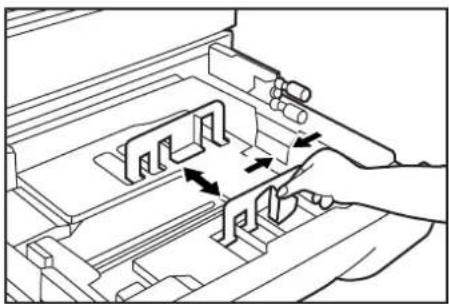
3 Pinch the levers for the paper width guide plates and move the plates to fit the width of the paper that is to be loaded in that drawer.
* The paper sizes are marked on the bottom of the drawer.
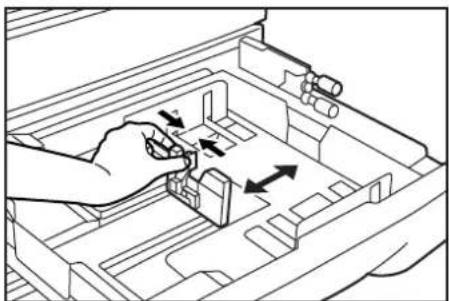
4 Pinch the levers for the paper length guide plate and move the plate to fit the length of the paper that is to be loaded in that drawer.
* The paper sizes are marked on the bottom of the drawer.
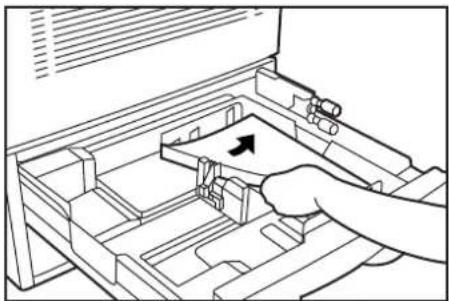
5 Align the paper flush against the right side of the drawer, and then set the paper in the drawer.
IMPORTANT!
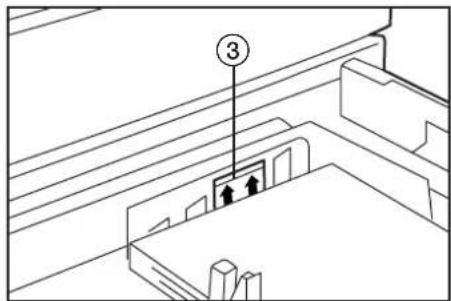
- DO NOT load more paper than indicated by the sticker located on the inside of the drawer (shown as ③ in the illustration).
- When you are loading paper into the drawer, make sure that the side to be copied onto is facing downward. (The copy side is the side facing upward when the package is opened.)
- Make sure that the paper is set securely against the paper length and width guide plates. If there is a gap between the paper and any guide plate, readjust the guide plates to fit the paper snugly. Anytime paper does not fit snugly against the guide plates, the message display may not indicate the correct size of paper for that drawer.
6 Close the paper feed unit.
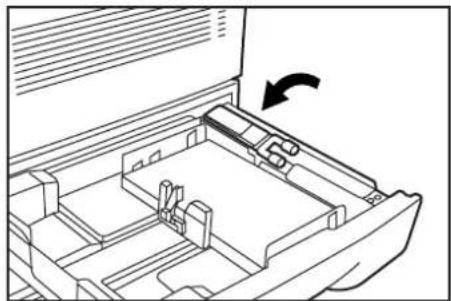
7 Gently push the drawer back in.
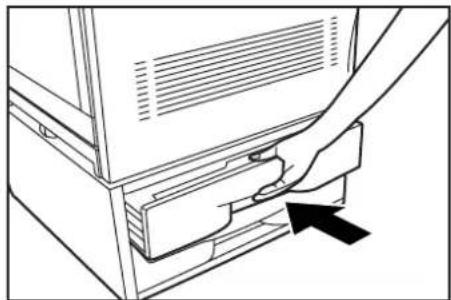
8 Insert the appropriate paper size label into the front of the drawer to indicate the size of paper that is loaded into that drawer.
NOTE
If you will not be using the copier for a prolonged period of time, remove all paper from the drawer(s) and seal in its original packaging in order to protect it against moisture.
(3) Setting paper on the multi-bypass tray
Up to 150 sheets of standard paper (75 g/m 2 – 90 g/m 2 ) can be set on the multi-bypass tray. Paper sizes between 5 1/2" x 8 1/2", 8 1/2" x 5 1/2", 8 1/2" x 11", 11" x 8 1/2", 8 1/2" x 14", 11" x 17" and 12" x 18" [B6R, A6R, A5R, B5R, B5, A4R, A4, B4, A3, A3 wide (305 mm x 457 mm) and Folio] can be used. When copying onto special paper, be sure to use the multi-bypass tray.
NOTES
- The following types of special paper and the number of sheets that can be set on the multi-bypass tray at one time are as follows: OHP transparencies: 25 sheets (BE SURE to use only 11'' × 81/2'' [A4] size OHP transparencies and ALWAYS fan through transparencies before setting them on the multi-bypass tray.) Thick paper ( 91g/m2 - 220g/m2 ): 50 sheets
- The acceptable paper weight for thick paper actually differs depending upon the size of the paper: Under 11" x 8 1/2" [A4]: 91g/m² - 220 g/m² Over 11" x 8 1/2" [A4]: 91g/m² - 135 g/m²
IMPORTANT!
- BE SURE to use paper that is specified for color copy use in order to make clear color copies.
- DO NOT use paper such as that designated for inkjet printers or any paper treated with special coating.
- When setting special paper such as OHP transparencies and thick paper on the multi-bypass tray, be sure to specify the type of paper under “● When setting OHP transparencies or thick paper on the multi-bypass tray” on page 3-5.
1 Open the multi-bypass tray.
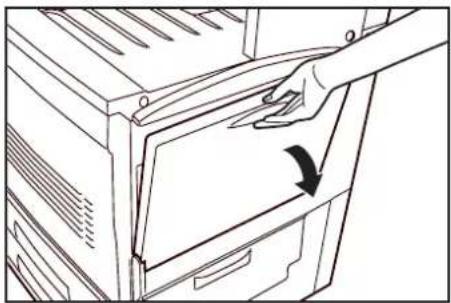
NOTE
When copying onto 8 1/2" x 11" [A4R] size paper or larger, be sure to pull out the multi-bypass extension.
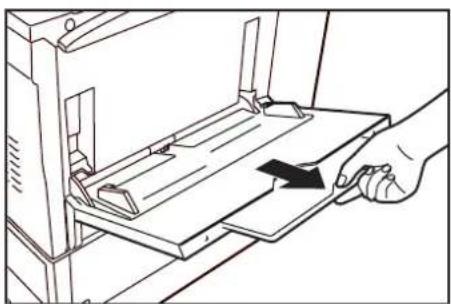
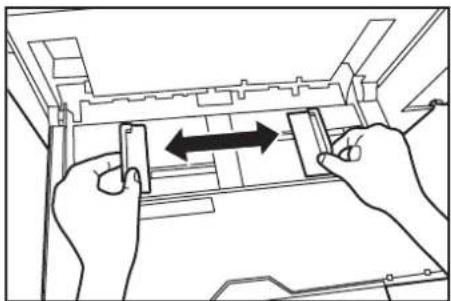
2 Adjust the insert guides to fit the width of the paper that is to be set on the multi-bypass tray.
3
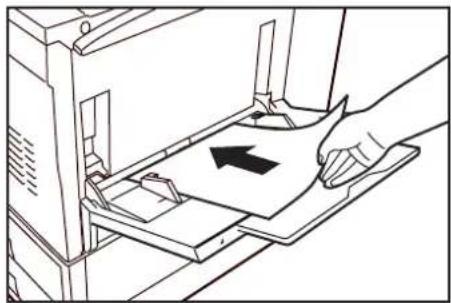
Slide the paper all the way in, along the insert guides, as far as it will go.
IMPORTANT!
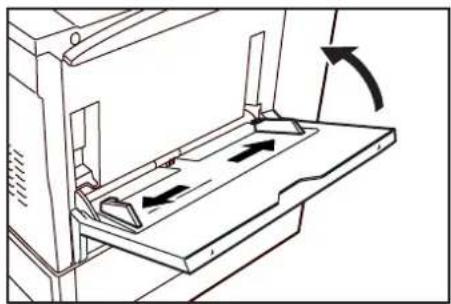
- When you are loading paper onto the multi-bypass tray, make sure that the side to be copied onto is facing upward. (The copy side is the side facing upward when the package is opened.) If the leading edge of the paper is curled at all, straighten it out before setting it on the multi-bypass tray.
- If you are copying onto special paper, be sure to have finished copies ejected onto the copy eject tray. (See “⑳ Eject destination” on page 7-22.)
- Be sure to push the multi-bypass extension back in, and open the insert guides as far as they will go BEFORE closing the multi-bypass tray.
●Setting the paper size for the multi-bypass tray
It is necessary to select the size of paper that will be set on the multi-bypass tray.
The acceptable sizes of paper are as follows.
Inch specifications
Custom sizes (4" x 5 7/8" - 11" x 17"), 5 1/2" x 8 1/2", 8 1/2" x 11", 8 1/2" x 14", 11" x 8 1/2", 11" x 17" and 12" x 18"
Metric specifications
Custom sizes (100 mm x 148 mm - 297 mm x 420 mm), B6R, B5, B5R, A6R, A5R, A4, A4R, B4, A3, A3 wide and Folio
1
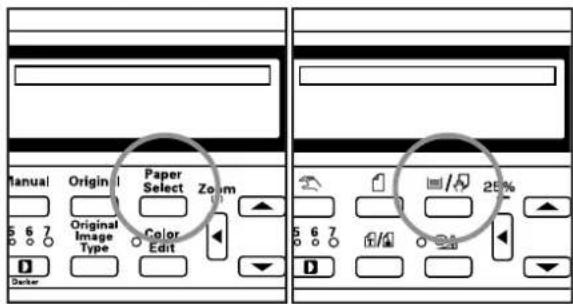
Press the Paper Select key. The "Select paper size for bypass" ["SELECT PAPER SIZE OF BYPASS"] screen will appear.
Inch specifications Metric specifications
2
Use the ▲ cursor or the ▼ cursor key to select the appropriate paper size and then press the Enter key.
Inch specifications
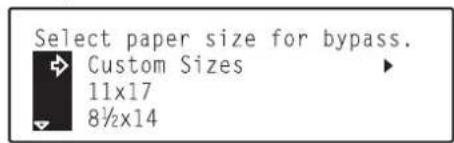
Metric specifications
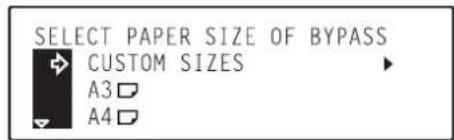
3 If you selected "Custom Sizes", the "Set custom size" screen will appear. Use the ◀ cursor or the ▶ cursor key to select the desired size for the paper length.
Inch specifications
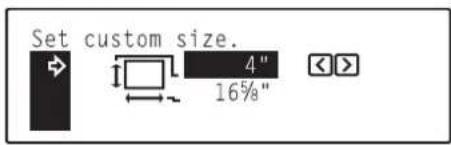
Metric specifications
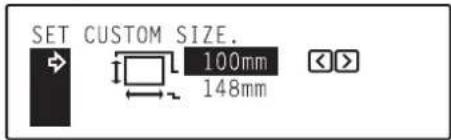
4 Press the ▼ cursor key to change to the width size setting.
5 Use the ◀ cursor or the ▶ cursor key to select the desired size for the paper width.
Inch specifications
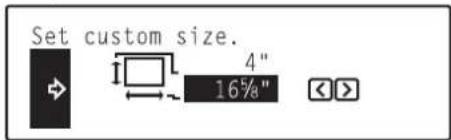
Metric specifications
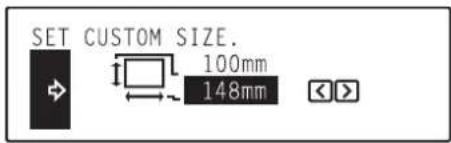
6 Press the Enter key. The message display will return to the "Ready to copy." screen.
●When setting OHP transparencies or thick paper on the multi-bypass tray
Perform the following procedure to select the transparency mode or the thick paper mode, as appropriate, when copying onto OHP transparencies or thick paper.
1 Press the Transparency Film / Card Stock key to light the Transparency Film / Card Stock indicator. The "Select function" screen will appear.
Inch specifications Metric specifications
2 Use the ▲ cursor or the ▼ cursor key to select either "① Transparency Mode" or "② Thick paper Mode", as desired.
Inch specifications
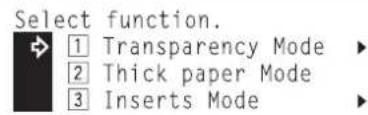
Metric specifications
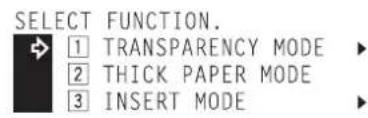
3 Press the Enter key. If a Memory Copy Board is installed in your copier and you selected "1 Transparency Mode", proceed to the next step.
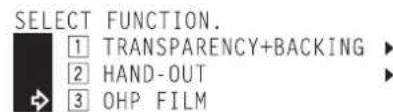
4 Use the ▲ cursor or the ▼ cursor key to select "3 OHP film". The message display will return to the "Ready to copy." screen.
Inch specifications
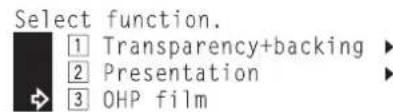
Metric specifications
NOTE
Once the transparency mode or the thick paper mode are selected, paper feed will be carried out from the multi-bypass tray and the copies will be ejected onto the copy eject tray.
●When printing onto envelopes
When you are using the optional printer functions of this machine, envelopes can be set in the multi-bypass tray for printing. Up to 10 envelopes can be set on the multi-bypass tray at a time. For more details, refer to the Operation Guide for the Printer Kit. Refer to the following table for the types and sizes of envelopes that can be used in this machine.
| Acceptable envelope types | Size |
| Monarch | 3 7/8" x 7 1/2" |
| Comm. #10 | 4 1/8" x 9 1/2" |
| Envelope DL | 110 mm x 220 mm |
| Envelope C5 | 162 mm x 229 mm |
| Executive | 7 1/4" x 10 1/2" |
| Comm. #9 | 3 7/8" x 8 7/8" |
| Comm. #6-3/4 | 3 5/8" x 6 1/2" |
| ISO B5 | 176 mm x 250 mm |
| Envelope C4 | 229 mm x 324 mm |
| Oufuku Hagaki | 200 mm x 148 mm |
| YOUKEI 2 | 162 mm x 114 mm |
| YOUKEI 4 | 234 mm x 105 mm |
- Designating the envelope size
In order to print onto envelopes, it is necessary to perform the following procedure and designate the size of those envelopes.
1 Press the Paper Select key. The "Select paper size for bypass" ["SELECT PAPER SIZE OF BYPASS"] screen will appear.
Inch specifications Metric specifications
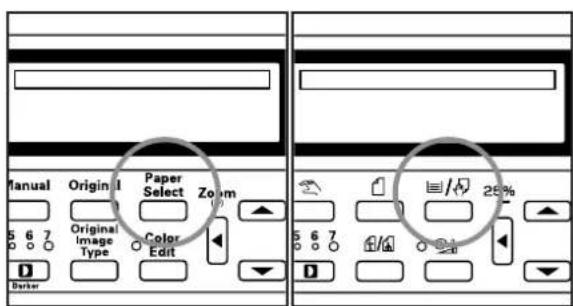
2 Use the ▲ cursor or the ▼ cursor key to select "Prt. exclusive paper" and then press the Enter key.
Inch specifications
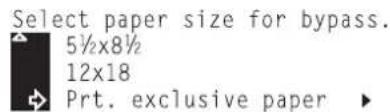
Metric specifications
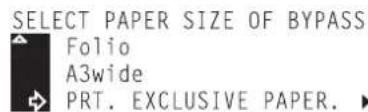
3 Use the ▲ cursor or the ▼ cursor key to select the size of the envelopes you want to use.
Inch specifications
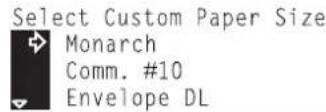
Metric specifications

4 Press the Enter key. The message display will return to the "Ready to copy." screen.
- Setting the envelopes on the multi-bypass tray
Perform the following procedure and set the envelopes on the multi-bypass tray.
1 Open the multi-bypass tray.
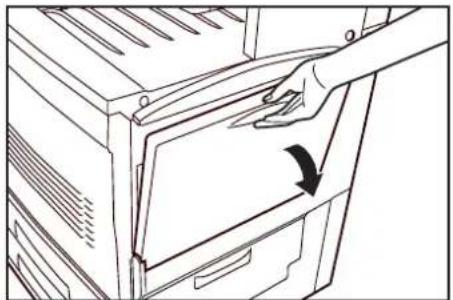
2 Adjust the insert guides to fit the width of the envelopes that are to be set on the multi-bypass tray.
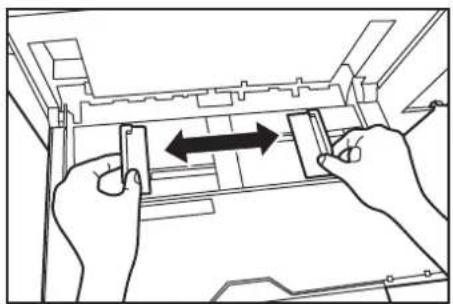
3 Keeping the flap closed, situate envelopes with the print side face-up and the flap side towards the front of the copier or towards the leading edge of insertion. Then slide them all the way into the multi-bypass tray, along the insert guides, as far as they will go.
* The proper orientation will actually depend upon the type of envelope being used.
* DO NOT set the flap towards the trailing edge of insertion as there is a danger of it jamming.
![graph TD A["Copier"] --> B["Circle"] C["Copier"] --> D["Circle"] E["Copier"] --> F["X"]](/content/2026/05/768513/images/b30d38b827e50bdd42fc4416270d7146666220d507ed08b4733442e8bcbf53b0.jpg)
2. Replacing the toner containers and the waste toner tank
This copier uses 4 colors of toner (yellow, cyan, magenta and black). Replace the toner container for the indicated color whenever "Add toner to resume copying." appears. Be sure to replace the waste toner tank each time you replace a toner container.
* Only replace the toner containers when the message tells you to do so.

CAUTION
DO NOT attempt to incinerate the toner containers or the waste toner tank. Dangerous sparks may cause burns.

CAUTION
DO NOT attempt to force open or destroy the toner containers or the waste toner tank.
The illustrations in the following procedure will show replacement of the black toner container.
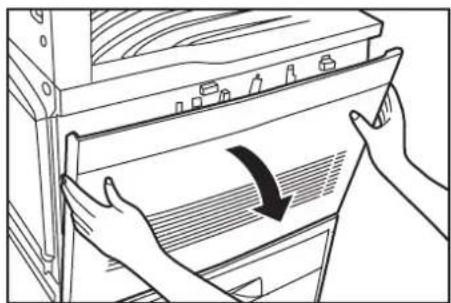
1
Open the front cover.
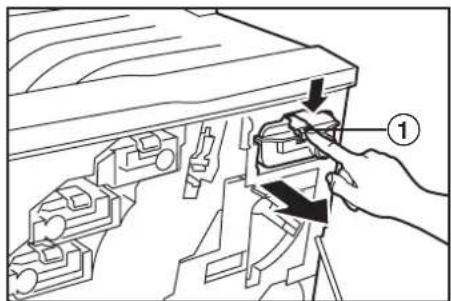
2
Hold the toner container release lever (shown as ① in the illustration) down and pull the old container out.
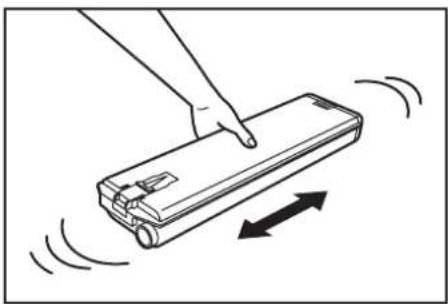
3
Shake the new toner container 5 times or more from side to side.
4
Insert the new container into the copier.
* Once it is inserted properly, the new container will lock into place.
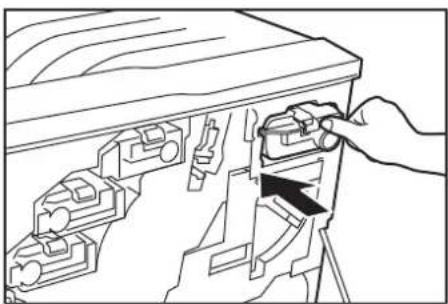
5
Insert the old container into the supplied disposable plastic bag.
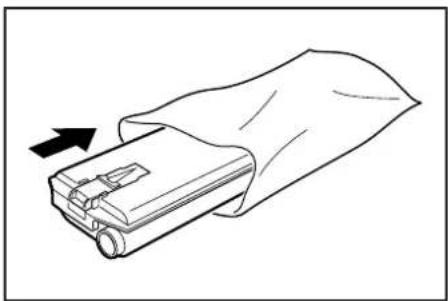
Follow this same procedure and replace the other toner containers, as necessary.
6
Operate the paper conveyor release lever and pull the paper conveyor out towards you as far as it will go.
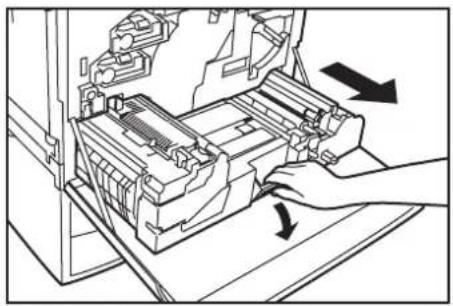

WARNING
High voltage is present in the charger section. Take sufficient care when working in this area, as there is a danger of electrical shock.

CAUTION
The copier's fixing unit is extremely hot. Take sufficient care when working in this area, as there is a danger of getting burned.
7
Push down on the waste toner tank release lever (shown as ② in the illustration) and remove the waste toner tank.
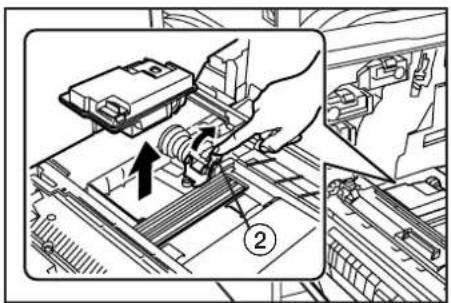
IMPORTANT!
DO NOT turn the waste toner tank upside down after you remove it from the copier.

CAUTION
DO NOT attempt to incinerate the toner containers or the waste toner tank. Dangerous sparks may cause burns.

CAUTION
DO NOT attempt to force open or destroy the toner containers or the waste toner tank.
8
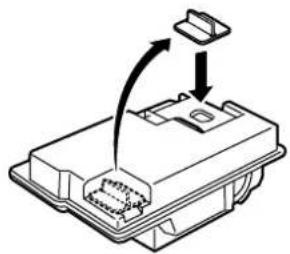
Use the cap that is located on top of the waste toner tank to seal to the opening in the tank.
9
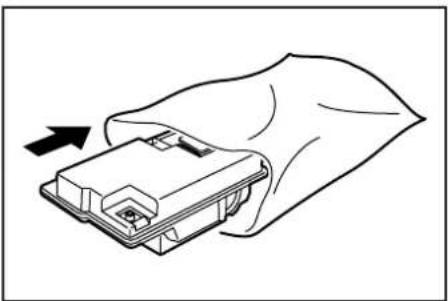
Insert the old tank into the supplied disposable plastic bag.
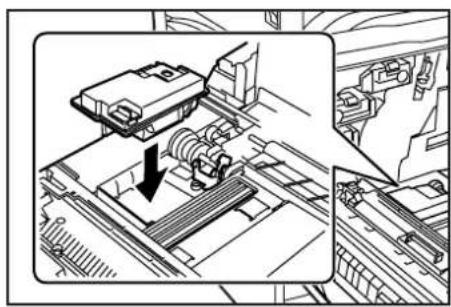
10 Set the new waste toner tank into the copier. * Once it is inserted properly, the new waste toner tank will lock into place.
NOTE
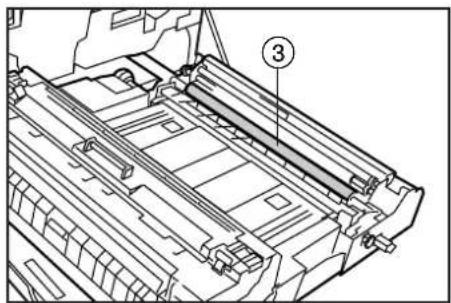
DO NOT touch the transfer roller (shown as ③ in the illustration) that is located to the right of the paper conveyor section. Touching it may cause subsequent copies to come out dirty.
11 Push the paper conveyor back into the copier.

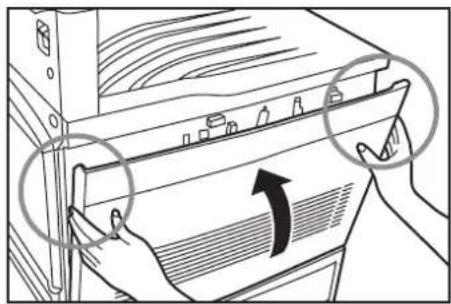
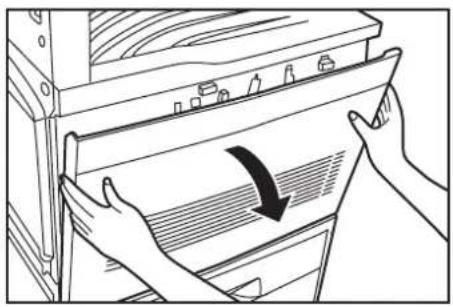
12 Close the front cover. * Be sure to hold both the left and right sides of the front cover and close it securely.
●After use, ALWAYS dispose of the toner containers and the waste toner tank in accordance with Federal, State and Local rules and regulations.
3. Cleaning the charger
Perform the following cleaning operation on the charger if black lines appear on the copy image.
1 Open the front cover.
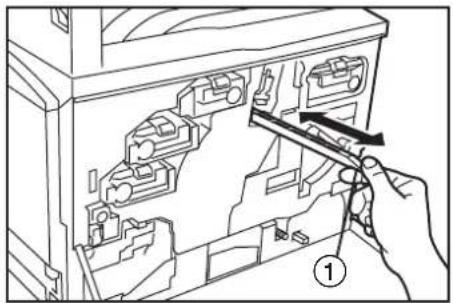
2 Grasp the green cleaning shaft (shown as ① in the illustration), pull it out slowly as far as it will go and then push it back in all the way. Repeat this step 3 to 5 times.
3 Take the supplied grid cleaner out of its package and remove the cap.
![graph TD A["Rectangular Box"] --> B["Machine with Internal Components"] B --> C["Arrow Up"] C --> D["Arrow Down"]](/content/2026/05/768513/images/7a0340c123472d8c1270f133a1f76bd57f9753aab59f4985c71dbd58dc31fdc4.jpg)
NOTE
The sponge portion of the grid cleaner contains fluid. Perform the cleaning operation as quickly as possible to prevent it from drying out.
4 With the sponge portion of the grid cleaner up, attach it to the copier as shown in the illustration.

5 Push up on the main charger release lever (shown as ② in the illustration). Lift up slightly on the main charger (shown as ③ in the illustration), slowly pull out the main charger as far as it will go and then push it back in all the way. Repeat this step 2 to 3 times.
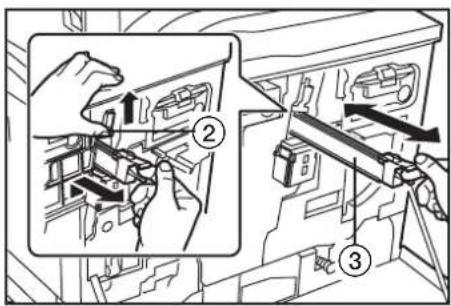
6 Lift up on the main charger release lever and push the main charger back into its original position in the copier.
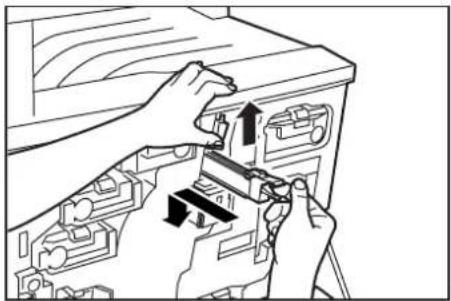
7 Remove the grid cleaner.

NOTE
DO NOT attempt to reuse the grid cleaner after it is used once.
8 Grasp the green cleaning shaft (shown as ④ in the illustration), pull it out slowly as far as it will go and then push it back in all the way. Repeat this step 5 to 7 times.
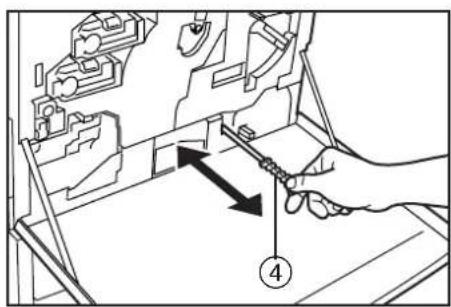
9 Close the front cover. * Be sure to hold both the left and right sides of the front cover and close it securely.
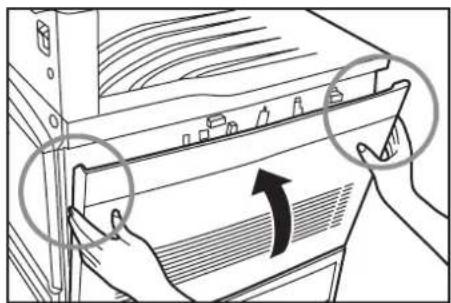
4. Replacing the oil roller
After approximately 25,000 copies, "Time to replace the oil kit." or "Replace the oil kit now" will appear. In this case, perform the following procedure in order to replace the oil roller.
1 Open the front cover.
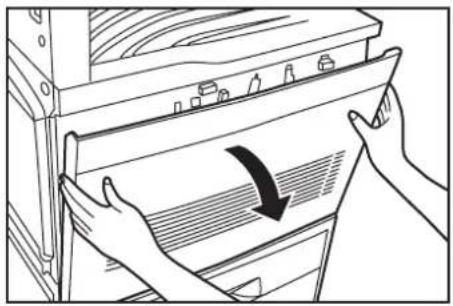
2 Operate the paper conveyor release lever and pull the paper conveyor out towards you.
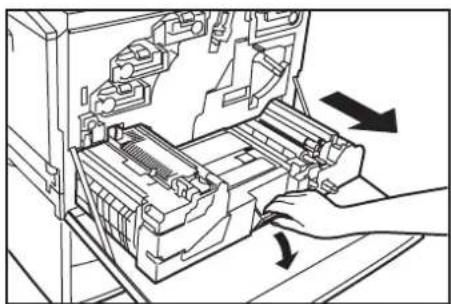
WARNING
High voltage is present in the charger section. Take sufficient care when working in this area, as there is a danger of electrical shock.
CAUTION
The copier's fixing unit is extremely hot. Take sufficient care when working in this area, as there is a danger of getting burned.
3 Slide the oil roller release levers (shown as ① in the illustration) away from the roller and then remove the oil roller from the copier.
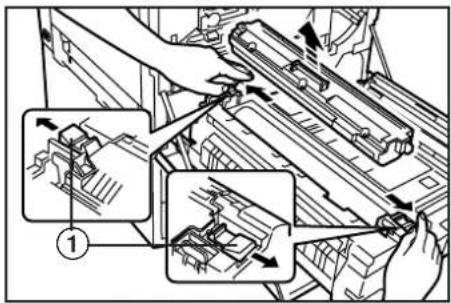
4 Remove the protective seals from each side of the new oil roller.
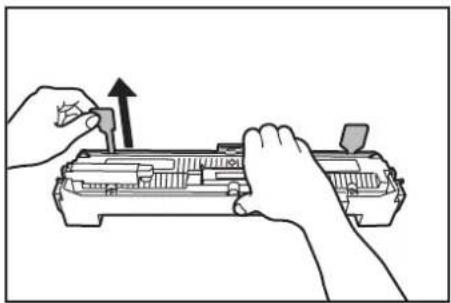
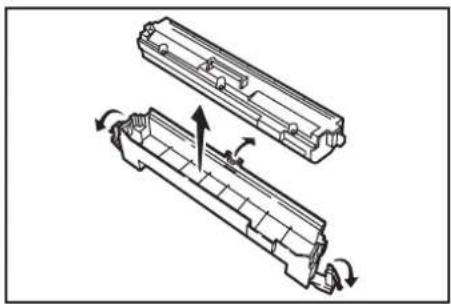
5 Remove the new oil roller from its cover.
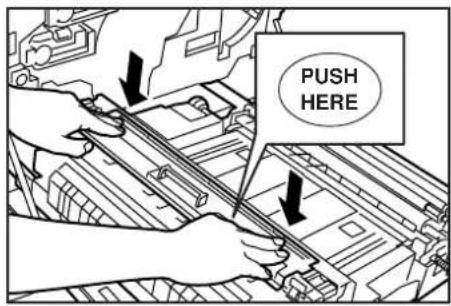
6 Set the new oil roller in the copier. As shown in the illustration, press down on the areas marked "PUSH HERE" and lock the oil roller securely into place.
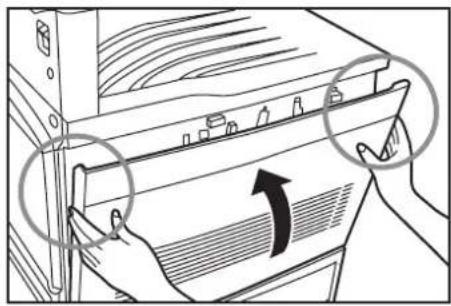
9 Close the front cover. * Be sure to hold both the left and right sides of the front cover and close it securely.
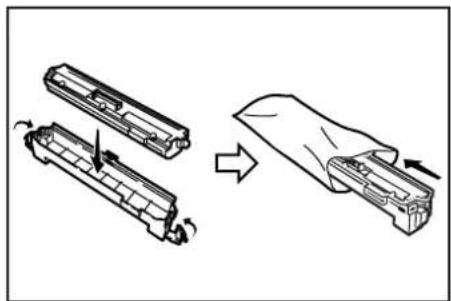
7 Place the old oil roller in the cover that you removed in step 5 and insert it into the supplied disposable plastic bag.
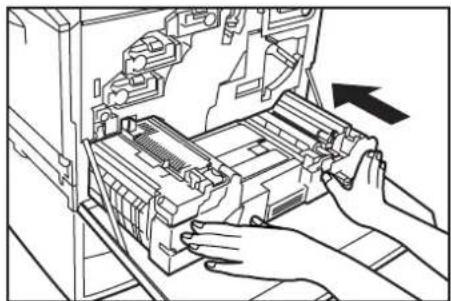
8 Push the paper conveyor back into the copier.
1. Basic copying procedure
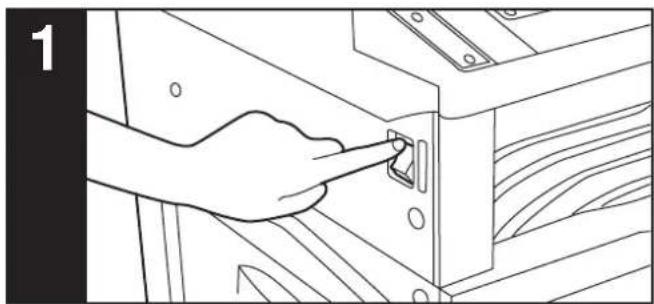
1. Warm-up
Turn the main switch ON ( | ). At the end of warm-up, "Ready to copy." will appear in the message display.
NOTE
If a Memory Copy Board is installed in your copier, and you set the original that you want to copy and press the Start key while the copier is still warming up, copying will begin as soon as warm-up is completed.
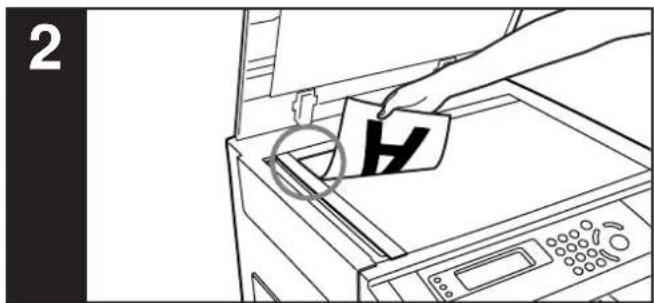
2. Setting an original
Set the original that you want to copy at the left-rear corner of the platen as shown in the illustration and align it with the original size indicator lines.
NOTE
See “● Setting originals in the SRDF” on page 8-2 for instructions on how to set originals in your document feeder.
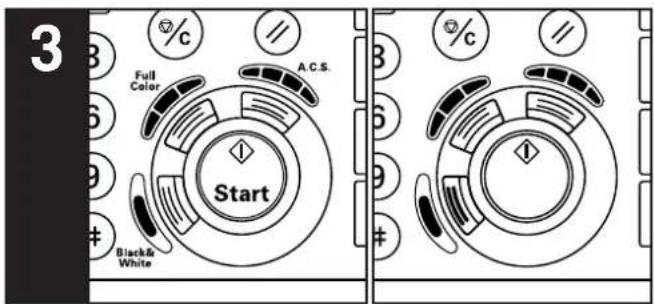
Inch specifications Metric specifications
3. Selecting the color mode
Press the Full Color key, the A.C.S. key or the Black&White key, as appropriate, until the message for that desired mode appears.
Color (full color mode): Press the Full Color key and "4C Mode" ["4-COL."] will appear in the message display. Select this mode when you want to make full color copies.
ACS (Auto Color Selection mode): Press the A.C.S. key and "ACS" will appear in the message display. The copier will automatically detect whether the original is color or monochrome (B/W) and the corresponding copy will be made: full color for color originals and black and white copies for monochrome originals.
Monochrome (black and white mode): Press the Black&White key and "BW Mode" ["B/W"] will appear in the message display. Select this mode when you want to make black and white copies.
NOTES
- If the mono-color mode is selected, the currently selected color for that mode will be displayed: "CYAN", "MAGENTA", "YELLOW", "RED", "GREEN" or "BLUE". (See "1. Mono-color mode" on page 5-1.)
- It is also possible for you to make other adjustments to color copying.
Gloss mode (See page 5-2.)
One-touch image quality adjustment (See page 5-3.)
Adjusting the color balance (See page 5-4.)
Adjusting the color hue (See page 5-5.)
Adjusting the sharpness (See page 5-7.)
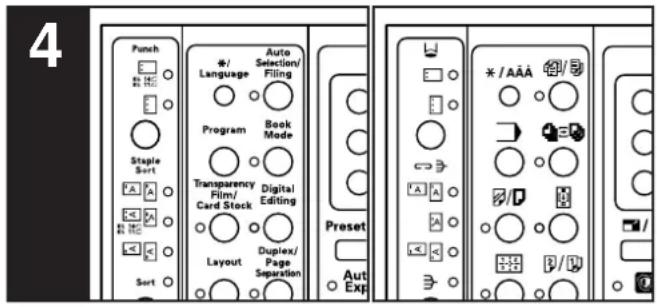
Inch specifications Metric specifications
4. Selecting functions
Select from the copier's various functions.

• Mono-color mode (Page 5-1.)
• Gloss mode (Page 5-2.)
• One-touch image quality adjustment (Page 5-3.)
- Adjusting the color balance (Page 5-4.)
- Adjusting the color hue (Page 5-5.)
- Adjusting the sharpness (Page 5-7.)
- Enlarging/reducing copies (Page 6-1.)
- Interrupt copying (Page 6-5.)
- Making duplex (2-sided) copies from various types of originals (Page 6-6.) *3
- Copying two-page originals onto separate sheets (Page 6-9.)
- Creating a margin on the copies (Page 6-11.) *1
- Making copies with clean edges (Page 6-15.) *1
- Inverting black and white AND colors (Page 6-17.)
- Making mirror image copies (Page 6-18.)
- Printing page numbers on copies (Page 6-19.) *1
- Feeding paper as a backing sheet for OHP transparencies (Page 6-21.) *1
- Preparing presentation materials to go with transparencies (Page 6-23.) *1
- Adding covers and separation inserts to your copy sets (Page 6-26.) *1
- Making one copy from either two or four originals (Page 6-32.) *1
- Making booklets, etc., from sheet originals (Page 6-34.) *3
- Making booklets, etc., from books (Page 6-36.) *3
- Making both black & white AND color copies at the same time (Page 6-38.) *1
- Enlarging the image and printing it out onto multiple sheets (Page 6-39.) *1
- Copying different sized originals onto one size of copy paper (Page 6-41.) *1
- Memorizing frequently used settings (Page 6-43.)
- Confirming copy settings (Recall function) (Page 6-45.)
- Sorting automatically (Page 6-46.) *1
- Rotate copy function (Page 6-47.) *1
• Auto selection mode (Page 8-3.) *2
*1: If you do not have a Memory Copy Board installed as standard equipment, the optional Memory Copy Board must be installed in your copier in order to use this mode.
*2: The optional DF must be installed in your copier in order to use this mode.
*3: Only available in duplex copiers.
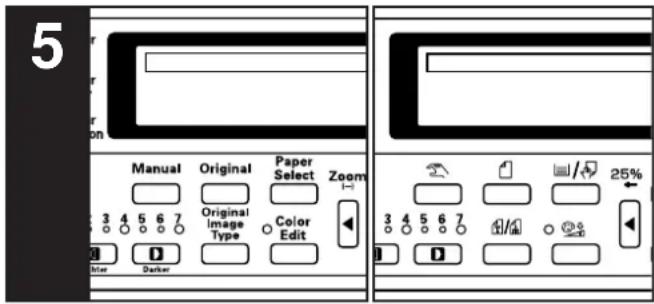
Inch specifications Metric specifications
5. Selecting the paper size
When "APS" appears in the message display, paper of the same size as the original will be automatically selected. Thus, if you want to make copies onto paper of the same size as the originals with images of the same size, no special settings are required. If you want to copy the original image onto a different size paper without changing the size of the image, press the Paper Select key and select the desired size of paper, and then press the Manual key.
NOTE
It is also possible for you to specify one drawer that will be selected automatically even without setting any originals. (See “⑫ Default drawer (b/w)” on page 7-19 and “⑬ Default drawer (color)” on page 7-20.)
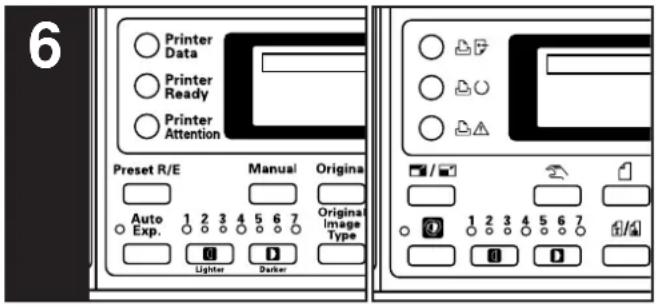
Inch specifications Metric specifications
6. Adjusting the copy exposure
Inch specifications
In the initial mode, manual exposure is normally the default exposure mode and one of the copy exposure indicators will be lit. If you want to make the exposure darker, press the right exposure adjustment key to move the lit indicator to the right; If you want to make the exposure lighter, press the left exposure adjustment key to move the lit indicator to the left.
NOTE
The copy exposure scale can be set to either 7 or 13 levels of adjustment. (See “② Exposure steps” on page 7-17.)
If you want the copy exposure to be adjusted automatically, press the Auto Exp. key to light Auto Exp. indicator and, thereby, select the auto exposure mode. In the auto exposure mode, the contrast of the original will be detected and the most suitable exposure level selected automatically. It is also possible for you to make clean copies without the original background or color.
NOTES
- It is possible for you to make adjustments to the auto exposure mode if the overall copies come out too dark or too light. (See “③ Auto exposure adjustment (color)” and “④ Auto exposure adjustment (b/w)” on page 7-17.)
- It is possible for you to change the default setting for the copy exposure to the auto exposure mode. (See “① Exposure mode” on page 7-17.)
- The auto exposure mode is not available when the photo mode, printed photo mode or map mode has been selected for the image quality.
Metric specifications
In the initial mode, auto exposure is normally the default exposure mode and the Auto Exp. indicator will be lit. In the auto exposure mode, the contrast of the original will be detected and the most suitable exposure level selected automatically. It is also possible for you to make clean copies without the original background or color.
NOTE
It is possible for you to make adjustments to the auto exposure mode if the overall copies come out too dark or too light.
(See “③ Auto exposure adjustment (color)” and “④ Auto exposure adjustment (b/w)” on page 7-17.)
If you want to adjust the copy exposure manually, press one of the copy exposure adjustment keys to lit one of the copy exposure indicators and, thereby, select the manual exposure mode. If you want to make the exposure darker, press the right exposure adjustment key to move the lit indicator to the right; If you want to make the exposure lighter, press the left exposure adjustment key to move the lit indicator to the left.
NOTES
- The copy exposure scale can be set to either 7 or 13 levels of adjustment. (See “② Exposure steps” on page 7-17.)
- It is possible for you to change the default setting for the copy exposure to the manual exposure mode. (See “① Exposure mode” on page 7-17.)
- The auto exposure mode is not available when the photo mode, printed photo mode or map mode has been selected for the image quality.
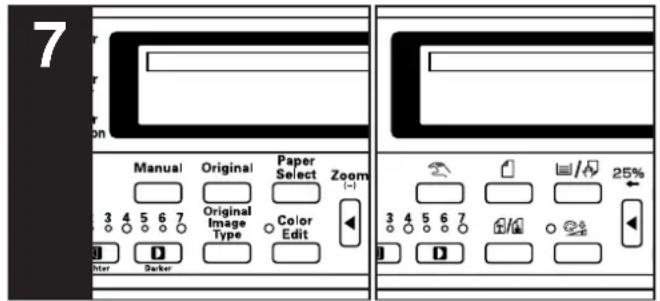
Inch specifications Metric specifications
7. Selecting the image quality
The image quality is selected according to the type of original. Press the Original Image Type key until the message for that desired mode appears.
MIX (text&photo mode): Select this mode when the original contains a mixture of both text and photographs.
TEXT (text mode): Select this mode when the original contains both mostly text.
PHOTO (photo mode): Select this mode when the original contains both mostly photographs taken by camera.
PRINT (printed photo mode): Select this mode when you are copying a magazine, etc., that contains printed photographs.
MAP (map mode): Select this mode when you are copying a map.
ECO (eco mode): Select this mode when you are want to save on toner usage. (The copy image will be relatively light and the colors will change somewhat.)
NOTES
- It is possible for you to select the image quality mode that will be the default setting in the initial mode. (See “⑪ Original quality” on page 7-19.)
- It is also possible for you to adjust the copy exposure in each of the image quality modes. (See “⑤ Mixed original density”, “⑥ Text original density”, “⑦ Print original density”, “⑧ Photo original density” and “⑨ Map original density” on pages 7-18 through 7-19.)
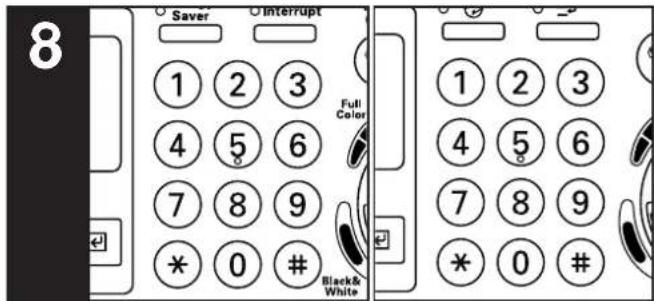
Inch specifications Metric specifications
8. Setting the number of copies to be made
Use the numeric keys on the keypad to change the message display to enter the desired number of copies to be made in the message display. Up to 999 copies can be made at one time.
NOTE
It is possible for you to limit the number of copies that can be made at a time. (See “⑭ Copy limit” on page 7-20.)
Inch specifications Metric specifications
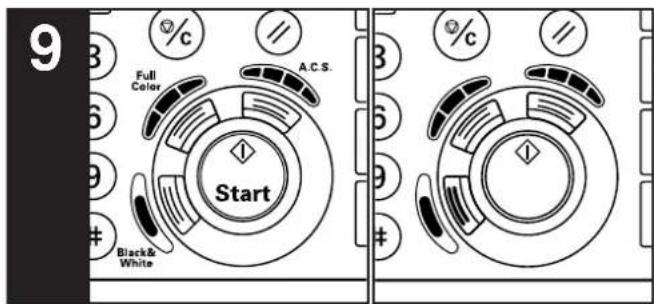
9. Start copying
Press the Start key. Once "Ready to copy." is shown in the message display, copying is possible.
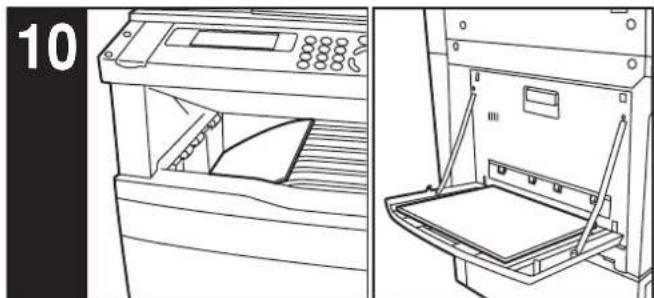
10. At the end of copying
Finished copies will be ejected onto the copy eject tray or the copy storage table, as selected.
NOTES
- Up to 250 copies (standard copy paper: 75 g / m2 - 90 g / m2 ) can be stored on the copy storage table, and up to 150 copies can be stored on the copy eject tray.
- If "Paper capacity exceeded. Remove paper from Inner." ["PAPER CAPACITY EXCEEDED. REMOVE PAPER FROM INNER TRAY."] is displayed, there are too many copies on the copy storage table. remove the copies from the table and then press the Start key to restart copying.
- If "Too much paper. Remove paper." ["TOO MUCH PAPER IN DRAWER. REMOVE SOME PAPER."] is displayed, there are too many copies on the copy eject tray. Remove the copies from the tray and then press the Start key to restart copying.
- If ejected copies come out curled, or are otherwise not stored cleanly, remove the paper from the drawer or the multi-bypass tray (whichever is currently being used), turn the paper over, set it again in that location and try to copy again.
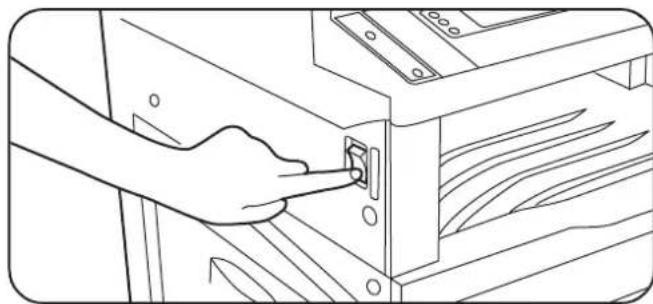

CAUTION
If the copier will not be used for a short period of time (overnight, etc.), turn the main switch OFF ( ) If it will not be used for an extended period of time (vacations, etc.), remove the power plug from the outlet for safety purposes during the time the copier is not in use.
NOTES
- About 30 minutes of fan cooling is required after the main switch is turned OFF. Thus, even after turning OFF the main switch, DO NOT immediately remove the power plug from the outlet.
- This product engages a cooling fan in order to cool off internal parts even after the main switch is turned OFF. In order to maintain its cooling effect, do not remove the power plug from the outlet or disconnect the power to the outlet itself.
* Removing the power plug from the outlet will cause the cooling fan to stop and may result in internal damage to the machine due to heat.
* If you are not going to use this product for a prolonged period of time, turn the main switch OFF and then wait about 30 minutes before removing the power plug from the outlet.
1. Mono-color mode
By selecting one color between cyan, magenta, yellow, red, green and blue, it is possible for you to make copies of that color, regardless of the type of original being copied.
1 Press the Digital Editing key to light the corresponding indicator.
Inch specifications Metric specifications
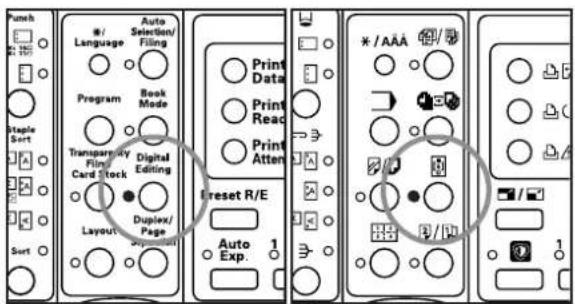
2 Use the ▲ cursor or the ▼ cursor key to select
“7 Monocolor” [“7 MONOCOLOUR”] and then press the Enter key.
Inch specifications
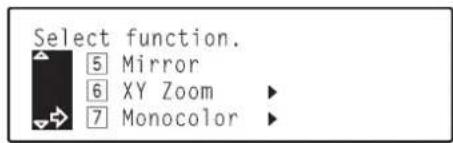
Metric specifications
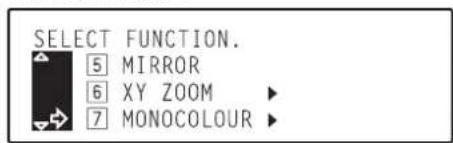
3 Use the ▲ cursor or the ▼ cursor key to select the desired color.
Inch specifications
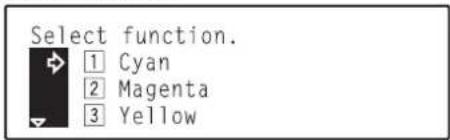
Metric specifications
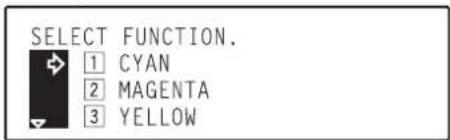
NOTE
Selection is possible between 6 colors: cyan, magenta, yellow, red, green and blue.
4 Press the Enter key.
Inch specifications Metric specifications
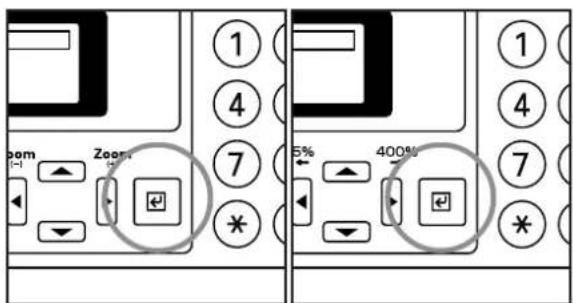
5 Use the ▲ cursor key to select "1 Enter" and then press the Enter key. The message display will return to the "Ready to copy," screen and the selected color will be shown in the display.
2. Gloss mode
Select the gloss mode when you want to make high-gloss copies.
NOTES
- This mode is only available when copying onto plain color copy paper.
- This mode is NOT available with 2-sided copying.
- Copying will take more time than usual when the gloss mode is selected.
- The effect from the gloss mode may not be evident with some types of originals.
- Depending upon the type of paper and the ambient conditions, paper may become wrinkled during printing with the gloss mode selected. If this does occur, use slightly thicker paper that doesn't wrinkle so easily or copy in a normal copy mode (cancel the gloss mode).
- For a sample of copies made under the gloss mode, see "Gloss mode samples" on page iii.
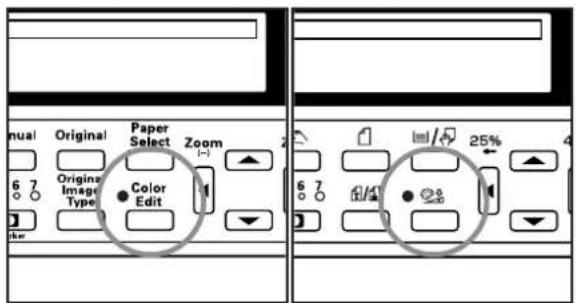
1 Press the Color Edit key to light the corresponding indicator.
Inch specifications Metric specifications
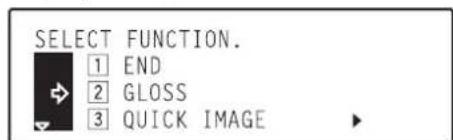
2 Use the ▲ cursor or the ▼ cursor key to select "|2| Gloss" and then press the Enter key.
Inch specifications

Metric specifications
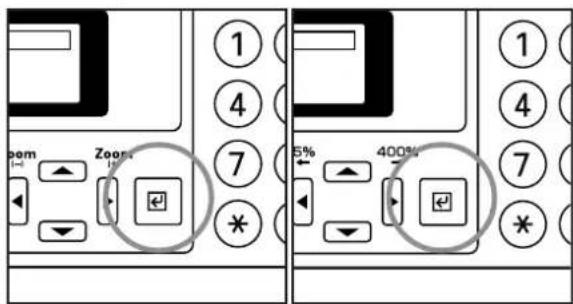
3 Press the Enter key. The gloss mode will be selected and an asterisk (✗) will appear in front of the number for that setting.
NOTE
In order to cancel the gloss mode, use the ▲ cursor or the ▼ cursor key to select the gloss mode again and then press the Enter key. The asterisk (✗) will be removed and the setting canceled.
4 Use the ▲ cursor key to select "|1| End" and then press the Enter key. The message display will return to the "Ready to copy." screen.
Inch specifications Metric specifications
3. One-touch image quality adjustment
Select the image quality, for example "Vivid" or "Calm", according to the type of copy image you want.
NOTES
- This setting is only available with full color copying.
- This setting is NOT available in the auto exposure mode.
- This setting is NOT available for use together with the color balance adjustment.
- Select one of the 6 available image quality settings. Multiple selections are NOT possible.
- Selection is possible between 6 settings: Vivid, Calm, Modulation, Smooth, Light and Heavy. For a sample of copies made under each setting, see "Image quality adjustment samples" on page i.
1 Press the Color Edit key to light the corresponding indicator.
Inch specifications Metric specifications
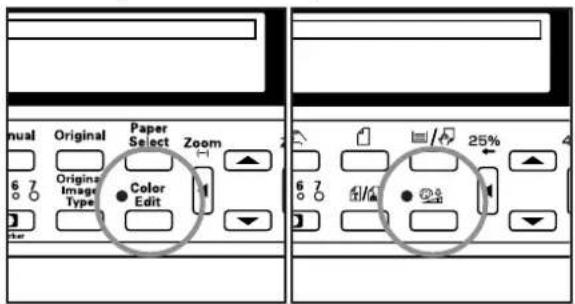
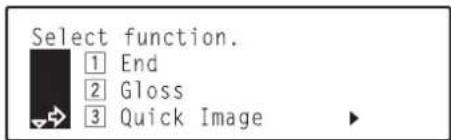
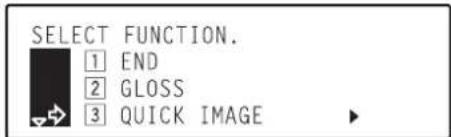
2 Use the ▲ cursor or the ▼ cursor key to select "3 Quick Image" and then press the Enter key.
Inch specifications
Metric specifications
3 Use the ▲ cursor or the ▼ cursor key to select the image quality setting that you want to use.
Inch specifications
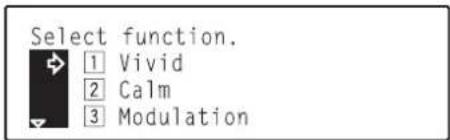
Metric specifications
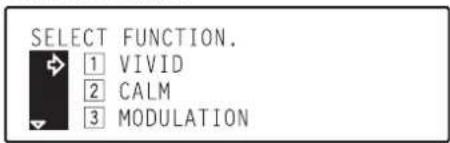
4 Press the Enter key. The image quality will be selected and an asterisk ( × will appear in front of the number for that setting.
Inch specifications Metric specifications
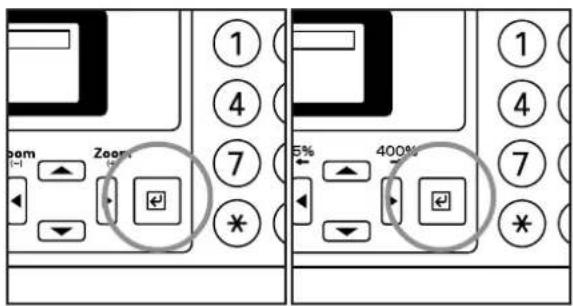
NOTE
In order to cancel the setting, use the ▲ cursor or the ▼ cursor key to select that setting again and then press the Enter key. The asterisk (✗) will be removed and the setting canceled.
5 Use the ▲ cursor key to select "1 End" and then press the Enter key. The message display will return to the "Ready to copy." screen.
4. Adjusting the color balance
The color balance can be fine-adjusted by increasing or decreasing the intensity of each of the colors: cyan, magenta, yellow or black.
NOTES
• These adjustments are only available with full color copying.
• These adjustments are NOT available in the auto exposure mode.
• These adjustments are NOT available in combination with one-touch image quality adjustment.
- For a sample of copies made with an adjusted color balance, see "Color balance adjustment samples" on page ii.
1
Press the Color Edit key to light the corresponding indicator.
Inch specifications Metric specifications
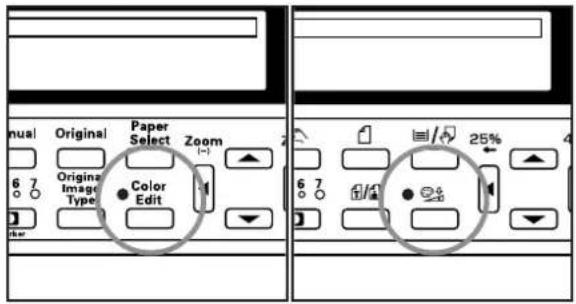
2
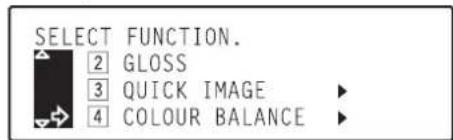
Use the ▲ cursor or the ▼ cursor key to select "4 Color Balance" ["4 COLOUR BALANCE"] and then press the Enter key.
Inch specifications
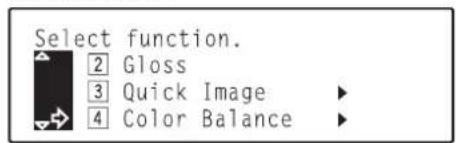
Metric specifications
3
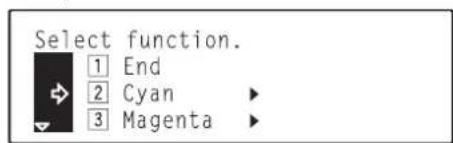
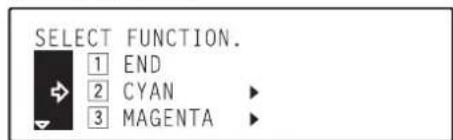
Use the ▲ cursor or the ▼ cursor key to select the color to be adjusted (cyan, magenta, yellow or black).
Inch specifications
Metric specifications
4
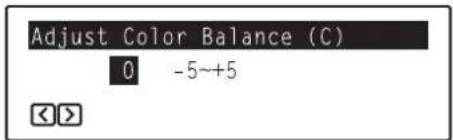
Press the Enter key. The "Adjust Color Balance" ["ADJUST COLOUR BALANCE"] screen will appear.
Inch specifications
Metric specifications
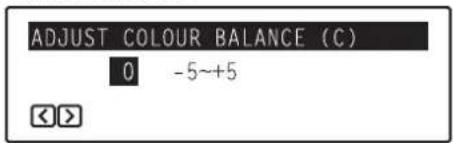
5
Use the ◀ cursor or the ▶ cursor key to adjust the value for that color as desired.
NOTE
Adjustment is possible in 11-step increments between -5 and +5.
6
Press the Enter key.
Inch specifications Metric specifications
7
If you want to adjust the intensity of another color, repeat steps 3 through 6.
8
Once you are finished adjusting the color balance, use the ▲ cursor key to select "1 End" and then press the Enter key.
9
Use the ▲ cursor key to select "1 End" and then press the Enter key. The message display will return to the "Ready to copy." screen.
5. Adjusting the color hue
It is possible for you to change the color hue and create copies of interesting colors. For example, turns reds into reddish-yellows or yellows into yellow-greens.
NOTES
• These adjustments are only available with full color copying.
• These adjustments are NOT available in the auto exposure mode.
• These adjustments are NOT available in combination with one-touch image quality adjustment.
- Selection is possible between the following settings:
All: Makes adjustment to the overall colors.
Y-B: Makes adjustment to the yellow and blue color wheel.
M-G: Makes adjustment to the magenta and green color wheel.
C-R: Makes adjustment to the cyan and red color wheel.
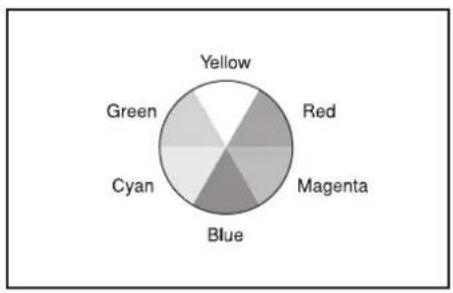
• These adjustments are especially effective for images with clear colors.
1 Press the Color Edit key to light the corresponding indicator.
Inch specifications Metric specifications
2 Use the ▲ cursor or the ▼ cursor key to select "5 Hue" and then press the Enter key.
Inch specifications
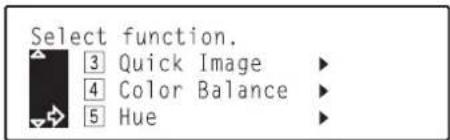
Metric specifications
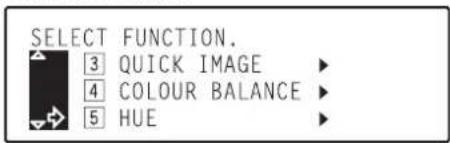
3 Use the ▲ cursor or the ▼ cursor key to select the color range to be adjusted.
Inch specifications
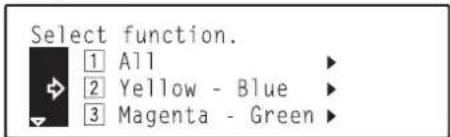
Metric specifications
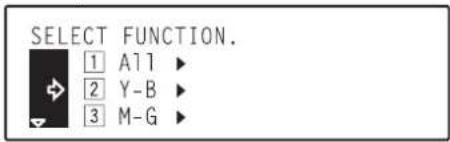
4 Press the Enter key. The "Adjust Hue" screen will appear.
Inch specifications
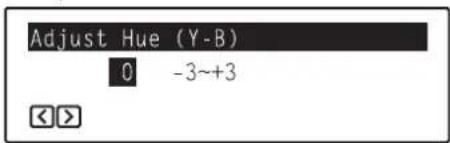
Metric specifications
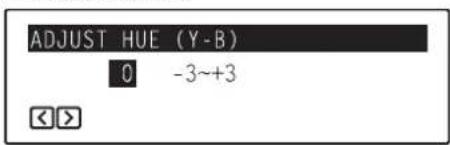
5 Use the ◀ cursor or the ▶ cursor key to adjust the hue for that color range as desired.
NOTE
Adjustment is possible in 7-step increments between -3 and +3.
[Example 1]
If you select "Yellow - Blue" ["Y-B"] and then select a minus value, greens near yellow will be intensified towards yellow and magenas near blue towards blue. (See sample ① on page iii.)
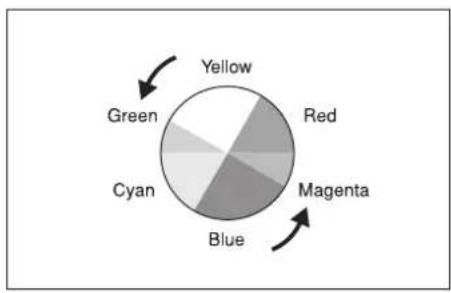
[Example 2]
If you select "Yellow - Blue" ["Y-B"] and then select a plus value, reds near yellow will be intensified towards yellow and cyans near blue towards blue. (See sample ② on page iii.)
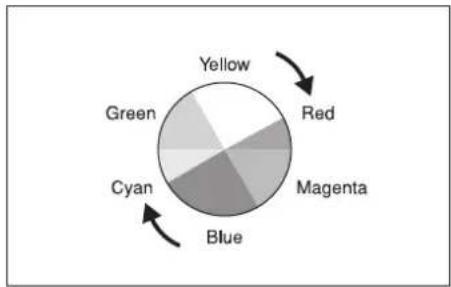
6 7
Press the Enter key.
Use the ▲ cursor key to select "1 End" and then press the Enter key. The message display will return to the "Ready to copy." screen.
6. Adjusting the sharpness
This setting adjusts the contours of the image. When, for example, copying originals that were written in pencil, if the text or lines are blurred or broken, increase the sharpness setting (select a plus value) and the text and lines should be copied more clearly. When copying pictures from magazines and the like where the dots in the photograph are evident and a moiré effect occurs (the phenomenon where the dots do not appear to be lined up properly but seem to be grouped together in patterns), decrease the sharpness (select a minus value) to lighten the contours and reduce the moiré effect.
NOTE
For a sample of copies made with an adjusted sharpness, see "Sharpness adjustment samples" on page iv.
1 Press the Color Edit key to light the corresponding indicator.
Inch specifications Metric specifications
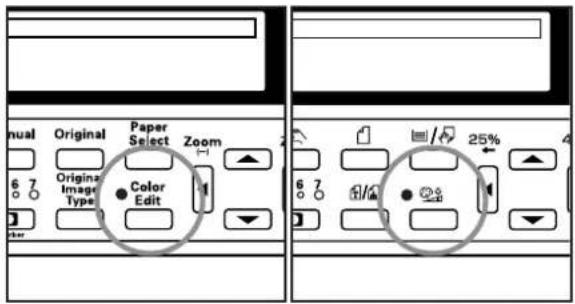
2 Use the ▲ cursor or the ▼ cursor key to select
“6 Sharpness” and then press the Enter key.
Inch specifications
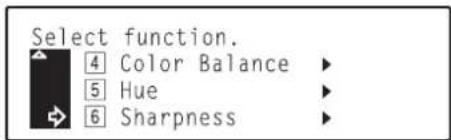
Metric specifications
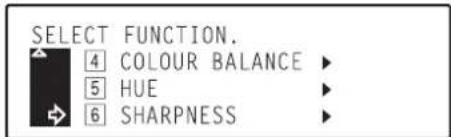
3 Use the ◀ cursor or the ▶ cursor key to adjust the sharpness as desired.
Inch specifications
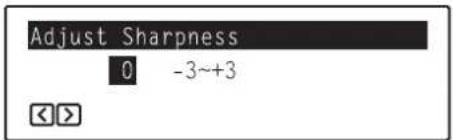
Metric specifications
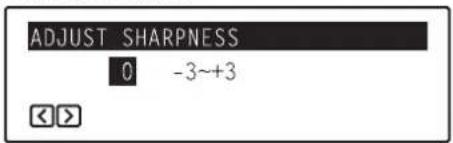
NOTE
Adjustment is possible in 7-step increments between -3 and +3.
4 Press the Enter key.
Inch specifications Metric specifications
5 Use the ▲ cursor key to select "1 End" and then press the Enter key. The message display will return to the "Ready to copy." screen.
1. Making enlarged and reduced copies
(1) Auto magnification selection mode
With this mode, the original image is enlarged/reduced automatically according to the selected paper size.
![graph TD A["8 ½" X 11" (A4)"] --> C["11" X 17": 129%"] B["5 ½" X 8 ½": 64%"] --> C style A fill:#f9f,stroke:#333 style B fill:#bbf,stroke:#333](/content/2026/05/768513/images/0ac4bc61a482fc4d4e6142f96ada355e93ac1c8bf62212b4e2f07d741e50bc45.jpg)
1 Set the original to be copied.
The size of the original will be automatically detected and paper of the same size as the original will be selected.
Inch specifications
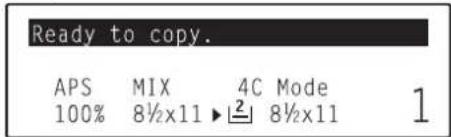
Metric specifications
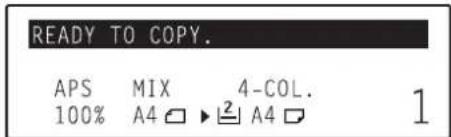
2 Press the Paper Select key and specify the paper size.
"AMS" and, under that, the appropriate magnification ratio will be displayed.
Inch specifications
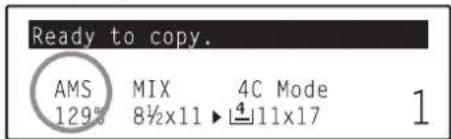
Metric specifications
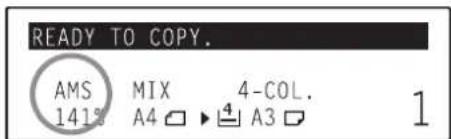
3 Press the Start key to begin the copying procedure.
Inch specifications Metric specifications
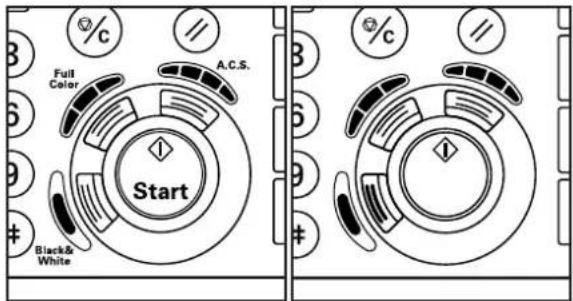
(2) Zoom mode
With this mode, the magnification ratio can be set to any 1% increment between 25% and 400%.
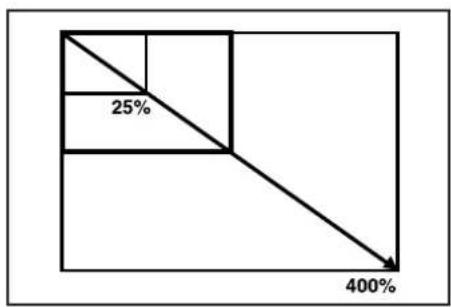
1 Set the original to be copied.
2 Use the Zoom(+) or the Zoom(-) key, as appropriate, to change the displayed magnification ratio to the desired ratio.
Inch specifications
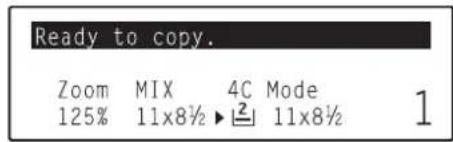
Metric specifications
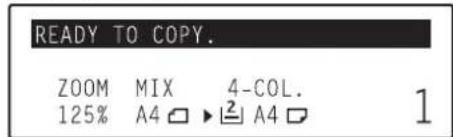
If you want to change the paper size, press the Paper Select key.
3 Press the Start key to begin the copying procedure.
Inch specifications Metric specifications
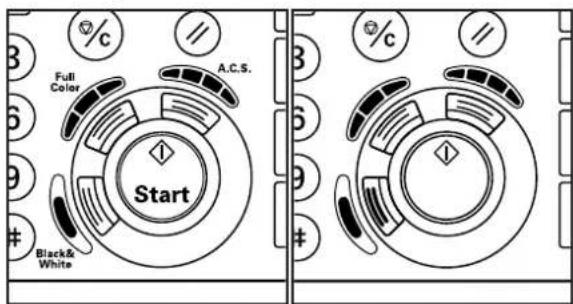
(3) Preset zoom mode
With this mode, the magnification ratio can be set to one of the pre-set ratios:
Available magnification ratios:
Inch specifications
Enlargement 400%
200 % (5 1 / 2" × 8 1 / 2" → 11" × 17")
154 % (5 1 / 2" × 8 1 / 2" → 8 1 / 2" × 14")
129 % (8 1 / 2" × 11" → 11" × 17")
121 % (8 1 / 2" × 14" → 11" × 17")
Reduction 78% (8 1/2" x 14" → 8 1/2" x11")
77 % (1 1" × 1 7" → 8 1 / 2" × 1 4")
64 % (1 1" × 1 7" → 8 1 / 2" × 1 1")
50 % (11" × 17" → 5 1 / 2" × 8 1 / 2")
25 %
Metric specifications
Enlargement 400%
200 % (A5 → A3)
141 % (A 4 → A 3, A 5 → A 4)
127 % ( Folio → A3 )
106 % (11" × 15" → A3)
Reduction 90% (Folio → A4)
75 % (11" × 15" → A4)
70 % (A3 → A4, A4 → A5)
50 % (A3 → A5)
25 %
1 Set the original to be copied.
2 Press the Preset R/E key.
The "Standard Zoom" screen will appear.
Inch specifications
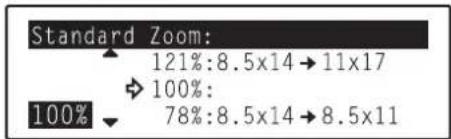
Metric specifications

3 Use the ▲ cursor or the ▼ cursor key to select the magnification ratio that you want to use.
4
Press the Enter key. The message display will return to the "Ready to copy." screen and the selected ratio will be shown in the display.
Inch specifications Metric specifications
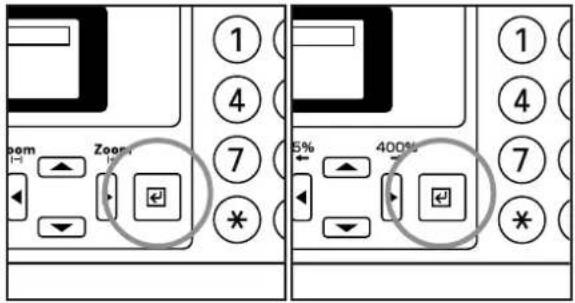
NOTE
The magnification ratio can be entered directly using the numeric keys on the keypad, or it can be changed in 1% increments using the Zoom(+) and/or Zoom(-) keys.
5
Press the Start key to begin the copying procedure.
Inch specifications Metric specifications
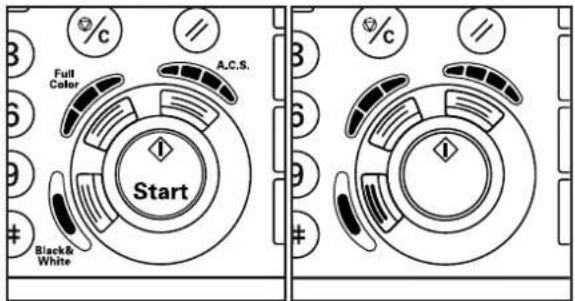
(4) XY zoom mode
With this mode, it is possible for you to change the length and width of the copy image separately. The magnification ratio can be set to any 1% increment between 25% and 400%.
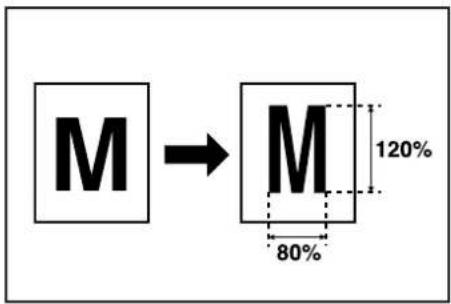
1
Set the original to be copied.
2
Press the Digital Editing key to light the corresponding indicator.
Inch specifications Metric specifications
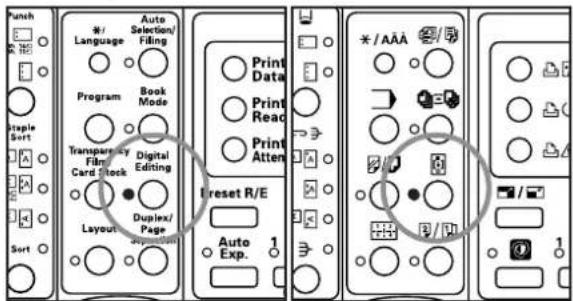
3
Use the ▲ cursor or the ▼ cursor key to select "6 XY Zoom" and then press the Enter key.
Inch specifications
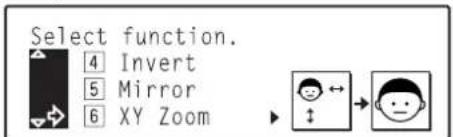
Metric specifications
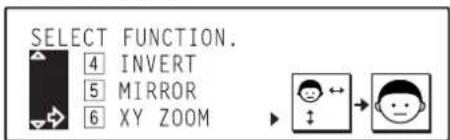
4 Use the Zoom(+) or Zoom(-) key to specify the desired ratio for the width of the image. It is also possible for you to enter the ratio directly using the numeric keys on the keypad.
Inch specifications
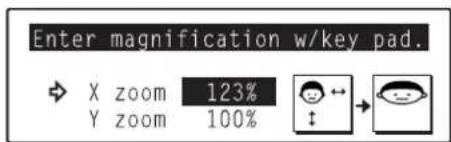
Metric specifications
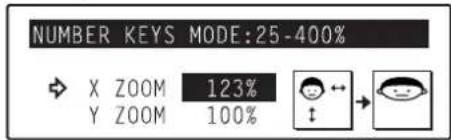
5 Press the ▼ cursor key to change to the length ratio setting.
6 Use the Zoom(+) or Zoom(-) key to specify the desired ratio for the length of the image. It is also possible for you to enter the ratio directly using the numeric keys on the keypad.
Inch specifications
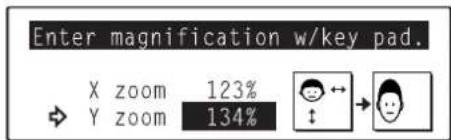
Metric specifications
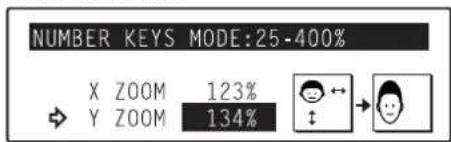
7 Press the Enter key. The XY zoom mode will be selected and the designated magnification ratios set, and an asterisk (※) will appear in front of the number for that setting.
Inch specifications Metric specifications
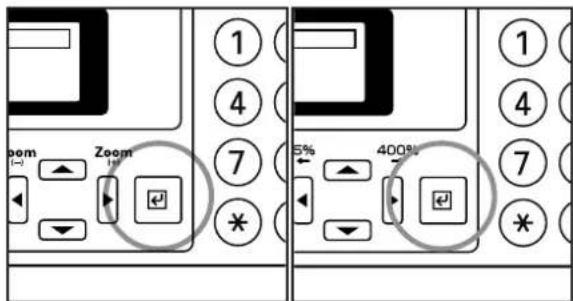
8 Use the ▲ cursor key to select [1] Enter" and then press the Enter key. The message display will return to the "Ready to copy." screen.
Inch specifications Metric specifications
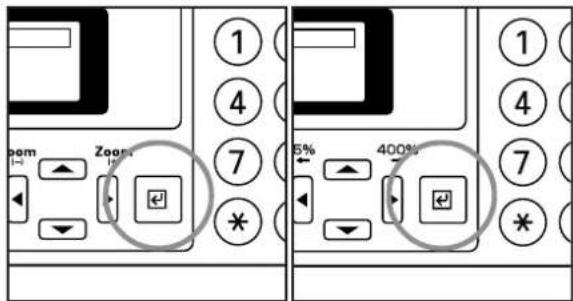
9 Press the Start key to begin the copying procedure.
Inch specifications Metric specifications
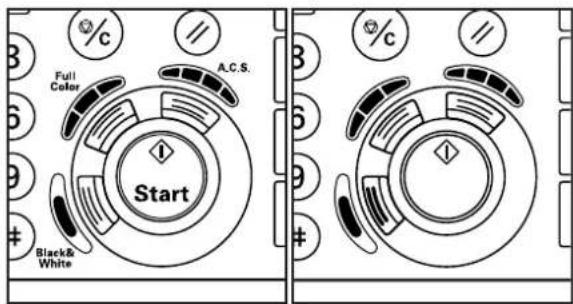
2. Interrupt copying
Interrupt copying is useful if, during one copy job, you want to copy other originals at different settings. Once the rush job is completed, the interrupted copy job can be resumed at the same settings as before.
![graph TD A["1"] --> B["2"] B --> C["3"] C --> D["A"] D --> E["1"] E --> F["2"] F --> G["A"] G --> H["3"]](/content/2026/05/768513/images/8ced536ca73f13a665062012c543ec165e42f907edcc34c86fd6a8f86a959710.jpg)
NOTE
Interrupt copying cannot be used to make copies in the transparency mode, the transparency + backing sheet mode, the presentation mode, the 2-sided copy modes or the insert sheet modes.
1
Press the Interrupt key. The Interrupt indicator will blink. Wait a while until "Interrupt mode OK" ["INTERRUPT MODE."] is displayed and the Interrupt indicator lights continuously.
Inch specifications Metric specifications
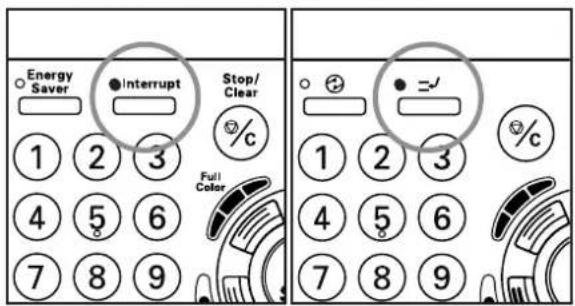
2
Remove the original(s) that were currently being copied and put it (them) aside.
3
Set the new original(s) and perform the desired copy procedure.
4
When copying is completed, press the Interrupt key once again, and replace the newly copied original(s) with the one(s) removed before. Then, press the Start key. The interrupted copy job will be resumed.
Inch specifications Metric specifications

3. Making duplex (2-sided) copies from various types of originals [2-sided copy modes]
With these modes, duplex (2-sided) copies can be made from a variety of originals including open-faced (books, etc.) originals or multiple one-sided originals.
NOTES
• These modes are only available in duplex copiers.
- 2-sided copies cannot be made automatically when paper is being fed from the multi-bypass tray.
(1) Making duplex (2-sided) copies from a 2-sided original
With this mode, a 2-sided original is copied and the front and back sides of the copy paper are used so that the copy looks just like the original.
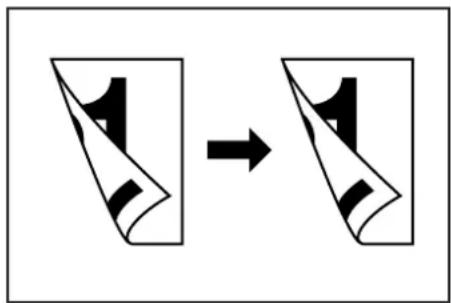
NOTES
- Only paper sizes between 5 1/2" x 8 1/2" and 11" x 17" [between A5R and A3] can be used in this mode.
- The optional DF must be installed in your copier.
(2) Making duplex (2-sided) copies from an open-faced (books, etc.) original
With this mode, the two facing pages of a magazine or book are copied separately onto the front and back sides of the copy paper by simply pressing the Start key.
NOTES
- The binding direction of the originals can also be selected.
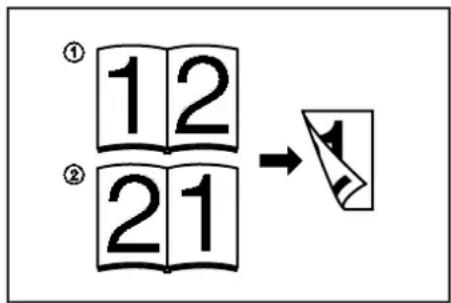
① Left side binding: Open-faced originals are copied from the left side page first.
② Right side binding: Open-faced originals are copied from the right side page first.
- Only 8 1/2" x 11" and 11" x 8 1/2" [B5, A4R and A4] paper sizes can be used in this mode. (8 1/2" x 11" and A4R paper can be loaded into the optional Paper Feeder, while B5 paper can be set onto the multi-bypass tray.)
(3) Making duplex (2-sided) copies from one-sided originals
With this mode, multiple one-sided originals are copied onto the front and back sides of the copy paper. If you are copying an odd number of originals, the back side of the last page will be blank.
![graph TD A["1"] --> B["2"] B --> C["3"] C --> D["4"] D --> E["5"] E --> F["3"] F --> G["1"] style A fill:#f9f,stroke:#333 style B fill:#f9f,stroke:#333 style C fill:#f9f,stroke:#333 style D fill:#f9f,stroke:#333 style E fill:#f9f,stroke:#333 style F fill:#f9f,stroke:#333 style G fill:#f9f,stroke:#33…](/content/2026/05/768513/images/67385f423dce6804119a4f117ad0faf4f217cd070840365b1b0141759cacbf57.jpg)
NOTE
The image that is copied onto the back side of the copy can also be rotated 180 degrees.
![graph TD A["Block ①: abc, def, ghi"] --> B["Block ②: abc, def, ghi"] A --> C["Arrow ①"] B --> D["Arrow ②"]](/content/2026/05/768513/images/af45f58337c4103cd29afc090348521f17f6a6f5f43886cd2338676d9129ae78.jpg)
① Do not rotate: The back side of the copy will be created with the same orientation as the original.
② Rotate: The image that is copied onto the back side of the copy will be rotated 180 degree. If you then bind the copy set at the top, the images will be oriented in the same direction when flipped up like a calendar, etc.
1
Set the original to be copied.
2
Press the Duplex/Page Separation key to light the corresponding indicator.
Inch specifications Metric specifications
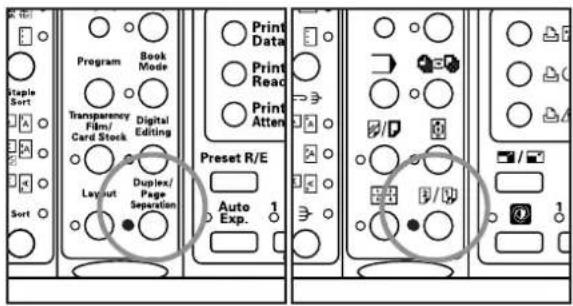
3
Use the ▲ cursor or the ▼ cursor key to select “☐ 2-sided copy” and then press the Enter key.
The "Select 2-sided copy mode" ["SELECT DUPLEX COPY MODE"] screen will appear.
Inch specifications
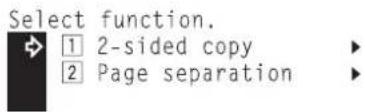
Metric specifications
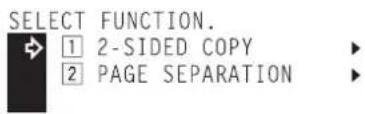
4
Use the ▲ cursor or the ▼ cursor key to select the 2-sided copy mode that you want to use.
Inch specifications
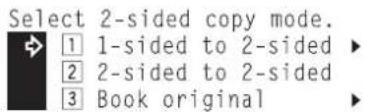
Metric specifications
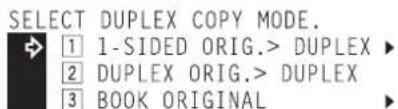
5
Press the Enter key.
- If you selected "1 1-sided to 2-sided" ["1 1-SIDED ORIG. > DUPLEX"], go to the next step.
- If you selected "|2| 2-sided to 2-sided" ["|2| DUPLEX ORIG. > DUPLEX"], the "2-sided mode" ["DUPLEX MODE"] screen will appear. In this case, go directly to step 10.
- If you selected "3 Book original", go directly to step 8.
6 Select whether you want the image that is copied onto the back side of the copy to be rotated 180 degrees or not.
Inch specifications
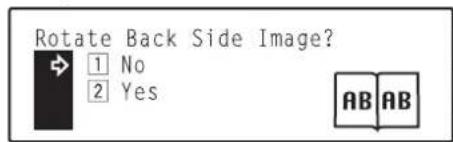
Metric specifications
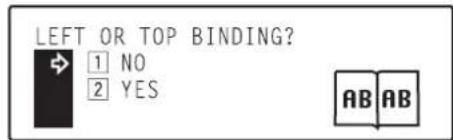
7 Press the Enter key
The "2-sided mode" ["DUPLEX MODE"] screen will appear. Go directly to step 10.
8 Use the ▲ cursor or the ▼ cursor key to specify the binding direction of the original being copied.
Inch specifications
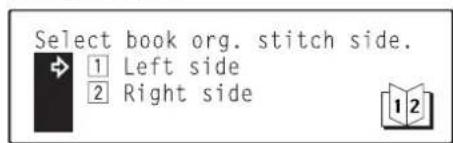
Metric specifications
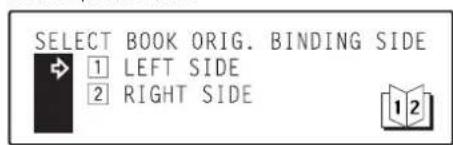
Press the Enter key.
The "2-sided mode" ["DUPLEX MODE"] screen will appear.
10 Press the Start key. Scanning of the original will start.
- If you set the originals in the optional DF, copying will start automatically.
- If you set the original on the platen, go to the next step.
Inch specifications Metric specifications
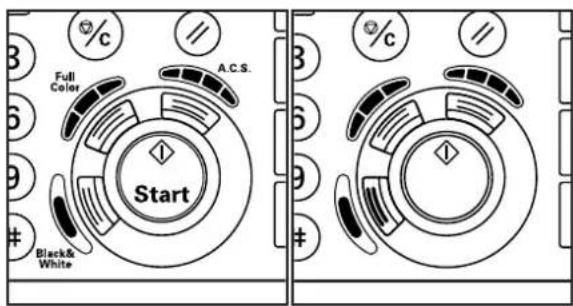
11 Replace the first original with the next one and press the Start key. Scanning of that next original will start. Carry out this step for all of the originals that you want to copy and, once you have finished scanning them all, press the Enter key. Copying will start.
Inch specifications Metric specifications
4. Copying two-page originals onto separate sheets [Page separation modes]
(1) Page separation from book originals
With this mode, the two facing pages of an open-faced original such as a magazine, book or the like are each copied onto a separate sheet of paper.
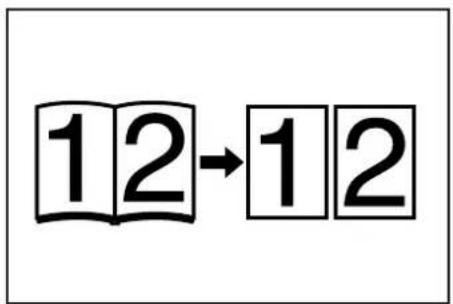
NOTES
- Only 11" x 8 1/2" [B5R and A4] size originals can be used in this mode. If the Memory Copy Board is installed in your copier, 8 1/2" x 11" and 11" x 8 1/2" [B5R, B5, A4R and A4] size originals can be used. (8 1/2" x 11" and A4R paper can be loaded into the optional Paper Feeder, while B5 paper can be set onto the multi-bypass tray.)
- Same-size (100% [1:1]) copying is possible in the following cases: When copying 11" x 17" open-faced (books, etc.) onto 11" x 8 1/2" paper
When copying A3 open-faced (books, etc.) onto A4 paper When copying B4 open-faced (books, etc.) onto B5 paper In any other case, the image will be enlarged or reduced to fit the size of paper. - The binding direction of the originals can also be selected.
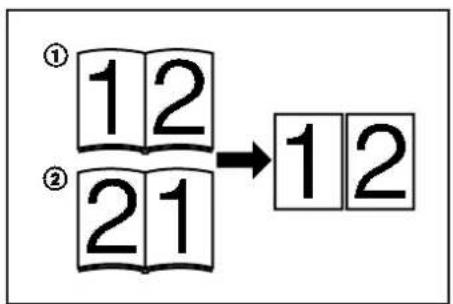
① Left side binding: Open-faced originals are copied from the left side page first.
② Right side binding: Open-faced originals are copied from the right side page first.
(2) Page separation from 2-sided originals
With this mode, the two sides of a 2-sided original are each copied onto a separate sheet of paper.
![graph LR A["1"] --> B["1"] B --> C["2"]](/content/2026/05/768513/images/bab491fafda37b78c96e93e0f7e9e962d6f72ebfc8ce958b097d71c9f5bc8cd6.jpg)
1
Set the original to be copied.
NOTE
When copying from a book, set the book on the platen as shown in the illustration.
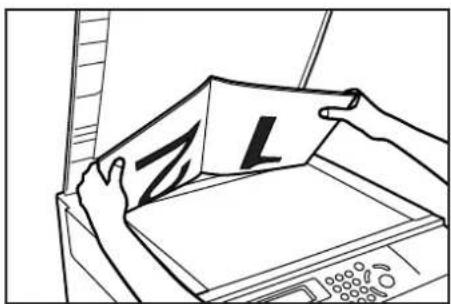
2
Press the Duplex/Page Separation key to light the corresponding indicator.
Inch specifications Metric specifications
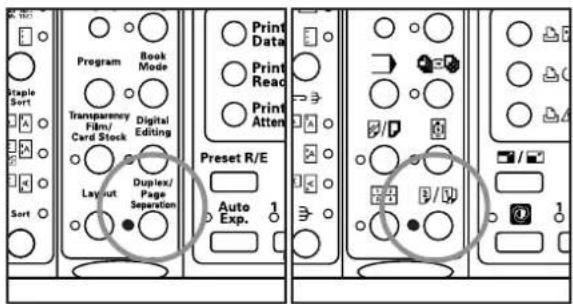
3 Use the ▲ cursor or the ▼ cursor key to select "12 Page separation" and then press the Enter key. The "Select 1-sided copy mode." screen will appear.
Inch specifications
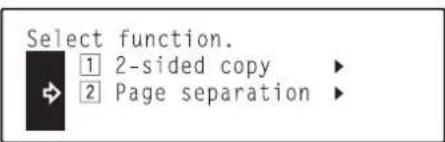
Metric specifications
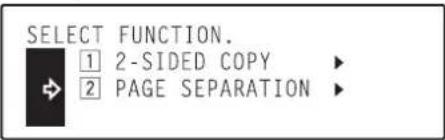
4 Use the ▲ cursor or the ▼ cursor key to select the page separation mode that you want to use.
Inch specifications
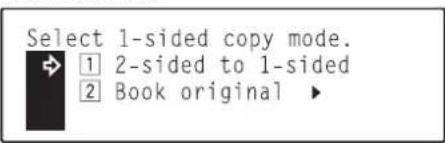
Metric specifications
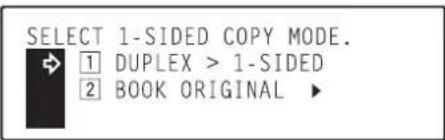
5 Press the Enter key.
- If you selected "1 2-sided to 1-sided" ["1 DUPLEX >
1-SIDED"], the message display will return to the "Ready to copy." screen. - If you selected "|2| Book original", go to the next step.
6 Use the ▲ cursor or the ▼ cursor key to select the binding direction of the original being copied.
Inch specifications
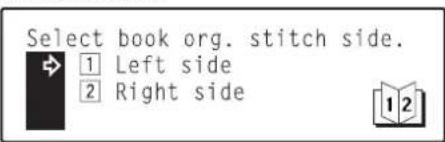
Metric specifications
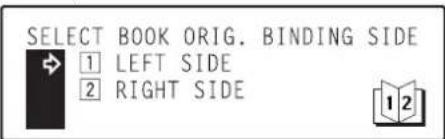
7 Press the Enter key.
The message display will return to the "Ready to copy." screen.
8 Press the Start key to begin the copying procedure.
Inch specifications Metric specifications
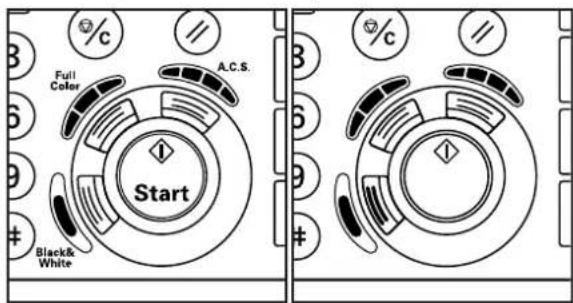
5. Making a margin space for binding [Margin mode]
NOTE
If you do not have a Memory Copy Board installed as standard equipment, the optional Memory Copy Board must be installed in your copier in order to use this mode.
(1) Left margin
The image of the original is shifted to the right to make a margin (blank space) for binding on the left side of the paper.
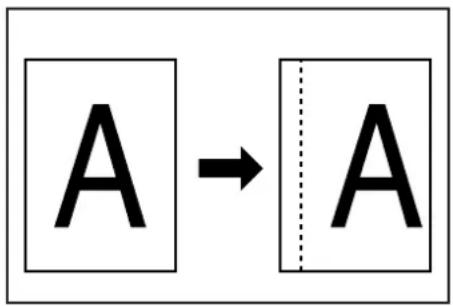
NOTES
- The margin width can be set to any 1/8" increment between 1/4" and 3/4" [1 mm increment between 6 mm and 18 mm].
- It is also possible for you to select the default setting for the margin width from among the range indicated above. (See “ 15 Margin width” on page 7-20.)
- If you select to have a left margin created during 2-sided copying, a right margin that is the same width as the margin on the front side will be automatically created on the back side of the copies.
(2) Top margin
The image of the original is shifted downward to make a margin for binding on the top side of the paper.
![graph LR A["A"] --> B["A"]](/content/2026/05/768513/images/4fa8583a5f979ef524c476130332189f6899cbad52b660ec4b61200e6da236a7.jpg)
NOTES
- The margin width can be set to any 1/8" increment between 1/4" and 3/4" [1 mm increment between 6 mm and 18 mm].
- It is also possible for you to select the default setting for the margin width from among the range indicated above. (See “⑮ Margin width” on page 7-20.)
(3) Front & back margin
When you are making 2-sided copies, the margin positions and widths can be selected separately for the front and back sides.
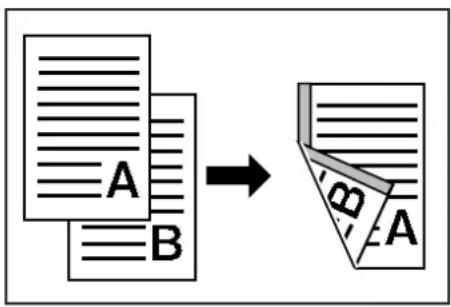
NOTES
- The margin widths can be set to any 1/8" increment between 1/4" and 3/4" [1 mm increment between 1 mm and 18 mm].
- The margin position that can be selected for the back side will differ depending upon the margin position that is selected for the front side. A circle ("○") in the following table indicates that the setting is possible.
| Rear side\Front side | “Left Margin” | “Right Margin” | “Top Margin” | “Bottom Margin” | “No Margin” |
| “Left Margin” | ○ | ○ | ○ | ||
| “Right Margin” | ○ | ○ | ○ | ||
| “Top Margin” | ○ | ○ | ○ | ||
| “Bottom Margin” | ○ | ○ | ○ | ||
| “No Margin” | ○ | ○ | ○ | ○ | ○ |
1 Set the original to be copied.
NOTE
Set originals as shown in the illustration. Setting them in the wrong direction may cause the margin to be created in the correct position.
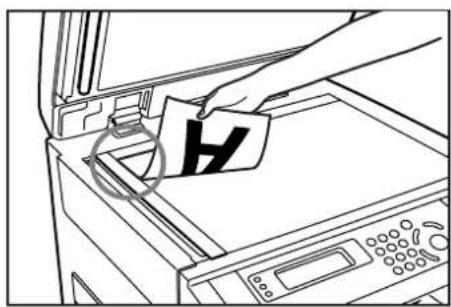
2 Press the Digital Editing key to light the corresponding indicator.
Inch specifications Metric specifications
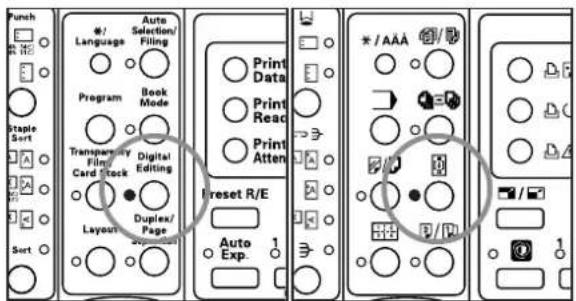
3 Use the ▲ cursor or the ▼ cursor key to select "2 Margin" and then press the Enter key.
The "Select Margin" ["SELECT MARGIN TYPE"] screen will appear.
Inch specifications
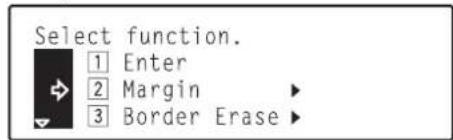
Metric specifications
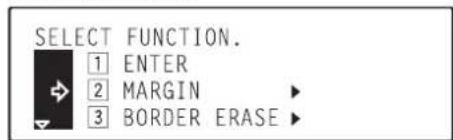
4 Use the ▲ cursor or the ▼ cursor key to select where you want the margin to be created.
Inch specifications
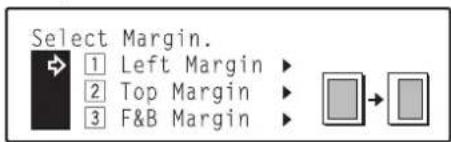
Metric specifications
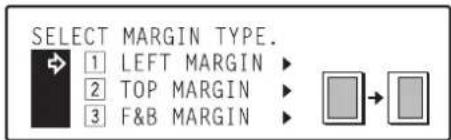
5 Press the Enter key.
- If you selected “1 Left Margin” or “2 Top Margin”, go to the next step.
- If you selected "3 F&B Margin", go directly to step 9.
6 If you want to change the selected margin width, use the ◀ cursor or the ▶ cursor key to select the desired width. If you want to copy with the currently selected margin width, go to the next step.
Inch specifications
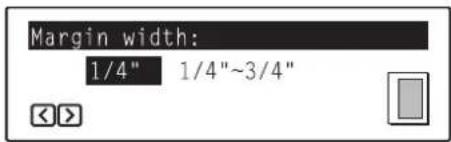
Metric specifications
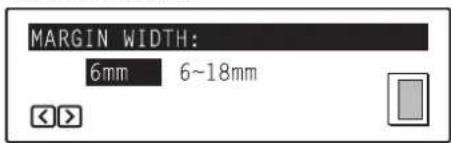
NOTE
The margin width can be set to any 1/8" increment between 1/4" and 3/4" [1 mm increment between 6 mm and 18 mm].
7 Press the Enter key.
8 Use the ▲ cursor key to select "1| Enter" and then press the
Enter key. The message display will return to the "Ready to copy." screen.
9 Check the settings shown for the front & back margins. If you
Enter key. In this case, go directly to step 19.
If you want to change the settings, go to the next step.
Inch specifications
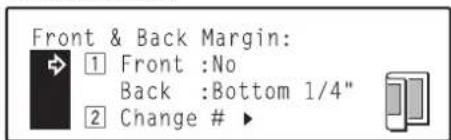
Metric specifications
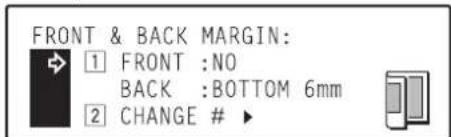
10 Use the ▼ cursor key to select "|2| Change #", and then press the Enter key.
The "Select Front Margin" screen will appear.
11 Use the ▲ cursor or the ▼ cursor key to select where you want the margin to be created.
Inch specifications

Metric specifications
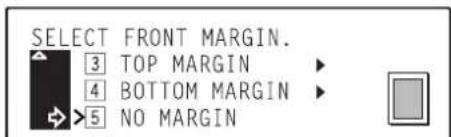
12 Press the Enter key.
- If you selected "Left Margin", "Right Margin", "Top Margin" or "Bottom Margin", go to the next step.
- If you selected "No Margin", go directly to step 15.
13 Use the ◀ cursor or the ▶ cursor key to select the desired margin width.
Inch specifications
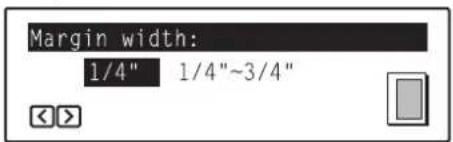
Metric specifications
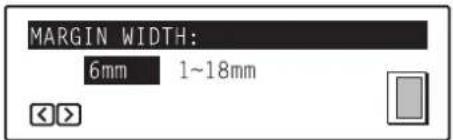
NOTE
The margin width can be set to any 1/8" increment between 1/4" and 3/4" [1 mm increment between 1 mm and 18 mm].
14 Press the Enter key.
15 Use the ▲ cursor or the ▼ cursor key to where on the back side of the copies you want the margin to be created.
Inch specifications
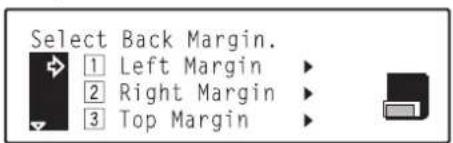
Metric specifications
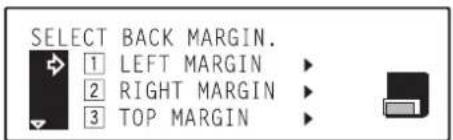
NOTE
The margin position that can be selected for the back side will differ depending on the margin position that is selected for the front side.
See the chart on page 6-11.
16 Press the Enter key.
- If you selected "Left Margin", "Right Margin", "Top Margin" or "Bottom Margin", go to the next step.
- If you selected "No Margin", go directly to step 19.
17 Use the ◀ cursor or the ▶ cursor key to select the desired margin width.
Inch specifications
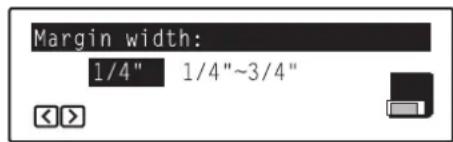
Metric specifications
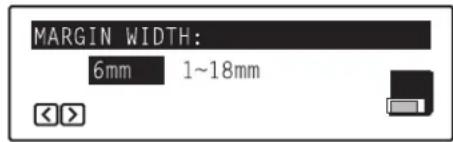
NOTE
The margin width can be set to any 1/8" increment between 1/4" and 3/4" [1 mm increment between 1 mm and 18 mm].
18 Press the Enter key.
19 Use the ▲ cursor key to select “1 Enter” and then press the Enter key. The message display will return to the “Ready to copy.” screen.
6. Making copies with clean edges [Border erase modes]
NOTE
If you do not have a Memory Copy Board installed as standard equipment, the optional Memory Copy Board must be installed in your copier in order to use this mode.
(1) Erasing blemishes from edges of copies (Sheet erase mode)
With this mode, shadows, lines, etc., that occur around the edges of copies made from sheet originals can be erased. (The erased border width is shown as ⓐ in the illustration.)
![graph LR A["Document with leaf symbol"] --> B["Empty image file"]](/content/2026/05/768513/images/b4e9f75085faba2da0a2ab56da21c74542f4c71170e3e6a2f9361572d28e9fee.jpg)
NOTES
- The width of the border to be erased can be set to either 1/4", 1/2" or 3/4" [6 mm, 12 mm or 18 mm].
- It is possible for you to change the default setting for the width of the erased border. (See "⑯ Erased border width" on page 7-20.)
(2) Erasing blemishes from the edges and middle of copies made from books (Book erase mode)
With this mode, you can make clean copies, even from thick books. (The erased border width is shown as ⓐ in the illustration.)
![graph TD A["abcdefghijk"] -->|a| B["abcdefghijk"] B --> C["abcdefghijk"] C --> D["abcdefghijk"] D --> E["abcdefghijk"] E --> F["abcdefghijk"] F --> G["abcdefghijk"] G --> H["abcdefghijk"] H --> I["abcdefghijk"] I --> J["abcdefghijk"]](/content/2026/05/768513/images/e17c0b71f31c924bcbc7855a390e02dfc93c39d1267cfdb2eb2fcf7cb31571cd.jpg)
NOTES
- The width of the border to be erased can be set to either 1/4", 1/2" or 3/4" [6 mm, 12 mm or 18 mm].
- It is possible for you to change the default setting for the width of the erased border. (See "⑯ Erased border width" on page 7-20.)
(3) Selecting the erasing area (Custom erase mode)
With this mode, you can make clean, blemish-free copies from non-standard size originals, i.e. sizes other than 8 1/2" x 11", 11" x 17" [A4, B4], etc. (The width of the border that will be erased is shown as ⓐ in the illustration.)
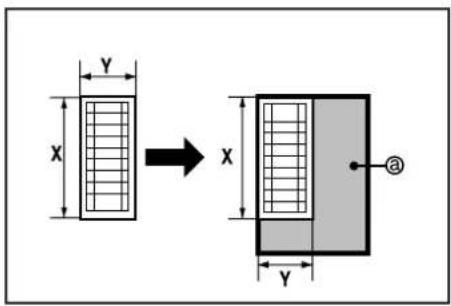
NOTES
- The size of the original that is being copied must be registered in advance. (See "⑰ Custom erase size" on page 7-21.)
- The illustration above shows how copies will be created when the original is set on the platen.

Set the original to be copied.
NOTE
Set book originals as shown in the illustration.
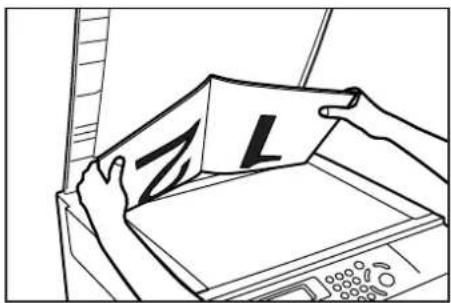
2 Press the Digital Editing key to light the corresponding indicator.
Inch specifications Metric specifications
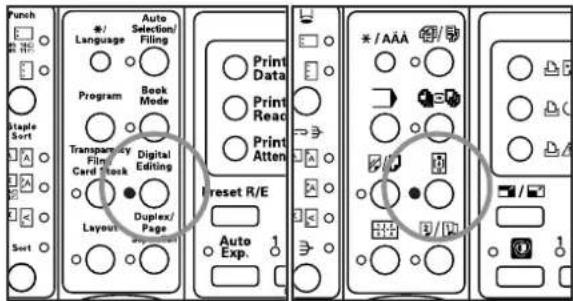
3 Use the ▲ cursor or the ▼ cursor key to select "3 Border Erase" and then press the Enter key.
The "Select Erase effect" screen will appear.
Inch specifications
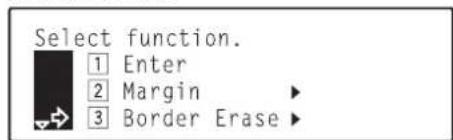
Metric specifications
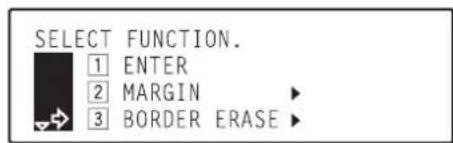
4 Use the ▲ cursor or the ▼ cursor key to select the border erase mode that you want to use.
Inch specifications
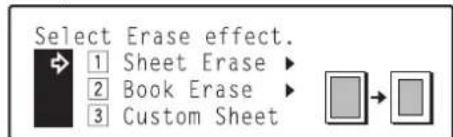
Metric specifications
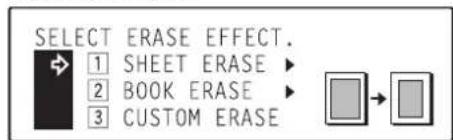
5 Press the Enter key.
- If you selected "1 Sheet Erase" or "2 Book Erase", go to the next step.
- If you selected "3 Custom Sheet", go directly to step 8.
NOTE
In order to use the “③ Custom Sheet” setting, the size of the original that is being copied must be registered in advance. (See “⑰ Custom erase size” on page 7-21.)
6 Use the ▲ cursor or the ▼ cursor key to select the width of the border that you want to have erased.
Inch specifications
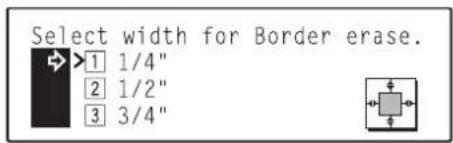
Metric specifications
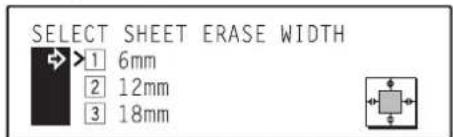
NOTES
- The width of the border to be erased can be set to either 1/4", 1/2" or 3/4" [6 mm, 12 mm or 18 mm].
• The arrow (>) indicates the current setting.
7 Press the Enter key.
8 Use the ▲ cursor key to select "1 | Enter" and then press the Enter key. The message display will return to the "Ready to copy." screen.
7. Inverting black and white AND colors [Invert mode]
With this mode, you can make copies where the black and white, as well as the color, areas of the image are inverted (or reversed).

NOTE
If multiple inverted copies are performed, "Please wait. Adding toner." ["PLEASE WAIT. NOW ADDING TONER."] may appear in the message display.
1 Set the original to be copied.
2 Press the Digital Editing key to light the corresponding indicator.
Inch specifications Metric specifications
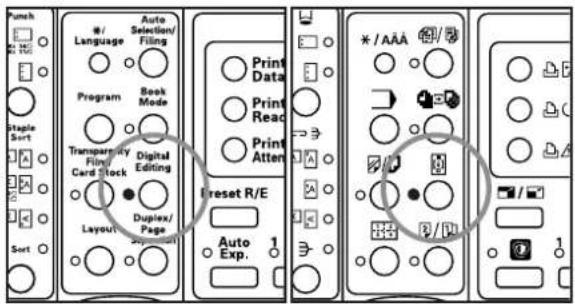
Metric specifications
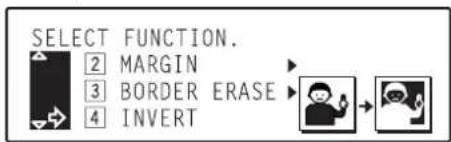
4 Press the Enter key. The invert mode will be selected and an asterisk (✗) will appear in front of the number for that setting.
NOTE
In order to cancel the invert mode, use the ▲ cursor or the ▼ cursor key to select the invert mode again and then press the Enter key. The asterisk (✗) will be removed and the setting canceled.
5 Use the ▲ cursor key to select "1| Enter" and then press the Enter key. The message display will return to the "Ready to copy." screen.
8. Making mirror image copies [Mirror image mode]
With this mode, you can make mirror image copies.
![graph LR A["Mouse sleeping"] --> B["Second state"]](/content/2026/05/768513/images/30e6776291d01d2f2d36288a63307ed1ad74c365eb28efab4d61fcc804839e49.jpg)
1 Set the original to be copied.
2 Press the Digital Editing key to light the corresponding indicator.
Inch specifications Metric specifications
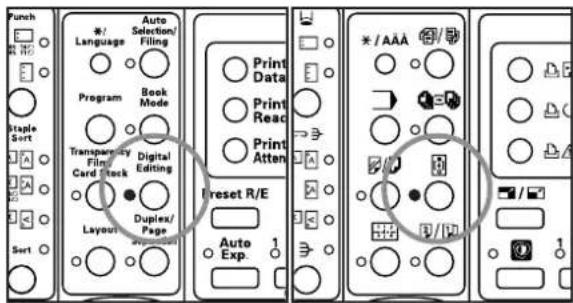
3 Use the ▲ cursor or the ▼ cursor key to select "5 Mirror". Inch specifications
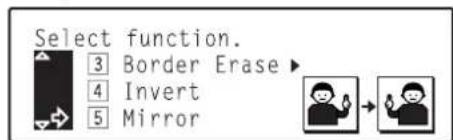
Metric specifications
4 Press the Enter key. The mirror image mode will be selected and an asterisk (*) will appear in front of the number for that setting.
NOTE
In order to cancel the mirror image mode, use the ▲ cursor or the ▼ cursor key to select the mirror image mode again and then press the Enter key. The asterisk (*) will be removed and the setting canceled.
5 Use the ▲ cursor key to select "1 | Enter" and then press the Enter key. The message display will return to the "Ready to copy." screen.
9. Printing page numbers on copies [Print page numbers mode]
When you make copies from multiple originals, you can have page numbers assigned to the corresponding copies in numerical order from the first original. There are three styles of page numbers to choose from: "-1-", "P.1" and "1/5".
![graph TD A["Block A"] --> D["Block D"] B["Block B"] --> D["Block D"] C["Block C"] --> D["Block D"] D["Block D"] --> A["Block A"] A["Block A"] --> D["Block D"] style A fill:#f9f,stroke:#333 style B fill:#f9f,stroke:#333 style C fill:#f9f,stroke:#333 style D fill:#f9f,stroke:#333 arrow["-->"] --> A["B…](/content/2026/05/768513/images/b4c82469c9fe19704a9d38b4ed2237a460ac2171da47d2cc6c3006e40e8cce80.jpg)
NOTES
• Page numbers will be printed in black in the position shown in the illustration.
- If you select "1/5" as the style of page number, the total number of pages will be printed as the denominator.
- The setting for the page on which page numbers will start to be printed can be selected to any number, except for "0", between "-10" and "900".
- The print page number mode is NOT available for use together with the zoom mode, preset zoom mode or XY zoom mode.
- If you do not have a Memory Copy Board installed as standard equipment, the optional Memory Copy Board must be installed in your copier in order to use this mode.
1 Set the original to be copied.
NOTE
Set originals as shown in the illustration.
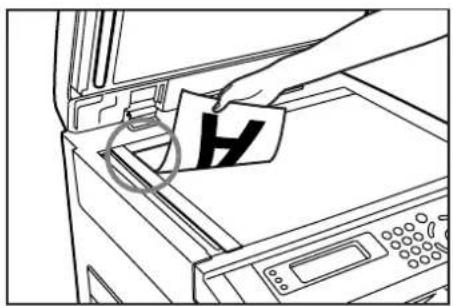
2 Press the Digital Editing key to light the corresponding indicator.
Inch specifications Metric specifications
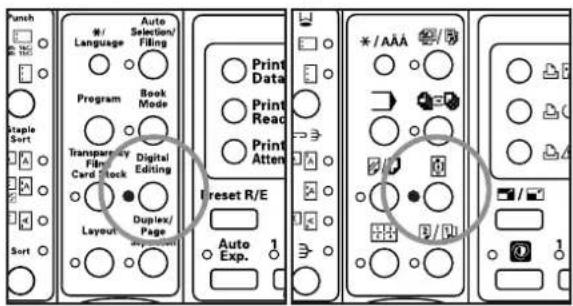
3 Use the ▲ cursor or the ▼ cursor key to select "8 Page No." ["PAGE #"] and then press the Enter key.
The "Select Page # style" ["SELECT PAGE NUMBER TYPE"] screen will appear.
Inch specifications
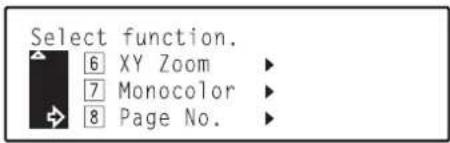
Metric specifications
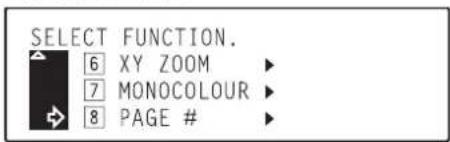
4 Use the ▲ cursor or the ▼ cursor key to select the style of page numbers that you want to be used.
Inch specifications
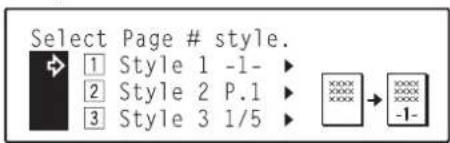
Metric specifications
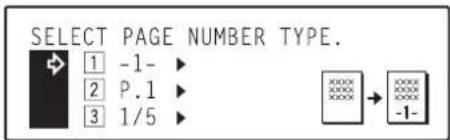
5 Press the Enter key.
6 If you want to change the page on which page numbers will start to be print, use the numeric keys on the keypad or press the ◀ cursor or the ▶ key to change the setting to that desired.
Inch specifications
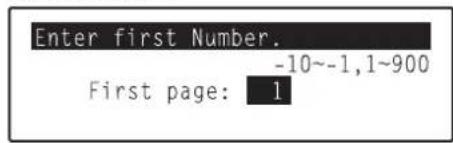
Metric specifications
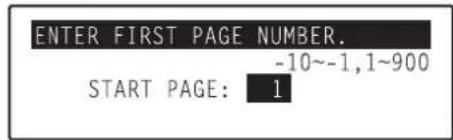
NOTES
- The setting for the page on which page numbers will start to be print can be selected to any number, except for "0", between "-10" and "900".
- If you enter a minus (-) number, page numbers will not be printed on that many pages. After copying is completed on that number of pages, printed page numbers will be started from page 1. For example, to start printing from the third original, select "-2".
7 Press the Enter key.
8 Use the ▲ cursor key to select "1" Enter" and then press the Enter key. The message display will return to the "Ready to copy." screen.
Press the Start key. Scanning of the original will start.
- If you set the originals in the optional DF, copying will start automatically.
- If you set the original on the platen, go to the next step.
Inch specifications Metric specifications
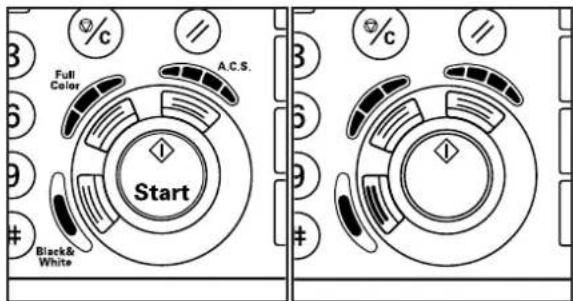
10 Replace the first original with the next one and press the Start key. Scanning of that next original will start. Carry out this step for all of the originals that you want to copy and, once you have finished scanning them all, press the Enter key. Copying will start.
Inch specifications Metric specifications
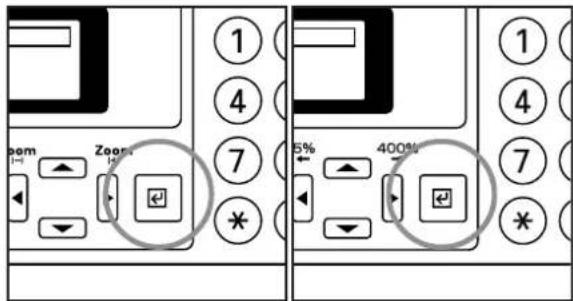
10. Feeding paper as a backing sheet for OHP transparencies [Transparency + backing sheet mode]
When 2 or 3 transparencies are piled on top of one another, static electricity can cause problems. This mode automatically places a backing sheet between the transparencies during copying. You can also select whether or not to have the image of the original copied onto the backing sheet.
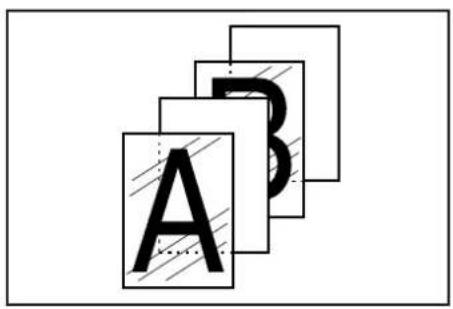
NOTE
If you do not have a Memory Copy Board installed as standard equipment, the optional Memory Copy Board must be installed in your copier in order to use this mode.
(1) Copying onto the backing sheet
With this setting, after the original is copied onto the transparency, the same image will be copied onto the backing sheet as well. (The asterisk “*” in the illustration indicates the transparencies.)
![graph TD A["3D Block Structure"] --> B["2D Layer"] style A fill:#f9f,stroke:#333 style B fill:#bbf,stroke:#333](/content/2026/05/768513/images/83dbfda917611719713711c22c745f68e2b00048e224587605f0eef91d65b38d.jpg)
(2) Leaving the backing sheet blank
With this setting, the original will be copied onto the transparency but the backing sheet will be left blank. (The asterisk “*” in the illustration indicates the transparencies.)
![graph TD A["Block 1"] --> C["Point 1"] B["Block 2"] --> C["Point 1"] D["Block 3"] --> E["Point 2"] F["Block 3"] --> G["Point 3"] C --> H["*"] E --> I["*"] G --> J["*"]](/content/2026/05/768513/images/9948481ff0862560a080264f32ac1c96b781ebb5d311c9f907b075e614542da5.jpg)
1
Set the transparency film in the multi-bypass tray.
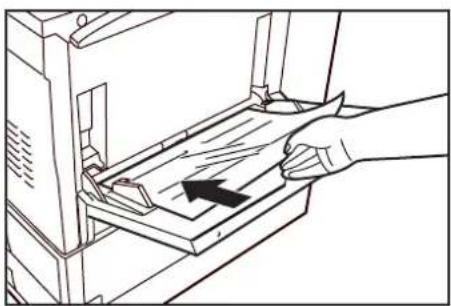
NOTES
• Fan through the transparencies before setting them.
- Up to 25 transparencies can be set on the multi-bypass tray at one time.
- Make sure that paper of the same size as the transparencies has been loaded into a drawer.
2
Set the originals to be copied.
3 Press the Transparency Film / Card Stock key to light the corresponding indicator.
Inch specifications Metric specifications
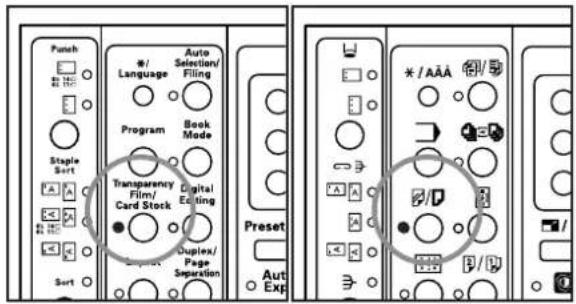
4 Use the ▲ cursor or the ▼ cursor key to select "1 | Transparency Mode" and then press the Enter key. The "Select function" screen will appear.
Inch specifications
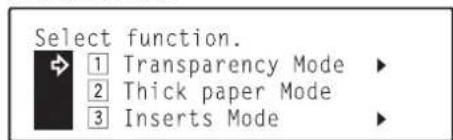
Metric specifications
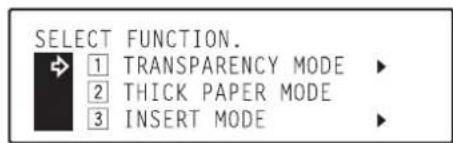
5 Use the ▲ cursor or the ▼ cursor key to select "1 | Transparency + backing" and then press the Enter key.
Inch specifications
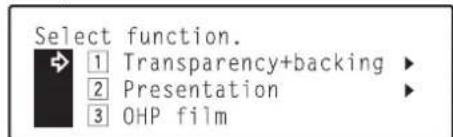
Metric specifications
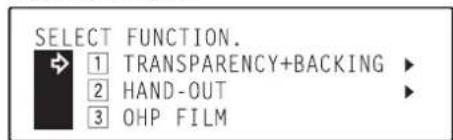
6 Use the ▲ cursor or the ▼ cursor key to select whether you want to have the image copied onto the backing sheets or not.
- If you DO want to have the image copied onto the backing sheets, select "|2| Copy" ["|2| COPIED"].
- If you do NOT want to have the image copied onto the backing sheets, select "1 | Blank".
Inch specifications
![graph TD A["Copy on backing sheet?"] --> B["Blank"] A --> C["Copy"] B --> D["AB"] C --> D](/content/2026/05/768513/images/748a3d237973db5d4926da70869142c718d801f838804d25b5d79fbbed5a21f8.jpg)
Metric specifications
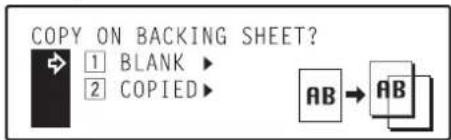
7 Press the Enter key.
8 Use the ▲ cursor or the ▼ cursor key to specify the type of originals being copied.
Select "1 1-sided" if you are using 1-sided originals and "2 2-sided" if you are using 2-sided originals.
Inch specifications
Metric specifications
Press the Enter key.
The message display will return to the "Ready to copy." screen.
11. Preparing presentation materials to go with transparencies [Presentation mode]
Multiple copies of the original image can be made onto standard copy paper while the transparency + backing sheet mode (see page 6-21) is selected. This mode is convenient for preparing materials to accompany transparencies.
NOTES
- If your machine is a duplex copier, it is possible for you to make duplex (2-sided) copies onto the standard copy paper.
- If you do not have a Memory Copy Board installed as standard equipment, the optional Memory Copy Board must be installed in your copier in order to use this mode.
(1) Copying onto the backing sheet
With this setting, after the original is copied onto the transparency and the same image copied onto the backing sheet (see “(1) Copying onto the backing sheet” on page 6-21), the same image will be copied onto a specified number of sheets of standard copy paper as well. (The asterisk “*” in the illustration indicates the transparencies.)
![graph TD A["Document Block 1"] --> C["Structured Layout"] B["Document Block 2"] --> C D["Document Block 3"] --> C C --> E["Text: Asterisk at Group 1"] C --> F["Text: Asterisk at Group 2"] C --> G["Text: Asterisk at Group 3"]](/content/2026/05/768513/images/42954004f442adbf1a0906a50feb4626ac4eb237cdc86526f10128800474d88d.jpg)
(2) Leaving the backing sheet blank
With this setting, after the original is copied onto the transparency but the backing sheet left blank (see “(2) Leaving the backing sheet blank” on page 6-21) the same image will be copied onto a specified number of sheets of standard copy paper as well. (The asterisk “*” in the illustration indicates the transparencies.)
![graph TD A["1"] --> B["2"] A --> C["3"] B --> D["1"] B --> E["2"] B --> F["3"] C --> G["1"] C --> H["2"] C --> I["3"] D --> J["•"] E --> K["•"] F --> L["•"] G --> M["•"] H --> N["•"] I --> O["•"]](/content/2026/05/768513/images/bcbf683f8b3f0ab35f1b7d99f8df191e7c0e4050b70db6a9815f5fe43a65eac0.jpg)
1 Set the transparency film in the multi-bypass tray and select the transparency mode.
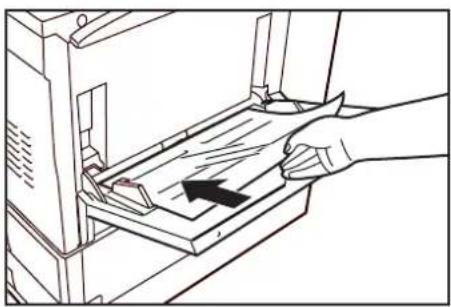
NOTES
• Fan through the transparencies before setting them.
- Up to 25 transparencies can be set on the multi-bypass tray at one time.
- Make sure that paper of the same size as the transparencies has been loaded into a drawer.
2 Set the originals to be copied.
3 Press the Transparency Film / Card Stock key to light the corresponding indicator.
Inch specifications Metric specifications
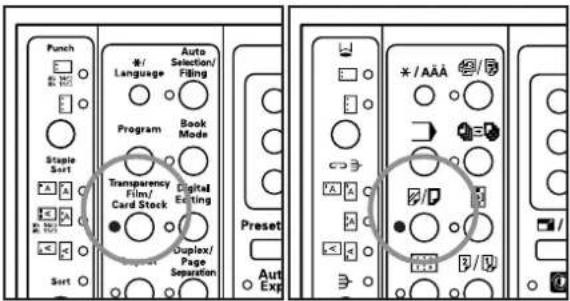
4 Use the ▲ cursor or the ▼ cursor key to select
"1 | Transparency Mode" and then press the Enter key. The "Select function" screen will appear.
Inch specifications
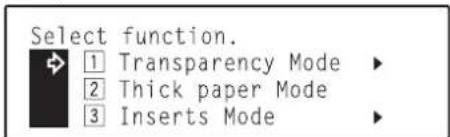
Metric specifications
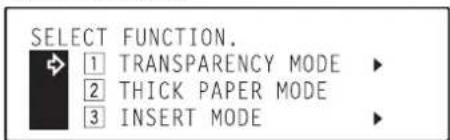
5 Use the ▲ cursor or the ▼ cursor key to select "2 Presentation" ["2 HAND-OUT"] and then press the Enter key.
Inch specifications
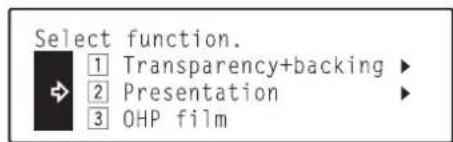
Metric specifications
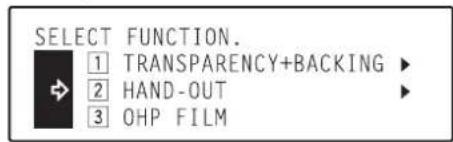
6 Use the ▲ cursor or the ▼ cursor key to select whether you want to have the image copied onto the first backing sheets or not.
- If you DO want to have the image copied onto the backing sheets, select "2 Copy" ["2 COPIED"].
- If you do NOT want to have the image copied onto the backing sheets, select "1 Blank".
Inch specifications
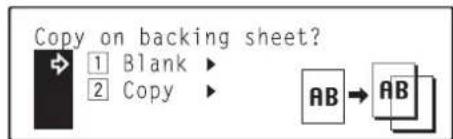
Metric specifications
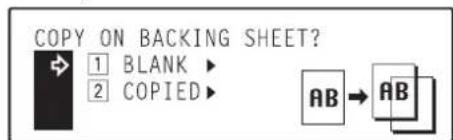
7 Press the Enter key.
8 Use the ▲ cursor or the ▼ cursor key to specify the type of originals being copied.
Select "1 1-sided" if you are using 1-sided originals and "2 2-sided" if you are using 2-sided originals.
Inch specifications
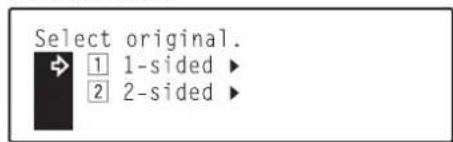
Metric specifications
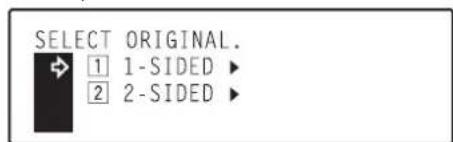
9 Press the Enter key.
- If your machine is a duplex copier, go to the next step.
- If your machine is a standard copier, go directly to step 12.
10 Use the ▲ cursor or the ▼ cursor key to select the type of finished copies you want to make.
Select "1 1-sided" if you want to make 1-sided copies and "2 2-sided" if you want to make 2-sided copies.
Inch specifications
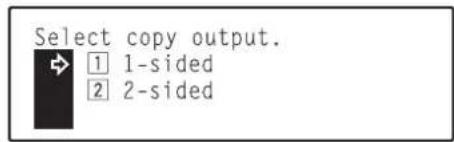
Metric specifications
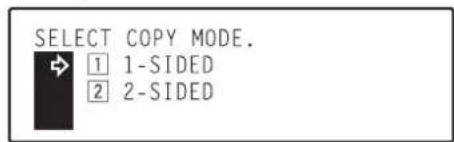
11 Press the Enter key.
The message display will return to the "Ready to copy." screen.
12 Use the numeric keys on the keypad to enter the number of copies that you want to make.
Inch specifications Metric specifications
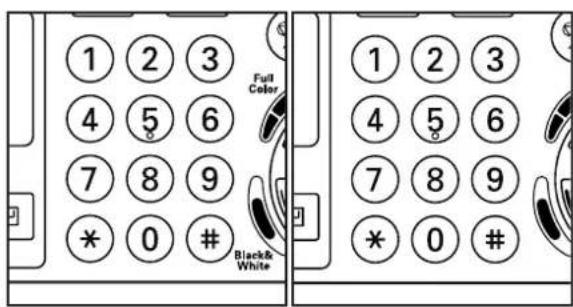
NOTES
• Each transparency and backing sheet will be ejected first, followed by the set of standard copies.
- If the optional Document Finisher is installed in your copier, the transparencies and backing sheets will be ejected onto the non-sort tray on the Document Finisher and the standard copy sets will be ejected one by one onto its sort tray.
12 Press the Start key. Scanning of the originals will start.
- If you set the originals in the optional DF, copying will start automatically.
- If you set the original on the platen, go to the next step.
Inch specifications Metric specifications
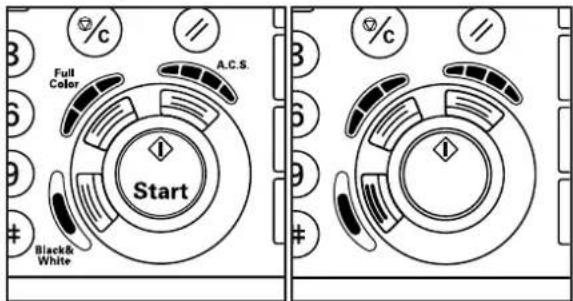
14 Replace the first original with the next one and press the Start key. Scanning of that next original will start. Carry out this step for all of the originals that you want to copy and, once you have finished scanning them all, press the Enter key. Copying will start.
Inch specifications Metric specifications
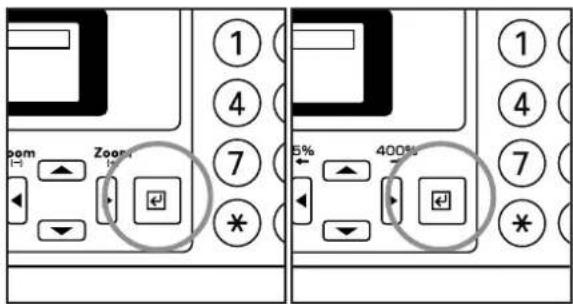
12. Adding covers and separation inserts to your copy sets [Insert sheet modes]
There are two insert sheet modes: cover and separation insert.
![graph TD A["Layer 1"] --> B["Layer 2"] B --> C["Layer 3"] C --> D["Layer 4"] D --> E["Layer 5"] E --> F["Layer 6"] F --> G["Layer 7"] G --> H["Layer 8"] H --> I["Layer 9"] I --> J["Layer 10"] style A fill:#f9f,stroke:#333 style B fill:#f9f,stroke:#333 style C fill:#f9f,stroke:#333 style D fill:#f9f,…](/content/2026/05/768513/images/d48e3755217b28b6d7079858b16d9d9aec7698e1be115a2247f7df7d440efdd9.jpg)
NOTE
If you do not have a Memory Copy Board installed as standard equipment, the optional Memory Copy Board must be installed in your copier in order to use this mode.
(1) Insert sheet modes
- Cover mode
With this mode, paper fed from the multi-bypass tray is added as front and back covers to the copy sets.
The front cover can be made into a 1-sided copy or be left blank. With the back cover, you can select whether to copy onto the cover or not, as well as whether or not to even including a back cover at all.
![graph TD A["1"] --> B["2"] B --> C["3"] C --> D["4"] D --> E["5"] style A fill:#f9f,stroke:#333 style B fill:#f9f,stroke:#333 style C fill:#f9f,stroke:#333 style D fill:#f9f,stroke:#333 style E fill:#f9f,stroke:#333](/content/2026/05/768513/images/d647c5482bb03cb55d5eb78c61201f22e0e4d99d52318447352168b87bc8fd16.jpg)
* Refer to the following table for the types of finished copies that each combination of settings will make.
| Back coverFront cover | Original | Copy on front | Blank | No back cover |
| Copy on front | 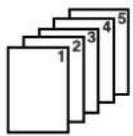 | 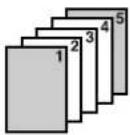 | 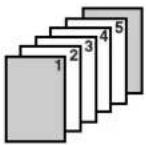 | 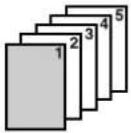 |
| Blank |  | 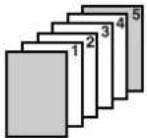 | 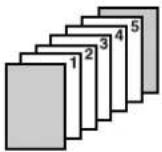 | 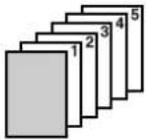 |
* The illustration shows the result when 1-sided copies are made.
● Separation insert mode
With this mode, sheets can be inserted at specified points among copies of multiple originals. You can also select whether to copy onto the inserted sheets themselves or not.
![graph TD A["Stack 1"] --> B["Stack 2"] A --> C["Stack 3"] A --> D["Stack 4"] A --> E["Stack 5"] F["Stack 1"] --> G["Stack 2"] F --> H["Stack 3"] F --> I["Stack 4"] F --> J["Stack 5"]](/content/2026/05/768513/images/e2829b08131c1e0efa2f843d8fdecd4dc56a3d6639776208f8bf36b5a78d3ec0.jpg)
NOTES
- The drawer which contains the paper that to be fed as insert sheets must be designated in advance. (See “18 Insert tray” on page 7-21.)
- If "Bypass" is selected under "⑱ Insert tray" on page 7-21, it will not be possible to make 2-sided copies of the separation inserts.
- The available settings for this mode will differ depending upon the type of originals being copied and the type of finished copies that are being made.
A circle ("○") in the following table indicates that the setting is possible.
| Types of copy settings availableOriginal/ Copy type | Copy onto front and back | Copy on front only | Leave both front and back blank | |
| 1-sided originals | 1-sided copies | ○ | ○ | |
| 2-sided copies | ○ | ○ | ○ | |
| 2-sided originals | 1-sided copies | ○ | ○ | |
| 2-sided copies | ○ | ○ | ○ | |
① If you choose to copy on the front and back side of the insert sheets...
* The illustration shows the result when 2-sided copies are made.
![graph TD A["Stack 1"] --> D["Folded Sheet"] B["Stack 2"] --> D C["Stack 3"] --> D E["Stack 4"] --> D F["Stack 5"] --> D D --> G["Final Folded Sheet"]](/content/2026/05/768513/images/4e4e6d33876f21bb3c8361fc05302eb62053dd688fd2191b5ac699fb5414f6fd.jpg)
② If you choose to copy on the front side of the insert sheets only...
* The illustration shows the result when 2-sided copies are made.
![graph TD A["Stack 1"] --> B["Stack 2"] A --> C["Stack 3"] A --> D["Stack 4"] A --> E["Stack 5"] B --> F["Folded Card with Section 1 and Section 2"] C --> G["Folded Card with Section 3"] D --> H["Folded Card with Section 4"]](/content/2026/05/768513/images/971e6407e7c7a196a3597de87c4ed31256b4226c443628123af2c4c2c66bd6bc.jpg)
③ If you choose to leave both the front and back side of the insert sheets blank...
* The illustration shows the result when 2-sided copies are made.
![graph TD A["1, 2, 3, 4, 5"] --> B["2, 3, 4, 5"] B --> C["3, 4, 5"]](/content/2026/05/768513/images/498ea5b4958c514c12e02dd6d057f85c96fb411a3a2226e6201d91af4b4e51b4.jpg)
(2) Making copies with the insert sheet modes
NOTES
- If your machine is a duplex copier, it is possible for you to make duplex (2-sided) copies in this mode.
- 2-sided copies cannot be made automatically when paper is being fed from the multi-bypass tray.
1 Press the Transparency Film / Card Stock key to light the corresponding indicator.
Inch specifications Metric specifications
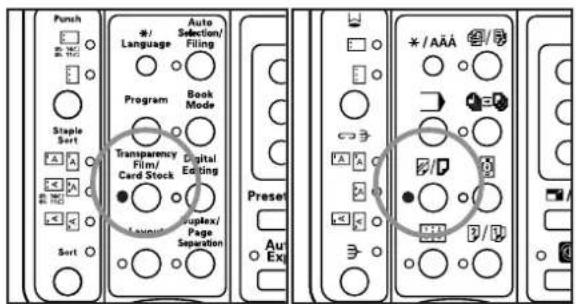
2 Use the ▲ cursor or the ▼ cursor key to select "|3| Inserts Mode" ["3| INSERT MODE"].
Inch specifications
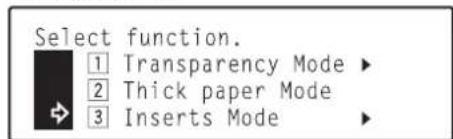
Metric specifications
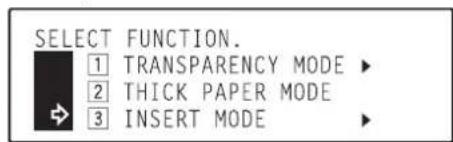
3 Press the Enter key. The "Select original" screen will appear.
4 Use the ▲ cursor or the ▼ cursor key to specify the type of originals being copied.
Select "1 1-sided" if you are using 1-sided originals and "2 2-sided" if you are using 2-sided originals.
Inch specifications
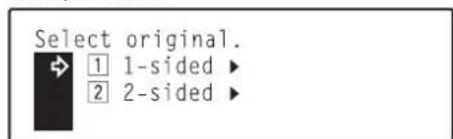
Metric specifications
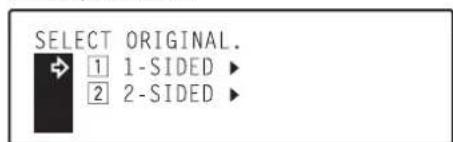
5 Press the Enter key.
- If your machine is a duplex copier, go to the next step
- If your machine is a standard copier, go directly to step 10.
6 Use the ▲ cursor or the ▼ cursor key to select the type of finished copies you want to make.
Select "1 1-sided" if you want to make 1-sided copies and "2 2-sided" if you want to make 2-sided copies.
Inch specifications
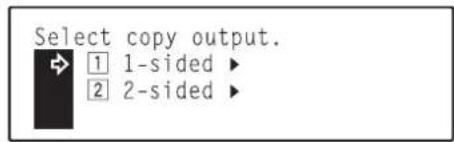
Metric specifications
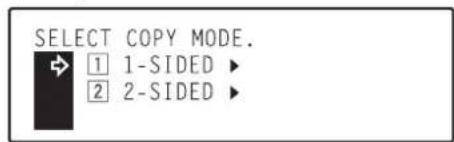
7 Press the Enter key.
If you selected "1 1-sided" in step 4 and "2 2-sided" in step 6, go to the next step. Otherwise, go directly to step 10.
8 Select whether you want the image that is copied onto the back side of the copies to be rotated 180 degrees or not.
Inch specifications
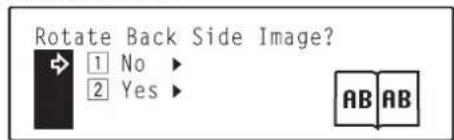
Metric specifications
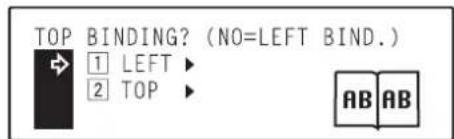
9 Press the Enter key.
10 Use the ▲ cursor or the ▼ cursor key to select the insert sheet mode that you want to use.
Inch specifications
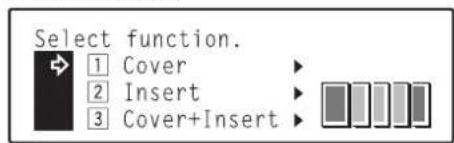
Metric specifications
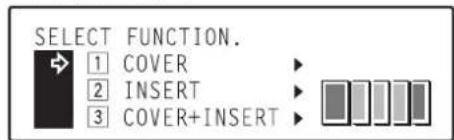
11 Press the Enter key. Perform the procedure below that corresponds to the mode that you selected.
- If you selected "|1| Cover" or "|3 Cover+Insert" here, go to the next step ("● Cover mode settings").
- If you selected "12 Insert" here, go directly to step 21 ("● Separation insert mode settings").
NOTE
If you selected both modes “[3] Cover+Insert”, the screen for the cover mode will be displayed first.
● Cover mode settings
12 Set the paper that you want to use as the covers in the multi-bypass tray.
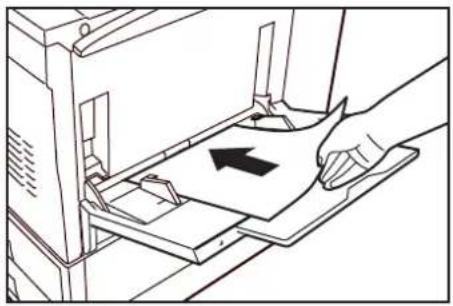
13 The currently selected cover mode settings will be displayed.
- If you want to change any of the settings, use the ▲ cursor or the ▼ key and select either "Front" or "Back".
- If you want to copy with the currently selected settings, go directly to step 19.
Inch specifications
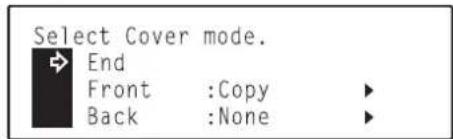
Metric specifications
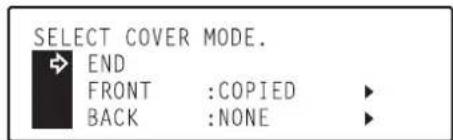
14 Press the Enter key.
- If you selected "Front", go to the next step.
- If you selected "Back", go directly to step 17.
15 Use the ▲ cursor or the ▼ cursor key to select whether you want to copy onto the front cover or not.
If you DO want to copy onto the front cover, select "Frt copy" ["COPIED"]. Otherwise, select "Blank".
Inch specifications
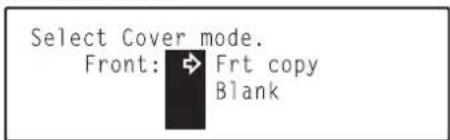
Metric specifications
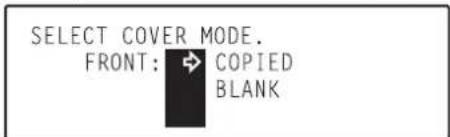
16 Press the Enter key.
- If you are finished changing the cover mode settings, go to step 19.
- If you want to change the settings for the back cover as well, use the ▼ cursor key to select "Back", and then press the Enter key.
17 Use the ▲ cursor or the ▼ cursor key to select whether you want to copy onto the back cover or not.
If you DO want to copy onto the back cover, select "Frt copy" ["COPIED"]. Otherwise, select "Blank".
* If you do not want to have a back cover included at all, select "No".
Inch specifications
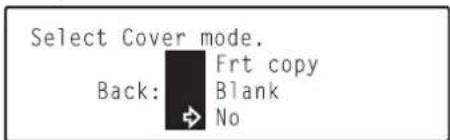
Metric specifications
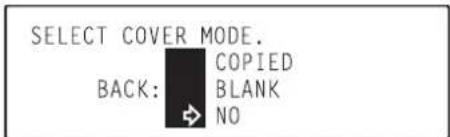
18 Press the Enter key.
19 If you are finished changing the settings for the cover mode, use the ▲ cursor key to select "End".
Inch specifications
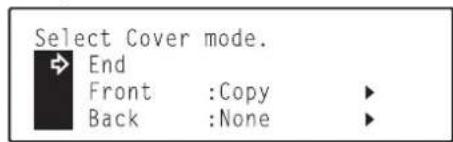
Metric specifications
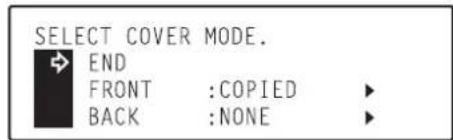
20 Press the Enter key.
- If you selected "|3| Cover+Insert" in step 10, go to the next step ("● Separation insert mode settings").
- If you selected "1 Cover" in step 10, go directly to step 26.
● Separation insert mode settings
21 The "Copy on Insert sheet?" screen will be displayed. Select whether you want to copy onto the separation inserts or not. If you DO want to copy onto the separation inserts, select "Frt copy" ["COPIED"]. Otherwise, select "Blank".
Inch specifications
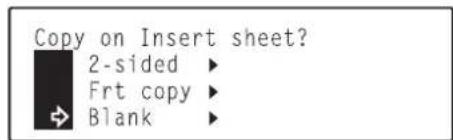
Metric specifications
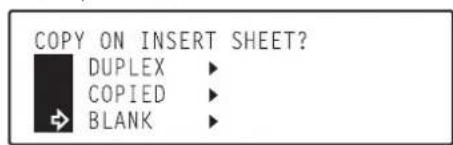
NOTES
- If you selected "2 2-sided" in step 6 and you want to make the separation inserts into 2-sided copies as well, select "2-sided" ["DUPLEX"] here.
- If you selected "1 1-sided" in step 6, "2-sided" ["DUPLEX"] will not be available for selection here.
- If "Bypass" is selected under "⑱ Insert tray" on page 7-21, "2-sided" ["DUPLEX"] will not be available for selection here.
22 Press the Enter key.
23 Use the numeric keys on the keypad to enter the page number(s) that will specify where the separation insert sheets will be inserted. The sheets will then be inserted before the designated page.
Inch specifications
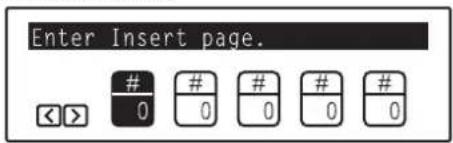
Metric specifications
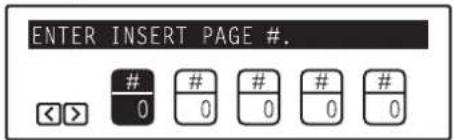
NOTE
If you selected "2 2-sided" in step 6, be sure not to enter the number of original sheets; enter the total number of pages being copied on the originals. In other words, each original should be counted as 2 pages.
24 If you want to specify a multiple number of separation insert locations, use the ◀ cursor or the ▶ cursor key to move to and highlight a different page # box, and enter another page number with the numeric keys.
Continue this procedure until you have entered all of the desired locations (Maximum: 5 locations).
Inch specifications
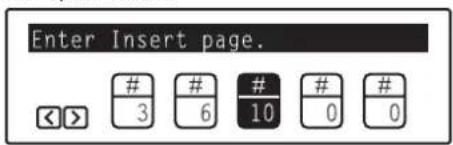
Metric specifications
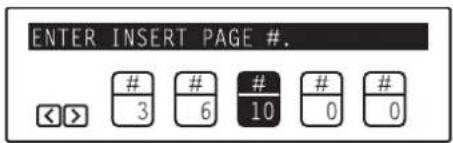
25 If you are finished with the settings for the separation insert mode, press the Enter key. The message display will return to the "Ready to copy." screen.
26 Set the originals to be copied.
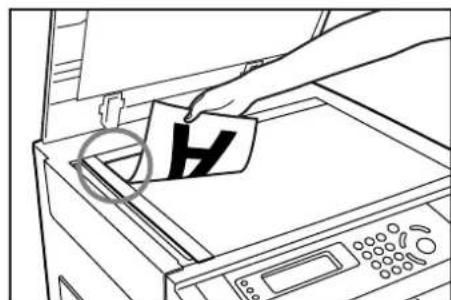
27 Press the Start key. Scanning of the originals will start.
- If you set the originals in the optional DF, copying will start automatically.
- If you set the original on the platen, go to the next step.
Inch specifications Metric specifications
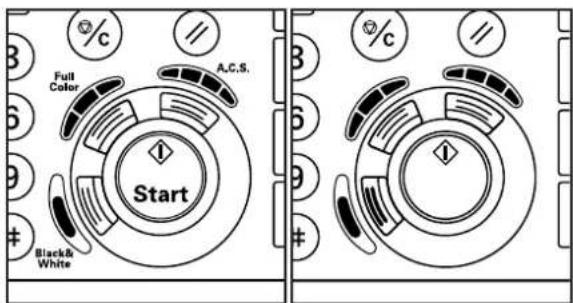
28 Replace the first original with the next one and press the Start key. Scanning of that next original will start. Carry out this step for all of the originals that you want to copy and, once you have finished scanning them all, press the Enter key. Copying will start.
Inch specifications Metric specifications
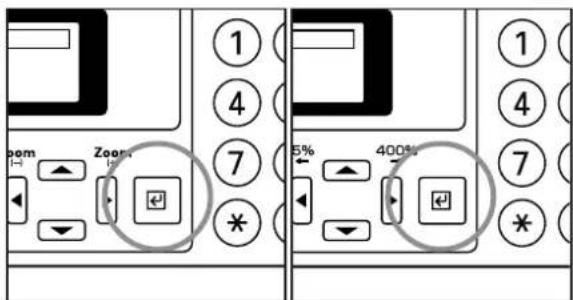
13. Making one copy from either two or four originals [Layout modes]
With this mode, the images from either 2 or 4 originals can be reduced and then combined onto a single copy. The borderline of each original can also be marked with a solid line, dotted line or registration marks (cropmarks).
![graph TD A["Spades"] --> D["4x4 Grid"] B["Heart"] --> D C["Diamond"] --> D E["Clusters"] --> D F["Four Cards"] --> D](/content/2026/05/768513/images/9418a709d06d6355c89921f2491029207b861ebbcabae8d604fd7118383742dd.jpg)
NOTES
- The size of the originals and of the copy paper must be of a standard size.
- If you do not have a Memory Copy Board installed as standard equipment, the optional Memory Copy Board must be installed in your copier in order to use this mode.
● 2 in 1
Use this mode when you want to copy two originals onto one sheet. If your machine is a duplex copier, this mode can also be used in conjunction with the 2-sided copy modes in order to copy four originals onto one sheet.
(When setting the originals on the platen, be sure to set the originals are arranged in the following order: 1 and then 2.)
![graph TD A["Block 1"] --> B["Block 2"] style A fill:#fff,stroke:#000 style B fill:#fff,stroke:#000](/content/2026/05/768513/images/b9bbfda0a590fe1b64eb6815121b2362e573c1ba55ed81b8a350c2070d8e1c93.jpg)
NOTES
- When making a 2-sided copy, the images that are copied onto the back side of the copy can also be rotated.
- 2-sided copies cannot be made automatically when paper is being fed from the multi-bypass tray.
● 4 in 1
Use this mode when you want to copy four originals onto one sheet. If your machine is a duplex copier, this mode can also be used in conjunction with the 2-sided copy modes in order to copy eight originals onto one sheet.
(When setting the originals on the platen, be sure to set the originals are arranged in the following order: 1, 2, 3 and then 4.)
![graph TD A["1"] --> B["2"] B --> C["3"] C --> D["4"] D --> E["2x2 Grid with 1, 2, 3, 4"]](/content/2026/05/768513/images/4638fa460d5a03fb7d7327cfe437b861f1b31455c7624269386b9d09140396f7.jpg)
NOTES
- The available "4 in 1" layout mode(s) will differ depending on the orientation of the originals.
- When making a 2-sided copy, the images that are copied onto the back side of the copy can also be rotated.
- 2-sided copies cannot be made automatically when paper is being fed from the multi-bypass tray.
1
Press the Layout key to light the corresponding indicator. The "Select layout" ["SELECT MODE"] screen will appear.
Inch specifications Metric specifications
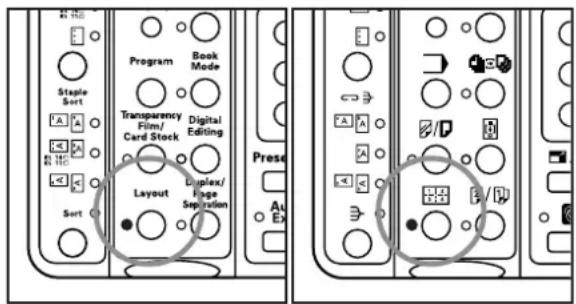
2 Use the ▲ cursor or the ▼ cursor key to select the layout mode that you want to use.
Inch specifications
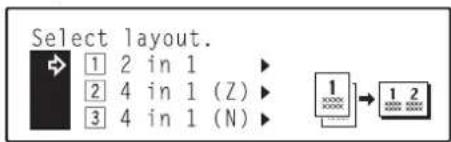
Metric specifications
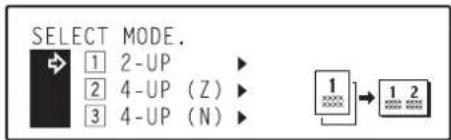
3 Press the Enter key.
4 Use the ▲ cursor or the ▼ cursor key to select the type of the borderline that you want to use. Select either “2 Solid”, “3 Dotted”, or “4 Mark” [“4 CROPMARK”. If you do not want to use a borderline to separate the images, select “1 None”.
Inch specifications
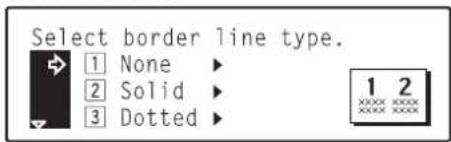
Metric specifications
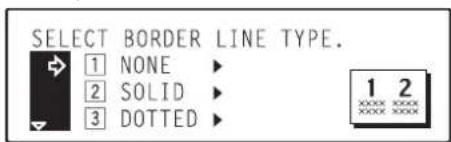
5 Press the Enter key.
6 Use the ▲ cursor or the ▼ cursor key to specify the type of originals being copied.
Select "1 1-sided" if you are using 1-sided originals and "2 2-sided" if you are using 2-sided originals.
Inch specifications
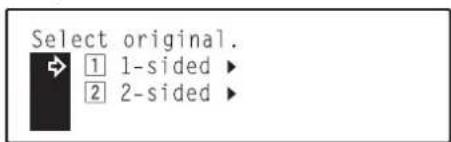
Metric specifications
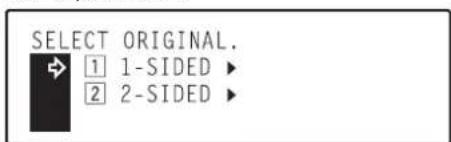
7 Press the Enter key.
- If your machine is a duplex copier, go to the next step. - If your machine is a standard copier, go directly to step 10.
8 Use the ▲ cursor or the ▼ cursor key to select the type of finished copies you want to make.
Select "|1| 1-sided" if you want to make 1-sided copies and "2 Book/2-sided" ["2 BOOK (2-SIDED)"] if you want to make 2-sided copies. If you want to rotate the image on the back side of a 2-sided copy, select "3 Tablet/2-sided" ["3|TOP BINDING"].
Inch specifications
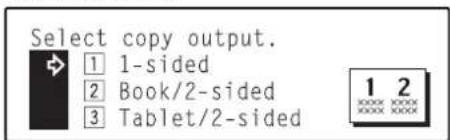
Metric specifications
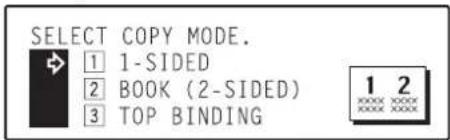
9 Press the Enter key.
10 Set the original to be copied.
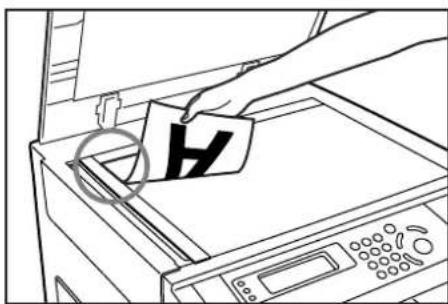
NOTES
• Make sure that the originals are set in the proper order on the platen.
- If necessary, select the location of paper feed.
11 Press the Start key. Scanning of the original will start.
- If you set the originals in the optional DF, copying will start automatically.
- If you set the original on the platen, go to the next step.
12 Replace the first original with the next one and press the Start key. Scanning of that next original will start.
Carry out this step for all of the originals that you want to copy and, once you have finished scanning them all, press the Enter key. Copying will start.
14. Making booklets, etc. from sheet originals [Booklet mode] (Only available in duplex copiers)
With this mode, you can use 1-sided or 2-sided originals to make open-faced two-sided copies in such a way that the finished copies can be stacked and folded into a booklet format.
![graph LR A["Layered Structure"] --> B["Arrow pointing to a simplified Book"] style A fill:#f9f,stroke:#333 style B fill:#bbf,stroke:#333](/content/2026/05/768513/images/1c26d3520aa74503e38c25a9601bc5556a33c3220fd505f968f9e202585ccdcf.jpg)
NOTES
• This mode is only available in duplex copiers.
- If the number of originals is not a multiple of four, the last page(s) of the copies will come out blank.
- 2-sided copies cannot be made automatically when paper is being fed from the multi-bypass tray.
① If "Right" is selected as the page sequence.
Copying will be performed so that the stacked and folded pages of the finished copies read from right to left.
② If "Left" is selected as the page sequence...
Copying will be performed so that the stacked and folded pages of the finished copies read from left to right.
![graph TD A["2"] --> B["3"] B --> C["4"] C --> D["5"] D --> E["6"] E --> F["7"] F --> G["8"] G --> H["①"] G --> I["②"] style A fill:#f9f,stroke:#333 style H fill:#bbf,stroke:#333](/content/2026/05/768513/images/032a4e18da979d9dcd24ae9abe389b7548bcbf90b437db6bc1382eef350c1433.jpg)
1 Press the Book Mode key to light the corresponding indicator.
Inch specifications Metric specifications
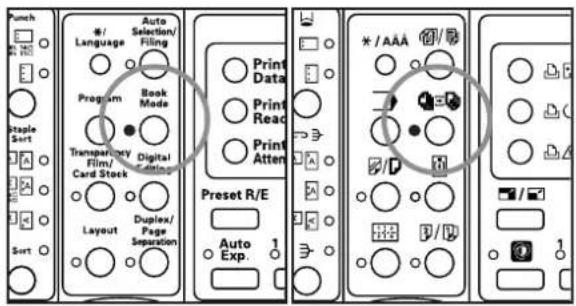
2 Use the ▲ cursor or the ▼ cursor key to select "1 Booklet" and then press the Enter key.
Inch specifications
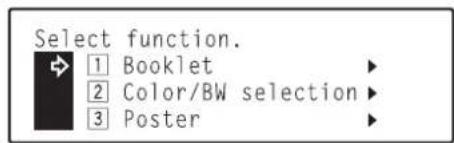
Metric specifications
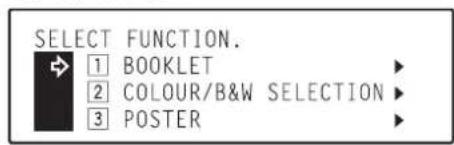
3 Use the ▲ cursor or the ▼ cursor key to select "1 Booklet" again and then press the Enter key. The "Select original." screen will appear.
Inch specifications
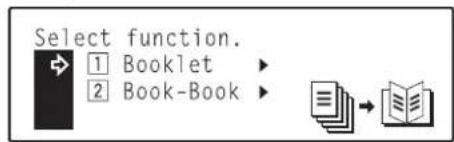
Metric specifications
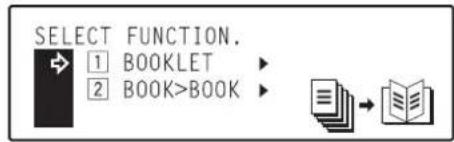
4
Use the ▲ cursor or the ▼ cursor key to specify the type of originals being copied.
Select "1|1-sided" if you are using 1-sided originals and
“2 2-sided” if you are using 2-sided originals.
Inch specifications
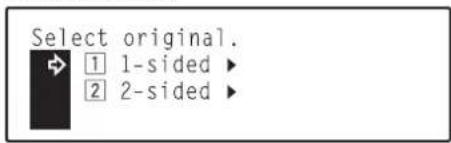
Metric specifications
5
Press the Enter key.
6
Use the ▲ cursor or the ▼ cursor key to select the binding direction for the finished copies.
Inch specifications
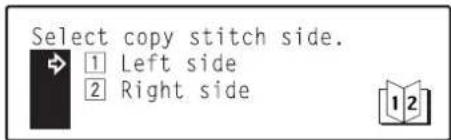
Metric specifications
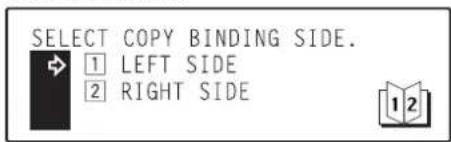
7
Press the Enter key. The "2-sided mode" ["DUPLEX MODE"] screen will appear.
8
Set the original to be copied.
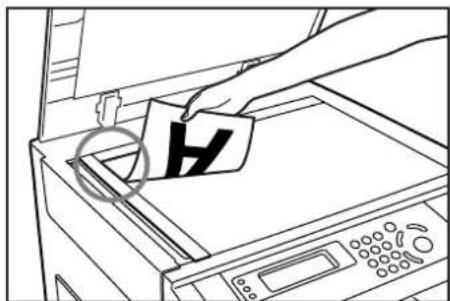
NOTES
- When setting the originals on the platen, be sure to set them in order from the first page first.
- If necessary, select the location of paper feed.
9
Press the Start key. Scanning of the original will start.
- If you set the originals in the optional DF, copying will start automatically.
- If you set the original on the platen, go to the next step.
Inch specifications Metric specifications
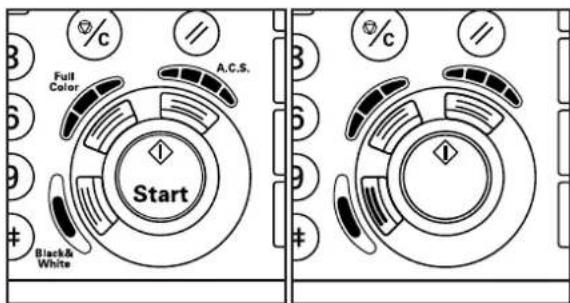
10
Replace the first original with the next one and press the Start key. Scanning of that next original will start.
Carry out this step for all of the originals that you want to copy and, once you have finished scanning them all, press the Enter key. Copying will start.
Inch specifications Metric specifications
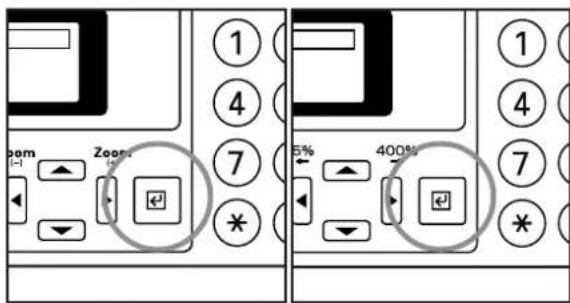
15. Making booklets, etc. from book originals [Book to Book mode] (Only available in duplex copiers)
With this mode, you can use open-faced originals (books, etc.) to make open-faced two-sided copies in such a way that the finished copies can be stacked and folded into a booklet format.
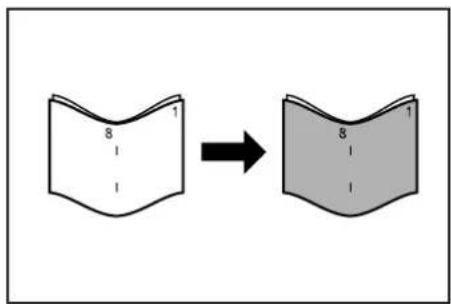
NOTES
- This mode is only available in duplex copiers.
- If the number of originals is not a multiple of four, the last page(s) of the copies will come out blank.
- 2-sided copies cannot be made automatically when paper is being fed from the multi-bypass tray.
① If "Right" is selected as the page sequence.
Copying will be performed so that the stacked and folded pages of the finished copies read from right to left.
② If "Left" is selected as the page sequence...
Copying will be performed so that the stacked and folded pages of the finished copies read from left to right.
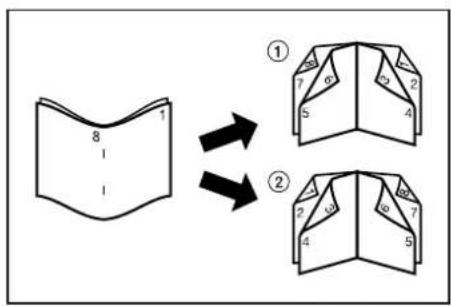
1 Press the Book Mode key to light the corresponding indicator.
Inch specifications Metric specifications
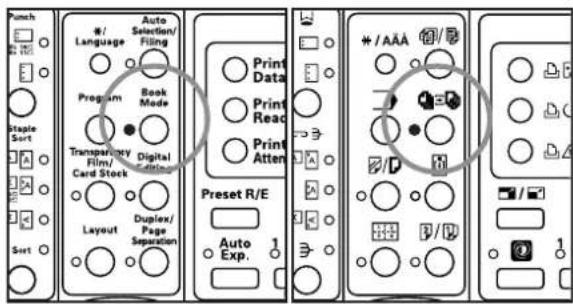
2 Use the ▲ cursor or the ▼ cursor key to select "1 Booklet" and then press the Enter key.
Inch specifications
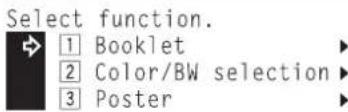
Metric specifications
3 Use the ▲ cursor or the ▼ cursor key to select “2 Book-Book” [“2 BOOK>BOOK”] again and then press the Enter key. The “Select copy stitch side” [“SELECT COPY BINDING SIDE”] screen will appear.
Inch specifications
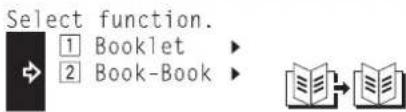
Metric specifications
4 Use the ▲ cursor or the ▼ cursor key to select the binding direction for the finished copies.
Inch specifications
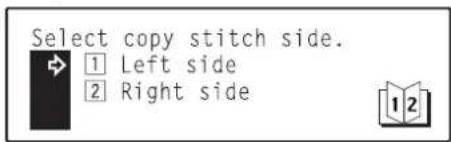
Metric specifications
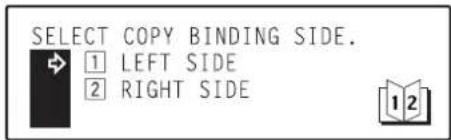
5 Press the Enter key.
6 Use the ▲ cursor or the ▼ cursor key to select whether you want to copy onto the front cover or not.
Inch specifications
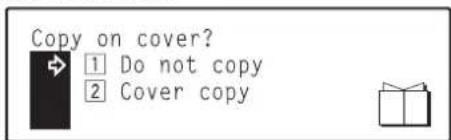
Metric specifications
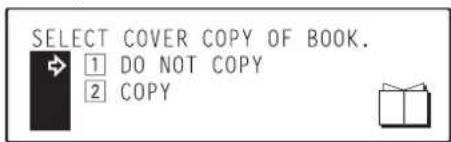
7 Press the Enter key.
If you selected "1 Do not copy" in step 6, the "Set first page." screen will appear.
If you selected "2 Cover copy" ["2 COPY"] in step 6, the "Set cover page." screen will appear.
8 If you chose to copy onto the front cover, set the open-faced original that you want to make into the front cover onto the platen. If you chose NOT to copy onto the front cover, set the open-faced original that you want to be the first page of the copy set.
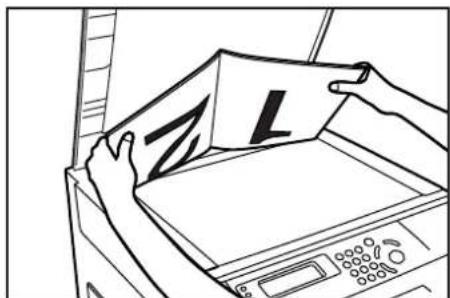
9 Press the Start key. Once the original has been scanned, remove it.
Inch specifications Metric specifications
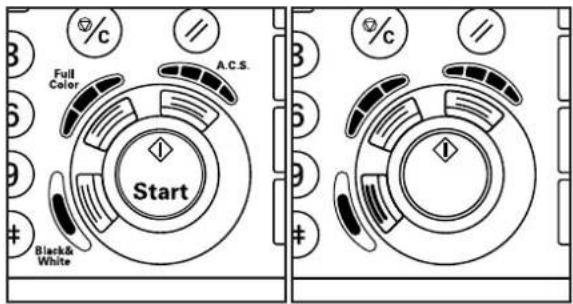
10 Set the next open-faced original on the platen.
11 Press the Start key. Scanning of that original will start. Once that original has been scanned, carry out this step for all of the originals that you want to copy.
12 Once you have finished scanning all of the originals that you want to copy, press the Enter key. Copying will start.
Inch specifications Metric specifications
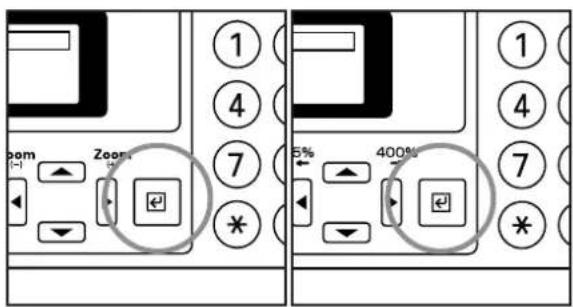
16. Making both black & white AND color copies at the same time [BW/Selection mode]
This mode is convenient when you do not necessarily need all of the copies to be in color. In this case, using this mode can save you time as making black and white copies is faster than making color copies.
![graph TD A["Input Image"] --> B["Output Image 1"] A --> C["Output Image 2"] A --> D["Output Image 3"] A --> E["Output Image 4"]](/content/2026/05/768513/images/747ecad2945653c229fb708e2033230d90bae14b4ff9c2de1bfcec8b533bbe4d.jpg)
NOTE
If you do not have a Memory Copy Board installed as standard equipment, the optional Memory Copy Board must be installed in your copier in order to use this mode.
1 Press the Book Mode key to light the corresponding indicator.
Inch specifications Metric specifications
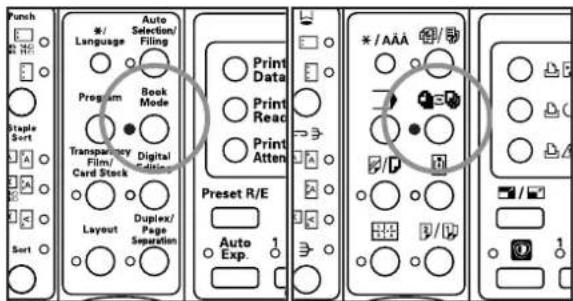
2 Use the ▲ cursor or the ▼ cursor key to select “② Color/BW selection” [“ 2 | COLOUR/B&W SELECTION”] and then press the Enter key. The “Enter number of copy” screen will appear.
Inch specifications
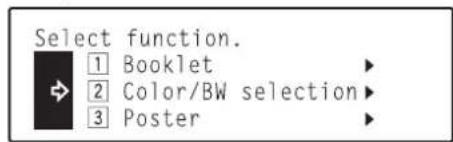
Metric specifications
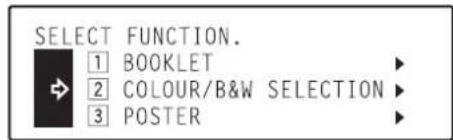
3 Use the numeric keys on the keypad, the ◀ cursor key or the ▶ cursor key to select the number of black and white copies (or copy sets) you want to make.
Inch specifications
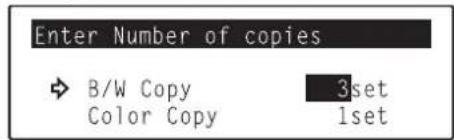
Metric specifications
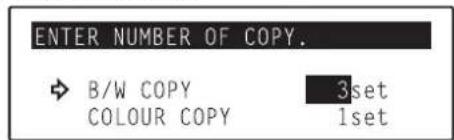
4 Press the ▼ cursor key to change to the color copy setting.
5 Use the numeric keys on the keypad, the ◀ cursor key or the ▶ cursor key to select the number of color copies (or copy sets) you want to make.
Inch specifications
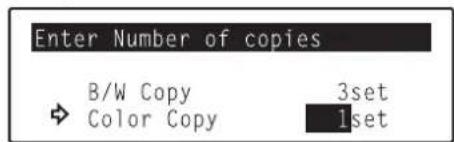
Metric specifications
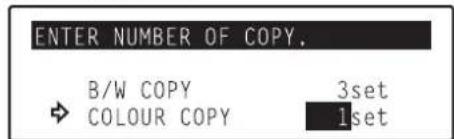
6 Press the Enter key. The message display will return to the "Ready to copy." screen.
17. Enlarging the image and printing it out onto multiple sheets [Poster mode]
With this mode, if the size of the copy image after enlargement is greater than the size of available copy paper, you can have the copy image split and printed out onto multiple sheets of copy paper.
![graph TD A["Grid of flowers with flower icons"] --> B["Arrow"] B --> C["Two rows of carrots and flowers"] B --> D["Two rows of flowers and flowers"] B --> E["Two rows of carrots and flowers"]](/content/2026/05/768513/images/16a26285881db84187c069aba100ec806017cd5a57d2d37defd48aa52236db02.jpg)
NOTES
- If you do not have a Memory Copy Board installed as standard equipment, the optional Memory Copy Board must be installed in your copier in order to use this mode.
- As there will be some duplication of a portion of the image on each finished copy, if you overlay these areas you can create a single enlarged image.
- Only 11" x 17" [A3] size paper can be used in this mode.
- There are two methods of making copies in the poster mode: priority towards a standard magnification ratio between the sizes of the original and the finished copies (Copy size), and priority towards a custom copy size at a desired magnification ratio (Zoom priority).
1 Press the Book Mode key to light the corresponding indicator.
Inch specifications Metric specifications
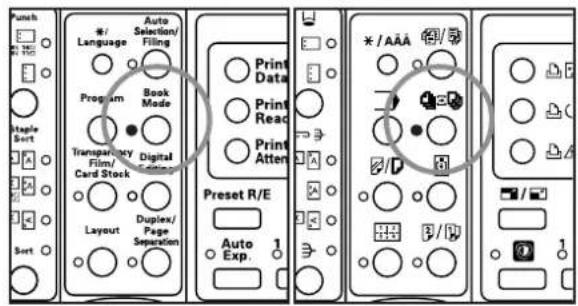
2 Use the ▲ cursor or the ▼ cursor key to select "3 Poster" and then press the Enter key. The "Select input mode" screen will appear.
Inch specifications
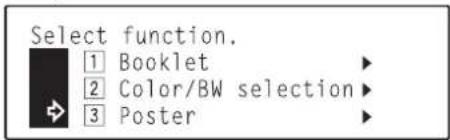
Metric specifications
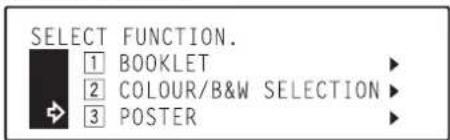
3 Use the ▲ cursor or the ▼ cursor key to select the poster mode method that you want to use.
Inch specifications
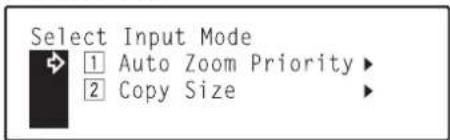
Metric specifications
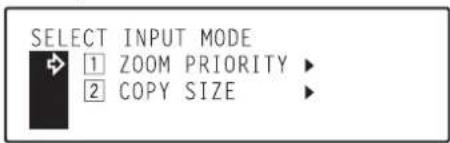
4 Press the Enter key.
- If you selected "1| Auto Zoom priority" ["1| ZOOM PRIORITY"], go to the next step.
- If you selected "2 Copy size", go directly to step 9.
5 Specify the size of the original being copied.
Inch specifications
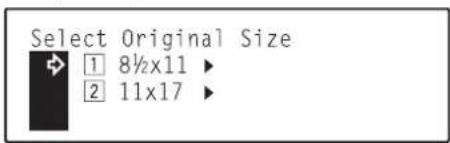
Metric specifications
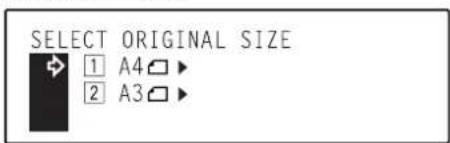
6 Press the Enter key.
7 Use the ◀ cursor or the ▶ cursor key to select the magnification ratio that you want to use.
Inch specifications
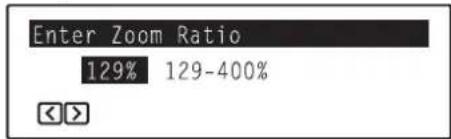
Metric specifications
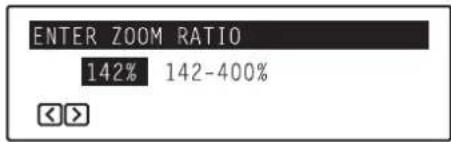
8 Press the Enter key. The message display will return to the "Ready to copy." screen.
9 Specify the size of the original being copied and select the size of the finished copy image.
Inch specifications
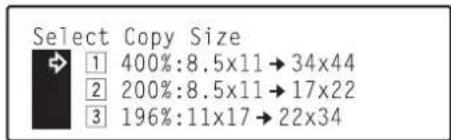
Metric specifications
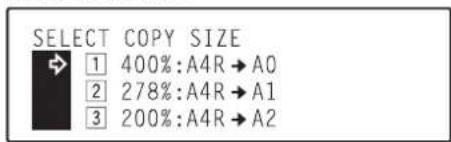
10 Press the Enter key. The message display will return to the "Ready to copy." screen.
●Number of copy pages that will be made when you specify the size of the original being copied and select the size of the finished copy image
Inch specifications
| Size of original | Size of finished copy image | Number of copy pages |
| 8 1/2" x 11" | 34" x 44" | 12 pages (11" x 17") |
| 8 1/2" x 11" | 17" x 22" | 4 pages (11" x 17") |
| 11" x 17" | 22" x 34" | 4 pages (11" x 17") |
Metric specifications
| Size of original | Size of finished copy image | Number of copy pages |
| A4R | A0 | 9 pages (A3) |
| A4R | A1 | 4 pages (A3) |
| A4R | A2 | 4 pages (A3) |
| A3 | A0 | 9 pages (A3) |
| A3 | A1 | 4 pages (A3) |
| A3 | A2 | 4 pages (A3) |
18. Copying different sized originals onto one size of copy paper [Filing mode]
With this mode, when you are copying from different sized originals, you need only separate the originals by size group and then scan them all in order to have all of the originals copied onto the same paper size.
![graph TD A["A"] --> B["B"] style A fill:#fff,stroke:#000 style B fill:#fff,stroke:#000 note right of B: > B](/content/2026/05/768513/images/01c12020cb2c011f83c08c0e8f716872f2c4ab5952aa22f0df2ff2daf818e97e.jpg)
NOTES
- If you do not have a Memory Copy Board installed as standard equipment, the optional Memory Copy Board must be installed in your copier in order to use this mode.
- If your machine is a duplex copier, it is possible for you to make duplex (2-sided) copies in this mode.
- Originals can be scanned from both the DF and the platen in combination.
1 Press the Auto Selection/Filing key to light the corresponding indicator.
The "Select function" screen will appear.
Inch specifications Metric specifications

2 Use the ▲ cursor or the ▼ cursor key to select "② Filing".
Inch specifications
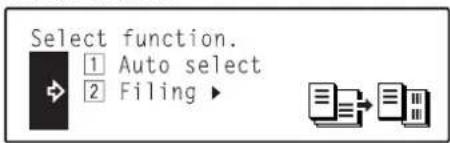
Metric specifications
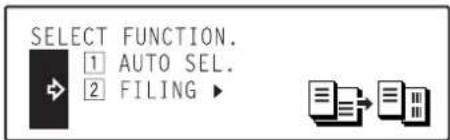
3 Press the Enter key.
4 Use the ▲ cursor or the ▼ cursor key to specify the type of originals being copied.
Select "1 1-sided" if you are using 1-sided originals and "2 2-sided" if you are using 2-sided originals.
Inch specifications
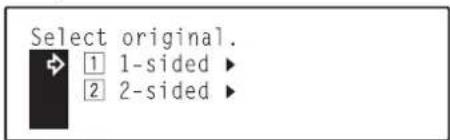
Metric specifications
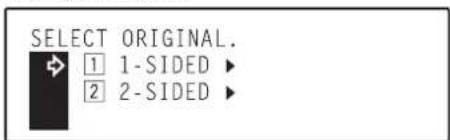
5 Press the Enter key.
- If your machine is a duplex copier, go to the next step. - If your machine is a standard copier, go directly to step 8.
6 Use the ▲ cursor or the ▼ cursor key to select the type of finished copies you want to make.
Select "1 | 1-sided" if you want to make 1-sided copies and "2 2-sided" if you want to make 2-sided copies.
Inch specifications
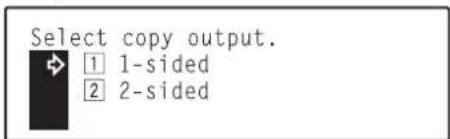
Metric specifications
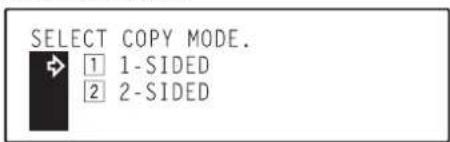
7 Press the Enter key.
8 Press the Paper Select key and specify the paper size.
Inch specifications Metric specifications

9 Set the original to be copied.
* If you set the originals in the optional DF, first set all of the originals of the same size together.
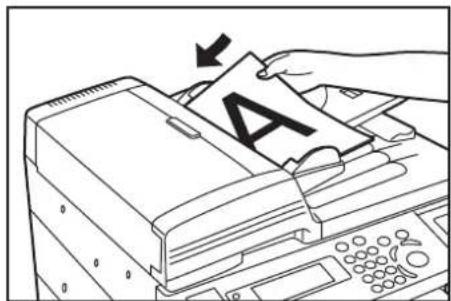
10 Press the Start key. Scanning will start.
- If you set the original on the platen, go to the next step.
- If you set the originals in the optional DF, go directly to step 12.
Inch specifications Metric specifications
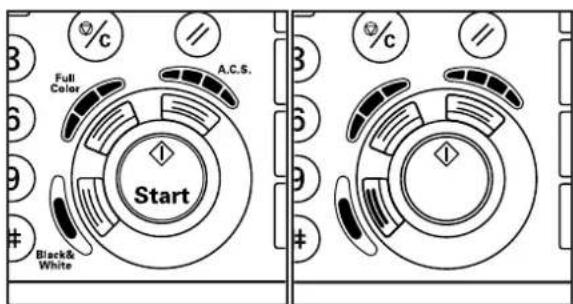
11 Replace the first original with the next one and press the Start key. Scanning of that next original will start. Carry out this step for all of the originals that you want to copy and, once you have finished scanning them all, press the Enter key. Copying will start.
Inch specifications Metric specifications
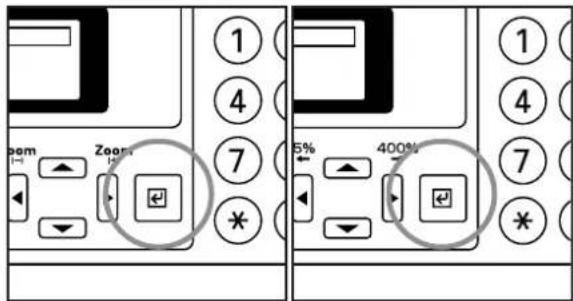
12 Once all of those originals have been scanned, set the next size of originals in the DF.
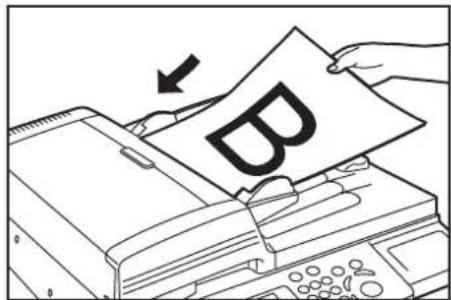
13 Press the Start key. Scanning of those originals will start. * Repeat steps 12 and 13 for each different size of originals.
14 Once all of the originals that you want to copy have been scanned, press the Enter key. Copying will start.
19. Memorizing frequently used settings [Program function]
Up to seven combinations of copy modes and other functions displayed on the operation panel can be registered as a single program using this function.
(1) Registering a program
1 Set the desired copy modes, etc., to be registered on the operation panel and return to the "Ready to copy." screen.
2 Press the */Language key.
The "Default mode setting" ["SELECT SET ITEM"] screen will appear.
Inch specifications Metric specifications
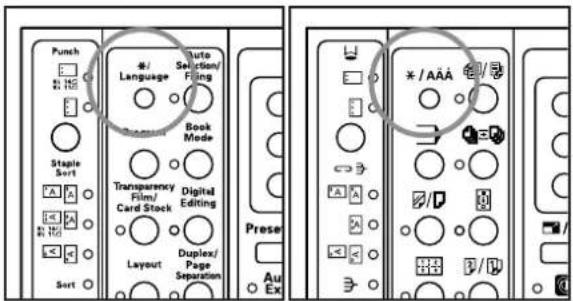
3 Use the ▲ cursor or the ▼ cursor key to select “2 Store Program” [“2|PROGRAM REGISTRATION”] and then press the Enter key.
Inch specifications
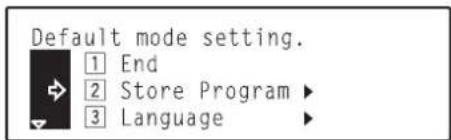
Metric specifications
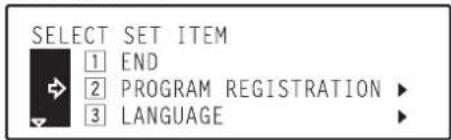
4 Use the ▲ cursor or the ▼ cursor key to select the program number under which you want to register the settings. The program number can also be entered directly using the numeric keys on the keypad.
Inch specifications
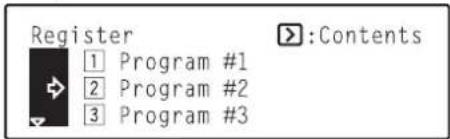
Metric specifications
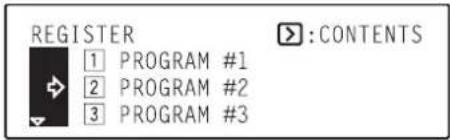
NOTE
Pressing the ▶ cursor key will display details of each setting. When a program contains many settings, continue to press the ▶ cursor key in order to confirm the other settings. Press the ◀ cursor key to return to the previous screen.
5 Press the Enter key.
The message display will return to the "Ready to copy." screen.
Copying is now possible using the settings that were registered under that program.
Inch specifications Metric specifications
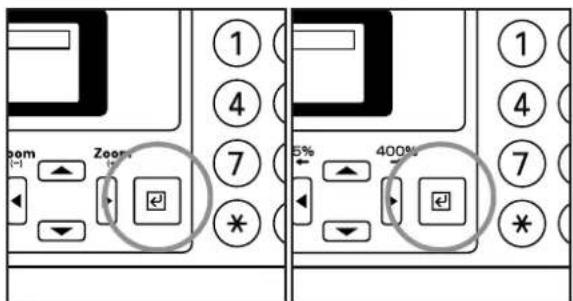
(2) Using programmed settings to make copies
1 Press the Program key.
Inch specifications Metric specifications
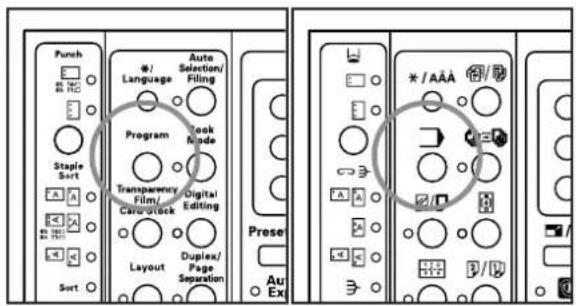
2 Use the ▲ cursor or the ▼ cursor key to select the program number under which the settings that you want to use are registered. The program number can also be entered directly using the numeric keys on the keypad.
Inch specifications
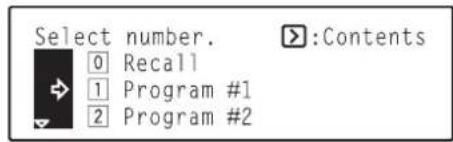
Metric specifications
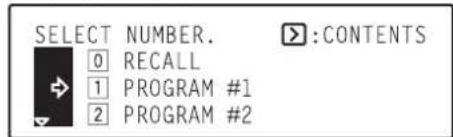
NOTE
Pressing the ▶ cursor key will display details of each setting. When a program contains many settings, continue to press the ▶ cursor key in order to confirm the other settings. Press the ◀ cursor key to return to the previous screen.
Inch specifications
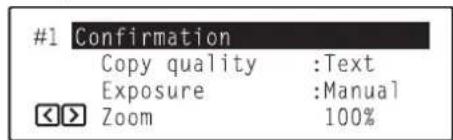
Metric specifications
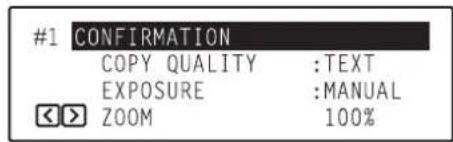
3 Press the Enter key.
The message display will return to the "Ready to copy." screen.
Copying is now possible using the settings that were registered under that program.
In order to copy using those settings, simply set the original(s) that you want to copy and press the Start key.
Inch specifications Metric specifications
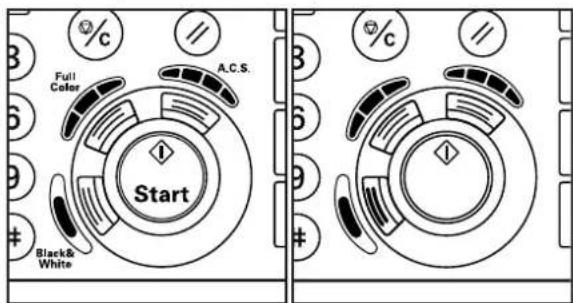
20. Confirming copy settings (Recall function)
When you have selected the copy mode and other functions, etc., the content of the settings that you have made can be confirmed using this function.
1 Press the Program key.
Inch specifications Metric specifications
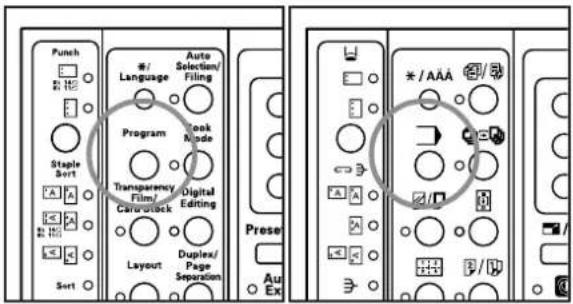
2 Use the ▲ cursor or the ▼ cursor key to select "0 Recall" and then press the Enter key.
Inch specifications
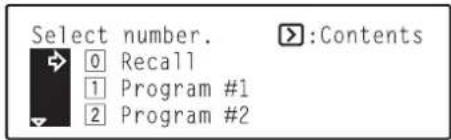
Metric specifications
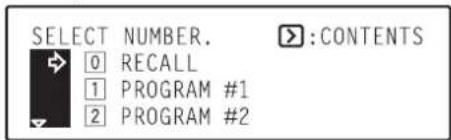
3 Press the ▶ cursor key in order to display the content of the current settings on the operation panel.
Inch specifications
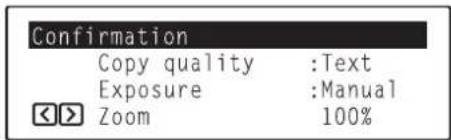
Metric specifications
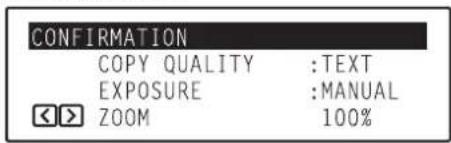
4 Once you have finished checking the settings, press the Enter key.
The message display will return to the "Ready to copy." screen.
21. Sorting automatically [Sort mode]
Since copying in this mode is performed after multiple originals are scanned and memorized, copies can be sorted into the required number of sets even without the optional Document Finisher.
![graph TD A1["A"] --> E1["A"] A2["B"] --> E1 A3["C"] --> E1 A4["D"] --> E1 E1 --> F1["B"] E1 --> G1["C"] E1 --> H1["D"] E2["A"] --> F2["A"] E3["B"] --> F2 E4["C"] --> F2 E5["D"] --> F2 F2 --> I1["B"] F2 --> J1["C"] F2 --> K1["D"]](/content/2026/05/768513/images/7c3ea2edb4b185243304c56e451396332f9118bca3ff1e080834379bfb46d82f.jpg)
NOTES
- If you do not have a Memory Copy Board installed as standard equipment, the optional Memory Copy Board must be installed in your copier in order to use this mode.
- If "On" is selected under “② Rotate sort ON/OFF” on page 7-23 and the size of the finished copies is set to 11" x 8 1/2" [B5 or A4], the orientation of each set of copies will be changed, thus making each copy set easier to separate. In order to use this setting, there must be 11" x 8 1/2" and 8 1/2" x 11" [B5 and B5R or A4 and A4R] paper set in the drawers. (8 1/2" x 11" and A4R paper can be loaded into the optional Paper Feeder, while B5 paper can be set onto the multi-bypass tray. However, 2-sided copies cannot be made automatically when paper is being fed from the multi-bypass tray.)
1 Set the original(s) to be copied.
2 Press the Sort key to light the corresponding indicator.
Inch specifications Metric specifications
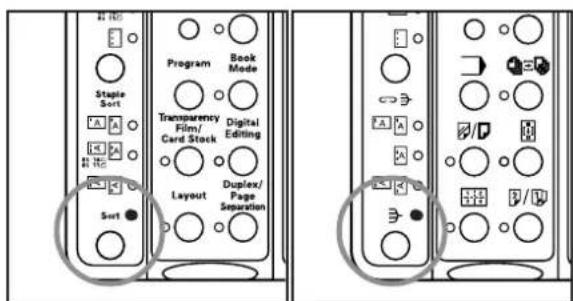
3 Enter the number of copy sets that you want to make and press the Start key.
- If you set the originals in the optional DF, copying will start automatically.
- If you set the original on the platen, go to the next step.
Inch specifications Metric specifications
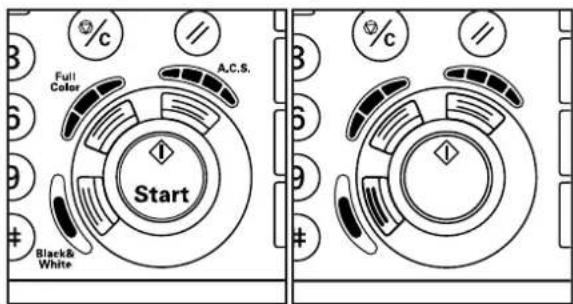
4 Replace the first original with the next one and press the Start key.
* Carry out this step for all of the originals that you want to copy.
5 Once all of the originals that you want to copy have been scanned, press the Enter key.
Copying will start.
Inch specifications Metric specifications
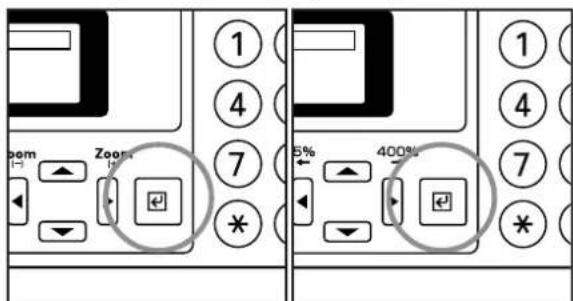
22. Rotate copy function 23. Energy-
If the orientation of the original is different from that of the paper loaded in the drawers, the image will be automatically turned 90 degrees counter-clockwise for copying. No special setting is required in order to use this function.
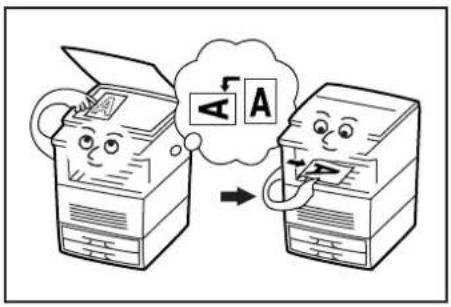
NOTES
- If you do not have a Memory Copy Board installed as standard equipment, the optional Memory Copy Board must be installed in your copier in order to use this mode.
- This function will only work with 8 1/2" x 11" or 5 1/2" x 8 1/2" [A4, A5, B5 or B6] size paper.
ng preheat function
If you press the Energy Saver key, even while the main switch is still turned ON, the copier's preheat function will engage and put the copier into the energy-saving preheat mode. When the copier is in this preheat mode, the Energy Saver indicator will be the only lit indicator on the operation panel.
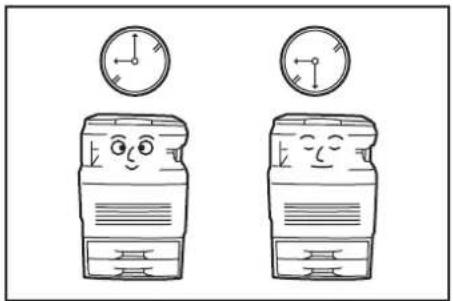
NOTES
- To resume copying after the preheat function has been activated, press the Energy Saver key once again.
- It is possible for you to change the amount of time that will elapse until the preheat function engage when no operation has been performed on the copier. (See “⑦ Auto preheat time” on page 7-29.)
24. Auto shut-off function
This function automatically turns the main switch OFF ( φ ) of no operation has been performed on the copier for a certain period of time (15 to 240 minutes).
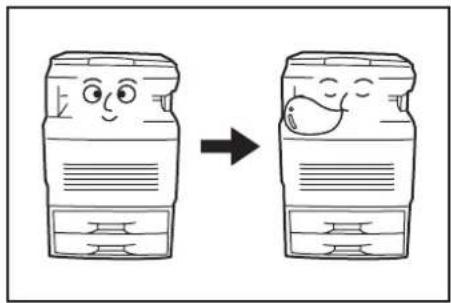
When you want to make copies again, turn the main switch back ON ( | ).
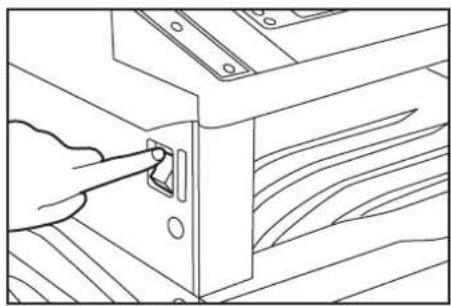
● More about the auto shut-off function
The auto shut-off function is a power-saving feature which automatically turns the main switch to the copier OFF (☐) when a certain time elapses without any operation being performed. Copiers are generally in a standby mode more than they are in actual operation, so power consumption in the standby mode occupies a large part of overall consumption. Having the copier turned OFF (☐) automatically after a certain amount of time reduces unnecessary power consumption in the standby mode or at night if the copier happens to be left on accidentally. The result is a lower electricity bill.
* In order to change the amount of time that will elapse before the auto shut-off function engages, see “⑧ Auto shut-off time” on page 7-29. In order to disable the auto shut-off function, see “③ Auto shut-off ON/OFF” on page 7-28.
* If the optional Printer Kit is installed in your copier, the copier will enter the energy-saving preheat mode rather than being turned off completely whenever the auto shut-off function engages. In this state, when the copier detects data for a print job, it will automatically recover to a print-ready state and print out of the corresponding information will begin.
* (Inch specifications copiers only) If the optional Fax Kit is installed in your copier, the copier will be automatically turned OFF (whenever the auto shut-off function engages. In this state, when the copier receives an incoming fax, it will automatically recover to a print-ready state and print out of the corresponding information will begin.
Section 7 COPIER MANAGEMENT
1. Copy management
The total number of copies made by each department can be managed using department codes for up to 500 different departments. Limits for the number of copies can be changed on a department-by-department basis.
NOTE
If you do not have a Memory Copy Board installed as standard equipment, the optional Memory Copy Board must be installed in your copier in order to use this mode.
(1) Copy management procedure table
| Procedure | Description | Reference page |
| ●Registering new department codes | Perform this procedure when you want to register a department code (inch specifications: 7 digits; metric specification: 4 digits) and set the maximum number of copies that can be made under that code. Up to 500 department codes can be registered. The copy limit can be set to any 1 page increment up to a maximum of 999,999. Entering “0” enables unlimited copying. When a department reaches its acceptable copy limit, the copier will not make any more copies under that department code. | 7-4 |
| ●Deleting department codes | Perform this procedure when you want to delete registered department codes. | 7-5 |
| ●Changing copy limits | Perform this procedure when you want to change the copy limit registered for each department code without have to delete or re-register the corresponding code. | 7-6 |
| ●Clearing copy counts | Perform this procedure when you want to clear the copy counts for all of the registered department codes after a designated period of time. Copy counts cannot be cleared individually, however. | 7-7 |
| ●Printing out the department code list | Perform this procedure when you want to print out a list of all of the currently registered department codes as well as the copy limit designated for each code. | 7-8 |
| ●Checking the copy counts | Perform this procedure when you want to check the total number of copies made under all department codes as a whole. | 7-9 |
| ●Printing out the copy management list | Perform this procedure when you want to print out a list of the number of copies made under each department code. | 7-10 |
| ●Turning copy management ON/OFF | Perform this procedure when you want to turn copy management ON or OFF, as desired. | 7-10 |
| ●Turning printing management ON/OFF | Perform this procedure when you want to turn printing management ON or OFF, as desired, for printing with the optional printer functions of this machine (printing management).* This procedure is only available when the optional Printer Kit is installed in your copier. | - |
| ●Turning the printing error report print out ON/OFF | When printing management is turned ON, you can have a report printed out automatically whenever a department code mismatch error occurs. Turn this setting ON if you want the report printed out automatically, and turn it OFF if you do not want to have the report printed out.* This procedure is only available when the optional Printer Kit is installed in your copier. | - |
(2) Accessing the copy management procedures
1 Press the */Language key.
The "Default mode setting" ["SELECT SET ITEM"] screen will appear.
Inch specifications Metric specifications
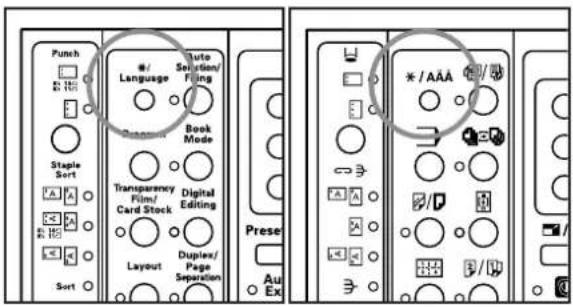
2 Use the ▲ cursor or the ▼ cursor key to select "4 Default".
Inch specifications
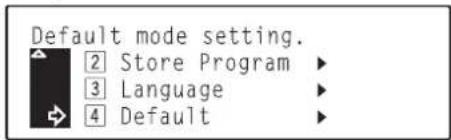
Metric specifications
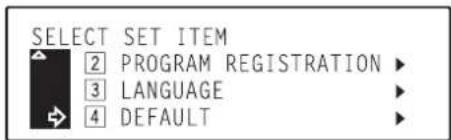
3 Press the Enter key.
4 Use the numeric keys on the keypad to enter the 4-digit management PIN code "3000".
Inch specifications
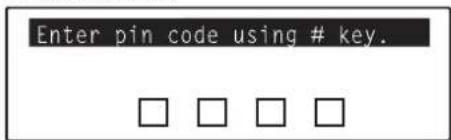
Metric specifications
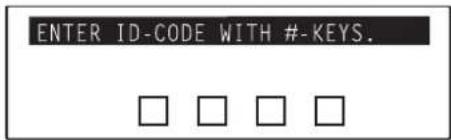
NOTE
It is possible for you to change the 4-digit management PIN code.
(See "⑩ Management PIN code" on page 7-30.)
5 Make sure that "|2| Management" is selected and press the Enter key.
The "Copy Management" screen will appear.
Inch specifications
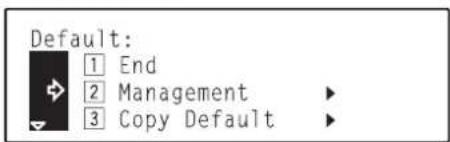
Metric specifications
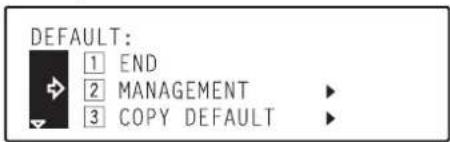
NOTE
Refer to “(3) Performing copy management procedures” and perform the desired procedure(s).
(3) Performing copy management procedures
●Registering new department codes
1 Display the "Copy Management" screen. (See page 7-3.)
2 Use the ▲ cursor or the ▼ cursor key to select "② Management Setting" ["② COPY MGMT SETTING"].
Inch specifications
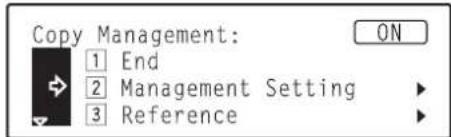
Metric specifications
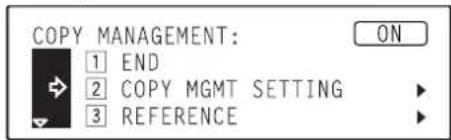
3 Press the Enter key.
4 Use the ▲ cursor or the ▼ cursor key to select "|2| Register".
Inch specifications
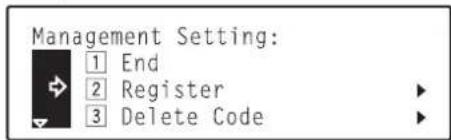
Metric specifications
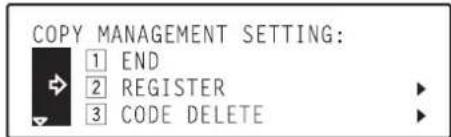
5 Press the Enter key.
6 Use the numeric keys on the keypad to enter the department code that you want to register.
Inch specifications
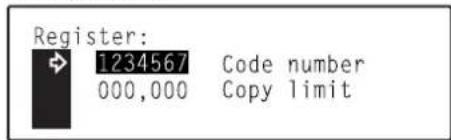
Metric specifications
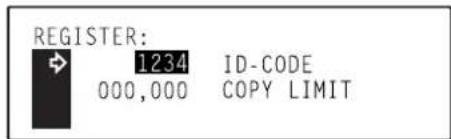
7 Use the ▼ cursor key to highlight the maximum number of copies.
Inch specifications
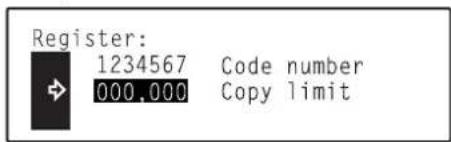
Metric specifications
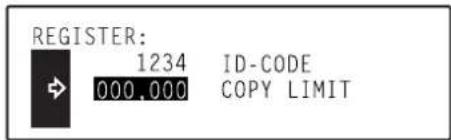
8 Use the numeric keys on the keypad to enter the maximum number of copies that can be made under that department code. The copy limit can be set to any 1 page increment between 1 and 999,999.
Inch specifications Metric specifications
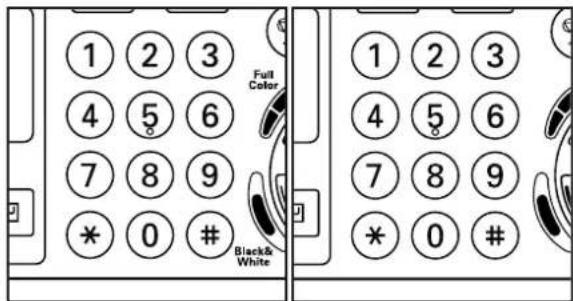
NOTES
- Enter "0" if you want to enable unlimited copying under that department code.
- Press the Stop/Clear key if you want to clear the registered department code and enter a new code.
Press the Enter key.
The message display will return to the screen in step 6.
NOTE
If you want to register another department code, repeat steps 6 through 8.
10 Press the Stop/Clear key.
The message display will return to the screen in step 4.
11 Use the ▲ cursor key to select "|1| End" and then press the Enter key. The message display will return to the screen in step 2.
Inch specifications
Management Setting:
1 End
2 Register
3 Delete Code
▶
Metric specifications
COPY MANAGEMENT SETTING:
1 END
2 REGISTER
3 CODE DELETE
▶
12 Use the ▲ cursor key to select "1 End" once again and then press the Enter key.
The message display will return to the "Ready to copy." screen.
Inch specifications
Copy Management:
ON
1 End
2 Management Setting
▶
3 Reference
▶
Metric specifications
COPY MANAGEMENT:
ON
1 END
2 COPY MGMT SETTING
▶
3 REFERENCE
▶
●Deleting department codes
1 Display the "Copy Management" screen. (See page 7-3.)
2 Use the ▲ cursor or the ▼ cursor key to select "2 Management Setting" ["2 COPY MGMT SETTING"].
Inch specifications
Copy Management:
ON
1 End
2 Management Setting
-
3 Reference
▶
Metric specifications
COPY MANAGEMENT:
ON
1 END
② COPY MGMT SETTING
[Non-Text]
3 REFERENCE
▶
3 Press the Enter key.
4 Use the ▲ cursor or the ▼ cursor key to select "|3| Delete Code" ["3] CODE DELETE"].
Inch specifications
Management Setting:
1 End
2 Register
3 Delete Code
▶
Metric specifications
COPY MANAGEMENT SETTING:
1 END
2 REGISTER
3 CODE DELETE
▶
5 Press the Enter key.
6 Use the numeric keys on the keypad to enter the department code that you want to delete.
Inch specifications
Code delete:
1234567
Code number
Metric specifications
CODE DELETE:
1234
ID-CODE
7 Press the Enter key.
8 A message asking you to confirm whether or not you really want to delete that department code will appear.
- If you DO want to delete that department code, use the ▲ cursor key to select "Yes" and then press the Enter key.
- If you do NOT want to delete that code, make sure that "No" is selected and press the Enter key. The message display will return to the screen in step 6.
Inch specifications
Will
delete code.
Yes
No

Metric specifications
WILL
DELETE CODE.
YES
NO

NOTE
If you want to delete another department code, repeat steps 6 through 8.
9 Press the Stop/Clear key.
The message display will return to the screen in step 4.
10 Use the ▲ cursor key to select "☐ End" and then press the Enter key.
The message display will return to the screen in step 2.
Inch specifications
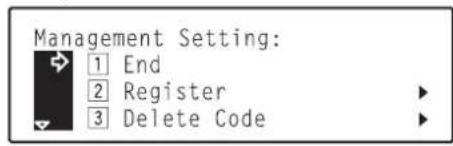
Metric specifications
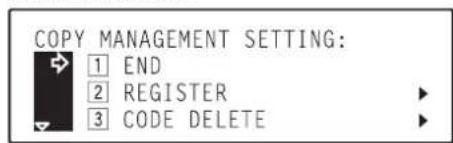
11 Use the ▲ cursor key to select "1 End" once again and then press the Enter key.
The message display will return to the "Ready to copy." screen.
Inch specifications
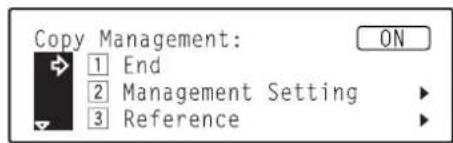
Metric specifications
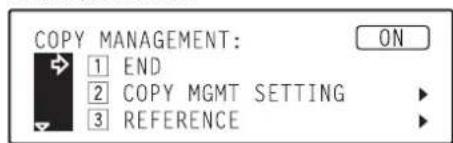
●Changing copy limits
1 Display the "Copy Management" screen. (See page 7-3.)
2 Use the ▲ cursor or the ▼ cursor key to select "② Management Setting" ["② COPY MGMT SETTING"].
Inch specifications
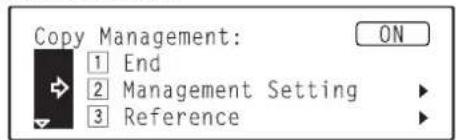
Metric specifications
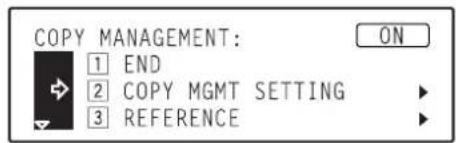
3 Press the Enter key.
4 Use the ▲ cursor or the ▼ cursor key to select "4 Copy Limit Correction".
Inch specifications
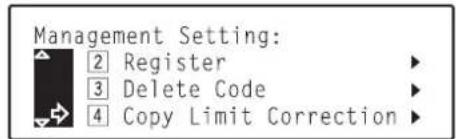
Metric specifications
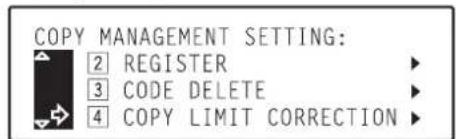
5 Press the Enter key.
6 Use the numeric keys on the keypad to enter the department code that you want to change to copy limit for.
Inch specifications
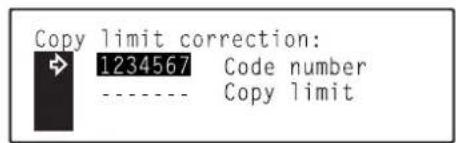
Metric specifications
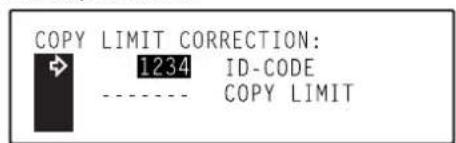
7 Press the Enter key.
8 Use the numeric keys on the keypad to enter the new copy limit for that department code.
The copy limit can be set to any 1 page increment between 1 and 999,999.
Inch specifications Metric specifications
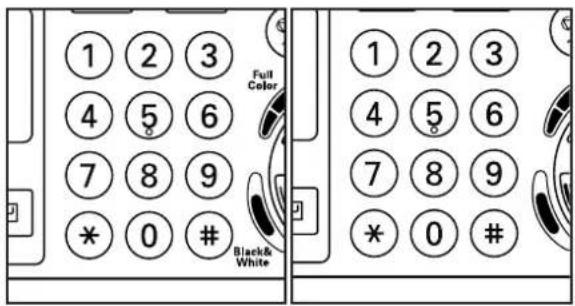
NOTE
Enter "0" if you want to enable unlimited copying under that department code.
9 Press the Enter key.
The display will return to the screen in step 6.
NOTE
If you want to change the copy limit for another department code, repeat steps 6 through 9.
10 Press the Stop/Clear key.
The message display will return to the screen in step 4.
11 Use the ▲ cursor key to select "☐ End" and then press the Enter key.
The message display will return to the screen in step 2.
Inch specifications
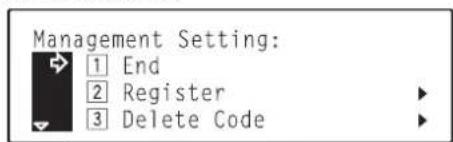
Metric specifications
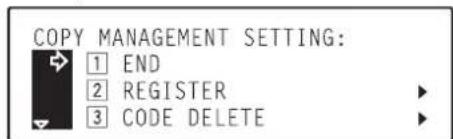
12 Use the ▲ cursor key to select "1| End" once again and then press the Enter key.
The message display will return to the "Ready to copy." screen.
Inch specifications
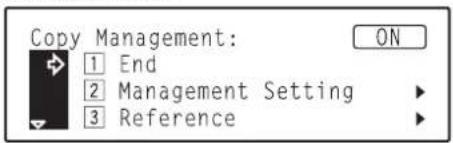
Metric specifications
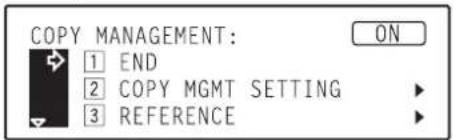
●Clearing copy counts
1 Display the "Copy Management" screen. (See page 7-3.)
2 Use the ▲ cursor or the ▼ cursor key to select
"|2 | Management Setting" ["|2 | COPY MGMT SETTING"].
Inch specifications
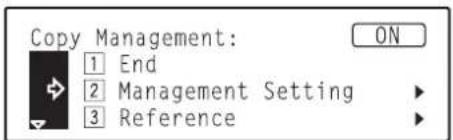
Metric specifications
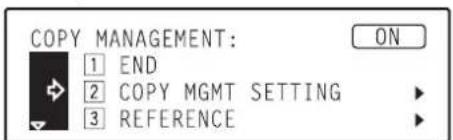
3 Press the Enter key.
4 Use the ▲ cursor or the ▼ cursor key to select "5 Delete Count" ["5 COUNTS CLEAR"].
Inch specifications
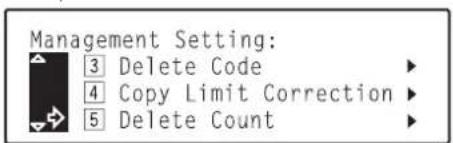
Metric specifications
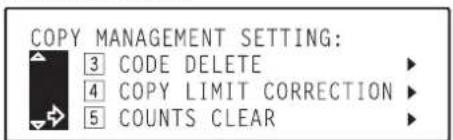
5 Press the Enter key.
6 A message asking you to confirm whether or not you really want to clear all copy counts will appear.
- If you DO want to clear the copy counts, use the ▲ cursor key to select "Yes" and then press the Enter key.
- If you do NOT want to clear the counts, make sure that "No" is selected and press the Enter key. The message display will return to the screen in step 4.
Inch specifications
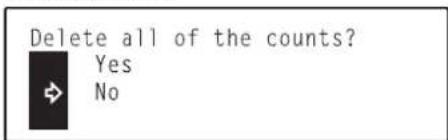
Metric specifications
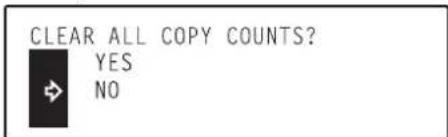
7 Use the ▲ cursor key to select "1 End" and then press the Enter key.
The message display will return to the screen in step 2.
Inch specifications
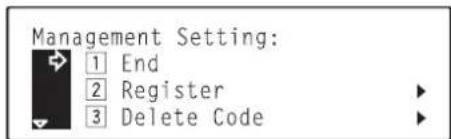
Metric specifications
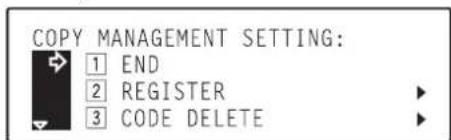
8 Use the ▲ cursor key to select "1 End" once again and then press the Enter key.
The message display will return to the "Ready to copy." screen.
Inch specifications
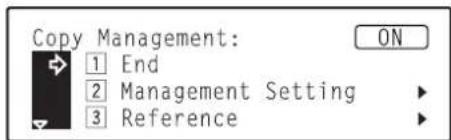
Metric specifications
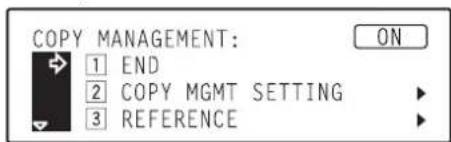
●Printing out the department code list
1 Display the "Copy Management" screen. (See page 7-3.)
NOTE
Make sure that 11" x 8 1/2" or 8 1/2" x 11" [A4 or A4R] size paper is loaded in one of the drawers. (8 1/2" x 11" and A4R paper can be loaded into the optional Paper Feeder.)
2 Use the ▲ cursor or the ▼ cursor key to select "|2| Management Setting" ["|2| COPY MGMT SETTING"].
Inch specifications
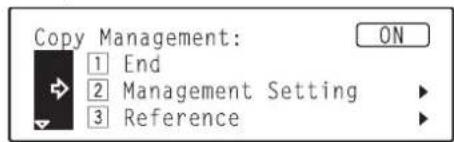
Metric specifications
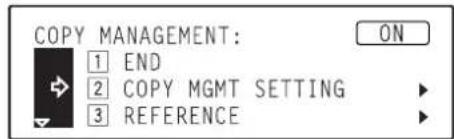
3 Press the Enter key.
4 Use the ▲ cursor or the ▼ cursor key to select "6 Printer Code List" ["6 PRINT MANAGEMENT LIST"].
Inch specifications
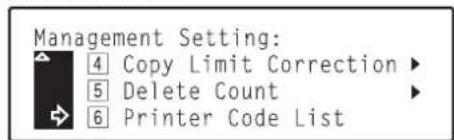
Metric specifications
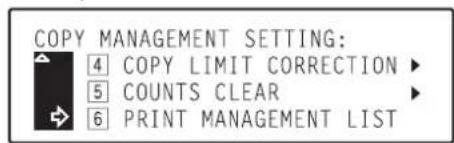
5 Press the Enter key. The department code list will be printed out and then the display will return to the screen in step 4.
6 Use the ▲ cursor key to select "|1| End" and then press the Enter key.
The message display will return to the screen in step 2.
Inch specifications
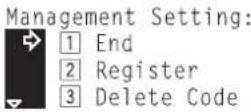
Metric specifications
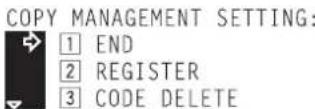
7 Use the ▲ cursor key to select "1 End" and then press the Enter key. The message display will return to the "Ready to copy." screen.
Inch specifications
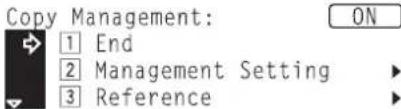
Metric specifications
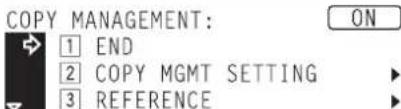
- Checking the copy counts
1 Display the "Copy Management" screen. (See page 7-3.)
2 Use the ▲ cursor or the ▼ cursor key to select "3| Reference".
Inch specifications
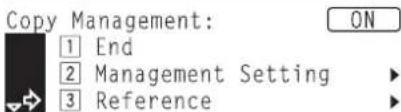
Metric specifications
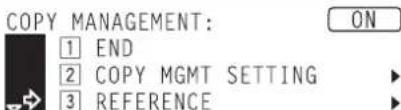
3 Press the Enter key.
The total number of copies made under all department codes as a whole will be displayed.
Inch specifications
All Dept. total: 1,234,567
Metric specifications
TOTAL/ALL ID-CODES: 1,234,567
4 Press the Enter key.
The message display will return to the screen in step 2.
5 Use the ▲ cursor key to select "1 End" and then press the Enter key. The message display will return to the "Ready to copy." screen.
Inch specifications
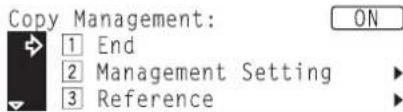
Metric specifications
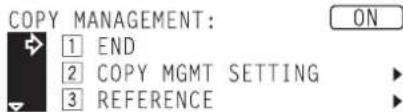
●Printing out the copy management list
1 Display the "Copy Management" screen. (See page 7-3.)
NOTE
Make sure that 11" x 8 1/2" or 8 1/2" x 11" [A4 or A4R] size paper is loaded in one of the drawers. (8 1/2" x 11" and A4R paper can be loaded into the optional Paper Feeder.)
2 Use the ▲ cursor or the ▼ cursor key to select "4 Printer management list" ["4 PRINT MANAGEMENT LIST"].
Inch specifications
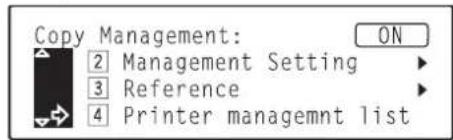
Metric specifications
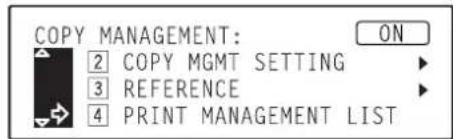
3 Press the Enter key. The copy management list will be printed out and then the display will return to the screen in step 2.
4 Use the ▲ cursor key to select "1 End" and then press the Enter key. The message display will return to the "Ready to copy." screen.
Inch specifications
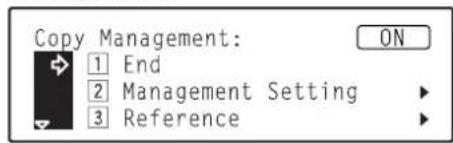
Metric specifications
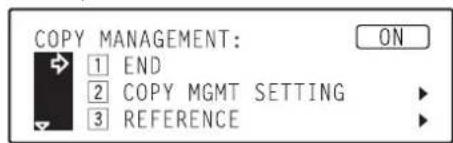
●Turning copy management ON/OFF
1 Display the "Copy Management" screen. (See page 7-3.)
NOTE
An indication whether copy management is currently ON or OFF will appear in the upper right portion of the screen.
Perform the following procedures when you want to change the copy management setting.
2 Use the ▲ cursor or the ▼ cursor key to select "5 Management on/off" ["5 COPY MANAGEMENT ON/OFF"].
Inch specifications
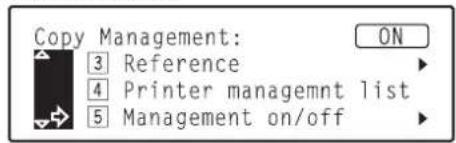
Metric specifications
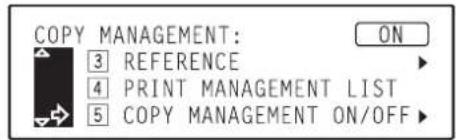
3 Press the Enter key.
4 Use the ▲ cursor or the ▼ cursor key to select “① On” or “② Off”, as appropriate.
Inch specifications
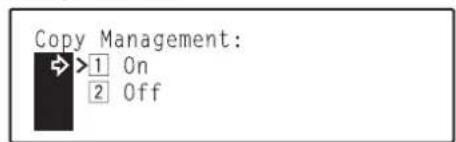
Metric specifications
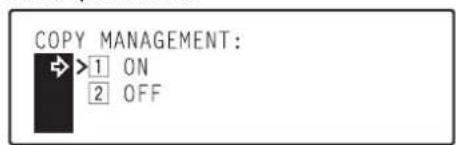
5
Press the Enter key.
The display will return to the screen in step 2.
6
Use the ▲ cursor key to select "1 End" and then press the Enter key.
- If you selected "1 On" in step 4, the department code entry screen will appear.
- If you selected "2 Off" in step 4, the message display will return to the "Ready to copy." screen.
Inch specifications
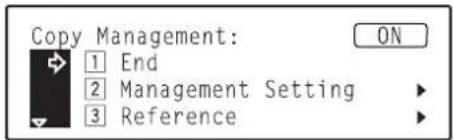
Metric specifications
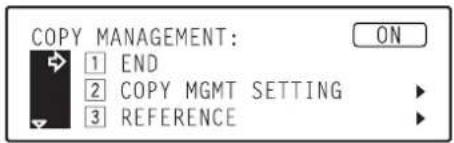
(4) Making copies when copy management is turned ON
When copy management is turned ON, "Enter 7-digit code with # keys." ["ENTER 4-DIGIT CODE WITH #-KEYS"] will appear on the message display.
Inch specifications
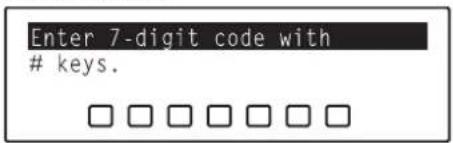
Metric specifications
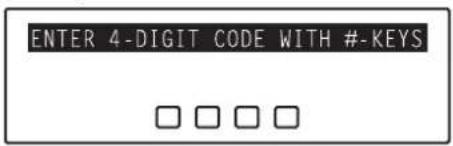
1
Use the numeric keys on the keypad to enter your designated department code.
Inch specifications Metric specifications
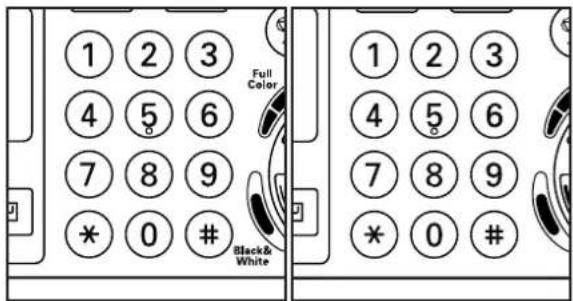
2
If "Ready to copy." appears, copying is possible in the usual manner.
NOTES
- If the auto clear function (see page 2-5) engages, the message display will return to the "Ready to copy." screen.
- Once you are finished copying, press the Energy Saver key in order to engage copy management again.
2. Default settings
The state that the copier enters at the end of warm-up or when the Reset key is pressed is called the "initial mode". The modes, functions and other settings that are automatically pre-set for the initial mode are called "default settings". These default settings are separated into two categories: "Copy defaults" and "Machine defaults". These default can be changed as desired to suit your copying needs.
(1) Copy default settings
The following 24 copy default settings can be changed. Change any or all of the settings as desired in order to make the most effective use of your copier.
| Default setting | Description | Available settings | Factory setting | Reference page |
| 1 Exposure mode | Selects between auto exposure (page 4-3) and manual exposure (page 4-3) as the default copy exposure mode at the time power is turned on. | Auto / Manual | Inch: ManualMetric: AUTO | 7-17 |
| 2 Exposure steps | Changes the number of exposure steps in the manual exposure mode. | 7 steps13 steps | 7 steps | 7-17 |
| 3 Auto exposure adjustment (color) | Changes the overall exposure when using the auto exposure mode for full color copies. | 1 – 7 | 4 (middle setting) | 7-17 |
| 4 Auto exposure adjustment (b/w) | Changes the overall exposure when using the auto exposure mode for black and white copies.* The overall exposure when making mono-color copies can be adjusted here as well.(See page 5-1.) | 1 – 7 | 4 (middle setting) | 7-17 |
| 5 Mixed original density | Adjusts the exposure of the original when the text&photo mode is selected for the image quality (page 4-3). | 1 – 7 | 4 (middle setting) | 7-18 |
| 6 Text original density | Adjusts the exposure of the original when the text mode is selected for the image quality (page 4-3). | 1 – 7 | 4 (middle setting) | 7-18 |
Section 7 COPIER MANAGEMENT
| Default setting | Description | Available settings | Factory setting | Reference page |
| 7 Print original density | Adjusts the exposure of the original when the printed photo mode is selected for the image quality (page 4-3). | 1 – 7 | 4 (middle setting) | 7-18 |
| 6 Photo original density | Adjusts the exposure of the original when the photo mode is selected for the image quality (page 4-3). | 1 – 7 | 4 (middle setting) | 7-18 |
| 9 Map original density | Adjusts the exposure of the original when the map mode is selected for the image quality (page 4-3). | 1 – 7 | 4 (middle setting) | 7-19 |
| 10 Copy mode | Sets the default mode for color copying (page 4-1). | Full-Color [FULL COLOUR] / Black & White / Auto color selection [AUTO COLOUR SELECTION] | Full-Color [FULL COLOUR] | 7-19 |
| 11 Original quality | Sets the default mode for the image quality (page 4-3). | Mixed Text Photo Print Map Eco | Mixed | 7-19 |
| 12 Default drawer (b/w) | Sets the location (a drawer or the multi-bypass tray) that will be automatically selected at the end of warm-up, or when the Reset key is pressed, for feeding paper in black and white copying.* No.3 and No.4 drawers can only be selected when the optional Paper Feeder is installed in your copier. | Standard copiers 1 paper [SOURCE 1] – 4 paper [SOURCE 4]Duplex copiers 2 paper [SOURCE 2] – 4 paper [SOURCE 4] | Standard copiers 1 paper [SOURCE 1]Duplex copiers 2 paper [SOURCE 2] | 7-19 |
| 13 Default drawer (color) | Sets the location (a drawer or the multi-bypass tray) that will be automatically selected at the end of warm-up, or when the Reset key is pressed, for feeding paper in color copying.* No.3 and No.4 drawers can only be selected when the optional Paper Feeder is installed in your copier.* The drawers selected here must also be designated under “6 Color copy paper location” on page 7-29. | Standard copiers1 paper [SOURCE 1]–4 paper [SOURCE 4]Duplex copiers2 paper [SOURCE 2]–4 paper [SOURCE 4] | Standard copiers1 paper [SOURCE 1]Duplex copiers2 paper [SOURCE 2] | 7-20 |
| 14 Copy limit | Sets a limit to the number of copies that can be made at one time. | 1 – 999 | 999 | 7-20 |
| 15 Margin width | Sets the default value of the margin width for the left and the top margins in the margin mode (page 6-11). | Inch1/4" – 3/4"(1/8" increments)Metric6 mm – 18 mm(1 mm increments) | Inch1/4"Metric6 mm | 7-20 |
| 16 Erased border width | Sets the default value of the width of the border to be erased in two of the border erase modes [sheet erase and book erase] (page 6-15). | Inch1/4" / 1/2" / 3/4"Metric6 mm / 12 mm / 18 mm | Inch1/4"Metric6 mm | 7-20 |
| 17 Custom erase size | Sets the size of the original that is to be used in one of the border erase modes [custom erase mode](page 6-15). The area outside the designated size will be erased. | InchHeight: 3 11/16" – 8 7/16"(5/16" increments)Width: 2 3/8" – 11 5/8"(1/8" increments)MetricHeight: 94 mm – 214 mm(8 mm increments)Width: 60 mm – 296 mm(4 mm increments) | InchHeight: 3 11/16"Width: 2 3/8"MetricHeight: 94 mmWidth: 60 mm | 7-21 |
Section 7 COPIER MANAGEMENT
| Default setting | Description | Available settings | Factory setting | Reference page |
| 18 Insert tray | Sets the drawer that contains the paper which will be fed in the insert sheet modes (page 6-26).* No.3 and No.4 drawers can only be selected when the optional Paper Feeder is installed in your copier. | Standard copiers1 paper [SOURCE 1] -4 paper [SOURCE 4] / BypassDuplex copiers2 paper [SOURCE 2] -4 paper [SOURCE 4] / Bypass | 2 paper [SOURCE 2] | 7-21 |
| 19 Sort mode ON/OFF (Output form) | Sets the default setting for the sort mode at the time power is turned on. | On / Off | Off | 7-21 |
| 20 Eject destination | Sets the location for ejection of finished copies: the copy eject tray (side) or the copy storage table (inner). | Inner Eject / Side Eject | Inner Eject | 7-22 |
| 21 ACS adjustment | Adjusts the level of detection between color and black&white originals in the Auto Color Selection mode (page 4-1). | 1 - 5 | 1 | 7-22 |
| 22 Auto color adjustment | Slight changes in color copying may take place if your color copier is used over a long period of time. If the color on the originals and that which appears on the copies begins to differ greatly, use this procedure to adjust the color. | --- | --- | 7-22 |
| 23 Drum refresh | This operation should be performed when high humidity causes the copy image to become blurred or faded. The operation will take approximately 5 minutes. | --- | --- | 7-23 |
| 24 Rotate sort ON/OFF | Selects between standard sorting (page 6-46) or rotate-sorting (page 6-46) as the default sort mode whenever the sort mode is selected.* In order to use this setting, there must be 11" x 8 1/2 and 8 1/2" x 11" [B5 and B5R or A4 and A4R] paper set in the drawers. (8 1/2" x 11" and A4R paper can be loaded into the optional Paper Feeder, while B5 paper can be set onto the multi-bypass tray. However, 2-sided copies cannot be made automatically when paper is being fed from the multi-bypass tray.) | On / Off | Off | 7-23 |
(2) Accessing the copy default settings
1 Press the */Language key.
The "Default mode setting" ["SELECT SET ITEM"] screen will appear.
Inch specifications Metric specifications
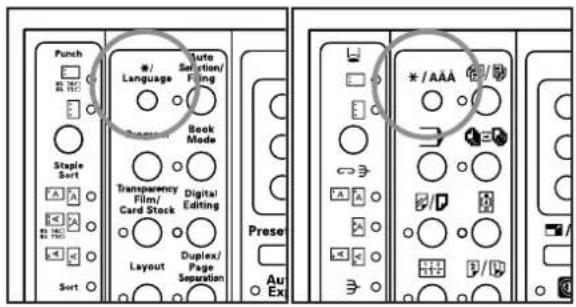
2 Use the ▲ cursor or the ▼ cursor key to select "4 Default".
Inch specifications
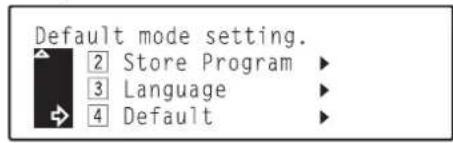
Metric specifications
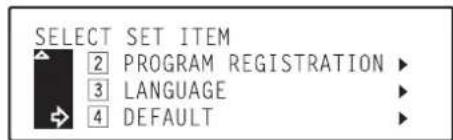
3 Press the Enter key.
4 Use the numeric keys on the keypad to enter the 4-digit management PIN code "3000".
Inch specifications
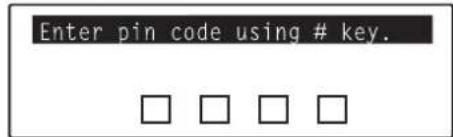
Metric specifications
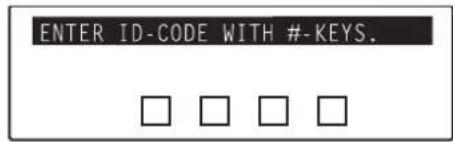
NOTE
It is possible for you to change the 4-digit management PIN code.
(See "⑩ Management PIN code" on page 7-30.)
5 Use the ▲ cursor or the ▼ cursor key to select "|3| Copy Default".
Inch specifications
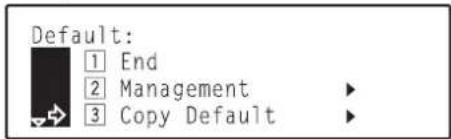
Metric specifications
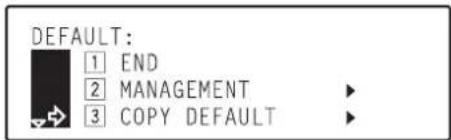
6 Press the Enter key.
The "Copy Default" screen will appear.
7 Use the ▲ cursor or the ▼ cursor key to select the copy default setting that you want to change. See “(1) Copy default settings” on page 7-12 for information on the settings that can be changed.
Inch specifications
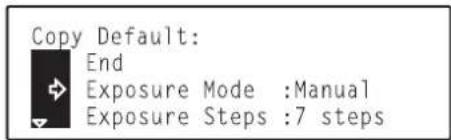
Metric specifications
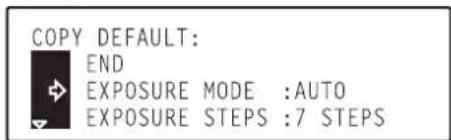
8 Press the Enter key.
9 Refer to and perform the following procedure that corresponds to the setting that you want to change.
NOTES
- The arrow (>) displayed in the screen for each setting indicates the current setting for that default.
- After you finish each setting, the display will return to the screen in step 7. If you want to change any other settings, repeat steps 7 through 9.
10 Once you have finished making all of the default settings you want, use the ▲ cursor key to select "End" and then press the Enter key.
The message display will return to the "Ready to copy." screen.
① Exposure mode
1 Use the ▲ cursor or the ▼ cursor key to select either "① Auto" or "② Manual".
Inch specifications
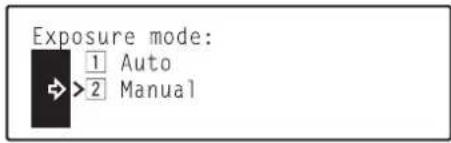
Metric specifications
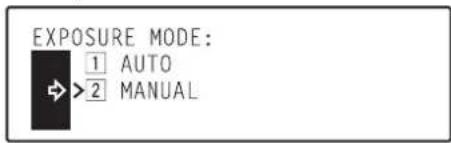
2
Press the Enter key.
②Exposure steps
1 Press the ▲ cursor or the ▼ cursor key to select either "1 7 Steps" or "2 13 Steps".
Inch specifications
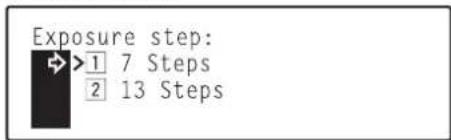
Metric specifications
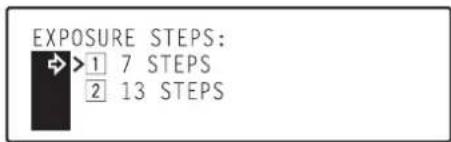
2
Press the Enter key.
③ Auto exposure adjustment (color)
1 Press the ◀ cursor or the ▶ cursor key to adjust the exposure as desired. Move the cursor to the right to make copies darker, and to the left to make copies lighter for making full color copies in the auto exposure mode.
Inch specifications
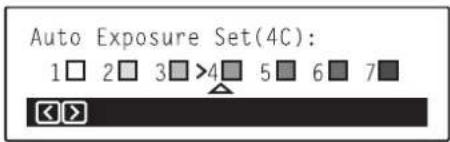
Metric specifications
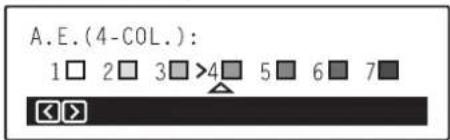
2 Press the Enter key.
④ Auto exposure adjustment (b/w)
1 Press the ◀ cursor or the ▶ cursor key to adjust the exposure as desired. Move the cursor to the right to make copies darker, and to the left to make copies lighter for making black and white copies in the auto exposure mode.
Inch specifications
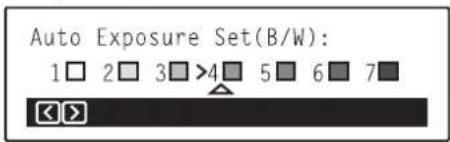
Metric specifications
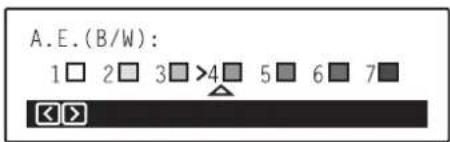
2 Press the Enter key.
⑤Mixed original density
1 Press the ◀ cursor or the ▶ cursor key to adjust the exposure as desired. Move the cursor to the right to make copies darker, and to the left to make copies lighter when using the text&photo mode.
Inch specifications
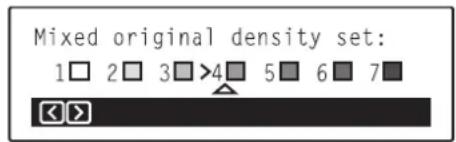
Metric specifications
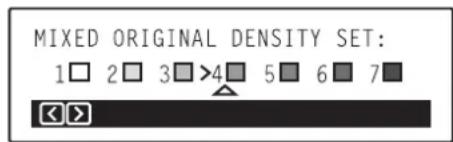
2 Press the Enter key.
⑥Text original density
1 Press the ◀ cursor or the ▶ cursor key to adjust the exposure as desired. Move the cursor to the right to make copies darker, and to the left to make copies lighter when using the text mode.
Inch specifications
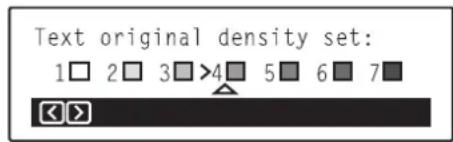
Metric specifications
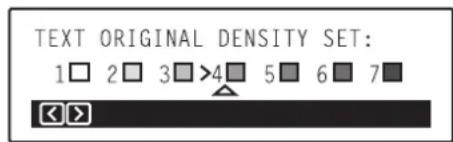
2 Press the Enter key.
⑦ Print original density
1 Press the ◀ cursor or the ▶ cursor key to adjust the exposure as desired. Move the cursor to the right to make copies darker, and to the left to make copies lighter when using the printed photo mode.
Inch specifications
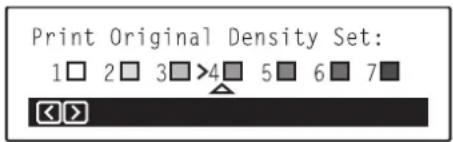
Metric specifications
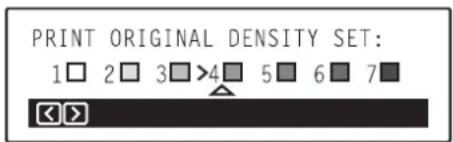
2 Press the Enter key.
⑧ Photo original density
1 Press the ◀ cursor or the ▶ cursor key to adjust the exposure as desired. Move the cursor to the right to make copies darker, and to the left to make copies lighter when using the photo mode.
Inch specifications
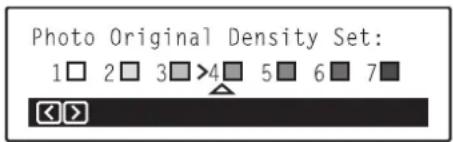
Metric specifications
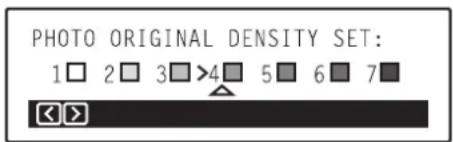
2 Press the Enter key.
⑨Map original density
1 Press the ◀ cursor or the ▶ cursor key to adjust the exposure as desired. Move the cursor to the right to make copies darker, and to the left to make copies lighter when using the map mode.
Inch specifications
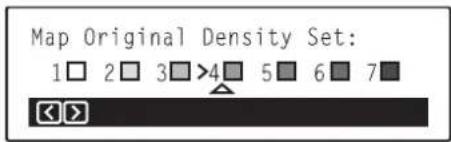
Metric specifications
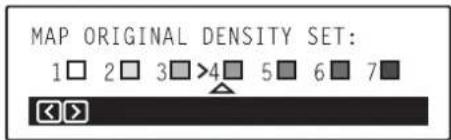
2 Press the Enter key.
⑩Copy mode
1 Use the ▲ cursor or the ▼ cursor key to select between "1 Full-Color" ["1 FULL COLOUR"], "2 Black & White" and "3 Auto color selection" ["3 AUTO COLOUR SELECTION"].
Inch specifications
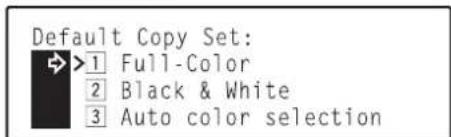
Metric specifications
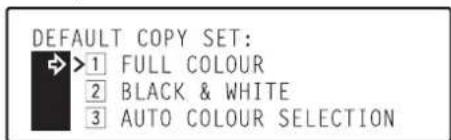
2 Press the Enter key.
⑪ Original quality
1 Use the ▲ cursor or the ▼ cursor key to select between "1 Mixed", "2 Text", "3 Photo", "4 Print", "5 Map" and "|6| Eco".
Inch specifications
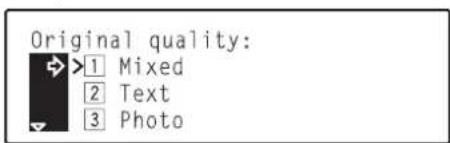
Metric specifications
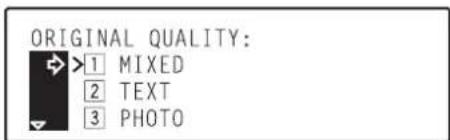
2 Press the Enter key.
⑫ Default drawer (b/w)
1 Use the ▲ cursor or the ▼ cursor key to select the location (a drawer or the multi-bypass tray) that will be automatically selected for feeding paper in black and white copying.
* The "1 paper" ["SOURCE 1"] drawer is not available in duplex copiers.
Inch specifications
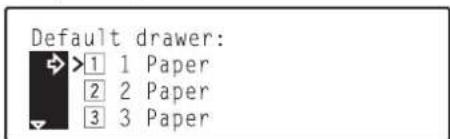
Metric specifications
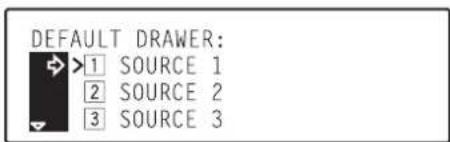
2 Press the Enter key.
⑬Default drawer (color)
1 Use the ▲ cursor or the ▼ cursor key to select the location (a drawer or the multi-bypass tray) that will be automatically selected for feeding paper in color copying.
* The "1 paper" ["SOURCE 1"] drawer is not available in duplex copiers.
Inch specifications
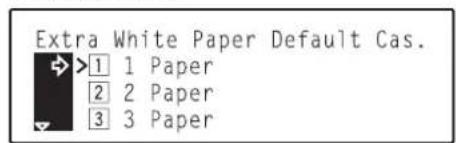
Metric specifications
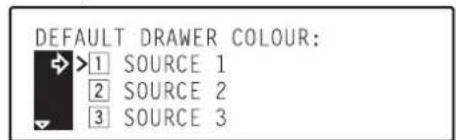
2 Press the Enter key.
⑭Copy limit
1 Use the numeric keys on the keypad to enter the maximum number of copies can be made at one time.
Inch specifications
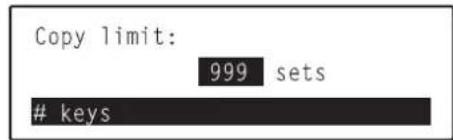
Metric specifications
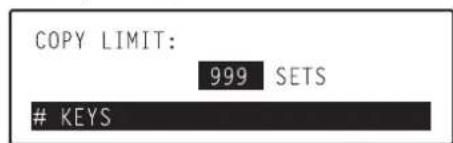
2 Press the Enter key.
⑮ Margin width
1 Press the ◀ cursor or the ▶ cursor key to select the default margin width. (The width can be set to any 1/8" increment between 1/4" and 3/4" [any 1 mm increment between 6 mm and 18 mm].)
Inch specifications
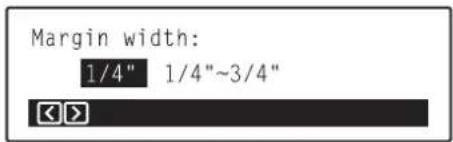
Metric specifications
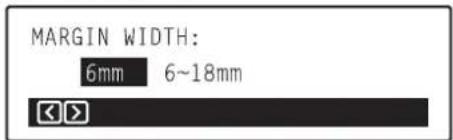
2 Press the Enter key.
⑯ Erased border width
1 Use the ▲ cursor or the ▼ cursor key to select the default width of the border to be erased. (The width can be set to either 1/4", 1/2" or 3/4" [6 mm, 12 mm or 18 mm].)
Inch specifications
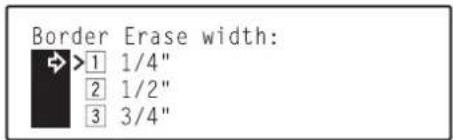
Metric specifications
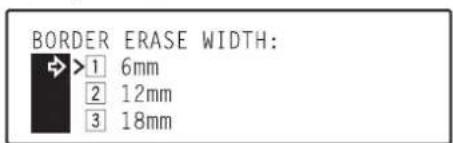
2 Press the Enter key.
⑰Custom erase size
1 Press the ◀ cursor or the ▶ cursor key to select the length of the original to be used in the custom erase mode.
(The length can be set to any 5/16" increment between 3 11/16" and 8 7/16" [any 8 mm increment between 94 mm and 214 mm.])
Inch specifications
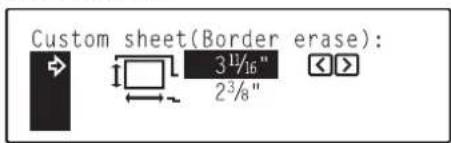
Metric specifications
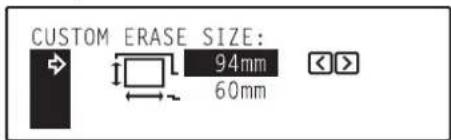
2 Press the ▼ cursor key to change to the width size setting.
3 Press the ◀ cursor or the ▶ cursor key to select the paper width. (The length can be set to any 1/8" increment between 2 3/8" and 11 5/8" [any 4 mm increment between 60 mm and 296 mm.])
Inch specifications
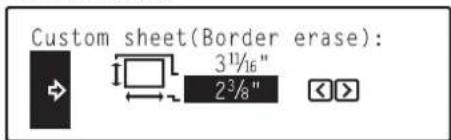
Metric specifications
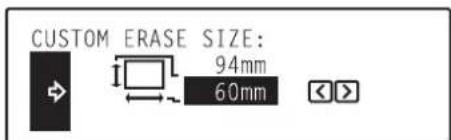
4 Press the Enter key.
⑱ Insert tray
1 Use the ▲ cursor or the ▼ cursor key to select the drawer that contains the paper which will be fed in the insert sheet modes.
* The "1 paper" ["SOURCE 1"] drawer is not available in duplex copiers.
Inch specifications
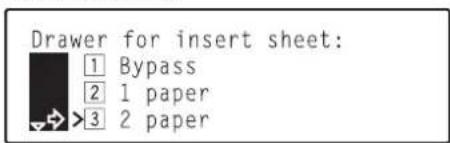
Metric specifications
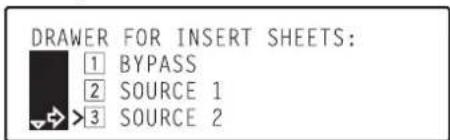
2 Press the Enter key.
⑲ Sort mode ON/OFF (Output form)
1 Use the ▲ cursor or the ▼ cursor key to select either "|1| On" or "|2| Off".
Inch specifications
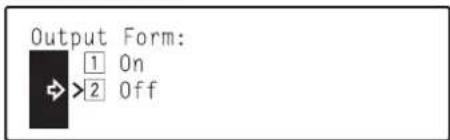
Metric specifications
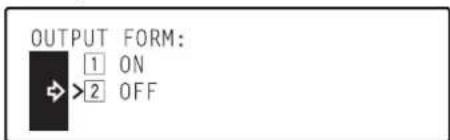
2 Press the Enter key.
⑳Eject destination
1 Use the ▲ cursor or the ▼ cursor key to select either "1 Inner Eject" (copy storage table) or "2 Side Eject" (copy eject tray).
Inch specifications
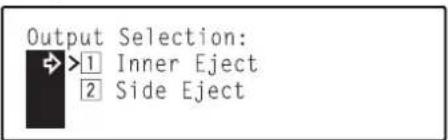
Metric specifications

2 Press the Enter key.
②1 ACS adjustment
1 Press the ◀ cursor or the ▶ cursor key to move the cursor on the exposure scale. Move the cursor to the right to make black and white copies even if there is a small amount of color in the original, and to the left to have color copies made even if there is a large volume of black and white in the original.
Inch specifications
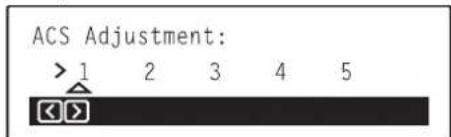
Metric specifications
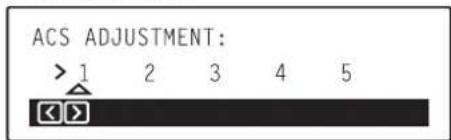
2 Press the Enter key.
②2 Auto color adjustment
1 Make sure that there is 11" x 8 1/2" [A4] paper loaded in one of the drawers.
2 Use the ▲ cursor or the ▼ cursor key to select the image quality that you want to adjust the color for.
Inch specifications

Metric specifications
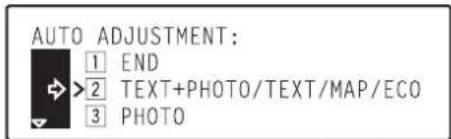
3 Press the Enter key. The "Begin Auto Calibration" ["START AUTO CALIBRATION"] screen will appear.
Inch specifications
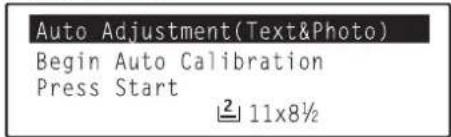
Metric specifications
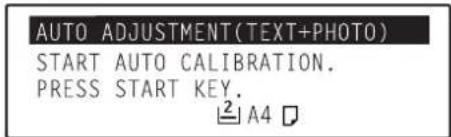
4 Press the Start key. A PG color pattern will be printed out. Inch specifications Metric specifications
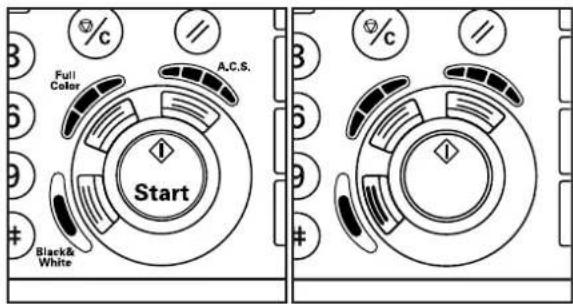
5 Once print out is complete, set the printed color pattern on the platen.
NOTES
- Set the PG color pattern on the platen so that the 3 squares are located on the left side as shown in the illustration.
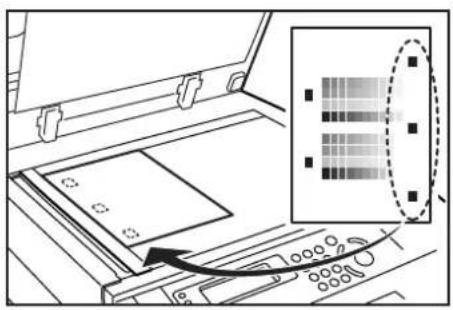
- Press the Stop/Clear key if you want to cancel the auto color adjustment procedure.
6 Press the Start key.
The set PG color pattern will be scanned and auto color adjustment performed automatically.
7 Once adjustment is completed, the "Auto Adjustment (Text&Photo)" screen will appear.
Use the ▲ cursor or the ▼ cursor key to select between "1 | Adjust Finish" ["1 | ADJUSTMENT COMPLETED"], "2 Test Copy" and "3 Adjust Again".
Inch specifications
Auto Adjustment(Text&Photo)
1 Adjust Finish 2 Test Copy 3 Adjust Again
Metric specifications
AUTO ADJUSTMENT(TEXT+PHOTO)
1 ADJUSTMENT COMPLETED 2 TEST COPY 3 ADJUST AGAIN
- If you are finished with auto color adjustment, select "1 Adjust Finish" ["1 ADJUSTMENT COMPLETED"] and go to the next step.
- If you want to make a test copy, select "2 Test Copy" and go directly to step 10.
- If you want to perform auto color adjustment again, select "3|Adjust Again" and proceed directly to step 12.
8 Press the Enter key. The message display will return to the screen in step 2.
9 Use the ▲ cursor or the ▼ cursor key to select "1 End" and then press the Enter key.
10 Press the Enter key.
11 Set an original and press the Start key. A test copy will be printed out and the message display will return to the screen in step 7.
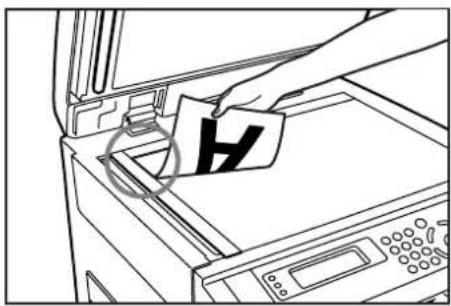
12 Press the Enter key. The message display will return to the screen in step 3. Repeat steps 4 through 7.
②3 Drum refresh
1 Press the Enter key.
The drum refresh operation will begin. Please wait about 5 minutes.
Inch specifications
Drum refresh:
Refresh is started. Press ENTER key
Metric specifications
DRUM REFRESH:
REFRESH IS STARTED. PRESS ENTER KEY.
2 Once the drum refresh operation is complete, press the Enter key.
24 Rotate sort ON/OFF
1 Use the ▲ cursor or the ▼ cursor key to select either "1 | On" or "2 Off".
Inch specifications
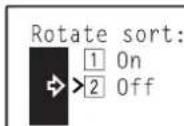
Metric specifications
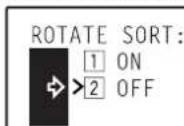
2 Press the Enter key.
(3) Machine default settings
The following 15 machine default settings can be changed.
Change any or all of the settings as desired in order to make the most effective use of your copier.
| Default setting | Description | Available settings | Factory setting | Reference page |
| 1 Status report print out | Prints out a list of all machine default settings. | ---- | ---- | 7-28 |
| 2 Auto drawer switching ON/OFF | Sets whether the automatic drawer switching function (page 2-5) will be used or not. | On / Off | On | 7-28 |
| 3 Auto shut-off ON/OFF | Sets whether the auto shut-off function (page 6-48) will be used or not. The auto shut-off function automatically turns the main switch OFF if no operation has been performed on the copier for a certain period of time.* If auto shut-off interferes with your copying operations, turn this function OFF. It is recommended that you try to set a longer time interval until auto shut-off engages before you actually turn it OFF. | On / Off | On | 7-28 |
| 4 Special paper location | Sets the location (a drawer or the multi-bypass tray) where recycled or special paper will be loaded.* No.3 and No.4 drawers can only be selected when the optional Paper Feeder is installed in your copier.* Be sure to load the type of paper selected under “15 Type of paper” on page 7-31 in the location selected here. | Standard copiersBypass /1 paper [SOURCE 1] –4 paper [SOURCE 4]Duplex copiersBypass /2 paper [SOURCE 2] –4 paper [SOURCE 4] | ---- | 7-28 |
Section 7 COPIER MANAGEMENT
| Default setting | Description | Available settings | Factory setting | Reference page |
| 5 APS for special paper ON/OFF | Sets whether the paper loaded in the drawer that was selected under “4 Special paper location” on page 7-28 will be used or not in the auto paper selection mode or in automatic drawer switching (page 2-5). | On / Off | On | 7-29 |
| 6 Color copy paper location | Sets the location (a drawer or the multi-bypass tray) where paper will be loaded for color copying. When you make color copies in the auto paper selection mode, copying will be performed onto paper that is loaded in the drawer that you select here.* No.3 and No.4 drawers can only be selected when the optional Paper Feeder is installed in your copier. | Standard copiersBypass /1 paper [SOURCE 1] –4 paper [SOURCE 4]Duplex copiersBypass /2 paper [SOURCE 2] –4 paper [SOURCE 4] | ---- | 7-29 |
| 7 Auto preheat time | Sets the amount of time between the point that copying ends and the energy-saving preheat mode (page 6-47) engages. | 5 minutes – 45 minutes(5 minute increments) | 15 minutes | 7-29 |
| 8 Auto shut-off time | Sets the amount of time that will elapse if no operation is performed before the auto shut-off function (page 6-48) engages and turns the copier OFF (It is also possible to disable the auto shut-off function. If the auto shut-off function is turned OFF, this setting will not be effective. (See “3 Auto shut-off ON/OFF” on page 7-28.)The factory default time is 30 minutes.* It is recommended that you try to set a longer time interval before auto shut-off engages if you use the copier frequently, and to a shorter time if it is used less frequently.* In order to disable the auto shut-off function, see “3 Auto shut-off ON/OFF” on page 7-28. | 15 minutes – 240minutes (15 minute increments) | 30 minutes | 7-29 |
| 9 Display contrast adjustment | Adjusts the contrast of the LCD display if you cannot see the message display clearly. | 1 – 7 | 4 (middle setting) | 7-30 |
| 10 Management PIN code | Changes the PIN code that is needed to access the copy management procedures (page 7-1), copy default settings (page 7-12) and these machine default settings (page 7-24).* If you do change the PIN code, be sure to make some sort of note of the new one. If you happen to forget it, enter the PIN code "6482". | ---- | 3000 | 7-30 |
| 11 Silent mode ON/OFF | The copier can be switched to a silent mode, which shuts down the motor inside the copier immediately after each copy job is finished. If you select to turn the silent mode ON, the motor will be stopped immediately after copying is completed. | On / Off | Off | 7-30 |
| 12 Day & time | Set the current date and time and other related settings.* Be ABSOLUTELY certain to set the correct time, or certain functions of the copier may not operate properly. | ---- | ---- | 7-30 |
| 13 Checking the total counter | Perform this procedure when you want to check the total number of black and white copies, mono-color copies and full color copies made.NOTE:The total counter can also be checked using the following procedure.1 Press the */Language key for approximately 5 seconds.The verification screen for the total counter will appear.Use the ▲ cursor or the ▼ cursor key to select the type of copies that you want to check the count for.2 After you are finished checking the total counter, use the ▲ cursor key to select “End” and then press the Enter key. | ---- | ---- | 7-31 |
| 14 Counter report print out | Prints out reports on toner usage for each of the copy, printer and fax functions of this machine. | ---- | ---- | 7-31 |
| 15 Type of paper | Sets the type of paper that is loaded in each drawer.* Setting is possible for drawers No.1 through No.4 in standard copiers and drawers No.2 through No.4 in duplex copiers. | PLAIN REPRINTED RECYCLED [RECYCLE] VELLUM ROUGH LETTERHEAD COLOR [COLOUR] PREPUNCHED Custom Size 1 – 8 | PLAIN | 7-31 |
(4) Accessing the machine default settings
1 Press the */Language key.
The "Default mode setting" ["SELECT SET ITEM"] screen will appear.
Inch specifications Metric specifications
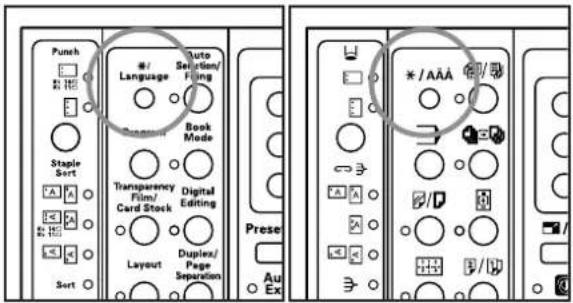
2 Use the ▲ cursor or the ▼ cursor key to select "4 Default".
Inch specifications
Default mode setting.
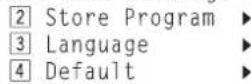
Metric specifications
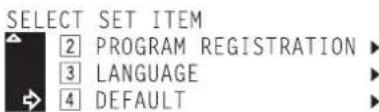
3 Press the Enter key.
4 Use the numeric keys on the keypad to enter the 4-digit management PIN code "3000".
Inch specifications
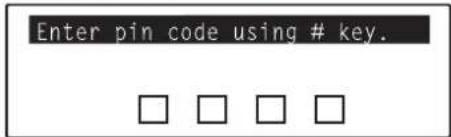
Metric specifications
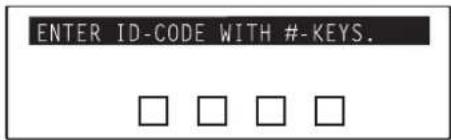
NOTE
It is possible for you to change the 4-digit management PIN code.
(See "⑩ Management PIN code" on page 7-30.)
5 Use the ▲ cursor or the ▼ cursor key to select "|4 | Machine Default".
Inch specifications
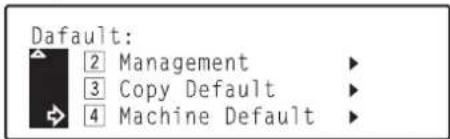
Metric specifications

6 Press the Enter key.
The "Machine default" screen will appear.
7 Use the ▲ cursor or the ▼ cursor key to select the machine default setting that you want to change. See “(3) Machine default settings” on page 7-24 for information on the settings that can be changed.
Inch specifications
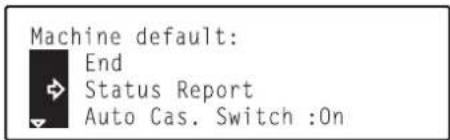
Metric specifications
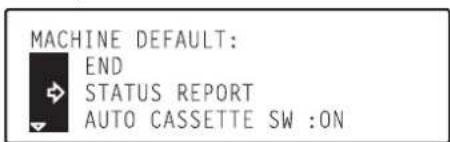
8 Press the Enter key.
9 Refer to and perform the following procedure that corresponds to the setting that you want to change.
NOTES
- The arrow (>) displayed in the screen for each setting indicates the current setting for that default.
- After you finish each setting, the display will return to the screen in step 7. If you want to change any other settings, repeat steps 7 through 9.
10 Once you have finished making all of the default settings you want, use the ▲ cursor key to select "End" and then press the Enter key.
The message display will return to the "Ready to copy." screen.
①Status report print out
1 Make sure that 11" x 8 1/2" [A4] size paper is loaded in one of the drawers.
* If a Memory Copy Board is installed in your copier, make sure that 8 1/2" x 11" or 11" x 8 1/2" [A4 or A4R] size paper is loaded in one of the drawers. (8 1/2" x 11" and A4R paper can be loaded into the optional Paper Feeder.)
2 Press the Enter key.
The status report will be printed out.
②Auto drawer switching ON/OFF
1 Use the ▲ cursor or the ▼ cursor key to select either "1 On" or "2 Off".
Inch specifications
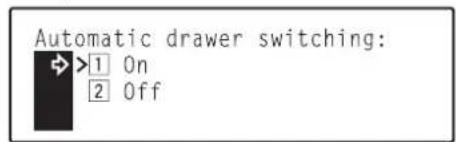
Metric specifications
2 Press the Enter key.
③Auto shut-off ON/OFF
1 Use the ▲ cursor or the ▼ cursor key to select either “□ On” or “|2| Off”.
Inch specifications
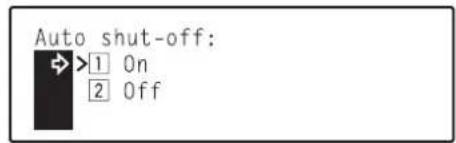
Metric specifications
2 Press the Enter key.
④ Special paper location
1 Use the ▲ cursor or the ▼ cursor key to select the location (a drawer or the multi-bypass tray) where recycled or special paper will be loaded.
* The "1 paper" ["SOURCE 1"] drawer is not available in duplex copiers.
Inch specifications

Metric specifications
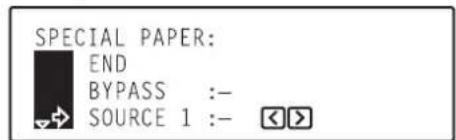
2 Press the ▶ cursor key. An asterisk (*) will appear next to the selected location.
If you want to cancel the designation, press the ◀ cursor key and the asterisk will be deleted.
Inch specifications
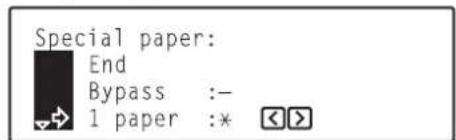
Metric specifications
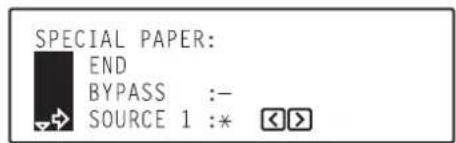
3 Use the ▲ cursor or the ▼ cursor key to select "End" and then press the Enter key.
⑤APS for special paper ON/OFF
1 Use the ▲ cursor or the ▼ cursor key to select either "|1| On" or "2 Off".
Inch specifications
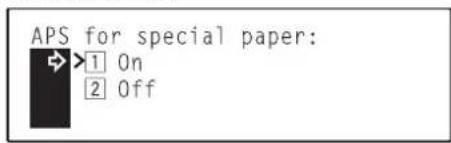
Metric specifications
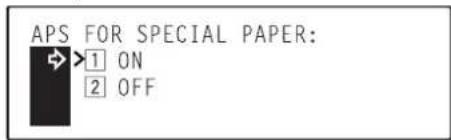
2 Press the Enter key.
⑥Color copy paper location
1 Use the ▲ cursor or the ▼ cursor key to select the location (a drawer or the multi-bypass tray) where paper will be loaded for color copying.
* The "1 paper" ["SOURCE 1"] drawer is not available in duplex copiers.
Inch specifications
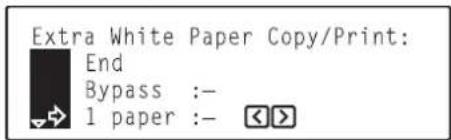
Metric specifications
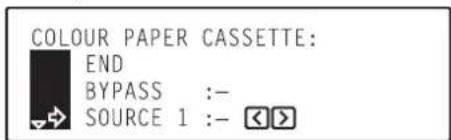
2 Press the ▶ cursor key. An asterisk (*) will appear next to the selected location.
If you want to cancel the designation, press the ◀ cursor key and the asterisk will be deleted.
Inch specifications
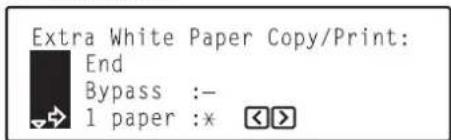
Metric specifications
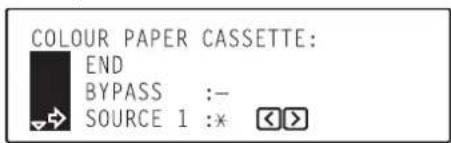
3 Use the ▲ cursor or the ▼ cursor key to select "End" and then press the Enter key.
⑦ Auto preheat time
1 Use the ▲ cursor or the ▼ cursor key to select the amount of time before the preheat mode engages. (The time can be set to any 5 minute increment between 5 minutes and 45 minutes.)
Inch specifications
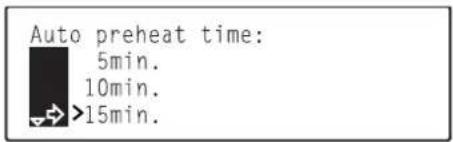
Metric specifications
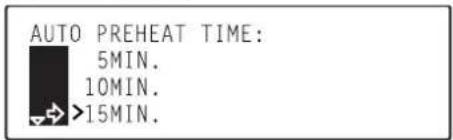
2 Press the Enter key.
⑧ Auto shut-off time
1 Use the ▲ cursor or the ▼ cursor key to select the amount of time before the auto shut-off function engages. (The time can be set to any 15 minute increment between 15 minutes and 240 minutes.)
Inch specifications
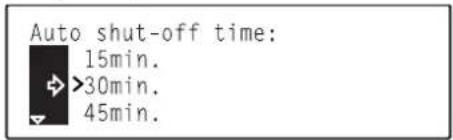
Metric specifications
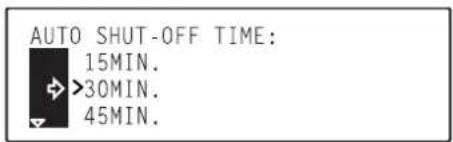
2 Press the Enter key.
⑨Display contrast adjustment
1 Press the ◀ cursor or the ▶ cursor key to adjust the contrast. Move the cursor to the right to make the display darker, and to the left to make the display lighter.
Inch specifications
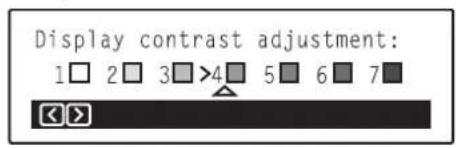
Metric specifications
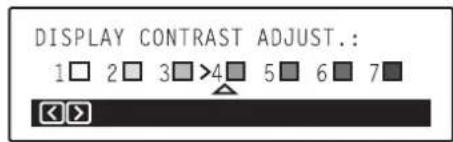
2 Press the Enter key.
⑩Management PIN code
1 Use the numeric keys on the keypad to enter a new 4-digit management PIN code.
Inch specifications
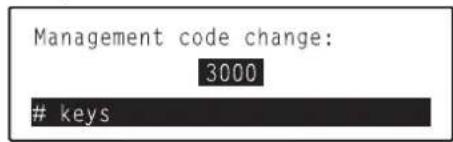
Metric specifications
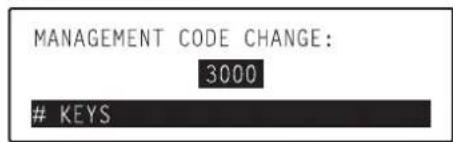
2 Press the Enter key.
⑪ Silent mode ON/OFF
1 Use the ▲ cursor or the ▼ cursor key to select either "1 | On" or "2 Off".
Inch specifications
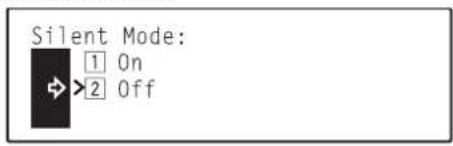
Metric specifications
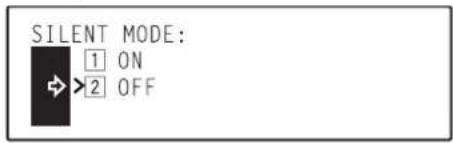
2 Press the Enter key.
⑫ Day & time
1 Use the ▲ cursor or the ▼ cursor key to select "Time".
Inch specifications
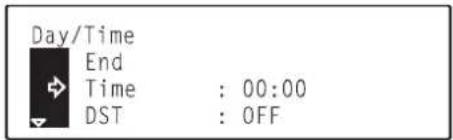
Metric specifications
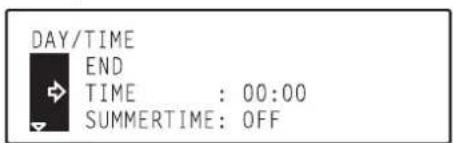
2 Use the ◀ cursor or the ▶ cursor key to set the current time.
3 Perform the other settings "DST" ["SUMMERTIME"], "Time Zone", "Year", "Month" and "Day" in the same manner.
4 Use the ▲ cursor key to select "End" and then press the Enter key.
⑬Checking the total counter
1 Use the ▲ cursor or the ▼ cursor key to select the type of copies that you want to check the count for.
Inch specifications
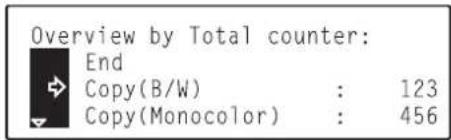
Metric specifications
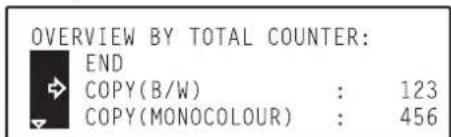
2 Use the ▲ cursor key to select "End" and then press the Enter key.
NOTE
The total counter can also be checked using the following procedure.
1 Press the */Language key for approximately 5 seconds.
The verification screen for the total counter will appear.
Use the ▲ cursor or the ▼ cursor key to select the type of copies that you want to check the count for.
2 After you are finished checking the total counter, use the ▲ cursor key to select "End" and then press the Enter key.
⑭ Counter report print out
1 Make sure that 11" x 8 1/2" [A4] size paper is loaded in one of the drawers.
* If a Memory Copy Board is installed in your copier, make sure that 8 1/2" x 11" or 11" x 8 1/2" [A4 or A4R] size paper is loaded in one of the drawers. (8 1/2" x 11" and A4R paper can be loaded into the optional Paper Feeder.)
2 Use the ▲ cursor or the ▼ cursor key to select which report you want to print out.
Inch specifications
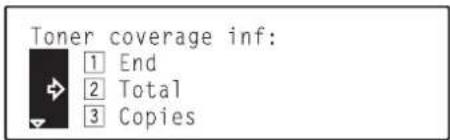
Metric specifications
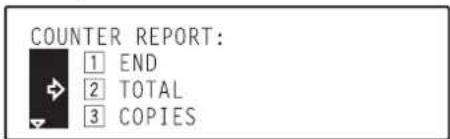
3 Press the Enter key. The selected report will be printed out.
4 Use the ▲ cursor key to select "1 End" and then press the Enter key.
⑮Type of paper
1 Use the ▲ cursor or the ▼ cursor key to select the type of paper that is loaded in each drawer.
* The "Paper Type 1st Cassette" ["PAPER TYPE (1ST)"] drawer setting is not available in duplex copiers.
Inch specifications
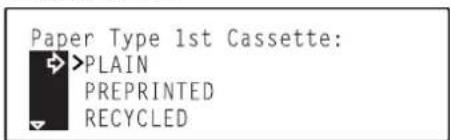
Metric specifications
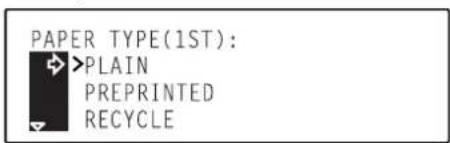
2 Press the Enter key.
3. Changing the language used for messages
You can select the language that will be used in the message display.
NOTE
The available languages are as follows:
Inch specification copiers: English, French ("Français"), Spanish ("Español") and Japanese ("日本語")
Metric specification copiers: English, German ("DEUTSCH"), French ("FRANÇAIS"), Italian ("ITALIANO") and Spanish ("ESPAÑOL")
1 Press the */Language key.
The "Default mode setting" ["SELECT SET ITEM"] screen will appear.
Inch specifications Metric specifications
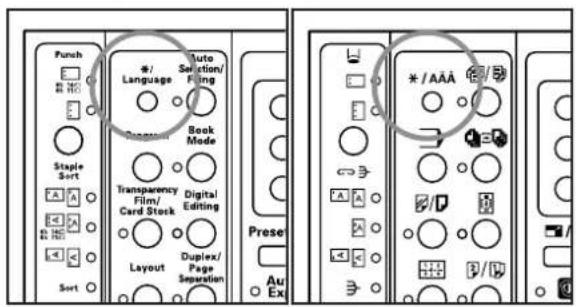
2 Use the ▲ cursor or the ▼ cursor key to select "3 Language".
Inch specifications
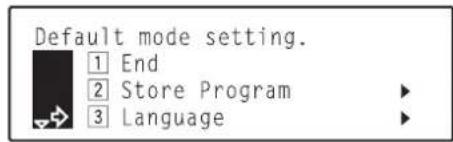
Metric specifications
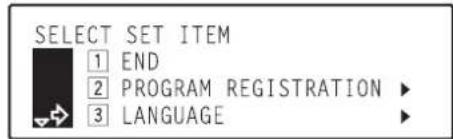
3 Press the Enter key.
The available languages will be displayed.
4 Use the ▲ cursor or the ▼ cursor key to select the language that you want to use.
Inch specifications
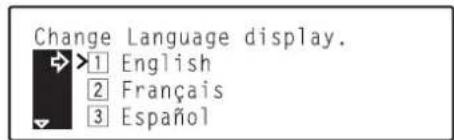
Metric specifications
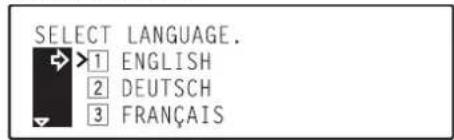
5 Press the Enter key.
* The language will be changed, and the message display will return to the "Ready to copy." screen.
Section 8 OPTIONAL EQUIPMENT
(1) SRDF (Sheet-thru Reverse Document feeder)
Automatically feeds and scans multiple sheet-originals one by one. Two-sided originals are automatically turned over so that both sides can be scanned and copied.
- Acceptable originals
- Use sheet originals only
- Paper weight
One-sided originals: Use only originals with a paper weight of between 35 g/m² and 160 g/m².
Two-sided originals: Use only originals with a paper weight of between 50 g/m² and 120 g/m².
- Sizes
8 1/2" x 5 1/2" - 11" x 17" [A5R - A3]
• Number which can be set at one time
100 sheets (smaller than 11" x 8 1/2" [A4] size, between 50 g/m² and 80 g/m²)
70 sheets (larger than 8 1/2" x 14" [B4] size, between 50 g/m² and 80 g/m²)
(The maximum number of originals that can be set when using the auto selection mode is 30 sheets.)
● Notes on acceptable documents
Be sure NOT to use the following as originals in the SRDF:
• OHP film or other transparencies.
- Soft originals such as carbon or vinyl paper, or other originals that are badly curled, wrinkled or creased.
- Irregularly shaped originals, wet originals, or originals that have adhesive tape or glue on them.
- Originals bound with clips or staples. (If you must use such originals, be sure to remove the clips or staples, and straighten any curls, wrinkles or creases, before setting them in the SRDF.)
- Originals with cut-out sections or that have a slippery surface on either side.
• Originals on which any correction fluid is still wet.
- Originals with strong folds. (If you must use such originals, be sure to smooth out the folds before setting them in the SRDF.)
* In addition, originals with punched holes or perforations should be set so that the edge of the paper with the holes or perforations is facing away from the SRDF.
- Names of parts
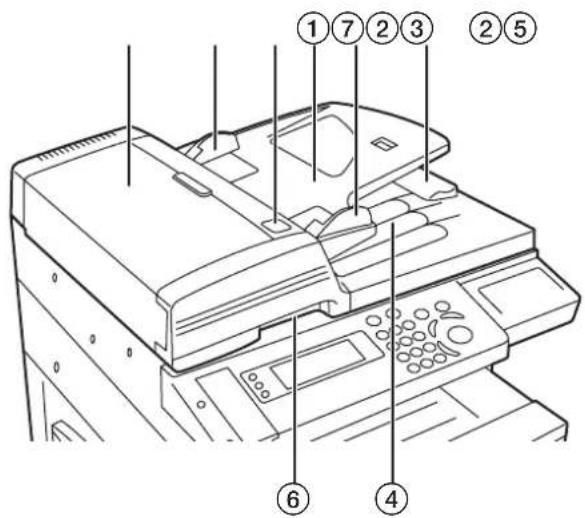
① Original table
(Set originals to be copied on this table.)
② Original insert guides
(Align these guides to fit the width of the originals to be copied.)
③ Left cover
(Open this cover if an original misfeed occurs.)
④ Original eject table
(Originals that have been copied are ejected and stored here.)
⑤ Ejection extension
(Open this extension when using larger sized originals such as 8 1/2" x 14" and 11" x 17" [B4 and A3].
⑥ SRDF release lever
(Operate this lever when you want to open the SRDF.)
⑦ Original set indicator
(Indicated the status of originals set in the SRDF.
Lit green: Originals are set properly. Copying will begin when you press the Start key.
Blinking green: Reset originals.
Blinking red: An original has jammed. See page 9-14 and removed the jammed original.
●Setting originals in the SRDF
1 Adjust the original insert guides to fit the width of original(s) to be copied.
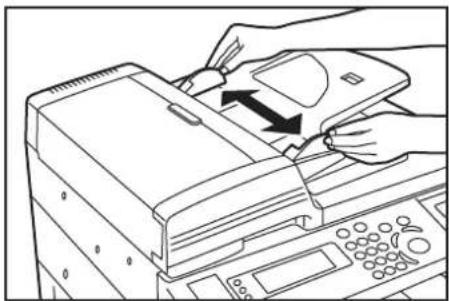
NOTES
- Before copying, make sure that there are no originals remaining on the original eject table. Originals left on the eject table can cause other originals to misfeed.

- If you are setting multiple originals at one time, ALWAYS use originals of the same size. It is, however, possible to use different size originals of the same width (ex.: 11" x 8 1/2" and 11" x 17" [A4 and A3]) at the same time if you use the auto selection mode. See page 8-3.)
2 Arrange the originals in order and set them face up (front side up for 2-sided copies) on the original table. The original set indicator will light green. If the indicator doesn't light, set the originals once again.
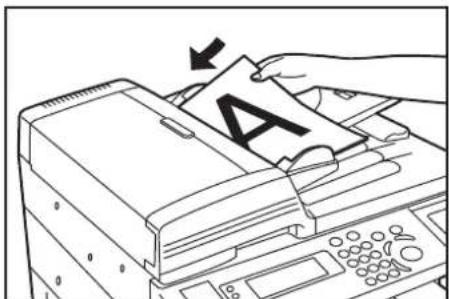
IMPORTANT!
- Be sure to set only a number of originals that is LESS than the level indicator on inside of the rear insert guide. Also, DO NOT set originals outside the acceptable range as this can cause the originals to misfeed. (See page 8-1 for details on acceptable originals.)
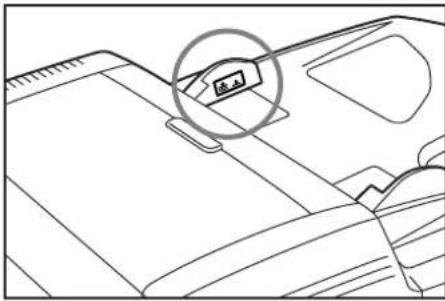
- To keep ejected originals from falling off the copier, open the ejection extension when using larger sized originals such as 8 1/2" x 14" and 11" x 17" [B4 and A3].
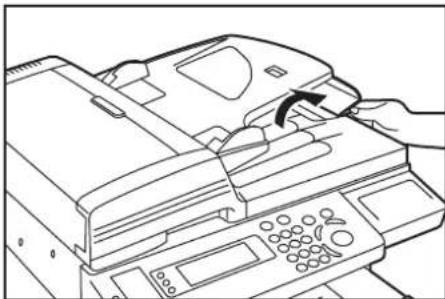
- When copying from 2-sided originals, the originals will be temporarily ejected from the left cover in order to turn them over and copy the reverse side. Do NOT touch them at this point! Any attempt to remove them can cause the originals to misfeed.
●Setting originals on the platen
When copying from an original which cannot be set in the SRDF (books, magazines, etc.), lift open the SRDF and set the original directly on the platen.
1 Operate the SRDF release lever and open the SRDF.
* Before opening the SRDF, make sure that there are no originals remaining on the original eject table. If there are originals left on the eject table, they will fall off the copier when the SRDF is opened.
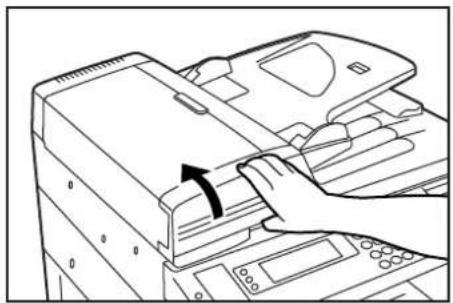
2 Set the original to be copied face-down and align the edges with the original size indicator lines.
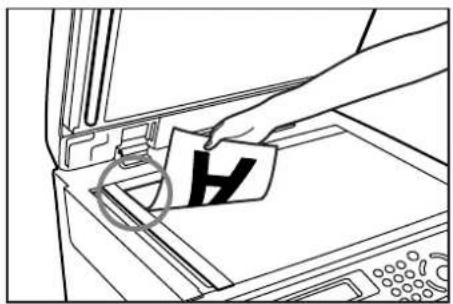
3 Hold the SRDF release lever and close the SRDF.
IMPORTANT!
Do NOT put undue pressure on the SRDF when you close it or there is a chance that you might break the platen glass.

CAUTION
DO NOT leave the document feeder open as there is a danger of personal injury.
●Auto selection mode
If you use the auto selection mode without pressing the Paper Select key and specifying a desired paper size, originals will be checked on by one for their size and the appropriate copy exposure, and paper of the same size as each original will be selected automatically.
* You can set up to 30 originals in the SRDF in this mode.
* Only originals with the same width, such as 11" x 17" and 11" x 8 1/2" [A3 and A4] size originals can be used in this mode.
- Selecting the auto selection mode
1 Press the Auto Selection/Filing key to light the corresponding indicator.
The "Select function" screen will appear.
Inch specifications Metric specifications
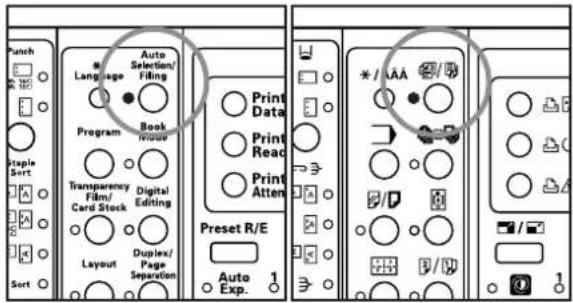
2 Make sure that "|1| Auto select" [ "|1| AUTO SEL."] is selected and press the Enter key.
The message display will return to the "Ready to copy." screen.
(2) Paper Feeder
This paper storage unit has two 250-sheet capacity drawers similar to those included as standard equipment with your copier.
• Paper capacity (each drawer)
250 sheets (standard copy paper of a paper weight between 75 g/m 2 and 90 g/m 2 )
- Acceptable sizes of paper
8 1/2" x 11", 11" x 8 1/2", 8 1/2" x 14" and 11" x 17" [A5R, B5R, A4R, A4, B4 and A3]
Paper is loaded in these drawers the same manner as with the included drawers. (See page 3-1.)
* An access cover is included on the right side of the unit just in case paper jams in either of these drawers.
* Casters are attached to the bottom of the Paper Feeder.
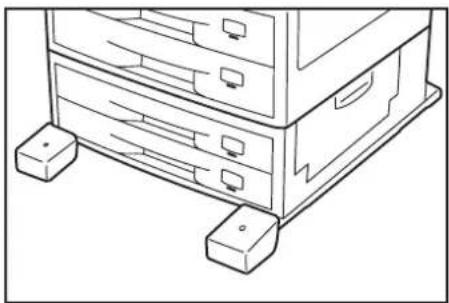
* To prevent the copier from tipping over because of weight in the copier and the upper paper drawers, the caster kit must be installed at the bottom-most paper feeder, when an optional paper feeder is installed with the copier.

CAUTION
To prevent the possibility of accidents due to tilting the copier body, always turn the desk's stopper bolts until they make firm contact with the floor during initial installation or whenever the machine is moved.

CAUTION
To prevent the copier from tipping over, the optional caster kit must be installed when the copier is installed with an optional paper feeder.
(3) Document Finisher
The Document Finisher stores a large quantity of copies and can sort multiple copy sets by shifting their position of ejection. It can also staple the copy sets as well. For more details, refer to the Operation Guide for the Document Finisher.
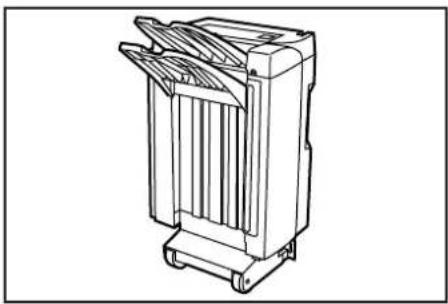
(4) Memory Copy Board
The Memory Copy Board is required in order to use the following modes and functions of your copier.
- Margin mode
- Border erase modes
- Print page numbers mode
• Transparency + backing sheet mode - Presentation mode
- Insert sheet modes
- Layout modes
- BW/Selection mode
- Poster mode
- Filing mode
- Sort mode
- Rotate copy function
• Copy management function
* The Memory Copy Board is standard in duplex copiers.
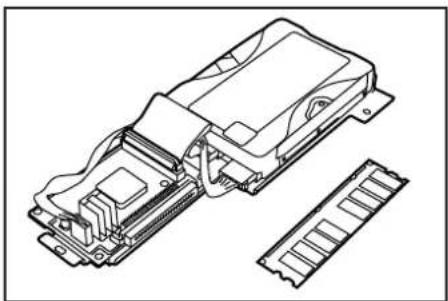
(5) Key Counter
The Key Counter is used for checking copier use and is convenient for centralized management of the number of copies made by each department as well as the total number of copies made on the machine overall.
* There are cases when prints made using the optional printer functions of this machine are counted on the key counter.
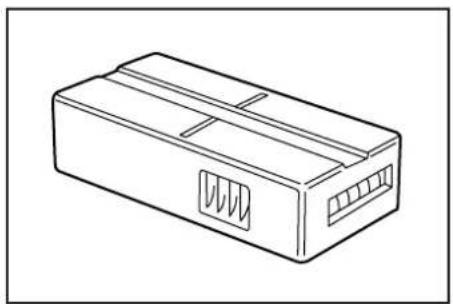
● Setting the Key Counter
Insert the Key Counter securely into the key counter opening.
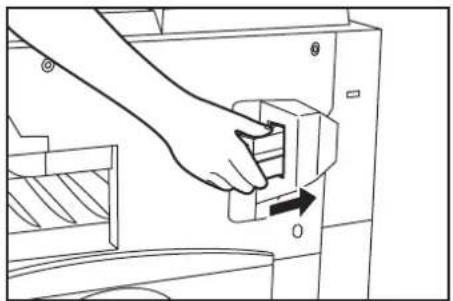
NOTE
When you are using the key counter function, copies cannot be made unless the Key Counter is inserted into the copier. If the Key Counter is not securely inserted into its opening, "Insert key counter." will appear in the message display.
(6) Printer Kit
If the Printer Kit is installed in your copier, you can use the copier as a printer. For more details, refer to the Operation Guide for the Printer Kit.
Inch specifications
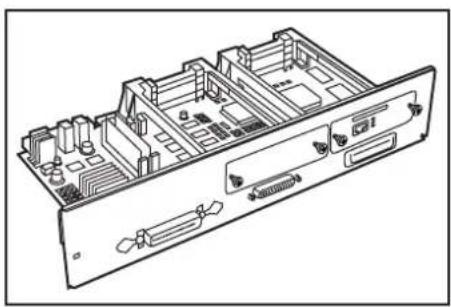
Metric specifications
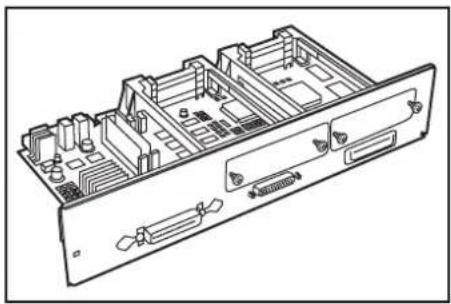
(7) Fax Kit
If the Fax Kit is installed in your copier, you can use the copier as a facsimile. For more details, refer to the Operation Guide for the Fax Kit.
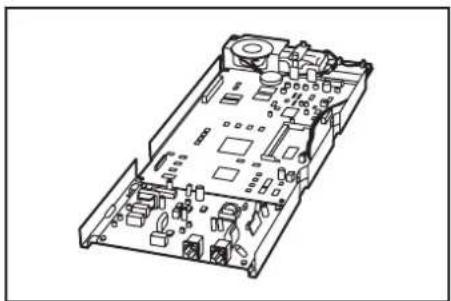
(8) Network Scanner Kit
If the Network Scanner Kit is installed in your copier, you can use the copier as a scanner from multiple computers over your network. For more details, refer to the Operation Guide for the Network Scanner Kit.
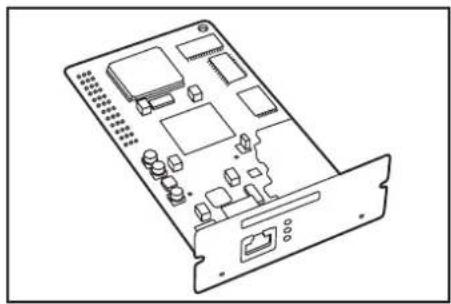
1. If one of the following messages is displayed
When any of the following messages appears on the message display, take the indicated action.
| Message | Procedure | Reference page |
| “Close xxx cover.”“CLOSE xxx COVER.” | The indicated cover is open. Close all covers securely. | —— |
| “Add paper in drawer.”“ADD PAPER IN DRAWER.” | There is no paper in the indicated drawer. Load paper of the indicated size. | 3-1 |
| “Set drawer.”“CLOSE PAPER DRAWER.” | One of the drawers is not closed properly. First pull it out, and then push it all the way back in. | —— |
| “Install duplex unit.”“INSTALL DUPLEX UNIT.” | (Only in duplex copiers) The Duplex Unit is not inserted properly. First pull it out, and then push it all the way back in. | —— |
| “Please Open Eject Tray”“THICK PAPER MODE PROGRAM'D” | “2 Side eject” is selected under copy default setting “29 Eject destination” (page 7-22), or the “|1| Transparency mode” or “|2| Thick paper mode” are selected (page 3-5), but the copy eject tray is closed. Open the copy eject tray. | —— |
| “Drawer inoperable. Call for service.”“PAPER DRAWER IS OUT OF ORDER. SELECT OTHER PAPER DRAWER.” | The drawer currently in use is out of order and cannot be used for the moment. Contact your service representative or an authorized service center as soon as possible. If you want to continue copying, use another drawer. | —— |
| “Check paper size.”“CHECK PAPER SIZE.” | There is no paper loaded of a size that can be used in the currently selected mode. Check the paper. | —— |
| “Reposi ori. or change drawer.”“REPOSITION ORIGINAL OR SELECT OTHER PAPER DRAWER.” | The orientation of the original and the selected paper are different. Change the orientation of the original. If you press the Start key without changing the original, copying will be performed at a 100% (1:1) magnification ratio. | —— |
| “Check bypass size setting. Differ from actual size.”“CHECK PAPER: NOT REGIST'D SIZE” | The size of the paper set on the multi-bypass tray and that loaded in the drawer are different. press the Stop/Clear key to delete the error message. Make sure the size of paper on the multi-bypass tray and that loaded in the drawer are the same and restart the copy operation from the beginning. | 3-4 |
| "Change bypass paper size" "CHANGE BYPASS PAPER SIZE." | Copying is not possible at the paper size selected for the multi-bypass tray. Change the paper size setting. | 3-4 |
| "Exceeded copy quantity limit." "COPY LIMIT REACHED. NO COPYING" | The number of copies made under your department code has reached the limit that was set under the copy management mode and copying is no longer possible with that code. Use the copy management mode to clear the copy count. | 7-1 |
| "Set toner container." "SET TONER CONTAINER." | One or more of the toner containers is not set or are not set properly. Set the toner containers properly. | 3-8 |
| "Ready to copy. Add toner. (KCMY)" "READY TO COPY. ADD TONER. (KCMY)" | There is insufficient toner left in the indicated toner container. Replace the corresponding toner cartridge as soon as possible (C = cyan, M = magenta, Y = yellow, K = black). | 3-8 |
| "Add toner to resume copying. (KCMY)" "ADD TONER TO RESUME COPYING. (KCMY)" | The copier has run out of toner of the color indicated. Replace the corresponding toner cartridge immediately (C = cyan, M = magenta, Y = yellow, K = black). | 3-8 |
| "Ready to copy. Time to replace the oil kit" "READY TO COPY. TIME TO REPLACE THE OIL KIT." | It is almost time to replace the oil kit. Replace the oil roller as soon as possible. | 3-13 |
| "Replace the oil kit now. Unable to copy." "REPLACE THE OIL KIT NOW. CANNOT COPY." | Replacement of the oil kit is required. Replace the oil roller immediately. | 3-13 |
| "Check waste toner tank." "CHANGE WASTE TONER TANK." | · The waste toner tank is full. Replace the waste toner tank. · The waste toner tank is not set properly. Set the toner waste toner tank properly. | 3-8 |
| "Call for service." "CALL FOR SERVICE." | Open and then close the front cover. If this message still remains, make a note of the number that displayed with the "C", turn the main switch OFF (Φ) and contact your service representative or authorized service center. | — |
| "System error. Main switch off / on." "SYSTEM ERROR. MAIN SWITCH OFF / ON." | An error has occurred. Turn the main switch OFF (Φ) and then back ON ( | ) again. | — |
| "Time for maintenance" "TIME FOR MAINTENANCE" | Periodic maintenance is required to keep your copier in good condition. Contact your service representative or authorized service center as soon as possible. | — |
| "Memory is full." "MEMORY IS FULL." | The copier's memory is full. Select whether you want to print out that data that is already scanned or delete all of that data. It will not be possible to copy or scan another original until one of these two operations is performed. | — |
| "Paper misfeed.""PAPER MISFEED." | If paper misfeeds, the copier will stop, and the location of the misfeed will be indicated on the message display. Leave the main switch ON ( | ) and follow the appropriate procedure to remove the jammed paper. | 9-4 |
| "Reset all originals in feeder.""Misfeed in feeder. Remove original(s).""REMOVE ORIGINAL FROM FEEDER.""MISFEED IN FEEDER. REMOVE ORIGINAL(S)." | An original has jammed in the optional DF. Leave the main switch ON ( | ) and follow the appropriate procedure to remove the jammed original. | 9-14 |
| "Duplex tray inoperable, call for service.""DUPLEX UNIT IS OUT OF ORDER. 1-SIDED COPYING IS POSSIBLE." | The Duplex Unit is out of order and 2-sided copying is not possible. Contact your service representative or authorized service center immediately. | — |
| "Paper capacity exceeded.Remove paper from Inner.""PAPER CAPACITY EXCEEDED. REMOVE PAPER FROM INNER TRAY." | There are already 250 sheets of paper stored in the copy storage table. Remove the paper and resume copying. | 4-4 |
| "Paper capacity exceeded.Remove paper from Finisher.""PAPER CAPACITY EXCEEDED. REMOVE PAPER FROM FINISHER." | There are already 250 sheets of paper stored in the optional Document Finisher. Remove the paper and resume copying. | 8-4 |
| "Remove paper from Finisher inner tray.""REMOVE PAPER FROM INNER TRAY OF FINISHER." | Paper has been misfed inside the optional Document Finisher. Refer to the Operation Guide for the Document Finisher and remove the jammed paper. | — |
| "Out of staples. Add staples.""STAPLER EMPTY. ADD STAPLES." | There are no staples left in the optional Document Finisher. Refer to the Operation Guide for the Document Finisher and load staples. | — |
| "Check punch waste tank.""PUNCH HOLE CONTAINER FULL." | · The hole punch waste container in the optional Document Finisher is full. Refer to the Operation Guide for your Document Finisher and dispose of the waste hole punch.· The hole punch waste container in the optional Document Finisher is not set properly. Refer to the Operation Guide for your Document Finisher and set the hole punch waste container properly. | — |
| "Cannot staple this size.""CANNOT STAPLE THIS PAPER SIZE." | Stapling of small size paper, such as 5 1/2 " x 8 1/2 " [A5R and B5R], is not possible. Refer to the Operation Guide for the Document Finisher. | — |
| "Cannot sort this size.""CANNOT SORT THIS PAPER SIZE." | Small sizes such as 5 1/2 " x 8 1/2 " [A5R and B5R] cannot be used in the Document Finisher under the sort mode. Use the copy storage table or the copy eject tray when copying onto such paper. | — |
2. If paper jams
If a paper misfeed occurs, copying will stop. A message will appear about the misfeed and the location of the misfeed will be indicated on the operation panel. Leave the main switch ON ( | ) and refer to “(3) Removal procedures” on page 9-5 to remove the jammed paper.
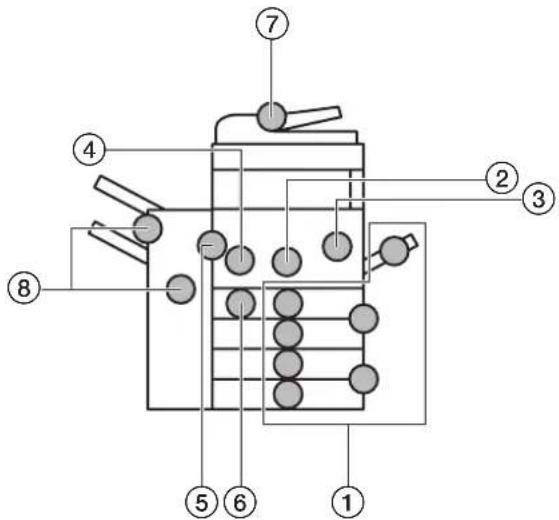
(1) Misfeed location indicators
① Misfeed in the paper feed area (page 9-5)
② Misfeed in the paper conveyor section (page 9-7)
③ Misfeed in the transfer section (page 9-8)
④ Misfeed in the fixing section (page 9-10)
⑤ Misfeed inside the left cover or near the copy storage table (page 9-12)
⑥ Misfeed in the Duplex Unit (Only in duplex copiers) (page 9-13)
⑦ Misfeed in the optional SRDF (page 9-14)
⑧ Misfeed in the optional Document Finisher (page 9-15)
(2) Cautions

WARNING
High voltage is present in the charger section. Take sufficient care when working in this area, as there is a danger of electrical shock.

CAUTION
The copier's fixing unit is extremely hot. Take sufficient care when working in this area, as there is a danger of getting burned.
* Do not reuse misfed paper.
* If paper is torn during removal, be sure to remove any loose scraps of paper from inside the copier, or they could cause another misfeed later.
* Once misfed paper has been removed, warm-up will begin, the misfeed message will disappear, and the copier will return to the same settings prior to the misfeed.
* If a misfeed occurs in the optional Document Finisher, it is not necessary to add the misfed copy to the other copies in the Document Finisher tray, as that copy will be automatically made again.
(3) Removal procedures
①Misfeed in a paper feed area
● Misfeed in a drawer
If "Paper misfeed in drawer. Remove paper." ["MISFEED IN PAPER DRAWER. REMOVE PAPER."] is displayed and any of the misfeed location indicators shown in the illustration light, a misfeed has occurred in the indicated drawer. Perform the following procedure to remove the jammed paper.
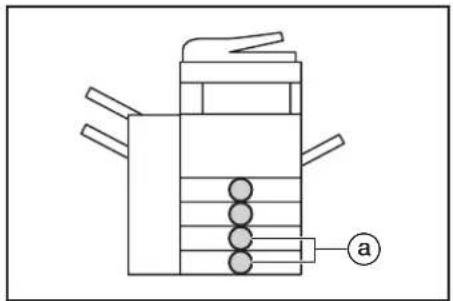
* If the optional Paper Feeder is installed in your copier and the jam has occurred in that unit, the misfeed location indicators indicated by the ① in the illustration will light. Follow the same procedure to remove the jammed paper.
1 Pull out the drawer currently being used.
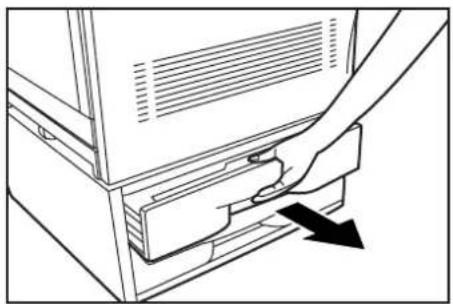
2 Remove the jammed paper without tearing it.
* If the paper does happen to tear, remove any loose scraps from inside the copier.
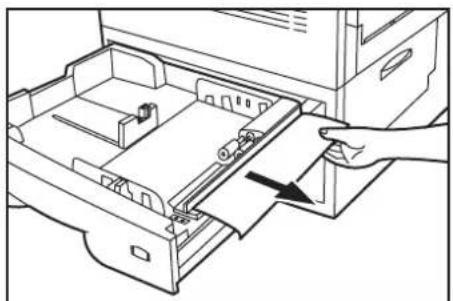
3 Push the drawer back in firmly.
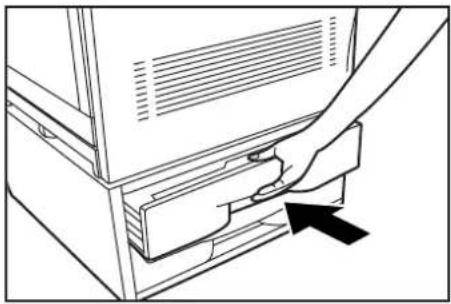
● Misfeed inside the right side drawer cover
If "Paper misfeed. Open Upper Feed Cover." ["PAPER MISFEED. OPEN UPPER FEEDER COVER."] is displayed and either of the misfeed location indicators shown in the illustration lights, a misfeed has occurred inside the right side drawer cover. Perform the following procedure to remove the jammed paper.
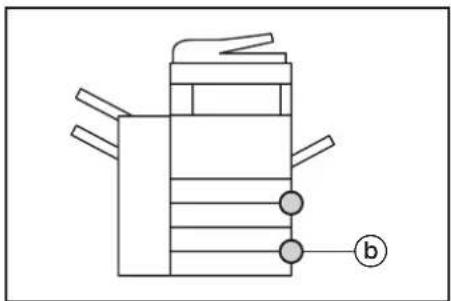
* If the optional Paper Feeder is installed in your copier and the jam has occurred in that unit, "Paper misfeed. Open second right cover." ["PAPER MISFEED. OPEN RIGHT 2 COVER."] will be displayed and the misfeed location indicator indicated by the ⑥ in the illustration will light. Follow the same procedure to remove the jammed paper.
1 Open the right side drawer cover for the drawer indicated by the lit misfeed location indicator.
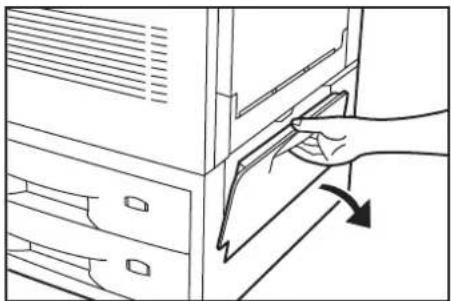
2 Remove the jammed paper without tearing it.
* If the paper does happen to tear, remove any loose scraps from inside the copier.
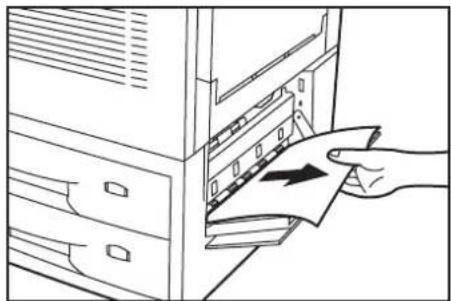
3 Pull out the indicated drawer.
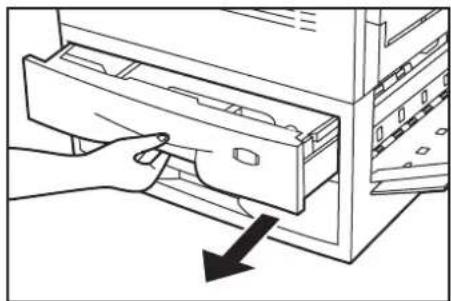
4 If there is any jammed paper inside that drawer, remove it without tearing it.
* If the paper does happen to tear, remove any loose scraps from inside the copier.
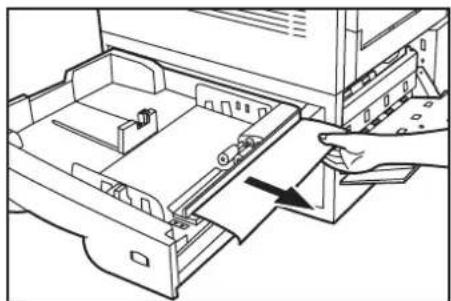
5 Push the drawer back in firmly and close the right side drawer cover.
● Misfeed in the multi-bypass tray
If "Paper misfeed in stack bypass. Remove paper." is displayed and the misfeed location indicator shown in the illustration lights, a misfeed has occurred in the multi-bypass tray. Perform the following procedure to remove the jammed paper.
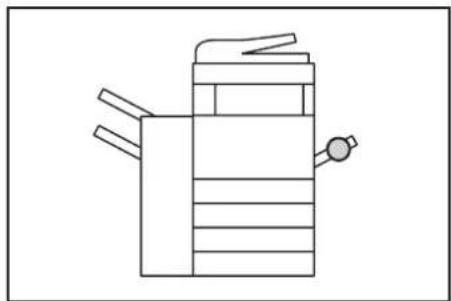
1 Remove all of the paper remaining in the multi-bypass tray.
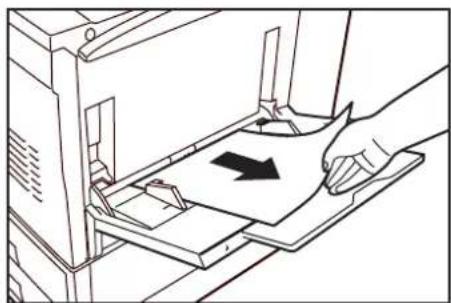
2 Reset the paper in the multi-bypass tray.
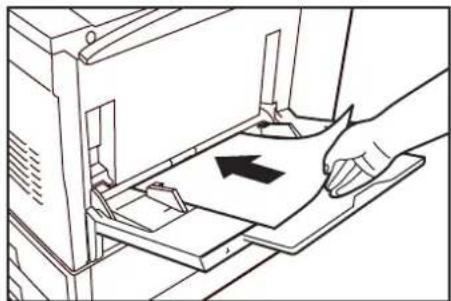
3
Open and then close the front cover.
The misfeed message will disappear and copying will start again.
* Be sure to hold both the left and right sides of the front cover and close it securely.
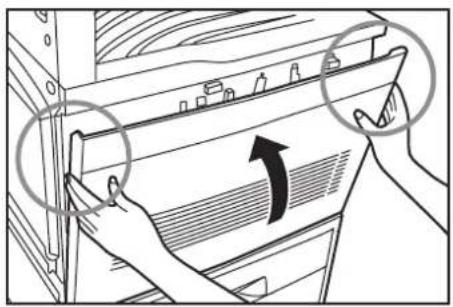
②Misfeed in the paper conveyor section
If "Paper misfeed. Open Front Cover." is displayed and the misfeed location indicator shown in the illustration lights, a misfeed has occurred in the paper conveyor section. Perform the following procedure to remove the jammed paper.

1
Open the front cover.
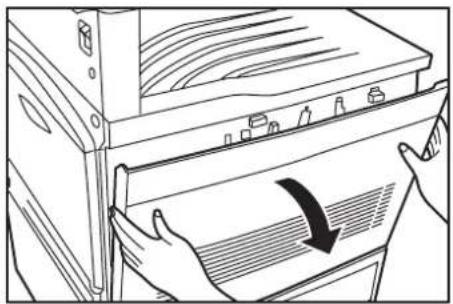
2
Operate the paper conveyor release lever and pull the paper conveyor out towards you as far as it will go.
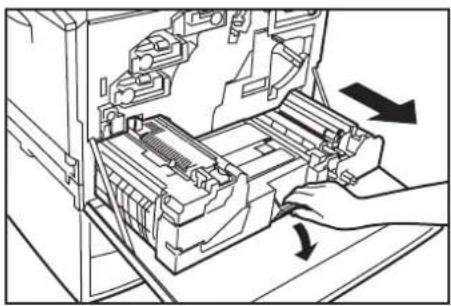

WARNING
High voltage is present in the charger section. Take sufficient care when working in this area, as there is a danger of electrical shock.

CAUTION
The copier's fixing unit is extremely hot. Take sufficient care when working in this area, as there is a danger of getting burned.
3
Push the green release lever (shown as ① in the illustration) down to the right, and remove the jammed paper without tearing it.
* If the paper does happen to tear, remove any loose scraps from inside the copier.
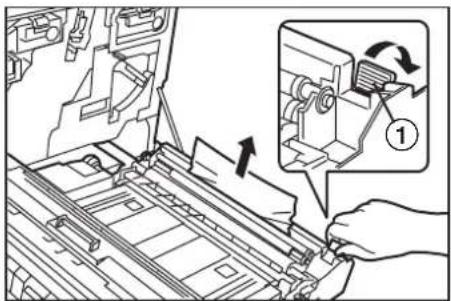
4
If paper can be seen on top of the conveyor section as well, remove the paper without tearing it.
* If the paper does happen to tear, remove any loose scraps from inside the copier.
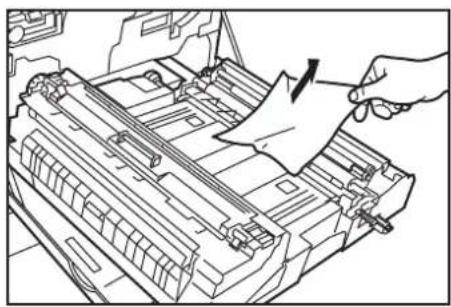
5
Replace the paper conveyor in its original position in the copier.

6
Close the front cover.
* Be sure to hold both the left and right sides of the front cover and close it securely.
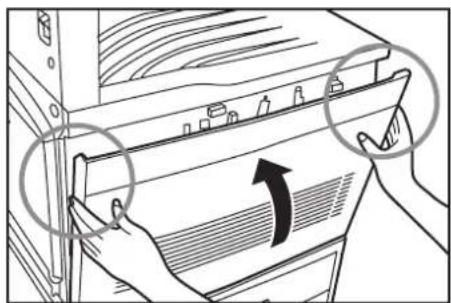
③
Misfeed in the transfer section
If "Paper misfeed. Open Front Cover." is displayed and the misfeed location indicator shown in the illustration lights, a misfeed has occurred in the transfer section. Perform the following procedure to remove the jammed paper.
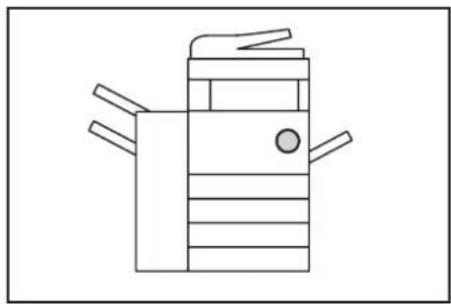
1
Open the front cover.
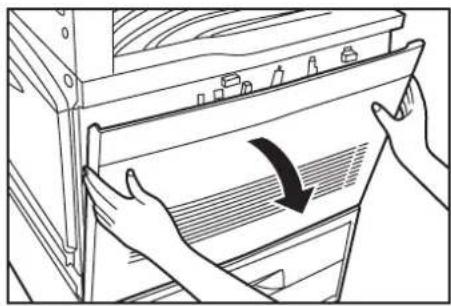
2
Operate the paper conveyor release lever and pull the paper conveyor out towards you as far as it will go.


WARNING
High voltage is present in the charger section. Take sufficient care when working in this area, as there is a danger of electrical shock.

CAUTION
The copier's fixing unit is extremely hot. Take sufficient care when working in this area, as there is a danger of getting burned.
3 Turn the green transfer unit release lever to the left until it reaches a vertical position.
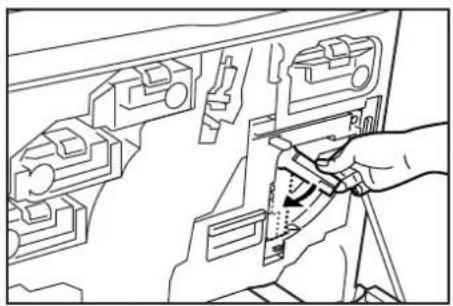
4 Grasp the transfer unit handle (shown as ① in the illustration) and pull the transfer unit out towards you as far as it will go.
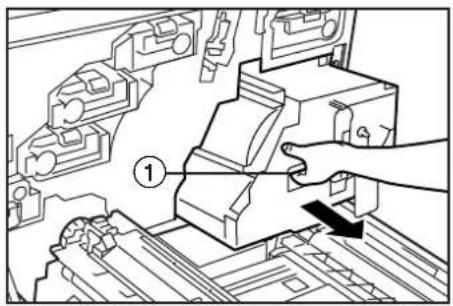
5 Remove the jammed paper without tearing it. If the paper is difficult to remove at all, turn the black paper feed dial (shown as ② in the illustration) towards you. The misfed paper will be fed out to a location that makes it easier to remove.
* If the paper does happen to tear, remove any loose scraps from inside the copier.
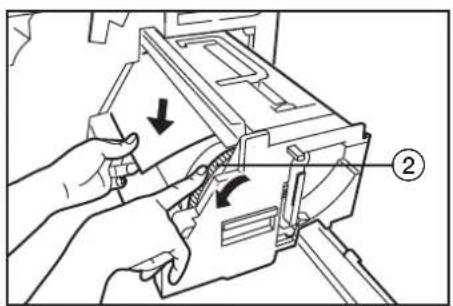
IMPORTANT!
The drum (shown as ③ in the illustration) is extremely sensitive to dirt. Do not to touch the drum with your hands.
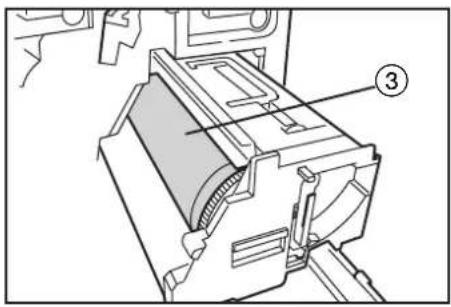
6 Replace the transfer unit in its original position in the copier.
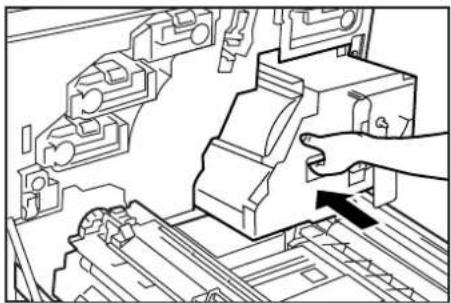
7 Push down on the release lock (shown as ④ in the illustration) and replace the transfer unit release lever into its original position in the copier.
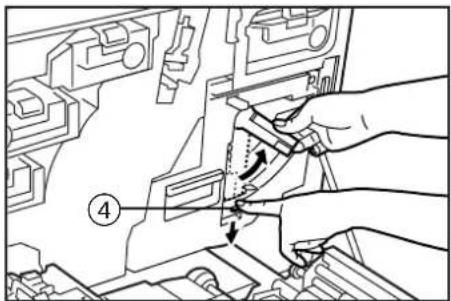
8 Replace the paper conveyor in its original position in the copier.
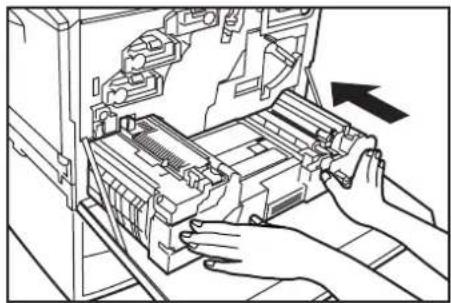
9 Close the front cover. * Be sure to hold both the left and right sides of the front cover and close it securely.
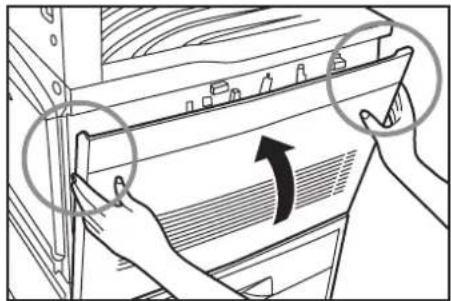
④Misfeed in the fixing section
If "Paper misfeed. Remove paper from Fixing unit." is displayed and the misfeed location indicator shown in the illustration lights, a misfeed has occurred in the fixing section. Perform the following procedure to remove the jammed paper.
1 Open the front cover.
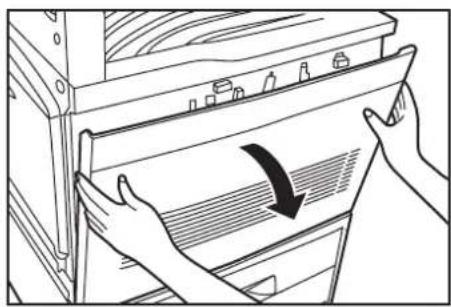
2 Operate the paper conveyor release lever and pull the paper conveyor out towards you as far as it will go.
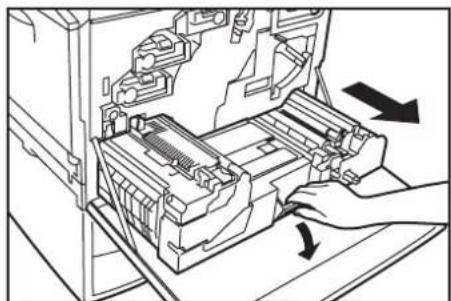
WARNING
High voltage is present in the charger section. Take sufficient care when working in this area, as there is a danger of electrical shock.
CAUTION
The copier's fixing unit is extremely hot. Take sufficient care when working in this area, as there is a danger of getting burned.
3 Grasp the green handle (shown as ① in the illustration) to the left cover to the fixing unit and open that cover.
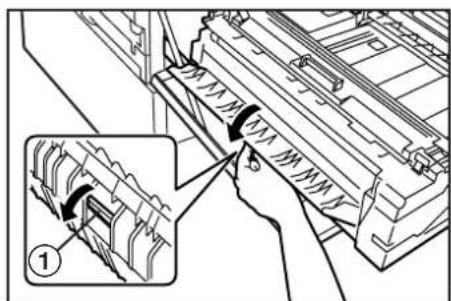
4 While holding the 2 green lock-levers (shown as ② in the illustration) down towards you, open the upper cover to the fixing unit.
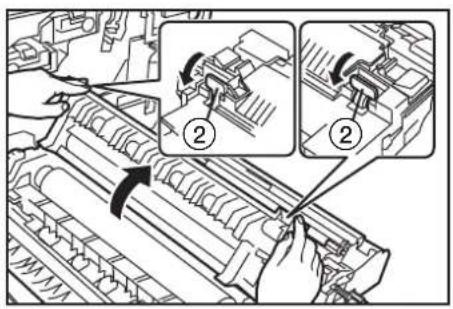
5 Grasp the handle (marked with an "A" and shown as ③ in the illustration) to the inner cover and open that cover.
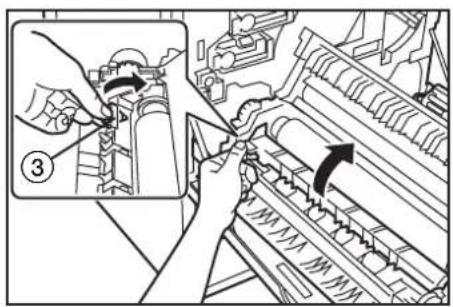
6 Remove the jammed paper without tearing it. If the paper is difficult to remove at all, turn the green paper feed dial (shown as ④ in the illustration). The misfed paper will be fed out to a location that makes it easier to remove. * If the paper does happen to tear, remove any loose scraps from inside the copier.
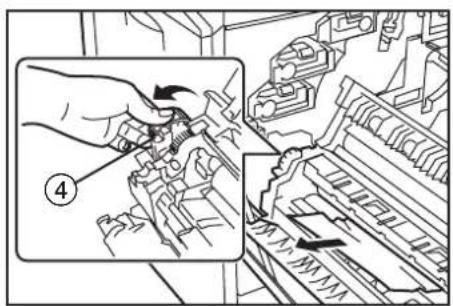
7 Close all open covers.
* Be sure to hold the middle handle (marked with a "B" and shown as ⑤ in the illustration) when you close the inner cover to the fixing unit.
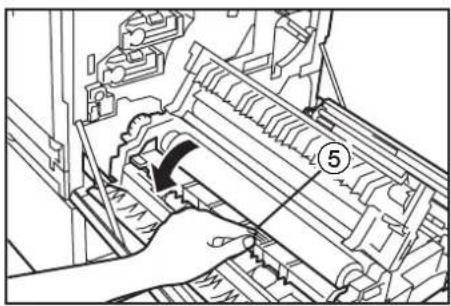
8 Replace the paper conveyor in its original position in the copier.
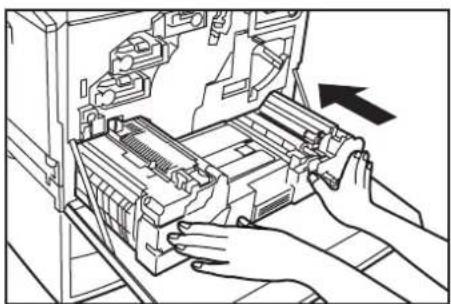
Close the front cover.
* Be sure to hold both the left and right sides of the front cover and close it securely.
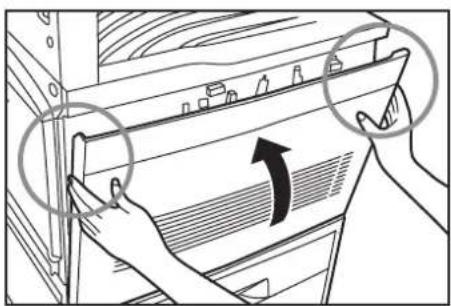
⑤Misfeed inside the left cover or near the copy storage table
If "Paper misfeed. Open Left Side Cover." ["PAPER MISFEED. OPEN LEFT COVER."] is displayed and the misfeed location indicator shown in the illustration lights, a misfeed has occurred inside the left cover or by the copy storage table. Perform the following procedure to remove the jammed paper.
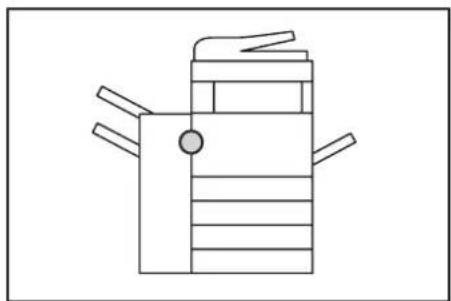
1 Remove all of the copies from the copy storage table.
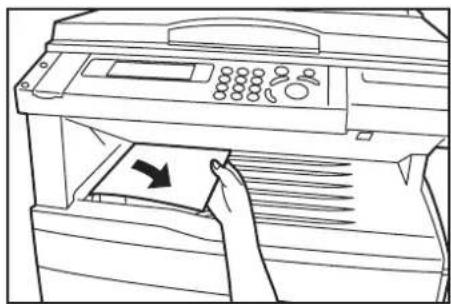
2 If necessary, open the copy eject tray.
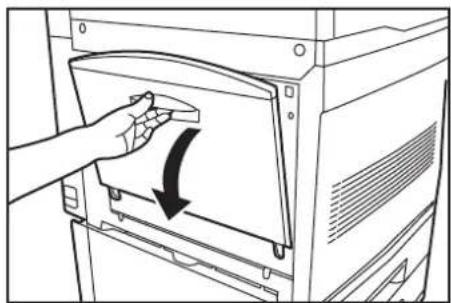
3 Open the left cover.
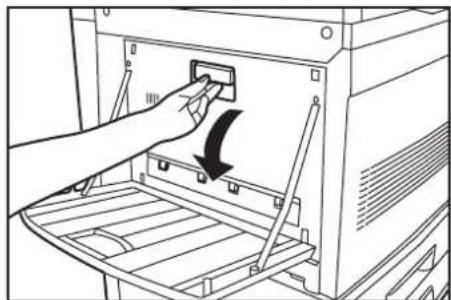
4 Remove the jammed paper without tearing it. * If the paper does happen to tear, remove any loose scraps from inside the copier.
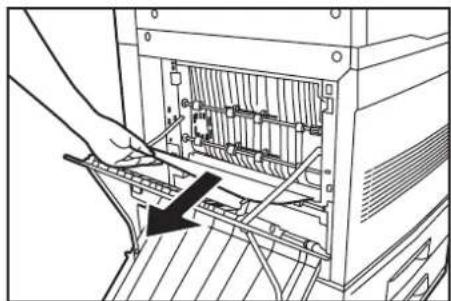
NOTE
If the paper is difficult to remove at all, turn the green paper feed dial (shown as ① in the illustration). The misfed paper will be fed out to a location that makes it easier to remove.

5 Close the left cover (and the copy eject tray if necessary).
⑥Misfeed in the Duplex Unit (Only in duplex copiers)
If "Paper misfeed. Open Duplex Unit Cover." ["PAPER MISFEED. OPEN COVER DUPLEX UNIT."] is displayed and the misfeed location indicator shown in the illustration lights, a misfeed has occurred in the Duplex Unit. Perform the following procedure to remove the jammed paper.
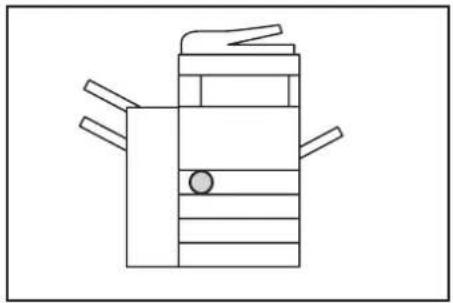
1 Pull out the Duplex Unit.
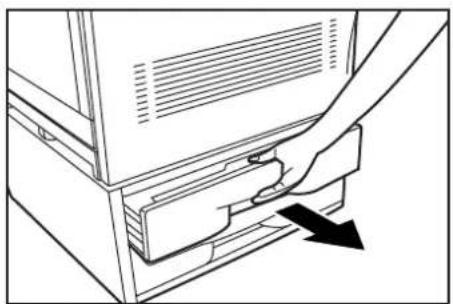
2 Open the Duplex Unit cover (shown as ① in the illustration) and remove the jammed paper without tearing it.
* If the paper does happen to tear, remove any loose scraps from inside the copier.
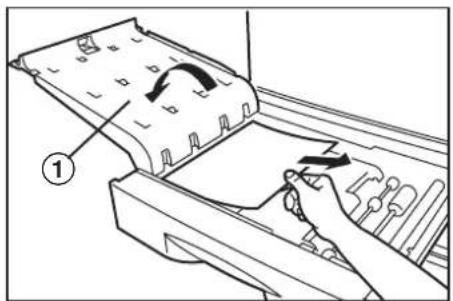
3 Open the reversing section cover (shown as ② in the illustration) and remove the jammed paper without tearing it. * If the paper does happen to tear, remove any loose scraps from inside the copier.
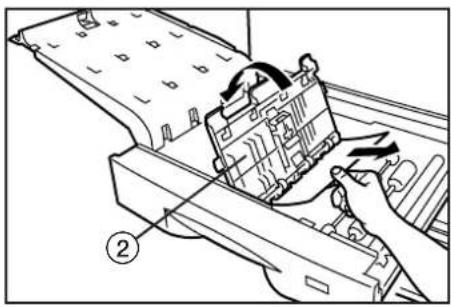
4 Close all open covers and replace the Duplex Unit in its original position in the copier.
⑦Misfeed in the optional SRDF
If "Misfeed in feeder. Remove original(s)." is displayed and the misfeed location indicator shown in the illustration lights, an original has misfed in the SRDF. In this case, the original set indicator will flash red. Perform the following procedure to remove the jammed original.
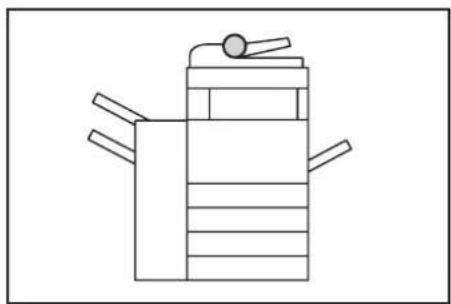
1 Remove all of the originals remaining in the original table.
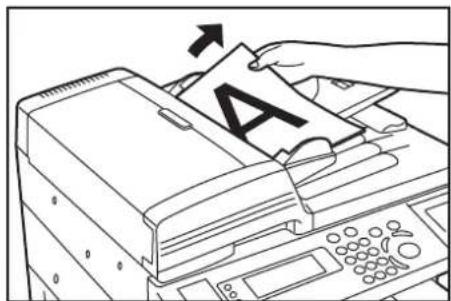
2 Remove all of the originals that have been ejected onto the original eject table.
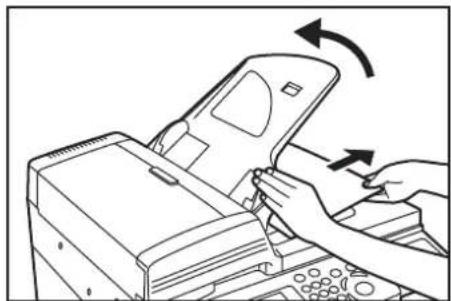
3 Open the left cover to the SRDF.
* Be sure to hold the handle in the middle of the cover when opening it.
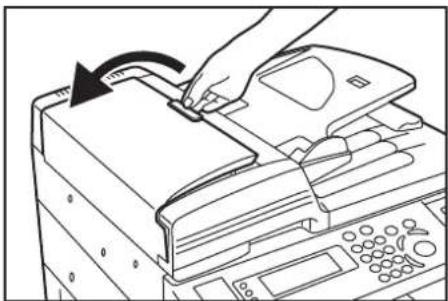
4 Remove the jammed original without tearing it.
* If the original does happen to tear, remove any loose scraps from inside the SRDF.
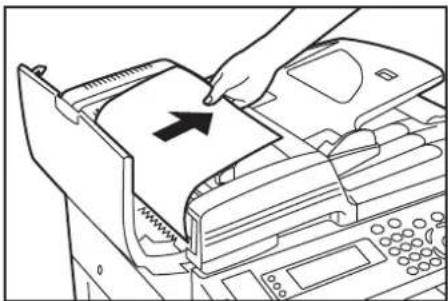
5 Open the paper conveyor cover (shown as ① in the illustration).
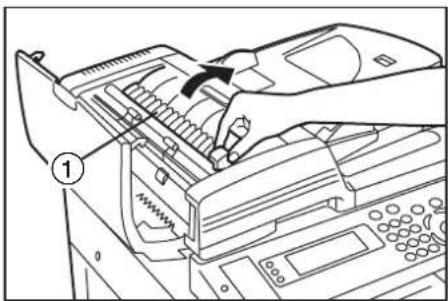
6
If there are any originals there, remove the jammed original without tearing it.
* If the original does happen to tear, remove any loose scraps from inside the SRDF.
* If the original is difficult to remove at all, turn the green original feed dial (shown as ② in the illustration). The misfed original will be fed out to a location that makes it easier to remove.
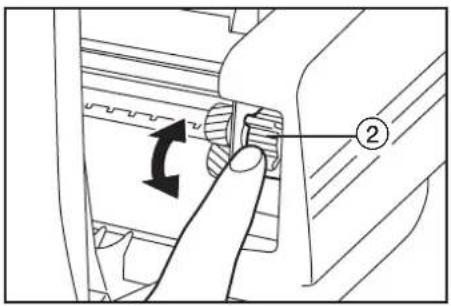
7
Close the paper cover.
8
Close the left cover. The original set indicator should go out. Reset the originals and start copying again.
* Be sure to hold the handle in the middle of the cover when closing it.
⑧Misfeed in the optional Document Finisher
If either of the misfeed location indicators shown in the illustration lights, a misfeed has occurred in the Document Finisher. Refer to the Operation Guide for the Document Finisher and remove the jammed paper.
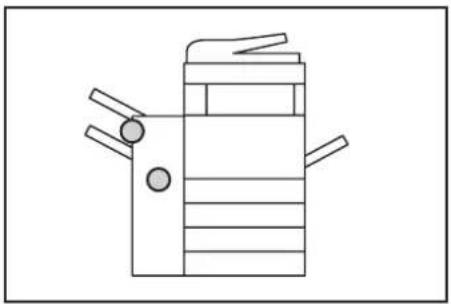
3. If other trouble occurs
If trouble occurs with your copier, carry out the applicable checkpoints and procedures indicated on the following pages.
If the trouble persists, contact your service representative or authorized service center.
| Trouble | Checkpoint | Procedure | Reference page |
| Nothing lights on the operation panel when the main switch is turned ON. | Is the power plug connected to an AC outlet? | Connect the plug to an AC outlet. | — |
| No copies come out when the Start key is pressed. | Is there an error message in the message display? | Check the appropriate response to that message, and perform the corresponding procedure. | 9-1 |
| The copies come out blank. | Were the originals set correctly? | When setting originals on the platen, set them face-down and align them with original size indicators.When setting originals in the optional DF, set them face-up. | 4-18-2 |
| The copies come out too light. | Is the copier in the auto exposure mode? | In order to adjust the overall exposure level, perform the “Auto exposure adjustment” procedure. | 7-17 |
| Is the copier in the manual exposure mode? | Adjust the exposure to the correct level using the copy exposure adjustment keys. | 4-3 | |
| To adjust the overall exposure, change the default value for manual exposure in each image quality mode. | 7-187-19 | ||
| Is a message that tells you to add toner displayed? | Replace the corresponding toner containers. | 3-8 | |
| Is the copy paper wet? | Replace the copy paper with new paper. | 3-1 | |
| The copies come out too dark. | Is the copier in the auto exposure mode? | In order to adjust the overall exposure level, perform the “Auto exposure adjustment” procedure. | 7-17 |
| Is the copier in the manual exposure mode? | Adjust the exposure to the correct level using the copy exposure adjustment keys. | 4-3 | |
| To adjust the overall exposure, change the default value for manual exposure in each image quality mode. | 7-187-19 | ||
| A moiré pattern (the phenomenon where the dots do not appear to be lined up properly but seem to be grouped together in patterns) appears on the copies. | Is the original that you are copying a printed photograph? | Change the image quality setting to the printed photo mode. | 4-3 |
| The color of the originals and the copies seem different. | Are the color adjustment settings correct? | Press the Color Edit key and perform the appropriate color adjustment. | 5-25-35-45-55-7 |
| Perform the auto color adjustment procedure. | 7-22 | ||
| The copies are not clear. | Did you select an image quality mode that was appropriate to the original being copied? | Select an appropriate image quality mode. | 4-3 |
| The copies are dirty. | Is the platen or the original cover dirty? | Clean the platen and/or the original cover. | 10-1 |
| The copies are blurred or faded. | Is the copier being used in an environment of high humidity? | Perform the drum refresh procedure. | 7-23 |
| The copy image is skewed. | Were the originals set correctly? | When setting originals on the platen, align them securely with appropriate original size indicators.When setting originals in the optional DF, align the original insert guides securely before setting the originals. | 4-18-2 |
| Was the paper set correctly? | Set paper securely against the guide plates. | 3-1 | |
| Paper jams occur often. | Is the copy paper loaded properly in the drawer? | Load the paper properly. | 3-1 |
| Depending upon the type and condition of the copy paper, finished copies can curl and may be the cause of paper jams. Remove the paper from the drawer, turn it over, and set it in the drawer again. | — | ||
| Is the copy paper curled, folded over or wrinkled? | Replace the copy paper with new paper. | 3-1 | |
| Is there any jammed paper or loose scraps of paper remaining inside the copier? | Carry out the appropriate procedure to remove the paper. | 9-4 | |
| Does the size of the paper actually set in the multi-bypass match the size you selected in the message display? | Make sure the size of the paper set in the multi-bypass matches the size you select in the message display. | 3-4 | |
| Black lines appear on copies when copying from the optional DF. | Is the slit glass dirty? | Clean the slit glass. | 10-1 |
Section 10 MAINTENANCE AND OPERATION INFORMATION
1. Cleaning the copier

CAUTION
For safety purposes, ALWAYS remove the power plug from the outlet when performing cleaning operations.
● Cleaning the original cover
Lift open the original cover. Wipe the back side of the original cover with a soft cloth dampened with alcohol or mild detergent.
* Never use thinner or other organic solvents to clean the original cover.
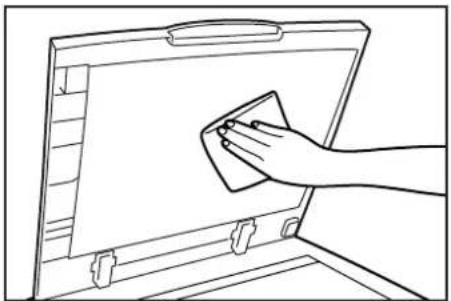
● Cleaning the platen
Lift open the original cover. Wipe the platen with a soft cloth dampened with alcohol or mild detergent.
* Never use thinner or other organic solvents to clean the platen.

* If copies appear soiled, such as black lines appearing on the copy image, while using the optional DF, the slit glass a is dirty.
Wipe the slit glass ⓐ with the soft cloth dampened with alcohol or mild detergent.
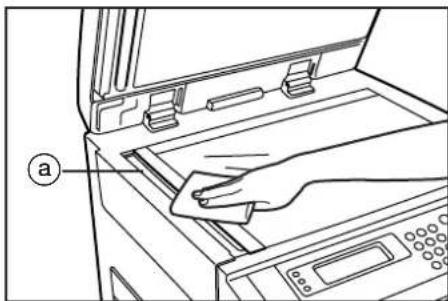
* See "3. Cleaning the charger" on page 3-11 for the procedure to clean the interior portion of the copier.
2. Specifications
| Type | Desktop |
| Original table | Fixed type |
| Copying system | Indirect electrostatic, internal transference drum |
| Acceptable originals | Sheets of paper, books and 3-dimensional objects (Maximum size: 11" x 17" [A3]) |
| Copy sizes | 5 1/2" x 8 1/2", 8 1/2" x 11", 11" x 8 1/2", 8 1/2" x 14", 11" x 17" and 12" x 18" [A6R, B6R, A5R, B5, A4R, A4, B4, A3, A3 wide (305 mm x 457 mm) and Folio]Print margin loss: 0.5 mm – 5.5 mm |
| Copying speed | Full color: 8 copies/min., Monochrome or monocolor: 30 copies/min.During 2-sided (duplex) copying – Full color: 4 copies/min.,Monochrome or monocolor: 6 copies/min. |
| Warm-up time | Within 300 secs. (at room temperature of 68°F/20°C, humidity 65%RH) |
| First copy speed | Full color: Approx. 24 secs.Monochrome or monocolor: Approx. 10.8 secs. |
| Available magnification ratios | Any 1% increment between 25% and 400% or standard pre-set ratios |
| Memory | Standard copiers: 128 MB of Bitmapping memoryDuplex copiers: 256 MB of Bitmapping memory and 10 GB of image storage memory |
| Resolution | Reading: 600 x 600 dpiWriting: 600 x 600 dpi |
| Paper feed system | Automatic feeding from drawers (Standard copiers: 2 drawers, Duplex copiers: 1 drawer; each with a 500 sheet capacity [75 g/m2 – 90g/m2]) or manual feed from the multi-bypass tray (150 sheet capacity [75 g/m2 – 90g/m2]) |
| Acceptable copy paper | Drawers and Duplex Unit: Standard copy paper (75 g/m2 – 90g/m2)Multi-bypass tray: Standard copy paper (60 g/m2 – 220 g/m2), special paper (Color paper, OHP transparencies, etc.) and envelopes [only available when the optional printer functions are used] |
| Continuous copying | 1 – 999 sheets |
| Light source | Rare gas lamp |
| Developing system | Dry dual-element process |
| Fixing system | Heat roller |
| Cleaning system | Blade and fur brush |
| Photoconductor | a-Si (amorphous silicon) |
| Standard functions and modes | Self-diagnosis function, preheat function, auto exposure adjustment function, original size detection function, auto paper selection mode, original mode, mono-color mode, auto color selection adjustment function, color adjustment functions, auto magnification selection mode, zoom mode, preset zoom mode, XY zoom mode, interrupt copying, 2-sided copy modes-1, page separation modes, margin mode-2, border erase modes-2, invert mode, mirror image mode, print page numbers mode-2, transparency + backing sheet mode-2, presentation mode-2, insert sheet modes-2, layout modes-2, booklet mode (sheet originals)-1, booklet mode (book originals)-1, BW/Selection mode-2, poster mode-2, filing mode-2, program function, recall function, sort mode-2, copy management function-2, language selection function*1: Only available in duplex copiers*2: Requires the optional Memory Copy Board in standard copiers |
| Power source | 120V AC, 60 Hz, 12 A220V – 240V AC, 50/60 Hz, 6.5 A (Max) |
| Power consumption | Maximum rated power consumption 1440 W |
| Dimensions (W) x (D) x (H) | 23 1/4" x 23" x 33 9/16"590 mm x 585 mm x 853 mm |
| Weight | Approx. 253 lbs. / Approx. 115 kg (Standard copier with the optional Paper Feeder installed) |
| Noise emission | ≤ 70 dB(A) |
| Required space (W) x (D) | 50 11/16" x 23"1288 mm x 585 mm |
| Optional equipment | SRDF (Sheet-thru Reverse Document Feeder), Paper Feeder, Document Finisher, Memory Copy Board*, Key Counter, Printer Kit,Fax Kit (only available in inch specification copiers) and Network Scanner Kit*: Standard equipment in duplex copiers |
(Specifications are subject to change without notice.)
3. Installing the optional equipment
This section shows where to install the optional units for this copier. For more details, refer to the Operation Guide for the corresponding optional unit.
●Available optional units
The following optional units can be installed on your copier.
![graph TD A["SRDF (Sheet-thru Reverse Document feeder)"] --> B["Original Cover Key Counter"] C["Document Finisher"] --> B D["Paper Feeder"] --> B E["Printer Kit"] --> B F["Network Scanner Kit"] --> B G["Memory Copy Board"] --> B H["Fax Kit"] --> B I["• Inch specifications • Metric specifications"] --…](/content/2026/05/768513/images/9702d7bef507d7832d21caf5138fe76c1bf8666d0a4f95b0f4846d0662cc0826.jpg)
SRDF (Sheet-thru Reverse Document Feeder)
Automatically feeds and scans multiple sheet-originals one by one. Two-sided originals are automatically turned over so that both sides can be scanned and copied.
Original Cover
Open/close this cover when you are setting the original on the platen.
Paper Feeder
The Paper Feeder (two 250-sheet capacity drawers) can be used in addition to the standard drawers. Paper is loaded in these drawers in the same manner as with the included drawers. This Paper Feeder includes casters that are attached to its bottom.
Document Finisher
The Document Finisher stores a large quantity of copies and can sort multiple copy sets by shifting their position of ejection. It can also staple and punch the sorted copy sets.
Memory Copy Board
The Memory Copy Board is required in order to use the various modes and functions (Margin mode, Border erase modes, Print page numbers mode, Transparency + backing sheet mode, Presentation mode, Insert sheet modes, Layout modes, Color/BW selection mode, Poster mode, Filing mode, Sort mode, Rotate copy function, Copy management function) of your copier.
* The Memory Copy Board is standard in duplex copiers.
Key Counter
The Key Counter is used for checking copier use and is convenient for centralized management of the number of copies made by each department as well as the total number of copies made overall on the machine.
Printer Kit
If the Printer Kit is installed in your copier, you can use the copier as a printer.
Fax Kit (only available in inch specification copiers)
If the Fax Kit is installed in your copier, you can use the copier as a facsimile.
Network Scanner Kit
If the Network Scanner Kit is installed in your copier, you can use the copier as a scanner from multiple computers over your network.
This copier contains many different functions and settings, and many of them can be used in combination for more efficient copying. Refer to the following chart for details on combining specific functions and settings.
○: Combination is possible
X: Combination is NOT possible
: Combination is NOT possible (the function selected first will be cleared and the second function will be set.)
O 1 : Combination is possible but acceptable copy sizes will be limited.
O²: Combination is NOT possible if originals are set in the DF.
▲: The second function is a setting selected from within the first function selected.
- Registration as a program is possible. When copying with a program, the function selected first will be cleared and the copying will be carried out using the programmed settings.
*: The corresponding option must be installed in order to use this function.
*1: It is only possible to alternately set originals on the platen and in the DF alternately when using the filing mode.
*2: The optional Duplex Unit is required in order to make duplex (2-sided) copies.
*3: Only available in duplex copiers.
| 2-sided copy modes | Page separation modes | Insert sheet modes | Copying onto transparecites (transparency mode) | Transparency + backing sheet mode | Presentation mode | Copying onto thick paper (thick paper mode) | Layout modes | Auto Selection mode | Filing mode | Sort mode | Hole punch | Staple-sort | Margin mode | Border erase modes | Custom erase mode | Invert mode | Mirror image mode | XY zoom mode | Mono-color mode | Print page numbers mode | BW/Selection mode | Poster mode | Booklet mode | Function selected second / Function selected first | |||||||||||||||||||||||||||||||||||||||||||||||||||||||||||||||||||||||||||||||||||||||||||||||||||||||||||||||||||||||||||||||||||||||||||||||||||||||||||||||||||||||||||||||||||||||||||||||||||||||||||||||||||||||||||||||||||||||||||||||||||||||||||||||||||||||||||||||||||||||||||||||||||||||||||||||||||||||||||||||||||||||||||||||||||||||||||||||||||||||||||||||||||||||||||||||||||||||||||||||||||||||||||||||||||||||||||||||||||||||||||||||||||||||||||||||||||||||||||||||||||||||||||||||||||||||||||||||||||||||||||||||||||||||||||||||||||||||||||||||||||||||||||||||||||||||||||||||||||||||||||||||||||||||||||||||||||||||||||||||||||||||||||||||||||||||||||||||||||||||||||||||||||||||||||||||||||||||||||||||||||||||||||||||||||||||||||||||||||||||||||||||||||||||||||||||||||||||||||||||||||||||
| Duplex (2-sided) copies from a 2-sided original | Rotate back side image | Dulter (2-sided) copies from a 2-sided original | Page separation from book originals | Cover mode | Separation insert mode | Page separation from book originals | Page separation from book originals | Page separation from book originals | Page separation from book originals | Page separation from book originals | Page separation from book originals | Page separation from book originals | Page separation from book originals | Page separation from book originals | Page separation from book originals | Page separation from book originals | Page separation from book originals | Page separation from book originals | Page separation from book originals | Page separation from book originals | Page separation from book originals | Page separation from book originals | Page separationfrom book originals | Page separation from book originals | Page separation from book originals | Page separation from book originals | Page separation from book originals | Page separation from book originals | Page separation from book originals | Page separation from book originals | Page separation from book originals | Page separation from book originals | Page separation from book originals | Page separation from book originals | Page separation from book originals | Page separation from book originals | Page separation from book originals | Page separation from book originals | Page separation from book originals | Price separation from book originals | Price separation from book originals | Price separation from book originals | Price separation from book originals | Price separation from book originals | Price separation from book originals | Price separation from book originals | Price separation from book originals | Price separation from book originals | Price separation from book originals | Price separation from book originals | Price separation from book originals | Price separation from book originals | Price separation from book originals | Price separation from book originals | Price separation from book originals | Price separation from book Originals | Price separation from book Originals | Price separation from book Originals | Price separation from book Originals | Price separation from book Originals | Price separation from book Originals | Price separation from book Originals | Price separation from book Originals | Price separation from book Originals | Price separation from book Originals | Price separation from book Originals | Price separation from book Originals | Price separation from book Originals | Price separation from book Originals | Price separation from book Originals | Print page numbers mode | Print page numbers mode | Print page numbers mode | Print page numbers mode | Print page numbers mode | Print page numbers mode | Print page numbers mode | Print page numbers mode | Print page numbers mode | Print page numbers mode | Print page numbers mode | Print page numbers mode | Print page numbers mode | Print page numbers mode | Print page numbers mode | Print page numbers mode | Print page numbers mode | Print page numbers mode | Print page numbers mode | Print page numbers mode | Print page numbers Mode | Print page numbers mode | Print page numbers mode | Print page numbers mode | Print page numbers mode | Print page numbers mode | Print page numbers mode | Print page numbers mode | Print page numbers mode | Print page numbers mode | Print page numbers mode | Print page numbers mode | Print page numbers mode | Print page numbers mode | Print page numbers mode | Print page numbers mode | Print page numbers mode | Print page numbers mode | Print page numbers mode | Print page numbers mode | Print page numbersMode | Print page numbers mode | Print page numbers mode | Print page numbers mode | Print page numbers mode | Print page numbers mode | Print page numbers mode | Print page numbers mode | Print page numbers mode | Print page numbers mode | Print page numbers mode | Print page numbers mode | Print page numbers mode | Print page numbers mode | Print page numbers mode | Print page numbers mode | Print page numbers mode | Print page numbers mode | Print page numbers mode | Print page numbers mode | Print page numbersmode | Print page numbers mode | Print page numbers mode | Print page numbers mode | Print page numbers mode | Print page numbers mode | Print page numbers mode | Print page numbers mode | Print page numbers mode | Print page numbers mode | Print page numbers mode | Print page numbers mode | Print page numbers mode | Print page numbers mode | Print page numbers mode | Print page numbers mode | Print page numbers mode | Print page numbers mode | Print page numbers mode | Print page numbers mode | Print page numbers modes | Print page numbers modes | Print page numbers modes | Print page numbers modes | Print page numbers modes | Print page numbers modes | Print page numbers modes | Print page numbers modes | Print page numbers modes | Print page numbers modes | Print page numbers modes | Print page numbers modes | Print page numbers modes | Print page numbers modes | Print page numbers modes | Print page numbers modes | Print page numbers modes | Print page numbers modes | Print page numbers modes | Print page numbers modes | Print page numbers Mode | Print page numbers modes | Print page numbers modes | Print page numbers modes | Print page numbers modes | Print page numbers modes | Print page numbers modes | Print page numbers modes | Print page numbers modes | Print page numbers modes | Print page numbers modes | Print page numbers modes | Print page numbers modes | Print page numbers modes | Print page numbers modes | Print page numbers modes | Print page numbers modes | Print page numbers modes | Print page numbers modes | Print page numbers modes | Print page numbers Modes | Print page numbers modes | Print page numbers modes | Print page numbers modes | Print page numbers modes | Print page numbers modes | Print page numbers modes | Print page numbers modes | Print page numbers modes | Print page numbers modes | Print page numbers modes | Print page numbers modes | Print page numbers modes | Print page numbers modes | Print page numbers modes | Print page numbers modes | Print page numbers modes | Print page numbers modes | Print page numbers modes | Print page numbers modes | Print page numbersMode | Print page numbers modes | Print page numbers modes | Print page numbers modes | Print page numbers modes | Print page numbers modes | Print page numbers modes | Print page numbers modes | Print page numbers modes | Print page numbers modes | Print page numbers modes | Print page numbers modes | Print page numbers modes | Print page numbers modes | Print page numbers modes | Print page numbers modes | Print page numbers modes | Print page numbers modes | Print page numbers modes | Print page numbers modes | Print page numbers MODE | Print page numbers modes | Print page numbers modes | Print page numbers modes | Print page numbers modes | Print page numbers modes | Print page numbers modes | Print page numbers modes | Print page numbers modes | Print page numbers modes | Print page numbers modes | Print page numbers modes | Print page numbers modes | Print page numbers modes | Print page numbers modes | Print page numbers modes | Print page numbers modes | Print page numbers modes | Print page numbers modes | Print page numbers modes | Print page numbersMODE | Print page numbers modes | Print page numbers modes | Print page numbers modes | Print page numbers modes | Print page numbers modes | Print page numbers modes | Print page numbers modes | Print page numbers modes | Print page numbers modes | Print page numbers modes | Print page numbers modes | Print page numbers modes | Print page numbers modes | Print page numbers modes | Print page numbers modes | Print page numbers modes | Print page numbers modes | Print page numbers modes | Print page numbers modes | Print page numbersmodes | Print page numbers modes | Print page numbers modes | Print page numbers modes | Print page numbers modes | Print page numbers modes | Print page numbers modes | Print page numbers modes | Print page numbers modes | Print page numbers modes | Print page numbers modes | Print page numbers modes | Print page numbers modes | Print page numbers modes | Print page numbers modes | Print page numbers modes | Print page numbers modes | Print page numbers modes | Print page numbers modes | Print page numbers modes | Print page numbersModes | Print page numbers modes | Print page numbers modes | Print page numbers modes | Print page numbers modes | Print page numbers modes | Print page numbers modes | Print page numbers modes | Print page numbers modes | Print page numbers modes | Print page numbers modes | Print page numbers modes | Print page numbers modes | Print page numbers modes | Print page numbers modes | Print page numbers modes | Print page numbers modes | Print page numbers modes | Print page numbers modes | Print page numbers modes | Print page numberscycles | Print page numbers modes | Print page numbers modes | Print page numbers modes | Print page numbers modes | Print page numbers modes | Print page numbers modes | Print page numbers modes | Print page numbers modes | Print page numbers modes | Print page numbers modes | Print page numbers modes | Print page numbers modes | Print page numbers modes | Print page numbers modes | Print page numbers modes | Print page numbers modes | Print page numbers modes | Print page numbers modes | Print page numbers modes | Print page numbers模式 | Print page numbers modes | Print page numbers modes | Print page numbers modes | Print page numbers modes | Print page numbers modes | Print page numbers modes | Print page numbers modes | Print page numbers modes | Print page numbers modes | Print page numbers modes | Print page numbers modes | Print page numbers modes | Print page numbers modes | Print page numbers modes | Print page numbers modes | Print page numbers modes | Print page numbers modes | Print page numbers modes | Print page numbers modes | Print page numbersacies | Print page numbers modes | Print page numbers modes | Print page numbers modes | Print page numbers modes | Print page numbers modes | Print page numbers modes | Print page numbers modes | Print page numbers modes | Print page numbers modes | Print page numbers modes | Print page numbers modes | Print page numbers modes | Print page numbers modes | Print page numbers modes | Print page numbers modes | Print page numbers modes | Print page numbers modes | Print page numbers modes | Print page numbers modes | Print page numbersycles | Print page numbers modes | Print page numbers modes | Print page numbers modes | Print page numbers modes | Print page numbers modes | Print page numbers modes | Print page numbers modes | Print page numbers modes | Print page numbers modes | Print page numbers modes | Print page numbers modes | Print page numbers modes | Print page numbers modes | Print page numbers modes | Print page numbers modes | Print page numbers modes | Print page numbers modes | Print page numbers modes | Print page numbers modes | Print page numbersweeks | Print page numbers modes | Print page numbers modes | Print page numbers modes | Print page numbers modes | Print page numbers modes | Print page numbers modes | Print page numbers modes | Print page numbers modes | Print page numbers modes | Print page numbers modes | Print page numbers modes | Print page numbers modes | Print page numbers modes | Print page numbers modes | Print page numbers modes | Print page numbers modes | Print page numbers modes | Print page numbers modes | Print page numbers modes | Print page numberscodes | Print page numbers modes | Print page numbers modes | Print page numbers modes | Print page numbers modes | Print page numbers modes | Print page numbers modes | Print page numbers modes | Print page numbers modes | Print page numbers modes | Print page numbers modes | Print page numbers modes | Print page numbers modes | Print page numbers modes | Print page numbers modes | Print page numbers modes | Print page numbers modes | Print page numbers modes | Print page numbers modes | Print page numbers modes | Print page numbers codes | Print page numbers modes | Print page numbers modes | Print page numbers modes | Print page numbers modes | Print page numbers modes | Print page numbers modes | Print page numbers modes | Print page numbers modes | Print page numbers modes | Print page numbers modes | Print page numbers modes | Print page numbers modes | Print page numbers modes | Print page numbers modes | Print page numbers modes | Print page numbers modes | Print page numbers modes | Print page numbers modes | Print page numbers modes | Print page numbers cities | Print page numbers modes | Print page numbers modes | Print page numbers modes | Print page numbers modes | Print page numbers modes | Print page numbers modes | Print page numbers modes | Print page numbers modes | Print page numbers modes | Print page numbers modes | Print page numbers modes | Print page numbers modes | Print page numbers modes | Print page numbers modes | Print page numbers modes | Print page numbers modes | Print page numbers modes | Print page numbers modes | Print page numbers modes | Print page numberscities | Print page numbers modes | Print page numbers modes | Print page numbers modes | Print page numbers modes | Print page numbers modes | Print page numbers modes | Print page numbers modes | Print page numbers modes | Print page numbers modes | Print page numbers modes | Print page numbers modes | Print page numbers modes | Print page numbers modes | Print page numbers modes | Print page numbers modes | Print page numbers modes | Print page numbers modes | Print page numbers modes | Print page numbers modes | Print page numbers个城市 | Print page numbers modes | Print page numbers modes | Print page numbers modes | Print page numbers modes | Print page numbers modes | Print page numbers modes | Print page numbers modes | Print page numbers modes | Print page numbers modes | Print page numbers modes | Print page numbers modes | Print page numbers modes | Print page numbers modes | Print page numbers modes | Print page numbers modes | Print page numbers modes | Print page numbers modes | Print page numbers modes | Print page numbers modes | Print page numbersrms | Print page numbers modes | Print page numbers modes | Print page numbers modes | Print page numbers modes | Print page numbers modes | Print page numbers modes | Print page numbers modes | Print page numbers modes | Print page numbers modes | Print page numbers modes | Print page numbers modes | Print page numbers modes | Print page numbers modes | Print page numbers modes | Print page numbers modes | Print page numbers modes | Print page numbers modes | Print page numbers modes | Print page numbers modes | Print page numbersmoles | Print page numbers modes | Print page numbers modes | Print page numbers modes | Print page numbers modes | Print page numbers modes | Print page numbers modes | Print page numbers modes | Print page numbers modes | Print page numbers modes | Print page numbers modes | Print page numbers modes | Print page numbers modes | Print page numbers modes | Print page numbers modes | Print page numbers modes | Print page numbers modes | Print page numbers modes | Print page numbers modes | Print page numbers modes | Print page numbers moles | Print page numbers modes | Print page numbers modes | Print page numbers modes | Print page numbers modes | Print page numbers modes | Print page numbers modes | Print page numbers modes | Print page numbers modes | Print page numbers modes | Print page numbers modes | Print page numbers modes | Print page numbers modes | Print page numbers modes | Print page numbers modes | Print page numbers modes | Print page numbers modes | Print page numbers modes | Print page numbers modes | Print page numbers modes | Print page numbertimes | Print page numbertimes | Print page numbertimes | Print page numbertimes | Print page numbertimes | Print page numbertimes | Print page numbertimes | Print page numbertimes | Print page numbertimes | Print page numbertimes | Print page numbertimes | Print page numbertimes | Print page numbertimes | Print page numbertimes | Print page numbertimes | Print page numbertimes | Print page numbertimes | Print page numbertimes | Print page numbertimes | Print page numbertimes | Print page numberxtimes | Print page numbertimes | Print page numbertimes | Print page numbertimes | Print page numbertimes | Print page numbertimes | Print page numbertimes | Print page numbertimes | Print page numbertimes | Print page numbertimes | Print page numbertimes | Print page numbertimes | Print page numbertimes | Print page numbertimes | Print page numbertimes | Print page numbertimes | Print page numbertimes | Print page numbertimes | Print page numbertimes | Print page numbertimes | Print pagenumbertimes | Print page numbertimes | Print page numbertimes | Print page numbertimes | Print page numbertimes | Print page numbertimes | Print page numbertimes | Print page numbertimes | Print page numbertimes | Print page numbertimes | Print page numbertimes | Print page numbertimes | Print page numbertimes | Print page numbertimes | Print page numbertimes | Print page numbertimes | Print page numbertimes | Print page numbertimes | Print page numbertimes | Print page numbertimes | Print page notimes | Print page notimes | Print page notimes | Print page notimes | Print page notimes | Print page notimes | Print page notimes | Print page notimes | Print page notimes | Print page notimes | Print page notimes | Print page notimes | Print page notimes | Print page notimes | Print page notimes | Print page notimes | Print page notimes | Print page notimes | Print page notimes | Print page notimes | Print pagenotimes | Print page notimes | Print page notimes | Print page notimes | Print page notimes | Print page notimes | Print page notimes | Print page notimes | Print page notimes | Print page notimes | Print page notimes | Print page notimes | Print page notimes | Print page notimes | Print page notimes | Print page notimes | Print page notimes | Print page notimes | Print page notimes | Print page notimes | Print page nonetimes | Print page notimes | Print page notimes | Print page notimes | Print page notimes | Print page notimes | Print page notimes | Print page notimes | Print page notimes | Print page notimes | Print page notimes | Print page notimes | Print page notimes | Print page notimes | Print page notimes | Print page notimes | Print page notimes | Print page notimes | Print page notimes | Print page notimes | Print page nontimes | Print page notimes | Print page notimes | Print page notimes | Print page notimes | Print page notimes | Print page notimes | Print page notimes | Print page notimes | Print page notimes | Print page notimes | Print page notimes | Print page notimes | Print page notimes | Print page notimes | Print page notimes | Print page notimes | Print page notimes | Print page notimes | Print page notimes | Print page ntimes | Print page notimes | Print page notimes | Print page notimes | Print page notimes | Print page notimes | Print page notimes | Print page notimes | Print page notimes | Print page notimes | Print page notimes | Print page notimes | Print page notimes | Print page notimes | Print page notimes | Print page notimes | Print page notimes | Print page notimes | Print page notimes | Print page notimes | Print page one times to 10000000000000000000000000000000000000000000000000000000000000000000000000000000000000000000000000000 | ||||||||||||||||||||||||||||||||||||||||||||||||||||||||||||||||||||||||||||||||||||||||||||||||||||
Laser Safety
Laser radiation could be hazardous to the human body. For this reason, laser radiation emitted inside this machine is hermetically sealed within the protective housing and external cover. In the normal operation of the product by user, no radiation can leak from the machine.
This machine is classified as Class 1 laser product under IEC 60825.
CAUTION
Performance of procedures other than those specified in this manual may result in hazardous radiation exposure.
This label is attached to the laser scanner unit inside the machine and is not in a user access area.
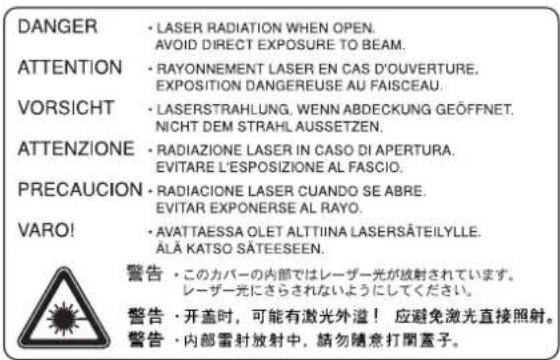
The labels shown below are attached on the right side of the machine.
CAUTION!
The power plug is the main isolation device! Other switches on the equipment are only functional switches and are not suitable for isolating the equipment from the power source.
VORSICHT!
This is Class A product. In a domestic environment this product may cause radio interference in which case the user may be required to take adequate measures.
* The above warning is valid only in Australia and New Zealand.

DECLARATION OF CONFORMITY
TO
89/336/EEC, 73/23/EEC and 93/68/EEC
We declare under our sole responsibility that the product to which this declaration relates is in conformity with the following specifications.
Limits and methods of measurement for immunity characteristics of information technology equipment
EN55024
Limits and methods of measurement for radio interference characteristics of information technology equipment
EN55022 Class B
Limits for harmonic currents emissions for equipment input current ≤ 16A per phase EN61000-3-2
Limitation of voltage fluctuations and flicker in low-voltage supply systems for equipment with rated current ≤ 16A EN61000-3-3
Safety of information technology equipment, including electrical equipment
EN60950
Radiation Safety of laser products, equipment classification, requirements and user's guide
EN60825-1
* For best copy results and machine performance, we recommend that you use only KYOCERA MITA original supplies for your KYOCERA MITA copier.
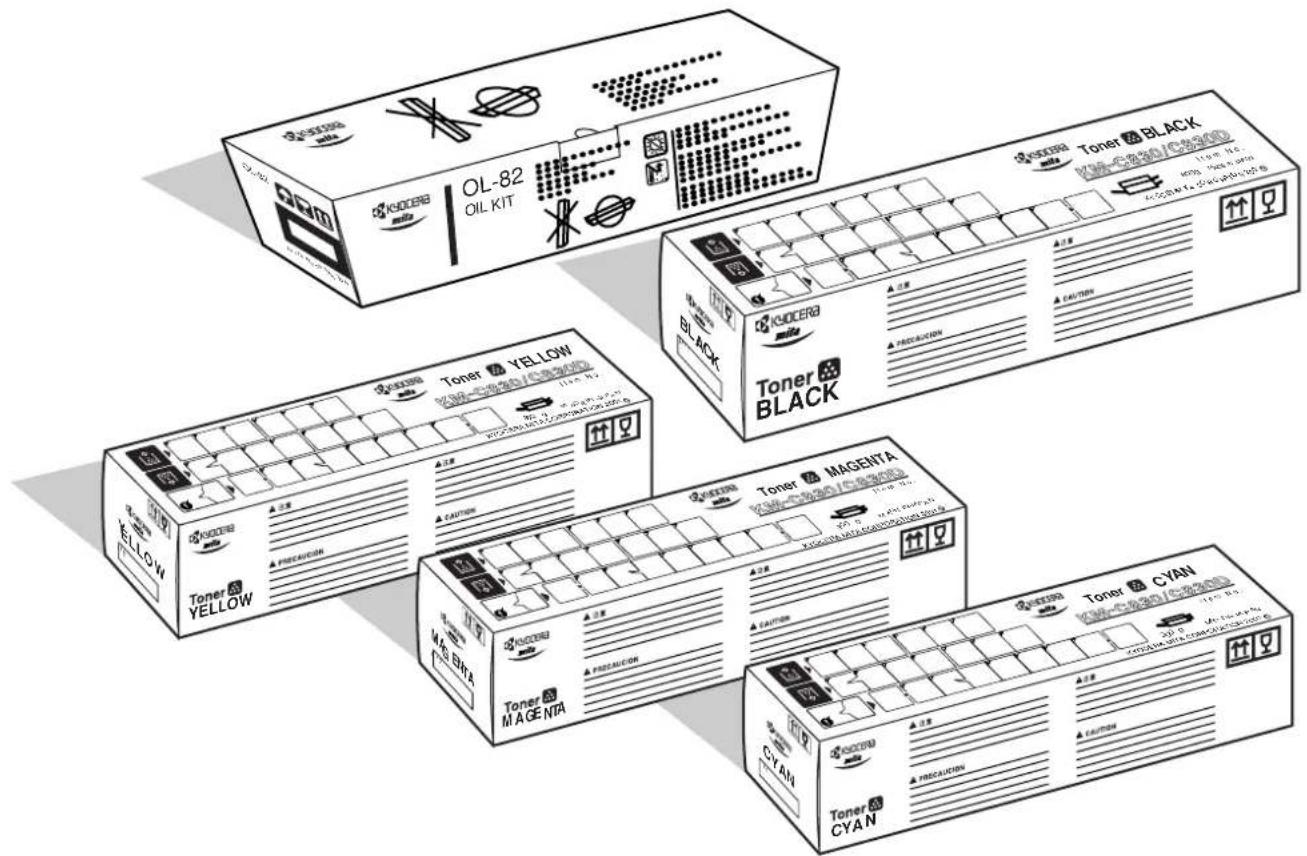

KYOCERA MITA EUROPE B.V.
UNIT 3, "Kyalami Crescent,"
Kyalami Business Park,
1685 Midrand, South Africa
Phone: (11) 466-3290
KYOCERA MITA
AMERICA, INC.
Headquarters:
225 Sand Road, P.O. Box 40008,
Fairfield, New Jersey 07004-0008,
U.S.A.
Phone: (973) 808-8444
KYOCERA MITA AUSTRALIA PTY.
LTD.
Level 3, 6-10 Talavera Road, North Ryde,
N.S.W. 2113 Australia
Phone: (02) 9888-9999
KYOCERA MITA NEW ZEALAND LTD.
1-3 Parkhead Place,
Albany, Auckland,
New Zealand
Phone: (09) 415-4517
KYOCERA MITA (THAILAND) CORP.,
LTD.
9/209 Ratchada-Prachachem Road,
Bang Sue, Bangkok 10800, Thailand
Phone: (02) 586-0320
KYOCERA MITA SINGAPORE
PTE LTD.
121 Genting Lane, 3rd Level,
Singapore 349572
Phone: (65) 7418733
KYOCERA MITA HONG KONG
LIMITED
11/F., Mita Centre,
552-566, Castle Peak Road,
Tsuen Wan, New Territories,
Hong Kong
Phone: (852) 24297422
KYOCERA MITA
CORPORATION
2-28, 1-chome, Tamatsukuri, Chuo-ku
Osaka 540-8585, Japan
Phone: (06) 6764-3555
- OCÉ | OPERATIONS GUIDE
- OCÉ OP30C
- NOTE
- LEGAL RESTRICTION ON COPYING
- IMAGE QUALITY ADJUSTMENT SAMPLES
- COLOR BALANCE ADJUSTMENT SAMPLES
- GLOSS MODE SAMPLES
- COLOR HUE ADJUSTMENT SAMPLES
- SHARPNESS ADJUSTMENT SAMPLES
- PLEASE READ THIS OPERATION GUIDE BEFORE USING THE COPIER. KEEP IT CLOSE TO THE COPIER FOR EASY REFERENCE
- SYMBOLS
- SECTION 1
- IMPORTANT! PLEASE READ FIRST. .. 1-1
- SECTION 2
- NAMES OF PARTS 2-1
- SECTION 3
- PREPARATIONS 3-1
- SECTION 4
- BASIC OPERATION.... 4-1
- SECTION 5
- COLOR COPY SETTINGS 5-1
- SECTION 6
- FUNCTIONS 6-1
- SECTION 7 COPIER MANAGEMENT .... 7-1
- SECTION 8 OPTIONAL EQUIPMENT .... 8-1
- SECTION 9
- TROUBLESHOOTING 9-1
- SECTION 10
- ● MAKING FULL USE OF THE COPIER'S ADVANCED FUNCTIONS
- MAKING FULL USE OF THE COPIER'S ADVANCED FUNCTIONS
- CAUTION
- CAUTION LABELS
- LABEL 1, 2
- LABEL 3
- LABEL 4
- LABEL 5
- ENVIRONMENT
- OTHER PRECAUTIONS
- POWER SUPPLY/GROUNDING THE COPIER
- WARNING
- HANDLING OF PLASTIC BAGS
- CAUTIONS WHEN USING THE COPIER
- CAUTIONS WHEN HANDLING CONSUMABLES
- MAIN BODY
- OPERATION PANEL
- ●INITIAL MODE (AT THE END OF WARM-UP OR WHEN THE RESET KEY IS PRESSED)
- INCH SPECIFICATIONS
- METRIC SPECIFICATIONS
- ●AUTO CLEAR FUNCTION
- ● AUTOMATIC DRAWER SWITCHING FUNCTION
- LOADING PAPER
- NOTE WHEN ADDING PAPER
- LOADING PAPER INTO A DRAWER
- IMPORTANT
- SETTING PAPER ON THE MULTI-BYPASS TRAY
- NOTES
- 3
- ●SETTING THE PAPER SIZE FOR THE MULTI-BYPASS TRAY
- 1
- 2
- ●WHEN SETTING OHP TRANSPARENCIES OR THICK PAPER ON THE MULTI-BYPASS TRAY
- ●WHEN PRINTING ONTO ENVELOPES
- DESIGNATING THE ENVELOPE SIZE
- REPLACING THE TONER CONTAINERS AND THE WASTE TONER TANK
- CLEANING THE CHARGER
- 7 REMOVE THE GRID CLEANER
- 8 GRASP THE GREEN CLEANING SHAFT (SHOWN AS ④ IN THE ILLUSTRATION), PULL IT OUT SLOWLY AS FAR AS IT WILL GO AND THEN PUSH IT BACK IN ALL THE WAY. REPEAT THIS STEP 5 TO 7 TIMES
- 9 CLOSE THE FRONT COVER. * BE SURE TO HOLD BOTH THE LEFT AND RIGHT SIDES OF THE FRONT COVER AND CLOSE IT SECURELY
- REPLACING THE OIL ROLLER
- BASIC COPYING PROCEDURE
- WARM-UP
- SETTING AN ORIGINAL
- SELECTING THE COLOR MODE
- SELECTING FUNCTIONS
- SELECTING THE PAPER SIZE
- ADJUSTING THE COPY EXPOSURE
- SELECTING THE IMAGE QUALITY
- SETTING THE NUMBER OF COPIES TO BE MADE
- START COPYING
- AT THE END OF COPYING
- MONO-COLOR MODE
- GLOSS MODE
- 1 PRESS THE COLOR EDIT KEY TO LIGHT THE CORRESPONDING INDICATOR
- 2 USE THE ▲ CURSOR OR THE ▼ CURSOR KEY TO SELECT "|2| GLOSS" AND THEN PRESS THE ENTER KEY
- ONE-TOUCH IMAGE QUALITY ADJUSTMENT
- ADJUSTING THE COLOR BALANCE
- 4
- 5
- 6
- 7
- 8
- 9
- ADJUSTING THE COLOR HUE
- [EXAMPLE 1]
- [EXAMPLE 2]
- 6 7
- ADJUSTING THE SHARPNESS
- 2 USE THE ▲ CURSOR OR THE ▼ CURSOR KEY TO SELECT
- 3 USE THE ◀ CURSOR OR THE ▶ CURSOR KEY TO ADJUST THE SHARPNESS AS DESIRED
- 4 PRESS THE ENTER KEY
- 5 USE THE ▲ CURSOR KEY TO SELECT "1 END" AND THEN PRESS THE ENTER KEY. THE MESSAGE DISPLAY WILL RETURN TO THE "READY TO COPY." SCREEN
- MAKING ENLARGED AND REDUCED COPIES
- AUTO MAGNIFICATION SELECTION MODE
- 1 SET THE ORIGINAL TO BE COPIED
- 2 PRESS THE PAPER SELECT KEY AND SPECIFY THE PAPER SIZE
- 3 PRESS THE START KEY TO BEGIN THE COPYING PROCEDURE
- ZOOM MODE
- PRESET ZOOM MODE
- XY ZOOM MODE
- INTERRUPT COPYING
- MAKING DUPLEX (2-SIDED) COPIES FROM VARIOUS TYPES OF ORIGINALS [2-SIDED COPY MODES]
- MAKING DUPLEX (2-SIDED) COPIES FROM A 2-SIDED ORIGINAL
- MAKING DUPLEX (2-SIDED) COPIES FROM AN OPEN-FACED (BOOKS, ETC.) ORIGINAL
- MAKING DUPLEX (2-SIDED) COPIES FROM ONE-SIDED ORIGINALS
- BLACK
- COPYING TWO-PAGE ORIGINALS ONTO SEPARATE SHEETS [PAGE SEPARATION MODES]
- PAGE SEPARATION FROM BOOK ORIGINALS
- PAGE SEPARATION FROM 2-SIDED ORIGINALS
- MAKING A MARGIN SPACE FOR BINDING [MARGIN MODE]
- LEFT MARGIN
- TOP MARGIN
- FRONT & BACK MARGIN
- 2 PRESS THE DIGITAL EDITING KEY TO LIGHT THE CORRESPONDING INDICATOR
- 3 USE THE ▲ CURSOR OR THE ▼ CURSOR KEY TO SELECT "2 MARGIN" AND THEN PRESS THE ENTER KEY
- 4 USE THE ▲ CURSOR OR THE ▼ CURSOR KEY TO SELECT WHERE YOU WANT THE MARGIN TO BE CREATED
- 5 PRESS THE ENTER KEY
- 6 IF YOU WANT TO CHANGE THE SELECTED MARGIN WIDTH, USE THE ◀ CURSOR OR THE ▶ CURSOR KEY TO SELECT THE DESIRED WIDTH. IF YOU WANT TO COPY WITH THE CURRENTLY SELECTED MARGIN WIDTH, GO TO THE NEXT STEP
- 7 PRESS THE ENTER KEY
- 9 CHECK THE SETTINGS SHOWN FOR THE FRONT & BACK MARGINS. IF YOU
- 10 USE THE ▼ CURSOR KEY TO SELECT "|2| CHANGE #", AND THEN PRESS THE ENTER KEY
- 11 USE THE ▲ CURSOR OR THE ▼ CURSOR KEY TO SELECT WHERE YOU WANT THE MARGIN TO BE CREATED
- 12 PRESS THE ENTER KEY
- 13 USE THE ◀ CURSOR OR THE ▶ CURSOR KEY TO SELECT THE DESIRED MARGIN WIDTH
- 14 PRESS THE ENTER KEY
- 15 USE THE ▲ CURSOR OR THE ▼ CURSOR KEY TO WHERE ON THE BACK SIDE OF THE COPIES YOU WANT THE MARGIN TO BE CREATED
- 16 PRESS THE ENTER KEY
- MAKING COPIES WITH CLEAN EDGES [BORDER ERASE MODES]
- ERASING BLEMISHES FROM EDGES OF COPIES (SHEET ERASE MODE)
- ERASING BLEMISHES FROM THE EDGES AND MIDDLE OF COPIES MADE FROM BOOKS (BOOK ERASE MODE)
- SELECTING THE ERASING AREA (CUSTOM ERASE MODE)
- 3 USE THE ▲ CURSOR OR THE ▼ CURSOR KEY TO SELECT "3 BORDER ERASE" AND THEN PRESS THE ENTER KEY
- 4 USE THE ▲ CURSOR OR THE ▼ CURSOR KEY TO SELECT THE BORDER ERASE MODE THAT YOU WANT TO USE
- 6 USE THE ▲ CURSOR OR THE ▼ CURSOR KEY TO SELECT THE WIDTH OF THE BORDER THAT YOU WANT TO HAVE ERASED
- INVERTING BLACK AND WHITE AND COLORS [INVERT MODE]
- MAKING MIRROR IMAGE COPIES [MIRROR IMAGE MODE]
- PRINTING PAGE NUMBERS ON COPIES [PRINT PAGE NUMBERS MODE]
- FEEDING PAPER AS A BACKING SHEET FOR OHP TRANSPARENCIES [TRANSPARENCY + BACKING SHEET MODE]
- COPYING ONTO THE BACKING SHEET
- LEAVING THE BACKING SHEET BLANK
- 3 PRESS THE TRANSPARENCY FILM / CARD STOCK KEY TO LIGHT THE CORRESPONDING INDICATOR
- 4 USE THE ▲ CURSOR OR THE ▼ CURSOR KEY TO SELECT "1 | TRANSPARENCY MODE" AND THEN PRESS THE ENTER KEY. THE "SELECT FUNCTION" SCREEN WILL APPEAR
- 5 USE THE ▲ CURSOR OR THE ▼ CURSOR KEY TO SELECT "1 | TRANSPARENCY + BACKING" AND THEN PRESS THE ENTER KEY
- 6 USE THE ▲ CURSOR OR THE ▼ CURSOR KEY TO SELECT WHETHER YOU WANT TO HAVE THE IMAGE COPIED ONTO THE BACKING SHEETS OR NOT
- 8 USE THE ▲ CURSOR OR THE ▼ CURSOR KEY TO SPECIFY THE TYPE OF ORIGINALS BEING COPIED
- PRESS THE ENTER KEY
- PREPARING PRESENTATION MATERIALS TO GO WITH TRANSPARENCIES [PRESENTATION MODE]
- 12 PRESS THE START KEY. SCANNING OF THE ORIGINALS WILL START
- 14 REPLACE THE FIRST ORIGINAL WITH THE NEXT ONE AND PRESS THE START KEY. SCANNING OF THAT NEXT ORIGINAL WILL START. CARRY OUT THIS STEP FOR ALL OF THE ORIGINALS THAT YOU WANT TO COPY AND, ONCE YOU HAVE FINISHED SCANNING THEM ALL, PRESS THE ENTER KEY. COPYING WILL START
- ADDING COVERS AND SEPARATION INSERTS TO YOUR COPY SETS [INSERT SHEET MODES]
- INSERT SHEET MODES
- COVER MODE
- ● SEPARATION INSERT MODE
- MAKING COPIES WITH THE INSERT SHEET MODES
- 1 PRESS THE TRANSPARENCY FILM / CARD STOCK KEY TO LIGHT THE CORRESPONDING INDICATOR
- 2 USE THE ▲ CURSOR OR THE ▼ CURSOR KEY TO SELECT "|3| INSERTS MODE" ["3| INSERT MODE"]
- 3 PRESS THE ENTER KEY. THE "SELECT ORIGINAL" SCREEN WILL APPEAR
- 4 USE THE ▲ CURSOR OR THE ▼ CURSOR KEY TO SPECIFY THE TYPE OF ORIGINALS BEING COPIED
- 6 USE THE ▲ CURSOR OR THE ▼ CURSOR KEY TO SELECT THE TYPE OF FINISHED COPIES YOU WANT TO MAKE
- 8 SELECT WHETHER YOU WANT THE IMAGE THAT IS COPIED ONTO THE BACK SIDE OF THE COPIES TO BE ROTATED 180 DEGREES OR NOT
- 9 PRESS THE ENTER KEY
- 10 USE THE ▲ CURSOR OR THE ▼ CURSOR KEY TO SELECT THE INSERT SHEET MODE THAT YOU WANT TO USE
- ● COVER MODE SETTINGS
- ● SEPARATION INSERT MODE SETTINGS
- 27 PRESS THE START KEY. SCANNING OF THE ORIGINALS WILL START
- MAKING ONE COPY FROM EITHER TWO OR FOUR ORIGINALS [LAYOUT MODES]
- ● 2 IN 1
- ● 4 IN 1
- MAKING BOOKLETS, ETC. FROM SHEET ORIGINALS [BOOKLET MODE] (ONLY AVAILABLE IN DUPLEX COPIERS)
- LANGUAGE
- AAA
- 10
- MAKING BOOKLETS, ETC. FROM BOOK ORIGINALS [BOOK TO BOOK MODE] (ONLY AVAILABLE IN DUPLEX COPIERS)
- MAKING BOTH BLACK & WHITE AND COLOR COPIES AT THE SAME TIME [BW/SELECTION MODE]
- 1 PRESS THE BOOK MODE KEY TO LIGHT THE CORRESPONDING INDICATOR
- 2 USE THE ▲ CURSOR OR THE ▼ CURSOR KEY TO SELECT “② COLOR/BW SELECTION” [“ 2 | COLOUR/B&W SELECTION”] AND THEN PRESS THE ENTER KEY. THE “ENTER NUMBER OF COPY” SCREEN WILL APPEAR
- 3 USE THE NUMERIC KEYS ON THE KEYPAD, THE ◀ CURSOR KEY OR THE ▶ CURSOR KEY TO SELECT THE NUMBER OF BLACK AND WHITE COPIES (OR COPY SETS) YOU WANT TO MAKE
- 4 PRESS THE ▼ CURSOR KEY TO CHANGE TO THE COLOR COPY SETTING
- 5 USE THE NUMERIC KEYS ON THE KEYPAD, THE ◀ CURSOR KEY OR THE ▶ CURSOR KEY TO SELECT THE NUMBER OF COLOR COPIES (OR COPY SETS) YOU WANT TO MAKE
- 6 PRESS THE ENTER KEY. THE MESSAGE DISPLAY WILL RETURN TO THE "READY TO COPY." SCREEN
- ENLARGING THE IMAGE AND PRINTING IT OUT ONTO MULTIPLE SHEETS [POSTER MODE]
- 2 USE THE ▲ CURSOR OR THE ▼ CURSOR KEY TO SELECT "3 POSTER" AND THEN PRESS THE ENTER KEY. THE "SELECT INPUT MODE" SCREEN WILL APPEAR
- 3 USE THE ▲ CURSOR OR THE ▼ CURSOR KEY TO SELECT THE POSTER MODE METHOD THAT YOU WANT TO USE
- 5 SPECIFY THE SIZE OF THE ORIGINAL BEING COPIED
- 6 PRESS THE ENTER KEY
- COPYING DIFFERENT SIZED ORIGINALS ONTO ONE SIZE OF COPY PAPER [FILING MODE]
- MEMORIZING FREQUENTLY USED SETTINGS [PROGRAM FUNCTION]
- REGISTERING A PROGRAM
- USING PROGRAMMED SETTINGS TO MAKE COPIES
- 1 PRESS THE PROGRAM KEY
- 2 USE THE ▲ CURSOR OR THE ▼ CURSOR KEY TO SELECT THE PROGRAM NUMBER UNDER WHICH THE SETTINGS THAT YOU WANT TO USE ARE REGISTERED. THE PROGRAM NUMBER CAN ALSO BE ENTERED DIRECTLY USING THE NUMERIC KEYS ON THE KEYPAD
- 3 PRESS THE ENTER KEY
- CONFIRMING COPY SETTINGS (RECALL FUNCTION)
- 2 USE THE ▲ CURSOR OR THE ▼ CURSOR KEY TO SELECT "0 RECALL" AND THEN PRESS THE ENTER KEY
- 3 PRESS THE ▶ CURSOR KEY IN ORDER TO DISPLAY THE CONTENT OF THE CURRENT SETTINGS ON THE OPERATION PANEL
- 4 ONCE YOU HAVE FINISHED CHECKING THE SETTINGS, PRESS THE ENTER KEY
- SORTING AUTOMATICALLY [SORT MODE]
- ROTATE COPY FUNCTION 23. ENERGY
- NG PREHEAT FUNCTION
- AUTO SHUT-OFF FUNCTION
- ● MORE ABOUT THE AUTO SHUT-OFF FUNCTION
- SECTION 7 COPIER MANAGEMENT
- COPY MANAGEMENT
- ACCESSING THE COPY MANAGEMENT PROCEDURES
- 1 PRESS THE */LANGUAGE KEY
- 2 USE THE ▲ CURSOR OR THE ▼ CURSOR KEY TO SELECT "4 DEFAULT
- 5 MAKE SURE THAT "|2| MANAGEMENT" IS SELECTED AND PRESS THE ENTER KEY
- PERFORMING COPY MANAGEMENT PROCEDURES
- ●REGISTERING NEW DEPARTMENT CODES
- ●DELETING DEPARTMENT CODES
- ●CHANGING COPY LIMITS
- ●CLEARING COPY COUNTS
- ●PRINTING OUT THE DEPARTMENT CODE LIST
- CHECKING THE COPY COUNTS
- ●PRINTING OUT THE COPY MANAGEMENT LIST
- ●TURNING COPY MANAGEMENT ON/OFF
- MAKING COPIES WHEN COPY MANAGEMENT IS TURNED ON
- KEYS
- DEFAULT SETTINGS
- COPY DEFAULT SETTINGS
- ACCESSING THE COPY DEFAULT SETTINGS
- 5 USE THE ▲ CURSOR OR THE ▼ CURSOR KEY TO SELECT "|3| COPY DEFAULT
- 8 PRESS THE ENTER KEY
- 10 ONCE YOU HAVE FINISHED MAKING ALL OF THE DEFAULT SETTINGS YOU WANT, USE THE ▲ CURSOR KEY TO SELECT "END" AND THEN PRESS THE ENTER KEY
- ① EXPOSURE MODE
- ②EXPOSURE STEPS
- ③ AUTO EXPOSURE ADJUSTMENT (COLOR)
- 2 PRESS THE ENTER KEY
- ④ AUTO EXPOSURE ADJUSTMENT (B/W)
- ⑤MIXED ORIGINAL DENSITY
- ⑥TEXT ORIGINAL DENSITY
- ⑦ PRINT ORIGINAL DENSITY
- ⑧ PHOTO ORIGINAL DENSITY
- ⑨MAP ORIGINAL DENSITY
- ⑩COPY MODE
- ⑪ ORIGINAL QUALITY
- ⑫ DEFAULT DRAWER (B/W)
- ⑬DEFAULT DRAWER (COLOR)
- ⑭COPY LIMIT
- ⑮ MARGIN WIDTH
- ⑯ ERASED BORDER WIDTH
- ⑰CUSTOM ERASE SIZE
- ⑱ INSERT TRAY
- ⑲ SORT MODE ON/OFF (OUTPUT FORM)
- ⑳EJECT DESTINATION
- ②1 ACS ADJUSTMENT
- ②2 AUTO COLOR ADJUSTMENT
- AUTO ADJUSTMENT(TEXT&PHOTO)
- AUTO ADJUSTMENT(TEXT+PHOTO)
- DRUM REFRESH
- MACHINE DEFAULT SETTINGS
- ACCESSING THE MACHINE DEFAULT SETTINGS
- 5 USE THE ▲ CURSOR OR THE ▼ CURSOR KEY TO SELECT "|4 | MACHINE DEFAULT
- 7 USE THE ▲ CURSOR OR THE ▼ CURSOR KEY TO SELECT THE MACHINE DEFAULT SETTING THAT YOU WANT TO CHANGE. SEE “(3) MACHINE DEFAULT SETTINGS” ON PAGE 7-24 FOR INFORMATION ON THE SETTINGS THAT CAN BE CHANGED
- ①STATUS REPORT PRINT OUT
- ②AUTO DRAWER SWITCHING ON/OFF
- ③AUTO SHUT-OFF ON/OFF
- ④ SPECIAL PAPER LOCATION
- ⑤APS FOR SPECIAL PAPER ON/OFF
- ⑥COLOR COPY PAPER LOCATION
- ⑦ AUTO PREHEAT TIME
- ⑧ AUTO SHUT-OFF TIME
- ⑨DISPLAY CONTRAST ADJUSTMENT
- ⑩MANAGEMENT PIN CODE
- ⑪ SILENT MODE ON/OFF
- ⑫ DAY & TIME
- ⑬CHECKING THE TOTAL COUNTER
- ⑭ COUNTER REPORT PRINT OUT
- ⑮TYPE OF PAPER
- CHANGING THE LANGUAGE USED FOR MESSAGES
- 2 USE THE ▲ CURSOR OR THE ▼ CURSOR KEY TO SELECT "3 LANGUAGE
- 4 USE THE ▲ CURSOR OR THE ▼ CURSOR KEY TO SELECT THE LANGUAGE THAT YOU WANT TO USE
- SECTION 8 OPTIONAL EQUIPMENT
- SRDF (SHEET-THRU REVERSE DOCUMENT FEEDER)
- ACCEPTABLE ORIGINALS
- ● NOTES ON ACCEPTABLE DOCUMENTS
- ●SETTING ORIGINALS IN THE SRDF
- ●SETTING ORIGINALS ON THE PLATEN
- 1 OPERATE THE SRDF RELEASE LEVER AND OPEN THE SRDF
- 2 SET THE ORIGINAL TO BE COPIED FACE-DOWN AND ALIGN THE EDGES WITH THE ORIGINAL SIZE INDICATOR LINES
- 3 HOLD THE SRDF RELEASE LEVER AND CLOSE THE SRDF
- ●AUTO SELECTION MODE
- SELECTING THE AUTO SELECTION MODE
- 1 PRESS THE AUTO SELECTION/FILING KEY TO LIGHT THE CORRESPONDING INDICATOR
- 2 MAKE SURE THAT "|1| AUTO SELECT" [ "|1| AUTO SEL."] IS SELECTED AND PRESS THE ENTER KEY
- PAPER FEEDER
- DOCUMENT FINISHER
- MEMORY COPY BOARD
- KEY COUNTER
- ● SETTING THE KEY COUNTER
- PRINTER KIT
- FAX KIT
- NETWORK SCANNER KIT
- IF ONE OF THE FOLLOWING MESSAGES IS DISPLAYED
- IF PAPER JAMS
- MISFEED LOCATION INDICATORS
- CAUTIONS
- REMOVAL PROCEDURES
- ①MISFEED IN A PAPER FEED AREA
- ● MISFEED IN A DRAWER
- ● MISFEED INSIDE THE RIGHT SIDE DRAWER COVER
- 2 REMOVE THE JAMMED PAPER WITHOUT TEARING IT
- 3 PULL OUT THE INDICATED DRAWER
- 4 IF THERE IS ANY JAMMED PAPER INSIDE THAT DRAWER, REMOVE IT WITHOUT TEARING IT
- 5 PUSH THE DRAWER BACK IN FIRMLY AND CLOSE THE RIGHT SIDE DRAWER COVER
- ● MISFEED IN THE MULTI-BYPASS TRAY
- 1 REMOVE ALL OF THE PAPER REMAINING IN THE MULTI-BYPASS TRAY
- 2 RESET THE PAPER IN THE MULTI-BYPASS TRAY
- ②MISFEED IN THE PAPER CONVEYOR SECTION
- ③
- MISFEED IN THE TRANSFER SECTION
- ④MISFEED IN THE FIXING SECTION
- ⑥MISFEED IN THE DUPLEX UNIT (ONLY IN DUPLEX COPIERS)
- 1 PULL OUT THE DUPLEX UNIT
- 2 OPEN THE DUPLEX UNIT COVER (SHOWN AS ① IN THE ILLUSTRATION) AND REMOVE THE JAMMED PAPER WITHOUT TEARING IT
- 3 OPEN THE REVERSING SECTION COVER (SHOWN AS ② IN THE ILLUSTRATION) AND REMOVE THE JAMMED PAPER WITHOUT TEARING IT. * IF THE PAPER DOES HAPPEN TO TEAR, REMOVE ANY LOOSE SCRAPS FROM INSIDE THE COPIER
- 4 CLOSE ALL OPEN COVERS AND REPLACE THE DUPLEX UNIT IN ITS ORIGINAL POSITION IN THE COPIER
- ⑦MISFEED IN THE OPTIONAL SRDF
- 3 OPEN THE LEFT COVER TO THE SRDF
- 4 REMOVE THE JAMMED ORIGINAL WITHOUT TEARING IT
- ⑧MISFEED IN THE OPTIONAL DOCUMENT FINISHER
- IF OTHER TROUBLE OCCURS
- SECTION 10 MAINTENANCE AND OPERATION INFORMATION
- CLEANING THE COPIER
- ● CLEANING THE ORIGINAL COVER
- ● CLEANING THE PLATEN
- SPECIFICATIONS
- INSTALLING THE OPTIONAL EQUIPMENT
- ●AVAILABLE OPTIONAL UNITS
- ORIGINAL COVER
- FAX KIT (ONLY AVAILABLE IN INCH SPECIFICATION COPIERS)
- COMBINATION IS NOT POSSIBLE (THE FUNCTION SELECTED FIRST WILL BE CLEARED AND THE SECOND FUNCTION WILL BE SET.)
- LASER SAFETY
- VORSICHT
- DECLARATION OF CONFORMITY
- KYOCERA MITA EUROPE B.V
- KYOCERA MITA
- AMERICA, INC
- HEADQUARTERS
- KYOCERA MITA AUSTRALIA PTY
- LTD
- KYOCERA MITA NEW ZEALAND LTD
- KYOCERA MITA (THAILAND) CORP
- KYOCERA MITA SINGAPORE
- PTE LTD
- KYOCERA MITA HONG KONG
- LIMITED
- CORPORATION
Brand : Océ
Model : OP30C
Category : Printer