
OP1020 - Printer Océ - Free user manual and instructions
Find the device manual for free OP1020 Océ in PDF.


| Type | Multifunction Printer (Copy, Print, Scan optional) |
| Brand | Océ |
| Model | OP1020 |
| Dimensions (W x D x H) | 25 3/16 x 25 3/16 x 22 13/16 in (639 x 640 x 574 mm) |
| Weight | Approx. 139 lbs (63 kg) |
| Power Source | 120 V AC, 60 Hz, 10.1 A or 220-240 V AC, 50/60 Hz, 5.1 A |
| Power Consumption | Maximum: 1240 W (120 V) / 1280 W (220-240 V); Copying: 623.6 W (120 V) / 616.9 W (220 V); Standby: 180 W; Sleep: 15 W; Low Power: 110 W |
| Print Speed | 20 ppm (A4) |
| Print Resolution | 600 dpi, 300 dpi, Fast 1200 mode |
| Paper Input Capacity | Standard: 500 sheets (80 g/m²); Multi-bypass tray: 100 sheets |
| Paper Sizes Supported | A3, B4, A4, A4R, B5, B5R, A5R, Folio, 11x17" (Ledger), 8.5x14" (Legal), 11x8.5", 8.5x11" (Letter), 5.5x8.5" (Statement), 8.5x13" (Oficio II) |
| Duplex Printing | Optional (Duplex Unit) |
| Finishing | Optional Finisher (stapling, sorting); Optional Job Separator |
| Document Processor | Optional (automatic feeding, up to 50 sheets) |
| Interfaces | Parallel (IEEE1284), USB 2.0 (Hi-Speed), Network (10/100 Base-TX) |
| Emulations | PCL6, KC-GL, KPDL, KPDL (AUTO), Line Printer, IBM Proprinter, Diablo 630, EPSON LQ-850 |
| Operating Systems | Windows 98/Me/NT 4.0/2000/XP, Apple Macintosh OS 9.x/OS X 10.x, UNIX/Linux |
| Energy Star | Yes |
| Manual Language | English |
| Manual Pages | 162 |
Frequently Asked Questions - OP1020 Océ
User questions about OP1020 Océ
0 question about this device. Answer the ones you know or ask your own.
Ask a new question about this device
Download the instructions for your Printer in PDF format for free! Find your manual OP1020 - Océ and take your electronic device back in hand. On this page are published all the documents necessary for the use of your device. OP1020 by Océ.
USER MANUAL OP1020 Océ
Océ OP1016/1020/1025
Printing System
Advanced Operations Guide

CAUTION: No liability is assumed for any damage caused by improper installation
Notice
The information in this guide is subject to change without notification. Additional pages may be inserted in future editions. The user is asked to excuse any technical inaccuracies or typographical errors in the present edition.
No responsibility is assumed if accidents occur while the user is following the instructions in this manual. No responsibility is assumed for defects in the printer's firmware (contents of its read-only memory).
Copyright
This guide, any copyrightable subject matter sold or provided with or in connection with the sale of the machine, are protected by copyright. All rights are reserved. Any copies made of all or part of this manual, or any copyrightable subject must contain the same copyright notice as the material from which the copying is done.
Regarding Trade names
PRESCRIBE is a registered trademark of Kyocera Corporation. KPDL and KIR (Kyocera Image Refinement) are trademarks of Kyocera Corporation.
Diablo 630 is a product of Xerox Corporation. IBM Proprinter X24E is a product of International Business Machines Corporation. Epson LQ-850 is a product of Seiko Epson Corporation. Hewlett-Packard, PCL, and PJL are registered trademarks of Hewlett-Packard Company. Centronics is a trade name of Centronics Data Computer Corp. PostScript is a registered trademark of Adobe Systems Incorporated. Macintosh is a registered trademark of Apple computer, Inc. Microsoft, Windows, and Windows NT are registered trademarks of Microsoft Corporation. PowerPC is a trademark of International Business Machines Corporation. ENERGY STAR is a U.S. registered mark. All other brand and product names are registered trademarks or trademarks of their respective companies.
Introduction
This Advanced Operation Guide has the following chapters:
• 1 Copy Functions
Explains the copier functions available on the machine.
• 2 Printer Settings
Explains the settings available for the printer functions.
• 3 System Settings
Explains the general settings available on the machine.
• 4 Job Accounting
Explains the Job Accounting function and settings.
- Appendix
Contains machine specifications.
Guides Included
The following guides are included with this machine. Refer to the guide that corresponds to your particular objective.
Basic Operation Guide
The Basic Operation Guide contains procedural steps for initial installation and set-up of the machine and connection to a computer. It also includes basic procedures for using the machine as a copier and printer and has a Troubleshooting section.
Advanced Operation Guide (this guide)
This Advanced Operation Guide contains explanations on copier and printer functions as well as default settings adjusted on the machine.
KX Printer Driver Operation Guide
Describes how to install and set-up the printer driver.
PRESCRIBE Technical Reference
PRESCRIBE is the native language of these printers. This Technical Reference contains information about how printing is performed using the PRESCRIBE commands, as well as a font and emulation description.
PRESCRIBE Command Reference
Gives a detailed explanation of the PRESCRIBE command syntax and parameters with the aid of print examples. This guide is stored on the CD-ROM as a PDF document.
This manual uses the following conventions.
| Convention Description Example | ||
| Italic Typeface Used | d to emphasise a key word, phrase or message. In addition, references to other publications are displayed in italic typeface. | Open the Multi-Bypass Tray. |
| Bracket Bold Text Typeface | Used to emphasise the selection of a feature mode or key. | Press [Enter]. |
| Notes Used to | provide additional or useful information about a function or feature. | NOTE: To ensure best copying quality, it is recommended this cleaning task is performed at least once a month. |
| Important Use to | provide important information. | IMPORTANT: Never use water, thinner or other organic solvents to clean the slit glass. |
| Caution Cautions | are statements that suggest mechanical damage as a result of an action. | CAUTION: For safety purposes, always remove the power plug from the outlet when cleaning the machine. |
| Warning Used to | alert users to the possibility of personal injury. | WARNING: High voltage is present in the charger section. |
Measurements
This guide contains information that corresponds to using both the inch and metric versions of the machine. The screens and messages shown in the guide reflect the inch version of the machine. When using the metric version, refer to the messages on your machine.
Contents
Legal Information .... Legal and Safety-i
Introduction
Guides Included iv
Conventions v
1 Copy Functions
Original Size 1-2
Original Placement 1-4
Offset Mode. 1-5
Stapling 1-6
Combine Mode 1-7
Margin Mode....1-12
Border Erase Mode....1-13
Continuous Scan....1-14
Auto Rotation 1-15
EcoPrint Mode. 1-16
Auto Selection Mode....1-17
Program Function 1-18
2 Printer Settings
Status Page....2-2
e-MPS Function 2-3
Interface 2-11
Emulation 2-18
Font 2-21
Print Configuration 2-26
Print Quality....2-31
Memory Card Operation 2-34
Hard Disk Operation 2-40
RAM Disk Operation 2-41
Paper Handling 2-44
Other Printer Settings 2-48
3 System Settings
Copy Default Settings 3-2
Machine Default Settings 3-14
Viewing and Printing the Total Counter 3-28
Report Output 3-30
Language Setting 3-32
User Adjustment 3-33
4 Job Accounting
Job Accounting Mode 4-2
Managing Accounts....4-4
Default Settings....4-12
Using Job Accounting 4-15
Appendix
Paper....Appendix-2
Specifications ...... Appendix-11
Glossary ....Appendix-17
1 Copy Functions
This chapter explains how to use the copier functions of the machine.
- Original Size.... 1-2
• Original Placement.... 1-4 - Offset Mode.... 1-5
- Stapling.... 1-6
- Combine Mode 1-7
- Margin Mode 1-12
• Border Erase Mode 1-13 - Continuous Scan.... 1-14
• Auto Rotation.... 1-15 - EcoPrint Mode.... 1-16
• Auto Selection Mode 1-17 - Program Function.... 1-18
Original Size
Use Original Size to select the size of original being scanned. The selection must match the physical size of the original.
The following Original Size options are available:
- Regular Size - use to select a standard original size.
- Other Regular Size - use for additional standard original sizes.
- Input Size - use this option to enter a custom original size if the size required is not displayed.
Regular Size
Use the following procedure to select a standard original size.
1 Position the original and press [Original Size].
2 Press ▲ or ▼ to select the original size required and press [Enter]. Original Size: Auto Input Size
Select Auto to allow the machine to automatically select the same size as the original on the platen.
3 Press [Start]. Copying commences.
Other Regular Size
Use the following procedure to select additional standard original sizes.
1 Position the original and press [Original Size].
2 Press ▲ or ▼ to select Other Regular Size and press [Enter].
Press ▲ or ▼ to select Other Regular Size and press [Enter].
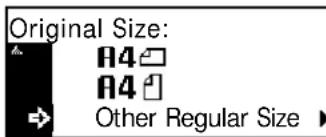
3 Press ▲ or ▼ to select the original size required and press [Enter].
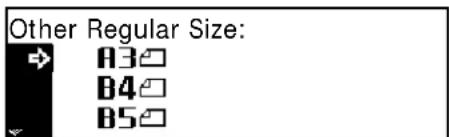
4 Press [Start]. Copying commences.
Input Size
1 Position the original and press [Original Size].
2 Press ▲ or ▼ to select Input Size and press [Enter].
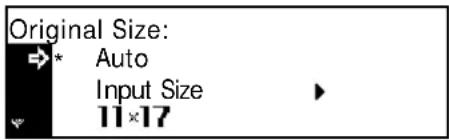
3 Press < or > to select the vertical size required, 2" to 11 5/8" in 1/8" increments (50 to 297 mm in 1 mm increments) can be selected.
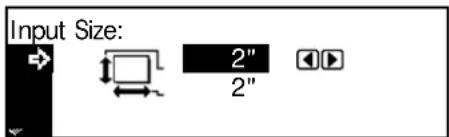
Press ▼ to select the horizontal size.
4 Press < or > to select the horizontal size, 2" to 17" in 1/8" increments (50 to 432 mm in 1 mm increments) can be selected.
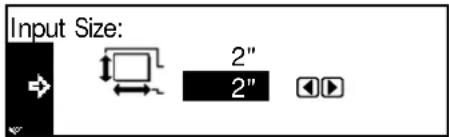
Press [Enter].
5 Press [Start]. Copying commences.
Original Placement
You must specify the orientation of the original when using the following functions:
- Duplex Copying
- Split Copying (from 2-sided originals)
- Margin mode
- Border Erase mode
- Combine mode
- Auto Selection mode (Optional)
- Stapling (Optional)
When the originals are positioned on the Platen:

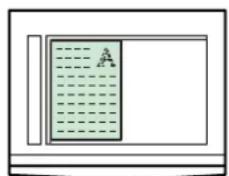
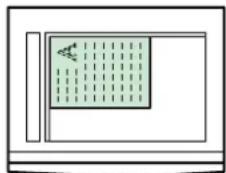
Original Rear Left Top
When the originals are loaded in the Document Processor:
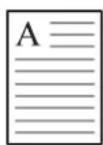
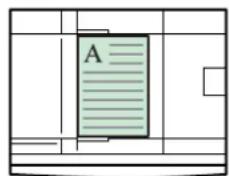
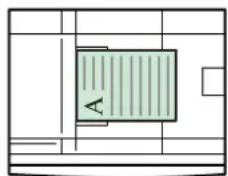
Original Rear Left Top
NOTE: To change the default setting for Original Orientation, refer to Original Orientation, on page 3-20.
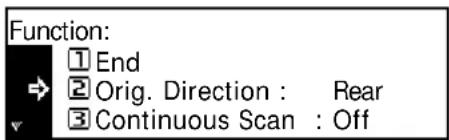
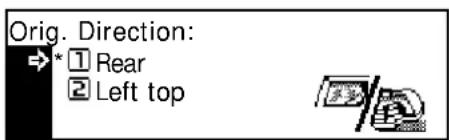
1 Press [Function].
2 Press ▲ or ▼ to select Orig. direction and press [Enter].
3 Press ▲ or ▼ to select Rear or Left top and press [Enter].
Offset Mode
Use this mode to change the orientation of the output at the end of each set for easy division.
NOTE: If the Document Processor (option) or Finisher (option) is not installed, use this function with Sort copying.
The paper sizes that can be used for Offset copying are A4, B5 and 11 × 8 1/2"
NOTE: Ensure the Auto Rotation feature is On, refer to Auto Rotation, on page 1-15.
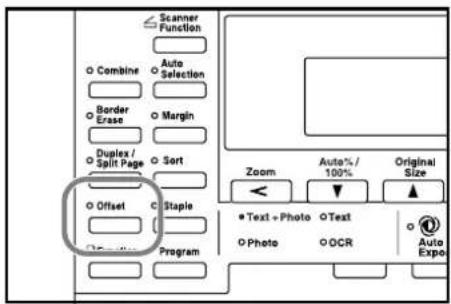
1 Position the original and press [Offset].
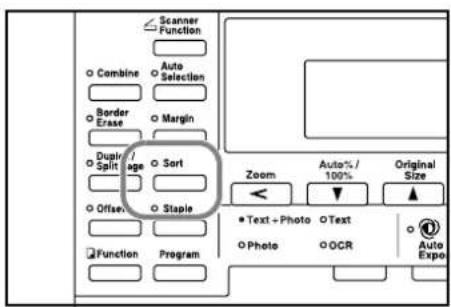
2 Press [Sort].
3 Enter the number of copies required and press [Start].
If using the optional Document Processor, copying completes automatically.
If using the platen, a message displays when the next original is required. Position the next original and press [Start].
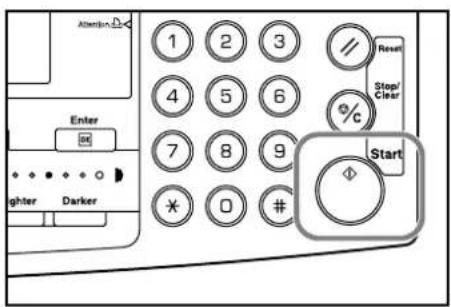
When all originals have been scanned, press [Enter].
Stapling
Copies can be stapled in the upper left or upper right corner.
NOTE: The optional Finisher must be installed.
The orientation of originals and the stapling position is shown below.
![graph TD A["Original Copy"] --> B["Document 1"] A --> C["Document 2"] D["Original Copy"] --> E["Document 3"] D --> F["Document 4"] G["Original Copy"] --> H["Document 5"] G --> I["Document 6"]](/content/2026/05/768512/images/1c477b72ec4a66bc10e87d497e63a423b1f0798d5b4d91a25ea962ace3c7aa90.jpg)
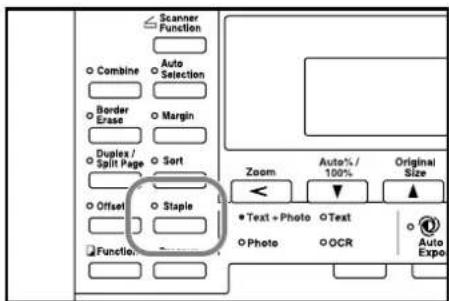
1 Position the original and press [Staple].
2 Press ▲ or ▼ to select the stapling position and press [Enter].
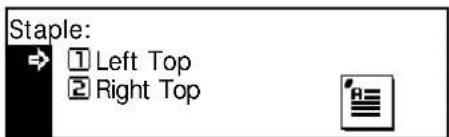
3 Press [Start].
If using the optional Document Processor, copying completes automatically.
If using the platen, a message displays when the next original is required. Position the next original and press [Start].
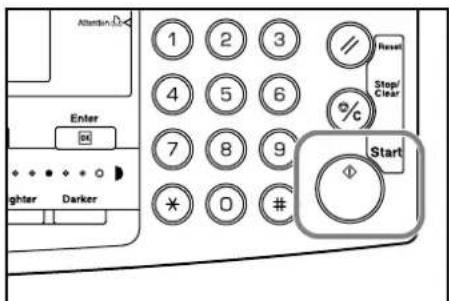
When all originals have been scanned, press [Enter].
Combine Mode
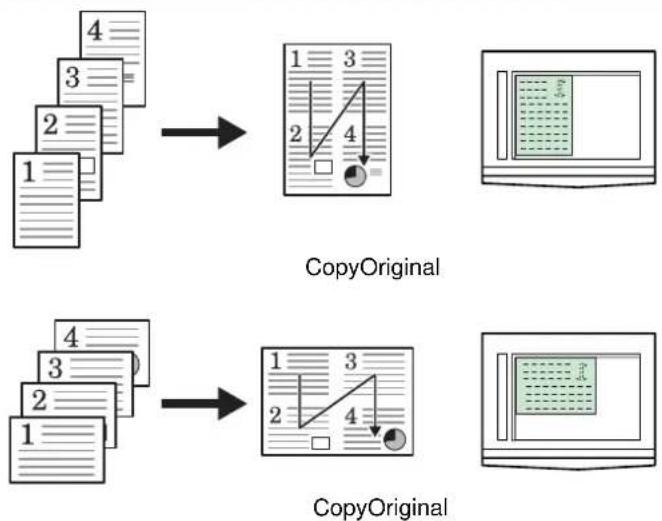
The images from either 2 or 4 originals can be reduced and combined onto a single copy. The Border Line of each original can also be marked with a solid or dotted line.
The following Combine modes are available:
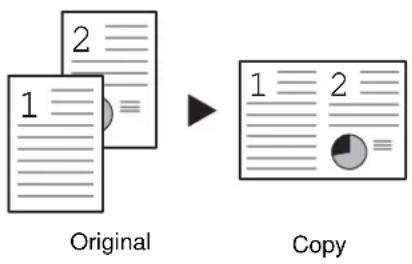
NOTE: Both the Original Size and the Copy Paper Size must be regular sizes.
| Mode Description | |
| 2 in 1 Copies two | originals onto one sheet. This mode can also be used in conjunction withDuplex Mode(optional) in order to copy four originals onto both sides of one sheet.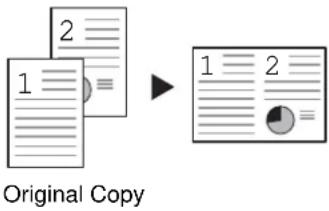 |
| 4 in 1 (Vertical Arrangement)4 in 1 (Horizontal Arrangement) | Copies four originals onto one sheet. This mode can also be used in conjunction withDuplex Mode(optional) in order to copy eight originals onto both sides of one sheet.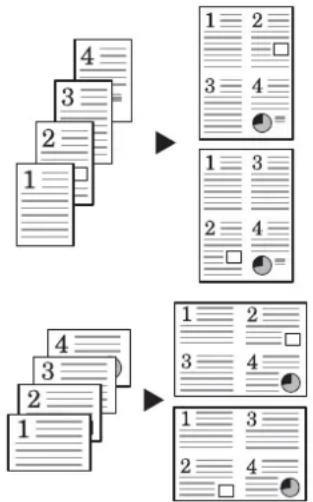 Original Copy Original Copy |
2 in 1
The following illustrations indicate how the orientation of the original will affect the resulting copies:
Using the Platen
![graph LR A["Document 1"] --> B["CopyOriginal"] C["Document 2"] --> D["CopyOriginal"] B --> E["Grid Layout"] D --> F["Grid Layout"]](/content/2026/05/768512/images/69b4da40faf4e158efd62b5256028e5883ed3bb3ad436ee51715b983500439c7.jpg)
Using the Document Processor
![graph LR A["Document 1"] --> B["CopyOriginal"] C["Document 2"] --> D["CopyOriginal"] B --> E["Output Image"] D --> F["Output Image"]](/content/2026/05/768512/images/9a681755b10a40357f2ec6c548033a0698ca211b49660b6820f40f174f82ad11.jpg)
NOTE: Ensure that the first page of the originals is scanned first.
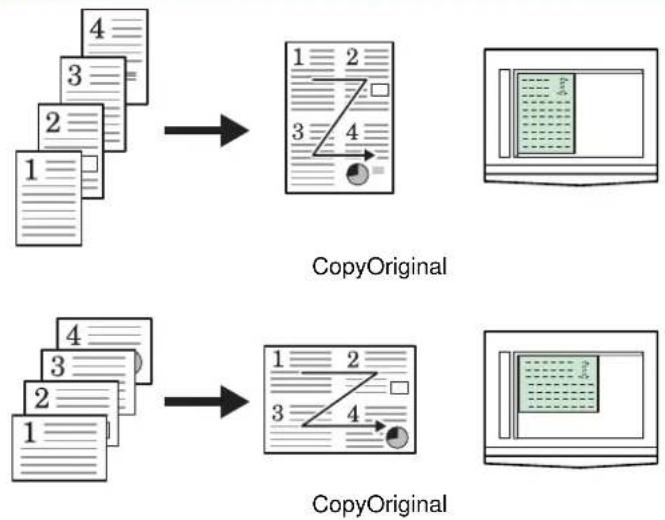
4 in 1 (Horizontal Arrangement)
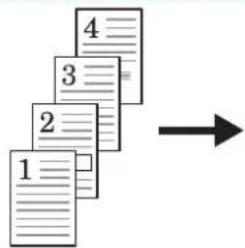
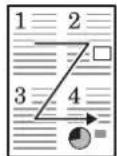
The following illustrations indicate how the orientation of the original will affect the resulting copies:
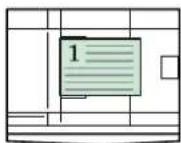
Using the Platen
Using the Document Processor
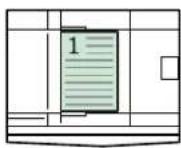
CopyOriginal
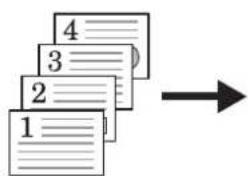
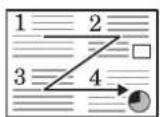
CopyOriginal
NOTE: Ensure that the first page of the originals is scanned first.
4 in 1 (Vertical Arrangement)
The following illustrations indicate how the orientation of the original will affect the resulting copies:
Using the Platen
Using the Document Processor
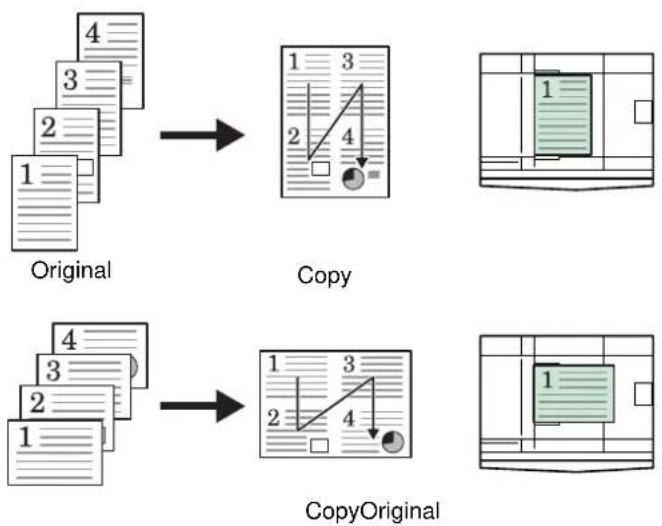
NOTE: Ensure that the first page of the originals is scanned first.
Borderline Types
The following borderline types are available.
| Borderline type | Copy | |
| 2 in 1 | 4 in 1 (horizontal arrangement)/4 in 1 (vertical arrangement) | |
| None | 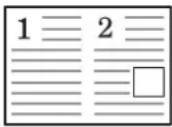 | 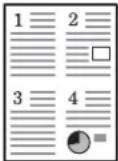 |
| Solid | 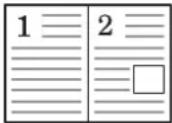 | 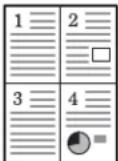 |
| Dotted | 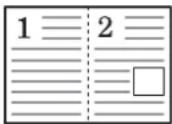 | 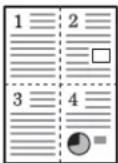 |
| Mark or Cropmark | 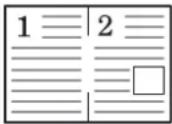 | 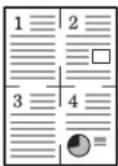 |
Using Combine Mode
1 Position the original and press [Combine].
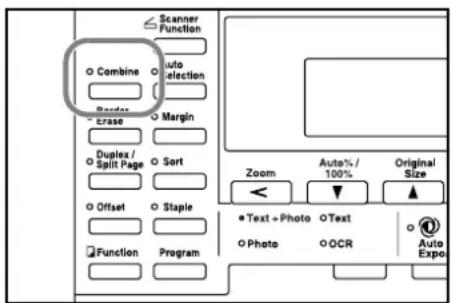
2 Press ▲ or ▼ to select the combine option required and press [Enter].
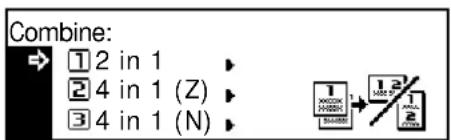
3 Press ▲ or ▼ to select the Border Line type and press [Enter].
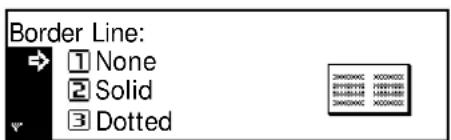
4 Press [Start].
If using the optional Document Processor, copying completes automatically.
If using the platen, a message displays when the next original is required. Position the next original and press [Start].
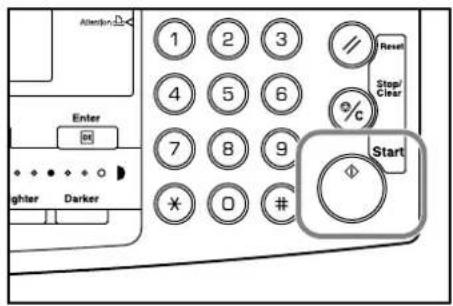
When all originals have been scanned, press [Enter].
Margin Mode
The image of the original can be shifted to make a margin (blank) space at the left or top side of the copy. You can set the width of each margin to 1/8" to 3/4" in 1/8" increments (1 mm to 18 mm in 1 mm increments).
NOTE: To set the default value for Margin Width, refer to Margin Width Default Value, on page 3-11.
1 Position the original and press [Margin].
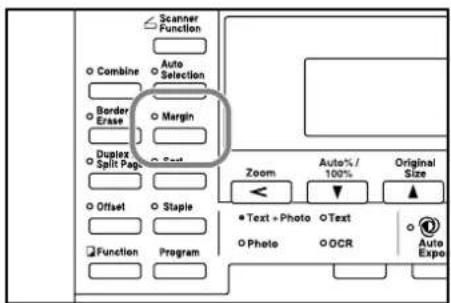
2 Press ▲ or ▼ to select Left Margin or Top Margin and press [Enter].
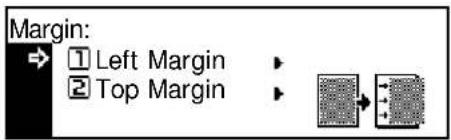
3 Press < or > to select the Margin Width, 1/8" to 3/4" in 1/8" increments (1 mm to 18 mm in 1 mm increments) can be selected.
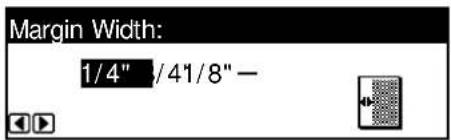
Press [Enter].
4 Press [Start]. Copying commences.
Border Erase Mode
Shadows that appear around the edges of copies can be erased. The following modes are available:
| Mode Description | |
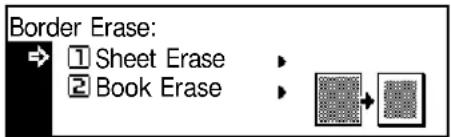
| Sheet Erase Use this mode | to erase shadows which appear when using sheet originals. You can set the width of the border to be erased from 1/8" to 3/4" in 1/8" increments (1 mm to 18 mm in 1 mm increments). |
| Book Erase Use this mode | to produce clean copies from a thick book. You can set the width of the border to be erased from 1/8" to 3/4" in 1/8" increments (1 mm to 18 mm in 1 mm increments). |
NOTE: To set the default value for Border Erase width, refer to Border Erase Width Default Value, on page 3-12.
1 Position the original and press [Border Erase].
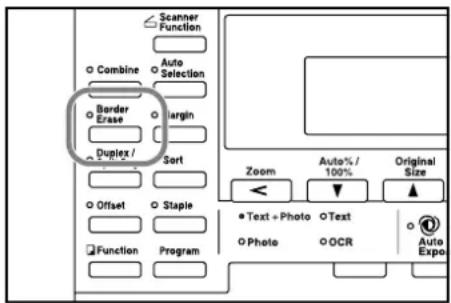
2 Press ▲ or ▼ to select Sheet Erase or Book Erase and press [Enter].
3 Press < or > to set the Border Erase Width, 1/8" to 3/4" in 1/8" increments (1 mm to 18 mm in 1 mm increments) can be selected.
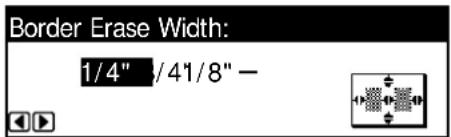
Press [Enter].
4 Press [Start]. Copying commences.
Continuous Scan
Using Continuous Scan, originals can be scanned individually or in blocks but still be processed as a single job. The originals are scanned into the machine's memory until all the originals have been scanned, copies are then made.
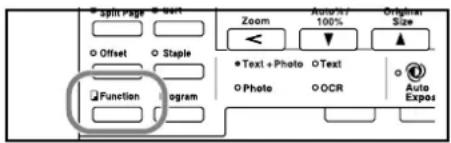
1 Position the first original(s) and press [Function].
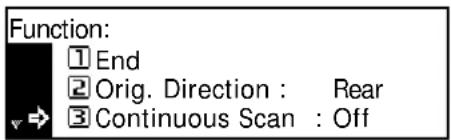
2 Press ▲ or ▼ to select Continuous Scan and press [Enter].
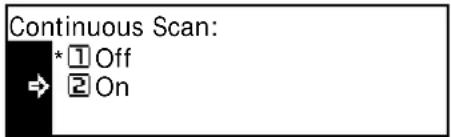
3 Press ▲ or ▼ to select On and press [Enter].
4 Press ▲ or ▼ to select End and press [Enter].
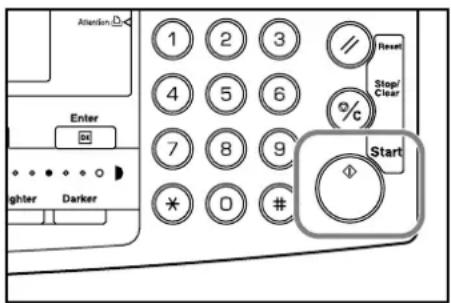
5 Press [Start].
Position the next original(s) and press [Start]. Repeat the procedure to scan the remaining originals.
When all originals have been scanned, press [Enter].
Copying commences.
Auto Rotation
Use Auto Rotation to automatically rotate images counterclockwise by 90 degrees, if the orientation of the original is different to the paper loaded in the cassette.
NOTE: To enable Auto Rotation as the default setting, refer to Auto Rotation Copy, on page 3-11.
The paper sizes that can be used for Auto Rotation are A4, 11 × 8 1/2" or smaller sizes
NOTE: A3, B4, Folio, 11 × 17" (Ledger) or 8 1/2 × 14" (Legal) cannot be used for Auto Rotation.
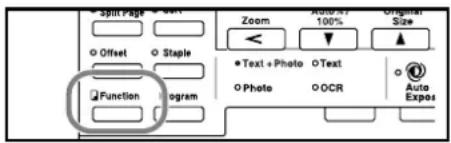
1 Position the first original(s) and press [Function].
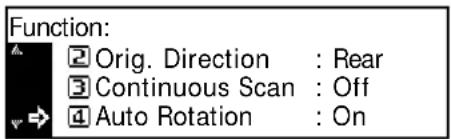
2 Press ▲ or ▼ to select Auto Rotation and press [Enter].
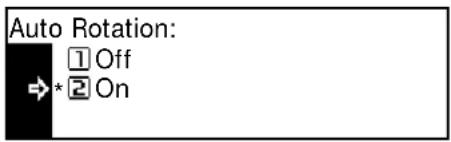
3 Press ▲ or ▼ to select On and press [Enter].
EcoPrint Mode
Ecoprint mode reduces toner consumption. Use this mode when high quality copies are not necessary, for example, for draft copies.
NOTE: The copy exposure will be a little lighter. To set the EcoPrint mode as the default setting, refer to EcoPrint Mode, on page 3-4.
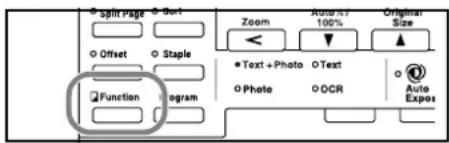
1 Position the first original(s) and press [Function].
2 Press ▲ or ▼ to select EcoPrint and press [Enter].
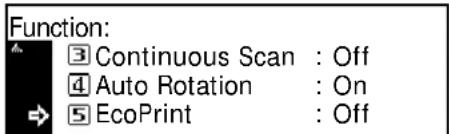
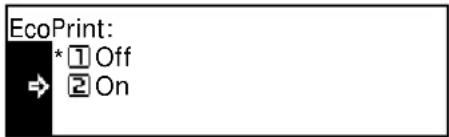
3 Press ▲ or ▼ to select On and press [Enter].
Auto Selection Mode
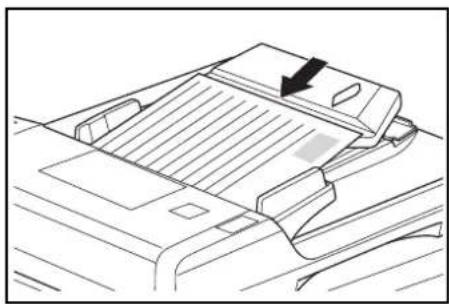
If using the optional Document Processor, Auto Selection mode enables the machine to detect each original size and produce copies on the same size paper as the original.
NOTE: The maximum number of sheets that can be loaded in the Document Processor in this mode is 30.
The following original sizes can be used in Auto Selection mode:
- Inch Specification — 11 × 8 1/2" and 11 × 17" (Ledger) or 8 1/2 × 14" (Legal) and 8 1/2 × 11" (Letter)
• Metric Specification — A3 and A4, folio and A4R, or B4 and B5.
The original width must be the same.
1 Load the originals in the Document Processor.
2 Press [Auto Selection].
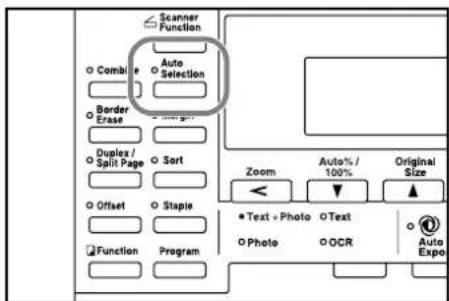
3 Press [Start]. Copying commences.
Program Function
Up to eight combinations of copy modes and functions displayed on the operation panel can be registered as a single program.
Registering a Program
1 Select the copy options to be registered (for example 5 copies, Sort, Margin) and press [Program].
2 Press ▲ or ▼ to select Register program and press [Enter].
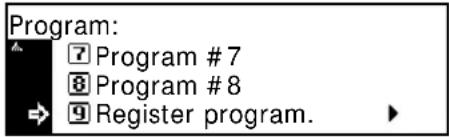
3 Press ▲ or ▼ to select the program number required (1 to 8) and press [Enter].
The program is registered.
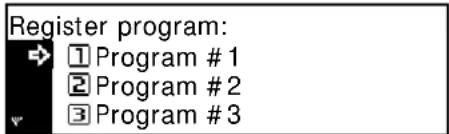
NOTE: You can also select the program number using a numeric key.
Using a Program
1 Press [Program].
2 Press ▲ or ▼ to select the program number required and press [Enter].
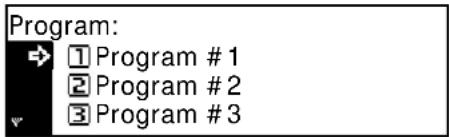
NOTE: You can also select the program number using a numeric key.
3 Position the originals and press [Start].
Copies are produced using the settings registered in the program.
2 Printer Settings
This section explains how to change settings which are required for the printer functions of the machine.
- Status Page.... 2-2
- e-MPS Function.... 2-3
- Interface ......2-11
- Emulation 2-18
- Font.... 2-21
• Print Configuration.... 2-26
• Print Quality 2-31
• Memory Card Operation.... 2-34 - Hard Disk Operation.... 2-40
• RAM Disk Operation.... 2-41
• Paper Handling...... 2-44
• Other Printer Settings.... 2-48
Status Page
The printer default settings, the memory capacity, and other details are printed on the Status Page.
1 Press [Printer].
![graph TD A["Printer"] --> B["Copier"] B --> C["Combine"] B --> D["Border Erase"] B --> E["Duplex / Split Page"]](/content/2026/05/768512/images/9c992cee63b7ff73593ed5dd60a402961fd266f7c21d21e03ce6afc45e8adfee.jpg)
2 Press ▲ or ▼ to select MENU and press [Enter].

3 Press ▲ or ▼ to select Print Status Page and press [Enter].
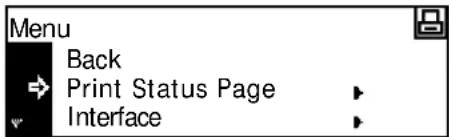
4 Press ▲ or ▼ to select Print and press [Enter].
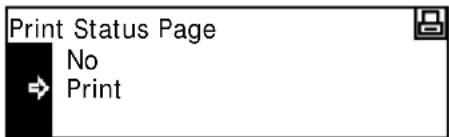
The Status Page is printed.
e-MPS Function
The following settings are available:
- Quick Copy/Proof-and-Hold
- Private Print/Stored Job
- Virtual Mailbox
• Virtual Mailbox List - Code Job List
• e-MPS Detail Settings
NOTE: To use the e-MPS functions, the optional Hard Disk must be installed. For details on e-MPS, refer to the KX Printer Driver Operation Guide.
NOTE: If the RAM Disk Operation (refer to page 2-41) is switched On, the e-MPS function can still be used for Proof-and-hold and Private Print jobs.
Access e-MPS
1 Press [Printer].
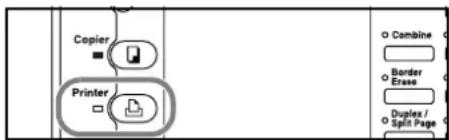
2 Press ▲ or ▼ to select MENU and press [Enter].
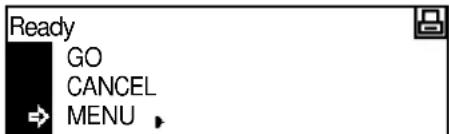
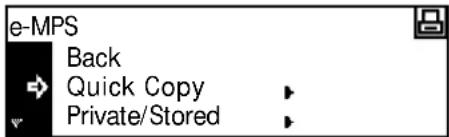
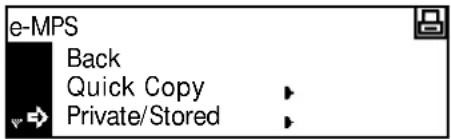
3 Press ▲ or ▼ to select e-MPS and press [Enter].
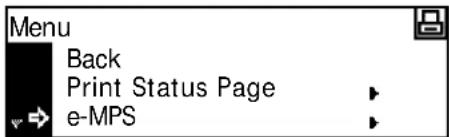
The e-MPS screen displays.
Select the options required.
Quick Copy/Proof-and-Hold
Quick Copy and Proof-and-hold are selected from the printer driver.
When a Quick Copy job is received, the machine stores it in memory until the user enters the number of copies required and prints the job.
When a Proof-and-hold job is received, the machine prints one set and then stores the job in memory. The user can check the proof, change the number of copies if required and print the remaining sets.
NOTE: For information about the printer driver options, refer to the KX Printer Driver Operation Guide.
1 Access e-MPS, refer to Access e-MPS, on page 2-3.
2 Press ▲ or ▼ to select Quick Copy and press [Enter].
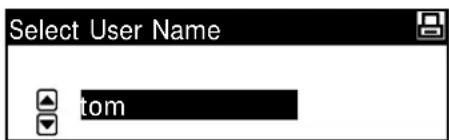
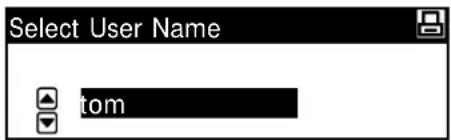
3 Press ▲ or ▼ to select the user name specified by the printer driver and press [Enter].
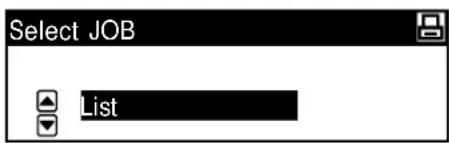
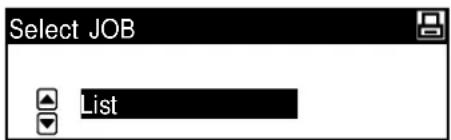
4 Press ▲ or ▼ to select the job name specified by the printer driver and press [Enter].
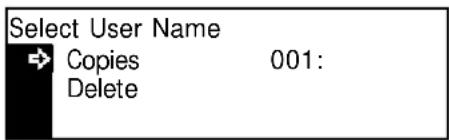
5 Use the numeric keys to enter the number of copies and press [Enter].
Printing commences.
Deleting Quick Copy/Proof-and-Hold
Quick copy/proof-and-hold jobs stored in memory are deleted automatically when the power is switched off. Use the following instructions to delete a job manually.
1 Select the job to delete, refer to Quick Copy/Proof-and-Hold, on page 2-4.
2 Press ▲ or ▼ to select Delete and press [Enter].
Private Print/Stored Job
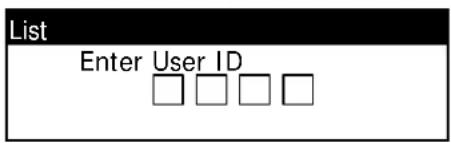
If Private is selected on the printer driver, the user enters a 4-digit access code prior to sending the job. The job is then held in memory until the user enters the same 4-digit access code to enable the job to print. The data is cleared after printing.
If Stored job is selected, there is no restriction on access. The job is printed and then stored in memory.
NOTE: For information about the printer driver options, refer to the KX Printer Driver Operation Guide.
1 Display the e-MPS screen, refer to Access e-MPS, on page 2-3.
2 Press ▲ or ▼ to select Private/Stored and press [Enter].
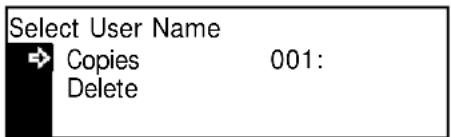
3 Press ▲ or ▼ to select the user name specified by the printer driver and press [Enter].
4 Press ▲ or ▼ to select the job name specified by the printer driver and press [Enter].
5 Use the numeric keys to enter the 4-digit access code specified on the printer driver and press [Enter].
6 Use the numeric keys to enter the number of copies and press [Enter].
Printing commences.
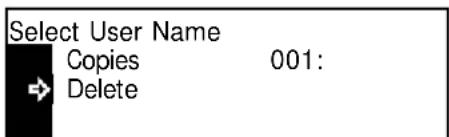
Deleting Private Print/Stored Job
Each stored job can be deleted manually as shown below:
1 Select the job to delete, refer to Private Print/Stored Job, on page 2-5.
2 Press ▲ or ▼ to select Delete and press [Enter].
Select User Name
001:
Copies
Delete
Virtual Mailbox
Virtual Mailbox is selected from the printer driver and is used to store jobs on the machine. A job will remain in a Virtual Mailbox until the 5-digit access code (set using KM-NET Printer Disk Manager) is entered to enable the job to print. When the job is printed the data is deleted from the mailbox.
NOTE: For information about the printer driver options, refer to the KX Printer Driver Operation Guide.
1 Display the e-MPS screen, refer to Access e-MPS, on page 2-3.
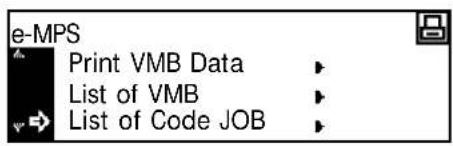
2 Press ▲ or ▼ to select Print VMB Data and press [Enter].
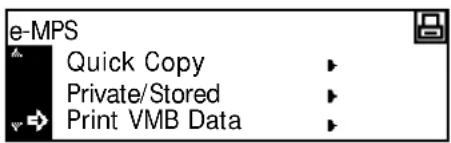
3 Press ▲ or ▼ to select the mailbox to print and press [Enter].
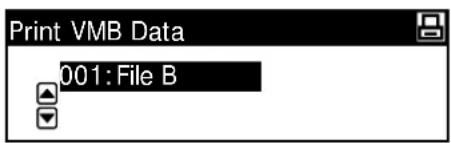
4 Use the numeric keys to enter the five-digit access code set with the KM-NET Printer Disk Manager, press [Enter].
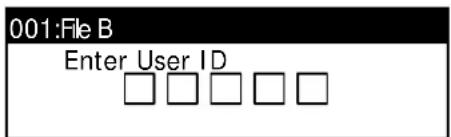
Printing starts. Once printing is complete, the document data in the mailbox is deleted.
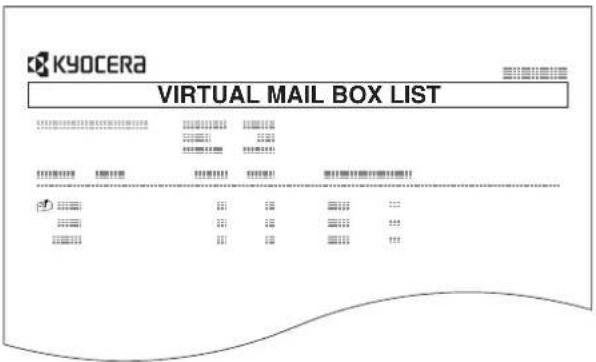
Virtual Mailbox List
A list can be printed which shows the current Virtual Mailbox numbers, the data stored in a mailbox, the size of data stored and other information.
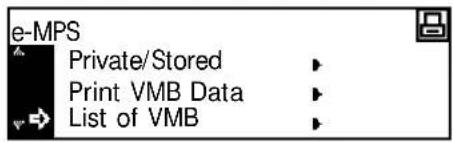
1 Display the e-MPS screen, refer to Access e-MPS, on page 2-3.
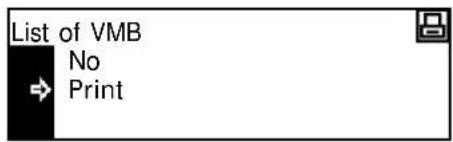
2 Press ▲ or ▼ to select List of VMB and press [Enter].
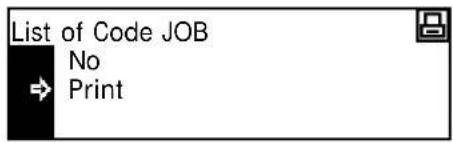
3 Press ▲ or ▼ to select Print and press [Enter].
The virtual mailbox list is printed.
Code Job List
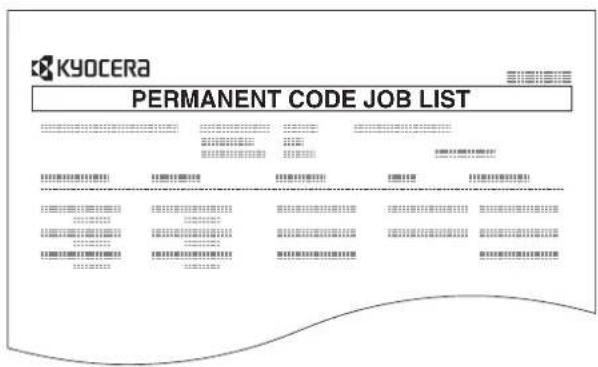
Permanent code jobs in the hard disk can be printed.
1 Display the e-MPS screen, refer to Access e-MPS, on page 2-3.
2 Press ▲ or ▼ to select List of code JOB and press [Enter].
3 Press ▲ or ▼ to select Print and press [Enter].
The code job list is printed.
e-MPS Detail Settings
The e-MPS settings such as the maximum number of documents that can be stored on the hard disk and the capacity assigned to each function, can be changed.
Maximum Number - Quick Copy Jobs
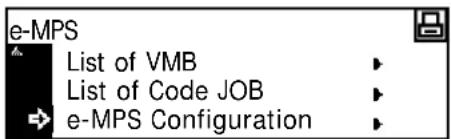
1 Display the e-MPS screen, refer to Access e-MPS, on page 2-3.
2 Press ▲ or ▼ to select e-MPS Configuration and press [Enter].
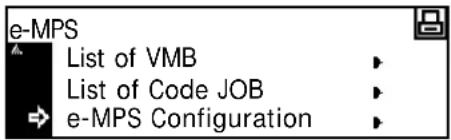
3 Press ▲ or ▼ to select Quick Copy and press [Enter].
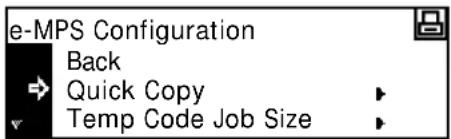
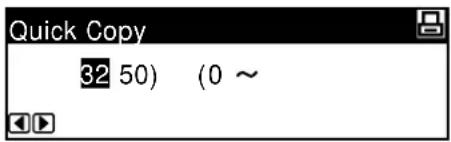
4 Press < or > to select the maximum number of jobs that can be stored, 0 to 50 can be selected. Press [Enter].
Total Capacity - Temporary Code Jobs
Use to set the total capacity for storage of temporary code jobs on the hard disk.
1 Display the e-MPS screen, refer to Access e-MPS, on page 2-3.
2 Press ▲ or ▼ to select e-MPS Configuration and press [Enter].
3 Press ▲ or ▼ to select Temp Code Job Size and press [Enter].
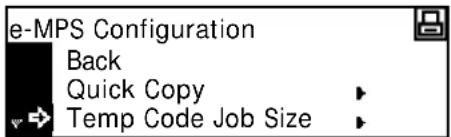
4 Press < or > to select the capacity for storage of temporary code jobs, 0 to 9999 MB can be selected. Press [Enter].
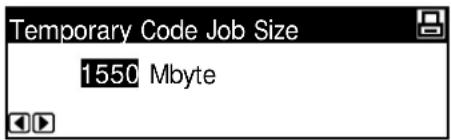
NOTE: The actual maximum size is the size of available hard disk space.
Total Capacity - Permanent Code Jobs
Use to set the total capacity for storage of permanent code jobs on the hard disk.
1 Display the e-MPS screen, refer to Access e-MPS, on page 2-3.
2 Press ▲ or ▼ to select e-MPS Configuration and press [Enter].
e-MPS
List of VMB
List of Code JOB
e-MPS Configuration
3 Press ▲ or ▼ to select Perm Code Job Size and press [Enter]. e-MPS Configuration Quick Copy Temp Code Job Size Perm Code Job Size
4 Press < or > to select the total capacity for storage of permanent code jobs, 0 to 9999 MB can be selected. Press [Enter].
NOTE: The actual maximum size is the size of available hard disk space.
Total Capacity - Virtual Mailboxes
Use to set the total capacity for storage of virtual mailboxes on the hard disk.
1 Display the e-MPS screen, refer to Access e-MPS, on page 2-3.
2 Press ▲ or ▼ to select e-MPS Configuration and press [Enter].
e-MPS
List of VMB
List of Code JOB
e-MPS Configuration
3 Press ▲ or ▼ to select VMB Size and press [Enter]. e-MPS Configuration Temp Code Job Size Perm Code Job Size VMB Size
4 Press < or > to select the capacity for storage of virtual mailboxes (VMB), 0 to 9999 MB can be selected. Press [Enter].
NOTE: The actual maximum size is the size of available hard disk space.
Interface
This machine is equipped with a parallel, USB and network interface as standard.
The following settings are available:
- Parallel Interface
- Network Setting
- IP Address Setting
- Subnet Mask Setting
- Default Gateway
• Network Status Page Printing
Access the Interface Screen
1 Press [Printer].
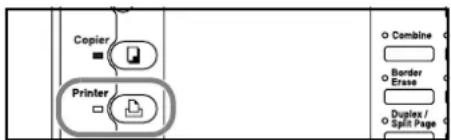
2 Press ▲ or ▼ to select MENU and press [Enter].
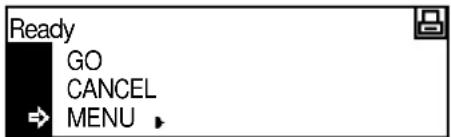
3 Press ▲ or ▼ to select Interface and press [Enter].

Setup the options required.
Parallel Interface
The parallel interface supports bi-directional/high-speed mode. The transmission/reception modes that can be set are shown below.
| Mode | Description |
| Auto The printer | automatically changes its communication mode according to the connected computer. We recommend you leave this setting unchanged. |
| Normal The printer | uses the standard communication method prescribed for Centronics interfaces. |
| High speed This mode enables faster data transmission between the printer and the computer. Select this mode if printing problems occur when the printer is connected to a workstation. | |
| Nibble (high) | High speed data communication is used in compliance with the IEEE 1284 standard. |
NOTE: Use a parallel interface cable that complies with the IEEE 1284 standard.
1 Display the Interface screen, refer to Access the Interface Screen, on page 2-11.
2 Press ▲ or ▼ to select Parallel and press [Enter].
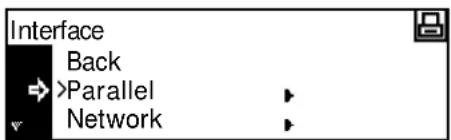
3 Press ▲ or ▼ to select the transmission/reception mode required and press [Enter].
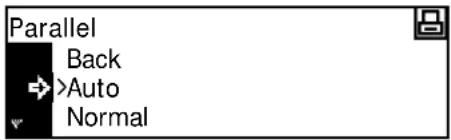
4 Press [Reset]. The Printer Basic screen displays.
Network Setting
To perform network printing, network setup is required. This section describes the tasks required for using the network function.
NOTE: Before setting the IP Address, ask your Network Administrator to obtain the address and prepare it.
NetWare
Set this option to On if connecting to a NetWare network.
1 Display the Interface screen, refer to Access the Interface Screen, on page 2-11.
2 Press ▲ or ▼ to select Network and press [Enter].
3 Press ▲ or ▼ to select NetWare and press [Enter].
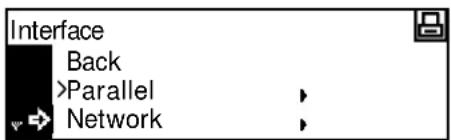
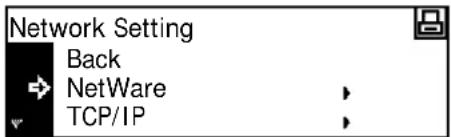
4 Press ▲ or ▼ to select On or Off and press [Enter]. If On is selected, Change # displays.
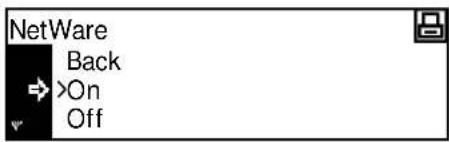
5 Press ▲ or ▼ to select Change # and press [Enter].

6 Press ▲ or ▼ to select the frame mode and press [Enter].
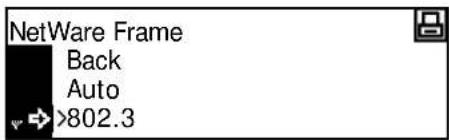
7 Press [Reset]. The Printer Basic screen displays.
EtherTalk
Set this option to On if connecting to an Apple Macintosh computer.
1 Display the Interface screen, refer to Access the Interface Screen, on page 2-11.
2 Press ▲ or ▼ to select Network and press [Enter].
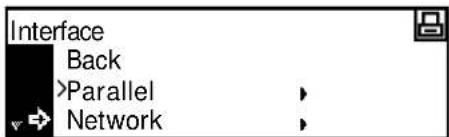
3 Press ▲ or ▼ to select EtherTalk and press [Enter].
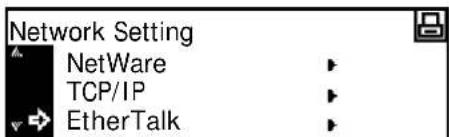
4 Press ▲ or ▼ to select On and press [Enter].
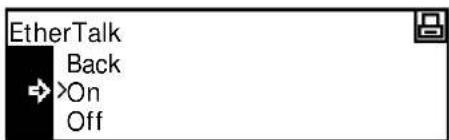
5 Press [Reset]. The Printer Basic screen displays.
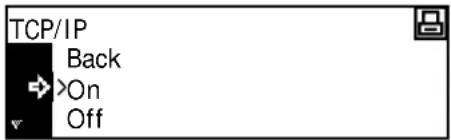
TCP/IP
Set this option to On if connecting to a Windows network via TCP/IP.
1 Display the Interface screen, refer to Access the Interface Screen, on page 2-11.
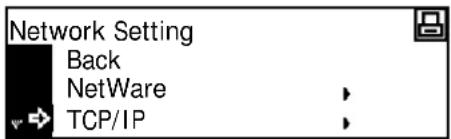
2 Press ▲ or ▼ to select Network and press [Enter].
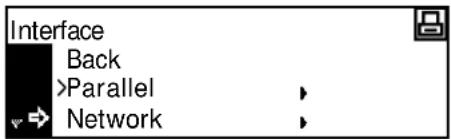
3 Press ▲ or ▼ to select TCP/IP and press [Enter].
4 Press ▲ or ▼ to select On and press [Enter].
DHCP
Set this option to On if using DHCP (Dynamic Host Configuration Protocol).
1 Display the TCP/IP screen, refer to TCP/IP, on page 2-14.
2 Press ▲ or ▼ to select Change # and press [Enter].
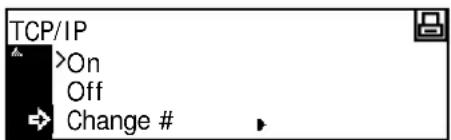
3 Press ▲ or ▼ to select DHCP and press [Enter].
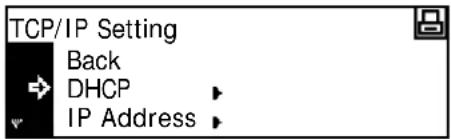
4 Press ▲ or ▼ to select On and press [Enter].
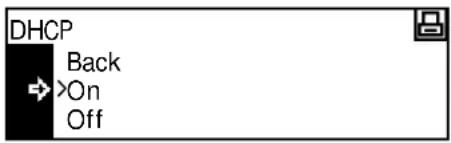
IP Address Setting
Use the following procedure to register an IP Address to the machine. Check with your network administrator before performing this procedure.
If you use the following procedure to register the IP Address manually, ensure DHCP is Off and TCP/IP is On.
NOTE: Any changes made to network settings become valid after you power the machine off and on again.
1 Display the TCP/IP screen, refer to TCP/IP, on page 2-14.
2 Press ▲ or ▼ to select Change # and press [Enter].
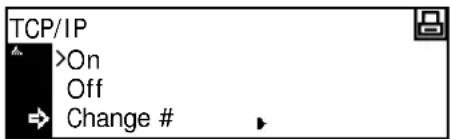
3 Press ▲ or ▼ to select IP Address and press [Enter].
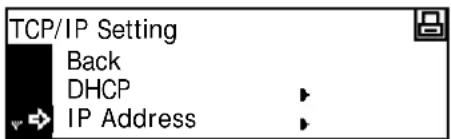
4 Press ▲ or ▼ to select IP Address and press [Enter].
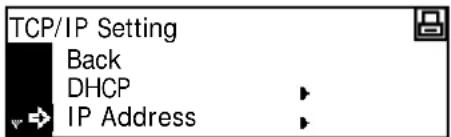
5 Use the keypad to enter the address. Enter the first segment of the IP Address in the highlighted area and press [#].
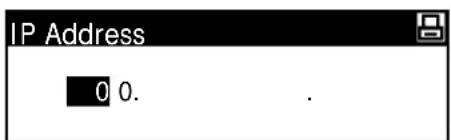
6 Enter the next segment and press [#].
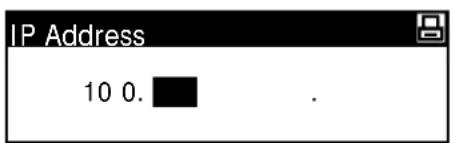
Enter the remaining segments using the same procedure.
Press [Enter] when the entire address has been entered.
Subnet Mask Setting
Continue from the previous Step 6 to register the Subnet Mask address.
NOTE: If you are not sure of the appropriate Subnet Mask address, contact your Network Administrator.
1 Display the TCP/IP Setting screen.
2 Press ▲ or ▼ to select Subnet Mask and press [Enter].
3 Enter the Subnet Mask address using the same procedure used for the IP Address in steps 8 - 9 of IP Address Setting.
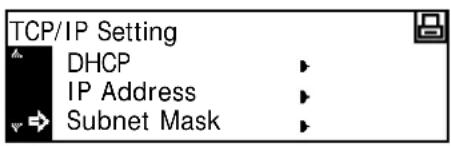
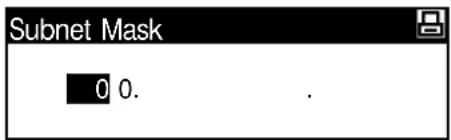
Press [Enter] when the entire address has been entered.
Default Gateway
Continue from the previous Step 3 to register the Default Gateway.
NOTE: If you are not sure of the appropriate Default Gateway address, contact your Network Administrator.
1 Access the TCP/IP Setting screen.
2 Press ▲ or ▼ to select Gateway and press [Enter].
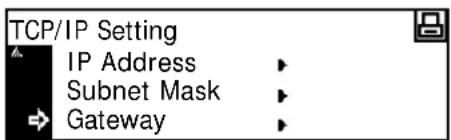
3 Enter the Gateway address using the same procedure used for the IP Address in steps 8 - 9 of IP Address Setting.
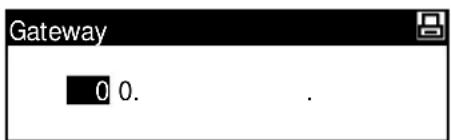
Press [Enter] when the entire address has been entered.
4 When you have entered all the network settings, press [Reset].
The Printer Basic screen displays.
Network Status Page Printing
When printing the Status Page, you can also print the network status page in succession.
1 Display the Interface screen, refer to Access the Interface Screen, on page 2-11.
2 Press ▲ or ▼ to select Network press [Enter]. Interface
Back
Parallel Network
3 Press ▲ or ▼ to select Network Status Page and press [Enter]. Network Setting TCP/IP EtherTalk Network Status Page
4 Press ▲ or ▼ to select On or Off and press [Enter]. Network Status Page Setting Back On >Off
5 Press [Reset]. The Printer Basic screen displays.
Emulation
The following settings are available:
- Emulation Mode Selection
- KC-GL Pen Thickness
- KPDL Error Printing
• KPDL (AUTO) Alternative Emulation Selection
NOTE: You can set the emulation for each interface.
Emulation Mode Selection
Emulation modes that can be used with this machine: PCL6, KC-GL, KDPL, KDPL (AUTO), Line Printer, IBM Proprinter, Diablo 630, EPSON LQ-850
If you set KC-GL, you can set the thickness of the pen and page size.
If you set KPDL (AUTO), switching between KPDL and an alternative emulation mode will be automatically performed according to the print data.
If you set KPDL or KPDL (AUTO), the details of any error that occurs during printing can be printed.
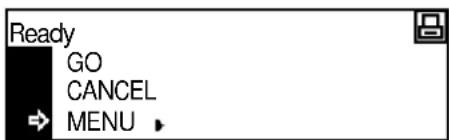
1 Press [Printer].
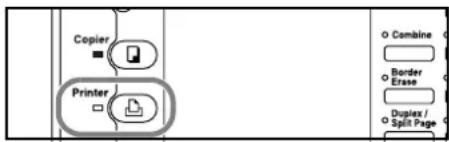
2 Press ▲ or ▼ to select MENU and press [Enter].
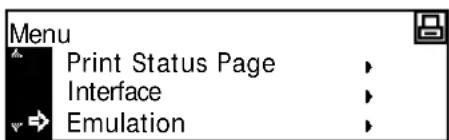
3 Press ▲ or ▼ to select Emulation and press [Enter].
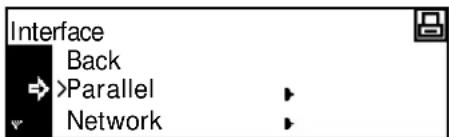
4 Press ▲ or ▼ to select the interface and press [Enter].
5 Press ▲ or ▼ to select the emulation mode and press [Enter].
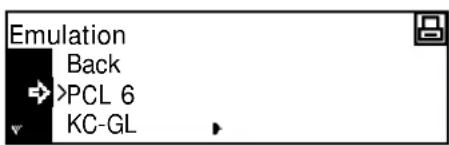
If you have selected KC-GL, refer to KC-GL Pen Thickness, on page 2-19.
If you have selected KPDL or KPDL (AUTO), refer to KPDL Error Printing, on page 2-20.
If you have selected KPDL (AUTO), refer to KPDL (AUTO) Alternative Emulation Selection, on page 2-20.
KC-GL Pen Thickness
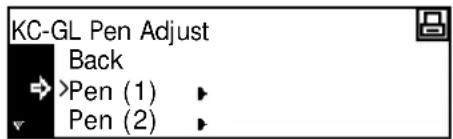
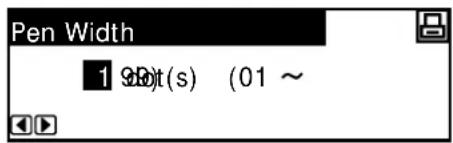
If you have selected KC-GL emulation, you can set the thicknesses of the eight pens and the page size. Continue the procedure from step 5 of Emulation Mode Selection to setup.
1 Press ▲ or ▼ to select KC-GL Pen Adjust and press [Enter].
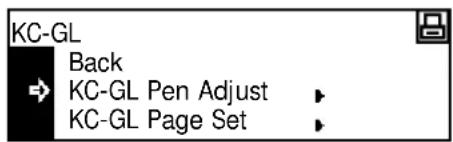
2 Press ▲ or ▼ to select the pen required and press [Enter].
3 Press < or > to select the thickness (number of dots) and press [Enter].
4 Press ▲ or ▼ to select Back and press [Enter].
5 Press ▲ or ▼ to select KC-GL Page Set and press [Enter].
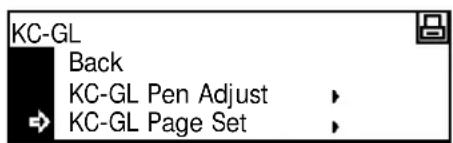
6 Press ▲ or ▼ to select the page size and press [Enter].
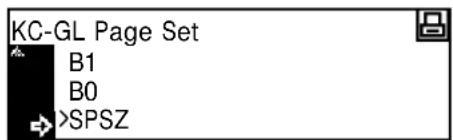
NOTE: SPSZ is the size specified with the PRESCRIBE SPSZ command. For details of the PRESCRIBE commands, refer to the PRESCRIBE Command Reference Manual.
7 Press [Reset]. The Printer Basic screen displays.
KPDL Error Printing
The details of any error that occurs during printing in the KPDL emulation mode can be printed. Continue the procedure from step 5 of Emulation Mode Selection to set up.
1 Press ▲ or ▼ to select Print KPDL Errs and press [Enter].
If On is selected, the details of any error will be printed.
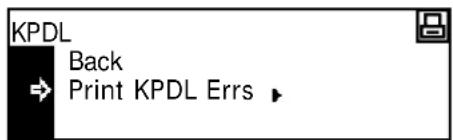
2 Press [Reset]. The Printer Basic screen displays.
KPDL (AUTO) Alternative Emulation Selection
If you set KPDL (AUTO), switching between KPDL and an alternative emulation mode will be automatically performed according to print data. Continue the procedure from step 5 of emulation mode selection to setup.
Available emulation modes: PCL6, KC-GL, Line Printer, IBM Proprinter, DIABLO 630, EPSON LQ-850
1 Press ▲ or ▼ to select Alt. Emulation and press [Enter].
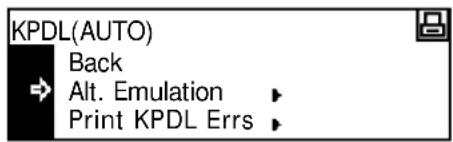
2 Press ▲ or ▼ to select the emulation mode and press [Enter].
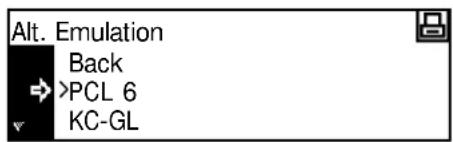
3 Press [Reset]. The Printer Basic screen displays.
Font
You can select the default Font for the current interface. The default Font can be one of the internal fonts or a font stored in the optional Memory Card.
The following settings are available:
- Font Selection
- Font Size
• Courier/Letter Gothic Font Character Pitch
• Courier/Letter Gothic Thickness - Code Set
- Printing a Font List
NOTE: You can set the font for each interface.
Access the Font Screen
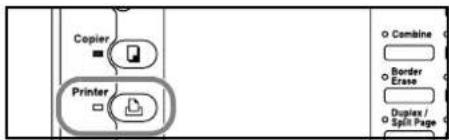
1 Press [Printer].
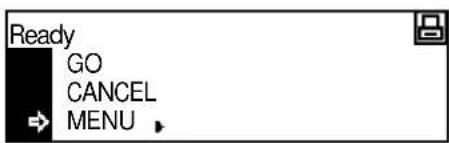
2 Press ▲ or ▼ to select MENU and press [Enter].
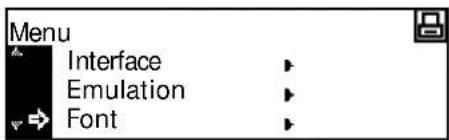
3 Press ▲ or ▼ to select Font and press [Enter].
4 Press ▲ or ▼ to select the interface to set and press [Enter].
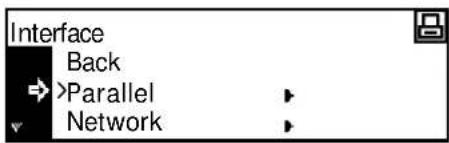
The Font screen displays.
Select the options required.
Font Selection
NOTE: If optional fonts as well as internal fonts are stored on the machine, a screen for selecting Internal font or Option font displays. Press ▲ or ▼ to select the font to set.
1 Display the Font screen, refer to Access the Font Screen, on page 2-21.
2 Press ▲ or ▼ to select Select Font and press [Enter].
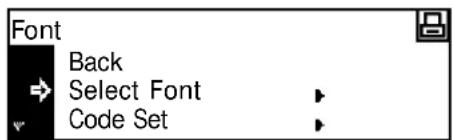
3 Press ▲ or ▼ to select the Font ID and press [Enter].
The font number displays.
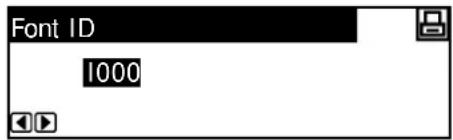
Characters displayed before font numbers indicate the following items.
| Display Description | |
| I Internal font | |
| S Downloaded fonts | |
| M Fonts in memory card | |
| H Fonts in RAM disk or optional hard disk | |
| O Fonts in optional ROM |
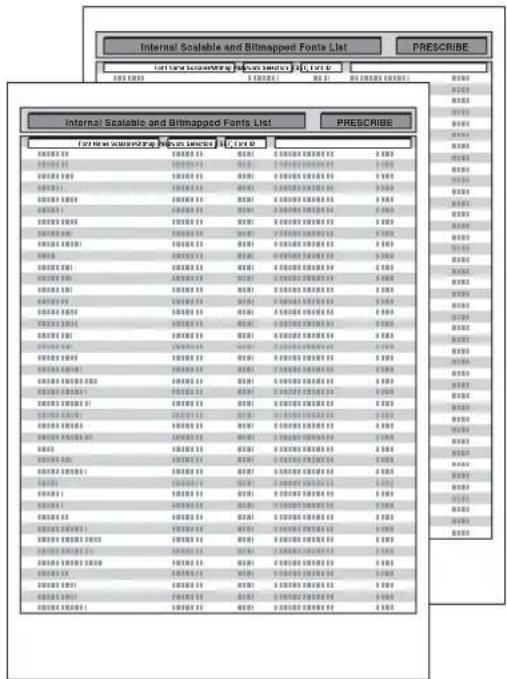
4 Press < or > to select the font number and press [Enter]. For internal font numbers, refer to Printing a Font List, on page 2-25.
5 Press [Reset]. The Printer Basic screen displays.
Font Size
If you have selected a proportional font as the default font, you can set the font size. If you have selected the Courier font or the Letter Gothic font as the default font, only the Character Pitch setting displays.
1 Display the Font screen, refer to Access the Font Screen, on page 2-21.
2 Press ▲ or ▼ to select Select Font and press [Enter].
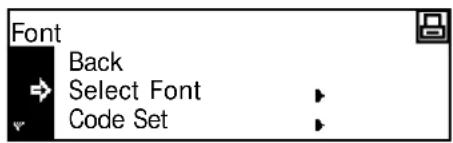
3 Press ▲ or ▼ to select Detail and press [Enter].
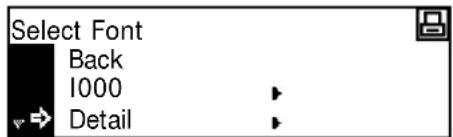
4 Press < or > to select the character size, 4.00 to 999.75 point can be selected. Press [Enter].
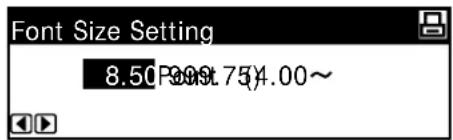
5 Press [Reset]. The Printer Basic screen displays.
Courier/Letter Gothic Font Character Pitch
You can set the character pitch for the Courier or Letter Gothic font.
1 Display the Font screen, refer to Access the Font Screen, on page 2-21.
2 Press ▲ or ▼ to select Select Font and press [Enter].
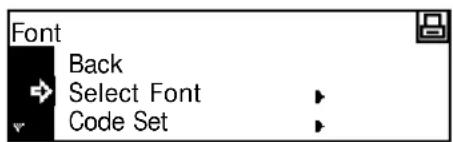
3 Press ▲ or ▼ to select Detail and press [Enter].
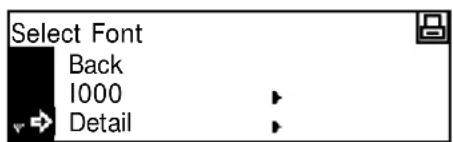
4 Press < or > to select the character pitch, 0.44 to 99.99 cpi can be selected. Press [Enter].
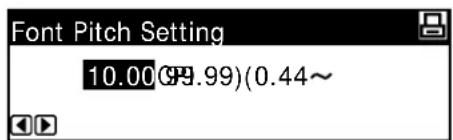
5 Press [Reset]. The Printer Basic screen displays.
Courier/Letter Gothic Thickness
You can select the thickness of the Courier or Letter Gothic font from two types. An example of changing the Courier font thickness is described below.
1 Display the Font screen, refer to Access the Font Screen, on page 2-21.
2 Press ▲ or ▼ to select Select Font and press [Enter].
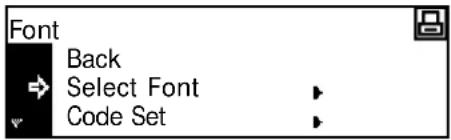
3 Press ▲ or ▼ to select Courier and press [Enter].
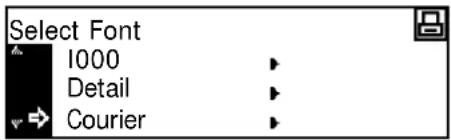
4 Press ▲ or ▼ to select Regular or Dark and press [Enter].
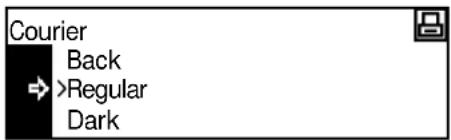
5 Press [Reset]. The Printer Basic screen displays.
Code Set
With the PCL6 emulation, you can select a code set.
1 Display the Font screen, refer to Access the Font Screen, on page 2-21.
2 Press ▲ or ▼ to select Code Set and press [Enter].
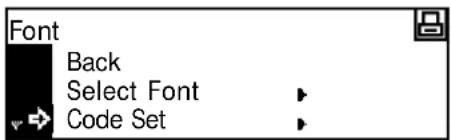
3 Press ▲ or ▼ to select the Code Setting and press [Enter].
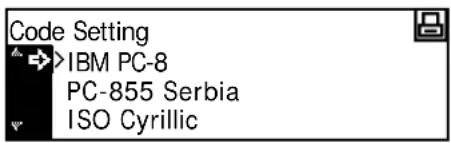
4 Press [Reset]. The Printer Basic screen displays.
Printing a Font List
1 Display the Font screen, refer to Access the Font Screen, on page 2-21.
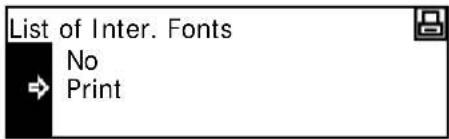
2 Press ▲ or ▼ to select List of Inter. Fonts and press [Enter].
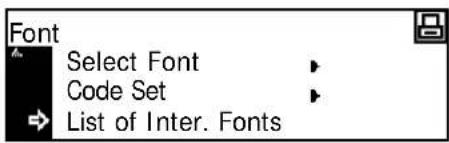
NOTE: If optional fonts as well as internal fonts are stored on the machine, you can also select List of Option Fonts.
3 Press ▲ or ▼ to select Print and press [Enter]. The Font List is printed.
Print Configuration
The following settings are available:
• Number of Copies
• Z o o m
- Print Orientation
- Page Protect Mode
• Line Feed (LF) Action
- Carriage Return (CR) Action
- Wide A 4
NOTE: You can set the print configuration for each interface.
Access the Page Set Screen
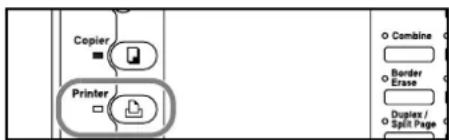
1 Press [Printer].
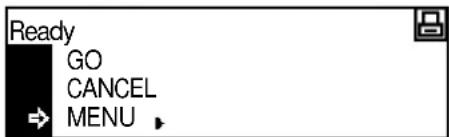
2 Press ▲ or ▼ to select MENU and press [Enter].
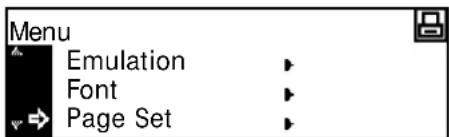
3 Press ▲ or ▼ to select Page Set and press [Enter].
4 Press ▲ or ▼ to select the interface and press [Enter].
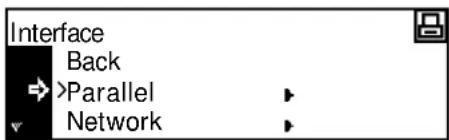
The Page Set screen displays.
Change the options required using the instructions starting on page 2-27.
Number of Copies
You can set the number of copies to be printed, any number from 1 to 999 can be selected.
1 Display the Page Set screen, refer to Access the Page Set Screen, on page 2-26.
2 Press ▲ or ▼ to select Copies and press [Enter].
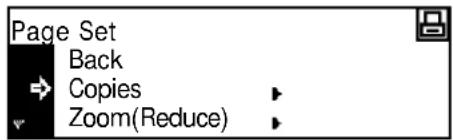
3 Press < or > to select the number of copies, 1 to 999 can be selected. Press [Enter].
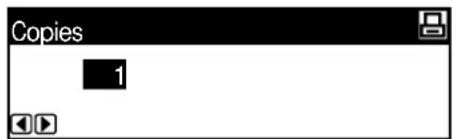
4 Press [Reset]. The Printer Basic screen displays.
Zoom
If you specify the Paper Size (original size) and the Output Size, the machine reduces the image at a preset magnification ratio to print onto the specified Output Size paper.
1 Display the Page Set screen, refer to Access the Page Set Screen, on page 2-26.
2 Press ▲ or ▼ to select Zoom (Reduce) and press [Enter].
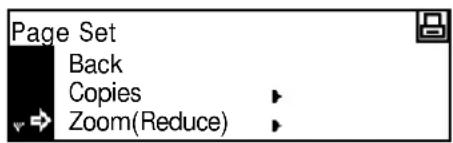
3 Press ▲ or ▼ to select the paper size and press >.
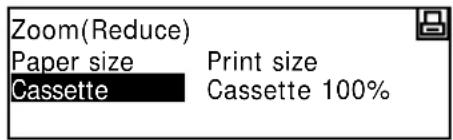
4 Press ▲ or ▼ to select the output size. The reduction ratio is automatically set and displayed. Press [Enter].
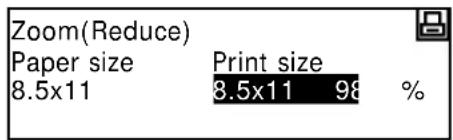
5 Press [Reset]. The Printer Basic screen displays.
Print Orientation
You can select the Print Orientation from Portrait and Landscape.
1 Display the Page Set screen, refer to Access the Page Set Screen, on page 2-26.
2 Press ▲ or ▼ to select Orientation and press [Enter].
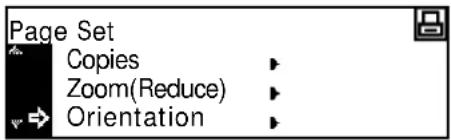
3 Press ▲ or ▼ to select Portrait or Landscape and press [Enter].
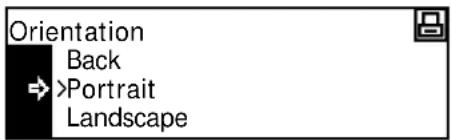
4 Press [Reset]. The Printer Basic screen displays.
Page Protect Mode
To maintain the printer memory efficiently, the default setting of this mode is Auto. This menu is not usually displayed. If a print overrun error occurs due to insufficient printer memory, Page Protect is forcibly set to On. After the print overrun error occurs, reset this setting to Auto.
1 Display the Page Set screen, refer to Access the Page Set Screen, on page 2-26.
2 Press ▲ or ▼ to select Page Protect and press [Enter].
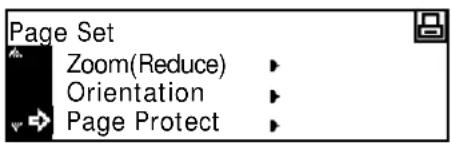
3 Press ▲ or ▼ to select Auto and press [Enter].
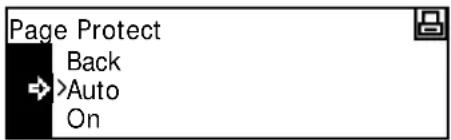
4 Press [Reset]. The Printer Basic screen displays.
Line Feed (LF) Action
Use to set the action taken by the machine when it receives a Line Feed code (0AH).
1 Display the Page Set screen, refer to Access the Page Set Screen, on page 2-26.
2 Press ▲ or ▼ to select LF Action and press [Enter].

3 Press ▲ or ▼ to select the action from LF only, CR and LF, and Ignore LF, and press [Enter].
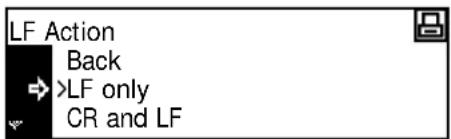
- LF only: Performs a line feed.
- CR and LF: Performs a line feed and carriage return.
- Ignore LF: Does not perform a line feed.
4 Press [Reset]. The Printer Basic screen displays.
Carriage Return (CR) Action
Use to set the action taken by the machine when it receives a Carriage Return code (0DH).
1 Display the Page Set screen, refer to Access the Page Set Screen, on page 2-26.
2 Press ▲ or ▼ to select CR Action and press [Enter].
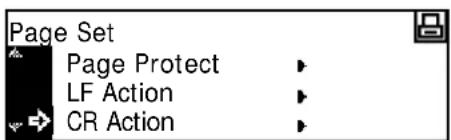
3 Press ▲ or ▼ to select the action from CR only, CR and LF, and Ignore CR, and press [Enter].
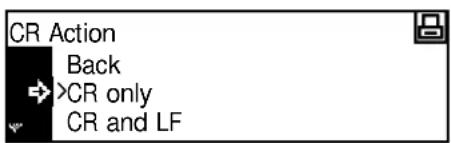
- CR only: Performs a carriage return.
- CR and LF: Performs a carriage return and line feed.
- Ignore CR: Does not perform a carriage return.
4 Press [Reset]. The Printer Basic screen displays.
Wide A4
The print area of A4 size can be enlarged.
1 Display the Page Set screen, refer to Access the Page Set Screen, on page 2-26.
2 Press ▲ or ▼ to select Wide A4 and press [Enter].
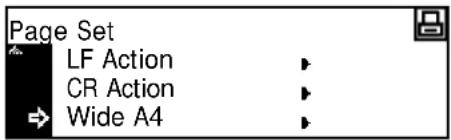
3 Press ▲ or ▼ to select On or Off and press [Enter].
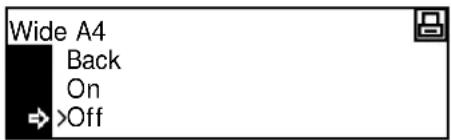
4 Press [Reset]. The Printer Basic screen displays.
Print Quality
The following settings are available:
- KIR Mode
- EcoPrint
- Resolution
- Print Density
Access the Print Quality Screen
1 Press [Printer].
![graph TD A["Printer"] --> B["Copier"] B --> C["Combine"] B --> D["Border Erase"] B --> E["Duplex / Split Page"]](/content/2026/05/768512/images/6db83213617e5b921c090c9643a1569199abcb42fe79f5f435c22eb8e9df51a5.jpg)
2 Press ▲ or ▼ to select MENU and press [Enter].
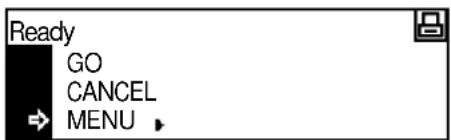
3 Press ▲ or ▼ to select Print Quality and press [Enter].
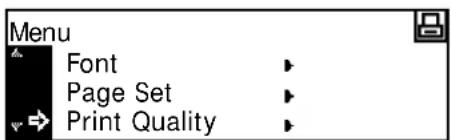
The Print Quality screen displays.
Select the options required.
KIR Mode
Smoothing changes the print quality to 2400 dpi equivalent × 600 dpi.
1 Display the Print Quality screen, refer to Access the Print Quality Screen, on page 2-31.
2 Press ▲ or ▼ to select KIR Mode and press [Enter].
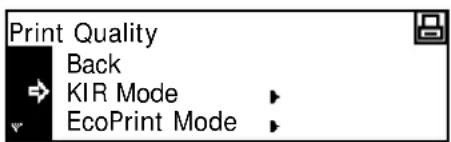
3 Press ▲ or ▼ to select On or Off and press [Enter].
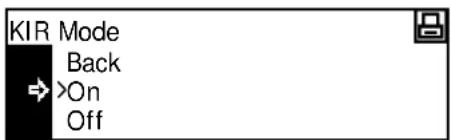
4 Press [Reset]. The Printer Basic screen displays.
EcoPrint
EcoPrint mode allows printing with less toner consumption. Use this mode when high quality printing is not necessary, for example, for draft printing.
1 Display the Print Quality screen, refer to Access the Print Quality Screen, on page 2-31.
2 Press ▲ or ▼ to select EcoPrint Mode and press [Enter]. Print Quality Back KIR Mode EcoPrint Mode
3 Press ▲ or ▼ to select On or Off and press [Enter]. EcoPrint Mode Back On >Off
4 Press [Reset]. The Printer Basic screen displays.
Resolution
With this machine, three types of resolution are available: 300 dpi, 600 dpi, and Fast 1200 Mode.
1 Display the Print Quality screen, refer to Access the Print Quality Screen, on page 2-31.
2 Press ▲ or ▼ to select Resolution and press [Enter].
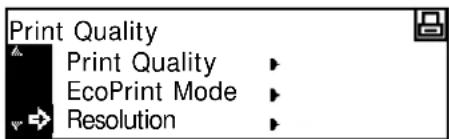
3 Press ▲ or ▼ to select Fast 1200 Mode, 600 dpi or 300 dpi and press [Enter].
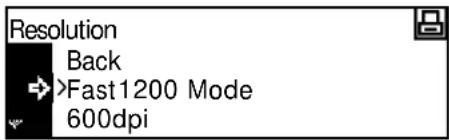
4 Press [Reset]. The Printer Basic screen displays.
Print Density
The print density can be set between five levels, 1 (light) to 5 (dark).
1 Display the Print Quality screen, refer to Access the Print Quality Screen, on page 2-31.
2 Press ▲ or ▼ to select Print Density and press [Enter].
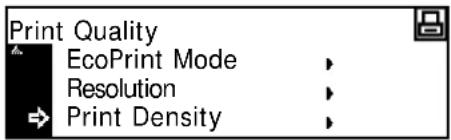
3 Press < or > to select the Print Density and press [Enter].

4 Press [Reset]. The Printer Basic screen displays.
Memory Card Operation
If the optional Memory Card is installed in this machine, Read, Write and Delete can be performed for different types of data.
The following options are available:
- Reading Font Data
- Reading Macro Data
- Reading Data
- Reading Program
- Writing Data
- Deleting Data
- Deleting Font Data
- Deleting Program Data
- Deleting Macro Data
- Deleting Language Data
- Formatting Memory Card
- Printing a Partition List
Access the Memory Card Screen
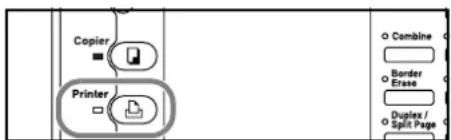
1 Press [Printer].
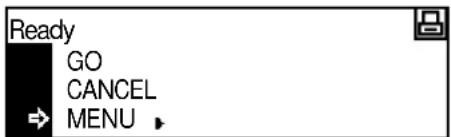
2 Press ▲ or ▼ to select MENU and press [Enter].
3 Press ▲ or ▼ to select Memory Card and press [Enter].
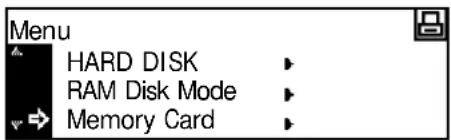
The Memory Card screen displays.
Select the options required.
Reading Font Data
1 Display the Memory Card screen, refer to Access the Memory Card Screen, on page 2-34.
2 Press ▲ or ▼ to select Read Fonts and press [Enter].
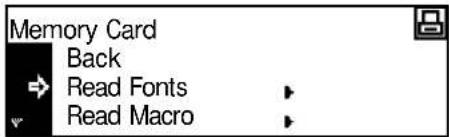
3 Press ▲ or ▼ to select OK and press [Enter].
Fonts are read from the Memory Card.
4 Press [Reset]. The Printer Basic screen displays.
Reading Macro Data
1 Display the Memory Card screen, refer to Access the Memory Card Screen, on page 2-34.
2 Press ▲ or ▼ to select Read Macro and press [Enter].
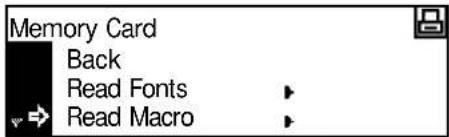
3 Press ▲ or ▼ to select OK and press [Enter]. Macros are read from the Memory Card.
4 Press [Reset]. The Printer Basic screen displays.
Reading Data
1 Display the Memory Card screen, refer to Access the Memory Card Screen, on page 2-34.
2 Press ▲ or ▼ to select Read Data and press [Enter].
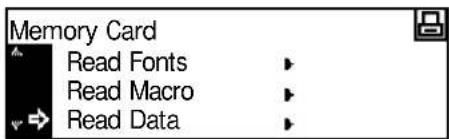
3 Press ▲ or ▼ to select the data to read and press [Enter].
The selected data is read from the Memory Card.
4 Press [Reset]. The Printer Basic screen displays.
Reading Program
1 Display the Memory Card screen, refer to Access the Memory Card Screen, on page 2-34.
2 Press ▲ or ▼ to select Read Program and press [Enter].
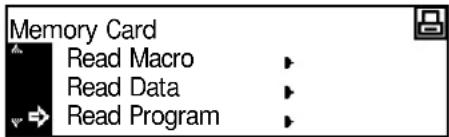
3 Press ▲ or ▼ to select the program to read and press [Enter].
The selected program is read from the Memory Card.
4 Press [Reset]. The Printer Basic screen displays.
Writing Data
1 Display the Memory Card screen, refer to Access the Memory Card Screen, on page 2-34.
2 Press ▲ or ▼ to select Write Data and press [Enter].
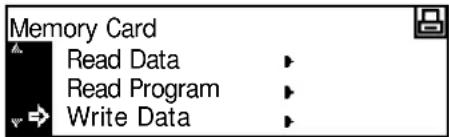
3 Press ▲ or ▼ to select OK and press [Enter]. GO and CANCEL display.
NOTE: If you select CANCEL and press [Enter], data is not written.
4 Send data from your computer to the machine.
When the data is received, the message display changes to Processing data. When reception is complete, the message display changes to Waiting.
5 Press ▲ or ▼ to select GO and press [Enter].
The data is written to the Memory Card.
Deleting Data
1 Display the Memory Card screen, refer to Access the Memory Card Screen, on page 2-34.
2 Press ▲ or ▼ to select Delete Data and press [Enter].
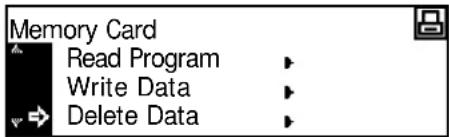
3 Press ▲ or ▼ to select the data to delete and press [Enter].
The selected data is deleted from the Memory Card.
4 Press [Reset]. The Printer Basic screen displays.
Deleting Font Data
1 Display the Memory Card screen, refer to Access the Memory Card Screen, on page 2-34.
2 Press ▲ or ▼ to select Delete Font and press [Enter].
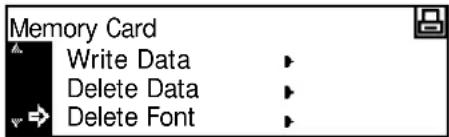
3 Press ▲ or ▼ to select the font to delete and press [Enter].
The selected font is deleted from the Memory Card.
4 Press [Reset]. The Printer Basic screen displays.
Deleting Program Data
1 Display the Memory Card screen, refer to Access the Memory Card Screen, on page 2-34.
2 Press ▲ or ▼ to select Delete Program and press [Enter].
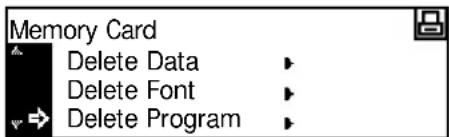
3 Press ▲ or ▼ to select the program to delete and press [Enter].
The selected program is deleted from the Memory Card.
4 Press [Reset]. The Printer Basic screen displays.
Deleting Macro Data
1 Display the Memory Card screen, refer to Access the Memory Card Screen, on page 2-34.
2 Press ▲ or ▼ to select Delete Macro and press [Enter].
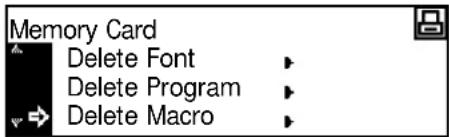
3 Press ▲ or ▼ to select the macro data to delete and press [Enter].
The selected macro data is deleted from the Memory Card.
4 Press [Reset]. The Printer Basic screen displays.
Deleting Language Data
1 Display the Memory Card screen, refer to Access the Memory Card Screen, on page 2-34.
2 Press ▲ or ▼ to select Delete the language and press [Enter].
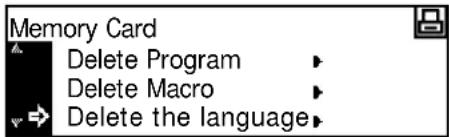
3 Press ▲ or ▼ to select the language data to delete and press [Enter].
The selected language data is deleted from the Memory Card.
4 Press [Reset]. The Printer Basic screen displays.
Formatting Memory Card
NOTE: Ensure the Memory Card is formatted using this machine. Any Memory Card formatted with other equipment cannot be used.
1 Display the Memory Card screen, refer to Access the Memory Card Screen, on page 2-34.
2 Press ▲ or ▼ to select Format and press [Enter].
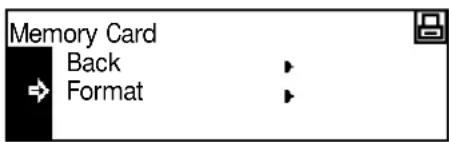
3 Press ▲ or ▼ to select OK and press [Enter].
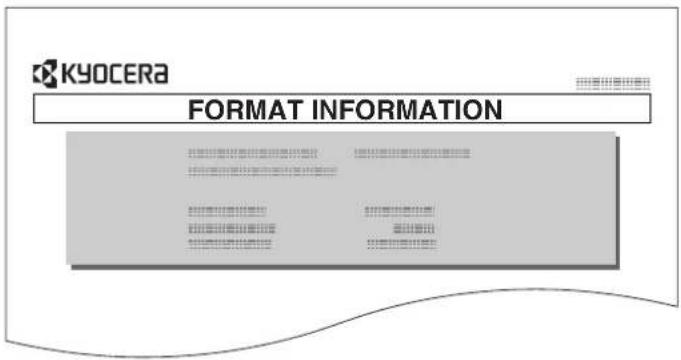
Formatting of the Memory Card starts. When formatting is complete, format information is printed.
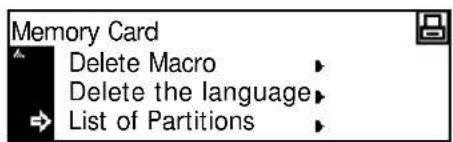
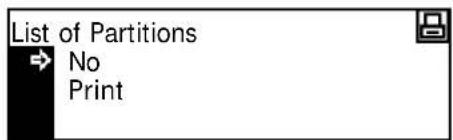
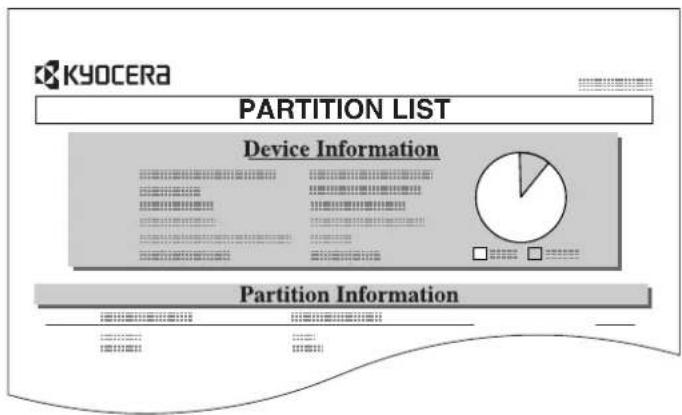
Printing a Partition List
1 Display the Memory Card screen, refer to Access the Memory Card Screen, on page 2-34.
2 Press ▲ or ▼ to select List of Partitions and press [Enter].
3 Press ▲ or ▼ to select Print and press [Enter]. The partition list is printed.
Hard Disk Operation
If the optional Hard Disk is installed in this machine, Read, Write and Delete can be performed for different types of data.
The Hard Disk can also be formatted and a Partition List printed.
Access Hard Disk
1 Press [Printer].
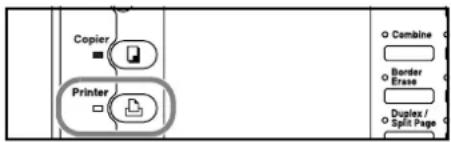
2 Press ▲ or ▼ to select MENU and press [Enter].
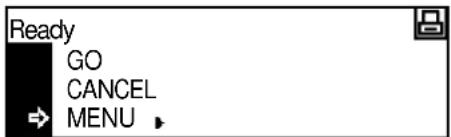
3 Press ▲ or ▼ to select HARD DISK and press [Enter].
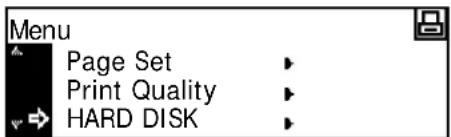
The operation procedure for each item is the same as the Memory
Card operation, refer to Memory Card Operation, on page 2-34.
RAM Disk Operation
RAM Disk Functions
This machine is equipped with RAM Disk functions. The RAM Disk is a virtual disk unit that uses a part of the memory. If you assign a certain size of the memory to the RAM Disk, you can use it for electronic sorting (for reduction of total print time) and storage and reading of data. Also you can use the e-MPS function (refer to page 2-3).
IMPORTANT: Data written to the RAM Disk is deleted when the machine is reset or the main power is switched off (O).
The RAM Disk area is assigned from the user available memory. Consequently, printing speed may be lower or insufficient memory occurs depending on the RAM Disk setting value.
The RAM Disk functions are disabled as the default setting. To use the RAM Disk functions, setup as follows.
1 Press [Printer].
![graph TD A["Printer"] --> B["Copier"] B --> C["Combine"] B --> D["Border Erase"] B --> E["Duplex / Split Page"]](/content/2026/05/768512/images/6e78060f92329fbd4294fe9eb500cb6784dd215dbb413231a2ec299b091f51bc.jpg)
2 Press ▲ or ▼ to select MENU and press [Enter].
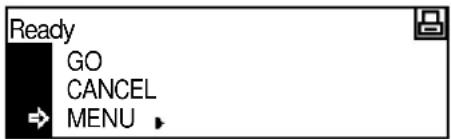
3 Press ▲ or ▼ to select RAM Disk Mode and press [Enter].
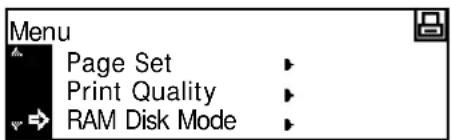
4 Press ▲ or ▼ to select On and press [Enter].
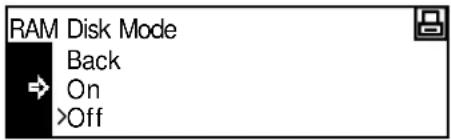
Change # displays.
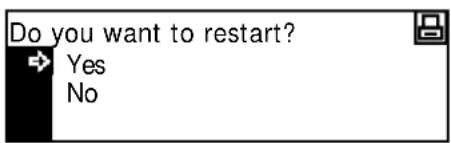
5 Press [Reset].
6 Press ▲ or ▼ to select Yes and press [Enter].
The machine restarts.
RAM Disk Operation
1 Press [Printer].

2 Press ▲ or ▼ to select MENU and press [Enter].
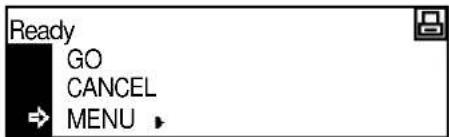
3 Press ▲ or ▼ to select RAM Disk Mode and press [Enter].
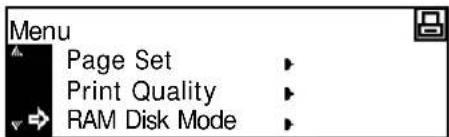
4 Press ▲ or ▼ to select Change # and press [Enter].
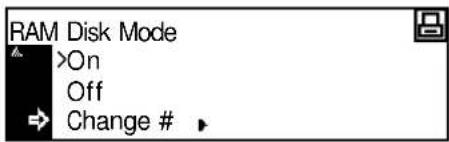
The operation procedure for each item is the same as the Memory
Card operation, refer to Memory Card Operation, on page 2-34.
RAM Disk Size
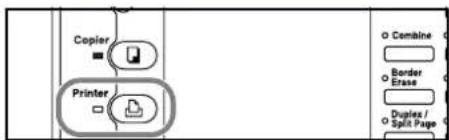
1 Press [Printer].
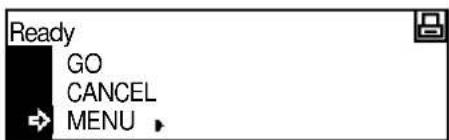
2 Press ▲ or ▼ to select MENU and press [Enter].
3 Press ▲ or ▼ to select RAM Disk Mode and press [Enter].
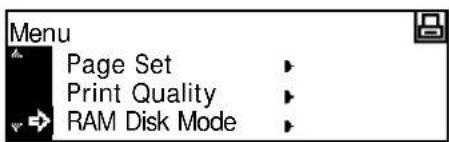
4 Press ▲ or ▼ to select Change # and press [Enter].
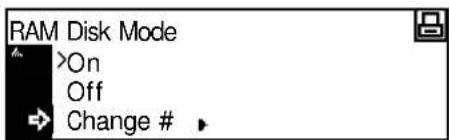
5 Press ▲ or ▼ to select RAM Disk Size and press [Enter].
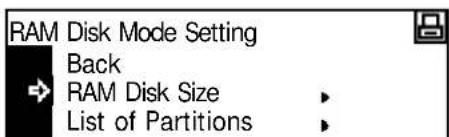
6 Press < or > to select the RAM disk size, 1 to 1024 Mbyte can be selected. Press [Enter].
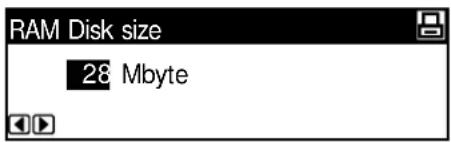
7 Press [Reset].
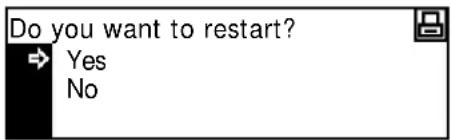
8 Press ▲ or ▼ to select Yes and press [Enter].
The machine restarts.
Paper Handling
The following settings are available:
- Multi-Bypass Tray Mode
- Paper Source
- Duplex Print Mode
- Output Destination
- Override A4/Letter
Access the Paper Handling Screen
1 Press [Printer].
![graph TD A["Printer"] --> B["Copier"] B --> C["Combine"] B --> D["Border Erase"] B --> E["Duplex / Split Page"]](/content/2026/05/768512/images/854c79900d7c450ce45f756a24f101addfa5c81ff3a2cc7424b6e9fd35749b70.jpg)
2 Press ▲ or ▼ to select MENU and press [Enter].
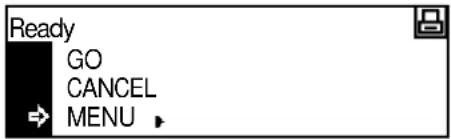
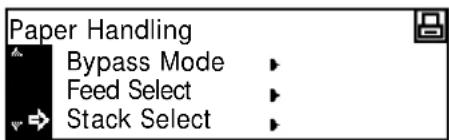
3 Press ▲ or ▼ to select Paper Handling and press [Enter]. The Paper Handling screen displays.
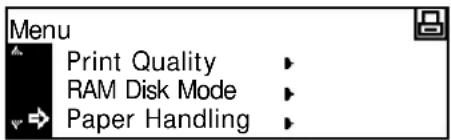
Select the options required.
Multi-Bypass Tray Mode
If you select First, any paper loaded in the Multi-Bypass Tray will be fed.
1 Display the Paper Handling screen, refer to Access the Paper Handling Screen, on page 2-44.
2 Press ▲ or ▼ to select Bypass Mode and press [Enter].
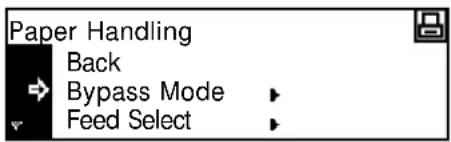
3 Press ▲ or ▼ to select Cassette or First and press [Enter].
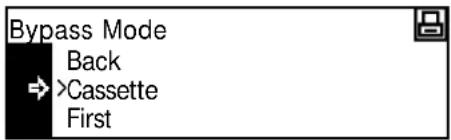
4 Press [Reset]. The Printer Basic screen displays.
Paper Source
Use to set the Paper Source to be selected first.
1 Display the Paper Handling screen, refer to Access the Paper Handling Screen, on page 2-44.
2 Press ▲ or ▼ to select Feed Select and press [Enter].
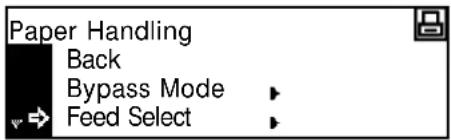
3 Press ▲ or ▼ to select the paper source and press [Enter].
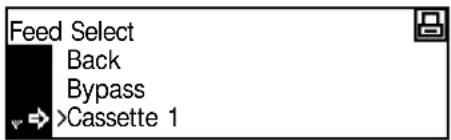
4 Press [Reset]. The Printer Basic screen displays.
Duplex Print Mode
Use to set the binding position on finished prints for duplex printing.
NOTE: This setting is displayed only if the optional Duplex Unit is installed.
1 Display the Paper Handling screen, refer to Access the Paper Handling Screen, on page 2-44.
2 Press ▲ or ▼ to select Duplex Mode and press [Enter].
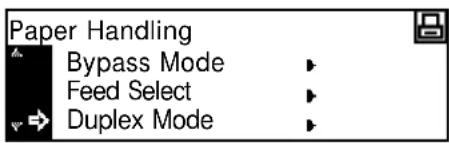
3 Press ▲ or ▼ to select Short edge bind or Long edge bind and press [Enter].
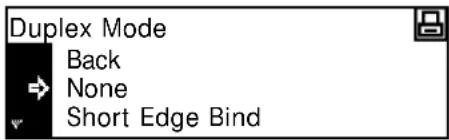
4 Press [Reset]. The Printer Basic screen displays.
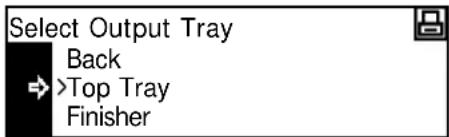
Output Destination
Use to set the paper Output Destination.
| Setting Output destination | |
| Top Tray Main body output tray | |
| Finisher Optional Finisher | |
| Job Separator Optional Job Separator |
NOTE: This item is displayed only if the optional Finisher or Job Separator is installed.
1 Display the Paper Handling screen, refer to Access the Paper Handling Screen, on page 2-44.
2 Press ▲ or ▼ to select Stack Select and press [Enter].
3 Press ▲ or ▼ to select the paper output destination and press [Enter].
4 Press [Reset]. The Printer Basic screen displays.
Override A4/Letter
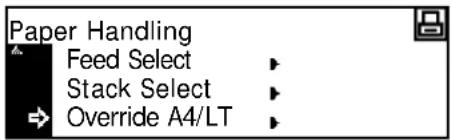
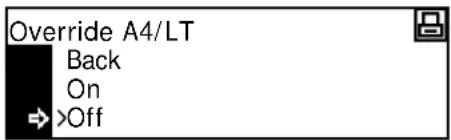
The A4 and 8 1/2 × 11" (Letter) sizes can be regarded as the same size.
1 Display the Paper Handling screen, refer to Access the Paper Handling Screen, on page 2-44.
2 Press ▲ or ▼ to select Override A4/LT and press [Enter].
3 Press ▲ or ▼ to select On or Off and press [Enter].
4 Press [Reset]. The Printer Basic screen displays.
Other Printer Settings
You can set the following items for other printer settings.
- Form Feed Timeout
- Received Data Dump
- Printer Function Resetting
• Resource Protect Mode - Auto Continue
- Duplex Error Detection
- Stapling Error Detection
- Printing a Service Status Page
Access the Others Screen
1 Press [Printer].
![graph TD A["Printer"] --> B["Copier"] B --> C["Combine"] B --> D["Border Erase"] B --> E["Duplex / Split Page"]](/content/2026/05/768512/images/8d1ecc081f371636881044cdc6c79a844129c2c12c45a6a2acf6cc7b010a9015.jpg)
2 Press ▲ or ▼ to select MENU and press [Enter].
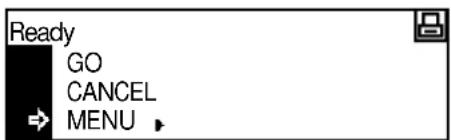
3 Press ▲ or ▼ to select Others and press [Enter]. The Others screen displays.
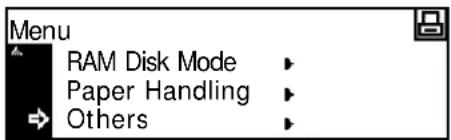
Select the options required.
Form Feed Timeout
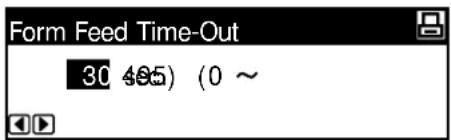
If this machine does not receive any information indicating the end of data after receiving the last data, the machine waits for a certain time without printing the last page. When the preset time elapses, the machine automatically performs a form feed. If you set the time to 0, the machine does not perform a form feed until GO is manually selected.
1 Display the Others screen, refer to Access the Others Screen, on page 2-48.
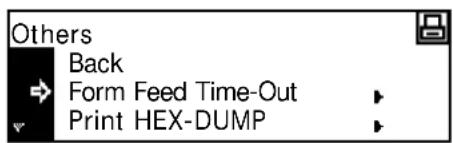
2 Press ▲ or ▼ to select Form Feed Time Out and press [Enter].
3 Press < or > to set the time, 0 to 495 seconds in 5 second increments can be selected. Press [Enter].
4 Press [Reset]. The Printer Basic screen displays.
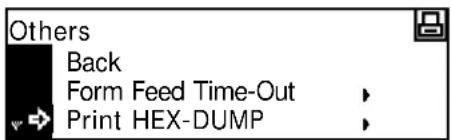
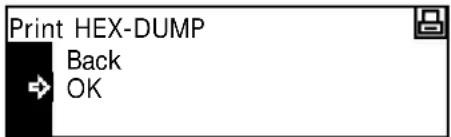
Received Data Dump
You can print data received as hexadecimal codes for debugging programs and files.
1 Display the Others screen, refer to Access the Others Screen, on page 2-48.
2 Press ▲ or ▼ to select Print HEX-DUMP and press [Enter].
3 Press ▲ or ▼ to select OK and press [Enter].
Waiting displays and then the Printer Basic screen.
4 Send data to the printer, dump pages are printed.
5 Press ▲ or ▼ to select GO and press [Enter].
6 Press [Reset]. The Printer Basic screen displays.
Printer Function Resetting
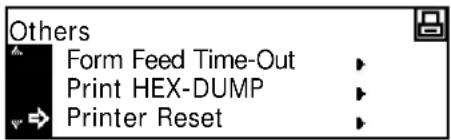
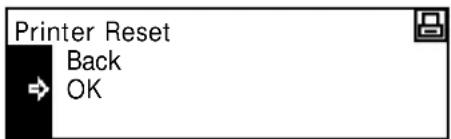
This function resets the printer's temporary settings (such as the current page orientation and font) to the default settings.
1 Display the Others screen, refer to Access the Others Screen, on page 2-48.
2 Press ▲ or ▼ to select Printer Reset and press [Enter].
3 Press ▲ or ▼ to select OK and press [Enter].
The printer functions are reset.
Resource Protect Mode
The Resource Protect Mode protects the resource data such as downloaded fonts and macros and memorizes the PCL resources even if the emulation mode is switched off. If you select Permanent, temporary resources are not protected. If you select Perm/Temp, temporary resources are protected.
1 Display the Others screen, refer to Access the Others Screen, on page 2-48.
2 Press ▲ or ▼ to select Resource Prot and press [Enter].
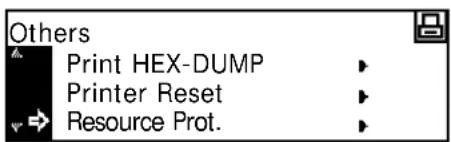
3 Press ▲ or ▼ to select Off, Permanent or Perm/Temp and press [Enter].
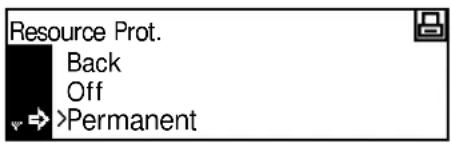
4 Press [Reset]. The Printer Basic screen displays.
Auto Continue
If any of the following error messages appear, the error can be cleared and printing can be continued after the preset recovery time elapses (auto continue).
- Memory Overflow
- Print overrun
- KPDL error
- File not found
- HARD DISK error
- RAM disk error
- MemoryCard err
- Illegal Account
- Exceeded Max.out
- Account error
- Duplex disabled
- e-MPS not stored
- Opt. ROM error
- A d d S t a p l e s
You can also set the time that elapses before Auto Continue is activated.
1 Display the Others screen, refer to Access the Others Screen, on page 2-48.
2 Press ▲ or ▼ to select Auto Continue and press [Enter].
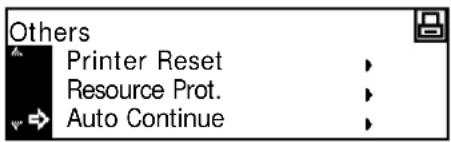
3 Press ▲ or ▼ to select On or Off and press [Enter]. If you have selected On, Change # displays.
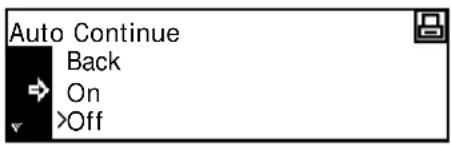
4 To set the time that elapses before Auto Continue is activated, press ▲ or ▼ to select Change # and press [Enter].
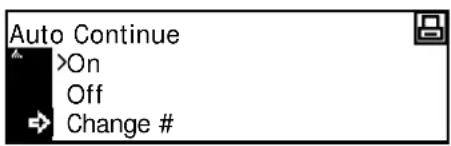
The Auto Continue (time) screen displays.
5 Press < or > to select the time, 0 to 495 seconds in 5 second increments can be selected. Press [Enter].

6 Press [Reset]. The Printer Basic screen displays.
Duplex Error Detection
This setting is available if the optional Duplex Unit is installed. You can select whether or not to display Duplex disabled Press GO when you select duplex printing and specify a paper type that cannot be used for duplex printing, such as label.
| Setting Processing | |
| On If you | select GO, one-sided printing is performed.If you select CANCEL, printing is canceled. |
| Off One-sided printing is performed. | |
1 Display the Others screen, refer to Access the Others Screen, on page 2-48.
2 Press ▲ or ▼ to select Finishing Error and press [Enter].
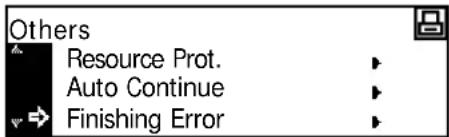
3 Press ▲ or ▼ to select Proces. Duplex print and press [Enter].
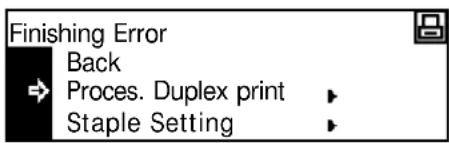
4 Press ▲ or ▼ to select On or Off and press [Enter].
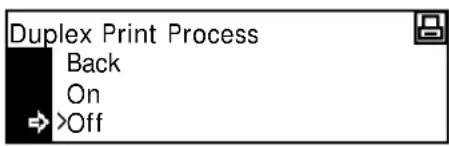
5 Press [Reset]. The Printer Basic screen displays.
Stapling Error Detection
You can select whether or not to display Add Staples and Press GO when staples have run out while stapling is performed.
| Setting Processing | |
| On | If you select GO, printing is performed without stapling.If you select CANCEL, printing is canceled. |
| Off Printing | is performed without stapling. |
NOTE: This setting is displayed only if the optional Finisher is installed.
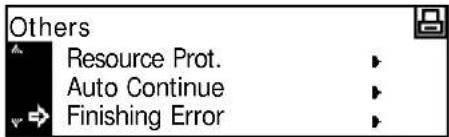
1 Display the Others screen, refer to Access the Others Screen, on page 2-48.
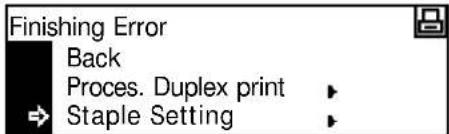
2 Press ▲ or ▼ to select Finishing Error and press [Enter].
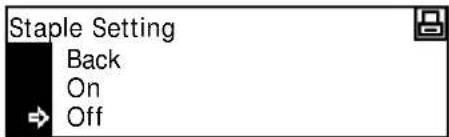
3 Press ▲ or ▼ to select Staple Setting and press [Enter].
4 Press ▲ or ▼ to select On or Off and press [Enter].
5 Press [Reset]. The Printer Basic screen displays.
Printing a Service Status Page
The Service Status Page contains more detailed printer setting information than the Status Page. This page is mainly used by service personnel for maintenance. Use the following procedure to print this page if required.
1 Display the Others screen, refer to Access the Others Screen, on page 2-48.
2 Press ▲ or ▼ to select Service and press [Enter].
2 Press ▲ or ▼ to select Service and press [Enter].
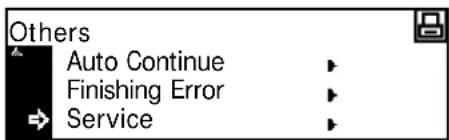
3 Press ▲ or ▼ to select Print Status Page and press [Enter].
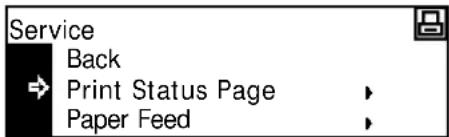
4 Press ▲ or ▼ to select Print and press [Enter]. The Service Status page is printed.
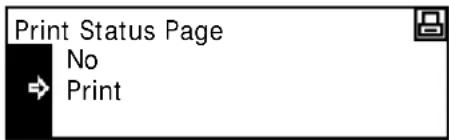
5 Press [Reset]. The Printer Basic screen displays.
3 System Settings
This chapter explains the system settings available on the machine.
• Copy Default Settings...... 3-2
• Machine Default Settings 3-14
- Viewing and Printing the Total Counter 3-28
• Report Output...... 3-30
• Language Setting 3-32
- User Adjustment.... 3-33
Copy Default Settings
Initial Mode is the state the machine enters after warm-up or if Reset is pressed. If no operations are performed for a preset period of time, the machine returns to initial mode. Any settings that have been selected will be cleared.
In the factory default setting, paper of the same size as the original is selected automatically (Auto Paper Selection mode), the copy magnification ratio is set to 100 %, the number of copies to be made is set to 1 and the Image Quality is set to Text + Photo mode.
Use these instructions to customize the settings to meet your requirements.
The following settings are available:
- Exposure Mode
• Original Image Quality - EcoPrint Mode
• Background Color Adjustment - Paper Selection
• Paper Type in Auto Paper Selection - Priority Cassette
- Default Magnification
• Auto Exposure Adjustment
• Auto OCR Exposure Adjustment - Exposure Adjustment for Text + Photo Originals
- Exposure Adjustment for Text Originals
- Exposure Adjustment for Photo Originals
- Sort Copying
- Offset Copying
- Auto Rotation Copy
- Margin Width Default Value
- Border Erase Width Default Value
• Number of Copies Limit - Black Streaking Reduction Processing
Access the Copy Default Screen
Use the following procedure to access the Copy Default screen.
1 Press [System Menu / Counter].
2 Press ▲ or ▼ to select Copy default and press [Enter].
3 Use the keypad to enter the 4 digit management code.
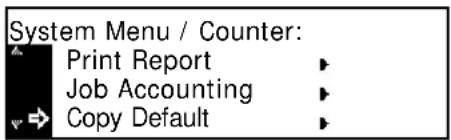
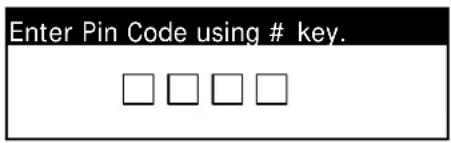
NOTE: The factory default management code varies for each model: 16 ppm model = 1600, 20 ppm model = 2000, and 25 ppm model = 2500. The four-digit management code can be changed. For further information refer to Administrator Management Code Change, on page 3-25.
If the code is accepted, the Copy Default screen displays.
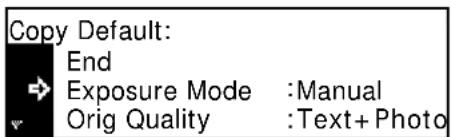
4 Change the options to the default settings required using the instructions starting on page 3-4.
NOTE: An * (asterisk) against a setting indicates the current setting.
Exposure Mode
Set the default Exposure mode to Auto or Manual.
1 Display the Copy Default screen, refer to Access the Copy Default Screen, on page 3-3.
2 Press ▲ or ▼ to select Exposure Mode and press [Enter].
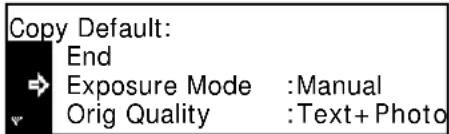
3 Press ▲ or ▼ to select Auto or Manual as the default setting and press [Enter].
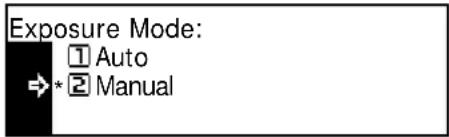
4 Press [Reset]. The Copier Basic screen returns.
Original Image Quality
Use to set the default Original Image Quality mode.
1 Display the Copy Default screen, refer to Access the Copy Default Screen, on page 3-3.
2 Press ▲ or ▼ to select Orig Quality and press [Enter].
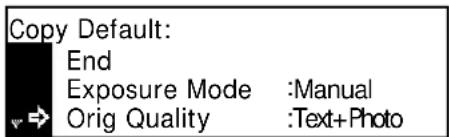
3 Press ▲ or ▼ to select Text+Photo, Text or Photo as the default setting and press [Enter].
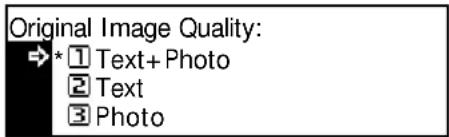
4 Press [Reset]. The Copier Basic screen returns.
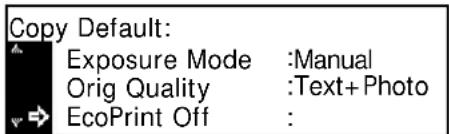
EcoPrint Mode
Use to select EcoPrint mode as the default setting.
1 Display the Copy Default screen, refer to Access the Copy Default Screen, on page 3-3.
2 Press ▲ or ▼ to select EcoPrint and press [Enter].
3
Press ▲ or ▼ to select On to enable Ecoprint Mode as the default. If you do not wish to use EcoPrint Mode as the default, select Off. Press [Enter].
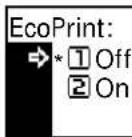
4
Press [Reset]. The Copier Basic screen returns.
Background Color Adjustment
If the Background Color is too dark or light, use this option to adjust it.
1
Display the Copy Default screen, refer to Access the Copy Default Screen, on page 3-3.
2
Press ▲ or ▼ to select Background adjust and press [Enter].

Default: Orig Quality :Text+Photo EcoPrint :Off Background Adjst :3
3
Press < or > to adjust the background color to the required default. Move right to darken the background color, or left to lighten the background color. Press [Enter].
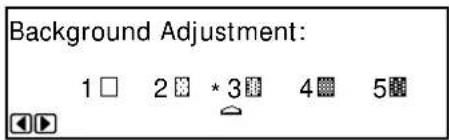
4
Press [Reset]. The Copier Basic screen returns.
Paper Selection
Use to automatically select the cassette that contains the same size paper as the original, or to have a fixed cassette with priority.
1
Display the Copy Default screen, refer to Access the Copy Default Screen, on page 3-3.
2
Press ▲ or ▼ to select Paper Select and press [Enter].

Default: EcoPrint : Off Background Adjst : 3 Paper Select : Auto
3
Press ▲ or ▼ to select Auto or Default cassette and press [Enter].

er Select: ① Auto ② Default Cassette
4
Press [Reset]. The Copier Basic screen returns.
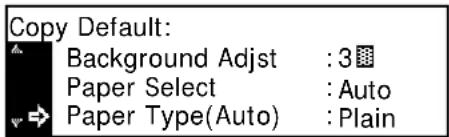
Paper Type in Auto Paper Selection
Paper selected in Auto Paper Selection mode can be limited to a certain paper type.
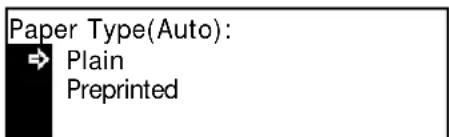
Paper types that can be set: Plain, Transparency, Preprinted, Labels, Bond, Recycled, Vellum, Rough, Letterhead, Color, Prepunched, Envelope, Cardstock, Thick paper, High quality, and Custom 1 (to 8)
NOTE: You can select a paper type from the paper types that are currently set for the cassettes, refer to Paper Type (cassettes 1 to 4), on page 3-17.
1 Display the Copy Default screen, refer to Access the Copy Default Screen, on page 3-3.
2 Press ▲ or ▼ to select Paper type (Auto) and press [Enter].
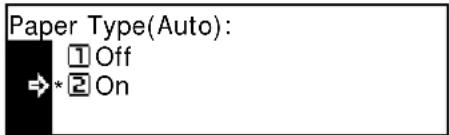
3 Press ▲ or ▼ to select Off or On and press [Enter].
4 If you have selected On, press ▲ or ▼ to select the paper type required and press [Enter].
5 Press [Reset]. The Copier Basic screen returns.
Priority Cassette
You can select the cassette (1 to 4) that is automatically selected with priority.
NOTE: For the 16 ppm model, cassettes 2 to 4 are included in the optional Paper Feeder. For the 20 and 25 ppm models, cassettes 3 and 4 are included in the optional Paper Feeder. This setting displays only if the optional Paper Feeder is installed.
IMPORTANT: You cannot set the Multi-Bypass Tray as the priority cassette.
1 Display the Copy Default screen, refer to Access the Copy Default Screen, on page 3-3.
2 Press ▲ or ▼ to select Default Cassette and press [Enter].
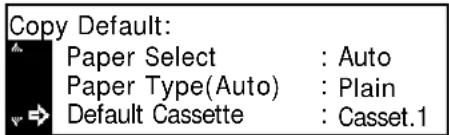
3 Press ▲ or ▼ to select the priority cassette and press [Enter].
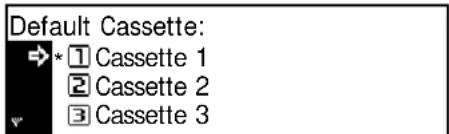
4 Press [Reset]. The Copier Basic screen returns.
Default Magnification
Select whether or not to set the Auto Zoom Ratio selection mode when a cassette is selected.
1 Display the Copy Default screen, refer to Access the Copy Default Screen, on page 3-3.
2 Press ▲ or ▼ to select Default Magnif and press [Enter].
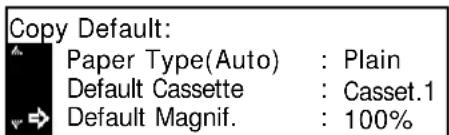
3 Press ▲ or ▼ to select 100% or Auto % and press [Enter].
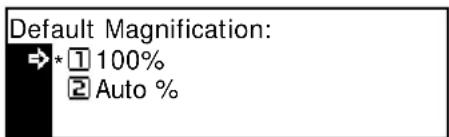
4 Press [Reset]. The Copier Basic screen returns.
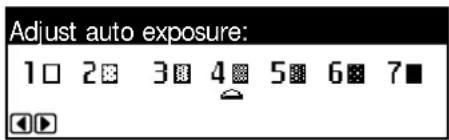
Auto Exposure Adjustment
Adjusts the overall density in Auto Exposure mode.
1 Display the Copy Default screen, refer to Access the Copy Default Screen, on page 3-3.
2 Press ▲ or ▼ to select Adj.Auto expos and press [Enter].
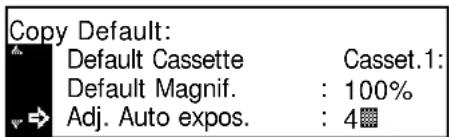
3 Press < or > to adjust the exposure. Move right to darken the density, or left to lighten it and press [Enter].
4 Press [Reset]. The Copier Basic screen returns.
Auto OCR Exposure Adjustment
Adjusts the overall density of scanning for OCR when using the optional Scanner functions.
1 Display the Copy Default screen, refer to Access the Copy Default Screen, on page 3-3.
2 Press ▲ or ▼ to select Auto expos.(OCR) and press [Enter].
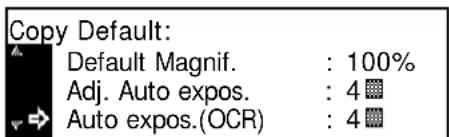
3 Press < or > to adjust the exposure. Move right to darken the density, or left to lighten it and press [Enter].
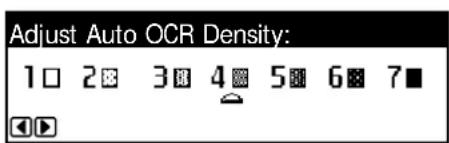
4 Press [Reset]. The Copier Basic screen returns.
Exposure Adjustment for Text + Photo Originals
Adjusts the density of the central value in Manual Exposure mode for Text + Photo originals.
1 Display the Copy Default screen, refer to Access the Copy Default Screen, on page 3-3.
2 Press ▲ or ▼ to select Txt+Photo Dens and press [Enter].
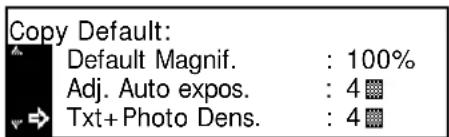
3 Press < or > to adjust the exposure. Move right to darken the density, or left to lighten it and press [Enter].
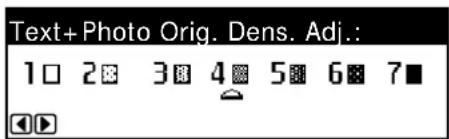
4 Press [Reset]. The Copier Basic screen returns.
Exposure Adjustment for Text Originals
Adjusts the density of the central value in Manual Exposure mode for Text originals.
1 Display the Copy Default screen, refer to Access the Copy Default Screen, on page 3-3.
2 Press ▲ or ▼ to select Txt Ori Density and press [Enter].
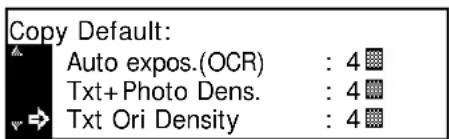
3 Press < or > to adjust the exposure. Move right to darken the density, or left to lighten it and press [Enter].

4 Press [Reset]. The Copier Basic screen returns.
Exposure Adjustment for Photo Originals
Adjusts the density of the central value in Manual Exposure mode for Photo originals.
1 Display the Copy Default screen, refer to Access the Copy Default Screen, on page 3-3.
2 Press ▲ or ▼ to select Photo Ori Dnsity and press [Enter].
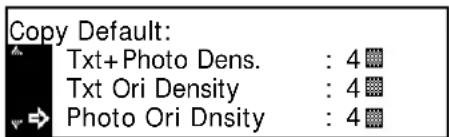
3 Press < or > to adjust the exposure. Move right to darken the density, or left to lighten it and press [Enter].
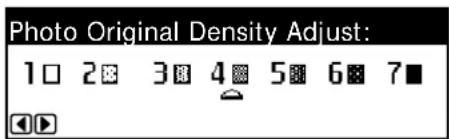
4 Press [Reset]. The Copier Basic screen returns.
Sort Copying
If the optional Document Processor is installed, select whether or not to set the Sort Copy mode as a default setting.
NOTE: This item is displayed only if the optional Document Processor is installed.
1 Display the Copy Default screen, refer to Access the Copy Default Screen, on page 3-3.
2 Press ▲ or ▼ to select Sort and press [Enter].
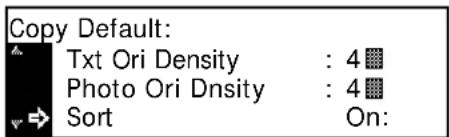
3 Press ▲ or ▼ to select On or Off and press [Enter].
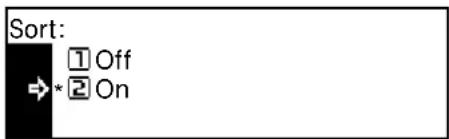
4 Press [Reset]. The Copier Basic screen returns.
Offset Copying
Use to set Offset Copy mode as the default setting.
1 Display the Copy Default screen, refer to Access the Copy Default Screen, on page 3-3.
2 Press ▲ or ▼ to select Offset and press [Enter].
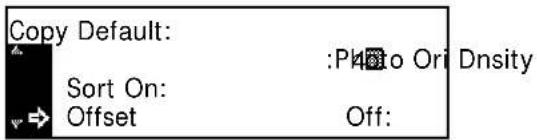
3 Press ▲ or ▼ to select On or Off and press [Enter].
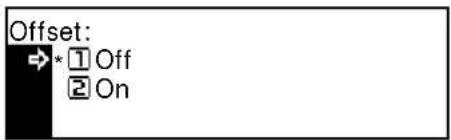
4 Press [Reset]. The Copier Basic screen returns.
Auto Rotation Copy
Use to select Auto Rotation Copy mode as the default setting.
1 Display the Copy Default screen, refer to Access the Copy Default Screen, on page 3-3.
2 Press ▲ or ▼ to select Auto Rotation and press [Enter].
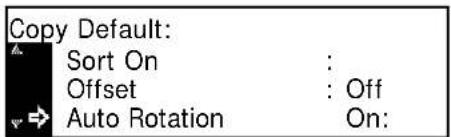
3 Press ▲ or ▼ to select On or Off and press [Enter].
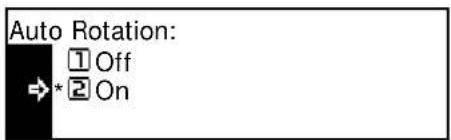
4 Press [Reset]. The Copier Basic screen returns.
Margin Width Default Value
Use to set the default value of Margin Width.
1 Display the Copy Default screen, refer to Access the Copy Default Screen, on page 3-3.
2 Press ▲ or ▼ to select Margin Width and press [Enter].
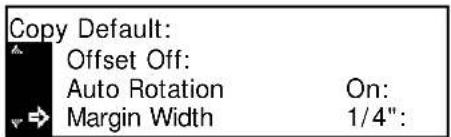
3 Press ▲ or ▼ to select the default margin width. You can select from 1/8" to 3/4" in 1/8" increments [1 mm to 18 mm in 1 mm increments] and press [Enter].
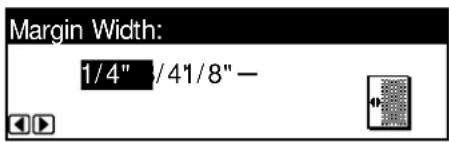
4 Press [Reset]. The Copier Basic screen returns.
Border Erase Width Default Value
Use to set the default value for the Border Erase Width.
1 Display the Copy Default screen, refer to Access the Copy Default Screen, on page 3-3.
2 Press ▲ or ▼ to select Border Erase Width and press [Enter].
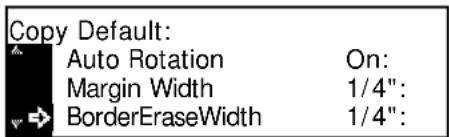
3 Press ▲ or ▼ to select the default Border Erase width. You can select from 1/8" to 3/4" in 1/8" increments (1 mm to 18 mm in 1 mm increments) and press [Enter].
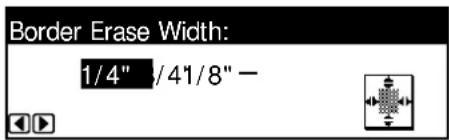
4 Press [Reset]. The Copier Basic screen returns.
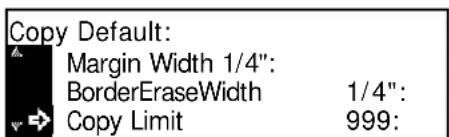
Number of Copies Limit
Use to set the limit for the number of copies that can be selected at a time.
1 Display the Copy Default screen, refer to Access the Copy Default Screen, on page 3-3.
2 Press ▲ or ▼ to select Copy Limit and press [Enter].
3 Use the numeric keys to enter the maximum number of copies (1 to 999) and press [Enter].
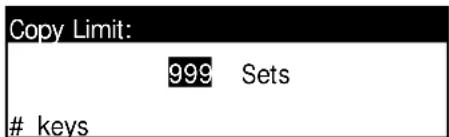
4 Press [Reset]. The Copier Basic screen returns.
Black Streaking Reduction Processing
If black streaks (streaks that are not contained in the original image) appear on copies from the optional Document Processor, you can make black streaking less noticeable. Black Streaking Reduction processing reduces the reproducibility of fine characters, therefore it is recommended to use the factory default setting.
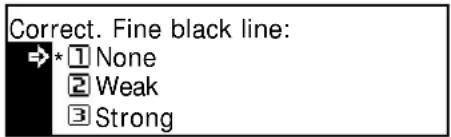
To use the Black Streaking Reduction processing, first select Weak. If black streaking is not reduced, select Strong
1 Display the Copy Default screen, refer to Access the Copy Default Screen, on page 3-3.
2 Press ▲ or ▼ to select Corr. Black line and press [Enter].
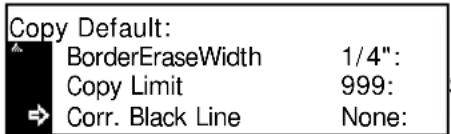
3 Press ▲ or ▼ to select None, Weak or Strong and press [Enter].
4 Press [Reset]. The Copier Basic screen returns.
Machine Default Settings
The machine enters Initial Mode after warm-up or if Reset is pressed. The options and settings which the machine returns to in Initial Mode are the default settings.
Use these instructions to customize the default settings to meet your requirements.
The following settings are available:
• Auto Cassette Switching
• Paper Size (cassettes 1 to 4)
• Paper Type (cassettes 1 to 4)
- Multi-Bypass Tray Confirmation Display
• Paper Weight for Paper Type
- Duplex Print for Paper Type
- Custom Paper Type
- Original Orientation
- Auto Sleep Time
• Auto Low Power Time
- Copy Output Destination
- Fax Output Destination
- Default Operation Mode
• Key Sound
- Date and Time
- Display Contrast Adjustment
- Administrator Management Code Change
- Auto Sleep
- Auto Clear
- Auto Clear Time
- Silent Mode
Access the Machine Default Screen
Use the following procedure to access the Machine Default screen.
1 Press [System Menu / Counter].
2 Press ▲ or ▼ to select Machine default and press [Enter].
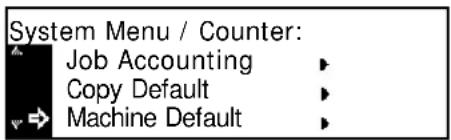
3 Use the keypad to enter the 4 digit management code.
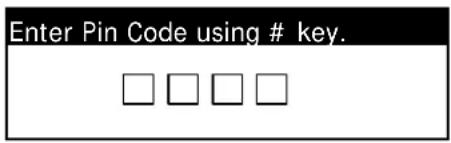
NOTE: The factory default management code varies for each model: 16 ppm model = 1600, 20 ppm model = 2000, and 25 ppm model = 2500. The four-digit management code can be changed. For further information refer to Administrator Management Code Change, on page 3-25.
If the code is accepted, the Machine Default screen displays.
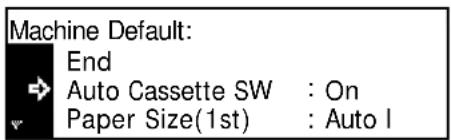
4 Change the options to the default settings required using the instructions starting on page 3-4.
NOTE: An * (asterisk) against a setting indicates the current setting.
Auto Cassette Switching
If multiple cassettes contain the same size paper and the paper in one cassette runs out during copying, the Automatic Cassette Switching function will switch paper feed from the empty cassette to another cassette containing paper of the same size and orientation.
To prohibit switching to a cassette that has a different paper type, select On/Only Same Paper Type.
NOTE: To use this function on the 16 ppm model, the Optional Paper Feeder must be installed.
1 Display the Machine default screen, refer to Access the Machine Default Screen, on page 3-15.
2 Press ▲ or ▼ to select Auto Cassette SW and press [Enter].
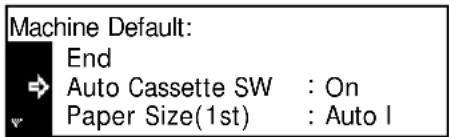
3 Press ▲ or ▼ to select On/All types of paper, On/Only same paper type, or Off and press [Enter].
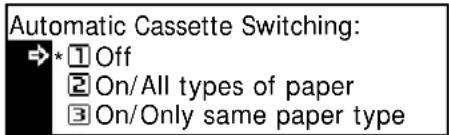
4 Press [Reset]. The Copier Basic screen returns.
Paper Size (cassettes 1 to 4)
Use to set the paper sizes for cassettes 1 to 4. To detect the paper size automatically, set to Auto Detection Metric or Auto Detection Inch.
NOTE: For the 16 ppm model, cassettes 2 to 4 are included in the optional paper feeder. For the 20 and 25 ppm model, cassettes 3 and 4 are included in the optional Paper Feeder. This setting is displayed only if the optional Paper Feeder is installed.
1 Display the Machine default screen, refer to Access the Machine Default Screen, on page 3-15.
2 A Paper Size option is available for each cassette. Press ▲ or ▼ to select the Paper Size option required, and press [Enter].
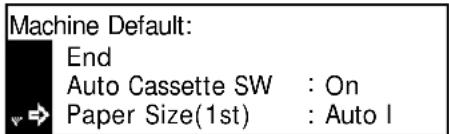
3 Press ▲ or ▼ to select Auto Detection Metric, Auto Detection Inch or a paper size and press [Enter].
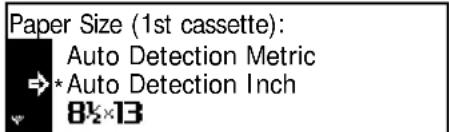
4 Press [Reset]. The Copier Basic screen returns.
Paper Type (cassettes 1 to 4)
Use to set the paper types for cassettes 1 to 4.
Paper types that can be set: Plain, Preprinted, Bond, Recycled, Rough, Letterhead, Color, Prepunched, High quality and Custom 1 to 8.
NOTE: For the 16 ppm model, cassettes 2 to 4 are included in the optional paper feeder. For the 20 and 25 ppm model, cassettes 3 and 4 are included in the optional Paper Feeder. This setting is displayed only if the optional Paper Feeder is installed.
1 Display the Machine default screen, refer to Access the Machine Default Screen, on page 3-15.
2 A Paper Type option is available for each cassette. Press ▲ or ▼ to select the Paper Type option required and press [Enter].
Machine Default:
Paper Size(3rd) Auto I:
Paper Size(4th) Auto I:
Paper Type(1st) Plain:
3 Press ▲ or ▼ to select the paper type and press [Enter].
Paper Type (1st cassette):
→ *Plain
Preprinted
Bond
4 Press [Reset]. The Copier Basic screen returns.
Multi-Bypass Tray Confirmation Display
Use to select to display the Bypass Paper Size screen when pressing the Paper Select key to select the Multi-Bypass Tray.
1 Display the Machine default screen, refer to Access the Machine Default Screen, on page 3-15.
2 Press ▲ or ▼ to select Check Bypass and press [Enter].
Machine Default: Paper Type(3rd) Plain: Paper Type(4th) Plain: Check Bypass Off:
3 Press ▲ or ▼ to select On or Off and press [Enter].
Check Bypass Sizing: → * ① Off ② On
4 Press [Reset]. The Copier Basic screen returns.
Paper Weight for Paper Type
Use to set the Paper Weight for each Paper Type.
Paper weight types that can be set: Super-Heavy, Heavy3, Heavy2, Heavy1, Middle3, Middle2, Middle1 and Light.
1 Display the Machine default screen, refer to Access the Machine Default Screen, on page 3-15.
2 Press ▲ or ▼ to select P.type (Weight) and press [Enter].
3 Press ▲ or ▼ to select the paper type and press [Enter].
4 Press ▲ or ▼ to select the paper weight and press [Enter].
Repeat the procedure to set the weight for each paper type.
5 When you have finished changing the settings, press ▲ or ▼ to select End and press [Enter].
6 Press [Reset]. The Copier Basic screen returns.
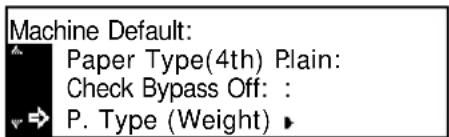
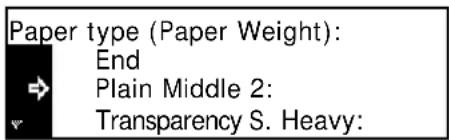
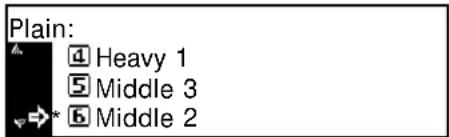
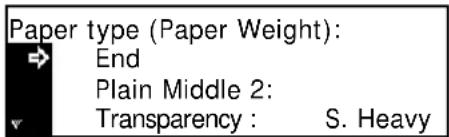
Duplex Print for Paper Type
Use to set the use of custom paper (1 to 8) for duplex printing.
1 Display the Machine default screen, refer to Access the Machine Default Screen, on page 3-15.
2 Press ▲ or ▼ to select P.type (Duplex) and press [Enter].
3 Press ▲ or ▼ to select the paper type and press [Enter].
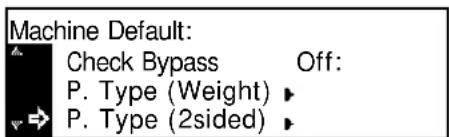
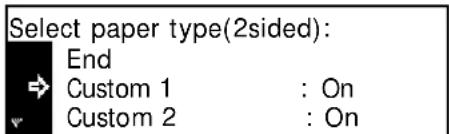
4 Press ▲ or ▼ to select On or Off and press [Enter].
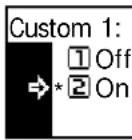
5 When you have finished changing the settings, press ▲ or ▼ to select End and press [Enter].
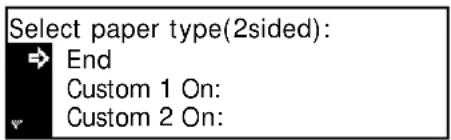
6 Press [Reset]. The Copier Basic screen returns.
Custom Paper Type
Printing onto prepunched paper, preprinted paper or letterhead in one-sided mode and two-sided mode from the same paper source may cause displacement of hole positions, or reverse orientations on both sides. Set Match Print Direction to match the orientation in one-sided printing and two-sided printing.
Example: Paper is set as shown in the illustration.

| Setting One-sided printing Two-sided printing | ||
| Match Print Direction |  |  |
| Fast Mode |  |  |
NOTE: Setting of Match Print Direction will decrease the speed of one-sided printing slightly.
When Match Print Direction is set, load the paper with the side for the first page face-down as shown in illustration A. If the optional Finisher is installed, load the paper with the side for the first page face-down as shown in illustration B.
A


B


If the optional Finisher is installed, the stapling mode may cause incorrect orientation of printing depending on the stapling position.
1 Display the Machine default screen, refer to Access the Machine Default Screen, on page 3-15.
2 Press ▲ or ▼ to select Special P. type and press [Enter].
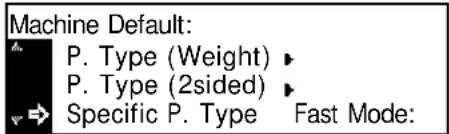
3 Press ▲ or ▼ to select Match Print Direction or Fast Mode and press [Enter].
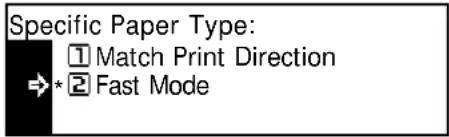
4 Press [Reset]. The Copier Basic screen returns.
Original Orientation
Use to set the default Original Orientation.
1 Display the Machine default screen, refer to Access the Machine Default Screen, on page 3-15.
2 Press ▲ or ▼ to select Orig. direction and press [Enter].
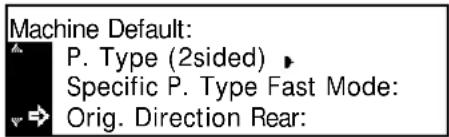
3 Press ▲ or ▼ to select Rear or Left top and press [Enter].
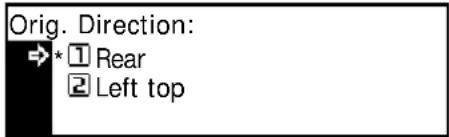
4 Press [Reset]. The Copier Basic screen returns.
Auto Sleep Time
Use to set the time that elapses before the Auto Sleep function is activated if the function has been enabled.
Time that can be set:
- Inch Specification — 1 to 240 minutes (in 1 minute increments)
- Metric Specification — 1 to 120 minutes (in 1 minute increments)
NOTE: It is recommended to set a longer time if you use the machine frequently.
1 Display the Machine default screen, refer to Access the Machine Default Screen, on page 3-15.
2 Press ▲ or ▼ to select Sleep mode time and press [Enter].
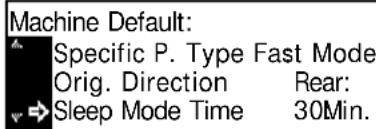
3 Press < or > to select the time required from 1 to 240 minutes or 1 to 120 minutes and press [Enter].
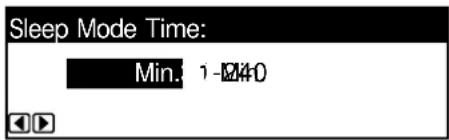
4 Press [Reset]. The Copier Basic screen returns.
Auto Low Power Time
Use to set the time that elapses before Low Power mode is automatically activated.
Time that can be set:
- Inch Specification — 1 to 240 minutes (in 1 minute increments)
- Metric Specification — 1 to 120 minutes (in 1 minute increments)
1 Display the Machine default screen, refer to Access the Machine Default Screen, on page 3-15.
2 Press ▲ or ▼ to select Low power time and press [Enter].
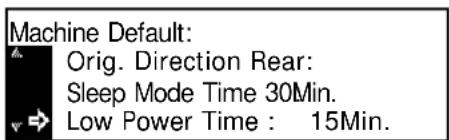
3 Press < or > to select the time required from 1 to 240 minutes or 1 to 120 minutes and press [Enter].
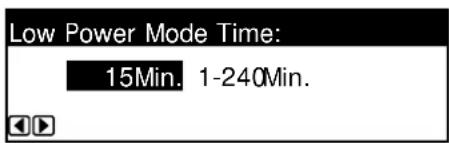
4 Press [Reset]. The Copier Basic screen returns.
Copy Output Destination
Use to set the paper output destination with priority for copying.
| Setting Item | Output Destination |
| Top Tray | Main body output tray |
| Finisher | Optional Finisher |
| Job Separator | Optional Job Separator |
NOTE: This item is displayed only if the optional Finisher or Job Separator is installed.
1 Display the Machine default screen, refer to Access the Machine Default Screen, on page 3-15.
2 Press ▲ or ▼ to select Copy
Otput Destn and press [Enter].
Machine Default:
Sleep Mode Time 30Min.
Low Power Time : 15Min.
Copy Otput Destn Top Tray:
3 Press ▲ or ▼ to select the output destination required and press [Enter]. Copy Output Destination: ➡ * ① Top Tray ② Finisher
4 Press [Reset]. The Copier Basic screen returns.
Fax Output Destination
Use to set the paper output destination with priority for received fax data and various reports.
| Setting Item Output Destination | |
| Top Tray Main body output tray | |
| Finisher Optional Finisher | |
| Job Separator Optional Job Separator |
NOTE: This item is displayed only if the optional Fax kit and Finisher or Job Separator are installed.
1 Display the Machine default screen, refer to Access the Machine Default Screen, on page 3-15.
2 Press ▲ or ▼ to select Fax Output Destn and press [Enter]. Machine Default:
Low Power Time : 30Min.
Copy Otput Destn Top Tray:
Fax Output Destn Top Tray:
3 Press ▲ or ▼ to select the output destination required and press [Enter]. Fax Output Destination: * Top Tray Finisher
4 Press [Reset]. The Copier Basic screen returns.
Default Operation Mode
Select the default screen to be displayed when the power is switched on. The Copy or Fax screen can be displayed.
NOTE: This item is displayed only if the optional Fax kit is installed.
1 Display the Machine default screen, refer to Access the Machine Default Screen, on page 3-15.
2 Press ▲ or ▼ to select Main mode and press [Enter].
3 Press ▲ or ▼ to select Copy mode or Fax mode and press [Enter].
4 Press [Reset]. The Copier Basic screen returns.
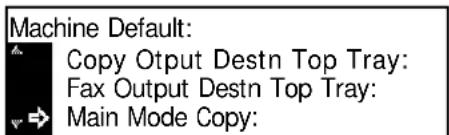
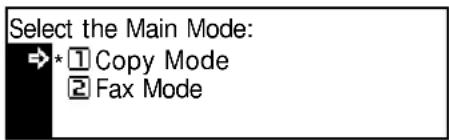
Key Sound
Use to enable a beep sound each time a key on the Operation Panel is pressed.
1 Display the Machine default screen, refer to Access the Machine Default Screen, on page 3-15.
2 Press ▲ or ▼ to select Key sound On/Off and press [Enter].
3 Press ▲ or ▼ to select Off or On and press [Enter].
4 Press [Reset]. The Copier Basic screen returns.

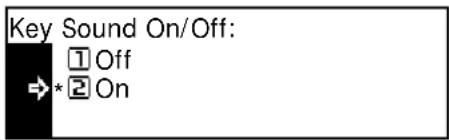
Date and Time
Use to register the current date and time, the time difference from Greenwich Mean Time (GMT), and the summer time setting.
1 Display the Machine default screen, refer to Access the Machine Default Screen, on page 3-15.
2 Press ▲ or ▼ to select Date/Time and press [Enter].
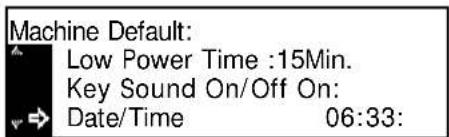
3 Press ▲ or ▼ to select Time Zone.
Press < or > key to set the time difference from Greenwich Mean Time.
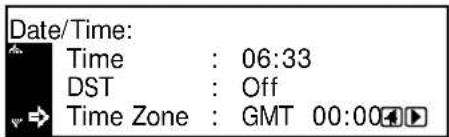
4 Press ▲ or ▼ to select Time.
Press the < key or the > key to set the current time.
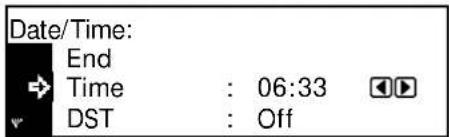
5 Press ▲ or ▼ to select DST (Summer time).
Press < or > to set On or Off.
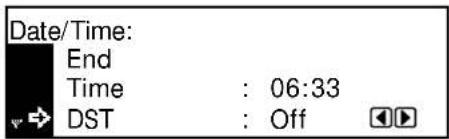
6 Press ▲ or ▼ to select Year.
Press < or > to set the current year.
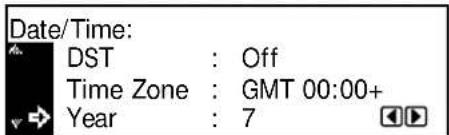
7 Press ▲ or ▼ to select Month.
Press < or > to set the current month.
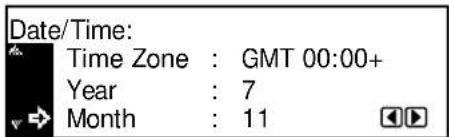
8 Press ▲ or ▼ to select Day.
Press < or > to set the current day.
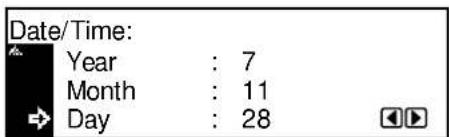
9 When the date and time settings have been entered, press ▲ or ▼ to select End and press [Enter].
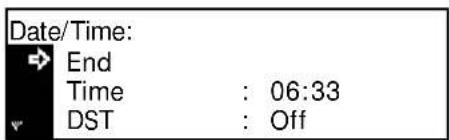
10 Press [Reset]. The Copier Basic screen displays.
Display Contrast Adjustment
Use to adjust the Display Contrast if required.
1 Display the Machine default screen, refer to Access the Machine Default Screen, on page 3-15.
2 Press ▲ or ▼ to select Display Contrast and press [Enter].
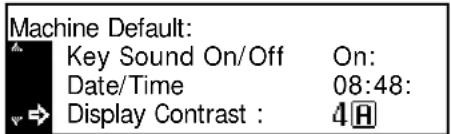
3 Press < or > to adjust the contrast. Move left to darken the contrast, or right to lightens the contrast and press [Enter].
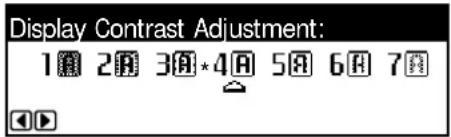
4 Press [Reset]. The Copier Basic screen returns.
Administrator Management Code Change
You can change the 4-digit Management Code for the machine administrator.
IMPORTANT: If you change the Management Code, ensure you note it down. If you forget the code, contact your Service Representative.
NOTE: The factory default management code varies for each model: 16 ppm model = 1600, 20 ppm model = 2000, and 25 ppm model = 2500.
1 Press ▲ or ▼ to select PIN # Change or MGMT Code.
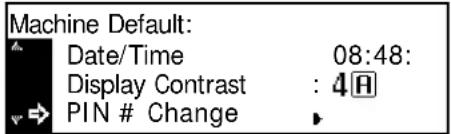
NOTE: If using a metric machine, this option displays as MGMT Code entry.
2 Use the numeric keys to enter the new Administrator Management Code and press [Enter].
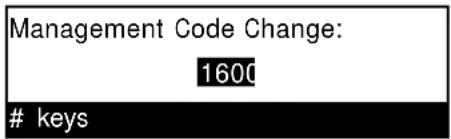
3 Press [Reset]. The Copier Basic screen returns.
Auto Sleep
Use to set the machine to enter sleep mode automatically when a preset period of time of non-use elapses.
NOTE: This setting is displayed only on the inch specification machine.
If the Auto Sleep function causes inconvenience, it is recommended to try a longer time period before disabling the function. If you disable this function, it is not displayed.
1 Display the Machine default screen, refer to Access the Machine Default Screen, on page 3-15.
2 Press ▲ or ▼ to select Auto Sleep and press [Enter].
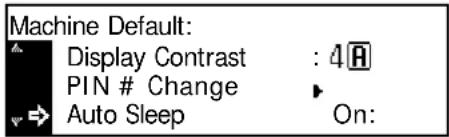
3 Press ▲ or ▼ to select On or Off and press [Enter].
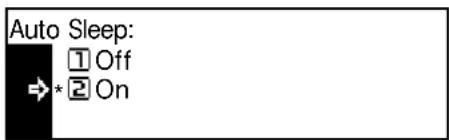
4 Press [Reset]. The Copier Basic screen returns.
Auto Clear
Using Auto Clear, once a specified amount of time has passed after copying stops (between 10 and 270 seconds), the machine returns to the current default settings. Copies can be made continually using the same settings (e.g. copy mode, number of copies, and exposure mode) if each job is started before the Auto Clear function is activated.
1 Display the Machine default screen, refer to Access the Machine Default Screen, on page 3-15.
2 Press ▲ or ▼ to select Auto Clear and press [Enter].
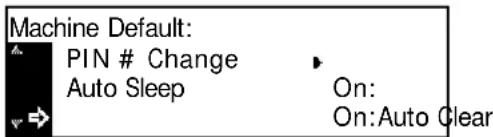
3 Press ▲ or ▼ to select On or Off and press [Enter].
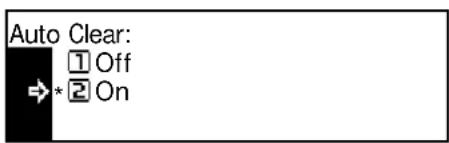
4 Press [Reset]. The Copier Basic screen returns.
Auto Clear Time
Use to set the time that elapses from completion of copying to activation of the Auto Clear function, if it is enabled.
Time that can be set: 10 to 270 seconds (in 10 second increments)
NOTE: This item is not displayed if the Auto Clear function is Off.
1 Display the Machine default screen, refer to Access the Machine Default Screen, on page 3-15.
2 Press ▲ or ▼ to select Auto Clear Time and press [Enter].
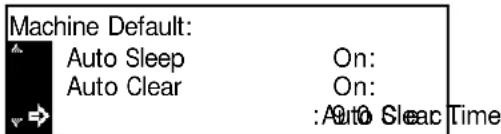
3 Press < or > to select the time from 10 to 270 seconds and press [Enter].
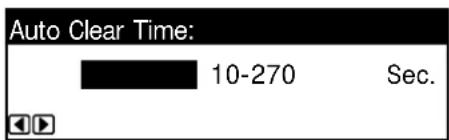
4 Press [Reset]. The Copier Basic screen returns.
Silent Mode
This mode reduces the operating noise caused by the machine.
1 Display the Machine default screen, refer to Access the Machine Default Screen, on page 3-15.
2 Press ▲ or ▼ to select Silent Mode and press [Enter].
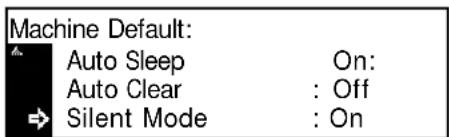
3 Press ▲ or ▼ to select On or Off and press [Enter].
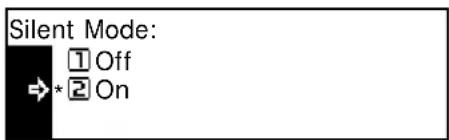
4 Press [Reset]. The Copier Basic screen returns.
Viewing and Printing the Total Counter
You can view the total counts on the Operation Panel and print a counter report.
Viewing the Total Counter
NOTE: You can view the Output Counter and the Scanning Counter.
1 Press [System Menu / Counter].
2 Press ▲ or ▼ to select Counter check and press [Enter].
3 Press ▲ or ▼ to select Output count or Scan count and press [Enter].
4 Press ▲ or ▼ to view the counter.

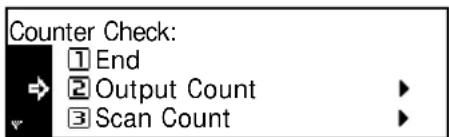
| Output Count: | |
| End | |
| Copy | : 1.234.567 |
| Printer | : 0.001.234 |
5 When you have finished viewing the counters, press ▲ or ▼ to select End and press [Enter].
6 Press [Reset]. The Copier Basic screen returns.
Printing the Counter Report
NOTE: Ensure that A4/11 × 8 1/2" paper is loaded in the cassette when printing the counter report.
1 Press [System Menu / Counter].
2 Press ▲ or ▼ to select Counter check and press [Enter].
3 Press ▲ or ▼ to select Print counter report and press [Enter].
The counter report is printed.
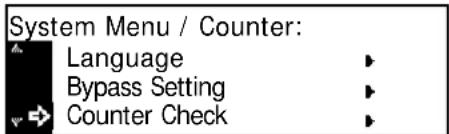
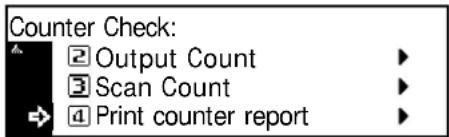
4 Press [Reset]. The Copier Basic screen returns.
Example: Counter report
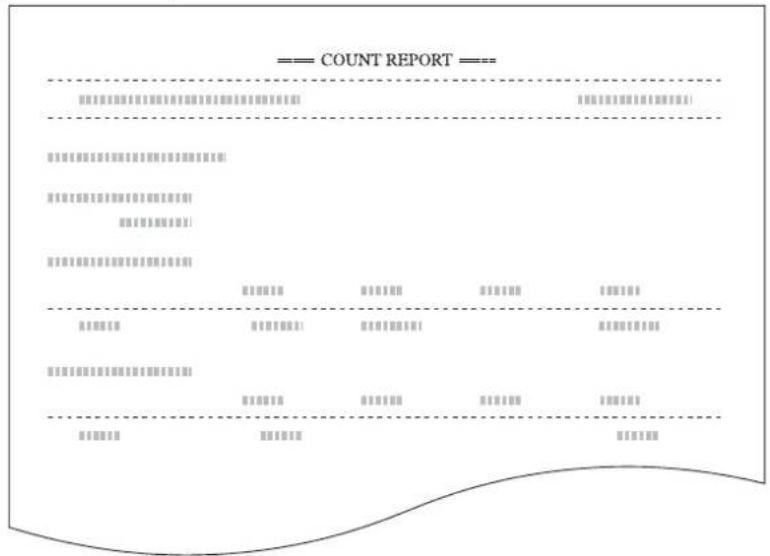
Report Output
You can output the following reports from the Operation Panel.
Copy Status Report
![=== USER COPY SETTING LIST === [ ] [ ] [ ] [ ] [ ] [ ] [ ] [ ] [ ] [ ] [ ] [ ] [ ] [ ] [ ] [ ] [ ] [ ] [ ] [ ] [ ] [ ] [ ] [ ] [ ] [ ] [ ] [ ] [ ] [ ] [ ] [ ] [ ] [ ] [ ] [ ] [ ] [ ] [ ] [ ] [ ] [ ] [ ] [ ] [ ] [ ] [ ] [ ] [ ] [ ] [ ] [ ] [ ] [ ],](/content/2026/05/768512/images/5d56c977bb475a6121b5e4872aeef96cc2f9e4477d37177feb42b5a4f9ba216a.jpg)
Machine Status Report
![—— USER MACHINE SETTING LIST —— [ ] [ ] [ ] [ ] [ ] [ ] [ ] [ ] [ ] [ ] [ ] [ ] [ ] [ ] [ ] [ ] [ ] [ ] [ ] [ ] [ ] [ ] [ ] [ ] [ ] [ ] [ ] [ ] [ ] [ ] [ ] [ ] [ ] [ ] [ ] [ ] [ ] [ ] [ ] [ ] [ ] [ ] [ ] [ ] [ ] [ ] [ ] [ ] [ ] [ ] [ ] [ ] [ ] [ ],](/content/2026/05/768512/images/1e35b2a10b6faeb52e2b47eefeff90820e5bea4a53b8763b285206d4ed24e1cb.jpg)
Coverage Report
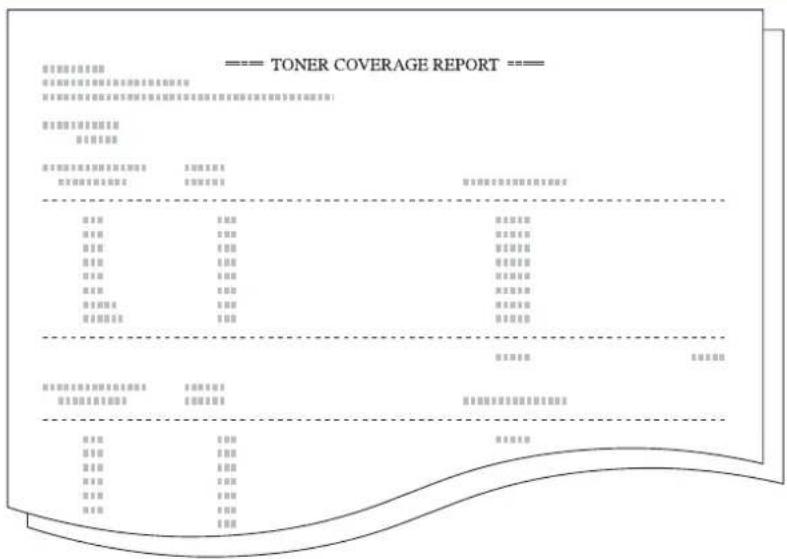
NOTE: Ensure that A4/11 × 8 1/2" paper is loaded in the cassette prior to printing a report.
A coverage report details the number of printed sheets and the average of blackness ratio for each paper size. The following items are included.
- Total Toner Coverage report
- Copy Toner Coverage report
- Printer Toner Coverage report
- Fax Toner Coverage report
1 Press [System Menu / Counter].
2 Press ▲ or ▼ to select Print Report and press [Enter].
3 Press ▲ or ▼ to select the report to print and press [Enter].
The report is printed.
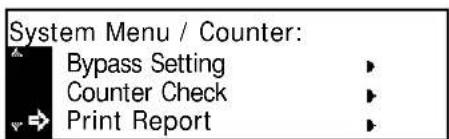
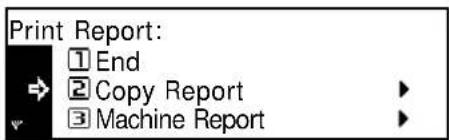
4 Press [Reset]. The Copier Basic screen returns.
Language Setting
You can select the language that will be used in the message display.
The following languages are available for selection:
- Inch Specification — English, French (Français), Spanish (Español), and Japanese (日本語
- Metric Specification — English, German (Deutsch), French (Français), Spanish (Español), and Italian (Italiano)
1 Press [System Menu / Counter].
2 Press ▲ or ▼ to select Language and press [Enter].
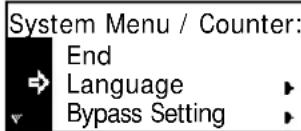
3 Press ▲ or ▼ to select the language required and press [Enter].
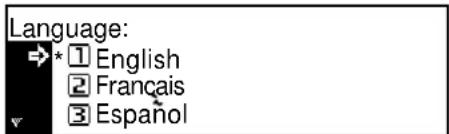
The message display returns to the Copier Basic screen, and the language changes.
User Adjustment
NOTE: This setting displays only on the 25 ppm model.
Drum Refresh
If output images are deformed or unnecessary white points appear, perform a Drum Refresh. It takes approximately two minutes.
NOTE: Ensure that A3, A4, 11 × 17" (Ledger), or 11 × 8 1/2" paper is loaded in the Multi-Bypass Tray.
1 Press [System Menu / Counter].
2 Press ▲ or ▼ to select User Adjustment and press [Enter].
3 Press ▲ or ▼ to select Drum refresh and press [Enter].
4 Press ▲ or ▼ to select Yes and press [Enter].
Drum refresh starts.
5 When Drum refresh has finished, press ▲ or ▼ to select End and press [Enter].
6 Press [Reset]. The Copier Basic screen returns.
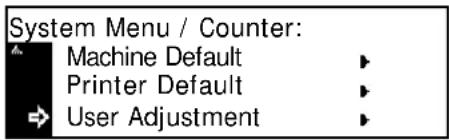

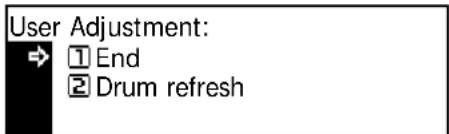
4 Job Accounting
This chapter explains the Job Accounting functions of the machine.
• Job Accounting Mode...... 4-2
• Managing Accounts 4-4
- Default Settings 4-12
• Using Job Accounting...... 4-15
Job Accounting Mode
Use Job Accounting mode to control the total number of copies and prints by setting an ID-code for each account.
Job Accounting mode has the following features.
- Controls the Copy functions, printer functions, and optional scanner/fax functions using ID-codes.
- Controls up to 100 accounts.
- ID-codes can have up to eight digits.
- Counts the number of copies for all accounts and individual accounts.
- You can limit of number of sheets up to 999,999 in 1 sheet increments.
- You can clear the counter for all accounts and individual accounts.
The following functions are available in the Job Accounting mode.
| Job Accounting mode | Description | Reference page |
| Managing Accounts | Registration — Registers ID-codes and limit of use. Up to 100 ID-codes can be registered.Deletion — Deletes registered accounts.Change of limit of use — Changes the limit of use for each account. | 4-4 |
| All Account Management | Viewing the total count, printing a Job Accounting report, and counter clear for all accounts can be performed. | 4-10 |
| Individual Account Management | Counting of the total count and counter clear for individual accounts can be performed. | 4-10 |
| Enabling Job Accounting | Switching the Job Accounting function On or Off. | 4-11 |
| Default Settings | Adjusting the default settings for Job Accounting mode. | 4-12 |
NOTE: For settings on the computer required for using Job Accounting concerning the printer functions, refer to the KX Printer Driver Operation Guide.
NOTE: In addition, the Job Accounting mode that can be set from the computer is available. For details, refer to the KM-NET for Accounting Operation Guide.
Access the Job Accounting Screen
Use the following procedure to display the Job Accounting screen.
1 Press [System Menu / Counter].
2 Press ▲ or ▼ to select Job Accounting and press [Enter].
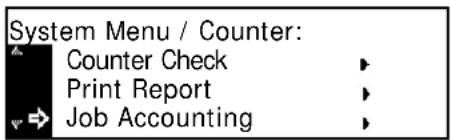
3 Use the keypad to enter the 4 digit management code.
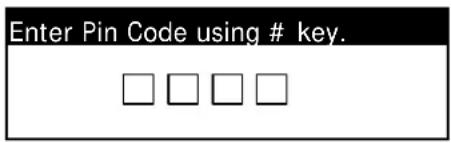
NOTE: The factory default management code varies for each model: 16 ppm model = 1600, 20 ppm model = 2000, and 25 ppm model = 2500. The four-digit management code can be changed. For further information refer to Administrator Management Code Change, on page 3-25.
If the code is accepted, the Job Accounting screen displays.
![Job Accounting: [ ] ① End ② Job Accounting Total ▶ ③ Each Job Accounting TL ▶](/content/2026/05/768512/images/0f94adee0f17bc16530af276395f8a04678b310dccf98e72e67d5b3f62be8ded.jpg)
On
4 Setup the options required using the instructions starting on page 4-4.
Managing Accounts
Registering a New Account
Register an ID-code and set the Limit of Use for each account.
1 Display the Job Accounting screen, refer to Access the Job Accounting Screen, on page 4-3.
2 Press ▲ or ▼ to select Edit Job Accounting and press [Enter].
![Job Accounting: [ ] ① End ② Job Accounting Total ▶ ③ Each Job Accounting TL ▶](/content/2026/05/768512/images/9cb469ef88f46c303ce379997c65a5d407376f50e8202db0d6f52030b52537c8.jpg)
3 Press ▲ or ▼ to select New registration and press [Enter].
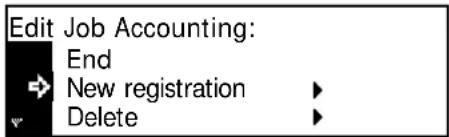
Use the numeric keys to enter a 1 to 8 digit ID-code, 0 to 99999999 can be used.
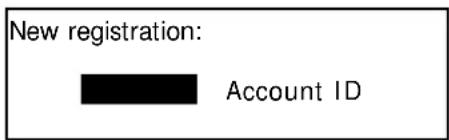
NOTE: If you try to register an ID-code that has been already entered, an error occurs. Enter another ID-code and press [Enter].
When the ID-code is registered, Please wait displays.
4 Set the Limit in use for each function, refer to Limit of Use, on page 4-5. You can set the Limit of use for each registered account.
| Limit in use: | |
| End | |
| Copy | : Able use |
| Printer | : Able use |
5 On completion, press ▲ or ▼ to select End and press [Enter].
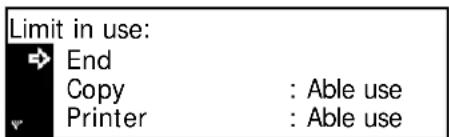
NOTE: You can change the management method to set the count limit for copying and printing respectively. For details, refer to the KM-NET for Accounting Operation Guide.
Limit of Use
Use to set the Limit of Use for each registered account. Restrictions can be setup for each available function.
Copy Restriction
Use to permit or prohibit copying.
NOTE: This item displays if Copy Job Accounting is set to On, refer to Copy Job Accounting, on page 4-12.
1 Display the Limit in use screen, refer to Registering a New Account, on page 4-4.
2 Press ▲ or ▼ to select Copy and press [Enter].
| Limit in use: | |
| End | |
| Copy | : Able use |
| Printer | : Able use |
3 Press ▲ or ▼ to select Able to use or Unable to use, and press the [Enter] key.
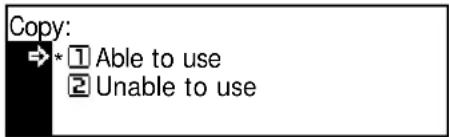
- Able to use — Permits copying.
- Unable to use — Prohibits copying.
The Limit in use screen displays.
Print Restriction
Use to permit or prohibit printing.
NOTE: This item displays if Printer Job Accounting is set to On, refer to Printer Job Accounting, on page 4-12.
1 Display the Limit in use screen, refer to Registering a New Account, on page 4-4.
2 Press ▲ or ▼ to select Printer and press [Enter].
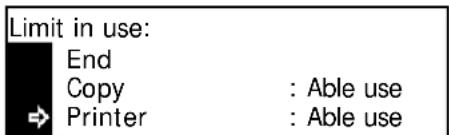
3
Press ▲ or ▼ to select Able to use or Unable to use and press the [Enter].
- Able to use — Permits printing.
- Unable to use — Prohibits printing.
The Limit in use screen displays.
Printer:

① Able to use
2 Unable to use

(1) 本说明仅供参考。
Output Limit
Use to limit the total number of copies or prints, or to set No Limit.
NOTE: This item does not display if both Copy Restriction and Print Restriction are set to Unable to use.
1
Display the Limit in use screen, refer to Registering a New Account, on page 4-4.
2
Press ▲ or ▼ to select Output limit and press [Enter].
Limit in

Copy : Able use
Printer Able use :
Output Limit No limit:
3
Press ▲ or ▼ to select No limit or Counter limit and press [Enter]
- No limit — Does not set the limit of count.
- Counter limit — Set the limit of count (0 to 999,999).
Output Limit

① No Limit
Counter Limit
① No Limit
Counter Limit
Output Limit
nter Limit Default Value:
999.999
Limitation
If Counter limit is selected, the Counter limit Default Value screen displays.
Use the numeric keys to enter the counter limit, up to 999,999 can be entered in 1 sheet increments. Press [Enter].
The Limit in use screen displays.
Scanner Transmission Limit
Use to permit or prohibit scanning if the optional Network Scanner kit is installed. If scanning is permitted, the total number of scanning transmissions can be limited or set to No Limit.
NOTE: This item displays if Scanner Job Accounting is set to On, refer to Scanner Job Accounting, on page 4-13.
1 Display the Limit in use screen, refer to Registering a New Account, on page 4-4.
2 Press ▲ or ▼ to select Scanner TX and press [Enter].
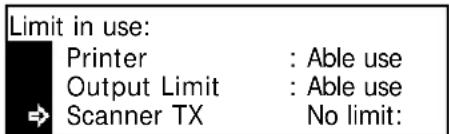
3 Press ▲ or ▼ to select No limit, Counter limit or Is not permitted and press [Enter].
- No limit — Does not set
the limit of count of scanner transmission. - Counter limit — Set the limit of count of scanner transmission (0 to 999,999).
- Is not permitted — Prohibits use of scanner transmission.
If Counter limit is selected, the Counter limit Default Value screen displays.
Use the numeric keys to enter the counter limit, up to 999,999 can be entered in 1 sheet increments. Press [Enter].
Counter Limit Default Value:
999.999 Limitation
The Limit in use screen displays.
Fax Transmission Limit
Use to permit or prohibit faxing if the optional Fax kit is installed. If faxing is permitted, the total number of fax transmissions can be limited or set to No Limit.
NOTE: This item displays if Fax Job Accounting is set to On, refer to Fax Job Accounting, on page 4-13.
1 Display the Limit in use screen, refer to Registering a New Account, on page 4-4.
2 Press ▲ or ▼ to select Fax TX and press [Enter].
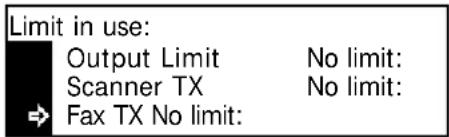
3 Press ▲ or ▼ to select No limit, Counter limit or Is not permitted and press [Enter].
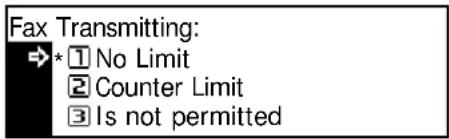
- No limit — Does not set the limit of count of fax transmission.
- Counter limit — Set the limit of count of fax transmission (0 to 999,999).
- Is not permitted — Prohibits use of fax transmission.
If Counter limit is selected, the Counter limit Default Value screen displays.
Use the numeric keys to enter the counter limit, up to 999,999 can be entered in 1 sheet increments. Press [Enter].
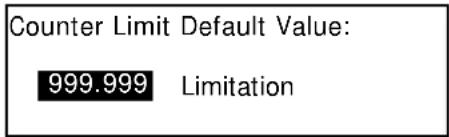
The Limit in use screen displays.
Deleting an Account
Use to delete a registered account.
1 Display the Job Accounting screen, refer to Access the Job Accounting Screen, on page 4-3.
2 Press ▲ or ▼ to select Edit Job Accounting and press [Enter].
3 Press ▲ or ▼ to select Delete and press [Enter].
![Job Accounting: [ ] 3 Each Job Accounting TL 4 Edit Job Accounting 5 Job Accountg Def. Set.](/content/2026/05/768512/images/f6e36fbfee896a96f30358077a60e49fd1cd9de258fc02c5e97cfa1a92b4a25e.jpg)
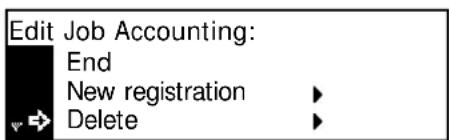
On
4 Press ▲ or ▼ to select the ID-code to delete and press [Enter].
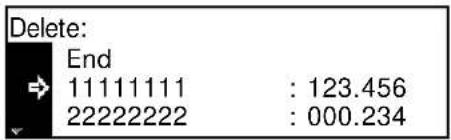
A confirmation screen displays.
Press ▲ or ▼ to select Yes and press [Enter].
To delete another account, repeat the procedure.
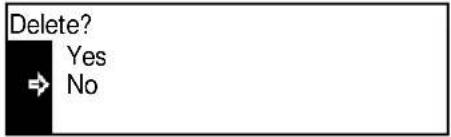
5 On completion, press ▲ or ▼ to select End and press [Enter].
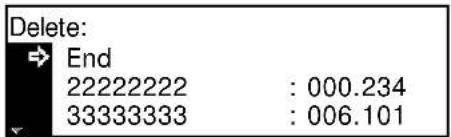
Changing Limit of Use
Use to change the Limit of use that has been setup.
NOTE: To set the limit of use in managing accounts, you must set Copy Job Accounting and Printer Job Accounting to On. If the optional Network Scanner kit or Fax kit is installed, set Scanner Job Accounting or Fax Job Accounting to On, refer to Default Settings, on page 4-12.
1 Display the Job Accounting screen, refer to Access the Job Accounting Screen, on page 4-3.
2 Press ▲ or ▼ to select Edit Job Accounting and press [Enter].
![Job Accounting: [ ] 3 Each Job Accounting TL 4 Edit Job Accounting 5 Job Accountg Def. Set.](/content/2026/05/768512/images/fd2b9863ff25a76c018dd0d1b60d1be33747b736f9c4a538393c327fe412941c.jpg)
On
3 Press ▲ or ▼ to select Change limit in use and press [Enter].
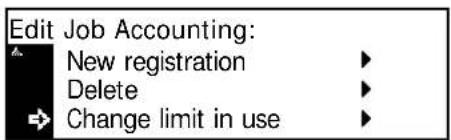
4 Press ▲ or ▼ to select the ID-code to change and press [Enter].
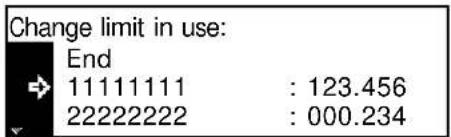
Change the limit.
5 On completion, press ▲ or ▼ to select End and press [Enter].
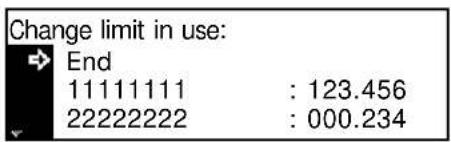
All Account Management
Use to view the total output count, print a Job Accounting report, and clear the counter for all accounts.
1 Display the Job Accounting screen, refer to Access the Job Accounting Screen, on page 4-3.
2 Press ▲ or ▼ to select Job Accounting Total and press [Enter].
![Job Accounting: [ ] ① End ② Job Accounting Total ▶ ③ Each Job Accounting TL ▶](/content/2026/05/768512/images/95c46839726fb0be5a83c298808ff0846ae8503ae808b1d7406b809019236976.jpg)
The total output count of all accounts displays.
3 To print the Job Accounting report, press ▲ or ▼ to select Print Report and press [Enter].
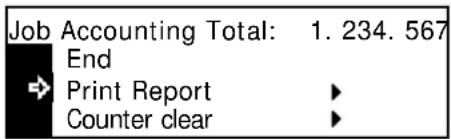
Example: Job Accounting report
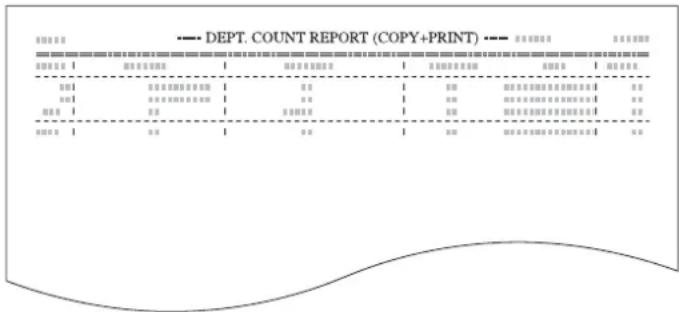
4 To clear the counter, press ▲ or ▼ to select Counter clear and press [Enter].
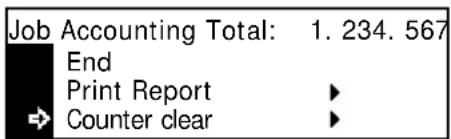
A confirmation screen displays.
Press ▲ or ▼ to select Yes and press [Enter].
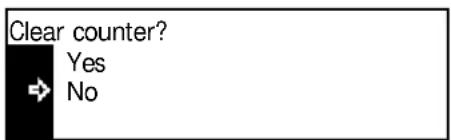
5 On completion, press ▲ or ▼ to select End and press [Enter].
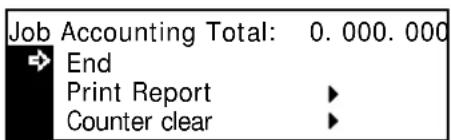
Individual Account Management
You can see the output count and clear the counter for individual accounts.
1 Display the Job Accounting screen, refer to Access the Job Accounting Screen, on page 4-3.
2 Press ▲ or ▼ to select Each Job Accounting TL and press [Enter].
![Job Accounting: [ ] ① End ② Job Accounting Total ▶ ③ Each Job Accounting TL ▶](/content/2026/05/768512/images/9d875f9d37d8b61020f41f1634d13e132e27b6e47d5c511e89b3c0733a52c4eb.jpg)
The output counts for individual accounts display.
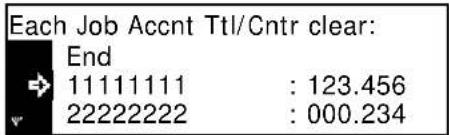
3 To clear the counter, press ▲ or ▼ to select the ID-code and press [Enter].
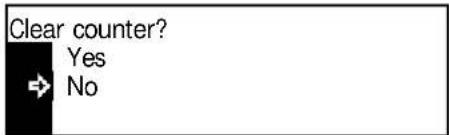
A confirmation screen displays.
Press ▲ or ▼ to select Yes and press [Enter].
4 On completion, press ▲ or ▼ to select End and press [Enter].
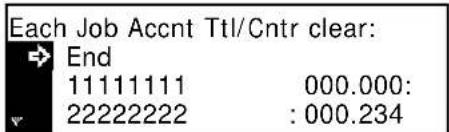
Enabling Job Accounting
Use to switch the Job Accounting function On or Off.
1 Display the Job Accounting screen, refer to Access the Job Accounting Screen, on page 4-3.
2 Press ▲ or ▼ to select Job Accounting On/Off and press [Enter].
![Job Accounting: [ ] ✓ Edit Job Accounting ✓ Job Accountg Def. Set. ✓ Job Accounting On/Off](/content/2026/05/768512/images/31fcbdbd4f3c1637c1bef63e8043e1893d754a60677818eb2d67924763ebcd93.jpg)
3 Press ▲ or ▼ to select Off or On and press [Enter].
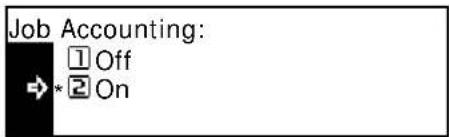
4 Press [Reset].
If you have selected On, the ID-code screen displays.
Default Settings
Use to adjust the default settings for Job Accounting.
Copy Job Accounting
You can select whether or not to enable Job Accounting for the Copy functions.
1 Display the Job Accounting screen, refer to Access the Job Accounting Screen, on page 4-3.
2 Press ▲ or ▼ to select Job Accountg Def. Set and press [Enter].
3 Press ▲ or ▼ to select Copy Job Account and press [Enter].
4 Press ▲ or ▼ to select Off or On and press [Enter].
5 On completion, press ▲ or ▼ to select End and press [Enter].
![Job Accounting: [ ] 3 Each Job Accounting TL ▶ 4 Edit Job Accounting ▶ 5 Job Accountg Def. Set. ▶](/content/2026/05/768512/images/75a457f74186e90a10802d293c66f5626028e156314824919bbe4d26eb6c9ef0.jpg)
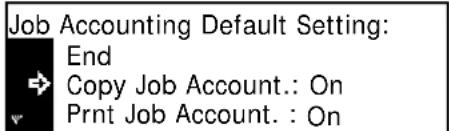
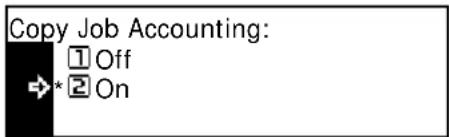
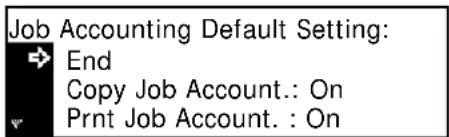
Printer Job Accounting
You can select whether or not to enable Job Accounting for the Printer functions.
1 Display the Job Accounting screen, refer to Access the Job Accounting Screen, on page 4-3.
2 Press ▲ or ▼ to select Job Accountg Def. Set and press [Enter].
3 Press ▲ or ▼ to select Print Job Account and press [Enter].
![Job Accounting: [ ] 3 Each Job Accounting TL 4 Edit Job Accounting 5 Job Accountg Def. Set.](/content/2026/05/768512/images/41df6f77c1177286fd7d25d5138a8956420f391c3582127b77c5b564658f4b09.jpg)
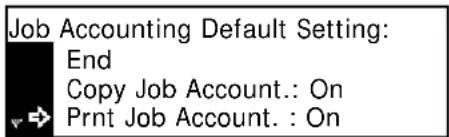
4 Press ▲ or ▼ to select Off or On and press [Enter].
Printer Job Accounting:
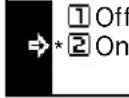
5 On completion, press ▲ or ▼ to select End and press [Enter].
Job Accounting Default Setting: → End
Copy Job Account.: On Print Job Account.: On
Scanner Job Accounting
You can select whether or not to enable Job Accounting for the Scanner functions.
NOTE: This item displays if the optional Network Scanner kit is installed.
1 Display the Job Accounting screen, refer to Access the Job Accounting Screen, on page 4-3.
2 Press ▲ or ▼ to select Job Accountg Def. Set and press [Enter].
3 Press ▲ or ▼ to select Scanner Job Accnt and press [Enter].
4 Press ▲ or ▼ to select Off or On and press [Enter].
5 On completion, press ▲ or ▼ to select End and press [Enter].
![Job Accounting: [ ] 3 Each Job Accounting TL 4 Edit Job Accounting 5 Job Accountg Def. Set.](/content/2026/05/768512/images/07ab3df81b6902c443d3beed64c46ba63af060b529461c0be5251117f2206bb5.jpg)
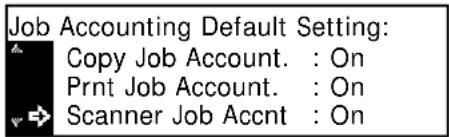
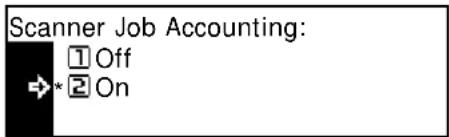
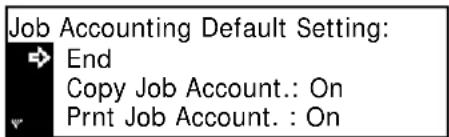
Fax Job Accounting
You can select whether or not to enable Job Accounting for the Fax functions.
NOTE: This item displays if the optional Fax kit is installed.
1 Display the Job Accounting screen, refer to Access the Job Accounting Screen, on page 4-3.
2 Press ▲ or ▼ to select Job Accountg Def. Set and press [Enter].
![Job Accounting: [ ] 3 Each Job Accounting TL 4 Edit Job Accounting 5 Job Accountg Def. Set.](/content/2026/05/768512/images/9f6ffadf05a9bbbc358d52b1ae463bdd969d58a14c2a3f9717b212324437be3f.jpg)
On
3 Press ▲ or ▼ to select Fax Job Accounting and press [Enter].
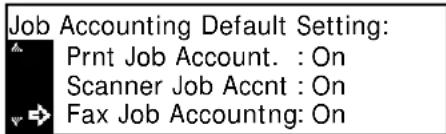
4 Press ▲ or ▼ to select Off or On and press [Enter].
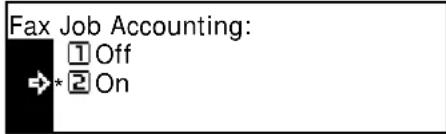
5 On completion, press ▲ or ▼ to select End and press [Enter].
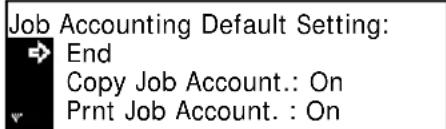
Excess Limit Setting
Use to select which action the machine takes when the limit set has been exceeded. You can select to prohibit use of the machine immediately, prohibit use after the current job has completed, or to display a warning message.
1 Display the Job Accounting screen, refer to Access the Job Accounting Screen, on page 4-3.
2 Press ▲ or ▼ to select Job Accountg Def. Set and press [Enter].
![Job Accounting: [ ] ✓ Each Job Accounting TL ▶ ✓ Edit Job Accounting ▶ ✓ Job Accountg Def. Set.](/content/2026/05/768512/images/53225ae5902cfb639a34f3d4947f64de2a2516c9d20b4a7375fd03cefa2f4689.jpg)
On
3 Press ▲ or ▼ to select Excess limit Set and press [Enter].
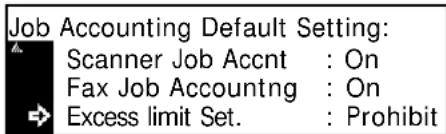
4 Press ▲ or ▼ to select Stop job immediately, Stop after job done or Only warning and press [Enter].
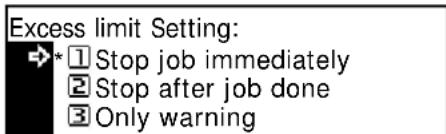
5 On completion, press ▲ or ▼ to select End and press [Enter].
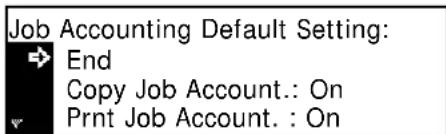
Using Job Accounting
Copy Operation
To perform copying operations when Job Accounting is enabled, enter your ID-code using the numeric keys.
1
Enter the ID-code using the numeric keys and press [Enter].
The Copier Basic screen displays.
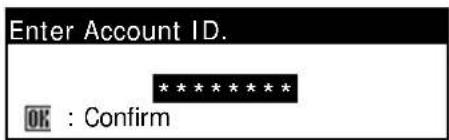
NOTE: If you enter an incorrect code, press [Stop/Clear] and enter the code again.
If the entered ID-code does not match any registered ID-code, an error sound is emitted. Enter the correct ID-code and press [Enter].
2
Perform the copy operation.
3
When copying is complete, press the Job Accounting key.
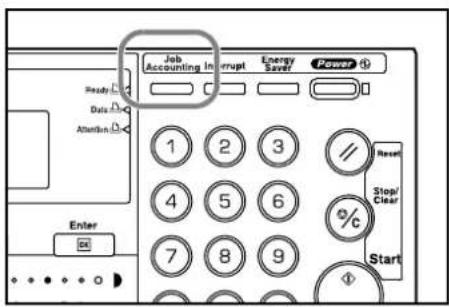
Printer Operation
To use Job Accounting for printing, options must be selected in the printer driver. For details, refer to the KX Printer Driver Operation Guide.
Appendix
The Appendix contains the following specifications:
• Paper...... Appendix-2
- Specifications ......Appendix-11
- Glossary ...... Appendix-17
Paper
General Guidelines
The machine is designed to print on standard copier paper (the type used in ordinary dry copier machines), but it can also accept a variety of other types of paper within the limits specified below.
NOTE: The manufacturer assumes no liability for problems that occur when paper not satisfying these requirements is used.
Selection of the right paper is important. Using the wrong paper can result in paper jams, curling, poor print quality, and paper waste, and in extreme cases can damage the machine. The guidelines given below will increase the productivity of your office by ensuring efficient, trouble-free printing and reducing wear and tear on the machine.
Paper Availability
Most types of paper are compatible with a variety of machines. Paper intended for xerographic copiers can also be used with the machine.
There are three general grades of paper: economy, standard, and premium. The most significant difference between grades is the ease with which they pass through the machine. This is affected by the smoothness, size, and moisture content of the paper, and the way in which the paper is cut. The higher the grade of paper you use, the less risk there will be of paper jams and other problems, and the higher the level of quality your printed output will reflect.
Differences between paper from different suppliers can also affect the machine's performance. A high-quality printer cannot produce high-quality results when the wrong paper is used. Low-priced paper is not economical in the long run if it causes printing problems.
Paper in each grade is available in a range of basis weights (defined later). The traditional standard weights are 16, 20, and 28 pounds (60 to 105 g/m 2 ).
Paper Specifications
The following table summarizes the basic paper specifications. Details are given on the following pages.
| Item Specification | |
| Weight | Cassette: 60 to 105 g/m2 (16 to 28 lb/ream)Multi-Bypass Tray: 60 to 163 g/m2(16 to 43 lb/ream) |
| Thickness 0.086 to 0.11 | 0 mm (3.4 to 4.3 mils) |
| Dimensional accuracy | ±0.7 mm (±0.0276 inches) |
| Squareness of corners | 90° ±0.2° |
| Moisture content 4 % to 6 % | |
| Direction of grain Long grain | |
| Pulp content 80 % or more | |
Selecting the Right Paper
This section describes the guidelines for selecting paper.
Condition
Avoid using paper that is bent at the edges, curled, dirty, torn, embossed, or contaminated with lint, clay, or paper shreds.
Use of paper in these conditions can lead to illegible printing and paper jams, and can shorten the life of the machine. In particular, avoid using paper with a surface coating or other surface treatment. Paper should have as smooth and even a surface as possible.
Composition
Do not use paper that has been coated or surface-treated and contains plastic or carbon. The heat of fusing can cause such paper to give off harmful fumes.
Bond paper should contain at least 80 % pulp. Not more than 20 % of the total paper content should consist of cotton or other fibers.
Paper Sizes
Cassettes and the Multi-Bypass Tray are available for the paper sizes listed in the table below. The dimensional tolerances are ±0.7 mm ( ±0.0276 inches) for the length and width. The angle at the corners must be 90° ± 0.2° .
| Multi-Bypass Tray Cassette or | Multi-Bypass Tray |
| B6R (128 × 182 mm) | A3 (297 × 420 mm) |
| A6R (105 × 148 mm) | B4 (257 × 364 mm) |
| Postcard (100 × 148 mm) | A4 (297 × 210 mm) |
| Return postcard (148 × 200 mm) | A4R (210 × 297 mm) |
| Executive (7 1/4 × 10 1/2") | B5 (257 × 182 mm) |
| Envelope DL (110 × 220 mm) | B5R (182 × 257 mm) |
| Envelope C5 (162 × 229 mm) | A5R (148 × 210 mm) |
| Envelope C4 (229 × 324 mm) | Folio (210 × 330 mm) |
| ISO B5 (176 × 250 mm) | 11 × 17" (Ledger) |
| Comm.#10 (4 1/8 × 9 1/2") | 8 1/2 × 14" (Legal) |
| Comm.#9 (3 7/8 × 8 7/8") | 11 × 8 1/2" |
| Comm.#6-3/4 (3 5/8 × 6 1/2") | 8 1/2 × 11" (Letter) |
| Monarch (3 7/8 × 7 1/2") | 5 1/2 × 8 1/2" (Statement) |
| Custom: 3 7/8 × 5 7/8" to 11 5/8 × 17",98 × 148 to 297 × 432 mm |
Smoothness
The paper should have a smooth, uncoated surface. Paper with a rough or sandy surface can cause voids in the printed output. Paper that is too smooth can cause multiple feeding and fogging problems. (Fogging is a gray background effect.)
Basis weight
Basis weight is the weight of paper expressed in grams per square meter (g/m 2 ). Paper that is too heavy or too light may cause feed errors or paper jams as well as premature wear of the product. Uneven weight of paper, namely uneven paper thickness may cause multiple-sheet feeding or print quality problems such as blurring because of poor toner fusing.
The recommended basis weight is between 60 and 105 g/m 2 (16 and 28 lb/ream) for the cassette and between 45 and 160 g/m 2 (12 and 42 lb/ream) for the multi-bypass tray.
Thickness
The paper used with the machine should be neither extremely thick nor extremely thin. If you are having problems with paper jams, multiple feeds, and faint printing, the paper you are using may be too thin. If you are having problems with paper jams and blurred printing the paper may be too thick. The correct thickness is 0.086 to 0.110 mm (3.4 to 4.3 mils).
Moisture Content
Moisture content is defined as the percent ratio of moisture to the dry mass of the paper. Moisture can affect the paper's appearance, feed ability, curl, electrostatic properties, and toner fusing characteristics.
The moisture content of the paper varies with the relative humidity in the room. When the relative humidity is high and the paper absorbs moisture, the paper edges expand, becoming wavy in appearance. When the relative humidity is low and the paper loses moisture, the edges shrink and tighten, and print contrast may suffer.
Wavy or tight edges can cause jams and alignment anomalies. The moisture content of the paper should be 4 to 6 %.
To ensure correct moisture content, it is important to store the paper in a controlled environment. Some tips on moisture control are:
- Store paper in a cool, dry location.
- Keep the paper in its wrapping as long as possible. Re-wrap paper that is not in use.
- Store paper in its original carton. Place a pallet etc. under the carton to separate it from the floor.
• After removing paper from storage, let it stand in the same room as the machine for 48 hours before use. - Avoid leaving paper where it is exposed to heat, sunlight, or damp.
Paper Grain
When paper is manufactured, it is cut into sheets with the grain running parallel to the length (long grain) or parallel to the width (short grain). Short grain paper can cause feeding problems in the machine. All paper used in the machine should be long grain.
Other Paper Properties
Porosity: Indicates the density of paper fiber.
Stiffness: Limp paper may buckle in the machine, resulting in paper jams.
Curl: Most paper naturally tends to curl one way if left unpacked. When paper passes through the fixing unit, it curls upward a little. To produce flat printouts, load the paper so that the upward pressure from the machine can correct their curling.
Electrostatic discharge: During the printing process the paper is electrostatically charged to attract the toner. The paper must be able to release this charge so that printed sheets do not cling together in the Output Tray.
Whiteness: The contrast of the printed page depends on the whiteness of the paper. Whiter paper provides a sharper, brighter appearance.
Quality control: Uneven sheet size, corners that are not square, ragged edges, welded (uncut) sheets, and crushed edges and corners can cause the machine to malfunction in various ways. A quality paper supplier should take considerable care to ensure that these problems do not occur.
Packaging: Paper should be packed in a sturdy carton to protect it from damage during transport. Quality paper obtained from a reputable supplier is usually correctly packaged.
Special treatment: It is recommended not to use paper with the following treatment even if the paper satisfies the basic specifications. To use this type of paper, perform a test prior to purchasing large amounts.
- Glazed paper
- Watermarked paper
- Paper with uneven surface
- Paper with perforations
Special Paper
The following types of special paper can be used:
- Transparency
- Preprinted paper
- Label
- Bond paper
- Recycled paper
- Thin paper (45 to 64 g/m²)
- Letterhead
- Color paper
- Prepunched paper
- Envelope
- Postcard
- Thick paper (90 to 160 g/m²)
- High-quality paper
Use paper that is sold specifically for use with copiers or printers (heat-fusing type). When using transparencies, labels, thin paper, envelopes, postcards, or thick paper, feed the paper from the Multi-Bypass Tray.
Since the composition and quality of special paper vary considerably, special paper is more likely than white bond paper to give trouble during printing. No liability will be assumed if moisture and so forth given off during printing on special paper causes harm to the machine or operator.
NOTE: Before purchasing any type of special paper, test a sample on the machine and check that printing quality is satisfactory.
Transparency
Transparency must be able to withstand the heat of fusing during the printing process. It should satisfy the conditions in the table below.
| Item Specification | |
| Tolerance of heat Must tolerate at least 190°C (374°F) | |
| Thickness 0.100 to 0.110 mm (3.9 to 4.3 mils) | |
| Material Polyester | |
| Dimensional accuracy ±0.7 mm (±0.0276 in) | |
| Squareness of corners 90° ±0.2° | |
To avoid problems, feed transparencies from the Multi-Bypass Tray, loaded with the long side toward the main body.
If transparency jams frequently, pull the top of the sheet very gently as it leaves the machine.
Labels
Labels must be fed from the Multi-Bypass Tray.
The basic rule for printing on adhesive labels is that the adhesive must never come into contact with any part of the machine. Adhesive paper sticking to the drum or rollers will damage the machine.
Label paper has a structure comprising of three layers, as shown in the diagram. The top sheet is printed on. The adhesive layer consists of pressure-sensitive adhesives. The carrier sheet (also called the linear or backing sheet) holds the labels until used. Due to the complexity of its composition, adhesive-
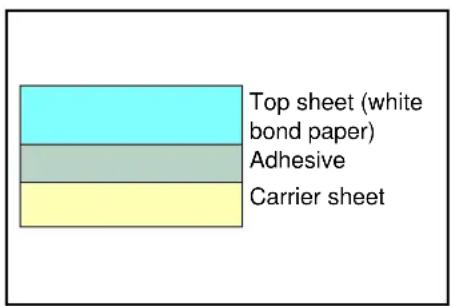
backed label paper is particularly likely to give printing problems.
Adhesive label paper must be entirely covered by its top sheet, with no spaces between the individual labels. Labels with spaces in between are liable to peel off, causing serious paper jam problems.
Some label paper is manufactured with an extra margin of top sheet around the edge. Do not remove the extra top sheet from the carrier sheet until after printing is finished.
![graph TD A["Top sheet"] --> B["Unacceptable"] C["Carrier sheet"] --> D["Unacceptable"]](/content/2026/05/768512/images/dbb8c314522d014b1a02a652457a530e22518ffe8472b450145c2fef2d3cc576.jpg)
The table below lists the specifications for adhesive label paper.
| Item Specification | |
| Weight of top sheet 44 to 74 | g/m2 (12 to 20 lb/ream) |
| Composite weight 104 to 15 | 1\ g/m2 (28 to 40 lb/ream) |
| Thickness of top sheet | 0.086 to 0.107 mm (3.9 to 4.2 mils) |
| Composite thickness 0.115 to 0.145 mm (4.5 to 5.7 mils) | |
| Moisture content 4 to 6 % (composite) | |
Postcards
Fan the stack of postcards and align the edges before loading them in the MP tray. Make sure the postcards you are going to set are not curled. Feeding curled postcards may cause paper jams.
Some postcards have rough edges on the back (those are created when the paper is cut). In this case, put the postcards on a f example, a ruler to smooth them.
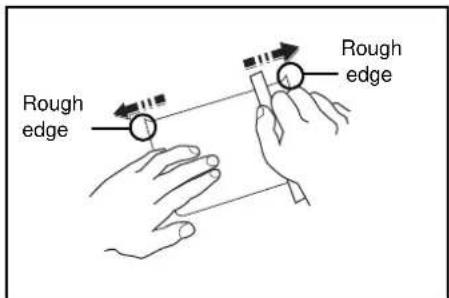
Envelopes
Feed envelopes from the Multi-Bypass Tray.
Since the composition of an envelope is complex, consistent printing quality over the entire envelope surface may be difficult. Thin envelopes may wrinkled when they pass through the machine. Before purchasing envelopes, perform a test to check to if the printing result is satisfactory.
Adhere to the following guidelines:
- Unpack the envelopes just before using them, do not use envelopes which have been left out for a long time.
- Do not use any envelopes on which adhesive is exposed. Even if adhesive is not exposed, if simple peeling of paper exposes adhesive, do not use such envelopes. If a small piece of paper that covers the adhesive is peeled in this machine, a serious failure may occur.
- Do not use envelopes with special treatment. Do not use envelopes with a grommet for winding a string, those with an open window or those with a window to which film treatment is applied.
- If paper jams occur, load fewer envelopes at a time.
- When printing onto multiple envelopes, avoid stacking more than 10 envelopes in the Output Tray to prevent paper jams.
Thick Paper
Fan the stack of paper and align the edges before loading them in the MP tray. Some types of paper have rough edges on the back (those are created when the paper is cut). In this case, put the paper on a flat place and rub the edges once or twice with, for example, a ruler to smooth them. Feeding rough edged paper may cause paper jams.
NOTE: If the paper jams even after you smooth it out, load the paper in the Multi-Bypass Tray with the leading edge raised up a few millimeters as shown in the illustration below.
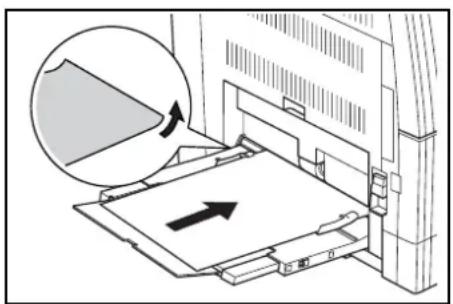
Colored Paper
Colored paper should satisfy the same conditions as white bond paper, refer to Paper Specifications, on page Appendix-2. In addition, the pigments used in the paper must be able to withstand the heat of fusing during the printing process (up to 200° C or 392° F).
Preprinted Paper
Preprinted paper should satisfy the same conditions as white bond paper, refer to Paper Specifications, on page Appendix-2. The preprinted ink must be able to withstand the heat of fusing during the printing process, and must not be affected by silicone oil.
Do not use paper with any kind of surface treatment, such as the type of paper commonly used for calendars.
Recycled paper
Select recycled paper that meets the same specifications as the white bond paper except for whiteness, refer to Paper Specifications, on page Appendix-2.
NOTE: Before purchasing recycled paper, test a sample on the machine and check that the printing quality is satisfactory.
NOTE: Specifications are subject to change without notice.
Machine
| Copying System Indirect Electrostatic System | |
| Original TypesAccommodated | Sheets, Books, and 3-dimensional objects (maximum original size: A3/11 × 17") |
| Copy Sizes- Cassette- Multi-Bypass Tray- Width that Cannot be Copied | A3, B4, A4, A4R, B5, B5R, A5R, Folio, 11 × 17" (Ledger), 8 1/2 × 14" (Legal), 11 × 8 1/2", 8 1/2 × 11" (Letter), 5 1/2 × 8 1/2" (Statement), 8 1/2 × 13" (Oficio II)A3 to A6R, Postcard, Folio, 11 × 17" (Ledger) to 5 1/2 × 8 1/2" (Statement)0.5 to 5.5 mm |
| Paper For further information refer to Paper, on page Appendix-2. | |
| Paper Feed Source Capacity- Cassette 300 sheets (80 g/m2), 100 sheets (90 to 105 g/m2)- Multi-Bypass Tray 50 sheets (80 g/m2)(25 sheets for A3, B4, Folio, 11 × 17" (Ledger), 8 1/2 × 14" (Legal), 8 1/2 × 13" (Oficio II)) | |
| Output Tray Capacity 250 sheets (80 g/m2) | |
| Warm-up Time | Less than 20 secondsTime for recovery from Low Power mode: 10 secondsTime for recovery from Sleep Mode: 20 seconds(At room temperature: around 73.4 °F (23 °C), humidity:around 50 %) |
| Memory- For Copier- For Printer- Additional Memory | 64 MB64 MBFor copier: 16 MB, 32 MB, 64 MB, and 128 MBFor printer: 32 MB, 64 MB, 128 MB, and 256 MB |
| Operating Environment- Temperature- Relative Humidity- Altitude- Illumination | 10 to 32.5 °C15 to 80%2,000 m maximum1,500 lux maximum |
| Power Source | 120 V AC, 60 Hz, 9.0 A220 to 240 V AC, 50/60 Hz, 5.0 A |
| Dimensions(W) × (D) × (H) | 16ppm model:22 5/8 × 23 3/8 × 21 7/16"574 × 593 × 545 mm20/25 ppm model:22 5/8 × 23 3/8 × 25 9/16"574 × 593 × 650mm |
| Weight | 16 ppm model: Approx 92.4lbs/42kg20/25 ppm model: Approx107.8lbs/49kg |
| Noise Emission 70 dB(A) | ≤ |
| Required Space(W) × (D) | 32 9/16 × 2 3 3/8"8 2 7 × 5 9 3 m m |
Copier
| Copying Speed:- Platen (1:1) 16 ppm model | A3/11 × 17" (Ledger): 8 sheets/minuteB4/8 1/2 × 14" (Legal): 8 sheets/minuteA4/11 × 8 1/2": 16 sheets/minuteA4R/8 1/2 × 11" (Letter): 13 sheets/minuteB5: 16 sheets/minuteB5R: 13 sheets/minuteA5R: 10 sheets/minuteA6R: 10 sheets/minute | |
| 20 ppm model A3/ | 11 × 17" (Ledger): 10 sheets/minuteB4/8 1/2 × 14" (Legal): 11 sheets/minuteA4/11 × 8 1/2": 20 sheets/minuteA4R/8 1/2 × 11" (Letter): 13 sheets/minuteB5: 20 sheets/minuteB5R: 13 sheets/minuteA5R: 10 sheets/minuteA6R: 10 sheets/minute | |
| 25 ppm model | A3/11 × 17" (Ledger): 13 sheets/minuteB4/8 1/2 × 14" (Legal): 13 sheets/minuteA4/11 × 8 1/2": 25 sheets/minuteA4R/8 1/2 × 11" (Letter): 15 sheets/minuteB5: 25 sheets/minuteB5R: 15 sheets/minuteA5R: 12 sheets/minuteA6R: 11 sheets/minute | |
| - Document Processor(1:1) | 16 ppm model A4/ | 11 × 8 1/2": 16 sheets/minute |
| 20 ppm model A4/ | 11 × 8 1/2": 20 sheets/minute | |
| 25 ppm model A4/ | 11 × 8 1/2": 25 sheets/minute | |
| First Copy Time 16/20 ppm | model | 5.9 seconds or less (1:1, A4/11 × 8 1/2") |
| 25 ppm model | 5.0 seconds or less (1:1, A4/11 × 8 1/2") | |
| Resolution Scanning: 600 × 600 dpi | ||
| Printing: 600 × 600 dpi | ||
| Continuous Copying 1 to 999 sheets | ||
| Copying Magnification | Any ratio from 25 to 200 % (1 % increments) and fixed magnifications. | |
Printer
| Printing Speed Same As Copying Speed. | |
| First Print Time 16/20 ppm model Approx. 5.5 seconds (1:1, A4/11×8 1/2")25 ppm model Approx. 4.9 seconds (1:1, A4/11×8 1/2") | |
| Resolution 300 dpi, 600 dpi, Fast 1200 mode | |
| Applicable OS Microsoft Windows 95/98/MeMicrosoft Windows NT4.x/2000/XPApple Macintosh OS 9.x/OS X 10.xUNIX/Linux | |
| Interface Parallel interface: 1 (based on IEEE1284)Network interface: 1USB 2.0: 1 (USB Hi-Speed)Network interface card (optional): 1 |
Document Processor (Option)
| Original Feed System Automatic Feeding | |
| Acceptable Originals Sheets of paper | |
| Original Sizes Max.: A3/11 × 17"Min.: A5R/5 1/2 × 8 1/2" | |
| Original Paper Weight | One-sided originals: 45 g/m2 to 160 g/m2Two-sided originals: 50 g/m2 to 120 g/m2 |
| Acceptable Number of Originals | 50 sheets (50 g/m2 to 80 g/m2) |
| Dimensions(W) × (D) × (H) | 21 3/4 × 19 1/8 × 4 11/16"552 × 483 × 120 mm |
| Weight | Approx. 13.2 lbs/6 kg |
Paper Feeder (Option)
| Paper Feed System | Automatic feeding from cassettes (300-sheet [80 g/m2] capacity) |
| Paper Sizes | A3, B4, A4, A4R, B5, B5R, A5R, Folio, 11 × 17" (Ledger), 8 1/2 × 14" (Legal), 11 × 8 1/2", 8 1/2 × 11" (Letter), 5 1/2 × 8 1/2" (Statement), 8 1/2 × 13" (Oficio II) |
| Acceptable Paper | Weight: 64 to 105 g/m2Types: Standard paper, recycled paper, and color paper |
| Dimensions(W) × (D) × (H) | 22 7/16 × 21 3/16 × 5 5/16"570 × 538 × 135 mm |
| Weight | Approx. 15.4 lbs/7 kg |
Duplex Unit (Option)
| System | Internal type |
| Paper Sizes | A3, B4, A4, A4R, B5, B5R, A5R, Folio, 11 × 17" (Ledger),8 1/2 × 14" (Legal), 11 × 8 1/2", 8 1/2 × 11" (Letter), 5 1/2 × 8 1/2"(Statement), 8 1/2 × 13" (Oficio II) |
| Acceptable Paper Weight: 64 to | 90 g/m2Types: Standard Paper, Recycled Paper, and Color Paper |
| Dimensions(W) × (D) × (H) | 14 1/2 × 2 1/16 × 7 1/16"368 × 53 × 180 mm |
| Weight Approx. 1.4 lbs/0.65 kg |
Finisher (Option)
| Number of Trays 1 | |
| Paper Sizes | A3, B4, A4, A4R, B5, Folio, 11 × 17" (Ledger), 8 1/2 × 1 4"(Legal), 11 × 8 1/2", 8 1/2 × 11" (Letter), 8 1/2 × 13" (Oficio II) |
| Acceptable Paper Weight: 60 to | 105 g/m2Types: Standard Paper, Recycled Paper, Color Paper, Thin Paper, Thick Paper, and Letterhead |
| Dimensions(W) × (D) × (H) | 12 13/16 × 17 11/16 × 6 1/2"325 × 450 × 165 mm |
| Weight Approx. 17.6 lbs/8 kg |
Job Separator (Option)
| Number of Trays 1 | |
| Tray Capacity | 100 sheets (80 g/m2) |
| Paper Sizes | A3, B4, A4, A4R, B5, B5R, A5R, Folio, 11 × 17" (Ledger), 8 1/2 × 14" (Legal), 11 × 8 1/2", 8 1/2 × 11" (Letter), 5 1/2 × 8 1/2" (Statement), 8 1/2 × 13" (Oficio II) |
| Acceptable Paper Weight: 45 to | 160 g/m2Types: Standard Paper, Recycled Paper, Color Paper, Thin Paper, Thick Paper, Letterhead, and Tracing Paper |
| Dimensions(W) × (D) × (H) | 21 7/16 × 17 11/16 × 2 3/4"5 4 5 × 4 5 0 × 7 0 mm |
| Weight Approx. 3.3 lbs/1.5 kg |
Environmental Specifications
| Recovery time from Low Power mode 10 seconds | |
| Transition time to Low Power mode (at time of purchase) | 15 minutes |
| Transition time to Auto Sleep mode (at time of purchase) | 30 minutes (16 and 20 ppm models)45 minutes (25 ppm model) |
| Duplex (2-sided) Copying Option | |
| Paper Feed Recycled Paper made from 100 % | recycledpulp may be used with this product. |
NOTE: Please consult with your Dealer or Service Representative if additional specifications are required.
Glossary
| Additional memory | An additional memory (optional) is used for increasing the memory capacity of this machine. In this machine, a memory can be added for the copier functions and the printer functions respectively. (For copier: 16 MB, 32 MB, 64 MB, and 128 MB/for printer: 32 MB, 64 MB, 128 MB, and 256 MB) For DIMM that can be used in this machine, contact your dealer. |
| AppleTalk | AppleTalk offers file sharing and printer sharing and it also enables you to utilize application software that is on another computer on the same AppleTalk network. |
| APS (Auto Paper Selection) | This mode will automatically select copy paper of the same size as the original. |
| Default Gateway | This indicates the device, such as a computer or router, that serves as the entrance/exit (gateway) for accessing computers outside of the network that you are on. When no specific gateway is designated for a destination IP address, data is sent to the host that is designated as the Default Gateway. |
| DHCP (Dynamic Host Configuration Protocol) | This is a protocol that automatically resolves the IP address, Subnet Mask and Gateway address on a TCP/IP network. Use of DHCP minimizes the load of network administration, especially on network environments with a large number of client computers where it is not specifically necessary to assign a separate IP address to each client, including printers. |
| dpi (dots per inch) | This indicates the number of dots printed per inch (25.4 mm) as a unit for expressing resolution. |
| EcoPrint | This is a printing mode that reduces toner consumption. Pages printed in the EcoPrint mode are lighter than pages printed in the normal mode. |
| Emulation | This refers to emulation of other manufacturers' printers. The printer emulates operation of the following printers: PCL6, KPDL, KC-GL, Line Printer, IBM Proprinter, DIABLO 630, and EPSON LQ-850. |
| Form Feed Timeout | While data is being sent to a printer, some pauses may occur. At this time, the printer waits for the next data without making a page break. Form feed timeout is a function to wait only a preset amount of time before it executes an automatic page break. After the waiting period begins, once the designated amount of time is exceeded, the printer will automatically process the currently received data and print it out. If the machine has received no print data for the last page, the printer ends processing of that job without outputting paper. |
| IEEE1284 | This is a standard used when connecting a printer to a computer, and was established by the Institute of Electrical and Electronic Engineers in 1994. |
| IP Access control | This is a function to prohibit access to this machine from a host with an IP address that is not approved. |
| IP Address (Internet Protocol Address) | The Internet Protocol address is a unique number that represents a specific computer in a network. The format of an IP Address is fournumbers separated by dots, e.g. 192.168.110.171. Each number should be a decimal between 0 and 255. |
| IPP (Internet Print Protocol) | This enables output to the printer from a printer driver over the Internet or an intranet and via an IPP port. Using IPP, output to a remote printer is possible over the Internet. |
| KIR | This is smoothing function. It uses software to enhance the printer's resolution and produce high-quality printing. The default setting is On. |
| KPDL | KPDL is Kyocera's implementation of the PostScript page description language Level3. |
| Logical Printer | This is a software interface that exists between the Windows OS and the printers connected to it. A printer refers to the actual device that prints out, while a logical printer refers to the software interface that resides on the printer server. By using this interface, the method of processing print jobs as well as the method of sending that job to its destination (local port, network port, file or remote printer sharing) is determined. When printing a document, the document data is first spooled (stored) in the logical printer from which it is then sent to the actual printer. |
| Low power mode | This mode is provided to save power. It is activated when the machine is not used for a preset period of time. In this mode, the machine consumes less power than in standby mode. The default time period is 15 minutes. The default setting can be changed. |
| Multi-Bypass tray | This tray is used instead of the cassette when printing on envelopes, postcards, transparency sheets, and labels. |
| NetBEUI (NetBIOS Extended User Interface) | An enhanced version of the NetBIOS protocol, it enables the utilization of more advanced functions on small-scale networks than do other protocols such as TCP/IP, etc. |
| Outline font | With outline fonts, character outlines are represented with numerical expressions and fonts can be enlarged or reduced in different ways by changing the numeric values of those expressions. Printing remains clear even if you enlarge fonts, since the characters are defined with outlines represented with numerical expressions. You can specify the font size in steps of 0.25 points up to 999.75 points. |
| Parallel interface | With this interface, data transfer between the printer and the computer takes place in 8-bit chunks. The printer can perform IEEE1284 compatible bi-directional communications. |
| PostScript | This is a page description language developed by Adobe Systems, Inc. It enables flexible font functions and highly-functional graphics, allowing higher quality printing. |
| PPM (prints per minute) | This indicates the number of A4 size printouts made in one minute. |
| Printer driver | The printer driver makes it possible for you to print data created using application software. The printer driver for the printer is contained on theCD-ROM supplied with the printer. Install the printer driver on the computer connected to the printer. |
| Sleep mode | This mode is provided to save power. It is activated when the machine is not used for a preset period of time.In this mode, power is reduced to the minimum. The default time period is 30 minutes. The default setting can be changed. |
| SMTP (Simple Mail Transfer Protocol) | This is a protocol for the transmission of e-mail over the Internet or an intranet. It is used for transferring mail between mail servers as well as for sending mail from each client to their server. |
| SNMP (Simple Network Management Protocol) | This is a protocol for the management of networks that use TCP/IP (Transmission Control Protocol/Internet Protocol). |
| Status page | This lists machine conditions, such as the machine's memory, the total number of prints and scans, and paper source settings. You can print the status page from the operation panel. |
| Subnet Mask | This is a 32-bit numerical value that defines which bits of the IP address specify the network address and which specify the host address. |
| TCP/IP (Transmission Control Protocol/Internet Protocol) | TCP/IP is a suite of protocols designed to define the way computers and other devices communicate with each other over a network. |
| USB (Universal Serial Bus) | An interface standard for low to middle speed serial interfaces. This printer supports Hi-Speed USB 2.0. The maximum transfer rate is 480 Mbps and the maximum cable length is 5 meters (16 feet). |
Index
Numerics
2-in-1 1-8
4-in-1 (horizontal arrangement) 1-9
4-in-1 (vertical arrangement) 1-10
A
Access
Copy default screen 3-3
e-Mps 2-3
Font screen 2-21
Hard disk 2-40
Interface screen 2-11
Job accounting screen 4-3
Machine default screen 3-15
Memory card screen 2-34
Others screen 2-48
Page set screen 2-26
Paper handling screen 2-44
Print quality screen 2-31
Additional memory Appendix-17
Administrator management code change 3-25
All account management 4-10
Auto cassette switching 3-16
Auto clear 3-26
Auto clear time 3-27
Auto continue 2-51
Auto exposure adjustment 3-8
Auto low power time 3-21
Auto OCR exposure adjustment 3-8
Auto paper selection Appendix-17
Auto rotation 1-15, 3-11
Auto selection mode 1-17
Auto sleep 3-26
Auto sleep time 3-20
B
Background color adjustment 3-5
Black streaking reduction processing 3-13
Book erase 1-13
Border erase mode 1-13
Book erase 1-13
Sheet erase 1-13
Border erase width default value 3-12
Borderline types 1-11
C
Carriage return (CR) action 2-29
Code job list 2-8
Code set 2-24
Color paper Appendix-9
Combine mode 1-7
2-in-1 1-8
4-in-1 (horizontal arrangement) 1-9
4-in-1 (vertical arrangement) 1-10
Borderline types 1-11
Continuous scan
Copy
Continuous scan 1-14
Copier functions Appendix-12
Copier specifications Appendix-12
Copy
Auto rotation 1-15
Auto selection mode 1-17
Border erase mode 1-13
Combine mode 1-7
Ecoprint mode 1-16
Margin mode 1-12
Offset mode 1-5
Original placement 1-4
Original size 1-2
Program function 1-18
Stapling 1-6
Copy default screen access 3-3
Copy job accounting 4-12
Copy output destination 3-21
Copy restriction 4-5
Copy status report 3-30
Copying speed Appendix-12
Counter report 3-28
Coverage report 3-31
Custom paper type 3-19
D
Date and time 3-24
Default gateway 2-16
Default magnification 3-7
Default operation mode 3-23
Default settings 4-12
Deleting an account 4-8
DHCP 2-14
Display contrast adjustment 3-25
Document processor (option) Appendix-14
Document Processor Specifications
Appendix-14
dpi Appendix-17
Drum refresh 3-33
Duplex print for paper type 3-18
Duplex print mode 2-45
Duplex printing error detection 2-52
Duplex unit (option) Appendix-15
Duplex unit specifications Appendix-15
E
EcoPrint 2-32, 3-4
Ecoprint mode 1-16
e-mps access 2-3
e-MPS function 2-3
Emulation mode 2-18
KPDL (AUTO) 2-20
KPDL error 2-20
Pen thickness 2-19
Selection 2-18
Enabling job accounting 4-11
Envelope Appendix-8
Environmental specifications Appendix-16
Error detection
Duplex 2-52
Stapling 2-53
EtherTalk 2-13
Excess limit setting 4-14
Exposure adjustment for photo originals 3-10
Exposure adjustment for text + photo
originals 3-9
Exposure adjustment for text originals 3-9
Exposure mode 3-4
F
Fax job accounting 4-13
Fax output destination 3-22
Fax transmission limit 4-8
Finisher (option) Appendix-15
Finisher specifications Appendix-15
First Copy Time Appendix-12
First Print Time Appendix-14
Font 2-21
Code set 2-24
Courier/Letter Gothic 2-23, 2-24
Courier/Letter Gothic character pitch 2-23
Courier/Letter Gothic thickness 2-24
Selection 2-22
Size 2-23
Font list 2-25
Font screen access 2-21
Form feed timeout 2-49
H
Hard disk 2-40
hard disk access 2-40
I
Individual account management 4-10
Interface 2-11
Network 2-12
Parallel 2-11
Interface screen access 2-11
IP access control Appendix-17
IP address setting 2-15
J
Job accounting 4-2
Changing limit of use 4-9
Copy 4-12
Excess limit setting 4-14
Fax 4-13
Limit in use 4-4
Limit of use 4-5
Printer 4-12
Scanner 4-13
Job accounting default settings 4-12
Job accounting report 4-10
Job accounting screen access 4-3
Job separator (option) Appendix-15
Job separator specifications Appendix-15
K
Key sound 3-23
KIR mode 2-31
KPDL (AUTO) alternative emulation 2-20
KPDL error 2-20
L
Label Appendix-7
Language setting 3-32
Limit of use 4-5
Line feed (LF) action 2-29
Low power mode Appendix-18
M
Machine default screen access 3-15
Machine default settings 3-14
Machine specifications Appendix-11
Machine status report 3-30
Management code 3-3, 3-15, 4-3
Managing accounts 4-4
Managing all accounts 4-10
Managing individual accounts 4-10
Margin mode 1-12
Margin width default value 3-11
Memory card 2-34
Memory card screen access 2-34
Multi-bypass tray Appendix-18
Multi-bypass tray confirmation display 3-17
Multi-bypass tray mode 2-44
N
NetWare 2-12
Network setting 2-12
Default gateway 2-16
DHCP 2-14
EtherTalk 2-13
IP address 2-15
NetWare 2-12
Subnet mask 2-16
TCP/IP 2-14
Network status page 2-17
Number of copies 2-27
Number of copies limit 3-12
O
Offset copying 3-11
Offset mode 1-5
Original image quality 3-4
Original orientation 3-20
Original placement 1-4
Original Size
Selecting 1-2
Original size 1-2
Other printer settings 2-48
Other regular size 1-2
Others screen access 2-48
Outline font Appendix-18
Output destination 2-46
Output limit 4-6
Override A4/Letter 2-47
P
Page protect mode 2-28
Page set screen access 2-26
Paper 2-44, Appendix-2
Duplex print mode 2-45
Handling 2-44
Multi-bypass tray 2-44
Output destination 2-46
Paper source 2-45
Paper feeder (option) Appendix-14
Paper feeder specifications Appendix-14
Paper handling screen access 2-44
Paper Input
Specifications Appendix-2
Paper selection 3-5
Paper size (cassettes) 3-16
Paper Specifications Appendix-2
Paper type (cassettes) 3-17
Paper type in auto paper selection 3-6
Paper weight for paper type 3-18
Parallel interface 2-11
Permanent code jobs 2-10
Postcard Appendix-8
Preprinted paper Appendix-9
Carriage return (CR) action 2-29
Code job list 2-8
Emulation mode 2-18
Font 2-21
Interface 2-11
Line feed (LF) action 2-29
Number of copies 2-27
Page protect mode 2-28
Private print/stored job 2-5
Proof and hold 2-4
Quick copy 2-4
Virtual mailbox 2-6
Wide A4 2-30
Zoom 2-27
Print density 2-33
Print quality
EcoPrint 2-32
KIR mode 2-31
Print density 2-33
Resolution 2-32
Print quality screen access2-31
Print restriction 4-5
Printer functions Appendix-14
Printer job accounting 4-12
Printer reset 2-50
Printer specifications Appendix-14
Printing a font list 2-25
Printing a service status page 2-54
Printing a status page 2-2
Printing speed Appendix-14
Priority cassette 3-7
Private print/stored job 2-5
Delete 2-6
Program function 1-18
Registering a program 1-18
Using a program 1-18
Proof and hold 2-4
Proof-and-Hold 2-4
Q
Quick copy 2-4
Quick copy jobs 2-9
R
RAM disk 2-41
RAM disk size 2-42
Received data dump 2-49
Recycled paper Appendix-10
Registering a new account 4-4
Registering a program 1-18
Regular size 1-2
Report output 3-30
Reports 3-30
Copy status report 3-30
Coverage report 3-31
Machine status report3-30
Reset 2-50
Resolution 2-32, Appendix-13, Appendix-14
Resource protect mode 2-50
S
Scanner job accounting 4-13
Scanner transmission limit 4-7
Selecting Original Size 1-2
Service status page 2-54
Settings
Summer time (DST) 3-24
Time zone 3-24
Sheet erase 1-13
Silent Mode 3-27
Sleep mode Appendix-19
Special paper Appendix-6
Specifications
Copier Appendix-12
Document processor (option) Appendix-14
Duplex unit Appendix-15
Environmental Appendix-16
Finisher (option) Appendix-15
Job separator (option) Appendix-15
Machine Appendix-11
Paper Appendix-2
Paper feeder (option) Appendix-14
Printer Appendix-14
Stapling 1-6
Stapling error detection 2-53
Status page 2-2
Subnet mask setting 2-16
Summer time 3-24
T
TCP/IP 2-14
Temporary code jobs 2-9
Thick paper Appendix-9
Time Zone 3-24
Total capacity
Permanent code jobs2-10
Quick copy jobs 2-9
Temporary code jobs 2-9
Virtual mailboxes 2-10
Total counter 3-28
Transparency Appendix-7
U
Using job accounting 4-15
V
Virtual mailbox 2-6
Virtual mailboxes 2-10
W
Wide A4 2-30
Z
Zoom 2-27
MEMO
For best print results and machine performance, we recommend that you use only KYOCERA MITA original supplies for your KYOCERA MITA products.

KYOCERA MITA EUROPE B.V.
Phone: +31.(0)20.587.7200
KYOCERA MITA (UK) LTD.
8 Beacontree Plaza
Gillette Way,
Reading Berks RG2 OBS, UK
Phone: +44.(0)118.931.1500
KYOCERA MITA ITALIA S.P.A.
Via Verdi 89 / 91 20063 Cernusco sul Naviglio, Italy
Phone:+39.02.92179.1
S.A. KYOCERA MITA BELGIUM N.V.
Hermesstraat 8A 1930 Zaventem Belgium
Phone: +32.(0)2.720.9270
KYOCERA MITA FRANCE S.A.
Phone: +33.(0)1.6985.2600
Phone: +34.(0)91.631.8392
KYOCERA MITA FINLAND OY
Phone: +41.(0)1.908.4949
KYOCERA MITA DEUTSCHLAND GMBH
Mollsfeld 12 D-40670 Meerbusch, Germany
Phone: +49.(0)2159.918.0
KYOCERA MITA GMBH AUSTRIA
Eduard-Kittenberger Gasse 95
1230 Wien, Austria
Phone: +43.(0)1.86338.0
KYOCERA MITA SVENSKA AB
Box 1402 171 27 Solna, Sweden
Phone: +46.(0)8.546.550.00
KYOCERA MITA NORGE
Postboks 150 Oppsal, NO 0619 Oslo
DK-2970 Hørsholm, Denmark
Phone:+45.7022.3880
KYOCERA MITA PORTUGAL LDA.
Rua do Centro Cultural, no 41 1700-106
Lisbon, Portugal
Phone: +351.(0)21.842.9100
KYOCERA MITA SOUTH AFRICA
(PTY) LTD
527 Kyalami Boulevard,
Kyalami Business Park 1685 Midrand South
Phone: +27.(0)11.466.3290
KYOCERA MITA
AMERICA, INC.
Headquarters:
225 Sand Road,
Fairfield, New Jersey 07004-0008,
U.S.A.
Phone: (973) 808-8444
KYOCERA MITA AUSTRALIA PTY. LTD.
Level 3, 6-10 Talavera Road, North Ryde,
N.S.W. 2113 Australia
Phone: (02) 9888-9999
KYOCERA MITA NEW ZEALAND LTD.
1-3 Parkhead Place, Albany
P.O. Box 302 125 NHPC,Auckland,
New Zealand
Phone: (09) 415-4517
KYOCERA MITA (THAILAND) CORP., LTD.
9/209 Ratchada-Prachachem Road,
Bang Sue, Bangkok 10800, Thailand
Phone: (02) 586-0320
KYOCERA MITA SINGAPORE
PTE LTD.
121 Genting Lane, 3rd Level,
Singapore 349572
Phone: 67418733
KYOCERA MITA HONG KONG
LIMITED
11/F., Mita Centre,
552-566, Castle Peak Road,
Tsuen Wan, New Territories,
Hong Kong
Phone: 24297422
KYOCERA MITA TAIWAN
Corporation.
7F-1\~2, No.41, Lane 221, Gangchi Rd.
Neihu District, Taipei, Taiwan, 114. R.O.C.
Phone: (02) 87511560
KYOCERA MITA
Corporation
2-28, 1-chome, Tamatsukuri, Chuo-ku
Osaka 540-8585, Japan
Phone: (06) 6764-3555
http://www.kyoceramita.com

- OCÉ OP1016/1020/1025
- PRINTING SYSTEM
- CAUTION: NO LIABILITY IS ASSUMED FOR ANY DAMAGE CAUSED BY IMPROPER INSTALLATION
- NOTICE
- COPYRIGHT
- REGARDING TRADE NAMES
- INTRODUCTION
- GUIDES INCLUDED
- BASIC OPERATION GUIDE
- ADVANCED OPERATION GUIDE (THIS GUIDE)
- KX PRINTER DRIVER OPERATION GUIDE
- PRESCRIBE TECHNICAL REFERENCE
- PRESCRIBE COMMAND REFERENCE
- MEASUREMENTS
- CONTENTS
- 1 COPY FUNCTIONS
- 2 PRINTER SETTINGS
- 3 SYSTEM SETTINGS
- 4 JOB ACCOUNTING
- APPENDIX
- ORIGINAL SIZE
- REGULAR SIZE
- OTHER REGULAR SIZE
- INPUT SIZE
- ORIGINAL PLACEMENT
- OFFSET MODE
- STAPLING
- COMBINE MODE
- 2 IN 1
- 4 IN 1 (HORIZONTAL ARRANGEMENT)
- 4 IN 1 (VERTICAL ARRANGEMENT)
- BORDERLINE TYPES
- USING COMBINE MODE
- 4 PRESS [START]
- MARGIN MODE
- 1 POSITION THE ORIGINAL AND PRESS [MARGIN]
- 2 PRESS ▲ OR ▼ TO SELECT LEFT MARGIN OR TOP MARGIN AND PRESS [ENTER]
- 3 PRESS < OR > TO SELECT THE MARGIN WIDTH, 1/8" TO 3/4" IN 1/8" INCREMENTS (1 MM TO 18 MM IN 1 MM INCREMENTS) CAN BE SELECTED
- 4 PRESS [START]. COPYING COMMENCES
- BORDER ERASE MODE
- CONTINUOUS SCAN
- AUTO ROTATION
- ECOPRINT MODE
- AUTO SELECTION MODE
- PROGRAM FUNCTION
- REGISTERING A PROGRAM
- USING A PROGRAM
- STATUS PAGE
- E-MPS FUNCTION
- ACCESS E-MPS
- QUICK COPY/PROOF-AND-HOLD
- DELETING QUICK COPY/PROOF-AND-HOLD
- PRIVATE PRINT/STORED JOB
- DELETING PRIVATE PRINT/STORED JOB
- VIRTUAL MAILBOX
- VIRTUAL MAILBOX LIST
- CODE JOB LIST
- E-MPS DETAIL SETTINGS
- MAXIMUM NUMBER - QUICK COPY JOBS
- TOTAL CAPACITY - TEMPORARY CODE JOBS
- TOTAL CAPACITY - PERMANENT CODE JOBS
- TOTAL CAPACITY - VIRTUAL MAILBOXES
- INTERFACE
- ACCESS THE INTERFACE SCREEN
- PARALLEL INTERFACE
- NETWORK SETTING
- NETWARE
- ETHERTALK
- TCP/IP
- DHCP
- IP ADDRESS SETTING
- SUBNET MASK SETTING
- DEFAULT GATEWAY
- NETWORK STATUS PAGE PRINTING
- EMULATION
- EMULATION MODE SELECTION
- KC-GL PEN THICKNESS
- KPDL ERROR PRINTING
- KPDL (AUTO) ALTERNATIVE EMULATION SELECTION
- FONT
- ACCESS THE FONT SCREEN
- FONT SELECTION
- FONT SIZE
- COURIER/LETTER GOTHIC FONT CHARACTER PITCH
- COURIER/LETTER GOTHIC THICKNESS
- CODE SET
- PRINTING A FONT LIST
- PRINT CONFIGURATION
- ACCESS THE PAGE SET SCREEN
- NUMBER OF COPIES
- ZOOM
- PRINT ORIENTATION
- PAGE PROTECT MODE
- LINE FEED (LF) ACTION
- CARRIAGE RETURN (CR) ACTION
- WIDE A4
- PRINT QUALITY
- ACCESS THE PRINT QUALITY SCREEN
- KIR MODE
- ECOPRINT
- RESOLUTION
- PRINT DENSITY
- MEMORY CARD OPERATION
- ACCESS THE MEMORY CARD SCREEN
- READING FONT DATA
- READING MACRO DATA
- READING DATA
- READING PROGRAM
- WRITING DATA
- DELETING DATA
- DELETING FONT DATA
- DELETING PROGRAM DATA
- DELETING MACRO DATA
- DELETING LANGUAGE DATA
- FORMATTING MEMORY CARD
- PRINTING A PARTITION LIST
- HARD DISK OPERATION
- ACCESS HARD DISK
- RAM DISK OPERATION
- RAM DISK FUNCTIONS
- RAM DISK SIZE
- PAPER HANDLING
- ACCESS THE PAPER HANDLING SCREEN
- MULTI-BYPASS TRAY MODE
- PAPER SOURCE
- DUPLEX PRINT MODE
- OUTPUT DESTINATION
- OVERRIDE A4/LETTER
- OTHER PRINTER SETTINGS
- ACCESS THE OTHERS SCREEN
- FORM FEED TIMEOUT
- RECEIVED DATA DUMP
- PRINTER FUNCTION RESETTING
- RESOURCE PROTECT MODE
- AUTO CONTINUE
- DUPLEX ERROR DETECTION
- STAPLING ERROR DETECTION
- PRINTING A SERVICE STATUS PAGE
- COPY DEFAULT SETTINGS
- ACCESS THE COPY DEFAULT SCREEN
- EXPOSURE MODE
- ORIGINAL IMAGE QUALITY
- 3
- 4
- BACKGROUND COLOR ADJUSTMENT
- 1
- 2
- PAPER SELECTION
- PAPER TYPE IN AUTO PAPER SELECTION
- PRIORITY CASSETTE
- DEFAULT MAGNIFICATION
- AUTO EXPOSURE ADJUSTMENT
- AUTO OCR EXPOSURE ADJUSTMENT
- EXPOSURE ADJUSTMENT FOR TEXT + PHOTO ORIGINALS
- EXPOSURE ADJUSTMENT FOR TEXT ORIGINALS
- EXPOSURE ADJUSTMENT FOR PHOTO ORIGINALS
- SORT COPYING
- OFFSET COPYING
- AUTO ROTATION COPY
- MARGIN WIDTH DEFAULT VALUE
- BORDER ERASE WIDTH DEFAULT VALUE
- NUMBER OF COPIES LIMIT
- KEYS
- BLACK STREAKING REDUCTION PROCESSING
- MACHINE DEFAULT SETTINGS
- ACCESS THE MACHINE DEFAULT SCREEN
- AUTO CASSETTE SWITCHING
- PAPER SIZE (CASSETTES 1 TO 4)
- 4 PRESS [RESET]. THE COPIER BASIC SCREEN RETURNS
- PAPER TYPE (CASSETTES 1 TO 4)
- MULTI-BYPASS TRAY CONFIRMATION DISPLAY
- PAPER WEIGHT FOR PAPER TYPE
- DUPLEX PRINT FOR PAPER TYPE
- CUSTOM PAPER TYPE
- ORIGINAL ORIENTATION
- AUTO SLEEP TIME
- AUTO LOW POWER TIME
- COPY OUTPUT DESTINATION
- FAX OUTPUT DESTINATION
- DEFAULT OPERATION MODE
- KEY SOUND
- DATE AND TIME
- DISPLAY CONTRAST ADJUSTMENT
- ADMINISTRATOR MANAGEMENT CODE CHANGE
- AUTO SLEEP
- AUTO CLEAR
- AUTO CLEAR TIME
- SILENT MODE
- VIEWING AND PRINTING THE TOTAL COUNTER
- VIEWING THE TOTAL COUNTER
- PRINTING THE COUNTER REPORT
- REPORT OUTPUT
- COVERAGE REPORT
- LANGUAGE SETTING
- 1 PRESS [SYSTEM MENU / COUNTER]
- 2 PRESS ▲ OR ▼ TO SELECT LANGUAGE AND PRESS [ENTER]
- 3 PRESS ▲ OR ▼ TO SELECT THE LANGUAGE REQUIRED AND PRESS [ENTER]
- USER ADJUSTMENT
- DRUM REFRESH
- JOB ACCOUNTING MODE
- ACCESS THE JOB ACCOUNTING SCREEN
- MANAGING ACCOUNTS
- REGISTERING A NEW ACCOUNT
- LIMIT OF USE
- COPY RESTRICTION
- PRINT RESTRICTION
- OUTPUT LIMIT
- SCANNER TRANSMISSION LIMIT
- FAX TRANSMISSION LIMIT
- DELETING AN ACCOUNT
- CHANGING LIMIT OF USE
- ALL ACCOUNT MANAGEMENT
- INDIVIDUAL ACCOUNT MANAGEMENT
- ENABLING JOB ACCOUNTING
- DEFAULT SETTINGS
- COPY JOB ACCOUNTING
- PRINTER JOB ACCOUNTING
- SCANNER JOB ACCOUNTING
- FAX JOB ACCOUNTING
- EXCESS LIMIT SETTING
- USING JOB ACCOUNTING
- COPY OPERATION
- PRINTER OPERATION
- THE APPENDIX CONTAINS THE FOLLOWING SPECIFICATIONS
- PAPER
- GENERAL GUIDELINES
- PAPER AVAILABILITY
- PAPER SPECIFICATIONS
- SELECTING THE RIGHT PAPER
- CONDITION
- COMPOSITION
- PAPER SIZES
- SMOOTHNESS
- BASIS WEIGHT
- THICKNESS
- MOISTURE CONTENT
- PAPER GRAIN
- OTHER PAPER PROPERTIES
- SPECIAL PAPER
- TRANSPARENCY
- LABELS
- POSTCARDS
- ENVELOPES
- THICK PAPER
- COLORED PAPER
- PREPRINTED PAPER
- RECYCLED PAPER
- INDEX
- NUMERICS
- A
- B
- C
- D
- E
- F
- H
- I
- J
- K
- L
- M
- N
- O
- P
- Q
- R
- S
- T
- U
- V
- W
- Z
- KYOCERA MITA EUROPE B.V
- KYOCERA MITA
- AMERICA, INC
- HEADQUARTERS
- CORPORATION
Brand : Océ
Model : OP1020
Category : Printer