
DC 2230 - Printer Triumph-Adler - Free user manual and instructions
Find the device manual for free DC 2230 Triumph-Adler in PDF.


User questions about DC 2230 Triumph-Adler
0 question about this device. Answer the ones you know or ask your own.
Ask a new question about this device
Download the instructions for your Printer in PDF format for free! Find your manual DC 2230 - Triumph-Adler and take your electronic device back in hand. On this page are published all the documents necessary for the use of your device. DC 2230 by Triumph-Adler.
USER MANUAL DC 2230 Triumph-Adler
natural_image
Woman working at a desk in an office, wearing headsets and using a headset (no visible text or symbols)Instruction Handbook
Advanced
DC 2230 | 2240 | 2250
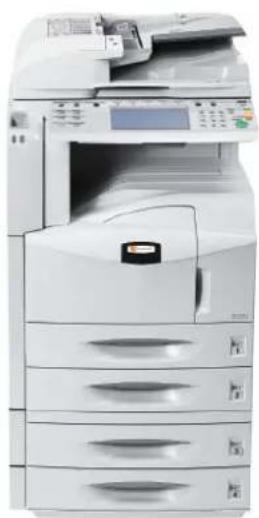
natural_image
Exterior view of a modern office building (no signage)Digital Multifunctional
System
Introduction
Thank you for your purchase of TA Triumph-Adler DC 2230/2240/2250.
This Operation Guide is intended to help you operate the machine correctly, perform routine maintenance and take a simple troubleshooting action as necessary, so that you can always use the machine in good condition.
Please read this Operation Guide before you start using the machine, and keep it close to the machine for easy reference.
Legal and Safety Information
Please read this information before using your machine. This chapter provides information on the following topics.
- Legal Information......ii
• Regarding Trade Names ....iii
Legal Information
Copying or other reproduction of all or part of this guide without the prior written consent of TA Triumph-Adler is prohibited.
Legal Restriction on Copying/Scanning
- It may be prohibited to copy/scan copyrighted material without permission of the copyright owner.
- It is prohibited under any circumstances to copy/scan domestic or foreign currencies.
- Local laws and regulations may prohibit or restrict copying/scanning of other items not mentioned above.
Regarding Trade Names
- KPDL is a trademark of Kyocera Corporation.
- Microsoft, MS-DOS, Windows, Windows NT and Internet Explorer are registered trademarks of Microsoft Corporation in the U.S.A. and/or other countries.
- Windows Me and Window XP are trademarks of Microsoft Corporation.
- PCL is a trademark of Hewlett-Packard Company.
- Adobe Acrobat, Adobe Reader and PostScript are trademarks of Adobe Systems, Incorporated.
- Ethernet is a registered trademark of Xerox Corporation.
- Novell and NetWare are registered trademarks of Novell, Inc.
- Centronics is a trademark of Centronics Data Computer Corporation.
- IBM and IBM PC/AT are trademarks of International Business Machines Corporation.
- Power PC is a trademark of IBM in the U.S.A. and/or other countries.
- AppleTalk is a registered trademark of Apple Computer, Inc.
- CompactFlash and CF are trademarks of SanDisk, Inc.
• PC-PR201/65A is a product of NEC Corporation.
• VP-1000 is a product of Seiko Epson Corporation. - This machine has been developed using embedded real-time operating system Tornado™ by Wind River Systems, Inc.
- PCL6, a command language of HP LaserJet emulated by this machine, is using the compatible system PeerelessPrintXL developed by Peerless Systems Corporation. PeerelessPrintXL is a trademark of Peerless Systems Corporation (2381 Rosecrans Ave. ElSegundo, CA 90245, U.S.A.).
- TrueType is a registered trademark of Apple Computer, Inc.
- Heisei fonts have been developed by the working groups in collaboration with the Japanese Standards Association. Reproduction of these fonts without permission is prohibited.
- TypeBankG-B, TypeBankM-M and Typebank-OCR are trademarks of TypeBank®.
- All European language fonts installed in this machine are used under licensing agreement with Monotype Imaging Inc.
- Helvetica, Palatino and Times are registered trademarks of Linotype-Hell AG.
- ITC Avant Garde Gothic, ITC Bookman, ITC ZapfChancery and ITC ZapfDingbats are registered trademarks of International Type-face Corporation.
- UFST™ MicroType ^® fonts by Monotype Imaging Inc. are installed in this machine.
- This machine contains the NF module developed by ACCESS Co., Ltd.
- This machine contains the software having modules developed by Independent JPEG Group.
All other brands and product names are registered trademarks or trademarks of their respective companies. The designations ^TM and ^® will not be used in this Operation Guide.
GPL
Firmware of this machine is using in part the GPL applied codes
About this Operation Guide
This Operation Guide contains the following chapters.
Chapter 1 - Copying Functions
Explains the functions available for copying.
Chapter 2 - Sending Functions
Explains the functions available for sending originals.
Chapter 3 - Printer
Explains how to configure the printer function.
Chapter 4 - Using Document Box
Explains the typical procedure for utilizing Document Box.
Chapter 5 - Status / Job Cancel
Explains how to check the status and history of job and cancel the jobs while processing or waiting to be printed.
Chapter 6 - System Menu
Explains how to configure various settings of the machine using the menus on the operation panel.
Chapter 7 - Management
Explains how to use login administration and manage job accounting to share usage among various department.
Chapter 8 - Security
Explains the procedures and tips for installation and operations of the optional Data Security Kit (C) (Security Kit).
Appendix
Lists the supported paper and intercompatible functions. includes a glossary.
Included Guides
The following guides are supplied with the machine. Refer to them as necessary.
Operation Guide (This Guide)
Describes how to load paper, basic copy, print and scan operations, and troubleshooting.
Advanced Operation Guide
Explains copying, printing and scanning features in depth, as well as default settings.
Conventions in This Guide
The following conventions are used depending on the nature of the description.
| Convention Description Example | ||
| Bold Indicates the operation panelkey or a computer screen. | Press the Start key. | |
| [Regular] Indicates the touch panel keys. Press [OK]. | ||
| Italic Indicates the message displayed on the touch panel. | Ready to copy is displayed. | |
| Used to emphasize a key word,phrase or references to additional information. | ||
| Note Indicates supplemental information or operations for reference. | NOTE: | |
| Important Indicates items that are requiredor prohibited so as to avoid problems. | IMPORTANT: | |
| Caution Indicates what must be observed to prevent injury or machine breakdown and how to deal with it. | CAUTION: | |
Description of Operation Procedure
In this Operation Guide, the continuous operation of the keys on the touch panel is as follows:
| Actual procedure | Description in this Operation Guide |
| Press [Copy].▼Press [Change] of Quick Setup.▼Press [▼] twice.▼Press [Change] of Original Image. | Press [Copy], [Change] of Quick Setup, [▼] twice, and then [Change] of Original Image. |
Originals and Paper Sizes
This section explains the notation used in this guide when referring to sizes of originals or paper sizes.
As in A4, B5 and Letter, which may be used either in the horizontal or vertical direction, horizontal direction is indicated by an additional R character in order to indicate the orientation of the original/paper.
| Set direction Indicated size * | |
Vertical direction A4, B5, A5, B6,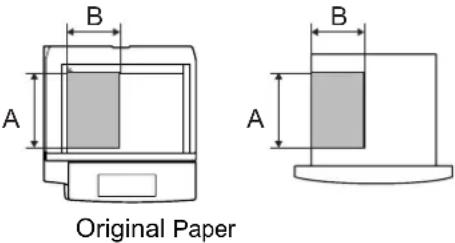 For original/paper, dimension A is longer than B. For original/paper, dimension A is longer than B. | A6, 16K, Letter,Statement |
Horizontal direction A4-R, B5-R, A5-R,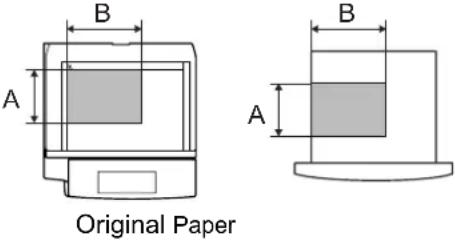 For original/paper, dimension A is shorter than B. For original/paper, dimension A is shorter than B. | B6-R, A6-R, 16K-R, Letter-R,Statement-R |
* The size of original/paper that can be used depends on the function and source tray. For further details, refer to the page detailing that function or source tray.
Icons on the Touch Panel
The following icons are used to indicate originals and paper set directions on the touch panel.
| Set direction Originals Paper | ||
| Vertical direction |  |  |
| Horizontal direction |  |  |
Contents
Legal and Safety Information
About this Operation Guide
1 Copying Functions
Original Size 1-2
Paper Selection 1-4
Mixed Sized Originals 1-7
Original Orientation 1-10
Collate/Offset Mode 1-12
Staple/Punch 1-13
Output Destination 1-16
Zoom Mode 1-18
Combine Mode 1-21
Margin/Centering Mode 1-24
Border Erase 1-26
Booklet from Sheets 1-28
Duplex 1-31
Cover Mode 1-35
Form Overlay 1-36
Page Numbering 1-38
Memo Mode 1-40
Density Adjustment 1-42
Selection of Image Quality 1-43
EcoPrint 1-44
Continuous Scan 1-45
Auto Image Rotation 1-47
Negative Image 1-48
Mirror Image 1-49
Job Finish Notice 1-50
File Name 1-52
Priority Override 1-53
Multi-Page Forms 1-54
Repeat Copy 1-55
Programmed Copying 1-57
Registering Shortcuts 1-59
2 Sending Functions
Original Size Selection 2-2
Sending Size Selection 2-4
Zoom 2-6
Centering 2-7
Mixed Sized Originals 2-8
1-sided/2-sided Selection 2-11
Original Orientation 2-12
File Format 2-14
PDF Encryption Functions 2-15
File Separation 2-18
Image Quality 2-19
Scan Density 2-20
Scan Resolution 2-21
Sharpness 2-22
Background Density Adjustment 2-23
Color / Grayscale / Monochrome Selection 2-24
Multi-page Form 2-25
Continuous Scan 2-26
Border Erase 2-27
Enter Document Name/File Name 2-30
Enter E-mail Subject and Body 2-31
Finish Notice 2-32
3 P r i n t e r
Parallel Interface 3-2
Serial Interface 3-3
Emulation 3-4
Setting of Other Printers 3-8
4 Using Document Box
What is Document Box? 4-2
Basic Operation for Document Box 4-5
Using a Job Box 4-16
5 Status / Job Cancel
Checking Job Status 5-2
Checking Job History 5-8
Pause and Resumption of Job 5-10
Canceling of Job 5-11
Priority Override the Waiting Jobs 5-12
Checking the Remaining Amount of Toner and Paper 5-13
Device/Communication 5-14
6 S y s t e m M e n u
Common Settings 6-2
Copy Settings 6-35
Sending Settings 6-40
Document Box/Removable Memory Settings 6-41
Printer Settings 6-43
Network Setup 6-50
Printing Reports/Sending Notice 6-53
Adjustment/Maintenance 6-58
Date/Timer 6-64
Editing Destination (Address Book/Adding One-Touch Keys) 6-70
System Initialization 6-78
Restarting the System 6-79
Accessibility (Enlarging Touch Panel Display) 6-80
7 Management
User Login Administration 7-2
Job Accounting 7-10
Security Kit Operations 7-23
8 S e c u r i t y
Security Kit Functions 8-2
Touch Panel Display after the Security Kit Installed 8-4
Installing the Security Kit 8-5
Changing Security Functions 8-6
System Initialization 8-8
Warning Message 8-9
Appendix
Paper ......Appendix-2
Intercompatible Functions ......Appendix-9
Glossary ....Appendix-10
1 Copying Functions
This chapter explains the functions available for copying.
- Original Size.... 1-2
• Paper Selection.... 1-4 - Mixed Sized Originals.... 1-7
• Original Orientation 1-10 - Collate/Offset Mode.... 1-12
- Staple/Punch 1-13
- Output Destination.... 1-16
- Zoom Mode 1-18
- Combine Mode.... 1-21
• Margin/Centering Mode 1-24 - Border Erase 1-26
- Booklet from Sheets.... 1-28
- Duplex 1-31
• Cover Mode.... 1-35 - Form Overlay.... 1-36
• Page Numbering 1-38 - Memo Mode 1-40
• Density Adjustment 1-42
• Selection of Image Quality 1-43 - EcoPrint.... 1-44
- Continuous Scan.... 1-45
• Auto Image Rotation.... 1-47 - Negative Image 1-48
- Mirror Image 1-49
• Job Finish Notice.... 1-50 - File Name 1-52
• Priority Override 1-53
• Multi-Page Forms 1-54 - Repeat Copy 1-55
- Programmed Copying 1-57
- Registering Shortcuts.... 1-59
Original Size
Specify the size of originals being scanned. Be sure to specify the original size when copying non-standard sizes.
The following options are available.
| Item How to Select Sizes | ||
| Standard Sizes 1 | Have the size of original detected automatically, or select from the standard sizes. | Inch models: Auto, Ledger, Legal, Letter, Letter-R, Statement, Statement-R, 8.5×13.5", Oficio II and 11×15" |
| Metric models: Auto, A3, B4, A4, A4-R, B5, B5-R, A5, A5-R, B6, B6-R, A6-R and Folio | ||
| Standard Sizes 2 | Select from the standard sizes not included in the Standard Sizes 1 . | Inch models: A3, B4, A4, A4-R, B5, B5-R, A5, A5-R, B6, B6-R, A6-R, Folio, 8K, 16K and 16K-R |
| Metric models: Ledger, Legal, Letter, Letter-R, Statement, Statement-R, 8.5×13.5", Oficio II, 11×15", 8K, 16K and 16K-R | ||
| Others Select from envelope, postcard or the custom sized originals*. | Hagaki, Oufuku Hagaki, Custom 1 to 4 | |
| Size Entry Enter the size not included in the standard sizes 1 and 2. | Inch modelsHorizontal: 2 to 17" (in 0.01" increments), Vertical: 2 to 11.69" (in 0.01" increments) | |
| Metric modelsHorizontal: 50 to 432 mm (in 1 mm increments), Vertical: 50 to 297 mm (in 1 mm increments) | ||
* For instructions on how to register custom original sizes (Custom 1 to 4), refer to Custom Original Size Setup on page 6-5.
1 Press the Copy key.
2 Press [Org./Paper/Finishing] and then [Original Size].
3 Press [Standard Sizes 1], [Standard Sizes 2], [Others] or [Size Entry] to select the original size.
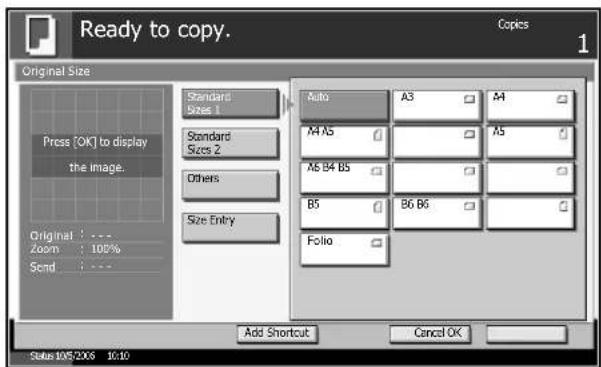
text_image
Ready to copy. Original Size Press [OK] to display the image. Original : --- Zoom : 100% Send : --- Standard Sizes 1 Standard Sizes 2 Others Size Entry Auto A3 A4 A4 A5 A5 A6 B4 B5 B5 B6 B6 Folio Add Shortcut Cancel OK Status: 10/5/2X6 10:10 Copies 1If [Size Entry] is selected, press [+] or [-] to specify the horizontal size (X) and the vertical size (Y). Press [# Keys] to enter the size directly using the numeric keys.
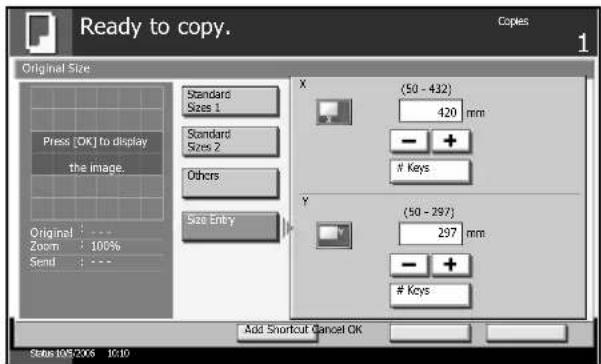
text_image
Ready to copy. Original Size Press [OK] to display the image Original Zoom 100% Send : --- Standard Sizes 1 Standard Sizes 2 Others Size Entry X (50 - 432) 420 mm - +Keys
Y (50 - 297) 297 mm - +Keys
Add Shortcut Cancel OK Status: 10/5/2006 10:10 Copies: 14 Press [OK].
5 Press the Start key to start copying.
Paper Selection
Select the paper source contains the required paper size.
NOTE: Specify in advance the size and type of the paper loaded in the cassette (refer to Original/Paper Setup on page 6-5).
Selecting the Cassette
1 Press the Copy key.
2 Press [Org./Paper/Finishing] and then [Paper Selection].
3 Press the key of the paper source corresponding to the required paper size. The cassette in which the paper is loaded is selected.
If [Auto] is selected, the paper matching the size of the original is selected automatically.
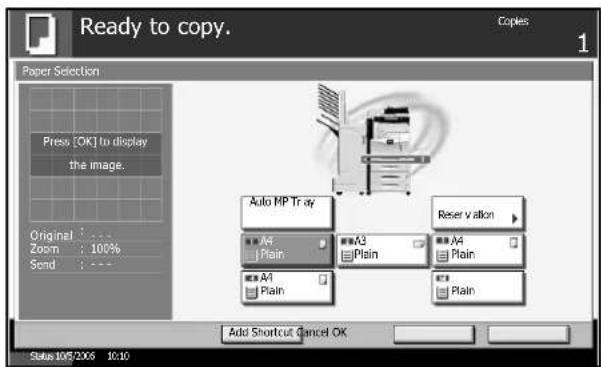
text_image
Ready to copy. Copies 1 Paper Selection Press [OK] to display the image. Original : --- Zoom : 100% Send : --- Auto HIP Tray A4 Plain A3 Plain A4 Plain A1 Plain Reserv vallion A4 Plain A1 Plain A4 Plain Add Shortcut Cancel OK Status: 10/5/2006 10:104 Press [OK].
5 Press the Start key to start copying.
Reserving the Multi Purpose Tray
To use the Multi Purpose tray, select the size and type to match the paper loaded in the paper source.
| Category Item | How to Select | Sizes | |
| Paper Size | Standard Sizes 1 | Choose from the standard size. | Inch models: Ledger, Legal, Letter, Letter-R, Statement, 8.5×13.5", Oficio II and Executive |
| Metric models: A3, B4, A4, A4-R, B5, B5-R, A5-R, B6, B6-R, A6-R and Folio | |||
| Standard Sizes 2 | Choose from the standard sizes not included in the Standard Sizes 1 . | Inch models: A3, B4, A4, A4-R, B5, B5-R, A5-R, B6-R, A6-R, Folio, 8K, 16K and 16K-R | |
| Metric models: Ledger, Legal, Letter, Letter-R, Statement, 8.5×13.5", Oficio II, Executive, 8K, 16K and 16K-R | |||
| Others Choose from non-standard sizes and custom sizes. | ISO B5, Envelope #10, Envelope #9, Envelope #6, Envelope Monarch, Envelope DL, Envelope C5, Envelope C4, Hagaki, Oufuku Hagaki, Youkei 4, Youkei 2 and Custom 1 to 4* | ||
| Size Entry | Enter the size not included in the standard sizes 1 and 2. | Inch modelsHorizontal: 5.83 to 17" (in 0.01" increments), Vertical: 3.86 to 11.69" (in 0.01" increments) | |
| Metric modelsVertical: 98 to 297 mm (in 1 mm increments), Horizontal: 148 to 432 mm (in 1 mm increments) | |||
| Media Type | Plain, Transparency, Rough, Vellum, Labels, Recycled, Preprinted, Bond, Cardstock, Color, Prepunched, Letterhead, Thick, Envelope, High Quality, Custom 1 to 8** | ||
* For instructions on how to select custom paper sizes (Custom 1 to 4), refer to Adding a Custom Size and Type for Paper to Print on page 6-6.
** For instructions on how to select custom paper types 1 to 8, refer to Paper Type on page 6-10.
NOTE: It will be useful to select in advance the size and type of paper that will be used often and set them as default (refer to Paper Size and Media Type Setup for Multi Purpose Tray on page 6-9).
1 Press the Copy key.
2 Press [Org./Paper/Finishing], [Paper Selection] and then [MP Tray Reservation].
3 Press [Standard Sizes 1], [Standard Sizes 2], [Others] or [Size Entry] to select the paper size.
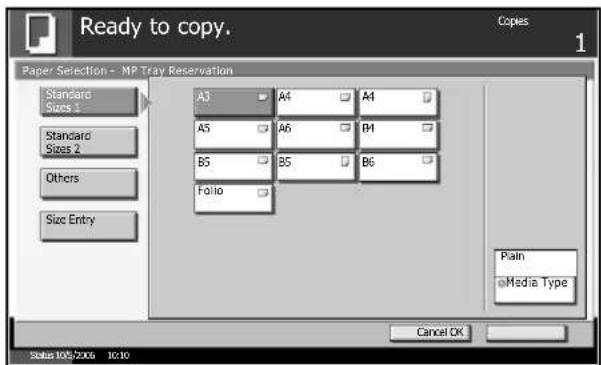
text_image
Ready to copy. Copies 1 Paper Selection - MP Tray Reservation Standard Sizes 1 Standard Sizes 2 Others Size Entry A3 A4 A4 A5 A6 B4 B5 B5 B6 Folio Plain Media Type Cancel OK Status: 105/2006 10:10If you select [Size Entry], press [+] or [-] to specify X (horizontal) and Y (vertical) sizes. You can enter the size directly using the numeric keys after pressing [# Keys].
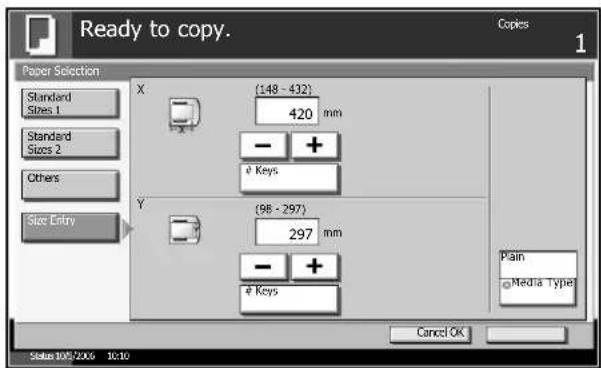
text_image
Ready to copy. Copies 1 Paper Selection Standard Sizes 1 Standard Sizes 2 Others Size Entry X (148 - 432) 420 mm - +Keys
Y (98 - 297) 297 mm - +Keys
Plain Media Type Cancel OK Status: 105/2006 10:104 Press [Media Type] to select paper type, and press [OK].
5 Press [OK].
6 Press the Start key to start scanning the originals.
7 When the machine is ready to copy your job, the confirmation screen for the specified paper appears. Load the required paper in the Multi Purpose tray and press [Continue] to start copying.
Mixed Sized Originals
Using the optional document processor, the originals of different sizes can be loaded in a batch and copied. In this operation, up to 30 originals of different sizes can be placed in the document processor at the same time.
Supported Combinations of Originals
Originals of the Same Width
The supported combinations of originals are as follows.
Ledger and Letter (A3 and A4)
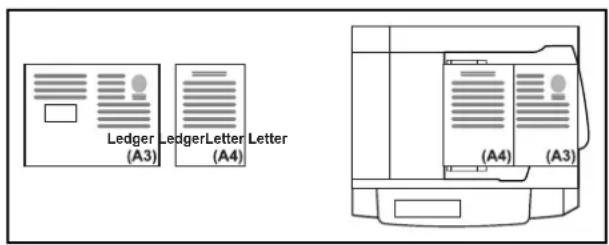
text_image
Ledger (A3) LedgerLetter (A4) Letter (A4) (A3)Ledger and Letter-R (Folio and A4-R)
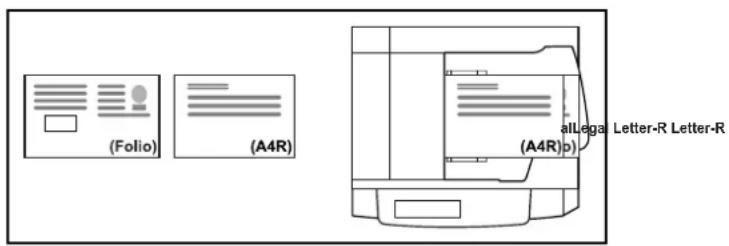
text_image
(Folio) (A4R) aLega Letter-R Letter-R (A4R)p)B4 and B5
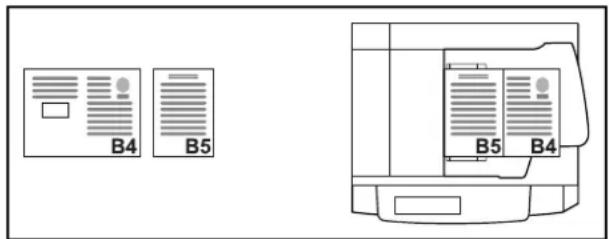
text_image
B4 B5 B5 B4Originals of Different Widths
Place all originals of different widths. The supported combinations of originals are as follows.
NOTE: This function is only available for metric models.
A3, B4, A4 and B5
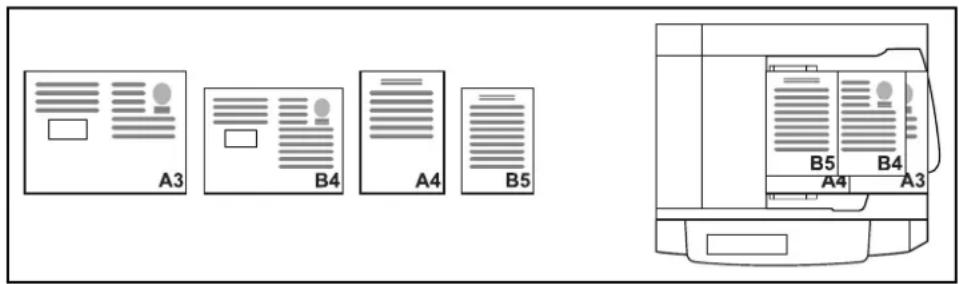
text_image
A3 B4 A4 B5 B5 B4 A4 A3B4, A4-R and B5
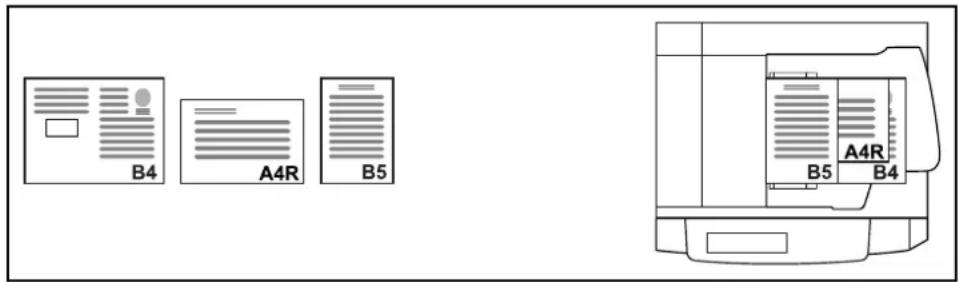
text_image
B4 A4R B5 B5 A4R B4Folio, A4-R and B5-R
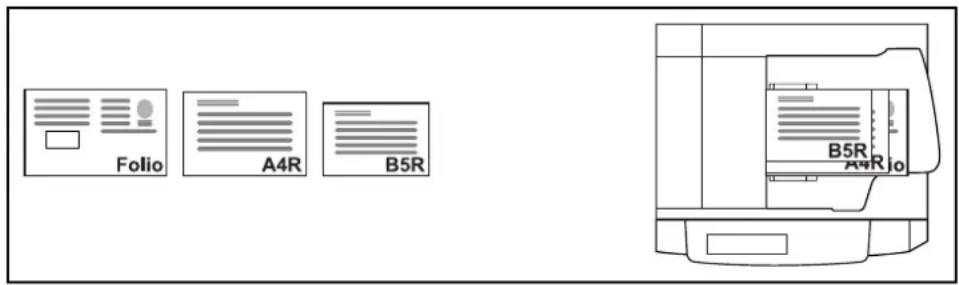
text_image
Folio A4R B5R B5R A4R joSelecting How to Copy Originals
Select whether you wish to create individual copies on different size papers matching the original sizes or to produce all copies on the same size papers.
NOTE: This function is available regardless of whether originals have the same width or not.
| Option Description | |
| Mixed Sized Copies | Originals are detected individually for size and copied to the same size papers as originals. |
| Same Size Copies | Originals are all copied to the same size papers. |
1 Place originals on the document processor.
IMPORTANT: When placing originals of different widths, be sure to flush them against the document width guide toward the back of the machine.
2 Press the Copy key.
3 Press [Org./Paper/Finishing] and then [Mixed Sized Originals].
4 Select [Mixed Sized Copies] or [Same Size Copies] as finish size.
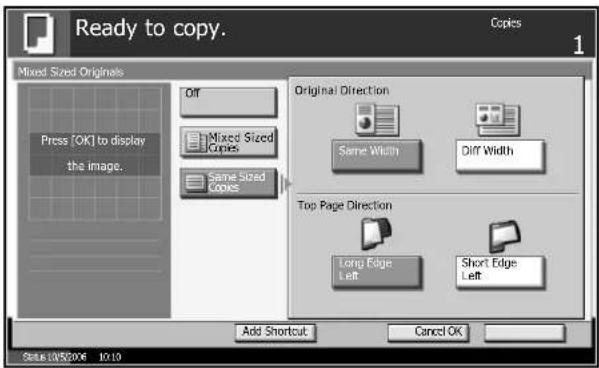
text_image
Ready to copy. Copies 1 Mixed Sized Originals Diff Press [OK] to display the image. Original Direction Same Width Diff Width Mixed Sized Copies Same Sized Copies Top Page Direction Long Edge Left Short Edge Left Add Shortcut Cancel OK Start 10/5/2006 10:105 Select [Same Width] or [Different Width] as combination of originals.
When [Same Size Copies] is selected, select [Long Edge Left] or [Short Edge Left] as the first original orientation.
6 Press [OK].
7 Press the Start key to start copying.
Original Orientation
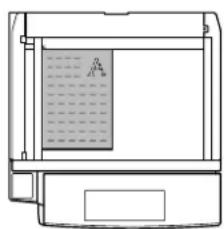
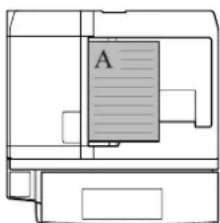
Select the original orientation to use the following functions.
- Duplex
- Margin/Centering originals
- Border erase
- Combine mode
- Memo mode
- Page numbering
- Booklets
- Stapling/Punching (optional feature)
* Use the functions above and press the Start key to display the original orientation selection screen.
When placing originals on the platen
natural_image
Simple line drawing of a rectangular container with internal liquid and a label 'A' (no text or symbols on the diagram itself)natural_image
Line drawing of a laptop with a grid screen and control panel (no text or symbols)When placing originals on the optional document processor

text_image
Anatural_image
Technical line drawing of a mechanical component with no visible text or symbolsNOTE: To change the default setting for the original orientation, refer to Original Orientation on page 6-20.
1 Press the Copy key.
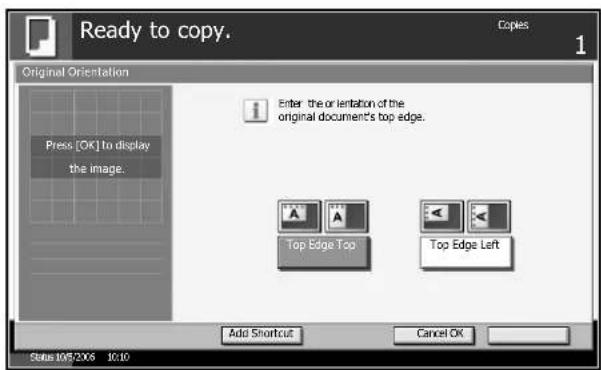
2 Press [Org./Paper/Finishing] and then [Original Orientation].
3 Select [Top Edge Top] or [Top Edge Left] as the way the original is oriented.
text_image
Ready to copy. Original Orientation Press [OK] to display the image. Enter the orientation of the original document's top edge. Top Edge Top Top Edge Left Add Shortcut Cancel OK Status 10/5/2X6 10:104 Press [OK].
5 Press the Start key to start copying.
Collate/Offset Mode
Use Collate to copy multiple originals and produce collated sets of copies as required.
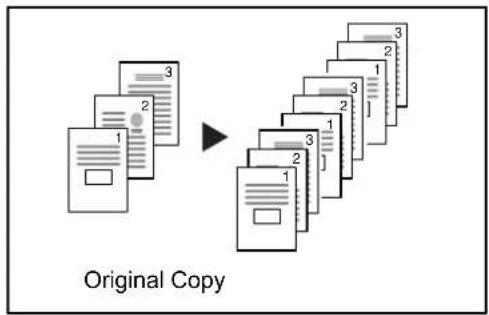
Use Offset to deliver the printed copies so that each set or page is stacked perpendicular to the previous set or page. This allows easy offsetting without using the optional document finisher.
Offset
text_image
Original CopyNOTE: Paper of the same size must be loaded in the different cassettes with portrait and landscape orientation.
The supported paper sizes are A4, B5, Letter and 16K.
1 Press the Copy key.
2 Press [Org./Paper/Finishing] and then [Collate/Offset].
3 If you select Collate, press [On] of Collate.
If you select Offset, press [Off] or [Each Set] of Offset.
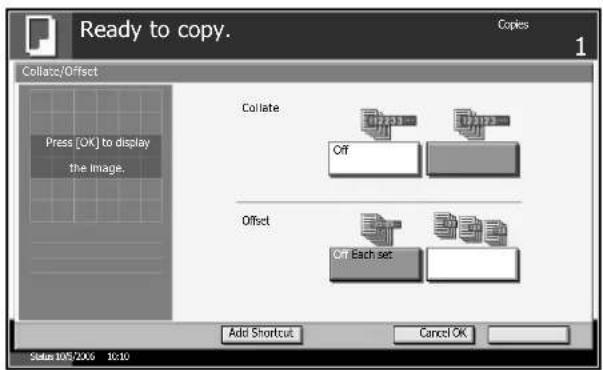
text_image
Ready to copy. Copies 1 Collate/Offset Press [OK] to display the Image. Collate Off Offset On Each set Add Shortcut Cancel OK Status 10/5/2006 10:104 Use the numeric keys to enter the copy quantity.
5 Press the Start key to start copying.
Collated sets of copies are delivered on the top tray.
Place the originals and press the Start key.
Staple/Punch
Use this feature to staple or hole-punch your finished copies.
NOTE: Stapling requires the optional document finisher, built-in finisher, or 3000 Sheet Document Finisher.
Punching requires the optional 3000 Sheet Document Finisher and the optional punching unit.
The following stapling options and orientations are available.
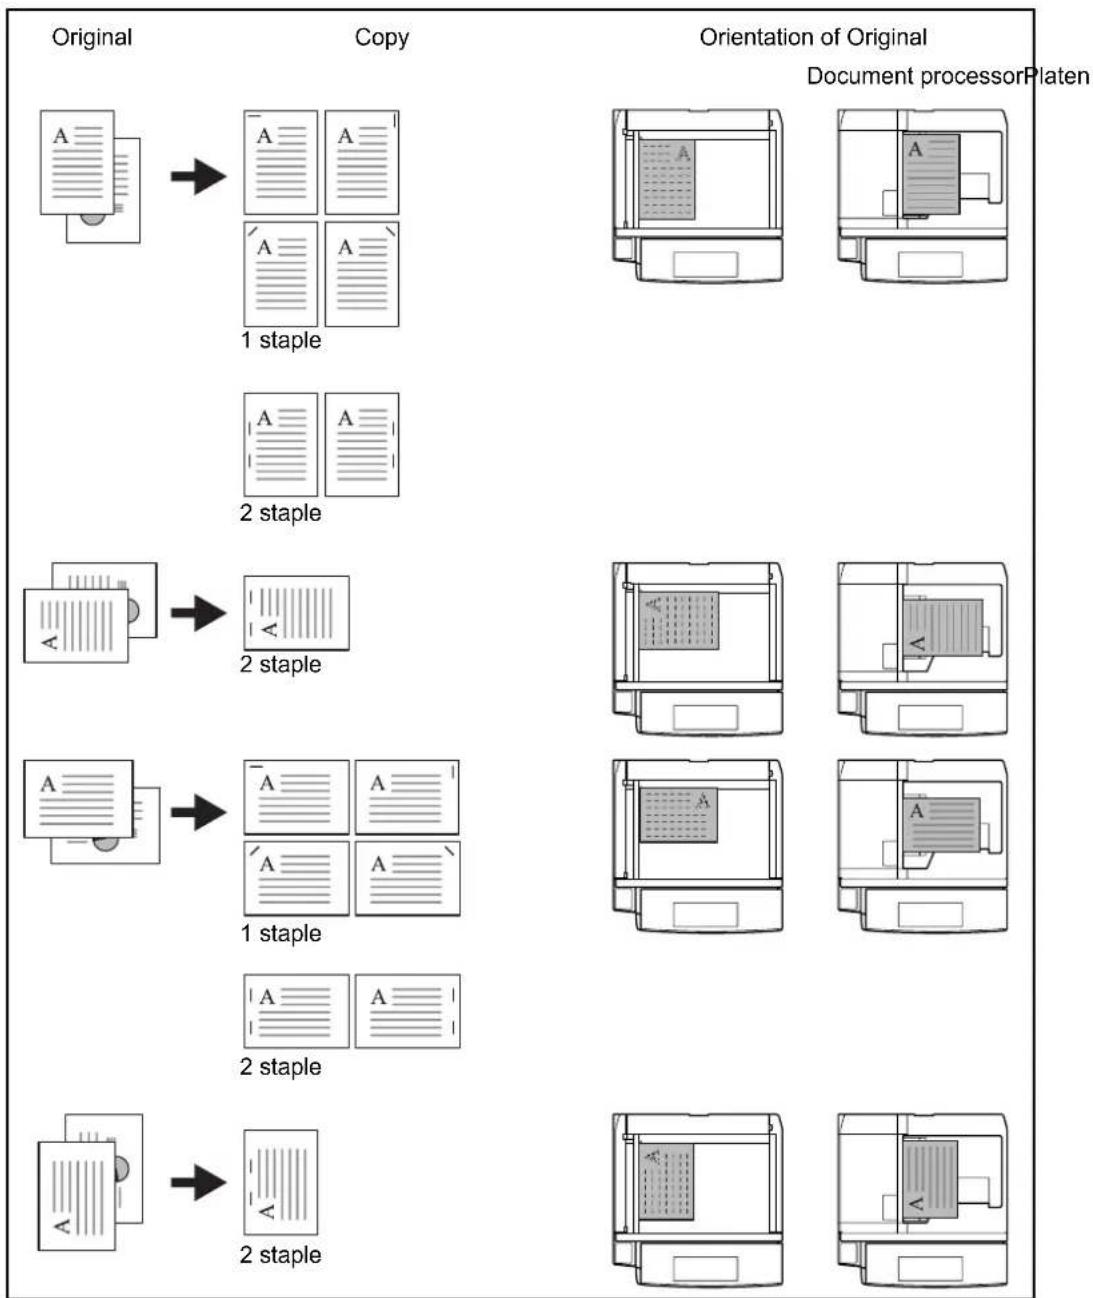
flowchart
graph TD
    A["Original"] --> B["Copy"]
    B --> C["Orientation of Original Document processorPlate"]
    subgraph Original
        D["1 staple"]
        E["2 staple"]
    end
    subgraph Copy
        F["1 staple"]
        G["2 staple"]
    end
    subgraph Orientation of Original
        H["1 staple"]
        I["2 staple"]
    end
The following punch options and orientations are available.
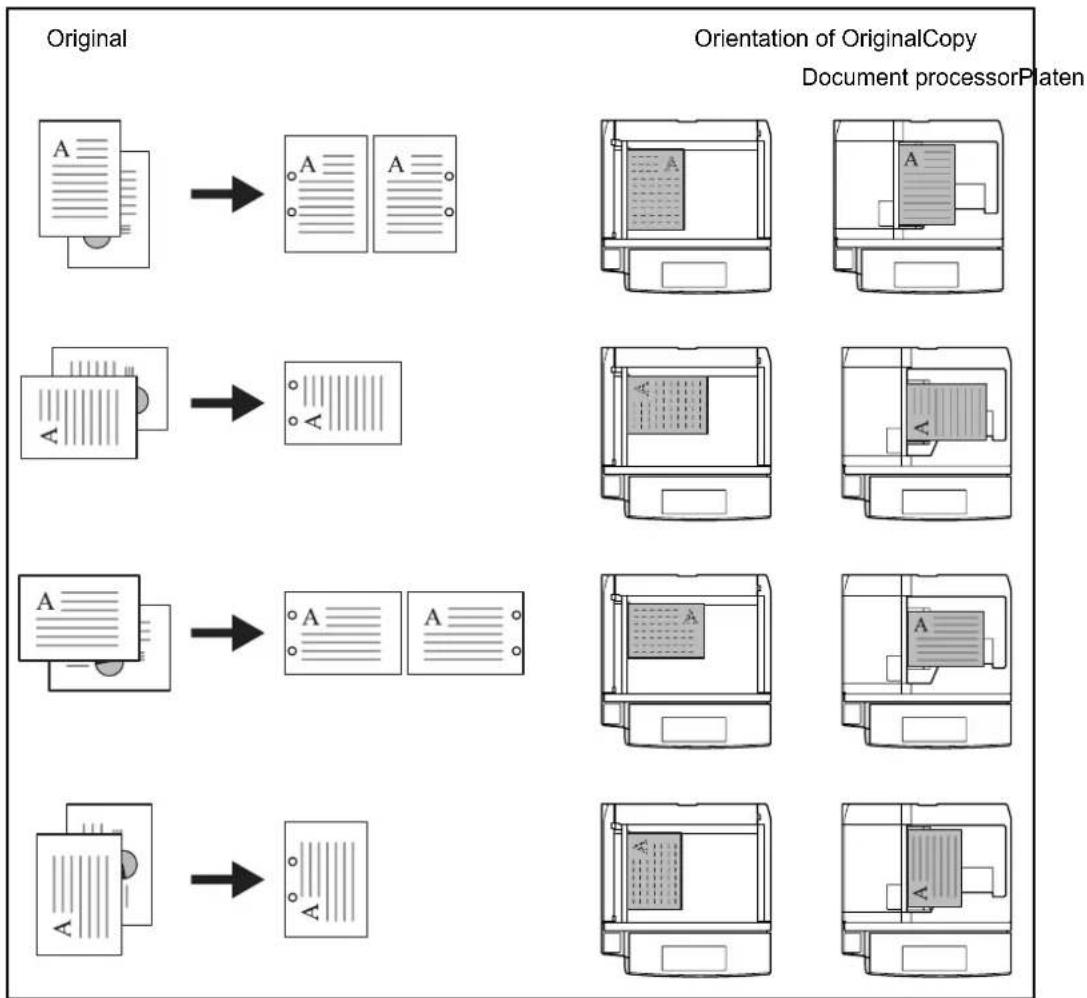
flowchart
graph TD
    A["Original"] --> B["Orientation of OriginalCopy"]
    B --> C["Document processorPlaten"]
    subgraph Original
        D1["A"]
        D2["A"]
        D3["A"]
    end
    subgraph Orientation
        E1["A"]
        E2["A"]
        E3["A"]
    end
    D1 --> E1
    D2 --> E2
    D3 --> E3
    E1 --> F1["A"]
    E2 --> F2["A"]
    E3 --> F3["A"]
    F1 --> G1["A"]
    F2 --> G2["A"]
    F3 --> G3["A"]
NOTE: The inch model provides two-hole and three-hole punching. The metric model provides two-hole and four-hole punching.
1 Press the Copy key.
2 Press [Org./Paper/Finishing] and then [Staple/Punch].
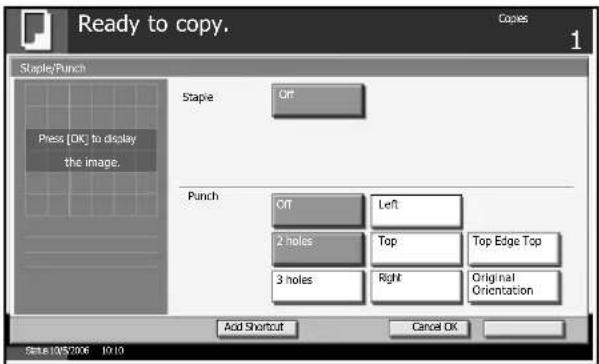
3 To staple, select the staple position, [1 staple] or [2 staples], under Staple.
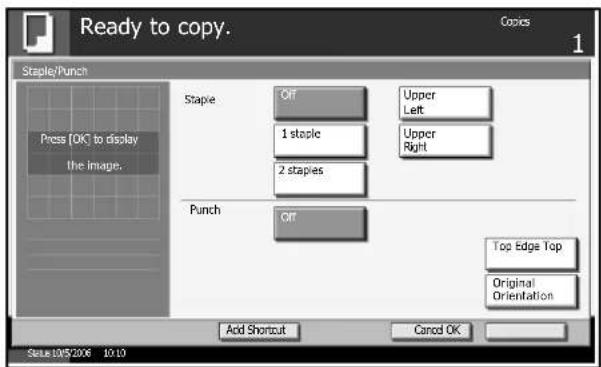
text_image
Ready to copy. Copics 1 Staple/Punch Press [OK] to display the image. Staple Off Upper Left Upper Right 1 staple 2 staples Punch Off Top Edge Top Original Orientation Acid Shortcut Cancel OK Status: 0/5/2006 10:10To punch, select the punch position, [2 holes] or [3 holes] ([4 holes]), under Punch.
text_image
Ready to copy. Copies 1 Staple/Punch Press [OK] to display the image. Staple Off Punch Off Left 2 holes Top Top Edge Top 3 holes Right Original Orientation Add Shortcut Cancel OK Status: 10/5/2006 10:104 Press [Original Orientation] to choose orientation of the originals, either [Top Edge Top] or [Top Edge Left]. Then press [OK].
5 Press [OK].
6 Place the originals and press the Start key.
Output Destination
Specify the optional document finisher tray or any other specific tray as the output destination for finished copies.
NOTE: Optional output destinations include the job separator, document finisher, 3000 Sheet Document Finisher and the mailbox.
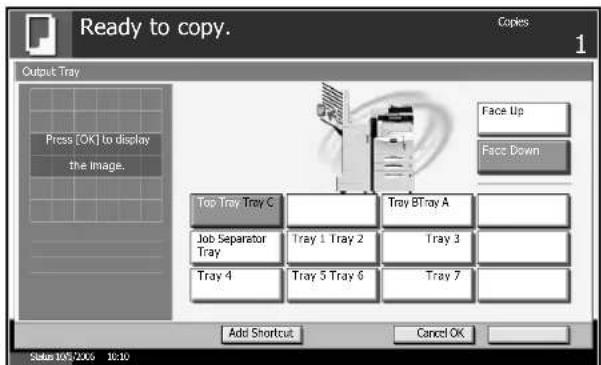
| Destination Description | |
| Top tray Top tray of the machine (where copies are stored) | |
| Finisher tray* | Tray of the optional document finisher or built-in finisher |
| Tray A, Tray B*, Tray C* | Tray A to C of the optional 3000 Sheet Document Finisher |
| Job separator tray O | Optional job separator |
| Trays 1 to 7* Trays 1 | to 7 of the optional mailbox (Tray 1 is the top tray) |
* Copy output orientation can be selected either as face-up (print facing up) or face-down (print facing down).
NOTE: To change default destination for copies, refer to Output Tray on page 6-19 for details.
1 Press the Copy key.
2 Press [Org./Paper/Finishing] and then [Output Tray].
3 Select the output destination for finished copies.
When you select any of [Finisher tray], [Tray B], [Tray C] or [Trays 1 to 7], select the orientation of output copy, Face Up (print facing up) or Face Down (print facing down).
text_image
Ready to copy. Copies 1 Output Tray Press [OK] to display the image. Face Up Face Down Top Tray Troy C Tray BTray A Job Separator Tray Tray 1 Tray 2 Tray 3 Tray 4 Tray 5 Tray 6 Tray 7 Add Shortcut Cancel OK Status 10/5/2006 10:104 Press [OK].
5 Place the originals in the document processor or on the platen. Press the Start key to start copying.
Zoom Mode
Original image can be reduced or enlarged for copying. The following zoom modes are available.
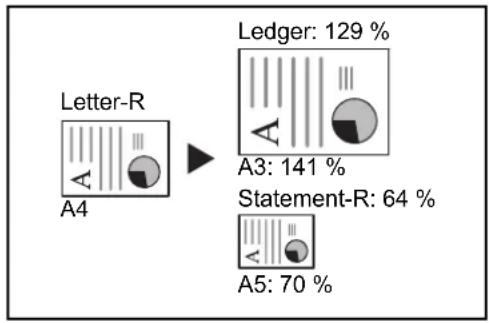
Auto Zoom
Automatically reduces or enlarges the original image suited to the selected paper size.
flowchart
graph LR
    A["Letter-R\nA4"] --> B["Ledger: 129%\nA3: 141%\nStatement-R: 64%\nA5: 70%"]
Manual Zoom
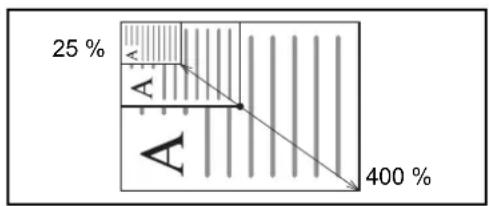
Enter desired magnification in 1% increments between 25% and 400%.
text_image
25 % A A 400 %Preset Zoom
Reduces or enlarges at preset magnifications.
The following magnifications are available.
| Model Zoom | Level (Original -> Copy) |
| Inch Models 200% | (Statement -> Ledger), 154% (Statement -> Legal), 129% (Letter-R -> Ledger), 121% (Legal -> Ledger), 78% (Legal -> Letter-R), 77% (Ledger -> Legal), 64% (Ledger -> Letter-R), 50% (Ledger -> Statement) |
| Metric Models 200% | (A5 -> A3), 141% (A4 -> A3, A5 -> A4), 127% (Folio ->A3), 106% (11×15" -> A3), 90% (Folio -> A4), 75% (11×15"-->A4), 70% (A3 -> A4, A4 -> A5) |
| Model Zoom Level (Original -> Copy) | |
| Asia Pacific 200% (A5 -> A3), 141% (A4 -> A3, B5 -> B4), 122% (A4 -> B4, A5 -> B5), 115% (B4 -> A3, B5 -> A4), 86% (A3 -> B4, A4 -> B5), 81% (B4 -> A4, B5 -> A5), 70% (A3 -> A4, B4 -> B5) | |
XY Zoom
Adjust vertical and horizontal magnifications independently. Enter desired magnification in 1% increments between 25% and 400%.
* When using the document processor, enter the desired magnification in 1% increments between 25% and 200%.
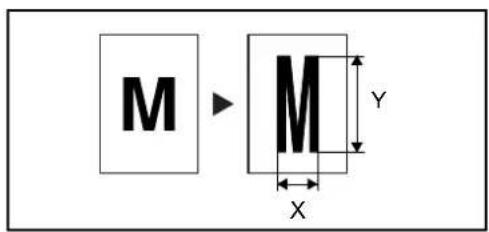
text_image
M M Y X1 Place the originals in the document processor or on the platen.
2 Press the Copy key.
3 Press [Layout/Edit] and then [Zoom].
4 Press [Auto] to use Auto Zoom.
Press [+] or [-] to change the displayed magnification as desired. You can also enter the magnification directly using the numeric keys by pressing [# Keys].
To use Preset Zoom, select the key of desired magnification.
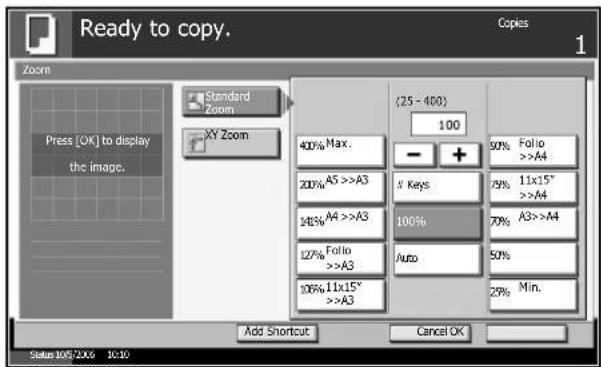
text_image
Ready to copy. Copies 1 Zoom Standard Zoom XY Zoom (25 - 400) 100 400% Max. - + 90% Folio >>A4 200%A5 >>A3 8 Keys 79% 11x15" >>A4 145%A4 >>A3 100% 70% A3 >>A4 127% Folio >>A3 Auto 50% 106% 11x15" >>A3 25% Min. Add Shortcut Cancel OK Status: 106/2X6 10:10To use XY Zoom, press [XY Zoom].
Press [+] or [-] to change the displayed magnifications of X (horizontal) and Y (vertical). You can also enter the magnification directly using the numeric keys by pressing [# Keys].
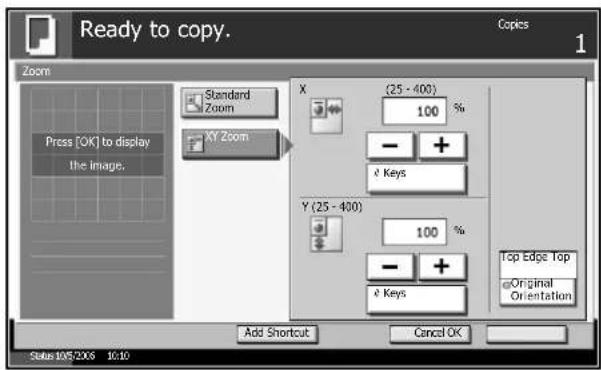
text_image
Ready to copy. Copies 1 Zoom Standard Zoom X (25 - 400) 100 % - +Keys
Y (25 - 400) 100 % - +Keys
Top Edge Top Original Orientation Add Shortcut Cancel OK Status: 105/206 10:10Press [Original Orientation] to choose orientation of the originals, either [Top Edge Top] or [Top Edge Left]. Then press [OK].
5 Press [OK].
6 Press the Start key to start copying.
Combine Mode
Images from either two or four originals are reduced and combined onto a single copy. 2-in-1 mode and 4-in-1 mode are available. The page boundary of each original can be indicated.
NOTE: Combine mode is available for the copy paper sizes of A3, B4, Folio, A4, A4-R, B5, B5-R, A5-R, Ledger, Legal, Oficio II, 8.5×13.5", Letter, Letter-R, Statement-R, 8K, 16K and 16K-R.
2-in-1 Mode
For copying two originals onto a single sheet. This mode can be used with Duplex mode to copy four originals onto one sheet.
The following 2-in-1 options and output orientations are available.
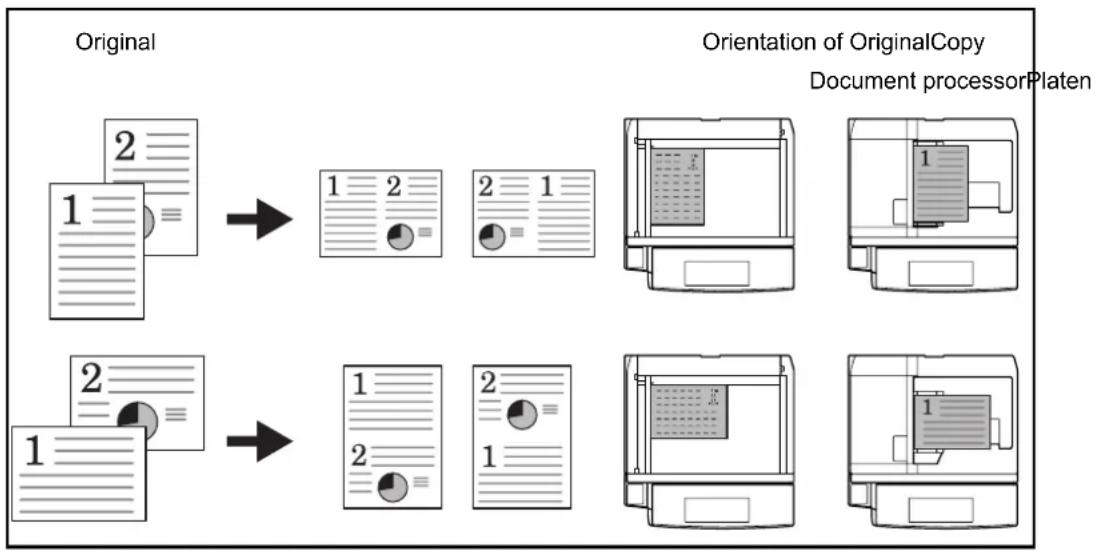
flowchart
graph LR
    A["Original"] --> B["Orientation of OriginalCopy"]
    B --> C["Document processor Platen"]
NOTE: When placing the original on the platen, be sure to copy the originals in page order.
4-in-1 Mode
For copying four originals onto a single sheet. This mode can be used with Duplex mode to copy eight originals onto one sheet.
The following 4-in-1 options and output orientations are available.
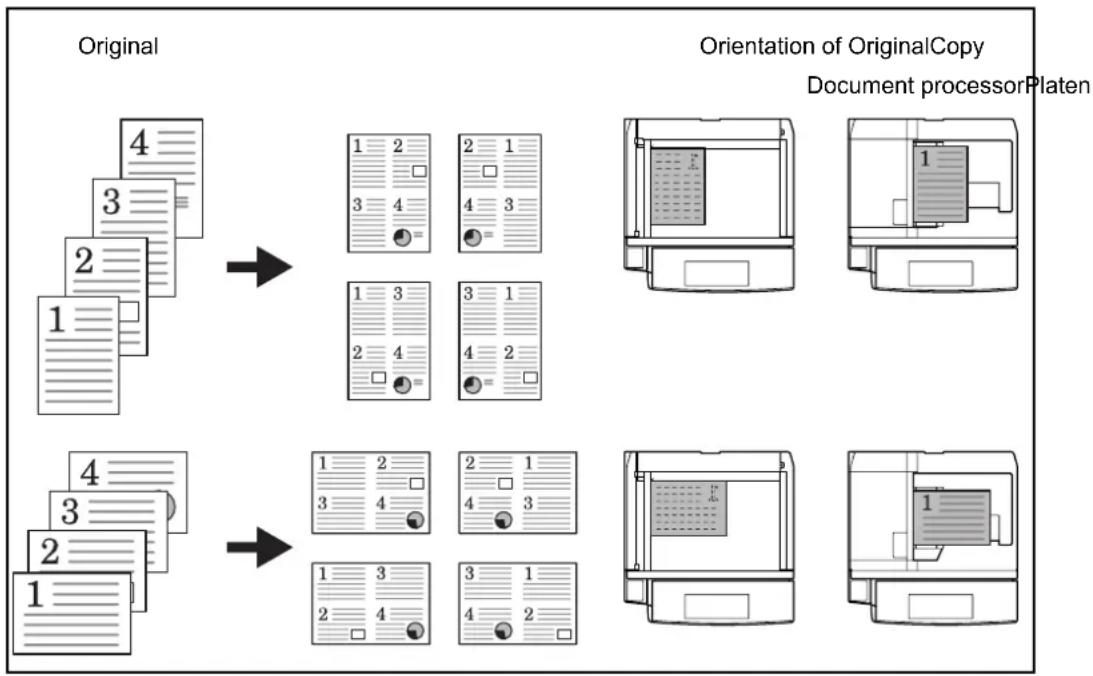
flowchart
graph TD
    A["Original"] --> B["Orientation of OriginalCopy"]
    B --> C["Document processorPlate"]

    subgraph Original
        D1["4"] --> D2["3"]
        D3["2"] --> D4["1"]
        D5["1"] --> D6["4"]
        D7["4"] --> D8["3"]
    end

    subgraph Orientation
        E1["1"] --> E2["2"]
        E3["3"] --> E4["4"]
        E5["1"] --> E6["3"]
        E7["4"] --> E8["2"]
    end

    D1 --> E1
    D1 --> E2
    D1 --> E3
    D1 --> E4
    D1 --> E5
    D1 --> E6
    D1 --> E7
    D1 --> E8
    D1 --> E9
    D1 --> E10
    D1 --> E11
    D1 --> E12
    D1 --> E13
    D1 --> E14
    D1 --> E15
    D1 --> E16
    D1 --> E17
    D1 --> E18
    D1 --> E19
    D1 --> E20
    D1 --> E21
    D1 --> E22
    D1 --> E23
    D1 --> E24
    D1 --> E25
    D1 --> E26
    D1 --> E27
    D1 --> E28
    D1 --> E29
    D1 --> E30
    D1 --> E31
    D1 --> E32
    D1 --> E33
    D1 --> E34
    D1 --> E35
    D1 --> E36
    D1 --> E37
    D1 --> E38
    D1 --> E39
    D1 --> E40
    D1 --> E41
    D1 --> E42
    D1 --> E43
    D1 --> E44
    D1 --> E45
    D1 --> E46
    D1 --> E47
    D1 --> E48
    D1 --> E49
    D1 --> E50
    D1 --> E51
    D1 --> E52
    D1 --> E53
    D1 --> E54
    D1 --> E55
    D1 --> E56
    D1 --> E57
    D1 --> E58
    D1 --> E59
    D1 --> E60
    D1 --> E61
    D1 --> E62
    D1 --> E63
    D1 --> E64
    D1 --> E65
    D1 --> E66
    D1 --> E67
    D1 --> E68
    D1 --> E69
    D1 --> E70
    D1 --> E71
    D1 --> E72
    D1 --> E73
    D1 --> E74
    D1 --> E75
    D1 --> E76
    D1 --> E77
    D1 --> E78
    D1 --> E79
    D1 --> E80
NOTE: When placing the original on the platen, be sure to copy the originals in page order.
Types of Page Boundary Lines
The following types of the boundary lines are available.
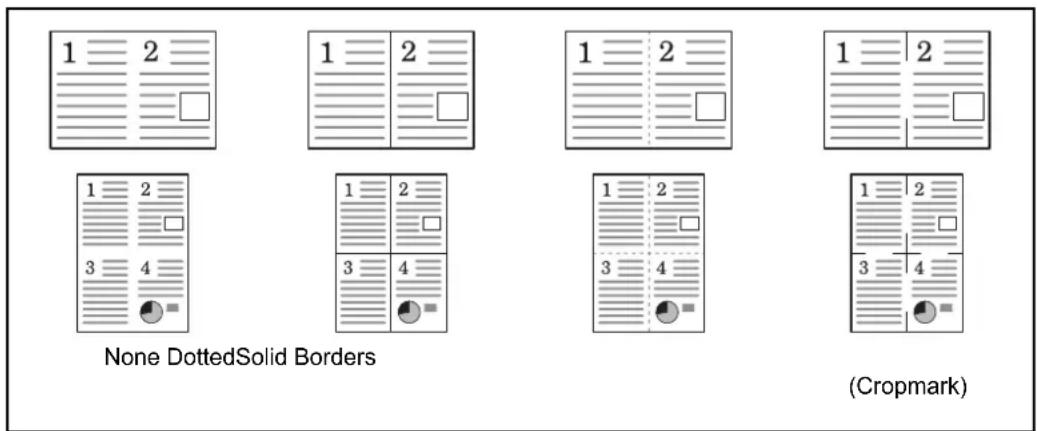
text_image
1 2 1 2 1 2 1 2 1 2 3 4 3 4 None DottedSolid Borders 1 2 1 2 1 2 3 4 3 4 Cropmark)1 Press the Copy key.
2 Press [Layout/Edit] and then [Combine].
3 Press [2 in 1] or [4 in 1], and choose the page layout of Layout.
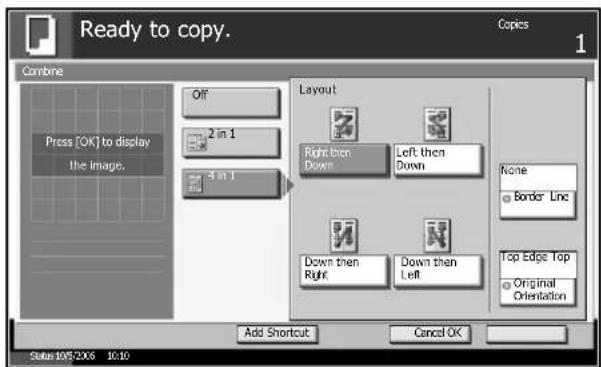
text_image
Ready to copy. Copies 1 Combine Press [OK] to display the image. Off 2 in 1 4 in 1 Layout Right then Down Left then Down None Border Line Down then Right Down then Left Top Edge Top Original Orientation Add Shortcut Cancel OK Status: 105/2X6 10:104 Press [Border Line] to choose the type of the lines to indicate page boundaries. Press [OK].
5 Press [Original Orientation] to choose orientation of the originals, either [Top Edge Top] or [Top Edge Left]. Then press [OK].
6 Press [OK].
7 Place the originals and press the Start key.
If the original is placed on the platen, replace the original and press the Start key.
After scanning all originals, press [Scan Finish] to start copying.
Margin/Centering Mode
Shift the original image to make space on the copy for binding on the left (right) or top (bottom) side.
When you copy onto paper different from the original size, you can center the original image on the paper.
The following margin widths are available.
| Model Margin | Width |
| Inch Models -0.75 to | 0.75" (in 0.01" increments) |
| Metric Models -18 mm | to 18 mm (in 1-mm increments) |
Margin on the Back Side
When duplex copying, you can also specify the margin on the back side.
Auto
When Auto is specified, the left and right margins on the front are reversed on the back. For example, if the left margin on the front is 10 mm, the right margin on the back will be 10 mm. The top and bottom margin widths on the back will match those on the front.
Separate Front/Back Margins
Enables you to specify the front and back settings separately.
NOTE: You can set the default margin width. Refer to Margin Default on page 6-28 for details.
1 Press the Copy key.
2 Press [Layout/Edit] and then [Margin/Centering].
3 Press [Margin] to select the copy with margin.
Use [+] or [-] to enter the margins for Left/Right and Top/Bottom. Press [# Keys] to use the numeric keys for entry.
When duplex copying, press [Back page margin] to select the margin on the back page. Then press [OK].
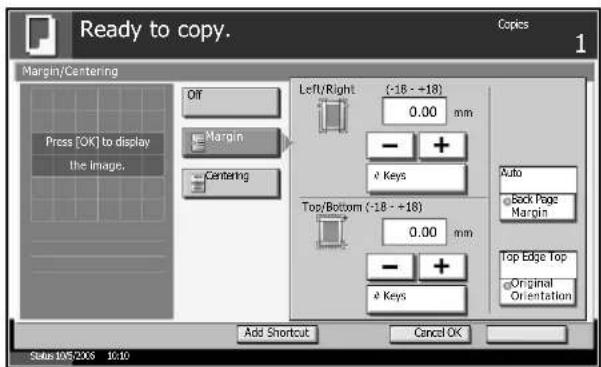
text_image
Ready to copy. Margin/Centering Off Press [OK] to display the image. Margin Centering Left/Right (-18 - +18) 0.00 mm - + e Keys Top/Bottom (-18 - +18) 0.00 mm - + e Keys Add Shortcut Cancel OK Copies 1 Auto Block Page Margin Top Edge Top Original Orientation Status: 1052X6 10:10Press [Centering] to center the original image on the paper.
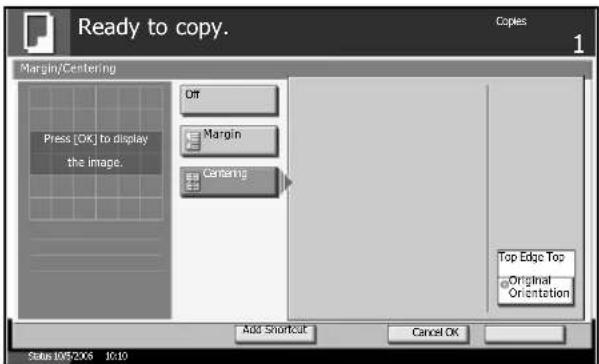
text_image
Ready to copy. Margin/Centering Press [OK] to display the image. Off Margin Centering Top Edge Top Original Orientation Add Shortcut Cancel OK Status: 10/5/2006 10:10 Copies 14 Press [Original Orientation] to choose orientation of the originals, either [Top Edge Top] or [Top Edge Left]. Then press [OK].
5 Press [OK].
6 Press the Start key to start copying.
Border Erase
Use Border Erase to prevent the appearance of shadows from around the edges of originals. The following options can be selected.
Border Erase Sheet
Erases black borders around the single sheet original.
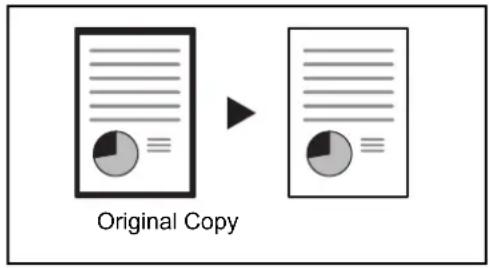
text_image
Original CopyBorder Erase Book
Erases black borders around the edges and in the middle of the original such as a thick book. You can specify the widths individually to erase the borders around the edges and in the center of the book.
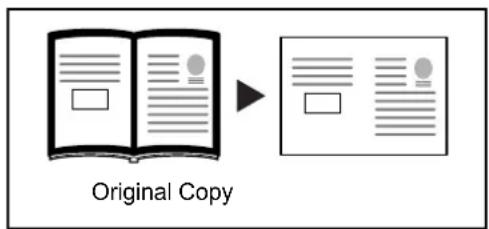
text_image
Original CopyIndividual Border Erase
Specify border erase widths individually for all edges.
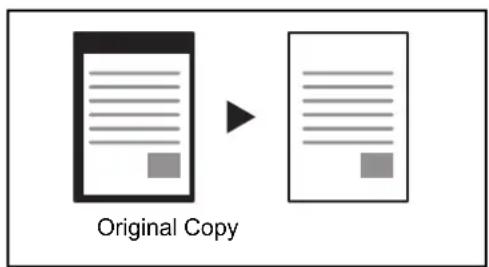
flowchart
graph LR
    A["Original Copy"] --> B["Modified Version"]
In each option, the available ranges are as below.
| Specifications Border Erase Range | |
| Inch Models 0 to 2"(in 0.01" increments) | |
| Metric Models 0 mm | to 50 mm (in 1 mm increments) |
NOTE: To specify the default width value of Border Erase, refer to Border Erase Default on page 6-27 for details.
1 Press the Copy key.
2 Press [Layout/Edit] and then [Border Erase].
3 Press [Border Erase Sheet] or [Border Erase Book] to select the border erase of the book border erase.
Use [+] or [-] to enter the width in Border or Gutter. Press [# Keys] to use the numeric keys for entry.
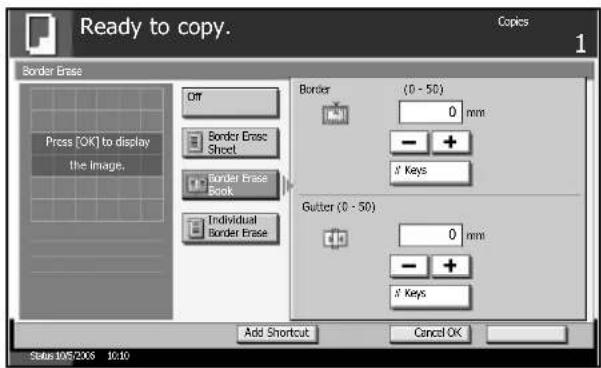
text_image
Ready to copy. Copies 1 Border Erase Off Border Erase Sheet Border Erase Book Individual Border Erase Border (0 - 50) 0 mm - + s' Keys Gutter (0 - 50) 0 mm - + s' Keys Add Shortcut Cancel OK Press [OK] to display The image, Status: 10/5"2X6 10:10Press [Individual Border Erase] to select the individual border erase.
Use [+] or [−] to enter the width in Top, Bottom, Left or Right. Press [# Keys] to use the numeric keys for entry.
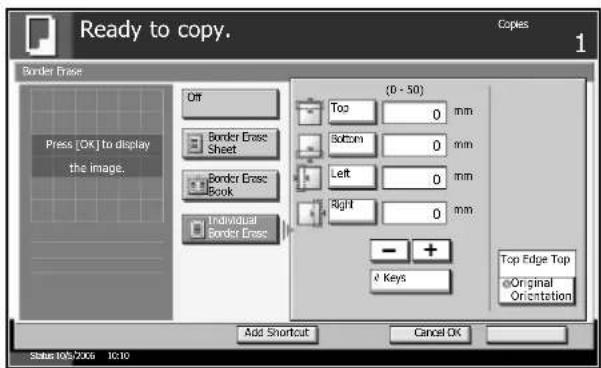
text_image
Ready to copy. Copies 1 Border Erase Off Border Erase Sheet Border Erase Book Individual Border Erase (0 - 50) Top 0 mm Bottom 0 mm Left 0 mm Right 0 mm - +Keys
Top Edge Top Original Orientation Add Shortcut Cancel OK Status:1067206 1C:10Press [Original Orientation] to select the original orientation from either [Top Edge Top] or [Top Edge Left]. Then press [OK].
4 Press [OK].
5 Press the Start key to start copying.
Booklet from Sheets
Delivers booklet of two-sided copies with facing pages from one-sided or two-sided originals. Booklet, such as a magazine, is available by folding at the center.
You can copy the cover page onto colored paper or thick paper. Paper for the cover is supplied from the Multi Purpose tray. To feed the cover paper from the cassette, refer to Paper Source for Cover on page 6-14.
The supported original and paper sizes are as follows.
| Type of Original | Center Binding And Folding Option* | Original Size Paper Size | |
| One-sided original, Two-sided original | Not available All** | A3, B4, A4, A4-R, B5, B5-R, Ledger, Legal, Letter and Letter-R | |
| Available All | ** | A3, B4, A4-R, Ledger, Legal and Letter-R | |
| Book original | Not available A3, | B4, A4-R, B5-R, A5-R, Ledger, Letter-R and 8K | A3, B4, A4, A4-R, B5, B5-R, Ledger, Legal, Letter and Letter-R |
| Available A3, B4, | A4-R, B5-R, A5-R, Ledger and Letter-R | A3, B4, A4-R, Ledger, Legal, and Letter-R | |
* Capability of stapling finished copies in the center and automatically folding them in the center. Optional 3000 Sheet Document Finisher and the center folding unit are required.
** Except for custom sized originals.
For binding on the left side
The folded copies can be read from left to right.
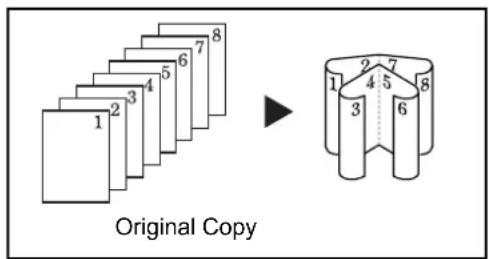
text_image
Original CopyFor binding on the right side
The folded copies can be read from right to left.
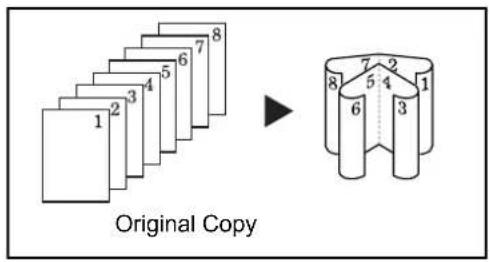
text_image
Original CopyFor top binding
The folded copies can be read from top to bottom.

text_image
Original Copy1 Press the Copy key.
2 Press [Layout/Edit] and then [Booklet].
3 Select [1-sided >> Booklet] to produce booklet from one-sided originals.
Select [2-sided >> Booklet] to produce booklet from two-sided originals.
Select [Book >> Booklet] to produce booklet from book originals.

text_image
Ready to copy. Copies 1 Booklet Off 1-sided >>Booklet 2-sided >>Booklet Book >>Booklet Original Binding Left/Right Binding Top/Bottom Cover Cover Finishing Binding Left Binding Right Binding Top Top Edge Top Original Orientation Add Shortcut Cancel OK Status: 1057306 10:104 If you choose [2-sided >> Booklet] or [Book >> Booklet], select desired binding orientation of Original.
5 Select desired binding orientation of Finishing.
6 If you choose [1-sided >> Booklet] or [2-sided >> Booklet], you can add the cover. Press [Cover] and select Cover. Press [OK].
7 If the optional 3000 Sheet Document Finisher and the center folding unit are equipped, [Bind and Fold]* can be selected. Press [Saddle Stitch] and select [Bind and Fold]. Press [OK]. Up to 16 sheets (64 pages) can be accomplished with center margin stapling and center folding.
* Capability of stapling finished copies in the center and automatically folding them in the center.
8 Press [Original Orientation] to choose orientation of the originals, either [Top Edge Top] or [Top Edge Left]. Then press [OK].
9 Press [OK].
10 Place the originals in the document processor or on the platen and press the Start key.
NOTE: When using the platen, be sure to place the original in page order.
If the original is placed on the platen, replace the original and press the Start key.
After scanning all originals, press [Scan Finish] to start copying.
Duplex
Use Duplex to create two-sided copies.
You can also create single-sided copies from two-sided originals or originals with facing pages such as books. The following modes are available.
CAUTION: To scan 2-sided originals in color using the optional document processor, extension of the memory in the machine is required. Call service.
One-sided to Two-sided
Produces two-sided copies from one-sided originals. In case the originals are in odd number, the back side of the last copy will be blank.
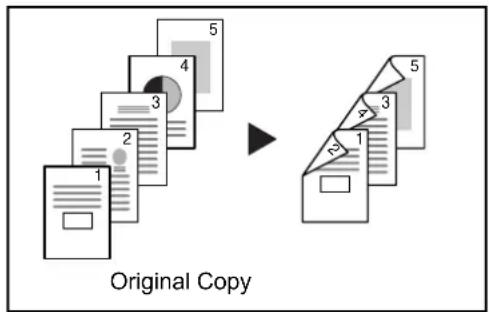
text_image
Original CopyThe following binding options are available.
A Original Left/Right Binding >> Copy Left/Right Binding: Images are copied onto the back side without being rotated.
B Original Left/Right Binding >> Copy Top Binding: Images are copied onto the back side after being rotated 180°. When copies are bound on top, the facing pages look in the same orientation.
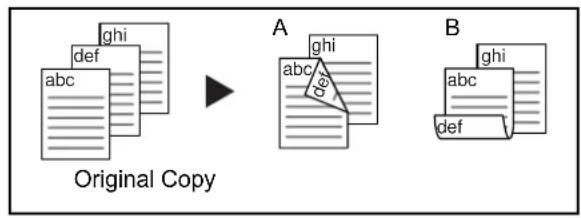
flowchart
graph LR
    A["Original Copy"] --> B["A"]
    B --> C["B"]
Two-sided to One-sided
Copies each side of a two-sided original onto two individual sheets. Optional document processor is required.
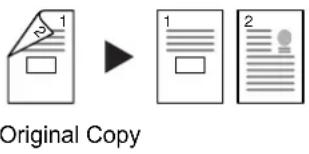
text_image
1 1 2 Original CopyThe following binding options are available.
Left/Right Binding: Images are copied onto the back side without being rotated.
Top Binding: Images are copied onto the back side after being rotated 180^ .
Two-sided to Two-sided
Produces two-sided copies from two-sided originals. Optional document processor is required.
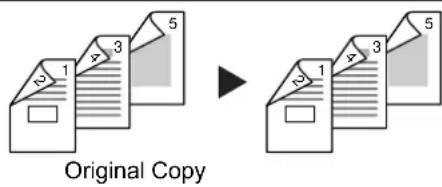
text_image
Original CopyNOTE: The paper sizes supported in Two-sided to Two-sided mode are Ledger, Legal, Letter, Letter-R, Statement, Oficio II, 8.5×13.5", A3, B4, A4, A4-R, B5, B5-R, A5-R and Folio.
Book to One-sided
Copies each page of originals with facing pages onto two individual sheets.
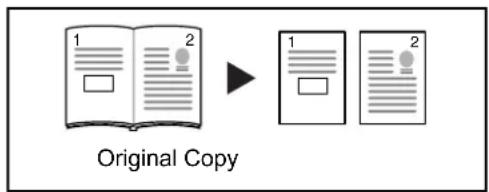
text_image
1 2 Original CopyThe following binding options are available.
Left Binding: Originals with facing pages are copied from left to right.
Right Binding: Originals with facing pages are copied from right to left.
NOTE: The following sizes of originals and paper are supported in Book to One-sided mode. Original: Ledger, Letter-R, A3, B4, A4-R, B5-R, A5-R and 8K. Paper: Letter, A4, B5 and 16K. When you select the paper size, change the zoom level to match that size.
Book to Two-sided
Produces two-sided copies from originals with facing pages.
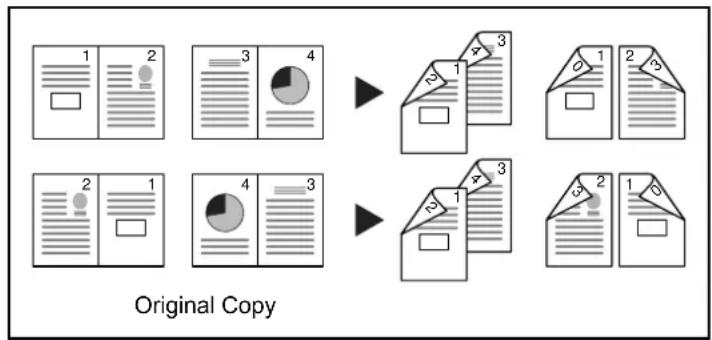
text_image
Original CopyNOTE: The sizes of originals supported in Book to Two-sided mode are Ledger, Letter-R, A3, B4, A4-R, B5-R, A5-R and 8K.
1 Press the Copy key.
2 Press [Layout/Edit] and then [Duplex].
3 Select the desired Duplex mode.
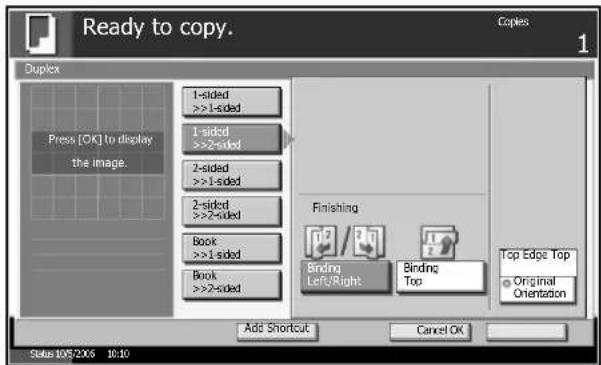
text_image
Ready to copy. Copies 1 Duplex Press [OK] to display the image. 1-sided >>1-sided 1-sided >>2-sided 2-sided >>1-sided 2-sided >>2-sided Book >>1-sided Book >>2-sided Finishing Binding Left/Right Binding Top Top Edge Top Original Orientation Add Shortcut Cancel OK Status: 10^5/2X6 16:104 If you choose [2 sided >> 2 sided], [2 sided >> 1 sided], [Book >> 1 sided] or [Book >> 2 sided], select the binding edge of the originals of Original.
5 If you choose [1 sided >> 2 sided], [2 sided >> 2 sided] or [Book >> 2 sided], select the binding edge of the finished copies of Finishing.
6 Press [Original Orientation] to select orientation of the originals, either [Top Edge Top] or [Top Edge Left]. Then press [OK].
7 Press [OK].
8 Place the originals in the document processor or on the platen and press the Start key.
If the original is placed on the platen, replace the original and press the Start key.
After scanning all originals, press [Scan Finish] to start copying.
Cover Mode
Add a cover to the finished copies. Copy the first page and/or the last page onto colored paper or thick paper fed from the different paper source than the regular one. The following two options are available.
| Type of Cover Description | |
| Front Cover First page of the originals is copied on a different paper. | |
| Front and Back Covers | First page and last page of the originals are copied on different paper. |
1 Press the Copy key.
2 Press [Layout/Edit] and then [Cover].
3 Press [Front Cover] or [Front and Back Covers].
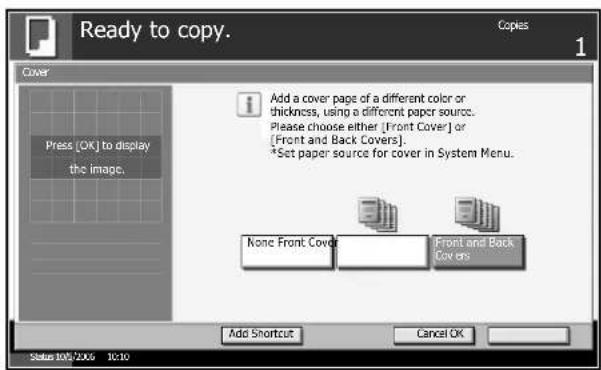
text_image
Ready to copy. Copies 1 Add a cover page of a different color or thickness, using a different paper source. Please choose either [Front Cover] or [Front and Back Covers]. *Set paper source for cover in System Menu. Press [OK] to display the image. None Front Cover Front and Back Covers Add Shortcut Cancel OK Status 10/07/2016 10:304 Press [OK].
5 Press the Start key.
If the original is placed on the platen, place the next original and press the Start key.
After scanning all originals, press [Scan Finish] to start copying.
Form Overlay
Copy the original images onto the form. Once you scan and register the form, the form is overlaid onto the original. You can also use a form that is already registered in the machine's memory.
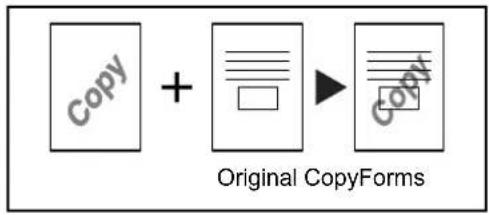
flowchart
graph LR
    A["Copy"] + B["Original CopyForms"] --> C["Copy"]
NOTE: To register a form in advance, refer to Image Overlay Form (Copy) Box on page 4-22 for details.
Follow the steps as below for form overlay.
1 Press the Copy key.
2 Press [Layout/Edit] and then [Form Overlay].
3 Press [Scan New Form] to use the first page of originals as a form.
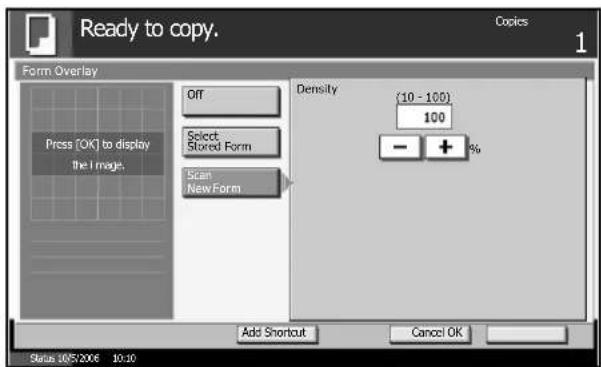
text_image
Ready to copy. Copics 1 Form Overlay Off Select Stored Form Scan New Form Density (10 - 100) 100 - + % Add Shortcut Cancel OK Press [OK] to display the I image. Status 10/5/2006 10:10NOTE: Press [+] or [-] in [Density] to adjust the density of the form. Choose from ten levels in 10% increments.
To use the forms already registered, press [Select Stored Form]. Press [Select Form] to view the form list. Select the desired form from the list and press [OK].
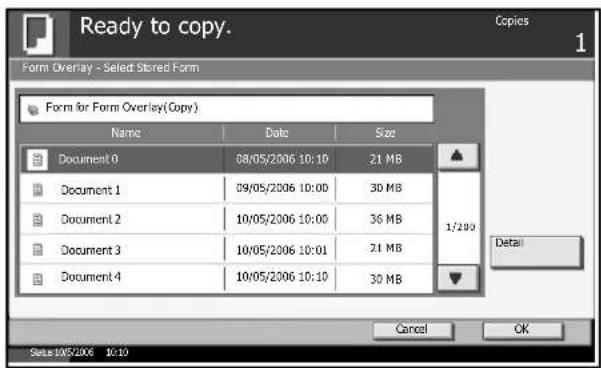
text_image
Ready to copy. Copies 1 Form Overlay - Select Stored Form Form for Form Overlay(Copy) Name Data Size Document 0 08/05/2006 10:10 21 MB Document 1 09/05/2006 10:00 30 MB Document 2 10/05/2006 10:00 36 MB Document 3 10/05/2006 10:01 21 MB Document 4 10/05/2006 10:10 30 MB 1/200 Detail Cancel OK Select 10/5/2006 10:10NOTE: Press [Detail] to view the selected form data.
4 Press [OK].
5 Place the originals.
Place the original for the form on top of the other originals. When using the optional document processor, the first page of the originals should be placed on the top.
6 Press the Start key.
Page Numbering
Number multiple pages of originals in sequential order. The formats for numbering include [-1-], [P.1] or [1/n]. The format [1/n] prints the total number of pages in the place of n.
The page number is centered at the bottom of the page.
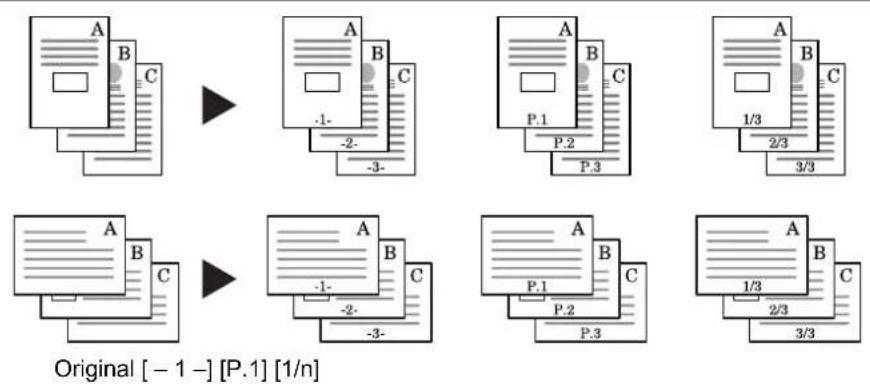
Original [-1 - ] [P.1] [1/n]
1 Place the originals in the document processor or on the platen with the top edge facing either the rear or the left side of the machine.
2 Press the Copy key.
3 Press [Layout/Edit] and then [Page #].
4 Select the numbering format from [-1-], [P.1] or [1/n].
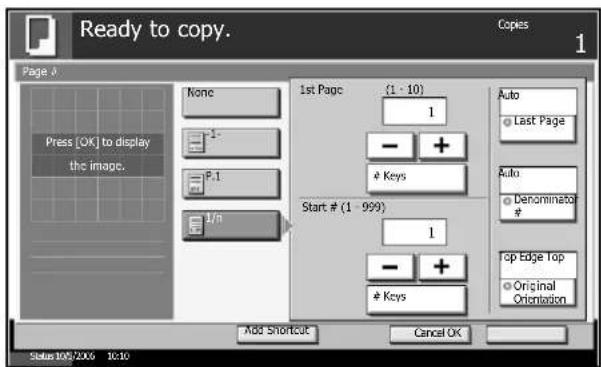
text_image
Ready to copy. Pages 1 Page 2 None Press [OK] to display the image. 1/n 1st Page (1 - 10) 1 - +Keys
Start # (1 - 999) 1 - +Keys
Auto Last Page Auto Denominator # Top Edge Top Original Orientation Mod Shortcut Cancel OK Status: 105/2006 10:10 Copies 15 To start page numbering from a page other than the first page, press [+] or [-] of 1st Page and select the starting page. You can also enter the number with the numeric keys after pressing [# Keys].
6 To start the numbering with a number other than 1, press [+] or [-] of Start Number and enter the starting number. You can also enter the number with the numeric keys after pressing [# Keys].
7 To specify the page to end numbering, press [Last Page] and select [Manual]. Press [+] or [-] to enter the ending page and press [OK]. You can also enter the number with the numeric keys after pressing [# Keys].
8 The total number of pages n in the format [1/n] can be changed manually. Press [Denomination #] and select [Manual]. Press [+] or [-] to enter the total number of pages and press [OK]. You can also enter the number with the numeric keys after pressing [# Keys].
9 Press [Original Orientation] to choose orientation of the originals, either [Top Edge Top] or [Top Edge Left]. Press [OK]
10 Press [OK].
11 Press the Start key.
Memo Mode
Delivers copies with a space for adding notes. You can also copy two originals onto the same sheet with a space or add lines to indicate page boundaries.
NOTE: Memo mode is available for the copy paper sizes of Ledger, Legal, Oficio II, 8.5×13.5", Letter, Letter-R, Statement-R, A3, B4, Folio, A4, A4-R, B5, B5-R, A5-R, 8K, 16K and 16K-R.
Layout A
Reduces images of each original page for printing onto half of a page, leaving the other half blank for notes.
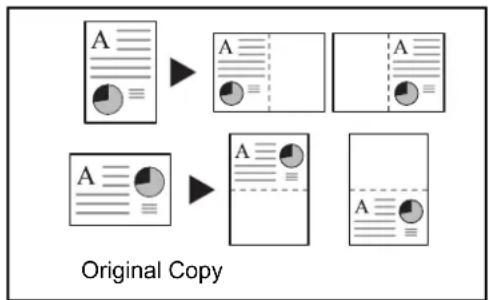
flowchart
graph TD
    A["Original Copy"] --> B["Image 1"]
    A --> C["Image 2"]
    A --> D["Image 3"]
    style A fill:#f9f,stroke:#333
    style B fill:#ccf,stroke:#333
    style C fill:#cfc,stroke:#333
    style D fill:#fcc,stroke:#333
Layout B
Reduces images of two original pages for copying onto half of a single page, leaving the other half blank for notes.
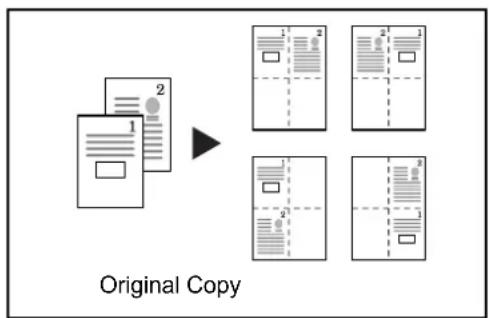
text_image
Original CopyTypes of Page Boundary Lines
The following boundary lines are available.
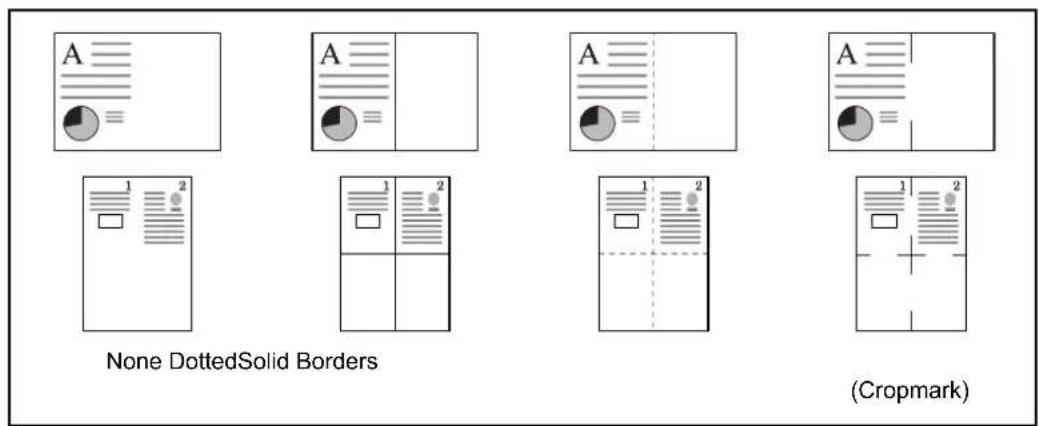
text_image
A None DottedSolid Borders Cropmark)1 Press the Copy key.
2 Press [Layout/Edit] and then [Memo Page].
3 Press [Layout A] or [Layout B]. Select the page layout from Layout.
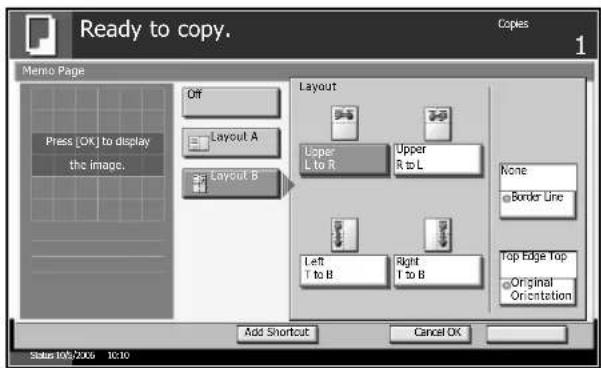
text_image
Ready to copy. Memo Page Off Layout A Layout B Press [OK] to display the image. Layout Layout Loper L to R Upper R to L None Border Line Left T to B Right T to B Top Edge Top Original Orientation Add Shortcut Cancel OK Status 10:2006 10:10 Copies 14 Press [Border Line] to select the page boundary line. Press [OK].
5 Press [Original Orientation] to select orientation of the originals, either [Top Edge Top] or [Top Edge Left]. Press [OK].
6 Press [OK].
7 Press the Start key.
Density Adjustment
Copy density is adjustable.
| Mode Description | |
| Manual Density is adjustable to either 7 or 13 different levels. | |
| Auto Optimum density is selected depending on density of original. |
NOTE: You may choose Auto mode as the default setting (refer to Density on page 6-25).
Follow the steps as below for density adjustment.
1 Press the Copy key.
2 Press [Image Quality] and then [Density].
3 To adjust density manually, press [-3] - [+3] (Lighter - Darker).
You can change the density level [-3] - [+3] (Lighter - Darker) by half a step.
To change density automatically, press [Auto].
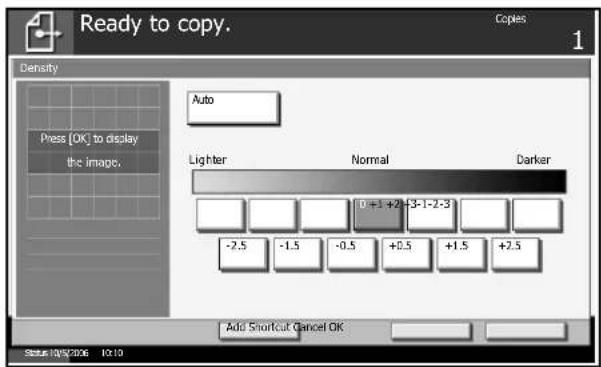
text_image
Ready to copy. Copies 1 Density Press [OK] to display the image. Auto Lighter Normal Darker 0+1 +2 -3-1-2-3 -2.5 -1.5 -0.5 +0.5 +1.5 +2.5 Add Shortcut Cancel OK Status: 10/5/2006 10:194 Press [OK].
5 Press the Start key to start copying.
Selection of Image Quality
Select the image quality to suit the type of original.
| Image Quality Mode | Description |
| Text+Photo For originals with both text and photographs. | |
| Text For originals primarily consisting of text. | |
| Photo For originals primarily consisting of photographs. | |
1 Press the Copy key.
2 Press [Image Quality] and then [Original Image].
3 Select the image quality.
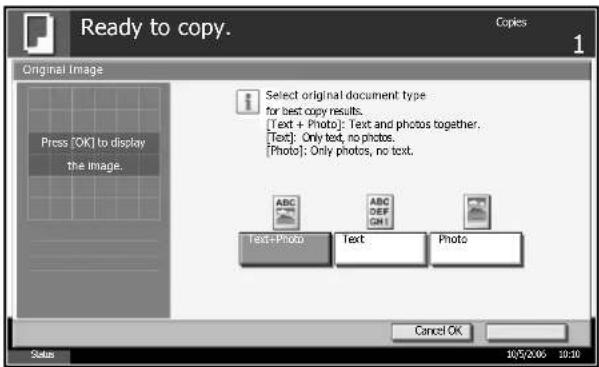
text_image
Ready to copy. Copies Original Image Press [OK] to display the image. Select original document type for best copy results. [Text + Photo]: Text and photos together. [Text]: Only text, no photos. [Photo]: Only photos, no text. ABC DEF CH! Text-Photo Text Photo Cancel OK 10/5/2:00 10:30 Status4 Press [OK].
5 Press the Start key to start copying.
EcoPrint
Use EcoPrint to save toner when printing. Use this function for test copies or any other occasion where high quality print is unnecessary.
1 Press the Copy key.
2 Press [Image Quality] and then [EcoPrint].
3 Press [On].
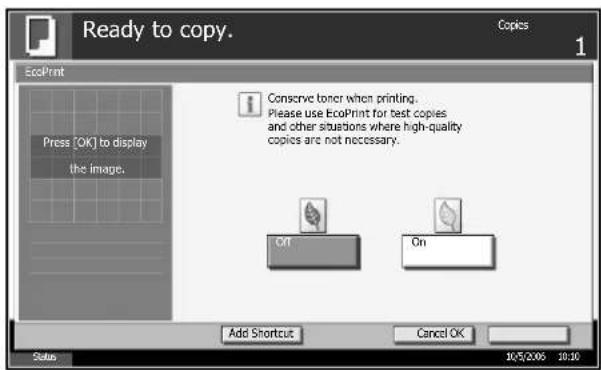
text_image
Ready to copy. EcoPrint Press [OK] to display the image. Conserve toner when printing. Please use EcoPrint for test copies and other situations where high-quality copies are not necessary. On On Add Shortcut Cancel OK 10/5/2006 10:104 Press [OK].
5 Press the Start key to start copying.
Continuous Scan
When a large number of originals cannot be placed in the document processor at one time, the originals can be scanned in separate batches and then copied as one job. With this function, originals are scanned until you press [Scan Finish].
Any of the following settings can be changed during scanning.
• Original size selection
- Original orientation
• Image quality selection
• Type of original (2-sided/book original)
• Z o o m
- Border erase
• Density
If you use Job Build, you can insert a blank paper during scanning or a blank page during duplex copying.
1 Press the Copy key.
2 Press [Advanced Setup] and then [Continuous Scan].
3 If Continuous Scan is selected, press [On].
If Job Build is selected, press [Job Build] and select desired binding orientation.
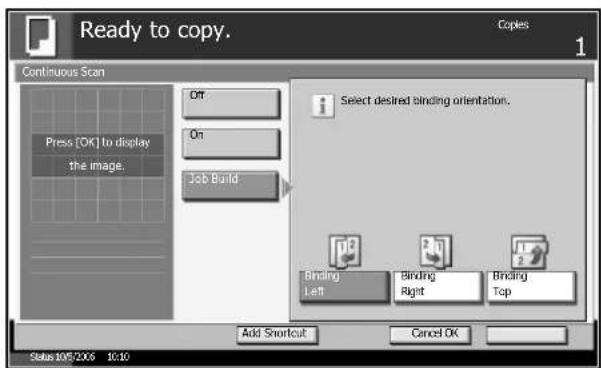
text_image
Ready to copy. Continuous Scan Press [OK] to display the image. Off On Job Build Select desired binding orientation. Binding Left Binding Right Binding Top Add Shortcut Cancel OK Status:10572X6 10:10 Copies 14 Press [OK].
5
Place the originals in the document processor or on the platen and press the Start key.
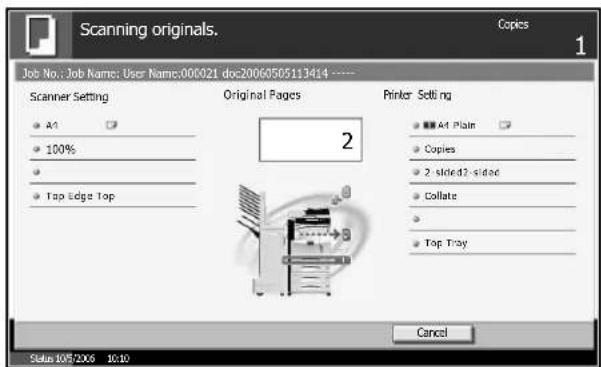
text_image
Scanning originals. Job No.: Job Name: User Name:000021 doc:20060505113414 Scanner Setting • A1 • 100% • • Top Edge Top Original Pages Printer Setting • A1 Plain • Copies • 2 sided42-sided • Collate • • Top Tray Cancel Status: 10/5/2006 10:10If [Job Build] is selected, the next page can be changed. Press [Sheet Insertion] to insert a blank paper. Press [Next Copy: On Back] in duplex copying to print the next page on back page.
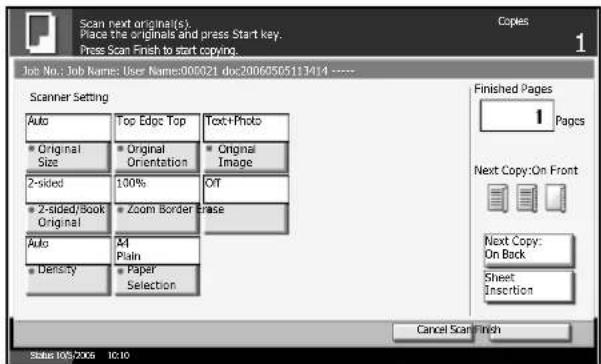
text_image
Scan next original(s): Place the originals and press Start key. Press Scan Finish to start copying. Job No.: Job Name: User Names:000021.doc:20060505113414 ---- Scanner Setting Auto Top Edge Top Text-Photo Original Size Original Orientation Original Image 2-sided 100% OT 2-sided/Book Original Zoom Border Base Auto M4 Plain Binary Paper Selection Finished Pages 1 Pages Next Copy:On Front Next Copy: On Back Sheet Insertions Cancel Scan Finish Status 105/2006 10:106
Place the next original and press the Start key. Repeat these steps to scan the remaining originals.
After scanning all originals, press [Scan Finish] to start copying.
Auto Image Rotation
Automatically rotates the image when the sizes of the original and the loaded paper matches but the orientations are different. The images will be rotated 90° counter-clockwise prior to copying.
NOTE: To set Auto Image Rotation as the default mode, refer to Auto Image Rotation on page 6-29.
1 Press the Copy key.
2 Press [Advanced Setup] and then [Auto Image Rotation].
3 Press [On] to select Auto Image Rotation.
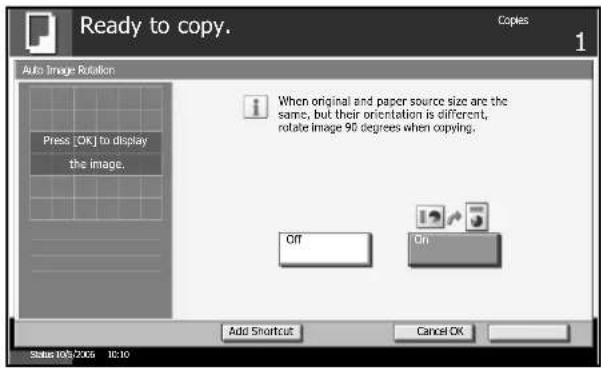
text_image
Ready to copy. Copies 1 Auto Image Rotation Press [OK] to display the image. When original and paper source size are the same, but their orientation is different, rotate image 90 degrees when copying. Off On Add Shortcut Cancel OK Status: 105/2006 10:104 Press [OK].
5 Press the Start key to start copying.
Negative Image
Inverts black and white portions of the image for printing.
1 Press the Copy key.
2 Press [Advanced Setup] and then [Negative Image].
3 Press [On] to select Negative Image.
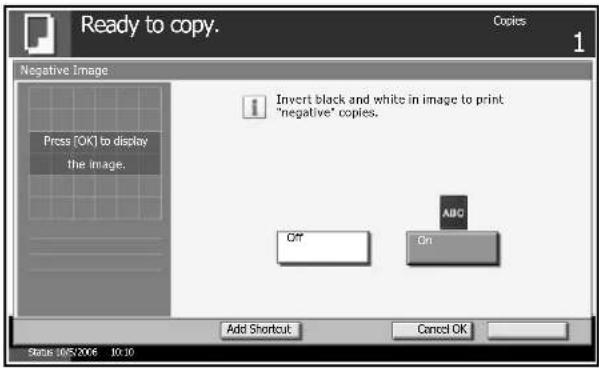
text_image
Ready to copy. Copies 1 Negative Image Press (OK) to display the Image. Invert black and white in image to print "negative" copies. ABC On Add Shortcut Cancel OK Status 005/2006 10:104 Press [OK].
5 Press the Start key to start copying.
Mirror Image
Copies the mirrored images of the original.
1 Press the Copy key.
2 Press [Advanced Setup] and then [Mirror Image].
3 Press [On] to select Mirror Image.
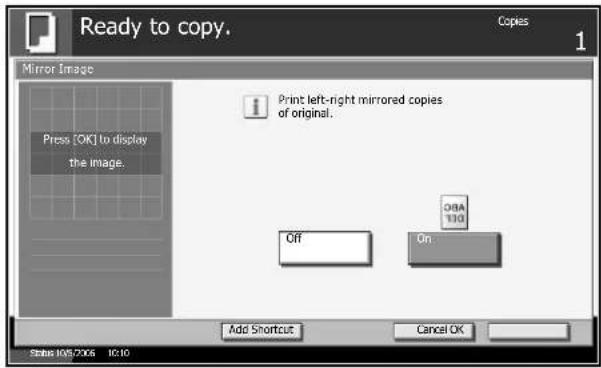
text_image
Ready to copy. Copies 1 Mirror Image Press [OK] to display the image. Print left-right mirrored copies of original. Off On OBA 1:10 Add Shortcut Cancel OK Status: 1087206 10:104 Press [OK].
5 Press the Start key to start copying.
Job Finish Notice
Sends a notice by E-mail when a copy job is complete. User is notified of the completion of a copy job while working at a remote desk, saving the time spent waiting for the finish of copying beside the machine.
NOTE: PC should be configured in advance so that E-mail can be used.
Example of Job Finish Notice
To:
Subject:
h_pttr@owl-net.net
1234 Job end report mail
Job No.: 0002
Result:
OK
End Time: Wed 27 Apr 2005 14:56:08
File Name: doc27042005145608
Job Type: Copy
1234
[00:c0:ee:d0:01:14]
1 Press the Copy key.
2 Press [Advanced Setup] and then [Job Finish Notice].
3 Press [Address Book] to select the notification address from the address book. Press [Address Book], select desired E-mail address and press [OK]. Press [Detail] to view the data of the selected destination.
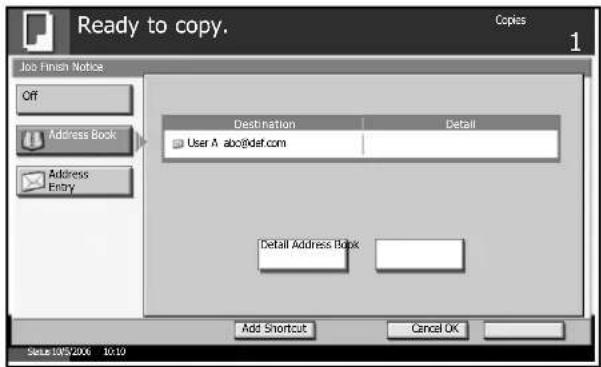
text_image
Ready to copy. Copies 1 Job Finish Notice Off Address Book Address Entry Destination User A abc@daf.com Detail Detail Address Book Add Shortcut Cancel OK Sete IWS 2006 10:10To directly enter the E-mail address, press [Address Entry]. Press [E-mail Address], enter the address and press [OK].
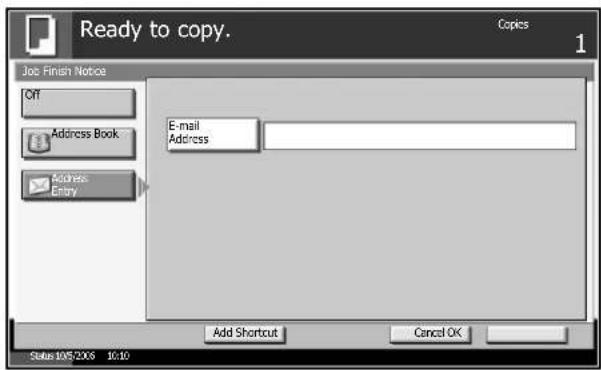
text_image
Ready to copy. Copies 1 Job Finish Notice Off Address Book Address Entry E-mail Address Add Shortcut Cancel OK Status 10/5/20/6 10:104 Press [OK].
5 Press the Start key to start copying. Upon completion of the job, an E-mail notice is sent to the selected destination.
File Name
Names a copy job. Add other information such as date and time or job number as necessary. Check a job history or job status using the job name, date and time, or job number specified here.
1 Press the Copy key.
2 Press [Advanced Setup] and then [File Name Entry].
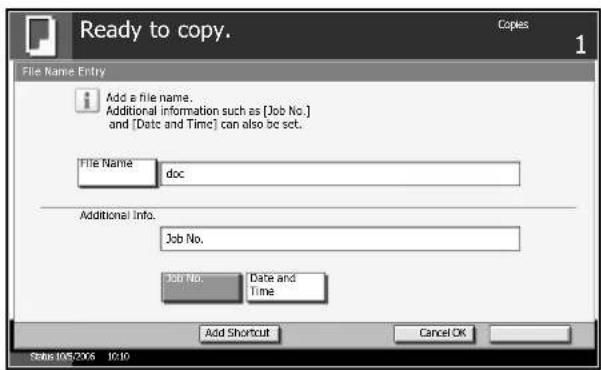
3 Press [File Name], enter the name for a copy job, and press [OK].
To add date and time, press [Date and Time]. To add job number, [Job No.]. Added information is displayed in Additional Info.
text_image
Ready to copy. Copies 1 File Name-Entry Add a file name. Additional information such as [Job No.] and [Date and Time] can also be set. File Name doc Additional Info. Job No. Job No. Date and Time Add Shortcut Cancel OK Status: 10/5/2006 10:104 Press [OK].
5 Press the Start key to start copying.
Priority Override
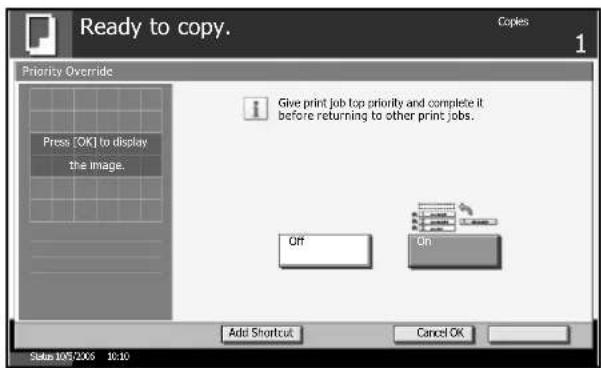
Suspends a current job and gives the selected job a priority for copying. The suspended job resumes after Priority Override copy is finished.
NOTE: The current job that is selected as Priority Override cannot be suspended.
1 Press the Copy key.
2 Press [Advanced Setup] and then [Priority Override].
3 Press [On] to select Priority Override.
text_image
Ready to copy. Copies Priority Override Press [OK] to display the image. Give print job top priority and complete it before returning to other print jobs. Off On Add Shortcut Cancel OK Status 10°/2006 10:104 Press [OK].
5 Press the Start key. The current copy job is suspended and the copy job selected in Priority Override starts. The suspended job resumes after Priority Override copy is finished.
Multi-Page Forms
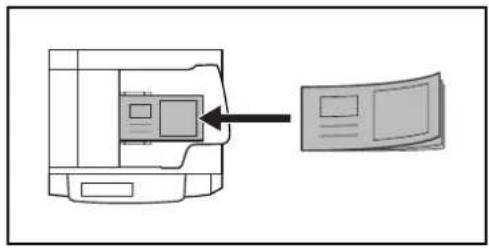
Copies multiple originals bound together as a single set, such as accounting forms. The optional document processor is required.
natural_image
Diagram showing a printer with an arrow pointing to a computer monitor (no text or symbols present)1 Place an original in the document processor.
NOTE: Place the original forms one by one in the document processor. Insert originals binding side first in the document processor.
2 Press the Copy key.
3 Press [Advanced Setup] and then [Multi-Page Form].
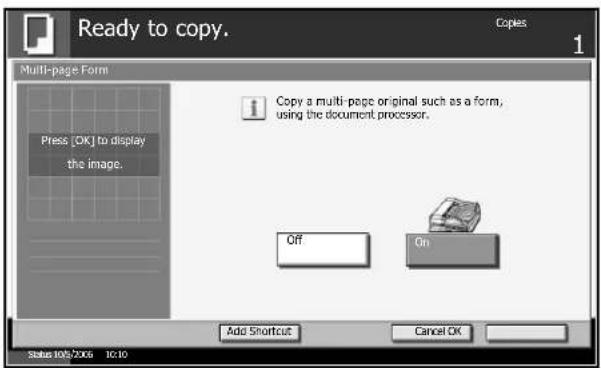
4 Press [On] to select Multi-Page Form copying.
text_image
Ready to copy. Copies 1 Multi-page Form Press [OK] to display the image. Copy a multi-page original such as a form, using the document processor. Off On Add Shortcut Cancel OK Status 10/5/2006 10:105 Press [OK].
6 Press the Start key.
Repeat Copy
Enable additional copies in the desired quantity as necessary after a copy job is completed. For confidential documents, you can set up a pass code for the use of Repeat Copy. In such a case, the correct pass code must be entered when using Repeat Copy or copies will not be delivered.
NOTE: Repeat Copy job is cleared when the main power switch is turned off.
Repeat Copy is not available when the machine is equipped with the optional security kit.
Repeat Copy cannot be used when the maximum number of Repeat Copy jobs to retain in the document box is set to zero (refer to Maximum Number of Repeat Copy Jobs on page 1-56).
You can select Repeat Copy as default setting. Refer to Repeat Copying on page 6-34.
Giving a file name to a copy job will facilitate identification of the data when copying (refer to File Name on page 1-52).
Selecting Repeat Copy
1 Press the Copy key.
2 Press [Advanced Setup] and then [Repeat Copy].
3 Press [On].
For confidential jobs, press [# Keys] and enter the pass code.
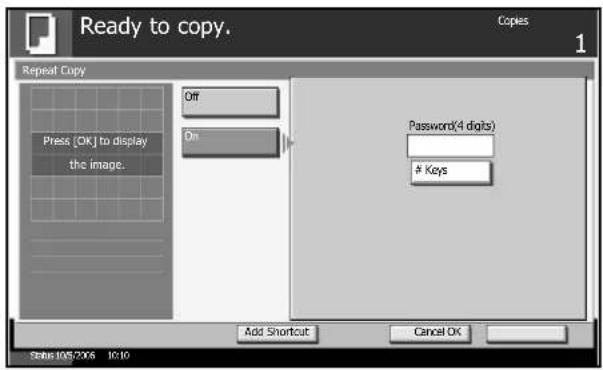
text_image
Ready to copy. Copies 1 Repeat Copy Press [OK] to display the image. Off On Password(4 digits)Keys
Add Shortcut Cancel OK Status 10/5/2006 10:10NOTE: Enter a 4-digits pass code.
If you forget the pass code, Repeat Copy will be unavailable. Take note if necessary.
4 Press [OK].
5 Place the originals in the document processor or on the platen. Press the Start key to start copying and register this job as a Repeat Copy job.
Outputting Repeat Copy Jobs
The Repeat Copy jobs are stored in the document box. Refer to Job Box on page 4-2 to print out the Repeat Copy jobs.
Maximum Number of Repeat Copy Jobs
You can change the maximum number of Repeat Copy jobs to retain in the document box.
1 Press the System Menu key.
2 Press [Document Box/Removable Memory] and then [Next] of Job Box.
3 Press [Change] of Repeat Copy Job Retention.
4 Press [+] or [-] to enter the number of Repeat Copy jobs to retain.
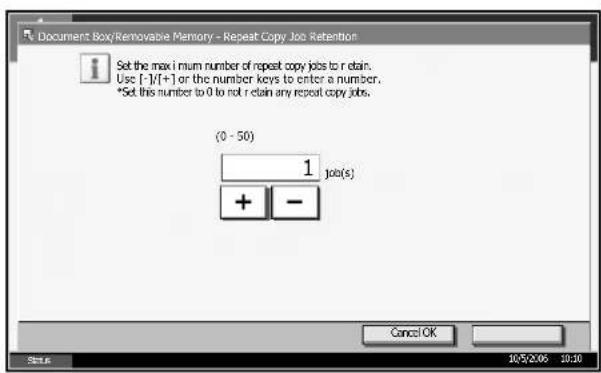
text_image
Document Box/Removable Memory - Repeat Copy Job Retention Set the max i num number of repeat copy jobs to r elain. Use [ -]/[ + ] or the number keys to enter a number. *Set this number to 0 to not r elain any repeat copy jobs. (0 - 50) 1 job(s) + -5 Press [OK].
6 When exiting, press the Reset key repeatedly to return to the System Menu default screen.
Programmed Copying
After registering sets of frequently used functions as a single program, you can simply press the program number as needed to recall those functions. You can also name the programs for easy identification in recalling.
NOTE: Sending operation can be registered in the program as well. Up to 50 functions combining copying and sending can be registered in the program (refer to page 4-5).
Program registration is only allowed for administrator when user authentication is required.
Registering Programs
1 Press the Program key while the copy mode is accessed.
2 Press [Register] and press a number (1 to 50) for the program number.
NOTE: If you select the program number already registered, the currently registered functions can be replaced with the new sets of functions.
3 Check that [Copy] is selected, and press [Next].
4 To rename the program, press [Change] of Name. Enter the new program name and press [OK].
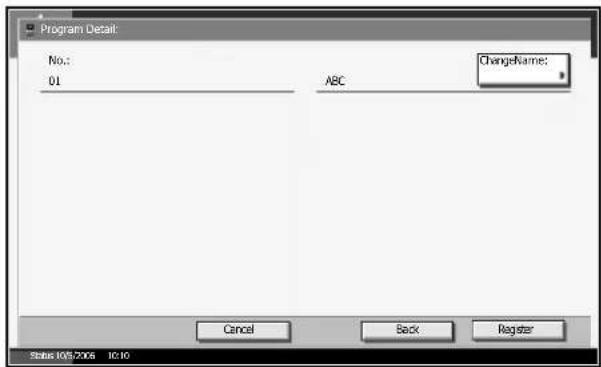
text_image
Program Detail No.; 01 ABC ChangeName: Cancel Back Register Status: 10572006 IC:105 Press [Register] to register the program.
Recalling Programs
1 Press the Program key.
2 Press [Call] and press the key corresponding to the program number (1 to 50) to recall. Press [No.] to enter the program number directly for recalling.
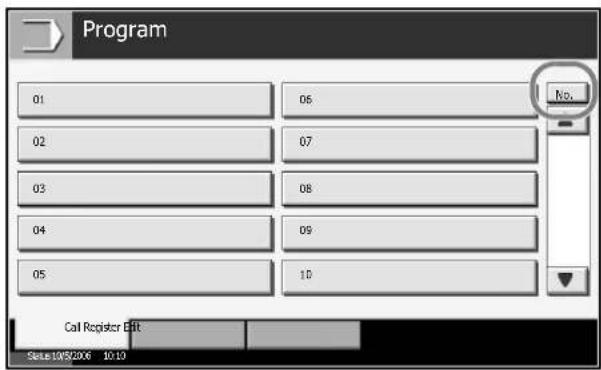
text_image
Program 01 02 03 04 05 06 07 08 09 10 No. Call Register Edit State: 1982006 10:10NOTE: If the program cannot be recalled, the document box or the form overlay specified in the program might have been deleted. Check the document box.
3 Place the originals and press the Start key. Copying is performed according to the registered program.
Editing and Deleting Programs
You can change program number and program name, or delete program.
1 Press the Program key.
2 Press [Edit] and press the key(s) corresponding to the program number (1 to 50) to change or delete.
3 To edit, change the program number and program name using the same steps as registration and press [Register]. Choose [Yes] in the confirmation screen to change the program.
To delete the program, press [Delete this Program]. Choose [Yes] in the confirmation screen to delete the program.
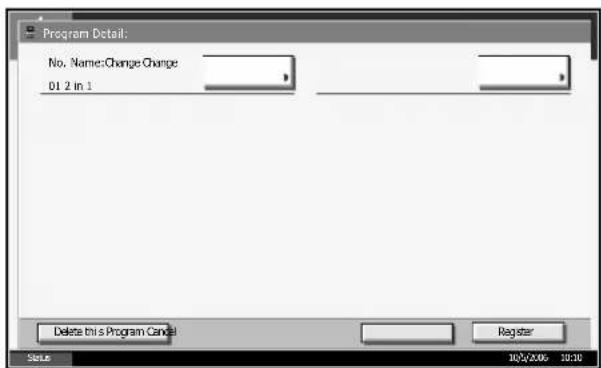
text_image
Program Detail: No. Name:Change Change 01 2 in 1 Delete this Program Cancel Register Status 10/4/2006 10:30Registering Shortcuts
Add shortcuts in the quick setup screen for easy access to the frequently used functions. Function name linked to the registered shortcut can be changed as necessary. Up to 6 shortcuts can be registered.
Adding Shortcuts
Shortcut registration is performed in the setup screen of each function. Any function which shows [Add Shortcut] can be registered as shortcut.
1 After making the desired settings in the setup screen of each function, press [Add Shortcut].
2 Press the keys corresponding to the shortcut number (01 to 06) to register.
NOTE: If you select the shortcut number already registered, the currently registered shortcut can be replaced with the new one.
3 To change the shortcut number, press [Change] of Shortcut No. Press [+] or [-] to change the shortcut number and press [OK].
To rename the shortcut, press [Change] of Shortcut Name. Press [Shortcut Name], enter the new name and press [OK].
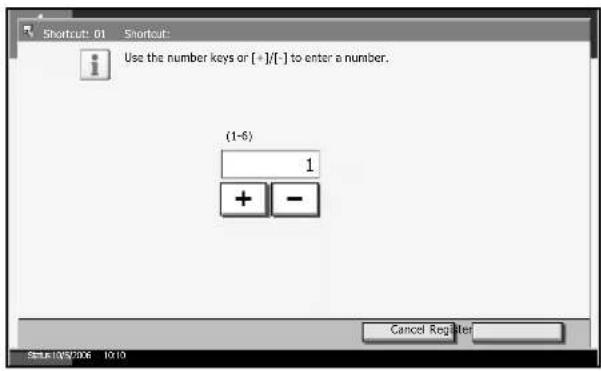
text_image
Shortcut: 01 Shortcut: Use the number keys or [ * ]/[- ] to enter a number. (1-6) 1 + - Cancel Register Status: 05/2006 10:10Check that the entry is correct and press [OK].
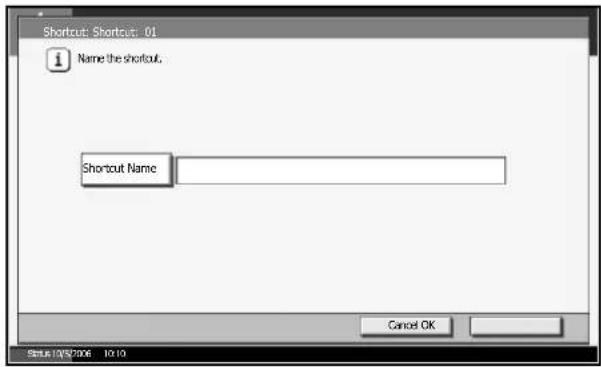
text_image
Shortcut: Shortcut: 01 Name the shortcut. Shortcut Name Cancel OK Status: 01/07/2006 10:104 Press [Register] to add the shortcut. Press [Close].
Editing and Deleting Shortcuts
Follow the steps as below to change shortcut number/name or delete shortcut.
1 In the setup screen of each function, press [Add Shortcut] in the bottom of the screen.
2 Press [Edit] and press the keys corresponding to the shortcut number (01 to 06) to change or delete.
3 To edit, change the shortcut number and shortcut name using the same steps as registration and press [Register]. Choose [Yes] in the confirmation screen to change the shortcut.
To delete the shortcut, press [Delete this Shortcut]. Choose [Yes] in the confirmation screen to delete the shortcut.
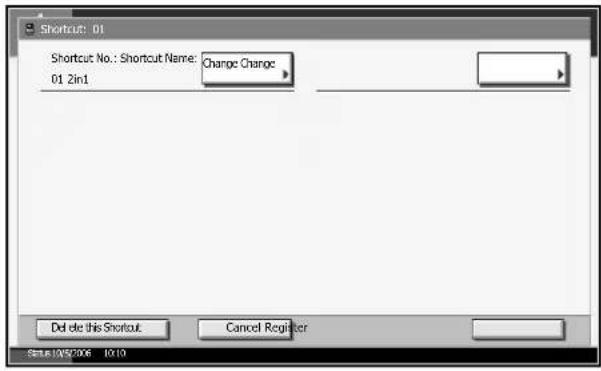
text_image
Shortcut: 01 Shortcut No.: Shortcut Name: Change Change 01 Zin1 Delete this Shortcut Cancel Register Status: 0052006 10:102 Sending Functions
This chapter explains the functions available for sending originals.
• Original Size Selection 2-2
- Sending Size Selection 2-4
- Zoom 2-6
- Centering.... 2-7
- Mixed Sized Originals.... 2-8
• 1-sided/2-sided Selection....2-11
• Original Orientation 2-12
- File Format 2-14
- PDF Encryption Functions.... 2-15
- File Separation 2-18
• Image Quality 2-19
- Scan Density 2-20
- Scan Resolution ...... 2-21
- Sharpness 2-22
• Background Density Adjustment 2-23
• Color / Grayscale / Monochrome Selection.... 2-24
• Multi-page Form 2-25
- Continuous Scan.... 2-26
- Border Erase 2-27
- Enter Document Name/File Name 2-30
• Enter E-mail Subject and Body 2-31
- Finish Notice.... 2-32
Original Size Selection
Select the size of originals that will serve as the basis for scanning. Be sure to select the original size when using originals of nonstandard sizes.
Choose the original size from the following groups of original size.
| Item Detail Size | ||
| Standard sizes 1 | Select from automatic detection and standard sizes. | Inch models: Auto, Ledger, Legal, Letter, Letter-R, Statement, Statement-R, 8.5×13.5", Oficio II-R, 11x15" |
| Metric models: Auto, A3, B4, A4, A4-R, B5, B5-R, A5, A5-R, B6, B6-R, A6-R, Folio | ||
| Standard Sizes 2 | Select from standard sizes except Standard Sizes 1 . | Inch models: A3, B4, A4, A4-R, B5, B5-R, A5, A5-R, B6, B6-R, A6-R, Folio, 8K, 16 K, 16K-R |
| Metric models: Ledger, Legal, Letter, Letter-R, Statement, Statement-R, 8.5×13.5", Oficio II-R, 11x15", 8K, 16K, 16K-R | ||
| Others Select from Envelope, Hagaki, and Custom Original Size *. | Hagaki, Oufuku Hagaki, Custom 1 to 4 | |
| Size Entry Enter the size that is not indicated in Standard Sizes 1 and 2. | Inch modelsHorizontal: 2 to 17" (in 0.01" increments), Vertical: 2 to 11.69" (in 0.01" increments) | |
| Metric modelsHorizontal: 50 to 432 mm (in 1 mm increments), Vertical: 50 to 297 mm (in 1 mm increments) | ||
* Regarding the setting method of Custom Original Size (Custom 1 to 4), refer to Custom Original Size Setup on page 6-5.
1 Press the Send key.
2 Press [Type of Original/Transmission] and then [Original Size].
3 Press [Standard Sizes 1], [Standard Sizes 2], [Others], or [Size Entry] to select original size.
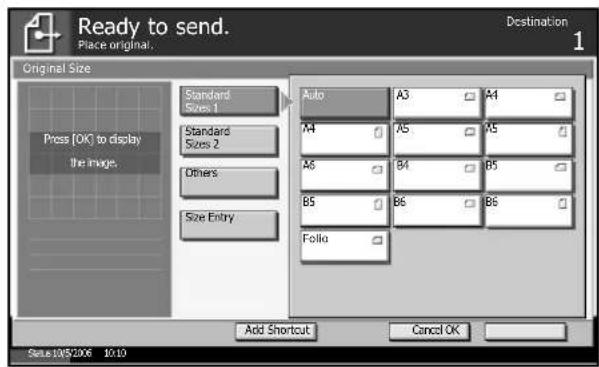
text_image
Ready to send. Place original. Original Size Press [OK] to display the image. Standard Sizes 1 Standard Sizes 2 Others Size Entry Auto A3 A4 A4 A5 A5 A6 B4 B5 B5 B6 B6 Folio Add Shortcut Cancel OK Destination 1 Start: 10/5/2006 10:10When you have selected [Size Entry], press [+] or [-] to set the sizes of X (horizontal) and Y (vertical). By pressing [# Keys], you can use the numeric keys.
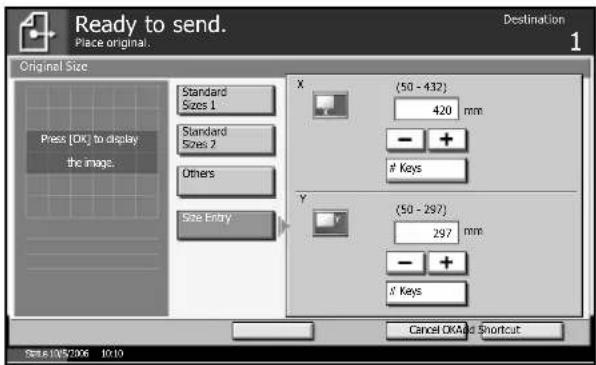
text_image
Ready to send. Place original. Destination 1 Original Size Standard Sizes 1 Standard Sizes 2 Others Size Entry Press [OK] to display the image. X (50 - 432) 420 mm - +Keys
Y (50 - 297) 297 mm - +Keys
Cancel OK And Shortcut Date: 10/05/2006 10:104 Press [OK].
5 Specify the destination, and press the Start key to start sending.
Sending Size Selection
Select the sending size (the size of image to be sent).
| Item Detail Size | ||
| Standard Sizes 1 | Select from Same as Original Size or Standard Size. | Inch models: Same as Original Size, Ledger, Legal, Letter, Statement, 8.5×13.5", Oficio II, 11x15" |
| Metric models: Same as Original Size, A3, B4, A4, B5, A5, B6, A6, Folio | ||
| Standard Sizes 2 | Select from standard size except Standard Sizes 1. | Inch models: A3, B4, A4, B5, A5, B6, A6, Folio, 8K, 16K |
| Metric models: Ledger, Legal, Letter, Statement, 8.5×13.5", Oficio II, 11x15", 8K, 16K | ||
| Others Select from Envelope and Hagaki. | Hagaki, Oufuku Hagaki | |
Relationship between Original Size, Sending Size, and Zoom
Original Size (page 2-2), Sending Size, and Zoom (page 2-6) are related to each other. Refer to the following table.
| Original Size and the size you wish to send as are | the same different | |
| Original Size Specify as | necessary | Specify as necessary |
| Sending Size Select [Same as | Original Size] | Select the required size |
| Zoom Select [100%] | (or [Auto]) | Select [Auto] |
NOTE: When you select Sending Size that is different from Original Size, and select the Zoom [100%], you can send the image as the actual size (No Zoom).
1 Press the Send Key.
2 Press [Type of Original/Transmission] and then [Sending Size].
3 Press [Standard Sizes 1], [Standard Sizes 2], or [Others] to select the sending size.
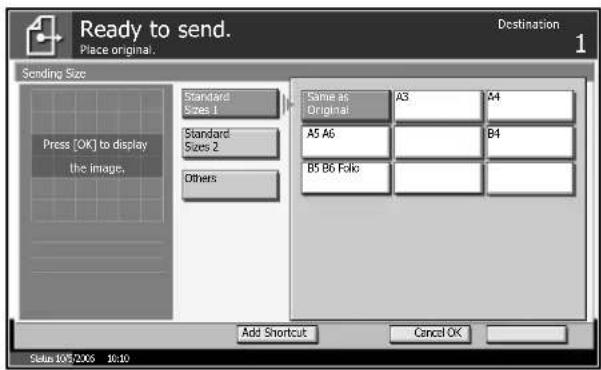
text_image
Ready to send. Place original. Destination 1 Sending Size Press [OK] to display the image. Standard Sizes 1 Standard Sizes 2 Others Same as Original A3 A4 A5 A6 B4 B5 B6 Folio Add Shortcut Cancel OK Status: 10F 2005 10:104 Press [OK].
5 Specify the destination, and press the Start key to start sending.
Zoom
Scans the original by automatically zooming it depending on the sending size.
| Item Detail | |
| 100% No Zoom (to be scanned by actual size) | |
| Auto Zoomed automatically according to the specified sending size. | |
NOTE: When zooming, select the Sending Size Selection on page 2-4.
When Custom Size or Size Entry is selected for the original size, zooming cannot be conducted.
Depending on the combination of original size and sending size, the image is arranged on the edge of paper. To arrange the image in the center of Top/Bottom and Left/Right, use the centering function on the next page.
1 Press the Send key.
2 Press [Advanced Setup] and then [Zoom].
3 Press [100%] or [Auto].
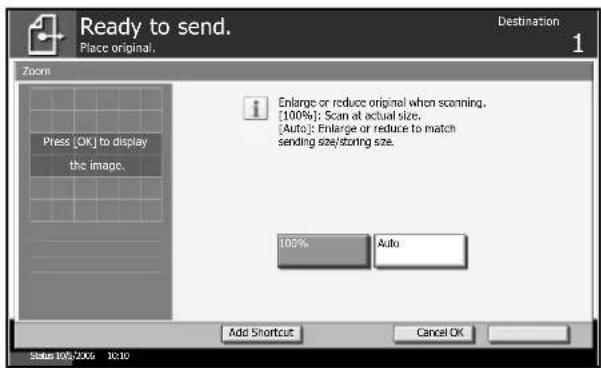
text_image
Ready to send. Place original. Destination 1 Zoom Press [OK] to display the image. Enlarge or reduce original when scanning. [100%]: Scan at actual size. [Auto]: Enlarge or reduce to match sending size/storing size. 100% Auto Add Shortcut Cancel OK Status 10/0/2006 10:304 Press [OK].
5 Specify the destination, and press the Start key to start sending.
Centering
When you have scanned the original after specifying the original size and sending size, depending on the sizes, the margin is created at the bottom, or either left or right side of paper. By using the centering, the image is arranged as the margin to be equally created at all the Top/Bottom and Left/Right.
1 Press the Send key.
2 Press [Advanced Setup] and then [Centering].
3 Press [On]. Centering is conducted.
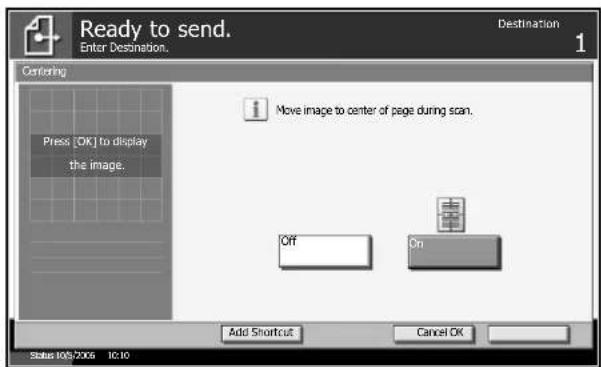
text_image
Ready to send. Enter Destination. Destination 1 Centering Press [OK] to display the image. Move image to center of page during scan. Off On Add Shortcut Cancel OK Status 10572006 1C:104 Press [OK].
5 Specify the destination, and press the Start key to start sending.
Mixed Sized Originals
Using the optional document processor, the originals of different sizes can be placed in a batch and sent. In this operation, up to 30 originals of different sizes can be placed in the document processor at the same time.
Original of the Same Width
When the original width is the same, the combinations of originals that can be placed are as follows.
• Ledger and Letter (A3 and A4)
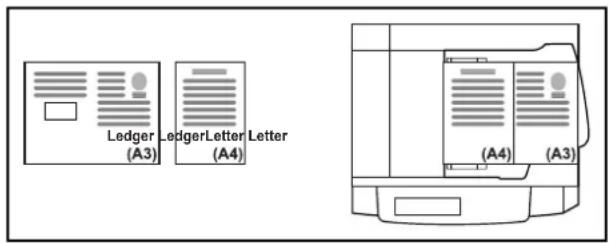
text_image
Ledger (A3) LedgerLetter (A4) Letter (A4) (A3)• Legal and Letter-R (Folio and A4-R)
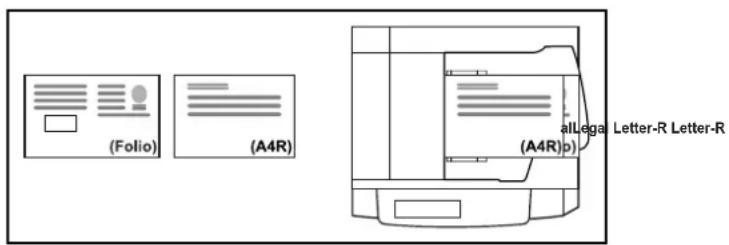
text_image
(Folio) (A4R) aLega Letter-R Letter-R (A4R)p)• B4 and B5
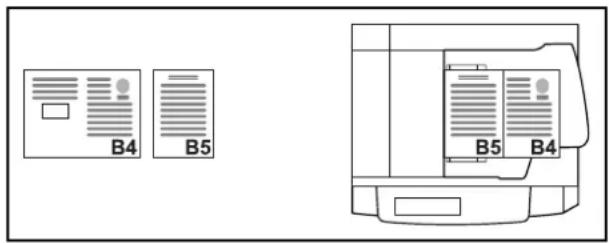
text_image
B4 B5 B5 B4When the original width is different
The combinations of originals of different sizes that can be placed together are as follows.
NOTE: You can only use metric models.
• A3, B4, A4, B5
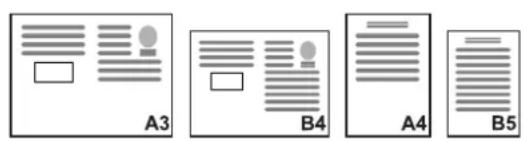
text_image
A3 B4 A4 B5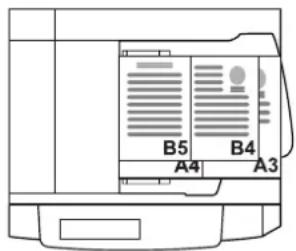
text_image
B5 B4 A4 A3• B4, A4-R, B5
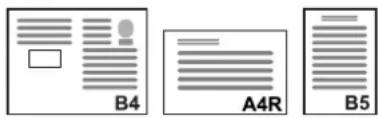
text_image
B4 A4R B5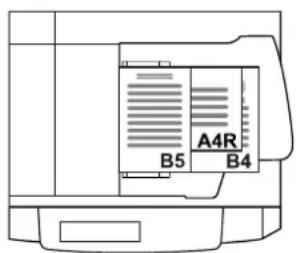
text_image
A4R B5 B4- Folio, A4-R, B5-R
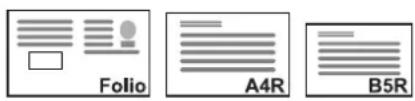
text_image
Folio A4R B5R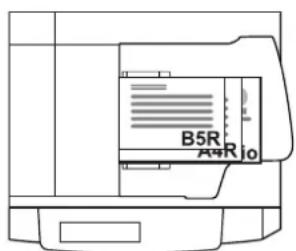
text_image
B5R A4R 101 Place the original into the document processor.
IMPORTANT: When you place originals of different width, place the top edge of originals to align with the width guide at the backside. If the originals are placed unevenly, they may not be scanned correctly.
2 Press the Send key.
3 Press [Type of Original/Transmission] and then [Mixed Sized Originals].
4 Select the combination of originals from [Same Width] and [Diff Width].
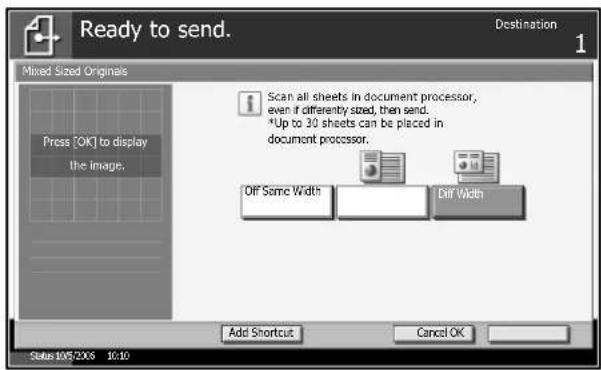
text_image
Ready to send. Destination 1 Mixed Sized Originals Press [OK] to display the image, Scan all sheets in document processor, even if differently sized, then send. *Up to 30 sheets can be placed in document processor. Off Same Width Diff Width Add Shortcut Cancel OK Status 10/5/2016 10:105 Press [OK].
6 Specify the destination, and press the Start key to start sending.
1-sided/2-sided Selection
Select the type and binding of original depending on the original.
| Original Type Binding | ||
| 1-sided Sheet Original 1-sided — | ||
| 2-sided Sheet Original 2-sided* | Binding Left/Right, Binding Top | |
| Open Book Original such as magazine and book | Book Binding Left, | Binding Right |
* Only when the optional document processor is used.
NOTE: To scan colored 2-sided originals using the optional document processor, you need to add memory to the machine. Contact to your service representative.
1 Press the Send key.
2 Press [Type of Original/Transmission] and then [2-sided/Book Original]
3 Press [1-sided], [2-sided], or [Book].
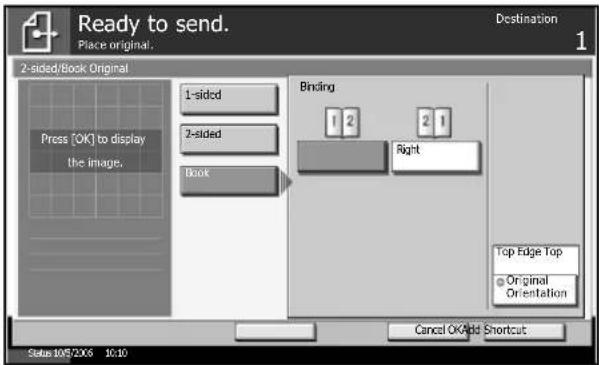
text_image
Ready to send. Place original. Destination 1 2-sided/Book Original Press [OK] to display the image. 1-sided 2-sided Book Binding 1 2 2 1 Right Top Edge Top Original Orientation Cancel OKAdd Shortcut Status: 10/5/2006 10:104 When you select [2-sided] or [Book], also select the binding and the setting orientation of original.
5 Press [OK].
6 Specify the destination, and press the Start key to start sending.
Original Orientation
To send the document in the orientation that can be read properly, specify the upper orientation of original. To use the following functions, you need to select the setting orientation of original.
• 1-sided / 2-sided Selection
- Border Erase
When placing the original on the platen
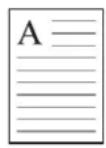
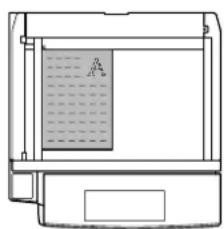
natural_image
Line drawing of a mechanical device with internal components and a highlighted section (no text or symbols)natural_image
Line drawing of a computer monitor with a grid-patterned screen on the front panel (no text or symbols)When placing the original on the optional document processor

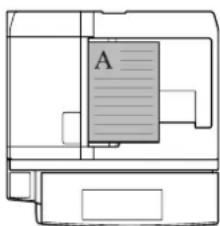
text_image
Anatural_image
Technical line drawing of a mechanical component with no visible text or symbols1 Press the Send key.
2 Press [Type of Original/Transmission] and then [Original Orientation].
3 Select original orientation from [Top Edge Top] and [Top Edge Left].
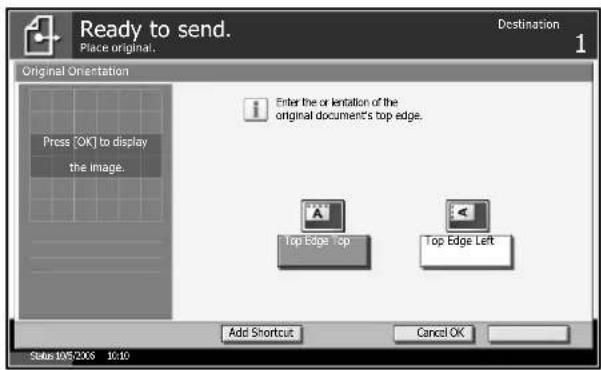
text_image
Ready to send. Place original... Destination Original Orientation Press [OK] to display the image. Enter the orientation of the original document's top edge. Top Edge Top Top Edge Left Add Shortcut Cancel OK Status 10/5/2016 10:104 Press [OK].
5 Specify the destination, and press the Start key to start sending.
File Format
Select the file format of the image to send.
| File Format | Adjustable range of image quality | Color mode |
| PDF 1 Low Quality (High Comp.) to 5 High Quality (Low Comp.) | Full Color, Grayscale, Monochrome | |
| TIFF 1 Low Quality (High Comp.) to 5 High Quality (Low Comp.) | Full Color, Grayscale, Monochrome | |
| JPEG 1 Low Quality (High Comp.) to 5 High Quality (Low Comp.) | Full Color, Grayscale | |
| High Comp. PDF * | 1 Compression Ratio Priority to 3 Quality Priority | Full Color |
* Only when the optional PDF upgrade kit is installed.
NOTE: When the color mode in scanning has been selected for Grayscale or Full Color, you can adjust the image quality Regarding color mode, refer to Color / Grayscale / Monochrome Selection on page 2-24. When the optional PDF upgrade kit has been installed, you can use PDF encryption functions. For details, refer to the following PDF Encryption Functions.
1 Press the Send key.
2 Press [Type of Original/Transmission] and then [File Format].
3 Select the file format from [PDF], [TIFF], [JPEG], and [High Comp. PDF].
When the color mode in scanning has been selected for Grayscale or Full Color, set the image quality.
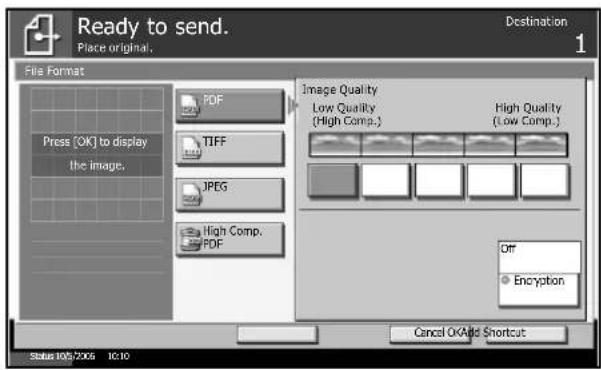
text_image
Ready to send. Place original. File Format Press (OK) to display the image. PDF TIFF JPEG High Comp. PDF Image Quality Low Quality (High Comp.) High Quality (Low Comp.) Off Encryption Cancel OK/All Shortcut Status 105/2006 10:10 Destination 14 Press [OK].
5 Specify the destination, and press the Start key to start sending.
PDF Encryption Functions
When you have selected PDF or High Comp. PDF for file format, you can restrict the access level of displaying, printing, and editing PDF by assigning a secure password.
NOTE: You need to use the optional PDF upgrade kit.
The items you can restrict the access level are as follows.
| Item Value | Detail | |
| Compatibility Acrobat4.0 or later, Acrobat5.0 or later | Select the version that is compatible with the PDF file. | |
| Password to open document | Off, On Enter the password to open the PDF file | |
| Password to edit/print document | Off, On Enter the password to edit the PDF fileWhen you have entered the password to edit/print document, you can specifically limit the operation. | |
1 Press the Send key.
2 Press [Type of Original/Transmission], [File Format], [PDF] or [High Comp. PDF], and [Encryption].
3 Press ▼ of Compatibility, select Acrobat4.0 or later or Acrobat5.0 or later.
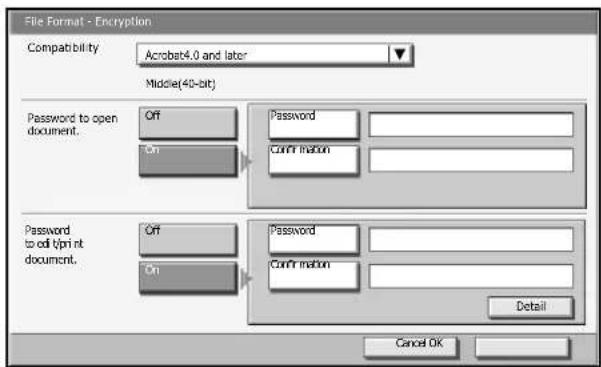
text_image
File Format - Encryption Compatibility: Acrobat4.0 and later Middle(40-bit) Password to open document. Off On Password Confirm motion Password to edit /print at document. Off On Password Confirm motion Detail Cancel OK4 When you enter the password to open PDF file, select [On] of Password to open document.
5 Press [Password] and enter the password and then press [OK].
NOTE: For the character entry method, refer to the appendix of the Operation Guide.
6 For confirmation, enter the same password once again. Press [Confirmation] and enter the password and then press [OK].
7 When you enter the password to edit the PDF file, select [On] of Password to edit/print document.
8 In the same way as the entry of Password to open document, enter the password to change PDF file.
9 Press [Detail].
10 Restrict the access level of the PDF file. Press ▼ of Printing Allowed to select the item (the contents of limit). The item to be displayed differs according to the version of Acrobat selected in Compatibility in step 3.
| Item Detail | |
| Not Allowed Make the printing of PDF file impossible | |
| Allowed (Low Resolution only)* | Can print the PDF file only in low resolution |
| Allowed Can print the PDF file in original resolution | |
* Only when [Acrobat5.0 or later] is selected in Compatibility
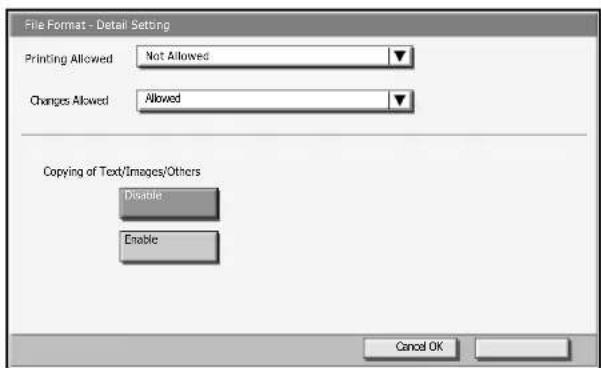
text_image
File Format - Detail Setting Printing Allowed Not Allowed Changes Allowed Allowed Copying of Text/Images/Others Disable Enable Cancel OK11 Press ▼ of Changes Allowed, and select the item (the contents of limit). The item to be displayed differs according to the version of Acrobat selected in Compatibility in step 3.
| Item Detail | |
| Not Allowed Cannot | change the PDF file |
| Commenting Can only add commenting | |
| Inserting/Deleting/Rotating Pages* | Can only insert, delete, and rotate the page of PDF file |
| Page Layout except extracting Pages** | Can change the page layout except extracting the pages of PDF file |
| Any except extracting Pages | Can conduct all operations except extracting the pages of PDF file |
* Only when [Acrobat5.0 or later] is selected in Compatibility
** Only when [Acrobat4.0 or later] is selected in Compatibility
12 From Copying of Text/Images/Others, select [Disable] or [Enable].
| Item Detail | |
| Disable Prohibit the copying of text and object on the PDF file. | |
| Enable Can copy text and object on the PDF file. | |
13 Press [OK] to return to File Format.
14 Specify the destination, and press the Start key to start sending.
File Separation
Create several files by dividing scanned original data by page, and send the files.
1 Press the Send key.
2 Press [Type of Original/Transmission] and then [File Separation].
3 Press [Each Page] to set File Separation.
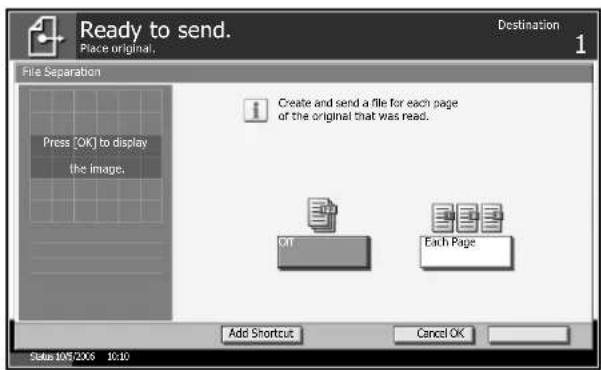
text_image
Ready to send. Place original... Destination 1 File Separation Press [OK] to display the image. Create and send a file for each page of the original that was read. DAT Each Page Add Shortcut Cancel OK Status: 10/5/2X6 10:104 Press [OK].
5 Specify the destination, and press the Start key. Scanned original is sent after being divided into files by one page each. Three-digit serial number such as abc_001.pdf, abc_002.pdf... is attached to the end of the file name.
Image Quality
Select image quality suitable to the type of original.
| Item Detail | |
| Text + Photo Suitable | for originals that contain a mixture of text and photos |
| Text Sharply renders | pencil text and fine lines. |
| Photo For better copies of photographs. | |
| For OCR Image quality suitable for OCR software (Applications that convert images into text data) | |
1 Press the Send key.
2 Press [Color/Image] and then [Original Image].
3 Select Image Quality
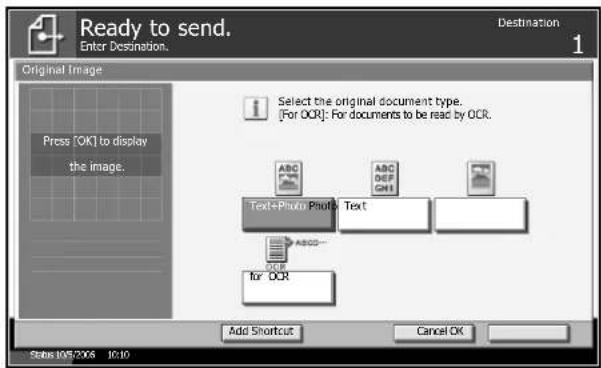
text_image
Ready to send. Enter Destination. Destination 1 Original Image Press [OK] to display the image. Select the original document type. [For OCR]: For documents to be read by OCR. ABC ABC DEF GNT Text+Photo Photo Text ABCD for OCR Add Shortcut Cancel OK Status: 10/5/2006 10:104 Press [OK].
5 Specify the destination, and press the Start key to start sending.
Scan Density
Adjust scan density of the original. You can adjust the scan density either automatically or manually.
| Item Detail | |
| Manual density adjustment | Can set density using 7 or 13 levels. |
| Auto density adjustment | Can set the optimal scan density according to the density of original. |
1 Press the Send key.
2 Press [Color/Image] and then [Density].
3 When selecting manual density adjustment, press [-3]-[+3] (Lighter - Darker) to adjust density.
When selecting auto density adjustment, press [Auto].
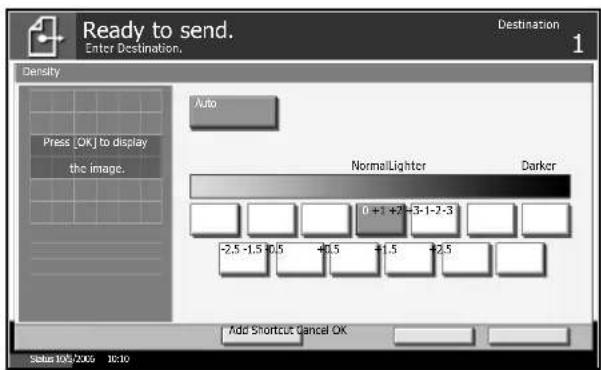
text_image
Ready to send. Enter Destination. Destination 1 Density Press [OK] to display the image. Auto NormalLighter Darker -2.5 -1.5 +0.5 +1.5 +1.5 +2.5 Add Shortcut Cancel OK Status 10/5/2006 10:104 Press [OK].
5 Specify the destination, and press the Start key to start sending.
Scan Resolution
Select the fineness of scanning resolution. The finer the scanning becomes (the larger the number becomes), the better the image quality becomes. However, better resolution also results in larger file size (file capacity) and longer scanning and sending times. The selectable resolution is 200×100dpi Normal, 200×200dpi Fine, 200×400dpi Super Fine, 300×300dpi, 400×400dpi Ultra Fine, or 600×600dpi.
NOTE: As the image to be displayed on the computer screen, 96 dpi (in the case of Windows), and as the image to be printed by the printer, 150 to 600 dpi generally become the target. To enlarge the image and print it in a large size, it is necessary to scan the original in high resolution.
1 Press the Send key.
2 Press [Color/Image] and then [Scan Resolution].
3 Select the resolution
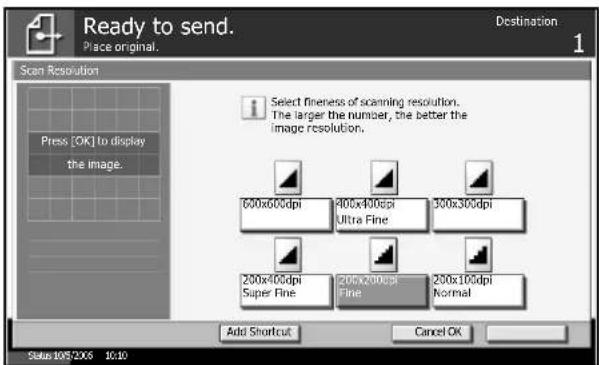
text_image
Ready to send. Place original. Destination 1 Scan Resolution Select fineness of scanning resolution. The larger the number, the better the image resolution. Press [OK] to display the image. 600x600dpi 400x400dpi 300x300dpi Ultra Fine 200x400dpi Super Fine 200x200dpi Fine 200x100dpi Normal Add Shortcut Cancel OK Status 10/5/2006 10:104 Press [OK].
5 Specify the destination, and press the Start key to start sending.
Sharpness
Select the sharpness of the image outline.
| Item Detail | |
| Sharpen Emphasize | the image outline. Make letters and lines appear sharper. |
| Unsharpen Blur the image outline. Can weaken Moire effects (grids appearing as wavelike patterns when scanning printed photos). | |
1 Press the Send key.
2 Press [Color/Image] and then [Sharpness].
3 Press [-3]-[+3] (Unsharpen - Sharpen) to adjust the sharpness.
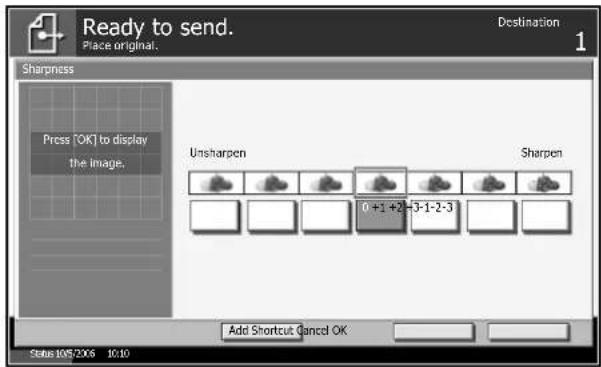
text_image
Ready to send. Place original. Destination 1 Sharpness Press (OK) to display the image. Unsharpen Sharpen 0 +1 +2 -3-1-2-3 Add Shortcut Cancel OK Status 10/5/2006 10:104 Press [OK].
5 Specify the destination, and press the Start key to start sending.
Background Density Adjustment
Lightens the background of the colored original when it is too dark.
1 Press the Send key.
2 Press [Color/Image] and then [Background Density Adj.].
3 Press [On], and press [1] to [5] (Lighter - Darker) to adjust the density.
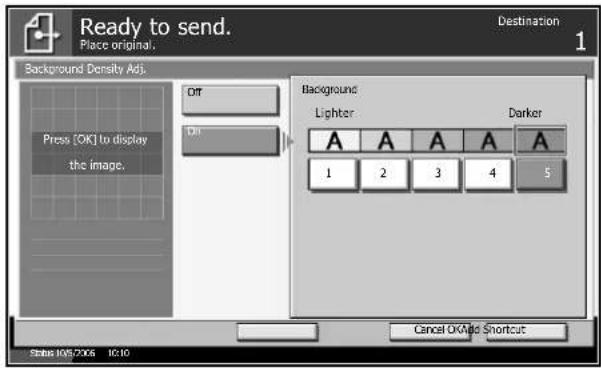
text_image
Ready to send. Place original. Destination 1 Background Density Adj. Off Out Press (OK) to display the image. Background Lighter Darker A A A A A 1 2 3 4 5 Cancel OK/Red Shortcut Status: 1087206 10:104 Press [OK].
5 Specify the destination, and press the Start key to start sending.
Color / Grayscale / Monochrome Selection
Select scanning color mode. You can select from Full Color, Grayscale or Monochrome.
NOTE: To scan colored 2-sided originals using the optional document processor, you need to add memory to the machine. Contact your service representative.
1 Press the Send key.
2 Press [Color/Image] and then [Color Selection].
3 Press either [Full Color], [Grayscale], or [Monochrome].
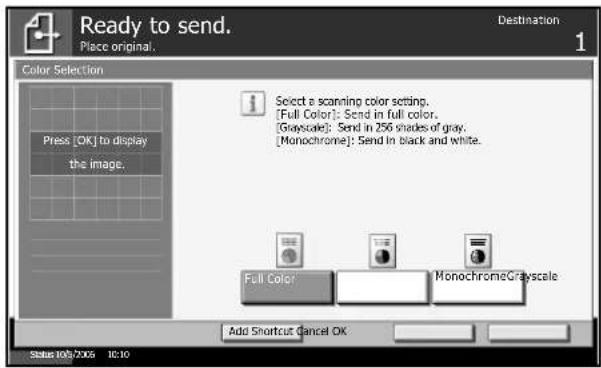
text_image
Ready to send. Piece original. Destination 1 Color Selection Select a scanning color setting. [Full Color]: Send in full color. [Grayscale]: Send in 256 shades of gray. [Monochrome]: Send In black and white. Press [OK] to display the image. Full Color MonochromeGrayscale Add Shortcut Cancel OK Status: 10/37/06 10:104 Press [OK].
5 Specify the destination, and press the Start key to start sending.
Multi-page Form
Scans multiple originals bound together as a single set, such as accounting forms. The optional document processor is required.
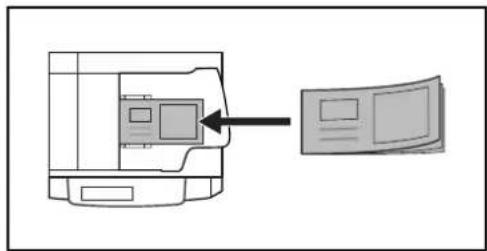
natural_image
Diagram showing a printer with an arrow pointing to a computer monitor (no text or symbols present)1 Place originals in the document processor.
NOTE: Place one form of originals at a time.
When placing the original, insert the original into the document processor, the bound edge first.
2 Press the Send key.
3 Press [Advanced Setup] and then [Multi-page Form].
4 Press [On] to select Multi-page Form sending.
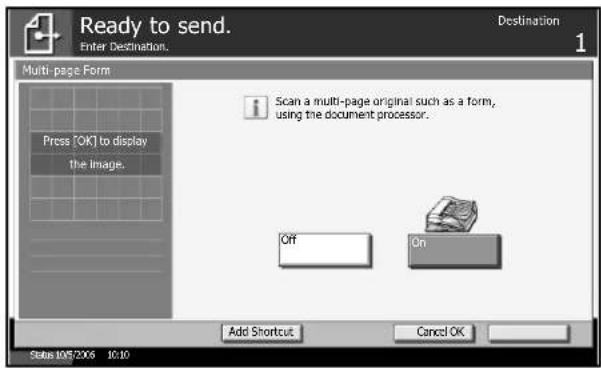
text_image
Ready to send. Enter Destination. Destination 1 Multi-page Form Press [OK] to display the image. Scan a multi-page original such as a form, using the document processor. Off On Add Shortcut Cancel OK Subs 10*2X06 10:105 Press [OK].
6 Specify the destination, and press the Start key. When the scanning is completed, replace the original with the next original, and press the Start key.
Continuous Scan
When the multi-page originals cannot be placed in the document processor at one time, the originals can be scanned in separate batches and then sent as one job. With this function, originals are scanned until you press [Scan Finish].
Any of the following settings can be changed during scanning.
- Original Size selection
• 1-sided / 2-sided selection - Sending Size selection
- Original Orientation
- Type of Original
- Scan density
- Scan resolution
• Z o o m - Border Erase
1 Press the Send key.
2 Press [Advanced Setup] and then [Continuous Scan].
3 Press [On]. Continuous Scan is selected.
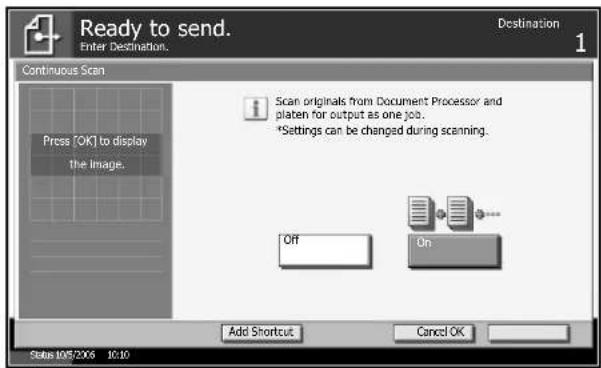
text_image
Ready to send. Enter Destination. Destination 1 Continuous Scan Press [OK] to display the Image. Scan originals from Document Processor and platen for output as one job. *Settings can be changed during scanning. Off On Add Shortcut Cancel OK Status 10*2X06 10:104 Press [OK].
5 Specify the destination.
6 Place the original, and press the Start key.
When the scanning is completed, change the settings as necessary.
7 Place the next original, and press the Start key. Scan the remaining originals by the same procedure.
When you have scanned all the originals, press [Scan Finish] to start sending.
Border Erase
Use Border Erase to prevent the appearance of shadows from around the edges of originals. The following options can be selected
Border Erase Sheet
Erases black borders around the single sheet original.
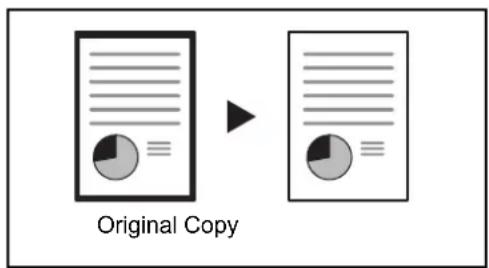
text_image
Original CopyBorder Erase Book
Erases black borders around the edges and in the middle of the original such as a thick books. You can specify the widths individually to erase the borders around the edges and in the center of the book.
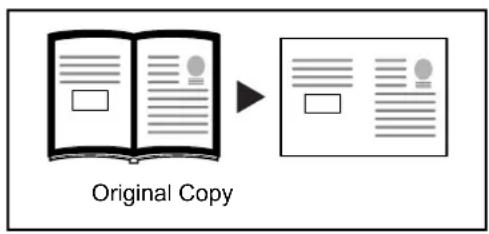
text_image
Original CopyIndividual Border Erase
Specify border erase widths individually for all edges.
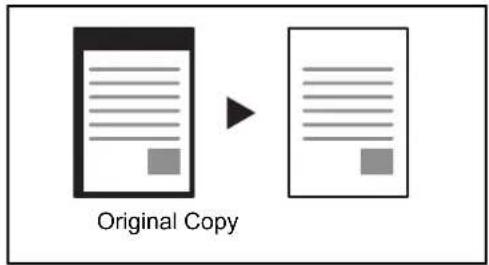
flowchart
graph LR
    A["Original Copy"] --> B["Modified Version"]
    style A fill:#f9f,stroke:#333
    style B fill:#bbf,stroke:#333
In each option, the available ranges are as below.
| Specifications Border Erase Range | |
| Inch models 0 to 2" (in 0.01" increments) | |
| Metric models 0 mm to 50 mm (in 1 mm increments) |
1 Press the Send key.
2 Press [Advanced Setup] and then [Border Erase].
3 Press [Border Erase Sheet] or [Border Erase Book] to select the border erase of the book border erase.
Use [+] or [-] to enter the width in Border or Gutter. Press [# Keys] to use the number keys for entry.
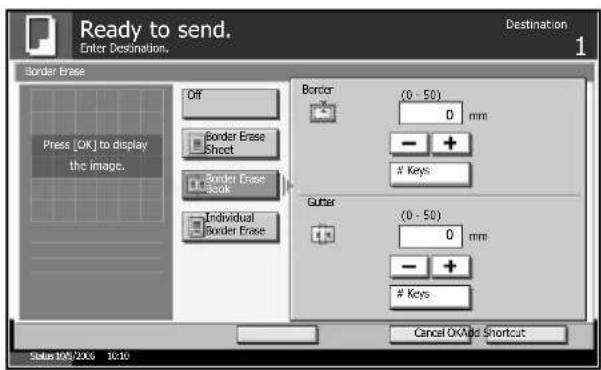
text_image
Ready to send. Enter Destination. Destination 1 Border Erase Off Border Erase Sheet Border Erase Book Individual Border Erase Press [OK] to display the image. Border (0 - 50) 0 mm - +Keys
Gutter (0 - 50) 0 mm - +Keys
Cancel OK And Shortcut Status: 10/6/2016 1c:10Press [Individual Border Erase] to select the individual border erase.
Use [+] or [-] to enter the width in Top, Bottom, Left or Right. Press [# Keys] to use the number keys for entry.
Press [Original Orientation] to select the original orientation from either [Top Edge Top] or [Top Edge Left], and press [OK].
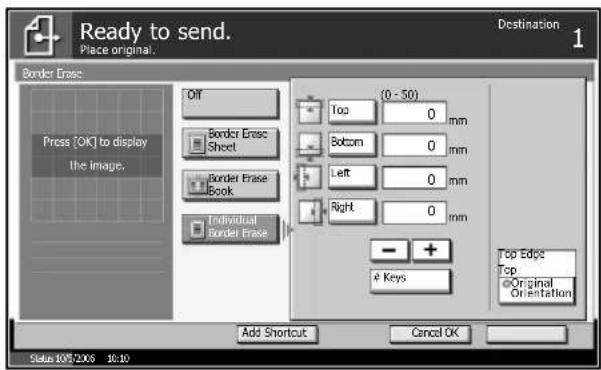
text_image
Ready to send. Place original. Destination 1 Border Erase Press [OK] to display the image, Off Border Erase Sheet Border Erase Book Individual Border Erase (0 - 50) Top 0 mm Bottom 0 mm Left 0 mm Right 0 mm - +Keys
Top Edge Top Original Orientation Add Shortcut Cancel OK Status: 10% 2006 10:104 Press [OK].
5 Specify the destination, and press the Start key to start sending.
Enter Document Name/File Name
Add document name as well as Job No. and date to the scanned image. You can specify the default for a document name.
1 Press the Send key.
2 Press [Advanced Setup] and then [File Name Entry].
3 Press [File Name].
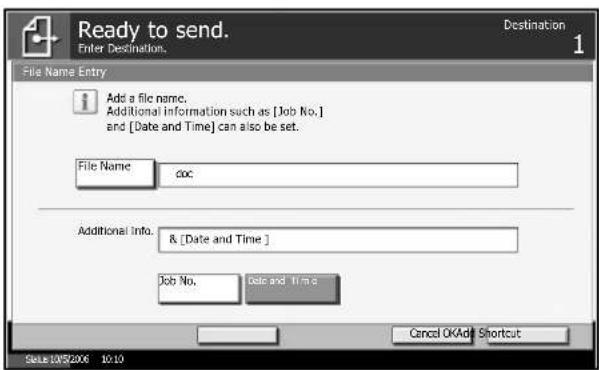
text_image
Ready to send. Enter Destination. Destination 1 File Name Entry Add a file name. Additional information such as [Job No.] and [Date and Time] can also be set. File Name doc Additional Info. & [Date and Time ] Job No. Date and Time Cancel OKAdj Shortcut SOLD 10/5/2006 10:104 Enter the document name, and press [OK].
NOTE: Up to 30 characters are available for the document name.
5 Press [Job No.] to enter the job No., and [Date and Time] to enter the date.
6 Press [OK].
7 Specify the destination, and press the Start key to start sending.
Enter E-mail Subject and Body
When sending E-mail, enter the subject and body of the E-mail.
1 Press the Send key.
2 Press [Advanced Setup] and then [E-mail Subject/Body].
3 Press [Subject].
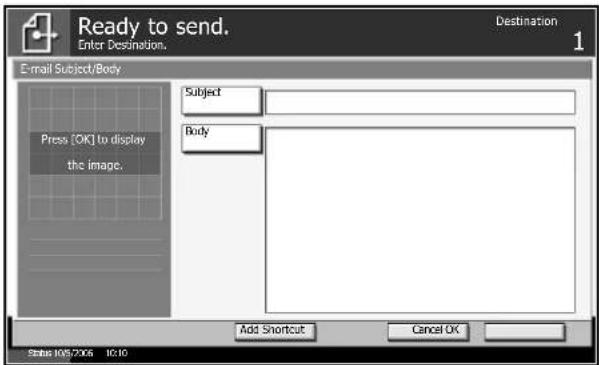
text_image
Ready to send. Enter Destination. Destination 1 E-mail Subject/Body Press [OK] to display the image. Subject Body Add Shortcut Cancel OK Status: 10/5/2006 10:104 Enter the subject, and press [OK].
NOTE: Up to 60 characters are available for the subject.
5 Press [Body].
6 Enter the body and press [OK].
NOTE: Up to 500 characters are available for the body.
7 Press [OK].
8 Specify the destination, and press the Start key to start sending.
Finish Notice
Informs that the sending is completed by an E-mail.
1 Press the Send key.
2 Press [Advanced Setup] and then [Job Finish Notice]
3 When selecting the destination from Address Book, press [Address Book].
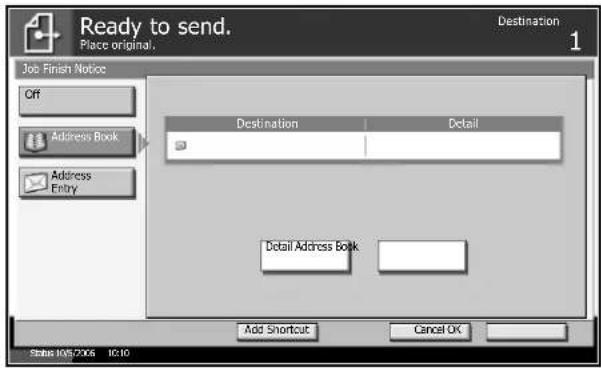
text_image
Ready to send. Place original. Destination Job Finish Notice Off Address Book Address Entry Destination Detail Detail Address Book Add Shortcut Cancel OK Status: 10/57/06 10:104 Specify the destination of sending the finish notice, and press [OK].
NOTE: For the procedure to select the destination from the address book, refer to the Operation Guide.
5 To directly enter the address, press [Address Entry] and then [E-mail Address].
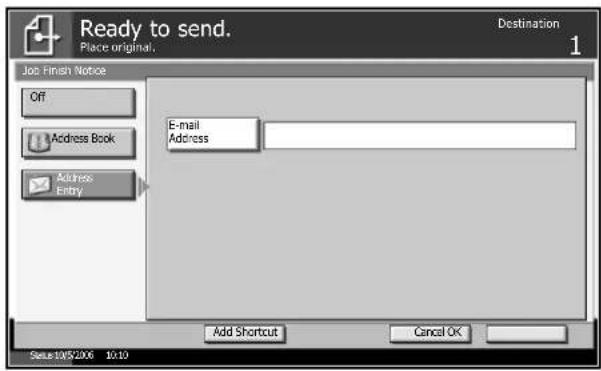
text_image
Ready to send. Place original... Destination 1 Job Finish Notice Off Address Book Address Entry E-mail Address Add Shortcut Cancel OK Status: 10/5/2006 10:106 Enter the E-mail address, and press [OK].
7 Press [OK].
8 Specify the destination, and press the Start key to start sending.
When the sending is completed, the finish notice is sent to the specified E-mail address.
3 Printer
This chapter explains the setting for using printer functions by connecting to the computer using parallel interface or serial interface (optional) of this machine.
- Parallel Interface 3-2
- Serial Interface 3-3
- Emulation 3-4
- Setting of Other Printers 3-8
Parallel Interface
The parallel interface of this machine supports both bidirectional mode and high speed mode. Normally, use the parallel interface by [Auto] of the default setting.
*: Default setting
| Item Detail | |
| Auto* Depending on | the computer to connect, the item will be automatically changed. Normally, no change to the setting is required. |
| Normal Communicate | by the standard method of Centronics interface. |
| High Speed It is possible to conduct high-speed data transfer between this machine and the computer. (When you cannot print properly even after connecting this machine to the workstation, select this mode.) | |
| Nibble (High Speed) | In conformity with IEEE1284 standard, send and receive data at high speed. It supports bidirectional communication and enables the computer to obtain the condition of this machine. |
1 Press the System Menu Key.
2 Press [System], [Change] of Parallel and then the key of the item you want.
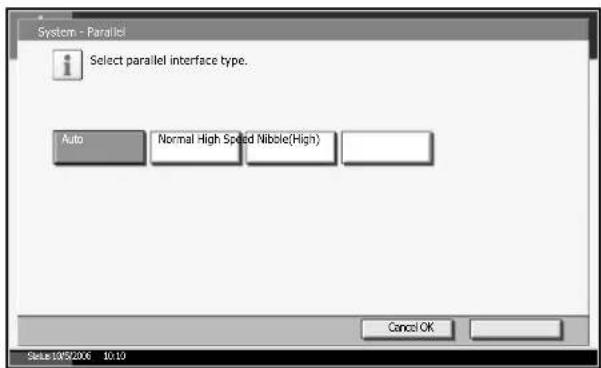
text_image
System - Parallel Select parallel interface type. Auto Normal High Speed Nibble(High) Cancel OK Select 1952006 10:103 Press [OK].
4 Press the Power key, and after confirming that the Power key/indicator and memory indicator have turned off, turn the main power off and on.
Serial Interface
The serial interface can be mounted as an option. Select each item according to the serial interface of the computer.
*: Default setting
| Item Value | |
| Baud Rate 1,200 bps, 2,400 bps, 4,800 bps, 9,600 bps*, 19,200 bps, 38,400 bps, 57,600 bps, 115,200 bps | |
| Data Bits 7 bits, 8 bits* | |
| Stop Bits 1 bits*, 2 bits | |
| Parity Not use*, Odd, Even, Ignore | |
| Protocol DTR (positive), &XOn/XOff*, DTR (positive), DTR (negative), XOn/XOff, ETX/ACK | |
1 Press the System Menu Key.
2 Press [System], [Change] of Serial, [Change] of Baud Rate and the key of Baud Rate you want.
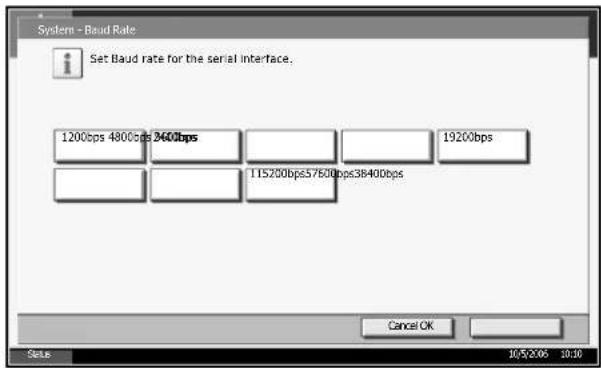
text_image
System - Baud Rate Set Baud rate for the serial Interface. 1200bps 4800bps 2600bps 19200bps 115200bps57600bps38400bps Cancel OK Sets 10/5/2006 10:103 Press [OK].
4 In the same way as Steps 2 and 3, set data bits, stop bits, parity and protocol.
5 Press the Power key, and after confirming that the Power key/indicator and memory indicator have turned off, turn the main power off and on.
Emulation
Select the emulation for operating this machine by the command for other printers.
Selection of emulation
The printer emulates Line Printer, IBM Proprinter, DIABLO 630, EPSON LQ-850, PCL 6, KC-GL, KPDL, and KPDL (Auto).
1 Press the System Menu Key.
2 Press [Printer], [Change] of Emulation and then the key of emulation you want.
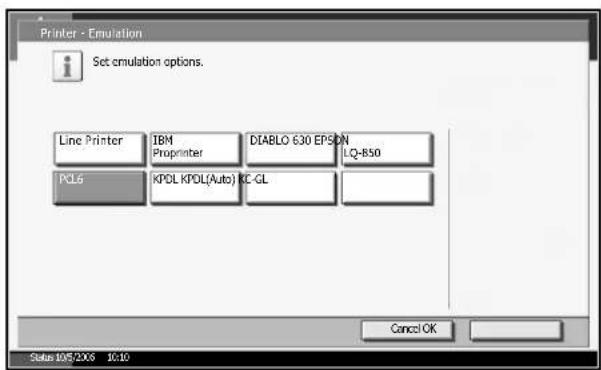
text_image
Printer - Emulation Set emulation options. Line Printer IBM Proprinter DIABLO 630 EPSON LQ-B50 PCL6 KPDL KPDL(Auto) KC-GL Cancel OK Status 105/2X6 10:10NOTE: When you have selected [KPDL (Auto)], select the following alternative emulation, too.
When you have selected [KPDL] or [KPDL (Auto)], set KPDL Error Report, too. (Refer to page 3-5)
When you have selected [KC-GL], set the print size and pen, too. (Refer to page 3-6)
3 Press [OK].
4 Press the Power key, and after confirming that the Power key/indicator and memory indicator have turned off, turn the main power off and on.
Setting of Alternative Emulation
When you have selected [KPDL (Auto)] as emulation mode, you can switch KPDL and another emulation mode (alternative emulation) automatically according to the data to print. The alternative emulation you can set is [Line Printer], [IBM Proprinter], [DIABLO 630], [EPSON LQ-850], [PCL 6]*, and [KC-GL] (*: Default setting).
1 Press the System Menu Key.
2 Press [Printer], [Change] of Emulation, [Alt Emulation] and then the key of alternative emulation you want.
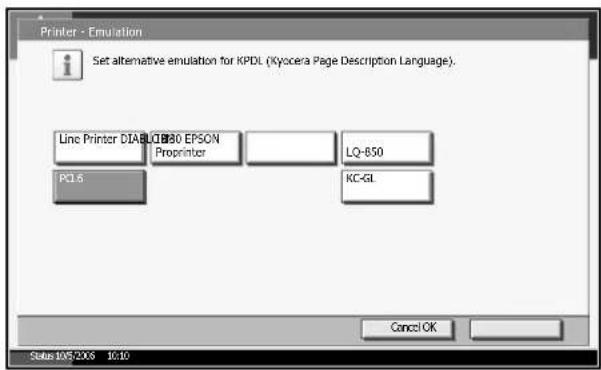
text_image
Printer - Emulation Set alternative emulation for KPDL (Kyscera Page Description Language). Line Printer DIAB LQ-850 EPSON Proprinter LQ-850 PC1.6 KC-GL Cancel OK Status 10/5/2016 10:103 Press [OK].
4 Press the Power key, and after confirming that the Power key/indicator and memory indicator have turned off, turn the main power off and on.
Setting of KPDL error report
When an error has occurred during printing in KPDL emulation mode, set whether or not the error report is output. The default setting is Off (not output).
1 Press the System Menu Key.
2 Press [Printer], [Change] of Emulation, [KPDL Error Report] and then [On] or [Off].
text_image
Printer - KPDL Error Report i Print an error report when a KPDL error occurs. Off On Cancel OK Status: 105.2X6 10:103 Press [OK].
4 Press the Power key, and after confirming that the Power key/indicator and memory indicator have turned off, turn the main power off and on.
Setting of page size and pen
When you have selected KC-GL as emulation mode, you can set the page size, eight kinds of pens, and thickness of each pen.
*: Default setting
| Setting item Set value |
| Page Set B0, B1, B2, B3, A0, A1, A2, Special Size* |
| Pen Adjust Pen 1 to Pen 8 1 to 99 dots |
NOTE: The default setting of thickness of pen is pen 1:1 dot, pen 2:2 dots, pen 3:3 dots...pen 8:8 dots.
1 Press the System Menu Key.
2 Press [Printer], [Change] of Emulation, [Page Set] and then the key of print size you want.
text_image
Printer - Page Set Select print size for KC-GL... A1 A2 B1B0 B2 B3 A0 Special Size Cancel OK Status: 10572X6 10:10NOTE: [Special Size] is the size designated in Prescribe SPSZ command. For details of Prescribe command, refer to the Prescribe Command Reference Manual (PDF format).
3 Press [OK].
4 Press [Pen Adjust], [Change] of the pen to change its thickness (1 to 8), and then [+]/[-] to set the thickness of pen (dots).
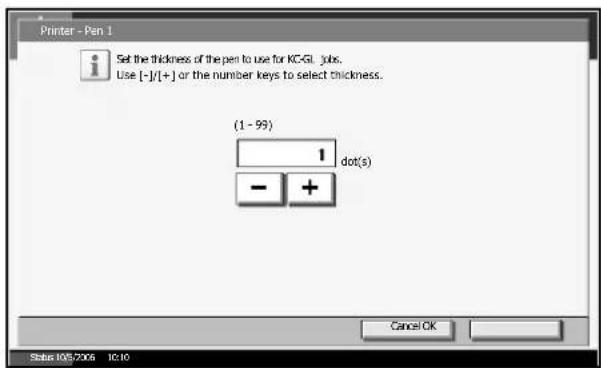
text_image
Printer - Pen 1 Set the thickness of the pen to use for KC-GI .jobs. Use [-J]/[+] or the number keys to select thickness. (1 - 99) 1 dot(s) - + Cancel OK Status: 1057206 10:105 Press [OK].
6 Press the Power key, and after confirming that the Power key/indicator and memory indicator have turned off, turn the main power off and on.
Setting of Other Printers
Regarding the setting of other printers, refer to Printer Settings on page 6-43.
4 Using Document Box
This chapter explains the typical procedure for utilizing Document Box.
• What is Document Box? 4-2
• Basic Operation for Document Box 4-5
• Using a Job Box 4-16
What is Document Box?
Document Box is an area in the hard disk in which you can save documents for later retrieval or sharing among multiple users.
Different Types of the Document Box Components
Document Box contains four types of component boxes which provide the following functions.
Custom Box
Custom Box is a component box which you can create within the Document Box and store data for later retrieval. You can create or delete a Custom Box, and manipulate data in various ways as described below:
- Creating/Deleting a Custom Box...page 4-5
- Viewing/Editing a Document in a Custom Box...page 4-12
- Storing Documents in a Custom Box...page 4-13
- Moving/Joining/Deleting Documents in a Custom Box...page 4-13
- Printing a Document in a Custom Box...page 4-14
- Sending a Document from a Custom Box...page 4-14
Job Box
Job Box holds temporary or permanent print data for use with job options including Private Print, Hold Job, Quick Copy, Proof and Hold, Repeat copy and Image Overlay Form which will be discussed later.
Corresponding to these job options, four individual Job Boxes are already provided in the Document Box.
These Job Boxes cannot be created or deleted by a user.
Private Print/Hold Job Box...page 4-16
In Private Printing, you can specify that a job is not printed until you release the job at the operation panel. When sending the job from the application software, specify a 4-digit access code in the printer driver.
The job is released for printing by entering the access code on the operation panel ensuring confidentiality of the print job.
The data will be erased upon completion of print job or after the main power switch is turned off.
In Hold Job, access codes are not mandatory, but can be set on the printer driver if printing with PIN security is required. Then, the access code must be entered on the operator panel to print a stored job. Print data will be stored in the hard disk after printing. This will allow to print the same print data repeatedly.
Quick Copy/Hold after Proof Print Box...page 4-18
Quick Copy feature facilitates additional prints of a document already printed.
Activating Quick Copy and printing a document using the printer driver allow the print data to be stored in the Quick Copy Job Box.
When additional copies are required, you can reprint the required number of copies from the operation panel.
By default, up to 32 documents can be stored.
When power is turned off, all stored jobs will be deleted.
NOTE: When you attempt to store documents in excess of the above maximum, the oldest document data will be overwritten by the latest document data.
The Proof and Hold feature produces only a single proof print of multiple-print job and holds printing of the remaining copies.
Printing a multiple-print job in Proof and Hold using the printer driver allows only a single copy to be printed while maintaining the document data in the Job Box.
To continue to print the remaining copies, use the operation panel.
You can change the number of copies to print.
Repeat Copy Box...page 4-21
Repeat Copy feature stores the copied original document data in the Job Box and allows to print additional copies later.
By default, up to 32 documents can be stored.
When power is turned off, the original data will be deleted.
NOTE: Repeat Copy function is not available when the optional security kit is installed.
Image Overlay Form (Copy) Box...page 4-22
Image Overlay feature copies the original document overlaid with a form or image.
This Job Box is used to store the forms or images for overlaying.
Removable Memory Box
A USB memory inserted into the USB memory slot of the machine is also recognizable as a Job Box. This allows to print the PDF data stored in the USB memory.
You can directly print PDF data in the USB memory without a PC.
Saving data into the USB memory is not possible.
Fax Box
Fax Box stores the fax data received. For details, refer to the Operation Guide supplied with the fax kit.
Basic Operation for Document Box
Using Custom Box
This section explains how to create a Custom Box, store a document and print it from the Custom Box.
NOTE: In the following explanation, it is assumed that User Login is not activated. For details on User Logon privileges, refer to User Privileges on page 4-14.
Creating a New Custom Box
1 Press the Document Box key.
flowchart
graph TD
    A["Application"] --> B["Document Box"]
    C["Icon 1"] --> A
    D["Icon 2"] --> B
    E["Icon 3"] --> B
2 Press [Custom Box], [Edit Box] and then [Add].
![Triumph-Adler DC 2230 - Press [Custom Box], [Edit Box] and then [Add]. - 1](/content/2026/05/767912/images/aaf6ae520e4e5c071cd8bd45c0cf89c64e69500344f0058e36ad47f2fea43d9d.jpg)
text_image
Custom Box No. Box Name Owner Use(%) Edit Box 091/901 Store File Detail Open Custom Box Job Box Removable Memory Save as: 15.03 To number the Custom Box, press [Change] of Box No..
![Triumph-Adler DC 2230 - To number the Custom Box, press [Change] of Box No.. - 1](/content/2026/05/767912/images/d6c008d096ebb7fa74b4ea461dbd30696ba04be2ba9f8ff3953ed9b6de8c9ade.jpg)
text_image
Box Box No.: Change 0001 Box Name: Change SALES Box Password: Change ****** Usage Restriction: Change Auto Fill Deletion: Change Off OR Cancel Add Shortcut Date 13/5/2006 10:104 Enter the box number by pressing [-]/[+] or number keys. Press [OK]. The box number can be from 0001 to 1000. A Custom Box should have a unique number.
If you enter 0000, the smallest number available will be automatically assign
![Triumph-Adler DC 2230 - To number the Custom Box, press [Change] of Box No.. - 2](/content/2026/05/767912/images/939e04dcf66a3667908500c466e47569b0a9a51ebbebb9e84d1473fb388c484c.jpg)
text_image
Box - Box No. Set box number. Use [-]/[-] or the number keys to enter a number. Enter 0000 to assign a number automatically. (0001 - 1000) 0001 - + Cancel OK Status: 105/2016 10:105 To name the Custom Box, press [Change] of Box Name.
6 Enter the box name of up to 32 characters. Press [OK]. For instructions on how to enter characters, refer to Appendix in the Operation Guide.
7 User access to the box can be restricted by specifying a password to protect the box. Entering a password is not mandatory. Press [Change] of Box Password.
8 Press [Password] and enter a password of up to 16 characters. Press [OK].
9 Press [Confirm Password] to enter the same password again.
10 To preserve the hard disk capacity, the storage capacity for a box can be restricted. Press [Change] of Usage Restriction.
11 To activate restriction of capacity, press [On]. Enter a number of the storage capacity for the Custom Box in megabytes by pressing [-]/[+] or number keys.
To cancel restricting the storage capacity, press [Off].
![Triumph-Adler DC 2230 - To number the Custom Box, press [Change] of Box No.. - 3](/content/2026/05/767912/images/06f8964aed413972137df0173c259996ca452d337b04533459caccb20b4f20e4.jpg)
text_image
Document Box/Removable Memory - Usage Restriction 1 Restrict the number of custom boxes that can be used. Use [−]/(+) or the number keys to enter a number. Off On Usage Restriction(1 - 30000MB) 30 - + MB Cancel OK Status: 10/5/2006 10:1012 Press [OK].
13 To activate automatic file deletion, press [Change] of Auto File Deletion.
14 This feature automatically deletes an unnecessary file after a period of time specified. To activate automatic file deletion, press [On]. Enter a number of days after which the file will be automatically deleted by pressing
![Triumph-Adler DC 2230 - To number the Custom Box, press [Change] of Box No.. - 4](/content/2026/05/767912/images/7d6550542665b7823767b25d8b7a07d59b4efe86a602f81dba4e6e0da942793d.jpg)
text_image
Box - Auto File Deletion 1 Delete stored documents after a set period of time. Please set how long to store documents before deleting them. Off On Storing Period(1 - 31) 30 day(s) - + Cancel OK Status 10/5/2006 10:10[-]/[+] or number keys. The period of days should be from 1 to 31. To deactivate the automatic file deletion, press [Off].
15 Press [OK].
16 Press [Register]. The Custom Box is created.
![Triumph-Adler DC 2230 - To number the Custom Box, press [Change] of Box No.. - 5](/content/2026/05/767912/images/83c46f3fa6e99dc3a578e8431324a1c05ef9a96584d51ab43f8000d0ead528ea.jpg)
text_image
Box Box No.: 0001 Change Box Name: SALES Change Box Password: ********+ Change Usage Restriction: 010 Change Auto File Deletion: day(s)07MB Change Cancel Register Status:10/5/2006 10:1017 Press [Close]. The display returns to the default Document Box screen.
Storing a Document in the Custom Box
1 Place the original to copy in the document processor or on the platen.
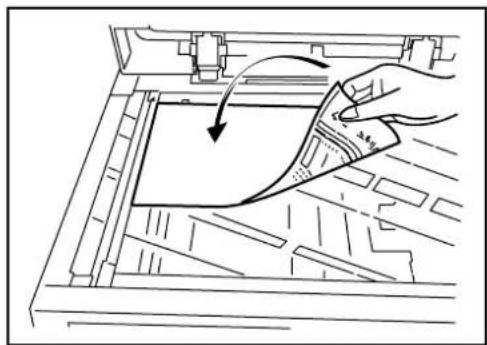
natural_image
Line drawing of a hand using a tool to press or spread material inside a container (no text or symbols)NOTE: Refer to the Operation Guide for details on placing originals on the platen.
2 Select the Custom Box to store the document.
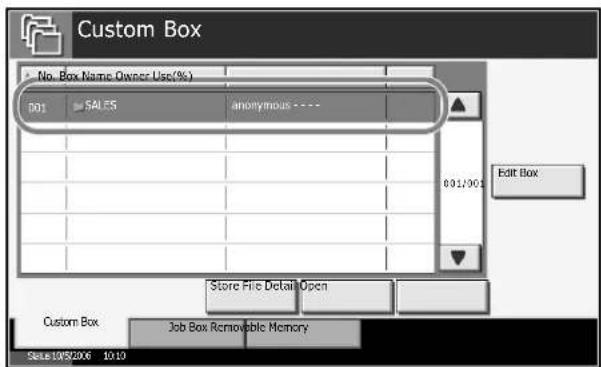
text_image
Custom Box No. Box Name Owner Use(%) 001 SALES anonymous Edit Box 801/001 Store File Detail Open Custom Box Job Box Removable Memory State 195206 10:103 Press [Store File].
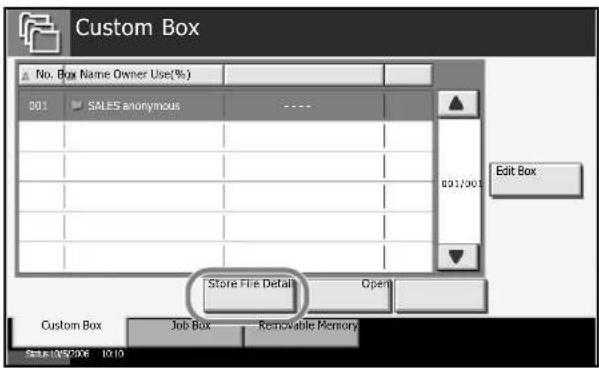
text_image
Custom Box No. Box Name Owner Use(%) 001 SALES anonymous .... Store File Detail Open Edit Box Custom Box Job Box Removable Memory STATE: 10/5/2006 10:10NOTE: If the Custom Box is password-protected, enter the password and press [OK].
4 Adjust the type of originals, scanning density, etc., as necessary.
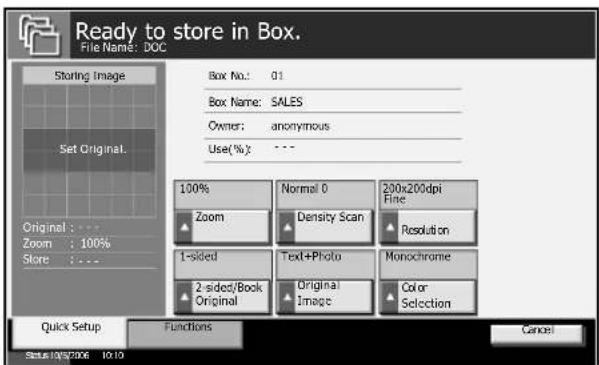
text_image
Ready to store in Box. File Name: DOC Starting Image Set Original. Box No.: 01 Box Name: SALES Owner: anonymous Use(%): --- 100% Zoom Normal 0 200x200dpi Fine Density Scan Resolution Original :... Zoom : 100% Store :... 1-sided Text+Photo Monochrome 2-sided/Book Original Original Image Color Selection Quick Setup Functions Cancel Status: 19/5/2006 10:105 Press the Start key. The original is scanned and the data is stored in the specified Custom Box.

text_image
Clear Reset 1 2 3 C // 4 5 6 Stop 7 8 9 Start * . 0 # ◆Printing a Document Stored in the Custom Box
1 Select the Custom Box which contains the document to print.
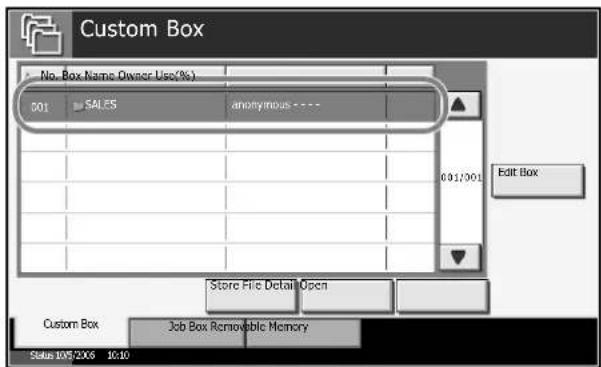
text_image
Custom Box No. Box Name Owner Use(%) 001 SALES anonymous 001/001 Edit Box Store File Detail Open Custom Box Job Box Removable Memory Status 1052X6 10:102 Press [Open].
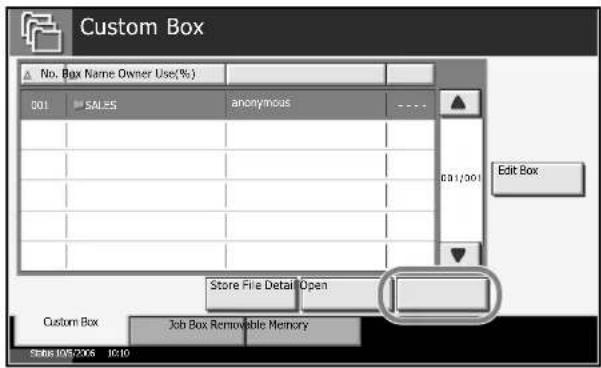
text_image
Custom Box No. Box Name Owner Use(%) 001 SALES anonymous Edit Box Store File Detail Open Custom Box Job Box Removable Memory 0586 108/2006 10:10NOTE: If the Custom Box is password-protected, enter the password and press [OK].
3 Select the document in the list by checking the checkbox. The document is designated by a checkmark.
You cannot select more than one document at a time. To deselect, press the checkbox again and remove the checkmark.
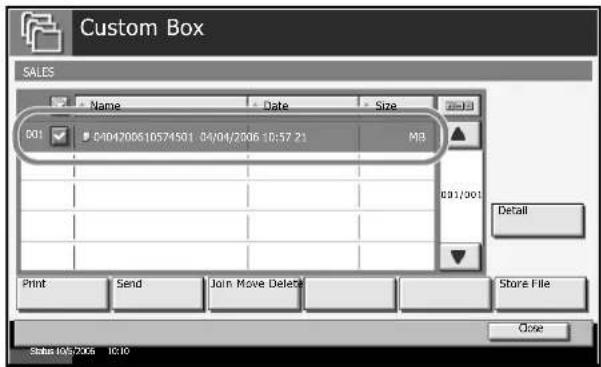
text_image
Custom Box SALES Name Date Size 001 04/04/200610574501 04/04/2006 10:57 21 MB 001/001 Detail Print Send Join Move Delete Store File Close Status 10/5/2006 10:104 Press [Print].
5
Change paper selection, duplex printing, etc., as desired.
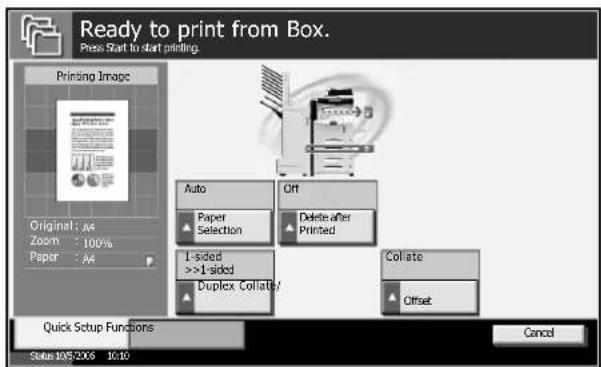
text_image
Ready to print from Box. Press Start to start printing. Printing Image Original: A4 Zoom: 100% Paper: A4 Auto Paper Selection Delete after Printed I-sided >>1-sided Duplex Collate/ Collate Offset Quick Setup Functions Status: 10/5/2X6 10:10 Cancel6
Press the Start key to start printing.
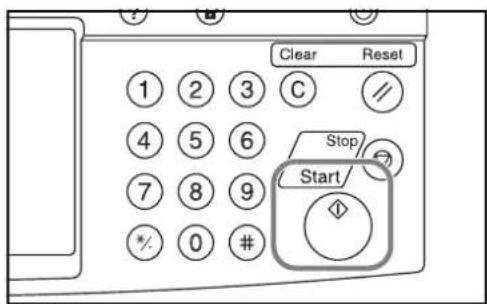
text_image
Clear Reset 1 2 3 C // 4 5 6 Stop 7 8 9 Start * 0 # ◇Custom Box List
The Custom Box List is a list of the Custom Boxes you can view on the display. It lists the boxes in ascending or descending order of numbers, or in alphabetical order of names.
Listing the boxes by number in ascending/descending order,
Listing the boxes by name in alphabetical order.
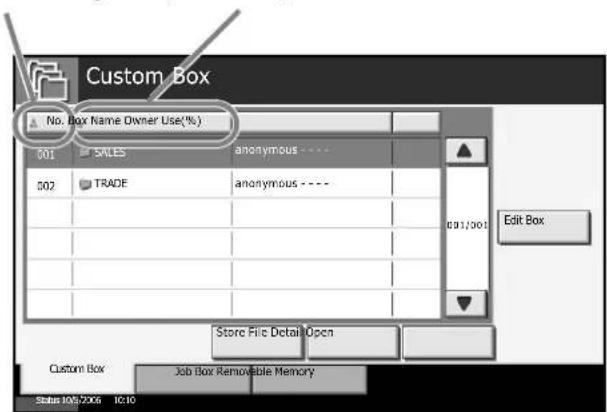
text_image
Custom Box No. Box Name Owner Use(%) 001 SALES anonymous ---- 502 TRADE anonymous ---- 031/301 Edit Box Store File Detail Open Custom Box Job Box Removable Memory Status: 100/2006 IC:10Document List
The document list is a list of the documents stored in the Custom Boxes. You can manipulate the list in various ways as below.
List

text_image
Listing the documents by name in alphabetical order. Listing the documents by time of update in ascending/ descending order. Listing the documents by size in ascending/ descending order. Selecting more than one document at a time. Selecting documents by checking checkboxes. Custom Box Name Date Size 21 MB 2006/04/04 10:57 2006/04/04 10:58 30MB 2006/04/04 10:57 501 2006/04/04 10:58 001/001 Detail SendPrint Store Print Move Delete Close Status: 1WS 2006 10:10 Switching to a thumbnail display. Highlighting a document to display its detail by [Detail]. Thumbnail Selecting more than one document at a time. Highlighting a document to display its detail by [Detail]. Selecting documents by checking checkboxes. Custom Box SALES 2006/04/04 10:57 501 2006/04/04 10:57 502 001 2006/04/04 10:57 503 SendPrint Store Print Move Delete Close Status: 1WS 2006 10:10Deleting a Custom Box
1 Press the Document Box key.
2 Press [Edit Box].
3 Select from the box you wish to delete in the list and press [Delete]. You are prompted to confirm the deletion.
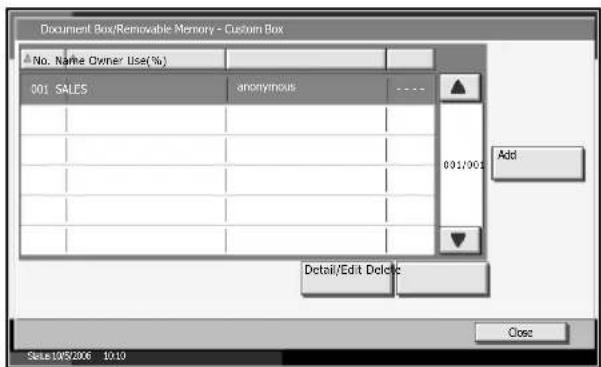
text_image
Document Box/Removable Memory - Custom Box No. Name Owner Use(%) 001 SALES anonymous .... 001/001 Add Detail/Edit Delete Close Date: 195/2006 10:104 To delete the box, press [Yes].
5 Press [Close]. The display returns to the default document box screen.
Viewing/Editing Box Contents
1 Press the Document Box.
2 Press [Edit Box].
3 Highlight the box you wish to view or edit its contents and press [Detail/Edit].
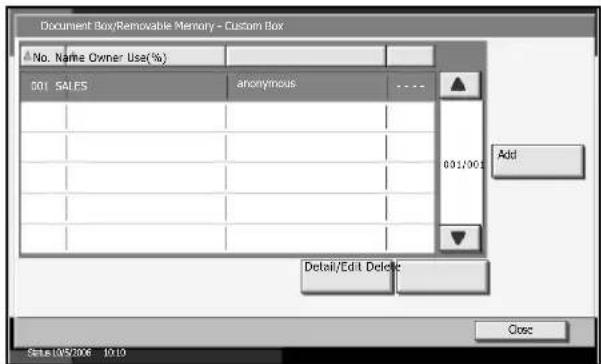
text_image
Document Box/Removable Memory - Custom Box No. Name Owner Use(%) 001 SALES anonymous 001/001 Add Detail/Edit Delete Close Sete 1952006 10:104 The contents of the selected box is displayed. To edit a content, press [Change] in the item you wish to edit. Edit the contents as desired.
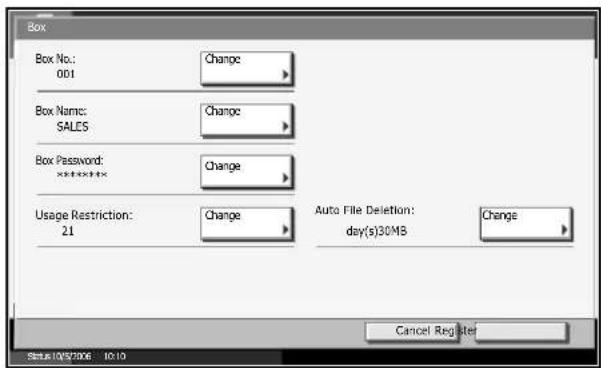
text_image
Box Box No.: 001 Change Box Name: SALES Change Box Password: ****+ Change Usage Restriction: 21 Change Auto File Deletion: day(s)30MB Change Cancel Register Status: 19/57/2006 10:105 Press [Register].
6 Press [Close]. The display returns to the default document box screen.
Storing Documents
A Custom Box can hold up to 1,000 documents. Refer to Storing a Document in the Custom Box on page 4-7 for details.
Moving/Joining/Deleting a Document
Moving a Document
The documents in the Custom Box can be moved to any other box. Refer to Chapter 3 Basic Operation of the Operation Guide for details.
Joining Documents
The documents in the Custom Box can be joined in one document. Refer to Chapter 3 Basic Operation of the Operation Guide for details.
Deleting a Document
1 Press the Document Box key.
2 Press [Custom Box] and choose the box which contains the document you wish to delete.
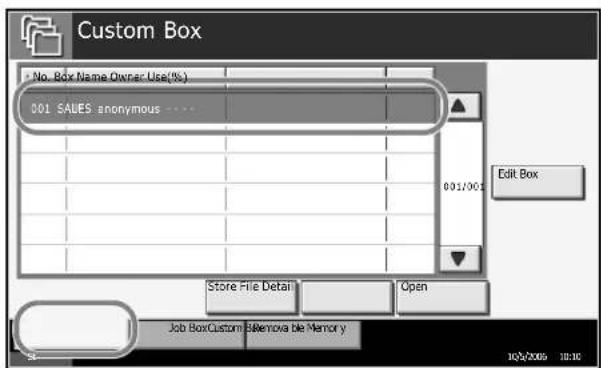
text_image
Custom Box No. Box Name Owner Use(%) 001 SALES anonymous .... Edit Box Store File Detail Open Job BoxCustom Blemova de Memory 10/2/2015 10:163 Press [Open].
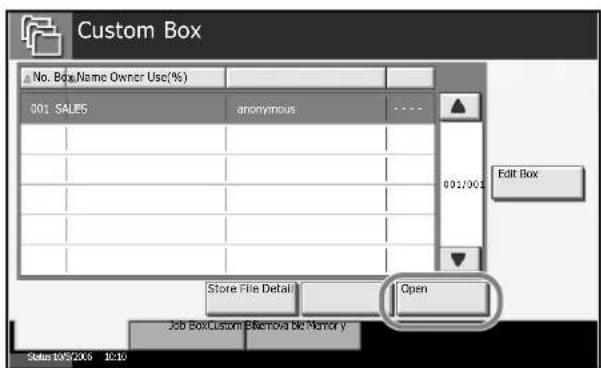
text_image
Custom Box No. Box Name Owner Use(%) 001 SALES anonymous 001/001 Edit Box Store File Detail Open Job Box Custom Remove Bid Memory Sales 195/2006 10:10NOTE: If the Custom Box is password-protected, enter the password and press [OK].
4 Select the document you wish to delete by checking the checkbox. The document is marked with a checkmark.
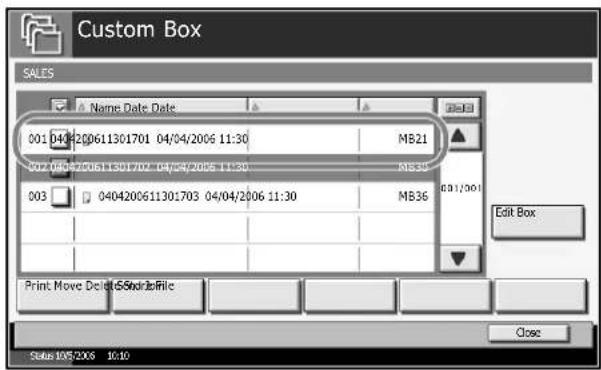
text_image
Custom Box SALES Name Date Date 001 0404200611301701 04/04/2006 11:30 MB21 002 0509200611301702 04/04/2006 11:30 MB35 003 0404200611301703 04/04/2006 11:30 MB36 Edit Box Print Move Delete SSDs in File Close Status 10/5/2006 10:10NOTE: [Delete] is disabled until the document is selected. To deselect, press the checkbox again and remove the checkmark.
5 Press [Delete].
6 Press [Yes] to delete the document.
Printing a Document
To print a document in the Custom Box, refer to Chapter 3 Basic Operation in the Operation Guide for details.
Sending a Document
To send a document in the custom box, refer to Chapter 3 Basic Operation in the Operation Guide for details.
User Privileges
When User Login is activated, accessibility to the Document Box components will vary depending on the given user privilege.
Accessibilities vary depending on user privilege as follows:
| Accessibility\Access level | Administrator | User | |
| Creating a box | Yes | No | |
| Changing box owner | Yes | No | |
| Deleting a box | Others | No | No |
| Owner | Yes | Yes | |
| Renaming a box | Others | Yes | No |
| Owner | Yes | Yes | |
| Accessibility\Access level | Administrator User | ||
| Changing how a box is shared | Others Yes No | ||
| Owner Yes Yes | |||
| Changing the password to a box | Others No No | ||
| Owner Yes Yes | |||
| Overwriting the password to a box | Others Yes No | ||
| Owner Yes No | |||
| Adjusting the box capacity | Others Yes No | ||
| Owner Yes No | |||
| Changing the period of using a box | Others Yes No | ||
| Owner Yes Yes | |||
Restricting the Accessibility to a Box
The accessibility to a Custom Box differs depending on the level of privileges as follows:
Administrator: An administrator can gain access and manipulate all boxes.
User: A user can gain access and manipulate his/her own boxes and the shared boxes.
NOTE: A user who is given a network authentication but not registered in the user list is limited to access the shared boxes only.
Password Entry Requirement
When User Login is activated, the way a password is required differs depending on the level of privileges as follows:
Administrator: The administrator is not required to enter a password to gain access to any box.
User: The user is required to enter a password to gain access to a box which is protected by a password. The user is not required to enter a password to gain access to his/her own boxes.
Using a Job Box
Private Print/Stored Job Box
Private Print/Stored Job Box stores the print data which is printed by using the printer driver as a Private Print/Stored Job.
Refer to the Extended Printer Driver User Guide on how to print a job as Private Print or Stored Job using the printer driver.
Printing a Document in Private Print/Stored Job Box
1 Press the Document Box key.
2 Press [Job Box].
3 Select [Private Print/Stored Job] and press [Open].
4 Select the creator of the document to print and press [Open].
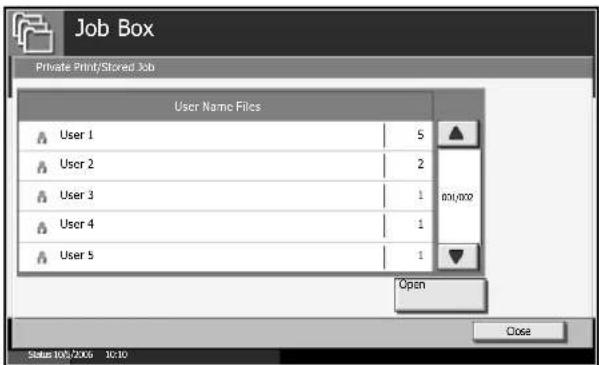
text_image
Job Box Private Print/Stored Job User Name Files User 1 5 User 2 2 User 3 1 User 4 1 User 5 1 Open Status: Job, 2006 10:10 Close5 Select the document and press [Print].
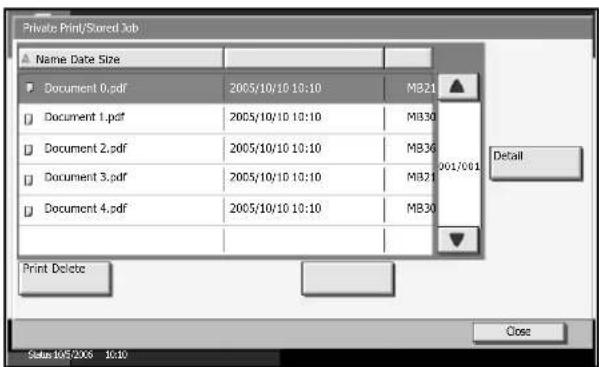
text_image
Private Print/Stored Job Name Date Size Document 0.pdf 2005/10/10 10:10 MB21 Document 1.pdf 2005/10/10 10:10 MB30 Document 2.pdf 2005/10/10 10:10 MB36 Document 3.pdf 2005/10/10 10:10 MB21 Document 4.pdf 2005/10/10 10:10 MB30 Print Delete Close Status: 10/5/2006 10:106 If the document is protected by a password, enter the password using the numeric keys.
7 Specify the number of copies to print as desired.
8 Press [Start Print] to start printing.
Upon completion of printing, the Private Print job is automatically deleted.
Viewing a Document
1 Press the Document Box key.
2 Press [Job Box].
3 Select [Private Print/Stored Job] and press [Open].
4 Select the creator of the document and press [Open].
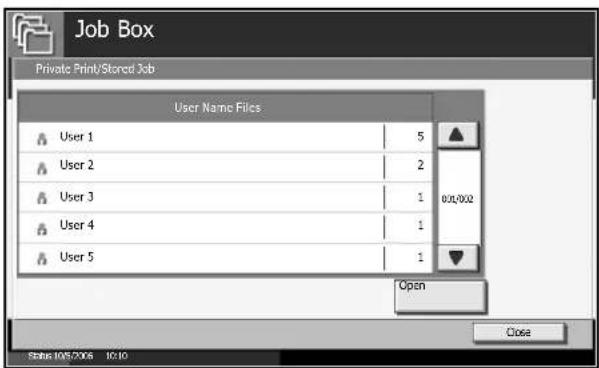
text_image
Job Box Private Print/Stored Job User Name Files User 1 5 User 2 2 00:00:00 User 3 1 User 4 1 User 5 1 Open Status: 10/5/2006 10:10 Close5 To view the document, select the document to view and press [Detail].
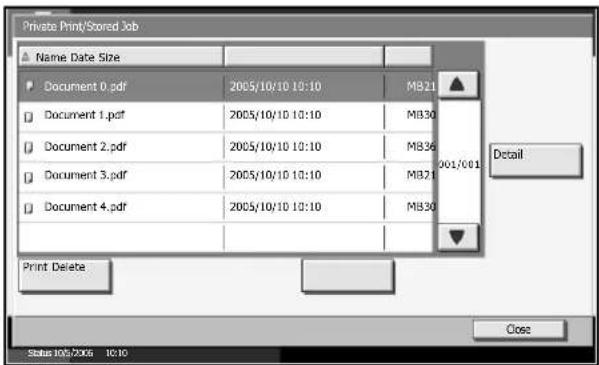
text_image
Private Print/Stored Job Name Date Size Document 0.pdf 2005/10/10 10:10 MB21 Document 1.pdf 2005/10/10 10:10 MB30 Document 2.pdf 2005/10/10 10:10 MB36 Document 3.pdf 2005/10/10 10:10 MB21 Document 4.pdf 2005/10/10 10:10 MB30 Print Delete Close Status 105/2006 10:106 If the document is protected by a password, enter the password using the numeric keys. Press [OK].
7 To close the document, press [Close].
Deleting a Document
1 Press the Document Box key.
2 Press [Job Box].
3 Select [Private Print/Stored Job] and press [Open].
4 Select the creator of the document and press [Open].
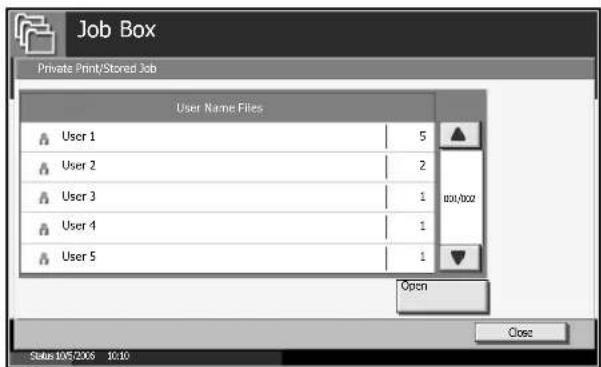
text_image
Job Box Private Print/Stoned Job User Name Files User 1 5 User 2 2 User 3 1 User 4 1 User 5 1 Open Status: 10/5/2006 10:10 Close5 To delete the document, select the document and press [Delete].

text_image
Private Print/Stored Job Name Date Size Document 0.pdf 2005/10/10 10:10 MB21 Document 1.pdf 2005/10/10 10:10 MB30 Document 2.pdf 2005/10/10 10:10 MB36 Document 3.pdf 2005/10/10 10:10 MB21 Document 4.pdf 2005/10/10 10:10 MB30 Print Delete Close Status: 10/5/2006 10:10If the document is protected by a password, enter the password using the numeric keys and the document is deleted.
Quick Copy/Proof and Hold Print Box
Quick Copy/Proof and Hold Box stores the print data which is printed by using the printer driver as a Quick Copy or Hold after Proof Print job.
Refer to the Extended Printer Driver User Guide on how to print a job as Quick Copy or Proof and Hold Print job using the printer driver.
Configuring the Number of Documents to Store
To preserve the free space on the hard disk, the maximum number of documents to be stored in the Quick Copy/Proof and Hold Print Box can be configured.
1 Press the System Menu key.
2 Press [Document Box/Removable Memory], [Next] of Job Box, then [Change] of Quick Copy Job Retention.
3 Press [+] or [-] to enter a number between 0 and 50 (documents).
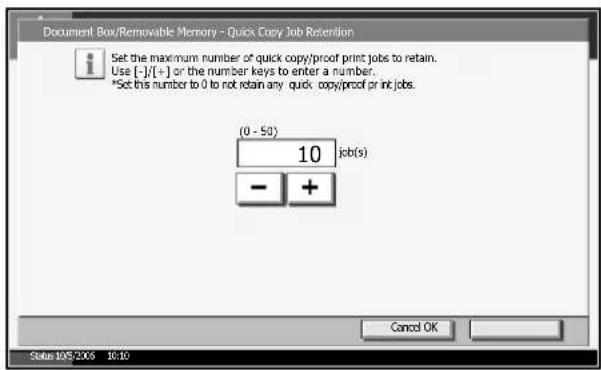
text_image
Document Box/Removable Memory - Quick Copy Job Retention Set the maximum number of quick copy/proof print jobs to retain. Use [-]/[+] or the number keys to enter a number. *Set this number to 0 to not retain any quick copy/proof or int jobs. (0 - 50) 10 job(s) - + Cancel OK Status: 105.206 16:10NOTE: If you enter 0, Quick Copy/Proof and Hold Print feature is not available.
4 Press [OK].
Printing a Document
1 Press the Document Box key.
2 Press [Job Box].
3 Select [Quick Copy/Proof and Hold] and press [Open].
4 Select the creator of the document and press [Open].
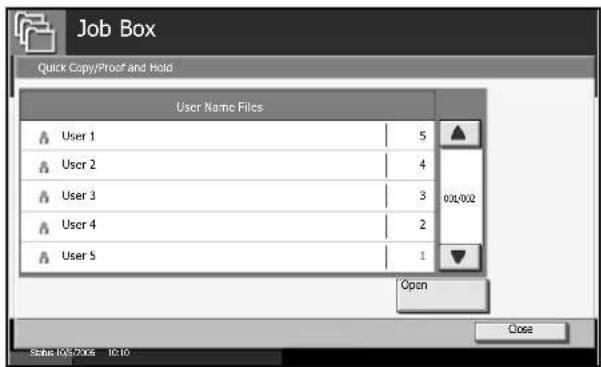
text_image
Job Box Quick Copy/Proof and Hold User Name Files User 1 5 User 2 4 User 3 3 User 4 2 User 5 1 Open Status: 10.5.2006 10.10 Close5 Select the document to print, and press [Print].
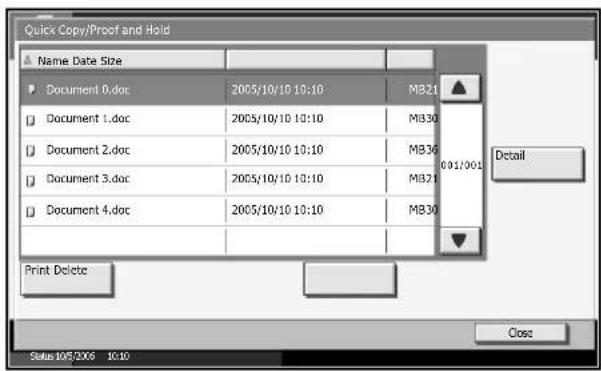
text_image
Quick Copy/Proof and Hold Name Date Size Document 0.doc 2005/10/10 10:10 MB21 Document 1.doc 2005/10/10 10:10 MB30 Document 2.doc 2005/10/10 10:10 MB30 Document 3.doc 2005/10/10 10:10 MB21 Document 4.doc 2005/10/10 10:10 MB30 Print Delete Status 10/5/2006 10:10 Close Detail6 Specify the number of prints as desired.
7 Press [Start Print] to start printing.
Viewing a Document
1 Press the Document Box key.
2 Press [Job Box], [Quick Copy/Proof and Hold], then [Open].
3 Select the creator of the document and press [Open].
text_image
Job Box Quick Copy/Proof and Hold User Name Files User 1 5 User 2 4 User 3 3 User 4 2 User 5 1 Open Status: 10:2006 10:10 Close4 Select the document to view and press [Detail]. The document can be viewed.
text_image
Quick Copy/Proof and Hold Name Date Size Document 0.doc 2005/10/10 10:10 MB21 Document 1.doc 2005/10/10 10:10 MB30 Document 2.doc 2005/10/10 10:10 MB30 Document 3.doc 2005/10/10 10:10 MB21 Document 4.doc 2005/10/10 10:10 MB30 Print Delete Close Status: 10/5/2006 10:105 Press [Close] to end viewing.
Deleting a Document
1 Press the Document Box key.
2 Press [Job Box], [Quick Copy/Proof and Hold], then [Open].
3 Select the creator of the document and press [Open].
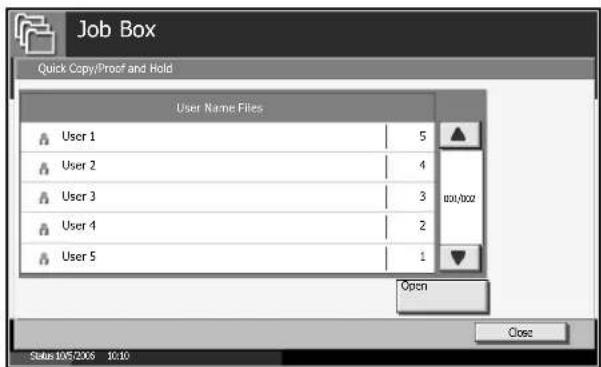
text_image
Job Box Quick Copy/Proof and Hold User Name Files User 1 5 User 2 4 User 3 3 User 4 2 User 5 1 Open Status: 10/5/2006 10:10 Close4 Select the document to delete and press [Delete].

text_image
Quick Copy/Proof and Hold Name Date Size Document 0.doc 2005/10/10 10:10 MB31 Document 1.doc 2005/10/10 10:10 MB30 Document 2.doc 2005/10/10 10:10 MB36 Document 3.doc 2005/10/10 10:10 MB21 Document 4.doc 2005/10/10 10:10 MB30 Print Delete Close Status: 10/5/2006 10:105 Press [Yes]. The document is deleted.
Repeat Copy Box
Configuring the Number of Documents to Store
To preserve the free space on the hard disk, the maximum number of documents to be stored in the Repeat Copy Box can be configured.
To configure this, refer to Configuring the Number of Documents to Store in Quick Copy/Hold after Proof Print Box. Press [Change] in Repeat Copy Job Retention in step 2.
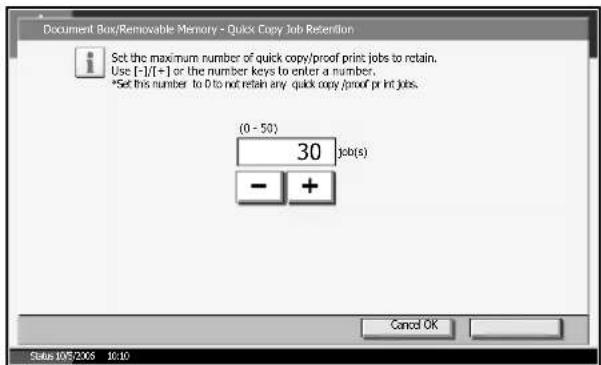
text_image
Document Box/Removable Memory - Quick Copy Job Retention Set the maximum number of quick copy/proof print jobs to retain. Use [ -]/[ + ] or the number keys to enter a number. *Set this number to 0 to not retain any quick copy /proof print jobs. (0 - 50) 30 job(s) - + Cancel OK Status 10/2/2006 10:10Printing a Document
1 Press the Document Box key.
2 Press [Job Box].
3 Select [Repeat Copy] box, and press [Open].
4 Select the document to print and press [Print].
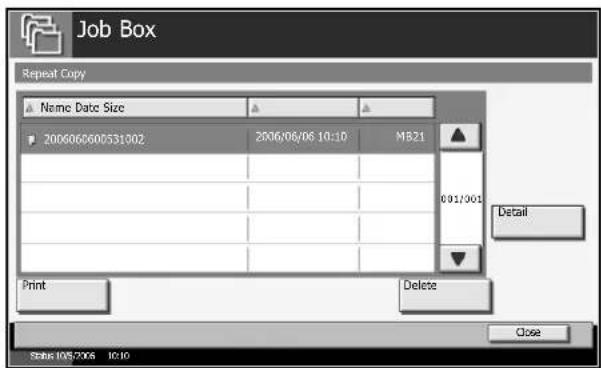
text_image
Job Box Repeat Copy Name Date Size 2006/06/06 10:10 MB21 001/001 Detail Print Delete Close Status: 1057006 10:105 If the document is protected by a password, enter the password using the numeric keys.
6 Press [Start Print] to start printing.
The Repeat Copy Box job will be erased when the main power switch is turned off.
Image Overlay Form (Copy) Box
Storing a Form
The Image Overlay Form (Copy) Box holds form overlay documents. To store a single page form for overlaying in this box, proceed as follows:
1 Place the original in the document processor or on the platen.
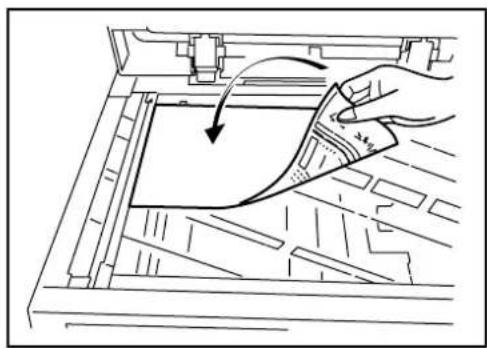
natural_image
Line drawing of a hand using a tool to press or print a document on a mechanical device (no text or symbols present)NOTE: Refer to the Operation Guide for details.
2 Press the Document Box key and [Job Box].
3 Press [Form for Form Overlay (Copy)] and press [Open].
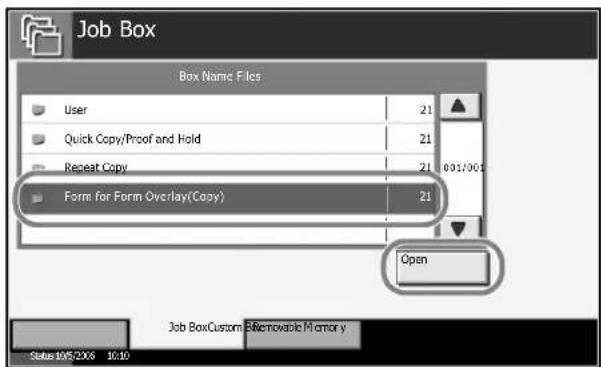
text_image
Job Box Box Name Files User 21 Quick Copy/Proof and Hold 21 Repeat Copy 21 001/001 Form for Form Overlay(Copy) 21 Open Job BoxCustom Emovable Memory Status: 10/5/2006 10:104 Press [Store File].
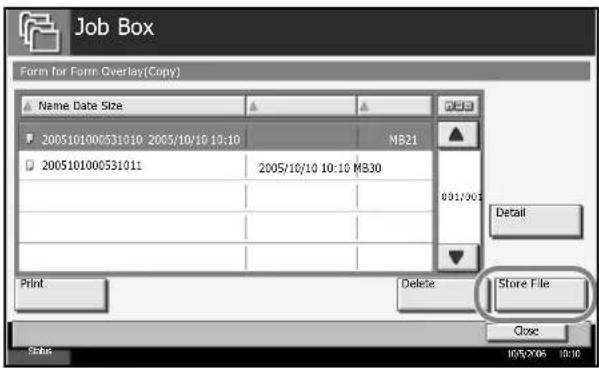
text_image
Job Box Form for Form Overlay(Copy) Name Date Size 2005101000531010 2005/10/10 10:10 2005101000531011 2005/10/10 10:10 MB30 801/907 Detail Print Delete Store File Close 10/5/2006 10:105 If necessary, adjust the type of original, scanning density, etc. before the original is scanned.
6 Press the Start key. The original is scanned and stored in the [Form for Form Overlay (Copy)] box.
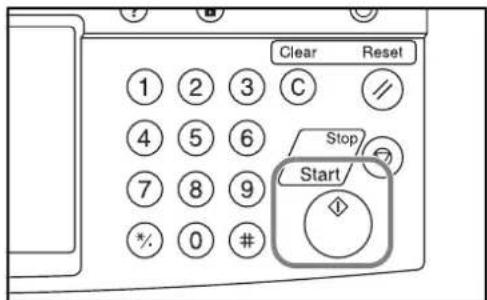
text_image
Clear Reset 1 2 3 C // 4 5 6 Stop 7 8 9 Start * . 0 # ◆Copying with an Image Overlay
Refer to Form Overlay on page 1-36 for the procedures to change type and density of the form preselected in the Image Overlay Form (Copy) box.
Viewing a Stored Form
1 Press the Document Box key.
2 Press [Job Box].
3 Select [Form for Form Overlay (Copy)] box, and press [Open].
4 Select the form to view and press [Detail].
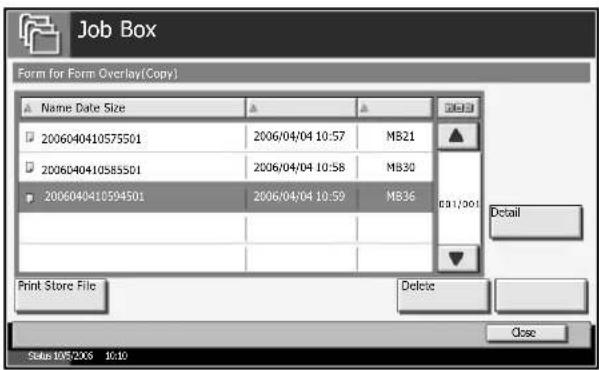
text_image
Job Box Form for Form Overlay(Copy) Name Date Size 2006040410575501 2006/04/04 10:57 MB21 2006040410585501 2006/04/04 10:58 MB30 2006040410594501 2006/04/04 10:59 MB36 Print Store File Delete Close Status: 10/5/2006 10:105 Press [Close].
Deleting a Form Stored
1 Press the Document Box key.
2 Press [Job Box].
3 Select [Image Overlay Form (Copy)] and press [Open].
4 Select the form to delete and press [Delete].
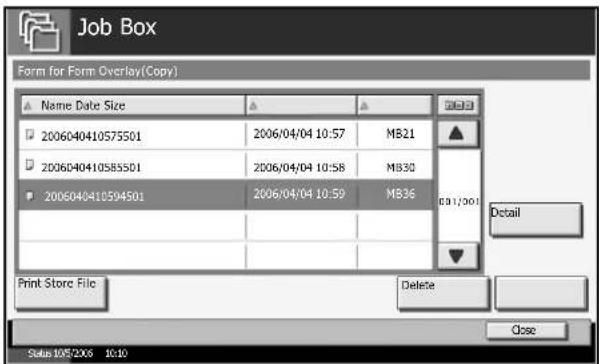
text_image
Job Box Form for Form Overlay(Copy) Name Date Size 2006040410575501 2006/04/04 10:57 MB21 2006040410585501 2006/04/04 10:58 MB30 2006040410594501 2006/04/04 10:59 MB36 Print Store File Delete Close Detail5 Press [Yes]. The form is deleted.
5 Status / Job Cancel
This chapter explains how to check the status and history of jobs and cancel the jobs while processing or waiting to be printed.
This chapter also contains how to check the remaining amount of toner and paper and the condition of devices, and cancel the fax communication.
- Checking Job Status.... 5-2
- Checking Job History 5-8
- Pause and Resumption of Job 5-10
- Canceling of Job....5-11
• Priority Override the Waiting Jobs 5-12 - Checking the Remaining Amount of Toner and Paper5-13
• Device/Communication 5-14
Checking Job Status
Check the status of jobs while processing or waiting to be printed.
Available Status Screens
The processing and waiting statuses of jobs are displayed as a list on the touch panel in four separated screens - Printing Jobs, Sending Jobs, Sending Jobs - Timer waiting, and Storing Jobs. The following job statuses are available.
| Screen Job statuses to be displayed | |
| Printing Jobs • Copy | PrinterFAX receptionE-mail receptionPrinting from Document BoxJob Report /ListPrinting data from removable memory |
| Sending Jobs • FAX transmission | PC (SMB/FTP) transmissionE - m a i lT W A I NMultiple destinationSending Job FAX using Delayed transmission |
| Storing Jobs • Scan | FAXPrinter |
Displaying Status Screen
1 Press the Status/Job Cancel key.
2 Press either of [Printing Jobs], [Sending Jobs], or [Storing Jobs] to check the status. To check the scheduled transmission job, press [Sending Jobs] and then [Scheduled Job].
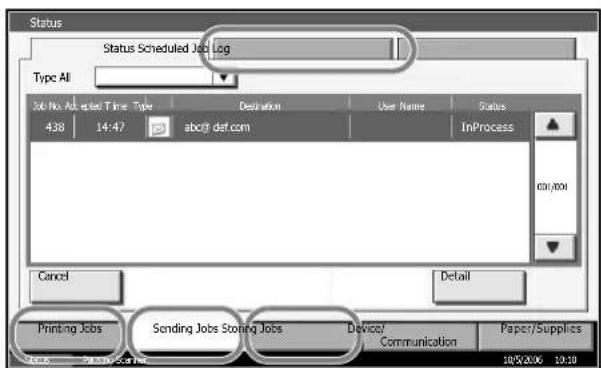
text_image
Status Status Scheduled Job Log Type All 36 No. 10:45 Time Type Destination User Name Status 438 14:47 abc@ def.com InProcess 001/001 Cancel Detail Printing Jobs Sending Jobs Storing Jobs Device/Communication Paper/Supplies 001-002 24:30:35:45:00 10:30:30:06 10:19Contents of the Status Screen
The items and keys displayed on the Status screen are as follows.
Printing Jobs Status screen
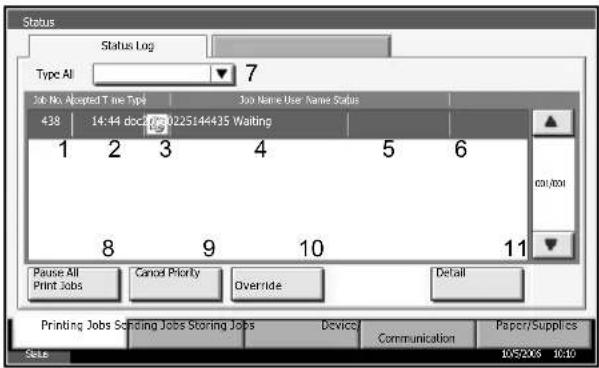
text_image
Status Status Log Type All 7 36 No. Adopted Time Type 300 Name User Name Status 438 14:44 doc#225144435 Waiting 1 2 3 4 5 6 cot/oot Pause All Print Jobs Cancel Priority Override Detail Printing Jobs Sending Jobs Storing Jobs Device Communication Paper/Supplies State 10/5/2006 10:10| No. | Item / Key | Detail |
| 1 | Job No. | Acceptance No. of job |
| 2 | Accepted Time | Accepted Time of job |
| 3 | Type | Icons that indicate the job typeCopy jobPrinter jobFAX receptionE-mail receptionJob from Document BoxReport / ListData from Removable Memory |
| 4 | Job Name | Job Name or file name |
| 5 | User Name | When there is no User Name that executed this job or Login User Name information to be displayed,anonymous is displayed |
| 6 | Status Name | Status of jobInProcess: The status before starting to print such as when scanning originals.Printing:Waiting: Print WaitingSuspending: Suspending printing by pausing print job or errorCanceling: Canceling the job |
| 7 | [▼] of Type | Sorts by specific type of job |
| No. | Item / Key Detail | |
| 8 [Pause all Print Jobs] Pauses | all the printing jobs. By pressing this key again, the printing jobs will be resumed. | |
| 9 [Cancel] Select the job to be canceled from the list, and press this key. | ||
| 10 [Priority Override] Select the job to be overridden, and press this key.(Refer to Priority Override the Waiting Jobs on page 5-12) | ||
| 11 [Detail] Select the job to display detailed information from the list, and press this key. (Refer to Checking the Detailed Information of Histories on page 5-9) | ||
Sending Jobs Status screen
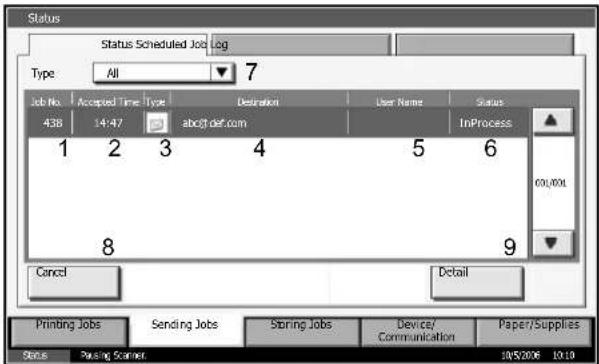
text_image
Status Status Scheduled Job Log Type All 7 Job No Accepted Time Type Destination User Name Status 438 14:47 abc@def.com InProcess 1 2 3 4 5 6 00/001 8 9 Cancel Detail Printing Jobs Sending Jobs Spring Jobs Device/ Communication Paper/Supplies Status Pushing Scarlet 10/5/2006 10:10| No. | Item / Key Detail | |
| 1 Job | No. | Acceptance No. of job |
| 2 Accepted Time | Accepted Time of job | |
| 3 Type | Icons that indicate the job type■Sending Job FAX [7028]■Sending Job PC (SMB/FTP) [BW37]■Sending Job E-mail  ■Sending Job TWAIN ■Sending Job TWAIN  ■Sending Job Multiple ■Sending Job Multiple  | |
| 4 Destination | Destination (Either destination name, FAX number, E-mail address, or server name) | |
| 5 | User Name When there is neither User Name that executed this job nor Login User Name information, anonymous is displayed. | |
| 6 | Status Status of job | InProcess: The status before starting sending such as during scanning originalsSendingWaiting: Sending WaitingCanceling: Canceling the job |
| 7 | [▼] of Type Can only display specific kinds of jobs. | |
| 8 [Cancel] Select the job you want to cancel from the list, and press this key. | ||
| 9 [Detail] Select the job whose detailed information you want to display from the list, and press this key. (Refer to Checking the Detailed Information of Histories on page 5-9) | ||
Storing Jobs Status screen
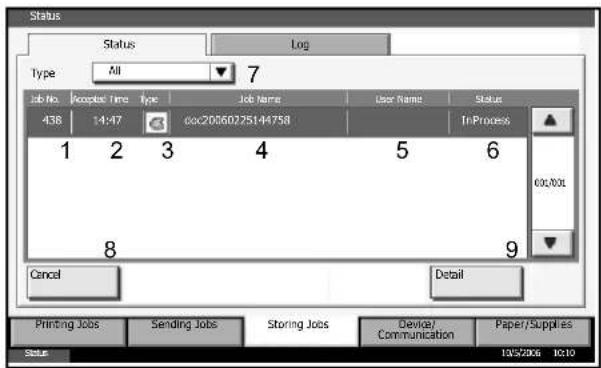
text_image
Status Status Log Type All 7 Job No. Projects Time Type Job Name User Name Status 438 14:47 cxc20060225144758 In-Process 1 2 3 4 5 6 8 9 Cancel Detail Printing Jobs Sending Jobs Storing Jobs Device/Communication Paper/Supplies Status 10/5/2006 10:10| No. | Display / Key | Details |
| 1 Job No. | Acceptance No. of job | |
| 2 Accepted Time | Accepted Time of job | |
| 3 Type | Icons that indicate the job type■Storing Job Scan  ■Storing Job Printer ■Storing Job Printer  ■Storing Job FAX ■Storing Job FAX  | |
| 4 Job | Name Job name or file name is displayed. | |
| 5 User | Name When there is neither User Name that executed this job nor Login User Name information, anonymous is displayed. | |
| 6 Status | Status of job | InProcess: The status before starting to save such as during scanning originalsStoring: Storing Data Canceling: Canceling the job |
| 7 | [ ▼] of Type Can only display specific kinds of jobs. | |
| 8 [Cancel] | Select the job you want to cancel from the list, and press this key. | |
| 9 [Detail] | Select the job whose detailed information you want to display from the list, and press this key. (Refer to Checking the Detailed Information of Histories on page 5-9) | |
Checking the Detailed Information of Jobs
Check the detailed information of each job.
1 Press the Status/Job Cancel key.
2 Press [Printing Jobs], [Sending Jobs], or [Storing Jobs].
To check the scheduled transmission, press [Sending Jobs] and then [Scheduled Job].
3 Select the job to check details from the list, and press [Detail].
Detailed information of the selected job is displayed.
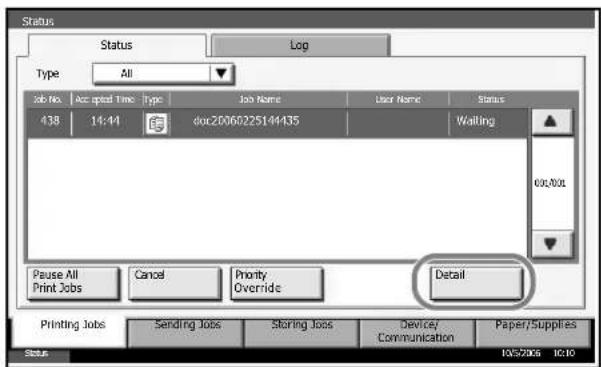
text_image
Status Status Log Type All Job No. Acc opted Time Type Job Name User Name Status 438 14:44 doi:20060225144435 Walling Pause All Cancel Priority Detail Print Jobs Sending Jobs Staring Jobs Devicey Paper/Supplies 10/27/05 10:10 Printing Jobs StatusNOTE: To check the information of the next/previous page, press [▼] or [▲].
In Sending Jobs, press [Detail] of Destination to check the destination.
When two or more destinations are selected, Status/Destination is displayed. Pressing [Detail] in this step displays the selected destinations as a list. Press [▼] or [▲] to select the destination and then press [Detail]. The information on the selected destination is displayed for confirmation.
4 To exit from the detailed information, press [Close].
Checking Job History
Check the history of completed jobs.
NOTE: Job history is also available by Command Center or KM-NET VIEWER from the computer.
Available Job History Screens
The job histories are displayed separately in three screens - Printing Jobs, Sending Jobs, and Storing Jobs. The following job histories are available.
| Screen Job histories to be displayed | |
| Printing Jobs • Copy | • P r i n t e r• FAX reception• E-mail reception• Printing from Document Box• Job Report / List• Printing data from removable memory |
| Sending Jobs • FAX transmission | • PC (SMB/FTP) transmission• E - m a i l• T W A I N• Multiple destination |
| Storing Jobs • Scan | • FAX• P r i n t e r |
Displaying Job History Screen
1 Press the Status/Job Cancel key.
2 Press either of [Printing Jobs], [Sending Jobs], or [Storing Jobs] to check the log, and press [Log].
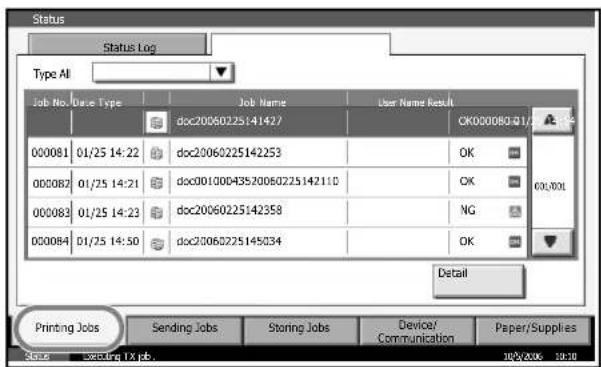
text_image
Status Status Log Type All Job No. Date Type Job Name User Name Result 000081 01/25 14:22 doc20060225141427 CK0000B031 000082 01/25 14:21 doc00100D43520060225142110 OK 000083 01/25 14:23 doc20060225142358 NG 000084 01/25 14:50 doc20060225145034 OK Detail Printing Jobs Sending Jobs Staring Jobs Device/ Paper/Supplies Score Starting TX pb 10/9/2006 19:38Checking the Detailed Information of Histories
Check the detailed information of each history.
Display of the detailed information of Job Finish history
1 Press the Status/Job Cancel key.
2 Press [Printing Jobs], [Sending Jobs] or [Storing Jobs] and then [Log].
3 Select the job to check details from the list, and press [Detail].
Detailed information of the selected job is displayed.
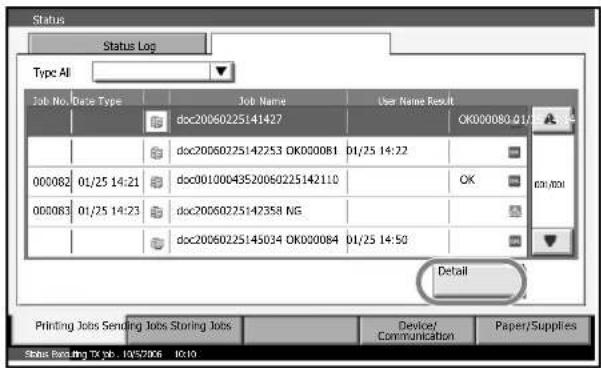
text_image
Status Status Log Type All Job No. Date Type Job Name User Name Result doc20060225141427 OK000080.01/ doc20060225142253 OK000081 01/25 14:22 000082 01/25 14:21 doc00100043520060225142110 OK 000083 01/25 14:23 doc20060225142358 NG doc20060225145034 OK000084 01/25 14:50 Detail Printing Jobs Sending Jobs Storing Jobs Device/ Paper/ Supplies Status Reporting TX job, IA957906 10:10NOTE: To check the information of the next/previous page, press [▼] or [▲].
4 To exit from the detailed information, press [Close].
Pause and Resumption of Job
Pause /resume all printing jobs in printing/waiting.
1 Press the Status/Job Cancel key.
2 Press [Pause All Print Jobs] on the Printing Jobs Status screen. Printing is paused.
3 When resuming the printing of job that has been paused, press [Resume All Print Jobs].
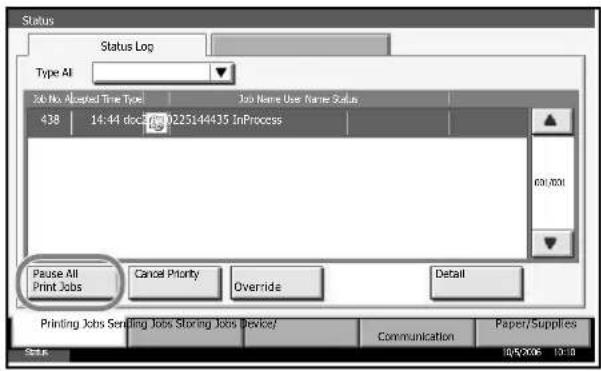
text_image
Status Status Log Type All Job No Alotted Time Tool Job Name Use Name Status 438 14:44 doc 0225144435 InProcess Pause All Print Jobs Cancel Priority Override Detail Printing Jobs Sending Jobs Storing Jobs Device/ Communication Paper/Supplies 10/07/2006 10:10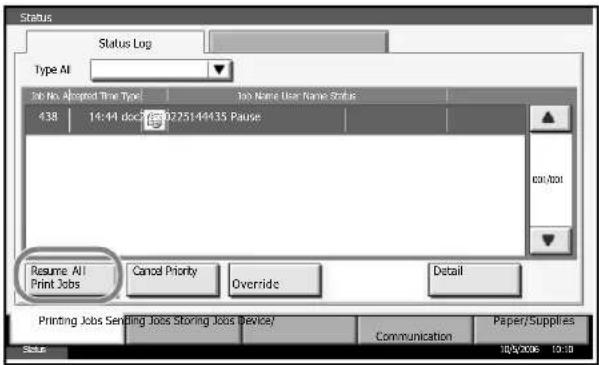
text_image
Status Status Log Type AI Job No. Adopted Time Type Job Name User Name Status 438 14:44 doc 0275144435 Pause Resume All Print Jobs Cancel Priority Override Detail Printing Jobs Sending Jobs Storing Jobs Device/Communication Paper/Supplies Status 10/2006 19:19Canceling of Job
Cancel the job in printing/waiting.
NOTE: You cannot cancel the printing job of received fax.
1 Press the Status/Job Cancel key.
2 Press [Printing Jobs], [Sending Jobs], or [Storing Jobs].
3 Select the job to be canceled, and press [Cancel].
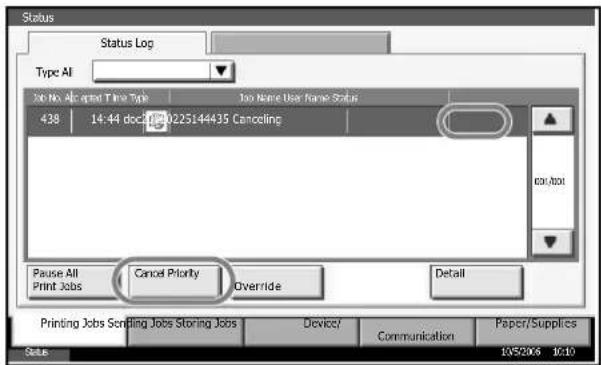
text_image
Status Status Log Type All Job No. All copy Time Type 100 Name User Name Status 438 14:44 doc#25144435 Canceling Pause All Cancel Priority Detail Print Jobs Override Printing Jobs Scripting Jobs Storing Jobs Device/Communication Paper/Supplies 10/5/2006 10:104 Press [Yes] in the confirmation screen. Canceling is displayed in the Status area, and the job is deleted.
NOTE: When the job is completely canceled, the canceled job is displayed on the history screen. (For details of job history, refer to Checking Job History on page 5-8)
5 To cancel another job, repeat steps 2 to 4.
Priority Override the Waiting Jobs
Priority Override function suspends the current job and prints the job in waiting first.
NOTE: The current job that is selected as Priority Override cannot be suspended. After the current Priority Override job is completed, the next Priority Override job is printed.
1 Press the Status/Job Cancel key.
2 Select the job to give a priority, and press [Priority Override].
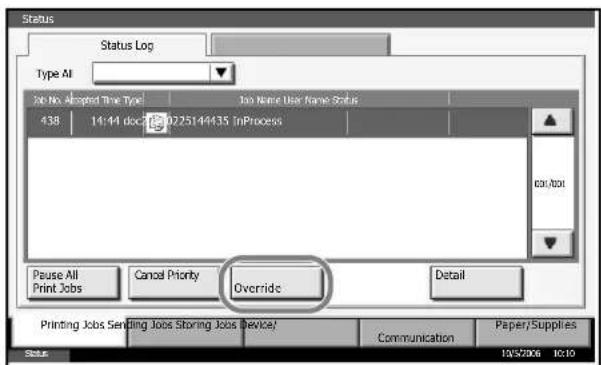
text_image
Status Status Log Type All Job No Adopted Type: Job Name User Name Status 438 14:44 dcd 0225144435 InProcess Pause All Print Jobs Cancel Priority Override Detail Printing Jobs Sending Jobs Storing Jobs Device! Communication Paper/Supplies 10/17/06 10:103 Press [Yes] in the confirmation screen. The current job in printing is suspended, and the job for override printing starts.
4 When the Priority Override is completed, the printing job that has been suspended will be resumed.
Checking the Remaining Amount of Toner and Paper
Check the remaining amount of toner, paper, and staple on the touch panel.
1 Press the Status/Job Cancel key.
2 Press [Paper/Supplies] to check the remaining amount of toner, paper, and staple.
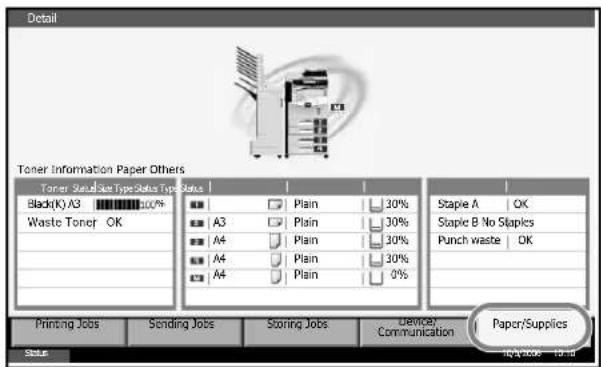
text_image
Detail Toner Information Paper Others Toner Status Type Status Type Status | Black(K)/A3 100% Waste Toner OK Plain 30% A3 Plain 30% A4 Plain 30% A4 Plain 30% A4 Plain 0% Staple A OK Staple B No Staples Punch waste OK Printing Jobs Sending Jobs Storing Jobs Device/ Communication Paper/Supplies Status IQA 2006 12:18Toner Information
Remaining amount of toner
You can check the remaining amount of toner by 11 stages from 100 to 0%.
Status of waste toner box
You can check the status of waste toner box.
Paper
You can check the size, orientation, type, and remaining amount of paper in each paper source.
Others
You can check the status of staple and punch waste box.
Device/Communication
Check the status or configure the devices/lines installed or connected to this machine.
Displaying Device/Communication Screen
1 Press the Status/Job Cancel key.
2 Press [Device/Communication]
The screen to check the status or configure the devices is displayed.
Check of Device Status
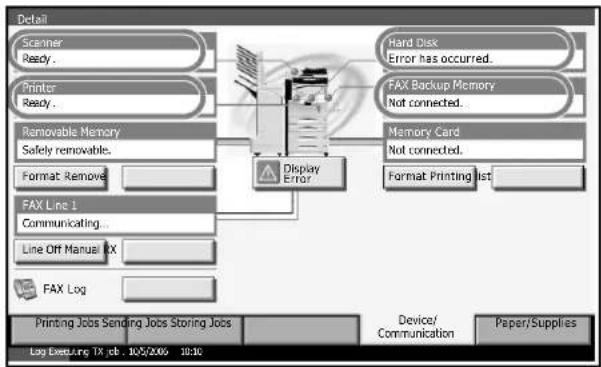
text_image
Detail Scanner Ready.. Printer Ready.. Removable Memory Safely removable.. Format Remove FAX Line 1 Communicating.. Line Off Manual TX FAX Log Display Error Hard Disk Error has occurred.. FAX Backup Memory Not connected.. Memory Card Not connected.. Format Printing list Printing Jobs Sending Jobs Storing Jobs Device/ Communication Paper/Supplies Log Existing TX .pb . 10/5/2006 10:30Scanner
The status of original scanning in the document processor (optional) or the error information (paper jam, opened cover, etc.) is displayed.
Printer
The error information such as paper jam, out of toner, and out of paper, and the status such as waiting and printing are displayed.
Hard Disk
The information such as formatting, overwriting for erasure, and error occurrence is displayed.
FAX Backup Memory
Usage and Capacity of the backup memory are displayed.
Configuring the Devices
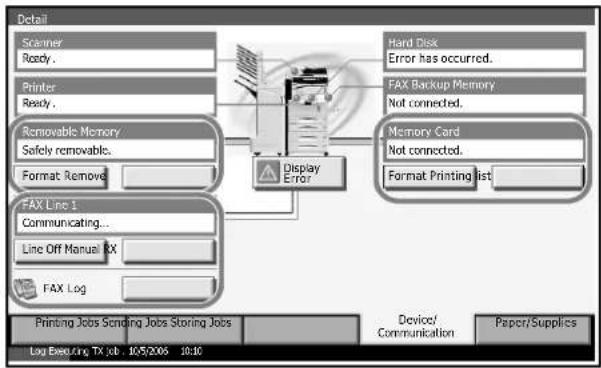
text_image
Detail Scinner Ready . Printer Ready . Removable Memory Safely removable. Format Remove FAX Line 1 Communicating... Line Off Manual FX FAX Log Display Error Hard Disk Error has occurred. FAX Backup Memory Not connected. Memory Card Not connected. Format Printing list Printing Jobs Sending Jobs Storing Jobs Device/ Communication Paper/Supplies Log Executing TX job : 10/5/2006 10:10Removable Memory (USB Memory)
- The usage and capacity of the external media connected to this machine are displayed.
- Press [Format] to format external media.
- Press [Remove] to safely remove the external media. For details, refer to Removing the USB Memory in the next section.
FAX Line 1
• The information such as sending/receiving and dialing is displayed.
- Press [Line Off] to cancel the FAX in sending/receiving. For details, refer to Canceling FAX Communication on page 5-16 in the section afterwards.
- Press [Manual RX] to start FAX. Use this function when you want to talk to the sender before receiving the FAX originals. For details, refer to the Operation Guide of FAX kit.
- Press [Log] to display the transmission history of FAX. For details, refer to the Operation Guide of FAX kit.
Memory Card (memory for printer, Compact Flash)
- The information such as cannot recognize or unconnected and the usage/capacity of memory card are displayed.
- Press [Format] to format the memory card.
- Press [Printing list] to print the partition list. For details, refer to Print of Partition List.
Removing the USB Memory
Remove the USB memory.
1 Press the Status/Job Cancel key.
2 Press [Device/Communication] and then [Remove].
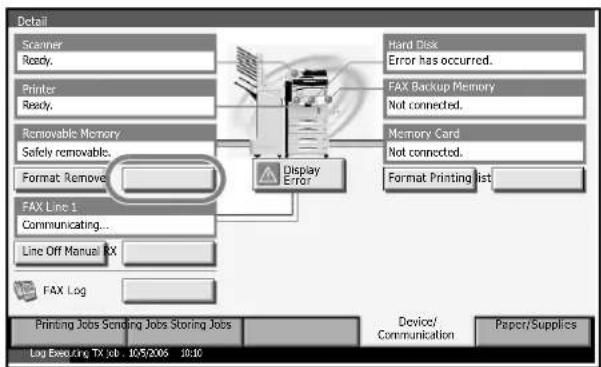
text_image
Detail Scanner Ready. Printer Ready. Removable Memory Safely removable. Format Remove FAX Line 1 Communicating... Line Off Manual RX FAX Log Display Error Hard Disk Error has occurred. FAX Backup Memory Not connected. Memory Card Not connected. Format Printing list Printing Jobs Sending Jobs Storing Jobs Device/ Communication Paper/Supplies Log Executing TX job - 10/5/2006 18:303 When Device can be removed safely is displayed, remove the USB memory.
Canceling FAX Communication
Cancel the communication of FAX.
1 Press the Status/Job Cancel key.
2 Press [Device/Communication] and then [Line Off].
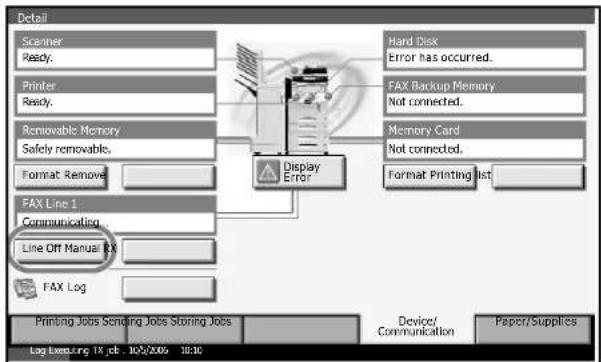
text_image
Detail Scanner Ready. Printer Ready. Removable Memory Safely removable. Format Remove FAX Line 1 Communicating Line Off Manual RX FAX Log Display Error Hard Disk Error has occurred. FAX Backup Memory Not connected. Memory Card Not connected. Format Printing list Printing Jobs Sending Jobs Storing Jobs Device/ Communication Paper/Supplies Log Executing TX job . 10/2/2005 10:303 Press [Yes]. The line is disconnected, and the fax communication is canceled.
Printing Partition List
Print the partition list of the memory for printer (Memory Card).
1 Press the Status/Job Cancel key.
2 Press [Device/Communication] and then [Printing list].
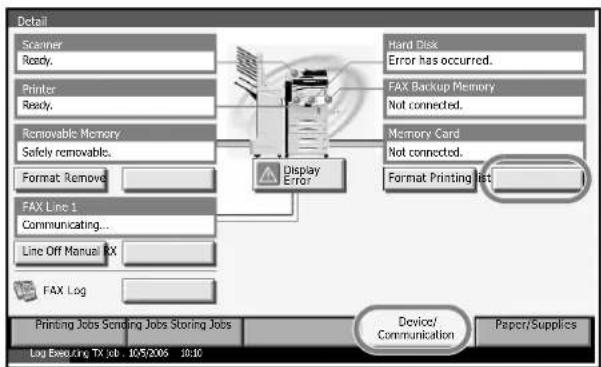
text_image
Detail Scanner Ready. Printer Ready. Removable Memory Safely removable... Format Remove FAX Line 1 Communicating... Line Off Manual RX FAX Log Display Error Hard Disk Error has occurred. FAX Backup Memory Not connected. Memory Card Not connected. Format Printing list Printing Jobs Sending Jobs Storing Jobs Device/ Communication Paper/Supplies Log Executing TX job - 10/5/2006 18:303 Press [Yes] to start printing the list.
NOTE: When the job accounting is enabled, the list may not be printed. For details, refer to page 7-15.
6 System Menu
This chapter explains how to configure various settings of the machine using the menus on the operation panel.
• Common Settings.... 6-2
• Copy Settings 6-35
- Sending Settings 6-40
- Document Box/Removable Memory Settings...... 6-41
• Printer Settings.... 6-43
• Network Setup.... 6-50
• Printing Reports/Sending Notice 6-53
- Adjustment/Maintenance....6-58
- Date/Timer.... 6-64
- Editing Destination (Address Book/Adding One-Touch Keys) 6-70
• System Initialization...... 6-78
- Restarting the System.... 6-79
- Accessibility (Enlarging Touch Panel Display)...... 6-80
Common Settings
Common settings include;
- Switching the Language for Display [Language] ...6-2
- Default Screen ...6-3
- Buzzer ...6-3
- Keyboard ...6-4
• Original/Paper Setup ...6-5
• Switching Measurement ...6-16 - Error Handling ...6-17
- Output Tray ...6-19
• Function Defaults ...6-20
NOTE: If user login administration is valid, only administrators can change common settings.
Switching the Language for Display [Language]
Select the language displayed on the touch panel.
1 Press the System Menu key.
2 Press [Common Settings] and then [Change] of Language.
3 Press the key for the language you want to use.
![Triumph-Adler DC 2230 - Switching the Language for Display [Language] - 1](/content/2026/05/767912/images/16fcc0877c71d1386f5b95d74cbf9cc7121dec2abb0fd89d7de470781998f55d.jpg)
text_image
Common Settings - Language Set the language to use for the touch panel display. English Français Deutsch Italiano Español Nederlands Portugues Cancel OK Status: 19/05/2006 10:104 Press [OK].
5 Press the power button, check that the Power key/indicator and memory indicator are OFF, and turn the main power switch off.
6 Turn the main power switch on. Touch panel will be displayed in the selected language.
Default Screen
Select the screen appearing right after start-up (default screen). The options are as follows.
| Item Description | |
| Copy The Copy screen (the screen shown when the Copy key is pressed) appears. | |
| Send The Send screen (the screen shown when the Send key is pressed) appears. | |
| Status The Status/Job Cancel screen (the screen shown when the Status/Job Cancel key is pressed) appears. | |
| Document Box The Document Box screen (the screen shown when the Document Box key is pressed) appears. | |
| Program The Program screen (the screen shown when the Program key is pressed) appears. | |
1 Press the System Menu key.
2 Press [Common Settings] and then [Change] of Default Screen.
3 Select the screen you wish to show.
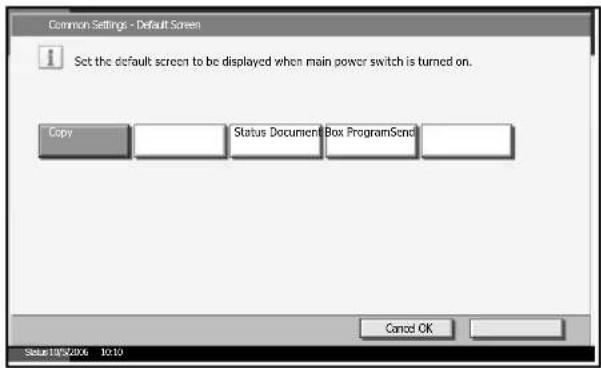
text_image
Common Settings - Default Screen Set the default screen to be displayed when main power switch is turned on. Copy Status Document Box ProgramSend Cancel OK Status10/05/2016 10:104 Press [OK].
Buzzer
Set options for buzzer sound during the machine operations.
| Item Value | Description | |
| Volume | 0 (Mute), 1 (Minimum) to5 (Maximum) | Set the buzzer volume level. |
| Item Value Description | ||
| Key Confirmation | Off, On Announce that the control panel and touch panel keys are pressed with a beep. | |
| Job Finish Off, | On Announce that a print job is normally completed with a sound. | |
| Ready Off, On | Announce the warm-up is completed with a sound. | |
| Warning Off, On | Announce errors with a sound. | |
1 Press the System Menu key.
2 Press [Common Settings], [Next] of Sound and then [Next] of Buzzer.
3 Press [Change] of
Volume, Key Confirmation, Job Finish, Ready, or Warning.
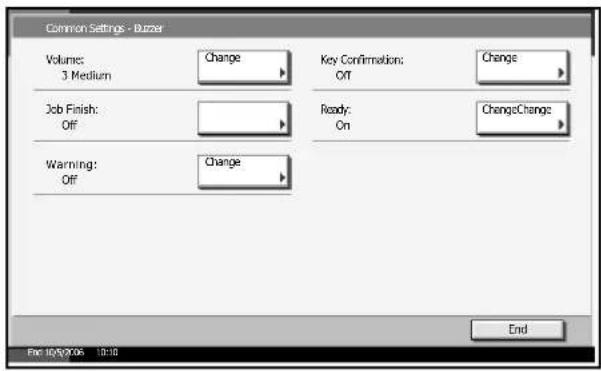
text_image
Common Settings - Buzzer Volumes: 3 Medium Change Job Finish: Off Warning: Off Change Key Confirmations: Off Ready: On Change Change Change End Fan 10/20/06 10:104 Select the buzzer volume level, or other sound options.
5 Press [OK].
Keyboard
Select the character-entry keyboard layout suitable for the selected language.
| Item | Description |
| QWERTY QWERTY | layout keyboard, mainly used for English |
| QWERTZ QWERTZ | layout keyboard, mainly used for German and Czech |
| AZERTY | AZERTY layout keyboard, mainly used for French |
1 Press the System Menu key.
2 Press [Common Settings] and then [Change] of Keyboard.
3 Select the keyboard layout you want to use.
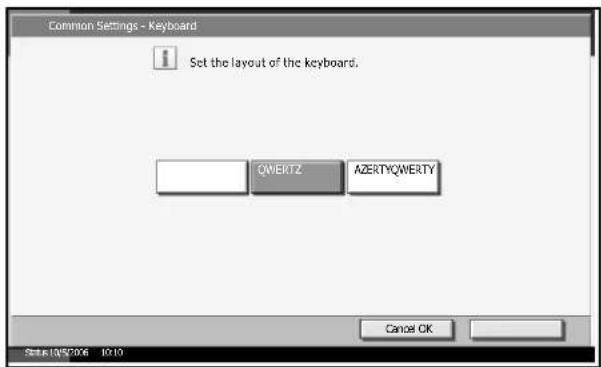
text_image
Common Settings - Keyboard Set the layout of the keyboard. QWERTZ AZERTYQWERTY Cancel OK Status:10/5/2006 10:104 Press [OK].
Original/Paper Setup
Add type and size of original and paper.
Custom Original Size Setup
Set up frequently-used custom original sizes at maximum. The custom size options are displayed on the screen to select original size. The dimensions available are as follows.
| Measurement Dimensions | |
| Inch models X: 2 to | 17" (in 0.01" increments)Y: 2 to 11.69" (in 0.01" increments) |
| Metric models X: 50 | to 432 mm (in 1 mm increments)Y: 50 to 297 mm (in 1 mm increments) |
Up to four custom original sizes can be added.
1 Press the System Menu key.
2 Press [Common Settings], [Next] of Original/Paper Setup and then [Next] of Custom Original Size.
3 Press [Change] of Custom 1 to Custom 4, on which you wish to register the size.
4 Press [On], and then press [+]/[-] or numeric keys to enter X (horizontal) and Y (vertical) dimensions.
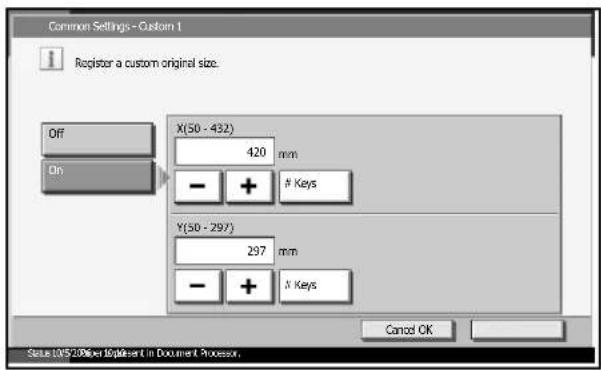
text_image
Common Settings - Custom 1 Register a custom original size. Off On X(50 - 432) 420 mm - +Keys
Y(50 - 297) 297 mm - + X Keys Cancel OK Status: No. 5 Project Insert in Document Processor.5 Press [OK].
Adding a Custom Size and Type for Paper to Print
Set up four frequently-used custom paper sizes at maximum. The custom size options are displayed on the screen to select paper set in the Multi Purpose tray.
| Measurement Dimensions | |
| Inch models H: 5.83 | to 17" (in 0.01" increments)V: 5.86 to 11.69" (in 0.01" increments) |
| Metric models H: 148 | to 432 mm (in 1 mm increments)V: 98 to 297 mm (in 1 mm increments) |
Up to four custom original sizes can be added.
Select type of paper for each paper size.
Type of paper: Plain, Transparencies, Rough, Vellum, Labels, Recycled, Preprint, Bond, Cardstock, Color, Prepunched, Letterhead, Thick, Envelope, High Quality, Custom 1-8
NOTE: Refer to Paper Type on page 6-10 for Custom 1-8 for Paper Type.
1 Press the System Menu key
2 Press [Common Settings], [Next] of Original/Paper Setup and then [Next] of Custom Paper Size.
3 Press [Change] of Custom 1 to Custom 4, on which you want to register the size.
4 Press [On], and then press [+]/[-] or numeric keys to enter X (horizontal) and Y (vertical) dimensions.
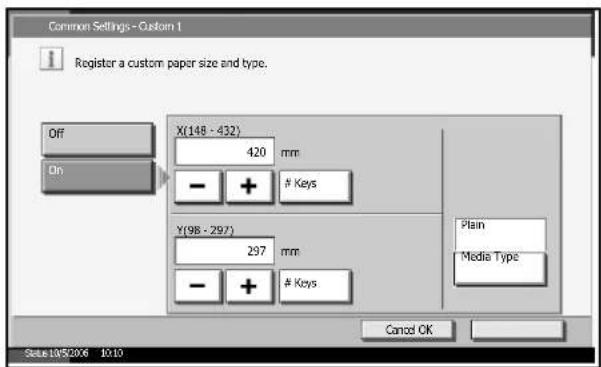
text_image
Common Settings - Custom 1 Register a custom paper size and type. Off X(148 - 432) 420 mm - +Keys
Plain Media Type Y(98 - 297) 297 mm - +Keys
Cancel OK Status:10/5/2006 10:105 Press [Media Type] to select the type of paper and press [OK] if necessary.
6 Press [OK].
Paper Size and Type Setup for Cassettes
Select paper size and type of paper for Cassette 1, 2 and optional paper feeders (Cassette 3 and 4). Select type of paper only for the optional 3000 sheet paper feeder (Cassette 3).
| Item | Description | |
| Paper Size | Auto Automatically detect paper size. Select Metric or inch for paper size. | |
| Standard Sizes 1 | Available options are as follows:Inch models: Ledger, Legal, Letter, Letter-R, Statement-R, 8.5×13.5", Oficio IIMetric models: A3, B4, A4, A4-R, B5, B5-R, A5-R, Folio | |
| Standard Sizes 2 | Select a standard size except that selected in Standard Sizes 1.Inch models: A3, B4, A4, A4-R, A5-R, B5, B5-R, Folio, 8K, 16K, 16K-RMetric models: Ledger, Legal, Letter, Letter-R, Statement-R, 8.5×13.5", Oficio II, 8K, 16K, 16K-R | |
| Media Type Plain, Rough, Vellum, Recycled, Preprint, Bond, Color, Prepunched, Letterhead, Thick, High Quality, Custom | ||
1 Press the System Menu key.
2 Press [Common Settings], [Next] of Original / Paper Setup, [Next] of Cassette Setting, [Next] of Cassette 1 to Cassette 4, on which you want to register the size, and then [Change] of Paper Size.
3 To detect paper size automatically, press [Auto] and select Metric or Inch for Paper Size.
To select paper size, press [Standard Sizes 1] or [Standard Sizes 2] for Paper Size.
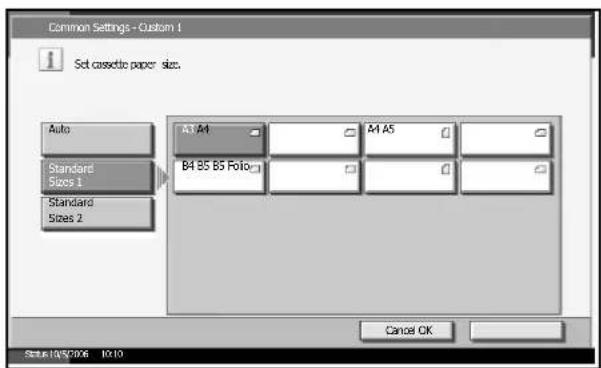
text_image
Common Settings - Custom 1 Set cassette paper size. Auto Standard Sizes 1 Standard Sizes 2 A4 A4 B4 B5 B5 Folio A4 A5 Cancel OK Status:08/06/2006 10:104 Press [OK].
5 Press [Change] of Media Type to select type of paper and press [OK].
Paper Size and Media Type Setup for Multi Purpose Tray
Select size and type of paper for Multi Purpose Tray. Set up frequently-used size and type of paper before use.
| Item Description | ||
| Paper Size | Auto | Automatically detect paper size. Select Metric or Inch for paper size. |
| Standard Sizes 1 | Available options are as follows:Inch models: Ledger, Legal, Letter, Letter-R, Statement-R, 8.5×13.5", Oficio II, Executive Metric models: A3, B4, A4, A4-R, B5, B5-R, A5-R, B6-R, A6-R, Folio | |
| Standard Sizes 2 | Select a standard size except that selected in Standard Sizes 1.Inch models: A3, B4, A4, A4-R, B5, B5-R, A5-R, B6-R, A6-R, Folio, 8K, 16K, 16K-RMetric models: Ledger, Legal, Letter, Letter-R, Statement-R, 8.5×13.5", Oficio II, Executive, 8K, 16K, 16K-R | |
| Others Select special standard sizes or custom sizes*.ISO B5, Envelope #10, Envelope #9, Envelope #6, Envelope Monarch, Envelope DL, Envelope C5, Envelope C4, Hagaki, Oufuku Hagaki, Youkei 4, Youkei 2 | ||
| Size Entry | Enter a size not displayed in the standard sizes.Inch models:H: 5.83 to 17" (in 0.01" increments)V: 3.86 to 11.69" (in 0.01" increments)Metric models:V: 98 to 297 mm (in 1 mm increments)H: 148 to 432 mm (in 1 mm increments) | |
| Media Type Plain, Transparencies, Rough, Vellum, Labels, Recycled, Preprint, Bond, Cardstock, Color, Prepunched, Letterhead, Thick, Envelope, High Quality, Custom 1-8** | ||
* Refer to Adding a Custom Size and Type for Paper to Print on page 6-6 for selecting Custom 1-4 for Custom Paper Size.
** Refer to Paper Type on page 6-10 for selecting Custom 1-8 from Paper Type.
1 Press the System Menu key.
2 Press [Common Settings], [Next] of Original/Paper Setup, [Next] of MP Tray Setting and then [Change] of Paper Size.
3 To detect paper size automatically, press [Auto] and select Metric or Inch for Paper Size.
To select paper size, press [Standard Sizes 1], [Standard Sizes 2], [Others] or [Size Entry] for Paper Size.
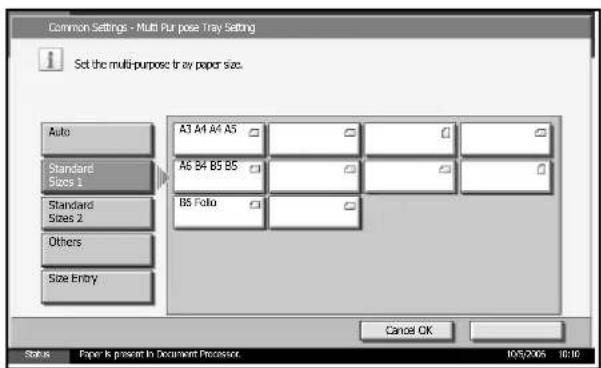
text_image
Common Settings - Multi Purpose Tray Setting Set the multi-purpose tray paper size. Auto Standard Sizes 1 Standard Sizes 2 Others Size Entry A3 A4 A4 A5 A6 B4 B5 B5 B5 Folio Cancel OK Status Paper is present in Document Processor 10/5/2005 10:10If you select [Size Entry], press [+]/[-] to enter X (horizontal) and Y (vertical) dimensions.
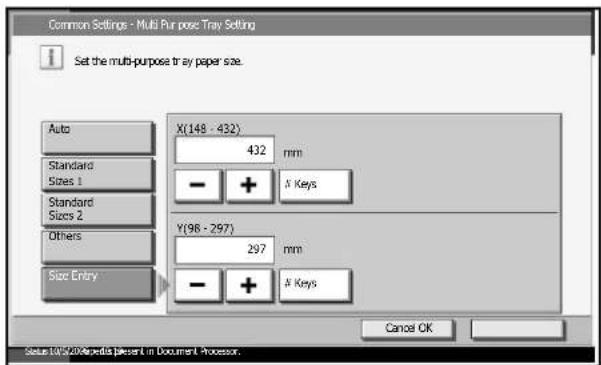
text_image
Common Settings - Multi Purpose Tray Setting Set the multi-purpose tray paper size. Auto Standard Sizes 1 Standard Sizes 2 Others Size Entry X(148 - 432) 432 mm - + A Keys Y(96 - 297) 297 mm - + A Keys Cancel OK Status: 10/5/20 Appendix please in Document Processor.4 Press [OK].
5 Press [Change] of Media Type to select the type of paper and press [OK].
Paper Type
Select weight for each type of paper. The options for type and weight of paper are as follows.
Paper availability for cassettes
●: Available ×: Not available
| Paper Weight | Light | Normal 1 | Normal 2 | Normal 3 | Heavy 1 | Heavy 2 | Heavy 3 | Extra Heavy |
| Weight (g/m2), Paper type | 64g/m2or less | 60g/m2to 75g/m2 | 76g/m2to 90g/m2 | 91g/m2to 105g/m2 | 106g/m2to 135g/m2 | 136g/m2to 170g/m2 | 171g/m2and more | Transparencies |
| Plain | ● | ● | ● | ● | × | × | × | × |
| Rough | ● | ● | ● | ● | × | × | × | × |
| Vellum | ● | ● | ● | ● | × | × | × | × |
| Recycled | ● | ● | ● | ● | × | × | × | × |
| Paper Weight Light Normal | 1 Normal 2 | Normal 3 | Heavy 1 | Heavy 2 | Heavy 3 | Extra Heavy | |
| Preprint ● | ● | ● | ● | × | × | × | × |
| Bond ● | ● | ● | ● | × | × | × | × |
| Color ● | ● | ● | ● | × | × | × | × |
| Prepunched ● | ● | ● | ● | × | × | × | × |
| Letterhead ● | ● | ● | ● | × | × | × | × |
| High Quality ● | ● | ● | ● | × | × | × | × |
| Custom 1-8 ● | ● | ● | ● | × | × | × | × |
Paper availability for Multi Purpose Tray
●: Available ×: Not available
| Paper Weight | Light | Normal 1 | Normal 2 | Normal 3 | Heavy 1 | Heavy 2 | Heavy 3 | Extra Heavy |
| Weight (g/m2), Paper type | 64g/m2 or less | 60g/m2 to 75g/m2 | 76g/m2 to 90g/m2 | 91g/m2 to 105g/m2 | 106g/m2 to 135g/m2 | 136g/m2 to 170g/m2 | 171g/m2 and more | Transparencies |
| Plain | ● | ● | ● | ● | × | × | × | × |
| Transparencies | × | × | × | × | × | × | × | ● |
| Rough | ● | ● | ● | ● | ● | × | × | × |
| Vellum | ● | ● | ● | ● | × | × | × | × |
| Labels | × | × | × | × | ● | ● | ● | × |
| Recycled | ● | ● | ● | ● | × | × | × | × |
| Preprint ● | ● | ● | ● | × | × | × | × | |
| Bond | ● | ● | ● | ● | ● | × | × | × |
| Cardstock | × | × | × | × | ● | ● | ● | × |
| Color ● | ● | ● | ● | × | × | × | × | |
| Prepunched ● | ● | ● | ● | × | × | × | × | |
| Letterhead ● | ● | ● | ● | ● | × | × | × | |
| Thick | × | × | ● | ● | ● | ● | ||
| Envelope | × | × | × | × | ● | ● | ● | × |
| High Quality ● | ● | ● | ● | ● | × | × | × | |
| Custom 1-8 ● | ● | ● | ● | ● | ● | ● | ● |
For Custom 1-8, settings for duplex printing and paper type name can be changed.
| Item | Description | |
| Duplex | Prohibit Duplex | printing not allowed. |
| Permit Duplex | printing allowed. | |
| Name Change names for Custom 1-8. Names should be not more than 15 characters.Selecting paper type at Multi Purpose Tray,the name after change will be displayed. | ||
1 Press the System Menu key.
2 Press [Common Settings], [Next] of Original/Paper Setup and then [Next] of Media Type Setting.
3 Press [Next] for the type of paper you want to change weight.
4 Press [Change] of Media Weight.
5 Select the weight and press [OK].
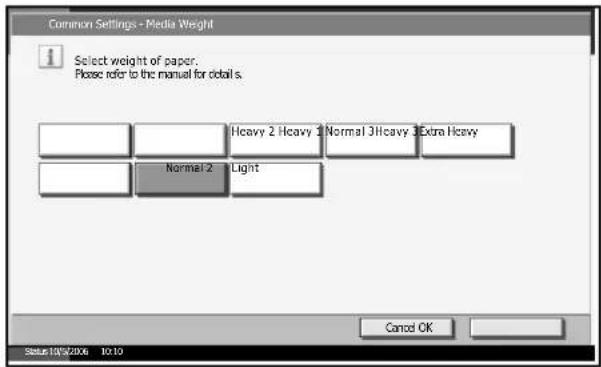
text_image
Common Settings - Media Weight Select weight of paper: Please refer to the manual for detail s. Normal 2 Heavy 1 Normal 3 Heavy Extra Heavy Light Cancel OK Status:10/07/06 10:106 To change the duplex printing settings for Custom 1 (-8), press [Change] of Duplex, select [Prohibit] or [Permit] and press [OK].
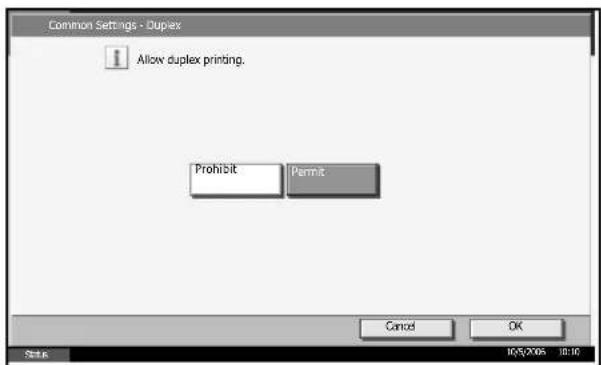
text_image
Common Settings - Duplex Allow duplex printing. Prohibit Permit Cancel OK Status 10/5/2008 10:107 To change the name for Custom 1(-8), press [Change] of Name to enter the name and press [OK].
NOTE: Refer to the Appendix of the Operation Guide for entering characters.
Default Paper Source
Select the default paper source from Cassette 1-4 and Multi Purpose Tray.
NOTE: [Cassette 3] and [Cassette 4] are displayed when the optional paper feeders or optional 3000 sheet paper feeder installed.
1 Press the System Menu key.
2 Press [Common Settings], [Next] of Original/Paper Setup and then [Change] of Default Paper Source.
3 Select default setting for paper cassette.
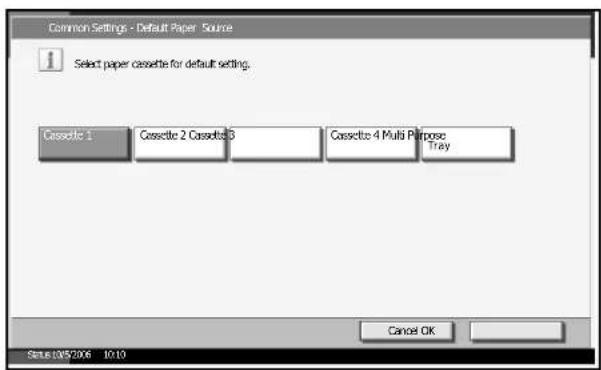
text_image
Common Settings - Default Paper Source Select paper cassettes for default setting. Cassette 1 Cassette 2 Cassettes 3 Cassette 4 Multi Purpose Tray Cancel OK Status: 05/2006 10:104 Press [OK].
Automatic Detection of Originals
Automatically detect originals of special or non-standard size.
| Item Description | |
| A6/Hagaki As A6 and Hagaki are similar in size, select either one of them for automatic detection. | |
| Folio Select Folio for automatic detection. | |
| 11×15" Select the 11×15" | size for automatic detection. |
1 Press the System Menu key.
2 Press [Common Settings], [Next] of Original/Paper Setup and then [Next] of Original Auto Detect.
3 Select [A6] or [Hagaki] of A6/Hagaki.
Select [Off] to disable automatic detection or [On] to enable automatic detection of Folio and 11×15" respectively.
![Triumph-Adler DC 2230 - Select [A6] or [Hagaki] of A6/Hagaki. - 1](/content/2026/05/767912/images/2baa7acac28ed9a09089e91e8fc8f2603320a5442d7ed1e771dc1c1bc1e4aba7.jpg)
text_image
Common Settings - Original Auto Detect Setup Automatically detect originals of special or non-standard size. A$/Hagak A$/ Hagak Off Folio On On 1X15* On Cancel OK Status: 10/02/2006 10:104 Press [OK].
Media for Auto Selection
Select default type of paper for auto paper selection when [Auto] is selected of Paper Selection. If selecting Plain, the paper source loading plain paper in the specific size. Select [All Media Type] for the paper source loading any kind of paper in specific size.
1 Press the System Menu key.
2 Press [Common Settings], [Next] of Original/Paper Setup and then [Change] of Media for Auto Selection.
3 Select [All Media Type] or any media type for paper selection.
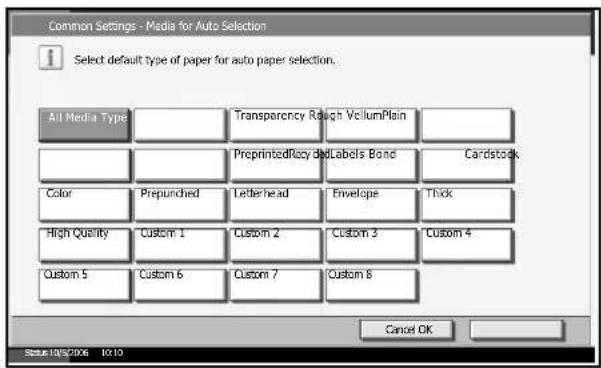
text_image
Common Settings - Media for Auto Selection Select default type of paper for auto paper selection. All Media Type Transparency Rough VcillumPlain PreprintedRecy dLabels Bond Cardstock Color Prepunched Letterhead Envelope Thick High Quality Custom 1 Custom 2 Custom 3 Custom 4 Custom 5 Custom 6 Custom 7 Custom 8 Cancel OK Status:05/2006 10:194 Press [OK].
Paper Source for Cover
Select paper source for cover from Cassette 1-4 or Multi Purpose Tray. Cover is used for Booklet (see page 1-35) and Cover (see page 1-28) modes.
NOTE: [Cassette 3] and [Cassette 4] are displayed when the optional paper feeders or optional 3000 sheet paper feeder installed.
1 Press the System Menu key.
2 Press [Common Settings], [Next] of Original/Paper Setup and then [Change] of Paper Source for Cover.
3 Select the paper source to load cover paper.
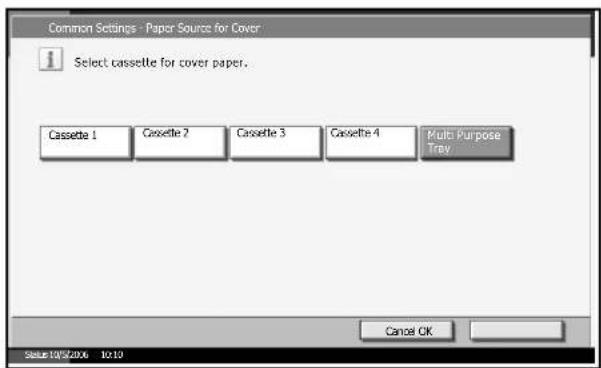
text_image
Common Settings - Paper Source for Cover Select cassette for cover paper. Cassette 1 Cassette 2 Cassette 3 Cassette 4 Multi Purpose Tray Cancel OK Status:10/05/2016 10:104 Press [OK].
Special Paper Action
To print on Prepunched, Preprint, and Letterhead, punch-holes might fail to be aligned or print direction might be upside down depending on how to set the originals and combination of copying functions. In such a case, select [Adjust Print Direction] to adjust the print direction. When paper orientation is not important, select [Speed Priority].
| Item Description | |
| Adjust Print Direction Adjust | print direction. Print speed gets a little slower. Select this item to print on Prepunched, Preprint and Letterhead. |
| Speed Priority Give the job | speed top priority and pay no attention to the paper orientation. Select this item when paper orientation is not important. |
If you select [Adjust Print Direction], load paper according to the steps below.
Example: copying on Letterhead
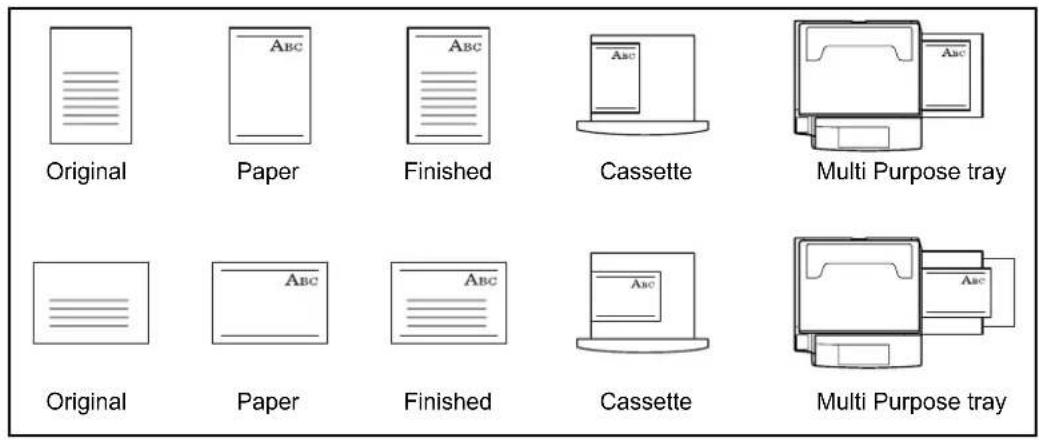
text_image
Original Paper Finished Cassette Multi Purpose tray Original Paper Finished Cassette Multi Purpose trayNOTE: When loading cover paper in a cassette or Multi Purpose tray, load the face, on which printing is supposed to be done, upward.
1 Press the System Menu key.
2 Press [Common Settings], [Next] of Original/Paper Setup and then [Change] of Special Paper Action.
3 Select [Adjust Print Direction] or [Speed Priority].
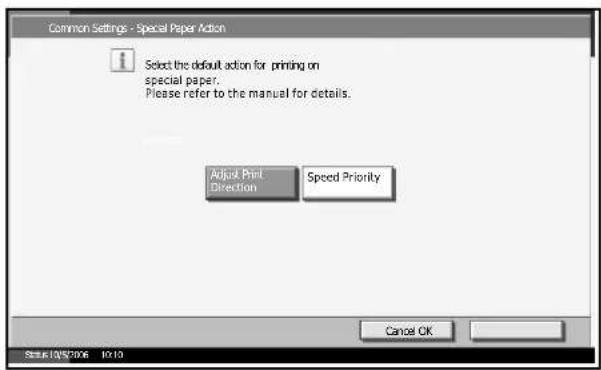
text_image
Common Settings - Special Paper Action Select the default action for printing on special paper. Please refer to the manual for details. Adjust Print Direction Speed Priority Cancel OK Status: 05/2016 10:104 Press [OK].
Switching Measurement
Select inch or metric for the unit for paper dimensions.
1 Press the System Menu key.
2 Press [Common Settings] and then [Change] of Measurement.
3 Select [mm] for metric or [Inch] for inch.
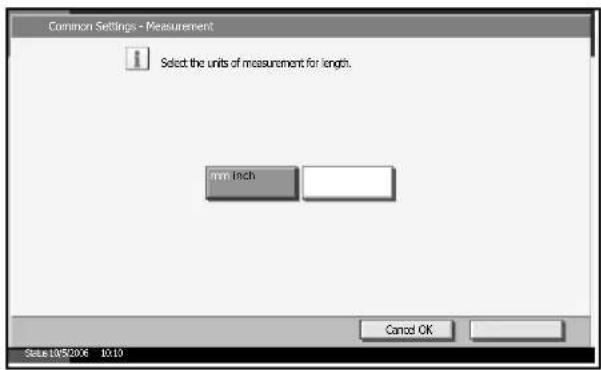
text_image
Common Settings - Measurement Select the units of measurement for length. mm Tech Cancel OK Status:10/5/2006 10:104 Press [OK].
Error Handling
Select whether cancelling or continuing the job when error has occurred. The possible errors and what to do for the errors are as follows.
Duplexing Paper Error
Select what to do when duplex printing is not possible for the selected paper size and type.
| Item Description | |
| 1-sided Printed in 1-sided | |
| Display Error Error message to cancel printing is displayed. | |
Finishing Paper Error
Select what to do when finishing (Staple, Punch, Offset or Auto Image Rotation) is not available for the selected size and type.
| Processing | Description |
| Ignore Printed by ignoring | the selected finishing function. |
| Display Error Error message | to cancel printing is displayed. |
No Staple Error
Select what to do when staples run out during printing.
| Item Description | |
| Not Stapling Printing continues without stapling. | |
| Error Display Error message to cancel printing is displayed. | |
NOTE: The messages are displayed when the optional paper feeders, built-in finisher or optional 3000 sheet finisher is installed.
Stapling Limit Error
Select what to do when staple capacity is exceeded during printing.
| Item Description | |
| No Stapling Printing continues without stapling. | |
| Error Display Error message to cancel printing is displayed |
NOTE: The messages are displayed when the optional paper feeders, built-in finisher or optional 3000 sheet finisher is installed.
Punch Waste Full Error
Select what to do when the punch waste box becomes full during printing.
| Processing Description | |
| No punching Printing continues without punching. | |
| Error Display Error message to cancel printing is displayed. |
NOTE: The messages are displayed when the optional 3000 sheet finisher and punch unit are installed.
1 Press the System Menu key.
2 Press [Common Settings] and then [Change] of Error Handling.
3 Press [Change] at the error you wish to change what to do about it.
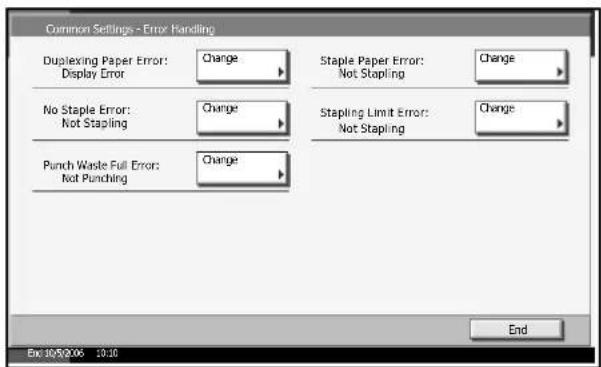
text_image
Common Settings - Error Handling Duplexing Paper Error: Change Display Error No Staple Error: Change Not Stapling Punch Waste Full Error: Change Not Punching Staple Paper Error: Change Not Stapling Stapling Limit Errors: Change Not Stapling End Ex: 10/05/2006 10:304 Select what to do about errors and press [OK].
Output Tray
Select output tray respectively for copy jobs, print jobs from Custom Box, computers, and FAX RX data. The options are as follows.
| Output Tray Descriptions | |
| Top Tray Delivered on Top | Tray of the machine. |
| Finisher Tray Delivered on | Tray set to the optional document finisher or built-in finisher. |
| Tray A, Tray B*, Tray C* | Delivered on Tray A-C of the optional 3000 sheet document finisher. |
| Job Separator Delivered on | the optional job separator. |
| Tray 1-7 * Delivered on Tray | 1-7 (1: uppermost) of the optional Mailbox. |
* Select [Face Up] (print surface up) or [Face Down] (print surface down) for paper orientation at output.
NOTE: Optional job separator, document finisher, 3000 sheet document finisher, and Mailbox are required.
FAX RX data output can be specified when the optional fax kit.
1 Press the System Menu key.
2 Press [Common Settings] and then [Change] of Output Tray.
3 Press [Change] of Copy/Custom Box, Printer, or FAX.
4 Select Output Tray.
For [Finisher Tray], [Tray B], [Tray C] or [Tray 1-7], select [Face Up] (print surface up) or [Face Down] (print surface down) for paper orientation at output.
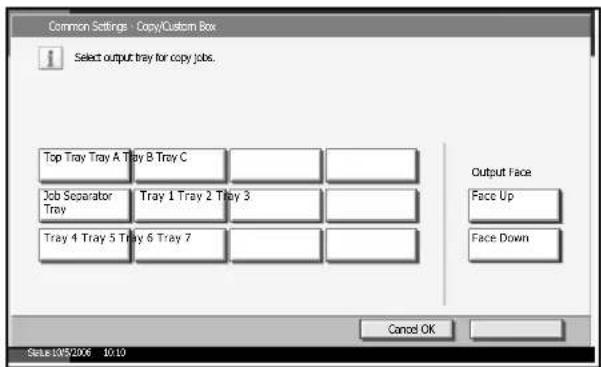
text_image
Common Settings - Copy/Custom Box Select output tray for copy jobs. Top Tray Tray A Tray B Tray C Job Separator Tray Tray 1 Tray 2 Tray 3 Tray 4 Tray 5 Tray 6 Tray 7 Output Face Face Up Face Down Cancel OK Status: 09/5/2006 10:105 Press [OK].
Function Defaults
Defaults are the values automatically set after the warm-up completed or the Reset key pressed.
Set the defaults for available settings such as copying and sending. Setting the frequently-used values as defaults makes subsequent jobs easier.
Original Orientation
Set the original orientation defaults. The options are as follows.
| Item Description | |
| Top Edge Top Select the | original's top edge at the back. |
| Top Edge Left Select the | original's top edge at the left. |
Refer to page 1-10 for Original Orientation.
1 Press the System Menu key.
2 Press [Common Settings], [Next] of Function Defaults and then [Change] of Original Orientation.
3 Select [Top Edge Top] or [Top Edge Left] for the default.
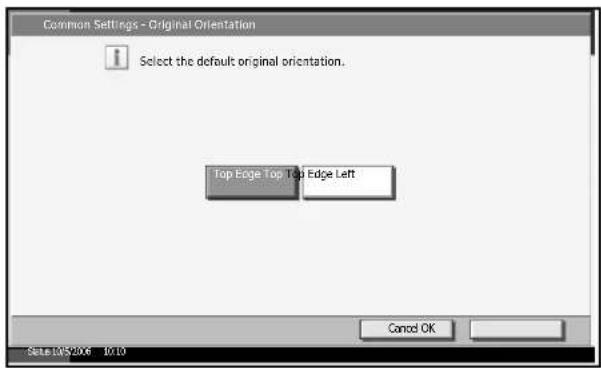
text_image
Common Settings - Original Orientation Select the default original orientation. Top Edge Top Top Edge Left Cancel OK Date: 05/2016 10:104 Press [OK].
Continuous Scan
Set the continuous scan defaults.
| Item | Description |
| Off Continuous scan not performed | |
| On Continuous scan performed | |
Refer to page 1-10 for Original Orientation.
1 Press the System Menu key.
2 Press [Common Settings], [Next] of Function Defaults and then [Change] of Continuous Scan.
3 Select [Off] or [On] for the default.
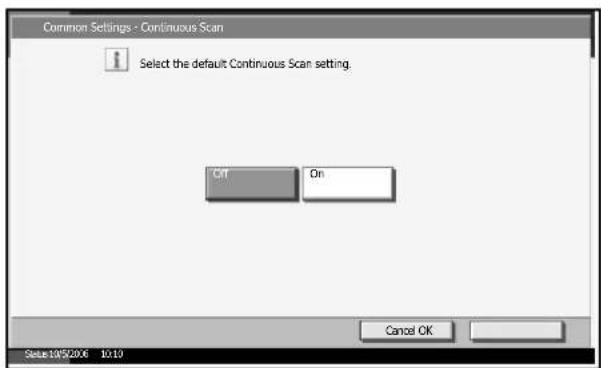
text_image
Common Settings - Continuous Scan Select the default Continuous Scan setting. Off On Cancel OK Status:10/5/2006 10:134 Press [OK].
Original Image
Set the default original document type.
| Item | Description |
| Text+Photo Originals which contain a mixture of text and photos | |
| Text Documents and other originals with more texts | |
| Photo Originals which contain photos | |
1 Press the System Menu key.
2 Press [Common Settings], [Next] of Function Defaults and then [Change] of Original Image.
3 Select the default for [Text+Photo], [Text] or [Photo].
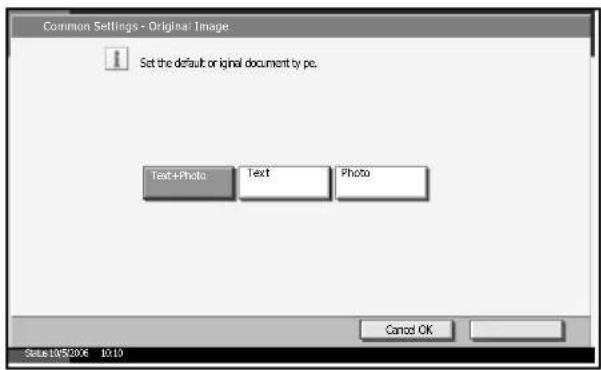
text_image
Common Settings - Original Image Set the default or ignai document by pc. Text+Photo Text Photo Cancel OK Status:10/5/2006 10:104 Press [OK].
Resolution
Select the default scanning resolution. The options are 600×600 dpi, 400×400 dpi Ultra Fine, 300×300 dpi, 200×400 dpi Super Fine, 200×200 dpi Fine, 200×100 dpi Normal.
1 Press the System Menu key.
2 Press [Common Settings], [Next] of Function Defaults and then [Change] of Scan Resolution.
3 Select the default resolution.
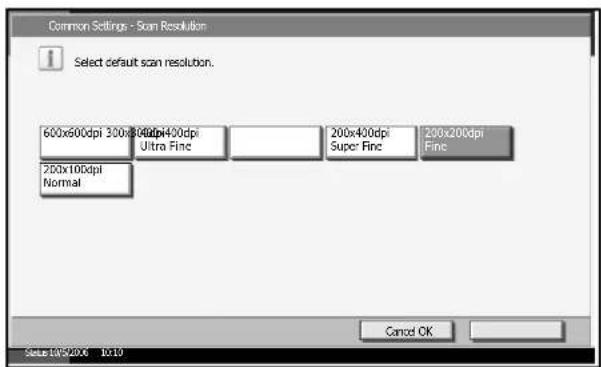
text_image
Common Settings - Scan Resolution 1 Select default scan resolution. 600x600dpi 300x800dpi400dpi Ultra Fine 200x400dpi Super Fine 200x200dpi Fine 200x100dpi Normal Cancel OK Status:10/5/20.0 10:104 Press [OK].
Color Selection
Select the default scanning color setting.
| Color mode Description | |
| Full color Scan document in full color. | |
| Grayscale Scan document in grayscale for smoother and finer finish. | |
| Monochrome Scan document in black and white. File size gets smaller than Full Color or Grayscale. |
1 Press the System Menu key.
2 Press [Common Settings], [Next] of Function Defaults and then [Change] of Color Selection.
3 Select the default color setting.
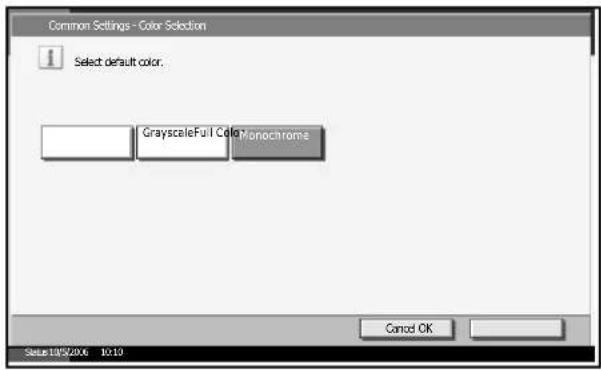
text_image
Common Settings - Color Selection 1 Select default color. GrayscaleFull Color Monochrome Cancel OK Status:10/5/2016 10:104 Press [OK].
File Format
Select the default file type to send the scanned originals.
| File Format Description | |
| TIFF Send files in TIFF format. | |
| PDF Send files in PDF format. | |
| JPEG Send files in JPEG format. | |
| High Comp. PDF* | Send files in High Comp. PDF format (refer to page 2-15). |
* Only when the optional PDF upgrade kit installed.
NOTE: Refer to page 2-14 for file formats.
1 Press the System Menu key.
2 Press [Common Settings], [Next] of Function Defaults and then [Change] of File Format.
3 Select the default file format.
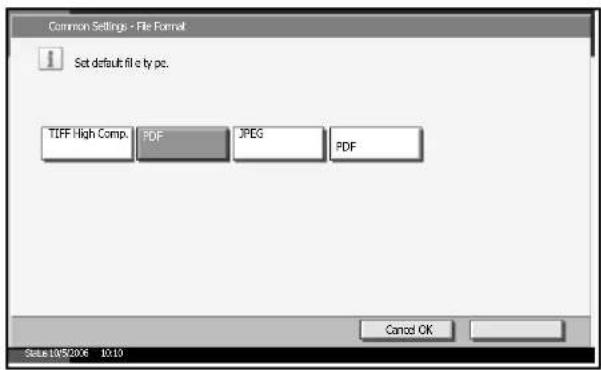
text_image
Common Settings - File Format Set default: fill a by pc. TIFF High Comp. PDF JPEG PDF Cancel OK Status:10/5/2006 10:104 Press [OK].
File Separation
Select the default file separation setting.
| File Format Description | |
| Off No file separation performed (all the pages are compiled in one file). | |
| Each Page Each scanned page is created into a separate file. |
NOTE: Refer to page 2-18 for file separation.
1 Press the System Menu key.
2 Press [Common Settings], [Next] of Function Defaults and then [Change] of File Separation.
3 Select the default for [Off] or [Each Page].
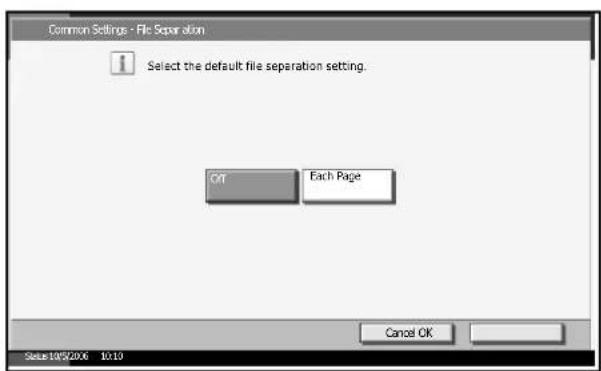
text_image
Common Settings - File Separation Select the default file separation setting. OK Each Page Cancel OK Status:10/5/2016 10:104 Press [OK].
Density
Set the default density.
| Item | Description |
| Manual Set to 0 (Normal) | in the Manual density. |
| Auto Set to Auto density. |
1 Press the System Menu key.
2 Press [Common Settings], [Next] of Function Defaults and then [Change] of Density.
3 Select the default density.
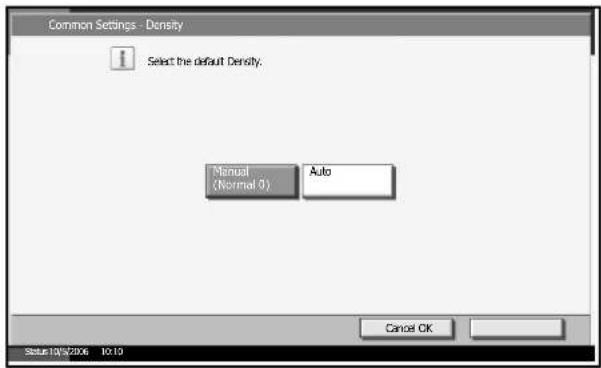
text_image
Common Settings - Density Select the default Density. Manual (Normal 0) Auto Cancel OK Status:10/57/06 10:194 Press [OK].
Zoom
Select the enlarged/reduced default when paper size/sending size changed after the originals set.
| Item | Description |
| 100% Copy (send/save) at actual size (100%). | |
| Auto Automatically reduce or enlarge the originals to match paper size/ sending size. | |
1 Press the System Menu key.
2 Press [Common Settings], [Next] of Function Defaults and then [Change] of Zoom.
3 Select the default zoom setting.
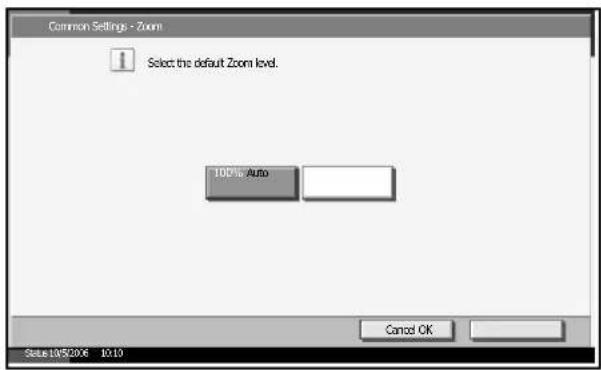
text_image
Common Settings - Zoom 1 Select the default Zoom level. 100% Auto Cancel OK Status: 10/5/2006 10:104 Press [OK].
File Name Entry
Set an automatically entered name (default) for jobs. Additional information such as Date and Time and Job No. can also be set.
NOTE: Refer to page 1-52 and page 2-30 for name entry.
1 Press the System Menu key.
2 Press [Common Settings], [Next] of Function Defaults, [▼] and then [Change] of File Name Entry.
3 Press [File Name] to enter the file name in not more than 30 characters.

text_image
Common Settings - File Name Entry: 1 Set the default file name. File Name doc Additional Info. B. [Date and Time ] Data and Time Job No. Cancel OK Status: 10/5/2006 10:10NOTE: Refer to the Appendix of the Operation Guide for entering characters.
4 Press [OK].
5 Press [Date and Time] to add the date/time to the job, or press [Job No.] to add the job number to the job. The added information will be displayed in Additional Info..
6 Press [OK].
E-mail Subject/Body
Set the subject and body automatically entered (default subject and body) when sending the scanned originals by E-mail.
NOTE: Refer to Chapter 2 of the Operation Guide for sending E-mail.
1 Press the System Menu key.
2 Press [Common Settings], [Next] of Function Defaults, [▼], and then [Change] of E-mail Subject/Body.
3 Press [Subject] to enter the E-mail subject in not more than 60 characters.
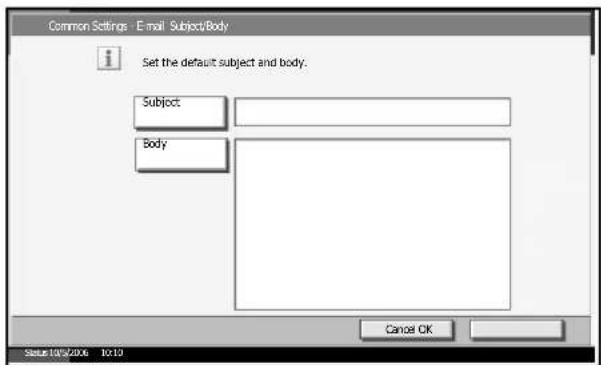
text_image
Common Settings E-mail Subject/Body Set the default subject and body. Subject Body Cancel OK Status:10/5/2016 10:10NOTE: Refer to the Appendix of the Operation Guide for entering characters.
4 Press [OK].
5 Press [Body] to enter the E-mail body in not more than 500 characters.
6 Press [OK].
7 Check if the entries are correct and press [OK].
Border Erase Default
Set the default border width to be erased.
| Specification Range | |
| Inch models 0 to 2" (in 0.01" increments) | |
| Metric models 0 mm to 50 mm (in 1 mm increments) | |
NOTE: Refer to page 1-26 and page 2-27 for Border Erase.
1 Press the System Menu key.
2 Press [Common Settings], [Next] of Function Defaults, [▼] and then [Change] of Border Erase Default.
3 Press [+] or [-] for the Border and Gutter width to erase.
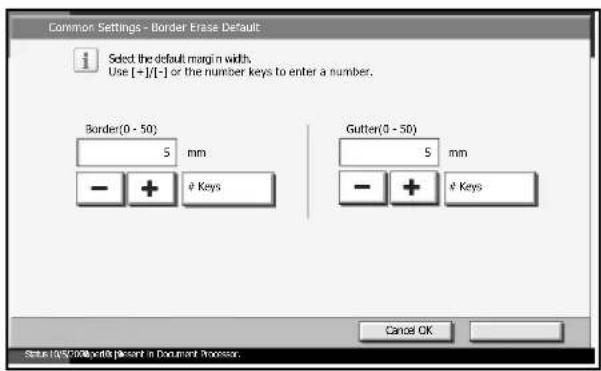
text_image
Common Settings - Border Erase Default Select the default margin width. Use [+]/[−] or the number keys to enter a number. Border(0 - 50) 5 mm - +Keys
Gutter(0 - 50) 5 mm - +Keys
Cancel OK Status:10/5/2000 points present in Document Processor.4 Press [OK].
Margin Default
Set the default margin.
| Specification Range | |
| Inch models -0.75 to 0.75" | (in 0.01" increments) |
| Metric models -18 mm to | 18 mm (in 1 mm increments) |
1 Press the System Menu key.
2 Press [Common Settings], [Next] of Function Defaults, [▼] and then [Change] of Margin Default.
3 Press [◀] or [▶] for the Left/Right and press [▲] or [▼] for Top/Bottom width margin.
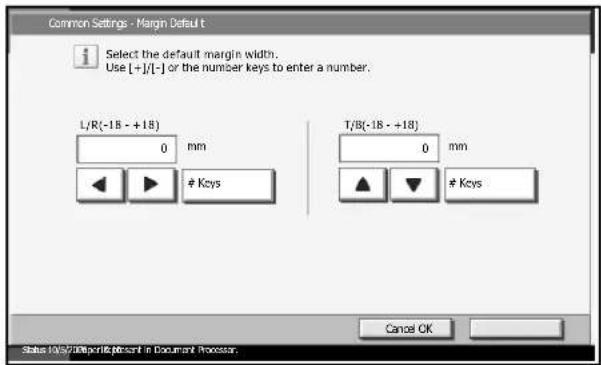
text_image
Common Settings - Margin Default Select the default margin width. Use [+]/[-] or the number keys to enter a number. L/R(-18 - +18) 0 mmKeys
T/B(-18 - +18) 0 mm ▲ ▼ # Keys Cancel OK Status: 10/5/20-point@present in Document Processor.4 Press [OK].
Collate/Offset
Set the defaults for Collate/Offset.
| Item Description | ||
| Collate Off | Off Collate not performed. | |
| On Collate performed. | ||
| Offset Off | Offset not performed. | |
| Each Set (Each Page) | Offset performed. (If [Off]) is selected of Collate, it is performed [Each Page].) | |
NOTE: Refer to page 1-12 for Collate/Offset.
1 Press the System Menu key.
2 Press [Common Settings], [Next] of Function Defaults, [▼] and then [Change] of Collate/Offset.
3 Select the defaults for Collate and Offset respectively.

text_image
Common Settings - Collate/Offset Select the default collate/offset setting. Collate Off On Off Offset Each Set Cancel OK Status: 10/07/2006 10:104 Press [OK].
Auto Image Rotation
Select the default Auto Image Rotation setting.
| Item Description |
| Off No Auto Image Rotation performed. |
| On Auto Image Rotation performed. |
NOTE: Refer to page 1-47 for Auto Image Rotation.
1 Press the System Menu key.
2 Press [Common Settings], [Next] of Function Defaults, [▼] and then [Change] of Auto Image Rotation.
3 Select the default for [Off] or [On].
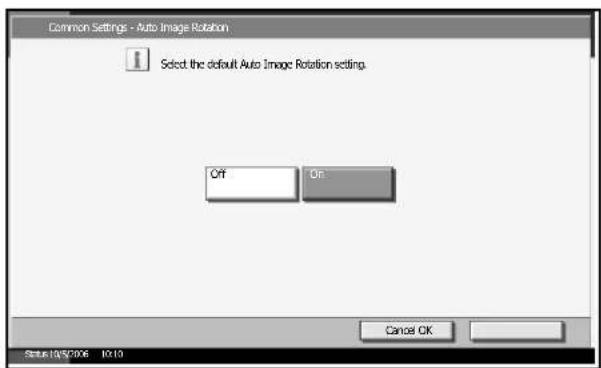
text_image
Common Settings - Auto Image Rotation Select the default Auto Image Rotation setting. Off On Cancel OK Status: 10/5/2016 10:104 Press [OK].
Form Overlay (Copy)
Select the default form and form density from Form Box for form overlay for copy jobs.
NOTE: Refer to page 1-36 for Form Overlay (Copy).
1 Press the System Menu key.
2 Press [Common Settings], [Next] of Function Defaults, [▼] and then [Change] of Form Overlay (Copy).
3 Press [Select Stored From].
4 Press [+) or [-] to enter the form density.
5 Press [Select Form].
6 Select the form that you want to use and press [OK].
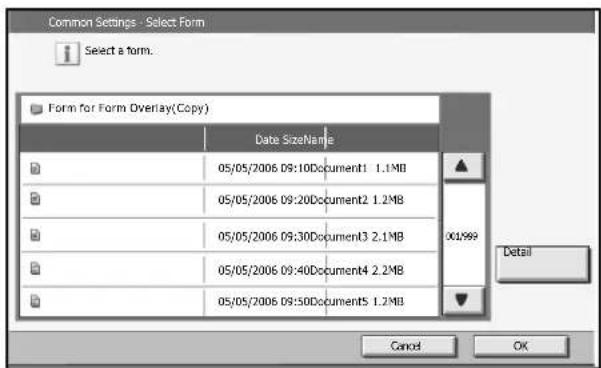
text_image
Common Settings - Select Form Select a form. Form for Form Overlay(Copy) Date SizeName 05/05/2006 09:10Document1 1.1MB 05/05/2006 09:20Document2 1.2MB 05/05/2006 09:30Document3 2.1MB 05/05/2006 09:40Document4 2.2MB 05/05/2006 09:50Document5 1.2MB 01:99 Detail Cancel OKNOTE: Press [Detail] to check File Name, Storing Size (Document size), Data Size, and Date Stored for the Form.
7 Press [OK].
Form Overlay (Box)
Select the default form and form density from Custom Box for form overlay for box print jobs.
NOTE: Refer to page 4-22 for Form Overlay (Box).
1 Press the System Menu key.
2 Press [Common Settings], [Next] of Function Defaults, [▼] and [Change] at Form Overlay (Box).
3 Press [Select Stored From].
4 Press [+] or [-] to enter the form density.
5 Press [Select Form].
6 Select the Box where the Form is stored and press [Open].
NOTE: Press [Detail] to check Box No., Box Name, Usage Restriction, Owner, Permission and Auto File Deletion.
7 Select the Form that you want to use and press [OK].
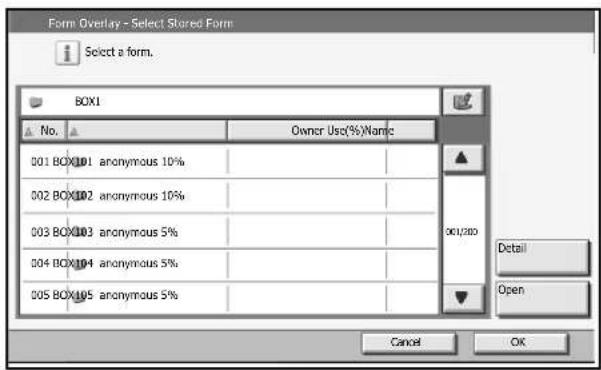
text_image
Form Overlay - Select Stored Form Select a form. BOX1 No. Owner Use(%)/Name 001 BOX101 anonymous 10% 002 BOX102 anonymous 10% 003 BOX103 anonymous 5% 004 BOX104 anonymous 5% 005 BOX105 anonymous 5% Detail Open Cancel OKNOTE: Press [Detail] to check File Name, Storing Size (Document size), Data Size, Pages, Resolution, Color/Monochrome, Data Size, and Date Stored in the Form.
8 Press [OK].
EcoPrint
Select the EcoPrint default.
| Item Description | |
| Off No EcoPrint performed. | |
| On | EcoPrint performed. |
NOTE: Refer to page 1-44 for EcoPrint.
1 Press the System Menu key.
2 Press [Common Settings], [Next] of Function Defaults, [▼] and then [Change] of EcoPrint.
3 Select [Off] or [On] for the default.
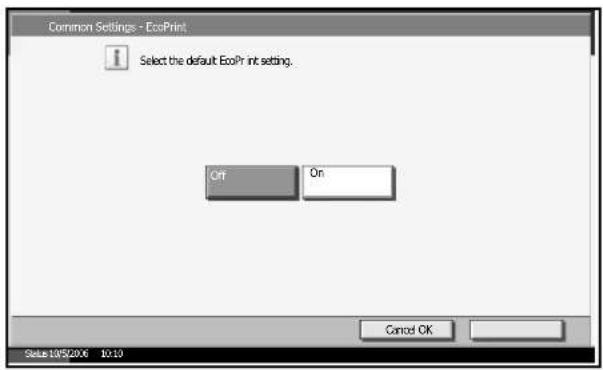
text_image
Common Settings - EcoPrint Select the default EcoPrint setting. Off On Cancel OK Status:10/5/2006 10:104 Press [OK].
PDF/TIFF/JPEG Image
Select the default PDF/TIFF/JPEG file quality. Five options are available from 1 Low Quality (High Comp.) to 5 High Quality (Low Comp.).
NOTE: Higher quality will make the stored files larger.
Refer to page 2-14 for file formats.
1 Press the System Menu key.
2 Press [Common Settings] and [Next] of Function Defaults. Press [▼] twice and then [Change] of PDF/TIFF/JPEG Image.
3 Select the default image quality from [1 Low Quality (High Comp.) to [5 High Quality (Low Comp.)].
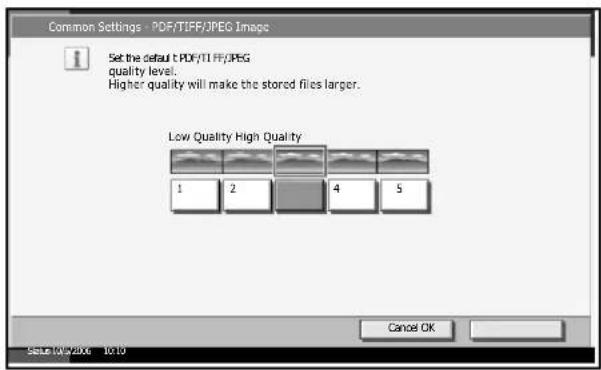
text_image
Common Settings - PDF/TIFF/JPEG Image 1 Set the default PDF/TIFF/JPEG quality level. Higher quality will make the stored files larger. Low Quality High Quality 1 2 4 5 Cancel OK Setup: 10/20/206 10:104 Press [OK].
High Comp. PDF Image
Select the default High Comp.
* Only when the option kit for upgrading PDF is used
| Item Description | |
| Compression Ratio Priority | Compression Ratio comes first with smaller file size. |
| Standard | Standard quality |
| Quality Priority Image quality | quality comes first with larger file size. |
NOTE: Higher quality will make the stored files larger.
Refer to page 2-14 for file formats.
1 Press the System Menu key.
2 Press [Common Settings] and [Next] of Function Defaults. Press [▼] twice and [Change] of High Comp. PDF Image.
3 Select the default for [Compression Ratio Priority], [Standard], or [Quality Priority].
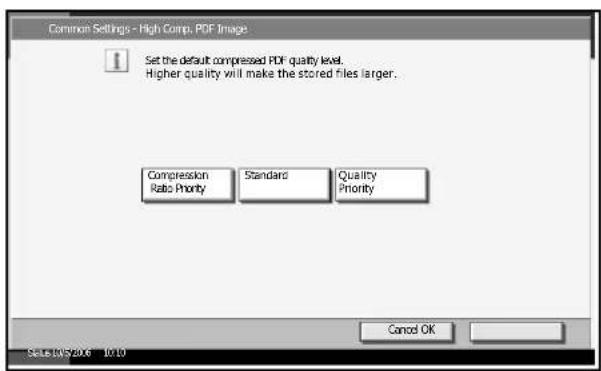
text_image
Common Settings - High Comp. PDF Image Set the default compressed PDF quality level. Higher quality will make the stored files larger. Compression Ratio Priority Standars Quality Priority Cancel OK Sells:INS 2016 10:104 Press [OK].
Repeat Copying
Select the Repeat Copy default. The options are as follows.
| Item Description |
| Off No Repeat Copy is performed. |
| On Repeat Copy is performed. |
NOTE: This setting is not displayed when the optional Security Kit is installed or the Repeat Copy job is set to 0.
Refer to page 1-55 for Repeat Copy.
1 Press the System Menu key.
2 Press [Common Settings] and [Next] of Function Defaults. Press [▼] twice and [Change] of Repeat Copy.
3 Select the default for [Off] or [On].
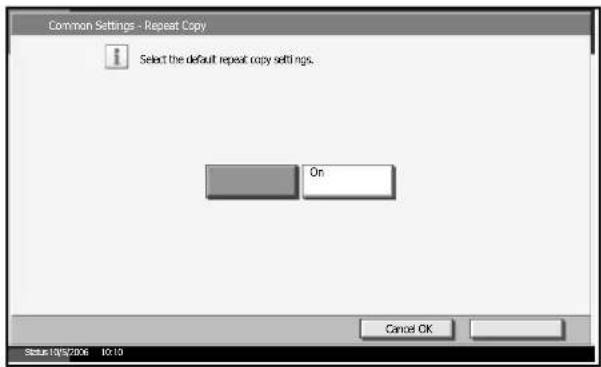
text_image
Common Settings - Repeat Copy Select the default repeat copy settings. On Cancel OK Status:10/5/2006 10:104 Press [OK].
Copy Settings
The following settings are available for copying functions.
• Border Erase to Back Page ...6-35
• Paper Selection ...6-36
• Auto Paper Selection ...6-36
• Auto % Priority ...6-37
- Preset Limit ...6-37
- Quick Setup Registration ...6-38
NOTE: If user login administration is valid, only administrators can change copy settings.
Border Erase to Back Page
Select the Border Erase Method for Back of Page.
| Item Description | |
| Same as Front Page Border | Erase performed in the same setting as the front page |
| Do not Erase No Border | Erase performed on the back page |
NOTE: Refer to page 1-26 and page 2-27 for Border Erase.
1 Press the System Menu key.
2 Press [Copy] and [Change] of Border Erase to Back Page.
3 Press [Same as Front Page] or [Do not Erase].
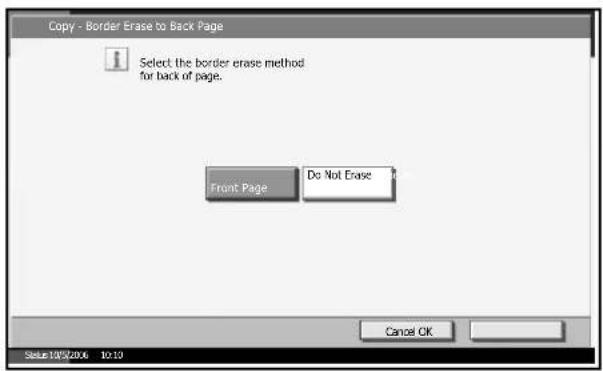
text_image
Copy - Border Erase to Back Page Select the border erase method for back of page. Front Page Do Not Erase Cancel OK Status: 10/05/2006 10:104 Press [OK].
Paper Selection
Set the default paper selection.
| Item Description | |
| Auto | Automatically select the cassette containing paper in the same size as originals. |
| Default Paper Source Select paper source set by Default Paper Source (refer to page 6-13). | |
1 Press the System Menu key.
2 Press [Copy] and [Change] of Paper Selection.
3 Press [Auto] or [Default Paper Source].
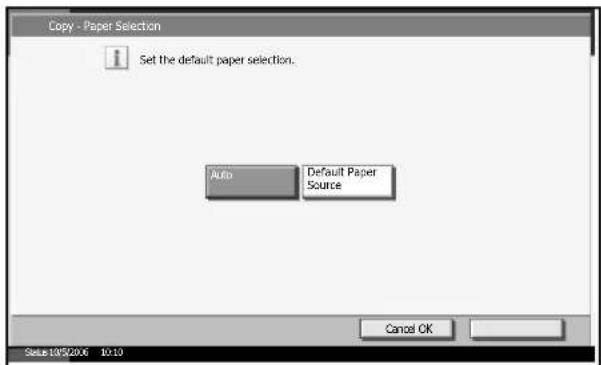
text_image
Copy - Paper Selection 1 Set the default paper selection. Auto Default Paper Source Cancel OK Status:10/52/06 10:104 Press [OK].
Auto Paper Selection
If [Auto] is selected for Paper Selection, set the paper size selection method when the zoom changed.
| Item Description | |
| Most Suitable Size Select | paper based on the current zoom and the size of the original. |
| Same as Original Size Select | paper that matches the size of the original, regardless the zoom. |
1 Press the System Menu key.
2 Press [Copy] and [Change] of Auto Paper Selection.
3 Press [Most Suitable Size] or [Same as Original Size].
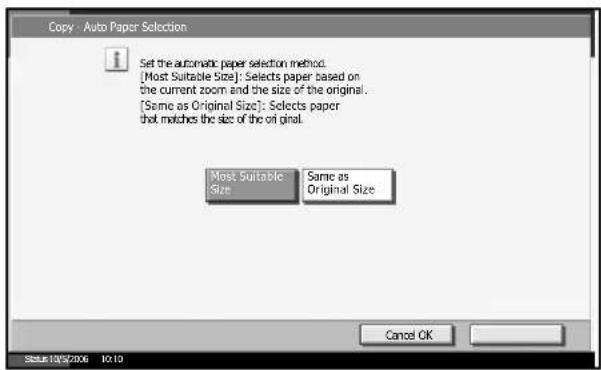
text_image
Copy - Auto Paper Selection Set the automatic paper selection method. [Most Suitable Size]: Selects paper based on the current zoom and the size of the original. [Same as Original Size]: Selects paper that matches the size of the original. Most Suitable Size Same as Original Size Cancel OK Status: 10/02/2006 10:104 Press [OK].
Auto % Priority
When a paper source of different size from the original is selected, select whether automatic zoom (reduce/zoom) is performed.
| Item Description |
| Off No zoom performed (copied in original size). |
| On Automatic zoom performed as appropriate. |
1 Press the System Menu key.
2 Press [Copy] and [Change] of Auto % Priority.
3 Select the default for [Off] or [On].
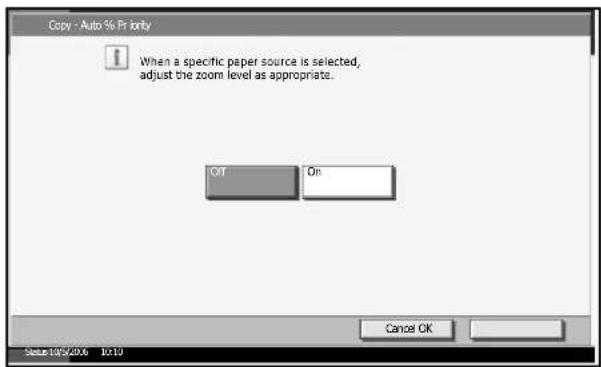
text_image
Copy - Auto % Priority When a specific paper source is selected, adjust the zoom level as appropriate. Off On Cancel OK Set:10/5/2016 10:104 Press [OK].
Preset Limit
Restrict the number of copies that can be made at one time. Options are 1-999 copies.
1 Press the System Menu key.
2 Press [Copy] and [Change] of Preset Limit.
3 Press [+] or [-] or use the numeric keys to enter the number of copies that you want to restrict.
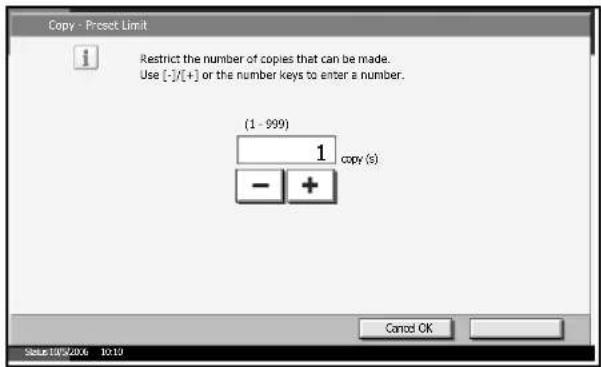
text_image
Copy - Preset Limit Restrict the number of copies that can be made. Use [-/]+ or the number keys to enter a number. (1 - 999) 1 copy (s) - + Cancel OK Status:10/5/2016 10:104 Press [OK].
Quick Setup Registration
Select the copying functions to be registered for Quick Setup. Six keys of the Quick Setup screen are allocated to typical functions but can be changed as necessary. Six items in the following options are available.
- Paper Selection
• Z o o m - Staple/Punch
• Density
• Duplex - Combine
- Collate/Offset
- Original Image
• Original Size
NOTE: Refer to Chapter 3 Quick Setup Registration of the Operation Guide for the Quick Setup steps.
1 Press the System Menu key.
2 Press [Copy] and [Next] of Quick Setup Registration.
3 Press [Change] of the function to be registered in Quick Setup.
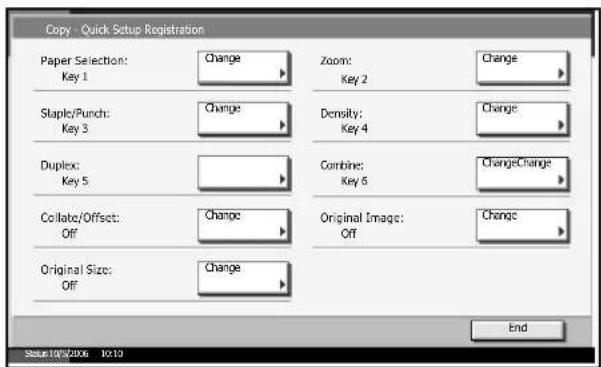
text_image
Copy - Quick Setup Registration Paper Selection: Change Key 1 Zoom: Change Key 2 Slaple/Punch: Change Key 3 Density: Change Key 4 Duplex: Combine: Change Key 5 Combine: Change Key 6 Collate/Offset: Change Off Original Image: Change Off Original Size: Change End Status: 10/05/2006 10:194 Select a key (1-6) allocated on the Quick Setup Registration screen. Press [Off] to delete a key from the Quick Setup.
5 Press [OK].
Sending Settings
Select the sending functions to be registered for Quick Setup. Six keys of the Quick Setup screen are allocated to typical functions but can be changed as necessary.
Six items in the following options are available.
• Original Size
• 2-sided/Book Original
- Sending Size
• Original Orientation
- File Format
• Density
- Original Image
- Resolution
- Color Selection
• Z o o m
NOTE: If user login administration is valid, only administrators can change sending settings.
1 Press the System Menu key.
2 Press [Send Setting] and [Next] of Quick Setup Registration.
3 Press [Change] of the function to be registered in Quick Setup.
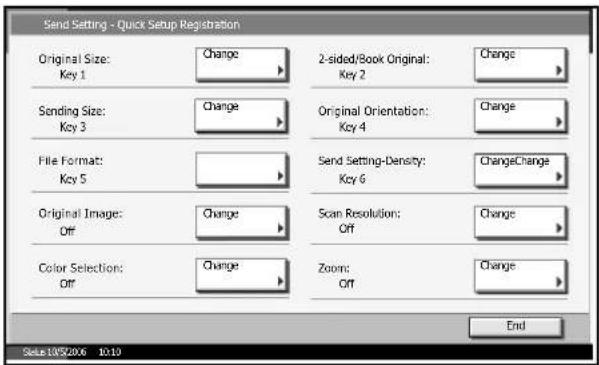
text_image
Send Setting - Quick Setup Registration Original Size: Key 1 Change 2-sided/Book Original: Key 2 Change Sending Size: Key 3 Change Original Orientation: Key 4 Change File Format: Key 5 Send Setting-Density: Key 6 ChangeChange Original Image: Off Change Scan Resolution: Off Change Color Selection: Off Change Zoom: Off Change End Status:10/05/2006 10:104 Select a key (1-6) allocated on the Quick Setup Registration screen. Press [Off] to delete a key from the Quick Setup.
5 Press [OK].
Document Box/Removable Memory Settings
The following settings are available for Document Box and removable USB memory.
- Registering / Editing Box ...6-41
- Job Box ...6-41
- Quick Setup Registration ...6-41
Registering / Editing Box
Creates a new box, corrects a box, or checks details of a box in the custom box, or deletes a box from the custom box. For details, refer to Using Custom Box on page 4-5.
Job Box
The following two operations can be done. For details, refer to each page shown below.
• Changing the number of documents to store (page 4-18)
• Changing the number of documents to store (page 4-21)
Quick Setup Registration
Select the Storing in Box, Sending from Box, Printing from Box functions to be registered for Quick Setup. Six keys of the Quick Setup screen are allocated to typical functions but can be changed as necessary.
The options are as follows.
Store File Quick Setup
• C o l o r
- Storing Size
- Density
• 2-sided/Book Original
- Resolution
• Z o o m
- Original Orientation
- Original Size
- Original Image
Printing from Box Quick Setup
- Paper Selection
- Collate/Offset
- Staple/Punch
- D u p l e x
- Delete After Printed
Sending from Box Quick Setup
- File Format
- Delete after Transmitted
1 Press the System Menu key.
2 Press [Document Box/Removable Memory] and [Next] of Quick Setup Registration.
3 Press [Next] of Store File, Send, or Print.
4 Press [Change] of the function to be registered in Quick Setup.

text_image
Document Box/Removable Memory - Store File Color: Key 1 Change Storing Size: Key 2 Change Density: Key 3 Change 2-sided/Book Original: Key 4 Change Resolution: Key 5 Zoom: Key 6 ChangeChange Original Orientation: Off Change Original Size: Off Change Original Image: Off Change Close Status:10/5/2016 10:105 Select a key (1-6) allocated on the Quick Setup screen. Press [Off] to delete a key from the Quick Setup.
6 Press [OK].
Printer Settings
Printing from computers, settings are generally made on the application software screen. The following settings are available for configuring the defaults to customize the machines.
• Printer Emulation ...6-43
- Resolution ...6-43
- EcoPrint ...6-44
• KIR ...6-44
- Override A4/Letter ...6-45
- Duplex ...6-45
- Copies ...6-46
- Orientation ...6-47
- Wide A4 ...6-47
• Form Feed Timeout ...6-48
- LF Action ...6-48
• CR Action ...6-49
Printer Emulation
Set emulation options to run the machine by the commands for other printers. Refer to Emulation on page 3-4 for the setting method.
Resolution
Select default resolution from Fast1200, 600 dpi, or 300 dpi.
NOTE: Fast1200 is our original resolution mode, in which photo and other graphic halftone can be reproduced much better than 600 dpi.
1 Press the System Menu key.
2 Press [Printer] and [Change] of Resolution.
3 Press [Fast1200], [600dpi], or [300dpi].
text_image
Printer - Resolution Select default resolution. Fast1200300dpi Cancel OK Status:10/5/2006 10:104 Press [OK].
EcoPrint
EcoPrint conserves toner when printing. This is recommended for test copies because printing is faded.
1 Press the System Menu key.
2 Press [Printer] and [Change] of EcoPrint.
3 Press [Off] or [On].
text_image
Printer EcoPrint 1 Select the default EcoPrint setting. Off On Cancel OK Status: 10/02/06 10:194 Press [OK].
KIR
The machine is equipped with the smoothing KIR (Kyocera Image Refinement) functions, which realizes exquisite output resolution of about 2400 dpi × 600 dpi.
1 Press the System Menu key.
2 Press [Printer] and [Change] of KIR.
3 Press [On] or [Off].
text_image
Printer - KIR Select the default KIR (smoothing) setting. On Off Cancel OK Status: 10/05/2006 TO 104 Press [OK].
Override A4/Letter
Select whether treating A4 size and Letter, which are similar in size, as the same size when printing.
| Item Description | |
| On A4 and Letter are regarded as the same in size. | |
| Off A4 and Letter are not regarded as the same in size. | |
1 Press the System Menu key.
2 Press [Printer] and [Change] of Override A4/Letter.
3 Press [Off] or [On].
text_image
Printer - Override A4/Letter Treat A4 and Letter as the same size when printing. Off On Cancel OK Status:10/57/2006 10:104 Press [OK].
Duplex
Select binding orientation for duplex mode.
| Item Description Finish | ||
| 2-sided Bind ShortEdge | Shorter edge bound | 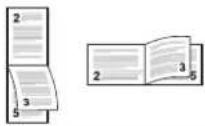 |
| 2-sided Bind LongEdge | Longer edge bound | 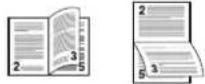 |
| 1-sided No duplex mode | ||
1 Press the System Menu key.
2 Press [Printer] and [Change] of Duplex.
3 Press [1-sided], [2-sided Bind ShortEdge], or [2-sided Bind LongEdge].
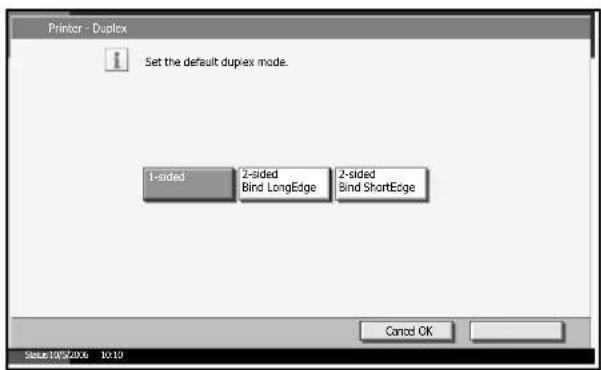
text_image
Printer - Duplex Set the default duplex mode. 1-sided 2-sided Bind LongEdge 2-sided Bind ShortEdge Cancel OK Status:10/5/2016 10:104 Press [OK].
Copies
Set the default number of copies, from 1 to 999.
1 Press the System Menu key.
2 Press [Printer] and [Change] of Copies.
3 Press [+]/[-] or the numeric keys to set the default number of copies.
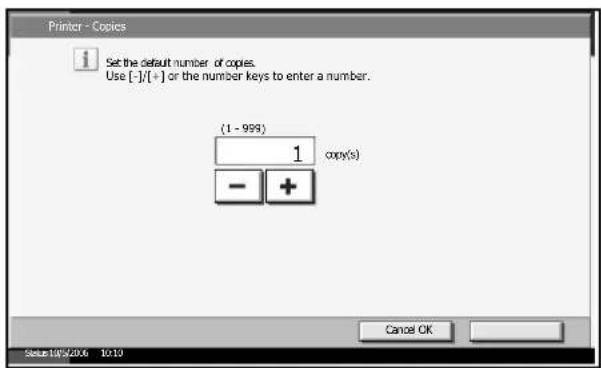
text_image
Printer - Copies Set the default number of copies. Use [-]/[+] or the number keys to enter a number. (1 - 999) 1 copy(s) - + Cancel OK Status:10/5/2006 10:134 Press [OK].
Orientation
Set the default orientation, Portrait or Landscape.
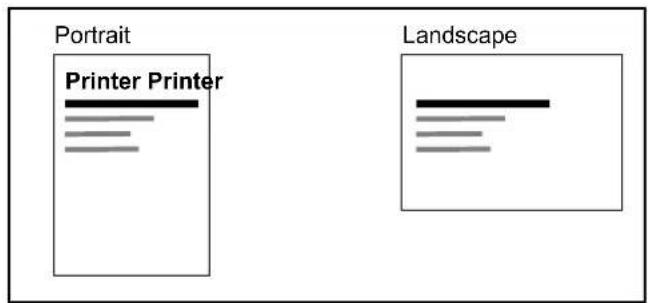
text_image
Portrait Printer Printer Landscape1 Press the System Menu key.
2 Press [Printer] and [Change] of Orientation.
3 Press [Portrait] or [Landscape].
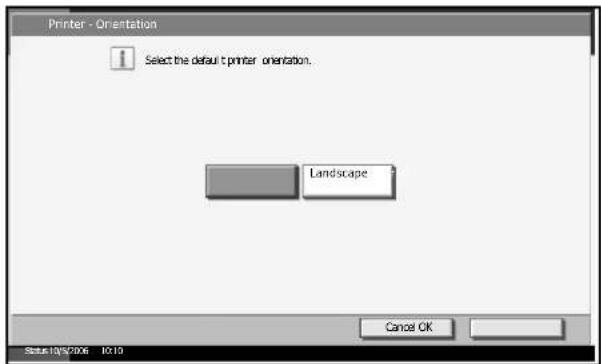
text_image
Printer - Orientation Select the default printer orientation. Landscape Cancel OK Status: 10/05/2006 10:104 Press [OK].
Wide A4
Increase the number of characters per line for A4 paper.
1 Press the System Menu key.
2 Press [Printer] and [Change] of Wide A4.
3 Press [Off] or [On].
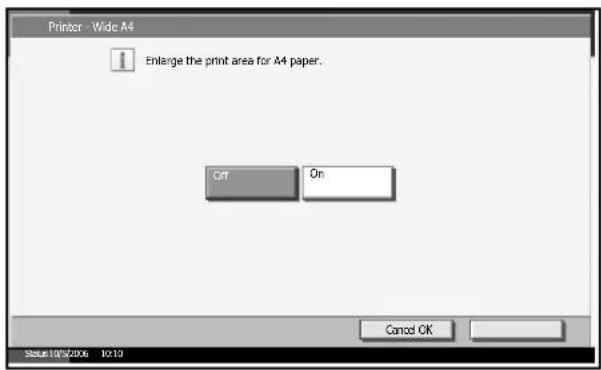
text_image
Printer - Wide A4 Enlarge the print area for A4 paper. Cift On Cancel OK Status:10/5/2006 10:194 Press [OK].
Form Feed Timeout
Receiving print data from the computer, the machine may sometimes have to wait if there is no information identifying the last page has no data any more to be printed. When the preset timeout passes, the machine automatically prints paper. The options are between 5 and 495 seconds.
1 Press the System Menu key.
2 Press [Printer], [▼] and [Change] of Form Feed Timeout.
3 Press [+] or [-] to set the Form Feed Timeout.
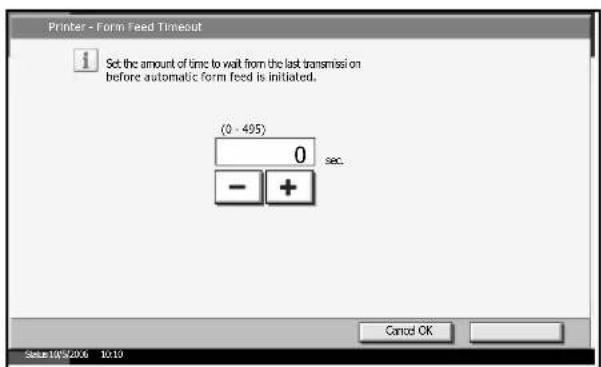
text_image
Printer - Form Feed Timeout 1 Set the amount of time to wait from the last transmission on before automatic form feed is initiated. (0 - 495) 0 sec. - + Cancel OK Status:10/5/2006 10:134 Press [OK].
LF Action
Set the line feed action when the machine receives the line feed code (character code 0AH).
| Item Description | |
| LF Only Only line feed performed. | |
| LF and CR Line feed and character return performed. | |
| Ignore LF No line feed performed. |
1 Press the System Menu key.
2 Press [Printer], [▼] and [Change] of LF Action.
3 Press [LF Only], [LF and CR] or [Ignore LF].
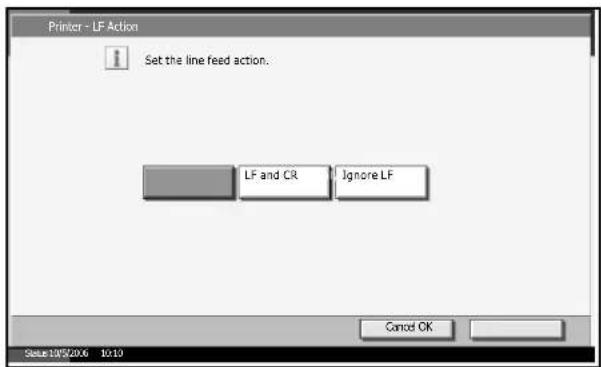
text_image
Printer - LF Action Set the line feed action. LF and CR Ignore LF Cancel OK Status:10/5/2006 10:104 Press [OK].
CR Action
Set the character return action when the machine receives the character return code (character code 0DH).
| Item Description |
| CR Only Only character return performed. |
| LF and CR Character return and line feed performed. |
| Ignore CR No character return performed. |
1 Press the System Menu key.
2 Press [Printer], [▼] and [Change] of CR Action.
3 Press [CR Only], [LF and CR] or [Ignore CR].
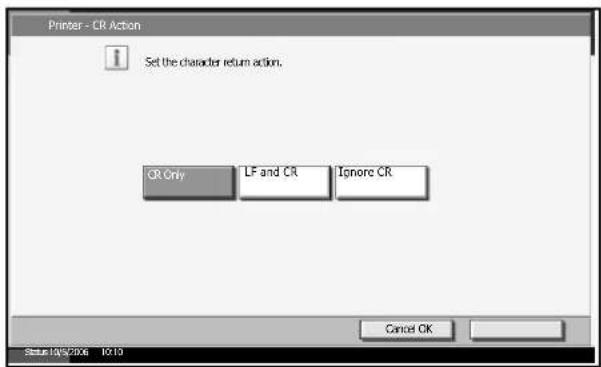
text_image
Printer - CR Action Set the character return action. CR Only LF and CR Ignore CR Cancel OK Status: 10/05/2006 10:104 Press [OK].
Network Setup
The machine is equipped with network interface, which is compatible with network protocols such as TCP/IP, IPX/SPX, NetBEUI, and AppleTalk. It enables network printing on the Windows, Macintosh, UNIX, NetWare and other platforms.
TCP/IP Setup (by Entering IP Addresses)
Set up TCP/IP to connect to the Windows network. Set the IP addresses, subnet masks, and gateway addresses.
NOTE: Prior to the IP address entries, obtain permission from the network administrator.
1 Press the System Menu key.
2 Press [System], [Next] of Network and then [Change] of TCP/IP.
3 Press [On] on the left side of the touch panel.
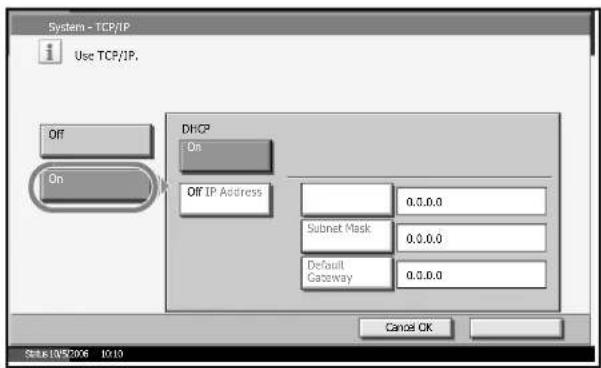
text_image
System - TCP/IP Use TCP/IP. Off On DHCP On Off IP Address 0.0.0.0 Subnet Mask 0.0.0.0 Default Gateway 0.0.0.0 Cancel OK Status:10/5/2006 10:104 Press [Off] of DHCP.
5 Press [IP Address] and enter the address using the numeric keys.
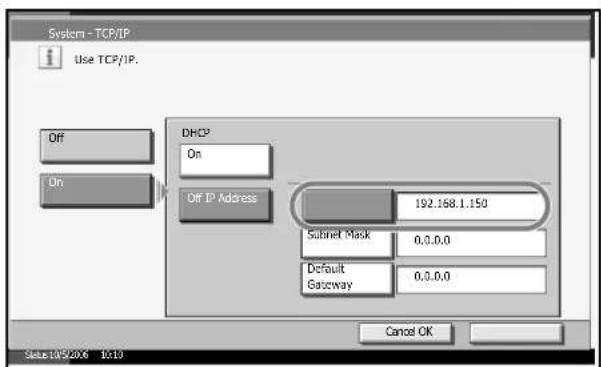
text_image
System - TCP/IP Use TCP/IP. Off On DHCP On Off IP Address 192.168.1.150 Subnet Mask 0.0.0.0 Default Gateway 0.0.0.0 Cancel OK Status:10/5/2016 1:106 Press [Subnet Mask] and enter the address using the numeric keys.
7 Press [Default Gateway] and enter the address using the numeric keys.
8 Check if all the address entries are correct and press [OK].
9 Press the Power key and confirm that the Power key/indicator and the memory indicator are off. After that, turn the main power switch off and on.
TCP/IP Setup (Equipped with DHCP Server)
Set up TCP/IP when the network is equipped with the DHCP server. The machine works as the DHCP client.
1 Press the System Menu key.
2 Press [System], [Next] of Network and then [Change] of TCP/IP.
3 Press [On] on the left side of the touch panel.
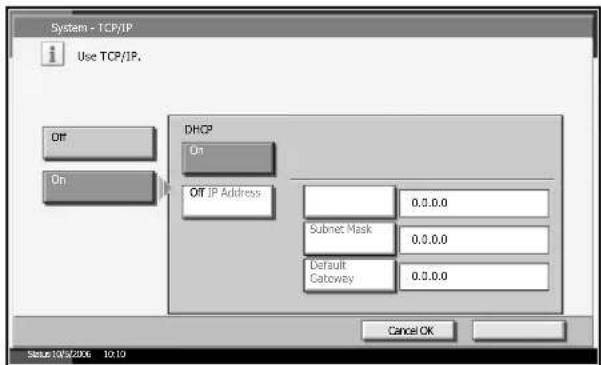
text_image
System - TCP/IP Use TCP/IP. Off On DHCP On Off IP Address 0.0.0.0 Subnet Mask 0.0.0.0 Default Catoway 0.0.0.0 Cancel OK Status:19/5/2006 10:104 Press [On] of DHCP.
5 Press [OK].
6 Press the Power key and confirm that the Power key/indicator and the memory indicator are off. After that, turn the main power switch off and on.
Netware Setup
Select the NetWare network connection. After that, select frame types for NetWare network from Auto, Ethernet-II, 802.3, 802.2, or SNAP.
1 Press the System Menu key.
2 Press [System], [Next] of Network and then [Change] of NetWare.
3 Press [On].
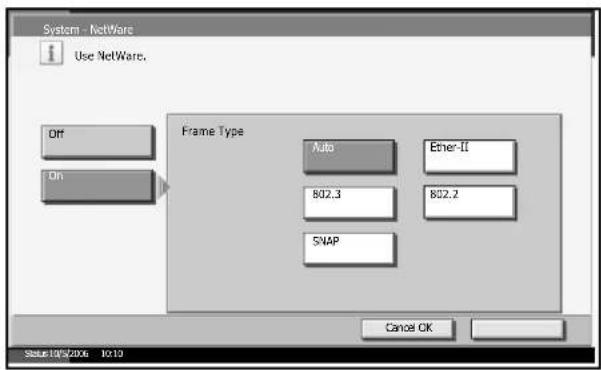
text_image
System - NetWare Use NetWare. Off On Frame Type Auto Ener-II B02.3 B02.2 SWAP Cancel OK Status:10/5/2006 10:194 Select the frame type you want to choose.
5 Press [OK].
6 Press the Power key and confirm that the Power key/indicator and the memory indicator are off. After that, turn the main power switch off and on.
AppleTalk Setup
Select the Apple Talk network connection.
1 Press the System Menu key.
2 Press [System], [Next] of Network and then [Change] of Apple Talk.
3 Press [On].
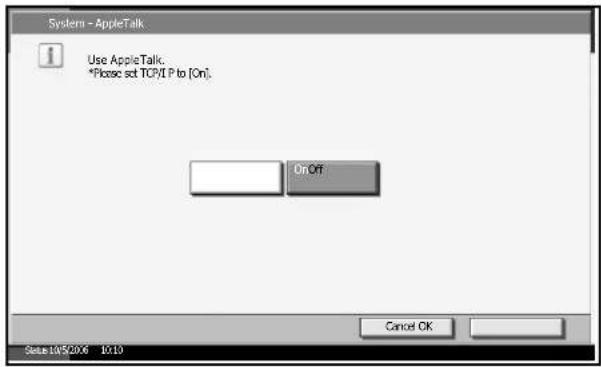
text_image
System - AppleTalk Use AppleTalk. *Please set TCP/IP to [On] On Off Cancel OK Setu 10/5/2016 10:104 Press [OK].
5 Press the Power key and confirm that the Power key/indicator and the memory indicator are off. After that, turn the main power switch off and on.
Printing Reports/Sending Notice
Print reports to check the machine settings and status. Default settings for printing the result reports can also be configured.
Printing Reports
Options for the reports to be printed are as follows.
Status Page
Check the information including current settings, available memory space, and optional equipment installed.
| Paper Handling MP Tray Size/Type: A 4 / Plain Cassette 1 Size/Type: A 4 / Plain Cassette 2 Size/Type: A 3 / Plain Copies: 1 Copying Card: Not Installed Copying Quality: Text+Photo Collate: Enabled Printing Resolution: 600 x 600 dpi EcoPrint: Disabled K/R: Enabled SCANNER File Name: doc File Format: PDF Resolution: 200 x 200 dpi Quality: Text+Photo Hardware Setting Sleep Timer: Enabled Form Feed Time Out: 30 Seconds Memory Slot: 262144 kB Sic#2: 0 kB Total Size: 262144 kB Network TCP/IP: On IP Address: 10.181.48.4 Subnet Mask: 255.255.248.0 Default Gateway: 10.181.55.254 DHCP: On AppleTalk: On Printer Name: KM1A0120 | Option Status Document Processor: Not Installed Paper Feeder: Not Installed Finisher: Not Installed Job Separator: Not Installed Memory Card: Not Installed PDF Expansion Kit: Not Installed FAX Backup Kit: Not Installed Security Kit: Not Installed | ||
| Emulation Emulation: PCL6 Default Font: Courier Default Code Set: IBM PC-8 | |||
| FAX Setting Local FAX Name: Local FAX Number: Local FAX ID: FAX Line Setting: Tone(DTMF) RX Setting: Auto(Normal) | |||
| Total Printed Pages 79 [ Copy 4 | Printer 75 | FAX 0 ] | [ SPL6201819 ] | ||
| Total Scanned Pages 11 [ Copy 7 | Other 4 ] | |||
| WARNING We recommend the use of our own brand supplies. We will not be liable for any damage caused by the use of third party supplies in this machine. | |||
Font List
Check the font samples installed in the machine.
Internal Scalable and Bitmapped Fonts List
PRESCRIBE
| Font Name | Scalable/Bitmap | Password | Selection [FSET] | Font ID |
| Courier | None | PSET 0p#h0e0b4099T; | 1000 | |
| CGTimes | None | PSET 1p#h0e0b4101T; | 1001 | |
| CGTimes-Bd | None | PSET 1p#h0e0b4101T; | 1002 | |
| CGTimes-It | None | PSET 1p#h1e0b4101T; | 1003 | |
| CGTimes-BdIt | None | PSET 1p#h1e0b4101T; | 1004 | |
| CGOmega | None | PSET 1p#h0e0b4113T; | 1005 | |
| CGOmega-Bd | None | PSET 1p#h0e0b4113T; | 1006 | |
| CGOmega-It | None | PSET 1p#h1e0b4113T; | 1007 | |
| CGOmega-BdIt | None | PSET 1p#h1e0b4113T; | 1008 | |
| Coneal | None | PSET 1p#h1e0b4116T; | 1009 | |
| Clarendon-Id | None | PSET 1p#h4e0b4140T; | 1010 | |
| Univers-Md | None | PSET 1p#h0e0b4140T; | 1011 | |
| Univers-Bd | None | PSET 1p#h0e0b4140T; | 1012 | |
| Univers-MdIt | None | PSET 1p#h1e0b4140T; | 1013 | |
| Univers-BdIt | None | PSET 1p#h1e0b4140T; | 1014 | |
| Univers-MdCd | None | PSET 1p#h4e0b4140T; | 1015 | |
| Univers-BdCd | None | PSET 1p#h4e0b4140T; | 1016 | |
| Univers-MdCdIt | None | PSET 1p#h5e0b4140T; | 1017 | |
| Univers-BdCdIt | None | PSET 1p#h5e0b4140T; | 1018 | |
| AntiqueOlive | None | PSET 1p#h0e0b4160T; | 1019 | |
| AntiqueOlive-Bd | None | PSET 1p#h0e0b4160T; | 1020 | |
| AntiqueOlive-It | None | PSET 1p#h1e0b4160T; | 1021 | |
| GaramondAntiqua | None | PSET 1p#h0e0b4197T; | 1022 | |
| Garamond-Hlb | None | PSET 1p#h0e0b4197T; | 1023 | |
| Garamond-Krsv | None | PSET 1p#h1e0b4197T; | 1024 | |
| Garamond-HlbKrsv | None | PSET 1p#h1e0b4197T; | 1025 | |
| Antigall | None | PSET 1p#h0e0b4297T; | 1026 | |
| Albertus-Md | None | PSET 1p#h0e0b4362T; | 1027 | |
| Albertus-ExtBd | None | PSET 1p#h0e0b4362T; | 1028 | |
| Arial | None | PSET 1p#h0e0b16602T; | 1029 | |
| Arial-Bd | None | PSET 1p#h0e0b16602T; | 1030 | |
| Arial-It | None | PSET 1p#h1e0b16602T; | 1031 | |
| Arial-BdIt | None | PSET 1p#h1e0b16602T; | 1032 | |
| TimesNewRoman | None | PSET 1p#h0e0b16901T; | 1033 | |
| TimesNewRoman-Bd | None | PSET 1p#h0e0b16901T; | 1034 | |
| TimesNewRoman-It | None | PSET 1p#h1e0b16901T; | 1035 | |
| TimesNewRoman-BdIt | None | PSET 1p#h1e0b16901T; | 1036 | |
| Helvetica | None | PSET 1p#h0e0b24580T; | 1037 | |
| Helvetica-Bd | None | PSET 1p#h0e0b24580T; | 1038 | |
| Helvetica-Ob | None | PSET 1p#h1e0b24580T; | 1039 | |
| Helvetica-BdOb | None | PSET 1p#h1e0b24580T; | 1040 |
Network Status Page
Check the information including network interface firmware version, network address and protocol.
Network Status Page

MFP KM-5050
Firmware Version 2GR_2000.XLG.368 2006.04.24
01/02/2004 03:30
Network Status
| Network Details | Read Community:sysContact: | public | |
| MAC Address: | 00:C0:EE:1A:00:43 | sysName: | |
| Default Name: | KM1:A0043 | sysLocation: | |
| Admin Password: | Not Defind | Authentication Traps: | Disabled |
| TCP/IP | Trap Recipient 1: | ||
| Trap Community: | public | ||
| Status: | Enabled | Trap IP Address: | 0.0.0.0 |
| Host Name: | KM1:A0043 | Trap IPX Address: | |
| IP Address: | 10.181.90.16 | Add Paper: | No |
| Subnet Mask: | 255.255.252.0 | Low Toner: | No |
| Default Gateway: | 10.181.83.254 | Add Toner: | No |
| IP Address Setting Methods: | Cover Operc | No | |
| DHCP/BOOTP: | On | Paper Jam: | No |
| RARP: | On | All Other Errors: | No |
| DNS Server (Prl.): | 10.181.192.44 | Trap Recipient 2: | |
| DNS Server (Sec.): | 0.0.0.0 | Trap Community: | public |
| Domain Name: | kyoceramila.co.jp | Trap IP Address: | 0.0.0.0 |
| WINS Settings: | Trap IPX Address: | ||
| WINS Server (Prl.): | 10.181.2.1 | Add Paper: | No |
| WINS Server (Sec.): | 0.0.0.0 | Low Toner: | No |
| Scope ID: | Add Toner: | No | |
NetBEUI
| Status: | Enabled |
| Printer Name: | KM1A0043 |
| Workgroup: | KM-NetPrinters |
AppleTalk
| Status: | Enabled |
| Printer Name: | KM1A0043 |
| Preferred Zone: | * |
| Device Type: | LaserWriter |
Service Status Page
More detailed information is available than on the status page. Service personnel usually print the service status pages for maintenance purpose.
1 Press the System Menu key.
2 Press [Report] and [Print] of Report Print.
3 Press [Print] for the report you want to print. Printing starts.
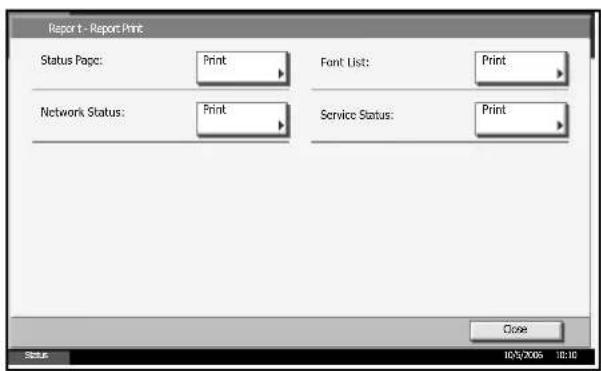
text_image
Report t - Report Print Status Page: Print Font List: Print Network Status: Print Service Status: Print Close Status 10/5/2006 10:10Transmission Result Reports
Automatically print a report of transmission results when the transmission is complete.
| Item | Description |
| Off No result report printed. | |
| On Result report automatically printed. | |
| Error Only Result report printed. If two or more destinations are registered, the reports are printed only for the destinations facing the errors. | |
1 Press the System Menu key.
2 Press [Report], [Change] of Result Report Setting and then [Change] of Send Result Report.
3 Press [Off], [On], or [Error Only].
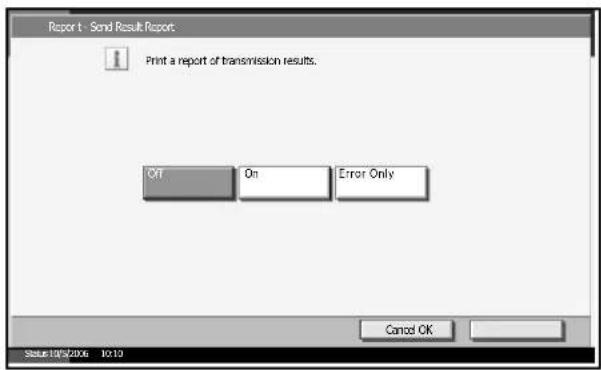
text_image
Report 1 - Send Result Report Print a report of transmission results. Off On Error Only Cancel OK Status:10/5/2006 10:134 Press [OK].
Adjustment/Maintenance
Adjust printing quality and conduct machine maintenance.
• Copy Density Adjustment ...6-58
- Print Density ...6-58
- Send/Box Density Adjust ...6-59
- Drum Refresh ...6-60
- Correcting Fine Black Line ...6-60
- Charger Auto Cleaning ...6-61
• Display Brightness ...6-62
- Silent Mode ...6-62
• System Initialization ...6-63
NOTE: If user login administration is valid, only administrators can change adjustment/maintenance.
Copy Density Adjustment
Adjust copy density. Adjustment can be made in 7 scales both in auto and manual density modes.
1 Press the System Menu key.
2 Press [▼], [Adjustment/Maintenance] and [Change] of Copy Density Adjustment.
3 Press [Change] of Auto for auto density mode or of Manual for manual density mode.
4 Press [-3] - [+3] (Lighter-Darker) to adjust density.
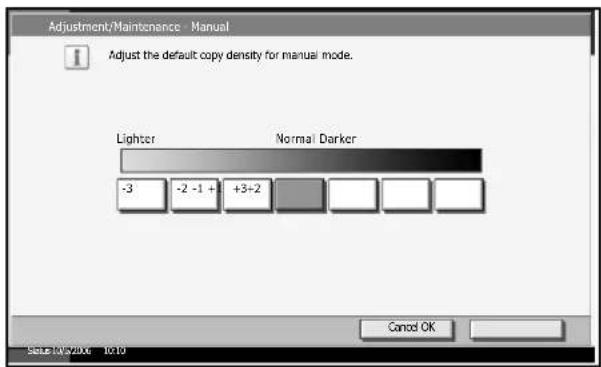
text_image
Adjustment/Maintenance Manual I Adjust the default copy density for manual mode. Lighter Normal Darker -3 -2 -1 + +3+2 Cancel OK Start: May 2016 October5 Press [OK].
Print Density
Adjust print density. Adjustment can be made in 5 scales.
1 Press the System Menu key.
2 Press [▼], [Adjustment/Maintenance] and [Change] of Print Density.
3 Press [1] - [5] (Lighter-Darker) to adjust density.
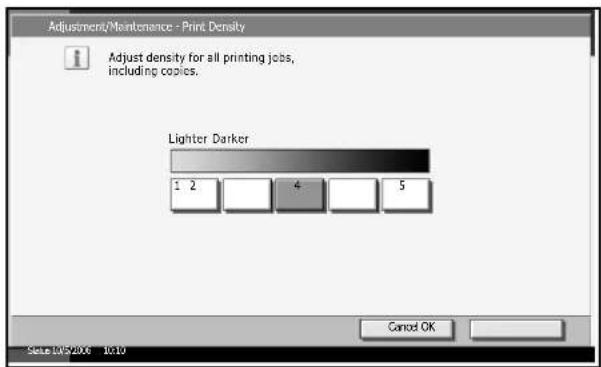
text_image
Adjustment/Maintenance - Print Density Adjust density for all printing jobs, including copies. Lighter Darker 1 2 4 5 Cancel OK State: WPS2006 10:104 Press [OK].
Send/Box Density Adjust
Adjust scan density when sending or storing the data in Document Box. Adjustment can be made in 7 scales both in auto and manual density modes.
1 Press the System Menu key.
2 Press [▼], [Adjustment/Maintenance] and [Change] of Send/Box Density Adjust.
3 Press [Change] of Auto for auto density mode or of Manual for manual density mode.
4 Press [-3] - [+3] (Lighter-Darker) to adjust density.
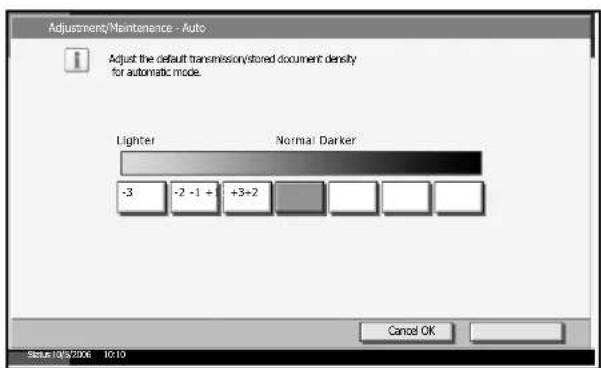
text_image
Adjustment/Maintenance - Auto I Adjust the default transmission/stored document density for automatic mode. Lighter Normal Darker -3 -2 -1 + +3+2 Cancel OK Status: 04/2006 To 105 Press [OK].
Drum Refresh
Execute drum refresh when print is blurred.
NOTE: Drum Refresh cannot be performed while printing. Execute Drum Refresh after the printing is done.
1 Place A4-R on the Multi Purpose tray.
2 Press the System Menu key.
3 Press [▼], [Adjustment/Maintenance] and then [Execute] of Drum Refresh.
4 Press [Yes]. Drum Refresh starts and ends in about 6 minutes.
5 Once Drum Refresh ends, return to the Adjustment/Maintenance screen.
text_image
Adjustment/Maintenance Copy Density Adjustment: Change Send/Box Density Adjust.: Change Print Density: 1 Drum Refresh will be started. Are you sure? Correcting Black Line: Execute Display Brightness: Execute Charger Auto Cleaning: Yes No Change Close Start 04/2006 10:10Correcting Fine Black Line
Correct fine black lines (black streaks caused by contamination), which may appear on the copies, when the optional document processor used.
If black lines appear from the top to the bottom edge, refer to Charger Auto Cleaning on page 6-61.

text_image
K| Item | Description |
| Off No correction performed. | |
| On (High) Correction performed. Select this item if black streak remains after using Use (Low). The reproduction of the image becomes lower when using Use (Low). | |
| On (Low) Correction performed. The reproduction of the image becomes lower when using Not Use. | |
NOTE: Using Correcting Fine Black Line can impair reproduction of fine characters. It is recommended to keep the default ([Off]).
1 Press the System Menu key.
2 Press [▼], [Adjustment/Maintenance] and [Change] of Correcting Black Line.
3 Press [Off], [On (Low)] or [On (High)].
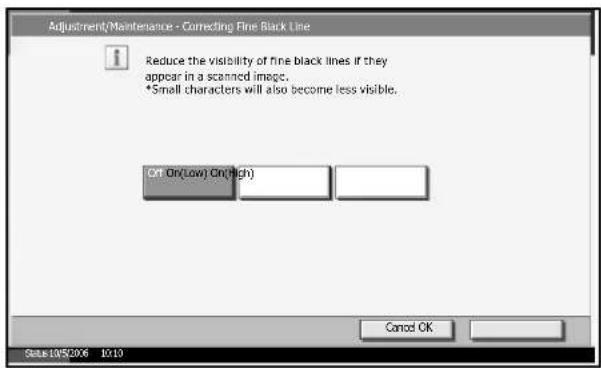
text_image
Adjustment/Maintenance - Correcting Fine Black Line Reduce the visibility of fine black lines if they appear in a scanned image. *Small characters will also become less visible. OK On(Low) On(High) Cancel OK Status: 10/5/2016 10:104 Press [OK].
Charger Auto Cleaning
If black streaks appear on the printouts or scanned data, perform automatic cleaning of the main chargers.
If no black line appears at the ends of the paper (margin), refer to Correcting Fine Black Line on page 6-60.
1 Press the System Menu key.
2 Press [▼], [Adjustment/Maintenance] and [Execute] of Charger Auto Cleaning.
3 Press [Yes]. Automatic cleaning of the main charger starts and ends in about 45 seconds.
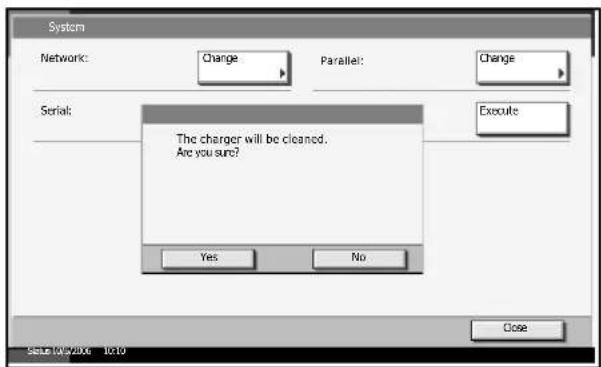
text_image
System Network: Change Parallel: Change Serial: The charger will be cleaned. Are you sure? Yes No Close Setto 10/20/20 10:104 Once the cleaning ends, return to the Adjustment/Maintenance screen.
Display Brightness
Set the brightness of the touch panel.
1 Press the System Menu key.
2 Press [▼], [Adjustment/Maintenance] and [Change] of Display Brightness.
3 Press [1] - [4] (Darker-Lighter) to adjust brightness.
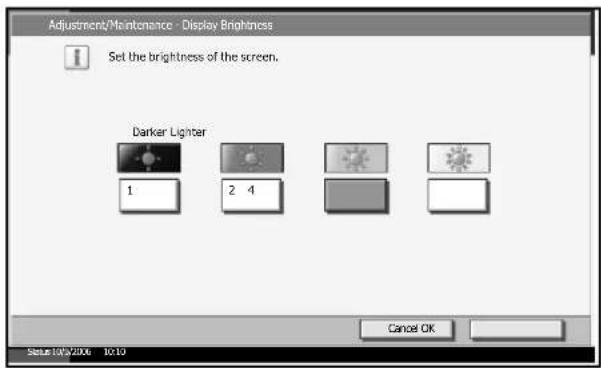
text_image
Adjustment/Maintenance - Display Brightness Set the brightness of the screen. Darker Lighter 1 2 4 Cancel OK Status: 10/07/2006 10:104 Press [OK].
Silent Mode
Make the machine run more quietly. Select the mode when the running noise is annoying.
1 Press the System Menu key.
2 Press [▼], [Adjustment/Maintenance] and [Change] of Silent Mode.
3 Press [Off] or [On].
![Triumph-Adler DC 2230 - Press [Off] or [On]. - 1](/content/2026/05/767912/images/3c2c7db94ca96953ab68ac1a32cb448957c48a2fc7e12420c9b42a01b5b72db1.jpg)
text_image
Adjustment/Maintenance - Silent Mode 1 Make after-printing process run more quietly. *This may increase the time need to prepare for the next job. Off On Cancel OK Status: 10/05/2006 10:134 Press [OK].
System Initialization
Initialize the hard disk mounted on the machine to return to the default mode.
Refer to System Initialization on page 6-78 about the initialization procedures.
Date/Timer
Date/Timer settings include:
- Date/Time ...6-64
• Time Zone ... 6 - 6 4 - Date Format ...6-65
• Auto Panel Reset ...6-65
• Auto Sleep ...6-66
• Auto Error Clear ...6-68
NOTE: If user login administration is valid, only administrators can change Date/Timer settings.
Date/Time
Set the date and time for the location where you use the machine. If you perform Send as E-mail, the date and time set here will be displayed on the header.
CAUTION: Be sure to set Time Zone before the Date/Time setup.
1 Press the System Menu key.
2 Press [▼], [Date/Timer] and then [Change] of Date/Time.
3 Press [+] or [-] to enter the date and time respectively.
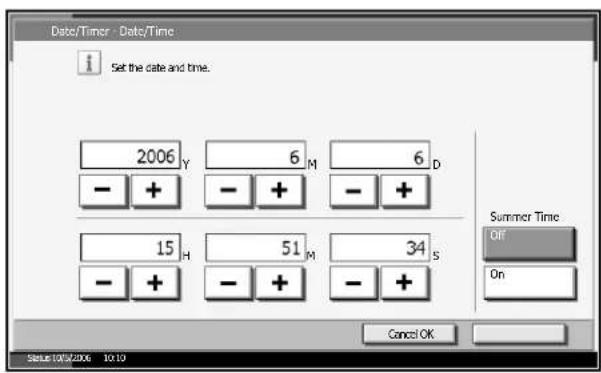
text_image
Date/Timer - Date/Time 1 Set the date and time. 2006 Y 6 M 6 D - + - + - + 15 H 51 M 34 S - + - + - + Summer Time Off On Cancel OK Status:00/00/2006 10:10NOTE: Set year (Y), month (M), date (D), hour (H), minute (M), and second (S).
4 Press [Off] or [On] of Summer Time and press [OK].
Time Zone
Set the time difference in the location you are from GMT.
1 Press the System Menu key.
2 Press [▼], [Date/Timer] and then [Change] of Time Zone.
3 Select the location and press [OK].
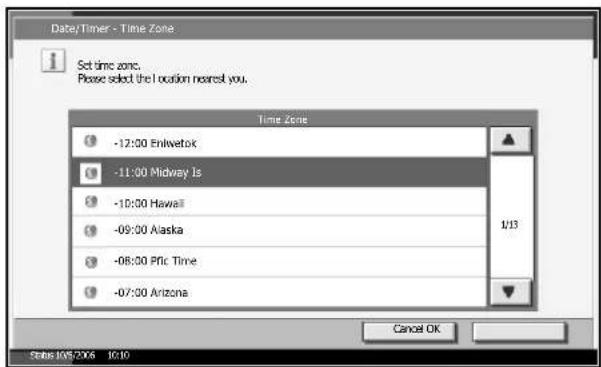
text_image
Data/Timer - Time Zone Set time zone. Please select the location nearest you. Time Zone -12:00 Enlwetok -11:00 Midway Is -10:00 Hawaii -09:00 Alaska -08:00 Pfc Time -07:00 Arizona 1/13 Cancel OK Status 105/2006 10:10NOTE: Press [▲] or [▼] to select the location.
Date Format
Select the display format of year, month, and date.
1 Press the System Menu key.
2 Press [▼], [Date/Timer] and then [Change] of Date Format.
3 Select [MM/DD/YYYY], [DD/MM/YYYY], or [YYYY/MM/DD] and press [OK].
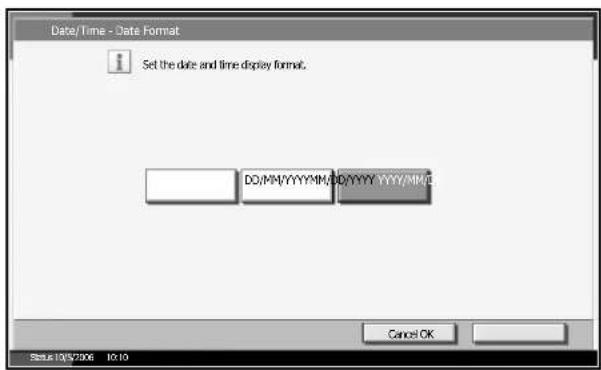
text_image
Date/Time - Date Format 1 Set the date and time display format. DO/MM/YYYY/MM/DD/YYYY YYYY/MM/03 Cancel OK Status: 10/05/2006 10:10Auto Panel Reset
If no job runs for a certain period of time, automatically reset settings and return to the default setting.
NOTE: Refer to page 6-20 for the default settings.
Auto Panel Reset ON/OFF
Select to use Auto Panel Reset or not.
1 Press the System Menu key.
2 Press [▼], [Date/Timer] and then [Change] of Auto Panel Reset.
3 Press [Off] or [On].
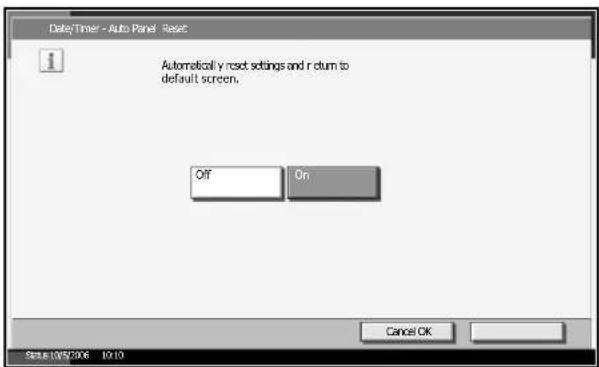
text_image
Date/Timer - Auto Panel Reset Automatically y reset settings and r return to default screen. Off On Cancel OK Status: 01/05/2006 10:104 Press [OK].
Reset Timer
If you select [On] for Auto Panel Reset, set the amount of time to wait before Auto Panel Reset. Options are between 5 and 495 seconds (every five seconds).
NOTE: If you select [Off] for Auto Panel Reset, the time display does not appear.
1 Press the System Menu key.
2 Press [▼], [Date/Timer] and then [Change] of Reset Timer.
3 Press [+] or [-] to enter the time until Auto Panel Reset is turned on.
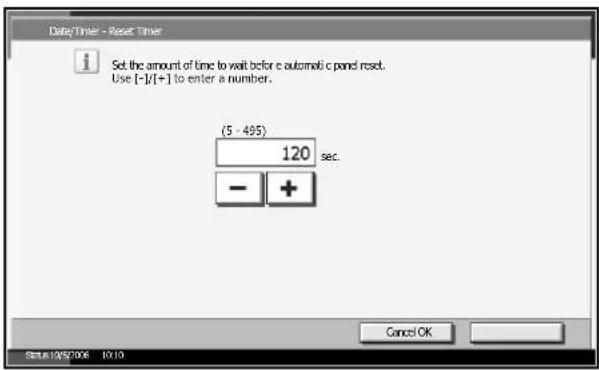
text_image
Date/Timer - Reset Timer 1 Set the amount of time to wait before c automatic pond reset. Use [-]/[+] to enter a number. (5 - 495) 120 sec. - + Cancel OK Status: 10/05/2006 10:104 Press [OK].
Auto Sleep
If no job runs for a certain period of time, automatically enter Sleep Mode. Refer to Chapter 3 of the Operation Guide for Sleep Mode.
Auto Sleep ON/OFF
Select whether to use Auto Sleep or not.
NOTE: Time remaining before Auto Sleep can be modified as necessary. Refer to Sleep Timer below about the procedures.
1 Press the System Menu key.
2 Press [▼], [Date/Timer] and then [Change] of Auto Sleep.
3 Press [Off] or [On].
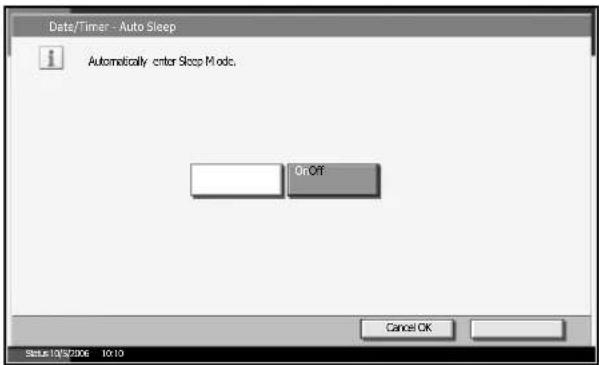
text_image
Date/Timer - Auto Sleep Automatically enter Sleep Mode. On Off Cancel OK Status: 10/5/2006 10:104 Press [OK].
Sleep Timer
If you select [On] for Auto Sleep, set the amount of time to wait before Auto Sleep. Options are between 1 and 240 minutes (every one minute).
NOTE: If you select [Off] for Auto Sleep, the time display does not appear.
1 Press the System Menu key.
2 Press [▼], [Date/Timer] and then [Change] of Sleep Timer.
3 Press [+]/[-] or the numeric keys to enter the time until Auto Sleep is turned on.
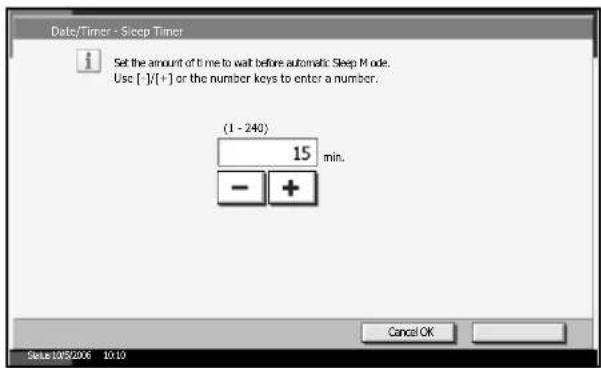
text_image
Date/Timer - Sleep Timer 1 Set the amount of time to wait before automatic Sleep Mode. Use [-]/[+] or the number keys to enter a number. (1 - 240) 15 min. - + Cancel OK Status: 19/5/2006 10:104 Press [OK].
Auto Error Clear
If an error occurs during printing, the print job stops to wait for the next step to be taken by the user. In the Auto Error Clear mode, automatically clear the error after a set amount of time elapses.
The following errors are automatically cleared.
Print overrun
Memory is full
Auto Error Clear ON/OFF
Select whether to use Auto Error Clear or not.
1 Press the System Menu key.
2 Press [▼], [Date/Timer] and then [Change] of Auto Error Clear.
3 Press [Off] or [On].
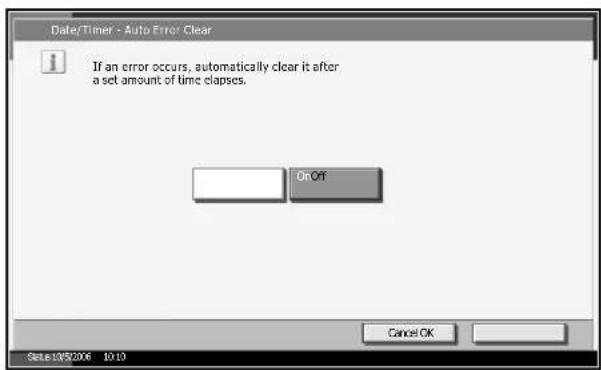
text_image
Date/Timer - Auto Error Clear If an error occurs, automatically clear is after a set amount of time clapses. On Off Cancel OK Status: 09/05/2006 10:104 Press [OK].
Error Clear Timer
If you select [On] for Auto Error Clear, set the amount of time to wait before automatically clearing errors. Options are between 5 and 495 seconds (every five seconds).
NOTE: If you select [Off] for Auto Error Clear, the time display does not appear.
1 Press the System Menu key.
2 Press [▼], [Date/Timer] and then [Change] of Error Clear Timer.
3 Press [+] or [-] to enter the time until printing restarts.
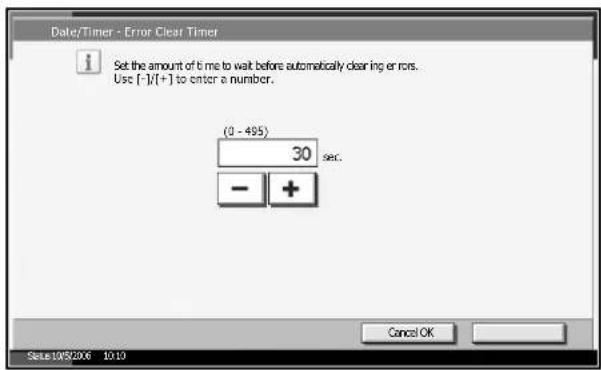
text_image
Date/Timer - Error Clear Timer 1 Set the amount of b me to wait before automatically clearing errors. Use [-]/[+] to enter a number. (0 - 495) 30 sec. - + Cancel OK Status:19/5/2006 10:104 Press [OK].
Editing Destination (Address Book/Adding One-Touch Keys)
Save frequently used destinations to Address Book or One-touch Keys and the saved destinations can be changed. The destinations are available for Send as E-mail, Send to Folder, and Fax Transmission (optional).
Adding a Destination
Add a new destination to the Address Book. There are two adding methods for individuals and groups. When adding a group, enter the group name and select group members from the Address Book.
Adding an individual
2,000 individual addresses can be registered at maximum. Each address can include the information such as destination name, E-mail address, FTP server folder path, computer folder path, and FAX No. (optional).
1 Press the System Menu key.
2 Press [Edit Destination], [Register/Edit] of Address Book, [Add], [Contact] and then [Next].
3 Press [Change] of Address Number.
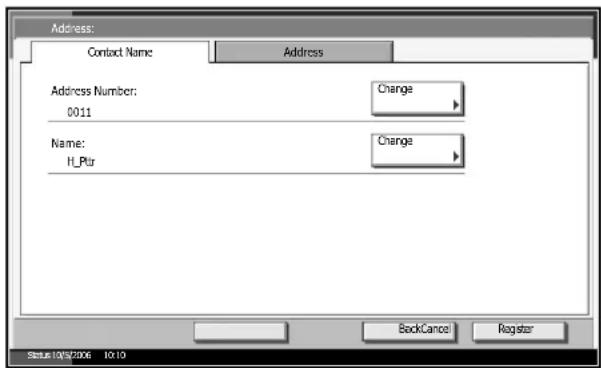
text_image
Address: Contact Name Address Address Number: Change 0011 Name: Change H_Ptr BackCancel Register Status: 19/5/2006 10:104 Press [+] / [-] or numeric keys to enter a particular Address Number (1-2,500).
NOTE: Address Number is an ID for a destination. You can select any available number out of 2,500 numbers for individuals and 500 numbers for groups.
5 Press [OK].
6 Press [Change] of Name.
7 Enter the destination name (up to 32 characters) displayed on the Address Book and press [OK].
NOTE: Refer to the Appendix of the Operation Guide for entering characters.
8 Press [Address].
9 Press [▲] or [▼] to select transmission method from E-mail, Folder (FTP), FAX or Folder (SMB).
10 Press [Change Dest.].
E-mail Address
1 Press [E-mail Address] to enter the E-mail address and press [OK].
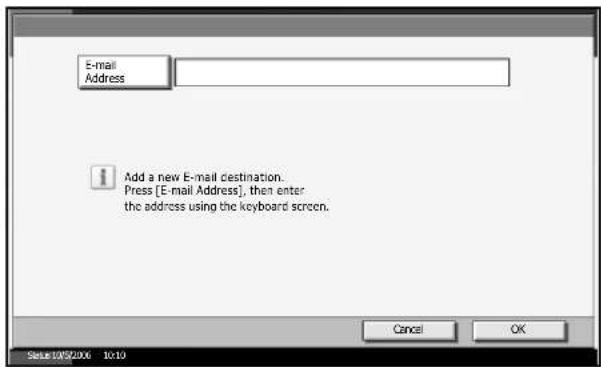
text_image
E-mail Address Add a new E-mail destination. Press [E-mail Address], then enter the address using the keyboard screen. Cancel OK Set:195206 10:10NOTE: Refer to the Appendix of the Operation Guide for entering characters.
2 Check if the entries are correct and press [OK].
The Folder (FTP) Address
1 Press [Host Name], [Path], [Login User Name], and [Login Password] to enter relevant information respectively and press [OK].
| Item | Description |
| Host Name Enter the FTP server name in not more than 62 characters. If the port number is other than 21, enter the port number into the server name column. | |
| Path Enter the path of the folder to which you want to upload the data in not more than 126 characters. For example, if you want to store the data in the ScanData folder of the home directory, enter ScanData. Without any entry here, the data would be stored in the home directory. | |
| Login User Name | Enter the user name to log in the FTP server in not more than 62 characters. |
| Login Password | Enter the password to log in the FTP server in not more than 62 characters. |
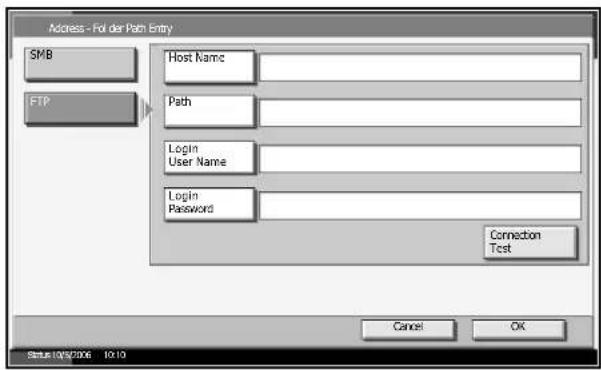
text_image
Address - Fol der Path Entry SMB FTP Host Name Path Login User Name Login Password Connection Test Cancel OK Status: 09/07/2006 10:10NOTE: Refer to the Appendix of the Operation Guide for entering characters.
2 Check if the entries are correct and press [OK].
NOTE: Press [Connection Test] to check the connection to the FTP server you chose. If the connection fails, check the entries you made.
The Folder (SMB) Address
1 Press [Host Name], [Path], [Login User Name], and [Login Password] to enter relevant information respectively and press [OK].
| Item Description | |
| Host Name Enter the computer name in not more than 62 characters. If the port number is other than 139, enter the port number into the host name column. | |
| Path Enter the path of the folder to which you want to send the data in not more than 126 characters. | |
| Login User Name | Enter the user name to log in the computer in not more than 62 characters. |
| Login Password | Enter the password to log in the computer in not more than 62 characters. |
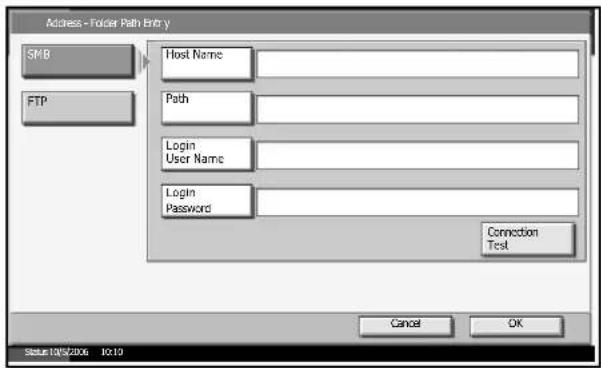
text_image
Address - Folder Path Entry SMB FTP Host Name Path Login User Name Login Password Connection Test Cancel OK Status:10/05/2006 10:19NOTE: Refer to the Appendix of the Operation Guide for entering characters.
2 Check if the entries are correct and press [OK].
NOTE: Press [Connection Test] to check the connection to the computer you chose. If the connection fails, check the entries you made.
11 Check if the destination entry is correct and press [Register]. The destination is added to the Address Book.
Adding a Group
Compile two or more individuals into a group. Designations in the group can be added at the same time. When adding a group, 500 groups can be added at maximum in the Address Book.
NOTE: Add the individuals, which are supposed to be included in a group, before adding the group in the Address Book. Up to 100 destinations for the e-mail, 500 destinations for the FAX, and the total of 10 destinations for the FTP and SMB can be registered per a group.
1 Press the System Menu key.
2 Press [Edit Destination], [Register/Edit] of Address Book, [Add], [Group] and then [Next].
3 Press [Change] of Address Number.
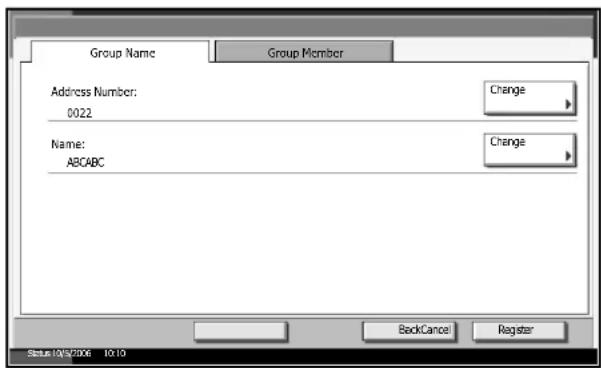
text_image
Group Name Group Member Address Number: 0022 Name: ABCABC Change Change BackCancel Register Status: 10/15/2006 10:104 Press [+] or [-] to enter a particular Address Number (1-2,500).
NOTE: Address Number is an ID for a group. You can select any available number out of 2,000 numbers for individuals and 500 numbers for groups.
5 Press [OK].
6 Press [Change] of Name.
7 Enter the group name displayed on the Address Book in not more than 32 characters.
NOTE: Refer to the Appendix of the Operation Guide for entering characters.
8 Press [Group Member].
9 Press [Add].
10 Select a destination (individual) to add to the group.
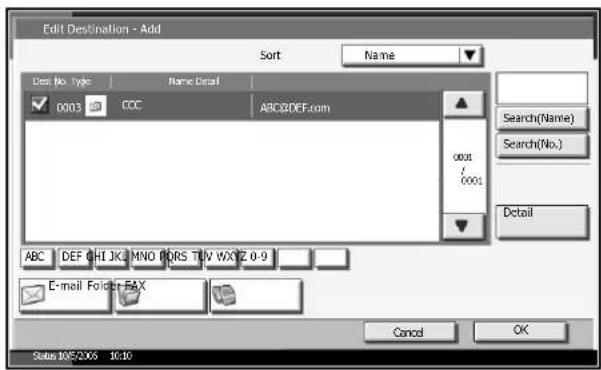
text_image
Edit Destination - Add Sort Name Desc No. Type Name Detal 0003 CCC ABC3DEF.com 0001 / 0001 Search(Name) Search(No.) Detail ABC DEF HI JK MNO DORS T N WX Y Z 0-9 E-mail Folder FAX Cancel OK Status:105/2016 16:10NOTE: Destinations can be sorted or searched by destination name or address number. Refer to Chapter 3 of the Operation Guide for Address List.
11 Press [OK].
12 If you have more destinations to add, repeat Steps 9 to 11.
Check if the selected destination was added to the group and press [Register]. Now the group is added to the Address Book.
Editing a Destination
Edit/delete the destinations (invididuals) you added to the Address Book.
1 Press the System Menu key.
2 Press [Edit Destination] and then [Register/Edit] of Address Book.
3 Select a destination or group to edit.
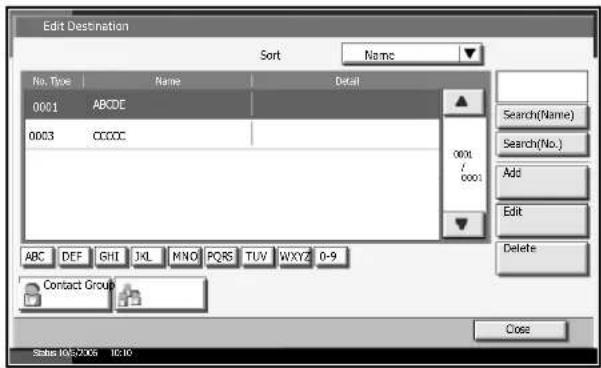
text_image
Edit Destination Sort Name No. Type Name Detail 0001 ABCDE 0003 CCCCC Search(Name) Search(No.) Add Edit Delete ABC DEF GHI JXL MNO PQRS TUV WXYZ 0-9 Contact Group Close Status: 10/2/06 16:10NOTE: Destinations can be sorted or searched by destination name or address number. Refer to Chapter 3 of the Operation Guide for Address List.
4 Press [Detail].
Editing an Individual Destination
Change Address Number, Name and destination type and address. Refer to Adding an individual on page 6-70 for the details.
Editing a Group
1 Change Address Number and Name. Refer to Adding a Group on page 6-74 for the details.
2 Press [Group Member].
3 To delete any destination from the group, select the destination and press [Delete]. Press [Yes] on the screen to confirm the deletion.
Deleting an Individual Destination or Group
Repeat Steps 1 to 3, press [Delete]. Press [Yes] on the screen to confirm the deletion. Deletion is performed.
Adding a Destination on One-touch Key
Add a new destination (individual or group). 100 destinations can be registered at maximum.
NOTE: Refer to Chapter 3 of the Operation Guide for use of One-touch Key.
1 Press the System Menu key.
2 Press [Edit Destination] and [Register/Edit] of One-touch Key.
3 Select a One-touch Key number (001 to 100) for the destination. Pressing [No.] enables direct entry of a One-touch Key number.
4 Press [Register/Edit]. The address book appears.
5 Select a destination (individual or group) to add to the One-touch Key number.
Pressing [Detail] enables to show the detailed information of the selected destination.
NOTE: Destinations can be sorted or searched by destination name or address number. Refer to Chapter 3 of the Operation Guide for Address List.
6 Press [OK]. The destination will be added to the One-touch Key.
Editing One-touch Key
Edit/delete the destinations you added to One-touch Key.
1 Press the System Menu key.
2 Press [Edit Destination] and then [Register/Edit] of One-touch Key.
3 Select a One-touch Key number (001 to 100) for the destination. Pressing [No.] enables direct entry of a One-touch Key number.
Changing the Registered Information
1 Press [Register/Edit].
2 Select a new destination (individual or group).
Pressing [Detail] enables to show the detailed information of the selected destination.
NOTE: Destinations can be sorted or searched by destination name or address number. Refer to Chapter 3 of the Operation Guide for Address List.
3 Press [OK].
4 Press [Yes] on the screen to add the destination to the One-touch Key.
Deleting the Registered Information
1 Press [Delete].
2 Press [Yes] on the screen to confirm the deletion of the data registered in the One-touch Key.
System Initialization
Initialize the hard disk mounted on the machine to return to the default mode.
CAUTION: System initialization will erase Custom Document Boxes, data stored in Document Box, addresses in the Address Book, user property, account information, and settings.
NOTE: This item will not be displayed if the optional Security Kit is installed. Refer to Security on page 8-1 about the functions added when the Security Kit is installed and related procedures.
1 Press the System Menu key.
2 Press [▼], [Adjustment/Maintenance] and then [Execute] of System Initialization.
3 Press [Yes].
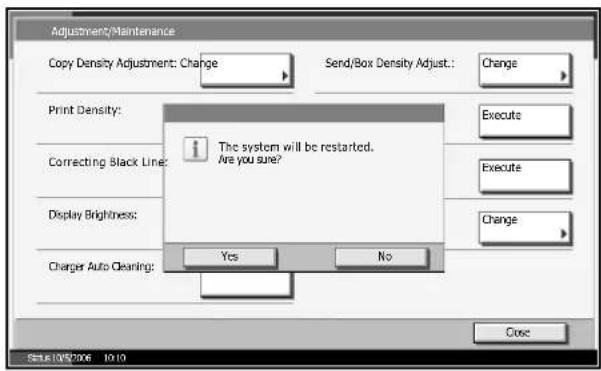
text_image
Adjustment/Maintenance Copy Density Adjustment: Change Send/Box Density Adjust.: Change Print Density: Correcting Black Line: The system will be restarted. Are you sure? Execute Execute Change Charger Auto Clearing: Yes No Close Date: 01/06/2006 10:104 Once the initialization ends, the message indicating Task is completed. Turn the main power switch off and on. appears. Turn the main power switch off.
Restarting the System
Restart the CPU without turning the main power switch off. It works to deal with the machine's unstable operation. (Same as the computer restart.)
1 Press the System Menu key.
2 Press [System] and [Execute] of Restart.
3 Press [Yes] to restart the machine.
Accessibility (Enlarging Touch Panel Display)
Touch panel characters and key displays can be enlarged. Use the numeric keys to select items and proceed to the next screen.
NOTE: Accessibility can be used only with Copying and Sending registered on the Quick Setup screen.
Press the Accessibility Display key when in the Copy or Send (i.e. the Copy or Send key indicator is On).
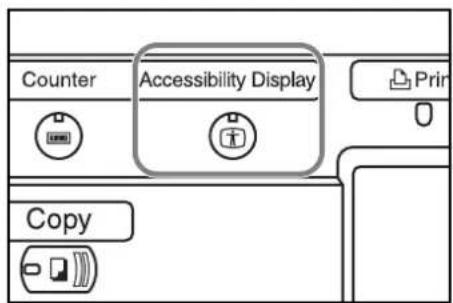
text_image
Counter Accessibility Display Copy PrintEnlarged keys or characters appear on the touch panel.
Operation can also be made by pressing any numeric key corresponding to the number or symbol displayed. (e.g. Press the 2 key to adjust density.)
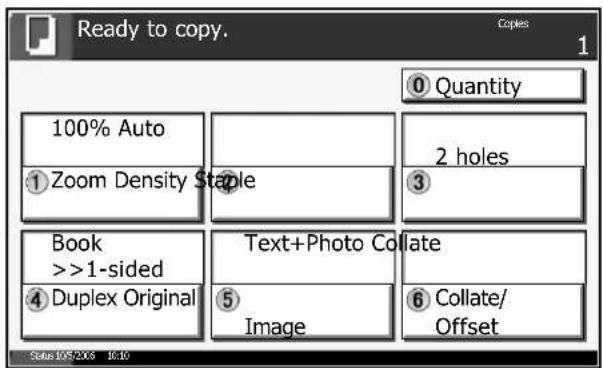
text_image
Ready to copy. Copies 1 Quantity 100% Auto Zoom Density Staple 2 holes 3 Book >>1-sided Text+Photo Collate 4 Duplex Original 5 Image 6 Collate/ Offset Status: 10/5/2006 10:10Follow the instructions on the screen for subsequent operations.
7 Management
This chapter explains the following operations.
- User Login Administration 7-2
• Job Accounting.... 7-10
• Security Kit Operations.... 7-23
User Login Administration
User login administration specifies how the user access is administered on this machine. Enter correct login user name and password for user authentication to log in.
Access privileges are in two types - User and Administrator. Certain items in System Menu can be modified only by administrators.
First User Login Administration
Follow these steps for the first user login administration.
Enable user login administration. (page 7-2)

Add a user.(page 7-4)

Log out.(page 7-4)

The registered user logs in for operations.(page 7-3)
Enabling/Disabling User Login Administration
This enables user login administration. Select one of the following authentication methods:
| Item Description | |
| Local Authentication | User authentication based on user property on the local user list stored in the machine |
| Network Authentication | User authentication based on Authentication Server. Use a user property stored in Authentication Server to access the network authentication login page. |
1 Press the System Menu key.
2 Press [User Login/Job Accounting].
3 If user login administration is invalid, the user authentication screen is displayed. Enter a login user name and password, and press [Login]. By default, the login user name and password are 5050 respectively.
NOTE: The login user name and password are for default users with administrator rights.
4 Press [Next] of User Login Setting and then [Change] of User Login.
5 Select [Local Authentic.] or [Network Authentic.]. Select [Off] to disable user login administration.
If you select [Network Authentic.], enter the host name (62 characters or less) and domain name
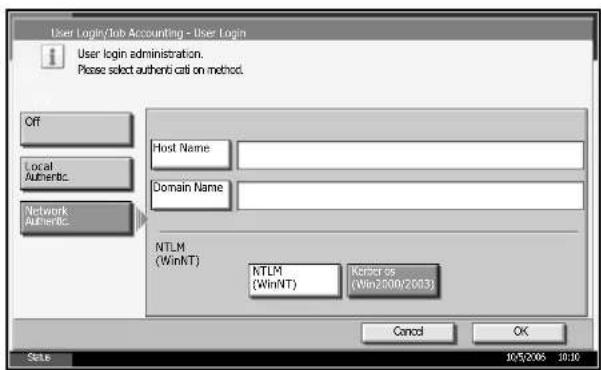
text_image
User Login/Job Accounting - User Login User login administration. Please select authentici on method. Off Local Authentic... Network Authentic... Host Name: Domain Name: NTLM (WinNT) NTLM (WinNT) Kontier os (Win2/2002/2013) Cancel OK State 10/5/2/06 10:10(254 characters or less) for the Authentication Server. Select [NTLM(WinNT)] or [Kerberos(Win2000/2003)] as the authentication method.
NOTE: If the login user name and password are rejected, check the following settings.
• Network Authentication setting of the machine
- User property of the Authentication Server
- Clock time setting of the machine and the Authentication Server
If you cannot login because of the setting of the machine, login with any administrator registered in the local user list and correct the settings.
6 Press [OK].
Login/Logout
If user login administration is enabled, it is necessary to enter the login user name and password to use the machine.
Login
1 If the screen below appears during the operations, press [Login User Name].
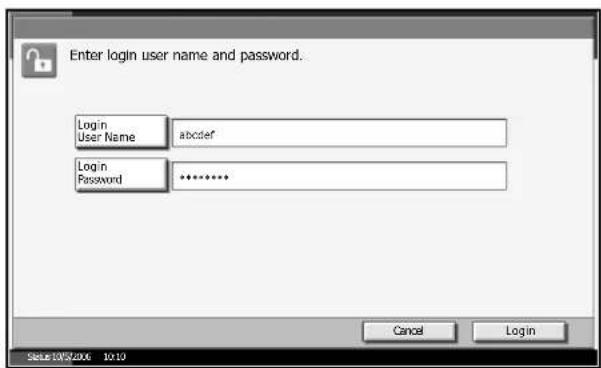
text_image
Enter login user name and password. Login User Name abcdef Login Password ******** Cancel Login Since 19/5/2006 10:102 Enter the login user name and press [OK].
NOTE: Refer to the Appendix of the Operation Guide for details on entering characters.
3 Press [Login Password].
4 Enter the password and press [OK].
5 Check the login user name and password are correct, and press [Login].
Logout
To log out the machine, press the Logout key to return to the login user name/password entry screen.
text_image
Help Logout Po ?Auto Logout
Logout is automatically executed in the following cases:
- When the Power key is pressed to enter the sleep mode
- When auto sleep is activated
- When auto reset is activated
Adding a User
This adds a new user. You can add Up to 1,000 users (including the default login user name).
| Item Description | |
| User Name* Enter | the name displayed on the user list (up to 32 characters). |
| login user name* | Enter the login user name to log in (up to 64 characters). The same login user name cannot be registered. |
| Password* Enter | the password to log in (up to 64 characters). |
| Access Level* Select User or Administrator for user access privileges. | |
| Account Name Add an account where the user belongs. The user, who registered his/her account name, can log in without entering the account ID. Refer to Job Accounting on page 7-10. | |
| E-mail Address The user can register his/her E-mail address. The registered address will be automatically selected for subsequent operations that need any E-mail function. | |
* Mandatory
NOTE: By default, one default user with administrator rights is already stored. This user property includes:
User Name: Admin
Login user name:5050
Password: 5050
Access Level: Administrator
It is recommended to periodically change the user name, login user name and password regularly for your security.
1 Log in as a user with administrator rights.
2 Press the System Menu key.
3 Press [User Login/Job Accounting].
4 If user login administration is invalid, the user authentication screen is displayed. Enter a login user name and password, and press [Login]. By default, the login user name and password are 5050 respectively.
5 Press [Next] of User Login Setting, [Register/Edit] of Local User List, and then [Add].
6 Press [Change] of User Name.
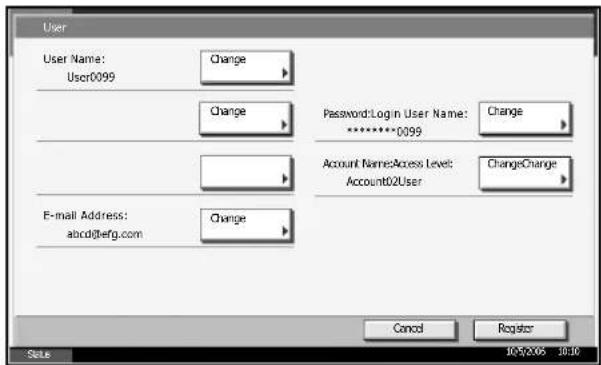
text_image
User User Name: User0099 Change Password:Login User Name: *********0099 Change Account NamesAccess Level: Account2User ChangeChange E-mail Address: abcld@terg.com Change Cancel Register State 10/5/2006 10:307 Enter the user name and press [OK].
NOTE: Refer to the Appendix of the Operation Guide for details on entering characters.
8 Enter the login user name and E-mail address following steps 3 and 4 above.
9 Press [Change] of Password and then [Password].
10 Enter the password and press [OK].
11 Press [Confirm Password].
12 Enter the same password to confirm and press [OK].
13 Press [Change] of Access Level.
14 Select the user access privilege and press [OK].
15 Press [Change] of Account Name.
16 Select the account and press [OK].
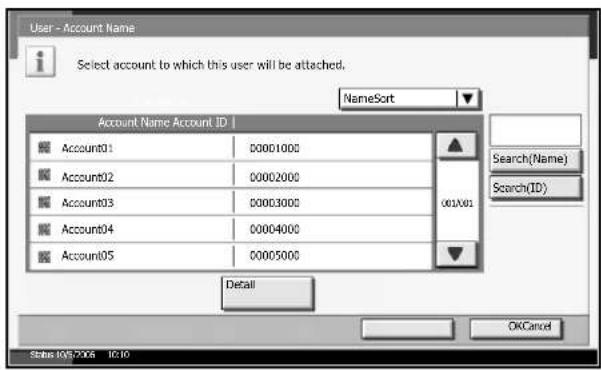
text_image
User - Account Name Select account to which this user will be attached. NameSort Account Name Account ID | Account01 00001000 Account02 00002000 Account03 00003000 Account04 00004000 Account05 00005000 Search(Name) Search(ID) Detail OKCancel Status: 10/5/2016 1C:10NOTE: Select [Name] and [ID] from the Sort pull-down menu to sort the user list.
Press [Search (Name)] or [Search (ID)] to search by account name or account ID.
17 Press [Register] to add a new user on the local user list.
Changing User Property
User property can be changed. Types of user property that could be changed may be different depending on user access privilege.
If any user with administrator rights logs in
User property can be changed and users can be deleted. The items, which can be added, are all able to be changed.
1 Press the System Menu key.
2 Press [User Login/Job Accounting].
3 If user login administration is invalid, the user authentication screen is displayed. Enter a login user name and password, and press [Login]. By default, the login user name and password are 5050 respectively.
4 Press [Next] of User Login Setting and [Register/Edit] of Local User List.
5 Select the user to change the user property.
NOTE: Select [User Name] and [Login User Name] from the Sort pull-down menu to sort the user list.
Press [Search(Name)] or [Search(Login)] to search by user name or login user name.
Changing user information
1 Press [Detail].
2 Refer to steps 3 to 13 of Adding a User to change user property.
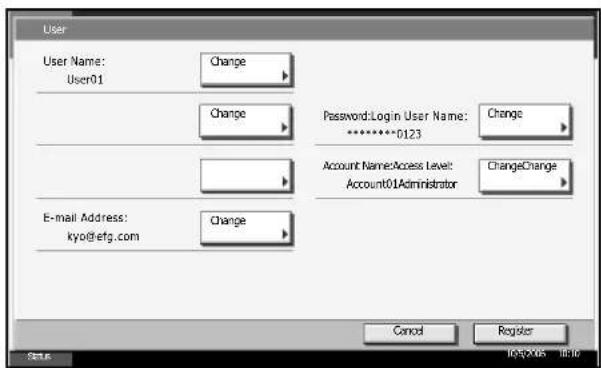
text_image
User User Name: Change User01 Change Password:Login User Name: Change *********0123 Account Name:Access Level: Change Account01Administrator E-mail Address: Change kyo@efg.com Cancel Register OK/OK Cancel3 Press [Register]. User property will be changed.
Deleting a user
1 Press [Delete].
2 Press [Yes] on the screen to confirm deletion. The selected user will be deleted.
NOTE: The default user with administrator rights cannot be deleted.
If any user without administrator rights logs in
These users can partially change their own user property including user name, password, and E-mail address.
Although login user name, access level, or account name cannot be changed, the users can check the present status.
1 Press the System Menu key.
2 Press [Change] of User Property.
3 Refer to steps 3 to 13 of Adding a User to change user property.
Press [Detail] of login User Name or Account Name to check the present status.
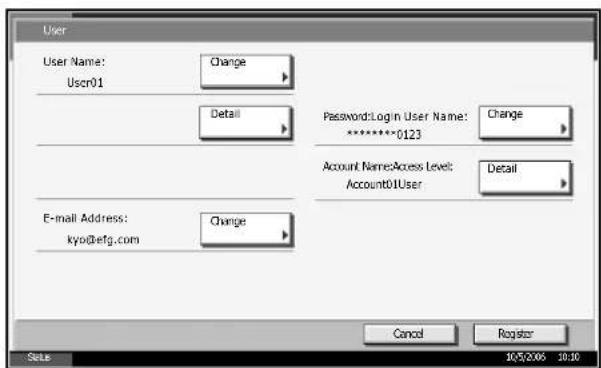
text_image
User User Name: Change User01 Detail Password:Login User Name: Change **********0123 Account NamesAccess Level: Detail E-mail Address: Change kyo@defg.com Cancel Register Setu 10/5/2006 10:104 Press [Register] to change user property.
Unknown login user name Job
This specifies the behavior for handling the jobs sent with unknown login user names (i.e. unsent IDs). If the User Login is set to invalid and Job Accounting is set to valid, follow the procedure when the Account ID is unknown.
| Item Description |
| Reject The job is rejected (not printed). |
| Permit The job is permitted to be printed. |
1 Press the System Menu key.
2 Press [User Login/Job Accounting].
3 If user login administration is invalid, the user authentication screen is displayed. Enter a login user name and password, and press [Login]. By default, the login user name and password are 5050 respectively.
4 Press [Change] of Unknown ID Job.
5 Press [Reject] or [Permit].
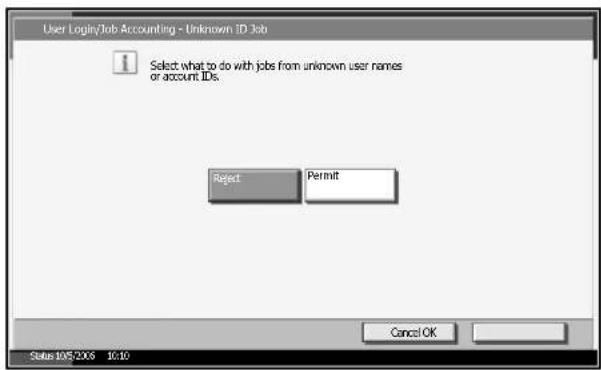
text_image
User Login/Job Accounting - Unknown ID Job 1 Select what to do with jobs from unknown user names or account IDs. Reject Permit Cancel OK Status 105 2016 10:106 Press [OK].
Job Accounting
Job accounting Manages the copy/print count incurred by individual accounts by assigning an ID to each account.
Job accounting helps the following activities in business organizations.
- Manageability of up to 1,000 individual accounts.
- Availability for account IDs with as many as eight digits (between 0 and 99999999) for security.
- Integrated management of printing and scanning statistics through the use of an identical account ID.
- Tracking the print volume for each account and for all accounts combined.
- Restricting the print counter in one-page increments up to 999,999 copies.
- Resetting the print counter for each account or for all accounts combined.
First Job Accounting Setup
Follow these steps for the first job accounting setup.
Enable job accounting. (page 7-10)

Add an account. (page 7-13)

Log out. (page 7-12)

Other users log in for operations. (page 7-11)
Enabling/Disabling Job Accounting
Enable job accounting.
1 Press the System Menu key.
2 Press [User Login/Job Accounting].
3 If user login administration is invalid, the user authentication screen is displayed. Enter a login user name and password, and press [Login]. By default, the login user name and password are 5050 respectively.
4 Press [Next] of Job Accounting Setting, and then [Change] of Job Accounting.
5 Press [On]. To disable job accounting, press [Off].
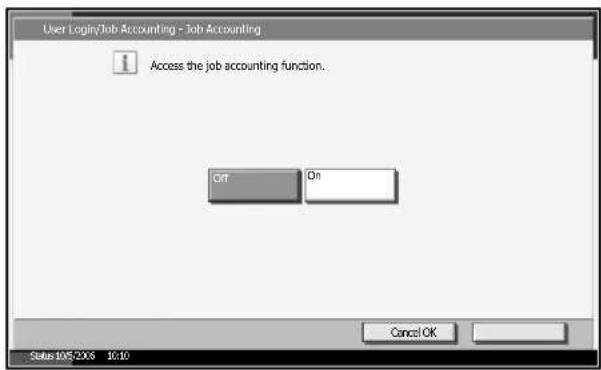
text_image
User Login/Job Accounting - Job Accounting 1 Access the job accounting function. Off On Cancel OK Status 105/2016 10:106 Press [OK].
7 When the display returns to the System Menu default screen, logout is automatically executed and the screen to enter the Account ID appears. To continue the operation, enter the Account ID.
Login/Logout
If job accounting is enabled, the account ID is required to use the machine.
Login
1 In the screen below, enter the account ID using the numeric keys and press [Login].
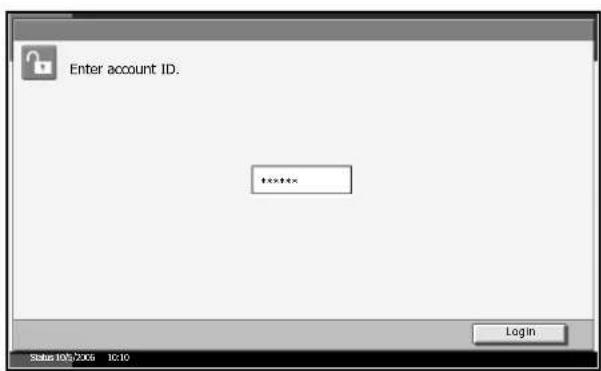
text_image
Enter account ID. Login Status 10/2/2006 10:10NOTE: If you entered a wrong character, press the Clear key and enter the account ID again.
If the entered account ID does not match the registered ID, a warning beep will sound and login will fail. Enter the correct account ID.
When the screen to enter the login user name and password appears
If user login administration is enabled, the screen to enter the login user name and password appears. Enter a login user name and password to log in. (Refer to Login/Logout on page 7-3.) If the user has already registered the account information, the account ID entry would be skipped. (Refer to Adding a User on page 7-4.)
2 Proceed to complete the rest of the steps.
Logout
When the operations are complete, press the Logout key to return to the account ID entry screen.
text_image
Help Logout ? ① ② ③ ④ ClearAdding an Account
This section explains how to add a new account. The following entries are required.
| Item Description | |
| Account Name Enter the account name (up to 32 characters). | |
| Account ID Enter the account ID as many as eight digits (between 0 and 99999999). | |
| Restriction This Prohibits printing/scanning or restricts the number of sheets to load. Refer to Restricting the Use of the Machine on page 7-15. |
1 Press the System Menu key.
2 Press [User Login/Job Accounting].
3 If user login administration is invalid, the user authentication screen is displayed. Enter a login user name and password, and press [Login]. By default, the login user name and password are 5050 respectively.
4 Press [Next] of Job Accounting Setting, [Register/Edit] of Accounting List, and then [Add].
5 Press [Change] of Account Name.
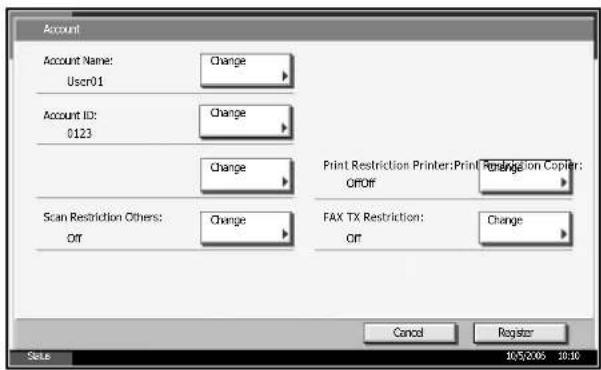
text_image
Account Account Name: Change User01 Account ID: Change 0123 Change Print Restriction Printer: Print Rangeation Copier: CPOFF Scan Restriction Others: Change OF FAX TX Restriction: Change OF Cancel Register Set 10/5/2006 10:106 Enter the account name and press [OK].
NOTE: Refer to Appendix of the Operation Guide for details on entering characters.
7 Follow steps 3 and 4 above to enter the Account ID.
NOTE: Any account ID that has already registered cannot be used. Enter any other account ID.
8 Activate or deactivate restriction. Refer to Restricting the Use of the Machine on page 7-15.
9 Press [Register] to add a new account on the Account List.
Managing Accounts
This changes the registered account information or deletes the account.
1 Press the System Menu key.
2 Press [User Login/Job Accounting].
3 If user login administration is invalid, the user authentication screen is displayed. Enter a login user name and password, and press [Login]. By default, the login user name and password are 5050 respectively.
4 Press [Next] of Job Accounting Setting and then [Register/Edit] of Accounting List.
5 Select an account to change or delete.
NOTE: Select [Account Name] or [Account ID] from the Sort pull-down menu to sort the account names.
Press [Search (Name)] or [Search (ID)] to search by account name or account ID.
Changing account information
1 Press [Detail].
2 Refer to steps
3 to 13 of
Adding an
Account and
steps 2 to 5 of
Restricting
Using the
Machine to
change
account
information.
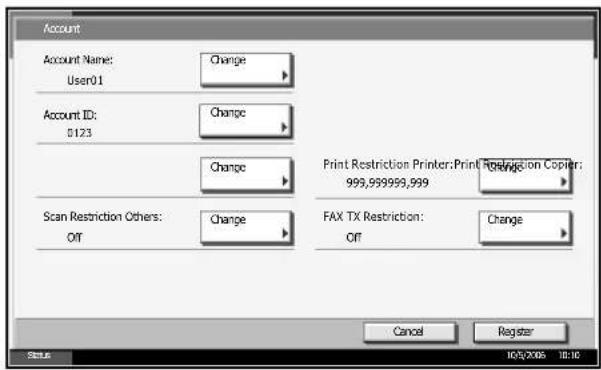
text_image
Account Account Name: Change User01 Account ID: Change 5123 Change Print Restriction Printer: Print Restriction Copy: 999,999999,999 Scan Restriction Others: Change FAX TX Restriction: Change Off OFF Cancel Register Status 10/5/2008 10:103 Press [Register] to confirm the change.
Deleting an account
1 Press [Delete].
2 Press [Yes] To delete the account.
Managing the Copy/Print Counts
You can select how the copying and printing page counts are shown - either the total of both or each of copying and printing individually. The selection may influence restriction on the count and count method. Refer to Restricting the Use of the Machine on page 7-15, Counting the Number of Pages Printed on page 7-17 and Printing an Accounting Report on page 7-20 for details.
1 Press the System Menu key.
2 Press [User Login/Job Accounting].
3 If user login administration is invalid, the user authentication screen is displayed. Enter a login user name and password, and press [Login]. By default, the login user name and password are 5050 respectively.
4 Press [Next] of Job Accounting Setting, [Next] of Default Setting and then [Change] of Copy/Print Count.
5 Press [Total] or [Split].
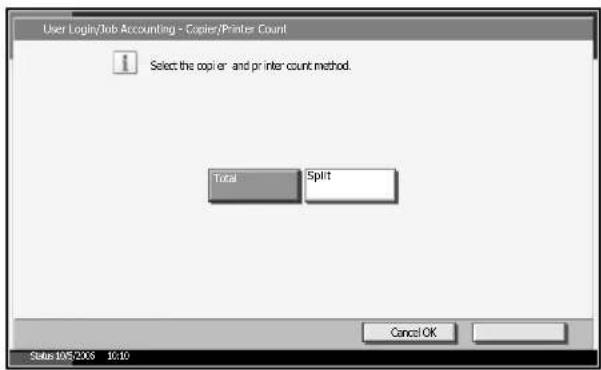
text_image
User Login/Job Accounting - Copier/Printer Count 1 Select the copi er- and pr inter count method. Total Split Cancel OK Status 105/2016 10:106 Press [OK].
Restricting the Use of the Machine
This section explains how to restrict the use of the machine by account or the number of sheets available.
Items to be Restricted
Print Restriction Copier
The number of sheets copied is restricted. This is displayed when Split mode is selected for Managing the Copy/Print Count.
Print Restriction Printer
- When Split is selected for Managing the Copy/Print Count
The number of sheets copied is restricted. - When Total is selected for Managing the Copy/Print Count
The total number of sheets copied and printed is restricted.
Scan Restriction Others
The number of sheets scanned (except for copy) is restricted.
Fax TX Restriction
The number of sheets sent by fax is restricted. This is displayed when the optional fax kit is installed.
Applying Restriction
Restriction can be applied in two modes as follows:
| Item Description | |
| Off No restriction given | |
| Counter Limit Restricts the print counter in one-page increments up to 999,999 copies. | |
| Reject Usage Restriction is applied. |
1 Follow steps 1 to 5 of Adding an Account on page 7-12.
2 Press [Change] of Print Restriction Copier, Print Restriction Printer, Scan Restriction Others, or Fax TX Restriction.
3 Select [Off], [Counter Limit], or [Reject Usage].
If [Counter Limit] selected, press [+]/[-] or numeric keys to select the number of pages.
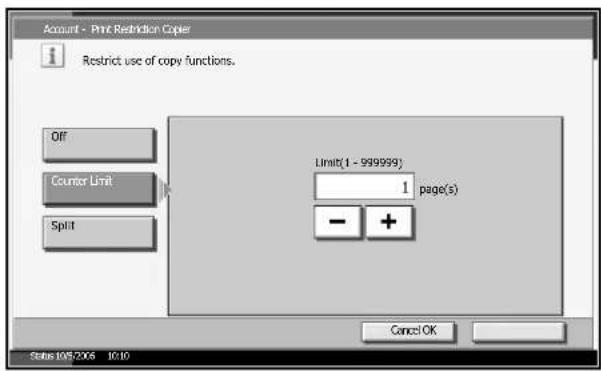
text_image
Account - Print Restriction Copier Restrict use of copy functions. Off Counter Limit Split Limit(1 - 999999) 1 page(s) - + Cancel OK Status: 10/5/2006 10:104 Press [OK].
5 Repeat steps 2 to 3 for other accounts to be restricted.
6 Press [Register] to add an account for restriction.
Applying Limit of Restriction
This specifies how the machine behaves when the counter has reached the limit of restriction.
| Item Description | |
| Immediately * | Job stops when the counter reaches its limit. |
| Subsequently Printing/scanning job continues but the subsequent job will be rejected. | |
| Alert Only Job continues displaying an alert message. | |
* The next job will be prohibited in sending or in storing in the box.
1 Press the System Menu key.
2 Press [User Login/Job Accounting].
3 If user login administration is invalid, the user authentication screen is displayed. Enter a login user name and password, and press [Login]. By default, the login user name and password are 5050 respectively.
4 Press [Next] of Job Accounting Setting, [Next] of Default Setting and then [Change] of Apply Limit.
5 Select [Immediately], [Subsequently], or [Alert Only].
6 Press [OK].
Counting the Number of Pages Printed
This counts the number of pages printed. Counts are classified into Total Job Accounting and Each Job Accounting. A new count can also be started after resetting the count data which was stored for a certain period of time.
Types of the counts are as follows.
| Item Description | |
| Print Pages (by Function) | When Split is selected for Managing the Copy/ Print Count:Number of pages copied, printed, faxed*, and the total number of those pages are displayed.When Total is selected for Managing the Copy/ Print Count:Number of pages printed (by copier and printer), number of pages faxed*, and the total number of those pages are displayed. |
| Print Pages (1 or 2 sided)** | Number of pages for 1 sided, 2 sided, as well as the total pages are displayed. |
| Scan Pages Number | Number of pages scanned for copier, other function, as well as the total pages are displayed |
| Fax Transmission Page* | Number of fax pages sent is displayed. |
| Fax Transmission Time* | Total duration of Fax transmission is displayed. |
* Only if optional fax kit is installed
** Only available for Total Job Accounting
Total Job Accounting/Resetting the Counter
This counts the number of pages for all accounts and resets the counts for those accounts at one time.
1 Press the System Menu key.
2 Press [User Login/Job Accounting].
3 If user login administration is invalid, the user authentication screen is displayed. Enter a login user name and password, and press [Login]. By default, the login user name and password are 5050 respectively.
4 Press [Next] of Job Accounting Setting and then [Next] of Total Job Accounting.
5 Press [Check] at the function to check the count. The results will be displayed.
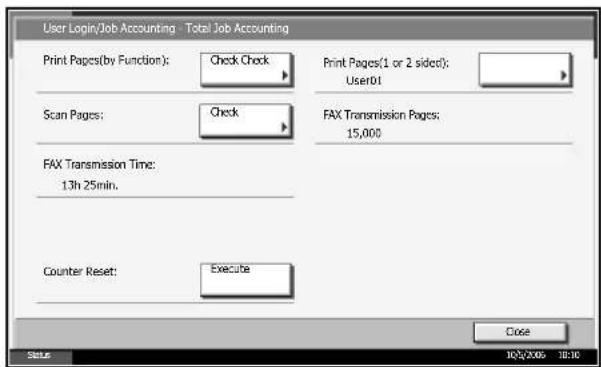
text_image
User Login/Job Accounting - Total Job Accounting Print Pages(by Function): Check Check Scan Pages: Check FAX Transmission Times: 13h 25min. Counter Reset: Execute Print Pages(1 or 2 sided): User01 FAX Transmission Pages: 15,000 Close Status 10/07/2008 18:106 Confirm the count and press [Close].
7 Press [Execute] of Counter Reset to reset the counter.
8 Press [Yes] on the screen to confirm the reset. The counter is reset.
Total Job Accounting/Resetting the Counter
This counts the number of pages for each account and resets the counts by account.
1 Press the System Menu key.
2 Press [User Login/Job Accounting].
3 If user login administration is invalid, the user authentication screen is displayed. Enter a login user name and password, and press [Login]. By default, the login user name and password are 5050 respectively.
4 Press [Next] of Job Accounting Setting and [Check] of Each Job Accounting.
5 Select the account to check the count.
NOTE: Select [Name] or [ID] from the Sort pull-down menu to sort the account names.
Press [Search(Name)] or [Search(Login)] to search by account name or account ID.
6 Press [Detail].
7 Press [Check] at the function to check the count. The results will be displayed.
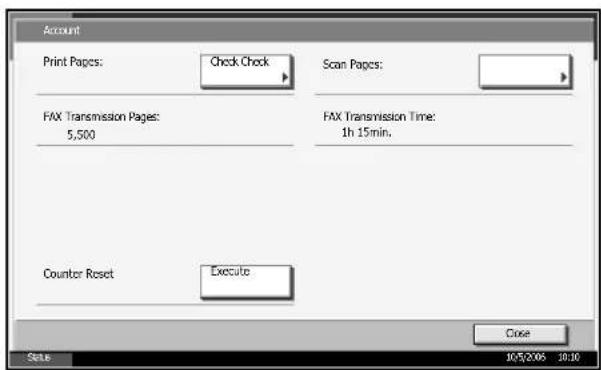
text_image
Account Print Pages: Check Check Scan Pages: FAX Transmission Pages: 5,500 FAX Transmission Time: 1h 15min. Counter Reset Execute Close State 10/5/2.06 10:108 Confirm the count and press [Close].
9 Press [Execute] of Counter Reset to reset the counter.
10 Press [Yes] on the screen to confirm the reset. The counter will be reset.
Counting by Paper Size
This counts the number of pages by paper size (e.g. Letter).
NOTE: Paper size is available in five type, - 1 to 5. These types are specified in accounting reports. Refer to Printing an Accounting Report on page 7-20.
In addition to paper size, paper type can also be specified (e.g. count the letter-size color paper used). Without specifying paper type, all types of paper in the size are counted.
1 Press the System Menu key.
2 Press [User Login/Job Accounting].
3 If user login administration is invalid, the user authentication screen is displayed. Enter a login user name and password, and press [Login]. By default, the login user name and password are 5050 respectively.
4 Press [Next] of Job Accounting Setting, [Next] of Default Setting, [Change] of Count by Paper Size, [Change] of Paper Size 1 to 5 and then [On].
5 Select the paper size.
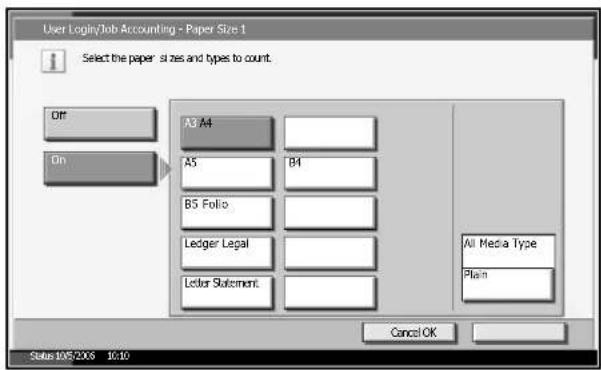
text_image
User Login/Job Accounting - Paper Size 1 Select the paper sizes and types to count. Off On A3 A4 A5 B4 B5 Folio Ledger Legal Ledger Statement All Media Type Plain Cancel OK Status: 10/5/2016 10:106 Press [Media Type] to specify paper type.
7 Select the media type and press [OK].
8 Press [OK].
Printing an Accounting Report
Total pages counted at all relevant accounts can be printed as an accounting report.
Reports have different formats depending on how the count of copiers and printers is administered.
When Split is selected for Managing the Copy/Print Count
ACCOUNT.REPORT
KYOCERA
MFP
KM-5050
Firmware Version 2GR_2000.XLG.368 2006.04.24
01/02/2004 03:35
| Account ID: | Other | ||||||
| Printed Pages: | Copier: | 000000 | FAX TX Pages: | 000000 | Paper Count: | ||
| Printer: | 000000 | FAX TX Time: | 0:0:0 | Ledger | Plain | 000000 | |
| FAX: | 000000 | Legal | Plain | 000000 | |||
| Total: | 000000 | Letter | Plain | 000000 | |||
| Scanned Pages: | Copier: | 000000 | 2-sided Print: | 000000 | A 4 | Plain | 000000 |
| Other: | 000000 | 1-sided Print: | 000000 | Auto | Plain | 000000 | |
| Total: | 000000 | Other | 000000 | ||||
| All Accounts: | |||||||
| Printed Pages: | Copier: | 000000 | FAX TX Pages: | 000000 | Paper Count: | ||
| Printer: | 000000 | FAX TX Time: | 0:0:0 | Ledger | Plain | 000000 | |
| FAX: | 000000 | Legal | Plain. | 000000 | |||
| Total: | 000000 | Letter | Plain | 000000 | |||
| Scanned Pages: | Copier: | 000000 | 2-sided Print: | 000000 | A 4 | Plain | 000000 |
| Other: | 000000 | 1-sided Print: | 0000O0 | Auto | Plain | 000000 | |
| Total: | 000000 | Other | 000000 | ||||
For the count by paper size, the report will be printed by size.
1 Check that Letter or A4 paper is loaded in the cassette.
2 Press the System Menu key.
3 Press [User Login/Job Accounting].
4 If user login administration is invalid, the user authentication screen is displayed. Enter a login user name and password, and press [Login]. By default, the login user name and password are 5050 respectively.
5 Press [Next] of Job Accounting Setting and then [Print] of Print Accounting Report.
6 Press [Yes] on the screen to confirm the printing.
Unknown Account ID Jobs
The behavior of the machine when it receives a job from unknown account ID (i.e. unsent ID) can be specified. Refer to Unknown login user name Job on page 7-8 for details.
Checking and Printing Counter
Press the Counter key to check the number of sheets printed and scanned.
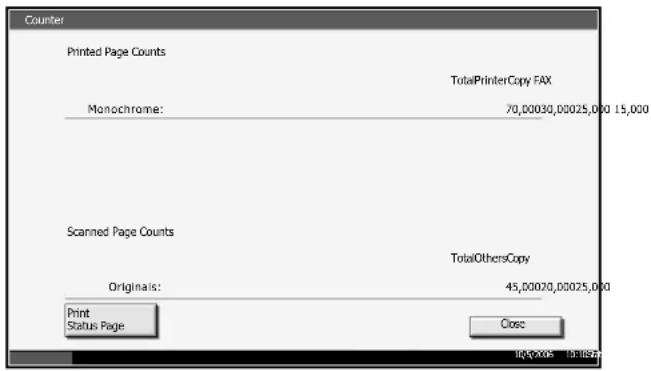
text_image
Counter Printed Page Counts TotalPrinterCopy FAX Monochrome: 70,00030,00025,000 15,000 Scanned Page Counts TotalOthersCopy Originals: 45,00020,00025,000 Print Status Page Close 10/9/2016 13:18:59Security Kit Operations
Installing an optional security kit adds [Security] on the System Menu.
Refer to Security on page 8-1 for the descriptions and operations related to the (Security) options.
8 Security
This chapter explains the procedures and tips for installation and operations of the optional Data Security Kit (C) (Security Kit).
■ Instructions for General Users (for Both General Users and Administrators)
• Security Kit Functions....8-2
- Touch Panel Display after the Security Kit Installed ..... 8-4
■ Instructions for Administrators (for Those in Charge of Installation and Operations of the Security Kit)
- Installing the Security Kit 8-5
• Changing Security Functions 8-6
- System Initialization.... 8-8
- Warning Message 8-9
Instructions for General Users (for Both General Users and Administrators)
Security Kit Functions
The Security Kit enables overwriting and encryption.
Overwriting
Multi function printers (MFPs) temporarily store the data of scanned original, print jobs as well as other data stored by users in the hard disk, from which the data is output for printing. As the data storage area used for such data remains in the hard disk until the said area is overwritten by other data, the stored data might be restored by a certain tool for unwanted use.
The Security Kit erases and overwrites (hereinafter collectively referred to as overwrite(s)) the unwanted data storage area used for the output data or deleted data so as not to be restored.
No special procedures are required for overwriting, which will be automatically performed.
CAUTION: Canceling the job immediately starts overwriting the data that was stored in the hard disk.
Overwrite Methods
There are two overwrite methods, which can be switched at any time.
Once Overwrite Method
Overwrite 0 on a target storage area of the hard disk (for overwriting) or entire hard disk (for system initialization) to disable data restoration.
3-time Overwrite Method (default)
Overwrite random pattern twice and then overwrite 0 on the same target storage area of the hard disk as mentioned above to disable data restoration. This method with its higher security makes the data restoration much more difficult even by a sophisticated restoration tool than Once Overwrite Method.
It may take more time than Once Overwrite Method to process a larger amount of data.
Encryption
MFPs store the data of scanned original and other data stored by users in the hard disk. It means the data could be leaked or tampered with if the hard disk is stolen.
The Security Kit encrypts the data before storing them in the hard disk. It guarantees higher security because no data would be decoded by any other means than ordinary output or operations.
Encryption is automatically performed and no special step is required.
CAUTION: Encryption helps enhance security. However, the data stored in the Document Box could be decoded by ordinary operations. Do not store any most strictly confidential data in the Document Box.
Functions of Security Kit
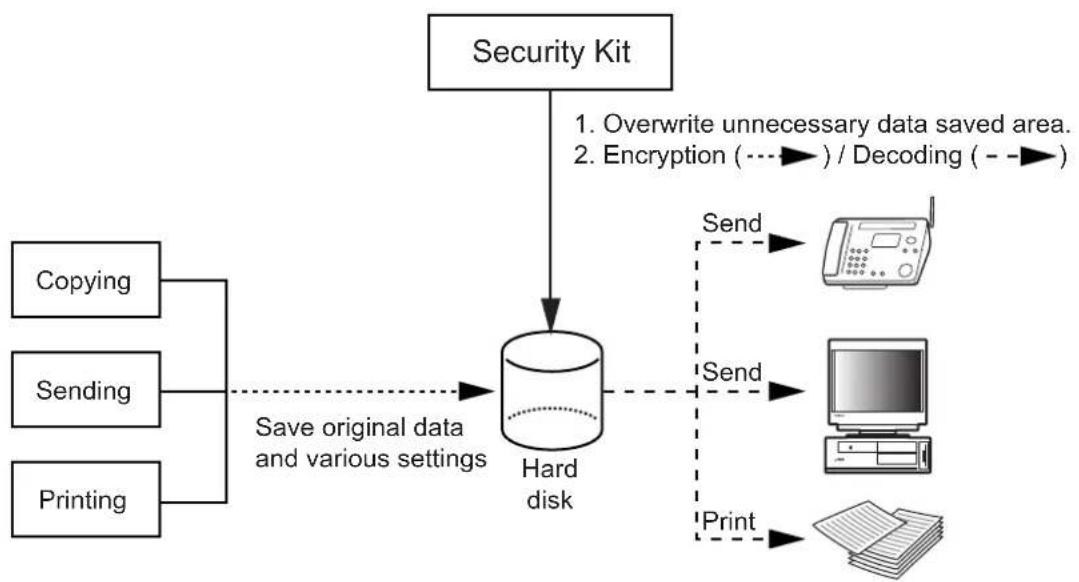
flowchart
graph TD
    A["Copying"] --> B["Hard disk"]
    C["Sending"] --> B
    D["Printing"] --> B
    B --> E["Send"]
    B --> F["Print"]
    G["Overwrite unnecessary data saved area."] --> H["Security Kit"]
    I["Encryption (---) / Decoding (---)"] --> H
    J["Computer"] --> K["Send"]
    L["Print"] --> M["Send"]
Touch Panel Display after the Security Kit Installed
Hard Disk Icon Display
In Security Mode, the Security Kit should be properly installed and run. The hard disk icon appears on the lower right side of the touch panel in Security Mode.
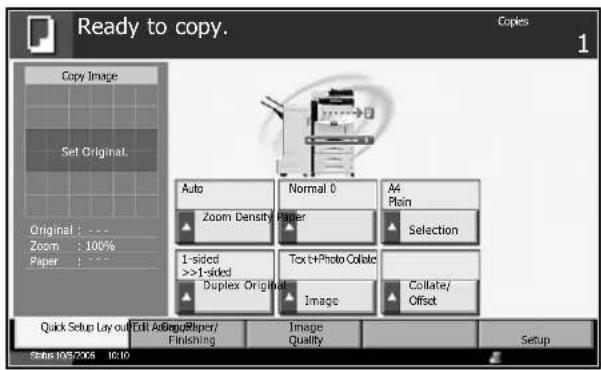
text_image
Ready to copy. Copies 1 Copy Image Set Original. Original : --- Zoom : 100% Paper : --- Auto Zoom Density Paper Normal 0 A4 Plain Selection 1-sided >>1-sided Text+Photo Collate Duplex Original Image Collate/ Offset Quick Setup Lay out Edit AsBags/Ripper/ Finishing Image Quality Setup Status: 1057206 10:10NOTE: If the hard disk icon does not appear on the normal screen, it could be possible that the Security Mode is not ON. Call service.
How hard disk icon display changes during overwriting
| Icon displayed Description | |
 | There is unwanted data on the hard disk. |
 | Overwriting the unwanted data |
 | The unwanted data overwritten. |
CAUTION: Do not turn the main power switch off during overwriting (while are displayed). It may crash the hard disk.
NOTE: If you accidentally turn the main power switch off during overwriting or initialization, the hard disk icon might not switch to HD ICON2. It should be caused by the possible crash or failed overwriting of the data, which must have been overwritten. This would not affect subsequent overwriting processes. However, system initialization should be recommended to return to the normal stable operations. (Initialization should be performed by the administrator following the steps in System Initialization on page 8-8.)
Instructions for Administrators (for Those in Charge of Installation and Operations of the Security Kit)
Installing the Security Kit
The Security Kit Contents
The Security Kit package includes:
- Security key
• Installation manual (for service personnel)
Before Installation
- The system will be initialized during installation of the Security Kit. It means that the data stored in the hard disk will be all erased. Special attention should be paid about this if you install the Security Kit on the MFP currently used.
- The Repeat Copy function will be unavailable after the installation.
- [Adjustment/Maintenance] -> [System Initialization] will not be displayed in the System Menu after the installation.
• [Security] will be added in the System Menu after the installation.
Installation
Installation of the Security Kit should be performed by the service personnel.
The only thing the administrator should do during the installation is to enter the encryption code.
Encryption Code
Encryption codes should be entered to encrypt data in 6-digit alphanumeric characters (0 to 9, A to Z, a to z). By default, the code is set 000000.
As an encryption key is created from this code, it would be safe enough to continue using the default code.
CAUTION: Be sure to remember the encryption code you entered. If reentry of the encryption code is requested for some reason, enter that code, or all the data stored in the hard disk will be erased.
After Installation
After installing the Security Kit, change the security password as well as the method how to erase entire hard disk.
The changes could be given as required, either at installation or later.
Refer to page 8-6 for the procedures.
Changing Security Functions
Changing Security Password
Enter the security password to change security functions. Customize the security password so that only the administrator can use the Security Kit.
1 Press the System Menu key.
2 Press [▼] and then [Security].
3 If user login administration is invalid, the user authentication screen is displayed. Enter a login user name and password, and press [Login]. By default, the login user name and password are 5050 respectively.
4 Enter the default security password, 000000.
5 Press [Change] of Security Password.
6 Press [Password] to enter a new security password in 6 to 16-digit alphanumeric characters.
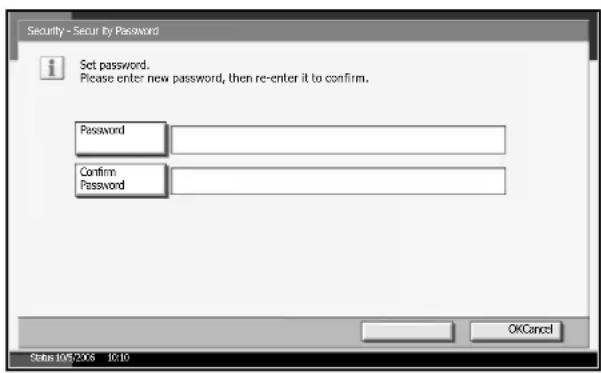
text_image
Security - Secur by Password Set password. Please enter new password, then re-enter it to confirm. Password Confirm Password OKCancel Status: 10/5/2006 1c:10CAUTION: Avoid any easy-to-guess numbers for the security password (e.g. 11111111 or 12345678).
7 Press [Confirm Password] to enter the same password again.
8 Press [OK].
Changing the Method How to Erase Entire Hard Disk
Change the method how to erase entire hard disk. Refer to Overwrite Methods on page 8-2 for details.
NOTE: The overwrite methods are used both for overwriting and system initialization (page 8-8), and cannot therefore be set individually.
1 Press the System Menu key.
2 Press [▼] and then [Security].
3 If the user login screen appears, enter the user name and password, and press [Login].
If the user authentication screen does not appear, go to Step 5.
4 Enter the security password. By default, the code is set 000000.
5 Press [Data Overwrite Method].
6 Press [3-time Overwrite Method] (default) or [Once Overwrite Method].
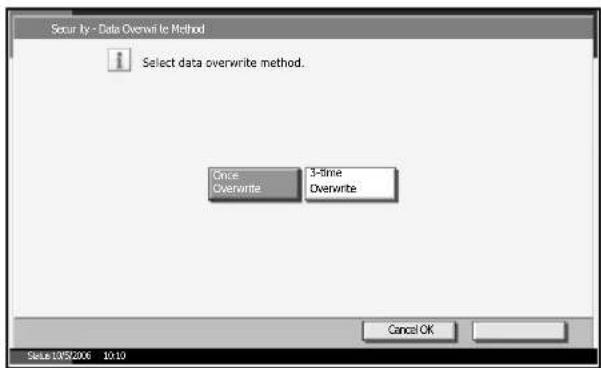
text_image
Secur by - Data Overwrite Method Select data overwrite method. Once Overwrite 3-Time Overwrite Cancel OK Sales: 19/5/2006 10:107 Press [OK].
System Initialization
Erase entire hard disk. Initialization should be performed while the machine stands by.
CAUTION: If you accidentally turn the main power switch off during initialization, the hard disk might possibly crash or initialization might fail.
NOTE: If you accidentally turn the main power switch off during initialization, turn the main power switch on again. Initialization automatically restarts.
1 Press the System Menu key.
2 Press [▼] and then [Security].
3 If the user login screen appears, enter the user name and password, and press [Login].
If the user authentication screen does not appear, go to Step 5.
4 Enter the default security password, 000000.
5 Press [Execute] of System Initialization.
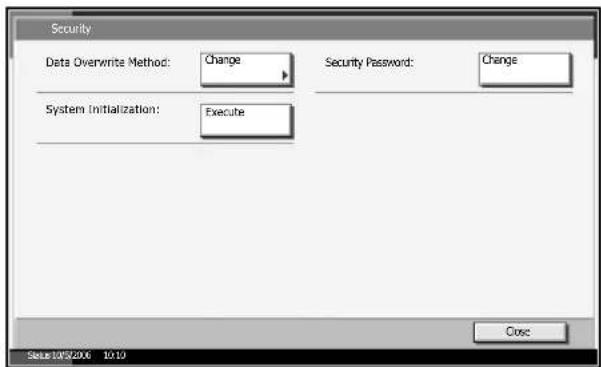
text_image
Security Data Overwrite Method: Change Security Password: Change System Initialization: Execute Close Set:INS/2006 10:106 Press [Yes] on the screen to confirm the initialization. Initialization starts.
7 When the screen appears to show initialization completed, press the Power key, check that the Power key and memory indicators are OFF, and turn the main power switch off and then on.
Warning Message
If the encryption code information of the machine has been lost for some reason, the screen below appears when the power is turned on.
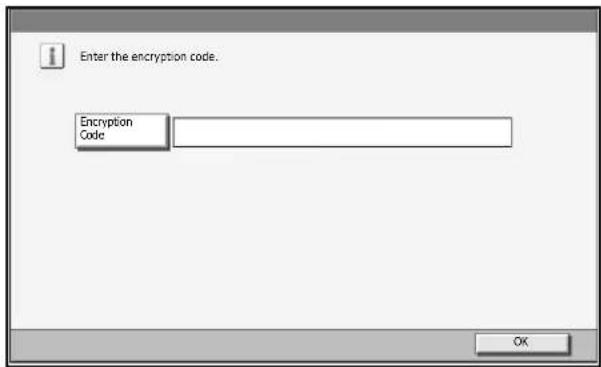
text_image
Enter the encryption code. Encryption Code OK1 Press [Encryption Code], and enter the encryption code that was entered during the installation of the Security Kit.
CAUTION: Even though the entry of a different encryption code could also enable to continue the job, the data stored in the hard disk would be all erased. You should be careful enough about this.
2 Press the Power key and confirm that the Power key/indicator and the memory indicator are off. After that, turn the main power switch off and on.
Appendix
- Paper...... Appendix-2
- Intercompatible Functions ...... Appendix-9
• Glossary ...... Appendix-10
Paper
Basic Paper Specifications
This machine is designed to print on standard copy paper as used in regular ('dry') copiers and page printers such as laser printers. It also supports a variety of other types of paper that conform to the specifications given in this appendix.
Be careful when choosing paper. Paper unsuitable for the machine may cause jams or may be wrinkled.
Supported Paper
Use standard copy paper for regular copiers or laser printers. The printing quality will be affected by the quality of paper. Poor quality paper may result in unsatisfactory output.
Basic Paper Specifications
The following table lists the specifications of paper that is supported with this machine. Refer to the subsequent sections for further details.
| Criteria Specifications | |
| Weight Cassettes: 60 to 105 g/m | 2 |
| Multi Purpose tray: 60 to 220 g/m^2 | |
| Thickness 0.086 to 0.110 mm | |
| Dimensional accuracy ±0.7 mm | |
| Squareness of corners 90° ±0.2° | |
| Moisture content 4 to 6% | |
| Grain direction Long grain (paper supply direction) | |
| Pulp content 80% or more | |
NOTE: Some recycled paper does not meet requirements for use with this machine as listed in the Basic Paper Specifications shown below, such as moisture or pulp content. For this reason, we recommend purchasing a small amount of recycled paper as a sample for testing prior to use. Choose recycled paper that gives the best printing results and contains low levels of paper dust.
We are not responsible for the problems occurred from the use of paper that does not conform to our specifications.
Choosing the Appropriate Paper
This section describes guidelines for choosing paper.
Condition
Avoid using paper with bent corners or that is curled, dirty, or torn. Do not use paper that has a rough surface or paper fiber lint, or that is especially delicate. Use of paper in any of these conditions will not only deliver poor copies but may also cause jams and shorten the useful life of the machine. Choose paper with a smooth and even surface; however, avoid coated paper or paper with a treated surface as it may damage the drum or fusing unit.
Ingredient
Do not use paper such as paper that has been coated or surface-treated or paper that contains plastic or carbon. These paper may produce harmful fumes from the heat of printing and may damage the drum.
Be sure to use the standard paper that contains at least 80% pulp, i.e., not more than 20% of the total paper content consists of cotton or other fibers.
Supported Paper Sizes
Paper of the following sizes is supported by the machine.
Measurements in the table take into account a ±0.7 mm dimensional accuracy for length and width. Corner angles must be 90^ ± 0.2^ .
| Multi Purpose Tray | Cassette or Multi Purpose Tray |
| B6-R (128 × 182 mm) A3 (297 × 420 mm) | |
| Hagaki (100×148mm) B4 (257 × 364 mm) | |
| Oufuku Hagaki (148 × 200 mm) A4 (297 × 210 mm) | |
| Executive (7 1/4 ×10 1/2") A4-R (210 × 297 mm) | |
| Envelope DL (110 × 220 mm) B5 (257 × 182 mm) | |
| Envelope C5 (162 × 229mm) B5-R (182 × 257 mm) | |
| Envelope C4 (229 × 324mm) A5-R (148 × 210 mm) | |
| ISO B5 (176 × 250 mm) Folio (210 × 330 mm) | |
| Envelope #10 (4 1/8 × 9 1/2") Ledger | |
| Envelope #9 (3 7/8 × 8 7/8") Legal | |
| Envelope #6 (3 5/8 × 6 1/2") Letter | |
| Envelope Monarch (3 7/8 ×7 1/2") Letter-R | |
| Youkei 2 (114 × 162 mm) Statement-R | |
| Youkei 4 (105 × 235 mm) | Oficio II |
| Size Entry (98 × 148 to 297 × 432 mm) | 8.5 × 13.5" |
| 8K (273 × 394 mm) | |
| 16K (273 × 197 mm) | |
| 16K-R (197 × 273 mm) |
Smoothness
The paper surface should be smooth, but it must be uncoated. With paper that is too smooth and slippery, several sheets may accidentally be supplied at once, causing jams.
Basis Weight
In countries that use the metric system, basis weight is the weight in grams of one sheet of paper one square meter in area. In the United States, basis weight is the weight in pounds of one ream (500 sheets) of paper cut to the standard size (or trade size) for a specific grade of paper. Paper that is too heavy or too light may be supplied incorrectly or cause paper jams, which may cause excessive wear of the machine. Mixed paper weight (i.e., thickness) may cause several sheets to be supplied at once accidentally and may also cause blurring or other printing problems if the toner fails to adhere correctly
The recommended basis weight is between 60 and 105 g/m ^2 for the cassettes and between 60 to 220 g/m ^2 for the Multi Purpose tray.
Thickness
Avoid using paper that is too thick or thin. Signs that paper may be thin include frequent problems with paper jams or with several sheets being supplied at once. Paper jams may also indicate that the paper is too thick. The proper thickness is between 0.086 and 0.110 mm.
Moisture Content
Paper moisture content is the ratio of moisture to dryness expressed as a percentage. Moisture affects how the paper is supplied, the electrostatic changeability of the paper, and how the toner adheres.
Paper moisture content varies depending on the relative humidity in the room. High relative humidity causes paper to become damp, making the edges expand so it appears wavy. Low relative humidity causes paper to lose moisture, making the edges tighten and weakening print contrast.
Wavy or tight edges may cause the paper to slip when it is supplied. Try to keep the moisture content between 4 to 6%.
To maintain the right level of moisture content, bear in mind the following considerations.
- Store paper in a cool, well-ventilated place.
- Store paper flat and unopened in the package. Once the package is opened, reseal it if the paper is not to be used for a while.
- Store paper sealed in the original package and box. Put a pallet under the carton to keep it raised above the floor. Especially during rainy seasons keep the paper a sufficient distance away from wooden or concrete floors.
- Before using paper that has been stored, keep it at the proper moisture level for at least 48 hours.
- Do not store paper where it is exposed to heat, sunlight, or dampness.
Other Paper Specifications
Porosity: The density of the paper fibers
Stiffness: Paper must be stiff enough or it may buckle in the machine, causing jams.
Curl: Most paper naturally tends to curl after the package is opened. When paper passes through the fixing unit, it curls upward slightly. To deliver flat printouts, load the paper so that the curl faces towards the bottom of the paper tray.
Static electricity: During printing, paper is electrostatically charged so that the toner adheres. Choose paper that can be discharged quickly so that copies do not cling together.
Whiteness: Paper whiteness affects print contrast. Use whiter paper for sharper, brighter copies.
Quality: Machine problems may occur if sheet sizes are not uniform or if corners are not square, edges are rough, sheets are uncut, or edges or corners are crushed. In order to prevent these problems, be especially careful when you cut the paper yourself.
Packaging: Choose paper that is properly packaged and stacked in boxes. Ideally, the packaging itself should have been treated with a coating to inhibit moisture.
◆Specially treated paper: We do not recommend printing onto the following types of paper, even if it conforms to the basic specifications. When you use these kinds of paper, purchase a small amount first as a sample to test.
- Glossy paper
- Watermarked paper
• Paper with an uneven surface - Perforated paper
Special Paper
This section describes printing onto special paper and print media.
The following paper and media can be used.
- Transparencies
- Preprinted paper
- Bond paper
- Recycled paper
- Thin paper (from 60g / m^2 to 64g / m^2 or less)
- Letterhead
- Colored paper
- Prepunched paper
- Envelopes
- Cardstocks
- Thick paper (from 106g / m^2 to 220g / m^2 or less)
- Labels
- Coated paper
• High-quality paper
When using these paper and media, choose that are designed specifically for copiers or page printers (such as laser printers). Use the Multi Purpose tray for transparencies, thin or thick paper, envelopes, cardstocks, and label paper.
Choosing Special Paper
Although special paper that meets the following requirements can be used with the machine, print quality will vary considerably due to differences in the construction and quality of special paper. Thus, special paper is more likely than regular paper to cause printing problems. Before purchasing special paper in volume, try testing a sample to ensure the print quality is satisfactory. General precautions when printing onto special paper are given below. Note that we are not responsible for any harm to the user or damage to the machine caused by moisture or specifications of special paper.
Select a cassette or Multi Purpose tray for special paper (please refer to Chapter 2 Selecting Paper Size for Multi Purpose Tray and Selecting Paper Type to Multi Purpose Tray of the manual).
Transparencies
Transparencies must be able to withstand the heat of printing. Transparencies must meet the following conditions.
| Criteria Specifications | |
| Heat resistance Must withstand at least 190°C | |
| Thickness 0.100 to 0.110 mm | |
| Material Polyester | |
| Criteria Specifications | |
| Dimensional accuracy ±0.7 mm | |
| Squareness of corners 90° ±0.2° | |
To avoid problems, use the Multi Purpose tray for transparencies and load transparencies with the long side facing the machine.
If transparencies jam frequently at output, try pulling the leading edge of sheets gently as they are ejected.
Hagaki
Before loading Hagaki into the Multi Purpose tray, fan them and align the edges. If the Hagaki paper is curled, straighten it before loading. Printing onto curled Hagaki may cause jams.
Use unfolded Oufuku Hagaki (available at post offices).
Some Hagaki may still have
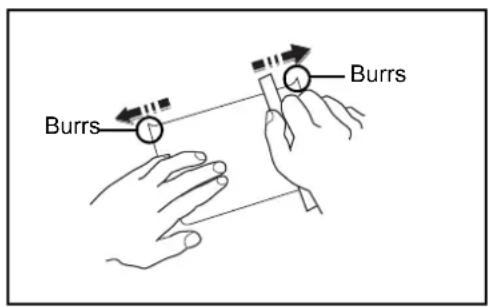
text_image
Burrs Burrsrough edges developed by a paper cutter on the back side. Remove any such rough edges by placing the Hagaki on a flat surface and rubbing the edges gently a few times with a ruler.
Envelopes
Use the Multi Purpose tray for envelopes.
Due to the structure of envelopes, printing evenly over the entire surface may not be possible in some cases. Thin envelopes in particular may be wrinkled by the machine in some cases as they pass through. Before purchasing envelopes in volume, try testing a sample to ensure the print quality.
Storing envelopes for a long period may cause them to become wrinkled. Thus, keep the package sealed until you are ready to use them.
Keep the following points in mind.
Do not use envelopes with exposed adhesive. In addition, do not use the type of envelope in which the adhesive is exposed after the top layer is peeled off. Serious damage may be caused if the paper covering the adhesive comes off in the machine.
Do not use envelopes with certain special features. For example, do not use envelopes with a grommet for winding a string to close the flap or envelopes with an open or film-covered window.
If paper jams occur, load fewer envelopes at once.
To prevent paper jams when printing onto multiple envelopes, do not allow more than ten envelopes remain in the output tray at once.
Thick Paper
Before loading thick paper in the Multi Purpose tray, fan it and align the edges. Some thick paper may still have rough edges developed by a paper cutter on the back side. Remove any such rough edges just as with Hagaki by placing the paper on a flat surface and rubbing the edges gently a few times with a ruler. Printing onto paper with rough edges may cause jams.
NOTE: If the paper is not supplied correctly even after it is smoothed, load the paper in the Multi Purpose tray with the leading edge raised a few millimeters as shown in the figure.
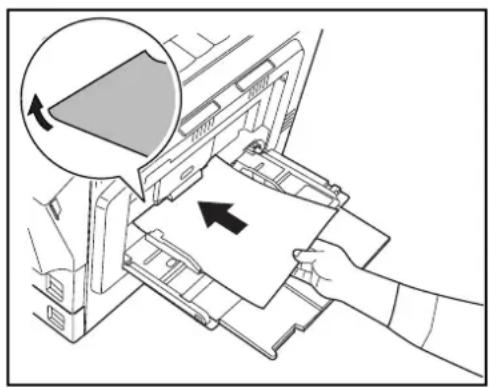
natural_image
Illustration of a printer's internal structure being inserted into a paper holder, with a magnified inset showing the blade (no text or symbols present)Colored Paper
Colored paper must conform to the specifications listed on the page 2 of the Appendix. In addition, the pigments in the paper must be able to withstand the heat of printing (up to 200^ C or 392^ F).
Preprinted Paper
Preprinted paper must conform to the specifications listed on the page 2 of the Appendix. The colored ink must be able to withstand the heat of printing. It must be resistant to silicone oil as well. Do not use paper with a treated surface such as glossy paper used for calendars.
Recycled Paper
Recycled paper must conform to the specifications listed on the page 2 of the Appendix; however, its whiteness may be considered separately.
NOTE: Before purchasing recycled paper in volume, try testing a sample to ensure that the print quality.
Intercompatible Functions
This is a full-featured machine with an array of different functions. Many features can also be combined for more efficient printing.
Glossary
AppleTalk
Apple Talk, which comes with Apple Computer's Mac OS, is a network protocol. Apple Talk enables file/printer sharing and also enables you to utilize application software that is on another computer on the same Apple Talk network.
DHCP (Dynamic Host Configuration Protocol)
Dynamic Host Configuration Protocol (DHCP) that automatically resolves IP addresses, subnet masks, and gateway addresses on a TCP/IP network. DHCP minimizes the load of network management employing a large number of client computers because it relieves individual clients including printers from the IP address being assigned.
dpi(dots per inch)
A unit for resolution, representing the number of dots printed per inch (25.4 mm).
Send as E-mail
A function to send the image data stored in the machine as an E-mail attachment. E-mail addresses can be selected from the list or entered at each time.
FTP(File Transfer Protocol)
A protocol to transfer files on the TCP/IP network, whether the Internet or an intranet. Along with HTTP and SMTP/POP, FTP is now frequently used on the Internet.
IEEE1284
An international standard for the printer-computer connection established by Institute of Electrical and Electronic Engineers (IEEE) in 1994.
IP Address
An Internet protocol address is a unique number that represents a specific computer or related device on the network. The format of an IP address is four sets of numbers separated by dots, e.g. 192.168.110.171. Each number should be between 0 and 255.
KPDL (Kyocera Page Description Language)
Kyocera's PostScript page description language compatible with Adobe PostScript Level 3.
NetBEUI (NetBIOS Extended User Interface)
An interface, developed by IBM in 1985, as an update from NetBIOS. It enables more advanced functions on smaller networks than other
protocols such as TCP/IP, etc. It is not suitable for larger networks due to lack of routing capabilities to choose the most appropriate routes. NetBEUI has been adopted by IBM for its OS/2 and Microsoft for its Windows as a standard protocol for file sharing and printing services.
NetWare
Novell's network management software that is able to run on a variety of operating systems.
POP3(Post Office Protocol 3)
A standard protocol to receive E-mail from the server in which the mail is stored on the Internet or an intranet.
PostScript
A page description language developed by Adobe Systems. It enables flexible font functions and highly-functional graphics, allowing higher quality printing. The first version called Level 1 was launched in 1985, followed by Level 2 that enabled color printing and two-byte languages (e.g. Japanese) in 1990. In 1996, Level 3 was released as an update for the Internet access and PDF format as well as gradual improvements in implementation technologies.
This indicates the number of A4 size printouts made in one minute.
SMTP (Simple Mail Transfer Protocol)
A protocol for E-mail transmission over the Internet or an intranet. It is used for transferring mail between mail servers as well as for sending mail from clients to their servers.
TCP/IP (Transmission Control Protocol/Internet Protocol)
TCP/IP is a suite of protocols designed to define the way computers and other devices communicate with each other over a network.
TWAIN (Technology Without Any Interested Name)
A technical specification for connecting scanners, digital cameras, and other image equipment to the computers. The TWAIN compatible devices enable to process image data on any relevant application software. TWAIN is adopted on a large number of graphic software (e.g. Adobe Photoshop) and OCR software.
USB (Universal Serial Bus)2.0
A USB interface standard for Hi-Speed USB 2.0. The maximum transfer rate is 480 Mbps. This machine is equipped with USB 2.0 for high-speed data transfer.
EcoPrint Mode
A printing mode that helps save toner. Copies made in this mode are thus lighter than normal.
Emulation
The function to interpret and execute other printers' page description languages. The machine emulates operation of Line Printer, IBM Proprinter, DIABLO 630, EPSON LQ-850, PCL6, KC-GL, KPDL, and KPDL (automatic).
Auto Sleep Mode
A mode designed for electrical power saving, activated when the machine is left unused or data transfer for a specific period. In Sleep mode, power consumption is kept to a minimum.
Grayscale
A computer color expression. Displayed images of this sort are typically composed of shades of gray, varying from black at the weakest intensity to white at the strongest, without any other colors. Gray levels are displayed in numerical levels: that is, white and black only for 1 bit; 256 gray levels (including white and black) for 8 bits; and 65,536 gray levels for 16 bits.
Subnet Mask
A 32-bit numerical value that defines how many bits of the IP address is specified for the network address to identify the network.
Auto Form Feed Timeout
During data transmission, the machine may sometimes have to wait until receiving the next data. This is the auto form feed timeout. When the preset timeout passes, the machine automatically put paper out. However, no output is performed if the last page has no data to be printed.
Auto Paper Selection
A function to automatically select paper in the same size as original at printing
Status Page
The page lists machine conditions, such as the memory capacity, total number of prints and scans, and paper source settings.
Additional Memory
An additional memory (optional) is used for increasing the memory capacity of this machine as well as enabling to print more sophisticated data. The 128 MB, 256 MB, or 512 MB modules are available for this machine. Contact your dealer for the memory modules that can be used on this machine.
Multi Purpose (MP) Tray
The paper supply tray on the right side of the machine. Use this tray instead of the cassettes when printing onto envelopes, Hagaki, transparencies, or labels.
Default Gateway
This indicates the device, such as a computer or router, that serves as the entrance/exit (gateway) for accessing computers outside the network that you are on. When no specific gateway is designated for a destination IP address, data is sent to the host designated as the Default Gateway.
Parallel Interface
The parallel interface mounted on the machine is used to receive the print data from the computer. With this interface, data transfer between the printer and the computer takes place in 8-bit chunks. This machine can perform IEEE 1284-compatible by-directional communications.
Printer Driver
The software to enable you to print data created on any application software. The printer driver for the machine is contained in the CD-ROM enclosed in the package. Install the printer driver on the computer connected to the machine.
Accessibility
The machine is designed featuring good accessibility even for the elderly and those who are physically challenged or visually impaired. Touch panel characters can be enlarged while the touch panel is adjustable in two angles.
For best results and machine performance, we recommend that you use only our original supplies for your products.