
Optra C710 - Printer LEXMARK - Free user manual and instructions
Find the device manual for free Optra C710 LEXMARK in PDF.


User questions about Optra C710 LEXMARK
0 question about this device. Answer the ones you know or ask your own.
Ask a new question about this device
Download the instructions for your Printer in PDF format for free! Find your manual Optra C710 - LEXMARK and take your electronic device back in hand. On this page are published all the documents necessary for the use of your device. Optra C710 by LEXMARK.
USER MANUAL Optra C710 LEXMARK
First Edition (September 1999)
The following paragraph does not apply to any country where such provisions are inconsistent with local law: LEXMARK INTERNATIONAL, INC. PROVIDES THIS PUBLICATION "AS IS" WITHOUT WARRANTY OF ANY KIND, EITHER EXPRESS OR IMPLIED, INCLUDING, BUT NOT LIMITED TO, THE IMPLIED WARRANTIES OF MERCHANTABILITY OR FITNESS FOR A PARTICULAR PURPOSE. Some states do not allow disclaimer of express or implied warranties in certain transactions; therefore, this statement may not apply to you.
This publication could include technical inaccuracies or typographical errors. Changes are periodically made to the information herein; these changes will be incorporated in later editions. Improvements or changes in the products or the programs described may be made at any time.
A form for reader's comments is provided at the back of this publication. If the form has been removed, comments may be addressed to Lexmark International, Inc., Department F95/035-3, 740 West New Circle Road, Lexington, Kentucky 40550, U.S.A. In the United Kingdom and Eire, send to Lexmark International Ltd., Marketing and Services Department, Westhorpe House, Westhorpe, Marlow Bucks SL7 3RQ. Lexmark may use or distribute any of the information you supply in any way it believes appropriate without incurring any obligation to you. You can purchase additional copies of publications related to this product by calling 1-800-553-9727. In the United Kingdom and Eire, call 0628-481500. In other countries, contact your point of purchase.
References in this publication to products, programs, or services do not imply that the manufacturer intends to make these available in all countries in which it operates. Any reference to a product, program, or service is not intended to state or imply that only that product, program, or service may be used. Any functionally equivalent product, program, or service that does not infringe any existing intellectual property right may be used instead. Evaluation and verification of operation in conjunction with other products, programs, or services, except those expressly designated by the manufacturer, are the user's responsibility.
© Copyright Lexmark International, Inc. 1999.
All rights reserved.
UNITED STATES GOVERNMENT RESTRICTED RIGHTS
This software and documentation are provided with RESTRICTED RIGHTS. Use, duplication or disclosure by the Government is subject to restrictions as set forth in subparagraph (c)(1)(ii) of the Rights in Technical Data and Computer Software clause at DFARS 252.227-7013 and in applicable FAR provisions: Lexmark International, Inc., Lexington, KY 40550.
Table of contents
Using your documentation ix
About the manuals ix
Conventions....x
Other sources of information xi
Online documents xi
Lexmark Web site .....xii
Automated fax system .....xii
Trademarks ...... xiii
1 Introducing your printer .... 1
Print speed 2
Memory 2
Color quality 2
Printer drivers ....3
MarkVision 3
Paper handling 3
2 Using printer drivers .... 5
3 Changing printer settings 7
Using the operator panel 8
MarkVision's remote operator panel 9
Menus 10
Printing current menu settings 10
Changing menu settings 12
Locking the menus 14
Fax Status Messages 15
Menu overview 16
Supplies Menu 17
Color Menu 19
Paper Menu 20
Finishing Menu 27
Utilities Menu 32
Job Menu 35
Setup Menu 38
PCL Emul Menu 44
PostScript Menu 48
Parallel Menu 49
Serial Menu 52
Network Menu 56
Infrared Menu 59
LocalTalk Menu....62
USB Menu 65
Fax Menu 67
4 Using color....75
Understanding color 75
Types of color 75
How we see color 76
Primary colors 76
Color difference....77
Managing color 78
Color management systems 78
Popular color management systems 79
Controlling your printer 80
Screening methods 80
Halftone screens 82
Attributes 82
Screen frequency 82
Screen angle 83
Spot function 83
Image Smoothing 83
Printing text 83
Color Correction 84
Auto 84
Vivid 84
Off 84
CMYK 85
Black and White 85
Display 85
2-Color Draft 86
Avoiding print quality problems 86
Media and supplies 86
Transparencies 86
Printer drivers 87
5 Managing memory 89
Printer memory 89
Adding memory 90
Solving memory problems 90
Allocating memory 91
Flash memory 92
Hard disk 92
Job buffering 92
Collating jobs 92
Storing job statistics 93
Managing resources downloaded to flash or disk 93
6 Handling paper 95
Paper sources and output bins 95
Paper sizes 96
Media guidelines....98
Paper 98
Letterhead 99
Transparencies....100
Envelopes 102
Labels 103
Card stock 103
Storing media 104
Avoiding paper jams 104
Loading paper in the trays 105
Tray linking 109
Using the multipurpose feeder 110
Printing from the multipurpose feeder ....111
7 Replacing supplies 113
Ordering supplies 113
Storing supplies 115
When to replace supplies....116
Print cartridges 117
Coating roll 118
Recycling used supplies 119
Conserving supplies 119
2-Color Draft 119
Black and White 119
Replacing supply items 120
Replacing print cartridges 121
Replacing the coating roll 126
Replacing the fuser kit ....131
Replacing the transfer kit....138
8 Solving printer problems ..... 145
Printer problems 145
Theory of operation 146
Understanding printer messages 147
Status messages 147
Attendance messages 150
Service messages 158
Identifying other problems 161
Clearing printer paper jams 168
Clearing duplex unit paper jams 175
Cleaning the print cartridge dust collector .... 181
Cleaning the waste toner sensor....184
Calling for customer support 188
Appendix A: MarkVision ..... 189
Operating systems supported .... 189
Introducing MarkVision 190
Features 191
MarkVision online Help 197
Installing MarkVision on a network 198
Getting updated utilities and drivers....199
Online services 199
Automated fax system 199
Appendix B: Printer specifications ..... 201
Appendix C: Fonts 205
Printing font samples 205
Resident fonts 206
PCL scalable fonts 206
PostScript scalable fonts 208
Bitmapped fonts 211
Symbol Sets 211
Symbol Sets for PCL 6 Emulation ....211
Downloadable fonts 213
Appendix D: Safety information ..... 215
Appendix E: Notices 227
Laser notices 231
Appendix F: Warranty 239
Glossary 241
Index 255
Using your documentation
About the manuals
This User's Guide provides detailed information about color functions, media specifications, printer supplies, memory requirements, using the printer operator panel, changing printer settings, and solving printer problems.
The book is intended for users who need information about printer configuration, printer default settings, troubleshooting printer problems, and those who may be responsible for ordering printer supplies.
A handy feature included with your manual is the chapter or procedural information located next to the page number. When searching for a chapter or topic, use this feature to quickly locate the information you need.
The Quick Reference Card offers an overview of the printer menu structure and tips for loading paper, and clearing paper jams. You may want to keep the Quick Reference Card near the printer so all users have access to it.
Refer to the Setup Guide for detailed instructions on setting up the printer hardware, installing options, and launching the CD to install printer drivers and utilities.
Conventions
It may help you to recognize the conventions we have used in this book:
- Operator panel buttons are printed in a boldface type:
Press Go after changing a menu setting.
- Messages on the operator panel display are also printed in a boldface type:
If 88 Cyan Toner Lowappears on the operator panel display, you should order a new Cyan print cartridge.
- Notes, warnings, and cautions appear in the left column for easy reference.
Note: A note provides auxiliary information you may find useful.
Warning! A warning identifies something that might damage your printer hardware or software.
Caution! A caution identifies something that might cause you harm.
Other sources of information
In addition to the User's Guide, Quick Reference Card, and Setup Guide, Lexmark offers other sources of information about your printer or about Lexmark products and services.
Online documents
The Drivers, MarkVision and Utilities compact disc (CD) that comes with your printer contains several online documents. Refer to the booklet that comes with the CD for launching instructions. Once you launch the CD, click View Documentation to display a list of available documents.
The CD includes:
- The MarkVision printer utility information, which provides step-by-step instructions for installing MarkVision for Windows 95/98 and Windows NT 4.0 on several different networks. It also describes some of the most popular MarkVision features.
- Documents which provide general information about setting up an optional print server after installing it in your printer.
- Documents which describe font options and available resources.
- A Card Stock & Label Guide which provides detailed information about selecting print material appropriate for your printer.
A Technical Reference which includes information about printer languages and commands, interface specification, and printer memory management.
Lexmark Web site
Access our site on the World Wide Web for up-to-date information about Lexmark and Lexmark products:
http://www.lexmark.com
If you need help with your printer, you can visit our Web site at:
http://www.lexmark.com/service/service.html
Automated fax system
If you're in the U.S. or Canada, you can use the Lexmark automated fax system to request information about Lexmark products, available printer drivers, or other related topics. LEXFAX^SM is available 24 hours a day, 7 days a week.
To request a catalog of the information available, simply dial (606) 232-2380 from a touchtone phone and follow the voice prompts. Have your fax number ready.
Trademarks
Lexmark, MarkNet, MarkVision, and Optra are trademarks of Lexmark International, Inc., registered in the United States and/or other countries. LexExpress, LEX-FAX, and Operation ReSource are service marks of Lexmark International, Inc.
AppleTalk, LocalTalk, Macintosh, System 7.1, and True-Type, are trademarks of Apple Computer, Inc., registered in the U.S. and other countries.
PANTONE Colors generated by the Optra C710 color printer are four-color process simulations and may not match PANTONE-identified solid color standards. Use current PANTONE Color Reference manuals for accurate color.
PANTONE Color simulations are only obtainable on this product when driven by qualified Pantone-licensed software packages. Contact Pantone, Inc. for a current list of qualified licensees.
PANTONE ^® and other Pantone, Inc. trademarks are the property of Pantone, Inc. © Pantone, Inc., 1988
PCL ^® is a registered trademark of the Hewlett-Packard Company. PCL 5 and PCL 6 are Hewlett-Packard Company's designations of a set of printer commands (language) and functions included in its printer products. This printer is intended to be compatible with the PCL 5 and PCL 6 languages. This means the printer recognizes PCL 5 and PCL 6 commands used in various application programs, and the printer emulates the functions corresponding to the commands.
PostScript ^® is a registered trademark of Adobe Systems Incorporated. PostScript is Adobe Systems' designation of a set of printer commands (language) and functions included in its printer products. This printer is intended to be compatible with the PostScript language. This means the printer recognizes PostScript commands used in various application programs, and the printer emulates the functions corresponding to the commands.
Details relating to compatibility are included in the Technical Reference.
The following terms are trademarks or registered trademarks of these companies:
Albertus The Monotype Corporation plc
Antique Olive Monsieur Marcel OLIVE
Arial The Monotype Corporation plc
CG Omega A product of Bayer Corporation
CG Times Based on Times New Roman under license from The Monotype Corporation plc, is a product of Bayer Corporation
Helvetica Linotype-Hell AG and/or its subsidiaries
Intellifont Bayer Corporation
ITC Bookman International Typeface Corporation
ITC Zapf Chancery International Typeface Corporation
Marigold AlphaOmega Typography, Inc.
Palatino Linotype-Hell AG and/or its subsidiaries
Times New Roman The Monotype Corporation plc
Univers Linotype-Hell AG and/or its subsidiaries
Wingdings Microsoft Corporation
Other trademarks are the property of their respective owners.
1
Introducing your printer
text_image
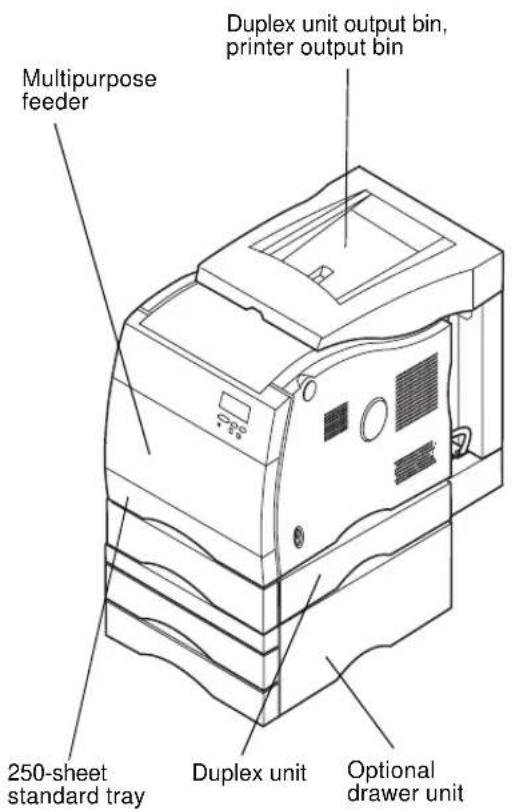
Multipurpose feeder Duplex unit output bin, printer output bin 250-sheet standard tray Duplex unit Optional drawer unitYour Lexmark Optrat TM C710 color printer is the ideal printer for presentations, business graphics, line art, and text. Your printer uses laser diode electrophotographic technology to deliver remarkable quality print images and text. You can print up to 16 pages per minute (ppm) for monochrome print jobs and 3 ppm for color print jobs. You can use your printer as a shared network or desktop printer.
A variety of connectivity options makes your printer an excellent choice for all types of system environments. You can install up to three internal adapters to support network configurations requiring Ethernet, Token-Ring, LocalTalk, serial, or additional parallel ports. You can even attach a class 1-fax modem to the serial port and send faxes directly to your printer.
Your printer also offers flexible paper handling. It supports a variety of paper sizes and has a standard multipurpose feeder that makes it easy to print envelopes, transparencies, paper, labels, and non-standard size paper.
You can add an optional duplex unit so you can print on both sides of the paper. You can also add an optional drawer unit consisting of two 250-sheet trays that can increase the printer's total paper capacity to 800 sheets.
Your Lexmark printer software enables you to easily master advanced color management techniques such as levels of brightness, contrast, and saturation. You can easily print professional color graphics, exceptional gray-scale images, or razor sharp black printing for text and detailed line art.
The modular design of your printer lets you perform routine printer maintenance procedures without the aid of a service technician. This includes replacing the photoconductor, transfer belt, coating roll, fuser, and all four color print cartridges.
Print speed
Your printer can print four-color and mono jobs at up to 16 ppm for monochrome print jobs and 3 ppm for color print jobs. If you install an optional duplex unit, you can print duplex jobs at up to 5 ppm for monochrome print jobs and 1.5 ppm for color print jobs. Print speed varies depending on specific characteristics of the job, such as the size of the formatted page, the number of fonts, the number and complexity of images and graphics, and so on.
Memory
Your printer ships with at least 32MB of standard printer memory for fast, efficient processing of color jobs. (Some models and Ethernet equipped printers may ship with more memory.) If you typically print large, complex jobs, you can install optional memory cards to increase the total usable memory to a maximum of 384MB.
In addition, you can install an optional hard disk for storing downloaded resources, job statistics, and for spooling or collating print jobs.
Color quality
Your printer is set to provide you with high quality business graphics. It also has several print quality settings to accommodate your many printing needs. These settings can provide you with superb quality presentation or draft printouts.
Printer drivers
The printer drivers included on the Driver, MarkVision, and Utilities CD shipped with your new printer were specially designed for this printer. Using these printer drivers gives you the greatest control over the features and functions of your printer. Your printer drivers have been designed to work efficiently with your printer and provide you with the best possible print quality. Using these print drivers is fast and easy.
MarkVision
The MarkVision™ printer utility, included on the Driver, MarkVision, and Utilities CD shipped with your printer, provides numerous printer management and color management tools you can access directly from your computer. MarkVision can display a graphic of your printer indicating the options installed and the location of any printer problems. If your printer is attached to a network and located some distance from your workstation, you can view printer status and change printer settings without leaving your desk. You can also use MarkVision to gather statistics about the jobs you print, or download resources.
Paper handling
Your printer comes equipped with a 250-sheet paper tray and a 50 sheet multipurpose feeder. The multipurpose feeder lets you load envelopes, transparencies, paper, labels, or card stock for a variety of print jobs. To increase paper feeding capacity, you can add an optional drawer unit consisting of two 250-sheet trays. These paper handling options allow you to use four different types of media or link the trays together and use the same paper throughout to reduce the number of times you reload paper.
2
Using printer drivers
This chapter contains information about your printer driver settings so you can use them to control printer functions.
Using the printer drivers supplied with your printer gives you the greatest control over the features and functions of your printer. These printer drivers have been designed to work efficiently with your printer and provide you with the best possible print quality. Using and accessing these drivers from your computer is fast, easy, and convenient.
Note: Printer settings selected from a software application or driver override default settings selected from the operator panel.
Most Windows software packages let you modify common printer settings through the use of their print dialog box. To modify your printer settings this way, select File from the menu bar and Print or Printer Settings. This opens a print or printer settings window that allows you to modify some or all of the many printer settings.
Many software printer dialog boxes have a printer setup or printer properties button. Select this button to access your printer driver window. Changing the printer settings through the software package or printer driver is the fastest and most convenient method for controlling your printer.
Using the printer driver window lets you print a test page that describes your printer driver and port settings. You can also use it to control things such as user identification pages, paper size, and overlays. If you encounter an item on the printer driver window you are not sure about, use your online Help for the latest information on that feature.
Lexmark confidential
The method to access your printer driver window depends on your operating system, personal preferences, and how your operating system is configured.
If you encounter a printer feature you cannot control from the printer driver or application software, use the printer operator panel or the remote operator panel available from MarkVision. Changing a printer setting from the operator panel or from MarkVision makes that setting the user default for all subsequent jobs sent to the printer. You can override these operator panel settings through the software application or printer driver. In most cases, settings you change from your software application or printer driver apply only to the job you are preparing to send to the printer.
3
Changing printer settings
This chapter contains details about printer settings you can use to control printer functions. This chapter is organized according to the structure of the printer operator panel menus. You can also change many of these settings from your application, a Lexmark printer driver, or from the MarkVision printer utility.
Note: Printer settings selected from a software application or driver override default settings selected from the operator panel.
If there is a printer feature you cannot control from the application or printer driver, use the printer operator panel or the remote operator panel available from MarkVision. Changing a printer setting from the operator panel or from MarkVision makes that setting the user default for all subsequent jobs sent to the printer. In most cases, settings you change from the application or driver apply only to the job you are preparing to send to the printer.
Using the operator panel
text_image
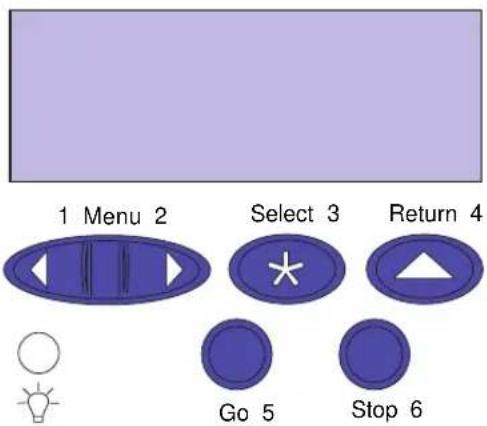
1 Menu 2 Select 3 Return 4 Go 5 Stop 6The operator panel on the upper right corner of your printer has a 2-line by 16-character Liquid Crystal Display (LCD), five buttons, and one indicator light.
The light indicates whether the printer power is on and whether the printer is idle or busy processing a job.
Indicator light
| Status Indicates | |
| Off Printer power is off. | |
| On Printer is on, but idle. | |
| Flashing Printer is busy processing a job. | |
Use the five operator panel buttons to open a menu, scroll through a list of values, select printer settings, and clear error messages. Detailed instructions for changing a printer setting begin on page 12.
Operator panel buttons
| Button Function | |
| Go 5 | Press the Go button to:Exit printer menus and return the printer to the ready stateClear certain messages from the displayWhen entering a number 5 as part of a PIN for confidential or print and hold printingIf you've changed printer settings from the operator panel, pressGo before you send a job to print. |
| 1 Menu >andand | Press the Menu>oror• Enter the menus from the ready stateScroll to the next (Menu>) or previous () or previous () or previous () or previous () or previous () or previous () or previous () or previous () or previous () or previous () or previous () or previous () or previous () or previous () or previous () or previous () or previous () or previous () or previous () or previous () or previous () or previous () or previous () or previous () or previous () or previous ( ) or previous ( ) or previous ( ) or previous ( ) or previous ( ) or previous ( ) or previous ( ) or previous ( ) or previous ( ) or previous ( ) or previous ( ) or previous ( ) or previous ( ) or previous ( ) or previous ( ) or previous ( ) or previous ( ) or previous ( ) or previous ( ) or previous ( ) or previous ( ) or previous ( ) or previous ( ) or previous ( ) or previous ( ) or previous ( ) or previous ( ) or previous ( ) or previous ( ) or previous ( ) or previous ( ) or previous ( ) or previous ( ) or previous ( ) or previous ( ) or previous ( ) or previous ( ) or previous ( ) or previous ( ) or previous ( ) or previous ( ) or previous ( ) or previous ( ) or previous ( ) or previous ( ) or previous ( ) or previous ( ) or previous ( ) or previous ( ) or previous ( ) or previous( ) or previous ( ) or previous ( ) or previous ( ) or previous ( ) or previous ( ) or previous ( ) or previous ( ) or previous ( ) or previous ( ) or previous ( ) or previous ( ) or previous ( ) or previous ( ) or previous ( ) or previous ( ) or previous ( ) or previous ( ) or previous ( ) or previous ( ) or previous ( ) or previous ( ) or previous ( ) or previous ( ) or previous ( ) or previous |
| Select 3 | Press the Select button to:Select the menu shown on the second line of the display and view the available menu itemsSelect the menu item shown on the second line of the display and view the available value or current user default setting for that menu itemSave the value displayed on the second line of the display as the new user default settingClear certain messages from the displayWhen entering a number 5 as part of a PIN for confidential or print and hold printing |
| Return 4 | Press the Return button to back up to the previous level of the menu structure without selecting a new menu item or value.Also press Return when entering a number 4 as part of a PIN for confidential or print and hold printing. |
| Stop 6 | Press the Stop button when the printer displays theBusy or Waiting message to temporarily stop all activity. The messageNot Ready is then displayed until you pressGo to continue printer activity.For example, if you need to load paper in a tray while a job is printing, pressStop and wait for the printer motors to idle before removing the tray. Reinsert the loaded tray, and then pressGo.Also press Stop when entering a number 6 as part of a PIN for confidential or print and hold printing. |
MarkVision's remote operator panel
The MarkVision utility has a remote operator panel that displays an exact replica of the printer operator panel on your computer screen. You can use the remote operator panel to check printer status and change printer settings just as you would on the actual printer operator panel. If the printer is located some distance from your computer, it may be more convenient to use the remote operator panel on your computer.
In addition to the remote operator panel, some versions of MarkVision also provide a way to view many of the menu items for one menu on a single screen. If you need to make several changes to settings in the Paper Menu, for example, you may find it easier to make those changes when you can see all of the menu items and their available values at one time. Using this option eliminates the time required to scroll through the various menu items and values when using the operator panel and its two-line display.
For additional information about MarkVision, see page 189.
Menus
A number of menus are available to make it easy for you to change printer settings. The diagram on page 16 shows all of the menus and items available under each menu. Items in each menu and the values you can select are described in more detail in the tables beginning on page 17.
Some of the menu items or values are displayed only if a specific option is installed on the printer. Other menu items may only be effective for a particular printer language. You can select these values at any time, but they only affect printer function when you have the optional equipment or the specified printer language.
Note: An asterisk (*) next to a value in the tables in this book indicates the original factory settings. Factory defaults may differ for different countries (for example, letter/A4 paper).
An asterisk (*) next to a value on the operator panel indicates the current setting. When you select a new setting, the asterisk moves to the selected setting to identify it as the current user default. These settings remain active until new ones are selected or the factory defaults are restored.
Printing current menu settings
Note: Before printing the menu settings page, ensure the selected paper source holds A4, B5, letter, or legal size paper.
You can print a list of the current user default settings at any time.
PAPER MENU
Paper Source
1 Menu 2
Select 3
Return 4





Go 5

Stop 6
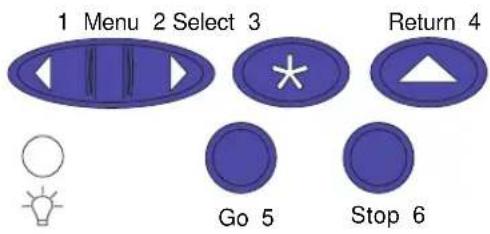
1 From the operator panel, press Menu> or <Menu to enter the menus.
If you do not need to verify the paper source and paper type, go to step 11 on page 12.
2 Continue to press and release Menu> or <Menu until you see PAPER MENU.
3 Press Select.
PAPER MENU is displayed on the first line, and Paper Source is on the second line.

text_image
Paper Source = Tray 1*
text_image
1 Menu 2 Select 3 Return 4 Go 5 Stop 6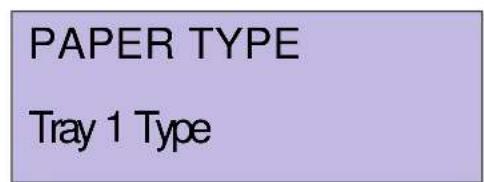
text_image
PAPER TYPE Tray 1 Type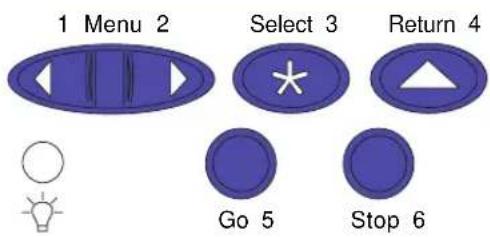
text_image
1 Menu 2 Select 3 Return 4 Go 5 Stop 6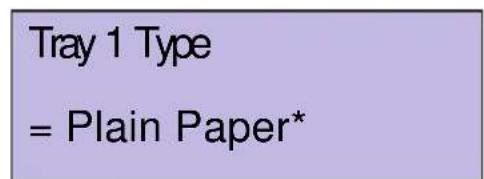
text_image
Tray 1 Type = Plain Paper*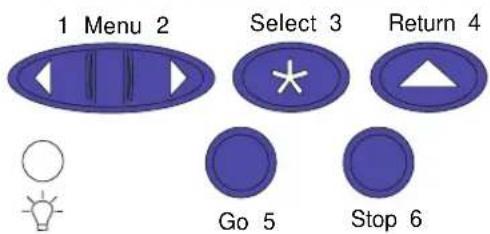
text_image
1 Menu 2 Select 3 Return 4 Go 5 Stop 64 Press Select.
Paper Source is displayed on the first line, and the current paper source is on the second line.
If you want to select a different paper source, press and release Menu> or <Menu until the source you want appears on the second line.
5 Press Select.
PAPER MENU appears on the first line and Paper Source appears on the second.
6 Press and release Menu> or
The paper source is displayed on the first line and the paper type is displayed on the second line.
If you want to select a different paper type, press and release Menu> or <Menu until the type you want appears on the second line.
9 Press Select.
UTILITIES MENU
Print Menus
1 Menu 2

Select 3

Return 4



Go 5

Stop 6
Changing menu settings
Note: Remember, settings you choose from your software application or printer driver change the user default settings you set on the operator panel.
10 Press the Return button twice.
11 Press and release Menu> or <Menu until you see UTILITIES MENU.
12 Press Select.
13 UTILITIES MENU is displayed on the first line, and Print Menus is on the second line.
14 Press Select again to print the page.
15 The message Printing Menu Settings is displayed. The printer returns to the ready state after the list of user default settings prints.
If an error message appears on the display, see “Understanding printer messages” on page 147.
To change the user default settings from the menus:
1 From the operator panel, press Menu> or
The menus and their items are listed on page 16.
3 Press Select to display the list of items for the selected menu.
4 Press Menu> or <Menu until the item you need appears on the second line.
5 Press Select to display a list of available values for the menu item.
Some menu items have submenus. For example, if you select the Paper Menu, and then select the Paper Type menu item, you must select another menu (such as Tray 1 Type) before the available values are displayed.
Note: Press Return if you need to go back to previous menus or menu items without changing the current setting.
Note: User default settings remain in effect until you save new settings or restore factory defaults.
A value can be:
- An On or Off setting
- A phrase or word that describes a setting
- A numerical value that you can increase or decrease
6 Press Menu> or <Menu to scroll through the list of values.
7 When the value you want appears on the second line of the display, press Select to make the value the new user default setting.
An asterisk appears beside the value to indicate that it is now the user default setting. The display shows the new setting for one second and then clears and shows the word Saved. It then displays the previous list of menu items.
8 Press Go if you have finished changing menu settings.
Locking the menus
To lock menus so changes cannot be made to user default settings:
1 Turn the printer off.
2 Press and hold the Go and Stop buttons and turn the printer on.
3 Release both buttons when Performing Self Test is displayed.
Note: If you press Menu> or <Menu, the Menus Disabled message is displayed.
Busy appears on the display. When the printer self test is complete, the Ready message is displayed.
To unlock the menus, repeat steps 1 through 3.
If you want to disable the button sequence so users cannot easily lock or unlock the menus from the printer operator panel, change the password variable of the PJL JOB command. Select any non-zero value for the password variable to prevent the button sequence from unlocking (or locking) the menus. Refer to the Technical Reference for more information about PJL commands.
Fax Status Messages
text_image
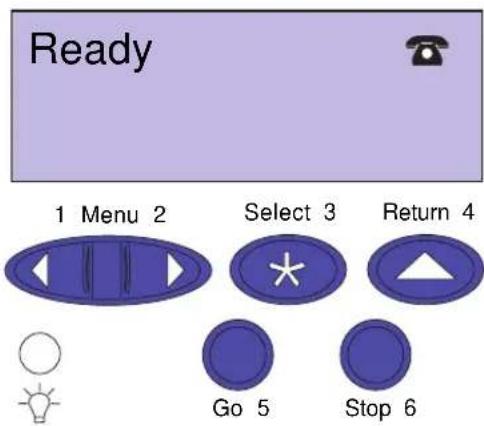
Ready 1 Menu 2 Select 3 Return 4 Go 5 Stop 6If an internal fax modem adapter card is installed and the printer is configured to process fax data, the operator panel will display different icons to indicate the current fax status.
The following table shows the icons and a description of the icon meaning.
| Status icon Description | |
| Fax Ready The fax processing system is idle and the modem has the phone line on the hook. The modem is ready to send or receive a fax. | |
| Fax Send Formatting:[WXHS](Blinking) | The printer has received a job to be faxed instead of printed. The job is being formatted. At this time, the modem has not been instructed to make the call to send the job.Note:The call to transmit the fax data is not initiated until the entire job is formatted and ready for transmission. |
Fax Sending The modem | and fax processing system is busy sending a fax. |
| Formatting & Fax Sending:[AC2C](Blinking) | The printer is sending a job and has received another job to be faxed. As one fax job is being formatted, another job is being sent by the fax processing system. |
Fax Receiving The modem | and fax processing system is busy receiving a fax. |
| Fax Formatting & Fax Receiving:[5007](Blinking) | The printer is receiving a fax and has another job to be faxed. As one fax job is being formatted, the other fax is being received by the fax processing system. |
| Fax Error An error occurred during the sending or receiving of the current fax job.[26T6] | |
Menu overview
Menus or menu items in italics are displayed only when the required option is installed. Capitalized menu items (for example, PAPER SIZE) have submenus. Refer to the tables on the following pages for a listing of the values for each menu item.

flowchart
graph TD
    A["SUPPLIES MENU (page 17)<br><Toner<br>Tray 1 Status<br>Tray 2 Status<br>Tray 3 Status<br>Coating Roll<br>Transfer Belt"] --> B["COLOR MENU (page 19)<br>Color Correction<br>Image Enhancement<br>Print Resolution"]
    B --> C["PAPER MENU (page 20)<br>Paper Source<br>PAPER SIZE<br>PAPER TYPE<br>PAPER WEIGHT<br>Custom Types<br>Substitute Size<br>Configure MP<br>Paper Loading"]
    C --> D["FINISHING MENU (page 27)<br>Duplex<br>Duplex Bind<br>Copies<br>Blank Pages<br>Collation<br>Separator Sheets<br>Separator Source<br>Multipage Print<br>Multipage Order<br>Multipage View<br>Multipage Border"]
    D --> E["UTILITIES MENU (page 32)<br>Change Cartridge<br>Print Menus<br>Print Net1 Setup<br>Print Net2 Setup<br>Print Net3 Setup<br>Print Fonts<br>Print Directory<br>Factory Defaults<br>Format Flash<br>Defragment Flash<br>Format Disk<br>Job Acct Stat<br>Hex Trace"]
    E --> F["JOB MENU (page 35)<br>Cancel Job Reset Printer<br>Print Buffer CONFIDENTIAL JOB HELD JOBS"]
    F --> G["SETUP MENU (page 38)<br>Printer Language Power Saver Resource Save Download Target<br>Print Timeout Auto Continue Wait Timeout Jam Recovery Page Protect Print Area Display Language Alarm Control Job Buffer Size Job Accounting Job Acct Limit"]
    G --> H["PCL EMUL MENU (page 44)<br>Font Source Font Name Point Size Pitch Symbol Set Orientation Lines per Page A4 Width Auto CR after LF Auto LF after CR TRAY RENUMBER"]
    H --> I["POSTSCRIPT MENU (page 48)<br>Print PS Error Font Priority Image Smoothing"]
    I --> J["PARALLEL MENU (page 49)<br>STD PARALLEL PARALLEL OPT1 PARALLEL OPT2 PARALLEL OPT3 PCL SmartSwitch PS SmartSwitch NPA Mode Parallel Buffer Job Buffering Advanced Status Protocol Honor Init Parallel Mode 1 Parallel Mode 2"]
    J --> K["SERIAL MENU (page 52)<br>STANDARD SERIAL SERIAL OPTION 1 SERIAL OPTION 2 SERIAL OPTION 3 PCL SmartSwitch PS SmartSwitch NPA Mode Serial Buffer Job Buffering RS-232/RS-422 RS-422 Polarity Serial Protocol Robust XON Baud Data Bits Parity Honor DSR"]
    K --> L["NETWORK MENU (page 56)<br>NETWORK OPTION 1 NETWORK OPTION 2 NETWORK OPTION 3 PCL SmartSwitch PS SmartSwitch NPA Mode Network Buffer Job Buffering NETWORK x Setup"]
    L --> M["INFRARED MENU (page 59)<br>Infrared Port PCL SmartSwitch PS SmartSwitch NPA Mode Infrared Buffer Job Buffering Window Size Transmit Deby Max Baud Rate"]
    M --> N["LOCAL TALK MENU (page 62)<br>LocalTalk Port PCL SmartSwitch PS SmartSwitch NPA Mode LocalTalk Buffer Job Buffering NPA Hosts LocalTalk Name LocalTalk Addr LocalTalk Zone"]
    N --> O["USB MENU (page 65)<br>USB OPTION 1 USB OPTION 2 USB OPTION 3 PCL SmartSwitch PS SmartSwitch NPA Mode USB Buffer Job Buffering"]
    O --> P["FAX MENU (page 67)<br>Fax Port Fax Baud Fax Data Bits Fax Parity Fax Buffer Job Buffering Fax Paper Size Fax Paper Type FAX SETUP FAX LOGS FAX SEND FAX RECEIVE"]
Supplies Menu
The Supplies Menu provides information about printer supplies that require attention. It is only available when a supply is low or needs replacement.
You can view the Supplies Menu when the printer is idle or when the printer is busy processing or printing a job. Press Menu> or
- 100 MHz or greater
-100 pin - 4K refresh rate
- unbuffered, non ECC
- x32
-3.3V
Adding memory
There are three memory slots in your printer. The maximum amount of usable memory is 384MB. You may add SDRAM DIMM memory cards in any memory combination to suit your needs, however the maximum amount of memory your printer can use is 384MB.
Note: Memory options designed for other Lexmark laser printers may not work with your printer.
Lexmark offers three memory options for your printer, they are 32MB, 64MB and 128MB. For memory installation instructions, refer to the Setup Guide.
Additional memory lets the printer print complex jobs, collate large jobs, and operate more efficiently. You can also download fonts and macros to printer memory. However, this type of memory is temporary storage: anything stored in printer memory is lost when the printer power is turned off.
Solving memory problems
If your printer encounters a memory shortage when trying to print a job, it may post an error message (37 Insufficient Collation Area, 37 Insufficient Defrag Memory 38 Memory Full, or 39 Complex Page), depending on the task it is trying to complete. Refer to “Understanding printer messages” on page 147 for more information about these and other messages.
If these messages appear frequently, you probably want to install additional printer memory. If they only occur rarely, try reducing the:
• Number of pages in the job
• Number of fonts or graphics on each page
- Size of scalable fonts used in the document
• Number of fonts or macros downloaded to printer memory
Additional things you may try are to set the:
- Print resolution to 600 dpi
• Page Protect On from the Setup Menu
• Resource Save Off from the Setup Menu
Allocating memory
A portion of printer memory is reserved for input buffers that hold print jobs sent from your software application. Your printer has an input buffer for each interface (parallel, serial, network, LocalTalk, or infrared). You can change the amount of memory allocated to each buffer, depending on your system requirements. For more information about using printer menus to allocate memory for each interface, see the description of the various interface menus in Chapter 3.
The size of the input buffers varies with the amount of memory installed in the printer. The following table lists the default size of the input buffers for each interface. If your printer is not using a particular interface, the allocated memory is reserved for job processing.
For more detailed information about these input buffers and memory allocation, refer to the Technical Reference.
Default input buffer size
| Installedmemory Each | parallel port Each | serial port Each network port LocalTalk | port Infrared port | |
| 32MB 192K | ^1 | 150K 1MB 1MB 150K | ||
| 64MB128MB | 2MB | 300K 2MB 2MB 300K | ||
| ^1 1MB allocated to standard parallel port if no optional adapter is installed. | ||||
Flash memory
You can add optional flash memory to your printer. If you frequently download fonts, macros, forms, or symbol sets to your printer, you may want to use flash memory storage, rather than RAM. Resources stored in flash memory are not lost when the printer power is turned off.
Hard disk
If you have a large number of permanent resources you'd like to download to your printer, you may want to install an optional hard disk. The hard disk works much like flash memory, but has a larger storage capacity for downloaded resources. You can also use the hard disk for job buffering, collating large jobs, and gathering job statistics.
For instructions on installing a hard disk, refer to the printer Setup Guide.
Job buffering
You can partition a portion of the hard disk for job buffering. In some cases, spooling jobs to a disk may decrease the time required for the printer to accept the print job data from the application. The job also remains stored on the disk until the entire job prints. Since disk memory acts as permanent storage, that means your jobs remain secure in the event of a power failure.
You can enable or disable job buffering for each of the available printer ports (parallel, serial, fax, network, infrared, and LocalTalk).
1 Using the printer operator panel or MarkVision, select Job Buffer Size under the Setup Menu.
2 Set the percentage of the disk you want to use for job buffering.
3 Press Go to return the printer to ready.
Collating jobs
If you are collating a large job and the printer memory is not sufficient, the printer automatically uses storage area available on an installed hard disk to finish collating the job. See page 28 for more information about collation.
Storing job statistics
You can also use an installed hard disk to gather statistics about a specified number of the most recent print jobs. The statistics include whether the job printed with or without errors, the time required to print the job, the size (in bytes) of the job, the requested paper size and paper type, the color settings used, the total number of printed pages, and the number of copies requested.
See page 43 for more information about setting up your printer to gather job statistics and printing the accumulated data. Or, if you're using the MarkVision utility, refer to the MarkVision online Help or the MarkVision documentation on the printer CD.
Managing resources downloaded to flash or disk
Use the MarkVision utility to manage the resources you store on flash memory or hard disk. MarkVision offers tools for setting:
- The download target, formatting the storage devices
- Downloading resources
- Deleting files
- Moving files from one storage device to the other on the same printer or from one printer to another printer
- Printing a directory listing the resources stored on a device
- Read/write and write passwords to protect resources stored on flash memory, hard disk or to protect individual files
For more information about the specific resource management tools that MarkVision offers, see “Introducing MarkVision” on page 190 or refer to the MarkVision online Help. For more information about setting passwords, refer to the Technical Reference.
6 Handling paper
Paper sources and output bins
text_image
Multipurpose feeder Top output bin 250-sheet standard tray250-sheet optional trays
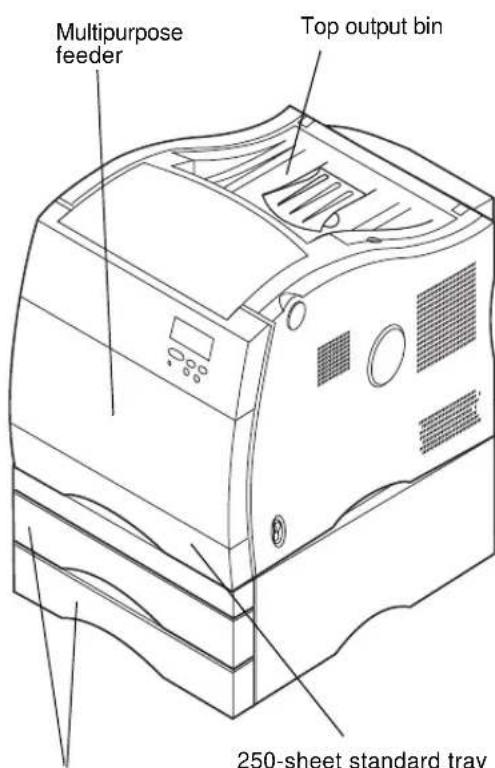
Your printer comes equipped with two standard paper sources: a 250-sheet paper tray and the 50-sheet multipurpose feeder. You can load paper in all the paper trays. Transparencies can only be loaded in the multipurpose feeder and tray 1. You can load paper, transparencies, labels, or envelopes in the multipurpose feeder.
For additional paper capacity, you can attach an optional drawer unit with two 250-sheet trays to your printer. When linked, you can then effectively create a single 800-sheet source. See page 109 for more information about tray linking. Refer to the Setup Guide for information about installing the optional drawer unit.
The table on page 96 details the types and quantities of media you can load in each of the printer's paper sources. For more information about selecting specific media, see “Media guidelines” on page 98.
Printed output is placed face down in the output bin located on the top of your printer.
Paper source specifications
| Source Media | Sizes Weight Capacity | 1 | Print side | ||
| Standard tray (Tray 1) | Paper Transparencies | A4, B5, letter, legal, executive | 60–90 g/m2(16–24 lb) | 250 sheets100 transparencies | Face up |
| Optional trays (Tray 2, or 3) | Paper A4, B5, letter, legal, executive | 75–90 g/m2(20–24 lb) | 250 sheets (per tray) | Face up | |
| Multipurpose feeder | Paper Transparencies Labels Envelopes | Supports all standard sizes listed in the "Paper size specifications" and "Envelope size specifications" tables on page 97.Supports any odd-size paper within the following dimensions (width x length): Minimum: 70 x 127 mm (2.75 x 5.0 in.)Maximum: 216 x 356 mm (8.5 x 14 in.) | 60–135 g/m2(16–36 lb)Card stock: 163 g/m2(90 lb) | 50 sheets30 transparencies30 label sheets9 envelopes30 card stock sheets | Face down |
| ^1 For 20 lb paper, unless otherwise noted.Note: The printer can only duplex print A4 and letter size paper. | |||||
Paper sizes
Your printer supports a wide variety of paper sizes. See the “Paper size specifications” table on page 97 for details. Refer to page 99 for illustrations of proper paper orientation.
The printer determines the size paper loaded in the trays by the position of the rear paper guide. Since the printer can only recognize letter, A4, B5, executive and legal size paper, you must decide which paper sizes you want your trays to support. Then choose the appropriate setting from the Size Detection menu item. You can still load the paper sizes you don't select in the multipurpose feeder.
The following tables list the paper and envelope sizes your printer supports.
Paper size specifications
| Size Dimensions | Print speed (ppm B&W/ Color) ^1 | |
| B5 182 x 257 mm 16/3 | ||
| A4 210 x 297 mm 16/3 | ||
| Executive 7.25 x 10.5 in. 16/3 | ||
| Letter 8.5 x 11 in. 16/3 | ||
| Legal 8.5 x 14 in. 8/1.6 | ||
| Letter/A4 transparency 8.5 x 11 in. / | 210 x 297 mm 8/1.8 | |
| Universal ^2 | 216 x 356 mm(8.5 x 14 in.) | 16/3 |
| ^1 Does not include 1200 x 1200 dpi print mode. When using 1200 x 1200 dpi print mode, print time is approximately doubled. ^2 Select this value when you're feeding a non-standard size sheet from the multipurpose feeder. The printer formats the page for 8.5 x 14 in. (216 x 356 mm). Set the margins for the actual page size from your software application. | ||
Envelope size specifications
| Size Dimensions (h/w) Print speed (ppm) | ||
| DL Envelope | 110 x 220 mm | 8/1.5 |
| C5 Envelope | 162 x 229 mm | 8/1.5 |
| B5 Envelope | 176 x 250 mm | 8/1.5 |
| 7 3/4 Envelope | 3.876 x 7.5 in. 8/1.5 | |
| 9 Envelope | 3.875 x 8.875 in. | 8/1.5 |
| 10 Envelope 4.125 x 9.5 in. | 8/1.5 | |
| Other Envelope ^1 | 8.5 x 14 in. | 8/1.5 |
| ^1 Select this value when you're using a non-standard size envelope. The printer formats the envelope for the maximum size (8.5 x 14 in.). Set the margins for the actual envelope size from your software application. | ||
Media guidelines
Use recommended media (paper, transparencies, envelopes, and labels) for your printer to avoid printing problems. For detailed information about media characteristics, refer to the Card Stock & Label Guide available on the CD provided with your printer. Brief guidelines for choosing paper and other media follow.
Paper
Note: The use of low quality paper may result in unsatisfactory performance and may degrade print quality.
Note: If you use 16 lb paper, it must be placed only in tray 1 or the multipurpose feeder. Do not place 16 lb paper in tray 2 or 3. Do not use 16 lb paper with the duplex unit.
When printing photographic quality images, use a high quality laser printer paper. We highly recommend the following papers for optimum results:
- Hammermill Laser Print 90g / m^2 (24 lb)
• Xerox Image Series LX Paper
For printing text and typical business graphics, you may find 75 g/m ^2 (20 lb) paper designed for use with laser printers or photocopiers produces acceptable print quality. Always try a sample of any paper before buying large quantities.
Before loading paper, note the recommended print side identified on the paper package. Load paper with the recommended print side face up in the paper trays and face down in the multi-purpose feeder. Refer to the Setup Guide for complete paper loading instructions.
The following papers are not recommended for use with your printer:
• Paper with a large cotton content
- Paper with a rough or heavily textured surface
• Coated papers, such as erasable bond
- Preprinted papers manufactured with chemicals that may contaminate the printer
• Paper designed for inkjets
- Multiple-part forms
- Synthetic papers
- Thermal papers
• Recycled paper having a weight less than 20 lb (75 g/m ^2 )
Letterhead
natural_image
Technical line drawing of a mechanical component with an inset showing a close-up view of a rectangular housing (no text or symbols)Stack height indicator
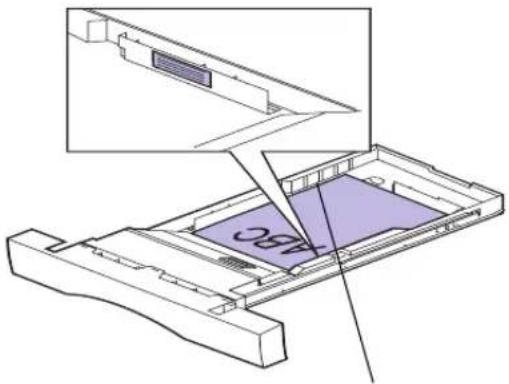
Refer to the illustrations at the left to orient A4 or letter size preprinted paper in the paper trays or the multipurpose feeder.
Do not exceed the maximum stack height indicated on the inside of the paper tray.
Preprinted papers such as letterhead must be able to withstand temperatures up to 195°C (383°F) without melting or releasing hazardous emissions. Use inks that are not affected by the resin in toner or the silicone in the fuser. Inks that are oxidation-set or oil-based should meet these requirements. Latex inks may melt.
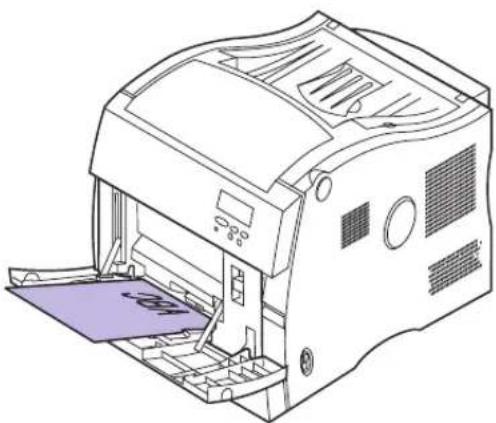
If you're loading preprinted letterhead in the trays, place the top of the page at the front of the tray with the letterhead up. If you are loading preprinted letterhead in the multipurpose feeder, place the top of the page toward the printer with the letterhead down.
natural_image
Line drawing of a printer with paper feed and paper holder (no text or symbols)Transparencies
For best results, use the following Lexmark transparencies with your printer:
Recommended transparencies
| Part number Size | |
| 12A5150 Letter | |
| 12A5151 A4 |
These transparencies are designed to provide optimal print quality when used with your printer. Using other transparencies designed for laser printers may yield unpredictable results and possibly cause damage to your printer.
Transparencies must be able to withstand temperatures of 180^ C ( 365^ F) without melting, discoloring, offsetting, or releasing hazardous emissions.
To order transparencies in the U.S., call 1-800-438-2468. In other countries, see the table on page 114 for a listing of phone numbers.
Changing the Paper Type
Always set the Paper Type to Transparency when printing transparencies. The printer will adjust the fuser temperature and engine speed to ensure the best possible print quality. When you print transparencies, you will experience a slight delay before printing starts as the printer warms the fuser to the higher temperature. Black and white transparencies print at approximately 8 ppm and color transparencies print at approximately 1.8 ppm.

Loading transparencies
Before loading transparencies, fan the stack to prevent sheets from sticking together. To prevent print quality problems, avoid getting fingerprints on the transparencies.
Load transparencies only in the multipurpose feeder or tray 1.
Envelopes
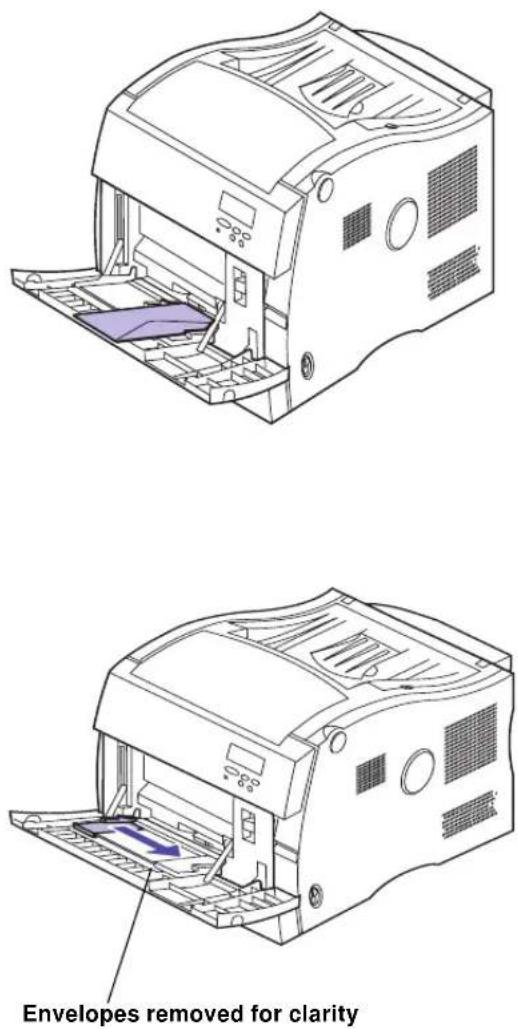
You can load up to 9 envelopes in the multipurpose feeder. Load envelopes with the flap side up with the return address positioned to enter the printer last. Do not load stamped envelopes. Refer to the Setup Guide for additional loading instructions.
To ensure the best print quality, set Paper Type to Envelope and select the correct envelope size before sending the job to print.
When printing on envelopes:
- Try a sample of any envelopes you are considering using with the printer before buying large quantities.
-
Use envelopes made from 90 to 105g / m^2 (24 to 28 lb) bond paper. For best performance and fewer paper jams, do not use envelopes that:
-
Have excessive curl
- Are stuck together
- Are damaged in any way
- Contain windows, holes, perforations, cutouts, or embossing
- Use metal clasps or string ties
- Have postage stamps attached
- Have any exposed adhesive when the flap is in the sealed or closed position
- Use envelopes that can withstand temperatures of 195^ (383°F) without sealing, excessive curling, wrinkling, or releasing hazardous emissions.
- Adjust the left paper guide to fit the envelope width.
Labels
Acceptable labels

natural_image
Blank grid layout with no text, numbers, or symbolsUnacceptable labels
natural_image
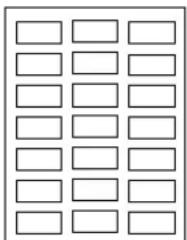
Grid of empty rectangular boxes arranged in 4 rows and 5 columns (no text or symbols)If you need to print labels, use paper labels designed for laser printers. Use only label sheets that have no gaps between the labels, as shown at left. Try a sample of any labels before purchasing a large quantity.
Labels must be able to withstand temperatures of 195^ C ( 383^ F) without melting, discoloring, offsetting, or releasing hazardous emissions. Labels must also withstand 25 psi of pressure. For detailed information on label printing, characteristics, and design, refer to the Card Stock & Label Guide on the printer CD.
Only feed labels from the multipurpose feeder. Do not load labels in the trays. Refer to the Setup Guide for loading instructions.
When printing on labels:
- Use only paper labels. Do not use vinyl labels.
- Do not print a large number of labels consecutively.
- Do not use labels that have adhesive exposed on the sheets.
- Do not use labels that have coating or sizing applied to make the labels liquid-resistant.
- From the operator panel or from MarkVision, set the Paper Type to Labels.
Card stock
Note: Load card stock in the multipurpose feeder only. Do not load more than 30 sheets of card stock into the multipurpose feeder. Loading more than 30 sheets of card stock or using the wrong paper source may cause paper jams or a failure to feed.
You can load a small quantity of heavier paper in the multipurpose feeder. The properties of the card stock you choose—such as the orientation of the paper fibers, moisture content, thickness, and texture—can affect the print quality. For for optimum results, we recommend using:
• Springhill Index Plus 90 lb card stock
For more information on card stock your printer supports, refer to the Card Stock & Label Guide on the printer CD.
Always set the Paper Type to Card Stock when printing on heavier paper. The printer then adjusts the fuser temperature and engine speed to ensure the best print quality.
Storing media
Proper storage of media helps ensure trouble-free printing. For best results:
- Store media in an environment where the temperature is approximately 21^ (70°F) and the relative humidity is 40%.
- Store cartons of paper on a pallet or shelf, rather than directly on the floor.
- If you store individual packages of paper out of the original carton, make sure they rest on a flat surface so the edges do not buckle or curl.
- Do not place anything on top of paper packages.
Avoiding paper jams
If you follow the “Media guidelines” on page 98, you’re well on your way to trouble-free printing. If you do experience a paper jam, see page 168 for instructions on clearing the jam.
Here are a few reminders to avoid paper jams:
- Ensure paper guides in trays are properly positioned for the size paper you have loaded.
- Load only standard-size paper in the trays.
- To load paper in a tray while a job is printing, press the operator panel Stop button and wait for the printer motors to idle. Remove tray from printer. Load paper and reinstall tray. Press Go to continue printing.
- Use only recommended media. See page 98 for more information.
- Do not load wrinkled, creased, or damp paper.
- Flex and straighten paper before loading.
- Do not overload paper trays. Make sure paper stack does not exceed maximum height indicator located inside the paper tray. Do not exceed the maximum recommended media amounts for media placed in the multipurpose feeder.
- The multipurpose feeder does not have size sensing. Select the correct source and paper size from the operator
panel, MarkVision, or printer driver before sending multi-purpose jobs to print.
- If you are printing a job using manual feed, send the job to the printer and then wait for the Load Manual message to appear on the display. Place media in the multipurpose feeder and press Go.
- Print transparencies only after printer has fully warmed.
Loading paper in the trays
The procedures for loading paper in all the trays (the standard 250-sheet tray and the optional 250-sheet trays) are the same. Refer to the Setup Guide for detailed instructions.
The printer lets you know when you need to load paper in the trays. If a tray has less than 50 sheets of paper, the
Supplies status message appears on the display. Press Menu> or <Menu to open Supplies Menu. Scroll through the list of supplies that need attention. The menu indicates whether a tray is missing, low, or empty.
When you change the paper in the tray, make sure the paper guides are in the correct positions. The position of the rear paper guide informs the printer of the size paper loaded in the tray. Feeding paper when the rear paper guide is not in the correct position may result in misfeeds or paper jams.
If you load a different type of media, change the Paper Type setting in the Paper Menu. Selecting the correct paper type guarantees optimal print quality for that media. See “Media guidelines” on page 98 for information about the changes the printer makes for specific media. For more information about changing the Paper Type setting, see page 22 or refer to the Setup Guide.
The paper size and the paper type also must be set correctly for tray linking to work as expected. See page 109 for more information about tray linking.
Note: Do not place paper into the duplex unit tray.
Note: If you load transparencies in tray 1 or the multipurpose feeder, make sure you change the Paper Type setting to transparencies for that location.
natural_image
Diagram of a printer's internal structure with a blue arrow indicating a loading or movement (no text or symbols present)
Note: If you are loading A4 or letter size paper, the tray may already be set up for the appropriate paper size.
If you attached an optional drawer unit, the instructions are the same for loading paper in those trays. However, load only paper in those trays.
To load the tray:
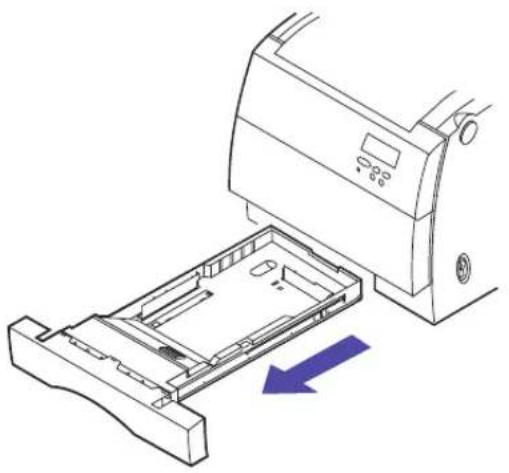
1 Pull the paper tray completely out of the printer.
2 Set the paper tray on a flat surface.
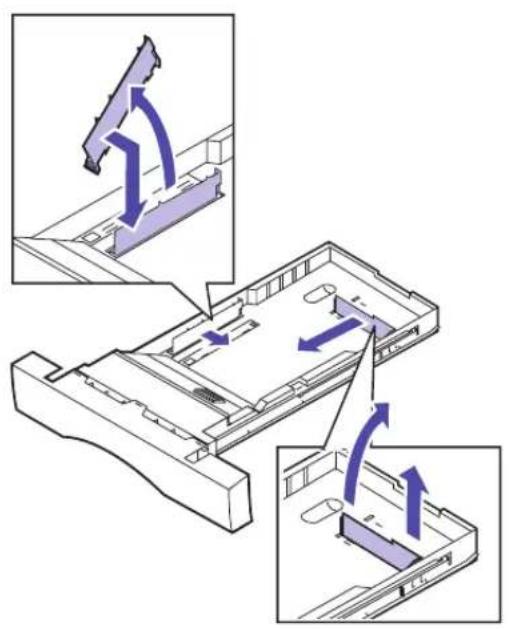
3 Squeeze the snap lock on the end of the rear paper guide.
4 Lift the rear paper guide from the tray.
5 Align the rear paper guide with the position for the paper size you are loading.
natural_image
Diagram showing three views of a mechanical component with directional arrows indicating motion (no text or symbols present)
natural_image
Illustration of a hand holding a purple curved object, possibly a rolled-up sheet or paper (no text or symbols)The position of the rear paper guide tells the printer the size of the paper in the tray. If the rear paper guide is in the wrong position, you may experience paper feeding problems or incorrect formatting of pages.
6 Set the rear paper guide into the holes on the side and bottom of the paper tray.
7 Squeeze the snap lock on the end of the side paper guide.
8 Lift the side paper guide from the paper tray.
9 Align the side paper guide with the position for the paper size you are loading.
10 Set the side paper guide into the holes on the side and bottom of the paper tray.
11 Before loading the paper, flex the sheets back and forth to loosen them, and then fan them. Straighten the edges on a level surface.
text_image
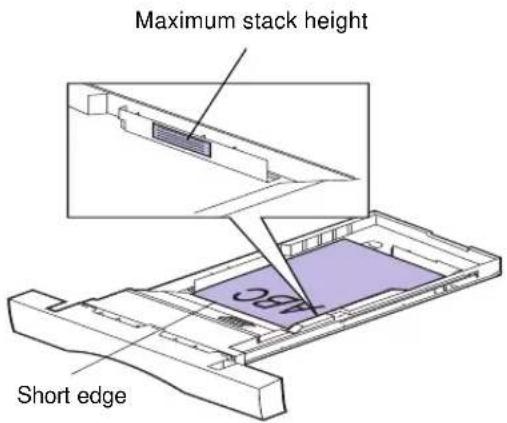
Maximum stack height Short edge12 Load the paper with the recommended print side face up.
Do not exceed the maximum stack height indicated on the label inside the paper tray.
Place the short edge of the paper at the front of the tray.
If you're loading preprinted letterhead, place the top of the page at the front of the tray with the letterhead up.

natural_image
Diagram of a printer being inserted into a slot, showing the printer's internal structure and an arrow indicating direction (no text or symbols present)13 Slide the paper tray into the printer.
Tray linking
If you want to increase your printer's paper capacity, you can add an optional drawer unit with two 250-sheet paper trays to your printer. If you load the same paper size and paper type in more than one tray, the printer automatically links the trays when one tray is empty, and feeds paper from the other tray. By linking the trays and multipurpose feeder, you can effectively create a single paper source that holds up to 800 sheets.
To initiate tray linking:
1 Load paper of the same size and type in all the trays you want to link.
2 Make sure the rear paper guide is set to the proper position for the paper size you have loaded.
The position of the rear paper guide informs the printer of the paper size loaded in the tray.
If you want to link the multipurpose feeder to a tray, select the appropriate MP Feeder Size setting from the Paper Size Menu.
3 Select the same Paper Type setting for all sources.
See page 22 or refer to the Setup Guide for more information about changing the Paper Type setting.
To disable tray linking, change the Paper Type setting for one or more of the trays to a Custom Type setting. See page 22 for more information.
Using the multipurpose feeder
The multipurpose feeder holds 50 sheets of paper, 30 transparencies, 30 sheets of labels, 9 envelopes or 30 card stock sheets. Refer to the Setup Guide for instructions on loading media in the multipurpose feeder.
If you want to use the multipurpose feeder like you use other trays, ensure the MP menu item in the Paper Menu is set to Cassette.
Note: Do not close the multi-purpose feeder while paper or envelopes are in the feeder.
You can also use the multipurpose feeder to manually feed a single sheet or envelope.
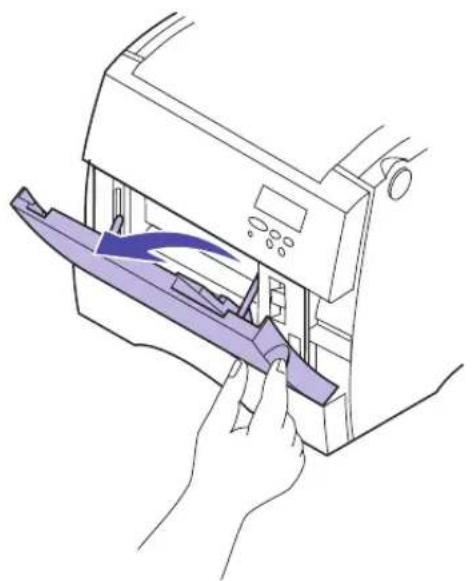
To load paper in the multipurpose feeder:
1 Pull the front of the multipurpose feeder down.
natural_image
Line drawing of a hand inserting a purple plastic bag into a printer (no text or symbols)
natural_image
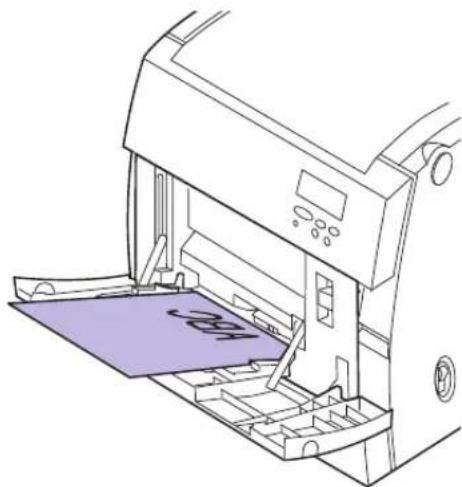
Illustration of a hand holding a curved purple object, possibly a rolled or folded material (no text or symbols)2 Before loading the media, flex the sheets back and forth to loosen them, and then fan them. Straighten the edges on a level surface.
natural_image
Line drawing of a printer with a purple cover and control panel (no text or symbols)Note: Paper removed for clarity.
text_image
Paper guidePrinting from the multipurpose feeder
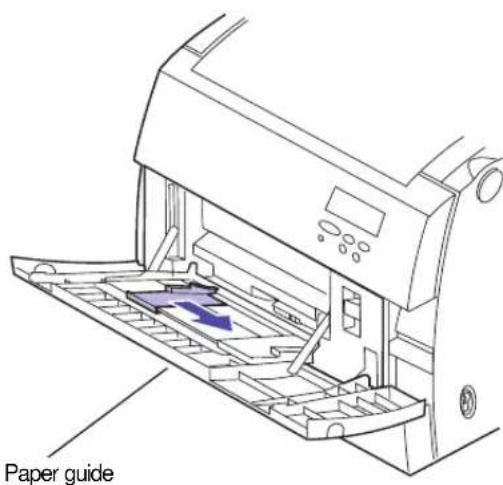
3 Load the media face down and slide the paper guide to the right until it touches the media.
If you are loading preprinted letterhead, place the top of the page toward the printer face down.
4 Set the paper type for the type media you are using.
You can set the paper type through the paper menu on the operator panel or your printer driver. For more information on paper type values, see "PAPER TYPE" on page 22.
Since the multipurpose feeder does not have auto size sensing, you must set the correct paper size and type. Use the printer operator panel or MarkVision to set the paper size and paper type before you send a job to print.
7
Replacing supplies
Your printer has been designed to let you replace supply items without the need of a service technician. Periodically you'll need to install new print cartridges and other items to keep your printer operating properly. You may want to keep extra replacement supplies so you can operate your printer without interruption.
Ordering supplies
text_image
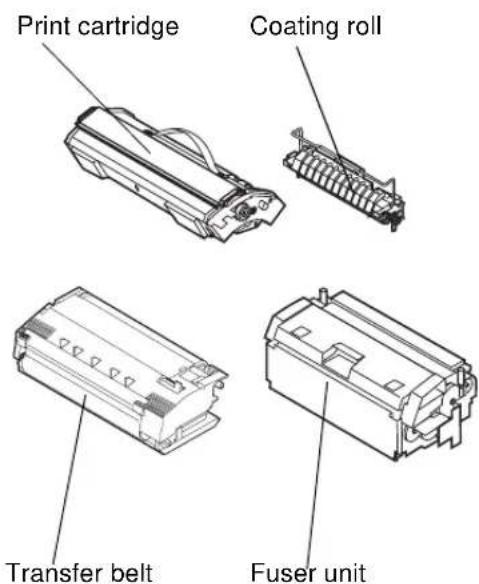
Print cartridge Coating roll Transfer belt Fuser unitThe following list identifies the items and part numbers you will need:
Routine maintenance supplies
| Part number | Supply item Approx. yield | |
| 10E0043 Black | print cartridge(includes coating roll) | 10,000 pages each(5% toner coverage)(15,000 pages maximum yield) |
| 10E0040 Cyan | print cartridge | |
| 10E0041 Magenta | print cartridge | |
| 10E0042 Yellow | print cartridge | |
| 10E0044 Coating roll | 15,000 continuous | pages |
| 10E0045 Transfer kit contains:transfer belt and transfer roller | 100,000 images | |
| 10E0049 Fuser kit (low voltage) 100,000 pages | ||
| 10E0059 Fuser kit (high voltage) 100,000 pages | ||
| Note: Each fuser kit contains a fuser unit and an air filter. | ||
Other supplies
| Part number Supply | item |
| 12A5150 Transparencies | ^1 (letter size) |
| 12A5151 Transparencies | ^1 (A4 size) |
| ^1 See page 100 for more information about transparencies. | |
If you need more information about the supplies available to you from Lexmark, you can visit Lexmark on the World Wide Web at www.Lexmark.com. At www.Lexmark.com, you can also get the latest information on the location and telephone numbers for Authorized Supplies Dealers in your area.
If you're in the U.S., you can call 1-800-438-2468 to order supplies from Lexmark Direct or to request information about Lexmark Authorized Supplies Dealers in your area. The following table lists appropriate phone numbers for other countries. In countries not listed, contact a representative at the place where you bought your printer.
Contacts for supplies information
| Region Country Phone number | ||
| North America Canada | a 888 453 9226 | |
| U.S. 800 438 2468 | ||
| Latin America Headquarters | 305 447 2200 | |
| Argentina 54 1 319 8900 | ||
| Brazil 55 11 820 5733 | ||
| Mexico 52 5 254 2435 | ||
| Asia / Pacific | Australia 1300 362 192 | |
| Hong Kong | 852 825 6168 | |
| Japan | 81 3 3523 7077 | |
| Singapore | 65 227 3488 | |
| Taiwan | 886 2 713 1000 | |
| Region | Country | Phone number |
| Europe Austria 43 1 797 32 0 | ||
| Belgium 32 2 716 74 11 | ||
| Denmark 45 45 82 55 11 | ||
| Finland 358 0 452 34 00 | ||
| France 33 1 46 67 40 00 | ||
| Germany 49 6074 488 0 | ||
| Italy 39 2 28 103 1 | ||
| Netherlands 31 20 56 32 800 | ||
| Norway 47 22 76 35 00 | ||
| Spain 34 1 436 0048 | ||
| Sweden 46 8 705 79 00 | ||
| Switzerland 41 1 722 88 11 | ||
| United Kingdom 44 1628 481 500 | ||
Storing supplies
Choose a cool, clean storage area for your printer supplies. Store print cartridges and other supplies in their original packaging until you are ready to install them.
Do not expose printer supplies to:
- Direct sunlight
• Temperatures above 35^ C ( 95^ F)
• High humidity (above 80%) - Salty air
- Corrosive gases
- Heavy dust
When to replace supplies
text_image
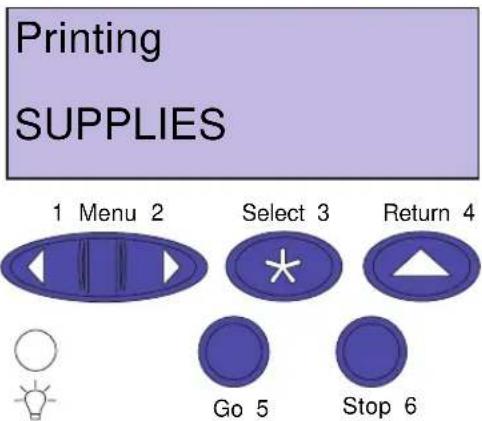
Printing SUPPLIES 1 Menu 2 Select 3 Return 4 Go 5 Stop 6Your printer displays Supplies on the second line of the operator panel display when there are any supplies that need attention. Press Menu> or
- The printer cable is securely attached to the printer and the host computer.
- The power cord is plugged into the printer and a properly grounded electrical outlet.
- The printer is turned on.
- The electrical outlet is not turned off by any switch or breaker.
- The printer's cartridge, fuser, and front covers are completely closed.
- All printer options are properly installed.
Once you've checked each of these possibilities, turn the printer off and back on. This often fixes the problem.
If a message appears on the operator panel display, see page 147 for more information. If the message indicates the printer has a paper jam, turn to “Clearing printer paper jams” on page 168.
If you are having trouble determining the source of the problem, refer to the tables beginning on page 161. They identify some printing problems and offer suggestions for solving them.
Theory of operation
text_image
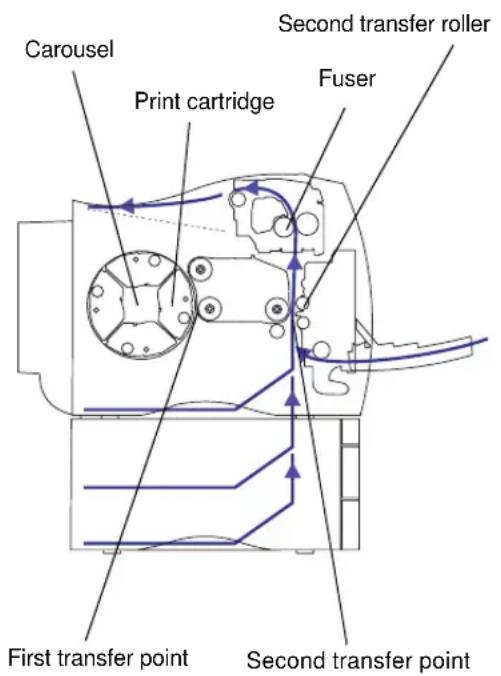
Carousel Print cartridge Second transfer roller Fuser First transfer point Second transfer pointYour laser printer is a very complex machine, but the general process that makes your image appear can be easily understood. By understanding how your printer operates, you can understand why problems occur and how to correct or prevent them. There are many components that make your printer work, however, the carousel, print cartridge, transfer belt, second transfer roller, and fuser will help you understand the basic process.
The information you send to your printer is changed into a laser-emitted signal. This signal is projected onto a mirror inside the print cartridge carousel. The image is then bounced off the mirror and onto the photoconductor (the green tube in your print cartridge). The photoconductor becomes electrically charged by the laser signal. The positively charged photoconductor pulls toner from the toner reservoir inside the print cartridge onto the photoconductor. As the carousel rotates, the photoconductor meets the transfer belt.
The transfer belt has a uniformly negative charge on it. When the transfer belt and photoconductor meet, the transfer belt pulls the electrically positive charged toner from the photoconductor onto the transfer belt. As the transfer belt rotates toward the front of the printer, the paper travels up the paper path to meet your image. The paper and toner image on the transfer belt meet at the second transfer roller located on the inside of the front cover. The second transfer roller has a stronger uniform negatively charged field than the transfer belt. The positively charged toner image on the transfer belt is pulled from the transfer belt into the paper by the second transfer roller.
The paper travels up the paper path to meet the fuser. The fuser uses heat and pressure to make toner adhere to the paper. The result of these components working together is the sharp laser image you want.
To get the best possible output, use the correct media thickness and type. The media recommended by Lexmark provides the best print quality.
Understanding printer messages
Your printer displays three types of messages: status messages, attendance messages, and service messages. Status messages provide information about the current state of the printer. They require no action on your part. Attendance messages alert you to printer problems that require your intervention. Service messages also alert you to problems that require intervention. However the printer will stop printing and the errors are non-recoverable. It may be possible to power the printer off and back on to temporarily recover from the service message error condition.
A table listing the status messages follows. See “Attendance messages” on page 150 for a listing of the attendance messages and what you need to do to respond to them. See “Service messages” on page 158 for a listing of the service messages and what you need to do to correct them.
Status messages
Status messages
| Message Meaning | |
| Ready The printer is ready to receive and process data.If the printer has an internal fax modem, the Ready/Fax icon is also displayed. For additional information regarding the fax icons, see page 15. | |
| Power Saver When your printer is in power saver mode, the Power Saver message replaces the Ready message on the display. When Power Saveris displayed, your printer is ready to receive and process data. See page 38 for more information about Power Saver mode.When Power Saver is displayed, you can:Press Go to quick start the printer.P r Menu oror | Power Saver message replaces the Ready message on the display. When Power Saveris displayed, your printer is ready to receive and process data. See page 38 for more information about Power Saver mode.When Power Saver is displayed, you can:Press Go to quick start the printer.P r Menu oror |
| Warming Engine The printer is warming the fuser to prepare for printing. | |
| Performing Self Test The printer is running the normal series of start-up tests it performs after it is turned on. | |
| Busy The printer is processing or printing data. (The light on the operator panel flashes while this message is displayed.) If a job name has been defined, the name replaces the Busy message on the display.To cancel the print job, pressMenu> or. When the Job Menu is displayed, press Select. Press Menu> oror | or |
| Waiting The printer has received | a page of data to print but is waiting for an End of Job or Form Feed command or for additional data.To print the contents of the print buffer, pressGo.To cancel the print job, pressMenu>oruntil the Job Menu is displayed. PressSelect. PressMenu>oruntil Cancel Job appears on the second line. PressSelect. |
| Not Ready The printer is not ready | to receive or process data, because someone selectedStopwhen another message was displayed.PressGoto remove the printer from the Not Ready state.To cancel the print job, pressMenu>oruntil the Job Menu is displayed. PressSelect. PressMenu>oruntil Cancel Job appears on the second line. PressSelect. |
| Ready Hex Hex Trace diagnostic | mode is active, and the printer is ready to receive data. UseHex Trace to isolate the source of a print job problem. With Hex Trace selected, all data sent to the printer is printed in hexadecimal and character representation. Control code strings are printed, not executed.To exit Hex Trace mode, turn the printer off or reset the printer. To reset the printer, pressMenu>or.When the Job Menu is displayed pressSelect. pressMenu>oruntil Reset Printer appears on the second line. PressSelect. |
| Locking Menus Someone has locked the menus. While the menus are locked, users cannot change the printer default settings from the operator panel. See “Locking the menus” on page 14 for more information. | |
| Unlocking Menus Someone has unlocked the menus. Users can now change the printer default settings from the operator panel. See “Locking the menus” on page 14 for more information. | |
| Disabled Menu Menus have been locked, or disabled. See page 14 for more information. | |
| Enabled Menu Menus have been unlocked. See page 14 for more information. | |
| Supplies At least one of the printer supplies needs attention. You may have a paper tray that is low on paper or a print cartridge that needs replacing. PressMenu>oropen the Supplies Menu. See page 17 for more information about the menu. | |
| Activating Menu Changes This message is displayed when the printer is being reset. To activate some of the printer settings, the printer must restart. No buttons are active when this message is displayed. | |
| Parallel The standard parallel interface is the active communication link. | |
| Parallel x | The specified parallel interface is the active communication link. |
| Serial x | The specified serial interface is the active communication link. |
| Network x | The specified network interface is the active communication link. |
| LocalTalk x | The LocalTalk interface is the active communication link. |
| Message | Meaning |
| Infrared x | The infrared interface is the active communication link. |
| Fax The fax interface is the active communication link. | |
| Cancelling Job The printer is processing a request to cancel the print job. | |
| Resetting the Printer The printer is deleting any print jobs in progress and restoring all print settings to the user defaults. | |
| Flushing Buffer The printer is flushing corrupted print data and discarding the current print job. No buttons are active when this message is displayed. | |
| Queuing Jobs This message is displayed after an operator has exited the CONFIDENTIAL JOB or HELD JOBS operation and has marked one or more Print and Hold jobs for printing or selected the Print All Jobs option. No buttons are active when this message is displayed. | |
| Deleting Jobs This message is displayed after an operator has exited the CONFIDENTIAL JOB or HELD JOBS operation and has marked one or more Print and Hold jobs for deletion or selected the Delete All Jobs option. No buttons are active when this message is displayed.This message may appear with the Queuing Jobs message if one or more Print and Hold jobs have been selected for printing and deletion. | |
| Printing Menu Settings A list of user default settings and installed options is printing.To cancel the print job, pressMenu>orororororororororororororororororororororororororororororororororororororororororororororororororororororororororororororororororororororororororororororororororororororororororororororororororororororsunl Cancel Job appears on the second line. PressSelect. | |
| Printing Font List A list of available fonts for the selected printer language is printing.To cancel the print job, pressMenu>orororororororororororororororororororororororororororororororororororororororororororororororororororororororororororororororororororororororororororororororororororororororororsunl Cancel Job appears on the second line. PressSelect. | |
| Printing Directory List A list of all files stored in flash memory or on the hard disk is printing.To cancel the print job, pressMenu>orororororororororororororororororororororororororororororororororororororororororororororororororororororororororororororororororororororororororororororororororororororororororaunl Cancel Job appears on the second line. PressSelect. | |
| Printing Job Accounting Stat An accumulated statistics report for the most recent print jobs is printing.To cancel the print job, pressMenu>ororororororororororororororororororororororororororororororororororororororororororororororororororororororororororororororororororororororororororororororororororororororororonl Cancel Job appears on the second line. PressSelect. | |
| Clearing Job Accounting Stat The printer is deleting all job statistics stored on the optional disk. | |
| Restoring Factory Defaults | The printer is restoring factory defaults. See page 33 for details about which printer settings are affected. No buttons are active when this message is displayed. |
| Formatting Flash The printer is formatting the flash memory. Do not turn the printer off while this message is displayed. No buttons are active when this message is displayed. | |
| Programming Flash | The printer is storing resources in flash memory. Do not turn the printer off while this message is displayed. |
| Message Meaning | |
| Defragmenting Flash The printer | is performing the defragmentation operation on flash memory. This operation is used to reclaim flash memory space occupied by deleted resources. No buttons are active when this message is displayed. Do not turn the printer off while this message is displayed. |
| Formatting Disk The printer is formatting the hard disk. Do not turn the printer off while this message is displayed. No buttons are active when this message is displayed. | |
| Programming Disk The printer is storing resources on the hard disk. Do not turn the printer off while this message is displayed. | |
| Network Card Busy The network adapter is being reset. The Network x Setup menu is not available while this message is displayed. | |
Attendance messages
Attendance messages alert you to printer problems that require your intervention.
Attendance messages
| Message Action | |
| Close Door Close the printer's front cover, fuser cover, or cartridge cover. | |
| Insert Trayx | Insert the tray indicated (tray 1, 2, or 3). |
| Change media | The printer is requesting a different size or type media than what it detects is in the identified tray (tray 1, 2, 3, or the multipurpose feeder). The message displays either the custom media name defined using the MarkVision utility, the media size, or the media size and type it is looking for.To clear the message:If the correct paper type is loaded in the tray (but the Paper Type setting was not changed from the operator panel), pressGo to continue printing.PressSelectto ignore the request and print on the media already installed in the tray.Load media of the requested size and type in the tray indicated.Cancel the print job. PressMenu>or.The Job Menu is displayed. PressMenu>oruntil Cancel Job appears on the second line. PressSelect. |
| Load media | This attendance message indicates the type of media selected is not available in the source tray you want to print from or the paper type indicated by the Paper Menu does not match the type or size of the media you have requested to print on.This message will display either the custom media name defined using the MarkVision utility, the media size, or the media size and type it is looking for.To clear the message:If the correct paper type is loaded in the tray (but the Paper Type setting was not changed from the operator panel), pressGoto continue printing.PressSelectto ignore the request and print on the media already installed in the tray.Load media of the requested size and type in the tray indicated.Cancel the print job. PressMenu>orororororororororororororororororororororororororororororororororororororororororororororororororororororororororororororororororororororororororororororororororororororororororororororororororororororsententance message occurs if you have entered a PIN (Personal Identification Number) to print or delete a Confidential Print Job and your PIN is not associated with any Confidential Print Job currently stored in the printer.PressGoto enter another PIN.PressReturnorStopto exit the PIN entry operation. |
| Tray xEmpty The printer is trying | to feed paper from a source it detects is empty (tray 1, 2, 3, or the multipurpose feeder). The message displays either the custom media name defined using the MarkVision utility, the media size, or the media size and type it is looking for.To clear the message:Load media of the requested size and type in the tray indicated.Cancel the print job. PressMenu>or.The Job Menu is displayed. PressMenu>ororororororororororororororororororororororororororororororororororororororororororororororororororororororororororororororororororororororororororororororororororororororororororororororororsententance sentence occurs if you have entered a PIN (Personal Identification Number) to print or delete a Confidential Print Job and your PIN is not associated with any Confidential Print Job currently stored in the printer.PressGoto enter another PIN.PressReturnorStopto exit the PIN entry operation. |
| Load Manual You have sent a request for a manual feed job to the printer, and the printer is ready for you to insert a single sheet or envelope into the multipurpose feeder. The message displays either the custom media name defined using the MarkVision utility, the media size, or the media size and type it is looking for.To clear the message:Load media of the requested size and type in the multipurpose feeder.PressSelectorGoto ignore the manual feed request and print on media already installed in one of the paper sources. If the printer finds a tray that has media of the correct size and type, it feeds media from that tray. If the printer cannot find a tray with the correct media size and type, it prints on whatever media is installed in the default paper source.Cancel the print job. PressMenu>orThe Job Menu is displayed. PressMenu>ororororororororororororororororororororororororororororororororororororororororororororororororororororororororororororororororororororororororororororororororororororororororororororsententance sentence occurs if you are entered a PIN (Personal Identification Number) to print or delete a Confidential Print Job and your PIN is not associated with any Confidential Print Job currently stored in the printer.PressGoto enter another PIN.PressReturnorStopto exit the PIN entry operation. | |
| No Jobs Found. Retry? This attendance message occurs if you have entered a PIN (Personal Identification Number) to print or delete a Confidential Print Job and your PIN is not associated with any Confidential Print Job currently stored in the printer.PressGoto enter another PIN.PressReturnorStopto exit the PIN entry operation. | |
| Print Jobs on Disk? Jobs that were spooled to the optional hard disk before the printer was last turned off have not yet printed.Press Go to print the jobs.Press Return or Stop to delete the jobs from the disk without printing them. | |
| Delete All Jobs. Go/Stop? This message is displayed when you have selected all CONFIDENTIAL JOBS or HELD JOBS for deletion. This message warns the user this operation results in the deletion of all confidential or held print jobs.You must take one of the following actions:Press Return or Stop to cancel the delete operation.Press Go to validate the option and delete all confidential or held jobs. | |
| Files Will be Lost. Go/Stop? You have changed the Job Buffer Size setting from the operator panel, and the printer must reformat the hard disk to activate the change. If you pressGo, all files currently stored on the disk will be deleted. PressReturn or Stop to cancel this operation. | |
| Invalid Font Data The printer has detected an incompatibility between the font data and the firmware. You must download compatible font data to flash memory before the printer can return to the ready state. | |
| Invalid Network x Code The code in the specified network adapter has not been programmed or is invalid.You must download valid code to the network adapter before the printer can return to the ready state. | |
| 30 Color Toner Missing The specified cartridge (Cyan, Magenta, Yellow, or Black) is not installed in the printer. Insert the cartridge and close the cartridge cover to clear the message. | |
| 35 Res Save Off Deficient Memory | The printer lacks the memory needed to enable the Resource Save function. This message usually indicates that too much memory is allocated for one or more of the printer link buffers.To disable Resource Save and continue printing, pressGo.To enable Resource Save after you get this message:Set the link buffer for each interface to Auto, then exit the menus to activate the link buffer changes. When theReadymessage is displayed, enable Resource Save from the Setup Menu.Or, install additional printer memory. See page 90 for more information. |
| 37 Insufficient Collation Area The printer memory (or optional hard disk, if installed) does not have the space necessary to collate the print job.Press Go to print the portion of the job already stored and begin collating the rest of the job.Cancel the print job. PressMenu>orororororororororororororororororororororororororororororororororororororororororororororororororororororororororororororororororororororororororororororororororororororororororororororororororororororsuntil the Job Menu is displayed.PressMenu>orororororororororororororororororororororororororororororororororororororororororororororororororororororororororororororororororororororororororororororororororororororororororororororororororontil the Job Menu is displayed.PressMenu>ororororororororororororororororororororororororororororororororororororororororororororororororororororororororororororororororororororororororororororororororororororororororororsuntil the Job Menu is displayed.Press Menu>orororororororororororororororororororororororororororororororororororororororororororororororororororororororororororororororororororororororororororororororororororororororororororororororororororsintil the Job Menu is displayed.Press Menu>ororororororororororororororororororororororororororororororororororororororororororororororororororororororororororororororororororororororororororororororororororororororororororsuntil the Job Menu is displayed.PressMenu>orororororororororororororororororororororororororororororororororororororororororororororororororororororororororororororororororororororororororororororsuntil the Job Menu is displayed.PressMenu>ororororororororororiororororororororororororororororororororororororororororororororororororororororororororororororororororororororororororororororororororororororororororororororororororororororororororororororororororora their respective values are not available. | |
| 37 Insufficient Defrag Memory The printer is unable to perform the requested Flash Memory Defragment operation because the printer does not have enough memory. This message is posted before the operation begins to ensure items in flash memory are not lost.• Press Go to clear the message.- If you want to perform the defragment operation, delete fonts, macros, and other data in RAM and try again or install more memory. | |
| 37 Insufficient Memory Held Jobs may be Lost. Go/Stop? | The printer is unable to perform the requested Print and Hold operation because the printer does not have enough memory.• Press Go to clear the message. The printer starts to free memory by deleting the oldest held job and continue deleting held jobs until enough memory has been freed to process the incoming job.• Press Stop to clear the message. Incoming data that was not stored will be lost. |
| 38 Memory Full The printer is processing the job, but the memory used to store pages is full.• Press Go to clear the message and continue printing. Some data may not print or may not print correctly.• Cancel the print job. Press Menu>or <Menu. The Job Menu is displayed. Press Menu>or <Menu until Cancel Job appears on the second line. Press Select.To reduce the complexity of the job:- Reduce the number of graphics or images on a page.- Delete unnecessary downloaded fonts or macros.- Change the Print Quality setting.• Install additional printer memory to avoid future Memory Full errors. | |
| 39 Complex Page The text, graphics, and print information on the page require more memory to print than what you have installed in your printer.• Press Go to clear the message and continue printing. Some data may not print or may not print correctly.• Cancel the print job. Press Menu>or <Menu. The Job Menu is displayed. Press Menu>or <Menu until Cancel Job appears on the second line. Press Select.To avoid another Complex Page error:- Set Page Protect On from the Setup Menu and resend the job.- Reduce the complexity of the page by using fewer fonts, macros, and graphics.- Install additional printer memory. | |
| 51 Defective Flash The flash card installed in your printer is defective. Press Go to clear the message and continue printing. You must install a different flash card before you can perform any flash functions. | |
| 52 Flash Full There is not enough space available to hold the resources you want to store in flash memory.·Press Go to clear the message and continue processing. Downloaded fonts and macros not previously stored in flash memory or disk are deleted.·Reset the printer. Press Menu>oror | |
| 53 Unformatted Flash The flash memory installed in your printer has not been formatted. You must format the flash memory before downloading resources.Press Go to clear the message. To format flash memory, select Format Flash from the Utilities Menu. | |
| 54 Serial Option x Error The printer has detected a protocol error on the specified serial interface. Make sure the serial interface parameters are set up correctly and you are using an appropriate serial cable.·Press Go to clear the message and continue printing. The job may not print correctly.·Reset the printer. Press Menu>oror | |
| 54 Serial x Fax Connection Lost The printer has detected the external modem that was once connected to the serial port is no longer responding. If the printer has been configured to receive faxes from a serial port and the Fax Port setting is not set to disabled, it will poll the modem. If it detects the modem connection is missing, it displays the attendance message. If the modem connection is re-established, the printer removes the message from the display.If the modem has been intentionally disconnected, you can pressGo to clear the message and continue printing. | |
| 54 Std Par ENA Connection Lost An External Network Adapter (ENA) that was once connected to the standard parallel port is no longer responding. The printer only recognizes the missing connection when the printer power is first turned on.·Make sure the cable connecting the ENA and the printer is securely attached. Turn the printer off and then on again to see if the printer recognizes the connection.·Press Go to clear the message. The printer erases any reference to the ENA and then resets. | |
| 54 Network x Software Error The printer software has detected that a network port is installed and cannot establish communications with it.Press Go to clear the message. The printer disables all communications to the associated network interface. No data can be transmitted through this interface. You can program new firmware in the network interface through the parallel port after this message has been cleared. | |
| 54 Par x ENA Connection Lost A | An External Network Adapter (ENA) that was once connected to the specified parallel port is no longer responding. The printer only recognizes the missing connection when the printer power is first turned on.Make sure the cable connecting the ENA and the printer is securely attached. Turn the printer off and then on again to see if the printer recognizes the connection.Press Go to clear the message. The printer erases any reference to the ENA and then resets. |
| 55 Insufficient Fax Buffer This at | attendance message may appear if the printer is processing a print job. The printer must complete the print job before processing the fax data. If the fax buffer is not large enough to hold the fax data, this message is displayed. After this message is posted, the printer breaks the phone connection with the sending fax machine.The ability of the printer to process fax data exceeds the data transmission rate of most fax machines.Press Go to clear the message and continue processing the current print job.Reset the printer. Press Menu> ororororororororororororororororororororororororororororororororororororororororororororororororororororororororororororororororororororororororororororororororororororororororororororororororororororororsunlnt the Job Menu is displayed. Press Menu> orororororororororororororororororororororororororororororororororororororororororororororororororororororororororororororororororororororororororororororororororororororororororororororororonlnt the Job Menu is displayed. Press Menu> orororororororororororororororororororororororororororororororororororororororororororororororororororororororororororororororororororororororororororororororororororororororororsunlnt the Job Menu is displayed. Press Menu > ororororororororororororororororororororororororororororororororororororororororororororororororororororororororororororororororororororororororororororororororororororororororororororororororororororsnnt the Job Menu is displayed. Press Menu> ororororororororororororororororororororororororororororororororororororororororororororororororororororororororororororororororororororororororororororororororororororororororororsunlnt the Job Menu is displayed. PressMenu> orororororororororororororororororororororororororororororororororororororororororororororororororororororororororororororororororororororororororororororororororororororororororororororororororororsun lnt the Job Menu is displayed. PressMenu> ororororororororororororororororororororororororororororororororororororororororororororororororororororororororororororororororororororororororororororororororororororororororororsunlnt the Job Menu is displayed, PressMenu> orororororororororororororororororororororororororororororororororororororororororororororororororororororororororororororororororororororororororororororororororororororororororororororororororsunlnt they are in the bus. |
| 56 Std Parallel Port Disabled Data | was sent to the standard parallel port, but the port has been disabled from the Parallel Buffer menu item.Press Go to clear the message. The printer discards the data sent to the parallel port.Reset the printer. Press Menu> or or or or or or or or or or or or or or or or or or or or or or or or or or or or or or or or or or or or or or or or or or or or or or or or or or or or or or or or or or or or or or or or or or or or or or or or or or or or or or or or or or or or or or or or or or or or or or or or or or or or it is the bus. PressMenu> or or or or or or or or or or or or or or or or or or or or or or or or or or or or or or or or or or or or or or or or or or or or or or or or or or or or or or or or or or or or or or or or or or or or or or or or or or or or or or or or or or or or or or or or or or or or or or or or or or norfor any other data. PressMenu> or or or or or norfor any other data. PressMenu> or or or or norfor any other data. PressMenu> or or or norfor any other data. PressMenu> or or or norfor any other data. PressMenu> or or norfor any other data. PressMenu> or or norfor any other data. PressMenu> or or norfor any other data. PressMenu> or or norfor any other data. PressMenu> or or norfor any other data. PressMenu> or or norfor any other data. PressMenu> or or norfor any other data. PressMenu> or or norfor any other data. PressMenu> or or norfor any other data. PressMenu> ORORORORORORORORORORORORORORORORORORORORORORORORORORORORORORORORORORORORORORORORORORORORORORORORORORORORORORORORORORORORORORORORORORORORORORORORORORORORORORORORORORORORORORORORORORORORORORORORORORORORORora |
| 56 Parallel Portx Disabled Data | was sent to the specified parallel port, but the port has been disabled from the Parallel Buffer menu item.Press Go to clear the message. The printer discards the data sent to the parallel port.Reset the printer. Press Menu> or or or our app is displayed. PressMenu> or or our app is displayed. PressMenu> or our app is displayed. PressMenu> or our app is displayed. PressMenu> or our app is displayed. PressMenu> or our app is displayed. PressMenu> or our app is displayed. PressMenu> or our app is displayed. PressMenu> or our app is displayed. PressMenu> or our app is displayed. PressMenu> or our app is displayed. PressMenu> or our app is displayed. PressMenu> or our app is displayed. PressMenu> ORORORORORORORORORORORORORORORORORORORORORORORORORORORORORORORORORORORORORORORORORORORORORORORORORORORORORORORORORORORORORORORORORORORORORORORORORORORORORORORORORORORORORORORORORORORORORORORorsunlnt the bus. |
| 56 Serial x Port Disabled Data w | was sent to the specified serial port, but the port has been disabled from the Serial Buffer menu item.Press Go to clear the message. The printer discards the data sent to the serial port.Reset the printer. Press Menu> or our app is displayed. PressMenu> or our app is displayed. PressMenu> or our app is displayed. PressMenu> or our app is displayed. PressMenu> or our app is displayed. PressMenu> or our app is displayed. PressMenu> or our app is displayed. PressMenu> or our app is displayed. PressMenu> or our app is displayed. PressMenu> or our app is displayed. PressMenu> or our app is displayed. PressMenu > ORORORORORORORORORORORORORORORORORORORORORORORORORORORORORORORORORORORORORORORORORORORORORORORORORORORORORORORORORORORORORORORORORORORORORORORORORORORORORORORORORORORORORORORORORORORORORORORORORORORorsunlnt the buses. |
| 58 Too Many Disks Installed You | have more than one hard disk installed. Place the printer power off (O) and follow the instructions in your Setup Guide for installing an optional hard disk. |
| 61 Defective Disk The hard disk | installed in your printer is defective. PressGo to clear the message and continue printing. You must install a different disk before you can perform any disk functions. |
| 62 Disk Full There is not enough | space available to hold the resources you want to store on disk.·Press Go to clear the message and continue processing. Downloaded fonts and macros not previously stored in flash memory or disk are deleted.·Reset the printer. Press Menu>or<Menu. When the Job Menu is displayed press Select. press Menu>or<Menu until Reset Printer appears on the second line. Press Select. |
| 63 Unformatted Disk The hard disk | installed in your printer has not been formatted. You must format the disk before you can download resources to it.Press Go to clear the message. If the error message remains, the disk may be defective and need replacing.To format the disk, select Format Disk from the Utilities Menu. |
| 64 Disk not in Slot 3 If you place | an optional hard disk in slot 1 or 2, this message will appear on the operator panel. The optional hard disk must be placed in slot 3 for the printer to operate. If you have another adapter in slot 3, move it to slot 1 or 2 and place the hard disk in slot 3.See your Setup Guide for information on installing an optional hard disk in your printer.Note: Do not attempt to remove or install the hard disk with the printer power on or the power cord connected. |
| 70–79 Network Reserved for messages relating to the optional print server sometimes referred to as an Internal Network Adapter (INA) installed in your printer. For more information, refer to the online documentation included on the printer CD under “Network Printing.” | |
| 83 Transfer Belt Life Warning This | message 83 Transfer Belt Life Warning indicates the waste toner area is full. If you suspect a false waste toner full condition has occurred, you can clean the waste toner sensor. See “Cleaning the waste toner sensor” on page 184 |
| 84 Transfer Belt Life Warning This | message indicates the transfer belt is nearing its end of life. The transfer belt is a part of the transfer kit. If you do not have an extra transfer kit, order it now. See page 113 for more information about ordering new supplies.Press Go to clear the message and continue printing. The Supplies status message is displayed with the Ready. Power Saver Busy and Waiting messages—unless another status message of higher priority is posted—until you replace the transfer belt. |
| 84 Transfer Belt Exhausted This | message indicates the transfer belt is exhausted and must be replaced. See page 113 for more information about ordering new supplies.A new transfer belt must be installed to clear this error message. |
| 85 Coating Roll Life Warning This | message indicates the coating roll is nearing its end of life or empty condition.Normally the coating roll is replaced when you replace the black print cartridge. It is possible, depending on the type of print jobs you send to the printer, a coating roll may have to be replaced prior to the print cartridge becoming low on toner. If you do not have an extra coating roll, order it now. See page 113 for more information about ordering new supplies.Press Go to clear the message and continue printing. TheSupplies status message is displayed with theReady, Power Saver Busy and Waiting messages—unless another status message of higher priority is posted—until you replace the coating roll.Note:Continued use of the coating roll after the warning has been displayed may result in poor toner adhesion to print media, other print quality problems, and paper jams. |
| 86 Transfer Belt Missing The transfer belt is not installed in the printer. Insert the transfer belt and close the front cover to clear the message. | |
| 87 Fuser Exhausted This message indicates a new fuser kit must be installed. If you do not have the fuser kit on hand, order it now. See page 113 for more information about ordering new supplies.Press Go to clear the message and continue printing. The Fuser Exhausted intervention message is posted every time the printer power it turned on.When a new fuser is installed, you must reset the fuser counter to zero. To reset the fuser counter place the printer power off (O). Press and hold theSelect and Return buttons on the operator panel while placing the printer power switch to on (I). TheConfiguration Menuis displayed on the operator panel.Press Menu>ororor | orororor |
| 88 Color Low This message indicates the color print cartridge indicated is nearing its end of life or empty condition. If you do not have an appropriate extra print cartridge, order it now. See page 113 for more information about ordering new supplies.Press Go to clear the message and continue printing. TheSupplies status message is displayed with theReady, Power Saver Busy and Waiting messages—unless another status message of higher priority is posted—until you replace the print cartridge. | |
| 88 Color Cartridge Empty The printer has detected the specified print cartridge is completely out of toner.You must install a new print cartridge before you can continue printing. See page 121 for more information. | |
| 20x Paper Jam The printer has detected a paper jam in the area specified in the message.You must remove the paper from the entire paper path. Then close any open covers and pressGo to clear the message. See page 168 or page 169 for additional information on clearing a jam.See page 104 for information about avoiding jams. | |
| 23x Paper Jam Check Duplex The printer has detected a paper jam in the duplex unit.You must remove the paper from the entire duplex unit paper path. Then close any open covers and the duplex tray.Press Go to clear the message. See page 175 for additional instructions on clearing a jam.See page 104 for information about avoiding jams.Note: If the duplex unit is not plugged in, the printer will display230 Paper Jam Check Duplex . | |
| 24x Paper Jam Check Trayx | The printer has detected a paper jam in the tray specified in the message.You must remove the paper from the paper path. Then close any open trays or covers.Press Go to clear the message. See page 173 for additional instructions on clearing a jam.See page 104 for information about avoiding jams. |
| 25x Paper Jam MP Feeder The printer has detected a paper jam in the multipurpose feeder.You must remove the paper from the multipurpose feeder and paper path. Then close any open covers.Press Go to clear the message. See page 172 for additional instructions on clearing a jam.See page 104 for information about avoiding jams. | |
Service messages
Service messages also alert you to problems that require intervention. However, the printer will stop printing and the errors are non-recoverable. It may be possible to power the printer off and back on to temporarily recover from the service message error condition. A service message normally indicates a service technician is required.
Service messages
| Message Action | |
| 900 Service RIP Software An unrecoverable printer software error has occurred. A service technician is required to correct this condition. | |
| 910-912 Service Engine Motor Indicates an engine motor problem has occurred. A service technician is required to correct this condition. | |
| 917 Service Transfer Belt Indicates an error has occurred in the transfer belt. If Alarm Control is turned on, the alarm is sounded if this error occurs. Replacing the transfer belt usually solves this problem. | |
| 920-929 Service Fuser Error Indicates the fuser is not working properly. If Alarm Control is turned on, the alarm is sounded if this error occurs. If the service number is 925 through 929, the normal life of your fuser has been exhausted and you must replace it. | |
| 930-935 Service Printhead Error | Indicates the fuser is not working properly. If Alarm Control is turned on, the alarm is sounded if this error occurs. A service technician is required to correct this condition. |
| 939 Service RIP-Engine Comm. | Indicates the printer engine has not received the proper input during a specified time period. If Alarm Control is turned on, the alarm is sounded if this error occurs. A service technician is required to correct this condition. |
| 941 Service Code CRC Indicates the ROM Code has failed the CRC check. A service technician is required to correct this condition. | |
| 941 Service Font CRC Indicates the Font ROM has failed the CRC check. A service technician is required to correct this condition. | |
| 943 Service RIP Font Version Indicates the RIP code and Font ROM are incompatible. A service technician is required to correct this condition. | |
| 944-946 Service System Board Indicates a failure on the printer system board. A service technician is required to correct this condition. | |
| 948 Service Engine Card Indicates a problem has occurred on the engine card. If Alarm Control is turned on, the alarm is sounded if this error occurs. A service technician is required to correct this condition. | |
| 953-954 Service NVRAM Failure | Indicates the NVRAM on the engine card has failed. If Alarm Control is turned on, the alarm is sounded if this error occurs. A service technician is required to correct this condition. |
| 955 Service Code/Font CRC Indicates the Code or Font ROM failed the CRC check. A service technician is required to correct this condition. | |
| 956-959 Service System Board Indicates the system board has failed. A service technician is required to correct this condition. | |
| 960-963 Service RAM Memory Error | Indicates a memory error has occurred and one or more memory cards need to be replaced.• 961 the memory card in slot 1 is bad.• 962 the memory card in slot 2 is bad.• 963 the memory card in slot 3 is bad.Removing or replacing the bad memory card normally fixes this error. Refer to your Setup Guide for information on removing and installing memory. |
| 964-965 Service Emulation Error | Indicates an emulation error occurred during an emulation download. If Alarm Control is turned on, the alarm is sounded if this error occurs. A service technician is required to correct this condition. |
| 970-979 Service Network Card x | Indicates a network card in the slot specified. If Alarm Control is turned on, the alarm is sounded if this error occurs. Removing or replacing the network card normally fixes this error. Refer to your Setup Guide for information on removing and installing memory. |
| 990-993 Service Engine Error Indicates an engine error has occurred. If Alarm Control is turned on, the alarm is sounded if this error occurs. A service technician is required to correct this condition. | |
Identifying other problems
The information in the following tables may help you solve other printing problems. If these suggestions still do not correct the problem, call for service. You may have a printer part that requires adjustment or replacement.
Print quality problems
| Problem Action | |
Print is too light, or printed images or characters have voids or dropouts.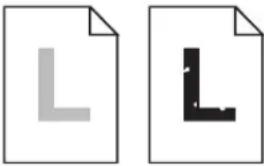 | Make sure the front cover is closed completely. |
| Make sure you're using recommended paper or other media. Use media from a new package. | |
| Make sure you have selected the correct Paper Type setting for the media you're using. | |
| If you suspect a print cartridge is low on toner, remove the appropriate cartridge and gently shake it back-and-forth to distribute the toner evenly. Reinsert the cartridge and try printing the job again. | |
| Replace the print cartridge that matches the color on the page that is too light or not present in the void areas. See page 121. | |
Colored lines, streaks, or smudges appear on the printed page, or print appears blurred or unclear.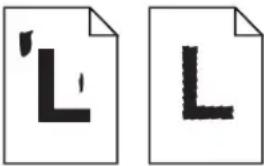 | Replace the print cartridge that matches the color of the lines, streaks, or smudges on the page. See page 121. |
The page has 100% coverage of one color. | Replace the print cartridge that matches the color on the page. See page 121. |
Light lines or streaks appear on the printed page.  | Remove the print cartridge that matches the color of the lines or streaks and gently shake it back-and-forth to distribute the toner evenly. Reinsert the print cartridge and try printing the job again. |
| Replace the print cartridge that matches the color of the lines or streaks on the page. See page 121. | |
Light lines or voids appear from the top of the page to the bottom of the page.  | Remove the print cartridge that matches the color of the voided color and clean the dust from inside the print cartridge. See “Cleaning the print cartridge dust collector” on page 181. Reinsert the print cartridge and try printing the job again. |
| Replace the print cartridge that matches the color of the voided color on the page. See page 121. | |
The page is blank or one of the colors is missing. | Replace the print cartridge that matches the missing color on the page. See page 121. |
Toner smears or rubs off the page. | Make sure you’re using recommended paper or other media. |
| Make sure you have selected the correct Paper Type setting for the media you’re using. | |
| Make sure the front cover is completely closed. | |
| You may need to replace the fuser unit. See page 131 for more information. | |
Toner adheres to the back of the page. | Make sure the paper size is set properly for the paper length you are printing on. Print several pages to clean the transfer roller of excess toner. |
Printed materials delivered by the postal service arrive with ghosting or mirror images of the text visible on the page. | When preparing printed materials for mailing:Use 24 lb (90 g/m ^2 ) paperAvoid rough paper; select paper with a smoothness from 100 to 150 SheffieldFold sheets with the text facing outwardInsert sheets in envelopesPre-barcode and pre-sort all envelopesMeter envelopes or use pre-canceled stampsPlace envelopes in trays and deliver to the post office; do not drop envelopes into mail boxes or chutes |
Quality of printed transparencies is inadequate. | Make sure you're using the recommended Lexmark transparencies. See page 100 for more information. |
| When printing transparencies, always set Paper Type to Transparency. | |
| Set Color Correction menu item to Vivid. See page 19 or page 84 for more information. | |
| Avoid getting fingerprints on transparencies before printing. | |
Print on the page is skewed. Make | sure the width guides in the paper tray or the multipurpose feeder fit snugly against the media you loaded. |
Quality of printed images is inadequate. | Set Image Enhancement to On. See page 19 or page 81 for more information. |
| If you're printing low resolution images using PostScript 3 emulation, set Image Smoothing On. See “PostScript Menu” on page 48 for more information. | |
A white gap is noticeable between color fills | Make sure all four corners of the printer are resting on a level surface. |
Colors do not print as you expect. | Make sure you have selected the appropriate Color Correction, Image Enhancement, and Print Resolution values for the job you're printing. See page 84 for more information. |
Printer problems
| Problem Action | |
| You cannot insert a print cartridge into the printer. | Make sure the print cartridge is aligned properly and is being installed in the correct location on the carousel (print cartridges only fit their color coded positions on the carousel. This means the toner color inside the print cartridge must match the color location strip on the carousel in order to be placed there). See page 121 for more information. |
| Toner accumulates inside the printer. | Replace the print cartridge that matches the color of the toner inside the printer. See “Replacing print cartridges” on page 121. |
Other printing problems
| Problem Action | |
| Your job did not print or incorrect characters printed. | Make sure Ready (or Power Saver) appears on the first line of the operator panel display before you send a job to print. PressGo to return the printer to the ready state.If Ready Hex appears on the operator panel display, you must exit Hex Trace mode before you can print your job. To exit Hex Trace mode, reset the printer or turn the printer off and back on. |
| Make sure the printer is not displaying aToner Emptymessage. If it is, you cannot print until you replace the specified print cartridge. | |
| Verify you are using the correct printer driver. | |
| If you're using a parallel interface, make sure you're using an IEEE 1284-compliant parallel cable. We recommend Lexmark part number 1329605 (10 ft) or 1427498 (20 ft) for the standard parallel port. | |
| If you're using a Lexmark internal or external network adapter, verify it is set up properly and the network cable is securely connected. Refer to the documentation that came with your adapter, or the network documentation on the printer CD for more information. | |
| You cannot print color. Make sure the Color Correction menu item is not set to Black & White. | |
| You cannot print the menu settings page. | Make sure the selected paper source holds A4, letter, or legal size paper. The menu settings page can only print on those paper sizes. Make sure the Paper Type setting for the selected source is Plain Paper. |
| You cannot print using the LocalTalk port. | Make sure neither LocalTalk Port nor LocalTalk Buffer is set to Disabled in the LocalTalk Menu. |
| Verify the printer is set up correctly in the Macintosh Chooser. | |
| You cannot receive faxes via the fax port. | Make sure the telephone line is connected to the fax port if you have an optional internal fax modem installed. If you have an external fax machine, make sure the serial cable is connected to the printer serial port. |
| Make sure the Fax Port or Fax Buffer has not been set to Disabled in the Fax Menu. | |
| Make sure the fax machine you have connected to your printer is a class 1 fax modem. | |
| If power to the modem has been interrupted, complete the following steps in the order listed:1 Turn the printer power off.2 Turn the modem power on.3 Turn the printer power on. | |
| Paper does not feed properly. Make | sure you're using recommended media. If you are using 16 lb paper, make sure it has been placed in tray 1 or the multipurpose only. Do not use 16 lb paper with the duplex unit. |
| Make sure the adjustable guides in the tray or multipurpose feeder are adjusted properly for the media you loaded. | |
| Make sure the stack of media does not exceed the maximum stack height indicated on the tray or feeder. | |
| The printer does not recognize a paper size loaded in the tray. | The printer can only recognize A4, B5, letter, executive, and legal size paper. You must decide which paper sizes you want your trays to support.You can load the paper sizes your trays don't support in the multipurpose feeder. When using the multipurpose feeder, always select the correct paper size from the operator panel or from the driver. |
| The printer seems slow to print. If you set Print Resolution to 1200 x 1200 dpi, it may take longer to print some complex jobs or jobs formatted for larger paper. Select the 600 dpi setting if you need the job to print faster. See page 19 or page 84 for more information. | |
| You can't collate a large job. Reduce the complexity of your print job. Eliminate the number and size of fonts, the number and complexity of images, and the number of pages in a job may increase print speed. | |
| You get unexpected page breaks. Check the Print Timeout setting in the Setup Menu. Increase the value. | |
| Transparencies curl excessively. Make sure you're using the recommended Lexmark transparencies. See page 100 for more information. | |
| Transparencies jam. Fan transparencies before loading. Make sure you only load transparencies in tray 1 or the multipurpose feeder. | |
| You cannot remove paper jammed in the fuser. | Remove the fuser unit and remove the jammed paper. See page 131 for more information. |
| You cannot clear the paper jam message. | To clear the paper jam messages, you must remove all paper from the printer's paper path. Check both inside the printer as well as the paper source you were using. Then open and close the front cover and fuser cover and pressGo. |
| The page that jammed does not reprint after you clear the jam. | Set Jam Recovery to Auto or to On in the Setup Menu. See page 41 for more information. |
Clearing printer paper jams
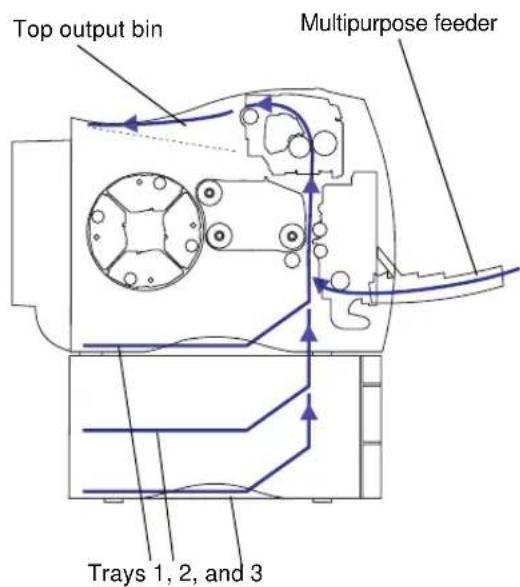
text_image
Top output bin Multipurpose feeder Trays 1, 2, and 3By carefully selecting print materials and loading them properly, you should be able to avoid most paper jams. For more information on proper paper handling, see page 95. For tips on avoiding jams, see page 104.
When a jam does occur, the Paper Jam message appears on the operator panel display and indicates where to find the jammed paper. You must clear the paper from this area, but you must also clear all paper from the entire paper path. The illustration of the printer's paper path may help you. For paper jams occurring in the duplex unit see "Clearing duplex unit paper jams" on page 175.
After you have cleared all the paper, close the printer's front cover and fuser cover and press Go to clear the message. If you feel you have cleared all the paper from the paper path, but the paper jam message is still displayed, open and close the front and fuser covers and press Go again.
The Jam Recovery setting in the Setup Menu determines whether the printer reprints the jammed page. See page 41 for more information.
Note: When clearing a jam open the front cover and fuser cover. Clear all paper from the entire paper path. Clear paper jammed in the paper tray. Close the fuser cover, front cover, paper tray, and press Go.
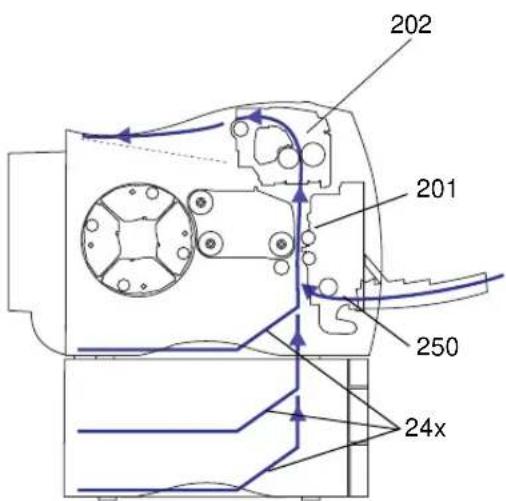
text_image
202 201 250 24xThe following table lists the paper jam messages. Clearing paper jams begin with the steps on page 170.
Paper jam messages
| Message To locate the jam... | |
| 202 Paper Jam Open the fuser cover | |
| 201 Paper Jam Open the front cover | |
| 250 Paper Jam Open the front cover | |
| 24x Paper Jam Open the paper tray |
Caution! The inside of the printer may be hot. Allow the printer to cool before touching any internal components.
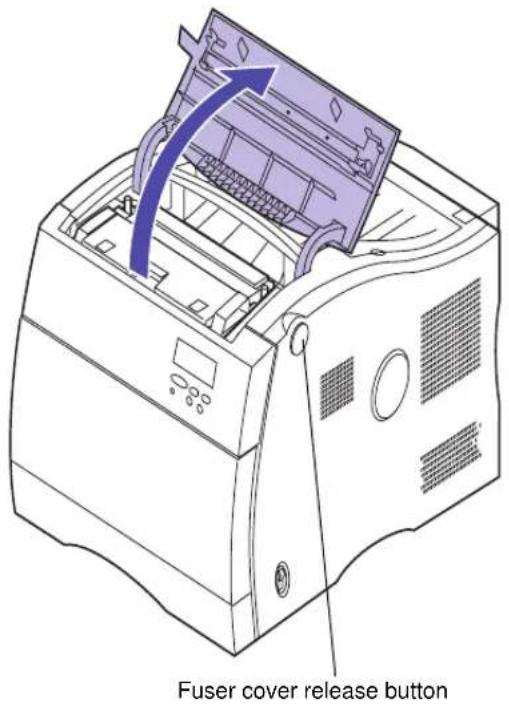
text_image
Fuser cover release button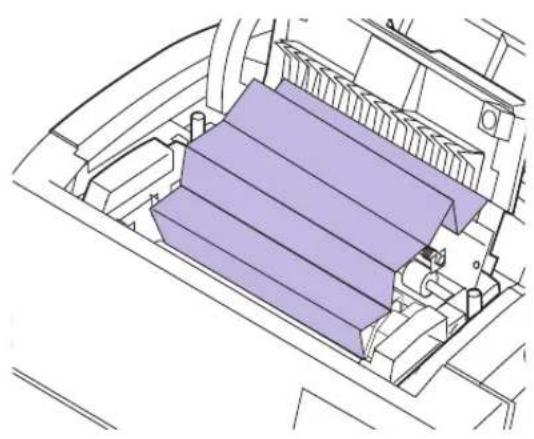
natural_image
Technical line drawing of a mechanical assembly with purple layered components (no text or symbols)202 paper jam
To clear a 202 paper jam (fuser and output rollers):
1 Press the fuser cover release button.
2 Lift the fuser cover.
3 Lift the fuser door.
4 Carefully remove any jammed paper from the output rollers.
If you can not remove the paper from the fuser rollers, remove the fuser. See page 131 for additional information on fuser removal.
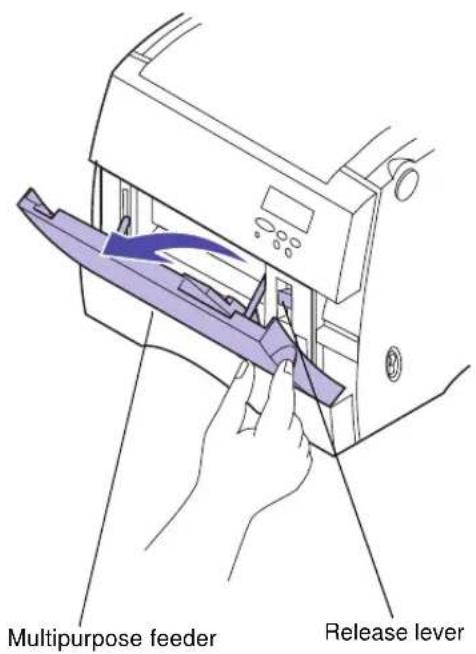
text_image
Multipurpose feeder Release leverCaution! The inside of the printer may be hot. Allow the printer to cool before touching any internal components.
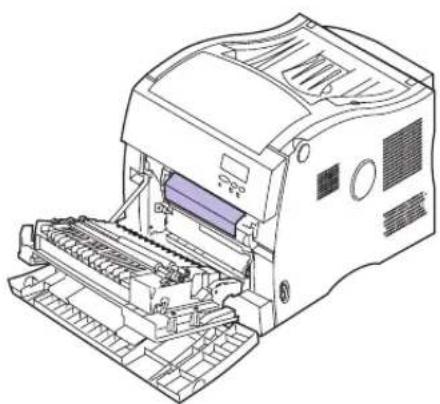
natural_image
Line drawing of a printer with internal components and external frame (no text or symbols)201 paper jam
To dear a 201 paper jam (transfer belt):
1 Open the multipurpose feeder.
2 Pull the release lever on the printer's front cover and open the front cover.
3 Carefully remove any paper in front of the transfer belt.
4 Close the front cover.
5 Close the multipurpose feeder.
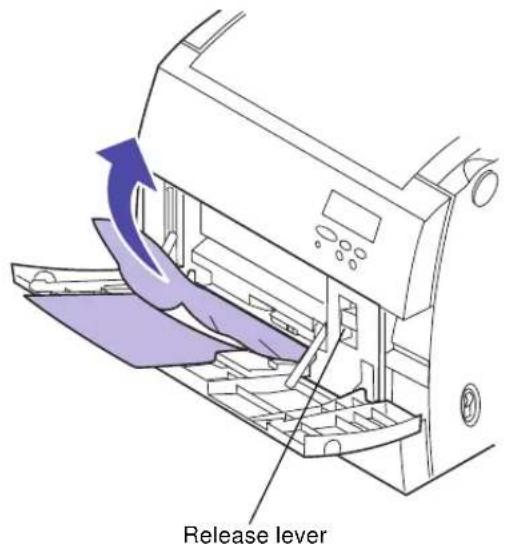
text_image
Release lever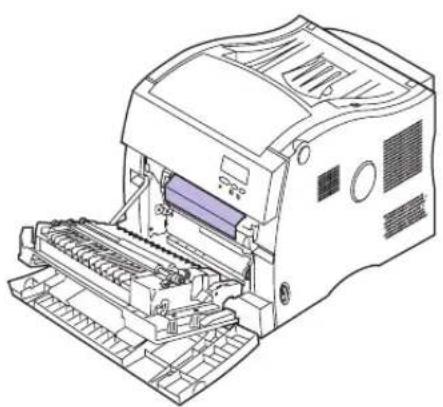
natural_image
Line drawing of a printer with internal components and no visible text or symbols250 paper jam
To clear a 250 paper jam (multipurpose feeder):
1 Remove the paper from multipurpose feeder.
2 Pull the release lever on the printer's front cover and open the front cover.
3 Carefully remove any paper in front of the transfer belt.
4 Close the front cover.
5 Place the paper in multipurpose feeder.
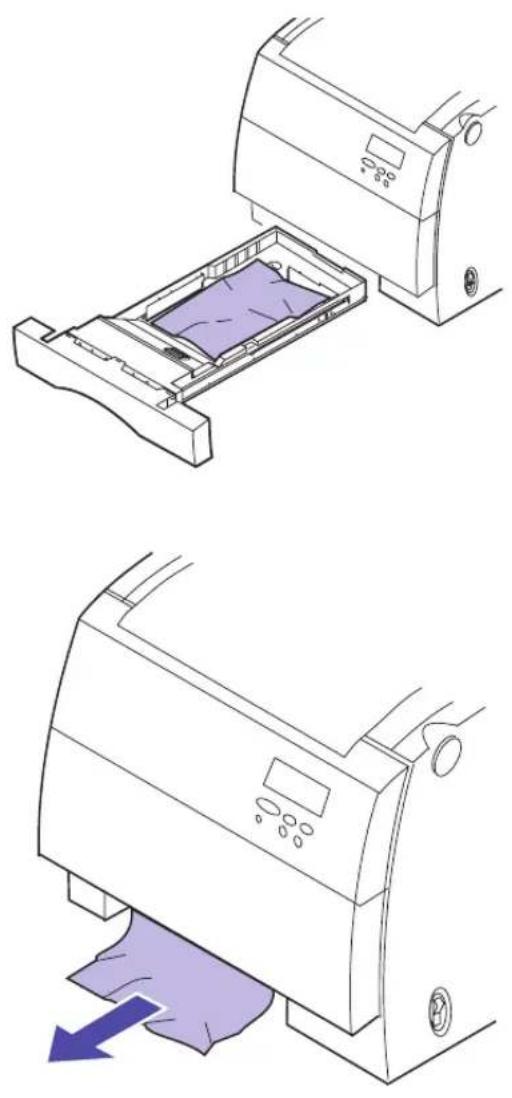
24x paper jam
To clear a 24x paper jam (paper trays 1, 2, or 3):
1 Pull the paper tray completely out of the printer and set it on a flat surface.
2 Remove any wrinkled or damaged paper from the tray.
3 Carefully remove any paper from the tray opening.
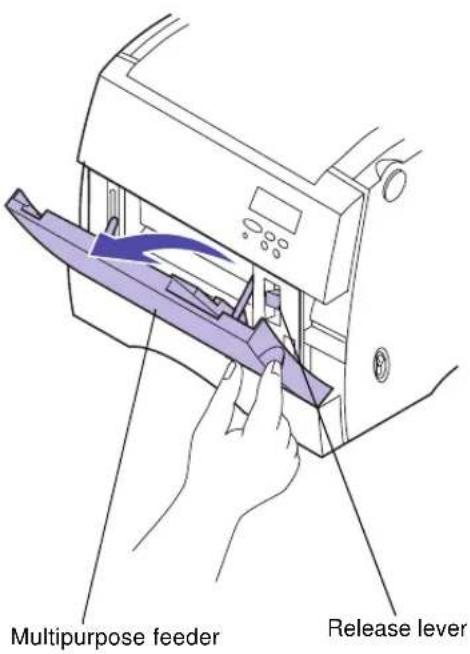
text_image
Multipurpose feeder Release lever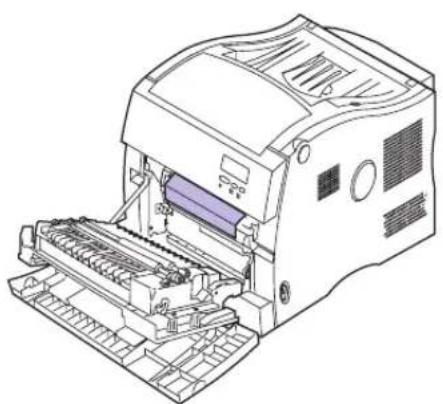
natural_image
Line drawing of a printer with internal components and external frame (no text or symbols)4 Open the multipurpose feeder.
5 Pull the release lever on the printer's front cover and open the front cover.
6 Carefully remove any paper in front of the transfer belt.
7 Close the front cover.
8 Close the multipurpose feeder.
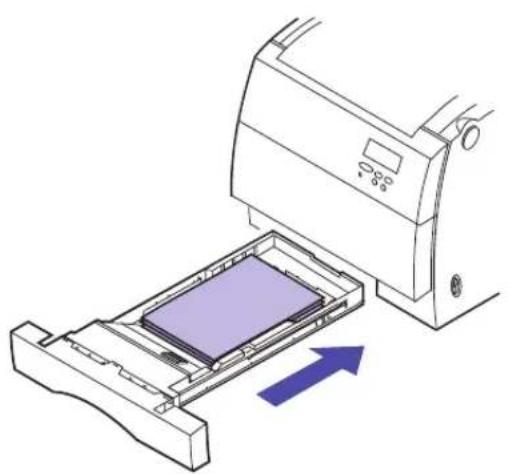
natural_image
Diagram of a printer being inserted into a slot, showing the printer's internal structure and an arrow indicating direction (no text or symbols present)Clearing duplex unit paper jams
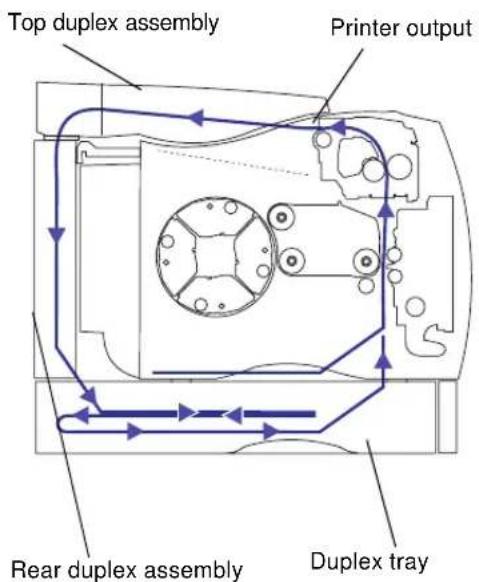
text_image
Top duplex assembly Printer output Rear duplex assembly Duplex tray9 Place the paper in the paper tray.
10 Hold the paper tray with both hands and firmly slide it all the way into the printer.
By carefully selecting print materials and loading them properly, you should be able to avoid most paper jams. Do not use 16 lb paper in the duplex unit. For more information on proper paper handling, see page 95. For tips on avoiding jams, see page 104.
When a jam does occur in the duplex unit, the Paper Jam message appears on the operator panel display and indicates where to find the jammed paper. You must clear the paper from this area. The illustration of the duplex unit's paper path may help you.
After you have cleared the paper jam, close the duplex unit's covers and press Go to clear the message. If you feel you have cleared all the paper from the paper path, but the paper jam message is still displayed, open and close the top, rear covers and open and close the duplex paper tray, then press Go again.
The Jam Recovery setting in the Setup Menu determines whether the printer reprints the jammed page. See page 41 for more information.
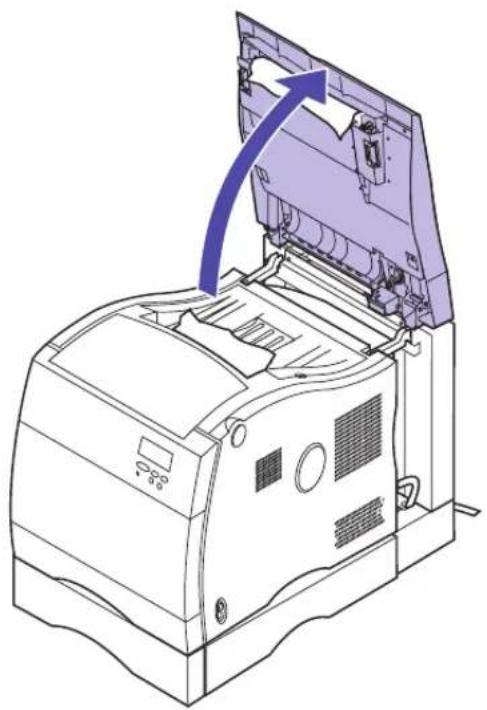
natural_image
Technical line drawing of a printer or printer with an open lid and internal components, showing no text or symbols.230 paper jam
To dear a 230 paper jam (duplex unit):
1 Raise the top duplex assembly.
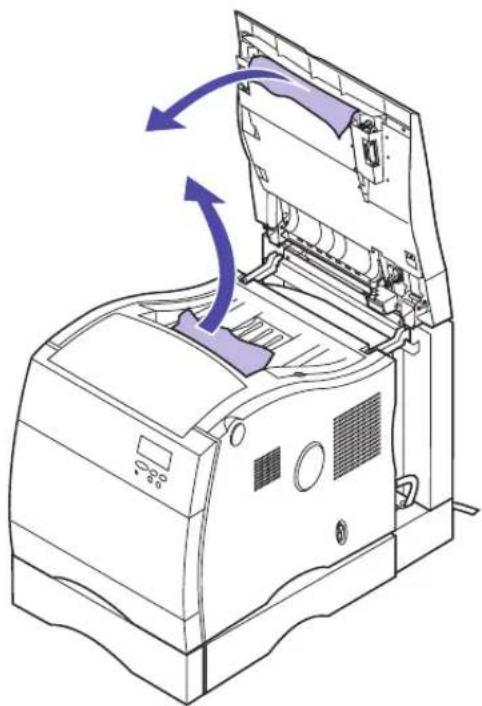
natural_image
Line drawing of a printer with arrows indicating process flow (no text or symbols)2 Carefully remove any jammed paper from the front of top duplex assembly or output rollers of the printer.
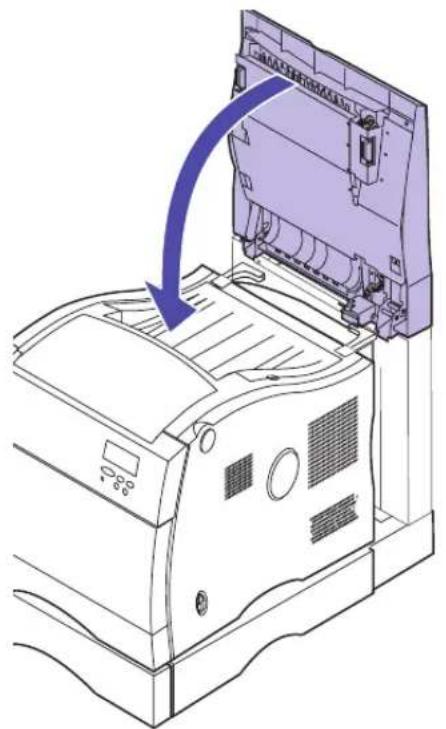
natural_image
Diagram of a printer's front panel showing internal components and a blue arrow indicating the process (no text or symbols present)3 Lower the top duplex assembly.
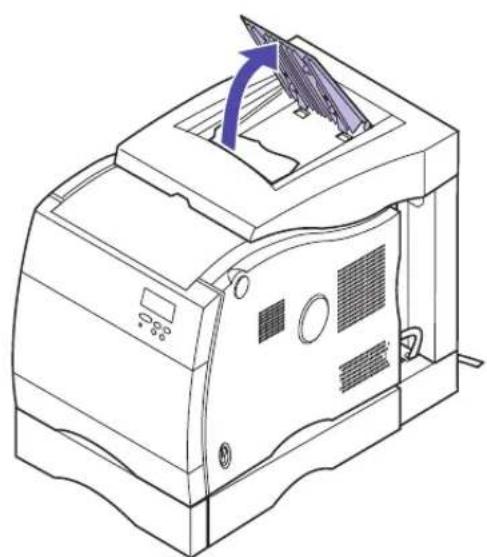
natural_image
Line drawing of a printer with a paper airplane being inserted (no text or symbols)4 Open the top duplex assembly access door.
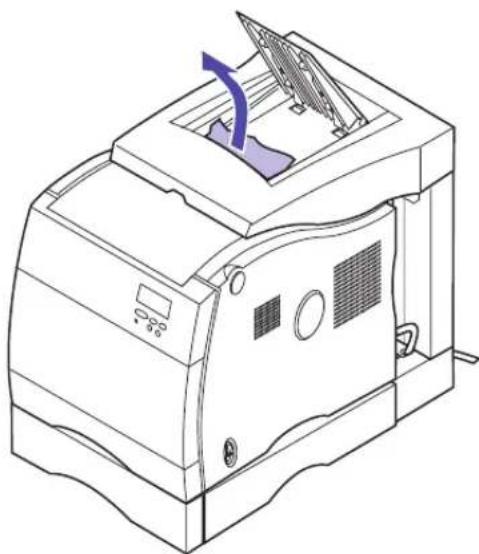
natural_image
Line drawing of a printer with a paper airplane, showing internal components and no text or symbols5 Carefully remove any jammed paper from the top duplex assembly.
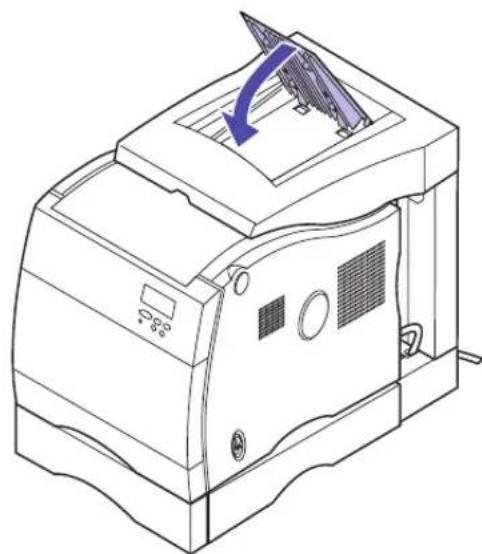
natural_image
Line drawing of a printer with a paper airplane being inserted, showing no text or symbols.6 Close the top duplex assembly access door.
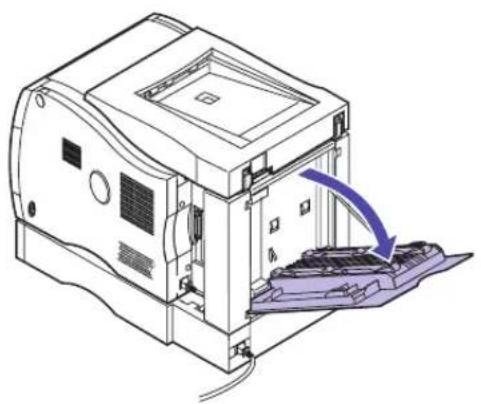
natural_image
Technical line drawing of a computer monitor with an open lid and internal components, showing no text or symbols.7 Open the rear duplex assembly access door.
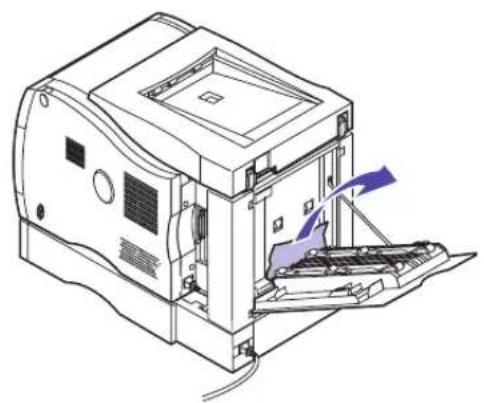
natural_image
Technical line drawing of a computer monitor with an open door and internal components, showing no text or symbols.8 Carefully remove any jammed paper from rear the duplex assembly.
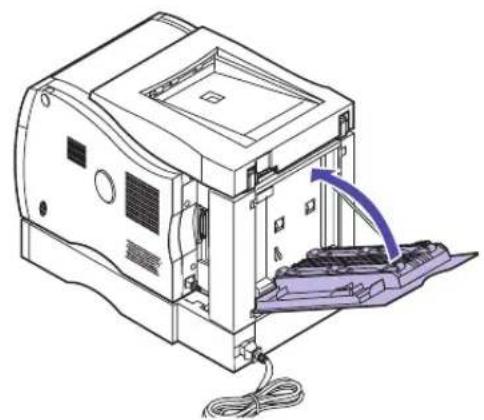
natural_image
Line drawing of a printer internal structure with cable, showing no text or symbols9 Close the rear duplex assembly access door.
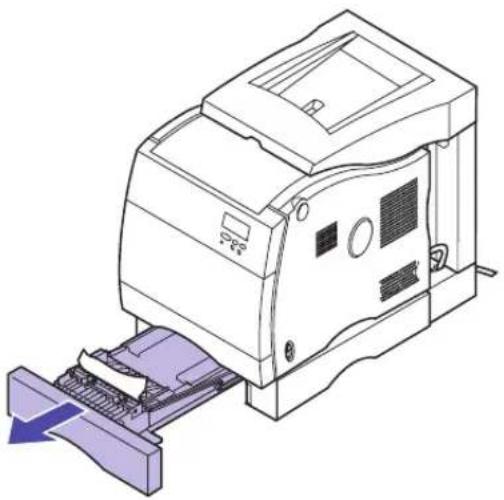
natural_image
Line drawing of a printer with paper feed and paper clip, no text or symbols present10 Pull the duplex tray out of the duplex unit base.
11 Remove any wrinkled or damaged paper from the duplex tray.
12 Hold the duplex tray with both hands and firmly slide it all the way into the duplex unit base.
Cleaning the print cartridge dust collector
UTILITIES MENU CHANGE TONER
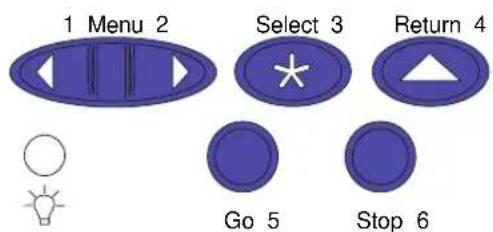
text_image
1 Menu 2 Select 3 Return 4 Go 5 Stop 6CHANGE TONER
=Change Color
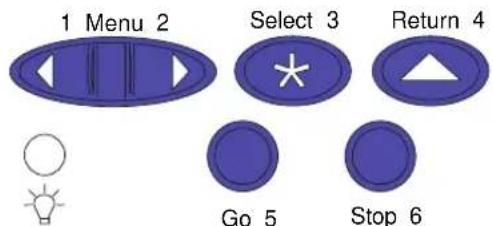
text_image
1 Menu 2 Select 3 Return 4 Go 5 Stop 6If you notice continuous vertical print voids when a particular color is printed, you may have dust accumulating on the inside of your print cartridge. The dust may accumulate in one or more locations and prevent the toner from being placed on the photoconductor. This condition does not occur often but can be easily corrected. Use the following steps to clear the print cartridge of this problem.
1 Press and release Menu> or
2 Press Select.
3 Press Menu> or
4 Press Select.
5 Press Menu> or <Menu until the color you need appears on the second line.
6 Press Select to have the printer rotate the carousel and place the cartridge in position for replacement.
7 Remove any paper in the output bin.
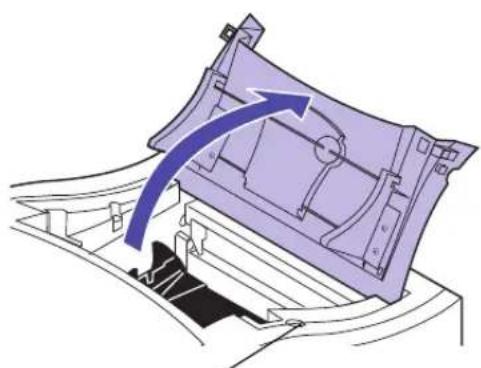
natural_image
Diagram of a mechanical component with an arrow indicating direction, no text or symbols present
Cartridge cover release button
8 Press the cartridge cover release button.
9 Open the cartridge cover.
10 Lift the print cartridge from the carousel.
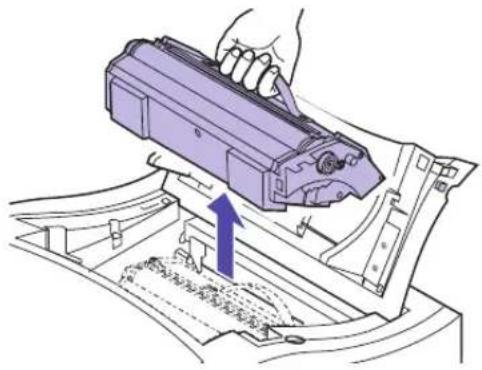
natural_image
Illustration of a hand using a purple tool to press or install a component, with an arrow indicating the process (no text or symbols present)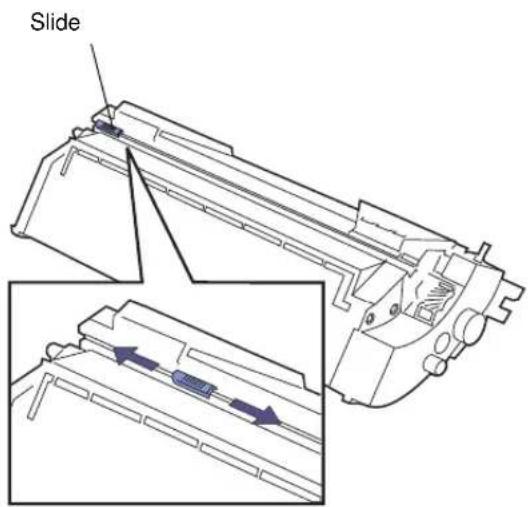
text_image
Slide11 Turn the print cartridge over.
12 Move the green slide completely across the print cartridge and back again.
13 Make sure the slide is fully seated.
Photoconductor shutter
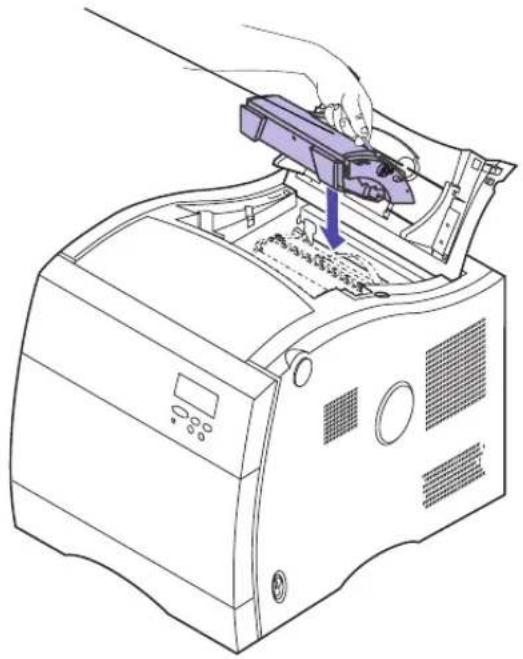
natural_image
Line drawing of a printer with a hand holding a pen, showing internal components and a downward arrow (no text or symbols)14 Place the print cartridge onto the carousel.
The edge of the cartridge toward the rear of the printer must be angled downward for the cartridge to align with the drum.
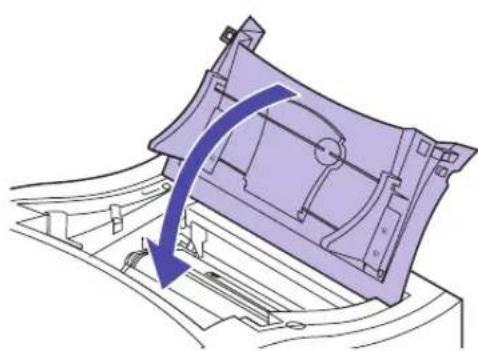
natural_image
Diagram of a mechanical component with a blue arrow indicating direction, no text or symbols present15 Close the cartridge cover.
Cleaning the waste toner sensor
If you accidentally turn the transfer belt on its end, you may induce a false waste toner full error. You can easily clear this error and continue printing. If the error continues to occur after cleaning, then the waste toner is full and the transfer belt needs to be replaced.
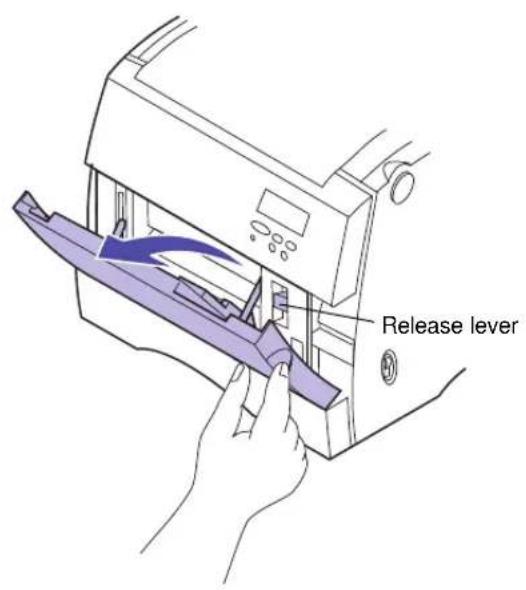
text_image
Release leverTo replace the transfer belt:
1 Place the printer power switch to off (O).
2 Unplug the printer or optional device power cord from the outlet.
3 Open the multipurpose feeder.
4 Lift the release lever on the printer's front cover.
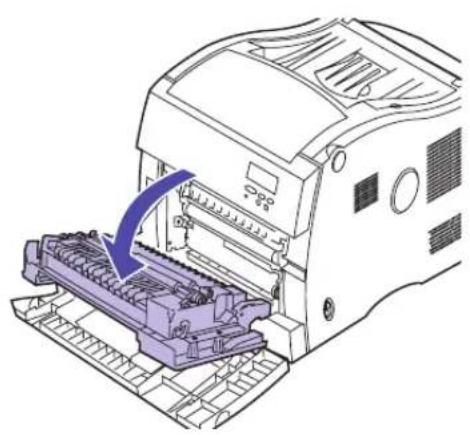
natural_image
Technical illustration of a printer's internal structure with a blue arrow indicating the process (no text or symbols present)5 Open the front cover.
Caution! The inside of the printer may be hot. Allow the printer to cool before touching any internal components.
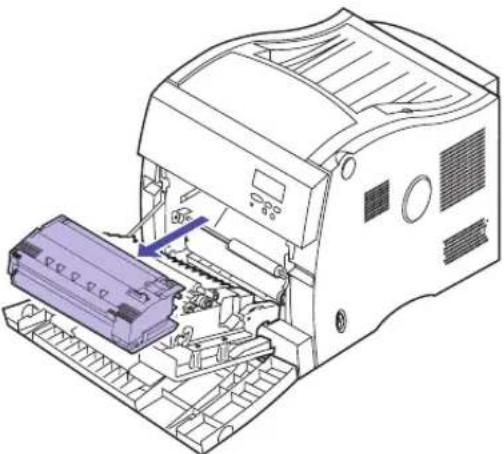
natural_image
Technical line drawing of a printer or printer assembly with a purple component being inserted (no text or symbols visible)Warning! Make sure you do not touch the image film inside the transfer belt housing.
6 Pull the transfer belt from the printer.
To remove the transfer belt, use the green tabs.
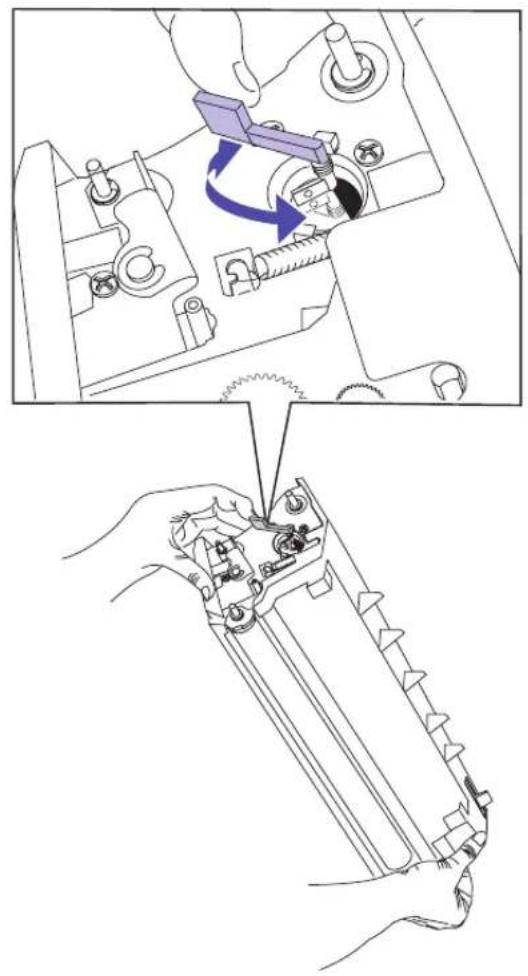
natural_image
Technical illustration showing a mechanical assembly with a tool interacting with a component, and a close-up of hands holding a cylindrical component (no text or symbols present)7 Place the transfer belt on its end as shown.
8 Move the wiper lever from side to side to clean the detection window.
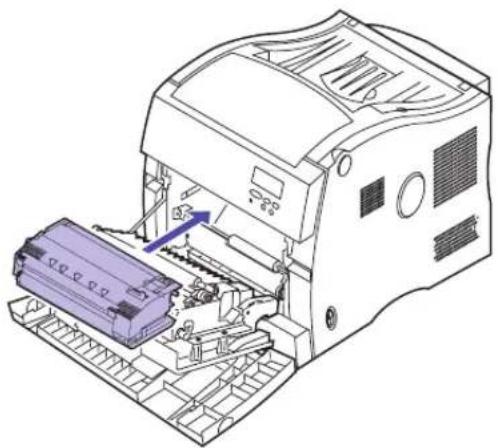
natural_image
Technical line drawing of a printer or scanner with internal components and a purple component (no text or symbols visible)9 Align the bottom of the transfer belt with rails inside the printer.
10 Push the transfer belt into the printer until it is firmly seated.
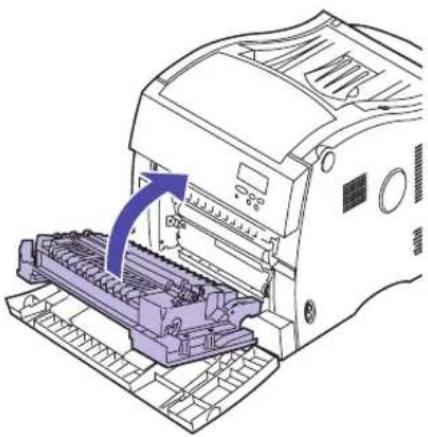
natural_image
Diagram of a printer printer with an arrow indicating the process, showing internal components and no text or symbols.11 Close the front cover.
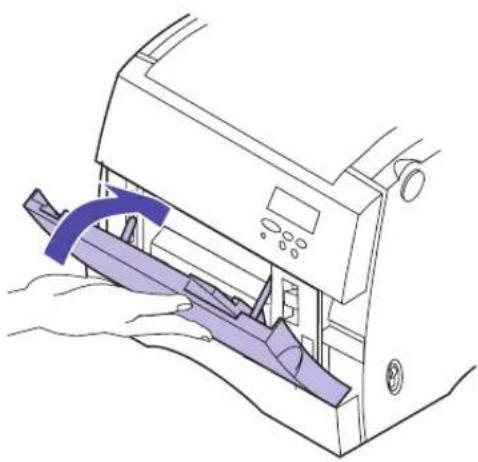
natural_image
Line drawing of a printer with a purple plastic cover being inserted (no text or symbols)12 Close the multipurpose feeder.
13 Plug the power cord into a properly grounded electrical outlet.
14 Place the printer power switch to on (I).
Calling for customer support
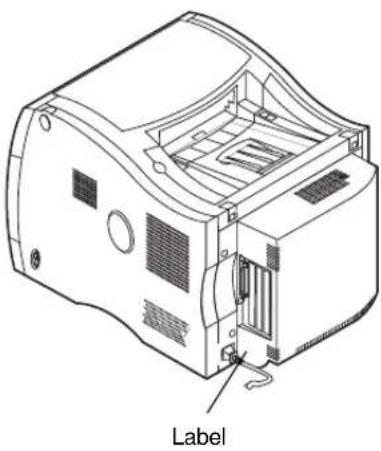
natural_image
Technical line drawing of a computer case with labeled component (no text or symbols beyond label)When you call for printer service, be prepared to describe the problem you are experiencing or the error message on the printer operator panel.
You'll also need to know your printer model type and serial number. Look for the label on the rear cover for your printer model and serial number information. The serial number is also listed on the menu settings page and can be printed from the Utilities Menu.
A
MarkVision
This section provides a brief overview of MarkVision and some of its key features. More information about features and how to use them is available online. Refer to the Drivers, MarkVision and Utilities CD that comes with your printer.
Note: Online information for MarkVision installation is available on the Drivers, MarkVision and Utilities CD.
Operating systems supported
MarkVision for Windows 95/98, Windows NT 4.0, Macintosh, and OS/2 Warp is shipped with your printer on the Drivers, MarkVision and Utilities CD. You can purchase MarkVision for UNIX networks and UNIX Intranet Servers and MarkVision for Sun Systems and Sun Intranet Servers from Lexmark.
Contact the place where you bought your printer or visit the Lexmark Web site at
- http://www.lexmark.com.
Introducing MarkVision
MarkVision's graphical user interface provides ongoing status for Lexmark printers connected locally or attached directly to a network. Network users and administrators can also use the following MarkVision features to increase productivity.
- MarkVision's centralized setup capabilities let you quickly configure and install multiple printers.
- MarkVision lets you configure multiple printers simultaneously from one workstation.
- Features such as automatic network printer discovery and multi-adapter flash update let you set up and configure Lexmark network printers and change network addresses from one workstation.
- If you install the Drivers, MarkVision and Utilities CD on a shared network drive, any user with access to that drive can do a remove install on his workstation.
Note: You can integrate MarkVision directly into your favorite network management software.
Note: Management capabilities for multi-vendor printers are available in some versions of MarkVision.
- Use MarkVision to easily manage and monitor your Lexmark printers.
- Messages on the MarkVision remote operator panel reflect printer real time status.
- The printer graphic provides a visual confirmation of installed options.
- MarkVision lets you view a list of installed features so you know your printer capabilities.
- MarkVision provides the tools to make printer-related administrative tasks effortless.
- You can use MarkVision to monitor network print jobs, change their printing order, and hold or delete specific jobs.
- You can use MarkVision's asset management options to maintain printer inventory, assign property tags, track page counts, and gather job statistics.
- MarkVision lets you easily download and manage resources such as fonts, demo pages, and overlays.
Features
The table on page 192 lists some of the key features of the MarkVision utility and indicates whether each feature is available for your workstation operating system. A brief summary of each feature follows the table. Scroll through the online Help included with MarkVision for more information about its functions, or refer to the MarkVision documentation included on the CD.
The majority of the features are most useful for network or workgroup administrators. In general, the information in the following sections is addressed to them. If a feature is helpful for a user at an individual workstation, “user” is clearly indicated in the section.
Lexmark is continually updating printer utilities to provide you optimum printer control. To get information about the newest versions of MarkVision, which may include new features or enhanced functions, use the Lexmark resources listed under “Getting updated utilities and drivers” on page 199.
Selected MarkVision features
| Feature | Windows 95, 98 and NT 4.0 | Windows NT Intranet Servers OS/2 | Warp UNIX Mac | |||
| Centralized setup | Printer configuration Yes Yes Yes Yes Yes | |||||
| Network adapter firmware setup Yes Yes | 1 | Yes Yes Yes | ||||
| MarkVision network installation | Yes | Yes | Yes | Yes | Yes | |
| Uninstaller for MarkVision | Yes | Yes | Yes | Yes | Yes | |
| Remote monitoring | Visual status | Yes Yes Yes Yes Yes | ||||
| Alerts | Yes | Yes | Yes | Yes | Yes | |
| Remote operator panel | Yes Yes Yes Yes Yes | |||||
| Printer management | Custom media names | Yes No | Yes No | No | ||
| Customized user accounts | No | Yes | No | No | No | |
| Job statistics | Yes | No | Yes | Yes | Yes | |
| Printer map | No | Yes | No | No | No | |
| Printer grouping | No | Yes | No | No | No | |
| Printer inventory | Yes | No | Yes | Yes | Yes | |
| Property tag support | Yes Yes | 2 | Yes Yes No | |||
| Resource management | Yes | No | Yes | Yes | Yes | |
| Printer and network adapter password control | Yes No | Yes No | No | |||
| Job management | Job queue management | Yes No | Yes3 | Yes | No | |
| Print buffer management | Yes | No | Yes | No | Yes | |
| Job buffering | Yes | No | Yes | Yes | No | |
| 1 Can configure but cannot upgrade.2 Limited function.3 Support for this feature provided by the operating system. | ||||||
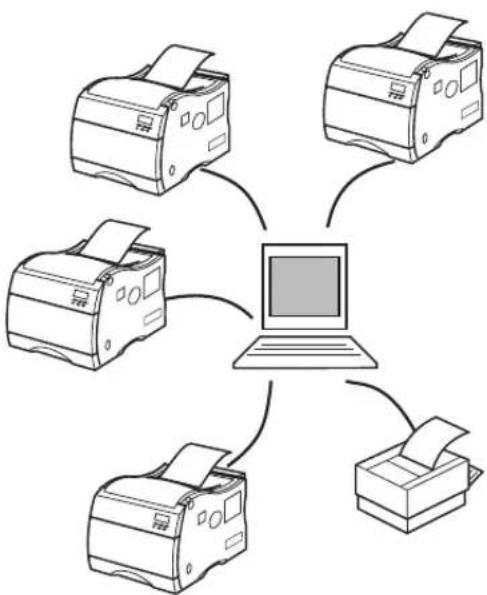
flowchart
graph TD
    A["Printer 1"] --> C["Computer"]
    B["Printer 2"] --> C["Computer"]
    D["Printer 3"] --> C["Computer"]
    E["Printer 4"] --> C["Computer"]
    F["Printer 5"] --> C["Computer"]
Centralized setup
MarkVision lets you set up several printers on a network without leaving your workstation.
Printer configuration. MarkVision's Quick Setup function lets you configure multiple printers simultaneously. Simply use MarkVision to set up one printer, save the settings into a file, and send that file to all the other printers you want to update.
Network adapter firmware setup. When new firmware is available for the network adapters installed in your printers, use MarkVision to upgrade all adapters from your workstation.
MarkVision network installation. Install MarkVision on a shared network drive and users with access to the drive can install MarkVision on their workstation.
MarkVision for intranets. If you install MarkVision for intranets with a web server, your users can run MarkVision directly from the web site.
Uninstaller for MarkVision. Use the uninstaller whenever you need to remove the MarkVision utility from a workstation.
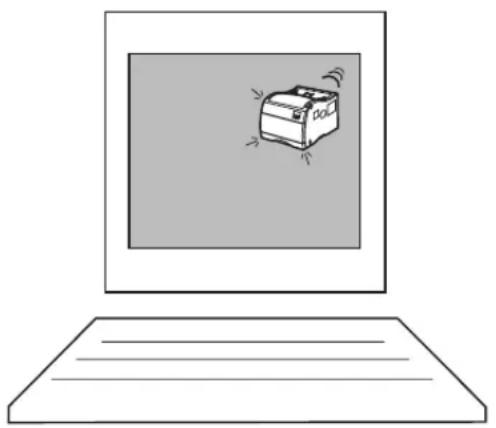
natural_image
Simple line drawing of a laptop with a box icon on screen (no text or symbols)Remote monitoring
Use MarkVision to monitor printer status directly from your workstation.
Visual status. Network users can determine the current status for each printer and see a graphic of the options installed on each printer. With this information, the user can then easily identify the printer best suited for a particular print job.
Alerts. Unlike other network printer management software, MarkVision's alert-driven architecture lets you actively monitor the status of multiple printers on a real-time basis without polling. If an error occurs on a printer attached to your network, MarkVision immediately provides a visual and audible alert.
When minimized on your screen, the MarkVision icon flashes to let you know there is a problem with a printer. You can maximize the window to see a graphic of the printer and detailed information about the problem.
You can customize the alerts for each printer, choosing which alerts the user and the network administrator receive, and whether the alerts are visual, simple sounds, or spoken words. You can also identify which printers on a network you are responsible for monitoring, and receive information only about those specific printers.
MarkVision status window. MarkVision's status window provides quick and easy access to information and management tools you can use to increase your productivity. This status window provides a quick visual image of your printer and the remote operator panel. The MarkVision status window will also display any warning or error conditions that exist on your printer.
You can find out general information such as the printer serial number, the amount of RAM installed and other features you have on your printer through the MarkVision status window.
Remote operator panel. MarkVision's remote operator panel provides an exact replica of the selected printer's operator panel. The menus and messages appear just as
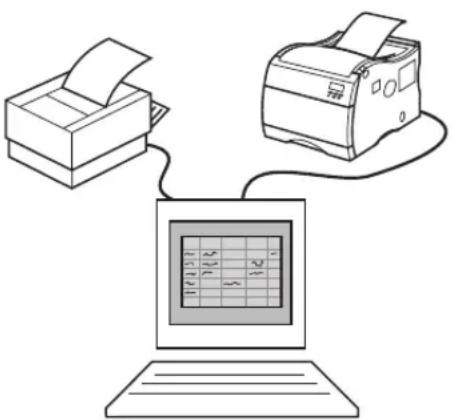
text_image
Diagram showing a printer, printer, and computer monitor connected to a paper airplane with grid layoutthey do on the printer display. You can then use the operator panel buttons to clear errors or step through the menus and change printer settings.
Printer management
The tabs in the MarkVision window that group related printer settings, as well as the remote operator panel, make it easy to view and change printer default settings. If necessary, you can use MarkVision to set up passwords that control who has authority to change these settings.
You can also use MarkVision to collect data about printer usage and printer hardware so you can better manage workloads and maintain an up-to-date printer inventory.
Custom media names. Use MarkVision to personalize names for different media you use with your printer. Network users can then easily select the correct paper source simply by selecting the custom name of the media the job requires.
Customized user accounts. Use MarkVision to customize your user accounts on your intranet. Administrators can easily setup and manage all printer user accounts on their intranet servers through MarkVision
Job statistics. MarkVision can collect data about individual printers or network printer activity, including user names, job duration, printer capabilities used, number of pages printed, and problems encountered. You can then print the job statistics data file, or import the data into a database application to generate the reports you need.
Printer map. You can use MarkVision to identify printers on your intranet servers. MarkVision will provide a printer map of all your printers located on your intranet server.
Printer Grouping. MarkVision can allow you to manage printer grouping on your intranet servers. MarkVision lets you control group access to printers you select and form into a group.
Printer inventory. MarkVision can collect information about the printers on your network and print a report listing the printer models, serial numbers, code versions, and installed options. You can save the report in a comma delimited file or as formatted output.
When you gather inventory information about the printers on a network, you can create a MIF file for each printer's data. You can then import the MIF files into various network management tools to create reports that may help with asset management and other tasks. The MIF file format is based on the standard layout approved by the Desktop Management Task Force (DMTF).
Property tag support. Use MarkVision to define company-specific information about each printer on a network, such as a unique printer name, the name of the person using the printer, the location of the printer, and so on. This information is available when you request a printer inventory from MarkVision.
Resource management. MarkVision provides a directory of all the fonts, overlays, and forms stored in flash memory or disk. The directory also lists the amount of memory available for each storage device. You can use MarkVision to delete, move, or copy files from one storage device to another on the same printer, or from one printer to another. In addition, you can use MarkVision to password protect resources on the storage devices.
Printer and network adapter password control. If you have MarkVision installed in a network environment without built-in security, such as TCP/IP, you can use MarkVision to set up printer and network adapter passwords. The network administrator may want to assign a password to the printer or to the network adapter to restrict the ability to change adapter or printer settings from MarkVision. Passwords can be set up for specific users and for specific printers. This security function does not override existing network security functions.
If your network does have built-in security, MarkVision has access to the logon authority granted to each LAN user within the network operating system. MarkVision
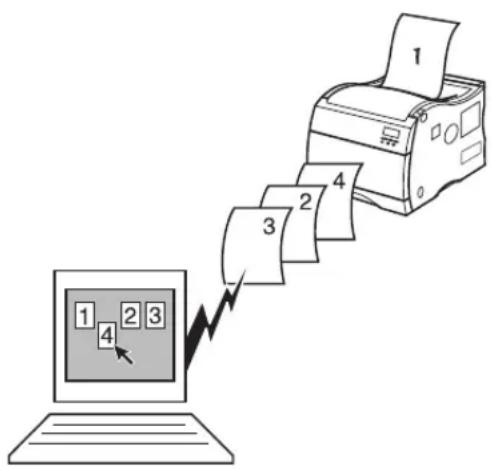
flowchart
graph TD
    A["Printer"] --> B["1"]
    A --> C["2"]
    A --> D["3"]
    A --> E["4"]
honors this logon authority when granting access to MarkVision functions.
MarkVision for intranets has a built in administrator and user account system for security.
Job management
Use MarkVision to manage jobs in the queue.
Job queue management. You can use MarkVision to view, reorder, cancel, and release print jobs in server queues.
Print buffer management. You can also use MarkVision to view and cancel print jobs already stored in the print buffer.
Job buffering. If you have an optional hard disk installed in any of your printers, you can use MarkVision to designate a percentage of disk space for job buffering. You can enable or disable job buffering for each of the available interface ports (parallel, serial, network, LocalTalk, or infrared).
Job buffering allows the printer to remain busy even if the host computer, network connection, or printer server is down. Jobs buffered to disk are retained even if the power supply to the printer is interrupted.
MarkVision online Help
Context-sensitive online Help is available from all MarkVision screens. Point to any option, click the right mouse button, and click "What's This."
MarkVision for Windows 95/98 and Windows NT 4.0 includes detailed step-by-step procedures for using many MarkVision functions. To view these procedures, select Help from the MarkVision Printer Window menu bar and click Help Topics.
MarkVision for OS/2 Warp and MarkVision for Macintosh also offer task-oriented information. The online Help in MarkVision for Macintosh includes full-color illustrations.
Installing MarkVision on a network
The following table defines which workstation operating systems support MarkVision in various network environments. All of the printer and network utilities necessary to install MarkVision on your workstation are included on the CD shipped with your printer, unless you need to purchase a separate CD for UNIX or Sun systems.
For more information about setting up your printer for a specific network, refer to the documentation that came with the optional network adapter or print server, or to the network documentation on the CD.
MarkVision network support
| Network operating system | Workstation operating system | ||||
| Windows 95/98 W | Windows NT 4.0 OS/2 | Warp ^1 | UNIX Mac | ||
| Novell NetWare 3.x, 4.x Yes | ^2 | YesNoNoNo | |||
| Windows NTS 3.5, 3.5.1 Yes | ^3 | YesNoNoNo | |||
| Windows NTS 4.0 Yes | ^3 | Yes ^3 | No No No | ||
| Windows 95/98(Peer-to-Peer) | Yes | No | NoNoNo | ||
| OS/2 LAN Server and OS/2 Warp ^1 Server | Yes ^4 | Yes ^4 | Yes | NoNo | |
| TCP/IP ^5 | Yes | Yes | Yes | Yes | No |
| AppleTalk | No | No | No No Yes | ||
| ^1 OS/2 3.x requires a bidirectional print spooler. Request the latest FixPak from IBM. ^2 Requires a 32-bit Requester from Novell. ^3 To set up the Windows NT server to support clients using Windows operating systems, select “Server Utilities” from the Install window when running the Network Printer Utility. ^4 To set up the OS/2 server to support clients using Windows operating systems, select “Server and Workstation Utilities” from the Install window when running the Network Printer Utility. ^5 Server/Network operating system independent. | |||||
You can also install MarkVision for Windows NT Intranet Servers on a workstation running Windows NT and a supported web server. MarkVision for Windows NT Intranet Servers lets you use a supported web browser, such as Netscape Navigator or Microsoft Internet Explorer, to access MarkVision from any client workstation, regardless of the operating system installed.
Getting updated utilities and drivers
There are a number of ways you can get information about the latest Lexmark utilities and drivers, including MarkVision and the Network Printer Utilities. For helpful phone numbers, refer to the Contacting Lexmark information on the CD or in the MarkVision Printer Utility folder on the Windows desktop.
Online services
If you have access to an online service, you can download printer drivers and updates to MarkVision and other printer utilities from Lexmark 24 hours a day, 7 days a week. The addresses are:
- Internet server: ftp.lexmark.com
(driver files are located at /pub/driver)
• World Wide Web (WWW):
http://www.lexmark.com - CompuServe: go lexmark
Automated fax system
In the U.S. and Canada, you can get a list of available drivers by dialing the Lexmark Automated Fax System. The system is available 24 hours a day, 7 days a week.
To access the Automated Fax System from the U.S. or Canada, call (606) 232-2380 from a touchtone phone and follow the voice prompts. You can request information on how to use the system, request a catalog of documents available, or choose a specific document you want sent to you. The system prompts you for the phone number of the fax machine that will receive the information you requested.

Printer specifications
Standard features
| Feature Description | |
| Print method Dry electrophotographic process | using a laser diode unit |
| Print addressability 600 x 600 dpi and 1200 x | 1200 dpi |
| Maximum print speed (Mono/Color) 16/3 ppm | (letter and A4 paper) |
| Maximum duplex print speed (Mono/Color) 5/1 | .5 ppm (letter and A4 paper) |
| Fonts • 240 resident scalable fonts: | - 156 PostScript 3 emulation- 84 PCL emulation• 2 PCL bitmap fonts:- LinePrinter- POSTNET Barcode• World class international font support:83 symbol sets, including support for Canadian, French, Brazilian,Portuguese, Cyrillic, Greek, and Multilingual Euro |
| Paper input • 250-sheet tray and 50-sheet multipurpose feeder | |
| Paper output • Top output bin: 250 sheets | |
| Paper sizes supported A4, B5, letter, legal, and executive | |
| Printer memory 32MB (SDRAM) | Note: Some printer models may ship with more memory. When a duplex unit is installed, 64MB is the recommended minimum printer memory. |
| Interface Base printer; Parallel (standard Centronics protocol that complies with bidirectional IEEE 1284B)Network printer; Ethernet standard connection | |
| Internal solutions ports 3 ports for network adapters, tri-port adapters, parallel port adapters, or hard disk3 memory connectors | |
| Printer software | MarkVision utility that lets you manage your printer from your computer. Supported in the following environments: Windows 95/98, Windows NT 4.0, OS/2 Warp, Macintosh, UNIX. |
Options
| Option Description | |
| Optional drawer Drawer unit with two 250-sheet trays installed underneath the printer | |
| Duplex unit Provides two sided color or monochrome printing | |
| Memory Maximum usable memory: 384MB | |
| Hard disk option 2.5-inch hard disk to store fonts, forms, job statistics, and spooled jobs (4GB limit) | |
| MarkNetTM N2000 internal print servers Internal print servers available to support the following topologies: · Ethernet 10BaseT and 10Base2 · Ethernet 10/100BaseTX · Token-Ring (connects the printer to a Token-Ring network via DB9 or RJ45) | |
| Tri-port adapter Provides support for the following interfaces: · Serial RS-232C/RS-422A (which can also be configured to support a class 1 fax modem) · High speed Infrared local connections · LocalTalk network connection | |
| Parallel/USB port adapter IEEE 1284 adapter, | provides additional parallel and USB port |
| Infrared adapter For use with the tri-port adapter; receives infrared beam from an IrDA-compatible workstation | |
| Serial interface adapter Converts the printer's parallel port to a serial port | |
| Parallel cables | High speed bidirectional 10-foot and 20-foot 1284-B parallel cables; 9.8-foot 1284 A-C parallel cable |
| Serial cable | 50-foot serial cable |
| Optralmage | Transforms your printer into an easy-to-use networkable print/copy station. |
Printer supplies
| Supply Description | Approximate yield | |
| Print cartridges Black, | magenta, cyan, or yellow cartridges 10,000 pages each | (5% toner coverage)maximum yield 15,000 pages |
| Coating roll Oil roll for fuser | (purchased as a component of the black print cartridge kit or separately) | 15,000 continuous pages |
| Fuser kit Fuses toner to media (consists of fuser and air filter) | 100,000 pages | |
| Transfer kit Transfers image to media (consists of transfer belt and transfer roller) | 100,000 images | |
| Transparencies A4 and letter size | ||
Dimensions
| Printer configuration Dimension (HxWxD) | |||
| Printer 405 mm (16.0 in.) 470 mm (18.5 in.) 570 mm (22.5 in.) | |||
| Printer with duplex unit 550 mm (217 in.) 470 mm (18.5 in.) 645 mm (25.5 in.) | |||
| Printer with optional drawer unit | 628 mm (24.8 in.) 470 mm (18.5 in.) 570 mm (22.5 in.) | ||
| Printer with optional drawer unit and duplex unit | 770 mm (30.4 in.) 470 mm (18.5 in.) 645 mm (25.5 in.) | ||
Weight
| Printer configuration | Weight |
| Printer (without supplies installed) | 30.8 kg (68 lb) |
| Printer (with supplies installed1) | 35.8 kg (79 lb) |
| Optional drawer unit | 10.0 kg (22 lb) |
| Optional duplex unit | 19.1 kg (42 lb) |
| 1The weight with supplies does not include the weight of any paper | |
C
Fonts
Printing font samples
To print samples of all the fonts currently available for your printer:
1 From the printer operator panel, press Menu> or
2 Continue to press and release Menu> until you see UTILITIES MENU.
3 Press Select to display the list of menu items for the UTILITIES Menu.
4 Press Menu> until Print Fonts is displayed.
5 Press Select.
6 Press Select again to print a sample of all the fonts available in PCL emulation. PressMenu> and press Select to print a sample of all the fonts available in PostScript 3 emulation.
Resident fonts
The scalable and bitmapped fonts resident in your printer are listed below. You can select the resident fonts from your software application, or from the printer operator panel if you're using PCL emulation.
PCL scalable fonts
The following are resident scalable fonts for PCL emulation:
Albertus Extra Bold
Albertus Medium
Antique Olive
Antique Olive Bold
Antique Olive Italic
Arial
Arial Bold
Arial Bold Italic
Arial Italic
Century Schoolbook Bold
Century Schoolbook Bold Italic
Century Schoolbook Italic
Century Schoolbook Roman
CG Omega
CG Omega Bold
CG Omega Bold Italic
CG Omega Italic
CG Times
CG Times Bold
CG Times Bold Italic
CG Times Italic
Clarendon Condensed Bold
Coronet
Courier
Courier Bold
Courier Bold Italic
Courier Italic
CourierPS
CourierPS Bold
CourierPS Bold Italic
CourierPS Oblique
Garamond Antiqua
Garamond Halbfett
Garamond Kursiv
ITC Zapf Chancery Medium Italic
ITC Zapf Dingbats
Letter Gothic
Letter Gothic Bold
Letter Gothic Italic
Marigold
Palatino Bold
Palatino Bold Italic
Palatino Italic
Palatino Roman
Symbol
SymbolPS
Times Bold
Times Bold Italic
Times Italic
Times New Roman
Times New Roman Bold
Times New Roman Bold Italic
Times New Roman Italic
Times Roman
Univers Bold
Univers Bold Italic
Univers Condensed Bold
Univers Condensed Bold Italic
Univers Condensed Medium
Univers Condensed Medium Italic
Univers Medium
Univers Medium Italic
Wingdings
PostScript scalable fonts
The following are resident scalable fonts for PostScript 3 emulation:
AlbertusMT
AlbertusMT-Italic
AlbertusMT-Light
AntiqueOlive-Bold
AntiqueOlive-Compact
AntiqueOlive-Italic
AntiqueOlive-Roman
Apple-Chancery
Arial-BoldItalicMT
Arial-BoldMT
Arial-ItalicMT
ArialMT
AvantGarde-Book
Copperplate-ThirtyThreeBC
Copperplate-ThirtyTwoBC
Coronet-Regular
Courier
Courier-Bold
Courier-BoldOblique
Courier-Oblique
Eurostile
Eurostile-Bold
Eurostile-BoldExtendedTwo
Eurostile-ExtendedTwo
Garamond-Antiqua
Garamond-Halbfett
Garamond-Kursiv
GillSans-BoldCondensed
GillSans-BoldItalic
GillSans-Condensed
GillSans-ExtraBold
GillSans-Italic
GillSans-Light
GillSans-LightItalic
Goudy
Goudy-Bold
Goudy-BoldItalic
Goudy-ExtraBold
Goudy-Italic
Helvetica
Helvetica-Black
Helvetica-BlackOblique
Helvetica-Bold
Helvetica-BoldOblique
Helvetica-Condensed
Helvetica-Condensed-Bold
Helvetica-Condensed-BoldObI
Helvetica-Condensed-Oblique
Helvetica-Light
Helvetica-LightOblique
Helvetica-Narrow
Helvetica-Narrow-Bold
Helvetica-Narrow-BoldOblique
Helvetica-Narrow-Oblique
Helvetica-Oblique
HoeflerText-Black
HoeflerText-BlackItalic
HoeflerText-Italic
HoeflerText-Ornaments
HoeflerText-Regular
Intl-CG-Times
Intl-CG-Times-Bold
Intl-CG-Times-BoldItalic
Intl-CG-Times-Italic
Intl-Courier
Intl-Courier-Bold
Intl-Courier-BoldOblique
Intl-Courier-Oblique
Intl-Univers-Bold
Intl-Univers-BoldItalic
Intl-Univers-Medium
Intl-Univers-MediumItalic
JoannaMT
JoannaMT-Bold
JoannaMT-BoldItalic
JoannaMT-Italic
LetterGothic
LetterGothic-Bold
LetterGothic-BoldSlanted
LetterGothic-Slanted
LubalinGraph-Book
LubalinGraph-BookOblique
LubalinGraph-Demi
LubalinGraph-DemiOblique
Marigold
Monaco
MonaLisa-Recut
NewCenturySchlbk-Bold
NewCenturySchlbk-BoldItalic
NewCenturySchlbk-Italic
NewCenturySchlbk-Roman
NewYork
Optima
Optima-Bold
Optima-BoldItalic
Optima-Italic
Oxford
Palatino-Bold
Palatino-BoldItalic
Palatino-Italic
Palatino-Roman
StempelGaramond-Bold
StempelGaramond-BoldItalic
StempelGaramond-Italic
StempelGaramond-Roman
Symbol
Taffy
Times-Bold
Times-BoldItalic
Times-Italic
TimesNewRomanPS-BoldItalicMT
TimesNewRomanPS-BoldMT
TimesNewRomanPS-ItalicMT
TimesNewRomanPSMT
Times-Roman
Univers
Univers-Bold
Univers-BoldExt
Univers-BoldExtObI
Univers-BoldOblique
Univers-Condensed
Univers-CondensedBold
Univers-CondensedBoldOblique
Univers-CondensedOblique
Univers-Extended
Univers-ExtendedObl
Univers-Light
Univers-LightOblique
Univers-Oblique
Wingdings-Regular
ZapfChancery-MediumItalic
ZapfDingbats
Bitmapped fonts
The following bitmapped fonts are resident for PCL emulation only:
Line Printer 16
POSTNET Barcode
Symbol Sets
A symbol set is the collection of alphabetic and numeric characters, punctuation, and special characters available in the font you select. Symbol sets support the requirements for different languages or specific applications, such as math symbols used for scientific text.
In PCL 6 emulation, a symbol set also defines which character will print for each key on the keyboard (or more specifically, for each code point). Some applications require different characters at some code points. To support multiple applications and languages, your printer has 83 symbol sets for the resident PCL 6 emulation fonts.
Symbol Sets for PCL 6 Emulation
Not all font names support all of the symbol sets listed. Refer to the Technical Reference to determine which symbols sets are supported by each font name.
ABICOMP Brazil/Portugal
ABICOMP International
DeskTop
Legal
MC Text
Microsoft Publishing
Russian-GOST
Ukrainian
PCL ITC Zapf Dingbats
PS ITC Zapf Dingbats
PS Math
PS Text
Pi Font
Symbol
Wingdings
POSTNET Barcode
ISO : German
ISO : Spanish
ISO 2: IRV (Int'l Ref Version)
ISO 4: United Kingdom
ISO 6: ASCII
ISO 10: Swedish
ISO 11: Swedish for Names
ISO 14: JIS ASCII
ISO 15: Italian
ISO 16: Portuguese
ISO 17: Spanish
ISO 21: German
ISO 25: French
ISO 57: Chinese
ISO 60: Norwegian version 1
ISO 61: Norwegian version 2
ISO 69: French
ISO 84: Portuguese
ISO 85: Spanish
ISO 8859-1 Latin 1 (ECMA-94)
ISO 8859-2 Latin 2
ISO 8859-5 Latin/Cyrillic
ISO 8859-7 Latin/Greek
ISO 8859-9 Latin 5
ISO 8859-10 Latin 6
ISO 8859-15 Latin 9
PC-8 Bulgarian
PC-8 Danish/Norwegian (437N)
PC-8 Greek Alternate (437G)
PC-8 Turkish (437T)
PC-8 Latin/Greek
PC-8 PC Nova
PC-8 Polish Mazovia
PC-8 Code Page 437
PC-775 Baltic (PC-8 Latin 6)
PC-850 Multilingual
PC-851 Greece
PC-852 Latin 2
PC-853 Latin 3 (Turkish)
PC-855 Cyrillic
PC-857 Latin 5 (Turkish)
PC-858 Multilingual Euro
PC-860 Portugal
PC-861 Iceland
PC-863 Canadian French
PC-865 Nordic
PC-866 Cyrillic
PC-869 Greece
PC-911 Katakana
PC-1004 OS/2
Math-8
Greek-8
Turkish-8
Roman-8
Roman-9
Roman Extension
Ventura ITC Zapf Dingbats
Ventura International
Ventura Math
Ventura US
Windows 3.0 Latin 1
Windows 98 Cyrillic
Windows 98 Greek
Windows 98 Latin 1
Windows 98 Latin 2
Windows 98 Latin 5
Windows 98 Latin 6 (Baltic)
Downloadable fonts
You can download scalable and bitmapped fonts in PostScript 3 emulation and PCL emulation. Fonts can be downloaded to printer memory, flash memory, or a hard disk option. Fonts downloaded to flash memory or disk remain in memory even after the printer language changes, the printer resets, or the printer is turned off.
The MarkVision utility includes a remote management function that lets you manipulate the font files you've downloaded to flash memory or disk. See page 189 for more information about MarkVision.
D
Safety information
- If your product is NOT marked with this symbol, it MUST be connected to an electrical outlet that is properly grounded.
- The power cord must be connected to an electrical outlet that is near the product and easily accessible.
- Refer service or repairs, other than those described in the operating instructions, to a professional service person.
- This product is designed, tested and approved to meet strict global safety standards with the use of specific Lexmark components. The safety features of some parts may not always be obvious. Lexmark is not responsible for the use of other replacement parts.
- Your product uses a laser, exercise CAUTION: Use of controls or adjustments or performance of procedures other than those specified herein may result in hazardous radiation exposure.
- Your product uses a printing process that heats the print media, and the heat may cause the media to release emissions. You must understand the section in your operating instructions that discusses the guidelines for selecting print media to avoid the possibility of harmful emissions.
The EPA ENERGY STAR Computers program is a partnership effort with computer manufacturers to promote the introduction of energy-efficient products and to reduce air pollution caused by power generation.
Companies participating in this program introduce personal computers, printers, monitors, or fax machines that power down when they are not being used. This feature will cut the energy used by up to 50 percent. Lexmark is proud to be a participant in this program.
As an Energy Star Partner, Lexmark International, Inc. has determined that this product meets the Energy Star guidelines for energy efficiency.
German acoustics statement
The following measurements were made in accordance with ISO 7779 and reported in conformance with ISO 9296.
Acoustics
| 1-Meter Average Sound Pressure, dBA | |
| Printing 47 dBA | |
| Idling 30 dBA | |
Electronic emissions notices
Electronic emission information for your printer varies, depending on whether or not you have an optional network adapter installed.
Without a network adapter installed
Federal Communications Commission (FCC) compliance information statement
Your Lexmark Optra C710 color laser printer has been tested and found to comply with the limits for a Class B digital device, pursuant to Part 15 of the FCC Rules. Operation is subject to the following two conditions: (1) this device may not cause harmful interference, and (2) this device must accept any interference received, including interference that may cause undesired operation.
The FCC Class B limits are designed to provide reasonable protection against harmful interference in a residential installation. This equipment generates, uses and can radiate radio frequency energy and, if not installed and used in accordance with the instructions, may cause harmful interference to radio communications. However, there is no guarantee that interference will not occur in a particular installation. If this equipment does cause harmful interference to radio or television reception, which can be determined by turning the equipment off and on, the user is encouraged to try to correct the interference by one or more of the following measures:
- Reorient or relocate the receiving antenna.
- Increase the separation between the equipment and receiver.
- Connect the equipment into an outlet on a circuit different from that to which the receiver is connected.
- Consult your point of purchase or service representative for additional suggestions.
The manufacturer is not responsible for any radio or television interference caused by using other than recommended cables or by unauthorized changes or modifications to this equipment. Unauthorized changes or modifications could void the user's authority to operate this equipment.
To assure compliance with FCC regulations on electromagnetic interference for a Class B computing device, use a properly shielded and grounded cable such as Lexmark part number 1329605. Use of a substitute cable not properly shielded and grounded may result in a violation of FCC regulations.
Any questions regarding this compliance information statement should be directed to:
Director of Lab Operations
Lexmark International, Inc.
740 West New Circle Road
Lexington, KY 40550
(606) 232-3000
Industry Canada compliance statement
This Class B digital apparatus meets all requirements of the Canadian Interference-Causing Equipment Regulations.
European Community (EC) Directives Conformity
This product is in conformity with the protection requirements of EC Council directives 89/336/EEC and 73/23/EEC on the approximation and harmonization of the laws of the Member States relating to electromagnetic compatibility and safety of electrical equipment designed for use within certain voltage limits.
A declaration of conformity with the requirements of the Directive has been signed by the Director of Manufacturing and Technical Support, Lexmark International, S.A., Boigny, France.
This product satisfies the Class B limits of EN 55022 and safety requirements of EN 60950.
Japanese VCCI Notice
(Without a Network Card Installed)
With a network adapter installed
Federal Communications Commission (FCC) compliance information statement
Your Lexmark Optra C710 color laser printer has been tested and found to comply with the limits for a Class A digital device, pursuant to Part 15 of the FCC Rules. Operation is subject to the following two conditions: (1) this device may not cause harmful interference, and (2) this device must accept any interference received, including interference that may cause undesired operation.
The FCC Class A limits are designed to provide reasonable protection against harmful interference when the equipment is operated in a commercial environment. This equipment generates, uses, and can radiate radio frequency energy and, if not installed and used in accordance with the instruction manual, may cause harmful interference to radio communications. Operation of this equipment in a residential area is likely to cause harmful interference, in which case the user will be required to correct the interference at his own expense.
The manufacturer is not responsible for any radio or television interference caused by using other than recommended cables or by unauthorized changes or modifications to this equipment. Unauthorized changes or modifications could void the user's authority to operate this equipment.
To assure compliance with FCC regulations on electromagnetic interference for a Class A computing device, use a properly shielded and grounded cable such as Lexmark part number 1329605. Use of a substitute cable not properly shielded and grounded may result in a violation of FCC regulations.
Industry Canada compliance statement
This Class A digital apparatus meets all requirements of the Canadian Interference-Causing Equipment Regulations.
Japanese VCCI Notice
(With a Network Card Installed)
European Community (EC) directives conformity
This product is in conformity with the protection requirements of EC Council directives 89/336/EEC and 73/23/EEC on the approximation and harmonization of the laws of the Member States relating to electromagnetic compatibility and safety of electrical equipment designed for use within certain voltage limits.
A declaration of conformity with the requirements of the Directive has been signed by the Director of Manufacturing and Technical Support, Lexmark International, S.A., Boigny, France.
This product satisfies the Class A limits of EN 55022 and safety requirements of EN 60950.
Warning
When a network card is installed, this is a Class A product. In a domestic environment, this product may cause radio interference, in which case, the user may be required to take adequate measures.
The United Kingdom Telecommunications Act 1984
This apparatus is approved under the approval number NS/G/1234/J/100003 for the indirect connections to the public telecommunications systems in the United Kingdom.
Laser notices
The following laser advisory label is affixed to this printer as shown:
Laser Advisory Label
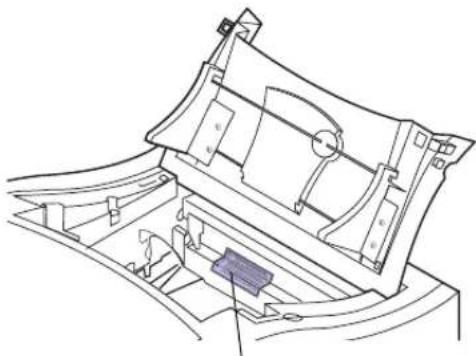
natural_image
Technical line drawing of a mechanical component with no visible text or symbolsAdvisory label
DANGER - Invisible laser radiation when cartridges are removed and interlock defeated. Avoid exposure to laser beam. Perigo - Emissão invisível de laser quando os cartuchos são removidos e a trava aberta. Evite exposição ao feixe. Opasnost - Nevidilivo laserako zračenje kada su kasete uklönjene i ponbliena sligumosna veza. Izbjegavati iblaganje zracima. Pozor Nebezpeči výskytu neviditelného laserového záření při odstranění kazet a odblokování pojistky. Novystavujte se paprskům. Fare - Usynlig laserstråling, når tonerkassetterne fjernes og aflašning ophaeves. Undgå at komme i kontakt med strålen. Pas op! - Onzichtbare laserstråling als cartridges worden verwijderd en vergrendeling open is. Voorkom blootstelling aan de stralen. Danger - Radiations invisibles lors du retrait des cartouches et du déverouillage des loquets. Eviter toute exposition au rayon laser. Vaara - Näkkymätöntä Lasersätielyå on varottava, kun värikasetit on poistettu ja lukitus na uuki. Vältä sätteelle altistumista. Gefahr - Unsichtbare Laserstrahlung beim Herausnehmen von Druckkassetten und offener Sicherheitssperre. Laserstrahl meiden! Káðuvoc - Adaporn oskrvoškois kláspó ótván ospakovívnsa os kasteres kva efduževsruvišnega n eviðopráksla. Ampolyens my idéson om bőtum wav oskivnu. Figyelem! A kazetták kivítelekor láthatatlan lézersugárzás téphet fel, ha a biztonsági kapcsoló nem működik. Kerüfjük el a lézersugarat. Pericolo - Emissione di radiazioni laser durante la rimozione delle cartucce e del blocco. Evitare l'esposizione ai raggi Fare - Usynlig laserstråling når kassetter tas ut og sperren er satt ut av spill. Ungå eksponering.
The printer is certified in the U.S. to conform to the requirements of DHHS 21 CFR Subchapter J for Class I (1) laser products, and elsewhere is certified as a Class I laser product conforming to the requirements of IEC 60825-1.
Class I laser products are not considered to be hazardous. The printer contains internally a Class IIIb (3b) laser that is nominally a 5 milliwatt gallium arsenide laser operating in the wavelength region of 770-795 nanometers. The laser system and printer are designed so there is never any human access to laser radiation above a Class I level during normal operation, user maintenance, or prescribed service condition.
Laser
KLASS 1 LASER APPARAT
Japanese Laser Notice
レーザーに関するお知らせ
Chinese Laser Notice
注意:
Statement of Limited Warranty
Lexmark International, Inc., Lexington, KY
This warranty applies to the United States and Canada. For customers outside the U.S. and Canada, refer to the country-specific warranty information that came with your printer.
Lexmark Optra C710 color laser printer
This Statement of Limited Warranty applies to this product if it was originally purchased for your use, and not for resale, from Lexmark or a Lexmark remarketer, referred to in this statement as "Remarketer."
Warranty
Lexmark warrants that this product:
- Is manufactured from new parts, or new and serviceable used parts, which perform like new parts,
- Is free from defects in material and workmanship,
- Conforms to Lexmark's official published specifications, and
• Is in good working order.
If this product does not function as warranted during the warranty period, contact a Remarketer or Lexmark for repair without charge.
If this product is a feature or option, this statement applies only when that feature or option is used with the product for which it was designed. To obtain warranty service, you may be required to present the feature or option with the product.
If you transfer this product to another user, warranty service under the terms of this statement is available to that user for the remainder of the warranty period. You should transfer proof of original purchase and this statement to that user.
Warranty service
The warranty period is 12 months and starts on the date of original purchase as shown on the purchase receipt.
To obtain warranty service you may be required to present proof of original purchase. Warranty service will be provided at your location.
When warranty service involves the exchange of a product or part, the item replaced becomes the property of the Remarketer or Lexmark. The replacement may be a new or
repaired item. The replacement item assumes the remaining warranty period of the original product.
Replacement is not available to you if the product you present for exchange is defaced, altered, in need of a repair not included in warranty service, or damaged beyond repair. Also, such product must be free of any legal obligation or restrictions that prevent its exchange.
Before you present this product for warranty service, remove all programs, data, and removable storage media.
For further explanation of your warranty alternatives and the nearest Lexmark authorized servicer in your area, please contact Lexmark at 1-800-LEXMARK (1-800-539-6275), or on the World Wide Web at http://www.lexmark.com.
Extent of warranty
We do not warrant uninterrupted or error-free operation of a product.
Warranty service does not include repair of failures caused by:
- modification or attachments
• accidents or misuse - unsuitable physical or operating environment
- maintenance by anyone other than Lexmark or a Lexmark authorized servicer
• operation of a product beyond the limit of its duty cycle - failure to have installed a maintenance kit as specified (if applicable)
- use of printing media outside of Lexmark specifications
- use of other than Lexmark supplies (such as print cartridges, inkjet cartridges, and ribbons)
- use of other than Lexmark product or component
ALL EXPRESS AND IMPLIED WARRANTIES, INCLUDING THE IMPLIED WARRANTIES OF MERCHANTABILITY AND FITNESS FOR A PARTICULAR PURPOSE, ARE LIMITED IN DURATION TO THE WARRANTY PERIOD. NO WARRANTIES, EXPRESS OR IMPLIED, WILL APPLY AFTER THIS PERIOD.
Limitation of liability
Your sole remedy under this Statement of Limited Warranty is set forth in this section. For any claim concerning performance or nonperformance of Lexmark or a Remarketer for this product under this Statement of Limited Warranty, you may recover actual damages up to the limit set forth in the following paragraph.
Lexmark's liability for actual damages from any cause whatsoever will be limited to the greater of 1) \$5,000 or 2) the amount you paid for the product that caused the damages. This limitation of liability will not apply to claims by you for bodily injury or damage to real property or tangible personal property for which Lexmark is legally liable. In no event will Lexmark be liable for any lost profits, lost savings, incidental damage, or other economic consequential damages. This is true even if you advise Lexmark or a Remarketer of the possibility of such damages. Lexmark is not liable for any claim by you based on a third party claim.
This limitation of remedies also applies to any developer of materials supplied to Lexmark. Lexmark's and the developer's limitations of remedies are not cumulative. Such developer is an intended beneficiary of this limitation.
Additional rights
Some states do not allow limitations on how long an implied warranty lasts, or do not allow the exclusion or limitation of incidental or consequential damages. If such laws apply, the limitations or exclusions contained in this statement may not apply to you.
This warranty gives you specific legal rights. You may also have other rights which vary from state to state.
Glossary
600/1200 Image Quality. A print quality setting that allows the printer to vary the size of each printed pixel, thereby producing a continuous tone effect. This setting improves the print quality of graphic fills, images, and halftones.
A4. Paper measuring 210 x 297 mm. Feeds long edge first.
A5. Paper measuring 148 x 210 mm. Feeds long edge first.
additive color. Color produced by mixing different combinations of the primary colors red, green, and blue (RGB). Color computer screens produce additive color.
application. See software application.
attendance message. A message that appears on the operator panel display describing a printer problem. The printer requires operator intervention before it can continue processing.
automated fax system. Lexmark's quick turnaround system for providing customers product information, technical tips, and printer driver information. The automated attendant walks the customer through the steps necessary to receive information by fax.
B4. Paper measuring 257 x 364 mm. Feeds short edge first.
B5. (1) Paper measuring 182 x 257 mm. Feeds short edge first. (2) Envelope measuring 176 x 250 mm.
baud. The rate at which data is sent to or received from the computer through the serial interface, in bits per second (bps).
bidirectional communication. Two-way communication between your printer and a computer, using Network Printing Alliance Protocol (NPAP 1.0 standard).
bin. See output bin.
bitmapped font. Predefined pattern of bits that represent a typeface at a specific size, style, and resolution.
bits per second (bps). A measurement of the speed of data being transferred through a serial interface.
bps. See bits per second.
buffer. A portion of memory used to temporarily store data.
Busy. A printer state in which the printer is processing data or printing pages.
byte. A group of eight binary digits processed as a unit. Typically used to represent an alphanumeric character.
C5. Envelope measuring 162 x 229 mm.
card stock. Heavy, single-ply paper frequently used for reports or book covers.
Centronics parallel interface. A standard for connecting printers and other peripheral devices to a computer. It defines the plug, socket, and electrical signals that are used for controlling the transmission of data.
CMY. Abbreviation for cyan, magenta, and yellow. See also subtractive color.
composite black. The result of combining a mixture of each of the subtractive primary colors (cyan, magenta, and yellow). Also called process black.
configuration. (1) The arrangement of a computer system, printer, or network. (2) The devices and programs that make up a system, subsystem, or network.
curl. Curvature at the edge of a sheet of paper.
D Data Set Ready (DSR). A “handshaking” signal contained in a serial interface indicating the device is ready to exchange information.
data stream. Print data and printer control information flowing from the host system (computer) to the printer without interruption.
Data Terminal Ready (DTR). A “handshaking” signal contained in a serial interface indicating the device is ready to exchange information.
default. An attribute, value, or setting that is assumed when none is explicitly specified.
developer roll. An element in the print cartridge that provides an even layer of toner to the photoconductor during the imaging process.
DIMM memory. Dual Inline Memory Module. This type of memory chip can be connected to multiple chips where Single Inline Memory Modules (SIMMS) can only be connected to one memory chip. Because of this, the DIMM memory chip provides wider and faster transfer of data.
disk. Optional device that you can install in the printer to provide non-volatile storage for downloaded fonts, symbol sets, or macros. A disk also lets you store job statistics, collate large jobs, and spool jobs to the disk.
display. The liquid crystal display on the printer operator panel that shows printer menus and messages.
DL. Envelope measuring 110 x 220 mm.
download. To transfer information, such as fonts, from a diskette or other device to your computer or printer for temporary or permanent storage.
dpi. Dots per inch. See resolution.
DRAM. See dynamic random access memory.
drawer. See optional drawer.
driver. See printer driver.
DSR. See Data Set Ready.
DTR. See Data Terminal Ready.
dynamic random access memory (DRAM). Memory that allows rapid storage and retrieval of data. DRAM contents are erased when electrical power is turned off.
E Electromagnetic Interference (EMI). Interference caused by a radiated electromagnetic field. Speakers, telephones, fans and other motors are typical sources of EMI.
emulation. Imitation of a printer processing language; for example, PCL 5 emulation imitates the printer language used with the Hewlett-Packard LaserJet printer.
Ethernet. A network with a bus topology that utilizes carrier sense multiple access with collision detection (CSMA/CD). An Ethernet network may be installed using any of three cabling systems:
- Ethernet 10Base2 (using RG-58 coax)
- Ethernet 10BaseT (using telephone twisted pair cable)
- Ethernet 100BaseTX
external network adapter (ENA). A LAN device—such as the Lexmark MarkNet XLe or MarkNet Pro—that attaches externally to the printer and lets you connect various printers to your network, thereby freeing dedicated PC print servers for use as LAN workstations.
F factory default. Printer setting defined when the printer is manufactured.
Fastbytes protocol. A parallel printer protocol that enables the printer to receive information at faster transmission rates than normal.
firmware. Printer system software that resides in the printer's Read-Only Memory (ROM).
flash memory. Memory that provides non-volatile storage for downloaded fonts, symbol sets, or macros.
font. A family or set of characters that have common visual characteristics, such as size, weight, and style; for example, Arial Bold.
fuser. A replaceable unit inside the printer that uses heat and pressure to make toner adhere to the paper.
fuser coating roll. A replaceable component inside the fuser that coats the fuser rollers with oil.
G grain. The alignment of the paper fibers in a sheet of paper. For example, in grain long paper, the fibers run the length of the page.
graphics. Visual data, such as graphs and charts, that are usually generated electronically from a software application.
g/m². Grams per square meter. Metric measurement for paper weight.
Handshaking. The exchange of predetermined signals when a connection is established.
hex trace. A diagnostic printer mode that lets you print the uninterpreted printer data stream so you can see a hexadecimal and character representation of a print job.
Honor INIT. A printer setting that allows the printer to be reset by an initialization signal sent from the computer.
image. The output form of graphics data, a drawn representation of a graphics file.
images. Visual data typically scanned from original sources external to the PC, such as photographs or video frames.
INA. Internal network adapter. See network adapter.
infrared adapter. An external device that uses a low-power infrared beam to allow a computer to exchange data with a printer without a physical connection between the two.
interface. The connection between the computer and the printer.
job accounting. A printer feature that lets you store statistical information about your printer's most recent jobs on an optional disk installed in your printer.
job buffering. A printer feature that lets you spool print jobs to an optional disk installed in the printer.
K KB. Kilobyte; 1024 bytes.
L LAN. See local area network.
landscape orientation. Printed page orientation in which the print runs along the long edge of the paper.
LCD. See liquid crystal display.
legal. Paper measuring 8.5 x 14 in.
letter. Paper measuring 8.5 x 11 in.
lines per page (lpp). The number of lines of text that can be printed on one page.
link. The connection between the computer system or local area network and the printer.
liquid crystal display (LCD). The display technology that shows menu selections and messages on the operator panel.
local area network (LAN). A computer network located on a user's premises within a limited geographical area.
LPTx. A representation of one of the logical parallel ports (for example, LPT1) on a personal computer.
M macro. A collection of commands grouped together and temporarily or permanently stored in printer memory.
manual feed. Feeding one sheet of media (paper, envelope, transparency) into the printer at a time.
MarkNet Pro. See external network adapter.
MarkNet S. Family of multi-protocol Lexmark INAs. Versions for Ethernet and Token-Ring available.
MarkNet XLe. See external network adapter.
MarkVision. A printer utility that works with the printer's bidirectional communication capability to provide continuous printer status and let you configure multiple printers from a single setup file.
MB. Megabyte; 1,048,576 bytes.
media. Any materials you print on, such as paper, envelopes, labels, and transparencies.
menu. The choices for displaying, altering, or testing printer features and settings.
multipage printing. Prints the images of a specified number of pages on one sheet of paper. For example, select 4-Up to print reduced images of pages 1–4 on the first sheet of paper, 5–8 on the second sheet, and so on.
multipurpose feeder. Paper feeder on the front of the printer that lets you load a small stack of envelopes, transparencies, and labels.
N
network. A group of computers, printers, and other hardware devices connected to each other so they can share information.
network adapter. The network card you install in your printer to connect your printer to a local area network.
Not Ready. A printer state in which the printer does not accept data from the computer. This state is initiated either by operator intervention or a printer error.
n-up printing. See multipage printing.
O
operating system. The basic software that provides the low-level functions needed to operate your computer.
Operation ReSource. Lexmark's process established to recycle print cartridges, fusers, transfer belts, and other supplies.
operator panel. The buttons and liquid crystal display on the printer used to change printer settings and display printer status.
operator panel display. See display.
optional drawer unit. A unit you install under your printer that holds two 250-sheet paper trays.
orientation. The perspective describing whether the printed text runs along the short (portrait) or long (landscape) edge of the paper.
output bin. The paper exit area. The top output bin allows the paper to exit face down and collated.
overlay. Background text or graphics intended to appear the same in each file where the overlay is applied.
P
pages per minute (ppm). The number of typical pages of text that can be printed in one minute.
paper guides. Sliding parts in the paper trays that define proper placement of paper. Failing to properly adjust the paper guides may result in paper jams.
paper type. A printer setting that defines the type of media (plain paper, letterhead, or transparency, for example) loaded in a specified tray.
parallel interface. A bidirectional interface for exchanging data between the computer and the printer.
pel. Picture element. The smallest addressable unit that can be effectively reproduced by the printer.
photoconductor. An element of the print cartridge. As the photoconductor rotates, it uses positive and negative charges to attract the toner necessary to define the image produced by the LEDs.
pitch. A unit of measure that designates the number of characters that can be printed in 1 horizontal inch. For example, a 10-pitch font prints 10 characters per inch (cpi).
point. A unit of measure that designates the height of a printed character (1 point = 1/72 in.).
point size. The height of the characters in a font.
portrait orientation. Printed page orientation in which the print runs along the short edge of the paper.
power saver. A printer setting that reduces power usage when the printer is idle. When the Power Saver message is displayed, the printer is ready to receive print jobs.
ppm. See pages per minute.
primary color. Colors that, when combined, produce white in an additive color system and black in a subtractive color system. Red, green, and blue (RGB) are the additive primaries. Cyan, magenta, and yellow (CMY) are the subtractive primaries.
print cartridge. The replaceable unit inside the printer that contains the toner supply, photoconductor and developer.
print material. See media.
print server. See external network adapter.
printer driver. A program that translates the language of a software application to the language of the printer so the two can communicate data.
printer language. A set of defined commands (such as PCL or PostScript) to which the printer responds.
process black. See composite black.
proportionally spaced font. A font that varies the width of the character to allow uniform spacing around characters.
protocol. A set of rules governing the communication and the transfer of data between two or more devices.
R RAM. See random access memory.
random access memory (RAM). Memory that allows rapid storage and retrieval of data. RAM contents are erased when electrical power is turned off.
Ready. State of the printer in which it can receive, process, and print data. Press the Go button to return the printer to the ready state. When the printer is in the ready state, the message Ready or the message Power Saver appears on the operator panel display.
rear paper guide. Sliding part at the back of the paper tray that defines the proper placement of paper and communicates to the printer the paper size loaded.
receive-only fax. A printer function possible if an optional tri-port adapter is installed. You can set up the serial port to receive faxes from a class 1 fax modem.
resolution. A measure of the sharpness of a printed image, expressed in the number of dots per inch (dpi).
RGB. Abbreviation for red, green, and blue. See additive color.
scalable font. A font whose characters are stored only as outlines so it is easy to change (or scale) the size of the characters (measured in points).
screen font. A font you download to your computer so it appears the same on the computer screen as it does on a printed page.
SDRAM memory. Synchronous Dynamic Random Access Memory is fast memory. It improves your systems performance by transmitting data on every clock cycle, thus skipping the wait states like other types of memory.
serial interface. A way of communicating between computer and printer by transmitting data one bit at a time.
server. A device that allows the sharing of resources, such as printers, on a network.
service message. A printer message that indicates the printer needs service.
setting. Values you choose from printer menus or software applications that control printer operation and the appearance of the printed page.
SmartSwitch. A printer function that automatically switches the printer language to that of the job the software application is sending to the printer.
software application. Any program loaded on your computer used to perform a specific task, such as word processing or data compiling.
standard protocol. A parallel printer protocol where the printer receives information sent from the computer at a normal transmission rate.
status message. A printer message that provides information on the state of the printer.
subtractive color. Color produced by mixing primary colors to produce a pigment or dye that reflects one wavelength of light and absorbs (or subtracts) all others. Color printers use subtractive color. The subtractive primary colors are cyan, magenta, and yellow.
symbol set. A unique set of alphanumeric characters and symbols the printer uses to print the requested font. Different symbol sets offer the diverse characters required for different languages or symbol-intense applications.
system board. The printer's main circuit board.
T timeout. A time interval allotted for certain operations to occur.
Token-Ring. A type of network communication that conforms to IEEE 802.5 standard. The name is derived from its physical ring configuration and the passing of a token from adapter to adapter.
toner. The material that adheres to the paper or other media to create the printed page.
transfer belt. The rotating belt inside the printer that uses an electrostatic charge to carry or transfer the image from the photocondutor to the media on which it is to be printed.
tray linking. A means of increasing the capacity of the paper source by having the printer feed paper from one tray until it is empty and then automatically feed paper from another tray.
tri-port adapter. Optional card you can install inside the printer to add support for three interfaces: LocalTalk, serial (or receive-only fax), and infrared.
TrueType fonts. Fonts that use a single font outline for both screen display and printing. You can use TrueType fonts in Microsoft Windows applications and scale them to any height. They print exactly as they appear on the screen.
U user default. Printer setting selected by a user that remains in effect until a new user default is chosen.
V value. One of the settings available for a specific menu item.
Y yield. The approximate number of A4 or letter size sheets you can print before a supply or service item must be replaced. For example, if a print cartridge has a yield of 15,000 pages, you can print approximately 15,000 pages before you must replace the print cartridge.
Index
Numerics
20x Paper Jam 157
23x Paper Jam Check Duplex 158
24x Paper Jam Check Tray x 158
25x Paper Jam MP Feeder 158
2-Color Draft setting 86
30 color toner missing 152
35 Res Save Off 152
37 Insufficient Collation Area 152
37 Insufficient Defrag Memory 153
37 Insufficient Memory 153
38 Memory Full 153
39 Complex Page 153
51 Defective Flash 153
52 Flash Full 154
53 Unformatted Flash 154
54 Par x ENA Connection Lost 155
54 Serial Option x Error 154
54 Std Par ENA Connection Lost 154
55 Insufficient Fax Buffer 155
56 Parallel Port x Disabled 155
56 Serial x Port Disabled 155
56 Standard Parallel Port Disabled 155
58 Too Many Disks Installed 155
61 Defective Disk 155
62 Disk Full 156
63 Unformatted Disk 156
64 Disk not in Slot 3 156
70-79 Network 156
83 Transfer Belt Life Warning 18, 156
84 Transfer Belt Exhausted 156
84 Transfer Belt Life Warning 18, 156
85 Coating Roll Life Warning 17, 157
86 Transfer Belt Missing 18, 157
87 Fuser Exhausted 18, 157
88 color Cartridge Empty 157
88 Color Cartridge Low/ Empty 17
88 color Toner Low 157
900 Service RIP Software 158
910-912 Service Engine Motor 158
917 Service Transfer Belt 158
920-929 Service Fuser Error 159
930-935 Service Printhead Error 159
939 Service RIP Engine Comm 159
941 Service Code CRC 159
941 Service Font CRC 159
943 Service RIP Font Version 159
944-946 Service System Board 159
948 Service Engine Card 159
953-954 Service NVRAM Failure 159
955 Service Code/Font CRC 159
956-959 Service System Board 159
960-963 Service RAM Memory Error 159
964-965 Service Emulation Error 159
970-979 Service Network Card x 160
990-993 Service Engine Error 160
A
A4 Width (PCL Emul Menu) 46
acoustics 227
additive colors 76
Alarm Control (Setup Menu) 42
alerts 194
attributes 82
Auto Continue (Setup Menu) 40
Auto CR after LF (PCL Emul Menu) 46
Auto LF after CR (PCL Emul Menu) 47
automated fax system xii, 199
avoiding print quality problems 86
B
bitmapped fonts
resident 211
black and white 85
Black Toner (Supplies Menu) 17
Blank Pages (Finishing Menu) 27
buttons, printer 8
C
Cancel 35
Cancel Fax (Job Menu) 35
Cancel Job (Job Menu) 35
canceling print jobs 35
card stock
guidelines 103
loading 110
printing 111
Card Stock & Label Guide xi, 98
cartridge installation 32
cautions x
CD
contents xi
MarkVision 189
online documentation xi
Change Cartridges
Install Cartridges 121
install cartridges 32
changing printer settings
from MarkVision 7,194
from operator panel 12
cleaning 181
cleaning the waste toner sensor 184
clearing the waste toner sensor 184
Clock Menu 58
CMYK 85
Coating Roll 17
coating roll
replacing 126
when to replace 118
collating
memory requirements 90
using the optional disk 92
Collation (Finishing Menu) 28
color
adjusting 19
color calibration 78
color correction 84
Color Correction (Color Menu) 19
color correction settings 81
color difference 77
color management systems 78
Color Menu 19
Color Correction 19
Image Enhancement 19
Print Resolution 19
CompuServe 199
confidential job
PIN numbers 36
Configure MP (Paper Menu) 25
conserving supplies 119
controlling your printer 80
conventions used in manual x
Copies (Finishing Menu) 27
Custom Types (Paper Menu) 25
Cyan Toner (Supplies Menu) 17
D
Defragment Flash (Utilities Menu) 33
device profile 78
disk 92
collating jobs 92
directory of contents 196
formatting 34
job buffering 92
managing resources 93
partitioning for job buffering 197
setting as the download target 39
storing job statistics 93
display 85
Display Language (Setup Menu) 42
Download Target (Setup Menu) 39
downloading
fonts 213
drawer, optional
options
250-sheet paper trays 109
driver, printer
See printer drivers
Duplex (Finishing Menu) 27
Duplex Bind (Finishing Menu) 27
duplex unit paper jam 175
dust collector 181
E
electronic emissions notices 228
empty print cartridges 113, 117
recycling 119
energy conservation 38, 227
Energy Star 227
envelopes
guidelines 102
loading 102
printing 111
sizes supported 97
error messages
See printer messages
F
factory defaults
restoring 33
Factory Defaults (Utilities Menu) 33
fax, automated xii, 199
Fax, cancel 35
Finishing Menu
Blank Pages 27
Collation 28
Copies 27
Duplex 27
Duplex Bind 27
Multipage Border 31
Multipage Order 30
Multipage Print 30
Multipage View 31
Separator Sheets 29
Separator Source 29
flash memory 92
directory of contents 196
formatting 33
managing resources 93
setting as the download target 39
Font Name (PCL Emul Menu) 44
Font Priority (PostScript Menu) 48
Font Source (PCL Emul Menu) 44
fonts
bitmapped 206
downloadable 213
printing sample list 205
resident 206
scalable 206
selecting 44
sizing 44
Format Disk (Utilities Menu) 34
Format Flash (Utilities Menu) 33
Fuser 18
fuser
replacing 118, 131
G
German acoustics statement 227
glossary 241
Go button 8
guidelines
online documentation xi
H
Halftone screens 82
hard disk
See disk
held jobs
Reserve Print
Repeat Print
Verify Print 37
Hex Trace (Utilities Menu) 34
how we see color 76
|
Image Enhancement (Color Menu) 19
Image Smoothing (PostScript Menu) 48
images
printing 48
information, online documents
Card Stock & Label Guide xi
Technical Reference xi
Infrared Menu 59
Infrared Buffer 60
Infrared Port 59
Job Buffering 60
Max Baud Rate 61
NPA Mode 60
PCL SmartSwitch 59
PS SmartSwitch 59
Transmit Delay 61
Window Size 61
Internet 48,199
intranet servers 189, 199
inventory, printer hardware 196
J
Jam Recovery (Setup Menu) 41
jams
See paper jams
Japanese VCCI notice 230
Job Accounting (Setup Menu) 43
Job Acct Limit (Setup Menu) 43
Job Acct Stat (Utilities Menu) 34
Job Buffer Size (Setup Menu) 43
job buffering
allocating memory 43
FAX port 68
infrared port 60
LocalTalk port 63
network port 57
parallel port 50
serial port 53
setting up in MarkVision 197
USB port 66
using a hard disk 92
Job Menu 35
Cancel Fax 35
Cancel Job 35
Print Buffer 35
Reset Printer 35
job queue management 197
job statistics 195
deleting 34
printing 34
setting the maximum number of jobs 43
storing on disk 43,93
L
label guidelines 103
labels
loading 110
printing 111
landscape orientation 45
laser notices 231
letterhead
guidelines 99
Lines per Page (PCL Emul Menu) 46
loading paper
letterhead paper 108, 111
multipurpose feeder 110
trays 105
LocalTalk Menu 62
LocalTalk Addr 64
LocalTalk Buffer 63
LocalTalk Name 64
LocalTalk Port 62
LocalTalk Zone 64
NPA Hosts 64
NPA Mode 63
PCL SmartSwitch 62, 65
PS SmartSwitch 62, 65
locking the operator panel menus 14
M
Macintosh
MarkVision 189
Magenta Toner (Supplies Menu) 17
managing color 78
managing memory 89
flash memory 92
hard disk 92
printer memory 89
solving problems 90
MarkNet internal print server 202
MarkVision 191
alerts 194
custom media names 195
features 191
job buffering 197
job queue management 197
job statistics 195
managing memory 93
online documentation xi
operating systems supported 189
passwords 196
print buffer management 197
printer inventory 196
remote operator panel 7,194
resource management 196
security 196
visual status 194
media and supplies 86
media guidelines
card stock 103
envelopes 102
labels 103
letterhead 99
paper 98
storing 104
transparencies 100
memory
allocating 91
flash 92
hard disk 92
managing 89
printer memory 89
solving problems 90
Menu button 8
menu settings
changing 12
printing default settings 10
menus 10
changing settings 12
Color 19
disabled 148
enabled 148
Fax 67
Finishing 27
Infrared 59
Job 35
LocalTalk 62
locking 14,148
Network 56
overview 16
Paper 20
Parallel 49
PCL Emul 44
PostScript 48
Serial 52
Setup 38
Supplies 17
unlocking 14,148
USB 65
Utilities 32
messages
fax status 15
See printer messages
Multipage Border (Finishing Menu) 31
Multipage Order (Finishing Menu) 30
Multipage Print (Finishing Menu) 30
Multipage View (Finishing Menu) 31
multipurpose feeder
media specifications 96
opening 110
printing from 111
using 110
N
Network Menu 56
Job Buffering 57
Network Buffer 57
Network x Setup 58
NPA Mode 56
PCL SmartSwitch 56
PS SmartSwitch 56
notices 227
notices, laser 231
NPA mode
USB 65
n -up printing 30
O
online documentation xi
Operation ReSource 119
operator panel
buttons 8
menus 16
messages 147
remote 194
setting the display language 42
options
250-sheet drawer 109
disk 92
print server 202
specifications 202
Orientation (PCL Emul Menu) 45
OS/2 Warp
MarkVision 189
P
page count 32
Page Protect (Setup Menu) 41
paper
guidelines xi, 98
letterhead 99
loading 105
loading letterhead 108, 111
output 27
selecting a size 20
size sensing 107
sizes supported 96
sources 20,95
storing 104
paper jam 201 171
paper jam 202 170
paper jam 24x 173
paper jam 250 172
paper jams
avoiding 104
clearing 167, 168, 175
duplex unit 175
transparency jams 167
Paper Loading (Paper Menu) 26
Paper Menu 20
Configure MP 25
Custom Types 25
Paper Loading 26
Paper Size 20
Paper Source 20
Paper Type 22
Substitute Size 25
paper path 168, 175
Paper Size (Paper Menu) 20
paper sizes
supported 96, 97
Paper Source (Paper Menu) 20
paper sources 95
capacity 96
linking 109
media specifications 96
selecting 20
Paper Type (Paper Menu) 22
Parallel Menu 49
Advanced Status 50
Honor Init 51
Job Buffering 50
NPA Mode 49
Parallel Buffer 50
Parallel Mode 1 51
Parallel Mode 2 51
PCL SmartSwitch 49
Protocol 51
PS SmartSwitch 49
part numbers
transparencies 114
passwords
MarkVision 196
PCL Emul Menu 44
A4 Width 46
Auto CR after LF 46
Auto LF after CR 47
Font Name 44
Font Source 44
Lines per Page 46
Orientation 45
Pitch 45
Point Size 44
Symbol Set 45
Tray Renumber 47
PCL emulation 38
command listing xi
menu 44
resident fonts 206
PCL scalable fonts 206
Pitch (PCL Emul Menu) 45
Point Size (PCL Emul Menu) 44
popular color management systems 79
portrait orientation 45
PostScript emulation 38
menu 48
resident fonts 206
PostScript Menu 48
Font Priority 48
Image Smoothing 48
Print PS Error 48
PostScript scalable fonts 208
Power Saver (Setup Menu) 38
primary colors 76
Print Area (Setup Menu) 42
Print Buffer (Job Menu) 35
print buffer management 197
print cartridge
ordering 113
recycling 119
storing 115
print cartridge dust collector 181
Print Directory (Utilities Menu) 32
Print drivers 87
Print Fonts (Utilities Menu) 32
print material
guidelines
online documentation xi
Print Menus (Utilities Menu) 32
Print Net1 Setup (Utilities Menu) 32
Print Net2 Setup (Utilities Menu) 32
Print Net3 Setup (Utilities Menu) 32
Print PS Error (PostScript Menu) 48
print quality
color 19
images 48
problems 161
Print Resolution (Color Menu) 19
print server
online documentation xi
print servers 202
print speed 2,166
Print Timeout (Setup Menu) 39
printable area 42
printer
commands xi
configuration files 193
dimensions 203
features 201
inventory 196
memory 89
menus 16
messages 147
operator panel 8
options 201
resetting 35
specifications 201
status 190
supplies 203
printer driver settings 5
printer drivers
getting the latest versions 199
Printer Language (Setup Menu) 38
printer memory 89
managing 91
options 90
problems 90
printer messages
Activating Menu Changes 148
attendance messages 150
Busy 147
Cancelling Job 149
Change tray 150
Clearing Job Accounting Stat 149
Close Top Cover 150
Coating Roll 17
Coating Roll Life Warning 157
color Cartridge Empty 157
Color Cartridge Low/Empty 17
color Toner Low 157
color toner missing 152
Complex Page 153
Defective Disk 155
Defective Flash 153
Defragmenting Flash 150
Delete All Jobs 152
Deleting Jobs 149
Disabled Menus 148
Disk Full 156
Disk not in Slot 3 156
Enabled Menus 148
Files Will be Lost. Go/Stop? 152
Flash Full 154
Flushing Buffer 149
Formatting Disk 150
Formatting Flash 149
Fuser Exhausted 18, 157
Infrared x 149
Insert Tray x 150
Insufficient Collation Area 152
Insufficient Defrag Memory 153
Insufficient Fax Buffer 155
Insufficient Memory 153
Invalid Font Data 152
Invalid Network x Code 152
Load Manual 151
Load tray 151
LocalTalk x 148
Locking Menus 148
Memory Full 153
Network 156
Network Card Busy 150
Network x 148
No Jobs Found 151
Not Ready 148
Paper Jam 157
Paper Jam Check Duplex 158
Paper Jam Check Tray x 158
Paper Jam MP Feeder 158
Par x ENA Connection Lost 155
Parallel 148
Parallel Port x Disabled 155
Performing Self Test 147
Power Saver 147
Print Jobs on Disk? 152
Printing Directory List 149
Printing Font List 149
Printing Job Accounting Stat 149
Printing Menu Settings 149
Programming Disk 150
Programming Flash 149
Queing Jobs 149
Ready 147
Ready Hex 148
Res Save Off 152
Resetting the Printer 149
Restoring Factory Defaults 149
Serial Option x Error 154
Serial x 148
Serial x Port Disabled 155
Service Code CRC 159
Service Emulation Error 159
Service Engine Card 159
Service Engine Error 160
Service Engine Motor 158
Service Font CRC 159
Service Fuser Error 159
Service Network Card x 160
Service NVRAM Failure 159
Service Printhead Error 159
Service RAM Memory Error 159
Service RIP Engine Comm 159
Service RIP Font Version 159
Service RIP Software 158
Service System Board 159
Service Transfer Belt 158
Standard Parallel Port Disabled 155
status messages 147
fax 149
Parallel x 148
Ready Hex 148
Std Par ENA Connection Lost 154
Supplies 148
Too Many Disks Installed 155
Transfer Belt 18
Transfer Belt Exhausted 156
Transfer Belt Life Warning 156
Transfer Belt Missing 18, 157
Tray x Empty 151
Unformatted Disk 156
Unformatted Flash 154
Unlocking Menus 148
Waiting 148
warming engine 147
printer settings, changing
from MarkVision 7
from operator panel 12
printer utilities
getting the latest versions 199
MarkVision 191
printing
directory of contents of flash and disk 32
font samples 32
images 48
menu settings page 10,32
multiple page images per sheet (n-up) 30
problems 165
printing text 83
problems
alerts 194
error messages 147
memory 90
paper jams 168, 175
print quality 161
printing 165
things to check 145

Quick Reference ix

remote operator panel 7,9,194
renumbering trays 47
Replacing
air filter 133
coating roll 126
fuser 131
print cartridges 117, 121
supplies 116
transfer belt 138
transfer roller 140
replacing supply items 120
Reset Printer (Job Menu) 35
resetting the printer 35
resident fonts 206
resource management 93, 196
Resource Save (Setup Menu) 39
Return button 9
RGB 84
RGB color 75
S
safety information 215
scalable fonts
resident 206
screen angle 83
screen frequency 82
screening methods 80
security
MarkVision 196
Select button 9
Separator Sheets (Finishing Menu) 29
Separator Source (Finishing Menu) 29
Serial Menu 52
Baud 54
Data Bits 54
Honor DSR 55
Job Buffering 53
NPA Mode 52
Parity 55
PCL SmartSwitch 52
PS SmartSwitch 52
Robust XON 54
RS-232/RS-422 53
RS-422 Polarity 53
Serial Buffer 53
Serial Protocol 54
service
calling 188
messages 157
warranty 239
settings
changing from MarkVision 7,194
changing from operator panel 12
printing current defaults 10
Setup Guide ix
Setup Menu 38
Alarm Control 42
Auto Continue 40
Display Language 42
Download Target 39
Jam Recovery 41
Job Accounting 43
Job Acct Limit 43
Job Buffer Size 43
Page Protect 41
Power Saver 38
Print Area 42
Print Timeout 39
Printer Language 38
Resource Save 39
Wait Timeout 41
solving problems
memory 90
paper jams 168, 175
print quality 161
printing 165
sources of information, online documents
Card Stock & Label Guide xi
Technical Reference xi
specifications
standard tray 96
specifications, printer 201
spooling jobs
See job buffering
spot function 83
standard tray specifications 96
statistics
See job statistics
status, printer
MarkVision 190, 194
messages 147
Stop button 9
storing
media 104
supplies 115
Substitute Size (Paper Menu) 25
subtractive color 76
supplies
coating roll 118
conserving 119
ordering 113
recycling 119
replacing 116
storing 115
transparencies 100
Supplies Menu 17
Coating Roll 17
color Toner 17
Fuser 18
Transfer Belt 18
Tray x 17
supply items, replacing 120
Symbol Set (PCL Emul Menu) 45
Symbol Sets 211
T
Technical Reference xi
timeouts
print timeout 39
wait timeout 41
Transfer Belt 18
transfer belt
replacing 138
transparencies 86, 114
guidelines 100
loading 101
ordering 100
printing 111
recommended 100
tray linking 109
disabling 24
Tray Renumber (PCL Emul Menu) 47
Tray x (Supplies Menu) 17
trays
capacity 96
linking 109
loading 105
media specifications 96
renumbering 47
troubleshooting
Hex Trace mode 34
memory problems 90
PostScript errors 48
print quality problems 161
printing problems 165
types of color 75
U
understanding color 75
UNIX Networks
MarkVision 189
USB Menu 65
user default settings 10
changing 12
overriding 7,145
printing current settings 10
using color 75
utilities
MarkVision 189
Utilities Menu 32
Change Cartridges 32
Change Toner 32
Defragment Flash 33
Factory Defaults 33
Format Disk 34
Format Flash 33
Hex Trace 34
Job Acct Stat 34
Print Directory 32
Print Fonts 32
Print Menus 32
Print Net1 Setup 32
Print Net2 Setup 32
Print Net3 Setup 32
V
vivid 84
W
Wait Timeout (Setup Menu) 41
warnings x
Windows
MarkVision support 189
World Wide Web xii, 199

Yellow Toner (Supplies Menu) 17
Lexmark Optra C710 Color Printer
User's Guide
Part Number 10E0201
9/99
Reader's
Comment Form
You may use this form to communicate your comments about this publication, with the understanding that Lexmark may use or distribute whatever information you supply in any way it believes appropriate without incurring any obligation to you.
- Did you find the book well organized?
Yes □ No □
- Was the content of the book accurate and complete?
Yes □ No □
- Was the book easy to use?
Yes □ No □
-
What can we do to improve the book?
-
What is your job title?
Questions or comments about supplies, service, applications, and so on will slow response time considerably. Please refer those questions or comments to your authorized dealer or point of purchase.
Note: Please direct all requests for copies of publications to your point of purchase. Publications are not stocked at the location to which this form is addressed.

NO POSTAGE
NECESSARY
IF MAILED
IN THE
UNITED STATES
BUSINESS REPLY MAIL
FIRST CLASS MAIL PERMIT NO. 2659 LEXINGTON KY
POSTAGE WILL BE PAID BY ADDRESSEE
Lexmark International, Inc.
Department F95, Building 035-3
740 WEST NEW CIRCLE ROAD
LEXINGTON KY 40511-9954

Fold Here
LEXMARK™
P/N 10E0201
E.C. 1E0016
Lexmark, Lexmark with diamond design and Optra are trademarks of
Lexmark International, Inc., registered in the United States and/or other countries.
© 1999 Lexmark International, Inc.
740 West New Circle Road
Lexington, Kentucky 40550, USA