
CR 2001 - Car stereo VDO DAYTON - Free user manual and instructions
Find the device manual for free CR 2001 VDO DAYTON in PDF.


User questions about CR 2001 VDO DAYTON
0 question about this device. Answer the ones you know or ask your own.
Ask a new question about this device
Download the instructions for your Car stereo in PDF format for free! Find your manual CR 2001 - VDO DAYTON and take your electronic device back in hand. On this page are published all the documents necessary for the use of your device. CR 2001 by VDO DAYTON.
USER MANUAL CR 2001 VDO DAYTON
If your car is equipped with ISO connectors, simply insert them in connectors of the car radio. If not, you can use an adaptor cable (Refer to the table on the separate installation card). Ensure all cables are installed so that they cannot be damaged by sharp edges or moving parts.
PREPARATION
Voltage and polarity: The set must be connected to a 12V car battery with negative terminal to earth (car chassis). Installation in vehicles not fulfilling these requirements could result in malfunction, damage or fire.
Warning: To prevent short-circuiting, disconnect the negative car battery terminal until the set has been mounted and connected (fig.1 See separate installation card).
CONNECTOR A (fig.2)
POWER SUPPLY CONNECTIONS
- Red lead A7 : Connect to a permanent 12V supply. This is the main power supply. Ensure this connection can handle a current of 10A.
- Yellow/red lead A4 : Connect to a switched 12V supply (switched on/off by car ignition).
- Brown lead A8: Connect to earth (car chassis).
This connection set up will enable you to make full use of the ON/OFF LOGIC function of this set limiting the use of the set to 1 hour after removal of the ignition key. If this feature does not appear to be functioning as expected you may require an adapter cable (EA6259). See reverse of installation card.
OPTIONAL CONNECTIONS (fig. 2)
- Pink lead A1 SDVC * (SDVC AND SPEED WARNING) :
Speed Dependent Volume Control automatically increases and decreases the volume as a result of the car's speed.
Speed Warning can be used to inform you that you are exceeding a certain speed.
- Connect pin A1 to a signal from the speedometer of your car. Some cars are already prepared for it (e.g. certain VW & Vauxhall/Opel cars), please consult your dealer.
If not, you may need a more detailed installation requiring extra equipment to enable your car to become compatible. This can only be accomplished by persons familiar with automotive electrical and mechanical systems. After connection see 'SPECIAL FUNCTIONS'.
- Blue lead A5 (Electronic/Motor Aerial) : [REDACTED] This radio can provide a 12V signal for the control of an automatic motor aerial or the supply of an electronic aerial by connection. Do not use this connection for the supply lead of the aerial motor!
- Orange lead A6 (Pilot light) Connect to the dashboard illumination wiring of the car. When the car headlights are switched on, the backlight to the power key remains illuminated (even when the radio is switched off). When the set is on with this connection, the brightness of the display is reduced.
CONNECTOR B (fig.2)
Loudspeakers (use 4 ohm loudspeakers only)
- Do not connect any of the loudspeaker leads to earth or directly to a booster/amplifier or via an external fader!
- Connecting 4 loudspeakers Front Rear
Left+ Green [B5] White [B7]
Left- Green/black [B6] White/black [B8]
Right+ Grey [B3] Blue [B1]
Right- Grey/black [B4] Blue/black [B2]
- To check the loudspeaker connections keep the 'SCAN' key pressed and switch on the set. To cancel switch off the set.
BLUE CONNECTOR C \* for a Digital CD changer (available separately) (fig. 3)
- You can only connect the following CD changer with a digital output to this set :
- CH0400 or CH0600 or CH1000

Useful tips
Recommended connection instructions between the CD changer and headunit :
- Ensure that the Connector A (power supply) is removed from the headunit.
- Finish all connections between the CD changer (see mounting instructions for the CD changer) and the headunit.
- Reconnect the Connector A (power supply) to the headunit.
OTHERS CONNECTIONS (fig.2)
Line-output \*
- You can connect a power amplifier (with 2 additional loudspeaker) to this set with the RCA cable.
- Connect Red socket to Right channel and white socket to Left channel.
- Connect Blue wire to Amplifier Remote on/off.
Wired Remote Control

You can connect a wired remote control to this set. Please note that you can also use an infrared remote control* with this set.
TEMPERATURE SENSOR \* 🔍 (available separately)
- You can connect a temperature sensor to this set to automatically give a visible and audible warning when the outside temperature becomes lower than 3°C to warn of the possibility of frost or black ice. The outside temperature can also be shown by pressing the 'DISPLAY' key.
– See the mounting instructions for the sensor. - Connect the temperature sensor to the connector marked ⬆(see separate installation card).
- See INITIAL SETTINGS; select Option 'TEMP' and set the Choice to 'C' (Celsius) or 'F' (Fahrenheit).
This device is an aid only and cannot be used to determine exact road conditions.
Use your own judgement at all times to decide whether it is safe to continue driving.
Pink lead wire (Telephone mute)

- If your car telephone or the car kit of your mobile phone provides a mute signal, it can be used to automatically interrupt the set's sound output.
- Connect the telephone mute wire to Pink lead wire (TEL. MUTE).
- See INITIAL SETTINGS; select
1 Option 'TEL' and set the Choice to 'MUTE'
2 Option 'PHONE' and set the Choice to 'LO' or 'HI' according to phone type.
* Depending on version
TELEPHONE IN

- If your car telephone or the car kit of your mobile phone provides both the mute signal and loudspeaker connection, its output can be amplified through the car's front speaker.
- Connect the telephone mute wire to Pink lead wire (TEL. MUTE).
- Connect connector F (yellow) to the loudspeaker output of your car phone or car kit.
- See INITIAL SETTINGS; select
1 Option 'TEL' and set the Choice to 'IN'
2 Option 'PHONE' and set the Choice to 'LO' or 'HI' according to phone type.

Useful tips
Do not operate cellular phones near the set or even in a car without using an outside antenna, it may cause disturbances to all electrical systems in the car.
REAR STUD
Screw rubber buffer E onto fixing stud at rear of set.
AERIAL
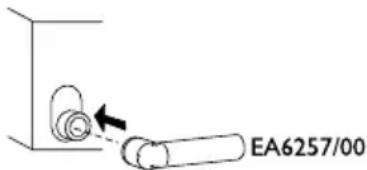
Fix antenna adaptor * (EA6257/00) if needed.
text_image
EA6257/00- Insert aerial plug into aerial socket (good reception is only possible with a good aerial).
METAL SLEEVE (fig.4)
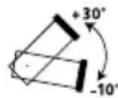
- Install the metal sleeve (dimension 182x53 mm) in the dashboard. For optimal performance of the CD player*, the metal sleeve should be positioned horizontally (between -10° and +30°).
- Fix metal sleeve into place by pressing the metal tags outwards using a screwdriver.
MOUNTING RADIO
This radio can be properly installed either from conventional Front Mounting or Rear Mounting.
FRONT MOUNTING
- Slide the radio into the metal sleeve until the springs at either side of the radio snap into the openings of the sleeve (fig.5).
- Finally reconnect the negative car battery terminal (fig.6).
REMOVING RADIO (using the two U-brackets supplied)
- Remove the front, see 'SECURITY', 'DETACHABLE FRONT'.
- Insert both U-brackets into the holes on the front of the set until they lock. Pull out the radio (Fig.7).
REAR MOUNTING (fig.8)
- Remove the trimplate around the front panel and the side springs.
- Select a position where the screw holes of the mounting bracket and the screw holes of the radio become aligned and tighten the screws at 2 places on each side.
- Only use M5 screws that are not longer than 6mm.
REPLACING FUSE (Fig. 2)
- Replace with a 10A blade-type fuse. The new fuse must be of exactly this value and type otherwise the set will not be adequately protected. Ignoring this procedure may lead to damage to the set, which will invalidate the guarantee.
INTERFERENCE SUPPRESSION
- Most modern cars have sufficient interference suppression. If you experience interference generated by the car, consult your garage.
LEGEND
| Briefly press the key. | |
| Press and hold the key. | |
| Press the key until you hear a confirmation beep. | |
| Turn the rotary knob. | |
| Useful tips | |
| * Depending on version | |
ENVIRONMENT

This booklet is printed on low-chlorine recyclable paper that can be used for recycling.
CHECK BEFORE REQUESTING SERVICE
There may be times when you suspect that your car radio is not functioning as you expected it to. Before calling for service, please read the operating / installation instructions and check for useful tips under each section. You may find that an apparent malfunction can easily be rectified.
If you still have to send your set for service, always send the complete set (with detachable front). Do not try to open the set to service it yourself.
SECURITY
For theft protection this set is provided with the following security features :
DETACHABLE FRONT
Take the detachable front with you when leaving the car. Keep it in its protective cover. Always replace the detachable front before starting to drive.
REMOVING THE FRONT
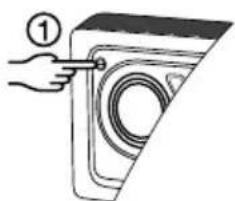
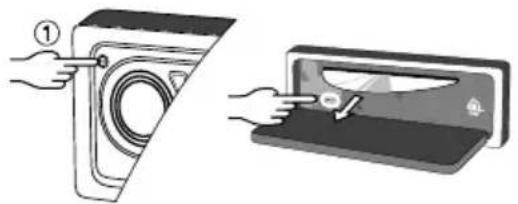
- Open the front (1).
natural_image
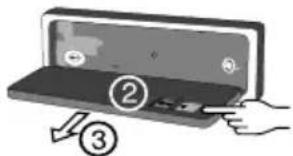
Illustration of a hand using a tool to adjust or install a washing machine component (no text or symbols visible)- Push the button in the direction of the arrow as shown (2).
- Remove the front (3).
text_image
Diagram showing a hand pressing down on a laptop with numbered instructions and arrows indicating action steps.REPLACING THE FRONT
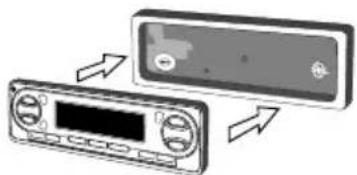
- Insert the front until it clicks into position.
natural_image
Diagram showing two connected devices with arrows indicating direction (no text or symbols present)To ensure good connection between the set and the detachable part, it is advisable to clean the connectors with a cotton swab from time to time.
SECURITY LIGHT
- When the car ignition is switched off and the detachable front is removed, the red light flashes.

Useful tips
You can switch off the flashing warning light.
- See INITIAL SETTINGS; select Option 'LED' and set the Choice to 'OFF'.
SECURITY WARNING STICKERS
- Stick the supplied 'Security' warning stickers on your car windows.
IDENTIFICATION NUMBER
This set has a unique identification number (stated on the 'Security card'). This card is required as a proof of ownership when the set is stolen, when the detachable panel is lost or when requesting service.
- Remove the 'Security card' before installing the set. Do not keep the 'Security Card' in your car.
It is possible to modify many of the set's initial settings according to your preferences.
- Enter the Initial Settings menu.
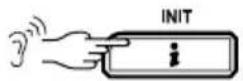
- Select one of the option you want to modify
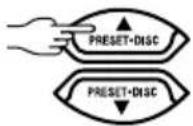
- Alter the Choice.
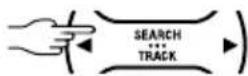
- Leave the Initial Settings menu :
The set automatically leaves the Initialisation mode about 1 minute after your last operation.
Option Choice Usage
(▲ or ▼) (◀ or ▶)
TEMP * [NO, C, F] Select the desired temperature format (when a temperature
sensor is connected). 'NO' to disable function or 'C' (Celsius) or 'F' (Fahrenheit).
SPD * [NO, KM/H, MPH]
Select 'KM/H' or 'MPH' to activate speed warning (only when connected and calibrated, see 'SDVC AND SPEED WARNING' in 'INSTALLATION' and 'SPECIAL FUNCTIONS').
SDVC * [OFF, 1, 2, 3, 4] Select the speed dependent volume control level (only when
connected and calibrated, see 'SDVC AND SPEED WARNING' in 'INSTALLATION' and 'SPECIAL FUNCTIONS').
TEL [NO, IN*, MUTE]
- Select 'NO' if no car phone is connected to the set.
- Select 'IN' if your phone provides a loudspeaker connection.
- Select 'MUTE' to automatically interrupt the set's sound output when using your car phone.
PHONE [LO, HI]
Select 'LO' or 'HI' according to phone ('LO' in most cases).
LOGI [ON, OFF]
Select 'ON' to limit the use of the set to one hour when the car ignition is switched off.
LED [OFF, ON]
Select 'OFF' to switch off the flashing warning light when the front is removed.
LOUD [OFF, ON]
Select 'ON' to activate dynamic loudness control.
BASS [80, 40]
Select the frequency threshold of the low notes.
TREB [5K, 7K] Select the frequency threshold of the high notes.
AL * [ON, OFF]
Select 'ON' to activate automatic leveller between the different sources.
BP_TYP [1, 2, 3, 4]
Select type of confirmation beeps.
BEEP [1, 2, 3, 4, 5]
Select volume level of confirmation beeps.
COMP [OFF, LOW, HI]
Select the compression level for CD playback; 'LOW' to retains the peaks in the volume; 'HI' to levels them out.
SCAN [5, 10, 15] Select the scan time (station or track).
TIME * [24H, 12H] Select desired clock format. (See 'SETTING THE CLOCK').
CLK * [MAN, AUTO] Select 'AUTO' to activate RDS clock or 'MAN' to set clock manually. (See 'SETTING THE CLOCK').
TA [0, +1, +2, +3, +4] Volume level of Traffic Announcement, News bulletins and Alarm messages relative to tuner.
SRCH [DX, LO] Select 'LO' if you wish to search only for strong stations during automatic tuning to a frequency.
AF [OFF, ON] Select 'OFF' to prevent the radio from returning to Alternative Frequencies.
MW [OFF, ON] Select 'OFF' to suppress MW if not in use (only applicable when RADIO is in European standard).
AM [OFF, ON] Select 'OFF' to suppress AM if not in use (only applicable when RADIO is in America or Asia standard).
LW [OFF, ON] Select 'OFF' to suppress LW if not in use (only applicable when RADIO is in European standard).
RADIO [EUROPE, AMERICA, ASIA] Select the tuner according to European, America or Asia standards.
REG [AUTO, OFF, ON] Select 'ON' to maintain regional programme, 'OFF' to directly switch to the programme of the next region. 'AUTO' only switches when the next signal is stronger.
RDS [ON, OFF] Select 'ON' to activate RDS feature.
CLOCK \*
This set has a clock that can either be manually set by you or can be automatically updated via the RDS signal.
SETTING THE CLOCK (MANUALLY)
- Enter the Initial Settings menu.
- Select option 'CLK'.
- Alter the Choice to 'MAN'.
- Display shows e.g. '00:00' (24 hour format) or 'AM 12:00' (12 hour format).
- To adjust the Clock
- The clock starts operating from the selected time.
- Leave the Initial Settings menu :
- 10 seconds after any key operation, the display will always show the time when clock mode is activated.
RDS CLOCK \* (AUTO UPDATED)
You can select an automatic update of the clock via the RDS radio signal.
- See INITIAL SETTINGS; select Option 'CLK' and set Choice to 'AUTO'.
– The transmitted time via RDS can be incorrect.
SDVC (SPEED DEPENDENT VOLUME CONTROL) AND SPEED WARNING
• See INSTALLATION for connection instructions.
SDVC \*
To compensate for surrounding noise this function automatically increases the volume of the set as a result of the car's speed. Four compensation levels can be selected. Level 1 gives a small increase up to level 4 which gives a greater increase. See 'INITIAL SETTINGS' option SDVC to alter the level until you find one which suits your car.
Speed Warning \*
You can use this function to inform you that you are exceeding a certain speed. Always obey the Highway Code and current traffic restrictions and conditions!
To calibrate :
To avoid unnecessary distraction we advise that this procedure is carried out with the help of somebody else.
1 While stationary, hold down the 'SPEED' key turn on the set.
2 The set mutes. Display shows 'CALIBRAT' and then '50 KM/H'.
3 Now drive to 50KM/H (30MPH)
(Always obey the Highway Code and current traffic restrictions and conditions!)
4 Once 50KM/H (30MPH) is reached briefly press 'SPEED' key :
You hear a beep and display shows 'CALIB OK' and then 'SDVC ON'.
5 Now turn the set off and on again to return to normal operation.
Level 3 is chosen for 'SDVC' and 'SPD' is set to KM/H in 'INITIAL SETTINGS'.
STORE A SPEED
Ensure in 'INITIAL SETTINGS' option 'SPD' is set either to 'KM/H' or 'MPH'.
- Drive at the desired speed.
- To record the speed e.g. 80KM/H (50MPH) :
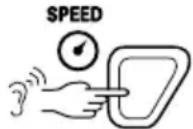
Display briefly shows '80 KM/H' and flag 'SPEED WASHING' turn on.
When the recorded speed is exceeded, display shows 'SPEED' follow by 'WARNING' and gives warning beeps which become quicker the faster you drive.
3 Warning ends, if the speed is reduced below the recorded level, or you can skip it :
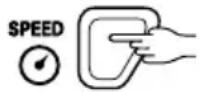
Activate / Deactivate Speed Warning
Once a speed has been recorded it can be activated or deactivated as often as you wish.
- Activate / Deactivate speed warning e.g. to warn when the car's speed exceeds the registered speed.
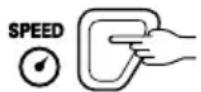
If speed warning is activated, flag ' sturn on.
If speed warning is deactivated, flag ' turn off.
To change the recorded speed, see 'STORE A SPEED'.
TEMPERATURE WARNING \*
You can connect a temperature sensor to this set to give you a visible and audible warning automatically when the outside temperature becomes lower than 3°C. See 'INSTALLATION' then 'INITIAL SETTINGS' option 'TEMP'.
- Activate / Deactivate temperature warning.

If temperature warning is activated, flag 'TEMP' turn on.
If temperature warning is deactivated, flag 'turn off.
When the temperature falls below 3^ C, you briefly see 'WARNING' then the current temperature displayed and hear 3 beeps. If the temperature remains at this level you will hear a beep every 5 minutes and see the current temperature until it rises sufficiently and then you will again hear 3 beeps and see the new temperature.
A temperature sensor MUST be safely and correctly mounted.
TEMPERATURE DISPLAY
With an external temperature sensor connected and the temperature format selected in 'INITIAL SETTINGS' option TEMP; you can check the outside temperature by pressing the display key as shown in 'DISPLAY OPTIONS'.
AUTOMATIC LEVELER
This ensures that when you change between different stations/wavebands or from radio to CD playback, that the new volume is neither too loud or too quite. See 'INITIAL SETTINGS' option 'AL'.
DEMONSTRATION MODE
In this mode, the display shows the main features of the set.
SWITCHING ON DEMO MODE
While keeping the DISPLAY key pressed, switch on the set. Release the DISPLAY key when you see a change in the display. The set remains in the demonstration mode, even if you switch the set off and then on again.
SWITCHING OFF DEMO MODE
Switch off the set. Follow the same procedure as 'SWITCHING ON DEMO MODE'.
AUDIO ADJUSTMENT
ON/OFF
- Switch the set on or off :
You can use the set even when the car ignition is switched off. See 'INSTALLATION'.
VOLUME
Please make sure you can still hear the traffic (horns, sirens......)
- Adjust the volume :
SOUND
- Select one of the pre-defined sound styles:
- BASS-TRE : Your own settings of bass and treble.
- FLAT : Mid-positions of bass and treble
- JAZZ: Jazz music
- VOCAL : Speech
- POP: Pop music
- CLASSIC : Classic music
- ROCK : Rock music
- These settings are memorised for each source (Radio, Cassette*/CD player* and CD changer *).
SELECT
- Select the desired audio mode :
- BASS (low notes), TREBLE (high notes), BALANCE (left-right), FADER (rear-front).
- Adjust the selected audio mode.
After 5 seconds the display goes back to the last mode of operation.
LOUDNESS
This option dynamically amplifies the high and low notes so as to improve the sound output at low volume levels. See INITIAL SETTINGS option 'LOUD'.
MUTE (Silence) :
- Mute the set or cancel the mute :
The silent period may be interrupted by traffic announcements (if TA/NEWS is switched on).
SOURCE
- Select the desired source :
- Radio
- Cassette*/CD player*
- CD Changer * (if connected)
- Phone in (if connected) and if option is selected in Initial Settings and a call is active.

Useful tips
Set does not function. No Display.
- Check fuse (set and car) and connections
Set functions but no sound?
- Adjust the volume of the set.
- Check fader and balance settings.
- Check aerial and its connection.
Set mutes when you drive or display shows 'TEL CALL', but no car telephone is connected to the set.
- See INITIAL SETTINGS; select Option 'TEL' and set Choice to 'NO'.
Set mutes when you drive or display shows 'TEL CALL', but the car telephone is not in used.
- See INITIAL SETTINGS; select Option 'PHONE' and set Choice to 'LO' or 'HI' according to phone type.
Set mutes when you used the car telephone, display shows 'TEL CALL', but you may still like to listen to the radio.
• To restore the same volume level
Display shows 'TOO HOT' and the sound from the speakers is reduced.
- A built-in safety circuit prevents the temperature in the set from exceeding a certain level.
- Wait until 'TOO HOT' disappears from the display before increasing the volume.
Detachable front of set feels warm?
- Some heat is always generated by the set.
Volume fluctuates.
- Check SDVC connections and calibration. If problems persist consult your dealer.
Speed warnings do not correspond with actual speed.
- Redo speed calibration.
Display shows set's specifications.
• See 'DEMONSTRATION MODE'.
Infrared remote control does not function (optional)
- If the weather is cold, there may be some condensation on the infrared sensor. Wait for about five minutes for the moisture to evaporate.
RADIO
WAVEBAND
- Select the desired waveband :
The display shows :
FM1 or FM2, MW1, or MW2, or LW
(when Choice is 'EUROPE' under 'RADIO' option; see INITIAL SETTINGS).
FM1, FM2, AM1, or AM2
(when Choice is 'AMERICA' or 'ASIA' under 'RADIO' option; see INITIAL SETTINGS).

Useful tips
You can suppress MW or LW bands if not in used.
- See INITIAL SETTINGS; select Option 'MW' or 'LW' and set Choice to 'OFF'.
SEARCH TUNING
Use search tuning to automatically search for a station.
- Tune to a station of a lower (★ or higher frequency (▶):
- You will receive a station after a short time. To search for another station, press the key again.

Useful tips
Cannot tune to desired station?
- Check that the aerial is fully extended and properly connected.
- Check that the negative terminal (brown lead) is connected to earth (car chassis).
• Desired station is too weak, try Manual Tuning.
• See INITIAL SETTINGS; check option 'RADIO'.
- Set is in TA mode : only stations with Traffic Announcements can be tuned in. If necessary, switch off the TA mode.
Search tuning stops too frequently (FM bands only).
- You can adjust its sensitivity, see INITIAL SETTINGS; option 'SRCH'.
Poor tuner reception?
- In some cars (e.g. VW and Seat) there is an active aerial on the roof that needs 12 Volt supply. Please ask your dealer to check whether 12 volt is supplied to the antenna.
MANUAL TUNING (if you know the frequency of the required station)
• To switch to manual tuning :
- Tune to the desired frequency :
After about 1 minute with a beep the radio automatically switches back to search tuning
MANUALLY STORING STATIONS IN A PRESET
You can manually store 20 FM stations (on the FM1 band), 10 MW stations (on the MW1 band) and 10 LW stations.
- Select the desired waveband :
- Tune-in the desired station :
• To enter preset store mode :
• To select the preset number you wish to use :
• To store the station on the selected preset number:

When storing an FM station, the relevant RDS information and AF mode (on/off) are also stored on the preset.
AUTOMATICALLY STORING STATIONS (AUTO-STORE)
By simply pressing one key you can automatically store 10 strongest FM stations (on the FM2 band) or 10 strongest MW stations (on the MW2 band). When you use Auto Store, the new stations replace any stations previously stored in the FM2 band or the AM2 (MW2) band.
- Select an FM or MW waveband :
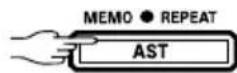
- Activate AST :
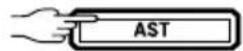
- The set gives a beep and then mutes.
- When it has finished, you hear a beep and the station stored on preset 1.
– Sometimes it may not be possible to find 10 stations.
RECALLING A PRESET
- Select the desired waveband :

- Select the desired preset :
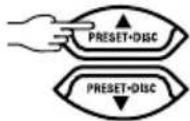

Useful tips
Cannot select desired preset station numerically in FM1 band.
- Alphabetical station selection (A\~Z) is activated. You can only select preset station according to alphabetical order.
- To deactivate alphabetical station selection :
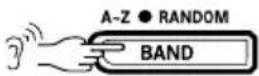
FREQUENCY SCAN
This function allows you to listen to each located station on the current waveband.
- Activate/deactivate SCAN :
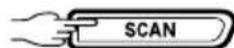
- To adjust the scan time, see INITIAL SETTINGS.
RADIO DATA SYSTEM (RDS) ON FM
Many FM stations broadcast RDS information. This set uses the RDS information to offer you many advantages including :
DISPLAY OF STATION-NAME
The set displays the name of the station instead of its frequency.

Useful tips
Display shows frequency (not station name).
- Set is tuned to non-RDS station or RDS is not active, see 'INITIAL SETTING' option 'RDS'.
AUTOMATIC RETUNING
The set remains tuned to the current station by continually searching for the best possible frequency for reception.

Useful tips
Radio mutes momentarily while display shows 'SEARCH' and station name/frequency alternately.
- Set is checking a list of Alternative Frequencies (AF) for the tuned radio station as reception is weak. In case no AF is transmitted for the tuned station, switch off AF via the INITIAL SETTING and stored the preset station (with AF off). Next time when you recall the same preset station (with AF off), the flag 'AROFF on.
DISPLAY OF PROGRAMME TYPE (PTY)
You can check the type of programme being broadcast (e.g.: news, sport, etc.).
INFORMATION FROM RELATED RADIO STATIONS
Enhanced Other Networks (EON) is an RDS service where the broadcaster links some stations together. If you are tuned to a station where is linked to others by EON, the set is capable of receiving Traffic Announcements (and/or News bulletins) from both the tuned station and related stations.
ALARM MESSAGES (PTY Alarm)
This set automatically receives emergency messages made by the broadcaster.
– During the messages the display shows 'ALARM' and the station-name alternately.
TRAFFIC ANNOUNCEMENTS (TA) AND NEWS/WEATHER ANNOUNCEMENTS
You can activate the TA and/or NEWS/WEATHER modes to give priority respectively so as to hear announcements related to these subjects, (even if you play a tape/CD* or mute the set).
ACTIVATE/DEACTIVATE TA AND/OR NEWS/WEATHER MODES
- Select an FM waveband :
- Activate/deactivate desired option TA/NEWS :
TA mode on only.
↓ TA and NEWS modes on.
↓ NEWS mode on only.
Both TA and NEWS modes off.
If you activate TA/NEWS mode :
- You will hear the Traffic/NEWS Announcements when broadcast.
- If the tuned station does not enable the reception of Traffic Announcements, the display shows 'NO TA'. The radio automatically searches an appropriate station.
News announcements may be interrupted by Traffic Announcements (if the TA mode is switched on).
VOLUME LEVEL FOR TA OR NEWS/WEATHER
- Adjust the required volume level while listening to a TA or NEWS/WEATHER :
- This volume level is memorised by the set.

Useful tips
Display shows 'NO TA', and set beeps at intervals.
- The tuned station becomes too weak to enable the reception of Traffic Announcements. Use search tuning to find another station.
- If the TA mode is switched on, search tuning only selects stations which enable the reception of Traffic Announcements.
Interrupting Traffic Announcement/News mode
If you do not wish to continue listening to a particular Traffic Announcement or News mode, you can interrupt it without switching off the mode.
- Interrupt TA/NEWS :
- The set will return to the previous operating mode.
RDS MEMO STORE
It is possible to store up to 50 stations in alphabetical order on this set in a separate FM memory.
LOADING RDS MEMORY
To load all the receivable RDS stations of the current reception area into the RDS memory.
- Select FM1 waveband :
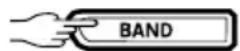
- Activate RDS MEMORY :
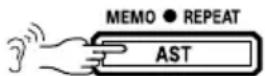
- The set mutes. When the search is completed the set beeps again and you hear the first alphabetically stored station.
SCROLLING THROUGH THE RDS MEMORY
- Activate/Deactivate alphabetical station selection :
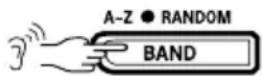
- If you hear a beep and cannot select station according to alphabetical order, see 'LOADING RDS MEMORY' to load RDS station in the memory first.
- Select the desired station :
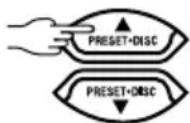
* Depending on version

Useful tips
You can switch off RDS features if not in use.
- See INITIAL SETTINGS; select Option 'RDS' and set Choice to 'OFF'.
- All above RDS related features e.g. A-Z, MEMO, i key, etc... will be deactivated when Option 'RDS' is set to 'OFF'.
Display shows 'PI SEARCH'.
- A preset has been requested but the frequency is not available or is lost.
Display shows 'TP LOST'. - Station has turned off the TP signal intentionally or the signal is too weak.
Display shows 'NO PTY'. - Search launched but no stations found.
CASSETTE PLAYER \*
PLAYBACK
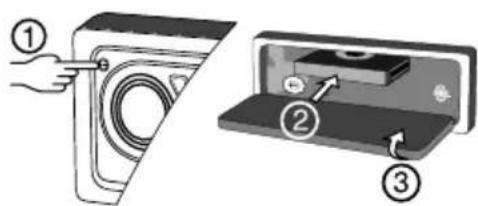
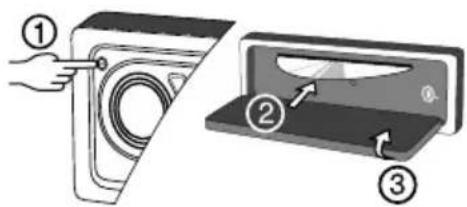
1 Open the front.
2 Slide the cassette, with the open side to the right into the cassette opening.
3 Close the front.
The display briefly shows 'TAPE CR' if a metal or chromium cassette is inserted. Playback starts.
text_image
Diagram showing a hand inserting a washing machine into a device with labeled steps ①, ②, and ③.- If a cassette is already inserted : Select cassette as SOURCE :
Playback starts.
DOLBY® B NOISE REDUCTION (NR)
If the tape has been recorded using the DOLBY B NR System.
- Activate/Deactivate NR :
© Dolby Noise Reduction manufactured under license from Dolby Laboratories Licensing Corporation. 'DOLBY' and the double-D symbol are trademarks of Dolby Laboratories Licensing Corporation.
CHANGE SIDE
- Change the side :
- At the end of the cassette, playback automatically continues with the other side.
FAST REWIND / FAST FORWARD
- Activate/Deactivate FAST REWIND :
- Activate/Deactivate FAST FORWARD :
- You hear the radio during this operation. If you continue fast winding until the end of the tape, playback restarts automatically.
PREVIOUS / NEXT TRACK (Music Search System)
Select how many tracks you want to miss out from the current playing position.
- Previous tracks :
- Next tracks :
- The sound is muted until the desired track is reached. The set can only recognise tracks when there are silent intervals of at least 3 seconds.
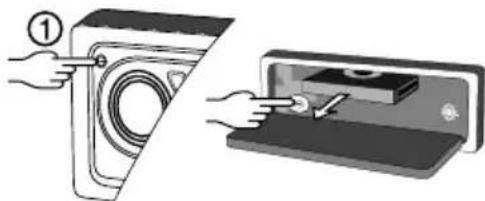
CASSETTE EJECT
text_image
Diagram showing hands operating a washing machine and inserting a device into a tray, with labeled step ①
Useful tips
Display shows 'TAPE ERR'.
- Check tape for faults
Cassette playback lacks high-notes or loss of one channel.
- Clean cassette player tape head.
Cassette mechanism changes direction of play before end of tape.
- Rewind cassette to the end of the tape.
CARE OF CASSETTES
- Only use good quality cassettes of 60 or 90 minutes.
- Put cassettes back in their boxes immediately after use to protect them from dust and dirt and to prevent the tape from unwinding.
- Never expose cassettes to heat or direct sunlight.
- Clean the tape head (once or twice a month) using a wet-tape cleaning cassette.
CD PLAYER\* AND CD CHANGER\*
CD PLAYBACK (CD Player\*)
This CD player is suitable for 12cm disc.
1 Open the front.
2 Slide the disc into the slot with the label facing upwards.
3 Close the front. Playback starts.
text_image
Diagram showing a hand inserting a washing machine into a device with labeled parts and directional arrows indicating motion.- If a disc is already inserted :
Select CD as SOURCE :
Playback starts.
- The display shows the track number, elapsed playing time during playback.
CD PLAYBACK (CD Changer\*, if connected)
- You can only connect the following CD changer with a digital output to this set :
- CH0400 or CH0600 or CH1000
- Check that the magazine is loaded with discs and inserted in the CD changer:
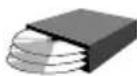
- Select CD changer as SOURCE :
- Select the desired disc:
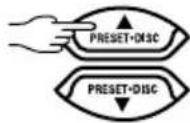
- The display shows the track number, elapsed playing time and current disc number during playback.
At the end of the disc, playback automatically continues with the next disc. Any missing disc is automatically skip.
PREVIOUS / NEXT TRACK
Select the desired track.
- Previous tracks :
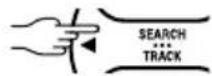
- Next tracks :
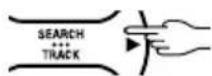
- Playback resumes with the chosen track.
FAST BACKWARD / FORWARD
To quickly move through the disc
- Backwards :
- Forward :
- Normal playback resumes when you release the key.
SCAN TRACK
The scan function enables you to listen to the first few seconds of each track. You can select how many seconds each track is scanned, see 'INITIAL SETTINGS'; option 'SCAN'.
- Activate/Deactivate Scan track :
RANDOM TRACK PLAYBACK
- Activate/Deactivate Random track playback :
REPEAT TRACK
To continually repeat the current track.
- Activate/Deactivate Repeat current track :
COMPRESSION
This function reduces the volume of the loud sections and increases the volume of the quiet sections.
• See INITIAL SETTINGS; Option 'COMP'.
Display shows 'CD ERROR' and set beeps.
- Check that the discs have been inserted the correct way and that you have not inserted a damaged or dirty disc.
Distorted sound during playback.
- Player unable to read disc. CD damaged or dirty.
Display shows 'NO CD'.
- Check that the CD mechanism or CD magazine has been loaded with disc(s).
Display shows 'NO MAG'.
• No CD magazine in the CD changer.

Useful tips
Display shows 'NO FRONT'.
- Check that the front of CD changer has been closed.
CD player does not function?
- If the weather is cold, there may be some condensation on the laser. Use the set in radio mode for about 5 minutes to allow the moisture to evaporate.
DISC EJECT (CD Player\*)
natural_image
Illustration showing two hand positions: one installing a door panel, the other inserting a card into a tray (no text or symbols)If the disc is not removed within 15 seconds, the CD player will reload the disc.
CARE OF DISCS
– Avoid making fingerprints on the disc
- Put the disc back in its box immediately after eject it, to protect the disc from damage and dust.
- Do not expose disc to heat or direct sunlight.
text_image
CLASS 1 LASER PRODUCT* Depending on version
A wired remote control can be connected to this set. See your dealer for more information. The remote control allows you to carry out some of the main functions of the set, without the need to take your eyes off the road while driving. This increases your safety.
AUDIO
• Volume : Adjust the volume by turning the wheel.
- Audio mute (Silence) : Mute the set or cancel the mute.
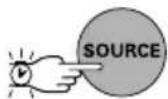
- SOURCE : Select the desired source : radio, CD*/cassette*, CD changer* (if connected) or Phone (if connected, and if option is selected in Initial Settings mode and a call is active).

RADIO
- Waveband selection : Select the desired waveband.
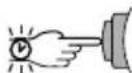
- Search tuning : Tune to a station of a lower or higher frequency.
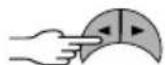
- Recalling a preset: Select the next preset.
CASSETTE \*
- Previous / next track : Select desired track.
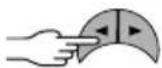
- Rewind/ fast forward : Activate/deactivate tape fast forward or rewind.
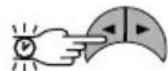
- Reverse direction : Change the direction of play.
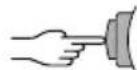
CD PLAYER\* AND CD CHANGER\* (if connected)
- track selection : Select desired track.
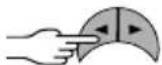
- Fast backward / Forward : Quickly move to another part of the disc during playback. Release the key to resume normal playback.
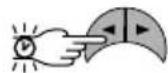
- First track : Return to the first track (CD player).
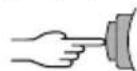
- Disc selection : Select the next disc (CD changer).
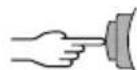
- Track scan: Activate/Deactivate the scan.
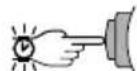
Please note that you can also use an infra red remote * control with this set.
Choose what the display shows :
In Radio mode :
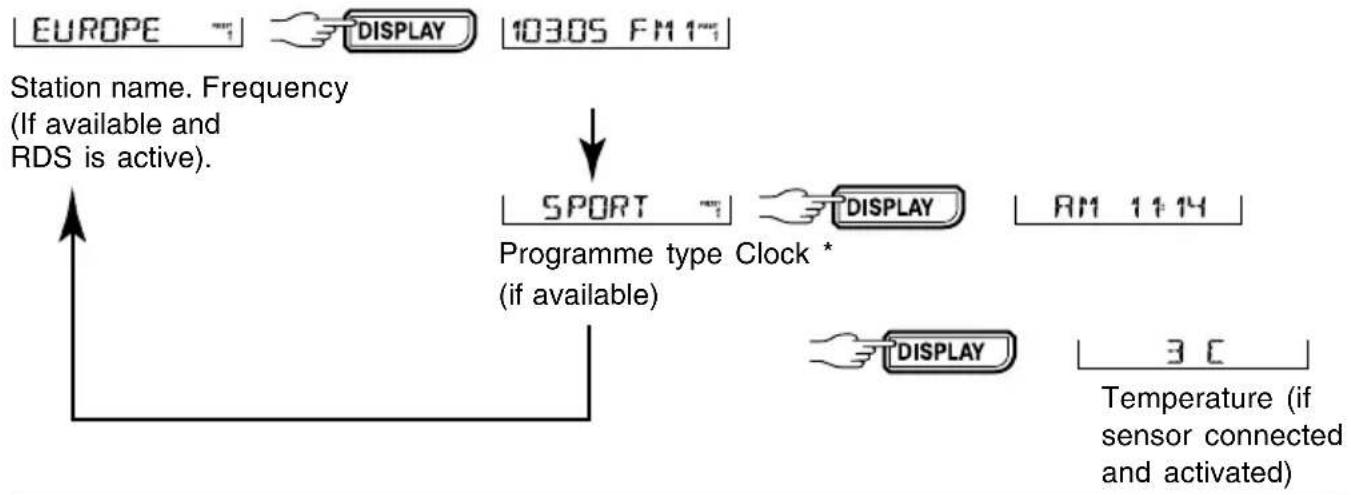
flowchart
graph TD
    A["EUROPE"] --> B["DISPLAY"]
    B --> C["10305 FM1"]
    D["Programme type Clock * (if available)"] --> E["SPORT"]
    E --> F["DISPLAY"]
    F --> G["AM 11:14"]
    H["DISPLAY"] --> I["3 C"]
    J["Temperature (if sensor connected and activated)"] --> K["Up arrow"]
text_image
PLAY ; DISPLAY AM 11:14 DISPLAY 3 C Depending on Clock * Temperature (if current operation. sensor connected and activated)In CD * mode :

text_image
0 1 12:50 | DISPLAY | 10 62:50 | DISPLAY | AM 14:14 | Current track and Total track and Clock * track time. playing time.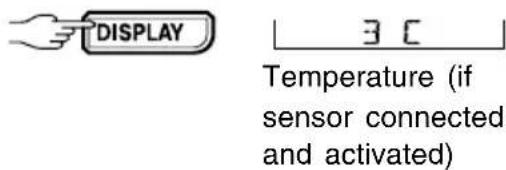
text_image
DISPLAY 3 C Temperature (if sensor connected and activated)In CDC * mode :

text_image
0 1 12:50" DISPLAY 10 62:50" DISPLAY AM 11:14 Disk number, current Disc number, Clock * track and track time. total track and playing time.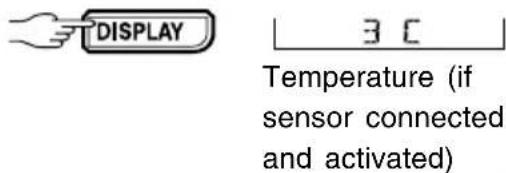
text_image
DISPLAY 3 C Temperature (if sensor connected and activated)During a Telephone Call
or Telephone Mute ( if connected)
