S6 TURBO - Vacuum Cleaner Tesvor - Free user manual and instructions
Find the device manual for free S6 TURBO Tesvor in PDF.


User questions about S6 TURBO Tesvor
0 question about this device. Answer the ones you know or ask your own.
Ask a new question about this device
Download the instructions for your Vacuum Cleaner in PDF format for free! Find your manual S6 TURBO - Tesvor and take your electronic device back in hand. On this page are published all the documents necessary for the use of your device. S6 TURBO by Tesvor.
USER MANUAL S6 TURBO Tesvor
- Note: Please track the first test run of the robot and help troubleshoot few tiny problems to guarantee a successful cleaning. Do not stand in front of the robot during the test.
CONTENTS
-
Safety Instructions P2
-
What's in the Box P5
-
Using Your S6 Turbo P6
Important Tips before Use P6
Preparation P7
LED Indication P9
Charging Modes P9
Switching Modes P10
Cleaning Modes P11
Set Time and Scheduled Cleaning P13
4.Cleaning and Maintenance P14
S6 Turbo Anatomy P14
Clean the Rolling Brush P15
Clean the Side Brushes P15
Clean the box and Filters P16
Replace the Side Brushes P17
Clean the Sensors and Charging Terminals P17
-
Troubleshooting P18
-
Specification P19
-
Customer Service P19
1. Safety Instructions
To reduce the risk of injury or damage, read these safety instructions carefully and keep them at hand when setting up, using, and maintaining this device.
Safety Instructions for S6 Turbo and Accessories
Warning
- Do not disassemble, repair or refit the product without authorization; otherwise, it may damage the product or pose a hazard.
- Do not use the device in an environment with a risk of fire or explosion.
- This device is only to be used with the original power adapter; otherwise, it may be damaged or catch fire.
- This device is not a toy. Do not sit or stand on this device. Small children and pets should be supervised when this device is operating.
- If the metal part of the power plug is dusty, please wipe it with a dry cloth.
- The power adapter is applied to a 100-240V AC voltage. Please plug it into the socket properly and keep away from children.
- Do not wash or soak the main body and electronic accessories in water; otherwise, the device may be damaged by a short circuit.
- Do not damage, load weight on, heat, pull, or bend it.
- During cleaning, please pay attention to the safety of toddlers and the elderly at home to avoid tripping, and to avoid injury please do not touch the wheel and side brush. (Please pay special attention to toddlers).
- This device is for indoor use only. Please do not use it outdoors.
- Do not allow metal and conductive materials to come in contact with the battery. It may result in a short circuit.
① Attention
-
Do not touch the device with wet hands. It may result in an electric shock.
-
Do no place the device where it could easily fall, such as on tables, chairs, high platforms in room, etc.
-
The device has a sophisticated design and should be protected from long-term exposure to sunlight.
-
Do not use the device in humid environments, such as bathrooms.
-
Do not place the device near cigarette butts, lighters or open fires.
-
Clean the product at the end of charging.
-
Please turn off the power switch on the side of the robot when it is out of service for a long time.
-
Before using the device, please remove all vulnerable items on the floor, such as glass, lamps, and items such as wires and curtains that may become entangled with the side brush and suction passages.
-
When the dust box is full, please empty it into the garbage before using it again.
-
Do not use the robot to clean construction waste.
-
The operating temperature of the device ranges from 0 degrees Celsius to 40 degrees Celsius; please do not use it in a high-temperature environment.
-
Before the device is scrapped, please remove the battery from the robot. When you remove the battery, please ensure that the device is not connected to a power supply. Please recycle the battery safely for environmental protection.
Safety Instructions for S6 Turbo and Accessories
Danger
- Always use a dedicated battery adapter to avoid leakage, heating or rupture.
- Do not short-circuit the battery or remove the battery. It may result in leakage, heating or rupture.
- Do not transport or preserve with necklaces, hairpins and other metal objects. It may result in a short circuit, leakage, heating or rupture.
- Do not burn or heat the battery. It may result in leakage, heating or rupture.
Warning
- When skin or clothing is exposed to the battery electrolyte, please immediately wash with clean water to avoid inflammation of the skin, etc.
- Do not use the rechargeable battery on other devices. This battery is only suitable for the Tesvor robot vacuum cleaner.
- If the battery's outer box is found to be deformed and enlarged, or there is a leakage of electrolytes, do not charge or continue to use to avoid danger.
- Do not throw or inflict a strong impact on the battery. It may result in leakage, heating or rupture.
- Do not disassemble the battery pack. It may result in battery rupture and electrolyte outflow, leading to fire, explosion, and other dangers.
- This device can be used by children aged from 8 years and above and persons with reduced physical, sensory or mental capabilities or lack of experience and knowledge if they have been given supervision or instruction concerning the use of the device in a safe way and understand the hazards involved.
- Children should be supervised to ensure they do not play with this device.
- Cleaning and maintenance must not be performed by children without adult supervision.
- This device contains batteries that can only be replaced by skilled people.
-
Only use the detachable supply unit provided with this device to recharge the battery.
-
The power supply must be removed from the socket-outlet before cleaning or maintaining the device.
- The battery must be removed from the device before it is scrapped.
- The device must be disconnected from the mains supply when removing the battery.
- The battery should be disposed of safely.
- How to remove the battery:
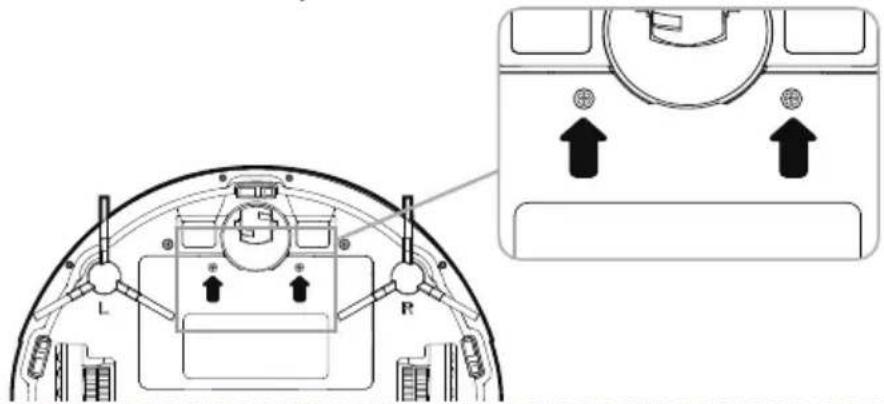
text_image
Technical diagram of a device rear view with labeled components and directional arrows indicating movement or positioning.① Take out the two screws on the battery cover with a screwdriver.
② Take off the battery cover.
③ Take the battery out and unplug the electric wires to remove the battery.
① Attention
- If abnormal overheating is discovered during charging, stop using it immediately to avoid leakage, heating or rupture.
- To prolong the service life of the battery, please remove the battery and place it in a cool, dry environment if it is out of service for a long time; this will avoid leakage, heating or rupture.
- Do not soak the battery in water or let it come into contact with any liquid; otherwise, it may cause leakage, heating or rupture.
- Be sure to stop using it immediately in case of any problem (e.g., discoloration or deformation), to avoid leakage, heating or rupture.
- Always use tape to insulate the battery's electrode when recycling or disposing of it.
2. What's in the Box
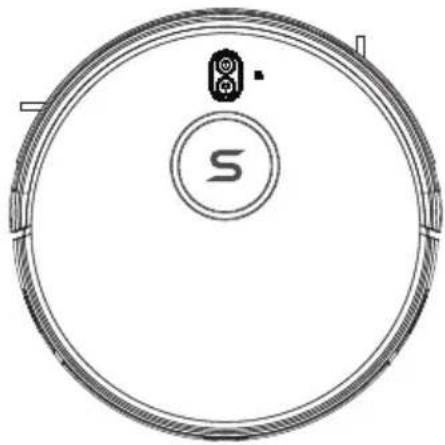
natural_image
Circular diagram with a central 'S' and two connected sensors at the top (no text or symbols)Main Body
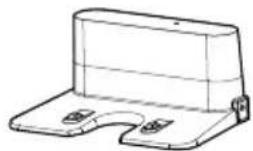
Charging Base
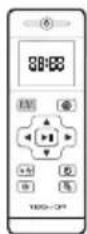
Remote Control
(2 * AAA Batteries required
but NOT included)
natural_image
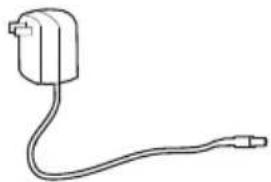
Simple line drawing of a cable or plug with a terminal connector (no text or symbols)Power Adapter
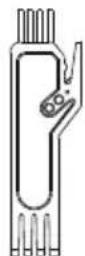
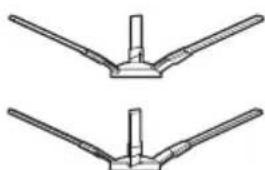
Cleaning Tool Side Brushes(4)
natural_image
Two identical line drawings of a V-shaped mechanical or electrical component with no text or symbols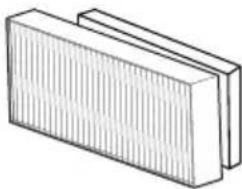
natural_image
Simple line drawing of a rectangular object with vertical grooves (no text or symbols)High-effective Filter/Sponge
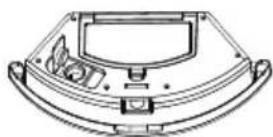
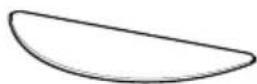
Two-in-one tank assembly Mop
While the accessories provided for some models are slightly different, they are subject to the actual product.
3. Using Your S6 Turbo
Important Tips before Use
text_image
Diagram showing a robotic vacuum cleaner connected to various devices including a car, battery, and power plug, with a red 'X' indicating cancellation.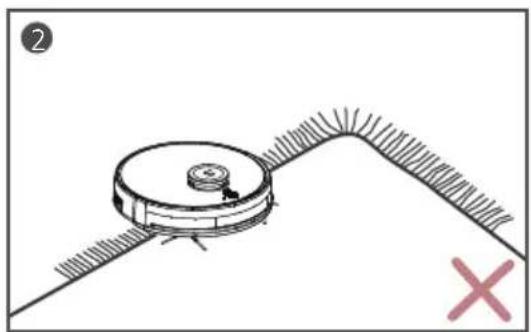
natural_image
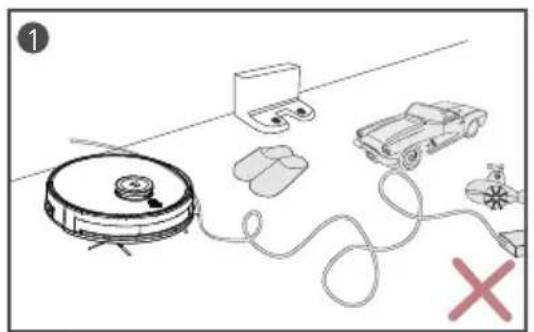
Diagram of a robotic vacuum cleaner positioned on a curved surface with a red X mark, no text or symbols present.1 Remove power cords and small objects from the floor that may become entangled with the S6 Turbo.
② The S6 Turbo may climb on top of objects less than 0.63 in/16 mm in height. Remove these objects if possible.
text_image
Diagram showing a person standing near a robotic vacuum cleaner in an indoor hallway, with a red X mark indicating a defect or failure.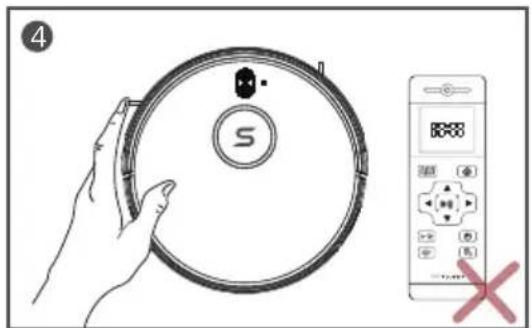
text_image
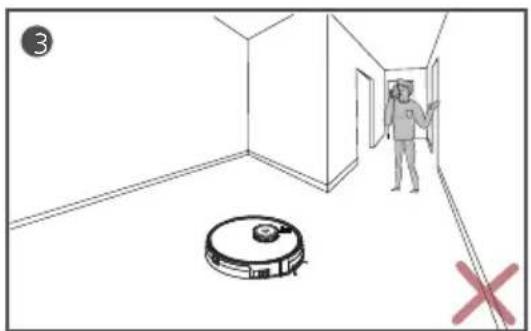
4 S 1888 X3 Do NOT stand around narrow places, such as thresholds and aisles, to reduce the uncovered rate.
④ The S6 Turbo will clear all memories and re-plan all work routes if it is manually moved or it is controlled by the remote control during cleaning. To ensure it works efficiently, please do NOT arbitrarily move S6 Turbo manually or operate it by remote control during cleaning.
natural_image
3D architectural diagram of a staircase with stairs and a circular object on top (no text or symbols)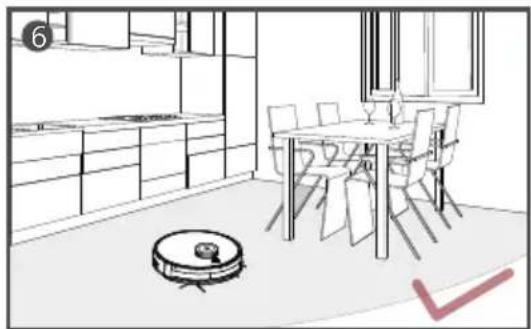
natural_image
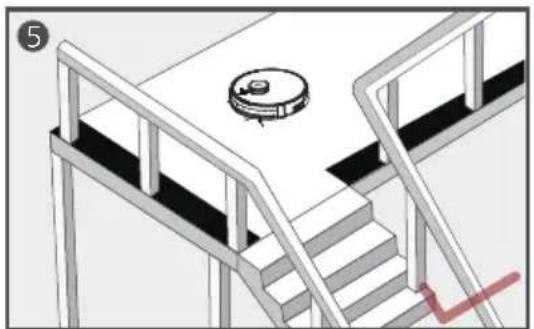
Interior view of a modern kitchen with a robotic vacuum cleaner and dining table (no text or symbols)5 Anti-drop sensors prevent the S6 Turbo from tumbling down stairs and steep drops. They may work less effectively if they are dirty or used on reflective/very dark-colored floors. It is recommended that physical barriers are used to block off areas where the S6 Turbo may fall.
⑥ Please make sure all furniture is properly organized so that the S6 Turbo is able to clean well without becoming stuck.
Preparation
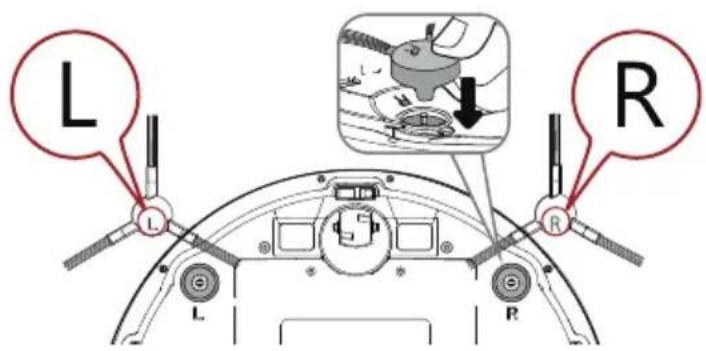
1 Install the side brushes before use. Please note L and R should correspond to each other when installing the side brushes.
text_image
L R L R② Turn on the main power switch on the side of S6 Turbo.
text_image
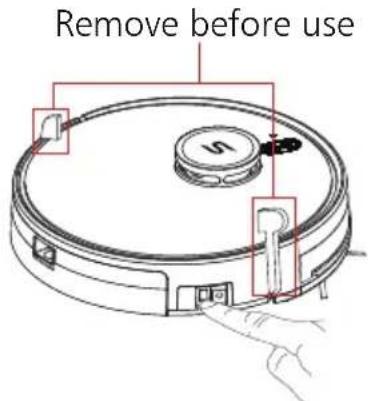
Remove before useRemove the protective film before use.
natural_image
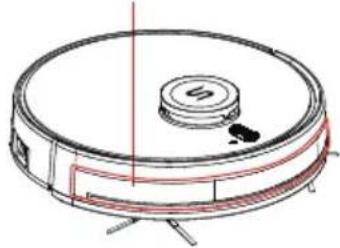
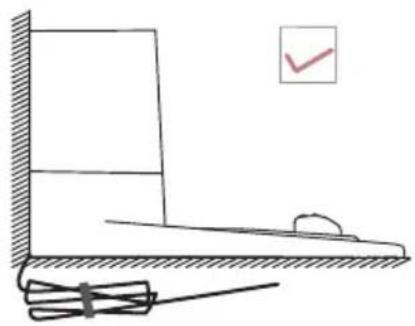
Technical line drawing of a circular vacuum cleaner with mounting base and internal components (no text or symbols)3 Place the Charging Base on a hard, level surface and against a wall.
natural_image
Simple line drawing of a physics experiment setup with a block on an inclined plane and a checkmark in the corner (no text or symbols)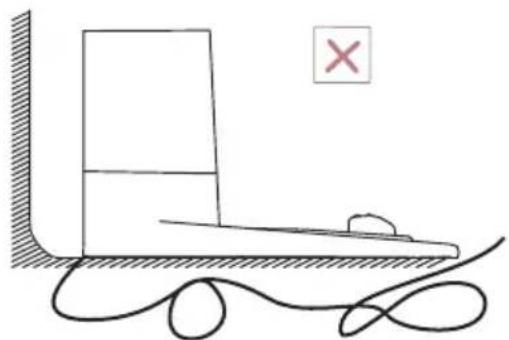
natural_image
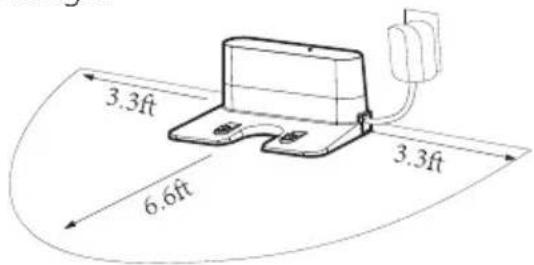
Simple line drawing of a ramp with a roller and a block, no text or symbols present4 Do not place any objects within 3.3 ft. to the left / right and 6.6 ft. to the front of the charging base, and do not place any mirrors or other reflective objects within this range.
text_image
3.3ft 6.6ft 3.3ft5 Install 2 AAA batteries (Not included in the package) into the remote control.
text_image
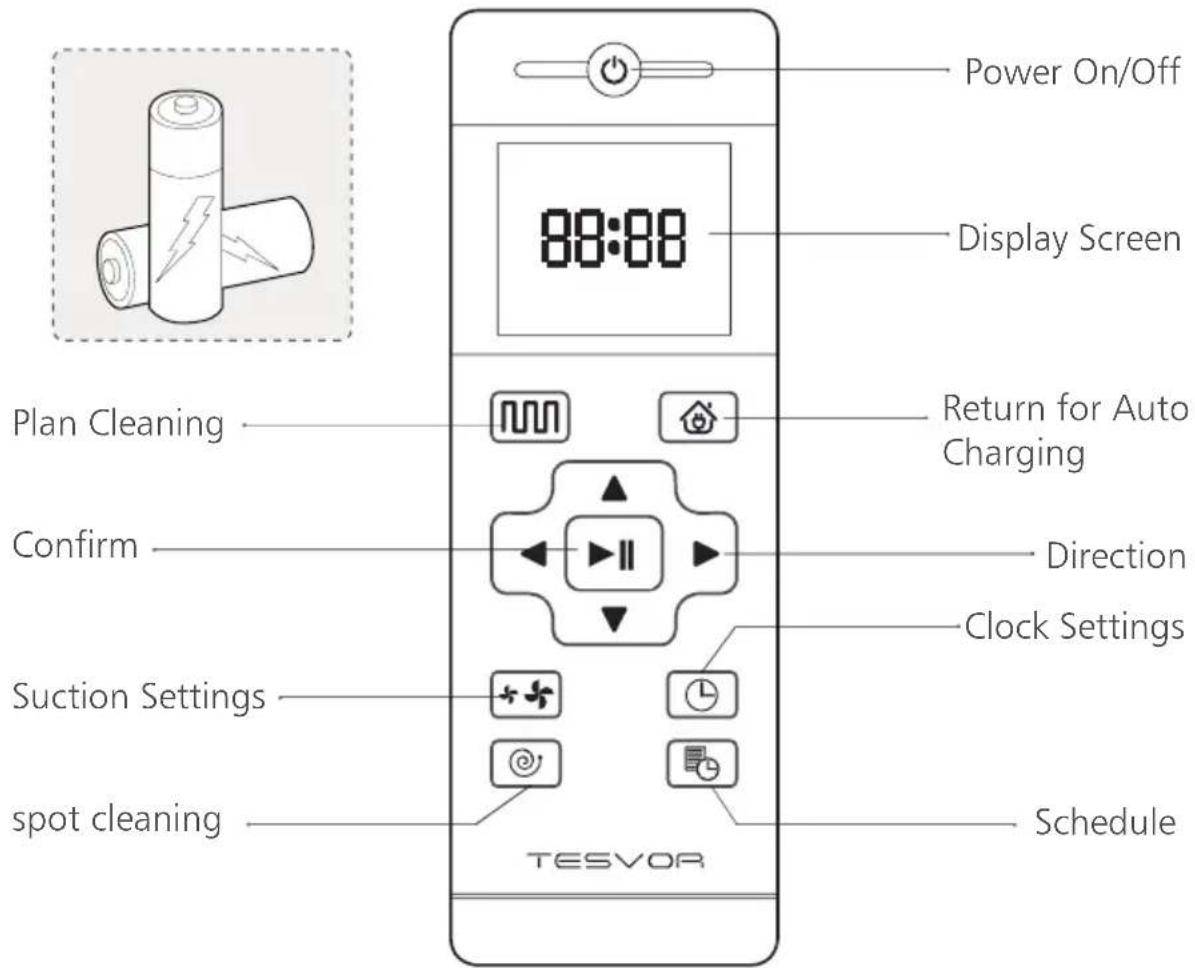
Power On/Off Display Screen 88:88 Plan Cleaning Return for Auto Charging Confirm Direction Clock Settings Suction Settings Schedule spot cleaning TESVORNote: For App users, please refer to our User Guide for App&Alexa.
When the device is in the vicinity of the charging base and the virtual protection wall, it may not be able to receive the instructions issued by the remote control. If you do not use the remote control for a long time, please remove the battery.
Direction Bu in
Under the standby mode, press this button to turn left/right, Press backward button, Vacuum will rotate 180 degrees. Release button to return to standby mode.
Press forward button, Vacuum continues forward and returns to standby mode when hitting obstacles.
Under the Preset mode or the Time Settings mode, press this button to switch from hours to minutes.
Suction Settings
When you press 📄 on the remote control, you can see a fan sign appear on the screen. You can adjust the suction power by pressing ✕ on the remote control.
LED Indication
| Indicator Light Machine Status | Scene | |
| running white light [KYDS] | Standby / Cleaning / Fully charged | The S6 Turbo is in Standby or Cleaning mode, or fully charged. |
| blinking white light [ATDS] | Configuring mode | When connecting with the app |
| running white light [3K6K] | Return for charging | Return for charging after cleaning finished |
| blinking white light [04KC] | Return for charging | Low power and returning to Charging Base |
| pulse white light [28WW] | Recharging | Low power recharging |
Off  | Sleep | The S6 Turbo is off.To conserve power, the light automatically turns off when the S6 Turbo has been inactive for 10 minutes. |
| pulse red light Error | The S6 Turbo has an error. | |
Charging Modes
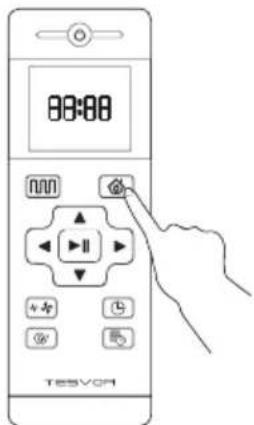
Method 1: Press 📷 on the remote control to return the S6 Turbo to the Charging Base. Method 2: When cleaning is completed, or the battery is too low, the S6 Turbo will automatically start finding the charging base to charge itself. Please keep the charging base energized, or the S6 Turbo will not be able to find the charging base.
text_image
00:00 TESVCH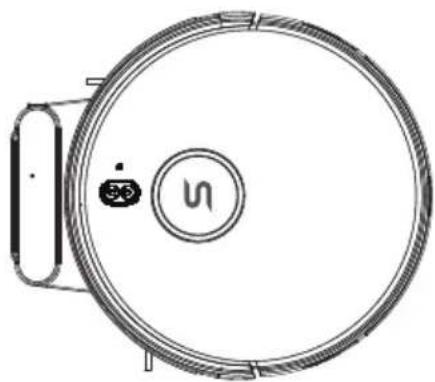
natural_image
Technical line drawing of a circular mechanical component with a labeled symbol (no text or symbols present)Switching Modes
Note: Make sure the power switch on the side of the S6 Turbo is t urned on before use.
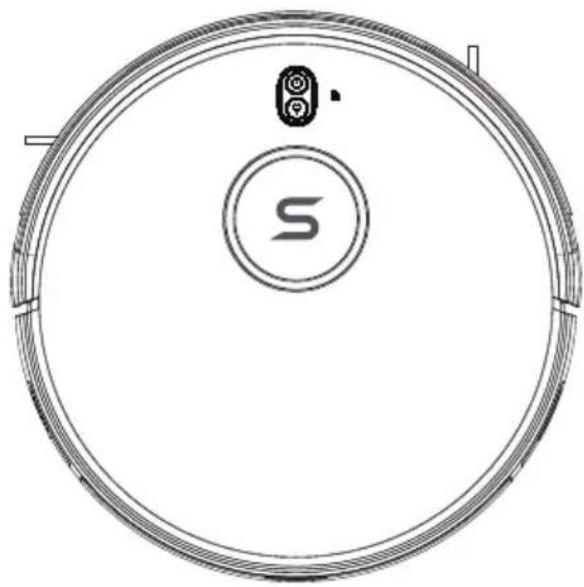
natural_image
Top-down line drawing of a circular robotic vacuum cleaner with a central logo and sensor icon (no text or symbols)Wake Up
Sleep mode means that the S6 Turbo is stopped and the indicator light is off. If the S6 Turbo is not active for 10 minutes, it will enter Sleep mode automatically. Press ▶ on the remote controller to wake it up.
Start
Under the Standby mode, press ⏻ on the S6 Turbo or 📁 on the remote control to start the robot.
Pause
The pause function switches the S6 Turbo from the operating mode to the selected mode, and it can be paused by the following operations:
Press ▶ on the remote control or robot to pause it.
Note: If the S6 Turbo is out of service for a long time, please turn the power switch off.
Cleaning Modes
flowchart
graph TD
    A["Start"] --> B{Loop}
    B -->|Up| C["Process 1"]
    B -->|Down| D["Process 2"]
    C --> E["End"]
    D --> E
    E --> F["Control Unit"]
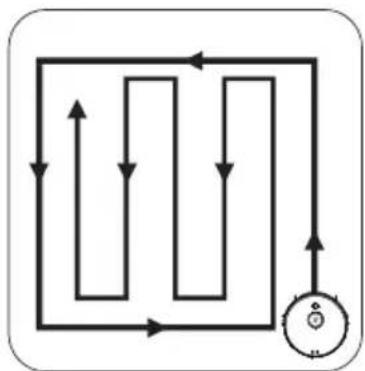
1. Plan Cleaning ( S shape Cleaning )
The robot will perform the cleaning plan in S shape route according to the room environment.
Click the Smart Cleaning icon 📌 on the app or press 📌 on the remote control to start cleaning under the Smart Cleaning mode.
natural_image
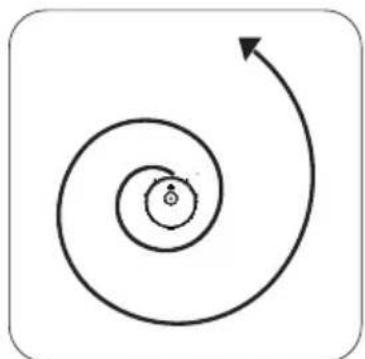
Abstract spiral diagram with an arrow indicating direction (no text or symbols)2. Spot Cleaning
S6 Turbo intensively cleans a specific area in a spiral pattern, useful if there is a concentrated area of dust or debris. When in the Spot Cleaning mode, the S6 Turbo will stop cleaning after 2 minutes.
text_image
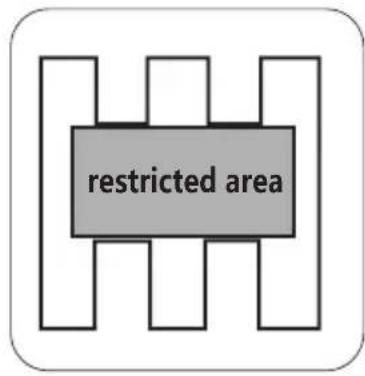
restricted area3. Setting Forbidden Area
Only available by App control, After setting the forbidden area, the robot will not enter the forbidden area of the room.
flowchart
graph TD
    A["Location A"] -->|Relocalization| B["Location B"]
    B -->|Be moved to| A
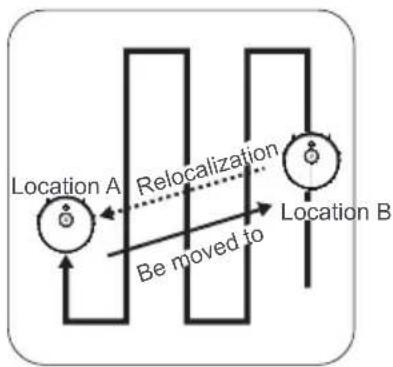
4. Relocation by LDS
During cleaning, when pause the robot and take it to a new area, then restart it to resume cleaning, the robot will begin relocation and move to its previous place.
Set Time and Scheduled Cleaning
Set Time
Note: Make sure the time is set correctly to your local time before setting a scheduled cleaning.
- Make sure the main power switch on the bottom of the S6 Turbo is turned on.
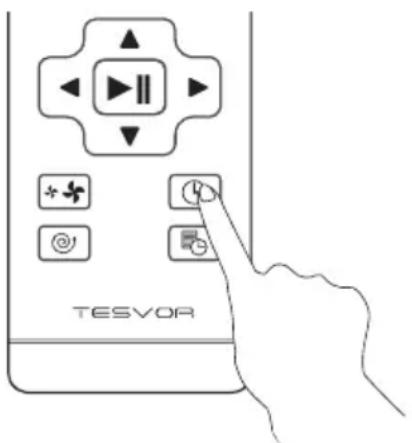
- Press ⏻ on the remote control. The time will blink on the display.
- Press ▲▼◀▶ to set the "hour" and "minute".
Note: Make sure AM/PM is set correctly.
- Press Ⓛ to save the setting.
text_image
TESVORSet a Scheduled Cleaning
You can schedule the S6 Turbo to start cleaning at a specified time. To cancel a previously scheduled cleaning session, press and hold 📋 for 3 seconds.
Note: Before setting a scheduled cleaning, make sure the time has been set correctly to your local time; refer to the previous section "Set Time" for how to set the time.
-
Make sure the main power switch on the bottom of the S6 Turbo is turned on.
-
Press 📁 on the remote control. 📁 will blink on the display.
-
Press ▲▼◀▶ to set the "hour" and "minute".
Note: Make sure AM/PM is set correctly.
- Press 📋 to save the setting.
4. Cleaning and Maintenance
For optimal performance, follow the instructions below to clean and maintain the S6 Turbo regularly. The cleaning/replacement frequency will depend on the way you use the S6 Turbo.
S6 Turbo Anatomy
Top & Side
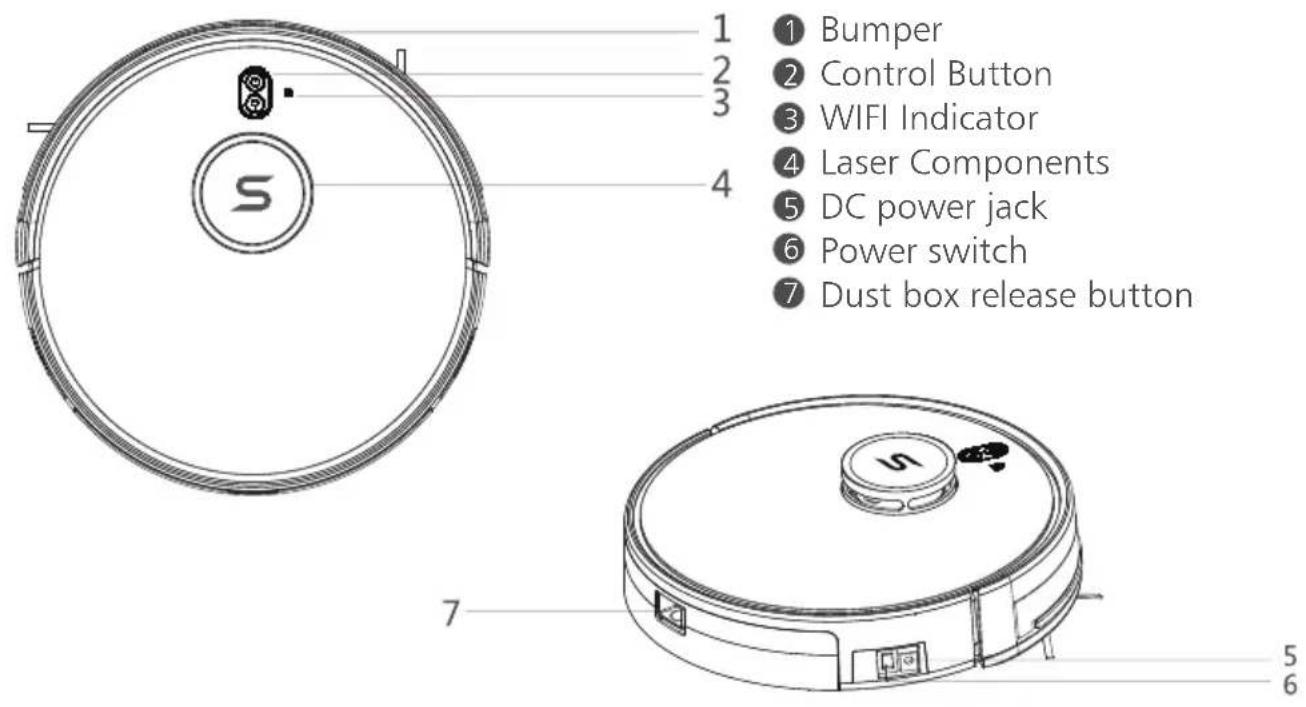
1
23
4
1 Bumper
2 Control Button
③ WIFI Indicator
4 Laser Components
5 DC power jack
6 Power switch
⑦ Dust box release button
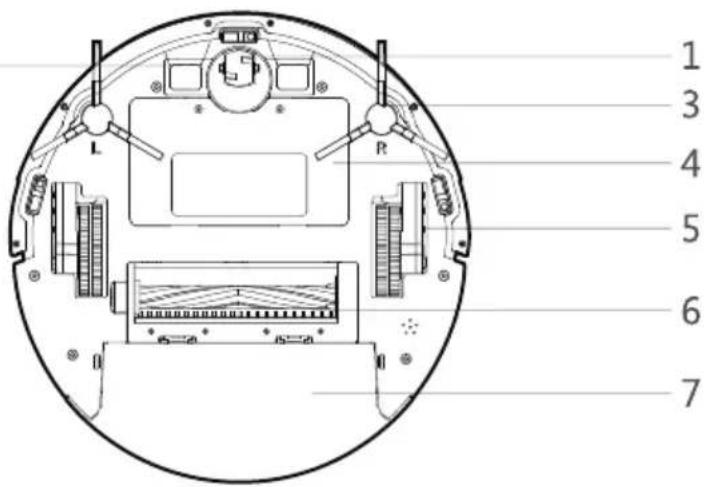
Bottom
① Swivel Wheel
② Electrode Slice
③ Side brushes
4 Battery Compartment
⑤ Wheels
6 Rolling brush
7 Dust box
2
text_image
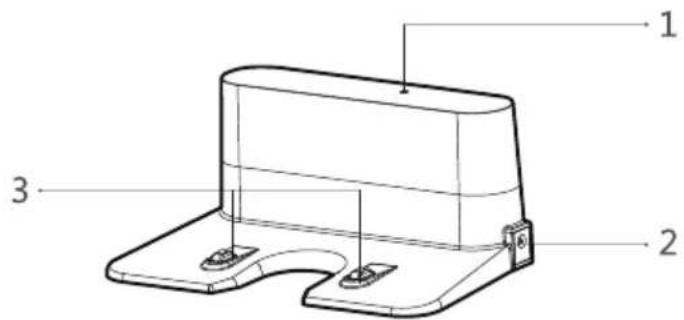
1 3 4 5 6 7Charging Base
text_image
1 2 3① Charging indicator light
② DC power jack
③ Charging terminal
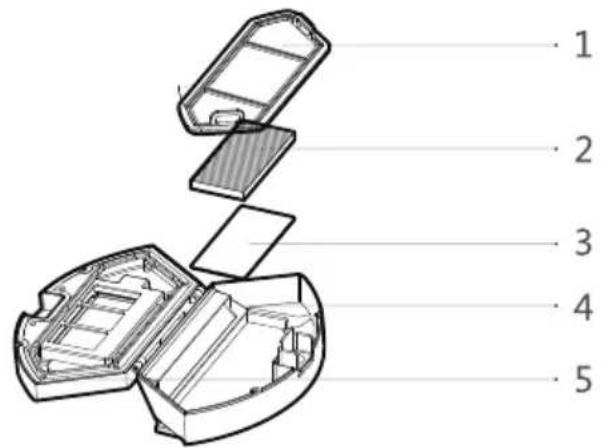
Dust box
text_image
1 2 3 4 51 Pre-filter
② High-performance filter
③ Filter sponge
4 Dust box
⑤ Dust box cover
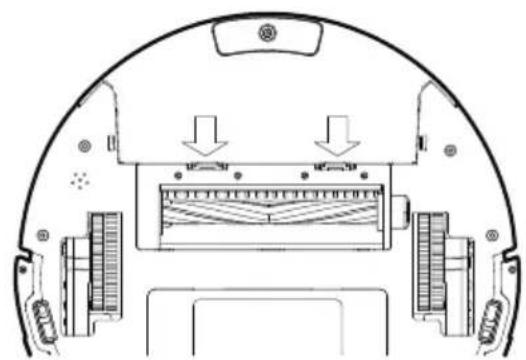
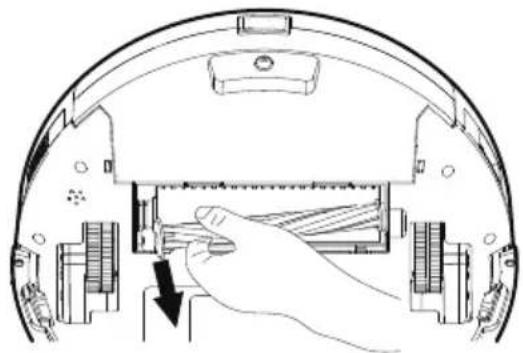
Clean the Rolling Brush
- Open the rolling brush components.
- Remove the rolling brush shaft and clean off any debris and hair.
natural_image
Top-down schematic of a device rear view showing internal components and directional arrows (no text or symbols)1
natural_image
Diagram of a robotic device showing internal components and a hand inserting a component (no text or symbols present)2
Clean the Side Brushes
Foreign substances, such as hair, can easily get tangled in the side brushes, and dirt may adhere to them. Be sure to clean them regularly.
1) Remove the side brushes.
2) Carefully unwind and pull off any hair or string that is wrapped between the main unit and the side brushes.
3) Use a cloth dampened with warm water to remove dust from the brushes or to gently reshape them.
Note: Only use the side brushes when they are completely dry.
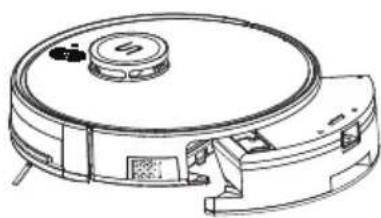
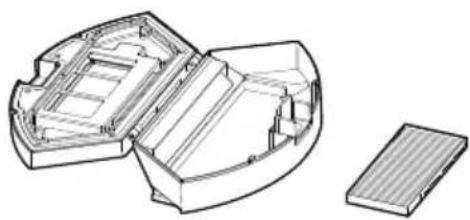
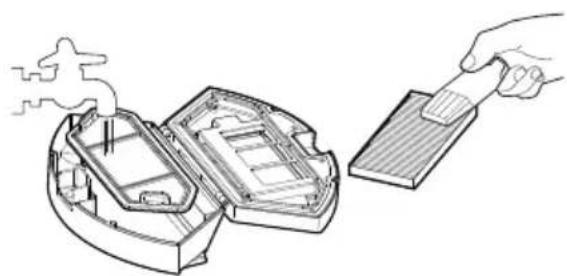
Clean the box and Filters
- Take out the dust box.
natural_image
Line drawing of a robotic vacuum cleaner with control panel and mounting bracket (no text or symbols)- Take out the high-performance filter and the basic filter.
natural_image
Technical line drawing of a mechanical housing assembly with internal compartments and a separate flat plate (no text or symbols)- Clean the dust box and basic filter with water; Clean the high-efficiency filter with a brush.
natural_image
Diagram showing a hand using a brush to clean or remove an open device, with no visible text or symbols.- Clean up all dirt and dust in the box.
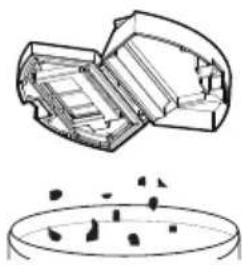
natural_image
Technical line drawing of a mechanical component with internal channels and a plate (no text or symbols)- Clean up all dirt in the high-efficiency filter.
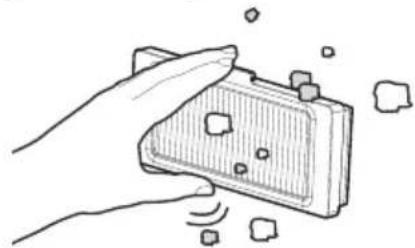
natural_image
Hand holding a small electronic device with sound waves, no text or symbols visible- Dry the dust box, high-efficiency filter and basic filter in the sun.
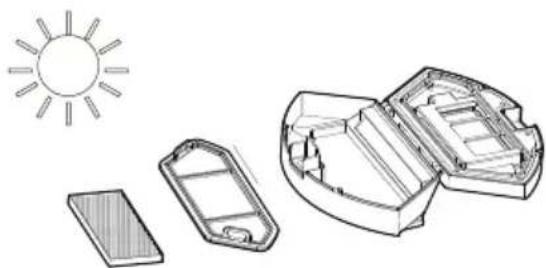
natural_image
Diagram showing a sun symbol above three open containers with different internal compartments, no text or labels present.Note: You can wash the dust box, pre-filter and Filter sponge with water. Be sure to air-dry them thoroughly before reassembling. Do not wash the high-performance filter with water, and not expose to sunlight, as it may damage the filter and reduce the suction power.
Replace the Side Brushes
The side brushes may become bent or damaged after being used for a period of time.
Follow the instructions below to replace them.
Pull off the old side brushes and snap the new ones into place.
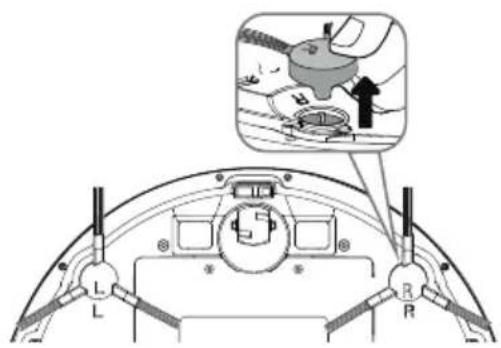
text_image
Technical diagram of a car intake system with labeled components and a magnified view showing a hand operating a fan.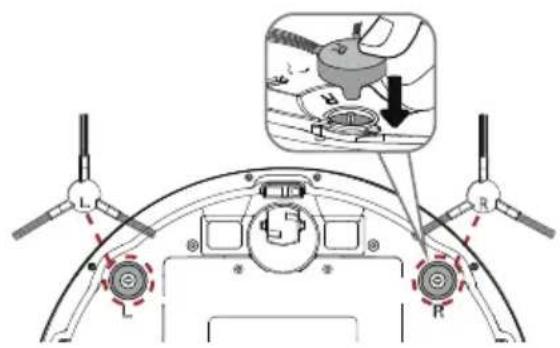
text_image
Technical diagram of a helicopter cockpit with labeled components and a zoomed-in view showing the aircraft's interior and head assembly.Clean the Sensors and Charging Terminals
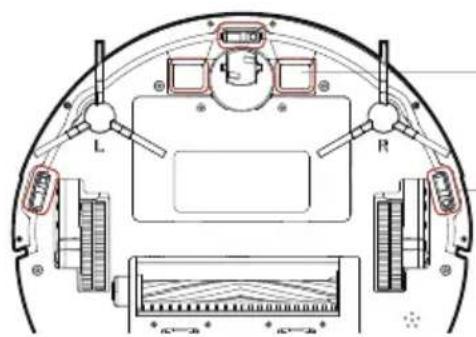
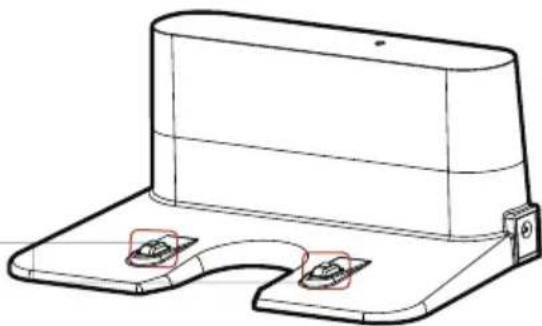
To maintain the best performance, clean the drop sensors and charging terminal regularly.
Use a soft cloth or cleaning brush to clean the sensors and charging terminals periodically.
text_image
Technical diagram of a vehicle rearview system with labeled components L and R, showing dashboard, steering wheel, and camera setup.Electrode slice
Sensor
Charging terminal
natural_image
Technical line drawing of a mechanical bracket or support structure (no text or symbols)5. Troubleshooting
Frequently Asked Questions
| Problems Causes | Solutions | |
| The S6 Turbo's movements or travel path are abnormal. | There is something wrong with the S6 Turbo's software. | Clean the sensors carefully with a dry cloth.Restart the S6 Turbo by turning the power switch off and back on. |
| The side brushes deform when you start cleaning the first time. | The side brushes are mounted in reverse. | Please install the side brushes correctly according to the marks L and R on the device. |
| The S6 Turbo doesn't keep working for 100 minutes. | The robot judge by itself that it has finished all the cleaning work and return for charging. | It is normal. |
| The S6 Turbo does not perform cleaning work automatically as scheduled on remote control. | Scheduling failed.The robot was restarted after scheduled. | The remote control scheduling must be in a non-sleep state, and there is a voice prompt for the start and success of scheduling. In addition, the robot needs to be rescheduled after power off. |
| The S6 Turbo suddenly make noise. | The side brushes or rolling brush deform. | Remove the side brushes and the rolling brush separately to see if there are still any noise when working. If yes, confirm the problem accessory and replace it with a new one. |
6. Specification
| Product Model S6 Turbo | |
| Input | 19 V/ 1 A |
| Battery Voltage | DC 14.4 V |
| Power Consumption | 25W |
| Battery Capacity 5200mAh | |
| Dust Box Capacity | 600ml |
| Cleaning Time | Max. 150 mins |
| Charging Time | 300 - 360 mins |
| Diameter of main unit | 330mm |
| Thickness of main unit | 101mm |
| Net weight of main unit | 4.8kg |
7. Customer Service
If you have any issues, please contact us by Online Service on the app or send email to service@tesvor.com.
MORE FAMILY TIME. LESS CLEANING.
Importer: Bright star consulting e.K.
Address: Humboldtstr.5, 31812 Bad Pyrmont Germany
Call Us : +49 69 365065463 Mon-Fri 9AM-5PM (CET)
Customer Service: service@tesvor.com
Company website: https://www.tesvor.com/de
Manufacturer: Shenzhen Zhisheng Dianzishangwuyouxiangongsi
Address: Qianwan Yilu 1hao Adong 201shi Qianhai shenganghezuoqu Shenzhen Guangdong China