
DD522 - Uncategorized Medeli - Free user manual and instructions
Find the device manual for free DD522 Medeli in PDF.


User questions about DD522 Medeli
0 question about this device. Answer the ones you know or ask your own.
Ask a new question about this device
Download the instructions for your Uncategorized in PDF format for free! Find your manual DD522 - Medeli and take your electronic device back in hand. On this page are published all the documents necessary for the use of your device. DD522 by Medeli.
USER MANUAL DD522 Medeli
text_image
MASTER VOLUME AUX IN TEMPOR SONG KIT VOICE PAGE - PAGE + UTILITY USER - TRIG + DRUM OFF + CLICK + - SHIFT START/STOP SAVE/ENTER REC PREVIEWDigital Drum
Owner's Manual
THE FCC REGULATION WARNING (for USA)
This equipment has been tested and found to comply with the limits for a Class B digital device, pursuant to Part 15 of the FCC Rules.
These limits are designed to provide reasonable protection against harmful interference in a residential installation. This equipment generates, uses, and can radiate radio frequency energy and, if not installed and used in accordance with the instructions, may cause harmful interference to radio communications. However, there is no guarantee that interference will not occur in a particular installation. If this equipment does cause harmful interference to radio or television reception, which can be determined by turning the equipment off and on, the user is encouraged to try to correct the interference by one or more of the following measures:
■ Reorient or relocate the receiving antenna.
■ Increase the separation between the equipment and receiver.
■ Connect the equipment into an outlet on a circuit different from that to which the receiver is connected.
- Consult the dealer or an experienced radio/TV technician for help.
Unauthorized changes or modification to this system can void the user's authority to operate this equipment.
CAUTION
The normal function of the product may be disturbed by Strong Electro Magnetic Interference. If so, simply reset the product to resume normal operation by following the owner's manual. In case the function could not resume, please use the product in other location.
PRECAUTIONS
PLEASE READ CAREFULLY BEFORE PROCEEDING
Please keep this manual in a safe place for future reference.
Power Supply
Please connect the designated AC adaptor to an AC outlet of the correct voltage.
Do not connect it to an AC outlet of voltage other than that for which your instrument is intended.
Unplug the AC power adaptor when not using the instrument, or during electrical storms.
Connections
Before connecting the instrument to other devices, turn off the power to all units. This will help prevent malfunction and / or damage to other devices.
Location
Do not expose the instrument to the following conditions to avoid deformation, discoloration, or more serious damage:
- Direct sunlight
• Extreme temperature or humidity
• Excessive dusty or dirty location
• Strong vibrations or shocks - Close to magnetic fields
Interference with other electrical devices
Radios and televisions placed nearby may experience reception interference. Operate this unit at a suitable distance from radios and televisions.
Cleaning
Clean only with a soft, dry cloth.
Do not use paint thinners, solvents, cleaning fluids, or chemical-impregnated wiping cloths.
Handling
Do not apply excessive force to the switches or controls.
Do not let paper, metallic, or other objects into the instrument. If this happens, remove the electric plug from the outlet. Then have the instrument inspected by qualified service personnel.
Disconnect all cables before moving the instrument.
Main Features 4....
Panel & Display Description
Front Panel....5
Side Panel (Connecting)....6
LCD Display....7
Setup
Connecting Pads and Pedals....8
Getting Ready to Play
Setting up the Power Supply....9
Turning the Power On/Off....9
About the Auto Power Off Function....9
Quick Play
Drum Kits and Voices....10
Playing the Pads....11
Metronome....12
Select a Preset Drum Kit and Create a User Drum Kit
About the Preset and User Drum Kit....13
Edit the Drum Kit Parameters....13
Edit the Voice Parameters....13
Save User Drum Kit....14
Playing Along with a Song
Playing Along with a Song....15
Mute the Drum Part of Song....15
Utility Mode (Utility)
The Drum Pad Trigger Settings....16
The Drum Module Settings....17
Record
Preparing Record....19
Start / Stop Recording....19
Downloading MIDI Songs from a Computer......20
MIDI
About MIDI....21
Troubleshooting....22
Prompt Messages....22
Specifications....23
Appendix
Drum Kit List 24
Drum Voice List....25
Song List....28
GM Drum Voice List....29
GM Backing Instrument List 3.1......
MIDI Implementation Chart....32
Bring the Professional Experience to Your Performance
Natural and Realistic Voices
This fresh digital drum has equipped with all fresh voices, which vastly improved sound quality and will reach a super natural and realistic sense for your ears. No matter playing the stroke roll or striking pads with velocity dynamic, all of these let you enjoy delicate nuances and natural voice, capture the unique characteristics of acoustic drum kit.
Professional Hi-hat Controlling
Our engineers are always keeping keen on simulating the real drum kit, this time we have redefined our previous pad designing, and if desired, the drummers can adjust the Close Point according to their playing habits on Hi-hat Pedal.
With different positions the pedal pressed down, the voice of pad varied while you are striking the Hi-Hat pad. And this is similar to an acoustic drum.
Conveniently Design for Left-hand Drummer
Exchange the Pads
To satisfy the requirement of left-hand player, conveniently exchange pads by referring to the Owner's Manual.
Shortcut Buttons
Add [SHIFT] to panel buttons, combined with other buttons to quickly enter the specified menu.
Preview Button
Use the preview function to listening pad voice, you can edit and play voice even in the condition that pads are unconnected, the force you pressed on the button will affect the volume of voice.
Fashionable Appearance
Used the LCD display, equipped with transparent LED buttons, all above sophisticated advantages make a vogue and attractive appearance and powerful feature drum for your performance journey.
Front Panel
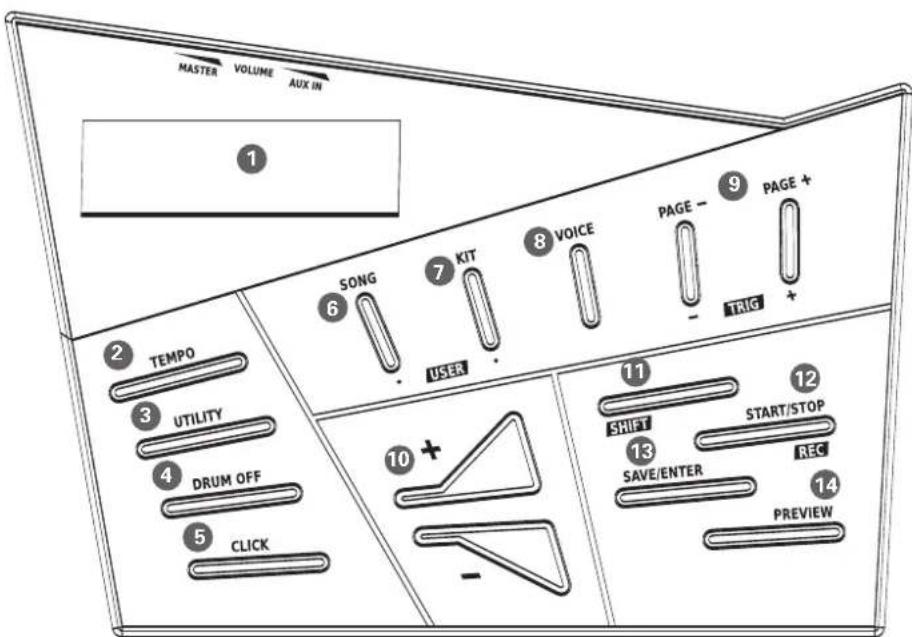
text_image
MASTER VOLUME AUX IN ① ② TEMPO ③ UTILITY ④ DRUM OFF ⑤ CLICK SONG USER ⑦ KIT VOICE PAGE - 9 PAGE + - TRIG + ⑩ + - ⑪ SHIFT START/STOP ⑬ SAVE/ENTER REC ⑭ PREVIEW1. LCD Display
Shows the name and parameter settings of Kit, Voice, Song and so on.
2. [TEMPO] Button
Adjust the tempo value.
3. [UTILITY] Button
Enter the utility mode.
4. [DRUM OFF] Button
Mute the drum part.
5. [CLICK] Button
Start/Stop the metronome, enter the metronome parameter setting.
6. [SONG] Button
Accesses to Song screen. With [SHIFT] + [SONG] shortcut buttons, quickly enter the user songs.
7. [KIT] Button
Switches drum kit. With [SHIFT] + [KIT] shortcut buttons, quickly enter the user kit.
8. [VOICE] Button
Enter the voice mode.
9. [PAGE +]/ [TRIG +]Buttons and [PAGE -]/ [TRIG -]
Page selection.
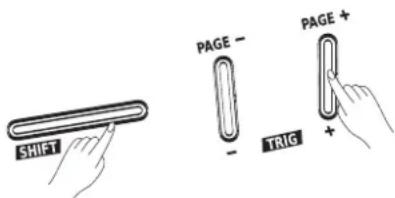
Use the combination of [SHIFT] + [PAGE -] / [PAGE +] buttons to select a trigger pad, such as snare, kick and so on.
10. [+] / [-] Button
Gradually increasing or decreasing the value of settings.
11. [SHIFT] Button
Combined with [SONG] / [KIT] / [PAGE+] / [PAGE-] / [START / STOP] buttons.
Combined with [SONG]/ [KIT] button, quickly enter the user mode.
Combined with [PAGE+] / [PAGE-] button, select a trigger you want.
Combined with [START]/ [STOP] button, enter the quick record mode.
12. [START/STOP]/ [REC] Button
Start / Stop playing songs.
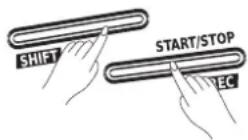
Press the [SHIFT] + [START / STOP], enter quick record.
13. [SAMEENTER
Save the drum kit / pad settings.
14. [PREVIEW] Button
Press this button when you want to preview pad voice, the volume value are related to the force level you have pressed on the button.
Side Panel (Connecting)
Note:
To prevent malfunction and equipment failure, alwaysturndown the volume, and turn off all the units before making any connections.
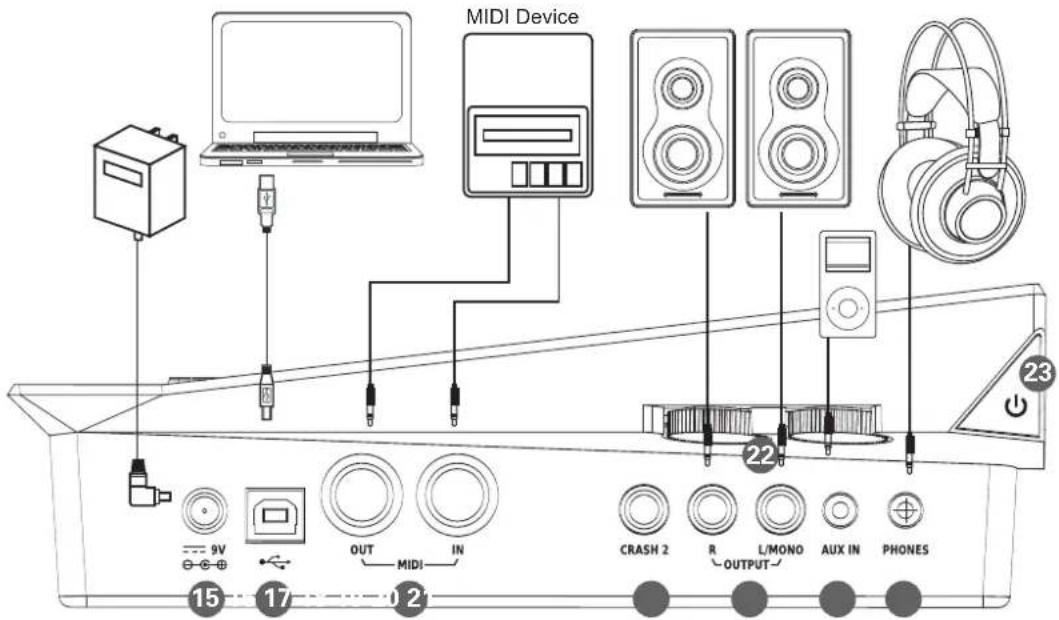
text_image
MIDI Device 9V OUT MIDI CRASH 2 R L/MONO AUX IN PHONES 15 17 0 2 22 2315. DC IN jack
Connect the AC adaptor here. Plug the AC adaptor cable into the DC IN jack.
16. USB MIDI Terminal
Use this when you want to connect a PC/laptop or USB host device.
Note:
Only transmit MIDI data.
17. MIDI Terminal
Use this to connect extra MIDI sequencer, transmit MIDI data.
MIDI IN Connector: receive MIDI data; you can receive MIDI data from an extra MIDI device or a PC/laptop.
MIDI OUT Connector: send MIDI data; you can send MIDI data to an extra MIDI device or a PC/laptop.
18. CRASH 2 jack (1/4")
This allows you to connect additional Crash 2.
19. OjdrP(II MONO, R) (2×1/4")
For connecting to your audio system or amplifier, all sounds from the module are output here.
L/ MONO jack: output sound in MONO.
R and L/ MONO jacks: output sound in stereo.
20. AUX IN jack (1/8")
For connecting an extra audio player, for example, Mp3 and so on via a stereo plug. You can enjoy playing the drum along with your favorite songs.
21. PHONES jack(1/8")
Connect stereo headphones here. Detecting all output sounds. Plug the headphone cable into this jack, sound will still be output from the OUTPUT jacks.
22. VOLUME knob
AUX IN: adjust the volume of extra audio.
MASTER: adjust the volume of headphone and output. Note:
Before turning the module on, always be sure to turn the volume down.
23. POWER button
Press this button to power on / off the module.
24. TRIGGER INPUT CONNECTOR terminal
Connect the included dedicated cable to this connector, and use it to connect the pads and pedals.
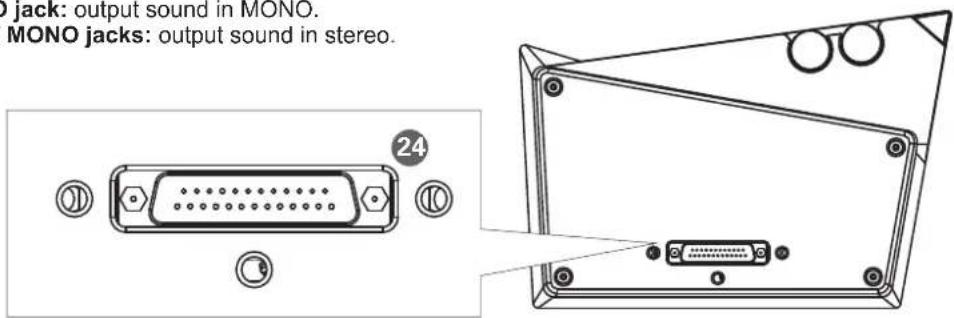
text_image
MO jack: output sound in MONO. MONO jacks: output sound in stereo. 24LCD Display
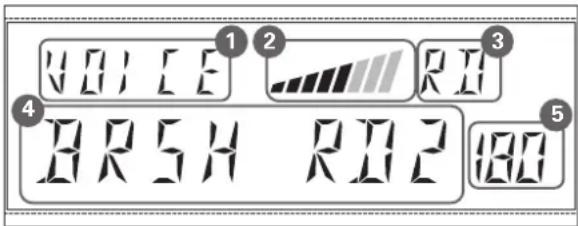
text_image
1 2 3 4 5 BRSH RD2 1801. Mode
Display the current mode, such as SONG, KIT and so on.
2. Velocity
Display the touch sensitivity of current pad you are playing or the force level you press on the [PREVIEW] button.
3. Pad Name
Display the current pad name.
4. Parameter Name
Display the parameter name, such as PAN, REVERB and so on or the name of song/kit.
5. Parameter Value
Display the value which corresponding to the parameter or the number of song /kit.
Caution!
To prevent electric shock and damage to drum module or other devices, always turn off the power of all devices before making any connections.
Connecting Pads and Pedals
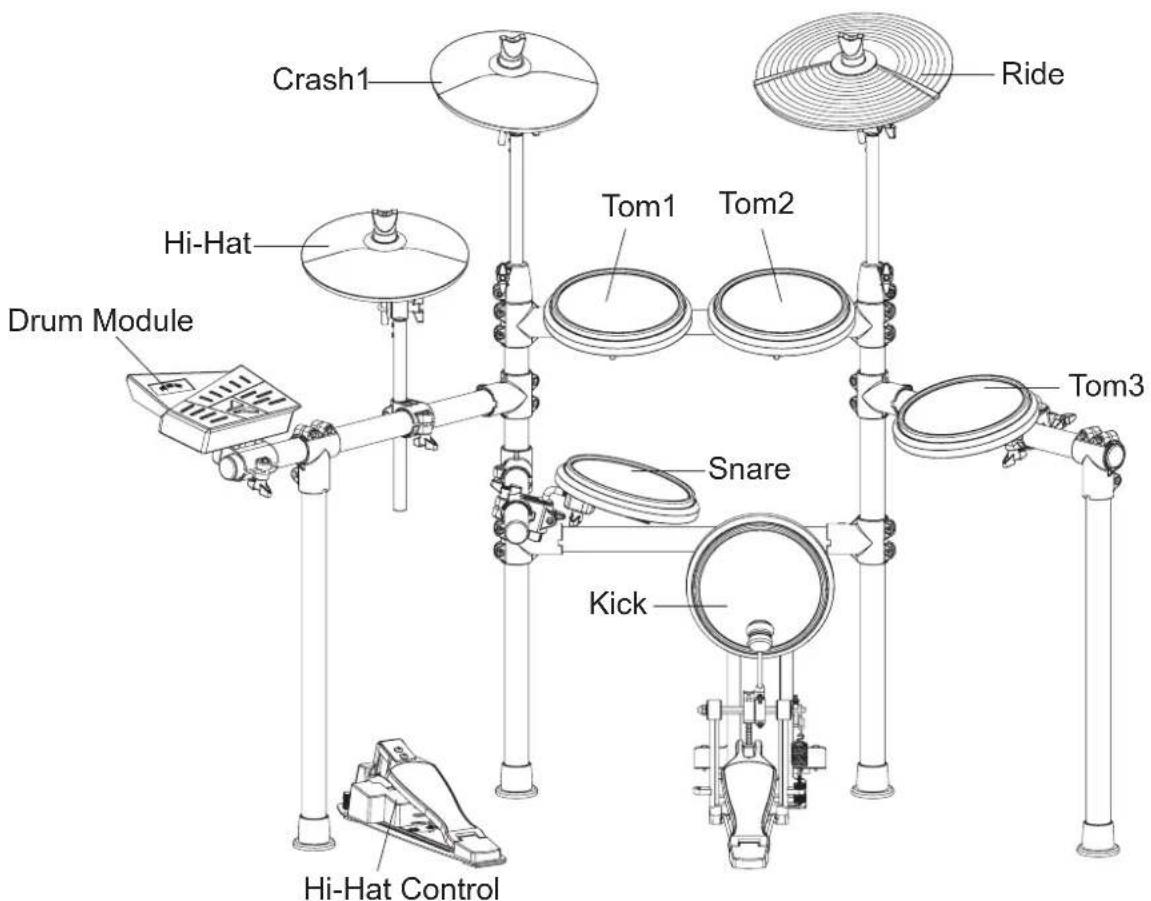
Standard configuration: KICK, SNARE (rim shot), TOM 1\~3, CRASH 1 (Choke), RIDE (Choke), HI-HAT, HI-HAT CONTROL PEDAL.
Additional configuration: CRASH 2.
text_image
Crash1 Ride Hi-Hat Tom1 Tom2 Drum Module Tom3 Snare Kick Hi-Hat ControlNote:
- The SNARE, CRASH 1 (CRASH 2) and RIDE are stereo output, and other pads are mono output.
- Using the cables provided, connect each Trigger input jack on the rear panel of the module, and make sure each pad is connected to its corresponding trigger input jack.
- For details on assembling the drum stand, attaching the digital drum and connecting pads, refer to the Installation Manual description.
Getting Ready to Play
Setting up the Power Supply
- Connect the DC plug of the AC power adaptor to the DC IN jack on the rear panel.
- Connect the other end of the power cord to the AC outlet.
Note:
- Only use the voltage specified as correct for the drum module.
- Even when the module is turned off, electricity is still flowing to the module at the minimum level. When you are not using the drum module for a long time, make sure to unplug the AC power adaptor from the wall AC outlet.
Turning the Power On/Off
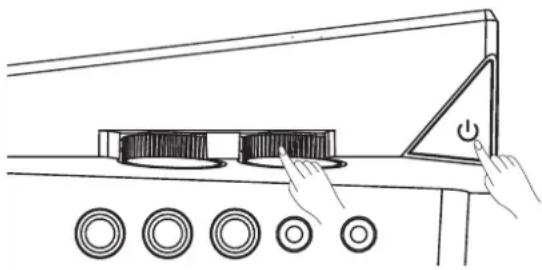
Turning the power on
Make sure that you have made all necessary connections (trigger, audio and so on), turn down all volume controls of the module and other audio equipment.
- Turn the [VOLUME] knob always to minimize the volume.
- Minimize the volume of the connected amplifier, headphone or audio system.
- Press the POWER button.
-
Turn the amplifier or audio system on, or listen to the headphone.
-
Striking the pads and adjust the volume by slowly turning the [VOLUME] knob (module, amplifier, audio or headphone) toward the right direction. Keep turning until you get an appropriate value.
Turning the power off
-
Minimize the volume of the module and the external equipment connected to the module.
-
Power off all the external equipment.
-
Press the POWER button again.
Hint:
The drum module automatically stores saved settings before it turns off, you can also restore the factory set by following steps:
a) Press the [+] and [-] buttons simultaneously.
b) Press POWER button.
c) Until the LCD displays "FACRESET", complete reset operation.
About the Auto Power Off Function
In order to save energy, we have designed the "Automatic Power Off" function to the digital drum. With this function, the drum will be powered off automatically when being idle for more than 30 (default) minutes. Refer to Utility Settings.
natural_image
Line drawing of a hand pressing down on a mechanical component with circular buttons (no text or symbols)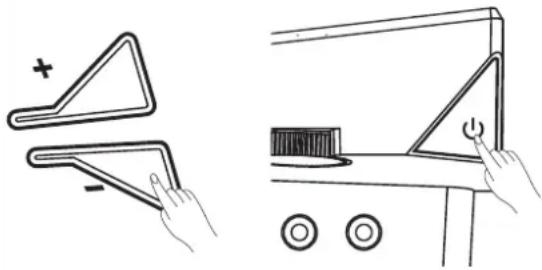
natural_image
Illustration showing two hand positions: one with a plus sign, the other with a button and three circular buttons (no text or symbols)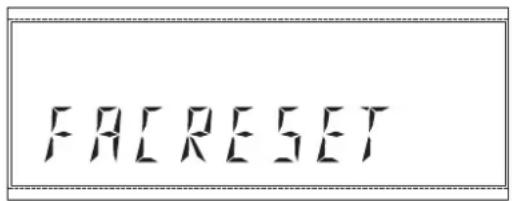
text_image
FACRESETQuick Play
Drum Kits and Voices
There is only a fixed drum kit in an acoustic drum, but, to a digital drum, it has a lot of drum kits. This is just one of the digital drum characteristics.
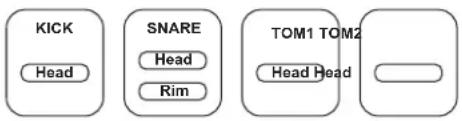
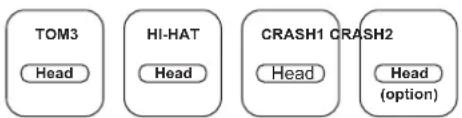
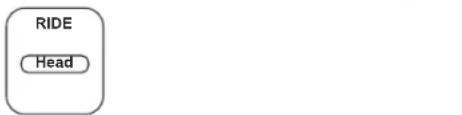
The structure of a drum kit showed on the right:
Drum Kits and Voices
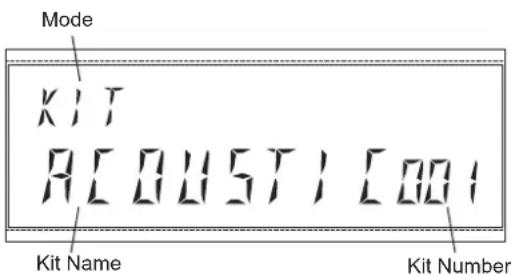
- Press the [KIT] button, enter drum kit menu. The screen shows on the right:
- Press the [+] / [-] button, select your desired drum kit. (Refer to Drum Kit list)
Selecting a voice
While striking the pads, you can listen to the ensemble kit sound effect. If you are not satisfied the voice of any pads, you can individually change the pad voice.
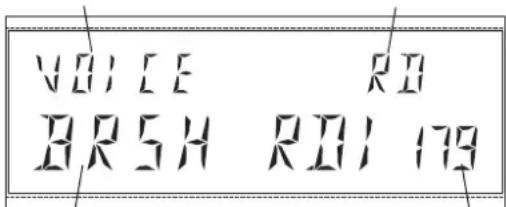
- Press the [VOICE] button, enter the voice menu. The screen shows on the right:
- Hit the pad that you want to change its voice or you can use the combination buttons [SHIFT] + [PAGE+] / [PAGE-]. The screen displays the name of current pad.
- While striking the pad, pressing the [+] / [-] button until you find an appropriate voice for your pads. (Refer to Voice List)
KIT xx
flowchart
graph LR
    A["KICK"] --> B["Head"]
    C["SNARE"] --> D["Head"]
    C --> E["Rim"]
    F["TOM1 TOM2"] --> G["Head Head"]
flowchart
graph TD
    A["TOM3"] --> B["Head"]
    C["HI-HAT"] --> D["Head"]
    E["CRASH1"] --> F["Head"]
    G["CRASH2"] --> H["Head (option)"]
text_image
RIDE HeadDrum Kit settings: Volume, 3-Band EQ. Voice settings: Volume, Pan, Pitch, Reverb, Decay, Pad Song and so on.
text_image
Mode KIT ACOUST [001] Kit Name Kit NumberMode Current Pad
text_image
VOICE RO BRSH RDI 179Voice Name Voice Number
text_image
SHIFT PAGE - - TRIG PAGE + +Playing the Pads
This section introduces various performance functions that will help you perform more expressively on the pads. Similar to an acoustic drum kit, the digital drum responds differently to various playing techniques and dynamics. All the pads are velocity sensitive. And some voices change timbre depending on the striking force.
Pad
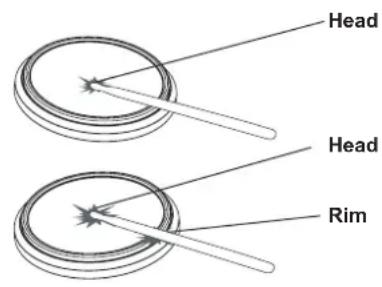
Only the snare drum can detect both head and rim shot.
Head
Hit only the head of the pad.
Rim Shot
Strike the head and the rim of the pad simultaneously. Or you can only strike the rim of the pad.
Cymbal
Cymbal Bow shot
Playing the bow area of the cymbal.
Choke Play
Both Ride and Crash cymbals have cymbal choke. But hi-hat don't have the cymbal choke.
Choking the crash/ride edge with the hand immediately after hitting the crash/ride mutes the crash/ride sound.
Hi-Hat
Hi-Hat Pedal Change
With different positions the pedal pressed down, the voice of pad varied while you are striking the Hi-Hat pad. And this is similar to an acoustic drum.
Open Hi-Hat
Strike the Hi-Hat pad without pressing the pedal.
Closed Hi-Hat
Strike the Hi-Hat pad with the pedal pressed completely down.
Hi-Hat Pedal
Press the hi-hat controller's pedal to create a foot-close sound without having to strike the hi-hat pad.
Splash
Playing the hi-hat with the pedal fully pressed and then instantly opening it.
text_image
Head Head Rim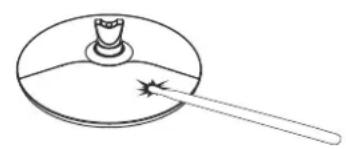
natural_image
Simple line drawing of a lid with a handle and a small object inside, no text or symbols present.
natural_image
Illustration of two hands holding a cylindrical object with a handle, showing the same top view (no text or symbols)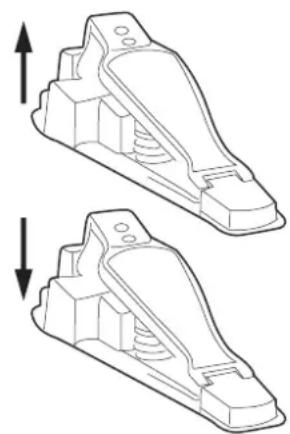
natural_image
Technical line drawing of two mechanical components with upward and downward arrows indicating movement (no text or symbols)Metronome
Practicing with the metronome is the best way to develop your accurate timing. Adjust a right tempo for your learning / performance require.
Starting/ Stopping the Metronome and Its Feature
- Press the [CLICK] button.
The metronome will start playing, and the button will blink as the tempo.
- Change the Voice, Volume, Tempo, Beat and Rhythm parameters of metronome. Use the [Page +] / [Page -] button to select the parameter you want to edit.
| Parameter | Value | Description |
| NAME | 1~6 | Select the voice name which corresponding to each number. |
| VOLUME | 0~16 | Adjust the volume of metronome. |
| TEMPO | 30~280 | Adjust the tempo value. |
| TIME SIGNATURE | 0-9/2, 0-9/4, 0-9/8, 0-9/16 | Adjust the time signature. |
| INTERVAL | 1/2, 3/8, 1/4, 1/8, 1/12, 1/16 | Adjust the interval. |
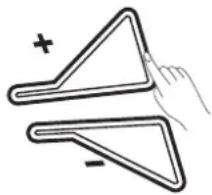
- Use the [+] / [-] button to change the parameter value.
- Press the [CLICK] button again to stop the metronome, and you will find the light goes out.


Select a Preset Drum Kit and Create a User Drum Kit
About the Preset and User Drum Kit
From no.1 to 30 are preset drum kits. You can edit the parameter of drum kit (from no.1-30), and you need save these changes into user drum kits (from user kit 001\~005).
Note:
After you have edited the drum kit parameter or voice data, please save your changes immediately or all changes may lost.
Edit the Drum Kit Parameters
Change drum kit volume and EQ parameters, the overall effect of drum kit will be affected. That is to say, if you increase the volume of drum kit, all volume of the pads will be increased.
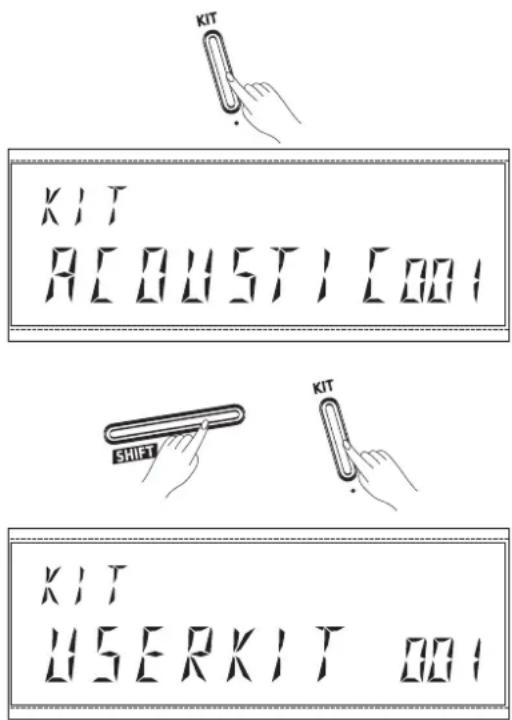
- Press the [KIT] button, the LCD will display the kit menu.
Use the combination of [SHIFT] + [KIT] buttons to enter the user drum kit USER KIT001 quickly. - Press the [PAGE+] / [PAGE-] button to select the item that you want to edit.
| Parameter | Value | Description |
| KIT NAME | Preset: 1~30User: 1~5 | Drum kit selection. |
| VOLUME | 0~16 | Adjust the volume of drum kit; the volume of each pad will be changed. |
| EQ HIGH | -12~12 | Adjust the gain (amplitude change) in the EQ high frequency band. |
| EQ MID | -12~12 | Adjust the gain (amplitude change) in the EQ middle frequency band. |
| EQ LOW | -12~12 | Adjust the gain (amplitude change) in the EQ low frequency band. |
- Press the [+]/[-] button to adjust parameter value.
Edit the Voice Parameters
The voice parameters are aimed at one pad. For example, if you have increased the volume of snare, the other pads wouldn't change their volumes.
- Press the [VOICE] button, and the LCD will display voice menu.
-
Press the [TRIG +] / [TRIG -] button or strike the pad that you want to edit.
Combination buttons: [SHIFT] + PAGE +] / [PAGE -]. -
Press the [PAGE +] / [PAGE -] button to select an item you want to edit.
text_image
KIT AC OUSTI COO SHIFT KIT USERKIT COO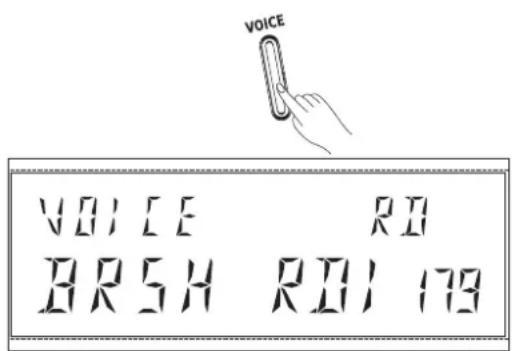
text_image
VOICE VOICE RD BRSH RDI 173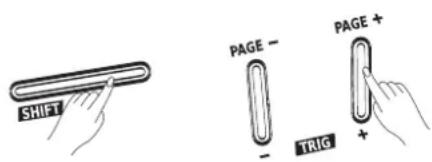
text_image
SHIFT PAGE - TRIG PAGE + +| Parameter | Value | Description | Triggers |
| VOICE NAME | 1–380 | Select a voice. | KI (Kick)SN (Snare)SNR (Snare Rim)T1 (Tom1)T2 (Tom2)T3 (Tom3)HH (Hi-hat)C1 (Crash1)RD (Ride)PD (Hi-hat Pedal)C2 (Crash2)PS (Hi-hat Splash) |
| VOLUME | 0~16 | Adjust the volume of voice. | |
| PAN | -8~8 | Adjust the pan of voice. | |
| PITCH | -8~8 | Change the pitch of voice. | |
| REVERB | 0~16 | Adjust the reverb of voice. | |
| DECAY | -5~0 | Adjust the decay of voice. | |
| NOTE | 0~127 | MIDI note. | |
| PAD SONG | Off, 1–82 | Switch the pad song on/off and choose the song number. |
- Press the [+] / [-] button to adjust parameter value.
Preview pad voice
Expect striking the pads, you can also pressing the [PREVIEW] button to preview the instrument voice. The force you pressed on the button will affect the volume of voice.
Save User Drum Kit
You should always save the edited drum kit and voice data before you switch to other menu or turn the module off, or the data will be lost.
- While in the drum kit and voice edit menu, pressing the [SAVE] button to save all changes.
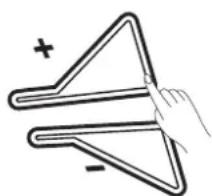
- Use the [+]/[-] button to select a user drum kit (From user kit 001 to 005).
- Press the [SAVE] button again, you will find the LCD displays "SAVE OK", it means saved successfully.
K1T
SV U-KITOO!
natural_image
Simple line drawing of a triangular shape with plus and minus signs, no text or symbols present
K1T
SAVE OK
Playing Along with a Song
There are 82 built-in songs coving a variety of styles. You can play the drums while listening to one of these songs.
Playing Along with a Song
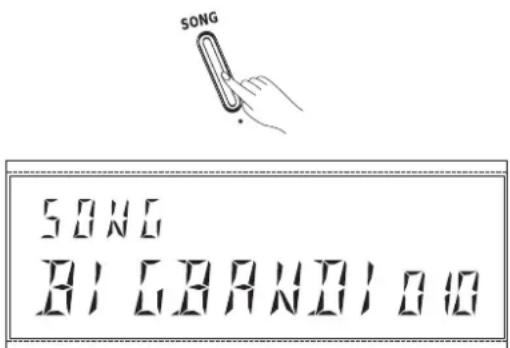
- Press the [SONG] button to enter the selection menu.
- Press the [PAGE+] / [PAGE-] button to select the menu that you want to edit.
| Parameter | Value | Description |
| SONG NAME | 1~82 | Select a song. |
| ACCOMPANY VOLUME | 0~16 | Adjust the accompaniment volume. |
| DRUM VOLUME | 0~16 | Adjust the drum volume. |
| DELETE | ---- | Delete user song.Press [SAVE/ENTER] button to enter “CONFIRM N”, then press [+] to switch “CONFIRM Y” display and press [SAVE/ENTER] to confirm. |
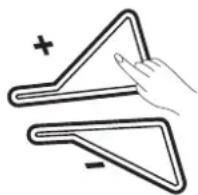
- Use the [+] / [-] button to adjust the value.
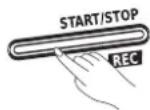
- Press the [START/STOP] button to play/stop song.
Mute the Drum Part of Song
If you want to learn a song, you can first practicing this song while playing songs. As you have controlled the drum part of a song, you can use this mute function to make some challenges, mute the drum part, or decrease the drum volume gradually.
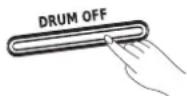
Press the [DRUM OFF] button to mute the drum part, the [DRUM OFF] button will light.
text_image
SONG B1 G BAN D1 0 10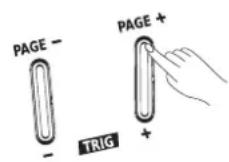
Utility Mode (UTILITY)
This mode contains two parts: the drum pad trigger settings and drum module settings.
The Drum Pad Trigger Settings
As a professional drummer, you may be very pleased to set your drum triggers carefully corresponding to your playing habits and feelings, making your performance more interesting and professional. At the meantime, your digital drum will be more operability.
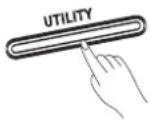
- Press the [UTILITY] button, the LCD will display the UTILITY menu.
- Press the [PAGE +] / [PAGE -] button; select the trigger parameters that you want to edit.
The drum pad trigger settings are as bellow:
UTILITY
5 N
SENS
009
natural_image
Simple line drawing of two triangular shapes with a plus sign and a minus sign, no text or symbols present.| Parameter | Value | Description |
| SENSITIVITY | 1~16 | Adjust the sensitivity of the pad to regulate the pad response. Higher settings result in higher sensitivity, so that the pad will produce a loud volume even when struck softly. Lower sensitivity will keep the pad to producing a low volume even when played forcefully. You can also adjust the sensitivity of the splash in Splash Sensitivity. |
| RIM SENS | 1~16 | Adjust the sensitivity of rim shot. |
| THRESHOLD | 1~16 | The threshold of the pads means a specified signal level, and only the trigger signal above it can be sounded. This setting can prevent some unwanted sounding , such as crosstalk from other pads and so on.For example, B will sound but A and C will not sound.If it is set to a high value, no sound may be heared when strike lightly.You can adjust threshold like this:1. Firstly set it to a low value;2. Raise the value a little, then strike the pad to check and adjust;3. Repeat step2 until the most suitable setting for performance has been achieved. 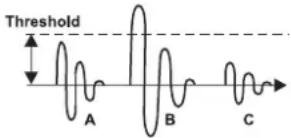 |
| XTALK | 1~16 | When two pads are mounted on the same stand, the vibration produced by hitting one pad may trigger the sound from another pad unintentionally (This is called crosstalk.) You can avoid this problem by adjusting Crosstalk on the pad that is sounding inadvertently. If the value is set too high, then when two pads are played simultaneously, the one that is struck less forcefully will not sound. So be careful and set this parameter to the minimum value required to prevent such crosstalk. With a setting of "0", crosstalk prevention does not function. |
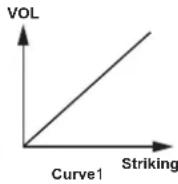
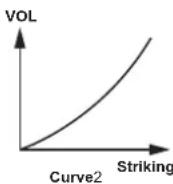
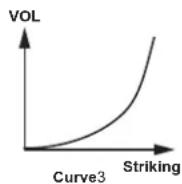
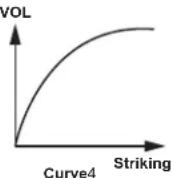
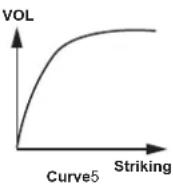
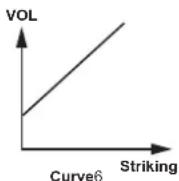
| CURVE | 1~6 | You can control the relation between striking force and response volume by this setting. Adjust the curve to satisfy your playing requirement.Refer to the CURVE description. Refer to the CURVE description. |
| RETRIG CANCEL | 1~16 | This setting avoids "re-triggering", which means that when you strike a pad once, maybe you can hear two hits coming from one strike. This may happen when pad vibrating. Adjust the "Retrigger Cancel" value and strike the pad to see if there is any re-triggering. Be careful to set it to a suitable value. If too high, some sounds may be omitted when played fast; if too low, retrigger can't be prevented effectively. It is best to set it to a value just prevented retriggering. |
| HH CLOSE | 0~2 | Adjust the position of Hi-Hat close.If you set the parameter as "0", it means a low Hi-Hat close position; you need to step the pedal almost down tightly.If you set the parameter as "1", it means a mid Hi-Hat close position; you just only to step the pedal on an appropriate level.If you set the parameter as "2", it means a high Hi-Hat close position; you don't need to step the pedal by too much force. |
| SPLASH | 1~5 | Splash sensitivity. The higher value makes the splash easier. |
-
Striking the specified pad or use the [SHIFT] + [PAGE+] / [SHIFT] + [PAGE-] combination buttons, select the pad that you want to edit.
-
Use the [+]/[-] button to adjust the parameter value.
Note:
The Curve descriptions are shown below:
Curve 1: The most natural setting. There is a linear change between playing dynamics and volume response.
Curve 2, 3: Compared to Curve 1, heavily strikings make greater change.
Curve 4, 5: Compared to Curve 1, gentle strikings make greater change
Curve 6: Even a soft strike can make strong volume, and the range of dynamic response is small. Especially when a drum trigger is used as an external pad, reliable triggering can be made.
The Drum Module Settings
You can go further set the drum module function, do as the procedures showed below:
-
Press the [UTILITY] button, the LCD will display the UTILITY menu.
-
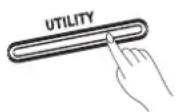
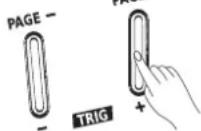
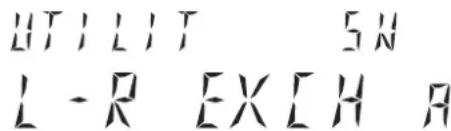
Press the [PAGE+] / [PAGE-] button to select the "L-R EXCH" item on the LCD menu.
What is "L-R EXCH"?
The "L-R EXCH" function is specially designed for those drummers who play drums with left-hand habit. Detailed description bellow:
-
The default pad position diagram showed on the right, please confirm the "L-R EXCH" setting is set to "R", this is the default parameter.
-
Now, maybe you want to move pad positions to adapt to your left-hand playing, not that much trouble, with our new design you can finish pad position in the condition of no changelings of cables. Firstly changing the "L-R EXCH" setting to "L", and following the procedure 3 below:
a) Tom 1 and Tom 2
b) Crash and Ride
c) Hi-hat, Pedal and Bass Drum
d) Move the Snare to right side, and the Tom 3 to left side.
- Continue pad exchange, suggest operation as follows:
a) Make sure the module is powered off.
b) Pull out all pad cables.
c) Move the left and right standers backward direction (About 90 degrees) to an appropriate position.
d) Rotated the horizontal stick of snare in backward direction about 90 degrees.
e) Loosen and pull out the left side stander, pull out the module with its pedestal, and then separate the module from pedestal, adapting negative-fixed to put them up again. Install back to the horizontal stick.
f) Remove the Hi-hat pedal and Bass Drum to the opposite side, adjust pads, crashes to an appropriate position and direction.
g) Connect cables to corresponding pads.
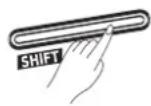
h) Above procedures completed, power module on, and set the "L-R EXCH" parameter to "L", press "SAVE/ENTER" button to save settings.

text_image
UTILIT 5N L-R EXCH A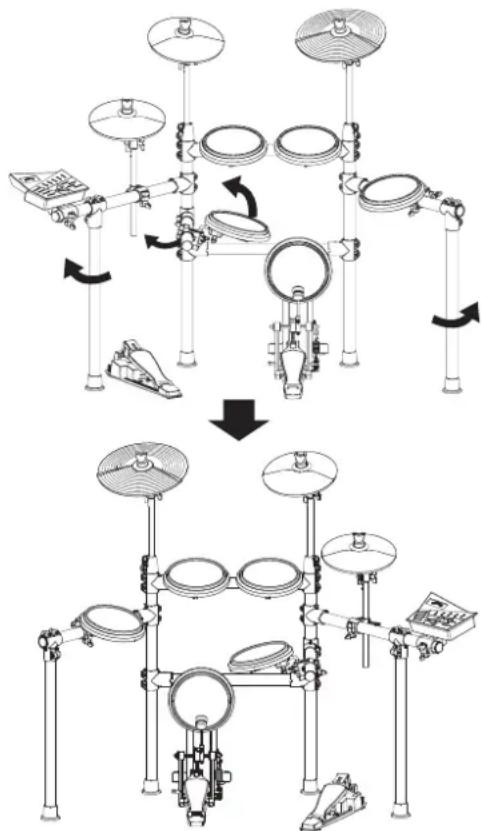
flowchart
graph TD
    A["Top Setup: Ball and Shoe"] --> B["Step 1: Control with Roll"]
    B --> C["Step 2: Control with Dials"]
    C --> D["Step 3: Control with Dials"]
    D --> E["Bottom Setup: Diameters on Platform"]
    E --> F["Step 4: Control with Dials"]
    F --> G["End"]
- You can press the [PAGE +] / [PAGE -] button to select the function menu and use the [+] / [-] button to adjust the parameter value.
The Setting description of drum module, as follows:
| Parameter | Value | Description |
| L-R EXCH | R/L | Exchange the left and right pad position.R: Normal settings.L: You can exchange the left and right pad position to satisfy the left-hand player. |
| LOCAL | ON/OFF | Specifies whether the pad signal will be connected to the internal sequencer or disconnected from the internal sound generator.ON:The pads and internal sequencer are connected to the digital drum's internal sound generator. Sounds are produced by the internal sound generator when the pads are struck.OFF:The pads and internal sequencer are disconnected from the digital drum's internal sound generator. Striking the pads does not cause sound to be produced by the internal sound generator. |
| GM MODE | ON/OFF | ON: The channel 10 will respond GM drum kit.OFF: The channel 10 will respond local drum kit. |
| AUTO POWER | 30, 60 ,OFF | Factory settings, approximately 30 minutes.30: Automatically turns the power off if no operation for approximately 30 minutes.60: Automatically turns the power off if no operation for approximately 60 minutes.OFF: The power will not power off automatically. |
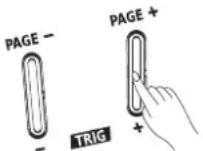
This digital drum lets you easily record your own performance. Quick record 5 user songs and about 6500 drum notes could be recorded in a song. Each song has two parts (The Drum and Accompaniment).
Preparing and starting record, refer to details bellow:
Preparing Record
Press the [REC] button (Combination buttons [SHIFT] + [START/STOP]) to enter prepare record mode, the [REC] button will light, enter the record standby mode.
Select User Song
-
The U-SONG 001\~005 which with "U-" prefix are user songs, for example, the name of the song displayed as "* U_SONG" (Pay attention to the "* mark), it means this song is empty, no data. Otherwise, contains record data.
-
Press the [+] / [-] button to select user song (from U-SONG 001\~005).
Select an Accompaniment Song
-
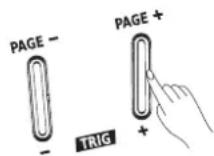
Press the [PAGE +] / [PAGE -] button, enter the Accompaniment Song Selection menu, the LCD displays "SONG xx".
-
Press the [+] / [-] button to select an accompaniment song. “--”: There is no accompaniment song. 1\~60: The number of preset songs.
The Parameters of Record
In state of preparing record, you can adjust these parameters below:
| Parameter | Value | Description |
| *U_SONG | 001~005 | Select a recorded song. The name with “*” mark means the song is empty. |
| SONG | --/1, 2,...,60 | Accompaniment song and the “--” means there is no accompaniment song and you can record drum solo. |
| KIT | 1~35 | Recorded drum kit. |
| TEMPO | 30~280 | Adjust the tempo value. |
| TIME SIGNATURE | 1-9/2, 1-9/4, 1-9/8, 1-9/16 | Adjust the time signature. |
| INTERVAL | 1/2, 3/8, 1/4, 1/8, 1/12, 1/16 | Select a interval. |
| DRUM OFF | ON/OFF | Turn off the drum part.ON: Keep the drum part playing.OFF: Turn off the drum part. |
| PRECOUNT | ON/OFF | Turn on/off the precount function. |
Start / Stop Recording
-
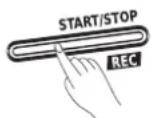
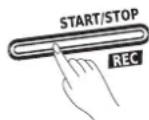
You can start recording in real time while in the preparing record menu, there are two ways to start record: Press the [START/STOP] button. Strike one pad.
-
While recording song, the [REC] button keeps flashing all along, and the LCD displays as "RECORDING---".
-
Press the [START/STOP] button again or you can press the [REC] button (Combination buttons [SHIFT] + [START/STOP]) to stop recording, and the [REC] button light will goes out.
Note:
If the record storage capacity is full, the LCD will display "REC FULL" temporarily and then stop recording.
RECORD
米 U-SONG002
RECORD
SONG 008
RECORD
SONG --
RECORD
1 NG --- 005
RECORD
REC FULL
Downloading MIDI Songs from a Computer
There are 5 user songs can be saved and all data will not be erased. Except 5 songs recorded by this module in quick record way, you can also download 5 user songs from a computer.
Note:
Prepare for computer, download software, USB or USB-MIDI cable to download user songs from computer.
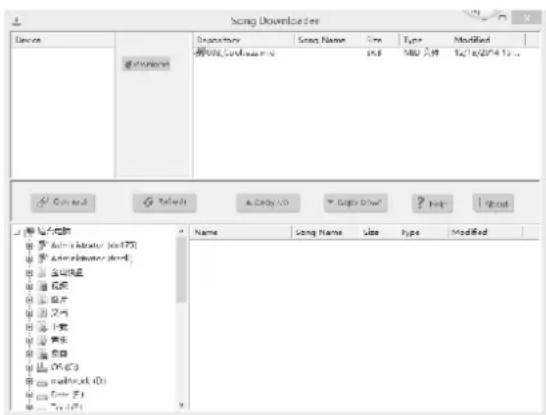
The interface of download software showed on the right side:
- Download specified software: You can download "Song Downloader" software on the website http://www.mecldata.com/download/apps/
- Connect to a computer:
- Download MIDI songs from a computer. It is very easily to download MIDI songs to your module (For more details, please refer to PC help content).
Note:
■ Support SMF MIDI file only.
■ Capacity less than 20K per MIDI file.
■ The filename extension should be ***.MID.
■ The download song only can be saved in one of user song 1\~5.
■ The new download song will automatically cover the old one, so you do not have to delete it in advance.
■ Support Window XP, Window 7 32bit, Window 7 64bit, Window 8 32bit, Window 8 64bit system.
text_image
Song Downloader Device #000000000000000000000000000000000000000000000000000000000000000000000000000 Name Song Name Size Type Modified Date: 12/18/2014.13 Administrator (all75) Administrator (all6) All-View View View View View View View View View View View View View View View View View View View View View View View View View View View View View View View View View View View View View View View View View View View View View View View View View View ViewAbout MIDI
MIDI (Musical Instrument Digital Interface) is a standard that allows performance data and other information to be exchanged among electronic musical instruments and computers. With a MIDI cable connecting MIDI connectors equipped device, you can play multiple instruments with a single electronic musical instrument, have multiple instruments perform in ensemble, program the settings to change kits automatically to match the performance as the song progress, and more.
MIDI Connection
MIDI IN: This terminal receives MIDI data from an external MIDI device.
MIDI OUT: This terminal transmits data from the digital drum to other MIDI devices.
USB Connection
The USB connector allows you to connect the digital drum directly to your computer. It can be connected without installing a driver in Windows XP/Vista/Win7 or MAC OSX environments. The digital drum will be recognized as a "USB Audio device" to receive and transmit MIDI messages through a single USB cable. The USB port is used only for MIDI messages (MIDI via USB).
Compatible USB connector: USB 3.0, USB 2.0 full speed and USB high speed.
Note:
When the USB port is connected to a computer, all MIDI messages will be received and transmitted via USB.
More details about MIDI function please refer to the MIDI Implementation Chart.
Troubleshooting
| Problem | Possible Cause and Solution |
| No sound | 1. Rotate the [VOLUME] knob to be sure that the volume isn't down.2. To be sure that Local Mode should be set to “ON”. |
| No sound from Pads | 1. To be sure that the pad is connected correctly.2. To be sure not set the volume of the pad to 0. |
| No click sound | 1. To be sure the metronome is turned on.2. To be sure not set the volume of the click to 0. |
| The Pad volume doesn't match the Song playback volume | 1. Adjust the song playback volume to matching the pad volume. |
| Cannot connect to the computer | 1. Make sure the USB has correctly connected.2. Do the connect operation again (Keep the computer on, and then turn the module on, connect the USB cable).3. The drum module can be connected to PC automatically without install any software driver. |
Prompt Messages
| Parameter | Meaning |
| SPI MEM Err | SPI FLASH goes wrong |
| REC FULL | The record data memory is full |
| FAC RESET | The factory reset of module is complete |
| EMPTY | The user song is empty |
| SAVE OK | The drum kit and utility settings are saved |
Maximum Polyphony
64
Drum kits
Kit: 35 (30 Presets + 5 Users)
GM Drum Kit: 9 GM Drum Kits
Instruments
Instrument: 380 (Drum Voice, Percussion Voice, Effect Voice) 10 Hi-hat Companion
Effect
Reverb, 3-band EQ
Sequencer
Preset Pattern: 60
Preset Hit/Tap: 22
User Song: 5
Tick: 192 ticks per beat
Record: Real-time Record
Data Capacity: About 6500 notes
Tempo
30\~280
Display
Backlit with segment code LCD
Connectors
TRIGGER INPUT CONNECTOR, PHONES, AUX IN, CRASH 2, R, L/MONO, USB, MIDI IN, MIDI OUT
Control Buttons
Power on/off, Master Volume, Aux In Volume, Start/Stop, Save, Song, Kit, Voice, Page+, Page-, INC, DEC, Click, Drum off, Record, Tempo, Utility, Shift
Power Supply
DC 9V, 500mA
Dimensions
* All specifications and appearances are subject to change without notice.
Drum Kit List
| NO. | PRESET |
| 1 | KITACOUSTIC |
| 2 | FUNK |
| 3 | STANDARD |
| 4 | BRUSH |
| 5 | DANCE |
| 6 | ROCK |
| 7 | JAZZ |
| 8 | 808 |
| 9 | 909 |
| 10 | FUNKBAND |
| 11 | FX MIX |
| 12 | POWER |
| 13 | LATIN |
| 14 | MARIMBA |
| 15 | PERCUSS |
| 16 | METAL |
| 17 | INDIAN |
| 18 | AFRICAN |
| 19 | ELECTRIC |
| 20 | REGGAE |
| 21 | ORCHESTR |
| 22 | SONGO |
| 23 | HIPHOP |
| 24 | BIG BAND |
| 25 | MAGIC |
| 26 | LIVE |
| 27 | HOUSE |
| 28 | JAZLATIN |
| 29 | TECHNO |
| 30 | VINTAGE |
| NO. | NAME | LCD NAME |
| KICK | ||
| 1 | 22"Acoustic Kick 1 | 22AC K1 |
| 2 | 22"Acoustic Kick 2 | 22AC K2 |
| 3 | 24"Standard Kick | 24STD K |
| 4 | Brush Kick 1 | BRUSH K1 |
| 5 | Jazz Kick | JAZZ K |
| 6 | 22"Rock Kick | 22ROCK K |
| 7 | Room Kick | ROOM K |
| 8 | Vintage Kick | VTG K |
| 9 | HipHop Kick | HIPHOP K |
| 10 | Reggae Kick | REGGAE K |
| 11 | 808 Kick | 808 K |
| 12 | 909 Kick | 909 K |
| 13 | Electronic Kick | ELEC K |
| 14 | Power Kick | POWER K |
| 15 | Dance Kick | DANCE K |
| 16 | FX Mix Kick | FX MIX K |
| 17 | Techno Kick | TECHNO K |
| 18 | Magic Kick | MAGIC K |
| SNARE | ||
| 19 | 14"Acoustic Snare | 14AC S1 |
| 20 | 14"Acoustic Snare Rim | 14AC SR1 |
| 21 | 14"Standard Snare | 14STD S1 |
| 22 | 14"Standard Snare Rim | 14ST SR1 |
| 23 | 14"Funk Snare 1 | 14FK S1 |
| 24 | 14"Funk Snare Rim 1 | 14FK SR1 |
| 25 | 14"Funk Snare 2 | 14FK S2 |
| 26 | 14"Funk Snare Rim 2 | 14FK SR2 |
| 27 | Brush Snare 1 | BRUSH S1 |
| 28 | Brush Snare Rim 1 | BRSH SR1 |
| 29 | Brush Snare 2 | BRUSH S2 |
| 30 | Brush Snare Rim 2 | BRSH SR2 |
| 31 | 14"Jazz Snare | 14JAZZ S |
| 32 | 14"Jazz Snare Rim | 14JZ SR |
| 33 | 14"Rock Snare | 14ROCK S |
| 34 | 14"Rock Snare Rim | 14RK SR |
| 35 | 13"Damped Snare | 13DP S1 |
| 36 | Orchestra Snare | ORCH S |
| 37 | Orchestra Snare Rim | ORCH SR |
| 38 | Fusion Snare | FUSION S |
| 39 | Fusion Snare Rim | FUS SR |
| 40 | Big Band Snare | BB S |
| 41 | Big Band Snare Rim | BB SR |
| 42 | Vintage Snare | VTG S |
| 43 | Vintage Snare Rim | VTG SR |
| 44 | Live Snare | LIVE S |
| 45 | Live Snare Rim | LIVE SR |
| 46 | Reggae Snare | REGGAE S |
| 47 | Reggae Snare Rim | RG SR |
| 48 | 808 Snare | 808 S |
| 49 | 808 Snare Rim | 808 SR |
| 50 | 909 Snare | 909 S |
| 51 | 909 Snare Rim | 909 SR |
| 52 | Electronic Snare | ELEC S |
| 53 | Power Snare | POWER S |
| 54 | Dance Snare | DANCE S |
| 55 | Dance Snare Rim | DANCE SR |
| 56 | House Snare | HOUSE S |
| 57 | House Snare Rim | HOUSE SR |
| 58 | Techno Snare | TECHNO S |
| 59 | Techno Snare Rim | TEK SR |
| 60 | Magic Snare | MAGIC S |
| 61 | Magic Snare Rim | MAGIC SR |
| 62 | Acoustic Snare Stick | AC SX1 |
| 63 | Standard Snare Stick 1 | STD SX1 |
| 64 | Brush Snare Stick | BRUSH SX |
| 65 | Standard Snare Stick 2 | STD SX2 |
| 66 | Rock Snare Stick 1 | ROCK SX1 |
| 67 | Rock Snare Stick 2 | ROCK SX2 |
| 68 | Live Snare Stick | LIVE SX |
| 69 | Fusion Snare Stick | FUS SX |
| 70 | 808 Snare Stick | 808 SX |
| 71 | 909 Snare Stick | 909 SX |
| 72 | Electronic Snare Stick | ELEC SX |
| 73 | House Snare Stick | HOUSE SX |
| 74 | Techno Snare Stick | TEK SX |
| 75 | Brush Swirl | BRUSH SW |
| TOM | ||
| 76 | Acoustic Tom 1 | AC T1 |
| 77 | Acoustic Tom 1 Rim | AC T1R |
| 78 | Acoustic Tom 2 | AC T2 |
| 79 | Acoustic Tom 2 Rim | AC T2R |
| 80 | Acoustic Tom 3 | AC T3 |
| 81 | Acoustic Tom 3 Rim | AC T3R |
| 82 | Acoustic Tom 4 | AC T4 |
| 83 | Acoustic Tom 4 Rim | AC T4R |
| 84 | Acoustic Tom 5 | AC T5 |
| 85 | Acoustic Tom 5 Rim | AC T5R |
| 86 | Acoustic Tom 6 | AC T6 |
| 87 | Acoustic Tom 6 Rim | AC T6R |
| 88 | Brush Tom 1 | BRUSH T1 |
| 89 | Brush Tom 1 Rim | BRSH T1R |
| 90 | Brush Tom 2 | BRUSH T2 |
| 91 | Brush Tom 2 Rim | BRSH T2R |
| 92 | Brush Tom 3 | BRUSH T3 |
| 93 | Brush Tom 3 Rim | BRSH T3R |
| 94 | Brush Tom 4 | BRUSH T4 |
| 95 | Brush Tom 4 Rim | BRSH T4R |
| 96 | Brush Tom 5 | BRUSH T5 |
| 97 | Brush Tom 5 Rim | BRSH T5R |
| 98 | Brush Tom 6 | BRUSH T6 |
| 99 | Brush Tom 6 Rim | BRSH T6R |
| 100 | Funk Tom 1 | FUNK T1 |
| 101 | Funk Tom 1 Rim | FUNK T1R |
| 102 | Funk Tom 2 | FUNK T2 |
| 103 | Funk Tom 2 Rim | FUNK T2R |
| 104 | Funk Tom 3 | FUNK T3 |
| 105 | Funk Tom 3 Rim | FUNK T3R |
| 106 | Funk Tom 4 | FUNK T4 |
| 107 | Funk Tom 4 R | FUNK T4R |
| 108 | Funk Tom 5 | FUNK T5 |
| 109 | Funk Tom 5 Rim | FUNK T5R |
| 110 | Funk Tom 6 | FUNK T6 |
| 111 | Funk Tom 6 Rim | FUNK T6R |
| 112 | Jazz Tom 1 | JAZZ T1 |
| 113 | Jazz Tom 1 Rim | JAZZ T1R |
| 114 | Jazz Tom 2 | JAZZ T2 |
| 115 | Jazz Tom 2 Rim | JAZZ T2R |
| 116 | Jazz Tom 3 | JAZZ T3 |
| 117 | Jazz Tom 3 Rim | JAZZ T3R |
| 118 | Jazz Tom 4 | JAZZ T4 |
| 119 | Jazz Tom 4 Rim | JAZZ T4R |
| 120 | Jazz Tom 5 | JAZZ T5 |
| 121 | Jazz Tom 5 Rim | JAZZ T5R |
| 122 | Jazz Tom 6 | JAZZ T6 |
| 123 | Jazz Tom 6 Rim | JAZZ T6R |
| 124 | Fusion Tom 1 | FUS T1 |
| 125 | Fusion Tom 2 | FUS T2 |
| 126 | Fusion Tom 3 | FUS T3 |
| 127 | Fusion Tom 4 | FUS T4 |
| 128 | 1970's Tom 1 | 70S T1 |
| 129 | 1970's Tom 2 | 70S T2 |
| 130 | 1970's Tom 3 | 70S T3 |
| 131 | 1970's Tom 4 | 70S T4 |
| 132 | 808 Tom 1 | 808 T1 |
| 133 | 808 Tom 2 | 808 T2 |
| 134 | 808 Tom 3 | 808 T3 |
| 135 | 808 Tom 4 | 808 T4 |
| 136 | 808 Tom 5 | 808 T5 |
| 137 | 808 Tom 6 | 808 T6 |
| 138 | 909 Tom 1 | 909 T1 |
| 139 | 909 Tom 2 | 909 T2 |
| 140 | 909 Tom 3 | 909 T3 |
| 141 | 909 Tom 4 | 909 T4 |
| 142 | 909 Tom 5 | 909 T5 |
| 143 | 909 Tom 6 | 909 T6 |
| 144 | Electronic Tom 1 | ELEC T1 |
| 145 | Electronic Tom 2 | ELEC T2 |
| 146 | Electronic Tom 3 | ELEC T3 |
| 147 | Electronic Tom 4 | ELEC T4 |
| 148 | Electronic Tom 5 | ELEC T5 |
| 149 | Electronic Tom 6 | ELEC T6 |
| 150 | Power Tom 1 | POWER T1 |
| 151 | Power Tom 2 | POWER T2 |
| 152 | Power Tom 3 | POWER T3 |
| 153 | Power Tom 4 | POWER T4 |
| 154 | Power Tom 5 | POWER T5 |
| 155 | Power Tom 6 | POWER T6 |
| 156 | Teckno Tom 1 | TEK T1 |
| 157 | Techno Tom 1 Rim | TEK T1R |
| 158 | Techno Tom 2 | TEK T2 |
| 159 | Techno Tom 2 Rim | TEK T2R |
| 160 | Techno Tom 3 | TEK T3 |
| 161 | Techno Tom 3 Rim | TEK T3R |
| 162 | Techno Tom 4 | TEK T4 |
| 163 | Techno Tom 4 Rim | TEK T4R |
| 164 | Techno Tom 5 | TEK T5 |
| 165 | Techno Tom 5 Rim | TEK T5R |
| 166 | Techno Tom 6 | TEK 6 |
| 167 | Techno Tom 6 Rim | TEK T6R |
| 168 | Magic Tom 1 | MAGIC T1 |
| 169 | Magic Tom 1 Rim | MAGIC T1R |
| 170 | Magic Tom 2 | MAGIC T2 |
| 171 | Magic Tom 2 Rim | MAGIC T2R |
| 172 | Magic Tom 3 | MAGIC T3 |
| 173 | Magic Tom 3 Rim | MAGIC T3R |
| 174 | Magic Tom 4 | MAGIC T4 |
| 175 | Magic Tom 4 Rim | MAGIC T4R |
| RIDE | ||
| 176 | 21" Acoustic Ride | 21AC RD |
| 177 | 21" Acoustic Ride Edge | 21AC RDE |
| 178 | 21" Acoustic Ride Bell | 21AC RDB |
| 179 | Brush Ride 1 | BRSH RD1 |
| 180 | Brush Ride 2 | BRSH RD2 |
| 181 | 20" Funk Ride | 20FK RD |
| 182 | 20" Funk Ride Edge | 20FK RDE |
| 183 | 20" Funk Ride Bell | 20FK RDB |
| 184 | 20" Rock Ride | 20RK RD |
| 185 | 20" Rock Ride Edge | 20RK RDE |
| 186 | 20" Rock Ride Bell | 20RK RDB |
| 187 | 808 Ride | 808 RD |
| 188 | 20" Room Ride | 20RM RD |
| 189 | 20" Room Ride Edge | 20RM RDE |
| 190 | 20" Room Ride Bell | 20RM RDB |
| 191 | 20" Metal Ride | 20MT RD |
| 192 | 20" Metal Ride Edge | 20MT RDE |
| 193 | 20" Metal Ride Bell | 20MT RDB |
| 194 | House Ride | HOUSE RD |
| 195 | House Ride Edge | HOUS RDE |
| 196 | House Ride Bell | HOUS RDB |
| 197 | Lo-Fi Ride | LOFI RD |
| 198 | Lo-Fi Ride Edge | LOFI RDE |
| 199 | Lo-Fi Ride Bell | LOFI RDB |
| 200 | Junkyard Ride | JKYD RD |
| 201 | Junkyard Ride Edge | JKYD RDE |
| 202 | Junkyard Ride Bell | JKYD RDB |
| CRASH | ||
| 203 | 16" Acoustic Crash 1 | AC C1 |
| 204 | 16" Acoustic Crash 1 Edge | AC C1E |
| 205 | 16" Acoustic Crash 2 | AC C2 |
| 206 | 16" Acoustic Crash 2 Edge | AC C2E |
| 207 | 16" Standard Crash 1 | STD C1 |
| 208 | 16" Standard Crash 1 Edge | STD C1E |
| 209 | 16" Standard Crash 2 | STD C2 |
| 210 | 16" Standard Crash 2 Edge | STD C2E |
| 211 | Brush Crash 1 | BRUSH C1 |
| 212 | Brush Crash 2 | BRUSH C2 |
| 213 | Funk Crash 1 | FUNK C1 |
| 214 | Funk Crash 1 Edge | FUNK C1E |
| 215 | Funk Crash 2 | FUNK C2 |
| 216 | Funk Crash 2 Edge | FUNK C2E |
| 217 | 19" Jazz Crash 1 | JAZZ C1 |
| 218 | 19" Jazz Crash 1 Edge | JAZZ C1E |
| 219 | 19" Jazz Crash 2 | JAZZ C2 |
| 220 | 19" Jazz Crash 2 Edge | JAZZ C2E |
| 221 | Rock Crash 1 | ROCK C1 |
| 222 | Rock Crash 1 Edge | ROCK C1E |
| 223 | Rock Crash 2 | ROCK C2 |
| 224 | Rock Crash 2 Edge | ROCK C2E |
| 225 | 808Crash | 808 C |
| 226 | 909Crash 1 | 909 C1 |
| 227 | 909Crash 2 | 909 C2 |
| 228 | Electronic Crash 1 | ELEC C1 |
| 229 | Electronic Crash 2 | ELEC C2 |
| 230 | Orchestra Crash | ORCH C |
| 231 | Room Crash | ROOM C |
| 232 | Room Crash Edge | ROOM CE |
| 233 | Vintage Crash 1 | VTG C1 |
| 234 | Vintage Crash 1 Edge | VTG C1E |
| 235 | Vintage Crash 2 | VTG C2 |
| 236 | Vintage Crash 2 Edge | VTG C2E |
| 237 | Big Band Crash 1 | BB C1 |
| 238 | Big Band Crash 1 Edge | BB C1E |
| 239 | Big Band Crash 2 | BB C2 |
| 240 | Big Band Crash 2 Edge | BB C2E |
| 241 | Techno Crash 1 | TEK C1 |
| 242 | Techno Crash 1 Edge | TEK C1E |
| 243 | Techno Crash 2 | TEK C2 |
| 244 | Techno Crash 2 Edge | TEK C2E |
| 245 | Latin Crash 1 | LATIN C1 |
| 246 | Latin Crash 1 Edge | LATN C1E |
| 247 | Latin Crash 2 | LATIN C2 |
| 248 | Latin Crash 2 Edge | LATN C2E |
| 249 | China 1 | CHINA1 |
| 250 | China 1 Edge | CHINA1 E |
| 251 | Splash | SPLASH |
| 252 | Splash Edge | SPLASH E |
| HIHAT | ||
| 253 | 14" Acoustic Hi-hat | 14AC HH |
| 254 | 14" Acoustic Hi-hat Edge | 14AC HHE |
| 255 | 14" Acoustic Hi-hat Pedal | 14AC HHP |
| 256 | 14" Acoustic Hi-hat Splash | 14AC HHS |
| 257 | 14" Standard Hi-hat | 14STD HH |
| 258 | 14" Standard Hi-hat Edge | 14ST HHE |
| 259 | 14" Standard Hi-hat Pedal | 14ST HHP |
| 260 | 14" Standard Hi-hat Splash | 14ST HHS |
| 261 | Brush Hi-hat | BRUSH HH |
| 262 | Brush Hi-hat Pedal | BRSH HHP |
| 263 | Brush Hi-hat Splash | BRSH HHS |
| 264 | 14" Rock Hi-hat | 14RK HH |
| 265 | 14" Rock Hi-hat Edge | 14RK HHE |
| 266 | 14" Rock Hi-hat Pedal | 14RK HHP |
| 267 | 14" Rock Hi-hat Splash | 14RK HHS |
| 268 | 808 Hi-hat | 808 HH |
| 269 | 808 Hi-hat Pedal | 808 HHP |
| 270 | 808 Hi-hat Splash | 808 HHS |
| 271 | 909 Hi-hat | 909 HH |
| 272 | 909 Hi-hat Pedal | 909 HHP |
| 273 | 909 Hi-hat Splash | 909 HHS |
| 274 | Dance Hi-hat | DANCE HH |
| 275 | Dance Hi-hat Pedal | DANC HHP |
| 276 | Dance Hi-hat Splash | DANC HHS |
| PERCUSSION | ||
| 277 | Maracas | MARACAS |
| 278 | Metronome Bell | METRO BL |
| 279 | Mute Hi Conga 1 | M CONGA1 |
| 280 | Open Hi Conga 1 | O CONGA1 |
| 281 | Low Conga | LO CONGA |
| 282 | High Bongo | HI CONGA |
| 283 | Low Bongo | LO BONGO |
| 284 | High Timbale 1 | HI TIMB1 |
| 285 | High Timbale 1 Rim | HI TIM1R |
| 286 | High Timbale 2 | HI TIMB2 |
| 287 | High Timbale 2 Rim | HI TIM2R |
| 288 | Low Timbale 1 | LO TIMB1 |
| 289 | Low Timbale 2 | LO TIMB2 |
| 290 | Low Timbale 3 | LO TIMB3 |
| 291 | High Agogo | HI AGOGO |
| 292 | Low Agogo | LO AGOGO |
| 293 | Claves | CLAVES |
| 294 | Jingle Bell | JINGL BL |
| 295 | Cowbell | COWBELL |
| 296 | Bell Tree 1 | BL TREE1 |
| 297 | Bell Tree 2 | BL TREE2 |
| 298 | Tambourine | TAMBORIN |
| 299 | Cabasa | CABASA |
| 300 | Long Guiro | L GUIRO |
| 301 | Short Guiro | S GUIRO |
| 302 | Indian 1 | INDIAN1 |
| 303 | Indian 2 | INDIAN2 |
| 304 | Indian 3 | INDIAN3 |
| 305 | Indian 4 | INDIAN4 |
| 306 | Indian 5 | INDIAN5 |
| 307 | Indian 6 | INDIAN6 |
| 308 | Indian 7 | INDIAN7 |
| 309 | Indian 8 | INDIAN8 |
| 310 | Indian 9 | INDIAN9 |
| 311 | Indian 10 | INDIAN10 |
| 312 | Indian 11 | INDIAN11 |
| 313 | Indian 12 | INDIAN12 |
| 314 | Indian 13 | INDIAN13 |
| 315 | Indian 14 | INDIAN14 |
| 316 | Indian 15 | INDIAN15 |
| 317 | Indian 16 | INDIAN16 |
| 318 | Indian 17 | INDIAN17 |
| 319 | African 1 | AFRICA1 |
| 320 | African 2 | AFRICA2 |
| 321 | African 3 | AFRICA3 |
| 322 | African 4 | AFRICA4 |
| 323 | African 5 | AFRICA5 |
| 324 | African 6 | AFRICA6 |
| 325 | African 7 | AFRICA7 |
| 326 | African 8 | AFRICA8 |
| 327 | African 9 | AFRICA9 |
| 328 | African 10 | AFRICA10 |
| 329 | African 11 | AFRICA11 |
| 330 | African 12 | AFRICA12 |
| 331 | African 13 | AFRICA13 |
| 332 | African 14 | AFRICA14 |
| 333 | African 15 | AFRICA15 |
| 334 | African 16 | AFRICA16 |
| 335 | African 17 | AFRICA17 |
| 336 | Marimba C3 | MARMB C3 |
| 337 | Marimba A3 | MARMB A3 |
| 338 | Marimba C4 | MARMB C4 |
| 339 | Marimba Db4 | MARB Db4 |
| 340 | Marimba D4 | MARMB D4 |
| 341 | Marimba Eb4 | MARB Eb4 |
| 342 | Marimba E4 | MARMB E4 |
| 343 | Marimba F4 | MARMB F4 |
| 344 | Marimba Gb4 | MARB Gb4 |
| 345 | Marimba G4 | MARMB G4 |
| 346 | Marimba Ab4 | MARB Ab4 |
| 347 | Marimba A4 | MARMB A4 |
| 348 | Marimba Bb4 | MARB Bb4 |
| 349 | Marimba B5 | MARMB B5 |
| 350 | Marimba C5 | MARMB C5 |
| 351 | Orchestra Timp C2 | ORCHT C2 |
| 352 | Orchestra Timp D2 | ORCHT D2 |
| 353 | Orchestra Timp E2 | ORCHT E2 |
| 354 | Orchestra Timp F2 | ORCHT F2 |
| 355 | Orchestra Timp G2 | ORCHT G2 |
| 356 | Orchestra Timp A2 | ORCHT A2 |
| 357 | Orchestra Timp B2 | ORCHT B2 |
| 358 | Orchestra Timp C3 | ORCHT C3 |
| FX | ||
| 359 | FX 1 | FX1 |
| 360 | FX 2 | FX2 |
| 361 | FX 3 | FX3 |
| 362 | FX 4 | FX4 |
| 363 | FX 5 | FX5 |
| 364 | FX 6 | FX6 |
| 365 | FX 7 | FX7 |
| 366 | FX 8 | FX8 |
| 367 | FX 9 | FX9 |
| 368 | FX 10 | FX10 |
| 369 | FX 11 | FX11 |
| 370 | FX 12 | Fx12 |
| 371 | FX 13 | FX13 |
| 372 | FX 14 | FX14 |
| 373 | FX 15 | FX15 |
| 374 | FX 16 | FX16 |
| 375 | FX 17 | FX17 |
| 376 | FX 18 | FX18 |
| 377 | FX 19 | FX19 |
| 378 | FX 20 | FX20 |
| 379 | FX 21 | FX21 |
| 380 | MUTE | MUTE |
| HIHAT COMBINATION | ||
| 381 | Acoustic | ACOUSTIC |
| 382 | Standard | STANDARD |
| 383 | JazBrush | BRUSH |
| 384 | Rock | ROCK |
| 385 | 808 | 808 |
| 386 | 909 | 909 |
| 387 | Dance | DANCE |
| 388 | Marimba | MARIMBA |
| 389 | Indian | INDIAN |
| 390 | African | AFRICAN |
| NO. | NAME | LCD NAME |
| PATTERN LOOP | ||
| 1 | Blues Funk | BLUESFK |
| 2 | Fusion 1 | FUSION 1 |
| 3 | Cool Jazz | COOLJAZZ |
| 4 | Ballad | BALLAD |
| 5 | Samba1 | SAMBA 1 |
| 6 | Vintage Hip-Hop | VTHIPHOP |
| 7 | Nu Jazz Funk | NUJAZZFK |
| 8 | Soul | SOUL |
| 9 | R&B | RNB |
| 10 | Big Band 1 | BIGBAND1 |
| 11 | Ska | SKA |
| 12 | Classic Rock | CLASSRK |
| 13 | Hardcore Hip-Hop | HCHIPHOP |
| 14 | Vintage Dance Pop | VTGDANCE |
| 15 | Nu-Metal | NU-METAL |
| 16 | Salsa | SALSA |
| 17 | Euro Hip-Hop | EUHIPHOP |
| 18 | Bossa Nova | BOSSA |
| 19 | Fusion 2 | FUSION2 |
| 20 | 8Beat Pop 1 | 8BEATP1 |
| 21 | Jazzy Funk | JAZZYFK |
| 22 | Swing Big Band | SWBGBAND |
| 23 | Reggae 1 | REGGAE 1 |
| 24 | 60's Pop | 60'S POP |
| 25 | Vintage Funk | VTGFUNK |
| 26 | Trance | TRANCE |
| 27 | Heavy Rock | HEAVYRK |
| 28 | Swing | SWING |
| 29 | Punk | PUNK |
| 30 | 8BeatPop 2 | 8BEATP2 |
| 31 | Disco House | DISCOHOU |
| 32 | 3/4 Folk | 3/4 FOLK |
| 33 | Samba 2 | SAMBA 2 |
| 34 | Latin Rock | LATINRK |
| 35 | Reggae 2 | REGGAE 2 |
| 36 | Dance | DANCE |
| 37 | Country Pop | CTRYPOP |
| 38 | Country | COUNTRY |
| 39 | Rock Ballad | RKBALLAD |
| 40 | DancePop | DANCEPOP |
| 41 | Bebop | BEBOP |
| 42 | Rock N'Roll | R'N'R |
| NO. | NAME | LCD NAME |
| 43 | Band Jazz | BANDJAZZ |
| 44 | Blues | BLUES |
| 45 | 3/4 Jazz | 3/4 JAZZ |
| 46 | 80's Metal | 80SMETAL |
| 47 | 6/8 Soul | 6/8SOUL |
| 48 | Latin Jazz | LATINJAZ |
| 49 | TripHop | TRIPHOP |
| 50 | Brit Pop | BRITPOP |
| PERCUSSION LOOP | ||
| 51 | Indonesia | INA |
| 52 | Latin | LATIN |
| 53 | Bossa | BOSSA |
| 54 | Samba | SAMBA |
| 55 | 3-4 Pop | 3/4 POP |
| 56 | Pop | POP |
| 57 | Jazz | JAZZ |
| 58 | Reggae 1 | REGGAE 1 |
| 59 | Reggae 2 | REGGAE 2 |
| 60 | Latin Rock | LTNROCK |
| HIT | ||
| 61 | New Age Tap 1 | NEWAGET1 |
| 62 | Atmosphere Tap 3 | ATMOSPT3 |
| 63 | Polysynth Tap 5 | POLYST5 |
| 64 | Brass Tap 6 | BRASST6 |
| 65 | Fx Tap 8 | FXT8 |
| TAP | ||
| 66 | Bass Tap 1 | BASST1 |
| 67 | Bass Tap 3 | BASST3 |
| 68 | Bass Tap 5 | BASST5 |
| 69 | Swing Bass Tap 6 | SWBASST6 |
| 70 | Bass Tap 8 | BASST8 |
| 71 | Crystal Tap 1 | CRYSTLT1 |
| 72 | Vibraphone Tap 3 | VIBRAT3 |
| 73 | Sawtooth Tap 5 | SAWT5 |
| 74 | Funk Gtslide Tap 6 | FKGTRST6 |
| 75 | Chorused Piano Tap 8 | CHRPNOT8 |
| 76 | Brightness Tap 1 | BRIGHTT1 |
| 77 | Lead Tap 3 | LEADT3 |
| 78 | Soundtrack Tap 5 | SNDTRKT5 |
| 79 | Funk Gtnote Tap 6 | FKGTRNT6 |
| 80 | Pad Tap 1 | PADT1 |
| 81 | Square Tap 3 | SQURET3 |
| 82 | Rain Tap 5 | RAINT5 |
| Note No. | Standard Set (bank 0) | Funk Set (bank 8) | Rock Set (bank 16) | Electric Set (bank 24) | Analog Set (bank 25) |
| Eb1[27] | High Q | < - | < - | < - | < - |
| E 1[28] | Slap | < - | < - | < - | < - |
| F 1[29] | Scratch Push | < - | < - | < - | < - |
| F#1[30] | Scratch Pull | < - | < - | < - | < - |
| G 1[31] | Sticks | < - | < - | < - | < - |
| G#1[32] | Square Click | < - | < - | < - | < - |
| A 1[33] | Metronome Click | < - | < - | < - | < - |
| Bb1[34] | Metronome Bell | < - | < - | < - | < - |
| B 1[35] | Acoustic Bass Drum | < - | < - | < - | < - |
| C 2[36] | Bass Drum 1 | Funk Kick | Rock Kick Drum | Electric Bass Drum | Analog Bass Drum |
| C#2[37] | Side Stick | < - | < - | < - | Analog Rim Shot |
| D 2[38] | Acoustic Snare | Funk Snare 1 | Rock Snare Drum1 | Electric Snare 1 | Analog Snare 1 |
| Eb2[39] | Hand Clap | < - | < - | < - | Analog Clap |
| E 2[40] | Electric Snare | Funk Snare 2 | Rock Snare Drum2 | Electric Snare 2 | Analog Snare 2 |
| F 2[41] | Low Floor Tom | Funk LowTom2 | Rock LowTom2 | Electric Low Tom 2 | Analog Low Tom2 |
| F#2[42] | Closed Hi-hat | < - | < - | < - | Analog Closed Hi-hat |
| G 2[43] | High Floor Tom | Funk LowTom1 | Rock LowTom1 | Electric Low Tom 1 | Analog Low Tom1 |
| G#2[44] | Pedal Hi-hat | < - | < - | < - | Analog Pedal Hi-hat |
| A 2[45] | Low Tom | Funk MidTom2 | Rock MidTom2 | Electric Mid Tom 2 | Analog Mid Tom2 |
| Bb2[46] | Open Hi-hat | < - | < - | < - | Analog Open Hi-hat |
| B 2[47] | Low-Mid Tom | Funk MidTom1 | Rock MidTom1 | Electric Mid Tom 1 | Analog Mid Tom1 |
| C 3[48] | High Mid Tom | Funk Hi Tom2 | Rock HiTom2 | Electric Hi Tom 2 | Analog Hi Tom2 |
| C#3[49] | Crash Cymbal 1 | < - | < - | < - | Analog Cymbal |
| D 3[50] | High Tom 1 | Funk Hi Tom1 | Rock HiTom1 | < - | Analog Hi Tom1 |
| Eb3[51] | Ride Cymbal 1 | < - | < - | < - | < - |
| E 3[52] | China Cymbal | < - | < - | < - | < - |
| F 3[53] | Ride Bell | < - | < - | < - | < - |
| F#3[54] | Tambourine | < - | < - | < - | < - |
| G 3[55] | Splash Cymbal | < - | < - | < - | < - |
| G#3[56] | Cowbell | < - | < - | < - | < - |
| A 3[57] | Crash Cymbal 2 | < - | < - | < - | < - |
| Bb3[58] | Vibra-slap | < - | < - | < - | < - |
| B 3[59] | Ride Cymbal 2 | < - | < - | < - | < - |
| C 4[60] | High Bongo | < - | < - | < - | < - |
| C#4[61] | Low Bongo | < - | < - | < - | < - |
| D 4[62] | Mute Hi Conga | < - | < - | < - | < - |
| Eb4[63] | Open Hi Conga | < - | < - | < - | < - |
| E 4[64] | Low Conga | < - | < - | < - | < - |
| F 4[65] | High Timbale | < - | < - | < - | < - |
| F#4[66] | Low Timbale | < - | < - | < - | < - |
| G 4[67] | High Agogo | < - | < - | < - | < - |
| G#4[68] | Low Agogo | < - | < - | < - | < - |
| A 4[69] | Cabasa | < - | < - | < - | < - |
| Bb4[70] | Maracas | < - | < - | < - | < - |
| B 4[71] | Short Whistle | < - | < - | < - | < - |
| C 5[72] | Long Whistle | < - | < - | < - | < - |
| C#5[73] | Short Guiro | < - | < - | < - | < - |
| D 5[74] | Long Guiro | < - | < - | < - | < - |
| Eb5[75] | Claves | < - | < - | < - | < - |
| E 5[76] | Hi Wood Block | < - | < - | < - | < - |
| F 5[77] | LowWood Block | < - | < - | < - | < - |
| F#5[78] | Mute Cuica | < - | < - | < - | < - |
| G 5[79] | Open Cuica | < - | < - | < - | < - |
| G#5[80] | Mute Triangle | < - | < - | < - | < - |
| A 5[81] | Open Triangle | < - | < - | < - | < - |
| Bb5[82] | Shaker | < - | < - | < - | < - |
| B 5[83] | Jingle Bell | < - | < - | < - | < - |
| C 6[84] | Bell Tree | < - | < - | < - | < - |
| C#6[85] | Castanets | < - | < - | < - | < - |
| D 6[86] | Mute Surdo | < - | < - | < - | < - |
| Eb6[87] | Open Surdo | < - | < - | < - | < - |
| Note No. | Jazz Set (bank 32) | Brush Set (bank 40) | Orchestra Set (bank 48) | Dance Set (bank 56) |
| Eb1[27] | < - | < - | Closed Hi-hat 2 | < - |
| E 1[28] | < - | < - | Pedal Hi-hat | < - |
| F 1[29] | < - | < - | Open Hi-hat 2 | < - |
| F#1[30] | < - | < - | Ride Cymbal 1 | < - |
| G 1[31] | < - | < - | < - | < - |
| G#1[32] | < - | < - | < - | < - |
| A 1[33] | < - | < - | < - | < - |
| Bb1[34] | < - | < - | < - | < - |
| B 1[35] | < - | < - | Concert BD 2 | < - |
| C 2[36] | Jazz Kick 1 | Brush Kick 1 | Concert BD 1 | Dance Bass Drum |
| C#2[37] | < - | < - | < - | < - |
| D 2[38] | Jazz Snare 1 | Brush Tap | Concert SD | Dance Snare 1 |
| Eb2[39] | < - | < - | Castanets | < - |
| E 2[40] | Jazz Snare 2 | Brush Slap | Concert SD | Dance Snare 2 |
| F 2[41] | < - | Brush Low Tom2 | Timpani F | Dance Low Tom2 |
| F#2[42] | < - | < - | Timpani F# | Dance Closed Hi-hat |
| G 2[43] | < - | Brush Low Tom1 | Timpani G | Dance Low Tom1 |
| G#2[44] | < - | < - | Timpani G# | Dance Pedal Hi-hat |
| A 2[45] | < - | Brush Mid Tom2 | Timpani A | Dance Mid Tom2 |
| Bb2[46] | < - | < - | Timpani A# | Dance Open Hi-hat |
| B 2[47] | < - | Brush Mid Tom1 | Timpani B | Dance Mid Tom1 |
| C 3[48] | < - | Brush Hi Tom2 | Timpani C | Dance Hi Tom2 |
| C#3[49] | < - | < - | Timpani C# | Dance Cymbal |
| D 3[50] | < - | Brush Hi Tom1 | Timpani D | Dance Hi Tom1 |
| Eb3[51] | < - | < - | Timpani D# | |
| E 3[52] | < - | < - | Timpani E | |
| F 3[53] | < - | < - | Timpani F | |
| F#3[54] | < - | < - | < - | < - |
| G 3[55] | < - | < - | < - | < - |
| G#3[56] | < - | < - | < - | < - |
| A 3[57] | < - | < - | < - | < - |
| Bb3[58] | < - | < - | < - | < - |
| B 3[59] | < - | < - | < - | < - |
| C 4[60] | < - | < - | < - | < - |
| C#4[61] | < - | < - | < - | < - |
| D 4[62] | < - | < - | < - | < - |
| Eb4[63] | < - | < - | < - | < - |
| E 4[64] | < - | < - | < - | < - |
| F 4[65] | < - | < - | < - | < - |
| F#4[66] | < - | < - | < - | < - |
| G 4[67] | < - | < - | < - | < - |
| G#4[68] | < - | < - | < - | < - |
| A 4[69] | < - | < - | < - | < - |
| Bb4[70] | < - | < - | < - | < - |
| B 4[71] | < - | < - | < - | < - |
| C 5[72] | < - | < - | < - | < - |
| C#5[73] | < - | < - | < - | < - |
| D 5[74] | < - | < - | < - | < - |
| Eb5[75] | < - | < - | < - | < - |
| E 5[76] | < - | < - | < - | < - |
| F 5[77] | < - | < - | < - | < - |
| F#5[78] | < - | < - | < - | < - |
| G 5[79] | < - | < - | < - | < - |
| G#5[80] | < - | < - | < - | < - |
| A 5[81] | < - | < - | < - | < - |
| Bb5[82] | < - | < - | < - | < - |
| B 5[83] | < - | < - | < - | < - |
| C 6[84] | < - | < - | < - | < - |
| C#6[85] | < - | < - | < - | < - |
| D 6[86] | < - | < - | < - | < - |
| Eb6[87] | < - | < - | < - | < - |
GM Backing Instrument List
| PIANO | STRINGS | LEAD | |||
| 1 | Acoustic Grand Piano | 41 | Violin | 81 | Lead1 (square) |
| 2 | Bright Acoustic Piano | 42 | Viola | 82 | Lead2 (sawtooth) |
| 3 | Electric Grand Piano | 43 | Cello | 83 | Lead3 (calliope) |
| 4 | Honky-Tonk Piano | 44 | Contrabass | 84 | Lead4 (cliff) |
| 5 | E.Piano 1 | 45 | Tremolo Strings | 85 | Lead5 (charang) |
| 6 | E.Piano 2 | 46 | Pizzicato Strings | 86 | Lead6 (voice) |
| 7 | Harpsichord | 47 | Orchestral Harp | 87 | Lead7 (fifths) |
| 8 | Clavi | 48 | Timpani | 88 | Lead8 (bass & lead) |
| MALLET | STRINGSENSEMBLE | PAD | |||
| 9 | Celesta | 49 | Strings Ensemble 1 | 89 | Pad1 (newage) |
| 10 | Glockenspiel | 50 | Strings Ensemble 2 | 90 | Pad2 (warm) |
| 11 | Music Box | 51 | Synth Strings 1 | 91 | Pad3 (polysynth) |
| 12 | Vibraphone | 52 | Synth Strings 2 | 92 | Pad4 (choir) |
| 13 | Marimba | 53 | Choir Aahs | 93 | Pad5 (bowed) |
| 14 | Xylophone | 54 | Voice Oohs | 94 | Pad6 (metallic) |
| 15 | Tubular Bells | 55 | Synth Voice | 95 | Pad7 (halo) |
| 16 | Dulcimer | 56 | Orchestra Hit | 96 | Pad8 (sweep) |
| ORGAN | BRASS | EFFECTS | |||
| 17 | Drawbar Organ | 57 | Trumpet | 97 | FX1 (rain) |
| 18 | Percussive Organ | 58 | Trombone | 98 | FX2 (soundtrack) |
| 19 | Rock Organ | 59 | Tuba | 99 | FX3 (crystal) |
| 20 | Church Organ | 60 | Muted Trumpet | 100 | FX4 (atmosphere) |
| 21 | Reed Organ | 61 | French Horn | 101 | FX5 (brightness) |
| 22 | Accordion | 62 | Brass Section | 102 | FX6 (goblins) |
| 23 | Harmonica | 63 | Synth Brass 1 | 103 | FX7 (echoes) |
| 24 | Tango Accordion | 64 | Synth Brass 2 | 104 | FX8 (sci-fi) |
| GUITAR | REED | ETHNIC | |||
| 25 | Nylon Guitar | 65 | Soprano Sax | 105 | Sitar |
| 26 | Steel Guitar | 66 | Alto Sax | 106 | Banjo |
| 27 | Jazz Guitar | 67 | Tenor Sax | 107 | Shamisen |
| 28 | Clean Guitar | 68 | Baritone Sax | 108 | Koto |
| 29 | Muted Guitar | 69 | Oboe | 109 | Kalimba |
| 30 | Overdriven Guitar | 70 | English Horn | 110 | Bagpipe |
| 31 | Distortion Guitar | 71 | Bassoon | 111 | Fiddle |
| 32 | Guitar Harmonics | 72 | Clarinet | 112 | Shanai |
| BASS | PIPE | PERCUSSIVE | |||
| 33 | Acoustic Bass | 73 | Piccolo | 113 | Tinkle Bell |
| 34 | Finger Bass | 74 | Flute | 114 | Agogo |
| 35 | Pick Bass | 75 | Recorder | 115 | Steel Drums |
| 36 | Fretless Bass | 76 | Pan Flute | 116 | Wood Block |
| 37 | Slap Bass 1 | 77 | Blown Bottle | 117 | Taiko Drum |
| 38 | Slap Bass 2 | 78 | Shakuhachi | 118 | Melodic Tom |
| 39 | Synth Bass 1 | 79 | Whistle | 119 | Synth Drum |
| 40 | Synth Bass 2 | 80 | Ocarina | 120 | Reverse Cymbal |
| SOUNDEFFECTS | |||||
| 121 | Guitar Fret Noise | ||||
| 122 | Breath Noise | ||||
| 123 | Seashore | ||||
| 124 | Bird Tweet | ||||
| 125 | Telephone Ring | ||||
| 126 | Helicopter | ||||
| 127 | Applause | ||||
| 128 | Gunshot | ||||
| Function | Transmitted | Recognized | Remarks | |||
| Basic Channel | DefaultChanged | 10ch× | 1-16× | |||
| Mode | DefaultMessagesAltered | ××********** | ××********** | |||
| NoteNumber | : True Voice | 0-127********** | 0-1270-127 | |||
| Velocity | Note OnNote Off | ○ 99H,V=1-127○ (99H,V=0) | ○○ | |||
| afterTouch | Key'sCh's | ×× | ○× | |||
| Pitch Bend | × | ○ | ||||
| ControlChange | 01567106465666780819193120121123 | ×××××××××××××××××××××××××××××××××××××××××××××××××××××××××××××××××××××××××××××××××××××××××××××××××××× | ○○○○○○○○○○○○○○○○○○○○○○○○○○○○○○○○○○○○○○○○○○○○○○○○○○○○○○○○○○○○○○○○○○○○○○○○○○○○○○○○○○○○○○○○○○○○○○○○○○○○ | Bank SelectModulationPortamento TimeData EntryVolumePanExpressionSustain PedalPortamento On/OffSostenuto PedalSoft PedalReverb ProgramChorus ProgramReverb LevelChorus LevelAll Sound OffReset All ControllersAll Notes Off | ||
| ProgramChange | : True Number | ×××××××××××××××××××××××××××××××××××××××××××××××××××××××××××××××××××××××××××××××××××××××××××××××××× | 0-127 | |||
| System Exclusive | × | ○ | ||||
| SystemCommon | : Song Position: Song Select: Tune | ×××××××××××××××××××××××××××××××××××××××××××××××××××××××××××××××××××××××××××××××××××××××××××××××××× ×××××××××××××××××××××××××××××××××××××××××××××××××××××××××××××××××××××××××××××××××××××××××××××××××××× × × × × × × × × × × × × × × × × × × × × × × × × × × × × × × × × × × × × × × × × × × × × × × × × × × × × × × × × × × × × × × × × × × × × × × × × × × × × × × × × × × × × × × × × × × × × × × × × × × × × ∞ | ||||
| SystemReal Time | : Clock: Commands | ○○ | ×× | Start And Stop Only | ||
| AuxMessages | : Local On/off: All Notes Off: Active Sensing: Reset | ××××××××××××××××××××××××××××××××××××××××××××××××××××××××××××××××××××××××××××××××××××××××××××××××××√×××××××××××××××××××××××××××××××××××××××××××××××××××××××××××××××××××××××××××××××××××××××××××××××××××√ × × × × × × × × × × × × × × × × × × × × × × × × × × × × × × × × × × × × × × × × × × × × × × × × × × × × × × × × × × × × × × × × × × × × × × × × × × × × × × × × × × × × × × × × × × × × × × × × × × × x × x × x × x × x × x × x × x × x × x × x × x × x × x × x × x × x × x × x × x × x × x × x × x × x × x × x × x × x × x × x × x × x × x × x × x × x × x × x × x × x × x × x × x × x × x × x × x × x × x ×x × x × x × x × x × x × x × x × x × x × x × x × x × x × x × x × x × x × x × x × x × x × x × x × x × x × x × x × x × x × x × x × x × x × x × x × x × x × x × x × x × x × x × x × x × x × x × x × x × x × y × y × y × y × y × y × y × y × y × y × y × y × y × y × y × y × y × y × y × y × y × y × y × y × y × y × y × y × y × y × y × y × y × y × y × y × y × y × y × y × y × y × y × y × y × y × y × y × y × y ×y × y y y y y y y y y y y y y y y y y y y y y y y y y y y y y y y y y y y y y y y y y y y y y y y y y y y y y y y y y y y y y y y y y y y y y y y y y y y y y y y y y y y y y y y y y y y y y y y y y y y yy y y y y y y y y y y y y y y y y y y y y y y y y y y y y y y y y y y y y y y y y y y y y y y y y y y y y y y y y y y y y y y y y y y y y y y y y y y y y y y y y y y y y y y y y y y y y y y y y y y y | 0-127********** | 0-127********** | 0-127********** | 0-127********** |
| 0-127********** | 0-127********** | 0-127********** | 0-127********** | 0-127********** | ||
| 0-127********** | 0-127********** | 0-127********** | 0-127********** | 0-127********** | ||
| 0-127********** | 0-127********** | 0-127********* | 0-127********** | 0-127********** | ||
| 0-127********** | 0-127********** | 0-127********** | 0-127********** | 0-127********** | ||
| 0-127********** | 0-127********** | 0-127********** | 0-127********** | 0-127********* | ||
| 0-127********** | 0-127********** | 0-127********** | 0-127********** | 0-127********** | ||
| 0-127********** | 0-127********** | 0-127********** | 0-127********** | 0-127********** | ||
| 0-127********** | 0-128********** | 0-127********** | 0-127********** | 0-127********** | ||
| 0-127********** | 0-127********** | 0-127********** | 0-127********** | 0-127********** | ||
| 0-127********** | 0-127********** | 0-127********** | 0-128********** | 0-127********** | ||
| 0-127********** | 0-127********** | 0-127********** | 0-127********** | 0-127********** | ||
| 0-127********** | 0-127********** | 0-127********** | 0-127********** | 0-127********** | ||
| 0-20********** | 0-20********** | 0-20********** | 0-20********** | 0-20********** | ||
| 0-20********** | 0-20********** | 0-20********** | 0-20********** | 0-20********** | ||
| 0-20********** | 0-20********** | 0-20********** | 0-20********** | 0-20********** | ||
| 0-20********** | 0-20********** | 0-20********** | ||||
○: YES ×: NO