
BT-101BK - Gramophone Boytone - Free user manual and instructions
Find the device manual for free BT-101BK Boytone in PDF.


| Product Type | Suitcase Turntable with Bluetooth, FM Radio, USB/SD Recording |
| Dimensions (approx.) | 35 x 25 x 10 cm |
| Weight (approx.) | 2.5 kg |
| Power Supply | 100-240V AC 50/60Hz via USB 5V DC 500mA; built-in rechargeable lithium battery (3-4 hours playtime) |
| Turntable Speeds | 33 1/3, 45, 78 rpm |
| Speakers | Built-in stereo speaker, 2x1W RMS |
| Outputs | RCA line out (L/R), headphone jack (3.5mm) |
| Inputs | Aux in (3.5mm), USB 5V DC power |
| Playback Media | Vinyl records, USB flash drive, SD/MMC card (MP3/WMA) |
| Recording | From vinyl or aux in to USB or SD card (MP3 128 kbps) |
| Radio | FM radio with LCD display |
| Bluetooth | Yes, for streaming audio from devices |
| Auto-Stop | Yes, can be switched ON/OFF |
| Tone Arm | With lift lever and lock |
| Accessories Included | Dust cover, 45 rpm adapter, USB power cable, user manual |
| Maintenance | Replace stylus every ~250 hours; clean stylus with soft brush and alcohol; clean records with anti-static cloth |
| Spare Parts | Stylus (needle) and cartridge are replaceable |
| Safety | Auto-stop prevents damage at record end; avoid upside-down USB insertion |
Frequently Asked Questions - BT-101BK Boytone
User questions about BT-101BK Boytone
0 question about this device. Answer the ones you know or ask your own.
Ask a new question about this device
Download the instructions for your Gramophone in PDF format for free! Find your manual BT-101BK - Boytone and take your electronic device back in hand. On this page are published all the documents necessary for the use of your device. BT-101BK by Boytone.
USER MANUAL BT-101BK Boytone
natural_image
Black-and-white photo of a vintage Benetone magazine with red cover and gold clapper (no visible text or symbols on the device itself)Suitcase Turntable with Rechargeable Battery USB/SD and FM Radio & Bluetooth
Model Numbers:
BT-101B
INSTRUCTION MANUAL
READ INSTRUCTIONS CAREFULLY BEFORE USE AND STORE IN A SAFE PLACE FOR FUTURE REFERENCE
Features:
- Function 33.3,45,45rpm Turntable LP player
- Built-in Speaker (2x1W RMS)
- Line Out ( RCA Jack )
- USB/SD playing and recording
- FM radio
- Aux in and Headphone
- RCA out
- Can built-in rechargeable lithium battery (Can be run continuously 3\~4 hours)
- The external power supply (USB Jack 5V 500ma)
DESCRIPTION
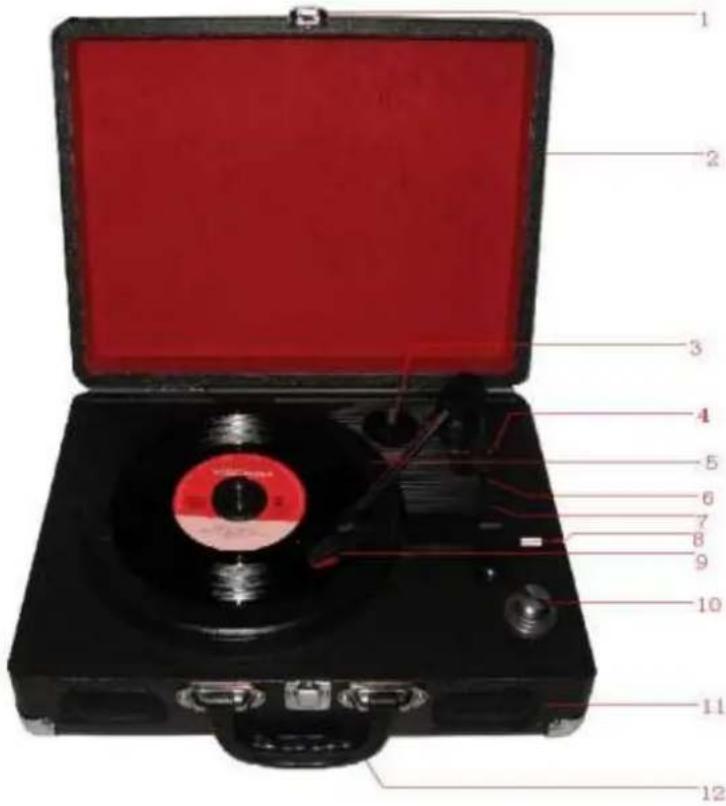
- Lock catch
- Plastic dust cover
- Adapter - Use this when playing 45rpm records with cut out centres.
- Tone arm lift lever
- Turntable
- Auto stop control
- Speed selection - Three speed for choice: 33.3, 45, 78 rpm.
- Llock ON and OFF
- Needle
- Power switch
- Built-in stereo speaker
- Handle
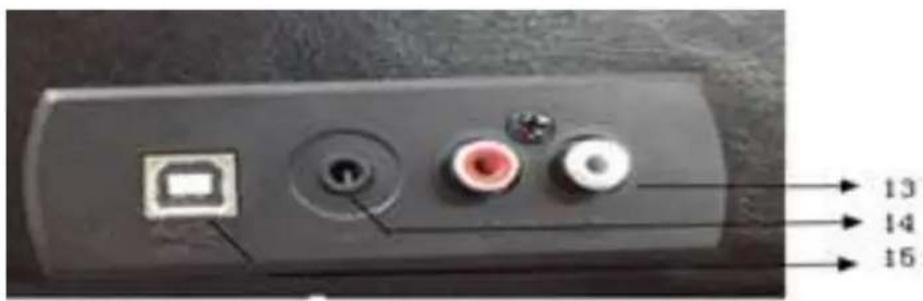
- RCA output
- USB 5V DC power in socket
- Socket for headphone to play iPhone/iPod
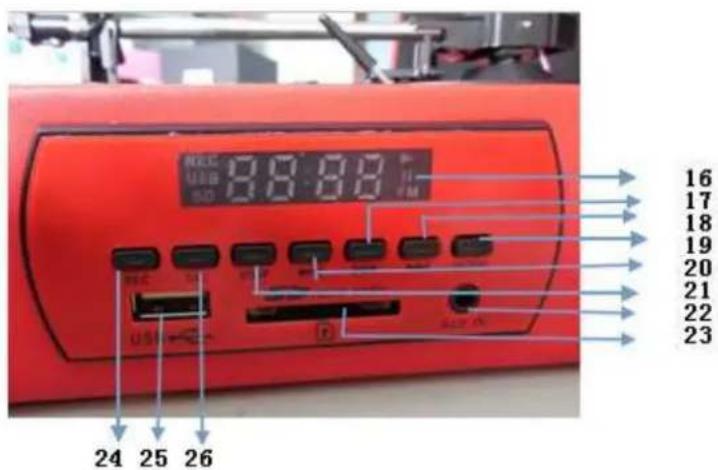
- LCD blue display
- SKIP UP button
- SKIP DOWN button
- Mode: to select FM radio/USB/SD/Bluetooth(Bluetooth Must be paired) or LP songs
- PLAY OR PAUSE
- Stop/Play button
- Aux in
- SD card slot: playing SD card songs or recording
- REC: function to record
- USB slot: playing USB songs or recording
- Delete button
MAIN CONNECTION
Ensure that the mains voltage of your home corresponds to the operating voltage of the unit. Your unit is ready to be connected to a mains voltage of 100-240V/50 / 60Hz.
Bluetooth Connection
Put on Bluetooth mode (#19) then paired with your device
AMPLIFIER CONNECTION (if required)
Whilst you can listen to your new turntable using the built in speakers you may wish to connect it to your existing Hi Fi system. Connect the audio plugs to the AUX input on your mixer or amplifier using an RCA cable (not supplied)
● Red plug into R/H channel input.
● White plug into L/H channel input.
BOYTONE 101B
*The first time this Record Player is used, plug it in to charge battery for at least 30 minutes.
Playing a Record
- Remove Protective Stylus Cap.
- Choose desired playing speed using Speed Selection Switch.
- Put Auto-Stop Switch in the ON position if you want Turntable to stop when Tone arm gets to the end.
- Place record on Turntable.
- Turn on Rotary Power Switch. This is also Volume Control.
- Release Tone arm Lock.
- Use your right hand to use Tone arm Lift Lever to raise Tone arm.
- While holding up Tone arm Lift Lever with your right hand, use your left hand to move Tone arm into place over record. Record should begin to spin. (If Record Player makes a popping sound, it needs to charge longer.)
*Clean records sound better and are easier on Stylus (needle). Use a proper record cleaner.
Phono encoding
- Set the function button to PHONO mode and then insert a memory device (USB drive, SD or MMC card).
- Put your record onto the turntable and get it ready for playback.
- Press the record REC button. It will take about 3 - 4 seconds to read the memory device, then the USB or SD icon will be flashing on the LC display.
- Press the skip up or skip down button to select the desired mode (USB or SD) for encoding, then press the record REC button again to confirm.(You can skip this step if only a USB drive or an SD/MMC card is inserted.)
- The system will start the encoding mode after a few seconds.
- Lower the tone arm to start playback of the record. During encoding, the USB or SD icon will be flashing on the display.
- To finish encoding, press the stop button. The display will show "END" and return to PHONO mode.
NOTE:
- The recording speed is 1:1. Recording will take as long as playing the record.
- The recording format is pre-set at MP3 bit rate 128 kbps.
AUX IN encoding
- Insert AUX in and then insert a memory device (USB drive, SD or MMC card).
- Press the record REC button, it will take 3 - 4 seconds to read the memory device, then the USB or SD icon will be flashing on the LC display.
- Press the skip up or skip down button to select the desired mode (USB or SD) for encoding, then press the record REC button again to confirm.(You can skip
this step if only a USB drive or an SD/MMC card is inserted.)
- The system will start the encoding mode after a few seconds. During encoding, the USB or SD icon will be flashing on the display.
- To finish encoding, press the stop button. The display will show "END" and return to TAPE/AUX mode.
NOTE:
- The recording speed is 1:1. Recording will take as long as playing the CD (or other auxiliary input).
- The recording format is pre-set at MP3 bit rate 128 kbps.
The USB Port and SD Card Slot
Playback of music in MP3/WMA format via USB device or memory card
The system is able to decode and playback all MP3/WMA files stored in the memory media connected to the USB port or SD/MMC card slot.
- Turn the volume knob clockwise to turn the equipment on.
-
Following the illustration below, insert a USB device face up into the USB port, making sure it is fully inserted. Alternatively, insert a memory card in the direction of the arrow (as shown on the label next to the memory card slot), making sure to insert it straight without bending. IMPORTANT: Connecting the USB device upside down or backwards could damage the audio system or storage media (USB drive, SD or MMC card). Check to ensure the direction is correct before connection.
-
Set the function selector to USB/SD mode. (If you have both a USB device and a memory card inserted, press the MODE button to toggle between USB and
SD mode.) The system will start reading the storage medium automatically after mode selection and will display the total number of folders and MP3/WMA files.
- The system will then start audio playback from the media storage device (USB or SD card) automatically.
Playback controls
PLAY/PAUSE Press this button once to stop playing, press it again to continue.
STOP Press this button to stop audio playback, the display will then show the total number of MP3/WMA files.
SKIP UP Press this button once to play the next file, press and hold this button to fast forward through the files/tracks.
SKIP DOWN Press this button once to play the previous file, press and hold this button to fast reverse through the files/tracks.
TUNING KNOB Turn this knob to the right/left to search a folder backward or forward.
MODE Press this button to toggle between USB and SD Card mode.
Important notes
- The system can detect and read files in MP3 / WMA format only via the USB port or SD card slot.
- You can connect an MP3 player to the system via the USB socket, however, some MP3 players may not be able to play via the USB socket. This is due to variances in the MP3 encoding format, it is not a malfunction of the system.
- There are numerous USB and SD device producers and their products vary in
solution and format. We therefore cannot guarantee that this unit will support all USB and SD devices from every brand.
- This system supports SD cards up to 8GB.
- MP3 / WMA track format requirements: MP3 bit rate: 32 kbps\~256 kbps; WMA bit rate: 32 kbps \~ 320 kbps.
Copying of MP3 / WMA files
The system allows you to copy files from USB to SD/MMC or vice versa. You can copy a single file/track, a folder of files/tracks, or all files/tracks on the storage medium.
Copying a single file/track
- Insert a USB storage device and SD/MMC card, then select USB/SD mode (as described previously).
- Press the record REC button during playback of the track you want to copy: "ONE" will be flashing on the display. Press the record REC button again to confirm.
- The USB or SD icon will be flashing on the display while the system is copying the file.
- Once the file has been copied, the unit will stop playback automatically. "END" will be shown on the display and the system will revert to USB or SD mode.
Copying a folder
-
Insert a USB storage device and SD card, then select USB/SD mode (as described previously). When the system has recognised the device, press the stop button.
-
Turn the tuning knob to select the desired folder for copying.
- Press the record REC button: "ONE" will be flashing on the display. Press the SKIP UP or SKIP DOWN button to select "FOL" (folder) on the display. Press the record REC button again to confirm.
- The USB or SD icon will be flashing on the display while the system is copying the folder.
- When the folder has been copied, the USB or SD icon will stop flashing on the display.
Copying all files/tracks
- Insert a USB storage device and SD card, then select USB/SD mode (as described previously). When the system has recognised the device, press the stop button.
- Press the record REC button: "ONE" will be flashing on the display. Press the SKIP UP or SKIP DOWN button to select "ALL" on the display. Press the record REC button again to confirm.
- The USB or SD icon will be flashing on the display while the system is copying the files/tracks.
- When all files/tracks have been copied, the USB or SD icon will stop flashing on the display.
NOTE: If you press the record REC button during playback in USB or SD mode, the file will copy from USB to SD or vice versa.
Deleting files from the USB device / SD card
The system is able to erase files stored on the USB drive or SD card. You can delete a single file/track, a folder of files/tracks, or all files/tracks on the storage medium.
Deleting a single file/track
- Insert the USB storage device or SD card, then select USB/SD mode (as described previously).
- Press the delete DEL button during the playback of the track you want to delete: "ONE" will be flashing on the display. Press the delete DEL button again to confirm.
- “DEL” will show on the display while the file/track is being deleted until the deletion is complete.
Deleting a folder
- Insert a USB storage device and SD card, then select USB/SD mode (as described previously). When the system has recognised the device, press the stop button.
- Turn the tuning knob to select the desired folder for deleting.
- Press the delete DEL button: "ONE" will be flashing on the display. Press the SKIP UP or SKIP DOWN button to select "DIR" (directory) on the display. Press the delete DEL button again to confirm.
- "DEL" will show on the display while the folder is being deleted until the deletion is complete.
Deleting all files/tracks
- Insert a USB storage device and SD card, then select USB/SD mode (as
described previously). When the system has recognised the device, press the stop button.
- Press the delete DEL button: "ONE" will be flashing on the display. Press the SKIP UP or SKIP DOWN button to select "ALL" on the display. Press the delete DEL button again to confirm.
- While the system is deleting the files/tracks, the USB or SD icon will be flashing on the display until the deletion is complete.
NOTE: Pressing the delete DEL button will completely delete all files/tracks on the USB device or SD card.
Removing the USB device / SD card
- First move the function selector to another mode (tuner, phono, tape), then turn the volume knob counter clockwise to turn off the power.
- To remove a USB device, pull it out of the USB port.
- To remove a memory card, press the memory card inwards and then release it. The card will be released (partially ejected) and you can remove it by hand.
MAINTENANCE
REPLACING THE STYLUS
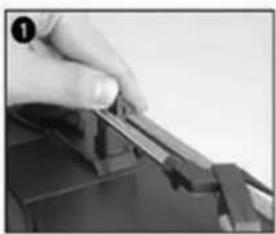
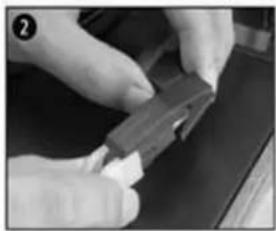
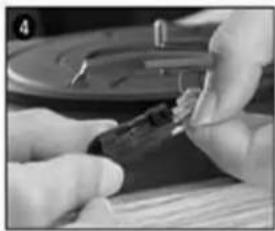
-Refer to the figures 1-8
natural_image
Close-up of a hand holding a small object, possibly a tool or component, with no visible text or symbols.push the arm lock to release the tone-arm.
natural_image
Close-up of hands using a tool to adjust or install a component (no visible text or symbols)take off cap of the cartridge to expose the needle out.

natural_image
Close-up of hands using pliers to cut a metal part (no visible text or symbols)separate the cartridge from the socket lightly.
natural_image
Close-up of hands assembling or adjusting a mechanical component (no visible text or symbols)take off the audio-line from the cartridges completely.
natural_image
Close-up of hands assembling or adjusting a small mechanical component (no visible text or symbols)to fit a new one just in opposite deals. insert the audio-line accordingly, and install the cartridge to the socket lightly.
natural_image
Close-up of hands using a tool to adjust or install a small electronic component (no visible text or symbols)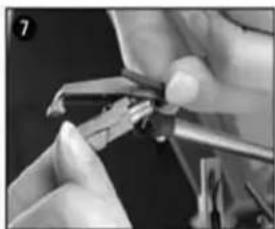
natural_image
Close-up of hands using a tool to cut or apply a small mechanical component (no visible text or symbols)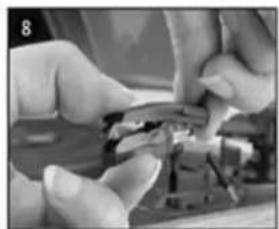
natural_image
Close-up of hands assembling or adjusting a mechanical component (no visible text or symbols)NOTE: Please exercise extreme care whilst performing this operation so as to avoid the tone arm and audio line wires from any damage.
INSTALLING A NEW STYLUS CARTRIDGE
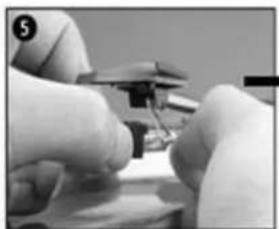
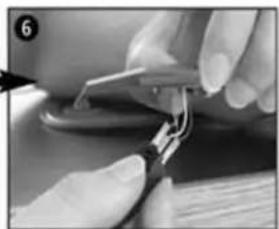
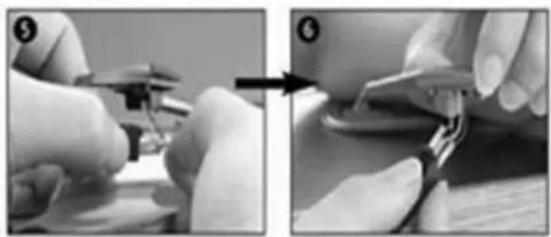
-Refer to the figures 5 & 6
natural_image
Two-step black-and-white photo showing hands assembling a small mechanical component, with no visible text or symbols.NOTES
We advise you to clean your records with an anti-static cloth to gain maximum enjoyment from them and to make them last.
We would also point out that for the same reason your stylus should be
Replaced periodically (approximately every 250 hours)
Dust the stylus from time to time using a very soft brush dipped in alcohol (brushing from back to front of the cartridge)
WHEN TRANSPORTING YOUR RECORD PLAYER DO NOT FORGET TO:
- Replace the protective cap on the stylus.
- Put the rest clip into the pick-up arm.
- Suitcase Turntable with Rechargeable Battery USB/SD and FM Radio & Bluetooth
- Features:
- DESCRIPTION
- MAIN CONNECTION
- Bluetooth Connection
- Put on Bluetooth mode (#19) then paired with your device
- AMPLIFIER CONNECTION (if required)
- BOYTONE 101B
- Playing a Record
- Phono encoding
- NOTE:
- AUX IN encoding
- The USB Port and SD Card Slot
- Playback of music in MP3/WMA format via USB device or memory card
- Playback controls
- Important notes
- Copying of MP3 / WMA files
- Copying a single file/track
- Copying a folder
- Copying all files/tracks
- Deleting files from the USB device / SD card
- Deleting a single file/track
- Deleting a folder
- Deleting all files/tracks
- Removing the USB device / SD card
- MAINTENANCE
- REPLACING THE STYLUS
- INSTALLING A NEW STYLUS CARTRIDGE
- NOTES
Brand : Boytone
Model : BT-101BK
Category : Gramophone