
Camaro (1993) - Automotive CHEVROLET - Free user manual and instructions
Find the device manual for free Camaro (1993) CHEVROLET in PDF.


| Product Type | Automobile |
| Brand | Chevrolet |
| Model | Camaro (1993) |
| Engine Options | 3.4L V6 (160 hp), 5.7L V8 (275 hp) |
| Transmission | 5-speed manual or 4-speed automatic |
| Drivetrain | Rear-wheel drive |
| Fuel Type | Gasoline |
| Fuel Tank Capacity | 15.5 gallons |
| Seating Capacity | 4 passengers |
| Curb Weight | Approx. 3,400 lbs (1,542 kg) |
| Length | 193.5 in (4,915 mm) |
| Width | 74.1 in (1,882 mm) |
| Height | 52.0 in (1,321 mm) |
| Wheelbase | 101.1 in (2,568 mm) |
| Tire Size | P215/65R15 (front), P235/55R16 (rear, optional) |
| Brakes | Front disc, rear drum (ABS optional) |
| Air Conditioning | Standard (R134a refrigerant retrofit possible) |
| Power Windows | Standard |
| Power Locks | Standard |
| Steering | Power-assisted rack and pinion |
| Maintenance | Oil change every 3,000-5,000 miles; coolant, brake fluid, transmission fluid as per manual |
Frequently Asked Questions - Camaro (1993) CHEVROLET
User questions about Camaro (1993) CHEVROLET
0 question about this device. Answer the ones you know or ask your own.
Ask a new question about this device
Download the instructions for your Automotive in PDF format for free! Find your manual Camaro (1993) - CHEVROLET and take your electronic device back in hand. On this page are published all the documents necessary for the use of your device. Camaro (1993) by CHEVROLET.
USER MANUAL Camaro (1993) CHEVROLET
C H E V R O L E T C A M A R O
natural_image
Abstract painting with red, blue, green, and yellow brushstrokes (no text or symbols)
natural_image
Painting of a winding path through green hills under a vibrant red and yellow sky (no text or symbols)
natural_image
Black cross-shaped logo on a colorful abstract background (no text or symbols)1993 OWNER'S MANUAL

natural_image
Completely blank white image with no visible content, text, or symbols.
Camaro
1993 Owner's Manual
Table of Contents
Introduction How to Use This Manual....6
Part 1 Seats & Safety Belts....11
Part 2 Features & Controls .....47
Part 3 Comfort Controls & Audio Systems ...109
Part 4 Your Driving and the Road.....131
Part 5 Problems on the Road .....183
Part 6 Service & Appearance Care .....217
Part 7 Maintenance Schedule....285
Part 8 Customer Assistance Information . . .313
Including "Reporting Safety Defects" on page 318.
Part 9 Index....329
Service Station Information...Last Page
Printed in U.S.A.
Part No. 10193571 B
Second Printing
Please keep this manual in your Chevrolet, so it will be there if you ever need it when you're on the road. If you sell the vehicle, please leave this manual in it so the new owner can use it.
This manual includes the latest information at the time it was printed. We reserve the right to make changes in the product after that time without further notice. For vehicles first sold in Canada, substitute the name “General Motors of Canada Limited” for Chevrolet Motor Division whenever it appears in this manual.
For Canadian Owners Who Prefer a French Language Manual
Published by Chevrolet Motor Division General Motors Corporation
General Motors, GM and the GM emblem, Chevrolet and the Chevrolet emblem, and Camaro and the Camaro emblem are registered trademarks of General Motors Corporation.
© Copyright 1992 General Motors Corporation, Chevrolet Motor Division. All Rights Reserved.
The Heritage of Chevrolet
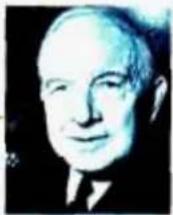
The dynamic William C. "Billy" Durant shifted gears from making carriages to making cars, forming half the team that gave birth to Chevrolet.
Welcome to the largest automotive family in the world — the family of Chevrolet owners. You have selected a vehicle designed, engineered and crafted by teamwork, a vehicle backed by a proud history of performance and value. Since the first “Classic Six” rolled off the line in 1912, more than 110 million Chevrolet cars and trucks have worn the Chevrolet marque. That kind of reception from auto owners is unmatched by any other car manufacturer in the world.
The Chevrolet blend of value and performance has become an American tradition—whether bred for the racetrack like the legendary
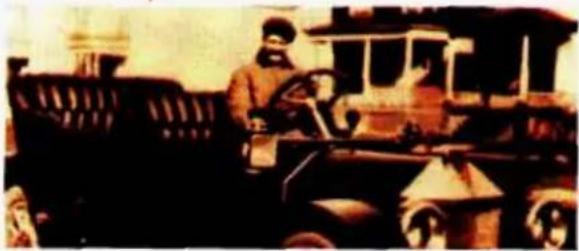
Louis Chevrolet, the other half of the team, at the wheel of his experimental “Classic Six,” which entered production in 1912—producing 2999 vehicles.
natural_image
Historic black-and-white photo of a man operating a vintage automobile with two other men in the background (no visible text or symbols)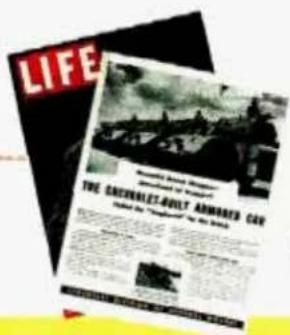
text_image
LIFE The CHEVROLET-AQUITY ARMORED CAR Covered by "Aguarland" by the USA.In January 1942, Chevrolet factories were converted to military production in an all-out effort to achieve victory in Europe and the Pacific . . . but millions of Americans already owned a “Chevy.”
Corvette and Camaro, or created for the pleasure of the open road.
Every decade, Chevrolet has reinforced its heritage of affordable performance with quality and value crafted into every vehicle. It's not surprising that for eighty years Chevrolet has been America's automobile . . . truly
"The Heartbeat of America."
We're proud to continue that heritage in your Chevrolet, and we
In 1932 Chevrolet introduced the Synchronesh transmission and offered a host of accessories—including such niceties as a clock!
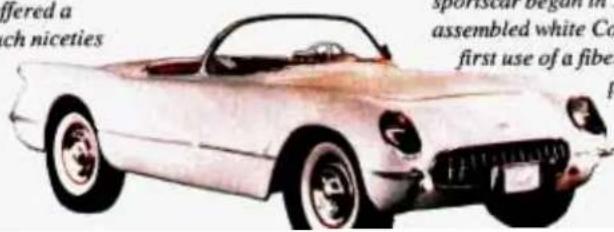
The legacy of America's favorite sportscar began in 1953, when 319 hand-assembled white Corvettes launched the first use of a fiberglass body in a production car.
text_image
ffered a ch niceties sporiscar began in assembled white Co first use of a fiber p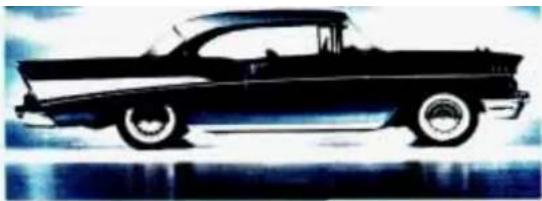
natural_image
Side profile of a classic black-and-white car against a blue background (no visible text or symbols)The 1957 Chevy started a romance with the American public—and was powered by an available fuel-injected V8.
are pledged to make ownership of your Chevrolet an enjoyable and rewarding experience.
text_image
f.c.b.Jim Perkins, General Manager
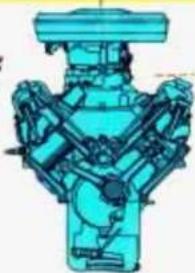
60's automotive excitement included Chevrolet landmarks like the Corvette Sting Ray, the sporty Camaro, and power-plants like the legendary 327 V8.
natural_image
Technical illustration of a blue industrial valve assembly (no text or symbols visible)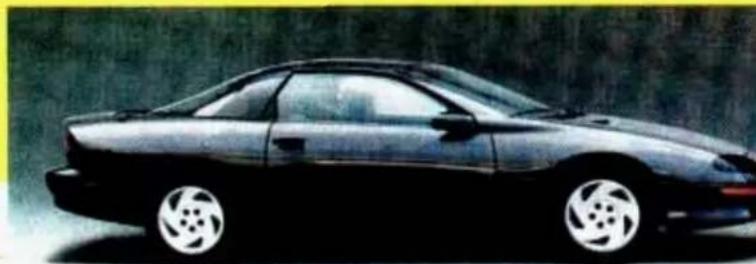
natural_image
Side view of a black sedan car with silver alloy wheels (no visible text or symbols)Your new Chevrolet continues a tradition of quality and value.
How to Use This Manual
natural_image
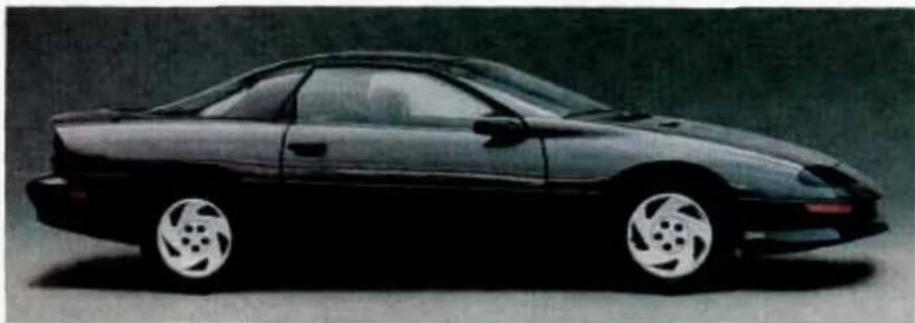
Side profile of a black sports car with silver alloy wheels (no visible text or symbols)■ How to Use This Manual
Many people read their owner's manual from beginning to end when they first receive their new vehicle. This will help you learn about the features and controls for your vehicle. In this manual, you'll find that pictures and words work together to explain things quickly.
Index: A good place to look for what you need is the Index in back of the manual. It's an alphabetical list of all that's in the manual, and the page number where you'll find it.
Parts 1-8: Each part of this manual begins with a brief list of its contents, so you can often find at a glance if a part contains the information you want.
How to Use This Manual
This part tells you how to use your manual and includes safety and vehicle damage warnings and symbols.
Part 1: Seats & Safety Belts
This part tells you how to use your seats and safety belts properly.
Part 2: Features & Controls
This part explains how to start and operate your Chevrolet.
Part 3: Comfort Controls & Audio Systems
This part tells you how to adjust the ventilation and comfort controls and how to operate your sound system.
Part 4: Your Driving and the Road
Here you'll find helpful information and tips about the road and how to drive under different conditions.
Part 5: Problems on the Road
This part tells you what to do if you have a problem while driving, such as a flat tire or engine overheating.
Part 6: Service & Appearance Care
Here the manual tells you how to keep your Chevrolet running properly and looking good.
Part 7: Maintenance Schedule
This part tells when to perform vehicle maintenance and what fluids and lubricants to use.
Part 8: Customer Assistance Information
This part includes important information about reporting safety defects and gives you details about the “Roadside Assistance” program. You will also find customer satisfaction phone numbers (including customer satisfaction numbers for the hearing and speech impaired), as well as the mediation/arbitration procedure. We’ve also included ordering information for service publications in this part.
Service Station Information
This is a quick reference of service information. You can find it on the last page of this manual.
CAUTION

These mean there is something that could hurt you or other ole.
Safety Warnings and Symbols
You will find a number of safety cautions in this book. We use yellow and the word CAUTION to tell you about things that could hurt you if you were to ignore the warning.
In the yellow caution area, we tell you what the hazard is. Then we tell you what to do to help avoid or reduce the hazard. Please read these cautions. If you don't, you or others could be hurt.
How to Use This Manual

text_image
Red prohibition symbol with circle and diagonal line, commonly used to indicate no smoking or anti-smoking.You will also find a red circle with a slash through it in this book. This safety symbol means “Don’t,” “Don’t do this,” or “Don’t let this happen.”
NOTICE
These mean there is something that could damage your vehicle.
Vehicle Damage Warnings
Also, in this book you will find these blue notices.
In the blue notice area, we tell you about something that can damage your vehicle. Many times, this damage would not be covered by your warranty, and it could be costly. But the notice will tell you what to do to help avoid the damage.
When you read other manuals, you might see CAUTION and NOTICE warnings in different colors or in different words. In this manual, we've used the familiar words and colors that Chevrolet has used for years.
You'll also see warning labels on your vehicle. They use the same colors, and the words CAUTION or NOTICE.
Vehicle Symbols
These are some of the symbols you will find on your vehicle. For example, these symbols are used on an original battery:
These symbols are important for you and your passengers whenever your vehicle is driven:
Caution Possible Injury
Protect Eyes by Shielding
Caustic Battery Acid Could Cause Burns
Avoid Sparks or Flames
Sparks or Flame Could Explode Battery



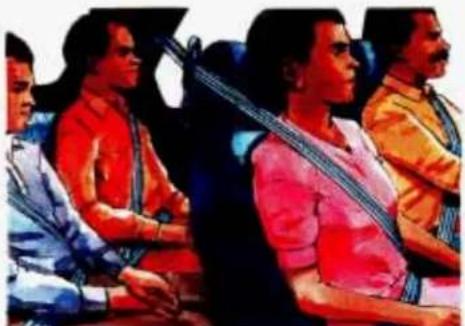
Fasten Safety Belts
Door Lock/Unlock
These symbols have to do with your lights:
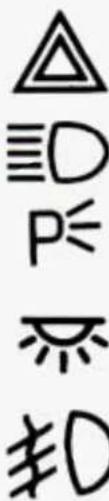
Master Lighting Switch
Turn Signal Direction



Hazard Warning Flasher
Headlight High Beam
Parking Lights
Courtesy Lights
Fog Lights
text_image
△ ≡D P= ≈ ∅DHow to Use This Manual
These symbols are on some of your controls:
Windshield Wiper
Windshield Washer
Windshield Defroster
Rear Window Defogger
Ventilating Fan


These symbols are used on warning and indicator lights:
Engine Coolant Temperature
Battery Charging System
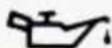
Engine Oil Pressure
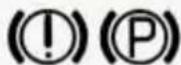
Brake (Canada)
Anti-Lock Brake System (Canada)
Low Coolant

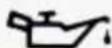
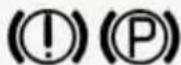


Here are some other symbols you may see:
Fuel
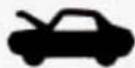
Hood Release
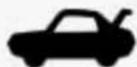
Hatchback Release
Lighter
Horn
Speaker

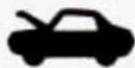
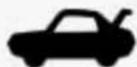

C H E V R O L E T C A M A R O
natural_image
Abstract painting with red, blue, green, and yellow brushstrokes (no text or symbols)
natural_image
Painting of a winding path through green hills under a vibrant red and yellow sky (no text or symbols)
natural_image
Black cross-shaped logo on a colorful abstract background (no text or symbols)1993 OWNER'S MANUAL
How to Use This Manual
These symbols are on some of your controls:
Windshield Wiper
Windshield Washer
Windshield Defroster
Rear Window Defogger
Ventilating Fan


These symbols are used on warning and indicator lights:
Engine Coolant Temperature
Battery Charging System
Engine Oil Pressure
Brake (Canada)
Anti-Lock Brake System (Canada)
Low Coolant



Here are some other symbols you may see:
Fuel
Hood Release
Hatchback Release
Lighter
Horn
Speaker


natural_image
Group of people in casual attire, one holding a rifle (no visible text or symbols)Here you'll find information about the seats in your Chevrolet and how to use your safety belts properly. You can also learn about some things you should not do with safety belts.
Part 1 Seats & Safety Belts
Seats and Seat Controls 12
Safety Belts: They're for Everyone 15
Why Safety Belts Work 17
Here Are Questions Many People Ask about Safety Belts — and the Answers . . . 19
Safety Belt Reminder Light 20
How to Wear Safety Belts Properly 21
Children 34
Child Restraints 36
Larger Children 43
Safety Belt Extender 44
Checking Your Restraint Systems 45
Replacing Safety Belts after a Crash 45
Seats & Safety Belts
natural_image
Close-up of a black object on a textured brown surface, partially visible against a yellow background (no text or symbols)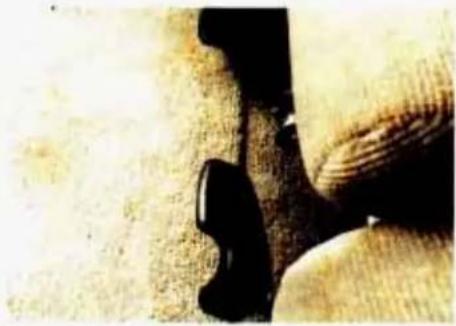
natural_image
Close-up of a hand holding a small object, possibly a musical instrument or tool, against a textured background (no visible text or symbols)■ Seats and Seat Controls
This section tells you about the seats — how to adjust them, and also about reclining front seatbacks, seatback latches and the folding rear seatback.
Manual Front Seat
Move the lever under the passenger's front seat to unlock it. Slide the seat to where you want it. Then release the lever and try to move the seat with your body, to make sure the seat is locked into place.
Four-Way Manual Seat
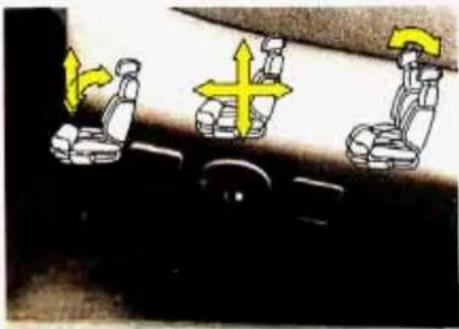
To move the driver's seat forward or backward, lift the lever under the left front of the seat. To tilt the entire seat, lift the lever under the right front of the seat.
text_image
Diagram showing three seated car seats with directional arrows indicating movement or force, likely illustrating vehicle safety or mobility.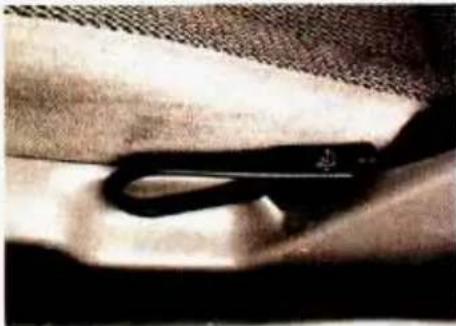
natural_image
Close-up of a black hairpin resting on a textured fabric surface (no visible text or symbols)CAUTION:
You can lose control of the vehicle if you try to adjust a manual driver's seat while the vehicle is moving. The sudden movement could startle and confuse you, or make you push a pedal when you don't want to. Adjust the driver's seat only when the vehicle is not moving.
Six-Way Power Seat (OPTION)
The driver's seat has three controls on the left side.
The front control makes the front of the seat go up and down.
The back control makes the back of the seat go up and down.
The center control makes the whole seat go up and down or forward and backward.
Reclining Front Seatbacks
To adjust the seatback, lift the lever on the outer side of the seat. Release the lever to lock the seatback where you want it. Pull up on the lever, and the seat will go to its original upright position. But don't have the seatback reclined if your vehicle is moving.
Seats & Safety Belts
text_image
Photo of a person lying in a car with a red prohibition symbol overlayCAUTION:

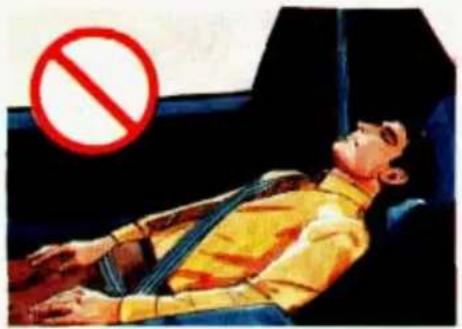
Sitting in a reclined position when your vehicle is in motion can be dangerous. Even if you buckle up, your safety belts can't do their job when re reclined like this.
The shoulder belt can't do its job because it won't be against your body. Instead, it will be in front of you. In a crash you could go into it, receiving neck or other injuries.
The lap belt can't do its job either. In a crash the belt could go up over your abdomen. The belt forces would be there, not at your pelvic bones. This could cause serious internal injuries.
For proper protection when the vehicle is in motion, have the seatback upright. Then sit well back in the seat and wear your safety belt properly.
natural_image
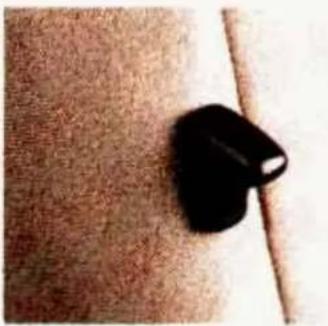
Close-up of a black object resting on a textured brown surface, possibly a knob or abstract shape (no text or symbols visible)Front Seatback Latches
The front seatbacks fold forward to let people get into the back seat. To fold a seatback forward, push the seatback toward the rear as you lift this latch. Then the seatback will fold forward.
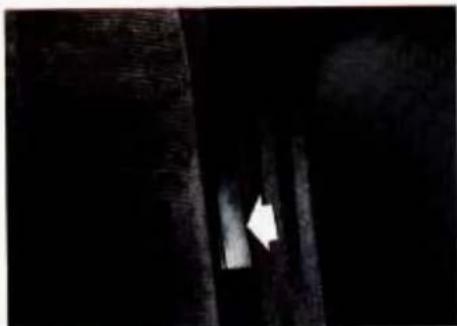
natural_image
Dark scene with indistinct vertical light streak and a white arrow pointing to a bright spot (no text or symbols visible)When you return the seatback to its original position, make sure the seatback is locked. The latch must be down for the seat to work properly.
CAUTION:

If the seatback isn't locked, it could move forward in a len stop or crash. That could be injury to the person sitting e. Always press rearward on the back to be sure it is locked.
Folding Rear Seatback
The rear seatback in your Chevrolet folds down to provide more storage space.
To fold the seatback down:
-
Pull forward on both levers.
-
Fold the seatback down.
To raise the seatback:
-
Pull it up to the locked, upright position.
-
Be sure both latches hold the seatback in place. Have them fixed if they don't.
■ Safety Belts: They're for Everyone
This part of the manual tells you how to use safety belts properly. It also tells you some things you should not do with safety belts. And it explains the Supplemental Inflatable Restraint, or "air bag" system.
Seats & Safety Belts
natural_image
Silhouette of a person holding a crossbar, enclosed in a square frame (no text or symbols)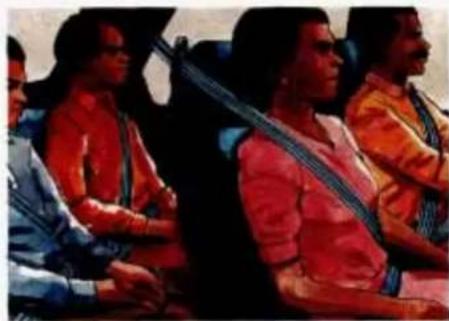
natural_image
Group of people seated in a vehicle, wearing colorful clothing (no visible text or symbols)CAUTION:

Don't let anyone ride where they can't wear a safety belt properly. If you are in a crash and you're not wearing a safety belt, your injuries can be much worse.
You can hit things inside the vehicle or be ejected from it. You can be seriously injured or killed. In the same crash, you might not be if you are buckled up. Always fasten your safety belt, and check that your passengers' belts are fastened properly too.
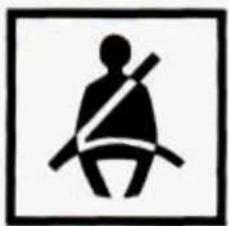
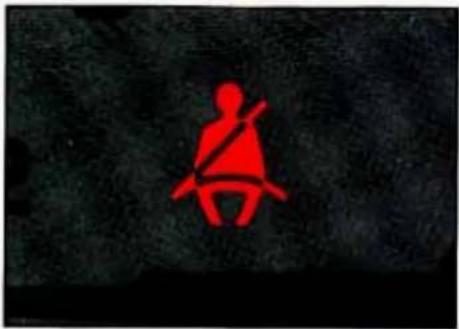
This figure lights up when you turn the key to Run or Start when your safety belt isn't buckled, and you'll hear a chime, too. It's the reminder to buckle up.
In many states and Canadian provinces, the law says to wear safety belts. Here's why: They work.
You never know if you'll be in a crash. If you do have a crash, you don't know if it will be a bad one.
A few crashes are very mild. In them, you won't get hurt even if you're not buckled up. And some crashes can be so serious, like being hit by a train, that even buckled up a person wouldn't survive. But most crashes are in between. In many of them, people who buckle up can survive and sometimes walk away. Without belts they could be badly hurt or killed.
After 25 years of safety belts in vehicles, the facts are clear. In most crashes buckling up does matter ... a lot!
natural_image
Illustration of a child riding a bicycle with wheels, no visible text or symbols■ Why Safety Belts Work
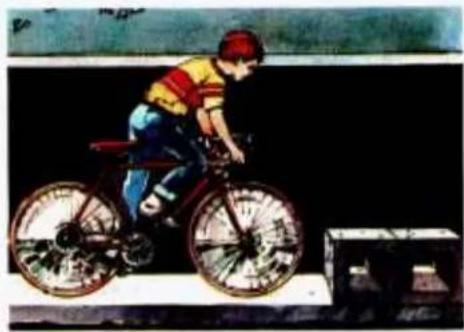
When you ride in or on anything, you go as fast as it goes.
For example, if the bike is going 10 mph (16 km/h), so is the child.
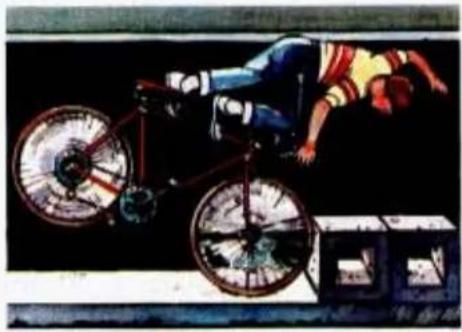
natural_image
Illustration of a person riding a bicycle with motion blur, no visible text or symbolsWhen the bike hits the block, it stops. But the child keeps going!
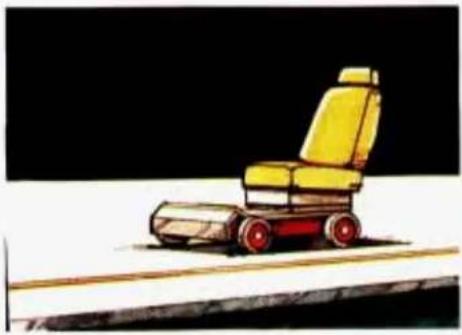
natural_image
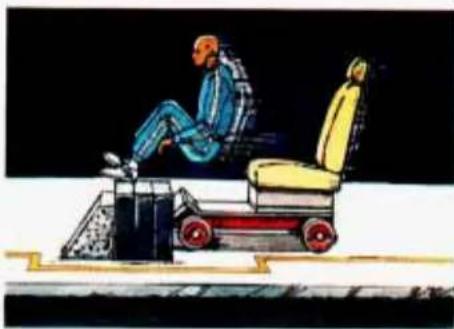
Illustration of a yellow and red car steering wheel on a flat surface (no text or symbols)Take the simplest "car." Suppose it's just a seat on wheels.
Seats & Safety Belts
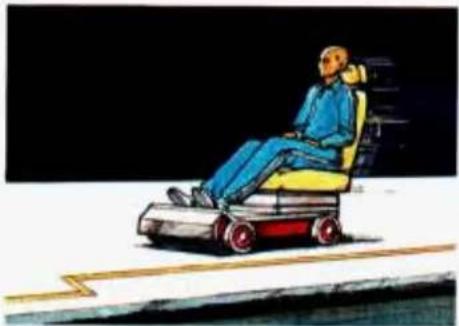
natural_image
Illustration of a person using a mobility scooter on a platform (no text or symbols visible)Put someone on it.
natural_image
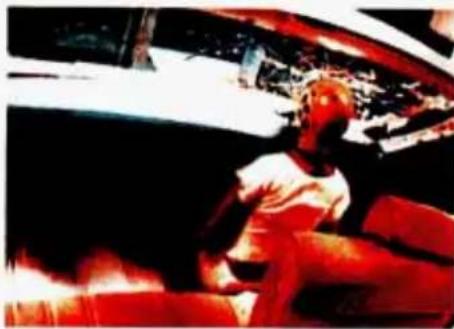
Illustration of a person seated on a robotic platform with a yellow chair, against a dark background (no text or symbols)Get it up to speed. Then stop the "car." The rider doesn't stop.
natural_image
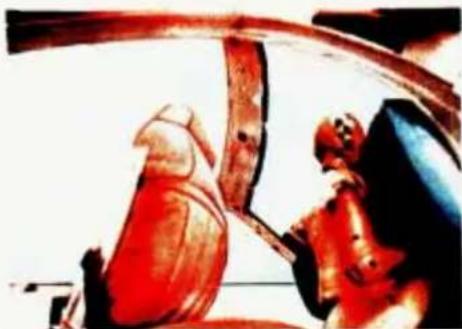
Person sitting on a vehicle in red lighting (no visible text or symbols)The person keeps going until stopped by something.
In a real vehicle, it could be the windshield ...
natural_image
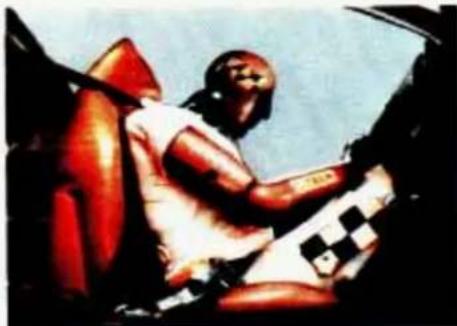
Illustration of two figures interacting near a curved structure (no text or symbols visible)or the instrument panel ...
natural_image
Illustration of a person in motion, wearing a white shirt with a checkered pattern, seated on a red vehicle (no visible text or symbols)or the safety belts!
With safety belts, you slow down as the vehicle does. You get more time to stop. You stop over more distance, and your strongest bones take the forces. That's why safety belts make such good sense.
■ Here Are Questions Many People Ask about Safety Belts — and the Answers
Q: Won't I be trapped in the vehicle after an accident if I'm wearing a safety belt?
A: You could be — whether you're wearing a safety belt or not. But you can easily unbuckle a safety belt, even if you're upside down. And your chance of being conscious during and after an accident, so you can unbuckle and get out, is much greater if you are belted.
Seats & Safety Belts
natural_image
Red silhouette of a person sitting on a bench with a diagonal stripe, against a dark background (no text or symbols)Q: Why don't they just put in air bags so people won't have to wear safety belts?
A: "Air bags," or Supplemental Inflatable Restraint systems, are in some vehicles today and will be in more of them in the future. But they are supplemental systems only — so they work with safety belts, not instead of them. Every "air bag" system ever offered for sale has required the use of safety belts. Even if you're in a vehicle that has "air bags," you still have to buckle up to get the most protection. That's true not only in frontal collisions, but especially in side and other collisions.
Q: If I'm a good driver, and I never drive far from home, why should I wear safety belts?
A: You may be an excellent driver, but if you're in an accident — even one that isn't your fault — you and your passengers can be hurt. Being a good driver doesn't protect you from things beyond your control, such as bad drivers.
Most accidents occur within 25 miles (40 km) of home. And the greatest number of serious injuries and deaths occur at speeds of less than 40 mph (65 km/h).
Safety belts are for everyone.
■ Safety Belt Reminder Light
When the key is turned to Run or Start, a light will come on for about eight seconds to remind people to fasten their safety belts. Unless the driver's safety belt is buckled, a chime will also sound.
■ How to Wear Safety Belts Properly
Adults
This section is only for people of adult size.
CAUTION:

There are special things to know about safety belts and children. And there are different rules for babies and smaller children. If a child will be riding in your Chevrolet, see the section after this one, called "Children." Follow those rules for everyone's protection.
natural_image
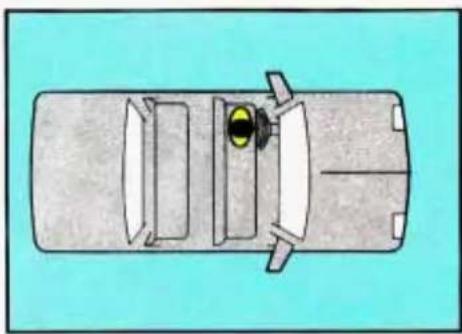
Top-down diagram of a car with two windows and a yellow traffic light, no text or symbols presentFirst, you'll want to know which restraint systems your vehicle has.
We'll start with the driver position.
Driver Position
This section describes the driver's restraint system.
natural_image
Illustration of a man in an orange jacket seated in a car, holding a steering wheel (no text or symbols visible)Lap-Shoulder Belt
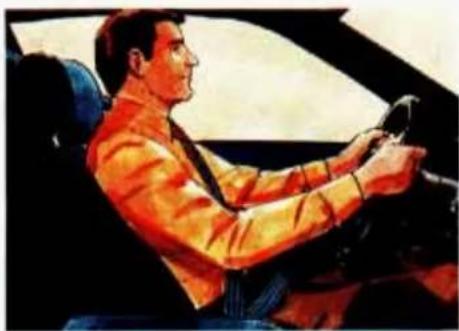
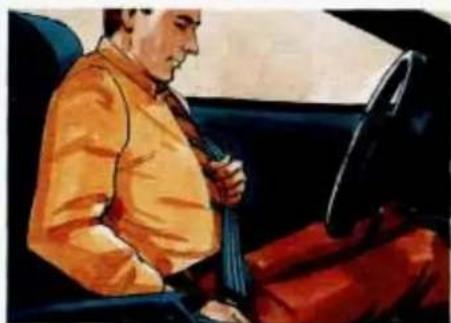
The driver has a lap-shoulder belt. Here's how to wear it properly.
- Close and lock the door.
- Adjust the seat (to see how, see "Seats" in the Index) so you can sit up straight.
Seats & Safety Belts
natural_image
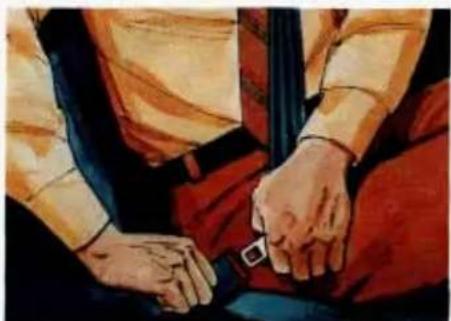
Illustration of two hands adjusting a seatbelt, wearing a red and yellow garment (no text or symbols visible)- Pick up the latch plate and pull the belt across you. Don't let it get twisted.
- Push the latch plate into the buckle until it clicks.
If the belt isn't long enough, see "Safety Belt Extender" at the end of this section.
Make sure the release button on the buckle faces upward or outward so you would be able to unbuckle it quickly if you ever had to.
natural_image
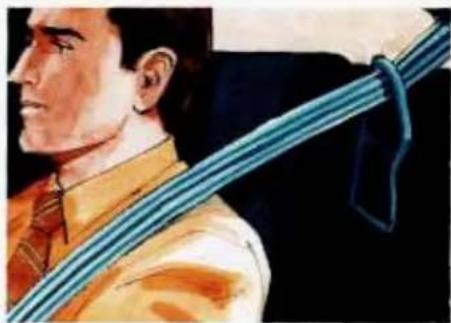
Illustration of a man in a yellow shirt seated in a car, holding a belt and seatbelt (no text or symbols visible)- To make the lap part tight, pull down on the buckle end of the belt as you pull up on the shoulder belt.
natural_image
Illustration of a person in profile holding a long blue object (no text or symbols visible)If the shoulder belt is too tight, move the shoulder belt to the upper or lower guide loop. Choose the one that makes the shoulder belt more comfortable.
natural_image
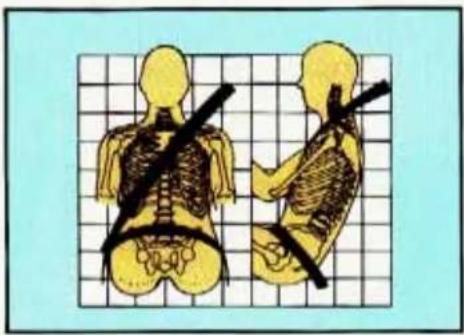
Illustration of human skeletal positions with black crossbones, shown in two views (top and side) against a grid background, no text or symbols present.The lap part of the belt should be worn low and snug on the hips, just touching the thighs. In a crash, this applies force to the strong pelvic bones. And you'd be less likely to slide under the lap belt. If you slid under it, the belt would apply force at your abdomen. This could cause serious or even fatal injuries. The shoulder belt should go over the shoulder and across the chest. These parts of the body are best able to take belt restraining forces.
The safety belt locks if there's a sudden stop or crash.
text_image
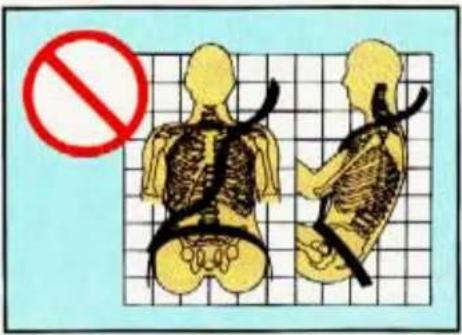
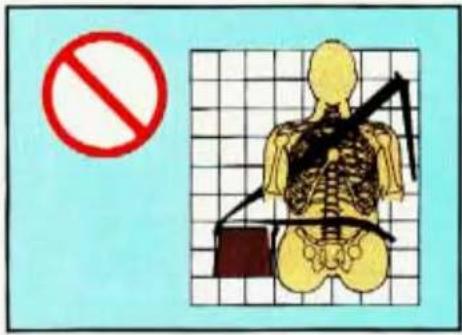
Medical illustration showing two human skeletal models with a red prohibition symbol above them, likely indicating a risk or exclusion scenario.Q: What's wrong with this?
A: The shoulder belt is too loose. It won't give nearly as much protection this way.
CAUTION:
You can be seriously hurt if your shoulder belt is too loose. In a crash you would move forward too much, which could increase injury. The shoulder belt should fit against your body.
text_image
Safety warning sign with red prohibition symbol and a pictogram of a skeleton on grid backgroundQ: What's wrong with this?
A: The belt is buckled in the wrong place.
CAUTION:
You can be seriously injured if your belt is buckled in the wrong place like this. In a crash, the belt would go up over your abdomen. The belt forces would be there, not at the pelvic bones. This could cause serious internal injuries. Always buckle your belt into the buckle nearest you.
Seats & Safety Belts
text_image
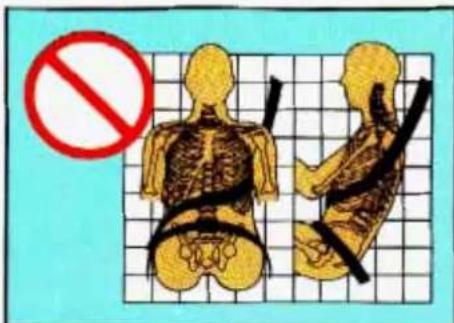
Medical illustration showing skeletal anatomy with a no-smoking symbol, including a red prohibition sign over the left side.Q: What's wrong with this?
A: The shoulder belt is worn under the arm. It should be worn over the shoulder at all times.
CAUTION:
You can be seriously injured if you wear the shoulder belt under your arm. In a crash, your body would move too far forward, which would increase the chance of head and neck injury. Also, the belt would apply too much force to the ribs, which aren't as strong as shoulder bones. You could also severely injure internal organs like your liver or spleen.

text_image
Illustration showing two human skeletal models with a red prohibition symbol above, likely indicating no protection or exclusion.Q: What's wrong with this?
A: The belt is twisted across the body.
CAUTION:
You can be seriously injured by a twisted belt. In a crash, you wouldn't have the full width of the belt to spread impact forces. If a belt is twisted, make it straight so it can work properly, or ask your dealer to fix it.
natural_image
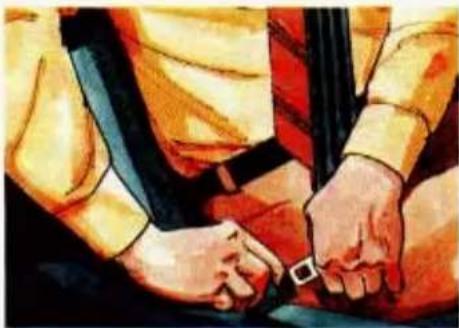
Illustration of two hands adjusting a belt, wearing yellow and black clothing (no text or symbols visible)To unlatch the belt, just push the button on the buckle. The belt should go back out of the way.
Before you close the door, be sure the belt is out of the way. If you slam the door on it, you can damage both the belt and your vehicle.
This vehicle has AIR BAGS for front occupants
CAUTION: YOU NEED YOUR SAFETY BELT, EVEN WITH AN AIR BAG. AND HERE'S WHY:
• Air bags are not designed to inflate in rollovers or in rear side or low-speed frontal crashes.
- Air bags inflate with great force faster than the blink of an eye. If you're too close to an inflating air bag, it could seriously injure you. Safety belts help keep you in position for air bag inflation in a crash.
- An initiating air bag can seriously injure small children. Follow the instructions on the passenger safety belt Caution label.
REGULAR MAINTENANCE OF THE AIR BAG SYSTEM IS NOT REQUIRED. If the air bag readiness light comes on while you are driving, or doesn't come on when you first start your vehicle. See your dealer for service.
PRINTED IN U.S.A See your Owner's Manual for more information. PART NO: C20-30-356
Supplemental Inflatable Restraint System (Air Bags)
This section explains the Supplemental Inflatable Restraint (SIR), or "air bag," system. Your Chevrolet has an air bag for both the driver and the right-front passenger.
Here's the most important thing to know:
CAUTION:
Even with an air bag, if you're not wearing a safety belt and you're in a crash, your injuries may be much worse. Air bags are not designed to inflate in rollovers or in rear, side or low-speed frontal crashes. You need to wear your safety belt to reduce the chance of hitting things inside the vehicle or being ejected from it. Always wear your safety belt, even with an air bag.
Seats & Safety Belts
AIR BAG
CAUTION:
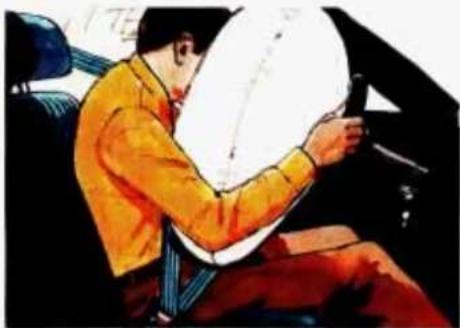
Air bags inflate with great force, faster than the blink of an eye. If you're too close to an inflating air bag, it could seriously injure you. Safety belts help keep you in position for an air bag inflation in a crash. Always wear your safety belt, even with an air bag, and the driver should sit as far back as possible while still maintaining control of the vehicle.
CAUTION:
An inflating air bag can seriously injure small children. Always secure children properly in your vehicle. To read how, see the "Children and Safety Belts" section of this manual, and read the caution label on the front-passenger's safety belt.
Air Bag System Light
There is an air bag readiness light on the instrument panel, which has AIR BAG on it. The system checks itself and the light tells you if there is a problem.
You will see this light flash for a few seconds when you turn your ignition to Run or Start. Then the light should go out, which means the system is ready.
natural_image
Illustration of a person in an orange jacket sitting inside a car, holding a white circular object (no text or symbols visible)
natural_image
Illustration of a person in a white shirt and red hat sitting on a chair, holding a large white object (no text or symbols visible)CAUTION:

If the air bag readiness light doesn't come on when you your vehicle, or stays on, or yes on when you are driving, air bag system may not work early. Have your vehicle faced right away.
How the Air Bag System Works Where is the air bag?
The driver's air bag is in the middle of the steering wheel.
The right-front passenger's air bag is located in the instrument panel on the passenger's side.
Seats & Safety Belts
When is an air bag expected to inflate?
The air bag is designed to inflate in moderate to severe frontal or near-frontal crashes. The air bag will only inflate if the velocity of the impact is above the designed threshold level. When impacting straight into a wall that does not move or deform, the threshold level for most GM vehicles is between 9 and 14 mph (14 and 23 km/h). However, this velocity threshold depends on the vehicle design and may be several miles-per-hour faster or slower. In addition, this threshold velocity will be considerably higher if the vehicle strikes an object such as a parked car which will move and deform on impact. The air bag is also not designed to inflate in rollovers, side impacts, or rear impacts where the inflation would provide no occupant protection benefit.
In any particular crash, the determination of whether the air bag should have inflated cannot be based solely on the level of damage on the vehicle(s). Inflation is determined by the angle of the impact and the vehicle's deceleration, of which vehicle damage is only one indication. Repair cost is not a good indicator of whether an air bag should have deployed.
What makes an air bag inflate?
In a frontal or near-frontal impact of sufficient severity, sensors strategically located on the vehicle detect that the vehicle is suddenly stopping as a result of a crash. These sensors complete an electrical circuit, triggering a chemical reaction of the sodium azide sealed in the inflator. The reaction produces nitrogen gas, which inflates a cloth bag. The inflator, cloth bag, and related hardware are all part of the air bag inflator modules packed inside the steering wheel and in the instrument panel in front of the passenger.
How does an air bag restrain?
In moderate to severe frontal or near-frontal collisions, even belted occupants can contact the steering wheel or the instrument panel. The air bag supplements the protection provided by safety belts. Air bags distribute the force of the impact more evenly over the occupant's upper body, stopping the occupant more gradually. But air bags would not provide protection in many types of collisions, including rollovers and rear and side impacts, primarily because an occupant's motion is not toward the air bag. Air bags should never be regarded as anything more than a supplement to safety belt protection in moderate to severe frontal and near-frontal collisions.
What will you see after an air bag inflation?
After the air bag has inflated, it will then quickly deflate. This occurs so quickly that some people may not even realize that the air bag inflated. The air bag will not impede the driver's vision or ability to steer the vehicle, nor will it hinder the occupants from exiting the vehicle. There will be small amounts of smoke coming from vents in the deflated air bags. Some components of the air bag module in the steering wheel hub for the driver's air bag or the instrument panel for the passenger's bag may be hot for a short time, but the portion of the bag that comes into contact with you will not be hot to the touch. The nitrogen gas used to inflate the air bag will have vented into the passenger compartment, and the bag will be deflated within seconds after the collision. Nitrogen makes up about 80% of the air we breathe and is not hazardous. As the nitrogen vents from the bag, small particles are also vented into the passenger compartment.
In many crashes severe enough to inflate an air bag, windshields are broken by vehicle deformation. Additional windshield breakage may occur in vehicles with passenger air bags because the windshield acts as a reaction surface for the inflating air bag.
Seats & Safety Belts
CAUTION:

- Don't attach anything to the steering wheel pad. It might injure the driver if the air bag inflates.
- Don't set anything on or attach anything to the instrument panel. It might injure the passenger if the air bag inflates.
- The air bags are designed to inflate only once. After they inflate, you'll need some new parts for your air bag system. If you don't get them, the air bag system won't be there to help protect you in another crash. A new system will include air bag modules and possibly other parts.
- Let only qualified technicians work on your air bag system. Improper service can mean that your air bag system won't work properly. See your dealer for service.
NOTICE:
If you damage the cover for the right-front passenger's air bag, it may not work properly. You may have to replace both the air bag and the instrument panel. Don't open or break the air bag cover.
Servicing Your Chevrolet with the Air Bag System
Please tell or remind anyone who works on your Chevrolet that it has the air bag system. There are parts of the air bag system in several places around your vehicle. You don't want the system to inflate while someone is working on your vehicle. The air bag system does not need
regular maintenance. Your Chevrolet dealer and the 1993 Camaro Service Manual have information about the air bag system, including repair or disposal.
CAUTION:
For up to 2 minutes after the ignition key is turned off and the battery disconnected, an air bag can still inflate during improper service. You can be injured if you are close to an air bag when it inflates. Be sure to follow the proper service procedures.
natural_image
Illustration of a person in traditional attire with red accents, seated against a dark background (no text or symbols visible)Safety Belt Use during Pregnancy
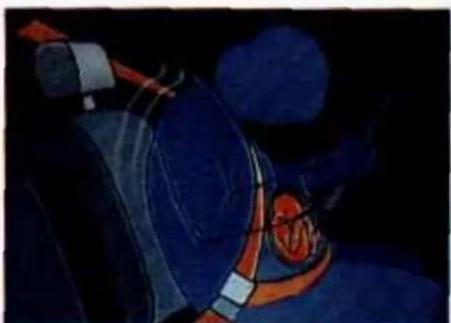
Safety belts work for everyone, including pregnant women. Like all occupants, they are more likely to be seriously injured if they don't wear safety belts.
A pregnant woman should wear a lap-shoulder belt, and the lap portion should be worn as low as possible throughout the pregnancy.
The best way to protect the fetus is to protect the mother. When a safety belt is worn properly, it's more likely that the fetus won't be hurt in a crash. For pregnant women, as for anyone, the key to making safety belts effective is wearing them properly.
When electrical work is done under the hood or inside your vehicle, the ignition should be in LOCK if possible. Avoid wires wrapped with yellow tape, or yellow connectors. They are probably part of the air bag system.
Your vehicle has a driver's air bag and a right-front passenger's air bag. Both bags must be disconnected if the ignition has to be on for electrical work or if the steering column is to be disassembled. First, disconnect the driver's air bag like this:
- Turn off the ignition.
- Remove the SIR (air bag) fuse. (See "Fuses and Circuit Breakers" in the Index.)
- Disconnect the yellow connector at the base of the steering column.
After you follow this procedure for the driver's air bag, then disconnect the right-front passenger's air bag like this:
- Remove the cover under the instrument panel.
- Disconnect the small yellow connector below the glove box.
When the work is complete, if the air bag system was disconnected, be sure to reattach everything and replace the fuse before turning the ignition on. When you turn the ignition key on, be sure you see the air bag readiness light on the instrument panel. If you don't see this light flash and then go out as usual, have your air bag system repaired.
Seats & Safety Belts
natural_image
Top-down schematic of a car with visible seats and window (no text or symbols)Passenger Positions
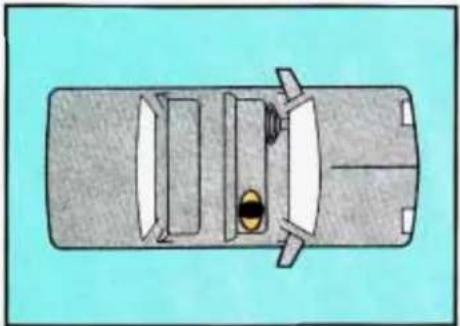
Right Front Passenger Position
The right front passenger's safety belt works the same way as the driver's safety belt. See "Driver Position," earlier in this part.
natural_image
Top-down schematic of a car's front view showing key components and roof structure (no text or labels)Rear Seat Passengers
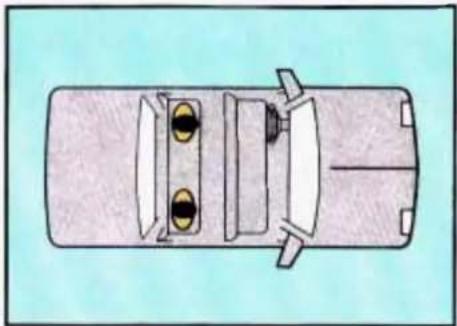
It's very important for rear seat passengers to buckle up! Accident statistics show that unbelted people in the rear seat are hurt more often in crashes than those who are wearing safety belts.
Rear passengers who aren't safety belted can be thrown out of the vehicle in a crash. And they can strike others in the vehicle who are wearing safety belts.
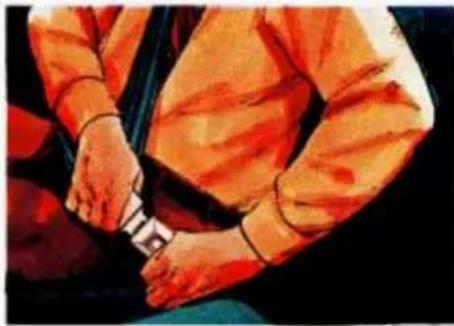
The rear seats have lap-shoulder belts. Here's how to wear one properly.
natural_image
Close-up illustration of a person's seatbelt with orange trim and black straps (no text or symbols visible)-
Pick up the latch plate and pull the belt across you. Don't let it get twisted.
-
Push the latch plate into the buckle until it clicks.
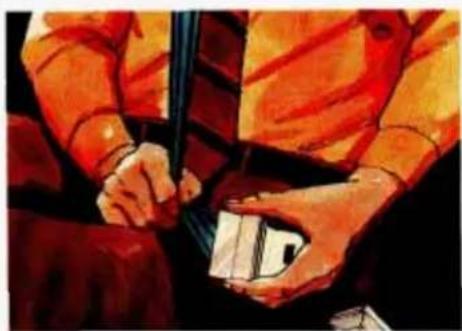
natural_image
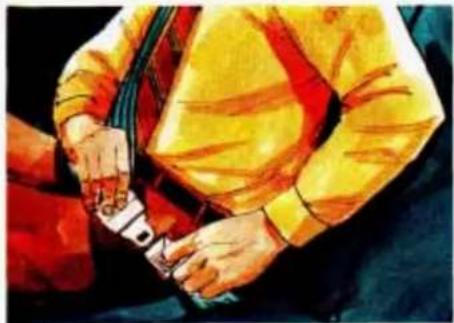
Illustration of a person wearing a yellow shirt and holding a blue object (no text or symbols visible)If the belt stops before it reaches the buckle, tilt the latch plate and keep pulling until you can buckle it.
If the belt is not long enough, see "Safety Belt Extender" at the end of this section.
Make sure the release button on the buckle faces upward or outward so you would be able to unbuckle it quickly if you ever had to.

natural_image
Illustration of a person in an orange shirt holding a rifle, with no visible text or symbols- To make the lap part tight, pull down on the buckle end of the belt as you pull up on the shoulder part.
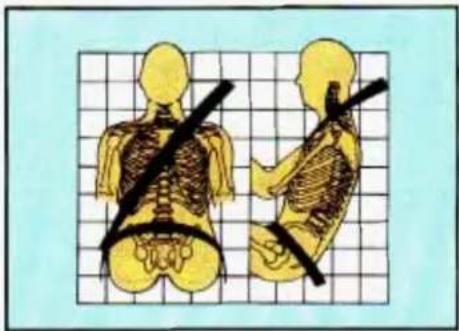
natural_image
Illustration of human skeleton positions on a grid background, showing two views with black bandages (no text or symbols)The lap part of the belt should be worn low and snug on the hips, just touching the thighs. In a crash, this applies force to the strong pelvic bones. And you'd be less likely to slide under the lap belt. If you slid under it, the belt would apply force at your abdomen. This could cause serious or even fatal injuries. The shoulder belt should go over the shoulder and across the chest. These parts of the body are best able to take belt restraining forces.
Seats & Safety Belts
natural_image
Illustration of a person wearing a yellow shirt and red belt, holding a seatbelt (no text or symbols visible)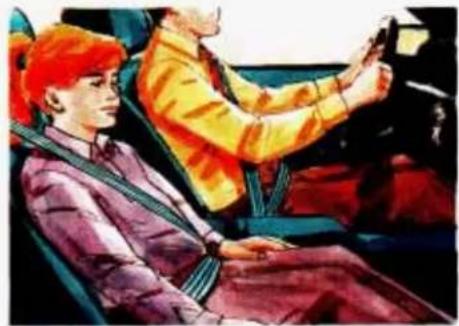
natural_image
Illustration of a person in a car seatbelt and another in a yellow jacket, both seated (no visible text or symbols)The safety belt locks if there's a sudden stop or a crash.
CAUTION:
You can be seriously hurt if your shoulder belt is too loose. In a crash you would move forward too much, which could increase injury. The shoulder belt should fit against your body.
● To unlatch the belt, just push the button on the buckle.
■ Children
Everyone in a vehicle needs protection! That includes infants and all children smaller than adult size. In fact, the law in every state and Canadian province says children up to some age must be restrained while in a vehicle.
Smaller Children and Babies
CAUTION:

Smaller children and babies should always be restrained in ild or infant restraint. The instructions for the restraint will say whether it is the right type and size for your child. A very young child's hip bones are so small that a regular belt might not stay low on the hips, as it should. Instead, the belt will likely be over the child's abdomen. In a crash the belt would apply force right on the child's abdomen, which could cause serious or fatal injuries. So, be sure that any child small enough for one is always properly restrained in a child or infant restraint.
natural_image
Illustration of a person in a car holding a white rabbit, with a red prohibition symbol overlay (no text or symbols on the main subject)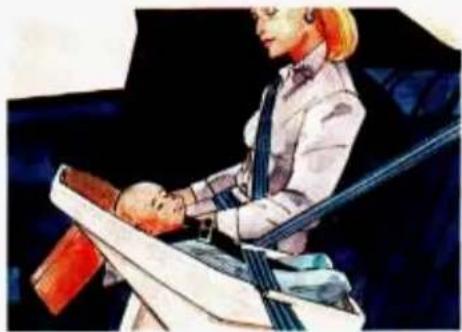
natural_image
Illustration of a person playing a stringed instrument (no text or symbols visible)CAUTION:

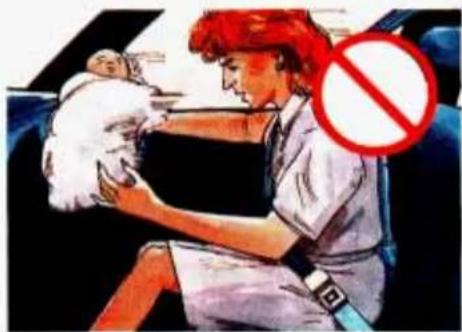
Never hold a baby in your arms while riding in a vehicle. A baby doesn't weigh much — until a crash. During a crash a baby will become so heavy can't hold it. For example, in a crash at only 25 mph (40 km/h), a 12-pound kg) baby will suddenly become a 240-pound (110 kg) force on your arms.
The baby would be almost impossible to hold.
Secure the baby in an infant restraint.
Seats & Safety Belts
■ Child Restraints
Be sure to follow the instructions for the restraint. You may find these instructions on the restraint itself or in a booklet, or both. These restraints use the belt system in your vehicle, but the child also has to be secured within the restraint to help reduce the chance of personal injury. The instructions that come with the infant or child restraint will show you how to do that.
Where to Put the Restraint
Accident statistics show that children are safer if they are restrained in the rear rather than the front seat. We at General Motors therefore recommend that you put your child restraint in the rear seat. If you are using a rear-facing child restraint, don't put it in the front seat. Here's why:
CAUTION:
A child in a rear-facing child restraint can be seriously injured if the right-front passenger's air bag inflates. This is because the back of a rear-facing child restraint would be very close to the inflating air bag. If your vehicle has a right-front passenger's air bag, always secure a rear-facing child restraint in the rear seat.
You may secure a forward-facing child restraint in the right-front seat. However, before securing a forward-facing child restraint, ALWAYS move the front passenger seat as far back as it will go. Or, secure the child restraint in the rear seat.
natural_image
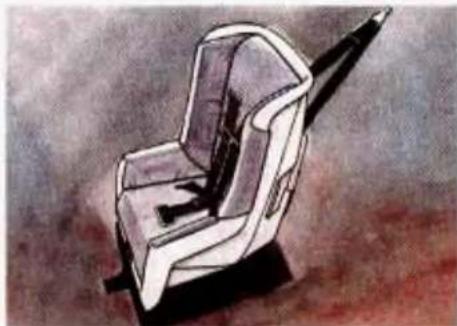
Illustration of a car seat with a long arm and black pointer, no text or symbols presentWherever you install it, be sure to secure the child restraint properly.
CAUTION:

An unsecured child restraint can move around in a collision or then stop and injure people in the uncle. Be sure to properly secure child restraint in your vehicle — when no child is in it.
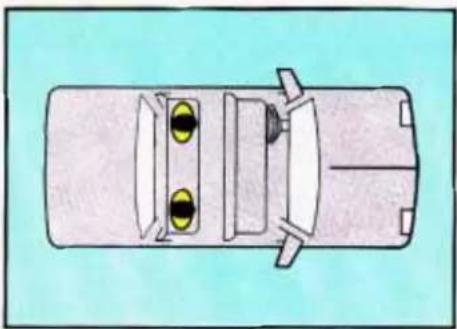
Top Strap
If your child restraint has a top strap, it should be anchored.
If you need to have an anchor installed, you can ask your Chevrolet dealer to put it in for you. If you want to install an anchor yourself, your dealer can tell you how to do it.
CAUTION:

The place where the anchor has to go is quite close to your fuel. If the anchor isn't put in directly, it can make a hole in the tank — either then, or in a later vision. Gasoline could leak out be ignited, and people in theicle or outside it could be badly lined. Don't put in the anchor yourself unless you know you can't correctly.
Seats & Safety Belts
natural_image
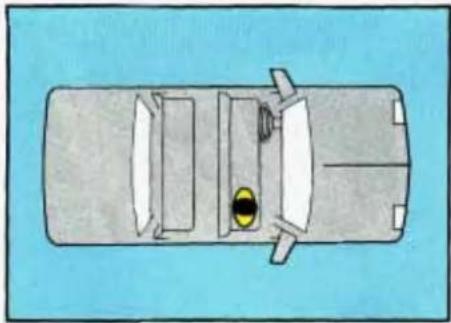
Top-down schematic of a car with two yellow circular components on the side (no text or symbols)Vehicles first sold in Canada have child restraint anchor bracket hardware in the glove box, along with instructions for installing it. This should be used only with a child restraint, and only to secure a child restraint at a rear seating position. An additional anchor bracket for a child restraint at the other rear seating position is available at Chevrolet dealerships in Canada.
Securing a Child Restraint in the Rear Seat
You'll be using the lap-shoulder belt. See the earlier section about the top strap if the child restraint has one.
- Put the restraint on the seat. Follow the instructions for the child restraint.
-
Secure the child in the child restraint as the instructions say.
-
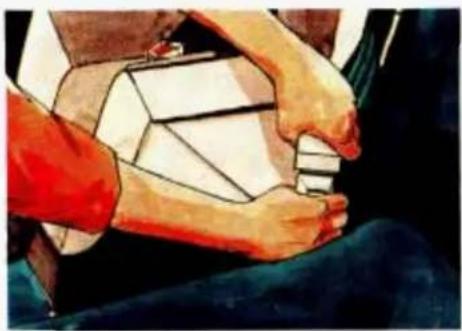
Pull out the vehicle's safety belt and run the lap part through or around the restraint. The child restraint instructions will show you how. Tilt the latch plate to adjust the belt if needed.
See if the shoulder belt would go in front of the child's face or neck. If so, put it behind the child restraint.
natural_image
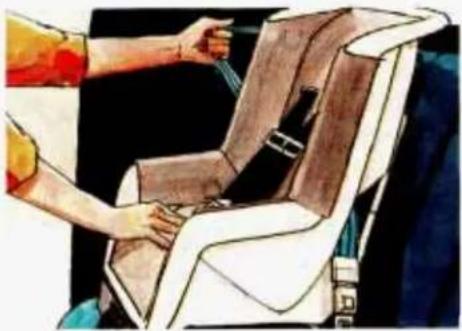
Illustration of two hands assembling a cube-like object (no text or symbols visible)- Buckle the belt. Make sure the release button faces upward or outward, so you'll be able to unbuckle it quickly if you ever need to.
natural_image
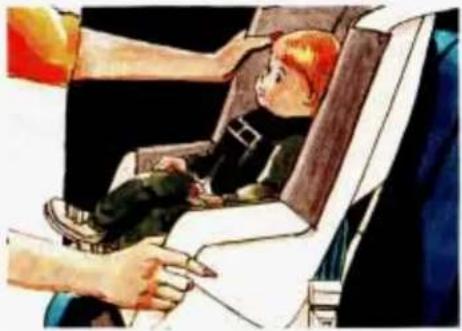
Illustration of a person adjusting a car seatbelt, no text or symbols present- To tighten the belt, pull up on the shoulder belt while you push down on the child restraint.
natural_image
Illustration of a child in a seat being assisted by an adult, with no visible text or symbols- Push and pull the child restraint in different directions to be sure it is secure.
To remove the child restraint, just unbuckle the vehicle's safety belt and let it go back all the way. The safety belt will move freely again and be ready to work for an adult or larger child passenger.
Seats & Safety Belts
natural_image
Top-down diagram of a car with a yellow circular object on the side, no text or symbols presentSecuring a Child Restraint in the Right Front Seat
Your vehicle has a right-front passenger's air bag. NEVER put a rear-facing child restraint in this position. Here's why:
CAUTION:

A rear-facing child restraint in the front seat could be pushed the seatback by the right-frontenger's air bag if it inflates. A 1d in a rear-facing child restraint be seriously injured if this opens. Always secure a 1f-facing child restraint in the rear
natural_image
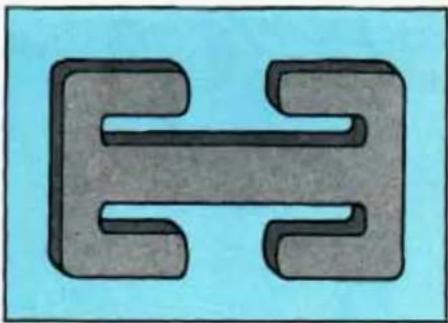
Abstract geometric shape with interlocking dark and light gray forms on a light blue background (no text or symbols)You'll be using the lap-shoulder belt. See the earlier section about the top strap if the child restraint has one.
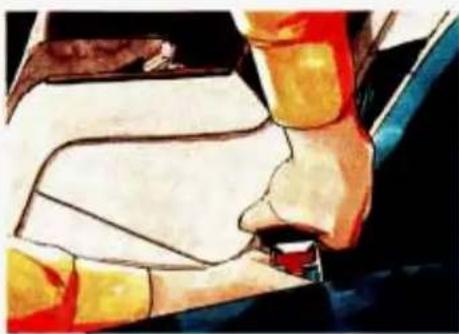
You'll need a safety locking clip to properly secure a child restraint in this position. You can get a locking clip where child restraints are sold, or from your Chevrolet dealer (GM Part No. 94844571). The locking clip must be the same as the one shown here.
Until you have this clip, secure a child restraint only in the rear seat. See the earlier section about securing a child restraint in the rear seat. Once you have the clip, follow these instructions:
-
Move the seat as far back as it will go before securing a front-facing child restraint.
-
Put the restraint on the seat. Follow the instructions for the child restraint.
natural_image
Illustration of a person's hand wearing a red and yellow helmet, seated at a vehicle wheel (no text or symbols visible)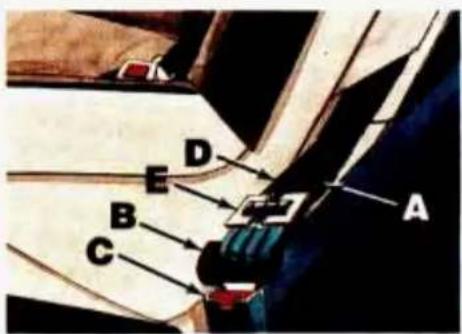
text_image
A B C D E- Secure the child in the child restraint as the instructions say.
- Pull out the vehicle's safety belt and run the lap part through or around the restraint. The child restraint instructions will show you how. See if the shoulder belt would go in front of the child's face or neck. If so, put it behind the child restraint.
5. Buckle the belt.
Make sure the release button faces upward or outward, so you'll be able to unbuckle it quickly if you ever need to.
A. Lap Belt Portion
B. Latch Plate
C. Buckle
D. Shoulder Belt Portion
E. Locking Clip
- Then thread both lap and shoulder belt portions through the locking clip.
Seats & Safety Belts
natural_image
Illustration of a person adjusting a car seat with a red seat, no visible text or symbolsCAUTION:
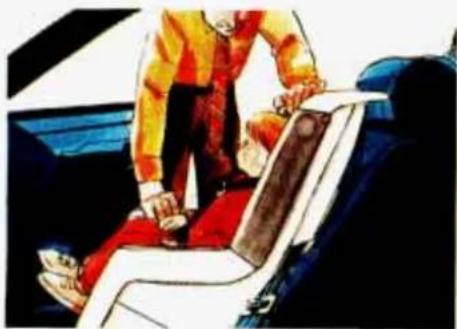
If a locking clip is not used or is not installed properly, the child restraint may move or tip over when your vehicle turns or stops quickly. The child or others could be injured. When you secure a child restraint with a lap-shoulder belt, always thread both the lap and shoulder belt portions through a locking clip.
- Push and pull the child restraint in different directions to be sure it is secure.
To remove the child restraint, just unbuckle the vehicle's safety belt and remove the locking clip. Let the safety belt go back all the way.
CAUTION:
When not used with a child restraint seat, a safety belt with a child restraint locking clip still attached can cause serious injury in a crash. Always remove the clip when you are not using it with a child restraint.
The safety belt will move freely again and be ready to work for an adult or larger child passenger.
natural_image
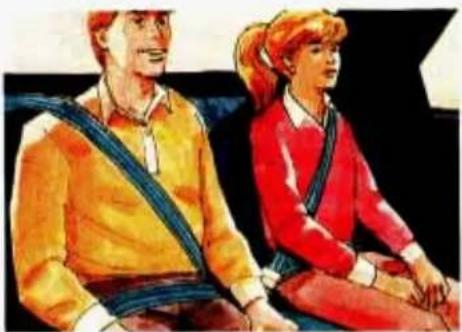
Illustration of two people sitting side by side, wearing colorful clothing (no text or symbols visible)■ Larger Children
Children who have outgrown child restraints should wear the vehicle's safety belts.
Accident statistics show that children are safer if they are restrained in the rear seat. But they need to use the safety belts properly.
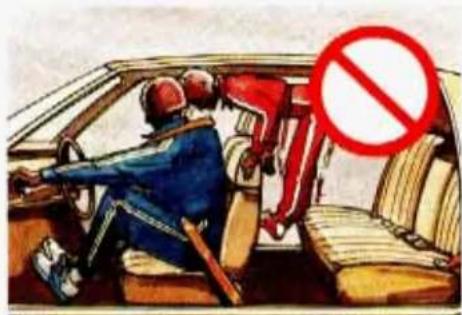
- Children who aren't buckled up can be thrown out in a crash.
text_image
Illustration of a driver in a car with a red prohibition symbol overlay, indicating no traffic or restriction.- Children who aren't buckled up can strike other people who are.
text_image
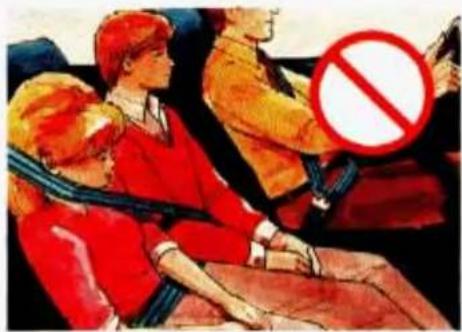
Illustration showing people in a car with a red prohibition symbol overlayCAUTION:
Never do this. Here two children are wearing the same belt. The belt can't properly spread the impact forces. In a crash, the two children can be crushed together and seriously injured. A belt must be used by only one person at a time.
Seats & Safety Belts
natural_image
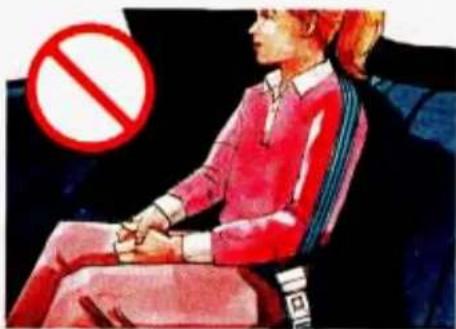
Illustration of a person sitting in a car seat with a red prohibition symbol overlay (no text or symbols on the figure)Q. What if a child is wearing a lap-shoulder belt, but the child is so small that the shoulder belt is very close to the child's face or neck?
A: Move the child toward the center of the vehicle, but be sure that the shoulder belt still is on the child's shoulder, so that in a crash the child's upper body would have the restraint that belts provide.
CAUTION:
Never do this. Here a child is sitting in a seat that has a lap-shoulder belt, but the shoulder part is behind the child. If the child wears the belt in this way, in a crash the child might slide under the belt. The belt's force would then be applied right on the child's abdomen. That could cause serious or fatal injuries.
Wherever the child sits, the lap portion of the belt should be worn low and snug on the hips, just touching the child's thighs. This applies belt force to the child's pelvic bones in a crash.
■ Safety Belt Extender
If the vehicle's safety belt will fasten around you, you should use it.
But if a safety belt isn't long enough to fasten, your dealer will order you an extender. It's free. When you go in to order it, take the heaviest coat you will wear, so the extender will be long enough for you. The extender will be just for you, and just for the seat in your vehicle that you choose. Don't let someone else use it, and use it only for the seat it is made to fit. To wear it, just attach it to the regular safety belt.
natural_image
Close-up of a metallic object with a red prohibition symbol overlay (no readable text or symbols)■ Checking Your Restraint Systems
Now and then, make sure all your belts, buckles, latch plates, retractors, anchorages and reminder systems are working properly. Look for any loose parts or damage. If you see anything that might keep a restraint system from doing its job, have it repaired.
■ Replacing Safety Belts after a Crash
If you've had a crash, do you need new belts?
After a very minor collision, nothing may be necessary. But if the belts were stretched, as they would be if worn during a more severe crash, then you need new belts.
If belts are cut or damaged, replace them. Collision damage also may mean you will have to have safety belt parts, like the retractor, replaced or anchorage locations repaired — even if the belt wasn't being used at the time of the collision.
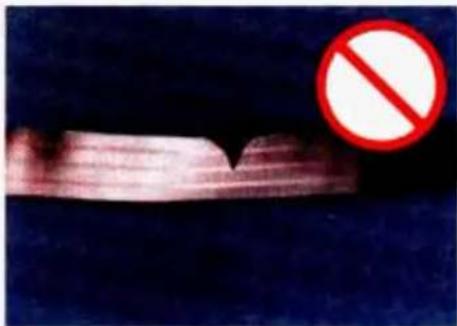
Q: What's wrong with this?
A: The belt is torn.
CAUTION:
Torn or frayed belts may not protect you in a crash. They can rip apart under impact forces. If a belt is torn or frayed, get a new one right away.
The model number on the replacement belt must be listed on the safety belt you want to replace.
Notes
natural_image
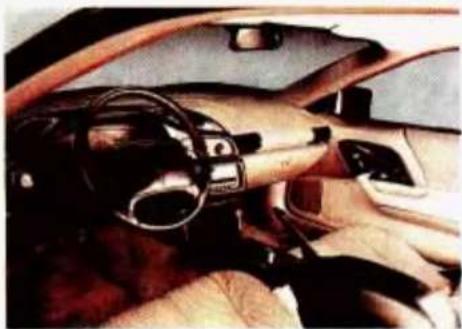
Interior view of a car showing steering wheel and dashboard (no visible text or symbols)Here you can learn about the many standard and optional features on your Chevrolet, and information on starting, shifting and braking. Also explained are the instrument panel and the warning systems that tell you if everything is working properly — and what to do if you have a problem.
Part 2 Features & Controls
Keys 48
Door Locks 50
Theft 52
PASS-Key II ^® 53
New Vehicle "Break-In" 55
Ignition Switch 55
Starting Your Engine 57
Driving through Deep Standing Water 61
Engine Block Heater 61
Automatic Transmission 62
Manual Transmission 66
Limited-Slip Rear Axle 70
Parking 70
Engine Exhaust 74
Windows 75
Horn 76
Tilt Wheel 76
The Turn Signal/Headlight Beam Lever 77
Operation of Lights 84
Interior Lights 86
Mirrors 87
Twin Lift-Off Roof Panels 88
Storage and Compartments 92
Sun Visors 94
Ashtray and Lighter 94
Floor Mats 95
Instrument Panel and Cluster 98
Warning Lights, Gages and Indicators 99
Features & Controls
natural_image
Illustration of two children inside a car with a 'no' symbol overlay (no text or symbols on the car or background)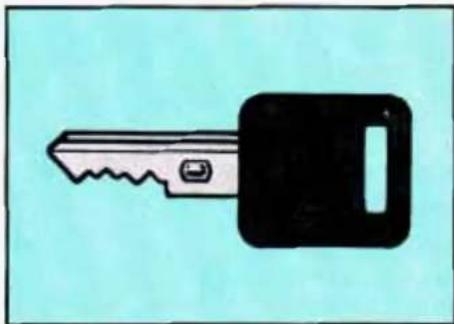
natural_image
Illustration of a black key with a serrated tip and handle, set against a light blue background (no text or symbols)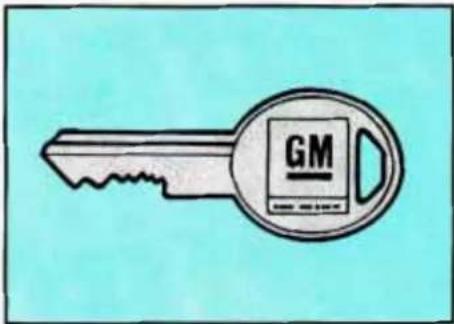
text_image
GM■ Keys
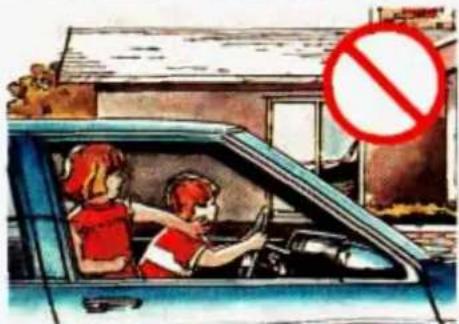
CAUTION:

Leaving young children in a vehicle with the ignition key is gerous for many reasons. A I or others could be badly red or even killed.
They could operate power windows or other controls or even make the vehicle move. Don't leave the keys in a vehicle with young children.
The ignition keys are for the ignition only.
The door keys are for the doors and all other locks.
text_image
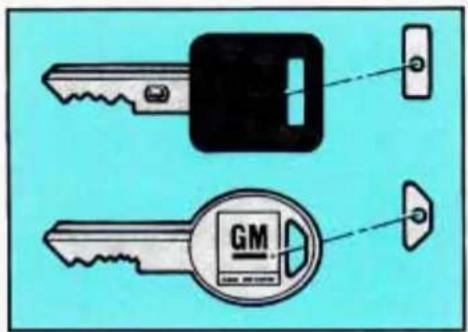
Diagram showing two key components: a saw and a key with a 'GM' logo, both connected to a lock.When a new Camaro is delivered, the dealer removes the plugs from the keys, and gives them to the first owner. However, the ignition key may not have a plug.
If the ignition key doesn't have a plug, there will be a bar-coded key tag instead. Each plug or tag has a code on it that tells your dealer or a qualified locksmith how to make extra keys. Keep the plugs in a safe place. If you lose your keys, you'll be able to have new ones made easily using these plugs. If your ignition keys don't have plugs, go to your Chevrolet dealer for the correct key code if you need a new ignition key.
NOTICE:
Your Chevrolet has a number of new features that can help prevent theft. But you can have a lot of trouble getting into your vehicle if you ever lock your keys inside. You may even have to damage your vehicle to get in. So be sure you have extra keys.
Features & Controls
■ Door Locks
CAUTION:

Unlocked doors can be dangerous.
Passengers — especially children — can easily open the doors and fall out. When a door is locked, the inside handle won't open it.
Outsiders can easily enter through an unlocked door when you slow down or stop your vehicle.
This may not be so obvious: You increase the chance of being thrown out of the vehicle in a crash if the doors aren't locked. Wear safety belts properly, lock your doors, and you will be far better off whenever you drive your vehicle.
natural_image
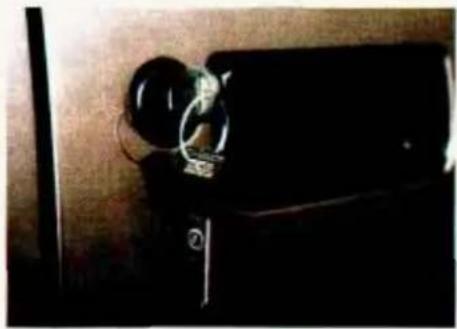
Close-up of a black electronic device with a circular connector and cable, mounted on a wooden surface (no visible text or symbols)There are several ways to lock and unlock your vehicle:
From the outside: Use your door key.
natural_image
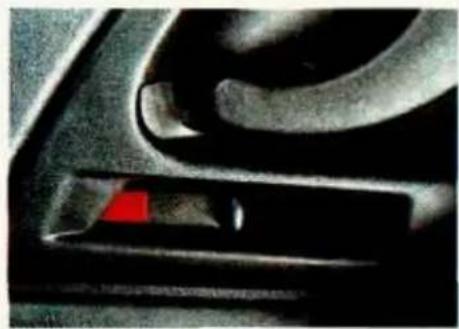
Close-up of a car's side panel showing a red indicator light and a black handle (no text or symbols visible)From the inside: To lock the door, move the lock control on the door back.
To unlock the door, move the lock control on the door forward.
natural_image
Close-up of a car's dashboard and steering wheel (no visible text or symbols)Power Door Locks (Option)
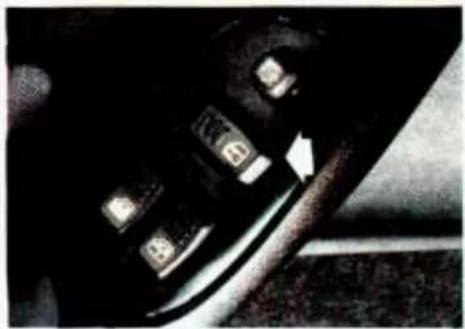
Push the power door lock switch to lock or unlock both doors at once.
The switch only works when the ignition switch is in Run or Acc, or when RAP is present. (See "Retained Accessory Power" in the Index.)
Leaving Your Vehicle
If you are leaving the vehicle, take your keys, open your door and set the locks from inside. Then get out and close the door.
natural_image
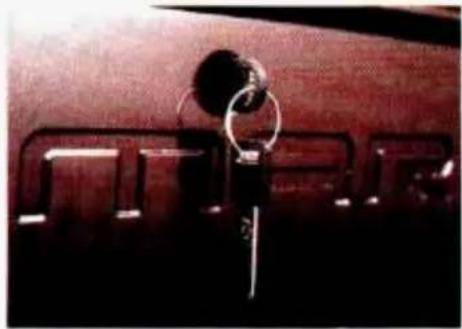
Close-up of a wooden cabinet with metal rings and a key inserted, no visible text or symbolsHatch Release
Your door key opens the hatch.
natural_image
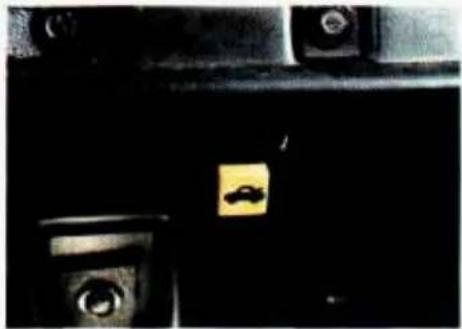
Close-up of a mechanical component with a yellow square label and circular features (no readable text or symbols)Remote Hatch Release (Option)
Press the switch in your glove box to unlock the hatch from inside your vehicle. If you have an automatic transmission, your shift lever must be in P (Park) or N (Neutral) to use the switch. If you have a manual transmission and the ignition switch is in Run, you must set the parking brake before you can use the switch.
The switch only works when the ignition switch is in Run or Acc. or when RAP is present. (See "Retained Accessory Power" in the Index.)
Features & Controls
NOTICE:
If you put things in the hatchback area, be sure they won't break the glass when you close it. Never slam the hatch down. You could break the glass or damage the defogger grid (if equipped).
CAUTION:
It can be dangerous to drive with the hatch open. Carbon monoxide (CO) gas can come into your vehicle. You can't see or smell CO. It can cause unconsciousness and even death.
If you must drive with the hatch open:
● Make sure all other windows are shut.
- Turn the fan on your heating or cooling system to its highest speed with the setting on 📂. That will force outside air into your vehicle. See “Comfort Controls” in the Index.
- If you have air vents on or under the instrument panel, open them all the way.
■ Theft
Vehicle theft is big business, especially in some cities. Although your Chevrolet has a number of theft-deterrent features, we know that nothing we put on it can make it impossible to steal. However, there are ways you can help.
Key in the ignition: If you walk away from your vehicle with the keys inside, it's an easy target for joy riders or professional thieves — so don't do it.
natural_image
Illustration of a black key with a serrated tip and handle, set against a solid blue background (no text or symbols)When you park your Chevrolet and open the driver's door, you'll hear a tone reminding you to remove your key from the ignition and take it with you. Always do this. Your steering wheel will be locked, and so will your ignition. If you have an automatic transmission, taking your key out also locks your transmission. And remember to lock the doors.
Parking at Night: Park in a lighted spot, close all windows and lock your vehicle. Remember to keep your valuables out of sight. Put them in a storage area, or take them with you.
Parking Lots: If you park in a lot where someone will be watching your vehicle, it's best to lock it up and take your keys. But what if you have to leave your ignition key? What if you have to leave something valuable in your vehicle?
- Put your valuables in a storage area, like your glove box.
- Lock the glove box.
- Lock all the doors except the driver's.
- Then take the door key with you.
■ PASS-Key II®
Your vehicle is equipped with the PASS-Key II ^ (Personalized Automotive Security System) theft-deterrent system. PASS-Key II ^ is a passive theft-deterrent system. This means you don't have to do anything different to arm or disarm the system. It works when you insert or remove the key from the ignition. PASS-Key II ^ uses a resistor pellet in the ignition key that matches a decoder in your vehicle.
When the PASS-Key II ^® system senses that someone is using the wrong key, it shuts down the vehicle's starter and fuel systems. For about three minutes, the starter won't work and fuel won't go to
Features & Controls

text_image
SECURITYthe engine. If someone tries to start your vehicle again or uses another key during this time, the vehicle will not start. This discourages someone from randomly trying different keys with different resistor pellets in an attempt to make a match.
The ignition key must be clean and dry before it's inserted in the ignition or the engine may not start. If the engine does not start and the SECURITY light stays on when you try to start the vehicle, the key may be dirty or wet. Turn the ignition off.
Clean and dry the key. Wait about three minutes and try again. The SECURITY light will remain on during this time. If the starter still won't work, and the key appears to be clean and dry, wait about three minutes and try the other ignition key. At this time, you may also want to check the fuses (see "Fuses and Circuit Breakers" in the Index). If the starter won't work with the other key, your vehicle needs service. If your vehicle does start, the first ignition key may be faulty. See your Chevrolet dealer or a locksmith who can service the PASS-Key II ^® .
If you accidentally use a key that has a damaged or missing resistor pellet, the starter won't work and the security light will flash. But you don't have to wait three minutes before trying one of the other ignition keys.
See your Chevrolet dealer or a locksmith who can service the PASS-Key II ^® to have a new key made.
If you're ever driving and the SECURITY light comes on and stays on, you will be able to restart your engine if you turn it off. Your PASS-Key II® system, however, is not working properly and must be serviced by your Chevrolet dealer. Your vehicle is not protected by the PASS-Key II® system.
If you lose or damage a PASS-Key II ^® ignition key, see your Chevrolet dealer or a locksmith who can service PASS-Key II ^® to have a new key made.
■ New Vehicle "Break-In"
NOTICE:
Your modern Chevrolet doesn't need an elaborate "break-in." But it will perform better in the long run if you follow these guidelines:
- Keep your speed at 55 mph (88 km/h) or less for the first 500 miles (804 km).
- Don't drive at any one speed — fast or slow — for the first 500 miles (804 km). Don't make full-throttle starts.
- Avoid making hard stops for the first 200 miles (322 km) or so. During this time your new brake linings aren't yet broken in. Hard stops with new linings can mean premature wear and earlier replacement. Follow this "breaking-in" guideline every time you get new brake linings.
text_image
Diagram of a mechanical or electrical component with labeled parts A, B, C, D, E and directional arrows indicating motion or flow.■ Ignition Switch
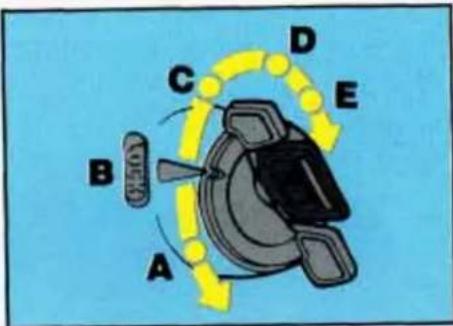
With the ignition key in the ignition switch, you can turn the switch to five positions:
Acc (A): Position in which you can operate your electrical power accessories. Press in the ignition switch as you turn the top of it toward you.
LOCK (B): The only position in which you can remove the key. This locks your steering wheel, ignition and automatic transmission.
If you have an automatic transmission, the ignition switch can't be turned to LOCK unless the shift lever is in the P (Park) position.
Off (C): Unlocks the steering wheel, ignition and automatic transmission, but does not send electrical power to any accessories. Use this position if your vehicle must be pushed or towed. A warning tone will sound if you open the driver's door when the ignition is in Off and the key is in the ignition.
Run (D): Position to which the switch returns after you start your engine and release the switch. The switch stays in the Run position when the engine is running. But even when the engine is not running, you can use Run to operate your electrical power accessories and to display some instrument panel warning and indicator lights.
Features & Controls
natural_image
Close-up of a hand holding a small object against a dark background (no visible text or symbols)Start (E): Starts the engine. When the engine starts, release the key. The ignition switch will return to Run for normal driving.
Note that even if the engine is not running. Acc and Run allow you to operate your electrical accessories, such as the radio and ventilation fan.
Key Release Button: If you have a manual transmission, your ignition lock has a key release button. You must press the button before you can take your key out of the ignition lock.
CAUTION:

On manual transmission vehicles, turning the key to
LOCK will lock the steering column and result in a loss of ability to steer the vehicle. This could cause a collision. If you need to turn the engine off while the vehicle is moving, turn the key only to Off. Don't press the key release button while the vehicle is moving.
NOTICE:
If your key seems stuck in LOCK and you can't turn it, be sure it is all the way in. If it is, then turn the steering wheel left and right while you turn the key hard. But turn the key only with your hand. Using a tool to force it could break the key or the ignition switch. If none of this works, then your vehicle needs service.
Retained Accessory Power (RAP)
If you have power door locks, your vehicle has a feature called Retained Accessory Power (RAP). With RAP your
power door locks, electric mirrors, power windows, audio system and remote hatch release will continue to work up to 10 minutes after the ignition key is turned to Off and neither door is opened.
If a door is opened, the audio system and power windows will shut off. The power door locks, electric mirrors and remote hatch release will work until you shut the door. Once you have shut the door, these accessories will continue to work for approximately 35 seconds. After this time you will not be able to use these accessories until the next time you open a door or turn on the ignition.
Starting Your Engine
Automatic Transmission: Move your shift lever to P (Park) or N (Neutral). Your engine won't start in any other position — that's a safety feature. To restart when you're already moving, use N (Neutral) only.
NOTICE:
Don't try to shift to P (Park) if your Chevrolet is moving. If you do, you could damage the transmission. Shift to P (Park) only when your vehicle is stopped.
Features & Controls
Manual Transmission: Shift your gear selector to neutral and hold the clutch pedal to the floor while starting the engine. Your vehicle won't start if the clutch pedal is not all the way down — that's a safety feature.
To start your V6 engine:
- Don't push the accelerator pedal before starting your engine. In some other vehicles you might need to do this, but because of your vehicle's computer systems, you don't.
- Turn your ignition key to Start. When the engine starts, let go of the key. The idle speed will go down as your engine gets warm.
NOTICE:
Holding your key in Start for longer than 15 seconds at a time will cause your battery to be drained much sooner. And the excessive heat can damage your starter motor.
- If your engine won't start (or starts but then stops), it could be flooded with too much gasoline. Try pushing your accelerator pedal all the way to the floor and holding it there as you hold the key in Start for about three seconds. If the vehicle starts briefly but then stops again, do the same thing, but this time keep the pedal down for five or six seconds. This clears the extra gasoline from the engine.
NOTICE:
Your engine is designed to work with the electronics in your vehicle. If you add electrical parts or accessories, you could change the way the fuel injection system operates. Before adding electrical equipment, check with your dealer. If you don't, your engine might not perform properly.
If you ever have to have your vehicle towed, see the part of this Manual that tells how to do it without damaging your vehicle. See "Towing Your Vehicle" in the Index.
To start your V8 engine:
- Don't push the accelerator pedal before starting your engine. In some other vehicles you might need to do this, but because of your vehicle's computer systems, you don't.
-
Turn the ignition key to Start. When the engine starts, let go of the key. The idle speed will go down as your engine gets warm.
-
If it doesn't start within 10 seconds, push the accelerator pedal all the way to the floor, while you hold the ignition key in Start. When the engine starts, let go of the key and let up on the accelerator pedal. Wait about 15 seconds between each try to help avoid draining your battery.
NOTICE:
Holding your key in Start for longer than 15 seconds at a time will cause your battery to be drained much sooner. And the excessive heat can damage your starter motor.
Features & Controls
When starting your engine in very cold weather (below 0^ F or -18^ C), do this:
-
With your foot off the accelerator pedal, turn the ignition key to Start and hold it there. When the engine starts, let go of the key. Use the accelerator pedal to maintain engine speed, if you have to, until your engine has run for a while.
-
If your engine still won't start (or starts but then stops), it could be flooded with too much gasoline. Try pushing your accelerator pedal all the way to the floor and holding it there as you hold the key in Start for about three seconds. If the vehicle starts briefly but then stops again, do the same thing, but this time keep the pedal down for five or six seconds. This clears the extra gasoline from the engine.
NOTICE:
Your engine is designed to work with the electronics in your vehicle. If you add electrical parts or accessories, you could change the way the fuel injection system operates. Before adding electrical equipment, check with your dealer. If you don't, your engine might not perform properly.
If you ever have to have your vehicle towed, see the part of this Manual that tells how to do it without damaging your vehicle. See "Towing Your Vehicle" in the Index.
natural_image
Abstract black ink brushstroke on white background, no text or symbols present■ Driving through Deep Standing Water
NOTICE:
If you drive too quickly through deep puddles or standing water, water can come in through your engine's air intake and badly damage your engine. If you can't avoid deep puddles or standing water, drive through them very slowly.
■ Engine Block Heater (OPTION)
In very cold weather, 0^ F ( -18^ C) or colder, the engine block heater can help. You'll get easier starting and better fuel economy during engine warm-up.
To use the block heater:
- Turn off the engine.
-
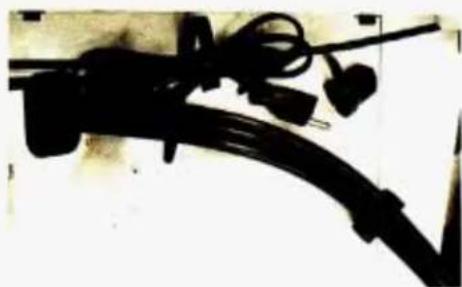
Open the hood and unwrap the electrical cord.
-
Plug it into a normal, grounded 110-volt outlet.
CAUTION:
Plugging the cord into an ungrounded outlet could cause an electrical shock. Also, the wrong kind of extension cord could overheat and cause a fire. You could be seriously injured. Plug the cord into a properly grounded three-prong 110-volt outlet. If the cord won't reach, use a heavy-duty three-prong extension cord rated for at least 15 amps.
Features & Controls
natural_image
Dark indoor scene with indistinct objects and lighting, possibly a vehicle or machinery (no visible text or symbols)NOTICE:
After you've used the block heater, be sure to store the cord as it was before, to keep it away from moving engine parts. If you don't, it could be damaged.
How long should you keep the block heater plugged in? The answer depends on the weather, the kind of oil you have, and some other things. Instead of trying to list everything here, we ask that you contact a Chevrolet dealer in the area where you'll be parking your vehicle. The dealer can give you the best advice for that particular area.
■ Automatic Transmission
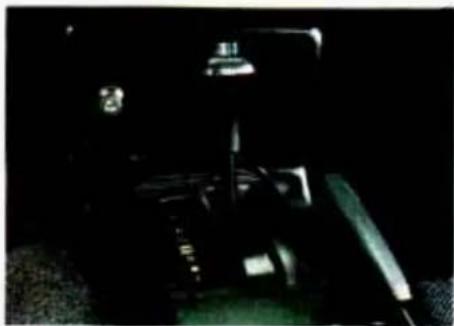
There are several different positions for your shift lever.
P (Park)
This locks your rear wheels. It's the best position to use when you start your engine because your vehicle can't move easily.
CAUTION:
It is dangerous to get out of your vehicle if the shift lever is not fully in P (Park) with the parking brake firmly set. Your vehicle can roll.
Don't leave your vehicle when the engine is running unless you have to. If you have left the engine running, the vehicle can move suddenly. You or others could be injured. To be sure your vehicle won't move, when you're on fairly level ground, always set your parking brake and move the shift lever to P (Park).
See “Shifting into P (Park)” in the Index. If you are parking on a hill, or if you’re pulling a trailer, also see “Parking on Hills” or “Towing a Trailer” in the Index.
Ensure the shift lever is fully in P (Park) range before starting the engine. Your Chevrolet has a brake-transmission shift interlock. You have to fully apply your regular brakes before you can shift from P (Park) when the ignition key is in the Run position. If you cannot shift out of P (Park), ease pressure on the shift lever — push the shift lever all the way into P (Park) and also release the shift lever button on floor shift console models as you maintain brake application. Then move the shift lever into the gear you wish. (Press the shift lever button before moving the shift lever on floor shift console models.) See “Shifting out of P (Park)” in this part.
• R (Reverse)
Use this gear to back up.
NOTICE:
Shifting to R (Reverse) while your vehicle is moving forward could damage your transmission. Shift to R only after your vehicle is stopped.
To rock your vehicle back and forth to get out of snow, ice or sand without damaging your transmission, see "Stuck: In Sand, Mud, Ice or Snow. If You're" in the Index.
• N (Neutral)
In this position, your engine doesn't connect with the wheels. To restart when you're already moving, use N (Neutral) only. Also, use N when your vehicle is being towed.
Features & Controls
CAUTION:

Shifting out of P (Park) or N (Neutral) while your engine racing" (running at high speed) ngerous. Unless your foot is ly on the brake pedal, yourcle could move very rapidly. could lose control and hitcle or objects. Don't shift out of Park) or N (Neutral) while yourne is racing.
NOTICE:
Damage to your transmission caused by shifting out of P (Park) or N (Neutral) with the engine racing isn't covered by your warranty.
- ① Automatic Overdrive
This position is for normal driving. If you need more power for passing, and you're:
- Going less than about 35 mph (56 km/h), push your accelerator pedal about halfway down.
- Going about 35 mph (56 km/h) or more, push the accelerator all the way down.
You'll shift down to the next gear and have more power.
● D (Third Gear)
This is like Ⓓ, but you never go into Overdrive.
Here are some times you might choose D instead of Ⓓ :
- When driving on hilly, winding roads
- When towing a trailer, so there is less shifting between gears
- When going down a steep hill
• 2 (Second Gear)
This position gives you more power but lower fuel economy. You can use 2 on hills. It can help control your speed as you go down steep mountain roads, but then you would also want to use your brakes off and on.
NOTICE:
Don't drive in 2 (Second Gear) for more than 5 miles (8 km), or at speeds over 55 mph (88 km/h), or you can damage your transmission. Use ① or D as much as possible.
Don't shift into 2 unless you are going slower than 65 mph (105 km/h), or you can damage your engine.
● 1 (First Gear) (V6 Engine)
This position gives you even more power (but lower fuel economy) than 2. You can use it on very steep hills, or in deep snow or mud. If the selector lever is put in 1, the transmission won't shift into first gear until the vehicle is going slowly enough.
Features & Controls
NOTICE:
If your rear wheels can't rotate, don't try to drive. This might happen if you were stuck in very deep sand or mud or were up against a solid object. You could damage your transmission.
Also, if you stop when going uphill, don't hold your vehicle there with only the accelerator pedal. This could overheat and damage the transmission. Use your brakes or shift into P (Park) to hold your vehicle in position on a hill.
Maximum engine speed is limited to protect driveline components from improper operation.
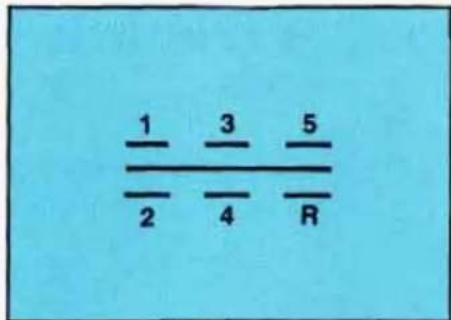
text_image
1 3 5 2 4 R■ Manual Transmission Five-Speed
This is your shift pattern. Here's how to operate your transmission:
● 1 (First Gear) — Press the clutch pedal and shift into 1. Then, slowly let up on the clutch pedal as you press the accelerator pedal.
You can shift into 1 when you're going less than 20 mph (32 km/h). If you've come to a complete stop and it's hard to shift into 1, put the shift lever in Neutral and let up on the clutch. Press the clutch pedal back down. Then shift into 1.
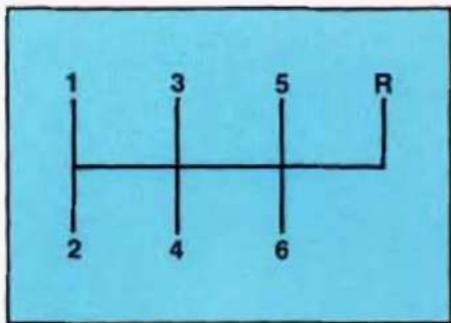
text_image
1 2 3 4 5 6 RSix-Speed
This is your shift pattern. Here's how to operate your transmission:
● 1 (First Gear) — Press the clutch pedal and shift into 1. Then, slowly let up on the clutch pedal as you press the accelerator pedal.
You can shift into 1 when you're going less than 20 mph (30 km/h). If you've come to a complete stop and it's hard to shift into 1, put the shift lever in Neutral and let up on the clutch. Press the clutch pedal back down. Then shift into 1.
- Neutral — Use this position when you start or idle your engine.
- R (Reverse) — To back up, press down the clutch pedal and shift into R. Let up on the clutch pedal slowly while pressing the accelerator pedal.
NOTICE:
Shift to R (Reverse) only after your vehicle is stopped. Shifting to R (Reverse) while your vehicle is moving could damage your transmission.
Also, use Reverse, along with the parking brake, for parking your vehicle.
Features & Controls
- 2 (Second Gear) — Press the clutch pedal as you let up on the accelerator pedal and shift into 2. Then, slowly let up on the clutch pedal as you press the accelerator pedal.
- 3, 4, 5 and 6 (Third, Fourth, Fifth and Sixth Gears) — Shift into 3, 4, 5 and 6 the same way you do for 2. Slowly let up on the clutch pedal as you press the accelerator pedal.
-
To Stop — Let up on the accelerator pedal and press the brake pedal. Just before the vehicle stops, press the clutch pedal and the brake pedal, and shift to Neutral.
-
Neutral — Use this position when you start or idle your engine.
- R (Reverse) — To back up, press down the clutch pedal and shift into R. Let up on the clutch pedal slowly while pressing the accelerator pedal. If you shift from 6 into R, the shift lever must be first placed in the Neutral position centered between 2 and 3 prior to shifting into R.
Your six-speed manual transmission has a feature that allows you to safely shift into R (Reverse) while the vehicle is rolling (at less than 5 mph). You will be "locked-out" if you try to shift into R (Reverse) while your vehicle is moving faster than 5 mph.
If you have turned your ignition off and wish to park your vehicle in Reverse, you will have to move the shift lever quickly to the right, "crashing" through the high load spring and then into gear.
Shift Speeds (MANUAL TRANSMISSION)
This chart shows when to shift to the next higher gear for best fuel economy.
MANUAL TRANSMISSION RECOMMENDED SHIFT SPEEDS, IN MPH (km/h)
| Engine | Acceleration Shift Speed | ||||
| 1 to 2 | 2 to 3 | 3 to 4 | 4 to 5 | 5 to 6 | |
| 3.4L L32 (Code S) | 13–16 (21–25) | 21–28 (34–35) | 32–37 (51–59) | 45–47 (72–75) | N/A |
| 5.7L LT1 (Code P) | 15 (24) | 25 (40) | 40 (64) | 45 (72) | 50 (80) |
If your speed drops below 20 mph (30 km/h), or if the engine is not running smoothly, you should downshift to the next lower gear. You may have to downshift two or more gears to keep the engine running smoothly or for good performance.
CAUTION:
If you skip more than one gear when you downshift, you could lose control of your vehicle. And you could injure yourself or others. Don't shift from 6 to 3, 5 to 2 or 4 to 1.
NOTICE:
If you skip more than one gear when you downshift, or if you race the engine when you downshift, you can damage the clutch or transmission.
Features & Controls
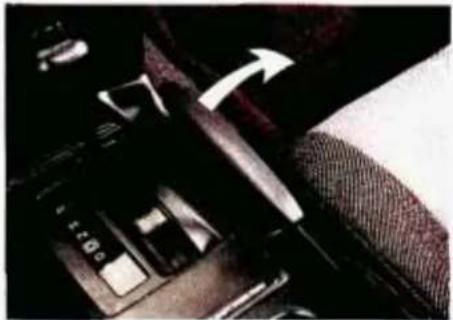
natural_image
Close-up of a car interior showing a hand presser and seatbelt with a white arrow pointing to the wheel (no text or symbols visible)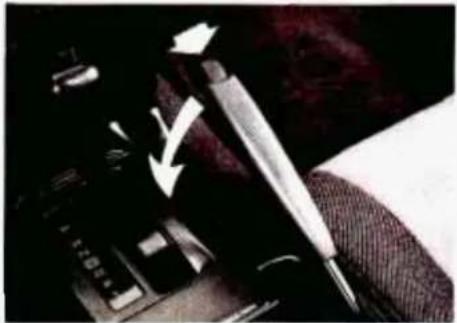
natural_image
Close-up of a mechanical device with a tool inserted, showing a white arrow pointing to a component (no visible text or symbols)■ Limited-Slip Rear Axle
If you have this feature, your rear axle can give you additional traction on snow, mud, ice, sand or gravel. It works like a standard axle most of the time, but when one of the rear wheels has no traction and the other does, the limited-slip feature will allow the wheel with traction to move the vehicle.
■ Parking
Parking Brake
The parking brake uses the brakes on the rear wheels
To set the parking brake: Hold the brake pedal down and pull up on the parking brake lever. If the ignition is on, the brake system warning light will come on.
To release the parking brake: Hold the brake pedal down. Pull the parking brake lever up until you can push in the release button. Hold the release button in as you move the brake lever all the way down.
NOTICE:
Driving with the parking brake on can cause your rear brakes to overheat. You may have to replace them, and you could also damage other parts of your vehicle.
Shifting into P (Park) (AUTOMATIC TRANSMISSION)
If you are on a hill: See "Parking on Hills" in the Index. That section shows how to turn your front wheels.
If you are towing a trailer and are parking on any hill: See "Towing a Trailer" in the Index. That section shows what to do first to keep the trailer from moving.
CAUTION:
It can be dangerous to get out of your vehicle if the shift lever is not fully in P (Park) with the parking brake firmly set. Your vehicle can roll.
If you have left the engine running, the vehicle can move suddenly. You or others could be injured. To be sure your vehicle won't move, when you're on fairly level ground, use the steps that follow. If you are parking on a hill, or if you're pulling a trailer, also see "Parking on Hills" or "Towing a Trailer" in the Index.
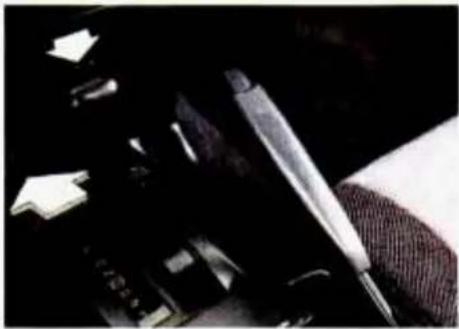
natural_image
Close-up of a mechanical component with a tool and paper, no visible text or symbols-
Hold the brake pedal down with your right foot and set the parking brake.
-
Move the shift lever into P (Park) position like this:
- Hold in the button on the lever, and push the lever all the way toward the front of your vehicle.
-
Move the ignition key to LOCK.
-
Remove the key and take it with you. If you can walk away from your vehicle with the ignition key in your hand, your vehicle is in P (Park).
Features & Controls
Leaving Your Vehicle with the Engine Running (AUTOMATIC TRANSMISSION)
CAUTION:

It can be dangerous to leave your vehicle with the engine running. Your vehicle could move only if the shift lever is not in P (Park) with the parking he firmly set. And, if you leave vehicle with the engine running, could overheat and even catch You or others could be injured. It's leave your vehicle with the one running unless you have to.
If you have to leave your vehicle with the engine running, be sure your vehicle is in P (Park) and your parking brake is firmly set before you leave it. After you've moved the shift lever into the P (Park) position, hold the regular brake pedal down. Then, see if you can move the shift lever away from P (Park) without first pushing the button. If you can, it means that the shift lever wasn't fully locked into P (Park).
Shifting out of P (Park) (AUTOMATIC TRANSMISSION)
Your Chevrolet has a brake-transmission shift interlock. You have to fully apply your regular brake before you can shift from P (Park) when the ignition is in the Run position. See “Automatic Transmission” in the Index.
If you cannot shift out of P (Park), ease pressure on the shift lever — push the shift lever all the way into P (Park) and also release the shift lever button on floor shift console models as you maintain brake application. Then move the shift lever into the gear you wish. (Press the shift lever button before moving the shift lever.)
If you ever hold the brake pedal down but still can't shift out of P (Park), try this:
- Turn the key to Off.
- Apply and hold the brake until the end of Step 4.
- Shift to N (Neutral).
- Start the vehicle and then shift to the drive gear you want.
- Have the vehicle fixed as soon as you can.
Parking Your Vehicle (MANUAL TRANSMISSION)
Before you get out of your vehicle, put your manual transmission in R (Reverse) and firmly apply the parking brake.
If you are parking on a hill, or if your vehicle is equipped to tow a trailer, see "Parking on Hills" or "Towing a Trailer" in the Index.
Features & Controls
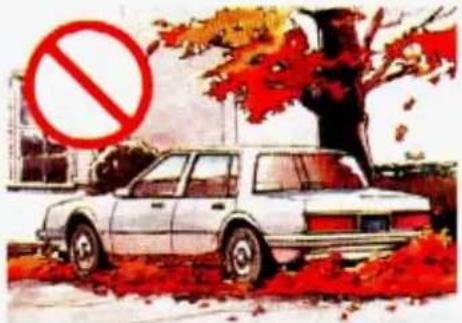
natural_image
Illustration of a white car parked outdoors with red autumn leaves and a large 'no' symbol overlay (no text or symbols on the car or tree)Parking over Things That Burn
CAUTION:

Things that can burn could touch hot exhaust parts under vehicle and ignite. Don't park papers, leaves, dry grass or things that can burn.
■ Engine Exhaust
CAUTION:

Engine exhaust can kill. It contains the gas carbon monoxide (CO), which you can't see or smell. It can cause unconsciousness and death.
You might have exhaust coming in if:
- Your exhaust system sounds strange or different.
- Your vehicle gets rusty underneath.
- Your vehicle was damaged in a collision.
- Your vehicle was damaged when driving over high points on the road or over road debris.
- Repairs weren't done correctly.
- Your vehicle or exhaust system had been modified improperly.
If you ever suspect exhaust is coming into your vehicle:
- Drive it only with all the windows down to blow out any CO; and
● Have it fixed immediately.
Running Your Engine While You're Parked (AUTOMATIC TRANSMISSION)
It's better not to park with the engine running. But if you ever have to, here are some things to know.
CAUTION:

Idling the engine with the air system control off could allow dangerous exhaust into your vehicle (see the earlier Caution under "Engine Exhaust").
Also, idling in a closed-in place can let deadly carbon monoxide (CO) into your vehicle even if the fan switch is at the highest setting. One place this can happen is a garage. Exhaust — with CO — can come in easily. NEVER park in a garage with the engine running.
Another closed-in place can be a blizzard. (See "Blizzard" in the Index.)
CAUTION:

It can be dangerous to get out of your vehicle if the shift lever is not fully in P (Park) with the parking brake firmly set. Your vehicle can roll. Don't leave a vehicle when the engine is running unless you have to. If you've left the one running, the vehicle can move suddenly. You or others could be injured. We sure your vehicle won't move, even when you're on fairly level ground, says set your parking brake and move the shift lever to P (Park).
If you are parking on a hill, or if you're pulling a trailer, also see "Parking on Hills" or "Towing a Trailer" in the Index.
■ Windows
Manual Windows
Use the window crank to open and close each door window.
Features & Controls
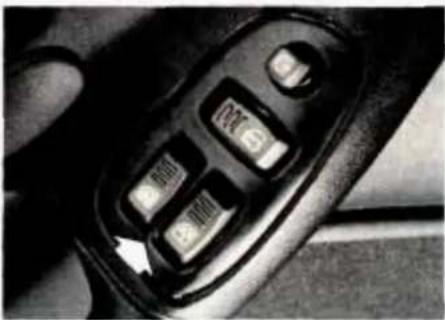
natural_image
Close-up of a car control panel with buttons and a white arrow pointing to the left button (no readable text or symbols)Power Windows (Option)
With power windows, switches on the door control each window when the ignition is on or when RAP is present. (See "Retained Accessory Power" in the Index.)
The switch for the driver's window has an Express Down feature. Quickly press and release the switch for the driver's window and the window will lower completely.
You can also open this window any amount by pressing the switch and releasing it when the window has lowered to the position you want.
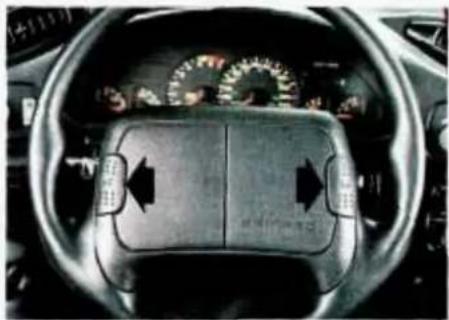
natural_image
Interior view of a car dashboard with steering wheel and dashboard (no visible text or symbols)Horn
To sound the horn, press either horn symbol on your steering wheel.
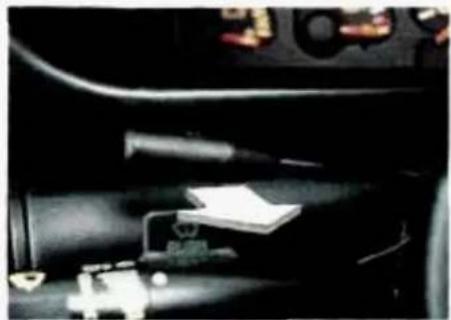
natural_image
Interior view of a vehicle showing a mounted device and a small component (no visible text or symbols)■ Tilt Wheel
A tilt steering wheel allows you to adjust the steering wheel before you drive.
You can also raise it to the highest level to give your legs more room when you exit and enter the vehicle.
To tilt the wheel, hold the steering wheel and pull the lever. Move the steering wheel to a comfortable level, then release the lever to lock the wheel in place.
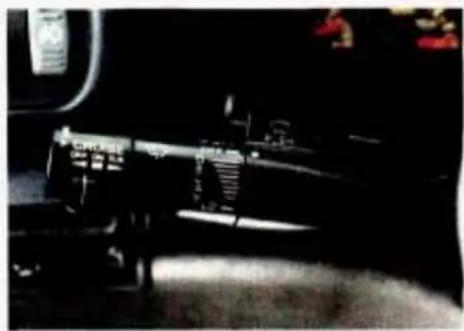
natural_image
Close-up of a mechanical device mounted on a dark surface, possibly a vehicle or instrument (no visible text or symbols)■ The Turn Signal/Headlight Beam Lever
The lever on the left side of the steering column includes your:
● Turn Signal and Lane Change Indicator
● Headlight High/Low Beam and Passing Signal
- Windshield Wipers
- Windshield Washer
• Cruise Control (Option)
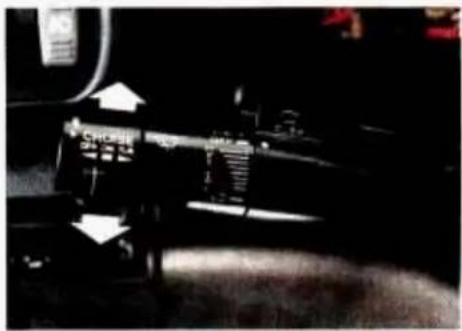
natural_image
Close-up of a mechanical device with directional arrows indicating motion or movement (no visible text or symbols)Turn Signal and Lane Change Indicator
The turn signal has two upward (for Right) and two downward (for Left) positions. These positions allow you to signal a turn or a lane change.
To signal a turn, move the lever all the way up or down. When the turn is finished, the lever will return automatically.
natural_image
Two green arrows pointing left and right on a dark textured background, separated by a white vertical line (no text or symbols)A green arrow on the instrument panel will flash in the direction of the turn or lane change.
To signal a lane change, just raise or lower the lever until the green arrow starts to flash. Hold it there until you complete your lane change. The lever will return by itself when you release it.
As you signal a turn or a lane change, if the arrows don't flash but just stay on, a signal bulb may be burned out and other drivers won't see your turn signal.
If a bulb is burned out, replace it to help avoid an accident. If the green arrows don't go on at all when you signal a turn, check the fuse (see "Fuses" in the Index) and for burned-out bulbs.
Features & Controls
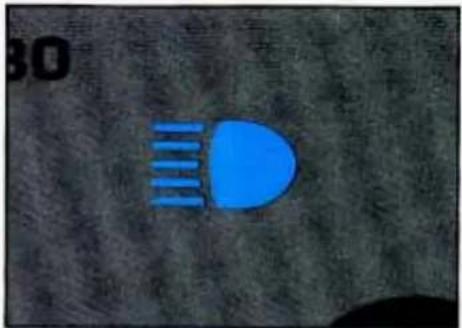
natural_image
Blue illuminated component with three parallel lines on a textured gray background (no text or symbols)Headlight High/Low Beam
To change the headlights from low beam to high or high to low, pull the turn signal lever all the way toward you. Then release it. When the high beams are on, this blue light on the instrument panel also will be on.
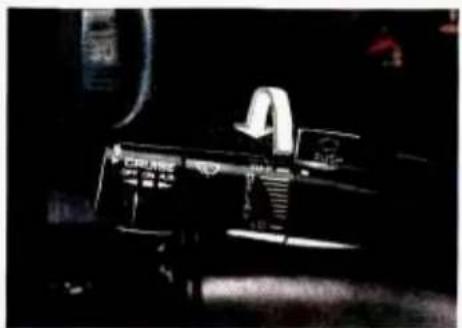
natural_image
Close-up of a mechanical device with a mounted component and visible wiring (no text or symbols)Windshield Wipers
You control the windshield wipers by turning the band with the wiper symbol on it.
For a single wiping cycle, turn the band to MIST. Hold it there until the wipers start, then let go. The wipers will stop after one cycle. If you want more cycles, hold the band on MIST longer.
You can set the wiper speed for a long or short delay between wipes. This can be very useful in light rain or snow. Turn the band to choose the delay time. The closer to LO, the shorter the delay.
For steady wiping at low speed, turn the band away from you to the LO position. For high speed wiping, turn the band further, to HI. To stop the wipers, move the band to OFF.
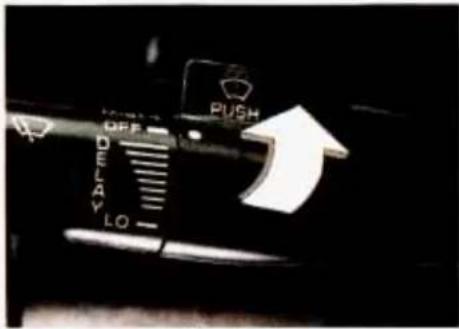
text_image
PUSH OFF DELAY LOCAUTION:
Damaged wiper blades may prevent you from seeing well enough to drive safely. To avoid damage, be sure to clear ice and snow from the wiper blades before using them. If they're frozen to the windshield, carefully loosen or thaw them. If your blades do become damaged, get new blades or blade inserts.
Heavy snow or ice can overload your wipers. A circuit breaker will stop them until the motor cools. Clear away snow or ice to prevent an overload.
Windshield Washer
At the top of the turn signal lever there's a paddle with the word PUSH on it. To spray washer fluid on the windshield, just push the paddle. The washer will continue to spray until you release the paddle. The wipers will clear the window and wipe a few more times before stopping or returning to the previous setting.
CAUTION:
Driving without washer fluid can be dangerous. A bad mud splash can block your vision. You could hit another vehicle or go off the road. Check your washer fluid level often.
- In freezing weather, don't use your washer until the windshield is warmed. Otherwise the washer fluid can form ice on the windshield, blocking your vision.
Features & Controls
NOTICE:
- When using concentrated washer fluid, follow the manufacturer's instructions for adding water.
- Don't mix water with ready-to-use washer fluid. Water can cause the solution to freeze and damage your washer fluid tank and other parts of the washer system. Also, water doesn't clean as well as washer fluid.
- Fill your washer fluid tank only 3/4 full when it's very cold. This allows for expansion, which could damage the tank if it is completely full.
- Don't use radiator antifreeze in your windshield washer. It can damage your washer system and paint.
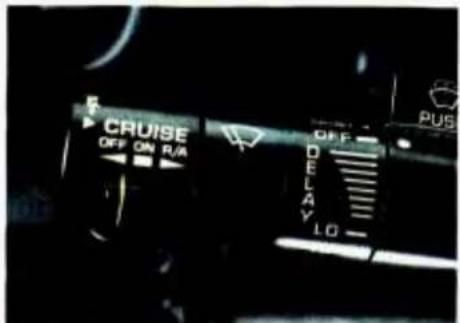
text_image
CRUISE OFF ON R/A OFF DE LAY Y LOCruise Control (OPTION)
With Cruise Control, you can maintain a speed of about 25 mph (40 km/h) or more without keeping your foot on the accelerator. This can really help on long trips. Cruise Control does not work at speeds below about 25 mph (40 km/h). When you apply your brakes, or push the clutch pedal, if you have a manual transmission, the Cruise Control shuts off.
CAUTION:
Cruise Control can be dangerous where you can't drive safely at a steady speed. So, don't use your Cruise Control on winding roads or in heavy traffic.
- Cruise Control can be dangerous on slippery roads. On such roads, fast changes in tire traction can cause needless wheel spinning, and you could lose control. Don't use Cruise Control on slippery roads.
To Set Cruise Control
- Move the Cruise Control switch to ON.
CAUTION:

If you leave your Cruise
Control switch on when you're not using Cruise, you might hit a button and go into Cruise when you don't want to. You could be startled and even lose control. Keep the Cruise Control switch OFF until you want to use it.
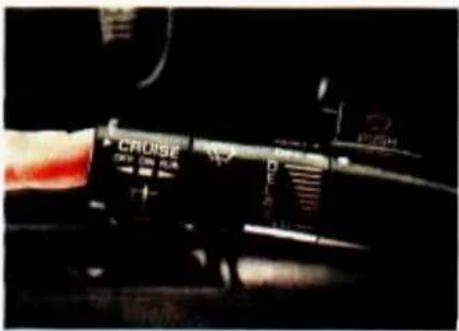
text_image
CROISE DELA- Get up to the speed you want.
- Push in the set button at the end of the lever and release it.
- Take your foot off the accelerator pedal.

text_image
CRUISE OFF 50 OFF 200To Resume a Set Speed
Suppose you set your Cruise Control at a desired speed and then you apply the brake. This, of course, shuts off the Cruise Control. But you don't need to reset it. Once you're going about 25 mph (40 km/h) or more, you can move the Cruise Control switch from ON to R/A (Resume/Accelerate) for about half a second.
You'll go right back up to your chosen speed and stay there.
Features & Controls
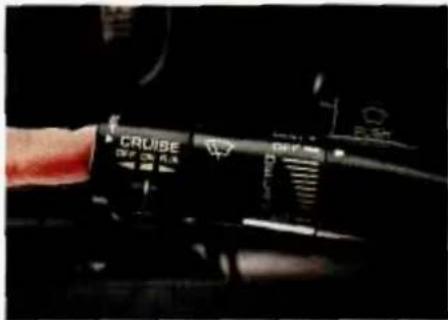
text_image
CROUSE OFF ON R.S. OFF ON R.S.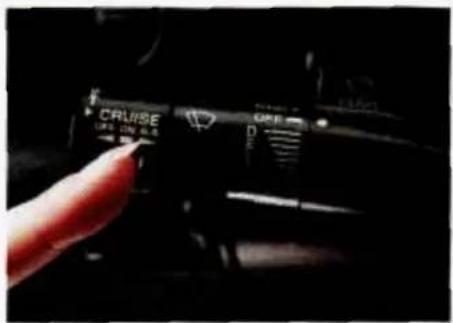
text_image
CRUISE OFF: 12V 0.5 OFF: DCAUTION:
If you hold the switch at R/A longer than half a second, the vehicle will keep going faster until you release the switch or apply the brake. You could be startled and even lose control. So unless you want to go faster, don't hold the switch at R/A.
To Increase Speed While Using Cruise Control
There are two ways to go to a higher speed. Here's the first:
- Use the accelerator pedal to get to the higher speed.
- Push the button at the end of the lever, then release the button and the accelerator pedal. You'll now cruise at the higher speed.
Here's the second way to go to a higher speed:
- Move the Cruise switch from ON to R/A. Hold it there until you get up to the speed you want, and then release the switch.
• To increase your speed in very small amounts, move the switch to R/A for less than half a second and then release it. Each time you do this, your vehicle will go about 1 mph (1.6 km/h) faster.
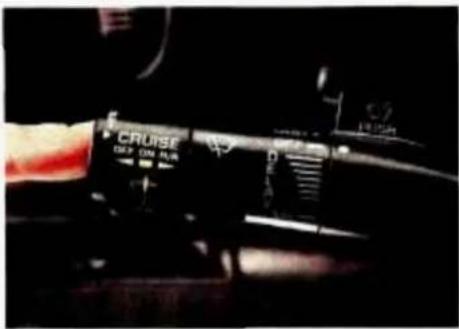
text_image
CRUISE DC 2018-04-06 D: 1.5VTo Reduce Speed While Using Cruise Control
There are two ways to reduce your speed while using cruise control:
- Push in the button at the end of the lever until you reach the lower speed you want, then release it.
- To slow down in very small amounts, push the button for less than half a second. Each time you do this, you'll go 1 mph (1.6 km/h) slower.
Passing Another Vehicle While Using Cruise Control
Use the accelerator pedal to increase your speed. When you take your foot off the pedal, your vehicle will slow down to the Cruise Control speed you set earlier.
Using Cruise Control on Hills
How well your Cruise Control will work on hills depends upon your speed, load, and the steepness of the hills. When going up steep hills, you may have to step on the accelerator pedal to maintain your speed. When going downhill, you may have to brake or shift to a lower gear to keep your speed down. Of course, applying the brake takes you out of Cruise Control. Many drivers find this to be too much trouble and don't use Cruise Control on steep hills.
Features & Controls
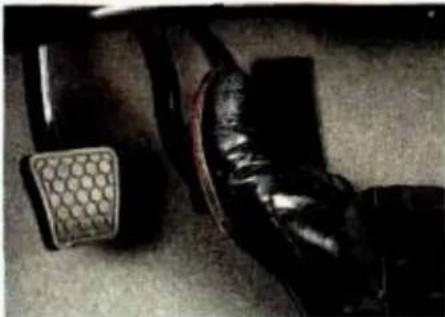
natural_image
Close-up of a black leather foot and a textured square object on the floor (no text or symbols visible)To Get Out of Cruise Control
There are several ways to turn off the Cruise Control:
- Step lightly on the brake pedal or push the clutch pedal, if you have a manual transmission; OR
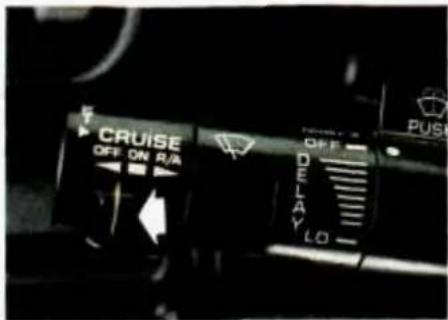
text_image
Cruise OFF ON R/A OFF DELAY LO- Move the Cruise switch to OFF.
To Erase Speed Memory
When you turn off the Cruise Control or the ignition, your Cruise Control set speed memory is erased.
■ Operation of Lights
Although your vehicle's lighting system (headlights, parking lights, fog lamps, side marker lights and taillights) meet all applicable federal lighting requirements, certain states and provinces may apply their own lighting regulations that may require special attention before you operate these lights. For example, some jurisdictions may require that you operate your lower beam lights with fog lamps at all times, or that headlights be turned on whenever you must use your windshield wipers. In addition, most jurisdictions prohibit driving solely with parking lights, especially at dawn or dusk. It is recommended that you check with your own state or provincial highway authority for applicable lighting regulations.
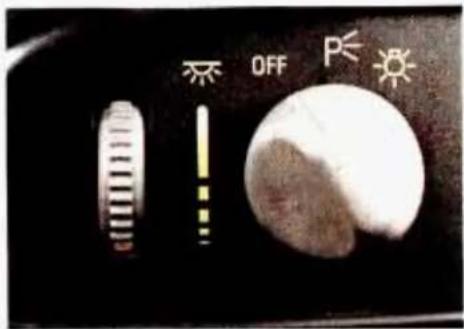
text_image
OFF P
text_image
茶 OFF PMain Light Control
The main light control is a knob that works these lights:
- Headlights
- Taillights
- Parking lights
- License lights
- Sidemarker lights
- Instrument panel lights
Turn the knob to 🌿 to turn on your headlights and other operating lights. Turn the knob to Ⓧ to turn on your parking lights without your headlights. Turn the knob to OFF to turn off the lights.
Brightness Control
This switch controls the brightness of your instrument panel lights. Turn the switch to brighten or dim the lights. If you turn the switch all the way up to , your courtesy lights will come on.
Lights On Reminder
If you turn the ignition Off and leave the lights on, you will hear a tone when you open the driver's door.
Daytime Running Lights (Canada)
The Canadian Federal Government has decided that "Daytime Running Lights" (DRL) are a useful feature, in that DRL can make your vehicle more visible to pedestrians and other drivers during daylight hours. DRL are required on new vehicles sold in Canada.
Your DRL work with a light sensor on top of the instrument panel. Don't cover it up. The front turn signal lights will come on in daylight when:
• The ignition is on
● The headlight switch is off, and
● The parking brake is released.
Features & Controls
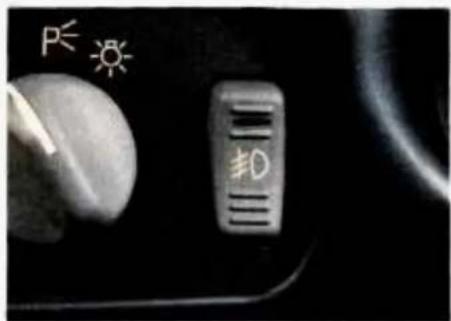
text_image
P≤ 卸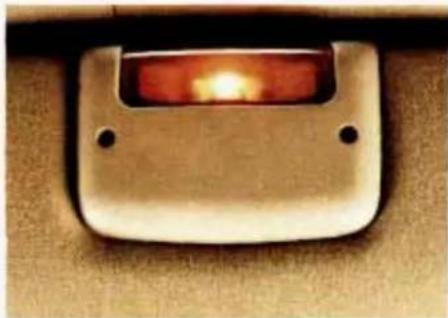
natural_image
Close-up of a metallic rectangular object with a glowing orange-red interior and two small holes, placed on a textured beige surface (no text or symbols visible)At dusk, the exterior lights will come on automatically and the front turn signal lights will go out. At dawn, the exterior lights will go out and the front turn signal lights will come on (if the headlight switch is off).
Of course, you may still turn on the headlights any time you need to.
To idle your vehicle with the DRL off, set the parking brake while the ignition is in the Off or LOCK position. Then start the vehicle. The DRL will stay off until you release the parking brake.
Fog Lights (Option)
Use your fog lights for better vision in foggy or misty conditions. Your parking lights must be on or your fog lights won't work.
To turn the fog lights on, push the switch above #0. Push the bottom of the switch to turn the fog lights off. A light on the switch will come on when the fog lights are on.
Fog lights will go off whenever your high beams come on. When the high beams go off, the fog lights will come on again.
■ Interior Lights
Courtesy Lights
When any door is opened, several interior lights go on. These lights are courtesy lights. They make it easier for you to enter and leave your vehicle.
Courtesy lights include the dome light and other lights throughout the interior of your vehicle.
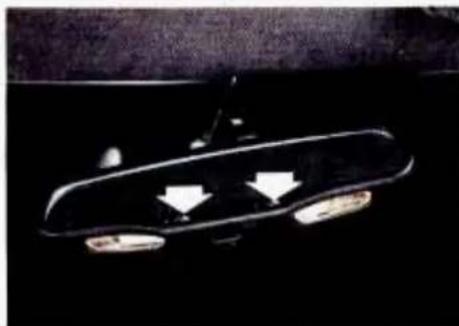
natural_image
Close-up of a black car head with two white arrows pointing to the side, against a dark background (no text or symbols visible)Front Map Lights
Your inside rearview mirror includes two map lights. Each light has its own switch. Use the switch closest to the light to turn it on. The lights will also go on when a door is opened.
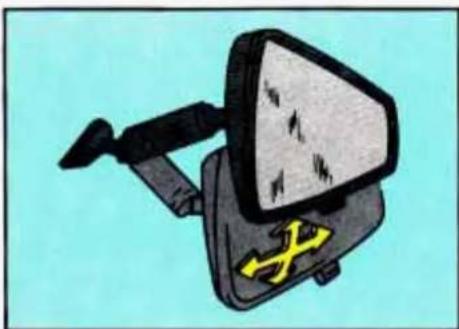
natural_image
Cartoon illustration of a mechanical device with a triangular head and yellow handle (no text or symbols)■ Mirrors
Inside Day/Night Rearview Mirror
An inside rearview mirror is attached to your windshield. The mirror has pivots so that you can adjust it up and down or side to side.
You can adjust the mirror for day or night driving. Pull the tab for night driving to reduce glare. Push the tab for daytime driving.
Manual Adjust Mirror
Adjust the passenger side outside mirror by hand so that you can just see the side of your vehicle when you are sitting in a comfortable driving position.
Convex Outside Mirror
Your right side mirror is convex.
A convex mirror's surface is curved so you can see more from the driver's seat.
CAUTION:
If you aren't used to a convex mirror, you can hit another vehicle. A convex mirror can make things (like other vehicles) look farther away than they really are. If you cut too sharply into the right lane, you could hit a vehicle on your right. Check your inside mirror or glance over your shoulder before changing lanes.
Features & Controls
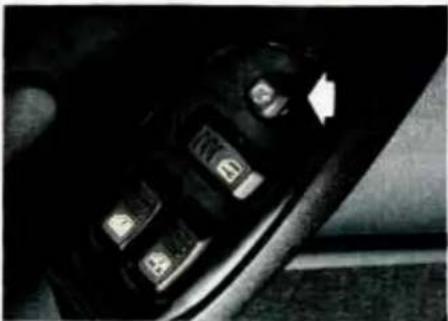
natural_image
Close-up of a car interior showing a control panel with buttons and a white arrow pointing to the right (no visible text or symbols)Manual Remote Control Mirror
Adjust the driver side outside mirror with the lever on the door. Adjust the mirror so that you can just see the side of your vehicle when you are sitting in a comfortable driving position.
Electric Mirror Control (Option)
The electric mirror control is on the driver's door. To adjust either mirror, turn the switch to LEFT or RIGHT. Then use the joystick to adjust the mirror.
The control only works when the ignition switch is in Run or Acc, or when RAP is present. (See “Retained Accessory Power” in the Index.)
■ Twin Lift-Off Roof Panels (OPTION)
If you have this option, you can remove one or both lift-off roof panels.
CAUTION:

Don't try to remove the T-top panels while the vehicle is
moving. Trying to remove a T-top panel while the vehicle is moving could cause an accident. The panel could fall into the vehicle and cause you to lose control, or it could fly off and strike another vehicle. You or others could be injured. Remove a T-top panel only when the vehicle is parked.
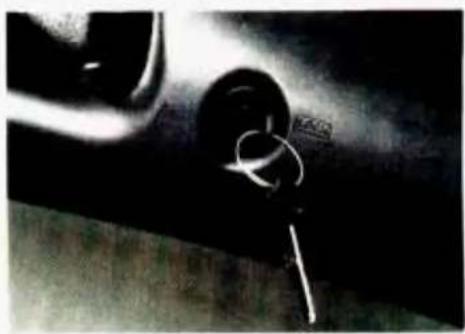
natural_image
Close-up of a car's wheel and keyhole (no visible text or symbols)The door key unlocks the panels. Turn the key to the left to unlock the panel.
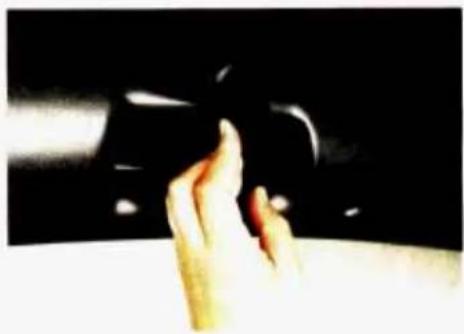
natural_image
Close-up of a hand holding a dark object against a black background (no visible text or symbols)Then pull on the release handle to unlatch the panel. Lift the outer edge of the panel and pull it toward you.
natural_image
Interior view of a vintage mechanical device with a cylindrical component and wooden base (no visible text or symbols)Open the close-out panel completely. Place the panel in the correct slot (DRIVER or PASSENGER) in the rear area of your vehicle. Make sure the handle is open and facing you when you put it in the storage slot.
CAUTION:
If a T-top panel is not stored properly, it could be thrown about the vehicle in a crash or sudden maneuver. People in the vehicle could be injured. Whenever you store a T-top panel in the vehicle, always be sure that it is stored securely in the correct storage slot with the T-top handle closed.
Features & Controls
natural_image
Interior view of a vintage-style office space with dark furniture and minimal furniture (no visible text or symbols)Push the handle closed to secure the panel in the slot. To lock each panel in the storage area, use your door key.
CAUTION:

An improperly installed T-top panel may fall into or fly off vehicle. You or others could be red. After installing a T-top panel, always check that it is firmly checked by pushing up on the sides of the panel.
Reverse the steps above to install the T-top panels.
When installing panels, be sure to align weatherstrips properly. Panels incorrectly installed may leak.
NOTICE:
High pressure car washes may cause water to enter your vehicle. Never spray water directly at the roof panel joints. This will cause leaks.

natural_image
Close-up of a hand holding a curved black object against a warm-toned background (no text or symbols visible)T-Top Sunshades
- Start with the panel marked DRIVER FRONT. Unlatch the driver-side T-top, raise it halfway and close the latch handle.
- With the top raised and resting on the center roof rail, slide the flat edge of the sunshade panel (with the vinyl side to the glass) between the glass and plastic trim, making sure the edge marked DRIVER FRONT is pointing to the front of the vehicle.
natural_image
Close-up of a dark fabric with a small object near the edge, against a warm-toned background (no text or symbols visible)- Open the latch and close the T-top. Check to see if there are any gaps showing. Unlatch the T-top and adjust the sunshade as required.
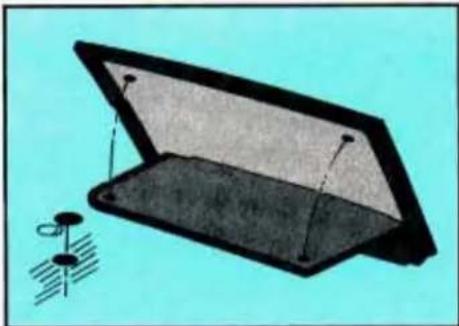
natural_image
Illustration of a folded paper or sheet with a small circular object nearby (no text or symbols)- Once the sunshade is installed properly, you can stick the velcro® buttons on the glass for a proper fit every time you install the sunshades. To do this, first remove the T-top with the sunshade installed and place it upside down on a table or bench. Take care not to scratch the glass.
- Pull the sunshade back a little and remove the backing paper from the velcro® buttons. Push the sunshade back into place sticking the velcro® to the glass.
- Install the T-top, close the latch and lock the T-top. Repeat the above steps for the passenger-side sunshade.
natural_image
Close-up of a mechanical component with textured surfaces and a central mechanism (no visible text or symbols)You can store the sunshades in their storage area in the rear of your vehicle. You can also leave them attached to the T-tops. The T-tops can still be removed and placed in their storage slots when the sunshades are attached.
Features & Controls
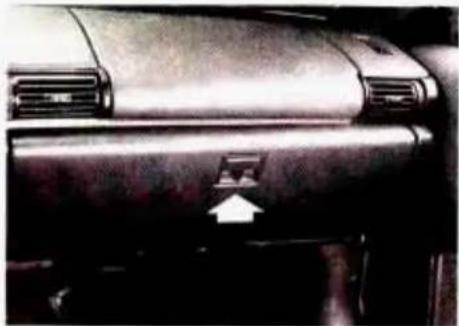
natural_image
Close-up of a car interior panel with a white arrow pointing to a component (no visible text or symbols)■ Storage and Compartments
Glove Box
To open the glove box, lift up on the lever. Use your door key to lock and unlock it. The glove box has a light inside.
natural_image
Close-up of a car's side panel showing the nose and mouth (no text or symbols visible)Map Pocket
Each door has a map pocket.
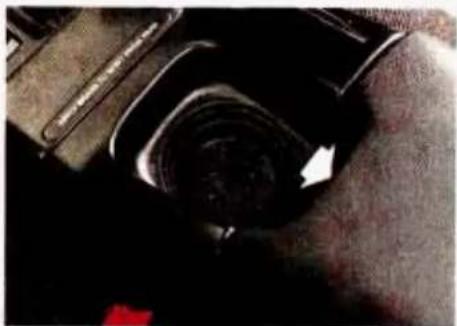
natural_image
Close-up of a mechanical component with a dark circular feature and a white arrow pointing to it (no visible text or symbols)Front Console
To use the storage area, pull up on the front end of the console. There is a cupholder and light and may be a coinholder in the console.
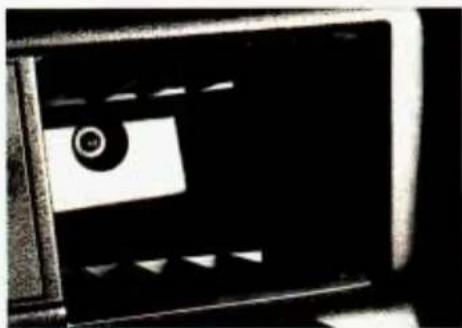
natural_image
Close-up of a black electronic device with a circular button and triangular ventilation slots (no visible text or symbols)Cassette and Compact Disc Storage
You have a storage area for cassette tapes.
natural_image
Close-up of a dark, textured object with no visible text or symbolsIf you have a compact disc player, you will have a storage area for compact discs in your console.
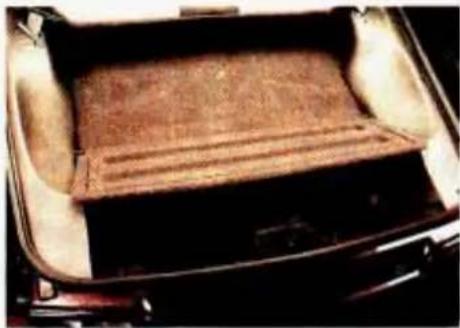
natural_image
Interior view of a car trunk with visible wood grain and ventilation slots (no text or symbols)Close-Out Panel
The close-out panel can be closed for hidden storage in the rear area of your vehicle.
To remove the close-out panel:
- Close the panel. If the close-out panel is not closed and resting on the trim panel, it cannot be removed.
- Pull the panel toward you to unsnap it. Then slide the close-out panel along the groove in the trim panel.
Reverse the steps to install the panel.
Features & Controls
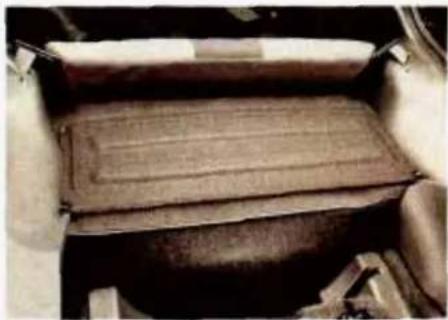
natural_image
Interior view of a wooden box with woven material (no visible text or symbols)When carrying large or heavy items, it is a good idea to open the panel and place the items in the rear area.
CAUTION:
An improperly stored close-out panel could be thrown about the vehicle during a collision or sudden maneuver. You or others could be injured. If you remove the cover, don't store it in your vehicle. When you put it back, always be sure that it is securely attached with both sides snapped in place.
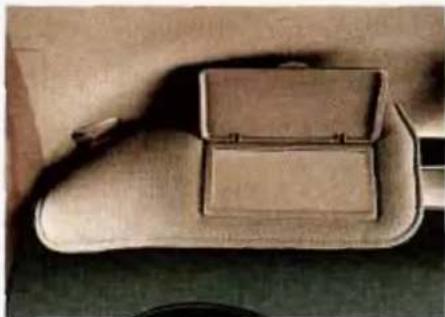
natural_image
Top-down view of a beige car interior with two rectangular compartments (no visible text or symbols)■ Sun Visors
To block out glare, you can swing down the visors. You can also swing them to the side.
Covered Visor Vanity Mirror
Pull down the sun visor and lift the cover to expose the vanity mirror.
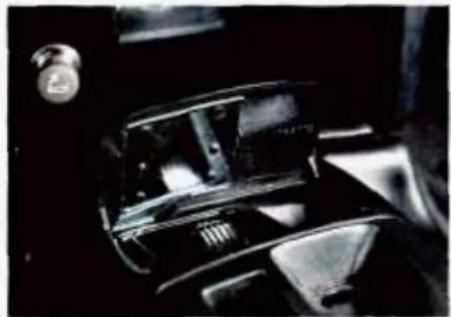
natural_image
Close-up of a vintage car interior with visible engine and dashboard (no text or symbols)Ashtray and Lighter
Front Ashtray
Lift up the cover to open the ashtray. To remove it, lift up on the right side of the ashtray. If you have an automatic transmission, the ashtray is near the front of your console. If you have a manual transmission, the ashtray is near your cupholder.
NOTICE:
Don't put papers and other things that burn into your ashtray. If you do, cigarettes or other smoking materials could set them on fire, causing damage.
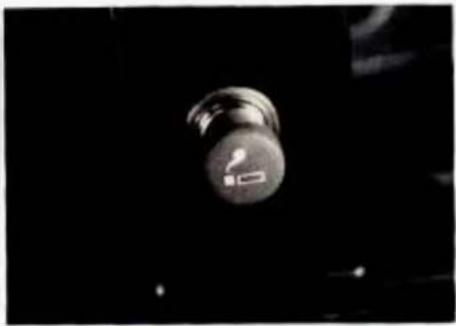
natural_image
Close-up of a spherical object with a small symbol, possibly a device or component, against a dark background (no readable text or symbols)Cigarette Lighter
To use the lighter, push it in all the way and let go. When it's ready, it will pop back by itself.
NOTICE:
Don't hold a cigarette lighter in with your hand while it is heating. If you do, it won't be able to back away from the heating element when it's ready. That can make it overheat, damaging the lighter and the heating element.
■ Floor Mats
Your Chevrolet's floor mats are custom-fitted to the foot wells. Be sure the driver's floor mat is in place. If it isn't, it could interfere with the accelerator or brake pedals.
Features & Controls
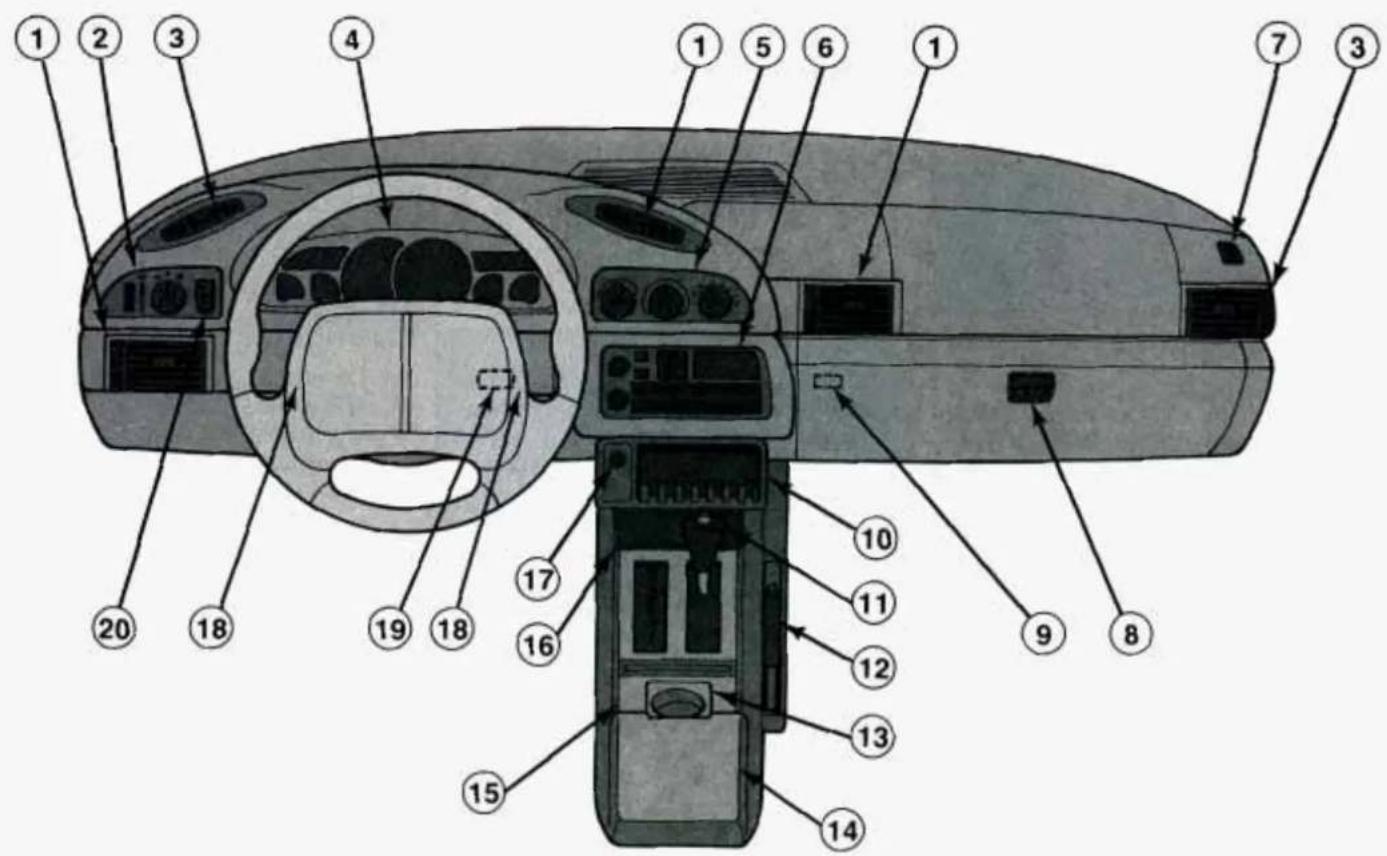
text_image
Labeled diagram of a car interior showing numbered components for identificationInstrument Panel
- Upper Air Vent
- Main Light Control
- Side Upper Air Vent
- Instrument Cluster
- Comfort Controls
- Audio System
-
Side Window Defogger Vent
-
Glove Box
- Remote Hatch Release
- Cassette Tape Storage
- Shift Lever
- Parking Brake Lever
- Cupholder
-
Storage Console and Compact Disc Storage (if equipped)
-
Cigarette Lighter (Manual Transmission)
- Ashtray and Coinholder with Mat (Automatic Transmission)
- Cigarette Lighter
- Horn
- Rear Window Defogger Switch
- Fog Lamp Switch (if equipped)
Features & Controls
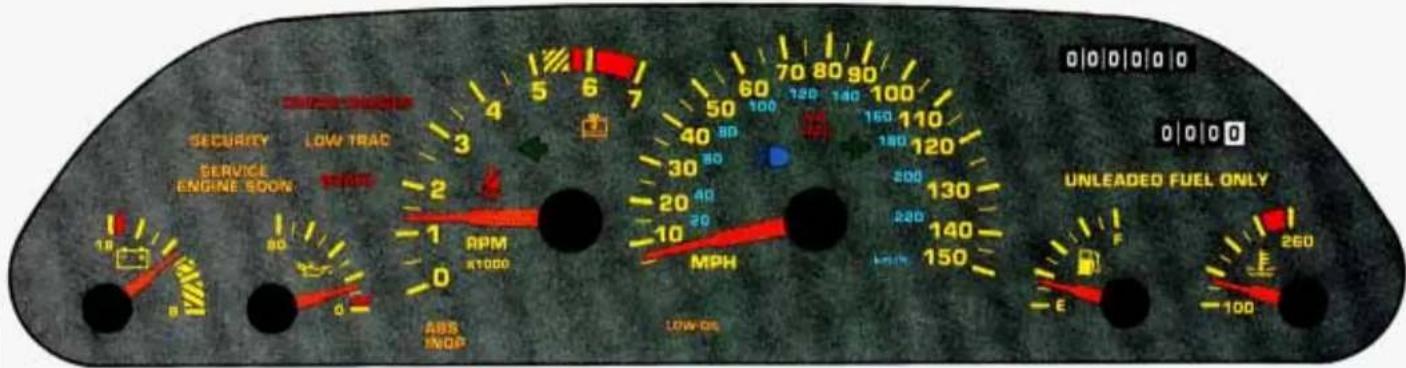
text_image
SECURITY LOW TRAD SERVICE ENGINE SOON -2 -1 RPM -1000 ABS INOP ABB INOP MPH LOW OIL 70 80 90 60 70 80 90 50 60 70 80 90 40 50 60 70 80 90 30 40 50 60 70 80 90 20 30 40 50 60 70 80 90 10 20 30 40 50 60 70 80 90 150 160 170 180 190 120 130 140 150 160 180 200 220 240 200 220 240 150 140 150 UNLEADED FUEL ONLY E F 100 260■ Instrument Panel and Cluster
Your instrument cluster is designed to let you know at a glance how your vehicle is running. You'll know how fast you're going, about how much fuel you have left and many other things you'll need to know to drive safely and economically.
U.S. shown, Canada similar
Speedometer and Odometer
Your speedometer lets you see your speed in both miles per hour (mph) and kilometers per hour (km/h). Your odometer shows how far your vehicle has been driven, in either miles (used in the U.S.) or kilometers (used in Canada).
Your Chevrolet's odometer is tamper-resistant. If you can see silver lines between the numbers, probably someone has tried to turn it back. The numbers may not be true.
You may wonder what happens if your Chevrolet needs a new odometer installed. If possible, the new one has to be set to the same reading the old one had. If it can't be, then it's set at zero, but a label on the driver's door must show the old reading and when the new one was installed.
Trip Odometer
The trip odometer can tell you how far your vehicle has been driven since you last set the trip odometer to zero.
To set the trip odometer to zero, press the knob.
Tachometer
The tachometer displays the engine speed in thousands of revolutions per minute (rpm).
NOTICE:
Do not operate the engine with the tachometer in the red area, or engine damage may occur.
■ Warning Lights, Gages and Indicators
This section describes the warning lights and gages that are on your vehicle. The pictures will help you locate them.
Warning lights and gages can signal that something is wrong before it becomes serious enough to cause an expensive repair or replacement. Paying attention to your warning lights and gages could also save you or others from injury.
Warning lights go on when there may be or is a problem with one of your vehicle's functions. As you will see in the details on the next few pages, some warning lights come on briefly when you turn the ignition key just to let you know they're working. If you are familiar with this section, you should not be alarmed when this happens.
Gages can indicate when there may be or is a problem with one of your vehicle's functions. Often gages and warning lights work together to let you know when there's a problem with your vehicle.
When one of the warning lights comes on and stays on when you are driving, or when one of the gages shows there may be a problem, check the section that tells you what to do about it. Please follow the manual's advice. Waiting to do repairs can be costly — and even dangerous. So please get to know your warning lights and gages. They're a big help.
Features & Controls
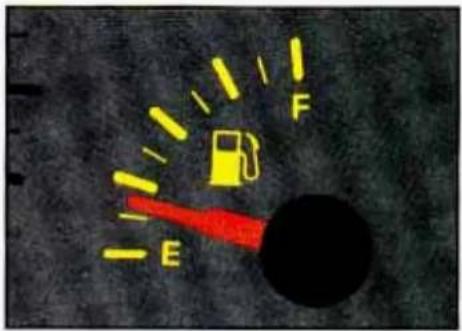
text_image
Warning sign with fuel pump icon and letter 'E' and 'F' indicating fuel safety warningFuel Gage
Your fuel gage shows about how much fuel is in your tank. The fuel gage works only when the ignition switch is in the
Run position. When the gage pointer first indicates E, you still have a little fuel left (about one to two gallons), but you need to get more right away.
Here are four concerns some owners have had about the fuel gage. All these situations are normal and do not indicate that anything is wrong with the fuel gage.
- At the gas station, the gas pump shuts off before the gage reads F.
- It takes more (or less) gas to fill up than the gage reads. For example, the gage reads 1/2 full, but it took more (or less) than half of the tank's capacity to fill it.
- The gage moves a little when you turn, stop or speed up.
- When you turn the engine off, the gage doesn't go back to E.
text_image
BRAKEBrake System Warning Light
Your Chevrolet's hydraulic brake system is divided into two parts. If one part isn't working, the other part can still work and stop you. For good braking, though, you need both parts working well.
If the warning light goes on, there could be a brake problem. Have your brake system inspected right away.
This light should come on as you start the vehicle. If it doesn't come on then, have it fixed so it will be ready to warn you if there's a problem.
ABS INOP
This light will also come on when you set your parking brake, and will stay on if your parking brake doesn't release fully. If it stays on after your parking brake is fully released, it means you have a brake problem.
If the light comes on while driving, pull off the road and stop carefully. You may notice that the pedal is harder to push. Or, the pedal may go closer to the floor. It may take longer to stop. If the light is still on, have the vehicle towed for service. (See "Towing Your Vehicle" in the Index.)
CAUTION:
Your brake system may not be working properly if the brake warning light is on. Driving with the brake warning light on can lead to an accident. If the light is still on after you've pulled off the road and stopped carefully, have the vehicle towed for service.
Anti-Lock Brake System Warning Light
With anti-lock, this light will go on when you start your engine and it will stay on for three seconds. If the light doesn't come on, have it fixed so it will be ready to warn you if there is a problem.
Features & Controls
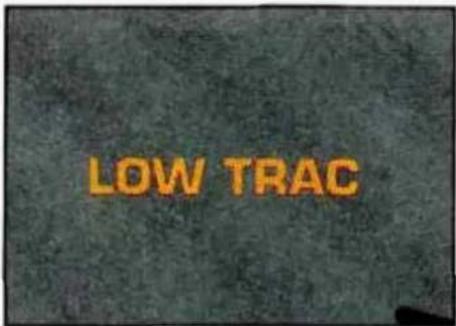
text_image
LOW TRAC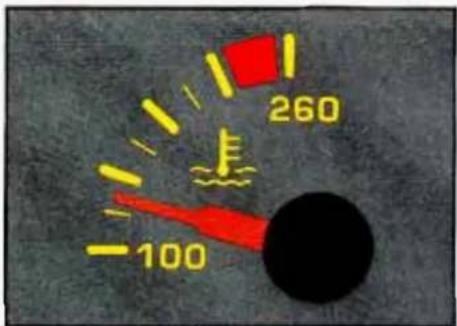
text_image
260 100If the light stays on or comes on when you're driving, stop as soon as possible and turn the key off. Then start the engine to reset the system. If the light still stays on, or comes on again while you're driving, your Chevrolet needs service. Unless the regular brake system warning light is also on, you will still have brakes, but not anti-lock brakes. If the regular brake system warning light is also on, see "Brake System Warning Light" earlier in this part.
When your anti-lock system is working, the message LOW TRAC will appear on your instrument cluster. This means that slippery road conditions may exist. Adjust your driving accordingly. The light will stay on for about four seconds after the ABS stops working. The LOW TRAC light also comes on during engine starting as a bulb check.
Engine Coolant Temperature Gage This gage shows the engine coolant temperature. If the gage pointer moves into the red area, your engine is too hot! It means that your engine coolant has overheated. If you have been operating your vehicle under normal driving conditions, you should pull off the road, stop your vehicle and turn off the engine as soon as possible.
HOT COOLANT CAN BURN YOU BADLY!
In "Problems on the Road," this manual shows what to do. See "Engine Overheating" in the Index.
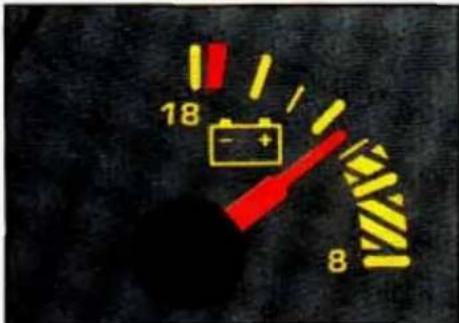
text_image
18 - 8Voltmeter
You can read battery voltage on your voltmeter. If it reads less than 11 volts or more than 16 volts while your engine is running, and it stays there, you may have a problem with the electrical charging system. Have it checked right away. Driving with the voltmeter reading in a warning zone could drain your battery.
If you idle your engine for a while, the voltmeter reading might move into the yellow zone. If the reading stays in the yellow zone while you are driving, you may have a problem with the electrical charging system. Have it checked. While the voltmeter reads in the yellow zone, your battery may not be able to power certain electrical accessories, like ABS. (If this happens, your ABS INOP light will come on. See “Anti-Lock Brake System Warning Light” in this part.) If you must drive a short distance with the voltmeter reading in a warning zone, turn off all your accessories, including your comfort control and audio systems.
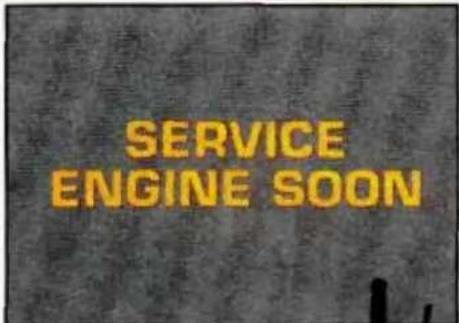
text_image
SERVICE ENGINE SOONMalfunction Indicator Lamp (Service Engine Soon Light)
A computer monitors operation of your fuel, ignition and emission control systems. This light should come on when the ignition is on, but the engine is not running, as a check to show you it is working. If it does not come on at all, have it fixed right away. If it stays on, or it comes on while you are driving, the computer is indicating that you have a problem. You should take your vehicle in for service soon.
Features & Controls
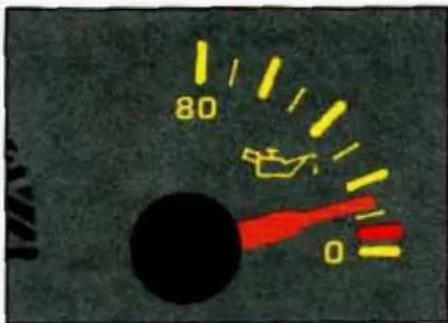
text_image
80 0NOTICE:
If you keep driving your vehicle with this light on, after a while the emission controls won't work as well, your fuel economy won't be as good and your engine may not run as smoothly. This could lead to costly repairs not covered by your warranty.
Engine Oil Pressure Gage
This gage tells you if there could be a problem with your engine oil pressure. The engine oil pressure gage shows the engine oil pressure in psi (pounds per square inch) in the U.S., or kPa (kilopascals) in Canada, when the engine is running. Oil pressure should be 20 to 80 psi (140 to 550 kPa). It may vary with engine speed, outside temperature and oil viscosity, but readings above the red area show the normal operating range. Readings in the red area tell you that the engine is low on oil, or that you might have some other oil problem. See “Engine Oil” in the Index.
CAUTION:
Don't keep driving if the oil pressure is low. If you do, your engine can become so hot that it catches fire. You or others could be burned. Check your oil as soon as possible and have your vehicle serviced.
NOTICE:
Damage to your engine from neglected oil problems can be costly and is not covered by your warranty.
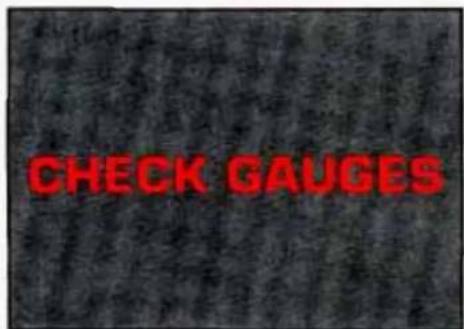
text_image
CHECK GAUGESCheck Gages Light
This light will come on briefly when you are starting the engine. If the light comes on and stays on while you are driving, check your gages to see if they are in the warning areas.
text_image
LOW OILLow Oil Light
This light should come on while you are starting your engine. If the light doesn't come on, have it repaired. If the light comes on while starting your engine and stays on, your engine oil level may be too low. You may need to add oil. See the Index under "Engine Oil."
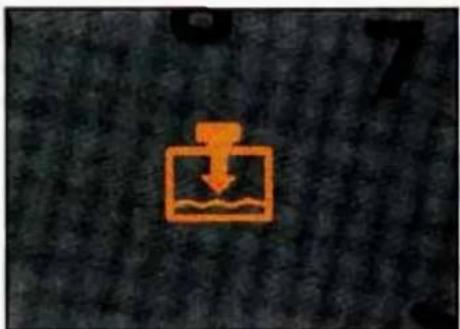
natural_image
Orange icon of a download arrow inside a box, set against a dark textured background (no text or symbols)Low Coolant Light (V8 Engine)
This light should come on while you are starting your engine. If the light doesn't come on, have it repaired. The light also comes on when the coolant in your radiator is low. You may need to add coolant. See the Index under "Engine Coolant."
NOTICE:
Driving with the LOW COOLANT light on could cause your Chevrolet to overheat. See "Engine Overheating" in the Index. Your Chevrolet could be damaged, and it wouldn't be covered by your warranty.
Notes
Notes
Notes
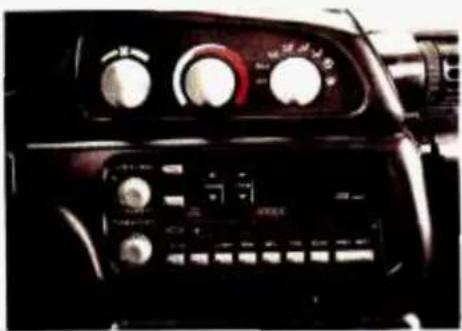
natural_image
Interior view of a car dashboard with analog gauges and control panel (no visible text or symbols)In this part you'll find out how to operate the comfort control systems and audio systems offered with your Chevrolet. Be sure to read about the particular system supplied with your vehicle.
Part 3 Comfort Controls & Audio Systems
Comfort Controls 110
Heater Controls 110
Heating 111
Bi-Level Heating 111
Ventilation 112
Defogging and Defrosting Windows 112
Air Conditioner Controls 112
Cooling 113
Rear Window Defogger 114
Flow-Through Ventilation System 114
Audio Systems 115
Setting the Clock 116
AM/FM Stereo with Cassette Tape Player 117
Delco/Bose AM/FM Stereo with Compact Disc Player 121
Understanding Radio Reception 127
Care of Your Cassette Tape Player 128
Care of Your Compact Discs 129
Fixed Mast Antenna 129
Comfort Controls & Audio Systems
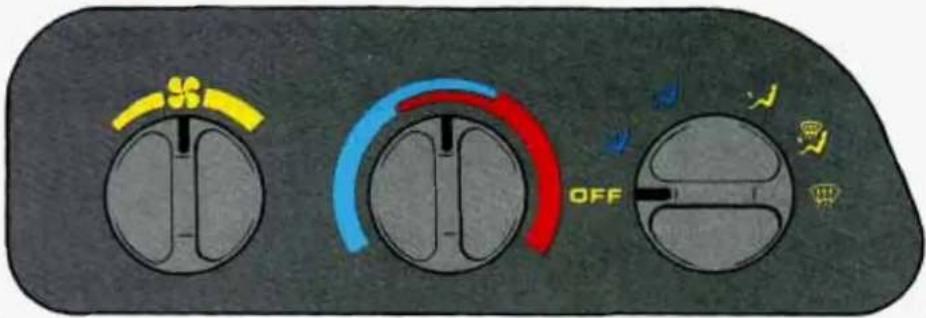
text_image
Control panel interface with three gauges showing directional indicators and a 'OFF' button, likely for vehicle or system control.■ Comfort Controls
With this system, you can control the heating and ventilation in your Chevrolet. If you have the air conditioning option, you can also control cooling.
Your vehicle also has the flow-through ventilation system described later in this section.
Heater Controls
Fan Control Knob
: Turn this knob to select the force of air you want.
Temperature Control Knob
Turn the knob to change the temperature of the air flowing from the heating system. Turn it to the right for warmer air and to the left for cooler air. The temperature of the air can not be less than the temperature of the outside air.
Air Control Knob
OFF: The system is off.
Air flows through the upper air vents.
Air is directed through the upper air vents and the heater ducts.
: This setting directs most of the air through the heater ducts and some of the air through the windshield defroster vents.
Air is directed through the windshield defroster vents and the heater ducts.
: This setting directs most of the air through the windshield defroster vents and some of the air through the heater ducts.
Heating
The heater works best if you keep your windows closed while using it.
- Turn the air control knob to √.
- Turn the fan control knob to the right.
- Turn the temperature control knob to a comfortable setting.
During initial start-up only, if your vehicle is equipped with an optional engine block heater, you can use it in cold weather (around +20°F/-8°C or lower) to heat the passenger area better than without it. Because an engine block heater warms the engine coolant, your vehicle's heating system can more efficiently provide heat for the passenger area of your vehicle. See "Engine Block Heater" in the Index.
Bi-Level Heating
You may want to use bi-level heating on cool, but sunny days. This setting directs cool air toward your body and warmer air toward your feet.
- Turn the air control knob to ✘.
- Turn the temperature control knob to a comfortable setting.
- Turn the fan control knob to the right.
Comfort Controls & Audio Systems
natural_image
Close-up of a car's wheel and blade blades against a dark background (no text or symbols visible)Ventilation
For mild outside temperatures when little heating or cooling is needed, you can still direct outside air through your vehicle.
- Turn the air control knob to ↗.
- Turn the temperature control knob to a comfortable setting.
- Turn the fan control knob to the right.
Defogging and Defrosting Windows
- Turn the air control knob to 🍼️.
- Turn the temperature control knob all the way to the right.
- Turn the fan control knob to the right.
Air Conditioner Controls (OPTION)
The air conditioning system uses the same controls as the heating system, except that the air control knob has two extra settings, described below. For an explanation of all the controls, see "Heater Controls" earlier in this part.
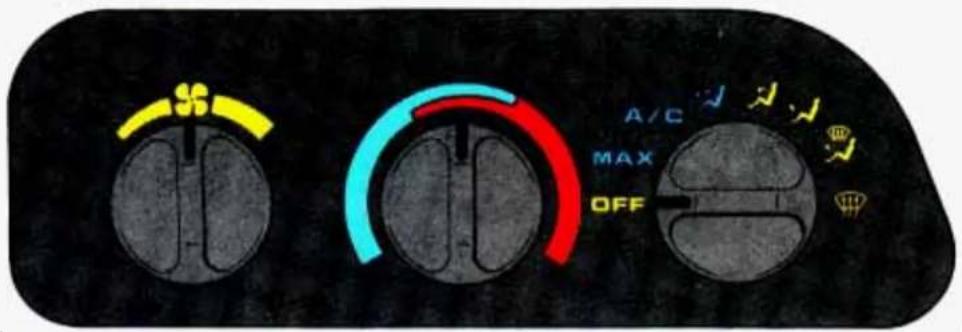
text_image
A/C MAX OFFMAX: Provides maximum cooling or quick cool-down on very hot days. This setting recirculates most of the air inside your vehicle. If it is used for long periods of time, the air may become dry. This setting directs air through the upper air vents.
A/C: Use for normal cooling on hot days. This setting cools outside air and directs it through the upper air vents.
The air conditioner compressor operates in MAX, A/C and in 📋, 🌐 and 🌐 when the outside temperature is above freezing. When the air conditioner is on, you may sometimes notice slight changes in your vehicle's engine speed and power. This is normal because the system is designed to cycle the compressor on and off to keep the desired cooling and help fuel economy.
Cooling
The air conditioner works best if you keep your windows closed. On very hot days, open the windows just long enough for the hot air to escape.
- Turn the air control knob to A/C for normal cooling. For faster cooling move the knob to MAX.
- Turn the temperature control knob to a comfortable setting.
- Turn the fan control knob to the right.
Comfort Controls & Audio Systems
natural_image
Simple diagram of a vehicle or road sign with directional arrows and vertical bars (no text or symbols)Rear Window Defogger (OPTION)
The rear window defogger uses a warming grid to remove fog from the rear window.
Press the right side of the switch to turn on the defogger. An indicator light will come on to remind you that the defogger is on. The defogger will turn off automatically after about ten minutes of use. If you turn it on again, the defogger will operate for about five minutes only. You can also turn the defogger off by pressing the left side of the switch.
Do not attach anything like a temporary vehicle license or a decal across the defogger grid on the rear window.
NOTICE:
Don't use a razor blade or something else sharp on the inside of the rear window. If you do, you could cut or damage the warming grid, and the repairs wouldn't be covered by your warranty.
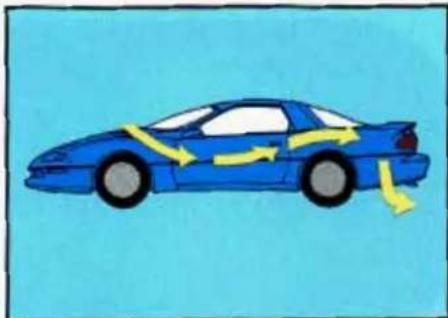
natural_image
Illustration of a blue car with yellow motion arrows indicating speed or flow (no text or symbols)Flow-Through Ventilation System
Your Chevrolet's flow-through ventilation system supplies outside air into the vehicle when it is moving. Outside air will also enter the vehicle when the heater or the air conditioning fan is running.
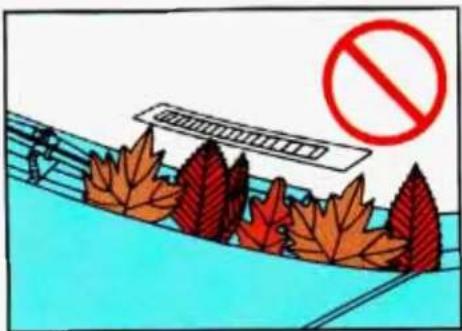
natural_image
Illustration of autumn leaves on a slope with a red prohibition symbol (no text or labels)Ventilation Tips
- Keep the hood and front air inlet free of ice, snow, or any other obstruction (such as leaves). The heater and defroster will work far better, reducing the chance of fogging the inside of your windows.
- When you enter a vehicle in cold weather, turn the fan control knob to the right for a few moments before driving off. This helps clear the intake ducts of snow and moisture, and reduces the chance of fogging the inside of your windows.
- Keep the air path under the front seats clear of objects. This helps air to circulate throughout your vehicle.
■ Audio Systems
Your Delco ^® audio system has been designed to operate easily and give years of listening pleasure. But you will get the most enjoyment out of it if you acquaint yourself with it first. Find out what your Delco ^® system can do and how to operate all its controls, to be sure you're getting the most out of the advanced engineering that went into it.
Comfort Controls & Audio Systems
CAUTION:

Hearing damage from loud noise is almost undetectable, it is too late. Your hearing can not to higher volumes of sound, and that seems normal can be and harmful to your hearing. The precautions by adjusting the time control on your radio to a sound level before your hearing is to it.
To help avoid hearing loss or damage:
- Adjust the volume control to the lowest setting.
- Increase volume slowly until you hear comfortably and clearly.
NOTICE:
Before you add any sound equipment to your vehicle — like a tape player, CB radio, mobile telephone or two-way radio — be sure you can add what you want. If you can, it's very important to do it properly. Added sound equipment may interfere with the operation of your vehicle's engine, Delco® radio or other systems, and even damage them. And, your vehicle's systems may interfere with the operation of sound equipment that has been added improperly.
So, before adding sound equipment, check with your dealer and be sure to check Federal rules covering mobile radio and telephone units.
Setting the Clock
AM/FM Stereo with Cassette Tape Player
- Press SET.
- Within five seconds, press and hold SEEK ▼ until the correct hour appears.
- Press and hold SEEK ▲ until the correct minute appears.
Delco/Bose AM/FM Stereo with Compact Disc Player
- Press SET.
- Within five seconds, press and hold SEEK ▶ until the correct hour appears.
- Press and hold SEEK ▶ until the correct minute appears.
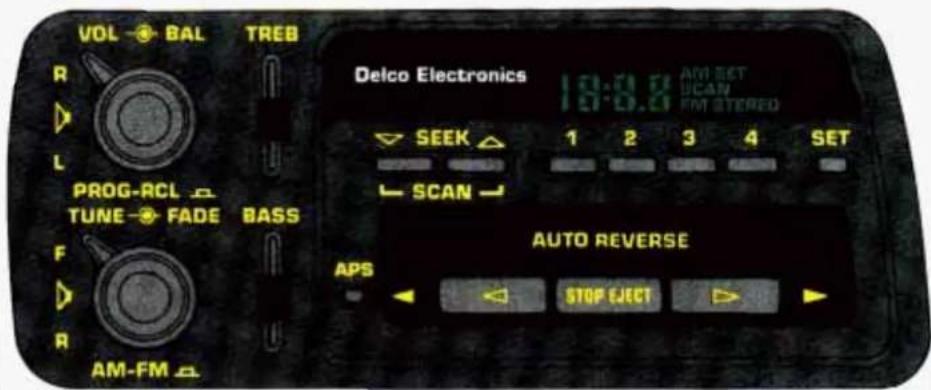
text_image
VOL BAL TREB R L PROG-RCL TUNE FADE BASS F R AM-FM Delco Electronics 18:0.8 AM SET SCAN FM STERED SEEK 1 2 3 4 SET SCAN AUTO REVERSE APS STOP ELECTAM/FM Stereo with Cassette Tape Player
To Play the Radio
Turn the upper knob to turn the system on or off.
Volume
Turn the upper knob to adjust the volume.
AM-FM
Press the lower knob to get AM or FM. The lighted display shows your selection.
Tune
Turn the lower knob to choose radio stations.
Recall
Press the upper knob to recall the station being played or the clock display.
Seek
Press SEEK ▼ or ▲ and the radio will tune to the next lower or higher station and stay there.
Scan
The scan function uses the same two buttons as the seek function.
To go to the next higher station and stay there for a few seconds, press and hold SEEK ▲ and then press SEEK ▼ for an instant.
To go to the next lower station and stay there for a few seconds, press and hold SEEK ▼ and then press SEEK ▲ for an instant.
To stop the scan function, press either SEEK ▲ or ▼.
Comfort Controls & Audio Systems
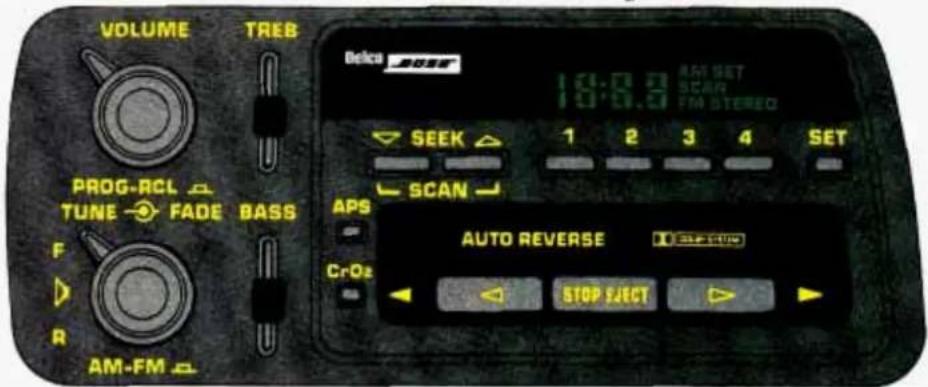
text_image
VOLUME TREB PROG-RCL TUNE → FADE BASS F R AM-FM Delci 2000 18:03 AM SET SCAN FM STEREO SEEK 1 2 3 4 SET SCAN APS AUTO REVERSE CrOz STOP SELECTPushbuttons
The four pushbuttons let you return to your favorite stations. You can preset up to 14 stations (7 AM and 7 FM).
To set the pushbuttons for up to eight stations (four AM and four FM), just:
- Tune in the station.
- Press SET. ("SET" will appear on the display for about five seconds.)
- Within five seconds, press one of the four pushbuttons. Whenever you press that button, the preset station will return.
Repeat these steps for each pushbutton.
You can preset three more stations on each band by pressing a pair of buttons next to each other at the same time. Just:
- Tune in the station.
- Press SET. ("SET" will appear on the display for about five seconds.)
- Within five seconds, press two pushbuttons next to each other at the same time. Whenever you press that pair of buttons, the preset station will return.
Repeat these steps for each pair of pushbuttons.
Setting the Tone
Bass: Slide the BASS lever up to hear more bass.
Treble: Slide the TREB lever up to hear more treble.
If a station is weak and noisy, move TREB down to reduce the noise.
Adjusting the Speakers
Balance: Turn the balance control behind the upper knob to move the sound between the right and left speakers if you do not have the Delco/Bose system. With the Delco/Bose system, your speakers are electronically balanced.
Fade: Turn the fade control behind the lower knob to move the sound between the front and rear speakers.
To Play a Cassette Tape
Your tape player is built to work best with tapes that are 30 to 45 minutes long on each side. Tapes longer than that are so thin they may not work well in this player.
The longer side with the tape visible goes in first. If you hear nothing or hear just a garbled sound, it may not be in squarely. Press STOP-EJECT to remove the tape and start over.
Once the tape is playing, use the upper and lower knobs for volume and balance, just as you do for radio. The arrows show which side of the tape is playing.
Press ◀ or ▶ to rapidly rewind or advance the tape. Press STOP-EJECT to stop the tape.
Comfort Controls & Audio Systems
Automatic Program Search
When you push APS you can go to the beginning of a new selection.
- To go forward to the beginning of the next selection, press ▶.
● To go back to the beginning of the current selection press ◀. Push ◀ again to go to the beginning of the previous selection.
Program
Press the upper knob on your system to switch from one side of the tape to the other.
Your cassette tape player can play continuously because the player has an auto-reverse feature.
Eject
Press STOP-EJECT to remove the tape or stop the tape and switch to the radio.
CrO_2 (Delco/Bose System)
The CrO_2 button lets you set the system for the type of cassette being used. If you are using chrome or metal tapes, push CrO_2 in. If you are using standard tapes, make sure CrO_2 is out.
Noise Reduction (Delco/Bose System)
Your sound system has the Dolby ^® automatic noise reduction feature. Dolby ^® Noise Reduction is manufactured under license from Dolby Laboratories Licensing Corporation. Dolby and the double-D symbol are trademarks of Dolby Laboratories Licensing Corporation.
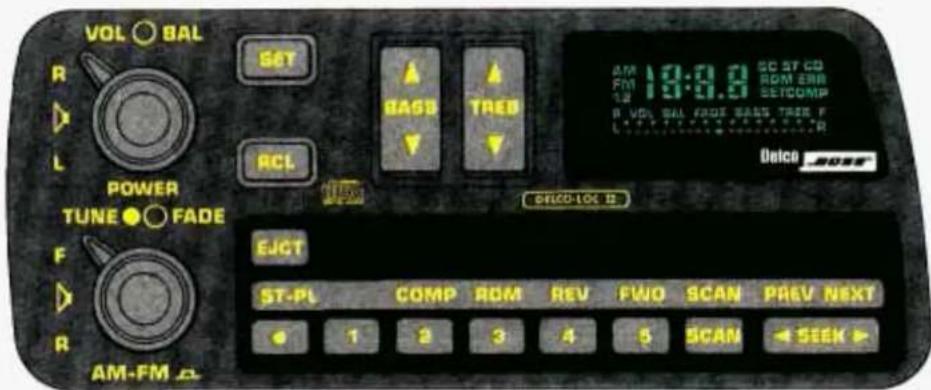
text_image
VOL ○ BAL R L POWER TUNE ● ○ FADE F R AM-FM △ SET BASD TRED ACL AM 10:0.0 SC ST CD FM 19:0.3 ROM ERR 1/2 SETCOMP R VOL BAL FADE BASS TREE F L 10:0.0 10:0.0 Delco "NOSE" EJGT ST-PL COMP ROM REV TWO SCAN PREV NEXT ● 1 2 3 4 5 SCAN ← SEEK ►Delco/Bose AM/FM Stereo with Compact Disc Player
To Play the Radio
Turn the upper knob to turn the system on or off.
Volume
Turn the upper knob to adjust the volume.
AM-FM
Press the lower knob to get AM, FM1 or FM2.
Tune
Turn the lower knob to choose radio stations.
Seek
Press SEEK ◀ or ▶ to go to the next lower or higher station and stay there.
Scan
Press SCAN to hear each station for a few seconds. When you want to stop scanning, press SCAN again or the upper knob.
Pushbuttons
The five pushbuttons let you return to your favorite stations. To set the pushbuttons for up to 15 stations (5 AM, 5 FM1 and 5 FM2), just:
-
Press the lower knob to choose AM, FM1 or FM2.
-
Tune in the station.
-
Press SET. ("SET" will appear on the display for about five seconds.)
-
Within five seconds, press one of the pushbuttons. Whenever you press that button, the preset station will return.
Repeat these steps for each pushbutton.
Comfort Controls & Audio Systems
Setting the Tone
Bass: Press BASS ▲ or BASS ▼ to hear more or less bass.
Treble: Press TREB ▲ or TREB ▼ to hear more or less treble.
For the clearest sound, keep both of these adjusted all the way up. If a station is weak and noisy, press TREB ▼ to reduce the noise.
Adjusting the Speakers
Balance: Turn the balance control behind the upper knob to move the sound between the right and left speakers.
Fade: Turn the fade control behind the lower knob to move the sound between the front and rear speakers.
To Play a Compact Disc
Before you begin, please note: don't use the mini-discs that are called "singles." They won't eject. Use full-size compact discs.
With the audio system on, insert a disc into the slot with the label side up. "CD" will appear on the display and track 1 will begin to play.
If the disc comes back out and "ERR" appears on the display, it could be that:
• The disc is upside down.
- It is dirty, scratched, or wet.
- There's too much moisture in the air.
- You are driving on a very rough road.
- The temperature is too hot or too cold.
Recall
Press RCL to see what track is playing. Press it again within five seconds to see how long it has been playing.
The track number also appears when the disc is inserted.
To Play the Next Selection
Press NEXT to hear the next track now (instead of waiting until the present track is finished).
If you press and hold this button or press it more than once, the disc will advance further.
To Replay the Current Selection
Press PREV to hear a track again.
If you press and hold this button, or press it more than once, the disc will return to previous tracks.
Reverse
Press and hold REV to rapidly return to a favorite passage. Release it to play the passage.
Fast Forward
Press and hold FWD to quickly advance within a track. Release it to resume playing.
Scan
Press SCAN to listen to each track for about 10 seconds. Press RDM or SCAN to stop the scanning.
Compression
Press COMP to make loud and soft passages more nearly equal in volume.
Random
Press RDM to hear a random selection of tracks.
Comfort Controls & Audio Systems
To Stop the Disc Player
- Turn the power off or turn the ignition key off. The disc stays in the player and will resume playing at the point where it stopped.
- Press ST-PL to stop playing the disc and switch to radio. Press ST-PL to restart the disc at the point where it stopped.
- Press EJCT to eject the disc and the radio will play. The disc will start playing at track 1 when you reinsert it.
Theft-Deterrent Feature
Delco-Loc II is a security feature for the compact disc player. It can be used or ignored. If ignored, the system functions normally. If it is used, your system won't be usable if it's ever stolen.
Setting Your Security Code
The instructions below tell you how to enter a security code into the system. If your vehicle loses battery power for any reason, you must enter the security code again before the system will turn on.
- Write down any six digit number and keep it in a safe place.
- Turn the ignition switch to the Acc or Run position.
- Turn the audio system off.
- Press and hold 1 and 4 together until “---” shows on the display.
You are now ready to enter your security code. Don't wait more than 15 seconds between steps.
- Press SET and "000" will appear on the display.
- Press SCAN and hold until the first digit of your code appears. Release the button.
- Press SEEK ◀ or ▶ and hold until the second and third digits of your code appear. Release the button.
-
Press the lower knob and "000" will appear. Now you are ready to enter the last three digits of your code.
-
Press SCAN and hold until the fourth digit of your code appears. Release the button.
- Press SEEK ◀ or ▶ and hold until the fifth and sixth digits of your code appear. Release the button.
- Press the lower knob. "rEP" will appear for five seconds, and then "000" will appear.
- Repeat steps 6 through 11. "SEC" will appear. This means that your audio system is secured.
Shutting Off the Theft-Deterrent Feature
If your audio system is secured ("SEC" shows on display) and you wish to disable it, enter your security code as follows, pausing no more than 15 seconds between steps:
- Turn the ignition on. Make sure the audio system is off. The time will show on the display.
- Press 1 and 4 together for five seconds. "SEC" will show on the display.
- Press SET. "000" will appear on the display.
Comfort Controls & Audio Systems
- Press SCAN and hold until the first digit of your code appears. Release the button.
- Press SEEK ◀ or ▶ and hold until the second and third digits appear. Release the button.
- Press the lower knob. "000" will appear on the display.
-
Press SCAN and hold until the fourth digit of your security code appears. Release the button.
-
Press SEEK ◀ or ▶ and hold until the fifth and sixth digits of your code appear. Release the button.
- Press the lower knob. If “—” shows, you have shut off the theft-deterrent feature. If “SEC” shows, your audio system is still secured.
NOTE: If you lose or forget your security code, see your dealer for assistance.
Unlocking the Audio System after a Power Failure
If power is disrupted to the audio system while in the "SEC" mode, the unit will not work and "LOC" will show on the display whenever the ignition is on. To unlock the unit:
- Press SET. "000" will appear on the display.
- Press SCAN and hold until the first digit of your code appears. Release the button.
-
Press SEEK ◀ or ▶ and hold until the second and third digits appear. Release the button.
-
Press the lower knob. "000" will appear on the display.
- Press SCAN and hold until the fourth digit of your code appears. Release the button.
- Press SEEK ◀ or ▶ and hold until the fifth and sixth digits of your code appear. Release the button.
- Press the lower knob. "SEC" will appear and the unit will work. If "LOC" shows, the numbers did not match and the unit is still locked.
How to Change Your Security Code
You can change your security code by following these steps:
- Using your old code, follow the directions given under "Shutting Off the Theft-Deterrent Feature."
- Repeat directions of "Setting Your Security Code" with your new security code.
Understanding Radio Reception
FM Stereo
FM stereo will give you the best sound. But FM signals will reach only about 10 to 40 miles (16 to 65 km). And, tall buildings or hills can interfere with FM signals, causing the sound to come and go.
AM
The range for most AM stations is greater than for FM, especially at night. The longer range, however, can cause stations to interfere with each other. AM can pick up noise from things like storms and power lines. Try reducing the treble to reduce this noise if you ever get it.
Comfort Controls & Audio Systems
natural_image
Hand holding a small electronic device with a pipette, against a blue background (no visible text or symbols)AM Stereo
This means the Delco ^® system can receive C-QUAM ^® stereo broadcasts. Many AM stations around the country use C-QUAM ^® to produce stereo, though some do not. (C-QUAM ^® is a registered trademark of Motorola, Inc.) If your Delco ^® system can get C-QUAM ^® , your "STEREO" light will come on when you're receiving it.
Care of Your Cassette Tape Player
A tape player that is not cleaned regularly can cause reduced sound quality, ruined cassettes, or a damaged mechanism.
Cassette tapes should be stored in their cases away from contaminants, direct sunlight, and extreme heat. If they aren't, they may not operate properly or cause failure of the tape player.
Your tape player should be cleaned regularly each month or after every 15 hours of use. If you notice a reduction in sound quality, try a known good cassette to see if the tape or the tape player is at fault. If this other cassette has no improvement in sound quality, clean the tape player.
Clean your tape player with a wiping-action, non-abrasive cleaning cassette, and follow the directions provided with it.
Cassettes are subject to wear and the sound quality may degrade over time. Always make sure that the cassette tape is in good condition before you have your tape player serviced.