
T4 - Dash cam Lamax - Free user manual and instructions
Find the device manual for free T4 Lamax in PDF.


| Brand | Lamax |
| Model | T4 |
| Product Type | Dash Cam |
| Power Supply | Car cigarette lighter adapter with USB (12V/24V) |
| Battery Type | Supercapacitor (no internal battery) |
| Memory Card | microSD up to 64 GB, Class 10 or higher |
| Video Recording | Loop recording with automatic file overwrite |
| G-Sensor | Detects impact, automatically protects current recording |
| Motion Detection | Auto recording when movement detected, stops after ~10 seconds of inactivity |
| File Protection | Manual protection via MENU button during recording or in gallery |
| Mounting | Magnetic 3M adhesive holder; attach to windscreen |
| Ports | Mini USB for power and PC connection |
| Controls | Buttons: POWER, MENU/MODE, OK, UP, DOWN |
| Display | Built-in screen (size not specified) |
| Microphone | Built-in, can be enabled/disabled |
| Speaker | Built-in |
| Reset | Reset button on device (use paper clip) |
| Operating Temperature | 20°C – 40°C (ideal bonding temperature) |
| Dimensions | Estimated: 60 x 50 x 30 mm (not specified in manual) |
| Weight | Estimated: ~50 g (not specified in manual) |
Frequently Asked Questions - T4 Lamax
User questions about T4 Lamax
0 question about this device. Answer the ones you know or ask your own.
Ask a new question about this device
Download the instructions for your Dash cam in PDF format for free! Find your manual T4 - Lamax and take your electronic device back in hand. On this page are published all the documents necessary for the use of your device. T4 by Lamax.
USER MANUAL T4 Lamax
© Halidio DOLL © The Xirdie OK
(1) Taciolo OK
E Reproduktor
© Tlačidlo POW
④ LED indikátor napájania (svieti modro = kamera je zapnutá)
Mini USB port pre napálanie
① Tla'idlo RESET
④ Slot pre namäfowú kartu
© Blot pre pamutova karta Mini UOP and are prinai
Mini USB port pre pripojenie k PC
Ovládání:
© Tractiko DOLC © Ti Xin, PK
© Tlaciko UK
E Reproduktor
F Tlačitko POWER
© Mikrofon
Car cigarette lighter adapter with extra USB port
© Mini USB data cable
⑤ Spare 3M adhesive pad for holder (2×)
① Square 6M database path for master (24)
2 INTRODUCTION TO THE CAMERA / CONTROLS
Ⓐ MENU / MODE button
® UP button
④ OF BUTTON ⑤ DOWN BUTTON
© DOWN DOUCH
(2) UK button
E Speaker
(F) POWER button
G Microphone
⑧ Power LED (lit blue – camera is on)
- Power LED (in blue - camera is on) - Mini USD port for power supply:
① Mini USB port for power supply
① RESET button
© Memory card slot
Mini USB port to connect to PC
Controls:
| VIDEO MODE | POWER | Hold | Switch camera on / off |
| MENU / MODE | Press | Open the settings menuProtect video whilst recording | |
| OK | Press | Start / Stop recording | |
| UP | Press | Enable / Disable audio recording | |
| DOWN | Press | Switch display on / off | |
| POWER | Hold | Switch camera on / off | |
| MENU / MODE | Press | Video settings / Camera / BackConfirm selection | |
| OK | Press | ||
| UP | Press | Move up the menu | |
| DOWN | Press | Move down the menu | |
| POWER | Hold | Switch camera on / off | |
| OK | Press | Turn playback on / off | |
| UP | Press | Previous recording /Rewind when playing a video | |
| DOWN | Press | Next recording /Fast forward when playing video | |
| AMYTIME | POWER | Hold | Switch camera on / off |
| MENU / MODE | Hold | Change mode | |
| RESET | Press with paper clip | Restart the camera |
DE
1
VERPACKUNGSINHALT
(A) Autnikamera LAMAX TA
2M Magnetholterung
3 BASIC SETTINGS AND FUNCTIONS
A Insert the microSD card into the camera as shown (card connectors facing away from the display).
Use branded cards from reputable manufacturers of Class 10 and higher with a capacity of up to 64 GB.
2 Only remove the card when the camera is turned off
3 The first time you use the card format it directly in the camera. Repeat the formatting at least once a month to ensure
that the camera works properly
③ Connect the adapter to the car cigarette lighter and connect it to the camera holder with a USB cable. The camera is intended
for operation only when connected to a power source.
Instead of a battery, the camera contains a supercapacitor, which provides power and has a longer life than a conventional battery
When connected to the power, the dashcam turns on automatically and starts recording.
For some vehicles, it is necessary to turn the ignition key first
BASIC FUNCTIONS:
BASIC FUND on recording
The camera automatically divides the recording into shorter video files and starts overwriting the oldest unprotected films.
The camera automatically divides the TV with new ones when the SD card is full
This means you do not have to worry about free space on the card.
This means you file protection
- You can manually protect the video currently being recorded by pressing the MENU button.
You can manually protect the video currently being recorded. You can manually protect all your recordings in the gallery.
you can
3° Sensor • Thank to the 6 seconds, the current can detect an impact such as in a constant
- Thanks to the G-sensor, the camera can detect an impact, such as in a car accident.
As soon as an impact is detected, it immediately protects the current recording against being overwritten. (CAUTION, does not apply
to formatting.) Motion detection
Motion detection
The camera starts recording auto
Recording after about 10 seconds.
- If you stop recording manually or turn off the cashcam, motion detection will be disabled
The function is used to monitor a parked vehicle, do not use while driving
To use motion detection, the camera should be turned on and plugged into the power
④ The ideal line for attaching the d YESOM in the space between the windiness and the reverse mirax on or not to chodrust the driver's view.
④ The ideal place for attaching the daskcam is the space between the
⑧ Make sure that the glass is clean and dry at the at
The ideal bonding temperature is 20°C - 40°C.
© Remove the plastic film from the 3M adhesive on the camera holder
Turn on the camera and aim it so it has the correct view before sticking it to the glass
Press the 3M adhesive pad onto the glass and hold for a while.
5 ADDITIONAL INFORMATION
Find complete instructions and firmware at https://www.lamax-electronics.com/14. Don't forget to register your product on our website.
https://www.lamax-electronics.com/productupdate As soon as we update the firmware, we will inform you immediately! By
registering, you will also get access to the latests news and and discount promotions!

m = 311

1 A CSOMAGOLÁS TARTALMA
- The results of the results of the model (any)

2 MEGISMERKEDÉS A KAMERÁVAL / VEZÉRLÉSSEL
Ⓐ MENU/ÚZEMMÓD gomb
m = 311
1 A CSOMAGOLÁS TARTALMA
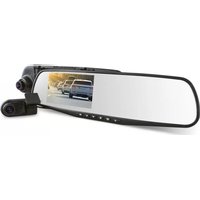



Brand : Lamax
Model : T4
Category : Dash cam