
MC-8044NLC - Oven LG - Free user manual and instructions
Find the device manual for free MC-8044NLC LG in PDF.


User questions about MC-8044NLC LG
0 question about this device. Answer the ones you know or ask your own.
Ask a new question about this device
Download the instructions for your Oven in PDF format for free! Find your manual MC-8044NLC - LG and take your electronic device back in hand. On this page are published all the documents necessary for the use of your device. MC-8044NLC by LG.
USER MANUAL MC-8044NLC LG
Precautions to avoid possible exposure to excessive microwave energy.
You cannot operate your oven with the door open due to the safety interlocks built into the door mechanism. These safety interlocks automatically switch off any cooking activity when the door is opened; which in the case of a microwave oven could result in harmful exposure to microwave energy. It is important not to tamper with the safety interlocks.
Do not place any object between the oven front face and the door or allow food or cleaner residue to accumulate on sealing surfaces.
Do not operate your oven if it is damaged. It is particularly important that the oven door closes properly and that there is no damage to the: (1) door(bent), (2) hinges and latches (broken or loosened), (3) door seals and sealing surfaces.
Your oven should not be adjusted or repaired by anyone except qualified service personnel.
Warning
Please ensure cooking times are correctly set as over cooking may result in the FOOD catching fire and subsequent damage to your oven.
When heating liquids, e.g. soups, sauces and beverages in your microwave oven, delayed eruptive boiling can occur without evidence of bubbling. This could result in a sudden boil over of the hot liquid. To prevent this possibility the following steps should be taken:
1 Avoid using straight sided containers with narrow necks.
2 Do not overheat.
3 Stir the liquid before placing the container in the oven and again halfway through the heating time.
4 After heating, allow to stand in the oven for a short time, stir or shake them (especially the contents of feeding bottles and baby food jars) again carefully and check the temperature of them before consumption to avoid burns (especially, contents of feeding bottles and baby food jars). Be careful when handling the container.
Warning
Always allow food to stand after being cooked by microwaves and check the temperature of them before consumption. Especially contents of feeding bottles and baby food jars.
How the Microwave Oven Works
Microwaves are a form of energy similar to radio and television waves and ordinary daylight. Normally, microwaves spread outwards as they travel through the atmosphere and disappear without effect. Microwave ovens, however, have a magnetron which is designed to make use of the energy in microwaves. Electricity, supplied to the magnetron tube, is used to created microwave energy.
These microwaves enter the cooking area through openings inside the oven. A turntable or tray is located at the bottom of the oven. Microwaves cannot pass through metal walls of the oven, but they can penetrate such materials as glass, porcelain and paper, the materials out of which microwave-safe cooking dishes are constructed.
Microwaves do not heat cookware, though cooking vessels will eventually get hot from the heat generated by the food.
A very safe appliance
Your microwave oven is one of the safest of all home appliances. When the door is opened, the oven automatically stops producing microwaves. Microwave energy is converted completely to heat when it enters food, leaving no "left over" energy to harm you when you eat your food.
| Precautions 2 | |
| Contents 3 | |
| Unpacking & Installing 4 ~ 5 | |
| Method to use accessories as per mode 6 | |
| Setting the Clock 7 | |
| Child Lock 8 | |
| Quick Start 9 | |
| Micro Power Cooking 10 | |
| Micro Power Level 11 | |
| Two Stage Cooking 12 | |
| Grill Cooking 13 | |
| Grill Combination Cooking 14 | |
| Steam Keep Warm 15 | |
| EZ Clean 16 | |
| Speed Hot Air Preheat | 17 |
| Speed Hot Air Cooking | 18 |
| Convection Combination Cooking | 19 |
| Convection Preheat | 20 |
| Convection Cooking | 21 |
| Auto Cook | 22 ~ 23 |
| Crispy Cook | 24 ~ 25 |
| Steam Chef | 26 ~ 27 |
| Auto Defrost | 28 |
| Auto Defrost Guide | 29 |
| Quick Defrost | 30 |
| Quick Defrost Guide | 31 |
| More or Less Cooking 32 | |
| Heating or Reheating Guide | 33 |
| Fresh Vegetable Guide | 34 |
| Defrosting Guide | 35 |
| Grill Cooking Guide | 36 |
| Convection Cooking Guide 37 ~ 38 | |
| Crisping Tray Cooking Guide | 39 ~ 40 |
| Speed Hot Air Cooking Guide | 41 |
| Steam Cooking Guide | 42 |
| Important safety instructions | 43 ~ 44 |
| Microwave-safe Utensils | 45 |
| Food characteristics & Microwave cooking | 46 ~ 47 |
| Questions & Answers | 48 |
| Plug Wiring Information/Technical Specifications | 49 |
Unpacking & Installing
By following the basic steps on these two pages you will be able to quickly check that your oven is operating correctly. Please pay particular attention to the guidance on where to install your oven. When unpacking your oven make sure you remove all accessories and packing. Check to make sure that your oven has not been damaged during delivery.
1 Unpack your oven and place it on a flat level surface.
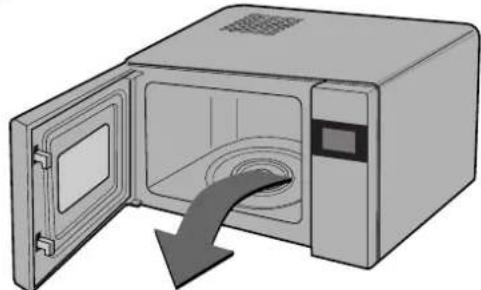
natural_image
Illustration of a microwave oven with an open door and lid, showing internal airflow direction (no text or symbols)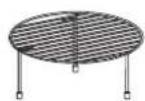
RACK
STEAMER
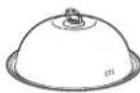
STEAM COVER

STEAM PLATE
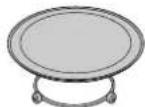
GLASS TRAY
ROTATING RING
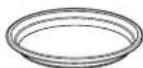
STEAM WATER
BOWL
(CRISPING TRAY)
Do not operate the oven when it is empty except the Convection Preheating function and the Ez Clean function.
The oven will automatically operate for cooling after cooking or when operating without food.
Place the oven in the level location of your choice with more than 85cm height but make sure there is at least 30cm of space on the top and 10cm at the rear for proper ventilation. The front of the oven should be at least 8cm from the edge of the surface to prevent tipping.
An exhaust outlet is located on top or side of the oven. Blocking the outlet can damage the oven.
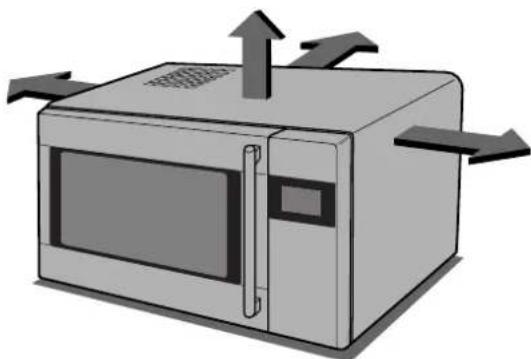
natural_image
Illustration of a microwave oven with airflow arrows indicating heat or airflow direction (no text or symbols)THIS OVEN SHOULD NOT BE USED FOR COMMERCIAL CATERING PURPOSES
3 Plug your oven into a standard household socket. Make sure your oven is the only appliance connected to the socket. If your oven does not operate properly, unplug it from the electrical socket and then plug it back in.
4 Open your oven door by pulling the DOOR HANDLE. Place the ROTATING RING inside the oven and place the GLASS TRAY on top.
5 Fill a microwave safe container with 300 ml (1/2 pint) of water. Place on the GLASS TRAY and close the oven door. If you have any doubts about what type of container to use please refer to page 45.
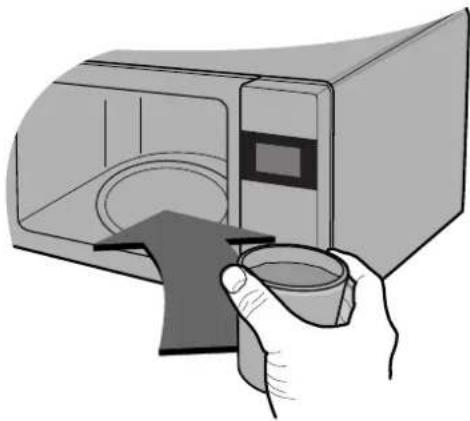
natural_image
Illustration of a hand holding a small container inside a microwave oven (no text or symbols)6 Press the STOP/CLEAR button, and press the START/QUICK START button one time to set 30 seconds of cooking time.
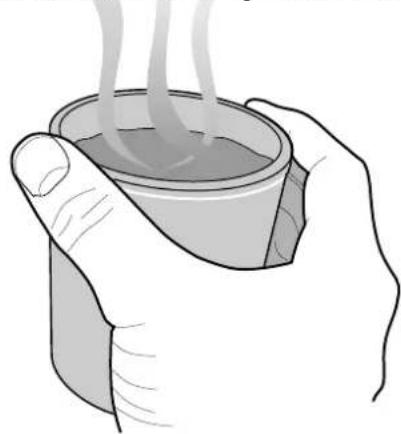
7 The DISPLAY will count down from 30 seconds. When it reaches 0 it will sound BEEPS. Open the oven door and test the temperature of the water. If your oven is operating the water should be warm. Be careful when removing the container it may be hot.
natural_image
Illustration of two hands holding a steaming cup (no text or symbols)YOUR OVEN IS NOW INSTALLED
8 The contents of feeding bottles and baby food jars shall be stirred or shaken and the temperature checked before consumption, in order to avoid burns.
Method to use accessories as per mode
| Microwave | Grill | Convection | Steam Keep Warm | Speed Hot Air | Combination | Crispy | ||
| Steam Cover |  | × | × | × | × | × | × | × |
| Steam Plate |  | × | × | × | × | × | × | × |
| Steam Water Bowl (Crisping Tray) | 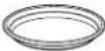 | ○ | × | × | × | × | × | × |
| Steam Plate + Steam Water Bowl | 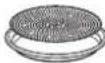 | × | × | × | × | × | × | × |
| Steamer (Assembly) |  | ○ | × | × | ○ | × | × | × |
| Steam Cover+ Steam Water Bowl |  | × | × | × | × | × | × | ○ |
| Rack |  | × | ○ | ○ | × | ○ | ○ | × |
| Glass Tray |  | ○ | ○ | ○ | ○ | ○ | ○ | ○ |
Caution: Be sure to use accessories refer to cook guide.
Q : Acceptable
X : Not Acceptable
You can set either 12 hour clock or 24 hour clock.
In the following example I will show you how to set the time for 15:35 when using the 24 clock.
Make sure that you have removed all packaging from your oven.
Setting the
Clock
When your oven is plugged in for the first time or when power resumes after a power cut, a ‘:’ will be shown in the display; you will have to reset the clock.
If the clock (or display) shows any strange looking symbols, unplug your oven from the electrical socket and plug it back in and reset the clock.
During clock setting the colon will flash. After setting, the colon will stop flashing.
Make sure that you have correctly installed your oven as described earlier in this book.
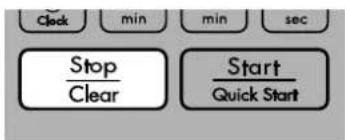
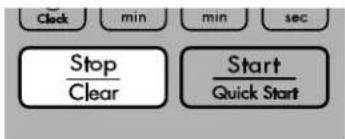
Press STOP/CLEAR.
text_image
Stop Clear Start Quick StartPress CLOCK once.
(If you want to use a 12 hour clock, Press CLOCK once more. If you want to change different option after setting clock, you have to unplug and plug it back in.)
text_image
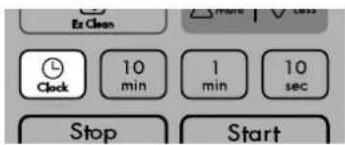
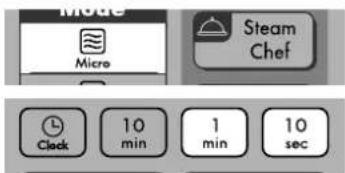
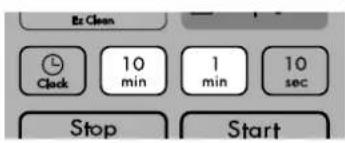
Ex Clean Clock 10 min 1 min 10 sec Stop StartPress 10 MIN fifteen times.
Press 1 MIN three times.
Press 10 SEC five times.
text_image
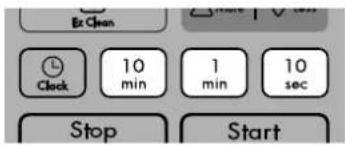
Ex Clean Clock 10 min 1 min 10 sec Stop StartIf the key (10 MIN / 1 MIN / 10 SEC) is pressed and held, the time will increase rapidly.
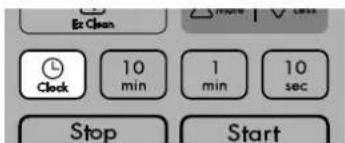
Press CLOCK to set the time.
The clock starts counting.
text_image
Ex Clean Clock 10 min 1 min 10 sec Stop StartChild
Lock
Your oven has a safety feature that prevents accidental running of the oven. Once the child lock is set, you will be unable to use any functions and no cooking can take place. However your child can still open the oven door.
Press STOP/CLEAR.
text_image
Stop Clear Start Quick StartPress and hold STOP/CLEAR until "CHILD LOCKED" appears on the display and BEEP sounds.
The CHILD LOCK is now set.
text_image
Stop Clear Start Quick StartTo cancel CHILD LOCK press and hold STOP/CLEAR until "CHILD LOCKED" disappears. You will hear BEEP when it's released.
text_image
Clock min min sec Stop Clear Start Quick StartIn the following example I will show you how to set 2 minutes of cooking on high power.
Quick
Start
The QUICK START feature allows you to set 30 seconds intervals of HIGH power cooking with a touch of the START/QUICK START button.
Press STOP/CLEAR.
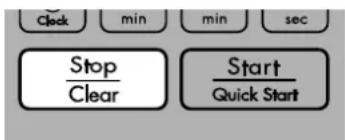
text_image
Clock min min sec Stop Clear Start Quick StartPress START/QUICK START four times to select 2 minutes on HIGH power. Your oven will start before you have finished the fourth press.
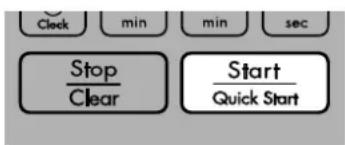
text_image
Clock min min sec Stop Clear Start Quick StartDuring QUICK START cooking, you can extend the cooking time up to 99 minutes and 59 seconds by repeatedly pressing the START/QUICK START button or by using MORE or LESS key.
Micro Power
Cooking
In the following example I will show you how to cook some food on 720W(80%) power for 5 minutes and 30 seconds.
Your oven has five microwave Power settings.
Make sure that you have correctly installed your oven as described earlier in this book.
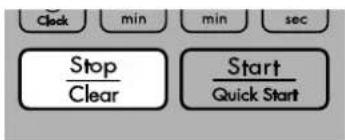
Press STOP/CLEAR.
text_image
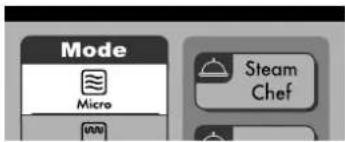
Stop Clear Start Quick StartPress MICRO twice to select 720W(80%) power. "720W" appears on the display.
text_image
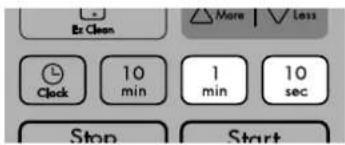
Mode Micro Steam ChefPress 1 MIN five times. Press 10 SEC three times.
text_image
Be Clean More Less Clock 10 min 1 min 10 sec Stop Start| POWER LEVEL | % | Power Output |
| HIGH | 100% | 900W(Max.) |
| MEDIUM HIGH | 80% | 720W |
| MEDIUM | 60% | 540W |
| DEFROST(MEDIUM LOW) | 40% | 360W( ** ) |
| LOW | 20% | 180W |
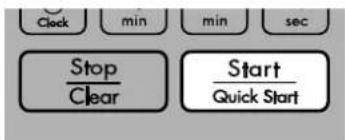
Press START/QUICK START.
When cooking you can use MORE or LESS key to increase or decrease cooking time.
text_image
Clock min min sec Stop Clear Start Quick StartYour microwave oven is equipped with 5 power levels to give you maximum flexibility and control over cooking. The table below shows the examples of food and their recommended cooking power levels for use with this microwave oven.
Micro Power
Level
| POWER LEVEL | USE | POWER LEVEL(%) | POWER OUTPUT |
| HIGH * Boil Water | * Brown minced beef* Cook poultry pieces, fish, vegetables* Cook tender cuts of meat | 100% | 900W(Max) |
| MEDIUM * Reheating(Liquid)HIGH * Roast meat and poultry | * Cook mushrooms and shellfish* Cook foods containing cheese and eggs | 80% | 720W |
| MEDIUM * Reheating(Mashed potato, Plated meal, Ready meal)* Prepare eggs* Cook custard* Prepare rice, soup | 60% | 540W | |
| DEFROST * All thawing(MEDIUM LOW) * Melt butter and chocolate* Cook less tender cuts of meat | 40% | 360W( ** ) | |
| LOW * Soften butter & cheese* Soften ice cream* Raise yeast dough | 20% | 180W |
Two stage
Cooking
In the following example I will show you how to cook some food in two stages. The first stage will cook your food for 5 minutes and 30 seconds on 720W(80%) the second will cook for 35 minutes on 360W(40%).
During two stage cooking the oven door can be opened and food checked. Close the oven door and press START/QUICK START and the cooking stage will continue.
At the end of stage1, BEEP sounds and stage 2 commences.
Should you wish to clear the programme press STOP/CLEAR twice.
In case of Auto Defrost cooking, you can cook the food in maximum three stages. (Auto Defrost + Stage 1 + Stage 2) Therefore you can Auto Defrost the food and cook it without resetting the oven at each stage.
Set the power and the cooking time for stage1.
Press STOP/CLEAR.
text_image
Clock min min sec Stop Clear Start Quick StartPress MICRO twice to select 720W(80%) power.
Press 1 MIN five times.
Press 10 SEC three times.
text_image
Mode Micro Steam Chef Clock 10 min 1 min 10 secPress MICRO four times to select 360W(40%) power.
Press 10 MIN three times.
Press 1 MIN five times.
text_image
Mode Micro Steam Chef Clock 10 min 1 min 10 secPress START/QUICK START.
When cooking you can use MORE or LESS key to increase or decrease cooking time.
text_image
Clock min min sec Stop Clear Start Quick StartIn the following example I will show you how to use the grill to cook some food for 12 minutes and 30 seconds.
Grill
Cooking
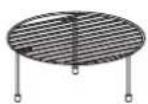
This feature will allow you to brown and crisp food quickly.
The rack must be used during grill cooking.
Press STOP/CLEAR.
text_image
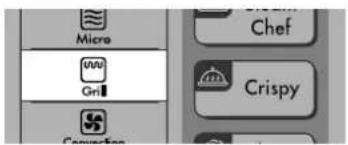
Stop Clear Start Quick StartPress GRILL.
text_image
Micro Grill Chef CrispySet the cooking time.
Press 10 MIN one time. Press 1 MIN two times. Press 10 SEC two times.
text_image
Er Chen Clock 10 min 1 min 10 sec Stop StartPress START/QUICK START.
When cooking you can use MORE or LESS key to increase or decrease cooking time.
Be careful when removing your food because the container will be hot!
text_image
Clock min min sec Stop Clear Start Quick StartGrill Combination
Cooking
In the following example I will show you how to programme your oven with micro power 180W(20%) and grill for a cooking time of 25 minutes.
Your oven has a combination cooking feature which allows you to cook food with heater and microwave at the same time or alternately. This generally means it takes less time to cook your food.
You can set three kinds of micro power level(20%, 40% and 60%) in combi mode.
Microwave Power
| (%) | (Watts) |
| 20 | 180 |
| 40 | 360 |
| 60 | 540 |
Press STOP/CLEAR.
text_image
Stop Clear Start Quick StartPress GRILL COMBI.
text_image
Convection Gri Combi Auto Cook Auto Auto Auto Auto AutoPress MICRO to select 180W(20%) power.
text_image
Mode Micro Steam ChefSet the cooking time.
Press 10 MIN two times.
Press 1 MIN five times.
text_image
Ex Clean Clock 10 min 1 min 10 sec Stop StartPress START/QUICK START.
When cooking you can use MORE or LESS key to increase or decrease cooking time.
Be careful when removing your food because the container will be hot!
text_image
Clock min min sec Stop Clear Start Quick StartSteam Keep
Warm
This function allows you to keep warm food after cooking with steam chef option.
There are two modes in steam keep warm function; WARM-HI and WARM-LO
STEAM KEEP WARM COOKING GUIDE
Pour 300ml tap water into the Steam water bowl. Put the Steam plate and place the food on the steam plate. And then cover with steam cover.
Place the prepared Steam water bowl in center of the glass tray carefully. Keep parallel!.
Plated meal, Soup, Sauce, Stew, etc.
CAUTION:
- Make sure your food is in Steamer with steam keep warm mode.
- Always use oven gloves when removing a STEAMER from the oven. It's very hot.
- Do not put a hot STEAMER on a glass table or a place easy to be melted after cooking. Always make sure to use a pad or tray.
- Be sure to put water before use when you cook it using STEAMER
- Be careful when you move the STEAMER with water
- When you use the STEAMER, the steam cover and steam water bowl should be set perfectly right. The eggs or the chestnut would be exploding without setting the steam cover and steam water bowl.
Press STOP/CLEAR.
text_image
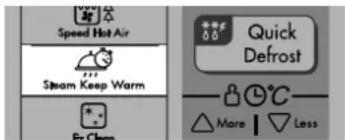
Clock min min sec Stop Clear Start Quick StartPress STEAM KEEP WARM one time. "WARM-HI" appears on the display window.
text_image
Speed Hot Air Steam Keep Warm For Clean Quick Defrost More | LessSet the cooking time.
Press 10 MIN three times.
text_image
Ex Clean 10 min 1 min 10 sec Stop StartPress START/QUICK START.
When cooking you can use MORE or LESS key to increase or decrease cooking time.
text_image
Clock min min sec Stop Clear Start Quick StartEZ
Clean
In the following example I will show you how to remove smell in the oven.
The oven has a special function to remove the smell in the oven with one touch.
You can use the EZ Clean function without food in the oven.
Please remove tray and other accessory during EZ-Cleaning operation and then relocate ones after finishing EZ-Cleaning operation.
Press STOP/CLEAR.
text_image
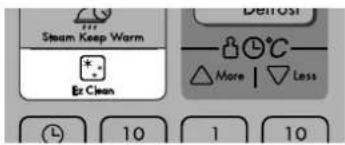
Stop Clear Start Quick StartPress EZ CLEAN.
(The oven will start automatically.)
text_image
Steam Keep Warm Ex Clean 10 1 10 More | LessIn the following example I will show you how to preheat the oven at a temperature of 230^ C.
Speed Hot Air Preheat
The oven has a temperature range of 100^ C \~ 250^ C. ( 180^ C automatically available when speed hot air mode is selected.)
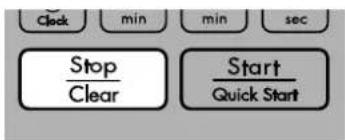
Press STOP/CLEAR.
text_image
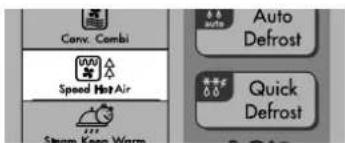
Stop Clear Start Quick StartPress SPEED HOT AIR.
text_image
Conv. Combi Speed Hot Air Smart Keep Warm Auto Defrost Quick DefrostPress MORE five times to select "230C"
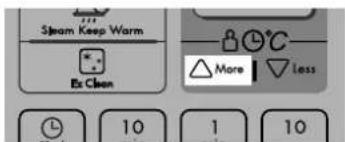
text_image
Steam Keep Warm Ex Clean More | Less 10 1 10Press START/QUICK START.
Preheating will be started with displaying "PREHEAT".
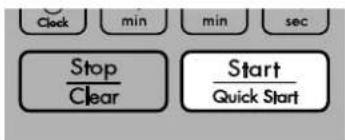
text_image
Clock min min sec Stop Clear Start Quick StartSpeed Hot Air Cooking
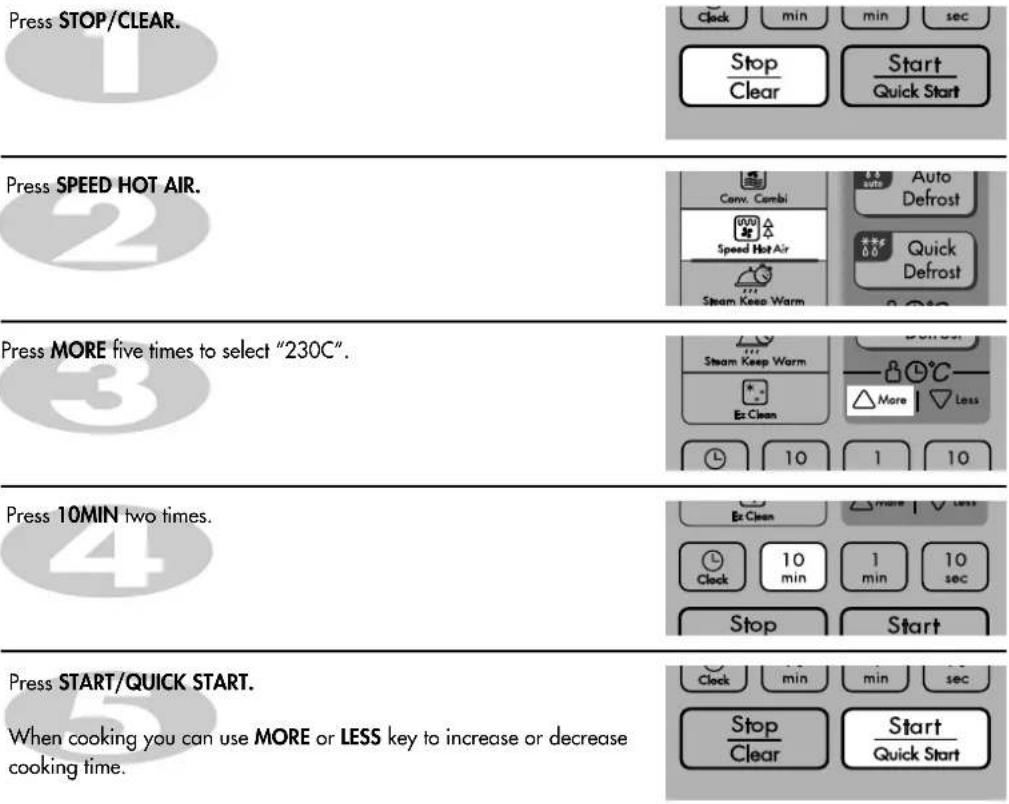
In the following example I will show you how to programme your oven with speed hot air cooking at 230°C for 20 minutes.
The oven has a temperature range of 100^ C \~ 250^ C. ( 180^ C automatically available when speed hot air mode is selected.)
This function allows you to combine convection operation with the grill.
It will reduce your cooking time.
text_image
Press STOP/CLEAR. Press SPEED HOT AIR. Press MORE five times to select "230C". Press 10MIN two times. Press START/QUICK START. When cooking you can use MORE or LESS key to increase or decrease cooking time.Convection Combination
Cooking
In the following example I will show you how to programme your oven with micro power 540W(60%) and at a convection temperature 200°C for a cooking time of 25 minutes.
The oven has a temperature range of 100^ C \~ 250^ C. ( 180^ C automatically available when convection combination mode is selected.)
You can set three kinds of micro power level(20%, 40% and 60%) in combi mode.
Press STOP/CLEAR.
text_image
Clock min min sec Stop Clear Start Quick StartPress CONV. COMBI.
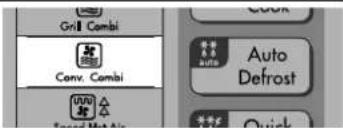
text_image
Grill Combi Conv. Combi Auto Defrost QuickPress MICRO two times.
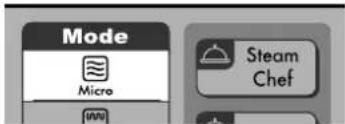
text_image
Mode Micro Steam ChefPress MORE three times to select "200C".
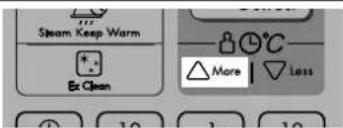
text_image
Steam Keep Warm Ec Clean More | LessPress 10 MIN two times.
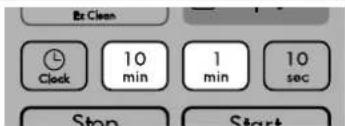
text_image
Bz Clean Clock 10 min 1 min 10 sec Stop StartPress 1 MIN five times.
Press START/QUICK START.
When cooking you can use MORE or LESS key to increase or decrease cooking time.
Be careful when removing your food because the container will be hot!
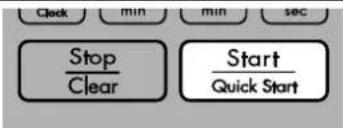
text_image
Stop Clear Start Quick StartConvection
Preheat
In the following example I will show you how to preheat the oven at a temperature of 230^ C.

The convection oven has a temperature range of 40^ C and 100^ C \~ 250^ C ( 180^ C is automatically available when convection mode is selected).
* The oven has a ferment function at the oven temperature of 40°C. When you use this function, if the oven temperature is over 70°C, then the display shows "E-05" error code. You may wait until the oven is cool.
Your oven will take a few minutes to reach the selected temperature.
Once it has reached correct temperature, your oven will BEEP to let you know that it has reached the correct temperature. Then place your food in your oven: then tell your oven to start cooking.
Press STOP/CLEAR.
Press CONVECTION.
Press MORE five times to select "230C".
Press START/QUICK START.
Preheating will be started with displaying "PREHEAT".
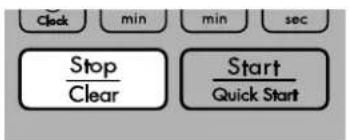
text_image
Stop Clear Start Quick Start
text_image
Gri Convection Gri Combi Crispy Auto Cook
text_image
Steam Keep Warm Ex Clean 10 1 10 More Loss
text_image
Clock min min sec Stop Clear Start Quick StartIn the following example I will show you how to preheat the oven first, then cook some food at a temperature of 230^ C for 50 minutes.
Convection
Cooking
The convection oven has a temperature range of 40^ C and 100^ C \~ 250^ C ( 180^ C is automatically available when convection mode is selected).
If you do not set a temperature your oven will automatically select 180°C, the cooking temperature can be changed by pressing MORE or LESS key.
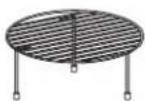
The rack must be used during convection cooking.
Press STOP/CLEAR.
text_image
Stop Clear Start Quick StartPress CONVECTION.
text_image
Gri Convection Gri Cambi Crispy Auto CookPress MORE five times to select "230C".
text_image
Steam Keep Warm Be Clean 10 1 10 More LessPress 10 MIN five times.
text_image
Ex Clean Clock 10 min 1 min 10 sec Stop StartPress START/QUICK START.
When cooking you can use MORE or LESS key to increase or decrease cooking time.
Be careful when removing your food because the container will be hot!
text_image
Stop Clear Start Quick StartAuto
Cook
In the following example I will show you how to cook 0.6kg of jacket potato.
Auto Cook allows you to cook most of your favorite food easily by selecting the food type and entering the weight of the food.
Press STOP/CLEAR.
text_image
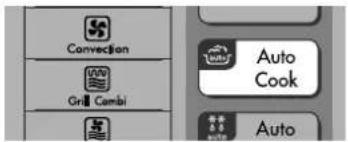
Stop Clear Start Quick StartPress AUTO COOK once to select "JACKET POTATO".
text_image
Convection Grill Cambi Auto Cook AutoSelect desired weight of jacket potato.
Press LESS five times to select "0.6kg".
text_image
Steam Keep Warm Ex Clean 10 1 10 More | LessPress START/QUICK START.
When cooking you can use MORE or LESS key to increase or decrease cooking time.
text_image
Clock min min sec Stop Clear Start Quick Start| Function Menu | Weight Range Temperature | Utensil | Initial | Instructions |
| Auto Cook 0.2 ~ 1.0kg On g POTATO (Ac-1) | lass trayJACKET | Room 1.Choose medium sized potatoes 180 -220g.Wash and dry potatoes. Pierce potatoes several timeswith a fork.2. Place potatoes in the oven.3. After cooking, stand covered with aluminum foil for 5 minutes. | ||
| FRESH VEGETABLES (Ac-2) | 0.2 ~ 0.8kg Microwave-safe bowl | Bowl | Room 1.Place vegetables in a microwave-safe bowl.Add the amount of water according to the quantity.** 0.2kg - 0.4kg : 2 tablespoons of water** 0.5kg - 0.8kg : 4 tablespoons of water2. Cover with plastic wrap. Place food in the oven.3. After cooking, stir for 3-4 seconds.Stand covered for 3 minutes. | |
| FROZEN VEGETABLES (Ac-3) | 0.2 ~ 0.8kg Microwave-safe bowl | Bowl | Frozen 1.Place vegetables in a microwave-safe bowl.Add the amount of water according to the quantity.** 0.2kg - 0.4kg : 2 tablespoons of water** 0.5kg - 0.8kg : 4 tablespoons of water2. Cover with plastic wrap. Place food in the oven.3. After cooking, stir for 3-4 seconds.Stand covered for 3 minutes. | |
| RICE/PASTA (Ac-4) | 0.1 ~ 0.3kg Microwave-safe bowl | Bowl | Room (Rice) | 1. Place rice/pasta and boiling water with 1/4 to 1 teaspoon salt in a deep and large bowl. Place food in the oven.2. After cooking, stir. Stand covered for 5 minutes.Notes: Rice: Add 300ml of boiling water per 100g white rice.Cover with plastic wrap and vent.Pasta: Add 400ml of boiling water per 100g pasta.Do not cover. Stir at least twice during cooking to prevent sticking. |
Crispy
Cook
In the following example I will show you how to cook 0.6 kg of fish fillet.
This feature allows you to crispy cook.
CAUTION:
- Always use oven gloves when removing a CRISPING TRAY from the oven. It's very hot.
- Do not put a hot CRISPING TRAY on a glass table or a place easy to be melted after cooking. Always make sure to use a pad or tray.
- Never use this CRISPING TRAY with a product of different model. it may cause a fire or fatal damage to the product.
Press STOP/CLEAR.
text_image
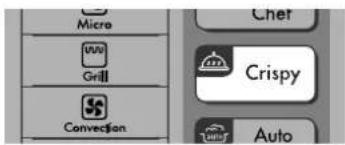
Clock min min sec Stop Clear Start Quick StartPress CRISPY once to select "FISH FILLET".
text_image
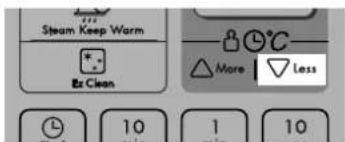
Micro Grill Convection Chef Crispy AutoSelect desired weight of fish fillet.
Press LESS five times to enter "0.6kg".
text_image
Steam Keep Warm Be Clean More Less 10 1 10Press START/QUICK START.
When cooking you can use MORE or LESS key to increase or decrease cooking time.
text_image
Clock min min sec Stop Clear Start Quick Start| Function Menu | Weight Range Temperature | Utensil | Initial | Instructions |
| Crispy Cook | 0.2-FISH FILLIETSping tray(cc-1) | Steam cover | Refrigerated | 1. Place fish fillets on the cirsping tray. Brush the fish fillets with vegetable oil.2. Cover with a steam cover. Place the prepared food in the oven.3. Choose the menu and adjust weight. Press start to cook.4. When beep, open the door and turn food over. Press start to continue cooking.5. After cooking, remove from the oven and stand for 1-2 minutes.CAUTION: The utensil and surrounding oven will get very HOT. Use oven gloves. |
| FRENCH FRIES(cc-2) | 0.2-0.4kg Crisping traySteam cover | Frozen | 1. Spread frozen potato products out on the crisping tray.For the best result, cook in a single layer.2. Cover with a steam cover. Place the prepared food in the oven.3. Choose the menu and adjust weight. Press start to cook.4. When beep, open the door and turn food over. Press start to continue cooking.5. After cooking, remove from the oven and stand for 1-2 minutes.CAUTION: The utensil and surrounding oven will get very HOT. Use oven gloves. | |
| CHICKEN BREASTS(cc-3) | 0.2-0.8kg Crisping traySteam cover | Refrigerated | 1. Place chicken breasts on the cirsping tray. Brush the chicken breasts with oil. Sprinkle with spicy.2. Cover with a steam cover. Place the prepared food in the oven.3. Choose the menu and adjust weight. Press start to cook.4. When beep, open the door and turn food over. Press start to continue cooking.5. After cooking, remove from the oven and stand for 1-2 minutes.CAUTION: The utensil and surrounding oven will get very HOT. Use oven gloves. | |
| SAUSAGE(cc-4) | 0.1-0.6kg Crisping traySteam cover | Refrigerated | 1. Place Sausages on the cirsping tray.2. Cover with a steam cover. Place the prepared food in the oven.3. Choose the menu and adjust weight. Press start to cook.4. When beep, open the door and turn food over. Press start to continue cooking.5. After cooking, remove from the oven and stand for 1-2 minutes.CAUTION: The utensil and surrounding oven will get very HOT. Use oven gloves. |
Steam
Chef
In the following example I will show you how to cook 0.6 kg of vegetables small cut.
This feature allows you steamed cook.
CAUTION:
- Always use oven gloves when removing a STEAMER from the oven. It's very hot.
- Do not put a hot STEAMER on a glass table or a place easy to be melted after cooking. Always make sure to use a pad or tray.
- When you use this Steamer, pour at least 300ml water before use. If the amount of water is less than 300ml, it may cause incomplete cooking, or may cause a fire or fatal damage to the product.
- Be careful when you move the STEAMER with water.
- When you use the STEAMER, the steam cover and steam water bowl should be set perfectly right. The eggs or the chestnut would be exploding without setting the steam cover and steam water bowl.
- Never use this Steamer with a product of different model, it may cause a fire or fatal damage to the product.
Press STOP/CLEAR.
text_image
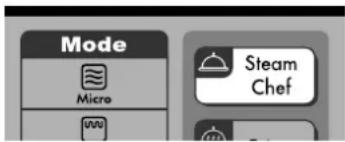
Clock min min sec Stop Clear Start Quick StartPress STEAM CHEF once to select "VEGETABLES-SMALL CUT".
"Sc-1" appears on the display.
text_image
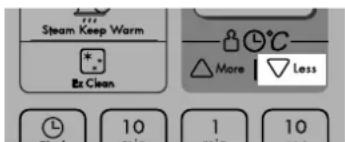
Mode Micro Steam ChefSelect desired weight of vegetables small cut.
Press LESS five times to enter "0.6kg".
text_image
Steam Keep Warm Be Clean More Less 10 1 10Press START/QUICK START.
When cooking you can use MORE or LESS key to increase or decrease cooking time.
text_image
Clock min min sec Stop Clear Start Quick Start| Function Menu | Weight Range Temperature | Utensil | Initial | Instructions |
| Steam Chef 0.VEGETABLESMALL CUT (Sc-1) | water | bowlSteam plateSteam cover | Room | 1. Clean the vegetables and cut into similar sized pieces.2. Pour 300ml tap water into the steam water bowl. Place the steam plate on the steam water bowl. Place the prepared vegetables on the steam plate in a single layer.Cover with the steam cover.3. Place the steam water bowl in the center of the glass tray.4. After steaming, stand for 1 minute in the oven.- Sliced carrots, sliced potatoes, pepper, courgettes, cauliflower florets and broccoli florets.Tomatoes(small size) |
| VEGETABLESLARGE CUT (Sc-2) | 0.2-0.8kg | Steam waterbowlSteam plateSteam cover | Room | 1. Clean the vegetables and cut into similar sized pieces.2. Pour 300ml tap water into the steam water bowl. Place the steam plate on the steam water bowl. Place the prepared vegetables on the steam plate in a single layer.Cover with the steam cover.3. Place the steam water bowl in the center of the glass tray.4. After steaming, stand for 1 minute in the oven.- Potato cut into half, Cabbage cut into quarters, Whole cauliflower, Corn on the cob |
| EGGS (Sc-3) | 2 ~ 9 eggs | Steam waterbowlSteam plateSteam cover | Refrigerated | 1. Pour 300ml tap water into the steam water bowl. Place the steam plate on the steam water bowl. Place the eggs on the steam plate. Cover with the steam cover.2. Place the steam water bowl in the center of the glass tray.3. Choose the menu and adjust weight. Press start to cook.4. After steaming, stand for 1 minute in the oven. |
| FISH STEAK (Sc-4) | 0.2 ~ 0.6kg | Steam waterbowlSteam plateSteam cover | Refrigerated | 1. Clean the food.2. Pour 300ml tap water into the steam water bowl. Place the steam plate on the steam water bowl. Place the prepared food on the steam plate in a single layer.Cover with the steam cover.3. Place the steam water bowl in the center of the glass tray.4. Choose the menu and adjust weight. Press start to cook.5. After steaming, stand for 1 minute in the oven.- under 2.5cm(1 inch) thick |
Auto Defrost
The temperature and density of food varies, I would recommend that the food is checked before cooking commences. Pay particular attention to large joints of meat and chicken, some foods should not be completely thawed before cooking. For example fish cooks so quickly that it is sometimes better to begin cooking while still slightly frozen. The BREAD programme is suitable for defrosting small items such as rolls or a small loaf. These will require a standing time to allow the centre to thaw. In the following example I will show you how to defrost 1.4Kg of frozen poultry.
Your oven has four microwave defrost settings: MEAT, POULTRY, FISH and BREAD; each defrost category has different power settings.
Press STOP/CLEAR.
Weight the food that you are about to defrost. Be certain to remove any metallic ties or wraps; then place the food in your oven and close the oven door.
text_image
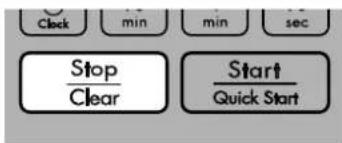
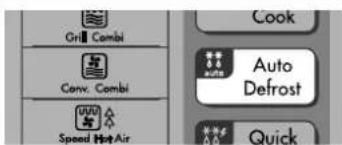
Clock min min sec Stop Clear Start Quick StartPress AUTO DEFROST twice to select the poultry defrosting programme.
"dEF2" appears on the display window.
text_image
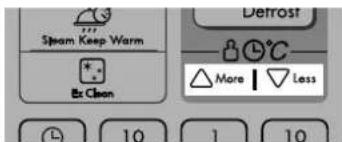
Grill Combi Conv. Combi Speed Hot Air Cook Auto Defrost QuickPress MORE one time.
Press LESS four times.
text_image
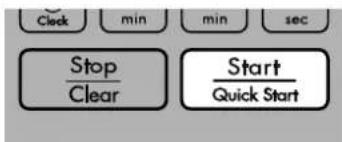
Steam Keep Warm Ex Clean Detrost More | LessPress START/QUICK START.
text_image
Clock min min sec Stop Clear Start Quick StartDuring defrosting your oven will "BEEP", at which point open the oven door, turn food over and separate to ensure even thawing. Remove any portions that have thawed or shield them to help slow down thawing. After checking close the oven door and press START/QUICK START to resume defrosting. Your oven will not stop defrosting (even when the beep sounded) unless the door is opened.
Auto Defrost Guide
* Food to be defrosted should be in a suitable microwave proof container and place uncovered on the glass turntable.
* If necessary, shield small areas of meat or poultry with flat pieces of aluminum foil. This will prevent thin areas becoming warm during defrosting. Ensure the foil does not touch the oven walls.
* Separate items like minced meat, chops, sausages and bacon as soon as possible.
* When beep, remove the food from the oven, turn the food over and return to the microwave oven. Remove defrosted portions at this point. Continue to defrost remaining pieces.
Stand until completely thawed.
| Category Weight Limit Utensil Food | |||
| MEAT (dEF1) | 0.1 ~ 4.0kg | Microwave-safe plate | MeatMinced beef, Fillet steak, Cubes for stew, Sirloin steak, Pot roast, Rump roast, Beef burgerPork chops, Lamp chops, Rolled roast, Sausage, Cutlets(2cm)After defrosting, stand covered with aluminum foil for 5-15 minutes.PoultryWhole chicken, Legs, Breasts, Turkey breasts(under 2.0kg)After defrosting, stand covered with aluminum foil for 20-30 minutes.FishFillets, Steaks, Whole fish, Sea foodsAfter defrosting, stand covered with aluminum foil for 10-20 minutes. |
| POULTRY (dEF2) | |||
| FISH (dEF3) | |||
| BREAD (dEF4) | 0.1 ~ 0.5kg | Paper towel Sliced | bread, Buns, Baguette, etc.After defrosting, let stand for 1 ~ 2 minutes. |
Quick Defrost
Use this function to thaw only 0.5kg of Minced meat very quickly. This will require a standing time to allow the center to thaw. In the following example will show you how to defrost 0.5kg of frozen meat.
Press STOP/CLEAR.
Weight the food that you are about to defrost. Be certain to remove any metallic ties or wraps; then place the food in your oven and close the oven door.
text_image
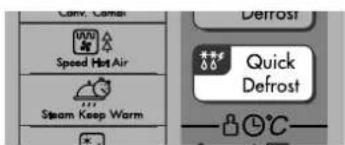
Stop Clear Start Quick StartPress QUICK DEFROST once.
(Put the 0.5kg of Meat)
The oven will start automatically.
text_image
Carv. Litter Speed Hot Air Steam Keep Warm Defrost Quick Defrost + -During defrosting your oven will "BEEP", at which point open the oven door, turn food over and separate to ensure even thawing. Remove any portions that have thawed or shield them to help slow down thawing. After checking close the oven door and press START/QUICK START to resume defrosting. Your oven will not stop defrosting (even when the beep sounded) unless the door is opened.
Quick Defrost Guide
Use this function to defrost quickly for minced meat.
Remove the meat completely from its wrapping. Place the mince onto a microwave-safe plate.
When beeps, at this point remove the mince from the microwave oven, turn the mince over and return to the microwave oven.
Press start to continue. At the end of the program remove the mince from the microwave oven, cover with foil and allow to stand
5-15 minutes or until completely thawed.
| Category Weight | Utensil Instructions | ||
| MINCED MEAT | 0.5kg | Microwave-safe plate | Minced meatAfter defrosting, stand covered with aluminum foil for 5-15 minutes. |
More or Less
Cooking
In the following example I will show you how to change the preset AUTO COOK programmes for a longer or shorter cooking time.
If you find that your food is over or undercooked when using the AUTO COOK programme, you can increase or decrease cooking time using the MORE/LESS keys.
When cooking without Auto function you can extend the cooking time at any point by using the MORE/LESS key. There is no need to stop the cooking process.
Press STOP/CLEAR.
text_image
Clock min min sec Stop Clear Start Quick StartSet the required AUTO COOK programme.
* See AUTO COOK. (Page 22)
Select weight of food.
Press START/QUICK START.
text_image
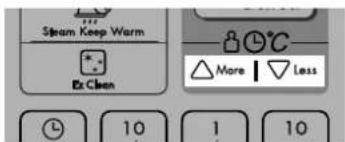
Clock min min sec Stop Clear Start Quick StartPress MORE.
The cooking time will increase by 10 seconds for each press of the key.
Press LESS.
The cooking time will decrease by 10 seconds for each press of the key.
text_image
Steam Keep Warm Ex Clean More | Less 10 1 10To heat or reheat successfully in the microwave, it is important to follow several guidelines. Measure the amount of Food in order to determine the needed to reheat. Arrange the food I a circular pattern for best results. Room temperature Food will heat faster than refrigerated food. Canned foods should be taken out of the can and placed in a microwavable container. The food will be heated more evenly if covered with a microwavable lid or vented plastic wrap. Remove cover carefully to prevent steam burns. Use the following chart as a guide for reheating cooked food.
Heating or Reheating
Guide
| Food | Cook time(Minutes/at HIGH) | Special Instructions |
| Sliced meat3 slices(0.5cm thick) | 1 ~ 2 | Place sliced meat on microwavable plate.Cover with plastic wrap and vent.Note : Gravy or sauce helps to keep meat juicy. |
| Chicken pieces1 breast1 leg and thigh | 1^1/2 2 2 3^1/2 | Place chicken pieces on microwavable plate.Cover with plastic wrap and vent. |
| Fish fillet(170 ~ 230g) | 1 ~ 2 | Place fish on microwavable plate.Cover with plastic wrap and vent. |
| Lasagne1 serving(300g) | 4 ~ 6 | Place lasagne on microwavable plate.Cover with plastic wrap and vent. |
| Casserole1 cup4 cups | 1^1/2 3 4^1/2 7 | COOK covered in microwavable casserole dish.Stir once halfway through cooking. |
| Casserolecream or cheese1 cup4 cups | 1 2^1/2 3^1/2 6 | COOK covered in microwavable casserole dish.Stir once halfway through cooking. |
| Sloppy Joe orBarbecued beef1 sandwich( 1/2 cup meat filling)without bun | 1 2^1/2 | COOK covered in microwavable casserole dish.Stir once halfway through cooking. |
| Food | Cook time(Minutes/at HIGH) | Special Instructions |
| Mashed potatoes350g | 5~7(at 540W) | COOK covered in microwavable casserole dish.Stir once halfway through cooking. |
| Baked beans1 cup | 1^1/_2 2^1/_2 | COOK covered in microwavable casserole dish.Stir once halfway through cooking. |
| Ravioli pasta in sauce1 cup4 cups | 1^1/_2 36^1/_2 9 | COOK covered in microwavable casserole dish.Stir once halfway through cooking. |
| Rice1 cup4 cups | 1 1^1/_22^1/_2 4 | COOK covered in microwavable casserole dish.Stir once halfway through cooking. |
| Sandwich roll or bun1 roll | 15~30 seconds | Wrap in paper towel and place on glass tray. |
| Vegetables1 cup4 cups | 1^1/_2 2^1/_24 6 | COOK covered in microwavable casserole dish.Stir once halfway through cooking. |
| Soup1 serving(230g) | 1^1/_2 2 | COOK covered in microwavable casserole dish.Stir once halfway through cooking. |
| Plated meal(1 serving)Meat 125g,Mashed potato 150gCarrot, cooked 150g | 9~14(at 540W) | COOK covered in microwavable dinner plate. |
Fresh Vegetable
Guide
| Food Quantity | Cook time(Minutes/at HIGH) | Instructions |
| Artichokes(230g each) | 2 medium4 medium | 4^1/_2 7 10 ~ 12 |
| Asparagus,Fresh, Spears | 450g | 3 ~ 6 |
| Green beans | 450g | 6 ~ 10 |
| Beats, Fresh | 450g | 10 ~ 14 |
| Broccoli, Fresh,Spears | 300g | 3^1/_2 4 |
| Cabbage,Fresh,Chopped | 450g | 7 ~ 9 |
| Carrots, Fresh,Sliced | 200g | 2 ~ 3 |
| Cauliflower,Fresh, Whole | 450g | 5 ~ 7 |
| Corn, Fresh | 2 ears | 4 ~ 8 |
| Food Quantity | Cook time(Minutes/at HIGH) | Instructions |
| Mushrooms, Fresh, Sliced | 230g 1^1/_2 2^1/_2 | Place mushrooms in 1.5 litre covered casserole dish. Stir halfway through cooking. Stand for 2 ~ 3 minutes. |
| Parsnips, Fresh, Sliced | 450g 6 8 | Add 1/2 cup water in 1.5 litre casserole dish. Stir halfway through cooking. Stand for 2 ~ 3 minutes. |
| Peas, Green, Fresh | 4 cups 6 9 | Add 1/2 cup water in 1.5 litre casserole dish. Stir halfway through cooking. Stand for 2 ~ 3 minutes. |
| Sweet Potatoes Whole baking (170 ~ 230g each) | 2 medium 5 9 4 medium 9 13 | Pierce potatoes several times with fork. Place on 2 paper towels. Turn over halfway through cooking. Stand for 2 ~ 3 minutes. |
| White potatoes, Whole baking (170 ~ 230g) | 2 potatoes 5^1/_2 7^1/_2 4 potatoes 9^1/_2 14 | Pierce potatoes several times with fork. Place on 2 paper towels. Turn over halfway through cooking. Stand for 2 ~ 3 minutes. |
| Spinach, Fresh, Leaf | 450g 6 8 | Add 1/2 cup water in 1.5 litre casserole dish. Stir halfway through cooking. Stand for 2 ~ 3 minutes. |
| Courgette, Fresh, Sliced | 450g 4^1/_2 7^1/_2 | Add 1/2 cup water in 1.5 litre casserole dish. Stir halfway through cooking. Stand for 2 ~ 3 minutes. |
| Courgette, Fresh, Whole | 450g 6 9 | Pierce. Place on 2 paper towels. Turn courgette over and rearrange halfway through cooking. |
Defrosting
Guide
Defrosting meats tips & techniques
You can defrost meats in their original wrapping as long as no metal is present. Remove any metal rings, twist ties, wire or foil.
Place meat in a microwavable plate to catch juices. Defrost meats only as long as necessary. Separate items like chops, sausages and bacon as soon as possible. Remove defrosted portions and continue to defrost remaining pieces. Whole pieces of meat are ready for standing time as soon as a fork can be pushed into the centre of the meat using moderate pressure. The centre will still be icy. Allow to stand until completely thawed.
| Food Quantity Instructions | Defrosting Time (Minutes) | Standing Time (Minutes) | ||
| BEEF | Remove wrapping from the meat.Place frozen meat on a microwavable flat plate. Defrost at 40% power level.Turn food over after halfway through defrosting.(Remove defrosted portions at this point) | |||
| Minced beef | 500g | 6 ~ 8 | 5 ~ 10 | |
| Steak, sirloin | 500g | 4 ~ 6 | 5 ~ 10 | |
| Roast, loin (boneless) | 1000g | 12 ~ 15 | 10 ~ 15 | |
| PORK | ||||
| Mince | 500g | 6 ~ 8 | 5 ~ 10 | |
| Chops | 500g | 4 ~ 6 | 5 ~ 10 | |
| Roast, loin (boneless) | 500g | 12 ~ 15 | 5 ~ 10 | |
| POULTRY | ||||
| Whole chicken | 1000g | 16 ~ 19 | 10 ~ 15 | |
| Breasts | 450g | 5 ~ 7 | 5 ~ 10 | |
| Drumsticks | 450g | 8 ~ 9 | 5 ~ 10 | |
| Thighs | 450g | 8 ~ 9 | 5 ~ 10 | |
| Wings | 450g | 6 ~ 8 | 5 ~ 10 | |
| FISH & SEAFOOD | ||||
| Whole fish | 450g | 6 ~ 8 | 5 ~ 10 | |
| Fish fillets | 500g | 7 ~ 9 | 5 ~ 10 | |
| shrimp | 250g | 4 ~ 6 | 5 ~ 10 | |
Grill Cooking
Guide
Directions for grilling meat on grill
Trim excess fat from meat. Cut fat, making sure you do not cut into the lean.
(This will stop the fat curling.)
Arrange on the rack. Brush with melted butter or oil.
Halfway through, turn the meat over.
| Food Quantity | Cook time(Minutes/at HIGH) | Instructions | |
| Beef burgers | 50g x 2100g x 2 | 11 ~ 1417 ~ 21 | Baste with oil or melted butter.Thin items should be placed on the rack.Thick items can be placed on to a drip tray.Turn food over after halfway cooking time.Turn frequently. |
| Beef steaks(2.5cm (1") thick) | |||
| Rare | 230g x 2 | 16 ~ 18 | |
| Medium | 230g x 2 | 19 ~ 21 | |
| Well | 230g x 2 | 23 ~ 25 | |
| Lamb chops(2.5cm (1") thick) | 230g x 2 | 22 ~ 29 | |
| Sausages(frank) | 230g x 2 | 11 ~ 14 | |
Directions for grilling fish and seafood
Place fish and seafood on the rack. Whole fish should be scored diagonally on both sides before grilling.
Brush fish and seafood with melted butter, margarine or oil before and during cooking. This helps stop the fish drying out. Grill for times recommended in the chart. Whole fish and fish steaks should be carefully turned over halfway grilling time. If desired thick fillets can also be turned halfway.
| Food Quantity | Cook time(Minutes/at HIGH) | Instructions | |
| Fish fillets1cm (1/3") thick1.5cm (1/2") thick | 230g230g | 11 ~ 1417 ~ 21 | Brush with melted butter and turn over halfway through cooking. |
| Fish steaks2.5cm (1") thick | 230g | 18 ~ 23 | |
| Whole fish | 225~350g each400g | 18 ~ 2322 ~ 32 | Allow extra time for thick and oily fish. |
| ScallopsPrawns uncooked | 450g450g | 16 ~ 2016 ~ 20 | Baste well during cooking. |
Convection
Cooking Guide
Preheat the oven to the desired temperature. Follow the times and instructions in the table. After cooking, the surrounding oven will get very HOT. USE OVEN GLOVES.
| Food Quantity Instructions | Convection Temperature | Cook Time (Minutes) | ||
| Muffins(fresh dough) | 6 pieces(each 60g) | 200°C | 20 ~ 25 | Prepare the dough. Place on the rack.Stand for 5 minutes. |
| Bread Rolls(ready baked) | 4 pieces(each 50g) | 180°C+180W(without preheating) | 8 ~ 10 | Arrange rolls on the rack.Stand for 3 minutes. |
| White bread(Fresh dough) | 1 loaf(approx.500 ~ 750g) | 200°C | 20 ~ 50or until browned | Prepare the dough. Place on the rack.Stand for 10 minutes. |
| Sponge cake(Fresh dough) | 1 pan(450 ~ 500g) | 180°C | 25 ~ 40 | Prepare the dough. Put into a 8-inch diameter round tin pan.Place on the rack. Stand for 10 minutes. |
| Fruit family cake | 1 pan(1000 ~ 1200g) | 160°C+180W | 40 ~ 60 | Prepare the dough. Put into a 8 or 9-inch diameter round tin pan. Place on the rack. Bake until skewer inserted into the cake is removed clean.Stand for 10 minutes. |
| Fresh pizza | 1 pan(approx. 1000g) | 200°C | 25 ~ 40 | Prepare the pizza. Place on the rack.Stand for 2 minutes. |
| Frozen pizza | 400g | 220°C | 18 ~ 25 | Remove the packages. Place on the rack.Stand for 2 minutes. |
| Food Quantity Instructions | Convection Temperature | Cook Time (Minutes) | |
| Frozen ready meal (Macaroni & cheese) | 300g | 200°C+360W(WITHOUT PREHEATING) | 18 ~ 25Put into a suitable sized heat proof dish.Place on the rack. Stand for 2-3 minutes. |
| Frozen spring rolls | 300g | 230°C | 35 ~ 50Brush over the surface with vegetable oil.Place spring rolls side by side on the rack. Stand for 1-2 minutes. |
| Potato gratin | 1000g | 140°C+540W(WITHOUT PREHEATING) | 14 ~ 18Prepare the potato gratin.Place on the rack. Stand for 2-3 minutes. |
| Roast beef | 1000g | 160°C+540W(WITHOUT PREHEATING) | 30 ~ 45Place on the rack. Turn over after half of the cooking time.Stand for 10-15 minutes with cover. |
| Roast lamb | 1000g | 160°C+540W(WITHOUT PREHEATING) | 34 ~ 48Place on the rack. Turn over after half of the cooking time.Stand for 10-15 minutes with cover. |
| Roast pork | 1000g | 200°C+540W(WITHOUT PREHEATING) | 35 ~ 50Place on the rack. Turn over after half of the cooking time.Stand for 10-15 minutes with cover. |
| Roast chicken | 1000g | 200°C+540W(WITHOUT PREHEATING) | 32 ~ 47Place on the rack. Turn over after half of the cooking time.Stand for 2-5 minutes with cover. |
Crisping Tray
Cooking Guide
Preheat the crisping tray with the Microwave 100% on the glass tray. Do not put the crisping tray on the rack.
Follow the times and instructions in the table. After cooking, the grill and surrounding oven will get very HOT. USE OVEN GLOVES.
| Food Quantity | Cook Mode | Preheat instruction | Cook Time (Minutes) | |
| Frozen pizza | 400g | 3 | M/W 900WGrill + M/W 180W | 58 ~ 11 |
| Omelet | 3 eggs | 3 | Grill + M/W 360W | 7 ~ 8 |
| Bacon | 2 slices | 3 | Grill + M/W 540W | 1 1^1/2 |
| Grilled tomato | 4 pieces(400g) | 3 | Grill + M/W 180W | 7 ~ 8 |
| Fried Egg(s)(Sunny side up) | 12 | 3(5ml oil) | Grill + M/W 540W | 1/2 1 1^1/2 2 |
| Stir FryVegetables | 125g250g | 3(5ml oil) | Grill + M/W 540W | 4 ~ 55 ~ 6 |
| Food Quantity Cook Mode Instructions | Cook Time (Minutes) | ||||
| Frozen Oven chips | 300g | 3 | Grill + M/W 180W | 15 ~ 24 | Preheat the crisping tray. Place the frozen oven chips on it. tray. Turn food over after half of the cooking time. |
| 300g | - | M/W 900W | 15 ~ 17 | Place the frozen oven chips on the crisping tray. Cover with steam cover. Turn food over after half of the cooking time. | |
| Frozen Nuggets (Chicken) | 200g | 3(5ml oil) | Grill + M/W 540W | 7 ~ 9 | Oil tray and preheat the crisping tray. Put the frozen nuggets on it. Turn food over after half of the cooking time. |
| 200g | - | M/W 900W | 8 ~ 12 | Place the frozen nuggets on the crisping tray. Cover with steam cover. Turn food over after half of the cooking time. | |
| Salmon Steak | 1(230g) | 3(5ml oil) | Grill + M/W 540W | 6 ~ 8 | Oil tray and preheat the crisping tray. Put the salmon on it. Turn food over after half of the cooking time. |
| 1(230g) | - | M/W 900W | 8 ~ 12 | Place the salmon steak on the crisping tray. Cover with steam cover. Turn food over after half of the cooking time. | |
| Hamburger patties, fresh | 240g(120gx2) | 3(5ml oil) | Grill+M/W 540W | 6 ~ 7 | Oil tray and preheat the crisping tray. Prepare the hamburger patties. Place on the crisping tray. Turn food over if needed. |
| 240g(120gx2) | - | M/W 900W | 7 ~ 9 | Place the patties on the crisping tray. Cover with steam cover. Turn food over after half of the cooking time. | |
Speed Hot Air
Cooking Guide
Preheat the oven to the desired temperature.
Follow the times and instructions in the table.
After cooking, the grill and surrounding oven will get very HOT. USE OVEN GLOVES.
| Food Quantity Instructions | Speed Hot Air Temperature | Cook Time (Minutes) | |
| Roast Turkey breast, fresh | 400g | 200°C | 30 ~ 38 Wash and dry the fresh turkey breasts. Spice or marinade. Place the breasts into a heat proof flat dish on the rack. |
| Frozen self-rising pizza | 400g | 200°C | 8 ~ 14 Put frozen pizza on the rack. |
| Frozen baguettes with topping | 250g | 200°C | 10 ~ 15 Put frozen baguettes with topping on the rack. |
| Frozen spring rolls | 300g (150gx2) | 230°C | 15 ~ 22 Put frozen spring rolls on the rack. |
| French fries (Frozen potato products) | 300g | 220°C | 15 ~ 22 Put frozen potato products on the heat-proof plate. |
Steam
Cooking Guide
Pour 300ml tap water into the steam water bowl.
Put the steam plate and place the food on the steam plate. And then cover with steam cover.
Place the prepared steam water bowl in center of the glass tray carefully. Keep parallel!.
| Food Weight | Limit Power | Level Instructions | Cook Time (Minutes) | |
| Whole fish | 100 ~ 600g | 900W(100%) | 15 ~ 20 | Put the prepared food side by side on the steam water bowl. Sprinkle with 30ml lemon juice and spices. |
| Fish fillets | 100 ~ 600g | 900W(100%) | 15 ~ 25 | Put the prepared food side by side on the steam water bowl. Sprinkle with 30ml lemon juice and spices. |
| Pawns | 100 ~ 600g | 900W(100%) | 13 ~ 20 | Rinse and clean. Put the prepared food side by side on the steam water bowl. |
| Chicken breasts, Fillets | 200 ~ 600g | 900W(100%) | 15 ~ 25 | Rinse and clean. Put the prepared food side by side on the steam water bowl. |
| Eggs, Hard boiled | 2 ~ 9 eggs | 900W(100%) | 17 ~ 25 | Put the eggs on the small cavities of the steam water bowl. |
| Sliced carrots | 200g ~ 800g | 900W(100%) | 13 ~ 20 | Prepare the carrots. Cut into slices. |
| Apple | 200g ~ 800g | 900W(100%) | 15 ~ 20 | Prepare the apples. Cut into slices. |
WARNING
Please ensure cooking times are correctly set as over cooking may result in FIRE and subsequent DAMAGE to the OVEN.
Important safety instructions
Read carefully and keep for future reference
1 Do not attempt to tamper with, or make any adjustments or repairs to the door, control panel, safety interlock switches or any other part of the oven. It is hazardous for anyone to carry out any service or repair operation which involves the removal of any cover which gives protection against exposure to microwave energy. Repairs should only be undertaken by a qualified service technician.
2 Do not operate the oven when empty. It is best to leave a glass of water in the oven when not in use. The water will safely absorb all microwave energy, if the oven is accidentally started.
3 Do not use the oven for the purpose of dehumidification. It can be the cause of serious damage of safety. (ex. Operating the microwave oven with the wet newspapers, clothes, toys, pet or portable electric devices, etc.)
4 Do not cook food wrapped in paper towels, unless your cook book contains instructions, for the food you are cooking.
5 Do not use newspaper in place of paper towels for cooking.
6 Do not use wooden containers. They may heat-up and char. Do not use ceramic containers which have metallic (e.g. gold or silver) inlays. Always remove metal twist ties. Metal objects in the oven may arc, which can cause serious damage.
7 Do not operate the oven with a kitchen towel, a napkin or any other obstruction between the door and the front edges of the oven, which may cause microwave energy leakage.
8 Do not use recycled paper products since they may contain impurities which may cause sparks and/or fires when used in cooking.
9 Do not rinse the turntable by placing it in water just after cooking. This may cause breakage or damage.
10 Small amounts of food require shorter cooking or heating time. If normal times are allowed they may overheat and burn.
11 Be certain to place the oven so the front of the door is 8 cm or more behind the edge of the surface on which it is placed, to avoid accidental tipping of the appliance.
12 Before cooking, pierce the skin of potatoes, apples or any such fruit or vegetable.
13 Do not cook eggs in their shell. Pressure will build up inside the egg which will burst.
14 Do not attempt deep fat frying in your oven.
15 Remove the plastic wrapping from food before cooking or defrosting. Note though that in some cases food should be covered with plastic film, for heating or cooking.
16 If the oven door or door seals are damaged, the oven must not be operated until it has been repaired by a qualified service technician.
17 If smoke is observed, switch off or disconnect the oven from the power supply and keep the oven door closed in order to stifle any flames.
18 When food is heated or cooked in disposable containers of plastic, paper or other combustible materials, check the oven frequently due to the possibility of the food container is deteriorating.
19 Only allow children to use the oven without supervision when adequate instructions have been given so that the child is able to use the oven in a safe way and understands the hazards of improper use.
20 Liquids or other foods must not be heated in sealed containers since they are liable to explode.
21 Do not operate the oven, if the door seals and adjacent parts of the microwave oven are faulty, until the oven has been repaired by a qualified service technician.
22 Check the utensils are suitable for use in microwave ovens before use.
23 Do not touch the oven door, outer cabinet, rear cabinet, oven cavity, accessories and dishes during grill mode, convection mode and auto cook operations, unless wearing thick oven gloves, as they will become hot. Before clearing make sure they are not hot.
Important safety instructions
Read carefully and keep for future reference
24 Only use utensils that are suitable for use in microwave ovens.
25 When heating food in plastic or paper containers, keep an eye on the oven due to the possibility of ignition.
26 If smoke is observed, switch off or unplug the appliance and keep the door closed in order to stifle any flames.
27 Microwave heating of beverages can result in delayed eruptive boiling, therefore care must be taken when handing the container.
28 The contents of feeding bottles and baby food jars shall be stirred or shaken and the temperature checked before consumption, in order to avoid burns.
29 Eggs in their shell and whole hard-boiled eggs should not be heated in microwave ovens since they may explode, even after microwave heating has ended.
30 Details for cleaning door seals, cavities and adjacent parts.
31 The oven should be cleaned regularly and any food deposits removed.
32 Failure to maintain the oven in a clean condition could lead to deterioration of the surface that could adversely affect the life of the appliance and possibly result in a hazardous situation.
33 Only use the temperature probe recommended for this oven (for appliances having a facility to use a temperature-sensing probe).
34 If heating elements are provided, during use the appliance becomes hot. Care should be taken to avoid touching heating elements inside the oven.
35 The appliance is not intended for use by young children or infirm persons without supervision.
WARNING: If the door or door seals are damaged, the oven must not be operated until it has been repaired by a competent person.
WARNING: It is hazardous for anyone other than a competent person to carry out any service or repair operation that involves the removal of a cover which gives protection against exposure to microwave energy.
WARNING: Liquids and other foods must not be heated in sealed containers since they are liable to explode.
WARNING: Only allow children to use the oven without supervision when adequate instructions have been given so that the child is able to use the oven in a safe way and understands the hazards of improper use.
Microwave-safe
Utensils
Never use metal or metal trimmed utensils in your
microwave oven
Microwaves cannot penetrate metal. They will bounce off any metal object in the oven and cause arcing, an alarming phenomenon that resembles lightning.
Most heat resistant non metallic cooking utensils are safe for use in your microwave oven. However, some may contain materials that render them unsuitable as microwave cookware. If you have any doubts about a particular utensil, there's a simple way to find out if it can be used in your microwave oven.
Place the utensil in question next to a glass bowl filled with water in the microwave oven. Microwave at power HIGH for 1 minute. If the water heats up but the utensil remains cool to the touch, the utensil is microwave\~safe. However, if the water does not change temperature but the utensil becomes warm, microwaves are being absorbed by the utensil and it is not safe for use in the microwave oven. You probably have many items on hand in your kitchen right now that can be used as cooking equipment in your microwave oven. Just read through the following checklist.
Dinner plates
Many kinds of dinner-ware are microwave-safe. If in doubt consult the manufacturer's literature or perform the microwave test.
Glassware
Glassware that is heat-resistant is microwave-safe. This would include all brands of oven tempered glass cookware. However, do not use delicate glassware, such as tumblers or wine glasses, as these might shatter as the food warms.
Plastic storage containers
These can be used to hold foods that are to be quickly reheated. However, they should not be used to hold foods that will need considerable time in the oven as hot foods will eventually warp or melt plastic containers.
Paper
Paper plates and containers are convenient and safe to use in your microwave oven, provided that the cooking time is short and foods to be cooked are low in fat and moisture. Paper towels are also very useful for wrapping foods and for lining baking trays in which greasy foods such as bacon are cooked. In general, avoid coloured paper products as the colour may run. Some recycled paper products may contain impurities which could cause arcing or fires when used in the microwave oven.
Plastic cooking bags
Provided they are made specially for cooking, cooking bags are microwave safe. However, be sure to make a slit in the bag so that steam can escape. Never use ordinary plastic bags for cooking in your microwave oven, as they will melt and rupture.
Plastic microwave cookware
A variety of shapes and sizes of microwave cookware are available. For the most part, you can probably use items you already have on hand rather than investing in new kitchen equipment.
Pottery, stoneware and ceramic
Containers made of these materials are usually fine for use in your microwave oven, but they should be tested to be sure.
CAUTION
Some items with high lead or iron content are not suitable for cooking utensils.
Utensils should be checked to ensure that they are suitable for use in microwave ovens.
Food characteristics &
Microwave cooking
Keeping an eye on things
The recipes in the book have been formulated with great care, but your success in preparing them depends on how much attention you pay to the food as it cooks. Always watch your food while it cooks. Your microwave oven is equipped with a light that turns on automatically when the oven is in operation so that you can see inside and check the progress of your food. Directions given in recipes to elevate, stir, and the like should be thought of as the minimum steps recommended. If the food seems to be cooking unevenly, simply make the necessary adjustments you think appropriate to correct the problem.
Factors affecting microwave cooking times
Many factors affect cooking times. The temperature of ingredients used in a recipe makes a big difference in cooking times. For example, a cake made with ice-cold butter, milk, and eggs will take considerably longer to bake than one made with ingredients that are at room temperature. All of the recipes in this book give a range of cooking times. In general, you will find that the food remains under-cooked at the lower end of the time range, and you may sometimes want to cook your food beyond the maximum time given, according to personal preference. The governing philosophy of this book is that it is best for a recipe to be conservative in giving cooking times. While overcooked food is ruined for good. Some of the recipes, particularly those for bread, cake, and custards, recommend that food be removed from the oven when they are slightly undercooked. This is not a mistake. When allowed to stand, usually covered, these foods will continue to cook outside of the oven as the heat trapped within the outer portions of the food gradually travels inward. If the food is left in the oven until it is cooked all the way through, the outer portions will become overcooked or even burnt. You will become increasingly skilful in estimating both cooking and standing times for various foods.
Density of food
Light, porous food such as cakes and breads cook more quickly than heavy, dense foods such as roasts and casseroles. You must take care when microwaving porous food that the outer edges do not become dry and brittle.
Height of food
The upper portion of tall food, particularly roasts, will cook more quickly than the lower portion. Therefore, it is wise to turn tall food during cooking, sometimes several times.
Moisture content of food
Since the heat generated from microwaves tends to evaporate moisture, relatively dry food such as roasts and some vegetables should either be sprinkled with water prior to cooking or covered to retain moisture.
Bone and fat content of food
Bones conduct heat and fat cooks more quickly than meat. Care must be taken when cooking bony or fatty cuts of meat that they do not cook unevenly and do not become overcooked.
Quantity of food
The number of microwaves in your oven remains constant regardless of how much food is being cooked. Therefore, the more food you place in the oven, the longer the cooking time. Remember to decrease cooking times by at least one third when halving a recipe.
Shape of food
Microwaves penetrate only about 2.cm into food, the interior portion of thick foods are cooked as the heat generated on the outside travels inward. Only the outer edge of food in cooked by microwave energy; the rest is cooked by conduction. The worst possible shape for a food that is to be microwaved is a thick square. The corners will burn long before the centre is even warm. Round thin foods and ring shaped foods cook successfully in the microwave.
Covering
A cover traps heat and steam which causes food to cook more quickly. Use a lid or microwave cling film with a corner folded back to prevent splitting.
Browning
Meats and poultry that are cooked fifteen minutes or longer will brown lightly in their own fat. Food that are cooked for a shorter period of time may be brushed with a browning sauce such as worcestershire sauce, soy sauce or barbecue sauce to achieve an appetizing colour. Since relatively small amounts of browning sauces are added to food the original flavour of the recipe is not altered.
Covering with greaseproof paper
Greaseproofing effectively prevents spattering and helps food retain some heat. But because it makes a looser cover than a lid or clingfilm, it allows the food to dry out slightly.
Arranging and spacing
Individual foods such as baked potatoes, small cakes and hors d'oeuvres will heat more evenly if placed in the oven an equal distance apart, preferably in a circular pattern. Never stack foods on top of one another.
Food characteristics &
Microwave cooking
Stirring
Stirring is one of the most important of all microwaving techniques. In conventional cooking, food is stirred for the purpose of blending. Microwaved food, however, is stirred in order to spread and redistribute heat. Always stir from the outside towards the centre as the outside of the food heats first.
Turning over
Large, tall foods such as roasts and whole chickens should be turned so that the top and bottom will cook evenly. It is also a good idea to turn cut up chicken and chops.
Placing thicker portions facing outwards
Since microwaves are attracted to the outside portion of food, it makes sense to place thicker portions of meat, poultry and fish to the outer edge of the baking dish. This way, thicker portions will receive the most microwave energy and the food will cook evenly.
Shielding
Strips of aluminium foil (which block microwaves) can be placed over the corners or edges of square and rectangular foods to prevent those portions from overcooking. Never use too much foil and make sure the foil is secured to the dish or it may cause 'arcing' in the oven.
Elevating
Thick or dense foods can be elevated so that microwaves can be absorbed by the underside and centre of the foods.
Piercing
Foods enclosed in a shell, skin or membrane are likely to burst in the oven unless they are pierced prior to cooking. Such foods include yolks and whites of eggs, clams and oysters and whole vegetables and fruits.
Testing if cooked
Food cooks so quickly in a microwave oven, it is necessary to test it frequently. Some foods are left in the microwave until completely cooked, but most foods, including meats and poultry, are removed from the oven while still slightly undercooked and allowed to finish cooking during standing time. The internal temperature of foods will rise between 5°F (3°C) and 15°F (8°C) during standing time.
Standing time
Foods are often allowed to stand for 3 to 10 minutes after being removed from the microwave oven. Usually the foods are covered during standing time to retain heat unless they are supposed to be dry in texture (some cakes and biscuits, for example). Standing allows foods to finish cooking and also helps flavour blend and develop.
To Clean Your Oven
1 Keep the inside of the oven clean
Food spatters or spilled liquids stick to oven walls and between seal and door surface. It is best to wipe up spillovers with a damp cloth right away. Crumbs and spillovers will absorb microwave energy and lengthen cooking times. Use a damp cloth to wipe out crumbs that fall between the door and the frame. It is important to keep this area clean to assure a tight seal. Remove greasy spatters with a soapy cloth then rinse and dry. Do not use harsh detergent or abrasive cleaners. The glass tray can be washed by hand or in the dishwasher.
2 Keep the outside of the oven clean
Clean the outside of your oven with soap and water then with clean water and dry with a soft cloth or paper towel. To prevent damage to the operating parts inside the oven, the water should not be allowed to seep into the ventilation openings. To clean control panel, open the door to prevent oven from accidentally starting, and wipe a damp cloth followed immediately by a dry cloth. Press STOP/CLEAR after cleaning.
3 If steam accumulates inside or around the outside of the oven door, wipe the panels with a soft cloth. This may occur when the microwave oven is operated under high humidity conditions and in no way indicates a malfunction of the unit.
4 The door and door seals should be kept clean. Use only warm, soapy water, rinse then dry thoroughly.
DO NOT USE ABRASIVE MATERIALS, SUCH AS CLEANING POWDERS OR STEEL AND PLASTIC PADS.
Metal parts will be easier to maintain if wiped frequently with a damp cloth.
Questions &
Answers
Q What's wrong when the oven light will not glow?
A There may be several reasons why the oven light will not glow. Light bulb has blown Door is not closed
Q Does microwave energy pass through the viewing screen in the door?
A No. The holes, or ports, are made to allow light to pass; they do not let microwave energy through.
Q Why does the beep tone sound when a pad on the Control Panel is touched?
A The beep tone sounds to assure that the setting is being properly entered.
Q Will the microwave oven be damaged if it operates empty?
A Yes Never run it empty or without the glass tray.
Q Why do eggs sometimes pop?
A When baking, frying, or poaching eggs, the yolk may pop due to steam build up inside the yolk membrane. To prevent this, simply pierce the yolk before cooking. Never microwave eggs in the shell.
Q Why is standing time recommended after microwave cooking is over?
A After microwave cooking is finished, food keeps on cooking during standing time. This standing time finishes cooking evenly throughout the food. The amount of standing time depends on the density of the food.
Q Fan operates even when not operating the microwave oven. Is it failure?
A No. 'Auto Cooling System' operates such that the fan automatically operates for the consumer's safety if interior temperature of the microwave oven is more than appropriate values after cooking is completed.
Q Is it possible to pop corn in a microwave oven?
A Yes, if using one of the two methods described below
- Popcorn-popping utensils designed specifically for microwave cooking.
- Prepackaged commercial microwave popcorn that contains specific times and power outputs needed for an acceptable final product.
FOLLOW EXACT DIRECTIONS GIVEN BY EACH MANUFACTURER FOR THEIR POPCORN PRODUCT. DO NOT LEAVE THE OVEN UNATTENDED WHILE THE CORN IS BEING POPPED. IF CORN FAILS TO POP AFTER THE SUGGESTED TIMES, DISCONTINUE COOKING. OVERCOOKING COULD RESULT IN THE CORN CATCHING FIRE.
CAUTION
NEVER USE A BROWN PAPER BAG FOR POPPING CORN. NEVER ATTEMPT TO POP LEFTOVER KERNELS.
Q Why doesn't my oven always cook as fast as the cooking guide says?
A Check your cooking guide again to make sure you've followed directions correctly, and to see what might cause variations in cooking time. Cooking guide times and heat settings are suggestions, chosen to help prevent overcooking, the most common problem in getting used to a microwave oven. Variations in the size, shape, weight and dimensions of the food require longer cooking time. Use your own judgement along with the cooking guide suggestions to test food condition, just as you would do with a conventional cooker.
Plug wiring information/ Technical Specifications
Warning
This appliance must be earthed
The wires in this mains lead are colored in accordance with the following codes
BLUE \~ Neutral
BROWN \~ Live
As the colours of the wires in the mains lead of this appliance may not correspond with the coloured markings identifying the terminals in your plug proceed as follows:
The wire which is colored BLUE must be connected to the terminal which is marked with the letter N or Colored BLACK.
The wire which is colored BROWN must be connected to the terminal which is marked with the letter L or colored RED.
The wire which is colored GREEN & YELLOW or GREEN must be connected to the terminal which is marked with the letter E or 12 .
If the supply cord is damaged, it must be replaced by the manufacturer or its service agent or a similarly qualified person in order to avoid a hazard;
Technical Specification
| MC-8044NLC | |
| Power Input | 240 V AC / 50Hz |
| Output | 900 W (IEC60705 rating standard) |
| Microwave Frequency | 2450 MHz |
| Outside Dimension | 530 mm(W) X 322 mm(H) X 422 mm(D) |
| Power Consumption | |
| Microwave | 1350 Watts |
| Grill | 1250 Watts |
| Combination | Max. 2550 Watts |
| Convection | Max. 2150 Watts |
Memo
Memo

LG
Printed in Korea