
RD-300GX - Musical instrument ROLAND - Free user manual and instructions
Find the device manual for free RD-300GX ROLAND in PDF.


User questions about RD-300GX ROLAND
0 question about this device. Answer the ones you know or ask your own.
Ask a new question about this device
Download the instructions for your Musical instrument in PDF format for free! Find your manual RD-300GX - ROLAND and take your electronic device back in hand. On this page are published all the documents necessary for the use of your device. RD-300GX by ROLAND.
USER MANUAL RD-300GX ROLAND
text_image
Roland RD-300GX STOP AUDIO KEY EQUISITION/SUPPORTS ZONE LEVEL/CONTROL VOLUME LOW RISP LOWER UPGS (RIP) ⑧ EXTERNAL SOUND CONTROL REVERS MULTI EFFECTS ⑨ INTERNAL TRANSFER PLOT DUAL — 2000 — REF HITRD-300GX
Owner's Manual
Roland®
Thank you, and congratulations on your choice of the RD-300GX. To ensure that you obtain the maximum enjoyment and take full advantage of the RD-300GX's functionality, please read this owner's manual carefully.
About the Manual
You should first read the "Getting Ready" (p. 15) section of the owner's manual (this document). This explains how to connect the AC adaptor and turn on the power.
Conventions in this Manual
In order to explain the operations as clearly as possible, this manual uses the following conventions.
- Text enclosed in square brackets [ ] indicates the name of a button or a knob, such as the [EDIT] button.
- Lines that begin with ⓄNCITB asterisk * are cautionary statements that you must be sure to read.
- The numbers of pages that you can turn to for additional, related information are given like this: (p. **).
- The explanations in this manual include illustrations that depict what should typically be shown by the display. Note, however, that your unit may incorporate a newer, enhanced version of the system (e.g., includes newer sounds), so what you actually see in the display may not always match what appears in the manual.
For the U.K.
IMPORTANT: THE WIRES IN THIS MAINS LEAD ARE COLOURED IN ACCORDANCE WITH THE FOLLOWING CODE.
BLUE: NEUTRAL
BROWN: LIVE
As the colours of the wires in the mains lead of this apparatus may not correspond with the coloured markings identifying the terminals in your plug, proceed as follows: The wire which is coloured BLUE must be connected to the terminal which is marked with the letter N or coloured BLACK. The wire which is coloured BROWN must be connected to the terminal which is marked with the letter L or coloured RED. Under no circumstances must either of the above wires be connected to the earth terminal of a three pin plug.
Before using this unit, carefully read the sections entitled: "USING THE UNIT SAFELY" (p. 4), and "IMPORTANT NOTES" (p. 6). These sections provide important information concerning the proper operation of the unit. Additionally, in order to feel assured that you have gained a good grasp of every feature provided by your new unit, Owner's manual should be read in its entirety. The manual should be saved and kept on hand as a convenient reference.
Copyright © 2008 ROLAND CORPORATION
All rights reserved. No part of this publication may be reproduced in any form without the written permission of ROLAND CORPORATION.
USING THE UNIT SAFELY
INSTRUCTIONS FOR THE PREVENTION OF FIRE, ELECTRIC SHOCK, OR INJURY TO PERSONS
About ⚠️ WARNING and ⚠️ CAUTION Notices
 | Used for instructions intended to alert the user to the risk of death or severe injury should the unit be used improperly. |
 |  * Material damage refers to damage or other adverse effects caused with respect to the home and all its furnishings, as well to domestic animals or pets. * Material damage refers to damage or other adverse effects caused with respect to the home and all its furnishings, as well to domestic animals or pets. |
* Material damage refers to damage or other adverse effects caused with respect to the home and all its furnishings, as well to domestic animals or pets.
About the Symbols
| [DC57] | 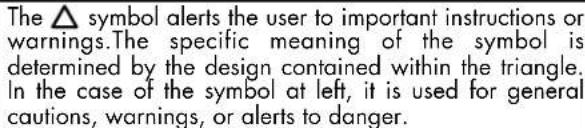 |
| [84X7] | 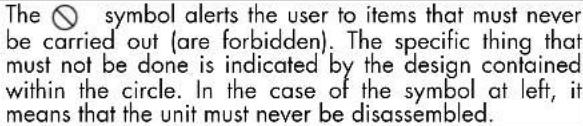 |
| [1626] | 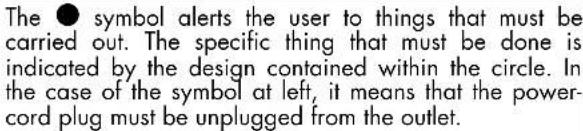 |
ALWAYS OBSERVE THE FOLLOWING
WARNING
Do not disassemble or modify
Do not open (or modify in any way) the unit or its AC adaptor.

Do not repair or replace parts
Never attempt to repair this device or replace parts. If repair or part replacement should become necessary, you must contact your dealer or a Roland service center.

Do not use or store in the following types of locations
- Locations of extremely high temperature (such as in direct sunlight, near heating equipment, or on a device that generates heat)
- Near moisture (such as in a bathroom, near a sink, or on a wet floor) or in locations of high humidity
- Locations exposed to rain
- Locations of excessive dust
- Locations subject to heavy vibration


Use only a stand that is recommended
This unit should be used only with a stand that is recommended by Roland.

Do not place in an unstable location
When using the unit with a stand recommended by Roland, the stand must be carefully placed so it is level and sure to remain stable. If not using a stand, you still need to make sure that any location you choose for placing the unit provides a level surface that will properly support the unit, and keep it from wobbling.

Connect the AC adaptor to an outlet of the correct voltage
Be sure to use only the AC adaptor supplied with the unit. Also, make sure the line voltage at the installation matches the input voltage specified on the AC adaptor's body. Other AC adaptors may use a different polarity, or be designed for a different voltage, so their use could result in damage, malfunction, or electric shock

Use only the included power cord
You must use only the power cord included with the device. Do not use the included power cord with any other device.

Do not bend the power cord or place heavy objects on it
Do not bend the power cord excessively, or place heavy objects on the power cord. Doing so will damage the power cord, and may cause short circuits or faulty connections, possibly resulting in fire or electrical shock.

Avoid extended use at high volume
This device, either by itself or used in conjunction with headphones, amps, and/or speakers, is capable of producing volume levels that can cause permanent hearing damage. If you experience impaired hearing or ringing in your ears, immediately stop using the device and consult a medical specialist.

Do not insert foreign objects
Never allow foreign objects (flammable objects, coins, wires, etc.) to enter this device. This can cause short circuits or other malfunctions.


WARNING
Turn off the power if an abnormality or malfunction occurs

Immediately turn the power off, remove the AC adaptor from the outlet, and contact your dealer or a service center to have the device serviced.
- The AC adaptor, the power-supply cord, or the plug has been damaged
- The device produces smoke or an unusual smell
- A foreign object enters the device, or liquid spills into the device
• The device becomes wet (by rain, etc.) - An abnormality or malfunction occurs in the device
Do not allow children to use without supervision

In households with children, take particular care against tampering. If children are to use this device, they must be supervised or guided by an adult.
Do not drop or subject to strong impact

Do not drop this device or subject it to strong impact.
Do not share an outlet with an unreasonable number of other devices

Do not connect excessive numbers of electrical devices to a single power outlet. In particular, when using a power strip, exceeding the rated capacity (watts/amps) of the power strip may cause heat to be generated, possibly melting the cable.
Do not use overseas

If you wish to use this device overseas, please contact your dealer or a service center.
Do not use a CD-ROM in an audio CD player or DVD player

If you attempt to play back a CD-ROM in a conventional audio CD player or DVD player, the resulting high volume may damage your hearing or your speakers.
Do not place containers of water on the device

Do not place containers of water (such as a flower vase) or drinks on the device. Nor should you place containers of insecticide, perfume, alcoholic liquids, nail polish, or spray cans on the device. Liquids that spill into the device may cause it to malfunction, and may cause short circuits or faulty operation.
CAUTION
Place in a well ventilated location

When using this device and the AC adaptor, ensure that it is placed in a well ventilated location.
Use only the specified stands

This (RD-300GX) for use only with Roland stand KS-12 or KS-18Z. Use with other stand is capable of resulting in instability causing possible injury.
CAUTION
Grasp the plug when connecting or disconnecting the power cord

Always grasp only the plug on the AC adaptor cord when plugging into, or unplugging from, an outlet or this unit.
Periodically wipe the dust off the AC adaptor plug

At regular intervals, you should unplug the AC adaptor and clean it by using a dry cloth to wipe all dust and other accumulations away from its prongs. Also, disconnect the power plug from the power outlet whenever the unit is to remain unused for an extended period of time. Any accumulation of dust between the power plug and the power outlet can result in poor insulation and lead to fire.
Manage cables for safety

Ensure that the connected cables are organized and managed in a safe manner. In particular, place the cables out of reach of children.
Do not stand or place heavy objects on this device

Do not stand on this device, or place heavy objects on it.
Do not connect or disconnect the AC adaptor with wet hands

Never handle the AC adaptor or its plugs with wet hands when plugging into, or unplugging from, an outlet or this unit.
Cautions when moving this device

When moving this device, please check the following cautions. Then, make sure that at least two persons work together in lifting and carrying the device, all the while making sure to keep it level. When doing so, be careful not to pinch your hands or drop the device on your feet.
- Disconnect the power cord.
- Disconnect external devices.
Unplug the AC adaptor from the AC outlet before cleaning

Before cleaning the unit, turn off the power and unplug the AC adaptor from the outlet (p. 16).
If there is a possibility of lightning strike, disconnect the AC adaptor from the AC outlet

Whenever you suspect the possibility of lightning in your area, disconnect the AC adaptor from the outlet.
Keep small items out of the reach of children

Should you remove the screw of ground terminal, keep it in a safe place out of children's reach, so there is no chance of it being swallowed accidentally.
Power Supply
- Do not connect this device to the same electrical outlet as an inverter-controlled device such as a refrigerator, microwave oven, or air conditioner, or a device that contains an electric motor. Depending on how the other device is used, power supply noise could cause this device to malfunction or produce noise. If it is not practical to use a separate electrical outlet, please connect this device via a power supply noise filter.
- The AC adaptor will begin to generate heat after long hours of consecutive use. This is normal, and is not a cause for concern.
- Before you make connections, you must switch off the power on all devices to prevent malfunction and/or speaker damage.
Location
- If this device is placed near devices that contain large transformers, such as power amps, hum may be induced in this device. If this occurs, move this device farther away or change its orientation.
- If this device is operated near a television or radio, color distortion may be seen in the television screen or noise may be heard from the radio. If this occurs, move this device farther away.
- Keep your cell phone powered off or at a sufficient distance from this device. If a cell phone is nearby, noise may be heard when a call is received or initiated, or during conversation.
- Do not expose the unit to direct sunlight, place it near devices that radiate heat, leave it inside an enclosed vehicle, or otherwise subject it to temperature extremes. Excessive heat can deform or discolor the unit.
- If you move this device between locations of radically different temperature or humidity, water droplets (condensation) may form inside the device. Using the device in this condition will cause malfunctions, so please allow several hours for the condensation to disappear before you use the device.
- Do not leave objects on top of the keyboard. This can cause malfunctions such as failure to sound.
- Depending on the material and temperature of the surface on which you place the unit, its rubber feet may discolor or mar the surface. You can place a piece of felt or cloth under the rubber feet to prevent this from happening. If you do so, please make sure that the unit will not slip or move accidentally.
Care
- For everyday cleaning wipe the unit with a soft, dry cloth or one that has been slightly dampened with water. To remove stubborn dirt, use a cloth impregnated with a mild, non-abrasive detergent. Afterwards, be sure to wipe the unit thoroughly with a soft, dry cloth.
- If water droplets should adhere to this device, immediately wipe them off using a soft dry cloth.
- Do not use solvents such as benzene, thinner, or alcohol, since these can cause deformation or color change.
Servicing
- If you return this device for servicing, the contents of memory may be lost. Please store important contents on a USB memory, or make a note of the contents. We take utmost care to preserve the contents of memory when performing service, but there may be cases when the stored content cannot be recovered because the memory section has malfunctioned. Please be aware that we cannot accept responsibility for the recovery of lost memory content or for any consequences of such loss.
Other Cautions
- Stored content may be lost due to a malfunction of the device or because of inadvertent operation. You should back up important content on a USB memory as a safeguard against such loss.
- We cannot accept responsibility for the recovery of any content lost from internal memory or USB memory, or for the consequences of such loss.
- Do not apply excessive force to the buttons, knobs, or input/output jacks, since this may cause malfunctions.
- Never strike or apply strong pressure to the display.
- When connecting or disconnecting cables, grasp the plug (not the cable) to prevent short circuits or broken connections.
- Please enjoy your music in ways that do not inconvenience other people nearby, and pay particular attention to the volume at nighttime. Using headphones will allow you to enjoy music without having to be concerned about others.
- When you need to transport the unit, package it in the box (including padding) that it came in, if possible. Otherwise, you will need to use equivalent packaging materials.
- Use only the specified expression pedal (EV-5/7; available separately). Connecting a pedal made by a different manufacturer may cause this device to malfunction.
USB Memory Handling
(Using USB Memory)
- When connecting USB memory, firmly insert it all the way in.
- Do not touch the pins of the USB memory connector, or allow them to become dirty.
-
USB memory is made using high-precision electronic components, so please observe the following points when handling it.
-
To prevent damage from static electrical charges, discharge any static electricity that might be present in your body before handling USB memory.
- Do not touch the terminals with your fingers or any metal object.
- Do not bend or drop USB memory, or subject it to strong impact.
- Do not leave USB memory in direct sunlight or in locations such as a closed-up automobile. (Storage temperature: 0–50 degrees C)
- Do not allow USB memory to become wet.
-
Do not disassemble or modify USB memory.
-
When connecting USB memory, position it horizontally with the USB memory connector and insert it without using excessive force. The USB memory connector may be damaged if you use excessive force when inserting USB memory.
- Do not insert anything other than USB memory (e.g., wire, coins, other types of device) into the USB memory connector. Doing so will damage the USB memory connector.
- Do not apply excessive force to the connected USB memory.
- If you will not be using USB memory for an extended period of time, close the USB memory cover.
CD Handling
- When handling the discs, please observe the following.
- Do not touch the encoded surface of the disc.
- Do not use in dusty areas.
- Do not leave the disc in direct sunlight or an enclosed vehicle.
- Do not touch or scratch the recording surface of a CD. Doing so may render the data unreadable. If a CD becomes soiled, clean it using a commercially available CD cleaner.
- Keep the disc in the case.
- Do not keep the disc in the CD drive for a long time.
- Do not put a sticker on the label of the disc.
-
Wipe the disc with a soft and dry cloth radially from inside to outside. Do not wipe along circumference.
-
Do not use benzine, record cleaner spray or solvents of any kind.
- Do not bend the disc. Bending discs may prevent proper reading and writing of data, and may further result in malfunction.
Floppy Disk Handling (Using Optional Floppy Disk Drive)
- Floppy disks contain a plastic disk with a thin coating of magnetic storage medium. Microscopic precision is required to enable storage of large amounts of data on such a small surface area. To preserve their integrity, please observe the following when handling floppy disks:
- Never touch the magnetic medium inside the disk.
- Do not use or store floppy disks in dirty or dusty areas.
- Do not subject floppy disks to temperature extremes (e.g., direct sunlight in an enclosed vehicle). Recommended temperature range: 10–50 degrees C (50–122 degrees F).
- Do not expose floppy disks to strong magnetic fields, such as those generated by loudspeakers.
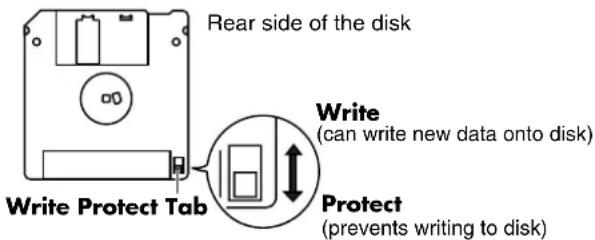
- Floppy disks have a "write protect" tab which can protect the disk from accidental erasure. It is recommended that the tab be kept in the PROTECT position, and moved to the WRITE position only when you wish to write new data onto the disk.
text_image
Rear side of the disk Write Protect Tab Write (can write new data onto disk) Protect (prevents writing to disk)- The identification label should be firmly affixed to the disk. Should the label come loose while the disk is in the drive, it may be difficult to remove the disk.
- Store all disks in a safe place to avoid damaging them, and to protect them from dust, dirt, and other hazards. By using a dirty or dust-ridden disk, you risk damaging the disk, as well as causing the disk drive to malfunction.
* GS () registered trademark of Roland Corporation.
* All product names mentioned in this document are trademarks or registered trademarks of their respective owners.
* MPEG Layer-3 audio compression technology is licensed from Fraunhofer IIS Corporation and THOMSON Multimedia Corporation.
Introduction 3
About the Manual .... 3
USING THE UNIT SAFELY....4
Important Notes......6
Panel Descriptions....12
Front Panel 12
Rear Panel 14
Getting Ready....15
Placing the RD-300GX on a Stand....15
Connecting the AC Adaptor 16
Connecting the External Equipment to RD-300GX....17
Connecting Pedals 18
Turning the Power On and Off....19
Turning On the Power....19
Turning Off the Power....20
Adjusting the Volume....20
Adjusting the Display Contrast ([DISPLAY CONTRAST] Knob) 20
Using a USB Memory 21
Connecting a USB Memory 21
Overview of the RD-300GX.... 22
Basic Organization of the RD-300GX 22
Units of Sound 22
Basic Operation....23
Main Screens 23
About the Function Buttons 24
Editing a Value....24
Listening to the Demo (DEMO PLAY).... 25
Performance 26
Piano Performances (ONE TOUCH [PIANO] Button)....26
Performing with a Variety of Tones (TONE SELECT Buttons) 27
Playing Multiple Tones with the Keyboard 28
Performing with Layered Tones ([DUAL] Button) 28
Playing Different Tones in Two Different Sections of the Keyboard ([SPLIT] Button) 29
Changing the Tone for a Zone (ZONE SELECT Button)....31
Adjusting the Volume Level for Individual Zones (ZONE LEVEL Sliders)....31
Transposing the Key of the Keyboard ([TRANSPOSE] Button) 32
Adding Reverberation to the Sound ([REVERB] Button)....33
Changing the Reverb Effect Type....33
Changing the Depth of Reverb Effect 34
Changing the Sound's Pitch in Real Time (Pitch Bend/Modulation Lever) 34
Adding Liveliness to the Sound ([SOUND CONTROL] Button) 35
Adjusting the Levels of Each Frequency Range (EQUALIZER Knobs) 36
Changing the Frequency of the Low and High Ranges 36
Using the Convenient Functions in Performances.... 37
Playing Rhythm ([SONG/RHYTHM] Button) 37
Changing Rhythm Pattern....38
Changing Rhythm Tempos....38
Changing Rhythm Volume 39
Playing Songs ([SONG/RHYTHM] Button)......40
Changing Song Tempos....41
Fast-forwarding or Rewinding a Song....41
Performing with Audio Files ([AUDIO KEY] Button)....42
Performing with Audio Files from USB Memory 42
Performing with Audio Files that are Built Into the RD-300GX....45
Adjusting the Volume of Audio Key 45
Changing Audio File Settings 46
Applying Effects to the Sound ([MULTI EFFECTS] Button) 47
Changing the Depth of Effect....47
Changing the Multi-effects Type 48
Changing the Undulation of the Organ Tone (Rotary Effect)....48
Disabling the Buttons (Panel Lock)....49
Selecting Stored Settings ([SETUP] Button)....50
Storing Settings to Setups ([WRITE] Button) 51
Using the RD-300GX As a Master Keyboard 53
What's MIDI? 53
About MIDI Connectors....53
Connecting to External MIDI Sound Generators 54
Setting the MIDI Transmit Channel (MIDI OUT Channel) 55
Selecting Sounds on an External MIDI Device (MSB/LSB/PC) 56
Adjusting the Volume of Each Zone (External Zone) 57
Detailed Settings for Transmitted Parts ([EXTERNAL/INTERNAL] Button)....58
How to Make Settings ....58
Adjusting the Volume and Pan (Vol/Pan) 58
Setting the Amount of Reverb and Chorus (Rev/Cho)....58
Setting the Transposition for Each Individual Zone (Trs) 58
Setting the Key Range (KRL/KRU) 59
Making Detailed Settings for the ONE TOUCH Tones 60
Making Detailed Settings for the Piano Tones (Piano Designer) 60
Making the Settings....60
Selecting the Piano Sound (Tone) 60
Changing the Amount of Reverb Effect (Reverb Depth) 60
Opening/Closing the Piano Lid (Lid)....60
Adjusting the Damper Noise (Damper Noise) 60
Adjusting the Resonance of the Aliquot Strings (Duplex Scale) 61
Adjusting the Resonant Sounds when the Keys are Pressed (String Resonance)....61
Adjusting the String Resonance Produced when a Key is Released (Key Off Reso.)....61
Adjusting the Sound of the Hammer Strike (Hammer Noise) 61
Precise Modification of Chord Sonorities (Stretch Tune)....61
Changing the Key Touch (Key Touch/Ofst)....62
Setting a Constant Volume Level in Response to the Playing Force (Velocity) 62
Changing the Timing of Sounds in Response to the Velocity (Velo Delay Sens)....62
Changing How Volume Responds to the Velocity (Key Touch Mode)....62
Detailed Settings for Each Function ([EDIT] Button).... 63
Setting Parameters....63
Parameters that can be Set 63
Making System Settings (System)....64
Tuning to Other Instrument's Pitches (Master Tune)....64
Adjusting the Volume (Master Volume)....64
Using a Control Pedal to Switch Setups (SETUP Pedal Sft)....64
Using Program Change Messages to Switch Setups (SETUP Ctrl Ch.)....65
Making the Settings for the USB Driver (USB Driver) 65
Changing the USB Memory Setting (USB Memory Mode)....65
Switching the Pedal's Polarity (Damper Polarity/Control Polarity) 65
Selecting the Indicator Mode (Indicator Mode)....65
Selecting the Number of Parts (Part Mode) 66
Setting the Tuning Method (Temperament)....66
Selecting the Keynote (Temperament Key) 66
Switching Between Reception of GM/GM2 System On and GS Reset (Rx GM Sys ON, Rx GS Reset) 67
Adjusting the Volume of Audio File Playback (Audio Volume) 67
Having Song Playback Stop when You Press a ONE TOUCH Button (Song Stop Mode)....67
Setting the Keyboard Touch (Key Touch)....67
Setup-Related Settings (Common) 68
Setting the Zone to which Multi Effects are Added (MFX Zone)....68
Changing the Pedal Function (Ctrl Pedal Func)....68
Assigning Functions to the [S1] [S2] Buttons (S1/S2 Func)....68
Tone Settings (Tone Parameter) 69
Changing Tone Elements (Attack Time/Release Time/Cutoff Freq/Resonance/Decay Time)......69
Setting the Amount of Reverb Applied to Each Tone (Reverb Amount) 69
Changing the Pitch (Coarse Tune/Fine Tune) 70
Changing the Bend Range (Bend Range) 70
Making the Settings for Each Zone Individually (Zone Parameter)....70
Setting the Transposition for Each Individual Zone (Transpose)....70
Setting the Pan (Pan) 70
Turning the Controllers in Each Zone On and Off....71
Part On/Off (Part Switch) 71
File Management (File)....72
Saving a Setup File (Save SETUP)....72
Calling Up Setup File (Load SETUP) 72
Deleting a Setup File (Delete SETUP)....73
Copying a Setup File (Copy SETUP) 74
Copying a Song (Copy SONG)....74
Deleting a Song (Delete SONG) 75
Formatting Memory (Format)....76
Settings Related to Song Playback (Song Function) 76
Selecting the Song Playback Method (Play Mode)....76
Changing the Key of the Song Playback (Playback Trans) 76
Performing Along with a Audio File (Center Cancel)....76
Utility Settings (Utility) 77
Transferring the RD-300GX's Settings to an External MIDI Device (Bulk Dump) 77
Restoring the Settings to the Factory Condition (Factory Reset) 77
Connecting External MIDI Devices 78
Recording RD-300GX Performances to an External MIDI Sequencer....78
Connecting to an External Sequencer 78
Settings for Recording (Rec Mode/Local Control) 78
Recording the Performance....79
Exiting Rec Mode....79
About the Local Switch....79
Playing the RD-300GX's Internal Sound Generator from an External MIDI Device....80
Making Connections 80
Selecting RD-300GX Sounds from an External MIDI Device 80
Switching Setups....80
Connecting to Your Computer.... 81
Connecting to a Computer via the USB MIDI Connector....81
About V-LINK 82
How to Use the V-LINK 82
Appendices 83
Troubleshooting 83
Error Messages/Other Messages 86
Error Messages....86
Other Messages 86
Effect List 87
Tone List....91
Rhythm Set List 94
Rhythm Pattern List....97
Setup List....98
Shortcut List 98
MIDI Implementation Chart....99
Main Specifications....100
Index 101
Front Panel
text_image
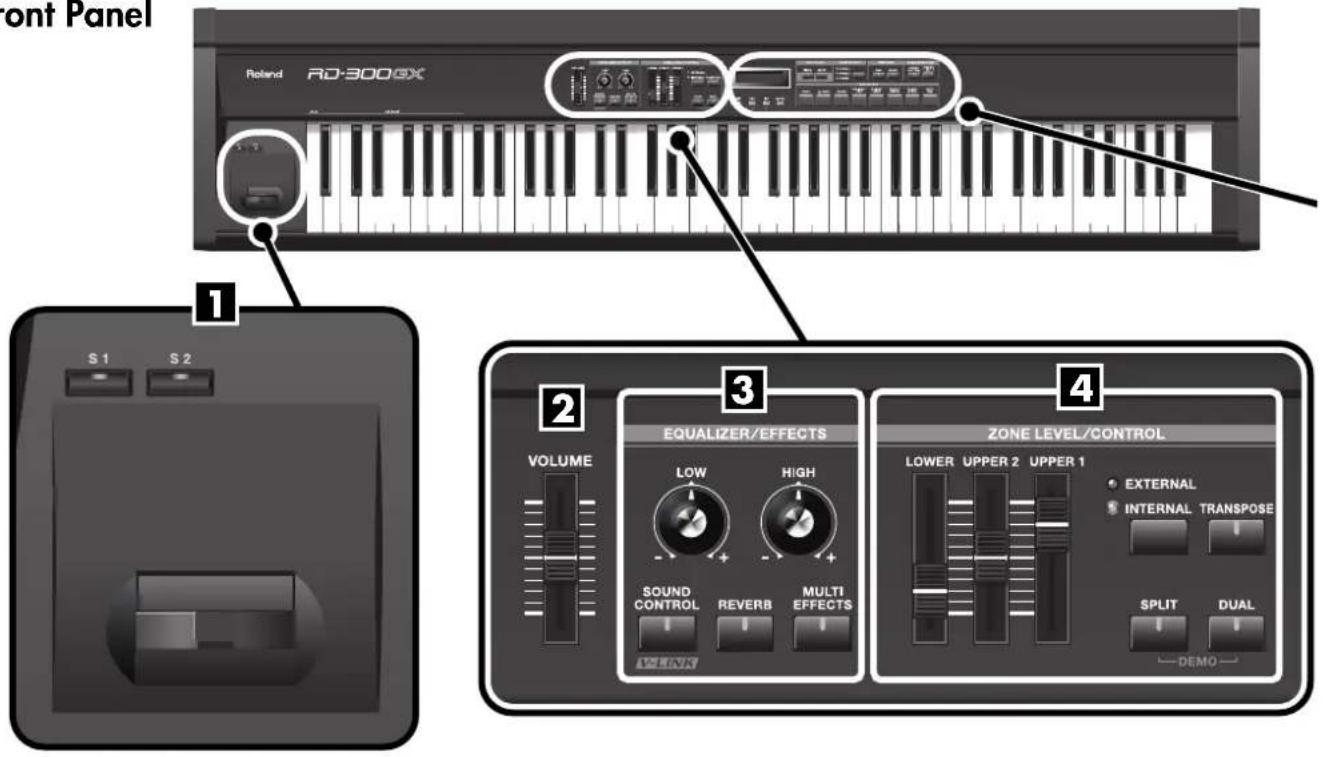
Front Panel Roland RD-300GX S 1 S 2 1 2 3 EQUALIZER/EFFECTS VOLUME LOW HIGH SOUND CONTROL REVERB MULTI EFFECTS ZONE LEVEL/CONTROL LOWER UPPER 2 UPPER 1 ● EXTERNAL ● INTERNAL TRANPOSE SPLIT DUAL DEMO1. [S1] Button, [S2] Button
You can assign various functions to these buttons (p. 68). While performing, you can press these buttons to use the assigned functions.
Pitch Bend/Modulation Lever
This allows you to control pitch bend or apply vibrato (p. 34).
2. VOLUME Slider
Adjusts the overall volume that is output from the rear panel OUTPUT jacks, and PHONES jack (p. 20).
3. EQUALIZER/EFFECTS
[LOW] Knob
Adjusts the sound's low-frequency range (p. 36).
[HIGH] Knob
Adjusts the sound's high-frequency range (p. 36).
[SOUND CONTROL] V-LINK Button
Switching this on will reduce inconsistencies in the volume, and produce a more stable, consistent sound (p. 35).
Switching this on lets you control external V-LINK compatible video equipment connected to the RD-300GX (p. 82).
[REVERB] Button
Switches the reverb on/off (p. 33).
[MULTI EFFECTS] Button
Switches the multi-effects on/off (p. 47).
Adjust the volume level for each Zone (p. 31).
If the "EXTERNAL" indicator is lit, these sliders control the volume of an external MIDI sound module (p. 57).
[EXTERNAL/INTERNAL] Button
Puts the RD-300GX in control of the external MIDI sound generator (p. 55).
[TRANSPOSE] Button
Sets the range of the keyboard to transposed (p. 32).
[SPLIT] Button
This button selects "Split mode," whereby the keyboard is divided into two regions, allowing you to play separate sounds with the right and left hands (p. 29).
In addition, you can listen to the demo songs by simultaneously pressing this button and the [DUAL] button (p. 25).
[DUAL] Button
Switches the RD-300GX to "Dual mode," which enables performances with two separate Tones layered together (p. 28).
In addition, you can listen to the demo songs by simultaneously pressing this button and the [SPLIT] button (p.25).
![ROLAND RD-300GX - [DUAL] Button - 1](/content/2026/05/763507/images/7a8d2c1cc431f75e0c7f8ec429523c0696ebbfdabf22ab6a009996ce5b1fc180.jpg)
text_image
5 6 7 8 9 ONE TOUCH Piano SETUP ZONE SELECT UPPER 1 UPPER 2 LOWER FUNCTION EDIT WRITE SONG/AUDIO KEY SONG/ RHYTHM AUDIO KEY TONE SELECT Piano E. PIANO ORGAN STRINGS/ PAD QUITAR/ BASS BRASS/ WINDS VOICE/ SYNTH RHY/ GM2 EXIT DEC INC ENTER SHIFT 105. DISPLAY
This shows the Tone names and the values of various settings, etc.
[EXIT/SHIFT] Button
Pressed to return to a previous screen or to cancel a procedure that is in progress.
Additionally, this is pressed simultaneously with other buttons to execute various functions.
[DEC] Button, [INC] Button
These are used to modify values.
If you keep on holding down one button while pressing the other, the value change accelerates.
[ENTER] Button
This is used to finalize a value or execute an operation.
6. ONE TOUCH
[PIANO] Button
Selects the optimum settings for piano performances (p. 26).
[SETUP] Button
Calls up the stored settings (Setup) (p. 50).
7. ZONE SELECT Button
Selects the Zone for which the Tone is to be selected (p. 31).
ZONE SELECT Indicators
8. FUNCTION
[EDIT] Button
Press this button when you wish to adjust various settings (p. 63).
[WRITE] Button
Stores the current settings to Setup (p. 51).
This also stores the System settings (p. 64) and Piano
Designer settings (p. 60).
9. SONG/AUDIO KEY
[SONG/RHYTHM] Button
Switches Song on/off (p. 40).
Switches Rhythm on/off (p. 37).
[AUDIO KEY] Button
Switches Audio Key on/off (p. 42).
10.TONE SELECT Buttons
Pressed to select Tones (p. 27).
Rear Panel
text_image
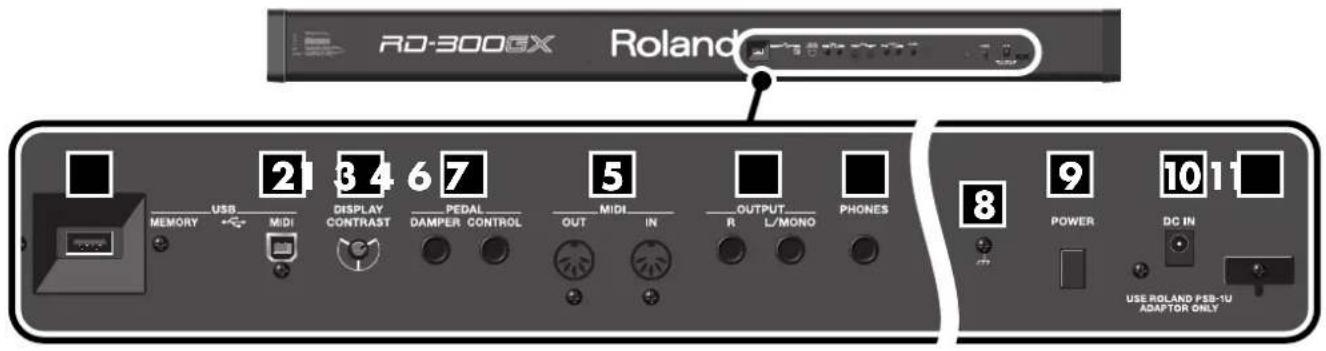
RD-300GX Roland 2 USB 34 67 5 MIDI IN OUTPUT PHONES 8 9 10 1 MEMORY MIDI DISPLAY CONTRAST PEDAL DAMPER CONTROL OUT IN R L/MONO L/MONO POWER DC IN USE ROLAND PSB-1U ADAPTOR ONLY USE ROLAND PSB-1U1. USB MEMORY Connector
Separately sold USB memory or a commercially available CD-ROM drive can be connected here (p. 21).
2. USB MIDI Connector
You can connect this to your computer so that it can exchange performance data with the RD-300GX (p. 81).
3. [DISPLAY CONTRAST] Knob
Adjusts the display's contrast (p. 20).
4. PEDAL Jacks (DAMPER, CONTROL)
Connecting the pedal switch (DP series) provided with the RD-300GX to the DAMPER jack allows you to use the switch as a damper pedal. (p. 18) With a pedal connected to the CONTROL jack, you can then assign a variety of functions to the pedal (p. 68).
5. MIDI Connectors (IN, OUT)
Used for connecting external MIDI devices and for transmission of MIDI messages (p. 53, p. 78).
6. OUTPUT L (MONO)/R Jacks
Provide output of the audio signals. These are connected to an amp or other device. For monaural output use the L/MONO jack. (p. 17)
7. PHONES Jack
A set of headphones can be connected to this jack (p. 17). Even when headphones are connected, sound will still be output from the OUTPUT jacks.
8. Ground Terminal (p. 16)
9. [POWER] Switch
Switch turns the power on/off (p. 19).
10.DC IN Jack
Connect the included AC adaptor here (p. 16).
11.Cord Hook
Use this to fix in place the cord from the supplied AC adaptor (p. 16).
Placing the RD-300GX on a Stand
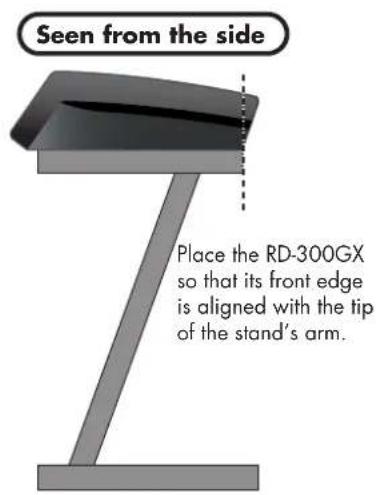
If you place the RD-300GX on a stand, you must use the KS-12 or KS-18Z (sold separately). When placing the RD-300GX on the KS-12 or KS-18Z, place it in the position shown below.
NOTE
Using the RD-300GX with any other stand may produce an unstable situation, possibly causing the instrument to fall or overturn, and resulting in injury or damage.
NOTE
For details on how to assemble the stand, refer to the owner's manual that accompanied the stand.
If using the KS-18Z stand
- Adjust the stand to a level no higher than the fourth level from the bottom.
- Adjust the width of the stand to the maximum width.
text_image
Seen from the side Place the RD-300GX so that its front edge is aligned with the tip of the stand's arm.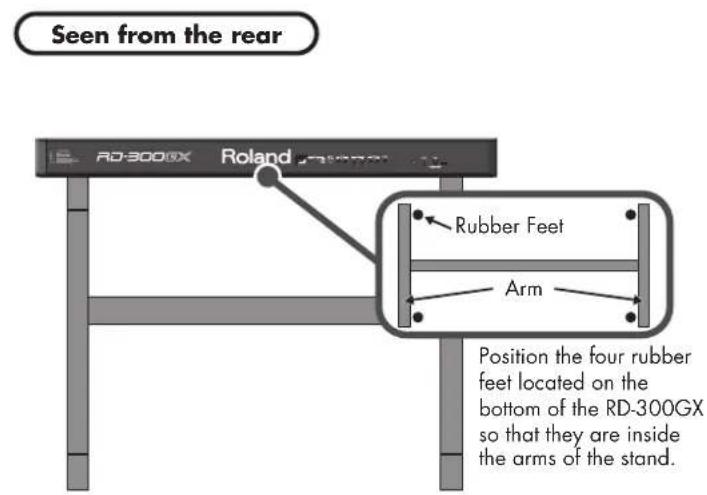
text_image
Seen from the rear RD-300GX Roland Rubber Feet Arm Position the four rubber feet located on the bottom of the RD-300GX so that they are inside the arms of the stand.If using the KS-12 stand
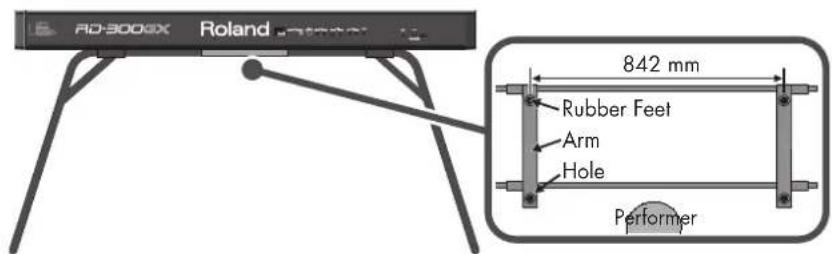
- Position the stand so that its arms extend toward the performer.
- Adjust the stand to the sixth (842 mm) of the seven steps of width.
Seen from the rear
text_image
AD-300GX Roland 842 mm Rubber Feet Arm Hole PerformerPosition the four rubber feet located on the bottom of the RD-300GX so that they go into the holes in the arms of the stand.
NOTE
When placing the RD-300GX on the stand, be careful not to pinch your fingers between the instrument and the stand.
Connecting the AC Adaptor
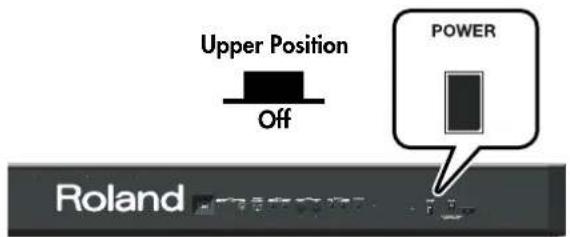
- Make sure that the [POWER] switch located at the left side of the keyboard is off (in the upward position).
text_image
Upper Position Off POWER Roland- Move the VOLUME slider all the way down to minimize the volume.
- Connect the supplied Power Cord to the supplied AC adaptor.

flowchart
graph LR
    A["AC adaptor"] --> B["Power Cord"]
    B --> C["AC Outlet"]
    D["Indicator"] --> A

Place the AC adaptor so the side with the indicator (see illustration) faces upwards and the side with textual information faces downwards.
The indicator will light when you plug the AC adaptor into an AC outlet.
-
Connect the AC adaptor to the RD-300GX's DC IN jack, and plug the power cord into an AC outlet.
-
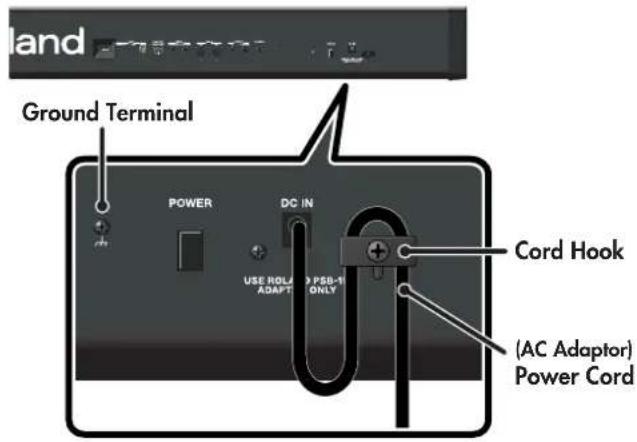
Loop the AC adaptor cord around the cord hook to fasten it in place.
text_image
Ground Terminal POWER DC IN USE ROLLAR PSB-R ADAPT ONLY Cord Hook (AC Adaptor) Power Cord
To prevent the inadvertent disruption of power to your unit (should the plug be pulled out accidentally), and to avoid applying undue stress to the AC adaptor jack, anchor the power cord using the cord hook, as shown in the illustration. Even if the cord is fastened, strong tension applied to the cord may cause it to be damaged or broken. Be careful not to pull the cord accidentally, or to apply strong pressure to it.

Depending on the circumstances of a particular setup, you may experience a discomforting sensation, or perceive that the surface feels gritty to the touch when you touch this device. This is due to an infinitesimal electrical charge, which is absolutely harmless. However, if you are concerned about this, connect the ground terminal (see figure) with an external ground. When the unit is grounded, a slight hum may occur, depending on the particulars of your installation. If you are unsure of the connection method, contact the nearest Roland Service Center, or an authorized Roland distributor, as listed on the "Information" page.
Unsuitable places for connection
•Water pipes (may result in shock or electrocution)
•Gas pipes (may result in fire or explosion)
- Telephone-line ground or lightning rod (may be dangerous in the event of lightning)
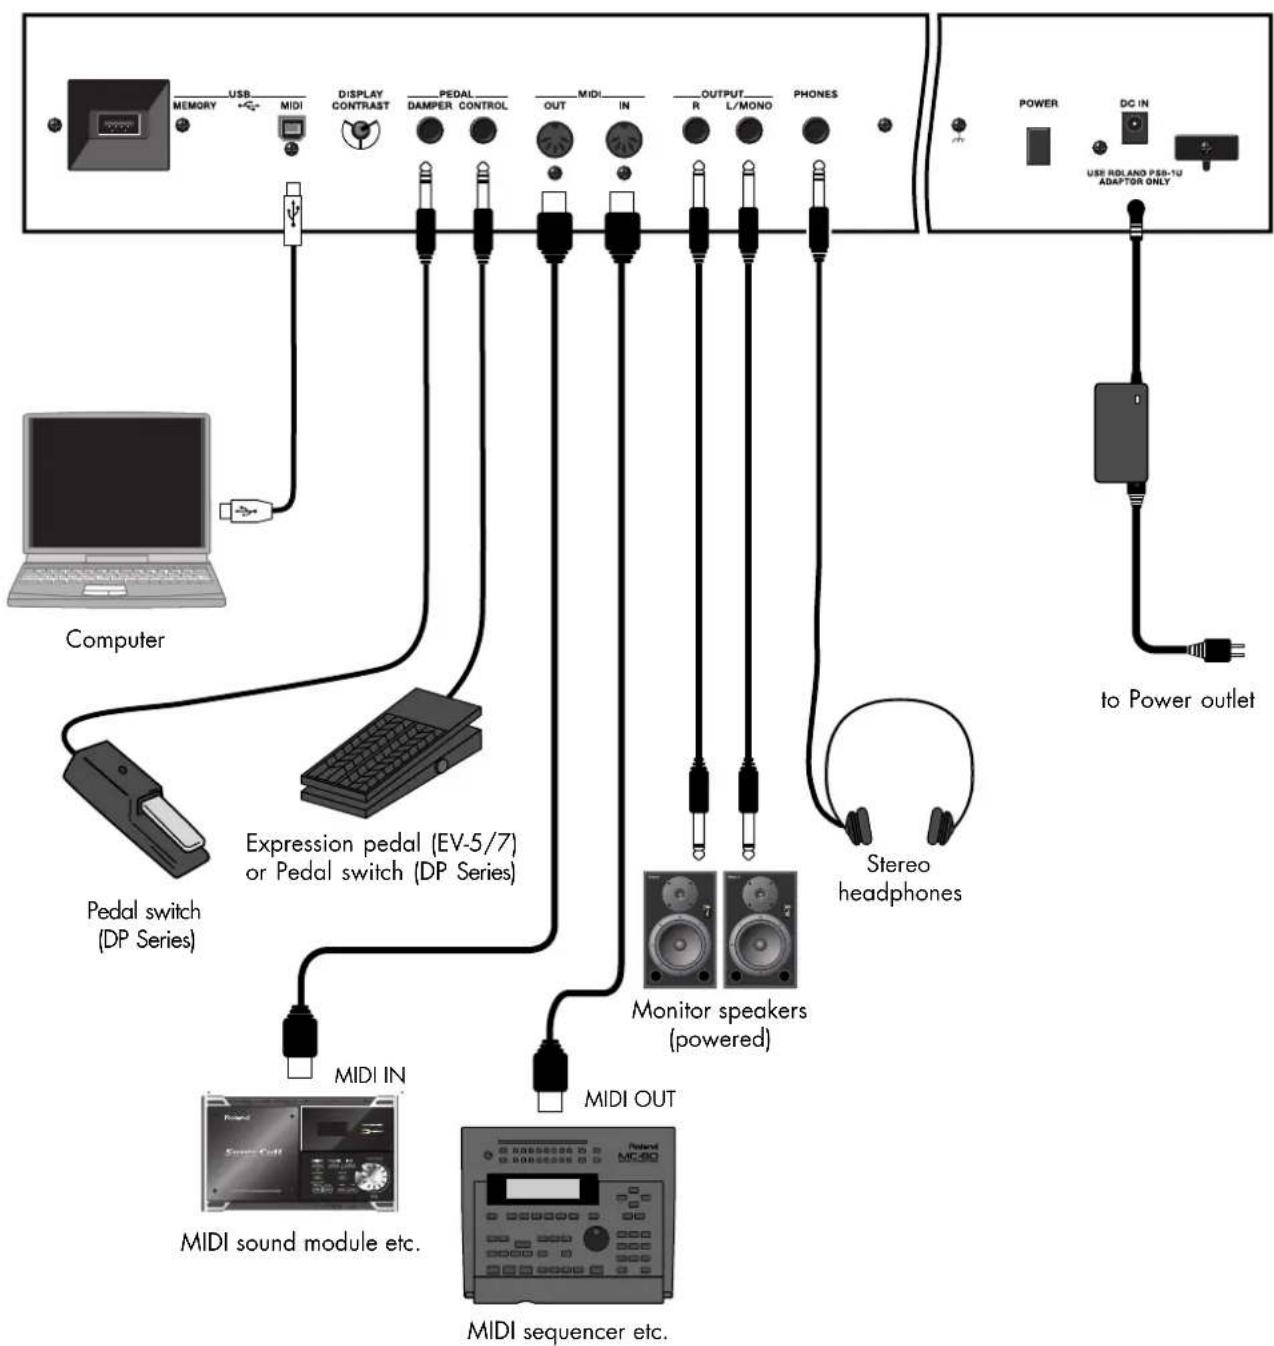
Connecting the External Equipment to RD-300GX
The RD-300GX is not equipped with an amplifier or speakers. In order to produce sound, you need to hook up audio equipment such as a monitor speaker or a stereo set, or use headphones.

Audio cables, USB cables, MIDI cables, headphones, expression pedals, and USB memory are not included. Consult your Roland dealer if you need to purchase accessories such as these.

To prevent malfunction and/or damage to speakers or other devices, always turn down the volume, and turn off the power on all devices before making any connections.
flowchart
graph TD
    A["Computer"] --> B["Podalog"]
    B --> C["LED System"]
    C --> D["USB Memory"]
    C --> E["MIDI"]
    D --> F["Display Contrast"]
    E --> G["DAMPER CONTROL"]
    F --> H["OUT"]
    G --> I["IN"]
    H --> J["R"]
    I --> K["L/MONO"]
    J --> L["OUTPUT"]
    K --> M["PHONES"]
    L --> N["Power"]
    M --> O["DC IN"]
    N --> P["Power outlet"]
    O --> Q["to Power outlet"]
    R["Expression pedal (EV-5/7) or Pedal switch (DP Series)"] --> S["MIDI IN"]
    T["MIDI sound module etc."] --> U["MIDI OUT"]
    V["MIDI sequencer etc."] --> W["MIDI OUT"]
    X["Stereo headphones"] --> Y["Monitor speakers (powered)"]
- Before you begin making connections, confirm the following.
Is the volume level of the RD-300GX or connected amp turned all the way down?
Is the power to the RD-300GX or connected amp turned off?
-
Connect supplied AC adaptor to the DC IN of the RD-300GX, and plug the other end into an AC outlet.
-
Connect the RD-300GX and external devices.
Use audio cables to connect audio equipment, such as an amp or speakers.
Use MIDI cables to connect MIDI devices. Use USB cables to connect computer.
If you are using headphones, plug them into the PHONES jack.
Connect pedal switches or expression pedals as necessary.
NOTE
Use Stereo headphones.
NOTE
Use only the specified expression pedal (EV-5/7; sold separately). By connecting any other expression pedal, you risk causing malfunction and/or damage to the unit.
NOTE
You can connect a floppy disk drive (sold separately) or a commercially available CD drive to the USB MEMORY connector (p. 14). You can use a floppy disk drive or CD drive to play back songs from a floppy disk or CD.
Connecting Pedals
Connect the pedal included with the RD-300GX to one of the PEDAL jacks.
When connected to the DAMPER jack, the pedal can be used as a damper pedal.
Connecting the pedal to the CONTROL jack allows you to assign a variety of functions to the pedal (p. 68).
NOTE
Set the switch on the included pedal to "Continuous" when the pedal is connected.
Turning the Power On and Off

Once the connections have been completed, turn on power to your various devices in the order specified. By turning on devices in the wrong order, you risk causing malfunction and/or damage to speakers and other devices.
Turning On the Power
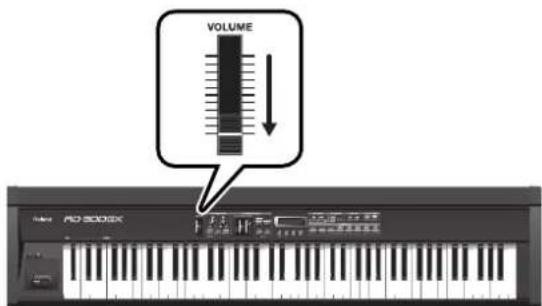
1. Before you turn on the power, use the VOLUME slider to minimize the volume.
Also completely turn down the volume of any connected audio device and other equipment.
text_image
VOLUME KNO-50080K2. Press the [POWER] switch on the back of the RD-300GX to turn on the power.
The unit is powered up, and the display's backlighting comes on.
![ROLAND RD-300GX - Press the [POWER] switch on the back of the RD-300GX to turn on the power. - 1](/content/2026/05/763507/images/51bbaddb6bab1a2b05aae326a6081fe8cb30ce2d624c3d5dd8c20b5983dbd6f6.jpg)
text_image
Lower Position On POWER RD-300GX Roland![ROLAND RD-300GX - Press the [POWER] switch on the back of the RD-300GX to turn on the power. - 2](/content/2026/05/763507/images/fdcc3cfe5e7f84b7083d6d83c092f5da2da1a98cbf0b969b8598d2dc5d608b28.jpg)
To prevent incorrect functioning of the Pitch Bend/Modulation Lever (p. 34), refrain from touching the lever while the power to the RD-300GX is turned on.
![ROLAND RD-300GX - Press the [POWER] switch on the back of the RD-300GX to turn on the power. - 3](/content/2026/05/763507/images/6d10afeb1a627f580259d3493beb987b31d5a60780a86965deea6fd9a9e73518.jpg)
This unit is equipped with a protection circuit. A brief interval (a few seconds) after power up is required before the unit will operate normally.
![ROLAND RD-300GX - Press the [POWER] switch on the back of the RD-300GX to turn on the power. - 4](/content/2026/05/763507/images/7f337596d633f6b4e4dc2a6fd2c0cf82589b27d1001fb165cdd2e51df530a1fe.jpg)
In the unlikely event the power is turned off or cut off while Factory Reset (p. 77) is in progress, the data may become corrupted, and it may require additional time for the unit to start up the next time.
- Turn on the power to connected external devices.
- Adjust the volume of the connected external devices.
- Adjust the RD-300GX's volume to obtain the proper volume level.
Turning Off the Power
- Before you turn off the power, move the volume down all the way by moving the VOLUME slider.
Also completely turn down the volume of any connected audio device and other equipment.
- Turn off the power to connected external devices.
- Press the [POWER] switch on the back of the RD-300GX.
The power is switched off.

If you need to turn off the power completely, first turn off the [POWER] switch, then unplug the power cord from the power outlet. Refer to "Power Supply" (p. 6).
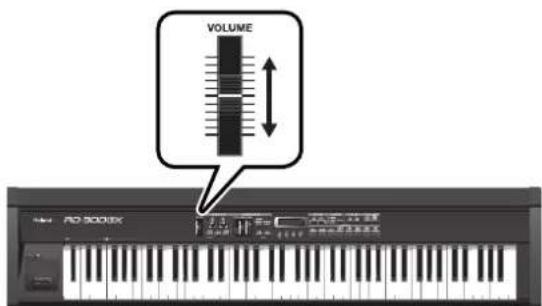
Adjusting the Volume
text_image
VOLUME RIO 30016X- Adjust the volume using the VOLUME slider.
Move the slider up to increase the volume, or down to lower it.
Also adjust the volume of the connected devices to an appropriate level.
Adjusting the Display Contrast ([DISPLAY CONTRAST] Knob)
The characters in the display may be difficult to view immediately after turning on the power or after extended use; this may also be because of where and how the display is situated.
In such instances, adjust the display contrast by turning the [DISPLAY CONTRAST] knob on the rear panel.
![ROLAND RD-300GX - Adjusting the Display Contrast ([DISPLAY CONTRAST] Knob) - 1](/content/2026/05/763507/images/71a4f9ff331bd82f481c16b76a89e36390f96137842f3751aa29fe3861fc65c2.jpg)
text_image
DISPLAY CONTRAST RD-300GX RolandUsing a USB Memory
You can copy Setup files and song files to separately sold USB memory for safekeeping. You can also play back SMF music files that's saved on USB memory (p. 40), or play audio files from USB memory (p. 42).

You can also use a separately sold floppy disk drive to copy data to a floppy disk. For details, refer to the owner's manual of your floppy disk drive.

Use USB memory and floppy disk drive available from Roland. Proper operation cannot be guaranteed if other USB device is used.
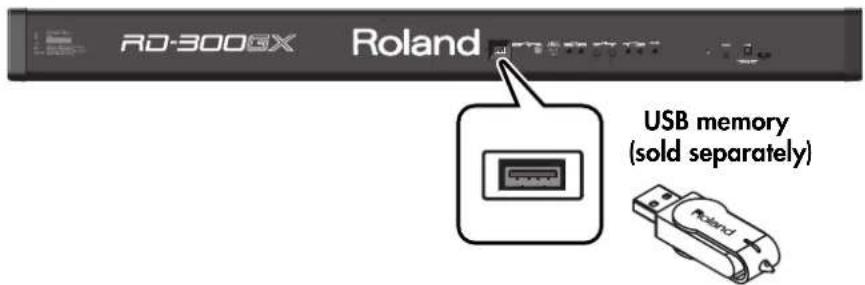
Connecting a USB Memory
- Connect your USB memory to the USB MEMORY connector located on the RD-300GX's rear panel.
text_image
RD-300GX Roland USB memory (sold separately)Carefully insert the USB memory all the way in—until it is firmly in place.

If you're using new USB memory, you must first initialize (format) it on the RD-300GX. For details, refer to "Formatting Memory (Format)" (p. 76).

You can also connect a commercially available CD drive or floppy disk drive (sold separately) to the USB MEMORY connector.
Basic Organization of the RD-300GX
The RD-300GX can be divided into two sections: a controller section and a sound generator section.
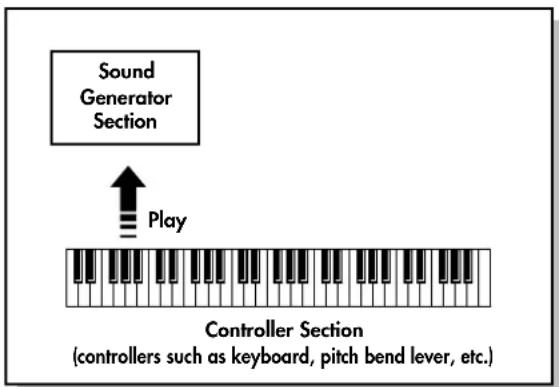
text_image
Sound Generator Section Play Controller Section (controllers such as keyboard, pitch bend lever, etc.)Controller Section
This section includes the keyboard, the Pitch Bend/Modulation lever, the panel knobs, the sliders, and any pedal connected to the rear panel. Actions such as pressing and releasing of keys on the keyboard, depressing a pedal, and so forth, are converted to MIDI messages and sent to the sound generator section, or to an external MIDI device.
Sound Generator Section
The sound generator section produces the sound. Here, MIDI messages received from the controller section or external MIDI device are converted to musical signals, which are then output as analog signals from the OUTPUT and PHONES jacks.
Units of Sound
When using the RD-300GX, you will notice that a variety of different categories come into play when working with sounds. What follows is a simple explanation of each sound category.
Tone
The individual sounds used when playing the RD-300GX are referred to as "Tones." Tones are assigned to each part. The Tones also include various groups of percussion instrument assembled into "Rhythm Sets." Each key (note number) of a Rhythm Set will produce a different percussion instrument.
Part
A sound generator of this type which can control multiple sounds using one device is referred to as a multitimbral sound generator. The RD-300GX contains a multitimbral sound generator capable of playing sixteen Tones simultaneously. "Parts" are where Tones that are created when the RD-300GX is used as a sound generator are assigned. Since different Tones can be assigned to each of the Parts and controlled individually, you can have multiple Tones play simultaneously, divide the keyboard into separate ranges and have different Tones sound in the different parts (Split), and enjoy playing ensemble performances.
The sixteen Parts played by the RD-300GX's internal sound generator are referred to as "Internal Parts."
Zone
The RD-300GX features three Parts (UPPER 1, UPPER 2, and LOWER) that you can use for freely controlling the Internal Parts with the RD-300GX's buttons and keyboard. These three Parts that are used for controlling the Internal Parts are collectively known as the "Internal Zone."
Furthermore, you can freely control external MIDI sound generators with the RD-300GX in the same manner as with the Internal Zone. You can likewise control the external MIDI sound generator with the three Parts (UPPER 1, UPPER 2, and LOWER), with this group of three Parts being referred to as the "External Zone." The external MIDI sound generator is assigned to these three Parts for control.
Basic Operation
Main Screens
ONE TOUCH Screen
When the ONE TOUCH [PIANO] button is pressed, setting the RD-300GX to the optimal status for Piano performances, this screen is displayed.
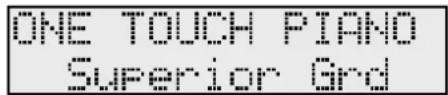
text_image
ONE TOUCH PIANO SUPERIOR ENDTone Screen (Basic Screen)
The names of the Tones currently selected for the Internal Zone are displayed. This is the screen that is ordinarily displayed. You can change the Internal Zone (UPPER 1, UPPER 2, and LOWER) Tones.
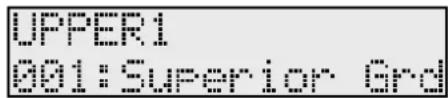
text_image
UPPER! UPPER: SUPERIOR. BndSetup Screen
The currently selected Setup is displayed (p. 50). You can have this screen displayed by pressing the ONE TOUCH [SETUP] button. You can change the Setups.
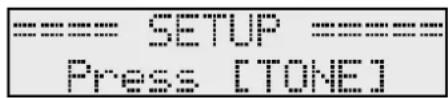
text_image
SETUP FREE COUNESSong Screen Rhythm Screen
When you press the [SONG/RHYTHM] button, the Song screen or Rhythm screen will appear.
In the Song screen, you can select and play songs (p. 40). You can also connect USB memory (sold separately) to the USB MEMORY connector and play SMF music files or audio files that you've saved in the USB memory.
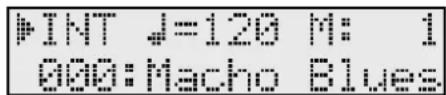
text_image
INT 4=120 M: 1 OKM: Macho Blues.If SMF music file is selected, the measure number is shown in the upper right of the screen. If an audio file is selected, the playing time is shown in the upper right of the screen.
In the Rhythm screen, you can change Rhythm patterns, and the tempo (p. 37).
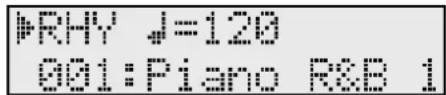
text_image
RHY 4=120 991:Piano R&R 1Switching between the Rhythm screen and Song screen
- While continuing to hold down the [EXIT/SHIFT] button, use the [DEC] [INC] buttons to move the cursor to the upper left of the screen.
- The Rhythm screen will appear if you use the [DEC] [INC] buttons to select "RHY," and the Song screen will appear if you select "INT" or "USB."
Audio Key Screen
Pressing the [AUDIO KEY] button switches the RD-300GX to this screen.
You can perform while playing back audio files you've saved on USB memory (sold separately) (p. 42).
Press Key BpA to B1
External Screen
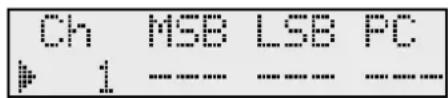
When the [EXTERNAL/INTERNAL] button is pressed, the EXTERNAL indicator lights up, and the RD-300GX switches to the mode enabling it to control an external MIDI sound generator. The status of this button determines whether the RD-300GX's buttons are used to control the Internal Zone (INTERNAL indicator lights up), or to control the External Zone (EXTERNAL indicator lights up). In addition, you can make detailed settings for the MIDI messages to be transmitted to the external sound generator (p. 58).
About the Function Buttons
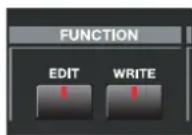
[EDIT] Button
By pressing the [EDIT] button to make the indicator light, you can enter "Edit mode." In Edit mode you can make detailed settings for various functions.
You can exit Edit mode by pressing the [EDIT] button, extinguishing its indicator.
[WRITE] Button
Stores the current settings to "Setup" (p. 51).
Editing a Value
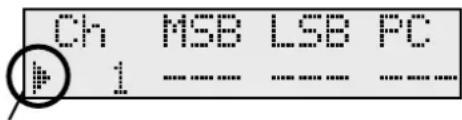
If more than one item is shown in a single screen, the "icon will appear at the left of the item name or value you're editing. This icon is called the "cursor." You can move the cursor by holding down the [EXIT/SHIFT] button and using the [DEC] [INC] buttons.
Use the [DEC] [INC] buttons to edit the value of an item for which the cursor ( ) is displayed.
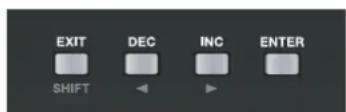
[DEC] [INC] Buttons
Pressing the [INC] button increases the value, and the [DEC] button decreases it.
If you want the value to continue changing, simply hold down the [DEC] button or [INC] button. For faster value increases, keep the [INC] button pressed down and press the [DEC] button. For decreasing value faster, keep the [DEC] button pressed down and press [INC] button.
Simultaneously pressing the [DEC] and [INC] buttons sets that parameter to the standard default value or switches it off.
Here's how to listen to these songs.
The RD-300GX features the internal demo songs that exhibit the special capabilities of the instrument.
| No. | Song Name Composer Copyright | |
| 01. | Macho Blues John Maul © 2008 Roland Corporation | |
| 02. | Fond Farewell | Adrian Scott © 2008 Roland Corporation |
| 03. | Superior Grand | Scott Tibbs © 2004 Roland Corporation |
![ROLAND RD-300GX - [DEC] [INC] Buttons - 1](/content/2026/05/763507/images/03a3e3164445373e38fc994f6f3f1e5d1bfb078b0018f56feac68f63cd07de32.jpg)
All rights reserved. Unauthorized use of this material for purposes other than private, personal enjoyment is a violation of applicable laws.
![ROLAND RD-300GX - [DEC] [INC] Buttons - 2](/content/2026/05/763507/images/fe2e0f8b1077f807ee895ed8d5dbbf4f09b0526ca87a5f75596a37750f925515.jpg)
No data for the music that is played will be output from the MIDI OUT connector.
![ROLAND RD-300GX - [DEC] [INC] Buttons - 3](/content/2026/05/763507/images/9ae6184e2e61857f522b70659793b5edf46ae1dcbc5e8a1a18e602da2d24a8bd.jpg)
text_image
VOLUME EQUALIZER/EFFECTS LOW HIGH SOUND CONTROL REVERS MULTI EFFECTS ZONE LEVEL/CONTROL LOWER UPPER 2 UPPER 1 * EXTERNAL * INTERNAL TRANPOSE SPLIT DUAL --- DEMO --- EXIT DEC INC ENTER SHIFT ONE TOUCH ZONE SELECT FUNCTION SONG/AUDIO KEY PIANO SETUP * UPPER 1 * UPPER 2 * LOWER TONE SELECT PIANO E. PIANO ORGAN STRINGS/ PAD QUTAR/ BASSE BRASS/ WINDS VOICE/ SYNTH RHY/ GMS![ROLAND RD-300GX - [DEC] [INC] Buttons - 4](/content/2026/05/763507/images/66c953164cbd06a6dbcd36616c035161c0e0598227ff2903cb230589ba20a160.jpg)
When you enter Demo mode, the various settings will be in the same state as they are immediately after the RD-300GX is powered up. Store any arrangements of settings that you want to keep in Setup (p. 51).
- Hold down the [SPLIT] button and press the [DUAL] button.
The Demo screen appears.
RD-300GX DEMO 1: Macho Blues
- Use the [DEC] [INC] buttons to select the song you want to hear.
- Press the [ENTER] button to start the playback of the song.
When the last song finishes playing, playback will return to the first song and continue.
- Press the [EXIT/SHIFT] button or the [ENTER] button to stop a song during playback.
- Press the [EXIT/SHIFT] button while the song is stopped to finish with the Demo screen.
![ROLAND RD-300GX - [DEC] [INC] Buttons - 5](/content/2026/05/763507/images/877781a1fc5537115561d0b8f3f4247a0a2dd83d64801328135515bd97a0f21a.jpg)
Regardless of whether the song is playing or stopped, pressing the ONE TOUCH [PIANO] button ends the demo and returns the original screen to the display.
Piano Performances (ONE TOUCH [PIANO] Button)
Now, try performing with the piano.
The RD-300GX lets you call up the ideal settings for piano performance at any time simply by pressing a button.
![ROLAND RD-300GX - Piano Performances (ONE TOUCH [PIANO] Button) - 1](/content/2026/05/763507/images/5f428cc44dee56ba7cc4f9a0c34463c7d81801fa49b379f7663f2a2a92a7485a.jpg)
text_image
EQUALIZER/EFFECTS ZONE LEVEL/CONTROL VOLUME LOW HIGH LOWER UPPER 2 UPPER 1 EXTERNAL INTERNAL TRANPOSE SPLIT DUAL SEM ONE TOUCH Piano TUP UNITER 1 UPPER 2 LOWER OPTION FUNCTION EDIT WRITE SONG/AUDIO KEY SOUND/RHYTHM AUDIO KEY TONE SELECT PIANO E. PIANO ORGAN STRINGS/PAD GUITAR/BASS BRASS/WINDS VOICE/SYNIH RHY/GM21. Press the ONE TOUCH [PIANO] button.
The ONE TOUCH PIANO screen appears.
![ROLAND RD-300GX - Press the ONE TOUCH [PIANO] button. - 1](/content/2026/05/763507/images/73ef827f7ef9d28c86bad57edbfe54aaa4c94dbe22e041728052199a05e4b14f.jpg)
text_image
ONE TOUCH PIANO SUPERIOR GridPressing the ONE TOUCH [PIANO] button sets the entire keyboard to play with the piano tone.
![ROLAND RD-300GX - Press the ONE TOUCH [PIANO] button. - 2](/content/2026/05/763507/images/f23af9e6b0eea1879535e33e1d0ac6b42f70e9deb05c50b9a470931851342d4b.jpg)
Pressing the ONE TOUCH [PIANO] button restores all of the settings except for the Piano Designer (p. 60) settings to their status at the time the power was turned on. If you want to preserve these settings, record them to a Setup (p. 50).
![ROLAND RD-300GX - Press the ONE TOUCH [PIANO] button. - 3](/content/2026/05/763507/images/d9859a3742e71a3aacfc0b1b4e2d94ccb309251632e5d9ec31ab2a4702e816d3.jpg)
You can use the [DEC] [INC] buttons in the ONE TOUCH PIANO screen to adjust the amount the grand piano lid is opened.
![ROLAND RD-300GX - Press the ONE TOUCH [PIANO] button. - 4](/content/2026/05/763507/images/013a47c603a15828a0feac0fa1494e6b473c5f7aedcc3312a35c4a31e6c43d0b.jpg)
You can specify whether song playback will stop if you press the ONE TOUCH [PIANO] button while a song is playing. For details, refer to "Having Song Playback Stop when You Press a ONE TOUCH Button (Song Stop Mode)" (p. 67).
With the RD-300GX, you can also make more detailed settings to make the sound even better match your favorite piano performances. You can store the settings configurations to the ONE TOUCH [PIANO] button.
Please refer to the following as needed.
- Fine Adjustment of Piano Tones (Piano Designer) → p. 60
Performing with a Variety of Tones (TONE SELECT Buttons)
The RD-300GX comes with a many built-in Tones.
Each one of these individual sounds is called a "Tone."
Tones are assigned to the TONE SELECT buttons according to the Tone category selected.
Try selecting and performing with a number of different Tones.
text_image
EQUALIZER/EFFECTS ZONE LEVEL/CONTROL VOLUME LOW HIGH LOWER UPPER 2 UPPER 1 EXTERNAL INTERNAL TRANSPOSE SPLIT DUAL —— DEMO — EXIT DEC INC ENTER ONE TOISH ZONE SELECT FUNCTION SONG/AUDIO KEY PIANO TUP UPPER 1 EDIT WRITE SONG/RHY/MK AUDIO KEY TONE SELECT PIANO E. PIANO ORGAN STRINGS/PAD GUITAR/BASS BRASS/WINDS VOICE/SYNTH RHY/GM31. Press the ONE TOUCH [PIANO] button.
This selects a single tone to be played over the entire keyboard.
![ROLAND RD-300GX - Press the ONE TOUCH [PIANO] button. - 1](/content/2026/05/763507/images/f16358ce13de3fd73293ccbb6cf86db1a40127806364bbbab72194ffec929cd2.jpg)
text_image
ONE TOUCH PIANO Superior Grd![ROLAND RD-300GX - Press the ONE TOUCH [PIANO] button. - 2](/content/2026/05/763507/images/4d2a30e25b3163d10594a572dc9a7fff26f549a1254b162bdb98ef28d537edb3.jpg)
If multiple tones are playing, do not press the ONE TOUCH [PIANO] button, but instead select the Zone containing the Tone to be changed using the ZONE SELECT button. Refer to "Changing the Tone for a Zone (ZONE SELECT Button)" (p. 31).
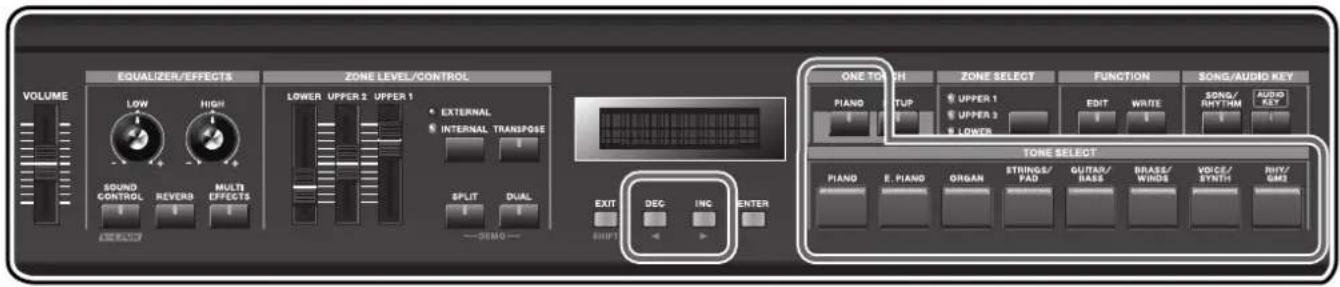
2. Press any of the TONE SELECT buttons to select the Tone category.
The indicator of the TONE SELECT button for the selected category will light.
text_image
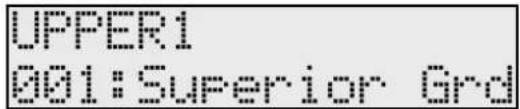
UPPER1 001: Superior Grid3. Use the [DEC] [INC] buttons to select the Tone.
Play the keyboard, and you will hear the selected Tone.
The next time you choose this TONE SELECT button, the Tone you're selected here is played.
![ROLAND RD-300GX - Use the [DEC] [INC] buttons to select the Tone. - 1](/content/2026/05/763507/images/814465d6e183860d33120ef2ebbd002b50a742d91171b4dc5dc78f802d02c42a.jpg)
Tones selected with the [RHY/GM2] button are registered in the following order: "Rhythm Sets," "GM2 Rhythm Sets," and "GM2 Tones." Refer to the "Tone List" (p. 91).
Playing Multiple Tones with the Keyboard
The RD-300GX features three Internal Zones (UPPER 1, UPPER 2, and LOWER), and one Tone can be assigned to each of these Zones.
You can perform using combinations of Tones by turning each Zone on or off. You can have multiple Tones layered together at the same time, and even have different Tones played in the left and right parts of the keyboard.
Performing with Layered Tones ([DUAL] Button)
The RD-300GX lets you layer two Tones so that they will sound together.
![ROLAND RD-300GX - Performing with Layered Tones ([DUAL] Button) - 1](/content/2026/05/763507/images/ddb7db7e42b4ce2dc53712ec3078657ad87057716485021c4da42c9d273da8c2.jpg)
text_image
EQUALIZER/EFFECTS VOLUME LOW HIGH SOUND CONTROL REVERB MULTI EFFECTS ZONE LEVEL/CONTROL LOWER UPPER 1 UPPER 1 EXTERNAL INTERNAL TRANPOSE SPLIT DUAL EMO — ONE TOUCH ZONE SELECT FUNCTION SONG/AUDIO KEY PIANO SETUP UPPER 1 UPPER 2 UPPER 3 LOWER TONE SELECT PIANO E. PIANO ORGAN STRINGS/PAD QUITAR/BASS BRASS/WINDS VOICE/SYNTH RHY/GMS1. Press the [DUAL] button, getting the indicator to light.
Try fingering the keyboard.
![ROLAND RD-300GX - Press the [DUAL] button, getting the indicator to light. - 1](/content/2026/05/763507/images/b659e82bdfc1031d33b8b37d178631c02ac2bec39ecad5023b75afc19918918d.jpg)
text_image
UPPER2 001:Rich StringsThe Tones for UPPER 1 and UPPER 2 are layered and played.
![ROLAND RD-300GX - Press the [DUAL] button, getting the indicator to light. - 2](/content/2026/05/763507/images/a32a84cf31f52f4b4e72a51e1420c01f978344cc3f12a2aa6b6a535b61e3e7a8.jpg)
text_image
UPPER 1 UPPER 22. Press the [DUAL] button once more, and the indicator light goes out.
The Tones for UPPER 1 played.
![ROLAND RD-300GX - Press the [DUAL] button once more, and the indicator light goes out. - 1](/content/2026/05/763507/images/a2493ca78506e227653dd5d1e3fa221475e2f2c20cfe4c6e12c0444c5f122c02.jpg)
The [DUAL] button has no effect while the EXTERNAL indicator is lit. In order to turn on the External Zone UPPER 2, you must set the MIDI channel for UPPER 2 (p. 55).
Pressing Two TONE SELECT buttons Simultaneously
You can layer two Tones by pressing two TONE SELECT buttons simultaneously.
For example, if you want to layer a piano sound with strings, together press both the [PIANO] button and the [STRINGS] button.
The [DUAL] button's indicator starts to flash, and when you begin playing the keyboard, the piano and strings sounds are layered together.
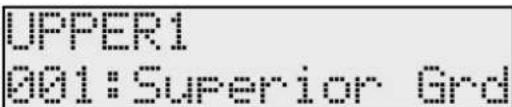
In this case, the Tone of the button you press first is assigned to UPPER 1, and the other is assigned to UPPER 2; the indicators of the two TONE SELECT buttons will light.
text_image
UPPER1 001: Superior GridOnce you have selected two TONE SELECT buttons, pressing either TONE SELECT button then selects that Tone to UPPER 1. The UPPER 2 indicator goes out, and that Tone stops playing. Also, the [DUAL] button's indicator will go out.
* The steps described above can be performed if the ZONE SELECT indicator UPPER 1 or UPPER 2 is lit.
Playing Different Tones in Two Different Sections of the Keyboard ([SPLIT] Button)
Such a division of the keyboard into right- and left-hand sections is called a "Split," and the key where the division takes place is called the "Split Point."
While in Split mode, a sound played in the right side is called an "Upper Tone," and the sound played in the left side is called a "Lower Tone." The split-point key is included in the LOWER section.
The Split Point has been set at the factory to "B3."
![ROLAND RD-300GX - Playing Different Tones in Two Different Sections of the Keyboard ([SPLIT] Button) - 1](/content/2026/05/763507/images/d51cb6fa2c4a9a9ce8ee6be6c4f9e929d276b8ce9cbeb4c63acd509666591fa6.jpg)
You can change the split point. Please refer to "Changing the Keyboard's Split Point" (p. 30).
![ROLAND RD-300GX - Playing Different Tones in Two Different Sections of the Keyboard ([SPLIT] Button) - 2](/content/2026/05/763507/images/75c628088d497d4d03e5f9644094e6ed99a1d61c2eaefb499ff3cbacd8996146.jpg)
text_image
VOLUME EQUALIZER/EFFECTS LOW HIGH SOUND CONTROL REVERB MULTI EFFECTS ZONE LEVEL/CONTROL LOWER UPPER 2 UPPER 1 * EXTERNAL * INTERNAL TRANPOSE Split DUAL EXIT DEC INC ENTER ONE TOUCH ZONE SELECT FUNCTION BONG/AUDIO KEY PIANO SETUP ↑ UPPER 1 ↓ UPPER 2 ↓ LOWER TONE SELECT PIANO E. PIANO ORGAN STRINGS/FAD GUTAR/BASS BRASS/WINDS VOICE/SYNTH RHY/GMS1. Press the [SPLIT] button, getting the indicator to light.
The ZONE SELECT "LOWER" indicator lights.
Try fingering the keyboard.
![ROLAND RD-300GX - Press the [SPLIT] button, getting the indicator to light. - 1](/content/2026/05/763507/images/256ad2d7b8e8a908a86b4e76b401c5a2ca9c483c4bdb1616044f30e11b3a189f.jpg)
text_image
LOWER 001: Acoustic Bass.The UPPER Tone plays in the right-hand section of the keyboard, and the LOWER Tone plays in the left-hand section.
![ROLAND RD-300GX - Press the [SPLIT] button, getting the indicator to light. - 2](/content/2026/05/763507/images/8b886561f9e97c14f443a020c3d855fafd3014d2a20f95cbba710c163561a69c.jpg)
text_image
Split Point (B3) UPPER2. To exit Split mode, press the [SPLIT] button once more, and the indicator light goes out.
Changing the Keyboard's Split Point
You can change the point at which the keyboard is divided (the Split Point) in Split mode.
1. Hold down the [SPLIT] button for several seconds.
A screen such as the following appears, and the current value of the setting is displayed.
![ROLAND RD-300GX - Hold down the [SPLIT] button for several seconds. - 1](/content/2026/05/763507/images/a3d9cd363f7d9ce7c9f2846197d5fbd55e6400208f8150c8b735db19115358c1.jpg)
text_image
Split Point B 32. Hold down the [SPLIT] button and press a key.
When you release the [SPLIT] button, the previous display will reappear.
The split-point key is included in the LOWER section.
![ROLAND RD-300GX - Hold down the [SPLIT] button and press a key. - 1](/content/2026/05/763507/images/7712424e2d7bcd9b11c7abeaa84ce9d75ef4b180e1410e8fe3e01cb976bf5eb2.jpg)
You can change the split point, adjusting it in semitone increments, by holding down the [SPLIT] button and using the [DEC] [INC] buttons.
![ROLAND RD-300GX - Hold down the [SPLIT] button and press a key. - 2](/content/2026/05/763507/images/ddc65eff6e6c3f2156a7c7159bccae5e98698e110b2bbdbce55747b57bce7a81.jpg)
You can divide the keyboard into left and right Zones, and play the LOWER Tone in the left Zone while playing the UPPER 1 and UPPER 2 Tones layered in the right Zone.
![ROLAND RD-300GX - Hold down the [SPLIT] button and press a key. - 3](/content/2026/05/763507/images/1a24cdd22f9a004b03cdfd7c577e871e79a93f601445d56c54570d456246d500.jpg)
text_image
UPPER1 UPPER2 LOWERChanging the Tone for a Zone (ZONE SELECT Button)
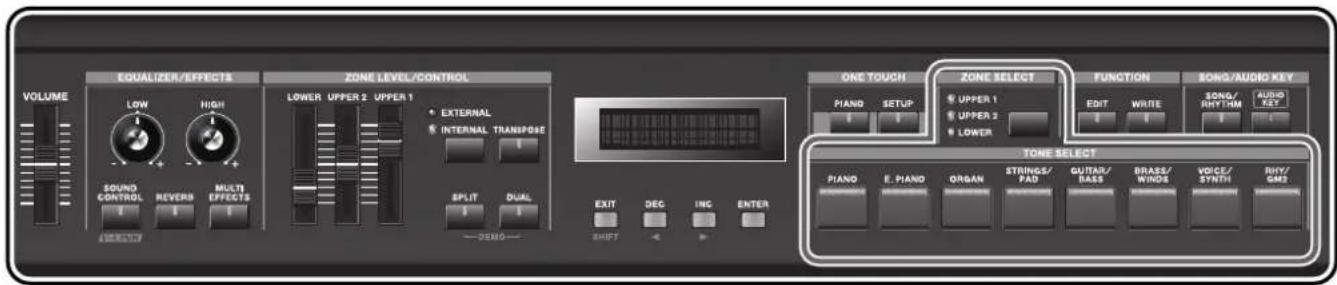
When changing the Tone assigned to a Zone, use the ZONE SELECT button to specify the Zone with the Tone you want to change.
text_image
VOLUME EQUALIZER/EFFECTS LOW HIGH SOUND CONTROL REVERS MULTI EFFECTS ZONE LEVEL/CONTROL LOWER UPPER 2 UPPER 1 EXTERNAL INTERNAL TRANSPOSE SPLIT DUAL ——— SMO—— ONE TOUCH ZONE SELECT FUNCTION BONG/AUDIO KEY PIANO SETUP EDIT WRITE SONG/RHYTH AUDIO KEY TONE SELECT PIANO E. PIANO ORGAN STRINGS/PAD GUTAR/RASS BRASS/WINDS VOICE/SYNTH RHY/GM2- Press the ZONE SELECT button so the ZONE SELECT indicator for the Zone you wish to select is lit or blink.
The indicator of the currently selected TONE SELECT button will light in the same color as the indicator of the selected Zone.
- Use the TONE SELECT buttons to select the Tone category, and then use the [DEC] [INC] buttons to select a Tone.

The [DUAL] button's indicator will blink if the UPPER 2 Zone is not on, and the [SPLIT] button's indicator will blink if the LOWER Zone is not on. If you want to play sounds in each Zone, press the corresponding button so the indicator is lit.
Adjusting the Volume Level for Individual Zones (ZONE LEVEL Sliders)
With the RD-300GX, each of the parts that is performed using the internal sound generator is referred to as an Internal Zone.
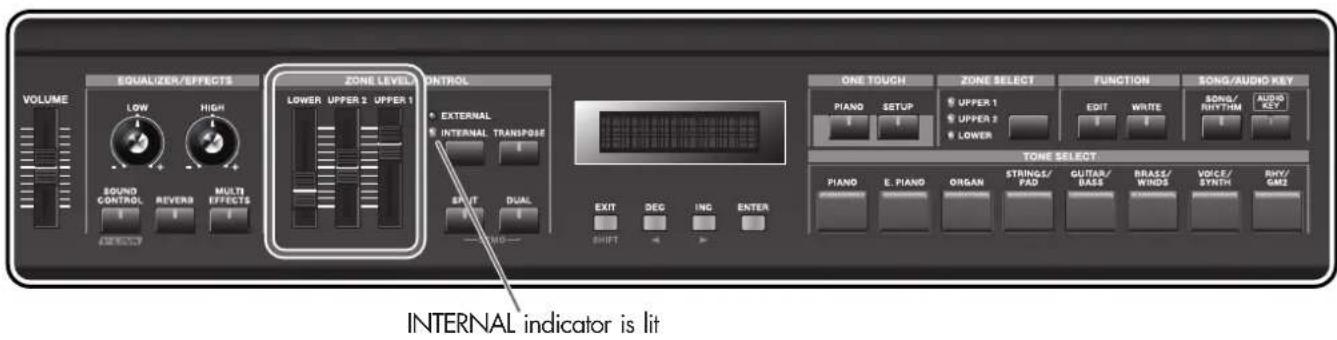
For each Zone (UPPER 1, UPPER 2, and LOWER), you can use the ZONE LEVEL sliders to adjust the volume of an individual Zone.
text_image
EQUALIZER/EFFECTS VOLUME LOW HIGH SOUND CONTROL REVERS MULTI EFFECTS ZONE LEVEL CONTROL LOWER UPPER 2 UPPER 1 EXTERNAL INTERNAL TRANSPOSE SPOT DUAL EXIT DEC INC ENTER ONE TOUCH ZONE SELECT FUNCTION SONG/AUDIO KEY PIANO SETUP UPPER 1 UPPER 2 LOWER TONE SELECT PIANO E. PIANO ORGAN STRINGS/ FAD GUTAR/ BASS BRASS/ WINDS VOICE/ SYNTH RHY/ GMZ INTERNAL indicator is lit
Use the VOLUME slider when adjusting the overall volume level (p. 20).
Zones to which Tones from external sound modules are assigned are called External Zones. With the RD-300GX, you can control both the External and Internal Zones in the same manner. For more on the control of External Zone, refer to "Adjusting the Volume of Each Zone (External Zone)" (p. 57).
Transposing the Key of the Keyboard ([TRANSPOSE] Button)
You can transpose performances without changing the keys you are playing, as well as change the pitch by an octave. This feature is called "Transpose."
This is a convenient feature to use when you want to match the pitch of the keyboard performance to a vocalist's pitch, or perform using the printed music for trumpets or other transposed instruments.
You can adjust the transpose setting in semitone steps over a range of -48-0-+48 relative to C4.
![ROLAND RD-300GX - Transposing the Key of the Keyboard ([TRANSPOSE] Button) - 1](/content/2026/05/763507/images/b0aa4d635a1ebfa7cea2bc502eefddd36c2e11f380d97de96e4730dba3a14273.jpg)
Note messages from MIDI IN connector will not be transposed.
![ROLAND RD-300GX - Transposing the Key of the Keyboard ([TRANSPOSE] Button) - 2](/content/2026/05/763507/images/6ae6ef08a429c6706fe3412461f527aed91512de59a29fe5dc62076415f8b2d4.jpg)
text_image
EQUALIZER/EFFECTS VOLUME LOW HIGH SPRING CONTROL REVERS MULTIEFFECTS ZONE LEVEL/CONTROL LOWER UPPER 2 UPPER 1 * EXTERIOR * INTERIOR TRANSPOSE SPLIT DUAL --- DEMG --- EXIT DEC INC ENTER SHIFT ONE TOUCH ZONE SELECT FUNCTION SONG/AUDIO KEY PIANO SETUP ↑ UPPER 1 EDIT WRITE SONG/ RHYTHM AUDIO ↓ UPPER 2 ↓ LOWER TONE SELECT PIANO E. PIANO ORGAN STRINGS/PAD GUTAR/BASS BRASS/WINDS VOICE/SYNTH RHY/GMS1. Hold down the [TRANSPOSE] button for several seconds.
A screen such as the following appears, and the current value of the setting is displayed.
Transpose +12
2. Hold down the [TRANSPOSE] button and press a key.
For example, to have "E" sound when you play "C" on the keyboard, hold down the [TRANSPOSE] button and press the E4 key. The degree of transposition then becomes "+4."
When you release the [TRANSPOSE] button, the previous display will reappear.
When the amount of transposition is set, the Transpose function switches on, and the [TRANSPOSE] button lights up.
When the transpose value is set to "0," the button's indicator will remain dark even if you press the [TRANSPOSE] button.
![ROLAND RD-300GX - Hold down the [TRANSPOSE] button and press a key. - 1](/content/2026/05/763507/images/885def52993fd042570766aeb1ce6d108f3891926169f94764cda3392f420a92.jpg)
You can also transpose by holding down the [TRANSPOSE] button and using the [DEC] [INC] buttons.
![ROLAND RD-300GX - Hold down the [TRANSPOSE] button and press a key. - 2](/content/2026/05/763507/images/7aa5f072bbcf33da28f260dd59bee6890b8643c4c3b3b76d8e24f54becedf3f1.jpg)
Even when the Transpose function is turned on, the Split Point remains unchanged (p. 30).
3. To turn off Transpose, press the [TRANSPOSE] button so that its indicator goes off.
The next time [TRANSPOSE] button is pressed, the sound is transposed by an amount corresponding to the value set here.
![ROLAND RD-300GX - To turn off Transpose, press the [TRANSPOSE] button so that its indicator goes off. - 1](/content/2026/05/763507/images/9db855cd861cca9e9b25869b4de792c43bdfa553c3757de13ec0e8bde5c91a69.jpg)
You can set the degree of transposition for each of the Zone individually. For details, refer to "Setting the Transposition for Each Individual Zone (Transpose)" (p. 70).
Adding Reverberation to the Sound ([REVERB] Button)
The RD-300GX can apply a reverb effect to the notes you play on the keyboard. Applying reverb adds pleasing reverberation to what you play, so it sounds almost as if you were playing in a concert hall.
![ROLAND RD-300GX - Adding Reverberation to the Sound ([REVERB] Button) - 1](/content/2026/05/763507/images/b2640cea6eab2570e6657ba1bb9c08e5f79b9cc23c762be109e7f936014ad9c2.jpg)
text_image
EQUALIZER/EFFECTS ZONE LEVEL/CONTROL VOLUME LOW HIGH SPRING CONTROL REVERB MULTI EPECTS LOWER UPPER 2 UPPER 1 * EXTERNAL * INTERNAL TRANSPOSE SPLIT DUAL — DEMO — EXIT DEC ING ENTER SHIFT ONE TOUCH ZONE SELECT FUNCTION SONG/AUDIO KEY PIANO SETUPUPPER 1
UPPER 2
EDIT WRITE SONG/RHYTH AUDIO KEY TONE SELECT PIANO E. PIANO ORGAN STRINGS/PAD GUTAR/BASS BRASS/WINDS VOICE/SYNTH RHY/GM3- Press the [REVERB] button, getting its indicator to light.
Try fingering the keyboard.
The reverb effect is applied to the entire tone.
- To eliminate the Reverb effect, press the [REVERB] button once more, extinguishing the indicator.
Changing the Reverb Effect Type
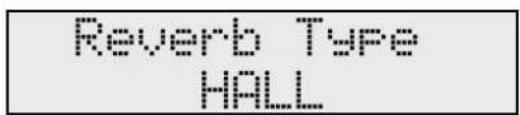
You can select from six different reverb effect types.
- While holding down the [EXIT/SHIFT] button, press the [REVERB] button.
text_image
Reverb Type HALL- Use the [DEC] [INC] buttons to switch the reverb type.
| TYPE | Explanation |
| STAGE | This reverb simulates the reverberation of a stage. It produces more reverberation than HALL. |
| ROOM | Simulates the reverberation of room interiors. It produces a well-defined and spacious reverberation. |
| HALL | Simulates the reverberation exhibited by hall. It provides a deeper reverberation than the Room reverbs. |
| PLATE | Simulates a plate reverb unit (a type of artificial reverb that utilized a metal plate). |
| GM2 REVERB | Reverb for use with GM2 |
| CATHEDRAL | This reproduces the reverb found in a church cathedral. |
- After determining the type, press the [EXIT/SHIFT] button.
Changing the Depth of Reverb Effect
You can select from 127 levels of depth for the reverb effect.
- Hold down the [REVERB] button and use the [DEC] [INC] buttons to change the depth of the reverb effect.
Reverb Depth 40
When you release the [REVERB] button, the previous display will reappear.

Reverb depth settings can be made independently for each Zone (p. 69).
Changing the Sound's Pitch in Real Time (Pitch Bend/Modulation Lever)
While playing the keyboard, move the lever to the left to lower the pitch, or to the right to raise the pitch. This is known as Pitch Bend.
You can also apply vibrato by manipulating the lever away from you. This is known as Modulation.
If you move the lever away from you and at the same time move it to the right or left, you can apply both effects simultaneously.

The effect obtained when you move the lever may differ according to the Tone being used. Additionally, the effect applied by moving the lever is predetermined for each Tone, and cannot be changed.
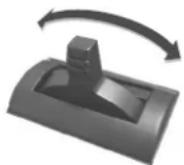
Pitch Bend
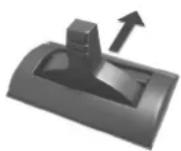
Modulation
Adding Liveliness to the Sound ([SOUND CONTROL] Button)
Switching on the Sound Control function suppresses differences in volume for a more consistent sound.
This is set to OFF when the power is turned on.
![ROLAND RD-300GX - Adding Liveliness to the Sound ([SOUND CONTROL] Button) - 1](/content/2026/05/763507/images/0f875f8c03aa114fdda644caeac591ad3e401eacbdc6b6df8dc2e9b97be6f32e.jpg)
text_image
EQUALIZER/EFFECTS ZONE LEVEL/CONTROL VOLUME LOW HIGH SOUND CONTROL EVERB MULT EFFECTS LOWER UPPER 2 UPPER 1 EXTERNAL INTERNAL TRANPOSE SPLIT DUAL NEXT EXIT DEC INC ENTER ONE TOUCH ZONE SELECT FUNCTION SONG/AUDIO KEY PIANO SETUP UPPER 1 UPPER 2 LOWER EDIT WRITE SONG/ RHYTHM AUDIO KEY TONE SELECT PIANO E. PIANO ORGAN STRINGS/PAD GUITAR/BASS BRASS/WINDS VOICE/SYNTH RHY/ GMS- Press the [SOUND CONTROL] button, getting its indicator to light.
NOTE
Sounds may become distorted with certain Tones. If this occurs, lower the respective ZONE LEVEL sliders.
- Hold down the [SOUND CONTROL] button and use the [DEC] [INC] buttons to switch the sound control type.
Sound Control HARD COMP
| TYPE Explanation | |
| HARD COMP | Applies strong compression. |
| SOFT COMP | Applies mild compression. |
| LOW BOOST | Boosts the low end. |
| MID BOOST | Boosts the midrange. |
| HI BOOST | Boosts the high end. |
- To cancel this function, press the [SOUND CONTROL] button once more, extinguishing the indicator.
Adjusting the Levels of Each Frequency Range (EQUALIZER Knobs)
The RD-300GX is equipped with a two-band equalizer.
You can use the EQUALIZER [LOW] knob, and [HIGH] knob to adjust the level of each frequency range.
NOTE Equalization is applied to the overall sound output from the OUTPUT jacks.
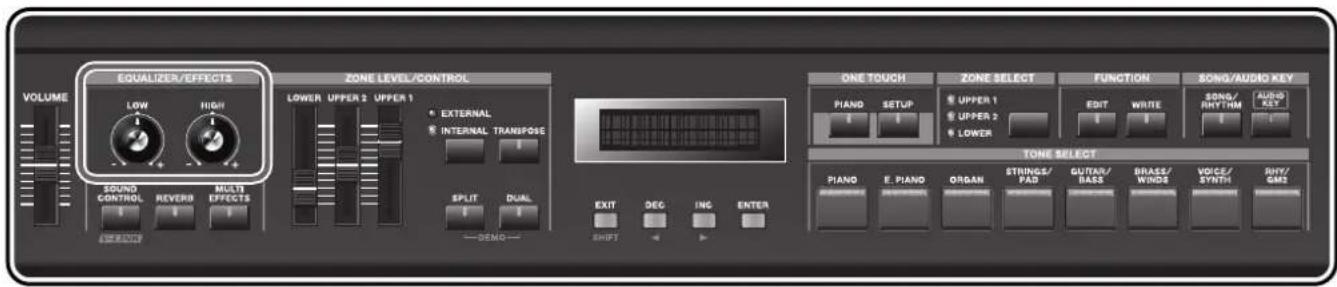
text_image
EQUALIZER/EFFECTS VOLUME LOW HIGH SOUND CONTROL REVERB MULTI EFFECTS ZONE LEVEL/CONTROL LOWER UPPER 2 UPPER 1 EXTERNAL INTERNAL TRANSPOSE SPLIT DUAL ——DEMO—— EXIT DEC INC ENTER SHIFT ONE TOUCH ZONE SELECT FUNCTION SONG/AUDIO KEY PIANO SETUP UPPER 1 UPPER 2 LOWER EDIT WRITE SONG/ RHYTHM AUDIO SET TONE SELECT PIANO E. PIANO ORGAN STRINGS/ PAD GUTAR/ BASS BRASS/ WINDS VOICE/ SYNTH RHY/ GM21. Turn the EQUALIZER knobs to adjust the levels in each range.
Turning a knob towards the minus (-) sign cuts the level of that frequency range; turn the knob towards the plus (+) sign to boost the level of that range.
NOTE Depending on the knob settings, you may hear distortion. If so, use the VOLUME slider to lower the volume.
Changing the Frequency of the Low and High Ranges
You can use the EQUALIZER [LOW] and [HIGH] knobs to change the frequency at which the adjustment will occur.
1. While holding down the [EXIT/SHIFT] button, turn the EQUALIZER knobs.
You can adjust the frequency.
![ROLAND RD-300GX - While holding down the [EXIT/SHIFT] button, turn the EQUALIZER knobs. - 1](/content/2026/05/763507/images/25193a5895c94f157ab8172074db00f771b5787b16bf71f08b11e9aed7d2e691.jpg)
text_image
Low Frequency 160Hz2. After determining the value, press the [EXIT/SHIFT] button to return to the previous screen.
Playing Rhythm ([SONG/RHYTHM] Button)
The RD-300GX features internal drum patterns complementing Jazz, Rock, and other various musical genres. These drum patterns are referred to as "Rhythms."
![ROLAND RD-300GX - Playing Rhythm ([SONG/RHYTHM] Button) - 1](/content/2026/05/763507/images/532b3fed9c12fb3d76bc3c64b42afdbb70867f2eb31d4f4e2e6480e3c44fe8ff.jpg)
text_image
EQUALIZER/EFFECTS VOLUME LOW HIGH SOUND CONTROL REVERB MULTI EFFECTS ZONE LEVEL/CONTROL LOWER UPPER 2 UPPER 1 EXTERNAL INTERNAL TRANSPOSE SPLIT DUAL —DEMO— ONE TOUCH ZONE SELECT FUNCTION SONG/AUDS KEY PIANO SETUP UPPER 1 UPPER 2 LOWER EDIT WRITE SONG/ RHY/MAY TONE SELECT PIANO E. PIANO ORGAN STRINGS/ FAD GUITAR/ BASS BRASS/ WINDS VOICE/ SYNTH RHY/ GAS- Press the [SONG/RHYTHM] button.
![ROLAND RD-300GX - Playing Rhythm ([SONG/RHYTHM] Button) - 2](/content/2026/05/763507/images/138434183dc5290e5f0a7a1825cdeb28b19aa24b1004ecd55f8081dd5aba92e2.jpg)
text_image
INT 4=120 M: 1 000:Macho Blues.- While continuing to hold down the [EXIT/SHIFT] button, use the [DEC] [INC] buttons to move the cursor to the upper left of the screen.
- Use the [DEC] [INC] buttons to select "RHY."
The Rhythm screen appears.
![ROLAND RD-300GX - Playing Rhythm ([SONG/RHYTHM] Button) - 3](/content/2026/05/763507/images/d031e2bdb613c699cbe654efec2dc615fb09029192aef11d2d2f3939ab5eadb1.jpg)
text_image
RHY 4=120 001:Piano RGB 1- Press the [ENTER] button.
The Rhythm sounds, and the [SONG/RHYTHM] button indicator lights.
- Press the [ENTER] button once more; the Rhythm stops playing.
The Rhythm stops, and the [SONG/RHYTHM] button indicator goes out.
Changing Rhythm Pattern
You can select the way a Rhythm is played (the pattern) to match a variety of different musical genres.
- Access the Rhythm screen.
- While continuing to hold down the [EXIT/SHIFT] button, use the [DEC] [INC] buttons to move the cursor to the lower left of the screen.
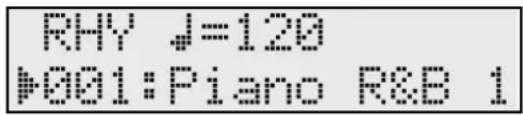
text_image
RHY ↓=120 ▶001:Piano R&B 1- Use the [DEC] [INC] buttons to select the pattern.
- Press the [ENTER] button.
The Rhythm sounds, and the [SONG/RHYTHM] button indicator lights.
- Press the [ENTER] button once more; the Rhythm stops playing.
The Rhythm stops, and the [SONG/RHYTHM] button indicator goes out.

For more information about the kind of Rhythm Patterns, please refer to "Rhythm Pattern List" (p. 97).
Changing Rhythm Tempos
- Access the Rhythm screen.
- While continuing to hold down the [EXIT/SHIFT] button, use the [DEC] [INC] buttons to move the cursor to the upper right of the screen.
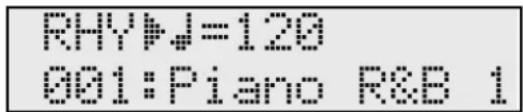
text_image
RHY4=120 001:Piano R&B 1- Use the [DEC] [INC] buttons to select the tempo.
The Rhythm are played at the selected tempo.

The way Rhythm is played and the tempo display may differ with some Rhythm Patterns.
Changing Rhythm Volume
1. While holding down the [SONG/RHYTHM] button, move any of the ZONE LEVEL sliders.
The volume of the Rhythm changes.
Rhythm Volume 100
NOTE
You won't be able to change the Rhythm volume if Rhythm is not set to play. If the audio file is set to play, this operation will change the audio volume.
How do I access the Rhythm screen again while keeping the rhythm playing?
Suppose that while the rhythm was playing, you switched from the Rhythm screen to a different screen. In this state, pressing the [SONG/RHYTHM] button in order to move back to the Rhythm screen will stop the rhythm.
In such cases, you can press and continue holding the [SONG/RHYTHM] button for about one second to access the Rhythm screen without stopping the rhythm.
Playing Songs ([SONG/RHYTHM] Button)
Here's how to play back SMF music files or audio files (WAV, MP3). You can play songs that are saved on USB memory (sold separately).
![ROLAND RD-300GX - Playing Songs ([SONG/RHYTHM] Button) - 1](/content/2026/05/763507/images/e1f099f7df1302b5726f6bedbc84b5624bcaec6250698b33dd2260be48946588.jpg)
text_image
VOLUME EQUALIZER/EFFECTS ZONE LEVEL/CONTROL LOW HIGH SOUND CONTROL REVERD MULTI EFFECTS LOWER UPPER 1 UPPER 1 EXTERNAL INTERNAL TRANPOSE SPLIT DUAL — DEMO — ONE TOUCH ZONE SELECT FUNCTION SONG/AUTH KEY PIANO SETUP UPPER 1 UPPER 2 LOWER EDIT WRITE SONG/ RHY/THM TONE SELECT Piano E. PIANO ORGAN STRINGS/PAD GUITAR/BASS BRASS/WINDS VOICE/SYNTH RHY/GM2 EXIT DEC INC ENTER SHIFT1. Press the [SONG/RHYTHM] button.
The Song screen appears.
If the following screen doesn't appear, refer to "Switching between the Rhythm screen and Song screen" (p. 23).
![ROLAND RD-300GX - Press the [SONG/RHYTHM] button. - 1](/content/2026/05/763507/images/3d10a7973a3d82d1b3edd9f5b82065bcecd2a552095c8bb963fcd2dbb205818e.jpg)
text_image
INT J=120 M: 1 000:Macho Blues2. While continuing to hold down the [EXIT/SHIFT] button, use the [DEC] [INC] buttons to move the cursor to the upper left of the screen.
3. Use the [DEC] [INC] buttons to select "INT" or "USB."
Select "INT" to play songs saved in internal memory, or "USB" to play songs saved in USB memory.
NOTE You can't select "USB" unless USB memory is connected to the USB Memory connector.
4. While continuing to hold down the [EXIT/SHIFT] button, use the [DEC] [INC] buttons to move the cursor to the lower left of the screen.
5. Use the [DEC] [INC] buttons to select a song.
6. Press the [ENTER] button.
The song sounds, and the [SONG/RHYTHM] button indicator lights.
7. Press the [ENTER] button once more; the song stops playing.
The song stops, and the [SONG/RHYTHM] button indicator goes out.
Song number "000" is programmed with a Preset song. Enjoy performing on the keyboard along with this song as it is played back.
| No. | Song Name | Composer Copyright | |
| 000. | Macho Blues | John Maul © 2008 Roland Corporation |
![ROLAND RD-300GX - Press the [ENTER] button once more; the song stops playing. - 1](/content/2026/05/763507/images/f5eac7acd91f2ef11df9e614bc5a38129929a8d8db232e32b8dfd12325600cb1.jpg)
You can make the following settings related to song playback.
- Change the way in which songs play (play a single song, play all songs)
• Transpose the song playback
- Minimize sounds located in the center, such as the melody
For details, refer to "Settings Related to Song Playback (Song Function)" (p. 76).
Changing Song Tempos
You can change the tempo for songs.
- In the Song screen, hold down the [EXIT/SHIFT] button and use the [DEC] [INC] buttons to move the cursor to the tempo indication.
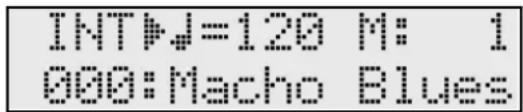
text_image
INTM=120 M: 1 000: Macho Blues- Use the [DEC] [INC] buttons to change the tempo.
Here's how to change the playback speed of audio files (WAV, MP3).
-
In the Song screen, hold down the [EXIT/SHIFT] button and use the [DEC] [INC] buttons to move the cursor to the percent indication in the top line of the screen.
-
Use the [DEC] [INC] buttons to change the playback speed. You can change the playback speed in a range of -25%–+25%.
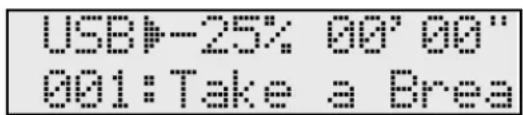
text_image
USB4-25% 00' 00' 001:Take a BreakFast-forwarding or Rewinding a Song
- In the Song screen, hold down the [EXIT/SHIFT] button and use the [DEC] [INC] buttons to move the cursor to the measure indication (or the playback time indication) in the upper right of the screen.
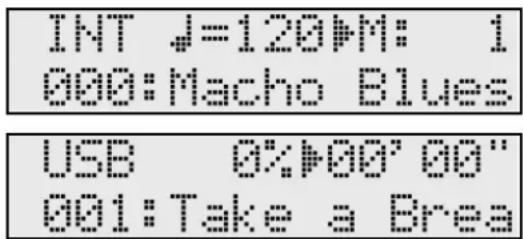
text_image
INT 4=120MHz: 1 000:Macho Blues USB 0%+00'00" 001:Take a Brea- Use the [DEC] [INC] buttons to change the value.
The playback position will change as shown by the indication.
How do I access the Song screen again while keeping the song playing?
Suppose that while the song was playing, you switched from the Song screen to a different screen. In this state, pressing the [SONG/RHYTHM] button in order to move back to the Song screen will also stop the song.
In such cases, you can press and continue holding the [SONG/RHYTHM] button for about one second to access the Song screen without stopping the song.
Performing with Audio Files ([AUDIO KEY] Button)
The RD-300GX lets you play audio files saved on USB memory (sold separately) while you perform. This is called the "Audio Key" function.
The Audio Key function lets you assign an audio file to each key B0-B1, and play those audio files by pressing the corresponding key. You can assign various phrases to the keys and play them at the appropriate moments during your performance.
You can also specify that an audio file play repeatedly, or reserve the audio file that should be played next.
![ROLAND RD-300GX - Performing with Audio Files ([AUDIO KEY] Button) - 1](/content/2026/05/763507/images/993359aa8f62b0c79733fa89812e6c227be03765b0ecb9ad3132bd71ce9984c7.jpg)
If you turn on the Audio Key function when USB memory containing audio files is not connected, an audio file built into the RD-300GX will be selected.
![ROLAND RD-300GX - Performing with Audio Files ([AUDIO KEY] Button) - 2](/content/2026/05/763507/images/b81887193ffb7cfffecb488650356e76628f52439dfa3499aafbd3ee0bb82886.jpg)
Here are some ways in which you can enjoy using the Audio Key function.
- By switching audio files between sections such as Intro, Theme, Break, and Ending as your song progresses, you can freely change the structure of the song while you perform.
- Assign a different audio song to each key, and use the keyboard to switch songs so you can perform to the accompaniment of an audio song.
![ROLAND RD-300GX - Performing with Audio Files ([AUDIO KEY] Button) - 3](/content/2026/05/763507/images/224dd0683433e7de3b4635b1320a85bdfd490e291e0f34b85fd6476b1fabff38.jpg)
text_image
EQUALIZER/EFFECTS ZONE LEVEL/CONTROL VOLUME LOW HIGH SOUND CONTROL REVERB MULTI EFFECTS LOWER UPPER 2 UPPER 1 EXTERNAL INTERNAL TRANPOSE Split DUAL — DEMO — EXIT DEC INC ENTER ONE TOUCH ZONE SELECT FUNCTION SONY AUDIO KEY PIANO SETUP UPPER 1 EDIT WRITE SOUND RHY M AUDIO KEY LOWER TONE SELECT PIANO E. PIANO ORGAN STRINGS/PAD GUTAR/BASS BRASS/WINDS VOICE/SYNTH RHY/GM3Performing with Audio Files from USB Memory
Here's how you can perform while playing audio files saved on USB memory (sold separately).
Before you begin, install the included "Audio Key Utility 2" into your computer, and prepare the audio file set that you want to play back on the RD-300GX.
The included CD-ROM contains a sample audio file set that you can copy to USB memory and use.
- Connect the USB memory containing the audio file set to the USB MEMORY connector (p. 21).
- While holding down the [AUDIO KEY] button, and use the [DEC] [INC] buttons to select an audio file set.
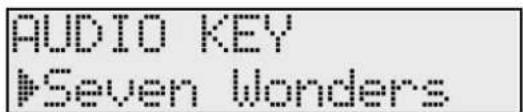
text_image
AUDIO KEY #Seven WondersWhen you take your finger off the button, a screen like the following will appear.
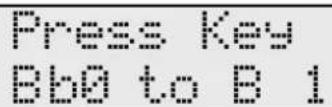
3. Play a key B0-B1.
The audio file assigned to the respective key will play.
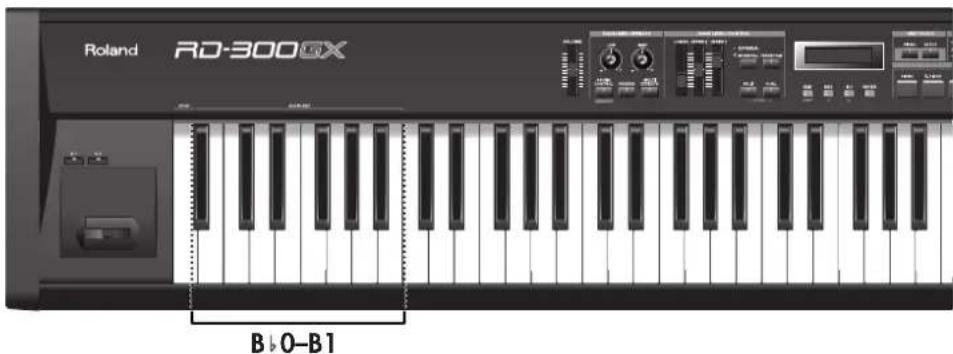
text_image
Roland RD-300GX B | O-B 1If you play the BO key, a screen like the following will appear.
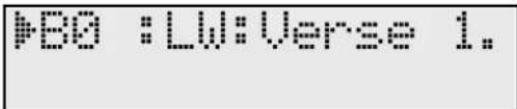
text_image
PBO :LW:Verse 1.The Audio Key function will be activated, allowing you to play audio files by pressing a key.
| Indication | Explanation |
| O | One-shot NowWhen you press the key, the audio file will play only once.The audio file will play immediately when you press the key. |
| OW | One-shot WaitWhen you press the key, the audio file will play only once.With this setting, pressing the key while another audio file is playing will reserve the audio file to be played next. When the currently playing audio file has finished, the reserved audio file will play. |
| L | Loop NowWhen you press the key, the audio file will play repeatedly.The audio file will play immediately when you press the key. |
| LW | Loop WaitWhen you press the key, the audio file will play repeatedly.With this setting, pressing the key while another audio file is playing will reserve the audio file to be played next. When the currently playing audio file has finished, the reserved audio file will play. |

Playing the keys won't produce sound unless a file has been assigned. If a file is currently playing, it will continue sounding.
Keys set to "OW" or "LW" let you reserve the audio file that will be played when the currently playing audio file has finished playing. If you've pressed the B0 key and then press the C1 key to reserve the next-played audio file, the screen will show as follows.
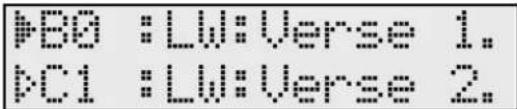
text_image
FBO :LW:Verse 1. PC1 :LW:Verse 2.The currently reserved audio file is shown in the lower line of the screen.
4. To stop the file that's playing, press the A0 key.
Audio file playback will stop.
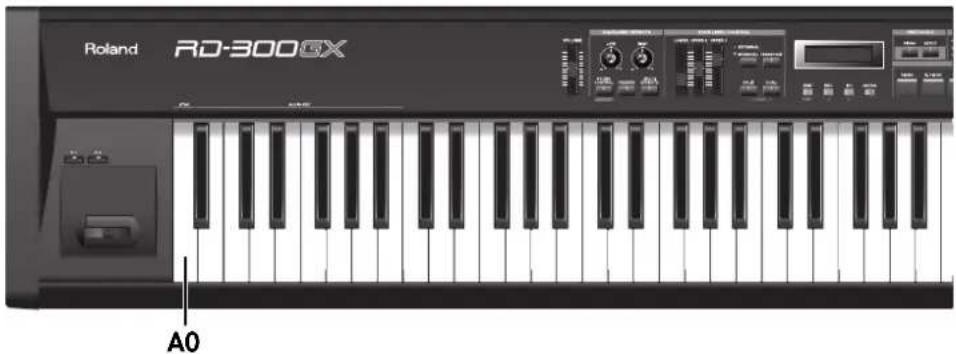
text_image
Roland RD-300GX A0
For details on installing the included "Audio Key Utility 2" into your computer, refer to "Audio Key Utility 2 Quick Guide" (separate document).

If no USB memory (sold separately) containing audio files is connected to the RD-300GX, you'll be able to play audio files that are built into the RD-300GX (see the section that follows).
If the connected USB memory does not contain an audio file set created by the "Audio Key Utility 2," you'll be able to assign audio files from USB memory to each key and play them.

You can also change the settings of the audio files assigned to the keys, and change the settings that specify how the audio files will be repeated (p. 46).
The changes you make will be lost if you select another audio file set. If you don't want to delete it, carry out the Write procedure.
Caution when Playing Back Audio Files
Playing back an MP3 file or changing the playback tempo of an audio file places a significant processing burden on the RD-300GX, and in some cases may cause it to be unable to completely process all of the performance data from the keyboard.
If this occurs, you may be able to solve the problem by taking the following actions.
- Use WAV/AIFF format data rather than MP3 format data
- Return the song tempo to its original setting (to 0%)
An MP3 file has little time of the blank at the head and the end of the file. Therefore, the sound might cut off when an MP3 file played repeatedly with Audio Key function.
If this occurs, you may be able to solve the problem by taking the following actions.
- Use WAV/AIFF format data rather than MP3 format data
Performing with Audio Files that are Built Into the RD-300GX
If USB memory (sold separately) containing audio files is not connected, you'll be able to play audio files that are built into the RD-300GX.
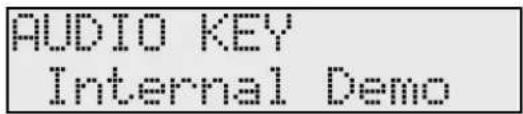
text_image
AUDIO KEY Internal Demo
Even if you're using the audio file set that's built into the RD-300GX, you can change the settings of the audio files assigned to the keys, and change the settings that specify how the audio files will be repeated (p. 46).
Even if you don't turn off the power, the changes you make will be lost if you connect USB memory and select another audio file set.

If you're using an audio file that's built into the RD-300GX, you can't save your changes in USB memory.
Adjusting the Volume of Audio Key
You can adjust the volume when using the Audio Key function.
You can adjust the volume of the Audio Key to change the volume balance between your keyboard performance and the audio file playback.
1. While holding down the [AUDIO KEY] button, move the ZONE LEVEL slider to adjust the volume of the Audio Key.
The volume can be adjusted to any value from 0 to 127.
![ROLAND RD-300GX - While holding down the [AUDIO KEY] button, move the ZONE LEVEL slider to adjust the volume of the Audio Key. - 1](/content/2026/05/763507/images/a0956ed988dc782c977c293bb3972c1e11a247576e00271b4ae8694650e38afd.jpg)
text_image
Audio Volume 100![ROLAND RD-300GX - While holding down the [AUDIO KEY] button, move the ZONE LEVEL slider to adjust the volume of the Audio Key. - 2](/content/2026/05/763507/images/42677a284c09c83f401d78040fa6afd65b8bdb914aa886419fdac3eae498e021.jpg)
You can also adjust the Audio Key volume by using the "Audio Level" setting in the System edit screen (p. 67).
![ROLAND RD-300GX - While holding down the [AUDIO KEY] button, move the ZONE LEVEL slider to adjust the volume of the Audio Key. - 3](/content/2026/05/763507/images/4e165f142250a9aa662ef351423945482d81cea7bf9a60bac85fa9ca1189f810.jpg)
When you change the Audio Key volume, this will also affect the volume at which audio files will play back in the Song screen.
How do I access the Audio Key screen again while keeping the audio file playing?
Suppose that while the audio file was playing, you switched from the Audio Key screen to a different screen. In this state, pressing the [AUDIO KEY] button in order to move back to the Audio Key screen will also stop the playback.
In such cases, you can press and continue holding the [AUDIO KEY] button for about one second to access the Audio Key screen without stopping the playback.
Changing Audio File Settings
Here's how you can edit the audio file settings, such as changing the audio file played by each key, or specifying whether the file will be played repeatedly.
- Connect the USB memory containing the audio file set to the USB MEMORY connector (p. 21).
- While holding down the [AUDIO KEY] button, and use the [DEC] [INC] buttons to select an audio file set.
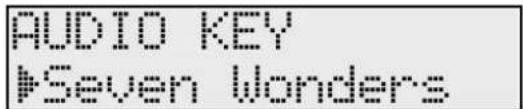
text_image
AUDIO KEY #Seven WondersWhen you take your finger off the button, a screen like the following will appear.
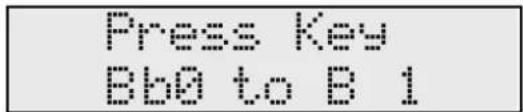
text_image
Press Key Bb0 to B 1The Audio Key function will be activated, allowing you to play audio files by pressing a key.
- Press the [ENTER] button.
The following screen appears.
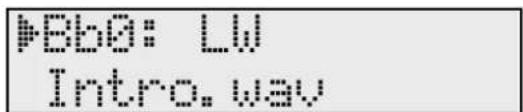
text_image
PBB: LW Intro.wav- Hold down the [EXIT/SHIFT] button and use the [DEC] [INC] buttons to move the cursor, and then use the [DEC] [INC] buttons to change the setting for each key.
You can also press the key whose settings you want to change.
Move the cursor to the upper right of the screen, and change the way in which the audio file will play ("O," "OW," "L," "LW"). Refer to the table on p. 43.
Move the cursor to the lower line of the screen, and change the audio file that is assigned to the key. If you press the [DEC] [INC] buttons simultaneously, the audio file assigned to that key will be cleared.
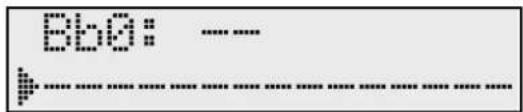
A confirmation message will appear.
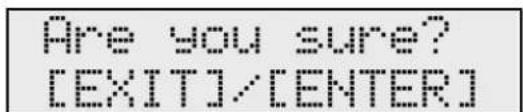
text_image
Are you sure? [EXIT]/[ENTER]If you don't want to store the settings, press the [EXIT/SHIFT] button. The operation will be cancelled.
- Press the [ENTER] button to overwrite the settings of the audio file set.
NOTE
If you're using an audio file that's built into the RD-300GX, you can't save your changes in USB memory.
Applying Effects to the Sound ([MULTI EFFECTS] Button)
In addition to reverb (p. 33), the RD-300GX also allows you to apply "multi effects" to sounds. Multi effects provides a collection of 78 different effects, such as distortion and rotary, from which you can choose.
The factory settings have a suitable effect assigned to each of the Tones.
![ROLAND RD-300GX - Applying Effects to the Sound ([MULTI EFFECTS] Button) - 1](/content/2026/05/763507/images/6d81af449c059824c54c6dcfc81444b5ea05c5b5f4640b87783351a680a6f9b9.jpg)
text_image
VOLUME EQUALIZER/EFFECTS ZONE LEVEL/CONTROL LOW HIGH SOUND CONTROL REVE MULTI EFFECTS LOWER UPPER 1 UPPER 1 * EXTERNAL * INTERNAL TRANPOSE SPLIT DUAL —DEMO— EXIT DEC INC ENTER SHIFT ONE TOUCH ZONE SELECT Piano SETUP * UPPER 1 * UPPER 2 * LOWER FUNCTION EDIT WRITE SONG/ RHYTHM AUDIO KEY TONE SELECT Piano E. PIANO ORGAN STRINGS/ PAD GUTAR/ BASS BRASS/ WINDS VOICE/ SYNTH RHY/ GM2- Press the [MULTI EFFECTS] button, getting its indicator to light.
Try fingering the keyboard.
The effect is applied to the currently selected Tone.
- To remove the effect, press the [MULTI EFFECTS] button once more, extinguishing the indicator.
![ROLAND RD-300GX - Applying Effects to the Sound ([MULTI EFFECTS] Button) - 2](/content/2026/05/763507/images/53722d6bd1bf392ccde345cdca2b4fc3d3ace22424ca15d7aeadef56db35dbc2.jpg)
Effects may not be applied with some of sounds.
![ROLAND RD-300GX - Applying Effects to the Sound ([MULTI EFFECTS] Button) - 3](/content/2026/05/763507/images/51fe3f67cf348e6cba1ebe91cac4e882eecfccc0a11c419f8b232cb50e774b84.jpg)
If the effect applied to the Tone of each Zone differs when you're using Dual mode or Split mode, you can specify the Zone to which the effect will be applied. For details, refer to "Setting the Zone to which Multi Effects are Added (MFX Zone)" (p. 68).
Changing the Depth of Effect
You can change the levels of depth for the effect.
The content and range vary according to the MFX type. For more detailed information, refer to "Effect List" (p. 87).
- While holding down the [MULTI EFFECTS] button, use the [DEC] [INC] buttons to adjust the effect depth.
SYM. RESONANCE
Depth: 100
The screen will show the effect that is applied to the currently selected Tone and the parameters that can be edited.
The next time you choose the same Tone, the effect with the depth you've selected here is applied.

You can change the effect type. Refer to "Changing the Multi-effects Type" (p. 48).
Choosing the Zone to which the multi-effect will apply
On the RD-300GX, only one type of multi-effect can be used at a time. For this reason, there's a "MFX Zone" setting that lets you choose the Zone to which the multi-effect is to be applied. Be aware that if you're playing more than one Zone simultaneously, there will be a Zone to which the multi-effect is not applied.
Changing the Multi-effects Type
- While holding down the [EXIT/SHIFT] button, press the [MULTI EFFECTS] button.
The effect name and number appear in the display.
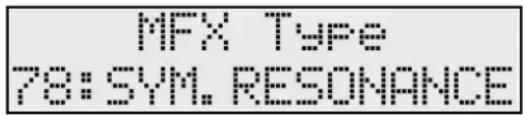
text_image
MFX Type 78:SYM.RESONANCE- Press the [DEC] [INC] buttons to select the effect type.
- After determining the type, press the [EXIT/SHIFT] button to return to the previous screen.

For more on the RD-300GX's internal effect types, refer to the "Effect List" (p. 87).
Changing the Undulation of the Organ Tone (Rotary Effect)
The Rotary effect is applied to some Organ Tones you can select with the [ORGAN] button. When one of these Tones is selected, you can use the [MULTI EFFECTS] button to change the speed of the rotary effect.
What the rotary effect does is to add a "spinning" effect similar to the sound of an organ using a rotating speaker.
- Press the [ORGAN] button and select the organ Tone.
When a Tone that has the Rotary effect added is selected, the [MULTI EFFECTS] button's indicator flashes.
- Each time pressing the [MULTI EFFECTS] button, switch the speed of the rotary effect between fast and slow rotation.
When the [MULTI EFFECTS] button's indicator flashes, a more fast rotary effect is applied.
When the [MULTI EFFECTS] button's indicator blinks, a slower rotary effect is applied.

To prevent the Rotary effect from being applied, select an effect type other than the Rotary effect and then remove the effect.

You can apply the rotary effect to Tones other than the organ Tones as well.
Disabling the Buttons (Panel Lock)
Once Panel Lock is engaged, all buttons (except for the VOLUME slider, [DISPLAY CONTRAST] knob, Pitch Bend/Modulation lever, Pedals, ONE TOUCH [PIANO] button, and [EXIT/SHIFT] button) will not function. This prevents settings from being changed inadvertently on stage or in other such situations.
1. While holding down the [EDIT] button, and press the [ENTER] button.
Continue holding down the [EDIT] button and [ENTER] button until the following display appears.
| Panel | Locked |
| Press | [EXIT] |
2. Press the ONE TOUCH [PIANO] button, or [EXIT/SHIFT] button to cancel Panel Lock.
Selecting Stored Settings ([SETUP] Button)
The RD-300GX's Internal Zone (p. 22) and External Zone (p. 22) Tone settings, effect settings, and other such settings are collectively referred to as a "Setup."
Once you've stored your preferred settings, and settings for the songs to be performed as a Setup, you can then switch whole groups of settings during a performance just by switching Setups.
You can store up to 32 different Setups.
The RD-300GX is shipped from the factory with recommended Setups already prepared. Now try actually calling up a Setup.
![ROLAND RD-300GX - Selecting Stored Settings ([SETUP] Button) - 1](/content/2026/05/763507/images/6cc0120d2467aaeda2f99e958f10d9e337fe20a0fcbfb8c7cf13e2fca0066970.jpg)
The current settings are erased when a Setup is called up. Be sure to save any Setup you would like to keep first before calling up another Setup (p. 51).
![ROLAND RD-300GX - Selecting Stored Settings ([SETUP] Button) - 2](/content/2026/05/763507/images/21964c02151e9d37707018ca9926ec169b91caaa1c894f9c7519536985558e81.jpg)
text_image
VOLUME EQUALIZER/EFFECTS LOW HIGH SOUND CONTROL REVERB MULTI EFFECTS ZONE LEVEL/CONTROL LOWER UPPER 2 UPPER 1 EXTERNAL INTERNAL TRANPOSE SPLIT DUAL --- DEMS --- EXIT DEC INC ENTER SHIFT ONEOUCH Piano SETUP ZONE SELECT UPPER 1 UPPER 2 LOWER FUNCTION EDIT WRITE SONG/AUDIO KEY RHY/RHYTHM AUDIO KEY TONE SELECT PIANO E. PIANO ORGAN STRINGS/ PAD GUITAR/ BASS BRASS/ WINDS VOICE/ SYNTH RHY/ GMS1. Press the [SETUP] button, getting the indicator to light.
The following screen appears in the display.
![ROLAND RD-300GX - Press the [SETUP] button, getting the indicator to light. - 1](/content/2026/05/763507/images/4565f26a504f72d12420582c857c8ebdb1955bb41c698264e046ef01ac213510.jpg)
text_image
SETUP Press, [TONE]2. Use the [DEC] [INC] buttons or press one of the TONE SELECT buttons to select the Setup that you want to call up.
By pressing the TONE SELECT buttons you can select four Setups from each button (p. 98).
![ROLAND RD-300GX - Use the [DEC] [INC] buttons or press one of the TONE SELECT buttons to select the Setup that you want to call up. - 1](/content/2026/05/763507/images/c4146e3589cee36ffe9ec876cb28728a84669380129a0f352f7deaa994fe89e3.jpg)
text_image
SETUP @1:Piano&ChoirTry playing the keyboard.
The settings are switched to those of the Setup that has been called up.
![ROLAND RD-300GX - Use the [DEC] [INC] buttons or press one of the TONE SELECT buttons to select the Setup that you want to call up. - 2](/content/2026/05/763507/images/b6c9dc35da18e350afa6153e52efa55a8536ba4f8cd1f2b2f786013dc1625ed8.jpg)
Once you've selected a Setup, pressing that [SETUP] button will take you to the screen shown in step 2.
![ROLAND RD-300GX - Use the [DEC] [INC] buttons or press one of the TONE SELECT buttons to select the Setup that you want to call up. - 3](/content/2026/05/763507/images/51f25d442ae0491ff302dabfff928e015c410644f0c8f1de937c7dd700a44867.jpg)
Setups indicated by a "R." before the name let you enjoy performing with a session-like feel while playing a Rhythm. Be sure to check it out.
Storing Settings to Setups ([WRITE] Button)
If you want to use the changed content as a new Setup, use the following procedure to save the settings to a Setup.
You can also change the name of a Setup.
You can store 32 Setups on the RD-300GX.
![ROLAND RD-300GX - Storing Settings to Setups ([WRITE] Button) - 1](/content/2026/05/763507/images/d62dfbc0bc9d0a54c08939388666d71abb4b90118ed759d2a5c18c27f1dda66c.jpg)
text_image
VOLUME EQUALIZER/EFFECTS LOW HIGH SOUND CONTROL REVERB MULTI EFFECTS ZONE LEVEL/CONTROL LOWER UPPER 2 UPPER 1 EXTERNAL INTERNAL TRANSPOSE SPLIT DUAL — DEMO — ONE TOUCH ZONE SELECT FUNCTION SONG/AUDIO KEY PIANO SETUP UPPER 1 UPPER 2 LOWER TONE SELECT PIANO E. PIANO ORGAN STRINGS/PAD GUTAR/BASS BRASSE/WINDS VOICE/SYNTH RHY/GM2 EXIT DEC INC ENTER SHIFT- Press the [WRITE] button, getting the indicator to light.
The following screen appears.
![ROLAND RD-300GX - Storing Settings to Setups ([WRITE] Button) - 2](/content/2026/05/763507/images/694c380a776fc659dd59c331055470bff8b9bb22c24b9ef5072cd72642119c35.jpg)
text_image
[Eiano&Choir] @1:Piano&Choir- While holding down the [EXIT/SHIFT] button, use the [DEC] [INC] buttons to move the cursor (.) to the positions where the characters are to be input.
- Use the [DEC] [INC] buttons to enter the characters.
The following characters are available.
$$ \text {space, !}" # \% \& ^ {\prime} ( ) ^ {*} +, -. / 0 - 9:; < = >? @ A - Z [ \backslash ] ^ {\wedge} _ {-} ^ {\prime} a - z {| } \sim $$
- Repeat steps 2-3 to input the name.
- Press the [ENTER] button to move the cursor to the destination Setup number.
![ROLAND RD-300GX - Storing Settings to Setups ([WRITE] Button) - 3](/content/2026/05/763507/images/9e39bd11ebefe5b08dfb59d87580b1877d8e4d09016614c5d8a8dfa14ca4b07c.jpg)
text_image
[Piano&Choir] #01:Piano&Choir- Select the save-destination Setup number, by using the [DEC] [INC] buttons.
7. When you have finished determining the save destination and the name for the new Setup, press the [ENTER] button.
The [ENTER] and [EXIT/SHIFT] buttons' indicators are flashing, and the confirmation message appears.
![ROLAND RD-300GX - When you have finished determining the save destination and the name for the new Setup, press the [ENTER] button. - 1](/content/2026/05/763507/images/c7726edef3625531012395c195eafcb23d78a437403efb3ad9cf2ead240cbe31.jpg)
text_image
SETUP Write Are you sure?If you do not want to save the Setup, press the [EXIT/SHIFT] button or [WRITE] button. The operation is cancelled.
8. When the [ENTER] button is pressed, saving of the Setup begins.
When you have finished saving the Setup, the [WRITE] button's indicator goes out and you are returned to the previous screen.
NOTE Never switch off the power while "Executing..." appears in the display.
Settings Not Saved in a Setup
The following settings cannot be saved to a Setup.
• TRANSPOSE Settings (p. 32)
• SOUND CONTROL Settings (p. 35)
• EQUALIZER knob Settings (p. 36)
- System Settings (p. 64)
• V-LINK Settings (p. 82)
By connecting an external MIDI device to the MIDI OUT connector on the RD-300GX's rear panel, you can then control the external MIDI device with the RD-300GX.
Normally, the RD-300GX will transmit note messages from the MIDI OUT connector, but if you press the [EXTERNAL/INTERNAL] button so the "EXTERNAL" indicator is lit, you'll be able to control various settings on your external MIDI device in addition to transmitting note messages.
You can control internal and external sound generators independently.
If you press the [EXTERNAL/INTERNAL] button so the "EXTERNAL" indicator is lit, the RD-300GX will be in a state where it can control an external MIDI sound module (External Zone). You use the [EXTERNAL/INTERNAL] button to switch between control of the Internal Zone and control of the External Zone. You can also make detailed settings for MIDI messages transmitted to external sound modules.
What's MIDI?
MIDI (Musical Instrument Digital Interface) is a standard specification that allows musical data to be exchanged between electronic musical instruments and computers. By using a MIDI cable to connect devices that have MIDI connectors, you can create an ensemble in which a single MIDI keyboard can play multiple instruments, or change settings automatically as the song progresses.
About MIDI Connectors
The RD-300GX has the following three types of MIDI connector. Their functions differ as described below.
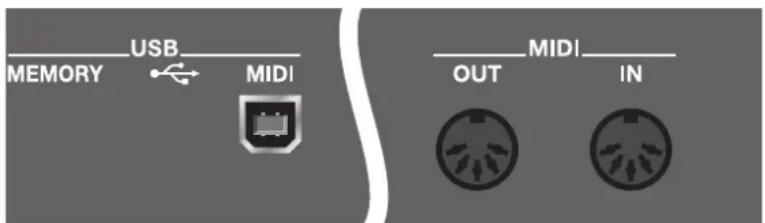
text_image
USB MEMORY MIDI MIDI OUT INMIDI IN Connector
Performance messages from an external MIDI device are received here. These incoming messages may instruct the RD-300GX to play sounds or switch Tones.
MIDI OUT Connector
MIDI messages are transmitted from this connector to an external MIDI device. The RD-300GX's MIDI OUT connector is used for sending the performance data of the controller section as well as data used for saving various settings (Bulk Dump→p. 77).
USB MIDI Connector
Use a commercially available USB cable to connect this to your computer's USB connector. You can use MIDI-compatible software on your computer to transmit SMF files for playback by the RD-300GX, or set up a sophisticated music production system in which MIDI data is transferred between your sequencer software and the RD-300GX.
Connecting to External MIDI Sound Generators
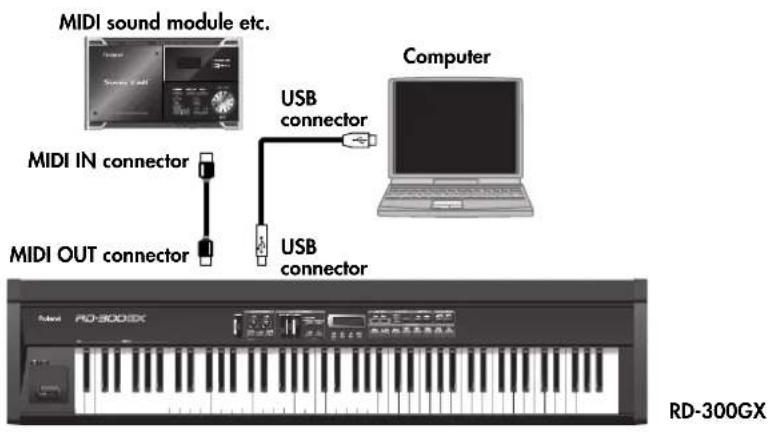
text_image
MIDI sound module etc. MIDI IN connector MIDI OUT connector USB connector USB connector Computer RD-300GX RD-300GX
Use a USB Cable no longer than 5 meters.
Setting the MIDI Transmit Channel (MIDI OUT Channel)
When you have finished connecting the external MIDI device, match the keyboard's Transmit channel and the Receive channel for each of the external MIDI sound generator's Parts. Sounds is produced when the MIDI channels for the sending device (the RD-300GX) and the receiving device (the external MIDI sound generator) are set to the same MIDI channel.
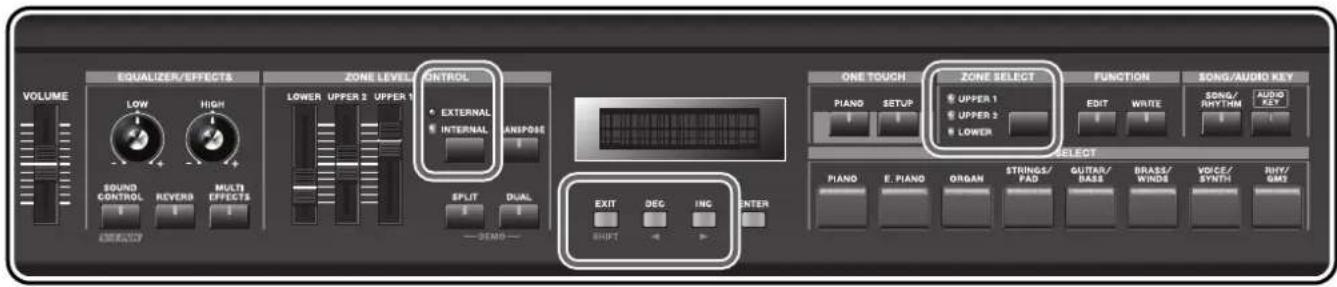
text_image
VOLUME EQUALIZER/EFFECTS LOW HIGH SOUND CONTROL REVERB MULTI EFFECTS ZONE LEVEL CONTROL LOWER UPPER 1 UPPER 2 EXTERNAL INTERNAL ANPOSE SPLIT DUAL — SMO — ONE TOUCH ZONE SELECT FUNCTION SONG/AUDIO KEY PIANO SETUP EDIT WRITE SONG/ RHYTHM AUDIO KEY SELECT PIANO E. PIANO ORGAN STRINGS/ FAD GUITAR/ BASS BRASS/ WINDS VOICE/ SYNTH RHY/ GMT EXIT DEC INC ENTER SHIFT1. Press the [EXTERNAL/INTERNAL] button so the "EXTERNAL" indicator is lit.
The External screen appears.
If the following screen doesn't appear, hold down the [EXIT/SHIFT] button and press the [DEC] button several times.
![ROLAND RD-300GX - Press the [EXTERNAL/INTERNAL] button so the "EXTERNAL" indicator is lit. - 1](/content/2026/05/763507/images/9f4f07463b6162d1c2da601dc8ff8c03e160fb10e0969609af9e8d65c6015b77.jpg)
text_image
Ch MSB LSB PC1 ---- ----
2. Press the ZONE SELECT button so the indicator of the button for the Zone you wish to select is lit.
| Part Parameter | Settings Description | ||
| UPPER 1 | Ch(MIDI OUT Channel) | 1-16, OFF | RD-300GXperformance data is sent over a selected channel. |
| UPPER 2 | |||
| LOWER |
3. Use the [DEC] [INC] buttons to set the transmit channel for each Zone.
If you turn this "OFF," MIDI data will not be transmitted for that Zone.
![ROLAND RD-300GX - Use the [DEC] [INC] buttons to set the transmit channel for each Zone. - 1](/content/2026/05/763507/images/e6430e337b3b6c4270df4a3f864cfc2f2594f97c808666c8cf1a92c9b3f10e8c.jpg)
For instructions on setting each of the external MIDI sound generator's Part's Receive channel, refer to the owner's manual for each device.
![ROLAND RD-300GX - Use the [DEC] [INC] buttons to set the transmit channel for each Zone. - 2](/content/2026/05/763507/images/d8e63226b63eeadf5e5de9ee8cb0c28ff55445db30455db1a96d88baf84454dc.jpg)
When "Rec Mode" is set to ON in the Utility in Edit mode, the External screen as shown above is not displayed. Set "Rec Mode" to OFF when setting the MIDI Transmit channel (p. 78).
Selecting Sounds on an External MIDI Device (MSB/LSB/PC)
To switch the tones of an external MIDI device, the program number and the MSB/LSB of the Bank Select message are entered as numerical values on the RD-300GX.
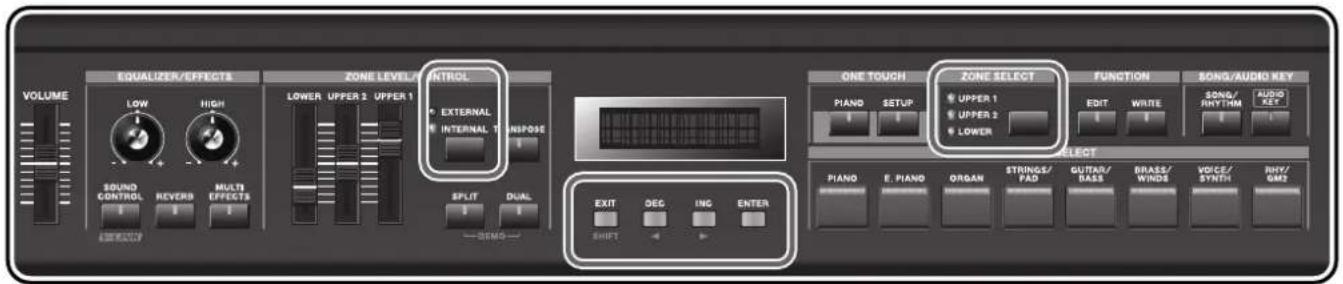
text_image
VOLUME EQUALIZER/EFFECTS LOW HIGH SOUND CONTROL REVERB MULTI EFFECTS ZONE LEVEL/INTROL LOWER UPPER 2 UPPER 1 EXTERNAL INTERNAL TRANSPOSE SPLIT DUAL SEM0 ONE TOUCH ZONE SELECT FUNCTION SONG/AUDIO KEY PIANO SETUP FUNCTION UPPER 1 UPPER 2 LOWER SONG/AUDIO KEY EDIT WRITE AUDIO KEY Piano E. PIANO ORGAN STRINGS/FAD GUITAR/BASS BRASS/WINDS VOICE/SYNTH RHY/GM2 E. PIANO ORGAN STRINGS/FAD GUITAR/BASS BRASS/WINDS VOICE/SYNTH RHY/GM21. Press the [EXTERNAL/INTERNAL] button so the "EXTERNAL" indicator is lit.
The External screen appears.
If the following screen doesn't appear, hold down the [EXIT/SHIFT] button and press the [DEC] button several times.
![ROLAND RD-300GX - Press the [EXTERNAL/INTERNAL] button so the "EXTERNAL" indicator is lit. - 1](/content/2026/05/763507/images/5a8ca98e5e5ece11fd55b2fcfc8cb79ed7ef7cea81373ffccb88f35c5b23d175.jpg)
text_image
Ch MSB LSB PC1 --------
2. Press the ZONE SELECT button so the indicator of the button for the Zone you wish to select is lit.
3. While continuing to hold down the [EXIT/SHIFT] button, use the [DEC] [INC] buttons to move the cursor, and use the [DEC] [INC] buttons to set the MSB, LSB, and PC for each Zone.
Pressing the [DEC] [INC] buttons simultaneously switches the settings value to “--- (OFF).” When this setting is “--- (OFF),” bank select messages will not be transmitted.
| Parameter | Settings |
| MSB (Bank Select MSB: CC 00) | 000-127, --- (OFF) |
| LSB (Bank Select LSB: CC 32) | 000-127, --- (OFF) |
| PC (Program Change) | 001-128, --- (OFF) |
NOTE
If the external MIDI sound generator receives a Program number or a Bank number for which no Tone has been assigned, an alternate Tone may be selected, or in some cases, there may be no sound played. If you do not want to transmit the Program number or Bank Select, use the procedure described above to set the PC/MSB/LSB to "--- (OFF)."
If this is set to “---,” the sound selection data will not be transmitted when you switch Setups.
Adjusting the Volume of Each Zone (External Zone)
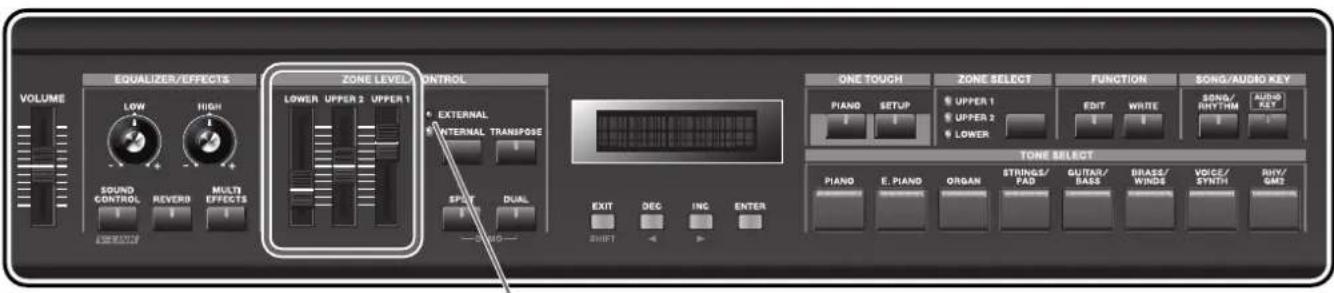
text_image
EQUALIZER/EFFECTS VOLUME LOW HIGH SOUND CONTROL REVERD MULTI EFFECTS ZONE LEVEL CONTROL LOWER UPPER 2 UPPER 1 EXTERNAL INTERNAL TRANPOSE SPOT DUAL ONE TOUCH Piano SETUP UPPER 1 UPPER 2 LOWER ZONE SELECT FUNCTION EDIT WRITE SONG/ RHYTHM AUNO AUYT TONE SELECT PIANO E. PIANO ORGAN STRINGS/ PAD GUTAR/ BASS BRASS/ WINDS VOICE/ SYNTH RHY/ GMZEXTERNAL indicator is lit
When the EXTERNAL indicator is lit, you can use the ZONE LEVEL sliders to control the External Zone in the same way as with the Internal Zone (p. 31).
Detailed Settings for Transmitted Parts ([EXTERNAL/INTERNAL] Button)
If you press the [EXTERNAL/INTERNAL] button so the "EXTERNAL" indicator is lit, you'll be able to set the following items.
| Parameter | |
| Ch | MIDI OUT Channel |
| MSB | Bank Select MSB |
| LSB | Bank Select LSB |
| PC | Program Number |
| Vol | Volume |
| Pan | Pan |
| Rev | Reverb Depth |
| Cho | Chorus Depth |
| Trs | Key Transpose |
| KRL | Key Range Lower |
| KRU | Key Range Upper |
How to Make Settings
1. Press the [EXTERNAL/INTERNAL] button so the "EXTERNAL" indicator is lit.
The RD-300GX is set to control the external MIDI devices.
NOTE
The External screen shown will not appear if "Rec Mode" is "ON" in Utility edit. Turn the Rec Mode setting "OFF" (p. 78).
2. While continuing to hold down the [EXIT/SHIFT] button, use the [DEC] [INC] buttons to select the parameter to be set.
3. Use the ZONE SELECT button to select the Zone for which you want to make settings.
The indicator of the selected Zone will light.
4. Use the [DEC] [INC] buttons to set the value.
Pressing the [DEC] [INC] buttons simultaneously sets the value to “---,” “OFF,” or “0.”
Adjusting the Volume and Pan (Vol/Pan)
Sets the volume and the panning (localizes sound image) for each of the Tones.
The Volume setting is mainly used when multiple tones are playing to obtain the desired balance in volume between each Zone.
The Pan setting positions the sound image of each Zone when the output is in stereo. With an increase in the value for L, more of the sound will be heard as coming from the left side. Similarly, more of the sound will originate at the right if the value of R is increased. When set to 0, the sound is heard as coming from the center.
| Parameter | TX CC# Value | |
| Vol (Volume) | CC07 | --- (OFF), 0–127 |
| Pan (Pan) | CC10 | L64–0–63R, --- (OFF) |
Setting the Amount of Reverb and Chorus (Rev/Cho)
This sets the depth of the reverb and chorus effects.
| Parameter | TX CC# Value | |
| Rev (Reverb) | CC91 | --- (OFF), 0–127 |
| Cho (Chorus) | CC93 | |
Setting the Transposition for Each Individual Zone (Trs)
You can perform with each Zone transposed to a different pitch.
When multiple Zones are set to on, you can create a richer sound by setting the two Tones to different octaves. Also, if the Keyboard Mode is set to Split and you are playing a bass Tone in the lower Part, you can use the Transpose function to play the bass at a lower pitch.
| Parameter | Value |
| Trs (Transpose) | -48 - 0 -+48 |
Setting the Key Range (KRL/KRU)
Set the keyboard range in which each Zone will sound.
This can be used to make notes in different areas of the keyboard play different Tones.
Specify the lower limit (KRL) and upper limit (KRU) of the key range being set.
You can also set this by pressing a specific key and then pressing the [ENTER] button.
| Parameter | Value |
| KRL (Key Range Lower) | A0-C8 |
| KRU (Key Range Upper) |
NOTE
This is effective only when the [SPLIT] button is on (p. 29) in the key range settings.
MEMO
"FUL" is displayed when the [SPLIT] button is set to OFF. In this case, the [SPLIT] button is automatically switched on when the value is changed to something other than "FUL" with the [DEC] [INC] buttons.
NOTE
You cannot set the key range's lower limit higher than the upper limit, nor can you set the upper limit below the lower limit.
MEMO
If you don't want MIDI note data to be transmitted, set the Zone's MIDI OUT Ch to "OFF." (p. 55)
Making Detailed Settings for the Piano Tones (Piano Designer)
You can make detailed settings to adjust the piano sound that's used when you press the ONE TOUCH [PIANO] button (p. 26).
This function is called "Piano Designer."
Furthermore, you can save the changed settings.
NOTE
When the ONE TOUCH [PIANO] button is pressed, all settings other than the Piano Designer settings are switched to their status at the time the RD-300GX's power was turned on. Store any arrangements of settings that you want to keep in Setup (p. 51).
Making the Settings
- Press the [ENTER] button in the ONE TOUCH PIANO screen to select the type you want to set.
- Use the [DEC] [INC] buttons to select the parameter to be set, then press the [ENTER] button.
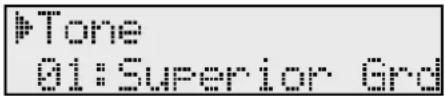
text_image
Tone MI: SUPERIOR Eng-
Use the [DEC] [INC] buttons to set the value.
-
If you want to save the setting, press the [WRITE] button.
The confirmation message appears. Press the [ENTER] button to save the settings. If you want to cancel, press the [EXIT/SHIFT] button.
- When you finish making settings, press the [EXIT/SHIFT] button.
You are returned to the ONE TOUCH PIANO screen.
NOTE
Depending on the piano tone selected, this setting may not be available.
Selecting the Piano Sound (Tone)
This chooses the piano Tone to be selected when the ONE TOUCH [PIANO] button is pressed.
You can choose from the Tones of the TONE SELECT [PIANO] button.
Changing the Amount of Reverb Effect (Reverb Depth)
This does the same thing as the setting described in "Changing the Depth of Reverb Effect" (p. 34), but this setting can be easily accessed by pressing the ONE TOUCH [PIANO] button.
| Parameter | Value Description | |
| Reverb Amount | 0–127 | The reverb effect becomes stronger as the value is increased. |
Opening/Closing the Piano Lid (Lid)
Reproduces the way the brightness of a grand piano's sound is affected by how much the piano's lid is opened.
| Parameter | Value Description | |
| Lid | 1-7 | The lid is opened more as the value is increased, creating a brighter sound. |
Adjusting the Damper Noise (Damper Noise)
This adjusts the damper noise (the sound that occurs when the strings of an acoustic piano are released by pressing the damper pedal).
| Parameter | Value Description | |
| Damper Noise | 0–127 | Increasing this value will increase the sound that is heard when the strings are released. |
Adjusting the Resonance of the Aliquot Strings (Duplex Scale)
This adjusts the sound of the sympathetically vibrating aliquot strings on an acoustic piano.
| Parameter | Value Description | |
| Duplex Scale | 0–127 | Higher values will increase the volume of the sympathetic vibration. |
What are Duplex Scale?
The Duplex Scale is a system of sympathetically vibrating strings sometimes included in grand pianos.
These sympathetically vibrating strings are not struck directly with hammers, but sound by vibrating in sympathy with the vibrations of other strings. By resonating with the overtones, these strings add richness and brilliance to the sound. These sympathetic strings are added only to the high register above approximately C4. Since they do not have a damper (a mechanism that stops them from sounding), they will continue sounding even after you play a note and then release it to stop the sound of the string that was actually struck.
Adjusting the Resonant Sounds when the Keys are Pressed (String Resonance)
When the keys are pressed on an acoustic piano, the strings for keys that are already pressed also vibrate sympathetically. The function used to reproduce is called "String Resonance."
| Parameter | Value Description | |
| String Resonance | OFF, 1-127 | Increasing the value will increase the amount of effect. |
Adjusting the String Resonance Produced when a Key is Released (Key Off Reso.)
This adjusts resonances such as the key-off sound of an acoustic piano (subtle sounds that are heard when you release a key).
| Parameter | Value Description | |
| Key Off Reso. (Key Off Resonance) | OFF, 1–127 | Higher values will increase the volume of the resonances. |
Adjusting the Sound of the Hammer Strike (Hammer Noise)
This adjusts the sound of the hammer striking the string of an acoustic piano.
| Parameter | Value Description | |
| Hammer Noise | -2-0-+2 | Higher values will increase the sound of the hammer striking the string. |
Precise Modification of Chord Sonorities (Stretch Tune)
Changes the pitch using the "stretch tune" method typically used on acoustic pianos. This makes high-range sounds slightly higher in pitch, and low-range sounds slightly lower in pitch.
| Parameter | Value Description | |
| Stretch Tune | OFF | No stretch tune. |
| ON This is | the standard tuning curve. | |
Changing the Key Touch (Key Touch/Ofst)
Use "Key Touch" to adjust the touch sensitivity of the keyboard.
You can use the "Key Touch Offset" setting to adjust the sensitivity in greater detail.
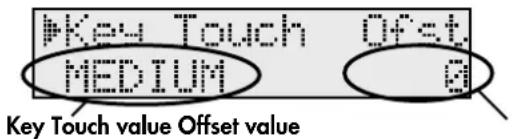
text_image
#Key Touch MEDIUM Offset. Q Key Touch value Offset value| Parameter | Value Description | |
| Key Touch | SUPER LIGHT | An even lighter setting than LIGHT. |
| LIGHT | This sets the keyboard to a light touch. You can achieve fortissimo (ff) play with a less forceful touch than usual, so the keyboard feels lighter. This setting makes it easy to play, even for children. | |
| MEDIUM | This sets the keyboard to the standard touch. You can play with the most natural touch. This is the closest to the touch of an acoustic piano. | |
| HEAVY | This sets the keyboard to a heavy touch. You have to finger the keyboard more forcefully than usual in order to play fortissimo (ff), so the keyboard touch feels heavier. Dynamic fingering adds even more feeling to what you play. | |
| SUPER HEAVY | An even heavier setting than HEAVY. | |
| Ofst (Offset) | -10-0-+9 | The touch sensitivity becomes heavier as the value increases. |

When you change the Key Touch setting, the Key Touch Offset value will be set to "0."

When "ofst" setting value continues into the positive or negative direction, the Key Touch's five-step value is switched automatically in accordance with that value.
Setting a Constant Volume Level in Response to the Playing Force (Velocity)
This sets the sound to play at a fixed volume, regardless of the strength used to play the keyboard (the velocity).
| Parameter | Value Description | |
| Velocity | REAL | Volume levels and the way sounds are played change in response to the velocity. |
| 1–127 | Values for the volume and the way sounds are played remain constant. | |
Changing the Timing of Sounds in Response to the Velocity (Velo Delay Sens)
This sets the interval from the time the key is played to when the sound is produced.
As the value is decreased, the timing of the sound is delayed more when more force is used to play the keys.
As the value is increased, the timing of the sound is delayed more when less force is used to play the keys.
| Parameter | Value |
| Velo Delay Sens (Velocity Delay Sense) | -63-0-+63 |
Changing How Volume Responds to the Velocity (Key Touch Mode)
If you choose "MODE 2," the volume will change more smoothly in response to your keyboard playing dynamics (velocity).
| Parameter | Value |
| Key Touch Mode | MODE1, MODE2 |
The process of changing Tone parameters to create the tones you like, and changing the settings for various functions is known as "editing." When the [EDIT] button is pressed and the indicator is lit, the RD-300GX switches to "Edit mode."
You can save edited settings to Setups.
Edited settings are discarded when the RD-300GX's power is turned off, so be sure that any settings you want to keep are saved to a Setup (p. 51).
However, the System settings can be saved in the edit screen. Therefore, no changes to the settings are lost, even when the power is turned off.
Setting Parameters
1. Press the [EDIT] button, getting the indicator to light.
The Edit Menu screen appears.
![ROLAND RD-300GX - Press the [EDIT] button, getting the indicator to light. - 1](/content/2026/05/763507/images/1a6a91af5a5171a4760e9586eebbbd61cfb280be391f28ac2ab3baa694b27a4a.jpg)
2. Use the [DEC] [INC] buttons to select a menu, then press the [ENTER] button.
![ROLAND RD-300GX - Use the [DEC] [INC] buttons to select a menu, then press the [ENTER] button. - 1](/content/2026/05/763507/images/4a44268e9f79417e6a1930536735e52ec4abc33dafc9ece470b626addb21e548.jpg)
text_image
Master Tune 440.0Hz3. Use the [DEC] [INC] buttons to select the parameter to be set, then press the [ENTER] button.
![ROLAND RD-300GX - Use the [DEC] [INC] buttons to select the parameter to be set, then press the [ENTER] button. - 1](/content/2026/05/763507/images/5303010ab296292527224d5f6486b8b55dce2d9f584a936427749bb54de1ada2.jpg)
text_image
Master: Tune M440. MHz4. Use the [DEC] [INC] buttons to set the value.
If you press the [DEC] button and [INC] button simultaneously, the setting will return to its default value.
5. If you want to save the setting, press the [WRITE] button. Then, press the [ENTER] button.
You can return to Step 3 by pressing the [EXIT/SHIFT] button.
NOTE
Unless they have been saved, these settings are lost when the power is turned off.
6. When you have finished making the settings, press the [EDIT] button, extinguishing its indicator.
![ROLAND RD-300GX - When you have finished making the settings, press the [EDIT] button, extinguishing its indicator. - 1](/content/2026/05/763507/images/ba3e59e9a364932d2d77faa28211eecd50344c14067a424fca1856c840ebb119.jpg)
The following settings will be stored as common settings for the entire RD-300GX.
- System
Parameters that can be Set
You can set the following parameters in Edit mode.
| System | Master Tune | p. 64 |
| Master Volume p. 64 | ||
| SETUP Pedal Shift p. 64 | ||
| SETUP Control Channel p. 65 | ||
| USB Driver p. 65 | ||
| USB Memory Mode p. 65 | ||
| Damper Pedal Polarity p. 65 | ||
| Control Pedal Polarity p. 65 | ||
| Indicator Mode p. 65 | ||
| Part Mode p. 66 | ||
| Temperament p. 66 | ||
| Temperament Key p. 66 | ||
| Rx GM System ON p. 67 | ||
| Rx GS Reset p. 67 | ||
| Audio Volume p. 67 | ||
| Song Stop Mode | p. 67 | |
| Key Touch | Key Touch | p. 62 |
| Key Touch Offset | p. 62 | |
| Velocity | p. 62 | |
| Velocity Delay Sense | p. 62 | |
| Key Touch Mode | p. 62 | |
| Common | MFX Zone | p. 68 |
| Control Pedal Function | p. 68 | |
| S1 Function | p. 68 | |
| S2 Function | p. 68 | |
| Tone Parameter | Attack Time | p. 69 |
| Release Time | p. 69 | |
| Cutoff Frequency | p. 69 | |
| Resonance | p. 69 | |
| Decay Time | p. 69 | |
| Reverb Amount | p. 69 | |
| Coarse Tune | p. 70 | |
| Fine Tune | p. 70 | |
| Bend Range p. 70 | ||
| Zone Parameter | Key Transpose | p. 70 |
| Pan p. 70 | ||
| Damper Pedal Switch p. 71 | ||
| Control Pedal Switch p. 71 | ||
| Bender Switch p. 71 | ||
| Modulation Switch p. 71 | ||
| S1 Switch p. 71 | ||
| S2 Switch p. 71 | ||
| Part Switch | Switch | p. 71 |
| File | Save SETUP | p. 72 |
| Load SETUP p. 72 | ||
| Delete SETUP p. 73 | ||
| Copy SETUP p. 74 | ||
| Delete SONG p. 75 | ||
| Copy SONG p. 74 | ||
| Format p. 76 | ||
| Song Function | Play Mode | p. 76 |
| Playback Transpose p. 76 | ||
| Center Cancel p. 76 | ||
| Utility | Rec Mode | p. 78 |
| Local Control p. 78 | ||
| Bulk Dump p. 77 | ||
| Factory Reset Current Setup p. | 77 | |
| Factory Reset All | p. 77 |
Making System Settings (System)
Functions that affect the RD-300GX's overall operating environment are called "System functions."
Tuning to Other Instrument's Pitches (Master Tune)
For a cleaner ensemble sound while performing with one or more other instruments, ensure that each instrument's basic pitch is in tune with that of the other instruments. In general, the tuning of an instrument is indicated by the pitch in Hertz (Hz) of the middle "A" note.
| Parameter | Value |
| Master Tune | 415.3–440.0–466.2 |
Adjusting the Volume (Master Volume)
Adjusts the volume of the entire RD-300GX.
| Parameter | Value |
| Master Volume | 0–127 |
Using a Control Pedal to Switch Setups (SETUP Pedal Sft)
You can use a control pedal connected to the CONTROL PEDAL jack to switch between RD-300GX Setups.
| Parameter | Value | Description |
| SETUP Pedal Sft (SETUP Pedal Shift) | OFF | The pedal will perform the function assigned in “Control Pedal Function” (p. 68) of the “COMMON” menu. |
| ON | Each time you press the pedal, the Setup will be switched in ascending order.* If you choose this setting, the function assigned in “Control Pedal Function” of the “COMMON” menu will be disabled. |
Using Program Change Messages to Switch Setups (SETUP Ctrl Ch.)
You can switch the RD-300GX's Setups with MIDI messages from an external MIDI device.
Set the MIDI Receive channel for receiving the MIDI messages (Program Changes) from the external MIDI device to be used for switching Setups.
When not switching Setups from an external MIDI device, set this to OFF.
| Parameter Value | |
| SETUP Ctrl Ch.(SETUP Control Channel) | 1-16, OFF |

When the SETUP Control Channel settings are transmitted along with the part's MIDI receive channel, switching of Setups takes priority over the switching of Tones.
For more information about switching Setups, refer to "Switching Setups" (p. 80).
Making the Settings for the USB Driver (USB Driver)
If you intend to connect to a computer using the USB connector, you need to make the following setting before you make the connection.
After changing this setting, turn the power off and then on again.
| Parameter | Value Description | |
| USB Driver | ORIGINAL | Select this if you're using the USB driver on the included CD-ROM (Audio Key Utility 2), or a USB driver you downloaded from the Roland website. |
| GENERIC | Choose this if you want to use the standard USB driver that was included with your computer. | |

Select the "ORIGINAL" setting if transmission and reception of MIDI data using the standard USB driver included with your computer is too slow.
Changing the USB Memory Setting (USB Memory Mode)
In some cases, when USB memory is connected to the USB MEMORY connector, it may take longer for data to be loaded, or data may fail to be loaded successfully. If this occurs, you may be able to solve the problem by changing the USB memory setting.
After changing this setting, turn the power off and then on again.
| Parameter | Value |
| USB Memory Mode | MODE1, MODE2 |
Switching the Pedal's Polarity (Damper Polarity/Control Polarity)
Switch the polarity of pedals connected to the RD-300GX.
This can be set individually for each of the Pedal jacks on the rear panel (DAMPER, CONTROL).
On some pedals, the electrical signal output by the pedal when it is pressed or released is the opposite of other pedals. If your pedal has an effect opposite of what you expect, set this parameter to REVERSE.
If you are using a Roland pedal (that has no polarity switch), set this parameter to STANDARD.
| Parameter | Value |
| Damper Polarity | STANDARD, REVERSE |
| Control Polarity |
Selecting the Indicator Mode (Indicator Mode)
This specifies how the indicators will appear when off.
| Parameter | Value Description | |
| Indicator Mode | NORMAL | The indicator will be lit if a function is on, and will be extinguished if it is off. |
| DIMLY | The indicator will be dimly lit when the function is off. This will help you find the location of the buttons even on a dimly lit stage. | |
Selecting the Number of Parts (Part Mode)
This selects the number of parts for the RD-300GX.
When set to "16PART+PERF," the performance on the keyboard is not affected by MIDI messages from the MIDI IN connector or song data played by the RD-300GX. This is useful when you want to perform on the keyboard while playing song data with the RD-300GX.
If you select "16PART," the keyboard part you yourself play can use the same part as the song data, meaning that you can specify program changes or bank selections within the song data so that the tone of the keyboard part will be switched automatically.
| Parameter | Value |
| Part Mode | 16PART, 16PART+PERF (Performance) |
Setting the Tuning Method (Temperament)
This sets the tuning.
Most modern songs are composed and played with the assumption that equal temperament will be used, but when classical music was composed, there were a wide variety of other tuning systems in existence. Playing a composition with its original tuning lets you enjoy the sonorities of the chords that the composer originally intended.
| Parameter | Value Description | |
| Tempera-ment | EQUAL | This tuning divides an octave into 12 equal parts. Every interval produces about the same amount of slight dissonance. |
| JUST(MAJOR) | This scale eliminates dissonance in fifths and thirds. It is unsuited to playing melodies and cannot be transposed, but is capable of beautiful sonorities. | |
| JUST(MINOR) | The scales of the major and minor just intonations are different. You can get the same effect with the minor scale as with the major scale. | |
| Parameter | Value Description | |
| Tempera-ment | PYTHAGOREAN | This scale devised by the philosopher Pythagoras eliminates dissonance in fourths and fifths. Dissonance is produced by third-interval chords, but melodies are euphonious. |
| KIRNBERGER | This scale is a modification of the meantone and just intonations that permits greater freedom in transposition to other keys. Performances are possible in all keys (III). | |
| MEAN TONE | This scale makes some compromises in just intonation, enabling transposition to other keys. | |
| WERCKMEISTER | This is a combination of the mean tone and Pythagorean scales. Performances are possible in all keys (first technique, III). | |
| ARABIC | This scale is suitable for Arabic music. | |
Selecting the Keynote (Temperament Key)
When playing with tuning other than equal temperament, you need to specify the keynote for tuning the song to be performed (that is, the note that corresponds to C for a major key or to A for a minor key). If you choose an equal temperament, there's no need to select a keynote.
| Parameter | Value |
| Temperament Key | C, C#, D, Eb, E, F, F#, G, G#, A, Bb, B |

When performing in ensemble with other instruments, be aware that depending on the key, there may be some shifting of the pitch. Tune the RD-300GX to the fundamental pitch of the other instruments.
Switching Between Reception of GM/GM2 System On and GS Reset (Rx GM Sys ON, Rx GS Reset)
Specifies whether General MIDI System On, General MIDI 2 System On, or GS Reset messages from external MIDI devices will be received (ON) or not (OFF).
| Parameter | Value |
| Rx. GM Sys ON(Rx GM/GM2 System ON) | ON, OFF |
| Rx. GS Reset |
Adjusting the Volume of Audio File Playback (Audio Volume)
This adjusts the volume of audio file playback (p. 40) and of the Audio Key function (p. 42).
| Parameter Value | |
| Audio Volume | 0–127 |
Having Song Playback Stop when You Press a ONE TOUCH Button (Song Stop Mode)
This specifies whether the song will stop when you press the ONE TOUCH [PIANO] button while a song is playing.
| Parameter | Value Description | |
| Song Stop Mode | ON | If you press a ONE TOUCH button while a song is playing, the song will stop playing. |
| OFF | Even if you press a ONE TOUCH button while a song is playing, the song will not stop playing. | |
Setting the Keyboard Touch (Key Touch)
You can make advanced settings for the touch used for the keys.
For more on the following key touch function parameters, refer to the corresponding pages.
Key Touch → p. 62
Key Touch Offset → p. 62
Velocity → p. 62
Velocity Delay Sense → p. 62
Key Touch Mode → p. 62
Setup-Related Settings (Common)
Setting the Zone to which Multi Effects are Added (MFX Zone)
This specifies the Zone to which the multi-effect will be applied when you're playing in Dual mode (p. 28) or Split mode (p. 29).
| Parameter | Value Description | |
| MFX Zone | UPPER 1 | The effect will be applied to the UPPER 1 Zone. |
| UPPER 2 | The effect will be applied to the UPPER 2 Zone. | |
| LOWER | The effect will be applied to the LOWER Zone. | |

The effect will be applied to Zones that use the same effect as this Zone.
Changing the Pedal Function (Ctrl Pedal Func)
This sets the function of the pedal switch or expression pedal (such as the optional EV-5/7) connected to the CONTROL jack on the rear panel.
| Parameter Value | Function/Parameter Setting Changed | |
| Ctrl Pedal Func (Control Pedal Function) | OFF | No control |
| SOFT Soft Pedal | ||
| SOSTENUTO Sostenuto pedal | ||
| EXPRESSION Expression Pedal | ||
| MODULATION | Vibrato will be applied in the same way as when you move the modulation lever. | |
| BEND UP | The pitch will rise in the same way as when you move the Pitch Bend lever toward the right. | |
| BEND DOWN | The pitch will fall in the same way as when you move the pitch bend lever toward the left. | |
| AFTERTOUCH | The pedal will control aftertouch. | |
| Parameter | Value | Function/Parameter Setting Changed |
| Ctrl Pedal Func | START/STOP | The external sequencer will start/stop. |
| TAP TEMPO | The tempo will be modified to the interval at which you press the pedal. | |
| RHY START/ STOP | Starts and stops Rhythms (p. 37). | |
| SONG START/ STOP | Starts and stops a song (p. 40). | |
| AUDIO KEY SW | This is the same function as the [AUDIO KEY] button. Audio key (p. 42) will be turned on/off. | |
| MFX SW | Performs the same function as the [MULTI EFFECTS] button. Switches the multi-effects (p. 47) on and off. |
Assigning Functions to the [S1] [S2] Buttons (S1/S2 Func)
This setting determines the function of the [S1] and [S2] buttons.
| Parameter | Value | Function/Parameter Setting Changed |
| S1/S2 Func (S1/S2 Function) | OFF | No control |
| COUPLE +1OCT | When you play the keyboard, notes one octave above will also sound at the same time. | |
| COUPLE -1OCT | When you play the keyboard, notes one octave below will also sound at the same time. | |
| COUPLE +2OCT | When you play the keyboard, notes two octave above will also sound at the same time. | |
| COUPLE -2OCT | When you play the keyboard, notes two octave below will also sound at the same time. | |
| S1/S2 Func | COUPLE +5TH | When you play the keyboard, notes a fifth (seven semitones) above will also sound at the same time. |
| COUPLE -4TH | When you play the keyboard, notes a fourth (five semitones) below will also sound at the same time. | |
| OCTAVE UP | Each button press raises the key range in octave steps (up to 4 octaves higher). | |
| OCTAVE DOWN | Each button press lowers the key range in octave steps (up to 4 octaves lower). | |
| START/STOP | The external sequencer will start/stop. | |
| TAP TEMPO | The tempo will be modified to the interval at which you press the button. | |
| RHY PLAY/ STOP | Starts and stops Rhythms (p. 37). | |
| SONG PLAY/ STOP | Starts and stops the song (p. 40). |
Tone Settings (Tone Parameter)
You can make more detailed settings to the Tones assigned to each of the Zones.

Press the ZONE SELECT button to select the Zone to be set.
Changing Tone Elements (Attack Time/Release Time/Cutoff Freq/Resonance/Decay Time)
You can make changes in tones by adjusting the settings of the following five elements.
Attack Time: The time it takes after the key is pressed for a sound to reach full volume.
Release Time: The time it takes after the key is released for a sound to become inaudible.
Cutoff Freq: Adjusts how much the filter is opened.
Resonance: This boosts the portions in the region around the cutoff frequency, lending a particular quality to the sound. Excessively high settings can produce oscillation, causing the sound to distort.
Decay Time: The time it is to take following the attack for the volume to decrease.

Making abrupt changes in the settings values may cause the sound to become distorted or overly loud. Carefully monitor volume levels while making the settings.
| Parameter | Value Description |
| Attack Time | Higher values produce a milder attack; lower values produce a sharper attack. |
| Release Time | Higher values produce longer decay; set lower values for a clear-cut sound. |
| Cutoff Freq | Higher values brighten the sound; lower values make the sound seem darker. |
| Resonance | Higher value makes the special quality of the sound stronger; lower value reduce these characteristics. |
| Decay Time | The time it takes for the volume to fall increases as the value is raised; lowering the value decreases the decay time. |

The effect may not be apparent with some Tones, even when the value is changed.
Setting the Amount of Reverb Applied to Each Tone (Reverb Amount)
This sets the depth of the reverb effect for each Tone.

When this value is set to "0," no effect is applied even when the [REVERB] button is pressed.

You can also make the setting by holding down the [REVERB] button and adjusting any of the ZONE LEVEL sliders.
| Parameter | Value |
| Reverb Amount | 0–127 |
Changing the Pitch (Coarse Tune/Fine Tune)
This sets the pitch of the Tone.
| Parameter | Value Description | |
| Coarse Tune | -48–+48(+/- 4 octaves) | Sets the sound's pitch in semitone units. |
| Fine Tune | -50–+50(+/- 50 cents) | Sets the sound's pitch in units of one cent. |

1 cent = 1/100 semitone

With some Tones, there may be ranges in which the pitch does not change as intended.
Changing the Bend Range (Bend Range)
This sets the amount of pitch change that will occur when you move the Pitch Bend lever (2 octaves).
| Parameter | Value |
| Bend Range | 0–24 (semitone) |
Making the Settings for Each Zone Individually (Zone Parameter)
You can make more detailed settings for the Zone.

Press the ZONE SELECT button to select the Zone to be set.
Setting the Transposition for Each Individual Zone (Transpose)
You can perform with each Zone transposed to a different pitch.
When multiple Tones are playing, you can create a richer sound by setting the two Tones to different octaves. Also, if the keyboard mode is set to Split and you are playing a bass Tone in the lower Zone, you can use the Transpose function to play the bass at a lower pitch.
| Parameter | Value |
| Transpose | -48-0-+48 |

You can also set the same degree of transposition for all parts with the [TRANSPOSE] button. For details, refer to "Transposing the Key of the Keyboard ([TRANSPOSE] Button)" (p. 32).
Setting the Pan (Pan)
Sets the panning (localizes sound image) for each of the Zones.
The Pan setting localizes the sound image of each Zone when the output is in stereo. With an increase in the value for L, more of the sound will be heard as coming from the left side. Similarly, more of the sound will originate at the right if the value of R is increased. When set to 0, the sound is heard as coming from the center.
| Parameter | Value |
| Pan | L64-0-R63 |
Turning the Controllers in Each Zone On and Off
These settings determine whether the pedals connected to each PEDAL jack (DAMPER, CONTROL), the Modulation lever, the Pitch Bend lever (Bender), and the [S1] [S2] buttons are used to control the Zone (ON), or not (OFF).
| Parameter | Value |
| Damper Pedal Sw | OFF, ON |
| ControlPedal Sw | |
| Bender Sw | |
| Modulation Sw | |
| S1 Sw | |
| S2 Sw |
Part On/Off (Part Switch)
Sets the part on or off.
- Press the [EDIT] button, getting the indicator to light.
The Edit Menu screen appears.
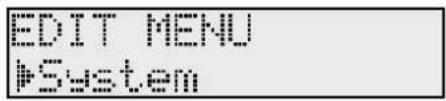
text_image
EDIT MENU #System- Use the [DEC] [INC] buttons to select "Part Switch," then press the [ENTER] button.
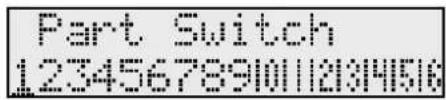
text_image
Part Switch 12345678910112034516- While continuing to hold down the [EXIT/SHIFT] button, use the [DEC] [INC] buttons to select the part to be set.
- Use the [DEC] [INC] buttons to switch the setting to "ON" or "OFF."
The part number is shown for parts that are turned on, and “-” is shown for parts that are turned off.
- When you have finished making the settings, press the [EDIT] button, extinguishing its indicator.
NOTE
On the RD-300GX, UPPER 1 is fixed as Part 1 (Ch 1), UPPER 2 is fixed as Part 2 (Ch 2), while LOWER is fixed as Part 3 (Ch 3). Note that the keyboard won't produce sound if Parts 1, 2 and 3 are set to OFF.
File Management (File)
The RD-300GX lets you store Setup data in internal memory or in USB memory connected to the USB MEMORY connector on the rear panel.
Saving a Setup File (Save SETUP)
A single, individual file containing a collection of 32 Setups registered to the RD-300GX is called a "Setup file."
This Setup file can be saved in the RD-300GX's internal memory or on USB memory (sold separately) connected to the USB MEMORY connector.
- Press the [EDIT] button, getting the indicator to light.
The Edit Menu screen appears.
-
Use the [DEC] [INC] buttons to select "File," then press the [ENTER] button.
-
Press the [DEC] button to select "Save SETUP," then press the [ENTER] button.
The following screen appears.
text_image
Select Media PRINT- Use the [DEC] [INC] buttons to select the destination in which the Setups are to be stored.
| Value | Description |
| INT | The data will be stored in the RD-300GX's internal memory. |
| USB | The data will be stored on USB memory connected to the USB MEMORY connector on the rear panel. |
- Press the [ENTER] button.
The following screen appears.
text_image
File Name [SETUP FILE]-
While continuing to hold down the [EXIT/SHIFT] button, use the [DEC] [INC] buttons to move the cursor to the positions where the characters are to be input.
-
Use the [DEC] [INC] buttons to enter the name.
Names can consist of up to 16 characters.
The following characters are available.
$$ \text { space! } # \% \& ^ {\prime} () +, -. 0 - 9; = @ A - Z [ ] ^ {\wedge} _ {-} ^ {\prime} a - z {} $$

You can't save a Setup file with a name that starts with a ". (period)". Do not use a ". (period)" at the beginning of the name.
-
Repeat steps 6–7 to input the name.
-
When you've finished entering the file name, press the [ENTER] button.
The following screen appears.
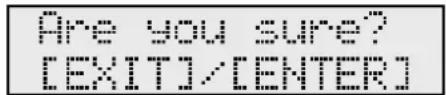
text_image
Are you sure? [EXIT/ENTER]If you do not want to save the Setup file, press the [EXIT/SHIFT] button.
- Press the [ENTER] button once again to save the Setup file.

"Executing..." appears in the display while the save is in progress. Be sure never to turn off the power.

If a file with the same name has already been saved, the confirmation message "Overwrite OK?" appears. To overwrite the file, press the [ENTER] button; to save the file under a different name, press the [EXIT/SHIFT] button.
- Press the [EDIT] button, extinguishing its indicator.
Calling Up Setup File (Load SETUP)
Here's how to load a previously saved Setup file.

The current settings are erased when a Setup file is called up. Be sure to save you would like to keep first before calling up.
- Press the [EDIT] button, getting the indicator to light.
The Edit Menu screen appears.
-
Use the [DEC] [INC] buttons to select "File," then press the [ENTER] button.
-
Use the [DEC] [INC] button to select "Load SETUP," then press the [ENTER] button.
- Use the [DEC] [INC] buttons to select the memory into which you want to load the data.
| Value | Description |
| INT | The data in the RD-300GX's internal memory will be loaded. |
| USB | The data on USB memory connected to the USB MEMORY connector on the rear panel will be loaded. |
- Press the [ENTER] button.
The following screen appears.
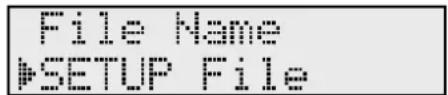
text_image
File Name #SETUP File- Use the [DEC] [INC] buttons to select the file you want to call up, then press the [ENTER] button.
The confirmation message appears.
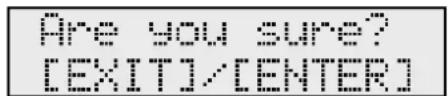
text_image
Are you sure? [EXIT]/[CENTER]If you do not want to load the Setup file, press the [EXIT/SHIFT] button.
- Press the [ENTER] button once again to load the Setup file.
The Setup file is loaded into the RD-300GX.

Be sure never to turn off the power while the load is in progress.

If you load a file with a name that contains characters that cannot be displayed by the RD-300GX, the file name is displayed as "?."
- Press the [EDIT] button, extinguishing its indicator.
Deleting a Setup File (Delete SETUP)
Here's how to delete a previously saved Setup file.
- Press the [EDIT] button, getting the indicator to light.
The Edit Menu screen appears. - Use the [DEC] [INC] buttons to select "File," then press the [ENTER] button.
- Use the [DEC] [INC] to select "Delete SETUP," then press the [ENTER] button.
- Use the [DEC] [INC] buttons to select the memory containing the file you want to delete.
| Value | Description |
| INT | The data in the RD-300GX's internal memory will be deleted. |
| USB | The data on USB memory connected to the USB MEMORY connector on the rear panel will be deleted. |
- Press the [ENTER] button.
The following screen appears.
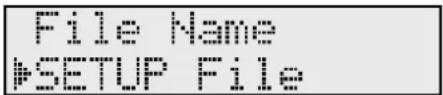
text_image
File Name #SETUP File- Use the [DEC] [INC] buttons to select the file that you want to delete, and press the [ENTER] button.

If you choose "ALL," all Setup files will be deleted.
The confirmation message appears.
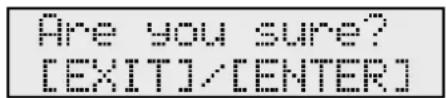
text_image
Are you sure? [EXIT]/[ENTER]If you do not want to delete the file, press the [EXIT/SHIFT] button.
- Press the [ENTER] button to delete the file.
- Press the [EDIT] button, extinguishing its indicator.
"Executing..." appears in the display while the deletion is in progress. Be sure never to turn off the power.
Copying a Setup File (Copy SETUP)
You can copy a Setup file from the RD-300GX's internal memory to USB memory (sold separately).
You can also copy a Setup file from USB memory to the RD-300GX's internal memory.
- Press the [EDIT] button, getting the indicator to light.
The Edit Menu screen appears.
- Use the [DEC] [INC] buttons to select "File," then press the [ENTER] button.
- Press the [DEC] [INC] buttons to select "Copy SETUP," then press the [ENTER] button.
The following screen appears.
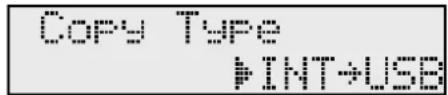
text_image
Copy Type PRINT+USB- Use the [DEC] [INC] buttons to select the type of copy.
| Value | Description |
| INT→USB | Copy from the RD-300GX's internal memory to USB memory. |
| USB→INT | Copy from USB memory to the RD-300GX's internal memory. |
- Press the [ENTER] button.
The following screen appears.
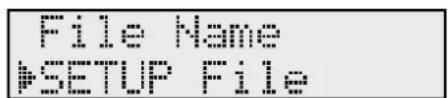
text_image
FILE NAME #TTUP FILE- Use the [DEC] [INC] buttons to select the file that you want to copy, and press the [ENTER] button.

If you choose "ALL," all Setup files will be copied.
The confirmation message appears.
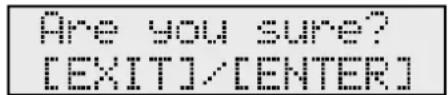
text_image
Are you sure? [EXIT]/[ENTER]If you do not want to copy the file, press the [EXIT/SHIFT] button.
-
Press the [ENTER] button once again to copy the file.
-
Press the [EDIT] button, extinguishing its indicator.

"Executing..." appears in the display while the copy is in progress. Be sure never to turn off the power.
Copying a Song (Copy SONG)
You can copy a song file from the RD-300GX's internal memory to USB memory (sold separately).
You can also copy a song file from USB memory to the RD-300GX's internal memory.

You can't copy audio files.
- Press the [EDIT] button, getting the indicator to light.
The Edit Menu screen appears. - Use the [DEC] [INC] buttons to select "File," then press the [ENTER] button.
- Press the [DEC] [INC] buttons to select "Copy SONG," then press the [ENTER] button.
The following screen appears.
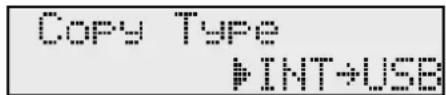
text_image
Copy Type PRINT+USE- Use the [DEC] [INC] buttons to select the type of copy.
| Value | Description |
| INT→USB | Copy from the RD-300GX's internal memory to USB memory. |
| USB→INT | Copy from USB memory to the RD-300GX's internal memory. |
- Press the [ENTER] button.
The following screen appears.
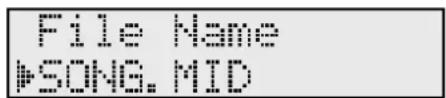
text_image
File Name #SONG MID- Use the [DEC] [INC] buttons to select the file that you want to copy, and press the [ENTER] button.

If you choose "ALL," all song files will be copied.
7. Press the [ENTER] button.
The confirmation message appears.
![ROLAND RD-300GX - Press the [ENTER] button. - 1](/content/2026/05/763507/images/7b4d4282a84bc1dd0f4de85876bbfa86a0f3f330d42a8f14603db61eb322aeb8.jpg)
text_image
Are you sure? [EXIT]/[ENTER]If you do not want to copy the file, press the [EXIT/SHIFT] button.
8. Press the [ENTER] button once again to copy the file.
9. Press the [EDIT] button, extinguishing its indicator.
![ROLAND RD-300GX - Press the [EDIT] button, extinguishing its indicator. - 1](/content/2026/05/763507/images/ab2a73d68e45e9212d8e50607b8473367b15fb9c8548f85b910a334f12e1ba04.jpg)
"Executing..." appears in the display while the copy is in progress. Be sure never to turn off the power.
Deleting a Song (Delete SONG)
This operation deletes a saved song.
- Press the [EDIT] button, getting the indicator to light.
The Edit Menu screen appears. - Use the [DEC] [INC] buttons to select "File," then press the [ENTER] button.
- Use the [DEC] [INC] to select "Delete SONG," then press the [ENTER] button.
- Use the [DEC] [INC] buttons to select the memory containing the file you want to delete.
| Value | Description |
| INT | The data in the RD-300GX's internal memory will be deleted. |
| USB | The data on USB memory connected to the USB MEMORY connector on the rear panel will be deleted. |
5. Press the [ENTER] button.
The following screen appears.
![ROLAND RD-300GX - Press the [ENTER] button. - 1](/content/2026/05/763507/images/4ac057591b5e9f6061895d70539a0574947c4ad349fc8f6c290ec45d893c548c.jpg)
text_image
File Name PHONE MID6. Use the [DEC] [INC] buttons to select the file that you want to delete, and press the [ENTER] button.
![ROLAND RD-300GX - Use the [DEC] [INC] buttons to select the file that you want to delete, and press the [ENTER] button. - 1](/content/2026/05/763507/images/c33efa8c5cf01e14ec666c2f4c7a96571c91b62a21249b380df82864359faf9a.jpg)
If you choose "ALL," all song files will be deleted.
The confirmation message appears.
![ROLAND RD-300GX - Use the [DEC] [INC] buttons to select the file that you want to delete, and press the [ENTER] button. - 2](/content/2026/05/763507/images/dc05723b4893ff77f46b79d632e24ae3378774c3600a662776f6e473592f98a4.jpg)
text_image
Are you sure? [EXIT]/[ENTER]If you do not want to delete the file, press the [EXIT/SHIFT] button.
7. Press the [ENTER] button to delete the song.
8. Press the [EDIT] button, extinguishing its indicator.
"Executing..." appears in the display while the deletion is in progress. Be sure never to turn off the power.
Formatting Memory (Format)
"Formatting" is the operation of returning the RD-300GX's internal memory to its factory-set state, or the operation of preparing USB memory for use with RD-300GX.
USB memory cannot be used with the RD-300GX unless it is formatted suitably for the RD-300GX.
If you're using newly purchased USB memory, you must first format it on the RD-300GX.

When you format the USB memory, all data previously saved on that memory will be erased.
Before you carry out a format, make sure that the USB memory does not contain important data you need to keep.
- Press the [EDIT] button, getting the indicator to light.
The Edit Menu screen appears. - Use the [DEC] [INC] buttons to select "File," then press the [ENTER] button.
- Press the [DEC] [INC] buttons to select "Format," then press the [ENTER] button.
- Use the [DEC] [INC] buttons to select the media that you want to format.
| Value | Description |
| INT | The RD-300GX's internal memory will be formatted. |
| USB | The USB memory connected to the USB MEMORY connector on the rear panel will be formatted. |
- Press the [ENTER] button.
The confirmation message appears.
text_image
Are you sure? [EXIT]/[ENTER]If you do not want to format the media, press the [EXIT/SHIFT] button.
- Press the [ENTER] button once again to execute the Format operation.
All the contents of the memory will be erased.
- Press the [EDIT] button, extinguishing its indicator.

"Executing..." appears in the display while the format is in progress. Be sure never to turn off the power.

Don't remove the USB memory until formatting is completed.
Settings Related to Song Playback (Song Function)
You can change a variety of settings related to song playback. (p. 40)
Selecting the Song Playback Method (Play Mode)
When playing songs on the RD-300GX, you can choose whether to play songs individually or play all songs successively.
| Parameter | Value Description | |
| Play Mode | ONE SONG | When you play back a song, only one song will play; playback will stop at the end of that song. |
| ALL SONG | The songs in internal memory or in USB memory will play consecutively. | |
Changing the Key of the Song Playback (Playback Trans)
This lets you shift the playback key of a song in semitone steps. This also applies to Audio Key playback (p. 42).
| Parameter Value | |
| Playback Trans(Playback Transpose) | -6-0-+5 |
Performing Along with a Audio File (Center Cancel)
When playing back audio files, this causes sounds located in the center (e.g., vocals or melodic instruments) to be reduced in volume.
This also applies to Audio Key playback (p. 42).
| Parameter | Value |
| Center Cancel | OFF, ON |

For some songs, using the Center Cancel function may affect the tonal character.
Utility Settings (Utility)
Utility includes functions for sending data to external MIDI sequencers and other devices and for restoring the settings to their original factory state.

For more on "Rec Mode" and "Local Control" in Utility menu, refer to "Settings for Recording (Rec Mode/Local Control)" (p. 78).
Transferring the RD-300GX's Settings to an External MIDI Device (Bulk Dump)
You can transfer the contents of a Setup to an external MIDI device. This operation is called "bulk dump."
The RD-300GX lets you send the contents of the currently selected Setup to an external MIDI device. This is convenient when you're recording a song.
-
Use a MIDI cable (optional) to connect the RD-300GX's MIDI OUT connector to the MIDI IN connector on an external sequencer.
-
Press the [EDIT] button, getting the indicator to light.
The Edit Menu screen appears.
-
Press the [INC] button to select "Utility," then press the [ENTER] button.
-
Use the [DEC] [INC] buttons to select "Bulk Dump," then press the [ENTER] button.
The following screen appears.

text_image
[Piano&Choir] Send OK? Currently selected Setup name-
Put the external sequencer in record mode.
-
Press the [ENTER] button to transmit the settings.
The message "Executing..." appears in the display during transmission of the data.
- After the transmitting is finished, the display will indicate "Completed."
You are returned to the Edit screen.
- Stop the external sequencer.
Restoring the Settings to the Factory Condition (Factory Reset)
The settings stored in the RD-300GX can be returned to their factory settings.
NOTE
Executing "Factory Reset All" results in deletion of the Setups (p. 50). If you want to keep the recorded content, save the Setup file to your USB memory (p. 72).
NOTE
When making USB connections, be absolutely sure to disconnect the USB cable before starting.
- Press the [EDIT] button, getting the indicator to light.
The Edit Menu screen appears. - Press the [INC] button to select "Utility," then press the [ENTER] button.
- Use the [DEC] [INC] buttons to select "Fctry Reset Cur" or "Fctry Reset All," then press the [ENTER] button.
| Parameter | Description |
| Fctry Reset Cur | The currently selected Setup returned to their factory settings. |
| Fctry Reset All | The settings stored in the RD-300GX can be returned to their factory settings. |
The following screen appears.
text_image
Are you sure? [EXIT]/[ENTER]To cancel the Factory Reset, press the [EXIT/SHIFT] button.
- Press the [ENTER] button once again to start the Factory Reset operation.
NOTE
"Executing..." appears in the display while the Factory Reset is in progress. Be sure never to turn off the power.
After the Factory Reset operation is finished, The Utility screen returns to the display.
NOTE
While the Factory Reset is in progress, no sounds are produced even when the keys are pressed. In addition, song, and Rhythms being played are also stopped.
Recording RD-300GX Performances to an External MIDI Sequencer
Now, try using an external sequencer to record your music onto multiple tracks, and then play back the recorded performance.
Connecting to an External Sequencer

To prevent malfunction and/or damage to speakers or other devices, always turn down the volume, and turn off the power on all devices before making any connections.
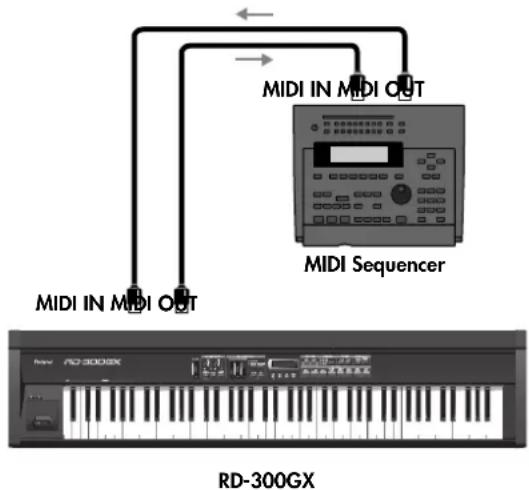
text_image
MIDI IN MIDI OUT MIDI Sequencer MIDI IN MIDI OUT RD-300GX- Before starting the connection procedure, make sure that the power to all devices has been turned off.
- After reading "Connecting the External Equipment to RD-300GX" (p. 17), connect an audio device/system or headphones.
- Connect the external MIDI sequencer with the MIDI cable as shown in the figure above.
- As described in "Turning On the Power" (p. 19), turn on the power of each device.
Settings for Recording (Rec Mode/Local Control)
"Rec Mode" and "Local Control" are convenient features to use when recording to an external sequencer.
When using the functions, you can get the most suitable settings for recording the RD-300GX's data to an external sequencer, without having to make all the Part and channel settings.
- Press the [EDIT] button, getting the indicator to light.
The Edit Menu screen appears. - Press the [INC] button to select "Utility," then press the [ENTER] button.
- Use the [DEC] [INC] buttons to select the parameter to be set, then press the [ENTER] button.

text_image
Rec Mode OFF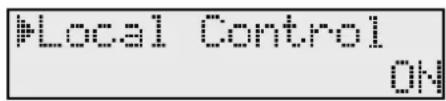
text_image
Local Control ON- Use the [DEC] [INC] buttons to switch the setting to "ON" or "OFF."
| Parameter | Value Description | |
| Rec Mode | ON, OFF | Ordinarily this will be set to OFF. When this is set to ON, settings appropriate for recording are used with respect to the output from MIDI OUT, regardless of the Internal Zone settings. |
| Local Control | This switches the Local Switch on and off. Although normally set to ON, it should be set to OFF when recording. For details, refer to the following section “About the Local Switch” (p. 79). | |
You can return to Step 3 by pressing the [EXIT/SHIFT] button.
- When you have finished making the settings, press the [EDIT] button, extinguishing its indicator.
NOTE
With Rec Mode set to ON, you cannot change the External Zone settings (p. 79). Pressing the [EXTERNAL/INTERNAL] button does not call up the External screen when Rec Mode is set to ON.
Recording the Performance
Use the following procedure when recording to an external sequencer.
1. Turn on the external sequencer's Thru function.
For details, refer to the following section "About Local Switch."
Refer to your sequencer owner's manual for instructions on how to carry out this procedure.
2. Select the Setup for the performance to be recorded.
For instructions on selecting the Setup, refer to p. 50.
3. Set the Rec Mode and the Local Control.
Use the procedure described in the previous section "Settings for Recording" to make the following settings.
Rec Mode: ON
Local Control: OFF
4. Begin recording with the external sequencer.
5. Bulk Dump the Setup.
Using the Utility "Bulk Dump" in Edit mode, transmit the contents of the selected Setup to the external sequencer. For instructions on carrying out this operation, refer to "Transferring the RD-300GX's Settings to an External MIDI Device (Bulk Dump)" (p. 77).
6. Perform on the RD-300GX.
7. When the performance is finished, stop recording with the external sequencer.
Recording is now complete.
You can then listen to the recorded performance by playing it back on the external sequencer.
NOTE
Set "Part Mode" to "16PART" in Edit mode when you use the Multi-Effect settings. (p. 66)
Exiting Rec Mode
When Rec Mode is set to ON, you cannot change the External settings. When you have finished recording the performance, use the procedure described in the previous section "Settings for Recording" to set Rec Mode to OFF.
NOTE
The Rec Mode and Local Control settings cannot be saved. The settings automatically switch to "Rec Mode: OFF, Local Control: ON" when the power is turned on.
About the Local Switch
The switch that connects and disconnects the MIDI connection between the keyboard controller section and the sound generator section (p. 22) is called the Local switch. Since essential information describing what is being played on the keyboard won't reach the sound generator if the Local switch is set to OFF, the Local switch should normally be left ON. However, if while performing you want to send that performance data to an external sequencer as MIDI messages to be recorded, you then perform with the externally connected MIDI sequencer set to MIDI Thru (whereby data received from MIDI IN is then output from the MIDI OUT with no changes made to the data).
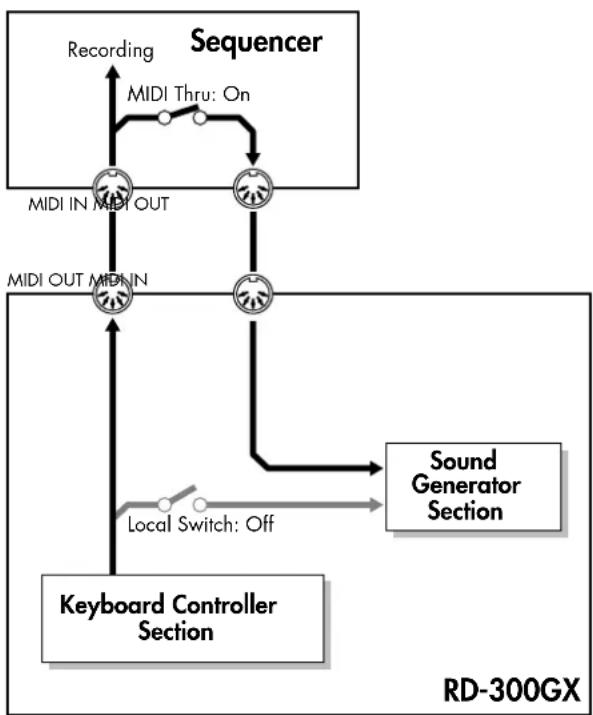
flowchart
graph TD
    A["Sequencer"] -->|Recording| B["MIDI Thru: On"]
    B --> C["MIDI IN MIDI OUT"]
    C --> D["MIDI OUT MIDI N"]
    D --> E["Keyboard Controller Section"]
    E -->|Local Switch: Off| F["Sound Generator Section"]
    F --> D
    style A fill:#f9f,stroke:#333
    style B fill:#ccf,stroke:#333
    style C fill:#cfc,stroke:#333
    style D fill:#fcc,stroke:#333
    style E fill:#cff,stroke:#333
    style F fill:#ffc,stroke:#333
In this case, the data sent over two paths, i.e., the data sent directly from the keyboard controller section and the data sent from the keyboard controller section via the external sequencer, ends up being sent to the sound generator section simultaneously. Thus, for example, even when you play a "C" key only once, the note "C" cannot be sounded correctly, as the sound is played by the sound generator section twice.
Playing the RD-300GX's Internal Sound Generator from an External MIDI Device
Try Playing the RD-300GX from an external MIDI Device.
Making Connections

To prevent malfunction and/or damage to speakers or other devices, always turn down the volume, and turn off the power on all devices before making any connections.
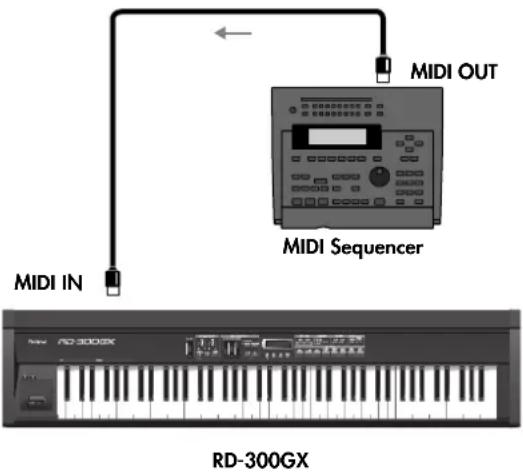
text_image
MIDI IN MIDI OUT MIDI Sequencer RD-300GX- Before starting the connection procedure, make sure that the power to all devices has been turned off.
- After reading "Connecting the External Equipment to RD-300GX" (p. 17), connect an audio device/system or headphones.
- Connect the external MIDI device with the MIDI cable as shown in the figure above.
- As described in "Turning On the Power" (p. 19), turn on the power of each device.
Selecting RD-300GX Sounds from an External MIDI Device
Transmitting Bank Select (Controller Number 0, 32) and Program Change messages from the external MIDI device to the RD-300GX allows you to switch Setups and Tones.
Switching Setups
The MIDI messages transmitted by the external MIDI device will be received by the RD-300GX to select Setups as shown in the following table.
| Setup Number | Bank Select | Program Change Number | |
| MSB LSB | |||
| 1-32 | 85 | 0 1-32 | |
When switching Setups, you must match the MIDI channel of the transmitting device with the RD-300GX's Control channel (p. 65).
When switching the tones in each part, match the MIDI channel of the transmitting device with the RD-300GX's Receive channel. However, when the Control channel and the Receive channel are both set to the same channel, the Control channel takes priority, and Setups are switched.

The RD-300GX does not allow you to change the MIDI channels of the parts. Parts 1–16 are fixed at MIDI channels 1–16, respectively.
Connecting to a Computer via the USB MIDI Connector
If you use a USB cable (commercially available) to connect the USB MIDI connector located on the RD-300GX's rear panel to the USB connector of your computer, you'll be able to do the following things.
- Use the RD-300GX to play SMF music files played back by MIDI-compatible software.
- By transferring MIDI data between the RD-300GX and your sequencer software, you'll be able to enjoy a wide range of possibilities for music production and editing.
Connect the RD-300GX to your computer as shown below.
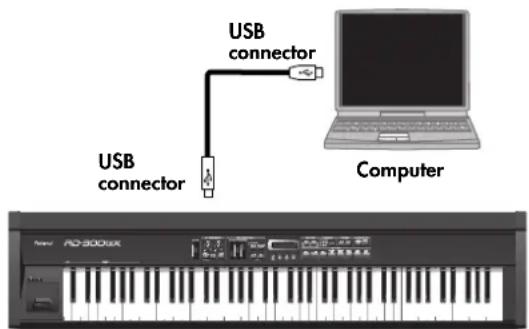
text_image
USB connector USB connector Computer Naner AC-30006XRD-300GX

Refer to the Roland website for system requirements.
Roland website: http://www.roland.com/

Depending on the type of computer you're using, this may not operate correctly.
For details on supported operating systems, refer to the Roland website.
Caution
- To avoid the risk of malfunction and/or speaker damage, always make sure to turn the volume all the way down and turn off the power on all equipment before you make any connections.
- Only MIDI data can be transmitted and received via USB.
- A USB cable is not included. If you need to obtain one, ask the dealer where you purchased the RD-300GX.
- Switch on power to the RD-300GX before you start up the MIDI application on your computer. Don't turn the RD-300GX's power on/off while your MIDI application is running.
Specify the USB driver you want to use, and then install the driver. For details, refer to "Making the Settings for the USB Driver (USB Driver)" (p. 65).
The correct driver and the installation procedure will depend on your system and on the other programs you are using. Be sure to read the Readme file on the CD-ROM before installation.
What is the USB MIDI Driver?
The USB MIDI Driver is a software which passes data between the RD-300GX and the application (sequencer software, etc.) that is running on the USB-connected computer.
The USB MIDI Driver sends data from the application to the RD-300GX, and passes data from the RD-300GX to the application.
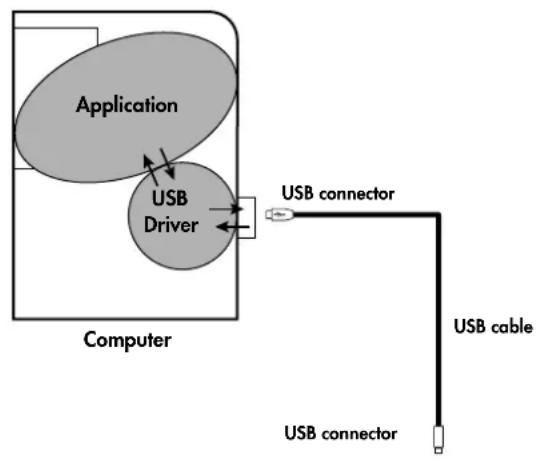
flowchart
graph TD
    A["Application"] --> B["Driver"]
    B --> C["USB connector"]
    C --> D["USB cable"]
    D --> E["USB connector"]
    style A fill:#f9f,stroke:#333
    style B fill:#ccf,stroke:#333
    style C fill:#cfc,stroke:#333
    style D fill:#fcc,stroke:#333
    style E fill:#cff,stroke:#333
text_image
RS-8006K A2.1.1 A2.1.2 A2.1.3 A2.1.4 A2.1.5 A2.1.6 A2.1.7 A2.1.8 A2.1.9 A2.1.10 A2.1.11 A2.1.12 A2.1.13 A2.1.14 A2.1.15 A2.1.16 A2.1.17 A2.1.18 A2.1.19 A2.1.20 A2.1.21 A2.1.22 A2.1.23 A2.1.24 A2.1.25 A2.1.26 A2.1.27 A2.1.28 A2.1.29 A2.1.30 A2.1.31 A2.1.32 A2.1.33 A2.1.34 A2.1.35 A2.1.36 A2.1.37 A2.1.38 A2.1.39 A2.1.40 A2.1.41 A2.1.42 A2.1.43 A2.1.44 A2.1.45 A2.1.46 A2.1.47 A2.1.48 A2.1.49 A2.1.50 A2.1.51 A2.1.52 A2.1.53 A2.1.54 A2.1.55 A2.1.56 A2.1.57 A2.1.58 A2.1.59 A2.1.60 A2.1.61 A2.1.62 A2.1.63 A2.1.64 A2.1.65 A2.1.66 A2.1.67 A2.1.68 A2.1.69 A2.1.70 A2.1.71 A2.1.72 A2.1.73 A2.1.74 A2.1.75 A2.1.76 A2.1.77 A2.1.78 A2.1.79 A2.1.80 A2.1.81 A2.1.82 A2.1.83 A2.1.84 A2.1.85 A2.1.86 A2.1.87 A2.1.88 A2.1.89 A2.1.90 A2.1.91 A2.1.92 A2.1.93 A2.1.94 A2.1.95 A2.1.96 A2.1.97 A2.1.98 A2.1.99 A2.200RD-300GX
About V-LINK
Connecting the RD-300GX to a V-LINK compatible image device allows you to control the images with the RD-300GX.

To prevent malfunction and/or damage to speakers or other devices, always turn down the volume, and turn off the power on all devices before making any connections.
V-LINK
V-LINK ( ) V-LINK activity promoted by Roland that allows linked performance of music and visual material. By using V-LINK-compatible video equipment, visual effects can be easily liked to, and made part of the expressive elements of a performance.
How to Use the V-LINK
1. Hold down the [EXIT/SHIFT] button and press the [SOUND CONTROL] button.
The upper right of the display will indicate [1] and the RD-300GX will be in video control mode.
You can control images using the twelve keys at the left end of the keyboard.
![ROLAND RD-300GX - Hold down the [EXIT/SHIFT] button and press the [SOUND CONTROL] button. - 1](/content/2026/05/763507/images/51fe325d364d599a1f215a287472598564a2254d0f0ba7f2e5414881078403c2.jpg)
text_image
Roland Rd-300GX A0-A1![ROLAND RD-300GX - Hold down the [EXIT/SHIFT] button and press the [SOUND CONTROL] button. - 2](/content/2026/05/763507/images/1c1f0d5a4534470fffc861360e6548e9d5c44038a200d04d67370e6c612089c7.jpg)
While V-LINK is switched on, no sound is produced when you press any of the twelve keys at the left end of the keyboard.
2. Hold down the [EXIT/SHIFT] button and press the [SOUND CONTROL] button once again to exit.
The [indication will go out, and V-LINK will turn off.
![ROLAND RD-300GX - Hold down the [EXIT/SHIFT] button and press the [SOUND CONTROL] button once again to exit. - 1](/content/2026/05/763507/images/093c40ee90fce28aea0bcfce9cdc26447ca66b2683fb9659037f7d6108f4afb2.jpg)
Depending on the screen that is displayed, there will be cases in which the [indication] does not appear even though V-LINK is on.
If the RD-300GX does not function in the way you expect, first check the following points. If this does not resolve the problem, consult your dealer or a nearby Roland Service Station.
* If certain messages appear in the display during operation, please refer to "Error Messages/Other Messages" (p. 86).
| Problem | Check/Solution Page | |
| Power Not Coming On | Is the power cord properly connected? | p. 16 |
| No Sound | Is the volume level of the RD-300GX or connected device turned all the way down? p. 20 | |
| Are all connections properly made?When using the RD-300GX as a stand-alone instrument, be sure to connect with audio cables or use headphones. | p. 17 | |
| Are sounds audible with headphones connected?If sounds are audible through headphones, it may indicate that there is a short in an audio cable or some sort of amp or mixer problem. Check the cables and equipment once again. | — | |
| Is a Zone level turned off with the ZONE LEVEL sliders? p. 31, p. 57 | ||
| Is the Part setting set to OFF? p. 71 | ||
| If the sound for a pressed key is not being played, is the Local Control set to OFF?Set the Local Control to ON. | p. 78 | |
| Are the effect settings correct?Check the ON/OFF settings for the [MULTI EFFECTS] button, MFX Zone and level settings. | p. 47, p. 68 | |
| Has the volume been lowered by pedal operations or by MIDI messages (volume messages or expression messages) received from an external MIDI device? | — | |
| No Sound for Specific Zone | Is the Zone's volume level turned down?Check the ZONE LEVEL sliders. | p. 31, p. 57 |
| No Sound From the Connected MIDI Device | Is the device enabled to transmit MIDI messages?Set the [EXTERNAL/INTERNAL] button to "EXTERNAL." MIDI messages cannot be transmitted if the [EXTERNAL/INTERNAL] button is set to "INTERNAL." | p. 55 |
| Is the RD-300GX's keyboard controller section MIDI Transmit channel matched to the connected MIDI device's MIDI Receive channel?Make the Ch settings. | p. 55 | |
| Is the power to all devices turned on? — | ||
| Is the MIDI cable connected and plugged in correctly? — | ||
| No Sound From the Left Side | Is V-LINK switched on?When V-LINK is switched on, the twelve keys at the left end of the keyboard are used to control images, and no sounds are played with these keys. | p. 82 |
| No Sound in a Specific Range | With certain Tones, for example Rhythm Sets, bass Tones, Timpani, and other Tones will not sound if a portion of the Tone falls outside the recommended range. | — |
| Not All Sounds Are Played | The RD-300GX has a maximum polyphony of 128 voices. When playing together with a song or Rhythm along with heavy use of the damper pedal, the performance data may exceed the number of available voices, and as a result, some notes or sounds played on the keyboard may not sound. | — |
| Not all keyboard performance data could be processed | Could you be playing back an MP3 file, or changing the playback tempo of an audio file?The following measures may solve the problem.Use WAV/AIFF format data rather than MP3 format dataReturn the song tempo to its original setting (to 0%) | p. 41 |
| Tones are Altered | Did you call up a Setup?When a Setup is called up, the current Tone, effect, and other settings are disabled, and the selected Setup goes into effect. Save the required settings to a Setup. | p. 50, p. 51 |
| Did you press the ONE TOUCH [PIANO] button?When the ONE TOUCH [PIANO] button is pressed, the current Tone, effect, and other settings are disabled, and settings for use in piano performances go into effect. Save the required settings to a Setup. | p. 26, p. 51 | |
| When a mono connection is used, the tone quality of some sounds may change, depending on the type of sound and the register in which it is used.To enjoy the best quality when listening to such sounds, we recommend connecting in stereo. | — | |
| Two Sounds are Produced When the Keyboard is Played | Is the RD-300GX in Dual Play? p. 28 | |
| When the RD-300GX is connected to an external sequencer, set it to the Local OFF mode. Alternatively, set SOFT THRU on the sequencer to “OFF.” | p. 78 | |
| Tone Doesn’t Change | Is the [EXTERNAL/INTERNAL] button to “EXTERNAL”?When the [EXTERNAL/INTERNAL] button is set to “EXTERNAL,” the external sound generator is controlled. To change the RD-300GX’s Tones, set the [EXTERNAL/INTERNAL] button to “INTERNAL.” | p. 55 |
| Is the ZONE SELECT button for the Zone containing the Tone you want to change set to ON? | p. 31 | |
| Effects Not Applied/ Effects Sound Wrong | Is the [MULTI EFFECTS] button set to OFF? p. 47 | |
| Could the Effect Type be set to 0? p. 48 | ||
| Could the Effect Level be set to 0? p. 47 | ||
| On the RD-300GX, only one type of multi-effect can be used at a time. For this reason, there’s a “MFX Zone” setting that lets you choose the Zone to which the multi-effect is to be applied. Be aware that if you’re playing more than one Zone simultaneously, there will be a Zone to which the multi-effect is not applied. | p. 68 | |
| Reverb Remains Even After Reverb is Lifted | As the RD-300GX piano sounds faithfully reproduce the depth and reverberation of actual acoustic pianos, reverberation may still be audible even after the reverb effect is removed from sounds. | — |
| Sound Suddenly Changes at Key in Upper Octaves | With the acoustic piano settings, sounds in the upper 1 1/2-octave range are extended to the end regardless of the damper pedal actions. The tone is also different in this range. Roland’s pianos faithfully reproduce the sonic qualities of acoustic pianos. Furthermore, you can use the instrument’s Key Transpose setting to change that range over which the damper pedal has no effect. | — |
| Sounds Come From Left or Right Each Time Key is Pressed (Panned) | In some Tones, the settings are such that sounds randomly play from the left or right side (are panned) each time the keys are pressed. These settings cannot be changed. | — |
| Sound is Distorted | Sounds can be distorted due to master volume, equalizer, multi-effect, and Part volume settings.Adjust the ZONE LEVEL sliders or “Master Volume” setting in the Edit mode. | p. 31, p. 57,p. 64 |
| Is a distortion-type effect being applied to the sound? p. 48 | ||
| Pitch is Odd | Depending on the Tone selected, pitches played in certain registers will be changed and played at other pitches. | — |
| Have you set Transpose? p. 32, p. 70, | p. 76 | |
| Has the RD-300GX gone out of tune?Check the System Master Tune settings in Edit mode. | p. 64 | |
| Has the pitch been changed by pedal operations or by Pitch Bend messages received from an external MIDI device? | — | |
| Sound is Cut Off | When you try playing more than the maximum 128 voices simultaneously, sounds currently being played may be cut out. | — |
| Sound Keeps Playing When Key is Pressed | Is the hold pedal polarity reversed?Check the System Damper Pedal Polarity settings in Edit mode. | p. 65 |
| Song Data Not Played Back Correctly | Is the Receive GM/GM2 System On Switch set to ON?Set the System Rx GM System On or System Rx GM2 System On to ON in Edit mode. | p. 67 |
| Are you playing back GS Format song data?Once the RD-300GX receives a GS Reset message, it then is enabled for GS Format. This permits playback of music files bearing the GS logo (GS music files). However, data created exclusively for the Sound Canvas Series may not play back properly on the RD-300GX. | — | |
| Is the audio file in a format supported by the RD-300GX?Audio file of the following format be played back.WAV/AIFFSampling Rate: 44.1 kHzBit rate: 16 bitMP3Format: MPEG-1 audio layer 3Sampling Rate: 44.1 kHzBit rate: 32/40/48/56/64/80/96/112/128/160/192/224/256/320 kbps, VBR (Variable Bit Rate) | — | |
| Pedal Has No Effect, or Effect "Sticks" | Is the pedal connected correctly?Connect the pedal securely to the PEDAL jack. | p. 18 |
| Are you using a pedal made by another manufacturer?Use the pedal included with the RD-300GX or an optional DP Series or similar pedal. | — | |
| Unplugging a pedal cord from the unit while the power is on may cause the pedal's effect to be applied nonstop.Be sure to switch off the power to the unit before attempting to disconnect or connect a pedal cord. | p. 19 | |
| When Setup Pedal Shift is set to ON and the pedal is being used as a dedicated Setup switch, the control pedal function cannot be used. | p. 64, p. 68 | |
| High-Pitched Whine is Produced | When listening through headphones:Certain piano tones that feature vibrant, sparking sounds contain a large high-frequency component, which may make it appear that a metallic reverberation has been applied. This faithfully reproduces the characteristics of acoustic pianos, and does not indicate any malfunction. Since this reverberation becomes particularly audible when supplemented by heavy reverb, you may be able to diminish the problem by reducing the amount of reverb applied to the sound.When listening through speakers:Here, a different cause (such as resonance produced by the RD-300GX) would be suspect. Consult your Roland dealer or nearest Roland Service Center. | — |
Error Messages
| Indication | Situation Action | |
| Error 02File Error | An error occurred during writing. The external media's protect tab may be in the "Protect" (writing prohibited) position, or the external media may not yet be initialized. | --- |
| Error 10No Storage Media | No external media is inserted. Insert the external media and try again. | |
| Error 11File Error | There is not sufficient free memory in the save destination. | Delete unneeded files (Songs or Setup files) you've saved in internal or external memory and try again. |
| Error 14File Error | An error occurred during writing.The external media may be corrupted. | Insert other external media and try again.Alternatively, you can initialize the external media. |
| Error 15File Error | The file is unreadable. The data format is not compatible with the RD-300GX. | Only files in the following formats can be used.• Setup files with an extension of "RDS"• SMF music files with an extension of "MID"• Audio files with an extension of "WAV," "AIF," or "MP3"For details on audio file formats, refer to "Song Data Not Played Back Correctly" (p. 85) |
| Error 16File Error | Data was not called up in time for playback of the song. | You may be able to play the song after waiting a few seconds. |
| Error 18File Error | This audio format is not supported. | Please use 44.1 kHz 16-bit linear WAV/AIFF format audio file or MP3. |
| Error 30File Error | The internal memory capacity of the RD-300GX is full. | You can't fast-forward or rewind the song.Only playback is possible. |
| Error 40MIDI Buffer Full | Due to an inordinate volume of MIDI messages received, the RD-300GX has failed to process them properly. | Reduce the amount of MIDI messages to be transmitted. |
| Error 41MIDI Commu Error | A MIDI cable has been disconnected. Connect it properly and securely. | |
| Error 43MIDI Commu Error | A MIDI transmission error has occurred. Check the MIDI cable and connected MIDI device. | |
| Error 51System Error | There may be a problem with the system. Turn on the power once again, then repeat the procedure. | |
| Error 65USB Over Current | The USB memory port was subjected to excessive current. | Make sure that there is no problem with the USB memory, then turn the power off, then on again. |
Other Messages
| Indication | Situation Action | ||
| UnavailableNow, Rec Mode | This is displayed when the [EXTERNAL/INTERNAL] button is pressed with Rec Mode "ON." | When Rec Mode is "ON," you cannot change the External settings. To make changes to the External settings, set Rec Mode to "OFF" (p. 78). | |
| "File name"Overwrite OK? | A file with the same name is already exists. | If you execute the procedure, the file will be overwrite. If you don't want to overwrite, change a filename. | |
| Can not Copy | You attempted to copy an audio fileYou attempted to copy a file to USB memory even though USB memory was not connected | You can't copy audio filesConnect USB memory | |
| Panel is Locked | Buttons will not function. Press the [EXIT/SHIFT] | button to cancel. | |
| Indicated number | MFX Type Overview | Effect parameter name when changed by holding down [MULTI EFFECTS] and pressing [INC] or [DEC] (p. 29): An overview thereof (Value) | |
| 00 | THRU | — | — |
| 01 | EQUALIZER | Amplifies the low and high ends for a noticeably striking tone. | EQ Gain:Gain of the low and high range (-15db-+15db) |
| 02 | MID CUT | Cuts the midrange for a clean, refreshing tone. Mid Gain:Gain of the middle range (-15db-+15db) | |
| 03 | LOW CUT | Reduces the volume of the low end. Low Gain: | Gain of the low range (-60db-+4db) |
| 04 | LOW BOOST | Boosts the volume of the lower range, creating powerful lows. | Boost Gain:Amount by which the lower range will be boosted (0db-+12db) |
| 05 | NOTCH FILTER | This filter cuts specific frequencies. Filter Cutoff: | Cutoff frequency of the filter (0-127) |
| 06 | STEP FILTER | This filter changes the cutoff frequency in a stepped fashion. | Rate:Rate of modulation (0.05-10.00 Hz) |
| 07 | ENHANCER | Controls the overtone structure of the high frequencies, adding sparkle and tightness to the sound. | Sens:Sensitivity of the enhancer (0-127) |
| 08 | AUTO WAH | Cyclically controls a filter to create cyclic change in timbre. | Manual:Adjusts the center frequency at which the effect is applied (0-127) |
| 09 | HUMANIZER | Adds a vowel character to the sound, making it similar to a human voice. | Rate:Frequency at which the two vowels switch (0.05-10.00 Hz) |
| 10 | SPEAKER SIMULATOR | Simulates the large triple stack speaker Direct Level:Volume of the direct sound (0-127) | |
| 11 | PHASER | This is a stereo phaser.A phase-shifted sound is added to the original sound and modulated. | Rate:Frequency of modulation (0.05-10.00 Hz) |
| 12 | STEP PHASER | This is a stereo phaser.The phaser effect will be varied gradually. | Step Rate:Frequency of modulation (0.10-20.00 Hz) |
| 13 | MULTI PHASER | Extremely high settings of the phase difference produce a deep phaser effect. | Rate:Frequency of modulation (0.05-10.00 Hz) |
| 14 | INFINITE PHASER | A phaser that continues raising/ lowering the frequency at which the sound is modulated. | Speed:Speed at which to raise or lower the frequency at which the sounds modulated (-100-+100) |
| 15 | RING MODULATOR | This is an effect that applies amplitude modulation (AM) to the input signal, producing bell-like sounds. | Frequency:Adjusts the frequency at which modulation is applied (0-127) |
| 16 | STEP RING MODULATOR | A ring modulator that cyclically changes the modulated frequencies. | Rate:Rate of modulation (0.05-10.00 Hz) |
| 17 | TREMOLO | Cyclically modulates the volume to add tremolo effect to the sound. | Rate:Frequency of the change (0.05-10.00 Hz) |
| 18 | AUTO PAN | Cyclically modulates the stereo location of the sound. | Rate:Frequency of the change (0.05-10.00 Hz) |
| 19 | STEP PAN | Cyclically modulates the stereo location of the sound. | Rate:Frequency of the change (0.05-10.00 Hz) |
| 20 | SLICER | By applying successive cuts to the sound, this effect turns a conventional sound into a sound that appears to be played as a backing phrase. This is especially effective when applied to sustain-type sounds. | Rate:Frequency of the change (0.05-10.00 Hz) |
| 21 | ROTARY | The Rotary effect simulates the sound of the rotary speakers often used with the electric organs of the past. | Speed:Rotational speed of the rotating speaker (Slow/Fast) |
| 22 | VK ROTARY | This type provides modified response for the rotary speaker, with the low end boosted further. | Speed:Rotational speed of the rotating speaker (Slow/Fast) |
| 23 | CHORUS | This is a stereo chorus. Depth: | Depth of modulation (0-127) |
| 24 | FLANGER | This is a stereo flanger. It produces a metallic resonance that rises and falls like a jet airplane taking off or landing. | Depth:Depth of modulation (0-127) |
| 25 | STEP FLANGER | This is a flanger in which the flanger pitch changes in steps. | Step Rate: Rate of pitch change (0.10–20.00 Hz) |
| 26 | HEXA-CHORUS | Uses a six-phase chorus to give richness and spatial spread to the sound. | Balance: Volume balance between the direct sound and the chorus sound (D100:0W–D0:100W) |
| 27 | TREMOLO CHORUS | This is a chorus effect with added Tremolo (cyclic modulation of volume). | Balance: Volume balance between the direct sound and the tremolo chorus sound (D100:0W–D0:100W) |
| 28 | SPACE-D | This is a multiple chorus that applies two-phase modulation in stereo. It gives no impression of modulation, but produces a transparent chorus effect. | Balance: Volume balance between the direct sound and the chorus sound (D100:0W–D0:100W) |
| 29 | 3D CHORUS | This applies a 3D effect to the chorus sound. The chorus sound will be positioned 90 degrees left and 90 degrees right. | Balance: Volume balance between the direct sound and the chorus sound (D100:0W–D0:100W) |
| 30 | 3D FLANGER | This applies a 3D effect to the flanger sound. The flanger sound will be positioned 90 degrees left and 90 degrees right. | Balance: Volume balance between the direct sound and the flanger sound (D100:0W–D0:100W) |
| 31 | 3D STEP FLANGER | This applies a 3D effect to the step flanger sound. The flanger sound will be positioned 90 degrees left and 90 degrees right. | Step Rate: Rate of pitch change (0.10–20.00 Hz) |
| 32 | 2BAND CHORUS | A chorus effect that lets you apply an effect independently to the low-frequency and high-frequency ranges. | Balance: Volume balance of the original sound and chorus sound (D100:0W–D0:100W) |
| 33 | 2BAND FLANGER | A flanger that lets you apply an effect independently to the low-frequency and high-frequency ranges. | Balance: Volume balance of the original sound and flanger sound (D100:0W–D0:100W) |
| 34 | 2BAND STEP FLANGER | A step flanger that lets you apply an effect independently to the low-frequency and high-frequency ranges. | Balance: Volume balance of the original sound and flanger sound (D100:0W–D0:100W) |
| 35 | OVERDRIVE | Creates a soft distortion similar to that produced by vacuum tube amplifiers. | Level: Output Level (0–127) |
| 36 | DISTORTION | Produces a more intense distortion than Overdrive. | Level: Output Level (0–127) |
| 37 | VS OVERDRIVE | This is an overdrive that provides heavy distortion. | Level: Output Level (0–127) |
| 38 | VS DISTORTION | This is a distortion effect that provides heavy distortion. | Level: Output Level (0–127) |
| 39 | GUITAR AMP SIMULATOR | This is an effect that simulates the sound of a guitar amplifier. | Input Volume: Pre amp input volume (0–127) |
| 40 | COMPRESSOR | Flattens out high levels and boosts low levels, smoothing out fluctuations in volume. | Threshold: Adjusts the volume at which compression begins (0–127) |
| 41 | LIMITER | Compresses signals that exceed a specified volume level, preventing distortion from occurring. | Threshold: Adjusts the volume at which compression begins (0–127) |
| 42 | GATE | Cuts the reverb's delay according to the volume of the sound sent into the effect. Use this when you want to create an artificial-sounding decrease in the reverb's decay. | Threshold: Volume level at which the gate begins to close (0–127) |
| 43 | DELAY | This is a stereo delay. Balance: | Volume balance between the direct sound and the delay sound (D100:0W–D0:100W) |
| 44 | LONG DELAY | A delay that provides a long delay time. Balance: | Volume balance between the direct sound and the delay sound (D100:0W–D0:100W) |
| 45 | SERIAL DELAY | This delay connects two delay units in series. Balance: | Volume balance between the direct sound and the delay sound (D100:0W–D0:100W) |
| 46 | MODULATION DELAY | Adds modulation to the delayed sound. Balance: | Volume balance between the direct sound and the delay sound (D100:0W–D0:100W) |
| 47 | 3TAP PAN DELAY | Produces three delay sounds; center, left and right. | Balance:Volume balance between the direct sound and the delay sound (D100:0W–D0:100W) |
| 48 | 4TAP PAN DELAY | This effect has four delays. Balance: | Volume balance between the direct sound and the delay sound (D100:0W–D0:100W) |
| 49 | MULTI TAP DELAY | This effect provides four delays with feedback. Balance: | Volume balance between the direct sound and the delay sound (D100:0W–D0:100W) |
| 50 | REVERSE DELAY | This is a reverse delay that adds a reversed and delayed sound to the input sound. | Balance:Volume balance between the direct sound and the delay sound (D100:0W–D0:100W) |
| 51 | SHUFFLE DELAY | Adds a shuffle to the delay sound, giving the sound a bouncy delay effect with a swing feel. | Balance:Volume balance between the direct sound and the delay sound (D100:0W–D0:100W) |
| 52 | 3D DELAY | This applies a 3D effect to the delay sound. The delay sound will be positioned 90 degrees left and 90 degrees right. | Balance:Volume balance between the direct sound and the delay sound (D100:0W–D0:100W) |
| 53 | TIME CONTROL DELAY | A stereo delay in which the delay time can be varied smoothly. | Balance:Volume balance between the direct sound and the delay sound (D100:0W–D0:100W) |
| 54 | LONG TIME CONTROL DELAY | A delay in which the delay time can be varied smoothly, and allowing an extended delay to be produced. | Balance:Volume balance between the direct sound and the delay sound (D100:0W–D0:100W) |
| 55 | TAPE ECHO | A virtual tape echo that produces a realistic tape delay sound. | Echo Level:Volume of the echo sound (0–127) |
| 56 | LOFI NOISE | In addition to a Lo-Fi effect, this adds various types of noise such as white noise and disc noise. | Balance:Volume balance between the direct sound and the effect sound (D100:0W–D0:100W) |
| 57 | LOFI COMPRSSOR | This is an effect that intentionally degrades the sound quality for creative purposes. | Balance:Volume balance between the direct sound and the effect sound (D100:0W–D0:100W) |
| 58 | LOFI RADIO | In addition to a Lo-Fi effect, this effect also generates radio noise. | Balance:Volume balance between the direct sound and the effect sound (D100:0W–D0:100W) |
| 59 | TELEPHONE | This applies a telephone sound. Balance: | Volume balance between the direct sound and the effect sound (D100:0W–D0:100W) |
| 60 | PHONOGRAPH | Simulates a sound recorded on an analog record and played back on a record player. | Balance:Volume balance between the direct sound and the effect sound (D100:0W–D0:100W) |
| 61 | PITCH SHIFTER | A stereo pitch shifter. Fine: | Adjusts the pitch of the pitch shifted sound (-100cent–+100cent) |
| 62 | 2VOICE PITCH SHIFTER | Shifts the pitch of the original sound. This 2-voice pitch shifter has two pitch shifters, and can add two pitch shifted sounds to the original sound. | Balance:Volume balance between the Pitch Shift 1 and Pitch Shift 2 sounds (D100:0W–D0:100W) |
| 63 | STEP PITCH SHIFTER | This pitch shifter changes the shift volume of the pitch shift sound in a stepped fashion. | Rate:Rate of modulation (0.05–10.00 Hz) |
| 64 | REVERB | Adds reverberation to the sound, simulating an acoustic space. | Time:Time length of reverberation (0–127) |
| 65 | GATED REVERB | This is a special type of reverb in which the reverberant sound is cut off before its natural length. | Balance:Volume balance between the direct sound and the reverb sound (D100:0W–D0:100W) |
| 66 | OVERDRIVE→CHORUS | This effect connects an overdrive and a chorus in series. | Chorus Balance:Adjusts the volume balance between the sound that is sent through the chorus and the sound that is not sent through the chorus (D100:0W–D0:100W) |
| 67 | OVERDRIVE→FLANGER | This effect connects an overdrive and a flanger in series. | Flanger Balance:Adjusts the volume balance between the sound that is sent through the flanger and the sound that is not sent through the flanger (D100:0W–D0:100W) |
| 68 | OVERDRIVE→DELAY | This effect connects an overdrive and a delay in series. | Delay Balance:Adjusts the volume balance between the sound that is sent through the delay and the sound that is not sent through the delay (D100:0W–D0:100W) |
| 69 | DISTORTION→CHORUS | This effect connects a distortion and a chorus in series. | Chorus Balance:Adjusts the volume balance between the sound that is sent through the chorus and the sound that is not sent through the chorus (D100:0W–D0:100W) |
| 70 | DISTORTION→FLANGER | This effect connects a distortion and a flanger in series. | Flanger Balance:Adjusts the volume balance between the sound that is sent through the flanger and the sound that is not sent through the flanger (D100:0W–D0:100W) |
| 71 | DISTORTION→DELAY | This effect connects a distortion and a delay in series. | Delay Balance:Adjusts the volume balance between the sound that is sent through the delay and the sound that is not sent through the delay (D100:0W–D0:100W) |
| 72 | ENHANCER→CHORUS | This effect connects an enhancer and a chorus in series. | Chorus Balance:Adjusts the volume balance between the sound that is sent through the chorus and the sound that is not sent through the chorus (D100:0W–D0:100W) |
| 73 | ENHANCER→FLANGER | This effect connects an enhancer and a flanger in series. | Flanger Balance:Adjusts the volume balance between the sound that is sent through the flanger and the sound that is not sent through the flanger (D100:0W–D0:100W) |
| 74 | ENHANCER→DELAY | This effect connects an enhancer and a delay in series. | Delay Balance:Adjusts the volume balance between the sound that is sent through the delay and the sound that is not sent through the delay (D100:0W–D0:100W) |
| 75 | CHORUS→DELAY | This effect connects a chorus and a delay in series. | Delay Balance:Adjusts the volume balance between the sound that is sent through the delay and the sound that is not sent through the delay (D100:0W–D0:100W) |
| 76 | FLANGER→DELAY | This effect connects a flanger and a delay in series. | Delay Balance:Adjusts the volume balance between the sound that is sent through the delay and the sound that is not sent through the delay (D100:0W–D0:100W) |
| 77 | CHORUS→FLANGER | This effect connects a chorus and a flanger in series. | Flanger Balance:Adjusts the volume balance between the sound that is sent through the flanger and the sound that is not sent through the flanger (D100:0W–D0:100W) |
| 78 | SYMPATHETIC RESONANCE | On an acoustic piano, holding down the damper pedal allows other strings to resonate in sympathy with the notes you play, creating rich and spacious resonances. This effect simulates these sympathetic resonances. | Depth:Depth of the effect (0–127) |
MSB: Bank Select MSB (Control Number: 0)
LSB: Bank Select LSB (Control Number: 32)
PC: Program Change
PIANO
No. Tone Name MSB LSB PC
| 1 Superior Grd 87 64 1 |
| 2 Ultimate Pno 87 64 2 |
| 3 Grand RD 87 64 3 |
| 4 Pure Grand 87 64 4 |
| 5 Mellow Piano 87 64 5 |
| 6 Pure Mellow 87 64 6 |
| 7 Superior Str 87 64 7 |
| 8 Superior Pad 87 64 8 |
| 9 Rock Piano 87 64 9 |
| 10 Honky-tonk 87 64 10 |
| 11 SuperiorMono 87 64 11 |
| 12 GrandRD Mono 87 64 12 |
E. PIANO
No. Tone Name MSB LSB PC
| 1 StageE.Piano | 87 65 1 |
| 2 Stage Phazer | 87 65 2 |
| 3 60'sE.Piano1 | 87 65 3 |
| 4 60'sE.Piano2 | 87 65 4 |
| 5 FM E.Piano | 87 65 5 |
| 6 70's E.Piano | 87 65 6 |
| 7 EP Belle | 87 65 7 |
| 8 D-50 E.Piano 87 65 8 | |
| 9 Vintage EP 1 87 65 9 | |
| 10 Vintage EP 2 87 65 10 | |
| 11 S.A.E.P. | 87 65 11 |
| 12 Funky D | 87 65 12 |
| 13 Clav | 87 65 13 |
| 14 Phase Clav | 87 65 14 |
| 15 WahWah Clav | 87 65 15 |
| 16 Natural Hps. 87 65 16 | |
| 17 Celesta | 87 65 17 |
| 18 Vibrations 87 65 18 | |
| 19 Marimba | 87 65 19 |
| 20 Morning Lite 87 65 20 | |
ORGAN
No. Tone Name MSB LSB PC
| 1 Zepix Organ 87 66 1 | |
| 2 Perc Organ 87 66 2 | |
| 3 Rock Organ | 87 66 3 |
| 4 Gospel Spin | 87 66 4 |
| 5 Mellow Bars 87 66 5 | |
| 6 FullDraw Org | 87 66 6 |
| 7 60's Organ 87 66 7 | |
| 8 Surf's Up! | 87 66 8 |
| 9 Purple Spin | 87 66 9 |
| 10 Massive Pipe 87 66 10 | |
| 11 Mid Pipe Org | 87 66 11 |
| 12 ParisRomance | 87 66 12 |
STRINGS/PAD
No. Tone Name MSB LSB PC
| 1 Rich Strings 87 67 1 | |
| 2 Studio Sect. 87 67 2 | |
| 3 Staccato VS | 87 67 3 |
| 4 Warm Strings | 87 67 4 |
| 5 OrchestraPad 87 67 5 | |
| 6 Orch & Horns | 87 67 6 |
| 7 ChmbrStrings | 87 67 7 |
| 8 Pizzicato | 87 67 8 |
| 9 Machine Str | 87 67 9 |
| 10 JP Strings | 87 67 10 |
| 11 SynthStrings | 87 67 11 |
| 12 Soft Pad | 87 67 12 |
| 13 Silky Way | 87 67 13 |
| 14 Nu Epic Pad | 87 67 14 |
| 15 Strings Pad | 87 67 15 |
| 16 Side Band X 87 67 16 | |
| 17 Glass Organ 87 67 17 | |
| 18 StellarTreck | 87 67 18 |
| 19 Mash Pad 87 67 19 | |
| 20 InfinitePhsr | 87 67 20 |
| 21 Flange Dream | 87 67 21 |
GUITAR/BASS
No. Tone Name MSB LSB PC
| 1 Dyna Nylon | 87 68 1 |
| 2 Steel Gtr | 87 68 2 |
| 3 Jz Gtr Hall | 87 68 3 |
| 4 JC Strat | 87 68 4 |
| 5 DistGt Mt | 87 68 5 |
| 6 Blusey OD | 87 68 6 |
| 7 Punker | 87 68 7 |
| 8 AcousticBass | 87 68 8 |
| 9 FingerMaster | 87 68 9 |
| 10 Pick Bass | 87 68 10 |
| 11 Slap Bass | 87 68 11 |
| 12 SX Fretnot | 87 68 12 |
| 13 Punch MG | 87 68 13 |
| 14 Garage Bass | 87 68 14 |
| 15 101 Bass | 87 68 15 |
| 16 Synth Bass | 87 68 16 |
| 17 Vox Bass | 87 68 17 |
| 18 Bass+RideCym | 87 68 18 |
BRASS/WINDS
No. Tone Name MSB LSB PC
| 1 R&R Brass 87 69 1 | |
| 2 VoyagerBrass | 87 69 2 |
| 3 StackTp Sect | 87 69 3 |
| 4 FullSt Brass | 87 69 4 |
| 5 Wood Symphony | 87 69 5 |
| 6 Bigband Sax 87 69 6 | |
| 7 Soprano Sax | 87 69 7 |
| 8 Alto Sax | 87 69 8 |
| 9 Tenor Sax 87 69 9 | |
| 10 Flute | 87 69 10 |
| 11 Bend SynBrs 87 69 11 | |
| 12 Saw Brass | 87 69 12 |
| 13 Jump For KY 87 69 13 | |
| 14 Afro Horns | 87 69 14 |
VOICE/SYNTH
No. Tone Name MSB LSB PC
| 1 Aerial Choir | 87 70 1 |
| 2 Jazz Scat | 87 70 2 |
| 3 Morning Star | 87 70 3 |
| 4 Choir Aahs | 87 70 4 |
| 5 Jazz Doos | 87 70 5 |
| 6 Female Aahs | 87 70 6 |
| 7 Gospel Oohs | 87 70 7 |
| 8 Galactic SX | 87 70 8 |
| 9 Synth Stack | 87 70 9 |
| 10 Saw Lead | 87 70 10 |
| 11 Square Lead | 87 70 11 |
| 12 SuperSawSlow | 87 70 12 |
| 13 Jupiter Lead | 87 70 13 |
RHY/GM2
No. Tone Name MSB LSB PC
| 1 RD Pop Kit 86 64 1 | ||
| 2 RD Rock Kit 86 64 2 | ||
| 3 RD Jazz Kit 86 64 3 | ||
| 4 RD R&B Kit 86 64 4 | ||
| 5 RD House Kit 86 64 5 | ||
| 6 GM2 STANDARD 120 0 1 | ||
| 7 GM2 ROOM 120 0 9 | ||
| 8 GM2 POWER 120 0 17 | ||
| 9 GM2 ELECTRIC 120 0 25 | ||
| 10 GM2 ANALOG 120 0 26 | ||
| 11 GM2 JAZZ 120 0 33 | ||
| 12 GM2 BRUSH 120 0 41 | ||
| 13 GM2 ORCHSTRA 120 0 49 | ||
| 14 GM2 SFX 120 0 57 | ||
| 15 Piano 1 121 0 1 | ||
| 16 Piano 1w 121 1 1 | ||
| 17 European Pf 121 2 1 | ||
| 18 Piano 2 121 0 2 | ||
| 19 Piano 2w 121 1 2 | ||
| 20 Piano 3 121 0 3 | ||
| 21 Piano 3w 121 1 3 | ||
| 22 Honky-tonk 121 0 | ||
| 23 Honky-tonk 2 121 1 4 | ||
| 24 E.Piano 1 121 0 5 | ||
| 25 St.Soft EP 121 1 5 | ||
| 26 FM+SA EP 121 2 5 | ||
| 27 60's E.Piano 121 3 5 | ||
| 28 E.Piano 2 121 0 6 | ||
| 29 Detuned EP 2 121 1 6 | ||
| 30 St.FM EP 121 2 6 | ||
| 31 EP Legend 121 3 6 | ||
| 32 EP Phase 121 4 6 | ||
| 33 Harpsichord 121 0 | ||
| 34 Coupled Hps. 121 1 7 | ||
| 35 Harpsi.w 121 2 7 | ||
| 36 Harpsi.o 121 3 7 | ||
| 37 Clav. 121 0 8 | ||
| 38 Pulse Clav 121 1 8 | ||
| 39 Celesta 121 0 9 | ||
| 40 Glockenspiel 121 0 10 | ||
| 41 Music Box 121 0 11 | ||
| 42 Vibraphone 121 0 | ||
| 43 Vibraphone w 121 1 12 | ||
| 44 Marimba 121 0 13 | ||
| 45 Marimba w 121 1 13 | ||
| 46 Xylophone 121 0 14 | ||
| 47 Tubular-bell 121 0 15 | ||
| 48 Church Bell 121 1 15 | ||
| 49 Carillon 121 2 15 | ||
| 50 Santur 121 0 16 | ||
| 51 Organ 1 121 0 17 | ||
| 52 Trem. Organ 121 1 17 | ||
| 53 60's Organ 1 121 2 17 | ||
| 54 70's E.Organ 121 3 17 | ||
| 55 Organ 2 121 0 18 | ||
| 56 Chorus Or.2 121 1 18 | ||
| 57 Perc. Organ 121 2 18 | ||
| 58 Organ 3 121 0 19 | ||
| 59 Church Org.1 121 0 20 | ||
| 60 Church Org.2 121 1 20 | ||
| 61 Church Org.3 121 2 20 |
No. Tone Name MSB LSB PC
| 62 | Reed Organ 121 0 21 | |
| 63 | Puff Organ 121 1 21 | |
| 64 | Accordion Fr 121 0 22 | |
| 65 | Accordion lt 121 1 22 | |
| 66 | Harmonica 121 0 23 | |
| 67 | Bandoneon 121 0 24 | |
| 68 | Nylon-str.Gt 121 0 25 | |
| 69 | Ukulele 121 1 25 | |
| 70 | Nylon Gt.o 121 2 25 | |
| 71 | Nylon Gt.2 121 3 25 | |
| 72 | Steel-str.Gt 121 0 26 | |
| 73 | 12-str.Gt 121 1 26 | |
| 74 | Mandolin 121 2 26 | |
| 75 | Steel + Body 121 3 26 | |
| 76 | Jazz Gt. 121 0 27 | |
| 77 | Pedal Steel 121 1 27 | |
| 78 | Clean Gt. 121 0 28 | |
| 79 | Chorus Gt. 121 1 28 | |
| 80 | Mid Tone GTR 121 2 28 | |
| 81 | Muted Gt. 121 0 29 | |
| 82 | Funk Pop 121 1 29 | |
| 83 | Funk Gt.2 121 2 29 | |
| 84 | Jazz Man 121 3 29 | |
| 85 | Overdrive Gt 121 0 30 | |
| 86 | Guitar Pinch 121 1 30 | |
| 87 | DistortionGt 121 0 31 | |
| 88 | Feedback Gt. 121 1 31 | |
| 89 | Dist Rtm GTR 121 2 31 | |
| 90 | Gt.Harmonics 121 0 32 | |
| 91 | Gt. Feedback 121 1 32 | |
| 92 | Acoustic Bs. 121 0 33 | |
| 93 | Fingered Bs. 121 0 34 | |
| 94 | Finger Slap 121 1 34 | |
| 95 | Picked Bass 121 0 35 | |
| 96 | Fretless Bs. 121 0 36 | |
| 7 | Slap Bass 1 121 0 37 | |
| 98 | Slap Bass 2 121 0 38 | |
| 99 | Synth Bass 1 121 0 39 | |
| 100 | SynthBass101 121 1 39 | |
| 101 | Acid Bass 121 2 39 | |
| 102 | Clavi Bass 121 3 39 | |
| 103 | Hammer 121 4 39 | |
| 104 | Synth Bass 2 121 0 40 | |
| 105 | Beef FM Bass 121 1 40 | |
| 12 | RubberBass 2 121 2 40 | |
| 107 | Attack Pulse 121 3 40 | |
| 108 | Violin 121 0 41 | |
| 109 | Slow Violin 121 1 41 | |
| 110 | Viola 121 0 42 | |
| 111 | Cello 121 0 43 | |
| 112 | Contrabass 121 0 | |
| 113 | Tremolo Str 121 0 45 | |
| 114 | PizzicatoStr 121 0 46 | |
| 115 | Harp 121 0 47 | |
| 116 | Yang Qin 121 1 47 | |
| 117 | Timpani 121 0 48 | |
| 118 | Orche str 121 0 49 | |
| 119 | Orchestra 121 1 49 | |
| 120 | 60s Strings 121 2 49 | |
| 121 | Slow Strings 121 0 50 | |
| 122 | Syn.Strings1 121 0 51 | |
| 123 | SynopheString3 121 1 51 | |
| 124 | SynometricString2 121 0 52 | |
| 125 | Choir Aahs 121 0 53 |
No. Tone Name MSB LSB PC
| 126 | Chorus Aahs | 121 | 1 | 53 |
| 127 | Voice Oohs | 121 | 0 | 54 |
| 128 | Humming | 121 | 1 | 54 |
| 129 | SynVox | 121 | 0 | 55 |
| 130 | Analog Voice | 121 | 1 | 55 |
| 131 | OrchestraHit | 121 | 0 | 56 |
| 132 | Bass Hit | 121 | 1 | 56 |
| 133 | 6th Hit | 121 | 2 | 56 |
| 134 | Euro Hit | 121 | 3 | 56 |
| 135 | Trumpet | 121 | 0 | 57 |
| 136 | Dark Trumpet 121 | 1 | 57 | |
| 137 | Trombone | 121 | 0 | 58 |
| 138 | Trombone 2 | 121 | 1 | 58 |
| 139 | Bright Tb | 121 | 2 | 58 |
| 140 | Tuba | 121 | 0 | 59 |
| 141 | MutedTrumpet 121 | 0 | 60 | |
| 142 | MuteTrumpet2 | 121 | 1 | 60 |
| 143 | French Horns | 121 | 0 | 61 |
| 144 | Fr.Horn 2 | 121 | 1 | 61 |
| 145 | Brass 1 | 121 | 0 | 62 |
| 146 | Brass 2 | 121 | 1 | 62 |
| 147 | Synth Brass1 | 121 | 0 | 63 |
| 148 | Pro Brass | 121 | 1 | 63 |
| 149 | Oct SynBrass | 121 | 2 | 63 |
| 150 | Jump Brass | 121 | 3 | 63 |
| 151 | Synth Brass2 | 121 | 0 | 64 |
| 152 | SynBrass sfz | 121 | 1 | 64 |
| 153 | Velo Brass 1 | 121 | 2 | 64 |
| 154 | Soprano Sax | 121 | 0 | 65 |
| 155 | Alto Sax | 121 | 0 | 66 |
| 156 | Tenor Sax | 121 | 0 | 67 |
| 157 | Baritone Sax | 121 | 0 | 68 |
| 158 | Oboe | 121 | 0 | 69 |
| 159 | English Horn | 121 | 0 | 70 |
| 160 | Bassoon | 121 | 0 | 71 |
| 161 | Clarinet | 121 | 0 | 72 |
| 162 | Piccolo | 121 | 0 | 73 |
| 163 | Flute | 121 | 0 | 74 |
| 164 | Recorder | 121 | 0 | 75 |
| 165 | Pan Flute | 121 | 0 | 76 |
| 166 | Bottle Blow | 121 | 0 | 77 |
| 167 | Shakuhachi | 121 | ||
| 168 | Whistle | 121 | 0 | 79 |
| 169 | Ocarina | 121 | 0 | 80 |
| 170 | Square Wave | 121 | 0 | 81 |
| 171 | MG Square | 121 | 1 | 81 |
| 172 | 2600 Sine | 121 | 2 | 81 |
| 173 | Saw Wave | 121 | 0 | 82 |
| 174 | OB2 Saw | 121 | 1 | 82 |
| 175 | Doctor Solo | 121 | 2 | 82 |
| 176 | Natural Lead 121 | 3 | 82 | |
| 177 | SequencedSaw | 121 | 4 | 82 |
| 178 | Syn.Calliope | 121 | 0 | 83 |
| 179 | Chiffer Lead | 121 | 0 | 84 |
| 180 | Charang | 121 | 0 | 85 |
| 181 | Wire Lead | 121 | 1 | 85 |
| 182 | Solo Vox | 121 | 0 | 86 |
| 183 | 5th Saw Wave | 121 | 0 | 87 |
| 184 | Bass & Lead | 121 | 0 | 88 |
| 185 | Delayed Lead | 121 | 1 | 88 |
| 186 | Fantasia | 121 | 0 | 89 |
| 187 | Warm Pad | 121 | 0 | 90 |
| 188 | Sine Pad | 121 | 1 | 90 |
| 189 | Polysynth | 121 | 0 | 91 |
No. Tone Name MSB LSB PC
| 190 | Space Voice | 121 | 0 | 92 | |
| 191 | Itopia | 121 | 1 | 92 | |
| 192 | Bowed Glass | 121 | 0 | 93 | |
| 193 | Metal Pad | 121 | 0 | 94 | |
| 194 | Halo Pad | 121 | 0 | 95 | |
| 195 | Sweep Pad | 121 | 0 | 96 | |
| 196 | Ice Rain | 121 | 0 | 97 | |
| 197 | Soundtrack | 121 | |||
| 198 | Crystal | 121 | 0 | 99 | |
| 199 | Syn Mallet | 121 | 1 | 99 | |
| 200 | Atmosphere | 121 | |||
| 201 | Brightness | 121 | |||
| 202 | Goblin | 121 | 0 102 | ||
| 203 | Echo Drops | 121 | 0 | 103 | |
| 204 | Echo Bell | 121 | 1 | 103 | |
| 205 | Echo Pan | 121 | 2 103 | ||
| 206 | Star Theme | 121 | 0 104 | ||
| 207 | Sitar | 121 | 0 105 | ||
| 208 | Sitar 2 | 121 | 1 | 105 | |
| 209 | Banjo | 121 | 0 106 | ||
| 210 | Shamisen | 121 | 0 | 107 | |
| 211 | Koto | 121 | 0 108 | ||
| 212 | Taisho Koto | 121 | 1 108 | ||
| 213 | Kalimba | 121 | 0 109 | ||
| 214 | Bagpipe | 121 | 0 110 | ||
| 215 | Fiddle | 121 | 0 111 | ||
| 216 | Shanai | 121 | 0 | 112 | |
| 217 | Tinkle Bell | 121 | 0 113 | ||
| 218 | Agogo | 121 | 0 114 | ||
| 219 | Steel Drums | 121 | 0 115 | ||
| 220 | Woodblock | 121 | 0 | 116 | |
| 221 | Castanets | 121 | 1 116 | ||
| 222 | Taiko | 121 | 0 117 | ||
| 223 | Concert BD | 121 | 1 117 | ||
| 224 | Melo. Tom 1 | 121 | 0 118 | ||
| 225 | Melo. Tom 2 | 121 | 1 118 | ||
| 226 | Synth Drum | 121 | 0 | 119 | |
| 227 | 808 Tom | 121 | 1 119 | ||
| 228 | Elec Perc | 121 | 2 119 | ||
| 229 | Reverse Cym. | 121 | 0 120 | ||
| 230 | Gt.FretNoise | 121 | 0 121 | ||
| 231 | Gt.Cut Noise | 121 | 1 121 | ||
| 232 | String Slap | 121 | 2 121 | ||
| 233 | Breath Noise | 121 | 0 122 | ||
| 234 | Fl.Key Click | 121 | 1 122 | ||
| 235 | Seashore | 121 | 0 123 | ||
| 236 | Rain | 121 | 1 123 | ||
| 237 | Thunder | 121 | 2 123 | ||
| 238 | Wind | 121 | 3 123 | ||
| 239 | Stream | 121 | 4 123 | ||
| 240 | Bubble | 121 | 5 123 | ||
| 241 | Bird | 121 | 0 124 | ||
| 242 | Dog | 121 | 1 124 | ||
| 243 | Horse-Gallop | 121 | 2 124 | ||
| 244 | Bird 2 | 121 | 3 | 124 | |
| 245 | Telephone 1 | 121 | 0 125 | ||
| 246 | Telephone 2 | 121 | 1 125 | ||
| 247 | DoorCreaking | 121 | 2 125 | ||
| 248 | Door | 121 | 3 125 | ||
| 249 | Scratch | 121 | 4 125 | ||
| 250 | Wind Chimes | 121 | 5 125 | ||
| 251 | Helicopter | 121 | |||
| 252 | Car-Engine | 121 | |||
| 253 | Car-Stop | 121 | 2 126 | ||
No. Tone Name MSB LSB PC
| 254 Car-Pass | 121 3 126 |
| 255 Car-Crash | 121 4 126 |
| 256 Siren | 121 5 126 |
| 257 Train | 121 6 126 |
| 258 Jetplane | 121 7 126 |
| 259 Starship | 121 8 126 |
| 260 Burst Noise | 121 9 126 |
| 0 261 Applause | 121 0 127 |
| 262 Laughing | 121 1 127 |
| 263 Screaming | 121 2 127 |
| 0 264 Panch | 121 3 127 |
| 0265 HeartBeat | 121 4 127 |
| 266 Footsteps | 121 5 127 |
| 267 Gun Shot | 121 0 128 |
| 268 Machine Gun | 121 1 128 |
| 269 Lasergun | 121 2 128 |
| 270 Explosion | 121 3 128 |
0 126
1 126
* [EXC]: will not sound simultaneously with other percussion instruments of the same number.
| RD Pop Kit | RD Rock Kit | RD Jazz Kit | RD R&B Kit | RD House Kit | |
| 21 | Rock KickPop KickAnalog Klick 1 | Old KickPop KickAnalog Klick 1 | Old KickJazz Kick 1Analog Klick 1 | Analog Kick 2TR909 Kick 1TR909 Kick 2 | Dance KickLo-Bit CHH [EXC1]Techno Kick 2 |
| 23 | |||||
| 24 | Hush KickPop CHH 1 [EXC1] | Rock KickRock CHH1 [EXC1] | Jazz SwishJazz Tap 1 | R&B CHH 2 [EXC1] | Concert Snare |
| 26 | Reg. Snare 1 | Rock Snare 1 | Jazz Tap 2 | R&B CHH 3 [EXC1] | Snare Roll |
| 27 | Finger Snap707 Claps | Finger Snap707 Claps | Finger Snap707 Claps | Finger Snap707 Claps | Finger SnapHigh-Q |
| 28 | Slap | ||||
| 29 | Hand Clap 1 | Hand Clap 1 | Hand Clap 1 | Hand Clap 1 | Scratch Push |
| 30 | Hand Clap 2 | Hand Clap 2 | Hand Clap 2 | Gospel Hand Clap 2 | Scratch Pull |
| 31 | Hand Clap 3 | Hand Clap 3 | Hand Clap 3 | Hand Clap 2 | Sticks |
| 32 | Pop PHH [EXC1] | Pop PHH [EXC1] | Pop PHH [EXC1] | R&B CHH 5 [EXC1] | Square Click |
| 33 | Hand Clap 4 | Hand Clap 4 | Gospel Hand Clap | Gospel Hand Clap | Metro Click |
| 34 | Snare Roll | Snare Roll | Snare Roll | Lo-Bit CHH [EXC1] | Metro Bell |
| 35 | Old Kick | Old Kick | Pop Kick | Analog Klick 1 | House Kick 1 |
| 36 | Hush KickReg Stick | Rock KickRock Side Stlick | Jazz Kick 2 | R&B Kick | House Kick 2 |
| 37 | Reg. Snare | Rock Snare 1 | Jazz Snare Swing | R&B Side Stlick 1 | R&B Side Stlick 1 |
| 38 | Reg. Snare Ghost | Snare Ghost | Jazz Snare 1 | R&B Snare 1 | House Snare 1 |
| 39 | Titan Snare | Rock Snare 2 | Pop Snare Swing | R&B Snare 2 | House Snare 2 |
| 40 | Jazz Snare 2 | R&B Snare 3 | House Snare 3 | ||
| 41 | Reg. Low Tom Flm | Rock Low Tom Flm | Jazz Low Tom Flm | Sharp Low Tom 6 | House Low Tom 1 |
| 42 | Pop CHH 1 [EXC1] | Rock CHH 1 [EXC1] | Pop CHH 1 [EXC1] | R&B CHH 1 [EXC1] | House CHH [EXC1] |
| 43 | Reg. Low Tom | Rock Low Tom | Jazz Low Tom | Sharp Low Tom 5 | House Low Tom 2 |
| 44 | Pop CHH 2 [EXC1] | Rock CHH 2 [EXC1] | Pop CHH 2 [EXC1] | R&B CHH 1 [EXC1] | House PHH [EXC1] |
| 45 | Reg.Mid Tom Flm | Rock Mid Tom Flm | Jazz Mid Tom Flm | Sharp Low Tom 4 | House Mid Tom 1 |
| 46 | Pop OHH [EXC1] | Rock OHH [EXC1] | Pop OHH [EXC1] | R&B OHH [EXC1] | House OHH [EXC1] |
| 47 | Reg. Mid Tom | Rock Mid Tom | Jazz Mid Tom | Sharp High Tom 3 | House Mid Tom 2 |
| 48 | Reg. High Tom Flm | Rock High Tom Flm | Jazz High Tom Flm | Sharp High Tom 2 | House High Tom 1 |
| 49 | Pop Crash Cymbal 1 | Rock Crash Cymbal | Jazz Crash Cymbal | R&B Crash Cymbal | House Crash Cymbal |
| 50 | Reg. High Tom | Rock HighTom | Jazz HighTom | Sharp High Tom 1 | House High Tom 2 |
| 51 | Pop RideCymbal 1 | Pop Ride Cymbal 2 | Jazz Ride Cymbal 1 | Pop Ride Cymbal 1 | House Ride Cymbal |
| 52 | Pop Chinese Cymbal | Rock Chinese Cymbal | Jazz Chinese Cymbal | R&B Chinese Cym | Reverse Cymbal |
| 53 | Pop Ride Bell | Rock Ride Bell | Jazz Ride Bell | R&B Ride Bell | House Ride Bell |
| 54 | Tambourine | Tambourine | Tambourine | Tambourine | ShakeTambourine |
| 55 | Pop Splash Cymbal | Rock Spish Cymbal | Pop Splish Cymbal | TR909 Ride | House Splash Cymbal |
| 56 | Cha Cha Cowbell | Cha Cha Cowbell | Cha Cha Cowbell | Cha Cha Cowbell | House Cowbell |
| 57 | Pop Crash Cymbal 2 | Rock Chinese Cymbal 2 | Jazz Crash Cymbal 2 | House Crash Cymbal | HouseCrash Cymbal |
| 58 | Vibraslap | Vibraslap | Vibraslap | Vibraslap | Vibraslap |
| 59 | Pop RideCymbal 2 | Pop Ride Cymbal 1 | Pop Ride Cymbal 1 | Pop Ride Cymbal 2 | Pop Ride Cymbal 2 |
| 60 | Bongo Hi | Bongo Hi | Bongo Hi | House Bongo Hi | House Bongo Hi |
| 61 | Bongo Lo | Bongo Lo | Bongo Lo | House Bongo Lo | House Bongo Lo |
| 62 | Conga Mute | Conga Mute | Conga Mute | House Conga Hi | House Conga Hi |
| 63 | Conga Hi | Conga Hi | Conga Hi | House Conga Mt | House Conga Mt |
| 64 | Conga Lo | Conga Lo | Conga Lo | House Conga Lo | House Conga Lo |
| 65 | Timbale Hi | Timbale Hi | Timbale Hi | Timbale Hi | Timbale Hi |
| 66 | Timbale Lo | Timbale Lo | Timbale Lo | Timbale Lo | Timbale Lo |
| 67 | Agogo Bell Hi | Agogo Bell Hi | Agogo Bell Hi | Agogo Bell Hi | Agogo Bell Hi |
| 68 | Agogo Bell Lo | Agogo Bell Lo | Agogo Bell Lo | Agogo Bell Lo | Agogo Bell Lo |
| 69 | Shaker 2 | Shaker 2 | Shaker 2 | Cabasa | Cabasa |
| 70 | Shaker 3 | Shaker 3 | Shaker 3 | House Maracas | House Maracas |
| 71 | Whistle Short [EXC2] | Whistle Short [EXC2] | Whistle Short [EXC2] | Whistle Short [EXC2] | Whistle Short [EXC2] |
| 72 | Whistle Long [EXC2] | Whistle Long [EXC2] | Whistle Long [EXC2] | Whistle Long [EXC2] | Whistle Long [EXC2] |
| 73 | Guiro Short [EXC3] | Guiro Short [EXC3] | Guiro Short [EXC3] | Guiro Short [EXC3] | Guiro Short [EXC3] |
| 74 | Guiro Long [EXC3] | Guiro Long [EXC3] | Guiro Long [EXC3] | Guiro Long [EXC3] | Guiro Long [EXC3] |
| 75 | Claves | Claves | Claves | House Claves | House Claves |
| 76 | Wood Block Hi | Wood Block Hi | Wood Block Hi | Wood Block Hi | Wood Block Hi |
| 77 | Wood Block Lo | Wood Block Lo | Wood Block Lo | Wood Block Lo | Wood Block Lo |
| 78 | Cuica Mute [EXC4] | Cuica Mute [EXC4] | Cuica Mute [EXC4] | Hoo Hi [EXC4] | Hoo Hi [EXC4] |
| 79 | Cuica Open [EXC4] | Cuica Open [EXC4] | Cuica Open [EXC4] | Hoo Lo [EXC4] | Hoo Lo [EXC4] |
| 80 | Triangle Mt [EXC5] | Triangle Mt [EXC5] | Triangle Mt [EXC5] | Triangle Mt [EXC5] | Electric Triangle Mt [EXC5] |
| 81 | Triangle Op [EXC5] | Triangle Op [EXC5] | Triangle Op [EXC5] | Triangle Op [EXC5] | Electric Triangle Op[EXC5] |
| 82 | Cabasa | Cabasa | Cabasa | Shaker | Shaker |
| 83 | Jingle Bell | Jingle Bell | Jingle Bell | Jingle Bell | Jingle Bell |
| 84 | Wind Chime | Wind Chime | Wind Chime | Wind Chime | Wind Chime |
| 85 | Castanets | Castanets | Castanets | Castanets | Castanets |
| 86 | Surdo Mute [EXC6] | Surdo Mute [EXC6] | Surdo Mute [EXC6] | Surdo Mute [EXC6] | Surdo Mute [EXC6] |
| 87 | Surdo Open [EXC6] | Surdo Open [EXC6] | Surdo Open [EXC6] | Surdo Open [EXC6] | Surdo Open [EXC6] |
| 88 | Cana | Cana | Cana | Tambourine | Cana |
| 89 | Flamenco Timbale Hi | Flamenco Timbale Hi | Flamenco Timbale Hi | Tambourine | Flamenco Timbale Hi |
| 90 | Flamenco Timbale Lo | Flamenco Timbale Lo | Flamenco Timbale Lo | Cabasa Up | Flamenco Timbale Lo |
| 91 | Flamenco Timbale Flam | Flamenco Timbale Flam | Flamenco Timbale Flam | Cabasa Down | Flamenco Timbale Flam |
| 92 | Shaker 1 | Shaker 1 | Shaker 1 | Shaker 1 | Shaker 1 |
| 93 | Shaker 2 | Shaker 2 | Shaker 2 | Shaker 2 | Shaker 2 |
| 94 | Bongo Lo Mt | Bongo Lo Mt | Bongo Lo Mt | Bongo Lo Mt | Bongo Lo Mt |
| 95 | Grit Snare | LoFi Snare | Jazz Snare 1 | Grit Snare | LoFi Snare |
| 96 | Jungle Snare 1 | Jungle Snare 1 | Jazz Snare 2 | Jungle Snare 1 | Jungle Snare 1 |
| 97 | Reg.Stick | Rock Side Stick | Jazz Snare Swing | R&B Side Stick 2 | R&B Side Stick 2 |
| 98 | Titan Snare | Rock Snare 2 | Jazz Swish | Analog Snare | Analog Snare |
| 99 | Old Kick | Old Kick | Old Kick | HipHop Kick | TR808 Kick 1 |
| 100 | Pop Kick | Pop Kick | Jazz Kick 1 | TR808 Kick 1 | TR808 Kick 2 |
| 101 | Rock Kick | Rock Kick | Jazz Kick 2 | TR808 Kick 2 | Jungle Kick |
| 102 | Analog Kick 1 | Analog Kick 1 | Analog Kick 1 | Techno Kick | Techno Kick |
| 103 | Rock Snare Dry | Rock Snare Dry | Jazz Tap 1 | Rock Snare Dry | Rock Snare Dry |
| 104 | Electric Snare | Electric Snare | Jazz Tap 2 | Electric Snare | Electric Snare |
| 105 | Reg. Snare Ghost | Rock Snare Ghost | Pop Snare Swing | Jungle Snare 2 | Jungle Snare 2 |
| 106 | Slappy | Slappy | Slappy | Vinyl Noise | Slappy |
| 107 | Wah Gtr Noise 1 | Wah Gtr Noise 1 | Wah Gtr Noise 1 | Wah Gtr Noise 1 | Wah Gtr Noise 1 |
| 108 | Wah Gtr Noise 2 | Wah Gtr Noise 2 | Wah Gtr Noise 2 | Wah Gtr Noise 2 | Wah Gtr Noise 2 |
* ----: No sound.
* [EXC]: will not sound simultaneously with other percussion instruments of the same number.
GM2 STANDARD GM2 ROOM GM2 POWER GM2 ELECTRIC
| 21 | ---- | ---- | ---- | ---- |
| 22 | ---- | ---- | ---- | ---- |
| 23 | ---- | ---- | ---- | ---- |
| 24 | ---- | ---- | ---- | ---- |
| 25 | ---- | ---- | ---- | ---- |
| 26 | ---- | ---- | ---- | ---- |
| 27 | High-Q | High-Q | High-Q | High-Q |
| Slap | Slap | Slap | Slap | |
| 28 | ScratchPush [EXC7] | ScratchPush [EXC7] | ScratchPush [EXC7] | ScratchPush [EXC7] |
| 29 | ScratchPull [EXC7] | ScratchPull [EXC7] | ScratchPull [EXC7] | ScratchPull [EXC7] |
| 30 | Sticks | Sticks | Sticks | Sticks |
| 31 | SquareClick | SquareClick | SquareClick | SquareClick |
| 32 | Mtrnm.Click | Mtrnm.Click | Mtrnm.Click | Mtrnm.Click |
| 33 | Mtrnm. Bell | Mtrnm. Bell | Mtrnm. Bell | Mtrnm. Bell |
| 34 | Jazz Kick 1 | Mix Kick | Standard KK1 | Power Kick1 |
| 35 | Side Stick | |||
| 36 | Mix Kick | Standard KK1 | Power Kick1 | Elec Kick 1 |
| 37 | Side Stick | Side Stick | Side Stick | Side Stick |
| 38 | Standard SN1 | Standard SN2 | Dance Snare1 | Elec. Snare |
| 39 | 909 HandClap | 909 HandClap | 909 HandClap | 909 HandClap |
| 40 | Elec Snare 3 | Elec Snare 7 | Elec Snare 4 | Elec Snare 2 |
| 41 | Real Tom 6 | Room Tom 5 | Room Tom 5 | Synth Drum 2 |
| 42 | Close HiHat2 [EXC1] | Close HiHat2 [EXC1] | Close HiHat2 [EXC1] | Close HiHat2 [EXC1] |
| 43 | Real Tom 6 | Room Tom 6 | Room Tom 6 | Synth Drum 2 |
| 44 | Pedal HiHat2 [EXC1] | Pedal HiHat2 [EXC1] | Pedal HiHat2 [EXC1] | Pedal HiHat2 [EXC1] |
| 45 | Real Tom 4 | Room Tom 2 | Room Tom 2 | Synth Drum 2 |
| 46 | Open HiHat2 [EXC1] | Open HiHat2 [EXC1] | Open HiHat2 [EXC1] | Open HiHat2 [EXC1] |
| 47 | Real Tom 4 | Room Tom 2 | Room Tom 2 | Synth Drum 2 |
| C3 | Real Tom 1 | Rock Tom 1 | Rock Tom 1 | Synth Drum 2 |
| 48 | Crash Cym.1 | Crash Cym.1 | Crash Cym.1 | Crash Cym.1 |
| 49 | Real Tom 1 | Rock Tom 1 | Rock Tom 1 | Synth Drum 2 |
| 50 | Ride Cymbal | Ride Cymbal | Ride Cymbal | Ride Cymbal |
| 51 | ChinaCymbal | ChinaCymbal | ChinaCymbal | ReverseCymbal |
| 52 | Ride Bell | Ride Bell | Ride Bell | Ride Bell |
| 53 | Tambourine | Tambourine | Tambourine | Tambourine |
| 54 | Splash Cym. | Splash Cym. | Splash Cym. | Splash Cym. |
| 55 | Cowbell | Cowbell | Cowbell | Cowbell |
| 56 | Crash Cym.2 | Crash Cym.2 | Crash Cym.2 | Crash Cym.2 |
| 57 | Vibraslap | Vibraslap | Vibraslap | Vibraslap |
| 58 | Ride Cymbal4 | Ride Cymbal4 | Ride Cymbal4 | Ride Cymbal4 |
| C4 | Bongo High | Bongo High | Bongo High | Bongo High |
| 60 | Bongo Lo | Bongo Lo | Bongo Lo | Bongo Lo |
| 61 | Mute H.Conga | Mute H.Conga | Mute H.Conga | Mute H.Conga |
| 62 | Conga Hi Opn | Conga Hi Opn | Conga Hi Opn | Conga Hi Opn |
| 63 | Conga Lo Opn | Conga Lo Opn | Conga Lo Opn | Conga Lo Opn |
| 64 | High Timbale | High Timbale | High Timbale | High Timbale |
| 65 | Low Timbale | Low Timbale | Low Timbale | Low Timbale |
| 66 | Agogo | Agogo | Agogo | Agogo |
| 67 | Agogo | Agogo | Agogo | Agogo |
| 68 | Cabasa | Cabasa | Cabasa | Cabasa |
| 69 | Maracas | Maracas | Maracas | Maracas |
| 70 | ShrtWhistle [EXC2] | ShrtWhistle [EXC2] | ShrtWhistle [EXC2] | ShrtWhistle [EXC2] |
| 71 | ||||
| 72 | LongWhistle [EXC2] | LongWhistle [EXC2] | LongWhistle [EXC2] | LongWhistle [EXC2] |
| 73 | Short Guiro [EXC3] | Short Guiro [EXC3] | Short Guiro [EXC3] | Short Guiro [EXC3] |
| 74 | Long Guiro [EXC3] | Long Guiro [EXC3] | Long Guiro [EXC3] | Long Guiro [EXC3] |
| 75 | Claves | Claves | Claves | Claves |
| 76 | Woodblock | Woodblock | Woodblock | Woodblock |
| 77 | Woodblock | Woodblock | Woodblock | Woodblock |
| 78 | Mute Cuica [EXC4] | Mute Cuica [EXC4] | Mute Cuica [EXC4] | Mute Cuica [EXC4] |
| 79 | Open Cuica [EXC4] | Open Cuica [EXC4] | Open Cuica [EXC4] | Open Cuica [EXC4] |
| 80 | MuteTriangl [EXC5] | MuteTriangl [EXC5] | MuteTriangl [EXC5] | MuteTriangl [EXC5] |
| 81 | OpenTriangl [EXC5] | OpenTriangl [EXC5] | OpenTriangl [EXC5] | OpenTriangl [EXC5] |
| 82 | Shaker | Shaker | Shaker | Shaker |
| 83 | Jingle Bell | Jingle Bell | Jingle Bell | Jingle Bell |
| C6 | Bell Tree | Bell Tree | Bell Tree | Bell Tree |
| 85 | Castanets | Castanets | Castanets | Castanets |
| 86 | Mute Surdo [EXC6] | Mute Surdo [EXC6] | Mute Surdo [EXC6] | Mute Surdo [EXC6] |
| 87 | Open Surdo [EXC6] | Open Surdo [EXC6] | Open Surdo [EXC6] | Open Surdo [EXC6] |
| 88 |
* ----: No sound.
* [EXC]: will not sound simultaneously with other percussion instruments of the same number.
GM2 ANALOG GM2 JAZZ GM2 ORCHSTRAGM2 BRUSH
GM2 SFX
| 21 | ---- | ---- | ---- | ---- | ---- |
| 22 | ---- | ---- | ---- | ---- | ---- |
| 23 | ---- | ---- | ---- | ---- | ---- |
| 24 | ---- | ---- | ---- | ---- | ---- |
| 25 | ---- | ---- | ---- | ---- | ---- |
| 26 | ---- | ---- | ---- | ---- | ---- |
| 27 | High-Q | High-Q | High-Q | Close HiHat2 [EXC1] | ---- |
| 28 | Slap | Slap | Slap | Pedal HiHat2 [EXC1] | ---- |
| 29 | ScratchPush [EXC7] | ScratchPush [EXC7] | ScratchPush [EXC7] | Open HiHat2 [EXC1] | ---- |
| 30 | ScratchPull [EXC7] | ScratchPull [EXC7] | ScratchPull [EXC7] | Ride Cymbal3 | ---- |
| 31 | Sticks | Sticks | Sticks | Sticks | ---- |
| 32 | SquareClick | SquareClick | SquareClick | SquareClick | ---- |
| 33 | Mtrmm.Click | Mtrnm.Click | Mtrnm.Click | Mtrnm.Click | ---- |
| 34 | Mtrmm. Bell | Mtrmm. Bell | Mtrmm. Bell | Mtrmm. Bell | ---- |
| 35 | TR-808 Kick2 | Jazz Kick 2 | Jazz Kick 2 | Concert BD | ---- |
| 36 | TR-808 Kick | Jazz Kick 1 | Jazz Kick 1 | Mix Kick | ---- |
| 37 | 808 Rimshot | Side Stick | Side Stick | Side Stick | ---- |
| 38 | 808 Snare 1 | Standard SN3 | Brush Swirl | Concert Snr | ---- |
| 39 | 909 HandClap | 909 HandClap | Brush Slap1 | Castanets | High-Q |
| 40 | Elec Snare 6 | Elec Snare 5 | Brush Swirl | Concert Snr | Slap |
| 41 | 808 Tom 2 | Real Tom 6 | Brash Tom 2 | Timpani | ScratchPush [EXC7] |
| 42 | TR-808 CHH [EXC1] | Close HiHat2 [EXC1] | Close HiHat3 [EXC1] | Timpani | ScratchPull [EXC7] |
| 43 | 808 Tom 2 | Real Tom 6 | Brash Tom 2 | Timpani | Sticks |
| 44 | 808_chh [EXC1] | Pedal HiHat2 [EXC1] | Pedal HiHat3 [EXC1] | Timpani | SquareClick |
| 45 | 808 Tom 2 | Real Tom 4 | Brash Tom 2 | Timpani | Mtrmm. Click |
| 46 | TR-808 OHH [EXC1] | Open HiHat2 [EXC1] | Open HiHat3 [EXC1] | Timpani | Mtrmm. Bell |
| 47 | 808 Tom 2 | Real Tom 4 | Brash Tom 2 | Timpani | Gt.FretNoiz |
| 48 | 808 Tom 2 | Real Tom 1 | Brash Tom 2 | Timpani | Gt.CutNoise |
| 49 | 808 Crash | Crash Cym.1 | Crash Cym.3 | Timpani | Gt.CutNoise |
| 50 | 808 Tom 2 | Real Tom 1 | Brash Tom 2 | Timpani | String Slap |
| 51 | Ride Cymbal | Ride Cymbal | Ride Cymbal2 | Timpani | Fl.KeyClick |
| 52 | ChinaCymbal | ChinaCymbal | ChinaCymbal | Timpani | Laughing |
| 53 | Ride Bell | Ride Bell 3 | Ride Bell 2 | Timpani | Screaming |
| 54 | Tambourine | Tambourine | Tambourine | Tambourine | Punch |
| 55 | Splash Cym. | Splash Cym. | Splash Cym. | Splash Cym. | Heart Beat |
| 56 | 808cowbe | Cowbell | Cowbell | Cowbell | Footsteps |
| 57 | Crash Cym.2 | Crash Cym.2 | Crash Cym.2 | Con.Cymbal2 | Footsteps |
| 58 | Vibraslap | Vibraslap | Vibraslap | Vibraslap | Applause |
| 59 | Ride Cymbal4 | Ride Cymbal4 | Ride Cymbal4 | Concert Cym. | Creaking |
| 60 | Bongo High | Bongo High | Bongo High | Bongo High | Door |
| 61 | Bongo Lo | Bongo Lo | Bongo Lo | Bongo Lo | Scratch |
| 62 | 808 Conga | Mute H.Conga | Mute H.Conga | Mute H.Conga | Wind Chimes |
| 63 | 808 Conga | Conga Hi Opn | Conga Hi Opn | Conga Hi Opn | Car-Engine |
| 64 | 808 Conga | Conga Lo Opn | Conga Lo Opn | Conga Lo Opn | Car-Stop |
| 65 | High Timbale | High Timbale | High Timbale | High Timbale | Car-Pass |
| 66 | Low Timbale | Low Timbale | Low Timbale | Low Timbale | Car-Crash |
| 67 | Agogo | Agogo | Agogo | Agogo | Siren |
| 68 | Agogo | Agogo | Agogo | Agogo | Train |
| 69 | Cabasa | Cabasa | Cabasa | Cabasa | Jetplane |
| 70 | 808marac | Maracas | Maracas | Maracas | Helicopter |
| 71 | ShrtWhistle [EXC2] | ShrtWhistle [EXC2] | ShrtWhistle [EXC2] | ShrtWhistle [EXC2] | Starship |
| 72 | LongWhistle [EXC2] | LongWhistle [EXC2] | LongWhistle [EXC2] | LongWhistle [EXC2] | Gun Shot |
| 73 | Short Guiro [EXC3] | Short Guiro [EXC3] | Short Guiro [EXC3] | Short Guiro [EXC3] | Machine Gun |
| 74 | Long Guiro [EXC3] | Long Guiro [EXC3] | Long Guiro [EXC3] | Long Guiro [EXC3] | Lasergun |
| 75 | 808clave | Claves | Claves | Claves | Explosion |
| 76 | Woodblock | Woodblock | Woodblock | Woodblock | Dog |
| 77 | Woodblock | Woodblock | Woodblock | Woodblock | HorseGallop |
| 78 | Mute Cuica [EXC4] | Mute Cuica [EXC4] | Mute Cuica [EXC4] | Mute Cuica [EXC4] | Bird |
| 79 | Open Cuica [EXC4] | Open Cuica [EXC4] | Open Cuica [EXC4] | Open Cuica [EXC4] | Rain |
| 80 | MuteTriangl [EXC5] | MuteTriangl [EXC5] | MuteTriangl [EXC5] | MuteTriangl [EXC5] | Thunder |
| 81 | OpenTriangl [EXC5] | OpenTriangl [EXC5] | OpenTriangl [EXC5] | OpenTriangl [EXC5] | Wind |
| 82 | Shaker | Shaker | Shaker | Shaker | Seashore |
| 83 | Jingle Bell | Jingle Bell | Jingle Bell | Jingle Bell | Stream |
| 84 | Bell Tree | Bell Tree | Bell Tree | Bell Tree | Bubble |
| 85 | Castanets | Castanets | Castanets | Castanets | ---- |
| 86 | Mute Surdo [EXC6] | Mute Surdo [EXC6] | Mute Surdo [EXC6] | Mute Surdo [EXC6] | ---- |
| 87 | Open Surdo [EXC6] | Open Surdo [EXC6] | Open Surdo [EXC6] | Open Surdo [EXC6] | ---- |
No. Rhythm Pattern No. Rhythm Pattern No. Rhythm Pattern
| 001 Piano R&B 1 | 068 R&B 4 | 135 BossaNova 2 |
| 002 Piano R&B 2 | 069 R&B 5 | 136 BossaNova 3 |
| 003 8-Beat Funk | 070 R&B 6 | 137 Fast Bossa |
| 004 16-BeatFunk | 071 R&B 7 | 138 Pop Bossa |
| 005 8-BtShuffle | 072 R&B 8 | 139 Salsa 1 |
| 006 16BtShuffle | 073 R&B 9 | 140 Salsa 2 |
| 007 Latin Dance | 074 R&B 10 | 141 Samba 1 |
| 008 LatinFusion | 075 R&B 11 | 142 Samba 2 |
| 009 Fast Jazz | 076 R&B 12 | 143 Rumba |
| 010 Afro-Cuban | 077 R&B 13 | 144 Mambo 1 |
| 011 Pop Ballad | 078 R&B 14 | 145 Mambo 2 |
| 012 Ballad 1 | 079 R&B 15 | 146 Merengue |
| 013 StraightRck | 080 R&B 16 | 147 PwrFusion 1 |
| 014 PowerfulRck | 081 R&B 17 | 148 PwrFusion 2 |
| 015 Slow Beat | 082 R&B 18 | 149 Rock 1 |
| 016 Back Beat 1 | 083 Funk 1 | 150 Rock 2 |
| 017 Hip'n'Hop | 084 Funk 2 | 151 Rock 3 |
| 018 ElecDance 1 | 085 Funk 3 | 152 Rock 4 |
| 019 Pop 1 | 086 8-BeatRock1 | 153 Rock 5 |
| 020 Pop 2 | 087 8-BeatRock2 | 154 Rock 6 |
| 021 Pop 3 | 088 8-BeatRock3 | 155 Rock 7 |
| 022 Pop 4 | 089 16BeatRock1 | 156 Rock 8 |
| 023 8-Beat Pop1 | 090 16BeatRock2 | 157 Rock 9 |
| 024 8-Beat Pop2 | 091 Ballad 2 | 158 Rock 10 |
| 025 8-Beat Pop3 | 092 Ballad 3 | 159 Rock 11 |
| 026 8-BtFusion1 | 093 PianoBallad | 160 Rock 12 |
| 027 8-BtFusion2 | 094 Rockaballad | 161 Rock 13 |
| 028 Pop Funk 1 | 095 Bluegrass | 162 Rock 14 |
| 029 Pop Funk 2 | 096 Combo 1 | 163 Rock 15 |
| 030 Pop Funk 3 | 097 Combo 2 | 164 Rock 16 |
| 031 Pop Funk 4 | 098 FastSwing 1 | 165 Rock 17 |
| 032 Pop Funk 5 | 099 FastSwing 2 | 166 Rock 18 |
| 033 Pop Funk 6 | 100 Swing 1 | 167 Rock 19 |
| 034 Pop Funk 7 | 101 Swing 2 | 168 Rock 20 |
| 035 Pop Funk 8 | 102 Swing 3 | 169 Progressive |
| 036 16-BeatPop1 | 103 JazzBrush 1 | 170 ElecDance 2 |
| 037 16-BeatPop2 | 104 JazzBrush 2 | 171 ElecDance 3 |
| 038 16-BeatPop3 | 105 Jazz Waltz | 172 ElecDance 4 |
| 039 16BtFusion1 | 106 Free Jazz | 173 ElecDance 5 |
| 040 16BtFusion2 | 107 Jazz 1 | 174 ElecDance 6 |
| 041 16BtFusion3 | 108 Jazz 2 | 175 ElecDance 7 |
| 042 ShufflePop1 | 109 Jazz 3 | 176 ElecDance 8 |
| 043 ShufflePop2 | 110 Jazz 4 | 177 ElecDance 9 |
| 044 ShufflePop3 | 111 Jazz 5 | 178 ElecDance10 |
| 045 ShufflePop4 | 112 Jazz 6 | 179 Acid Jazz |
| 046 ShufflePop5 | 113 Jazz 7 | 180 Techno |
| 047 ShufflePop6 | 114 Jazz 8 | 181 Hip Hop |
| 048 ShufflePop7 | 115 Jazz 9 | 182 House |
| 049 West Coast | 116 Jazz 10 | 183 Jungle |
| 050 Motown | 117 Blues 1 | 184 Dance |
| 051 R&B Pop 1 | 118 Blues 2 | 185 Pop Waltz 1 |
| 052 R&B Pop 2 | 119 Gospel 1 | 186 Pop Waltz 2 |
| 053 R&B Pop 3 | 120 Gospel 2 | 187 Pop Waltz 3 |
| 054 R&B Pop 4 | 121 Polka 1 | 188 Pop Waltz 4 |
| 055 R&B Pop 5 | 122 Polka 2 | 189 SimpleWltz1 |
| 056 Back Beat 2 | 123 Latin Pop 1 | 190 SimpleWltz2 |
| 057 Back Beat 3 | 124 Latin Pop 2 | 191 3/4 Brush |
| 058 Back Beat 4 | 125 Latin Pop 3 | 192 5/4 Fusion |
| 059 Back Beat 5 | 126 Latin Pop 4 | 193 5/4 Swing |
| 060 Back Beat 6 | 127 Latin Pop 5 | 194 5/8 Progres |
| 061 Back Beat 7 | 128 Latin Pop 6 | 195 6/4 Fusion |
| 062 Back Beat 8 | 129 Latin Pop 7 | 196 6/8 Progres |
| 063 Back Beat 9 | 130 Latin Pop 8 | 197 6/8 Swing |
| 064 Back Beat10 | 131 Latin Pop 9 | 198 7/4 Fusion |
| 065 R&B 1 | 132 Latin Pop10 | 199 7/4 Swing |
| 066 R&B 2 | 133 Latin Pop11 | 200 7/8 Progres |
| 067 R&B 3 | 134 BossaNova 1 |
→ Selecting Stored Settings ([SETUP] Button) (p. 50)
"R.": These Setups let you enjoy performing with a session-like feel while playing a Rhythm.
Be sure to check it out. For more on Rhythms, refer to the "Playing Rhythm ([SONG/RHYTHM] Button)" (p. 37).
[Piano]
| 01 | Piano&Choir |
| 02 | Piano&Winds |
| 03 | R.Piano Pop |
| 04 | R.Jazz Trio |
[STRINGS/PAD]
| 13 Strings Sect |
| 14 Mysterious |
| 15 R.Str Ballad |
| 16 R.DancingPad |
[VOICE/SYNTH]
| 25 Large Choir |
| 26 Dance Groove |
| 27 R.A Cappella |
| 28 R.Synth Jam |
[E. PIANO]
| 05 | E.Piano&Pad |
| 06 | EP&Strings |
| 07 | R.EP R&B |
| 08 | R.ClayGroove |
[GUITAR/BASS]
| 17 OD Guitar |
| 18 Fretless&Pad |
| 19 R.Cool Bossa |
| 20 R.Bass Solo |
[RHY/GM2]
| 29 RD SETUP |
| 30 RD SETUP |
| 31 RD SETUP |
| 32 RD SETUP |
[ORGAN]
| 09 OD Organ |
| 10 Manual Bass |
| 11 R.Hot Gospel |
| 12 R.Jazz Funk |
[BRASS/WINDS]
| 21 Full Brass |
| 22 Sax Section |
| 23 R.Brass Funk |
| 24 R.Sax Ballad |
* Setup No. 29-32 (RD SETUP) include the "Basic Setup." Use this when creating Setups from scratch.
Shortcut List
You can easily change settings for the following functions using a number of related buttons.
* "[A] + [B]" indicates that you are to hold down [A] and press [B].
| What to do | Operation Page | |
| Changing the Sound Control Type [SOUND CONTROL] + [DEC] [INC] p. 35 | ||
| Changing the Reverb Depth [REVERB] + [DEC] [INC] p. 34 | ||
| Changing the Reverb Depth for Each Tone [REVERB] + ZONE LEVEL Slider p. 34 | ||
| Changing the Amount of Multi-effects Applied [MULTI EFFECTS] + [DEC] [INC] p. 47 | ||
| Changing the Amount of Transposition | [TRANSPOSE] + [DEC] [INC][TRANSPOSE] + Key | p. 32 |
| Changing the Rhythm Pattern Volume Level | [SONG/RHYTHM] + ZONE LEVEL Slider*Can be operated while Rhythm is playing | p. 37 |
| Changing Volume of Song (Audio File) | [SONG/RHYTHM] + ZONE LEVEL Slider*Can be operated while an audio file is playing | p. 40 |
| Changing Volume of Audio Key (Audio File) [AUDIO KEY] + ZONE LEVEL Slider p. 42 | ||
| Changing the Split Point Key | [SPLIT] + [DEC] [INC][SPLIT] + Key | p. 29 |
| Switching V-LINK On and Off [EXIT/SHIFT] + [SOUND CONTROL] p. 82 | ||||
| Changing the Reverb Type | [EXIT/SHIFT] + [REVERB] | p. 33 | ||
| Changing the Multi-effects Type | [EXIT/SHIFT] + [MULTI EFFECTS] | p. 48 | ||
| Adjusting the Frequency of the Equalizer [EXIT/SHIFT] + [LOW] Knob/[HIGH] Knob | p. 36 | |||
| Function... | Transmitted Recognized Remarks | |||
| Basic Channel | Default Changed | 1 1-16 | 1-16 1-16 | |
| Mode | Default Messages Altered | Mode 3 x********** | Mode 3 Mode 3, 4(M=1) | *1 |
| Note Number : True Voice | 0-127********** | 0-127 0-127 | ||
| Velocity | Note ON Note OFF | O O | O O | |
| After Touch | Key's Ch's | x O | O O | |
| Pitch Bend | O | O | ||
| Control Change | 0, 32 1 5 6, 38 7 10 11 64 65 66 67 71 72 73 74 75 76 77 78 84 91 93 98, 99 100, 101 | O O X X O O O O X O O X X X X X X X X O X X | O O O O O O O O O O O O O O O O O O O O O O O O O O O O O O O O O O O O O O O O O O O O O O O O O O O O O O O O O O O O O O O O O O O O O O O O O O O O O O O O O O O O O O O O O O O O O O O O O O O O O | Bank select Modulation Portamento time Data entry Volume Panpot Expression Hold 1 Portamento Sostenuto Soft Resonance Release time Attack time Cutoff Decay time Vibrato rate Vibrato depth Vibrato delay Portamento control Effect1 depth Effect3 depth NRPN LSB, MSB RPN LSB, MSB |
| Prog Change : True Number | 0-127********** | O 0-127 | Program number 1-128 | |
| System Exclusive | O | O | ||
| System Common : Song Pos Common : Song Sel : Tune | x x x | x x x | ||
| System Real Time : Commands | x x | x x | ||
| Aux Message : All sound off : Reset all controllers : Local Control : All Notes OFF : Active Sense : Reset | x x x x x O x | O (120, 126, 127) O x O (123-125) O x | ||
| Notes | *1 Recognized as M=1 even if M≠1. | |||
Mode 1 : OMNI ON, POLY
Mode 2 : OMNI ON, MONO
O: Yes
Mode 3 : OMNI OFF, POLY
Mode 4 : OMNI OFF, MONO
X: No
RD-300GX: Digital Piano
| Keyboard Section | |
| Keyboard | 88 keys (PHA alpha II Keyboard) |
| Sound Generator SectionConforms to General MIDI 2 System, 88-key Stereo Multi-sampled Piano Sound | |
| Part | 16 Parts |
| Maximum Polyphony | 128 voices |
| Wave Memory | 128 MB (16-bit linear equivalent) |
| Tones | Normal Tones: 110General MIDI 2 Tones: 256Rhythm Sets: 5General MIDI 2 Rhythm Sets: 9 |
| Setups | 32 |
| Effects | Multi-Effects: 78 typesReverb: 6 typesSound Control2-band Digital Equalizer |
| SMF/Audio File Player | |
| File Format | Standard MIDI File: format-0/1,Audio File: WAV, AIFF (44.1 kHz, 16-bit linear), MP3Audio File can be played with Audio Key Function. |
| Connectors | |
| Connectors | Output Jacks (L/MONO, R): 1/4 inch phone typeDAMPER PedalCONTROL PedalMIDI Connectors (IN, OUT)USB Connectors (MIDI, MEMORY)Headphones Jack: Stereo 1/4 inch phone typeDC IN Jack |
| Dimensions/Weight | |
| Dimensions | 1438 (W) x 337 (D) x 141 (H) mm56-5/8 (W) x 13-5/16 (D) x 5-9/16 (H) inches |
| Weight | 16.4 kg / 36 lbs 3 oz |
| Others | |
| Rhythm Patterns | 200 patterns |
| Display | 16 characters, 2 lines (Backlit LCD) |
| Controllers | Zone Level slider x 3Equalizer knob x 2Pitch Bend/Modulation leverAssignable Switches (S1, S2) |
| Internal Memory | 1 M bytes |
| Power Supply | DC 9 V (AC Adaptor) |
| Power Consumption | 11 W |
| Accessories | Owner's ManualCD-ROMs (Audio Key Utility 2, SONAR LE)Damper Pedal (DP-8)AC Adaptor, Power Cord |
* In the interest of product improvement, the specifications and/or appearance of this unit are subject to change without prior notice.
A
AC Adaptor 16
Attack Time 69
Audio File 45
Audio Key 42
Audio Key 42
Volume 45
[AUDIO KEY] Button 13,42
Audio Volume 67
B
Bank Select LSB 56
Bank Select MSB 56
Bend Range 70
Bender Switch 71
Bulk Dump 77
C
Center Cancel 76
Ch 55
Cho 58
Chorus External Zone 58
Coarse Tune 70
Common 68
Connection AC Adaptor 16
Computer 81
External Equipment 17
MIDI 54
MIDI Sequencer 78
Pedals 18
USB 54
USB Memory 21
Control Channel 65
CONTROL Jack 18
Control Pedal Function 68
Control Pedal Switch 71
Control Polarity 65
Copy SETUP 74
Copy SONG 74
Cord Hook 14, 16
Cutoff 69
D
DAMPER Jack 18
Damper Noise 60
Damper Pedal Switch 71
Damper Polarity 65
DC IN Jack 14, 16
[DEC] Button 13
Decay Time 69
Delete SETUP 73
Delete SONG 75
DEMO PLAY 25
[DISPLAY CONTRAST] Knob 14, 20
[DUAL] Button 12, 28
Duplex Scale 61
E
[EDIT] Button 13,63
Edit Mode 63
Effects 47,87
[ENTER] Button 13
EQ Mode 64
EQUALIZER Knobs 36
[EXIT/SHIFT] Button 13
External Zone 22,53
[EXTERNAL/INTERNAL] Button 12,55
F
Factory Reset 77
Fast-forward Song 41
File 72
Fine Tune 70
Format 76
Frequency 36
G
Ground Terminal 14, 16
H
Hammer Noise 61
[HIGH] Knob 12,36
|
[INC] Button 13
Indicator Mode 65
Internal Zone 22
K
Key Off Resonance 61
Key Range External Zone 59
Key Touch 62
Key Touch (Edit Mode) 67
Key Touch Mode 62
Key Touch Offset 62
Keynote 66
KRL 59
KRU 59
L
Layer 28
Lid 60
Load SETUP 72
Local Control 78
Local Switch 79
[LOW] Knob 12,36
LOWER 30
LOWER (External Zone) 55
Lower Tone 29
LSB 56
M
Master Tune 64
Master Volume 64
MFX Type 87
MFX Zone 68
MIDI 53
MIDI Connectors 14,53
MIDI OUT Channel 55
Modulation 34
Modulation Switch 71
MSB 56
Multi Effects 47, 68
Depth 47
Type 48
[MULTI EFFECTS] Button 12,47
O
ONE TOUCH [PIANO] Button 13,60
OUTPUT Jacks 14
P
Pan
External Zone 58
Internal Zone 70
Panel Lock 49
Part 22
Part Mode 66
Part Switch 71
PC (Program Change) 56
Pedal 18
Pedal Function 68
PEDAL Jacks 14
PHONES Jack 14
Piano Designer 60
Pitch 70
Pitch Bend 34
Pitch Bend/Modulation Lever 12,34
Play Mode 76
Playback
Audio Files 40
Song 40
Playback Transpose 76
Polarity 65
Power 19
Power Cord 16
[POWER] Switch 14, 19
R
Rec Mode 78
Recording 79
Release Time 69
Resonance 69
Rev 58
Reverb
Depth 34
External Zone 58
Internal Zone 69
Piano Designer 60
Type 33
Reverb Amount 69
[REVERB] Button 12,33
Reverb Depth 60
Rewind
Song 41
RHY (Rhythm) 37
Rhythm 37
Pattern 38
Tempo 38
Volume 39
Rhythm Pattern List 97
Rhythm Set List 94
Rotary Effect 48
Rx. GM/GM2 System ON 67
Rx. GS Reset 67
S
S1 Switch 71
S1/S2 Function 68
[S1] [S2] Buttons 12,68
S2 Switch 71
Save
Settings (Setup) 51
Save SETUP 72
Setup 50,80,98
Copy 74
Delete 73
Factory Reset 77
Load 72
Save 72
Write 51
[SETUP] Button 13,50
SETUP Control Channel 65
SETUP Pedal Shift 64
Shortcut 98
SMF Music File
Playback 40
Song 40
Copy 74
Delete 75
Fast-forward 41
Rewind 41
Tempo 41
Song Function 76
Song Stop Mode 67
[SONG/RHYTHM] Button 13, 37, 40
Sound Control 35
[SOUND CONTROL] Button 12,35
Split 29
[SPLIT] Button 12, 29
Split Point 30
Stand 15
Stretch Tune 61
String Resonance 61
System 64
T
Temperament 66
Temperament Key 66
Tempo
Audio Files 41
Rhythm 38
Song 41
Tone 22,91
Tone List 91
Tone Parameter 69
TONE SELECT Buttons 13,27
Transpose
External Zone 58
Internal Zone 70
Keyboard 32
Song 76
[TRANSPOSE] Button 12,32
Trs 58
Tuning 64
U
UPPER 1 28,30
UPPER 1 (External Zone) 55
UPPER 2 28,30
UPPER 2 (External Zone) 55
Upper Tone 29
USB Driver 65
USB Memory 21
USB MEMORY Connector 14
USB Memory Mode 65
USB MIDI Connector 14, 53, 81
USB MIDI Driver 81
Utility 77
V
Velocity 62
Velocity Delay Sense 62
V-LINK 82
Vol 58
Volume
Audio File 67
Audio Key 45
External Zone 57-58
Internal Zone 31
Master 20,64
Rhythm 39
VOLUME Slider 12, 20
W
[WRITE] Button 13,51
Z
Zone 22
ZONE LEVEL Sliders 12, 31, 57
Zone Parameter 70
ZONE SELECT Button 13, 31
ZONE SELECT Indicators 13, 31
AFRICA
EGYPT
Al Fanny Trading Office
9, EBN Hagar Al Askalany
Street,
ARID E1 Golf, Heliopolis
Cairo 11341, EGYPT
TEL: (022)-418-5531
REUNIÓN
Royal Cape Park, Unit 24
Londonderry Road, Ottery 7800
Cape Town, SOUTH AFRICA
TEL: (021) 799 4900
ASIA
CHINA
Roland Shanghai Electronics
Co., Ltd.
5F. No.1500 Pingliang Road
Shanghai 200090, CHINA
TEL: (021) 5580-0800
Roland Shanghai Electronics
Co., Ltd.
(BEIJING OFFICE)
10F. No.18 3 Section Anhuaxili
Chaoyang District Beijing
100011 CHINA
TEL: (010) 6426-5050
HONG KONG
Tom Lee Music Co., Ltd.
Service Division
22-32 Pun Shan Street, Tsuen
Wan, New Territories,
HONG KONG
TEL: 2415 0911
Parsons Music Ltd.
8th Floor, Railway Plaza, 39
Chatham Road South, T.S.T.
Kowloon, HONG KONG
TEL: 2333 1863
INDIA
Rivera Digitec (India) Pvt. Ltd.
411, Nirman Kendra
Mahalaxmi Flats Compound
Off. Dr. Edwin Moses Road, Mar 15: 400211 INDIA
Mumbai-400011, INDLA TEL: (022) 2493 9051
TEL. (022) 2493 9651
INDONESIA
PT Citra IntiRama
Suoi Nhac Company, Ltd
370 Cach Mang Thang Tam St.
Dist.3, Ho Chi Minh City,
VIET NAM
TEL: 9316540
PHILIPPINES
G.A. Yupangco & Co. Inc.
339 Gil J. Puyat Avenue
Makati, Metro Manila 1200
PHILIPPINES
TEL:(02) 899 9801
SINGAPORE
SWEE LEE MUSIC
COMPANY PTE. LTD.
150 Sims Drive,
SINGAPORE 387381
TEL: 6846-3676
TAIWAN
ROLAND TAIWAN
ENTERPRISE CO., LTD.
Room 5, 9fl. No. 112 Chung
Shan N.Road Sec.2, Taipei,
TAIWAN, R.O.C.
TEL: (02) 2561 3339
THAILAND
Theera Music Co., Ltd.
100-108 Soi Verng
Nakornkasem, New
Road, Sumpantawongse,
Bangkok 10100 THAILAND
TEL: (02) 224-8821
AUSTRALIA/ NEW ZEALAND
AUSTRALIA/
NEW ZEALAND
Roland Corporation
Australia Pty., Ltd.
38 Campbell Avenue
Dee Why West. NSW 2099
AUSTRALIA
For Australia
Tel: (02) 9982 8266
For New Zealand Tel: (06) 2008 715
Tel: (19) 5098 715
CENTRAL/LATIN AMERICA
ARGENTINA
Instrumentos Musicales S.A.
Av.Santa Fe 2055
(1123) Buenos Aires
ARGENTINA
TEL: (011) 4508-2700
BARBADOS
A&B Music Supplies LTD
12 Webster Industrial Park
Wildey, St. Michael, Barbados
TEL: (246)430-1100
BRAZIL
Roland Brasil Ltda.
Rua San Jose, 780 Sala B
Parque Industrial San Jose
Cotia - Sao Paulo - SP, BRAZIL.
TEL: (011) 4615 5666
CHILE
Comercial Fancy II S.A.
Rut.: 96.919.420-1
Nataniel Cox #739, 4th Floor
Santiago - Centro, CHILE
TEL: (02) 688-9540
COLOMBIA
Centro Musical Ltda.
Cra 43 B No 25 A 41 Bododega 9
Medellin, Colombia
TEL: (574)3812
COSTA RICA
JUAN Bansbach Instrumentos
Musicales
Boulevard Andrews, Albrook,
Panama City, REP. DE
PANAMA
TEL: 315-0101
PARAGUAY
Distribuidora De
Instrumentos Musicales
J.E. Olear y ESQ. Manduvira
Asuncion PARACUAY TEL (505) 51 402147
TEL: (595) 21 492147
PERU
Audionet
This symbol indicates that in EU countries, this product must be collected separately from household waste, as defined in each region. Products bearing this symbol must not be discarded together with household waste.

This equipment has been tested and found to comply with the limits for a Class B digital device, pursuant to Part 15 of the FCC Rules. These limits are designed to provide reasonable protection against harmful interference in a residential installation. This equipment generates, uses, and can radiate radio frequency energy and, if not installed and used in accordance with the instructions, may cause harmful interference to radio communications. However, there is no guarantee that interference will not occur in a particular installation. If this equipment does cause harmful interference to radio or television reception, which can be determined by turning the equipment off and on, the user is encouraged to try to correct the interference by one or more of the following measures:
– Reorient or relocate the receiving antenna.
– Increase the separation between the equipment and receiver.
- Connect the equipment into an outlet on a circuit different from that to which the receiver is connected.
— Consult the dealer or an experienced radio/TV technician for help.
This device complies with Part 15 of the FCC Rules. Operation is subject to the following two conditions:
(1) this device may not cause harmful interference, and
(2) this device must accept any interference received, including interference that may cause undesired operation.
Unauthorized changes or modification to this system can void the users authority to operate this equipment.
This equipment requires shielded interface cables in order to meet FCC class B Limit.
For Canada
NOTICE
This Class B digital apparatus meets all requirements of the Canadian Interference-Causing Equipment Regulations.
AVIS
DECLARATION OF CONFORMITY Compliance Information Statement
Model Name : RD-300GX
Type of Equipment: Digital Piano
Responsible Party : Roland Corporation U.S.
Address: 5100 S. Eastern Avenue, Los Angeles, CA 90040-2938
Telephone : (323) 890-3700