Crystal CT- 8000R - Security Camera NUUO - Free user manual and instructions
Find the device manual for free Crystal CT- 8000R NUUO in PDF.


User questions about Crystal CT- 8000R NUUO
0 question about this device. Answer the ones you know or ask your own.
Ask a new question about this device
Download the instructions for your Security Camera in PDF format for free! Find your manual Crystal CT- 8000R - NUUO and take your electronic device back in hand. On this page are published all the documents necessary for the use of your device. Crystal CT- 8000R by NUUO.
USER MANUAL Crystal CT- 8000R NUUO
11.1 Image Fusion....290
11.1.1. Create an Image Fusion....292
11.1.2 Delete An Image Fusion ......298
11.2 E-Map....299
11.2.1. Create an E-Map ....302
11.2.2 Delete an E-Map 307
11.3 View 308
11.3.1 Add A View....310
11.3.2 Add Cameras to View....312
11.3.3 Delete a Camera from View 315
11.3.4 Add A View Group....317
11.3.5 Add A View Tour....320
11.3.6 Duplicate A View....323
11.3.7 Search A View ...... 326
11.3.8 Delete A View....328
11.3.9 Assign stream prole ....330
11.4 Client Conguraon ....333
11.4.1. The General Menu ....335
11.4.2 The User Interface Menu 338
11.4.3 The Funcon Menu....350
- Live View 361
12.1 View List....363
12.2 Content List ....363
12.2.1 Watch Live Video....363
12.2.2 Toolbar Content ......363
12.3 PTZ Panel....370
12.3.1 PTZ....370
12.4 I/O Control Panel....377
12.5 Content Properes Panel....378
12.6 Event List ....380
12.7 I/O 381
12.8 View Panel....381
12.9 Status Bar 381
12.10 Toolbar 382
12.11 Fisheye Camera Dewarp 383
12.11.1 NUUO Fisheye Camera Dewarp 383
12.12 Connecon Sengs 389
- Playback 390
13.1 Content Properes Panel....390
13.2 Content List 391
13.2.1 Watch Recorded Video....391
13.2.2 Toolbar Content ....391
13.3 Event List 392
13.4 Search Panel....392
13.4.1 Moon Search....392
13.5 Timeline....396
13.5.1 Search in Timeline....396
13.6 Time Navigaon / View Toolbar....402
13.6.1 The Playback Control Panel....402
13.6.2 The Playback Control 403
13.6.3 The Date / Time Display....404
13.6.4 Event browsing control 404
13.6.5 The Toolbar Icons....405
13.7 Export Video....406
13.8 Snapshot / Print 408
-
Log Export 409
-
Backup....411
-
Export Cong....415
-
Import Cong 418
-
Video Wall 422
18.1 Matrix Applicaon....422
18.2 Matrix Console 424
18.2.1 Add camera to Matrix 427
18.2.2 Add view to Matrix....428
18.3 Matrix Prole List....429
- Help 434
1. Introduction
Crystal 2.0 is a Linux-based enterprise soluon. It is designed for the management of large projects with mulple servers, or single server with high throughput megapixel recording.
Crystal 2.0 provides centralized management for unlimited devices, servers, users, with the unlimited channels of video wall display for centralized viewing(Ulmate level only), to help users manage a big system eciently.
There are two levels of the camera channel—Ulmate and Enterprise. Ulmate level support full funcon of Crystal 2.0, and Enterprise level support full funcons except for the video wall applicaon.
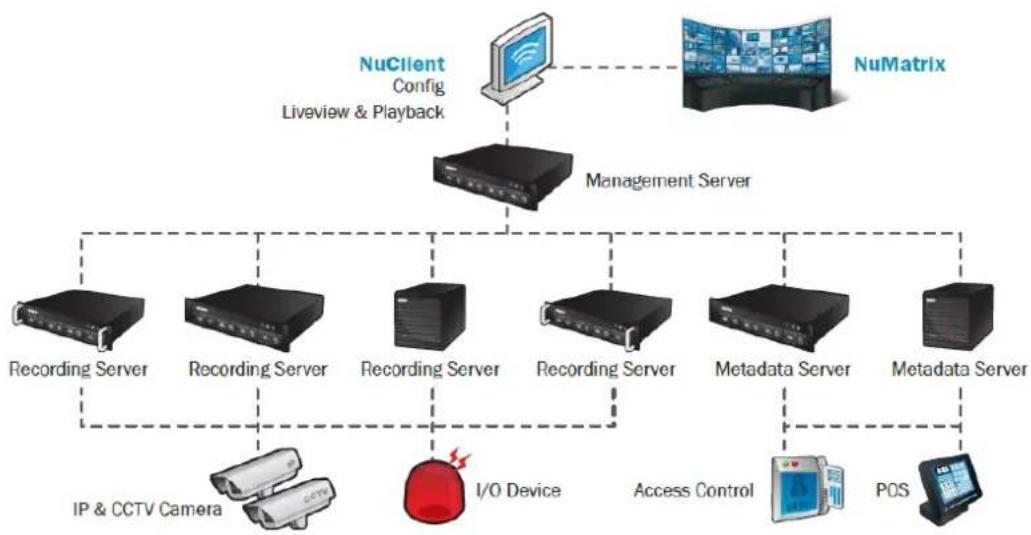
The following is the system structure.
flowchart
graph TD
    A["NuClient Config Liveview & Playback"] --> B["Management Server"]
    C["NuMatrix"] --> B
    B --> D["Recording Server"]
    B --> E["Recording Server"]
    B --> F["Recording Server"]
    B --> G["Recording Server"]
    B --> H["Metadata Server"]
    B --> I["Metadata Server"]
    D --> J["IP & CCTV Camera"]
    E --> K["I/O Device"]
    F --> L["Access Control"]
    G --> M["POS"]
The whole Crystal 2.0 system contains the following components:
| Component | Description |
| Management Server | The Management Server controls and congures the Recording Server and the Metadata Server. |
| Recording Server | The Recording Server controls the cameras. |
| Metadata Server | The Metadata Server controls third-party device such as a POS server, Access Control server, and so on. |
| NuClient | The soware that login Management Server for Live View (instant video playback), Playback (recorded video playback) and Cong (system conguraon). |
| NuMatrix (Ulmate only) | The soware that control by NuClient and display unlimited number of live viewing videos. |
2. Installation
2.1 Installation Process
Step 1: Unpack the Unit
This package contains the following items:
The unit
■ Quick Start Guide
■ Screws for disk drives
Key
■ Power cord
■ Warranty card
■ CD with Install Wizard, NuClient and Oine License Tool applicaon, user manual, and quick start guide
 | The electronic components within the unit can be damaged by Electrostatic Discharge (ESD). Please take precautions at all times when handling the unit or its sub-assemblies. |
 | To configure the unit, you must install the software onto a desktop/ laptop running Windows XP-SP3 32bit, Windows 7 32/64bit, Mac OS X v10.6/10.7 |
Unit front/rear view
(CT-4000: Tower)
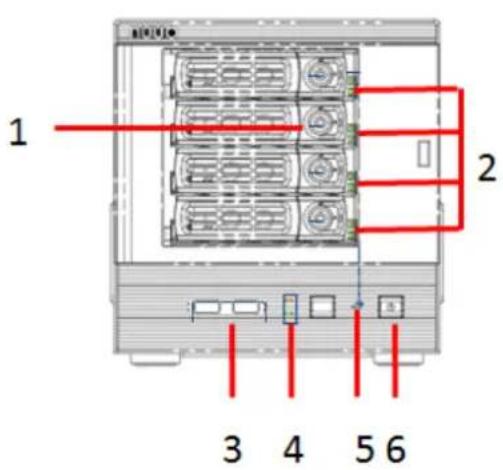
text_image
1 2 3 4 5 6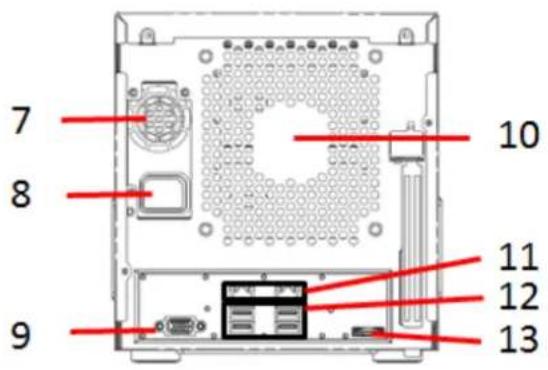
text_image
7 8 9 10 11 12 13| Setting | Description |
| 1 | Key Lock |
| 2 | LED Indicators: HDD1-4 |
| 3 | USB x2 |
| 4 | LED Indicators: LAN1-2 |
| 5 | LED Indicators: Power |
| 6 | Power Button |
| 7 | PSU Cooling Fan |
| 8 | Power Connector |
| 9 | VGA |
| 10 | System Cooling Fan |
| 11 | Gigabit LAN x 2 |
| 12 | USB x 4 |
| 13 | eSATA Connector |
(CT-4000R: 4 bay rackmount)
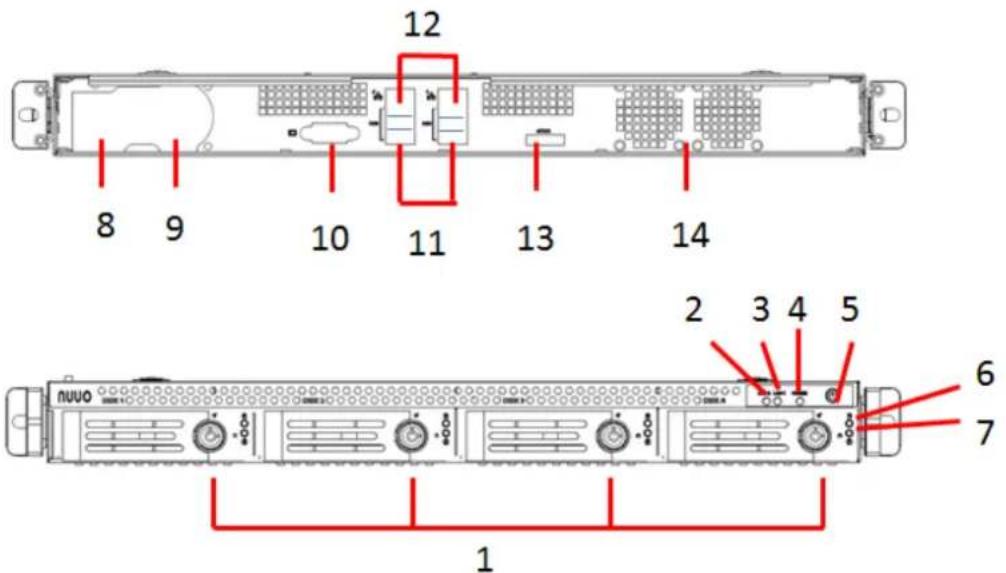
text_image
12 8 9 10 11 13 14 2 3 4 5 NUUO 6 7 1| Setting | Description |
| 1 | Key Lock |
| 2 | LED Indicators: LAN2 |
| 3 | LED Indicators: LAN1 |
| 4 | Power LED |
| 5 | Power Button |
| 6 | HDD Power LED |
| 7 | HDD Access LED |
| 8 | Power Connector |
| 9 | PSU Cooling Fan |
| 10 | VGA |
| 11 | USB x 4 |
| 12 | Gigabit LAN x 2 (LAN2 / LAN1) |
| 13 | eSATA Connector |
| 14 | System Cooling Fan |
(CT-8000R:8 bay rackmount)
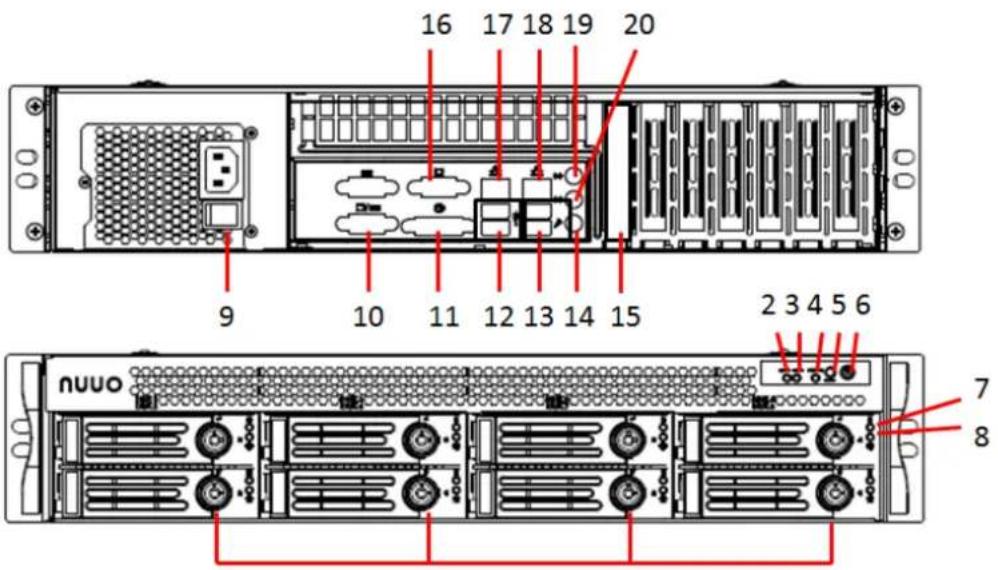
text_image
16 17 18 19 20 9 10 11 12 13 14 15 2 3 4 5 6 nuuo 7 81
| Setting | Description |
| 1 | Key Lock |
| 2 | LED Indicators: LAN2 |
| 3 | LED Indicators: LAN1 |
| 4 | Power LED |
| 5 | Reset Button |
| 6 | Power Button |
| 7 | HDD Power LED |
| 8 | HDD Access LED |
| 9 | Power Supply Switch |
| 10 | COM port |
| 11 | DVI |
| 12 | USB 2.0 x 2 |
| 13 | USE 3.0 x 2 |
| 14 | Microphone in |
| 15 | eSATA Connector |
| 16 | VGA |
| 17 | LAN 2 |
| 18 | LAN 1 |
| 19 | Line-in |
| 20 | Line-out |
(CT-8000RP: 8 bay rackmount with redundant power)
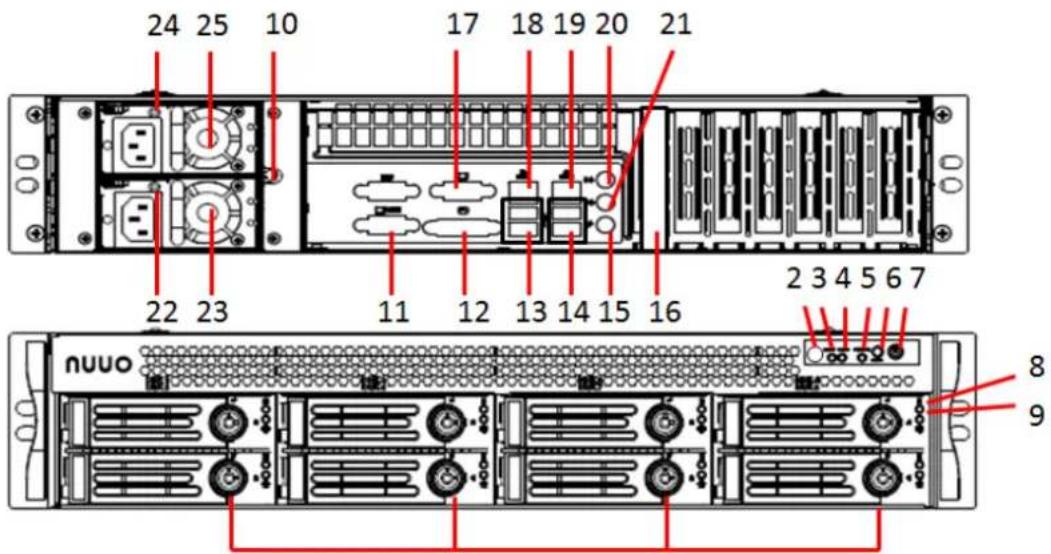
text_image
24 25 10 17 18 19 20 21 22 23 11 12 13 14 15 16 2 3 4 5 6 7 nuuo 8 91
| Setting | Description |
| 1 | Key Lock |
| 2 | Power Fail LED |
| 3 | LED Indicators: LAN2 |
| 4 | LED Indicators: LAN1 |
| 5 | Power LED |
| 6 | Reset Button |
| 7 | Power Button |
| 8 | HDD Power LED |
| 9 | HDD Access LED |
| 10 | Power Supply Mute Button |
| 11 | COM port |
| 12 | DVI |
| 13 | USB 2.0 x 2 |
| 14 | USE 3.0 x 2 |
| 15 | Microphone in |
| 16 | eSATA Connector |
| 17 | VGA |
| 18 | LAN 2 |
| 19 | LAN 1 |
| 20 | Line-in |
| 21 | Line-out |
| 22 | LED Indicators: PSU1 |
| 23 | PSU 2 |
| 24 | LED Indicators: PSU2 |
| 25 | PSU1 |
Step 2: Install Hard Drives
Refer to compatibility list and install HDDs. For opmal performance consideraon, install disks with the same model and storage capacity. The available RAID level depends on the amount of disks installed.
- Open the lid on the front of the unit enclosure.
- Pull a HDD tray from the enclosure. See the front view gure.
- Carefully lock the disks into the HDD tray with screws and 3 screws for each disk.
We recommend locking the screws on the boom of the disk, instead of the side of tray. Put the HDD tray back once you nished.
Step 3: Connect to the Network
- Each one end of the network cable to the RJ45 network conncon. See the rear view gure.
- Aach the other end of the network cable to your Ethernet hub or switch.
| If there are multiple networks at your facility, note the network to which you connect the unit. You will need this information during the setup process. Please also enable the DHCP function within the network, as the unit will retrieve an IP address through DHCP by default. |
Step 4: Connect the Power
- Aach the power cord to the power source.
- Connect the power cord to the back of the unit enclosure. See the rear view gure.
- On the front of the unit, press the power buon. See the front view gure.
It takes about a minute for the unit to fully power up. Once it is powered up, the Power Status LED turns blue. See the front view gure.
Step 5: Install the Soware
- Insert the CD into your CDROM.
-
Double-click Setup.exe to begin installaon.
-
Follow the instrucon of Setup.exe, and click the Finish buon to close the installer.
Step 6: Set up the Unit
The soware Installaon Wizard performs the setup procedures on the unit.
Once a Crystal Titan, the hardware for the Management Server, is set up and connects to the network, proceed to set up the management service. Launch the Install Wizard to set up the management service for your surveillance network.
To set up the management service:
-
Go to Start and select NUUO Crystal Series
-
Run the executable le InstallaonWizard.
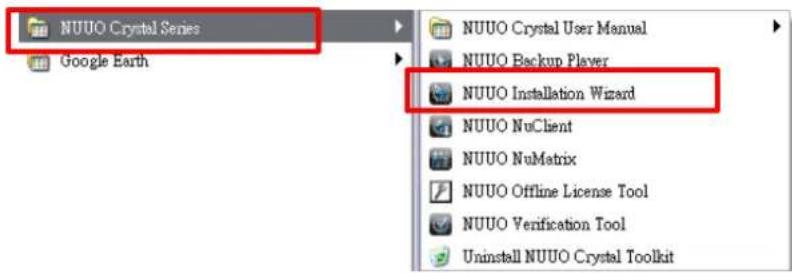
text_image
NUUO Crystal Series Google Earth NUUO Crystal User Manual NUUO Backup Player NUUO Installation Wizard NUUO NuClient NUUO NuMatrix NUUO Offline License Tool NUUO Verification Tool Uninstall NUUO Crystal ToolkitThe NUUO Crystal Installaon Wizard opens.
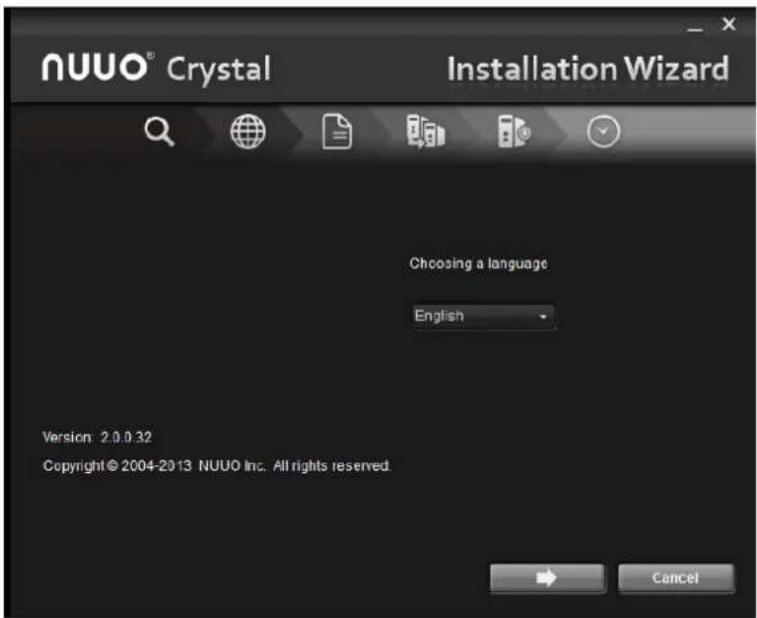
text_image
NUUO® Crystal Installation Wizard Choosing a language English Version: 2.0.0.32 Copyright© 2004-2013 NUUO Inc. All rights reserved. Cancel-
Select a language and click the button to proceed.
-
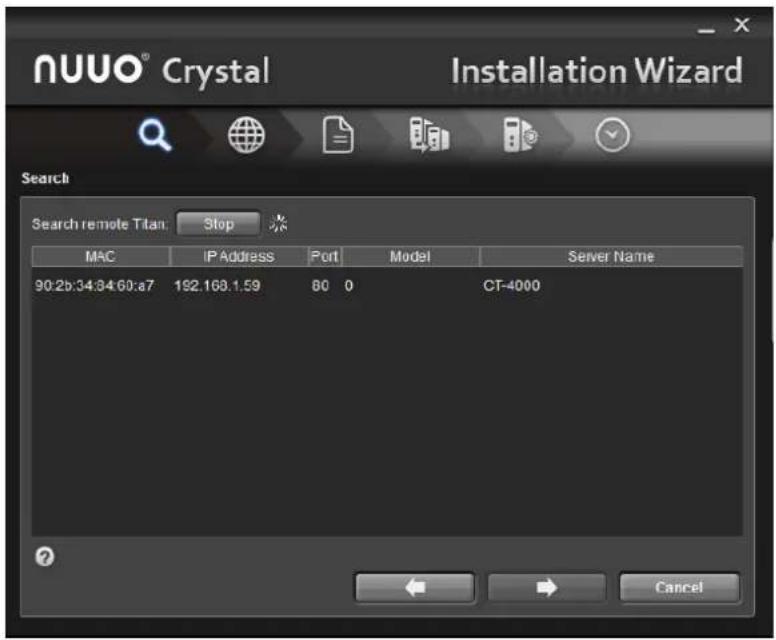
A Search page opens.
text_image
NUUO® Crystal Installation Wizard Search Search remote Titan: Stop MAC IP Address Port Model Server Name 90:2b:34:84:60:a7 192.168.1.59 80 0 CT-4000 Cancel- On the Search page, click the Search button to search for any Crystal Titan within the network.
text_image
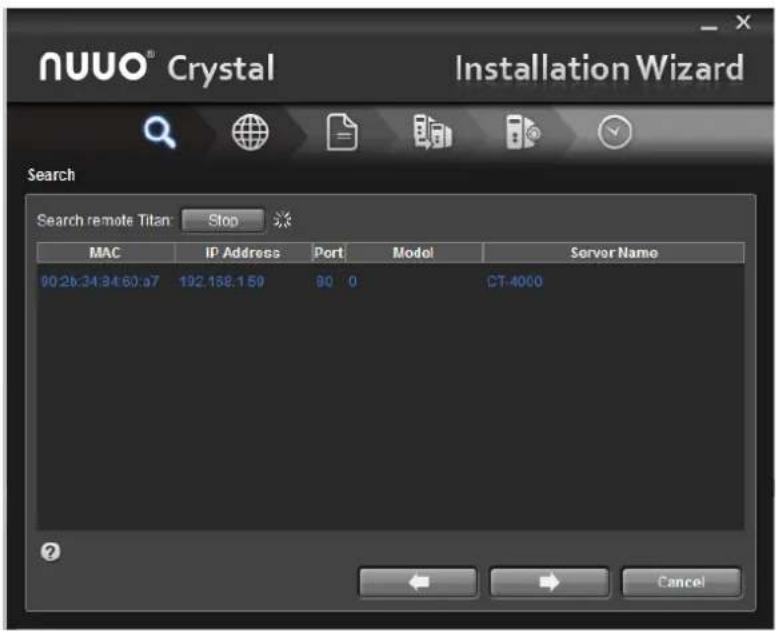
NUUO® Crystal Installation Wizard Search Search remote Titan: Stop MAC IP Address Port Model Server Name 90 25.34 34 60. a7 192.188.159 90 0 CT-4000 Cancel(Click the boom-le queson mark icon to see the ps.)
Any Crystal Titan discovered within the network will be displayed on the Search page, with the informaon about the MAC address, IP address, port, model and the Crystal Titan's server name.
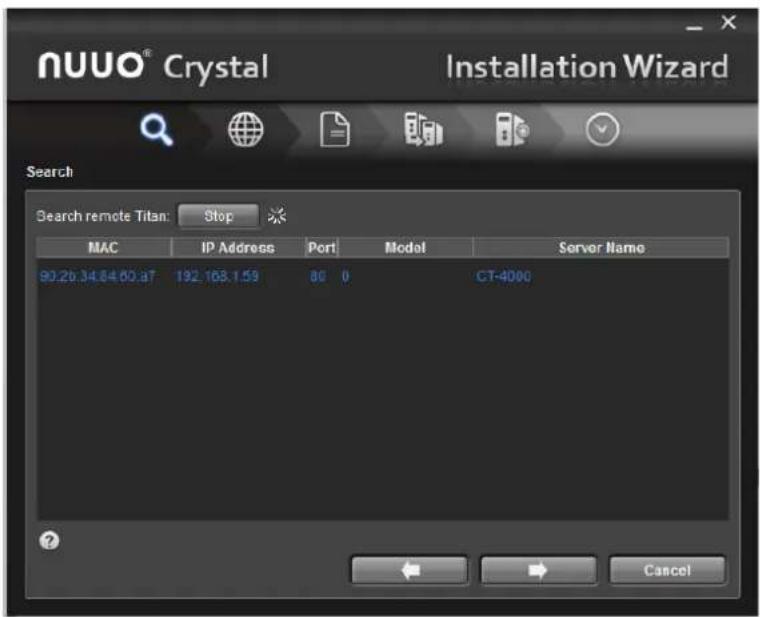
text_image
NUUO® Crystal Installation Wizard Search Search remote Titan: Stop MAC IP Address Port Model Server Name 90.20.34.84 80.87 192.163.1.59 80 0 CT-4000 ?< < Cancel- Double click the discovered Crystal Titan.
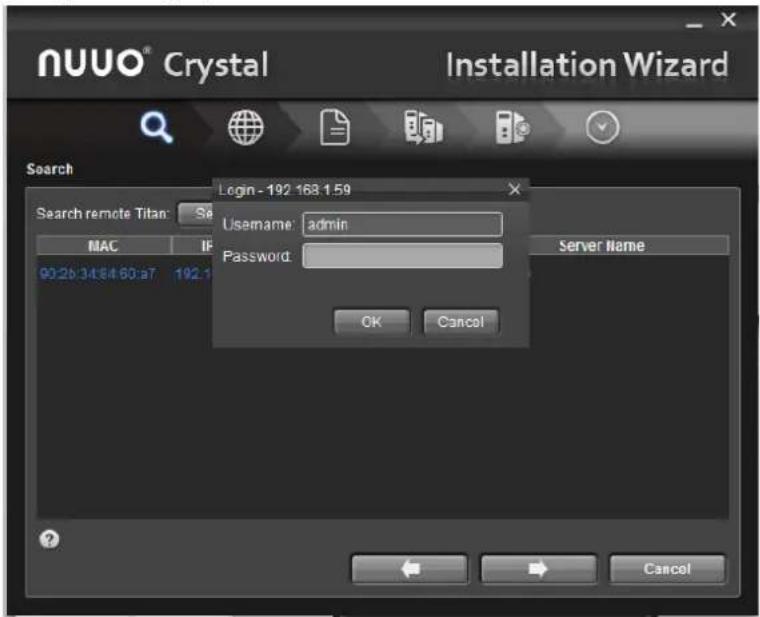
A Login dialog opens.
text_image
NUUO® Crystal Installation Wizard Search Login - 192 168.1.59 Search remote Titan: Sa MAC IP Username: admin Password: 00:25:34:$4:60:a7 192.1 Server Name OK Cancel Cancel- Enter the username and the password. Click the OK buon to submit. Then click the →buon to proceed.
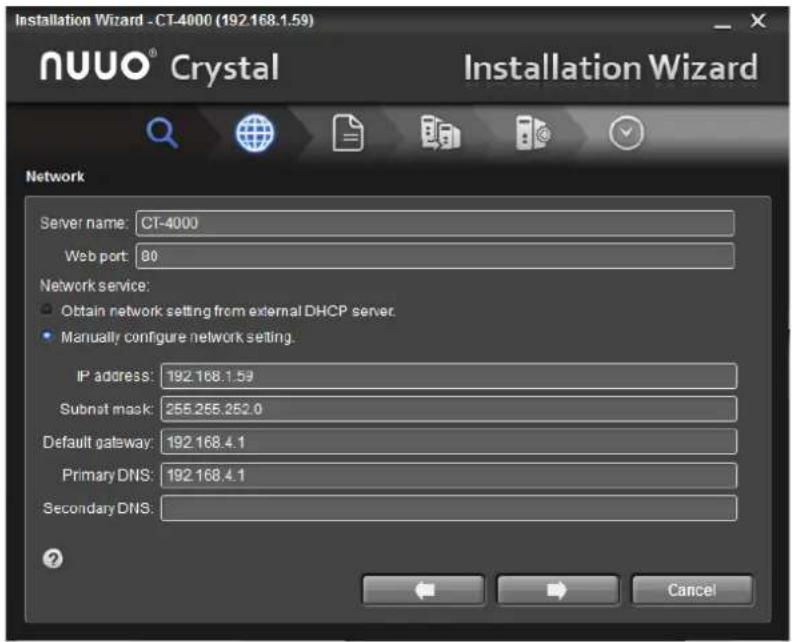
The Network page opens.
text_image
Installation Wizard - CT-4000 (192.168.1.59) NUUO® Crystal Installation Wizard Network Server name: CT-4000 Web port: 80 Network service: Obtain network setting from external DHCP server. Manually configure network setting. IP address: 192.168.1.59 Submat mask: 255.255.252.0 Default gateway: 192.168.4.1 Primary DNS: 192.168.4.1 Secondary DNS: ?(Click the boom-le queson mark icon to see the ps.)
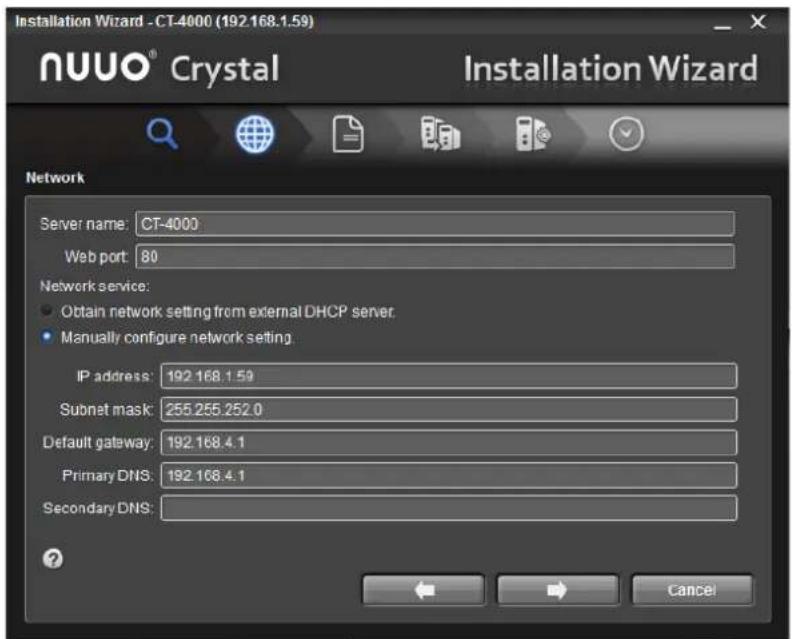
- Make your network settings. Then click the ➞buon to proceed.
text_image
Installation Wizard - CT-4000 (192.168.1.59) NUUO® Crystal Installation Wizard Network Server name: CT-4000 Web port: 80 Network service: ● Obtain network setting from external DHCP server ● Manually configure network setting IP address: 192.168.1.59 Subnet mask: 255.255.252.0 Default gateway: 192.168.4.1 Primary DNS: 192.168.4.1 Secondary DNS: ?< Back Cancel>(Click the boom-le queson mark icon to see the ps.)

For web default Port is 80(TCP).
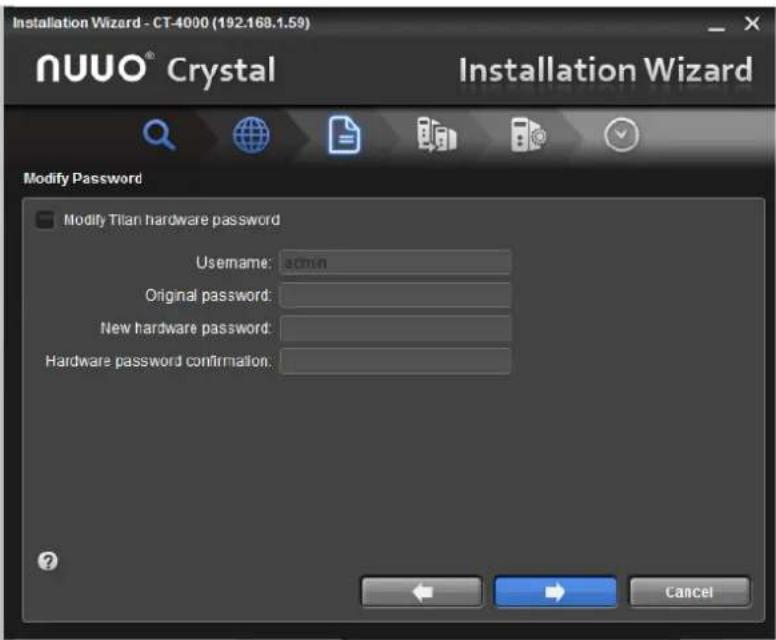
A Modify Password* page then opens.
text_image
Installation Wizard - CT-4000 (192.168.1.59) NUUO® Crystal Installation Wizard Modify Password Modify Titan hardware password Username: admin Original password: New hardware password: Hardware password confirmation: Cancel(Click the boom-le queson mark icon to see the ps.)
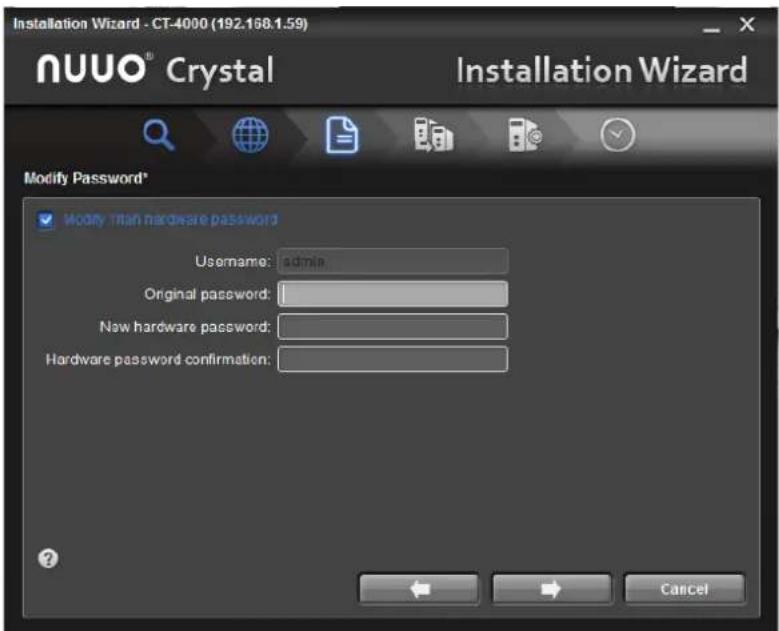
- Modify the password to access the Crystal Titan hardware. Then click the buon to proceed.
text_image
Installation Wizard - CT-4000 (192.168.1.59) NUUO® Crystal Installation Wizard Modify Password* Modify Than hardware password Username: adminia Original password: New hardware password: Hardware password confirmation:
Crystal Titan hardware password is for Crystal Titan hardware only.
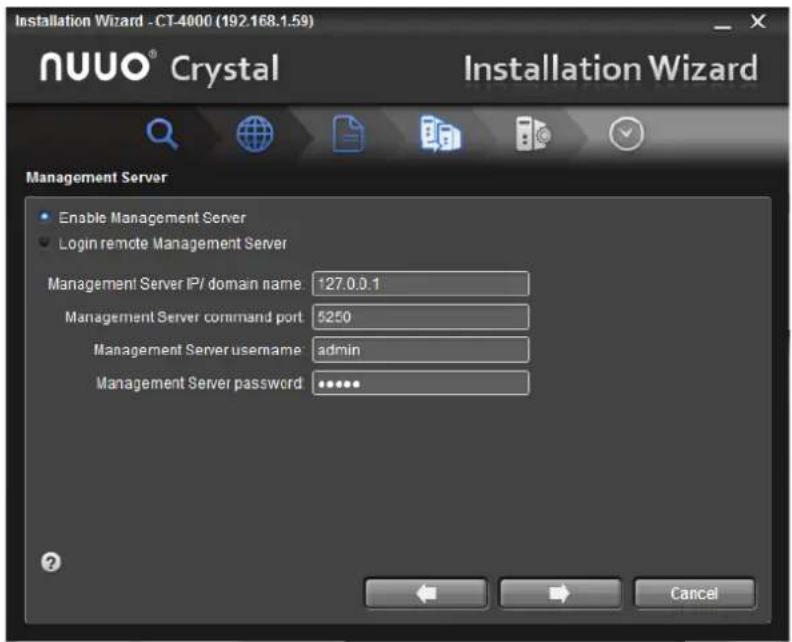
A Management Server page opens.
text_image
Installation Wizard - CT-4000 (192.168.1.59) NUUO® Crystal Installation Wizard Management Server Enable Management Server Login remote Management Server Management Server IP/ domain name: 127.0.0.1 Management Server command port: 5250 Management Server username: admin Management Server password: ****. Cancel- On the Management Server page, enable the management service on the previously discovered Crystal Titan or login to another remote Management Server. Then click the →buon to proceed.
text_image
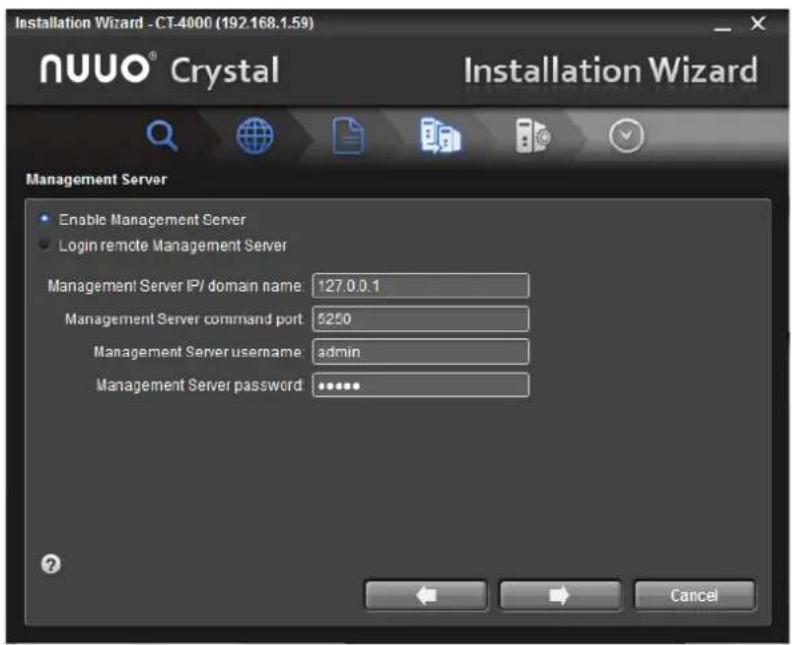
Installation Wizard - CT-4000 (192.168.1.59) NUUO® Crystal Installation Wizard Management Server Enable Management Server Login remote Management Server Management Server IP/ domain name: 127.0.0.1 Management Server command port: 5250 Management Server username: admin Management Server password: ****. Cancel
For Management Server default Port is 5250(TCP) and the server port should be larger than 1000. Also the command port cannot be the same.
text_image
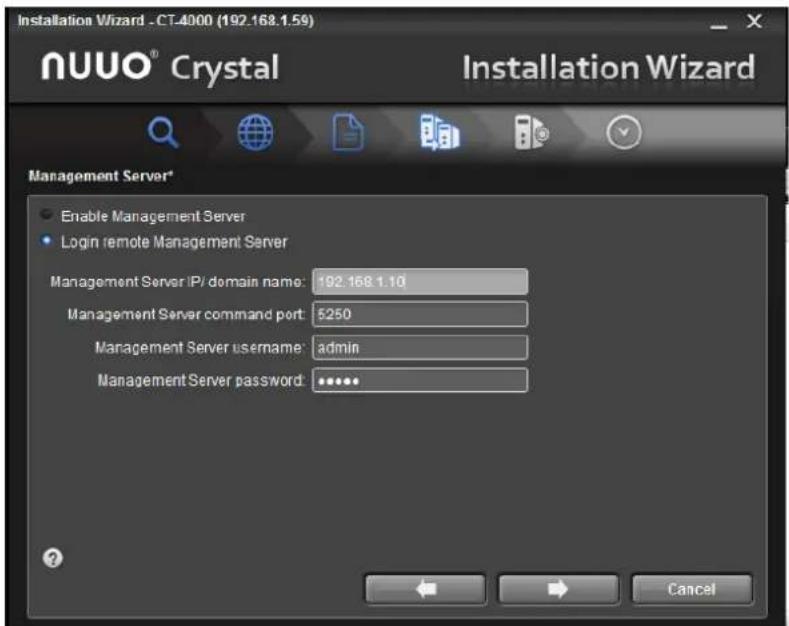
Installation Wizard - CT-4000 (192.168.1.59) NUUO® Crystal Installation Wizard Management Server* Enable Management Server Login remote Management Server Management Server IP/ domain name: 192.168.1.10 Management Server command port: 5250 Management Server username: admin Management Server password: ****. Cancel(Click the boom-le queson mark icon to see the ps.)

If you enable Management Server on the previously discovered Crystal Titan, the Crystal Titan will assign as Management Server. If enable login remote Management Server, you can enter Management Server IP, port, username and password to assign the previously discovered Crystal Titan as recording server or Metadata Server to Management Server.
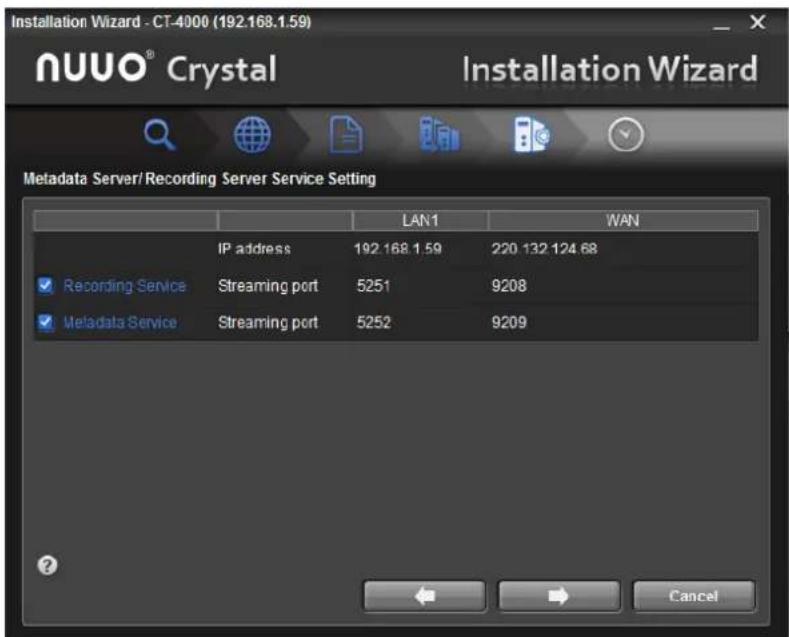
The Metadata Server/Recording Server Service Seng* page opens.
- Enable/disable the recording service or metadata service on the Crystal Titan.
Then click the → uon to proceed.
text_image
Installation Wizard - CT-4000 (192.168.1.59) NUUO® Crystal Installation Wizard Metadata Server/Recording Server Service Setting LAN 1 WAN IP address 192.168.1.59 220.132.124.68 Recording Service Streaming port 5251 9208 Metadata Service Streaming port 5252 9209 Cancel(Click the bottom-left question mark icon ☐ to see the tips.)
For Recording Server default Port is 5251(TCP) and Metadata Server default Port is 5252(TCP). The server port should be larger than 1000. Also the command port cannot be the same.
A Date Time page opens.
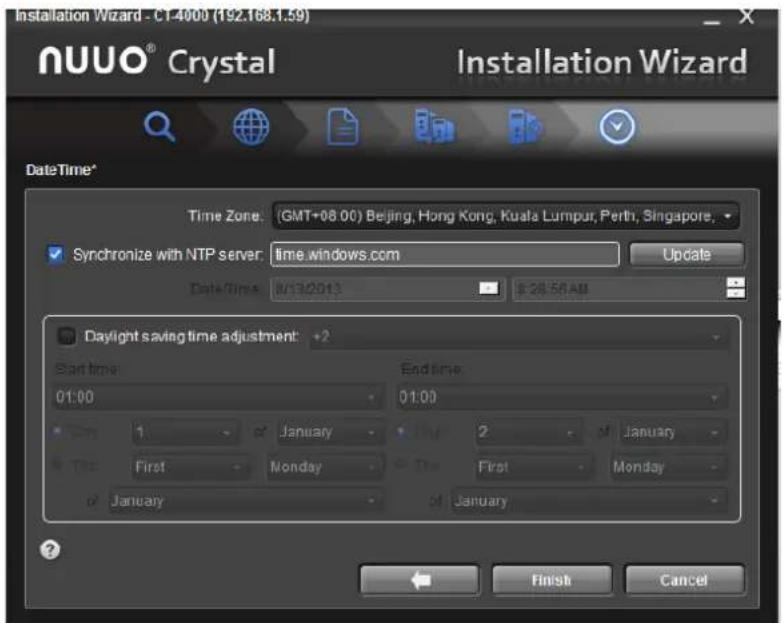
text_image
Installation Wizard - CT-4000 (192.168.1.59) NUUO® Crystal Installation Wizard DateTime* Time Zone: (GMT+08.00) Beijing, Hong Kong, Kuala Lumpur, Perth, Singapore, Synchronize with NTP server: time.windows.com Update Data/Time: 0/13/2013 $ 28.58AM Daylight saving time adjustment: +2 Start time: 01:00 End time: 01:00 On: 1. of January Two: First. Monday One: January 2. of January Three: First. Monday of January Finish Cancel(Click the bottom-left question mark icon ②o see the tips.)
- Select Synchronize with NTP server to synchronize date/me with the Internet me server, or deselect Synchronize with NTP server to enable manual date/me sengs.
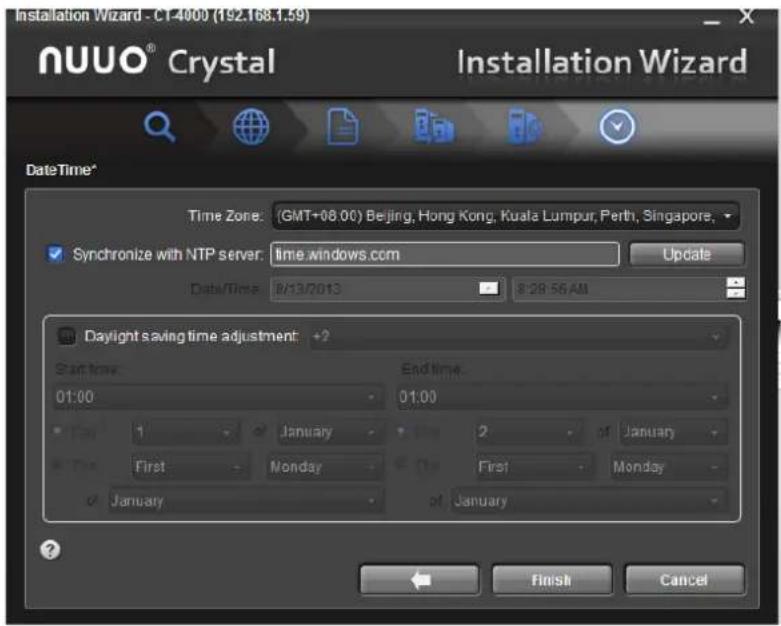
text_image
Installation Wizard - C1 4000 (192.168.1.59) NUUO® Crystal Installation Wizard DateTime* Time Zone: (GMT+08.00) Beijing, Hong Kong, Kuala Lumpur, Perth, Singapore, Synchronize with NTP server: time.windows.com Update Data/Time 8/13/2013 8:28:56 AM Daylight saving time adjustment: +2 Start time: 01:00 End time: 01:00 Day 1 January 2 of January First Monday First Monday January of January Finish Cancel(Click the bottom-left question mark icon ☐ to see the tips.)
 | To connect to the NTP server, access the Internet by LAN1. |
 | For NTP Server default Port is 123(UDP). |
Select Daylight saving me adjustment to set daylight saving me zone, start me and end me.
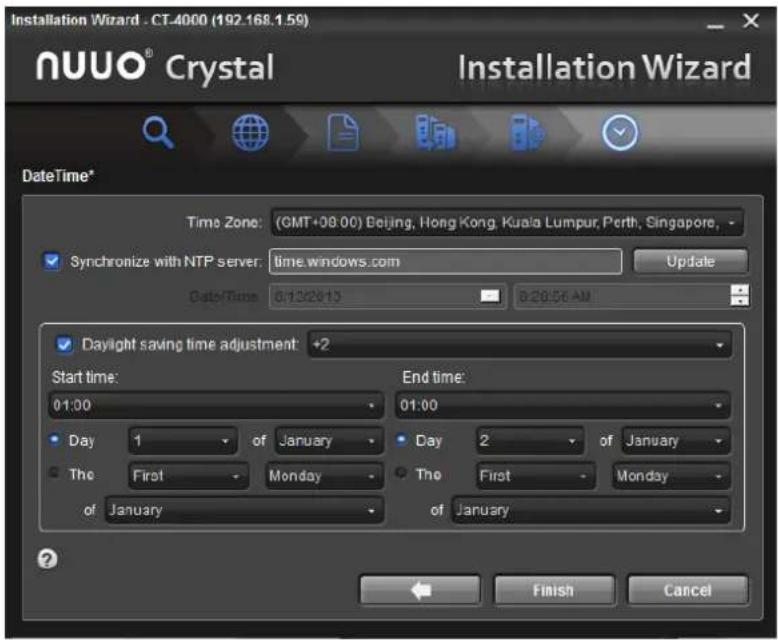
text_image
Installation Wizard - CT-4000 (192.168.1.59) NUUO® Crystal Installation Wizard DateTime* Time Zone: (GMT+08.00) Beijing, Hong Kong, Kuala Lumpur, Perth, Singapore, Synchronize with NTP server: time.windows.com Update Date/Time 07/13/2013 0:20:56 AM Daylight saving time adjustment: +2 Start time: 01:00 Day 1 of January The First Monday of January End time: 01:00 Day 2 of January The First Monday of January Finish Cancel- Click the Finish button to nish the setup of management service.
2.2 LED Status Deinitions
CT-4000
| Function | LED Status |
| Power Status | ▸ Power-on: blue▸ Power-o: dark |
| HDD Status (top) | ▸ Power-on: blue▸ Power-o: dark |
| HDD Acvity Status (boom) | ▸ Healthy: blue with blinking▸ No disk: dark |
| Ethernet Status | ▸ Linking: blue▸ Accessing: blue with blinking▸ No linking: dark |
CT-4000R
| Function | LED Status |
| Power Status | ▸ Power-on: blue▸ Power-o: dark |
| HDD Status (top) | ▸ Power-on: blue▸ Power-o: dark |
| HDD Acvity Status (boom) | ▸ Healthy: blue with blinking▸ No disk: dark |
| Ethernet Status | ▸ Linking: blue▸ Accessing: blue with blinking▸ No linking: dark |
CT-8000R
| Function | LED Status | Remark | |
| Power Status(front) | Power-on: bluePower-o: dark | ||
| HDD Status(front; HDD Tray) | Power-on: bluePower-o: darkAccess: blink (Green) | Two LEDs on HDD trayLED1: Power indicator (Blue/always turn on)LED2: Access indicator(Green/blink) | |
| Ethernet Status x2(front) | Connected: blueAccessing: blue with blinking | Two LED, one for LAN1 status and the other one for LAN2 status | |
| Ethernet Acvity x2(rear) | Link Rate indicator (Le side) | Two LEDs for each Ethernet port | |
| Seng | Descripon | ||
| Green | =1000Mbps | ||
| Orange | =100Mbps | ||
| Dark | =10Mbps or no link | ||
| Link status indicator(Right side)1) Accessing: Green with blinking |
CT-8000RP
| Function | LED Status | Remark | |
| Power Status(front) | Power-on: bluePower-o: dark | ||
| Power Fail | Power-fail: redNormal: dark | ||
| HDD Status(front; HDD Tray) | Power-on: bluePower-o: darkAccess: blink (Green) | Two LEDs on HDD trayLED1: Power indicator (Blue/always turn on)LED2: Access indicator(Green/blink) | |
| Ethernet Status x2(front) | Connected: blueAccessing: blue with blinking | Two LED, one for LAN1 status and the other one for LAN2 status | |
| Ethernet Acvity x2(rear) | Link Rate indicator (Le side) | Two LEDs for each Ethernet port | |
| Seng | Descripon | ||
| Green | =1000Mbps | ||
| Orange | =100Mbps | ||
| Dark | =10Mbps or no link | ||
| Link status indicator(Right side)2) Accessing: Green with blinking | |||
3. Web Settings
The web setngs enable users to set up web server or Management Server through the web-based interface.
3.1Login
- Open the NUUO Crystal Network Video Recorder Login page.
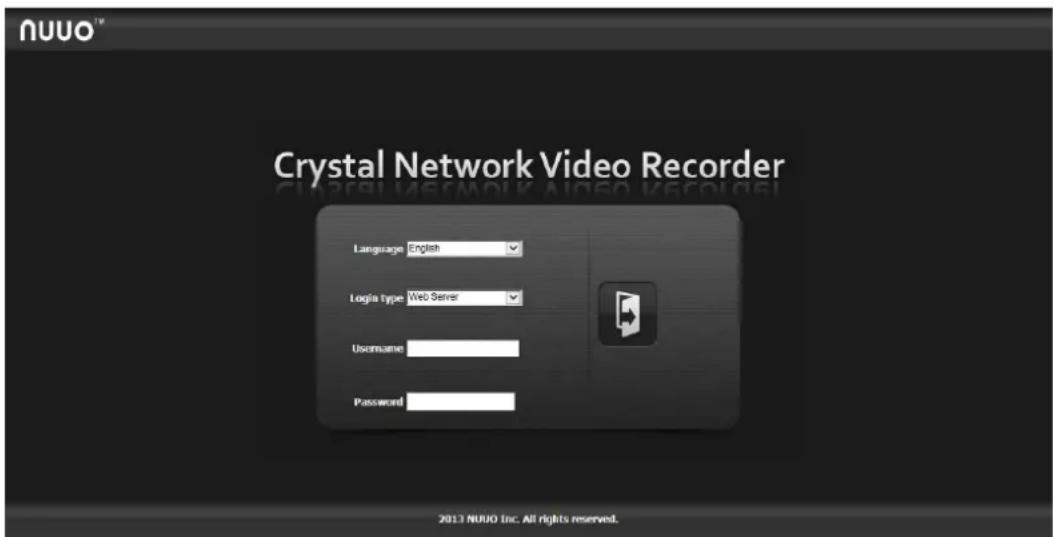
text_image
NUUO™ Crystal Network Video Recorder Language English Login type Web Server Username Password 2013 NUOU Inc. All rights reserved.- Select a language and select the login type.
Web server will lead to Crystal Titan hardware seng and Management Server will lead to Management Server web seng.
-
Enter the username and password.
-
Click the

- The web sengs open.
3.2 Web Server
text_image
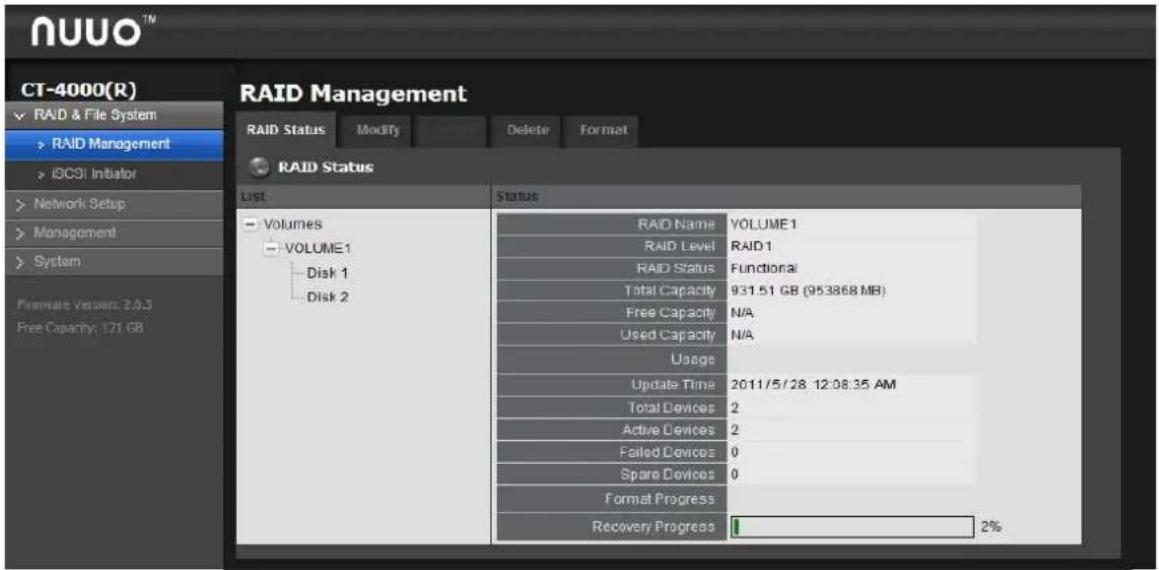
NUUO™ CT-4000(R) RAID & File System RAID Management DCSI Initiator Network Setup Management System Firmware Version: 2.0.3 Free Capacity: 121 GB RAID Management RAID Status Modly Delete Format RAID Status List Status Volumes VOLUME1 VOLUME1 Disk 1 Disk 2 RAID Name VOLUME1 RAID Level RAID 1 RAID Status Functional Total Capacity 931.51 GB (953868 MB) Free Capacity N/A Used Capacity N/A Usage Update Time 2011/5/28 12:08:35 AM Total Devices 2 Active Devices 2 Failed Devices 0 Spare Devices 0 Format Progress Recovery Progress 1 2%The features sengs are: RAID & File System, Network Setup, Management and System, which will be explicated in the following seconds.

Username and password is Crystal Titan hardware's username and password.
3.2.1 RAID & File System
Use the RAID & File System menu to congregate the system's RAID features and le sengs.
To access the RAID & File System menu:
- Login to NUUO Crystal Network Video Recorder web page as described in Login.
The web sengs open.
- From the Cong Catalog, click the RAID & File System.
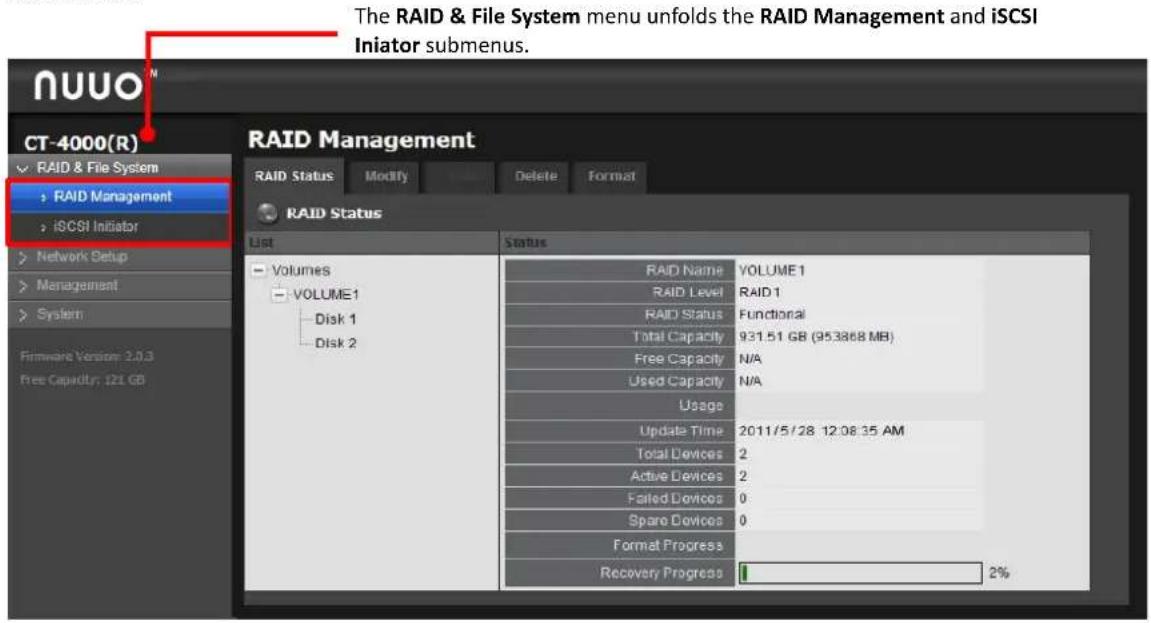
The RAID & File System menu unfolds the RAID Management and iSCSI Iniator submenus.
text_image
The RAID & File System menu unfolds the RAID Management and iSCSI Initiator submenus. NUOU CT-4000(R) RAID & File System RAID Management iSCSI Initiator Network Setup Management System Firmware Version: 2.0.3 Free Capacity: 121 GB RAID Management RAID Status Modify Delete Format RAID Status List Volumes VOLUME1 Disk 1 Disk 2 Status RAID Name VOLUME 1 RAID Level RAID 1 RAID Status Functional Total Capacity 931.51 GB (95.3868 MB) Free Capacity N/A Used Capacity N/A Usage Update Time 2011/5/28 12:06:35 AM Total Devices 2 Active Devices 2 Failed Devices 0 Spare Devices 0 Format Progress Recovery Progress 1 2%The features submenus are: RAID Management and iSCSI Iniator, which will be explicated in the following seconds.
3.2.1.1 RAID Management
As the name suggest, the RAID Management tabbed page manages the system's RAID (Redundant Array of Independent Disks), a storage that combines mulple disk
drives into a logical unit.
To access the RAID Management submenu:
- Login to NUUO Crystal Network Video Recorder web page as described in Login.
- The web sengs open.
- From the Cong Catalog, click the RAID & File System | RAID Management.
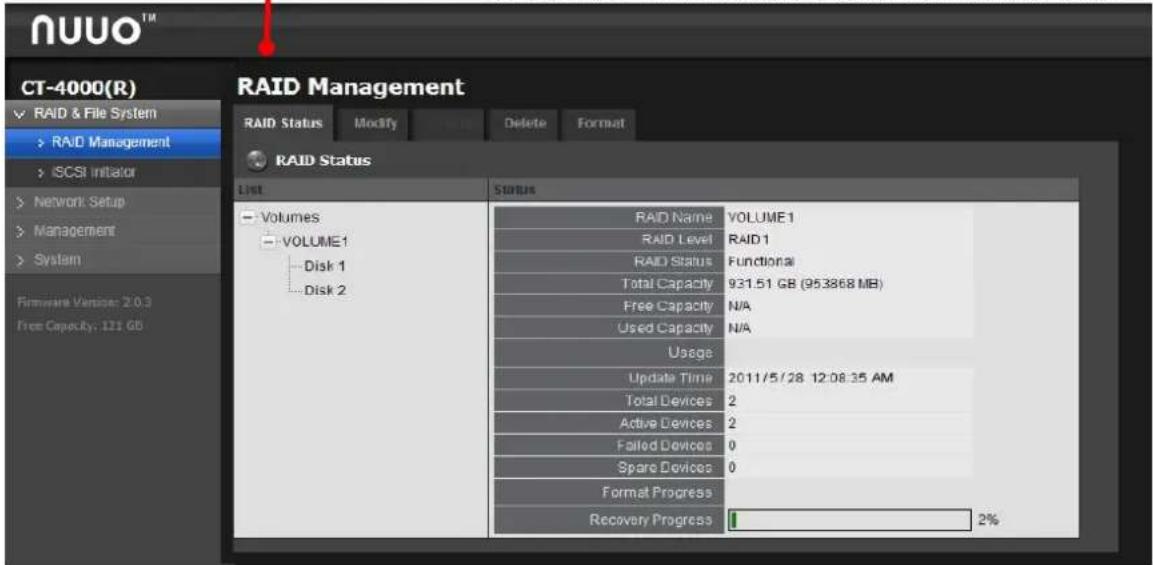
The RAID Management submenu displays in the Conguraon Pane.
The RAID Management submenu The RAID & File System menu unfolds the RAID Management and iSCSI Iniator submenus.
text_image
NUUO™ CT-4000(R) RAID & File System > RAID Management > ISCSI Initiator > Network Setup > Management > System Firmware Vendors: 2.0.3 Free Capacity: 121 GB RAID Management RAID Status Modify Delete Format RAID Status List Status Volumes VOLUME1 Disk 1 Disk 2 RAID Name VOLUME1 RAID Level RAID1 RAID Status Functional Total Capacity 931.51 GB (953868 MB) Free Capacity N/A Used Capacity N/A Usage Update Time 2011/5/28 12:08:35 AM Total Devices 2 Active Devices 2 Failed Devices 0 Spare Devices 0 Format Progress Recovery Progress 1 2%The RAID Management menu features ve tabbed pages, RAID Status, Modify, Create, Delete and Format, which will be explicated in the following seconds.
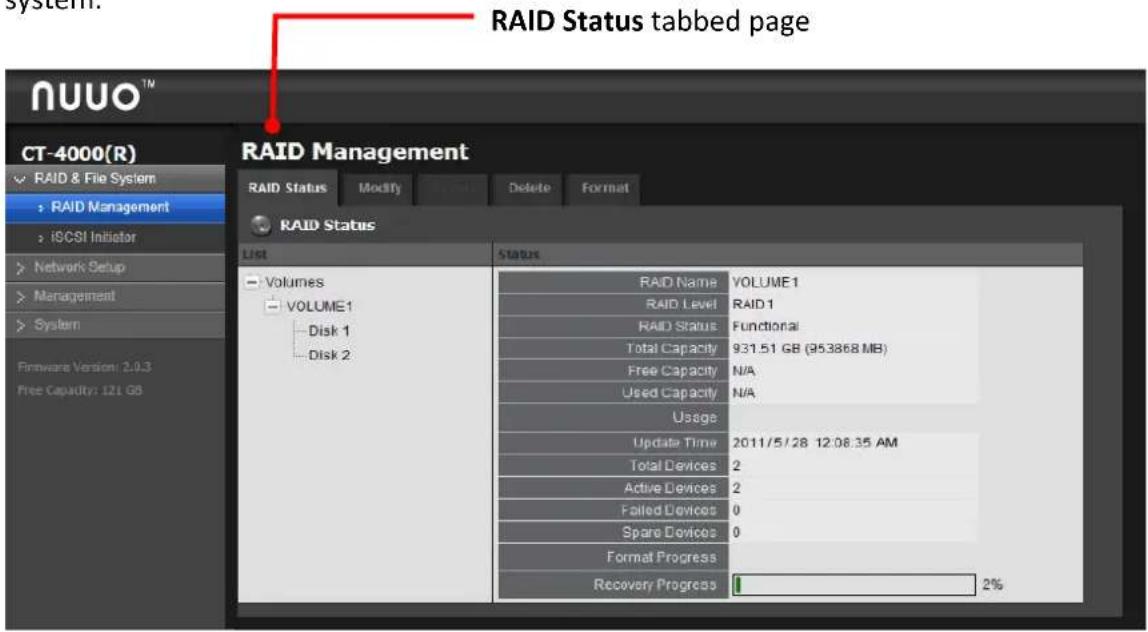
The Status tabbed page delivers the status of RAID "volume", which means one or more disk drives working together as a logical drive. Video recording requires a volume to be created rst.
To access the Status tabbed page:
- Login to NUUO Crystal Network Video Recorder web page as described in Login.
The web sengs open.
- From the Cong Catalog, click the RAID & File System | RAID Management | RAID Status tab.
The RAID Status tabbed page opens and shows the created volume(s) in the system.
text_image
RAID Status tabbed page NUUO™ CT-4000(R) RAID & File System : RAID Management : iGCSI Initiator > Network Setup > Management > System Firmware Version: 2.0.3 Free Capacity: 121 GB RAID Management RAID Status Modify Delete Format RAID Status List Status Volumes VOLUME1 Disk 1 Disk 2 RAID Name VOLUME1 RAID Level RAID 1 RAID Status Functional Total Capacity 931.51 GB (953868 MB) Free Capacity N/A Used Capacity N/A Usage Update Time 2011/5/28 12:08:35 AM Total Devices 2 Active Devices 2 Failed Devices 0 Spare Devices 0 Format Progress Recovery Progress 1 2%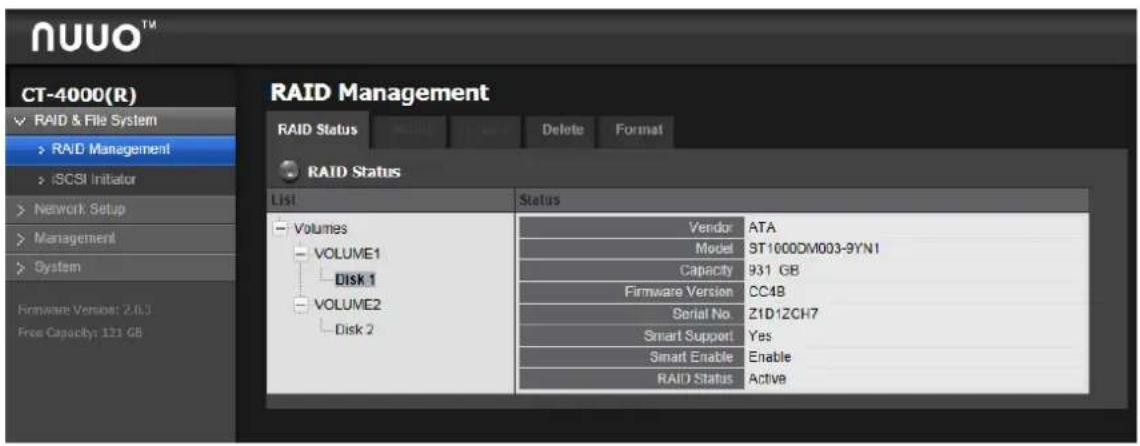
text_image
NUUO™ CT-4000(R) RAID & File System > RAID Management > iSCSI Initiator > Network Setup > Management > System Firmware Versibet: 2.6.3 Free Capacity: 121 GB RAID Management RAID Status Delete Format RAID Status List Status Volumes Vendor ATA VOLUME1 Model ST1000DM003-9YN1 Disk 1 Capacity 931 GB VOLUME2 Firmware Version CC4B Disk 2 Serial No Z1D12CH7 Smart Support Yes Smart Enable Enable RAID Status ActiveThe RAID status info delivered is:
| Group | Description |
| Disk | Delivers the present volume(s) in the system.Click Volume # or Disk# to switches the status info between the present volume(s) and disk(s).If there hasn't been any volume created yet, “No Volume” is displayed here. The status info delivered for a present disk is: |
| Info | Description | ||
| Vendor | Delivers the manufacturer of the disk. | ||
| Model | Delivers the model number of the disk. | ||
| Capacity | Delivers the total capacity of the disk. | ||
| Firmware | Delivers the firmware version of the disk. | ||
| Serial No. | Delivers the serial number of the disk. | ||
| Smart Support | Delivers the smart support of the disk. | ||
| Smart Enabled | Delivers the disk's support of S.M.A.R.T. (Self-Monitoring, Analysis and Reporting Technology), which enables a hard disk drive to detect and report on various indicators of reliability, in order to anticipate failures. | ||
| RAID Status | Delivers the status of the RAID that the disk belongs to. | ||
| Volume | Shows the status of the selected volume: | ||
| Info | Description | ||
| RAID Name | Delivers the name of the volume, which is auto-assigned when the volume is created. | ||
| RAID Level | Delivers the RAID level, which is defined when the volume is created.► The selectable levels depend on the number of drives present in the system.► SeeCreateto know how to define the RAID level. | ||
| RAID Status | Delivers the following statuses of the volume: | ||
| Message | Description | ||
| Funconal | The volume is normally operating. | ||
| Crical | There are some problems with the volume, but video recording is normal. | ||
| Oine | The volume cannot be found. Hence video recording is stopped and the storage cannot be accessed. | ||
| File system error | Volume is found but isn't mounted so video recording is stopped and storage cannot be accessed. | ||
| Free Capacity | Delivers the free space on the volume. | ||
| Used Capacity | Delivers the used space on the volume. | ||
| Usage | Delivers the percentage of the volume's usage. | ||
| Update Time | Delivers the time when the volume is created /updated. | ||
| Total Devices | Delivers the total number of the disk(s) covered by the volume and also the number of the disk(s) that is active, failed or spare. | ||
| Acve Devices | Delivers the number of the active disk(s) covered by the volume at the moment. | ||
| Failed Devices | Delivers the number of the failed disk(s) covered by the | ||
| volume at the moment. | |||
| Spare Devices | Delivers the number of the spare disk(s) covered by the volume at the moment. | ||
| Format Progress | Delivers the formatting progress if the volume is being formatted at the moment. | ||
| Recovery Progress | Delivers the recovery progress if the volume is being recovered at the moment. | ||
3.2.1.1.1.1Create
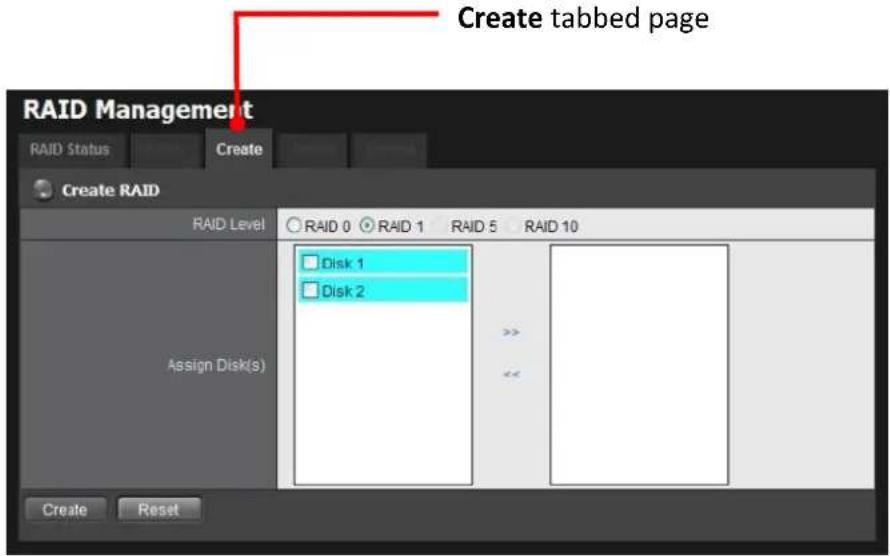
It relies on the Create tabbed page to create one or more volumes in the system.
To access the Create tabbed page:
- Login to NUUO Crystal Network Video Recorder web page as described in Login.
The web sengs open.
- From the Cong Catalog, click the RAID & File System | RAID Management | Create tab.
The Create tabbed page opens and shows the created volume(s) in the system.
text_image
RAID Management RAID Status Create Create RAID RAID Level RAID 0 RAID 1 RAID 5 RAID 10 Assign Disk(s) Disk 1 Disk 2 >> <>On the Create tabbed page, the featured sengs are:
| Setting | Description | Default | |
| RAID Level | Defines the RAID level. | It depends on the number of drives present in the system | |
| Assigned Disk(s) | Disk # | Selects a disk to assign it to the volume to be created. | Deselected |
| Create button | Creates the configured volume. | -- |
| Reset button | Reset the configured volume. | -- |
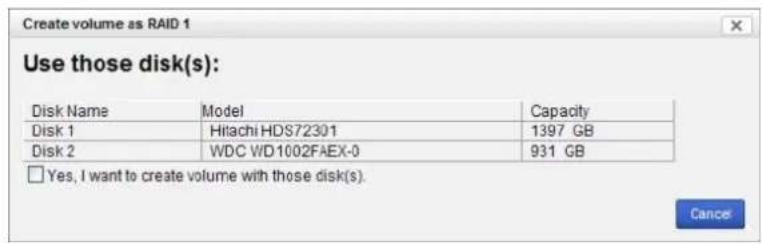
- Click Create button and a conrmaon dialog pops up.
- Check the Yes, I want to create volume with those disk(s) box, and click the Yes, create it buon.
text_image
Create volume as RAID 1 Use those disk(s): Disk Name Model Capacity Disk 1 Hitachi HDS72301 1397 GB Disk 2 WDC WD1002FAEX-0 931 GB □ Yes, I want to create volume with those disk(s). Cancel- Finish the setup of Create.

The RAID Volume will be functional on another unit if all disks of this volume are moved to the unit.

After setting RAID level, you are not allowed to change neither the RAID level nor the number of disks containing in this volume.

If you choose Express Mode when using the Installation Wizard, the disk(s) will be set to RAID 1 (2 bay) or RAID 5 (4 bay) automatically unless the number of disks is not enough for this RAID level.
3.2.1.1.1.2 Modify
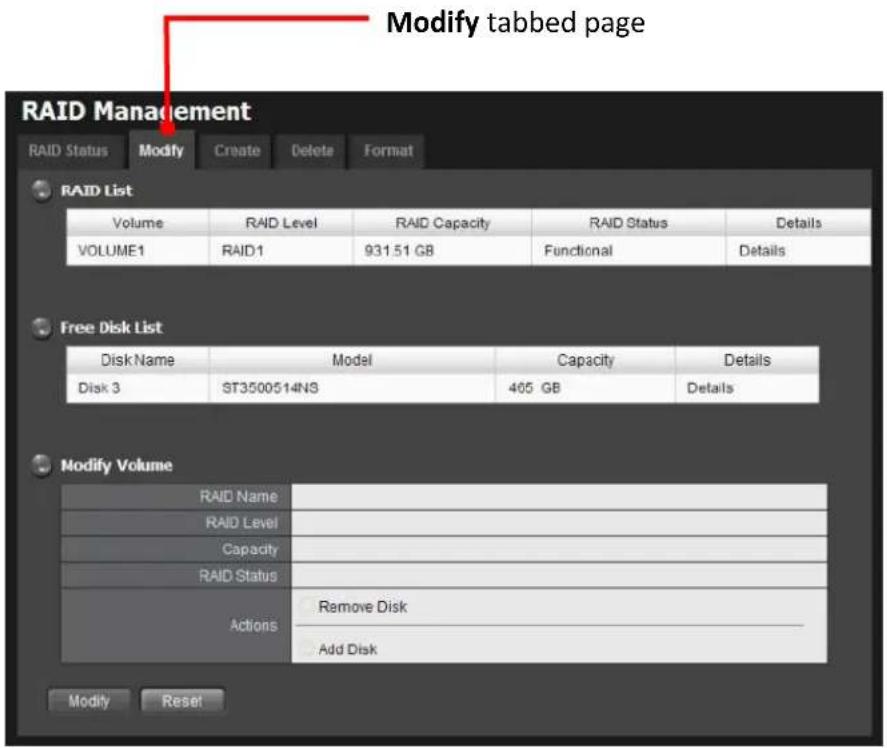
It relies on the Modify tabbed page to replace a broken hard drive with a new one, instead of modifying the RAID level.
In the case of “Crical” RAID status, a warning message will noce that one of the volume’s disks may be damaged. Although the video recording won’t be impacted, an immediate replacement is recommended to protect the volume from data loss.
To access the Modify tabbed page:
- Login to NUUO Crystal Network Video Recorder web page as described in Login.
The web sengs open.
- From the Cong Catalog, click the RAID & File System | RAID Management | Modify tab.
The Modify tabbed page opens and shows the created volume(s) in the system.
text_image
Modify tabbed page RAID Management RAID Status Modify Create Delete Format RAID List Volume RAID Level RAID Capacity RAID Status Details VOLUME1 RAID1 931.51 GB Functional Details Free Disk List Disk Name Model Capacity Details Disk 3 ST3500514NS 405 GB Details Modify Volume RAID Name RAID Level Capacity RAID Status Actions Remove Disk Add Disk Modify Reset- Modify a volume:
(1) Select the damaged disk to remove.
(2) Click Remove buon to remove the selected disk.
(3) Aer the system remove the disk successfully, replace it with a new disk, and back to the Modify tabbed page to add this new free disk.
 | This funcon isn’t applicable to RAID 0, which has no data protecon mechanism by nature. |
 | This funcon is recommended for any unexpected disk damage. Use this funcon to safely unplug the running HDD. |
3.2.1.1.1.3 Delete
It relies on the Delete tabbed page to delete one or more volumes.
To access the Delete tabbed page:
- Login to NUUO Crystal Network Video Recorder web page as described in Login.
The web sengs open.
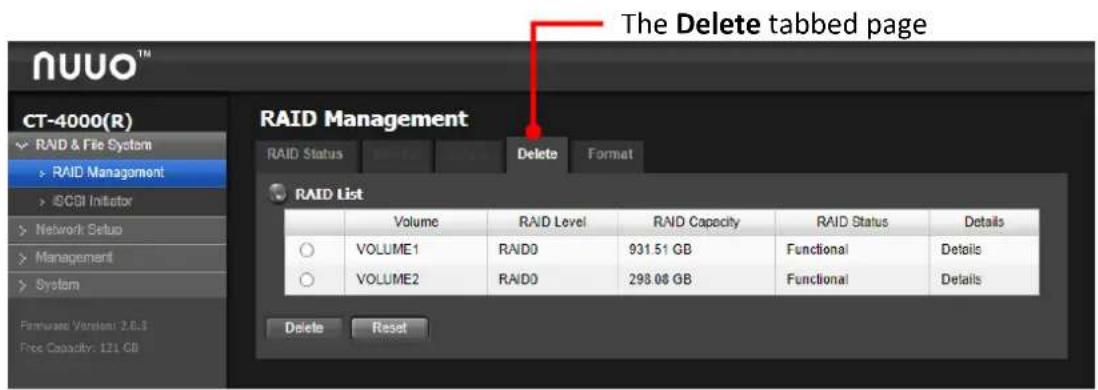
- From the Cong Catalog, click the RAID & File System | RAID Management | Delete tab.
The Delete tabbed page opens and shows the created volume(s) in the system.
text_image
The Delete tabbed page CT-4000(R) RAID Management RAID Status Delete Format RAID List Volume RAID Level RAND Capacity RAID Status Details VOLUME1 RAND0 931.51 GB Functional Details VOLUME2 RAND0 298.08 GB Functional Details Delete Reset- Delete a volume:
(1) Select a volume.
(2) Click the Delete buon to delete the selected volume.
OR
Click the Reset buon to clear the selecon.
3.2.1.1.1.4 Format
It relies on the Format tabbed page to format the volumes funconing in the system.
To access the Format tabbed page:
- Login to NUUO Crystal Network Video Recorder web page as described in Login.
The web sengs open.
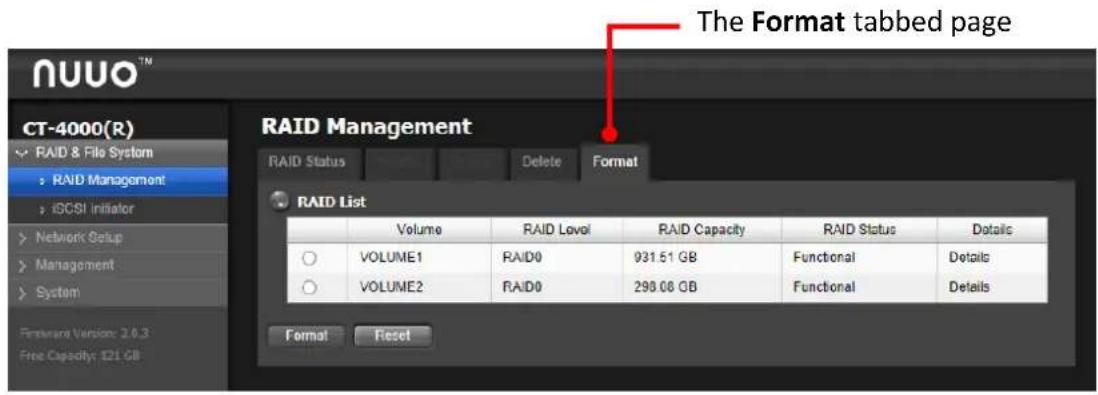
- From the Cong Catalog, click the RAID & File System | RAID Management | Format tab.
The Format tabbed page opens and shows the created volume(s) in the system.
text_image
The Format tabbed page CT-4000(R) RAID & File System RAID Management iSCSI Initiator Network Setup Management System Feature Version: 2.0.3 Free Capacity: I21 GB RAID Management RAID Status Delete Format RAID List Volume RAID Level RAID Capacity RAID Status Details VOLUME1 RAID0 931.51 GB Functional Details VOLUME2 RAID0 298.08 GB Functional Details Format Reset- Format a volume:
(1) Select a volume.
(2) Click the Format buon,
The formang starts and progresses.
3.2.1.2 iSCSI Initiator
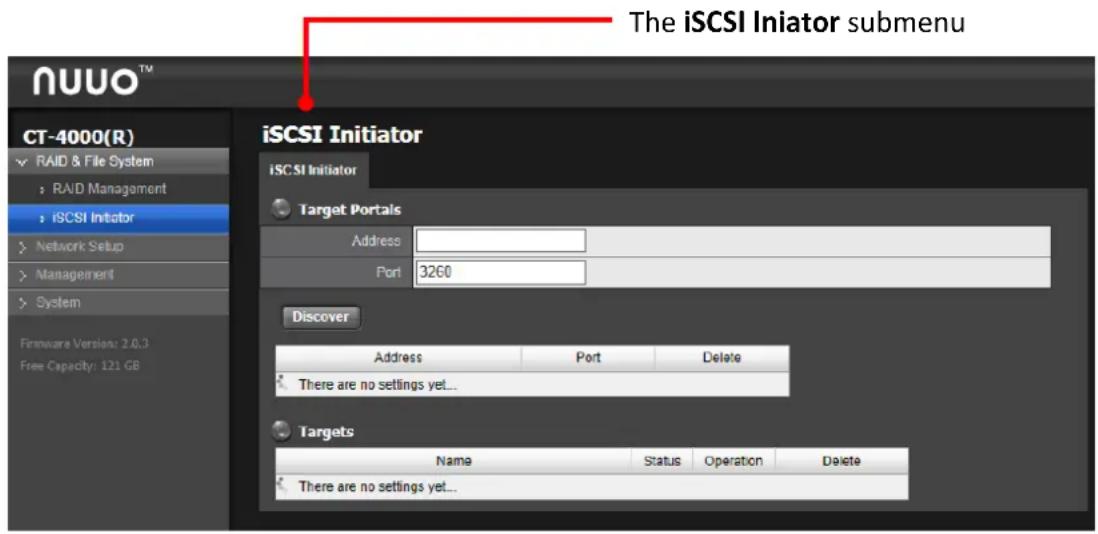
It relies on the iSCSI Iniator tabbed page to create an external storage on iSCSI, which means “Internet Small Computer System Interface”, an IP-based protocol for transming data and linking data storage facilities.
To access the iSCSI Iniator submenu:
- Login to NUUO Crystal Network Video Recorder web page as described in Login.
The web sengs open.
- From the Cong Catalog, click the RAID & File System | iSCSI Iniator.
The iSCSI Iniator submenu displays in the Conguraon Pane.
text_image
The iSCSI Initiator submenu NUO™ CT-4000(R) RAID & File System RAID Management iSCSI Initiator Network Setup Management System Firmware Version: 2.0.3 Free Capacity: 121 GB iSCSI Initiator iSCSI Initiator Target Portals Address Port 3260 Discover Address Port Delete There are no settings yet... Targets Name Status_Operation Delete There are no settings yet...- Create an external storage on iSCSI.
- Fill in the IP address and the port number (default 3260) for iSCSI
- Click the Discover buon.
The discovered iSCSI will show.
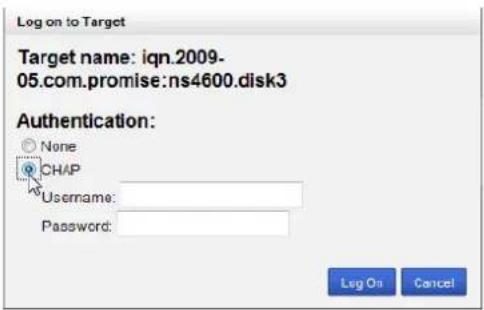
- Log on each disk on Target. If you have set password on iSCSI, choose CHAP to log on. If not, choose "None".
text_image
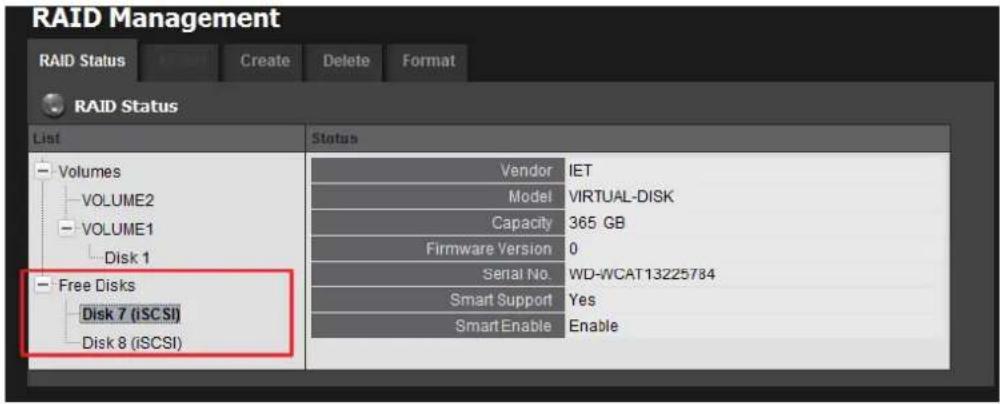
Log on to Target Target name: iqn.2009- 05.com.promise:ns4600.disk3 Authentication: None CHAP Username: Password: Log On Cancel- Open the RAID Status tabbed page as described in RAID Status, the iSCSI disk will show under the Free Disks.
text_image
RAID Management RAID Status Create Delete Format RAID Status List Status Volumes Vendor IET VOLUME2 Model VIRTUAL-DISK VOLUME1 Capacity 365 GB Disk 1 Firmware Version 0 Free Disks Serial No. WD-WCAT13225784 Disk 7 (iSCSI) Smart Support Yes Disk 8 (iSCSI) Smart Enable Enable- Creates a volume for it as described in Create. You can only create a volume with purely iSCSI disk.
| We suggest that you use more than one HD to create one volume. DO NOT use only one HD to divide to more than 2 volumes. | |
 | If you log o the disk that has been created as a RAID, the current recording le may be destroyed. |
3.2.2 Network Setup
It relies on the Network Setup menu to congregate the systems' networking so the system can connect and communicate with associated devices within the network.
To access the Network Setup menu:
- Login to NUUO Crystal Network Video Recorder web page as described in Login.
The web sengs open.
- From the Cong Catalog, click the Network Setup.
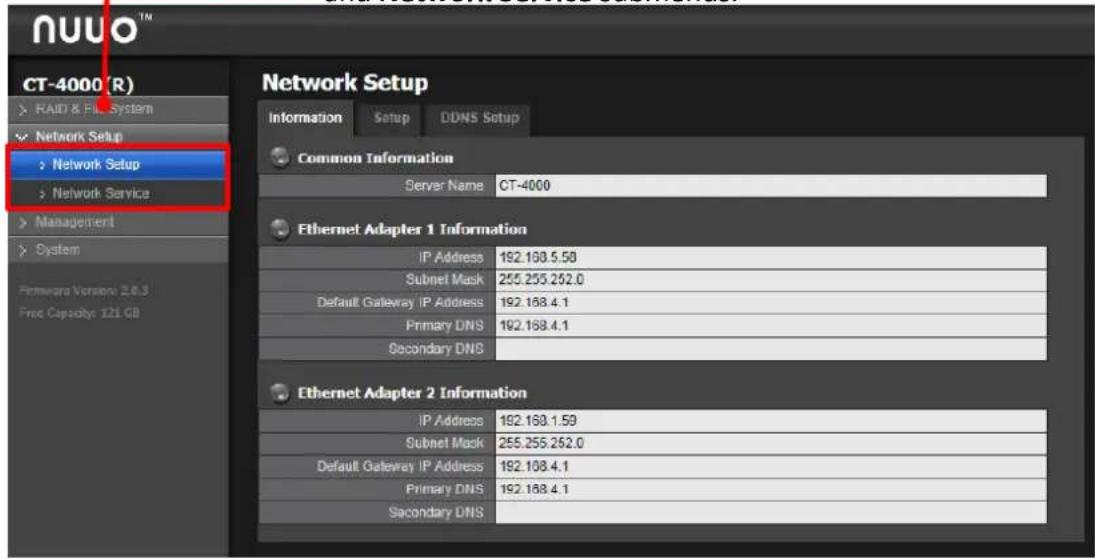
The Network Setup menu unfolds the Network Setup and Network Service submenus.
The Network Setup menu unfolds the Network Setup and Network Service submenus.
text_image
NUUO™ CT-4000 (R) RAID & FIL System Network Setup Network Setup Network Service Management System Primary Version: 2.4.3 Free Capsidy: 121 GB Network Setup Information Setup DDNS Setup Common Information Server Name CT-4000 Ethernet Adapter 1 Information IP Address 192.168.5.58 Subnet Mask 255.255.252.0 Default Gateway IP Address 192.168.4.1 Primary DNS 192.168.4.1 Secondary DNS Ethernet Adapter 2 Information IP Address 192.168.1.59 Subnet Mask 255.255.252.0 Default Gateway IP Address 192.168.4.1 Primary DNS 192.168.4.1 Secondary DNSThe features submenus are Network Setup and Network Service, which will be explicated in the following seconds.
3.2.2.1 Network Setup
The Network Setup submenu features the network sengs including IP address, subnet mask, default gateway and primary/secondary DNS.
To access the RAID Management submenu:
- Login to NUUO Crystal Network Video Recorder web page as described in Login.
The web sengs open.
- From the Cong Catalog, click the Network Setup | Network Setup.
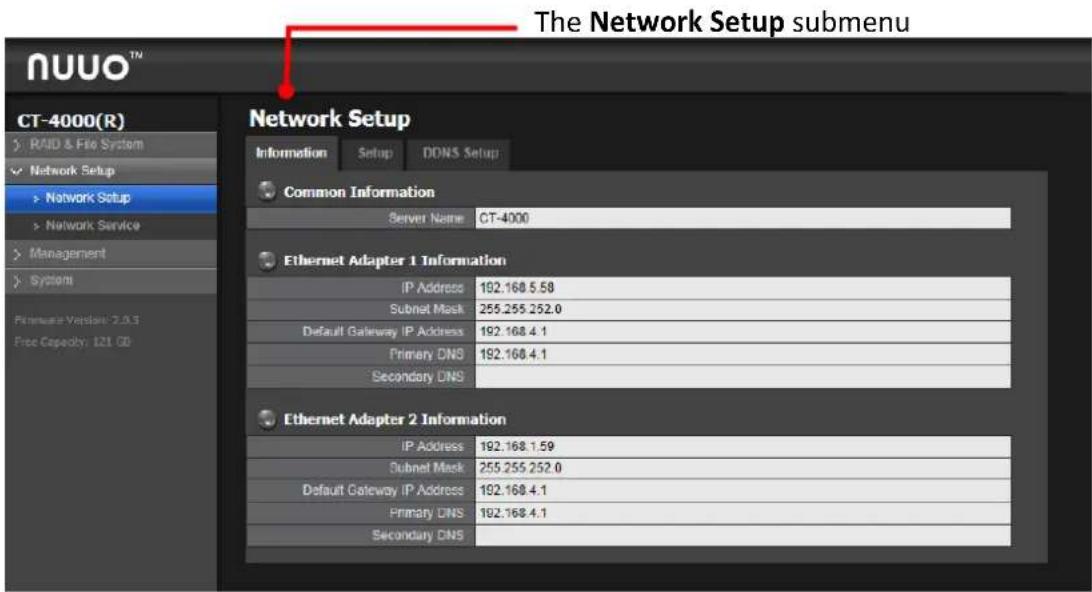
The Network Setup submenu displays in the Conguraon Pane.
text_image
The Network Setup submenu CT-4000(R) RAID & File System Network Setup > Network Setup > Network Service > Management > System Hardware Version: 2.0.3 Free Capacity: 121 GB Network Setup Information Setup DDNS Setup Common Information Server Name CT-4000 Ethernet Adapter 1 Information IP Address 192.168.5.58 Subnet Mask 255.255.252.0 Default Gateway IP Address 192.168.4.1 Primary DNS 192.168.4.1 Secondary DNS Ethernet Adapter 2 Information IP Address 192.168.1.59 Subnet Mask 255.255.252.0 Default Gateway IP Address 192.168.4.1 Primary DNS 192.168.4.1 Secondary DNS The Network Setup submenuThe Network Setup menu features three tabbed pages, Informaon, Setup and DDNS Setup, which will be explicated in the following seconds.
3.2.2.1.1 Information
The Informaon tabbed page allows users to view the system's Ethernet networking sengs.
To access the Informaon tabbed page:
- Login to NUUO Crystal Network Video Recorder web page as described in Login.
The web sengs open.
- From the Cong Catalog, click the Network Setup | Network Setup | Informaon tab.
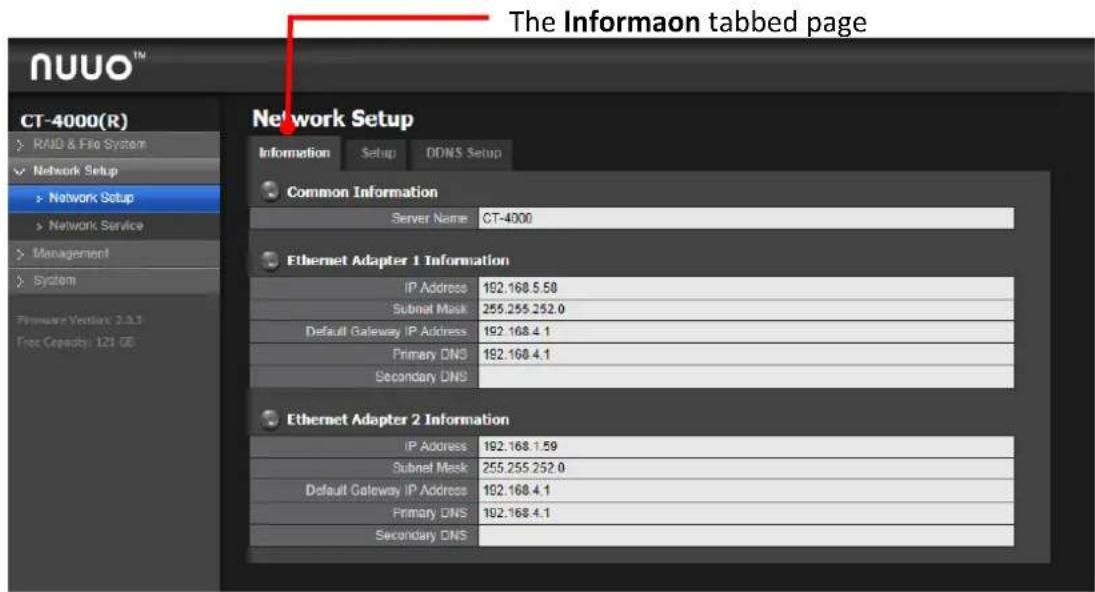
The Informaon tabbed page opens and shows the network conguraon of the system's LAN ports.
text_image
The Informaon tabbed page CT-4000(R) RAID & File System Network Setup > Network Setup > Network Service > Management > System Primary Version: 2.0.1 Free Capacity: 121 GB Network Setup Information Setup ODNS Setup Common Information Server Name CT-4000 Ethernet Adapter 1 Information IP Address 192.168.5.58 Subnet Mask 255.255.252.0 Default Gateway IP Address 192.168.4.1 Primary DNS 192.168.4.1 Secondary DNS Ethernet Adapter 2 Information IP Address 192.168.1.59 Subnet Mask 255.255.252.0 Default Gateway IP Address 192.168.4.1 Primary DNS 192.168.4.1 Secondary DNSOn the Informaon tabbed page, the info delivered is:
| Group | Item | Description |
| Connection Information | Server Name | Delivers the hardware's server name. |
| Ethernet Adapter 1 / 2 Information | IP Address | Delivers the IP address assigned to this adapter. |
| Subnet Mask | Delivers the subnet mask assigned to the IP address used on the adapter. | |
| Default Gateway IP | Delivers the IP address assigned to the adapter as gateway. | |
| Address | ||
| Primary DNS | Delivers the IP address assigned to the adapter as the primary DNS (Domain Name System). | |
| Secondary DNS | Delivers the IP address assigned to the adapter as the secondary DNS (Domain Name System). |
| To access the sengs, see Setup tabbed page. | |
| When an adapter isn’t in use, the network informaon isn’t available. | |
| For web default Port is 80(TCP). |
3.2.2.1.2 Setup
It relies on the Setup tabbed page to conjure the system's networking.
To access the Setup tabbed page:
- Login to NUUO Crystal Network Video Recorder web page as described in Login.
The web sengs open.
- From the Cong Catalog, click the Network Setup | Network Setup | Setup tab.
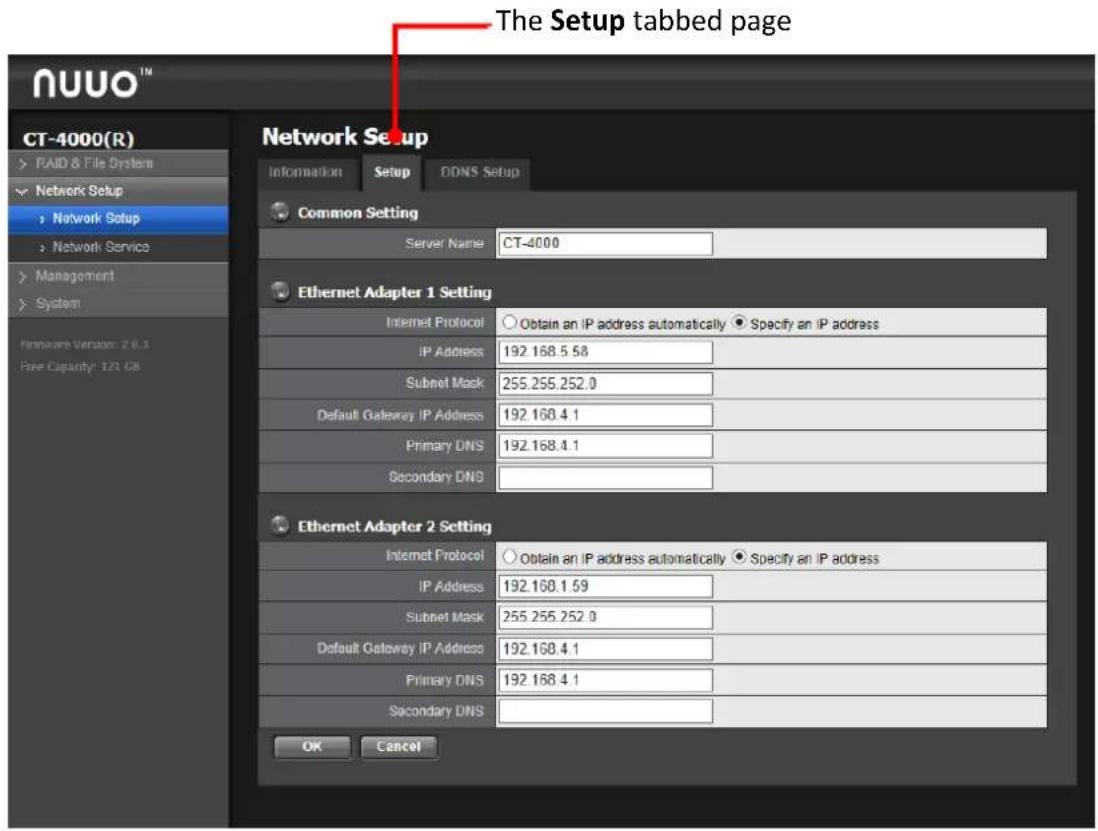
The Setup tabbed page opens and shows the system's Ethernet adapters in use and the sengs thereof..
text_image
The Setup tabbed page NTUO™ CT-4000(R) > RAID & File System ✓ Network Setup > Network Setup > Network Service > Management > System Hardware Version: 2.6.3 Free Capacity: 121 GB Network Setup Information Setup DDNS Setup Common Setting Server Name CT-4000 Ethernet Adapter 1 Setting Internet Protocol ○ Obtain an IP address automatically ● Specify an IP address IP Address 192.168.5.58 Subnet Mask 255.255.252.0 Default Gateway IP Address 192.168.4.1 Primary DNS 192.168.4.1 Secondary DNS Ethernet Adapter 2 Setting Internet Protocol ○ Obtain an IP address automatically ● Specify an IP address IP Address 192.168.1.59 Subnet Mask 255.255.252.0 Default Gateway IP Address 192.168.4.1 Primary DNS 192.168.4.1 Secondary DNS OK CancelThe featured sengs on the Setup tabbed page are:
| Group | Setting | Description | Default |
| Common Setting | Server Name | Sets the hardware's server name. | -- |
| Ethernet | Internet | Sets whether to automatically obtain an IP address | -- |
| Adapter 1 / 2 Setting | Protocol | (DHCP) or manually specify one (static) for the adapter. | |
| IP Address | Assigns an IP address for the adapter.▸ This setting is only available when the Internet Protocol is set to Specify an IP address. | 192.168.1.100 | |
| Subnet Mask | Assigns the subnet mask for the adapter's IP address.▸ This setting is only available when the Internet Protocol is set to Specify an IP address. | 255.255.255.0 | |
| Default Gateway | Assigns the IP address for adapter's the gateway.▸ This setting is only available when the Internet Protocol is set to Specify an IP address. | 192.168.1.1 | |
| Primary DNS | Assigns the IP address for the primary DNS (Domain Naming System).▸ This setting is only available when the Internet Protocol is set to Specify an IP address. | 192.168.1.1 | |
| Secondary DNS | Assigns the IP address for the secondary DNS (Domain Naming System).▸ This setting is only available when the Internet Protocol is set to Specify an IP address. | -- | |
| OK button | Applies the change(s) | -- | |
| Cancel button | Recovers the defaults. | -- | |

There are two Ethernet adapters per Crystal Titan unit. We recommend that you use them under the scenario of two subnets, one for the cameras/devices, and the other for the remote access. If you deploy two Ethernet adapters within the same subnet, it's likely to cause parts of the cameras disconnected as either one of the adapters disconnected.
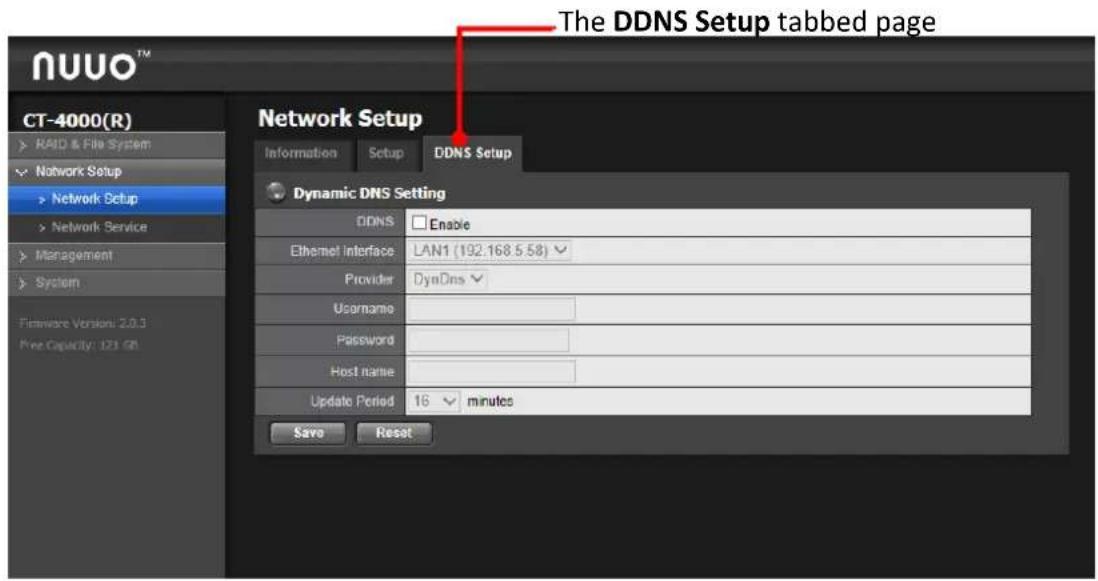
The DDNS Setup tabbed page enables/disables DDNS, which allows the system to use dynamic IP address. This page also sets the DDNS prole.
To access the DDNS Setup tabbed page:
- Login to NUUO Crystal Network Video Recorder web page as described in Login.
The web sengs open.
- From the Cong Catalog, click the Network Setup | Network Setup | DDNS Setup tab.
The DDNS Setup tabbed page opens.
text_image
The DDNS Setup tabbed page CT-4000(R) RAID & File System Network Setup Network Setup Network Service Management System Firmware Version: 2.0.3 Free Capacity: 121 GB Network Setup Information Setup DDNS Setup Dynamic DNS Setting DDNS Enable Ethernet Interface LAN1 (192.168.5.58) Provider DynDNS Username Password Host name Update Period 16 minutes Save ResetThe featured sengs on the DDNS Setup tabbed page are:
| Setting | Description | Default |
| DDNS | Enables/disables DDNS for the system | Deselected (Disabled) |
| Ethernet Interface | LAN 1 and LAN 2 | LAN 1 |
| Provider | Sets the provider of the DDNS service.► Options available are DynDns and DtDNS. | DynDns |
| Username | Sets the username to login to the DDNS service. | -- |
| Password | Sets the password to login to the DDNS service. | -- |
| Host Name | Enters the sub domain name. | -- |
| Update Period | Since the IP is dynamic, sets how often to refresh the DNS to point to the server's changing IP address. | 16 minutes |
3.2.2.2 Network Service
The Network Service submenu controls the remote accesses to the system for live view streaming, playback and management.
To access the Network Service submenu:
- Login to NUUO Crystal Network Video Recorder web page as described in Login.
The web sengs open.
- From the Cong Catalog, click the Network Setup | Network Service.
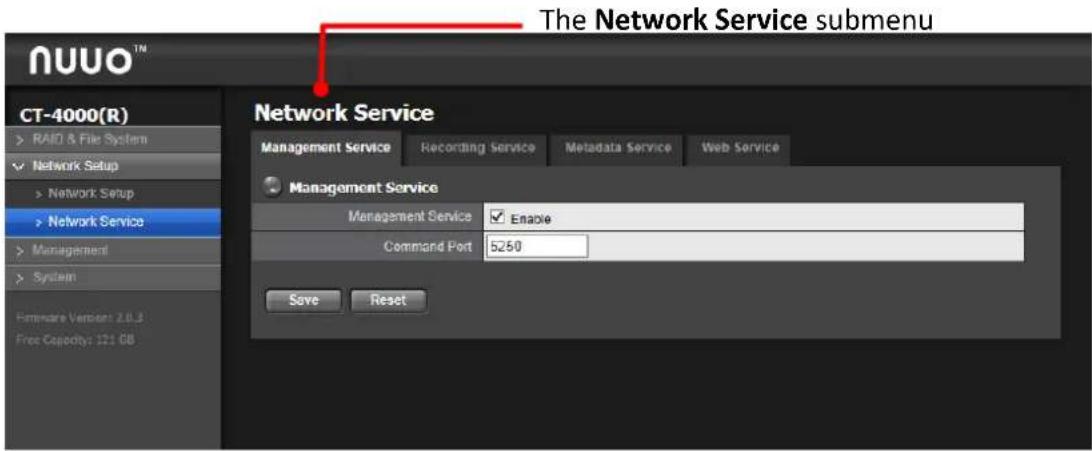
The Network Service submenu displays in the Conguraon Pane.
text_image
The Network Service submenu CT-4000(R) RAID & File System Network Setup Network Setup Network Service Management System Firmware Version: 2.0.3 Free Capacity: 121 GB Network Service Management Service Recording Service Metadata Service Web Service Management Service Management Service Enable Command Port 5250 Save ResetThe Network Service menu features three tabbed pages, Management Service, Recording Service, Metadata Service and Web Service which will be explicated in the following seconds.
3.2.2.2.1 Management Service
It relies on the Management Service tabbed page to enable the Crystal Titan for the Management Server.
To access the Management Service tabbed page:
- Login to NUUO Crystal Network Video Recorder web page as described in Login.
The web sengs open.
- From the Le Toolbar, click the Network Setup | Network Service | Management Service tab.
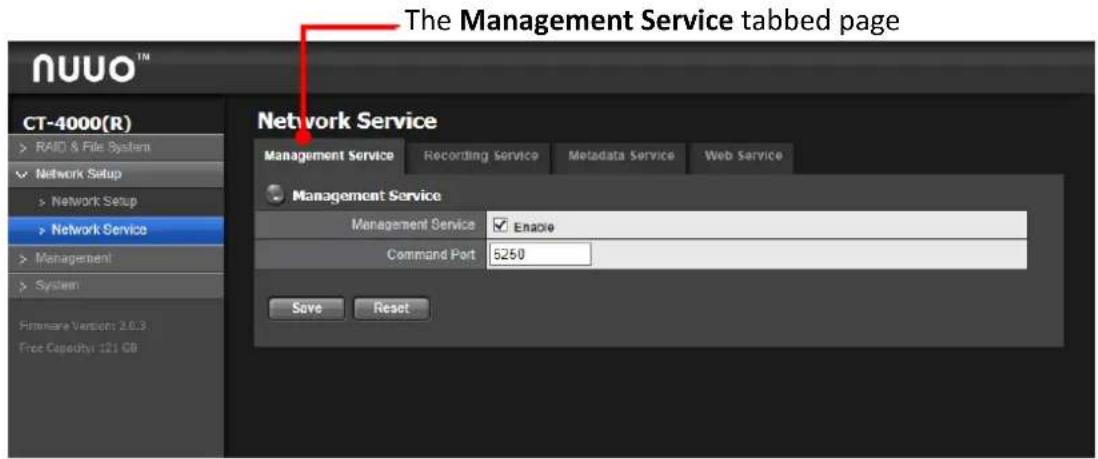
The Management Service tabbed page opens.
text_image
The Management Service tabbed page CT-4000(R) RAID & File System Network Setup Network Setup Network Service Management System Hardware Versions 2.0.3 Free Capacity: 121 GB Network Service Management Service Recording Service Metadata Service Web Service Management Service Management Service Enable Command Port 5250 Save ResetThe featured sengs on the Management Service tabbed page are:
| Setting | Description | Default |
| Management Service | Enables/disables the Crystal Titan for the Management Server. | Selected (Enabled) |
| command port | Sets the management port. | 5250 |
| Save button | Applies the change. | -- |

For Management Server default Port is 5250(TCP) and the server port should be larger than 1000. Also the command port cannot be the same.
3.2.2.2.2 Recording Service
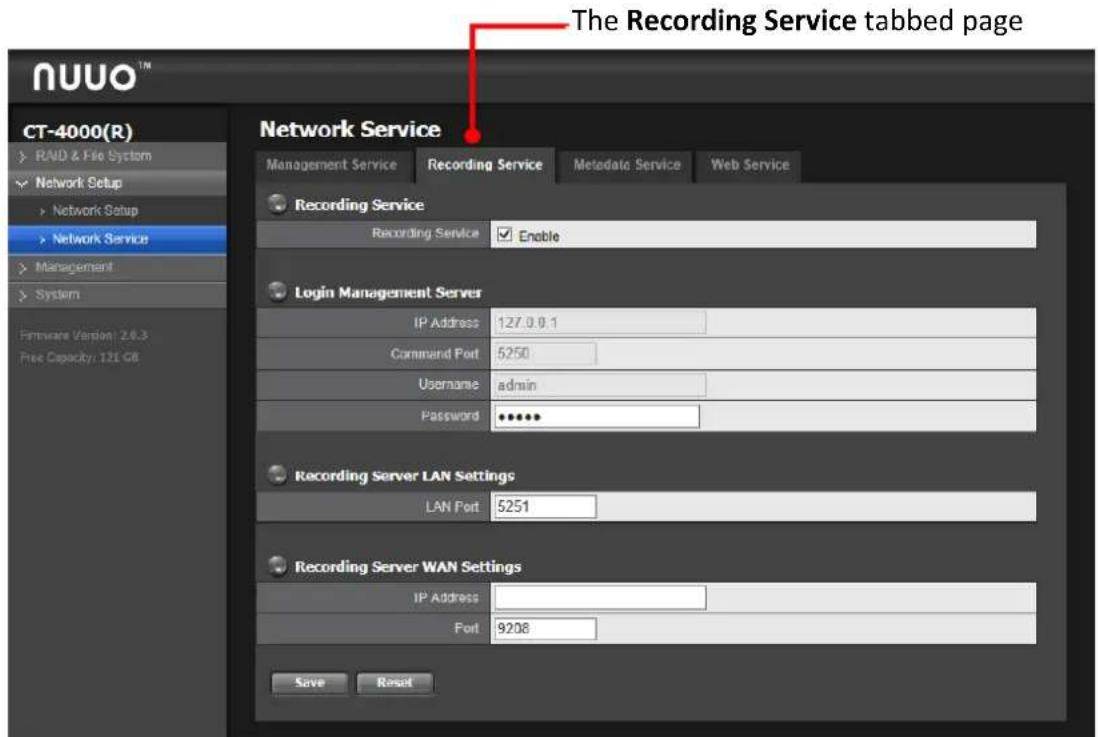
It relies on the Recording Service tabbed page to enable the Crystal Titan for the Recording Server.
To access the Recording Service tabbed page:
- Login to NUUO Crystal Network Video Recorder web page as described in Login.
The web sengs open.
- From the Le Toolbar, click the Network Setup | Network Service | Recording Service tab.
The Recording Service tabbed page opens.
text_image
The Recording Service tabbed page CT-4000(R) RD & File System Network Setup Network Setup Network Service Management System Hardware Version 2.6.3 Free Capacity: 121 GB Network Service Management Service Recording Service Recording Service Enable Login Management Server IP Address 127.0.0.1 Command Port 5250 Username admin Password ****** Recording Server LAN Settings LAN Port 5251 Recording Server WAN Settings IP Address Port 9208 Save ResetThe featured sengs on the Recording Service tabbed page are:
| Group | Setting / Info | Description | Default |
| Recording service | Recording service | Enables/disables the Crystal Titan for the Recording Server. | Selected (Enabled) |
| Login Management Server | IP address | Sets the IP address of the Recording Server. | -- |
| command port | Sets the recording port. | 5250 | |
| username | Enters the username to login the Recording Server. | admin | |
| password | Enters the password to login the Recording Server. | admin | |
| LAN Settings | LAN 1 Port | Sets the LAN port for the Recording Server. | 5251 |
| WAN Settings | IP Address | Sets the IP address of the WAN for the Recording Server.▸ This setting can only work when port forwarding is done.▸ To use WAN settings, the Management Server, Recording Server and Metadata Server all require port forwarding. | |
| Port | Sets the WAN port for the Recording Server.▸ This setting can only work when port forwarding is done.▸ To use WAN settings, the Management Server, Recording Server and Metadata Server all require port forwarding. | 12 | |
| Save button | Applies the change. | -- | |
| To use WAN sengs, the Management Server, Recording Server and Metadata Server all require port forwarding. | |
| For Recording Server default Port is 5251(TCP) and the server port should be larger than 1000. Also the command port cannot be the same. |
3.2.2.2.3 Metadata Service
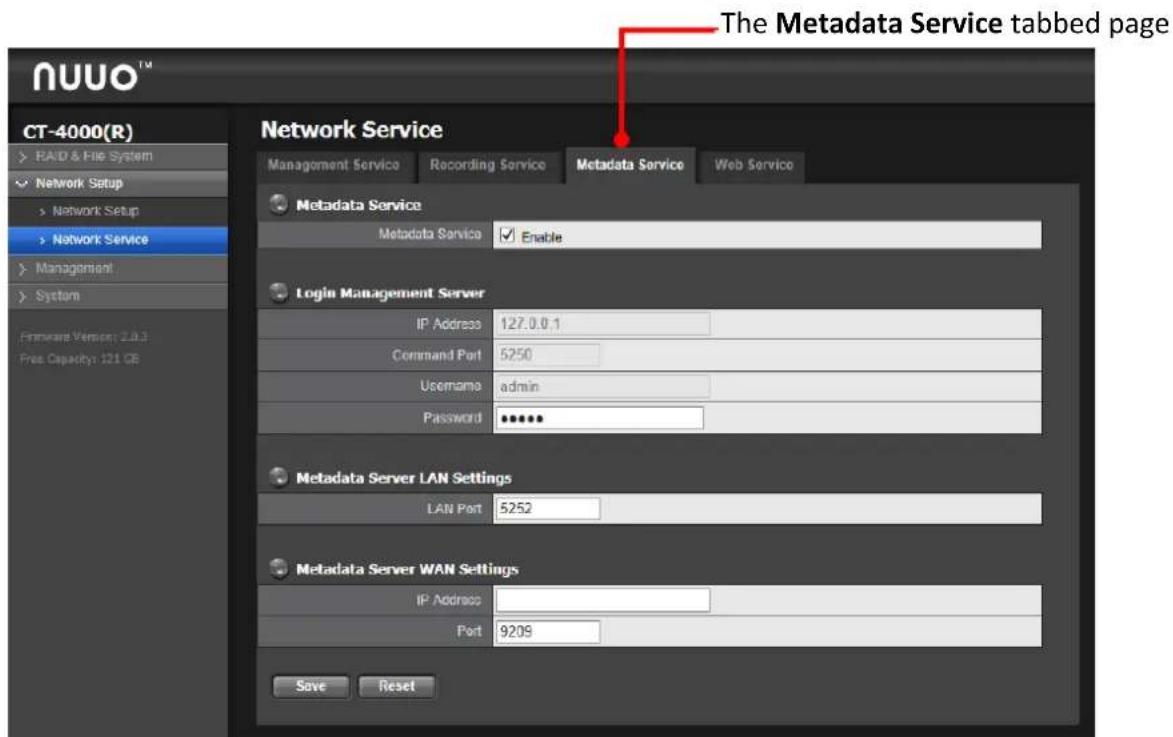
It relies on the Metadata Service tabbed page to enable the Crystal Titan for Metadata Server.
To access the Metadata Service tabbed page:
- Login to NUUO Crystal Network Video Recorder web page as described in Login.
The web sengs open.
- From the Le Tool bar, click the Network Setup | Network Service | Metadata Service tab.
The Metadata Service tabbed page opens.
text_image
The Metadata Service tabbed page CT-4000(R) RAID & File System Network Setup Network Setup Network Service Management System Hardware Version: 2.0.3 Free Capacity: 121 GB Network Service Management Service Recording Service Metadata Service Web Service Metadata Service Metadata Service Enable Login Management Server IP Address 127.0.0.1 Command Port 5250 Username admin Password ****** Metadata Server LAN Settings LAN Port 5252 Metadata Server WAN Settings IP Address Port 9208 Save ResetThe featured sengs on the Metadata Service tabbed page are:
| Group | Setting / Info | Description | Default |
| Metadata service | Metadata service | Enables/disables the Crystal Titan for Metadata Server. | Selected (Enabled) |
| Login Management Server | IP address | Sets the IP address of the Metadata Server. | -- |
| command port | Sets the metadata port. | 5250 | |
| username | Enters the username to login the Metadata Server. | admin | |
| password | Enters the password to login the Metadata Server. | admin | |
| LAN Settings | LAN 1 Port | Sets the LAN port for the Metadata Server. | 5252 |
| WAN Settings | IP Address | Sets the IP address of the WAN for the Recording Server.▸ This setting can only work when port forwarding is done.▸ To use WAN settings, the Management Server, Recording Server and Metadata Server all require port forwarding. | |
| Port | Sets the WAN port for the Recording Server.▸ This setting can only work when port forwarding is done.▸ To use WAN settings, the Management Server, Recording Server and Metadata Server all require port forwarding. | 12 | |
| Save button | Applies the change. | -- | |


3.2.2.2.4 Web Service
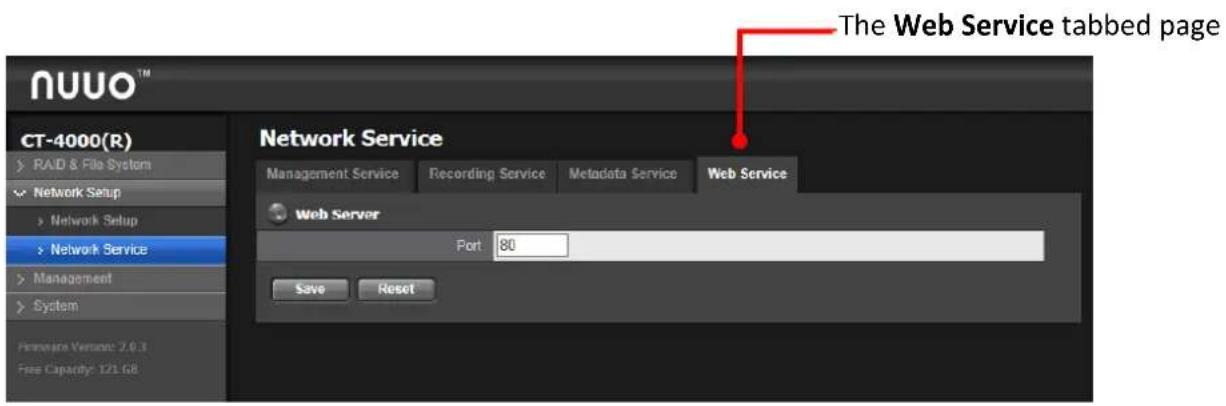
It relies on the Web Service tabbed page to setup the Crystal Titan web server port.
To access the Web Service tabbed page:
- Login to NUUO Crystal Network Video Recorder web page as described in Login.
The web sengs open.
- From the Le Tool bar, click the Network Setup | Network Service | Web Service tab.
The Web Service tabbed page opens.
text_image
The Web Service tabbed page NUUO™ CT-4000(R) RAID & File System Network Setup Network Setup Network Service Management System Network Service Management Service Recording Service Metadata Service Web Service Web Server Port 80 Save ResetThe featured sengs on the Management Service tabbed page are:
| Setting | Description | Default |
| command port | Sets the web port. | 80 |
| Save button | Applies the change. | -- |

For Web Server default Port is 80. Also the command port cannot be the same. If ulizing Firefox, it's suggested not to modify the web service port due to Firefox limitaon.
3.2.3 Management
It relies on the Management menu to change the password to the system, to view the system's hardware logs, and to recover factory defaults.
To access the Management menu:
- Login to NUUO Crystal Network Video Recorder web page as described in Login.
The web sengs open.
- From the Le Toolbar, click the Management.
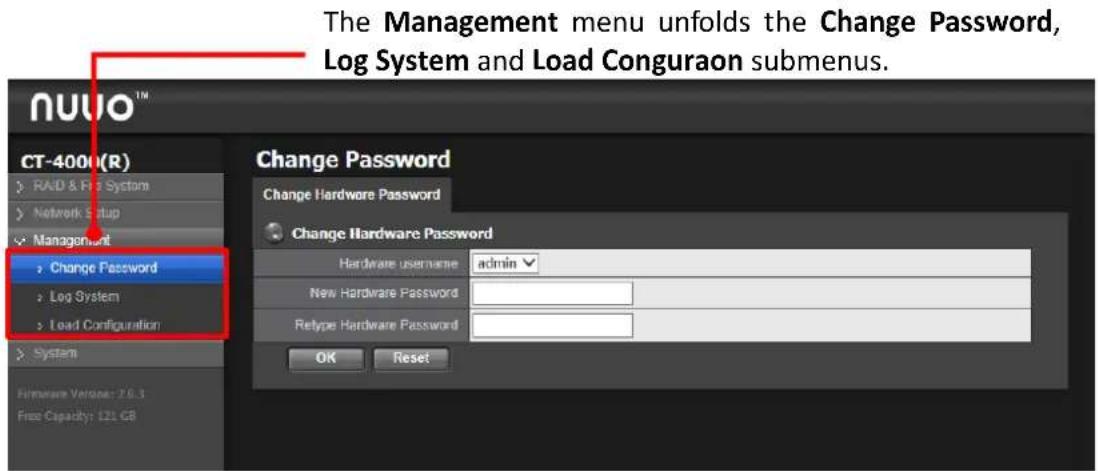
The Management menu unfolds the Change Password, Log System and Load Conguraon submenus.
text_image
The Management menu unfolds the Change Password, Log System and Load Conguraon submenus. CT-4000(R) RAID & F2 System Network Setup Management Change Password Log System Load Configuration System Firmware Verona: 76.1 Free Capacity: 121 GB Change Password Change Hardware Password Change Hardware Password Hardware username admin New Hardware Password Retype Hardware Password OK ResetThe features submenus are Change Password, Log System and Load Conguraon which will be explicated in the following seconds.
3.2.3.1 Change Password
Use the Change Password to change the password to login the Management Server.
To access the Change Password submenu:
- Login to NUUO Crystal Network Video Recorder web page as described in Login.
The web sengs open.
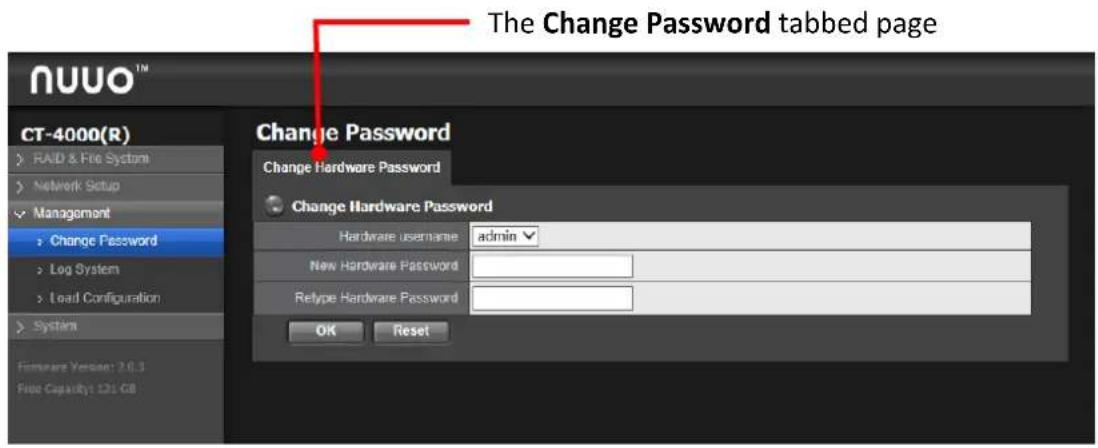
- From the Le Toolbar, click the Management | Change Password.
The Change Password tabbed page displays in the Conguraon Pane.
text_image
The Change Password tabbed page CT-4000(R) RAID & File System Network Setup Management Change Password Log System Load Configuration System Hardware Version: 2.0.3 File Capacity: 121 GB Change Password Change Hardware Password Change Hardware Password Hardware username admin New Hardware Password Relype Hardware Password OK ResetUse the Change Password tabbed page to change the password to login the Crystal Titan.
3.2.3.2 Log System
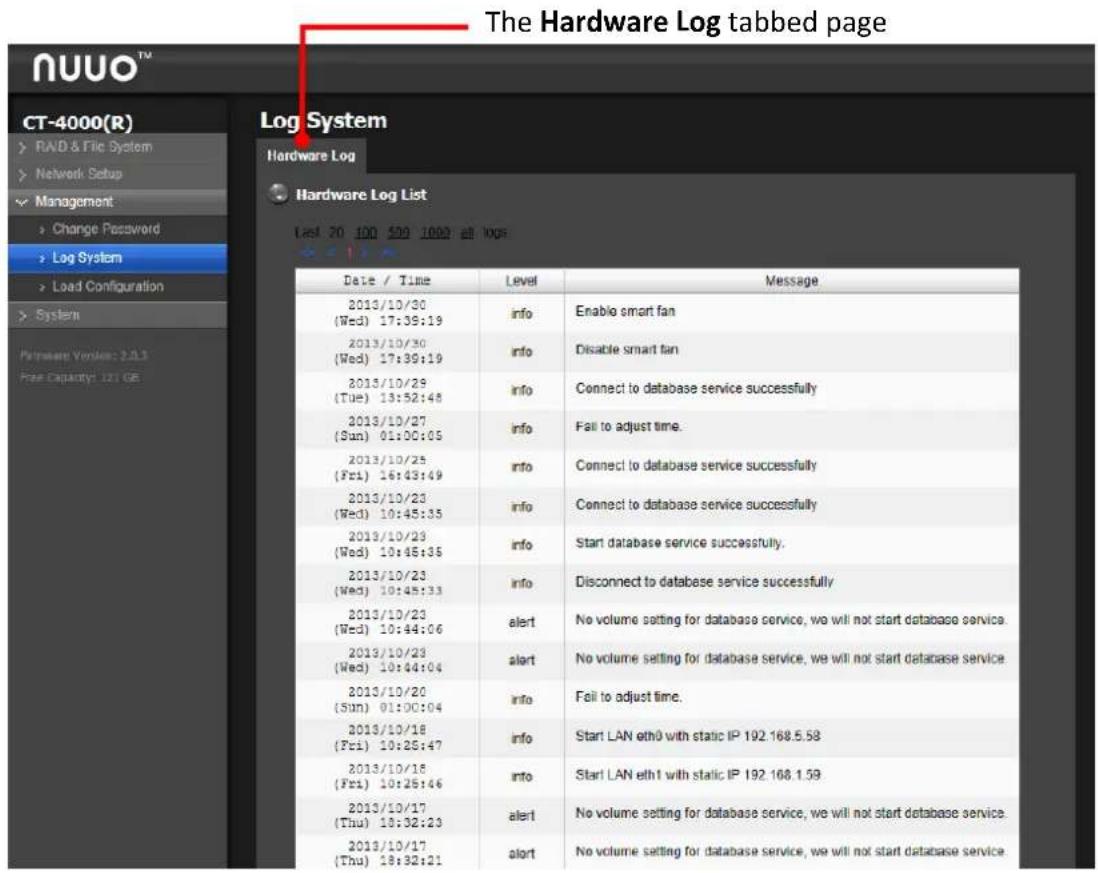
The Log System submenu allows users to view the Management Server's hardware logs including power-on, shutdown, storage acvity and so on.
To access the Log System submenu:
- Login to NUUO Crystal Network Video Recorder web page as described in Login.
The web sengs open.
- From the Le Toolbar, click the Management | Log System.
The Hardware Log tabbed page opens in the Conguraon Pane showing a list of the Management Server's hardware logs.
text_image
The Hardware Log tabbed page CT-4000(R) > RAND & File System > Network Setup ✓ Management > Change Password > Log System > Load Configuration > System Primware Version: 2.0.1 Free Capacity: 121 GE Log System Hardware Log Hardware Log List Last 20 100 500 1000 all logs Date / Time Level Message 2013/10/30 (Wed) 17:39:19 info Enable smart fan 2013/10/30 (Wed) 17:39:19 info Disable smart fan 2013/10/29 (Tue) 13:52:48 info Connect to database service successfully 2013/10/27 (Sun) 01:00:05 info Fall to adjust time. 2013/10/25 (Fri) 16:43:49 info Connect to database service successfully 2013/10/23 (Wed) 10:45:35 info Connect to database service successfully 2013/10/29 (Wed) 10:46:35 info Start database service successfully. 2013/10/23 (Wed) 10:45:33 info Disconnect to database service successfully 2013/10/23 (Wed) 10:44:06 alert No volume setting for database service, we will not start database service. 2013/10/28 (Wed) 10:44:04 alert No volume setting for database service, we will not start database service. 2013/10/20 (Sun) 01:00:04 info Fell to adjust time. 2013/10/18 (Fri) 10:25:47 info Start LAN eth0 with static IP 192.168.5.58 2013/10/18 (Fri) 10:26:46 info Start LAN eth1 with static IP 192.168.1.59 2013/10/17 (Thu) 10:32:23 alert No volume setting for database service, we will not start database service. 2013/10/17 (Thu) 18:32:21 alert No volume setting for database service, we will not start database service.3.2.3.3 Load Configuration
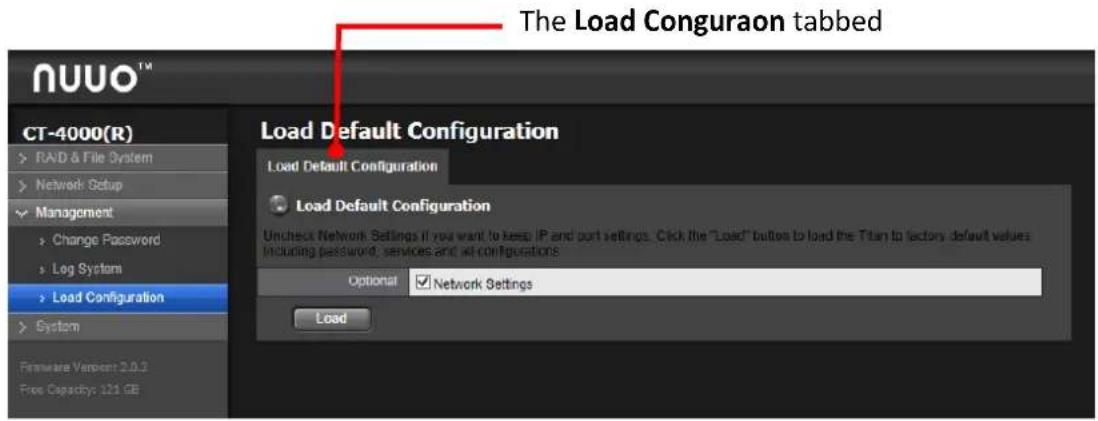
The Load Conguraon submenu allows users to restore the system sengs to factory defaults.
To access the Load Conguraon submenu:
- Login to NUUO Crystal Network Video Recorder web page as described in Login.
The web sengs open.
- From the Le Toolbar, click the Management | Load Conguraon.
The Load Conguraon tabbed page opens in the Conguraon Pane.
text_image
The Load Conguraon tabbed NUUO™ CT-4000(R) > RAD & File System > Network Setup ✓ Management > Change Password > Log System > Load Configuration > System Load Default Configuration Load Default Configuration Load Default Configuration Uncheck Network Settings if you want to keep IP and port settings. Click the "Load" button to load the Titan to lactors default values including password, services and all configurations Optional ✓ Network Settings Load| Group | Setting / Info | Description | Default |
| Load Default Settings | Network Settings | Enables/disables the restoration of the network settings. | Selected (Enabled) |
| Load button | Runs the restoration of system settings. | -- | |
3.2.4 System
Use the System menu to view system informaon, congure system setngs and manage system upgrade. This menu also enables re-opening the Install Wizard which launches during the system's very rst power-on.
To access the System menu:
- Login to NUUO Crystal Network Video Recorder web page as described in Login.
The web sengs open.
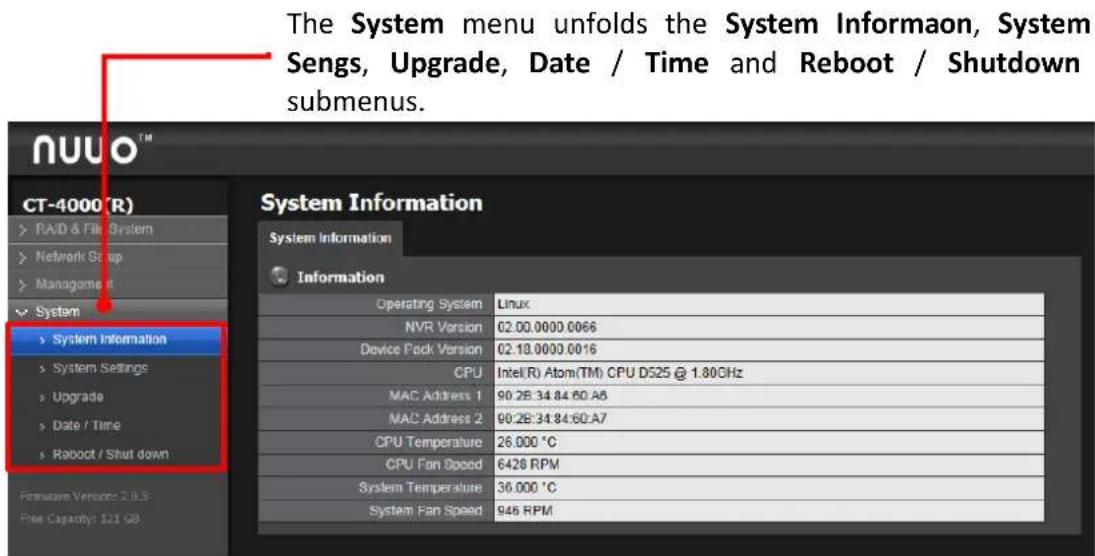
- From the Le Toolbar, click the System.
The System menu unfolds the System Informaon, System Setngs, Upgrade, Date/ Time and Reboot / Shut down submenus.
text_image
The System menu unfolds the System Information, System Sengs, Upgrade, Date / Time and Reboot / Shutdown submenus. NUUO™ CT-4000(R) > RAID & File System > Network Setup > Management System > System Information > System Settings > Upgrade > Date / Time > Roboot / Shut down System Information Operating System Linux NVR Version 02.00.0000.0066 Device Pack Version 02.18.0000.0016 CPU Intel(R) Atom(TM) CPU D525 @ 1.80GHz MAC Address 1 90.2B:34.84.60.A6 MAC Address 2 90.2B:34.84.60.A7 CPU Temperature 26.000 °C CPU Fan Speed 6428 RPM System Temperature 36.000 °C System Fan Speed 946 RPMThe features submenus are System Informaon, System Setngs, Upgrade, Date / Time and Reboot / Shut down which will be explicated in the following seconds.
3.2.4.1 System Information
The Informaon submenu enables viewing some important system informaon including the hardware informaon and rmware informaon.
To access the System Informaon submenu:
- Login to NUUO Crystal Network Video Recorder web page as described in Login.
The web sengs open.
- From the Le Toolbar, click the System | System Informaon.
The System Informaon tabbed page displays in the Conguraon Pane.

text_image
The System Informaon tabbed page NUUO™ CT-4000(R) RAID & File System Network Setup Management System System Information System Information Information Operating System Linux NVR Version 02.00.0000.0066 Device Pack Version 02.18.0000.0016 CPU Intel(R) Atom(TM) CPU D525 @ 1.80GHz MAC Address 1 90.2B:34.84.60.A6 MAC Address 2 90.2B:34.84.60.A7 CPU Temperature 26.000 °C CPU Fan Speed 6428 RPM System Temperature 36.000 °C System Fan Speed 946 RPM3.2.4.2 System Settings
Use the System Sengs submenu to congregate and optimize the system for your applicaons.
To access the System Sengs submenu:
- Login to NUUO Crystal Network Video Recorder web page as described in Login.
The web sengs open.
- From the Le Toolbar, click the System | System Sengs.
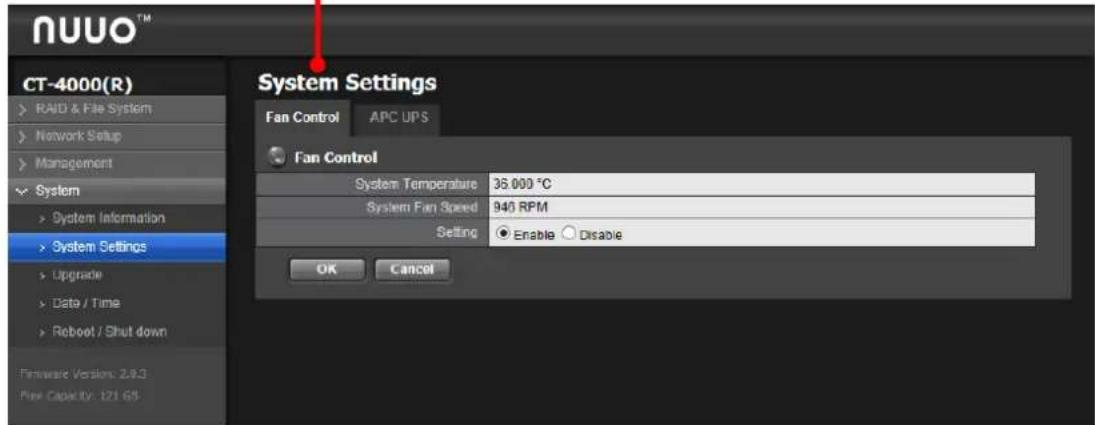
The System Sengs submenu opens in the Conguraon Pane and shows the Fan Control tabbed page by default.
The System Sengs submenu opens and shows the Fan Control tabbed page by default.
text_image
NUUO™ CT-4000(R) RAID & File System Network Setup Management System System Information System Settings Upgrade Data / Time Reboot / Shut down Firmware Version: 2.0.3 Play Capex by: 121.65 System Settings Fan Control APC UPS Fan Control System Temperature 35 000 °C System Fan Speed 940 RPM Setting Enable Disable OK CancelThe featured tabbed pages are Fan Control and APC UPS which will be explicated in the following seconds.
3.2.4.2.1 Fan Control
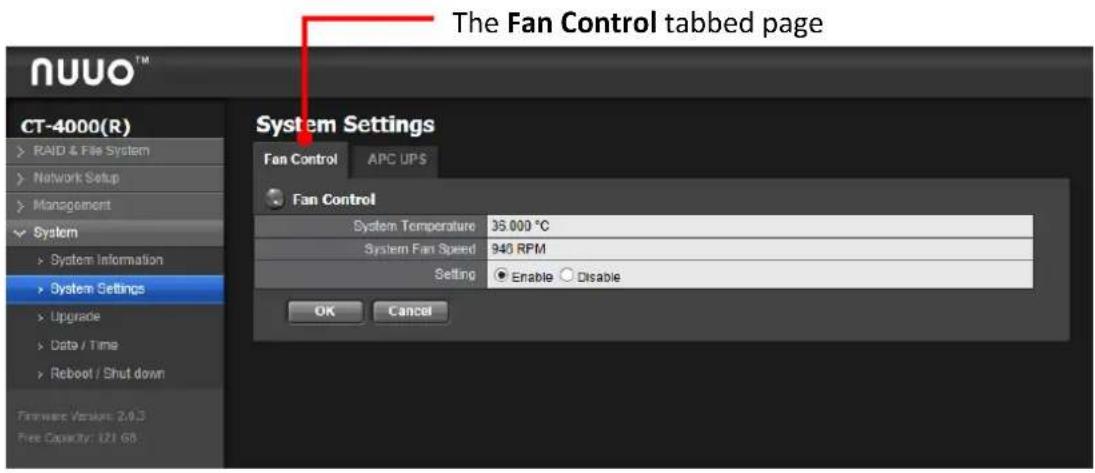
The Fan Control tab page enables viewing some important system informaon including system temperature, system fan speed and seng informaon.
To access the Fan Control tabbed page:
- Login to NUUO Crystal Network Video Recorder web page as described in Login.
- The web sengs open.
- From the Le Toolbar, click the System | System Sengs | Fan Control tabbed page.
The Fan Control tabbed page opens.
text_image
The Fan Control tabbed page NUUO™ CT-4000(R) RAID & File System Network Setup Management System System Information System Settings Upgrade Data / Time Reboot / Shut down Forward Version: 2.0.3 Free Capacity: 121 GB System Settings Fan Control APC UPS Fan Control System Temperature 35.000 °C System Fan Speed 940 RPM Setting Enable Disable OK CancelThe featured sengs and delivered info are:
| Group | Setting | Description | Default |
| Fan Control | System Temperature | Delivers the system temperature. | -- |
| System Fan Speed | Delivers the system fan speed. | -- | |
| Setting | Delivery the setting status | disable | |
| OK button | Applies the change. | -- | |
| Cancel button | Clears the change. | -- | |
3.2.4.2.2 APC UPS
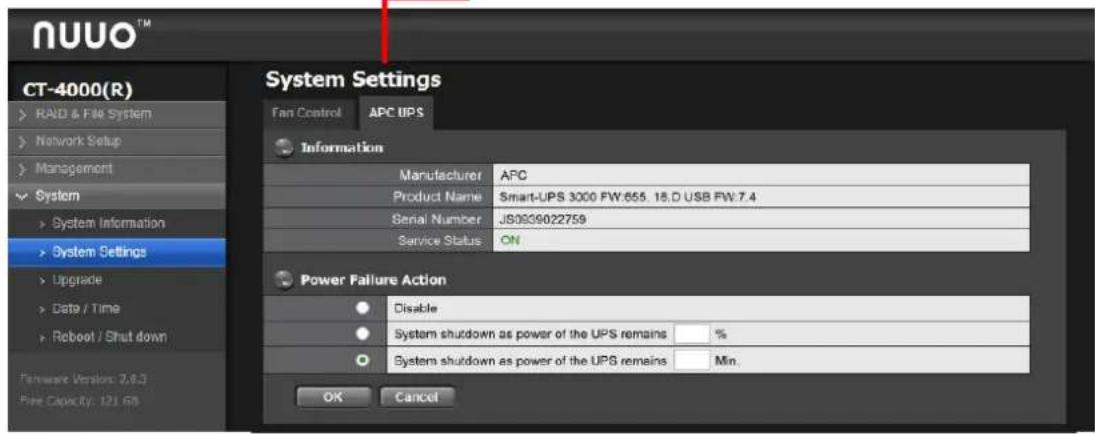
If the Management Server is used with an UPS module, it is able to deal with accidental power failure or unstable power supply. The APC UPS tabbed page congures how the system reacts to such scenario by dening the ming for auto shutdown with APC Uninterruptable Power Supply (UPS) baery power. This tabbed page also delivers the info about the APC UPS module used.
To access the APC UPS seng:
- Aach the APC UPS to one of the unit's USB ports.
- Login to NUUO Crystal Network Video Recorder web page as described in Login.
- The web sengs open.
- From the Le Toolbar, click the System | System Setngs | APC UPS tabbed page.
The APC UPS tabbed page opens.
The APC UPS tabbed page
text_image
NUUO™ CT-4000(R) RAID & File System Network Setup Management System System Information System Settings Upgrade Data / Time Reboot / Shut down Firmware Version: 2.6.3 Fire Capacity: 121.68 System Settings Fan Control APC UPS Information Manufacturer APC Product Name Smart-UPS 3000 FW:655 18.D USB FW:7.4 Serial Number JS039022759 Service Status ON Power Failure Action Disable System shutdown as power of the UPS remains % System shutdown as power of the UPS remains Min. OK CancelThe featured sengs and delivered info are:
| Group | Setting | Description | Default |
| Information | Manufacturer | Delivers the manufacturer of the UPS module. | -- |
| Product Name | Delivers the model name of the UPS module. | -- | |
| Serial Number | Delivers the serial number of the UPS module. | -- | |
| Services Status | Delivers if the UPS module is servicing. | -- | |
| Power Failure Action | Disable | Enables/disables the operating system's actions to deal with power failure. | Selected (Disabled) |
| Shutdown as power of the UPSremains_% | Sets how low does the UPS battery power drain down to before the operating system shuts down. | -- | |
| Shutdown as power of the UPSremains_Min | Sets how long should the unit run on UPS battery power before the operating system shuts down. | -- | |
| OK button | Applies the change. | -- | |
| Exit button | Clears the change. | -- | |

For Power Failure Acon, an USB conncon is needed between the unit and the UPS to check the status of UPS.
3.2.4.3 Upgrade
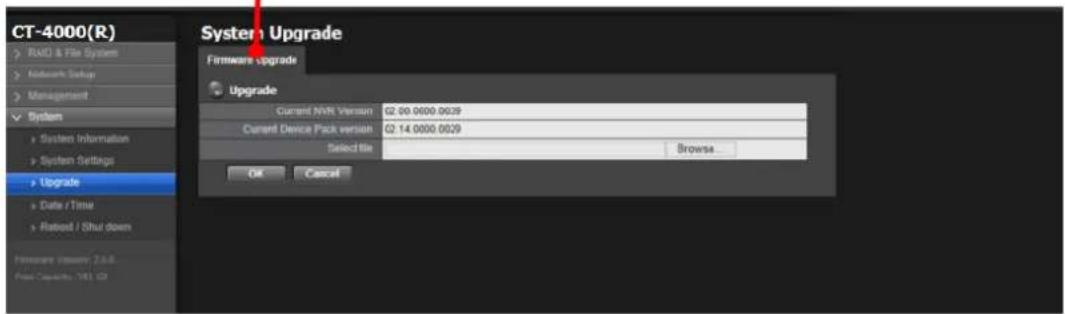
Exactly as the tle adverses, the Upgrade tabbed page enables system upgrade to bring the system to a newer version that promises beer performance or new funcons. Besides, this tabbed page also delivers the current rmware version and device pack version.
To access the Upgrade seng:
- Login to NUUO Crystal Network Video Recorder web page as described in Login.
- The web sengs open.
- From the Le Toolbar, click the System | Upgrade.
- Go to www.nuuo.com for FW download, browse the FW for upgrading and click the OK buon.
- A conrmaon dialog pops up. Click the OK button to start upgrade process.
- Aer upgrade, the system will restart. You need to re-access the unit again aer this.
The Firmware Upgrade tabbed page opens in the Conguraon Pane.
The Firmware Upgrade tabbed page.
text_image
CT-4000(R) RAND & File System Network Setup Management System System Information System Settings Upgrade Date / Time Reset / Shut down Firmware Version: 2.6.6 File Capsets: 143.59 System Upgrade Firmware upgrade Upgrade Current NVRT Version G2.00.0000.0029 Current Device Pack version G2.14.0000.0029 Select file Browse... OK CancelThe featured facility and delivered info are:
| Info / Facility | Description |
| Current NVR Version | Delivers the server’s current firmware version. |
| Current Device Pack Version | Delivers the server’s current device pack version. |
| Select File (and the Browse button) | Browsers for the firmware and runs the upgrade. |

The FW upgrade includes Crystal Titan server FW upgrade and device pack upgrade. You can only upgrade camera device pack to add camera in device pack new version without upgrade Crystal FW.

The network bandwidth should be more than 4 mbps when upgrading rmware.
3.2.4.4 Date / Time
Access the Date/Time submenu to congregate the date, me, me zone of your locale and other me-related parameters for the server.
To access the Date/Time seng:
- Login to NUUO Crystal Network Video Recorder web page as described in Login.
- The web sengs open.
- From the Le Tool bar, click the System | Date Time.
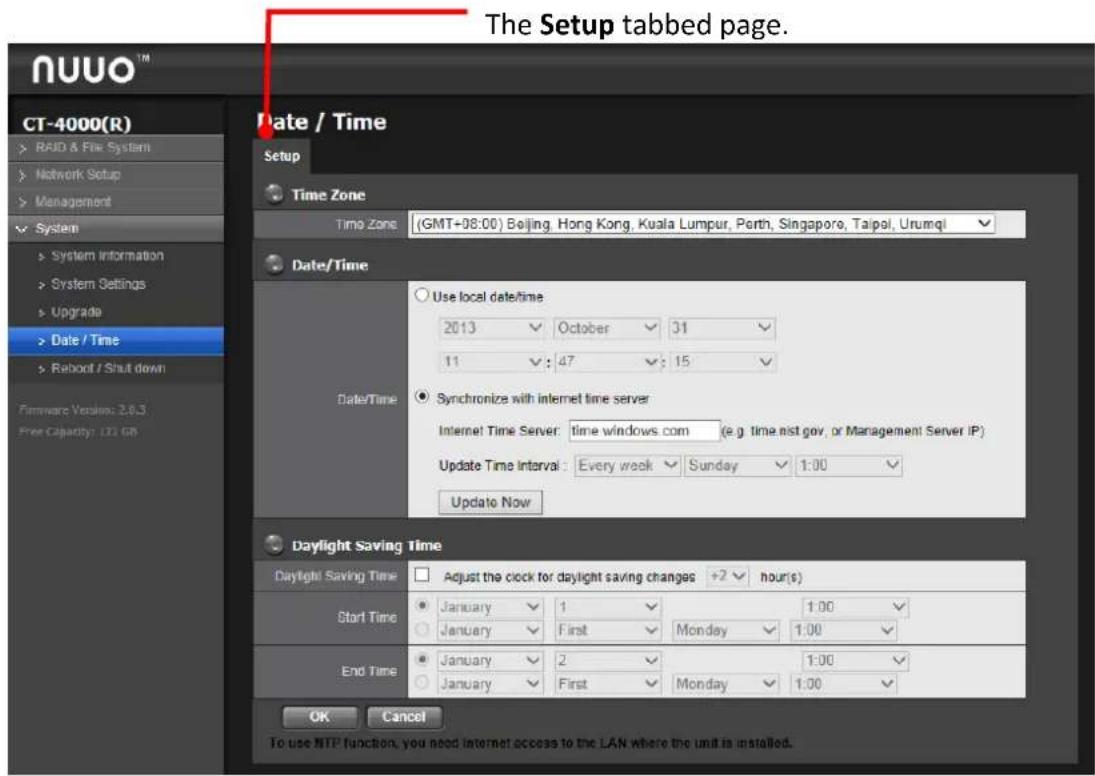
- Choose the me zone.
- Congure the year, month, day and me manually, or enable Network Time to synchronize me automacally. When Network Time enabled, the date/me sengs will be grayed out.
- Assign me server and update interval if choosing Network Time. You can also click "Update Now" to update date/ me right away.
- Check the Adjust clock for daylight saving changes onop and select the me change of daylight saving me in your locaon. Choose the start me and end me of recurrence.
- Click the OK buon to restart the system.
The Setup tabbed page opens in the Conguraon Pane.
text_image
The Setup tabbed page. CT-4000(R) > RAID & File System > Network Setup > Management System > System Information > System Settings > Upgrade > Date / Time > Reboot / Shut down Firmware Version: 2.0.3 Free Capacity: 121 GB Date / Time Setup Time Zone (GMT+08:00) Beijing, Hong Kong, Kuala Lumpur, Perth, Singapore, Taipei, Urumqi Date/Time Use local date/time 2013 October 31 11 : 47 : 15 Date/Time Synchronize with internet time server Internet Time Server: time windows com (e.g. time nist gov, or Management Server IP) Update Time Interval: Every week Sunday 1:00 Update Now Daylight Saving Time Daylight Saving Time Adjust the clock for daylight saving changes +2 hour(s) Start Time January 1 1:00 January First Monday 1:00 End Time January 2 1:00 January First Monday 1:00 OK Cancel To use NTP function, you need internet access to the LAN where the unit is installed.The featured sengs are:
| Time Zone | Time Zone | Sets the time zone of your locale. | GMT+08:00 | ||
| NTP Setup | Network Time | Enable check box | Enables/disables network time. | Deselected (Disabled) | |
| Synchronize with internet time server | Enables/disables the synchronization with internet time server.► This setting is only available when network time is enabled.► When enabled, the Date/Time group box become unavailable. | Deselected (Disabled) | |||
| Works as internet time server | |||||
| Time Server | Sets the time server name or IP address.► This setting is only available when network time is enabled. | -- | |||
| Update Now button | Updates the system time immediately.► This setting is available only when network time is enabled.► Updating system time will cause the system to restart. | Weekly on Sunday, at 01:00 o'clock | |||
| Date / Time | Year | Sets system date and time. | |||
| Month | |||||
| Day | |||||
| Time | |||||
| Daylight Saving Time | Daylight Saving Time | Adjust the clock for daylight saving changes | Enables/disables daylight saving time. | Deselected (Disabled) | |
| hours drop box | Defines how much time should the system time be adjusted forward/backward for. | +2 hours | |||
| Start Time | Defines the date to start applying daylight saving time.► This setting is available only when daylight saving time is enabled. | January the 1^st , 1:00 AM | |||
| End Time | Defines the date to stop applying daytime saving time.► This setting is available only when daylight saving time is enabled. | January the 2^nd , 1:00 AM | |||
| Save button | Applies the change. | -- | |||
| Exit button | Clears the change. | -- | |||
3.2.4.5 Reboot / Shut down
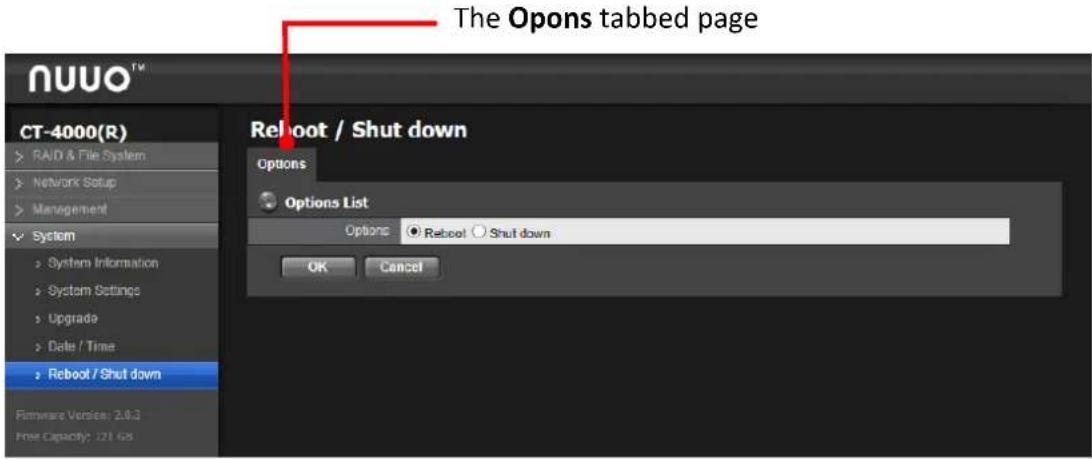
Access this Reboot / Shutdown submenu to safely turn o or restart the system.
To access the Reboot / Shutdown submenu:
- Login to NUUO Crystal Network Video Recorder web page as described in Login.
- The web sengs open.
- From the Le Tool bar, click the System | Reboot / Shutdown.
The Opons tabbed page displays in the Conguraon Pane.
text_image
The Opons tabbed page NUUO™ CT-4000(R) RAID & File System Network Setup Management System System Information System Settings Upgrade Date / Time Reboot / Shut down Options Options List Options Reboot Shut down OK Cancel Firmware Version: 2.0.3 Free Capacity: 121 GB- Select Reboot or Shutdown and click the OK buon to restart or power off the system.
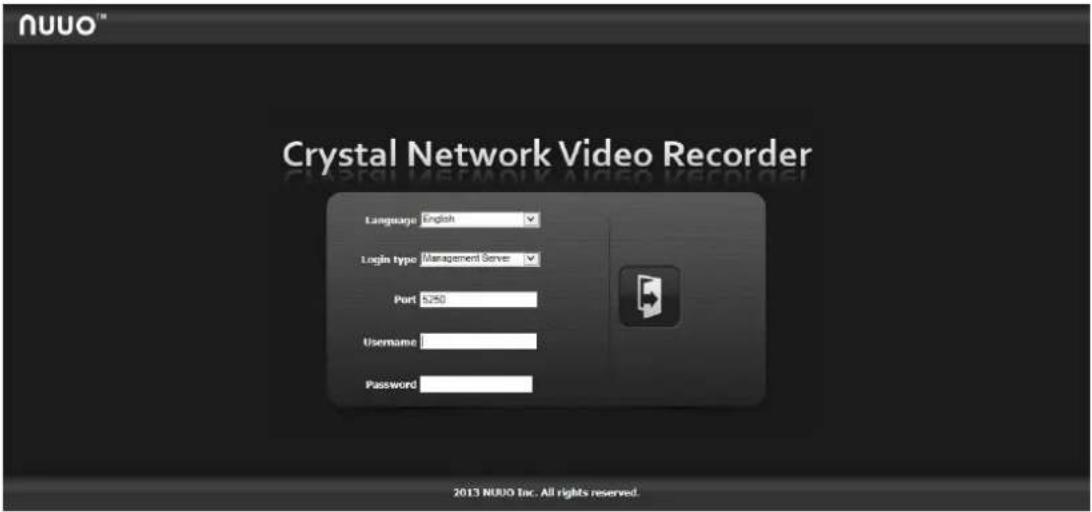
3.3 Management Server
text_image
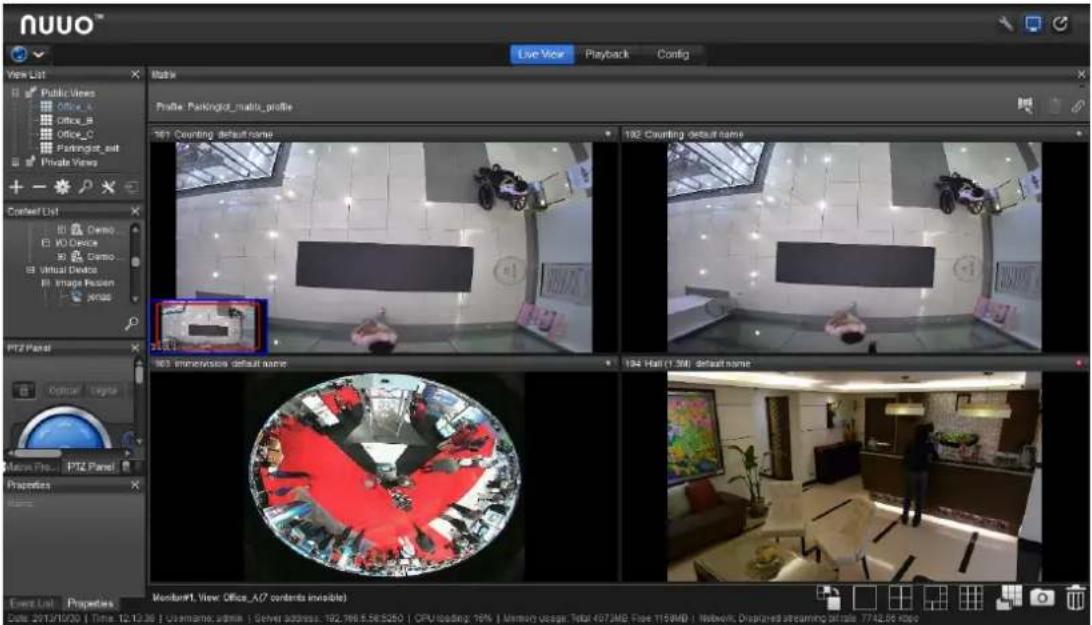
NUUO™ Crystal Network Video Recorder Language English Login type Management Server Port $250 Username Password 2013 NUUO Inc. All rights reserved.The feature sengs are same with NuClient, please refer to Interface Overview.
text_image
NUO Live View Playback Config View List Public Views Office_A Office_B Office_C Parkingot_out Private Views + - Contact List Demo VO Device Demo Virtual Device Image Resen Xmas PTZ Panel Optical lights Motion Pro... PTZ Panel Properties Name: Event List Properties Date: 2013/10/30 | Time: 12:12:36 | Username.admls | Server address: 162.166.5.58.5250 | CPU loading: 10% | Memory usage: Total: 4573MB Free: 115MB | Network, Designed streaming bits: 7742.86 kbps Profile: Parkinglot_matrix_profile 192 Counting default name 193 Immovisions default name 194 Hall (1.3M) default name Monitor#: View: Office_A(7 contents invisible)| Username and password is Management Server's username and password. | |
| Install CrystalNuClientWeb.cab first to view the video on web. |
4. Application Installation
NuClient is the soware that enables Management Server for Live View (instant video playback), Playback (recorded video playback) and Cong (system conguraon). NuMatrix is the soware that enables video wall for Live View.
This secon will walk you through the installaons of the NuClient and NuMatrix, in both Windows O.S. and Mac O.S.

Please note that only when have an "UImate level" license will you be able to see the Matrix interface on NuClient.
4.1 NuClient
4.1.1 Install on Windows OS
This secon will walk you through the installaon of the NuClient in Windows operang system.
4.1.1.1 System Requirement
The NuClient requires the following hardware and soware to run properly in Windows O.S.:
| Client PC Minimum Requirements | ||
| CPU | Intel Core 2 Duo, 2.6GHz | |
| Display Card | OpenGL 2.0 and later | |
| OS Supported | Windows XP 32 bit | Windows 7 32/64 bit |
| RAM | 1GB | 2GB |
| User Interface | HTTP Web browser - Internet Explorer 8 and laterNUUO client application program | |
4.1.1.2 Proceed to Install
- Insert the CD into your CD-ROM drive and double-click Setup.exe.
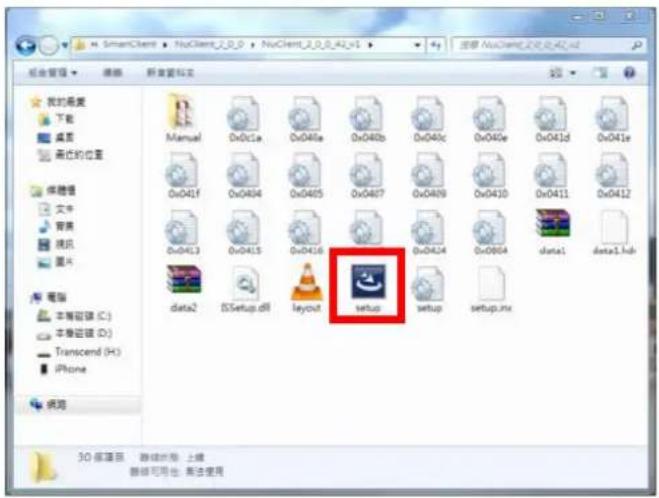
The installer then opens.
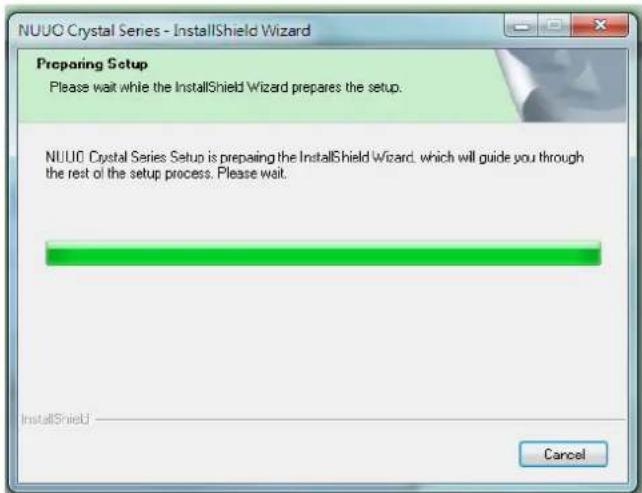
text_image
NUUO Crystal Series - InstallShield Wizard Preparing Setup Please wait while the InstallShield Wizard prepares the setup. NUUO Crystal Series Setup is preparing the InstallShield Wizard, which will guide you through the rest of the setup process. Please wait. InstallShield Cancel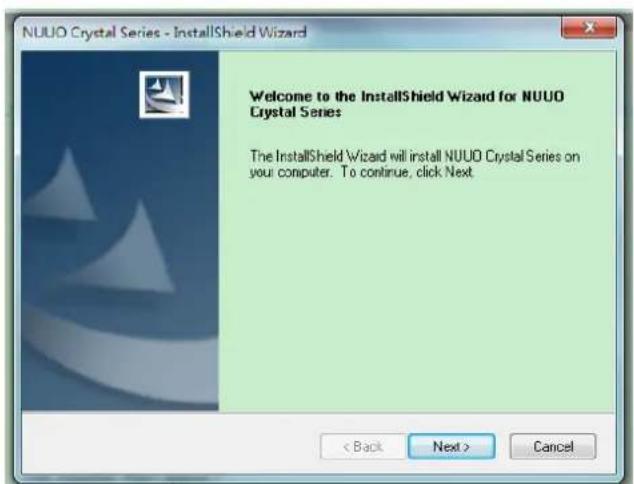
text_image
NUUO Crystal Series - InstallShield Wizard Welcome to the InstallShield Wizard for NUUO Crystal Series The InstallShield Wizard will install NUUO Crystal Series on your computer. To continue, click Next < Back Next > Cancel- Click the Next buon to proceed.
The License Agreement opens.
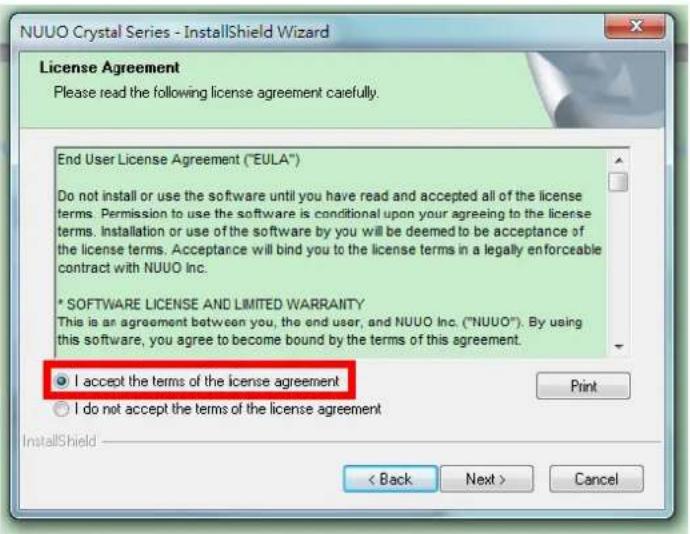
text_image
NUUO Crystal Series - InstallShield Wizard License Agreement Please read the following license agreement carefully. End User License Agreement ("EULA") Do not install or use the software until you have read and accepted all of the license terms. Permission to use the software is conditional upon your agreeing to the license terms. Installation or use of the software by you will be deemed to be acceptance of the license terms. Acceptance will bind you to the license terms in a legally enforceable contract with NUUO Inc. * SOFTWARE LICENSE AND LIMITED WARRANTY This is an agreement between you, the end user, and NUUO Inc. ("NUUO"). By using this software, you agree to become bound by the terms of this agreement. I accept the terms of the license agreement I do not accept the terms of the license agreement InstallShield < Back Next > Cancel- Select I accept the terms of the license agreement.
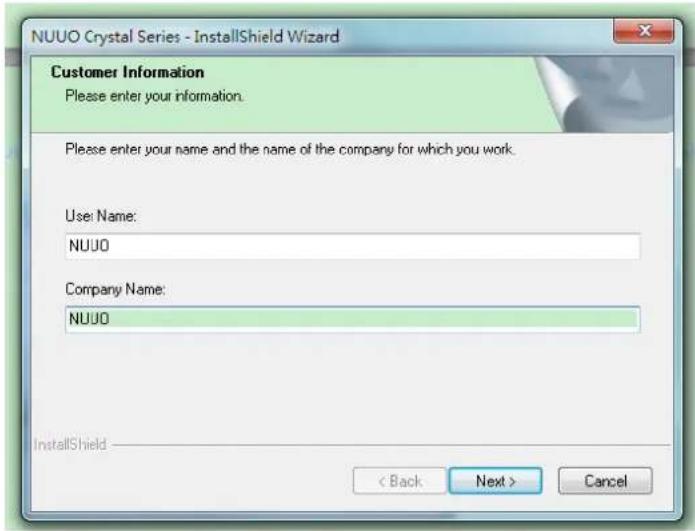
A Customer Informaon window opens.
text_image
NUUO Crystal Series - InstallShield Wizard Customer Information Please enter your information. Please enter your name and the name of the company for which you work. Use: Name: NUUO Company Name: NUUO InstallShield < Back Next > Cancel- Enter your name and the name of your company. Then click the Next button.
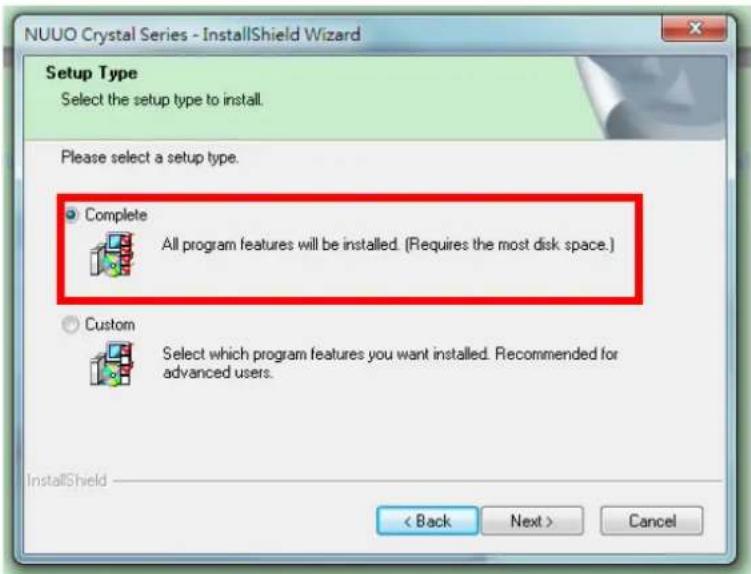
A Setup Type window then opens and presents two types of installaon, Complete and Custom.

text_image
NUUO Crystal Series - InstallShield Wizard Setup Type Select the setup type to install. Please select a setup type. Complete All program features will be installed. (Requires the most disk space.) Custom Select which program features you want installed. Recommended for advanced users. InstallShield < Back Next > Cancel- Select Complete and click the Next button to proceed.
OR
Select Custom and click the Next button to proceed.
• Complete: To install everything in this package.
text_image
NUUO Crystal Series - InstallShield Wizard Setup Type Select the setup type to install. Please select a setup type. Complete All program features will be installed. (Requires the most disk space.) Custom Select which program features you want installed. Recommended for advanced users. InstallShield < Back Next > Cancel- Custom: To install a custom selecon of applicaons and to conjure the installaon directory.

text_image
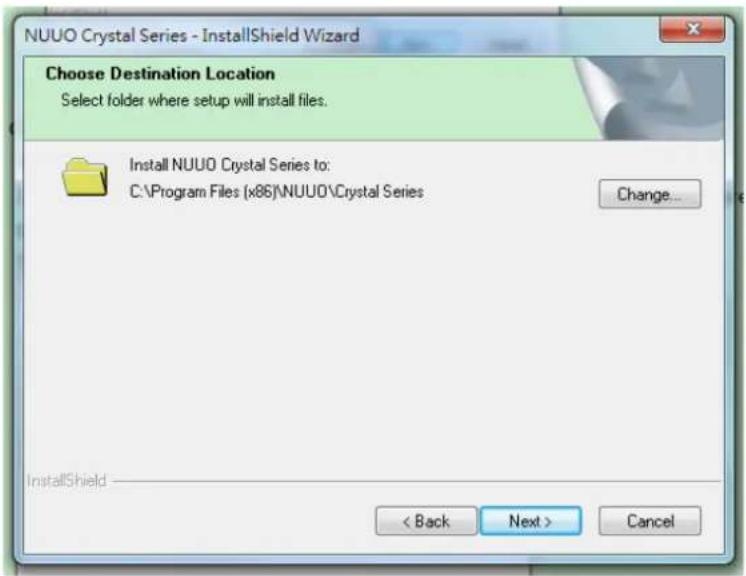
NUUO Crystal Series - InstallShield Wizard Setup Type Select the setup type to install. Please select a setup type. Complete All program features will be installed. (Requires the most disk space.) Custom Select which program features you want installed. Recommended for advanced users. InstallShield < Back Next > Cancel- Click the Next button to install the soware to the default folder.
OR
Click the Change buon and browse for some other folder to install the soware to. Then click the Next buon to proceed.
text_image
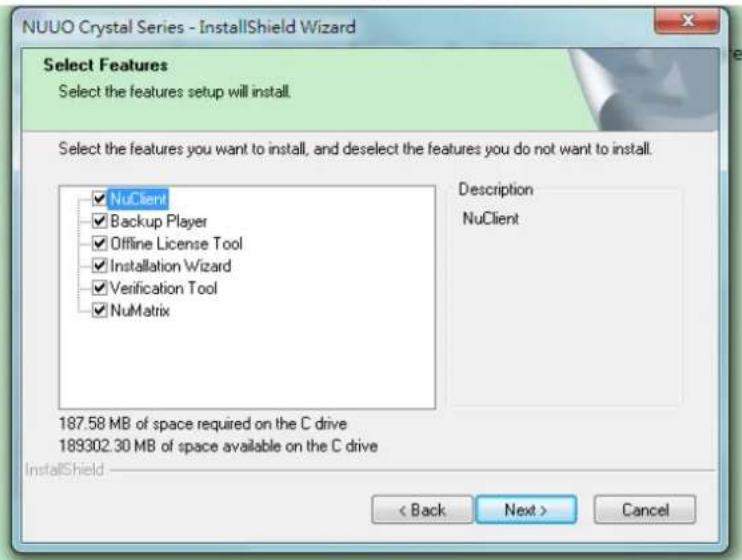
NUUO Crystal Series - InstallShield Wizard Choose Destination Location Select folder where setup will install files. Install NUUO Crystal Series to: C:\Program Files (x86)\NUUO\Crystal Series Change... InstallShield < Back Next > CancelA Select Features window then opens.
text_image
NUUO Crystal Series - InstallShield Wizard Select Features Select the features setup will install. Select the features you want to install, and deselect the features you do not want to install. Description NuClient NuClient 187.58 MB of space required on the C drive 189302.30 MB of space available on the C drive InstallShield < Back Next > Cancel- Select the feature(s) to install and deselect the feature(s) that you don't want. Then click the Next button to proceed. Then click the Install button.
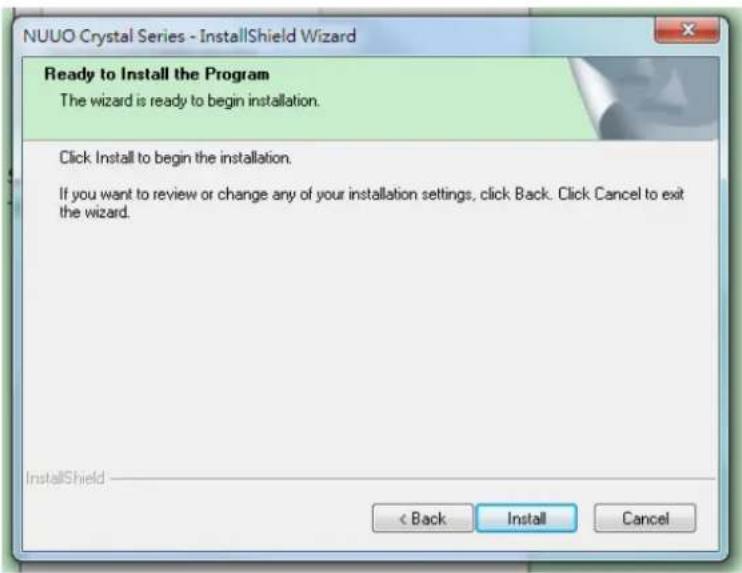
text_image
NUUO Crystal Series - InstallShield Wizard Ready to Install the Program The wizard is ready to begin installation. Click Install to begin the installation. If you want to review or change any of your installation settings, click Back. Click Cancel to exit the wizard. InstallShield < Back Install CancelThe installaon then starts, progresses and nishes.
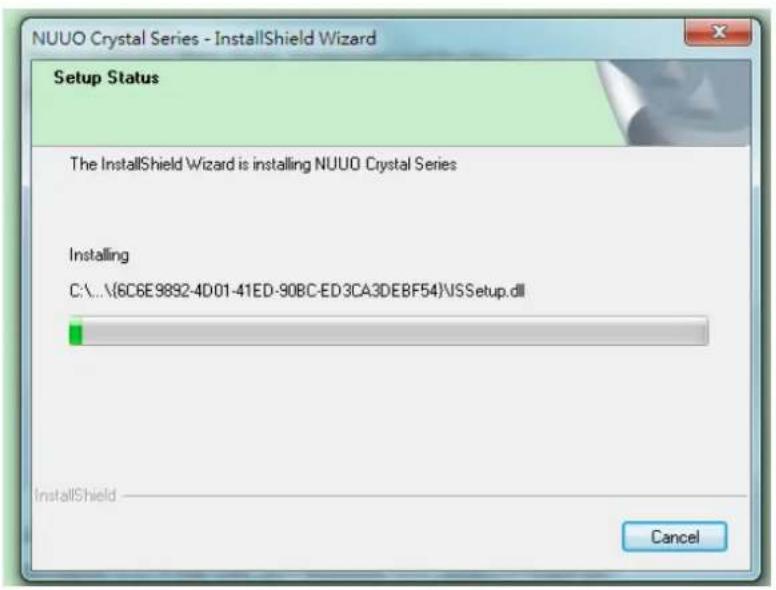
text_image
NUUO Crystal Series - InstallShield Wizard Setup Status The InstallShield Wizard is installing NUUO Crystal Series Installing C:\...\(6C6E9892-4D01-41ED-90BC-ED3CA3DEBF54)\JSSetup.dll InstallShield CancelAs soon as the installaon nishes, the installer disables the UAC on your Windows O.S. If the UAC isn't disabled, O.S. restart is required.
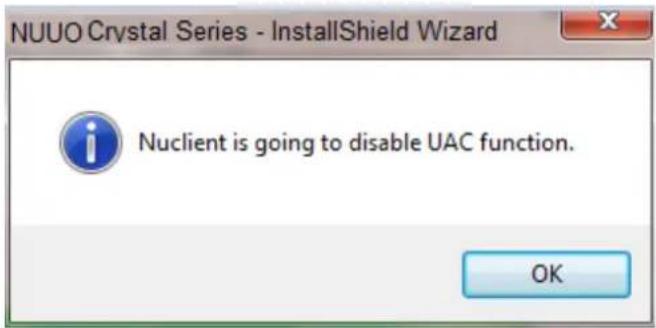
text_image
NUUO Crystal Series - InstallShield Wizard Nuclient is going to disable UAC function. OK- Click Yes to restart the O.S. immediately or No to restart it later. Then click the Finish buon to nish and quit the installaon.
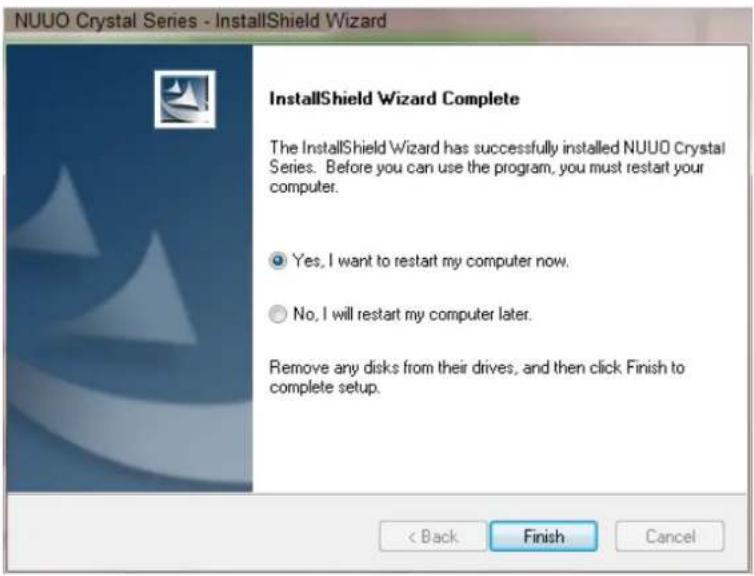
text_image
NUUO Crystal Series - InstallShield Wizard InstallShield Wizard Complete The InstallShield Wizard has successfully installed NUUO Crystal Series. Before you can use the program, you must restart your computer. Yes, I want to restart my computer now. No, I will restart my computer later. Remove any disks from their drives, and then click Finish to complete setup. < Back Finish Cancel4.1.1.3 Launch NuClient in Windows OS
Aer the O.S. restarts, the installaon is done. As soon as the system is successfully installed, a shortcut to launch the soware becomes available at the Start button | All Programs.
4.1.2 Install on MAC OS
This secon will walk you through the installaon of the NuClient in MAC operang system.
4.1.2.1 System Requirement
The NuClient requires the following hardware and soware to run properly in MAC O.S.:
| Client PC Minimum Requirements | ||
| CPU | Intel Core 2 Duo, 2.6GHz | |
| Display Card | OpenGL 2.0 and later | |
| OS Supported | Windows XP 32 bit | Windows 7 32/64 bitMac 10.6/10.7 |
| RAM | 1GB | 2GB |
| User Interface | HTTP Web browser - Internet Explorer 8 and later and Firefox 7.0.1NUUO client application program | |
 | We suggest that you avoid using on-board graphics card which will give you a poor performance. NuClient may pop up an error dialog saying “Videos cannot be displayed on the Client PC with on-board graphic card” for using an on-board graphics card.We also recommend that the drivers of graphics cards be upgraded to the latest versions. |
 | The system requires OpenGL 2.0 or higher versions to be installed. An error message will pop up if OpenGL 2.0 or higher versions are not found. |
 | The minimum supported screen resoluon 1024x768. NuClient will not run under the minimum resoluon. |
4.1.2.2 Proceed to Install
- Insert the CD into your CD-ROM drive and double-click NUUO Crystal Titan Series.mpkg to begin installaon.

text_image
NUUO Crystal Series.mpkgThe installer then opens.
- Choose your language and click Connue button.
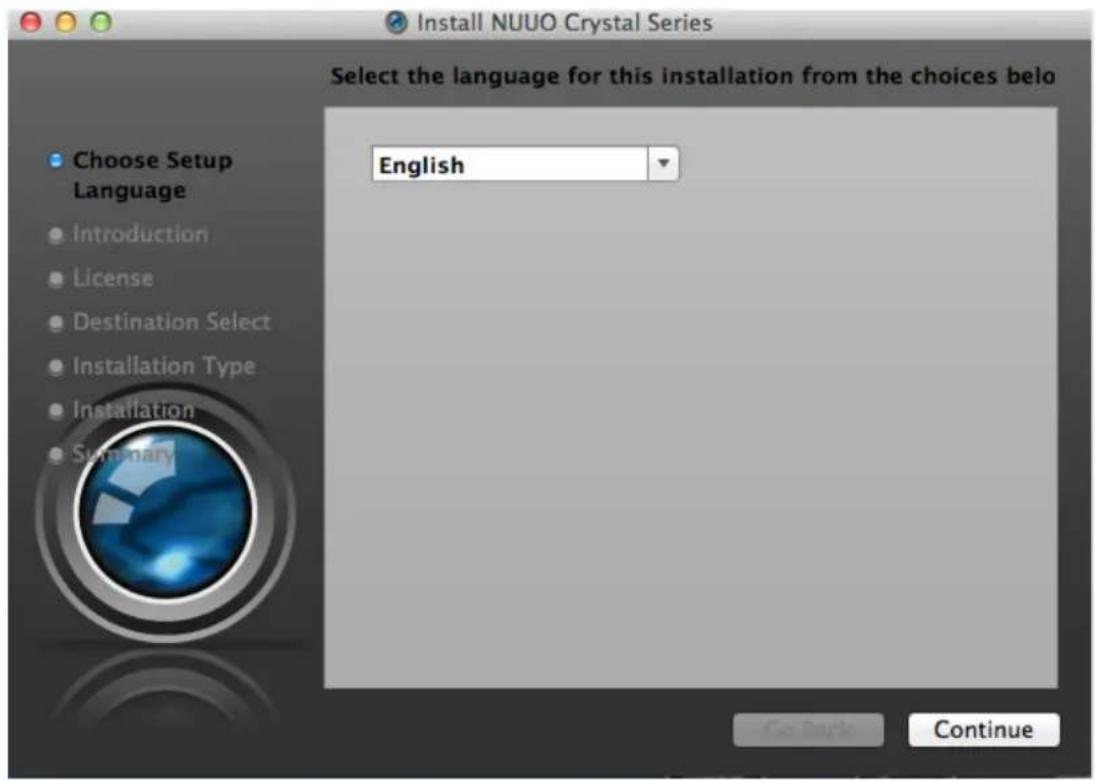
text_image
Install NUUO Crystal Series Select the language for this installation from the choices belo Choose Setup Language Introduction License Destination Select Installation Type Installation Summary English Go Back Continue3. Click the Connue button and accept the License Agreement.
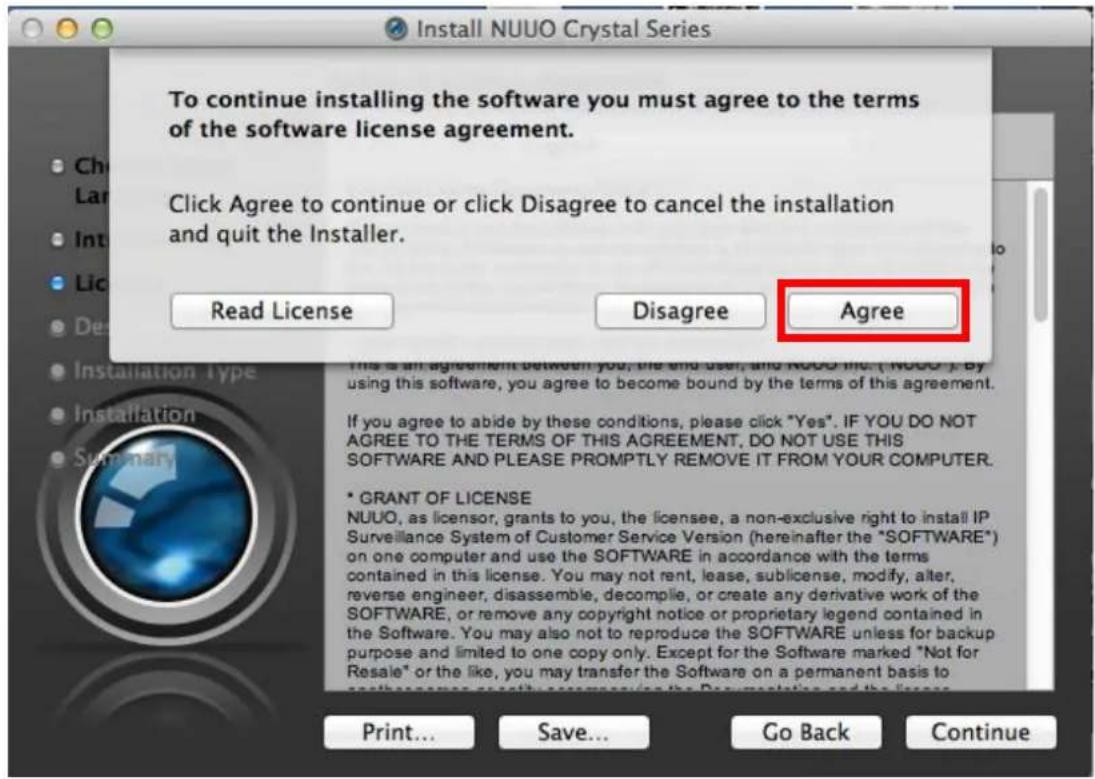
text_image
To continue installing the software you must agree to the terms of the software license agreement. Click Agree to continue or click Disagree to cancel the installation and quit the Installer. Read License Disagree Agree This is an agreement between you, the end user, and NUUO Inc. ("NUUU"). By using this software, you agree to become bound by the terms of this agreement. If you agree to abide by these conditions, please click "Yes". IF YOU DO NOT AGREE TO THE TERMS OF THIS AGREEMENT, DO NOT USE THIS SOFTWARE AND PLEASE PROMPTLY REMOVE IT FROM YOUR COMPUTER. * GRANT OF LICENSE NUUO, as licensor, grants to you, the licensee, a non-exclusive right to install IP Surveillance System of Customer Service Version (hereinafter the "SOFTWARE") on one computer and use the SOFTWARE in accordance with the terms contained in this license. You may not rent, lease, sublicense, modify, alter, reverse engineer, disassemble, decompile, or create any derivative work of the SOFTWARE, or remove any copyright notice or proprietary legend contained in the Software. You may also not to reproduce the SOFTWARE unless for backup purpose and limited to one copy only. Except for the Software marked "Not for Resale" or the like, you may transfer the Software on a permanent basis to other services so with access to the Documentaries and the licenses. Print... Save... Go Back Continue4. You can choose two types of installaon, Install and Customize. Install: Install everything in this package.
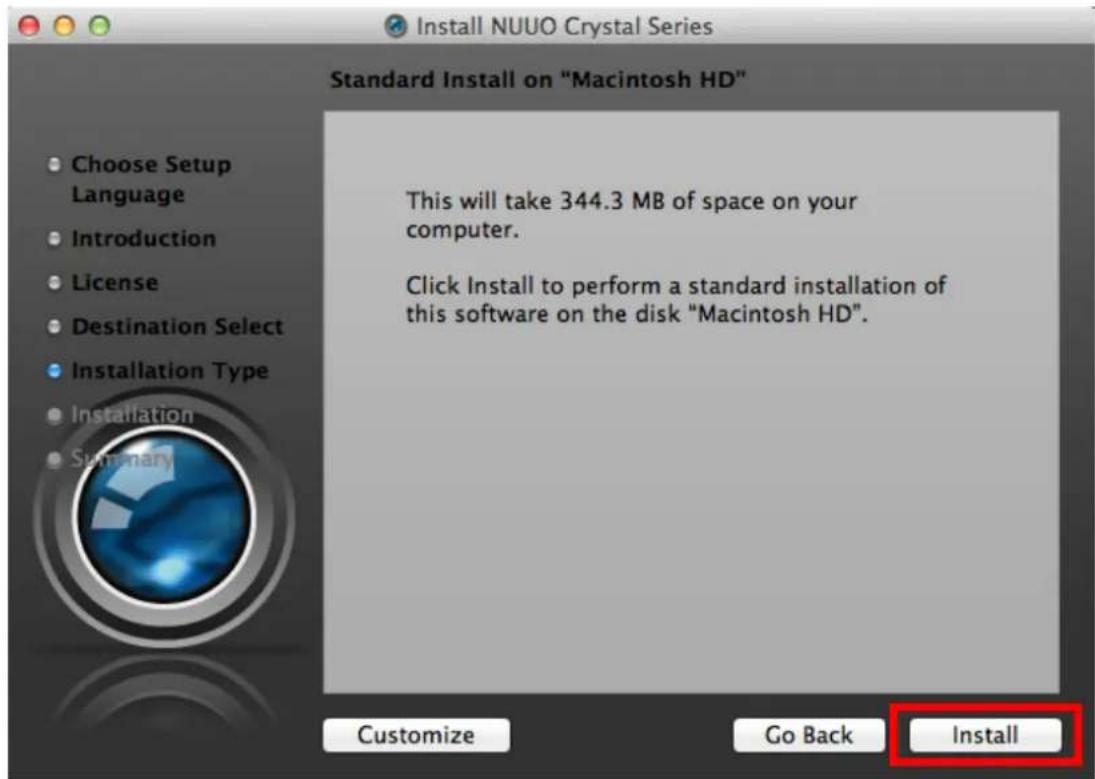
text_image
Install NUUO Crystal Series Standard Install on "Macintosh HD" Choose Setup Language Introduction License Destination Select Installation Type Installation Summary This will take 344.3 MB of space on your computer. Click Install to perform a standard installation of this software on the disk "Macintosh HD". Customize Go Back InstallCustomize: Install a custom selecon of applicaons.
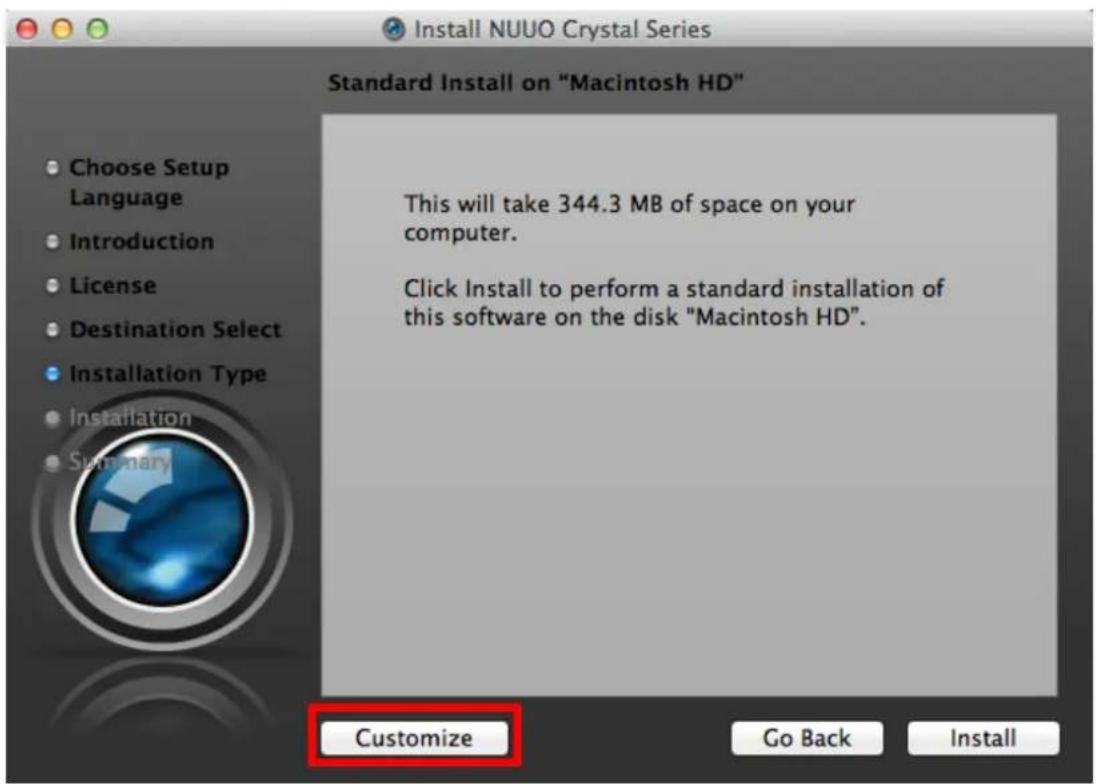
text_image
Install NUUO Crystal Series Standard Install on "Macintosh HD" Choose Setup Language Introduction License Destination Select Installation Type Installation Summary This will take 344.3 MB of space on your computer. Click Install to perform a standard installation of this software on the disk "Macintosh HD". Customize Go Back Install- Select the applicaons you want to install
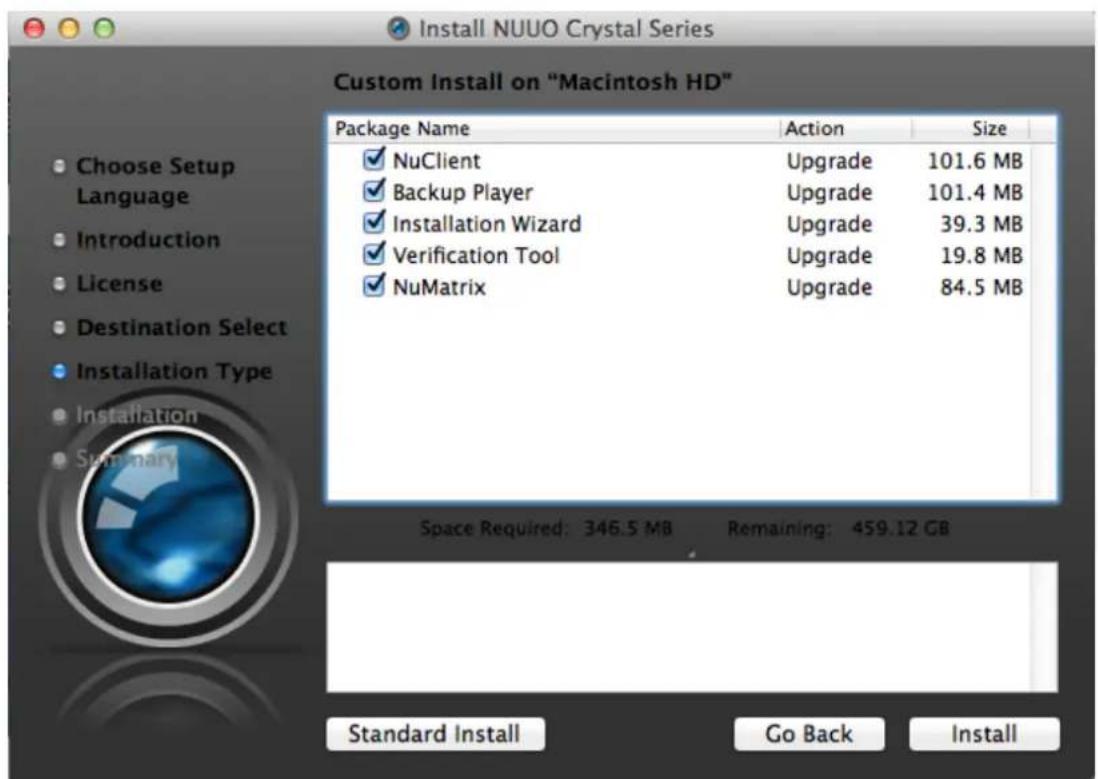
text_image
Install NUUO Crystal Series Custom Install on "Macintosh HD" Package Name Action Size ✓ NuClient Upgrade 101.6 MB ✓ Backup Player Upgrade 101.4 MB ✓ Installation Wizard Upgrade 39.3 MB ✓ Verification Tool Upgrade 19.8 MB ✓ NuMatrix Upgrade 84.5 MB Space Required: 346.5 MB Remaining: 459.12 GB Standard Install Go Back Install
The install desnaon only supports the system hard drive at this version.
- Click on the Install buon to start the installaon.
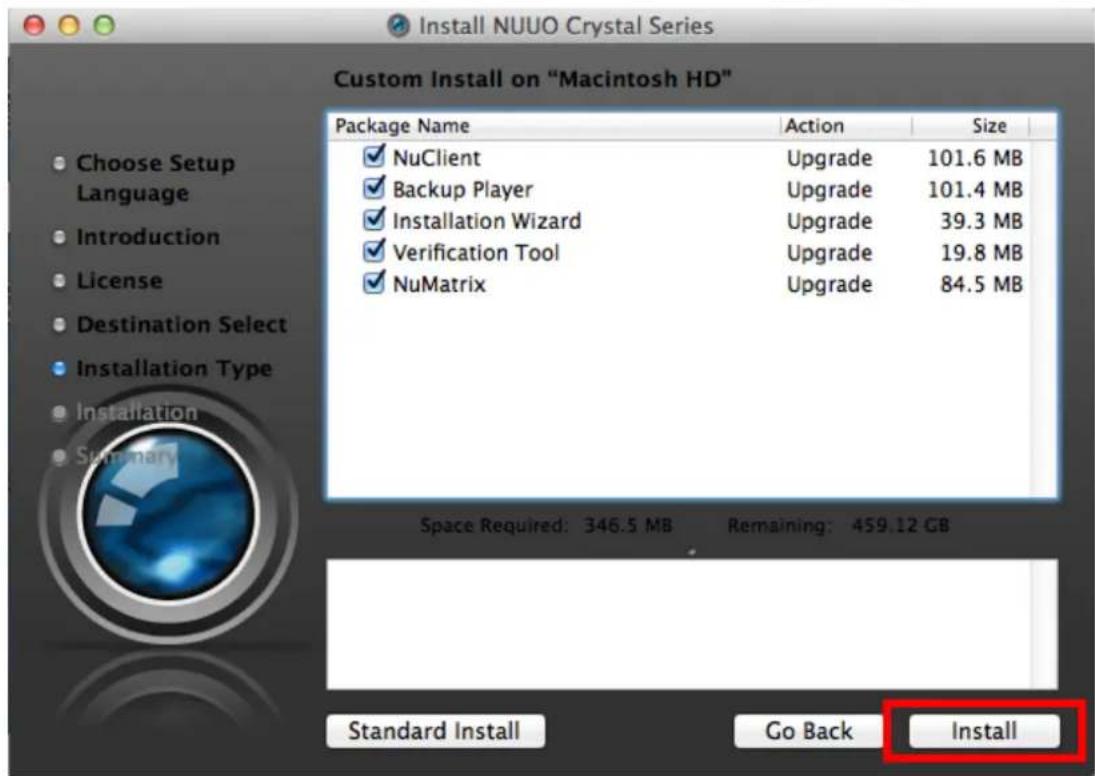
text_image
Install NUUO Crystal Series Custom Install on "Macintosh HD" Package Name Action Size ✓ NuClient Upgrade 101.6 MB ✓ Backup Player Upgrade 101.4 MB ✓ Installation Wizard Upgrade 39.3 MB ✓ Verification Tool Upgrade 19.8 MB ✓ NuMatrix Upgrade 84.5 MB Space Required: 346.5 MB Remaining: 459.12 GB Standard Install Go Back Install- The system is being installed.
text_image
Install NUUO Crystal Series Installing NUUO Crystal Series Choose Setup Language Introduction License Destination Select Installation Type Installation Summary Writing files... Install time remaining: About a minute Go Back Continue8. Choose Close to nish installaon.
text_image
Install NUUO Crystal Series The installation was completed successfully. Choose Setup Language Introduction License Destination Select Installation Type Installation Summary The installation was successful. The software was installed. Go Back Close4.1.2.3 Launch NuClient in MAC OS
Aer the O.S. restarts, the installaon is done. As soon as the system is successfully installed, a shortcut to launch the soware becomes available in your Applicaons.
5. Log in
To log in to the system:
-
Launch the NuClient as described in Launch NuClient in Window OS or Launch NuClient in Mac OS.
-
NuClient launches and a login dialog opens.
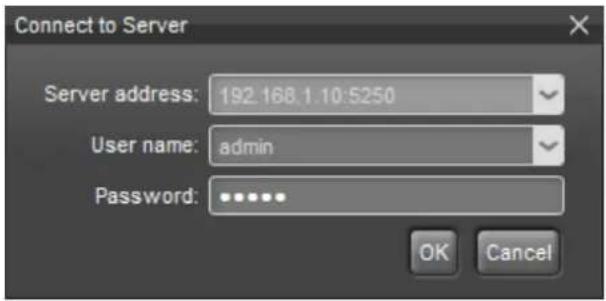
text_image
Connect to Server Server address: 192.168.1.10:5250 User name: admin Password: ***** OK Cancel- Enter the server address you are going to connect to, the user name, and the password. Then click the OK buon.
Once you're logged in, the main interface of the NuClient shows.
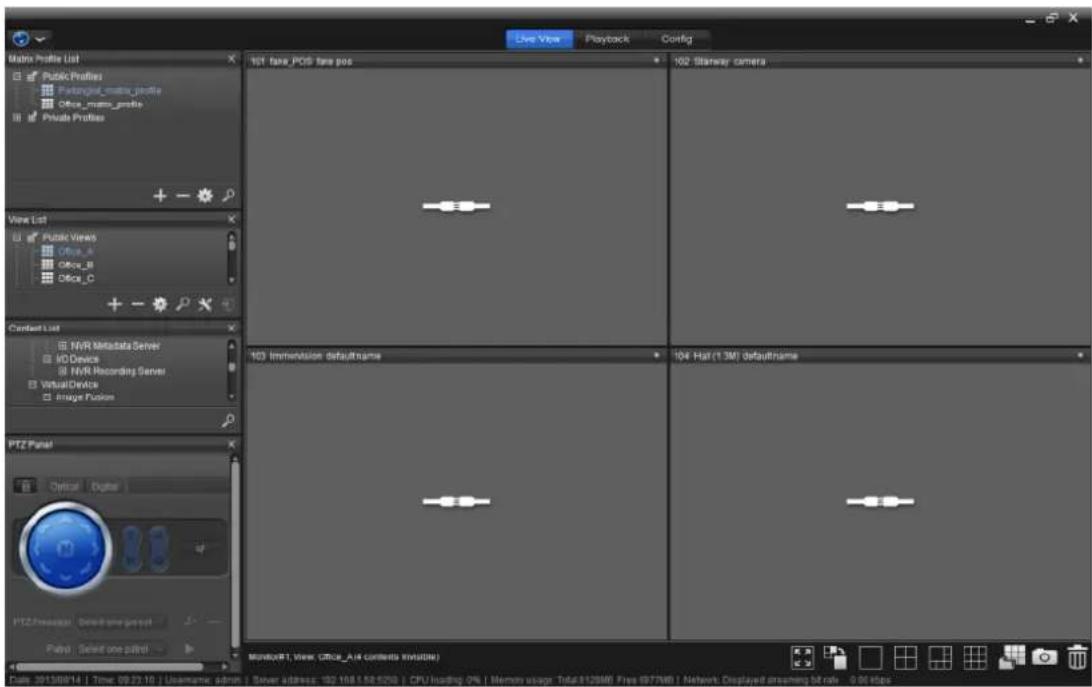
text_image
Main Profile List Public Profiles Patangial_main_profile Office_main_profile Private Profiles 101 fare_POS fare pos 102 Starway camera View List Public Views Office_A Office_B Office_C Contact List NVR Metadata Server HD Device NVR Recording Server Virtual Device Image Fusion PTZ Panel Optical Digital PTZ https://www.txtv.net/Select one button Photo Select one button Monobuff, view: Office_A-4 contents Invisible) Date: 2013/08/14 | Time: 09:23:10 | Username: admin | Server address: 182.163.156.1293 | CPU loading: 0% | Memory usage: Total:112MB | Free: 8F7MB | Network Displayed dressing bit rub - 0.01 bytes
If too many clients are trying to connecng to a remote server, then an error message will pop up saying the number of maximum connecns has been reached.
text_image
Arecont AV8180-1 MAX
NuClient can only login Management Server, cannot login Recording Server(s), Metadata Server(s) and Matrix.
6. Log out
To log out from the system:
1. Access NuClient.
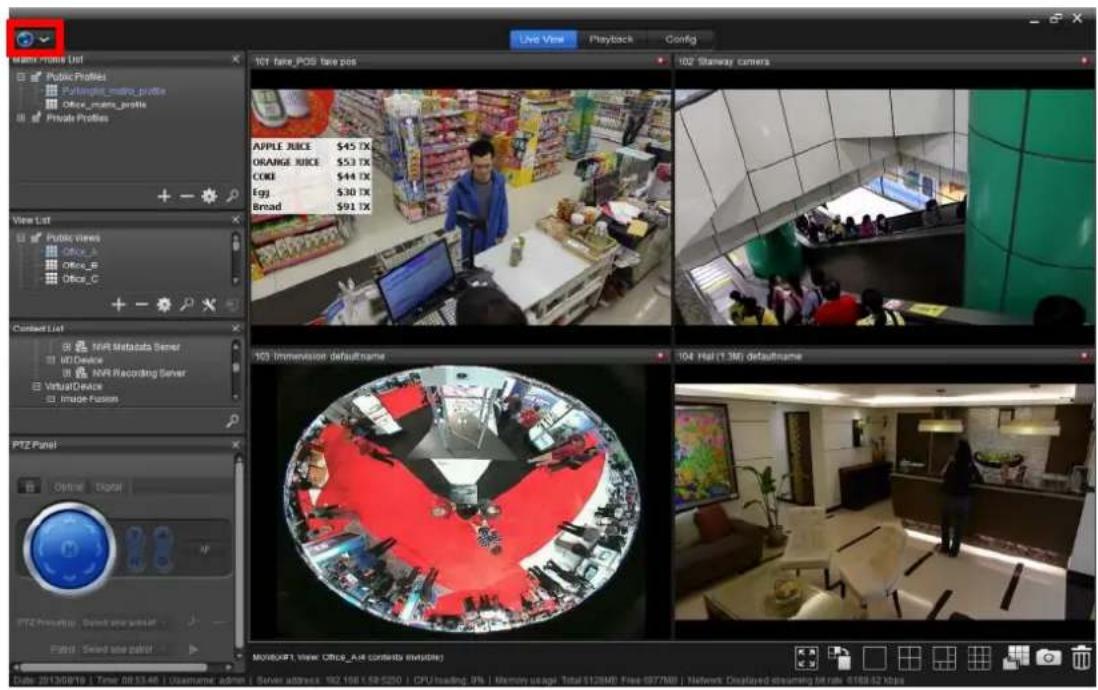
text_image
101 fare_POS fare pos APPLE JUICE $45 TX ORANGE JUICE $53 TX COG $44 TX Egg $30 TX Broad $91 TX 102 Starway camera 103 Immersion defaultname 104 Hot (1.3M) defaultname PTZ Panel Optimal Digital PTZ Display: Select color Fiat: Select color Movie(IFT, View: Office_Aut contents invisible) Tube: 25130876 | Time: 00:17:46 | Username: admin | Silver address: 192.168.169.250 | CPU loading: PS | Memory usage: Total12MB; Free:97MB | Network Displayed streaming off rate: $188.12 kbps- From the Top Toolbar of the NuClient, click the "global" icon
The menu opens.
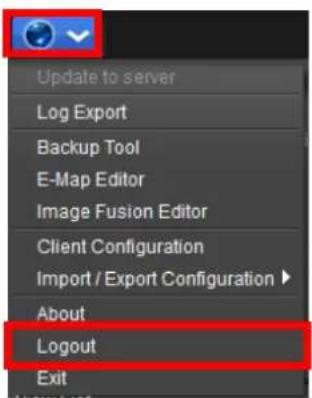
text_image
Update to server Log Export Backup Tool E-Map Editor Image Fusion Editor Client Configuration Import / Export Configuration ▶ About Logout Exit3. Click Logout.
If you have made any change to the conguraon, a dialogs will show and request for your conrmaon whether to write the change(s) to the conguraon when you log out. To write the change(s) to the server, click the Yes buon in the dialog.
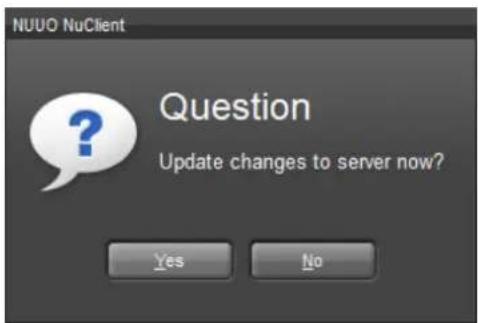
text_image
NUUO NuClient Question Update changes to server now? Yes NoA progress bar will appear to show the wring status.

text_image
Committing ... 0%Once the update is through, the login dialog will re-appear and you are logged out from the system.
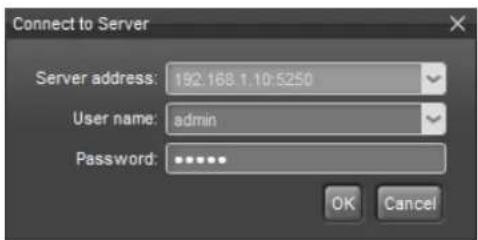
text_image
Connect to Server Server address: 192.168.1.10:5250 User name: admin Password: ***** OK Cancel
Both your primary monitor and secondary monitors will be closed when you log out.
7. Exit
The NuClient sll runs and stays in main memory aer you log out from it. To close the sware:
1. Access NuClient.
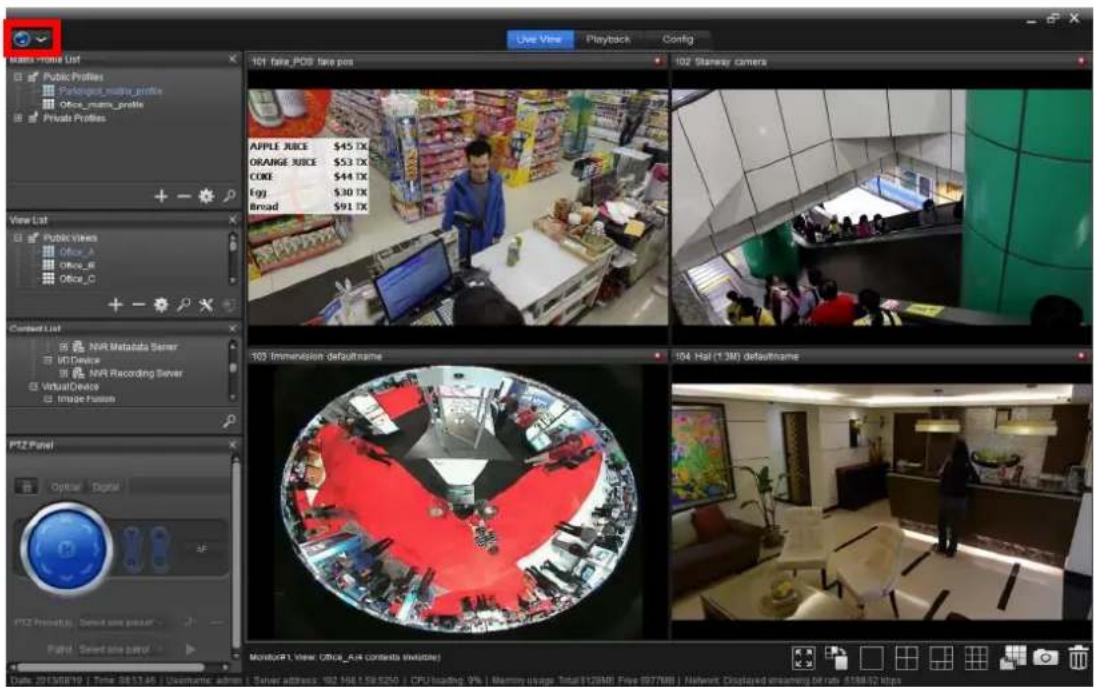
text_image
Main - main List Public Profiles Package warrior profile Office_mam profile Private Profiles 301 fare PCB time pos Apple Juice $45 TX ORANGE JUICE $53 TX CORE $44 TX Igg $30 TX Broad $91 TX 102 Starway cameras 103 Immersion defaultname 104 Hal (1.3M) defaultname MultiCAP1 View (Office_A4 contents available) Date: 2013/8/10 | Time: 08:57:45 | Username: admin | Timer address: 162 Hali 109 5250 | CPU/sailing: 9% | Memory usage: Total(17MB Fios 99708) | Network Displayed streaming rate: $188.52 kbps- From the Top Toolbar of the NuClient, click the "global" icon
The menu opens.
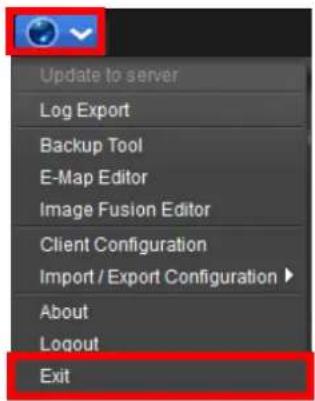
text_image
Update to server Log Export Backup Tool E-Map Editor Image Fusion Editor Client Configuration Import / Export Configuration ▶ About Logout Exit- Click Exit.
The NuClient is quit.
8. Version information
To see the soware version of NuClient:
1. Access NuClient.
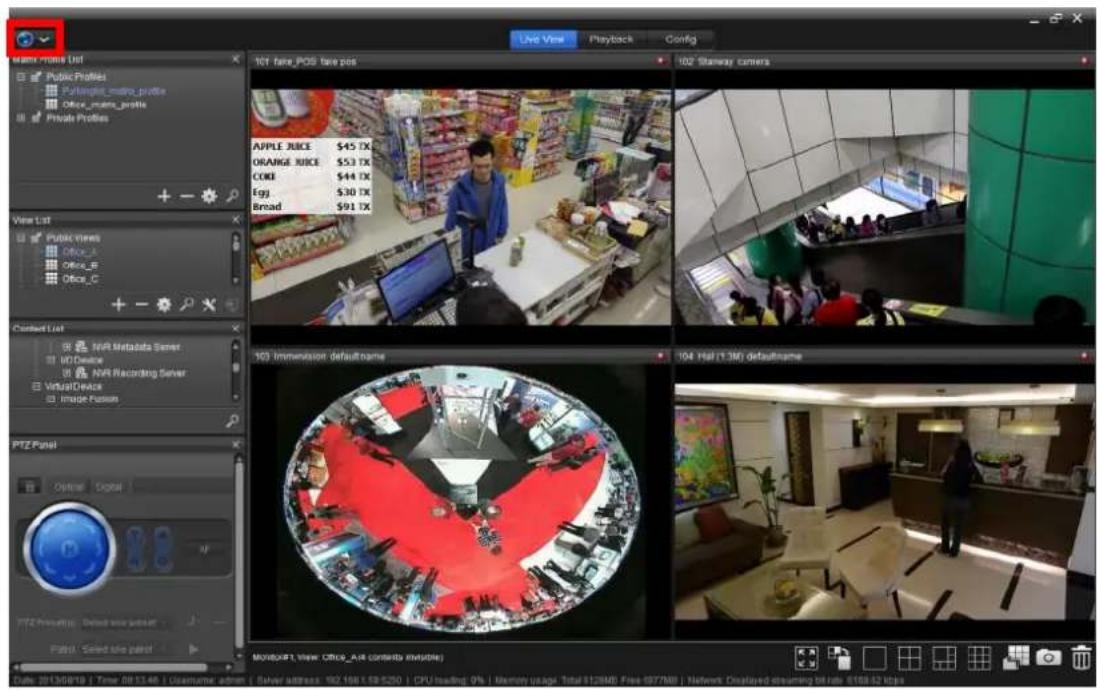
text_image
101 fare_POS fare pos APPLE JUICE $45 TX ORANGE JUICE $53 TX COGS $44 TX Egg $30 TX Broad $91 TX 102 Starway camera 103 Immersion defaultname 104 Hall (1.3M) defaultname PTZ Panel Optimal Digital PATE: Select time panel TITLE: 20130878 | Time: 00:17:46 | Username: admin | Silver address: 102.168.169.1250 | CPU loading: 9Ps | Memory page: Total12MB Free:97MB | Network Displayed streaming bit rate: $188.12 kbps- From the Top Toolbar of the NuClient, click the "global" icon
The menu opens.
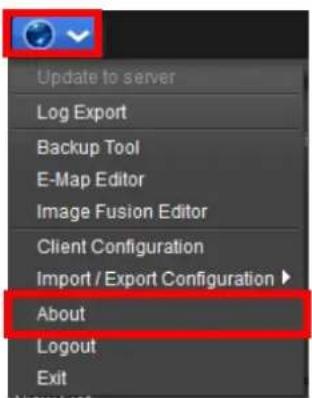
text_image
Update to server Log Export Backup Tool E-Map Editor Image Fusion Editor Client Configuration Import / Export Configuration ▶ About Logout Exit3. Click About.
An About NuClient window then opens and shows the soware's version, copyright informaon and the links to NUUO's homepage and its technical support site.
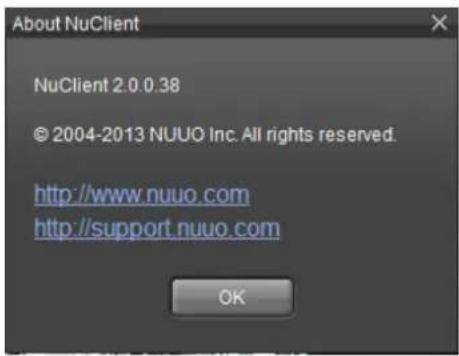
text_image
About NuClient NuClient 2.0.0.38 © 2004-2013 NUUO Inc. All rights reserved. http://www.nuuo.com http://support.nuuo.com OK
Visit NUUO's technical support site at http://www.nuuo.com/eHelpdesk.php. You may nd all sorts of technical informaon including FAQs, product specicaons, and technical contact informaon.
9. Interface Overview
Understanding the NuClient's user interface helps you navigate the soware without any problem. Once you are familiar with the NuClient's UI, you can jump seamlessly within the soware.
The Global
Live View, Playback and Cong tab

text_image
Live View Playback Config 101 fake_POS fake pos 102 Immersion defaultname 104 Hal (1.3M) defaultname Matte Profile List Private Profiles Pulatang'smater_prolite Office_mater_prolite Private Profiles View List Public Views Office_A Office_B Office_C Content List NVR Metadata Server ISO Device NVR Recording Server Virtual Device Image Fusion PTZ Panel Optical Digital AF PTZ Release(s) Select and insert Patrl. Select time panel Microsoft (http://Office_AH contents.inversion) Date: 2013/08/14 | Time: 09:23:10 | Username: admin | Server address: 162.168.158.520 | CPU loading: 0% | Macron usage: Total 312MB Free SET7MB | Network: Displayed streaming off tabs - 0.00 tbps9.1 Menu- The Global
To access the NuClient's menu:
- From the Top Toolbar of the NuClient, click the "global" icon
The menu opens.
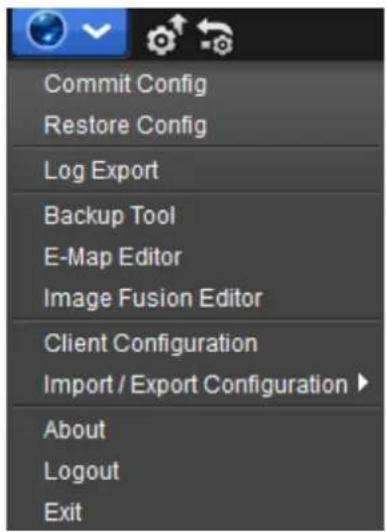
text_image
Commit Config Restore Config Log Export Backup Tool E-Map Editor Image Fusion Editor Client Configuration Import / Export Configuration ▶ About Logout ExitThe featured commands are:
| Command | Description |
| Commit Config | Applies the change(s).▸ This command is efficacious as thecommit config [IMAGE] on theConfig tab, Top Toolbar.▸ See alsoScreen Terminology. |
| Restore Config | Refresh the change(s).▸ Request Server provides the configuration which saved in Management Server.▸ This command is efficacious as therestore config [IMAGE] on theConfig tab, Top Toolbar.▸ See alsoScreen Terminology. |
| Log Export | Opens aLog Viewertool to export the log of a desired period of time. |
| Backup Tool | Launches theBackup Toolto save the videos recorded in a desired period of time to a desired local storage. |
| E-Map Editor | Opens theE-Map Editorthat inserts multiple maps that mark the locations of cameras and I/O.▸ The “E-map” is a graphical way to present cameras and I/O devices to give the administrator an idea of where a camera is located, and the relationship among those devices. Cameras and I/O are overlaid on a street map, a floor plan, or any other custom image files. |
| Image Fusion Editor | Open the Image Fusion Editor to create a panoramic view by stitching multiple camera images together. |
| Client Configuration | Access the preference configuration for the software. |
| Export Config | Save the NuClient configuration to a file. |
| Import Config | Load a NuClient configuration file. |
| About | Views the developer and version of the software, NuClient. |
| Logout | Signs out from the current account. (NuClient will still be running.) |
| Exit | Quits the software, NuClient. |
9.2. Live View
When the system starts and users log in, it is the Live View that opens onscreen. If it isn't the Live View screen that shows at the moment, click the Live View tab from the NuClient's Top Toolbar to open the Live View screen.
Exactly as its name communicates, the Live View is the screen where the instant videos are displayed. Most of the Live View screen is occupied by a predominant video area. See Live View to know more about the Live View screen.
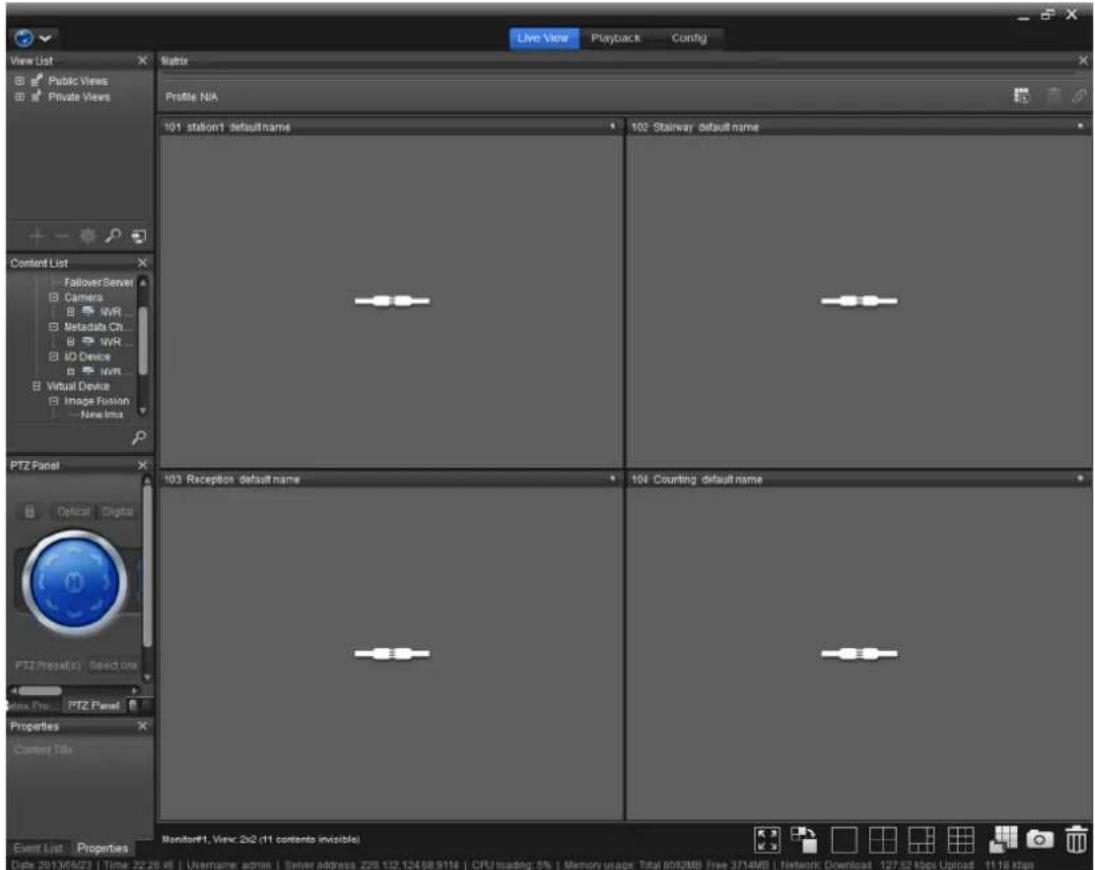
text_image
Live View Playback Config View List Public Views Private Views Profile N/A 101 station1 defaultname 102 Stairway defaultname 103 Reception defaultname 104 Counting defaultname Event List Properties Date: 2013/6/23 | Time: 22:28:45 | Username: admin | Server address: 229 132 12468.9114 | CPU loading: 5% | Memory usage: Total 8992MB Free 3714MB | Network Download: 127.52 kbps Upload 11.16 kbps Content List Fallover Server Camers WVR Metadata Ch WVR IO Device Iwrt Virtual Device Image Fusion New Ina PTZ Panel Optical Digital PTZ (Prestatic) Select one New One PTZ Panel Properties Current TSs Monitor1, View: 2x2 (11 corremb invisible)9.3. Playback
To open the NuClient's Playback screen, click the Playback tab from the Top Toolbar.
The Playback is the screen to play the recorded videos. Same as the Live View screen, the Playback screen is occupied by a predominant video area as well. See Playback to know more about the Playback screen.
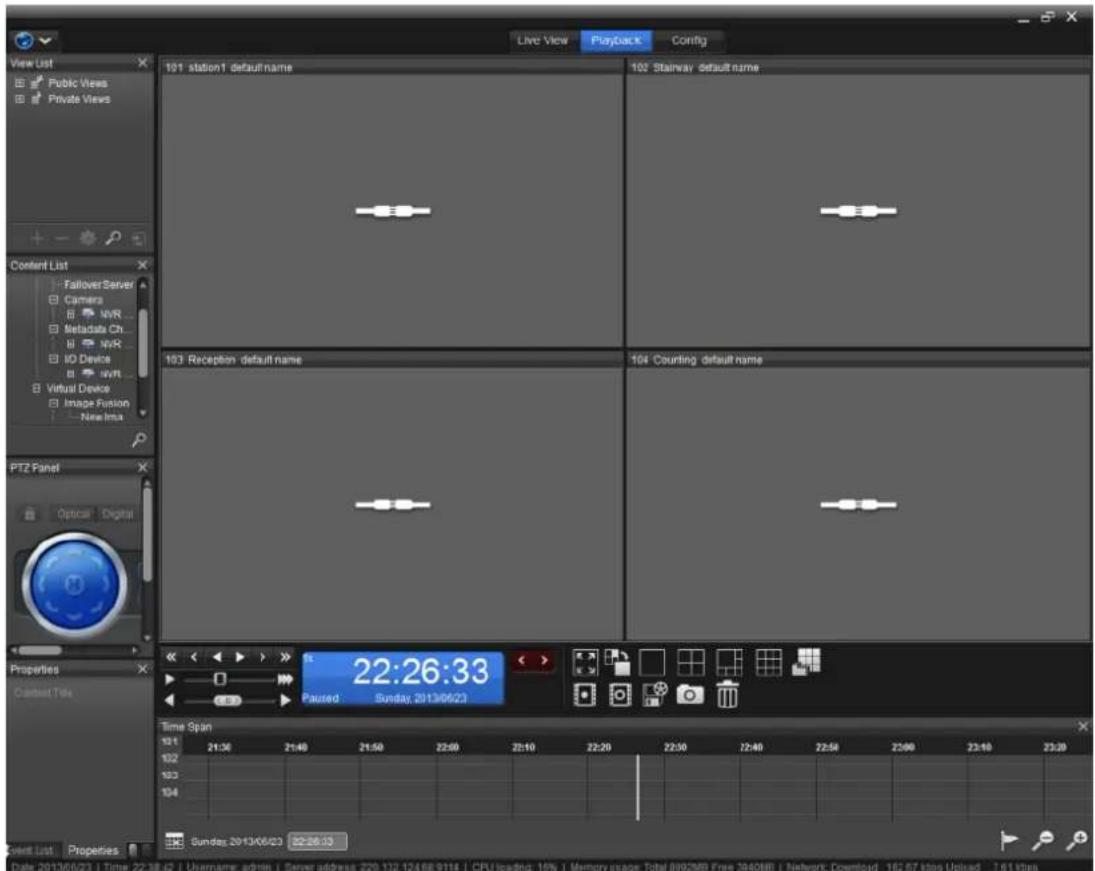
text_image
Live View Playback Config View List Public Views Private Views 101 station1 default name 102 Stairway default name Content List Fallover Server Camers NVR Metadata Ch NVR IO Device svirt Virtual Device Image Fusion New Ina PTZ Panel Optical Digital Properties Context Tools Time Span 13:1 21:30 21:40 21:50 22:00 22:10 22:20 22:30 22:40 22:50 22:00 23:10 23:30 13:2 13:3 13:4 Sunday 2013/06/23 22:26:33 Date: 2013/06/23 | Time: 22:38:42 | Username: admin | Server address: 229.132.124/68.9114 | CPU loading: 16% | Memory usage: Total 8092MB Free 3940MB | Network: Download: 162.67 kbps Upload: 1.61 kbps9.4. Conig
From the Top Toolbar of the NuClient, click the Cong tab to open the NuClient's "conguraon" feature which includes "system conguraon", "physical conguraon" and the help le of the NuClient.
See Sengs for the "system conguraon" and "physical conguraon" featured by the NuClient.
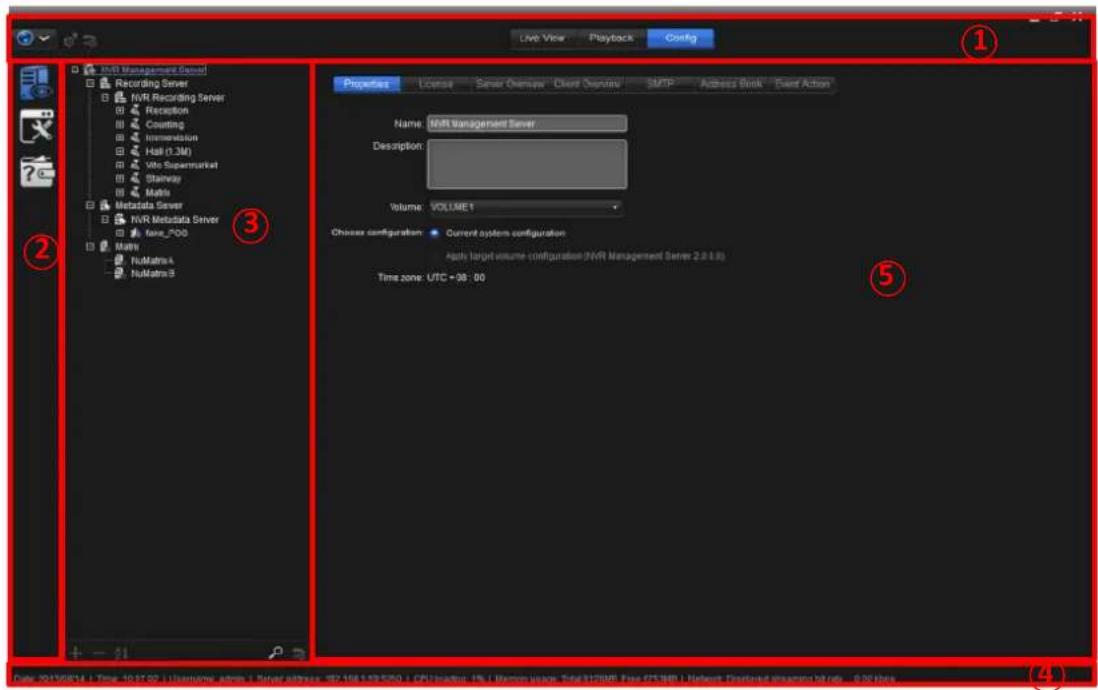
text_image
Live View Playback Config Recording Server NVR Recording Server Reception Counting Immediation Hall (1.3M) Vito Supermarket Starway Matrix Metadata Server NVR Metadata Server zone_P00 Matrix NuMatrix4 NuMatrix8 Properties License Server Overview Client Address SMTP Address Book Event Action Name: NVR Management Server Description: Volume: VOLUME 1 Choose configuration Current system configuration Apply target volume configuration (NVR Management Server 2.0.1.6) Time zone: UTC + 08 : 00 ① ② ③ ④ ⑤ Date: 2013/06/14 - Time: 10:17:00 - Username, admin.1, Reset address: DE2.165.165.5750 - CPU usage: 4% / Memory usage: Total: 317MB; Free: FTCHM | Network Disboard streamers kit rate: 8.96 bytes| Number | Title | Description | ||
| 1 | Top Toolbar | The Top Toolbar features the following onscreen facilities: | ||
| Facility | Title | Description | ||
 | the “global” | Opens the menu of the NuClient. ▶ SeeNuClient Menufor more details. | ||
 | apply button | Applies the change(s). | ||
 | restore button | Refresh the change(s). | ||
 | the tabs | Switch the NuClient between the Live View,Playback and Config features. | ||
| 2 | Config Catalog | Switches the NuClient between System Config, Physical Config, and Help. | ||
| 3 | Tree Console | ▶ Provides the tree menu. ▶ Features the following onscreen facilities: | ||
| Icon | Title | Description | |||
| + | add sign | Adds auser group/device. | |||
| - | delete sign | Deletes the selecteduser group/device. | |||
| A↓ | ascending button | Sorts all theuser group(s)/device in an ascending order. | |||
| ∅ | search button | Searches for anuser group/adevice. | |||
| ←→ | Restore system/physical button | Restore system/physical setting. | |||
| 4 | Status Bar | Deliver system date, system time, user ID, server address, CPU loading, memory usage, and download/upload speed. | |||
| 5 | Configuration Pane | Opens the settings featured by a subject of the menu tree when the subject is clicked. | |||
| Icon | Title | Description |
| + | add sign | Adds auser group/device. |
| - | delete sign | Deletes the selecteduser group/device. |
| ↓ | ascending button | Sorts all theuser group(s)/device in an ascending order. |
| search button | Searches for anuser group/adevice. | |
| Restore system/physical button | Restore system/physical setting. |
9.5 Graphic Icon on Tree list
The following icon will display on tree from Physical conguraon.
| Graphic icon | Description |
| Management Server | |
| Recording Server | |
| Video Device | |
| Camera | |
| Camera DI/DO | |
| IO device | |
| Metadata Server | |
| Metadata Source | |
| Metadata channel | |
| Matrix |
The following icon will display on tree from System configuration page.
Special notification will overlay on icon from tree list include:
| Graphic icon | Description |
| [HW80] | Configuration is modified but haven't commit to Management Server.Click theapply buttonon theTop Toolbarto apply the change(s). |
 | The device is disabled. |
 | The device is disconnect |
 | Can't get device information. |
10. Settings
The Cong tab features two types of conguraon. One is the “system conguraon”; the other is the “physical conguraon”. The “system conguraon” means to conjure Management Server basic prole setng such as user group, role, schedule and layout while the “physical conguraon” means to conjure the Management Server in order to conjure all the physical devices within the network such as recording server, Metadata Server, Matrix Server, video device, camera and I/O devices. Generally the “system conguraon” should be done prior to the “physical conguraon”.
To access the NuClient sengs:
- Launch the NuClient as described in Launch NuClient in Window OS or Launch NuClient in Mac OS.
The NuClient opens onscreen and shows the Live View tabbed page by default.
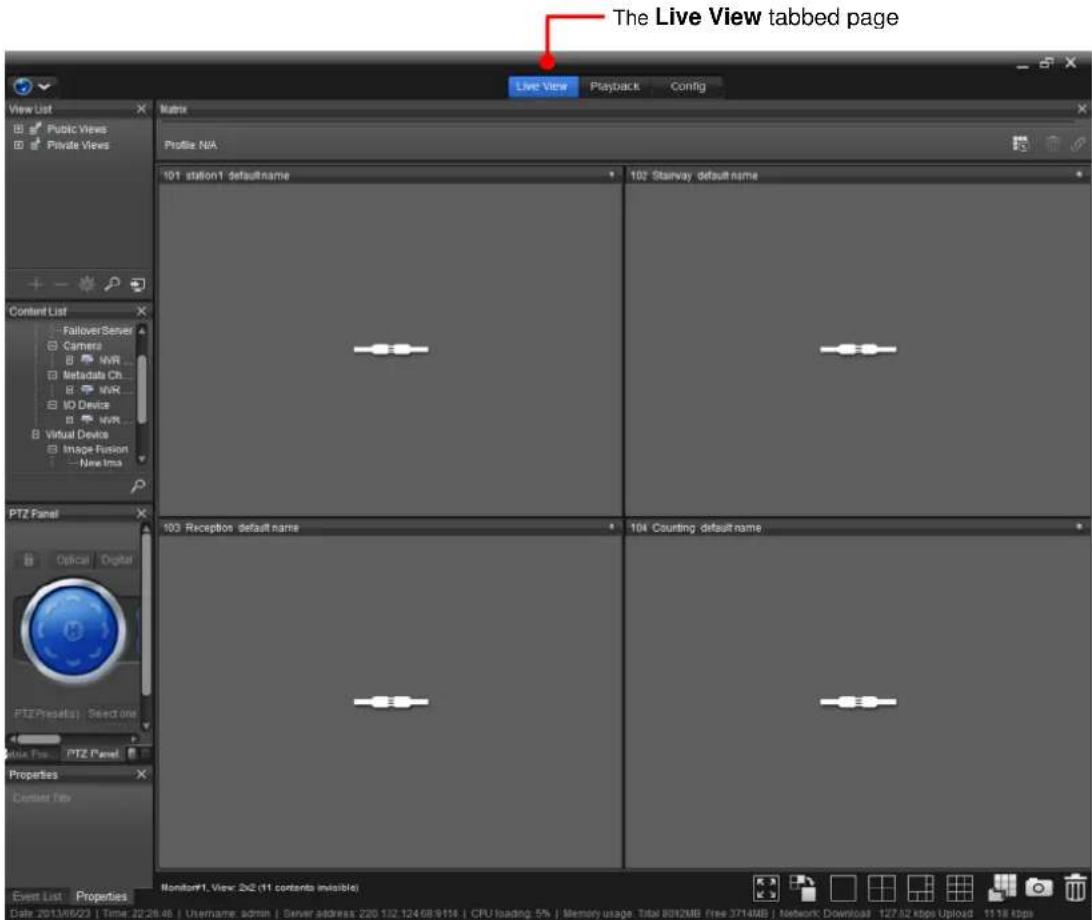
text_image
The Live View tabbed page Live View Playback Config Matrix Profile N/A 101 station1 defaultname 102 Starvay defaultname 103 Reception default name 104 Counting default name Event List Properties Date: 2013/05/23 | Time: 22:28:46 | Username: admin | Server address: 220 132.124/68.9114 | CPU loading: 5% | Memory usage: Total 8012MB free.3714MB | Network Download: 127.52 kbps Upload: 1118 kbps2. From the Top Toolbar, click the Cong tab.
The Cong tab opens.
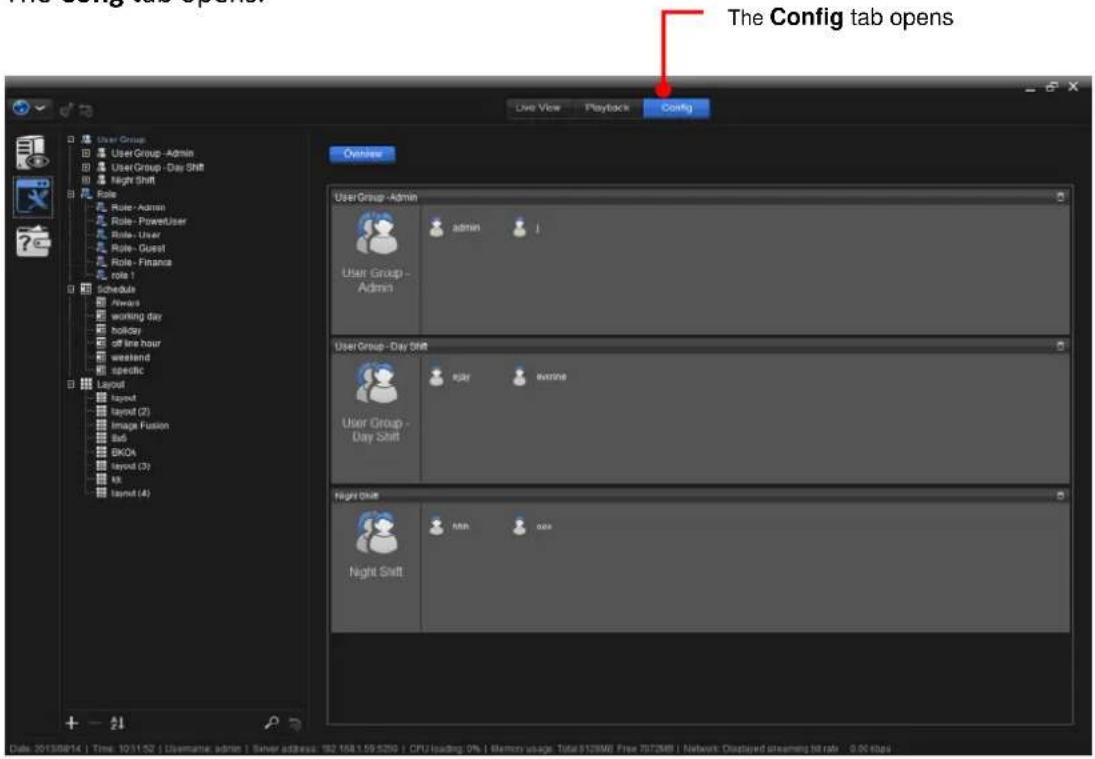
text_image
The Config tab opens Live View Playback Config User Group -Admin User Group - Admin User Group - Admin User Group - Day Shift User Group - Day Shift Night Shift admin user user user user user user user user user user user user user user user user user user user user user user user user user user user user user user user user user user user user user user user user user user user user user user user user user user other user user user user user user user user user user user user user user user user user user user user user user user user user user user user user user user user user user user user user user user user user user user user user user user user user upper class 1000000000000000000000000000000000000000000000000000000000000000000000000000000000000000000000000000010.1 Physical Configuration
The Management Server runs the administrave soware to control all the networked devices including the Recording Server, Metadata Server and Matrix. Hence, it relies on the Management Server to congure all the networked devices.
To access the Physical Cong ("physical conguraon"):
- Open the NuClient setngs as described in Sengs.
The NuClient sengs open.
- Click the Physical Cong icon

from the Cong Catalog.
The physical conguraon then opens onscreen and shows the Management Server sengs by showing the Properes tabbed page in the Conguraon Pane.
The physical configuration opens and shows Management Server settings by showing the Properties tabbed page in the Right Pane..
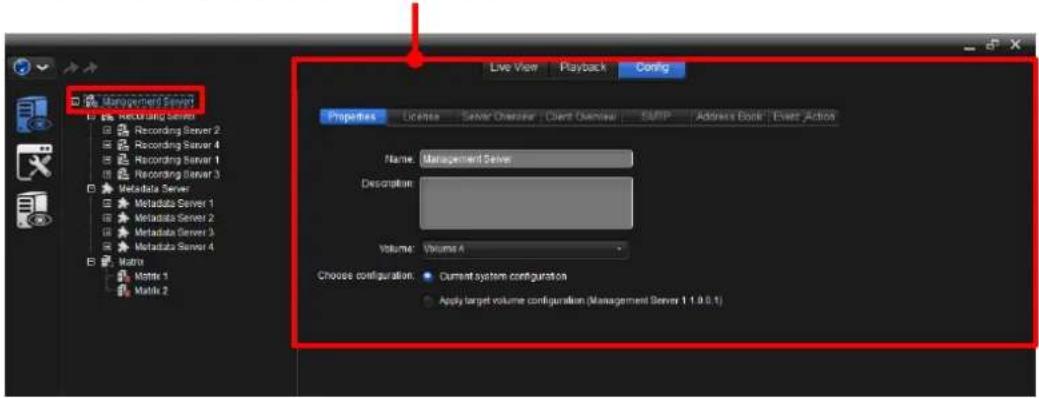
text_image
Live View Playback Config Management Server Recording Server Recording Server 2 Recording Server 4 Recording Server 1 Recording Server 3 Metadata Server Metadata Server 1 Metadata Server 2 Metadata Server 3 Metadata Server 4 Matrix Matrix 1 Matrix 2 Properties License Selfer Overview Class Overview SUPP Address Book Event Action Name: Management Serve Description: Volume: Volume A Choose configuration: Current system configuration Apply target volume configuration (Management Server 1.1.0.0.1)The physical conguraon features the following sengs:
| Setting | Description |
| Recording Server | Configures the Recording Server to control one or more “video device(s)” that further controls one or more camera(s) or camera DI/DO.➢ See Configure Recording Server for the settings. |
| Metadata Server | 1. Configures the Metadata Server to host the third-party device servers and archive their data.2. Configures the Metadata Server to stream and archive the data from the third-party device servers (such as POS server, Access Control server, and LPR server) so the NuClient is able to combine the data with video images for more sophisticated application such as theft investigation.➢ See Configure Metadata Server for the settings. |
| Matrix | Enables an unlimited number of video walls and video displays.➢ See Configure Matrix for the settings. |

Please note that only when have an "Ulmate level" license will you be able to see the Matrix interface on NuClient.
10.1.1. Conigure Management Server
To congregate the Management Server:
- Run the NuClient. Click the Cong tab from the Top Toolbar. Then click the
Physical Cong icon

from the Cong Catalog.
- The Tree Console then shows three setng groups: Recording Server, Metadata Server and Matrix.
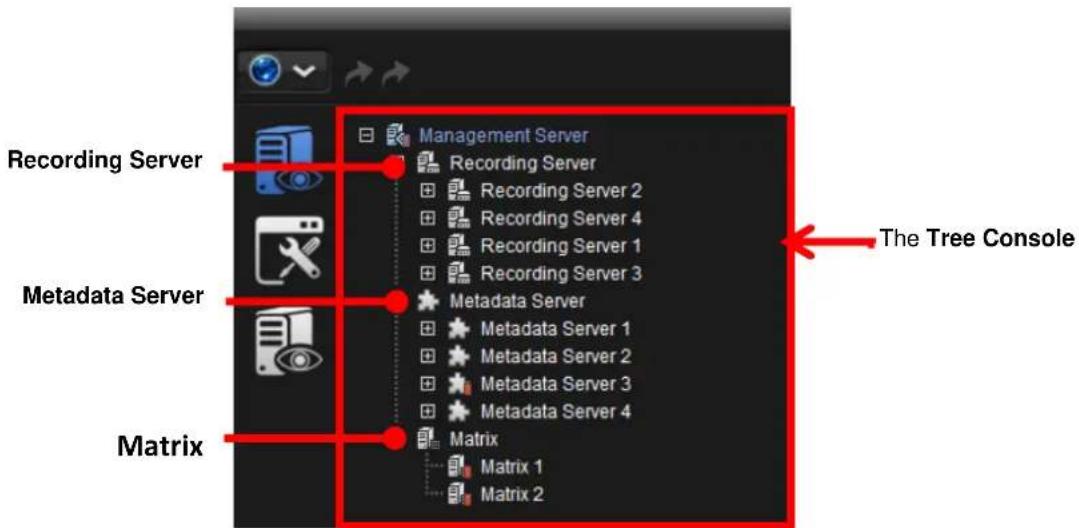
text_image
Recording Server Metadata Server Matrix Management Server Recording Server Recording Server 2 Recording Server 4 Recording Server 1 Recording Server 3 Metadata Server Metadata Server 1 Metadata Server 2 Metadata Server 3 Metadata Server 4 Matrix Matrix 1 Matrix 2 The Tree Console3. From the Tree Console, click the topic Management Server.
The Properes tabbed page then opens in the Conguraon Pane while the other six tabbed pages are hidden.
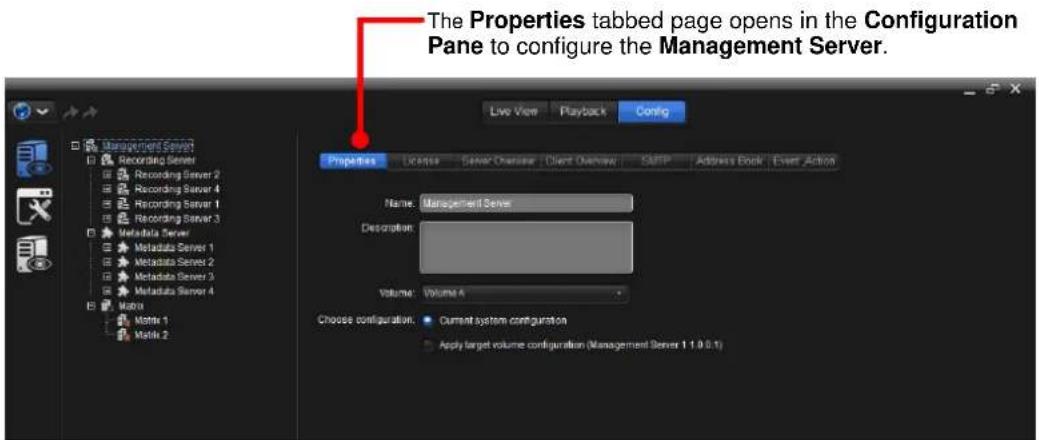
text_image
The Properties tabbed page opens in the Configuration Pane to configure the Management Server. Live View Playback Config Properties License Save Overview Client Overview SFTP Address Book Event Action Name: Management Server Description: Volume: Volume 4 Choose configuration: Current system configuration Apply target volume configuration (Management Server 1 1.0 0.1)4. Access one of these tabbed pages to congregate the Management Server.
A funcon overview of these tabbed pages:
| Tab | Description |
| Properes | Enters the information about the Management Server including the name, description, RAID (disk) volume and so on.▸ See Properties for the settings. |
| License | Activates/transfers the licenses (to use NUUO software) for the networked physical devices.▸ See License for the settings. |
| Server Overview | Delivers a general view of all the servers under the control of the Management Server, including the Recording Server(s), Metadata Server(s) and Matrix(s).▸ See Server Overview for the settings. |
| Client Overview | Delivers a general view of the clients connected to the Management Server.▸ See Client Overview for the settings. |
| SMTP | Sets up the “Simple Mail Transfer Protocol” for the Management Server so it can send out emails.▸ See SMTP for the settings. |
| Address Book | Sets up the emails to receive the Management Server’s notifications for the configured camera events, input events and system events.▸ See Address Book for the settings. |
| Event Acon | Enables/disables the event(s) that will launch action(s) from the Management Server.▸ See Event Action for the settings. |
10.1.1.1. Properties
It relies on the Properes tabbed page to enter the informaon about the
Management Server including the name, descripon, RAID (disk) volume and so on.
To access the Properes tabbed page that congures the Management Server:
1. From the Tree Console, click the topic Management Server.
The Properes tabbed page then opens in the Conguraon Pane.
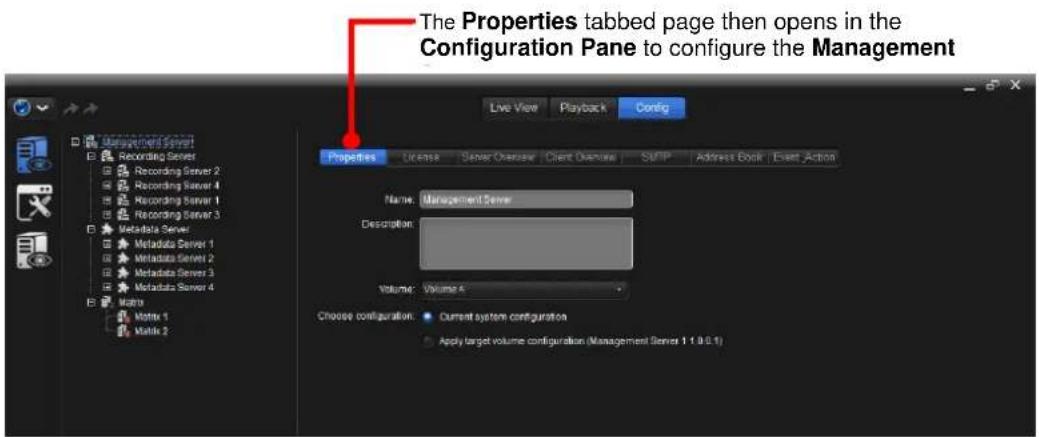
text_image
The Properties tabbed page then opens in the Configuration Panel to configure the Management Live View Playback Config Properties License Server Overview Client Overview SMIP Address Book Elicit_Action Name: Management Server Description: Volume: Volume 4 Choose configuration: Current system configuration Apply target volume configuration (Management Server 1.1.0.0.1)The featured sengs on the Properes tabbed page are:
| Setting | Description | Default |
| Name | Names the Management Server. | “Management Server” |
| Descripon | Provides a brief description for this Management Server for the easier identification of it. | -- |
| Volume | Assigns a “volume” to the Management Server.▸ A “volume” is one or more disk drives working together as a logical drive. Video recording requires a volume to be created first. For RAID setting, go to web setting first. | Volume A |
| Choose conguraon | If the volume chosen has existing configuration, there are two options.1. Current system configuration2. Apply target volume configuration |
10.1.1.2. License
It relies on the License tabbed page to acvates/transfer the licenses (to use NUUO soware) for the physical devices on the Management Server's network.
To access the License tabbed page that congures the Management Server:
- From the Tree Console, click the topic Management Server.
The Properes tabbed page then opens in the Conguraon Pane.
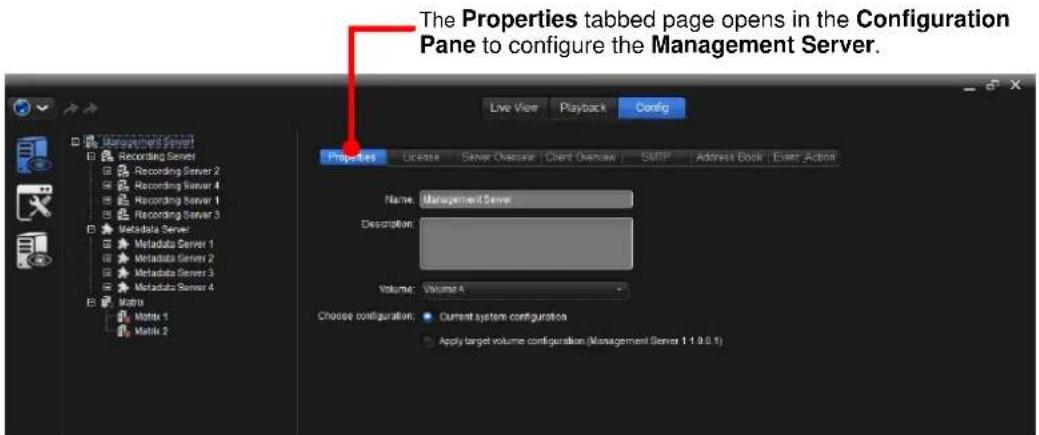
text_image
The Properties tabbed page opens in the Configuration Pane to configure the Management Server. Live View Playback Config Properties License Server Overview Client Overview SMIP Address Book Esteet_Action Name: Management Server Description: Volume: Volume 4 Choose configuration: Current system configuration Apply target volume configuration (Management Server 1.1.0.0.1)2. Click the License tab.
The License tabbed page then opens at the Conguraon Pane showing an overview of the networked devices' current licensing status for NUUO soware
as well as some sengs.
The License tabbed page opens in the Configuration Pane.
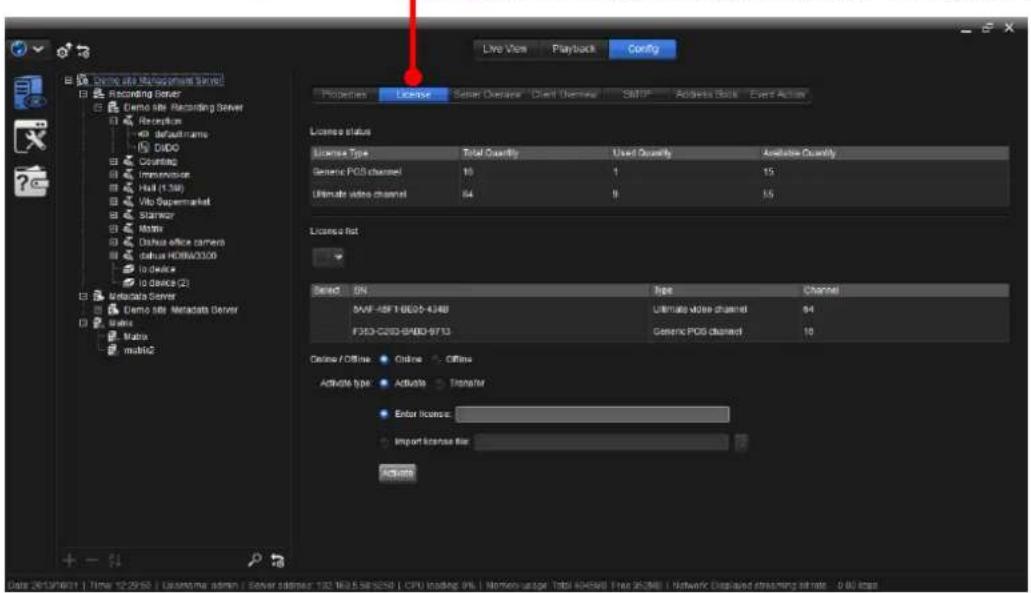
text_image
Live View Playback Config Recording Site Management Server Recording Server Cermo site Recording Server Recognition default name DiDO Counting Improvision Host (1.5M) Vito Supermarket Starwor Atom Outros office camera status HDMI/300 to device to device (2) Metadata Server Cermo site Metadata Server Matrix mable2 License status License Type Total Quantity Used Quantity Available Quantity Generic POS channel 10 1 15 Ultimate video channel 64 9 55 License list Shared SN Type Channel DAV-ASF-T-8620-4348 Ultimate video channel 94 F333-C293-GPMD-S713 Generic POS channel 10 Online / Offline: Online Offlines Activate type: Activate Transfer Enter License: Import license file: Activate Data: 2610PhiW1 | Time 10:29:45 | Laiangma admin | Enter admin: TSC NID 581258 | CPU loading: 9% | Network user: Toba 0x647 | Free SCSMB | Network Displayed displaying hit rate: 0.001mgTake a look at the NUUO soware license overview table:
| License Type | Total Quantity | Activated Quantity | Unactivated Quantity |
| Falco access control channel | 6 | 0 | 6 |
| Generic POS channel | 11 | 1 | 10 |
| Ultimate Video channel | 8 | 7 | 1 |
| Item | Description |
| License Type | Delivers what the user is permitted to use the software for.➢ Three license types are available:Video License With enterprise and ultimate license, the user is able to connect cameras to this software (network).Metadata License With this metadata license, the user is able to access different type and brand metadata data (along with camera videos) and view them with the software. |
| Total Quantity | Delivers the total quantity of the license(s) within the Management Server. |
| Available Quantity | Delivers the quantity of the available license(s) from the Management Server assign to Recording Server and Metadata Server. |
| Used Quantity | Delivers the quantity of the used license(s) from the Management Server assign to Recording Server and Metadata Server. |
The featured sengs on the License tabbed page are:
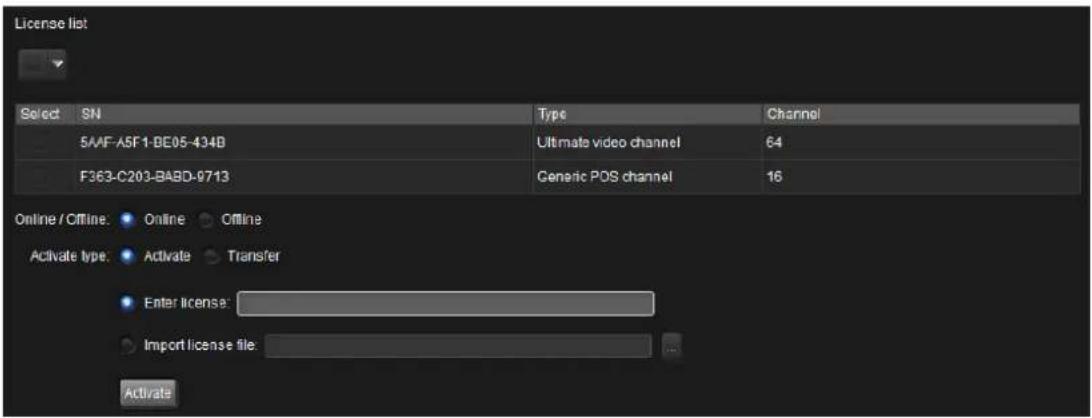
text_image
License list Select SN Type Channel 5AAF-ASF1-BE05-434B Ultimate video channel 64 F363-C203-BABD-0713 Generic POS channel 16 Online / Offline: Online Offline Activate type: Activate Transfer Enter license: Import license file: Activate| Item / Setting / Option | Description | Default |
| Select | Selects a license. | -- |
| SN | Delivers a license's serial number. | -- |
| Type | Delivers the license type. | -- |
| Channel | Delivers the total license quantity of SN. | -- |
| Online/Oine | Sets how to active/transfer license, online or offline.Select Online to activate/transfer the license online, which requires the computer to connect to the Internet.Select Offline to activate/transfer the license offline. | Online |
| Acvate type | Sets what to do with the license, to activate or to transfer it.Select Activate to activate the licenseSelect Transfer to transfer the license to other servers. | Activate |
| Input license | The license key should be manually entered here.This option is only available when you are “activating” the license “online” (, which means Online is selected for Online / Offline setting and Activate is selected for Activate type setting). | -- |
| Import license le | Click the ellipsis (...) button to browse for the license file.This option is only available when you are “activating” the license “online” (, which means Online is selected for Online / Offline setting and Activate is selected for Activate type setting). | -- |
| Step 1: Export one pack folder | Exports the server information file to the local disk.Click the ellipsis (...) button to browse where to export the server information file.Click the Export button to export the server information file.This option is only available when you are “activating” the license “offline” (, which means Offline is selected for Online / Offline setting and Activate is selected for Activate type setting). | -- |
| Step 2: Copy exported oine.req to a PC ... | This is a line of guide rather than a setting. Please copy the offline.req that is exported in Step 1 to a computer that is connected to the Internet, and run the License Management Tool to activate the license and get the offline license file.This line of guide is only available when you are “activating” the license “offline” (, which means Offline is selected for Online / Offline setting and Activate is selected for Activate type setting). | -- |
| Step 3: Import license le | Imports the offline license file that is obtained in Step 2.This option is only available when you are “activating” the license “offline” (, which meansOfflineis selected forOnline / Offlinesetting andActivateis selected forActivate typesetting).Click theActivatebutton to run the activation. | -- |
| Acvate buon | Runs the activation. | -- |
| Transfer buon | Runs the transfer. | -- |


Before transferring licenses, please disable the devices to have sufficient available license to transfer.
The maximum number of camera licenses per recording server is 64CH. If there has been 63 ch camera enabled, and then add 4 ch licenses, only one camera will be enabled and the remaining 3ch will be disabled.
10.1.1.2.1. Online License Activate
If the server computer is “online” (, which means it is connected to the Internet), acvate the license online by the following guide:
- Open the License tabbed page for the Management Server as described in License.
- Select Online for the Online/Oine setng.
- Select Acvate for the Acvate type seng.
- Select Input license and enter the license key in the eld.
OR
Select Import license le and click the ellipsis (...) button to browse for the license le to import.
- Click the Acvate button.
The license will be acvated on the server computer if the license key is eecve.
10.1.1.2.2. Offline License Activate
If the server computer is “oine” (, which means it isn’t connected to the Internet), acvate the license oine by the following guide:
- Open the License tabbed page for the Management Server as described as described in License.
Select Oine for the Online/Oine seng.
- Select Acvate for the Acvate type seng.
- Click the ellipsis (...) button besides the Step 1: Export oine pack folder eld to browse for the directory to export the server informaon le to.
- Click the Export buon.
The server informaon le is exported the directory assigned.
- Select Import license le and click the ellipsis (...) button to browse for the license le to import.
- Copy the oine.req that is exported in step 6 to a computer that is connected to the Internet.
- Run the OineTool.exe on that computer.
The Oine Tool launches.
- Enter the serial number or import the serial number le.
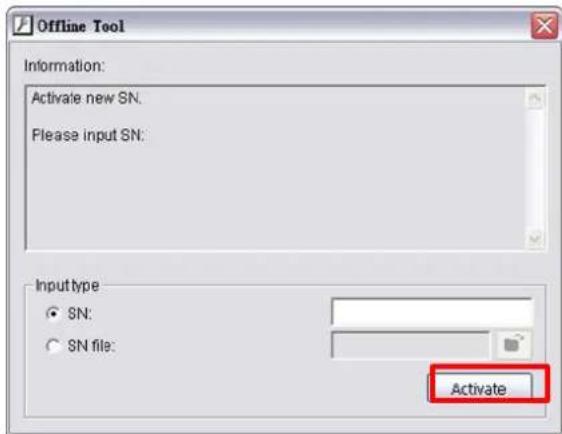
text_image
Offline Tool Information: Activate new SN. Please input SN. Input type • SN: ○ SN file: Activate- Click the Acvate button.
The license is acvated and an oine license le is generated on that computer.
- Copy the oine license le back to the server computer.
- On the server computer, re-open the License tabbed page for the Management Server as described as described in License if it hasn't been opened.
- Select Oine for the Online/Oine setng, and select Acvate for the Acvate type seng if they haven't been selected yet.
- Click the ellipsis (...) buon besides the Step 3: Import license le eld to browse for the oine license le on the server computer.
- Click the Acvate buon.
The license will be acvated on the server computer.
10.1.1.2.3. Online License Transfer
If the server computer is “online” (, which means it is connected to the Internet), transfer the license to other computer by an online manner by the following guide:
- Open the License tabbed page for the Management Server as described in License.
- Select Online for the Online/Oine seng.
- Select Transfer for the Acvate type setng.
- Click the Transfer button.
The license will be transferred as "OffLineTool.reg" file.

If user only finish step 1 to 4 (only click "Export" on license manage page, but not ta the "OffLineTool.reg" to another computer, then transfer online), this license will still be transferred from the original Crystal Titan, but can't be used by anther Crystal Titan.
10.1.1.2.4. Offline License Transfer
If the server computer is “oine” (, which means it isn’t connected to the Internet), transfer the license to other computer with an oine manner by the following guide:
- Open the License tabbed page for the Management Server as described in License.
- Select Oine for the Online/Oine seng.
- Select Transfer for the Acvate type setng.
- Click the Transfer button.
- Save the request le that is generated.
- Copy the request le generated in step5 to some other computer that is connected to the internet.
- Run the OineTool.exe on that computer.
- The Oine Tool launches.
- Click the serial number and click the Transfer button.
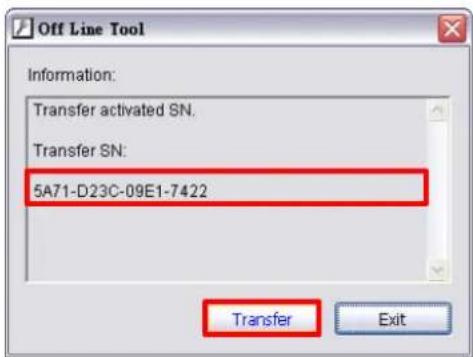
text_image
Off Line Tool Information: Transfer activated SN. Transfer SN: 5A71-D23C-09E1-7422 Transfer ExitThe license will be transferred as "OffLineTool.reg" file.
| If user only finish step 1 to 4 (only click "Export" on license manage page, but not ta the "OffLineTool.reg" to another computer, then transfer online), this license will still be transferred from the original Crystal Titan, but can't be used by another Crystal Titan. |
10.1.1.3. Server Overview
It relies on the Server Overview tabbed page to get a general view of all the Management Server's networked servers, including Recording Server, Metadata Server and Matrix.
To access the Server Overview tabbed page that congures the Management Server:
- From the Tree Console, click the topic Management Server.
The Properes tabbed page then opens in the Conguraon Pane.
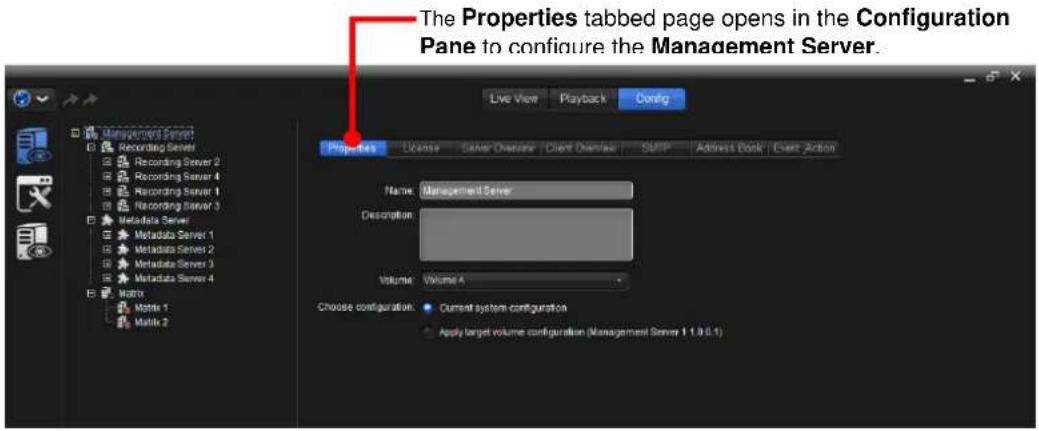
text_image
The Properties tabbed page opens in the Configuration Pane to configure the Management Server. Live View Playback Config Properties License Center Overview Client Overview SMIP Address Book Center Action Name: Management Server Description: Volume: Volume 4 Choose configuration: ● Current system configuration ● Apply target volume configuration (Management Server 1.1.0.1)- Click the Server Overview tab.
The Server Overview tabbed page then opens in the Conguraon Pane showing an overview of all the Management Server's networked servers, including Recording Server, Metadata Server and Matrix.
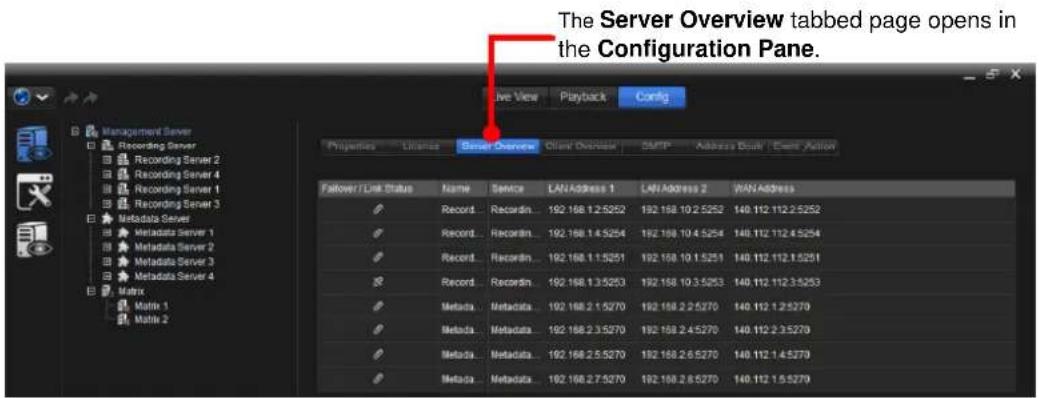
text_image
The Server Overview tabbed page opens in the Configuration Pane. File View Playback Config Properties License Server Overview Classid Overview SMTP Address Book Count Action Follower/Link Status Name Service LAN Address 1 LAN Address 2 WAN Address Record...Recordin...192.168.1.2.5252 192.168.10.2.5252 140.112.112.2.5252 Record...Recordin...192.168.1.4.5254 192.168.10.4.5254 140.112.112.4.5254 Record...Recordin...192.168.1.1.5251 192.168.10.1.5251 140.112.112.1.5251 Record...Recordin...192.168.1.3.5253 192.168.10.3.5253 140.112.112.3.5253 Metada...Metadata...192.168.2.1.5270 192.168.2.2.5270 140.112.1.2.5270 Metada...Metadata...192.168.2.3.5270 192.168.2.4.5270 140.112.2.3.5270 Metada...Metadata...192.168.2.5.5270 192.168.2.6.5270 140.112.1.4.5270 Metada...Metadata...192.168.2.7.5270 192.168.2.8.5270 140.112.1.5.5270Take the closer look at the overview table. Each column delivers the following info:
| Setting | Description | |
| Failover/Link Status | Delivers the server's failover or connection status: | |
| Icon | Description | |
| The server is connected with the Management Server. | ||
| The server is disconnected from the Management Server. | ||
| Name | Delivers the name of the server. | |
| Service | Delivers the service that the server provides. | |
| LAN Address 1 | Delivers the server's LAN port 1's currently networked IP address.► If the LAN port isn't in use, the networking status isn't available. | |
| LAN Address 2 | Delivers the server's LAN port 2's currently networked IP address.► If the LAN port isn't in use, the networking status isn't available. | |
| WAN Address | Delivers the server's WAN address.► If the WAN isn't in use, the networking status isn't available. | |
10.1.1.4. Client Overview
It relies on the Client Overview tabbed page to get a general view of all the clients connected to the Management Server.
To access the Client Overview tabbed page that congures the Management Server:
- From the Tree Console, click the topic Management Server.
The Properes tabbed page then opens in the Conguraon Pane.
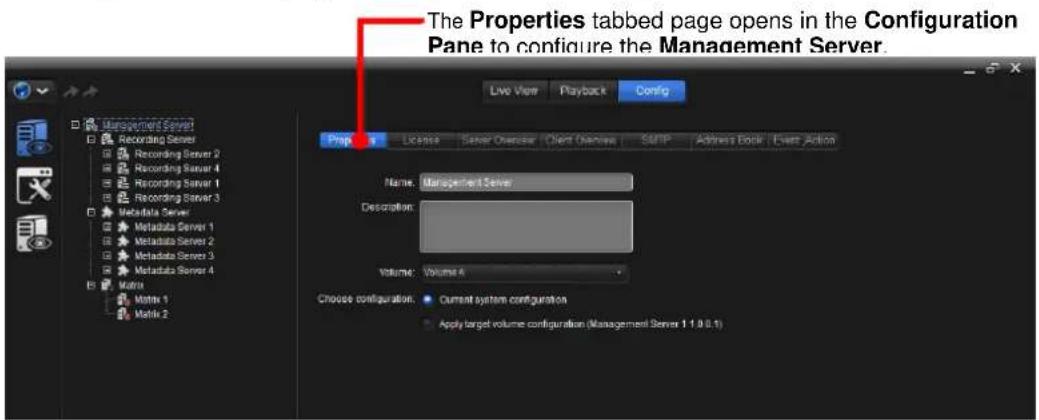
text_image
The Properties tabbed page opens in the Configuration Pane to configure the Management Server. Live View Playback Config Prop License Sensor Overview Client Overview SMMP Address Book Event Action Name: ManagementServer Description: Volume: Volume 4 Choose configuration: Current system configuration Apply target volume configuration (Management Server 1.0.0.1)- Click the Client Overview tab.
The Client Overview tabbed page then opens at the Conguraon Pane showing an overview of all the client(s) connected to the Management Server at the moment, including NuClient and mobile client(s), which streams videos with
lower fps.
The Client Overview tabbed page opens in the Configuration Pane.
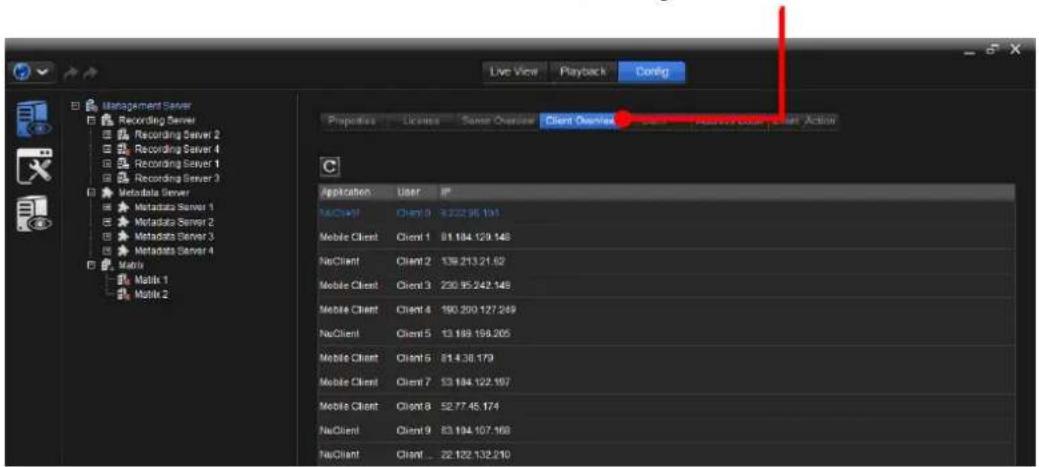
text_image
Live View Playback Codig Management Server Recording Server Recording Server 2 Recording Server 4 Recording Server 1 Recording Server 3 Metadata Server Metadata Server 1 Metadata Server 2 Metadata Server 3 Metadata Server 4 Matrix Matrix 1 Matrix 2 Properties License Sensor Overview Client Owner Active Revised User Action Application User P MACClient Client 0 3222.96.191 Mobile Client Client 1 81.184.129.148 NaClient Client 2 138.213.21.62 Mobile Client Client 3 230.95.242.148 Mobile Client Client 4 190.200.127.269 NaClient Client 5 13.189.188.205 Mobile Client Client 6 81.4.38.179 Mobile Client Client 7 53.184.122.167 Mobile Client Client 8 52.77.45.174 NaClient Client 9 83.184.107.166 NaClient Client ... 22.122.132.210Take the closer look at the overview table. Each column delivers the following info:
| Icon / Item | Description |
| C | Refreshes the connected client(s). |
| Applicaon | Delivers the client's application type. |
| User | Shows the user(s) using the application at the moment. |
| IP | Delivers the IP address by which the client is connected to the Managemen Server. |
10.1.1.5. SMTP
It relies on the SMTP tabbed page to set up the "Simple Mail Transfer Protocol" for the Management Server to send out emails.
To access the SMTP tabbed page for the Management Server:
- From the Tree Console, click the topic Management Server.
The Properes tabbed page then opens in the Conguraon Pane.
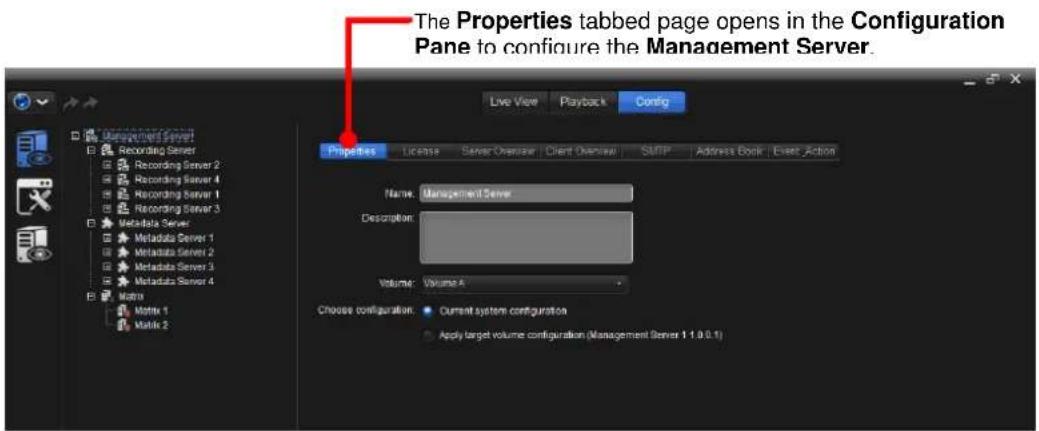
text_image
The Properties tabbed page opens in the Configuration Pane to configure the Management Server. Live View Playback Config Properties License Server Overview Client Overview SMTP Address Book Estez_Action Name: Management Server Description: Volume: Volume A Choose configuration: Current system configuration Apply target volume configuration (Management Server 1.0.0.1)- Click the SMTP tab.
The SMTP tabbed page then opens at the Conguraon Pane.
The SMTP tabbed page opens in the Configuration Pane.
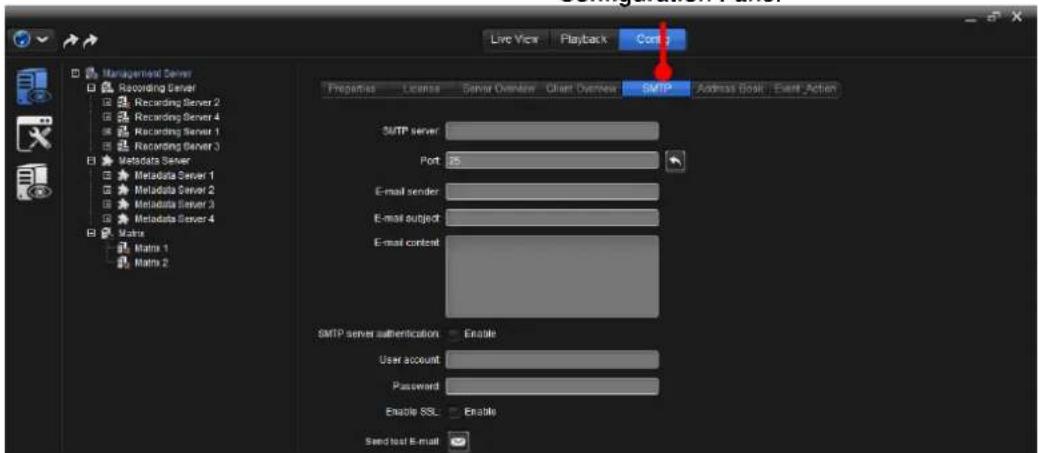
text_image
Live View Playback Cont: Management Server Recording Server Recording Server 2 Recording Server 4 Recording Server 1 Recording Server 3 Metadata Server Metadata Server 1 Metadata Server 2 Metadata Server 3 Metadata Server 4 Matrix Matrix 1 Matrix 2 Properties License GW# Owner Client Overview SMTP Address goal Exact Action SMTP server Port: 25 E-mail sender E-mail subject E-mail content SMTP server authentication Enable User account Password Enable SSL Enable Send text E-mailThe featured sengs on the SMTP tabbed page are:
| Setting | Description | Default |
| SMTP server | Sets the SMTP server's IP address or server name. | -- |
| Port | Assigns the port number.➢ Click the icon to recover the default. | 25 |
| E-mail sender | Sets the sender's Email address. | -- |
| E-mail subject | Defines a subject for all the Emails sent. | -- |
| E-mail content | Enters the Email content. | -- |
| SMTP server authentication | Enables/disables the username/password authentication before an Email is sent. | Deselected (Disabled) |
| User account | Sets up the username for SMTP authentication. | -- |
| Password | Sets up the password for SMTP authentication. | -- |
| Enable SSL | Enables/disables Secure Sockets Layer. | Deselected (Disabled) |
| Send test E-mail | Makes the Management Server send a test Email to the sender to make sure the function works.➢ Click the icon to send the test Email. | -- |
10.1.1.6. Address Book
It relies on the Address Book tabbed page to set up the emails to receive the Management Server's nocaons for the congured camera events, input events and system events.
To access the Address Book tabbed page for the Management Server:
- From the Tree Console, click the topic Management Server.
The Properes tabbed page then opens in the Conguraon Pane.
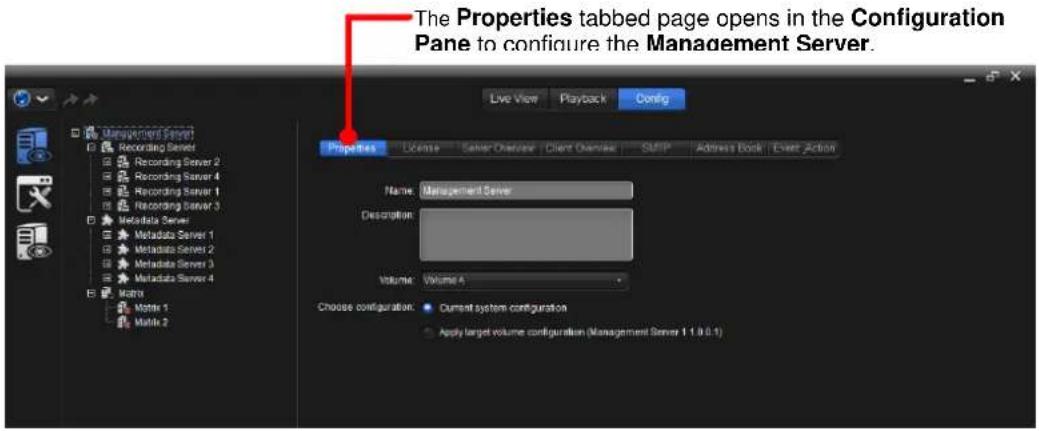
text_image
The Properties tabbed page opens in the Configuration Pane to configure the Management Server. Live View Playback Config Properties License Center Overview Client Overview SMIP Address Book Ever Action Name: Management Server Description: Volume: Volume A Choose configuration: Current system configuration Apply target volume configuration (Management Server 1.0.0.1)- Click the Address Book tab.
The Address Book tabbed page then opens in the Conguraon Pane showing an overview of all the emails set up as well as some sengs.
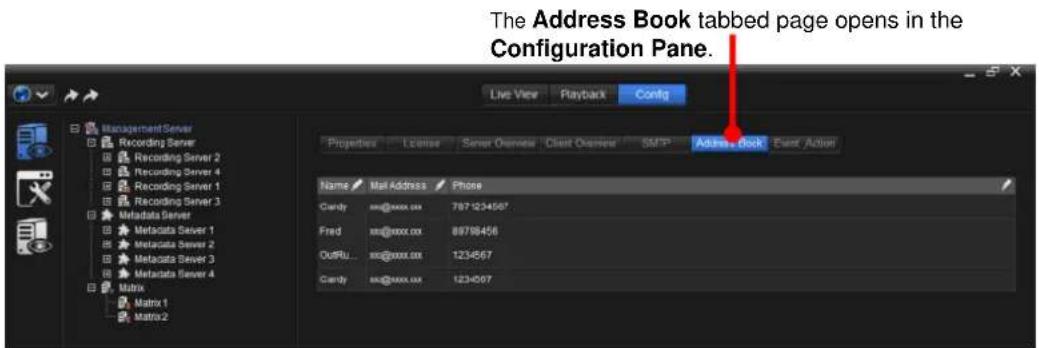
text_image
The Address Book tabbed page opens in the Configuration Panel. Live View Playback Config Management Server Recording Server Recording Server 2 Recording Server 4 Recording Server 1 Recording Server 3 Metadata Server Metadata Server 1 Metadata Server 2 Metadata Server 3 Metadata Server 4 Matrix Matrix 1 Matrix2 Properties License Server Overview Class Owner SMP Address Book Event Action Name Mal Address Phone Cardy xx@xxxx.xx 787-123456? Fred xx@xxxx.xx 89798456 OutRu... xx@xxxx.xx 1234567 Cardy xx@xxxx.xx 123-007Each column of the overview table delivers the following info:
| Item | Description |
| Name | Delivers the name of the contact. |
| Mail Address | Delivers the email address of the contact |
| Phone | Delivers the phone number of the contact |
The featured sengs are:
| Icon | Description |
| + | Adds a new contact. |
| - | Deletes the selected contact.➢ Click any of the contact info to select the contact. |
| ◆ | Edits the selected contact.➢ Click any of the contact info to edit the info. |
10.1.1.7. Event Action
It relies on the Event Acon tabbed page to enable/disable the event(s) that will launch acon(s) from the Management Server, including the server abnormality such as exhausted disk space and the failure to write to the disk drive.
To access the Event Acon tabbed page for the Management Server:
- From the Tree Console, click the topic Management Server.
The Properes tabbed page then opens in the Conguraon Pane.

text_image
The Properties tabbed page opens in the Configuration Pane to configure the Management Server. Live View Playback Config Properties License Center Overview Client Overview SMIP Address Dock Center Action Name: ManagementServer Description: Volume: Volume 4 Choose configuration: Current system configuration Apply target volume configuration (Management Server 1.1.0.0.1)- Click the Event Acon tab.
The Event Acon tabbed page then opens in the Conguraon Pane.
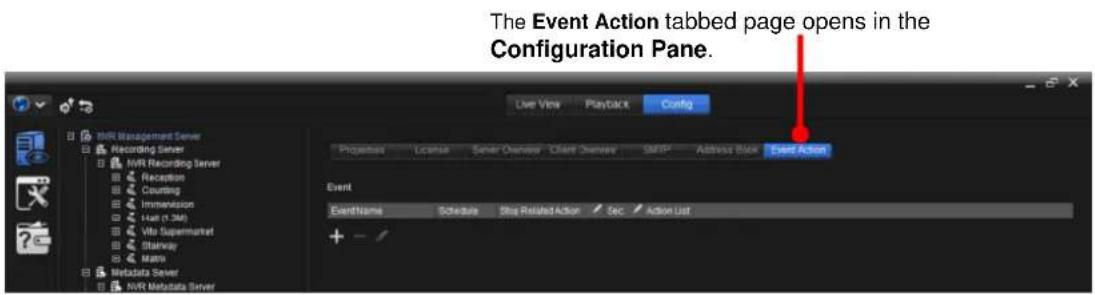
text_image
The Event Action tabbed page opens in the Configuration Panel. Live View Playback Config PROCTOR License Sensor Overview Client Overview SMSP Address Back Event Action Event EventName Schedule Ship Related Action Sec Action List + - /The featured sengs are:
| Group | Icon / Setting | Description |
| Event | [CE3] | Adds an event.▸ Available events isFail to write to drive. |
| [SD5] | Deletes the selected event.▸ Click any of the event info cells to select the event. | |
| [CY07] | Edits the selected event.▸ Click any of the event info cells to edit the info. | |
| [S4W6] | Copies the event setting to another networked device. | |
| Ever [2210] | Delivers the name of the event.▸ Click theEvent Namecell to edit the name of the event. | |
| E [X7B4] | Delivers the event type.▸ Fail to write to drive. | |
| Scl [SB40] | Delivers the applied “schedule”, which means one or more time period(s) in which the occurrence of the event is taken effective.▸ Use theAdd schedulesettings to apply ascheduleto the event.▸ To create/delete/edit a schedule, seeSchedule. | |
Stop [SO-IT]A  | Stop action on NuClient includingVideo Edge DisplayandPlay Alert Sound. | |
| [HS42] | Sets when to stop the related action launched by theManagement Serverafter the event occurs.▸ 1 to 60 seconds are configurable. | |
| Acon List | Delivers all the actions set up for theManagement Serverto take when the event occurs.▸ The available actions areFail to write to drive. | |
| Add schedule | [SI8C] | Adds a schedule.▸ Available options are theschedulescreated as described inCreate A Schedule. |
| [SB07] | Deletes the selectedschedule.▸ Click ascheduleto select it. | |
| [ES1C] | Edits the selectedschedule.▸ Click ascheduleto select it. | |
| [HK07] | Moves the selectedscheduleup.▸ Click ascheduleto select it. | |
| [SKCH] | Moves the selectedscheduledown.▸ Click ascheduleto select it. | |
| [AUST] | Opens a schedule overview dialog that shows the applied schedule(s) in a daily view or a weekly view. | |
| [CE39] | Copies theschedulesetting to another event. | |
| Sched [X200] | 1. Delivers the name of the schedule.2. Click theSchedule namecell to change thescheduleto some otherschedule. | |
Pr  | Sets whether to allow or block the appliedschedule’s time period(s). | |
Des  | Delivers a brief description for thisschedulefor the easier identification of it. | |
| Add action | Acon List | Delivers all the actions set up for theManagement Serverto take when the event occurs.▸ Available actions areE-Mail to multipleandPlay alert sound. |
| [X3B]— | Adds an action for theManagement Serverto take when the event occurs.▸ Two actions are available:E-Mail to multipleandPlay alert sound.Deletes the selected action.▸ Click an action to select it. | |
| E-Mail to Mulple | Click this setting to open a group ofAction propertiessettings to set whom to send alert emails to. | |
| Play alert sound | Play Alert Sound on NuClient. Please enableAudio Nocaon on Global| Client Configuration| Function| Alarm |
10.1.2. Conigure Recording Server
A Recording Server is a server right under the control of the Management Server to control one or more “video device(s)” that further controls one or more camera(s) or camera DI/DO.
To access the seng of a Recording Server:
- Access the Physical Cong ("physical conguraon") as described in Physical Cong (Management Server).
The physical conguraon opens onscreen, and the Tree Console shows the three sub settings: Recording Server, Metadata Server, and Matrix.
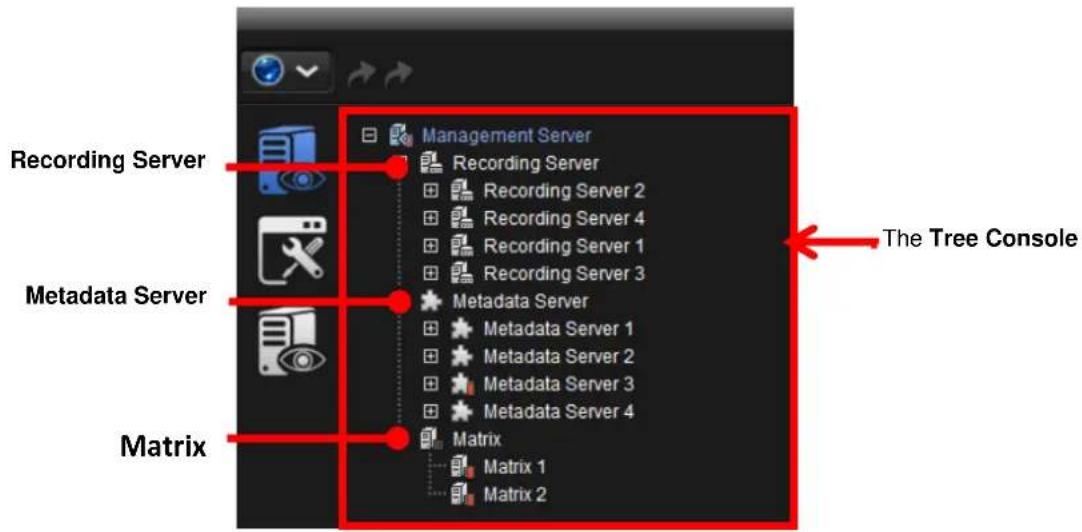
text_image
Recording Server Metadata Server Matrix Management Server Recording Server Recording Server 2 Recording Server 4 Recording Server 1 Recording Server 3 Metadata Server Metadata Server 1 Metadata Server 2 Metadata Server 3 Metadata Server 4 Matrix Matrix 1 Matrix 2 The Tree Console- If a plus sign (+) shows besides the sub topic Recording Server, click the plus sign (+) to collapse the exisng Recording Server(s). Then click the Recording Server to congure.
OR
If a minus sign (-) shows besides the sub topic Recording Server, the existing Recording Server(s) collapse already. Simply click the Recording Server to congregate.
The Properes tabbed page then opens at the Conguraon Pane to conjure the selected Recording Server while the other ve tabbed pages are hidden.
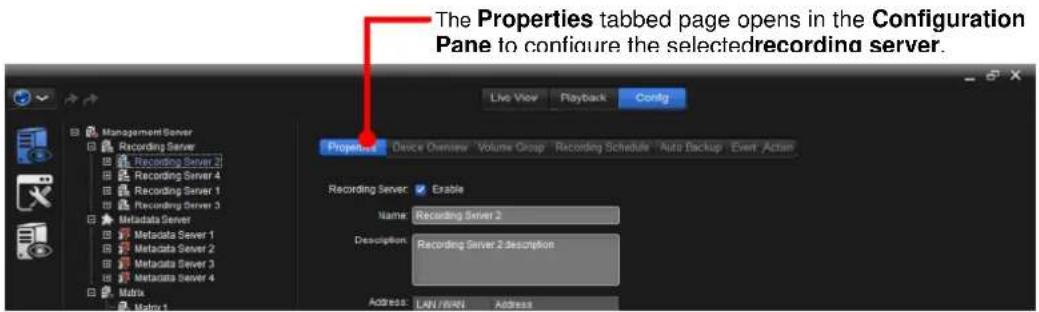
text_image
The Properties tabbed page opens in the Configuration Pane to configure the selectedrecording server. Live View Playback Config Management Server Recording Server Recording Server 2 Recording Server 4 Recording Server 1 Recording Server 3 Metadata Server Metadata Server 1 Metadata Server 2 Metadata Server 3 Metadata Server 4 Matrix Matrix 1 Project 1 Device Overview 'Volume Group' Recording Schedule 'Auto Backup Event Action Recording Server: Enable Name: Recording Server 2 Description: Recording Server 2 description Address: LAN / LAN1 Address- Access one of these tabbed pages to congregate the Recording Server.
A funcon overview of these tabbed pages:
| Tab | Description |
| Properes | 1. Enables/disables the Recording Server.2. Enters a brief description of the Recording Server for the better identification of it.3. Launches an application to detect and install the available cameras within the network.▸ See Properties for the settings. |
| Device Overview | Delivers a general view of the cameras connected to the Recording Server. |
| Volume Group | Allocates the RAID disk volume for a camera to save the recorded videos to.(One or more disk drives are working for the Recording Server as a logical drive.)▸ Video recording requires a volume.▸ For RAID setting please go to Web Setting |
| Recording Schedule | Delivers a general view of the video recording schedules of all the video devices (i.e. cameras) connected to a Recording Server.▸ See Schedule to set the video recording schedule. |
| Auto Backup | Manages the backup for the videos recorded on the selected period.▸ The Auto Backup requires two major settings, one is the backup schedule and the other is FTP server setting. |
| Event Acon | Sets the events to alarm for the Recording Server. |
10.1.2.1. Properties
It relies on the Properes tabbed page to enter the informaon about the Recording Server including the name and descripon, or to launch the install wizard.
To access the Properes tabbed page of the Recording Server to congure:
1. From the Tree Console, click the topic Recording Server.
By default, the Properes tabbed page then opens at the Conguraon Pane.
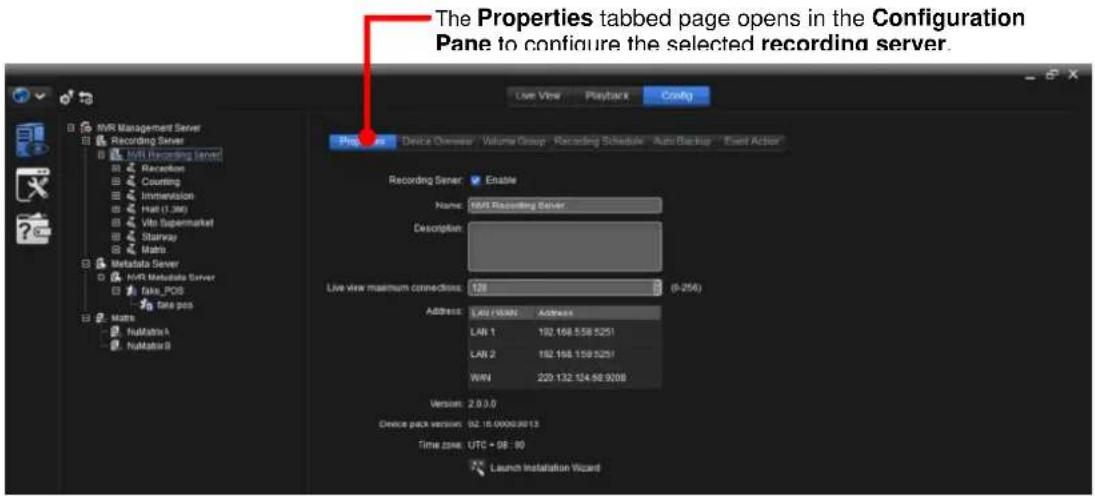
text_image
The Properties tabbed page opens in the Configuration Pane to configure the selected recording server. User View Playback Config Program Device Owner Volume Group Recording Schedule Auto Backup Event Action Recording Server Enable Name: MRT Recording Server Description: Live View maximum connections: 128 (0-256) Address: LAN / LAN1 Address LAN 1 192.168.558.5251 LAN 2 192.168.159.5251 WIN 220.132.124.96.9208 Version: 2.0.0.0 Device pack version: 02:16.0000.0013 Time zone: UTC + 98 : 80 Launch Installation WizardThe featured sengs on the Properes tabbed page are:
| Setting | Description | Default | |
| Enable | Enables/disables the Recording Server. | Selected (Enabled) | |
| Name | Names the Recording Server. | “Recording Server #” | |
| Descripon | Provides a brief description for this Recording Server for the easier identification of it. | “Recording Server # description” | |
| Address | Delivers the following addresses: | ||
| Seng | Description | ||
| LAN1 | Delivers the server's LAN port 1's currently networked IP address.► If the LAN port isn't in use, the networking status isn't available. | ||
| LAN 2 | Delivers the server's LAN port 2's currently networked IP address.► If the LAN port isn't in use, the networking status isn't available. | ||
| WAN | Delivers the server's WAN address.► If the WAN isn't in use, the networkingstatus isn't available. | ||
| Version | The version of Recording Server | -- | |
| Device pack version | The version of device pack | ||
| Time zone | The time zone of Recording Server | ||
| Launch Install Wizard | Launches an application to detect and configure Crystal Titan within the network. | -- | |
10.1.2.2. Device Overview
It relies on the Device Overview tabbed page to get a general view of all the physical devices connected to the Recording Server, including the video devices and IO devices.
To access the Device Overview tabbed page that congures the Recording Server:
- From the Tree Console, click the topic Recording Server.
By default, the Properes tabbed page then opens at the Conguraon Pane.
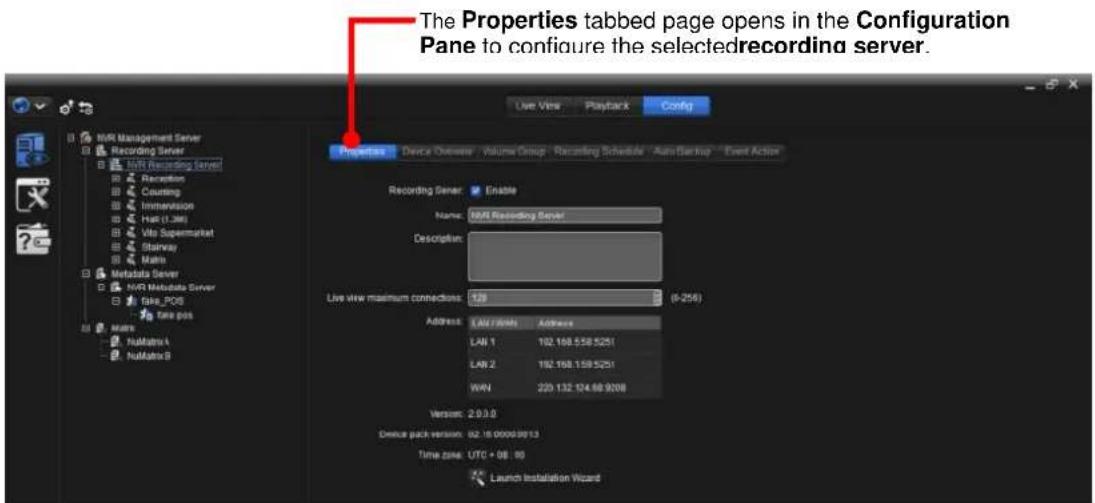
text_image
The Properties tabbed page opens in the Configuration Pane to configure the selectedrecording server. Live View Playback Config Properties Device Owners Volume Group Recording Schedule Auto Startup Event Action Recording Gener: Enable Name: NVR Recording Server Description: Live view maximum connections: 128 (6-256) Address: LAN 7000 Address LAN 1 192.168.558.5251 LAN 2 192.168.558.5251 WIN 220.132.124.68.9208 Version: 2.0.0.0 Device pack version: 02.18.00003913 Time zone: UTC + 08:00 Launch Installation Wizard2. Click the Device Overview tab.
The Device Overview tabbed page then opens.
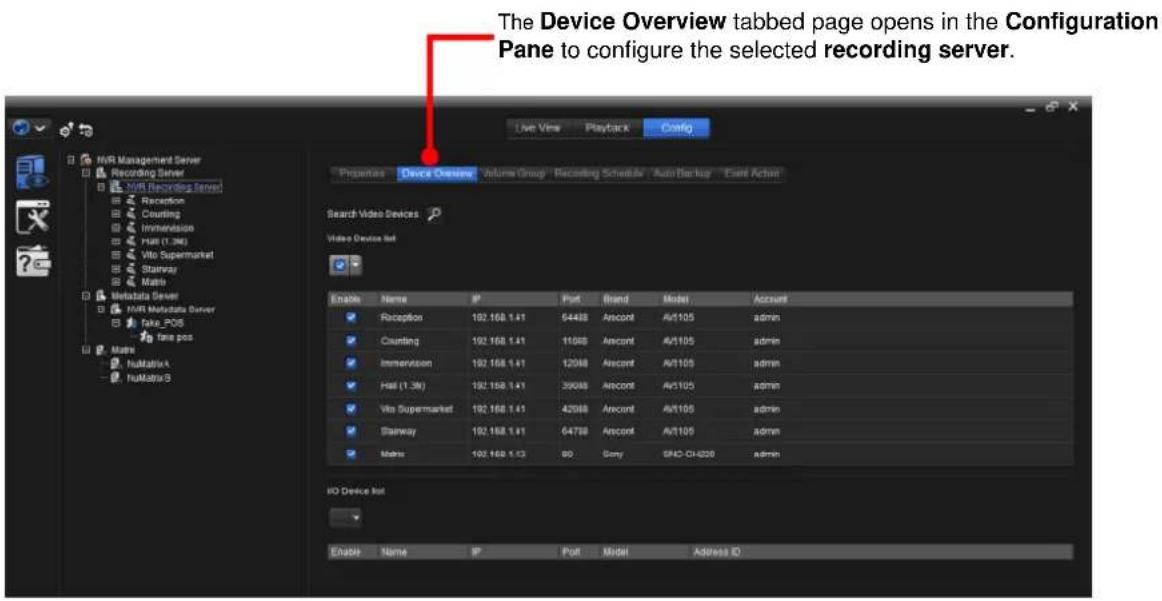
text_image
The Device Overview tabbed page opens in the Configuration Pane to configure the selected recording server. Properties Device Options Volume Group Recording Schedule Auto Backlog Event Action Search Video Devices Video Device list Enable Name IP Port Brand Model Account Reception 192.168.1.41 64488 Ancont Av/1105 admin Counting 192.168.1.41 11065 Ancont Av/1105 admin Immersion 192.168.1.41 12068 Ancont Av/1105 admin Hall (1.3M) 192.168.1.41 39088 Ancont Av/1105 admin Vito Supermarket 192.168.1.41 42068 Ancont Av/1105 admin Starway 192.168.1.41 64738 Ancont Av/1105 admin Matrix 192.168.1.43 90 Gamy SNCC-CH-0200 admin NO Device list Enable Name IP Port Model Address IDThe featured sengs on the Device Overview tabbed page are:
| Group | Setting | Description | Default |
| Search Video Devices | Opens a Search Video Devices dialog to search for the available video devices to add them to the Recording Server. | -- | |
| Video Device List |  | Select the drop-downs All, None or Invert to select all video devices, deselect all video devices or reverse the selection. | All(All video devices are selected.) |
| Enable | Enables/disables the video device. | Selected (Enabled) | |
| Name | Delivers the name of the video device.➢ See Properties to know how to set the name for the video device. | -- | |
| IP | Delivers the IP address of the video device.➢ See Properties to know how to set the IP address for the video device. | -- | |
| Port | Delivers the port of the video device.➢ See Properties to know how to set the port for the video device. | -- | |
| Brand | Delivers the brand of the video device.➢ See Properties to know how to set the brand for the video device. | -- | |
| Model | Delivers the model name of the video device.➢ See Properties to know how to set the modelname for the video device. | -- | |
| Account | Video device user account display | ||
| I/O Device List |  | Select the drop-downs All, None or Invert to select all devices, deselect all devices or reverse the selection. | All(All devices are selected.) |
| Enable | Enables/disables the I/O device. | Selected (Enabled) | |
| Name | Delivers the name of the I/O device. | -- | |
| IP | Delivers the IP address of the I/O device. | -- | |
| Port | Delivers the port of the I/O device. | -- | |
| Model | Delivers the model name of the I/O device. | -- | |
| Address ID | I/O device address ID display | -- | |
10.1.2.3. Volume Group
It relies on the Volume Group tabbed page to allocate the RAID disk volume for a camera to save the recorded videos to. (One or more disk drives are working for the Recording Server as a logical drive.) The volume is required for video recording.
To access the Volume Group tabbed page that congures the Recording Server:
- From the Tree Console, click the topic Recording Server.
By default, the Properes tabbed page then opens at the Conguraon Pane.
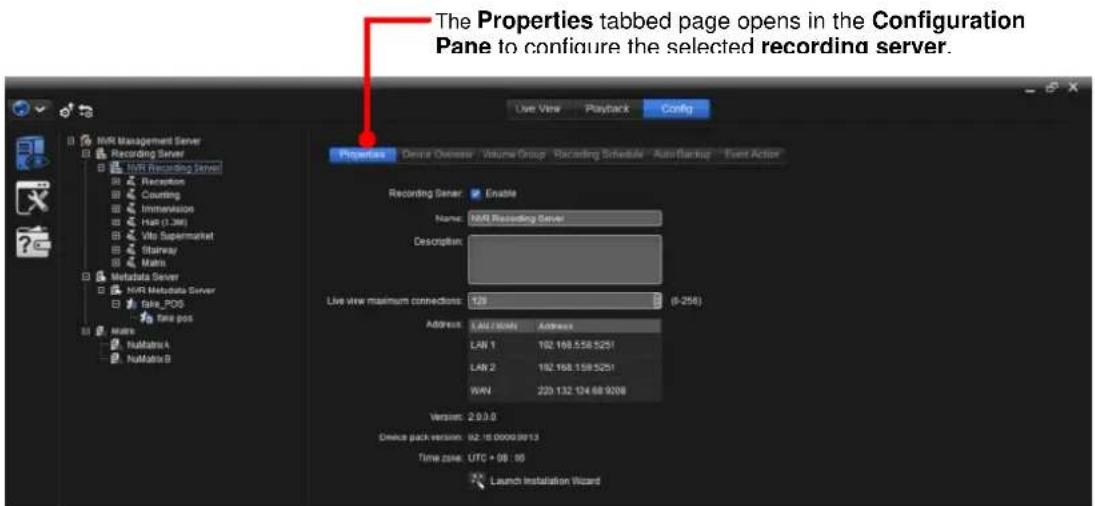
text_image
The Properties tabbed page opens in the Configuration Pane to configure the selected recording server. Live View Playback Config Properties Denue Owner Volume Group Recording Schedule Auto Parking Event Action Recording Server: Enable Name: NMR Recording Server Description: Live view maximum connections: 129 (6-256) Address: LAN 7048 Address LAN 1 192.168.558.5251 LAN 2 192.168.558.5251 WAN 220.132.124.68.9208 Version: 2.0.0.0 Device pack version: 02.16.00003013 Time zone: UTC + 08 : 00 Launch Installation Wizard2. Click the Volume Group tab.
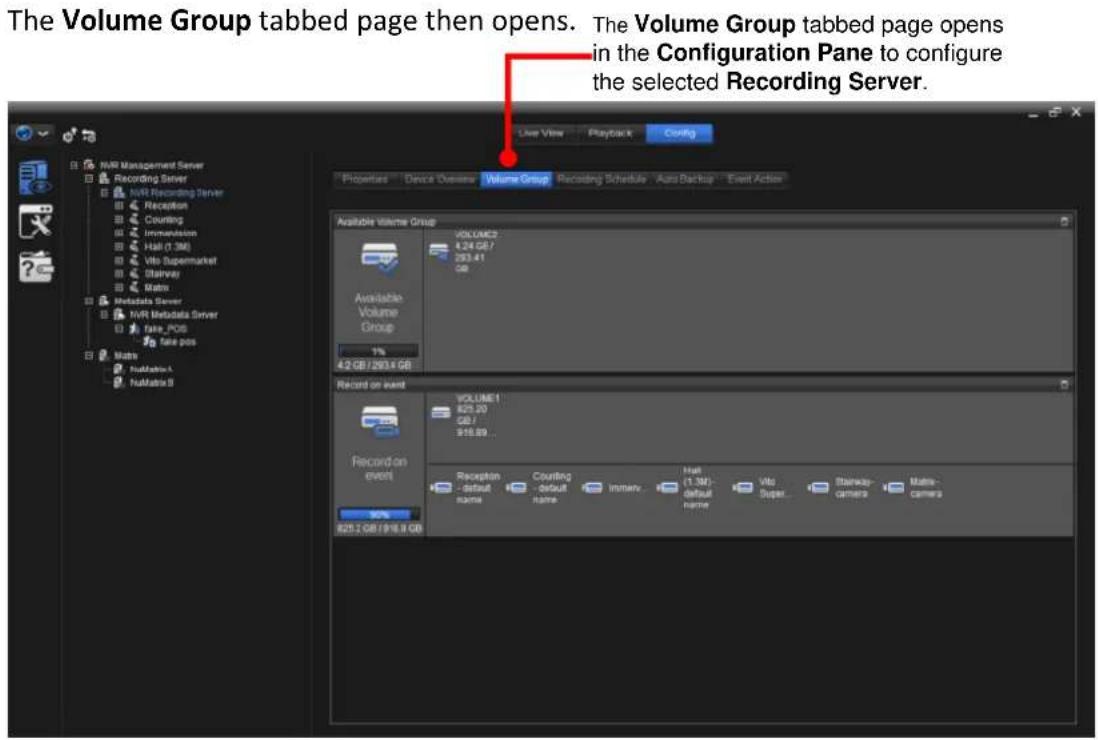
text_image
The Volume Group tabbed page then opens. The Volume Group tabbed page opens in the Configuration Panel to configure the selected Recording Server. Live View Playback Config Properties Device Owners Volume Group Recording Schedule Auto Backup Event Action Available Volume Group VOLUME2 4.24 GB / 263.41 GB Available Volume Group 1% 4.2 GB / 293.4 GB Record on event VOLUME1 825.20 GB / 918.89 Record on event Reception - default name Counting - default name Innany- Host (1.3M) - default name Vitc Super Starway-camera Matrix-camera 825.2 GB / 918.8 GBTake a closer look at the user interface. The Volume Group tabbed page actually shows all the exisng volume group(s), with the info about the allocated disk volume(s).
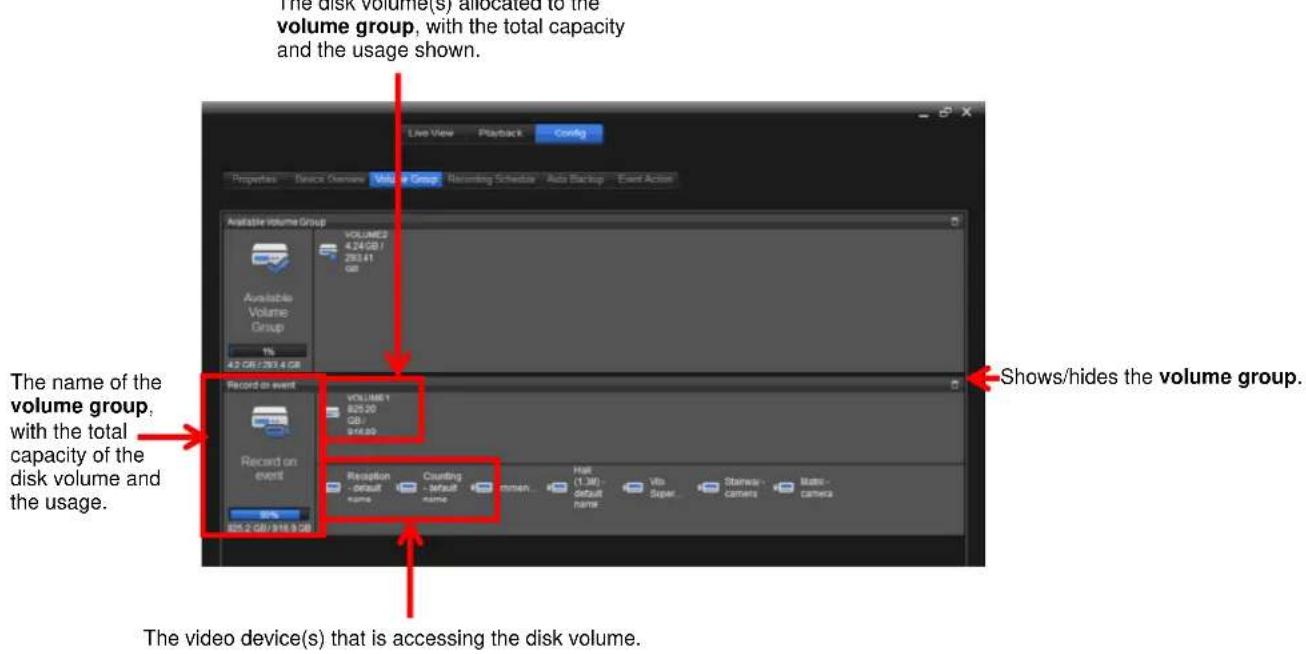
text_image
The disk volume(s) allocated to the volume group, with the total capacity and the usage shown. Live View Playback Config Properties Direct Universe Volume Group Remington Schedule Auto Backup Event Action Available volume Group VOLUMES 424 GB/ 283.61 GB Available Volume Group 1% 45 GB / 291.4 GB Record on event VOLUME Y 825.00 GB / 916.00 Record on event Reception Default name Counting - default name Camera Hill (1.3M)- Default name.Vito Super.Starcher - Camera Matrix - camera 855.2 GB/916.8 GB Shows/hides the volume group. The name of the volume group, with the total capacity of the disk volume and the usage. The video device(s) that is accessing the disk volume.10.1.2.4. Recording Schedule
It relies on the Recording Schedule tabbed page to get a general view of the video recording schedules of all the video devices (i.e. cameras) connected to a Recording Server.
To access the Recording Schedule tabbed page that congures the Recording Server:
- From the Tree Console, click the topic Recording Server.
By default, the Properes tabbed page then opens at the Conguraon Pane.
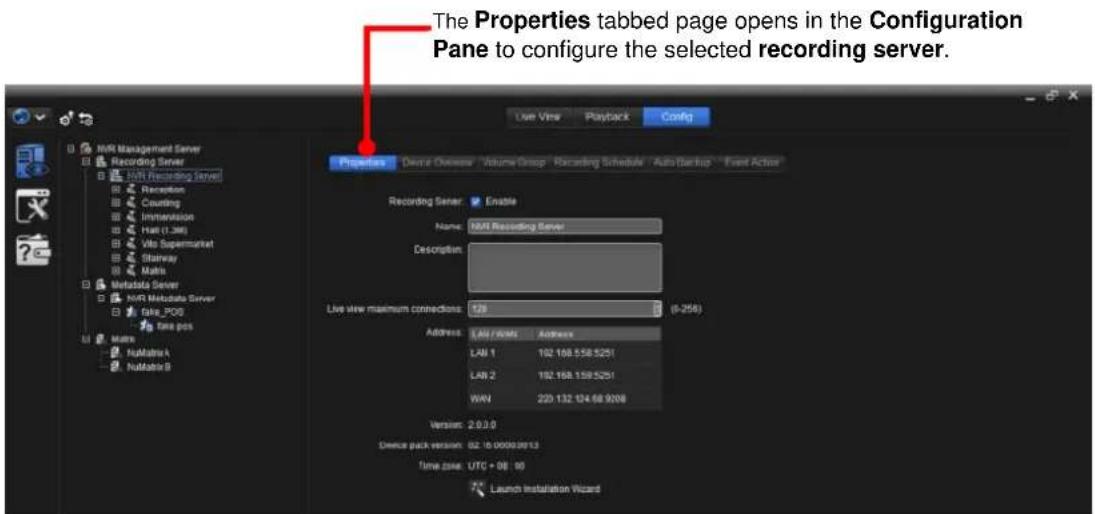
text_image
The Properties tabbed page opens in the Configuration Pane to configure the selected recording server. Live View Playback Config Properties Device Address Volume Group Recording Schedule Auto Backup Event Action Recording Server Enable Name: NMI Receiving Server Description: Live skew maximum connections: 128 (0-258) Address: LAN / ROMI Address LAN 1 192.168.558.5251 LAN 2 192.168.159.5251 WAV 220.132.124.68.9208 Version: 2.0.0.0 Device pack version: 02:16.000030/13 Time zone: UTC + 08:00 Launch Installation Wizard- Click the Recording Schedule tab.
The Recording Schedule tabbed page then opens.
The Recording Schedule tabbed page opens in the Configuration Pane to configure the selected Recording Server.
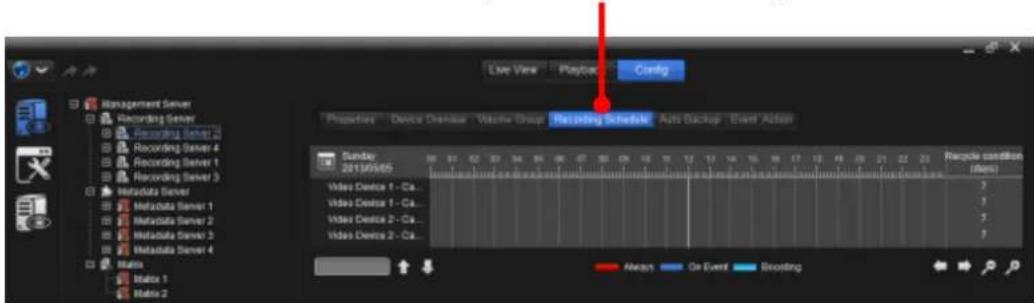
text_image
Live View Playbox Config Management Server Recording Server Recording Server 2 Recording Server 4 Recording Server 1 Recording Server 3 Metadata Server Metadata Server 1 Metadata Server 2 Metadata Server 3 Metadata Server 4 Mats Mats 1 Mats 2 Properties Device Universe Volume Group Ordering Schedule Auto Backup Event Action Sunday 2013/05/05 Video Device 1 - Ca... Video Device 1 - Ca... Video Device 2 - Ca... Video Device 2 - Ca... Recycle condition (Yes) 7 7 7 7 Always On Event BoostingThe featured sengs on the Recording Schedule tabbed page are:
| Setting / Item | Description |
| [width] | Switches theschedule tableto any other calendar day. |
| schedule table | Click and drag on theschedule tableto view other time slots. |
 | Search the keyword of schedule |
| [width] | Focuses on the previous searched result. |
| [width] | Focuses on the next searched result. |
| Airways | Delivers the times slots in which the video recording is on unconditionally.➢ SeeAdd A Scheduleto know how to change the setting. |
| On Event | Delivers the times slots in which the video recording is on when aneventoccurs.➢ SeeAdd A Scheduleto know how to change the setting. |
| Boosng | Delivers the times slots in which the video are recorded with higher frame rate.➢ SeeAdd A Scheduleto know how to change the setting. |
| Scrolls theschedule tableto the left. | |
| Scrolls theschedule tableto the right. | |
| Zooms out thedaily timeschedule tableto bring more time slots into view. | |
| Zooms in theschedule tableto view the time slots in a more specific way. | |
| Recycle condion | Delivers how long to keep the recorded videos for. |
10.1.2.5. Auto Backup
It relies on the Auto Backup tabbed page to auto back up the videos recorded on the previous day to a FTP server. For such auto backup, it requires the backup schedule seng and the FTP server seng.
To access the Auto Backup tabbed page that congures the Recording Server:
- From the Tree Console, click the topic Recording Server.
By default, the Properes tabbed page then opens at the Conguraon Pane.
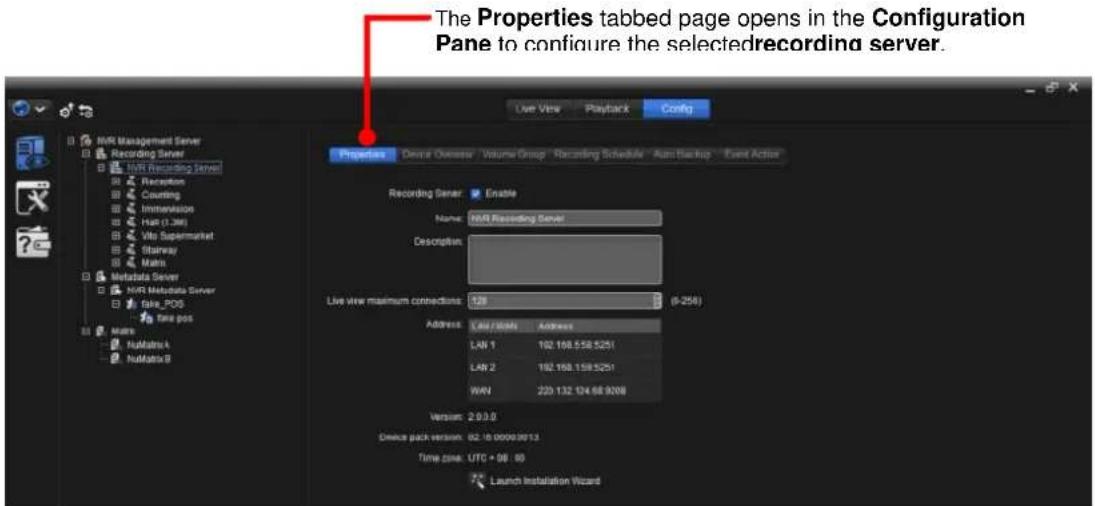
text_image
The Properties tabbed page opens in the Configuration Pane to configure the selectedrecording server. Live View Playback Config Properties Dentive Owner Volume Group Recording Schedule Auto Backup Event Action Recording Server Enable Name: NMR Recording Server Description: Live view maximum connections: 128 (6-256) Address: Cali/State Address LAN 1 192.198.558.5251 LAN 2 192.198.558.5251 WAV 220.132.124.68.9208 Version: 2.0.0.0 Device pack version: 02.10.00003013 Time zone: UTC + 08:00 Launch Installation Wizard2. Click the Auto Backup tab.
The Auto Backup tabbed page then opens.
The Auto Backup tabbed page opens in the Configuration Pane to configure the selected recording
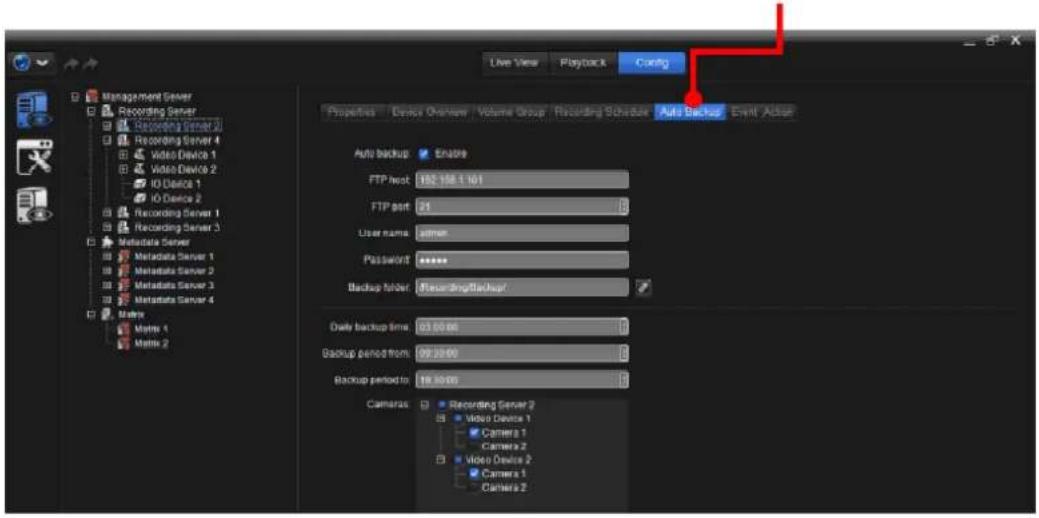
text_image
Live View Playback Config Management Server Recording Server Recording Server 2 Recording Server 4 Video Device 1 Video Device 2 ID Device 1 ID Device 2 Recording Server 1 Recording Server 3 Metadata Server Metadata Server 1 Metadata Server 2 Metadata Server 3 Metadata Server 4 Matrix Matrix 1 Matrix 2 Properties Device Overview Volume Group Recording Schedule Auto Backup Event Action Auto backup Enable FTP host 152.158.1.161 FTP port 21 User name:sitter Password:**** Backup folder: ReasuringBackup/ Date backup time 03:00:00 Backup period from: 09:30:00 Backup period to: 19:00:00 Cameras Recording Server 2 Video Device 1 Camera 1 Camera 2 Video Device 2 Camera 1 Camera 2The featured sengs on the Auto Backup tabbed page are:
| Group | Setting | Description | Default |
| Auto backup: Enable | Enables/disables the auto backup feature for the Recording Server. | Disabled | |
| FTP server setting | FTP host | Sets the IP address or server name of the backup FTP server. | -- |
| FTP port | Sets the port number of the backup server. | -- | |
| User name | Enters the username to log in the backup FTP server. | -- | |
| Password | Enters the password to log in the backup FTP server. | -- | |
| Backup folder | Specifies the folder to save the backup data to.► The folder name should be the format of “Folder Name”, “Folder Name/Sub Folder Name” and so on. | ||
| Runs a connection test to the configured FTP server. | -- | ||
| Backup schedule setting | Daily backup me | Sets the daily time for the system to do the auto backup. | 0:00:00 |
| Backup period from | Sets the start time of recorded video of the previous day. | 0:00:00 | |
| Backup period to | Sets the end time of recorded video of the previous day. | 23:59:59 | |
| Cameras | Sets the channel(s) to back up the videos for. | Deselected. | |
10.1.2.6. Event Action
It relies on the Event Acon tabbed page to enable/disable the event(s) that will launch acon(s) from the Recording Server, including the server abnormality such as server disconncon or the failure to write to the disk drive.
To access the Event Acon tabbed page for the Recording Server:
- From the Tree Console, click the topic Recording Server.
By default, the Properes tabbed page then opens at the Conguraon Pane.
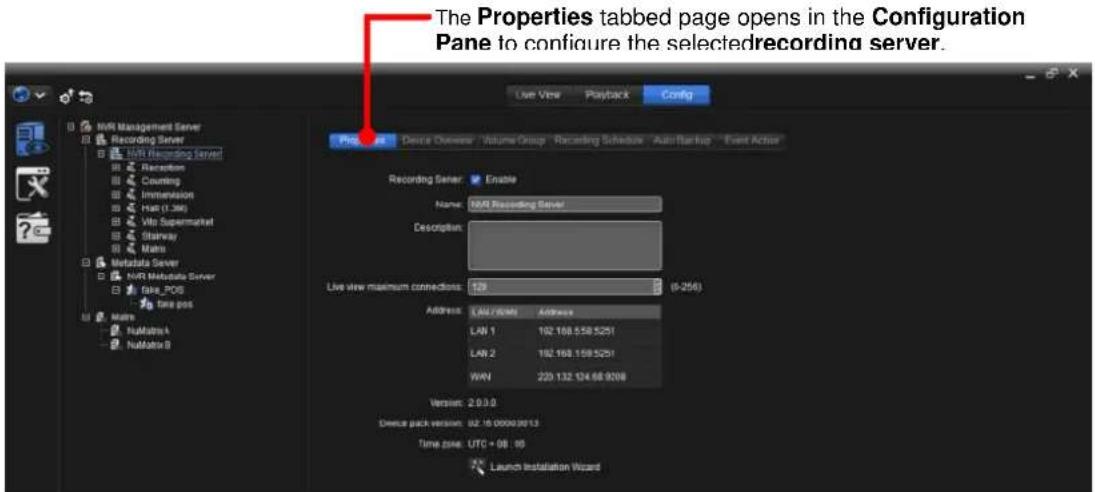
text_image
The Properties tabbed page opens in the Configuration Pane to configure the selectedrecording server. Recording Server NMI Recording Server Recording Server Name: NMI Recording Server Description: Live view maximum connections: 128 (6-256) Address: LAN / directory Address LAN 1 192.108.558.5251 LAN 2 192.108.108.5251 WAN 220.132.124.68.9208 Version: 2.0.0.0 Device pack version: 02.16.00003013 Time zone: UTC + 08 : 05 Launch Installation Wizard- Click the Event Acon tab.
The Event Acon tabbed page then opens.
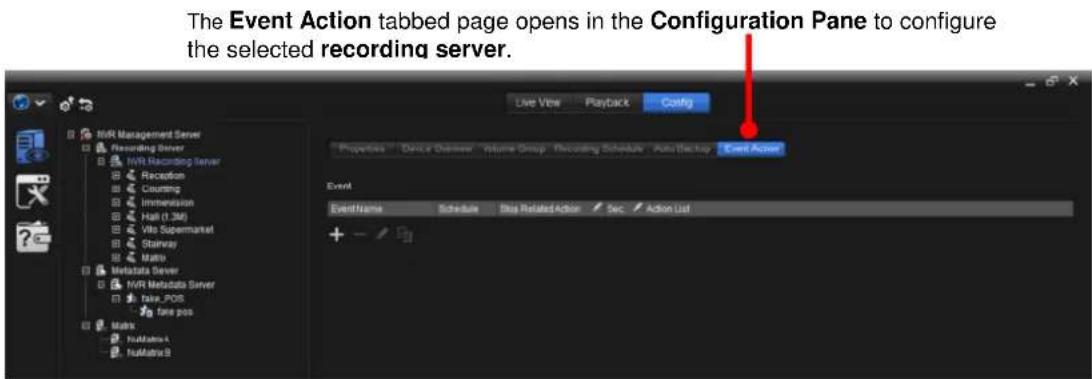
text_image
The Event Action tabbed page opens in the Configuration Pane to configure the selected recording server. Live View Playback Config Event Properties Detect Overview Volume Group Recording Schedule Auto Backlog Event Action Event Event Name Side-Back Bus Related Action Sec Action List + - / - MVR Management Server Recording Server MVR Recording Server Reception Counting Immunization Hall (1.3M) Vito Supermarket Stainray Math Metadata Server MVR Metadata Server take_POS false pos Mask: NullMatrix1 NullMatrix9The featured sengs on the Event Acon tabbed page are:
| Group | Icon / Setting | Description |
| Event |  | Adds an event.▸ Available events are Server disconnect, Fail to write to drive and Auto backup failed. |
| [7TKT] | Deletes the selected event.▸ Click any of the event info cells to select the event. | |
| [AWHO] | Edits the selected event.▸ Click any of the event info cells to edit the info. | |
| [T0KKI] | Copies the event setting to another device. | |
| Evei [DOC2] | Delivers the name of the event.▸ Click the Event Name cell to edit the name of the event. | |
| [64ZX]Event [YABZ] | Delivers the event type.▸ Four types are available: Server disconnect, Fail to write to drive and Auto backup fail. | |
| Scl [G46Z] | Delivers the applied “schedule”, which means one or more time period(s) in which the occurrence of the event is taken effective.▸ Use the Add schedule settings to apply a schedule to the event.▸ To create/delete/edit a schedule, see Schedule. | |
Stop A  | Stop action after _Sec. | |
| [DKAB] | Sets when to stop the action launched by the Recording Server after the event occurs.▸ 1 to 60 seconds are configurable. | |
| [A08K]Acon list | Delivers all the actions set up for the Recording Server to take when the event occurs.▸ The available action is E-Mail to multiple and play alter sound. | |
| Add schedule | [06W4] | Adds a schedule.▸ Available options are the schedules created as described in Create A Schedule. |
 | Deletes the selected schedule.▸ Click a schedule to select it. | |
| [ABKZ] | Edits the selected schedule.▸ Click a schedule to select it. | |
 | Moves the selected schedule up.▸ Click a schedule to select it. | |
| [OKBZ] | Moves the selected schedule down.▸ Click a schedule to select it. | |
| [3ZXX] | Opens a schedule overview dialog that shows the applied schedule(s) in a daily view or a weekly view. | |
 | Copies the schedule setting to another event. | |
| Schedule Name | Delivers the name of the schedule.▸ Click the Schedule name cell to change the schedule to some other schedule. | |
| Property | Sets whether to allow or block the applied schedule's time period(s). | |
| Descripon | Delivers a brief description for this schedule for the easier identification of it. | |
| Add action | Acon List | Delivers all the actions set up for the Recording Server to take whenthe event occurs.▸ The available action is E-Mail to multiple and play alter sound.. |
 | Adds an action for the Recording Server to take when the event occurs.▸ The available action is E-Mail to multiple and play alter sound.. | |
| [OKSZ] | Deletes the selected action.▸ Click an action to select it. | |
| Action properties | Sets whom to send the alert email(s) to.▸ This group of settings is available only when the E-Mail to multiple action is added. | |
10.1.2.7. Add A Video Device / IO Device
To add a video device or IO device to a Recording Server:
- From the Tree Console, click the topic Recording Server.
- If a plus sign (+) shows besides the sub topic Recording Server, click the plus sign (+) to collapse the exisng Recording Server(s). Then click the Recording Server to congure.
OR
If a minus sign (-) shows besides the sub topic Recording Server, the existing Recording Server(s) collapse already. Simply click the Recording Server to congregate. Click the Recording Server to add the video device or IO device to.
The Recording Server becomes highlighted.
- From the bottom of the Tree Console, click the add icon +.
A ny dialog then opens showing the opons of Add Video Device and Add IO Device.
- Click Add Video Device to add a video device.
OR
Click Add IO Device to add an I/O device.
A new video device, named "video device" by default, or a new I/O device, named "io device" by default", will be appended under the selected Recording Server, and a Properes tabbed page will open in the Conguraon Pane for users to conjure the newly added video device or I/O device.
The new video device or I/O device is appended to the recording server.
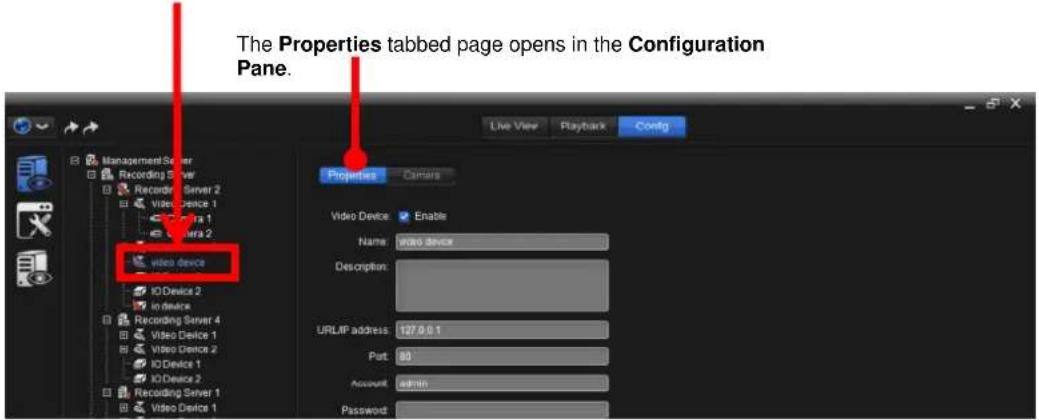
text_image
The Properties tabbed page opens in the Configuration Pane. Properties Camera Video Device: Enable Name: VIDEO Device Description: URLIP address: 127.9.0.1 Part: 80 Amount admin Password:To congure a video device, see Congure A Video Device.
To conjure an IO device, see Congure An IO Device.
10.1.2.8. Delete A Video Device / IO Device
To delete a video device or IO device from a Recording Server:
- From the Tree Console, click the topic Recording Server.
- Click the Recording Server to delete the video device or I/O device from.
The Recording Server becomes highlighted
- If a plus sign (+) shows besides the Recording Server, click the plus sign (+) to collapse the exisng video device(s) and IO device(s). Then click the device to delete.
OR
If a minus sign (-) shows besides the Recording Server, the exisng video device(s) and IO device(s) collapse already. Simply click the device to delete.
The device to delete becomes highlighted.
- From the bottom of the Tree Console, click the delete icon —.
A queson dialog opens to ask for the conrmaon of deleon.
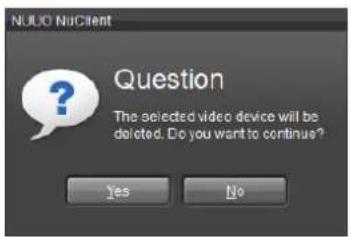
text_image
NULO NoClient Question The selected video device will be deleted. Do you want to continue? Yes No-
Click Yes to conrm the deleon.
-
Click the apply button 📋 on the Top Toolbar to apply the change.
10.1.2.9. Conigure A Video Device
To congure a video device:
- From the Tree Console, click the topic Recording Server.
- If a plus sign (+) shows besides the sub topic Recording Server, click the plus sign (+) to collapse the exisng Recording Server(s). Then click the Recording Server to congure.
OR
If a minus sign (-) shows besides the sub topic Recording Server, the existing Recording Server(s) collapse already. Simply click the Recording Server to congure.
- Click the Recording Server to which the video device to congregate belongs.
The video device to conjure becomes highlighted and the Properes tabbed page opens in the Conguraon Pane while the Camera tabbed page is hidden by default.
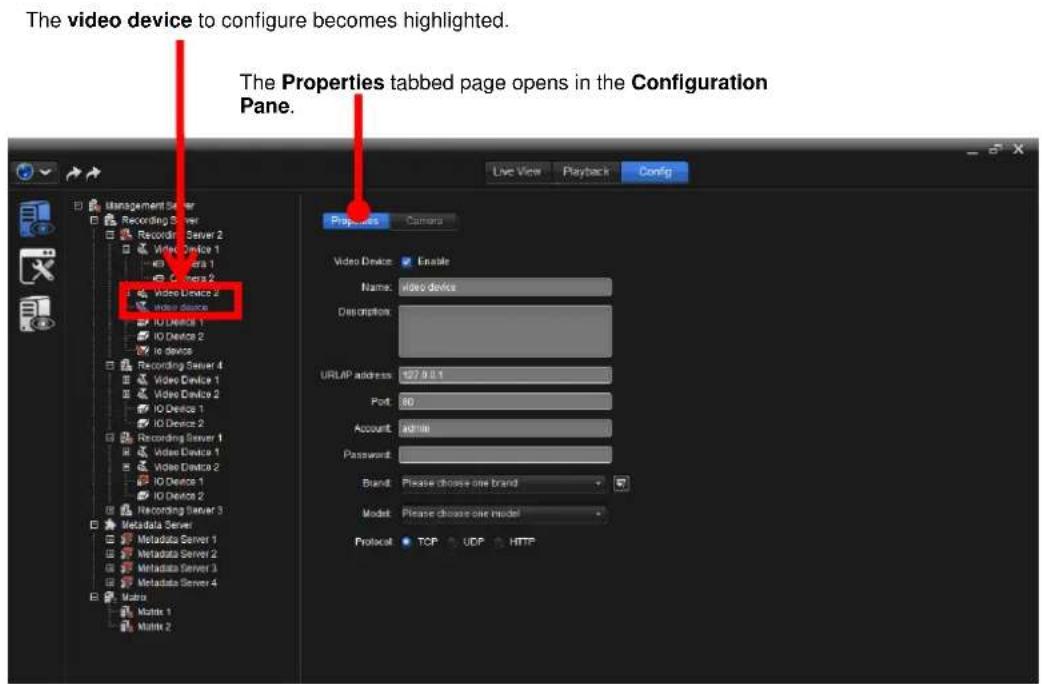
text_image
The video device to configure becomes highlighted. The Properties tabbed page opens in the Configuration Pane. Live View Playback Config Management Server Recording Server Recording Server 2 Video Device 1 Video Device 1 Video Device 2 Video Device 2 Video Device IO Device 1 IO Device 2 io devices Recording Server 4 Video Device 1 Video Device 2 IO Device 1 IO Device 2 Recording Server 1 Video Device 1 Video Device 2 IO Device 1 IO Device 2 Recording Server 3 Metadata Server Metadata Server 1 Metadata Server 2 Metadata Server 3 Metadata Server 4 Matrix Matrix 1 Matrix 2 Properties Camera Video Device Enable Name: video device Description: URLAP address: 97.9.0.1 Port: 60 Account: admin Password: Brand: Please choose one brand Model: Please choose one model Protocol: TCP UDP HITPSee Properes for the settings featured on the Properes tabbed page.
See Camera for the sengs featured on the Camera tabbed page.
10.1.2.9.1. Properties
It relies on the Properes tabbed page to congregate the properes of a video device:
- From the Tree Console, click the topic Recording Server.
- Click the Recording Server to which the video device to conjure belongs.
The Properes tabbed page opens in the Conguraon Pane for the video device to congure while the Camera tabbed page is hidden by default.
The Properties tabbed page opens in the Configuration Pane.
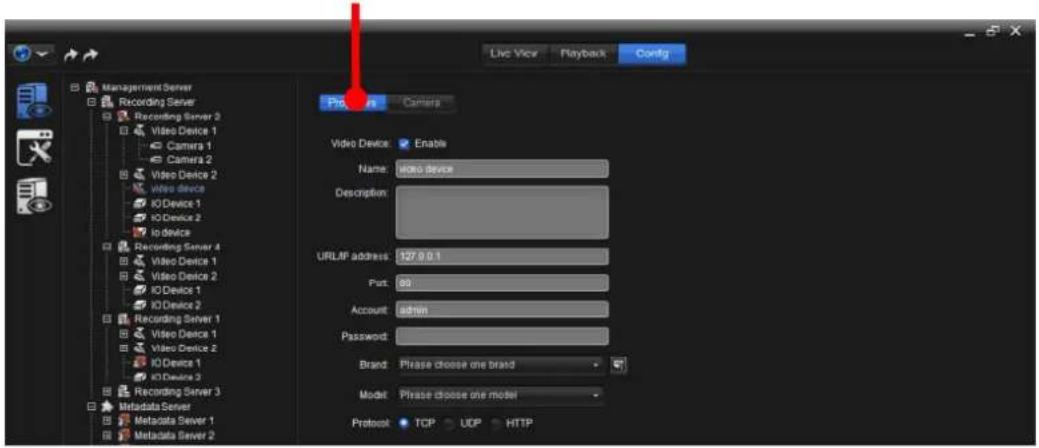
text_image
Live View Playback Config Management Server Recording Server Recording Server 2 Video Device 1 Camera 1 Camera 2 Video Device 2 Video device IO Device 1 IO Device 2 io device Recording Server 4 Video Device 1 Video Device 2 IO Device 1 IO Device 2 Recording Server 1 Video Device 1 Video Device 2 IO Device 1 IO Device 2 Recording Server 3 Metadata Server Metadata Server 1 Metadata Server 2 Project Camera Video Device Enable Name: video device Description: URLIP address: 127.0.0.1 Port: 60 Account admin Password: Brand: Please choose one brand Model: Please choose one model Protocol TCP UDP HTTPThe featured sengs on the Properes tabbed page are:
| Group | Description | Default |
| Video Device Enable | Enables/disables the video device. | Selected (Enabled) |
| Name | Sets the name of the video device. | “video device” |
| Descripon | Provides a brief description of the video device for the better identification of it. | -- |
| URL/IP address | Sets the URL or IP address of the video device. | 127.0.0.1 |
| Port | Sets the port of the video device. | 80 |
| Account | Sets the user name to access the video device. | Admin |
| Password | Sets the password to access the video device. | -- |
| Brand | Sets the brand of the video device. | -- |
| Model | Sets the model name of the video device. | -- |
| Protocol | Sets the protocol of the video device.► Options available are: TCP, UDP and HTTP. | TCP |
10.1.2.9.2. Camera
It relies on the Camera tabbed page to view the status of all the video channels controlled by a video device.
To access the Camera tabbed page of a video device:
- From the Tree Console, click the topic Recording Server.
- Click the topic Video Device.
- Click the Video Device to which the camera to congure belongs.
The Properes tabbed page opens in the Conguraon Pane for the video device to congure while the Camera tabbed page is hidden by default.
The Properties tabbed page opens in the Configuration Pane.
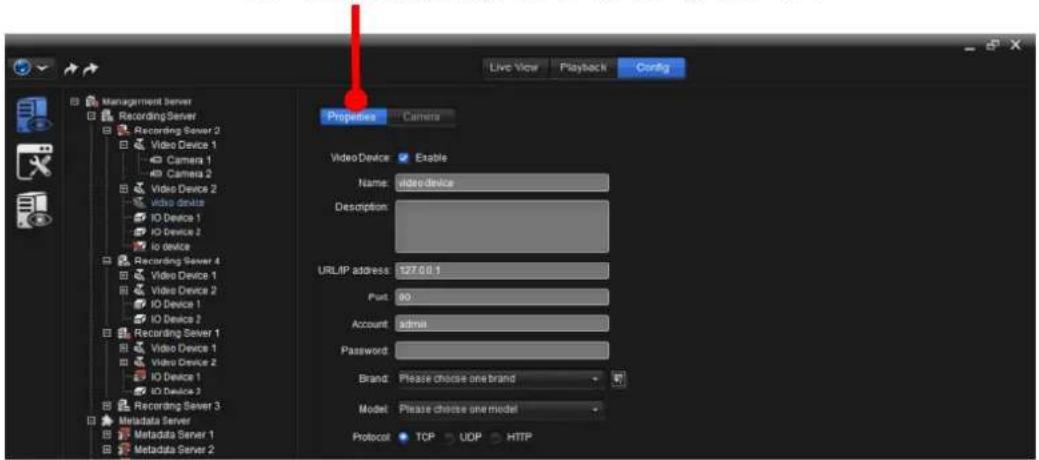
text_image
Live View Playback Config Management Server Recording Server Recording Server 2 Video Device 1 4D Camera 1 4B Camera 2 Video Device 2 Video devices IO Device 1 IO Device 2 IO devices Recording Server 4 Video Device 1 Video Device 2 IO Device 1 IO Device 2 Recording Server 1 Video Device 1 Video Device 2 IO Device 1 IO Device 2 Recording Server 3 Metadata Server Metadata Server 1 Metadata Server 2 Properties Camera Video Device Enable Name: video device Description: URL IP address: 127.00.1 Post: 90 Account admin Password: Brand: Please choose one brand Model: Please choose one model Protocol TCP UDP HTTP4. Click the Camera tab.
The Camera tabbed page then opens.
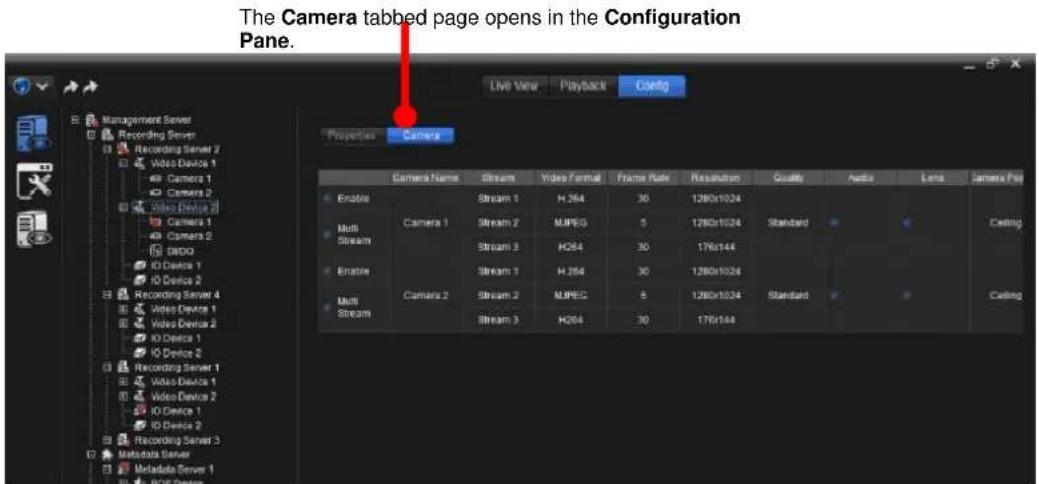
text_image
The Camera tabbed page opens in the Configuration Pane. Live View Playback Careg Properties Camera Camera Name Stream Video Formal Frame Rate Resolution Quality Audio Lens Camera Fee Enable Camera 1 Stream 1 H:264 30 1280x1024 Main Stream Camera 1 Stream 2 MJPEG 5 1280x1024 Standard Enable Camera 2 Stream 3 H:264 30 176x144 Main Stream Camera 3 Stream 1 H:264 30 1280x1024 Enable Camera 4 Stream 2 MJPEG 5 1280x1024 Standard Enable Camera 5 Stream 3 H:264 30 176x144 Recording Server 1 Recording Server 2 Recording Server 3 Recording Server 4 Recording Server 5 Recording Server 6 Recording Server 7 Recording Server 8 Recording Server 9 Recording Server 10 Recording Server 11 Recording Server 12 Recording Server 13 Recording Server 14 Recording Server 15 Recording Server 16 Recording Server 17 Recording Server 18 Recording Server 19 Recording Server 20 Recording Server 21 Recording Server 22 Recording Server 23 Recording Server 24 Recording Server 25 Recording Server 26 Recording Server 27 Recording Server 28 Recording Server 29 Recording Server 30 Recording Server 31 Recording Server 32 Recording Server 33 Recording Server 34 Recording Server 35 Recording Server 36 Recording Server 37 Recording Server 38 Recording Server 39 Recording Server 40 Recording Server 41 Recording Server 42 Recording Server 43 Recording Server 44 Recording Server 45 Recording Server 46 Recording Server 47 Recording Server 48 Recording Server 49 Recording Server 50Take a closer look at the tabbed page, which actually shows the statuses of all the camera(s) controlled by the video device.
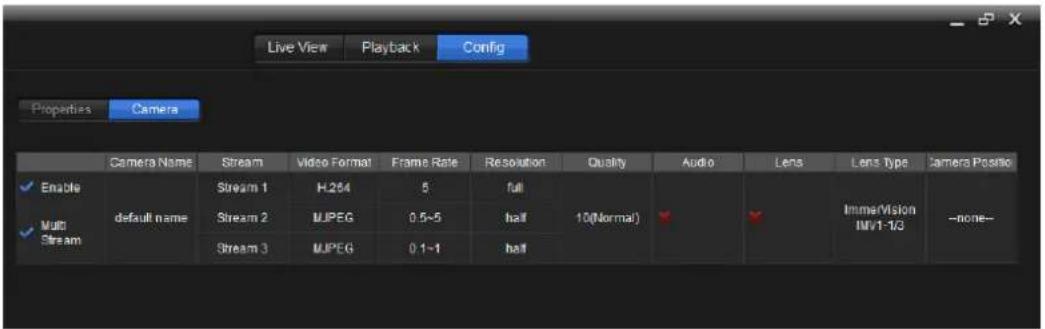
text_image
Live View Playback Config Properties Camers ✓ Enable ✓ Multi Stream default name Stream 1 H.264 5 full Stream 2 MJPEG 0.5~5 half Stream 3 MJPEG 0.1~1 half Stream 1 Multi Stream Stream 2 Stream 3 10(Normal) Audio Lens ImmeVision IMV1-1/3 Lens Type Camera Posito -x -x -none-| Group | Description |
| Enable | Enables/disables thecamera. |
| Mul stream | Enable/disable the multi stream |
| Camera Name | Delivers the name of thecamera. |
| Stream | Delivers the stream quantity forcamera. |
| Video Format | Delivers the video format of thecamera. |
| Frame Rate | Delivers the frame rate of the video. |
| Resoluon | Delivers the resolution of the video. |
| Quality | Delivers the quality of the video. |
| Audio | Delivers whether audio is enabled for thecamera. |
| Lens | Delivers the lens for thecamerause. |
| Lens Type | Special lens feature, such as fisheyecamera. |
| Camera Posion | Delivers wherethecameralocates for the special lens feature. |
10.1.2.9.3. Conigure A Camera
To congure a camera for the general properes, data streaming, recording schedule and event & acon features:
- From the Tree Console, click the topic Recording Server.
- Click the topic Video Device.
- Click the Video Device to which the camera to congure belongs.
- If a plus sign (+) shows besides the video device, click the plus sign (+) to collapse all the exisng camera(s). Then click the camera to congure.
OR
If a minus sign (-) shows besides the video device, the exisng camera(s) collapse already. Simply click the camera to congure.
The Properes tabbed page opens in the Conguraon Pane for the camera to conjure while the other tabbed pages are hidden by default.
The Properties tabbed page opens in the Configuration Pane.
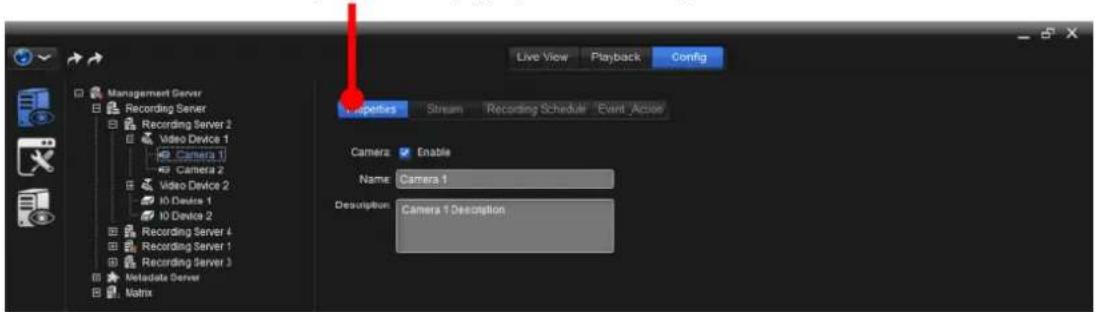
text_image
Live View Playback Config Management Server Recording Server Recording Server 2 Video Device 1 60 Camera 1 Camera 2 Video Device 2 10 Devices 1 10 Device 2 Recording Server 4 Recording Server 1 Recording Server 3 Metadata Server Matrix Supporters Sream Recording Schedule Event _Action Camera: Enable Name: Camera 1 Description: Camera 1 DescriptionAn overview of the tabbed pages featured:
| Tabbed Page | Description |
| Properes | 1. Enables/disables thecamera.2. Sets the name and brief description for thecamera. |
| Stream | 1. Enables/disables the stream profile.2. Configures thecamera's stream profile setting. |
| Recording Schedule | 3. Delivers a general view of thecamera's video recording schedule.4. Configures thecamera's video recording schedule and other recording features. |
| Event Acon | Sets the event(s) that will launch action(s) from thecamera. |
10.1.2.9.3.1. Properties
It relies on the Properes tabbed page to congregate a camera for the general properes such as the tle and a brief descripon.
To access the Properes tabbed page of a camera:
- From the Tree Console, click the topic Recording Server.
- Click the topic Video Device.
- Click the Video Device to which the camera to congure belongs.
- If a plus sign (+) shows besides the video device, click the plus sign (+) to collapse all the exisng camera(s). Then click the camera to congure.
OR
If a minus sign (-) shows besides the video device, the exisng camera(s) collapse already. Simply click the camera to congure.
The Properes tabbed page opens in the Conguraon Pane for the camera to conjure while the other tabbed pages are hidden by default.
The Properties tabbed page opens in the Configuration Pane.
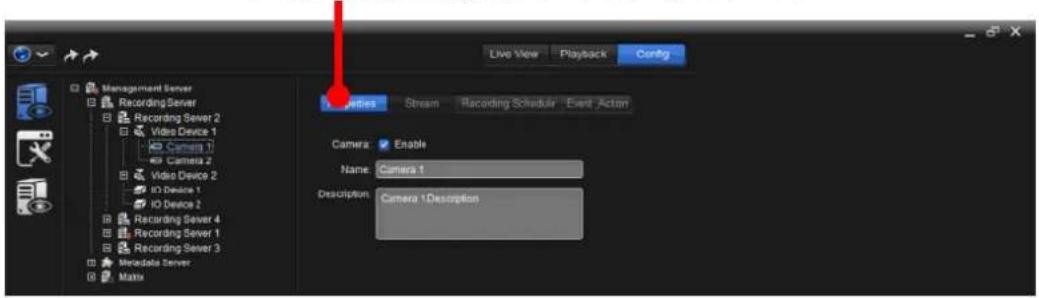
text_image
Live View Playback Config Management Server Recording Server Recording Server 2 Video Device 1 Camera 1 Camera 2 Video Device 2 ID Device 1 ID Device 2 Recording Server 4 Recording Server 1 Recording Server 3 Metadata Server Matrix Categories Stream Recording Schedule Event Action Camera Enable Name Camera 1 Description Camera 1DescriptionThe featured sengs on the Properes tabbed page are:
| Setting | Description | Default |
| Camera√Enable | Enables/disables thecamera. | Enable |
| Name | Names thecamera. | Default name |
| Descripon | Provides a brief description of thecamerafor the better identification of it. | -- |
10.1.2.9.3.2. Stream
It relies on the Stream tabbed page to congregate a camera for the general properes such as the tle and a brief descripon.
To access the Stream tabbed page of a camera:
- From the Tree Console, click the topic Recording Server.
- Click the topic Video Device.
- Click the Video Device to which the camera to congure belongs.
- If a plus sign (+) shows besides the video device, click the plus sign (+) to collapse all the exisng camera(s). Then click the camera to congure.
OR
If a minus sign (-) shows besides the video device, the exisng camera(s) collapse already. Simply click the camera to congure.
5. Click the Stream tab.
The Stream tabbed page opens in the Conguraon Pane for the camera to congure while the other tabbed pages are hidden by default.
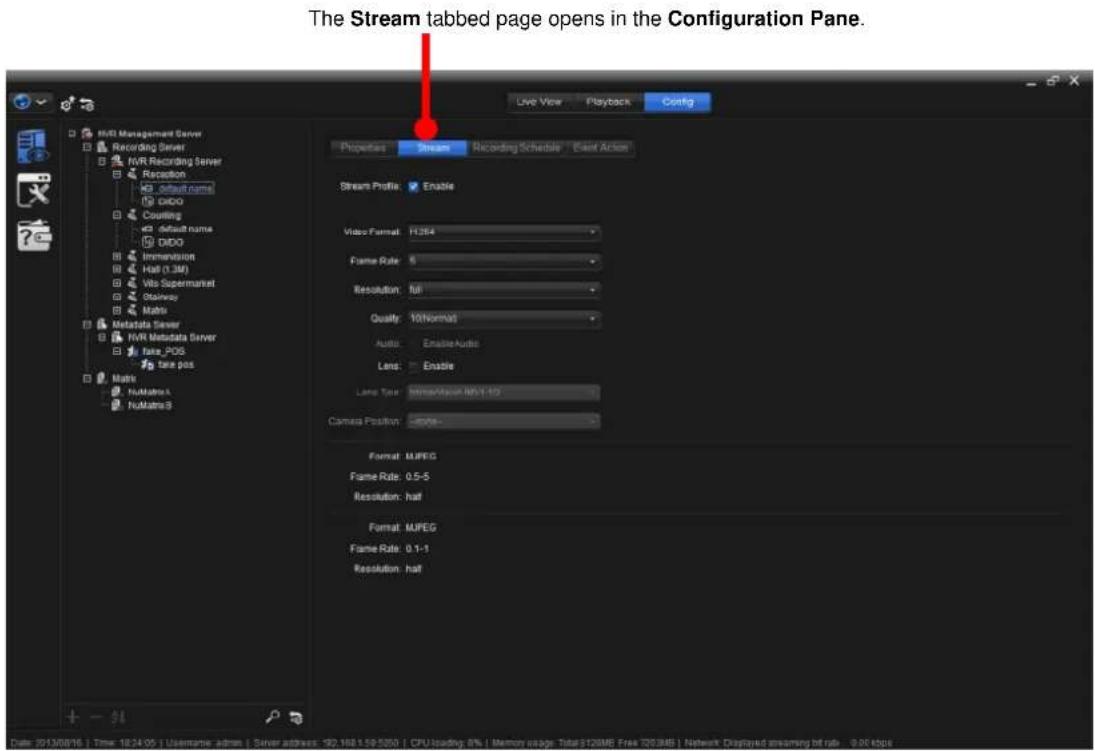
text_image
The Stream tabbed page opens in the Configuration Pane. Live View Playback Config HVRI Management Server Recording Server HVRI Recording Server Recovery default name DDO Counting default name DDO Immersion Half (1.3M) Vis Supermanet Stability Matrix Metadata Server HVRI Metadata Server false_POS false pass Matrix NullMatrix1 NullMatrix3 Properties Stream Recording Schedule Event Action Stream Profile Enable Video Format: 11264 Frame Rate: 5 Resolution: full Quality: 10/Normal Audio: Enable Audio Lens: Enable Lane Type: Immersion/Max-1-02 Camera Position: -800s- Format: MJPEG Frame Rate: 0.5-5 Resolution: half Format: MJPEG Frame Rate: 0.1-1 Resolution: half Date: 2013/08/16 | Time: 18:24:00 | Username: admin | Server address: 182.168.1.59.5200 | CPU loading: 8% | Memory usage: Total:120MB Free:200MB | Network Displayed streaming bit rate: 0.00 kbpsTake a closer look at the user interface.
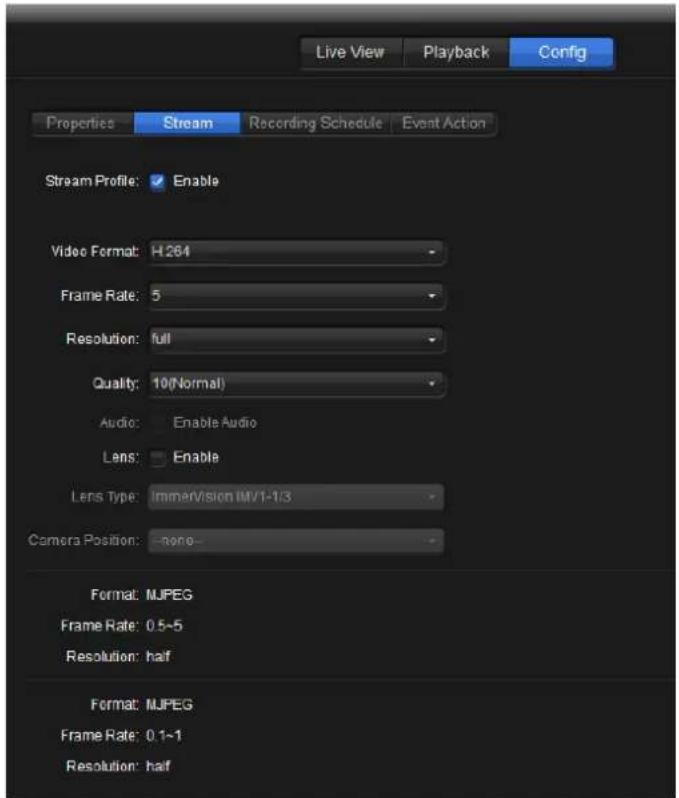
text_image
Live View Playback Config Properties Stream Recording Schedule Event Action Stream Profile: Enable Video Format: H264 Frame Rate: 5 Resolution: full Quality: 10(Normal) Audio: Enable Audio Lens: Enable Lens Type: ImmVision IMV1-1/3 Camera Position: none Format: MJPEG Frame Rate: 0.5~5 Resolution: half Format: MJPEG Frame Rate: 0.1~1 Resolution: halfThe featured sengs on the Stream tabbed page are:
| Setting | Description | Default |
| Stream Prole | Enables/disables the camera. | Disable |
| Video Format | Sets the video format for the camera. | Base on camera integration. |
| Frame Rate | Sets the frame rate for the video.▸ Frame rate per sec. are configurable. | Base on camera integration. |
| Resoluon | Sets the resolution for the video. | Base on camera integration. |
| Quality | Sets the quality for the video. | Base on camera integration. |
| Audio | Enables/disable the audio for the camera. | Base on camera integration. |
| Lens | Enables/disable the lens for the camera. | Base on camera integration. |
| Lens type | Sets the lens type for the camera. | Base on camera integration. |
| Camera Posion | Sets the camera position for the camera. | Base on camera integration. |
| Format/Frame rate and Resoluon | Delivers the multi stream information for the camera. | Base on camera integration. |
| Format/Frame rate and Resoluon | Delivers the multi stream information for the camera. | Base on camera integration. |
10.1.2.9.3.3. Recording Schedule
It relies on the Recording Schedule tabbed page to get a general overview of a camera's recording schedule, or to congregate the camera's recording schedule:
To access the Recording Schedule tabbed page of a camera:
- From the Tree Console, click the topic Recording Server.
- Click the topic Video Device.
- Click the Video Device to which the camera to congure belongs.
- If a plus sign (+) shows besides the video device, click the plus sign (+) to collapse all the exisng camera(s). Then click the camera to congure.
OR
If a minus sign (-) shows besides the video device, the exisng camera(s) collapse already. Simply click the camera to congure.
The Properes tabbed page opens in the Conguraon Pane for the camera to congure while the other tabbed pages are hidden by default.
The Properties tabbed page opens in the Configuration Pane.
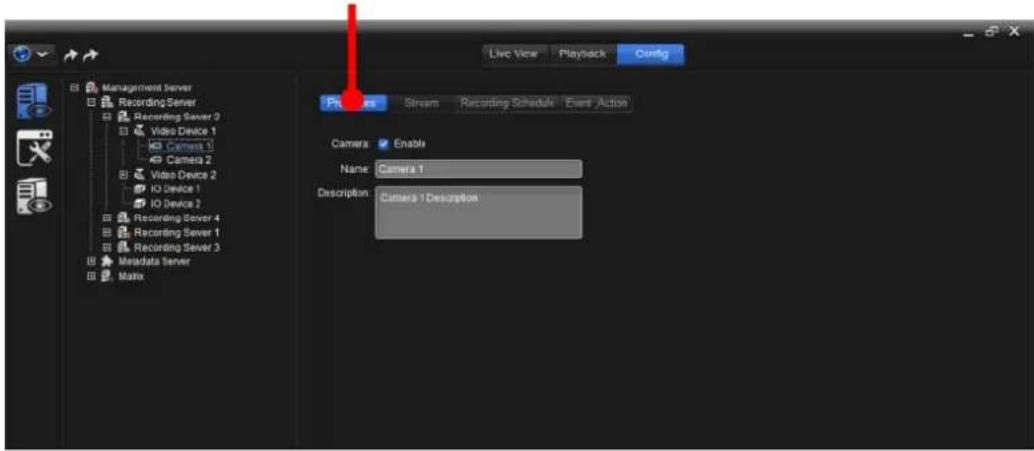
text_image
Live View Playback Config Management Server Recording Server Recording Server 2 Video Device 1 IO Camera 1 49 Camera 2 Video Device 2 IO Device 1 IO Device 2 Recording Server 4 Recording Server 1 Recording Server 3 Metadata Server Matrix Places Stream Recording Schedule Event Action Camera Enable Name Camera 1 Description Camera 1 Description5. Click the Recording Schedule tab.
The Recording Schedule tabbed page opens in the Conguraon Pane.
The Recording Schedule tabbed page opens in the Configuration Pane to configure the selected camera.
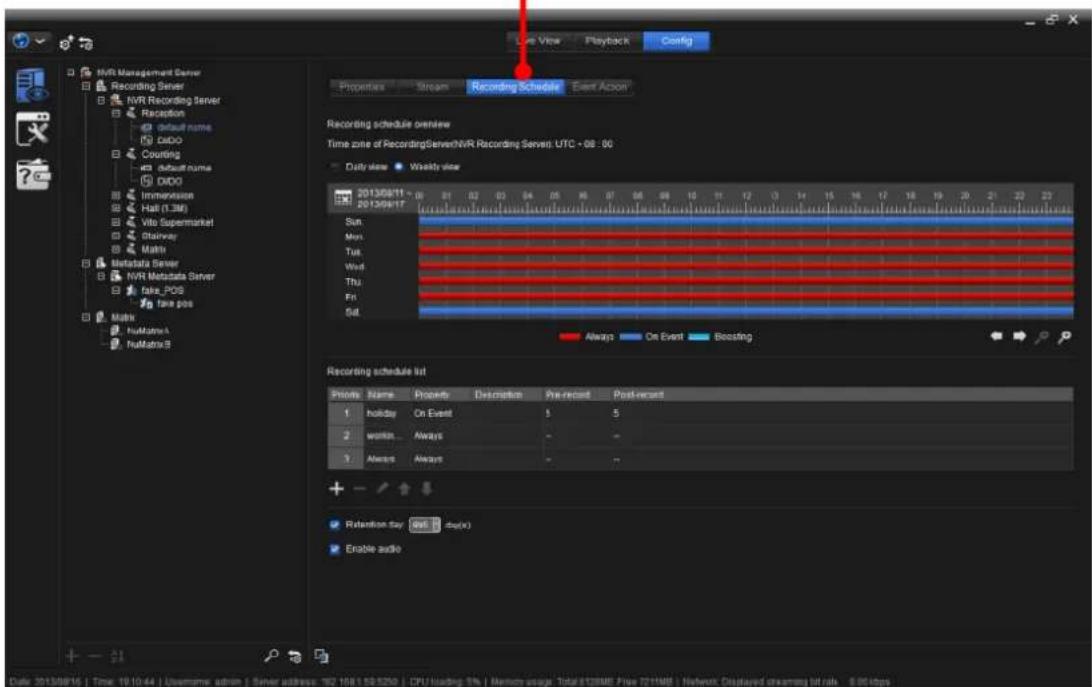
text_image
NVR Management Server Recording Server NVR Recording Server Reception default name DDO Counting default name DDO Immersion Hall (1.3M) Vito Supermarket Stainver Matrix Metastata Server NVR Metadata Server fake_POS fake pos Matrix Audience4 Audience9 Recording schedule overview Time zone of RecordingServer/NVR Recording Servers: UTC - 08 : 00 Daily view • Weekly view 2013/08/11 - 00 01 02 03 04 05 06 07 08 09 10 11 12 13 14 15 16 17 18 19 20 21 22 23 Sun: Myr: Tue: Wed: Thu: Fri: Sat: Always On Event Boosting Recording schedule list Actions Name Property Description Pre-recard Post-recard 1 holiday On Event 5 5 2 work: Always - 3 always Always - + Retention day: 406 db(x) Enable audio Date: 2013/08/16 | Time: 19:10:44 | Username: admin | Server address: 182.168.169.5292 | CPU loading: 5% | Memory usage: Total #12MBE Free #271MBE | Network Displayed dreaming bit rate: 8.06 LbpsTake a closer look at the user interface.
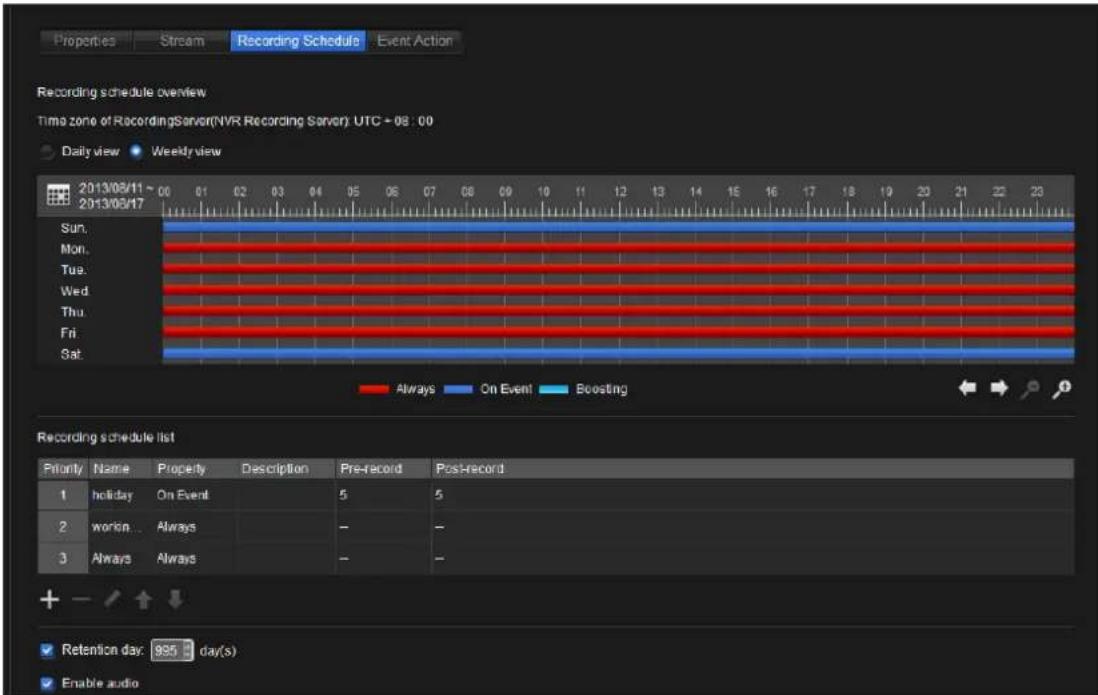
text_image
Recording schedule overview Time zone of RecordingServer(NVR Recording Server) UTC - 08:00 Daily view Weekly view 2013/08/11 ~ 00 01 02 03 04 05 06 07 08 09 10 11 12 13 14 15 16 17 18 19 20 21 22 23 Sun. Mon. Tue. Wed. Thu. Fri. Sat. Always On Event Boosting Recording schedule list Priority Name Property Description Pre-record Post-record 1 holiday On Event 5 5 2 work... Always - - 3 Always Always - - Retention day: 995 day(s) Enable audioThe featured sengs on the Recording Schedule tabbed page are:
| Group | Setting | Description |
| Recording schedule overview | Daily view | Shows theschedule tablein a daily view. |
| Weekly view | Shows theschedule tablein a weekly view. | |
| [KSKA] | Switches theschedule tableto any other calendar day. | |
| schedule table | Click or drag on theschedule tableto view other time slots. | |
 | Moves the selectedvideo deviceup. | |
| [0ACS] | Moves the selectedvideo devicedown. | |
 Always Always | Delivers the times slots in which the video recording is on unconditionally.SeeAdd A Scheduleto know how to change the setting. | |
| [AYX3]On event | Delivers the times slots in which the video recording is on when an eventoccurs.SeeAdd A Scheduleto know how to change the setting. | |
| [07YK]Boosng | Delivers the times slots in which the video are recorded with higher frame rate.SeeAdd A Scheduleto know how to change the setting. | |
 | Scrolls theschedule tableto the left. | |
| [HDKS] | Scrolls theschedule tableto the right. | |
| [6ZDC]- | Zooms out thedaily time schedule tableto bring more time slots into view. | |
| [KCIZ]- | Zooms in theschedule tableto view the time slots in a more specific way. | |
| Recording schedule list | Name | Delivers the name of the schedule. |
| Property | Delivers how videos are recorded,Always, On Eventor Boosting.SeeAdd A Scheduleto know how to change the setting. | |
| Descripon | Delivers a brief description for thisschedulefor the easier identification of it. | |
| [ZXHB]- | Opens a dedicated page to add arecording scheduleto a camera.SeeAdd A Schedulefor the details. | |
| [YXB4] | Deletes the selectedschedule.Click ascheduleto select it. | |
| [CKX]- | Edits the selectedschedule.Click ascheduleto select it. | |
| [KSDA]- | Moves the selectedschedule up.Click ascheduleto select it. | |
 | Moves the selectedscheduledown.Click ascheduleto select it. | |
| Others | Retention Days | Sets the retention days of the recorded video.1 to 999 is configurable. |
| Enable Audio | Enables/disables audio. |
10.1.2.9.3.3.1. Add A Recording Schedule to A Camera
On the Recording Schedule tabbed page, the recording schedule list is featured to deliver the recording schedule(s) of a camera. It is also a group of settings to congregate the recording schedule(s) of a camera. The group of sengs features a add sign icon + to add a recording schedule to a camera. Click such + icon to open a dedicated page to add a recording schedule to a camera.
To open the dedicated page to add a recording schedule to a camera:
- From the Tree Console, click the topic Recording Server.
- Click the topic Video Device.
- Click the Video Device to which the camera to congure belongs.
- Open the Recording Schedule tabbed page of a camera.
The Recording Schedule tabbed page opens in the Conguraon Pane.
The Recording Schedule tabbed page opens in the Configuration Pane to configure the selected
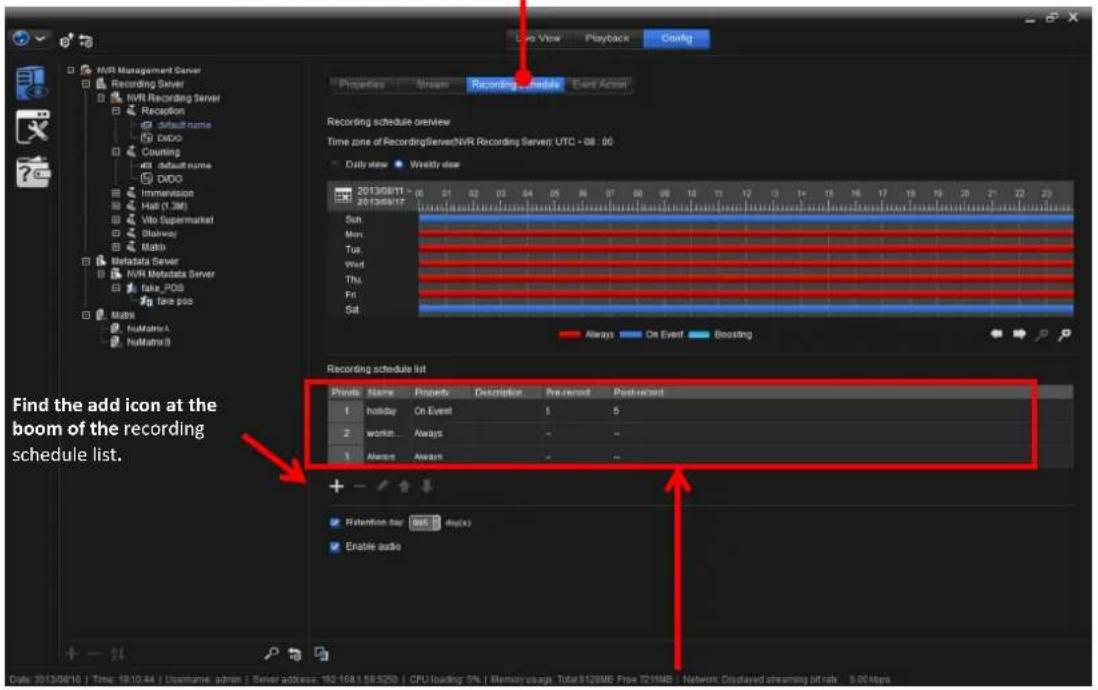
text_image
Recording schedule list Find the add icon at the boom of the recording schedule list. Lock View Playback Config Properties Screen Recording Schedule Event Action Recording schedule overview Time zone of RecordingServer/NVR Recording Server: UTC - 08 : 06 Daily view Weight view 2013/08/11 - 05 01 02 03 04 05 06 07 08 09 10 11 12 13 14 15 16 17 18 19 20 21 22 23 Sun Mon Tue Wed Thu Fri Sat Always On Event Boosting recording schedule list Points Name Property Description Pre record Post record 1 holiday On Event 5 5 2.workn Always - 3.Almont Always - + - - - Retention rate Get back Enable audioFind the recording schedule list group of settings in the middle of the Recording Schedule tabbed page.
-
Find the recording schedule list group of settings in the middle of the Recording Schedule tabbed page. And nd the +icon at the boom of the recording schedule list.
-
Click the +con.
The dedicated page to add a recording schedule to a camera then opens.
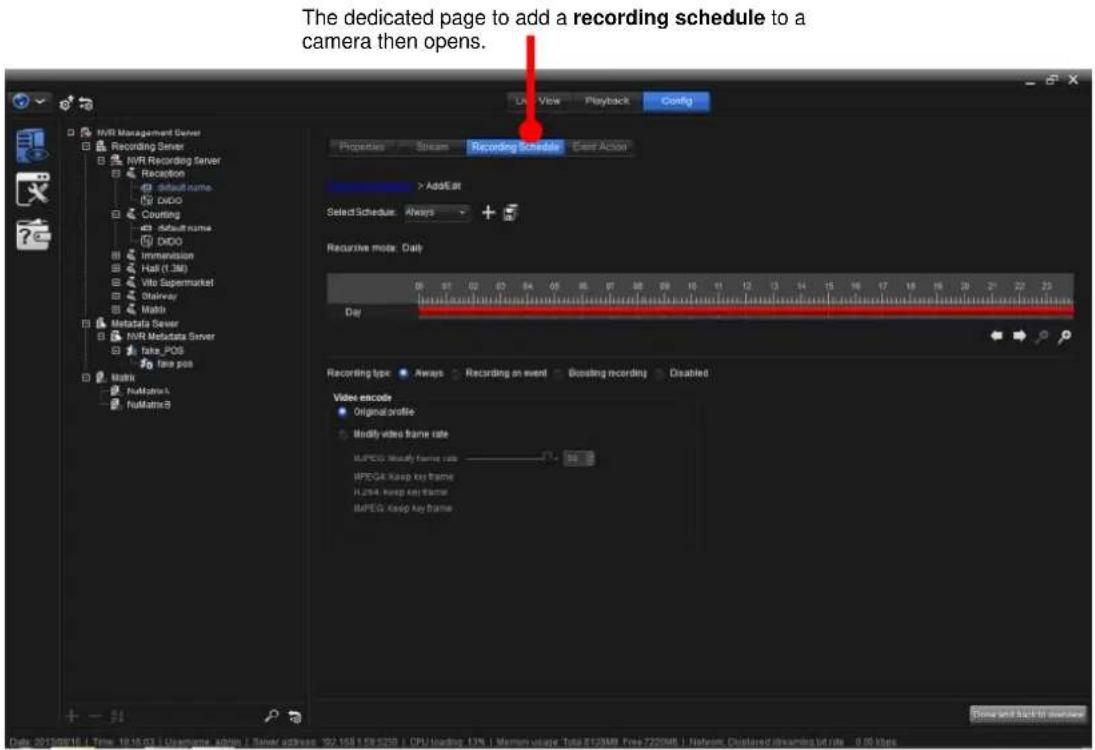
text_image
The dedicated page to add a recording schedule to a camera then opens. Recording Properties Stream Recording Schedule Care Action > Add E at Select Schedule Always + Recursive mode: Daily Day Recording type: Always Recording on event Boosting recording Disabled Video encode Original profile Modify video frame rate MPEGG Modify frame rate MPEGG Keep key frame M254. Keep key frame MPEGG Keep key frameTake a closer look at the user interface.
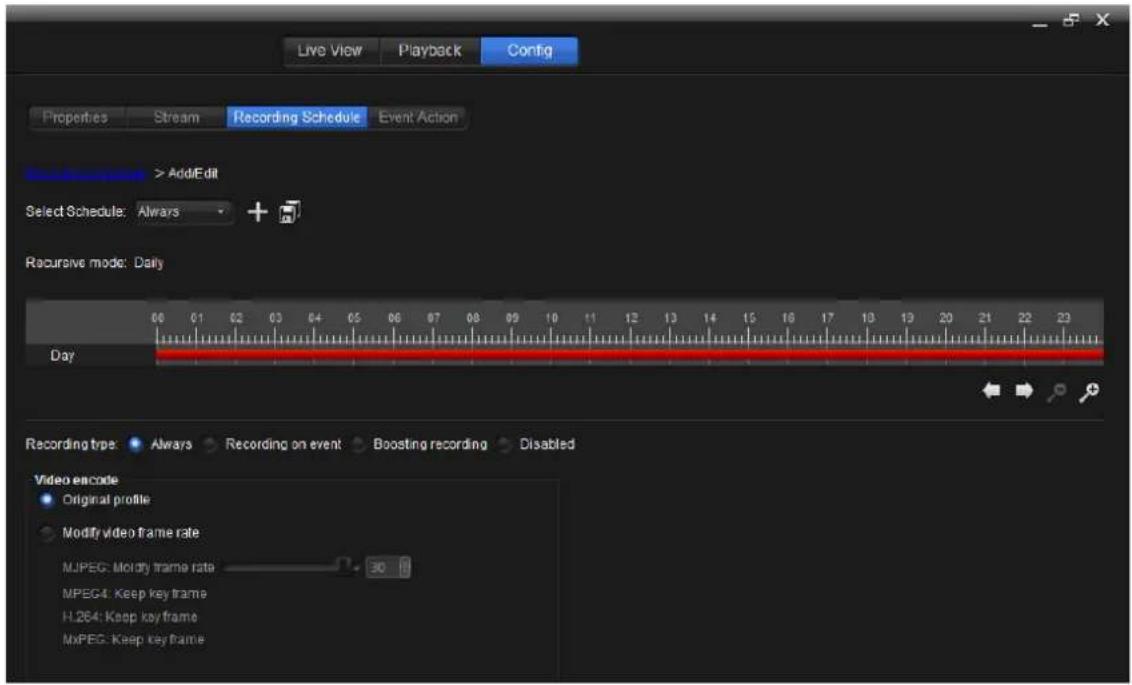
text_image
Live View Playback Config Properties Stream Recording Schedule Event Action > AddEdit Select Schedule: Always Recursive mode: Daily Day Recording type: Always Recording on event Boosting recording Disabled Video encode Original profile Modify video frame rate MJPEG: Moldry frame rate 30 MPEG4: Keep key frame H.264: Keep key frame MJPEG: Keep key frameThe featured sengs are:
| Setting | Description | Default | |
| Select Schedule | Selects an existing schedule to add, or adds a new schedule to add.► The existing schedules are the schedules created as described in Create A Schedule.► Click the + con on the right to create a new schedule.► To create a new schedule, see Create A Schedule for more details. | The "Always" schedule | |
| Schedule table | Shows the selected schedule or the schedule about to be added in an overview table. | -- | |
| Recording type | Sets how videos are recorded for the selected schedule or the schedule about to be added.► Options available are: | Always | |
| Option | Description | ||
| Always | Records videos 24 hours a day.► When set to Always, the Video encode setting becomes available. Select Modify video frame rate to be able to adjust the MJPEG video frame rate from 1 to 30. | ||
| Recording on Event | Records videos when an event occurs.► When set to Recording on Event, the Video encode setting becomes available. Select Modify video frame rate to be able to adjust the MJPEG video frame rate from 1 to 30. Also available are the Pre-record and Post-record settings, which is configurable from 5 to 180 sec.► When set to Recording on Event, the Event type setting also becomes available so users can set which event to trigger video recording. | ||
| Boosng recording | Records videos with higher frame rate.▸ When set toBoost Recording, the Normal Video encodegroup of settings andEvent Video encodegroup of settings both become available so users can set which frame rate to record videos when an event occurs or when nothing happens (“normally”). SelectModify video frame rate to be able to adjust the MJPEG video frame rate from 1 to30.▸ When set toBoost Recording, theEvent typesetting also becomes available so users can set which event to trigger video recording. | ||
| Disabled | Disables video recording. | ||
| Video Encode | Selects the video format for the recording schedule.▸ Available video encode areoriginal profileandmodify video frame rate. | ||
Take a closer look at the Recording schedule list:
| Recording schedule list | |||||
| Name | Property | Description | Pre-record | Post-record | |
| 1 | Weekly | Always | Mon. Wed. Fri. | -- | -- |
| 2 | monthly 1 | On Event | the 3 1th day of every month | 7 | 10 |
| 3 | month... | Boosting | the 2nd Mon. of every month | -- | -- |
| 4 | month... | Disabled | the last Fri. of every month | -- | -- |
The informaon delivered is:
| Setting | Description |
| Name | Delivers the name of the schedule currently applied to thecamera. |
| Property | Delivers when and how to record videos. |
| Descripon | Delivers the brief description of the schedule (profile). |
| Pre-record | Sets the time to start recording right before the scheduled time. |
| Post-record | Sets the time to keep recording after the scheduled time elapses. |
The featured sengs are:
| Setting | Description |
| + | Click this add sign icon to open another page to add a schedule.▸ Available options are the schedules created as described in Create A Schedule. |
| - | Deletes the selected schedule.▸ Click a schedule to select it. |
| ◆ | Edits the selected schedule.▸ Click a schedule to select it. |
| ↑ | Moves the selected schedule up.▸ Click a schedule to select it. |
| ↓ | Moves the selected schedule down.▸ Click a schedule to select it. |
10.1.2.9.3.4. Event Action
It relies on the Event Acon tabbed page to enable/disable the event(s) that will launch acon(s) from the Camera.
To access the Event Acon tabbed page for the Camera:
- From the Tree Console, click the topic Recording Server.
- Click the topic Video Device.
- Click the Video Device to which the camera to congure belongs.
By default, the Properes tabbed page then opens at the Conguraon Pane.
The Properties tabbed page opens in the Configuration Pane to configure the selected recording server.
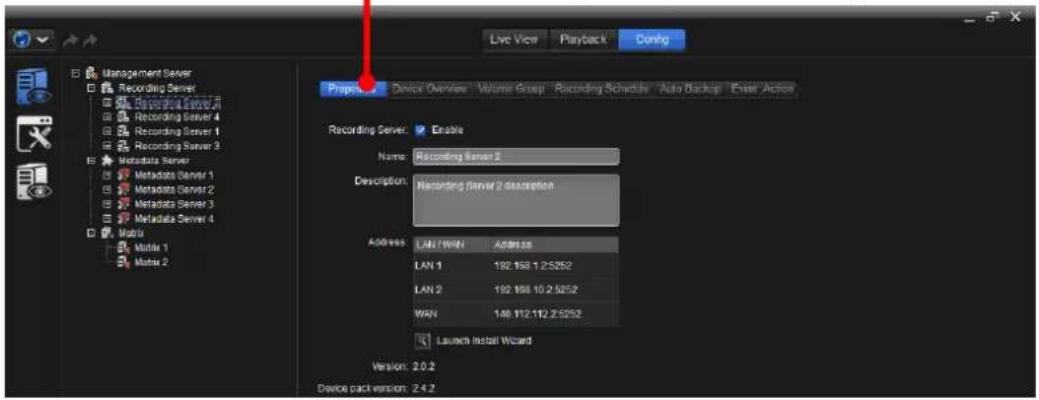
text_image
Live View Playback Config Management Server Recording Server Recording Server 1 Recording Server 2 Recording Server 3 Metadata Server Metadata Server 4 Metadata Server 5 Metadata Server 6 Metadata Server 7 Metadata Server 8 Metadata Server 9 Metadata Server 10 Metadata Server 11 Metadata Server 12 Metadata Server 13 Metadata Server 14 Metadata Server 15 Metadata Server 16 Metadata Server 17 Metadata Server 18 Metadata Server 19 Metadata Server 20 Metadata Server 21 Metadata Server 22 Metadata Server 23 Metadata Server 24 Metadata Server 25 Metadata Server 26 Metadata Server 27 Metadata Server 28 Metadata Server 29 Metadata Server 30 Metadata Server 31 Metadata Server 32 Metadata Server 33 Metadata Server 34 Metadata Server 35 Metadata Server 36 Metadata Server 37 Metadata Server 38 Metadata Server 39 Metadata Server 40 Metadata Server 41 Metadata Server 42 Metadata Server 43 Metadata Server 44 Metadata Server 45 Metadata Server 46 Metadata Server 47 Metadata Server 48 Metadata Server 49 Metadata Server 50 Metadata Server 51 Metadata Server 52 Metadata Server 53 Metadata Server 54 Metadata Server 55 Metadata Server 56 Metadata Server 57 Metadata Server 58 Metadata Server 59 Metadata Server 60 Metadata Server 61 Metadata Server 62 Metadata Server 63 Metadata Server 64 Metadata Server 65 Metadata Server 66 Metadata Server 67 Metadata Server 68 Metadata Server 69 Metadata Server 70 Metadata Server 71 Metadata Server 72 Metadata Server 73 Metadata Server 74 Metadata Server 75 Metadata Server 76 Metadata Server 77 Metadata Server 78 Metadata Server 79 Metadata Server 80 Metadata Server 81 Metadata Server 82 Metadata Server 83 Metadata Server 84 Metadata Server 85 Metadata Server 86 Metadata Server 87 Metadata Server 88 Metadata Server 89 Metadata Server 90 Metadata Server 91 Metadata Server 92 Metadata Server 93 Metadata Server 94 Metadata Server 95 Metadata Server 96 Metadata Server 97 Metadata Server 98 Metadata Server 99 Metadata Server 100 Location Install Wizard Version: 2.0.2 Device pack version: 2.4.2- Click the Event Acon tab.
The Event Acon tabbed page then opens.
The Event Action tabbed page opens in the Configuration Pane to configure the selected recording server.
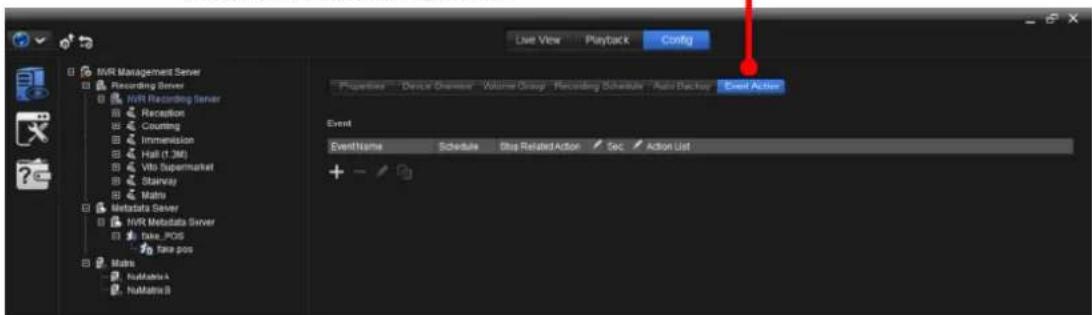
text_image
Live View Playback Config WVR Management Server Recording Server WVR Recording Server Reception Counting Immenision Hall (1.3M) Vito Supermarket Stairway Matrix Metadata Server WVR Metadata Server take_POS Take pos Matrix Nustalva4 Nustalva8 Event Event Name Schedule Stop Related Action Sec Action List + -The featured sengs on the Event Acon tabbed page are:
| Group | Icon / Setting | Description |
| Event |  | Adds an event.▸ Available events are connection lost, No enough days for retention days and Motion started. |
 | Deletes the selected event.▸ Click any of the event info cells to select the event. | |
| [CSY3] | Edits the selected event.▸ Click any of the event info cells to edit the info. | |
| [KB3A] | Copies the event setting to another device. | |
| Evel [ZWJA] | Delivers the name of the event.▸ Click the Event Name cell to edit the name of the event. | |
| E [WIX4] | Delivers the event type.▸ Four types are available: connection lost, No enough days for retention days and Motion started. | |
| Scl [6BH2] | Delivers the applied “schedule”, which means one or more time period(s) in which the occurrence of the event is taken effective.▸ Use the Add schedule settings to apply a schedule to the event.▸ To create/delete/edit a schedule, see Schedule. | |
Stop  A A | Stop action after _Sec. | |
| [20XX] | Sets when to stop the action launched by the Camera after the event occurs.▸ 1 to 60 seconds are configurable. | |
| Acc [AAS8] | Delivers all the actions set up for the Camera to take when the event occurs.▸ The available action is E-Mail to multiple, DO turn on, Go to preset, Video edge display and Play alter sound. | |
| Add schedule |  | Adds a schedule.▸ Available options are the schedules created as described in Create A Schedule. |
| [2303] | Deletes the selected schedule.▸ Click a schedule to select it. | |
 | Edits the selected schedule.▸ Click a schedule to select it. | |
| [14X2K] | Moves the selected schedule up.▸ Click a schedule to select it. | |
| [025A] | Moves the selected schedule down.▸ Click a schedule to select it. | |
| [06ST] | Opens a schedule overview dialog that shows the applied schedule(s) in a daily view or a weekly view. | |
 | Copies the schedule setting to another event. | |
| Schedule Name | Delivers the name of the schedule.▸ Click the Schedule name cell to change the schedule to some other schedule. | |
| Property | Sets whether to allow or block the applied schedule's time period(s). | |
| Descripon | Delivers a brief description for this schedule for the easier identification of it. | |
| Add action | Acon List | Delivers all the actions set up for the Camera to take when the eventoccurs.▸ The available action is E-Mail to multiple, DO turn on, Go to preset, Video edge display and Play alter sound.. |
| [###] | Adds an action for the Recording Server to take when the event occurs.▸ The available action is E-Mail to multiple, DO turn on, Go to preset, Video edge display and Play alter sound.. | |
 | Deletes the selected action.▸ Click an action to select it. | |
| Action properties | Sets whom to send the alert email(s) to.▸ This group of settings is available when the E-Mail to multiple, DO turn on, Go to preset action is added. | |
10.1.2.9.4. Conigure A DI/DO of Camera
To congregate the digital input/output pins and the event & acon for a video device:
- From the Tree Console, click the topic Recording Server.
- Click the topic Video Device.
- Click the Video Device to which the DI/DO to conjure belongs.
- If a plus sign (+) shows besides the video device, click the plus sign (+) to collapse all the exisng digital input/output. Then click the digital input/output to congure.
OR
If a minus sign (-) shows besides the video device, the exisng camera(s) collapse already. Simply click the camera to conjure.
The DI/DO Overview tabbed page opens in the Conguraon Pane for the digital input/output to conjure while the Event Acon tabbed page is hidden by default.
The DI/DO Overview tabbed page opens in the Configuration Pane.
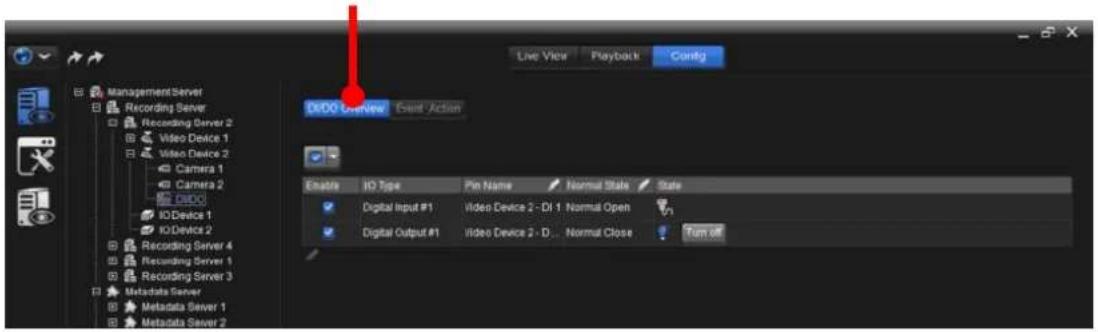
text_image
DrDO Overview Event Action Enable ID Type Pin Name Normal State State Digital Input #1 Video Device 2 - DI 1 Normal Open Digital Output #1 video Device 2 - D... Normal Close Turn offAn overview of the featured tabbed pages:
| Tabbed Page | Description |
| DI/DO Overview | Enables/disables the digital input/output pin.Configures the name, type and state for the digital input/output pins.. |
| Event Acon | Enable/disable the event(s) that will launch action(s) from thedigital input/output, which is when the input signal is on. |
10.1.2.9.4.1. DI/DO Overview
It relies on the DI/DO Overview tabbed page to congregate the digital input/output for a video device:
- From the Tree Console, click the topic Recording Server.
- Click the topic Video Device.
- Click the Video Device to which the DI/DO to congure belongs.
The DI/DO Overview tabbed page opens in the Conguraon Pane for the digital input/output to conjure while the Event Acon tabbed page is hidden by default.
The DI/DO Overview tabbed page opens in the Configuration Pane.
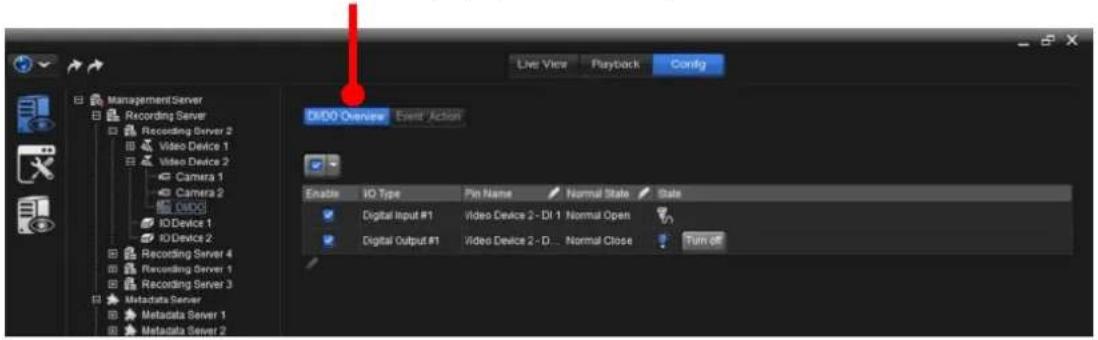
text_image
Live View Playback Config D:\DO Overview Event Action Enable IO Type Pin Name Normal State State Digital Input #1 Video Device 2 - DI 1 Normal Open Digital Output #1 Video Device 2 - D... Normal Close Turn offThe featured sengs are:
| Setting | Description | Default |
 | Enables/disables thedigital input/output pins.SelectAllto enable all device(s)SelectNoneto disable all devicesSelectInvertto reverse the selection. | All(All digitalinput/output pins are enabled.) |
| Enable | Enables/disables thedigital input/output pin. | Enabled |
| IO Type | Delivers what the pin does, digital input or digital output.Click theIO Typecell of andigital input/output pin to view the pin'sAssociated Camera(s), or to associate a camera with thedigital input/output pin. | -- |
| Pin Name | Delivers the name of the input/output pin.Click thePin Namecell to edit the name of thedigital input/output pin. | -- |
| Normal State | Delivers whether thedigital input/output pinis normally open or normally close. | -- |
| State | Delivers the current state of theIO device.for digital inputfor digital output and can be turned off |
10.1.2.9.4.2 Event Action
It relies on the Event Acon tabbed page to enable/disable the event(s) that will launch acon(s) from the digital input/output pin, which is when the input signal is on.
To access the Event Acon tabbed page for a digital input/output pin:
- From the Tree Console, click the topic Recording Server.
- Click the topic Video Device.
- Click the Video Device to which the DI/DO to congure belongs.
The DI/DO Overview tabbed page opens in the Conguraon Pane for the digital input/output to conjure while the Event Acon tabbed page is hidden by default.
The DI/DO Overview tabbed page opens in the Configuration Pane.
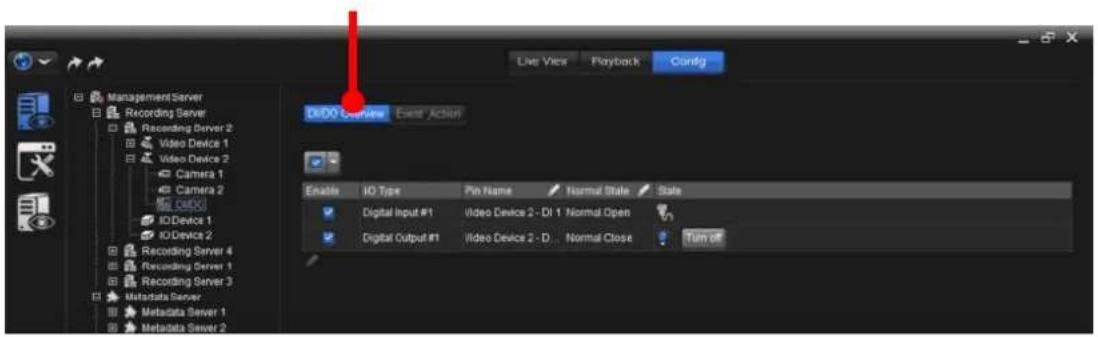
text_image
Edit Action Enable IO Type Pin Name Normal State State Digital Input #1 video Device 2 - DI 1 Normal Open Digital Output #1 video Device 2 - D Normal Close Turn off- Click the Event Acon tab.
The Event Acon tabbed page then opens.
The Event Action tabbed page opens in the Configuration Pane to configure the selected DI/DO.
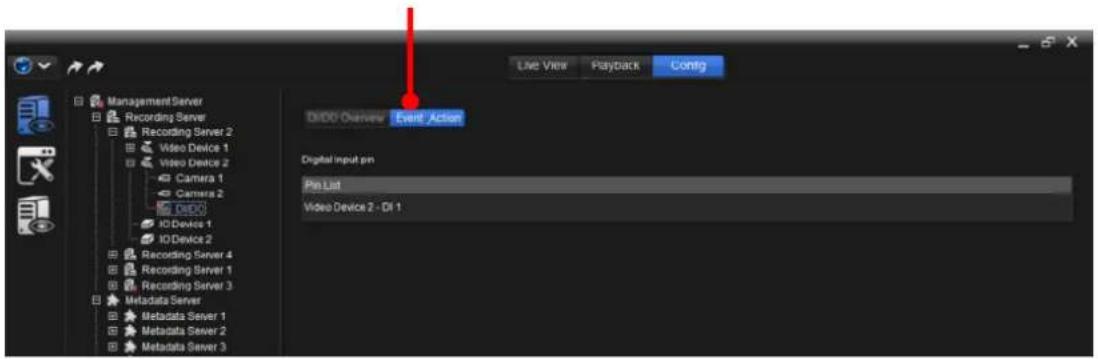
text_image
Live View PlayBack Config ManagementServer Recording Server Recording Server 2 Video Device 1 Video Device 2 Camera 1 Camera 2 DIDS ID Device 1 ID Device 2 Recording Server 4 Recording Server 1 Recording Server 3 Metadata Server Metadata Server 1 Metadata Server 2 Metadata Server 3 DIDS Overview Event Action Digital input pin Pin List Video Device 2 - DI 1Take a closer look at the user interface. The Event Acon tabbed page shows an overview of the available digital input pin(s) at the top. And the event sengs are in the following. Click a listed digital input pin to show the Event group of setngs.
The Event Action tabbed page
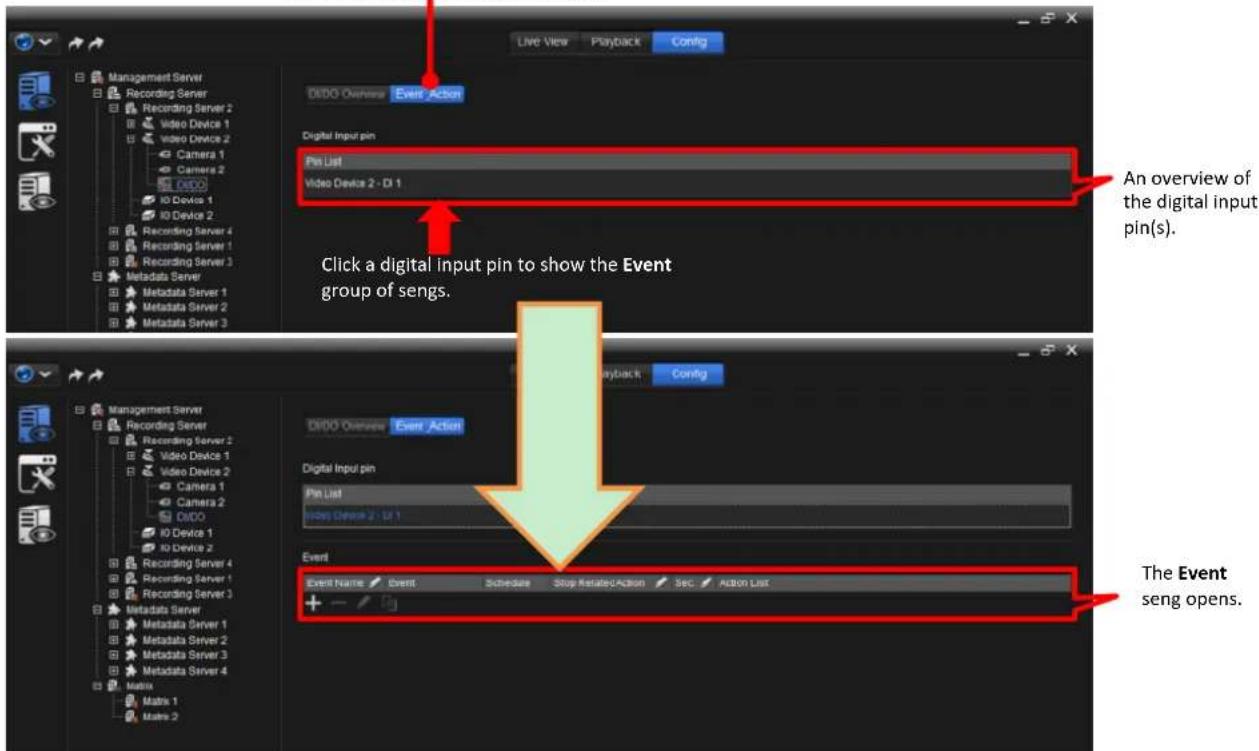
text_image
Live View Playback Config Management Server Recording Server Video Device 1 Video Device 2 Camera 1 Camera 2 DIDO IO Device 1 IO Device 2 Recording Server 4 Recording Server 1 Recording Server 3 Metadata Server Metadata Server 1 Metadata Server 2 Metadata Server 3 An overview of the digital input pin(s). Click a digital input pin to show the Event group of sengs. The Event seng opens.The Event sengs are:
| Group | Icon / Setting | Description |
| Event | + | Adds an event.▸ The available event isDigital input triggered. |
| - | Deletes the selected event.▸ Click any of the event info cells to select the event. | |
| Edits the selected event.▸ Click any of the event info cells to edit the info. | ||
| Copies the event setting to anotherDigital input triggered. | ||
| Event Name | Delivers the name of the event.▸ Click theEvent Namecell to edit the name of the event. | |
| Event | Delivers the event type.▸ Only one type is available:Digital input triggered. | |
| Schedule | Delivers the applied “schedule”, which means one or more time period(s) in which the occurrence of the event is taken effective.▸ Use theAdd schedulesettings to apply ascheduleto the event.▸ To create/delete/edit a schedule, seeSchedule. | |
| Stop Related Acon | Sets whether to stop the action launched by thedigital input pir sometime after the event occurs or leaves it on automatic. | |
| Sec.Acon list | Sets when to stop the action launched by thedigital input pinafter the event occurs.▸ 1 to 60 seconds are configurable.Delivers all the actions set up for thedigital input pinto take when the event occurs.► The available actions areE-Mail to multiple, DO turn on, Go to preset, Video edge display and Play alert sound. | |
| Add schedule |  | Adds a schedule.► Available options are theschedulescreated as described inCreate A Schedule. |
 | Deletes the selectedschedule.► Click ascheduleto select it. | |
| [HH33] | Edits the selectedschedule.► Click ascheduleto select it. | |
 | Moves the selectedscheduleup.► Click ascheduleto select it. | |
 | Moves the selectedscheduledown.► Click ascheduleto select it. | |
| [HBWA] | Opens a schedule overview dialog that shows the applied schedule(s) in a daily view or a weekly view. | |
| [W4KO] | Copies theschedulesetting to another event. | |
Sched  | Delivers the name of the schedule.► Click theSchedule namecell to change thescheduleto some otherschedule. | |
Pri  | Sets whether to allow or block the appliedschedule's time period(s). | |
Des  | Delivers a brief description for thisschedulefor the easier identification of it. | |
| Add action | Acc [XB42] | Delivers all the actions set up for theIO deviceto take when the event occurs.► The available actions areE-Mail to multiple, DO turn on, Go to preset, Video edge displayand Play alert sound. |
| [CSTX] | Adds an action for theIO deviceto take when the event occurs.► The available actions areE-Mail to multiple, DO turn on, Go to preset, Video edge displayand Play alert sound.. | |
| [0CZK] | Deletes the selected action.► Click an action to select it. | |
| Action properties | 1. Sets whom to send the alert email(s) to (forE-Mail to multiple)2. Sets which digital output pin to turn on (forDO turn on).3. Sets associated camera to go to the "preset point" (forGo to Preset).► This group of settings is available only when any of the available actions is added. | |
10.1.2.10. Conigure An IO Device
To congregate an IO Device:
- From the Tree Console, click the topic Recording Server.
- Click the Recording Server to which the IO device to congure belongs.
The IO device to conjure becomes highlighted and the Properes tabbed page opens in the Conguraon Pane while the DI/DO Overview and Event Acon tabbed pages are hidden by default.
The IO device to configure becomes highlighted.
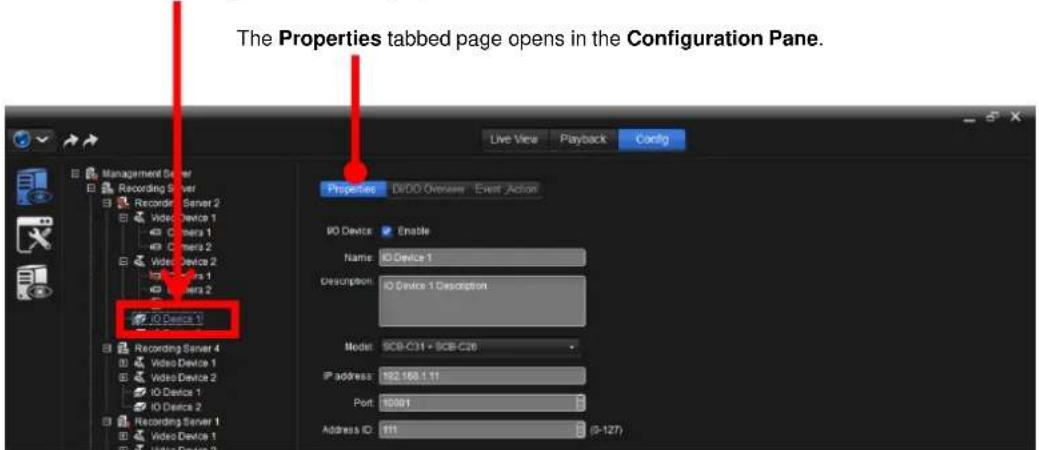
text_image
The Properties tabbed page opens in the Configuration Pane. Live View Playback Config Management Server Recording Server Recorder Server 2 Video Device 1 Camera 1 Camera 2 Video Device 2 Camera 1 Camera 2 ID Device 1 Recording Server 4 Video Device 1 Video Device 2 ID Device 1 ID Device 2 Recording Server 1 Video Device 1 Video Device 2 Properties DI/DO Overseas Event Action ID Device Enable Name: ID Device 1 Description: ID Device 1 Description Model: ICB-C31 + ICB-C26 IP address: 182.160.1.11 Port: 10001 Address ID: 111 (3-127)See Properes for the setngs featured on the Properes tabbed page.
See DI/DO Overview for the sengs featured on the DI/DO Overview tabbed page.
See Event Acon for the sengs featured on the Event Acon tabbed page.
10.1.2.10.1. Properties
It relies on the Properes tabbed page to conjure the properes of an IO device:
- From the Tree Console, click the topic Recording Server.
- Click the Recording Server to which the IO device to congregate belongs.
The Properes tabbed page opens in the Conguraon Pane for the IO device to conjure while the DI/DO Overview and Event Acon tabbed pages are hidden by default.
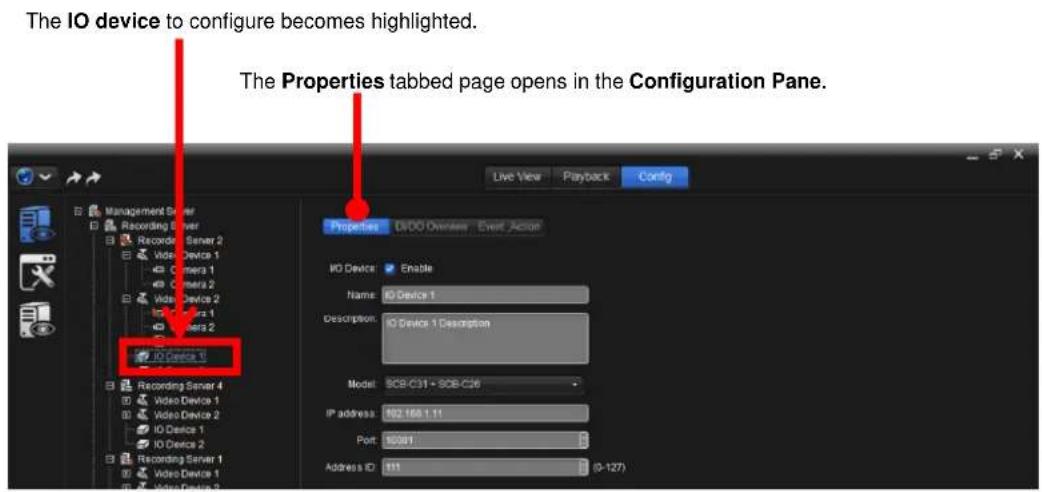
text_image
The IO device to configure becomes highlighted. The Properties tabbed page opens in the Configuration Pane. Live View Playback Config Management Server Recording Server 2 Video Device 1 Camera 1 Camera 2 Video Device 2 Camera 1 Camera 2 IO Device 1 Recording Server 4 Video Device 1 Video Device 2 IO Device 1 IO Device 2 Recording Server 1 Video Device 1 Video Device 2 Properties D/DOO Owner Event Action IO Device: Enable Name: IO Device 1 Description: IO Device 1 Description Model: SDB-C31 - SDB-C26 IP address: N2.168.1.11 Port: N0001 Address ID: 111 (0-127)The featured sengs on the Properes tabbed page are:
| Group | Description | Default |
| IO Device Enable | Enables/disables the IO device. | Selected (Enabled) |
| Name | Sets the name of the IO device. | “IO Device #” |
| Descripon | Provides a brief description of the IO device for the better identification of it. | -- |
| Model | Sets the model of the IO device. | -- |
| IP address | Sets the IP address of the IO device. | -- |
| Port | Sets the port of the IO device.► 0~65535 are configurable. | -- |
| Address ID | Sets the address ID of the IO device.► 0~255 are configurable. | 0 |
10.1.2.10.2. DI/DO Overview
It relies on the DI/DO Overview tabbed page to congregate the digital input/output for an IO device:
- From the Tree Console, click the topic Recording Server.
- Click the Recording Server to which the IO device to congregate belongs.
The Properes tabbed page opens in the Conguraon Pane for the IO device to congure while the DI/DO Overview and Event acon tabbed pages are hidden by default.
The IO device to configure becomes highlighted.
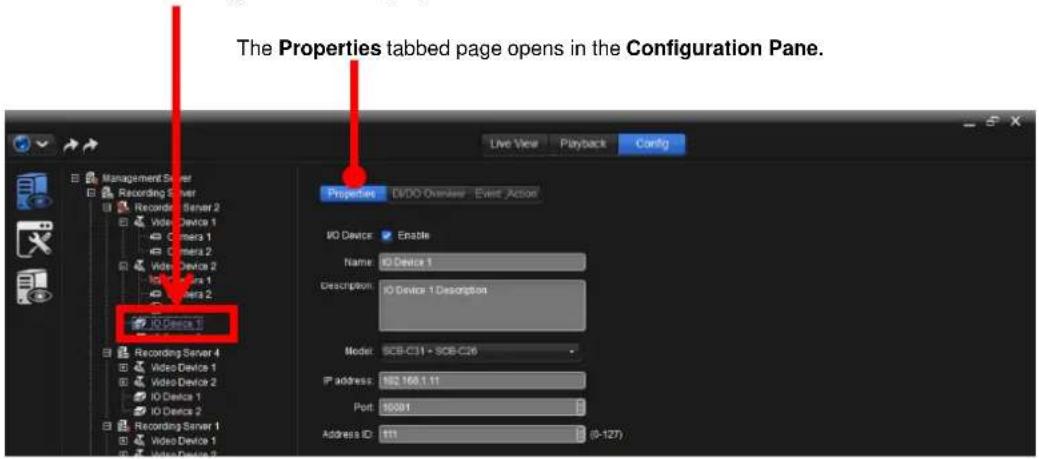
text_image
The Properties tabbed page opens in the Configuration Pane. Properties D/DO Overview Event Action IO Device: Enable Name: IO Device 1 Description: IO Device 1 Desorption Model: SGB-C31 + SGB-C26 IP address: 182.168.1.11 Port: 95091 Address ID: 411 (0-127)3. Click the DI/DO Overview tab.
The DI/DO Overview tabbed page then opens.
The DI/DO Overview tabbed page opens in the Configuration Pane.
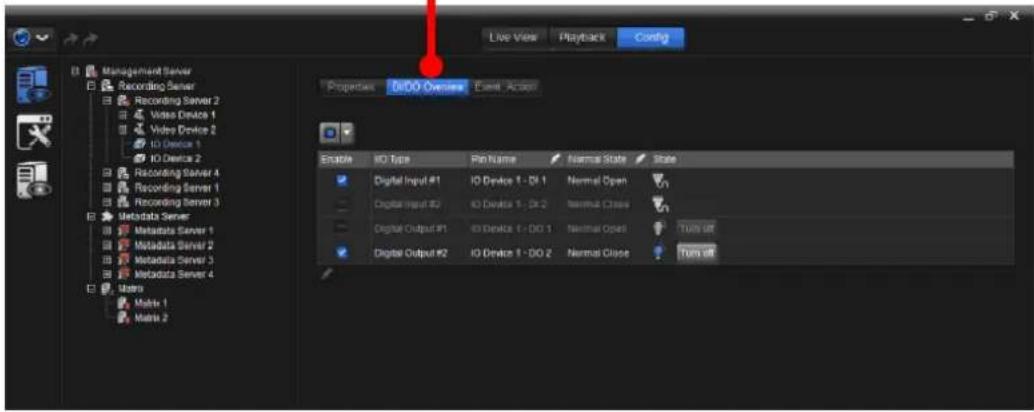
text_image
Live View Playback Config Management Server Recording Server Recording Server 2 Video Device 1 Video Device 2 IO Device 1 IO Device 2 Recording Server 4 Recording Server 1 Recording Server 3 Metadata Server Metadata Server 1 Metadata Server 2 Metadata Server 3 Metadata Server 4 Matrix Matrix 1 Matrix 2 Properties: DoDO Owners Event Active Enable IO Type Pin Name Normal State State Digital Input #1 IO Device 1 - DI 1 Normal Open Digital Input #2 IO Device 1 - DI 2 Normal Close Digital Output #1 IO Device 1 - DO 1 Normal Open Digital Output #2 IO Device 1 - DO 2 Normal Close Turn off Turn off| Group | Description | Default |
 | Enables/disables the IO device.► Select All to enable all device(s)► Select None to disable all devices► Select Invert to reverse the selection. | All(All IO devices are enabled.) |
| Enable | Enables/disables the IO device. | Enabled |
| IO Type | Delivers what the IO device does, digital input or digital output.► Click the IO Type cell of an IO device to view the IO device's Associated Camera(s), or to associate a camera with the IO device. | -- |
| Pin Name | Delivers the name of the input/output pin of the IO device.► Click the Pin Name cell of an IO device to edit the pin name for the IO device. | -- |
| Normal State | Delivers whether the IO device is normal open or normal close. | -- |
| State | Delivers the current state of the IO device. for DIfor DO and can set turn off for DIfor DO and can set turn off |
10.1.2.10.3. Event Action
It relies on the Event Acon tabbed page to enable/disable the event(s) that will launch acon(s) from the IO device, which is when the input signal is on.
To access the Event Acon tabbed page for the IO device:
- From the Tree Console, click the topic Recording Server.
- Click the Recording Server to which the IO device to congure belongs.
By default, the Properes tabbed page then opens at the Conguraon Pane.
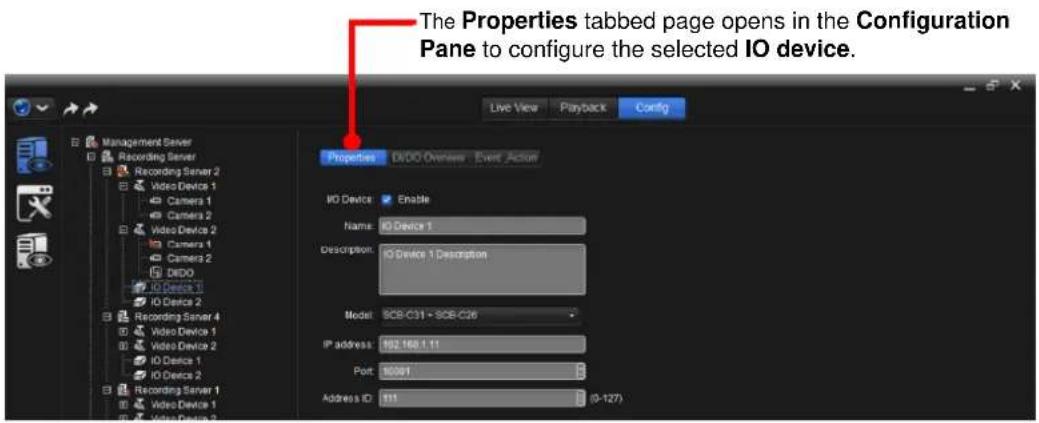
text_image
The Properties tabbed page opens in the Configuration Pane to configure the selected IO device. Live View Playback Config Management Server Recording Server Video Device 1 Camera 1 Camera 2 Video Device 2 Camera 1 Camera 2 DIDO ID Device 1 ID Device 2 Recording Server 4 Video Device 1 Video Device 2 ID Device 1 ID Device 2 Recording Server 1 Video Device 1 Video Device 2 Properties DIDO Owner Event Action IO Devices: Enable Name: IO Device 1 Description: IO Device 1 Description Model: SCB-C31+SCB-C26 IP address: 192.168.1.11 Port: 60091 Address ID: 111 (0-127)- Click the Event Acon tab.
The Event Acon tabbed page then opens.
The Event Action tabbed page opens in the Configuration Pane to configure the selected IO device.
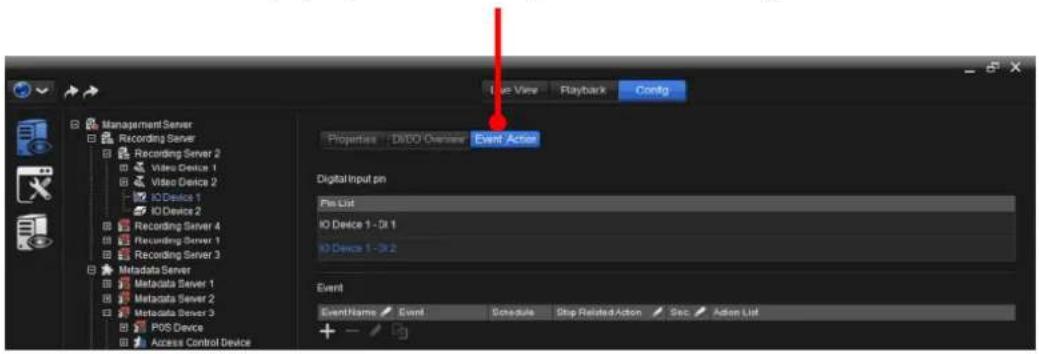
text_image
Live View Playback Config Management Server Recording Server Recording Server 2 Video Device 1 Video Device 2 IO Device 1 IO Device 2 Recording Server 4 Recording Server 1 Recording Server 3 Metadata Server Metadata Server 1 Metadata Server 2 Metadata Server 3 POS Device Access Control Device Properties - DI/DO Overseas Event Action Digital Input pn Pin List IO Device 1 - 0x 1 IO Device 1 - >2 Event Event Name Event Schedule Stop Related Action Sec Action ListTake a closer look at the user interface. The Event Acon tabbed page shows an overview of the available digital input pin(s) at the top and the event sengs in the following.
The Event Action tabbed page
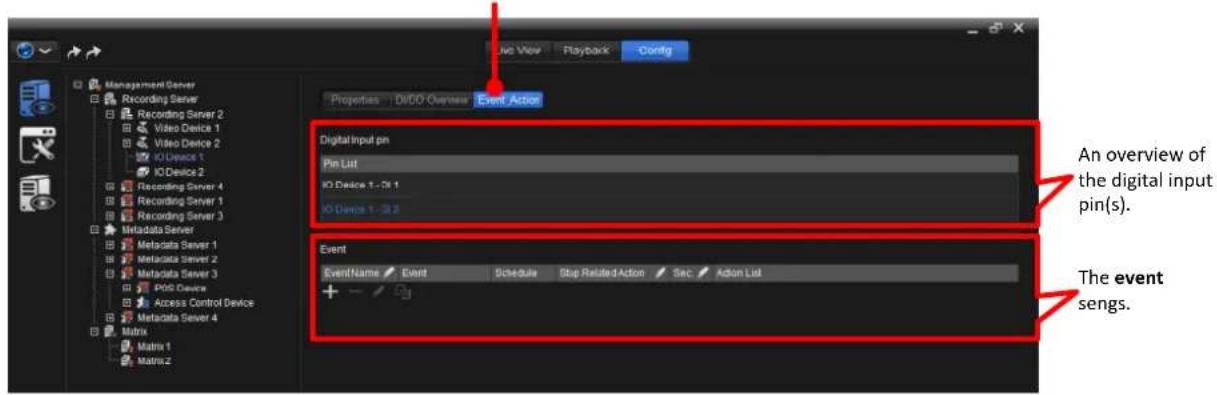
text_image
Management Server Recording Server Recording Server 2 Video Device 1 Video Device 2 IO Device 1 IO Device 2 Recording Server 4 Recording Server 1 Recording Server 3 Metadata Server Metadata Server 1 Metadata Server 2 Metadata Server 3 PDD Device Access Control Device Metadata Server 4 Matrix Matrix 1 Matrix 2 Properties DiGO Overview Event Action Digital Input pin Pin List IO Device 1 - 01.1 IO Device 1 - 02.2 Event EventName Event Schedule Stop Related Action Set Action List + - An overview of the digital input pin(s). The event sengs.The event sengs are:
| Group | Icon / Setting | Description |
| Event | + | Adds an event.▸ The available event isInput signal on. |
| - | Deletes the selected event.▸ Click any of the event info cells to select the event. | |
| Edits the selected event.▸ Click any of the event info cells to edit the info. | ||
| Copies the event setting to anotherdigital input pin. | ||
| Event Name | Delivers the name of the event.▸ Click theEvent Namecell to edit the name of the event. | |
| Event | Delivers the event type.▸ Only one type is available:Input signal on. | |
| Schedule | Delivers the applied “schedule”, which means one or more time period(s) in which the occurrence of the event is taken effective.▸ Use theAdd schedulesettings to apply ascheduleto the event.▸ To create/delete/edit a schedule, seeSchedule. | |
| Stop Related Acon | Sets whether to stop the action launched by theIO devicesome time after the event occurs or leaves it on automatic. | |
| Sec. | Sets when to stop the action launched by theIO deviceafter the event occurs.▸ 1 to 60 seconds are configurable. | |
Acon list | Delivers all the actions set up for theIO deviceto take when the event occurs.▸ The available actions areE-Mail to multiple, DO turn on, Go to Preset andOn screen display.Adds a schedule.▸ Available options are the schedules created as described in Create A Schedule. | |
| Add schedule | ||
 | Deletes the selected schedule.▸ Click a schedule to select it. | |
 | Edits the selected schedule.▸ Click a schedule to select it. | |
| [H225] | Moves the selected schedule up.▸ Click a schedule to select it. | |
 | Moves the selected schedule down.▸ Click a schedule to select it. | |
| [4023] | Opens a schedule overview dialog that shows the applied schedule(s) in an daily view or a weekly view. | |
 | Copies the schedule setting to another event. | |
| Schedule Name | Delivers the name of the schedule.▸ Click the Schedule name cell to change the schedule to some other schedule. | |
| Property | Sets whether to allow or block the applied schedule's time period(s). | |
| Descripon | Delivers a brief description for this schedule for the easier identification of it. | |
| Add action | Acon List | Delivers all the actions set up for the IO device to take when the event occurs.▸ The available actions are E-Mail to multiple, DO turn on, Go to Preset and On screen display. |
 | Adds an action for the IO device to take when the event occurs.▸ The available actions are E-Mail to multiple, DO turn on, Go to Preset and On screen display. | |
| — | Deletes the selected action.▸ Click an action to select it. | |
| Action properties | 4. Sets whom to send the alert email(s) to (for E-Mail to multiple).5. Sets which digital output pin to turn on (for DO turn on).6. Sets which associated camera to go to the “preset point” (for Go to Preset).▸ This group of settings is available only when any of the available actions is added. | |
10.1.3. Conigure Metadata Server
A Metadata Server is the server to host third-party device servers and archive their data. The “plugin” is a module for each of the custom integraons working with the Metadata Server to make the Metadata Server capable of exchanging data with the third-party Metadata source through a “Metadata channel”.
This allows faster development cycles from eld requests to a nished tested product. When integrated with 3rd party products like POS and access control products, which are used as Metadata sources by the NUUO Metadata structure, the NUUO plaorm becomes a seamless interface allowing intelligent search and data iterating for monitoring and handling events. Data is supplied to the Metadata source via Metadata channels. For example: the Door channels supply the Access Control Server and the Register channels supply the POS Server. Through the Metadata Plugin, users can manage metadata by recording real me informaon in databases which describe events that link to video. The Metadata Server integrates third party data and video in a unied management plaorm. NUUO provides dierent plugin modules for 3rd party products to meet your needs.
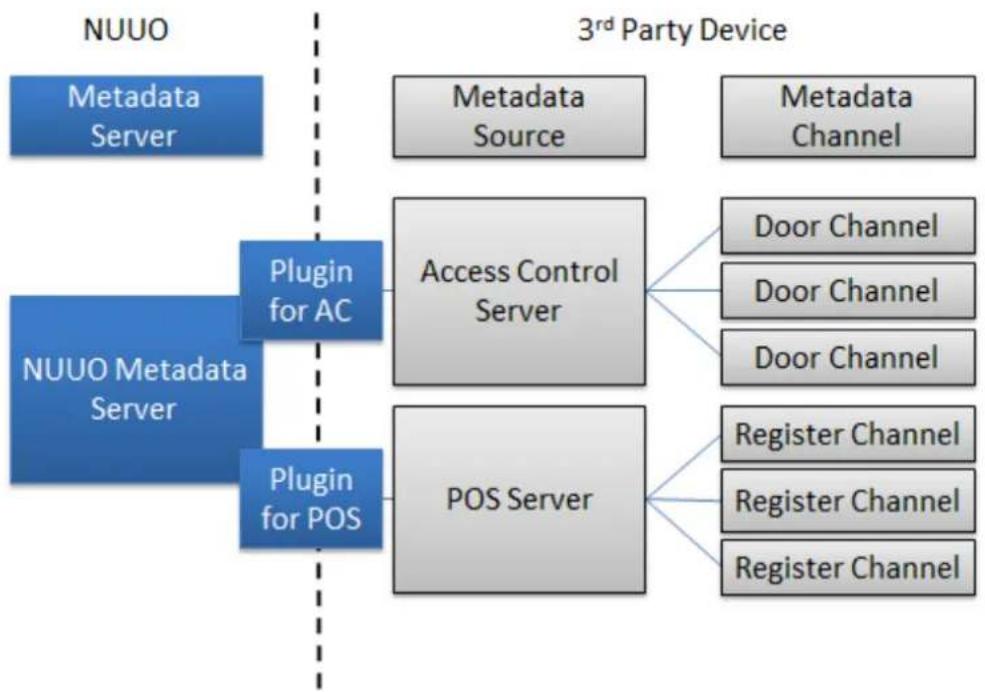
flowchart
graph TD
    A["Metadata Server"] --> B["Plugin for AC"]
    C["NUUO Metadata Server"] --> B
    D["Metadata Source"] --> E["Access Control Server"]
    F["Metadata Channel"] --> E
    G["Door Channel"] --> E
    H["Door Channel"] --> E
    I["Door Channel"] --> E
    J["Register Channel"] --> K["POS Server"]
    L["Register Channel"] --> K
    M["Register Channel"] --> K
    N["Register Channel"] --> K
    O["Register Channel"] --> K
    P["Register Channel"] --> K
    Q["Register Channel"] --> K
    R["Register Channel"] --> K
    S["Register Channel"] --> K
    T["Register Channel"] --> K
    U["Register Channel"] --> K
    V["Register Channel"] --> K
    W["Register Channel"] --> K
    X["Register Channel"] --> K
    Y["Register Channel"] --> K
    Z["Register Channel"] --> K
    AA["Register Channel"] --> K
    AB["Register Channel"] --> K
    AC["User"] --> AD["3rd Party Device"]
To access the seng of a Metadata Server:
- Access the Physical Cong ("physical conguraon") as described in Physical Cong (Management Server).
The physical conguraon opens onscreen, and the Tree Console shows the three sub setngs: Recording Server, Metadata Server, and Matrix.
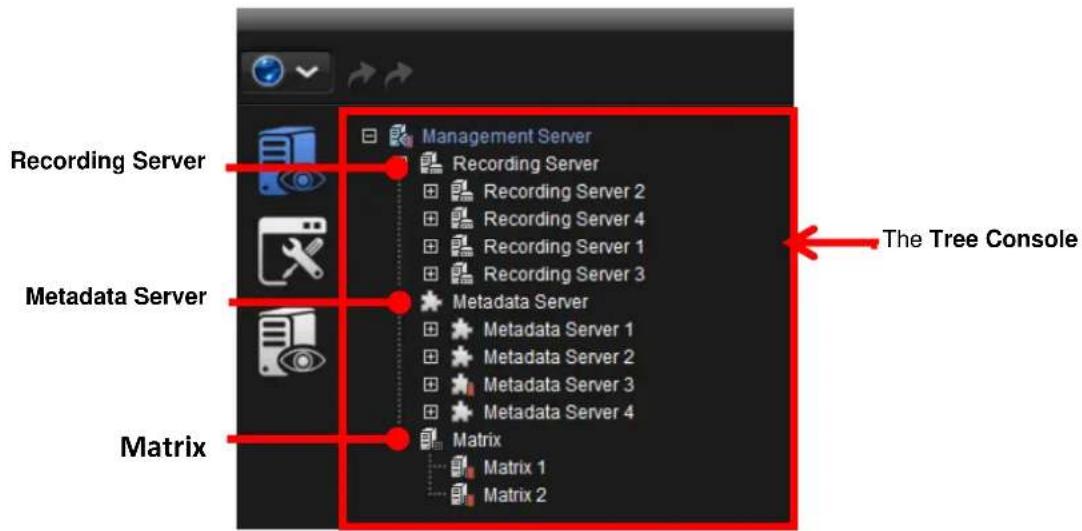
text_image
Recording Server Metadata Server Matrix Management Server Recording Server Recording Server 2 Recording Server 4 Recording Server 1 Recording Server 3 Metadata Server Metadata Server 1 Metadata Server 2 Metadata Server 3 Metadata Server 4 Matrix Matrix 1 Matrix 2 The Tree Console- If a plus sign (+) shows besides the sub topic Metadata Server, click the plus sign (+) to collapse the exisng Metadata Server(s). Then click the Metadata Server to congure.
OR
If a minus sign (-) shows besides the sub topic Metadata Server, the existing Metadata Server(s) collapse already. Simply click the Metadata Server to congure.
The Properes tabbed page then opens at the Conguraon Pane to congregate the selected Recording Server while the other ve tabbed pages are hidden.
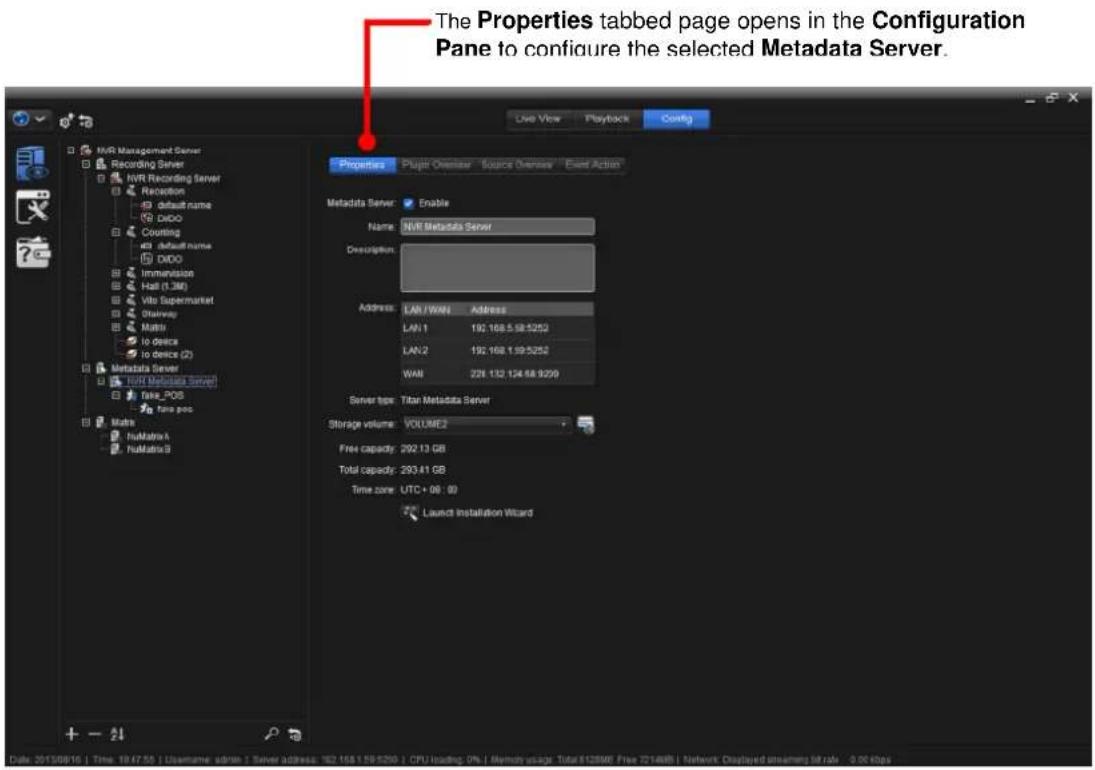
text_image
The Properties tabbed page opens in the Configuration Pane to configure the selected Metadata Server. Live View Playback Config MVR Management Server Recording Server NVR Recording Server Reception default name DIDO Counting default name DIDO Imminision Hall (1.3M) Vito Supermarket Disarray Matrix to device to device (2) Metadata Server NVR Metadata Server fake_POS fake pos Matrix huMatrivaA huMatrivaB Properties Putir Oester Source Overse Event Action Metadata Server Enable Name:NVR Metadata Server Description: Address: LAN / WAN Address LAN 1 192.168.5.58.5252 LAN 2 192.168.1.59.5252 WAN 224.132.124.68.9209 Server type:Titan Metadata Server Storage volume VOLUME2 Free capacity:292.13 GB Total capacity:293.41 GB Time zone:UTC+06:00 Launch Installation Wizard Date: 2015/08/16 | Time: 19:47:55 | Username: admin | Server address: 182.168.1.59.520 | CPU loading: 0% | Memory usage: Total:103ME Free ZT4MB | Network Displayed streaming rate: -0.06 Mbps- Access one of these tabbed pages to conjure the Metadata Server.
A funcon overview of these tabbed pages:
| Setting | Description |
| Properes | 1. Enables/disables the Metadata Server.2. Enters a brief description of the Metadata Server for the better identification of it.3. Launches an application to detect and install the available 3 ^rd -party device servers within the network.▸ See Properties for the settings. |
| Plugin Overview | Delivers an overview of all the “plugins”, a piece of software, which enables the data exchange between the Metadata Server and the third-party device server through a “metadata channel”▸ A third-party device server is connected to the Metadata Server as a “metadata source”. |
| Source Overview | Delivers an overview of all the third-party device servers, i.e. “metadata sources”, that are connected to the Metadata Server. |
| Event Acon | Sets the event(s) that will launch action(s) from the Metadata Server. |
10.1.3.1. Properties
It relies on the Properes tabbed page to conjure the properes of a Metadata Server:
- From the Tree Console, click the topic Metadata Server.
The Properes tabbed page opens in the Conguraon Pane for the Metadata Server to congure while the other tabbed page is hidden by default.
The Properties tabbed page opens in the Configuration Pane.
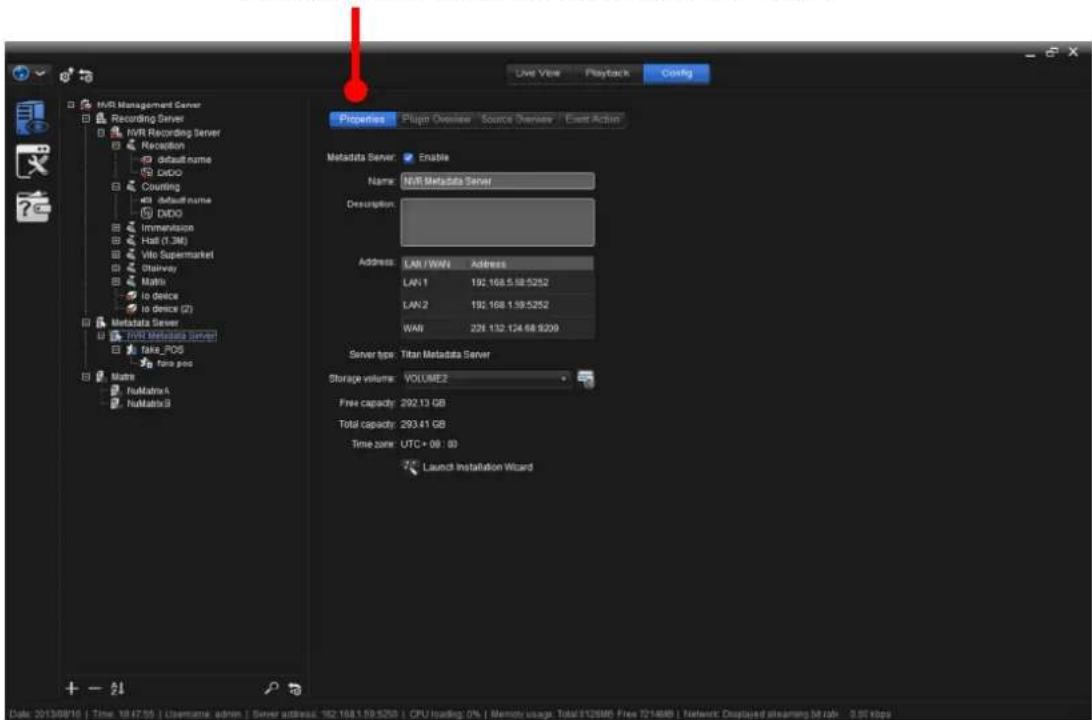
text_image
Live View Playback Config MVR Management Server Recording Server MVR Recording Server Reception default name DeBDO Counting default name DDDO Immunization Host (1.3M) Vito Supermarket Showray Math to device to device (2) Metadata Server MVR Metadata Server fake_POS fake proc Notes Nullmatrix Nullmatrix Properties Plugin Overseer Source Overseer Cast Action Metadata Server Enable Name: MVR Metadata Server Description: Address: LAN /WAVI Address LAN 1 192.168.5.58.5252 LAN 2 192.168.1.58.5252 WAV 208.132.124.68.9209 Server type: Titan Metadata Server Storage volume: VOLUME2 Free capacity: 292.13 GB Total capacity: 293.41 GB Time zone: UTC + 08 : 00 Launch Installation WizardThe featured sengs on the Properes tabbed page are:
| Group | Description | Default | |
| Metadata Server Enable | Enables/disables the Metadata Server. | Selected (Enabled) | |
| Name | Sets the name of the Metadata Server. | “Metadata Server #” | |
| Descripon | Provides a brief description of the Metadata Server for the better identification of it. | -- | |
| Address | Delivers the following addresses: | -- | |
| Seng | Description | ||
| LAN1 | Delivers the server's LAN port 1's currently networked IP address.► If the LAN port isn't in use, the networking status isn't available. | ||
| LAN 2 | Delivers the server's LAN port 2's currently networked IP address.► If the LAN port isn't in use, the networking status isn't available. | ||
| WAN | Delivers the server's WAN address.► If the WAN isn't in use, the networking status isn't available. | ||
| Launch Install Wizard | Launches an application to detect and install the available Metadata Server(s), i.e. the “Metadata Server”, within the network. | -- | |
| Server type | Delivers the type of the Metadata Server. | ||
| Storage volume | Assigns a disk volume for the Metadata Server for storage.► Click the icon to open the Recording Server's Volume Group tabbed page to release a disk volume to free volume group. | Volume 1 | |
| Free capacity | Delivers the free disk space of the disk volume selected in Storage volume setting. | -- | |
| Total capacity | Delivers the total disk space of the disk volume selected in Storage volume setting. | -- | |

Metadata Server and Recording Server cannot share the same volume group due to performance issue.
10.1.3.2. Plugin Overview
The “plugin” is a module for each of the custom integraons working with the Metadata Server to make the Metadata Server capable of exchanging data with the third-party Metadata source through a “Metadata channel”.
The Plugin Overview tabbed page is featured to deliver an overview of all the "plugins" that enable the data exchange between the Metadata Server and the Metadata source through "Metadata channel".
To access the Plugin Overview tabbed page for the Metadata Server:
- From the Tree Console, click the topic Metadata Server.
By default, the Properes tabbed page then opens at the Conguraon Pane.
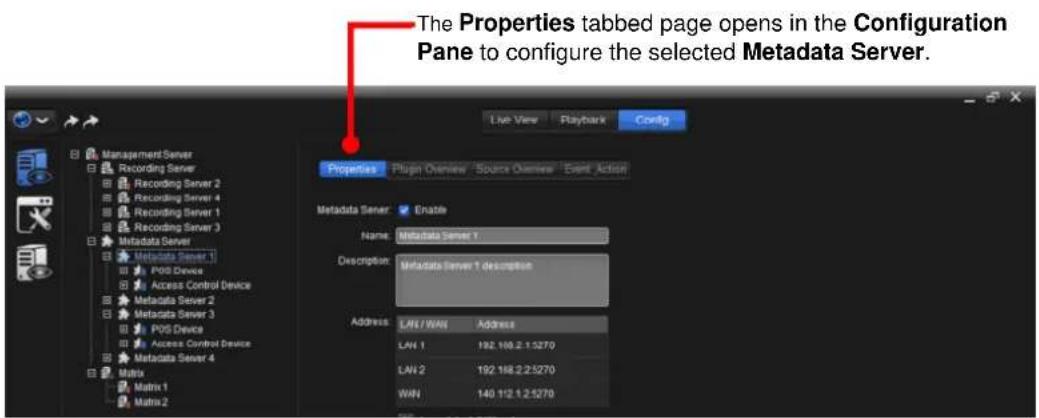
text_image
The Properties tabbed page opens in the Configuration Pane to configure the selected Metadata Server. Live View Playback Config Management Server Recording Server Recording Server 2 Recording Server 4 Recording Server 1 Recording Server 3 Metadata Server Metadata Server 1 P00 Devices Access Control Device Metadata Server 2 Metadata Server 3 P05 Devices Access Control Device Metadata Server 4 Matrix Matrix 1 Matrix 2 Properties Plugin Overview/ Source Overview/ Event Action Metadata Server: Enable Name: Metadata Server 1 Description: Metadata Server 1 description Address: LAN / WAN Address LAN 1 192.168.2.1.5270 LAN 2 192.168.2.2.5270 WIN 140.112.1.2.52702. Click the Plugin Overview tab.
The Plugin Overview tabbed page then opens.
The Plugin Overview tabbed page opens in the Configuration Pane to configure the selected Metadata Server.
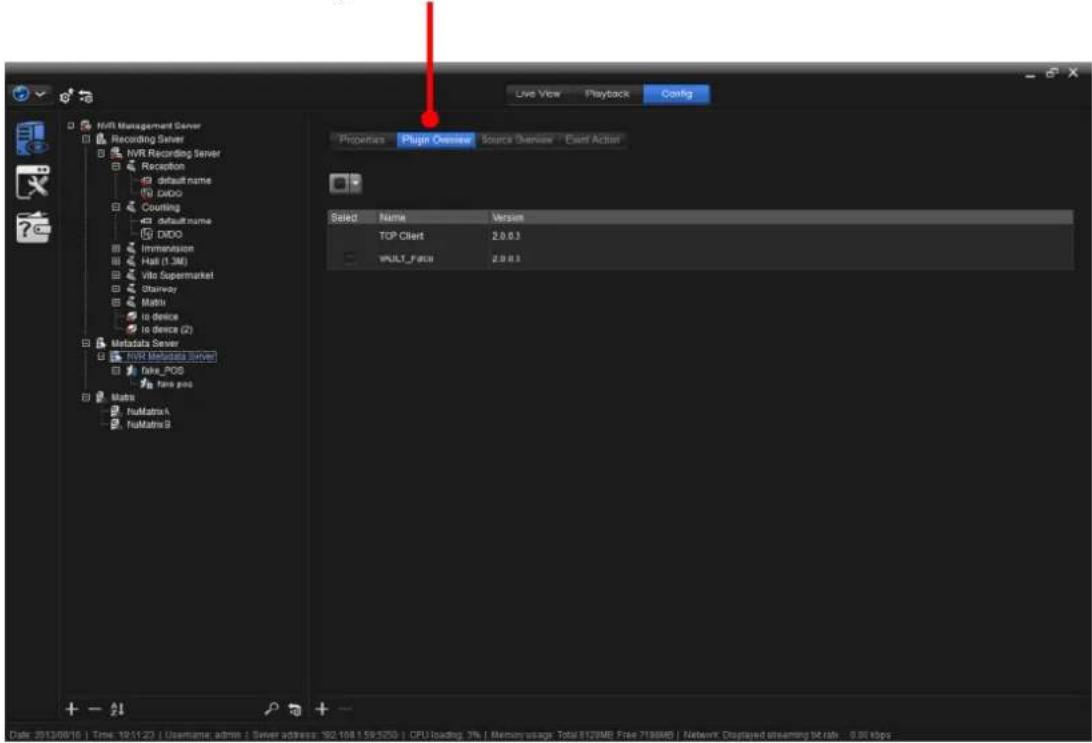
text_image
NVR Management Server Recording Server NVR Recording Server Reception default name DDIO Counting default name DDIO Immersion Habit (1.3M) Vitis Supermarket Shinney Matrix to device to device (2) Metadata Server NVR Metadata Server False_POS False pad Matrix NullMatrix4 NullMatrix9 Live View Playback Config Properties Plugin Owner Source Wizard Start Active1 Select Name Version TOP Client 2.0.0.3 MULT_Focus 2.0.0.3 Date: 2013/06/16 | Time: 19:51:23 | Username: admin | Server address: 782.108.159-5203 | CPU loading: 3% | Memory usage: Total 812MB Free 718MB | Network Displayed streaming M4 rash - 0.06 kbpsTake a closer look at the user interface.
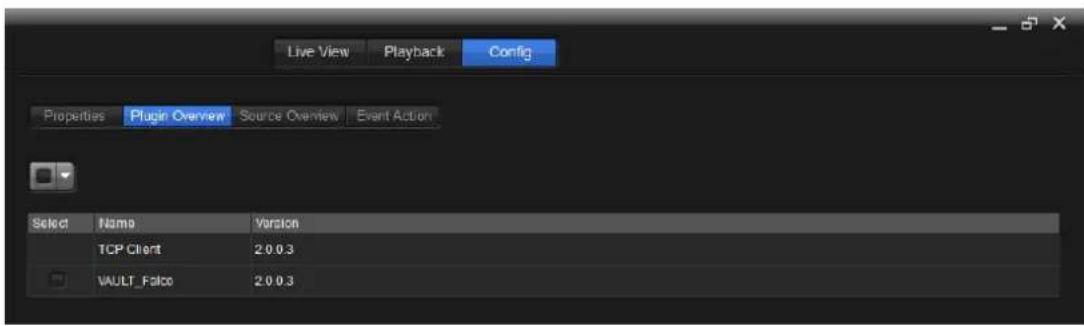
text_image
Live View Playback Config Properties Plugin Overview Source Overview Event Action Select Namen Version TCP Client 2.0.0.3 VAULT_Falco 2.0.0.3The featured sengs on the Plugin Overview tabbed page are:
| Setting | Description | Default |
 | Select the drop-downs All, None or Invert to select all plugins, deselect all plugins or reverse the selection. | Enable |
| Select | Selects/deselects the plugin. | Enable |
| Name | Delivers the name of the plugin.➢ See Properties to know how to set the name for the plugin. | -- |
| Version | Delivers the software version of the plugin. | -- |

The metadata plugin Falco default port is 5000.
10.1.3.3. Source Overview
The Source Overview tabbed page delivers an overview of all the "Metadata sources", i.e. the third-party device servers, connected to the Metadata Server.
To access the Source Overview tabbed page for the Metadata Server:
- From the Tree Console, click the topic Metadata Server.
By default, the Properes tabbed page then opens at the Conguraon Pane.
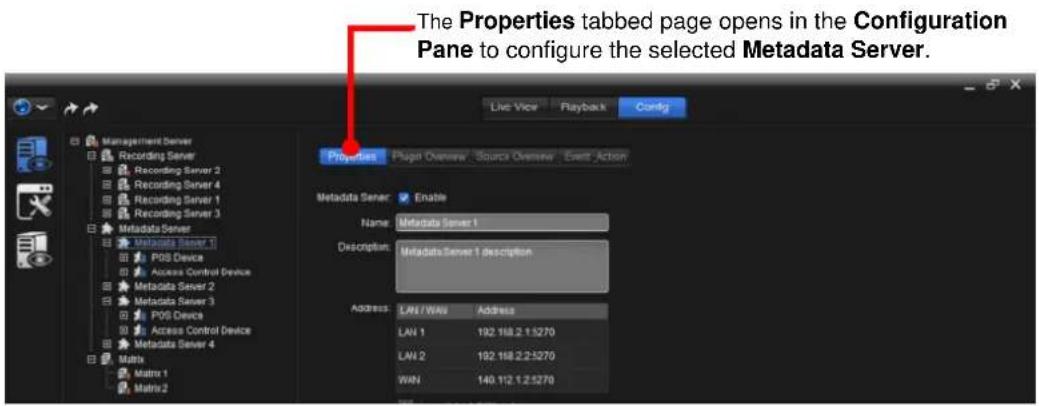
text_image
The Properties tabbed page opens in the Configuration Pane to configure the selected Metadata Server. Properties Login View Playback Config Management Server Recording Server Recording Server 2 Recording Server 4 Recording Server 1 Recording Server 3 Metadata Server Metadata Server 1 POS Device Access Control Device Metadata Server 2 Metadata Server 3 POS Device Access Control Device Metadata Server 4 Matrix Matrix 1 Matrix 2 Metadata Server: Enable Name: Metadata Server 1 Description: Metadata Server 1 description Address: LAW / WAN Address LAV 1 192.168.2.1.5270 LAV 2 192.168.2.2.5270 WIN 140.112.1.2.5270- Click the Source Overview tab.
The Source Overview tabbed page then opens.
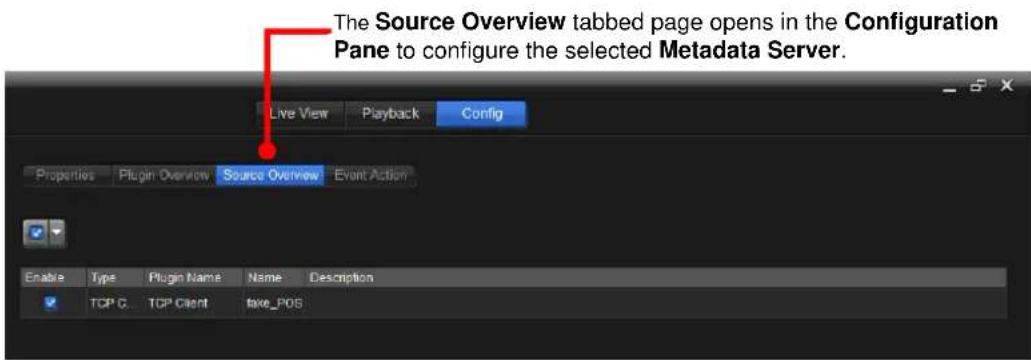
text_image
The Source Overview tabbed page opens in the Configuration Pane to configure the selected Metadata Server. Live View Playback Config Properties Plugin Overview Source Overview Event Action Enable Type Pb#in Name Name Descripption TCP C.TCP Client taxe_POSThe featured sengs on the Source Overview tabbed page are:
| Setting | Description | Default |
 | Select the drop-downs All, None or Invert to select all metadata sources, deselect all metadata source or reverse the selection. | All |
| Select | Selects/deselects the metadata source. | Selected (Enabled) |
| Type | Delivers the type of the metadata source, i.e. the 3^rd -party device server.➢ See also the Properties tabbed page of a metadata source. | -- |
| Plugin Name | Delivers the name of the Metadata source. | |
| Name | Delivers the name of the Metadata channel.➢ See also the Properties tabbed page of a metadata channel. | -- |
| Descripon | Delivers the software version of the metadata source.➢ See also the Properties tabbed page of a metadata source. | -- |
10.1.3.4. Event Action
It relies on the Event Acon tabbed page to set the events that launch acon(s) from the Metadata Server.
To access the Event Acon tabbed page for the Metadata Server:
- From the Tree Console, click the topic Metadata Server.
By default, the Properes tabbed page then opens at the Conguraon Pane.
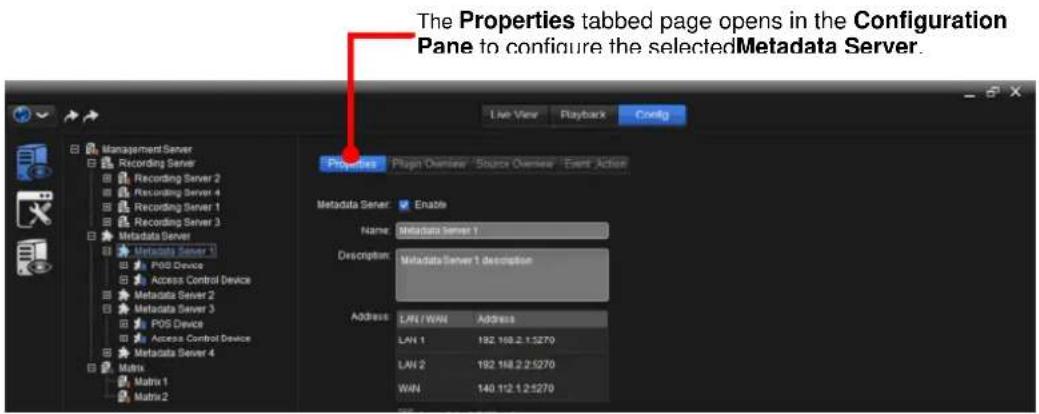
text_image
The Properties tabbed page opens in the Configuration Pane to configure the selectedMetadata Server. Live View Playback Coding Management Server Recording Server Recording Server 2 Recording Server 4 Recording Server 1 Recording Server 3 Metadata Server Metadata Server 1 POS Device Access Control Device Metadata Server 2 Metadata Server 3 POS Device Access Control Device Metadata Server 4 Matrix Matrix 1 Matrix 2 Properties Plugin Overse/ Source Overse Event Action Metadata Server Enable Name: Metadata Server 1 Description: Metadata Server 1 description Address: LAN1/WAN Address LAN 1 192.168.2.1.5270 LAN 2 192.168.2.2.5270 WIN 140.112.1.2.5270- Click the Event Acon tab.
The Event Acon tabbed page then opens.
The Event Action tabbed page opens in the Configuration Pane to configure the selected Metadata Server.
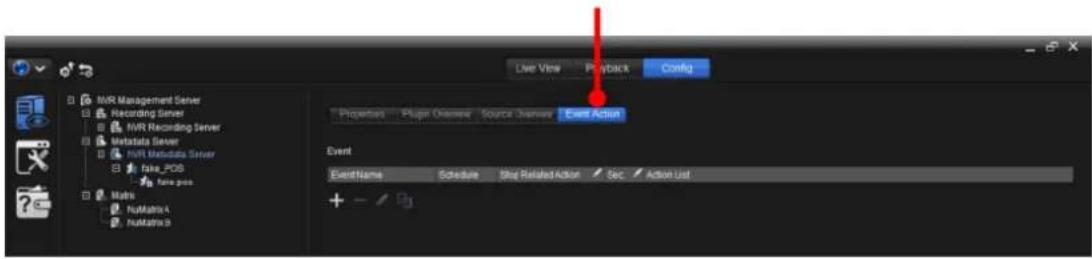
text_image
Live View Playback Config MVR Management Server Recording Server MVR Recording Server Metadata Server MVR Metadata Server fake_POS fake-pos Matrix Nutmatrix4 Nutmatrix3 Properties Plugin Overview Source Overview Event Action1 Event Event Name Schedule Stop Related Action Sec Action ListThe featured sengs are:
| Group | Icon / Setting | Description |
| Event | [4074] | Adds an event.▸ Available events areServer disconnectandFail to write to drive. |
| [72-40] | Deletes the selected event.▸ Click any of the event info cells to select the event. | |
| [473C] | Edits the selected event.▸ Click any of the event info cells to edit the info. | |
| [5482] | Copies the event setting to anotherDevice. | |
Ever  | Delivers the name of the event.▸ Click theEvent Namecell to edit the name of the event. | |
| [7413]E [55VW8] | Delivers the event type.▸ Two types are available:Server disconnectandFail to write to drive. | |
| [5647] | Delivers the applied “schedule”, which means one or more time period(s) in which the occurrence of the event is taken effective.▸ Use theAdd schedulesettings to apply ascheduleto the event.▸ To create/delete/edit a schedule, seeSchedule. | |
| Scl [6H14] | ||
| Stop A [7AH2] | Stop action after__sec. | |
| [44A1] | Sets when to stop the action launched by theMetadata Serverafter the event occurs.▸ 1 to 60 seconds are configurable. | |
| Acc [30SK] t | Delivers all the actions set up for theMetadata Serverto take when the event occurs.▸ The available actions areE-Mail to multipleandPlay alert sound. | |
| Add schedule | [46K2] | Adds a schedule.▸ Available options are theschedulescreated as described inCreate A Schedule. |
 | Deletes the selectedschedule.▸ Click ascheduleto select it. | |
| [1W77] | Edits the selectedschedule.▸ Click ascheduleto select it. | |
| [0AC0] | Moves the selectedscheduleup.▸ Click ascheduleto select it. | |
| [542A] | Moves the selectedscheduledown.▸ Click ascheduleto select it. | |
| [30Y7] | Opens a schedule overview dialog that shows the applied schedule(s) in a daily view or a weekly view. | |
| [29Y7] | Copies theschedulesetting to another event. | |
| Sched [ACTB] | 1. Delivers the name of the schedule.2. Click theSchedule namecell to change thescheduleto some otherschedule. | |
| Pr [CRY5] | Sets whether to allow or block the appliedschedule's time period(s). | |
| Des [38H9] | Delivers a brief description for thisschedulefor the easier identification of it. | |
| Add action | Acc [002C] | Delivers all the actions set up for theMetadata Serverto take when the event occurs.▸ Available actions areEmail to multipleandPlay alert sound |
| [1332]— | Adds an action for theMetadata Serverto take when the event occurs.▸ One action is available:Email to multiple.Deletes the selected action.▸ Click an action to select it. | |
| E-Mail to Mulple | Click this setting to open a group ofAction propertiessettings to set whom to send alert emails to. |
10.1.3.5. Add A Metadata Source
To add a metadata source, i.e. a POS server or an access control server, to a Metadata Server:
- From the Tree Console, click the topic Metadata Server.
All the exisng Metadata Server(s) collapse under the sub topic Metadata Server.
- Click the Metadata Server to add a metadata source to.
The Metadata Server to add a metadata source to becomes highlighted.
- From the bottom of the Tree Console, click the add icon +.
A ny dialog then opens showing the opons to add a metadata source.
A new metadata source, named “metadata source” by default will be appended under the selected Metadata Server, and a Properes tabbed page will open in the Conguraon Pane for users to conjure the newly added metadata source.
The newly added metadata source is appended to the Metadata Server.
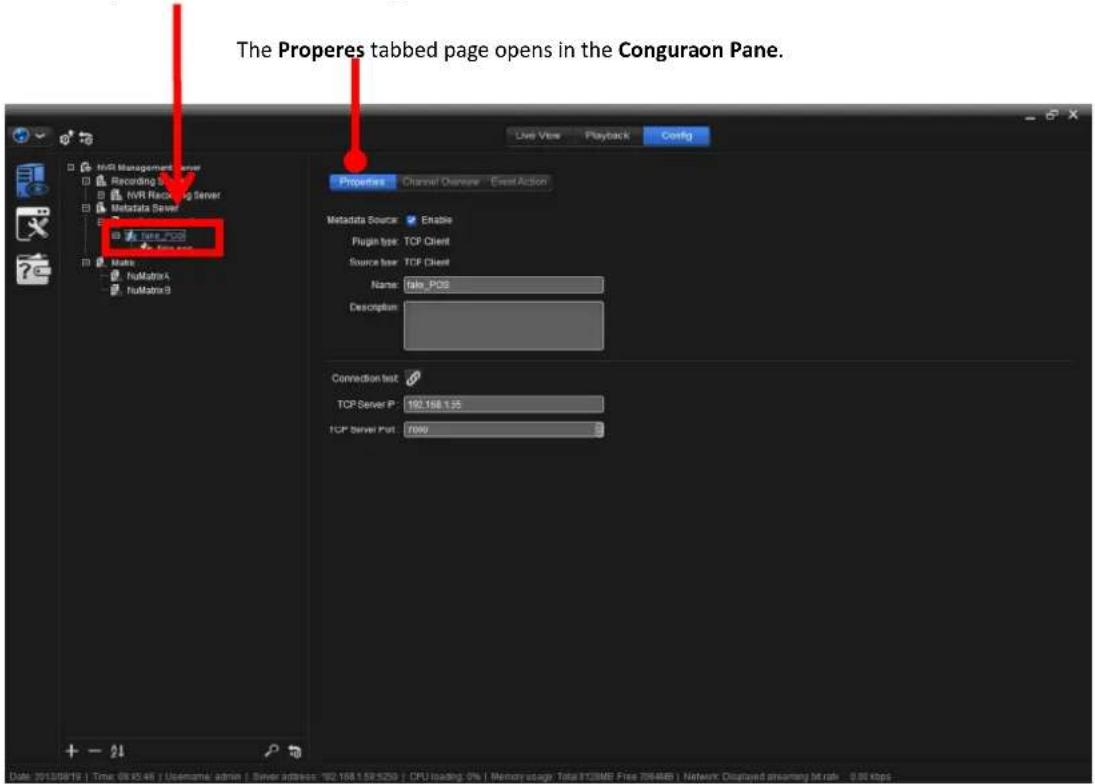
text_image
The Properes tabbed page opens in the Conguraon Pane. Live View Playback Config MVR Management server Recording Server MVR Recording Server Metadata Server MVR_POS Matte NuMatrixA NuMatrixB Properties Channel Overview Event Action Metadata Source Enable Plugin test: TCP Client Source test: TCP Client Name: Taks_POS Description: Connection test TCP Server P: 192.168.1.35 TCP Server Put: 7000 Date: 2013/09/13 | Time: 00:34:00 | Username: admin | Server address: 102.168.1.35.1230 | CPU loading: 2% | Memer usage: Total TCME Res 26486.1 Network Displaced Sheffield 36.0k - 6.0k bpsTo congure a metadata source, see Congure A metadata source.
10.1.3.6 Delete A Metadata Source
To delete a metadata source, i.e. a POS server or an access control server, from a Metadata Server:
- From the Tree Console, click the topic Metadata Server.
All the exisng Metadata Server(s) collapse under the sub topic Metadata Server. - Find the Metadata Server to delete the metadata source from.
- If a plus sign (+) shows besides the Metadata Server, click the plus sign (+) to collapse the exisng metadata source(s). Then click the source to delete.
OR
If a minus sign (-) shows besides the Metadata Server, the exisng metadata source(s) collapse already. Simply click the source to delete.
The metadata source to delete becomes highlighted.
- From the bottom of the Tree Console, click the delete icon —.
A queson dialog opens to ask for the conrmaon of deleon.
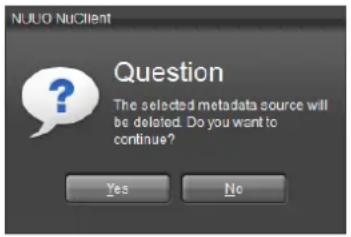
text_image
NUUO NuClient Question The selected metadata source will be deleted. Do you want to continue? Yes No- Click Yes to conrm the deleon.
- Click the apply button 📋 on the Top Toolbar to apply the change.
10.1.3.7 Conigure A Metadata Source
To congure a metadata source:
- From the Tree Console, click the topic Metadata Server.
All the exisng Metadata Server(s) collapses under the sub topic Metadata Server.
- If a plus sign (+) shows besides the Metadata Server to conjure, click the plus sign (+) to collapse the exisng metadata source(s). Then click the POS device to conjure.
OR
If a minus sign (-) shows besides the Metadata Server to conjure, the existing metadata source(s) collapse already. Simply click the metadata source to conjure.
The metadata source to congure becomes highlighted and the Properes tabbed page opens in the Conguraon Pane while the other tabbed pages are hidden by default.
The metadata source to configure becomes highlighted.
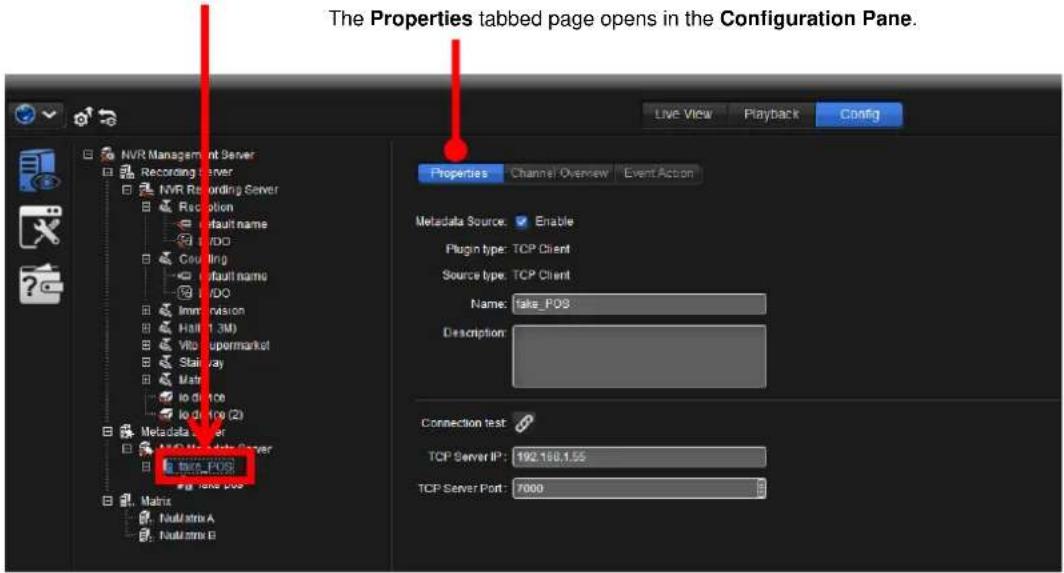
text_image
The Properties tabbed page opens in the Configuration Pane. NVR Management Server Recording server NVR Recording Server Recallion Default name 1/DO Counting Default name 1/DO Immersion Hall 1.3M) Vito supermarket Statusray Matrix Io device Io drive (2) Metadata server MO-Medate Server INS_POS Main NullMatrix A NullMatrix B Live View Playback Config Properties Channel Overview Event Action Metadata Source: Enable Plugin type: TCP Client Source type: TCP Client Name: fake_POS Description: Connection test TCP Server IP: 192.188.1.55 TCP Server Port: 7000See Properes for the settings featured on the Properes tabbed page.
See Channel Overview for the settings featured on the Channel Overview tabbed page.
See Event Aconfor the setngs featured on the Event Acon tabbed page.
10.1.3.7.1 Properties
It relies on the Properes tabbed page to conjure the properes of a metadata source:
- From the Tree Console, click the topic Metadata Server.
- Click the Metadata Server to which the metadata source to conjure belongs.
The Properes tabbed page opens in the Conguraon Pane for the metadata source to congure while the other tabbed pages are hidden by default.
The Properties tabbed page opens in the Configuration Pane.
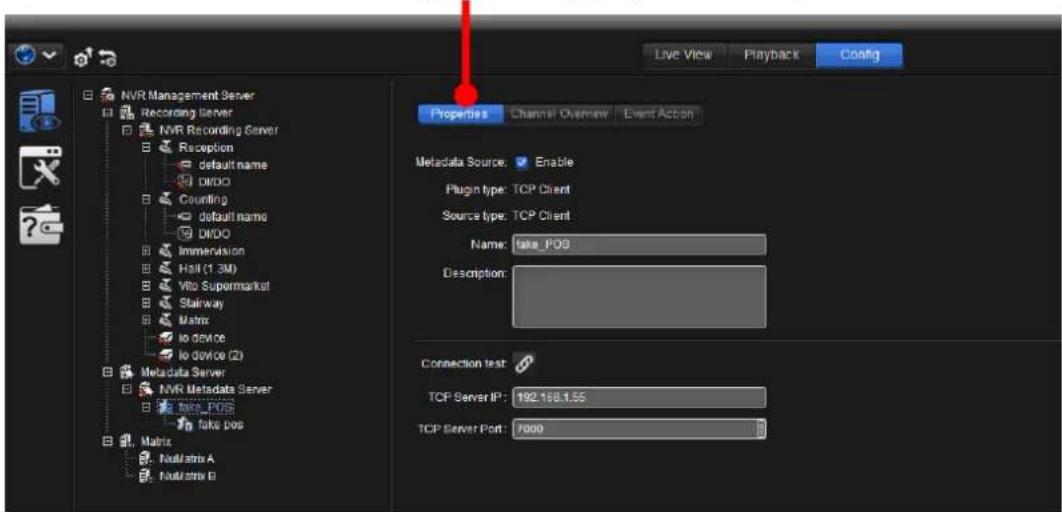
text_image
Live View Playback Config NVR Management Server Recording Server NVR Recording Server Reception default name DIRDO Counting default name DIRDO Immersion Hall (1.3M) Vito Supermarket Stairway Matrix lo device lo device (2) Metadata Server NVR Metadata Server take_POS take pos Matrix NullMatrix A NullMatrix B Properties Channel Overview Event Action Metadata Source: Enable Plugin type: TCP Client Source type: TCP Client Name: fake_POG Description: Connection test TCP Server IP: 192.168.1.55 TCP Server Port: 7000The featured sengs on the Properes tabbed page are:
| Setting | Description | Default |
| Metadata source √ Enable | Enables/disables the metadata source. | Selected (Enabled) |
| Plugin type | Delivers the type of the plugin.▸ The plugin is a module to enable the data exchange between the Metadata Server and the metadata source | -- |
| Source type | Delivers the type of the metadata source. | -- |
| Name | Sets the name of the metadata source. | “metadata source #” |
| Descripon | Provides a brief description of the metadata source for | -- |
the better identification of it.

The other information will be different base on different metadata server.
10.1.3.7.2 Channel Overview
The “channel” means a “metadata channel” through which the metadata source streams the data to the Metadata Server. The Channel Overview tabbed page is featured for users to get a general view of such metadata channels.
To access the Channel Overview tabbed page for the metadata source:
- From the Tree Console, click the topic Metadata Server.
- Click the Metadata Server to which the metadata source to congure belongs.
The Properes tabbed page opens in the Conguraon Pane for the metadata source to congure while the other tabbed pages are hidden by default.
The Properties tabbed page opens in the Configuration Pane.
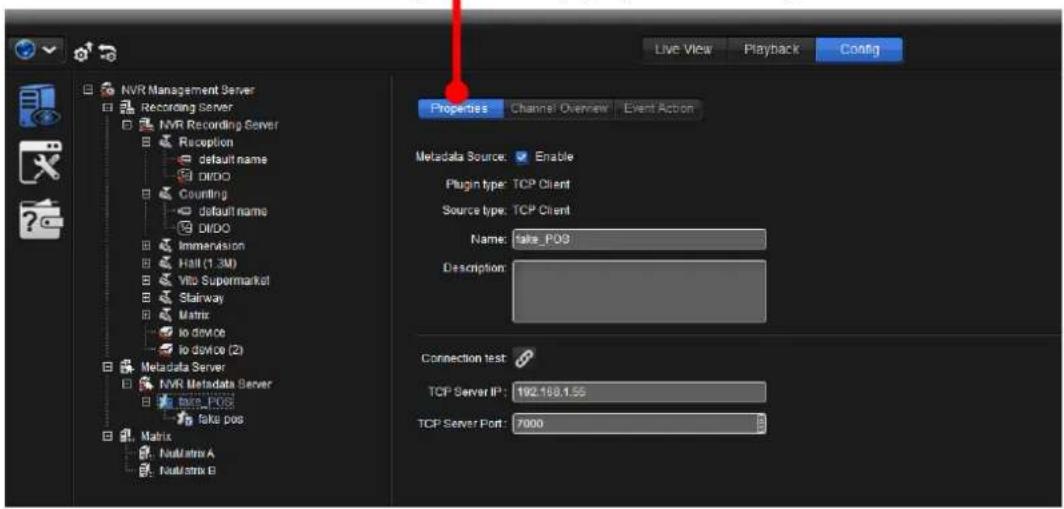
text_image
Live View Playback Config NVR Management Server Recording Server NVR Recording Server Reception default name DIRDO Counting default name DIRDO Immunvision Hill (1.3M) Vito Supermarket Stairway Matrix io device io device (2) Metadata Server NVR Metadata Server BMS_P08 fake pos Matrix NullMatrix A NullMatrix B Properties Channel Overview Event Action Metadata Source: Enable Plugin type: TCP Client Source type: TCP Client Name: fake_P09 Description: Connection test TCP Server IP: 192.198.1.55 TCP Server Port: 70003. Click the Channel Overview tab.
The Channel Overview tabbed page then opens.
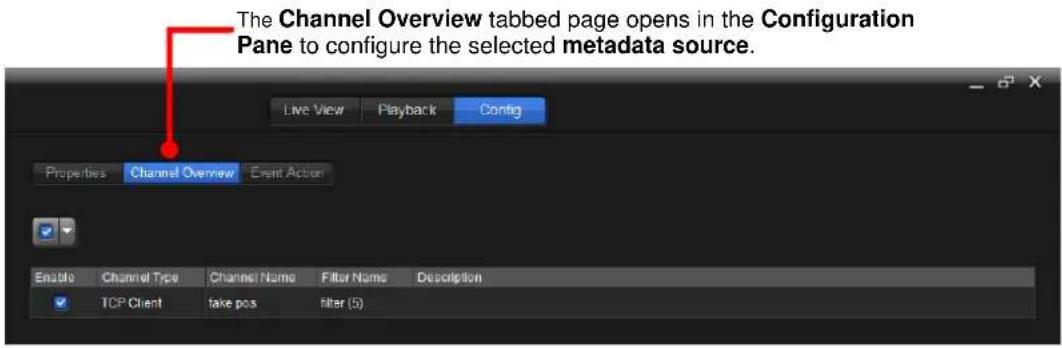
text_image
The Channel Overview tabbed page opens in the Configuration Pane to configure the selected metadata source. Live View Playback Config Properties Channel Overview Event Action Enable Channel Type Channel Name Filter Name Description TCP Client take pos filter (5)The featured sengs on the Channel Overview tabbed page are:
| Setting | Description | Default |
 | Select the drop-downsAll, None or Invertto select all metadata channels, deselect all metadata channels or reverse the selection. | -- |
| Enable | 1. Delivers whether themetadata channelis enabled or disabled at the moment.2. Enables/disables themetadata channel. | Enable |
| Channel Type | Delivers the type of themetadata channel. | |
| Channel Name | Delivers the name of thechannel.➢ See also thePropertiestabbed page of ametadata channel. | -- |
| Filter Name | Delivers the name of the filter.➢ See also theFiltertabbed page of ametadata channel. | -- |
| Descripon | Deliver the description of the channel.➢ See also thePropertiestabbed page of ametadata channel. | -- |
10.1.3.7.3 Event Action
It relies on the Event Acon tabbed page to enable/disable the event(s) that will launch acon(s) from the metadata source, which is when the conncon to the Metadata Server is lost.
To access the Event Acon tabbed page for the metadata source:
- From the Tree Console, click the topic Metadata Server.
- Click the Metadata Server to which the metadata source to congure belongs.
The Properes tabbed page opens in the Conguraon Pane for the metadata source to congure while the other tabbed pages are hidden by default.
The Properties tabbed page opens in the Configuration Pane.
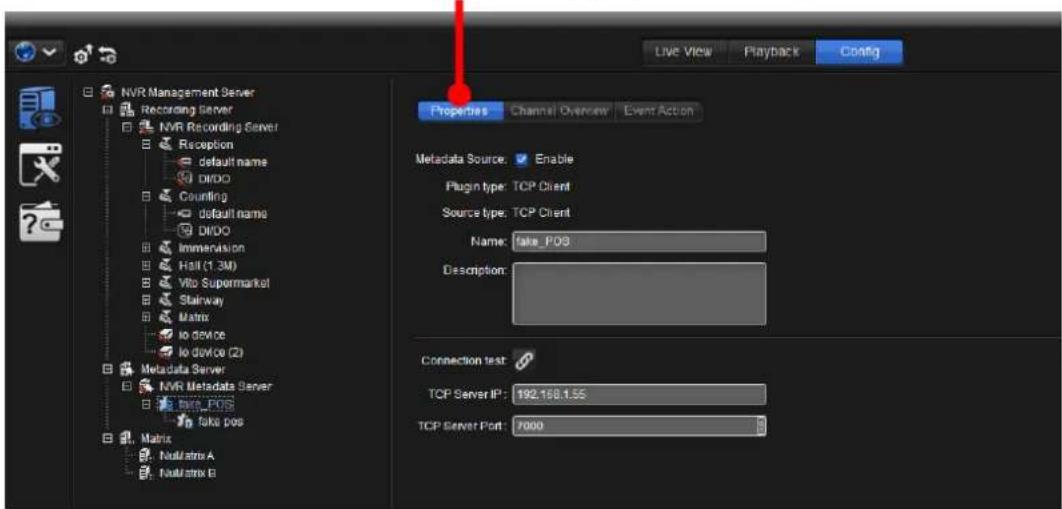
text_image
Live View Playback Config NVR Management Server Recording Server NVR Recording Server Reception default name DIRDO Counting default name DIRDO Immersion Hall (1.3M) Vito Supermarket Stairway Matrix lo device lo device (2) Metadata Server NVR Metadata Server two_POS fake pos Matrix NullMatrix A NullMatrix B Properties Channel Overview Event Action Metadata Source: Enable Plugin type: TCP Client Source type: TCP Client Name: fake_POS Description: Connection test: TCP Server IP: 192.168.1.55 TCP Server Port: 70003. Click the Event acon tab.
The Event acon tabbed page then opens.
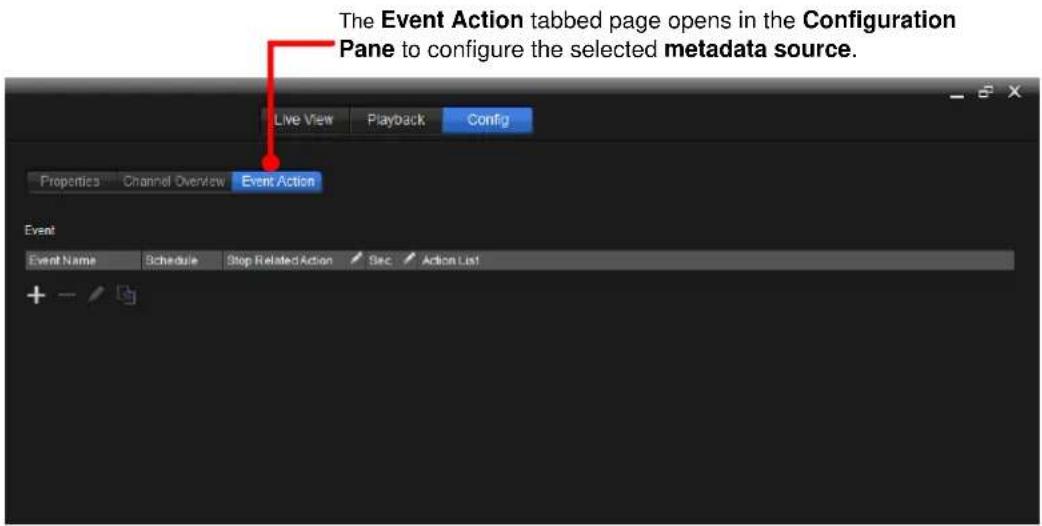
text_image
The Event Action tabbed page opens in the Configuration Pane to configure the selected metadata source. Live View Playback Config Properties Channel Overview Event Action Event Event Name Schedule Stop Related Action Sec Action ListThe featured sengs on the Event Acon tabbed page are:
| Group | Icon / Setting | Description |
| Event |  | Adds an event.► The available event isConnection lost, which means the metadata source loses the connection to the Metadata Server. |
| [HHST] | Deletes the selected event.► Click any of the event info cells to select the event. | |
| [XSZY] | Edits the selected event.► Click any of the event info cells to edit the info. | |
 | Copies the event setting to anotherdevice. | |
| [EVIH Name] | Delivers the name of the event.► Click theEvent Namecell to edit the name of the event. | |
| [2YG3]Event[83Y] | Delivers the event type.► Only one type is available:Connection lost, which means the metadata source loses the connection to the Metadata Server. | |
 Schedule[8CKY][SBWW] Schedule[8CKY][SBWW] | Delivers the applied “schedule”, which means one or more time period(s) in which the occurrence of the event is taken effective.► Use theAdd schedulesettings to apply ascheduleto the event.► To create/delete/edit a schedule, seeSchedule. | |
| StoplatedAcon | Sets whether to stop the action launched by themetadata sourcsometime after the event occurs. | |
| [KZZ4][SAYI][6YCK] | Sets when to stop the action launched by themetadata sourceafter the event occurs.► 1 to 60 seconds are configurable. | |
| [VWWW]Acon list[VCWW] | Delivers all the actions set up for themetadata sourceto take when the event occurs.► The available actions areE-Mail to multiple, DO turn on, Go to Preset, Video edge displayand Play alert sound. | |
| Add schedule | [STK8]+ | Adds a schedule.► Available options are theschedulescreated as described inCreate A Schedule. |
| [XX&2] | Deletes the selected schedule.▸ Click a schedule to select it. | |
| [www1] | Edits the selected schedule.▸ Click a schedule to select it. | |
| [0451] | Moves the selected schedule up.▸ Click a schedule to select it. | |
| [0429] | Moves the selected schedule down.▸ Click a schedule to select it. | |
| [0574] | Opens a schedule overview dialog that shows the applied schedule(s) in a daily view or a weekly view. | |
| [0647] | Copies the schedule setting to another event. | |
Sched  | Delivers the name of the schedule.▸ Click the Schedule name cell to change the schedule to some other schedule. | |
| Property | Sets whether to allow or block the applied schedule's time period(s). | |
| Descripon | Delivers a brief description for this schedule for the easier identification of it. | |
| Add action | Acon List | Delivers all the actions set up for the metadata source to take when the event occurs.▸ The available actions are E-Mail to multiple, DO turn on, Go to Preset, Video edge display and Play alert sound. |
| [0594] | Adds an action for the metadata source to take when the event occurs.▸ The available actions are E-Mail to multiple, DO turn on, Go to Preset, Video edge display and Play alert sound. | |
| — | Deletes the selected action.▸ Click an action to select it. | |
| Action properties | 1. Sets whom to send the alert email(s) to.2. Sets which digital output pin to turn on.3. Sets which associated camera to go to the "preset point".▸ This group of settings is available only when any of the available actions is added. | |
10.1.3.7.4 Add A Metadata Channel
To add a metadata channel:
- From the Tree Console, click the topic Metadata Server.
- Click the Metadata Server to which the metadata source to congure belongs.
To add a metadata channel to becomes highlighted.
- From the bottom of the Tree Console, click the add icon +.
A ny dialog then opens showing the opons to add a metadata channel.
A new metadata channel, named “metadata channel” by default will be appended under the selected metadata source, and a Properes tabbed page will open in the Conguraon Pane for users to conjure the newly added metadata channel.
To conjure a metadata channel, see Congure A Metadata Channel.
To delete a metadata channel, see Delete A Metadata Channel.
10.1.3.7.5 Delete A Metadata Channel
To delete a metadata channel from a metadata source:
- From the Tree Console, click the topic Metadata Server.
- Click the topic metadata source.
All the exisng metadata source(s) collapse under the Metadata Server.
- Find the metadata source to delete the metadata channel from.
- If a plus sign (+) shows besides the metadata source, click the plus sign (+) to collapse the exisng metadata channel(s). Then click the channel to delete.
OR
If a minus sign (-) shows besides the metadata source, the existing metadata channel(s) collapse already. Simply click the channel to delete.
The metadata channel to delete becomes highlighted.
- From the bottom of the Tree Console, click the delete icon —.
A queson dialog opens to ask for the conrmaon of deleon.
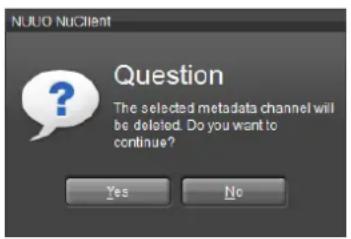
text_image
NUUO NuClient Question The selected metadata channel will be deleted. Do you want to continue? Yes No- Click Yes to conrm the deleon.
- Click the apply button 📋 on the Top Toolbar to apply the change.
10.1.3.7.6 Conigure A Metadata Channel
To congure a Metadata Channel:
- From the Tree Console, click the topic Metadata Server.
- Click the topic metadata source.
All the exisng metadata source(s) collapse under the Metadata Server.
- If a plus sign (+) shows besides the metadata source (the POS device) to congure, click the plus sign (+) to collapse the exisng metadata channel(s). Then click the metadata channel to congure.
OR
If a minus sign (-) shows besides the metadata source (the POS device) to congure, the exisng metadata channel(s) collapse already. Simply click the metadata channel to congure.
The metadata channel to conjure becomes highlighted and the Properes tabbed page opens in the Conguraon Pane while the other tabbed pages are hidden by default.
The metadata channel to configure becomes highlighted.
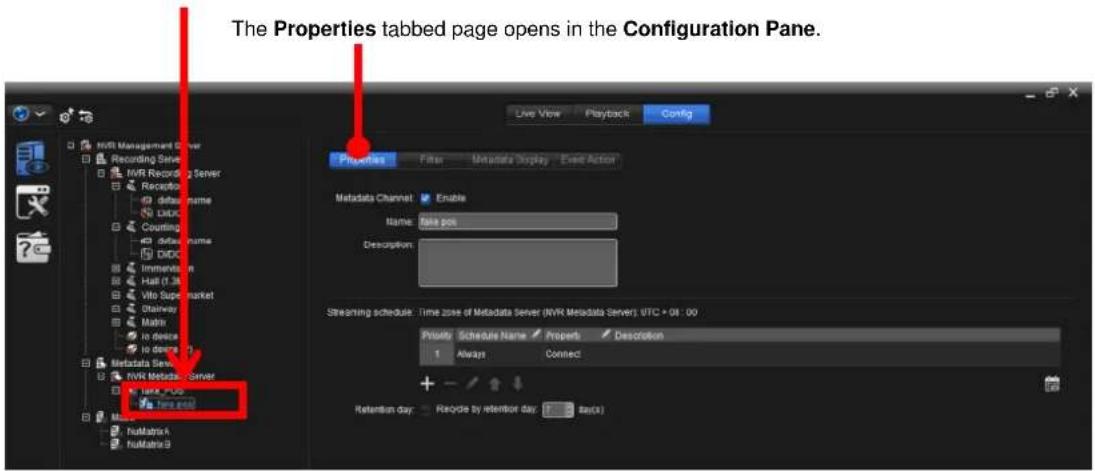
text_image
The Properties tabbed page opens in the Configuration Pane. Live View Playback Config Properties Filter Metadata Display Event Action Metadata Channel Enable Name: base pos Description: Streaming schedule: time zone of Metadata server (NVR Metadata Server) UTC + 01 : 00 Priority Schedule Name Property Description 1 Always Connected Retention day: Recycle by retention day: Ep(s) NVR Record Server NVR Record Server Recirculation default name DDC Counting default name DDC Immediation Hall (1.3) Vito Supermarket Drainway Main to device to doing Metadata Server NVR Metadata Server Line - 00 Line maxSee Properes for the settings featured on the Properes tabbed page.
See Filter for the settings featured on the Filter tabbed page.
See Metadata Display for the settings featured on the Metadata Display tabbed page.
See Event Aconfor the settings featured on the Event Acon tabbed page.
10.1.3.7.6.1 Properties
It relies on the Properes tabbed page to conjure the properes of a metadata channel:
- From the Tree Console, click the topic Metadata Server.
- Click the topic metadata source.
- Click the metadata source to which the metadata channel to congure belongs.
The Properes tabbed page opens in the Conguraon Pane for the metadata channel to conjure while the other tabbed pages are hidden by default.
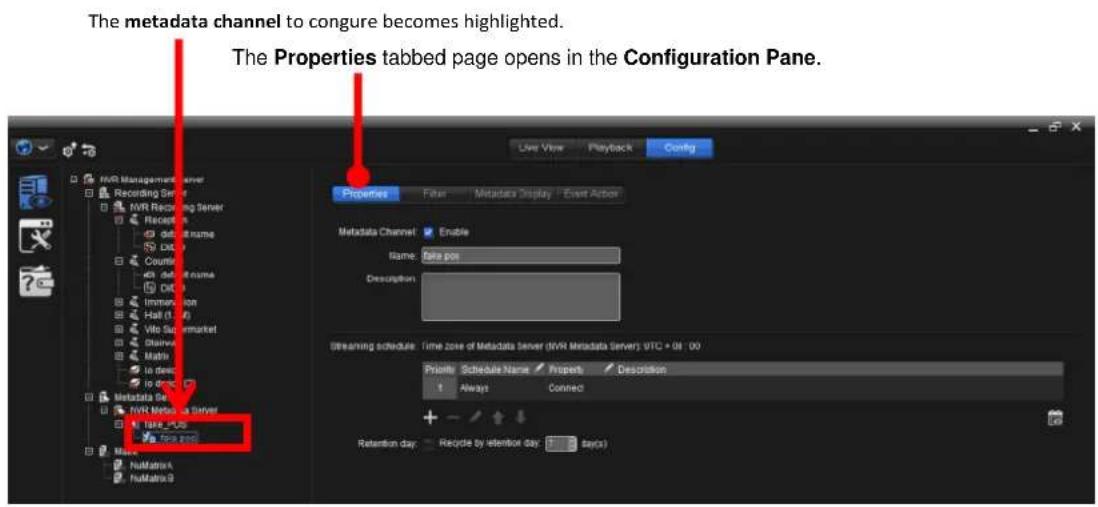
text_image
The metadata channel to conjure becomes highlighted. The Properties tabbed page opens in the Configuration Pane. Live View Playback Config Properties Fire Metadata Display Event Action Metadata Channel Enable Name: fair pos Description Streaming schedule: Time zone of Metadata server (MVR Metadata Server) UTC + 01 - 00 Priority Schedule Name Propen Description 1 Always Connect Retention day: Recycle by elentor day: 3 days(5) NVR Management Server Recording Server NVR Recording Server Receipts default name Del Counties default name Del Immersion Hall (1, 2) Vito Supermarket Diserve Maths to design to design NVR Manager Server NVR Manager VTC NVR Manager VTC NVR Manager VTC NVR Manager VTC NVR Manager VTC NVR Manager VTC NVR Manager VTC NVR Manager VTC NVR Manager VTC NVR Manager VTC NVR Manager VTC NVR Manager VTC NVR Manager VTC NVR Manager VTC NVR Manager VTC NVR Manager VTC NVR Manager VTC NVR Master4 NVR Master3Take a closer look at the user interface.
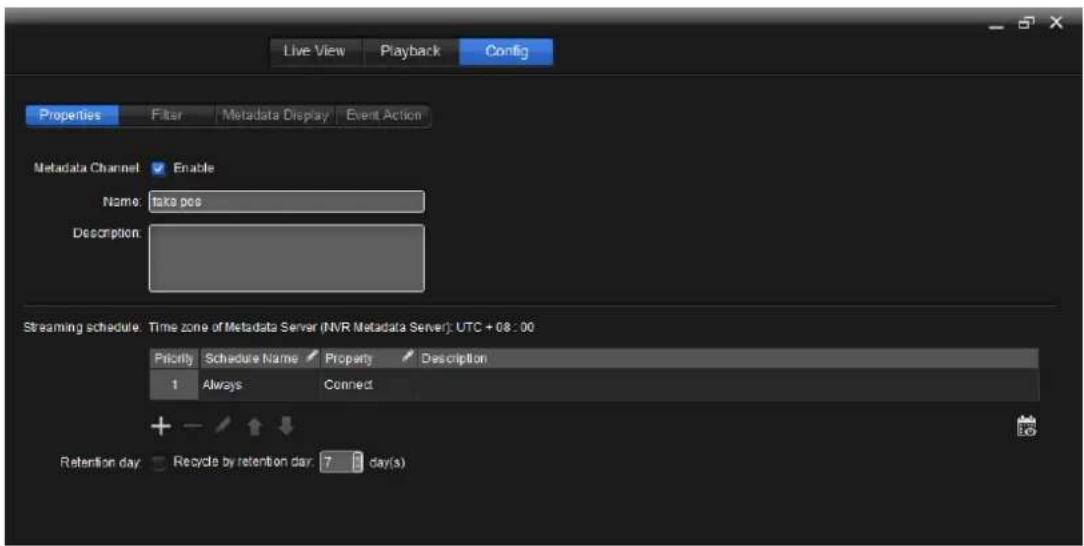
text_image
Live View Playback Config Properties Filter Metadata Display Event Action Metadata Channel Enable Name:taka pos Description: Streaming schedule.Time zone of Metadata Server (NVR Metadata Server): UTC + 08:00 Priority Schedule Name Property Description 1 Always Connect Retention day: Recycle by retention day: 7 9 day(s)The featured sengs on the Properes tabbed page are:
| Group | Setting | Description | Default | |
| Metadata channel√ Enable | Enables/disables the metadata channel. | Selected (Enabled) | ||
| Name | Names the metadata channel. | “metadata channel” | ||
| Descripon | Provides a brief description of the metadata channel for the better identification of it. | -- | ||
| Streaming schedule | Schedule Name | 1. Assigns a schedule (profile) to the metadata channel to define the time period(s) for the metadata channel to connect to the network or disconnect from the network.2. Delivers the name of the schedule currently applied to the register channel. | the Always schedule | |
| Properes | Sets when to connect the metadata channel to the network or when to disconnect the metadata channel from the network. | Connect | ||
| Descripon | Delivers a brief description of the schedule (profile). | the “test description” | ||
| + | Applies another schedule to the metadata channel. | -- | ||
| - | Withdraws a schedule from a metadata channel. | -- | ||
| Edits the currently applied schedule(s):1. Replaces a currently applied schedule with another schedule.2. Changes the schedule Property to Connect or Disconnect. ▶ Click the item to edit and then click the icon to make the item editable, or simply double-click the item to make it editable.) | -- | |||
| ↑ | Moves the selected schedule up. | -- | ||
| ↓ | Moves the selected schedule down. | -- | ||
| Retenon day | Sets how long to keep the metadata for. | 7 days | ||
10.1.3.7.6.2 Filter
The "Filter" means the data iterated from a "metadata channel" through which the metadata source streams to the Metadata Server.
To access the Filter tabbed page for the metadata channel:
- From the Tree Console, click the topic Metadata Server.
- Click the topic metadata source.
- Click the metadata source to which the metadata channel to congure belongs.
The Properes tabbed page opens in the Conguraon Pane for the metadata channel to conjure while the other tabbed pages are hidden by default.
The metadata channel to congure becomes highlighted.
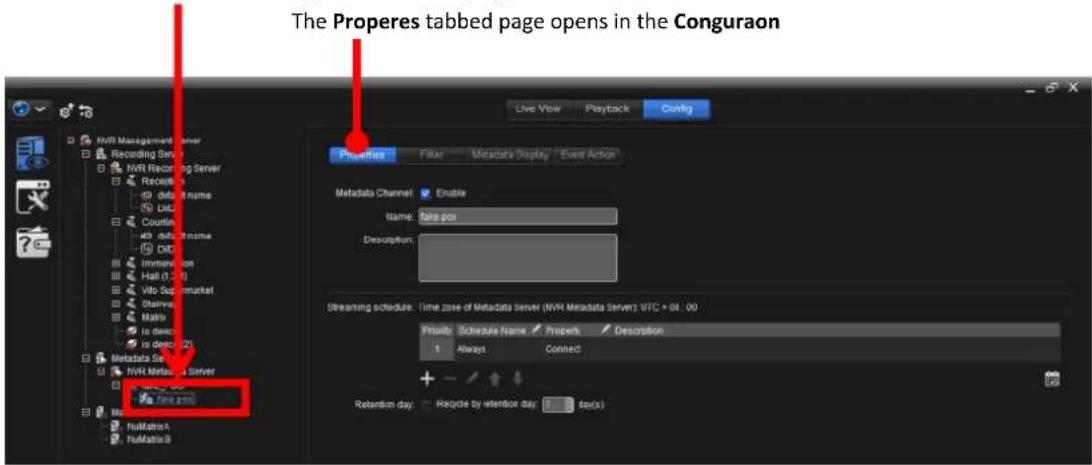
text_image
The Properes tabbed page opens in the Conguraon Live View Playback Config Properties Filter Metadata Display Event Action Metadata Channel: Enable Name: Nara pos Description: Streaming schedule: Time zone of Metadata Server (NVR Metadata Server) UTC + 04.00 Priority Schedule Name Properties Description 1 Always Connected Retention day: Requote by retention day: 7 days(s) NuMatrix4 NuMatrix34. Click the Filter tab.
The Filter tabbed page then opens.
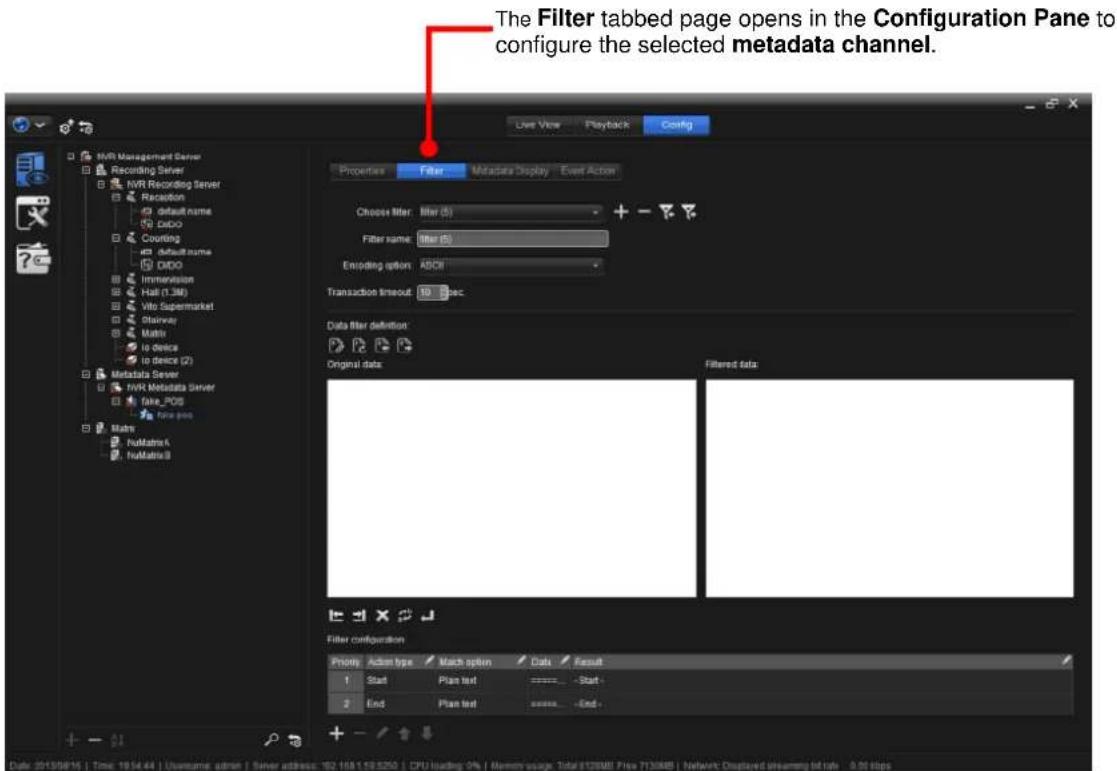
text_image
The Filter tabbed page opens in the Configuration Pane to configure the selected metadata channel. IWR Management Server Recording Server IWR Recording Server Reception default name DPIO Counting default name DPIO Immerization Hall (1.3M) Vito Supermarket Binaryay Matrix to device to device (2) Metadata Server IWR Metadata Server fake_POS fake pre Notes NuMatrix4 NuMatrix8 Properties Filter Metadata Display Event Action Choose filter: Filter (5) Filter name: Filter (5) Encoding option: ASCII Transaction timeout: 10 sec. Data filter definition: Original data Filtered data Filter configuration Priority: Action type Match option Data Result 1 Start Plan text ---- Start - 2 End Plan text ***** End - Date: 2013/06/16 | Time: 19:54:44 | Ubuntu, admin | Server address: 182 168 119 3250 | CPU loading: 0% | Memory usage: Total 112MB Pile 713MB | Network Display assuming hit rate: 4.96 bitsTake a closer look at the user interface.
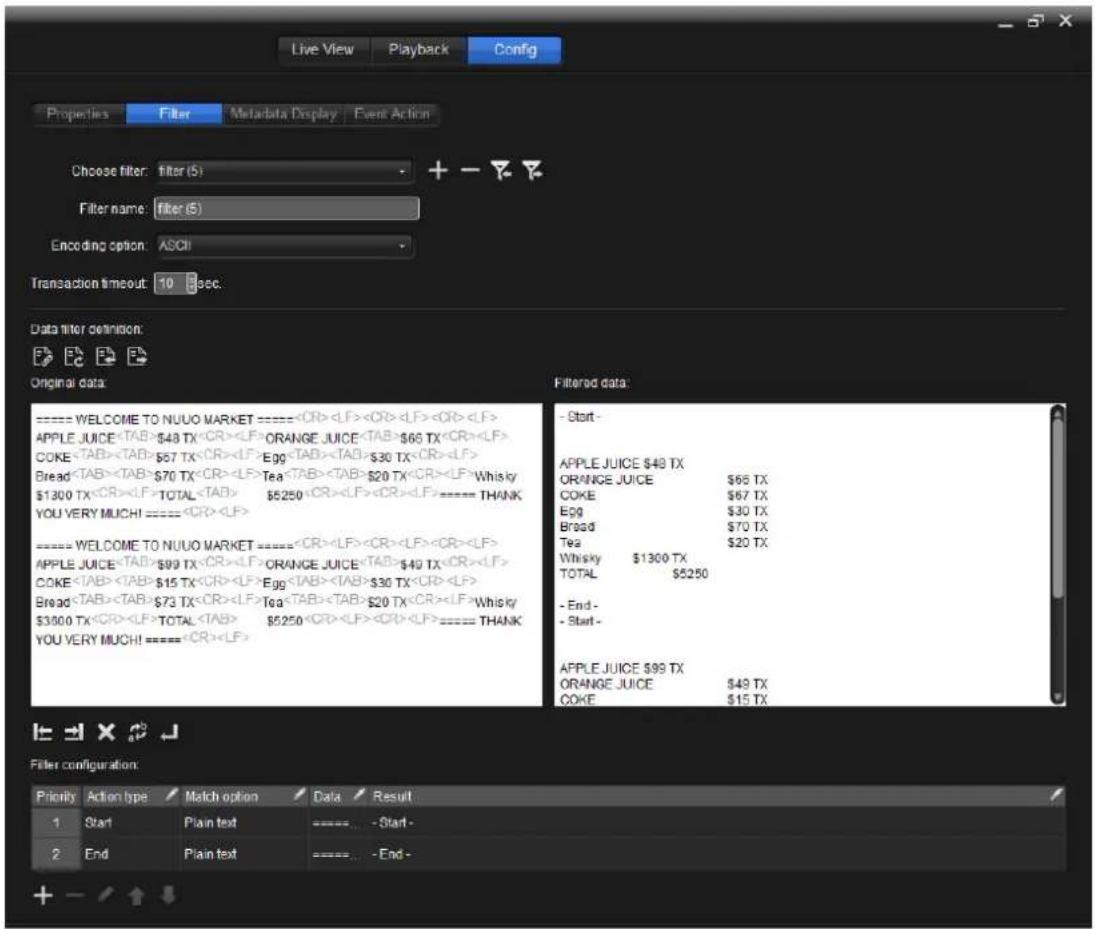
text_image
Live View Playback Config Properties Filter Metadata Display Event Action Choose filter: filter (5) + - ? Filter name: filter (5) Encoding option: ASCII Transaction timeout: 10 sec. Data filter definition: Original data: ==== WELCOME TO NUUO MARKET ======The featured sengs on the Filter tabbed page are:
| Group | Setting | Description | Default | ||
| Choose Iter | Assigns afilterfor the metadata channel. | Description | -- | ||
 | Add new filter | ||||
 | Delete selected filter. | ||||
 | Import filter. | ||||
 | Export filter. | ||||
| Filter Name | Names thefilter. | “filter (1)” | |||
| Encoding opon | Assigns an encoding option for thefilter. | ASCII | |||
| Transacon meout | Sets when to timeout the transaction. | 10 sec. | |||
| Data Iterdenion |  | Catch data from the server | -- | ||
 | Clear data | -- | |||
 | Import data | -- | |||
 | Export data | -- | |||
| Original data | The original data from metadata channel. | -- | |||
 ed data ed data | The filtered data. | -- | |||
 | set start | -- | |||
 | end | -- | |||
 | omit | -- | |||
| [BY35] | substitute | -- | |||
 | change to new line | -- | |||
| Filter Conguraon | Acon type | Assigns an action to the filter. | -- | ||
| Priority | Sets the priority for an action. | -- | |||
| Match opon | Assigns a match option to the filter.Three types are available: Plain test, wildcard and regular expression. | -- | |||
| Data | Delivers the data be matched for the filter. | -- | |||
| Result | Delivers the result be matched for the filter. | -- | |||
| [SA77] | Applies another action to the filter. | -- | |||
| [0000] | Withdraws an action from the filter. | -- | |||
| [1110] | Edits the currently applied filter(s):1. Replaces a currently applied filter with another filter.2. Changes the filter Action Type, Match option, Data and Result.Click the item to edit and then click the icon to make the item editable, or simply double-click the item to make it editable.) | -- | |||
| [0000] | Moves the selected action up. | -- | |||
| [0000] | Moves the selected action down. | -- | |||
10.1.3.7.6.3 Metadata Display
It relies on the Metadata Display tabbed page to set how to show the metadata onscreen.
To access the Metadata Display tabbed page for the metadata channel:
- From the Tree Console, click the topic Metadata Server.
- Click the topic metadata source.
- Click the metadata source to which the metadata channel to congure belongs.
The Properes tabbed page opens in the Conguraon Pane for the metadata channel to conjure while the other tabbed pages are hidden by default.
The metadata channel to congure becomes highlighted.
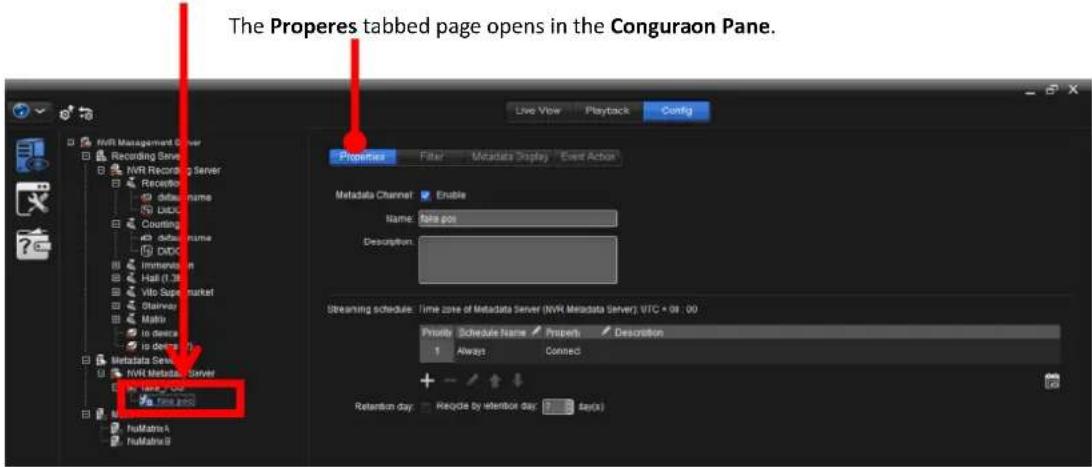
text_image
The Properes tabbed page opens in the Conguraon Pane. Live View Playback Config Properties Filter Metadata Display Event Action Metadata Channel: Enable Name: Rare pos Description: Streaming schedule: Time zone of Metadata Server (NVR Metadata Server), UTC • 08 : 00 Priority Schedule Name Properties Description 1 Always Connected Retention day: Requeue by retention day: 7 days4. Click the Metadata Display tab.
The Metadata Display tabbed page then opens.
The Metadata Display tabbed page opens in the Configuration Pane to configure the selected metadata channel.
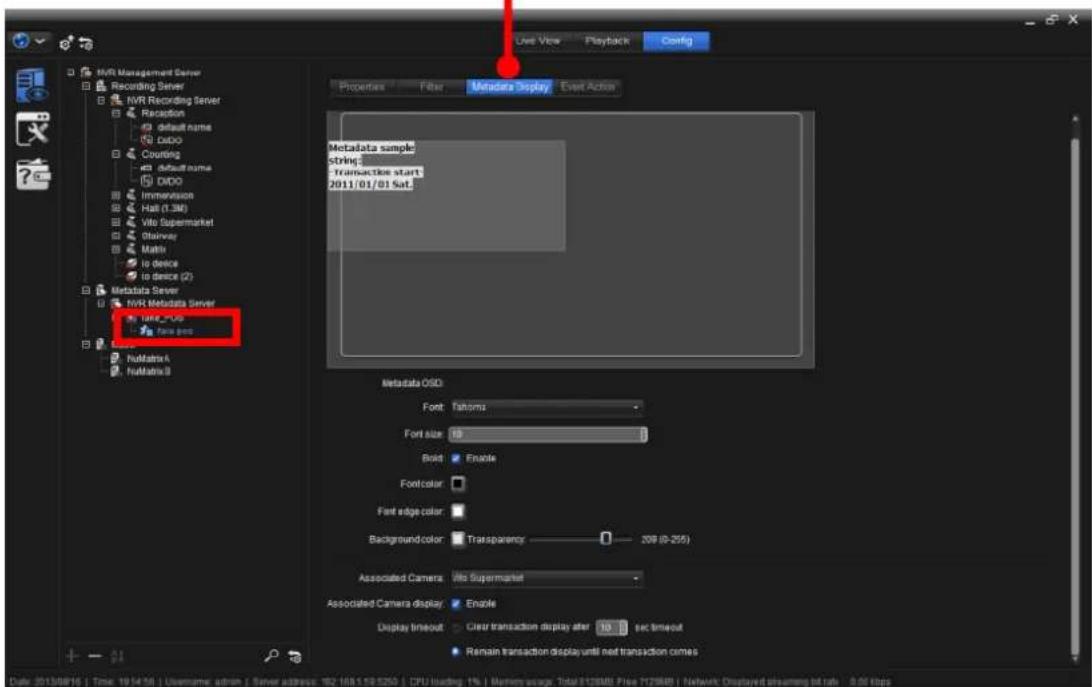
text_image
IVMR Management Server Recording Server IVIR Recording Server Recapton default name DSDO Counting default name DSDO Immonition Hall (1.3M) Vito Supermarket Dlinear Math to device to device (2) Metadata Server IVIR Metadata Server link_00 file prec NumMatrix 4 NumMatrix 8 Properties Filter Metadata display Event Action Metadata sample string: Transaction start 2011/01/01 Sat. Metadata OSD Font: Taltoms Font size: 10 Word: Encode Font color: Font edge color: Background color: Transparency 209 (0-255) Associated Camera: Vito Supermarket Associated Camera display: Encode Display timeout: Clear transaction display after 10 sec timeout Remain transaction display until next transaction comes Date: 2013/08/16 | Time: 19:54:56 | Username: admin | Server address: 162.168.119.5250 | CPU loading: 1% | Membrn usage: Total:812MBF Free:712MBF | Network: Displayed streaming bit rate: 0.06 kbpsTake a closer look at the user interface. The Metadata Display tabbed page shows a screen simulaon at the top to set where to show the metadata onscreen. Click and drag the rectangle where the metadata sample text is to set the locaon for the metadata onscreen. And click and drag the eight nodes of the rectangle to resize the rectangle. Where the metadata text sample is.
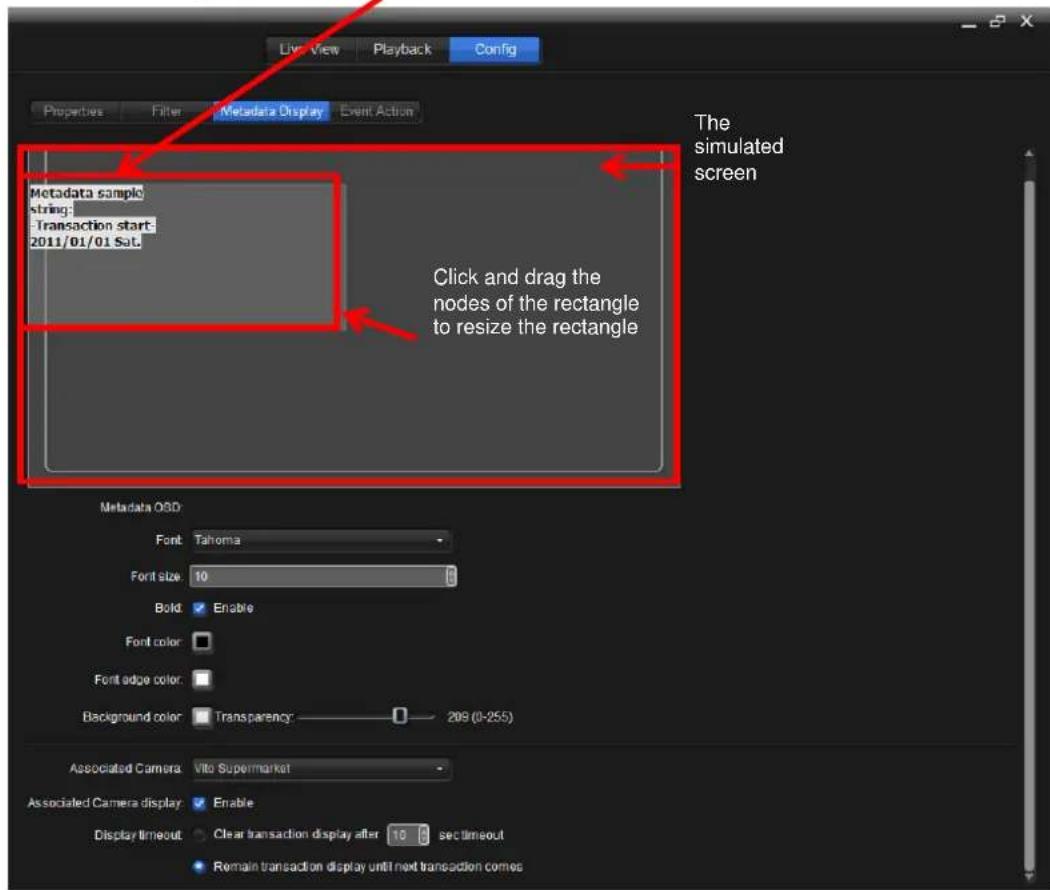
text_image
Live View Playback Config Properties Filter Metadata Display Event Action Metadata sample string: Transaction start: 2011/01/01 Sat. Click and drag the nodes of the rectangle to resize the rectangle The simulated screen Metadata OSD Font: Tahoma Font size: 10 Bold: Enable Font color: Font edge color: Background color: Transparency 209 (0-25-5) Associated Camera: Vito Supermarket Associated Camera display: Enable Display timeout: Clear transaction display after 10 sec timeout Remain transaction display until next transaction comesOther featured sengs are:
| Setting | Description | Default |
| Font | Sets the font for the onscreen metadata | Tahoma |
| Font size | Sets the font size for the onscreen metadata. | 10 |
| Bold | Enables/disables bold font or the onscreen metadata. | Deselected (Disabled) |
| Font color | Sets the font color for the onscreen metadata. | black |
| Font edge color | Sets the outline color for the font of the onscreen metadata. | white |
| Background color | Sets the border color for the onscreen metadata.▸ Use the slide bar to adjust the transparency of the border color. | blue |
| Associated Camera | Associates the metadata setting with a video device. | None |
| Associated Camera display | Enables/disables showing the metadata with associated camera on Live view. | Selected (Enabled) |
| Display meout | Enables/disables clear transaction display after __ sec.timeout, or remain transaction display until next transaction comes.▸ Enable the timeout to be able to set the timeout in the sec field. | Clear transactiondisplay after 10 sec. timeout. |
10.1.3.7.6.4 Event Action
It relies on the Event Acon tabbed page to set the events that launch acon(s) from the metadata channel.
To access the Event Acon tabbed page for the metadata channel:
- From the Tree Console, click the topic Metadata Server.
- Click the topic metadata source.
- Click the metadata source to which the metadata channel to congure belongs.
The Properes tabbed page opens in the Conguraon Pane for the register channel to conjure while the other tabbed pages are hidden by default.
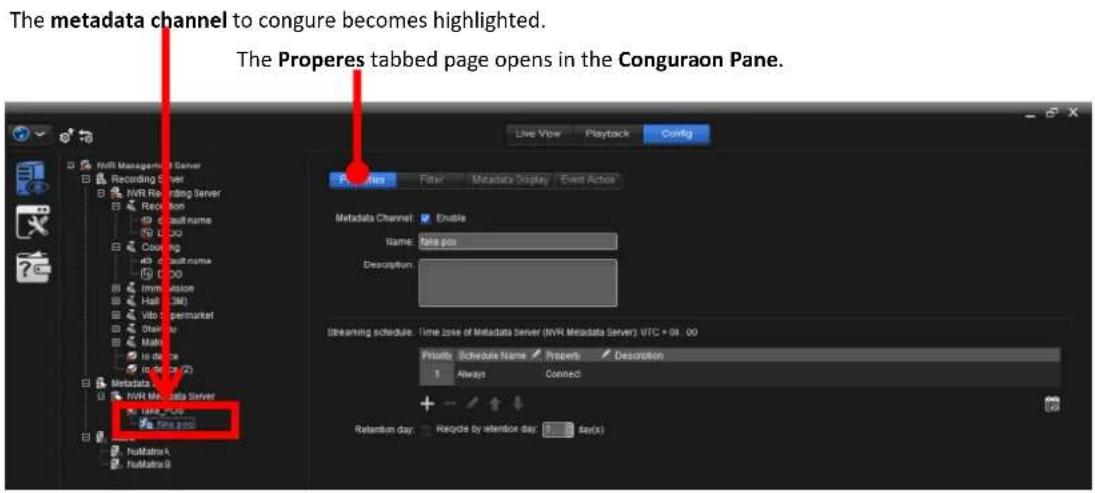
text_image
The metadata channel to congure becomes highlighted. The Properes tabbed page opens in the Conguraon Pane. NVR Management Server Recording Server NVR Recording Server Registration C++ mail name L+00 Counting C++ mail name L+00 Immersion Hall 3M Vito: permarket Shower Main to device to device (2) Metadata NVR Metadata Server Time pos Time pos Metadata Channel Enable Name: data pos Description: Streaming schedule: Time zone of Metadata Server (NVR Metadata Server) UTC + 01 - 00 Priority Schedule Name Property Description Always Connect Retention day: Recycle by retention day: say(s)4. Click the Event Acon tab.
The Event Acon tabbed page then opens.
The Event Action tabbed page opens in the Configuration Pane to configure the selected metadata channel.
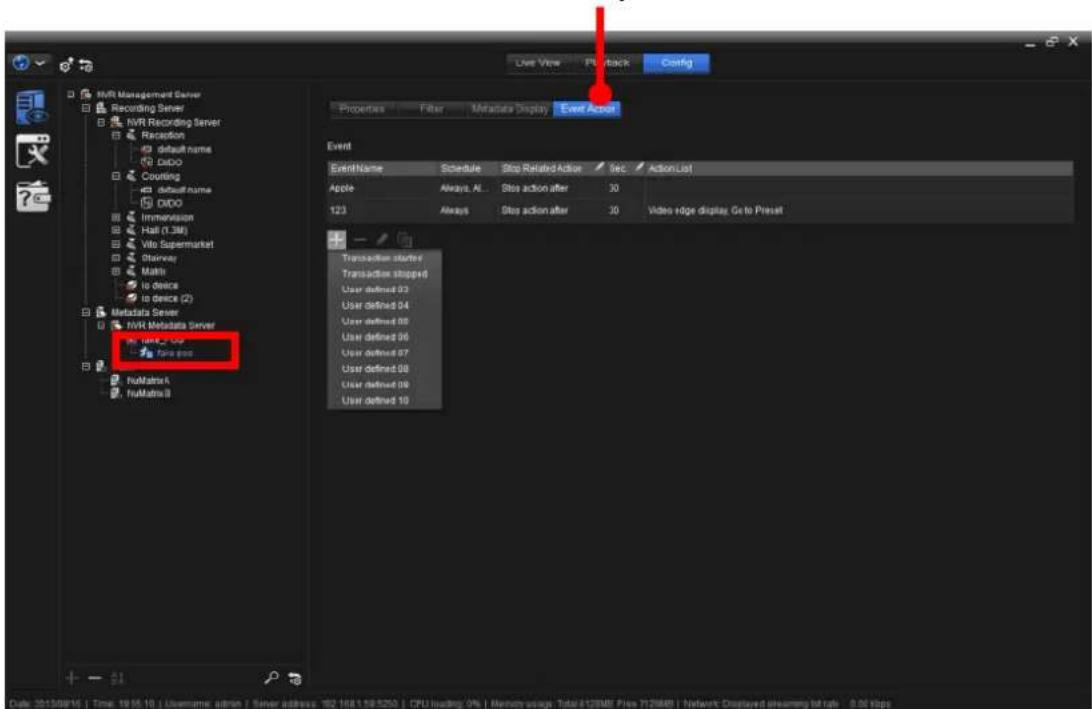
text_image
VIVR Management Server Recording Server NVR Recording Server Reception default name Dicho Counting default name Dicho Immersion Hall (1.3M) Vito Supermarket Chairway Math No device to Device (2) Metadata Server NVR Metadata Server Zara pos NumMatrix NumMatrix3 Live View Play Back Config Properties Filter Metadata Display Event Action Event Event Name Schedule Stop Related Action Sec Action List Apache Always, AL... Stop action after 30 123 Always Stop action after 30 Video edge display, Go to Presset Transaction starter Transaction stopped User defined 03 User defined 04 User defined 05 User defined 06 User defined 07 User defined 08 User defined 09 User defined 10 Date: 2013/08/16 | Time: 19:55:10 | Username, admin | Server address: 182.168.1.19.5250 | CPU loading: 0% | Version usage: Total: 812MBE Files: 712MBE | Network: Displayed Dreaming Kit Rate: 0.00 kbpsTake a closer look at the user interface.
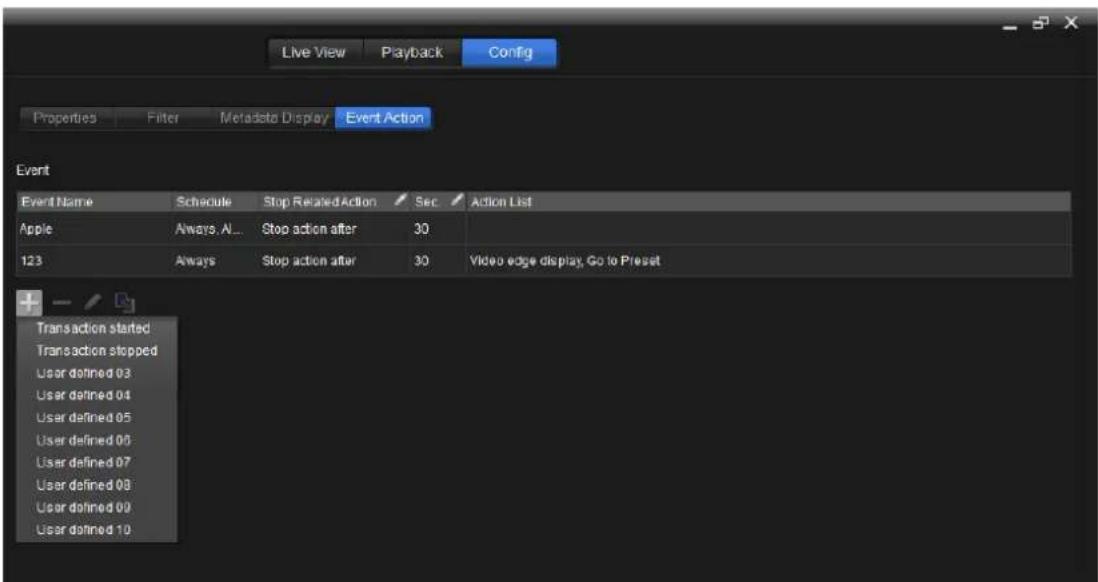
text_image
Live View Playback Config Properties Filter Metadata Display Event Action Event Event Name Schedule Stop Related Action Sec Action List Apple Always, All... Stop action after 30 123 Always Stop action after 30 Video edge display, Go to Preset Transaction started Transaction stopped User defined 03 User defined 04 User defined 05 User defined 06 User defined 07 User defined 08 User defined 09 User defined 10The featured sengs are:
| Group | Icon / Setting | Description |
| Event | [807H] | Adds an event.▸ Available events areTransaction started, Transaction stopped and other user definable events.▸ SelectUser define #to create an user-defined event.▸ SeeUser defined configuration settingsto know the how to create a user-defined event. |
| [ATCB] | Deletes the selected event.▸ Click any of the event info cells to select the event. | |
| [KAHD] | Edits the selected event.▸ Click any of the event info cells to edit the info. | |
| [BR32] | Copies the event setting to anothermetadata channel. | |
| E[CDV4] | Delivers the event type.▸ The available types are:Transaction started, Transaction stoppedand up to seven other user definable events..▸ SelectUser define #to create an user-defined event.▸ SeeUser defined configuration settingsto know the how to create an user-defined event. | |
| [WCZ4]Schedule | Delivers the applied “schedule”, which means one or more time period(s) in which the occurrence of the event is taken effective.▸ Use theAdd schedulesettings to apply ascheduleto the event.▸ To create/delete/edit a schedule, seeSchedule. | |
| [WSZ8]Stop Related Acon | Sets whether to stop the action launched by themetadata channel sometime after the event occurs or leaves it on automatic. | |
| [IXCTB]Sec. | Sets when to stop the action launched by themetadata channelafter the event occurs.▸ 1 to 60 seconds are configurable. | |
 Acon List[440C] Acon List[440C] | Delivers all the actions set up for themetadata channelto take when the event occurs.▸ The available actions areE-Mail to multiple, DO turn on, Go to Preset, Video edge displayand Play alert sound. | |
| Add schedule | +[BYOT] | Adds a schedule.▸ Available options are theschedulescreated as described inCreate A Schedule. |
| — | Deletes the selectedschedule.▸ Click ascheduleto select it. | |
| [CDD8] | Edits the selectedschedule.▸ Click ascheduleto select it. | |
| [ALXQ] | Moves the selectedscheduleup.▸ Click ascheduleto select it. | |
| [HCZT] | Moves the selectedscheduledown.▸ Click ascheduleto select it. | |
| [TWAZ] | Opens a schedule overview dialog that shows the applied schedule(s) in a daily view or a weekly view. | |
| [DCBA] | Copies theschedulesetting to another event. | |
| Schedule Name | 1. Delivers the name of the schedule.2. Click theSchedule namecell to change thescheduleto some otherschedule. | |
| Property | Sets whether to allow or block the appliedschedule's time period(s). | |
| Descripon | Delivers a brief description for thisschedulefor the easier identification of it. | |
| Add action | Acon List | Delivers all the actions set up for the metadata channel to take when the event occurs.▸ Available actions are E-Mail to multiple, DO turn on, Go to Preset, Video edge display and Play alert sound. |
| [785T] | Adds an action for the metadata channel to take when the event occurs.▸ Available actions are: E-Mail to multiple, DO turn on, Go to Preset, Video edge display and Play alert sound. | |
| — | Deletes the selected action.▸ Click an action to select it. | |
| Action properties | 1. Sets whom to send the alert email(s) to (for Email to multiple).2. Sets which digital output pin to turn on (for DO turn on).3. Sets associated camera to go to the “preset point” (for Go to Preset).▸ This group of settings is available only when any of the available actions is added. | |
10.1.3.7.6.4.1 User defined configuration settings
It relies on the user dened conguraon setngs to tailor-create an event that meets your needs to launch acon(s) from the metadata channel.
To access the user dened conguraon sengs:
- Open the Event Acon tabbed for the register channel to congure as described in Event Acon.
- Click the add icon .+
- From the drop-downs that show, select any of the User dene #.
The user dened conguraon sengs then become available.
The User defined configuration settings shows to tailor-create an event for the selected metadata channel.
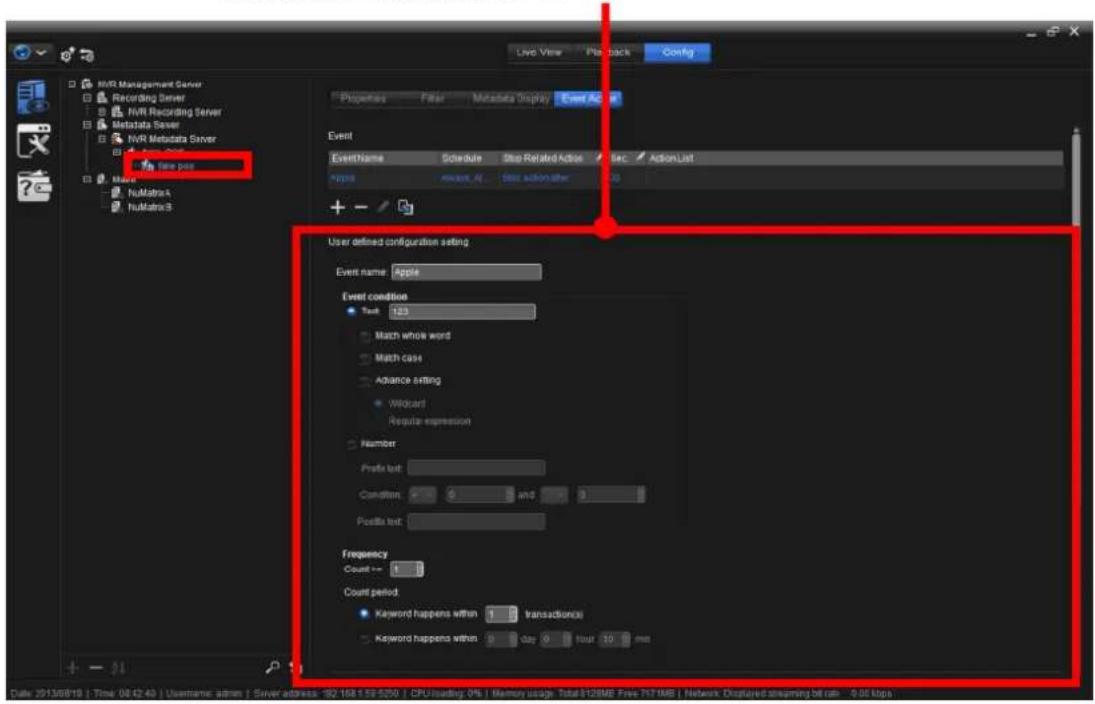
text_image
MVR Management Server Recording Server MVR Recording Server Metadata Server MVR Metadata Server New pass NumMatrix4 NumMatrix3 Live View Play Back Config Properties Filter Metadata Display Event Active Event Event Name Schedule Stop Related Active SNC Action List Name Aircraft A1 Data action after + - User defined configuration setting Event name: Apple Event condition: Text: 123 Match whole word Match case Advance setting Wildcard Regular expression Number Prefix list: Condition: 0 and 9 Prefix list: Frequency: Count = 1 Count period: Keyword happens within 1 transactional Keyword happens within 0 day 0 four 10 mm Date: 2013/8/18 | Time: 08:42:40 | Username: admin | Server address: 162.163.152.529 | CPU usage: 0% | Memory usage: Total:312MB Free:757MB | Network Displanned streaming bit rate : 9.01 kbpsTake a closer look at the user interface.
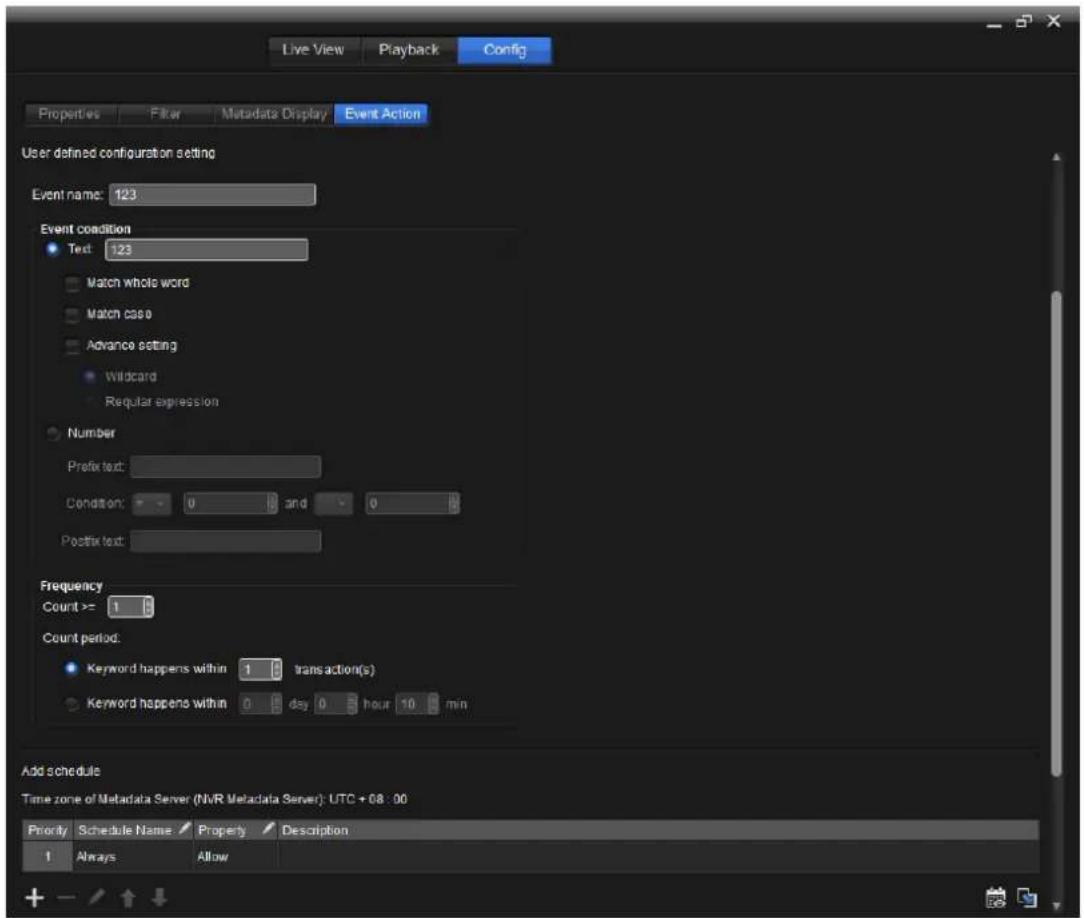
text_image
Live View Playback Config Properties Filter Metadata Display Event Action User defined configuration setting Event name: 123 Event condition Test: 123 Match whole word Match case Advance setting Wildcard Regular expression Number Prefix text: Condition: 0 and 0 Prefix text: Frequency Count >= 1 Count period: Keyword happens within 1 transaction(s) Keyword happens within 0 day 0 hour 10 min Add schedule Time zone of Metadata Server (NVR Metadata Server): UTC + 68 : 00 Priority Schedule Name Property Description 1 Always AllowThe featured sengs are:
| Group | Icon / Setting | Description | |
| Event name | Names the event to create. | ||
| Event condition | Text | Edits the keyword for the event to match.Three types are available: Match whole word, match case and advanced setting. | |
| Info | Description | ||
| Match whole word | Searches the terms as a whole word. | ||
| Match case | Searches names where the case matches the letters. | ||
| Advanced seng | Include wildcard and regular expression. | ||
| Number | Edits the number for the event to match. | ||
| Info | Description | ||
| Prex text | Edits special text before the value's condition. | ||
| Condion | Edits a number as the condition of event and select one of the symbols ( <=, <, =, >, >=) to define the numeric value. | ||
| Posix text | Edits special text after the value's condition. | ||
| Frequency | Count>= | Edits the event trigger times over specific numbers. | |
| Count period | Edits count period for the event.➢ Two count periods are available: Keyword happens within __ transaction(s) or keyword happens within __ day __ hour __min.➢ 1 to 999 transaction(s) are configurable.➢ 0 to 5 day(s), 0 to 23 hour(s), 0 to 59 min(s) are configurable. | ||
| Add schedule | [4447] | Adds a schedule.➢ Available options are the schedules created as described in Create A Schedule. | |
| [4447] | Deletes the selected schedule.➢ Click a schedule to select it. | ||
| [4448] | Edits the selected schedule.➢ Click a schedule to select it. | ||
| [4449] | Moves the selected schedule up.➢ Click a schedule to select it. | ||
| [4450] | Moves the selected schedule down.➢ Click a schedule to select it. | ||
| [4451] | Opens a schedule overview dialog that shows the applied schedule(s) in a daily view or a weekly view. | ||
| [4452] | Copies the schedule setting to another event. | ||
| Schedule Name | 3. Delivers the name of the schedule.4. Click the Schedule name cell to change the schedule to some other schedule. | ||
| Property | Sets whether to allow or block the applied schedule's time period(s). | ||
| Descripon | Delivers a brief description for this schedule for the easier identification of it. | ||
| Add action | Acon List | Delivers all the actions set up for the metadata channel to take when the event occurs.➢ Available actions are E-Mail to multiple, DO turn on, Go to Preset, Video edge display and Play alert sound. | |
| [4461] | Adds an action for the metadata channel to take when the event occurs.➢ Available actions are: E-Mail to multiple, DO turn on, Go to Preset, Video edge display and Play alert sound. | ||
| — | Deletes the selected action.➢ Click an action to select it. | ||
| Action properties | 1. Sets whom to send the alert email(s) to (for Email to multiple).2. Sets which digital output pin to turn on (for DO turn on).3. Sets associated camera to go to the "preset point" (for Go to Preset).➢ This group of settings is available only when any of the available actions is added. | ||

The value is also case sensitive, you must key in “,” symbol to search for 10,000US.
10.1.4 Conigure Matrix
A Matrix Server is a server right under the control of the Management Server to enable an unlimited number of video walls and video displays, with up to 100 channels displayed per monitor. Congure the Matrix to customize your video wall applicaon.
- Install NuMatrix. For Numatrix installaon, please refer to NuMatrix.
To access the Matrix sengs:
- Access the Physical Cong (“physical configuration”) as described in Physical Cong (Management Server).
The physical conguraon opens onscreen, and the Tree Console shows the three sub topics: Recording Server, Metadata Server, and Matrix.
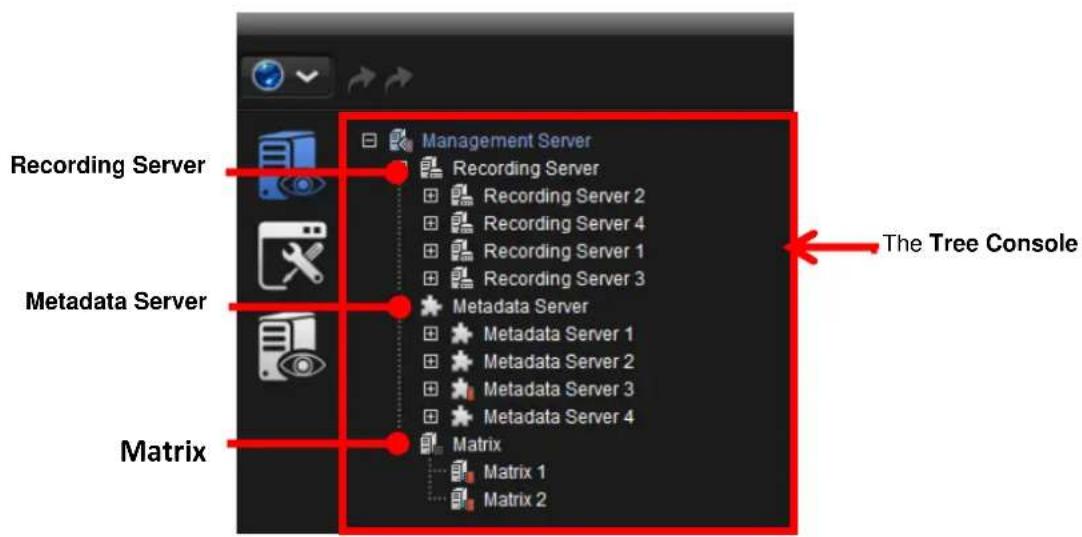
text_image
Recording Server Metadata Server Matrix Management Server Recording Server Recording Server 2 Recording Server 4 Recording Server 1 Recording Server 3 Metadata Server Metadata Server 1 Metadata Server 2 Metadata Server 3 Metadata Server 4 Matrix Matrix 1 Matrix 2 The Tree Console- If a plus sign (+) shows besides the sub topic Matrix, click the plus sign (+) to collapse the exisng Matrix(s). Then click the Matrix to congure.
OR
If a minus sign (-) shows besides the sub topic Matrix, the exisng Matrix
Server(s) collapse already. Simply click the Matrix to congregate.
The Properes tabbed page then opens at the Conguraon Pane to congregate the selected Matrix Server while the other tabbed page is hidden.
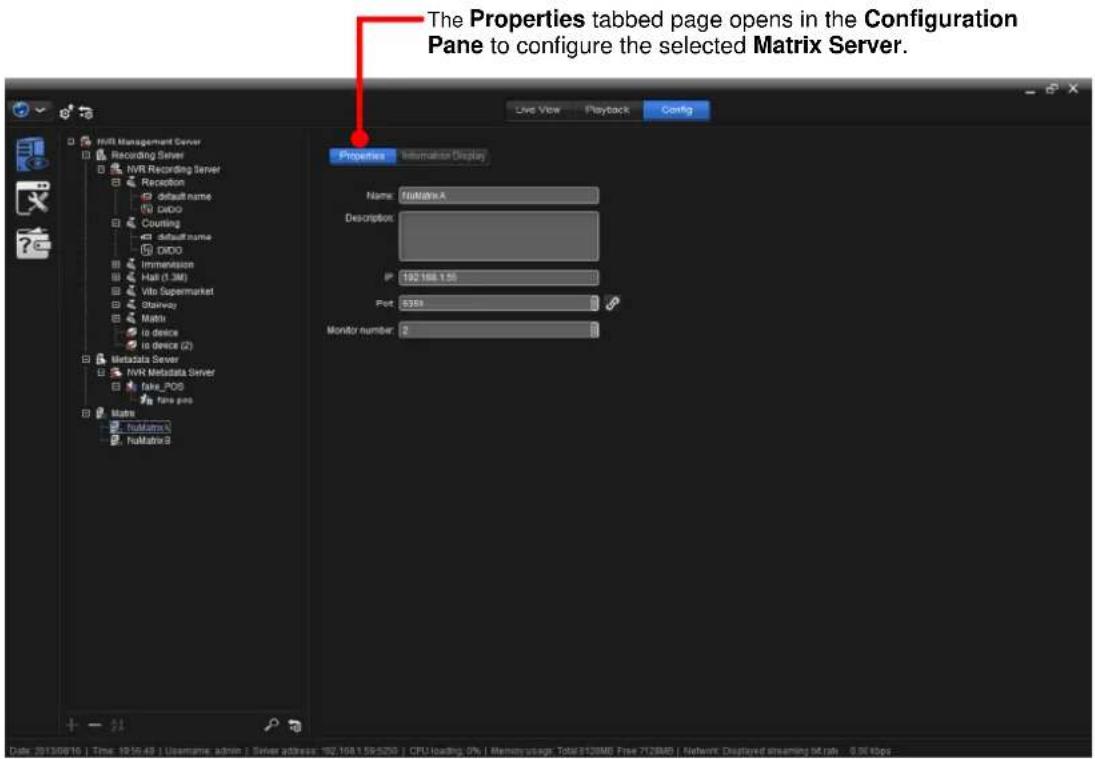
text_image
The Properties tabbed page opens in the Configuration Pane to configure the selected Matrix Server. Properties Information Display Name: MultiMatrix A Description: 192 166.155 Port: $360 Monitor number: 2 Date: 2013/06/16 | Time: 19:30:48 | Username: admin | Server address: 162.168.1.56-5200 | CPU loading: 0% | Memory usage: Total 312MBF Free 712MBF | Refrunt Displayed streaming M drive 0.00 kbps- Access one of these tabbed pages to congregate the Matrix.
A funcon overview of these tabbed pages:
| Tab | Description |
| Properes | Names theMatrix Server.Enters a brief description of theMatrixfor the better identification of it.Sets the IP and port for the Matrix Server.Run a test on the connection to the Matrix Server.Sets the monitor number forMatrix Server.SeePropertiesfor the settings. |
| Informaon Display | Configures which information to show on the screens of the video wall, including the grid number, server name, device name, camera name, camera bit rate, camera frame rate, date and time.SeeInformation Displayfor the settings. |

Please note that only when have an "Ulmate level" license will you be able to see the Matrix interface.
10.1.4.1 Properties
It relies on the Properes tabbed page to enter the informaon about the Matrix Server including the name and descripon, or to run a test on the conncon to the Matrix Server.
To access the Properes tabbed page of the Matrix Server to congregate:
- From the Tree Console, click the topic Matrix.
By default, the Properes tabbed page then opens at the Conguraon Pane.
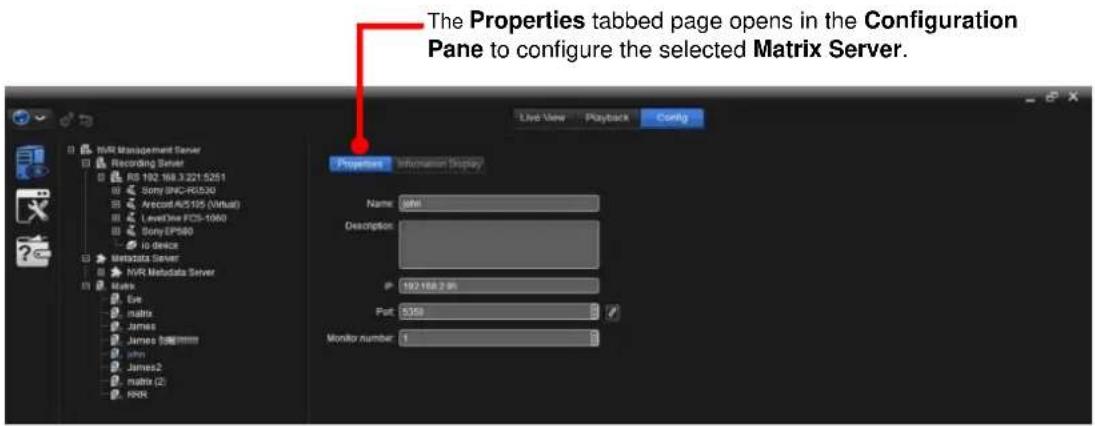
text_image
The Properties tabbed page opens in the Configuration Pane to configure the selected Matrix Server. Properties Information Display Name: BMI Description: 192.168.2 MB Port: $350 Monitor number: 1Take a closer look at the user interface.
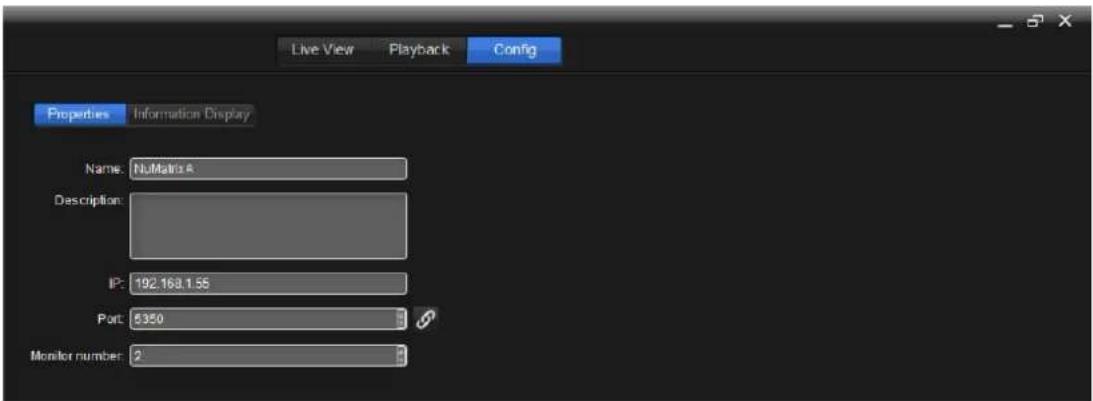
text_image
Live View Playback Config Properties Information Display Name: NuMatrix A Description: IP: 192.168.1.55 Port: 5350 Monitor number: 2The featured sengs on the Properes tabbed page are:
| Setting | Description | Default |
| Name | Names theMatrix Server. | “matrix” |
| Descripon | Provides a brief description for thisMatrix Serverfor the easier identification of it. | -- |
| IP | Sets the IP address of theMatrix Server. | 127.0.0.1 |
| Port | Sets the port for theMatrix Server.Click the icon to run a test on the connection to theMatrix Server. | 5350 |
| Monitor number | Sets the number of the monitor(s). | 1 |

Please note that only when have an "Ulmate level" license will you be able to see the Matrix interface.
10.1.4.2 Information Display
It relies on the Informaon Display tabbed page to congure which informaon to show on the screens of the video wall, including the grid number, server name, device name, camera name, camera bitrate, camera frame rate, date and me.
To access the Informaon Display tabbed page of the Matrix Server to congure:
1. From the Tree Console, click the topic Matrix.
By default, the Properes tabbed page then opens at the Conguraon Pane.
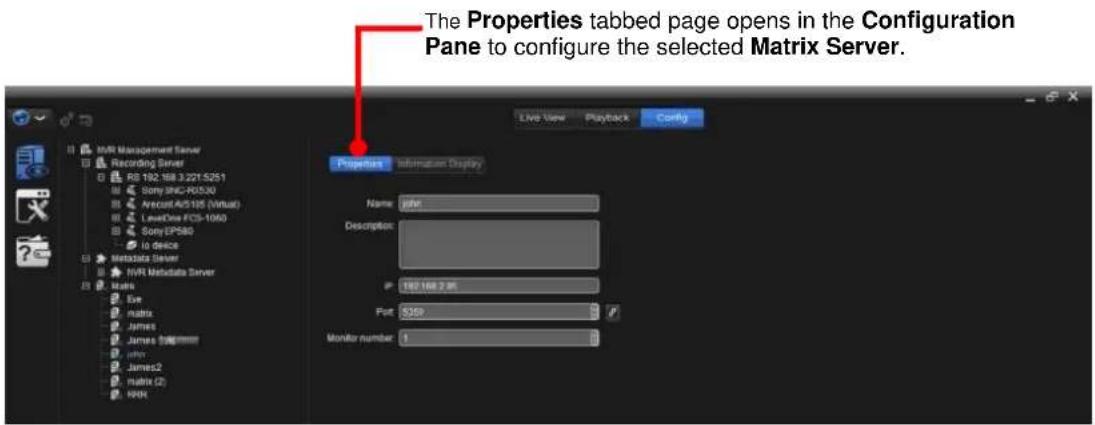
text_image
The Properties tabbed page opens in the Configuration Pane to configure the selected Matrix Server. Properties Information Display Name: IBM Description: 182.168.2 KB Port: $350 Monitor number: 12. Click the Informaon Display tab.
The Informaon Display tabbed page opens.
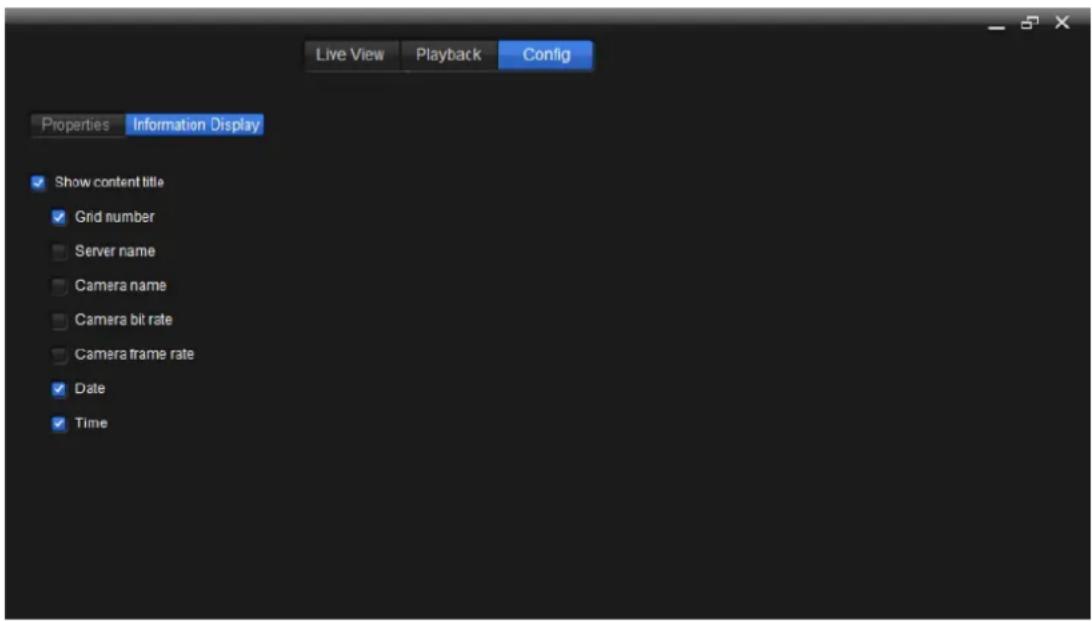
text_image
Live View Playback Config Properties Information Display ✓ Show content title ✓ Grid number □ Server name □ Camera name □ Camera bit rate □ Camera frame rate ✓ Date ✓ TimeThe featured sengs on the Informaon Display tabbed page are:
| Seng | Descripon | Default |
| Show content tle | Selects/deselects all the information to show on the screens of the video wall, including the grid number, server name, camera name, camera bit rate, camera frame rate, date and time. | “Selected”(All information is enabled.) |
| Grid number | Enables/disables grid number info on the screens of the video wall. | “Selected”(Enabled) |
| Server name | Enables/disables server name info on the screens of the video wall. | “Selected”(Enabled) |
| Camera name | Enables/disables camera name info on the screens of the video wall. | “Selected”(Enabled) |
| Camera bit rate | Enables/disables showing the camera bit rate on the screens of the video wall. | “Selected”(Enabled) |
| Camera frame rate | Enables/disables showing the camera frame rate on the screens of the video wall. | “Selected”(Enabled) |
| Date | Enables/disables date info from Matrix Server on the screens of the video wall. | “Selected”(Enabled) |
| Time | Enables/disables time info from Matrix Server on the screens of the video wall. | “Selected”(Enabled) |
10.1.4.3 Add A Matrix
To add a Matrix Server to the Management Server:
- Access the Physical Cong ("physical conguraon") as described in Physical Cong (Management Server).
The physical conguraon opens onscreen, and the Tree Console shows the three sub topics: Recording Server, Metadata Server, and Matrix.
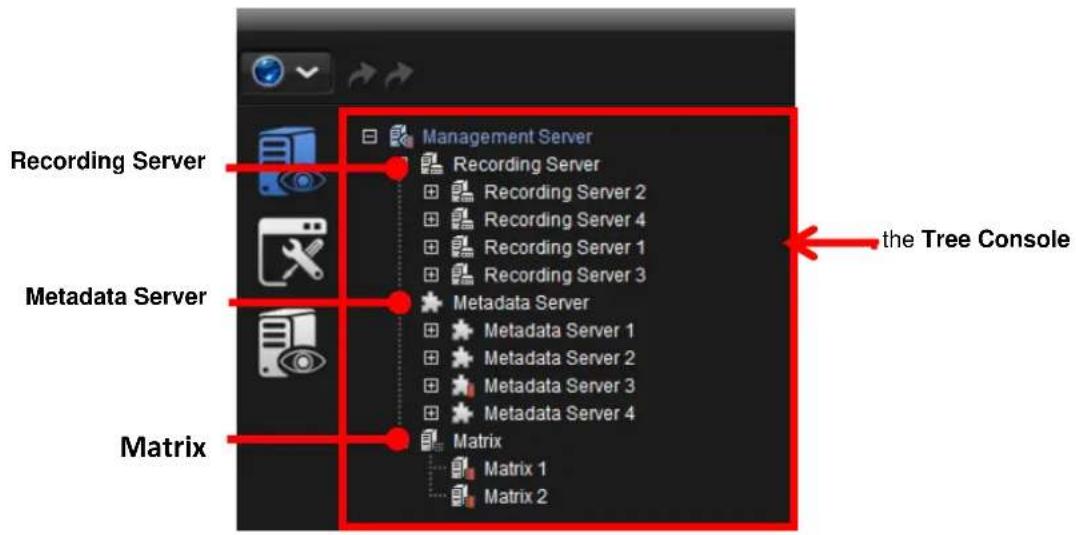
text_image
Recording Server Metadata Server Matrix Management Server Recording Server Recording Server 2 Recording Server 4 Recording Server 1 Recording Server 3 Metadata Server Metadata Server 1 Metadata Server 2 Metadata Server 3 Metadata Server 4 Matrix Matrix 1 Matrix 2 the Tree Console- Click the sub topic Matrix.
The sub topic Matrix becomes highlighted.
- From the bottom of the Tree Console, click the add icon +.
A new Matrix Server, named "matrix (#)" by default will be appended under the sub topic Matrix, and a Properes tabbed page will open in the Conguraon Pane for users to congregate the newly added Matrix Server.
The new Matrix Server is appended to the sub topic Matrix Server.
The Properes tabbed page opens in the Conguraon Pane.
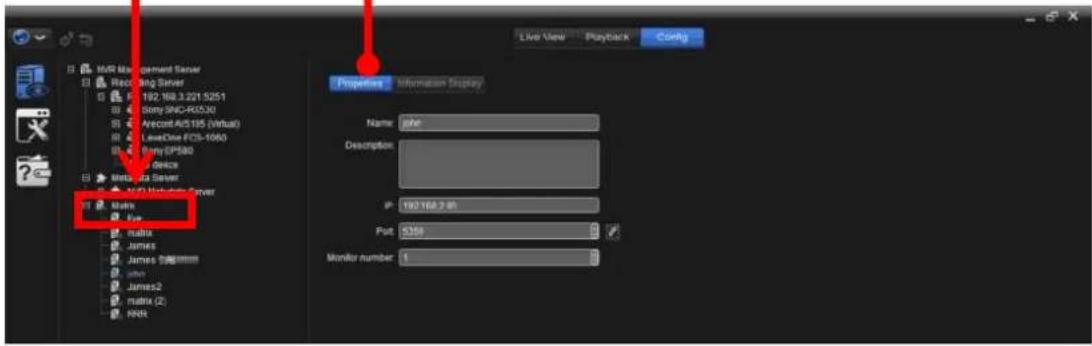
text_image
MVR Management Server Recording Server 192 168.3.221 S251 Stony SNC-R0530 Arecom AVS185 (Virtual) LevelOne FC3-1060 Sony EP580 Data Device Web Lab Server Web Lab Server Matrix Java matrix James James 2 Matrix (2) NNS Properties Information Display Name: jhm Description: 192 168.3.25 Put: $50 Monitor number: 110.1.4.4 Delete A Matrix
To delete a Matrix Server from the Management Server:
- Access the Physical Cong ("physical conguraon") as described in Physical Cong (Management Server).
The physical conguraon opens onscreen, and the Tree Console shows the three sub topics: Recording Server, Metadata Server, and Matrix.
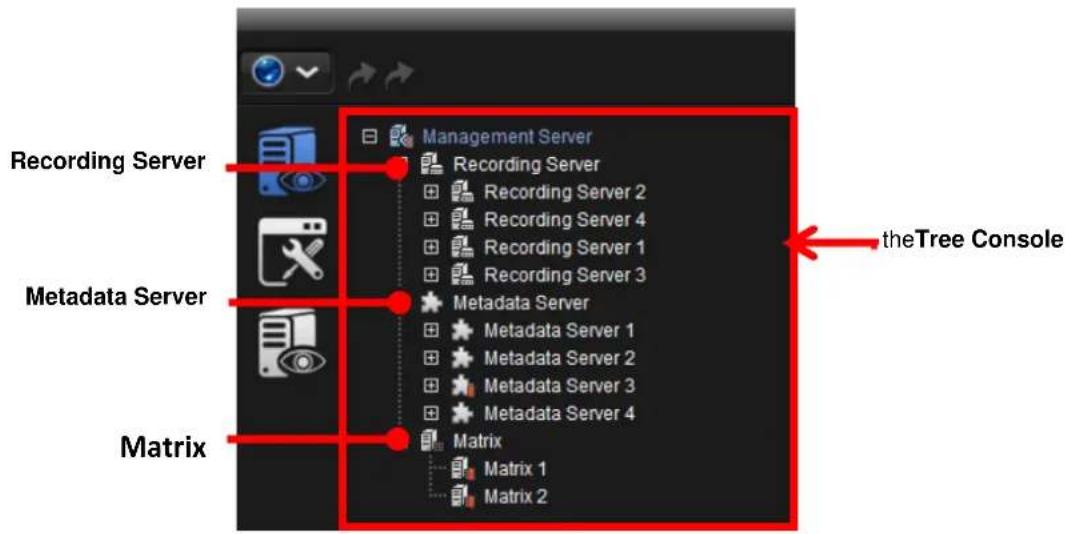
text_image
Recording Server Metadata Server Matrix Management Server Recording Server Recording Server 2 Recording Server 4 Recording Server 1 Recording Server 3 Metadata Server Metadata Server 1 Metadata Server 2 Metadata Server 3 Metadata Server 4 Matrix Matrix 1 Matrix 2 theTree Console- If a plus sign (+) shows besides the sub topic Matrix, click the plus sign (+) to collapse the exisng Matrix(s). Then click the Matrix to delete.
OR
If a minus sign (-) shows besides the sub topic Matrix, the exisng Matrix(s) collapse already. Simply click the Matrix to delete.
- From the bottom of the Tree Console, click the delete icon —.
A queson dialog opens to ask for the conrmaon of deleon.
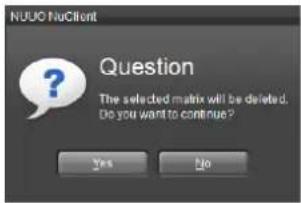
text_image
NUO NoClient Question The selected matrix will be deleted. Do you want to continue? Yes No-
Click Yes to conrm the deleon.
-
Click the apply button 📋 on the Top Toolbar to apply the change.

Please note that only when have an "Ulmate level" license will you be able to see the Matrix interface.
10.2. System Configuration
System Cong is the short form for "system conguraon", which means congure Management Server basic prole seng such as user group, role, schedule and layout.
To access the System Cong ("system conguraon"):
- Open the NuClient settings as described in Sengs.
The NuClient sengs open.
- Click the System Cong icon from the Cong Catalog.
The system conguraon then opens onscreen and shows the User Group sengs by default (when the NuClient is used for the rst me).
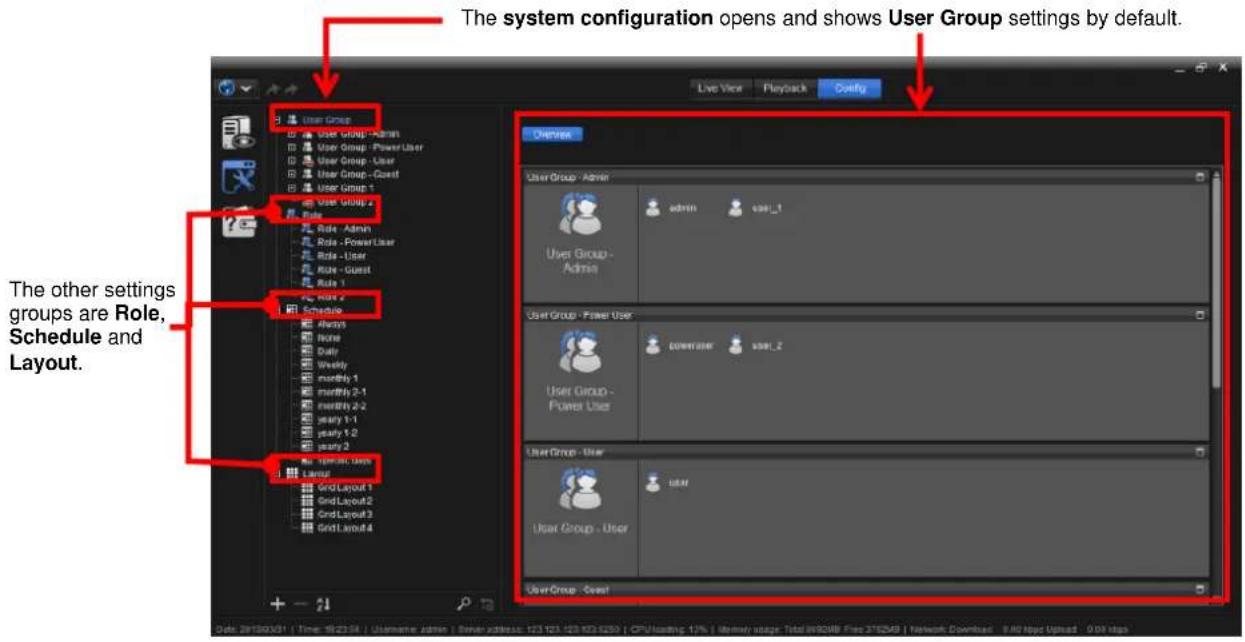
text_image
The system configuration opens and shows User Group settings by default. Live View Playback Configure User Group User Group - Admin User Group - Power User User Group - User User Group - Guest User Group 1 User Group 2 Role Role - Admin Role - Power User Role - User Role - Guest Role 1 Role 2 Schedule Always None Daily Weekly weekly 1 weekly 2-1 weekly 2-2 weekly 1-1 weekly 1-2 weekly 2 User Group - User Layout Grid Layout 1 Grid Layout 2 Grid Layout 3 Grid Layout 4 User Group - User User Group - ServerThe system conguraon features four topic sengs –User Group, Role, Schedule & Layout, which are summarized as following:
| Setting | Description |
| User Group | 1. Manages and configures the “user groups”2. Assigns a Role to a user group.3. Defines the user classification, privilege and the Login Schedule for a user group and apply to the users belong to the user group.➢ SeeUser Groupfor the settings. |
| Role | Defines the user authentication which include privilege (permitted action(s) to take) and Permission (the permitted device(s) to access) and for a user group and user.➢ SeeRolefor the settings. |
| Schedule | Defines one or more periods of time to launch some actions from the Management Server.➢ SeeSchedulefor the settings. |
| Layout | Arranges the video grid that tiles multiple video channels together for view and Matrix.➢ SeeLayoutfor the settings. |
10.2.1. User Group
The User Group is a group of settings to manage and congregate the “user group(s)” and assigns a Role to a user group and user. These settings also denote the user classicaon, privilege and the Login Schedule for a user group and apply to the users belong to the user group. The Login Schedule denotes the allowed me for a user of a user group to log in the system. See also Role and Schedule.
10.2.1.1. The User Interface
To understand the user interface of the User Group sengs:
- Run the NuClient. Click the Cong tab from the Top Toolbar. Then click the
System Cong icon from the Cong Catalog.
The Tree Console then shows four setng groups: User Group, Role, Schedule, and Layout.
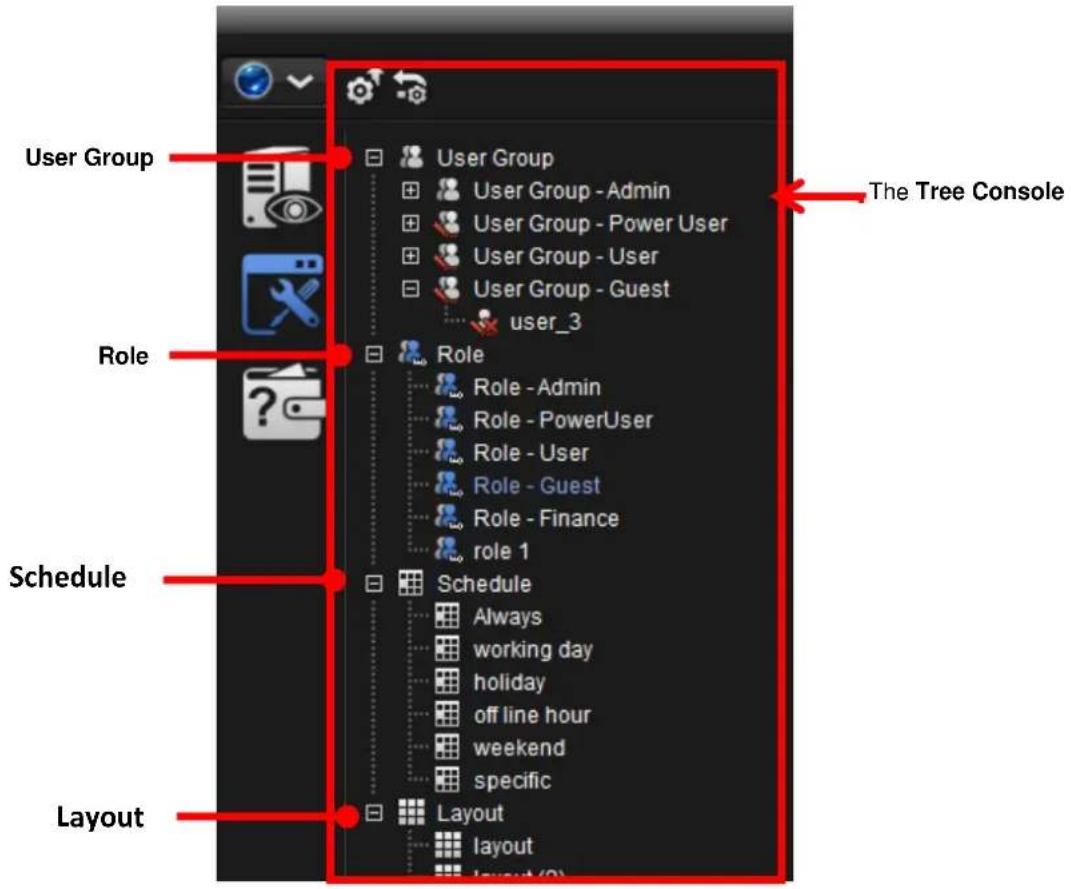
text_image
User Group Role Schedule Layout The Tree Console User Group User Group - Admin User Group - Power User User Group - User User Group - Guest user_3 Role Role - Admin Role - PowerUser Role - User Role - Guest Role - Finance role 1 Schedule Always working day holiday off line hour weekend specific Layout layout layout (0)And the User Group setng group will expand four pre-congured user groups:
User Group – Admin
User Group – Power User
User Group – User
User Group – Guest.
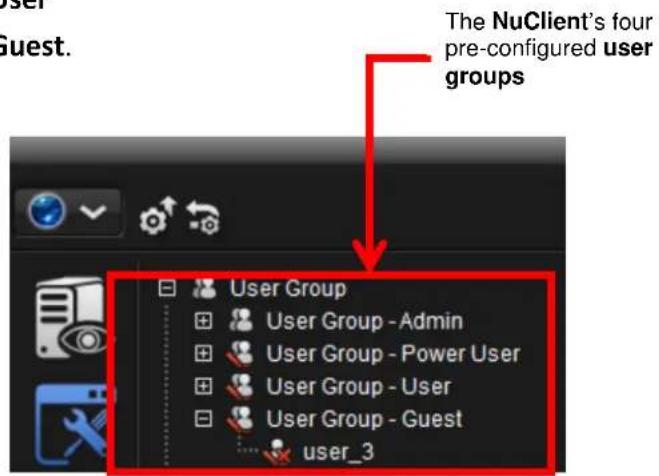
text_image
The NuClient's four pre-configured user groups User Group User Group - Admin User Group - Power User User Group - User User Group - Guest user_3
Among the pre-congured user groups, User Group – Admin cannot be deleted while the other three are subject to change and deleon. See Congure A User Group to edit a user group and see Delete A User Group to delete a user group.
Save for the pre-congured ones, you can freely add your own user groups to the soware. To add a user group, see Create A User Group.
2. From the Tree Console, click the topic User Group.
The Overview tabbed page then opens at the Conguraon Pane to deliver a general view of all the exisng user groups.
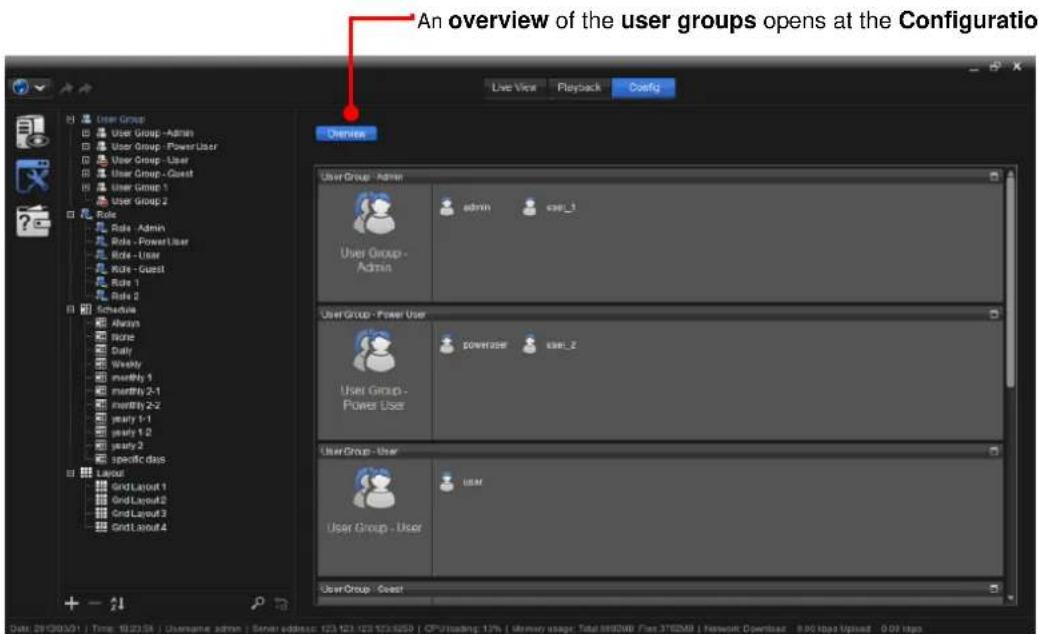
text_image
An overview of the user groups opens at the Configuration Live View Playback Config User Group - Admin User Group - Admin User Group - Power User User Group - User User Group - User User Group - User User Group - User User Group - User User Group - User User Group - User User Group - User User Group - User User Group - User User Group - User User Group - User User Group - User User Group - User User Group - User User Group - User User Group - User User Group - User User Group - User User Group - User User Group: 29.030.01 | Time: 18:23:36 | Username: admin | Server address: 123.123.123.123.050 | CPU/loading: 17% | Memory usage: Total 8882MB / File 3782MB | Network Download: 8.00 bits/Upload: 0.00 bitsTake a closer look at the user interface. The Overview tabbed page actually shows all the exisng user group(s), with the info about the member(s) of the user group.
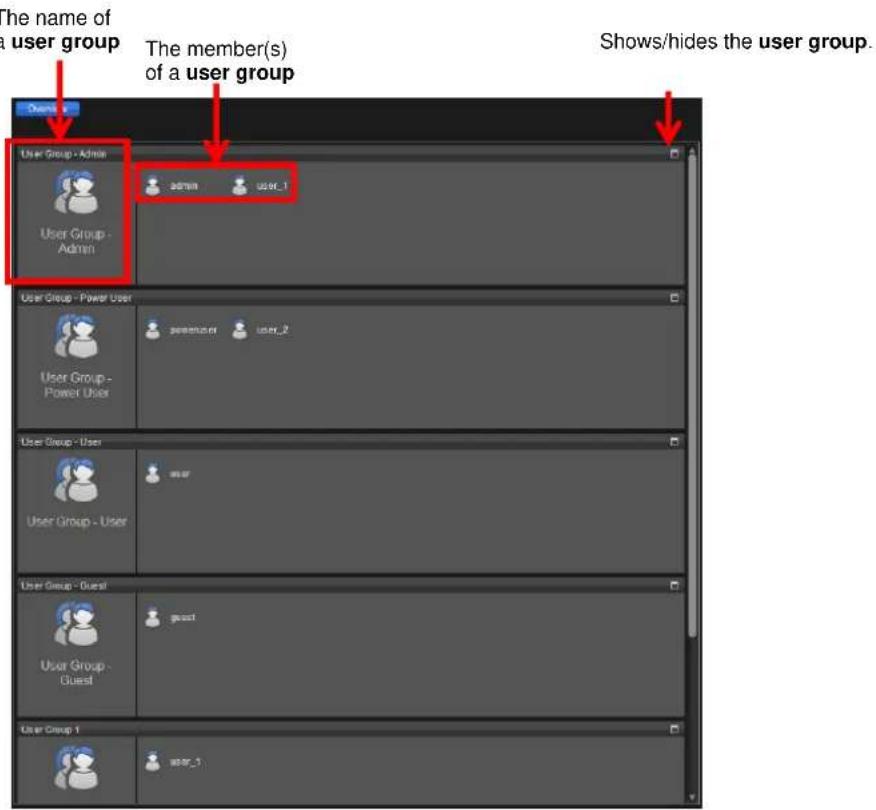
text_image
The name of a user group The member(s) of a user group Shows/hides the user group. User Group - Admin user1 user_1 User Group - Admin user_2 User Group - Power User user_3 user_4 user_5 user_6 user_7 user_8 user_9 user_10 user_11 user_12 user_13 user_14 user_15 user_16 user_17 user_18 user_19 user_20 user_21 user_22 user_23 user_24 user_25 user_26 user_27 user_28 user_29 user_30 user_31 user_32 user_33 user_34 user_35 user_36 user_37 user_38 user_39 user_40 user_41 user_42 user_43 user_44 user_45 user_46 user_47 user_48 user_49 user_50 user_51 user_52 user_53 user_54 user_55 user_56 user_57 user_58 user_59 user_60 user_61 user_62 user_63 user_64 user_65 user_66 user_67 user_68 user_69 user_70 user_71 user_72 user_73 user_74 user_75 user_76 user_77 user_78 user_79 user_80 user_81 user_82 user_83 user_84 user_85 user_86 user_87 user_88 user_89 user_90 user_91 user_92 user_93 user_94 user_95 user_96 user_97 user_98 user_99 user10010.2.1.2. Access User Group Settings
To access the User Group sengs:
- Run the NuClient. Click the Cong tab from the Top Toolbar. Then click the
System Cong icon

from the Cong Catalog.
The Tree Console shows four groups of sengs: User Group, Role, Schedule, and Layout.
2. From the Tree Console, click the topic User Group.
The Overview tabbed page then opens at the Conguraon Pane.
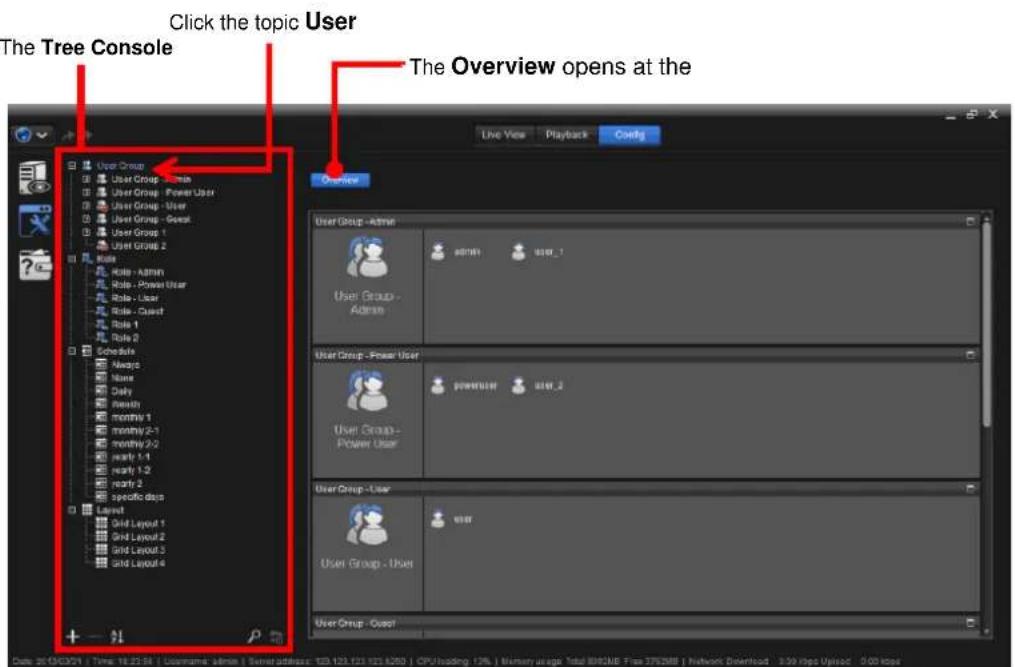
text_image
Click the topic User The Tree Console The Overview opens at the Live View Playback Config User Group - Admin User Group - Admin User Group - User User Group - User User Group - User User Group - User User Group - User User Group - User User Group - User User Group - User User Group - User User Group - User User Group - User User Group - User User Group - User User Group - User User Group - User User Group - User User Group - User User Group - User User Group - User User Group - User User Group - Users User Group - Users User Group - Users User Group - Users User Group - Users User Group - Users User Group - Users User Group - Users User Group - Users User Group - Users User Group - Users User Group - Users User Group - Users User Group - Users User Group - Users User Group - Users User Group - Users User Group - Users User Group - Users User Group - Users User Group - User10.2.1.3. Create A User Group
To create a user group:
- Run the NuClient. Click the Cong tab from the Top Toolbar. Then click the
System Cong icon

from the Cong Catalog.
The Tree Console then shows the four groups of sengs – User Group, Role, Schedule and Layout.
- Click the topic User Group.
The topic User Group becomes highlighted
- From the bottom of the Tree Console, click the add icon +.
A new user group, named "user group" by default, is then appended to the topic User Group, and a Properes tabbed page opens in the Conguraon Pane for users to conjure the newly created user group.
The new user group is appended to the topic User Group.
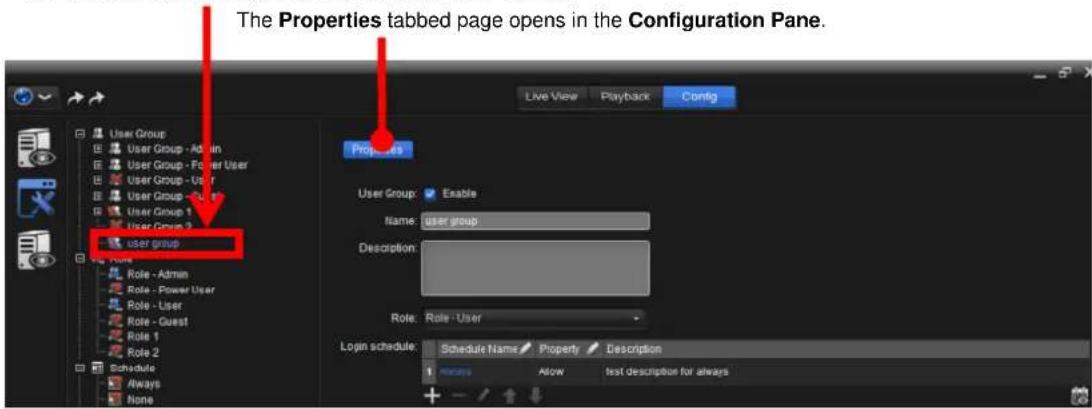
text_image
The Properties tabbed page opens in the Configuration Pane. Live View Playback Config User Group User Group - Admin User Group - Power User User Group - User User Group - User1 User Group 1 User Group 2 user group Role - Admin Role - Power User Role - User Role - Guest Role 1 Role 2 Schedule Always None Properties User Group: Enable Name: user group Description: Role: Role - User Login schedule: Schedule Name Property Description 1 Always Allow test description for alwaysTo know the settings featured on the Properes tabbed page, see Congure A User Group.
10.2.1.4. Delete A User Group
To delete a user group:
- Run the NuClient. Click the Cong tab from the Top Toolbar. Then click the
System Cong icon

from the Cong Catalog.
The Tree Console shows four groups of sengs: User Group, Role, Schedule, and Layout.
- From the Tree Console, click the (+) plus sign besides the topic User Group if there shows a (+) plus sign.
All exisng user group(s) then collapse under the topic User Group, including the soware's pre-congured ones and the created ones
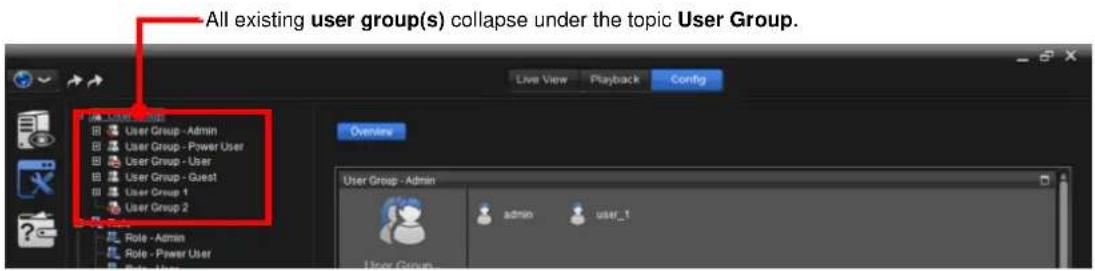
text_image
All existing user group(s) collapse under the topic User Group. Live View Playback Config User Group - Admin User Group - Power User User Group - User User Group - Guest User Group 1 User Group 2 Role - Admin Role - Power User Role - Admin Overview User Group - Admin admin user_1 User Group- Click the user group to delete.
The user group to delete becomes highlighted.
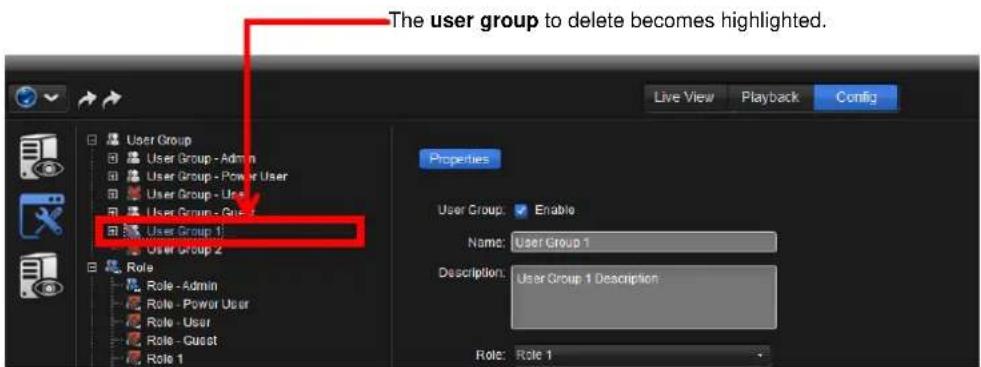
text_image
The user group to delete becomes highlighted. Live View Playback Config User Group User Group - Admin User Group - Power User User Group - Us User Group - Gru User Group 1 User Group 2 Role Role - Admin Role - Power User Role - User Role - Guest Role 1 Properties User Group: Enable Name: User Group 1 Description: User Group 1 Description Role: Role 1- From the bottom of the Tree Console, click the delete icon —.
A queson dialog opens to ask for the conrmaon of deleon.
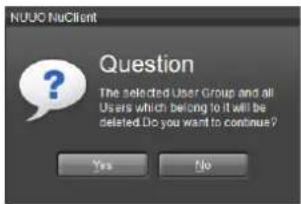
text_image
NUJO NuClient Question The selected User Group and all Users which belong to it will be deleted. Do you want to continue? Yes No-
Click Yes to conrm the deleon.
-
Click the apply button 📋 on the Top Toolbar to apply the change.
10.2.1.5. Conigure A User Group
To congure an exisng user group:
- Run the NuClient. Click the Cong tab from the Top Toolbar. Then click the
System Cong icon

from the Cong Catalog.
The Tree Console shows four groups of sengs: User Group, Role, Schedule, and Layout.
- From the Tree Console, click the (+) plus sign besides the topic User Group if there shows a (+) plus sign.
All exisng user group(s) then collapse under the topic User Group, including the soware's pre-congured user groups and the created ones.
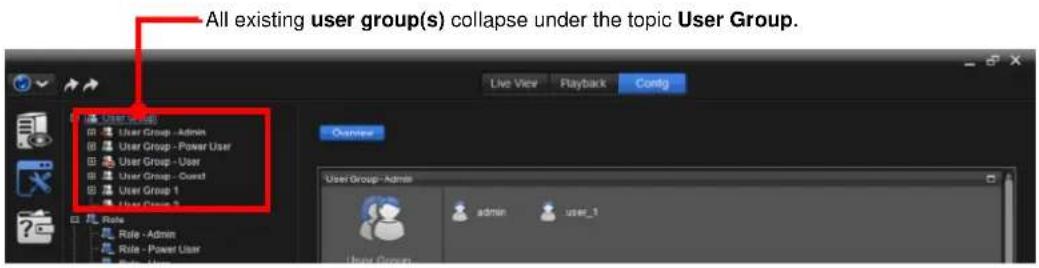
text_image
All existing user group(s) collapse under the topic User Group. Live View Playback Config User Group User Group - Admin User Group - Power User User Group - User User Group - Quest User Group 1 User Group 2 Role Role - Admin Role - Power User Change User Group-Admin admin user_1- Click the user group to congregate.
The Properes tabbed page then opens at the Conguraon Pane for the user group to congure
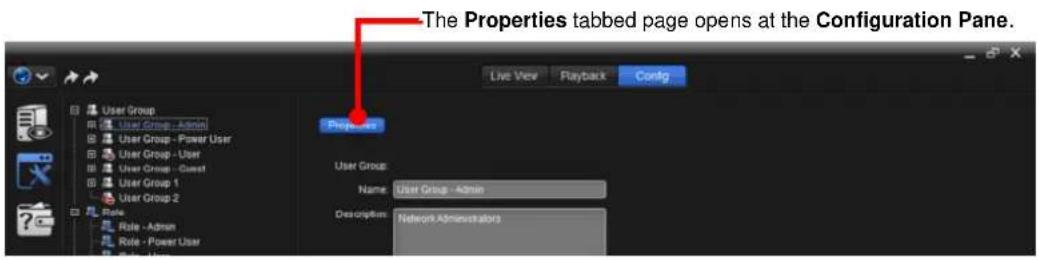
text_image
The Properties tabbed page opens at the Configuration Pane. Live View Playback Config User Group User Group - Admin User Group - Power User User Group - User User Group - Guest User Group 1 User Group 2 Role Role - Admin Role - Power User Properties User Group Name: User Group - Admin Description: Network AdministratorsThe featured sengs on the Properes tabbed page are:
| Setting | Description | Default | |
| Enable checkbox | Enables/disables a user group. | Selected (Enabled) | |
| Name | Names the user group. | “user group” | |
| Descripon | Provides a brief description for this user group for the easier identification of the user group. | -- | |
| Role | Assigns a role for the user group.➢ See also Role. | Role - User | |
| Login Schedule | The Login schedule table features the following settings: | ||
| Setting | Description | Default | |
| Schedule Name | 1. Assigns a schedule (profile) to the user group to define the allowed time period(s) for the user group to log into the network.2. Delivers the name of the schedule currently applied to the user group. | The Always schedule | |
| Properes | Allows/blocks the schedule's defined period(s) of time for the user group to log in the network | Allow | |
| Descricon | Delivers the brief description of the schedule (profile). | the “test description” | |
| + | Applies another schedule to the user group. | -- | |
| - | Withdraws a schedule from a user group. | -- | |
| # | Edits the selected cell in the Login schedule table:➢ To double-click a cell in the Login schedule table can also edit the cell.➢ The “Description” cells aren't editable. | -- | |
| ↑ | Moves the selected schedule up as higher priority. | -- | |
| ↓ | Moves the selected schedule down as lower priority. | -- | |
| # | Opens the Schedule Overview, a general view of the period(s) of time allowed for the user group to log in the network presented in a daily or weekly manner. | -- | |
10.2.1.6. Add A User to A User Group
To add a user:
- Run the NuClient. Click the Cong tab from the Top Toolbar. Then click the
System Cong icon

from the Cong Catalog.
The Tree Console shows four groups of sengs: User Group, Role, Schedule, and Layout.
- From the Tree Console, click the topic User Group.
The topic User Group then becomes highlighted.
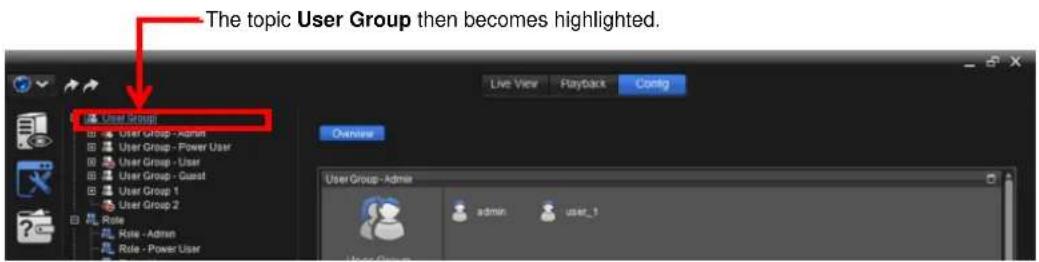
text_image
The topic User Group then becomes highlighted. Live View Playback Config User Group User Group - Admin User Group - Power User User Group - User User Group - Quest User Group 1 User Group 2 Role Role - Admin Role - Power User Options User Group - Admin admin user_1- From the bottom of the Tree Console, click the add sign icon +.
A new user, named "user" by default, is then appended under the topic User Group, and a Properes tabbed page opens in the Conguraon Pane for users to conjure the newly created user.
The Properes tabbed page opens in the Conguraon Pane for the new user.
A new user group is appended under the topic User Group.
The Properties tabbed page for the new user group opens in the Configuration Pane.
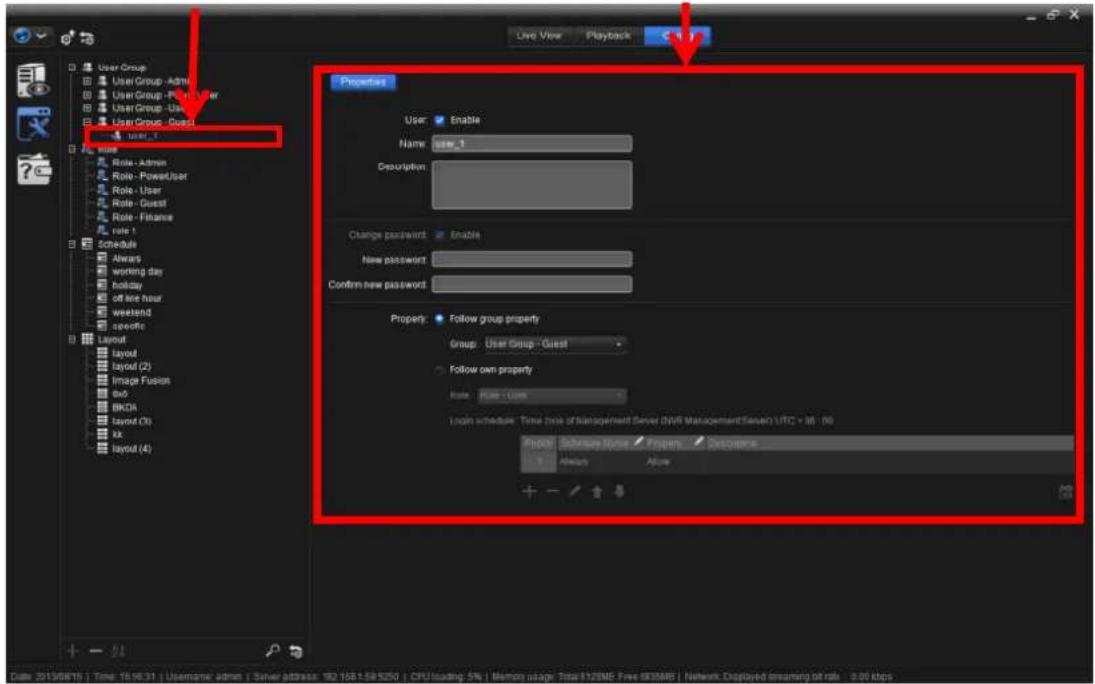
text_image
User Group User Group - Admin User Group - User User Group - User User Group - Global user_1 Name Role - Admin Role - Power/User Role - User Role - Guest Role - Finance Role 1 Schedule Always Working day Holiday off line hour weekend Specifics Layout layout layout (2) Image Fusion box BKDA layout (0) AX layout (4) Properties User Enable Name: new_1 Description: Change password Enable New password: Confirm new password: Property Follow group property Group: User Group - Guest Follow own property Role: Role - User Login schedule: Time block of management Server (NWS ManagementServer UTC + M : 06 Prop# Subprivate Name Properties Descapes 1 Always Allow + - / / + Date: 2013/08/16 | Time: 19:16:31 | Username: admin | Server address: 102.108.159.5250 | CPU/Usage: 5% | Memory usage: TotalT12ME Five 800MB | Network Displayed Streaming of rub - 3.00 kbpsTake a closer look at the user interface.
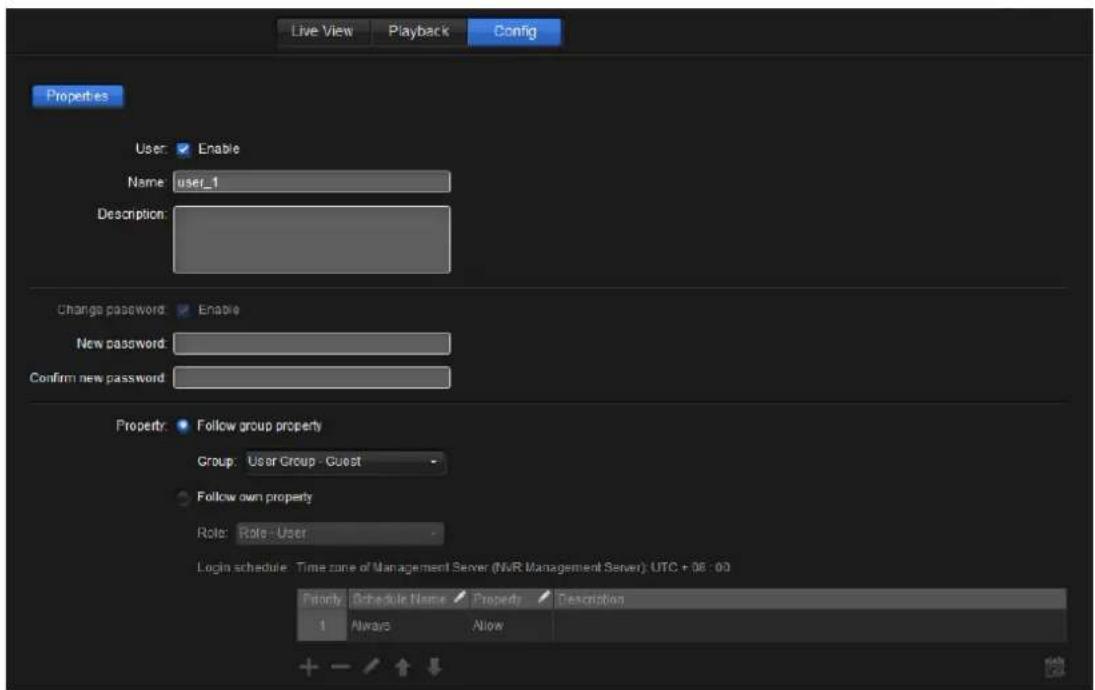
text_image
Live View Playback Config Properties User: Enable Name: user_1 Description: Change password: Enable New password: Confirm new password: Property: Follow group property Group: User Group - Guest Follow own property Role: Role - User Login schedule: Time zone of Management Server (NVIR Management Server): UTC + 06 : 00 Priority Schedule Name Property Description 1 Always AllowThe featured sengs on the Properes tabbed page are:
| Setting | Description | Default | ||
| Enable checkbox | Enables/disables a user. | Selected (Enabled) | ||
| Name | Names the user. | “user” | ||
| Descripon | Provides a brief description for this user for the easier identification of the user. | -- | ||
| Change password | Change the password for user. | -- | ||
| New password | Provide new password. | -- | ||
| Conrm new password | Confirm new password. | -- | ||
| Property | 1. Follow group propertyAssigns a user group for the user.2. Follow own propertyAssigns a role for the user.➢ See also Role.The Login schedule table features the following settings: | |||
| Setting | Description | Default | ||
| Schedule Name | 1. Assigns a schedule (profile) to the user to define the allowed time period(s) for the user to log into the network.2. Delivers the name of the schedule currently applied to the user. | The Always schedule | ||
| Properes | Allows/blocks the schedule's defined period(s) of time for the user to log in the network | Allow | ||
| Descripon | Delivers the brief description of the schedule (profile). | the “test description” | ||
| + | Applies another schedule to the user. | -- | ||
| - | Withdraws a schedule from a user. | -- | ||
| # | Edits the selected cell in the Login schedule table:➢ To double-click a cell in the Login schedule table can also edit the cell.➢ The “Description” cells aren't editable. | -- | ||
| ↑ | Moves the selected schedule up as higher priority. | -- | ||
 | Moves the selected schedule down as lower priority. | -- | ||
 | Opens the Schedule Overview, a general view of the period(s) of time allowed for the user to log in the network presented in a daily or weekly manner. | -- | ||
10.2.2. Role
The Role is a group of sengs to dene the permied acon(s) to take and the permied device(s) to access for a user group.
The role makes it highly exible for the user authencaon which include privilege (permied acon(s) to take) and permission (the permied device(s) to access) and for a user group and user. Users need not congregate the devices one by one but only have to apply one or more created role(s) to the user group and user. This can substantially reduce the me to congregate the user groups and users.
10.2.2.1. The User Interface
To understand the user interface of the Role group of sengs:
- Access the System Cong ("system conguraon") as described in System Cong.
The system conguraon opens onscreen, and the Tree Console shows four topic settings: User Group, Role, Schedule, and Layout.
And the topic setng Role will expand four pre-congured user groups:
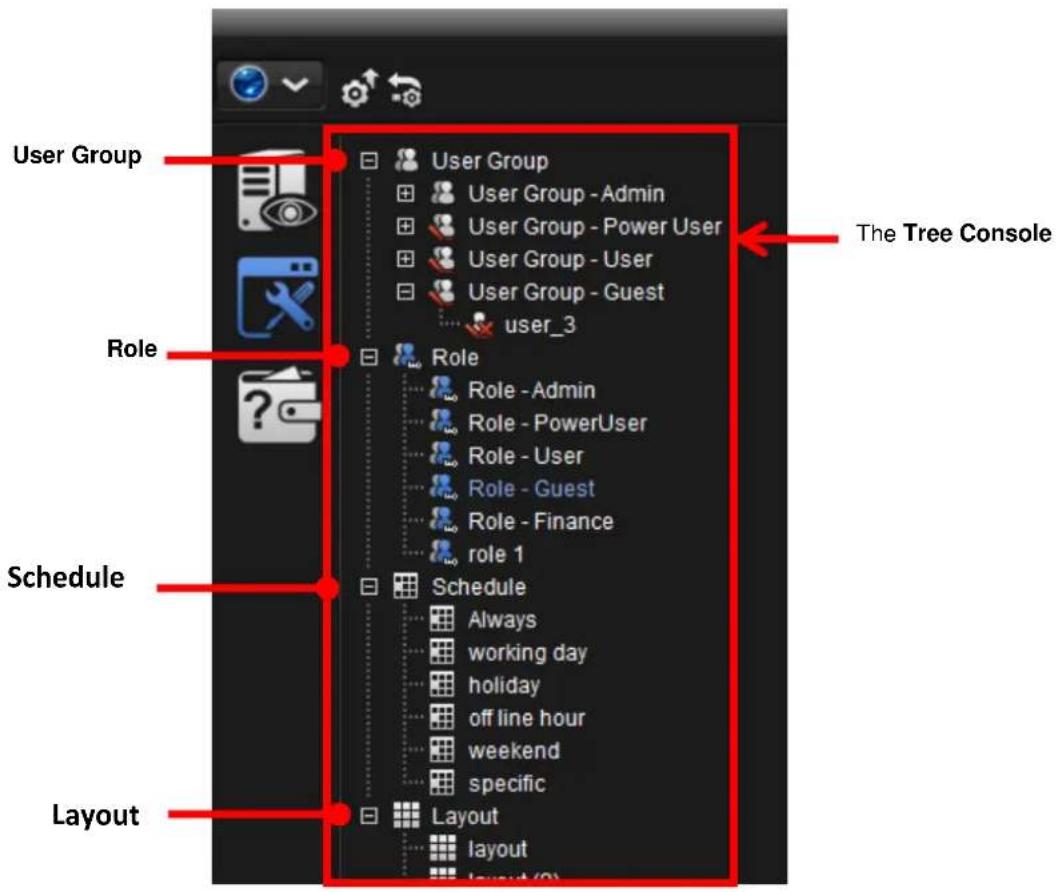
text_image
User Group Role Schedule Layout The Tree Console User Group User Group - Admin User Group - Power User User Group - User User Group - Guest user_3 Role Role - Admin Role - PowerUser Role - User Role - Guest Role - Finance role 1 Schedule Always working day holiday off line hour weekend specific Layout layout layout (0)Role- Admin
Role- Power User
Role-User
Role-Guest.
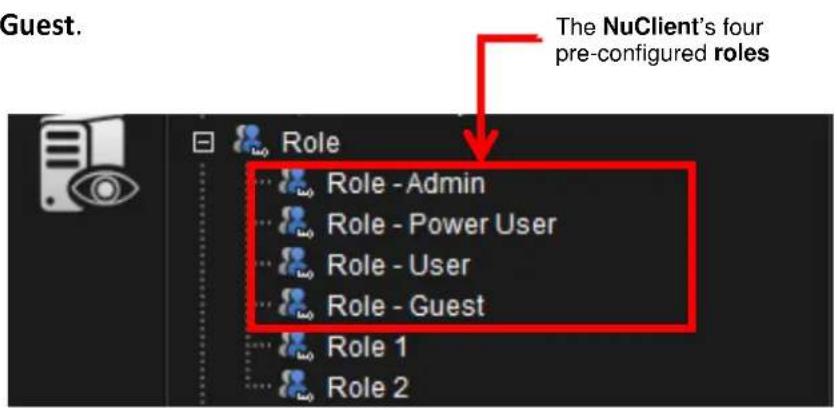
text_image
Guest. The NuClient's four pre-configured roles Role Role - Admin Role - Power User Role - User Role - Guest Role 1 Role 2Among the pre-congured roles, Role- Admin cannot be deleted while the other three are subject to change and deleon. See Congure A Role to edit a role and see Delete A Role to delete a role.
Save for the pre-congured ones, the NuClient users can freely add their own roles to the soware. To add a role, see Create A Role.
2. From the Tree Console, click the topic Role.
The Overview tabbed page then opens at the Conguraon Pane to deliver a general view of the “privileges” of all the exisng roles.
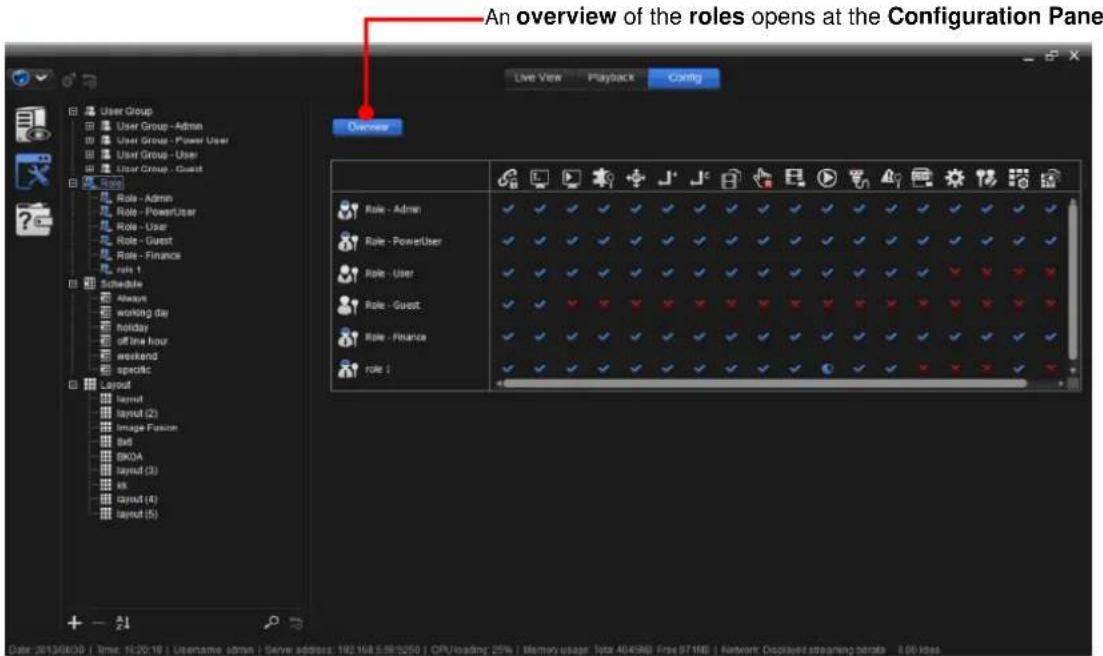
text_image
An overview of the roles opens at the Configuration Panel User Group User Group - Admin User Group - Power User User Group - User User Group - Guest Role Role - Admin Role - PowerUser Role - User Role - Guest Role - Finance role 1 Schedule Always Working Day Holiday off-line hour Weekend specific Layout layout layout (2) Image Fusion Bad SKOA layout (3) kx Layout (4) layout (5) Browse Live View Playback Config Role - Admin Role - PowerUser Role - User Role - Guest Role - Finance Role 1Take a closer look at the user interface. The Overview tabbed page actually shows all the exisng role(s), with the info about their “privileges”, which means the allowed/prohibited acons to take for a role.
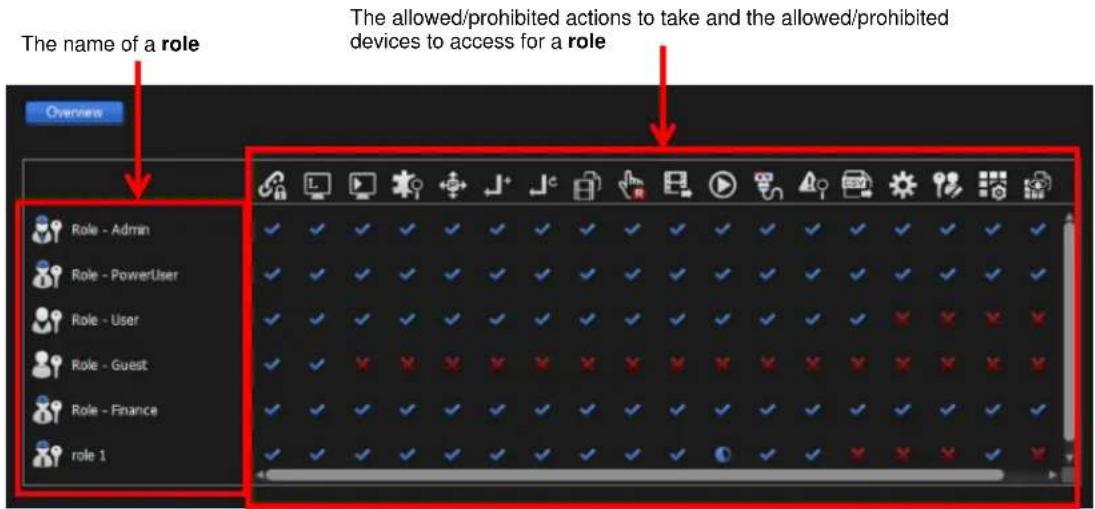
text_image
The name of a role The allowed/prohibited actions to take and the allowed/prohibited devices to access for a role Overview Role - Admin Role - PowerUser Role - User Role - Guest Role - Finance role 1The icons for the allowed/prohibited acons to take have the following meanings:
| Icon | Permitted Actions |
 | Access the device(s). |
 | ViewsLive view, the instant playback of videos. |
 | ViewsPlayback, the playback of recorded videos. |
 | Searches for metadata transactions. |
 | Controls the optical PTZ and focus of cameras. |
 | Controls the “preset point”, which means the preprogrammed point of view of a camera. |
 | Starts/stops the camera’s “patrol”, which means a preset path that the camera goes through by schedule. |
   | Switches between stream profiles. A “stream profile” is a series of stream settings for mobile clients to stream videos with lower fps. Without such profile, users can neither watch live video on mobile client nor select lower fps stream on theLive Viewscreen. The stream setting can also fix the resolution and frame rate for a camera brand/series. |
| Manually starts video recording. | |
 | Exports video and metadata transactions. |
 | Backs up video and metadata transaction. |
 | Triggers digital output. |
 | Browses events. |
 | Log export. |
 | Edits the configuration. |
 | Changes the password. |
 | Edits the layout of video grid. |
 | Configures the public view. |
10.2.2.2. Access Role Settings
To access the Role sengs:
- Run the NuClient. Click the Cong tab from the Top Toolbar. Then click the
System Cong icon

from the Cong Catalog.
The Tree Console then shows four setng groups: User Group, Role, Schedule, and Layout.
- From the Tree Console, click the topic Role.
The Overview tabbed page then opens at the Conguraon Pane.
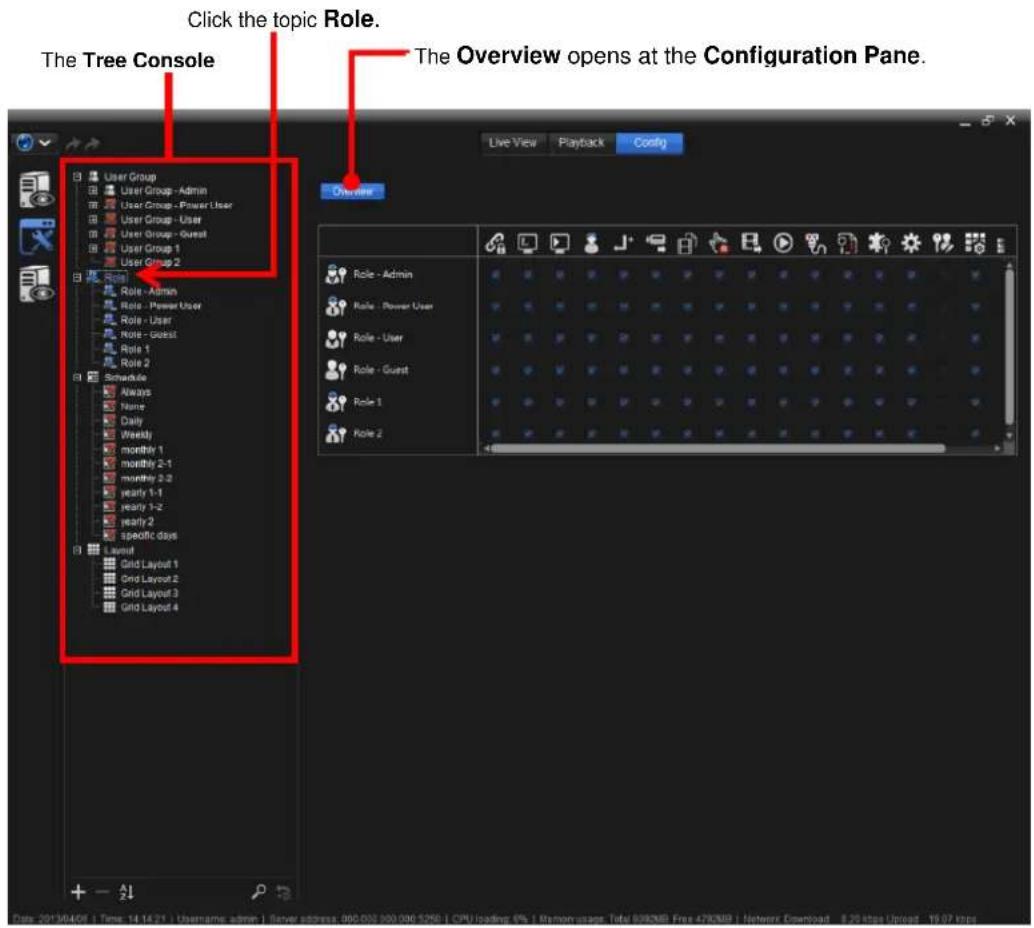
text_image
Click the topic Role. The Tree Console The Overview opens at the Configuration Pane. Live View Playback Config User Group User Group - Admin User Group - Power User User Group - User User Group - Guest User Group 1 User Group 2 Role - Admin Role - Power User Role - User Role - Guest Role 1 Role 2 Schedule Always None Daily Weekly monthly 1 monthly 2-1 monthly 3-2 yearly 1-1 yearly 1-2 yearly 2 specific days Layout Grid Layout 1 Grid Layout 2 Grid Layout 3 Grid Layout 410.2.2.3. Create A Role
To create a Role:
- Run the NuClient. Click the Cong tab from the Top Toolbar. Then click the
System Cong icon

from the Cong Catalog.
The Tree Console then shows the four groups of sengs – User Group, Role, Schedule and Layout.
- Click the topic Role.
The topic Role becomes highlighted
- From the bottom of the Tree Console, click the add icon +.
A new role, named "role" by default, will be appended to the topic Role, and a Properes tabbed page will open in the Conguraon Pane for users to congregate the newly created role while the other four tabbed pages - Privilege, Permission, Priority and Matrix are hidden by default.
The Properties tabbed page opens in the Configuration Pane while the other four tabbed pages – the Privilege, Permission, Priority and Matrix are hidden by default
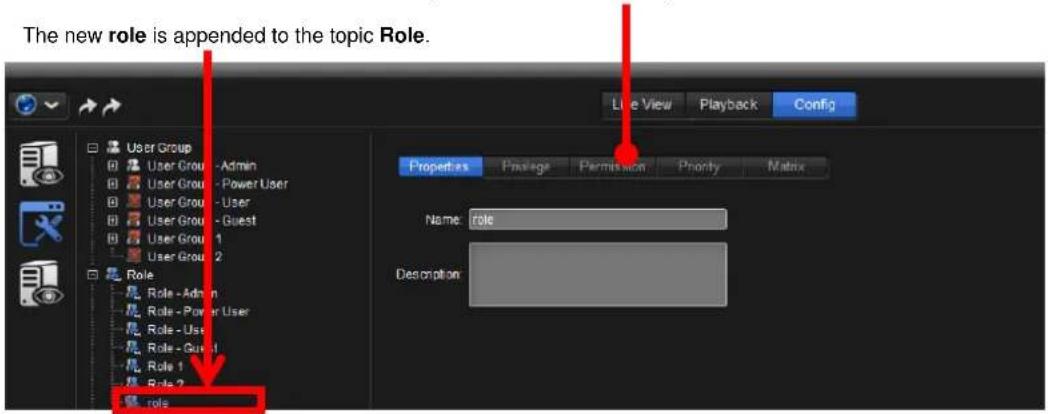
text_image
The new role is appended to the topic Role. Line View Playback Config User Group User Group - Admin User Group - Power User User Group - User User Group - Guest User Group 1 User Group 2 Role Role - Admin Role - Power User Role - Use Role - Gual Role 1 Role 2 role Properties Prasige Permission Priority Matrix Name: role Description:To know the sengs on the Properes tabbed page, see Properes. To know the sengs on the Privilege tabbed page, see Privilege. To know the setngs on the Permission tabbed page, see Permission. To know the setngs on the Priority tabbed page, see Priority. To know the sengs on the Matrix tabbed page, see Matrix.
10.2.2.4. Delete A Role
To delete a role:
- Run the NuClient. Click the Cong tab from the Top Toolbar. Then click the
System Cong icon

from the Cong Catalog.
The Tree Console shows four groups of sengs: User Group, Role, Schedule, and Layout.
- From the Tree Console, click the (+) plus sign besides the topic Role if there shows a (+) plus sign.
All exisng role(s) then collapse under the topic Role, including the soware's pre-congured ones and the created ones.
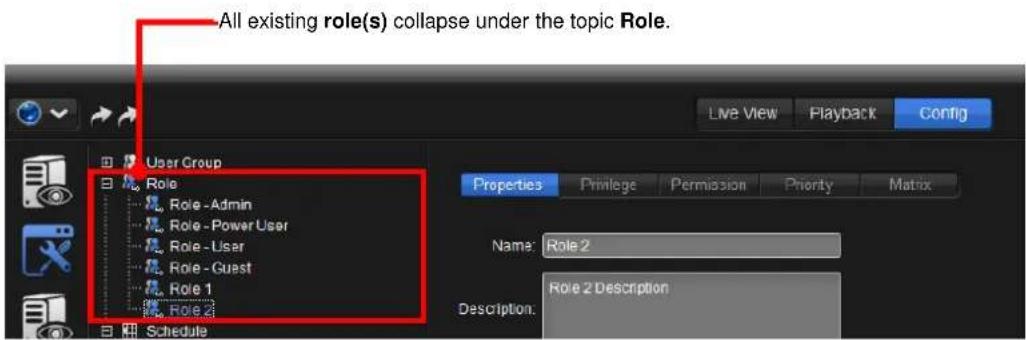
text_image
All existing role(s) collapse under the topic Role. Live View Playback Config User Group Role Role - Admin Role - Power User Role - User Role - Guest Role 1 Role 2 Schedule Properties Privilege Permission Priority Matrix Name: Role 2 Description: Role 2 Description- Click the role to delete.
The role to delete becomes highlighted.
Click the role to delete. Then it becomes highlighted.
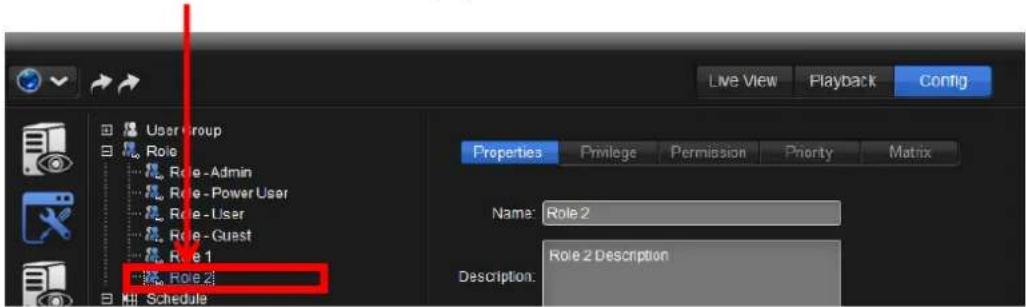
text_image
Live View Playback Config User Group Role Role - Admin Role - Power User Role - User Role - Guest Role 1 Role 2 Schedule Properties Privilege Permission Priority Matrix Name: Role 2 Description: Role 2 Description- From the bottom of the Tree Console, click the delete icon —.
A queson dialog opens to ask for the conrmaon of deleon.
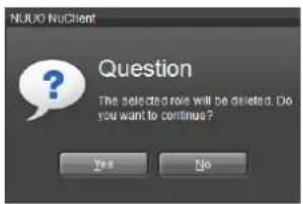
text_image
NUUO NoClient Question The selected role will be deleted. Do you want to continue? Yes No-
Click Yes to conrm the deleon.
-
Click the apply button 📋 on the Top Toolbar to apply the change.
10.2.2.5. Conigure A Role
To congure an exisng role:
- Run the NuClient. Click the Cong tab from the Top Toolbar. Then click the
System Cong icon

from the Cong Catalog.
The Tree Console shows four groups of sengs: User Group, Role, Schedule, and Layout.
- From the Tree Console, click the (+) plus sign besides the topic Role if there shows a (+) plus sign.
All exisng role(s) then collapse under the topic Role, including the soware's pre-congured roles and the created ones.
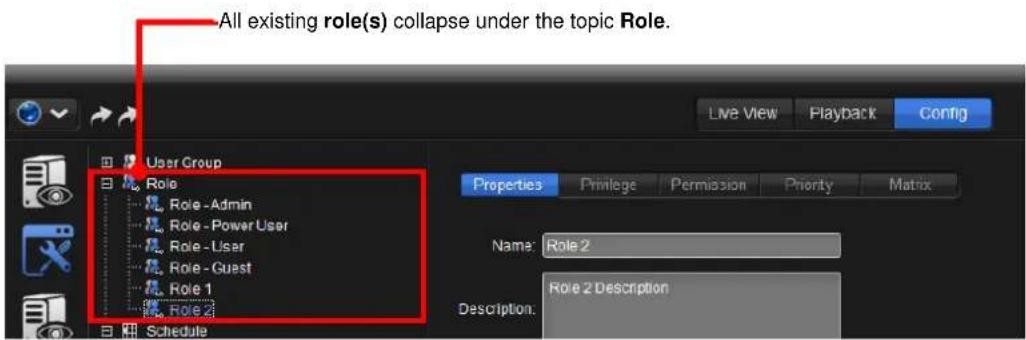
text_image
All existing role(s) collapse under the topic Role. Live View Playback Config User Group Role Role - Admin Role - Power User Role - User Role - Guest Role 1 Role 2 Schedule Properties Privilege Permission Priority Matrix Name: Role 2 Description: Role 2 Description3. Click the role to congregate.
The Properes tabbed page then opens at the Conguraon Pane for the role to congure
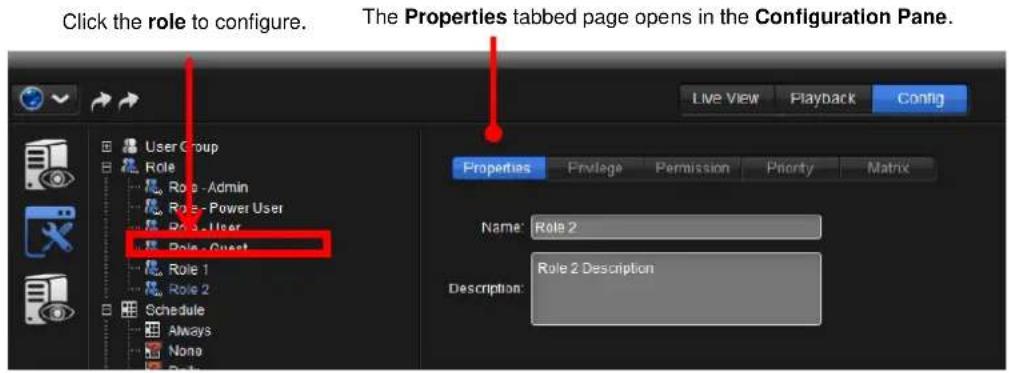
text_image
Click the role to configure. The Properties tabbed page opens in the Configuration Pane. Live View Playback Config User Group Role Role - Admin Role - Power User Role - User Role - Quest Role 1 Role 2 Schedule Always None Role 3 Properties Privilege Permission Priority Matrix Name: Role 2 Description: Role 2 DescriptionTo know the setngs featured on the Properes tabbed page, see Properes.
10.2.2.5.1. Properties
It relies on the Properes tabbed page to set the name and the descripon of a role.
To access the Properes tabbed page of a role:
- Open the Properes tabbed page of the role to congregate as described in Congure A Role.
The Properes tabbed page opens in the Conguraon Pane.
The Properties tabbed page opens in the Configuration Pane.
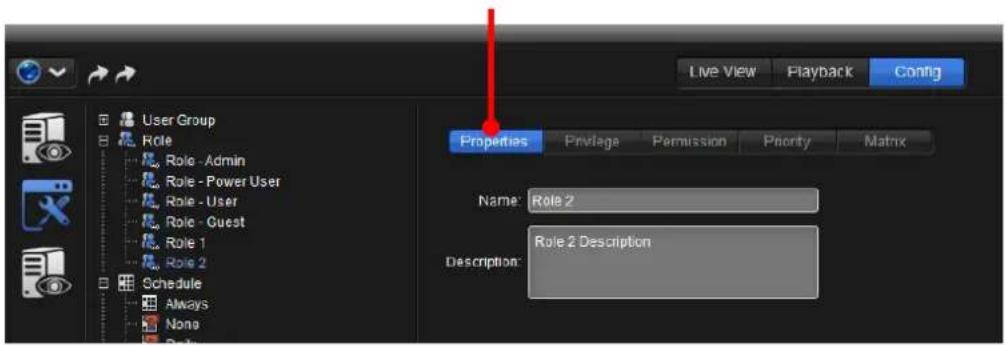
text_image
Live View Playback Config Properties Privilege Permission Priority Matrix Name: Role 2 Description: Role 2 DescriptionThe sengs featured on the Properes tabbed page are:
| Setting | Description | Default |
| Name | Names the role. | “role” |
| Descripon | Provides a brief description for this role for the easier identification of the role. | -- |
10.2.2.5.2. Privilege
It relies on the Privilege tabbed page to congregate a role's "privilege", which means the allowed or prohibited acons to take for a role.
To access the Privilege tabbed page of a role:
- Open the Properes tabbed page of the role to congregate as described in Congure A Role.
The Properes tabbed page opens in the Conguraon Pane.
The Properties tabbed page opens in the Configuration Pane.
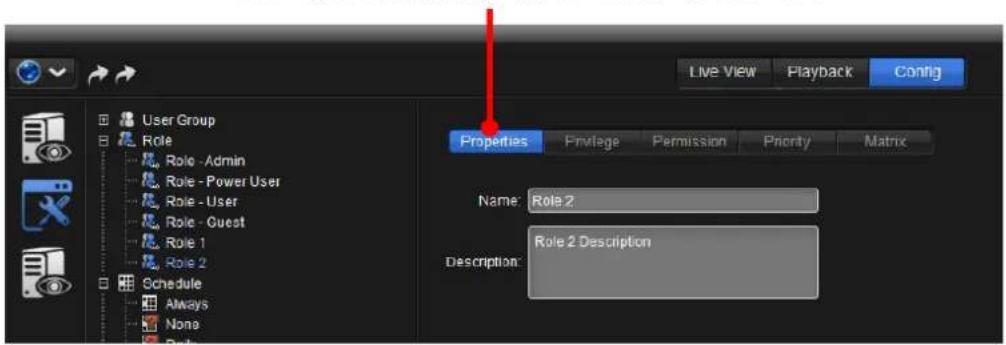
text_image
Live View Playback Config Properties Privilege Permission Priority Matrix Name: Role 2 Description: Role 2 Description2. From the Conguraon Pane, click the tab Privilege.
The Privilege tabbed page then opens.
The Privilege tabbed page opens in the Configuration Pane.
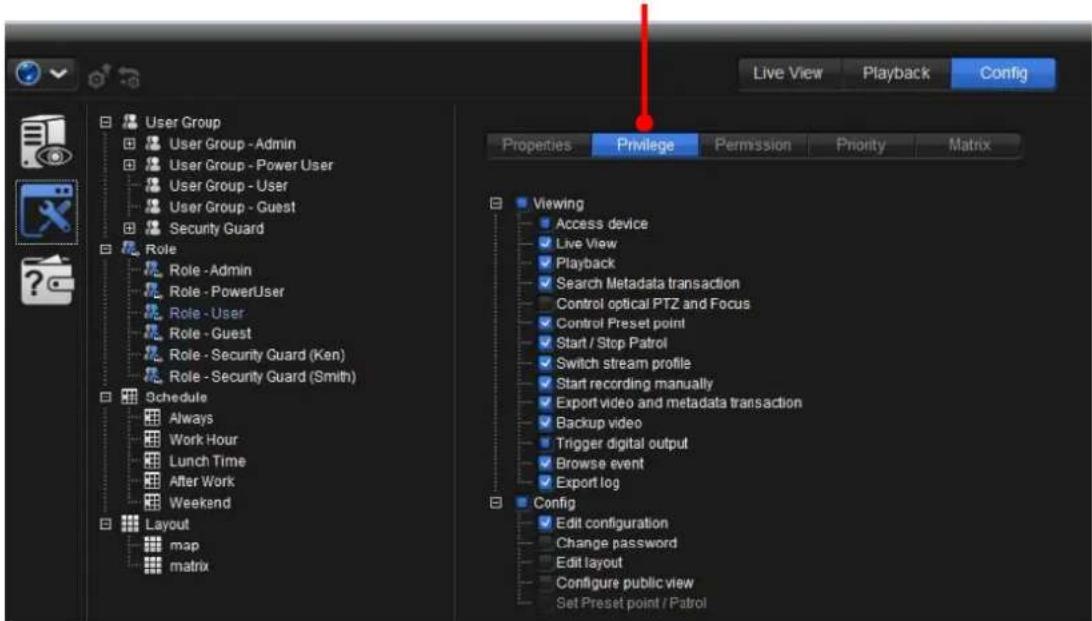
text_image
Live View Playback Config User Group User Group - Admin User Group - Power User User Group - User User Group - Guest Security Guard Role Role - Admin Role - PowerUser Role - User Role - Guest Role - Security Guard (Ken) Role - Security Guard (Smith) Schedule Always Work Hour Lunch Time After Work Weekend Layout map matrix Properties Privilege Permission Priority Matrix Viewing Access device Live View Playback Search Metadata transaction Control optical PTZ and Focus Control Preset point Start / Stop Patrol Switch stream profile Start recording manually Export video and metadata transaction Backup video Trigger digital output Browse event Export log Config Edit configuration Change password Edit layout Configure public view Set Preset point / PatrolThe sengs featured on the Privilege tabbed page are:
| Group | Setting | Description |
| Viewing | Access Device | Views the device(s). |
| Live view | Views Live view, the instant playback of videos. | |
| Playback | Views Playback, the playback of recorded videos. | |
| Control opcal PTZ and Focus | Controls the optical PTZ and focus of cameras. | |
| Control Preset point | Controls the “preset point”, a pre-programmed point of view of a camera. | |
| Start/Stop Patrol | Starts/stops the camera’s “patrol”, which means a preset path that the camera goes through has scheduled. | |
| Switch stream prole | Switches between stream profiles.▸ A “stream profile” is a series of stream settings for mobile clients to stream videos with lower fps. Without such profile, users can neither watch live video on mobile client nor select lower fps stream on the Live view screen. The stream setting can also fix the resolution and frame rate for a camera brand/series. | |
| Start record manually | Manually starts video recording. | |
| Export video and metadata transacon | Exports video and metadata transactions. | |
| Backup video transacon | Backs up video transactions. | |
| Trigger Digital Output | Triggers digital output. | |
| Browse event | Browses events. | |
| Search metadata transacon | Searches for metadata transactions. | |
| Cong | Edit conguraon | Edits the configuration. |
| Change password | Changes the password. | |
| Edit layout | Edits the layout of video grid. | |
| Congure public view | Configures the public view. | |
| Set Preset point / Patrol | Sets the preset point / patrol |

New added devices are default to enable all privileges.
10.2.2.5.3. Permission
It relies on the Permission tabbed page to congregate a role's "permission", which means the allowed or prohibited device(s) to access for a role.
To access the Permission tabbed page of a role:
- Open the Properes tabbed page of the role to congregate as described in Congure A Role.
The Properes tabbed page opens in the Conguraon Pane.
The Properties tabbed page opens in the Configuration Pane.
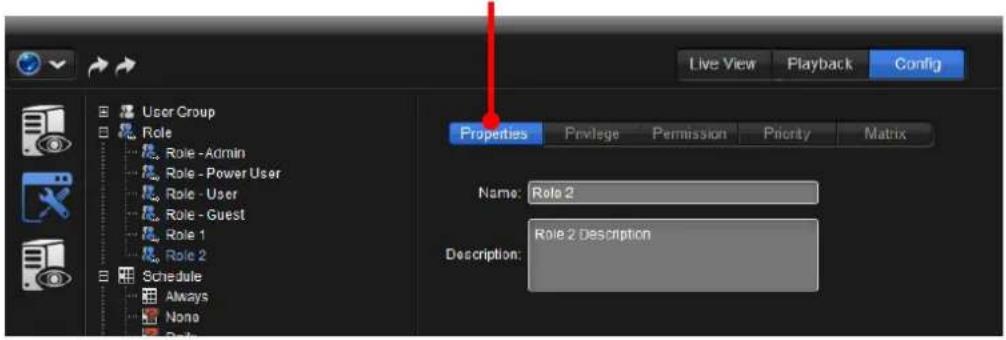
text_image
Live View Playback Config User Group Role Role - Admin Role - Power User Role - User Role - Guest Role 1 Role 2 Schedule Always None Properties Privilege Permission Priority Matrix Name: Role 2 Description: Role 2 Description2. From the Conguraon Pane, click the tab Permission.
The Permission tabbed page then opens and shows some sengs and all the networked devices.
The Permission tabbed page opens in the Configuration Pane.
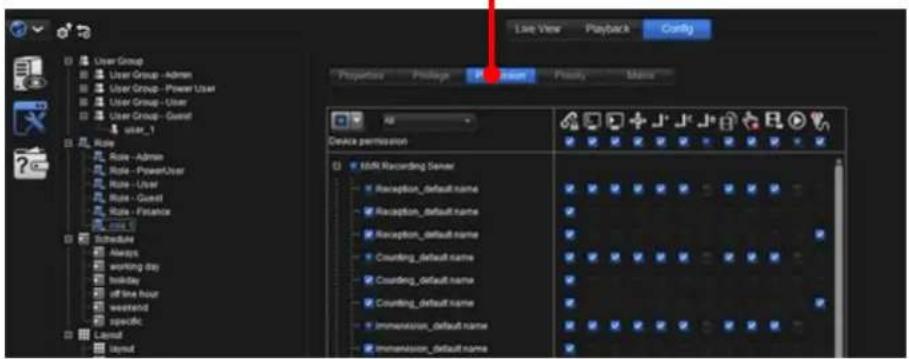
text_image
Live View Playback Config User Group User Group - Admin User Group - Power User User Group - User User Group - Guard user_1 Name Role - Admin Role - Power User Role - User Role - Guard Role - Finance Schedule Always working day Holiday off-line hour weekend specific Layout Layout Properties Package Position Priority Name Device permission MEN Recording Server Reception_default name Reception_default name Reception_default name Counting_default name Counting_default name Counting_default name Immersion_default name Immersion_default nameTake a closer look at the user interface.
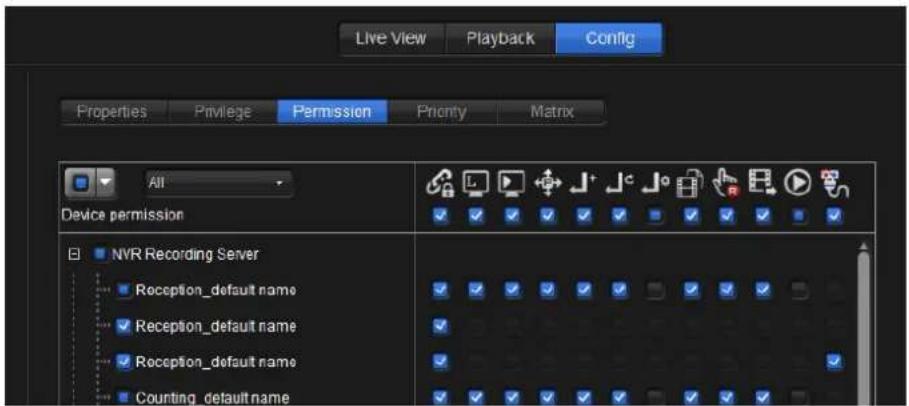
text_image
Live View Playback Config Properties Privilege Permission Priority Matrix All Device permission NVR Recording Server Reception_default name Reception_default name Reception_default name Counting_default nameThe sengs featured on the Privilege tabbed page are:
| Group | Setting | Description | Default |
| Device Permission |  | Selects between All, None or Invert to select all devices, deselect all devices or reverse the selection. | All(All devices are selected.) |
 | This is a filter to show/hide some device(s) from the device list. | All | |
 | Accesses the device. | Selected (Enabled) | |
 | Views Live view, the instant playback of videos. | Selected (Enabled) | |
 | Views Playback, the playback of recorded videos. | Selected (Enabled) | |
 | Controls the optical PTZ and focus of cameras. | Selected (Enabled) | |
 | Controls the “preset point”, the pre-programmed point of view of a camera. | Selected (Enabled) | |
 | Starts/stops the camera's "patrol", which means a preset path that the camera goes through has scheduled. | Selected (Enabled) | |
 | Sets the camera preset point and patrol | Selected (Enabled) | |
 | Switches between stream profiles.A "stream profile" is a series of stream settings for mobile clients to stream videos with lower fps. Without such profile, users can neither watch live video on mobile client nor select lower fps stream on theLiveviewscreen. The stream setting can also fix the resolution and frame rate for a camera brand/series. | Selected (Enabled) | |
 | Manually starts video recording. | Selected (Enabled) | |
 | Exports video and metadata transactions. | Selected (Enabled) | |
| [GSHX] | Backs up video transactions. | Selected (Enabled) | |
 | Triggers digital output. | Selected (Enabled) | |
| [Sevel] | 1. Select a device (or a server) to enable theroleto access it.2. Deselect a device (or a server) to disable therolefrom accessing it. | Selected (Enabled) |
10.2.2.5.4. Priority
It relies on the Priority tabbed page to set a role's priority to control the PTZ (PAN-Tilt-Zoom), the preset point(s) and the patrol of a device. The role with higher priority has the right to precede others in controlling the said features of a device. Such role can even lock/unlock the rights of lower-priority roles.
The higher-priority role also takes the precedence in login to the Matrix Server.
To access the Priority tabbed page of a role:
- Open the Properes tabbed page of the role to congregate as described in Congure A Role.
The Properes tabbed page opens in the Conguraon Pane.
The Properties tabbed page opens in the Configuration Pane.
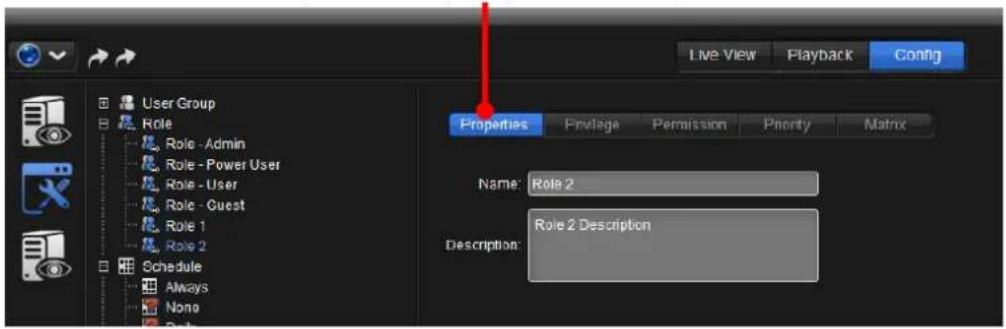
text_image
Live View Playback Config User Group Role Role - Admin Role - Power User Role - User Role - Guest Role 1 Role 2 Schedule Always None Properties Privilege Permission Priority Matrix Name: Role 2 Description: Role 2 Description- From the Conguraon Pane, click the tab Priority.
The Priority tabbed page then opens and shows some sengs and all the networked devices.
The Priority tabbed page opens in the Configuration Pane.
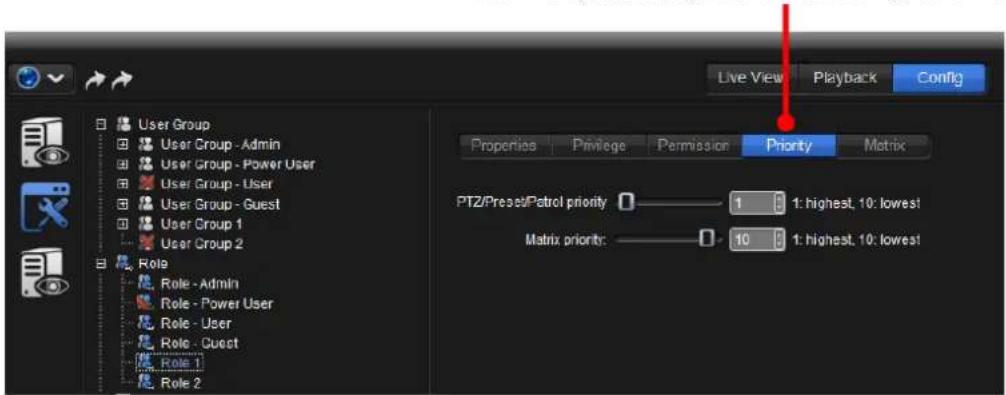
text_image
Live View Playback Config Properties Privilege Permission Priority Matrix PTZ/Preset/Patrol priority: 1 1: highest, 10: lowest Matrix priority: 10 1: highest, 10: lowestThe featured sengs on the Priority tabbed page are:
| Setting | Description | Default |
| PTZ/Preset/Patrol Priority | Sets the priority for a role to control the PTZ, preset points and patrol of a device. | 7(the highest priority) |
| Matrix Priority | Sets the priority for a role to log in to a matrix.► The Matrix Priority shows on the Ultimate level only. | 7(the lowest priority) |

Please note that only when have an "Ulmate level" license will you be able to see the Matrix seng.
10.2.2.5.5. Matrix
It relies on the Matrix tabbed page to enable/disable a role to/from accessing a Matrix Server.
To access the Matrix tabbed page of a role:
- Open the Properes tabbed page of the role to congregate as described in Congure A Role.
The Properes tabbed page opens in the Conguraon Pane.
The Properties tabbed page opens in the Configuration Pane.
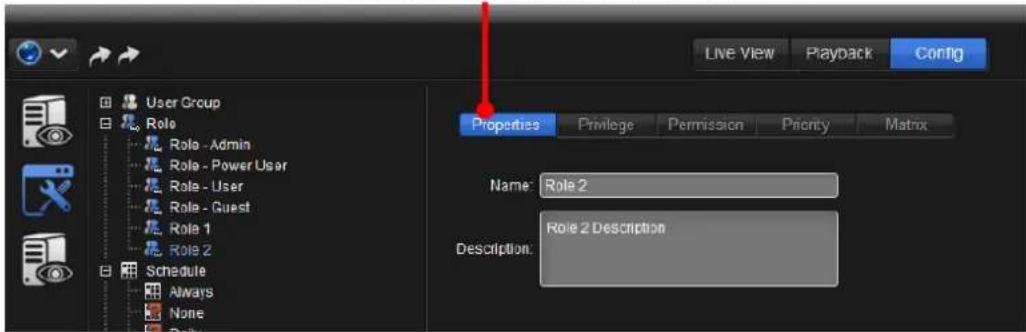
text_image
Live View Playback Config User Group Role Role - Admin Role - Power User Role - User Role - Guest Role 1 Role 2 Schedule Always None Properties Privilege Permission Priority Matrix Name: Role 2 Description: Role 2 Description2. From the Conguraon Pane, click the tab Matrix.
The Matrix tabbed page then opens.
The Matrix tabbed page opens in the Configuration Pane.
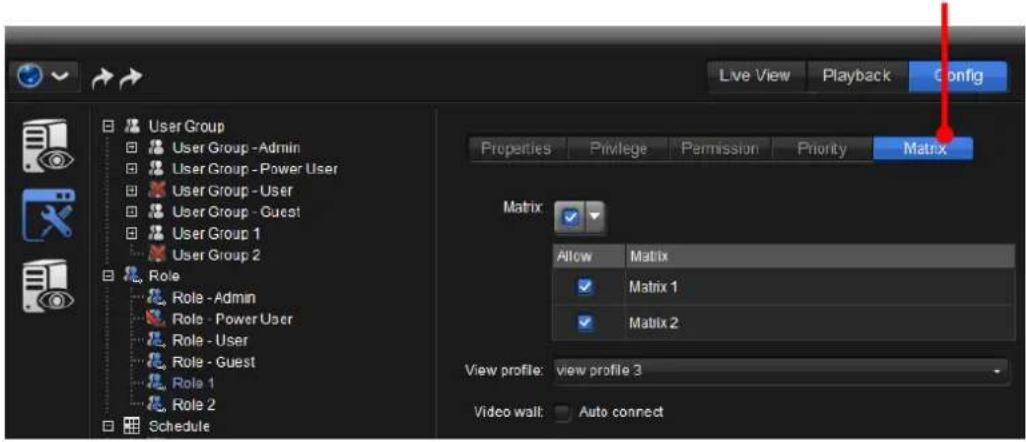
text_image
Live View Playback Config User Group User Group - Admin User Group - Power User User Group - User User Group - Guest User Group 1 User Group 2 Role Role - Admin Role - Power User Role - User Role - Guest Role 1 Role 2 Schedule Properties Privilege Permission Priority Matrix Matrix: Allow Matrix Matrix 1 Matrix 2 View profile: view profile 3 Video wall: Auto connectThe featured sengs on the Matrix tabbed page are:
| Group | Setting | Description | Default |
| Matrix |  | Selects betweenAll, None or Invertto select all Matrix Servers, deselect all Matrix Servers or reverse the selection.To select a Matrix Server is to enable users with theroleto access it.To deselect a Matrix Server is to disable therolefrom accessing it. | All(All Matrix Servers are selected.) |
| [7548] | Enables/disables users with theroleto/from accessing the Matrix Server.To select a Matrix Server is to enable users with theroleto access it.To deselect a Matrix Server is to disable therolefrom accessing it. | Selected(Enabled) | |
| View prole | Sets theview profilethat applies when users with theroleslogs in thematrix.SeeMatrixto know more about theview profile. | ||
| Video wall | Sets whether to allow users with theroleto auto log in the matrix when therolelogs in theNuClient. | Deselected(Not allowed) | |

Please note that only when have an "UImate level" license will you be able to see the Matrix seng.
10.2.3. Schedule
The “schedule” is a schedule prole that denes one or more periods of me to launch some acons from the Recording Server and Metadata Server, including the mes to record videos, the mes to stream data from the third-party device servers. The schedule also Iters the mes in which the occurrence of an event is taken eecve.
By default, all roles are assigned the default schedule prole, which is Always, which means around-the-clock. The Always does not block any me period from the 24 hours of a day for the Recording Server and Metadata Server to take acons.
The schedule proles make it highly exible to manipulate the me for the Recording Server and Metadata Server to take acons. Users need not schedule the devices one by one but only have to apply the created schedule prole(s) to the devices. This can substanally reduce the me to schedule a large group of devices.
The schedule proles are applied to the following sengs:
- Physical Cong | Management Server | Recording Server | Video device | Camera | Recording Schedule
- Physical Cong | Management Server | Recording Server | Video device | Camera | Event Acon
- Physical Cong | Management Server | Metadata Server | POS device | Channel | Properes | Streaming schedule
- Physical Cong | Management Server | Metadata Server | Access Control device | Channel | Properes | Streaming schedule
- Physical Cong | Management Server | Metadata Server | POS device | Channel | Event Acon | Add schedule
- Physical Cong | Management Server | Metadata Server | Access Control device | Channel | Event Acon | Add schedule
- System Cong | User group | User group | Properes | Login schedule
10.2.3.1. The User Interface
To understand the user interface of the Schedule group of sengs:
- Access the System Cong ("system conguraon") as described in System Cong.
The system conguraon opens onscreen, and the Tree Console shows four topic settings: User Group, Role, Schedule, and Layout.
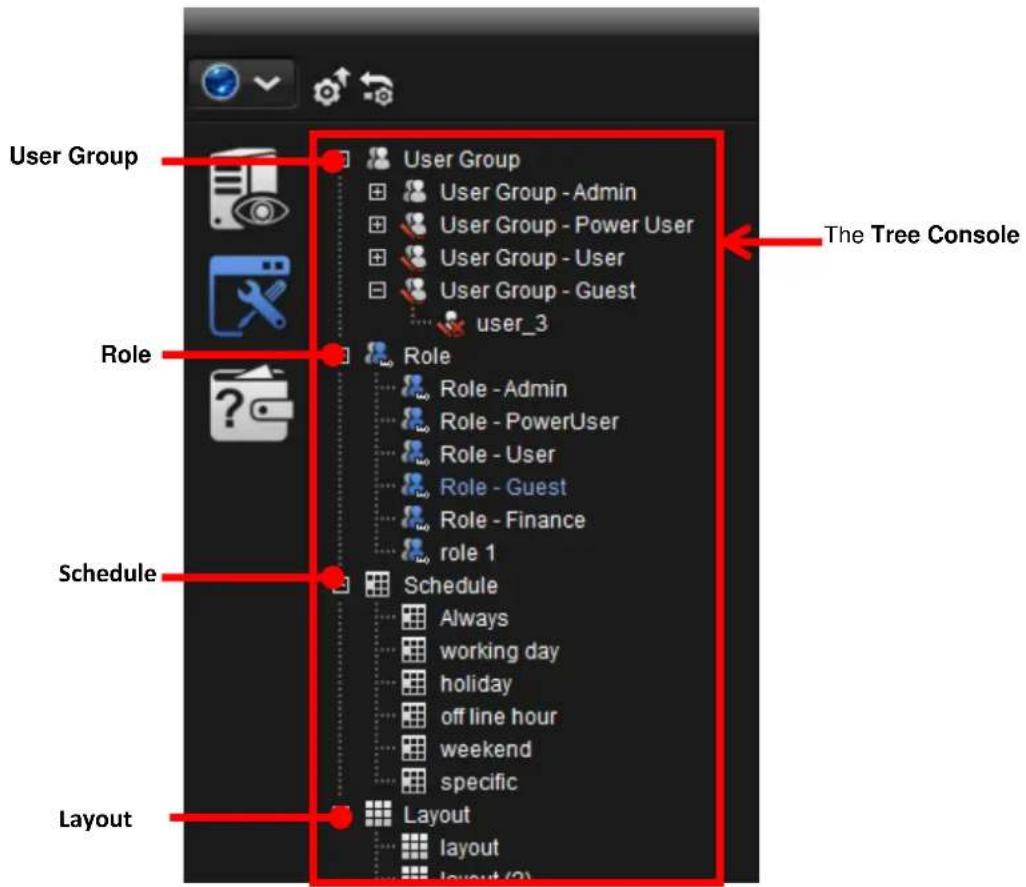
text_image
User Group Role Schedule Layout The Tree Console User Group User Group - Admin User Group - Power User User Group - User User Group - Guest user_3 Role Role - Admin Role - PowerUser Role - User Role - Guest Role - Finance role 1 Schedule Always working day holiday off line hour weekend specific Layout layout layout (2)And the topic setng Schedule will expand four pre-congured schedule prole:
Always.
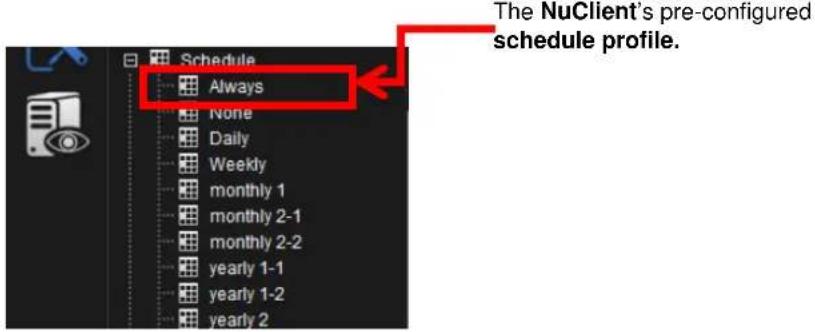
text_image
The NuClient's pre-configured schedule profile. Schedule Always None Daily Weekly monthly 1 monthly 2-1 monthly 2-2 yearly 1-1 yearly 1-2 yearly 2The pre-congured schedule prole is Always, CANNOT be changed and deleted.
However users are able to freely add their own schedule proles to the soware.
The user-created schedule proles are subject to change and deleon.
To add a schedule prole, see Create A Schedule.
To edit a schedule prole, see Congure A Schedule.
To delete a schedule prole, see Delete A Schedule.
10.2.3.2. Access Schedule Settings
To access the Schedule sengs:
- Run the NuClient. Click the Cong tab from the Top Toolbar. Then click the
System Cong icon

from the Cong Catalog.
The Tree Console then shows four setng groups: User Group, Role, Schedule, and Layout.
- From the Tree Console, click the (+) plus sign besides the topic Schedule if there shows a (+) plus sign.
All exisng schedule prole(s) then collapse under the topic Schedule, including the soware's pre-congured ones and the created ones.
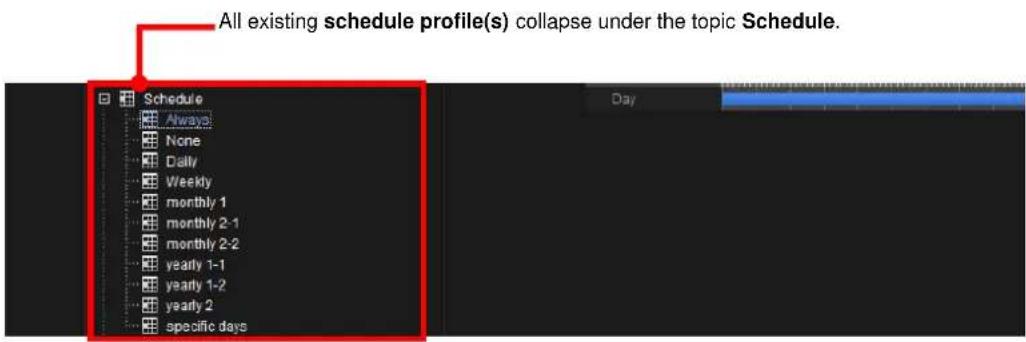
text_image
All existing schedule profile(s) collapse under the topic Schedule. Schedule Always None Daily Weekly monthly 1 monthly 2-1 monthly 2-2 yearly 1-1 yearly 1-2 yearly 2 specific days10.2.3.3. Create A Schedule
To create a Schedule:
- Run the NuClient. Click the Cong tab from the Top Toolbar. Then click the
System Cong icon

from the Cong Catalog.
The Tree Console then shows the four groups of sengs – User Group, Role, Schedule and Layout.
- Click the topic Schedule.
The topic Schedule becomes highlighted
- From the bottom of the Tree Console, click the add icon +.
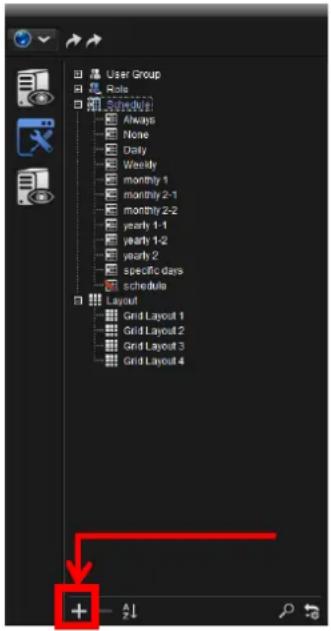
text_image
User Group Role Schedule Always None Daily Weekly monthly 1 monthly 2-1 monthly 2-2 yearly 1-1 yearly 1-2 yearly 2 specific class schedule Layout Grid Layout 1 Grid Layout 2 Grid Layout 3 Grid Layout 4Click the add icon.
A new schedule prole, named "schedule" by default, will be appended to the topic Schedule, and a Properes tabbed page will open in the Conguraon Pane for users to conjure the newly created schedule (prole).
The new schedule (profile) is appended to the topic Schedule.
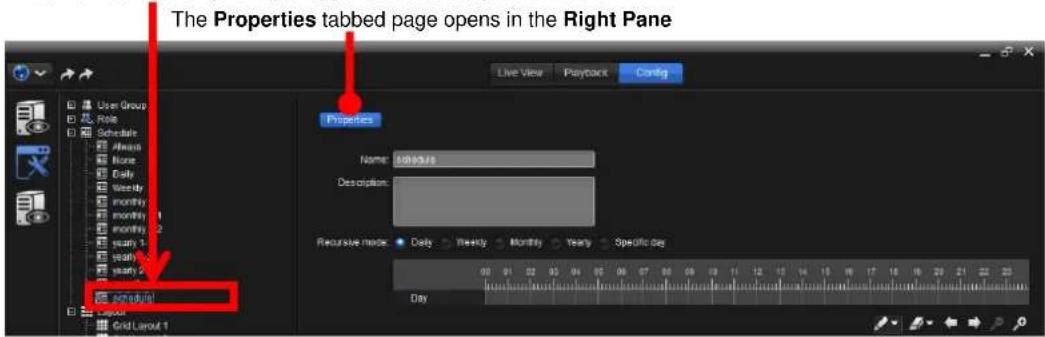
text_image
The Properties tabbed page opens in the Right Pane Live View Playback Config Properties Name: Schedule Description: Recursive mode: Daily Weekly Monthly Yearly Specific Day 2016.01 2016.01 Cyclor Grid Layout 1To know the sengs on the Properes tabbed page, see Properes.
10.2.3.4. Delete A Schedule
To delete a schedule prole:
- Run the NuClient. Click the Cong tab from the Top Toolbar. Then click the
System Cong icon

from the Cong Catalog.
The Tree Console shows four groups of sengs: User Group, Role, Schedule, and Layout.
- From the Tree Console, click the (+) plus sign besides the topic Schedule if there shows a (+) plus sign.
All exisng schedule prole(s) then collapse under the topic Schedule, including the soware's pre-congured ones and the created ones.
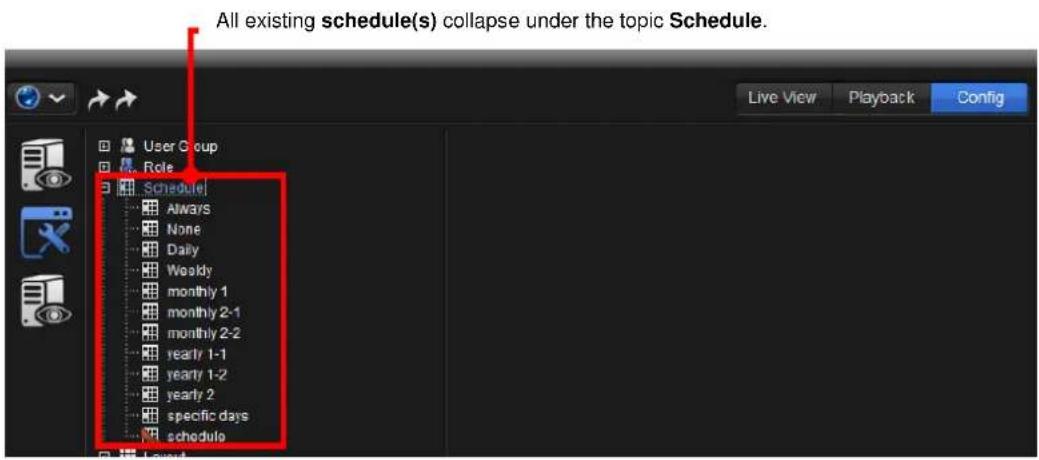
text_image
All existing schedule(s) collapse under the topic Schedule. Live View Playback Config User Group Role Schedule Always None Daily Weedy monthly 1 monthly 2-1 monthly 2-2 yearly 1-1 yearly 1-2 yearly 2 specific days schedule- Click the schedule prole to delete.
The schedule prole to delete becomes highlighted.
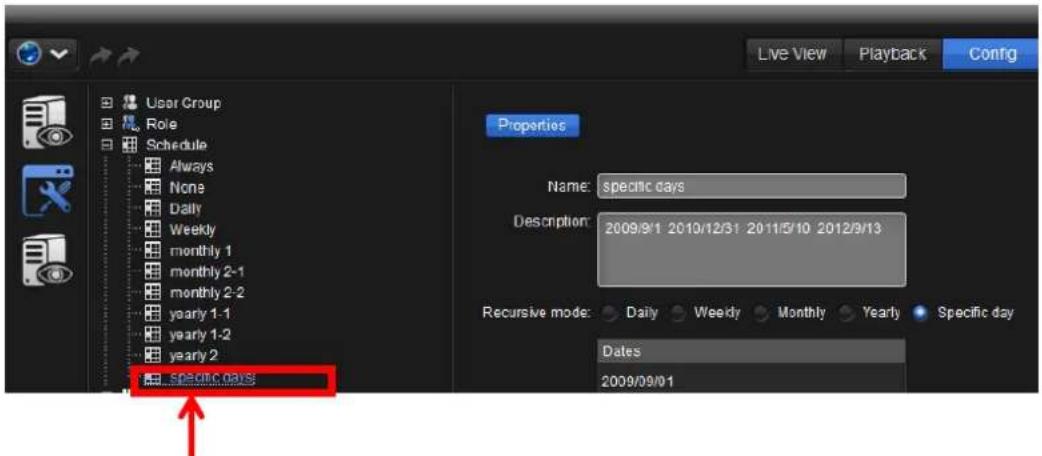
text_image
Live View Playback Config User Group Role Schedule Always None Daily Weekly monthly 1 monthly 2-1 monthly 2-2 yearly 1-1 yearly 1-2 yearly 2 specific days Properties Name: specific days Description: 2009/9/1 2010/12/31 2011/5/10 2012/9/13 Recursive mode: Daily Weekly Monthly Yearly Specific day Dates 2009/09/01Click the schedule profile to delete. Then it becomes highlighted.
- From the bottom of the Tree Console, click the delete icon —.
A queson dialog opens to ask for the conrmaon of deleon.
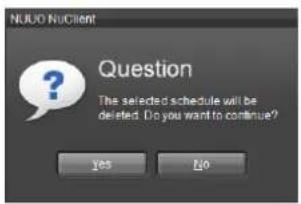
text_image
NUUD NoClient Question The selected schedule will be deleted. Do you want to continue? Yes No-
Click Yes to conrm the deleon.
-
Click the apply button 📋 on the Top Toolbar to apply the change.
10.2.3.5. Conigure A Schedule
To congure an exisng schedule prole:
- Run the NuClient. Click the Cong tab from the Top Toolbar. Then click the
System Cong icon

from the Cong Catalog.
The Tree Console shows four groups of sengs: User Group, Role, Schedule, and Layout.
- From the Tree Console, click the (+) plus sign besides the topic Schedule if there shows a (+) plus sign.
All exisng schedule prole(s) then collapse under the topic Schedule, including the soware's pre-congured ones and the created ones.
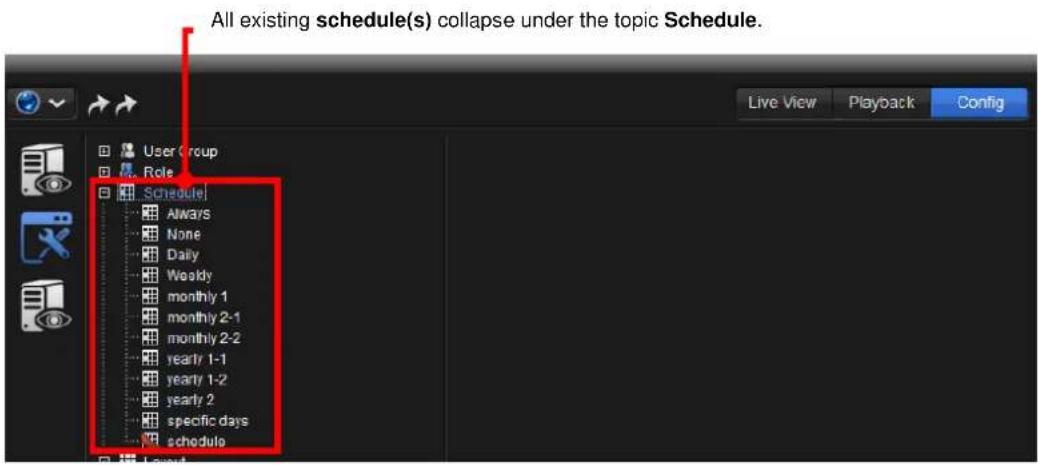
text_image
All existing schedule(s) collapse under the topic Schedule. Live View Playback Config User Group Role Schedule Always None Daily Weekly monthly 1 monthly 2-1 monthly 2-2 yearly 1-1 yearly 1-2 yearly 2 specific days schedule- Click the schedule prole to congure.
The Properes tabbed page then opens at the Conguraon Pane.
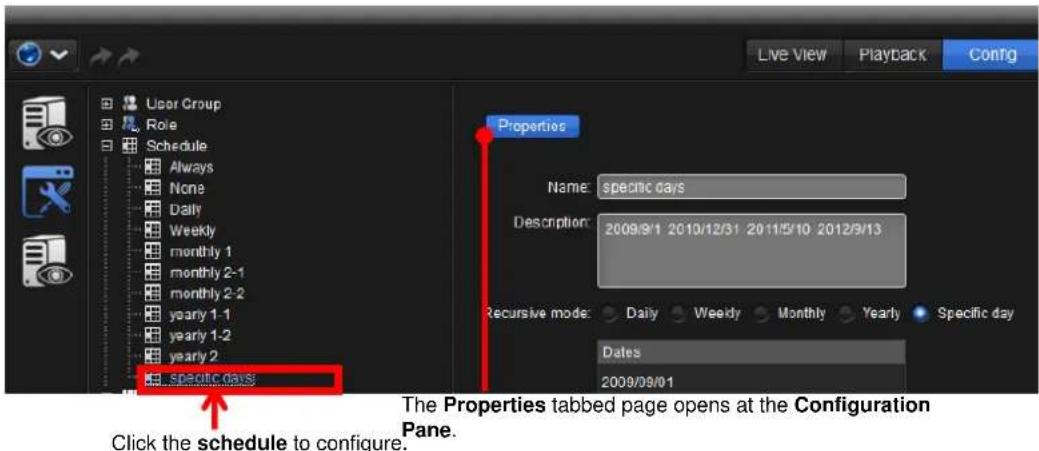
text_image
Live View Playback Config User Group Role Schedule Always None Daily Weekly monthly 1 monthly 2-1 monthly 2-2 yearly 1-1 yearly 1-2 yearly 2 specific days Properties Name: specific days Description: 2009/8/1 2010/12/31 2011/5/10 2012/9/13 Recursive mode: Daily Weekly Monthly Yearly Specific day Dates 2009/09/01 Click the schedule to configure. The Properties tabbed page opens at the Configuration Pane.To know the setngs featured on the Properes tabbed page, see Properes.
10.2.3.5.1. Properties
It relies on the Properes tabbed page to congregate a schedule prole.
To access the Properes tabbed page of a schedule prole:
- Open the Properes tabbed page of the schedule prole to congure as described in Congure A Schedule.
The Properes tabbed page opens in the Conguraon Pane for the schedule prole to congure.
The Properties tabbed page opens at the Configuration Pane.
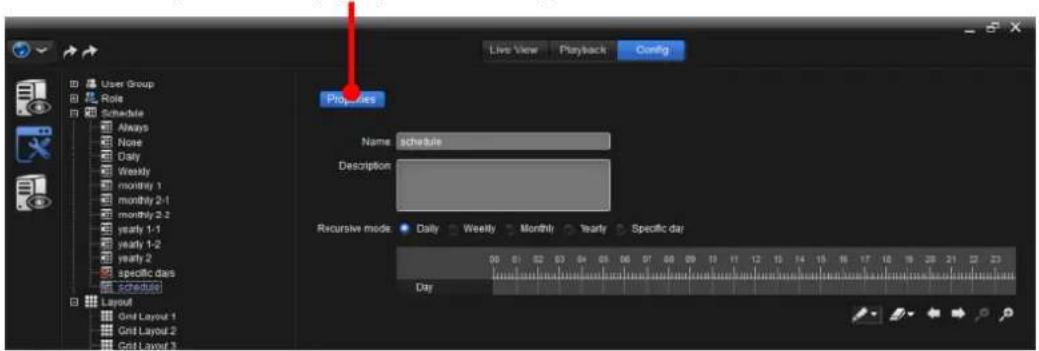
text_image
User Group Role Schedule Always None Daily Weekly monthly 1 monthly 2-1 monthly 3-2 yearly 1-1 yearly 1-2 yearly 2 specific days schedule Layout Grid Layout 1 Grid Layout 2 Grid Layout 3 Live View Playback Config Properties Name:schedule Description: Recursive mode:● Daily ● Weekly ● Monthly ● Yearly ● Specific day 00 01 02 03 04 05 06 07 08 09 10 11 12 13 14 15 16 17 18 19 20 21 22 23 DayThe sengs featured on the Properes tabbed page are:
| Setting | Description | Default |
| Name | Names the schedule profile. | “schedule” |
| Descripon | Provides a brief description for this schedule profile for the easier identification of it. | -- |
| Recursive mode | Sets the configuration mode between Daily, Weekly, Monthly, Yearly and Specific day.➢ SelectDailyto set how often for an event or an action to take place on a daily basis. See "Daily" settingsfor details.➢ SelectWeeklyto set how often for an event or an action to take place on a weekly basis. See "Weekly" settingsfor details.➢ SelectMonthlyto set how often for an event or an action to take place on a monthly basis. See "Monthly" settingsfor details.➢ SelectYearlyto set how often for an event or an action to take place on an annually basis. See "Yearly" settingsfor details.➢ SelectSpecific dayto set the day for an event or an action to take place. See "Specific day" settingsfor details. | Daily |
10.2.3.5.1.1. "Daily" settings
Use the Daily sengs of a schedule prole to set how oen for an event or an acon to take place on a daily basis.
To access the Daily sengs of a schedule prole:
- Open the Properes tabbed page of the schedule prole as described in Congure A Schedule.
The Properes tabbed page opens in the Conguraon Pane.
The Properties tabbed page opens in the Configuration Pane.
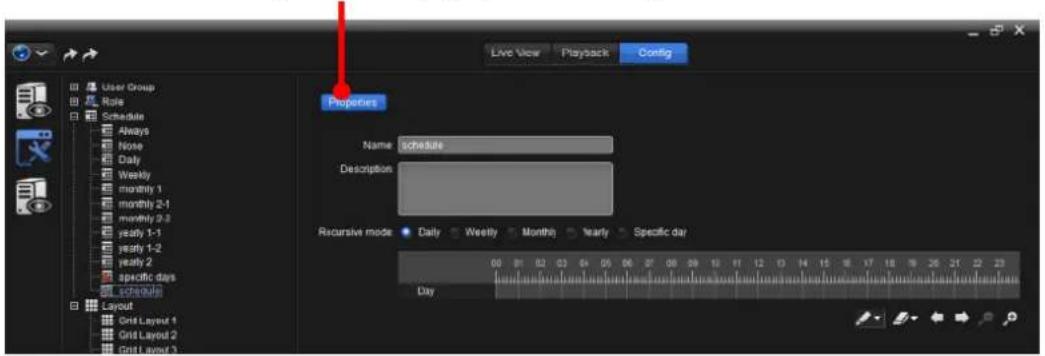
text_image
Live View Playback Config User Group Role Schedule Always None Daily Weekly monthly 1 monthly 2-1 monthly 2-2 yearly 1-1 yearly 1-2 yearly 2 specific days Schedule Layout Grid Layout 1 Grid Layout 2 Grid Layout 3 Properties Name: schedule Description: Recursive mode: Daily Weekly Monthly Yearly Specific day 00 01 02 03 04 05 06 07 08 09 10 11 12 13 14 15 16 17 18 19 20 21 22 23 Day- At the Recursive mode setng, select Daily.
A daily me table shows onscreen, with a few graphic buons.
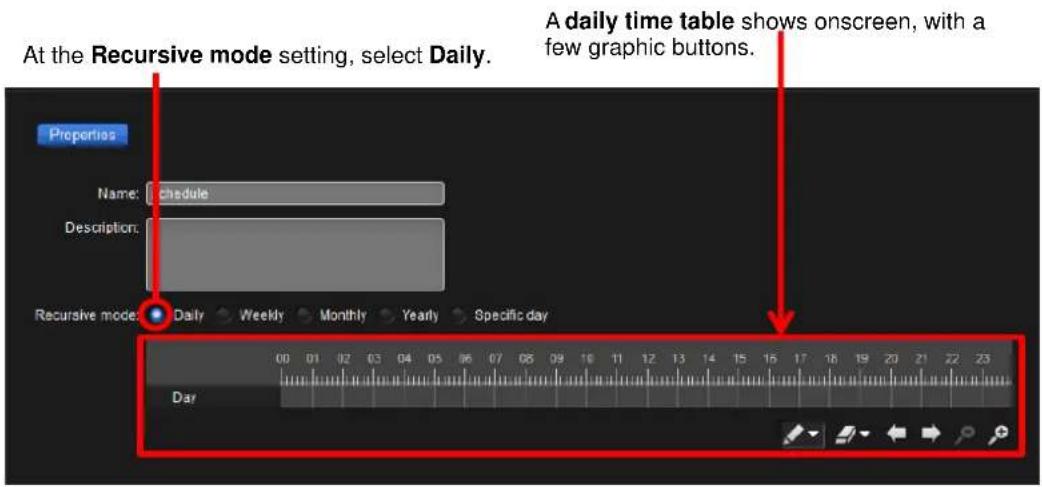
text_image
At the Recursive mode setting, select Daily. Properties Name: Schedule Description: Recessive mode: Daily Weekly Monthly Yearly Specific day 00 01 02 03 04 05 06 07 08 09 10 11 12 13 14 15 16 17 18 19 20 21 22 23 DayThe featured "daily" sengs are:
| Setting / Graphic Button | Description |
daily me table | Click a time slot or drag through multiple time slots on thedailytime tableto select or deselect one or more time slot(s) in a day.Clickbutton to be able to select a time slot.Clickbutton to be able to deselect a time slot. |
 | Click this button to be able to select a time slot.Click the down arrow iconto select all time slots of a day. |
| [40HT] | Click this button to be able to deselect a time slot.Click the down arrow iconto deselect all selected timeslots. |
| [2DZY] | Zooms out thedaily timetableto bring more time slots into view. |
 | Zooms in thedaily timetableto make more specific selection of time slot(s). |
 | Scrolls thedaily timetableto the left. |
| [KXKB] | Scrolls thedaily timetableto the right. |
10.2.3.5.1.2. "Weekly" settings
Use the Weekly settings of a schedule prole to set how oen for an event or an acon to take place on a weekly basis.
To access the Weekly settings of a schedule prole:
- Open the Properes tabbed page of the schedule prole as described in Congure A Schedule.
The Properes tabbed page opens in the Conguraon Pane.
The Properties tabbed page opens in the Configuration Pane.
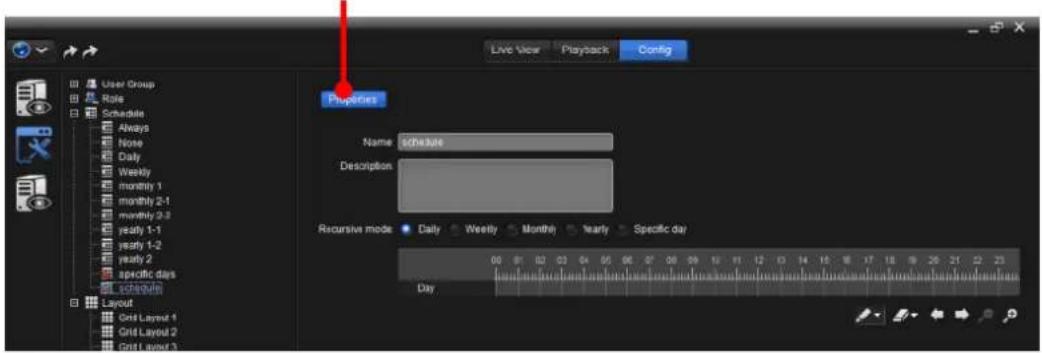
text_image
Live View Playback Config Properties Name: schedule Description: Recursive mode: Daily Weekly Monthly Nearly Specific day Day- At the Recursive mode setng, select Weekly.
A weekly me table shows onscreen, with a few graphic buons.
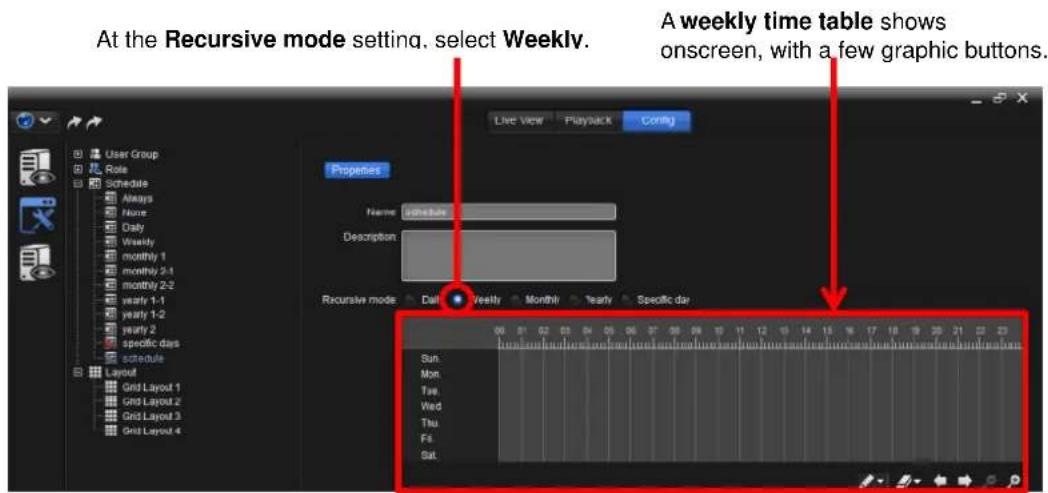
text_image
At the Recursive mode setting, select Weekly. A weekly time table shows onscreen, with a few graphic buttons. Properties Name: schedule Description: Recursive mode: Daily Weekly: Monthly Yearly: Specific day Sun: Mon: Tue: Wed: Thu: Fri: Sat:The featured "weekly" sengs are:
| Setting / Graphic Button | Description |
weekly me table | Click a time slot or drag through multiple time slots on the weekly time table to select or deselect one or more time slot(s) in a week.➢ Click  tton to be able to select a time slot.➢ Click _ tton to be able to deselect a time slot. tton to be able to select a time slot.➢ Click _ tton to be able to deselect a time slot. |
| Click this button to be able to select a time slot.➢ Click the down arrow icon ↗to select all time slots of a week. | |
| Click this button to be able to deselect a time slot.➢ Click the down arrow icon ↗to deselect all selected time slots. | |
| Zooms out the weekly time table to bring more time slots into view. | |
| Zooms in the weekly time table to make more specific selection of time slot(s). | |
| Scrolls the weekly time table to the left. | |
| Scrolls the weekly time table to the right. |
10.2.3.5.1.3. "Monthly" settings
Use the Monthly sengs of a schedule prole to set how oen for an event or an acon to take place on a monthly basis.
To access the Monthly sengs of a schedule prole:
- Open the Properes tabbed page of the schedule prole as described in Congure A Schedule.
The Properes tabbed page opens in the Conguraon Pane.
The Properties tabbed page opens in the Configuration Pane.
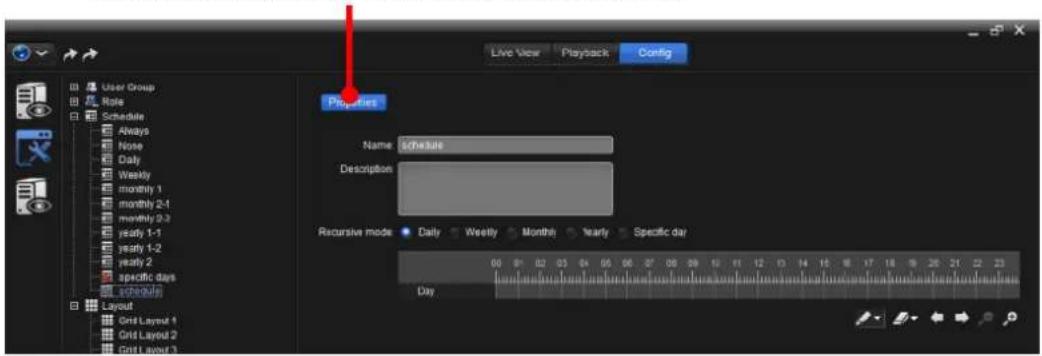
text_image
Live View Playback Config User Group Role Schedule Always Noise Daily Weekly monthly 1 monthly 2-1 monthly 2-3 yearly 1-1 yearly 1-2 yearly 2 specific days Schedule Layout Grid Layout 1 Grid Layout 2 Grid Layout 3 Properties Name: schedule Description: Recursive mode: Daily Weekly Monthly Yearly Specific day 00 01 02 03 04 05 06 07 08 09 10 11 12 13 14 15 16 17 18 19 20 21 22 23 Day- At the Recursive mode setng, select Monthly.
Some sengs show onscreen, with a monthly me table and a few graphic buons.
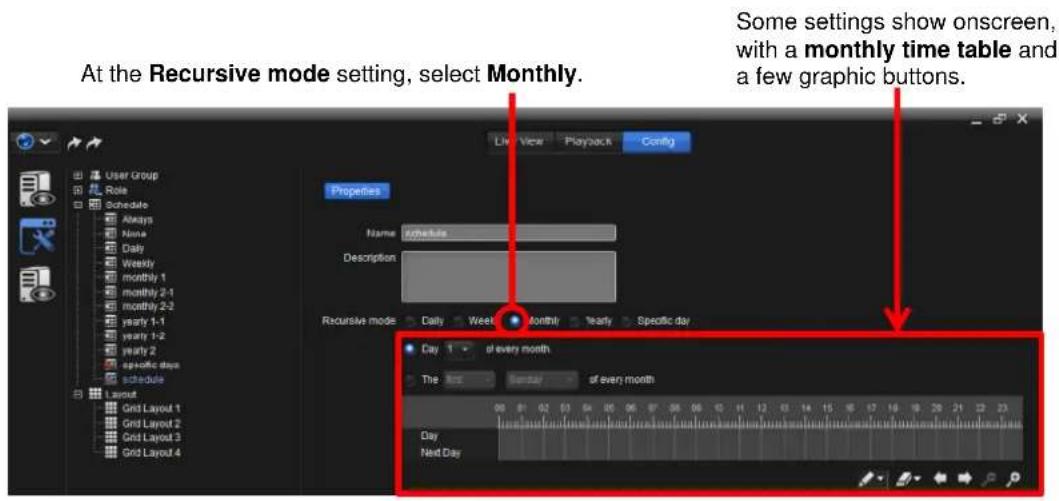
text_image
At the Recursive mode setting, select Monthly. Some settings show onscreen, with a monthly time table and a few graphic buttons. Properties Name: schedule Description: Recursive mode: Daily Week Month/Yearly Specific day Day 1 of every month The Time: Saturday of every month Day Next DayThe featured "monthly" sengs are:
| Setting / Graphic Button | Description |
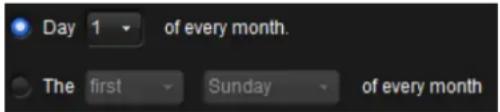 | Sets which day of every month to configure, or which day of a week of every month to configure. |
monthly me table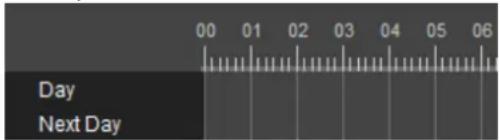 | Click a time slot or drag through multiple time slots on themonthly timetableto select or deselect one or more time slot(s) in a month.Clickbutton to be able to select a time slot.Clickbutton to be able to deselect a time slot. |
 | Click this button to be able to select a time slot.Click the down arrow iconto select all time slots of a month. |
 | Click this button to be able to deselect a time slot.Click the down arrow iconto deselect all selected time slots. |
| [5A05] | Zooms out themonthly timetableto bring more time slots into view. |
 | Zooms in themonthly timetableto make more specific selection of time slot(s). |
 | Scrolls themonthly timetableto the left. |
 | Scrolls themonthly timetableto the right. |
10.2.3.5.1.4. "Yearly" settings
Use the Yearly setngs of a schedule prole to set how oen for an event or an acon to take place on an annual basis.
To access the Yearly setngs of a schedule prole:
- Open the Properes tabbed page of the schedule prole as described in Congure A Schedule.
The Properes tabbed page opens in the Conguraon Pane.
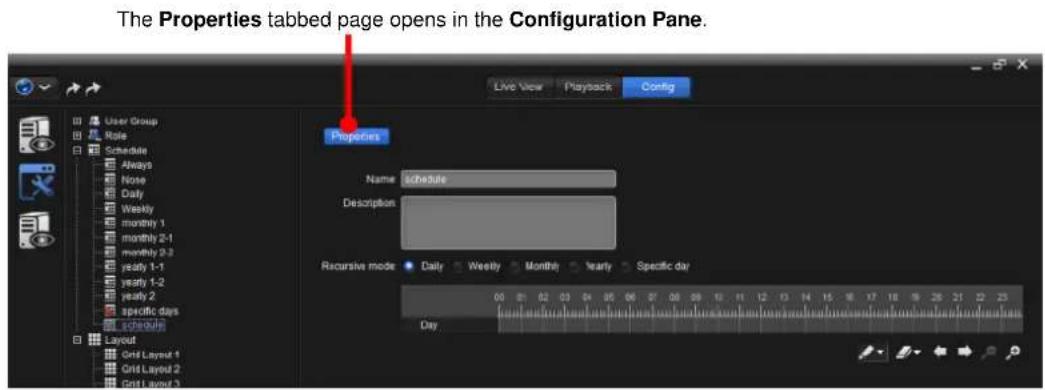
text_image
The Properties tabbed page opens in the Configuration Pane. Live View Playback Config Properties Name schedule Description Recursive mode Daily Weekly Monthly Nearly Specific day 00 01 02 03 04 05 06 07 08 09 10 11 12 13 14 15 16 17 18 19 20 21 22 23 Day- At the Recursive mode setng, select Yearly.
Some sengs show onscreen, with a yearly me table and a few graphic
buons.
Some settings show onscreen, with an annual time table and a few graphic buttons.
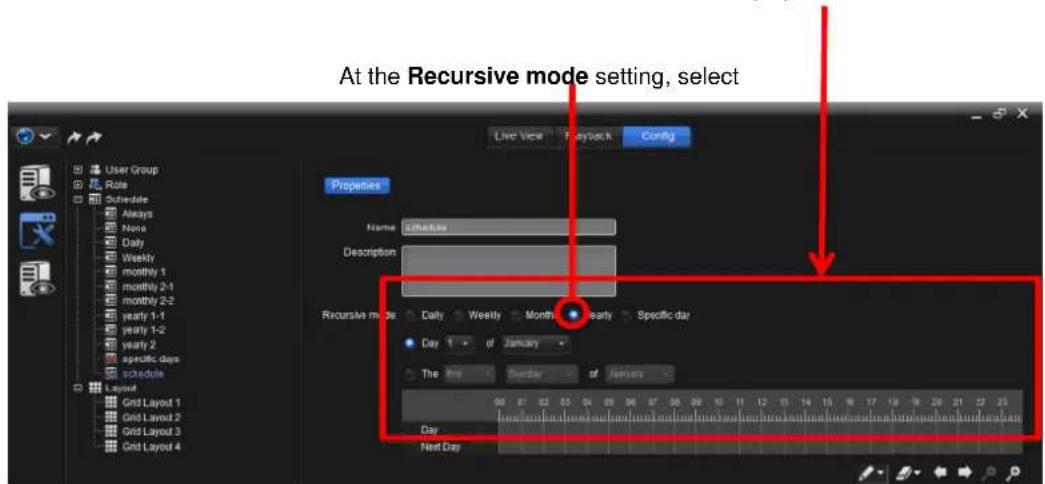
text_image
At the Recursive mode setting, select Line View Edit Back Modify Properties Name schedule Description Recursive mode Daily Weekly Month Early Specific day Day 1 of January The First Saturday of January 00 01 02 03 04 05 06 07 08 09 10 11 12 13 14 15 16 17 18 19 20 21 22 23 Grid Layout 1 Grid Layout 2 Grid Layout 3 Grid Layout 4 Day Next DayThe featured "yearly" sengs are:
| Setting / Graphic Button | Description |
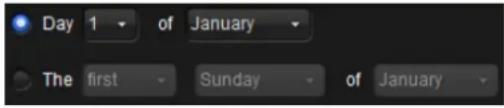 | Sets which day of a month to configure, or which day of a week of a month to configure. |
yearly me table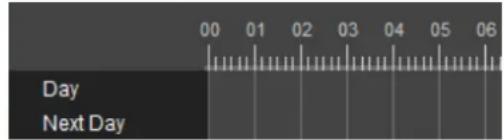 | Click a time slot or drag through multiple time slots on the yearly time table to select or deselect one or more time slot(s) in a year. ▶ Click button to be able to select a time slot. ▶ Click button to be able to deselect a time slot. |
| [2T20] | Click this button to be able to select a time slot. ▶ Click the down arrow icon ▶ to select all time slots of a year. |
 | Click this button to be able to deselect a time slot. ▶ Click the down arrow icon ▶ to deselect all selected time slots. |
 | Zooms out the yearly time table to bring more time slots into view. |
 | Zooms in the yearly time table to make more specific selection of time slot(s). |
 | Scrolls the yearly time table to the left. |
 | Scrolls the yearly time table to the right. |
10.2.3.5.1.5. "Specific day" settings
Use the Specific day sengs of a schedule prole to set how oen for an event or an acon to take place on a specific day of all me.
To access the Specific day sengs of a schedule prole:
- Open the Properes tabbed page of the schedule prole as described in Congure A Schedule.
The Properes tabbed page opens in the Conguraon Pane.
The Properties tabbed page opens in the Configuration Pane.
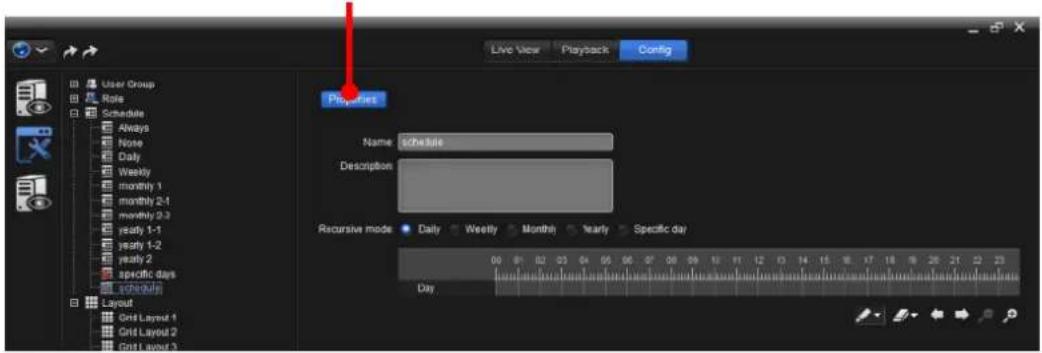
text_image
Live View Playback Config User Group Role Schedule Always None Daily Weekly monthly 1 monthly 2-4 monthly 9-3 yearly 1-1 yearly 1-2 yearly 2 specific days Schedule Layout Grid Layout 1 Grid Layout 2 Grid Layout 3 Properties Name: schedule Description: Recursive mode: Daily Weekly Monthly Nearly Specific day Day2. At the Recursive mode setng, select Specific day.
A perpetual calendar shows onscreen, with a specific day table and some graphic buons.
A perpetual calendar shows, with some graphic buttons.
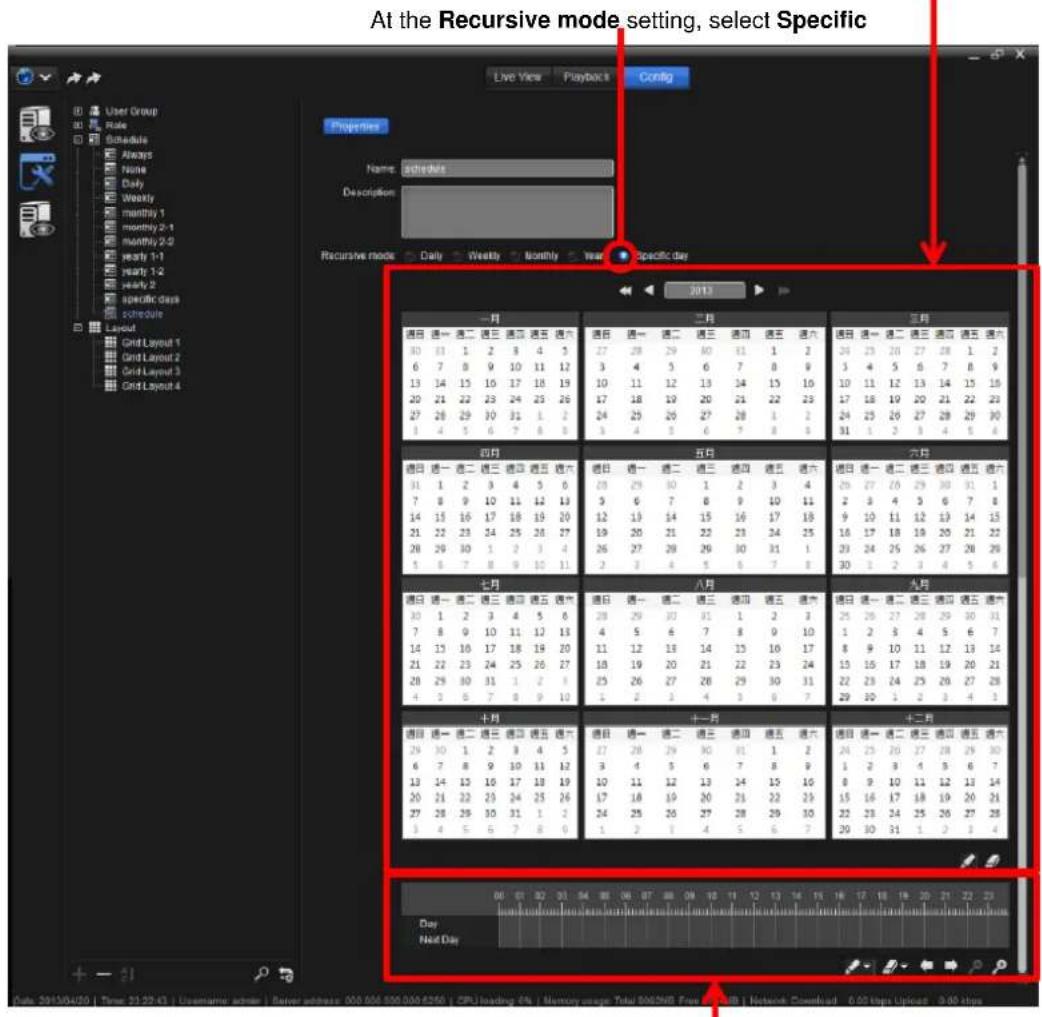
text_image
At the Recursive mode setting, select Specific Live View Playback Config Properties Name: schedule Description: Recessive mode: Daily Weekly Monthly.Year Specific day 2013 一月 二月 三月 日日 通一 通二 通三 通四 通五 通六 30 31 1 2 3 4 5 6 7 8 9 10 11 12 13 14 15 16 17 18 19 20 21 22 23 24 25 26 27 28 29 30 31 1 2 3 4 5 6 7 8 9 四月 五月 六月 日日 通一 通二 通三 通四 通五 通六 31 1 2 3 4 5 6 7 8 9 10 11 12 13 14 15 16 17 18 19 20 21 22 23 24 25 26 27 28 29 30 31 3 4 3 4 5 6 7 8 9 七月 八月 九月 日日 通一 通二 通三 通四 通五 通六 30 1 2 3 4 5 6 7 8 9 10 11 12 13 14 15 16 17 18 19 20 21 22 23 24 25 26 27 28 29 30 31 1 2 4 5 6 7 8 9 10 十月 十一月 十二月 日日 谩一 谩二 谩三 谩四 谩五 谩六 29 30 1 2 3 4 5 6 7 8 9 10 11 12 13 14 15 16 17 18 19 20 21 22 23 24 25 27 28 29 30 31 1 3.4.5.6.7.8.9.10.11.12.13.14.15.16.17.18.19.20.21.22.23.24.25.26.27.28.29.30.31.32.33.34.35.36.37.38.39.40.41.42.43.44.45.46.47.48.49.50.51.52.53.54.55.56.57.58.59.60.61.62.63.64.65.66.67.68.69.70.71.72.73.74.75.76.77.78.79.80.81.82.83.84.85.86.87.88.89.90.91.92.93.94.95.96.97.98.99.100.101.102.103.104.105.106.107.108.109.110.111.112.113.114.115. Day Not DayA specific day table shows onscreen, with a few graphic buttons.
The featured sengs are:
| Group | Setting / Graphic Button | Description |
| N/A |  | Selects a year. |
| perpetual calendar | the perpetual calendar | Click a date on this perpetual calendar to select or deselect a day.Click thebutton to be able to select a date.Click thebutton to be able to deselect a date. |
| (WTXH) | Click this button to be able to select a date on the perpetual calendar. | |
| [S552] | Click this button to be able to deselect a date on the perpetual calendar. | |
| specific day table | the specific day table | Click a time slot or drag through multiple time slots on this specific day table to select or deselect one or more time slot(s) of the date(s) selected on the perpetual calendar.➢ Click the button to be able to select a time slot.➢ Click the button to be able to deselect a time slot. |
| [2604] | Click this button to be able to select a time slot on the specific day table.➢ Click the down arrow icon ▼to select all time slots of the specific day. | |
 | Click this button to be able to deselect a time slot on the specific day table.➢ Click the down arrow icon ▼deselect all selected time slots on the specific day. | |
 | Zooms out the specific day table to bring more time slots into view. | |
| [08CY] | Zooms in the specific day table to make more specific selection of time slot(s). | |
| [8TY0] | Scrolls the specific day table to the left. | |
 | Scrolls the specific day table to the right. |
10.2.4. Layout
The Layout means to arrange the video grid that les together mulple video channels on a display.
10.2.4.1. The User Interface
To understand the user interface of the Layout group of sengs:
- Access the System Cong ("system conguraon") as described in System Cong.
The system conguraon opens onscreen, and the Tree Console shows four topic settings: User Group, Role, Schedule, and Layout.
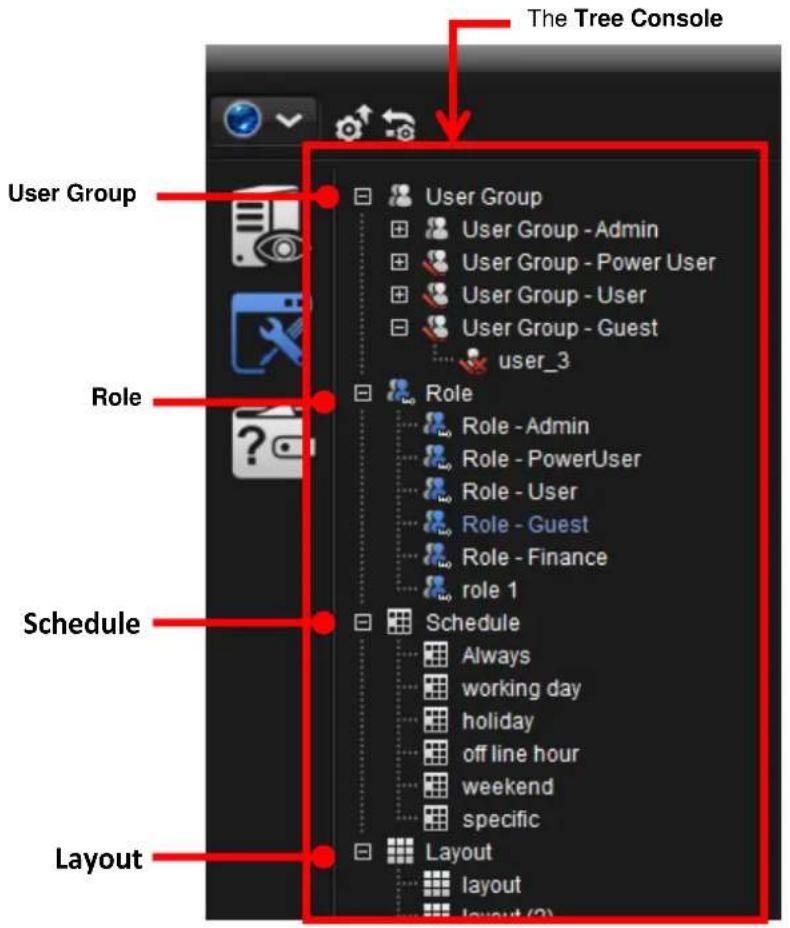
text_image
The Tree Console User Group Role Schedule LayoutAll the layouts are subject to change and deleon. See Congure A Layout to edit a layout. See Delete A Layout to delete a layout. See Create A Layout to add a layout.
2. From the Tree Console, click the topic Layout.
The Overview tabbed page then opens at the Conguraon Pane to deliver a general view of all the existing layouts.

text_image
An overview of the user groups opens at the Configuration Panel. Live View Playback Config Overview Grid Layout 1 Grid Layout 2 Grid Layout 3 Grid Layout 4 Date: 2013/04/21 Time: 20:49:53 | Username admin | Server: 5826165, 000.000.000.000.5258 | CPU Loading: 14% | Memory page Total: 892888 Free: 351788 | Network Download: 105.51 Http Upload: -5.72 Http10.2.4.2. Access Layout Settings
To access the Layout sengs:
- Run the NuClient. Click the Cong tab from the Top Toolbar. Then click the
System Cong icon

from the Cong Catalog.
The Tree Console shows four groups of sengs: User Group, Role, Schedule, and Layout.
- From the Tree Console, click the topic Layout.
The Overview tabbed page then opens at the Conguraon Pane.
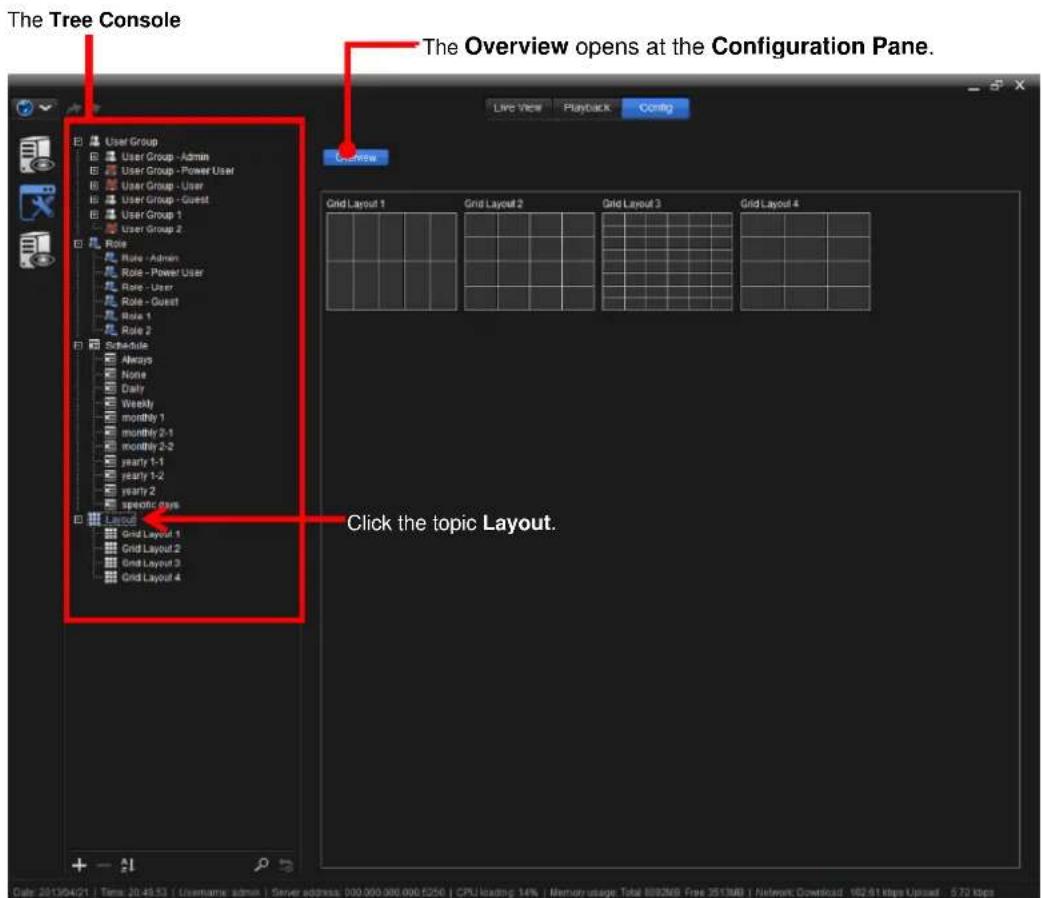
text_image
The Tree Console The Overview opens at the Configuration Pane. Live View Playback Config User Group User Group - Admin User Group - Power User User Group - User User Group - Quest User Group 1 User Group 2 Role Role - Admin Role - Power User Role - User Role - Quest Role 1 Role 2 Schedule Always None Daily Weekly monthly 1 monthly 2-1 monthly 2-2 yearly 1-1 yearly 1-2 yearly 2 specific rows Layout Grid Layout 1 Grid Layout 2 Grid Layout 3 Grid Layout 4 Click the topic Layout. Click 2013/04/21 | Time: 20:45:33 | Username admin | Server address: 000.000.000.000.0250 | CPU usage: 14% | Memory usage Total: 800.000 Free: 251768 | Network Download: 182.41 kbps Upload: 5.72 kbps10.2.4.3. Create A Layout
To create a layout:
- Run the NuClient. Click the Cong tab from the Top Toolbar. Then click the
System Cong icon

from the Cong Catalog.
The Tree Console then shows the four groups of sengs – User Group, Role, Schedule and Layout.
- Click the topic Layout.
The topic Layout becomes highlighted
- From the bottom of the Tree Console, click the add icon +.
A new layout, named "layout" by default, will be appended to the topic Layout, and a Properes tabbed page will open in the Conguraon Pane for users to conjure the newly created layout.
The new layout is appended to the topic Layout.
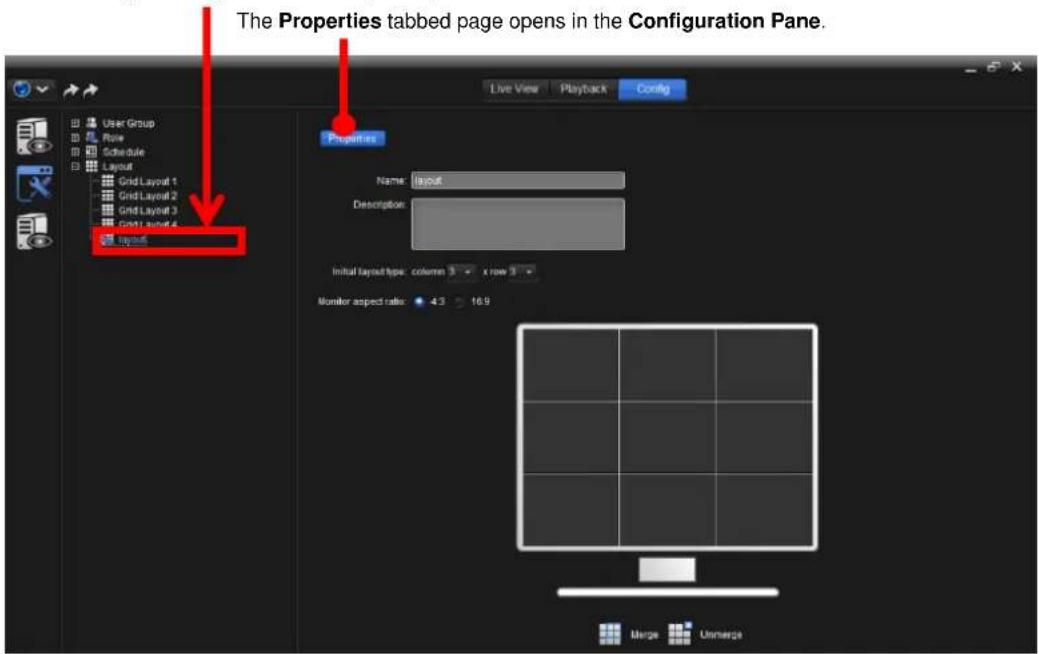
text_image
The Properties tabbed page opens in the Configuration Pane. Live View Playback Config Properties Name: layout Description: Initial layout type: column 3 x row 3 Monitor aspect ratio: 4.3 16.9 Merge UnmergeTo know the settings featured on the Properes tabbed page, see Congure ALayout.
10.2.4.4. Delete A Layout
To delete a layout:
- Run the NuClient. Click the Cong tab from the Top Toolbar. Then click the
System Cong icon

from the Cong Catalog.
The Tree Console shows four groups of sengs: User Group, Role, Schedule, and Layout.
- From the Tree Console, click the (+) plus sign besides the topic Layout if there shows a (+) plus sign.
All exisng layout(s) then collapse under the topic Layout, including the soware's pre-congured ones and the created ones
All existing layout(s) collapse under the topic Layout.
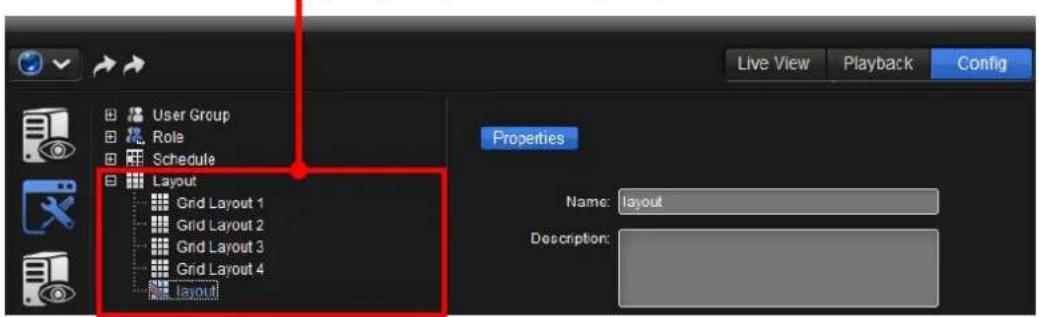
text_image
User Group Role Schedule Layout Grid Layout 1 Grid Layout 2 Grid Layout 3 Grid Layout 4 Layout Live View Playback Config Properties Name: layout Description:3. Click the layout to delete.
The layout to delete becomes highlighted.
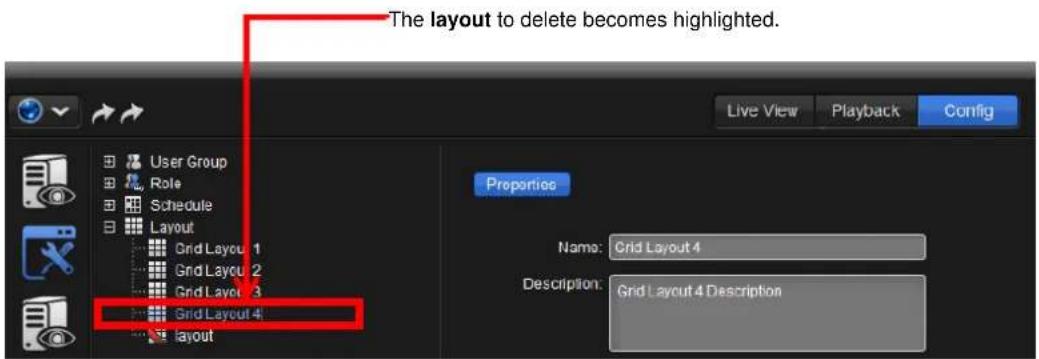
text_image
The layout to delete becomes highlighted. Live View Playback Config User Group Role Schedule Layout Grid Layout 1 Grid Layout 2 Grid Layout 3 Grid Layout 4 Layout Proportions Name: Grid Layout 4 Description: Grid Layout 4 Description4. From the bottom of the Tree Console, click the delete icon —.
A queson dialog opens to ask for the conrmaon of deleon.
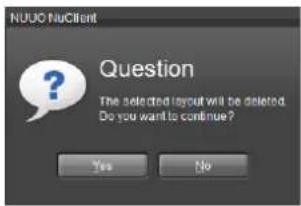
text_image
NUOD NuClient Question The selected layout will be deleted. Do you want to continue? Yes No5. Click Yes to conrm the deleon.
6. Click the apply button 📋 on the Top Toolbar to apply the change.

10.2.4.5. Conigure A Layout
To congregate an exisng layout:
- Run the NuClient. Click the Cong tab from the Top Toolbar. Then click the
System Cong icon

from the Cong Catalog.
The Tree Console shows four groups of sengs: User Group, Role, Schedule, and Layout.
- From the Tree Console, click the (+) plus sign besides the topic Layout if there shows a (+) plus sign.
All exisng layout(s) then collapse under the topic Layout, including the soware's pre-congured layouts and the created ones.
All existing layout(s) collapse under the topic Layout.
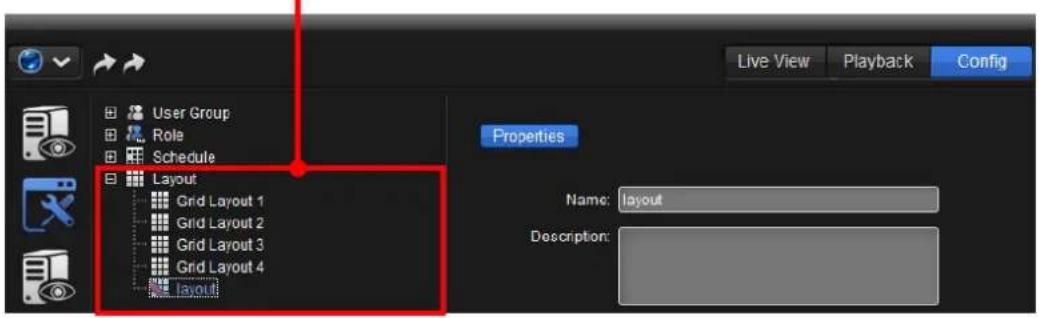
text_image
Live View Playback Config User Group Role Schedule Layout Grid Layout 1 Grid Layout 2 Grid Layout 3 Grid Layout 4 Layout Properties Name: layout Description:3. Click the layout to congregate.
The Properes tabbed page of the layout to congure then opens at the Conguraon Pane.
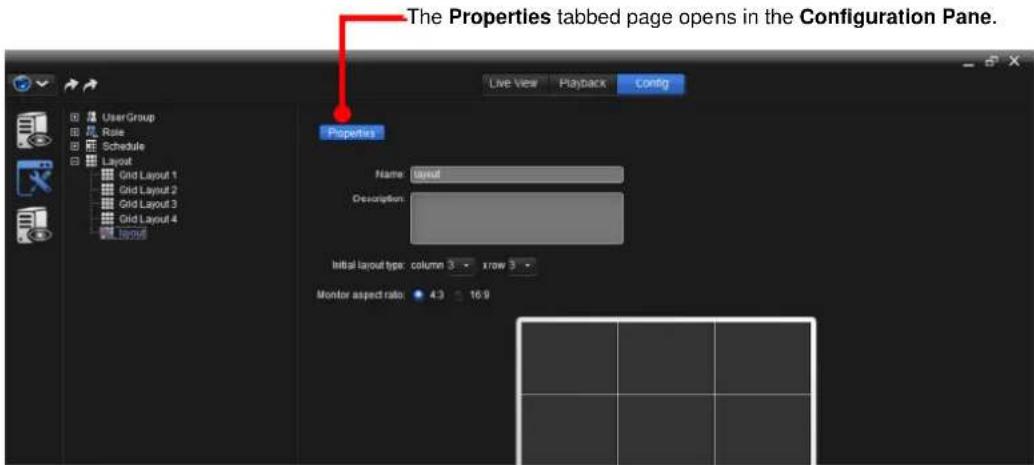
text_image
The Properties tabbed page opens in the Configuration Pane. Live View Playback Config Properties Name: layout Description: Initial layout type: column 3 x row 3 Monitor aspect ratio: 4.3 16.9The featured sengs on the Properes tabbed page are:
| Setting | Description | Default |
| Name | Names the layout. | "layout" |
| Descripon | Provides a brief description for this layout for the easier identification of it. | -- |
| Inial layout type | Sets the grid layout by assigning the amount of column(s) and the amount of row(s).▸ 1 to 10 columns are configurable.▸ 1 to 10 rows are configurable. | 3 columns & 3 rows |
| Monitor aspect rao | Sets the aspect ratio of the display.▸ Options available are 4:3 and 16:9. | 4:3 |
| Merge | Merges the cells selected in the video grid.▸ Click and drag a cell to select it. | -- |
| Unmerge | Restores the merged cells selected in the video grid.▸ Click and drag a cell to select it. | -- |
11 Application Configuration
11.1 Image Fusion
The Image Fusion Technology allows a seamless panoramic view of mulple camera videos by changing their viewing angles and image sizes. Up to 10 independent cameras can be set up as single view.
To launch the Image Fusion Editor:
1. Access the Live View tab.
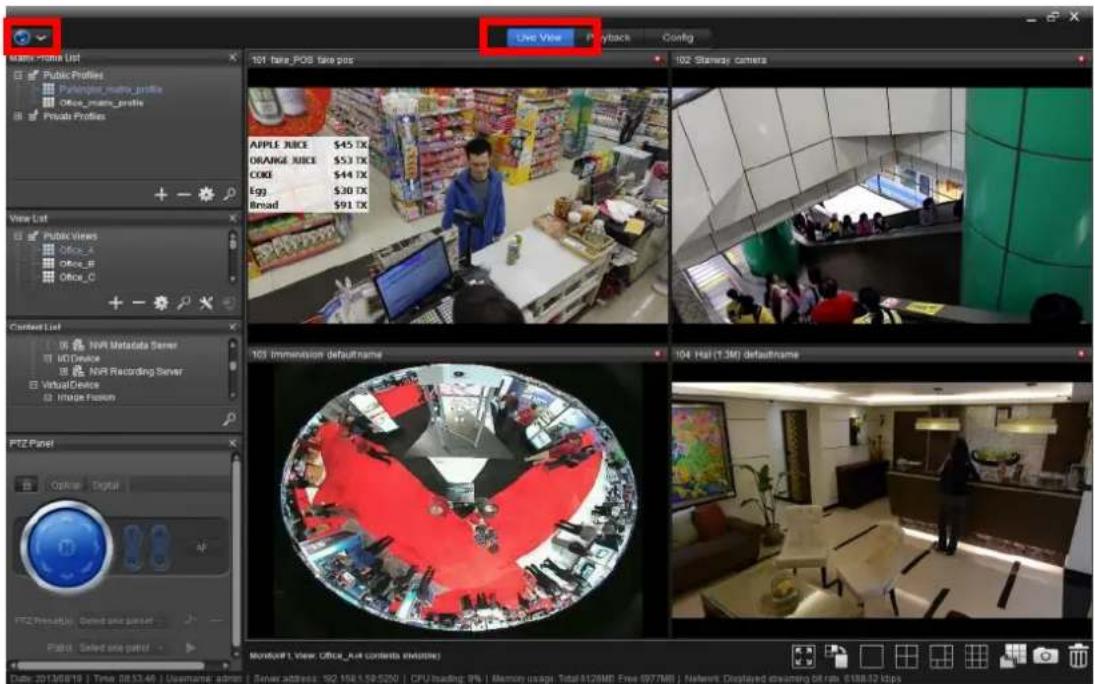
text_image
Live View 101 tape_POS take pos 102 Starway camera APPLE JUICE $45 TX ORANGE XJICE $53 TX CODE $44 TX Egg $30 TX Broad $91 TX 103 Immersion defaultname 104 Hal (1.3M) defaultname MultiPoint View Office_Aut contents installed Date: 2013/08/18 | Time: 08:53:46 | Username: admin | Server address: 102.108.1.59.520 | CPU loading: 9% | Memory usage: Total 012MB Free 897MM | Network Displayed streaming hit rate: 0188.52 kbps- From the Top Toolbar of the NuClient, click the "global" icon
The menu opens.
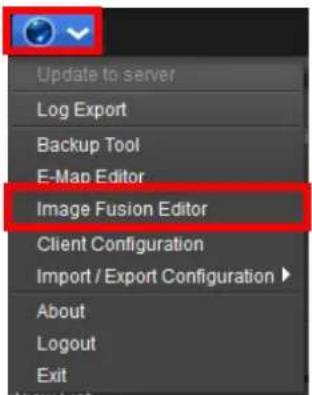
text_image
Update to server Log Export Backup Tool E-Map Editor Image Fusion Editor Client Configuration Import / Export Configuration > About Logout Exit- Click the Image Fusion Editor.
The Image Fusion Editor launches.
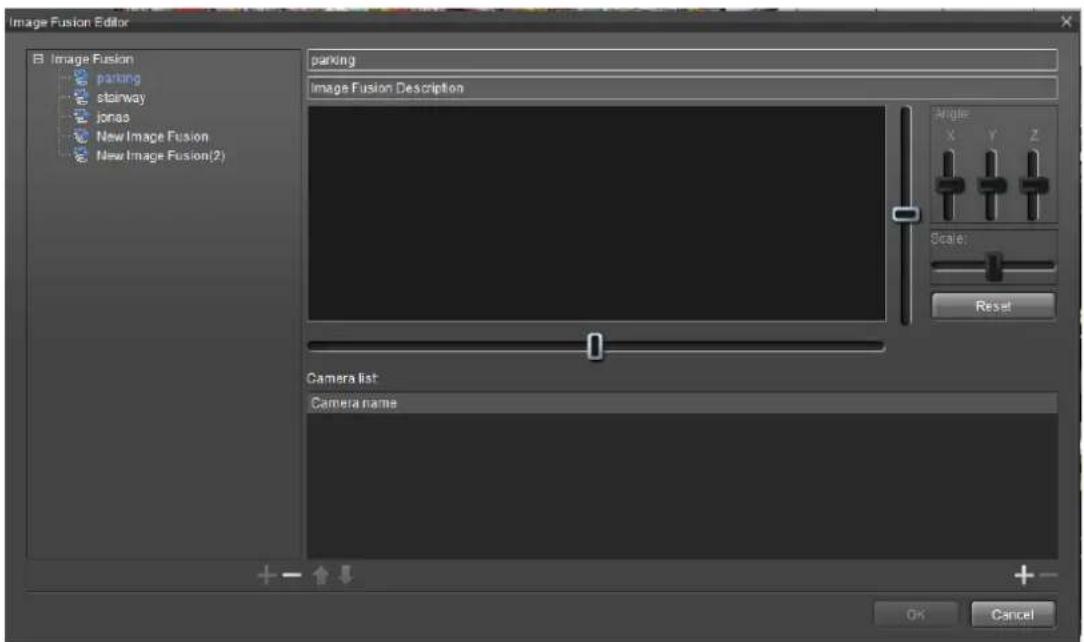
text_image
Image Fusion Editor Image Fusion parking stairway Jonas New Image Fusion New Image Fusion(2) parking Image Fusion Description Angle X Y Z Scale: Reset Camera list Camera name OK CancelIn the Image Fusion Editor window, the Cong Catalog shows a list of the existing image fusions. The right side shows the conguraon ulity and the list of available cameras.
11.1.1. Create an Image Fusion
To create an image fusion:
- Launch the Image Fusion as described in Image Fusion Editor.
The Image Fusion Editor launches, with the exisng image fusion(s) listed in the Image Fusion tree at the Cong Catalog and the conguraon ulity in the
Conguraon Pane.
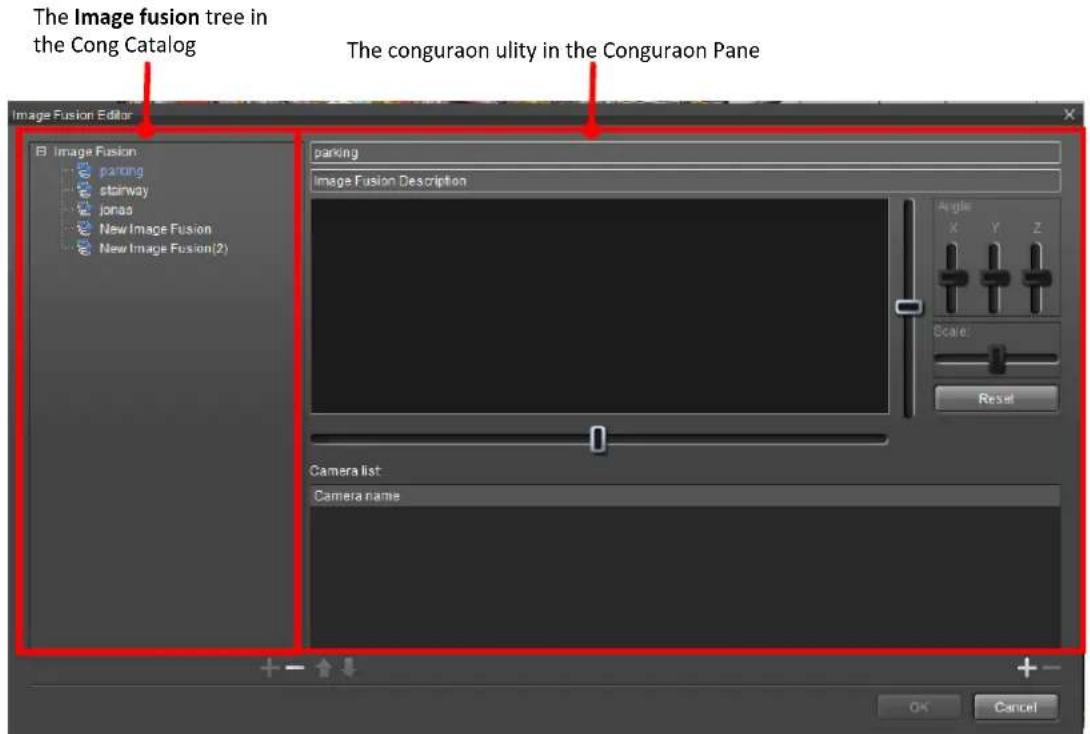
text_image
The Image fusion tree in the Cong Catalog The conguraon ulity in the Conguraon Pane Image Fusion Editor Image Fusion parking stairway jonas New Image Fusion New Image Fusion(2) parking Image Fusion Description Angle X Y Z Scale: Reset Camera list: Camera name OK Cancel- In the Image Fusion tree, click the node Image fusion.
The Image fusion node becomes highlighted.
- Click the add sign icon + in the lower-right of the Image fusion box.
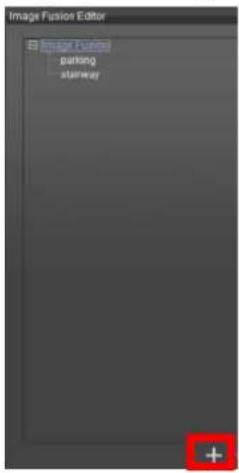
text_image
Image Fusion Editor Image Fusion parking stairwayA new image fusion named "New Image Fusion" by default is appended to the image fusion tree.
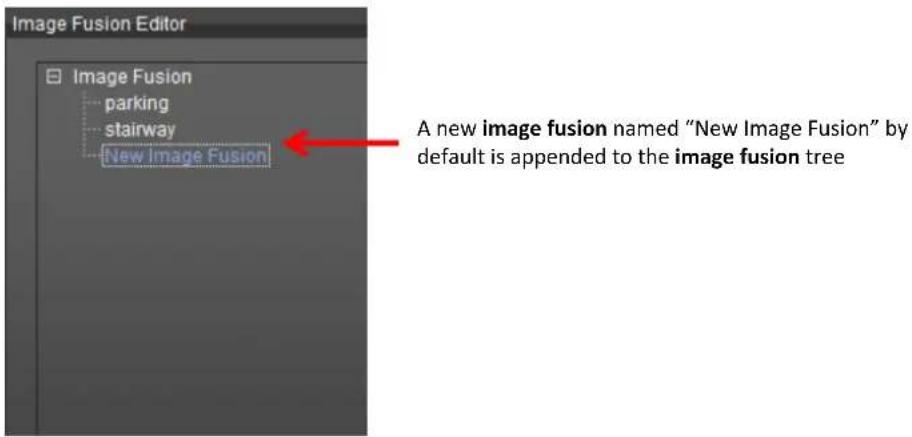
text_image
Image Fusion Editor Image Fusion parking stairway New Image Fusion A new image fusion named "New Image Fusion" by default is appended to the image fusion tree4. Click on the name of the newly created image fusion.
On the Conguraon Pane, change the name and enter a brief descripon about the panorama.
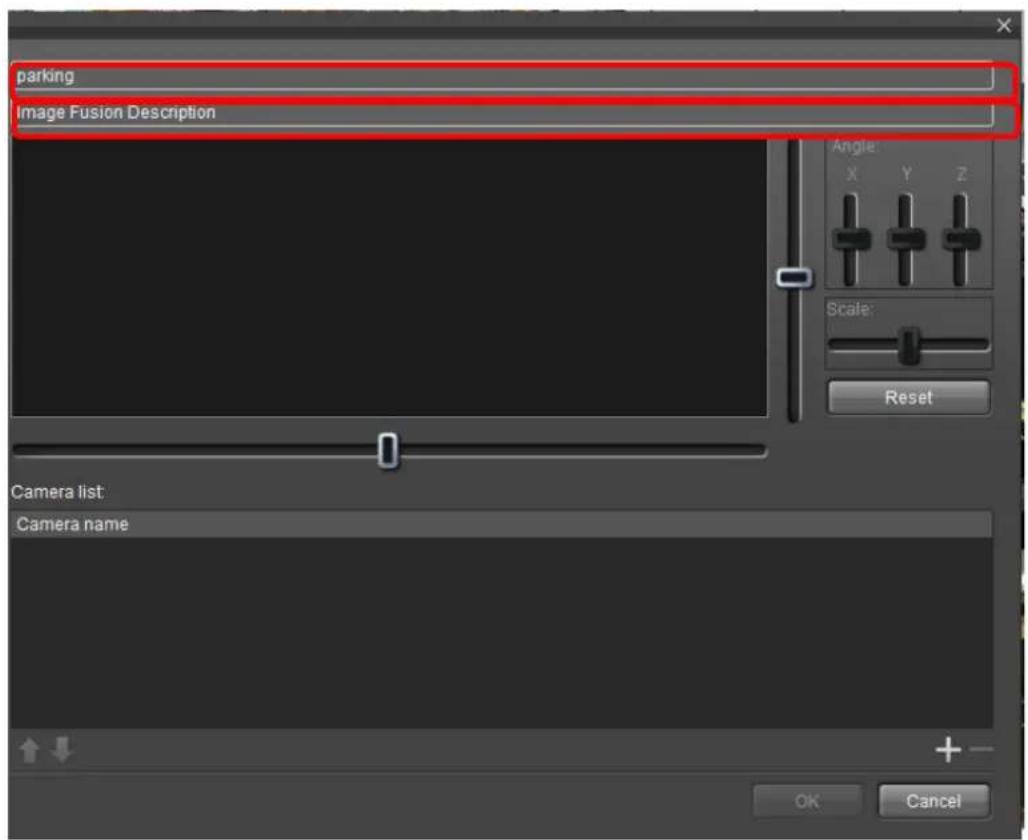
text_image
parking Image Fusion Description Angle: X Y Z Scale: Reset Camera list: Camera name OK Cancel- Click the add sign icon at the lower-right.
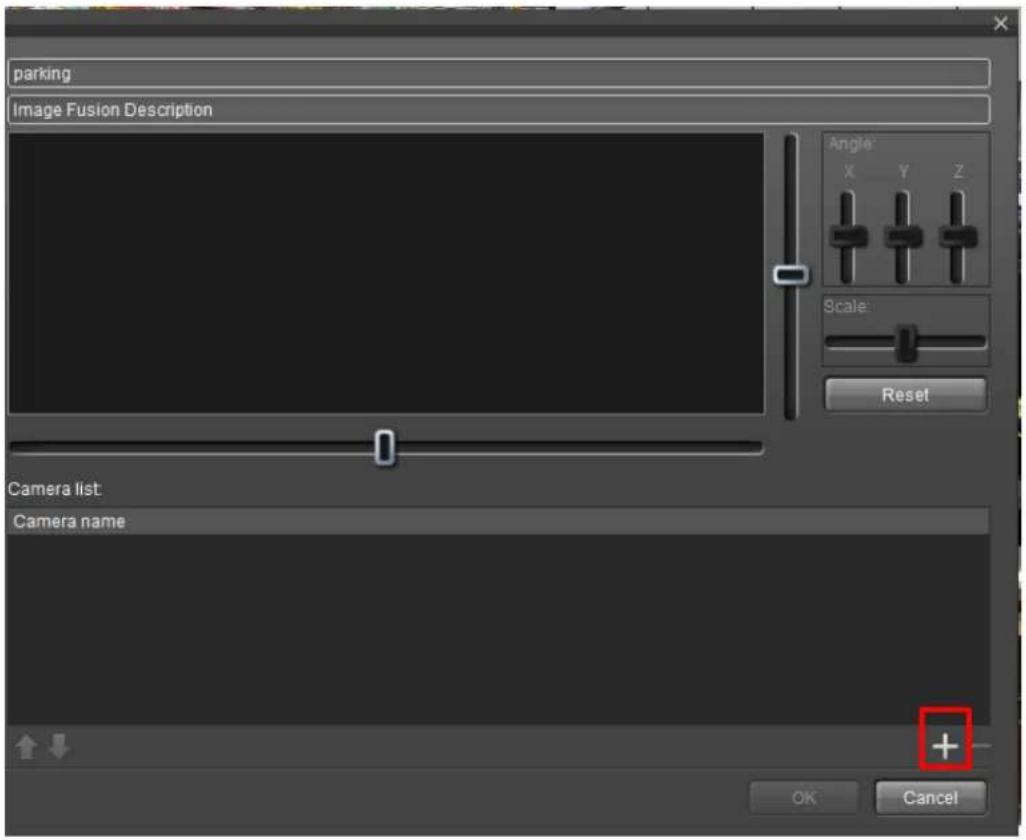
text_image
parking Image Fusion Description Angle X Y Z Scale: Reset Camera list Camera name OK CancelAn Add Camera window opens.
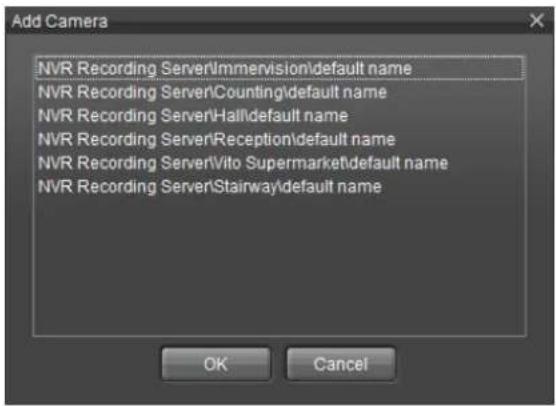
text_image
Add Camera NVR Recording Server\Immervision\default name NVR Recording Server\Counting\default name NVR Recording Server\Hall\default name NVR Recording Server\Reception\default name NVR Recording Server\Vito Supermarket\default name NVR Recording Server\Stairway\default name OK Cancel6. Select the cameras to add to the image fusion.
The selected cameras become highlighted.
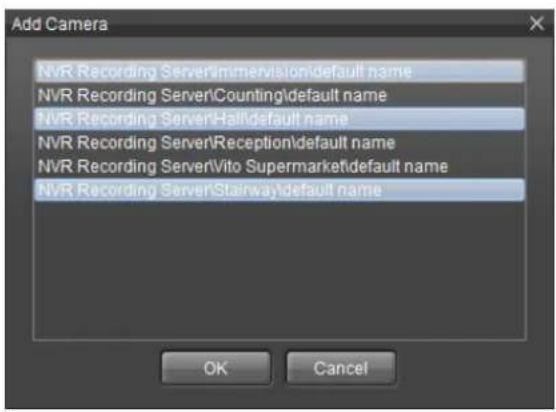
text_image
Add Camera NVR Recording Server\imervision\default name NVR Recording Server\Counting\default name NVR Recording Server-Hall\default name NVR Recording Server\Reception\default name NVR Recording Server\Vito Supermarket\default name NVR Recording Server\Stairway\default name OK CancelThe added camera images are stched together in the view area at the upper part of the Image Fusion Editor window.
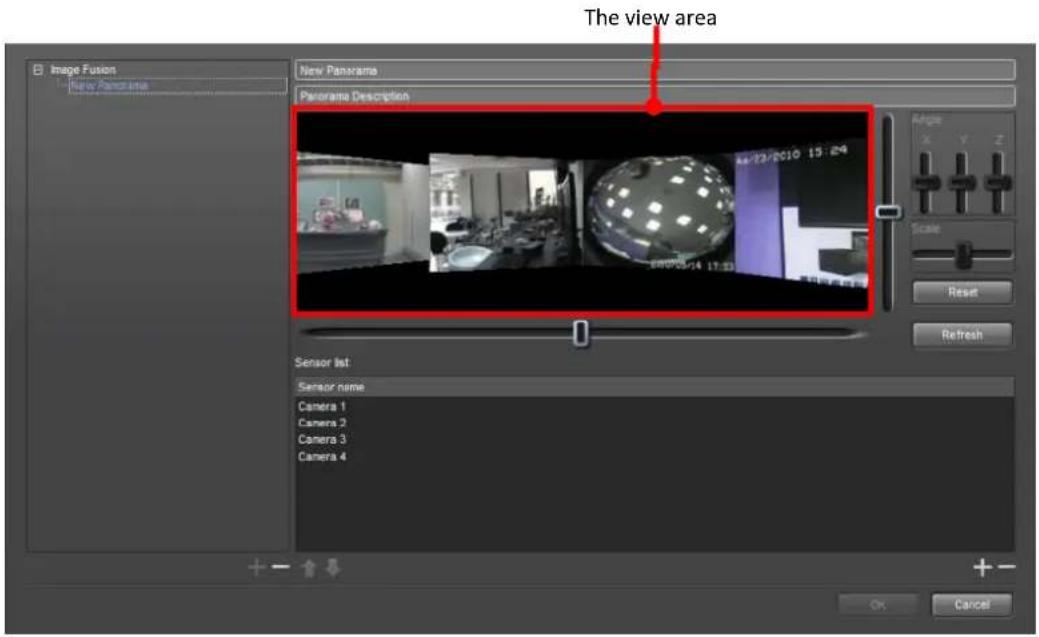
text_image
The view area New Panorama Panorama Description Sensor list: Sensor name: Camera 1 Camera 2 Camera 3 Camera 4 OK Cancel- Adjust orientaon of each image of the image fusion if you want to.
Use the horizontal and vercal sliders at the right side and boom side of the view area to control the viewport of the image fusion. Use the XYZ sliders to adjust the angles of an image. Use the scale slider to enlarge or shrink an image.
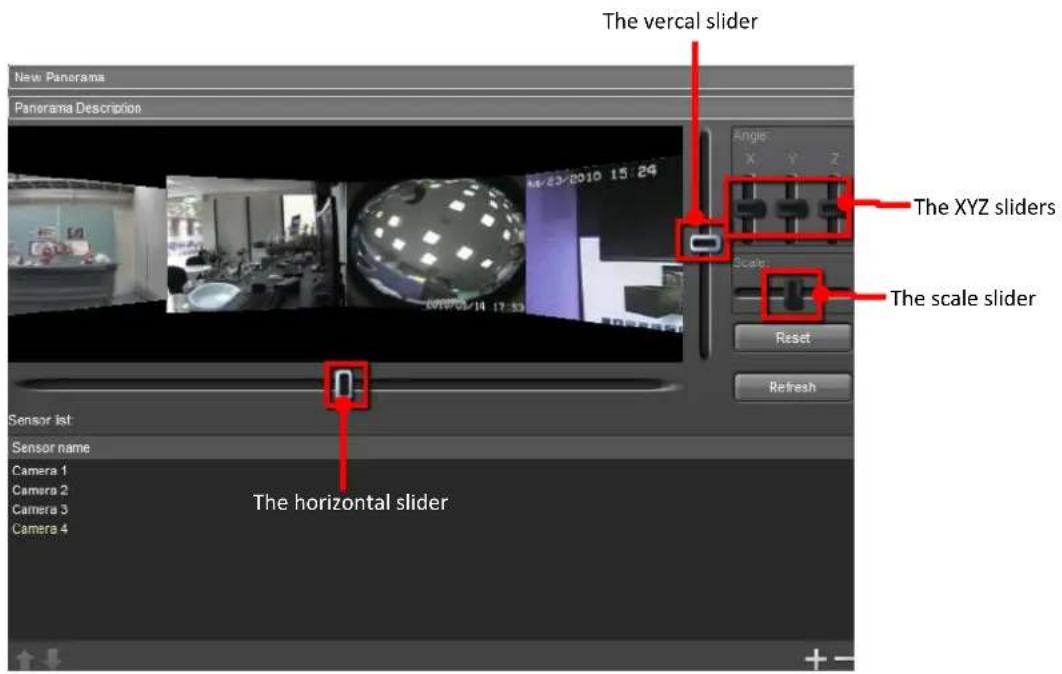
text_image
New Panorama Panorama Description The vercal slider The XYZ sliders The scale slider Sensor list Sensor name Camera 1 Camera 2 Camera 3 Camera 4 The horizontal slider- Click the OK buon and apply the change.
11.1.2 Delete An Image Fusion
- Launch the Image Fusion as described in Image Fusion Editor.
- In the Image Fusion group box, click the delete icon — to delete an Image Fusion.
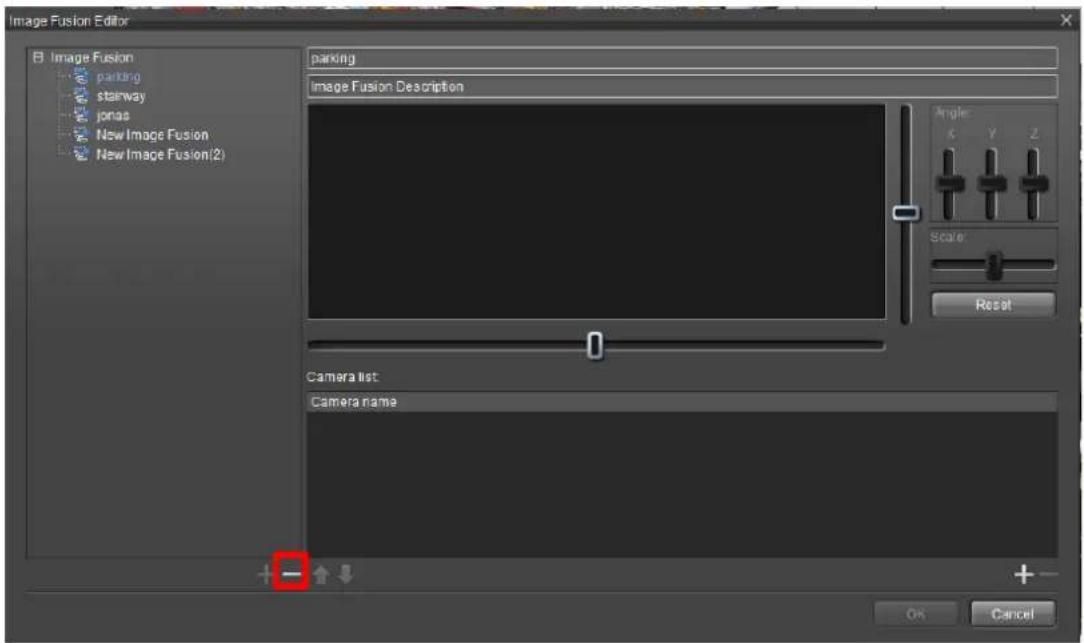
text_image
Image Fusion Editor B Image Fusion parking starway jones New Image Fusion New Image Fusion(2) parking Image Fusion Description Angle X Y Z Scale: Reset Camera list: Camera name + - ↑ ↓ OK Cancel- Click the OK buon and apply the change.
11.2 E-Map
E-map is a graphic image to be overlaid with the icons including Recording Server, video devices, cameras and I/O devices, Metadata Server, Metadata source, and Metadata a Channel, so administrators are able to know where a camera is located and also the layout of all the devices. Such graphic image can be a street map, a oor plan, or any other custom image le.
To launch the E-Map Editor:
1. Access the Live View tab.
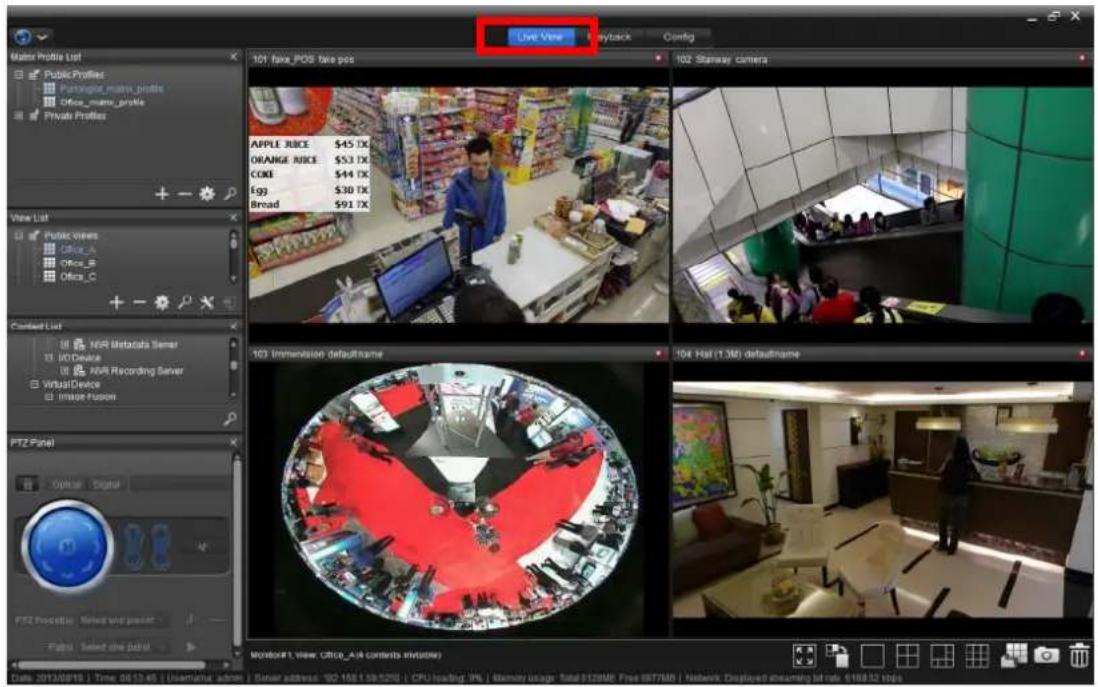
text_image
Live View 101 fake_POS face pos 102 Stairway camera APPLE JUICE $45 TX ORANGE JUICE $53 TX COKE $44 TX Egg $30 TX Bread $91 TX 103 Immenvision defaultname 104 Hall (1.3M) defaultname PTZ Panel Optical Digital FTZ Procedure Select and present FAB Select one panel Monitor#1, view: Office Ask controls inpatients Date: 2013/08/16 | Time: 08:13:45 | Usual/End admin | Server address: 102.105.1.09:203 | CPU loading: 9% | Domain usage: Total: 817MB | Free: 807MB | Network Displayed assuming bit rate: 6168.42 bps- From the Top Toolbar of the NuClient, click the "global" icon
The menu opens.
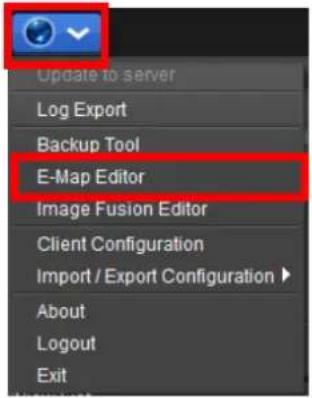
text_image
Update to server Log Export Backup Tool E-Map Editor Image Fusion Editor Client Configuration Import / Export Configuration > About Logout Exit-
Click E-Map Editor.
-
An E-Map Editor window opens.
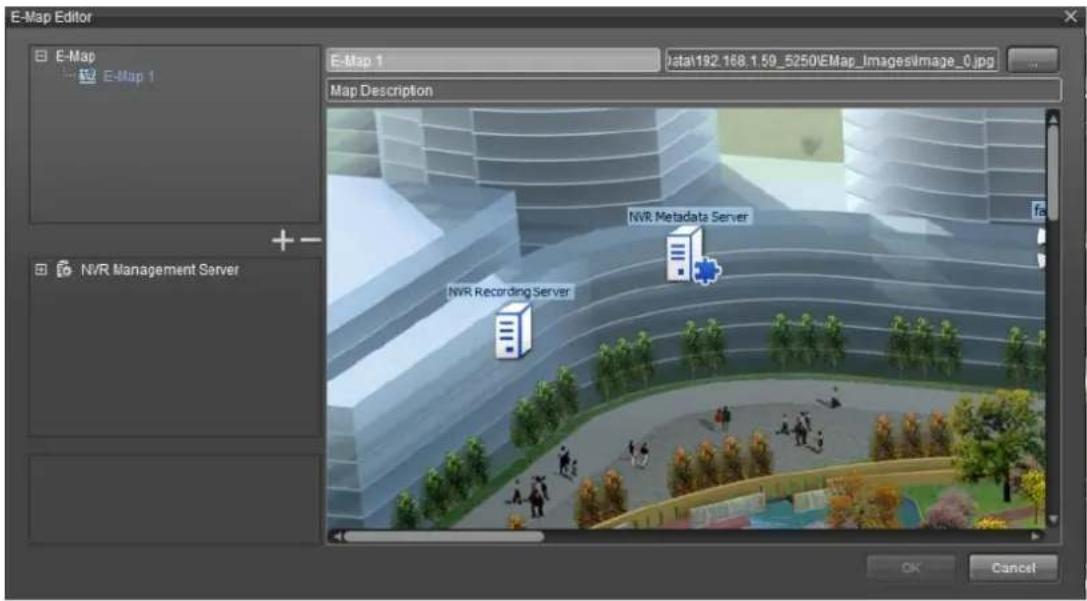
text_image
E-Map Editor E-Map 1 E-Map 1 Map Description NVR Management Server NVR Recording Server NVR Metadata Server OK CancelThe featured sengs are:
| Group box / Setting | Description | |
| E-Mapgroup box | + | Adds an E-map. |
| - | Deletes a selected E-map. | |
| New Mapfield | Assigns the name for the E-map. | |
| Map Descriptionfield | Provides a brief description of the E-map. | |
| [Select a map image file]field | Click the ellipsis (...) button to open an explorer window to browser for the graphic image.1. The acceptable file formats are PNG, BMP, and JPEG. | |
| 2. The maximum file size allowed is 2MB. | ||
| NVR Management Server group box | Expand the tree menu. Click and drag a desired camera or I/O device onto the graphic image and drop it where the device is installed on the image. | |
11.2.1. Create an E-Map
To create an E-map:
- Launch the E-map Editor as described in E-Map Editor.
The E-Map Editor launches, with the exisng E-maps listed in the E-Map group box at the upper-le, the Management Server tree menu in the lower-le, and the graphic image displays in the right.
text_image
E-Map Editor E-Map 1 E-Map 1 Map Description NVR Management Server NVR Metadata Server NVR Recording Server OK Cancel- In the E-Map group box, click the add sign icon + to add a new E-map to.
The root to be added with a new E-map then becomes highlighted.
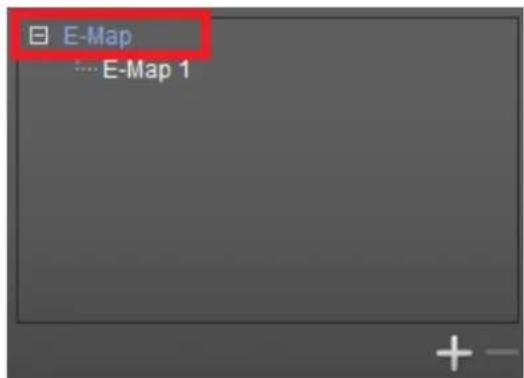
text_image
E-Map ... E-Map 1The root to be added with a new E-map becomes highlighted.
- Click the add sign icon + at the bottom-right corner of the E-Map group box.
A new E-map named "New Map" by default is appended to the root.
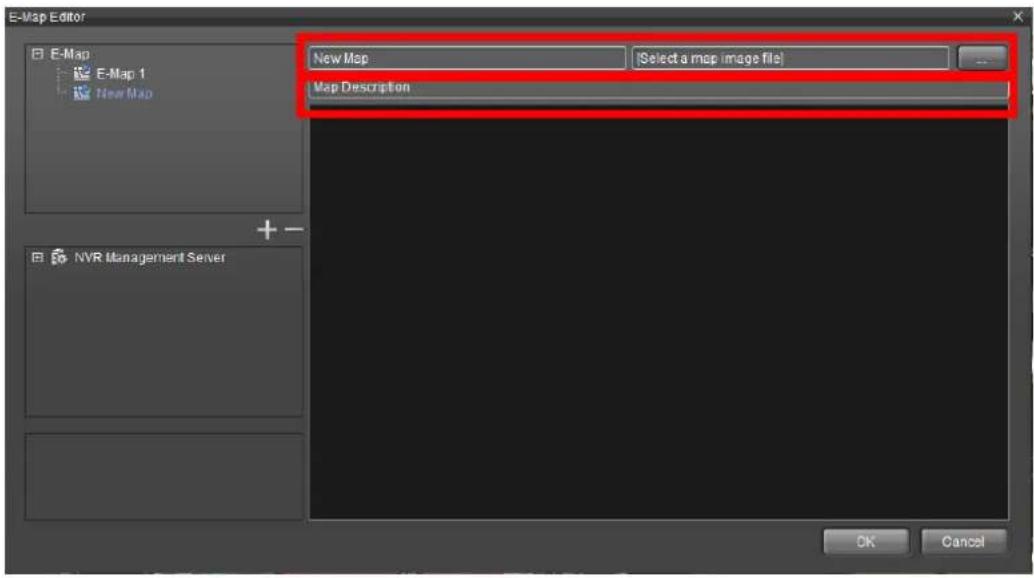
text_image
E-Map Editor E-Map E-Map 1 New Map New Map Select a map image file Map Description NVR Management Server OK Cancel- Enter the name and a brief descripon for the new E-map. And click the ellipsis (...) buon to open an explorer window to browser for the graphic image.

The acceptable le formats are PNG, BMP, and JPEG. The maximum le size allowed is 2MB.
An image le is added. Scroll the mouse wheel to zoom in and out the map image.
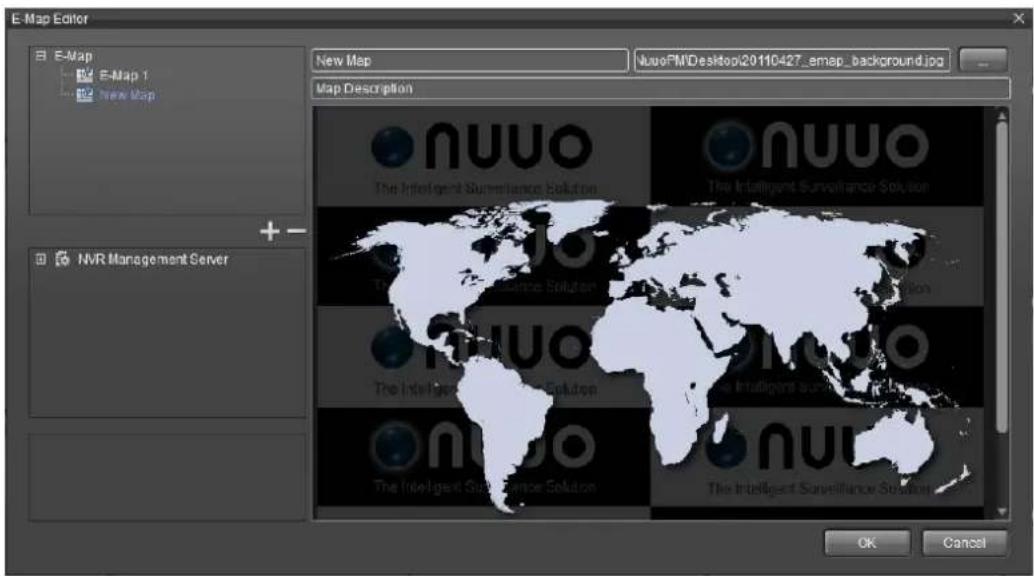
text_image
E-Map Editor New Map nuuoPM\Desktop20110427_emap_background.jpg Map Description nuuo The Intelligent Surveillance Solution nuuo The Intelligent Surveillance Solution nuuo The Intelligent Surveillance Solution nuuo The Intelligent Surveillance Solution nuuo The Intelligent Surveillance Solution NVR Management Server + - OK Cancel- From the NVR Management Server tree menu, drag a server on to the map.
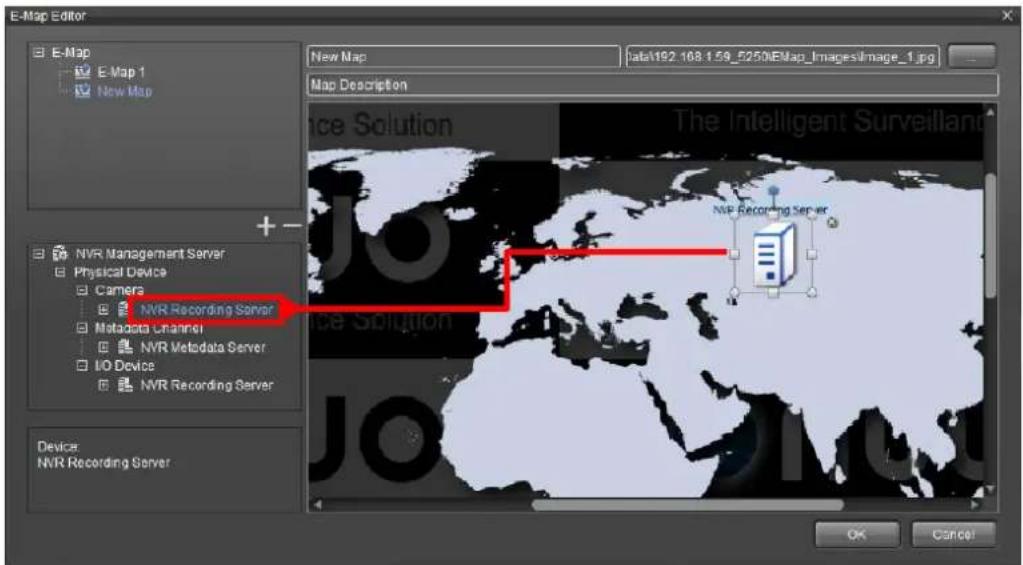
text_image
E-Map Editor E-Map E Map 1 New Map Map Description NVR Management Server Physical Device Camera NVR Recording Server Metadata Unchannel NVR Metadata Server I/O Device NVR Recording Server Device: NVR Recording Server The Intelligent Surveillance NVR Recording Server OK Cancel
The icons should all be placed on the area of an image and cannot be placed on the black area surrounding an image when you zoom out.
- Drag a camera onto the map.
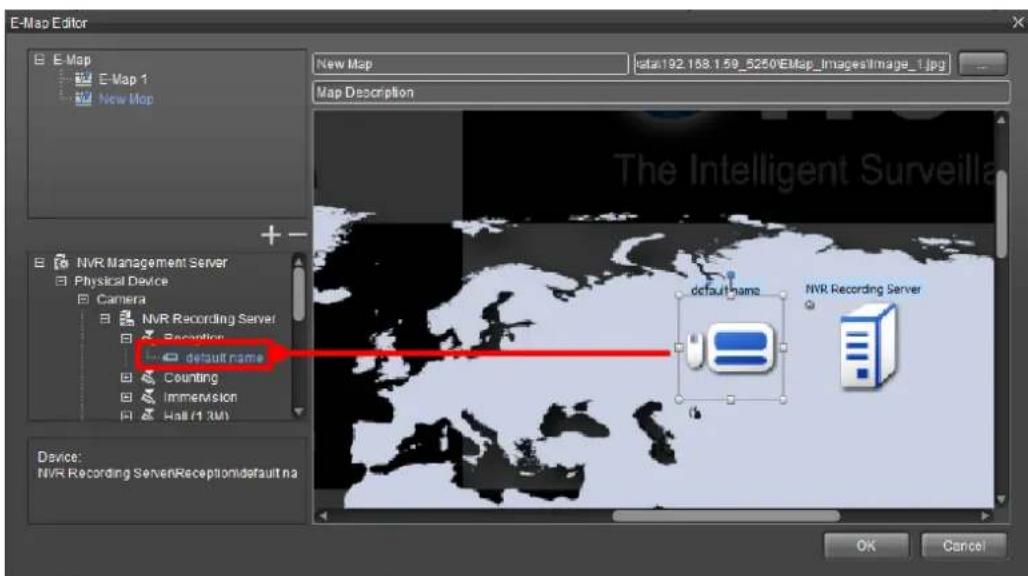
text_image
E-Map Editor E-Map E-Map 1 New Map Map Description The Intelligent Surveilla NVR Management Server Physical Device Camera NVR Recording Server Reception default name Counting Immersion Hall (1.3M) Device: NVR Recording Server/Reception/default.no default name NVR Recording Server OK Cancel7. Drag an I/O device onto the map.
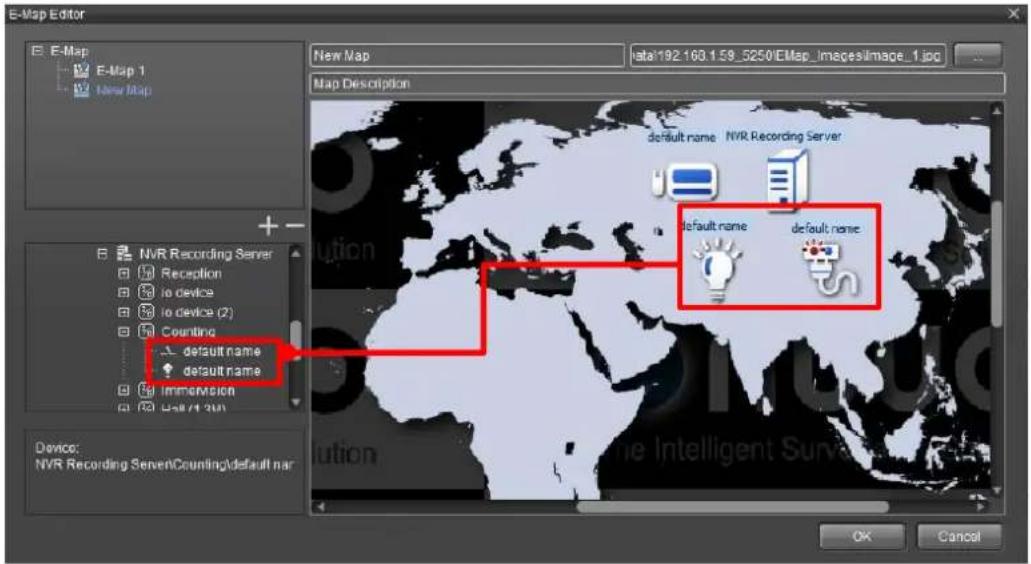
text_image
E-Map Editor E-Map E-Map 1 New Map Map Description default name NVR Recording Server default name default name NVR Recording Server Reception to device to device (2) Counting default name default name Immersion Bull/1.3M Device: NVR Recording Server Counting default name OK Cancel8. Adjust the size by dragging the edge points of an icon.
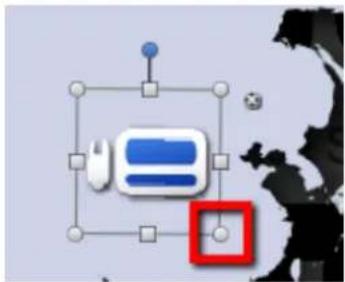
flowchart
graph TD
    A["User"] --> B["Device"]
    B --> C["Interface"]
    C --> D["Red Box"]
    style A fill:#f9f,stroke:#333
    style B fill:#bbf,stroke:#333
    style C fill:#dfd,stroke:#333
    style D fill:#dfd,stroke:#333
Drag and rotate the blue point to rotate an icon.
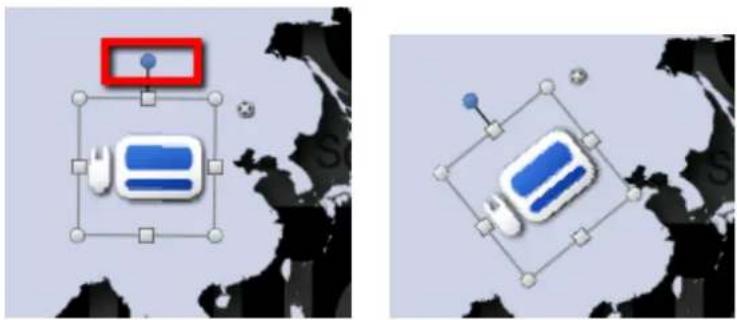
flowchart
graph TD
    A["Start"] --> B{Decision}
    B -->|Yes| C["Process Step 1"]
    B -->|No| D["Process Step 2"]
    C --> E["End"]
    D --> F["End"]
Click on the x icon to delete an icon.
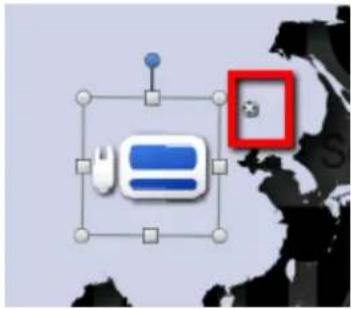
flowchart
graph TD
    A["Device 1"] --> B["Processing Unit"]
    C["User"] --> B
    D["Sensor"] --> B
    B --> E["Output"]
To delete mulple icons at one me, select mulple icons and drag them to the trash can in the corner.
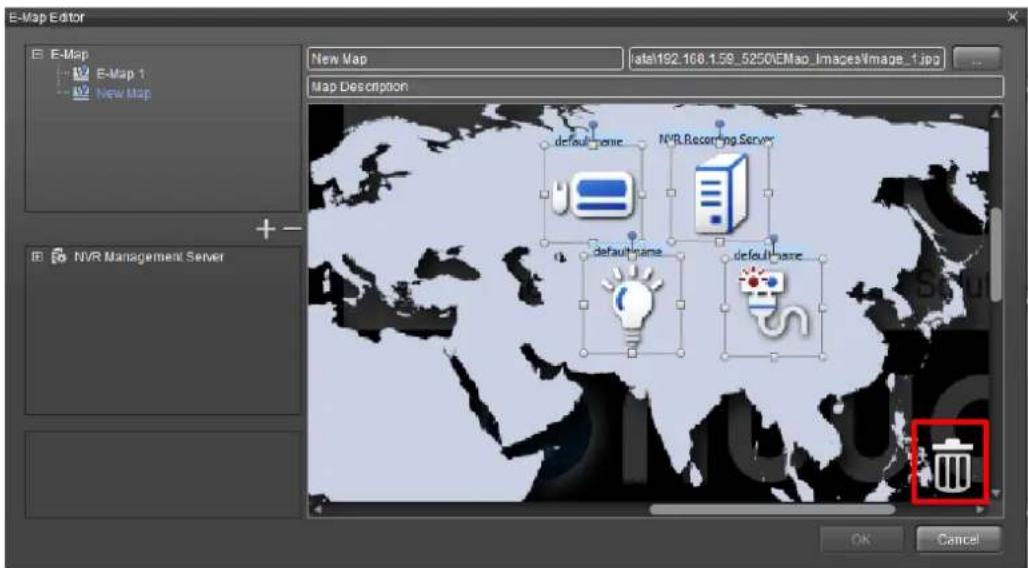
text_image
E-Map Editor E-Map E-Map 1 New Map Map Description NVR Management Server default name NVR Recording Server default name default name OK Cancel- Click the OK buon and apply the change.
11.2.2 Delete an E-Map
To delete an E-map:
1 Launch the E-map Editor as described in E-Map Editor.
2 In the E-Map group box, click the delete icon — to delete an E-map.
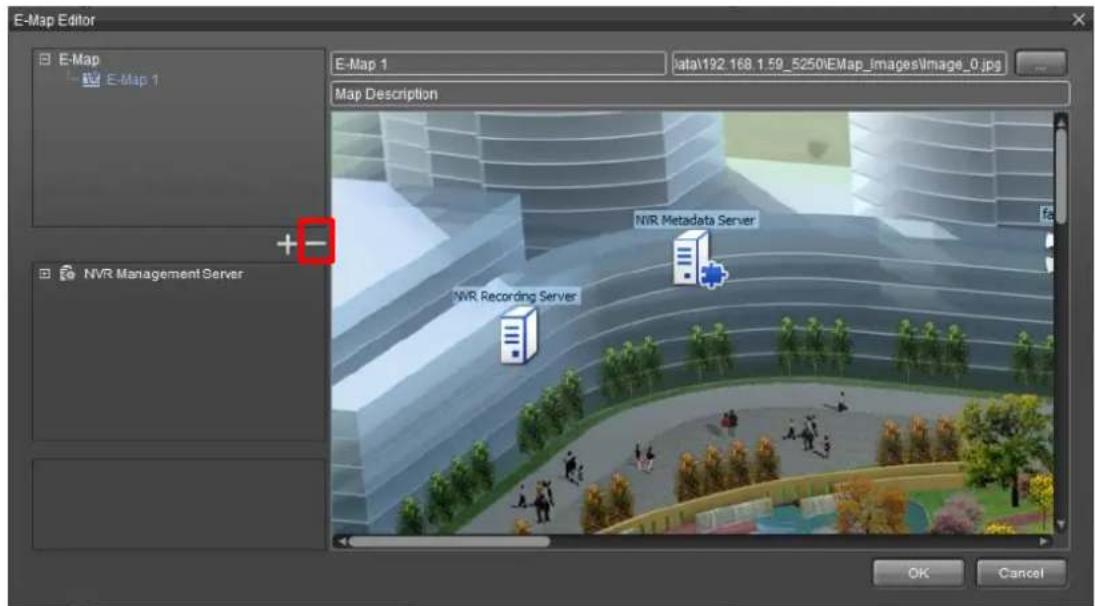
text_image
E-Map Editor E-Map E-Map 1 Map Description NVR Management Server NVR Recording Server NVR Metadata Server OK Cancel- Click the OK buon and apply the change.
11.3 View
A view is the conguraon of how you arrange video content in the view area, video stream sengs, and the grid layout. Views can be categorized into Public View and Private View. Public Views are congured by the users who have the eding permission on the server and can be viewed by any users. Private views are visible only to who edit them, but every user can view private views.
The comparison between Public View and Private View:
| Seng | Descripon |
| Public View | The users with edit privilege of the server. Everyone can view. |
| Private View | Everyone can edit privilege of the server. Visible only to view owners |
To launch the View:
1. Access the Live View tab.
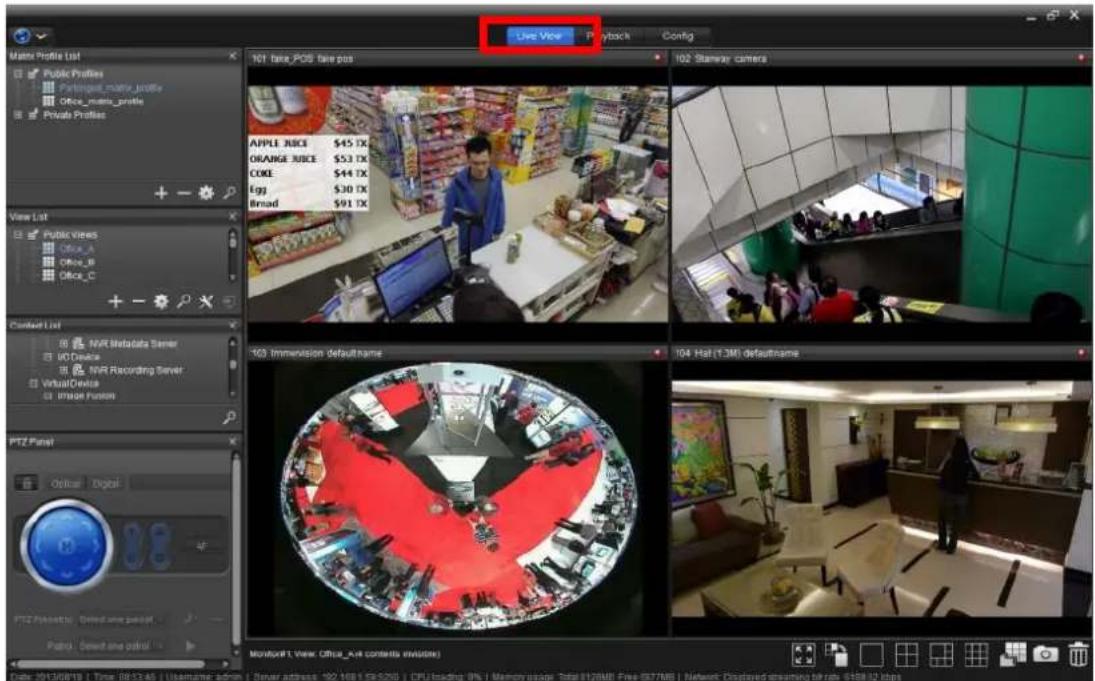
text_image
Live View Playback Config 101 take_POS take pos 102 Starway camera APPLE JUICE $45 TX ORANGE JUICE $53 TX COKE $44 TX Egg $30 TX Broad $91 TX 103 Immersion defaultname 104 Hat (1.3M) defaultname POTZ Panel Optical Digital Time: 00:30:45 | Username admin | Server address: 102.168.1.06.520 | CPU loading: 9% | Memory image: Total (12MB) Free (557MB) | Network: Displayed streaming toll rate: $158.32 bps2. Click the View list
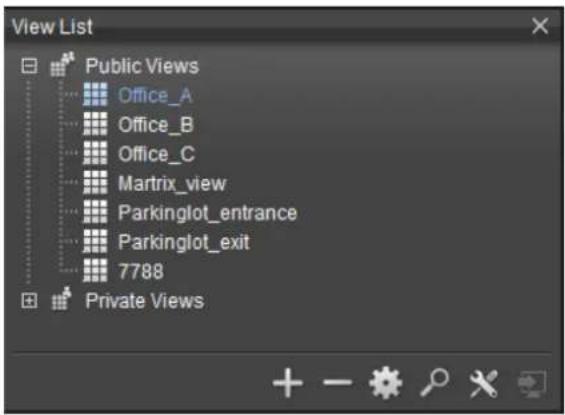
text_image
View List Public Views Office_A Office_B Office_C Matrix_view Parkinglot_entrance Parkinglot_exit 7788 Private ViewsThe featured sengs are:
| Seng | Descripon |
 | Add view/group/view tour |
 | Delete view/group/view tour |
 | Configure view/group/view tour |
 | Search |
 | Switch stream profile |
 | Send view/group/view tour to a secondary monitor when available |

Live View can be displayed both in the primary monitor and in secondary monitors, but Playback can open only in the primary monitor.
11.3.1 Add A View
A view is the conguraon of how you arrange video content in the view area, video stream sengs, and the grid layout.
To launch the View:
1. Access the Live View tab.
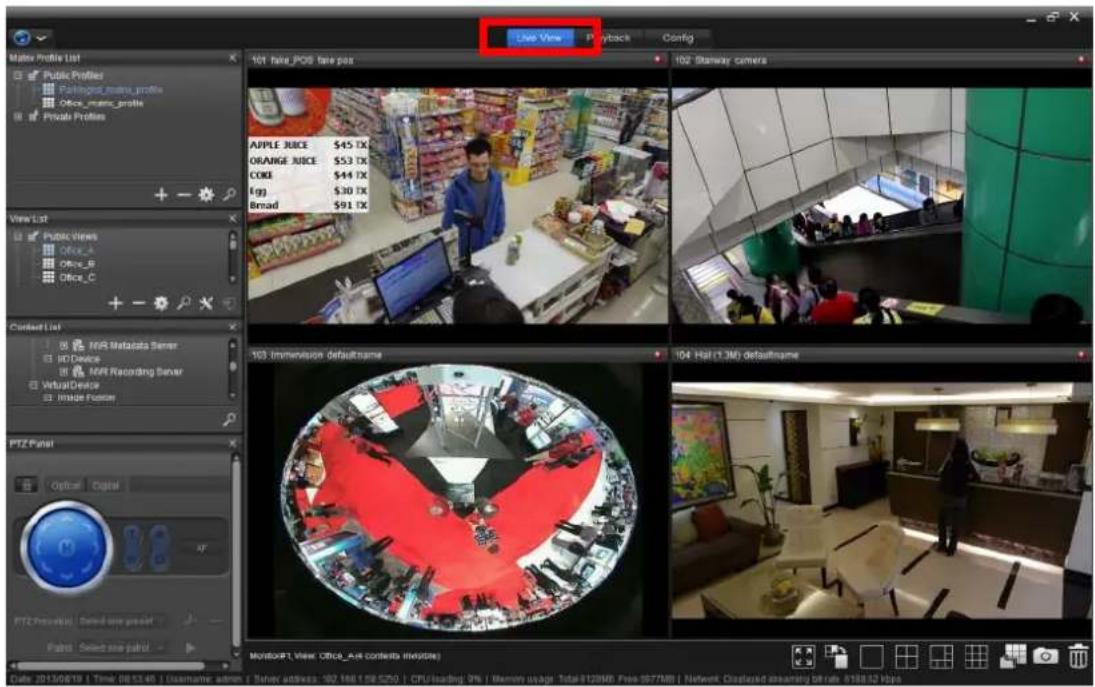
text_image
Make View Playback Config 101 take_POS fare pos 102 Shanway covers APPLE JUICE $45 TX ORANGE JUICE $53 TX CODE $44 TX 699 $30 TX Broad $91 TX 103 Immenvision defaultname 104 Hal (1.3M) defaultname PTZ Panel Optical Digital PTZ Pulsual Select one packet Fabric Select one padri Model#T view Office_Aut contents live(site) Date: 2013/08/19 | Time: 08:13:45 | Username: admin / Server address: 182 166 159 520 | CPU loaded: 3% | Bsmen usage: Total81288 | Free 95788 | Network Displaying output: $158.52 kbps2. Click the View list
text_image
View List Public Views Office_A Office_B Office_C Matrix_view Parkinglot_entrance Parkinglot_exit 7788 Private Views- Select the type of view, either Public or Private, to be created.
text_image
View List Public Views Private Views- Click on the add sign icon .+
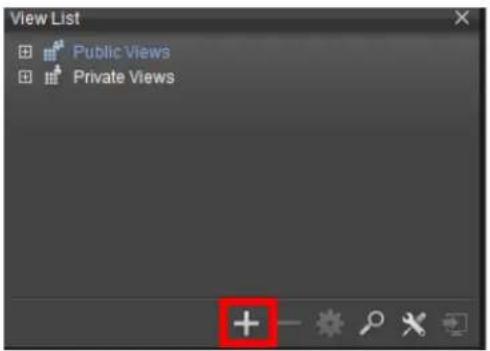
text_image
View List Public Views Private Views- Click on Add View.
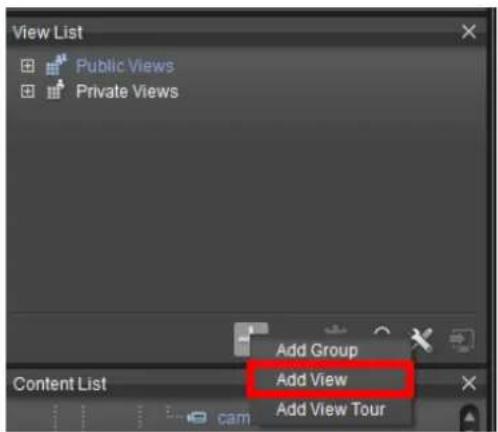
text_image
View List Public Views Private Views Add Group Add View Add View Tour Content List- A new view named "New View" by default is appended to the root.
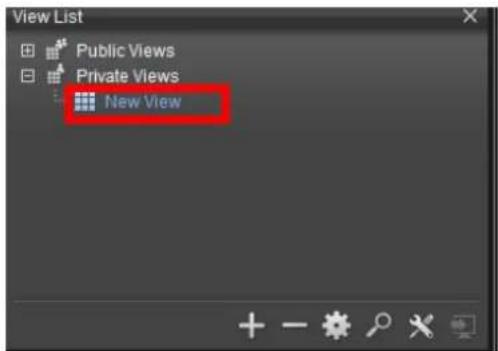
text_image
View List Public Views Private Views New View
When you modify the content in View List, a modicaon icon will come with modified items. Any modicaon is not saved to remote servers until you upload it.
11.3.2 Add Cameras to View
To launch the View:
- Access the Live View tab.
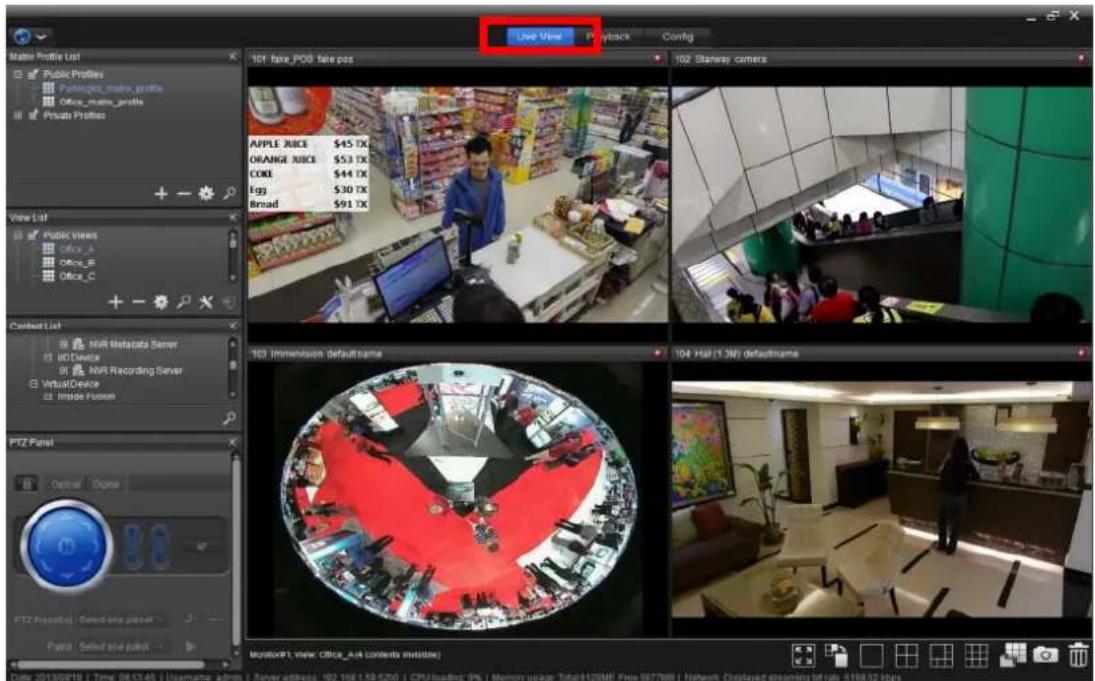
text_image
Live View 101 fare_POS fare pos 102 Glanway camera APPLE JUICE $45 TX ORANGE NICEI $53 TX CODE $44 TX Egg $30 TX Broad $91 TX 103 Immersion defaultname 104 Hal (1.3M) defaultname MicrosoftView Office_A4 contents division Date: 2013/08/18 | Time: 06:53:45 | Username admn | Server address: 102.168.159.520 | CPU/loading: 9% | Memory usage: Total(120MB) Free 9977MB | Network Displayed streaming bit rate: 0188.02 kbps- Click the View list you want to edit.
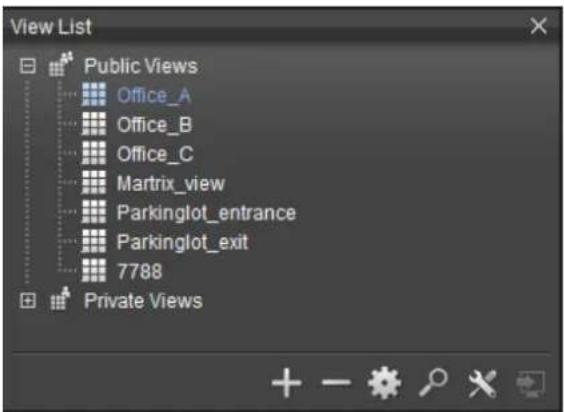
text_image
View List Public Views Office_A Office_B Office_C Matrix_view Parkinglot_entrance Parkinglot_exit 7788 Private Views- Click Content list.
Drag and drop a single camera or a sensor to a grid cell.
OR
Drag and drop a server to a grid cell.
Then the camera's video will show in the cell.
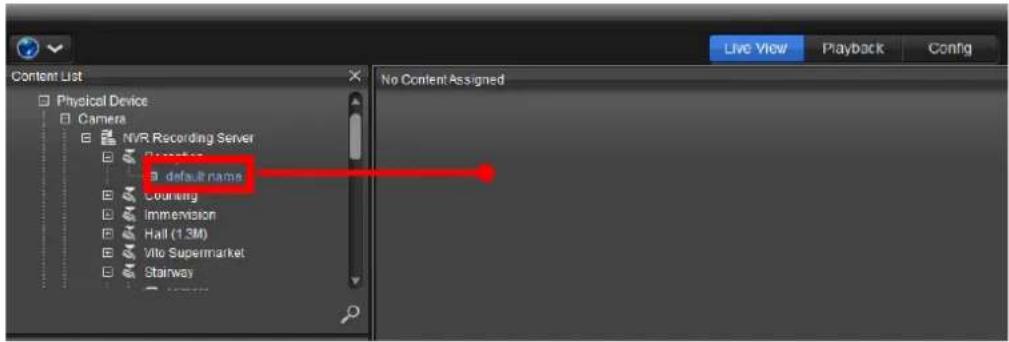
text_image
Content List Physical Device Camera NVR Recording Server default name Counting Imprecision Hall (1.3M) Vito Supermarket Stairway Live View Playback Config No Content Assigned- Drag a server to the grid, cameras will ll up in the view area unl no grid cells are available to display more video streams.
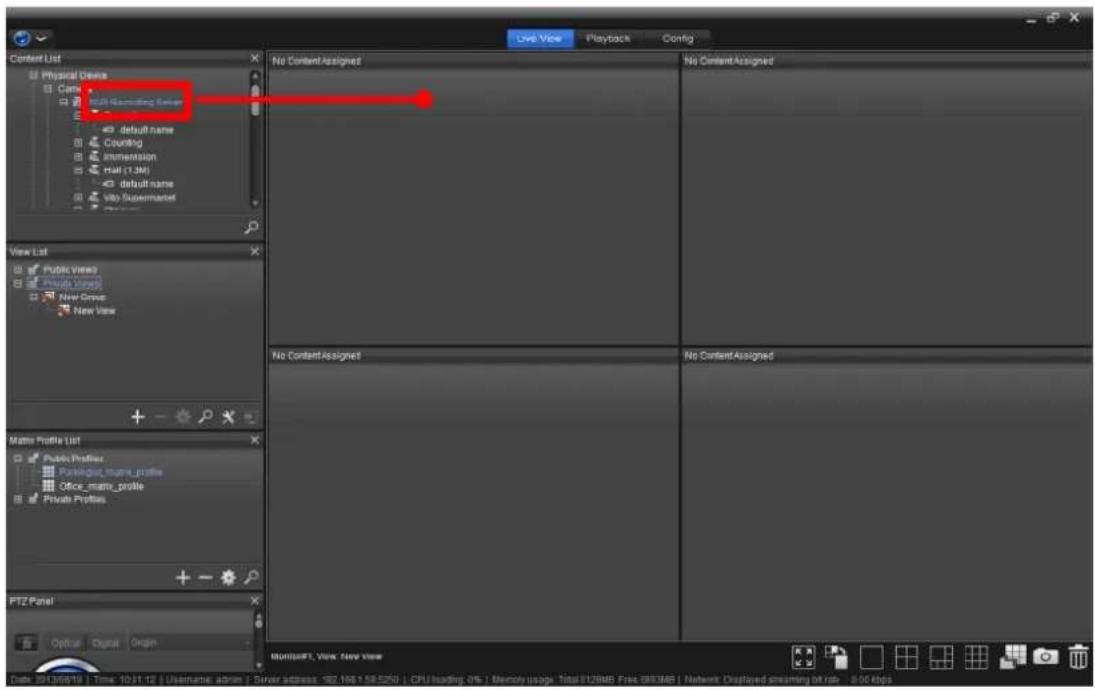
text_image
Content List Physical Device Carns Full Reasoning Server default name Counting Implementation Hall (1.3M) default name Vito Supermarket View List Public Views Private Views New Graph New View Matte Profile List Public Profiles Portingout mamro_profile office mamro_profile Private Profiles PTZ Panel Optical Digital Origin Live View Playback Config No Content Assigned No Content Assigned No Content Assigned Untitled.F1, View: New View Page 201-06-19 | Time - 10:21:12 | Username admin | Server address: 182.165.1.58.525G | CPU loading: 0% | Memory usage: Total:112MB Free: 803MB | Network Displayed streaming bit rub - 8.06 bps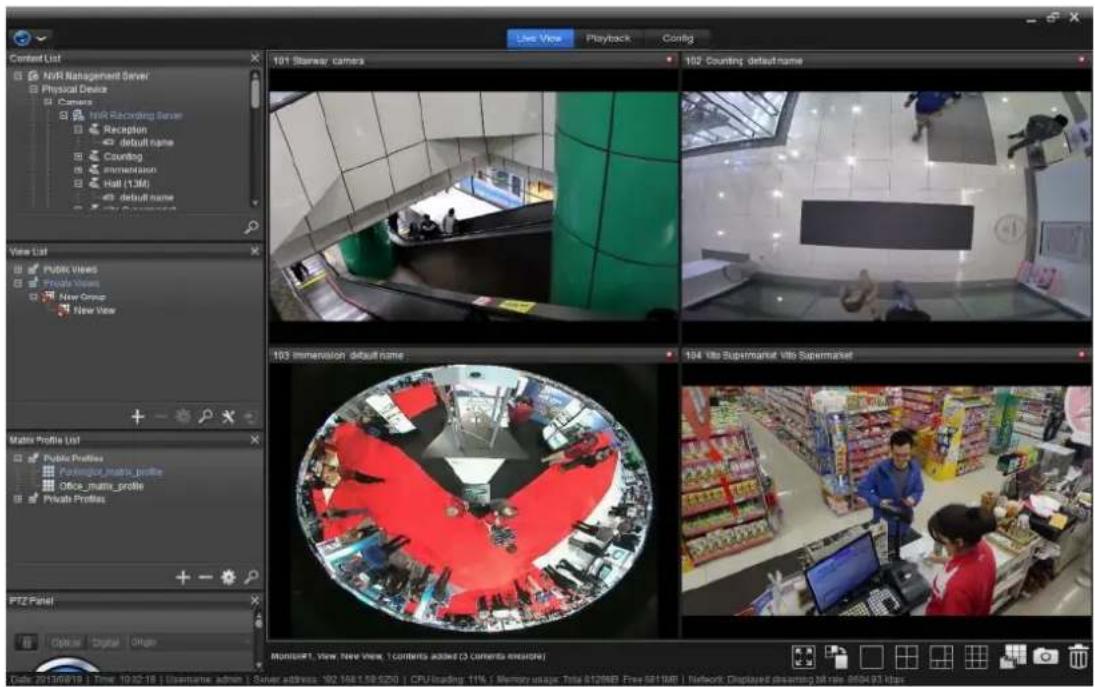
text_image
Content List NVR Management Server Physical Device Camers NVR Recording Server Reception default name Counting immersion Hall (138) default name New View View List Public Views Private Views New Group New View 101 Starway cameras 102 Counting default name 103 Immersion default name 104 Vito Supermarket Vito Supermarket Matrix Profile List Public Profiles Foreignor,在极目的 Office,在极目的 Private Profiles PTZ Panel Optical Digital Style Multiport, View New View, 1 contents added (2 contents installed) Code: 2013/09/19 | Time: 10:02:16 | Username: admin | Server address: 102.168.159.5293 | CPU/loading: 11% | Memory usage: July 01/08/08 Free 02/19/08 | Network Displayed dreaming bit rate: 9994.93 bytes11.3.3 Delete a Camera from View
To launch the View:
1. Access the Live View tab.
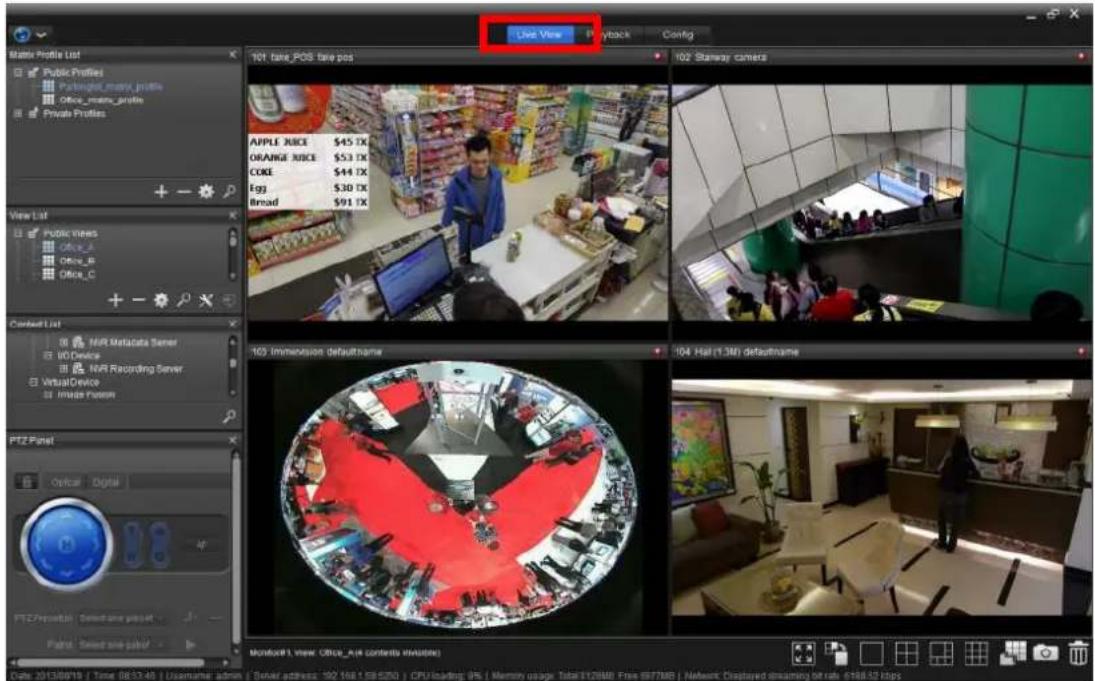
text_image
Live View 101 take_POS take pos 102 Starway camera APPLE JUICE $45 TX ORANGE JUICE $53 TX CODE $44 TX Egg $30 TX Broad $91 TX 103 Immersion defaultname 104 Hal (1.3M) defaultname PTZ Panel Optical Digital PTZ Production Command name preset Photo Select one panel Monbook#1 view Office_tal contenta in/outpage Date: 2013/09/18 | Time: 06:33:45 | Username: admin | Serial address: 102.164.158.520 | CPU loading: 9% | Memory usage | Total:176MB Plus:957MB | Network: Displayed streaming bit tabs: 6156.52 kbps2. Click the View list you want to edit.
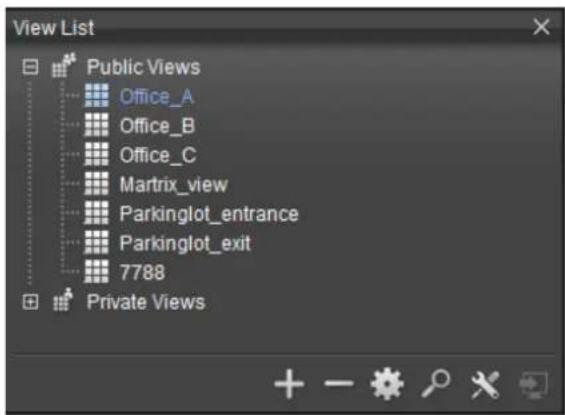
text_image
View List Public Views Office_A Office_B Office_C Matrix_view Parkinglot_entrance Parkinglot_exit 7788 Private Views- Click on the tle bar of a channel and drag it to the trash can in the corner.
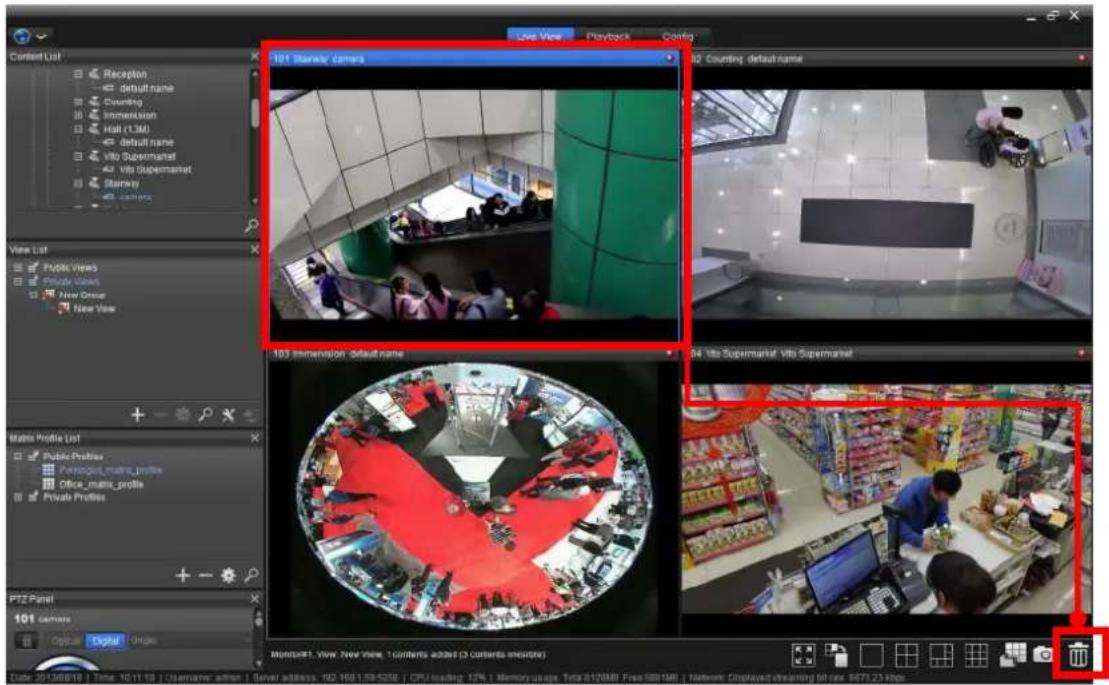
text_image
101 browser camera 102 Counting default name 103 immersion default name 104 Vito Supermarket Vito Supermarket PTZ Panel 101 cameras Optic Digital Origin Date: 2013/08/18 | Time: 10:11:18 | Username: admin | Server address: 102.163.1.93-5256 | CPU loading: 17% | Memory usage, Total: 6120MB Free: 8801MB | Hardware: Displayed streaming kit case: 8878.23.jpgOR
Click on the trash can icon in the corner.
Click OK to conrm the removal.
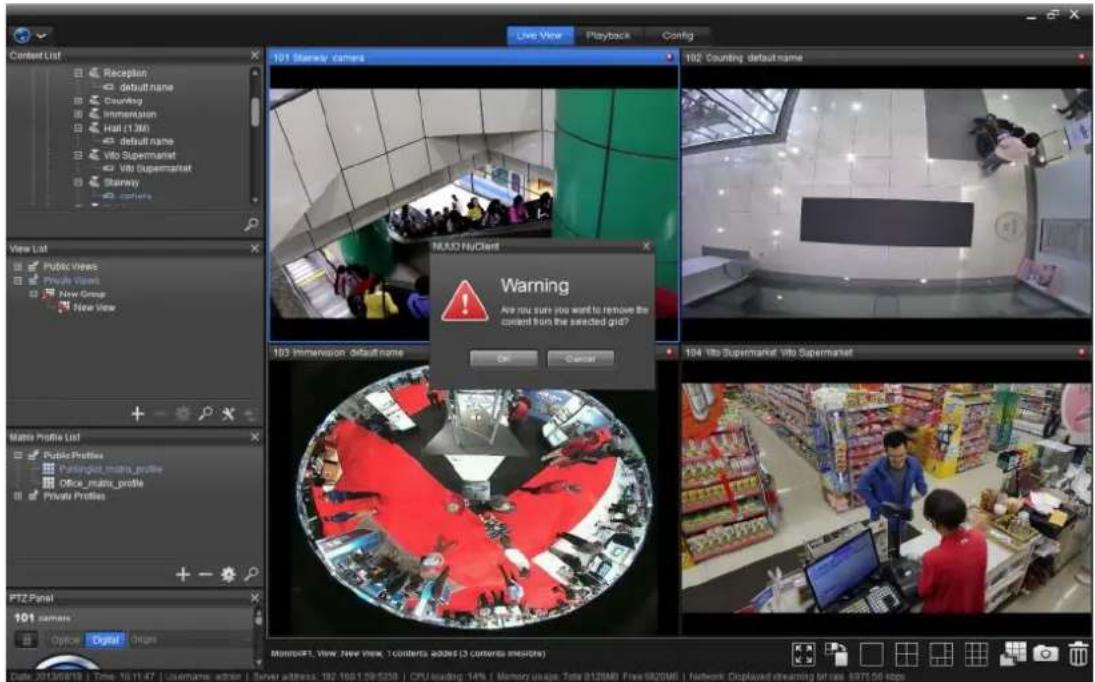
text_image
Context List Reception default name Counting Interration Hall (1386) default name Vito Supermarket Vito Supermarket Stanley viewlist 101 Stanley cameras 102 Counting default name View List Public Views Private Views New Group New View MADO NuClient Warning Are you sure you want to remove the content from the selected grid? OK Cancel 103 Immersion default name 104 Vito Supermarket Vito Supermarket PTZ Panel 101 cameras Optive Digital Options MUSUOFT, VIEW NEW VIEW, TOUBINS: 20065 (2 CONTROLS VERSION) Date: 2013/08/19 | Time: 10:11:47 | Username: admin | Server address: 102.105.1.09:5256 | CPU/leading: 14% | Memory usage: Tate 012MBI Free 5820MB | Network Displayed dreaming bits per 3975.56 bps11.3.4 Add A View Group
A view group is a group of views which can be organized into a tree structure. You can manage views via view group.
To launch the View Group:
1. Access the Live View tab.
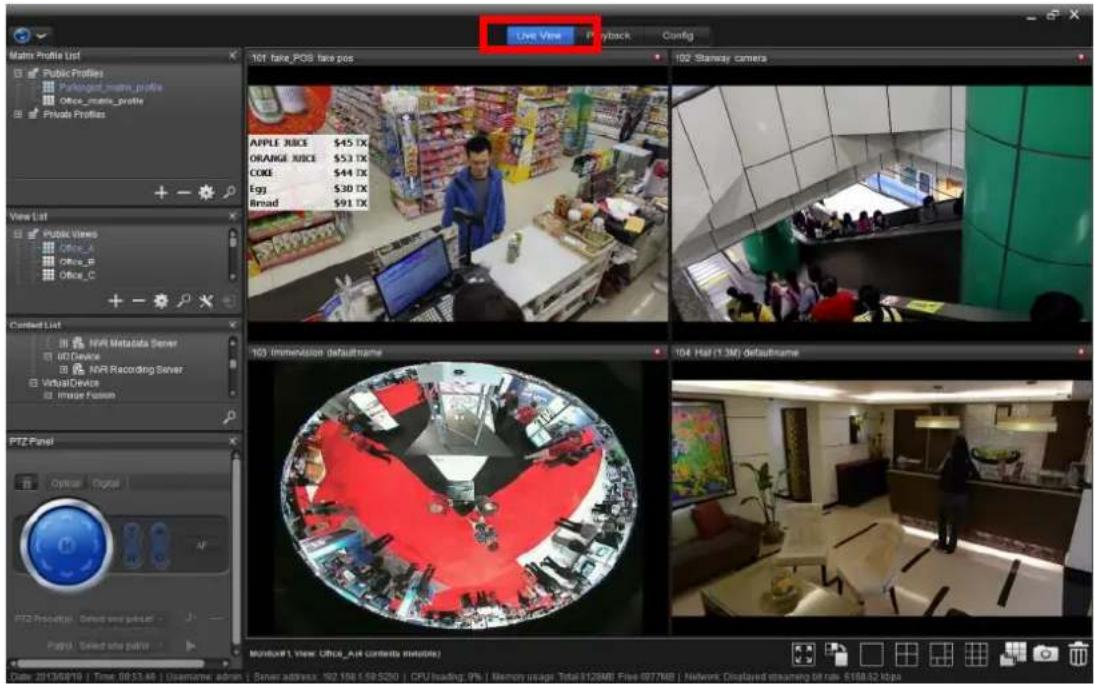
text_image
Live View Playback Config 101 take_POS face pos 102 Shamay camera APPLE JURCE $45 TX ORANGE JURCE $53 TX CORE $44 TX Egg $30 TX Broad $91 TX 103 Immovision defaultframe 104 Hal (1.3M) defaultname PTZ Panel Optical Digital PTZ Procedure: Select one packet Packet: Select one packet Date: 2013/08/16 | Time: 08:13:46 | Username: admin | Server address: 102.106.159.520 | CPU loading: 9% | Memory usage: Total313MB Files 997MB | Network Clustified Treaming off run: $188.12 kbps2. Click the View list
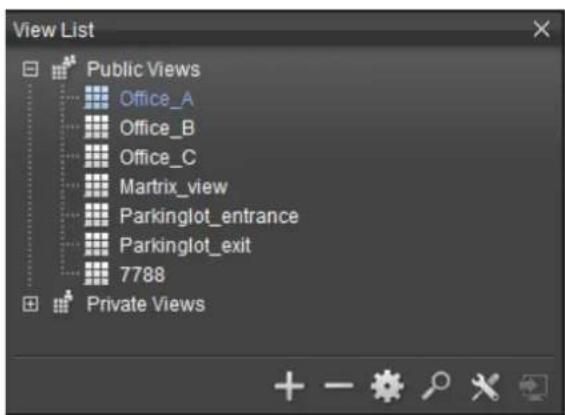
text_image
View List Public Views Office_A Office_B Office_C Matrix_view Parkinglot_entrance Parkinglot_exit 7788 Private Views- Select the type of view, either Public or Private, to be created.
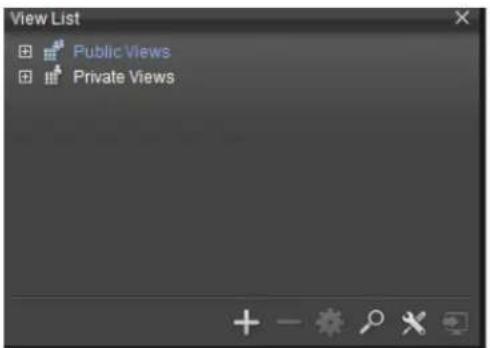
text_image
View List Public Views Private Views- Click on the add sign icon + to add View Group.
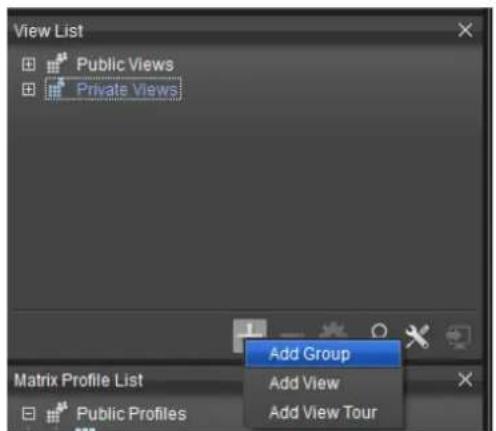
text_image
View List Public Views Private Views Add Group Add View Add View Tour Matrix Profile List Public Profiles- Click on add new view and new view will be added under selected group type.
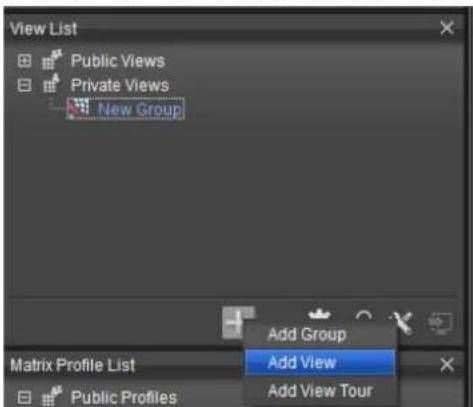
text_image
View List Public Views Private Views New Group Add Group Add View Add View Tour Matrix Profile List Public Profiles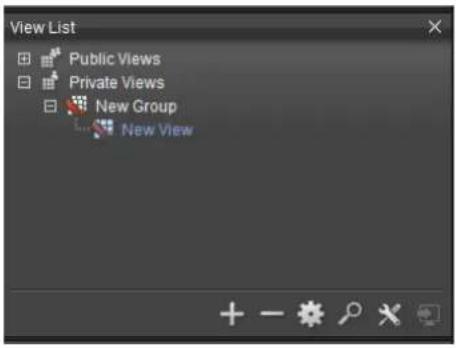
text_image
View List Public Views Private Views New Group New ViewOR
Drag the exist view to View Group.
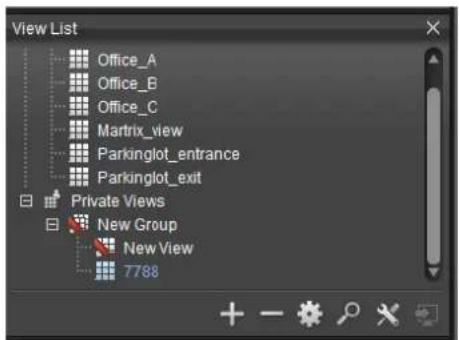
text_image
View List Office_A Office_B Office_C Matrix_view Parkinglot_entrance Parkinglot_exit Private Views New Group New View 778811.3.5 Add A View Tour
A view tour is a set of dierent views which are automacally rotated to show in the view area.
To launch the View Tour:
1. Access the Live View tab.
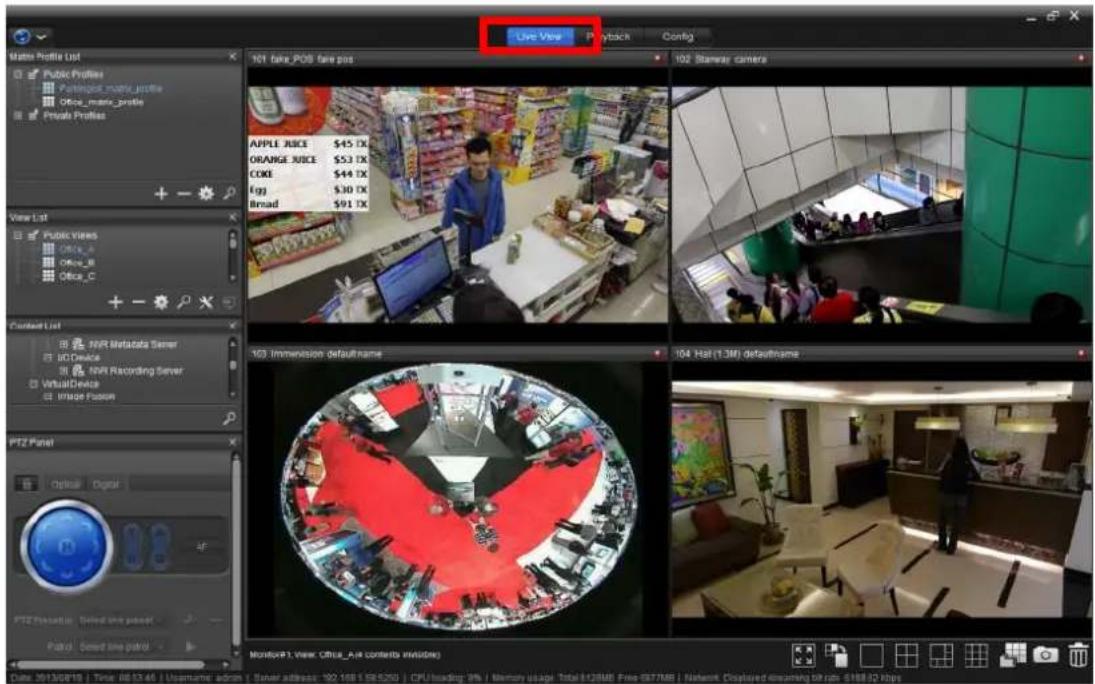
text_image
Live View Playback Config 301 fake_POS fare pos 102 Starway camera APPLE JUICE $45 TX ORANGE JUICE $53 TX CORE $44 TX egg $30 TX Broad $91 TX 303 Immersion defaultname 104 Hal (1.3M) defaultname MultiView: Office_Aut contents (includes) Date: 06/12/2018 | Time: 08:53:46 | Username: admin | Server address: 102.168.1.08.5250 | CPU/loading: 3% | Memory usage: Total (12MB) Free (557MB) Network Displayed running 60 bits: $168.52 kbps2. Click the View list
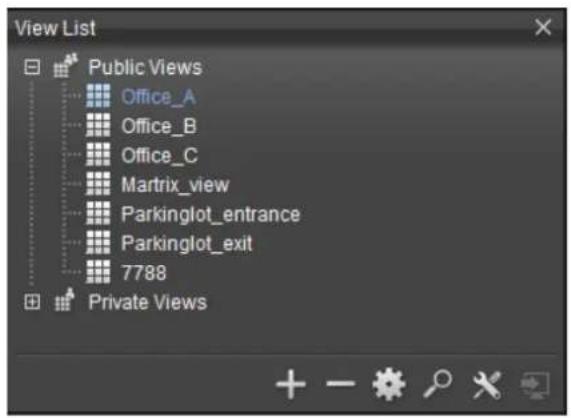
text_image
View List Public Views Office_A Office_B Office_C Martrix_view Parkinglot_entrance Parkinglot_exit 7788 Private Views- Select the type of view, either Public or Private, to be added.
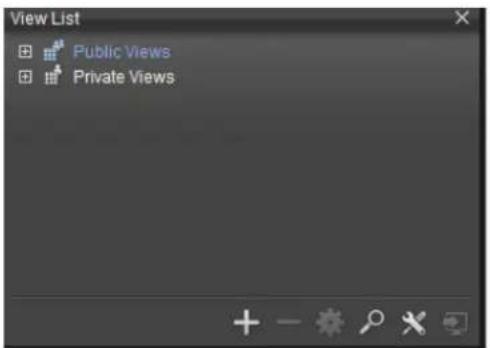
text_image
View List Public Views Private Views- Click on the add sign icon + to add View Tour.
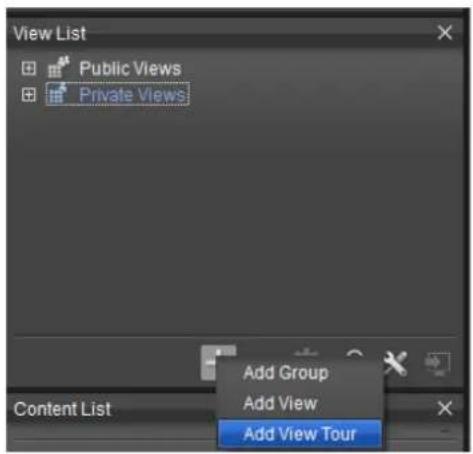
text_image
View List Public Views Private Views Add Group Add View Add View Tour Content List- View Tour Seng opens.
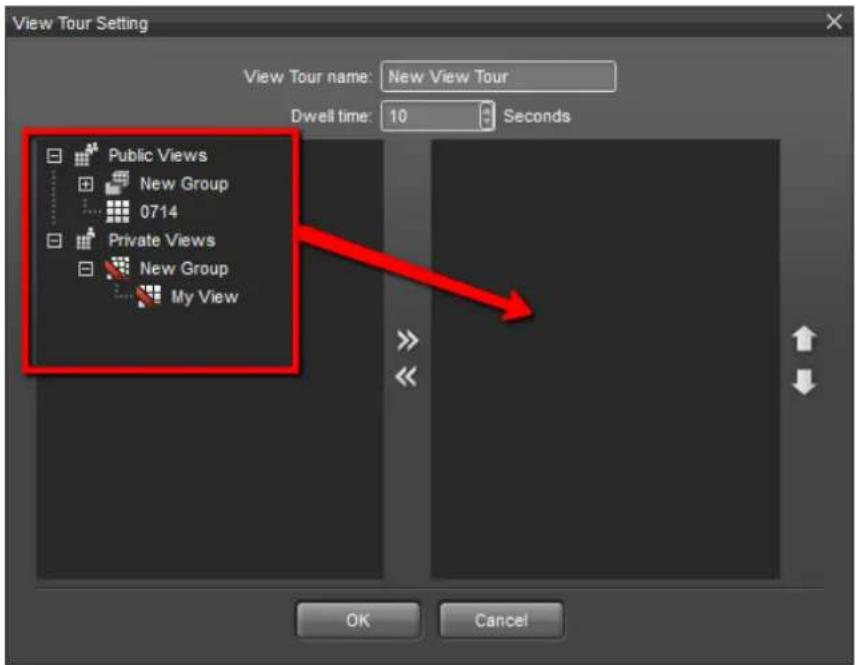
text_image
View Tour Setting View Tour name: New View Tour Dwell time: 10 Seconds Public Views New Group 0714 Private Views New Group My View OK CancelThe featured sengs are:
| Seng | Descripon |
| View Tour Name | Edits View Tour Name. |
| Dwell Time | Edits the time interval when a view switches to the next one in a view tour.► 1 to 60 seconds are available. |
| Add view to View Tour. | |
| Delete view to View Tour. | |
| Moves the selected view up. | |
| Moves the selected view down. |
- Click the OK buon and apply the change.
- In View Tour will switch between previous and next views, and toggle full screen.
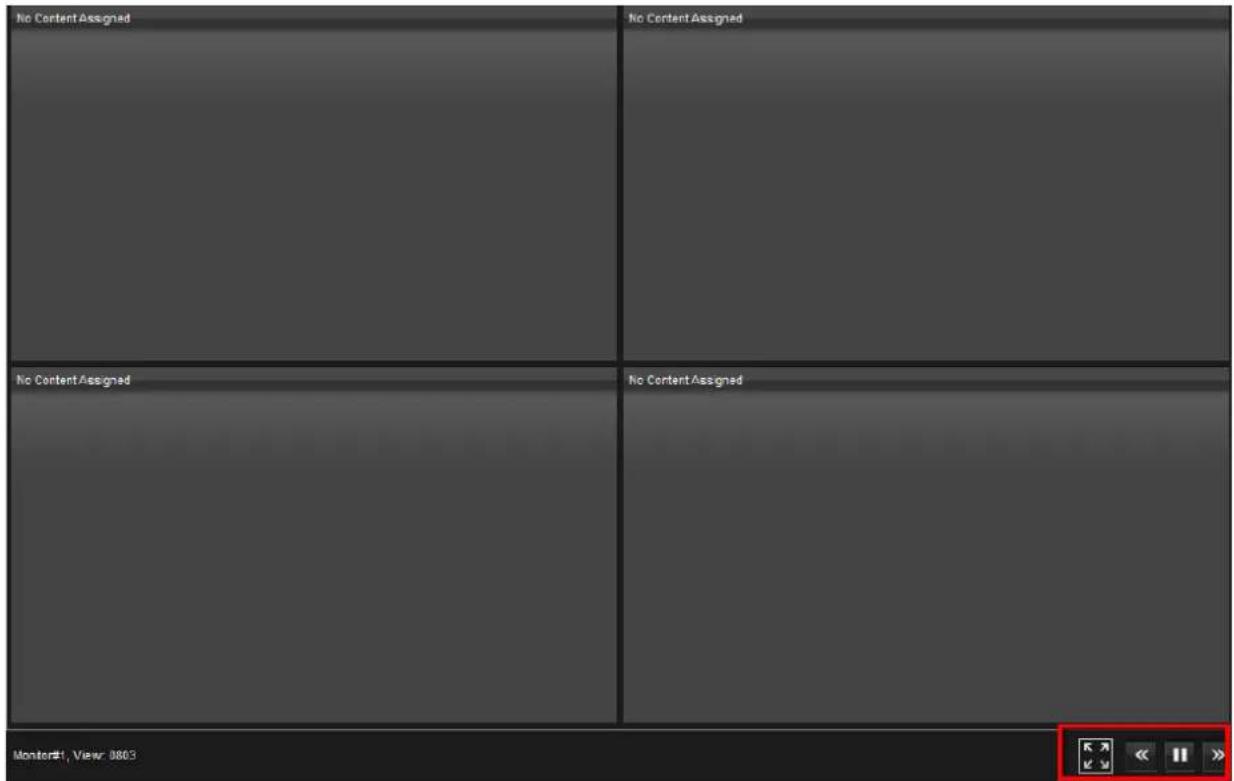
text_image
No Content Assigned No Content Assigned No Content Assigned Monitor#: View: 0803The featured sengs are:
| Seng | Descripon | |
 | Toggle full-screen | |
 | Go to previous view | |
 | Pause | |
 | Go to next view | |
11.3.6 Duplicate A View
To duplicate a View:
1. Access the Live View tab.
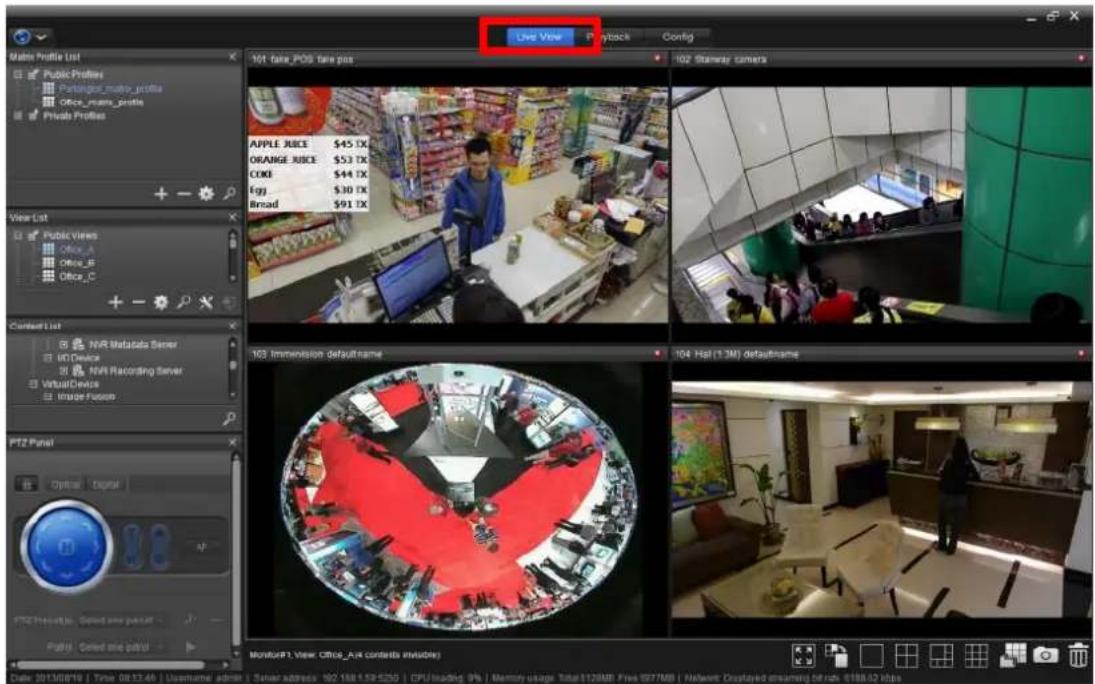
text_image
Live View Playbox Config 301 take_POS take pos 302 Sliteway camera APPLE JUICE $45 TX ORANGE JUICE $53 TX CODE $44 TX Egg $30 TX Broad $91 TX 103 Immersion defaultname 104 Hal (1.3M) defaultname PTZ Panel Central Digital Time 2013/08/19 | Time 08:37:46 | Usenthune admin | Server address: 102.168.5.58.5255 | CPU/loading: 9% | Memory usage: Total 112MB Free 957MB | Network Displayed dreaming of tabs 8188.32 kbps PhotoScript View Office_Akt contents includes2. Click the View list
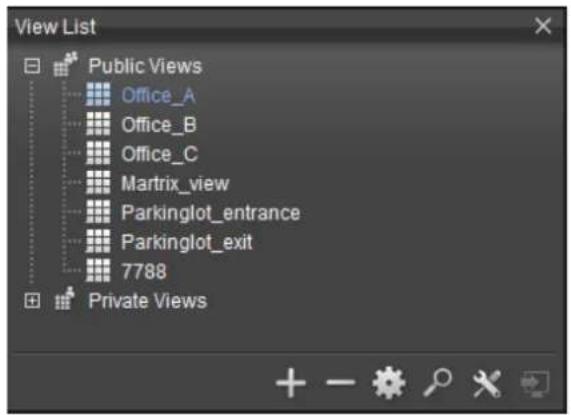
text_image
View List Public Views Office_A Office_B Office_C Matrix_view Parkinglot_entrance Parkinglot_exit 7788 Private Views3. Select the type of view, either Public or Private, to be duplicated.
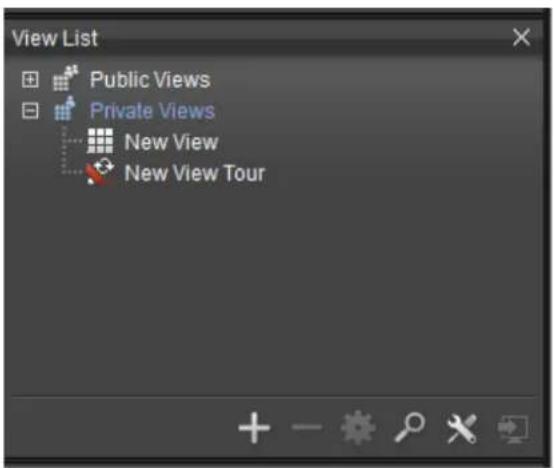
text_image
View List Public Views Private Views New View New View Tour- Click on the add sign icon + and connue to click on Save As ...
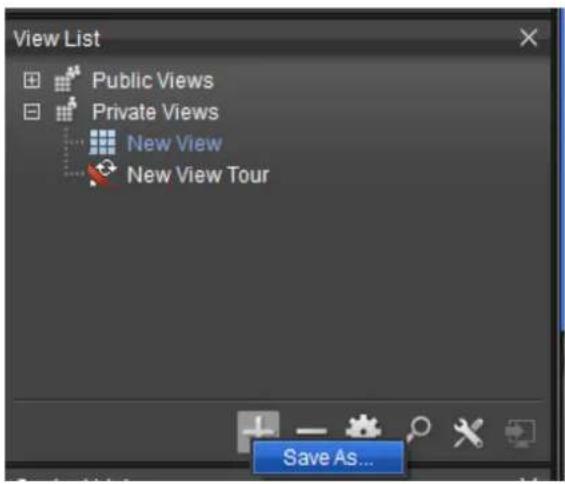
text_image
View List Public Views Private Views New View New View Tour Save As...- Edits the name of the duplicated view and specify the desnaon view group.
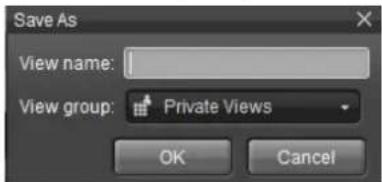
text_image
Save As View name: View group: Private Views OK Cancel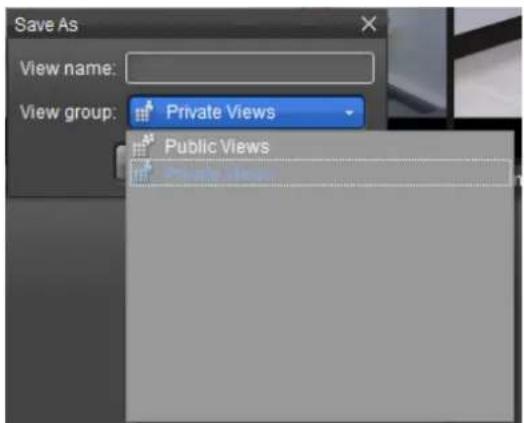
text_image
Save As View name: View group: Private Views Public Views
You can duplicate for a view and a view tour.
11.3.7 Search A View
To search the View:
1. Access the Live View tab.
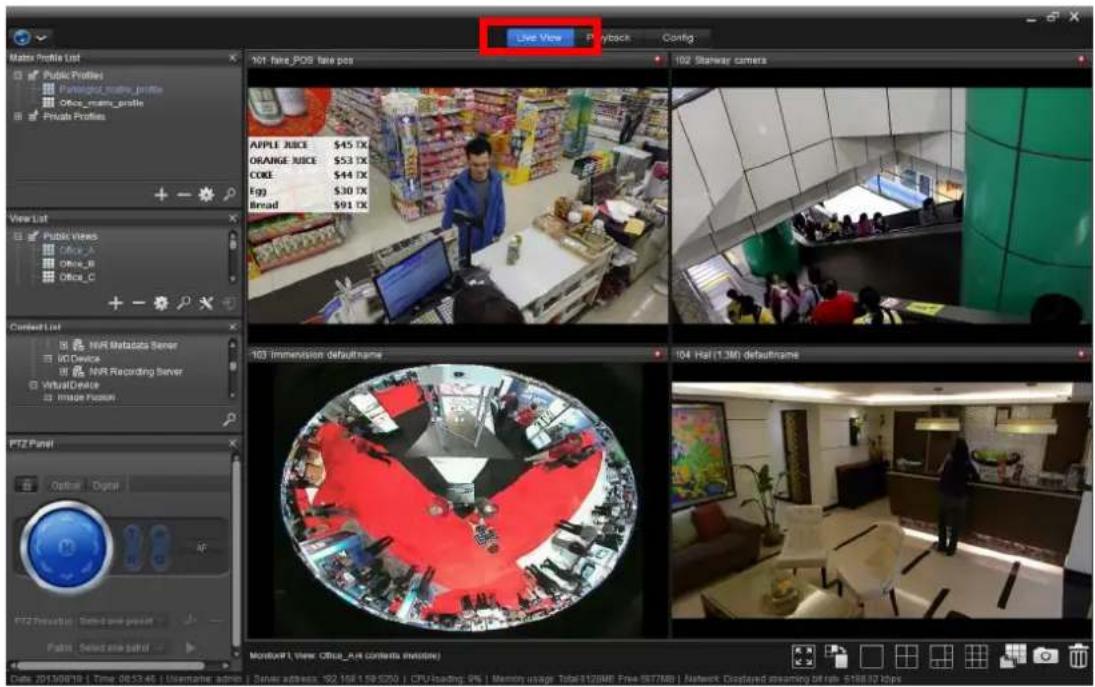
text_image
Live View Playback Config Mater Profile List Public Profiles Partingout_strive_profile Office_main_profile Private Profiles + - View List Public Views Office_A Office_B Office_C + - Current List VR Metabats Server UD Service VR Recording Server VirtualDevice Image Focus PTZ Panel Optional Digital PTZ Features Control screen Fabri: Select the Safari 101 fake_POS fake pos APPLE JUICE $45 TX ORANGE JUICE $53 TX CODE $44 TX Egg $30 TX Broad $91 TX 102 Starway camera 103 Immersion defaultname 104 Hal (1.3M) defaultname MoistureP1 view: OBlue_Aut contents installed Date: 2013/08/16 | Time: 08:53:45 | Username admin | Server address: 102.108.1.19.5200 | CPU/Loading, 9% | Monon usage | Total(170MB) Free (957MB) | Rutework - Dustered streaming bit run: $158.32 kbps2. Click the View list
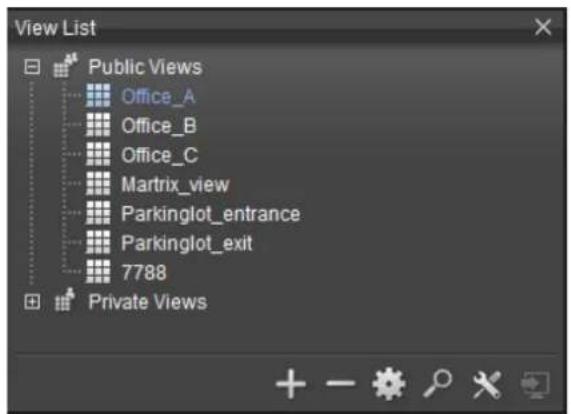
text_image
View List Public Views Office_A Office_B Office_C Matrix_view Parkinglot_entrance Parkinglot_exit 7788 Private Views- Select the type of view, either Public or Private, to be searched.
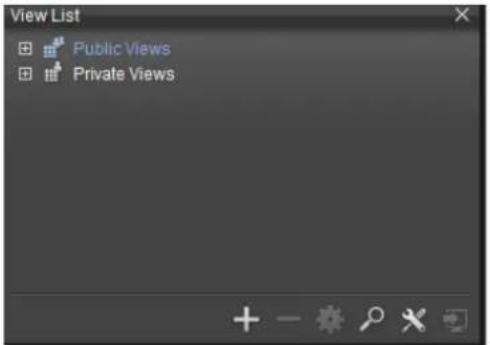
text_image
View List Public Views Private Views- Click on the magnier icon will show a text eld.
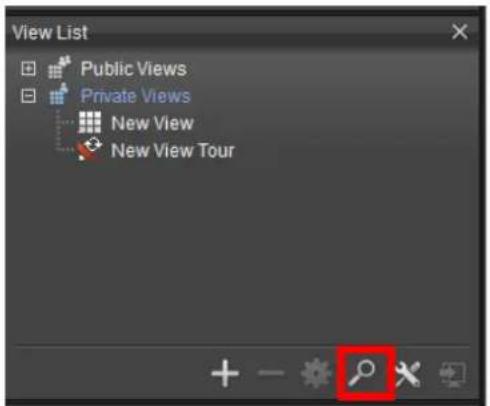
text_image
View List Public Views Private Views New View New View Tour- Type the view would like to search. Clicking on the arrows 📄 to focus on the matched results.
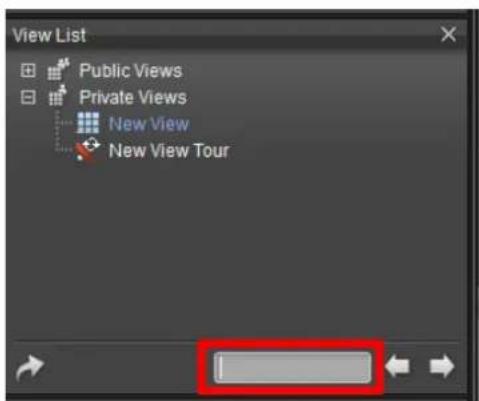
text_image
View List Public Views Private Views New View New View Tour11.3.8 Delete A View
To delete the View:
1. Access the Live View tab.
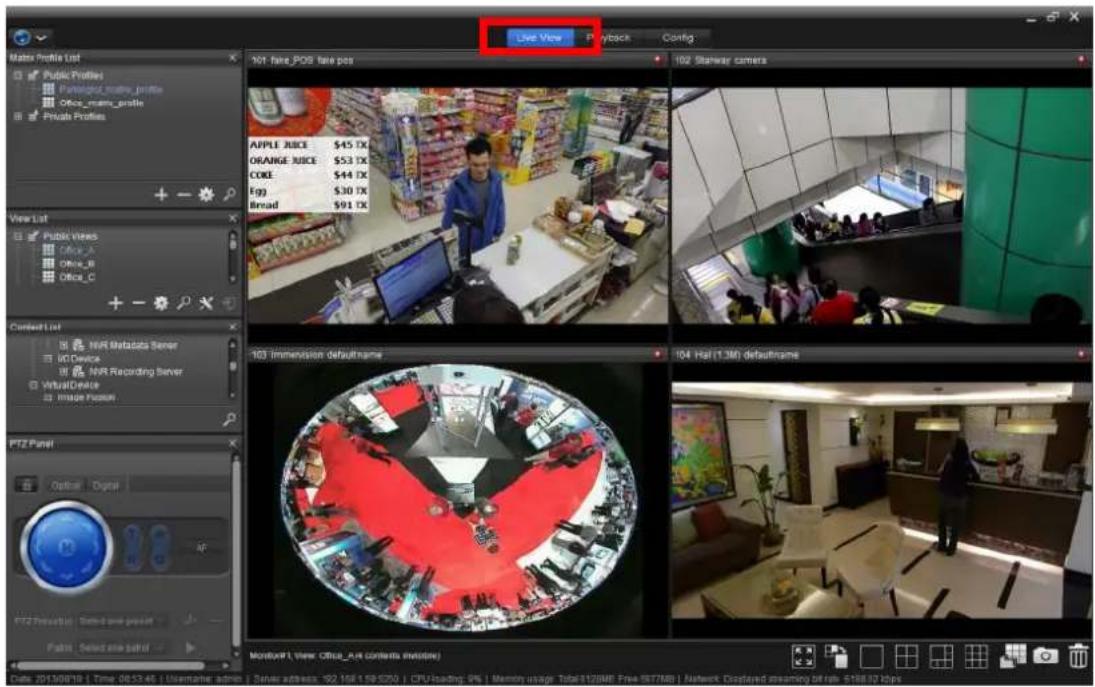
text_image
Live View Playback Config Mater Profile List Public Profiles Partingout_strive_profile Office_main_profile Private Profiles + - View List Public Views Office_A Office_B Office_C + - Current List VR Metabats Server UD Service VR Recording Server VirtualDevice Image Focus PTZ Panel Optional Digital PTZ Features Control screen Fabri: Select the Safari 101 fake_POS fake pos APPLE JUICE $45 TX ORANGE JUICE $53 TX CODE $44 TX Egg $30 TX Broad $91 TX 102 Starway camera 103 Immersion defaultname 104 Hal (1.3M) defaultname MoistureP1 view: OBlue_Aut contents installed Date: 2013/08/16 | Time: 08:53:45 | Username admin | Server address: 102.108.1.19.5200 | CPU/Loading, 9% | Monon usage | Total(170MB) Free (957MB) | Rutework - Dustered streaming bit run: $158.32 kbps2. Click the View list
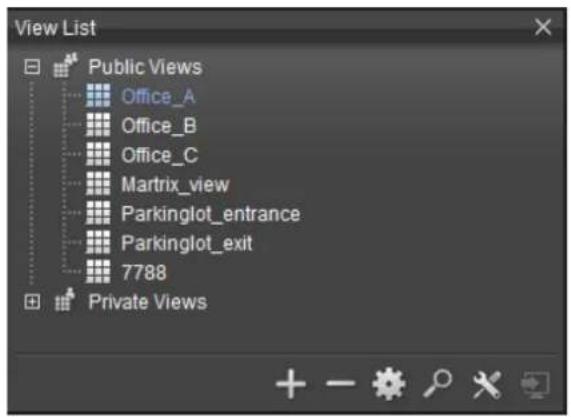
text_image
View List Public Views Office_A Office_B Office_C Matrix_view Parkinglot_entrance Parkinglot_exit 7788 Private Views- Select the type of view, either Public or Private, to be deleted.
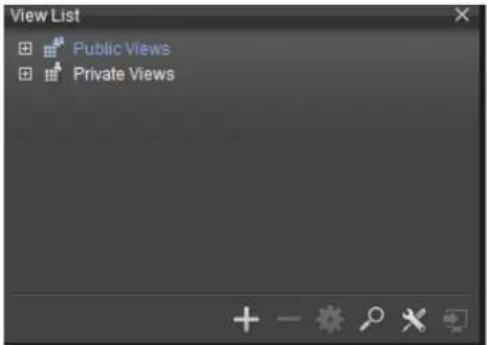
text_image
View List Public Views Private Views- Click the delete icon — to delete a View.
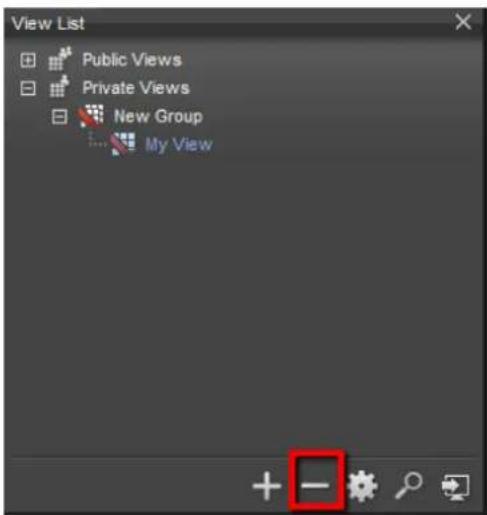
text_image
View List Public Views Private Views New Group My View + - | An error message will pop up if you do not have permissions to modify a view. |
 | You can delete for a view, a view tour, or public/private view |
11.3.9 Assign stream proile
To assign prole for the View:
1. Access the Live View tab.
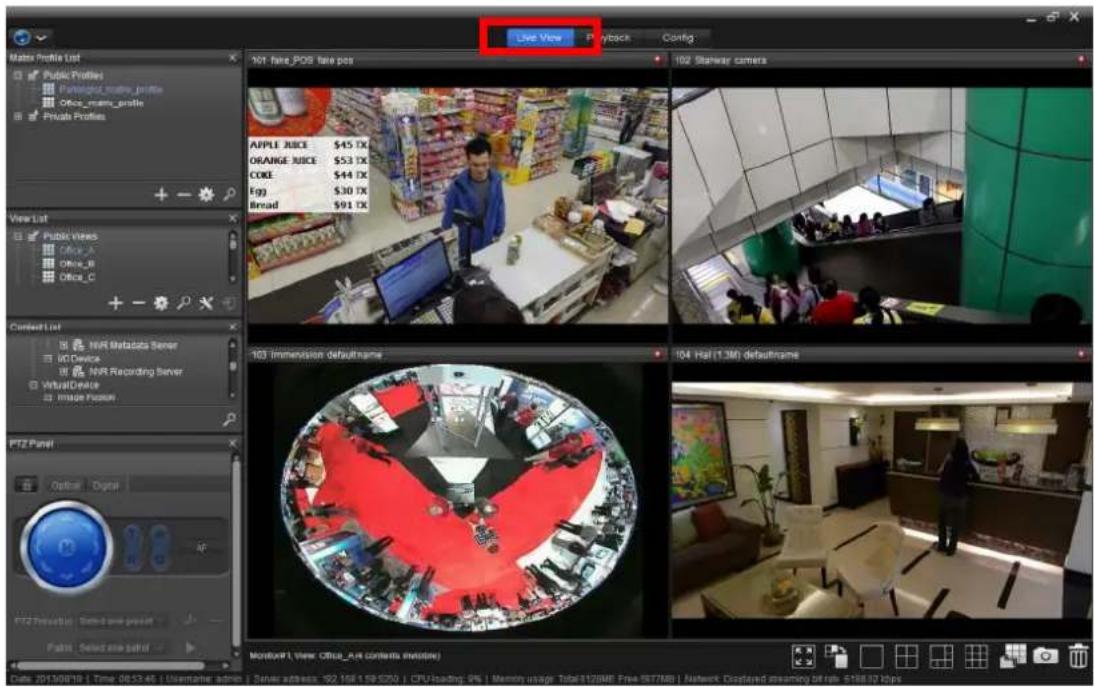
text_image
Live View Playback Config Mater Profile List Public Profiles Partingout_strive_profile Office_main_profile Private Profiles + - View List Public Views Office_A Office_B Office_C + - Current List VR Metabats Server UD Service VR Recording Server VirtualDevice Image Focus PTZ Panel Optional Digital PTZ Features Control set preview Fabri: Select the Safari 101 fake_POS fake pos APPLE JUICE $45 TX ORANGE JUICE $53 TX CODE $44 TX Egg $30 TX Broad $91 TX 102 Starway camera 103 Immersion defaultname 104 Hal (1.3M) defaultname MoistureP1 view: OBlue_Aut contents installed Date: 2013/08/16 | Time: 08:53:45 | Username admin | Server address: 102.108.1.19.5200 | CPU/Loading, 9% | Monon usage | Total(170MB) Free (957MB) | Rutework - Dustered streaming bit run: $158.32 kbps2. Click the View list
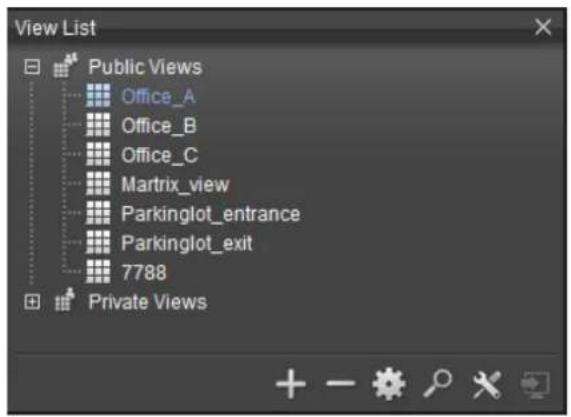
text_image
View List Public Views Office_A Office_B Office_C Matrix_view Parkinglot_entrance Parkinglot_exit 7788 Private Views- Select the type of view.
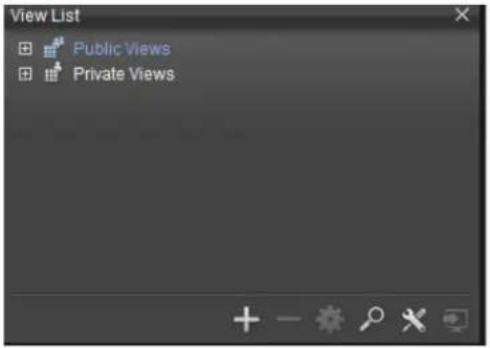
text_image
View List Public Views Private Views
You can assign the stream prole for a view, a view tour, or public/private view
- Click on to choose a universal stream prole for it

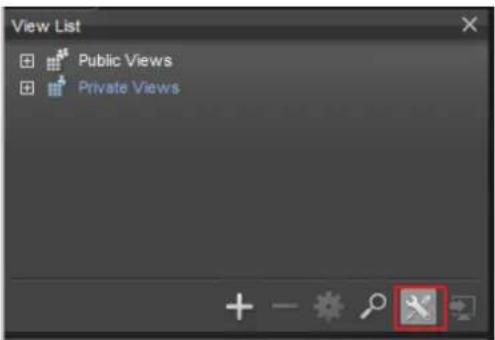
text_image
View List Public Views Private Views- Choose automacally adjust stream prole by the grid, or switch to specific stream prole once.
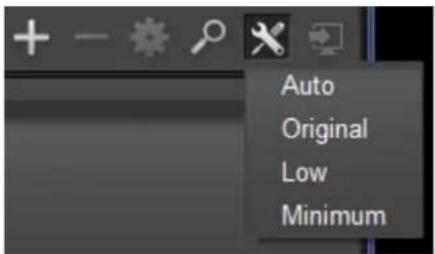
text_image
Auto Original Low MinimumThe featured sengs are:
| Seng | Descripon |
| Auto | Enables original prole for all cameras when select 1x1 grid display. |
| Original | Enables the original prole for all cameras. |
| Low | Enables the low prole on grid number of display between 4-15 channels. |
| Minimum | Enables the minimum prole when the grid number of display is over 16 channels. |

If the stream profile chosen is not supported by specific cameras, the cameras will remain the original stream profile settings.
- Also can adjust specific camera stream prole on grid.
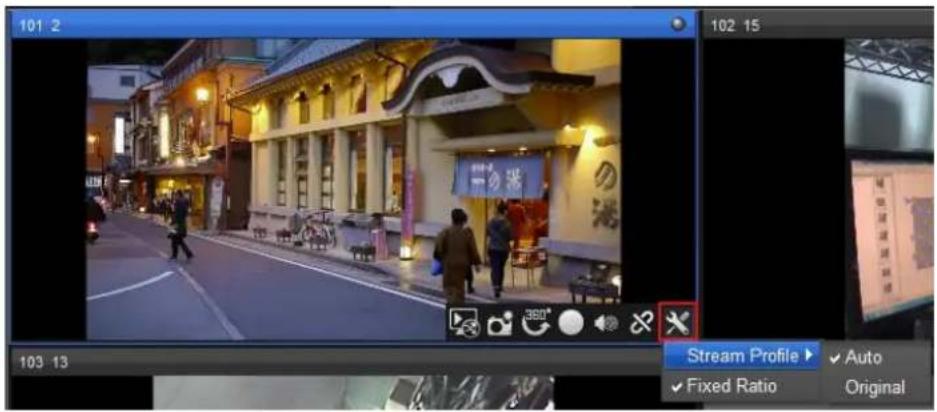
text_image
101 2 102 15 Stream Profile ▶ Auto ✓ Fixed Ratio Original11.4 Client Configuration
To “congure the client” is to congure the NuClient’s “preference” to control how the soware acts each me the soware is used. It also controls how the user interface is presented.
To launch the Client Conguraon:
1. Access the NuClient.
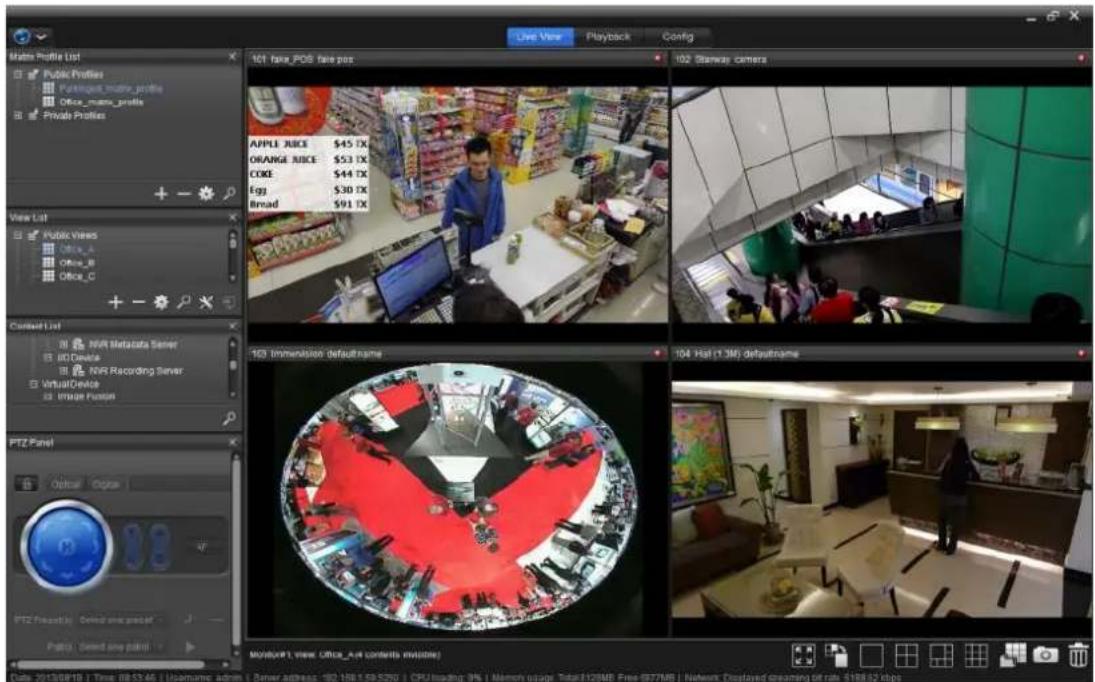
text_image
Make Profile List Public Profiles Public profile Private Profiles 101 face_POS face pes 102 Glanway camera APPLE JUICE $45 TX ORANGE JUICE $53 TX CODE $44 TX Egg $30 TX Broad $91 TX 163 Immersion defaultname 104 Hal (1.3M) defaultname PTZ Panel Optical Options PTZ Preview 1 Colored mini panel Photo / Secret line panel Date: 2013/09/18 | Time: 08:53:46 | Username admin | Server address: 102.168.1.59.5292 | CPU/loading: 9% | Memory usage: Total(12MB Free: 8577MB) | Network Displayed streaming off rate: $168.62 kbps- From the Top Toolbar of the NuClient, click the "global" icon
The menu opens.
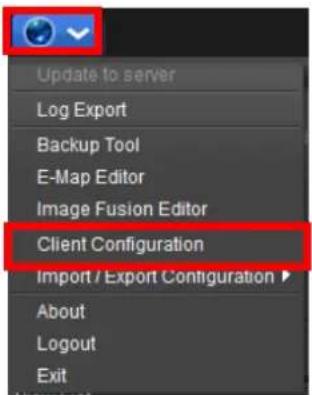
text_image
Update to server Log Export Backup Tool E-Map Editor Image Fusion Editor Client Configuration Import / Export Configuration ▶ About Logout Exit3. Click the Client Conguraon.
The Client Conguraon launches and shows three menus in its Cong Catalog: General, User Interface, and Funcon.
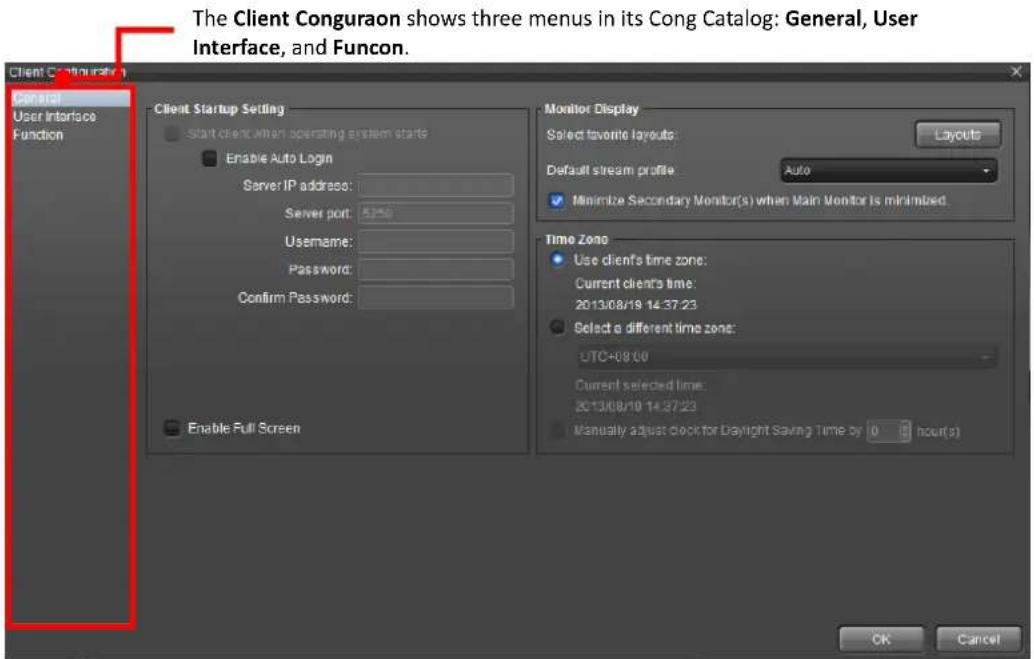
text_image
The Client Conguraon shows three menus in its Cong Catalog: General, User Interface, and Funcon. Client Configuration General User Interface Function Client Startup Setting Start client when operating system starts Enable Auto Login Server IP address: Server port: 6256 Username: Password: Confirm Password: Enable Full Screen Monitor Display Select favorite layouts Layouts Default stream profile Auto Minimize Secondary Monitor(s) when Main Monitor is minimized Time Zone Use clients time zone: Current clients time: 2013/08/19 14:37:23 Select a different time zone: UTC-08:00 Current selected time: 2013/08/19 14:37:23 Manually adjust clock for Daylight Saving Time by 0 hour(s) OK CancelTo know the General menu, see The General Menu.
To know the User Interface menu, see The User Interface Menu.
To know the Funcon menu, see The Funcon Menu.
11.4.1. The General Menu
It relies on the General menu of to congregate how the NuClient acts each me it is used.
To open the General menu:
1. Access the NuClient.
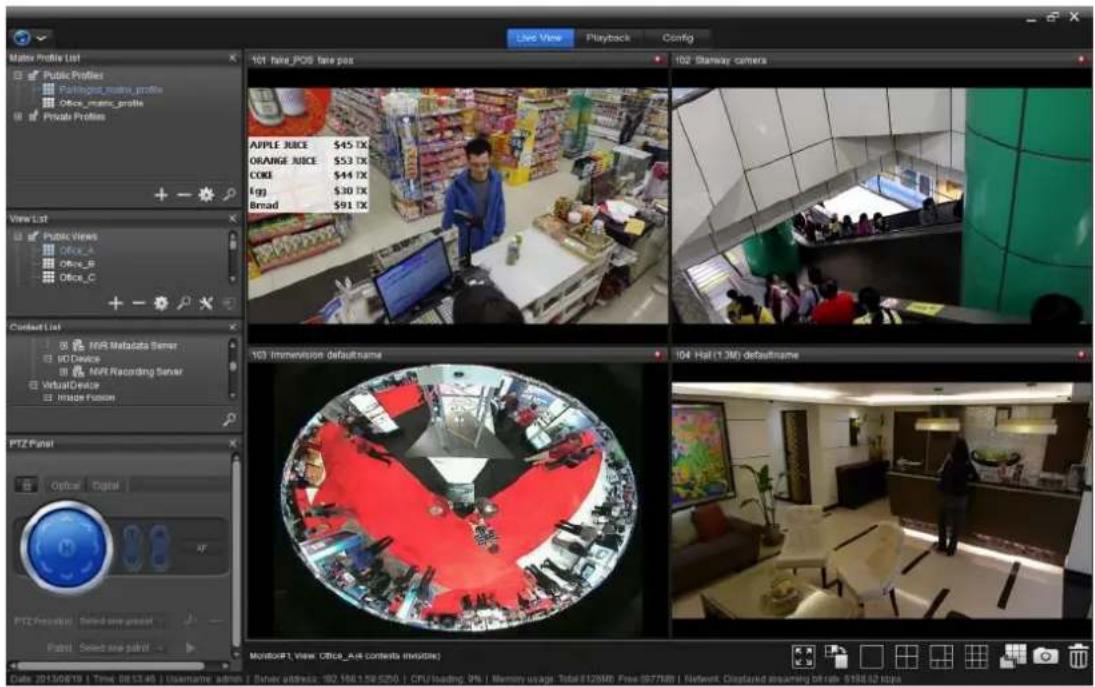
text_image
Live View Playback Config Mater Profile List Public Profiles Partingout_matrix_profile Office_matrix_profile Private Profiles 101 take_POS fare pos 102 Shanway centers APPLE JUICE $45 TX ORANGE JUICE $53 TX CODE $44 TX 699 $30 TX Broad $91 TX View List Public Views Office_A Office_B Office_C + - Contact List NVR Metadata Server 8D Device NVR Recording Server VirtualDevice Image Fusion 103 Immenvision defaultname 104 Hal (1.3M) defaultname PTZ Panel Optical Digital PTZ Personal Select one panel Fabric Select one panel MayIcon#1 view Office_vot contents in Belize Date: 2013/08/19 | Time: 08:13:45 | Username admin / Server address: 182.166.19.5250 | CPU loading: 3% | Memory usage: Total:112688; Free: 957988 | Rework Display Dreaming bit rate: $156.52 kbps- From the Top Toolbar of the NuClient, click the "global" icon
The menu opens.
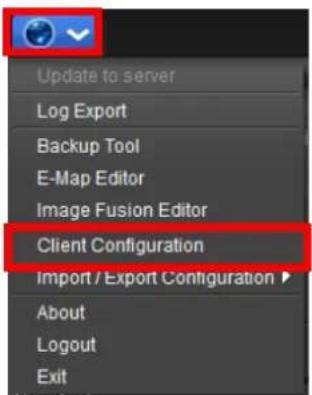
text_image
Update to server Log Export Backup Tool E-Map Editor Image Fusion Editor Client Configuration Import / Export Configuration ▶ About Logout ExitThe Client Conguraon launches and shows the General menu by default.
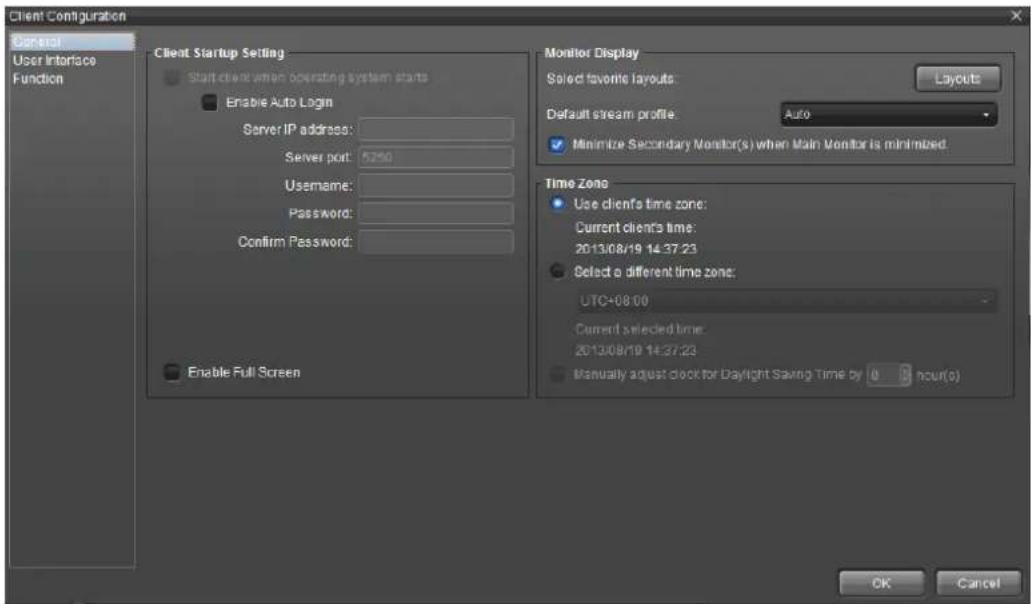
text_image
Client Configuration Control User Interface Function Client Startup Setting Start client when operating system starts Enable Auto Login Server IP address: Server port: 5250 Username: Password: Confirm Password: Enable Full Screen Monitor Display Select favorite layouts Layouts Default stream profile: Auto Minimize Secondary Monitor(s) when Main Monitor is minimized. Time Zone Use clients' time zone: Current clients' time: 2013/08/19 14:37:23 Select a different time zone: UTC+08:00 Current selected time: 2013/08/19 14:37:23 Manually adjust clock for Daylight Saving Time by 0 hour(0) OK CancelThe General menu features three group boxes: Client Startup Seng, Monitor Display, and Time Zone.
They present the following sengs:
| Group Box | Setting | Description | ||
| Client Startup Setting | Start client when operating system starts | Tick the check box to enable the NuClient to auto-launch when the operating system starts up. | ||
| Enable Auto Login | Tick the check box to enable the NuClient to auto-connect to the specified server when the NuClient is launched.1. When enabled, the following settings are available: | |||
| Setting | Description | Default | ||
| Server IP address | Sets the IP address of the server to connect to. | -- | ||
| Server port | Sets the port number of the server IP address to connect to. | 5250 | ||
| Username | Sets the username to login to the server. | -- | ||
| Password | Sets the password to login to the server. | -- | ||
| Confirm Password | Re-enters the password to login to the server. | -- | ||
| Enable Full Screen | Tick the check box to enable the NuClient to be opened in full screen. | |||
| Monitor Display | Select favorite layouts | Opens a Select Favorite Layout window for users to select up to 4 different grid layouts as their favorites. These favorite layouts will be accessible from the toolbar of the software's Live View and | ||
Playback.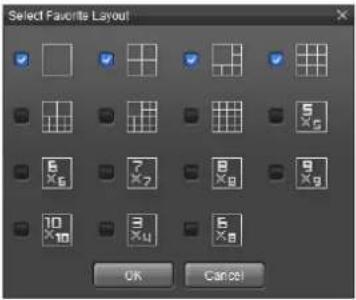  | ||||
| DefaultStream Profile | Sets the default stream profile.➢ Four options are available: Auto, Original, Low and Minimum. | |||
| Seng | Descripon | |||
| Auto | Enables original prole for all cameras when select 1x1 grid display. | |||
| Original | Enables the original prole for all cameras. | |||
| Low | Enables the low prole on grid number of display between 4-15 channels. | |||
| Minimum | Enables the minimum prole when the grid number of display is over 16 channels. | |||
| Tick the check box to minimize the secondary monitor(s) when the main monitor is minimized.1. The NuClient can connect up to 4 monitors.2. Live View can only be opened in any of the 4 monitors, and Playback can only run on the first monitor only. | ||||
| Time Zone | Use client's time zone | Applies the NuClient's time zone for system time zone. | ||
| Select a different time zone | Manually sets some other time zone. | |||
| Manually adjust clock | Enables/disables daylight saving time and defines how many hours should the system time be adjusted forward/backward for. | |||
| Seng | Descripon |
| Auto | Enables original prole for all cameras when select 1x1 grid display. |
| Original | Enables the original prole for all cameras. |
| Low | Enables the low prole on grid number of display between 4-15 channels. |
| Minimum | Enables the minimum prole when the grid number of display is over 16 channels. |
| for Daylight Saving Time by ____ hour(s) |

If the stream profile chosen is not supported by specific cameras, the cameras will choose "Original" profile when added to View.
11.4.2 The User Interface Menu
It relies on the User Interface menu to control which informaon to show on the soware's status bar / content tie and which dockable components to show in the soware's user interface.
To open the User Interface menu:
1. Access the NuClient.
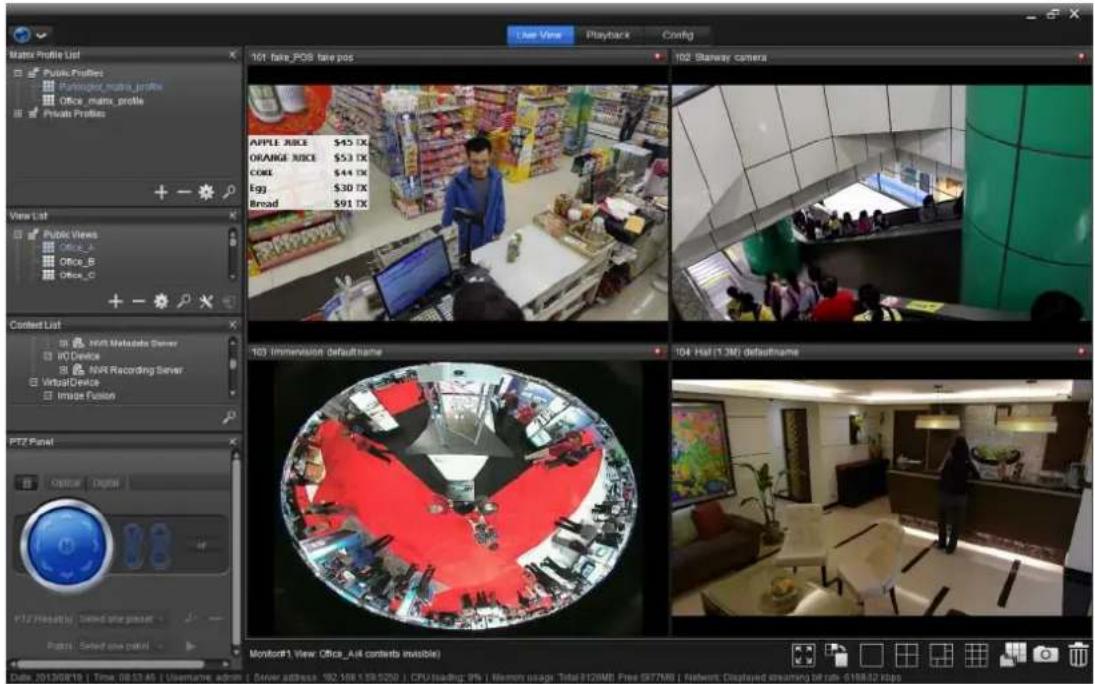
text_image
Master Profile List Public Profiles Aerospace mangro profile Office matrix profile Private Profiles 101 fare_POS fate pos 102 Starway cameras APPLE JUICE $45 TX ORANGE NICE $53 TX COM $44 TX Egg $30 TX Broad $91 TX 103 Immersion defaultname 104 Hal (1.3M) defaultname PTZ Panel Optical Digital PZT Results by: Given some power - Post: Select one panel! Monitor#1: view Office_kil contests invisible) Date: 01/08/18 | Time: 08:33:45 | Username admin | Server address: 102.168.139.520 | CPU issuing: 3% | Memory usage: TotalF12MB; Free SFTMB | Refount Displayed streaming of rub: $166.12 kbps- From the Top Toolbar of the NuClient, click the "global" icon
The menu opens.
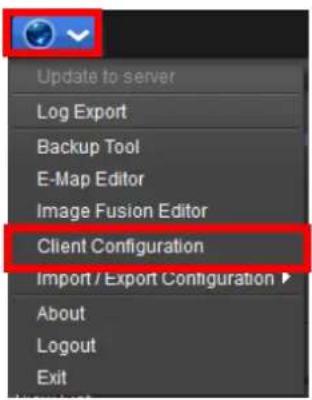
text_image
Update to server Log Export Backup Tool E-Map Editor Image Fusion Editor Client Configuration Import / Export Configuration ▶ About Logout Exit- The Client Conguraon launches and shows the General menu by default.
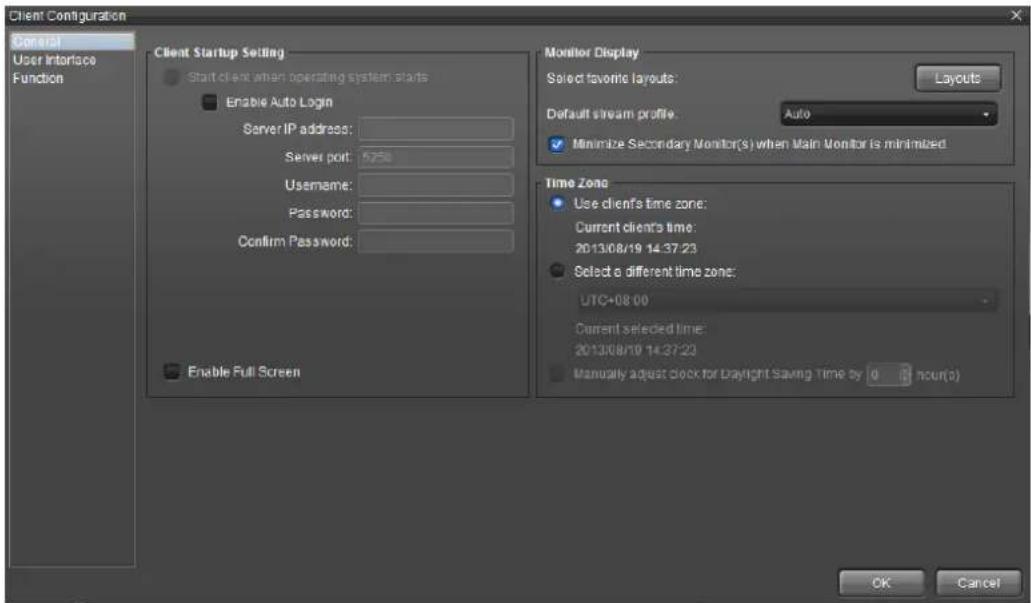
text_image
Client Configuration General User Interface Function Client Startup Setting Start client when operating system starts Enable Auto Login Server IP address: Server port: 5250 Username: Password: Confirm Password: Enable Full Screen Monitor Display Select favorite layouts: Layouts Default stream profile: Auto Minimize Secondary Monitor(s) when Main Monitor is minimized Time Zone Use clients' time zone: Current clients' time: 2013/08/19 14:37:23 Select a different time zone: UTC+08:00 Current selected time: 2013/08/19 14:37:23 Manually adjust clock for Daylight Saving Time by 0 hour(0) OK Cancel4. From the Cong Catalog, click the User Interface.
The User Interface menu opens and shows the General tabbed page.
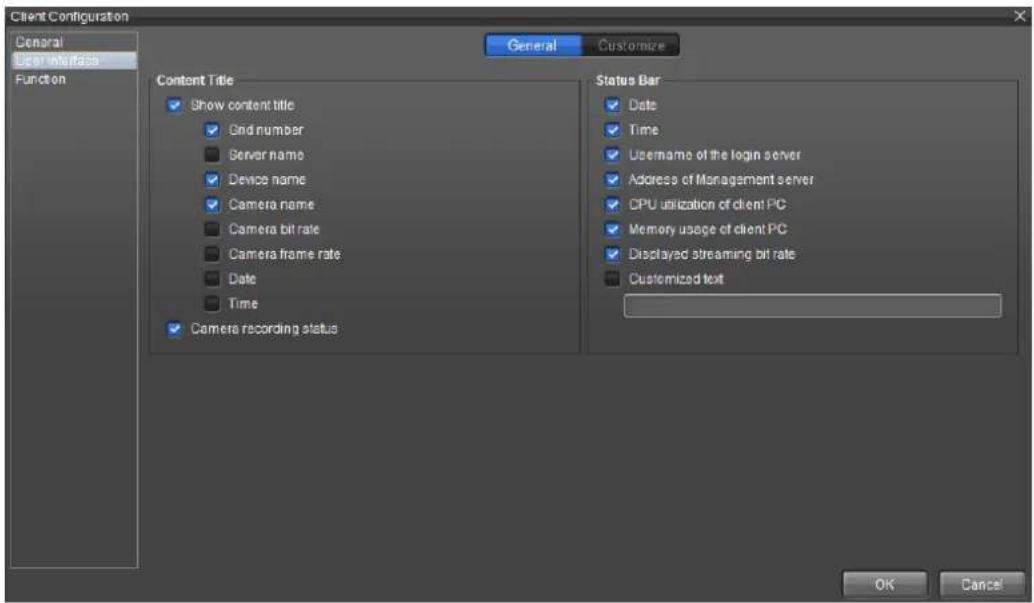
text_image
Client Configuration General Local interfaces Function General Customize Content Title Show content title Grid number Server name Device name Camera name Camera bit rate Camera frame rate Date Time Camera recording status Status Bar Date Time Username of the login server Address of Management server CPU utilization of client PC Memory usage of client PC Displayed streaming bit rate Customized text OK CancelTo know the General tabbed page, see The General tabbed page.
To know the Customize tabbed page, see The Customize tabbed page.
11.4.2.1 The General tabbed page
It relies on the General tabbed page to enable/disable a piece of informaon on the Status Bar of NuClient, which locates at the boom of the soware. It also relies on the General tabbed page to enable/disable a piece of informaon on the tle bar of a video channel in the View Area.
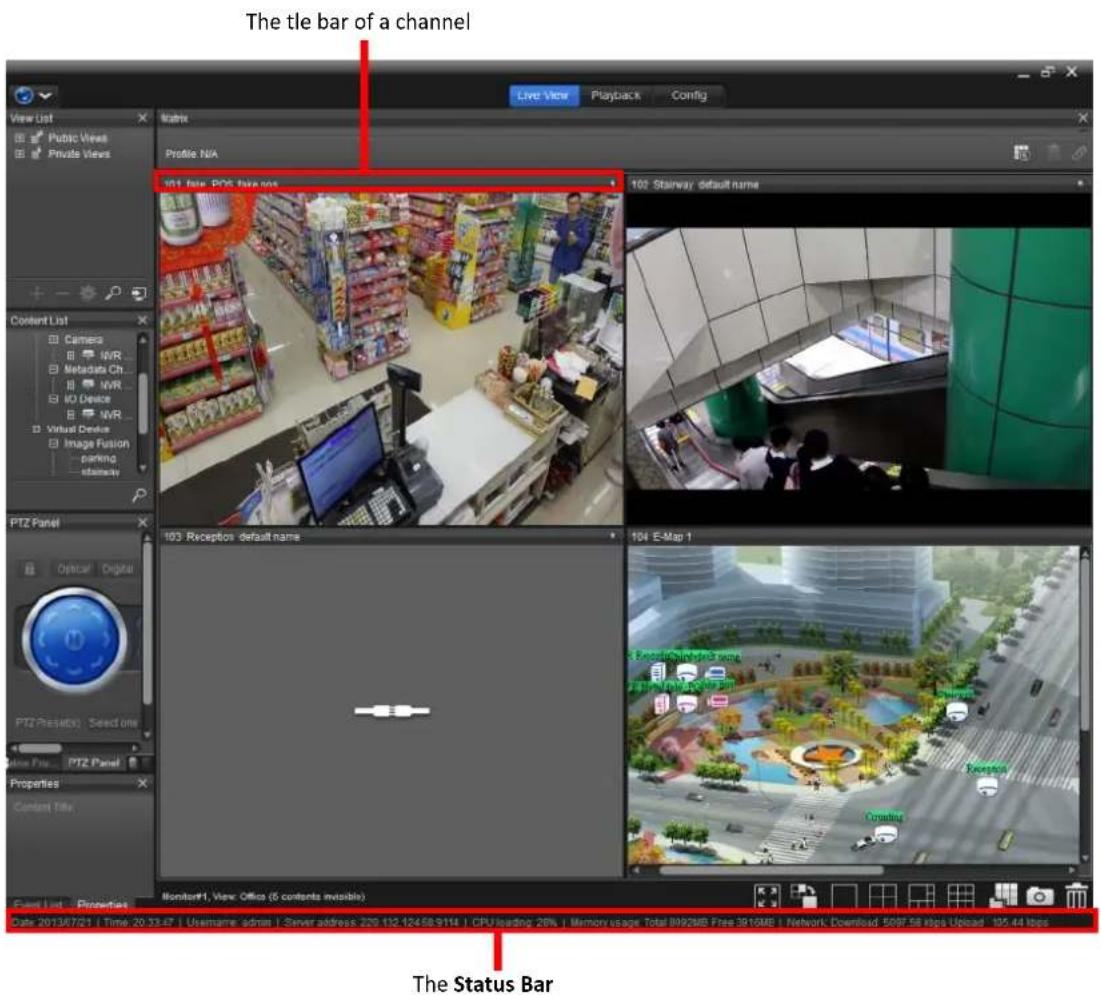
text_image
The tle bar of a channel Live View Playback Config View List Public Views Private Views Profile N/A 101 free - PS6 free apps 102 Stairway default name Content List Camera IVR Metadata Ch IVR IO Device IVR Virtual Device Image Fusion parking stairway PTZ Panel Optical Digital PTZ Presetio | Select line PTZ Panel Properties Content Title Monitor1, View Office (5 contents available) 103 Receptions default name 104 E-Map 1 Data: 2013/07/21 | Time: 20:33:47 | Username: admin | Server address: 220.132.124.58.9114 | CPU loading: 20% | Memory usage: Total 8992MB Free 3916MB | Network: Download 5097.58 kbps Upload 105.44 kbps The Status BarFollow the guide below to enable/disable a piece of informaon on the soware's Status Bar or a piece of informaon on the tle bar of a video channel in the View Area.
1. Access the NuClient.
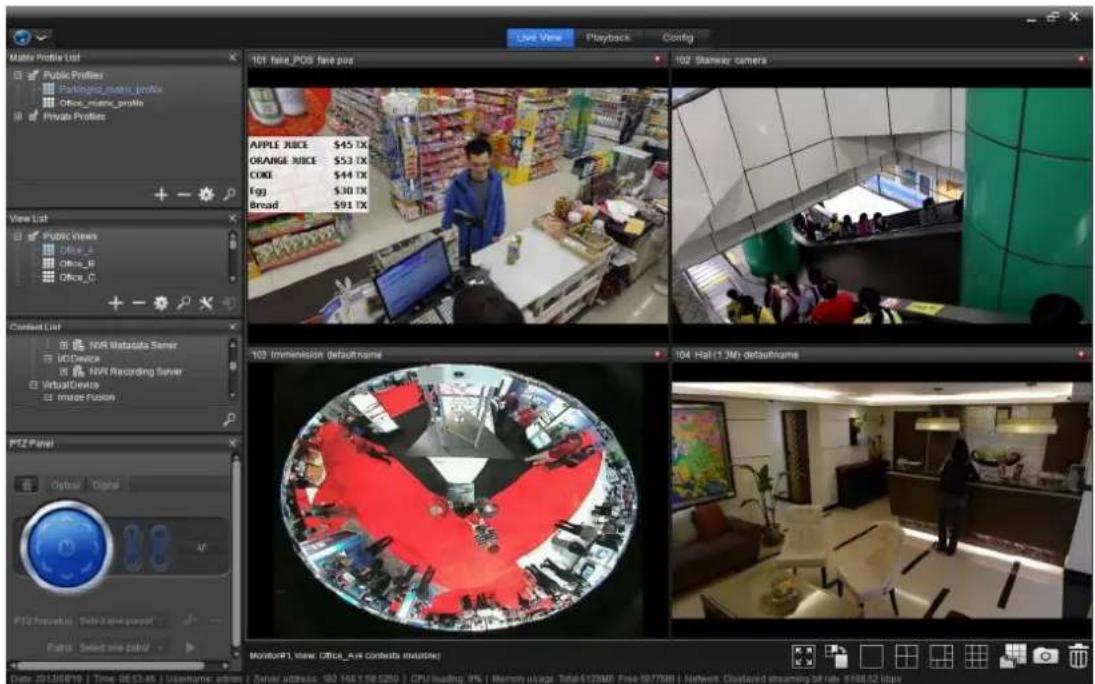
text_image
Live View Playback Config 101 fake_POS fake pos 102 Stanway camera APPLE JUICE $45 TX ORANGE JUICE $53 TX CODE $44 TX Egg $30 TX Broad $91 TX 103 Immersion defaultname 104 Hal (1 M) defaultname MUSTOPT View Office_AUI contacts available Date: 2013/06/19 | Time: 08:53:45 | Username: admin / Server address: 102 168 1.99 5250 | CPU loading: 9% | Memory usage Total: 672MB Free: 997708 | Network Clustered streaming off rate: 9166.52 kbps2. From the Top Toolbar of the NuClient, click the "global" icon
The menu opens.
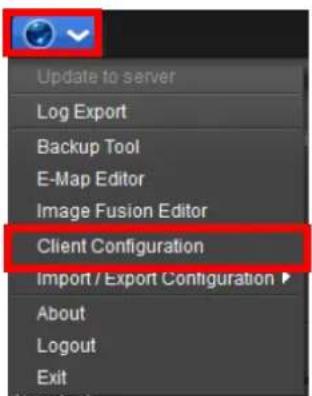
text_image
Update to server Log Export Backup Tool E-Map Editor Image Fusion Editor Client Configuration Import / Export Configuration ▶ About Logout Exit- The Client Conguraon launches and shows the General menu by default.
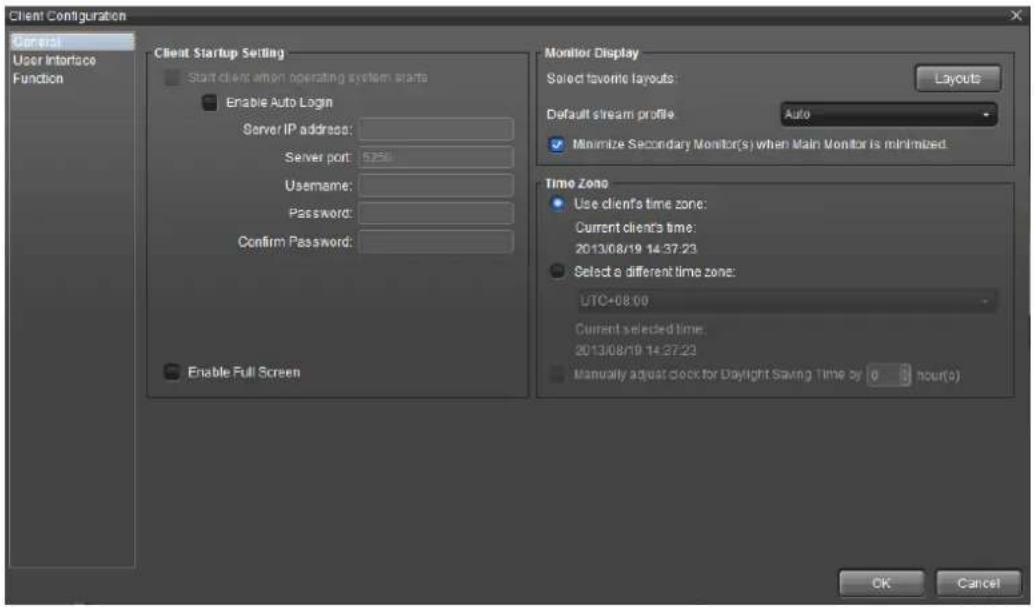
text_image
Client Configuration General User Interface Function Client Startup Setting Start client amon operating system starts Enable Auto Login Server IP address: Server port: 625 Username: Password: Confirm Password: Enable Full Screen Monitor Display Select favorite layouts: Layouts Default stream profile: Auto Minimize Secondary Monitor(s) when Main Monitor is minimized. Time Zone Use clients' time zone: Current clients' time: 2013/08/19 14:37:23 Select a different time zone: UTC+08:00 Current selected time: 2013/08/19 14:37:23 Manually adjust clock for Daylight Saving Time by 0 hour(0) OK Cancel- From the Cong Catalog, click the User Interface.
The User Interface menu opens and shows the General tabbed page.
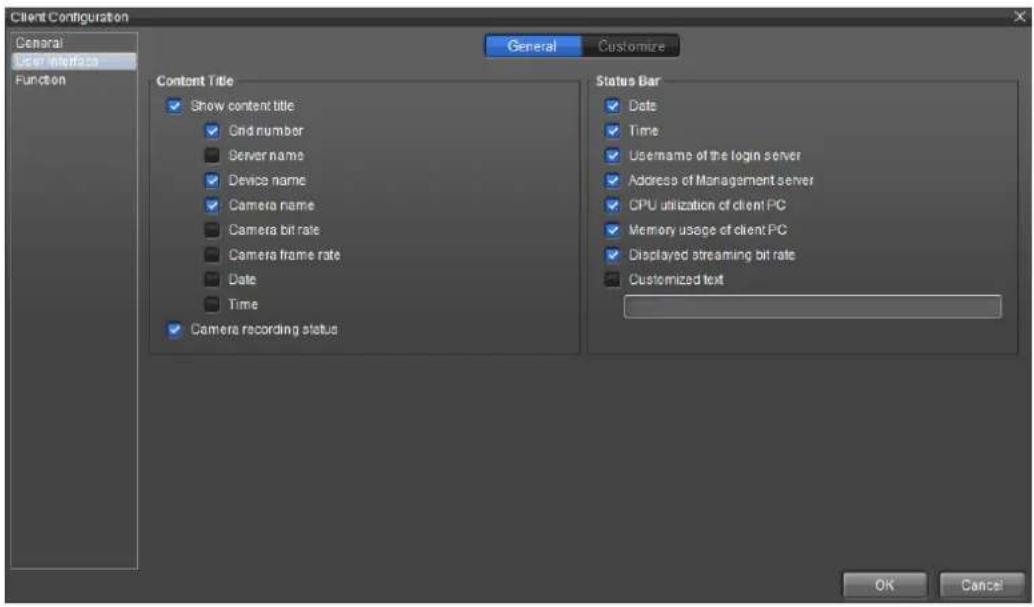
text_image
Client Configuration General User Interface Function General Customize Content Title Show content title Grid number Server name Device name Camera name Camera bit rate Camera frame rate Date Time Camera recording status Status Bar Date Time Username of the login server Address of Management server CPU utilization of client PC Memory usage of client PC Displayed streaming bit rate Customized text OK Cancel-
In the Content Title group box, select/deselect an item to enable/disable that piece of informaon on the tle bar of a video channel in the View Area.
-
In the Status Bar group box, select/deselect an item to enable/disable that piece of informaon on the soware's Status Bar.
(The Customized text setng enables a piece of custom informaon to show in the Status Bar. Maximum 64 Unicode characters are allowed.)
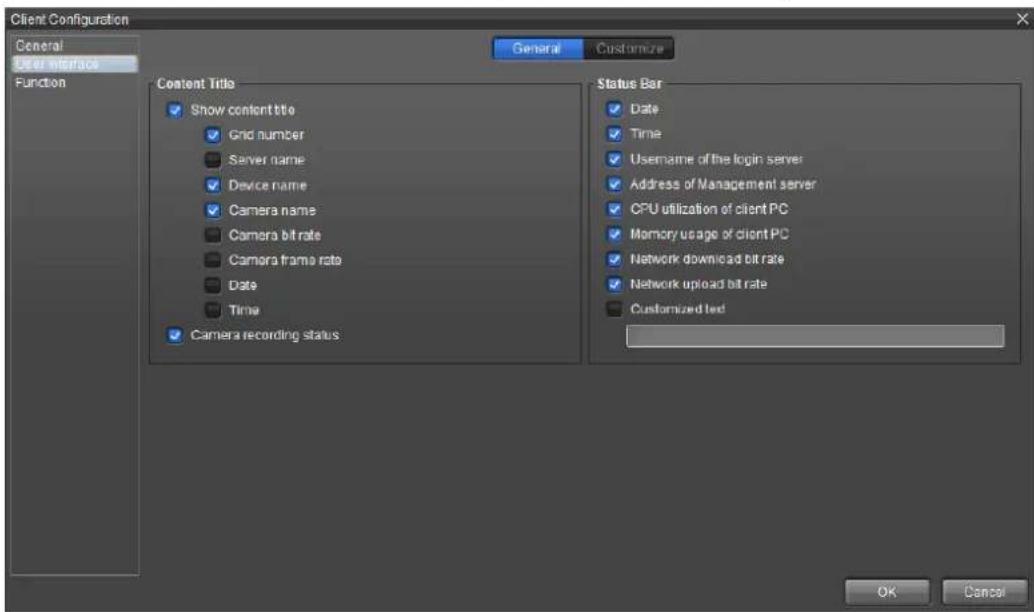
text_image
Client Configuration General User Interface Function General Customize Content Title Show content title Grid number Server name Device name Camera name Camera bit rate Camera frame rate Date Time Camera recording status Status Bar Date Time Username of the login server Address of Management server CPU utilization of client PC Memory usage of client PC Network download bit rate Network upload bit rate Customized text OK Cancel11.4.2.2 The Customize tabbed page
It relies on the Customize tabbed page to conjure which dockable widget to show at the Cong Catalog of each Live View and Playback of the soware.
Follow the guide below to enable/disable a widget at the Cong Catalog of each Live View and Playback:
1. Access the NuClient.
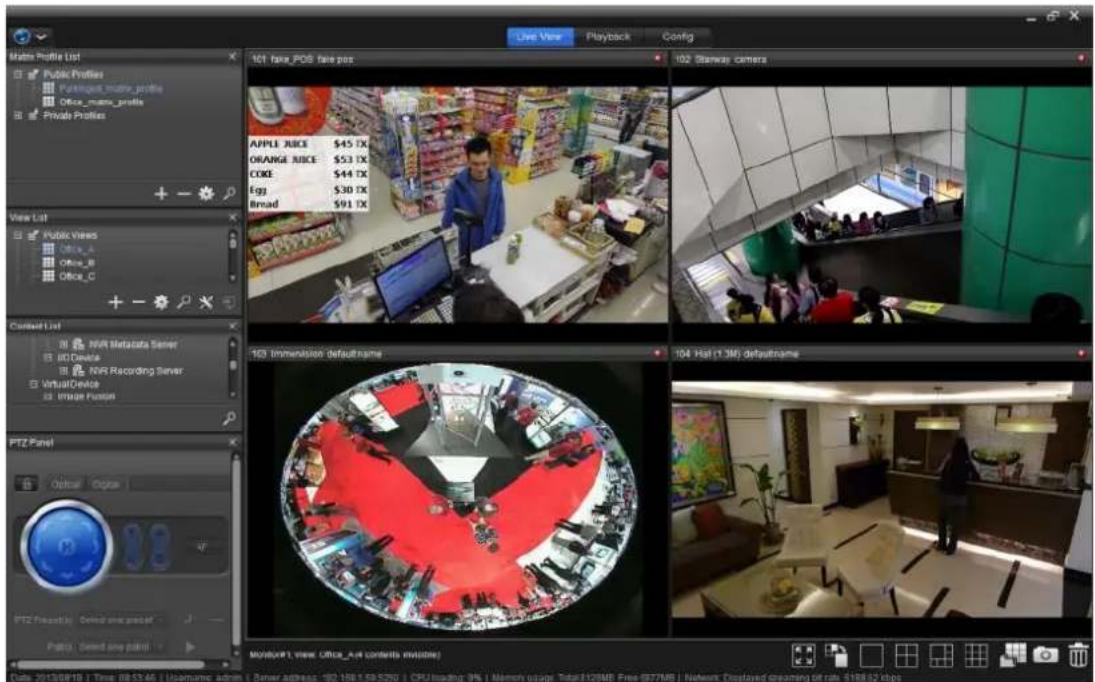
text_image
Make Profile List Public Profiles Public profile Private Profiles 101 face_POS face pes 102 Glanway camera APPLE JUICE $45 TX ORANGE JUICE $53 TX CODE $44 TX Egg $30 TX Broad $91 TX 163 Immersion defaultname 104 Hal (1.3M) defaultname PTZ Panel Optical Options PTZ Preview 1 Colored mini panel Photo / Secret line panel Date: 2013/09/18 | Time: 08:53:46 | Username admin | Server address: 102.168.1.59.5292 | CPU/loading: 9% | Memory usage: Total(12MB Free: 8577MB) | Network Displayed streaming off rate: $168.62 kbps2. From the Top Toolbar of the NuClient, click the "global" icon
The menu opens.
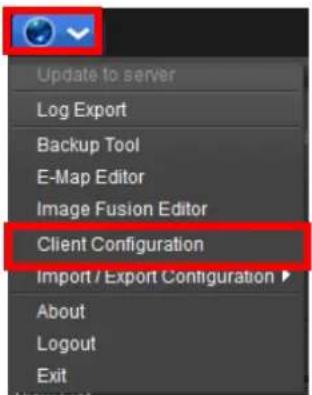
text_image
Update to server Log Export Backup Tool E-Map Editor Image Fusion Editor Client Configuration Import / Export Configuration ▶ About Logout Exit- The Client Conguraon launches and shows the General menu by default.
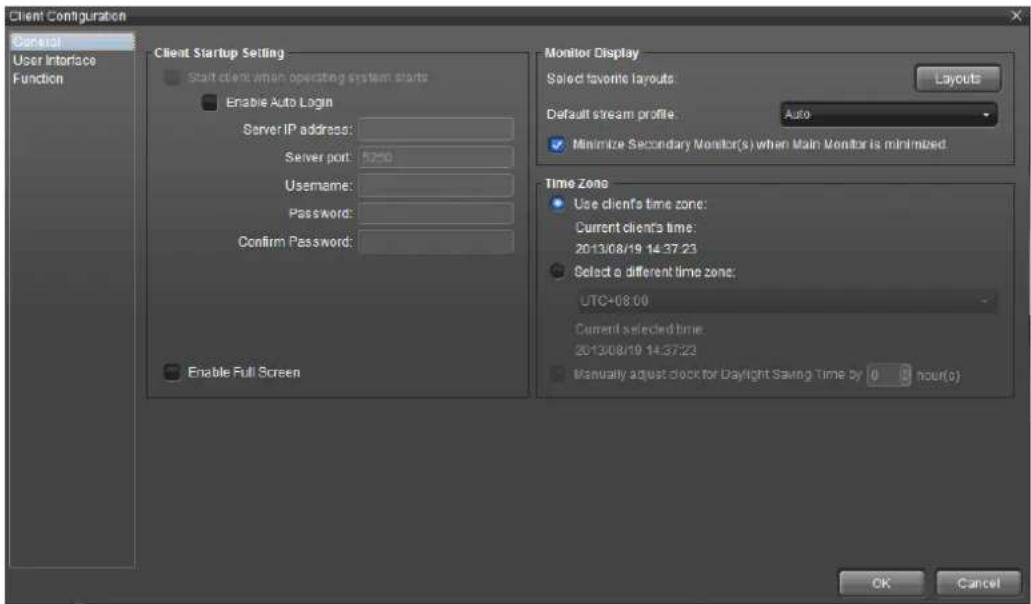
text_image
Client Configuration Control User Interface Function Client Startup Setting Start client when operating system starts Enable Auto Login Server IP address: Server port: 5250 Username: Password: Confirm Password: Enable Full Screen Monitor Display Select favorite layouts Layouts Default stream profile: Auto Minimize Secondary Monitor(s) when Main Monitor is minimized. Time Zone Use clients' time zone: Current clients' time: 2013/08/19 14:37:23 Select a different time zone: UTC+08:00 Current selected time: 2013/08/19 14:37:23 Manually adjust clock for Daylight Saving Time by 0 hour(s) OK Cancel- From the Cong Catalog, click the User Interface.
The User Interface menu opens and shows the General tabbed page.
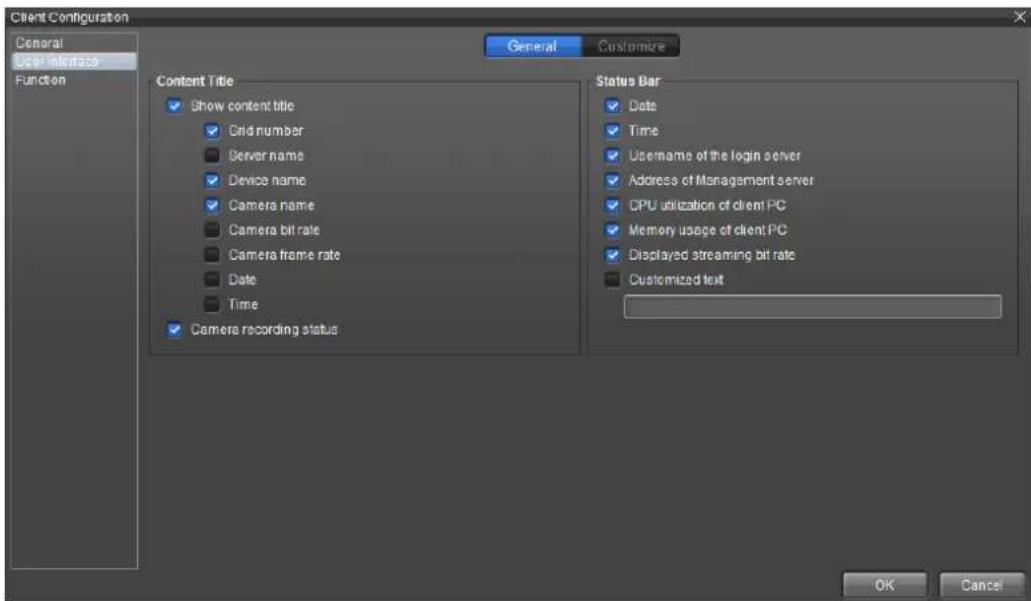
text_image
Client Configuration General Local interface Function General Customize Content Title Show content title Grid number Server name Device name Camera name Camera bit rate Camera frame rate Date Time Camera recording status Status Bar Date Time Username of the login server Address of Management server CPU utilization of client PC Memory usage of client PC Displayed streaming bit rate Customized text OK Cancel5. Click the Customize tab.
The Customize tabbed page opens.
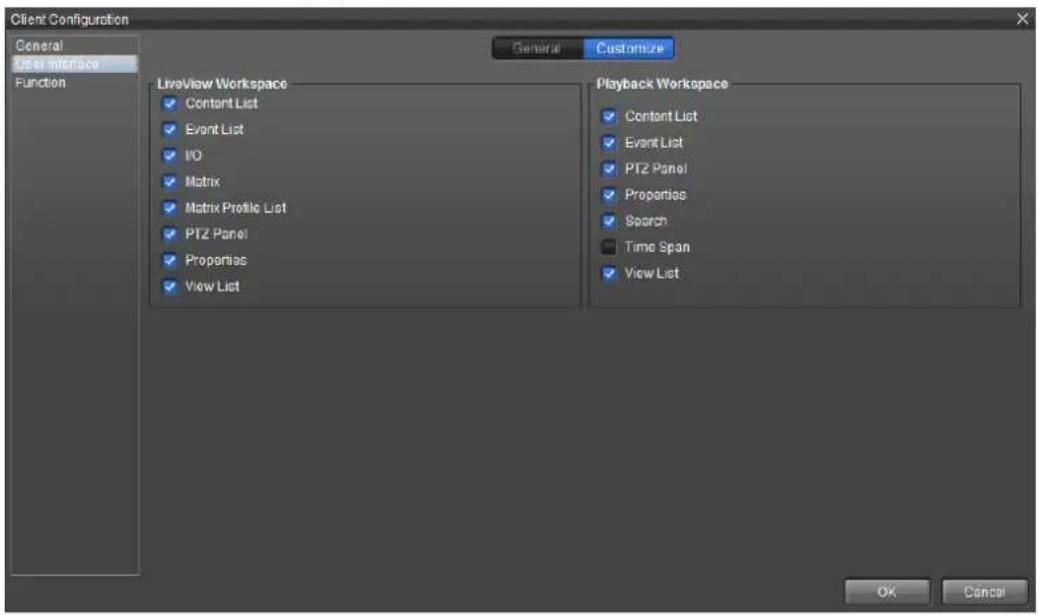
text_image
Client Configuration General User Interface Function LiveView Workspace Content List Event List I/O Matrix Matrix Profile List PTZ Panel Properties View List General Customize Playback Workspace Content List Event List PTZ Panel Properties Search Time Span View List OK Cancel- In the Live View Workspace group box, select/deselect an item to enable/disable that widget at the Cong Catalog of the Live View screen.
- In the Playback Workspace group box, select/deselect an item to enable/disable that widget at the Cong Catalog of the Playback screen.
- For example, select only Content List, Event List, and View List in the Live View Workspace group box.
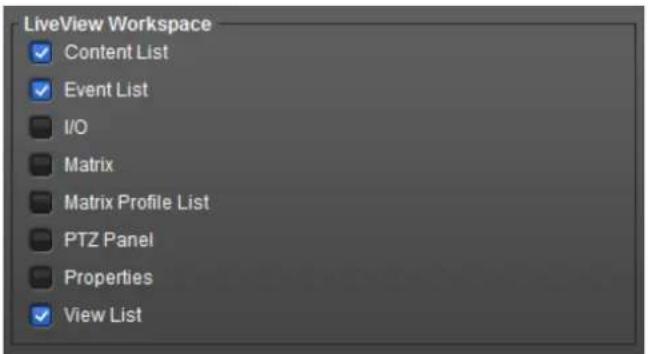
text_image
LiveView Workspace ✓ Content List ✓ Event List I/O Matrix Matrix Profile List PTZ Panel Properties ✓ View ListThe Live View screen then shows only the widgets of the Content List, Event List, and View List.
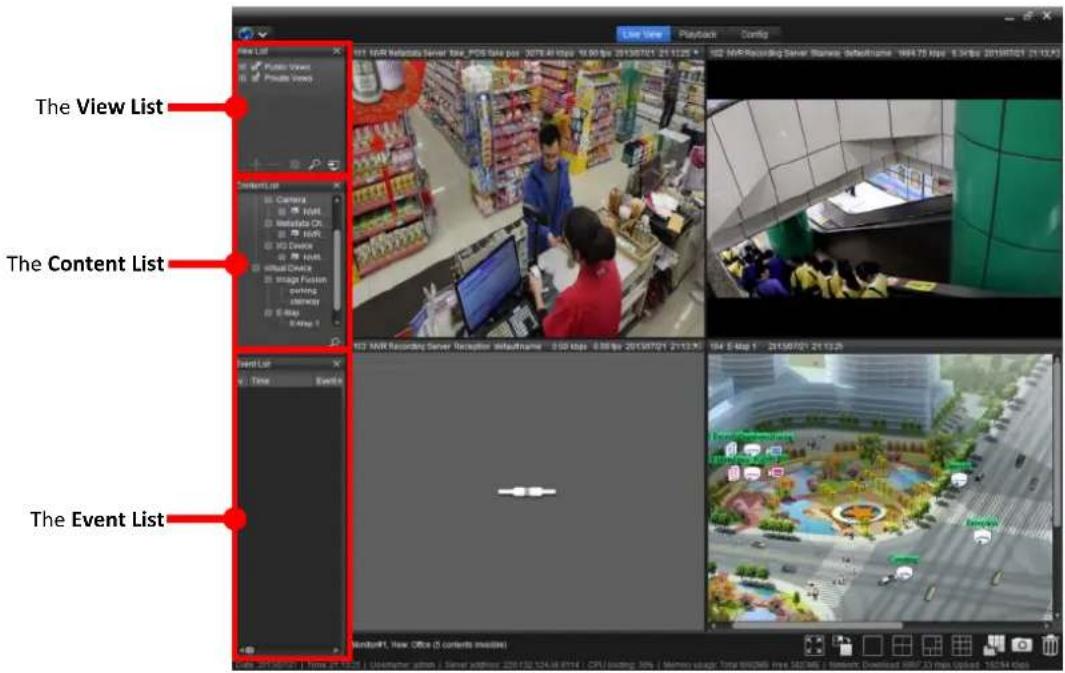
text_image
The View List The Content List The Event List
Right-click on the tle bar of a dockable widget to open a context menu to enable/disable a widget at the Cong Catalog of the Live View or Playback screen.
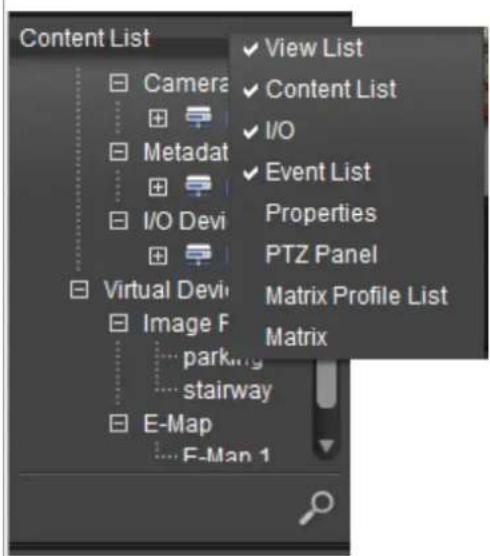
text_image
Content List ✓ View List ✓ Content List ✓ I/O ✓ Event List Properties PTZ Panel Matrix Profile List Matrix ✓ Virtual Devi Image F parking stairway E-Map E-Map 1
Double-click the tle bar of a dockable widget to oat the widget.
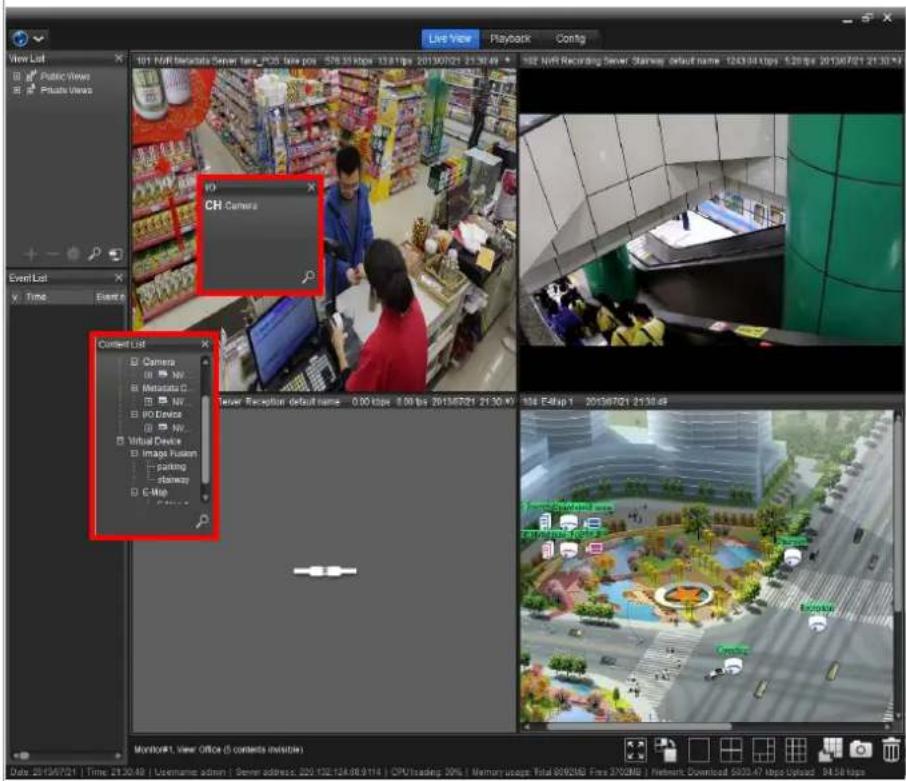
text_image
Live View Playbox Config View List Public Views Private Views 101 NRF Recordable Server Time_PDS time pos 576.35 fps 13:41 fps 201307021 21:30:49 102 NRF Recording Server Starway default name 1243.041fps 5:28 fps 201307021 21:30:49 Event List Time Event CH Camera Content List Camera NV Metadata C NV. I/O Device NV. Virtual Device Image Fusion picking starway C Map Server Reception default name 0.00 fps 8.00 fps 26/13/07/01 21:30:49 104 E4/4sp 1 201307021 21:30:49 Monitor#: View Office (5 contents invalid) Date: 21/07/21 | Time: 21:30:49 | Licensee admin | Semi address: 222 132.124.06.9114 | CPU/trading: 30% | Memory usage: Total 865260 Free 876362 | Network Download: 5003.47 fps output: 94.58 fps11.4.3 The Function Menu
It relies on the Funcon menu to congregate the features of each the Live View and Playback screen.
To open the Funcon menu:
1. Access the NuClient.
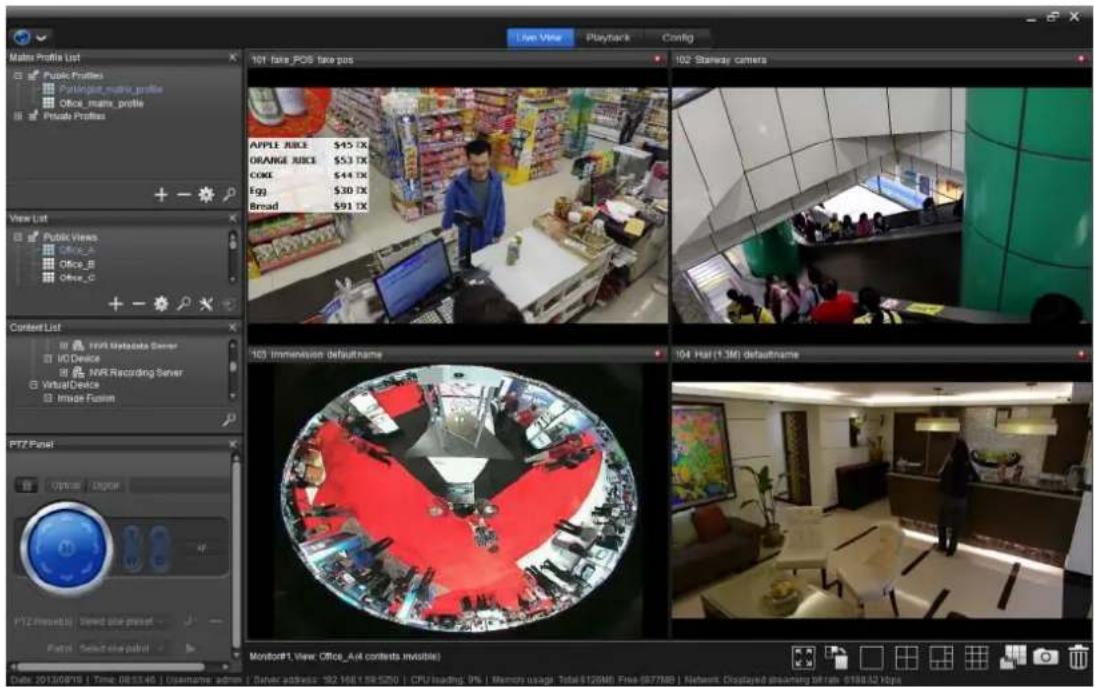
text_image
Matsa Profile List Public Profiles Pitexplot-matrix_profile Office._matrix_profile Posta Profiles 101 face_POS face pos 102 Starway camera APPLE JURCE $45 TX ORANGE JURCE $53 TX COOL $44 TX Egg $30 TX Broad $91 TX 103 Immersion defaultname 104 Hat (1.3M) defaultname PTZ Panel Optical Digital PTZ (current bus) Stored blue preset - Facts Select the button Monitor P1 View: Office_A4 contexts invisible) Date: 2013/09/18 | Time: 08:33:46 | Username: admin | Server address: 182.168.198.520 | CPU loading: 9% | Memors usage: Total 120M6, Free: 957788 | Reboot Displayed streaming off run:198.52 kbps- From the Top Toolbar of the NuClient, click the "global" icon
The menu opens.
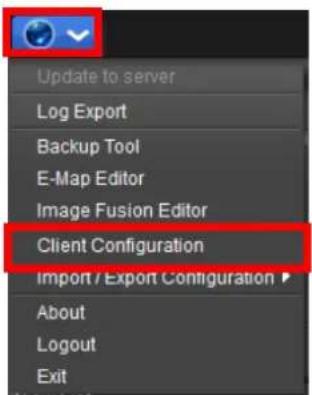
text_image
Update to server Log Export Backup Tool E-Map Editor Image Fusion Editor Client Configuration Import / Export Configuration About Logout Exit- The Client Conguraon launches and shows the General menu by default.
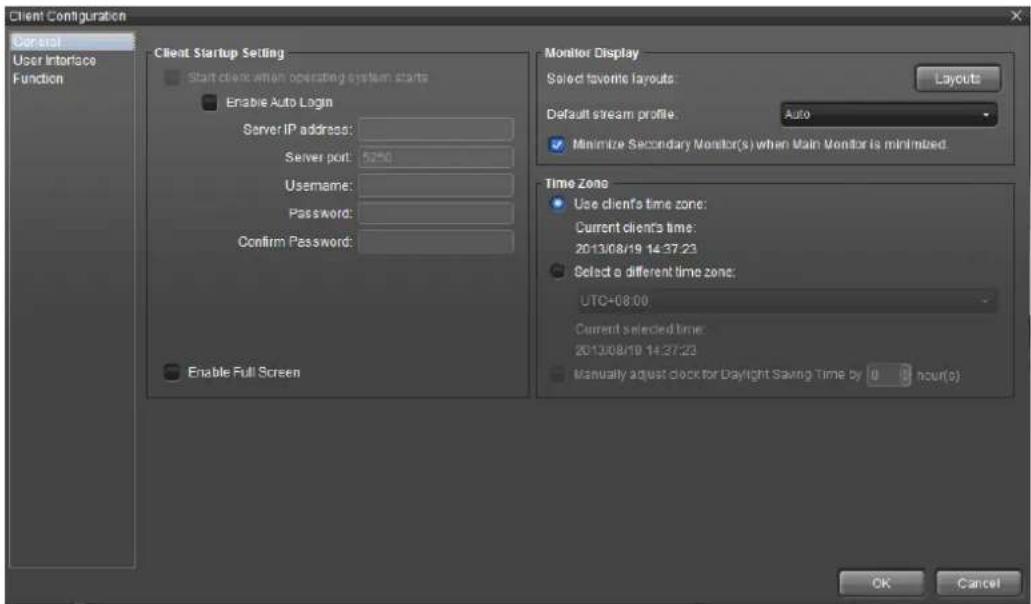
text_image
Client Configuration Control User Interface Function Client Startup Setting Start client when operating system starts Enable Auto Login Server IP address: Server port: 5250 Username: Password: Confirm Password: Enable Full Screen Monitor Display Select favorite layouts Layouts Default stream profile: Auto Minimize Secondary Monitor(s) when Main Monitor is minimized. Time Zone Use clients' time zone: Current clients' time: 2013/08/19 14:37:23 Select a different time zone: UTC+08:00 Current selected time: 2013/08/19 14:37:23 Manually adjust clock for Daylight Saving Time by 0 hour(s) OK Cancel- From the Cong Catalog, click the Funcon.
The Funcon menu opens and shows the Live View tabbed page by default.
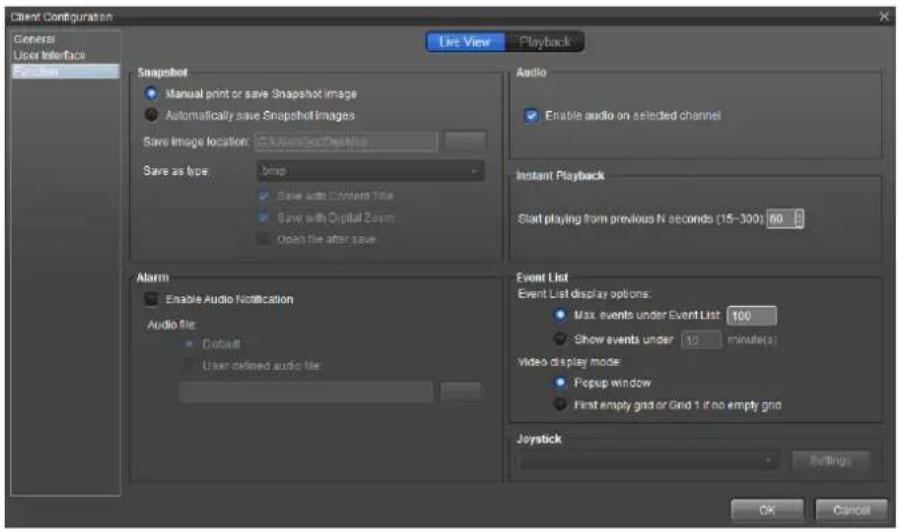
text_image
Client Configuration General User Interface Live View Playback Snapshot ● Manual print or save Snapshot image ● Automatically save Snapshot images Save Image location: User and Desktop Save as type: spring ○ Save with Content Title ○ Save with Digital Zoom ○ Open file after save Audio ● Enable audio on selected channels Instant Playback Start playing from previous N seconds (15-300) 60 Alarm ● Enable Audio Notification Audio file ● Default User defined audio file Event List Event List display options: ● Max events under Event List 100 ○ Show events under 10 minute(s) Video display mode: ● Popup window ● First empty grid or Grid 1 if no empty grid Joystick Settings OK CancelTo know the Live View tabbed page, see Live View tabbed page.
To know the Playback tabbed page, see Playback tabbed page.
11.4.3.1 Live View tabbed page
It relies on the Live View tabbed page to enable/disable a feature of the Live View screen.
To open the Live View tabbed page:
1. Access the NuClient.
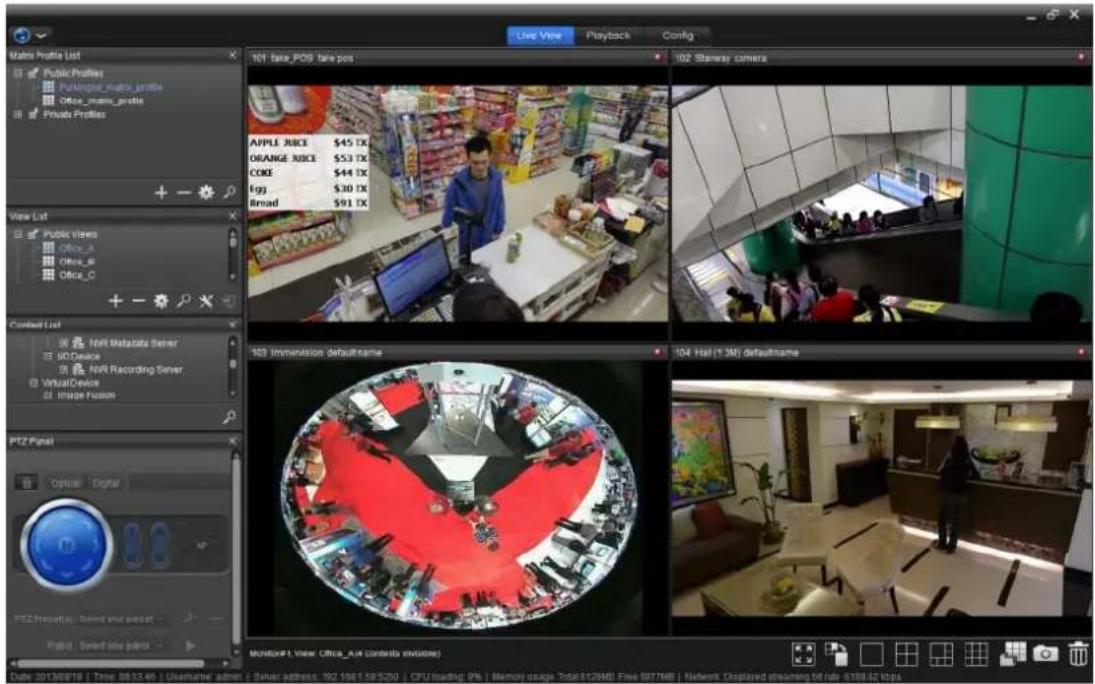
text_image
Live View Playback Config Matrix Profile List Public Profiles Public profile profile Office profile Private Profiles 101 tape_POS: tape pos 102 Shamray camera APPLE JUICE $45 TX ORANGE JUICE $53 TX CORE $44 TX egg $30 TX Broad $91 TX View List Public Views Office_A Office_B Office_C + - + Contact List NVR Metadata Server UCO Device NVR Recording Server VirtualDevice Image Fusion PTZ Panel Optico Digital PTZ Presentation: Select audio format... Page 1: Select audio format 103 Immersion defaultname 104 Has (1.3N) defaultname Monitor#1 view: Office_Aut contents available Date: 2013/08/19 | Time: 08:53:46 | Username: admin | Timer address: 102.100.1.59.5200 | CPU reading: 7% | Monitor usage: Total:117MB Freq: 997MB | Network Displayed Dreaming bit run: $198.42 Ubps- From the Top Toolbar of the NuClient, click the "global" icon
The menu opens.
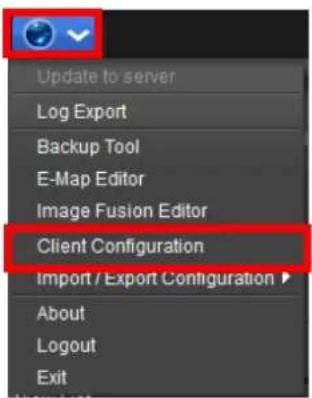
text_image
Update to server Log Export Backup Tool E-Map Editor Image Fusion Editor Client Configuration Import / Export Configuration ▶ About Logout Exit- The Client Conguraon launches and shows the General menu by default.
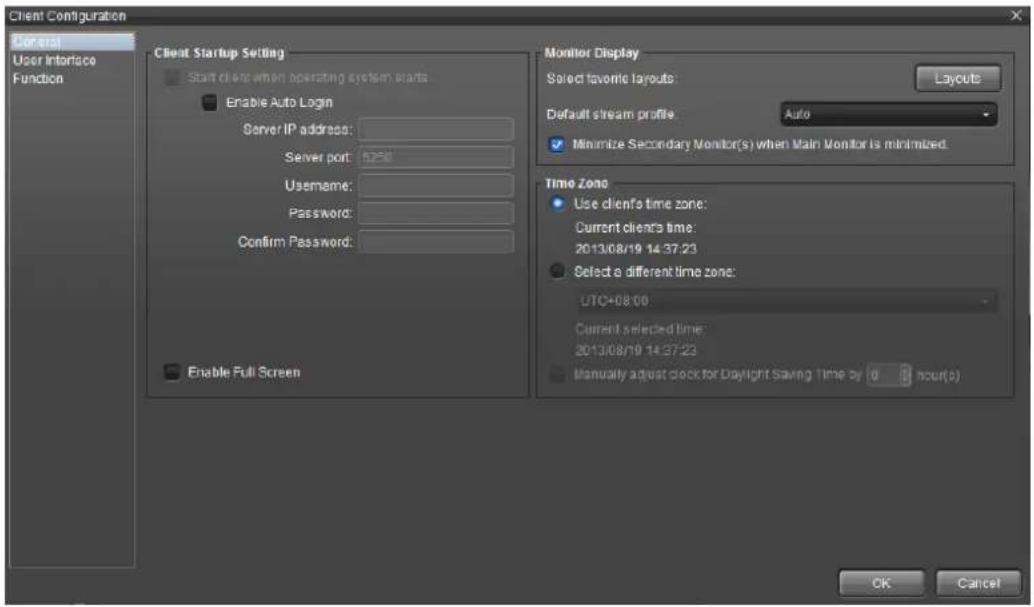
text_image
Client Configuration General User Interface Function Client Startup Setting Start client when operating system starts Enable Auto Login Server IP address: Server port: 6250 Username: Password: Confirm Password: Enable Full Screen Monitor Display Select favorite layouts: Layouts Default stream profile: Auto Minimize Secondary Monitor(s) when Main Monitor is minimized. Time Zone Use client's time zone: Current client's time: 2013/08/19 14:37:23 Select a different time zone: UTC+08:00 Current selected time: 2013/08/19 14:37:23 Manually adjust clock for Daylight Saving Time by 0 hour(s) OK Cancel- From the Cong Catalog, click the Funcon.
The Funcon menu opens and shows the Live View tabbed page by default.
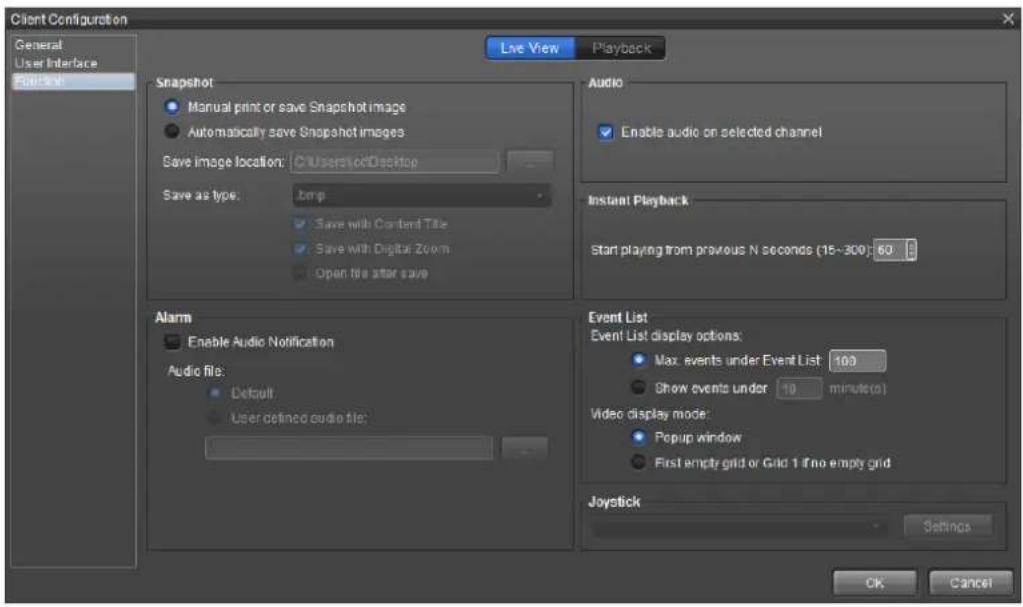
text_image
Client Configuration General User Interface Default Live View Playback Snapshot ● Manual print or save Snapshot image ● Automatically save Snapshot images Save image location: C:\Users\odesktop Save as type: lamp ✓ Save with Content Title ✓ Save with Digital Zoom ■ Open file after save Audio ✓ Enable audio on selected channel Instant Playback Start playing from previous N seconds (15~300): 60 % Alarm ● Enable Audio Notification Audio file: ● Default ● User defined audio file: Event List Event List display options: ● Max. events under Event List 100 ● Show events under 10 minute(s) Video display mode: ● Popup window ● First empty grid or Grid 1 if no empty grid Joystick Settings OK CancelThe featured sengs are:
| Group Box | Setting | Description | |||
| Snapshot | Manual print or save Snapshot image | Tick the check box to assign the folder to save a snapshot to each time a snapshot is captured. | |||
| Automatically save Snapshot image | Tick the check box to save the snapshot to a specific folder by a specific format.When enabled, the following settings are available: | ||||
| Setting | Description | Default | |||
| Save image location | Sets where to save the captured snapshot.Click the ellipsis (...) button to open an explorer window to browser where to save the snapshot. | The desktop folder | |||
| Save as type: | Sets the file format to save the snapshot to.Two types are available:.bmp and .jpg | .bmp | |||
| Save with Content Title | Saves the captured snapshot with the “content title” of the video channel (, which is delivered by the title bar of the video channel.) | Selected (enabled) | |||
| Save with Digital Zoom | Saves the captured snapshot with the “Digital Zoom” of the video channel | Selected (enabled) | |||
| Open the file after save | Auto-opens the snapshot after it is saved. | Deselected (disabled) | |||
| Alarm | Enable Audio Notification | Enables/disables the NuClient to sound an audio for notification when an event comes up.1.Enabled is the default.2. When enabled, the following group of settings becomes available: | |||
| Group | Setting | Description | Default | ||
| Audio file | Default | Uses the system-featured sound file for the alarm audio. | Selected (Enabled) | ||
| User-defined audio file: | Uses a unique sound file of user’s own for the alarm audio.1. Click the ellipsis (...) button to open an explorer window to browser for the audio file. | -- | |||
| Audio | Enable audio on selected channel | Sets whether to hear the sound of the instant video when the camera channel is clicked.1. This setting requires the camera to have a microphone.2. Enables the mouse over any video channel in the View Area to launch a tool bar to enable/disable the camera audio. | |||
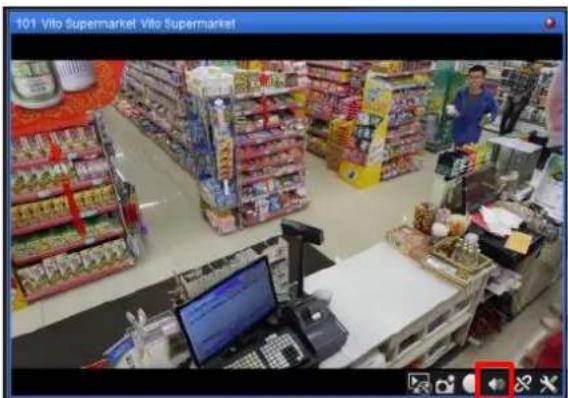 | |||||
| Instant Playback | Start playing from previous N seconds (15~300): | Defines how fast to forward or rewind an instant video footage 1. 15 to 300 seconds configurable.2. 60 seconds is the default. | |||
| Event List | Event List display options | Configures how to display an event in the Event List, by defining how many events to show or how long to display an event for. The featured settings are: | |||
| Setting | Description | Default | |||
| Max.events under Event List: | Defines how many events to show in the Event List.1. 1 to 1000 events configurable.2. 100 events is the default. | Selected (Enabled) | |||
| Show events under _minutes | Defines the maximum time to show an event in the Event List.1. 10 to 60 minutes configurable.2. 10 minutes is the default. | Deselected (Disabled) | |||
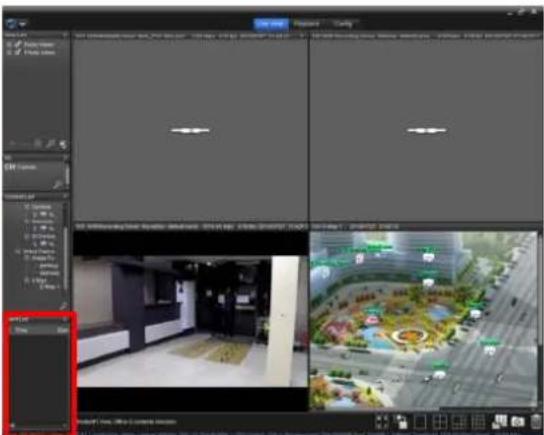 | |||||
| Video display mode | Sets video display mode.Two modes are available: Popup window or First empty grid or Grid 1 if no empty grid. | ||||
| Joystick | N/A | Sets joystick feature. | |||
| Setting | Description | ||||
| Name | Joystick button name. | ||||
| Function | Sets joystick function.Three functions are available: View and grid switching, Screen layout switching and PTZ control. | ||||
| Setting | Description | Default |
| Max.events under Event List: | Defines how many events to show in the Event List.1. 1 to 1000 events configurable.2. 100 events is the default. | Selected (Enabled) |
| Show events under _minutes | Defines the maximum time to show an event in the Event List.1. 10 to 60 minutes configurable.2. 10 minutes is the default. | Deselected (Disabled) |
| Setting | Description |
| Name | Joystick button name. |
| Function | Sets joystick function.Three functions are available: View and grid switching, Screen layout switching and PTZ control. |
| Setting | Description | |||
| View and grid switching | Go to monitor # Next view Previous view Next grid Previous grid Go to grid # | |||
| Screen layout switching | Toggle single camera view Toggle full-screen | |||
| PTZ control | Digital / Optical switch Zoom in Zoom out Go to preset # | |||
| Parameter | Joystick's parameter. | |||
| Joystick Settings | ||||
| 1 | Button 1 | -- Switch View/ Switch Grid -- | ||
| 2 | Button 2 | -- Switch View/ Switch Grid -- | ||
| 3 | Button 3 | -- Switch View/ Switch Grid -- | ||
| 4 | Button 4 | -- Switch View/ Switch Grid -- | ||
| 5 | Button 5 | -- Switch View/ Switch Grid -- | ||
| 6 | Button 6 | -- Switch View/ Switch Grid -- | ||
| 7 | Button 7 | -- Switch View/ Switch Grid -- | ||
| 8 | Button 8 | -- Switch View/ Switch Grid -- | ||
| 9 | Button 9 | -- Switch View/ Switch Grid -- | ||
| 10 | Button 10 | -- Switch View/ Switch Grid -- | ||
| 11 | Button 11 | -- Switch View/ Switch Grid -- | ||
| 12 | Button 12 | -- Switch View/ Switch Grid -- | ||

Enable joystick option when use joystick plugged to computer.
11.4.3.2 Playback tabbed page
It relies on the Playback tabbed page to enable/disable a feature to/from the Playback screen.
To open the Playback tabbed page:
1. Access the NuClient.
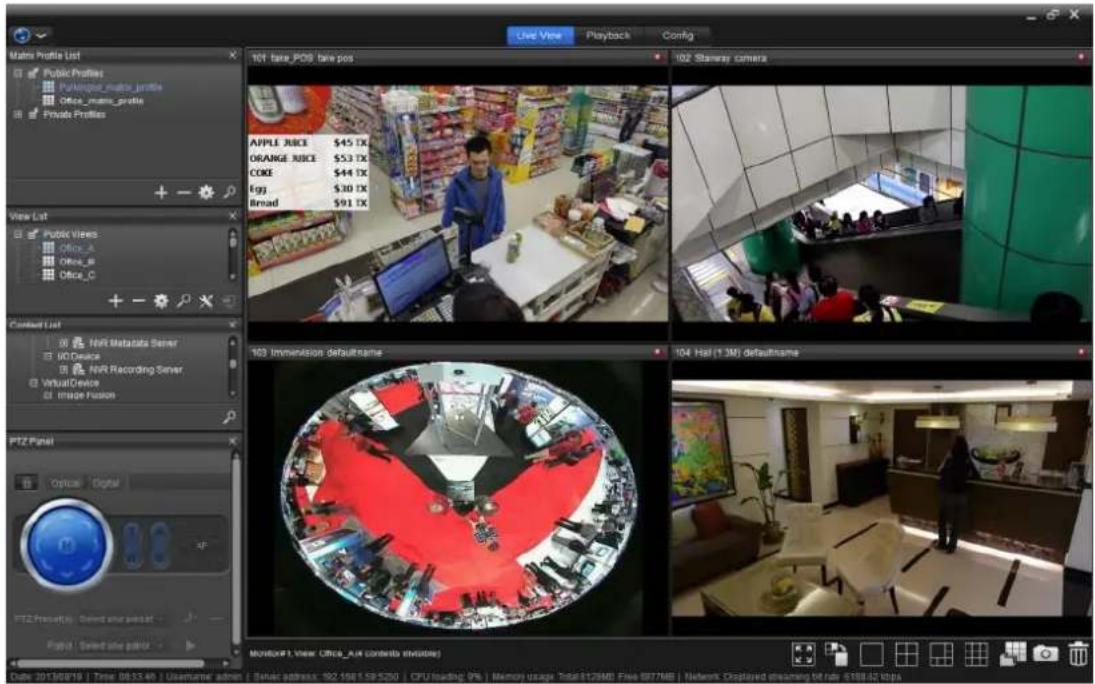
text_image
Live View Playback Config Matrix Profile List Public Profiles Public profile profile Office profile Private Profiles 101 tape_POS: tape pos 102 Shamray camera APPLE JUICE $45 TX ORANGE JUICE $53 TX CORE $44 TX egg $30 TX Broad $91 TX View List Public Views Office_A Office_B Office_C + - + Contact List NVR Metadata Server UCO Device NVR Recording Server VirtualDevice Image Fusion PTZ Panel Optico Digital PTZ Presentation: Select audio format... Page 1: Select audio format 103 Immersion defaultname 104 Has (1.3N) defaultname Monitor#1 view: Office_Aut contents available Date: 2013/08/19 | Time: 08:53:46 | Username: admin | Timer address: 102.100.1.59.5200 | CPU reading: 7% | Monitor usage: Total: 117MB Freq: 997MB | Network Displayed Dreaming bit run: $198.42 Ubps- From the Top Toolbar of the NuClient, click the "global" icon
The menu opens.
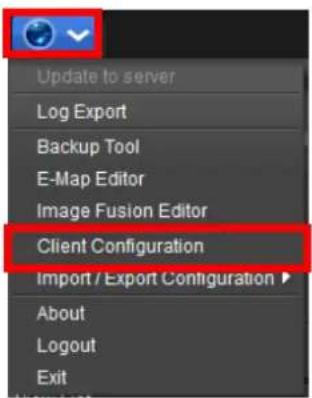
text_image
Update to server Log Export Backup Tool E-Map Editor Image Fusion Editor Client Configuration Import / Export Configuration ▶ About Logout Exit- The Client Conguraon launches and shows the General menu by default.
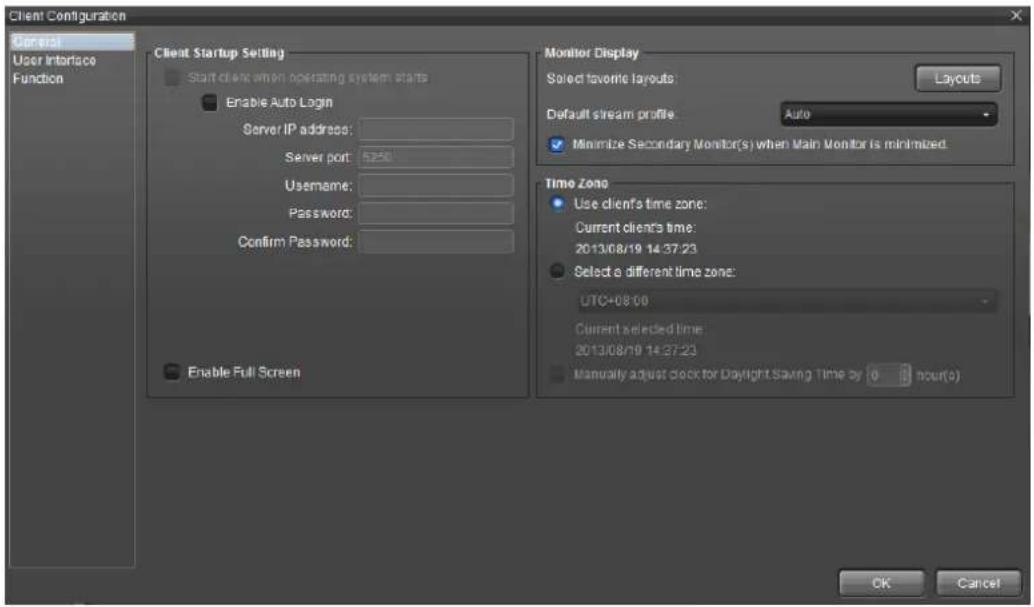
text_image
Client Configuration General User Interface Function Client Startup Setting Start client when operating system starts Enable Auto Login Server IP address: Server port: 1250 Username: Password: Confirm Password: Enable Full Screen Monitor Display Select favorite layouts Layouts Default stream profile: Auto Minimize Secondary Monitor(s) when Main Monitor is minimized. Time Zone Use clients' time zone: Current clients' time: 2013/08/19 14:37:23 Select a different time zone: UTC+08:00 Current selected time: 2013/08/19 14:37:23 Manually adjust clock for Daylight Saving Time by 0 hour(s) OK Cancel- From the Cong Catalog, click the Funcon.
The Funcon menu opens and shows the Live View tabbed page by default.
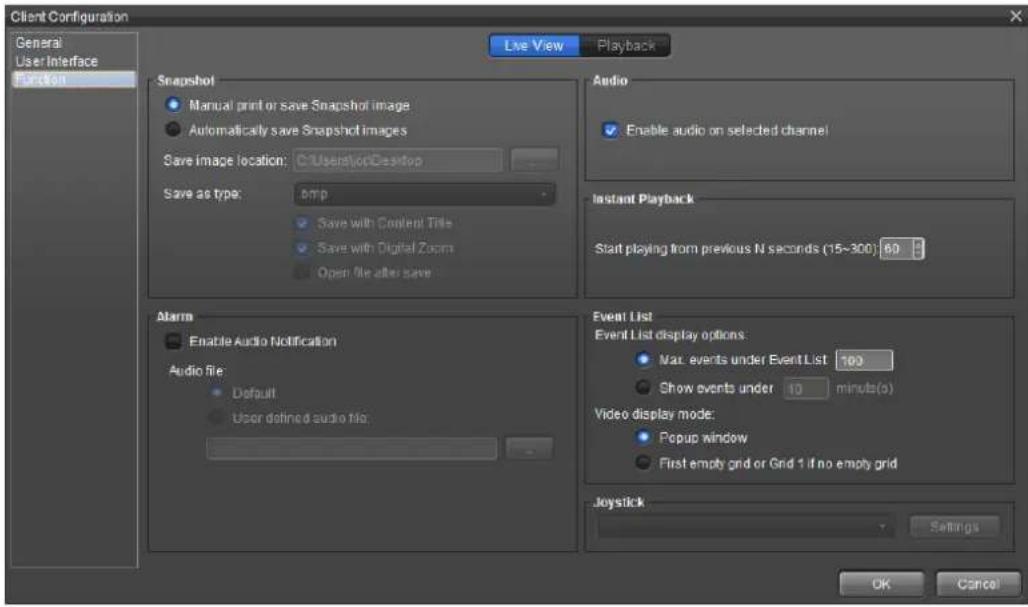
text_image
Client Configuration General User Interface Function Live View Playback Snapshot ● Manual print or save Snapshot image ● Automatically save Snapshot images Save image location: C:\Users\io\Desktop Save as type: cmp Save with Content Title Save with Digital Zoom Open file after save Audio ● Enable audio on selected channel Instant Playback Start playing from previous N seconds (15~300) 60 Alarm ● Enable Audio Notification Audio file: Default User defined audio file: Event List Event List display options: ● Max events under Event List 100 ● Show events under 10 minutes(s) Video display mode: ● Popup window ● First empty grid or Grid 1 if no empty grid Jeystick Settings OK Cancel5. Click the Playback tab.
The Playback tabbed page opens.
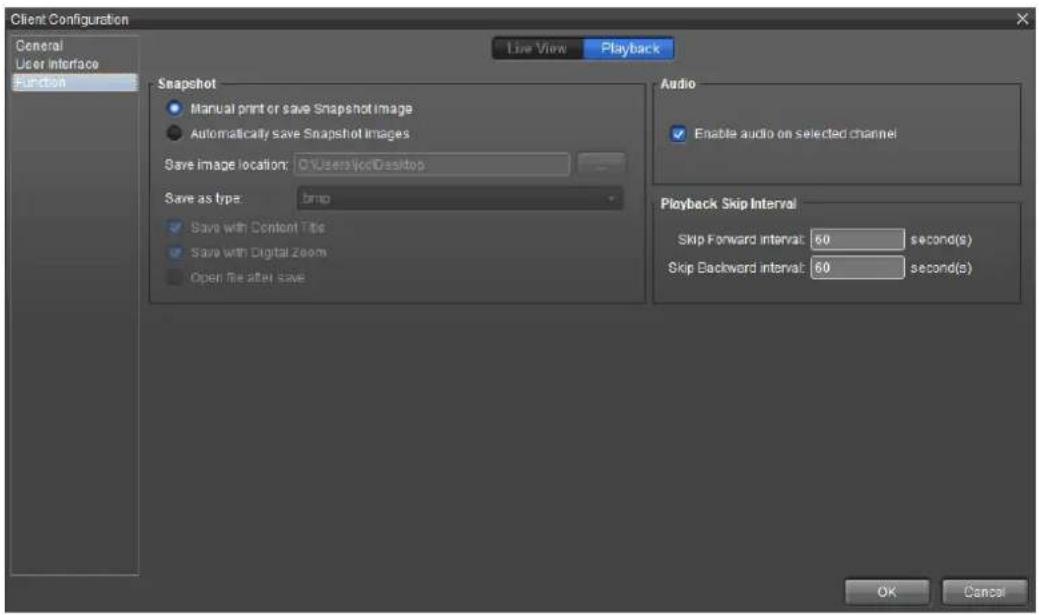
text_image
Client Configuration General User Interface Function Live View Playback Snapshot ● Manual print or save Snapshot Image ● Automatically save Snapshot Images Save image location: O:\Users\oc\Desktop Save as type: strip ✓ Save with Content Title ✓ Save with Digital Zoom Open file after save Audio ✓ Enable audio on selected channel Playback Skip Interval Skip Forward interval: 50 second(s) Skip Backward interval: 50 second(s) OK CancelThe featured sengs are:
| Group Box | Setting | Description | ||
| Snapshot | Manual print or save Snapshot image | Tick the check box to assign the folder to save a snapshot to each time a snapshot is captured. | ||
| Automatically save Snapshot image | Tick the check box to save the snapshot to a specific folder by a specific format.1. When enabled, the following settings are available: | |||
| Setting | Description | Default | ||
| Save image location | Sets where to save the captured snapshot.1. Click the ellipsis (...) button to open an explorer window to browser where to save the snapshot. | The desktop folder | ||
| Save as type: | Sets the file format to save the snapshot to. | .bmp | ||
| Save with Content Title | Saves the captured snapshot with the “content title” of the video channel (, which is delivered by the title bar of the video channel.) | Selected (enabled) | ||
| Save with Digital Zoom | Saves the captured snapshot with the “Digital Zoom” of the video channel | Selected (enabled) | ||
| Open the file after save | Auto-opens the snapshot after it is saved. | Deselected (disabled) | |||
| Audio | Enable audio on selected channel | Sets whether to hear the sound of the recorded video when the camera channel is clicked.1. This setting requires the camera to have a microphone and the audio input must be enabled during recording. | |||
| Playback Skip Interval | Skip Forward Interval | Defines how fast to forward a recorded video1. 1 to 3600 seconds configurable.2. 60 seconds is the default. | |||
| Skip Backward Interval | Defines how fast to rewind a recorded video1. 1 to 3600 seconds configurable.2. 60 seconds is the default. | ||||
12. Live View
Live view page displays video streams in a grid. Grid types can be congured using the toolbar below the live view area.
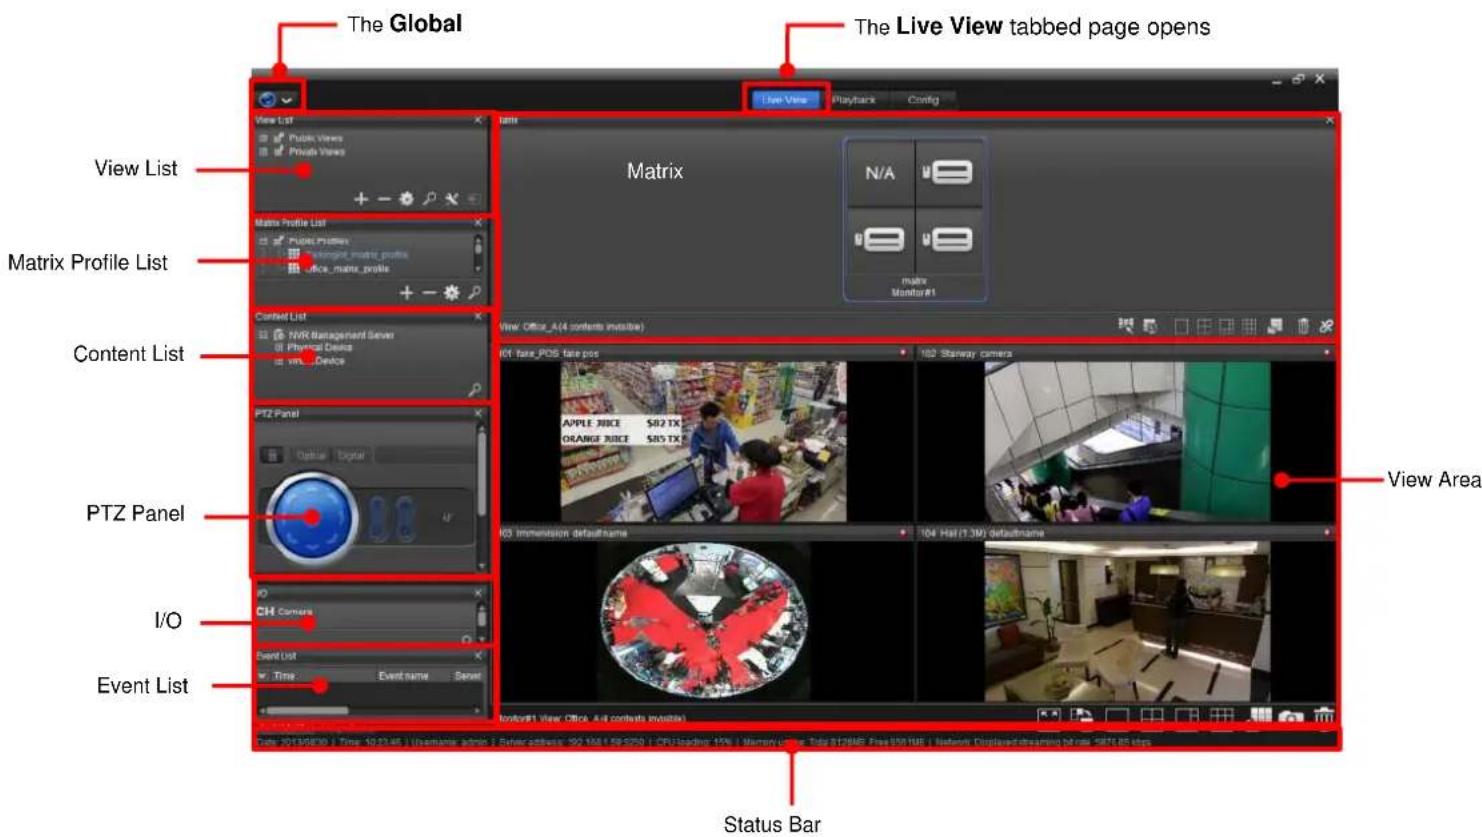
text_image
The Global The Live View tabbed page opens View List Matrix Profile List Matrix List Content List PTZ Panel I/O Event List Matrix Matrix View Office_A(4 contents installed) H01: fans_POS tape pos 100: Railway camera APPLE JUICE $82 TX ORANGE JUICE $85 TX H0: Immersion defaultname 104 Hall(1.3M) defaultname Event List Time Event name Server In favor1 view Office A4 contents available Status BarIf you have mulple monitors, the Live View interface on secondary monitors is very similar. The main dherence is in the toolbar.
The interface of Live View on a secondary monitor
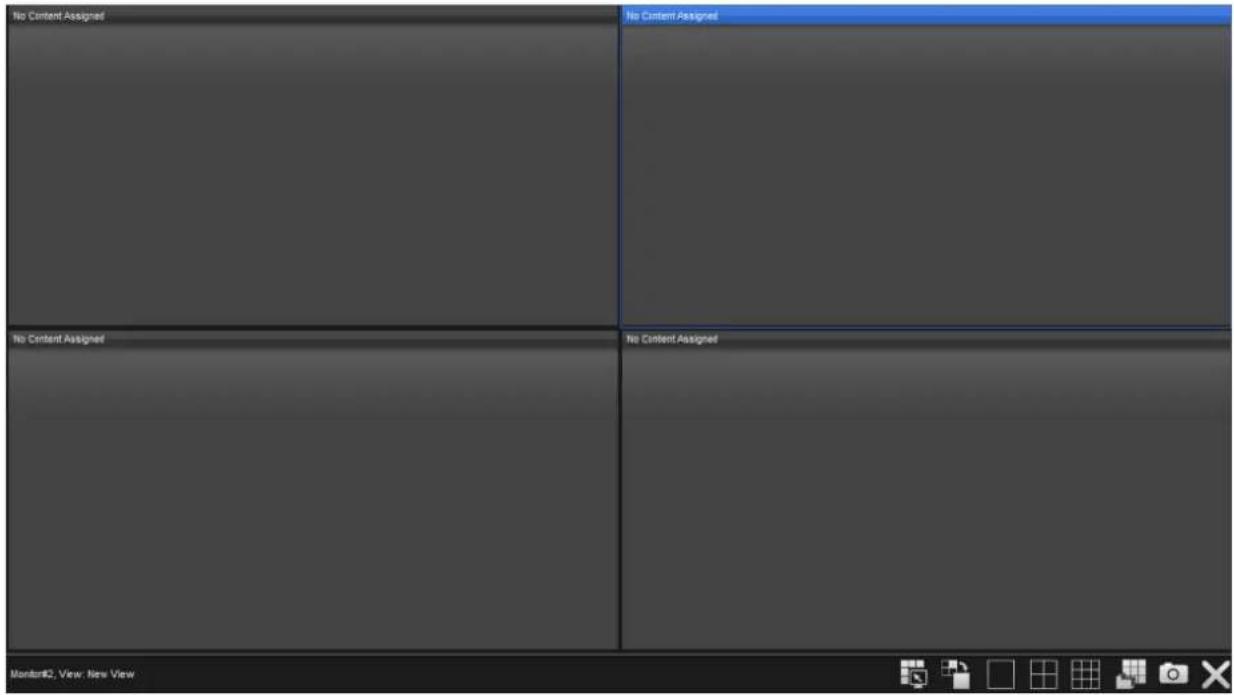
text_image
No Content Assigned No Content Assigned No Content Assigned Monitor#2, View: New ViewThe featured sengs are:
| Graphic Button | Description |
 | Switch between views |
 | Close Live View on a secondary monitor |
12.1 View List
A view is a collecon of conguraons including those of grid layouts, camera sengs, aspect raos, stream proles, etc.
12.2 Content List
Content List shows all the devices a user have permission to access. A device can be a camera, an I/O device, an image fusion, or an E-map.
Each device node as shown in the screenshot below can be expanded to see the details of each device. Expanding each device will show subordinate items, such as sensors on cameras.
12.2.1 Watch Live Video
In view area, add devices from Content List to the view area. You may add not only cameras, but also image fusion, E-Map, and I/O devices to the view area. Refer to the View secon to add view, camera, view tour, etc.
12.2.2 Toolbar Content
For each camera channel has toolbar for quick operaon. You can use the toolbar easily.

natural_image
Row of grayscale icons representing media and audio control functions (no text or symbols)The featured sengs are:
| Setting | Graphic Button | Description |
| Instant Playback |  | Sync to playback.Current instant playback will be opened in playback tab. However, if instant playback runs in a secondary monitor, then the playback will be opened on the primary monitor.➢ See also the Instant Playback of toolbar content |
| Snapshot |  | Takes snapshot.➢ See also the Snapshot of toolbar content. |
| PTZ |  | Controls camera remote directional and zoom.➢ See also the PTZ of toolbar content. |
| Manual Record Video |  ____ ____ | Records video manually.➢ See also the Manual Record Video of toolbar content. |
| Audio |  | Enables/disables audio.➢ See also the Audio of toolbar content. |
| Connecon |  | Connects/disconnects camera.➢ See also the Connection of toolbar content. |
12.2.2.1 Instant Playback
Click on the Instant Playback

You may playback video or
reverse-playback video with this funcon. Hold the scroll handle in the middle can change the playback speed.
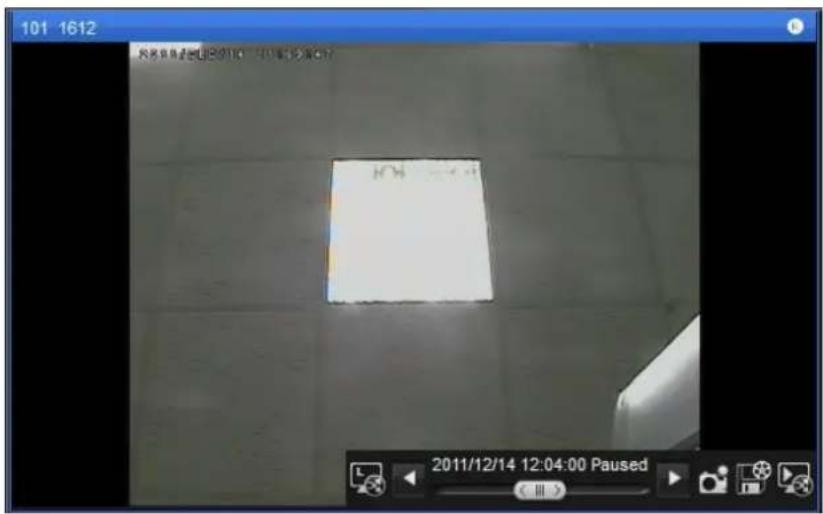
text_image
101 1612 2011/12/14 12:04:00 Paused12.2.2.2 Snapshot
12.2.2.2.1 Snapshot one channel
Click on the snapshot

icon in toolbar content and saves the snapshot of the
current video channel at the current moment.
You may choose to export the names, enable digital zoom in exported data, save exported images to les or to printers.
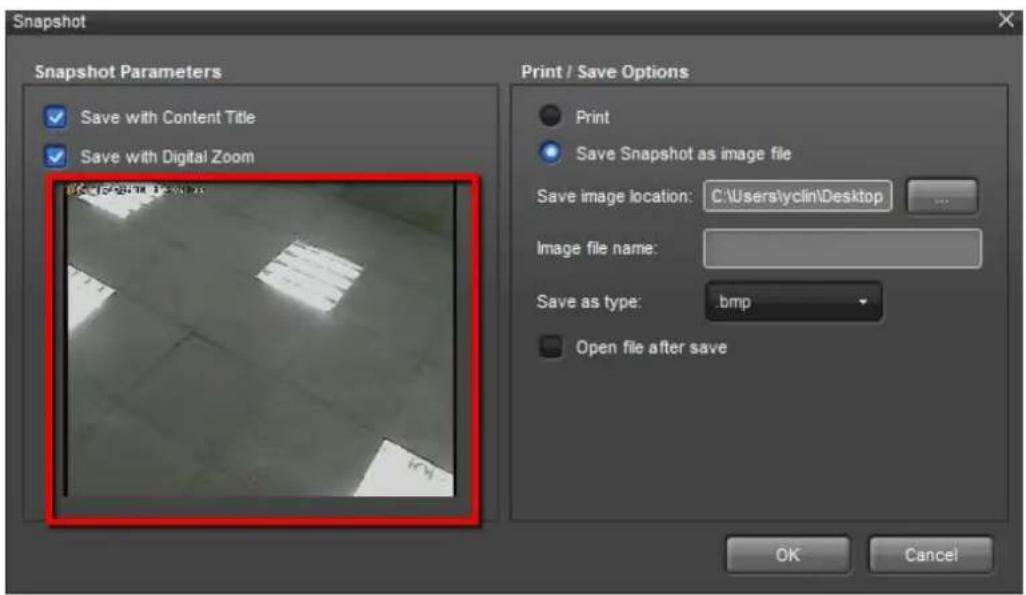
text_image
Snapshot Snapshot Parameters Save with Content Title Save with Digital Zoom Print / Save Options Print Save Snapshot as image file Save image location: C:\Users\yclin\Desktop Image file name: Save as type: .bmp Open file after save OK CancelThe featured sengs are:
| Setting | Description |
| Snapshot Parameters | There are two options available: save with Content title and save with Digital Zoom. |
| Print / Save Opons | 1. There are two options available: print and save Snapshot as image file.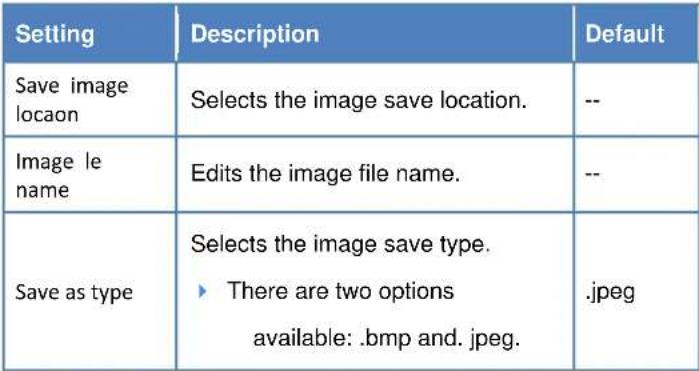 2. Enables/disable open file after save. 2. Enables/disable open file after save. |
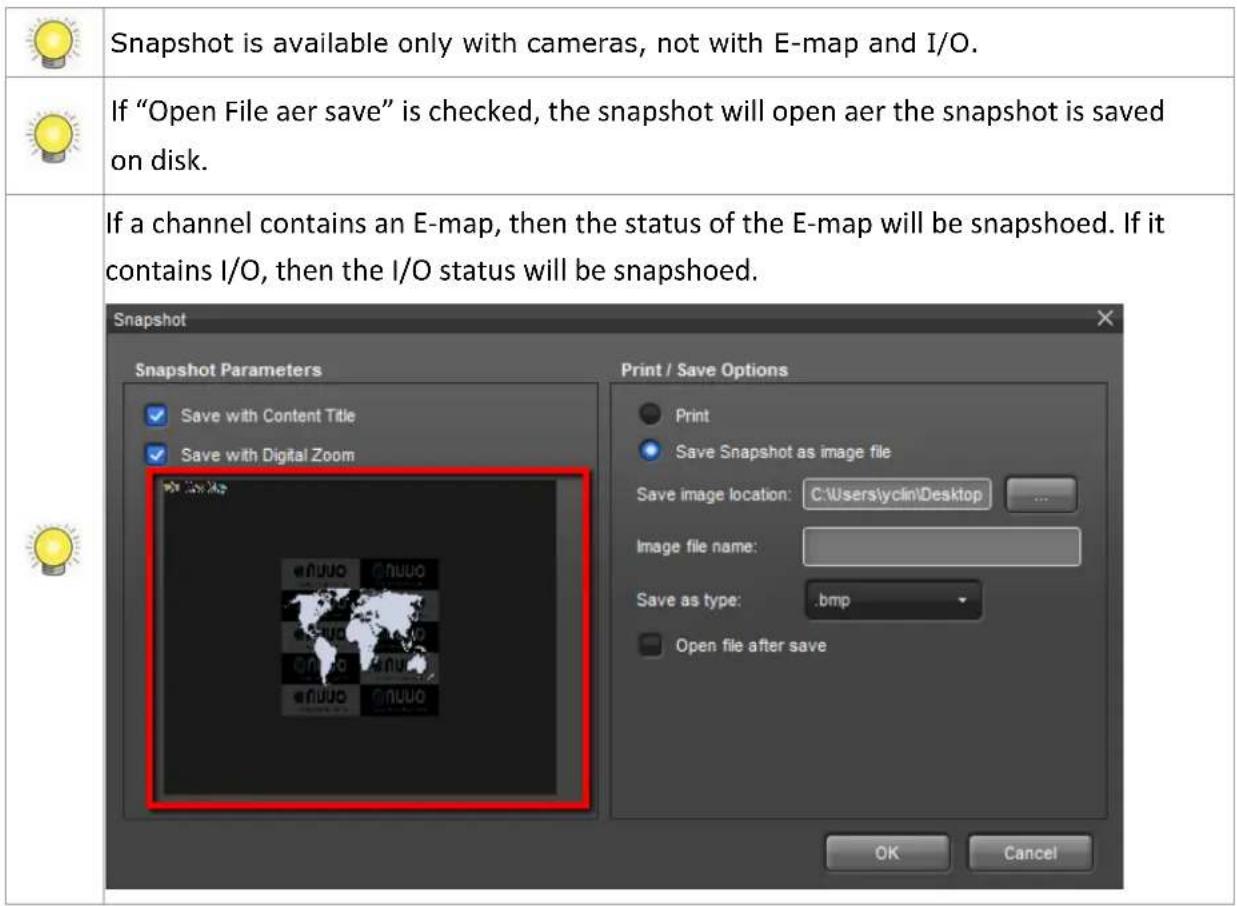
text_image
Snapshot is available only with cameras, not with E-map and I/O. If "Open File aer save" is checked, the snapshot will open aer the snapshot is saved on disk. If a channel contains an E-map, then the status of the E-map will be snapshoed. If it contains I/O, then the I/O status will be snapshoed. Snapshot Snapshot Parameters Save with Content Title Save with Digital Zoom Print / Save Options Print Save Snapshot as image file Save image location: C:\Users\yclin\Desktop ... Image file name: Save as type: .bmp Open file after save OK Cancel12.2.2.2 Snapshot whole view area
If you want to snapshot all channels on the screen, you need to press the snapshot icon in view toolbar.
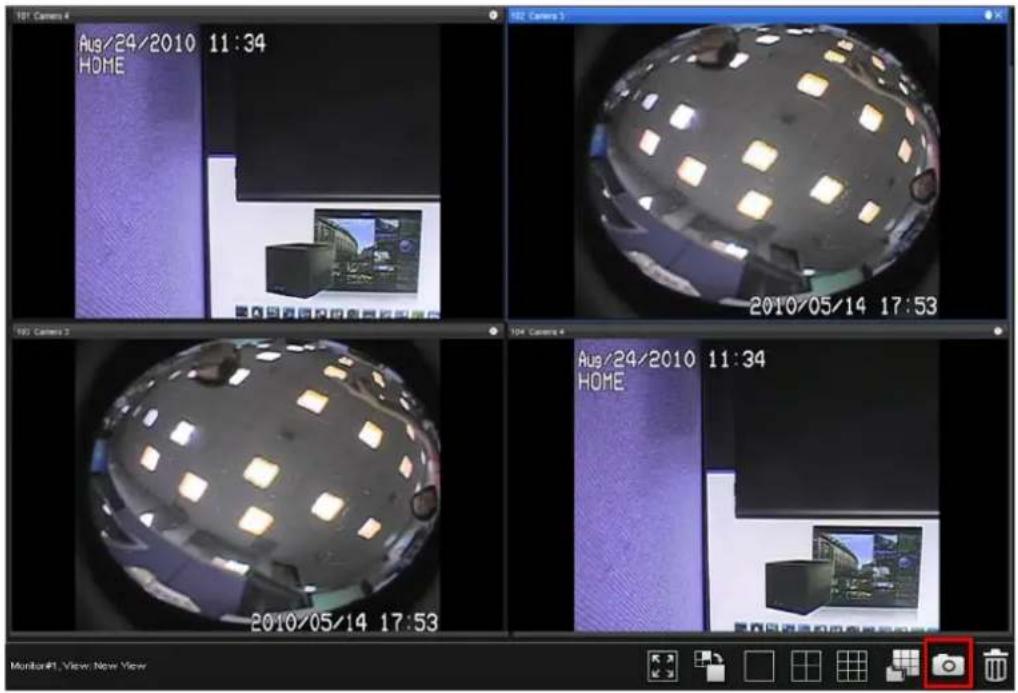
text_image
101 Camera 4 Aug/24/2010 11:34 HOME 102 Camera 5 2010/05/14 17:53 103 Camera 6 Aug/24/2010 11:34 HOME 2010/05/14 17:53 Monitor#1, View: New ViewIf the content of a channel is E-map or I/O panel, they will also be put in a snapshot.
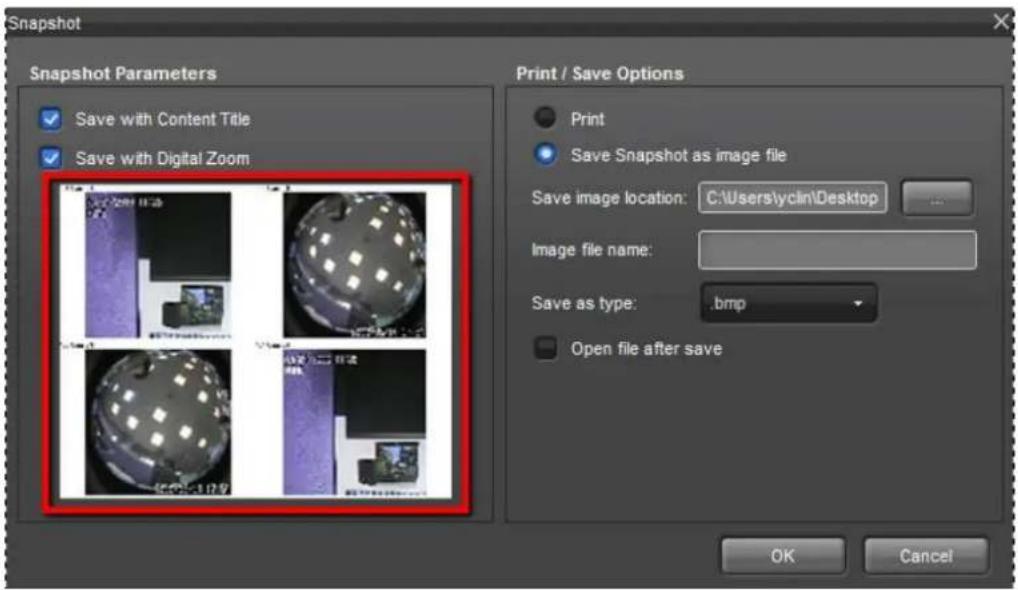
text_image
Snapshot Snapshot Parameters Save with Content Title Save with Digital Zoom Print / Save Options Print Save Snapshot as image file Save image location: C:\Users\yclin\Desktop Image file name: Save as type: .bmp Open file after save OK CancelThe featured sengs are:
| Setting | Description |
| Snapshot Parameters | There are two options available: save with Content title and save with Digital Zoom. |
| Print / Save Opons | 3. There are two options available: print and saveSnapshotas image file.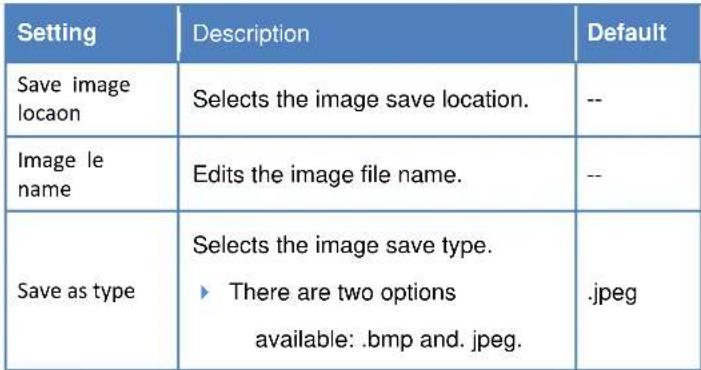 4. Enables/disable open file after save. 4. Enables/disable open file after save. |
| Snapshot is available only with cameras, not with E-map and I/O. | |
| If "Open File after save" is checked, the snapshot will open after the snapshot is save on disk. | |
| If a channel contains an E-map, then the status of the E-map will be snapshotted. If it contains I/O, then the I/O status will be snapshotted. |
12.2.2.3 PTZ
Please see the secon of PTZ for details.
12.2.2.4 Manually Record Video
- Click on the Start/Stop Recording icon.
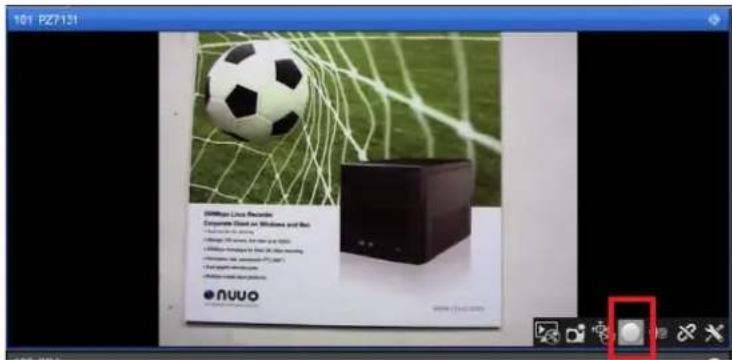
text_image
101 PZ7131 2000Pro Lina Reorder Corporate Sold on Windows and Web • 2000 Pro Lina Reorder • 2000 Pro Lina Reorder • 2000 Pro Lina Reorder • 2000 Pro Lina Reorder • 2000 Pro Lina Reorder • 2000 Pro Lina Reorder • 2000 Pro Lina Reorder • 2000 Pro Lina Reorder • 2000 Pro Lina Reorder • 6/18/2014 • 6/18/2014 • 6/18/2014 • 6/18/2014 • 6/18/2014 • 6/18/2014 • 6/18/2014 • 6/18/2014 • 6/18/2014 • 2000 Pro Lina Reorder • 2000 Pro Lina Reorder • 2000 Pro Lina Reorder • 2000 Pro Lina Reorder • 2000 Pro Lina Reorder • 2000 Pro Lina Reorder • 2000 Pro Lina Reorder • 2000 Pro Lina Reorder • 5/18/2014 • 5/18/2014 • 5/18/2014 • 5/18/2014 • 5/18/2014 • 5/18/2014 • 5/18/2014 • 5/18/2014 • 5/18/2014 • 6/18/2014 • 6/18/2014 • 6/18/2014 • 6/18/2014 • 6/18/2014 • 6/18/2014 • 6/18/2014 • 6/18 / 6/18 / 6/18 / 6/18 / 6/18 / 6/18 / 6/18 / 6/18 / 6/18 / 6/18 / 6/18 / 6/18 / 6/18 / 6/18 / 6/18 / 6/18 / 6/18 / 6/3- When video is being recorded, the icon will become a square Click it again to stop recording.
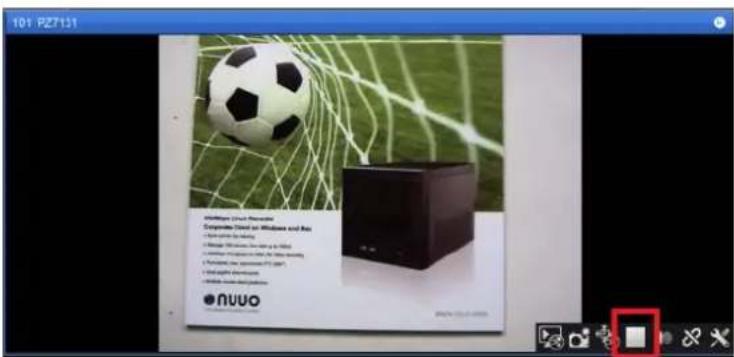
text_image
101 P27131 Mueller Smart Wireless Supernode Stand out Windows and Neo • A new platform for the game • A Manager 500 minutes on the game to be hit • A Newman 10 minutes on the game to hit • A Newman 10 minutes on the game to hit • A Newman 10 minutes on the game to hit NUVO12.2.2.5 Audio
Presses the speaker icons to enable/disable audio from a camera.
Please note that a camera must support audio for this funcon to work.
 | If your camera supports audio but you cannot hear that in NuClient, please make sure:1. Audio is enabled in the admin interface of the camera.2. Cables are properly connected.3. Audio is not muted in Windows. |
 | If mulple channels of video streams are running without enough bandwidth, it is possible to hear audio of poor quality. To solve this issue, you may try disconnecting a few cameras. |
 | Aer switching to dierent layouts, if a camera is not present in the current grid, you will not able to hear the audio of it. |
12.2.2.6 Connection
Press the chain icon to connect to a camera and disconnect from a camera.
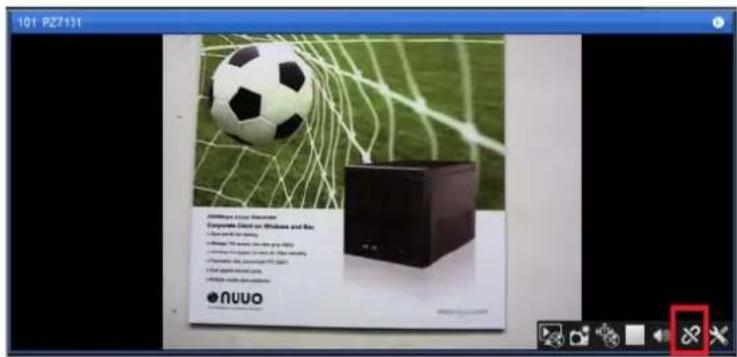
text_image
101 PZ7131 2024: You Use Possible Exceptional Start in Windows and then a Start is the next on the next screen to help you use this on the next screen to help you use this on the next screen to help you use this NUVO12.3 PTZ Panel
In the panel, you may control both opcal and digital pan/lt/zoom of your cameras. Opcal PTZ is enabled only when a camera has PTZ capability. Digital PTZ is achieved purely by digital image processing, and it is enabled for all cameras.
12.3.1 PTZ
PTZ is a mechanism for remote direconal and zoom control. PTZ is an abbreviation of Pan, Tilt, and Zoom. Pan refers to horizontal movement of a camera; Tilt refers to
vercal movement of a camera; Zoom refers to the change in focal lengths.
12.3.1.1 Optical PTZ
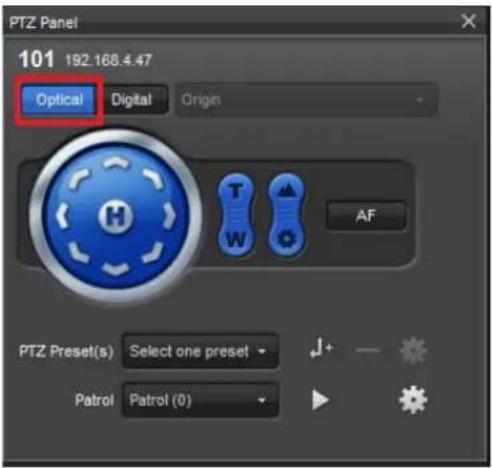
text_image
PTZ Panel 101 192.168.4.47 Optical Digital Origin T W AF PTZ Preset(s) Select one preset Patrol Patrol (0)The featured sengs are:
| Setting | Graphic Button | Description |
| PTZ |  | Controls the camera view by using the PTZ camera control panel to adjust the camera's view. |
| Zoom in |  | Zooms in of the area of interest. |
| Zoom out | [G3A4] | Zooms out of the area of interest. |
| Focus near | [0675] | Focuses near of the area of interest. |
| Focus far | [T067] | Focus far of the area of interest. |
| Auto focus |  | Adjusts the focus point of the area of interest. |
| PTZ Preset(s) | Sets camera PTZ configurations.The camera will be configured to the preset configurations when select a preset point.16 preset points are available.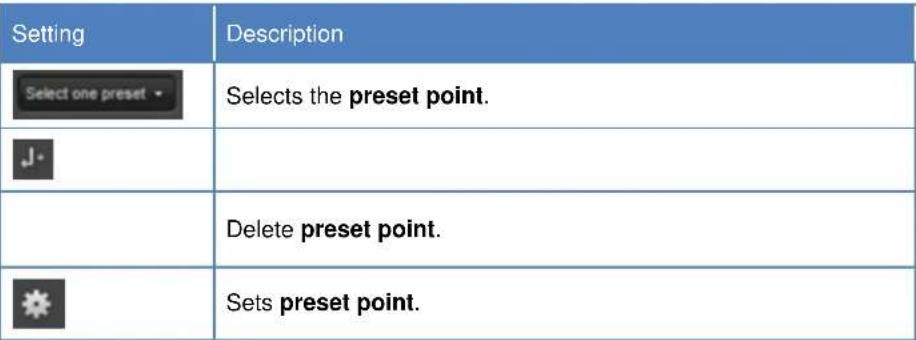 | |
| Patrol | Preset point group which enable user go to preset point automatically and stay at the preset point for the assigned time period.Four patrol groups are available.32 preset points for a patrol group are available.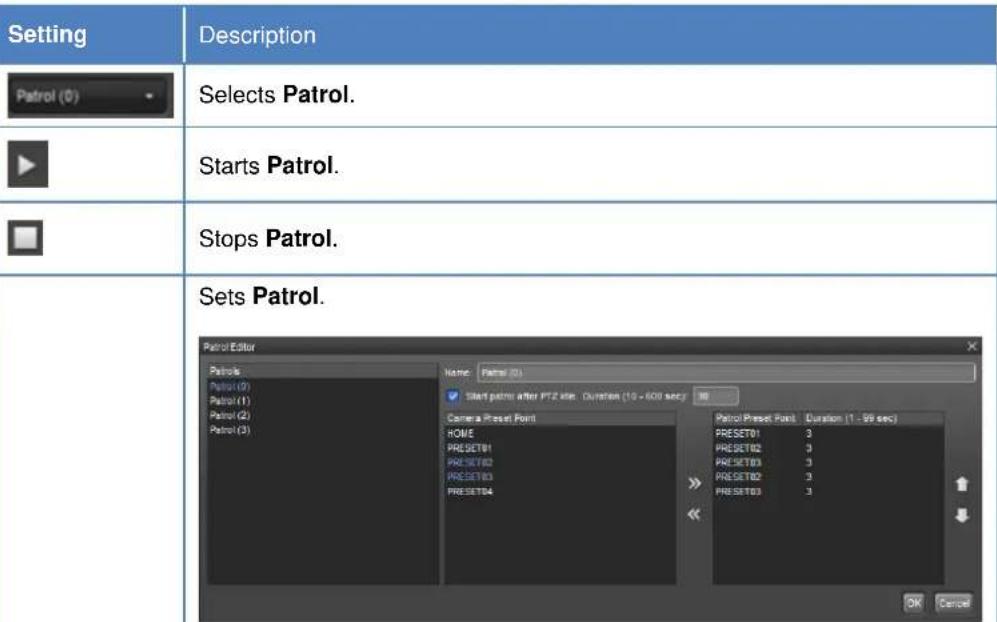 [282X] [282X] | 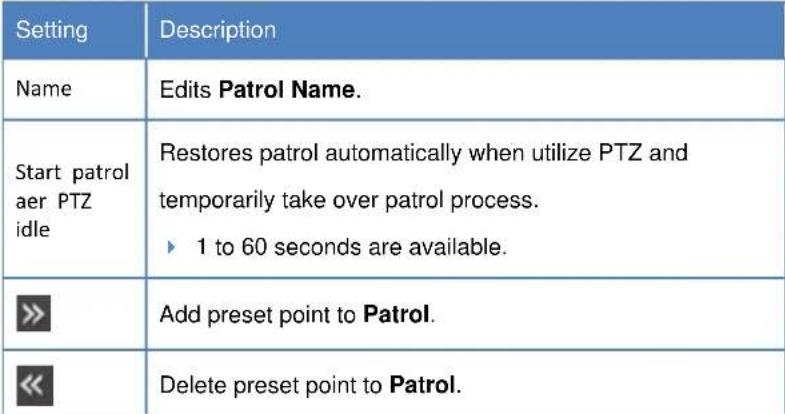 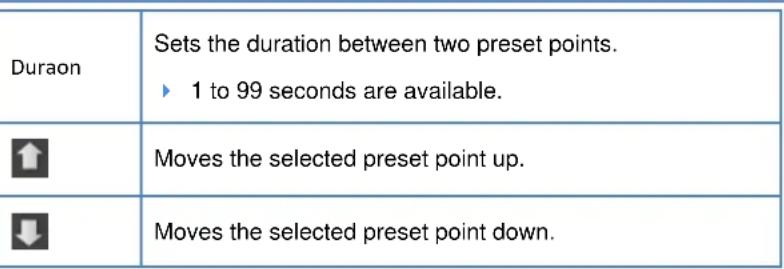 |
| Opcal PTZ is the default PTZ mode as long as a camera supports it. | |
| The names of preset may be scrambled if input Chinese/Japanese/Korean characters due to cameras do not support those character sets. | |
| Please assign preset point seng rst before Patrol. | |
| For patrol, the preset point can be chose for mulple mes. | |
| If user operate camera PTZ or go to preset point during patrol process, patrol will stop without manually stop patrol. If user enabled “Start patrol aer PTZ idle” for this patrol, the patrol process will restore aer assigned PTZ idle duraon. |
12.3.1.2 Digital PTZ
In contrast to opcal PTZ, Digital PTZ is an image-processing algorithm used to magnify each pixel see in a video image. Since it is merely a soware algorithm, digital PTZ is supported with any camera which NuClient connects to. Digital PTZ is supported both in Live View and Playback.

Opcal PTZ is supported only in Live View, while digital PTZ is supported both in Live View and Playback.
There are three ways of using digital PTZ in NuClient: draw a rectangle, use mouse wheel and use the on-screen buons.
12.3.1.2.1 Draw a rectangle
Draw a rectangle area in view area. The covered area which is surrounded dashed lines will be magnified and stretched to the whole view area. As soon as the rectangle is drawn, the view is smoothly zoomed into the area of interest.
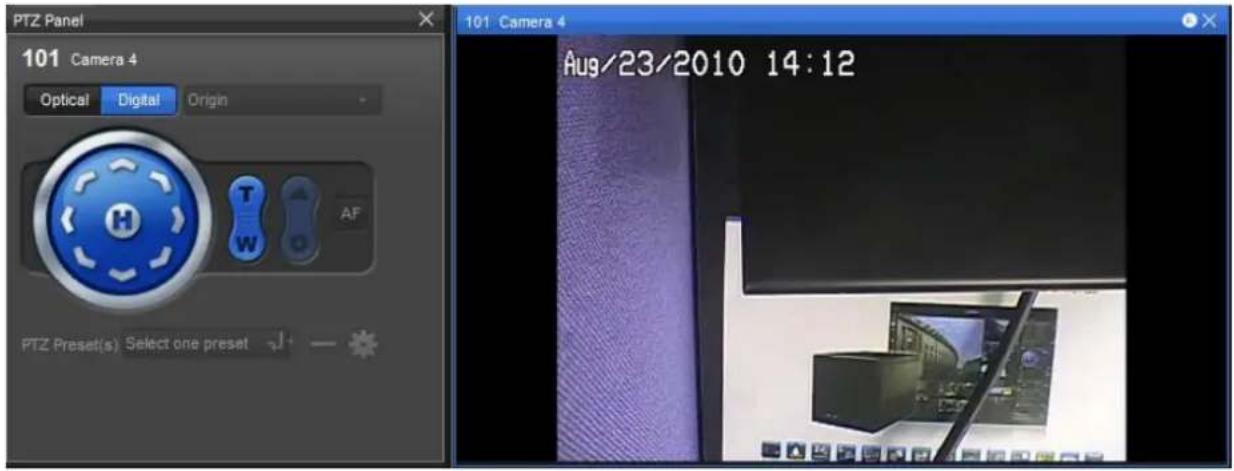
text_image
PTZ Panel 101 Camera 4 Optical Digital Origin H T W AF PTZ Preset(s) Select one preset J+ — 101 Camera 4 Aug/23/2010 14:12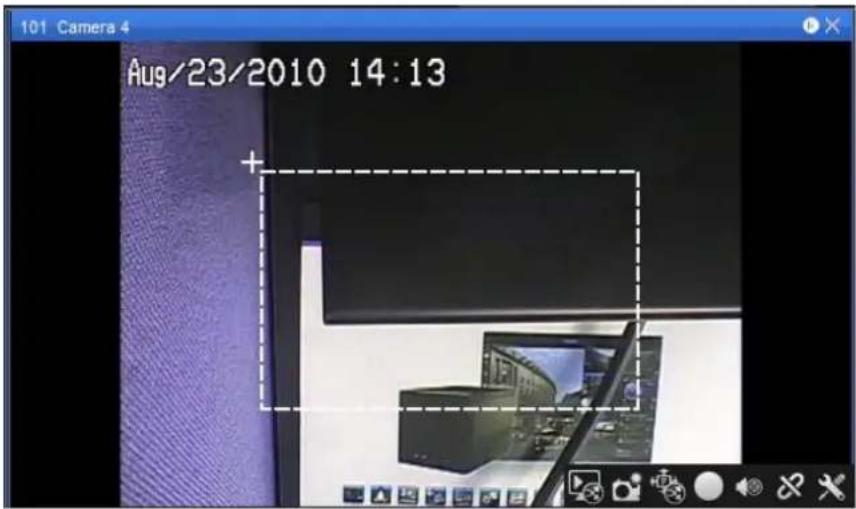
text_image
101 Camera 4 Aug/23/2010 14:13In the corner, nd a sub-window showing the full content of the current camera.
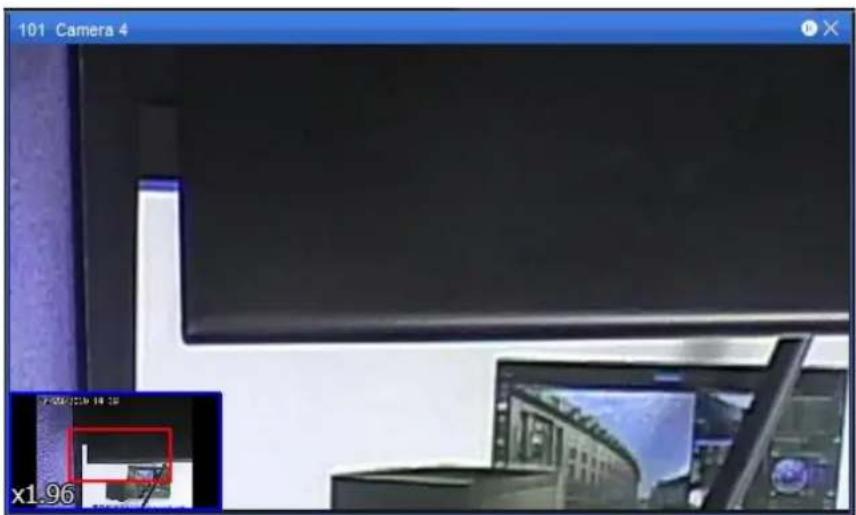
text_image
101 Camera 4 7:26:13:18:20 x1.9612.3.1.2.2 Use mouse wheel
Besides drawing a rectangle, it is even more intuitive to use mouse wheel to zoom in and zoom out. Drag-and-drop the view area to change viewport of the camera.
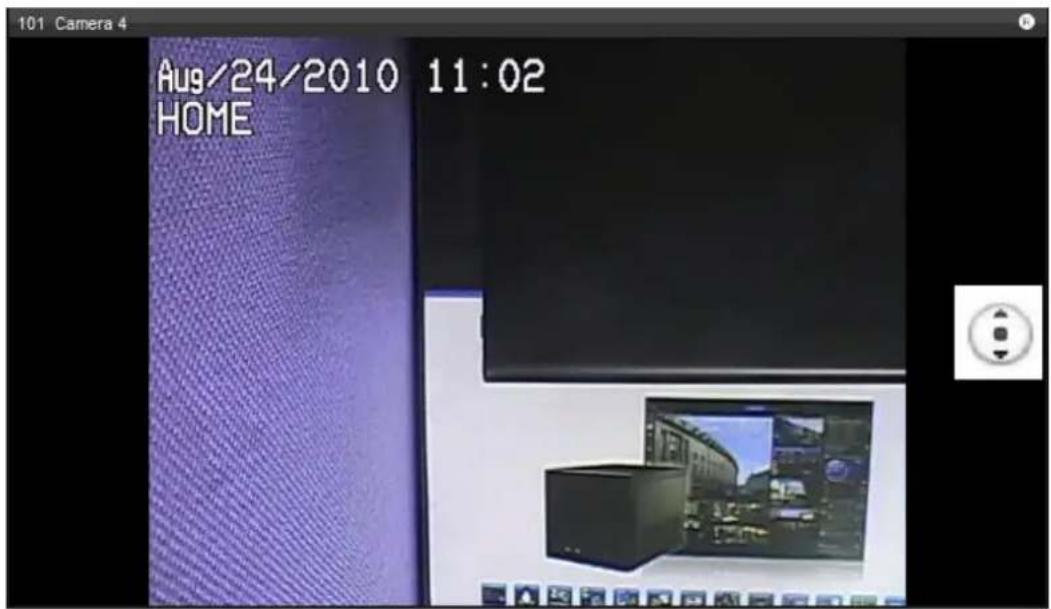
text_image
101 Camera 4 Aug/24/2010 11:02 HOMEIn the corner, nd a sub-window showing the full content of the current camera.
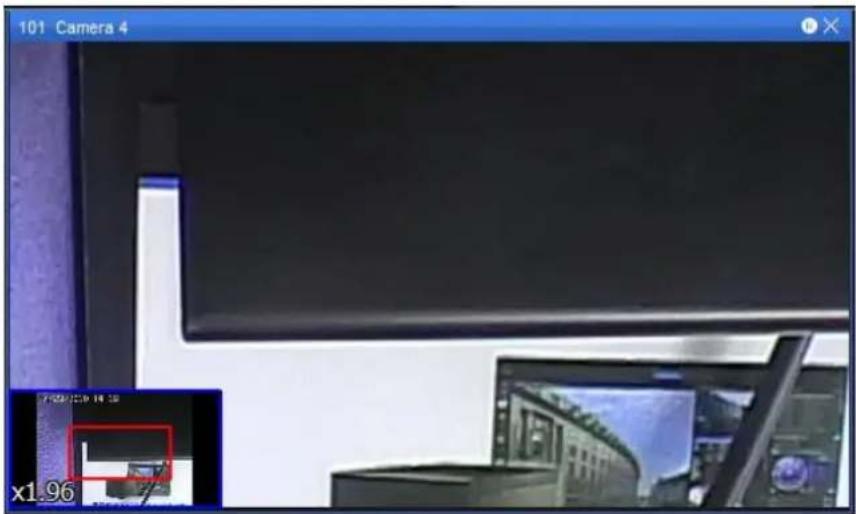
text_image
101 Camera 4 x1.9612.3.1.2.3 Use the on-screen buttons
A set of control buons are also available in PTZ controller.
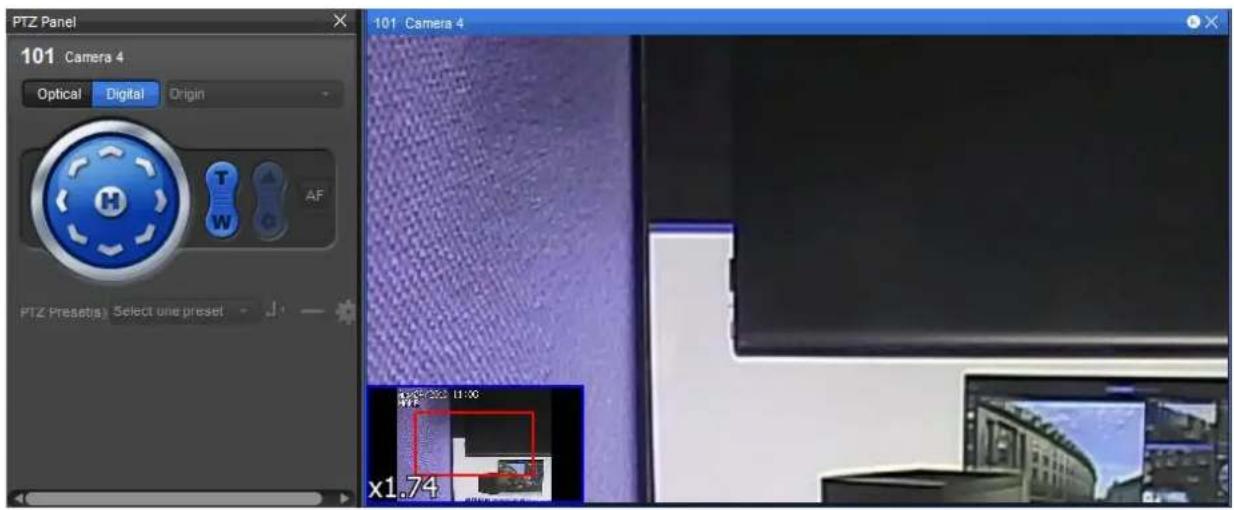
text_image
PTZ Panel 101 Camera 4 Optical Digital Origin M T W AF PTZ Presetis Select une preset 101 Camera 4 x1.74The on controls zoom-in and zoom-out.
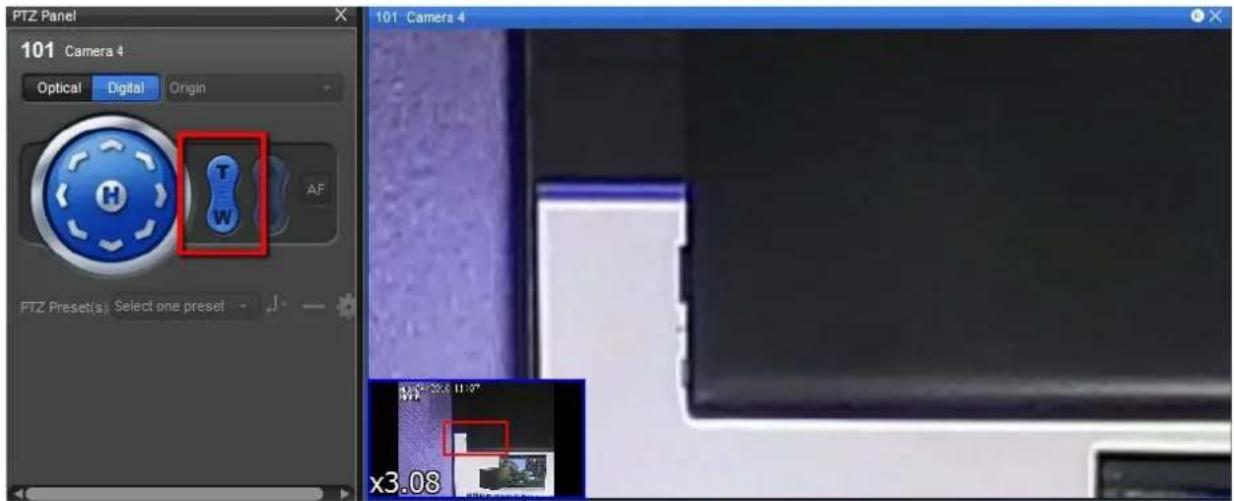
text_image
PTZ Panel 101 Camera 4 Optical Digital Origin H T W AF PTZ Preset(s) Select one preset 101 Camera 4 x3.08The arrow wheel controls pan and lt of the current camera.
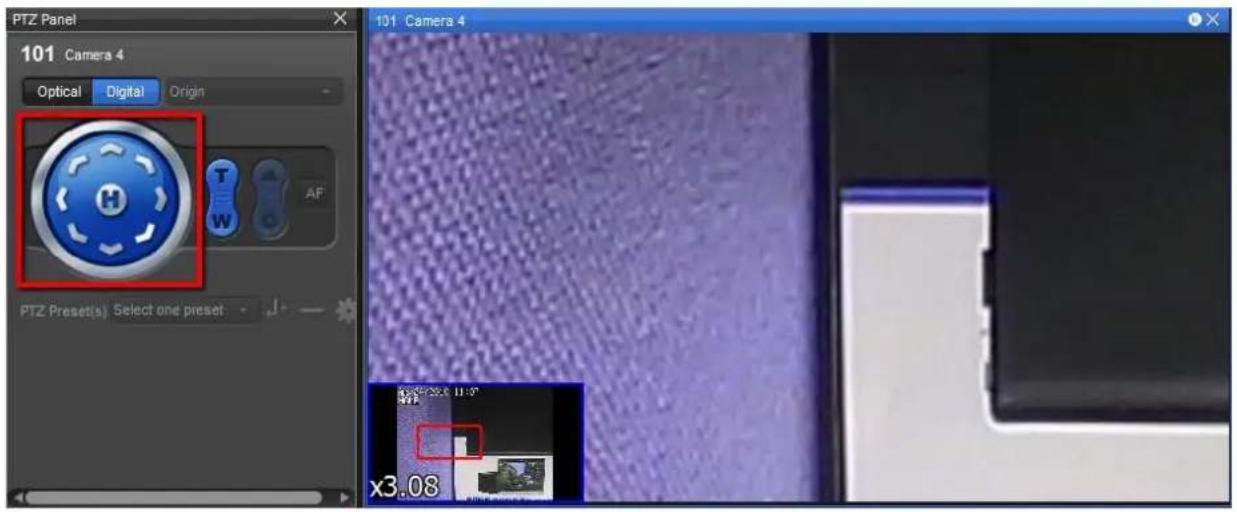
text_image
PTZ Panel 101 Camera 4 Optical Digital Origin PTZ Preset(s) Select one preset 101 Camera 4 x3.08The Home buon will show the enre video image in one view area.
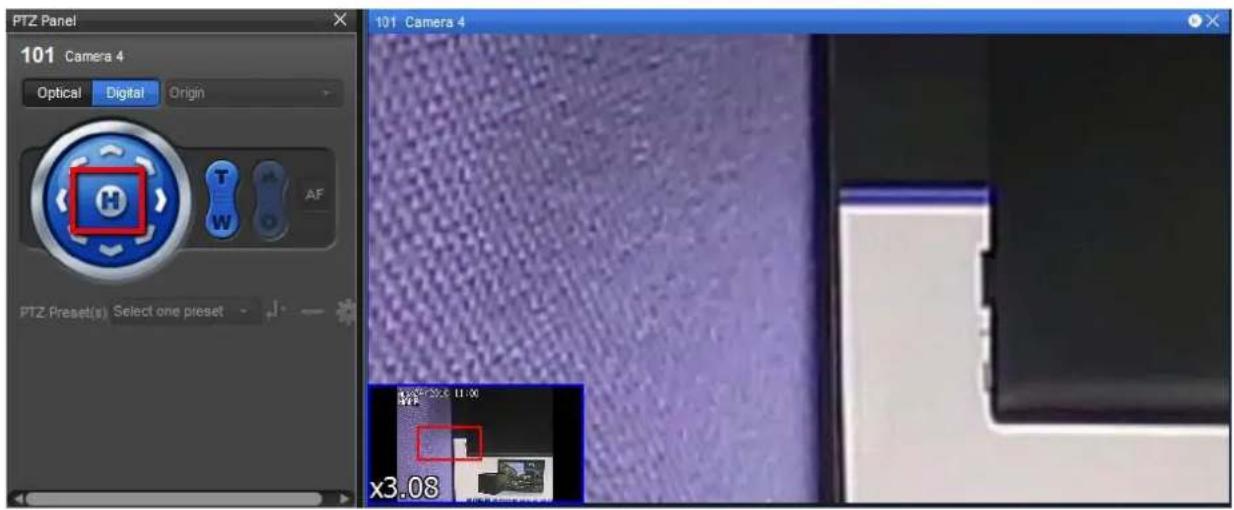
text_image
PTZ Panel 101 Camera 4 Optical Digital Origin PTZ Preset(s) Select one preset 101 Camera 4 x3.0812.4 I/O Control Panel
The status of I/O devices is displayed in panel. You can enable trigger outputs using this panel.
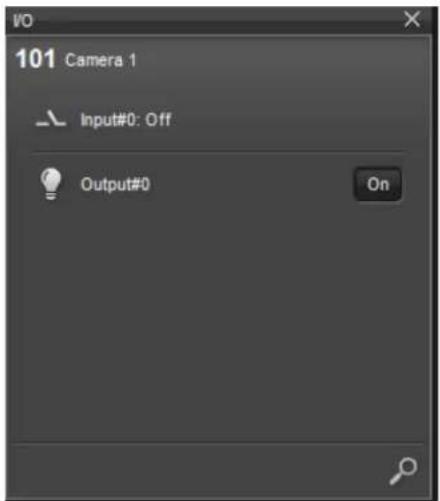
text_image
101 Camera 1 Input#0: Off Output#0 On | If the current content is an image fusion, in this panel, all of the I/O devices will be displayed in one list. You may name the I/O devices on Crystal Titan server. |
 | I/O conguraons of a camera can be immediately shown by clicking on it in Content List.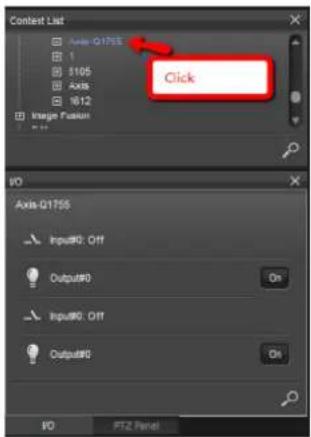 |
12.5 Content Properties Panel
Properes panel shows the informaon of the current content in a focus channel. The display informaon varies according to the type of content in a grid cell and according to the type of the current tab.
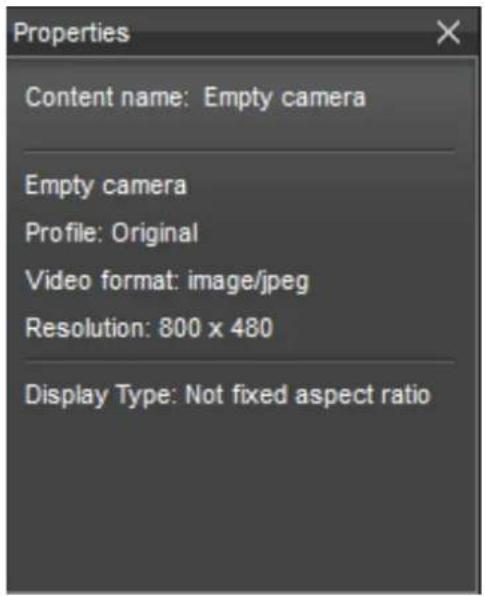
text_image
Properties Content name: Empty camera Empty camera Profile: Original Video format: image/jpeg Resolution: 800 x 480 Display Type: Not fixed aspect ratio| Setting | Displayed information in Live View |
| Camera | Camera nameVideo stream proleVideo formatResoluonFPS (Frames per second)Bit-rateDisplay type |
| E-map | Map nameMap descripon |
| Image fusion | Camera nameVideo stream proleVideo formatResoluon |
| Content Properes Panel is a read-only. The properes cannot be modified through this widget. | |
| Clicking on a camera icon in an E-map will show only the camera name and the video format in the properes panel currently. |
12.6 Event List
Event list shows latest events from a camera or from the monitor of system resources, with date/me informaon and the source. New events are constantly appended to the top of the list and old events will be removed from the list.
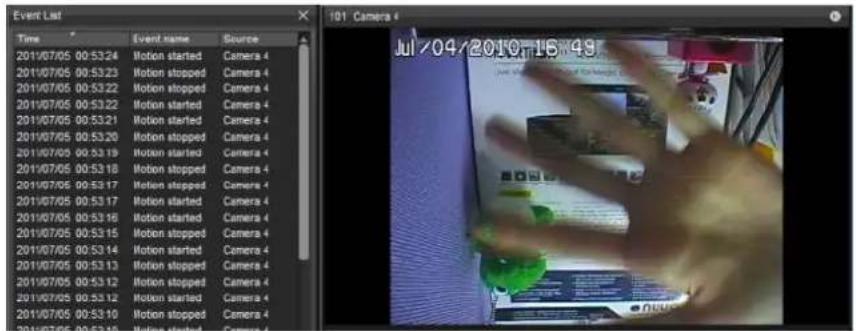
text_image
Event List Time Event name Source 2011/07/05 00:53:24 Motion started Camera 4 2011/07/05 00:53:23 Motion stopped Camera 4 2011/07/05 00:53:22 Motion stopped Camera 4 2011/07/05 00:53:22 Motion started Camera 4 2011/07/05 00:53:21 Motion started Camera 4 2011/07/05 00:53:20 Motion stopped Camera 4 2011/07/05 00:53:19 Motion started Camera 4 2011/07/05 00:53:18 Motion stopped Camera 4 2011/07/05 00:53:17 Motion stopped Camera 4 2011/07/05 00:53:17 Motion started Camera 4 2011/07/05 00:53:16 Motion started Camera 4 2011/07/05 00:53:15 Motion stopped Camera 4 2011/07/05 00:53:14 Motion started Camera 4 2011/07/05 00:53:13 Motion stopped Camera 4 2011/07/05 00:53:12 Motion stopped Camera 4 2011/07/05 00:53:12 Motion started Camera 4 2011/07/05 00:53:10 Motion stopped Camera 4 2011/07/05 00:53:19 Motion started Camera 4 101 Camera Jul / 04 / 2019.16.49
If returned results exceed 1000 records, NuClient will pop up a dialog to rene the query.
The list of possible events:
| Setting | Displayed information in Live View |
| Camera | Moon startedMoon stoppedRecording on manual startedRecording on manual stoppedUnit conncon lost |
| Digital Input | Input signal onInput signal oUnit conncon lost |
| Server | Disk abnormalAuto backup startedAuto backup stoppedAuto backup failedRecording seng is changed to always recordingRecording seng is changed to schedule recordingRecording seng is changed to no recording |

When an event is triggered and with associated camera, instant playback of the camera will pop up manually. At most 3 instant playback windows can be opened.
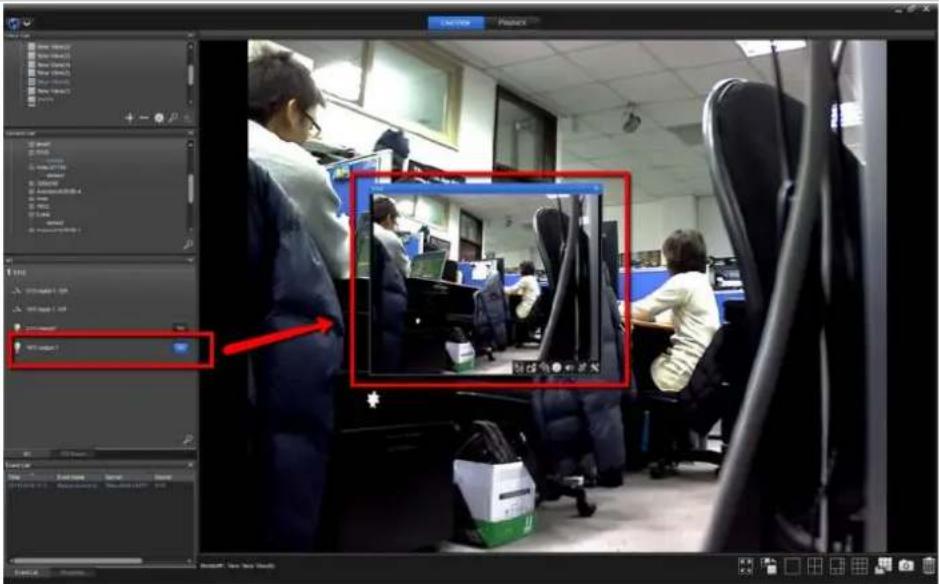
text_image
Screenshot of a video editing software interface showing an office scene with multiple video frames and a zoomed-in view of a person in the room.12.7 I/O
The status of I/O devices is displayed in I/O panel.
12.8 View Panel
This is the main video display area. You may decide which device to be viewed in the area, manually record video, and change conguraons of video streams.
12.9 Status Bar
In the status bar, you may see real-me system informaon including the current date/me, user name, the address of the server you connect to, CPU usage, memory usage, network download/upload bit-rates, and custom text.
12.10 Toolbar
The toolbar provides several quick buons of funcons below:
| Graphic Button | Description |
 | Toggle full-screen |
 | Toggle single grid |
 | The favorite grid layouts. This is configurable in Options. |
 | Switch different grid layouts |
 | Take a snapshot |
 | Remove the content in the selected channel |

Full-screen display is supported by desktop NuClient, but not by the web edion.
12.11 Fisheye Camera Dewarp
12.11.1 NUUO Fisheye Camera Dewarp
NUUO Fisheye Camera Dewarp is a generic mechanism for dewarping all kinds of sheye camera or camera with ImmerVision lens.
NuClient supports the Original mode, PTZ mode, Quad mode, and Perimeter mode.
To access NUUO sheye camera dewarp seng:
- Access the Video Device as described in Congure A Video Device.
- Select the sheye camera and go to stream tab.
- Select Lens type as Generic Dewarp.
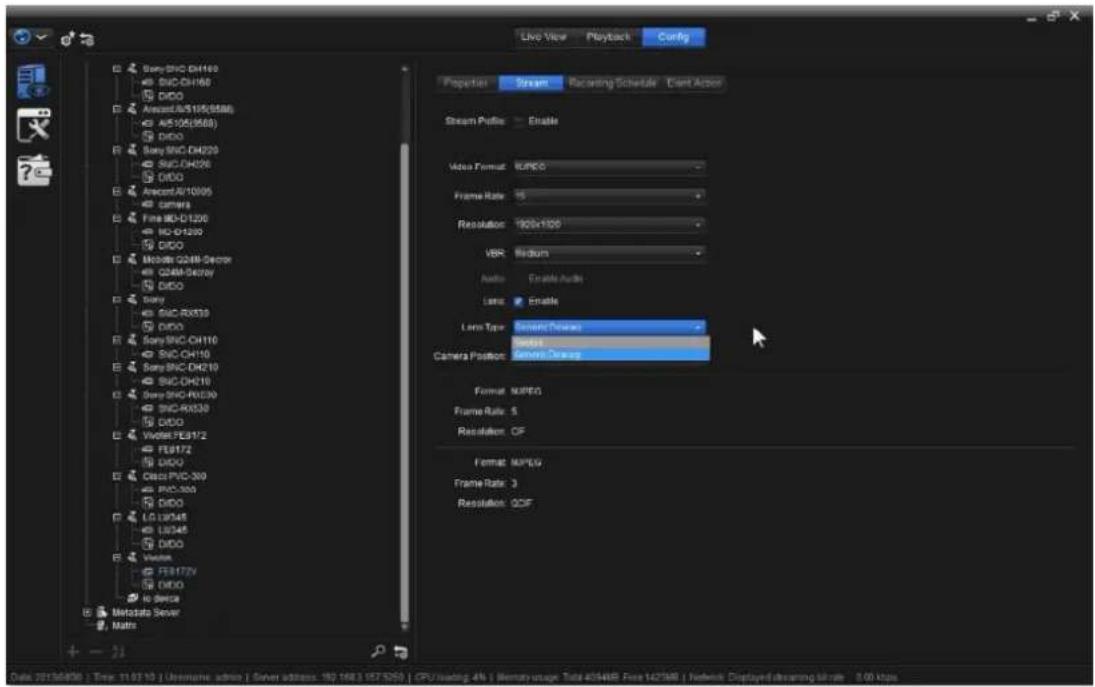
text_image
Live View Playback Config Sany-SNC-DH160 SNC-DH160 DIDO Anoctal-8/5105(558) A45105(9568) DIDO Sany-SNC-DH220 SNC-DH220 DIDO Anoctal-A11005 camers File MD-D1200 HD-D1200 DIDO Mobile G24M-Server G24M-Server DIDO Sany SNC-RX330 DIDO Sany-SNC-CH110 SNC-CH110 Sany-SNC-DH210 SNC-DH210 Sany-SNC-RX330 SNC-RX330 DIDO VDDR-FE31/2 FE31/2 DIDO Class P/C-300 P/C-300 DIDO LG 137548 LG348 DIDO VDDR FE3172V DIDO to device Metadata Server Matls Proportion Stream Recording Schedule Client Action Stream Profile Enable Video Format: MPDC Frame Rate: 15 Resolution: 100x100 VBR Medium Audio Enable Audio Line Enable Lamp Type Screen Release Wireless Camera Position: Screen Release Format: MPDC Frame Rate: 5 Resolution: CF Format: MPDC Frame Rate: 3 Resolution: QOF Date: 2013/08/08 - Tree: 11.07.10 | Umkine, admin | Server address: 192 1983 197 5750 | CPU/adding: 4% | Memory usage: Total:40446B; Fox: 1427MB | Weblink Displayed: streaming.bk-rite: 5.00 kbps4. Select camera posion
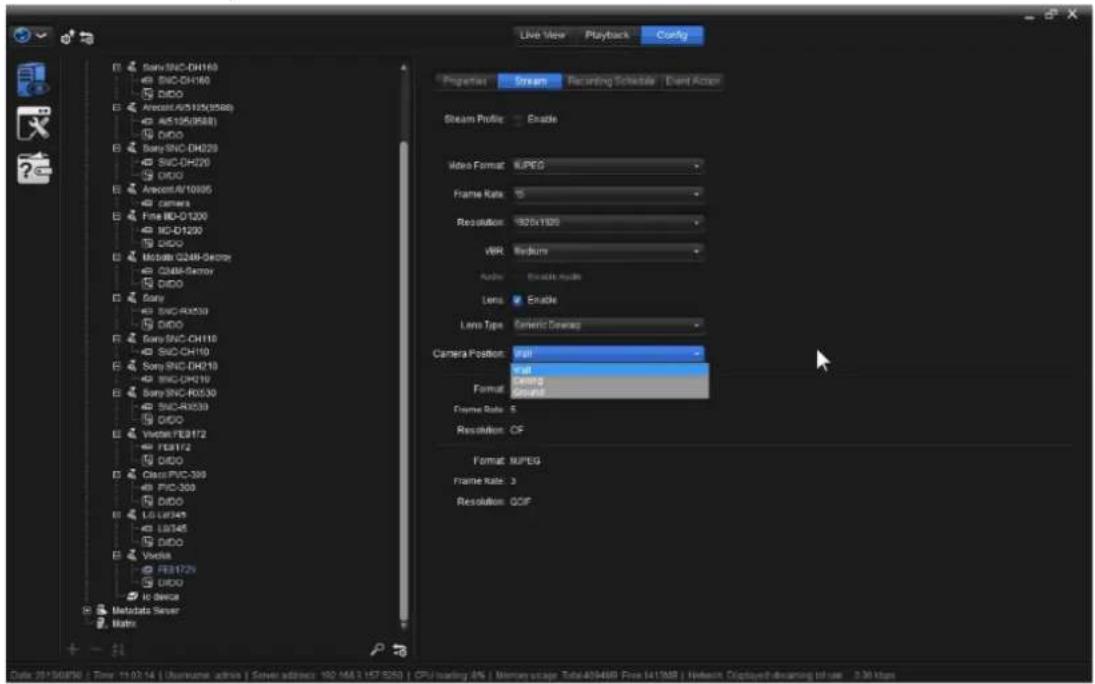
text_image
Live View Playback Config Bany SNC-DH160 SNC-DH160 DIDO Arecast/AG5103(8588) AV5105(8588) DIDO Baby SNC-DH200 SNC-DH200 DIDO Arecast/AF10005 CAMERA Fine MD-D1200 MD-D1200 DIDO Mobile Q24K-Skono Q24K-Skono DIDO Sony SNC-RX030 DIDO Sony SNC-CH110 SNC-CH110 Sony SNC-DH210 SNC-DH210 Sony SNC-RX030 DIDO Victor PE39172 FE39172 DIDO Class PVC-399 PXD-399 DIDO LG LIM249 LIM249 DIDO Vodafone FE391729 DIDO IC Device Metabeta Server Matrix Properties S Stream Recording Schedule Event Active Stream Profile Enable Video Format: MJPEG Frame Rate: 5 Resolution: 920x100 WR: Medium Audio: Enable Audio Lens: Enable Lamp Type: Generic Gearcap Camera Position: Full Format: Full Format: Corel Frame Rate: 5 Resolution: CF Format: MJPEG Frame Rate: 3 Resolution: GOF Date: 2/15/2016 | Time: 11:03:14 | Subname, admin | Screen address: 102.163.167.520 | CPU loading: 8% | Membrane script: Totc49468 Free 641388 | Netless Object diagram by: 3.36 bytes- Aer Generic Dewarp is enabled, you will see the video on NuClient become sheye warped image.
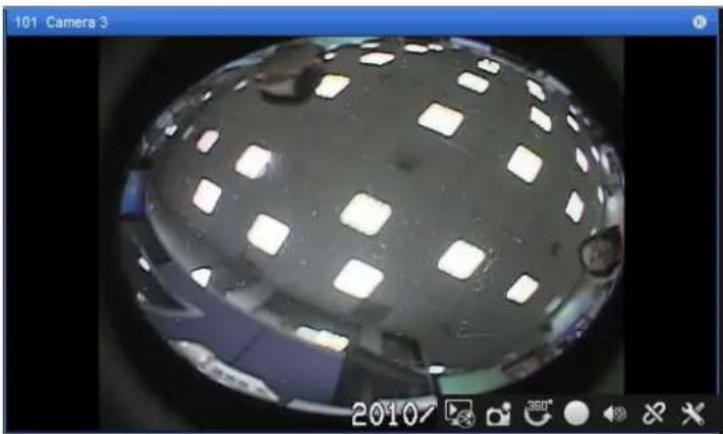
natural_image
Close-up of a reflective spherical object with white square patterns, captured in a fisheye view (no text or symbols visible)12.11.1.2 The Modes of NUUO Fisheye Camera
Dewarp
Aer NUUO Generic Dewarp is enabled, you may see the selecon menu on the PTZ controller is enabled and it has four dierent opons: Original mode, PTZ mode, Quad mode, and Perimeter mode.
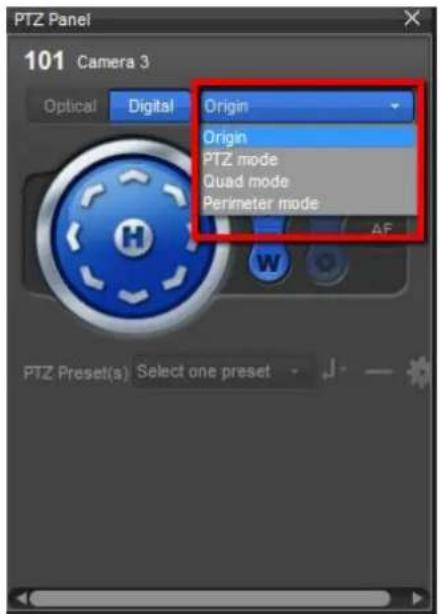
text_image
PTZ Panel 101 Camera 3 Optical Digital Origin Origin PTZ mode Quad mode Perimeter mode AF PTZ Preset(s) Select one preset12.11.1.2.1 Original Mode
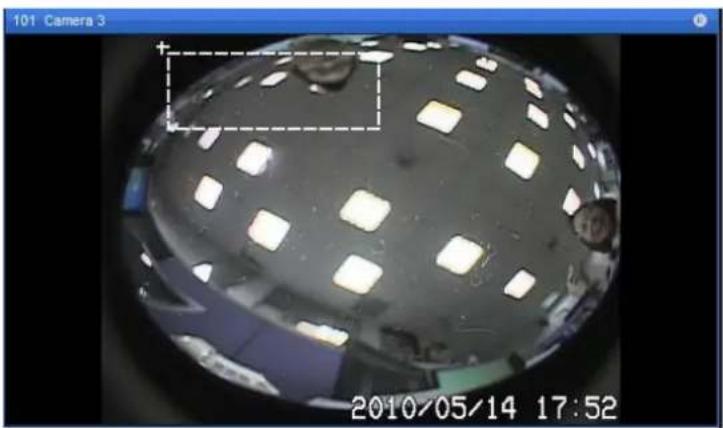
natural_image
Close-up of a spherical electronic component with illuminated square holes, captured in a fisheye lens (no text or symbols visible)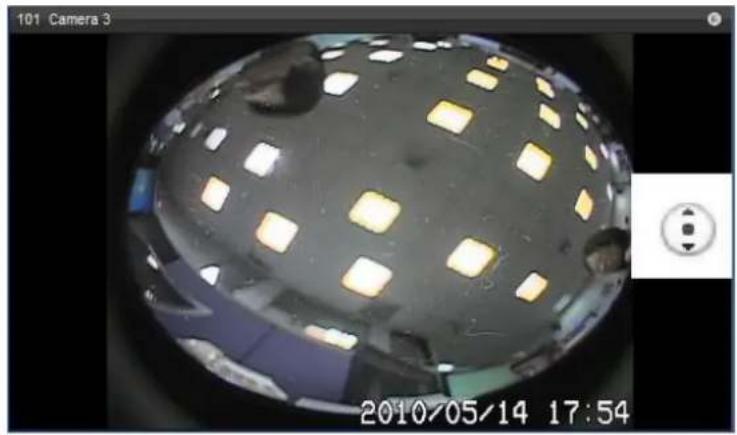
natural_image
Close-up of a spherical electronic component with square holes, captured in a fisheye lens (no text or symbols visible)
natural_image
Close-up of a mechanical component with circular features and a magnified inset showing a spherical component (no visible text or symbols)As soon as the rectangle is drawn, the view is smoothly zoomed into the area of interest.
12.11.1.2.2 PTZ Mode
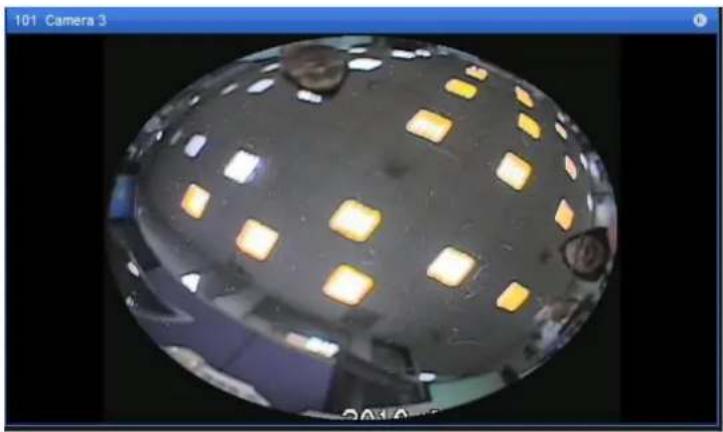
natural_image
Close-up of a transparent spherical object with illuminated square patterns and small circular features, captured in a fisheye view (no text or symbols visible)
natural_image
Close-up of a spherical object with scattered yellow and white square patterns, possibly a sensor or display (no text or symbols visible)
natural_image
Interior view of a modern office or cinema space with ceiling lights and a person in the background (no visible text or symbols)12.11.1.2.3 Quad Mode
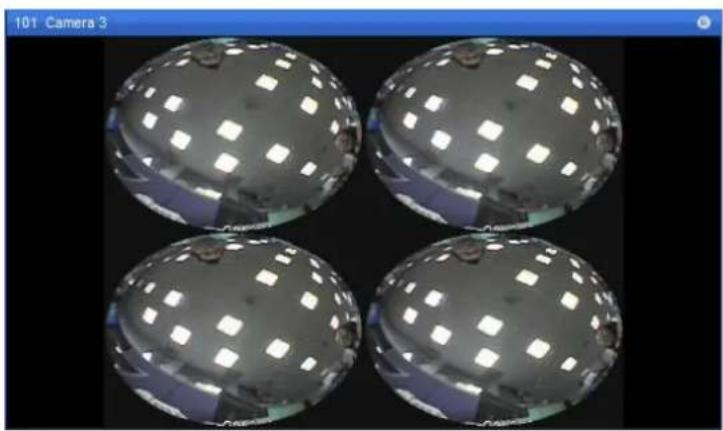
natural_image
Four identical spherical objects with reflective surfaces and grid patterns, displayed against a black background (no text or symbols)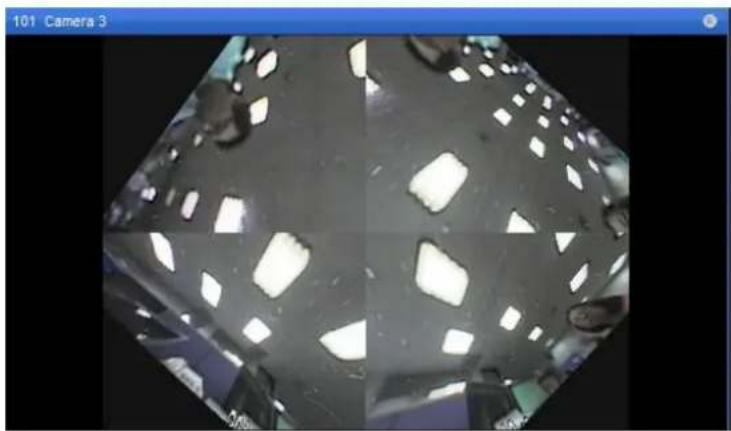
natural_image
Close-up of a crystal structure with white diamond-shaped inclusions, displayed within a blue frame (no text or symbols visible)12.11.1.2.4 Perimeter Mode
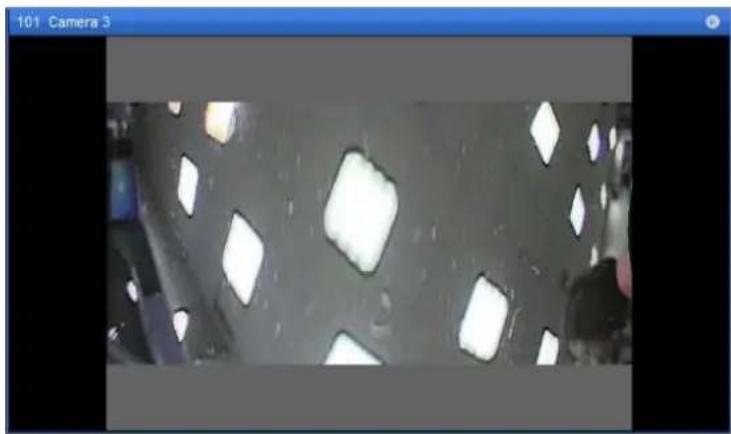
natural_image
Interior view of a modern building with large windows and glass panels (no visible text or symbols)On NuClient grid, there is fast seng. In the content toolbar in the corner, there
is an icon 📄360° Clickon it will lead you to the funcon icons of PTZ mode.
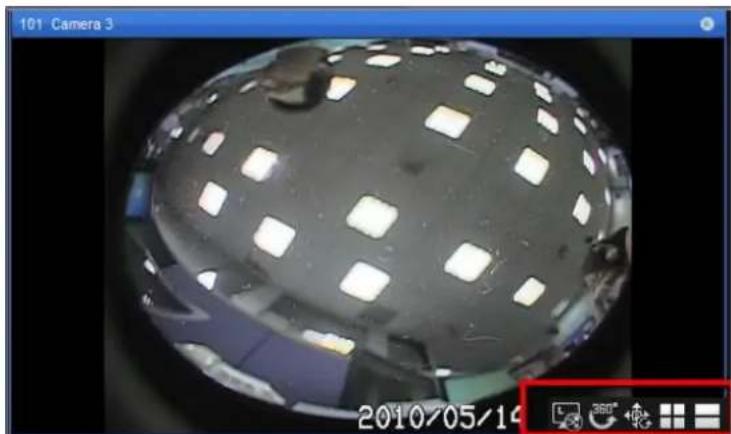
natural_image
Close-up of a spherical electronic device with illuminated square components, captured in a fisheye lens (no readable text or symbols)The featured sengs are:
| Graphic Button | Description | |
 | Return to the toolbar of live view | |
 | Original mode. The original image from the fisheye camera without being processed by any image processing algorithm. | |
 | PTZ mode. Pan, Tilt & Zoom are computed by NuClient | |
 | Quad mode. Video is split into 4 separate views simultaneously. | |
 | Perimeter mode. In this mode, video is split into a horizontal view of 180° | |
12.12 Connection Settings
Connecon sengs are a set of sengs to congure stream proles and aspect rao.
If a camera has dual streaming, then one of the video streams can be chosen to be displayed in Live View.

Using dierent stream proles of a camera may make connecons become unstable and disconnect more oen, because streaming video in dierent formats and resoluons will require the CPU on cameras to do extra video processing and it may overload a camera.
13. Playback
The common panels are the same as those seen in Live View page, but there are some extra panels in Playback page.
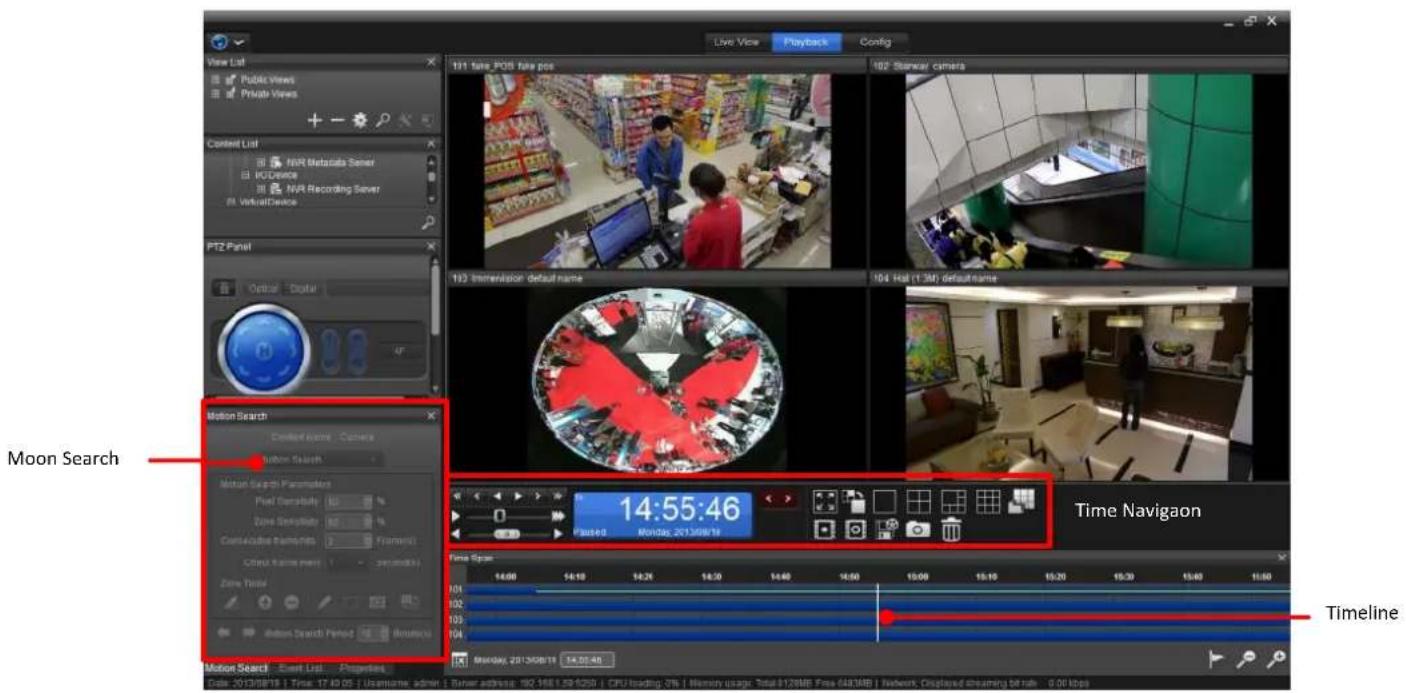
text_image
View List Public Views Private Views Content List NVR Metadata Server IO Device NVR Recording Server R VirtualDevice PTZ Panel Other - Digital Motion Search Content Image - Camera Motion Search Motion Search Parameters Pixel Sensitivity: 100 % Zone Sensitivity: 100 % Consecutive Transitions: 0 fps (1) Circuit Options: 2000000000000000000000000000000000000000000000000000000000000000000000000000000000 Moon Search 14:55:46 Plasted: Mold9c_213588718 Time Navigaon Timeline Motion Search - Event List - Properties Date: 21/13/28/19 1 Time: 17:48:05 | Username: admin | Server address: 182.168.1.29-6229 | CPU loading: 2% | Memory usage: Total: 112MB Free: 443MB | Network: Cispland of dreaming bill rub : 9.26 lbps13.1 Content Properties Panel
Properes panel shows the informaon of the current content in focus. The display informaon varies according to the type of content in a grid cell and according to the type of the current tab.
| Setting | Displayed information in Playback |
| Camera | Camera nameVideo formatResoluonFPS (Frames per second)Bit-rateDisplay type |
| Image fusion | Camera nameVideo formatResoluon |
13.2 Content List
Content List shows all the devices a user have permission to access. A device can be a camera, a I/O device, an image fusion, or an E-map.
Each device node as shown in the screenshot below can be expanded to see the details of each device. Expanding each device will show subordinate items, such as sensors on cameras.
13.2.1 Watch Recorded Video
When switching from Live View to Playback, View List, Content List, and event list on the Live View page are identical with the ones on Playback page. Therefore, if you have managed cameras and views, you can select it to check recorded video directly. If you haven't, please refer to the View secon to add view and camera.
13.2.2 Toolbar Content
When mouse is hovering over a video channel, you will see a toolbar in the corner similar to that in Live View.
| Graphic Button | Description |
 | Snapshot. |
 | Enable/disable audio. |
 | Change the aspect ratio of a video |
13.3 Event List
The event list in Playback is slightly dierent and it oers a search interface with several parameters to locate events in recording les.
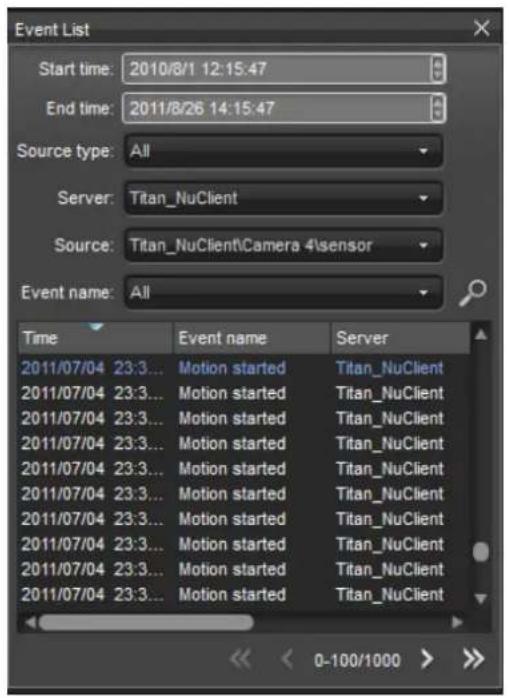
text_image
Event List Start time: 2010/8/1 12:15:47 End time: 2011/8/26 14:15:47 Source type: All Server: Titan_NuClient Source: Titan_NuClient\Camera 4\sensor Event name: All Time Event name Server 2011/07/04 23:3... Motion started Titan_NuClient 2011/07/04 23:3... Motion started Titan_NuClient 2011/07/04 23:3... Motion started Titan_NuClient 2011/07/04 23:3... Motion started Titan_NuClient 2011/07/04 23:3... Motion started Titan_NuCllnt 2011/07/04 23:3... Motion started Titan_NuCllnt 2011/07/04 23:3... Motion started Titan_NuCllnt 2011/07/04 23:3... Motion started Titan_NuCllnt 2011/07/04 23:3... Mtion started Titan_NuCllnt 2011/07/04 23:3... Motion started Titan_NuCllnt 2011/07/04 23:3... Motion started Titan_NuCllnt13.4 Search Panel
In search panel, search for moon in videos.
13.4.1 Motion Search
Moon search is the utility that enables you to search for the video frames with moon in the video quickly and accurately.
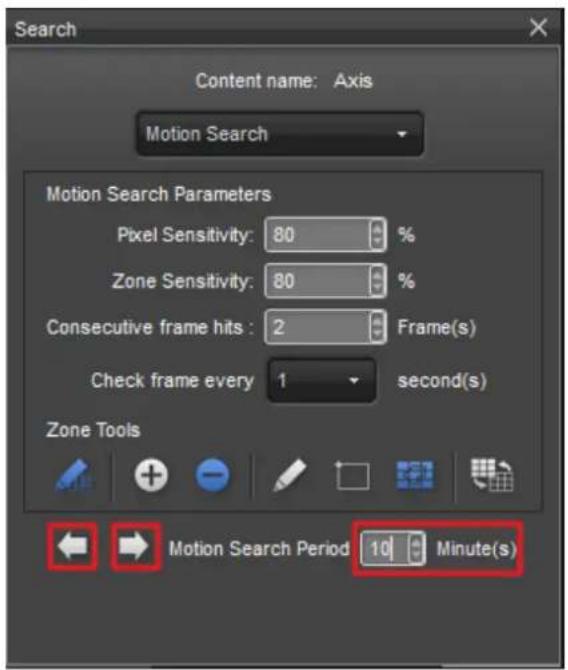
text_image
Search Content name: Axis Motion Search Motion Search Parameters Pixel Sensitivity: 80 % Zone Sensitivity: 80 % Consecutive frame hits : 2 Frame(s) Check frame every 1 second(s) Zone Tools Motion Search Period 10 Minute(s)The featured sengs are:
| Setting/Graphic Button | Description | Default | ||
| Content name | Shows the content name. | -- | ||
| Sets the search type. | -- | |||
| Moon Search Parameters | Sets motion search parameters below: | -- | ||
| Setting | Description | Default | ||
| Pixel Sensitivity | It refers to the pixel change between two compared frames. 90% indicates that above 90% of the pixels between two frames are different. ▶ The value ranges from 1% to 99%. | |||
| Zone Sensitivity | It refers to the percentage of different grid boxes between two compared frames. 80% indicates that when more than 20%, that is 100% – 80%, of the content of the selected grid boxes is different, one motion eventwill be issued. The higher the value is, the more sensitive the detector is.► The value ranges from 1% to 99%. | |||
| Consecuve Frame Hits | It refers to the minimum number of frames with motion to trigger a motion. Setting it to 2 means that a motion will be detected only when a motion spans over at least 2 frames.► The value ranges from 1 to 30 frames. | |||
| Check frames every _ seconds | It refers to the number of seconds between two compared frames.► The number can range from 1/60, 1/30, 1/20, 1/15, 1/10, 1/5, 1/3, 1/2, 1, 2, 5, 10, 15, 30, 40, 50, 60. | 1 sec. | ||
 | Enables/disables motion search | |||
 | Selects detection region | |||
 | Deselects detection region | |||
 | Selects/deselects an region | |||
 | Draws a rectangle | |||
 | Selects/deselects all | |||
 | Inverts selection / de-selection | |||
 | Moves to the backward search. | -- | ||
 | Moves to the forward search. | -- | ||
| Moon search period _ minute(s) | Sets the motion search interval. | 10 minutes | ||
- Select an acve channel and go to the moon search tab.
- Click on the icon and moon search will be enabled.

When moon search is enabled, the content tool bar of a content cell will be disabled.
To enable the toolbar, please disable moon search by clicking again.
- By default, the whole visible region is not selected, and the plus icon is default enabled.
- You may start to select the areas of interest. You can combine and
and


to select the region you need, or select to select all region.


- The selected regions will show in red.
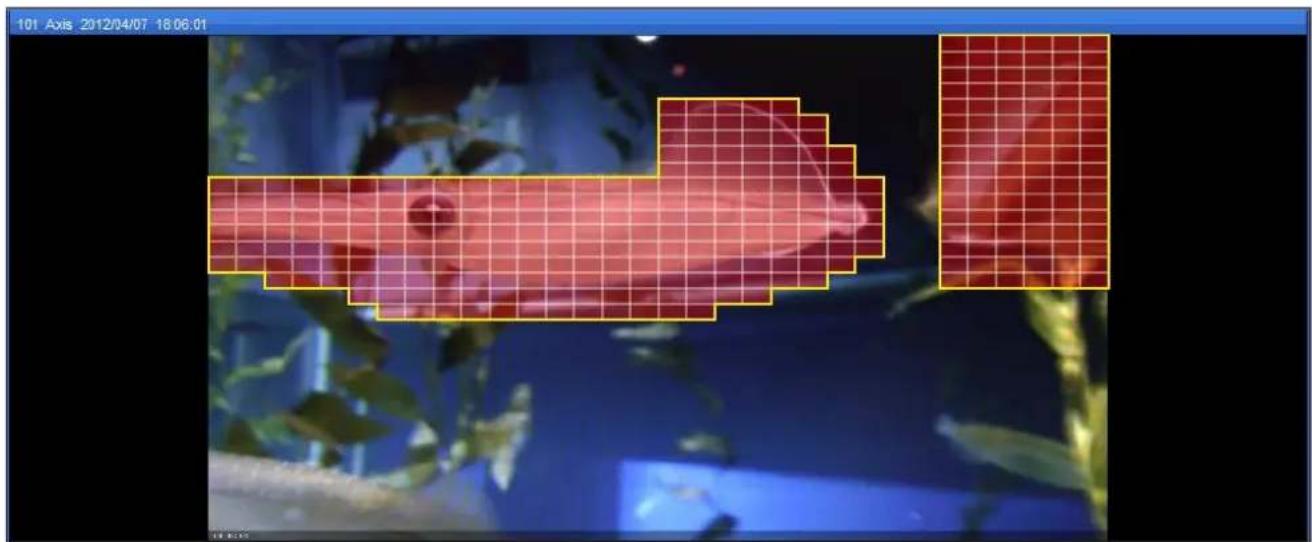
natural_image
Underwater scene with red fish and green plants, no visible text or symbols- Pressing to invert the selecon/de-selecon.

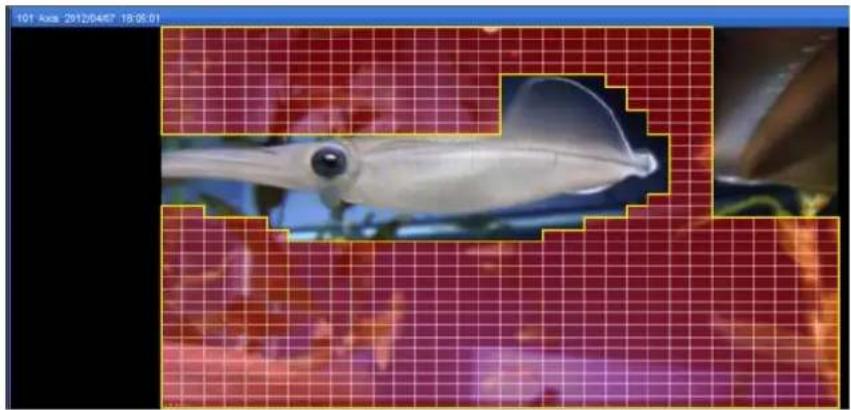
natural_image
Close-up of a small fish swimming near water, with a red grid overlay and no visible text or symbols.- Aer the region selecon is done, you may click on the search icon at the buon of the tab.
8.

refers to backward search and

refers to forward search. By default,
the search period is 10 minutes.

Moon search does not support search under digital PTZ or ImmerVision mode.
13.5 Timeline
Timeline is a user-friendly representaon of me and recorded data. You may not only quickly have an overview of the me span of video les, but also quickly locate the video at a specied me.
13.5.1 Search in Timeline
The meline is a user-friendly interface to quickly nd the video of a certain me period.
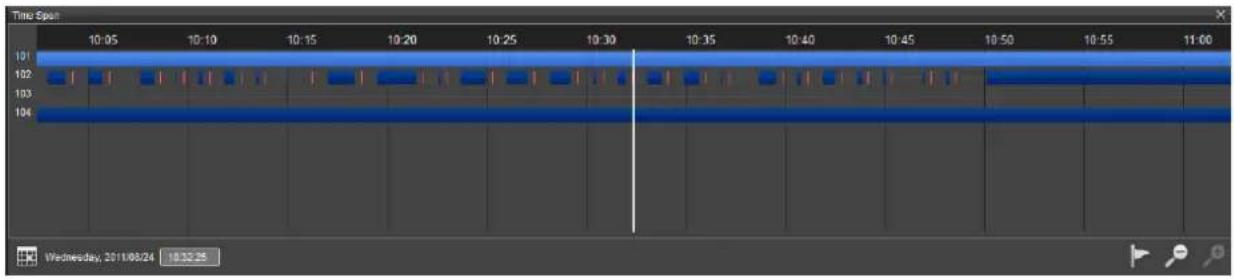
text_image
Time Spot 10:05 10:10 10:15 10:20 10:25 10:30 10:35 10:40 10:45 10:50 10:55 11:00 101 102 103 104 Wednesday, 2011/08/24 10:32:25The featured sengs are:
| Graphic Button | Description |
 Wednesday, 2011/08/24 09:35:20 Wednesday, 2011/08/24 09:35:20 | Date/Time selection |
 | Event browsing settings |
 | Zoom out |
 | Zoom in |
1. Drag the meline to the me.
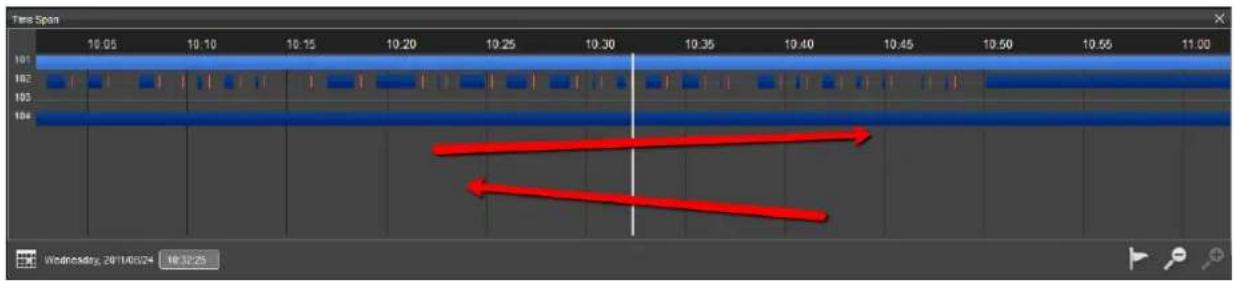
text_image
Time Span 10:05 10:10 10:15 10:20 10:25 10:30 10:35 10:40 10:45 10:50 10:55 11:00 101 102 103 104 Wednesday, 2014/024 16:32:25
If video content is an image fusion, as long as one camera has recording data, a meline will be displayed in the area for the video content.
It is possible that a camera has two video streams of dierent video proles. If one camera is placed in two grid cells, two melines will be drawn for each grid cell.
- When mouse is hovering on both the ends of the meline, an arrow icon will show up. Click on it will browse through me more quickly.
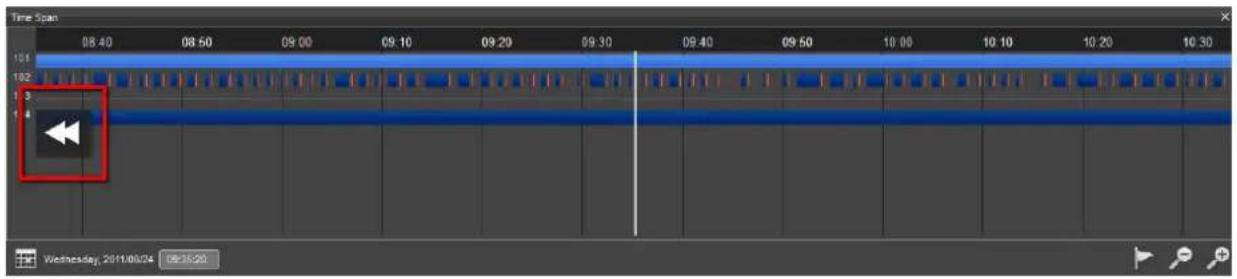
text_image
Time Span 08:40 08:50 09:00 09:10 09:20 09:30 09:40 09:50 10:00 10:10 10:20 10:30 101 102 1 1 Wednesday, 2011/03/04 08:15:20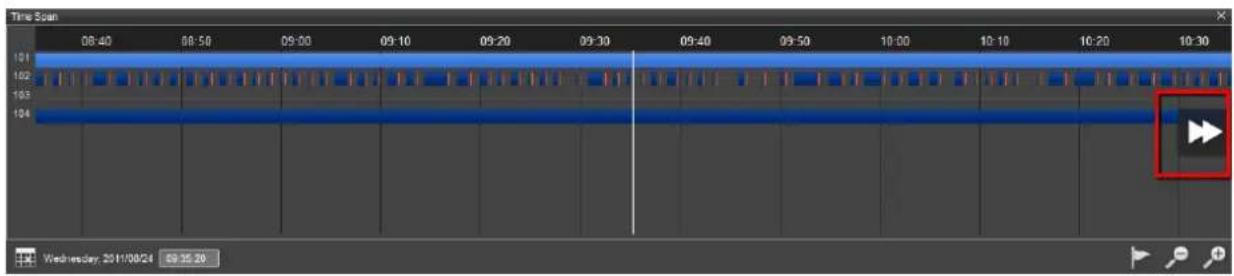
text_image
Time Span 08:40 08:50 09:00 09:10 09:20 09:30 09:40 09:50 10:00 10:10 10:20 10:30 101 102 103 104 Wednesday: 2011/08/24 09:25:20- The two icons in the corner zoom in and out the meline.
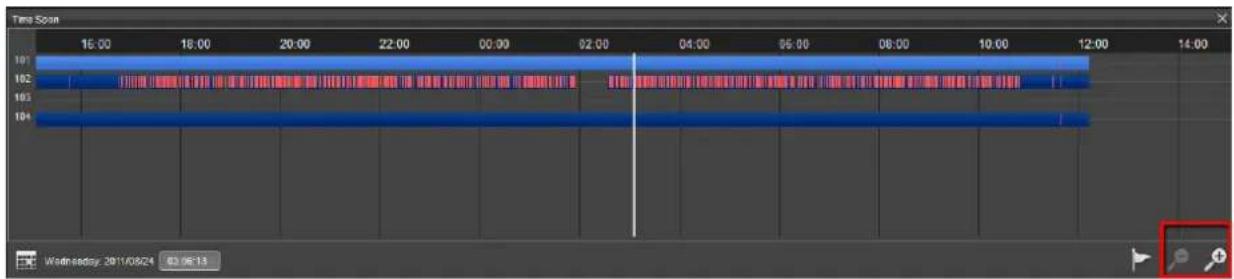
text_image
Time Span 15:00 18:00 20:00 22:00 00:00 02:00 04:00 06:00 08:00 10:00 12:00 14:00 101 102 103 104 Wednesday 2011/08/24 03:06:13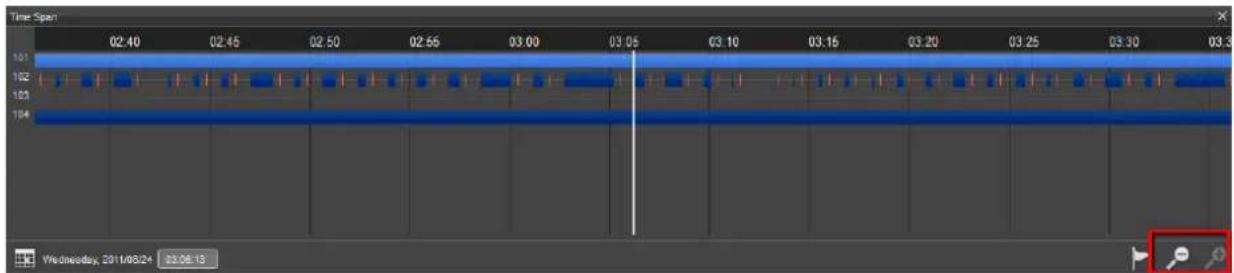
text_image
Time Span 02:40 02:45 02:50 02:56 03:00 03:05 03:10 03:15 03:20 03:25 03:30 03:3 101 102 103 104 Wednesday, 2011/08/24 03:06:19- Specify the date / me directly using the widget in the corner.
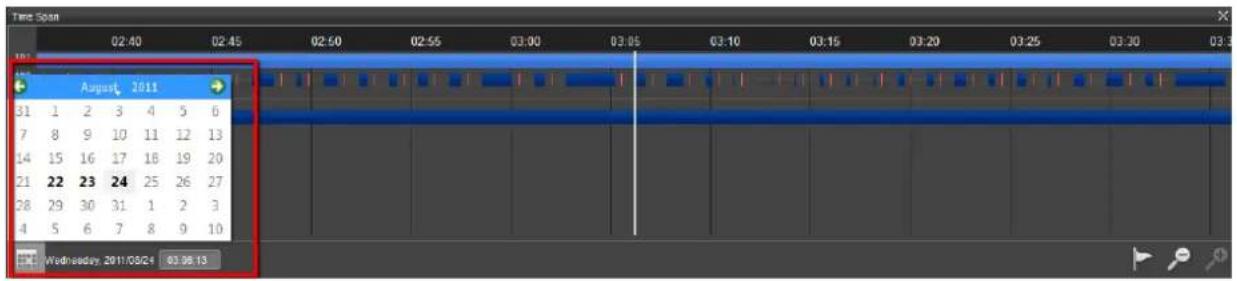
text_image
Time Span 02:40 02:45 02:50 02:55 03:00 03:05 03:10 03:15 03:20 03:25 03:30 August 2011 31 1 2 3 4 5 6 7 8 9 10 11 12 13 14 15 16 17 18 19 20 21 22 23 24 25 26 27 28 29 30 31 1 2 3 4 5 6 7 8 9 10 Wednesday, 2011/08/24 03:06:13- The dates with recording data are shown in boldface.
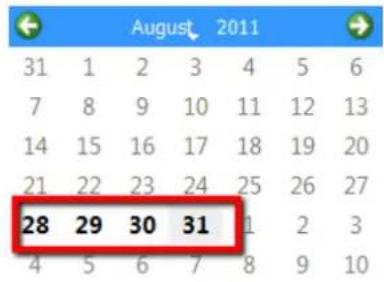
other
| Month | August | 2011 | | :--- | :--- | :--- | | 31 | 1 | 2 | | 7 | 8 | 9 | | 14 | 15 | 16 | | 21 | 22 | 23 | | 28 | 29 | 30 | | 4 | 5 | 6 | | 5 | | | | 6 | | | | 7 | | | | 8 | | | | 9 | | | | 10 | | | | 11 | | | | 12 | | | | 13 | | | | 14 | | | | 15 | | | | 16 | | | | 17 | | | | 18 | | | | 19 | | | | 20 | | | | 21 | | | | 22 | | | | 23 | | | | 24 | | | | 25 | | | | 26 | | | | 27 | | | | 28 | | | | 31 | | | | 4 | | | | 5 | | | | 6 | | | | 7 | | | | 8 | | | | 9 | | | | 10 | | |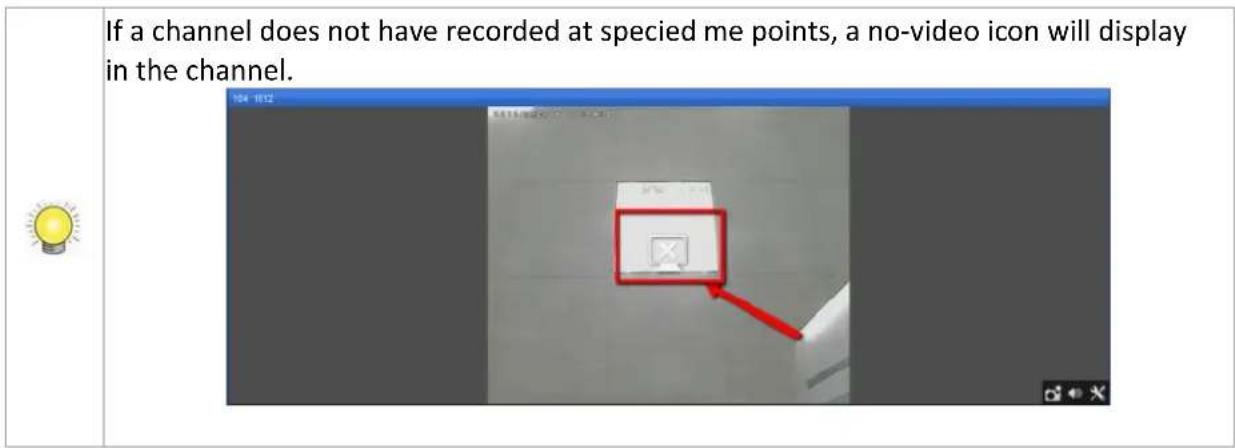
text_image
If a channel does not have recorded at specied me points, a no-video icon will display in the channel.| If a camera is dragged into the playback grid, the same camera will appear in the grid when you switch toLiveView tab. |
- Change event browsing setngs. In Timeline, event-triggered recording data can be shown in dierent colors. Locate video les more quickly by enabling event browsing in dierent colors. If you uncheck the event items in the list, the markers of event video will not be shown in Timeline.
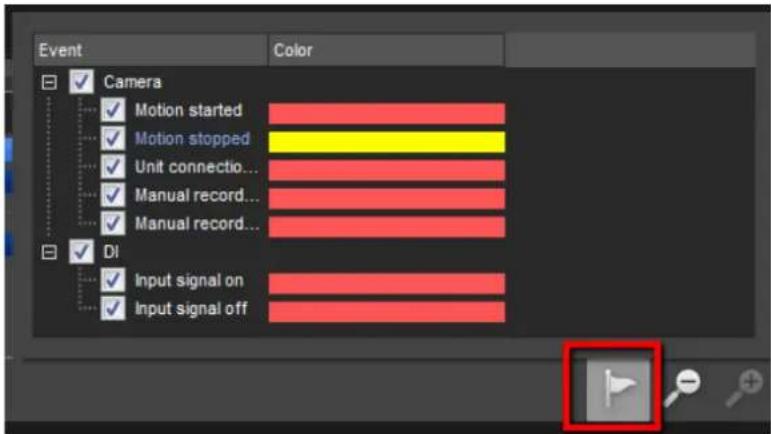
text_image
Event Color Camera ✓ Motion started ✓ Motion stopped ✓ Unit connectio... ✓ Manual record... ✓ Manual record... ✓ DI ✓ Input signal on ✓ Input signal offClick on the color bars will open the color palee.
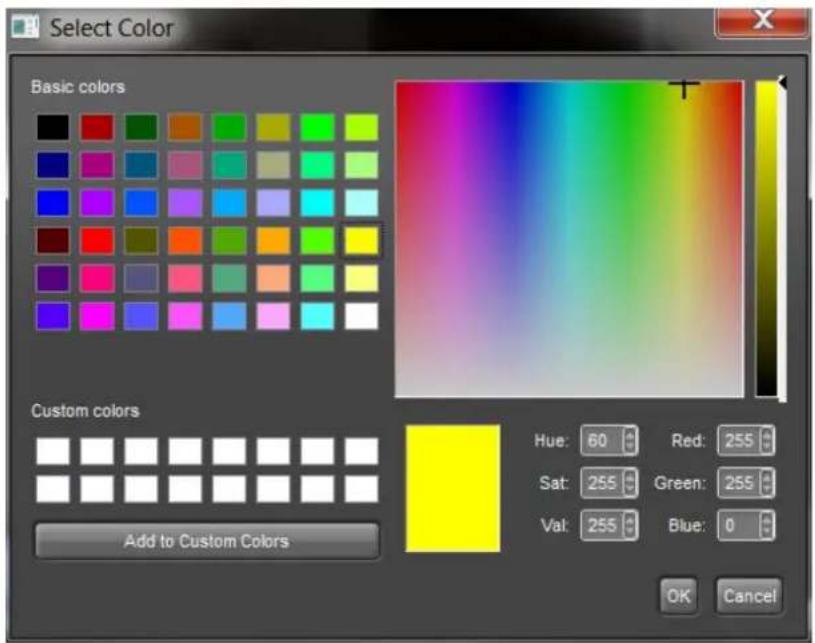
text_image
Select Color Basic colors Custom colors Add to Custom Colors Hue: 60 Red: 255 Sat: 255 Green: 255 Val: 255 Blue: 0 OK Cancel- You may change the layout of the meline if using the horizontal layout is not convenient.
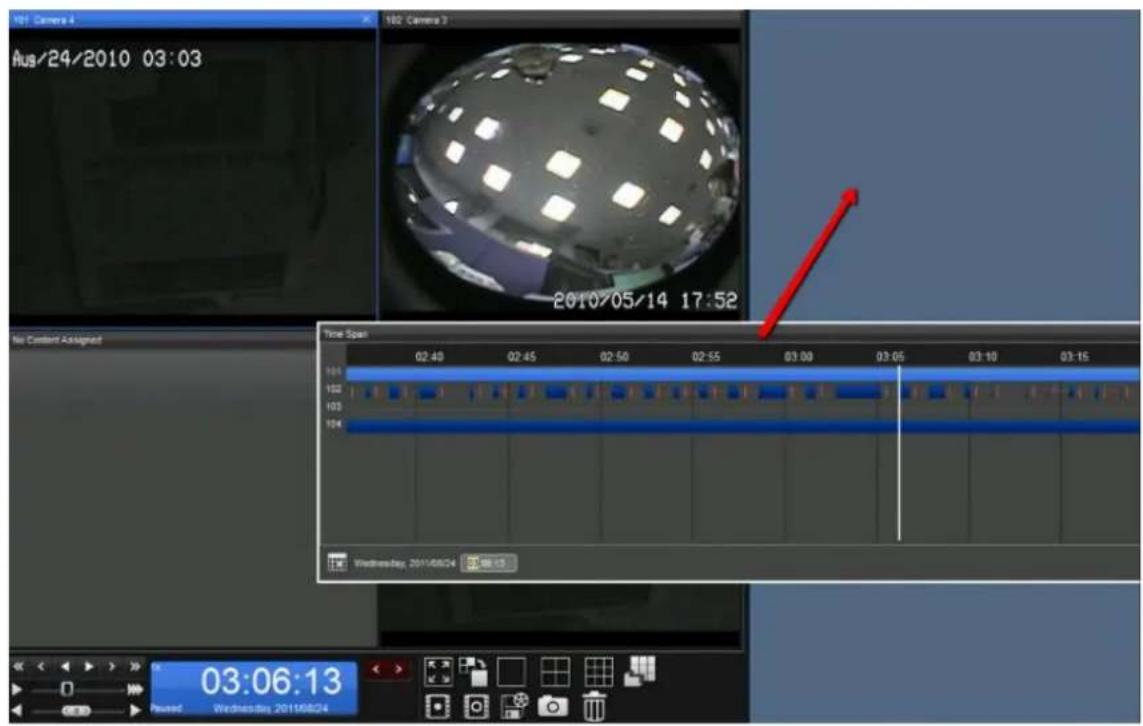
text_image
101 Camera 4 Aus/24/2010 03:03 102 Camera 3 2010/05/14 17:52 No Content Assigned Time Span 02:40 02:45 02:50 02:55 03:00 03:05 03:10 03:15 104 103 104 Wednesday, 2011/06/24 03:06:13 Revised. Wednesday, 2011/06/24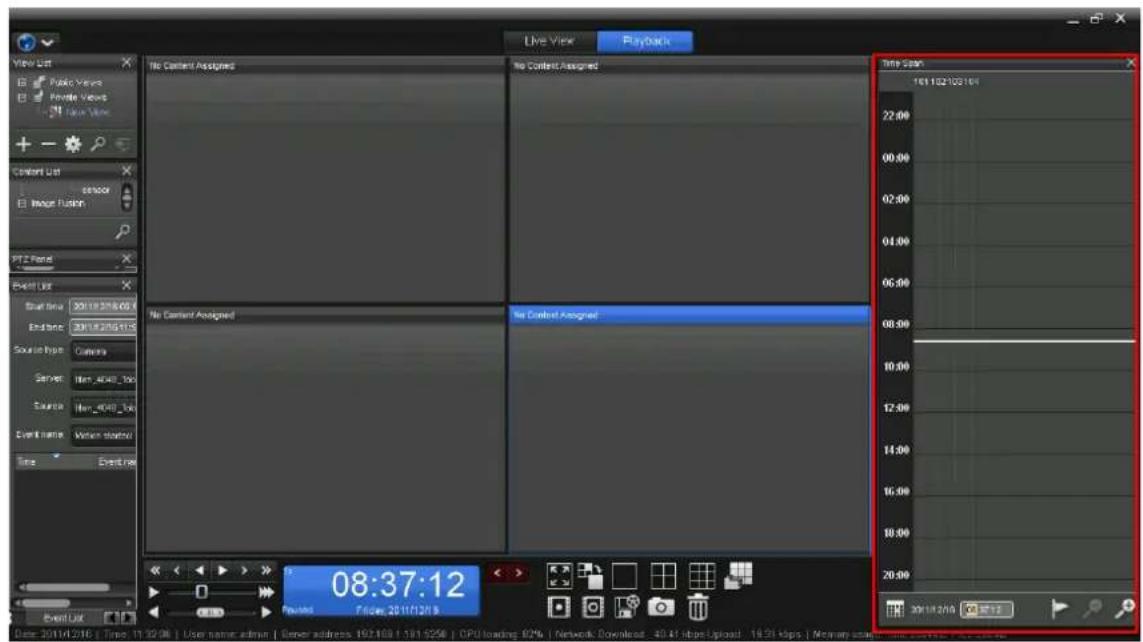
text_image
Live View Playback No Content Assigned No Content Assigned Time Span 101.102/08/14 22:00 00:00 02:00 04:00 06:00 08:00 10:00 12:00 14:00 16:00 18:00 20:00 2011/12/19 08:37:12 Event List Public Views Favorite Views Event List Sensor Monitor Fusion PTZ Fend Event List Start New 2011/12/15/08 Instance 2011/12/15/15 Source type Camera Server Hrs_4040_Tax Source Hrs_4040_Tax Event name Master status Time Event Now Event List Fiscal 2011/12/19 Date: 2011/12/16 [ Type: 11.32.08 ] User name admin [ Refer address: 102.108 | 101.9256 | CPU loading 87% | Network Download: 40.41 kbps Lapsed: 18.51 kbps | Memory usage: 3.55% / 3.55% / 3.55% / 3.55% / 3.55% / 3.55% / 3.55% / 3.55% / 3.55% / 3.55% / 3.55% / 3.55% / 3.55% / 3.55% / 3.55% / 18.51 kbps / 18.51 kbps / 18.51 kbps / 18.51 kbps / 18.51 kbps / 18.51 kbps / 18.51 kbps / 18.51 kbps / 18.51 kbps / 18.51 kbps / 18.51 kbps / 18.51 kbps13.6 Time Navigation / View Toolbar
Time navigaon is a set of navigaon buons, scroll bars, and image exporng tools.

You can open the system in dierent screen resoluons and the window can be resized to t your needs.
Each component in the interface is a dockable widget which can be placed anywhere in the current window. You may resize each of the components by clicking on the edges of dockable widgets, and you may arrange them in the way you like. Please see the following screenshot for an example.
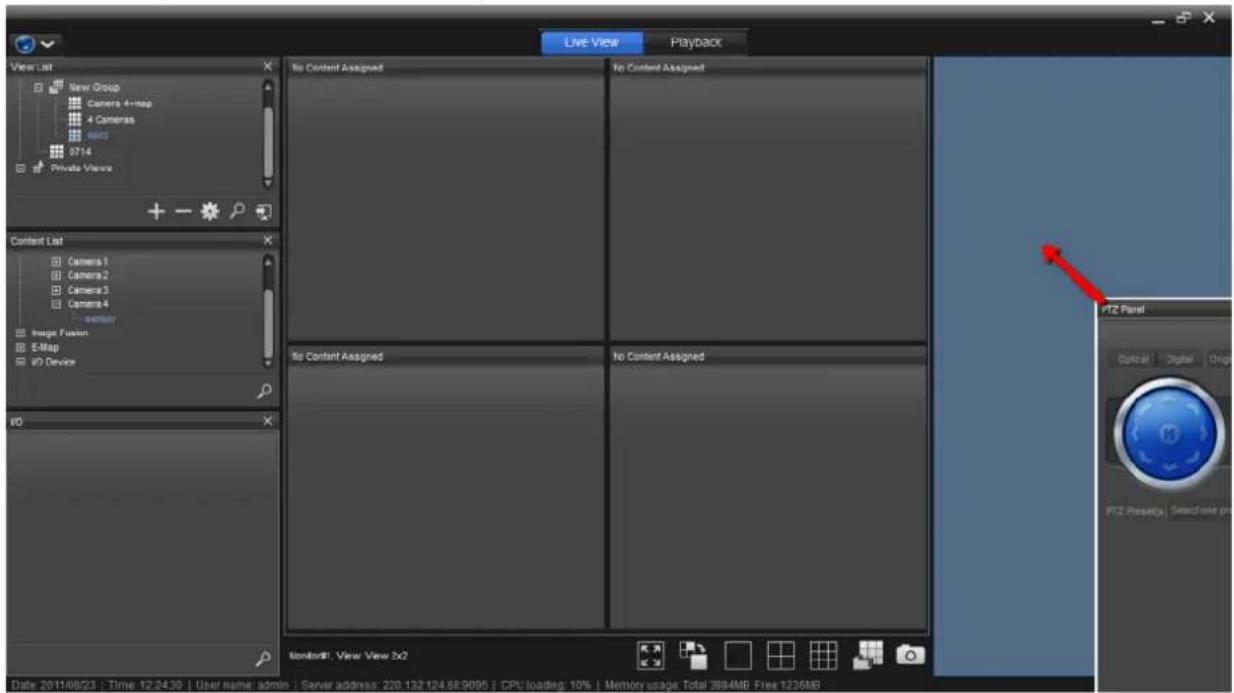
text_image
Live View Playback View List New Group Camera 4+map 4 Cameras 8714 Private Views Content List Camera 1 Camera 2 Camera 3 Camera 4 sensor Image Fusion E-Map WD Device WD No Content Assigned No Content Assigned PTZ Panel Optical Digital One PTZ Property | Select time pr Monitoft: View View 3x2 Date: 2011/08/23 : Time: 12:24:30 | User name: admin | Server address: 220.132.124.66.9096 | CPU loading: 10% | Memory usage: Total 3584MB Free 1236MB
Live View can be displayed both in the primary monitor and in secondary monitors, but Playback can open only in the primary monitor.
13.6.1 The Playback Control Panel
The control panel can be divided into four dierent parts which are, from le to right, playback control, the date/me display, meline browsing, event browsing control, and the toolbar icons.

text_image
08:37:12 Friday, 2011/12/1613.6.2 The Playback Control
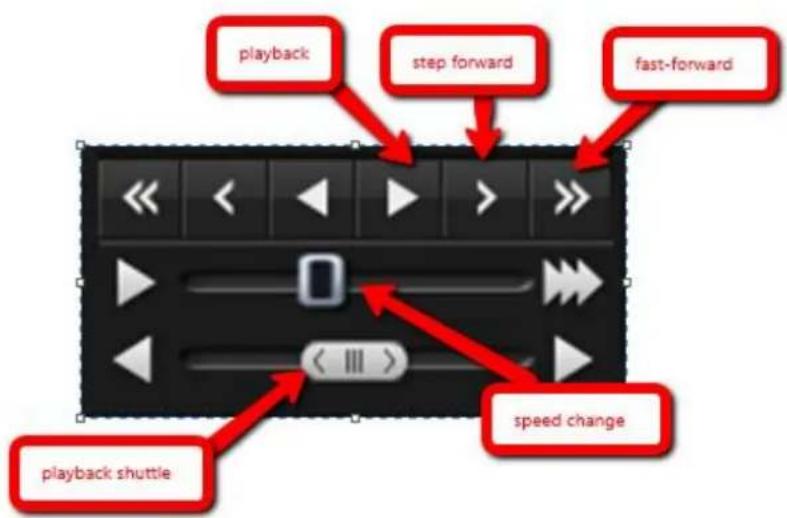
text_image
playback step forward fast-forward speed change playback shuttleThe featured sengs are:
| Setting | Description |
| Playback / Reverse Playback | Click to plays videos.When video is being reversely played, the focused channel will play according to the specified frame rate, and the unfocused channels will play at 20 frames per second. |
| Step forward/backward | Click to play one frame next/last to the current frame. |
| Next/Previous | Click to set the current frame to that one in next/last interval.➢ See also thePlayback of Client Configuration. |
| Speed | Click to change alter the speed from 1/16x to 64x. |
| Speed Shule | Click to quickly scan through video forwards or backwards.The speed can be adjusted by dragging the handle. For example, when you drag the handle towards the right-hand side, forward playback will start. The playback speed is determined how far away the handle is from the originalposition. If you drag the handle towards the left-hand side, reverse playback will start. |
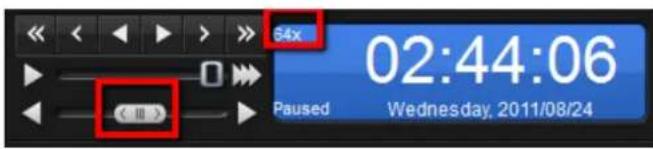
text_image
64x 02:44:06 Paused Wednesday, 2011/08/24
If video is being played at a faster speed, the audio will not be heard.
13.6.3 The Date / Time Display
It shows the playback status, the date/me of the current video frame, the speed of playback.
13.6.4 Event browsing control
The event browsing control is a quick interface for you to move between the me points when event occurs.
text_image
1x 13:43:16 Paused Friday, 2011/08/26The featured sengs are:
| Graphic Button | Description |
 | Moves to the previous event. |
 | Move to the next event |
13.6.5 The Toolbar Icons
The toolbar icons are a quick interface for you to operate funcons, for example: change grid, export, snapshot and remove schedule.
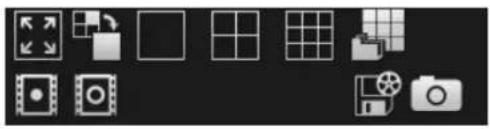
natural_image
Collection of grayscale icons representing media, film, and camera functions (no text or symbols)The featured sengs are:
| Graphic Button | Description |
 | Toggle full-screen |
 | Toggle single grid |
 | Switch different grid layouts |
 | Set cue-in point |
 | Set cue-out point |
 | Export video |
 | Take a snapshot |
 | Remove selected channels |
13.7 Export Video
Video exporng is a tool for converng the video of a specied me span into commonly-used video formats so that the video can be played with other video player applicaons, such Windows Media Player and VLC.
- Click on the cue-in icon.
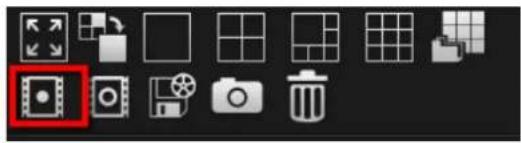
natural_image
Grid of grayscale icons representing media, film, camera, and trash (no text or symbols)- You will see an icon on the meline indicang the start of the video to be exported.
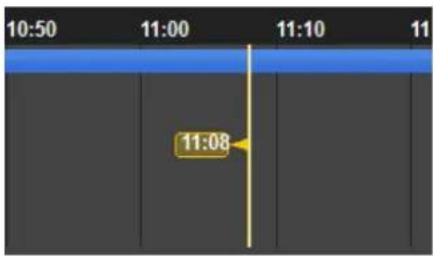
text_image
10:50 11:00 11:10 11 11:08- Click on the cue-out icon.
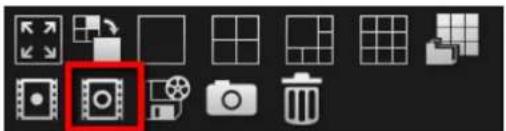
text_image
Screenshot of a software toolbar with icons for image editing, film strip, grid, camera, and trash bin- You will see the icon indicang the end of the video. And the edges of start me and end me are draggable. You may drag them to modify start me and end me.
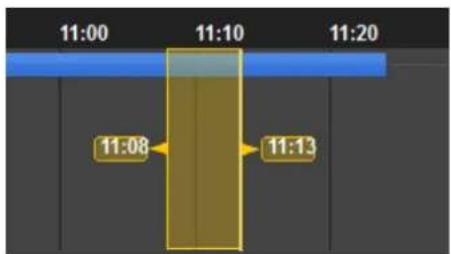
text_image
11:00 11:10 11:20 11:08 11:13- Click on the export icon.
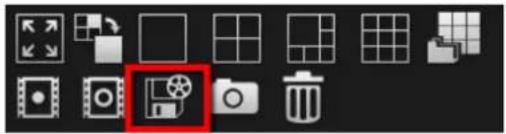
natural_image
Grid of grayscale icons including film strip, camera, and trash bin (no text or symbols)- A dialog will be opened to ask for the parameters to congregate the video to be exported. The supported video formats are ASF, Original AVI, and Microso AVI. You may enable "Export audio" and "Export tle informaon". They are not enabled by default.
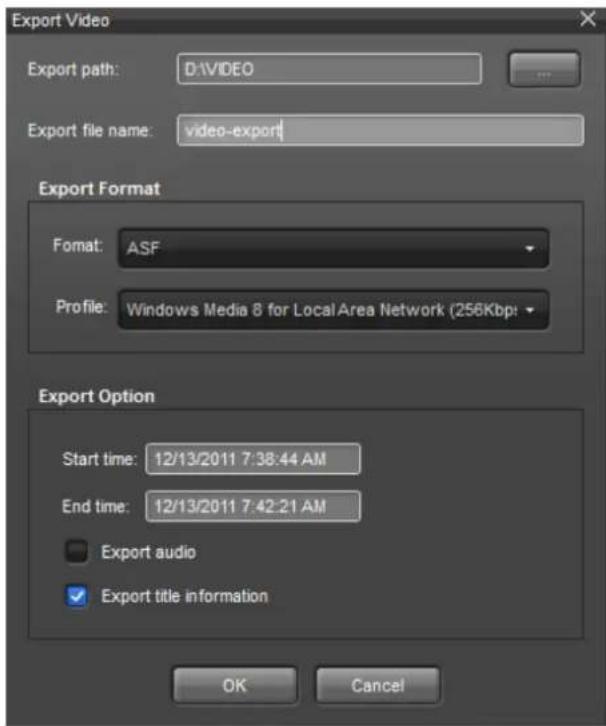
text_image
Export Video Export path: D:\VIDEO Export file name: video-export\ Export Format Format: ASF Profile: Windows Media 8 for Local Area Network (256Kbp) Export Option Start time: 12/13/2011 7:38:44 AM End time: 12/13/2011 7:42:21 AM Export audio Export title information OK Cancel | The maximum lename length of export les is 64 characters. |
 | If there is a video format change in your selecons, NuClient will save video data of dierent formats in dierent les and number them properly. |
 | The start me and the end me are modiable in the export dialog. You may click on the numbers you feel like changing and press KEY UP and KEY DOWN. |
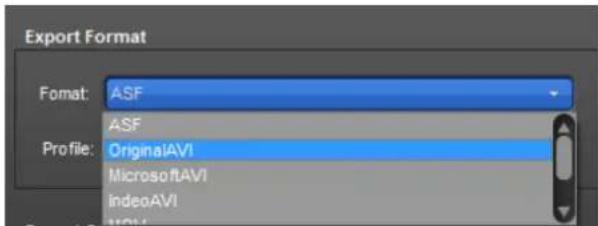
text_image
Export Format Format: ASF Profile: ASF OriginalAVI MicrosoftAVI IndeoAVIIf the export format is ASF, you can choose dierent video proles.
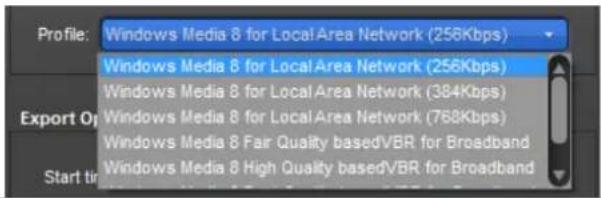
text_image
Profile: Windows Media 8 for LocalArea Network (258Kbps) Windows Media 8 for LocalArea Network (256Kbps) Windows Media 8 for LocalArea Network (384Kbps) Windows Media 8 for LocalArea Network (768Kbps) Windows Media 8 Fair Quality basedVBR for Broadband Windows Media 8 High Quality basedVBR for Broadband
If you run NuClient on Mac OS X, you may also export video in MJPEG.
- Aer OK is pressed, the video will be exported and can be seen in the target folder when the exporng is completed.

text_image
Progress Bar 96% Cancel13.8 Snapshot / Print
See the secon of Snapshot for details.
14. Log Export
Whether the Crystal Titan is serving as a Management Server, Recording Server or Metadata Server, follow the guide below to export the log recorded during a period of me:
1. Access the Live View tab.
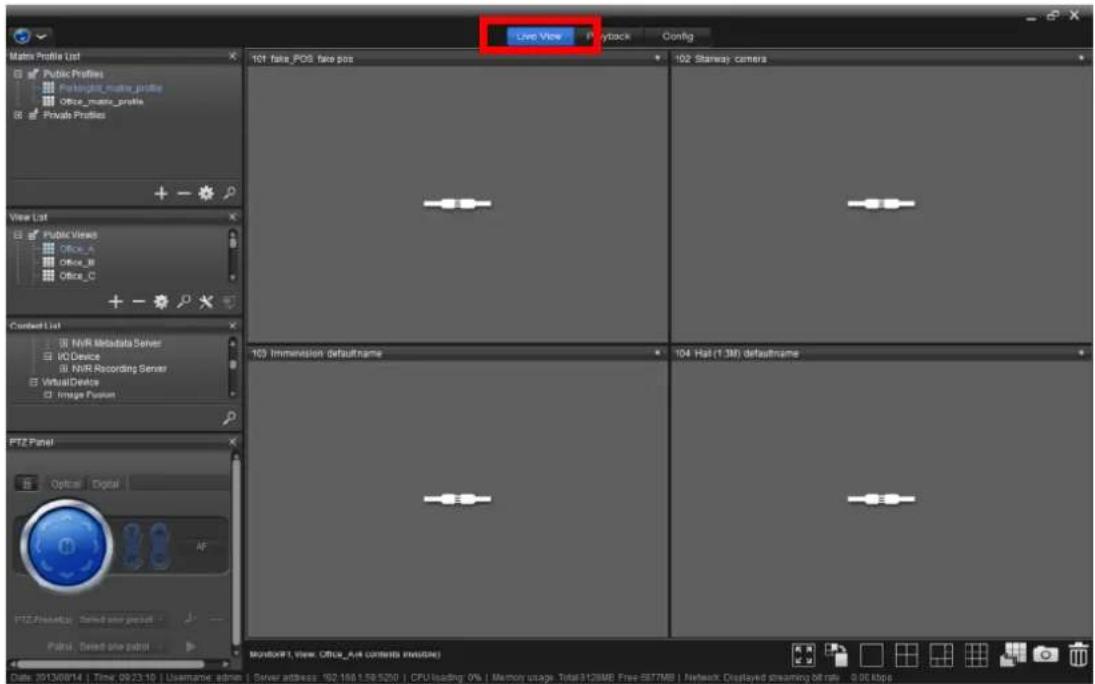
text_image
Live View 101-fake_POS face pos 102 Starway camera 103 Immersion defaultname 104 Hal (1.3M) defaultname PTZ Panel Optical Digital AF PTZ Frequency Control error packet Fabric Select one patrol Monitor1, view: Office_Akt content in both Date: 2013/09/14 | Time: 05:23:10 | Username: admin | Server address: 162.168.139.5200 | CPU loading: 0% | Memory usage: Total312MBE Free SETMBE | Refresh Displayed streaming off mini - 0.00 kbps2. From the Top Toolbar of the NuClient, click the "global" icon
The menu opens.
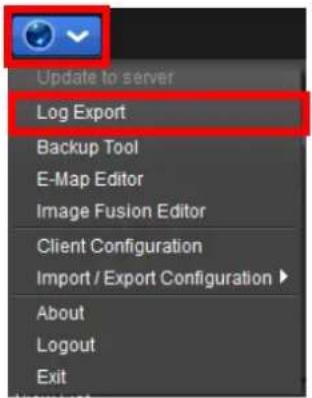
text_image
Update to server Log Export Backup Tool E-Map Editor Image Fusion Editor Client Configuration Import / Export Configuration ▶ About Logout Exit3. Click Log Export.
A Log Viewer dialog opens.
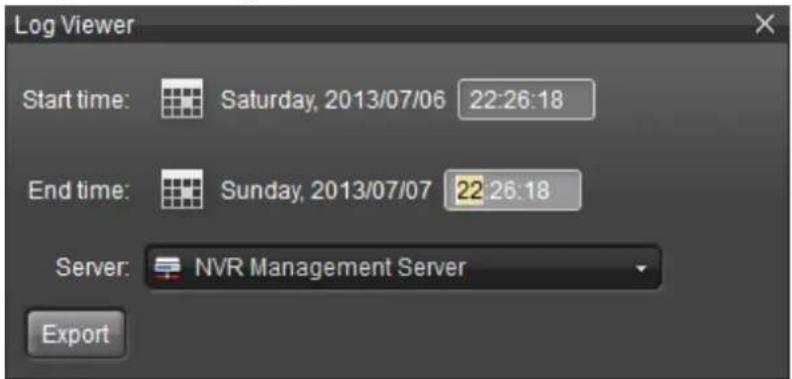
text_image
Log Viewer Start time: Saturday, 2013/07/06 22:26:18 End time: Sunday, 2013/07/07 22:26:18 Server: NVR Management Server ExportThe featured sengs are:
| Setting | Description |
| Start time | Sets the moment from which the log to export startsClick the calendar icon to open a calendar for date selection. |
| End time | Sets the moment at which the log to export stops.Click the calendar icon to open a calendar for date selection. |
| Server | Sets which server to collect the log.Options available are: NVR Management Server, NVR Recording Server and NVR Metadata Server. |
| Export button | Opens a Log file path window to browse where to export the log file.The log file are saved as *.csv file. |
15. Backup
Backup is a utility for exporng video in its original format without any format conversion. It is dierent than exporng video. The format of video is not converted in video backup.
1. Access the Live View tab.
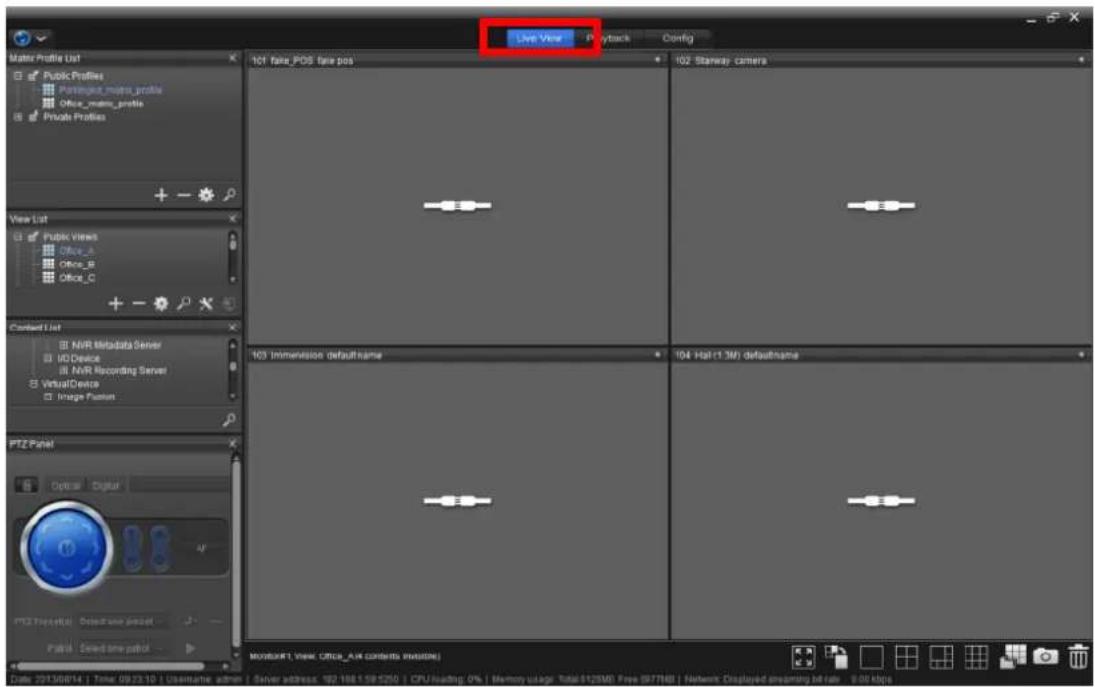
text_image
Live View Playback Config 101 fake_POS false pos 102 Stanway camera 103 Immersion defaultname 104 Hal (1.3M) defaultname Data: 20150614 | Time: 09:23:10 | Usatute admin | Server address: 182 166 158 5200 | CPU/loading: 0% | Memory usage: Total: 312MB Free: 977MB | Network Displayed streaming bit rate : 3.00 kbps2. From the Top Toolbar of the NuClient, click the "global" icon
The menu opens.
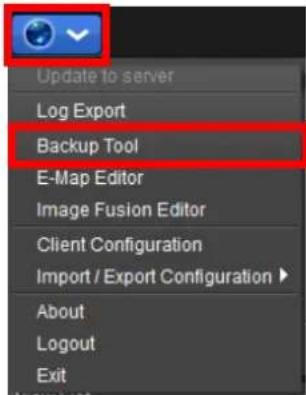
text_image
Update to server Log Export Backup Tool E-Map Editor Image Fusion Editor Client Configuration Import / Export Configuration > About Logout Exit3. Press the Add Period icon in the corner of the opened dialog.
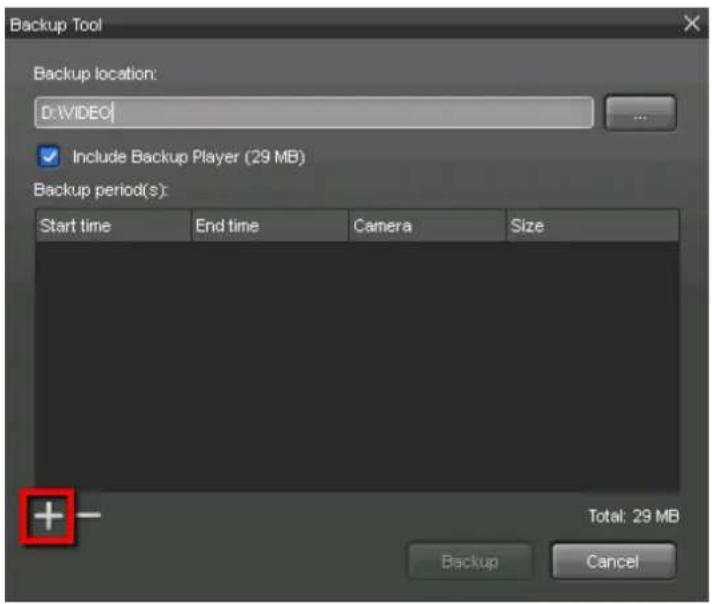
text_image
Backup Tool Backup location: D:\VIDEO\ Include Backup Player (29 MB) Backup period(s): Start time End time Camera Size Total: 29 MB Backup Cancel- Aer the icon is pressed, a meline dialog will open.
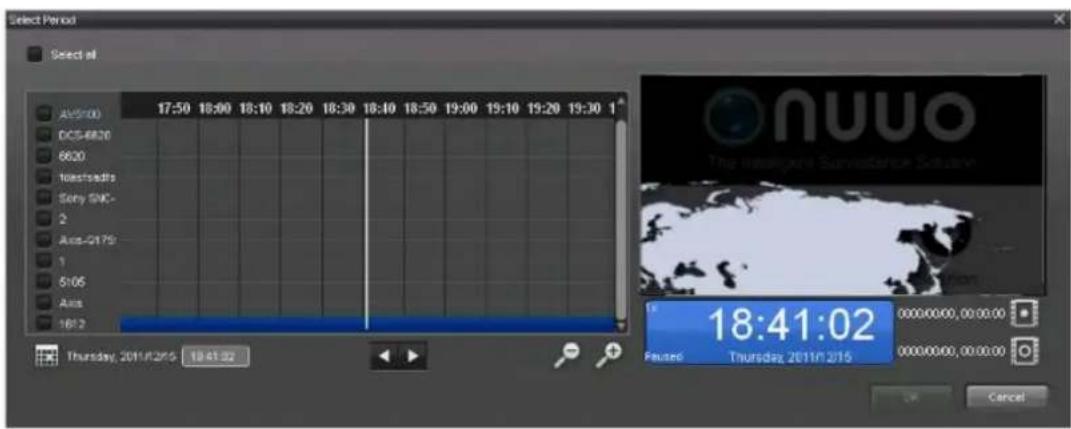
text_image
Select Period Select all AV5100 17:50 18:00 18:10 18:20 18:30 18:40 18:50 19:00 19:10 19:20 19:30 1 GCS-6620 6620 Hosstads Sony SNC- 2 Acs-2175 1 5105 Acs 16:2 Thursday, 2011/02/15 18:41:02 nuuo The Intergrims Surveillance Solution 18:41:02 Reuters Thursday, 2011/2/15 0000.00.00, 00.00.00 0000.00.00, 00.00.00 Cancel- The interface is quite similar to the meline in the Playback interface.
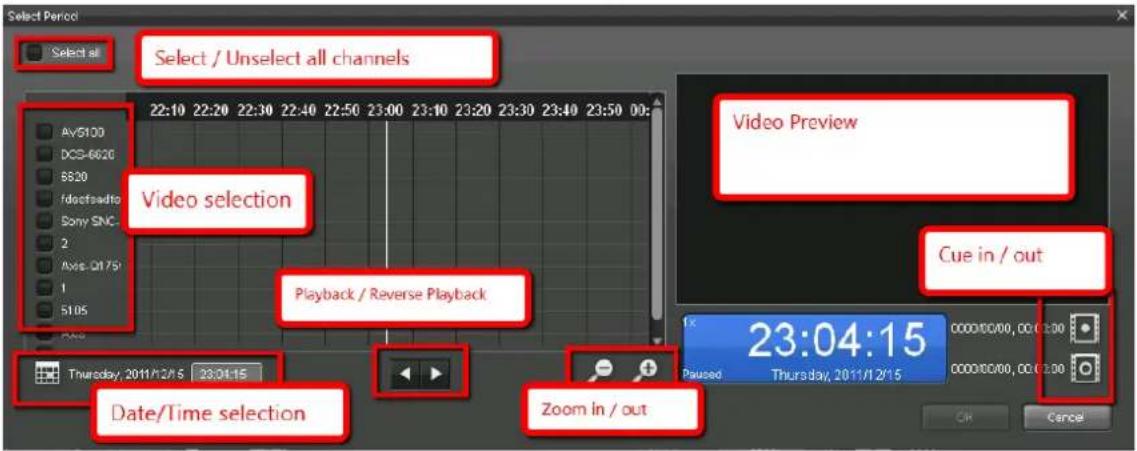
text_image
Select Period Select all Select / Unselect all channels 22:10 22:20 22:30 22:40 22:50 23:00 23:10 23:20 23:30 23:40 23:50 00: AVS100 DCS-6620 B820 fdoctoadio Sony SNC 2 Ave. D175 1 5105 Video selection Playback / Reverse Playback Thursday, 2011/12/15 23:04:15 Date/Time selection Zoom In / out Video Preview Cue in / out 1x 23:04:15 Paused Thursday, 2011/12/15 0000/00/00, 00:00:00 0000/00/00, 00:00:00 OK Cancel- Select a camera and specify the cue-in me.
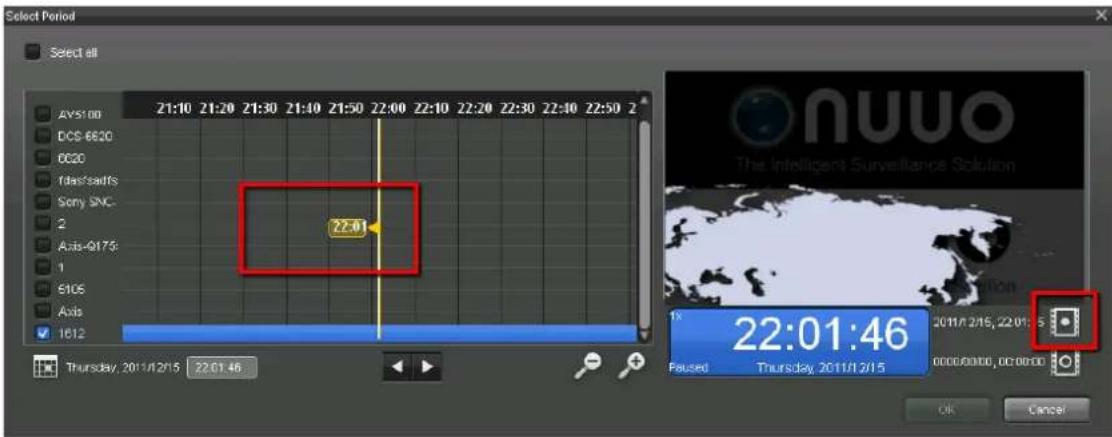
text_image
Select Period Select all AVS100 21:10 21:20 21:30 21:40 21:50 22:00 22:10 22:20 22:30 22:40 22:50 2 DCS-6620 0020 Tidas/sadfs Sony SNC. 2 Axis-Q175 1 8105 Axis 1612 Thursday, 2011/1/2/15 22:01:46 22:01 Nuuo The Intelligent Surveillance Solution 1x 22:01:46 2011/1/15, 22:01:5 Passed Thursday, 2011/1/15 0006/0006, 00:00:00 OK Cancel- Select a camera and specify the cue-out me. Click the OK button when the selecon is done.
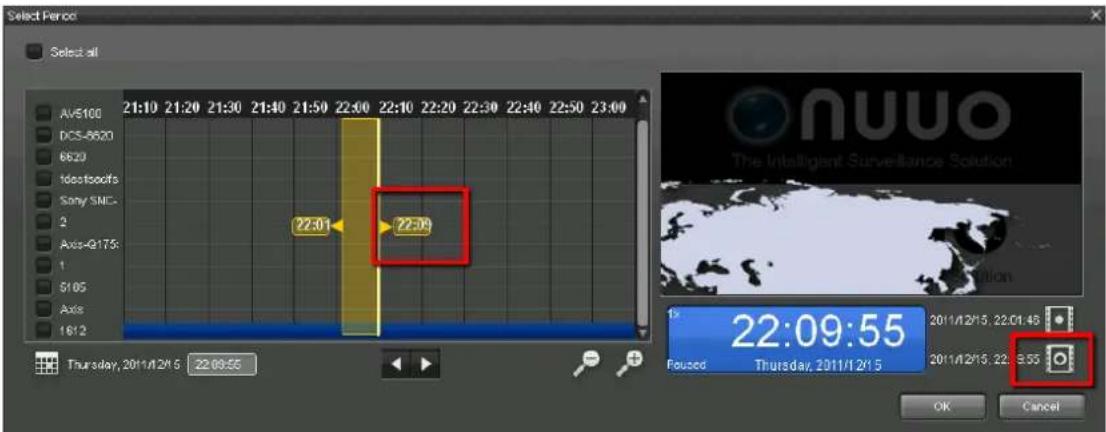
text_image
Select Period Select all AVE100 21:10 21:20 21:30 21:40 21:50 22:00 22:10 22:20 22:30 22:40 22:50 23:00 DOS-8620 6620 Idosfoofs Sony SMC- 2 Axis-G175: 1 S105 Axis 16/2 Thursday, 2011/1/2/15 22:09:55 22:01 22:09 Nuuo The Intelligent Surveillance Solution 1% 22:09:55 Pseudod Thursday, 2011/1/2/15 2011/1/2/15, 22:01:48 2011/1/2/15, 22:3:55 OK Cancel- In the list, you may nd the list of selected video data. Clicking OK will start backing up the video data.
- If you have "Include Backup Player" enabled, then you will nd Backup Player in the exported folder. You may playback video les using the playback applicaon.
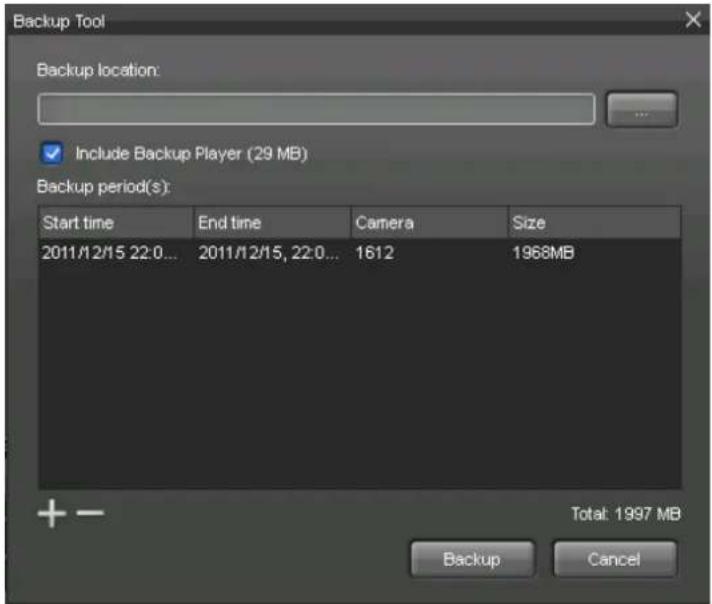
text_image
Backup Tool Backup location: Include Backup Player (29 MB) Backup period(s): Start time End time Camera Size 2011/12/15 22:0... 2011/12/15, 22:0... 1612 1968MB + - Total: 1997 MB Backup Cancel- With the camera video to be exported and the cue-in/out me specied, the original video les will be exported to the target folder.

text_image
NuClient is performing back up... 0% Cancel- When it is completed, you will nd video les in the backup directory. If you have Include Backup Player enabled, you will also nd a playback applicaon in the directory.
text_image
Computer DATA IDI VIDEO Organism Inclusion library Share with Play out New Edition Families Desktop Downloads Dropbox Recent Places 2001.03.174.06.00 95 0000000000000 08M/2011/07/03 0414/4213/08/03 08.6 000000000000 08M/4211/07/03 0414/4213/08/03 08.6 00000000000 08M/4211/07/03 0414/4213/08/03 08.6 Cyber support Libraries Documents Photos Pictures Frames Homegtruss Computers OS (C:) DATA (D:) Network 5 items16. Export Conig
The Export Cong tool is featured to save the NuClient's conguraon to a file so such le can be loaded to recover the system conguraon in a painless manner. This will save users from spending great me and eorts in reconstung the system conguraon.
To use the Export Cong tool:
1. Access the Cong tab.
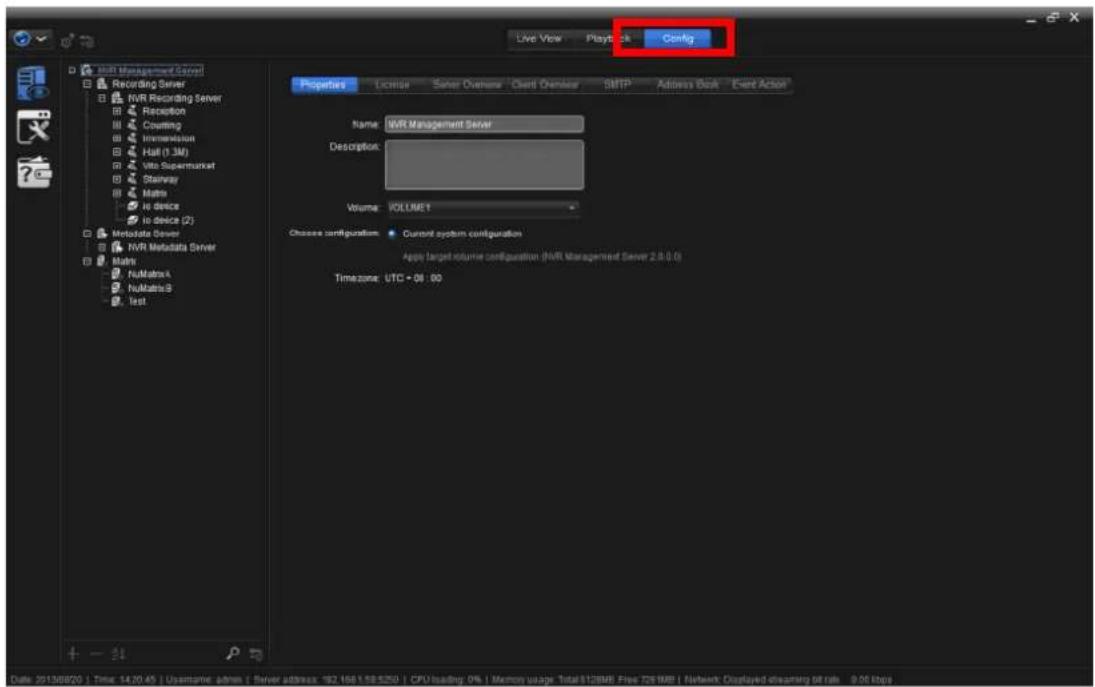
text_image
Live View Play Back Config Recording Server WVR Recording Server Reception Counting Intermission Hall (1.3M) Vito Supermarket Stairway Matrix to device to device (2) Metastate Server WVR Metadata Server Hlsm NullMatrix NullMatrixB Test Properties License Server Overview Client Address SMTP Address Back Event Action Name: WVR Management Server Description: Volume: VOLUME1 Choose configuration: Current system configuration App's target volume configuration (WVR Management Server 2.8.0.0) Timezone: UTC - 06 : 00 Date: 2013/09/20 | Time: 14:20:45 | Username: admin | Server address: 182.166.158.5250 | CPU loading: 0% | Memory usage: Total813ME Free 729.988 | Network Displayed streaming bit rub - 9.00 bits- From the Top Toolbar of the NuClient, click the "global" icon
The menu opens.
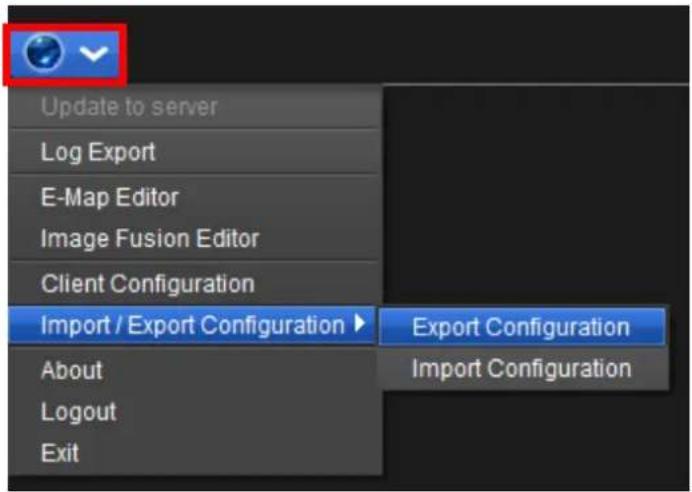
text_image
Update to server Log Export E-Map Editor Image Fusion Editor Client Configuration Import / Export Configuration ▶ About Logout Exit Export Configuration Import Configuration- Click Import/ Export Conguraon and click Export conguraon
The Export Cong tool launches.
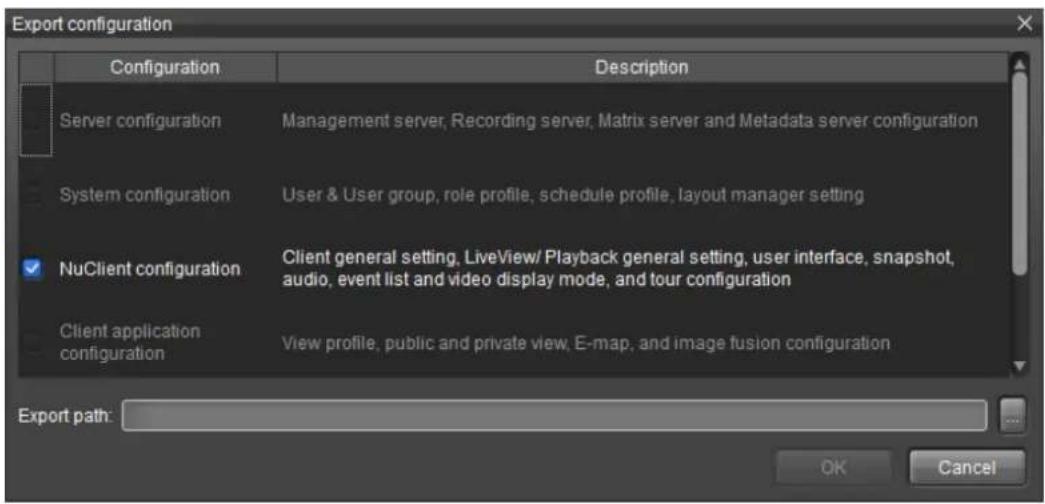
text_image
Export configuration Configuration Description Server configuration Management server, Recording server, Matrix server and Metadata server configuration System configuration User & User group, role profile, schedule profile, layout manager setting NuClient configuration Client general setting,LiveView/ Playback general setting, user interface, snapshot, audio, event list and video display mode, and tour configuration Client application configuration View profile, public and private view, E-map, and image fusion configuration Export path: OK Cancel- Select the conguraon to save.
 | It is suggested that all types of conguraon be export and import simultaneously to ensure the conguraon is intact. |
 | Before export conguraon, please commit all modicaons to make sure the exported conguraon is up to date. |
- Click the ellipsis (...) button at the right side of the Export path eld.
An explorer window opens.
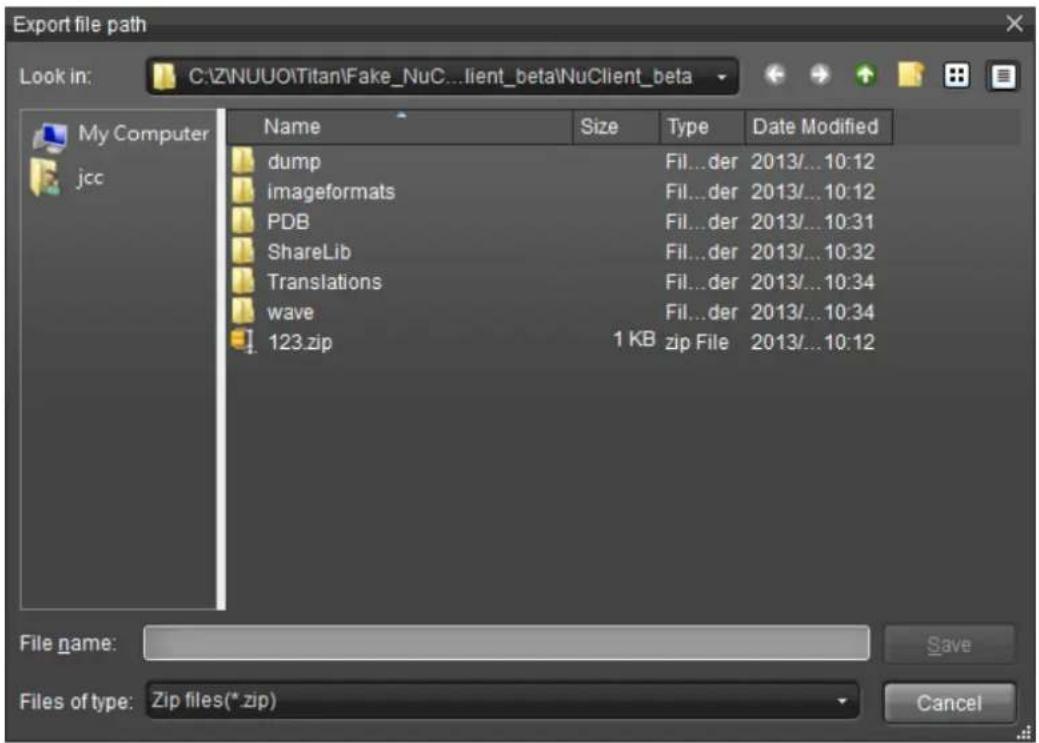
text_image
Export file path Look in: C:\ZNUUO\Titan\Fake_NuC...client_beta\nuClient_beta Name Size Type Date Modified dump Fil...der 2013/...10:12 imageformats Fil...der 2013/...10:12 PDB Fil...der 2013/...10:31 ShareLib Fil...der 2013/...10:32 Translations Fil...der 2013/...10:34 wave Fil...der 2013/...10:34 123.zip 1 KB_zip File 2013/...10:12 File name: Save Files of type: Zip files(*zip) Cancel- Browse where to save the conguraon le.
- Enter a name for the conguraon le in the File name eld. Click the Save buon.
The selected conguraon is saved as one *.zip le at the assigned folder.
17. Import Conig
The Import Cong tool is featured to load a copy of the NuClient's conguraon saved as a le in the disk drive so it is painless to reconstute the system conguraon.
To use the Import Cong tool:
1. Access the Cong tab.
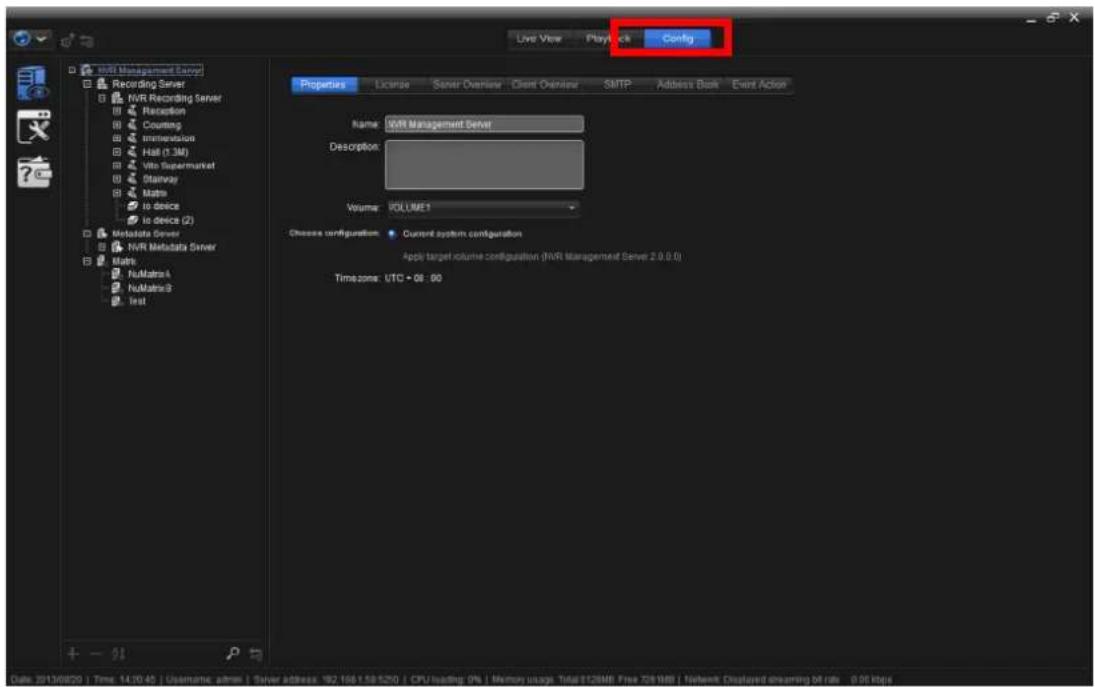
text_image
Live View Play Back Config Recording Server NVR Recording Server Recovery Counting Interconnection Hall (1.3M) Vito Supermarket Stairvoy Maths to device to device (2) Metadata Server NVR Metadata Server Maths NuMatrix4 NuMatrix8 test Properties License Server Overview Client Overview SMTP Address Bank Event Action Name: NVIDIA Management Server Description: Volume: VOLUME1 Cheese configuration: Current system configuration Apply target volume configuration (NVR Management Server 2.0.0.0) Timezone: UTC + 08 : 00 Date: 2013/06/20 | Time: 14:00:45 | Username: admin | Server address: 182.166.1.59.5290 | CPU/loading: 0% | Motion usage: Total:113MB Free: 751988 | Riscart Displayed streaming off rub - 0.01 bps- From the Top Toolbar of the NuClient, click the "global" icon
The menu opens.
- Click Import/ Export Conguraon and click Import Conguraon
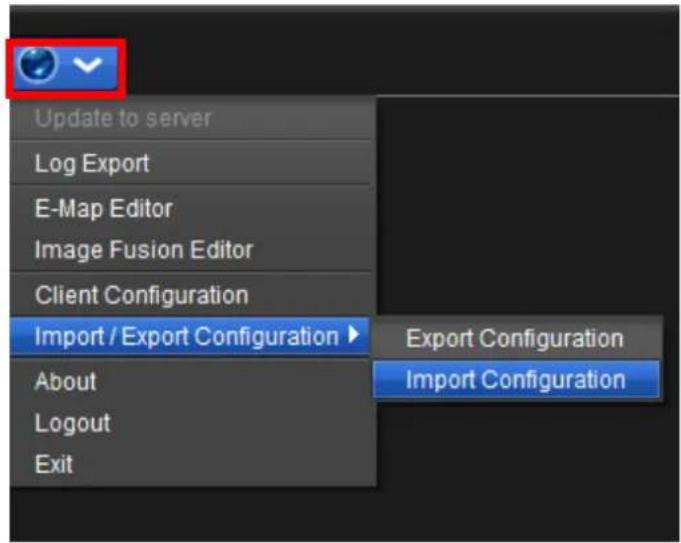
text_image
Update to server Log Export E-Map Editor Image Fusion Editor Client Configuration Import / Export Configuration ▶ About Logout Exit Export Configuration Import ConfigurationThe Import Cong tool launches.
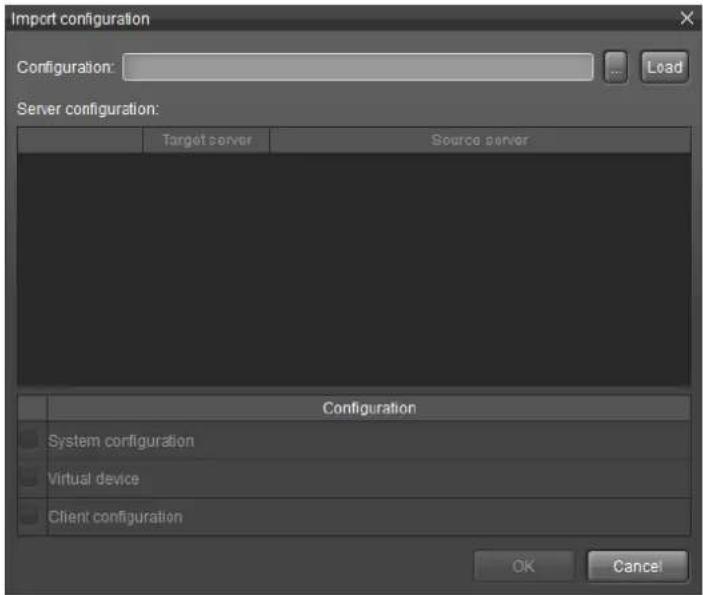
text_image
Import configuration Configuration: Load Server configuration: Target server Source server Configuration System configuration Virtual device Client configuration OK Cancel- Click the ellipsis (...) button at the right side of the Conguraon eld.
An explorer window opens.
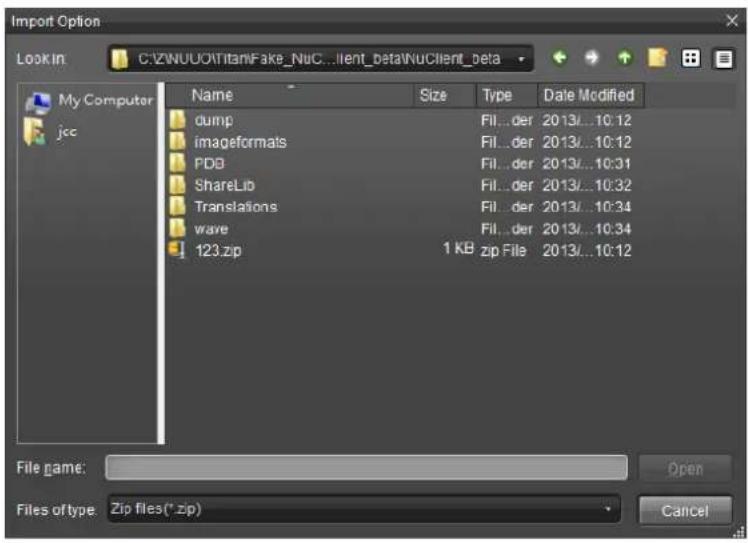
text_image
Import Option Look In: C:\ZWUUO\Titani\Fake_NuC...\client_beta\NuClient_beta My Computer jcc Name Size Type(Date Modified) cump Fil...der 2013/...10:12 imageformats Fil...der 2013/...10:12 PDB Fil...der 2013/...10:31 ShareLib Fil...der 2013/...10:32 Translations Fil...der 2013/...10:34 wave Fil...der 2013/...10:34 123.zip 1 KB zip File 2013/...10:12 File name: Files of type Zip files(*.zip) Open Cancel- Browse for the saved conguraon le. Click the conguraon le.
The conguraon le becomes highlighted.
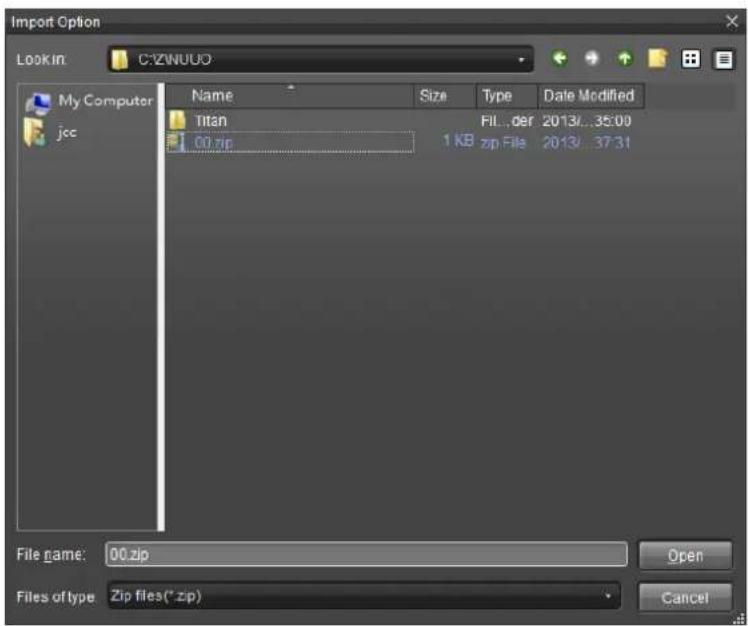
text_image
Import Option Look in: C:\ZNUUO My Computer jcc Name Size Type Date Modified Titan Fil...def 2013/..35.00 00 zip 1 KB zip File 2013/ 37.31 File name: 00.zip Open Files of type: Zip files(*zip) Cancel- Click the Open buon at the right side of the File name eld.
The explorer window closes.
- Click the Load buon at the right side of the Conguraon eld.
The available conguraon(s) then shows in the lower half of the Import Cong tool.

It is suggested that all types of conguraon be export and import simultaneously to ensure the conguraon is intact.
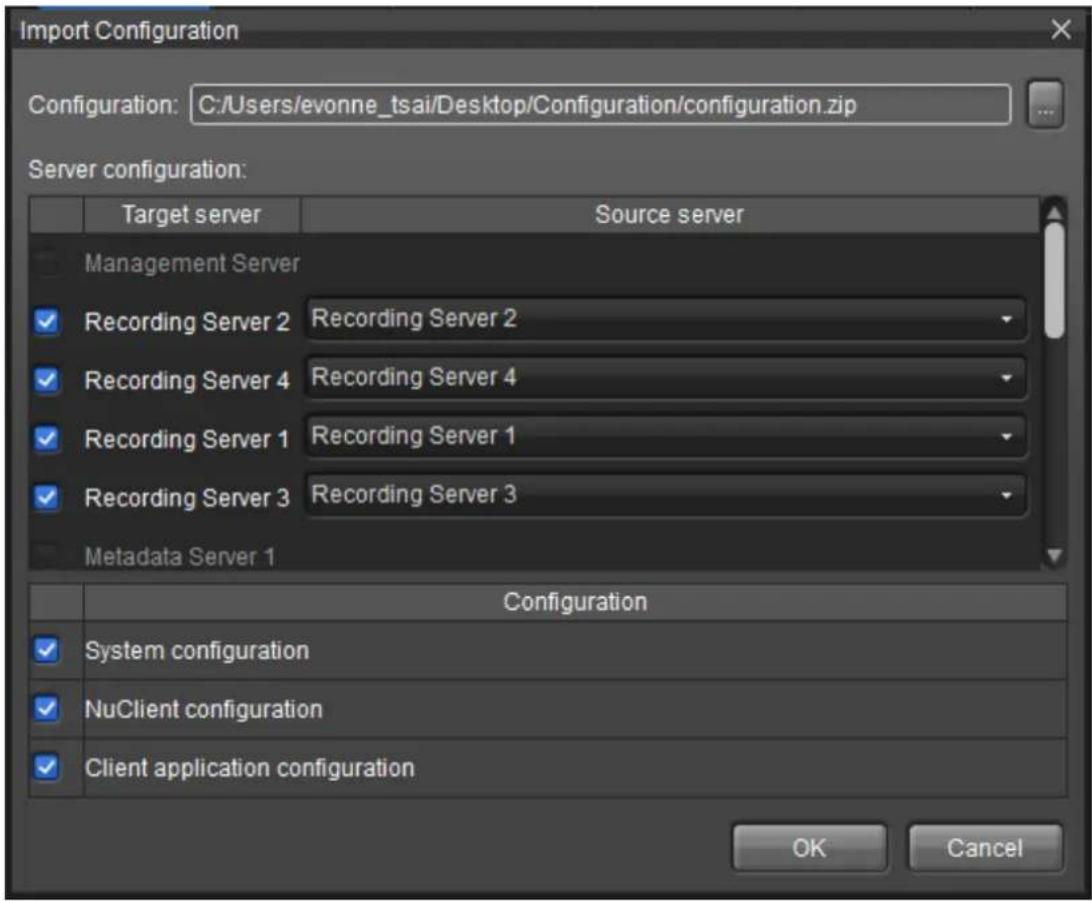
text_image
Import Configuration Configuration: C:/Users/evonne_tsai/Desktop/Configuration/configuration.zip Server configuration: Target server Source server Management Server Recording Server 2 Recording Server 2 Recording Server 4 Recording Server 4 Recording Server 1 Recording Server 1 Recording Server 3 Recording Server 3 Metadata Server 1 Configuration System configuration NuClient configuration Client application configuration OK Cancel- Select the conguraon to load and deselect the conguraon that you don't want to load.
- Click the OK buon.
The selected conguraon is imported to the system and replaced original conguraon.
| The hardware between source server and target server is strongly suggested to be the same. | |
| It is suggested to import one server configuration into one target server. Please not import one server configuration into multiple target server. |
18. Video Wall
To enlarge the management eciency of big projects, NUUO NuMatrix, provides an advanced centralized viewing soluon that supports unlimited channels of live viewing, without any monitor counts limitaon per computer.
The followings are components.
| Component | Description |
| NuMatrix applicaon | Install in the computer as Matrix Server. |
| Matrix sengs | The Matrix Server settings on NuClient-Config tab |
| Matrix Console | Control all monitor on NuClient |
| Matrix prole | A group of monitors and Views setting for monitoring efficiency |
18.1 Matrix Application
- Install NuMatrix applicaon on the computer as Matrix Server. For NuMatrix installaon process refers to Applicaon Installaon.
- On Windows, click "Start", and then click NUUO Crystal NuMatrix to launch NuMatrix applicaon.
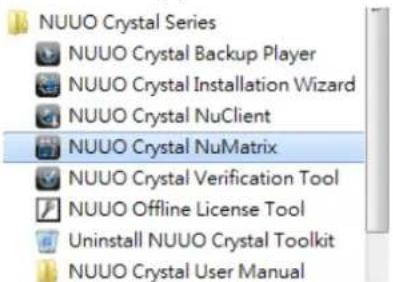
text_image
NUUO Crystal Series NUUO Crystal Backup Player NUUO Crystal Installation Wizard NUUO Crystal NuClient NUUO Crystal NuMatrix NUUO Crystal Verification Tool NUUO Offline License Tool Uninstall NUUO Crystal Toolkit NUUO Crystal User Manual- Select instance name and click OK to launch NuMatrix.
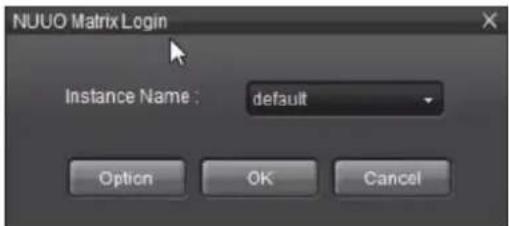
text_image
NUUO Matrix Login Instance Name : default Option OK Cancel- Go to opons for detail seng or add new NuMatrix applicaon. For new NuMatrix applicaon, assign a new port to dierenated dierent NuMatrix applicaon.
Then click on "OK".
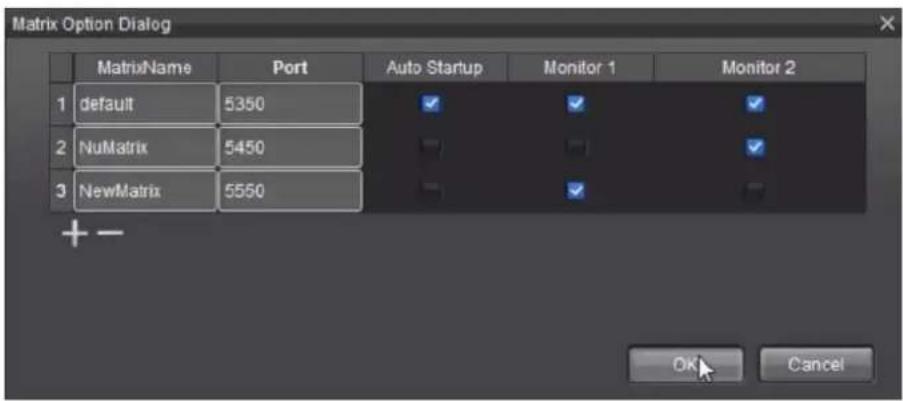
text_image
Matrix Option Dialog MatrixName Port Auto Startup Monitor 1 Monitor 2 1 default 5350 2 NuMatrix 5450 3 NewMatrix 5550 + -| Setting | Description | Default |
| MatrixName | Names the Matrix. | “default” |
| Port | Provides port of the Matrix. | 5350 |
| Auto Startup | Start the Matrix automatically | Enable |
| Monitor 1 | Show Matrix on Monitor 1 | Enable |
- Then go to NuClient | Cong tab | Physical Cong | Matrix to add the NuMatrix Server to the system. For NuMatrix seng refer to Cong Matrix.
- For Matrix control priority and access privilege refer to Priority and Matrix.
Once installed NUUO Crystal NuMatrix application and go to Matrix config on NuClient please make sure NUUO Crystal NuMatrix is still operating when add the Matrix Serve on NuClient| Config.
18.2 Matrix Console
The Matrix console is the primary locaon for controlling the matrix display. It displays all the monitors you have added to the Management Server on your secon of NuMatrix. Mulple monitors for one Matrix server seng are an available opon. NuMatrix has no inherent limitaon when it comes to the number of monitors.
For NuMatrix seng refer to Cong Matrix.

Please note that only when have an "UImate level" license will you be able to see the Matrix interface on NuClient.
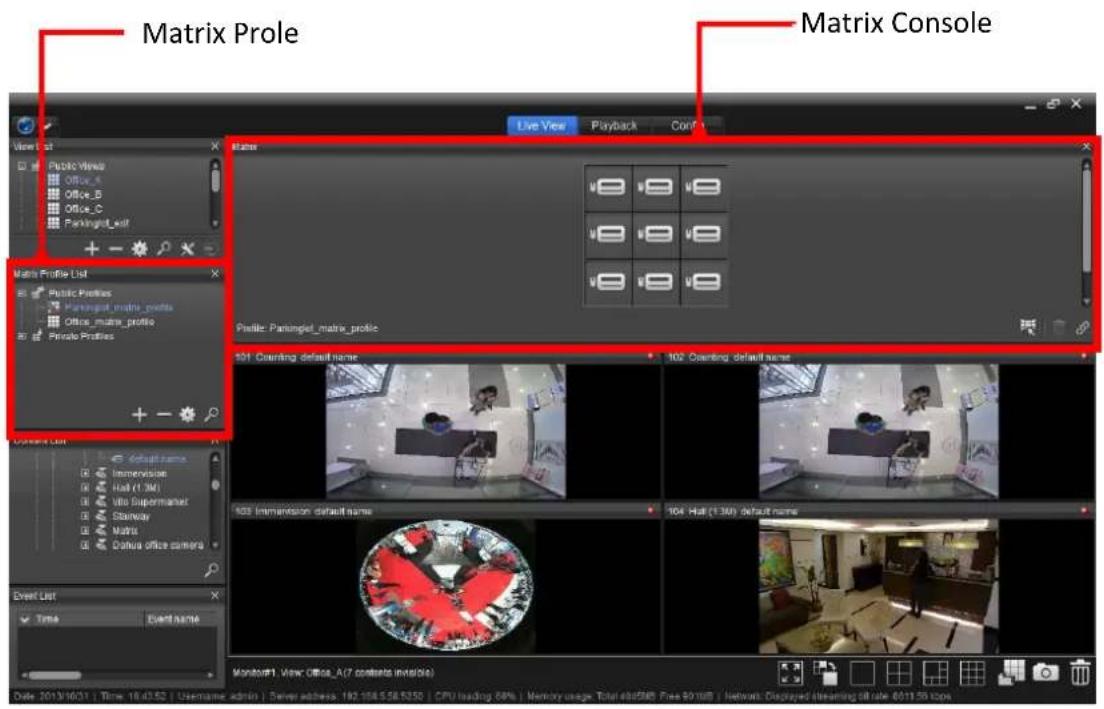
text_image
Matrix Prole Matrix Console Live View Playback Confl Matrix Profile List Public Profiles Paringled_matrix_profile Office_matrix_profile Private Profiles 101 Clearing default name 102 Clearing default name 103 Immersion default name 104 Hall (13M) default name Monitor#1 View: Office_A (7 contracts invalid) Date: 2013/05/31 | Time: 18:43:52 | Username admin | Server address: 192.198.56.5350 | CPU loading: 60% | Memory usage: Total 400MB, Free 90 mW | Network: Displayed streaming off cache: 6011.50 icons
Please note that metadata related video will not show on the NuMatrix.
To launch Matrix console:
- Connect to NuMatrix Server
Focus on the NuMatrix applicaon. Then click "Connect"

Console toolbar.
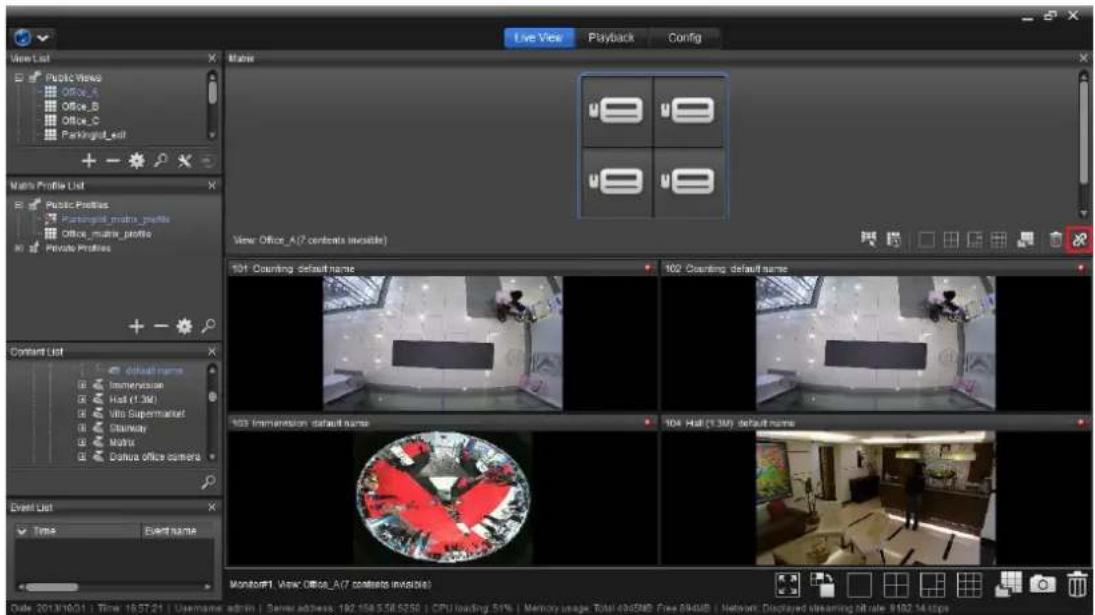
text_image
Live View Playback Config View List Public Views Office_A Office_B Office_C Parkinglet_edit + - Matrix Profile List Public Profiles Fasterboard_matrix_profile Office_matrix_profile Private Profiles + - Content List Default name Immersion Hall (1.3M) Vito Supermarket Stairway Matrix Distru office camera Event List Time Event name 101 Counting default name 102 Counting default name 103 Immersion default name 104 Hall (1.3M) default name Monitor1 View Office_A(7 contents invalid) Date: 2013/10/21 | Time: 16:27:21 | Username: admin | Server address: 192-158.5.58.5250 | CPU loading: 51% | Memory usage: Total: 6965MB Free: 894MB | Network: Displayed streaming Dilt rate: 9102.14 LbpsWhen select the view, the featured sengs are:
| Graphic Button | Description |
 | Select ProfileThere are two options: Public profile and private profile once set on view list. |
 | Select View |
 | View 1x1 |
 | View 2x2 |
 | View 1+5 |
 | View 3x3 |
 | Switch Grid Type |
 | Remove selected content |
 | Connect Matrix |
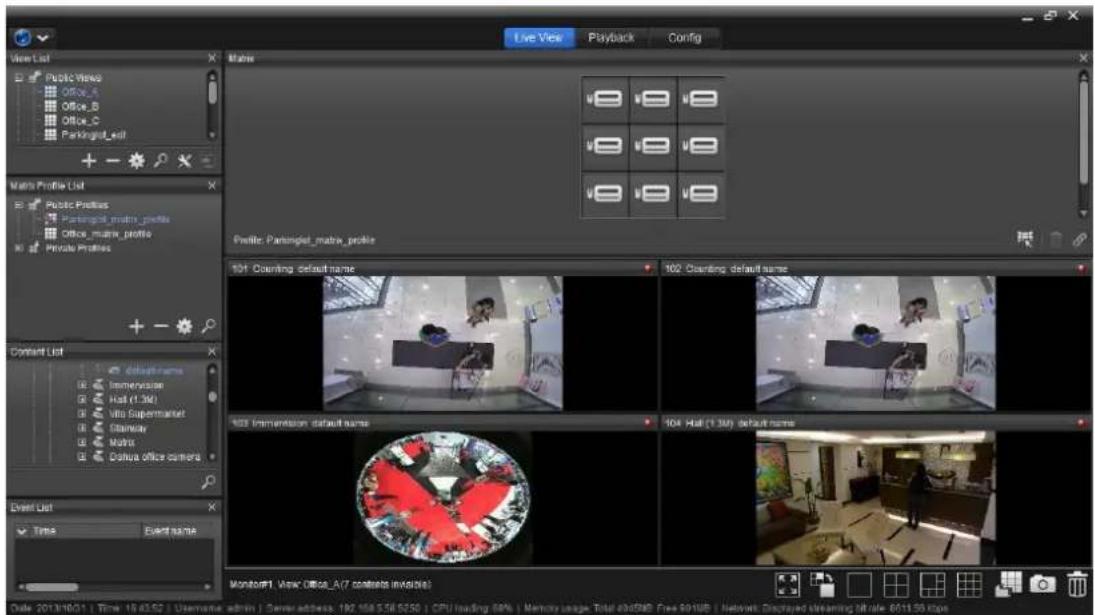
text_image
Live View Playback Config View List Public Views Office_A Office_B Office_C Parkinglet_edit + - Matrix Profile List Public Profiles Parkinglet_matrix_profile Office_matrix_profile Private Profiles + - Constant List default name Immersion Hall (1.3M) Vito Supermarket Stainway Matrix Datura office camera Event List Time Event name 101 Counting default name 102 Counting default name 103 Immersion default name 104 Hall (1.3M) default name MonitorF1 View Office_A(7 contracts invalid) Date: 2013/10/21 | Time: 16:05:52 | Username: admin | Server address: 192 188 5.58 5250 | CPU loading: 99% | Memory usage: Total 6965MB Free 891WB | Network: Displayed streaming hit rate: 6011.59 kbpsWhen select the camera, the featured sengs are:
| Graphic Button | Description |
 | Select ProfileThere are two options: Public profile and private profile once set on view list. |
 | Start/stop Manual Recording |
 | Enables/disable audio |
 | Connect/disconnect |
 | Content SettingThere are two options: stream profile or fixed profile.Select auto or original for stream profile. |
 | Single Grid |
 | Remove selected content |
 | Connect Matrix |
18.2.1 Add camera to Matrix
1. Access the Live View tab.
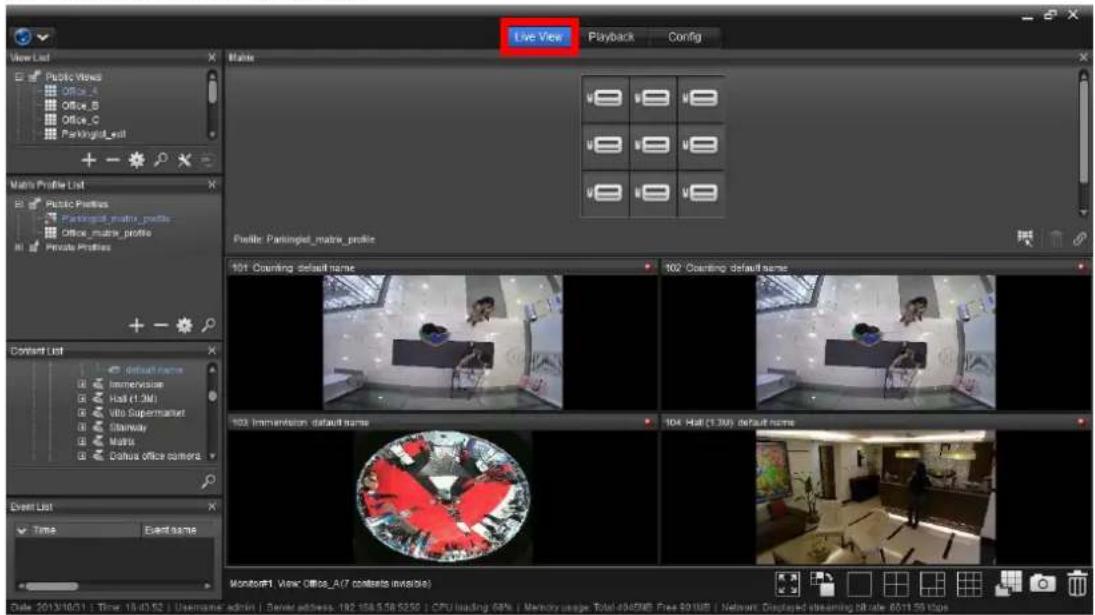
text_image
Live View Playback Config Profile: Parkingel_matrix_profile 101 Counting default name 102 Counting default name 103 Immersion default name 104 Hall (1.3M) default name Monitor1 View Office_A(7 contents invalid) Date: 2013/06/31 | Time: 18:01:52 | Username: admin | Driver address, 182 158.5.58 52:50 | CPU loading 00% | Memory usage Total 4947MB Free 901MB | Network Displayed streaming DB rate: 6011.59.10us2. Click Content list.
Drag and drop a single camera or a sensor to Matrix.
OR
Drag and drop a server to a grid cell.
Then the camera's video will show in Matrix.
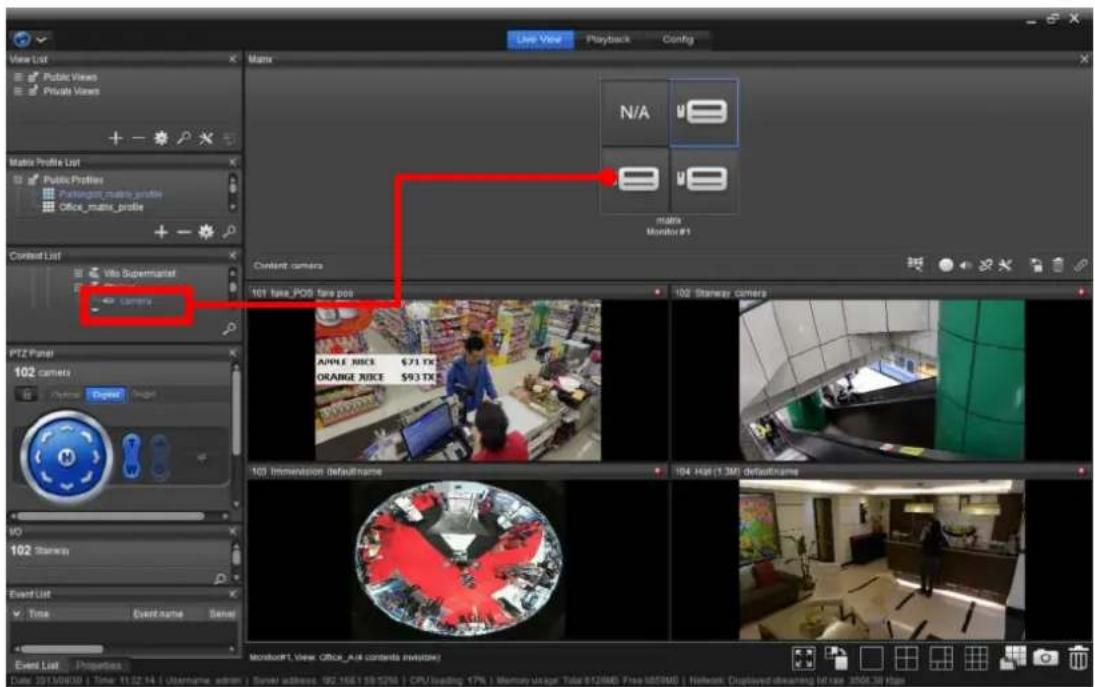
text_image
Live View Playback Config View List Public Views Private Views + - Matrix Profile List Public Profiles Parking/matrix profile Office_matrix_profile + - Current List Vito Supermarket Camera Matrix N/A matrix Monitor #1 Current camera 101 Time_POS Time pos 102 Stanway camera APPLE RICE $71 TX ORANGE RICE $93 TX 103 Immersion Defaultname 104 Hot (1.3M) defaultname Monitor#T, View Office_Aid contents in allusion Date: 2013/08/08 | Time: 11:22:14 | Username, admin | Server address, 192 168 159 1796 | CPU/loading, 17% | Manner usage, Tube 912666, Free MS966 | Toileam, Displaced dimming off line, 3500.36 fps18.2.2 Add view to Matrix
- Access the Live View tab.
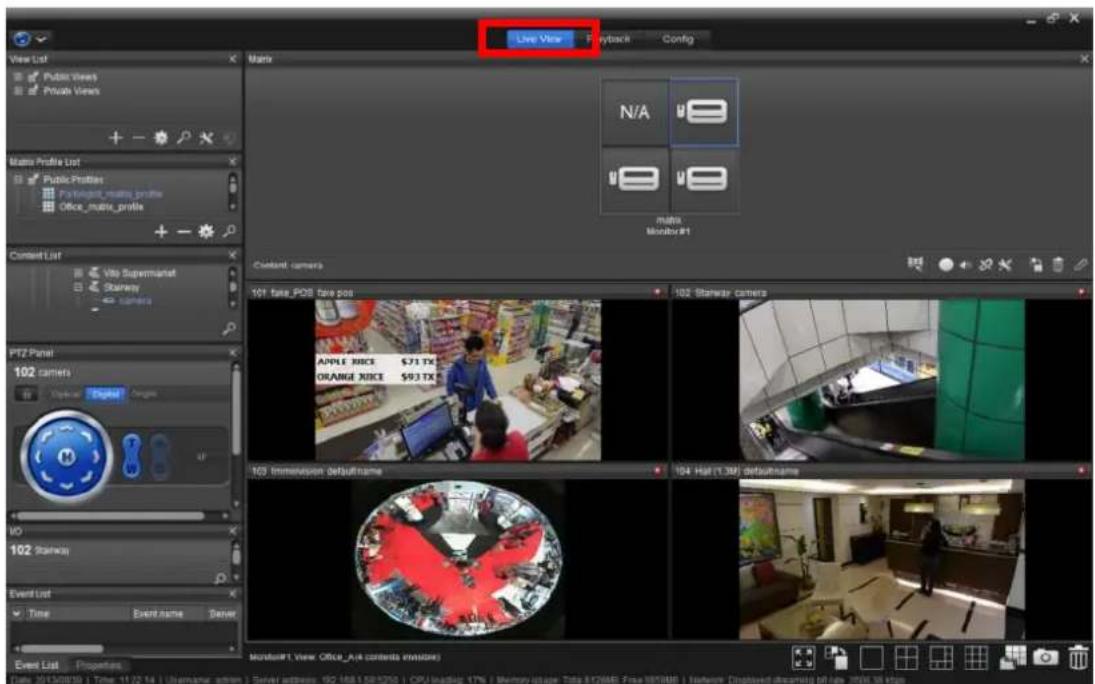
text_image
Live View Playback Config Main N/A main Monitor #1 Content cameras 101 fake_POS: fake pos 102 Starway camera APPLE RICE $71 TX ORANGE JUICE $93 TX 103 Immersion debutname 104 Hot (1.3M) defaultname MultiIFT View Office_A/4 contents version Date: 2013/08/30 | Time: 11:22:14 | Ubremian actem | Server address: 162 168 158 15256 | CPU loading: 17% | Memory stage: Title 81268E; False 881988 | Software Displayed dreaming bit-lux 3506.38 kbps2. Click View list.
Drag and drop a private view or a public view to Matrix.
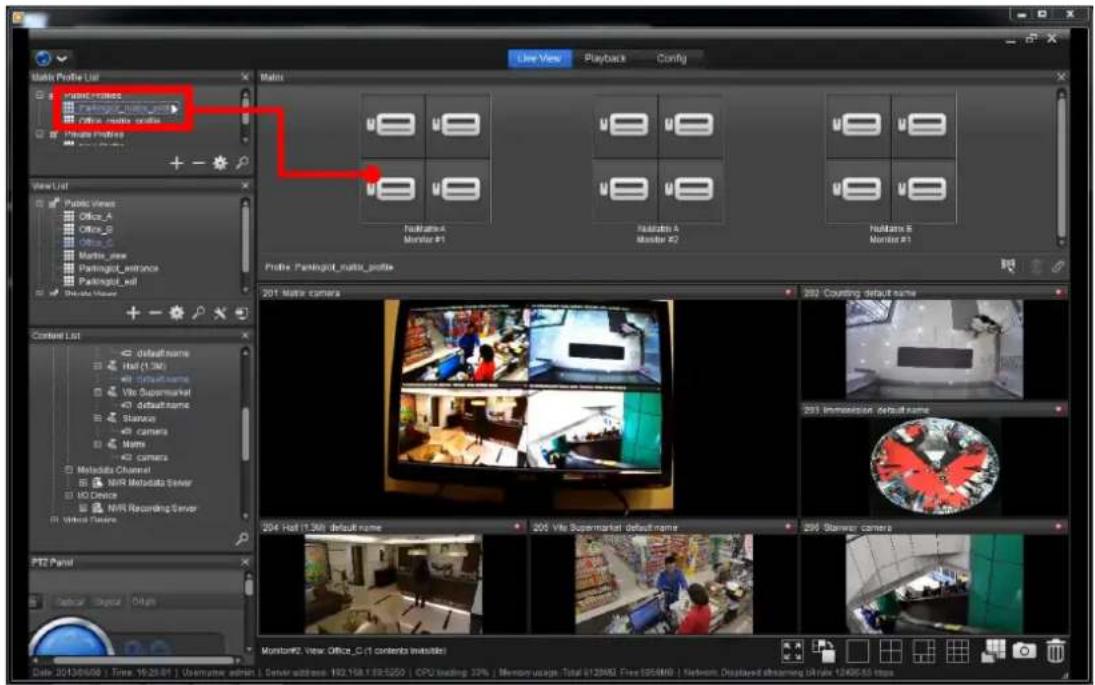
text_image
Make Profile List Create Resources Paringlot_main_ynt Office Main profile Private Profile + - View List Public views Office_A Office_B Office_C Market_new Paringlot_entrance Paringlot_full Private View 201 Matrix camera 202 Counting default name Default name Hall (1.3M) Default name Vite Supermarket default name Slance Camera Held K2 Camera Melinda Channel NVR Metadata Server WD Device NVR Recording Server Windows Server 204 Hall 1.3M default name 205 Vite Supermarket default name 206 Starizer cameras 201 Master A Monitor #1 Monitor #2 Monitor #3 Monitor #4 201 Master A Monitor #1 202 Master A Monitor #2 Monitor #3 203 Immersion default name 204 Master A Monitor #2 View Office_G(1 contents installed) Date: 2013/04/08 | Time: 16:29:01 | Username admin | Server address: 192.158.119.5250 | CPU loading: 33% | Memory usage Total: 812MB2 Free: 105MB0 | Network Display: streaming UK/ke 136656 https18.3 Matrix Proile List
The Matrix prole makes seng up mulple monitors and views more convenient. It consists of a group of sengs for the “Monitors” plus “Views” enabling rapid switching of the viewing target.

Please note that only when have an "Ulmate level" license will you be able to see the Matrix interface on NuClient.
To launch the Matrix Prole List:
- Access the Live View tab.
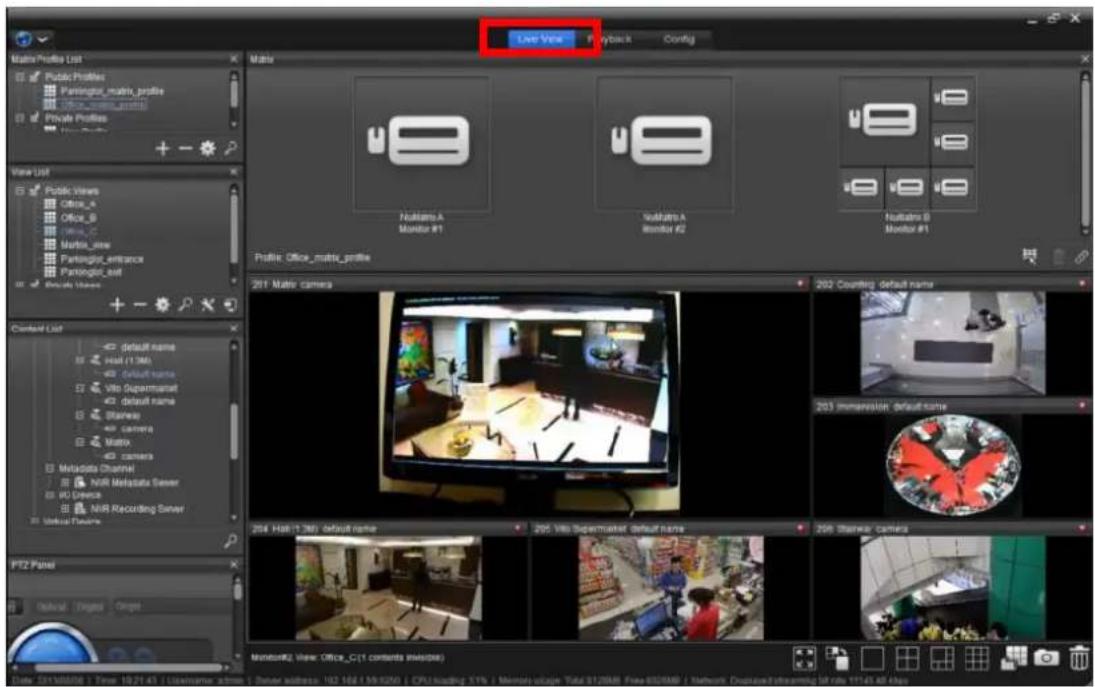
text_image
Live View Mouse Profiles List Public Profiles Paringler._marts_profile Office._marts_profile Private Profiles + - View List Public Views Office_A Office_B Office_C Media_new Paringler_entrance Paringler_sxt Private Views + - Cordant List default name cell (1.36) default name Vito Supermanat default name Starware Camera Matrix Camera Metadata Channel NIR Metadata Server VO Device NIR Recording Server Unknown Camera PTZ Paper Outral Origin Script 201 Matrix cameras 202 Counting default name 203 Immersion default name 204 Hall 1.36 default name 205 Vito Supermaster default name 206 Starware cameras Monitor2 View: Office_C(1 contents image) Date: 01/30/08:1 Time 10:21:47 | Lizenyma.shms | Server address: 102.168.199.0200 | CPU loading: 1% | Memchat stage: Tulu 31/2008 Free:00:000 | Network: Duspack/Dupping/Sales 11/14/46 class- Click the Matrix Prole list
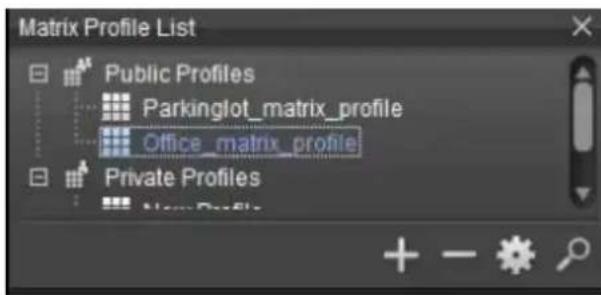
text_image
Matrix Profile List Public Profiles Parkinglot_matrix_profile Office_matrix_profile Private Profiles- Select the type of prole, either Public or Private, to be created.
text_image
Matrix Profile List Public Profiles Parkinglot_matrix_profile Office_matrix_profile Private Profiles- Click on the add sign icon .+
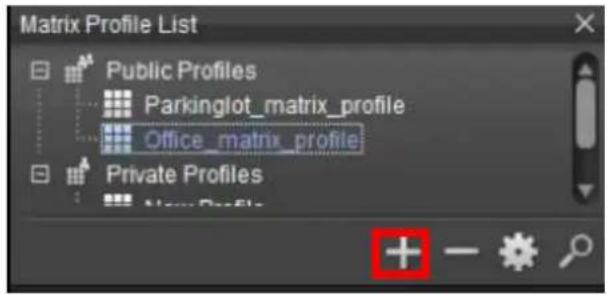
text_image
Matrix Profile List Public Profiles Parkinglot_matrix_profile Office_matrix_profile Private Profiles- Click on Add Prole.
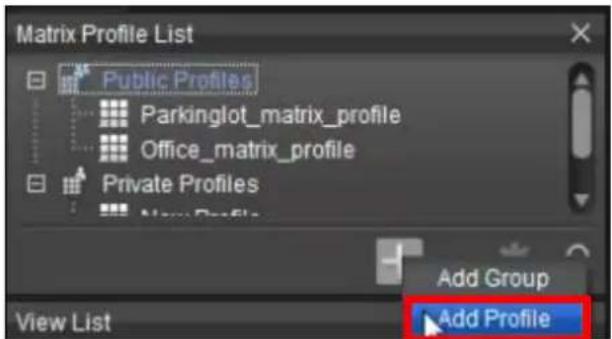
text_image
Matrix Profile List Public Profiles Parkinglot_matrix_profile Office_matrix_profile Private Profiles New Profile Add Group Add Profile View List- A new view named "New Prole" by default is appended to the root.
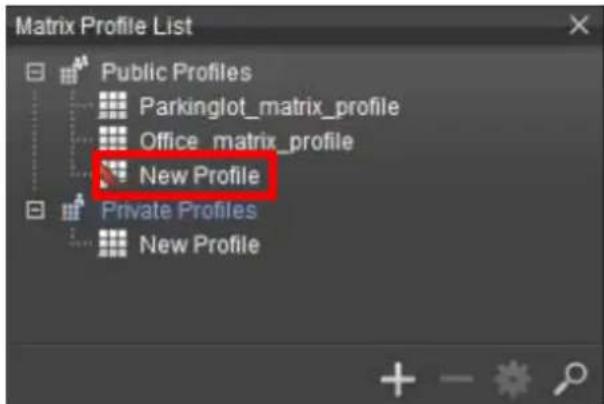
text_image
Matrix Profile List Public Profiles Parkinglot_matrix_profile Office_matrix_profile New Profile Private Profiles New Profile- Drag a view to the matrix prole, view will ll up in the NuMatrix monitor.
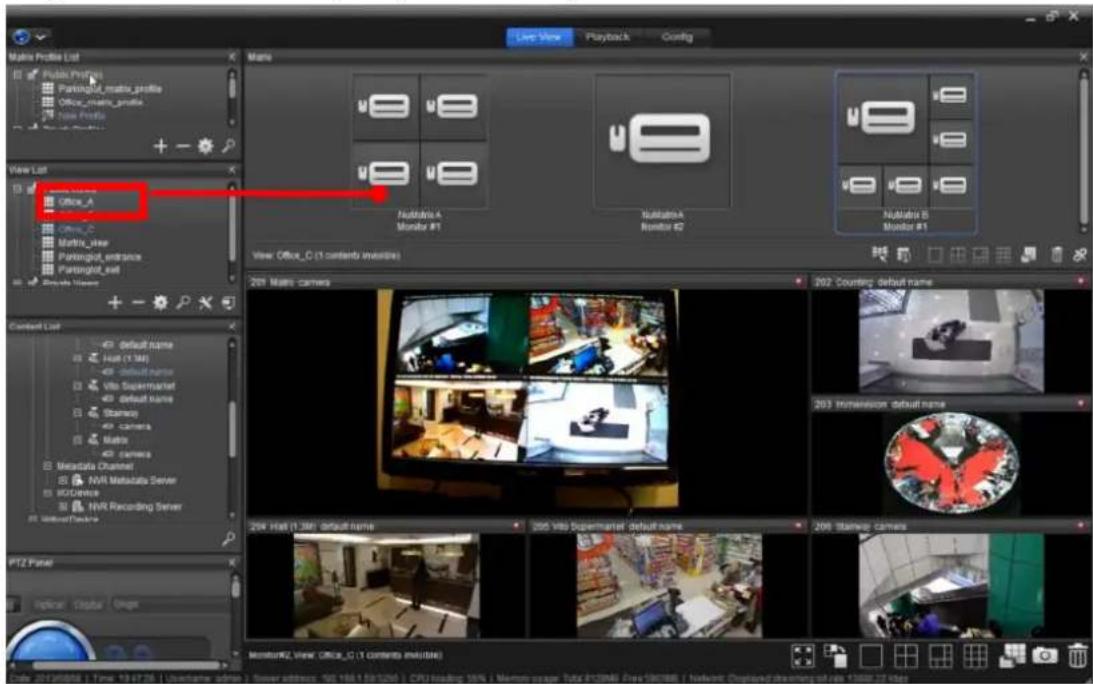
text_image
Matrix Profile List PublicProfile Pantingall_matrix_profile Office_main_profile New Profile View List Office_A Office_C MatWit_user Pantingall_address Pantingall_out Create Users + - Matrix Hutakira A Monitor #1 Hutakira A Monitor #2 Hutakira B Monitor #1 View Office_C (1 contenta investors) 201 Matrix cameras 202 Course: default name 203 Immersion: default name 204 HstB (1.3M) default name 205 Vito Supermaster default name 206 Mastero cameras MOISTURE: VIEW OFFICE_C (1 contenta investors) Date: 2019/08/06 - Time: 19:47:26 | Username admin | Server address: 100 100 1:50:1200 | CPU/HeadBox 100% | Memron space: Tokyo 412046, Free 1001885 | Network Displayed characters of job 13888-22 jobs- NuMatrix monitor will display the view.
When select the view, the featured sengs are:
| Graphic Button | Description |
 | Select ProfileThere are two options: Public profile and private profile once set on view list. |
 | Select View |
 | View 1x1 |
 | View 2x2 |
 | View 1+5 |
 | View 3x3 |
 | Switch Grid Type |
 | Remove selected content |
 | Connect Matrix |
When select the camera, the featured sengs are:
| Graphic Button | Description |
 | Select Profile▸ There are two options: Public profile and private profile once set on view list. |
 | Select View |
 | Start/stop Manual Recording |
 | Enables/disable audio |
 | Connect/disconnect |
 | Content Setting▸ There are two options: stream profile or fixed profile.▸ Select auto or original for stream profile. |
 | Single Grid |
 | View 1x1 |
 | View 2x2 |
 | View 1+5 |
 | View 3x3 |
 | Switch Grid Type |
 | Remove selected content |
 | Connect Matrix |
19. Help
To use the Help:
- Open the NuClient setngs as described in Sengs.
The NuClient sengs open.
- Click the Help icon

from the Cong Catalog.
The Help then opens onscreen and shows the useful tools.
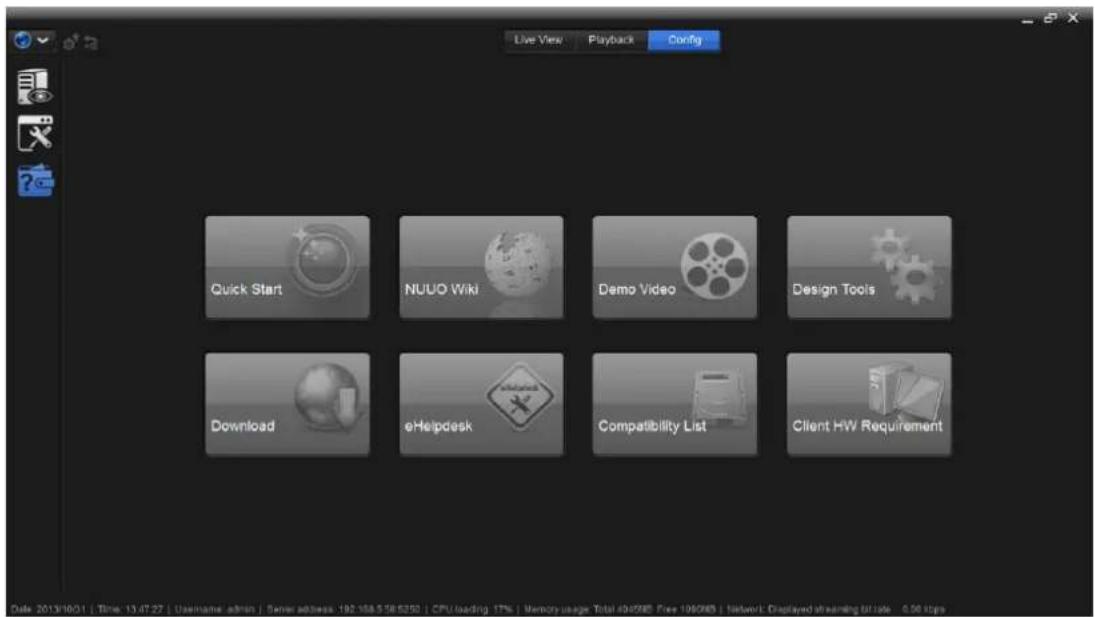
text_image
Live View Playback Config Quick Start NUUO Wiki Demo Video Design Tools Download eHelpdesk Compatibility List Client HW Requirement Date: 2013/10/21 | Time: 13:47:27 | Username, admin | Server address: 192.158.556.6230 | CPU loading: 17% | Memory usage: Total 49.4287 | Free 100%NS | Network | Displayed streaming bit rate: 0.06 kbps| Setting | Description |
| Quick Start | The quick start document helps to start the system. |
| NUUO Wiki | The useful Q&A helps to install the system. |
| Demo Video | The demo video helps to install the system. |
| Design Tools | The design tools help to design the system. |
| Download | The download helps to download latest firmwave for the system. |
| eHelpdesk | The eHelpdesk helps to reply any issue to install or process the system. |
| Compatibility List | The compatibility list helps to provide latest compatibility list with other device(s). |
Client Hardware Requirement
The Client Hardware Requirement helps to design the NuClient and NuMatrix system requirement.

The Help informaon will be available when connect to Internet.