
SL926DLTM850 - Range hood SIRIUS - Free user manual and instructions
Find the device manual for free SL926DLTM850 SIRIUS in PDF.


User questions about SL926DLTM850 SIRIUS
0 question about this device. Answer the ones you know or ask your own.
Ask a new question about this device
Download the instructions for your Range hood in PDF format for free! Find your manual SL926DLTM850 - SIRIUS and take your electronic device back in hand. On this page are published all the documents necessary for the use of your device. SL926DLTM850 by SIRIUS.
USER MANUAL SL926DLTM850 SIRIUS
Congratulations on your purchase! Thank you for choosing a Sirius product.
SL926DLTM series
TWIN MOTOR UNDERMOUNT RANGEHOOD
INSTALLATION INSTRUCTIONS
SL926DLTM850
EAN #9351116002800
SL926DLTM1000
EAN #9351116002817
SL926DLTM1200
EAN #9351116002824
SMART/SWITCH
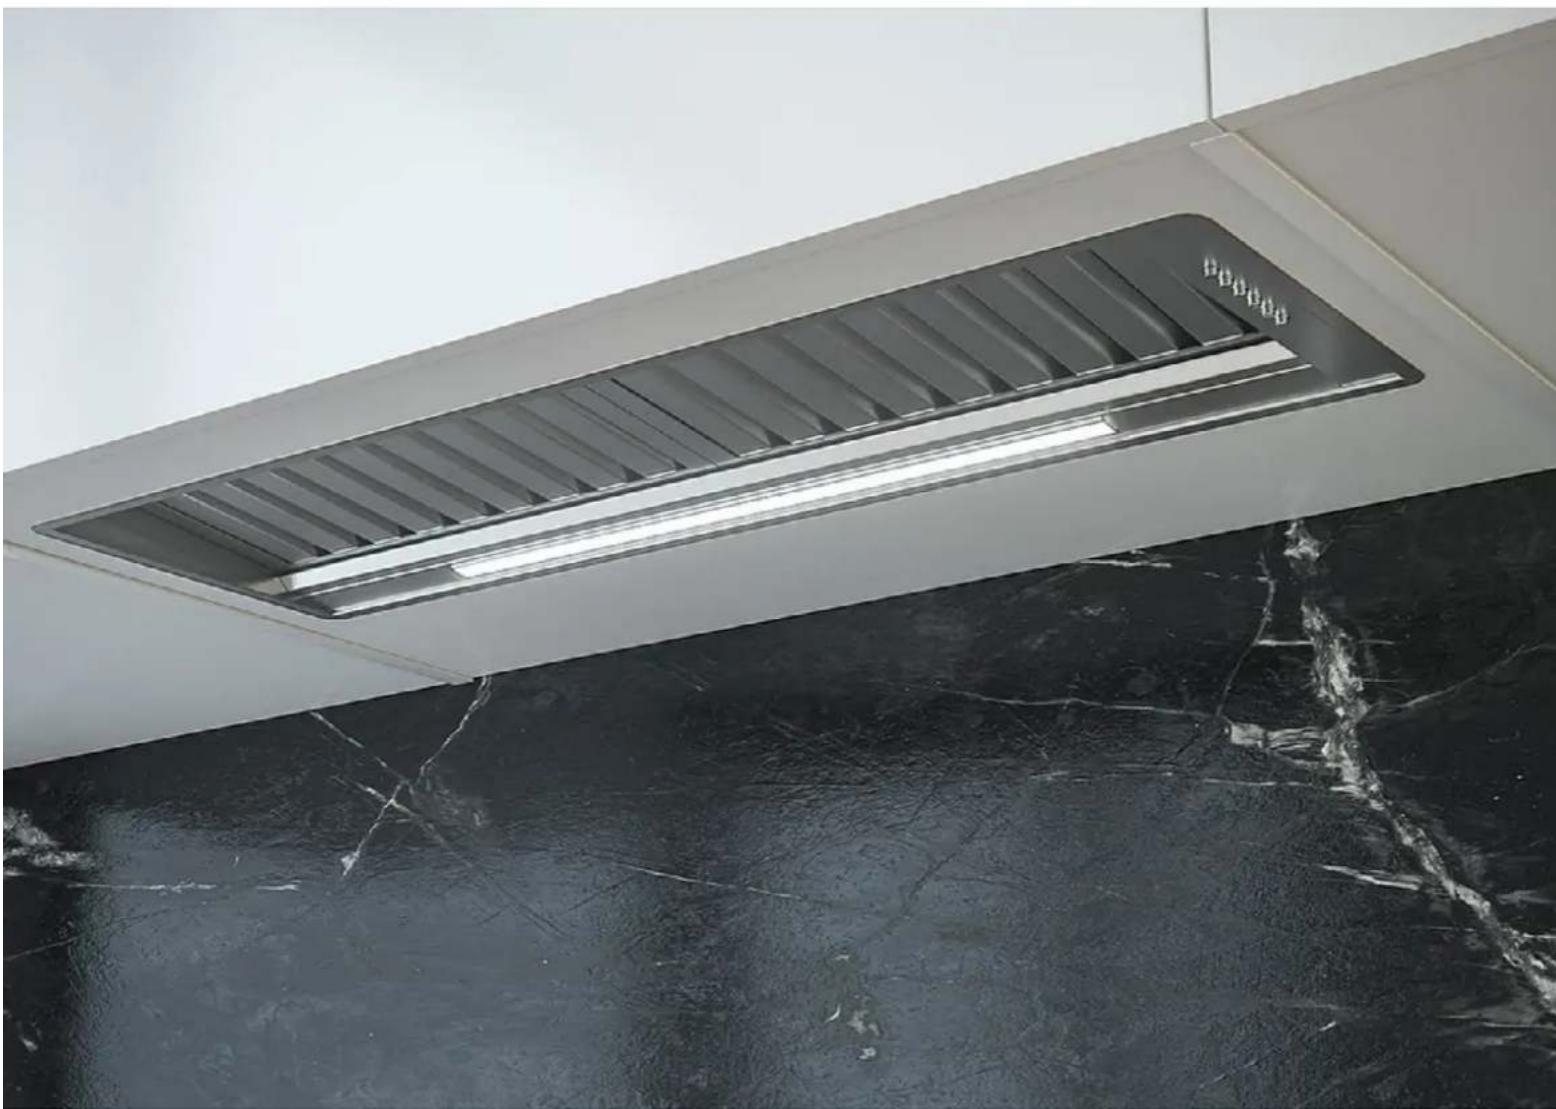
natural_image
Interior ceiling with a black ventilation duct and cracked floor, no visible text or symbols
CAUTION

BEFORE YOU INSTALL – please read
Sirius warranty covers only Sirius product. If you choose to install a non-Sirius branded accessory such as flexible ducting, Sirius will only warrant the hood and motor. If installation is found to be the cause of failure or issue then charges will apply for service and parts.
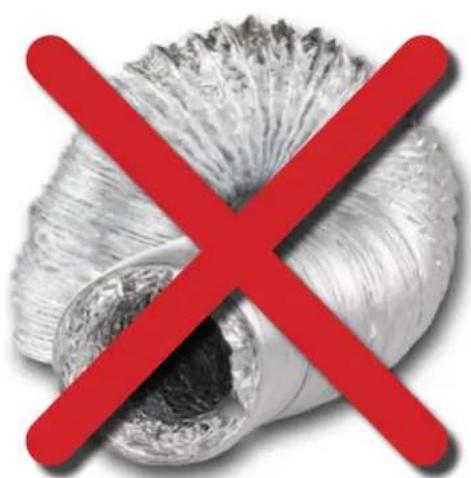
Flexible ducting is not permitted under any circumstances. Flexible ducting has been found to increase noise levels, increase vibration and reduce airflow.
Sirius Semi-rigid or solid ducting can be used in lieu.
There is a range available to suit any application.

WARNING

The appliance must be installed and connected to the power supply only by a qualified technician.
- There shall be adequate ventilation of the room when the range hood is used at the same time as appliances burning gas or other fuels (not applicable to appliances that only discharge the air back into the room)
- The details concerning the method and frequency of cleaning
- There is a fire risk if cleaning is not carried out in accordance with the instructions;
- Do not flambé under the range hood;
- CAUTION: Accessible parts may become hot when used with cooking appliances.
Ducting available at www.siriusbrand.com
6 Year Warranty when Sirius Ducting is used. Full replacement warranty on parts and labour.
See website for terms & conditions.
A reduction in the duct diameter from stated ducting size will void warranty.
If you are in doubt about the ducting, please contact Sirius on 1300 762 219 prior to installation
natural_image
Cross-shaped warning symbol with red X, overlaid on a rolled-up fabric or paper structure (no text or symbols)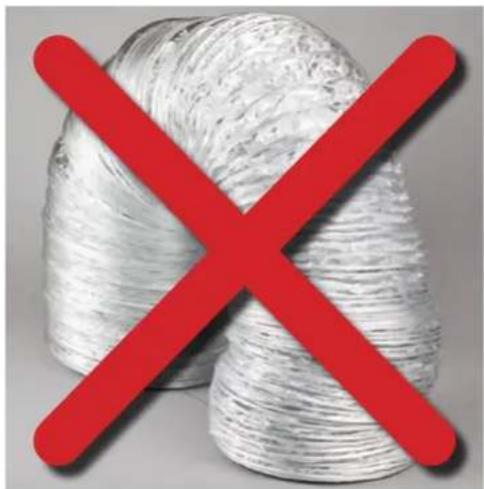
natural_image
Red X symbol crossed over a bundle of white yarn spools, no text or symbols present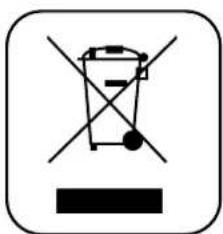
natural_image
Symbol of a trash bin crossed out by two crossed lines, with a solid black rectangle below (no text or numbers present)The symbol on the product or on its packaging indicates that this product may not be treated as house-hold waste. Instead it shall be handed over to the applicable collection point for the recycling of electrical and electronic equipment. By ensuring this product is disposed of correctly, you will help prevent potential negative consequences for the environment and human health, which could otherwise be caused by inappropriate waste handling of this product. For more detailed information about recycling of this product, please contact your local city office, your household waste disposal service or the shop where you purchased the product. This appliance is marked according to the European directive 2002/96/EC on waste electrical and electronic equipment (WEEE).

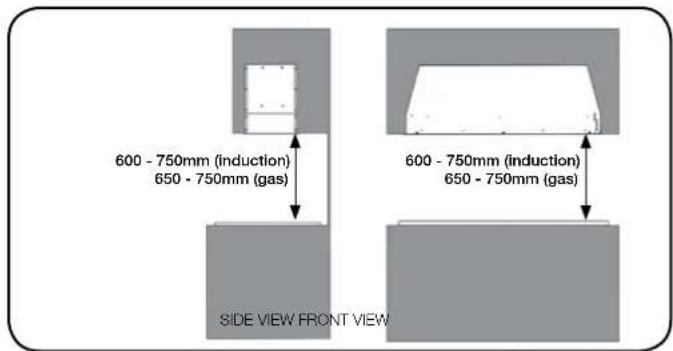
Min. 600mm - Max. 750mm for induction cooktops. Min. 650mm - Max. 750mm gas cooktops.
If the rangehood is positioned above the max height recommended, warranty may be compromised as performance of the rangehood will be affected. Measurement is taken from the top of the trivets to the underside of the hood. (Fig.1)
text_image
600 - 750mm (induction) 650 - 750mm (gas) 600 - 750mm (induction) 650 - 750mm (gas) SIDE VIEW FRONT VIEW(Fig. 1)
- The air being drawn can't be conveyed through or into a duct used to let out fumes from appliances fed by energy other than electric power (eg. centralized heating, radiators, water heaters, etc.).
- Attention: remove any possible PVC film from the stainless steel, including the filters.
- To externally vent, please comply with the pertaining rules given by competent authorities.
- Provide the room with an adequate ventilation when a rangehood and appliances fed by energy other than electric power (gas, oil, or coal stoves, etc.) are used simultaneously. The rangehood, when evacuating the air, could generate a negative pressure in the room which can't exceed the limit of 0.04 mbar, in order to avoid the suck of exhausts deriving from the heat source. Therefore the room should be provided with air intakes to allow a constant flow of fresh air.
If the rating label in the rangehood shows the symbol ☐, the appliance is built in class II° and it does not need any earth connection.
If the rating label in the rangehood does not show the symbol □, the appliance is built in class I° and it needs the earth connection.
When performing the electrical connections on the appliance, please make sure that the current-tap is provided with earth connection and that voltage values correspond to those indicated on the label placed inside the appliance itself.
Before carrying out any cleaning or maintaining operations, the appliance needs to be switched off. If the appliance is not provided with a non-separable flexible cable and plug, or with another device ensuring omnipolar disconnections from the grid, with an opening distance between the contacts of at least 3mm, then such disconnecting devices must be supplied within the fixed installation.
If the fixed appliance is endowed with a supply cord and a plug, the appliance has to be put in a place where the plug can be reached easily.
The use of materials which can burst into flames should be avoided in close proximity of the appliance. When frying, please pay particular attention to fire risk due to oil grease. Being highly flammable, fried oil is especially dangerous. Do not use uncovered electric grills. In order to avoid possible fire risk, all instructions for grease-filter cleaning and for removing eventual grease deposits should be strictly followed.
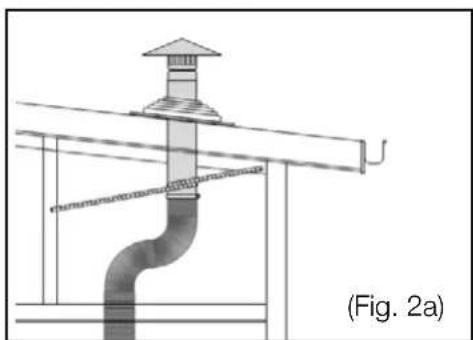
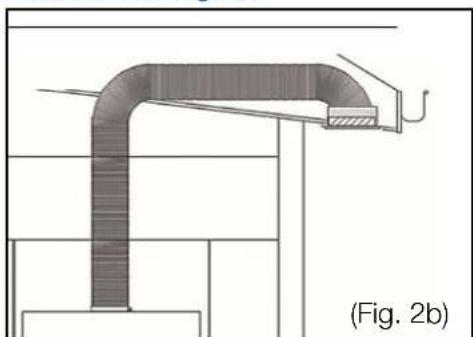
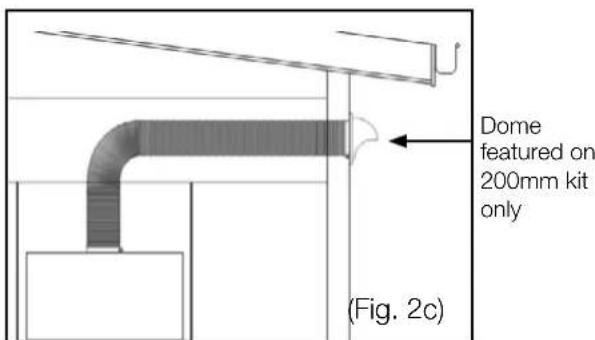
When ducting rangehood, options are as follows:
Roof vent - EASYROOF 200T/M
*Kit includes roof flashing
Download installation guide
natural_image
Technical line drawing of a pipe system with support structures (no text or symbols)Eave vent - EASYEAVE 200
Download installation guide
natural_image
Technical diagram of a pipe system with a curved duct and support structure, labeled (Fig. 2b), showing no text or symbols.Wall vent - EASYWALL 200
Download installation guide
text_image
Dome featured on 200mm kit only (Fig. 2c)SL926DLTM series INSTALLATION - ONBOARD
WARNING: Failure to install the screws or fixing device in accordance with these instructions may result in electrical hazards.

NOTE

Before installing the appliance, make sure that none of the parts are damaged in any way. In case of damaged parts, contact your retailer and do not proceed with installation. Read all of the following instructions with care before installing the appliance.
- Use ducting within the min/max specifications
- Limit the number of ducting bends.
- Do not make any changes in ducting diameter (recommended constant diameter: ∅ 200 mm or equal surface area).
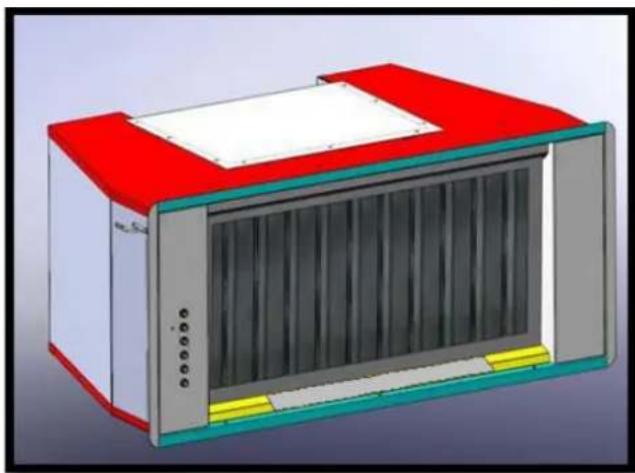
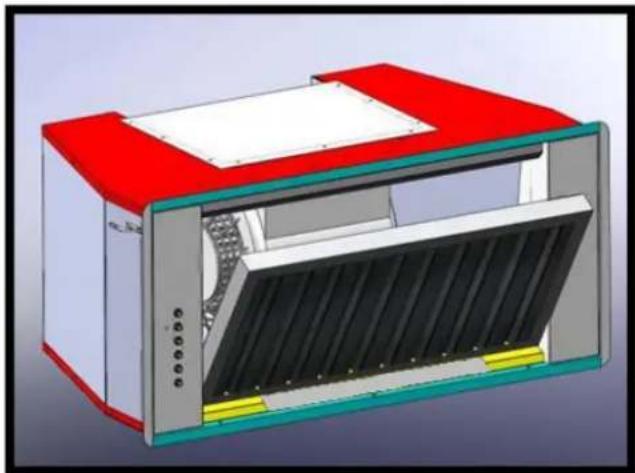
Before installing the appliance - in order not to damage the appliance itself - the metal grease filter should be removed. These filters could be removed by pushing the handles towards the back side of the rangehood and pulling it downwards to unfasten it from its slot. (Fig.3).
natural_image
3D rendering of a red and white industrial machine with vertical slats and control panel (no text or symbols visible)(Fig.3a)
natural_image
3D rendering of a red and white industrial machine with internal cooling fins and ventilation slots (no text or symbols visible)(Fig.3b)
To install the appliance please respect the follow instructions:
- The appliance must be installed by qualified technicians, or where possible use a Sirius recommended installer. See siriusbrand.com. In order to avoid damage to the electronic parts of the appliance, please do not use additional screws.
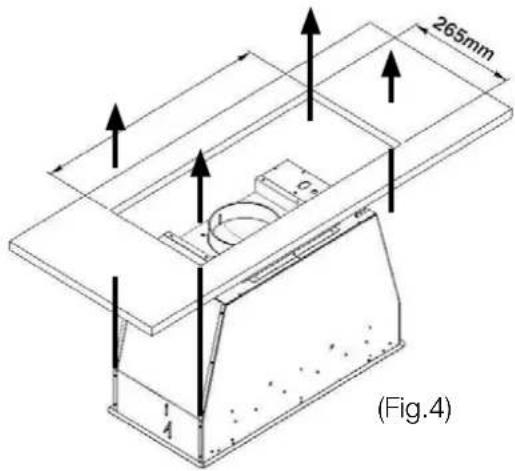
- Essential precautions to respect before installing the appliance are the following: To have made a cutout on the bottom of the cabinet which is suitable to hold the appliance in position (fig. 4):
SL926DLTM 850 - 835 x 265mm
SL926DLTM 1000 - 985 x 265mm
SL926DLTM 1200 - 1100 x 265mm
text_image
265mm (Fig.4)- Prepare the power supply - 240 volts.
- Prepare a hole for the exhaust - 210mm for twin motor versions.
- Do not use screws to fix the ducting to the rangehoods as they will prevent the movement of non-return valves.
- Limit the number of elbows in the ducting, since each elbow reduces the duct efficiency by 1 metre. (i.e. if you use two 90^ elbows, the length of ducting must not exceed 5 metres.)
- Avoid abrupt direction changes.
- Use 200mm constant diameter for the whole length for the twin motor rangehood.
- The use of Sirius ducting will increase the warranty of the unit to 6 years.

WARNING

The rangehood is quite heavy, so two people will be needed for installation.
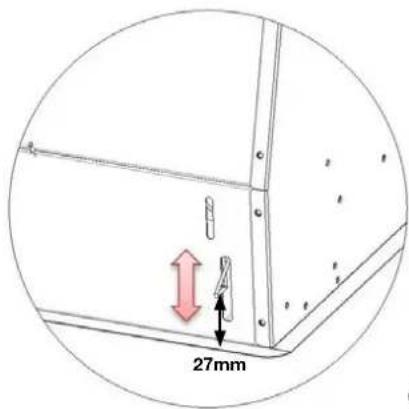
- To install the appliance, adjust the position of the adjustable side-springs using the supplied screws (fig.5), according to the thickness of the board, in which the appliance will be fixed.
text_image
27mm(Fig.5)
-
Insert the rangehood into the cutout in the cabinet until the stop click of the side-springs is heard and the rangehood is supported.
-
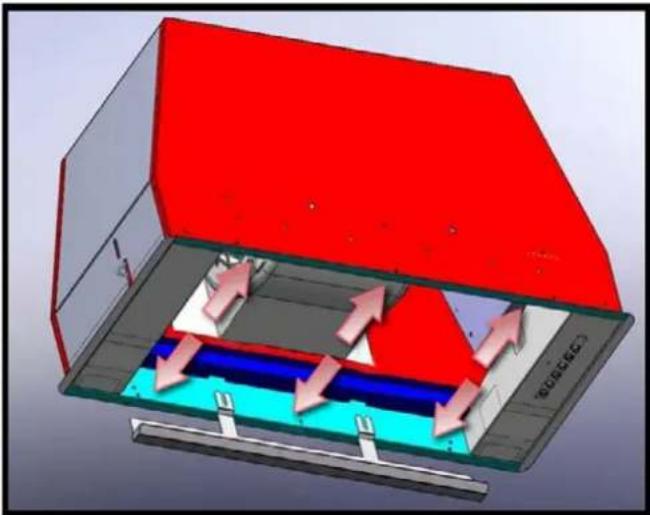
Insert the 25mm screws provided into the holes inside the rangehood (Fig.6) to fix it to cabinetry.
natural_image
3D diagram of a red-roofed container with internal blue and cyan pipes, showing airflow or fluid flow direction (no text or symbols)- Insert the grease channel.
(Fig.6)
- Insert the grease filter (Fig.3b)

CAUTION

Before connecting any ducting to the motor, make sure the non-return valves - which are on the air outlet of the motor - can swing open.
External venting
- Connect the flange to the exhaust hole with the appropriate ducting. Connect the rangehood with the electrical mains through the supply cord.
OPERATION
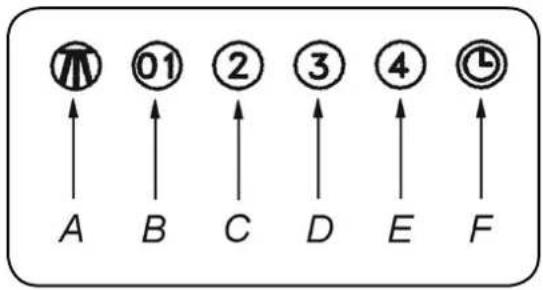
SL926DLTM
A: Light switch on/off
B: Motor switch on speed 1/off - (low/simmer)
C: Motor switch on speed 2 - (general cooking)
D: Motor switch on speed 3 - (high power)
E: Motor switch on speed 4 - (booster)
F: 10 minute shut-off timer
flowchart
graph TD
    A["A"] --> 1["1"]
    B["B"] --> 2["01"]
    C["C"] --> 2["01"]
    D["D"] --> 3["2"]
    E["E"] --> 4["3"]
    F["F"] --> 5["4"]
    1 --> 2
    2 --> 3
    3 --> 4
    4 --> 5
(Fig.11)
MAINTENANCE
- Accurate maintenance guarantees good functioning and long-lasting performance.
- Particular care is due to the grease filter panel. It can be removed by pushing its handle toward the back side of the rangehood and pulling the filter downwards so to unfasten it from its slot (Fig.3). To insert the filter just perform the opposite operation.
- After 30 hours of operation, the push button control panel will flash, signaling the filters are due for cleaning. Press the timer button to reset. The grease filter needs cleaning by regular handwashing or in dishwashers every two months at least, depending on its use.
Filters may require cleaning sooner if frequent heavy frying is done.
- To clean the appliance itself, water and detergent are recommended, while abrasive products should be avoided. For steel appliances specialized detergents are recommended (please follow the instructions indicated on the product itself to obtain the desired results).

NOTE

To remove the rangehood from the cabinet, remove the fixing screws (fig. 6) using a screwdriver, and remove the grease filters (fig.3).
- Push down on the small handle of the springs, which are inside the rangehood, with the necessary strength to unhook the hood from the cabinet.

If the supply cord is damaged, it must be replaced by the manufacturer or its service agent or a similarly qualified person in order to avoid a hazard.
REPLACING THE LED LIGHT ON THE SL 906-L
-
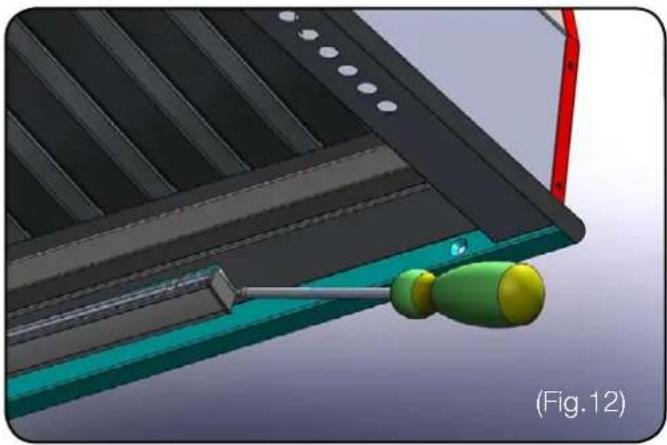
Before replacing the LED light, switch off the rangehood, then - by using appropriate tools - remove the LED light from its slot (fig.12).
-
Take out the LED light from its connector and replace.
- To find the correct LED light, please contact Sirius directly on our toll-free number: 1300 762 216.
natural_image
3D rendered mechanical component with a green and yellow tool inserted, mounted on a teal base (no visible text or symbols)- NB: light is easier to remove from centre of LED globe. Use a small, flathead screwdriver (pictured), pallette knife or blunt butter knife.
REMOTE CONTROL
SL926 DL
Working:
6 channel control for rangehood remote.
- When the rangehood is first turned on, hold the lighting button for 5 seconds.
TECHNICAL DATA
- Alkaline battery powered: 12 V mod. 23 A
- Operating frequency: 433.92 Mhz
• Combinations: 32.768
• Max. consumption: 25 mA - Operating temperature: -20 ÷ +55^
• Dimensions: 120 x 45 x 15 mm.
The transmitter is equipped with 5 buttons as specified below:
: Light ON/OFF.
: Motor ON (speed level 1) / OFF.
: Reduce speed.
: Increase speed.
: 10-minute shut-off timer.
DEFAULT OPERATING CONDITION
The manufacturer supplies the remote control unit ready to be used with codes preset in the factory.

natural_image
Black remote control device with buttons and indicator lights (no visible text or symbols)OPERATION MODE
Standard configuration:
Standard configuration requires all rangehood remote control systems to be provided with the same transmission code. In the event two rangehoods are installed in the same room or nearby, each system may affect the operation of the another. Therefore, the code of one remote control system must be changed.
Generating a new transmission code:
The system is provided with preset codes. Should new codes be required, proceed as follows: Press simultaneously buttons:
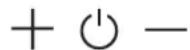
for two seconds. When LEDs are on, press buttons:
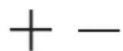
(within 5 seconds). The LEDs flash 3 times to indicate the procedure is completed.
WARNING! This operation deletes permanently the preset codes.
Learning the new transmission code.
Once the transmission code is changed in the remote control unit, the electronic central unit of the rangehood must be made to set the new code in the following way:
Press the red main power-off button of the hood and then restore power to the electronic control unit. Within the next 15 seconds, press the Light Button ⚙️ to synchronise the central unit with the code.
Reset of the Factory configuration:
To restore the Factory configuration, follow the procedure described below: press simultaneously buttons:

for 2 seconds. When LEDs light on, press buttons:

(within 5 seconds). LEDs flash 6 times to indicate the procedure is completed.
WARNING! This operation deletes permanently the preset codes.
Emergency button:
In the event that the remote control does not work, use the emergency button to switch the appliance off. After any necessary repairs have been performed, reset the emergency button.
WARNING
The battery should be replaced every year to guarantee the optimal range of the transmitter. To replace the battery, take the plastic lid off, remove the battery and replace it with a new one, making sure it is placed the correct way.
Used batteries should be discarded in special collection bins.
NOTE: The removal of the battery may cause the remote frequency to lose transmission with the rangehood. Follow the procedure on page 8 of the manual to generate the new code if this occurs.
The below product:
RC001 Remote Controls complies with the specifications set out in the Directive RED 2014/53/EU.
WARNING
Any adjustments or modifications which have not been expressly approved by the holder of the legal conformity certificate may invalidate the user's rights relating to the operation of the device.
The products are fitted with an electronic device which swicthes off the unit after 4 hours from the remote or manual buttons being used.
DIMMABLE LIGHT FUNCTION
This function provides for lights dimmability, ranging from 20% to 100%, by holding down light key on the remote control or rangehood buttons.
Functions are the following:
- rangehood light off- shortly press the key - light on a 100%
- light on at 100% - shortly press the Ⓞ key - light off
- light on at 100% - hold down the light button to reduce brightness.
- releasing the key during reduction, or increase - light keeps the luminous intensity reached.
- Light on - dimmed - hold down the light button to increase brightness.
COLOUR TEMPERATURE SETTING (KELVIN)
Make sure that the lights and the fan are off. Holding down the TIMER key ⏻ will turn on the light at the previously set colour temperature.
Press the TIMER key 📊 again. As long as the key is kept pressed, the colour temperature is changed from warm to cool, just leave the light key to select the desired colour. Exit the colour temperature selection function by pressing the ON/OFF key.
'BI-POWER' FUNCTION
The new Smart-Switch BI-POWER feature is designed to offer the user a rangehood with the option for significant energy saving and noise reduction, specifically for cooking that does not require high-powered extraction performances. Activating the BI-POWER feature increases the airflow power of the hood for when a more powerful extraction is required.
To activate the Bi-Power function, select a speed on the rangehood by pressing one of the buttons, and then hold that same button for 3 seconds. You should be able to hear the rangehood motor power change. To disactivate the function, press and hold the current speed setting for 3 seconds.
THE SIRIUS APP
DOWNLOAD SIRIUS APP FOR ANDROID
- Open the Google Play Store App

- Search or browse for SIRIUS App.
- Select it.
- Tap to Install.
- Follow the onscreen instructions to complete the transaction and get the content.
You can change what language is displayed when you visit Google Play on your computer by changing your Google Accounts settings.
Note: Apps are designed for use with supported Android and Chromebook devices and can't be used on Windows or Mac computers.
DOWNLOAD SIRIUS APP FOR iOS
Notes:
• After requesting an app, you may be asked to verify your identity by entering your passcode or by using Touch ID or Face ID.
- The steps below don't apply to the iPhone 5c, iPhone 5, iPhone 4s or the iPhone 4.
-
Open the App Store
-
To install apps, you must sign in with your Apple ID or create one.
- To browse the App Store, tap Apps (at the bot tom).
- Tap Search (at the bottom) then enter SIRIUS App.
- Tap the app.
- Tap GET then tap INSTALL.
- If you have a compatible iPhone with Face ID enabled, double-tap the Side button then look at the screen to authenticate.
- If prompted, sign in to the iTunes Store to complete the install
CREATE YOUR ACCOUNT ON SIRIUS APP.
- From Home App, Tap on Join now.
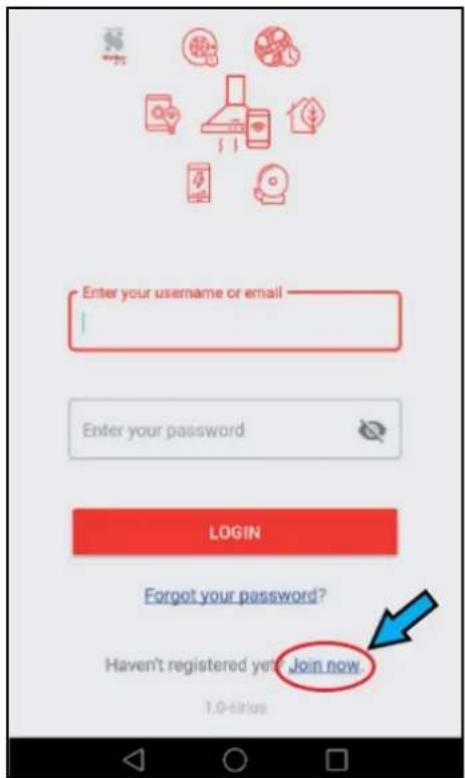
text_image
Enter your username or email Enter your password LOGIN Forgot your password? Haven't registered yet Join now 1.0-status- Insert your account data
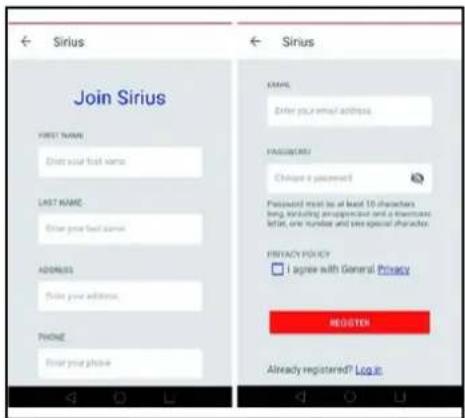
text_image
Sirius Join Sirius FIRST NAME Enter your first name LAST NAME Enter your last name ADDRESS Enter your address PHONE Enter your phone Sirius CREATE Enter your email address PASSMENTS Change a password Password must be at least 10 characters beg, including an expensive and a decrease left, one number and two special characters. FIDACY POLICY I agree with General Privacy REGISTER Already registered? Log-inTap Agree with General Privacy and tap on Register.
- If all instructions are done correctly a Popup message "Registration was successful. Check your email for the activation link" appears.
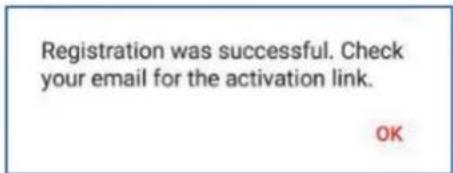
text_image
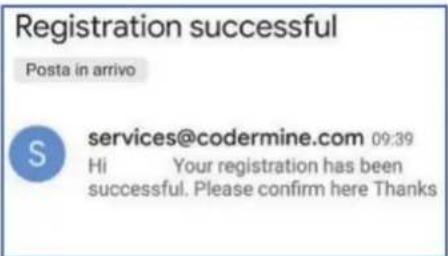
Registration was successful. Check your email for the activation link. OK- Go to your e-mail address and Confirm your account.
text_image
Registration successful Posta in arrivo services@codermine.com 09:39 Hi Your registration has been successful. Please confirm here ThanksNote: We'll send the email from
service@codermine.com, so you can quickly search for it. If it isn't in your inbox, check your folders. If a spam filter or email rule moved the email, it might be in the Spam, Junk, Trash, Deleted Items, or Archive folder. If you didn't find yet please create another account.
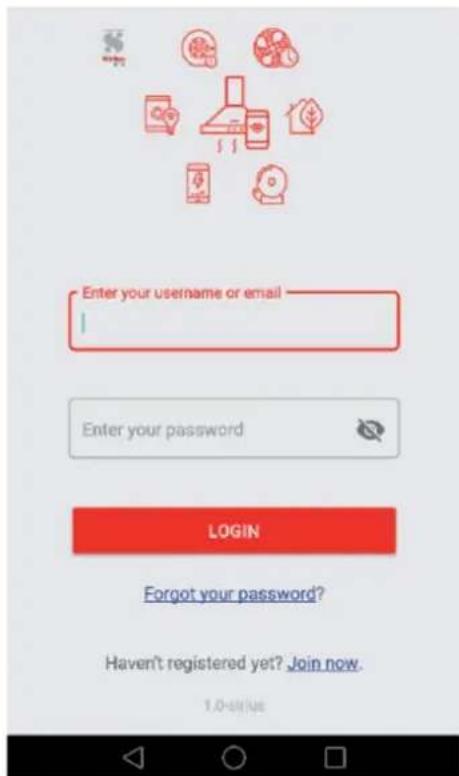
- From Login page Insert the e-mail and password of your account and tap LOGIN.
text_image
Enter your username or email Enter your password LOGIN Forgot your password? Haven't registered yet? Join now. 1.0-stigeNote: If you forgot your password, tap on Forgot your password? insert your e-mail address and tap Send me a Link.
PAIRING YOUR PRODUCT
Fast way using the WPS procedure, if your router has no WPS button, please follow the next instructions.
PAIRING WPS MODE
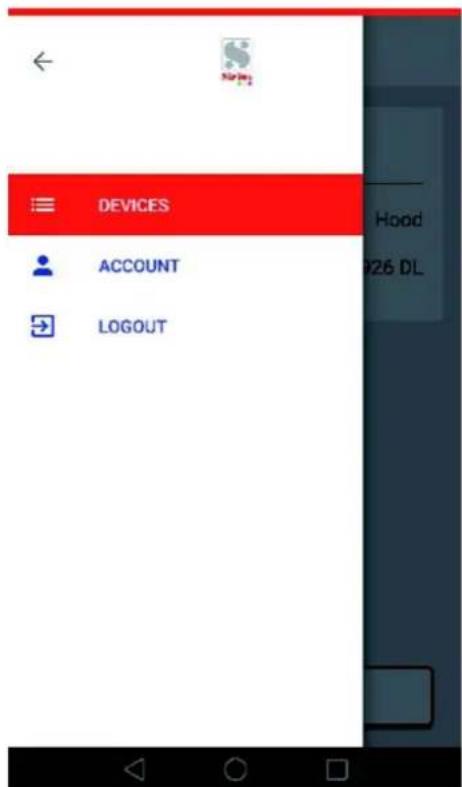
- After Login Tap the ≡ App Menu (top left) and select DEVICES.
text_image
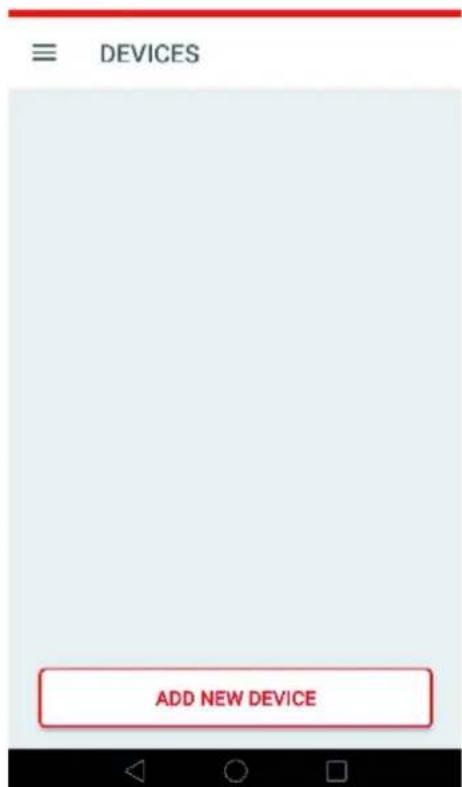
DEVICES ACCOUNT LOGOUT- Tap ADD NEW DEVICE.
text_image
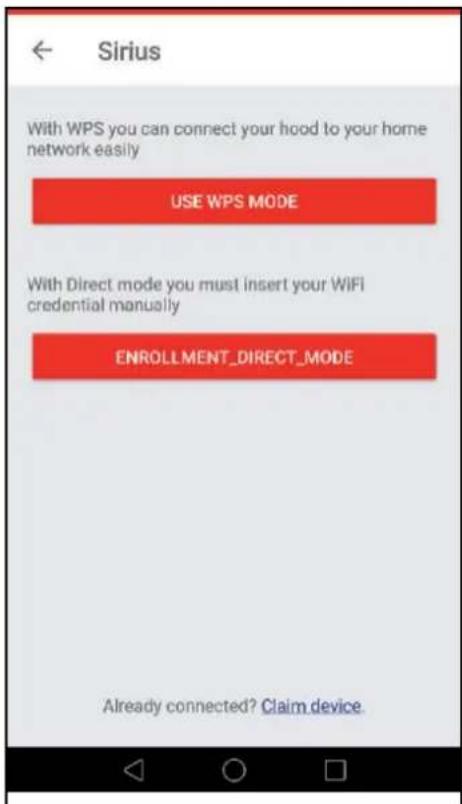
≡ DEVICES ADD NEW DEVICE3. Tap USE WPS MODE.
text_image
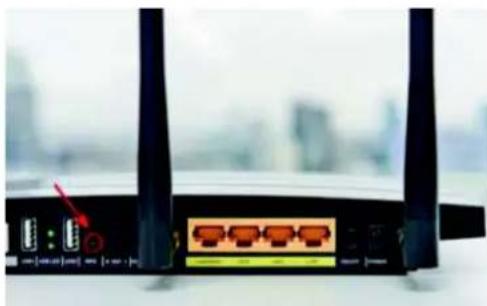
Sirius With WPS you can connect your hood to your home network easily USE WPS MODE With Direct mode you must insert your WIFI credential manually ENROLLMENT_DIRECT_MODE Already connected? Claim device.4. On your Router WI-FI press WPS button.
natural_image
Front view of a wireless router with two antennas and ports, showing network interface (no visible text or symbols)5. On your range hood:
- Switch off completely (light and motor)
- Hold 01 button for 3 sec for settings menu (01 LEDs will flash)
- Press② button to enable WPS pairing.
- Hold ① button for 3 sec to save.
Note:
If buttons are not pressed within 10 secs the system automatically exits from settings menu and all unsaved operations will be discarded.
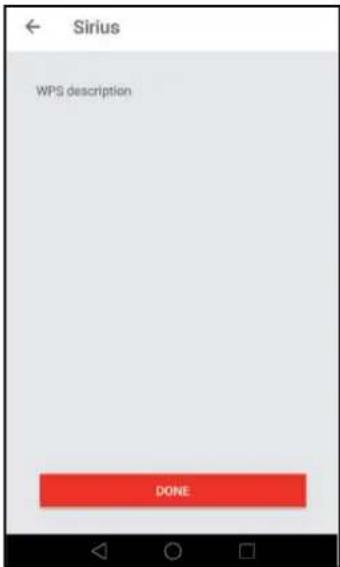
6. Press DONE on WPS description.
text_image
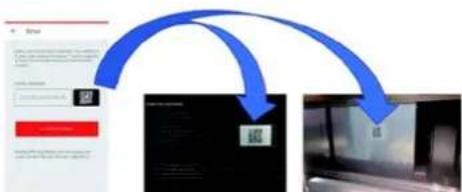
Sirius WPS description DONE7. Use the QR code reader to connect the product with the App, using the label on the brochure or using the label located inside the product, found on the motor when you remove the grease filters.
flowchart
graph TD
    A["User Interface"] --> B["QR Code"]
    B --> C["Output Image"]
    style A fill:#f9f,stroke:#333
    style B fill:#ccf,stroke:#333
    style C fill:#cfc,stroke:#333
8. Press ACTIVATE DEVICE and you have a pop-up message.
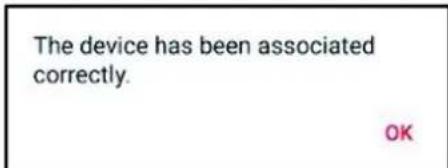
text_image
The device has been associated correctly. OK8. Tap the device icon. Enjoy your device.
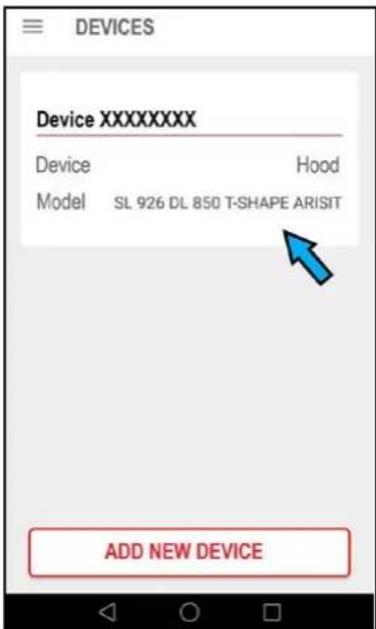
text_image
DEVICES Device XXXXXXXX Device Hood Model SL 926 DL 850 T-SHAPE ARISIT ADD NEW DEVICEPAIRING MANUAL MODE
- After Login Tap the ≡ App Menu (top left) and select DEVICES
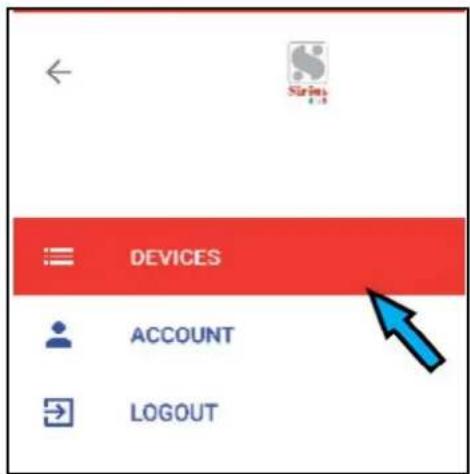
text_image
DEVICES ACCOUNT LOGOUT- Tap ADD NEW DEVICE
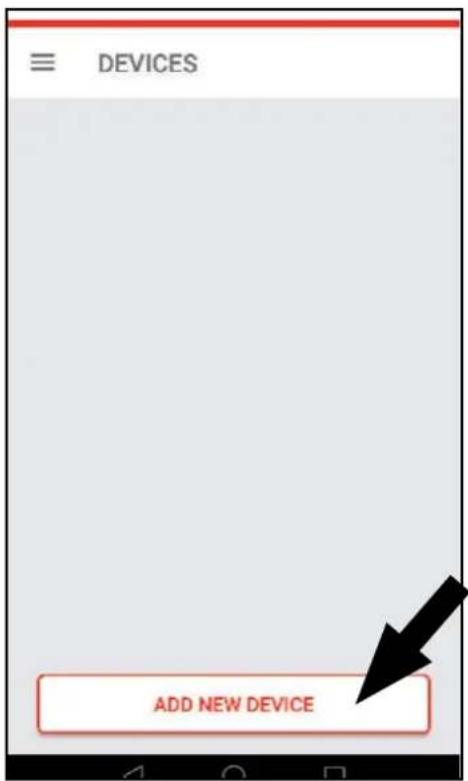
text_image
≡ DEVICES ADD NEW DEVICE- Tap ENROLLMENT_DIRECT_MODE
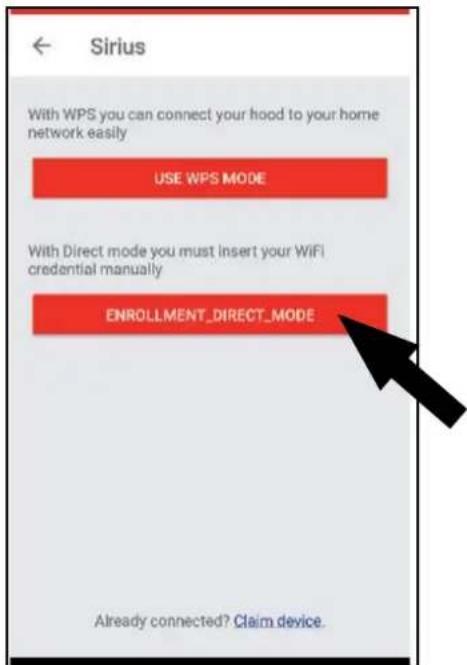
text_image
← Sirius With WPS you can connect your hood to your home network easily USE WPS MODE With Direct mode you must insert your WiFi credential manually ENROLLMENT_DIRECT_MODE Already connected? Claim device.-
ON YOUR RANGE HOOD:
-
Switch off completely (light and motor)
- Hold 01 button for 3 secs for settings menu
(π01 LEDs will flash) - press ③ button to enable manual pairing
- Hold 01 button for 3 sec button to save.
Note:
If buttons are not pressed within 10 secs the system automatically exits from settings menu and all operations unsaved will be discarded.
- Tap OPEN SETTINGS
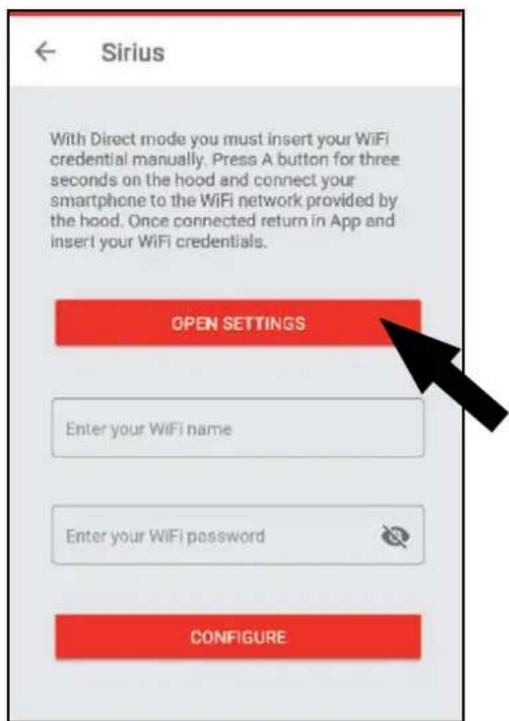
text_image
← Sirius With Direct mode you must insert your WiFi credential manually. Press A button for three seconds on the hood and connect your smartphone to the WiFi network provided by the hood. Once connected return in App and insert your WiFi credentials. OPEN SETTINGS Enter your WiFi name Enter your WiFi password CONFIGURE- Connect to "HOOD network" inserting as password "password".
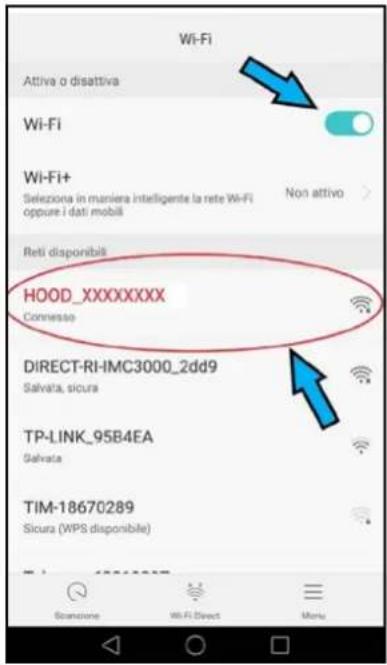
text_image
Sirius With Direct mode you must insert your WiFi credential manually. Press A button for three seconds on the hood and connect your smartphone to the WiFi network provided by the hood. Once connected return in App and insert your WiFi credentials. OPEN SETTINGS Enter your WiFi name Enter your WiFi password CONFIGURE- ENTER WI-FI NAME AND WI-FI PASSWORD
-
TAP CONFIGURE
-
In case of following error
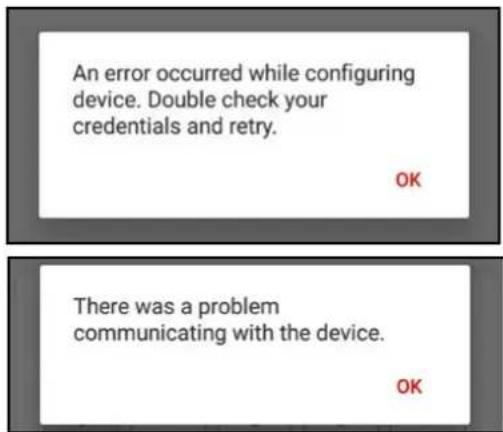
text_image
An error occurred while configuring device. Double check your credentials and retry. OK There was a problem communicating with the device. OKGo back to the home page.
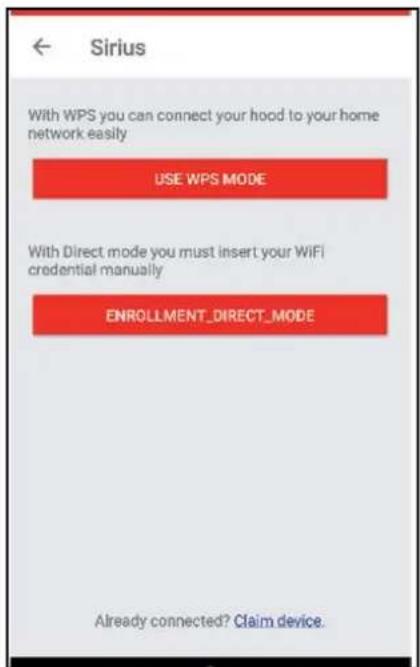
text_image
← Sirius With WPS you can connect your hood to your home network easily USE WPS MODE With Direct mode you must insert your WIFI credential manually ENROLLMENT_DIRECT_MODE Already connected? Claim device.TAP "Claim Devices".
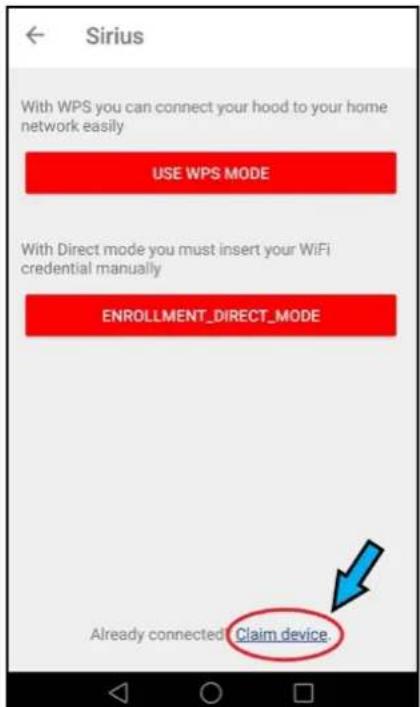
text_image
Sirius With WPS you can connect your hood to your home network easily USE WPS MODE With Direct mode you must insert your WiFi credential manually ENROLLMENT_DIRECT_MODE Already connected Claim device- Use the QR code reader to connect the product with the App, using the label on brochure or using the label located inside the product, visible by removing the grease filters.
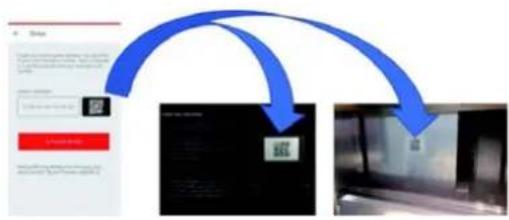
flowchart
graph TD
    A["Input Data"] --> B["Processing Module"]
    B --> C["Output Module"]
-
Connect your mobile to your home Wi-Fi Router network.
-
Press ACTIVATE DEVICE and you have a pop-up message.
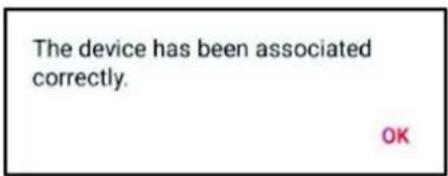
text_image
The device has been associated correctly. OK- Tap the device icon. Enjoy your device.
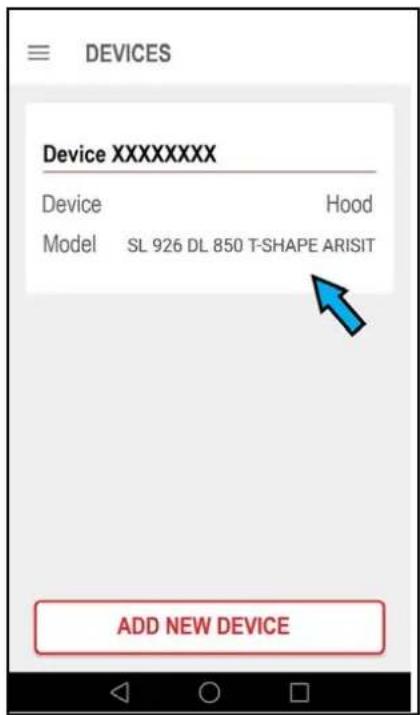
text_image
DEVICES Device XXXXXXXX Device Hood Model SL 926 DL 850 T-SHAPE ARISIT ADD NEW DEVICEREMOVE ONE DEVICE FROM APP
- After Login Tap the ≡ App Menu (top left) and select DEVICES
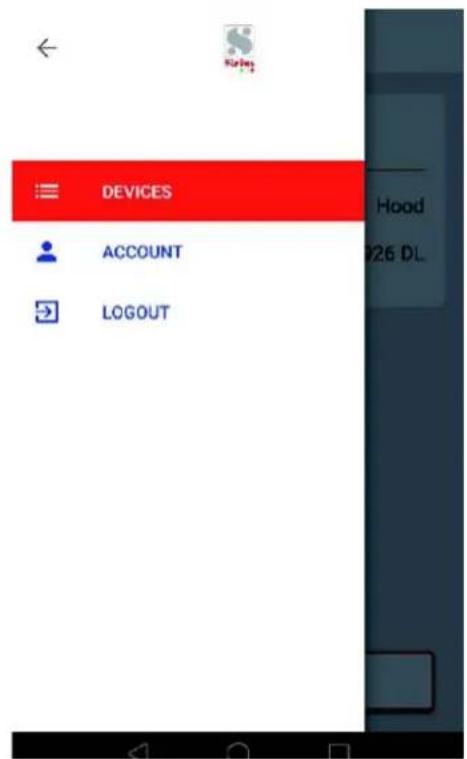
text_image
DEVICES ACCOUNT LOGOUT- On DEVICES slice your device on left and tap Remove.
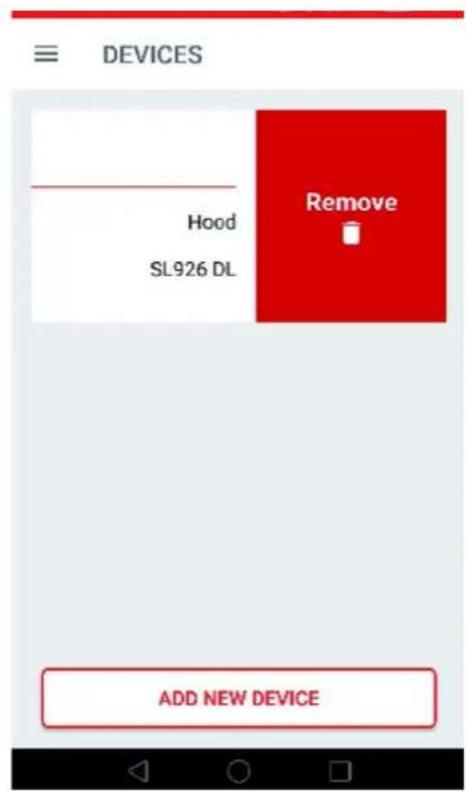
text_image
≡ DEVICES Hood SL926 DL Remove ADD NEW DEVICEFUNCTIONS
Timer
Tap on Ⓞ⋯ and set the minutes for shutting down the device.
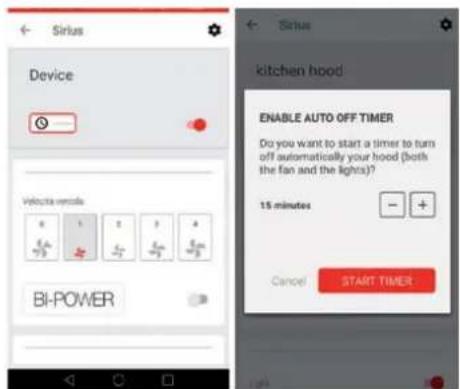
text_image
Sirius Device kitchen hood ENABLE AUTO OFF TIMER Do you want to start a timer to turn off automatically your hood (both the fan and the lights)? 15 minutes Cancel START TIMERFan speed
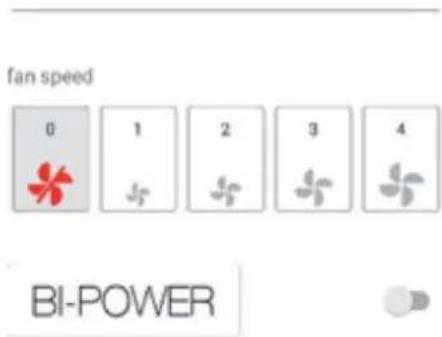
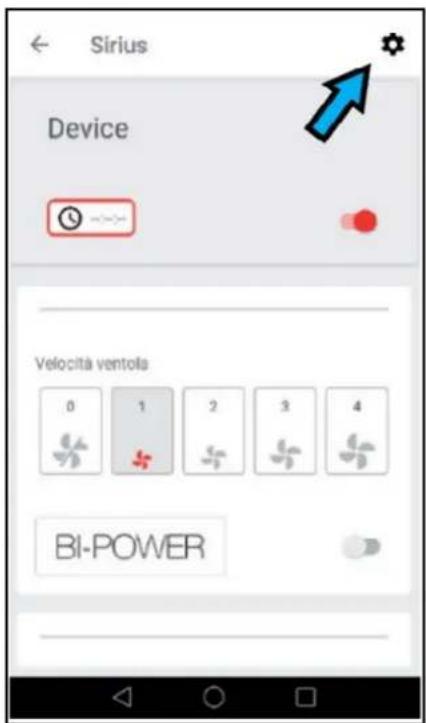
Tap on the speed you want, select '0' for switching OFF.
text_image
fan speed 0 1 2 3 4 BI-POWERBI-POWER
The BI-POWER function allows reducing the performance of the fan, if the maximum efficiency of the product is not required.
LIGHT
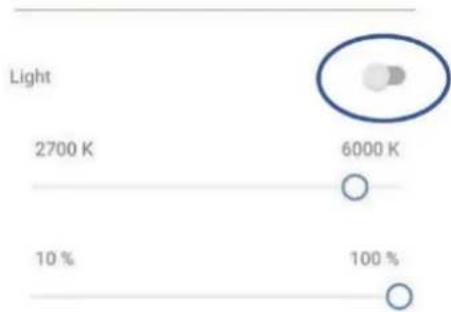
Slide the toggle switch for switching ON/OFF.
other
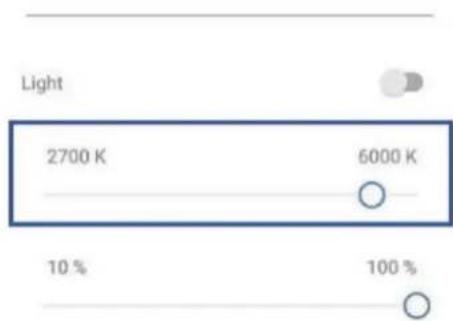
| Light | Value | | :--- | :--- | | 2700 K | 6000 K | | 10 % | 100 % |Slide the scrollbar for setting the colour temperature (°K)
text_image
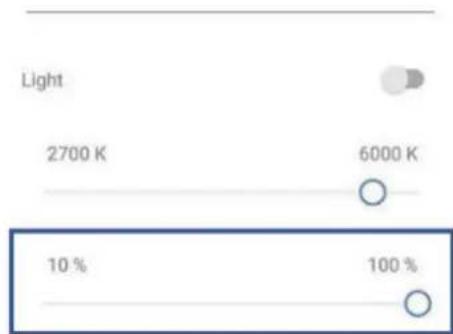
Light 2700 K 6000 K 10 % 100 %Slide the scrollbar for lights dimmability, ranging from 10% to 100%.
text_image
Light 2700 K 6000 K 10 % 100 %FILTERS CLEANING

Hours of use left before you need to provide maintenance.
28h
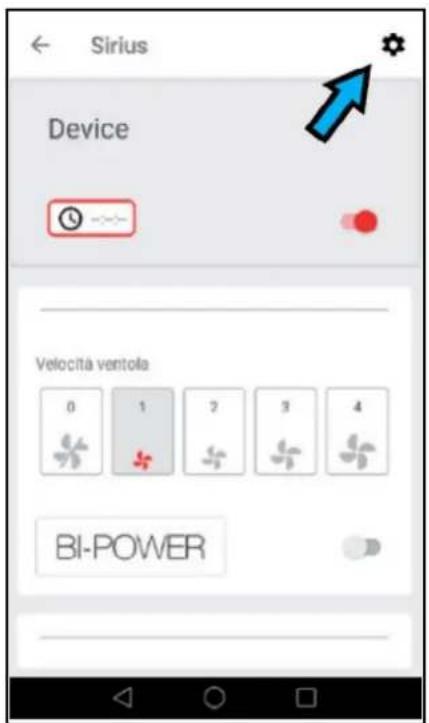
RENAME DEVICE
Tap on ✿ and rename device.
text_image
DEVICES SETTINGS DEVICE Device XXXXXXXXXX Remove Share device DEVICE SETTINGS DEVICE Device XXXXXXXXXX. Rename device Device name Device XXXXXXXXXX CANCEL OKSHARE DEVICE
Tap on ⚙️ and share device only to subscribed account.
text_image
DEVICES SETTINGS DEVICE Device XXXXXXXXXX Remove Share device DEVICE Device XXXXXXXXXX Share device Select an email to share the device with CANCEL OK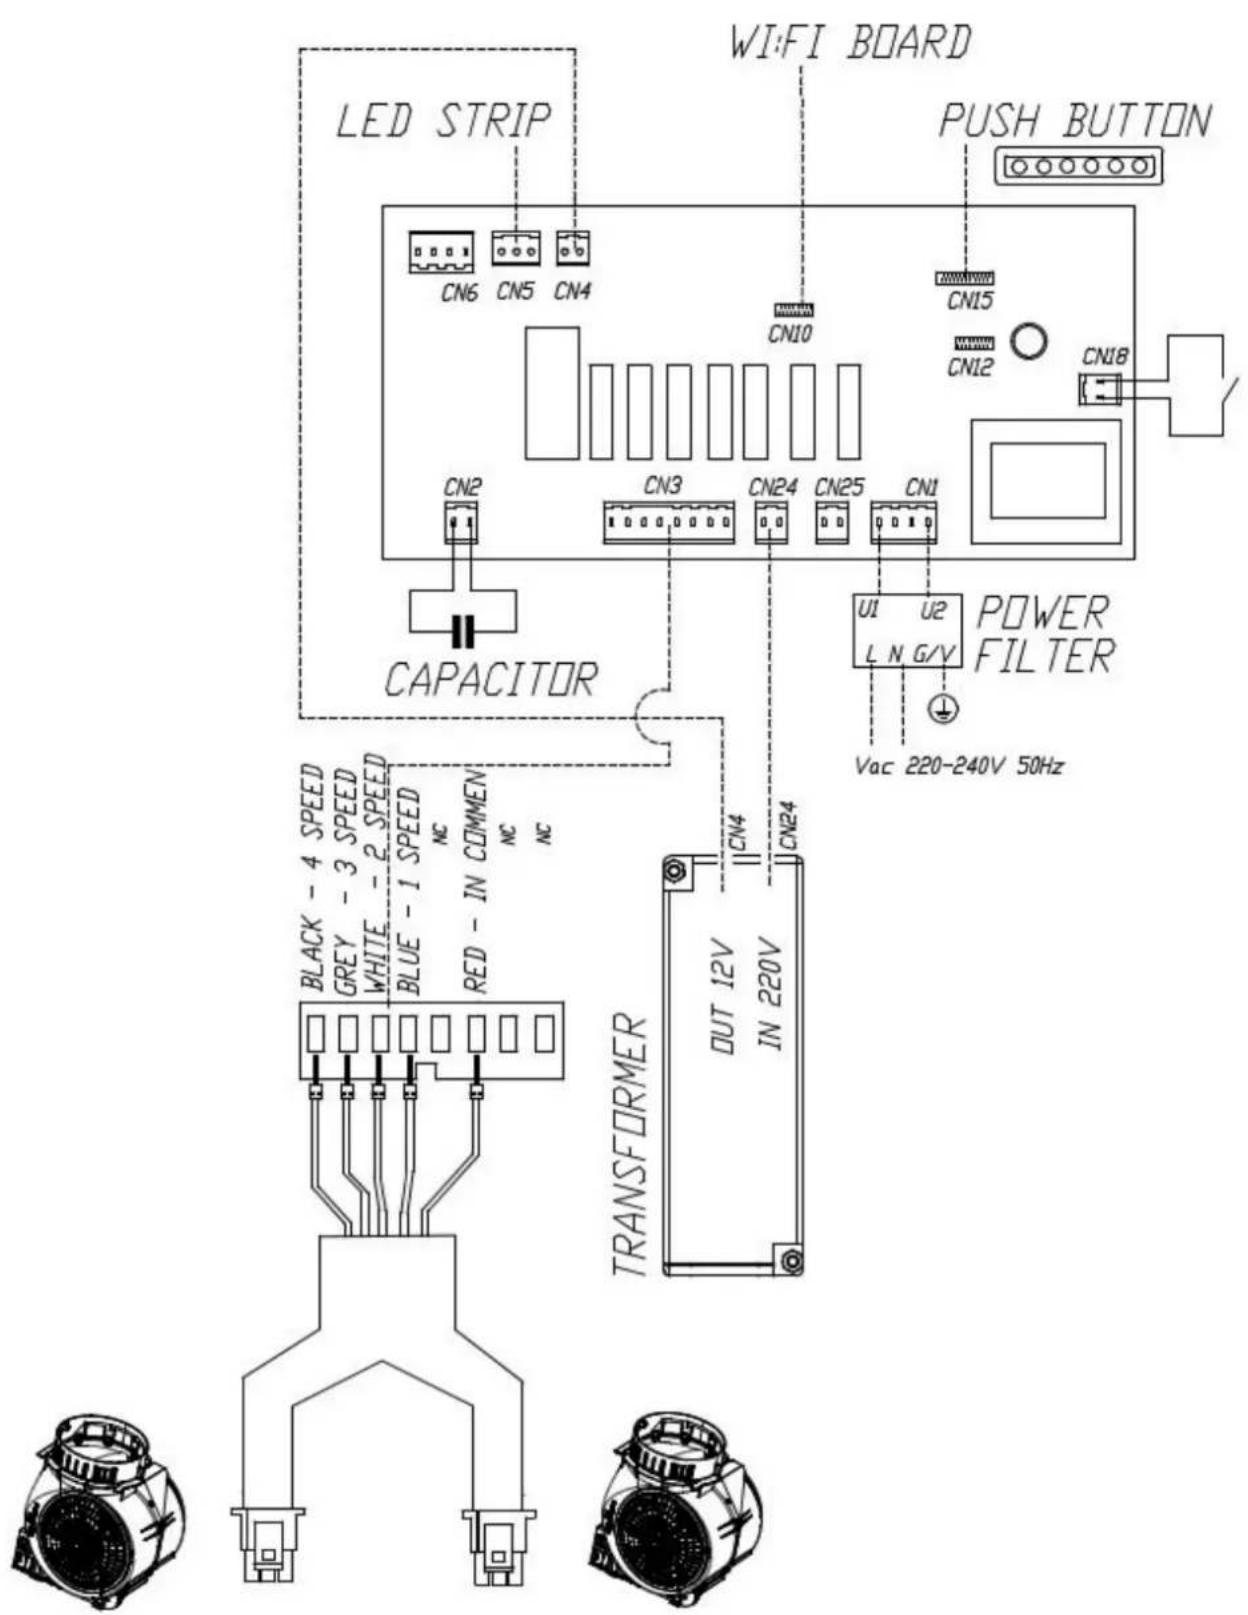
text_image
LED STRIP CN6 CN5 CN4 CN10 CN15 CN12 CN18 PWM BOARD PUSH BUTTON CN2 CN3 CN24 CN25 CN1 CAPACITOR U1 U2 L N G/V POWER FILTER Vac 220-240V 50Hz TRANSFORMER OUT 12V IN 220V BLACK - 4 SPEED GREY - 3 SPEED WHITE - 2 SPEED BLUE - 1 SPEED NC RED - IN COMMEN NC NC CN4NOTES
NOTES
ARISIT PTY LIMITED (Australia) ABN 23 091 515 294
40-50 Mark Anthony Drive
Dandenong South VIC 3175
P: Sales & Service: 1300 762 219
F: Sales & Service: (03) 9768 0838
E: arisit@arisit.com
ARISIT PTY LIMITED (New Zealand)
1A Howe Street Newton, Auckland 1145
PO Box 68-140 Newton, Auckland 1145
P: (09) 306 1020 - Fax: (09) 302 0077
E: sales2@aristonappliances.co.nz
www.arisit.com
www.arisitwarranties.com.au
www.siriusbrand.com

Year Warranty
when Sirius ducting is used.
Full replacement warranty on parts and labour. Check website for T&Cs.
Sirius Hocos and ducting products are only available from our select group of Sirius Professional Stockets nationwide. For the lakes, list of Sirius Stockisla near you, please refer to www.sirlusbrand.com
All efforts have been made to ensure that the information provided in this brochure is correct at the time of printing. Due to continuous product improvement and ongoing development, Sirius reserves the right to make changes to the products and technical data without prior notice. Some products appearing in this brochure may be for illustrative purposes only. Diagrams are indicative measures only. Prior to commencing capillary outputs the operating/station instructions accompanying the product must be referred to at www.sir.usbrand.com