
Turret Dome IT9380-H - Security Camera Vivotek - Free user manual and instructions
Find the device manual for free Turret Dome IT9380-H Vivotek in PDF.


User questions about Turret Dome IT9380-H Vivotek
0 question about this device. Answer the ones you know or ask your own.
Ask a new question about this device
Download the instructions for your Security Camera in PDF format for free! Find your manual Turret Dome IT9380-H - Vivotek and take your electronic device back in hand. On this page are published all the documents necessary for the use of your device. Turret Dome IT9380-H by Vivotek.
USER MANUAL Turret Dome IT9380-H Vivotek
natural_image
Technical line drawing of a camera lens assembly (no text or symbols)Rev. 1.0
Table of Contents
Overview....3
Revision History 4
Read Before Use....4
Package Contents....5
Symbols and Statements in this Document....5
Physical Description 6
Hardware Installation 9
Software Installation....20
Network Deployment....28
Ready to Use....29
Accessing the Network Camera 32
Using Web Browsers 32
Using RTSP Players....35
Using 3GPP-compatible Mobile Devices....36
Using VIVOTEK Recording Software 37
Main Page....38
Client Settings......43
Configuration 48
System > General settings 49
Network > General settings....87
Network > Streaming protocols 94
Network > SNMP (Simple Network Management Protocol) 103
Network > FTP 104
Security > User accounts 105
Security > HTTPS (Hypertext Transfer Protocol over SSL) 107
Security > Access List 114
PTZ > PTZ settings 120
Event > Event settings....124
Applications > Motion detection....138
Applications > Tampering detection 141
Applications > Audio detection 142
Applications > Package management - a.k.a., VADP (VIVOTEK Application Development Platform) ..... 144
Recording > Recording settings 147
Local storage > SD card management....152
Local storage > Content management....153
Appendix 156
URL Commands for the Network Camera....156
Technology License Notice....394
Electromagnetic Compatibility (EMC)....395
Overview
The IT9360, IT9380, and IT9388-HT is an outdoor turret network camera capable of 1920 x 1080 at 30 fps, or 2560 x 1920 resolution at 20 fps. At the 5MP resolution and with the WDR function enabled, the frame rate is slightly reduced to 20fps. The firmware comes with another 4MP resolution mode with a 30fps frame rate. With the most updated VIVOTEK WDR Pro technology, the camera series is capable of capturing the highest quality images in both low light and high contrast environments.
The onboard IR can provide illumination in total darkness. With the Smart IR feature, the firmware automatically adjusts the IR intensity for objects that came too close, in order to avoid over-exposure.
The cameras support WDR function at the effectiveness of up to 120dB. These models support local video stroage on the MicroSD cards if network service should be interrupted. The cameras also come with configurable motion detection and tampering detection with up to 5 privacy mask areas.
Revision History
■ Rev. 1.0: Initial release.
Read Before Use
The use of surveillance devices may be prohibited by law in your country. The Network Camera is not only a high-performance web-ready camera but can also be part of a flexible surveillance system. It is the user's responsibility to ensure that the operation of such devices is legal before installing this unit for its intended use.
It is important to first verify that all contents received are complete according to the Package Contents listed below. Take note of the warnings in the Quick Installation Guide before the Network Camera is installed; then carefully read and follow the instructions in the Installation chapter to avoid damage due to faulty assembly and installation. This also ensures the product is used properly as intended.
The Network Camera is a network device and its use should be straightforward for those who have basic networking knowledge. It is designed for various applications including video sharing, general security/surveillance, etc. The Configuration chapter suggests ways to best utilize the Network Camera and ensure proper operations. For creative and professional developers, the URL Commands of the Network Camera section serves as a helpful reference to customizing existing homepages or integrating with the current web server.

IMPORTANT:
- The product must be installed and protected in a location that is not easily accessible, and is away from impacts or heavy vibration. For example, at the location where the surveillance cameras are looking down or installed at high positions such as on a wall, or at least 3 meters above the ground.
- The camera should be installed at least 10 centimeters away from the eave of a building.
- If powered by a power adapter, the adapter should be properly grounded.
- Maintenance and repair work must always be carried out by qualified technical personnel.
- Disconnect power from the unit when performing a maintenance task.
- Please contact VIVOTEK's certified dealers for power adapters.
Package Contents
■ IT9360-H / IT9380-H / IT9388-HT ■ Mount bracket ■ Alignment sticker
■ Screws. ■ Waterproof cable housing
■ T10 torx wrench. ■ Quick Installation Guide.

WARNING:
- IR lights emit from this product.
- Use live view to verify if the IR lights are in the night mode.
Symbols and Statements in this Document

INFORMATION: provides important messages or advices that might help prevent inconvenient or problem situations.

NOTE: Notices provide guidance or advices that are related to the functional integrity of the machine.

Tips: Tips are useful information that helps enhance or facilitae an installation, function, or process.

WARNING: or IMPORTANT:: These statements indicate situations that can be dangerous or hazardous to the machine or you.

Electrical Hazard: This statement appears when high voltage electrical hazards might occur to an operator.

IMPORTANT:
Use the camera only with a DC power supply that is UL listed, and limited power source (LPS) certified. The power supply should bear the UL listed and LPS marks. The power supply should also meet any safety and compliance requirements for the country of use.
Physical Description
Outer View
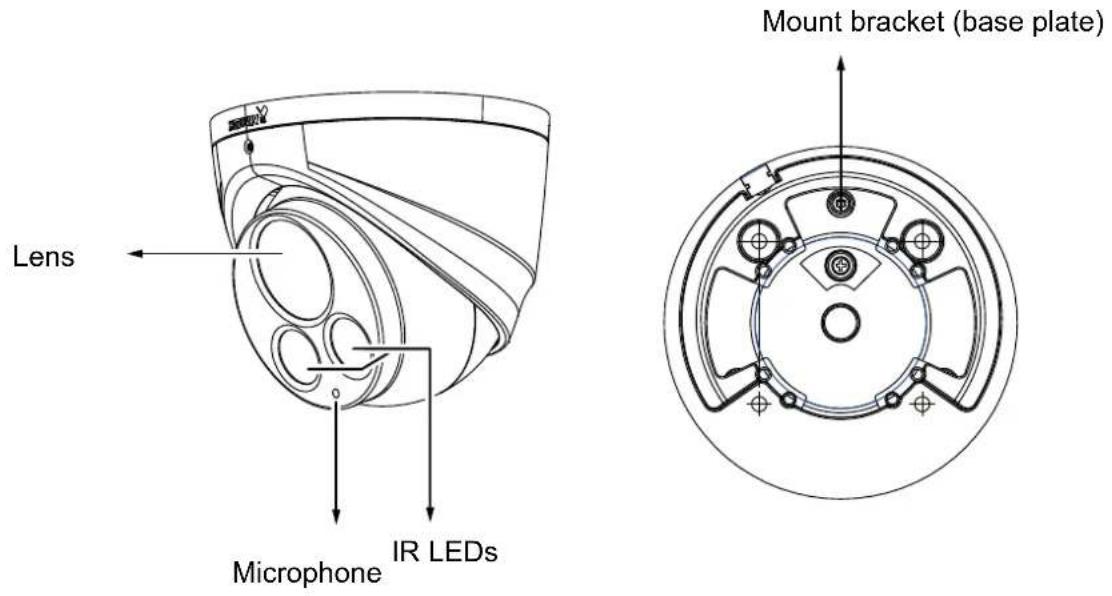
text_image
Lens Microphone IR LEDs Mount bracket (base plate)Inner View
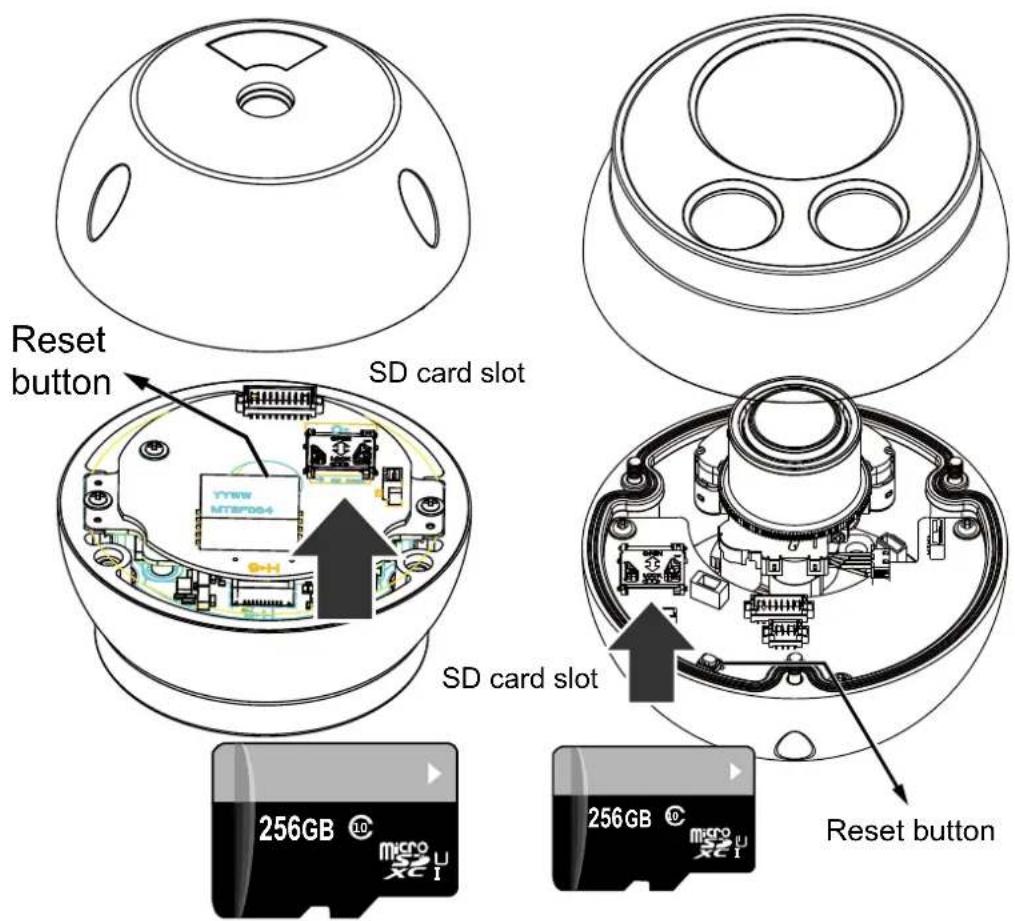
text_image
Reset button SD card slot YWW MTSPD04 SD card slot 256GB micro U 256GB micro U Reset buttonIT9388T

IMPORTANT:
Many copper coated aluminum (CCA) and other non-standard conductors cabling products are masqueraded as CAT5E or CAT6 cables. Please avoid using these CCA products especially when cascading PoE cameras. It is a must to use Ethernet cables compliant with the 3P/ETL standard.

The camera's cable can be routed through a drilled hole or through the opening on the side of camera. Observe and look for the best installation position.
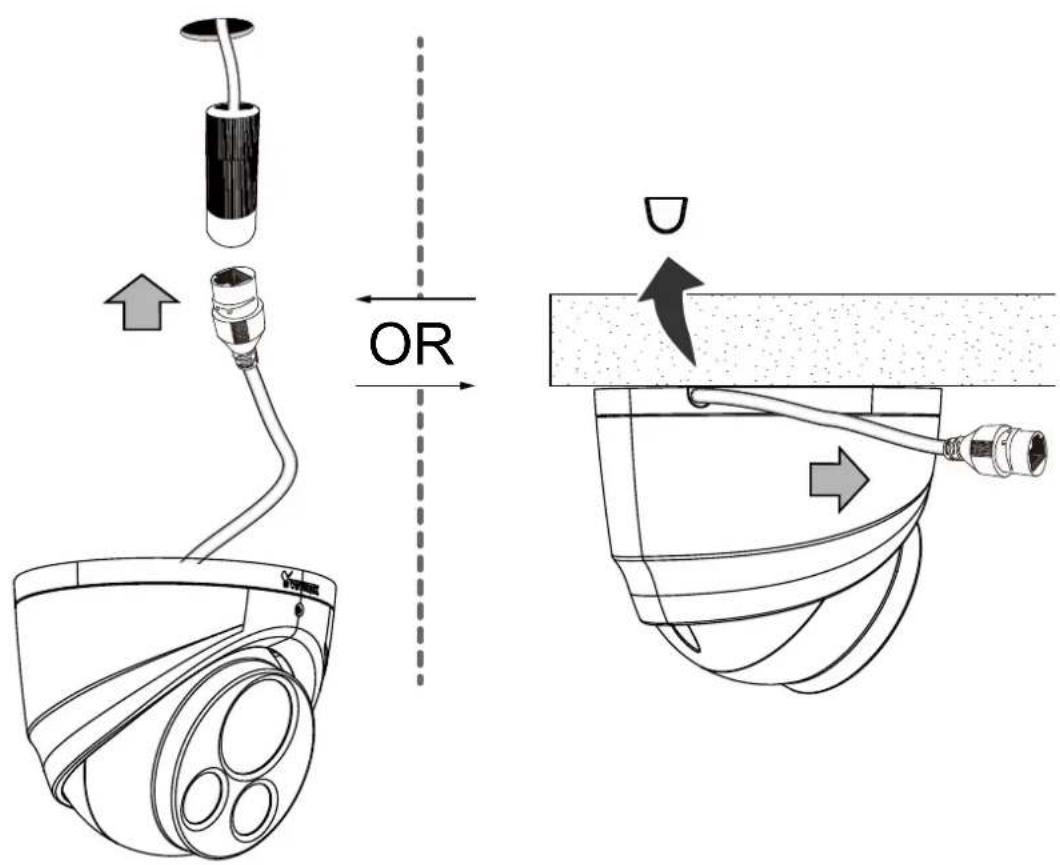
text_image
Technical diagram illustrating cable installation and port positioning with labeled components and directional arrows
NOTE:
Some of the suffix syntax used in model naming are listed below:
| E w/ heater for extreme weather |
| Fx Focal length w/ number |
| T w/ Remote focus lens |
| R w/ PoE repeater |
| H w/ High Dynamic Range functionality |
| M Manual focus lens |

IMPORTANT:

Power consumption:
| Consumption & Power Input |
| IR ON: 9W |
| IR Off: 8W |
Hardware Installation
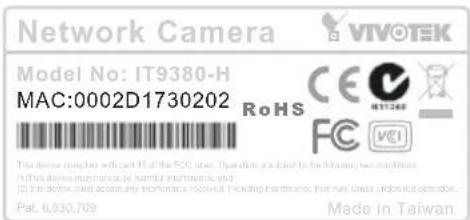
- Jot down the camera's MAC address for later reference.
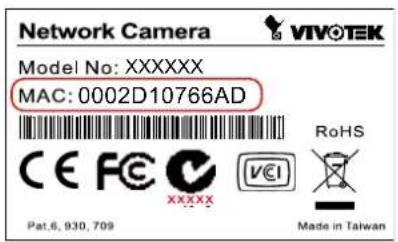
text_image
Network Camera VIVO TEK Model No: XXXXXX MAC: 0002D10766AD CE FC XXXX Pat.6, 930, 709 RoHS VCEI Made in Taiwan
natural_image
Illustration of a hand holding a pen, no text or symbols present
Below are the tilt, pan, and rotation limitations.
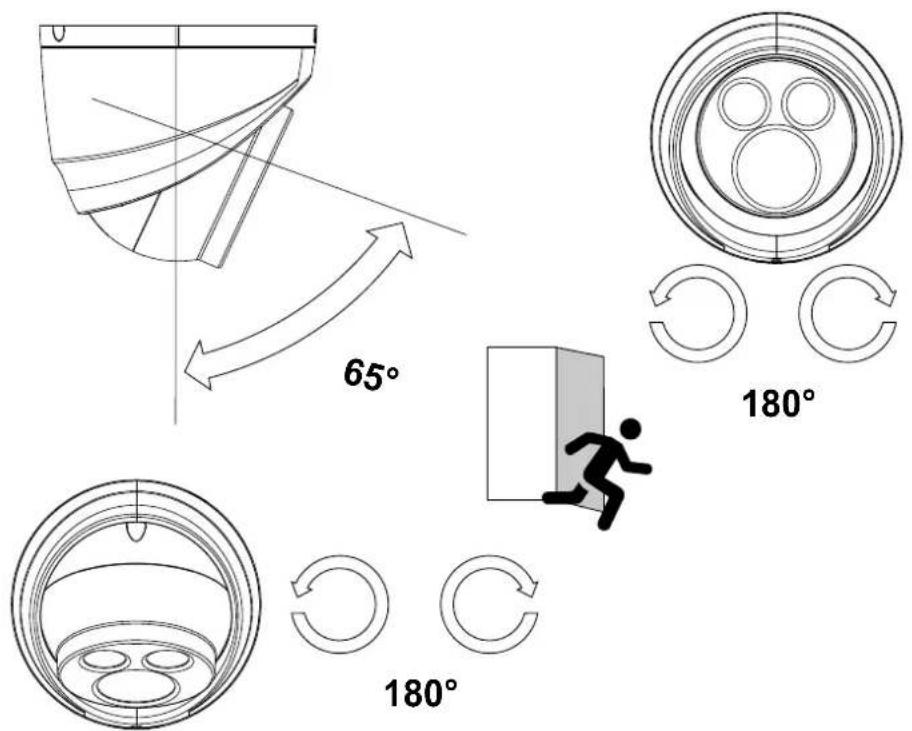
text_image
65° 180° 180°- Remove the camera main body from the base plate using the T10 torx wrench.
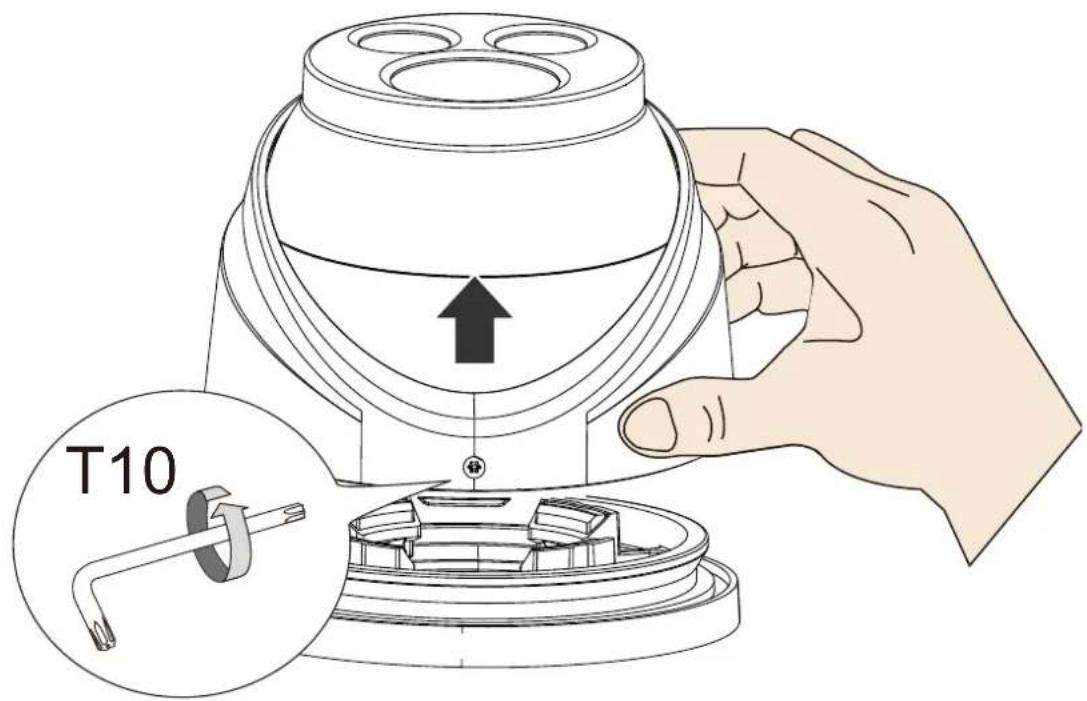
text_image
T10
You need only to loosen, but not completely remove the T10 screw.
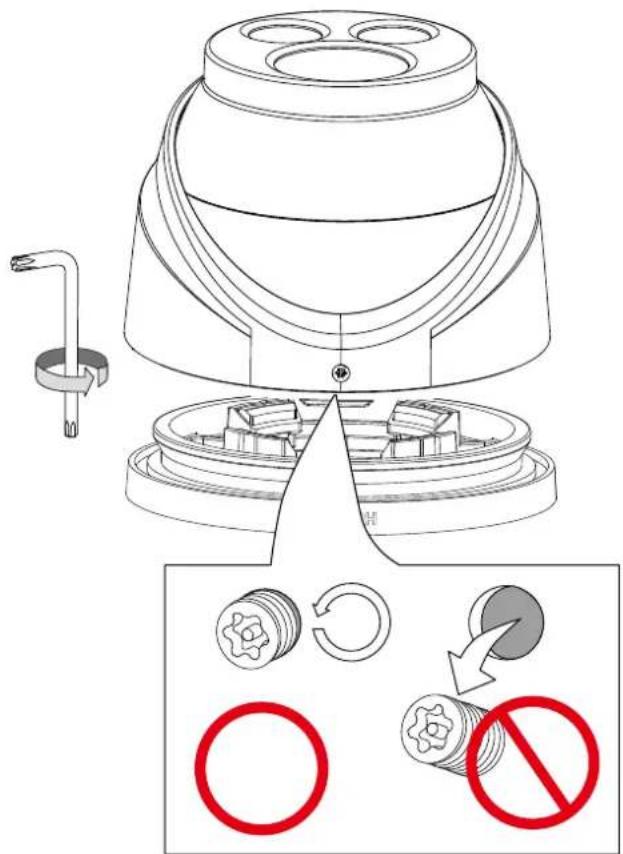
text_image
Technical diagram illustrating a mechanical device with labeled components and a prohibition symbol for disassembly or reassembly.- Loosen the 3 screws from on the main body.
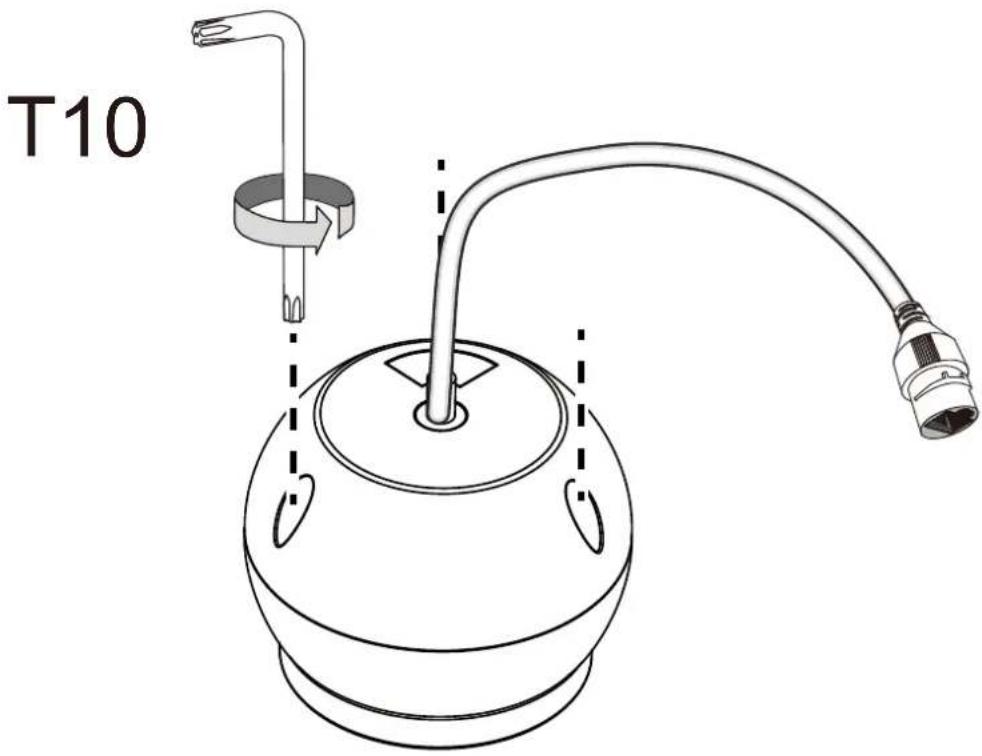
text_image
T10- Install a MicroSD card if onboard storage is preferred.
IT9360, IT9380
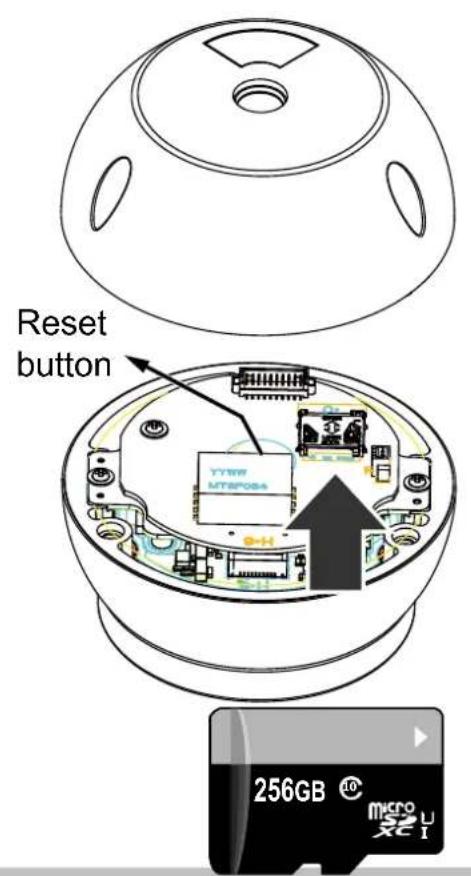
text_image
Reset button YYWW MT8POS4 256GB 10 micro x21IT9388T
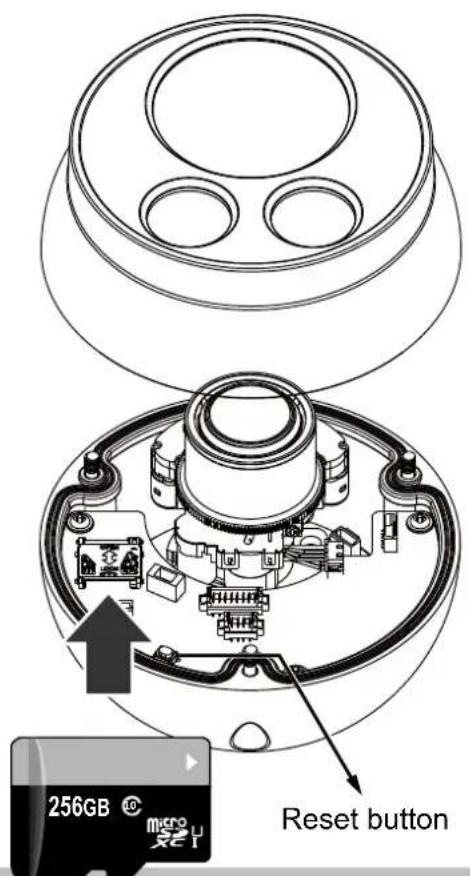
text_image
256GB micro 256GB Reset button
Avoid touching the circuit board to prevent the damage from electro-static discharge. If available, it is recommended to wear an anti-static wrist band.
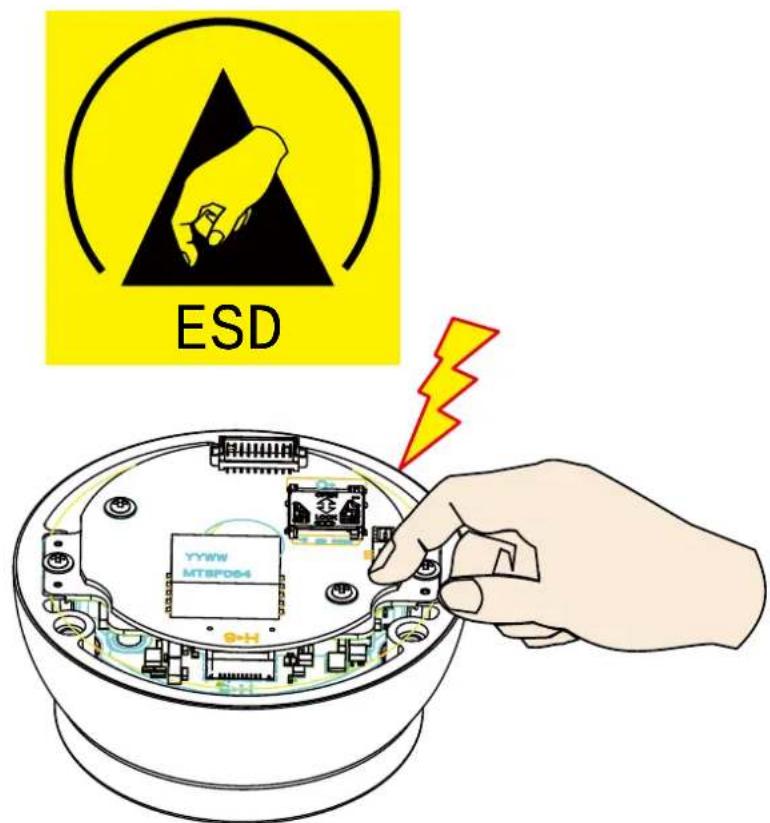
text_image
ESD YYWW MTSP0644-1. Open the SD card socket lid by sliding it backward and flip open the lid.
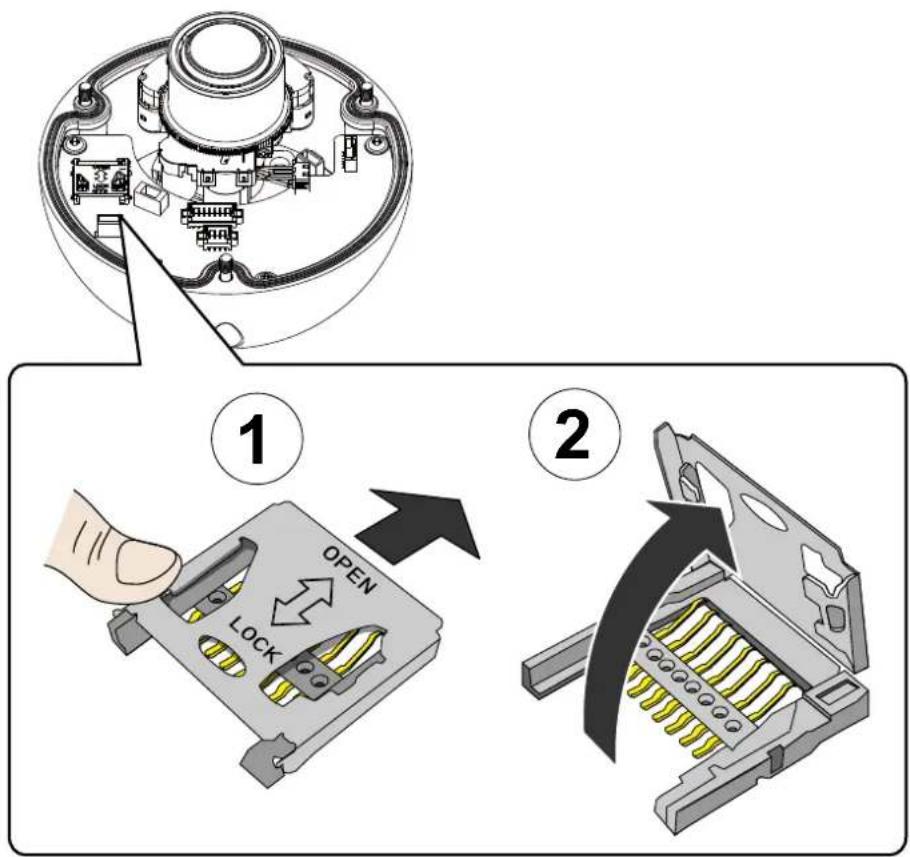
text_image
Diagram illustrating the step-by-step installation of a device lock mechanism, showing open and closed states with numbered instructions.4-2. Insert a MicroSD card into the socket on the lid, with its gold fingers facing down. Close the lid.
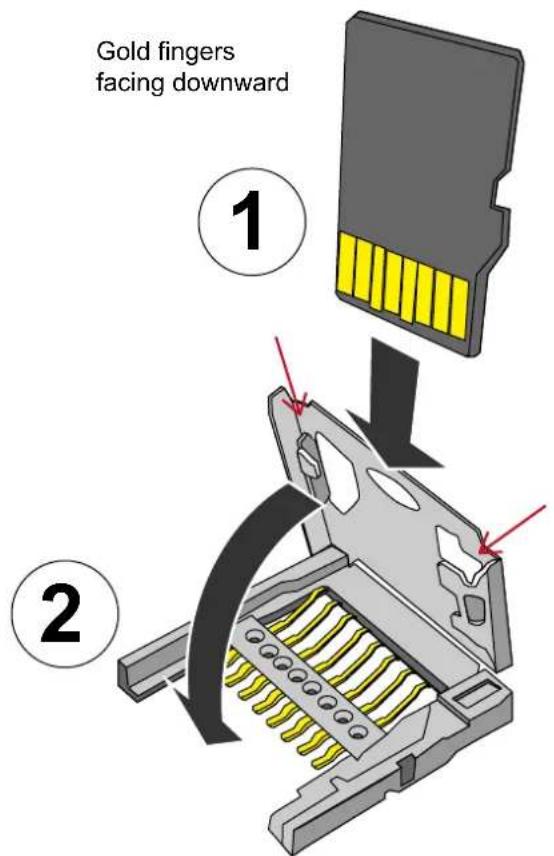
text_image
Gold fingers facing downward ① ②4-3. Slide the lid forward. A click sound should be heard to indicate that the lid and the card is secured in place.
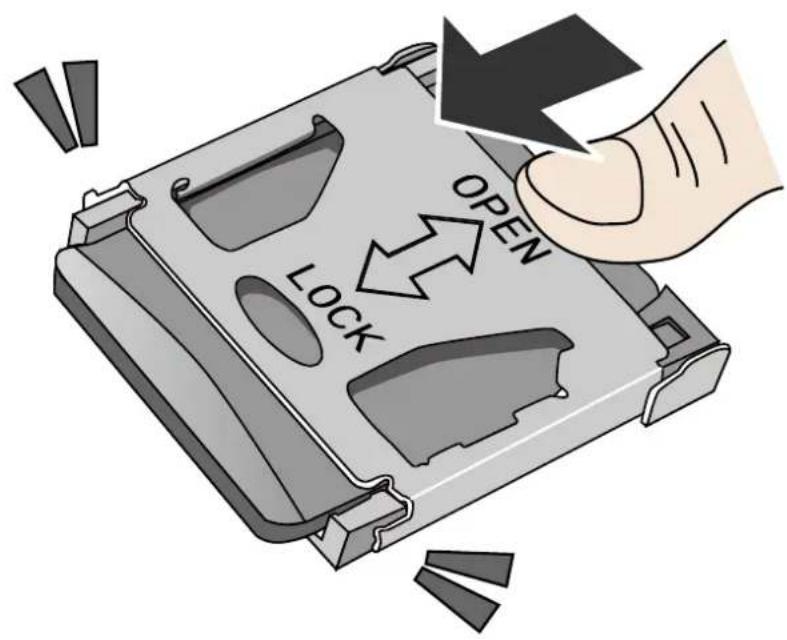
text_image
OPEN LOCK4-4. Replace the desiccant bag on the inside of the top cover.
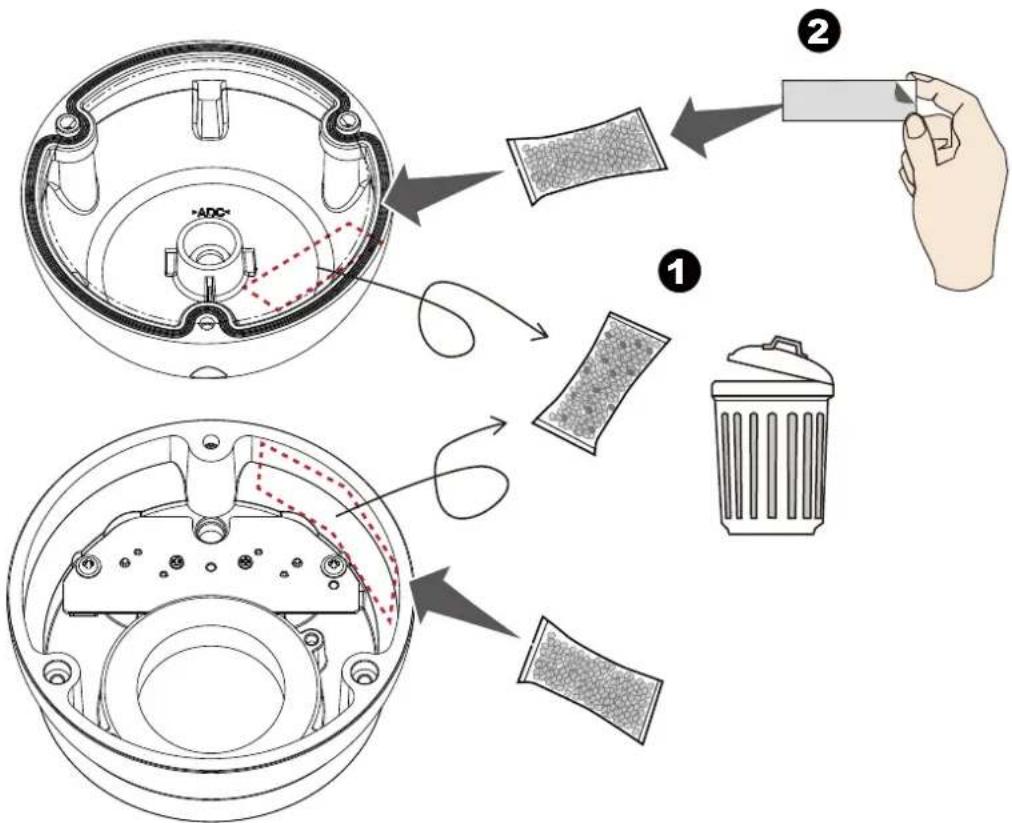
text_image
Diagram illustrating the steps of cleaning a device, showing components before and after installation with labeled parts.- Tighten the 3 T10 screws to secure camera top cover.
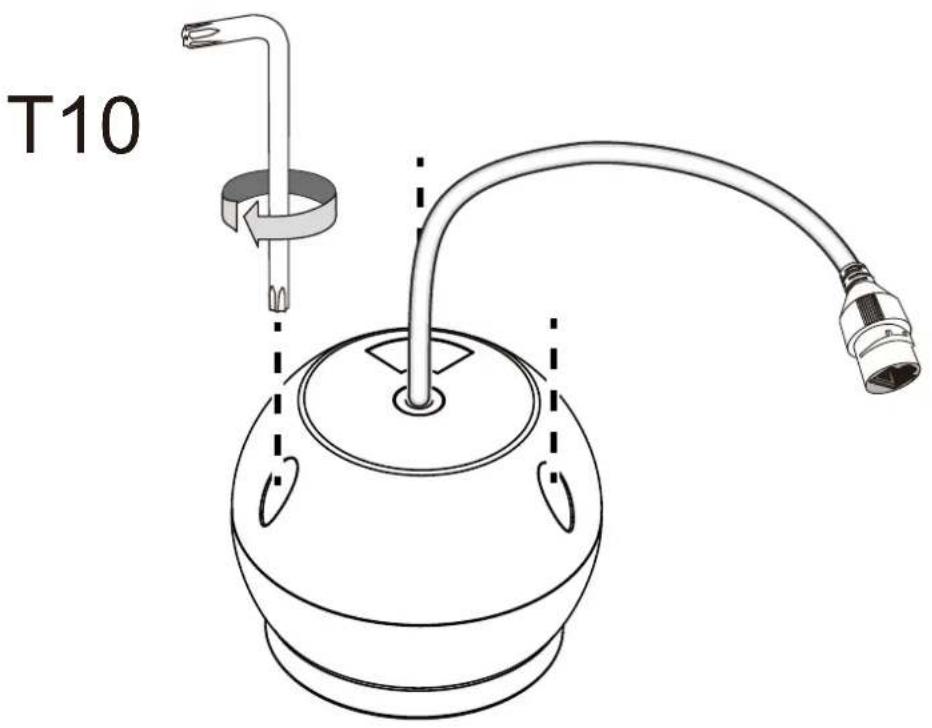
text_image
T10- Use the included alignment sticker to drill holes for mounting screws and a cabling hole if applicable.
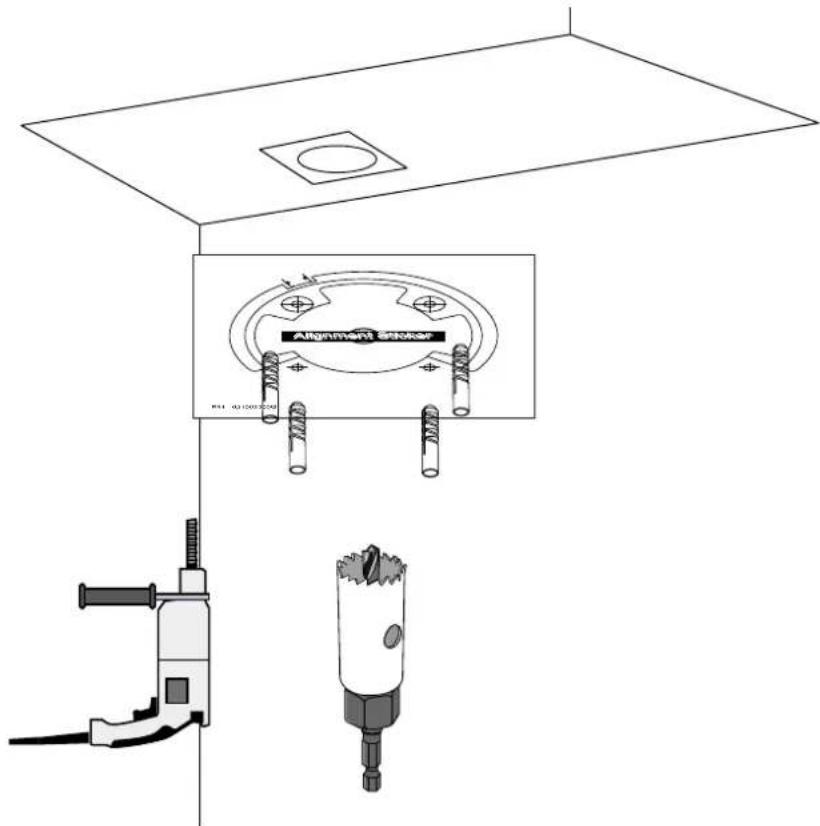
text_image
Alignment Stocker R14 4G1200-0000- If a cabling through hole is preferred, it should have a diameter larger than 25mm. Pull a CAT5e Ethernet cable through the hole.
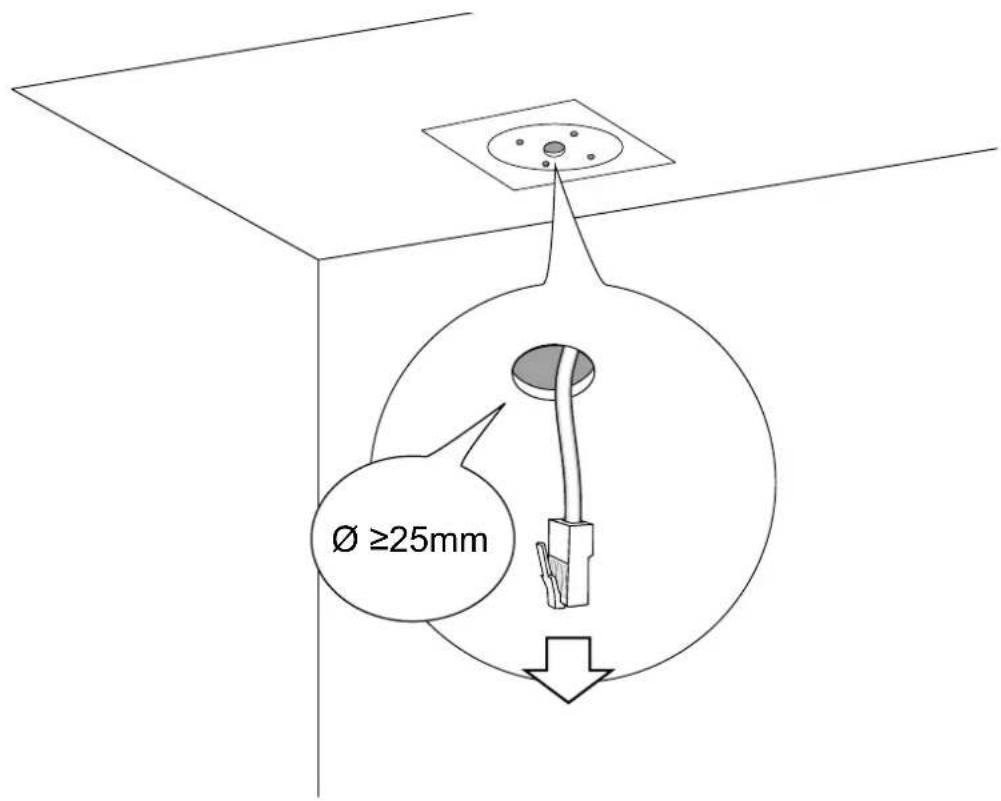
text_image
Ø ≥25mm- Disassemble the cable gland and install the waterproof seal components to the Ethernet cable.
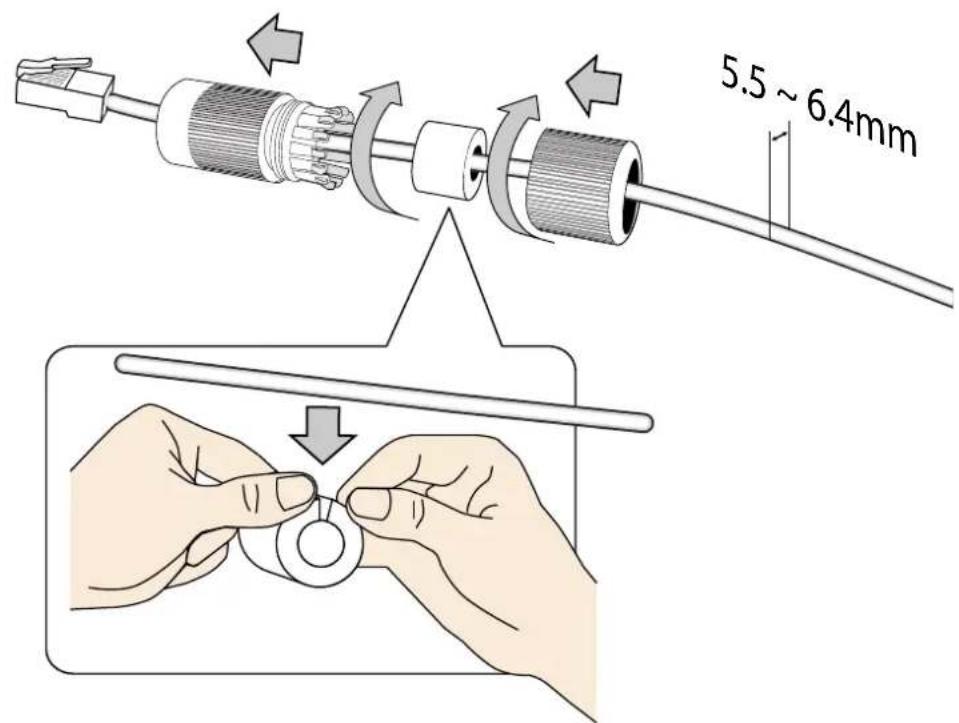
text_image
5.5 ~ 6.4mm- Connect the Ethernet cable to the camera's RJ45 female socket. Tighten up the waterproof components. Make sure they are adequately installed to prevent damage by moisture.
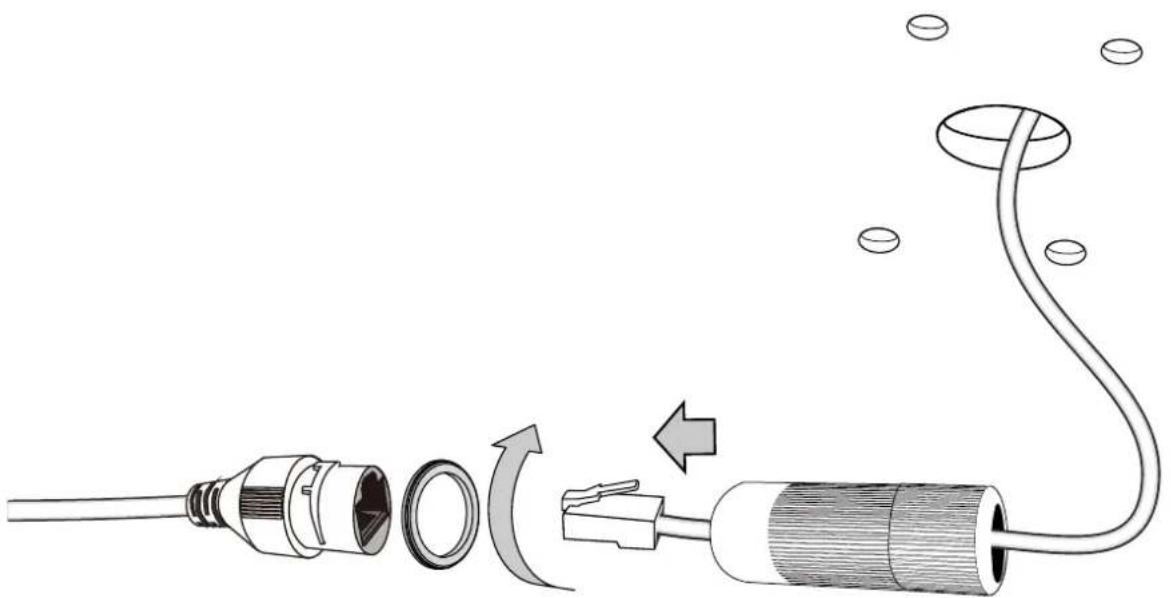
natural_image
Diagram of a plug assembly showing internal components and fluid flow (no text or labels)
It is a good practice to form a drip loop on the back-end cable. Leakage or moisture can gather in condensation into water drops and run along the cable. A drip loop ensures no water gets to the camera.
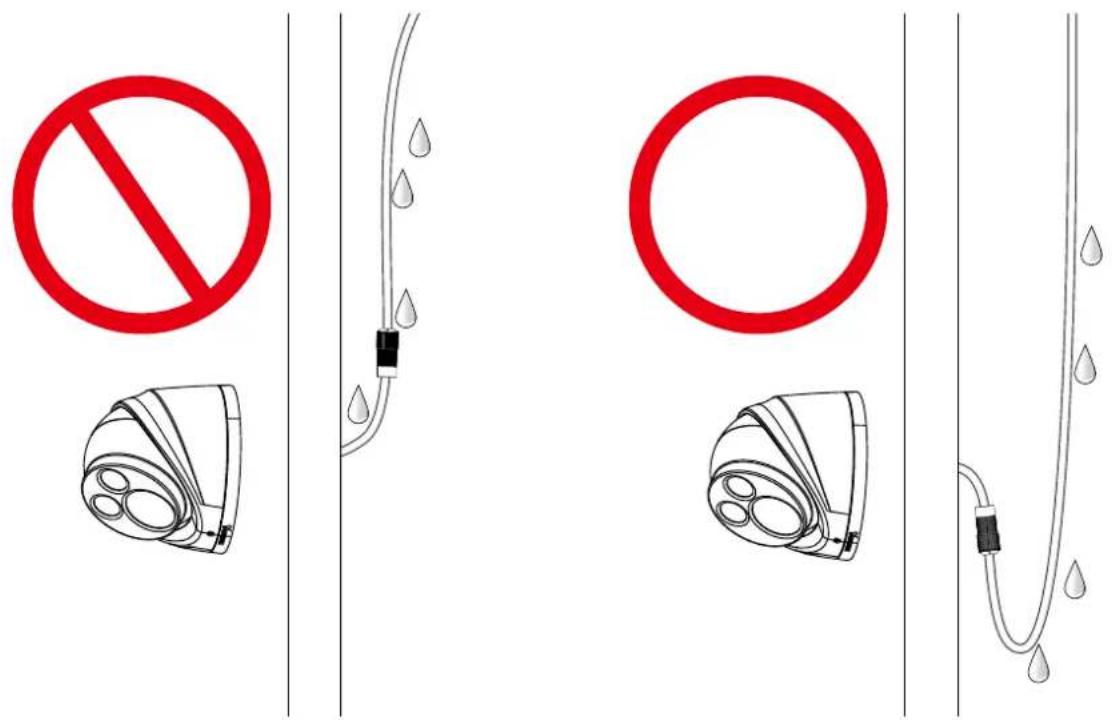
text_image
Diagram illustrating three types of water safety symbols: no prohibition, connected to a pipe with water droplets, and connected to a pipeline with water droplets.- Install the camera to a wall or ceiling by fastening 4 included screws.

natural_image
Diagram of a ceiling-mounted appliance with a mounted sensor and base mount (no text or symbols)
Shown below are the different alignment stickers.
IT9360/9380 IT9388T

text_image
Alignment Sticker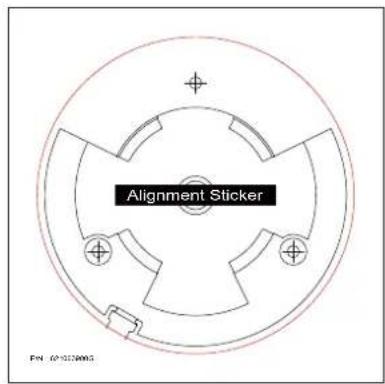
text_image
Alignment Sticker FN: 07-01236003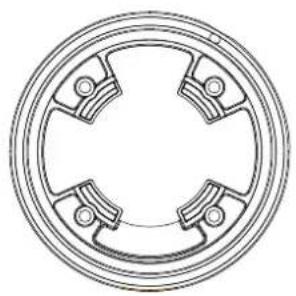
natural_image
Technical line drawing of a circular mechanical component with four symmetrical slots and mounting holes (no text or symbols)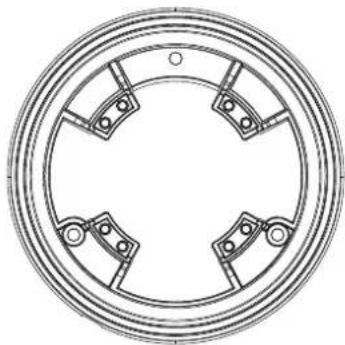
natural_image
Technical line drawing of a circular mechanical component with four symmetrical slots and mounting holes (no text or symbols)- Match the outer shroud with the camera's main body.
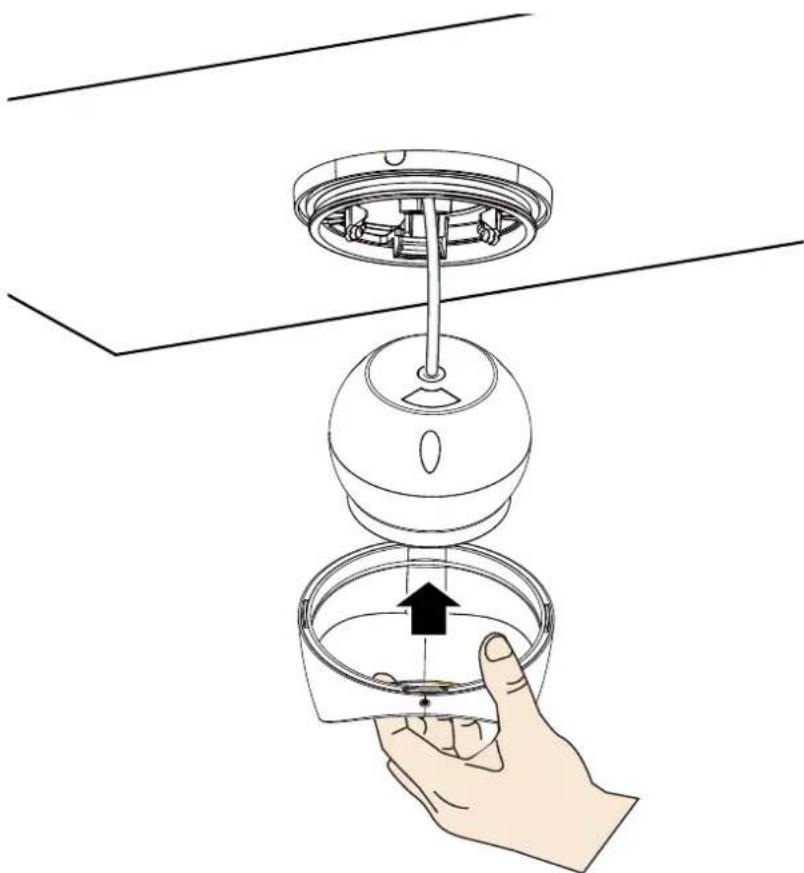
natural_image
Diagram of a hand inserting a device into a container with an upward arrow, showing internal components and wiring (no text or symbols)- Install the camera to the base plate. It is easier to install by matching the groove on the outer shroud with the inner rim on the base plate.
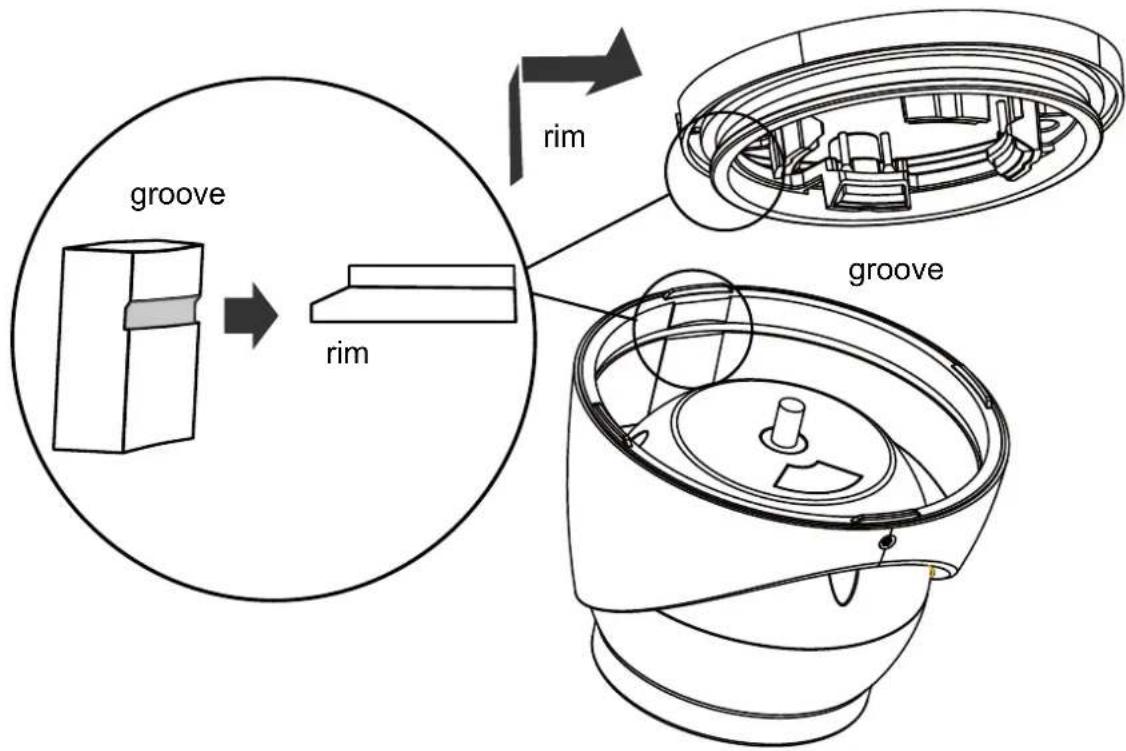
text_image
groove rim rim groove- Tighten the T10 retention screw.
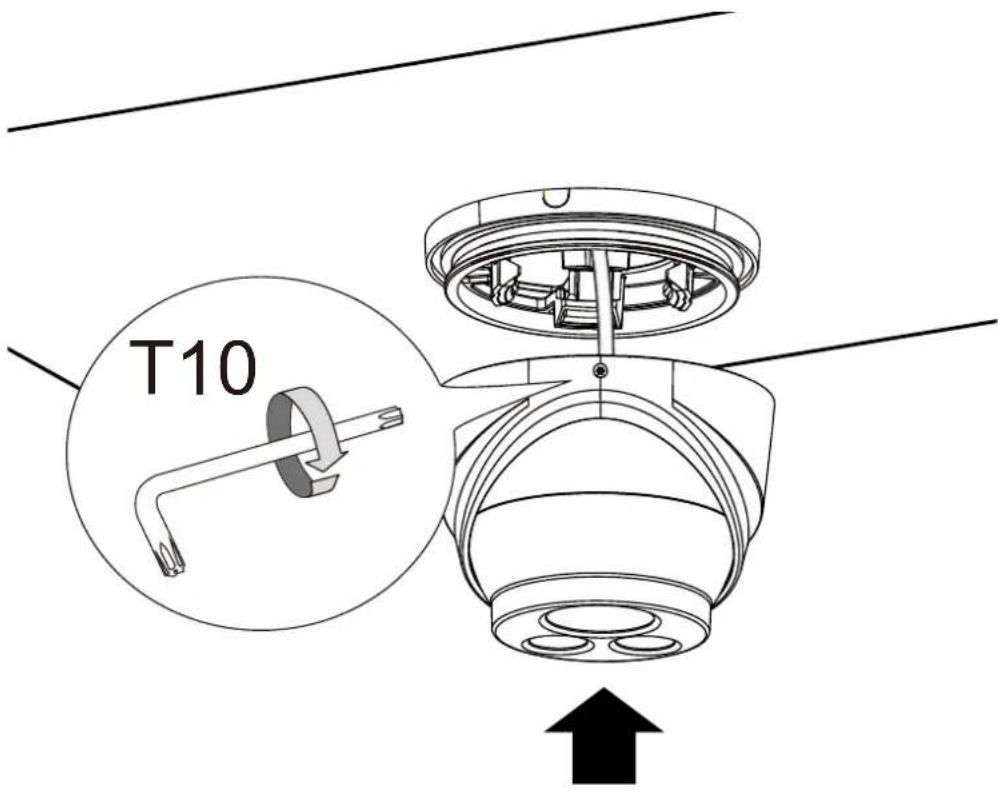
text_image
T10Software Installation
- Install the Shepherd utility, which helps you locate and configure your Network Camera in the local network. If your camera comes without the CD, go to VIVOTEK's website, and locate the utility in the Downloads > Software page.

text_image
VIVOTEK Products Support Downloads Solutions L Product Files Brochure Firmware Flyer Logo Software Wall Paper SOL AAI Tough Prote for Tough High-Seq14-1. Run the Shepherd utility.
14-2. The program will conduct an analysis of your network environment.
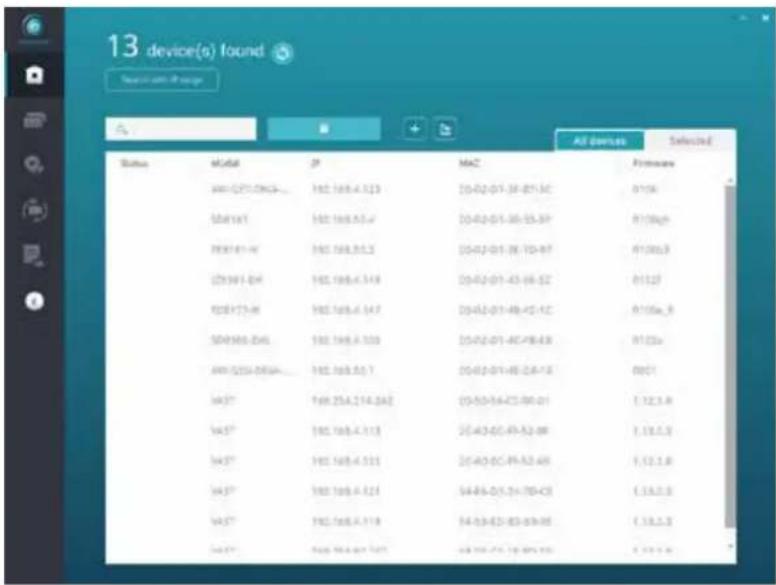
text_image
13 device(s) found Search with IP design Status MAC IP MAC AF Devices Selected 001-021-096A... 182.168,4.123 20-02-01-39-01-50 0156 0241x1 182.168,5.4 20-02-01-39-55-59 0156pb 7031-01-H 182.168,5.5.2 20-02-01-39-70-87 0156.9 (29341-04) 182.168,4.148 20-02-01-43-66-52 0132 8281-73-H 182.168,4.147 20-02-01-48-45-42 0156a_8 504586-246L 182.168,4.133 20-02-01-4C-7B-6X 0132a 001-0254-056A... 182.168,5.7 20-02-01-4E-2A-7A 00C1 9437° 182.25A,214,243 20-03-04-75:00-01 1.12.3.9 9437° 182.168,4.113 20-03-05-49-53-88 1.13.2.3 9437° 182.168,4.131 20-03-05-49-53-88 1.13.2.8 9437° 182.168,4.124 54-85-05,54-70-03 1.13.2.3 9437° 182.168,4.119 54-85-05,83-69-85 1.13.2.3 9437° 182.168,4.127 49-75-75,75-85-75 1.13.2.814-3. The program will search for all VIVOTEK network devices on the same LAN.
14-4. After a brief search, the installer window will prompt. Click on the MAC and model name that matches the one printed on the product label. You can then double-click on the address to open a management session with the Network Camera.
text_image
Network Camera VIVOTEK Model No: IT9380-H MAC:0002D1730202 RoHS CE NT1248 FC vci This device includes all of the FCO units. Operation is linked to the following two conditions: (1) This device must include a technical instrument, and (2) The device must account performance needed. Following instructions that may cause unloaded operation. Pat. 6,030,709 Made in Taiwan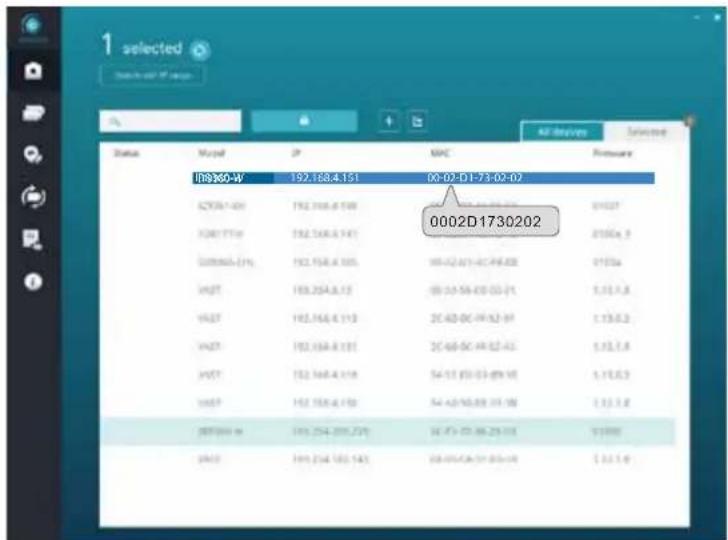
text_image
1 selected Selected on the screen Status Mycall IP MAC Rumware Ih9260-W 192.168.4.151 00-02-D1-73-02-02 0002D1730202 CZ06-1-01 192.368.4.158 01027 X20177W 192.568.4.141 01066,3 G09965-1% 192.158.4.105 00-02-01-41-99-88 01034 VAST 193.254.8.13 00-03-56-03-03-01 1.31,7,8 VAST 192.368.4.113 20-02-06-49-52-99 1.13,8,3 VAST 192.368.4.131 20-06-56-49-52-43 1.32,7,8 VAST 192.368.4.118 54-15 03-03-89-95 1.13,8,3 VAST 192.358.4.150 54-62/66:88-95-98 1.32,7,8 JST044 w 193.254.8(57,72) 16-73-03-86:25-03 13/00 VAST 193.254.8(57,74) 08-05/66:57-85-95 1.32,7,8Forceful Password Configuration
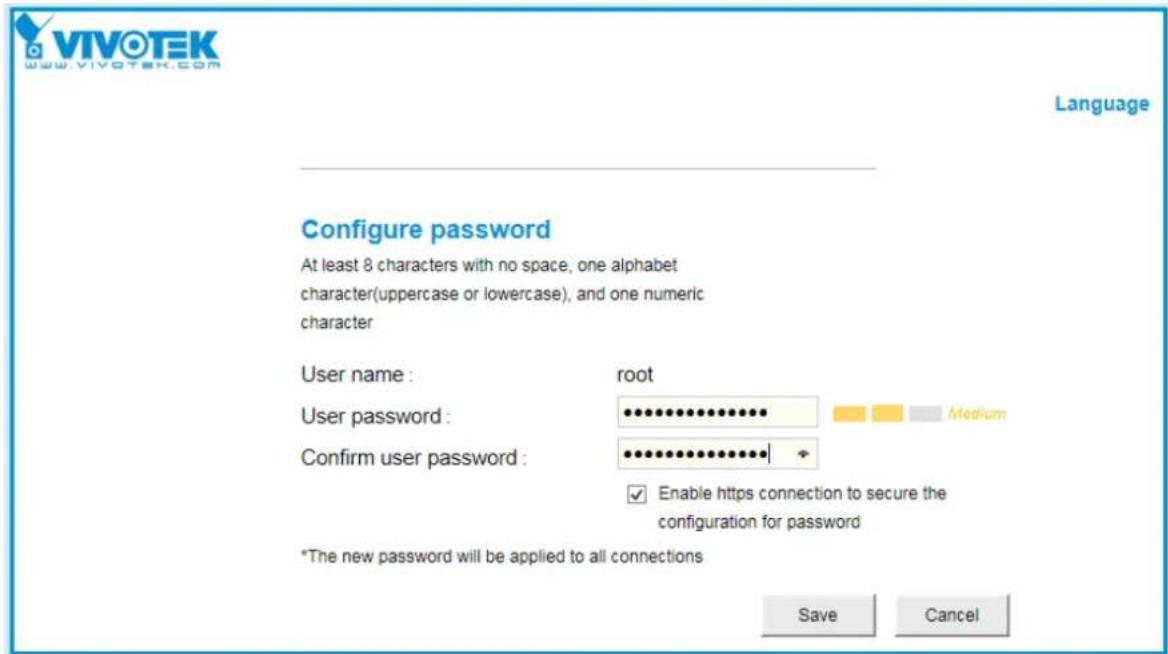
- The first time you log in to the camera, the firmware will prompt for a password configuration for security concerns. Protecting your camera with a password can deter the majority of cyber attacks.
15-1. Enter the combination of alphabetic and numeric characters to fulfill the password strength. requirement. The default name for the camera administrator is "root", and can not be changed.
text_image
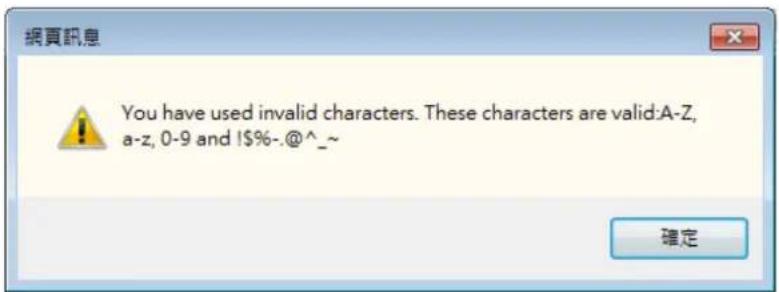
VIVOTEK www.vivotek.com Language Configure password At least 8 characters with no space, one alphabet character(uppercase or lowercase), and one numeric character User name : root User password : medium Confirm user password : ✓ Enable https connection to secure the configuration for password *The new password will be applied to all connections Save CancelSome, but not all special ASCII characters are supported: !, \$, %, -, ., @, ^, _, and \~. You can use them in the password combination.
text_image
You have used invalid characters. These characters are valid:A-Z, a-z, 0-9 and 1$%-.@^_^~15-2. Another prompt will request for the password you just configured. Enter the password and then you can start configure your camera and see the live view.
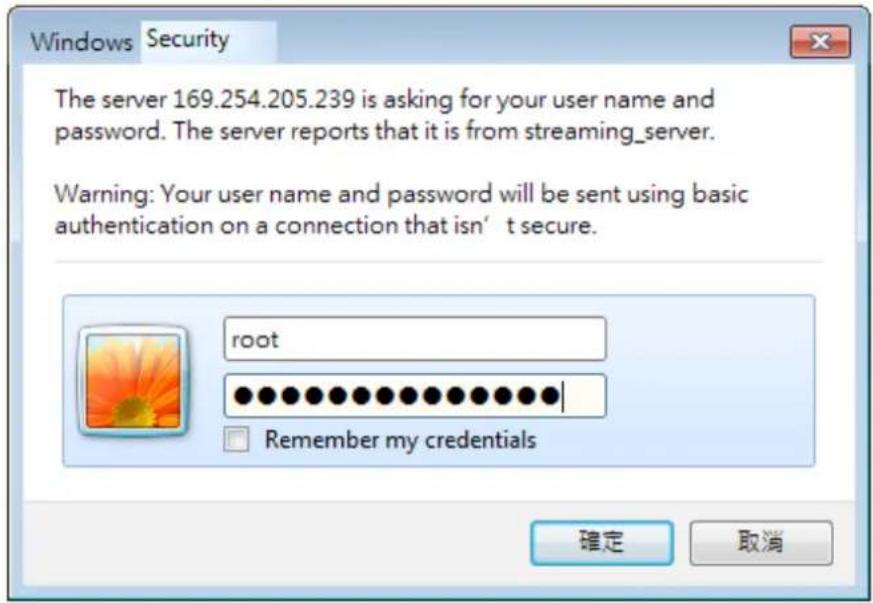
text_image
Windows Security The server 169.254.205.239 is asking for your user name and password. The server reports that it is from streaming_server. Warning: Your user name and password will be sent using basic authentication on a connection that isn't secure. root Remember my credentials 確定 取消- Remove the protective sheet from the lens.
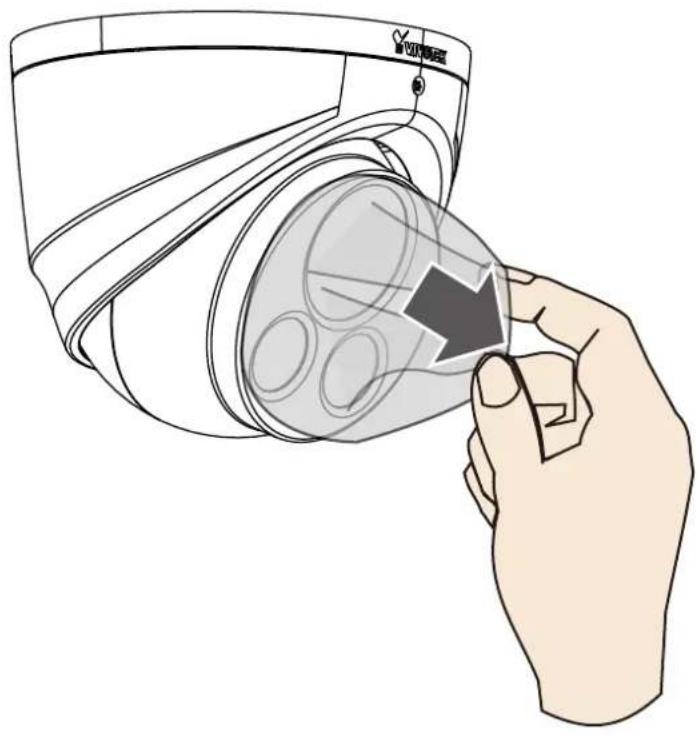
natural_image
Illustration of a hand inserting a cable into a device (no text or symbols visible)
IMPORTANT: Pan the camera first. You may clog the cable if tilting the camera first. Tilt the camera back to its upright position, and try again if you can not turn the camera towards a preferred orientation.
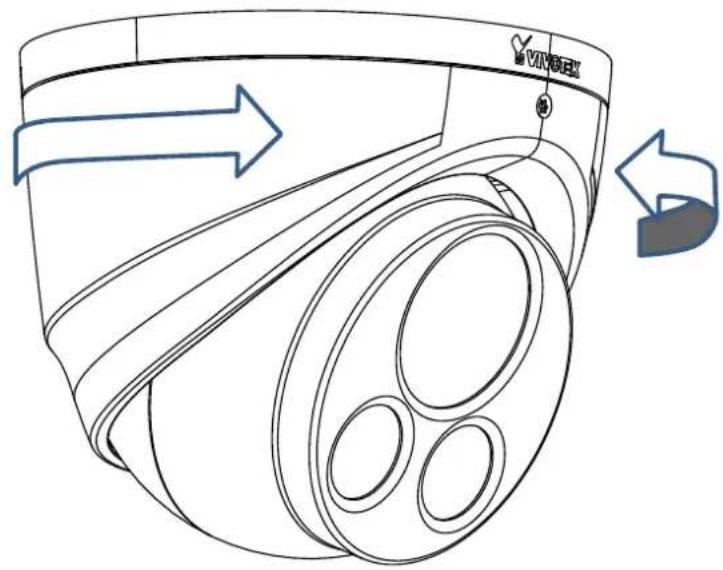
natural_image
Technical line drawing of a camera module with directional arrows indicating motion (no text or symbols)- With a live view, pan, tilt, or rotate the camera to acquire an optimal field of view.
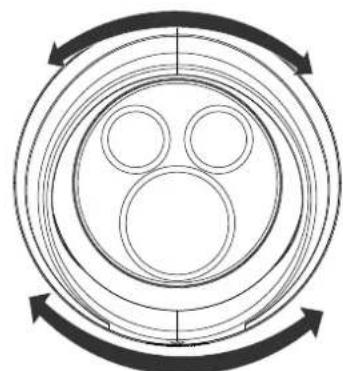
natural_image
Diagram of concentric circular rings with directional arrows indicating rotation (no text or symbols)Pan
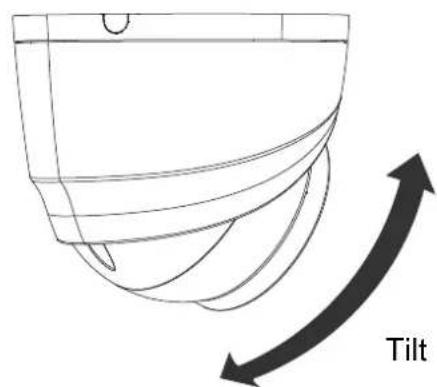
text_image
Tilt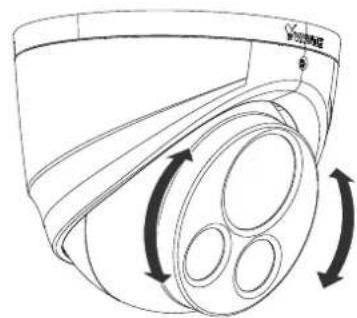
natural_image
Technical line drawing of a cylindrical device with three circular ports and rotational arrows indicating rotation (no text or symbols)Rotate
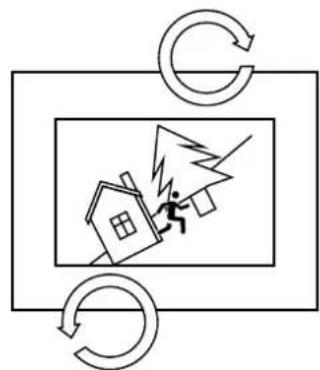
flowchart
graph TD
    A["House"] --> B["Lightning"]
    B --> C["Back to House"]
    C --> D["Circumulus"]
    D --> E["Loop Back"]
    E --> F["Return Loop"]
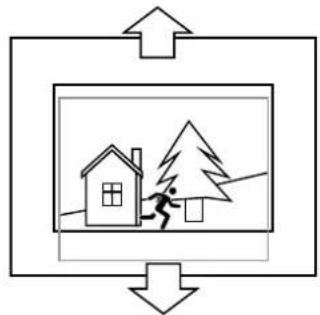
natural_image
Simple line drawing of a house with a person running away from it, surrounded by arrows indicating direction (no text or symbols)- When done, tighten the retention screw on the camera.
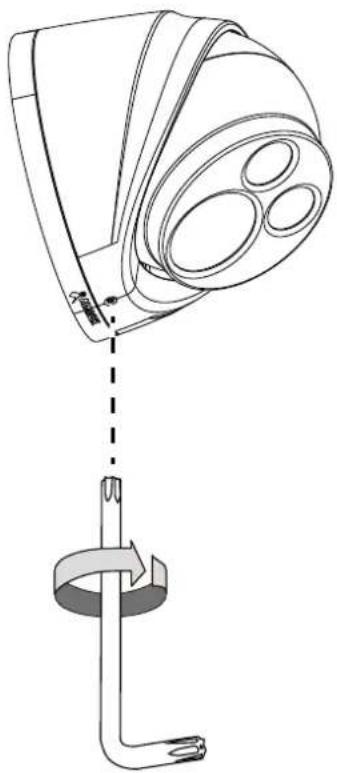
natural_image
Technical line drawing of a ceiling-mounted lamp with three circular components and a vertical support bracket (no text or symbols)IT9388-HT
For the -HT model, open a web console. From a web console, open the firmware configuration page. Enter the Configuration > Media > Image > Focus page. You will see a live stream on screen. If preferred, you can zoom in on the scene. Use the "Perform Auto Focus" function to automatically tune to a best image focus. Check the live view to ensure the image is in focus.
Configuration > Media > Image > Focus
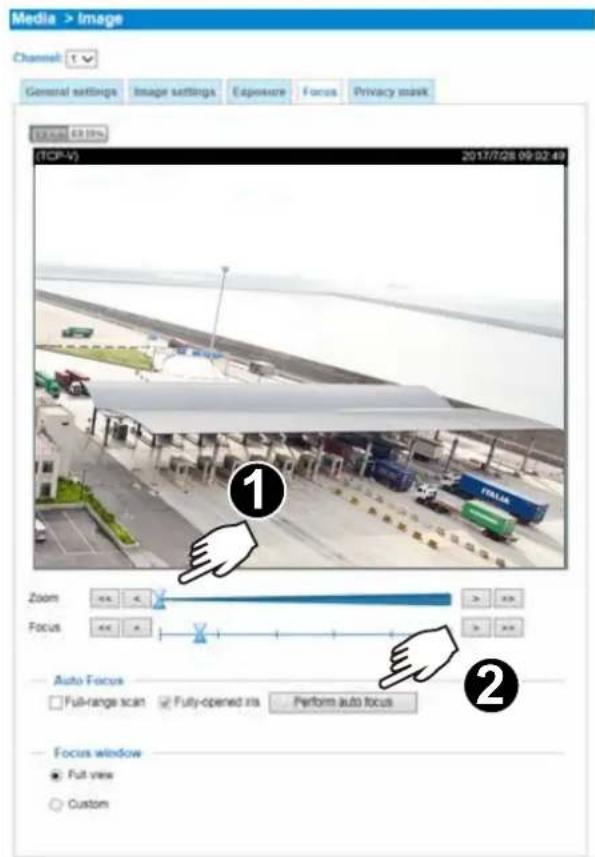
text_image
Media > Image Channel General settings Image settings Exposure Focus Privacy mask TCP-V 2017/7/28 09:02:49 Zoom Focus Auto Focus Full-range scan Fully-opened ns Perform auto focus Focus window Full view Custom
NOTE:
The IT9360-H and IT9380-H are the fixed-lens model, and do not support the Zoom and Auto Focus function.
The "T" models comes with a motorized focus lens.
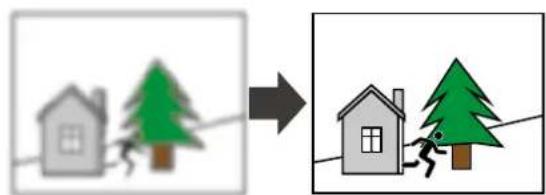
text_image
Diagram showing a house with two trees moving along a line, resulting in a house with a person climbing and another tree.LED Definitions
There are no LEDs on this model.
Hardware Reset
The reset button is used to reset the system or restore the factory default settings. Sometimes resetting the system can return the camera to normal operation. If the system problems remain after reset, restore the factory settings and install again.
Reset: Press the recessed reset button. Wait for the Network Camera to reboot.
Restore: Press and hold the reset button until the status LED rapidly blinks. Note that all settings will be restored to factory default. Upon successful restore, the status LED will blink green and red during normal operation.
SD/SDHC/SDXC Card Capacity
This network camera is compliant with SD/SDHC/SDXC 16GB / 8GB / 32GB / 64GB / 128GB / 256GB and other preceding standard SD cards.
Network Deployment
General Connection (PoE)
When using a PoE-enabled switch
The Network Camera is PoE-compliant, allowing transmission of power and data via a single Ethernet cable. Follow the below illustration to connect the Network Camera to a PoE-enabled switch via Ethernet cable.

text_image
802.3af PoE SwitchWhen using a non-PoE switch
Use a PoE power injector (optional) to connect between the Network Camera and a non-PoE switch.
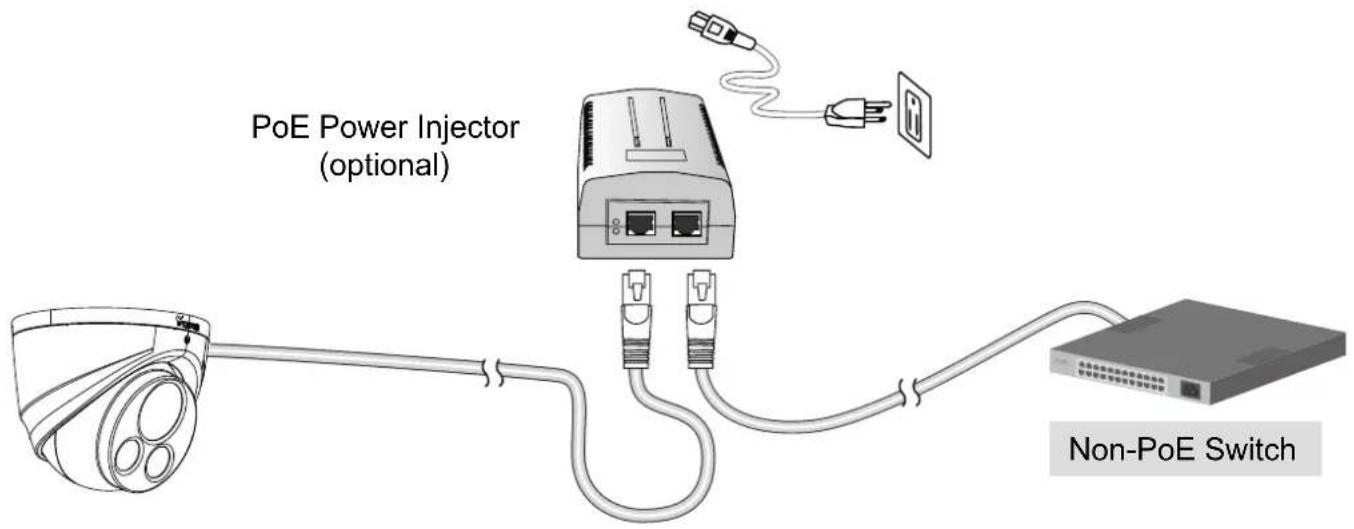
text_image
PoE Power Injector (optional) Non-PoE SwitchReady to Use
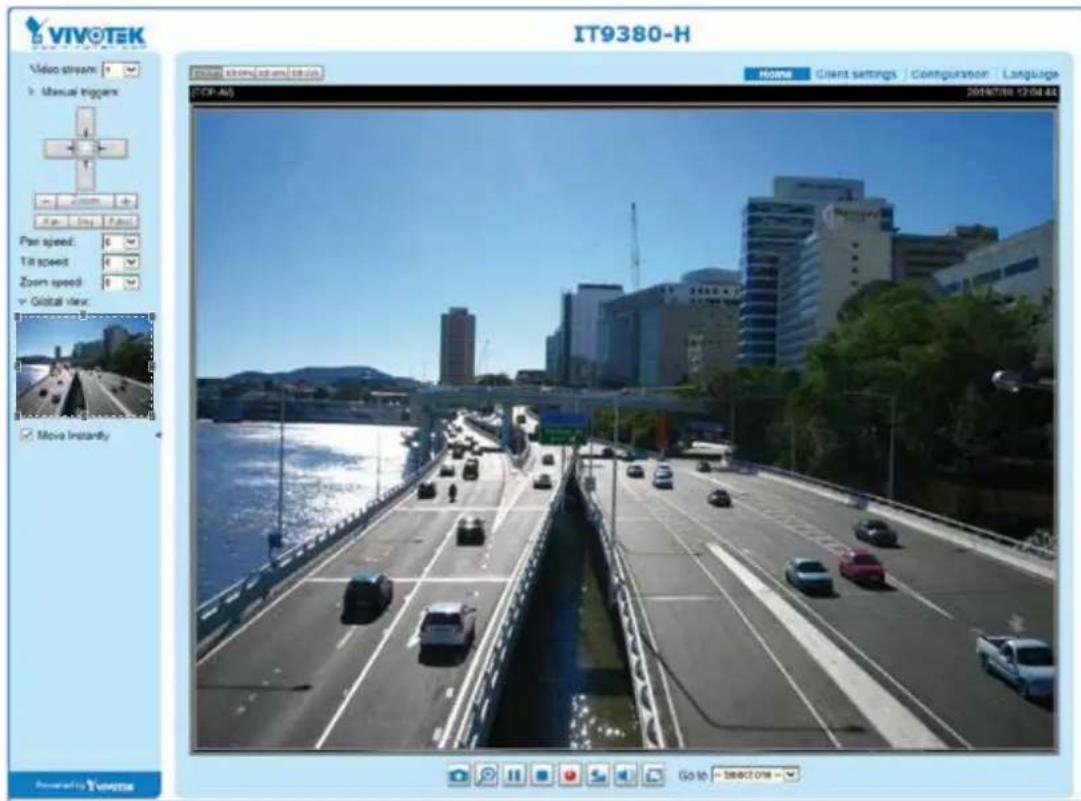
- A browser session to the Network Camera should prompt as shown below.
- You should be able to see live video from your camera. You may also install the 32-channel VAST recording software from our website in a deployment consisting of multiple cameras. For its installation details, please refer to its related documents.
text_image
VIVOTEK Video stream: 1 Manual loggers Pan speed: 0 Tilt speed: 0 Zoom speed: 0 Global view: Move instantly IT9380-H Volume: 10000000000 HOME Client settings Configuration Language TCP-AS 2018/7/16 12:04:44 Go to: 38802078 -Internet connection via a router
Before setting up the Network Camera over the Internet, make sure you have a router and follow the steps below.
- Connect your Network Camera behind a router, the Internet environment is illustrated below. Regarding how to obtain your IP address, please refer to Software Installation on page 20 for details.

flowchart
graph TD
    A["Internet"] --> B["Cable or DSL Modem"]
    B --> C["WAN (Wide Area Network)\nRouter IP address : from ISP"]
    C --> D["LAN (Local Area Network)\nRouter IP address: 192.168.0.1"]
    D --> E["IP address: 192.168.0.3\nSubnet mask: 255.255.255.0\nDefault router: 192.168.0.1"]
    D --> F["IP address: 192.168.0.2\nSubnet mask: 255.255.255.0\nDefault router: 192.168.0.1"]
- In this case, if the Local Area Network (LAN) IP address of your Network Camera is 192.168.0.3, please forward the following ports for the Network Camera on the router.
■ HTTP port: default is 80
■ RTSP port: default is 554
■ RTP port for video: default is 5556
■ RTCP port for video: default is 5557
If you have changed the port numbers on the Network page, please open the ports accordingly on your router. For information on how to forward ports on the router, please refer to your router's user's manual.
- Find out the public IP address of your router provided by your ISP (Internet Service Provider). Use the public IP and the secondary HTTP port to access the Network Camera from the Internet. Please refer to Network Type on page 88 for details.
Internet connection with static IP
Choose this connection type if you are required to use a static IP for the Network Camera. Please refer to LAN setting on page 87 for details.
Internet connection via PPPoE (Point-to-Point over Ethernet)
Choose this connection type if you are connected to the Internet via a DSL Line. Please refer to PPPoE on page 88 for details.
For example, your router and IP settings may look like this:
| Device IP Address: internal port IP Address: External Port (Mapped port on the router) | |
| Public IP of router 122.1 | 46.57.120 |
| LAN IP of router 192.168.2.1 | |
| Camera 1 192.168.2.10 | 80 122.146.57.120:8000 |
| Camera 2 192.168.2.11 | 80 122.146.57.120:8001 |
| ... ... ... | |
Configure the router, virtual server or firewall, so that the router can forward any data coming into a preconfigured port number to a network camera on the private network, and allow data from the camera to be transmitted to the outside of the network over the same path.
| From Forward to | |
| 122.146.57.120:8000 19 | 2.168.2.10:80 |
| 122.146.57.120:8001 19 | 2.168.2.11:80 |
| ... ... |
When properly configured, you can access a camera behind the router using the HTTP request as follows: http://122.146.57.120:8000
If you change the port numbers on the Network configuration page, please open the ports accordingly on your router. For example, you can open a management session with your router to configure access through the router to the camera within your local network. Please consult your network administrator for router configuration if you have troubles with the configuration.
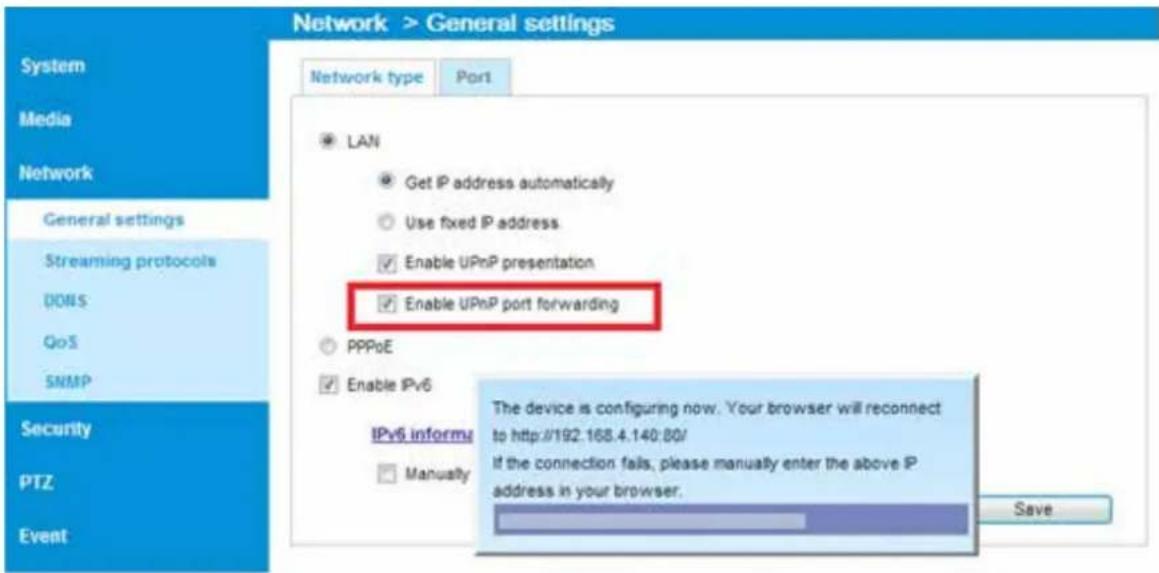
For more information with network configuration options (such as that of streaming ports), please refer to Configuration > Network Settings. VIVOTEK also provides the automatic port forwarding feature as an NAT traversal function with the precondition that your router must support the UPnP port forwarding feature.
text_image
Network > General settings Network type Port1 LAN Get IP address automatically Use fixed IP address Enable UPnP presentation Enable UPnP port forwarding PPPoE Enable IPv6 IPv6 inform: Manually The device is configuring now. Your browser will reconnect to http://192.168.4.140:80/ If the connection fails, please manually enter the above IP address in your browser. SaveAccessing the Network Camera
This chapter explains how to access the Network Camera through web browsers, RTSP players, 3GPP-compatible mobile devices, and VIVOTEK recording software.
Using Web Browsers
Use Installation Wizard 2 (IW2) to access the Network Cameras on LAN.
If your network environment is not a LAN, follow these steps to access the Network Camera:
- Launch your web browser (e.g., Microsoft® Internet Explorer or Mozilla Firefox).
- Enter the IP address of the Network Camera in the address field. Press Enter.
- Live video will be displayed in your web browser.
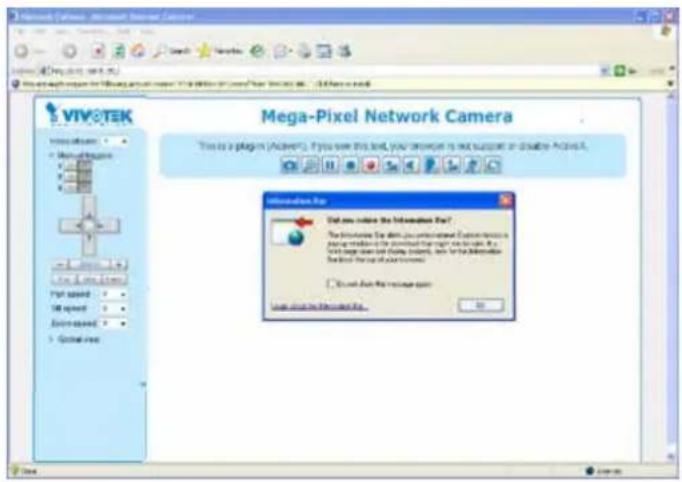
- If it is the first time installing the VIVOTEK network camera, an information bar will prompt as shown below. Follow the instructions to install the required plug-in on your computer.
text_image
VIVoTEK Mega-Pixel Network Camera This is a program (Acctera). If you see this level, your computer is not successful or disable. Please click the program to. Information For Did you select the Information For? The Information Is available upon the Internet. Customer is using email to the website for your email. It with a message that is being used. This is the Information and then the user's response to. Show how to access your app. OK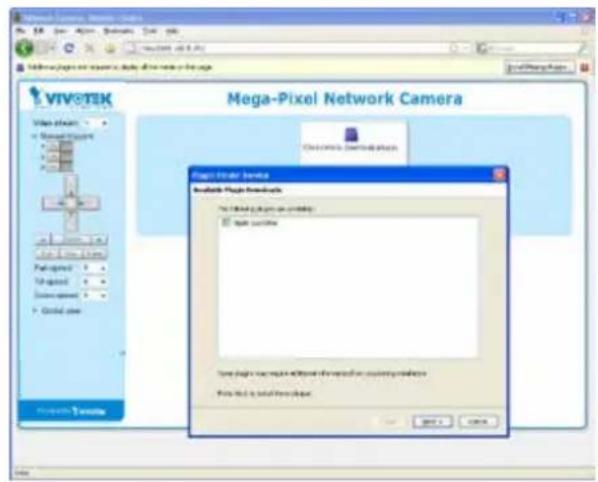
text_image
VIVOTEK Mega-Pixel Network Camera Video Player • New Image • 2000 • 2000 • 2000 • 2000 • 2000 • 2000 • 2000 • 2000 • 2000 • 2000 • 2000 • 2000 • 2000 • 2000 • 2000 Bigg Bigg Bigg Bigg Bigg Bigg Bigg Bigg Bigg Bigg Bigg Bigg Bigg Bigg Bigg Bigg Bigg Bigg Bigg Bigg Bigg Bigg Bigg Bigg Bigg Bigg Bigg Bigg Bigg Bigg Bigg Bigg Bigg Bigg
NOTE:
For Mozilla Firefox or Chrome users, your browser will use QuickTime to stream the live video. If you don't have QuickTime on your computer, please download it first, then launch the web browser.
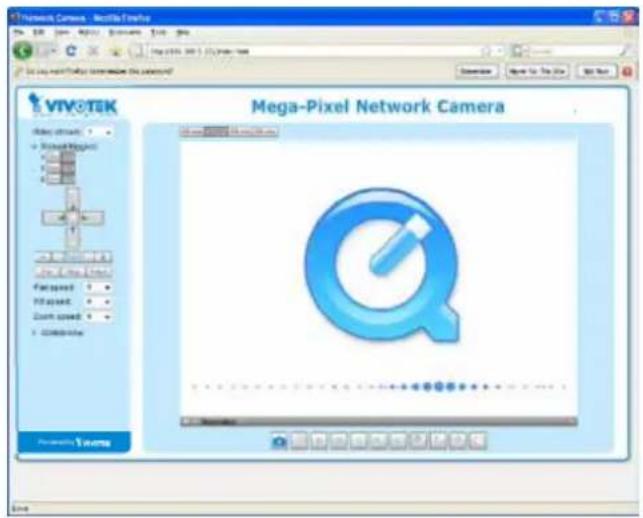
text_image
Network Camera - Microsoft Teams VIVOTEK Mega-Pixel Network Camera My name: VIVOTEK My name: VIVOTEK My name: VIVOTEK My name: VIVOTEK My name: VIVOTEK My name: VIVOTEK My name: VIVOTEK My name: VIVOTEK My name: VIVOTEK My name: VIVOTEK My name: VIVOTEK My name: VIVOTEK My name: VIVOTEK My name: My name: My name: My name: My name: My name: My name: My name: My name: My name: My name: My name: My name: My name: My name: My name: My name: My name: My name: My name: My name: My name: My name: My name: My name: My name: My name: My name: My name: My name: My name: My name: My name: My name: MY name: My name: My name: MY name: MY name: MY name: MY name: MY name: MY name: MY name: MY name: MY name: MY name: MY name: MY name: MY name: MY name: MY name: MY name: MY name: MY name: MY name: MY name: MY name: MY name: MY name: MY name: MY name: MY name: MY name: MY name: MY name: MY name: MY name: MY name: MY name: MY Name: My Name: My Name: My Name: My Name: My Name: My Name: My Name: My Name: My Name: My Name: My Name: My Name: My Name: My Name: My Name: My Name: My Name: My Name: My Name: My Name: My Name: My Name: My Name: My Name: My Name: My Name: My Name: My Name: My Name: My Name: My Name: My Name: My Name: My NAME My name: VIVOTEK My name: VIVOTEK My name: VIVOTEK My name: VIVOTEK My name: VIVOTEK My name: VIVOTEK My name: VIVOTEK My name: VIVOTEK My name: VIVOTEK My name: VIVOTEK My name: VIVOTEK My name: VIVOTEK My name/My Name/My Name/My Name/My Name/My Name/My Name/My Name/My Name/My Name/My Name/My Name/My Name/My Name/My Name/My Name/My Name/My Name/My Name/My Name/My Name/My Name/My Name/My Name/My Name/My Name/My Name/My Name/My Name/My Name/My Name/My Name/My Name/My Name/My Name/ Microsoft Teams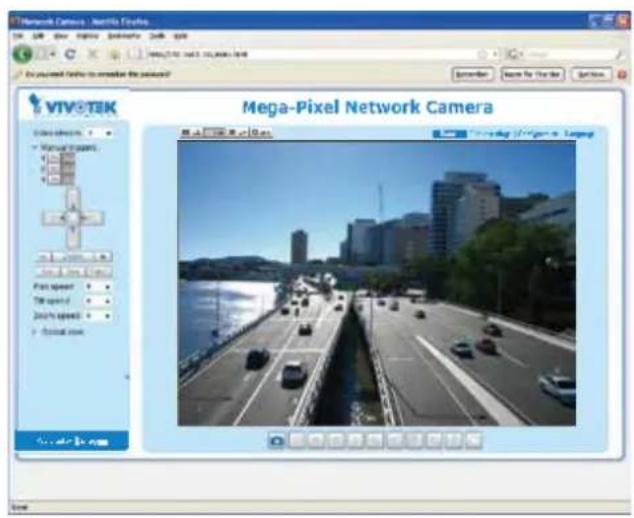
text_image
Network Camera - Netto Flows VIVOTIK Mega-Pixel Network Camera www.vivotik.com http://www.vivotik.com New SaveBy default, the Network Camera is not password-protected. To prevent unauthorized access, it is highly recommended to set a password for the Network Camera.
For more information about how to enable password protection, please refer to Security on page 105.
▶ If you see a dialog box indicating that your security settings prohibit running ActiveX ^® Controls, please enable the ActiveX ^® Controls for your browser.
- Choose Tools > Internet Options > Security > Custom Level.
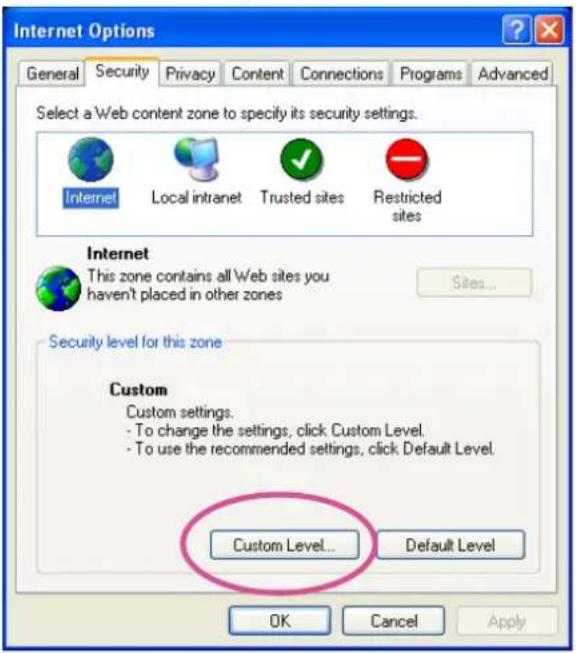
text_image
Internet Options General Security Privacy Content Connections Programs Advanced Select a Web content zone to specify its security settings. Internet Local intranet Trusted sites Restricted sites Internet This zone contains all Web sites you haven't placed in other zones Sites... Security level for this zone Custom Custom settings. - To change the settings, click Custom Level. - To use the recommended settings, click Default Level. Custom Level... Default Level OK Cancel Apply- Look for Download signed ActiveX® controls; select Enable or Prompt. Click OK.
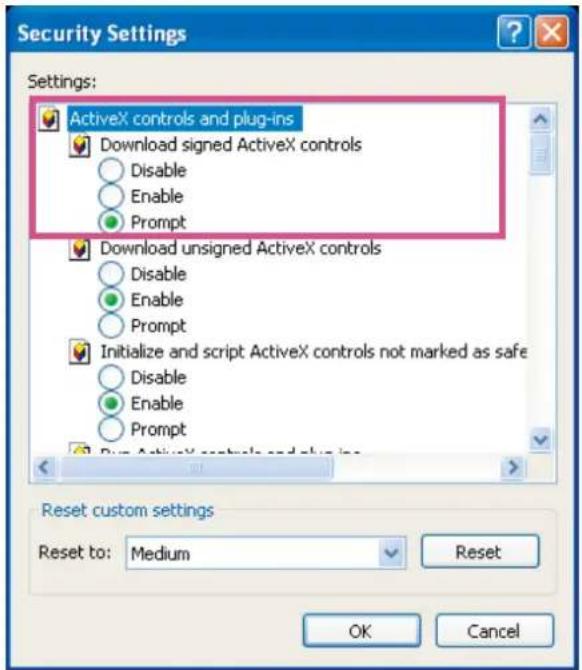
text_image
Security Settings Settings: ActiveX controls and plug-ins Download signed ActiveX controls Disable Enable Prompt Download unsigned ActiveX controls Disable Enable Prompt Initialize and script ActiveX controls not marked as safe Disable Enable Prompt Reset custom settings Reset to: Medium Reset OK Cancel- Refresh your web browser, then install the ActiveX control. Follow the instructions to complete installation.

IMPORTANT:
- Currently the Network Camera utilizes a 32-bit ActiveX plugin. You CAN NOT open a management/view session with the camera using a 64-bit IE browser.
- If you encounter this problem, try execute the lexlore.exe program from C:\Windows\SysWOW64. A 32-bit version of IE browser will be installed.
- On Windows 7, the 32-bit explorer browser can be accessed from here:
C:\Program Files (x86)\Internet Explorer\iexplore.exe - If you open a web session from the Shepherd utility, a 32-bit IE browser will be opened.

Tips:
- The onscreen Java control can malfunction under the following situations: A PC connects to different cameras that are using the same IP address (or the same camera running different firmware versions). Removing your browser cookies will solve this problem.
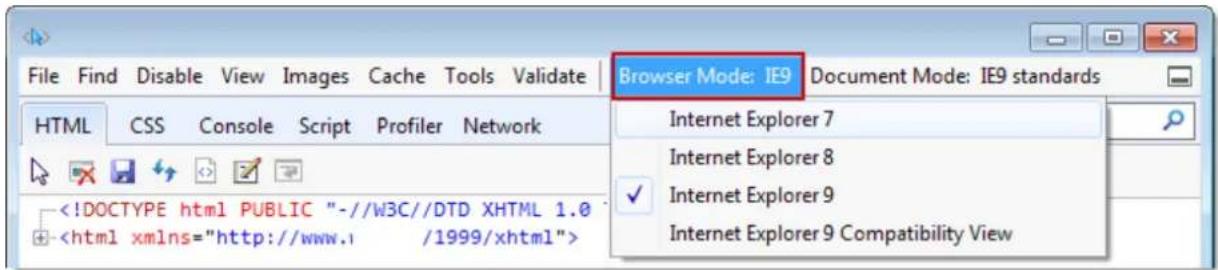
- If you encounter problems with displaying the configuration menus or UI items, try disable the Compatibility View on IE8 or IE9.

text_image
http://www.joinsmsn.com/You may also press the F12 key to open the developer tools utility, and then change the Browser Mode to the genuine IE8 or IE9 mode.
text_image
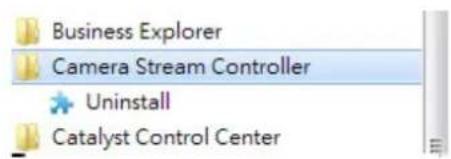
File Find Disable View Images Cache Tools Validate Browser Mode: IE9 Document Mode: IE9 standards HTML CSS Console Script Profiler Network Internet Explorer 7 Internet Explorer 8 ✓ Internet Explorer 9 Internet Explorer 9 Compatibility View- In the event of plug-in compatibility issues, you may try to uninstall the plug-in that was previously installed.
text_image
Business Explorer Camera Stream Controller Uninstall Catalyst Control CenterUsing RTSP Players
To view the streaming media using RTSP players, you can use one of the following players that support RTSP streaming.

Quick Time Player
VLC media player
- Launch the RTSP player.
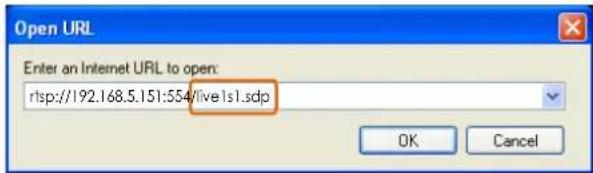
- Choose File > Open URL. A URL dialog box will pop up.
- The address format is rtsp://
: /
As most ISPs and players only allow RTSP streaming through port number 554, please set the RTSP port to 554. For more information, please refer to RTSP Streaming on page 95.
For example:
text_image
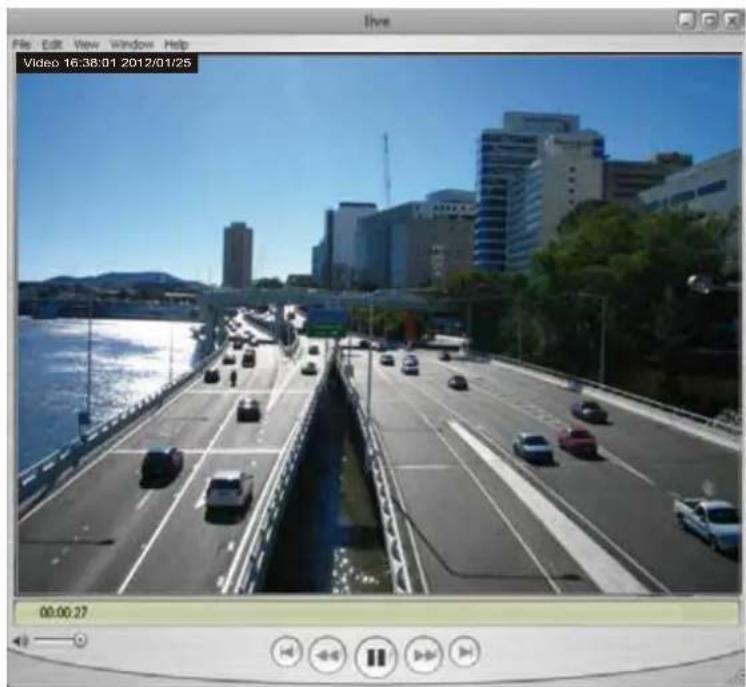
Open URL Enter an Internet URL to open: rlsp://192.168.5.151:554/live ls1.sdp OK Cancel- The live video will be displayed in your player.
For more information on how to configure the RTSP access name, please refer to RTSP Streaming on page 95 for details.
natural_image
Video player interface showing a highway bridge over water with city skyline in background (no readable text or symbols)Using 3GPP-compatible Mobile Devices
To view the streaming media through 3GPP-compatible mobile devices, make sure the Network Camera can be accessed over the Internet. For more information on how to set up the Network Camera over the Internet, please refer to Setup the Network Camera over the Internet on page 28.
To utilize this feature, please check the following settings on your Network Camera:
-
Because most players on 3GPP mobile phones do not support RTSP authentication, make sure the authentication mode of RTSP streaming is set to disable. For more information, please refer to RTSP Streaming on page 95.
-
As the bandwidth on 3G networks is limited, you will not be able to use a large video size. Please set the video streaming parameters as listed below. For more information, please refer to Stream settings on page 76.
| Video Mode H.264 | |
| Frame size 176 x 144 | |
| Maximum frame rate 5 fps | |
| Intra frame period 1S | |
| Video quality (Constant bit rate) 40kbps | |
-
As most ISPs and players only allow RTSP streaming through port number 554, please set the RTSP port to 554. For more information, please refer to RTSP Streaming on page 95.
-
Launch the player on the 3GPP-compatible mobile devices (e.g., QuickTime).
-
Type the following URL commands into the player. The address format is rtsp://
: / . For example:
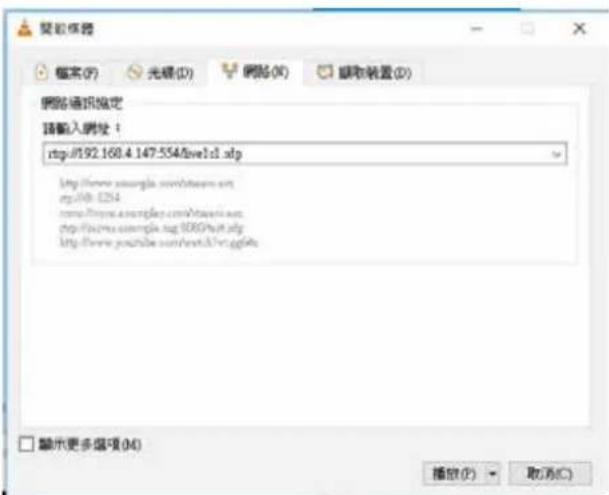
You can configure Stream #2 into the suggested stream settings as listed above for live viewing on a mobile device.
Using VIVOTEK Recording Software
Visit our website for download the VAST recording software that provides simultaneous monitoring and video recording for multiple Network Cameras. Please install the recording software; then launch the program to add the Network Camera to the Channel list. For detailed information about how to use the recording software, please refer to the user's manual of the software or download it from http://www.vivotek.com.
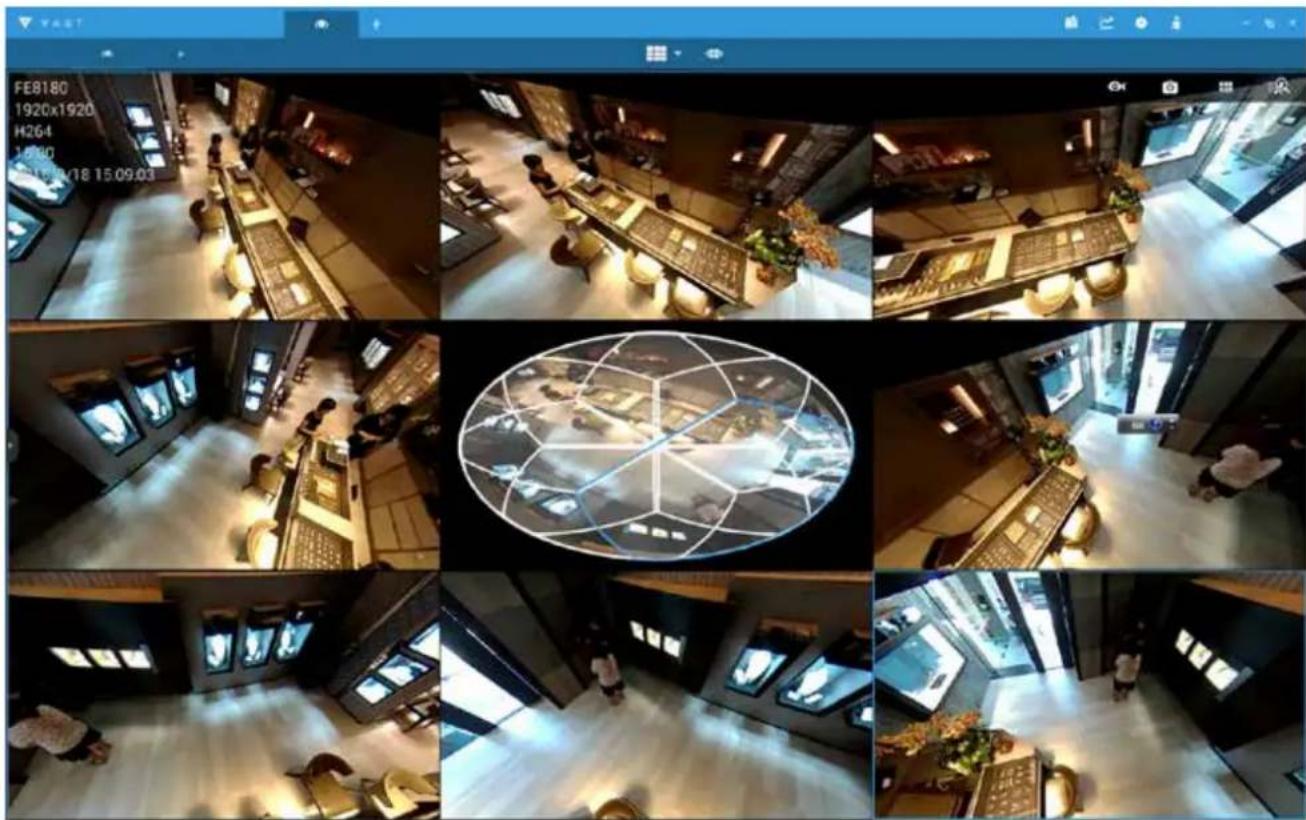
natural_image
Overhead view of a modern, multi-level interior space with multiple views and digital displays (no readable text or symbols)
Tips:
- If you encounter problems with displaying live view or the onscreen plug-in control, you may try to remove the plug-ins that might have been installed on your computer. Remove the following folder: C:\Program Files (x86)\Camera Stream Controller\
- If you forget the root (administrator) password for the camera, you can restore the camera defaults by pressing the reset button for longer than 5 seconds.
- If DHCP is enabled in your network, and the camera cannot be accessed, run the Shepherd utility to search the network. If the camera has been configured with fixed IP that does not comply with your local network, you may see its default IP 169.254.x.x. If you still cannot find the camera, you can restore the camera to its factory defaults.
- If you change your network parameters, e.g., added a connection to a LAN card, re-start the Shepherd utility.
Main Page
This chapter explains the layout of the main page. It is composed of the following sections: VIVOTEK INC. Logo, Host Name, Camera Control Area, Configuration Area, Menu, and Live Video Window.
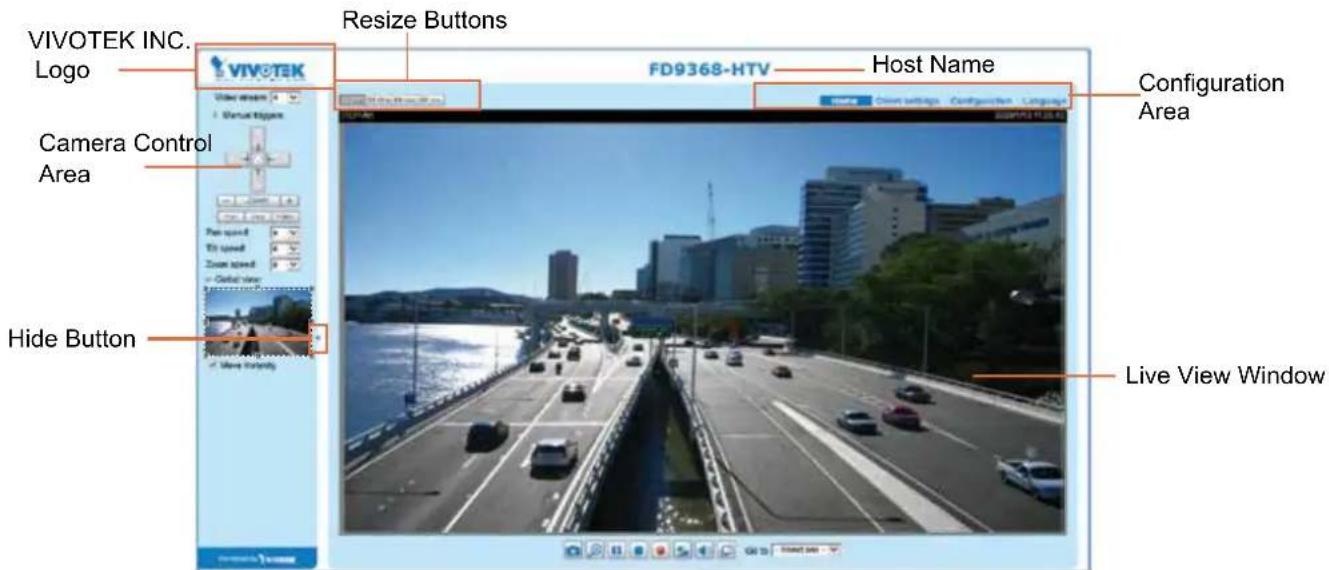
text_image
VIVOTEK INC. Logo VIVOTEK Resize Buttons Camera Control Area Hide Button FD9368-HTV Host Name Configuration Area Live View WindowVIVOTEK INC. Logo
Click this logo to visit the VIVOTEK website.
Host Name
The host name can be customized to fit your needs. The name can be changed especially there are many cameras in your surveillance deployment. For more information, please refer to System on page 49.
Camera Control Area
Video Stream: This Network Camera supports multiple streams (streams 1 and 2) simultaneously. You can select any of them for live viewing. For more information about multiple streams, please refer to page 76 for detailed information.
Manual Trigger: Click to enable/disable an event trigger manually. Please configure an event setting on the Application page before you enable this function. A total of 3 event configuration can be configured. For more information about event setting, please refer to page 123. If you want to hide this item on the homepage, please go to Configuration> System > Homepage Layout > General settings > Customized button to deselect the "show manual trigger button" checkbox.
Configuration Area
Client Settings: Click this button to access the client setting page. For more information, please refer to Client Settings on page 43.
Configuration: Click this button to access the configuration page of the Network Camera. It is suggested that a password be applied to the Network Camera so that only the administrator can configure the Network Camera. For more information, please refer to Configuration on page 48.
Language: Click this button to choose a language for the user interface. Language options are available in: English, Deutsch, Español, Français, Italiano, 日本語, Português, 簡体ド之, and 繁體ド之. Please note that you can also change a language on the Configuration page; please refer to page 48.
Hide Button
You can click the hide button to hide or display the control panel.
Resize Buttons

Click the Auto button, the video cell will resize automatically to fit the monitor. Click 100% is to display the original homepage size. Click 50% is to resize the homepage to 50% of its original size. Click 25% is to resize the homepage to 25% of its original size.
Live Video Window
■ The following window is displayed when the video mode is set to H.264 or H.265: H.265/264 Protocol and Media Options
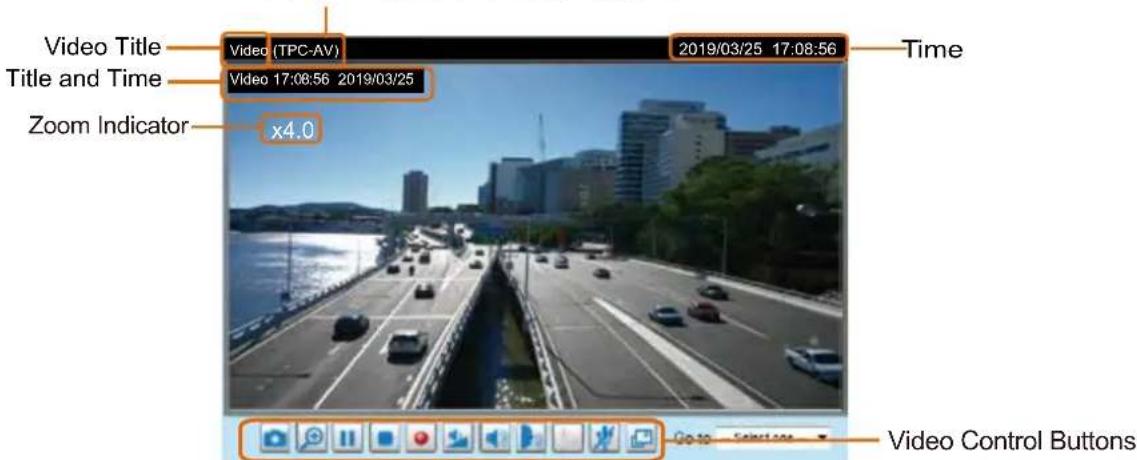
text_image
Video Title Title and Time Zoom Indicator x4.0 Video (TPC-AV) 2019/03/25 17:08:56 Time Video 17:08:56 2019/03/25 Video Control ButtonsVideo Title: The video title can be configured. For more information, please refer to Video Settings on page 61.
H.264 or H. 265 Protocol and Media Options: The transmission protocol and media options for H.264 or H.265 video streaming. For further configuration, please refer to Client Settings on page 43.
Time: Display the current time. For further configuration, please refer to Media > Image > Genral settings on page 61.
Title and Time: The video title and time can be stamped on the streaming video. For further configuration, please refer to Media > Image > General settings on page 66.
PTZ Panel: This Network Camera supports "digital" (e-PTZ) pan/tilt/zoom control, which allows roaming a smaller view frame within a large view frame. Please refer to PTZ settiings on page 120 for detailed information.
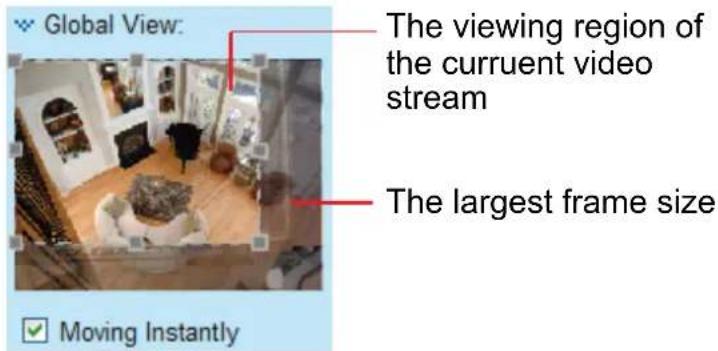
Global View: Click on this item to display the Global View window. The Global View window contains a full view image (the largest frame size of the captured video) and a floating frame (the viewing region of the current video stream). The floating frame allows users to control the e-PTZ function (Electronic Pan/Tilt/Zoom). For more information about e-PTZ operation, please refer to E-PTZ Operation on page 120. For more information about how to set up the viewing region of the current video stream, please refer to page 120.
text_image
Global View: The viewing region of the curruent video stream The largest frame size Moving InstantlyNote that the PTZ buttons on the panel are not operational unless you are showing only a portion of the full image. If the live view window is displaying the full view, the PTZ buttons are not functional.
Video Control Buttons: Depending on the Network Camera model and Network Camera configuration, some buttons may not be available.

Snapshot: Click this button to capture and save still images. The captured images will be displayed pop-up window. Right-click the image and choose Save Picture As to save it in JPEG (*.jpg) or BMP.mp) format.

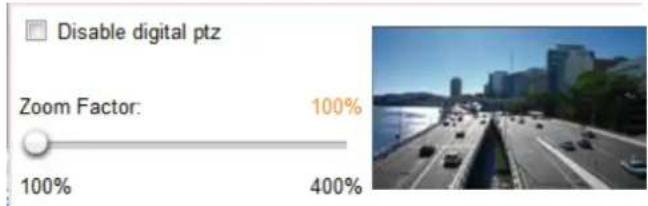
Digital Zoom: Click and uncheck "Disable digital zoom" to enable the zoom operation. The navigation been indicates the part of the image being magnified. To control the zoom level, drag the slider bar. To ve to a different area you want to magnify, drag the navigation screen.
text_image
Disable digital ptz Zoom Factor: 100% 100% 400%
Pause: Pause the transmission of the streaming media. The button becomes the ▶ Resume button or clicking the Pause button.

Stop: Stop the transmission of the streaming media. Click the ▶ Resume button to continue smission.

Start MP4 Recording: Click this button to record video clips in MP4 file format to your computer.
ss the □ Stop MP4 Recording button to end recording. When you exit the web browser, video
ording stops accordingly. To specify the storage destination and file name, please refer to MP4 Saving
ions on page 44 for details.

Volume: When the 📷 Mute function is not activated, move the slider bar to adjust the volume on the real computer.

Mute: Turn off the volume on the local computer. The button becomes the 📄 Audio On button after king the Mute button.

Full Screen: Click this button to switch to full screen mode. Press the "Esc" key to switch back to normal mode.

NOTE:
- For a megapixel camera, it is recommended to use monitors of the 24" size or larger, and are capable of 1600x1200 or better resolutions.
- Below are the defaults for Audio settings:
For cameras with built-in microphone: Not Muted.
For cameras without built-in microphone: Muted.
To receive audio input from an external microphone, you may need to enable the audio input from Media > Audio. Refer to page 86 for more information.
■ The following window is displayed when the video mode is set to MJPEG:
text_image
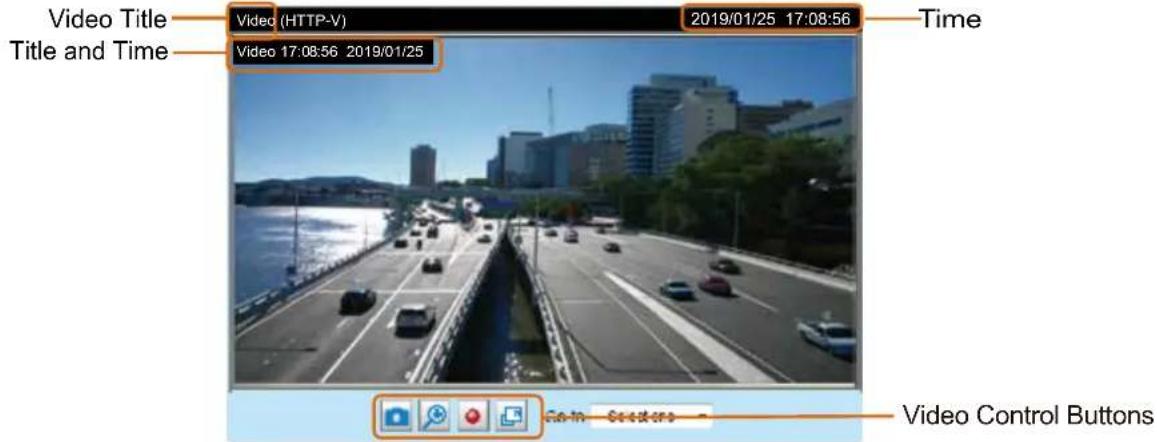
Video Title Title and Time Video (HTTP-V) 2019/01/25 17:08:56 Time Video 17:08:56 2019/01/25 Video Control ButtonsVideo Title: The video title can be configured. For more information, please refer to Media > Image on page 66.
Time: Display the current time. For more information, please refer to Media > Image on page 66.
Title and Time: Video title and time can be stamped on the streaming video. For more information, please refer to Media > Image on page 66.
Video Control Buttons: Depending on the Network Camera model and Network Camera configuration, some buttons may not be available.

Snapshot: Click this button to capture and save still images. The captured images will be displayed in a pop-up window. Right-click the image and choose Save Picture As to save it in JPEG (*.jpg) or BMP (*.bmp) format.

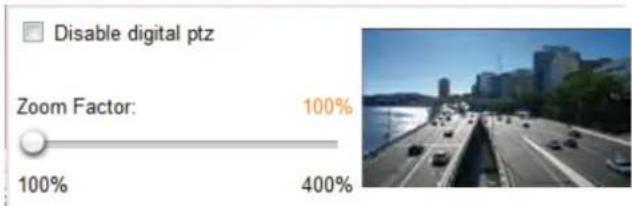
Digital Zoom: Click and uncheck "Disable digital zoom" to enable the zoom operation. The navigation screen indicates the part of the image being magnified. To control the zoom level, drag the slider bar. To move to a different area you want to magnify, drag the navigation screen.
text_image
Disable digital ptz Zoom Factor: 100% 100% 400%
- Start MP4 Recording: Click this button to record video clips in MP4 file format to your computer. Press the □ Stop MP4 Recording button to end recording. When you exit the web browser, video recording stops accordingly. To specify the storage destination and file name, please refer to MP4 Saving Options on page 44 for details.

Full Screen: Click this button to switch to full screen mode. Press the "Esc" key to switch back to normal mode.
Client Settings
This chapter explains how to select the stream transmission mode and saving options on the local computer. When completed with the settings on this page, click Save on the page bottom to enable the settings.
H.265/H.264 Media Options
H.265/H.264 media options
Video and audio
Select to stream video or audio data or both. This is enabled only when the video mode is set to H.264.
H.265/H.264 Protocol Options
H.265/H.264 protocol options
TCP

Depending on your network environment, there are four transmission modes of H.264 streaming:
UDP unicast: This protocol allows for more real-time audio and video streams. However, network packets may be lost due to network burst traffic and images may be broken. Activate UDP connection when occasions require time-sensitive responses and the video quality is less important. Note that each unicast client connecting to the server takes up additional bandwidth and the Network Camera allows up to ten simultaneous accesses.
UDP multicast: This protocol allows multicast-enabled routers to forward network packets to all clients requesting streaming media. This helps to reduce the network transmission load of the Network Camera while serving multiple clients at the same time. Note that to utilize this feature, the Network Camera must be configured to enable multicast streaming at the same time. For more information, please refer to RTSP Streaming on page 95.
TCP: This protocol guarantees the complete delivery of streaming data and thus provides better video quality. The downside of this protocol is that its real-time effect is not as good as that of the UDP protocol.
HTTP: This protocol allows the same quality as TCP protocol without needing to open specific ports for streaming under some network environments. Users inside a firewall can utilize this protocol to allow streaming data through.
MP4 Saving Options
MP4 saving options
Folder:
C:\Record
Browse.
File name prefix:
CLIP

Add date and time suffix to file name
Users can record live video as they are watching it by clicking Start MP4 Recording on the main page. Here, you can specify the storage destination and file name.
Folder: Specify a storage destination on your PC for the recorded video files. The location can be changed.
File name prefix: Enter the text that will be appended to the front of the video file name. A specified folder will be automatically created on your local hard disk.
Add date and time suffix to the file name: Select this option to append the date and time to the end of the file name.
CLIP_20190321-180853


File name prefix
Date and time suffix
The format is: YYYYMMDD_HHMMSS
Local Streaming Buffer Time
Local streaming buffer time

Millisecond
Save
In the case of encountering unsteady bandwidth, live streaming may lag and video streaming may not be very smoothly. If you enable this option, the live streaming will be stored temporarily on your PC's cache memory for a few milli seconds before being played on the live viewing window. This will help you see the streaming more smoothly. If you enter 3,000 Millisecond, the streaming will delay for 3 seconds.
Joystick settings
Enable Joystick
Connect a joystick to a USB port on your management computer. Supported by the plug-in (Microsoft's DirectX), once the plug-in for the web console is loaded, it will automatically detect if there is any joystick on the computer. The joystick should work properly without installing any other driver or software.
Then you can begin to configure the joystick settings of connected devices. Please follow the instructions below to enable joystick settings.
-
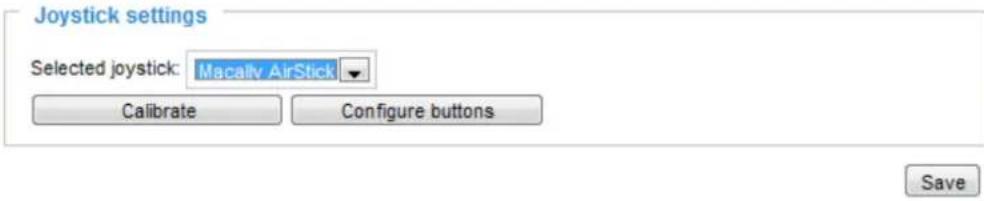
Select a detected joystick, if there are multiple, from the Selected joystick menu. If your joystick is not detected, if may be defective.
-
Click Calibrate or Configure buttons to configure the joystick-related settings.
text_image
Joystick settings Selected joystick: Macally AirStick Calibrate Configure buttons Save
NOTE:
- If you want to assign Preset actions to your joystick, the preset locations should be configured in advance in the Configuration > PTZ page. In Windows, use the search function on the Start menu to search for Game Controller.
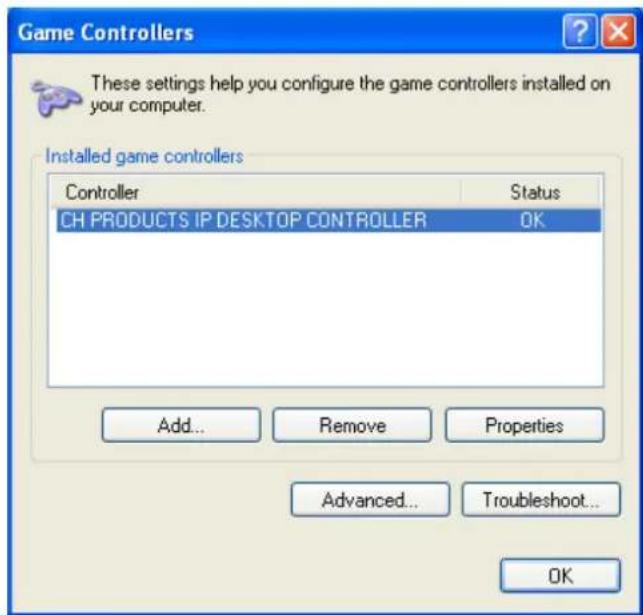
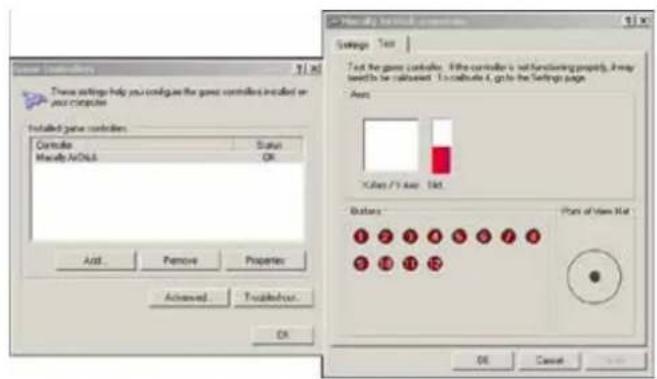
- If your joystick is not working properly, it may need to be calibrated. Click the Calibrate button to open the Game Controllers window located in Microsoft Windows control panel and follow the instructions for trouble shooting.
- The joystick will appear in the Game Controllers list in the Windows Control panel. If you want to check out for your devices, go to the following page: Start -> Control Panel -> Game Controllers.
text_image
Game Controllers These settings help you configure the game controllers installed on your computer. Installed game controllers Controller Status CH PRODUCTS IP DESKTOP CONTROLLER OK Add... Remove Properties Advanced... Troubleshoot... OKButtons Configuration
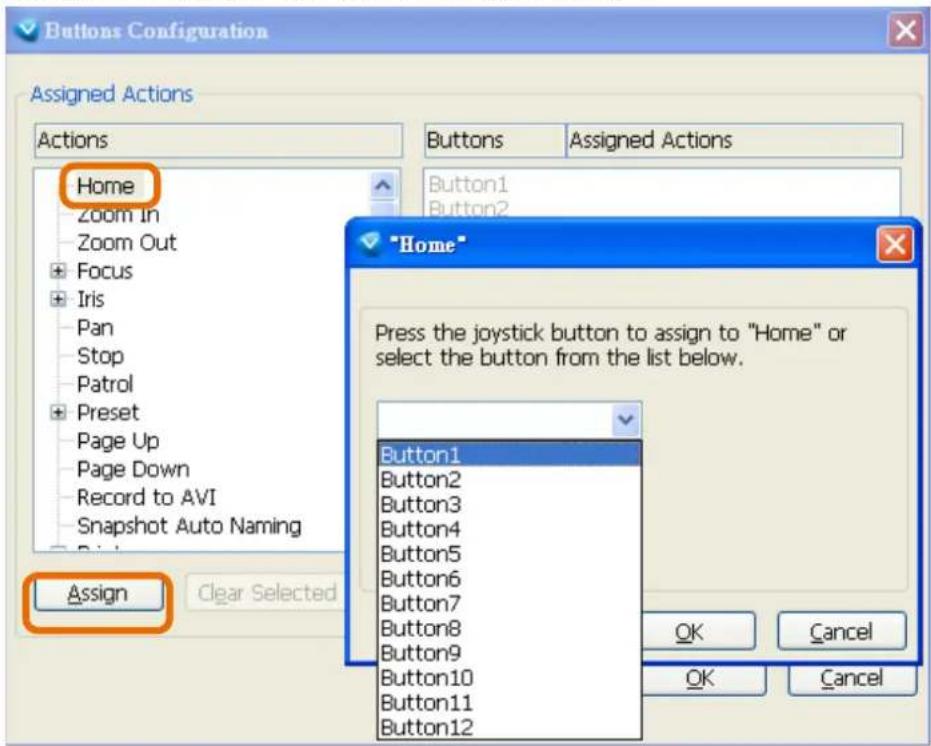
In the Button Configuration window, the left column shows the actions you can assign, and the right column shows the functional buttons and assigned actions. The number of buttons may differ from different joysticks.
Please follow the steps below to configure your joystick buttons:
- Choosing one of the actions and click Assign will pop up a dialog. Then you can assign this action to a button by pressing the joystick button or select it from the drop-down list. For example: Assign Home (move to home position) to Button 1.
text_image
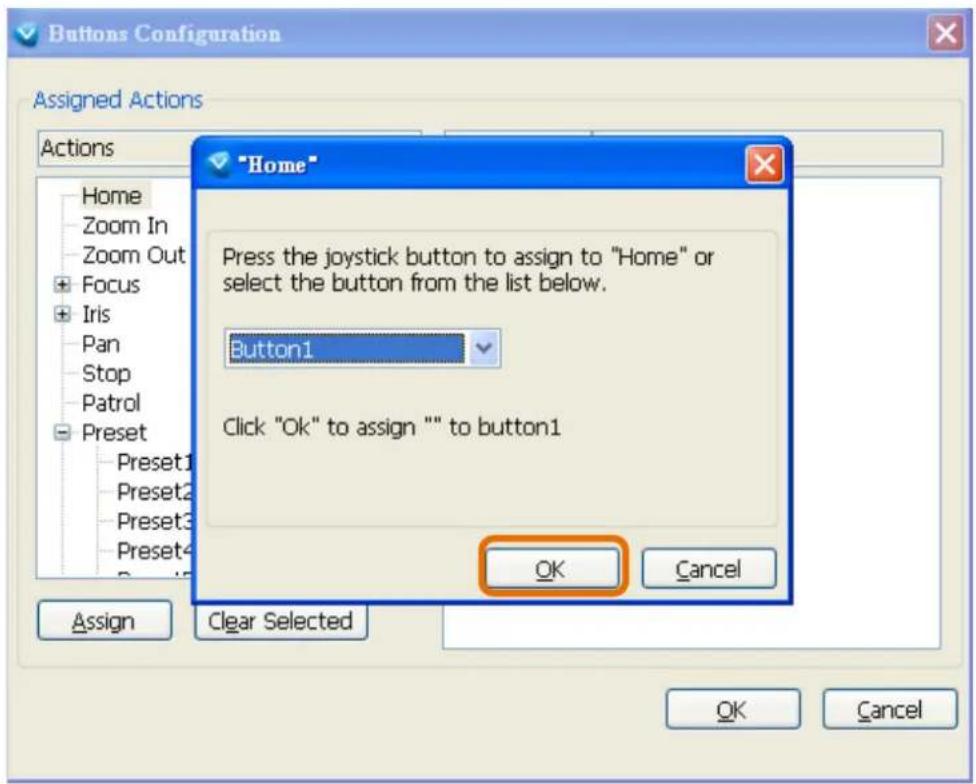
Buttons Configuration Assigned Actions Actions Home Zoom In Zoom Out Focus Iris Pan Stop Patrol Preset Page Up Page Down Record to AVI Snapshot Auto Naming Assign Clear Selected Buttons Assigned Actions Button1 Button2 Button3 Button4 Button5 Button6 Button7 Button8 Button9 Button10 Button11 Button12 "Home" Press the joystick button to assign to "Home" or select the button from the list below. Button1 Button2 Button3 Button4 Button5 Button6 Button7 Button8 Button9 Button10 Button11 Button12 OK Cancel OK Cancel- Click OK to confirm the configuration.
text_image
Buttons Configuration Assigned Actions Actions Home Zoom In Zoom Out Focus Iris Pan Stop Patrol Preset Preset1 Preset2 Preset3 Preset4 Preset5 "Home" Press the joystick button to assign to "Home" or select the button from the list below. Button1 Click "Ok" to assign "" to button1 OK Cancel Assign Clear Selected OK CancelButtons Configuration
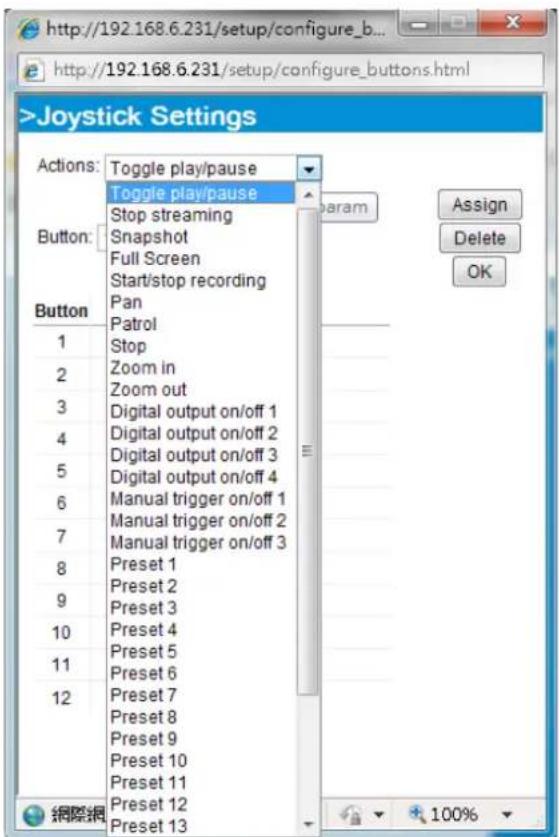
Click the Configure Buttons button, a window will prompt as shown below. Please follow the steps below to configure your joystick buttons:
- Select a button number from the Button # pull-down menu.

text_image
>Joystick Settings Actions: Toggle play/pause Button: 1 1 2 3 4 5 6 7 8 9 10 11 12 Assigned Actions Full Screen Stop Zoom in Patrol Toggle play/pause Snapshot Assign Delete OK 網際網路 | 受保護模式: 關閉 100%
Tips:
If you are not sure of the locations of each button, use the Properties window in the Game Controllers utility.
text_image
Configure Settings These settings help you configure the game controller installed or you computer. Installed game controller: Configure Macify iOS4 Status OK Add... Remove Properties Achieved... Refresher... OK Modify to set common Settings Test for game controller. If the controller is not functioning properly, then beets to be corrected. To calculate it, give the Settings page. Auto 1000x 7000x 1000x Auto / 7 Auto 1000x 7000x 1000x Buttons 1 2 3 4 5 6 7 8 9 10 11 12 Part of View List OK Cancel- Select a corresponding action, such as Patrol or Preset#.
- Click the Assign button to assign an action to the button. You can delete an association by selecting a button number, and then click the Delete button.
Repeat the process until you are done with the configuration of all preferred actions.
The buttons you define should appear on the button list accordingly.
- Please remember to click the Save button on the Client settings page to preserver your settings.
text_image
>Joystick Settings Actions: Toggle play/pause Toggle play/pause Stop streaming Snapshot Full Screen Start/stop recording Pan Patrol Stop Zoom in Zoom out Digital output on/off 1 Digital output on/off 2 Digital output on/off 3 Digital output on/off 4 Manual trigger on/off 1 Manual trigger on/off 2 Manual trigger on/off 3 Preset 1 Preset 2 Preset 3 Preset 4 Preset 5 Preset 6 Preset 7 Preset 8 Preset 9 Preset 10 Preset 11 Preset 12 Preset 13 Assign Delete OKConfiguration
Click Configuration on the main page to enter the camera setting pages. Note that only Administrators can access the configuration page.
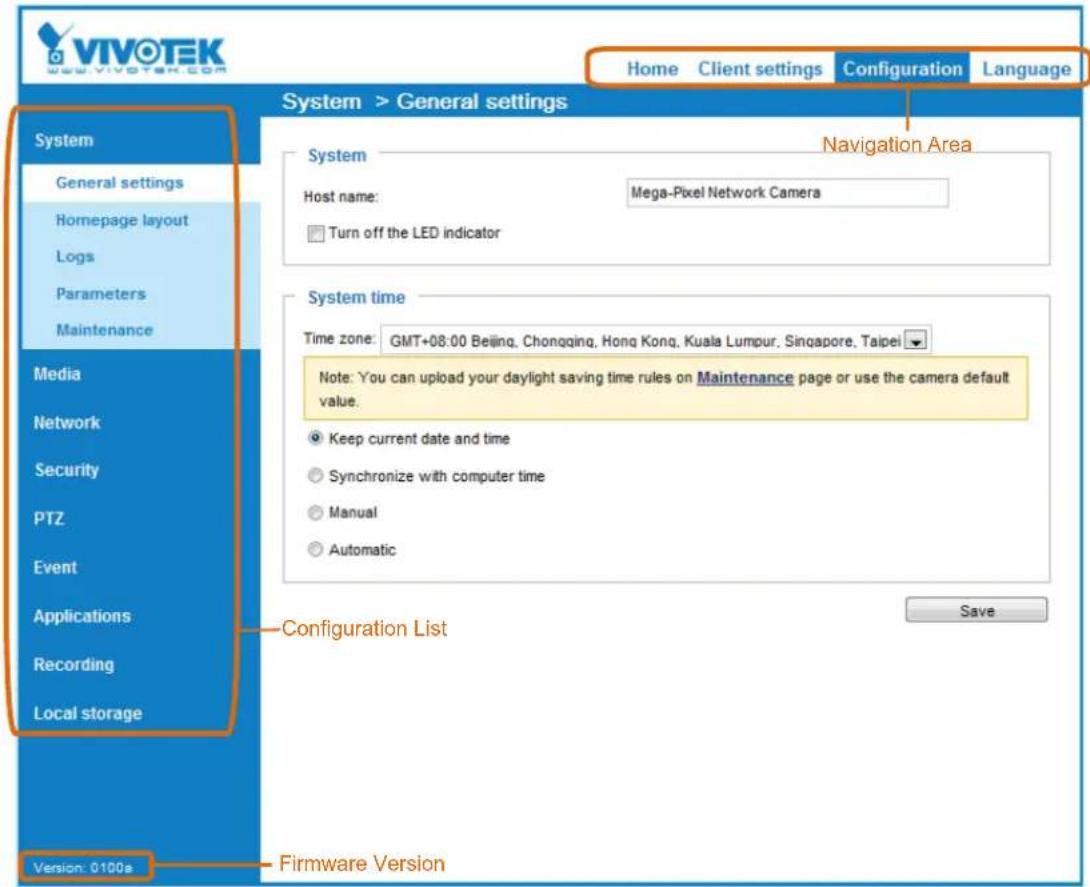
VIVOTEK provides an easy-to-use user interface that helps you set up your network camera with minimal effort. In order to simplify the user interface, detailed information will be hidden unless you click on the function item. When you click on the first sub-item, the detailed information for the first sub-item will be displayed; when you click on the second sub-item, the detailed information for the second sub-item will be displayed and that of the first sub-item will be hidden.
The following is the interface of the main page:
text_image
VIVOTEK Web.VIVOTEK.COM Home Client settings Configuration Language System > General settings System General settings Homepage layout Logs Parameters Maintenance Media Network Security PTZ Event Applications Recording Local storage System Host name: Mega-Pixel Network Camera Turn off the LED indicator Navigation Area System time Time zone: GMT+08:00 Beijing, Chongqing, Hong Kong, Kuala Lumpur, Singapore, Taipei Note: You can upload your daylight saving time rules on Maintenance page or use the camera default value. Keep current date and time Synchronize with computer time Manual Automatic Configuration List Save Version: 0100s Firmware VersionEach function on the configuration list will be explained in the following sections.
The Navigation Area provides access to all different views from the Home page (for live viewing), Configuration page, and multi-language selection.
System > General settings
This section explains how to configure the basic settings for the Network Camera, such as the host name and system time. It is composed of the following two columns: System, and System Time. When finished with the settings on this page, click Save at the bottom of the page to enable the settings.
System

text_image
System Host name: Mega-Pixel Network Camera Turn off the LED indicatorHost name: Enter a desired name for the Network Camera. The text will be displayed at the top of the main page, and also on the view cells of the ST7501 and VAST management software.
Turn off the LED indicators: If you do not want others to notice the network camera is in operation, you can select this option to turn off the LED indicators.
System time
text_image
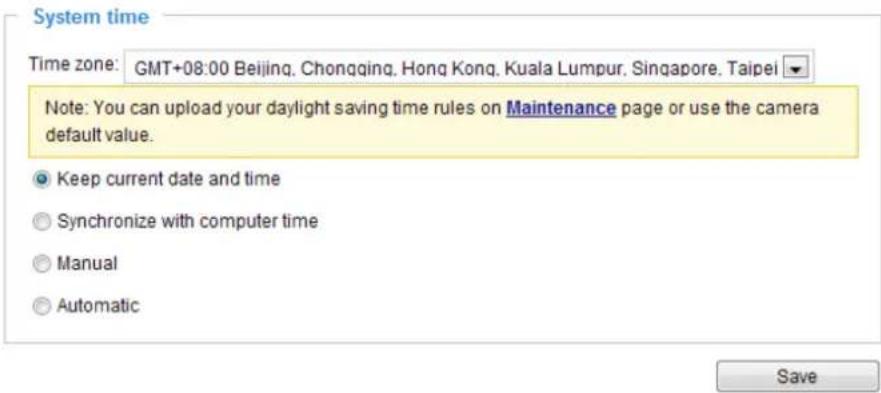
System time Time zone: GMT+08:00 Beijing, Chongqing, Hong Kong, Kuala Lumpur, Singapore, Taipei Note: You can upload your daylight saving time rules on Maintenance page or use the camera default value. Keep current date and time Synchronize with computer time Manual Automatic SaveKeep current date and time: Select this option to preserve the current date and time of the Network Camera. The Network Camera's internal real-time clock maintains the date and time even when the power of the system is turned off.
Synchronize with computer time: Select this option to synchronize the date and time of the Network Camera with the local computer. The read-only date and time of the PC is displayed as updated.
Manual: The administrator can enter the date and time manually. Note that the date and time format are [yyyy/mm/dd] and [hh:mm:ss].
Automatic: The Network Time Protocol is a protocol which synchronizes computer clocks by periodically querying an NTP Server.
NTP server: Assign the IP address or domain name of the time-server. Leaving the text box blank connects the Network Camera to the default time servers. The precondition is that the camera must have the access to the Internet.
Update interval: Select to update the time using the NTP server on an hourly, daily, weekly, or monthly basis.
Time zone : Select the appropriate time zone from the list. If you want to upload Daylight Savings Time rules, please refer to System > Maintenance > Import/ Export files on page 58 for details.
This section explains how to set up your own customized homepage layout.
General settings
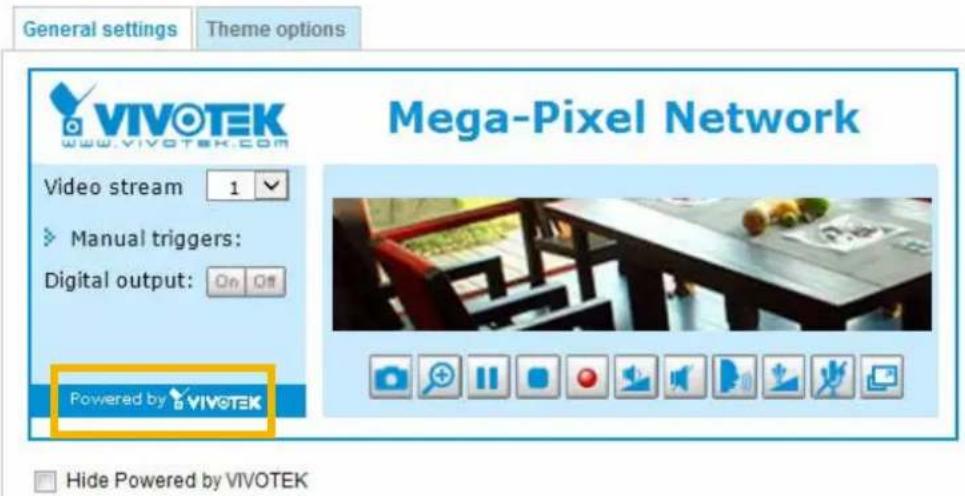
This column shows the settings of your homage layout. You can manually select the background and font colors in Theme Options (the second tab on this page). The settings will be displayed automatically in this Preview field. The following shows the homepage using the default settings:
text_image
General settings Theme options VIVOTEK www.vivotek.com Video stream 1 Manual triggers: Digital output: On Off Powered by VIVOTEK Mega-Pixel Network Hide Powered by VIVOTEK■ Hide Powered by VIVOTEK: If you check this item, it will be removed from the homepage.
Logo graph
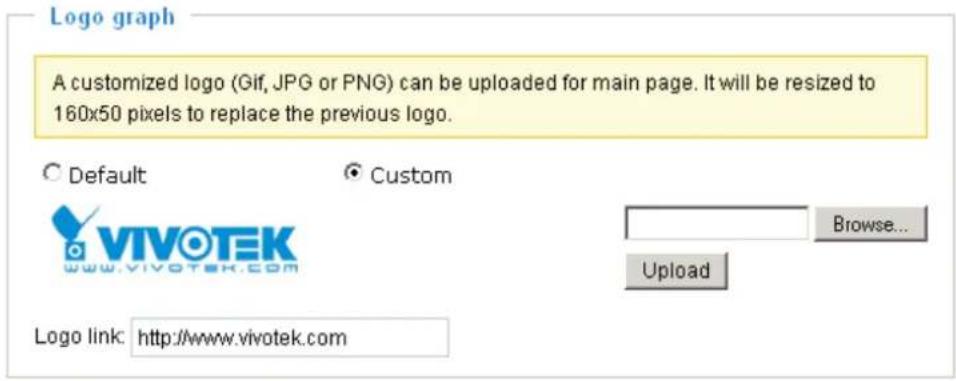
Here you can change the logo that is placed at the top of your homepage.
text_image
Logo graph A customized logo (Gif, JPG or PNG) can be uploaded for main page. It will be resized to 160x50 pixels to replace the previous logo. Default Custom VIVOTEK www.vivotek.com Browse... Upload Logo link: http://www.vivotek.comFollow the steps below to upload a new logo:
- Click Custom and the Browse field will appear.
- Select a logo from your files.
- Click Upload to replace the existing logo with a new one.
- Enter a website link if necessary.
- Click Save to enable the settings.
Customized button
If you want to hide manual trigger buttons on the homepage, please uncheck this item. This item is checked by default.

text_image
Customized button ✓ Show manual trigger buttonTheme Options
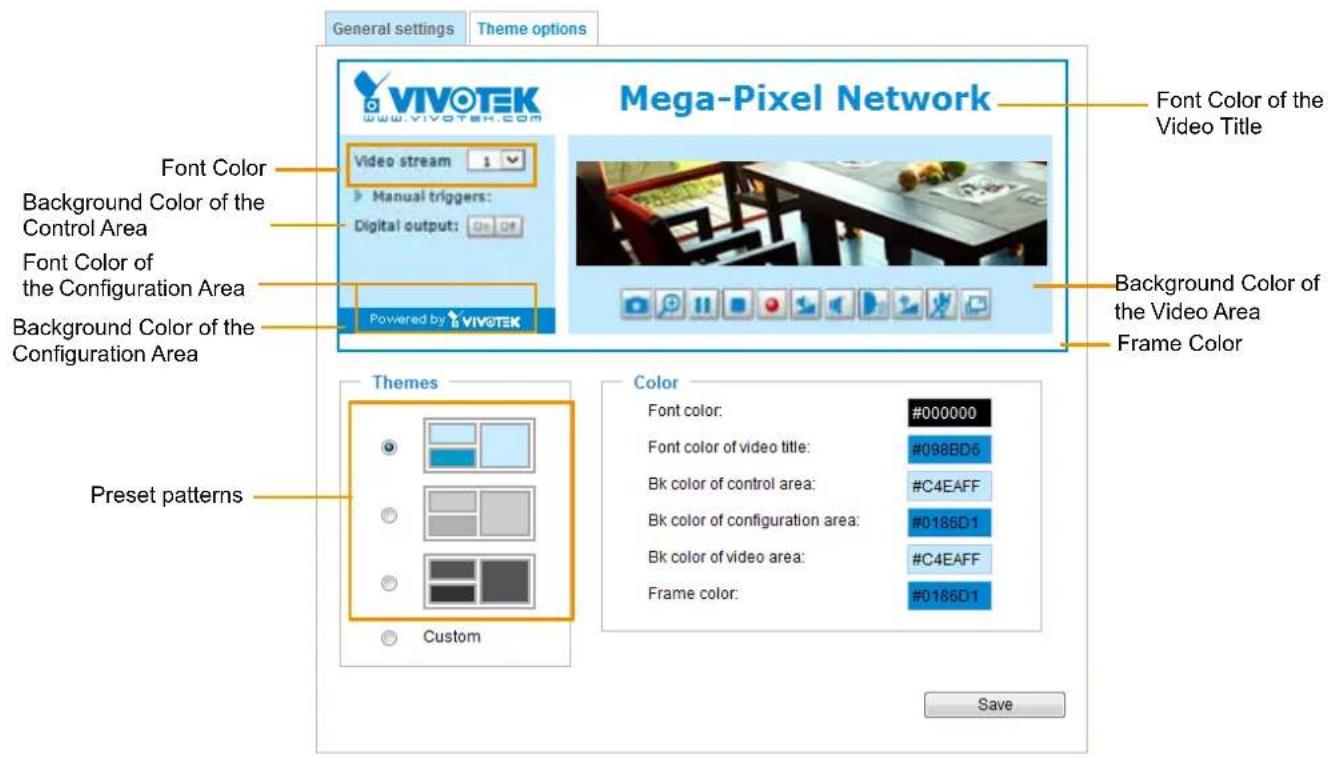
Here you can change the color of your homepage layout. There are three types of preset patterns for you to choose from. The new layout will simultaneously appear in the Preview filed. Click Save to enable the settings.
text_image
General settings Theme options VIVOTEK www.vivotek.com Mega-Pixel Network Font Color of the Video Title Video stream Manual triggers: Digital output: Font Color of the Configuration Area Background Color of the Configuration Area Powered by VIVOTEK Background Color of the Video Area Frame Color Preset patterns Themes Custom Color Font color: #000000 Font color of video title: #098BD6 Bk color of control area: #C4EAFF Bk color of configuration area: #0186D1 Bk color of video area: #C4EAFF Frame color: #0186D1 Save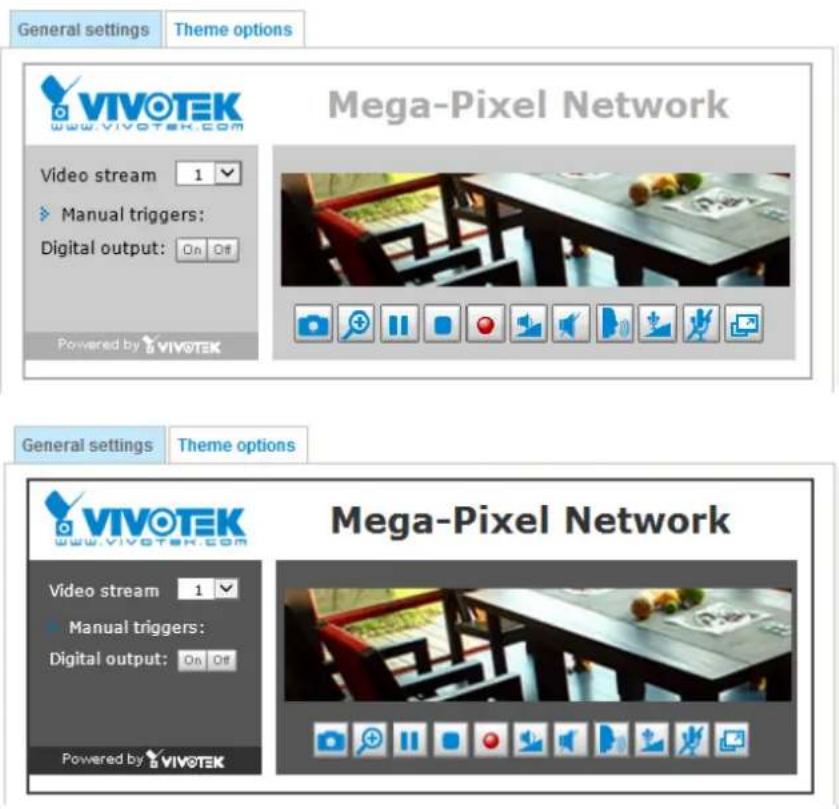
text_image
General settings Theme options VIVOTEK www.vivotek.com Mega-Pixel Network Video stream 1 Manual triggers: Digital output: On Off Powered by VIVOTEK General settings Theme options VIVOTEK www.vivOTEK.com Video stream 1 Manual triggers: Digital output: On Off Powered by VIVOTEK Mega-Pixel Network■ Follow the steps below to set up the customized homepage:
- Click Custom on the left column.
- Click the field where you want to change the color on the right column.
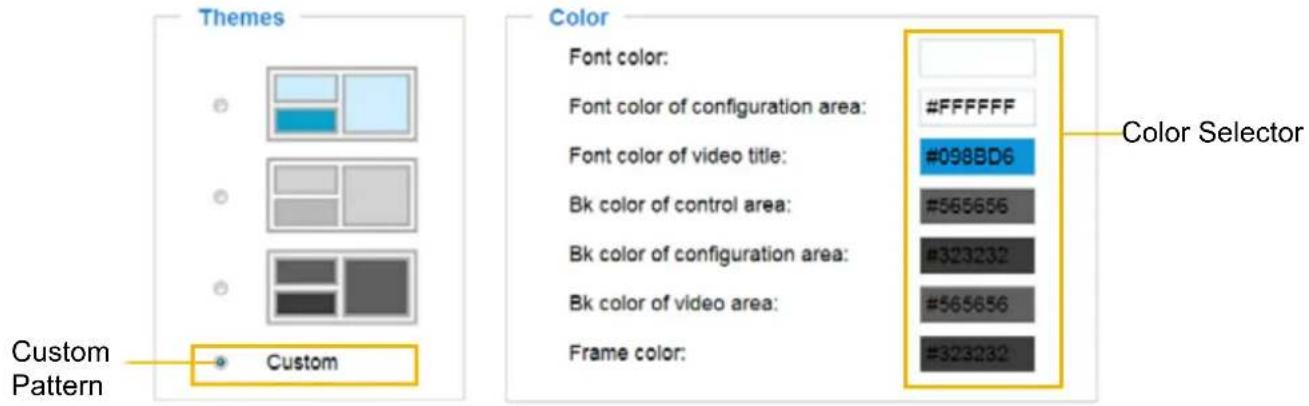
text_image
Themes Custom Pattern Custom Color Font color: Font color of configuration area: #FFFFFFF Font color of video title: #098BD6 Bk color of control area: #565656 Bk color of configuration area: #323232 Bk color of video area: #565656 Frame color: #323232 Color Selector- The palette window will pop up as shown below.
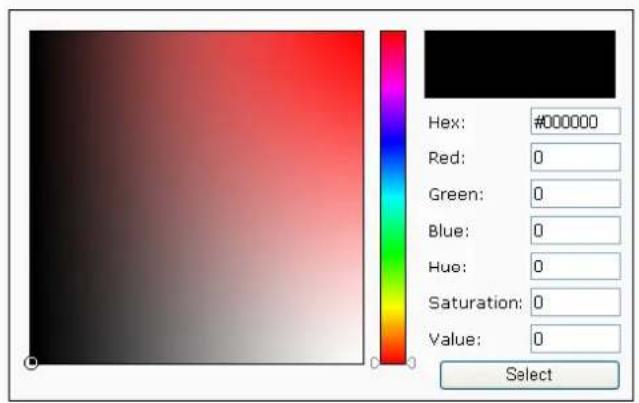
text_image
Hex: #000000 Red: 0 Green: 0 Blue: 0 Hue: 0 Saturation: 0 Value: 0 Select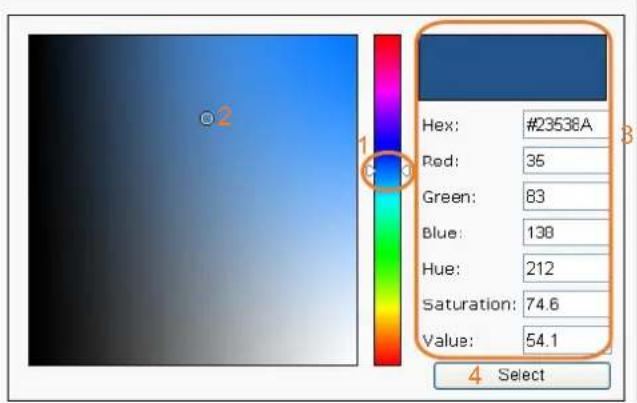
text_image
Hex: #23538A Red: 35 Green: 83 Blue: 138 Hue: 212 Saturation: 74.6 Value: 54.1 4 Select- Drag the slider bar and click on the left square to select a desired color.
- The selected color will be displayed in the corresponding fields and in the Preview column.
- Click Save to enable the settings.
System > Logs
This section explains how to configure the Network Camera to send the system log to a remote server as backup.
Log server settings
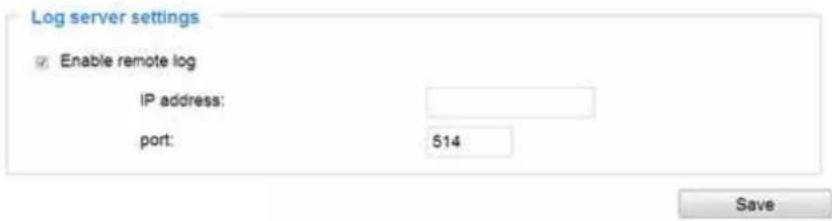
text_image
Log server settings Enable remote log IP address: port: 514 SaveFollow the steps below to set up the remote log:
- Select Enable remote log.
- In the IP address text box, enter the IP address of the remote server.
- In the port text box, enter the port number of the remote server.
- When completed, click Save to enable the setting.
You can configure the Network Camera to send the system log file to a remote server as a log backup. Before utilizing this feature, it is suggested that the user install a log-recording tool to receive system log messages from the Network Camera. An example is Kiwi Syslog Daemon. Visit http://www.kiwisyslog.com/kiwi-syslog-daemon-overview/.
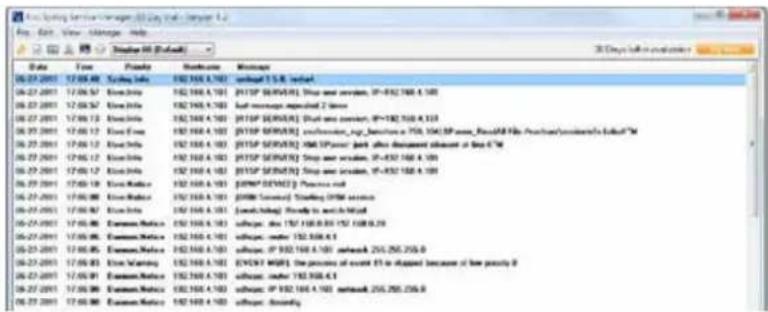
text_image
06.27.2001 17:08:48 Scaling Info 152.355.4.703 mbroad 1 S.B. mbroad 06.27.2001 17:08:57 EnerBio 152.355.4.703 IP/ISP (SPRVR) Ship and service, IP-152.355.4.703 06.27.2001 17:08:57 Urea Bio 152.355.4.703 full message expected 2 times 06.27.2001 17:08:13 EnerBio 152.355.4.703 IP/ISP (SPRVR) Ship and service, IP-152.355.4.703 06.27.2001 17:08:13 EnerBio 152.355.4.703 IP/ISP (SPRVR) support, high services, 750, 1043 SPWR, Pack/B File Purchased Services SoldTM 06.27.2001 17:08:13 EnerBio 152.355.4.703 IP/ISP (SPRVR) Pack B post after deployment announcement at low 6 M 06.27.2001 17:08:13 EnerBio 152.355.4.703 IP/ISP (SPRVR) Ship and service, IP-432.355.4.703 06.27.2001 17:08:13 EnerBio 152.355.4.703 IP/ISP (SPRVR) Ship and service, IP-432.355.4.703 06.27.2001 17:08:13 EnerBio 152.355.4.793 IP/ISP (SPRVR) Protection tool 06.27.2001 17:08:08 EnerBio 152.355.4.703 IP/ISP (SPRVR) Stacking (SPRVR) service 06.27.2001 17:08:07 EnerBio 152.355.4.703 [mail kit] Status to end to Mid 06.27.2001 17:08:06 EnerBio 152.355.4.703 software, info 152.355.4.703 / 152.355.4.70 06.27.2001 17:08:06 EnerBio 152.355.4.703 software, info 152.355.4.7 06.27.2001 17:08:05 EnerBio 152.355.4.703 software, IP 152.355.4.703 emailack 216,255,255.9 06.27.2001 17:08:03 Enter Warning 152.355.4.703 I/O/C/I WBRL The process of event $1 or stopped because of low priority 06.27.2001 17:08:91 EnerBio 152.355.4.703 software, info 152.355.4.7 06.27.2001 17:08:99 EnerBio 152.355.4.703 software, IP 152.355.4.703 emailack 216,255,255.9 06.27.2001 17:08:98 EnerBio 152.355.4.703 software, info 152, wodilySystem log
text_image
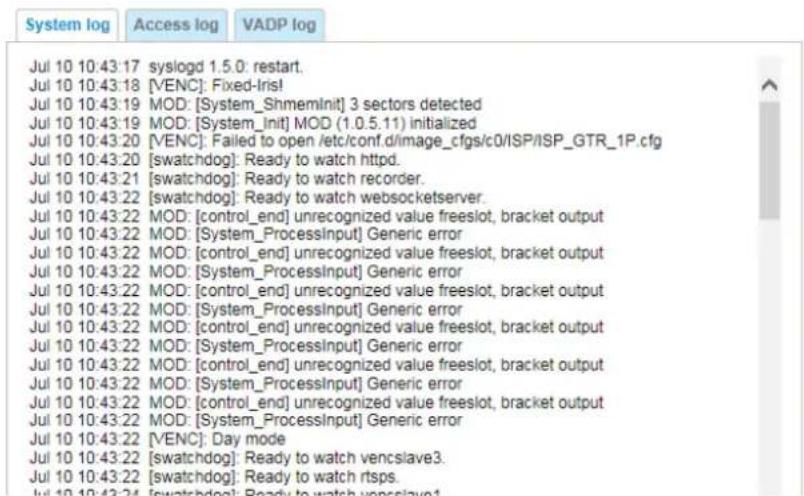
System log Access log VADP log Jul 10 10:43:17 syslogd 1.5.0: restart. Jul 10 10:43:18 [VENC]: Fixed-Iris! Jul 10 10:43:19 MOD: [System_Shmeminit] 3 sectors detected Jul 10 10:43:19 MOD: [System_Init] MOD (1.0.5.11) initialized Jul 10 10:43:20 [VENC]: Failed to open /etc/conf.d/image_cfgs/c0/ISP/ISP_GTR_1P.cfg Jul 10 10:43:20 [swatchdog]: Ready to watch httpd. Jul 10 10:43:21 [swatchdog]: Ready to watch recorder. Jul 10 10:43:22 [swatchdog]: Ready to watch websocketserver. Jul 10 10:43:22 MOD: [control_end] unrecognized value freeslot, bracket output Jul 10 10:43:22 MOD: [System_ProcessInput] Generic error Jul 10 10:43:22 MOD: [control_end] unrecognized value freeslot, bracket output Jul 10 10:43:22 MOD: [System_ProcessInput] Generic error Jul 10 10:43:22 MOD: [control_end] unrecognized value freeslot, bracket output Jul 10 10:43:22 MOD: [System_ProcessInput] Generic error Jul 10 10:43:22 MOD: [control_end] unrecognized value freeslot, bracket output Jul 10 10:43:22 MOD: [System_ProcessInput] Generic error Jul 10 10:43:22 MOD: [control_end] unrecognized value freeslot, bracket output Jul 10 10:43:22 MOD: [System_ProcessInput] Generic error. Jul 10 10:43:22 MOD: [control_end] unrecognized value freeslot, bracket output Jul 10 10:43:22 MOD: [System_ProcessInput] Generic error Jul 10 10:43:22 [VENC]: Day mode Jul 10 10:43:22 [swatchdog]: Ready to watch vencslave3. Jul 10 10:43:22 [swatchdog]: Ready to watch rtsps. Jul 10 10:43:24 [swatchdog]: Ready to watch uncrslave3.This column displays the system log in a chronological order. The system log is stored in the Network Camera's buffer area and will be overwritten when reaching a certain limit.
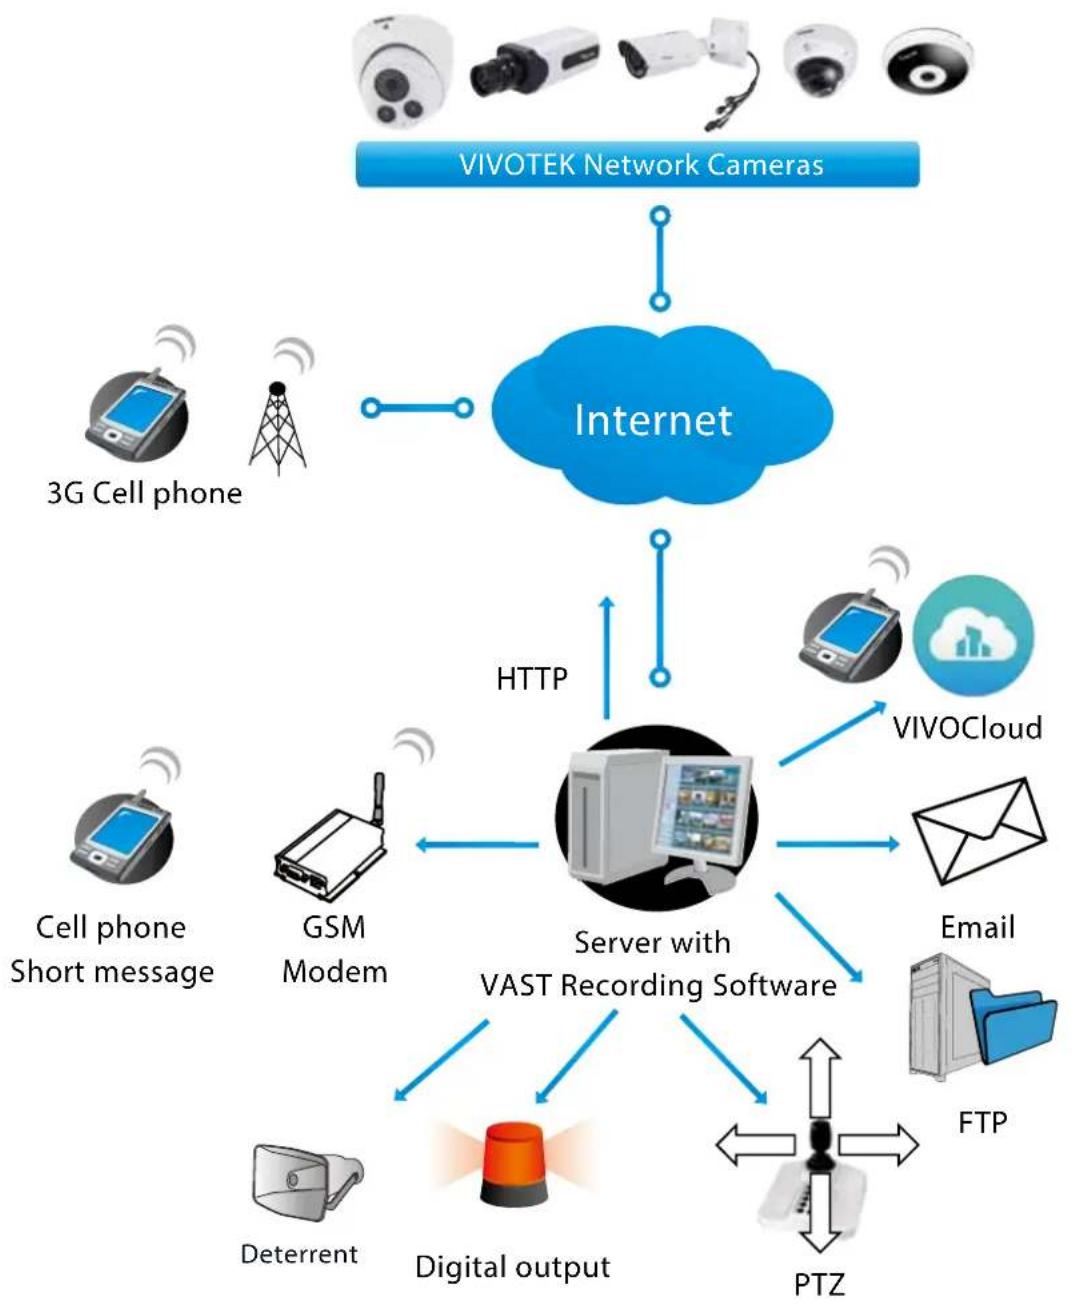
You can install the included VAST recording software, which provides an Event Management function group for delivering event messages via emails, GSM short messages, onscreen event panel, or to trigger an alarm, etc. For more information, refer to the VAST User Manual.
flowchart
graph TD
    A["VIVOTEK Network Cameras"] --> B["Internet"]
    C["3G Cell phone"] --> B
    D["Cell phone Short message"] --> E["Server with VAST Recording Software"]
    F["GSM Modem"] --> E
    G["Deterrent"] --> E
    H["Digital output"] --> E
    I["PTZ"] --> E
    J["VIVOCloud"] --> E
    K["Email"] --> E
    L["FTP"] --> E
    M["HTTP"] --> E
    N["3G Cell phone"] --> B
Access log
System log Access log
Jan 5 11:36:28 [RTSP SERVER]: Start one session, IP=172.16.2.52
Jan 5 11:49:15 [RTSP SERVER]: Start one session, IP=192.168.4.105
Jan 5 13:11:20 [RTSP SERVER]: Start one session, IP=192.168.4.105
Access log displays the access time and IP address of all viewers (including operators and administrators) in a chronological order. The access log is stored in the Network Camera's buffer area and will be overwritten when reaching a certain limit.
System > Parameters
The View Parameters page lists the entire system's parameters. If you need technical assistance, please provide the information listed on this page.
Parameters
system_hostname='IT9380-H'
system_ledoff='0'
system_lowlight='1'
system_date='2019/07/10'
system_time='12:37:52'
system_datetime=''

system_ntp=''
system_timezone timezoneindex='320'
system_daylight_enable='0'
system_daylight_dstactualmode='1'
system_daylight_auto_begintime='NONE'
system_daylight_auto_endtime='NONE'
system_daylight_timezones=',-360,-320,-280,-240,-241,-200,-201,-160'
system_updateinterval='0'
system_info_modelname='IT9380-H'
system_info_extendedmodelname='IT9380-H'
system_info_serialnumber='0002D183DD5F'
system_info_firmwareversion='IT9380-VVTK-0100k'
system_info_language_count='10'
system_info_language_i0='English'
system_info_language_i1='Deutsch'
system_info_language_i2='Español'
system_info_language_i3='Français'
system_info_language_i4='Italiano'
system_info_language_i5='日本語'
system_info_language_i6='Português'
system_info_language_i7='简体中文'
system_info_language_i8='繁體中文'
system_info_language_i9='Русский'
system_info_language_i10='
System > Maintenance
This chapter explains how to restore the Network Camera to factory default, upgrade firmware version, etc.
General settings > Upgrade firmware
Upgrade firmware
Select firmware file:
Browse.
Upgrade
This feature allows you to upgrade the firmware of your Network Camera. It takes a few minutes to complete the process.
Note: Do not power off the Network Camera during the upgrade!
Follow the steps below to upgrade the firmware:
- Download the latest firmware file from the VIVOTEK website. The file is in .pkg file format.
- Click Browse... and locate the firmware file.
- Click Upgrade. The Network Camera starts to upgrade and will reboot automatically when the upgrade completes.
If the upgrade is successful, you will see "Reboot system now!! This connection will close". After that, re-access the Network Camera.
The following message is displayed when the upgrade has succeeded.
Reboot system now!!
This connection will close.
The following message is displayed when you have selected an incorrect firmware file.
Starting firmware upgrade...
Do not power down the server during the upgrade.
The server will restart automatically after the upgrade is
completed.
This will take about 1 - 5 minutes.
Wrong PKG file format
Unpack fail
General settings > Reboot
Reboot
Reboot
This feature allows you to reboot the Network Camera, which takes about one minute to complete. When completed, the live video page will be displayed in your browser. The following message will be displayed during the reboot process.
The device is rebooting now. Your browser will reconnect to http://192.168.5.151:80/
If the connection fails, please manually enter the above IP address in your browser.
[Non-Text]
If the connection fails after rebooting, manually enter the IP address of the Network Camera in the address field to resume the connection.
General settings > Restore
Restore
Restore all settings to factory default except settings in
□ Network
□ Daylight saving time
□ Custom language
□ VADP
Restore
This feature allows you to restore the Network Camera to factory default settings.
Network: Select this option to retain the Network Type settings (please refer to Network Type on page 88).
Daylight Saving Time: Select this option to retain the Daylight Saving Time settings (please refer to Import/Export files below on this page).
Custom Language: Select this option to retain the Custom Language settings.
VADP: Retain the VADP modules (3rd-party software stored on the SD card) and related settings.
Focus position: Retain the lens focus position using the previously saved position parameters.
If none of the options is selected, all settings will be restored to factory default. The following message is displayed during the restoring process.
The device is rebooting now. Your browser will reconnect to http://192.168.5.151:80/ If the connection fails, please manually enter the above IP address in your browser.

Import/Export files
This feature allows you to Export / Update daylight saving time rules, custom language file, configuration file, and server status report.
General settings Import/Export files
Export files
Export daylight saving time configuration file
Export language file
Export configuration file
Export server status report
Export
Export
Export
Export
Upload files
Update daylight saving time rules:
Update custom language file:
Upload configuration file:
Browse.
Upload
Browse.
Upload
Browse.
Upload
Export daylight saving time configuration file: Click to set the start and end time of DST (Daylight Saving).
Follow the steps below to export:
- In the Export files column, click Export to export the daylight saving time configuration file from the Network Camera.
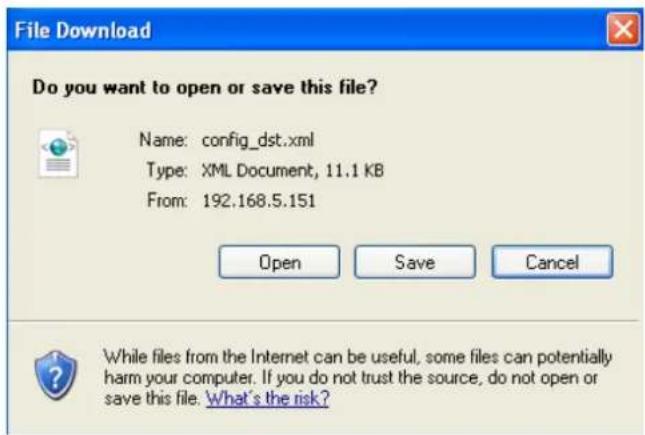
- A file download dialog will pop up as shown below. Click Open to review the XML file or click Save to store the file for editing.
text_image
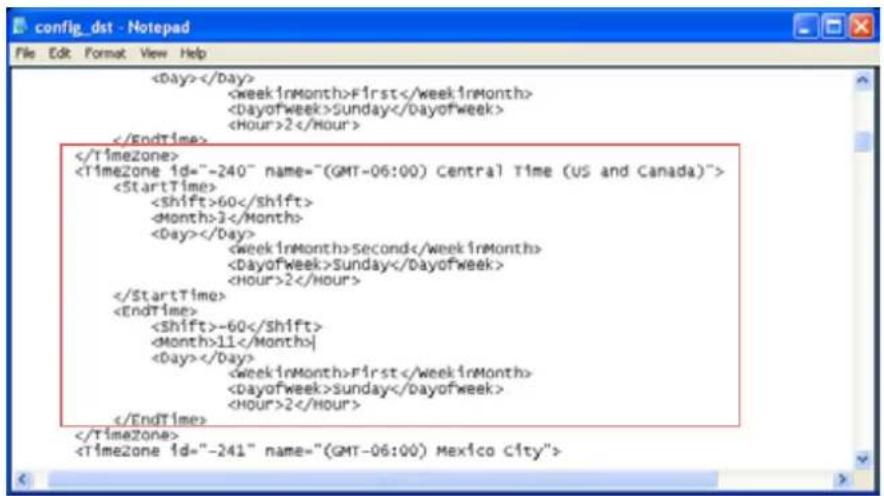
File Download Do you want to open or save this file? Name: config_dst.xml Type: XML Document, 11.1 KB From: 192.168.5.151 Open Save Cancel While files from the Internet can be useful, some files can potentially harm your computer. If you do not trust the source, do not open or save this file. What's the risk?- Open the file with Microsoft ^® Notepad and locate your time zone; set the start and end time of DST. When completed, save the file.
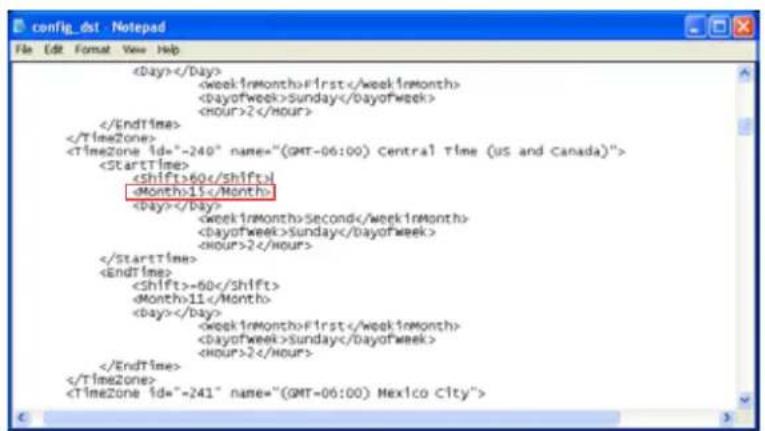
In the example below, DST begins each year at 2:00 a.m. on the second Sunday in March and ends at 2:00 a.m. on the first Sunday in November.
text_image
Update daylight saving time rules: Click Browse... and specify the XML file to update.
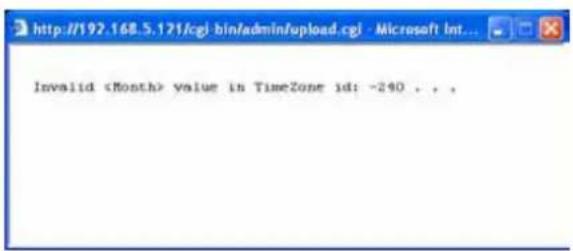
If the incorrect date and time are assigned, you will see the following warning message when uploading the file to the Network Camera.
text_image
text_image
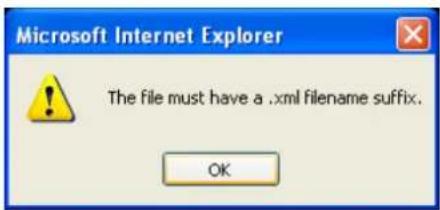
InvalidThe following message is displayed when attempting to upload an incorrect file format.
text_image
Microsoft Internet Explorer The file must have a .xml filename suffix. OKExport language file: Click to export language strings. VIVOTEK provides nine languages: English, Deutsch, Español, Français, Italiano, 日木語, Português, 簡体中文, and 繁體。
Update custom language file: Click Browse... and specify your own custom language file to upload.
Export configuration file: Click to export all parameters for the device and user-defined scripts.
Update configuration file: Click Browse... to update a configuration file. Please note that the model and firmware version of the device should be the same as the configuration file. If you have set up a fixed IP or other special settings for your device, it is not suggested to update a configuration file.
Export server staus report: Click to export the current server status report, such as time, logs, parameters, process status, memory status, file system status, network status, kernel message ... and so on.

Tips:
- If a firmware upgrade is accidentally disrupted, say, by a power outage, you still have a last resort method to restore normal operation. See the following for how to bring the camera back to work:
Applicable scenario:
(a) Power disconnected during firmware upgrade.
(b) Unknown reason causing abnormal LED status, and a Restore cannot recover normal working condition.
You can use the following methods to activate the camera with its backup firmware:
(a) Press and hold down the reset button for at least one minute.
(b) Power on the camera until the Red LED blinks rapidly.
(c) After boot up, the firmware should return to the previous version before the camera hanged. (The procedure should take 5 to 10 minutes, longer than the normal boot-up process). When this process is completed, the LED status should return to normal.
Media > Image
This section explains how to configure the image settings of the Network Camera. It is composed of the following columns: General settings, IR control, Image settings, Exposure, Focus, and Privacy mask. The Focus window is available only for models that come with motorized lens.
General settings
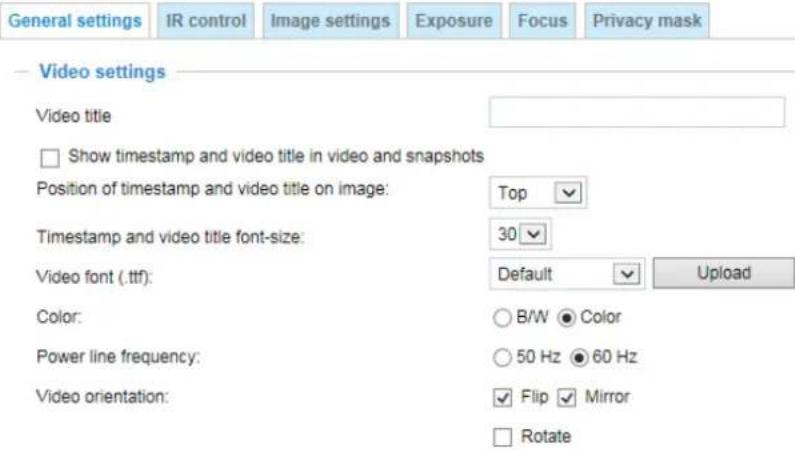
text_image
General settings IR control XiImage settings Exposure Focus Privacy mask Video settings Video title □ Show timestamp and video title in video and snapshots Position of timestamp and video title on image: Top Timestamp and video title font-size: 30 Video font (.ttf): Default Upload Color: B/W ● Color Power line frequency: ○ 50 Hz ● 60 Hz Video orientation: ✓ Flip ✓ Mirror □ RotateVideo title
Show_timestamp_and_video_title_in_video_and_snapshots: Enter a name that will be displayed on the title bar of the live video as the picture shown below. A zoom indicator will be displayed on the Home page when you zoom in/out on the live viewing window as shown below. You may zoom in/out on the image by scrolling the mouse wheel inside the live viewing window, and the maximum zoom in will be up to 12 times.
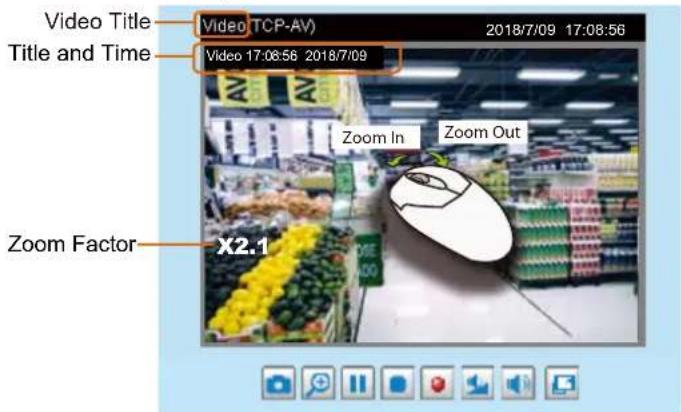
text_image
Video Title Title and Time Video TCP-AV 2018/7/09 17:08:56 Video 17:06:56 2018/7/09 Zoom In Zoom Out Zoom Factor X2.1Position of timestamp and video title on image: Select to display time stamp and video title on the top or at the bottom of the video stream.
Timestamp and video title font size: Select the font size for the time stamp and title.
Video font (.ttf): You can select a True Type font file for the display of textual messages on video.
Color: Select to display color or black/white video streams.
Power line frequency: Set the power line frequency consistent with local utility settings to eliminate image flickering associated with fluorescent lights. Note that after the power line frequency is changed, you must disconnect and reconnect the power cord of the Network Camera in order for the new setting to take effect.
Video orientation: Flip - vertically reflect the display of the live video; Mirror - horizontally reflect the display of the live video. Select both options if the Network Camera is installed upside-down (e.g., on the ceiling) to correct the image orientation. Please note that if you have preset locations, those locations will be cleared after flip/mirror setting.
Rotate -

Rotate
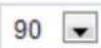
Degrees
The rotation here indicates clockwise rotation. Rotation can be applied with flip, mirror, and physical lens rotation (see below) settings to adapt to different mounting locations.
The figures in the illustration are shown in a consecutive order.
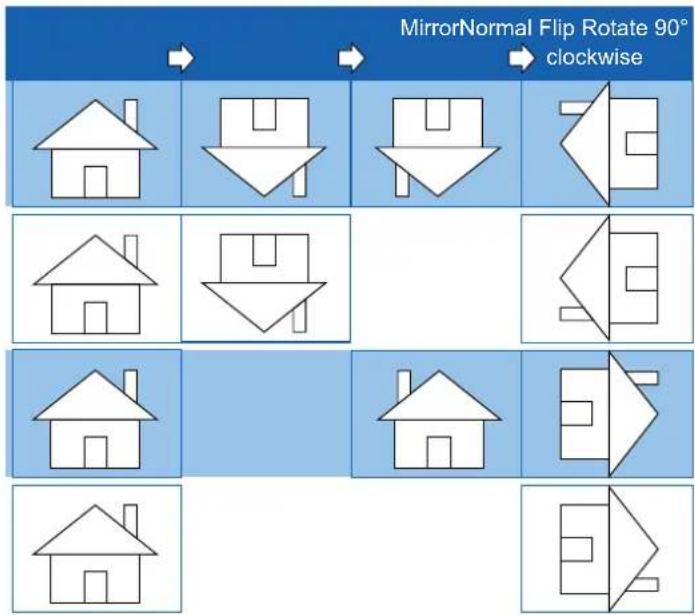
flowchart
graph TD
    A["House"] --> B["Downward Arrow"]
    B --> C["Box Box"]
    C --> D["Up Arrow"]
    D --> E["Clockwise"]
    F["House"] --> G["Downward Arrow"]
    G --> H["Box Box"]
    H --> I["Up Arrow"]
    I --> J["Downward Arrow"]
    K["House"] --> L["Downward Arrow"]
    L --> M["Box Box"]
    M --> N["Up Arrow"]
    N --> O["Downward Arrow"]
    P["House"] --> Q["Downward Arrow"]
    Q --> R["Box Box"]
    R --> S["Up Arrow"]
    S --> T["Downward Arrow"]
The camera may be installed on a vertical, side-facing, or tilted surface in order to accommodate the interior or exterior design of a building. The interior of a building can be shaped as a narrow rectangular space, such as a corridor. The conventional HD image, such as that of a 16:9 aspect ratio, will be incongruous with its wide horizontal view. With video rotation, the camera can more readily cover the field of view on a tall and narrow scene.
Day/Night Settings
Day/Night settings

Switch to B/W in night mode
IR cut filter:
Light sensor sensitivity:

Save
Switch to B/W in night mode
Select this to enable the Network Camera to automatically switch to Black/White during night mode.
IR cut filter
With a removable IR-cut filter, this Network Camera can automatically remove the filter to let Infrared light pass into the sensor during low light conditions.
■ Auto mode (The Day/Night Exposure Profile will not be available if Auto mode is selected) The Network Camera automatically removes the filter by judging the level of ambient light.
■ Day mode In day mode, the Network Camera switches on the IR cut filter at all times to block infrared light from reaching the sensor so that the colors will not be distorted.
■ Night mode In night mode, the Network Camera switches off the IR cut filter at all times for the sensor to accept infrared light, thus helping to improve low light sensitivity.
■ Synchronize with digital input If an external IR device is connected that comes with its own light sensor, you can use a digital input from it to trigger the IR cut filter. Doing so can synchronize the detection of light level between the camera and the external IR device.
■ Schedule mode The Network Camera switches between day mode and night mode based on a specified schedule. Enter the start and end time for day mode. Note that the time format is [hh:mm] and is expressed in 24-hour clock time. By default, the start and end time of day mode are set to 07:00 and 18:00.
Sensitivity of IR cut filter
Tune the responsiveness of the IR filter to lighting conditions as Low, Normal, or High.
When completed with the settings on this page, click Save to enable the settings.
IR control
Turn on built-in IR illuminator in night mode
Select this to turn on the camera's onboard IR illuminator when the camera detects low light condition and enters the night mode.
Smart IR
Anti-overexposure: When enabled, the camera automatically adjusts the IR projection to adjacent objects in order to avoid over-exposure in the night mode.
The Smart IR function is more beneficial when the spot of intrusions or an object of your interest is close to the lens and the IR lights. For example, if an intruder has a chance of getting near the range of 3 meters, Smart IR can effectively reduce the over-exposure. For a surveillance area at a greater distance, e.g., 5 meters or farther away, the Smart IR function may not bring as significant benefits as in close range.
Smart IR disabled; distance: 5M
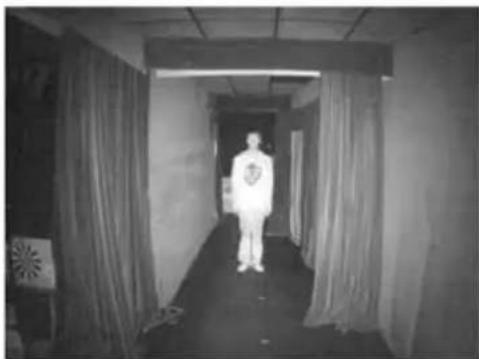
natural_image
Black-and-white photo of a person standing in a long, empty corridor with curtains and curtains (no visible text or symbols)Smart IR disabled; distance: 3M
Smart IR enabled; distance: 5M
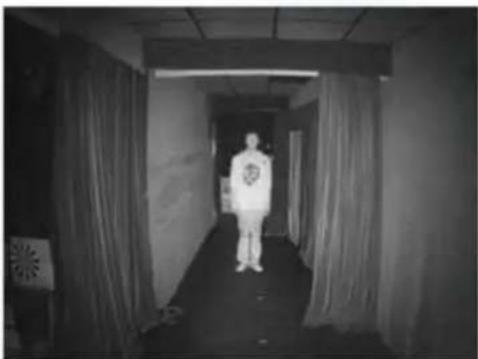
natural_image
Black-and-white photo of a person standing in a hallway with curtains, no visible text or symbolsSmart IR enabled; distance: 3M
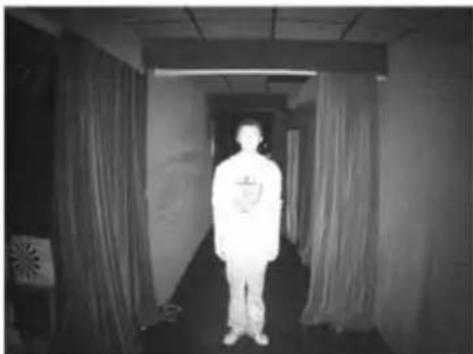
natural_image
Black-and-white photo of a person standing in a hallway with curtains, no visible text or symbols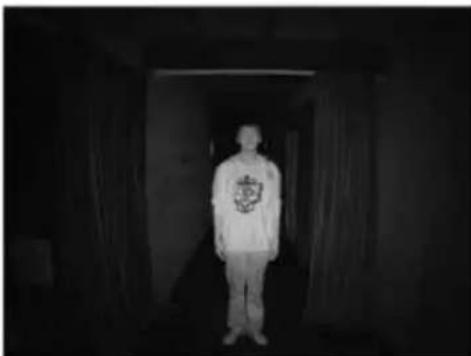
natural_image
Black-and-white photo of a person standing in a dimly lit corridor, wearing a patterned shirt with a circular emblem (no visible text or symbols)
Tips:
If there is an object in close proximity, the IR lights reflected back from it can mislead the Smart IR's calculation of light level. To solve this problem, you can place an "Exposure Exclude" window on an unavoidable object in the Exposure setting window. See page 55 for how to do it.
You can also configure the "Exposure Exclude" window in a night mode "Profile" setting so that your day time setting is not affected.
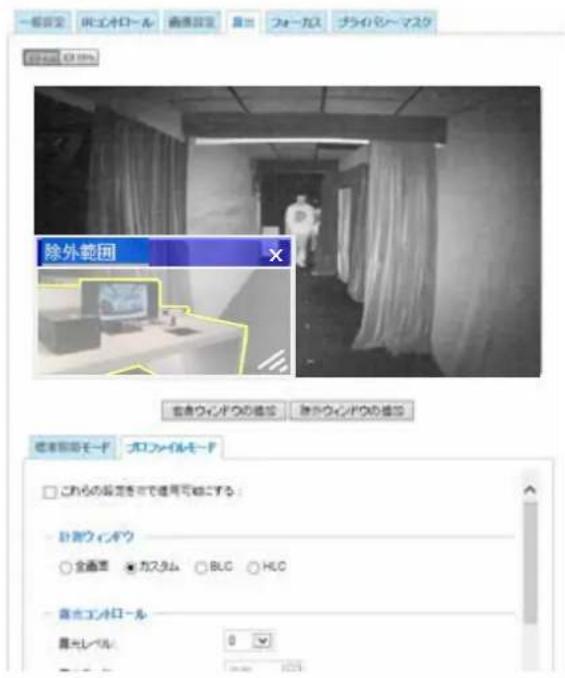
text_image
Black-and-white photo sequence showing a person in protective suit walking through a corridor, with computer monitors and a '除外範囲' (excluding scope) panel visible.Image settings
On this page, you can tune the White balance and Image adjustment.
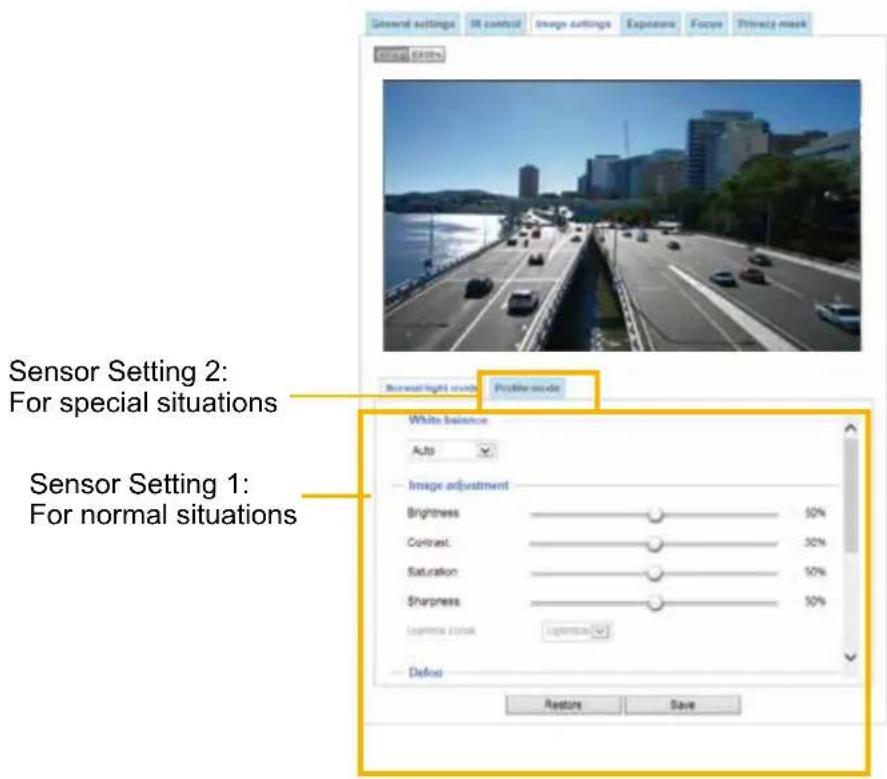
text_image
General settings IM control Image settings Exposure Focus Privacy mask General settings IM control Image settings Exposure Focus Privacy mask Global Light Sensor Setting 2: For special situations Normal light source Profile mode Sensor Setting 1: For normal situations White balance Auto Image adjustment Brightness 50% Contrast. 30% Saturation 50% Sharpness 50% Lagrange: 0.0000 Cognitive Defoud Restore SaveWhite balance: Adjust the value for the best color temperature.
■ You may follow the steps below to adjust the white balance to the best color temperature.
- Place a sheet of paper of white or cooler-color temperature color, such as blue, in front of the lens, then allow the Network Camera to automatically adjust the color temperature.
- Click the On button to Fix current value and confirm the setting while the white balance is being measured.
■ You may also manually tune the color temperature by pulling the RGain and BGain slide bars.
Image Adjustment
■ Brightness: Adjust the image brightness level, which ranges from 0% to 100%.
■ Contrast: Adjust the image contrast level, which ranges from 0% to 100%.
■ Saturation: Adjust the image saturation level, which ranges from 0% to 100%.
■ Sharpness: Adjust the image sharpness level, which ranges from 0% to 100%.
■ Gamma curve: Adjust the image sharpness level, which ranges from 0.45 to 1, from Detailed to Contrast. You may let firmware Optimize your display or select the Manual mode, and pull the slide bar pointer to change the preferred level of Gamma correction towards higher contrast or towards the higher luminance for detailed expression for both dark and lighted areas of an image.
This option is disabled when the WDR feature is enabled.
Defog: Defog helps improve the visibility quality of captured image in poor weather conditions such as smog, fog, or smoke.
Noise reduction
■ Enable noise reduction: Check to enable noise reduction in order to reduce noises and flickers in image. This applies to the onboard 3D Noise Reduction feature. Use the slide bar to adjust the reduction strength. Note that applying this function to the video channel will consume system computing power.
3D Noise Reduction is mostly applied in low-light conditions. When enabled in a low-light condition with fast moving objects, trails of after-images may occur. You may then select a lower strength level or disable the function.
Note that the Preview button has been cancelled, all changes made to image settings is directly shown on screen. You can click Restore to recall the original settings without incorporating the changes. When completed with the settings on this page, click Save to enable the setting. You can also click on Profile mode to adjust all settings above in a tabbed window for special lighting conditions.
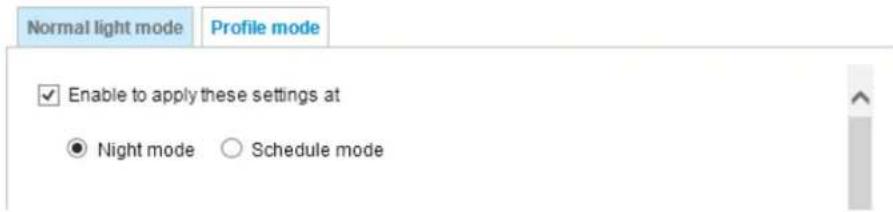
text_image
Normal light mode Profile mode ✓ Enable to apply these settings at ● Night mode ○ Schedule modeEnable to apply these settings at: Select the mode this profile to apply to: Day mode, Night mode, or Schedule mode. Please manually enter a range of time if you choose the Schedule mode. Then check Save to take effect.
Exposure
On this page, you can set the Exposure measurement window, Exposure level, Exposure mode, Exposure time, Gain control, and Day/Night mode settings. You can configure two sets of Exposure settings: one for normal situations, the other for special situations, such as the day/night/schedule mode.
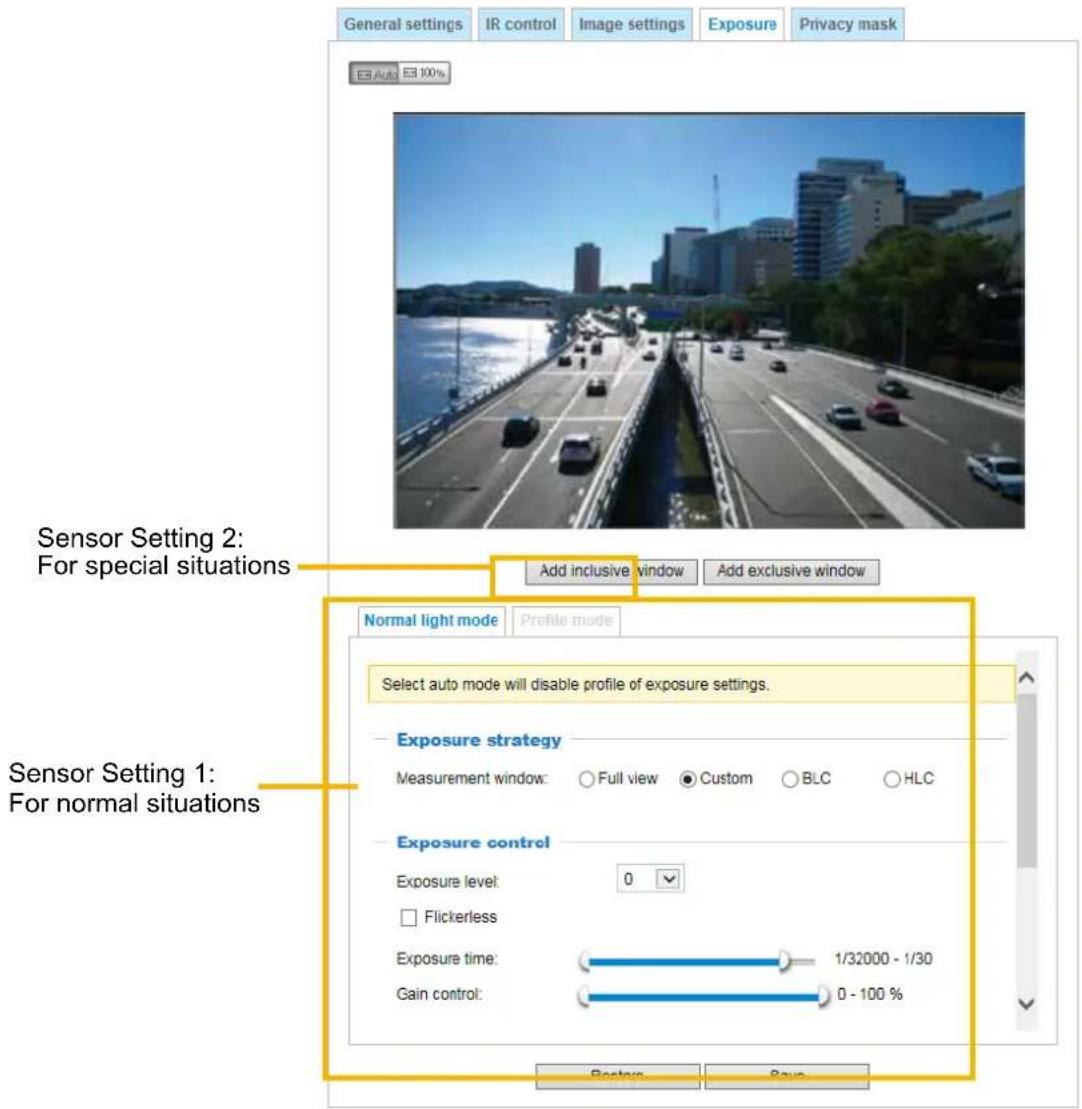
text_image
General settings IR control Image settings Exposure Privacy mask Auto 100% Sensor Setting 2: For special situations Add inclusive window Add exclusive window Normal light mode Profile mode Select auto mode will disable profile of exposure settings. Exposure strategy Measurement window: ○ Full view ● Custom ○ BLC ○ HLC Exposure control Exposure level: 0 □ Flickerless Exposure time: 1/32000 - 1/30 Gain control: 0 - 100 % Posters SaveExposure strategy:
Measurement window: This function allows users to set measurement window(s) for low light compensation. For example, where low-light objects are posed against an extremely bright background. You may want to exclude the bright sunlight shining through a building's corridor.
■ Full view: Calculate the full range of view and offer appropriate light compensation.
■ Custom: This option allows you to manually add customized windows as inclusive or exclusive regions. A total of 10 windows can be configured. Please refer to the next page for detailed illustration.
The inclusive window refers to the "weighted window"; the exclusive window refers to "ignored window". It adopts the weighted averages method to calculate the value. The inclusive windows have a higher priority. You can overlap these windows, and, if you place an exclusive window within a larger inclusive window, the exclusive part of the overlapped windows will be deducted from the inclusive window. An exposure value will then be calculated out of the remaining of the inclusive window.
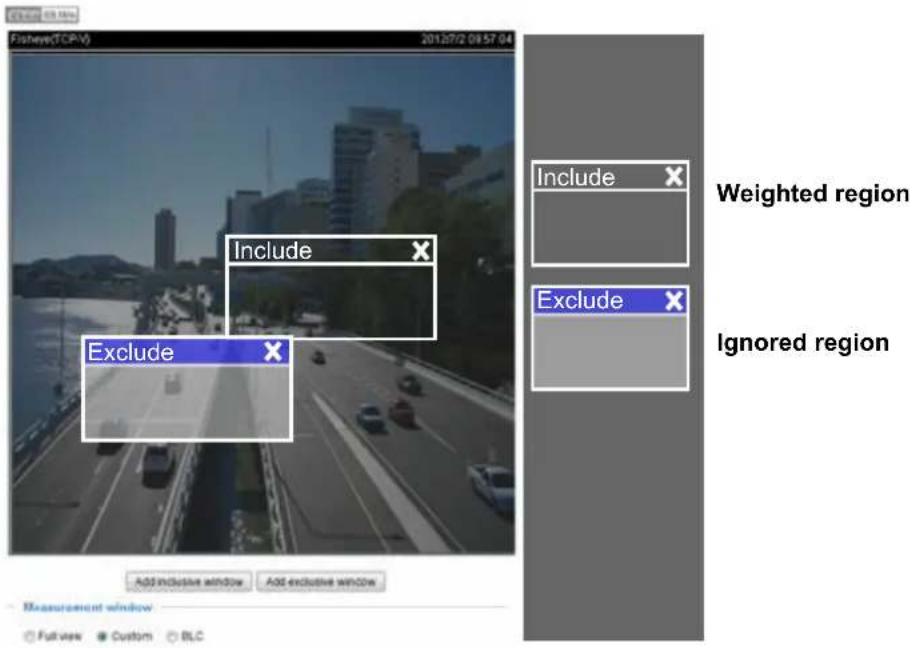
text_image
Fisheye(TCPV) 2012/7/2 09:57:04 Include Exclude Include Exclude Weighted region Ignored region Add inclusive window Add exclusive window Measurement window Full view Custom BLC■ Center: Use the center portion of the screen to determine the exposure level.
Exposure control: (not configurable when WDR is enabled)
■ Exposure level: You can manually set the Exposure level, which ranges from -2.0 to +2.0 (dark to bright). You can click and drag the semi-circular pointers on the Exposure time and Gain control slide bars to specify a range of shutter time and Gain control values within which the camera can automatically tune to an optimal imaging result. You may prefer a shorter shutter time to better capture moving objects, while a faster shutter reduces light and needs to be compensated by electrical brightness gains.
You can click and drag the semi-circular pointers on the Exposure time and Gain control slide bars to specify a range of shutter time and Gain control values within which the camera can automatically tune to an optimal imaging result. You can also configure the iris size to control the amount of light. For example, you may prefer a shorter shutter time to better capture moving objects, while a faster shutter reduces light and needs to be compensated by electrical brightness gains.
■ Flickerless: Under some circumstances when there is a difference between the video capture frequency and local AC power frequency (NTSC or PAL), the mismatch causes color shifts or flickering images. If the above mismatch occurs, select the Flickerless checkbox, and the range of Exposure time (the shutter time) will be limited to a range in order to match the AC power frequency. When selected, the exposure time will be forced to stay longer than 1/120 second. For cameras that come with fixed iris lens, setting the exposure time to longer than 1/120 second may introduce too much lights to the lens. Users can use this option to observe whether the result of long exposure time is satisfactory.
Auto: If you set Exposure mode as Auto, the Exposure time and Gain control will not be configurable since the sensor library will automatically adjust the value according to the ambient light. Then you can configure iris mode as "indoor" or "outdoor" to reach the best image quality.
- Iris mode: Select Indoor or Outdoor iris mode to adapt to the installation. The preset iris aperture setting will apply.
■ AE Speed Adjustment:
This function applies when you need to monitor fast changing lighting conditions. For example, the camera may need to monitor a highway lane or entrance of a parking area at night where cars passing by with their lights on can bring fast changes in light levels. The same applies if the camera is installed on a vehicle, and when it needs to adapt to fast changes of light when entering and leaving a tunnel.
■ WDR Pro:
This refers to the Wide Dynamic Range function that enables the camera to capture details in a high contrast environment. Use the checkbox to enable the function, and use the slide bar to select the strength of the WDR Pro functionality, depending on the lighting condition at the installation site. You can select a higher effect when the contrast is high (between the shaded area and the light behind the objects).
Enable WDR enhanced: This function allows users to identify more image details with an extreme contrast from an object of interest with one shadowed side against a bright background, e.g., an entrance. You may select the Enable WDR enhanced checkbox, and then adjust the strength (low, medium, high) to reach the best image quality.
You can click Restore to recall the original settings without incorporating the changes. When completed with the settings on this page, click Save to enable the settings.
If you want to configure another sensor setting for day/night/schedule mode, please click Profile to open the Profile of exposure settings page as shown below.
Activated period: Select the mode this profile to apply to: Day mode, Night mode, or Schedule mode. Please manually enter a range of time if you choose Schedule mode. Then check Save to take effect.
Note that the Profile mode is not available when the IR cut filter setting is configured into the Auto mode.
Please follow the steps below to set up a profile:
- Select the Profile mode tab.
- Select the applicable mode: Night mode or Schedule mode. Please manually enter a range of time if you choose the Schedule mode.
- Configure Exposure control settings in the following columns. Please refer to previous discussions for detailed information.
- Click Save to enable the setting and click Close to exit the page.
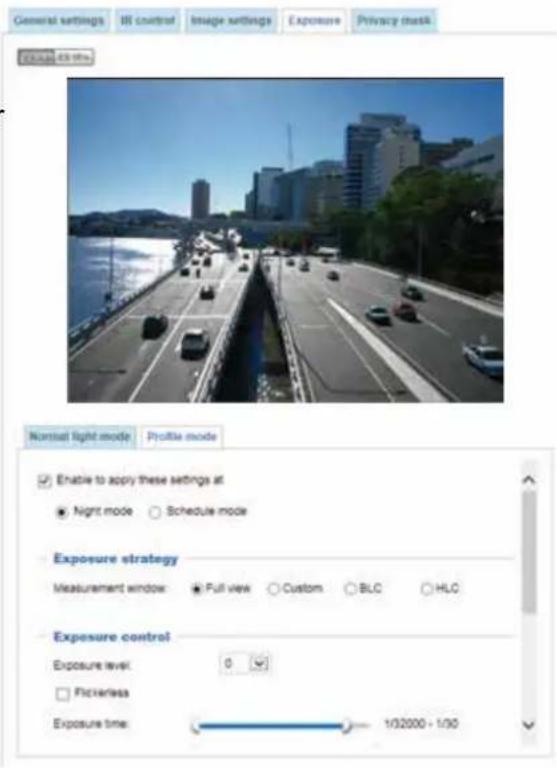
text_image
General settings H5 control Image settings Exposure Privacy mask Normal light mode Profile mode Enable to apply these settings at Night mode Schedule mode Exposure strategy Measurement window Full view Custom BLC HLC Exposure control Exposure level: 0 Pictureless Exposure time: 1/32000 - 1/30Focus (T model)
Focus here refers to the Remote Focus, applicable to Network Cameras that are equipped with a stepping motor lens. The automated focus adjustment function eliminates the needs to physically adjust camera focus. In an outdoor deployment consisting of a large number of cameras, the auto focus function can be very helpful when these cameras become out of focus after days or weeks of operation. And that can easily result from the effects of natural forces, e.g., shrink and expand due to a wide range of operating temperatures and the vibration caused by wind.
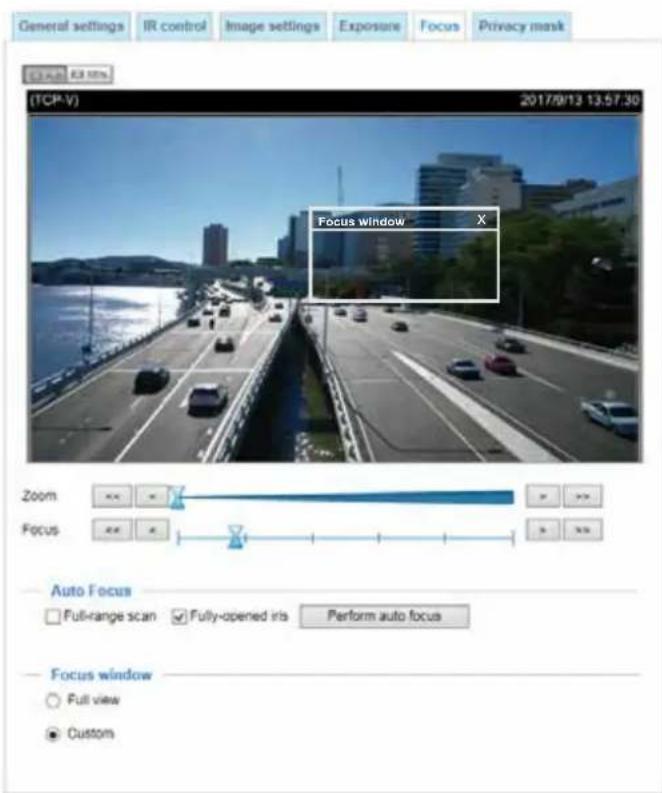
text_image
General settings IR control Image settings Exposure Focus Privacy mask TCP-V 2017/9/13 13:57:30 (TCP-V) Focus window X Zoom Focus Auto Focus Full-range scan Fully-opened iris Perform auto focus Focus window Full view CustomBelow is the procedure to perform the automated Focus function:
- Select from the bottom of the screen whether you want to perform focus adjustment on the Full view or within a Custom focus window. You can create a custom window and click and drag the window to a desired position on screen.
- It is recommended to Reset to the default back focus position of the sensor board.
- You can use the Fully-opened iris checkbox (default) to increase the iris size for a better focus adjustment result.
-
Click to select the Fully-opened iris or the Full-range scan buttons. When a full-range scan is selected, a full-range scan through the camera's entire focal length can take about 30 to 80 seconds. If not, the auto focus scan will only go through the length where optimal focus may occur, and that takes about 15 to 20 seconds. In theory, best results of the auto scan can be acquired when the camera's iris is fully open.
-
Wait for the scan to complete. After a short while, the clearest image obtained should be displayed and the optimal focus range achieved. Use the arrow marks on the sides to fine-tune the focus if you are not satisfied with the results. You may still need to use the arrow marks to fine-tune the focus depending on the live image on your screen. “>” means moving from wide to tele end; and “<” tele to wide.
The methodology of using the Resize Buttons at the upper left corner of the streaming window is the same as that on the home page.
Focus window:
By default, the optimal focus is found on a full view window. You may designate a custom window within your current field of view to acquire the best focus out of it. However, you can not place a focus window on a distant background, e.g., a hall way that stretches away for 3 meters or farther. Doing so you will not benefit from the Focus window function.
■ Full view: The focus tuning takes place by referring to the full view.
■ Custom: You can create a focus window and drag it to a place of interest in your view window. Note that it is recommended to use this function only when you have a solid object in your view window that is showing a consistent color or texture. This function will not take effect if you set the focus window on a distant background.
Privacy mask
Click Privacy Mask to open the settings page. On this page, you can block out sensitive zones to address privacy concerns.
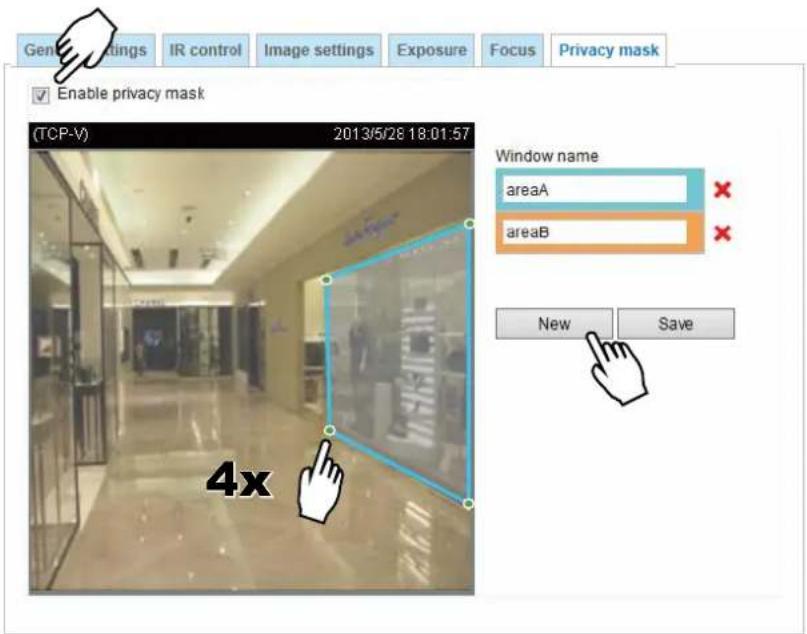
text_image
Gen Settings IR control Image settings Exposure Focus Privacy mask Enable privacy mask (TCP-V) 2013/5/28 18:01:57 Window name areaA areaB New Save 4x■ To configure privacy mask windows,
- Click New to add a new window.
- You can use 4 mouse clicks to create a new masking window, which is recommended to be at least twice the size of the object (height and width) you want to cover.
- Enter a Window Name and click Save to enable the setting.
- Click on the Enable privacy mask checkbox to enable this function.

NOTE:
▶ Up to 5 privacy mask windows can be configured on the same screen.
▶ If you want to delete the privacy mask window, please click the 'x' mark on the side of window name.
Media > Video
Mode
Media > Video
Mode
Stream
5-Megapixel (4:3) (MAX 20fps)(WDR Pro)
○ 4-Megapixel (16:9) (MAX 20fps)(WDR Pro)
○ 4-Megapixel (16:9) (MAX 30fps)
The applicable video modes include:
■ 5 Megapixel (4:3) (max. 30fps): This is the full resolution at 5 megapixels in a 4:3 screen aspect ratio.
■ 4 Megapixel (16:9) (max. 20fps): At the 16:9 aspect ratio and with the WDR Pro function, the usable resolution is slightly reduced to 4MP.
■ 4 Megapixel (16:9) (max. 30fps): Without the WDR Pro function, the usable resolution is slightly reduced to 4MP at the 30fps frame rate.
Media > Video
Stream settings
Stream
Video settings for stream 1 Viewing Window
Video settings for stream 2 Viewing Window
Video settings for stream 3
Save
This Network Camera supports multiple streams with frame sizes ranging from 480 x 352 to 2560 x 1920 pixels
The definition of multiple streams:
■ Stream 1: Users can define the "Region of Interest" (viewing region) and the "Output Frame Size" (size of the live view window).
■ Stream 2: The default frame size for Stream 2 is set to the 640 x 480.
■ Stream 3: The default frame size for Stream 3 is set to the 2560 x 1920.
Click Viewing Window to open the viewing region settings page. On this page, you can configure the Region of Interest and the Output Frame Size for a video stream. For example, you can crop only a portion of the image that is of your interest, and thus save the bandwidth needed to transmit the video stream. As the picture shown below, the area of your interest in a parking lot should be the vehicles. The blue sky is of little value for the surveillance purpose.
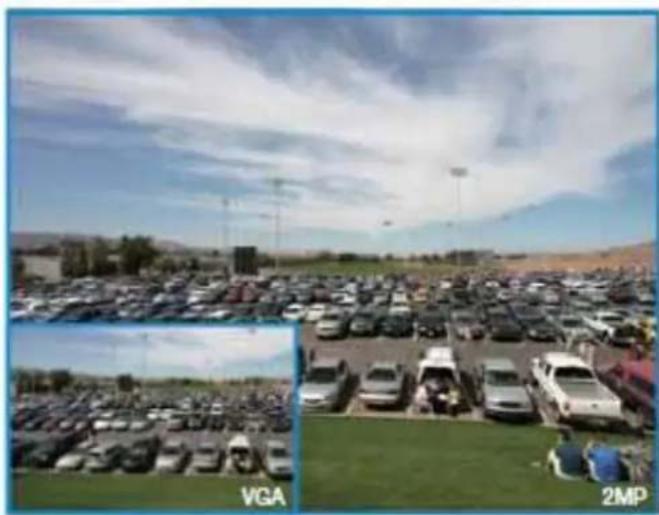
natural_image
Exterior view of a large parking lot with numerous parked cars under a cloudy sky (no signage or text visible)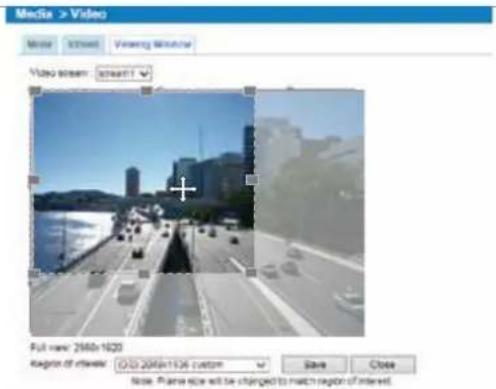
text_image
Media > Video Show 3DView Viewing Visual Video stream: screen1 Full view: 2600x1020 region of interest: QD 2000x1136 custom Save Close Close. Please size will be changed to match region of interest.Please follow the steps below to set up those settings for a stream:
- Select a stream for which you want to set up the viewing region.
- Select a Region of Interest from the drop-down list. The floating frame, the same as the one in the Gloabl View window on the home page, will resize accordingly. If you want to set up a customized viewing region, you can also resize and drag the floating frame to a desired position with your mouse.
- Choose a proper Output Frame Size from the drop-down list according to the size of your monitoring device.

NOTE: Video
▶ All the items in the “Region of Interest” should not be larger than the “Output Frame Size” (current maximum resolution).
■ The parameters of the multiple streams:
| Region of Interest Output frame size | ||
| Stream 1 | 2560 x 1920 ~ 480 x 352 (Selectable) | 2560 x 1920 ~ 480 x 352 (Selectable) |
| Stream 2 | 2560 x 1920 ~ 480 x 352 (Selectable) | 2560 x 1920 ~ 480 x 352 (Selectable) |
| Stream 3 Fixed Fixed | ||
When completed with the settings in the Viewing Window, click Save to enable the settings and click Close to exit the window. The selected Output Frame Size will immediately be applied to the Frame size of each video stream. Then you can go back to the home page to test the e-PTZ function. For more information about the e-PTZ function, please refer to page 120.
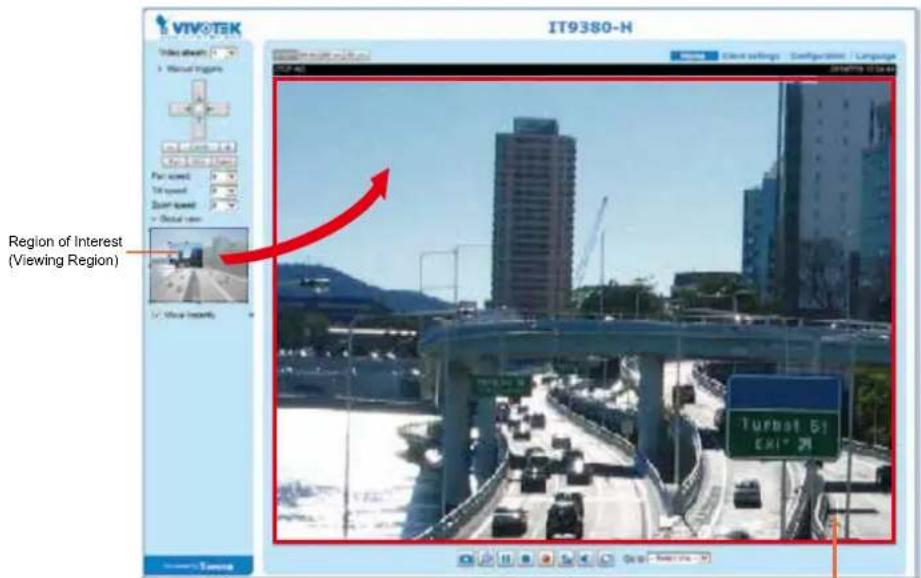
text_image
IT9380-H Region of Interest (Viewing Region) Turbo St Exit 24Output Frame Size
(Size of the Live View Window)
Click the stream item to display the detailed information. The maximum frame size will follow your settings in the above Viewing Window sections.
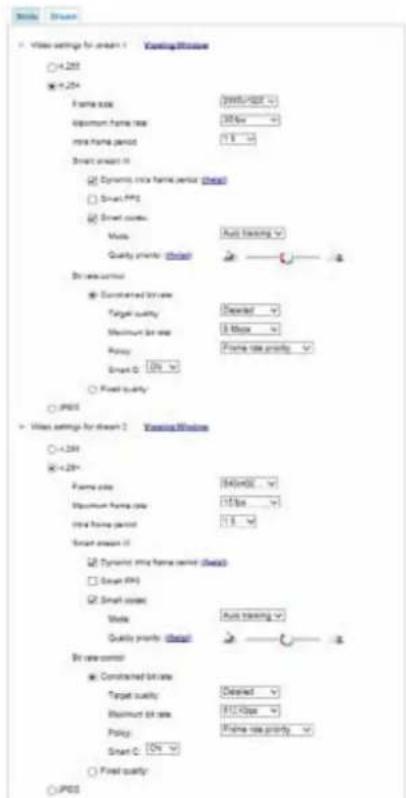
text_image
Video Settings for stream 1 Voting Window ○+200 ○+204 Frame size: (width=width) Maximum frame size: 300 px min frame period: 1.5 Smart stream 11 ● Dynamic min frame period (speed) ○ Smart FPS ● Smart colors Wave: Full matching Quality printer (speed) Drive stream: ● Constrained frame Target quality: Deemed Maximum frame size: 3 times Proxy: Frame size priority Smart D: 100% ○ Fixed quality ○ FPS ▶ Video settings for stream 2 Voting Window ○+200 ○+204 Frame size: (width=width) Maximum frame size: 15 times min frame period: 1.5 Smart stream 11 ● Dynamic ring frame series (speed) ○ Smart FPS ● Small colors Wide: Full matching Quality priority (speed) Drive stream: ● Constrained bit rate Target quality: Deemed Maximum bit rate: 15 times Policy: Frame size priority Smart C: 100% ○ Fixed quality ○ FPSThis Network Camera provides real-time H.265, H.264 and MJPEG compression standards (Triple Codec) for real-time viewing. If the H.265 or H.264 mode is selected, the video is streamed via RTSP protocol. There are several parameters through which you can adjust the video performance:
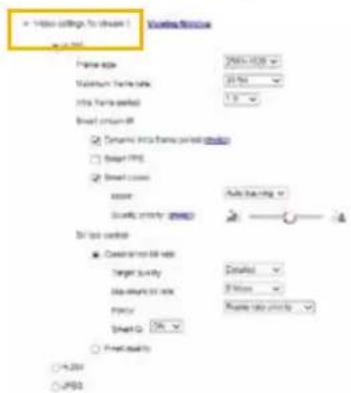
text_image
Video settings, to show 1 Video Rate Frame size 200x100% Maximum Frame rate 35.5% Intra Frame rate 1.5 Blend screen off Dynamic into frame print mode Simple PDF Blend mode angle Auto saving Scale: 200x100% By line color Decreased by line Target size Details Base format rate Preview New file color Preview to +20% +95%■ Frame size
You can set up different video resolutions for different viewing devices. For example, you can configure a smaller frame size and lower bit rate for remote viewing on mobile phones and a larger video size and a higher bit rate for live viewing on web browsers, or recording the stream to an NVR. Note that a larger frame size takes up more bandwidth.
■ Maximum frame rate
This limits the maximum refresh frame rate per second. Set the frame rate higher for smoother video quality and for recognizing moving objects in the field of view.
If the power line frequency is set to 50Hz, the frame rates are selectable at 1fps, 2fps, 3fps, 5fps, 8fps, 10fps, 12fps, 15fps, and up to 25fps. If the power line frequency is set to 60Hz, the frame rates are selectable at 1fps, 2fps, 3fps, 5fps, 8fps, 10fps, 12fps, 15fps, and up to 30fps. You can also select Customize and manually enter a value.
The frame rate will decrease if you select a higher resolution.
■ Intra frame period
Determine how often for firmware to plant an I frame. The shorter the duration, the more likely you will get better video quality, but at the cost of higher network bandwidth consumption. Select the intra frame period from the following durations: 1/4 second, 1/2 second, 1 second, 2 seconds, 3 seconds, and 4 seconds.
■ Smart stream III
■ Dynamic Intra frame period
High quality motion codecs, such as H.265, utilize the redundancies between video frames to deliver video streams at a balance of quality and bit rate.
The encoding parameters are summarized and illustrated below. The I-frames are completely self-referential and they are largest in size. The P-frames are predicted frames. The encoder refers to the previous I- or P-frames for redundant image information.

natural_image
Abstract geometric pattern with alternating blue and white parallelograms (no text or symbols)PIPPPPPPPIPPPP PPP I
H.264/265 Frame Types
By dynamically prolonging the intervals for I-frames insertion to up to 10 seconds, the bit rates required for streaming a video can be tremendously reduced. When streaming a video of a static scene, the Dynamic Intra frame feature can save up to 53% of bandwidth. The amount of bandwidth thus saved is also determined by the activities in the field of view. If activities occur in the scene, firmware automatically shortens the I-frame insertion intervals in order to maintain image quality. In the low light or night conditions, the sizes of P-frames tend to be enlarged due to the noises, and hence the bandwidth saving effect is also reduced.
Streaming a typical 2MP scene normally requires 3\~4Mb/s of bandwidth. With the Dynamic Intra frame function, the bandwidth for streaming a medium-traffic scene can be reduced to 2\~3Mb/s, and during the no-traffic period of time, down to 500kb/s.

natural_image
Abstract geometric pattern with alternating blue and white parallelograms (no text or symbols)Dynamic Intra Frame w/ static scenes


natural_image
Abstract geometric pattern of interlocking white and blue isometric panels (no text or symbols)PIPPPPPPPIPPPPPPPI
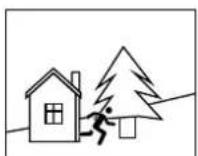
Activities
Dynamic Intra Frame w/ activities in scenes

With the H.265 codec in an optimal scenario and when Dynamic Intra frame is combined with the Smart Stream function, an 80% of bandwidth saving can be achieved comparing with using H.264 without enabling these bandwidth-saving features.
■ Smart FPS
In a static scene, the algorithm puts old frames in queue when no motions occur in scene. When motions occur, the encoding returns to normal to deliver real-time streaming.

flowchart
graph LR
    A["f1f1f1"] --> B["f1"]
    B --> C["f5f5f5f5f9"]
    C --> D["End"]
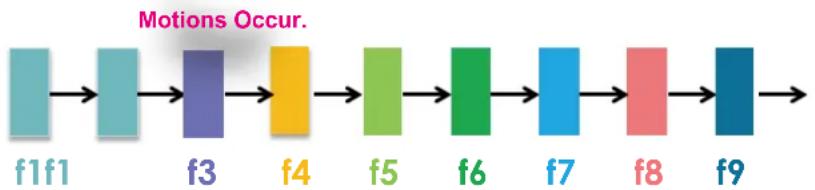
flowchart
graph LR
    f1 --> f3 --> f4 --> f5 --> f6 --> f7 --> f8 --> f9
    note right of f4: Motions Occur.
    Note left of f1: f1f1
By queuing the old frames from a static scene, both the computing efforts and the size of P frames are reduced. It is beneficial for keeping up with the frame rate requirements.
A default frame difference threshold, 1%, is embedded in firmware for returning from Smart FPS to normal encoding when motions occur.

NOTE:
Comparing with Smart Stream II, Smart Stream III has two more configurable options: Smart Q, and Smart FPS.
- Smart codec: Smart codec effectively reduces the quality of the whole or the non-interested areas on a screen and therefore reduces the bandwidth consumed.
You can manually specify the video quality for the foreground and the background areas.
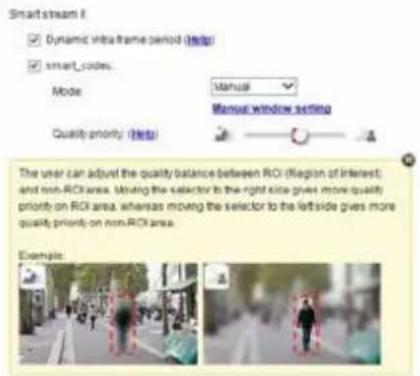
text_image
Smart stream I ✓ Dynamic intra frame period (Help) ✓ smart_codes. Mode: Manual Manual window setting Quality priority (Help) The user can adjust the quality balance between ROI (Region of interest) and non-ROI area. Using the selector to the right side gives more quality priority on ROI area, whereas moving the selector to the left side gives more quality priority on non-ROI area. Example:Select an operation mode if Smart codec is preferred.
- Auto tracking: The Auto mode configures the whole screen into the non-interested area. The video quality of part of the screen returns to normal when one or more objects move in that area. The remainder of the screen where there are no moving objects (no pixel changes) will still be transmitted in low-quality format.
- Manual: The Manual mode allows you to configure 3 ROI windows (Region of Interest, with Foreground quality) on the screen. Areas not included in any ROI windows will be considered as the non-interested areas. The details in the ROI areas will be transmitted in a higher-quality video format.
As illustrated below, the upper screen may contain little details of your interest, while the sidewalk on the lower screen is included in an ROI window.
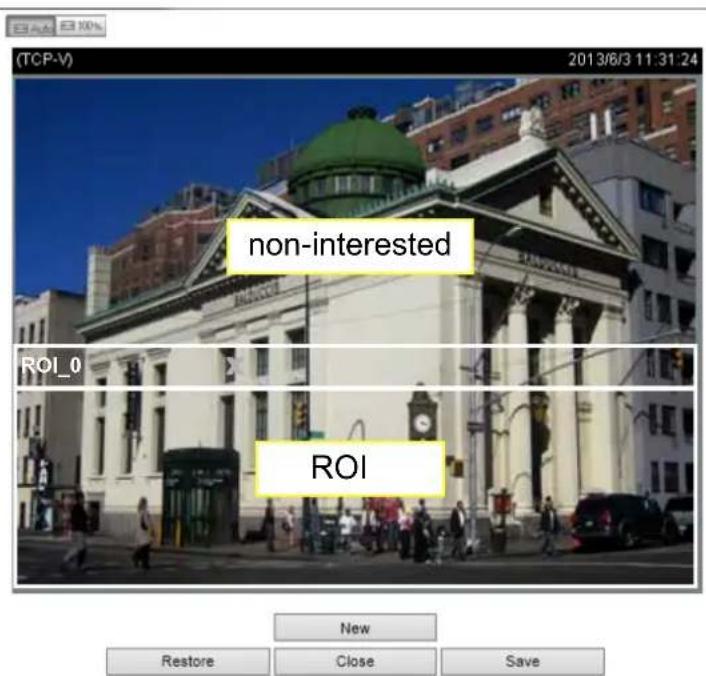
text_image
(TCP-V) 2013/6/3 11:31:24 non-interested ROI_0 ROI New Restore Close SaveAs the result, the lower screen is constantly displayed in high details, while the upper half is transmitted using a lower-quality format. Although the upper half is transmitted using a lower quality format, you still have an awareness of what is happening on the whole screen.
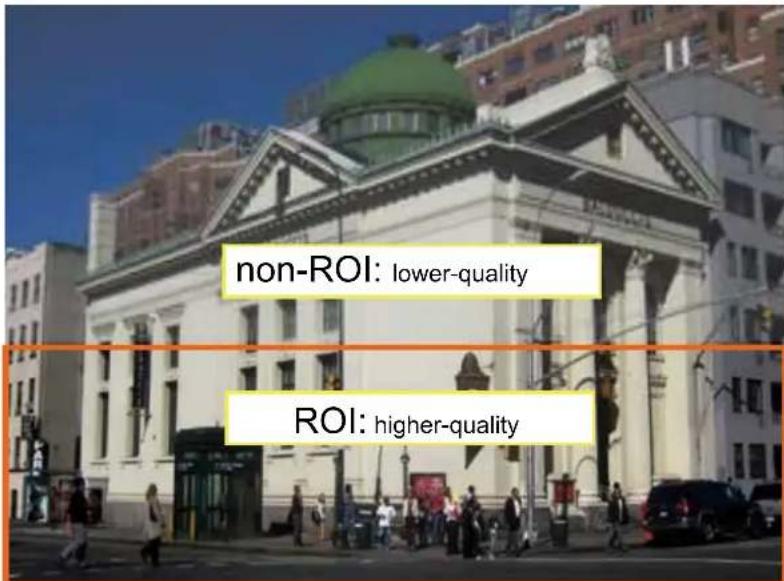
text_image
non-ROI: lower-quality ROI: higher-quality- Hybrid: The major difference between the “Manual” mode and the “Hybrid” mode is that:
In the "Hybrid" mode, any objects entering the non-interested area will restore the video quality of the moving objects and the area around them. The video quality of the associated non-interested area is immediately restored to normal to cover the moving objects.
In the “Manual” mode, the non-interested area is always transmitted using a low-quality format regardless of the activities occurring inside.
Quality priority: (Help)

- Quality priority: Use the slide bar to tune the quality contrast between the ROI and non-interested areas.
The farther the slide bar button is to the right, the higher the image quality of the ROI areas. On the contrary, the farther the slide bar button to the left, the higher the image quality of the non-interested area.
In this way, you may set up an ROI window as a privacy mask by covering a protected area using an ROI window, while the rest of the screen becomes the non-interested area. You may then configure the non-interested area to have a high image quality, or vice versa.
You should also select the Maximum bit rate from the pull-down menu as the threshold to contain the bandwidth consumption for both the high- and low-quality video sections in a smart stream.
■ Bit rate control
Constrained bit rate:
A complex scene generally produces a larger file size, meaning that higher bandwidth will be needed for data transmission. The bandwidth utilization is configurable to match a selected level, resulting in mutable video quality performance. The bit rates are selectable at the following rates: 20Kbps, 30Kbps, 40Kbps, 50Kbps, 64Kbps, 128Kbps, 256Kbps, 512Kbps, 768Kbps, 1Mbps, 2Mbps, 3Mbps, 4Mbps, 6Mbps, 8Mbps, 10Mbps, 12Mbps, 14Mbps, \~ to 40Mbps. You can also select Customize and manually enter a value up to 40Mbps.
- Target quality: Select a desired quality ranging from Medium to Excellent.
- Maximum bit rate: select a bit rate from the pull-down menu. The bit rate ranges from 20kbps to a maximum of 40Mbps. The bit rate then becomes the Average or Upper bound bit rate number. The Network Camera will strive to deliver video streams around or within the bit rate limitation you impose.
- Policy: If Frame Rate Priority is selected, the Network Camera will try to maintain the frame rate per second performance, while the image quality will be compromised. If Image quality priority is selected, the Network Camera may drop some video frames in order to maintain image quality.
Smart Q: Select ON or OFF to enable or disable the feature. Smart Q is scene-aware. The Smart Q reduces frame size and bit rate consumption through the following:
■ Dynamically adjusting the image quality for scenes in different luminosities in low light frames. Less noises means less of the bandwidth consumed.
■ Endorsing different qualities for the I frames and P frames, and hence reduces the frame size.
■ Dividing a single frame into different sections, and giving these sections different qualities. For a highly complex area, such as an area with dense vegetation, screen windows, or repeated patterns (complex textiles patterns like wall paper), having a lower quality value actually poses little effects on human eyes.
Unnecessary quality is unrecognized by human eyes and wastes the bit rate.
The Smart Q streaming can save up to 50% to 80% of bandwidth in different illumination conditions while keeping the same imaging quality. These numbers come from the comparison between Smart Stream II and Smart Stream III streamings.
Fixed quality:
On the other hand, if Fixed quality is selected, all frames are transmitted with the same quality; bandwidth utilization is therefore unpredictable. The video quality can be adjusted to the following settings: Medium, Standard, Good, Detailed, and Excellent. You can also select Customize and manually enter a value.
Maximum bit rate: With the guaranteed image quality, you might still want to place a bit rate limitation to control the size of video streams for bandwidth and storage concerns. The configurable bit rate starts from 1Mbps to 40Mbps.
The Maximum bit rate setting in the Fixed quality configuration can ensure a reasonable and limited use of network bandwidth. For example, in low light conditions where a Fixed quality setting is applied, video packet sizes can tremendously increase when noises are produced with electrical gains.
You may also manually enter a bit rate number by selecting the Customized option.
If the JPEG mode is selected, the Network Camera sends consecutive JPEG images to the client, producing a moving effect similar to a filmstrip. Every single JPEG image transmitted guarantees the same image quality, which in turn comes at the expense of variable bandwidth usage. Because the media contents are a combination of JPEG images, no audio data is transmitted to the client. There are three parameters provided in MJPEG mode to control the video performance:
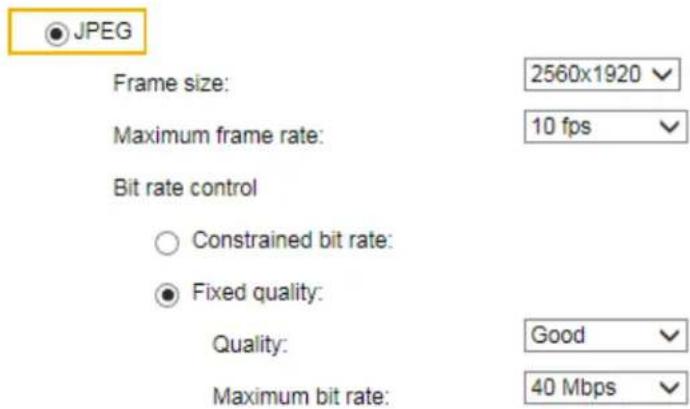
text_image
JPEG Frame size: 2560x1920 Maximum frame rate: 10 fps Bit rate control Constrained bit rate: Fixed quality: Quality: Good Maximum bit rate: 40 Mbps■ Frame size
You can set up different video resolution for different viewing devices. For example, set a smaller frame size and lower bit rate for remote viewing on mobile phones and a larger video size and a higher bit rate for live viewing on web browsers. Note that a larger frame size takes up more bandwidth.
■ Maximum frame rate
This limits the maximum refresh frame rate per second. Set the frame rate higher for smoother video quality.
If the power line frequency is set to 50Hz (at the 5MP resolution), the frame rates are selectable at 1fps, 2fps, 3fps, 5fps, 8fps, 10fps, and 15fps. If the power line frequency is set to 60Hz, the frame rates are selectable at 1fps, 2fps, 3fps, 5fps, 8fps, 10fps, and 15fps. You can also select Customize and manually enter a value. The frame rate will decrease if you select a higher resolution.
■ Video quality
Refer to the previous page setting an average or upper bound threshold for controlling the bandwidth consumed for transmitting motion jpegs. The configuration method is identical to that for H.264.
For Constant Bit Rate and other settings, refer to the previous page for details.

NOTE:
▶ Video quality and fixed quality refers to the compression rate, so a lower value will produce higher quality.
▶ Converting high-quality video may significantly increase the CPU loading, and you may encounter streaming disconnection or video loss while capturing a complicated scene. In the event of occurrence, we suggest you customize a lower video resolution or reduce the frame rate to obtain smooth video.
Media > Audio
Audio Settings
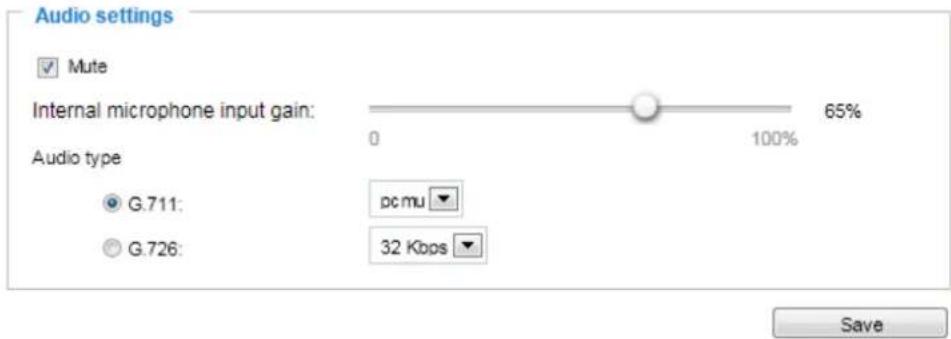
text_image
Audio settings ✓ Mute Internal microphone input gain: 65% 0 100% Audio type G.711: pc mu G.726: 32 Kbps SaveMute: Select this option to disable audio transmission from the Network Camera to all clients. Note that if muted, no audio data will be transmitted even if audio transmission is enabled on the Client Settings page. In that case, the following message is displayed:
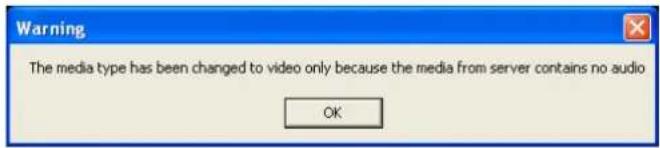
text_image
Warning The media type has been changed to video only because the media from server contains no audio OKInternal microphone input: Select the gain of the external audio input according to ambient conditions. Adjust the gain from 0% to 100%.
Audio type: Select audio codec and the sampling bit rate.
■ G.711 also provides good sound quality and requires about 64Kbps. Select pcmu ( -Law) or pcma (A-Law) mode.
■ G.726 is a speech codec standard covering voice transmission at rates of 16, 24, 32, and 40kbit/s.
When completed with the settings on this page, click Save to enable the settings.
Network > General settings
This section explains how to configure a wired network connection for the Network Camera.
Network Type
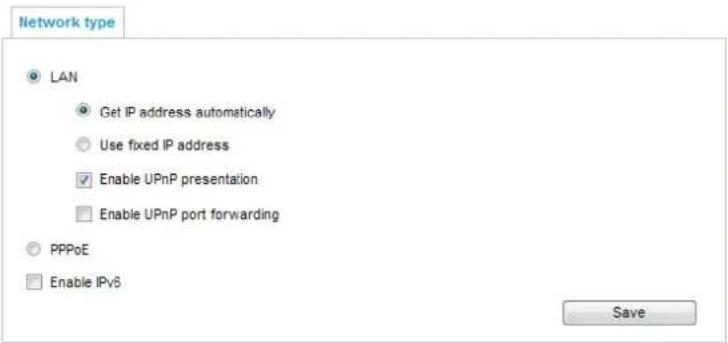
text_image
Network type LAN Get IP address automatically Use fixed IP address Enable UPnP presentation Enable UPnP port forwarding PPPoE Enable IPv6 SaveLAN
Select this option when the Network Camera is deployed on a local area network (LAN) and is intended to be accessed by local computers. The default setting for the Network Type is LAN. Please remember to click on the Save button when you complete the Network setting.
Get IP address automatically: Select this option to obtain an available dynamic IP address assigned by the DHCP server each time the camera is connected to the LAN.
Use fixed IP address: Select this option to manually assign a static IP address to the Network Camera.
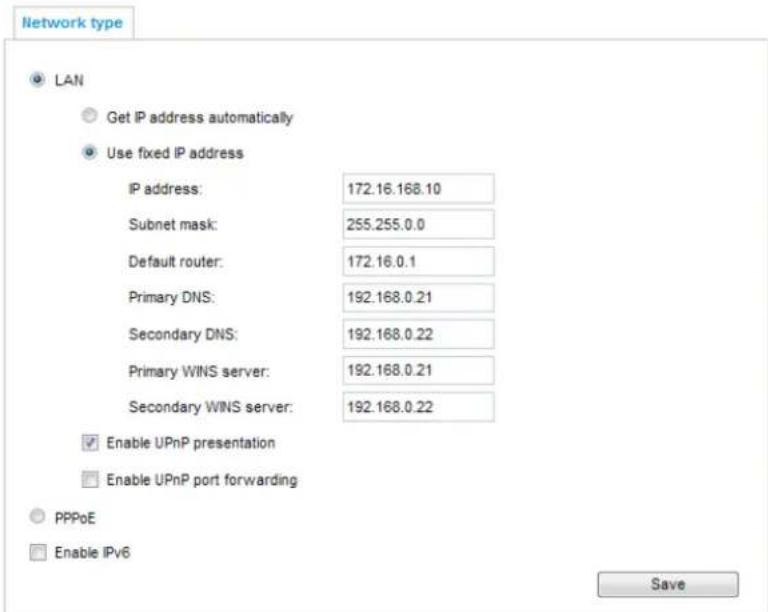
text_image
Network type LAN Get IP address automatically Use fixed IP address IP address: 172.16.168.10 Subnet mask: 255.255.0.0 Default router: 172.16.0.1 Primary DNS: 192.168.0.21 Secondary DNS: 192.168.0.22 Primary WINS server: 192.168.0.21 Secondary WINS server: 192.168.0.22 Enable UPnP presentation Enable UPnP port forwarding PPPoE Enable IPv6 Save- You can make use of VIVOTEK Installation Wizard 2 on the software CD to easily set up the Network Camera on LAN. Please refer to Software Installation on page 26 for details.
- Enter the Static IP, Subnet mask, Default router, and Primary DNS provided by your ISP or network administrator.
Subnet mask: This is used to determine if the destination is in the same subnet. The default value is "255.255.255.0".
Default router: This is the gateway used to forward frames to destinations in a different subnet. Invalid router setting will disable the transmission to destinations across different subnets.
Primary DNS: The primary domain name server that translates hostnames into IP addresses.
Secondary DNS: Secondary domain name server that backups the Primary DNS.
Primary WINS server: The primary WINS server that maintains the database of computer names and IP addresses.
Secondary WINS server: The secondary WINS server that maintains the database of computer names and IP addresses.
Enable UPnP presentation: Select this option to enable UPnP ^TM presentation for your Network Camera so that whenever a Network Camera is presented to the LAN, the shortcuts to connected Network Cameras will be listed in My Network Places. You can click the shortcut to link to the web browser. Currently, UPnP ^TM is supported by Windows XP or later. Note that to utilize this feature, please make sure the UPnP ^TM component is installed on your computer.
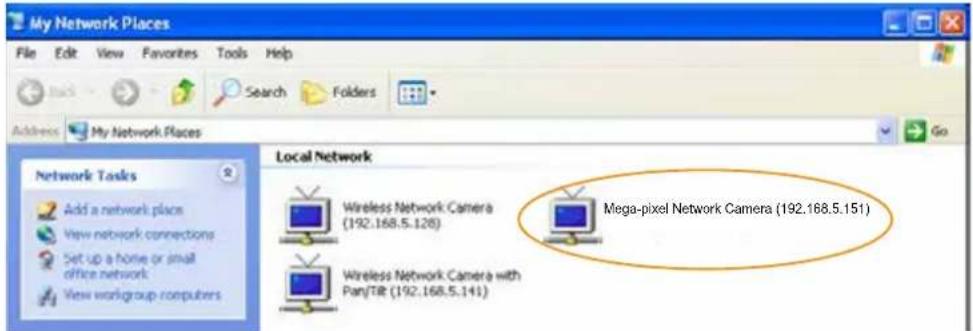
text_image
My Network Places File Edit View Favorites Tools Help Address My Network Places Go Network Tasks Add a network places View network connections Set up a home or small office network View workgroup computers Local Network Wireless Network Camera (192.168.5.128) Mega-pixel Network Camera (192.168.5.151) Wireless Network Camera with Pan/Tilt (192.168.5.141)Enable UPnP port forwarding: To access the Network Camera from the Internet, select this option to allow the Network Camera to open ports automatically on the router so that video streams can be sent out from a LAN. To utilize of this feature, make sure that your router supports UPnP ^™ and it is activated.
PPPoE (Point-to-point over Ethernet)
Select this option to configure your Network Camera to make it accessible from anywhere as long as there is an Internet connection. Note that to utilize this feature, it requires an account provided by your ISP.
Follow the steps below to acquire your Network Camera's public IP address.
- Set up the Network Camera on the LAN.
- Go to Configuration > Event > Event settings > Add server (please refer to Add server on page 128) to add a new email or FTP server.
- Go to Configuration > Event > Event settings > Add media (please refer to Add media on page 133).
Select System log so that you will receive the system log in TXT file format which contains the Network Camera's public IP address in your email or on the FTP server. - Go to Configuration > Network > General settings > Network type. Select PPPoE and enter the user name and password provided by your ISP. Click Save to enable the setting.
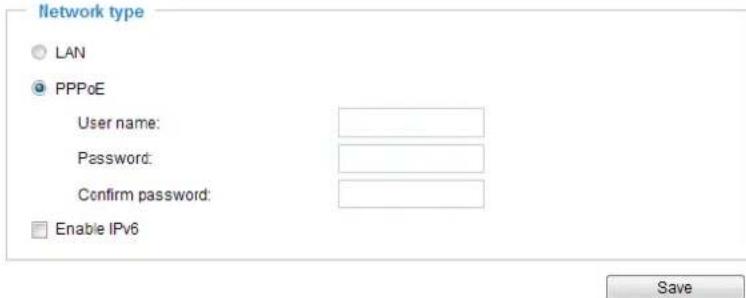
text_image
Network type LAN PPPoE User name: Password: Confirm password: Enable IPv6 Save- The Network Camera will reboot.
- Disconnect the power to the Network Camera; remove it from the LAN environment.

NOTE:
▶ If the default ports are already used by other devices connected to the same router, the Network Camera will select other ports for the Network Camera.
If UPnP ^TM is not supported by your router, you will see the following message: Error: Router does not support UPnP port forwarding.
▶ Steps to enable the UPnP ^TM user interface on your computer: Note that you must log on to the computer as a system administrator to install the UPnP ^TM components.
- Go to Start, click Control Panel, then click Add or Remove Programs.
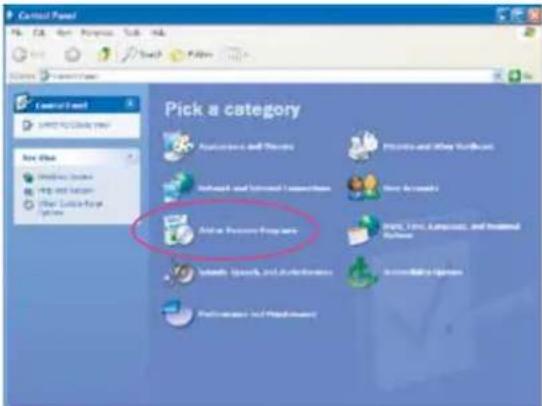
text_image
Control Panel Find it for Change your New Info Active Pressure Program Active Pressure Program Performance and Performance Pick a category Active Pressure Program Performance and Performance- In the Add or Remove Programs dialog box, click Add/Remove Windows Components.
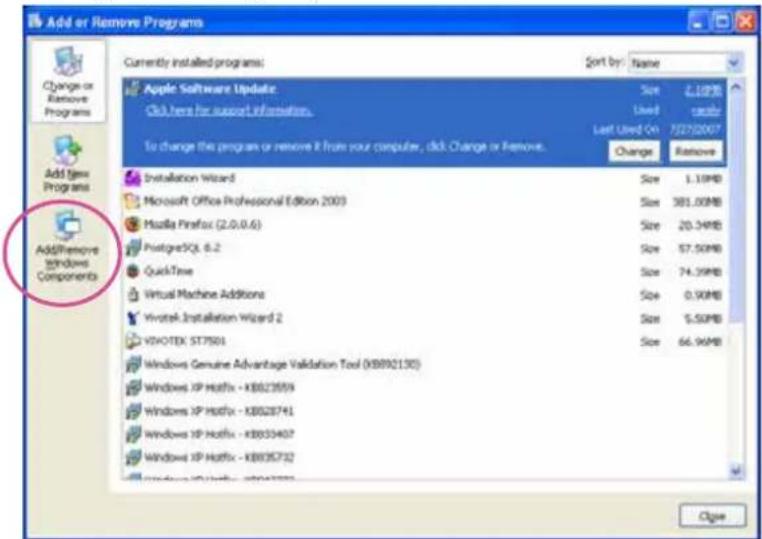
text_image
Add or Remove Programs Currently installed programs: Sort by: Name Apple Software Update Click here for support information. Size 2.10MB Used cable Last Used On 7/27/2007 Add new Programs To change this program or remove it from your computer, click Change or Remove. Change Remove Installation Wizard Size 1.10MB Microsoft Office Professional Edition 2003 Size 381.00MB Mozilla Firefox (2.0.0.6) Size 20.34MB PostgreSQL 8.2 Size 57.50MB QuickTime Size 74.59MB Virtual Machine Additions Size 0.50MB Vivotek Installation Wizard 2 Size 5.50MB VSPOTEK ST7501 Size 66.96MB Windows Genuine Advantage Validation Tool (KB892130) Windows XP Hotfix - KB82359 Windows XP Hotfix - KB828741 Windows XP Hotfix - KB833407 Windows XP Hotfix - KB835732 Close- In the Windows Components Wizard dialog box, select Networking Services and click Details.
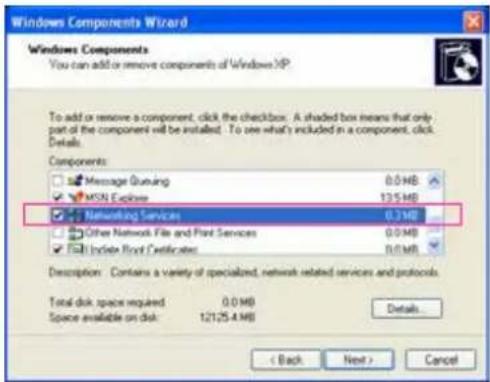
text_image
Windows Components Wizard Windows Components You can add or remove components of Windows XP To add or remove a component, click the checkbox. A shaded box means that only part of the component will be installed. To see what's included in a component, click. Details. Components: Message Queueing 0.0 MB MSN Explore 135 MB Networking Services 0.1 MB Other Network File and Print Services 0.0 MB Index Front Certificates 0.0 MB Description: Contains a variety of specialized, network-related services and protocols. Total disk space required 0.0 MB Space available on disk: 12125.4 MB Details... < Back Next > Cancel- In the Networking Services dialog box, select Universal Plug and Play and click OK.
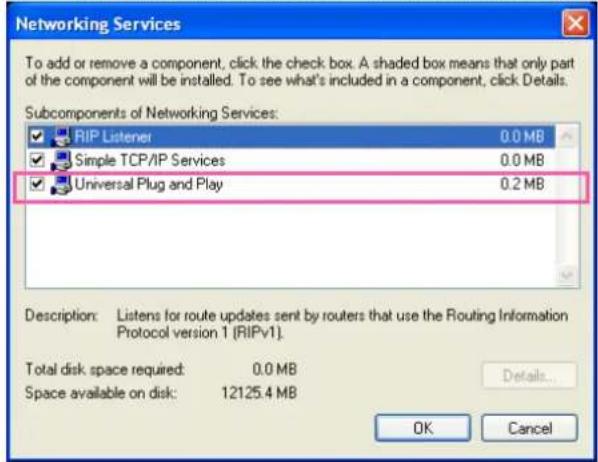
text_image
Networking Services To add or remove a component, click the check box. A shaded box means that only part of the component will be installed. To see what's included in a component, click Details. Subcomponents of Networking Services: RIP Listener 0.0 MB Simple TCP/IP Services 0.0 MB Universal Plug and Play 0.2 MB Description: Listens for route updates sent by routers that use the Routing Information Protocol version 1 (RIPv1). Total disk space required: 0.0 MB Space available on disk: 12125.4 MB Details... OK Cancel- Click Next in the following window.
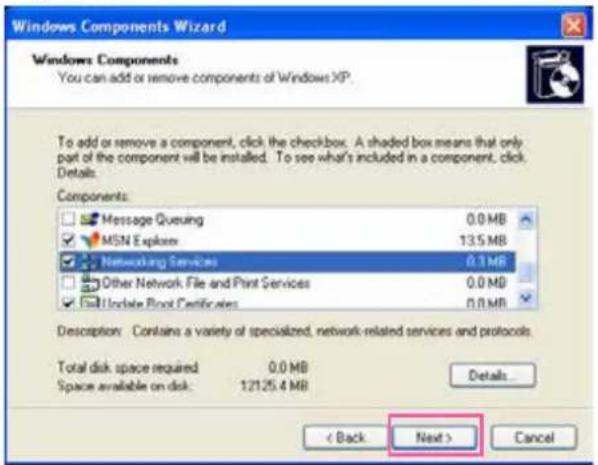
text_image
Windows Components Wizard Windows Components You can add or remove components of Windows XP. To add or remove a component, click the checkbox. A shaded box means that only part of the component will be installed. To see what's included in a component, click. Details: Components: Message Queueing 0.0 MB MSN Explorer 13.5 MB Networking Services 0.3 MB Other Network File and Print Services 0.0 MB Update Print Certificates 0.0 MB Description: Contains a variety of specialized, network-related services and protocols. Total disk space required 0.0 MB Space available on disk: 12125.4 MB Details... < Back Next > Cancel- Click Finish. UPnP ^TM is enabled.
▶ How does UPnP ^TM work?
UPnP ^™ networking technology provides automatic IP configuration and dynamic discovery of devices added to a network. Services and capabilities offered by networked devices, such as printing and file sharing, are available among each other without the need for cumbersome network configuration. In the case of Network Cameras, you will see Network Camera shortcuts under My Network Places.
▶ Enabling UPnP port forwarding allows the Network Camera to open a secondary HTTP port on the router-not HTTP port-meaning that you have to add the secondary HTTP port number to the Network Camera's public address in order to access the Network Camera from the Internet. For example, when the HTTP port is set to 80 and the secondary HTTP port is set to 8080, refer to the list below for the Network Camera's IP address.
| From the Internet In LAN | |
| http://203.67.124.123:8080 http://192.168.4.160 or http://192.168.4.160:8080 | |
▶ If the PPPoE settings are incorrectly configured or the Internet access is not working, restore the Network Camera to factory default; please refer to Restore on page 58 for details. After the Network Camera is reset to factory default, it will be accessible on the LAN.
Enable IPv6
Select this option and click Save to enable IPv6 settings.
Please note that this only works if your network environment and hardware equipment support IPv6. The browser should be Microsoft® Internet Explorer 6.5, Mozilla Firefox 3.0 or above.
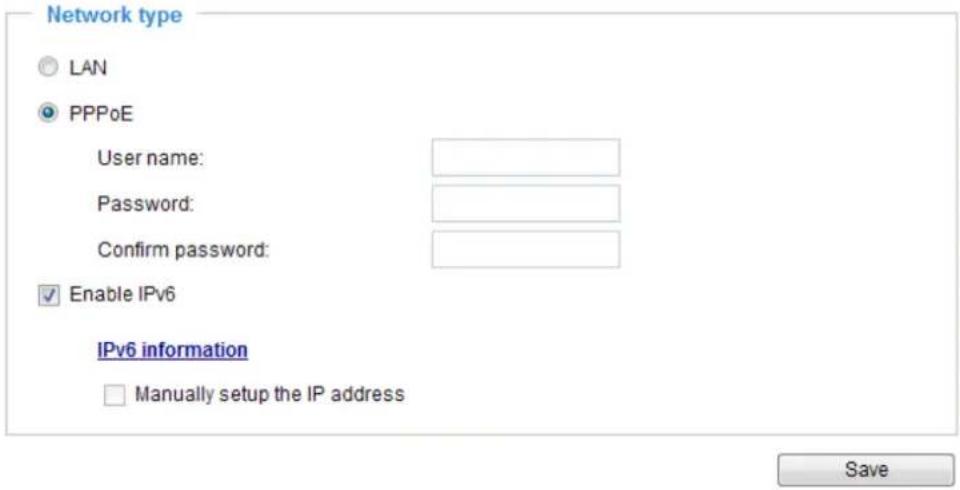
text_image
Network type LAN PPPoE User name: Password: Confirm password: Enable IPv6 IPv6 information Manually setup the IP address SaveWhen IPv6 is enabled, by default, the network camera will listen to router advertisements and be assigned with a link-local IPv6 address accordingly.
IPv6 Information: Click this button to obtain the IPv6 information as shown below.
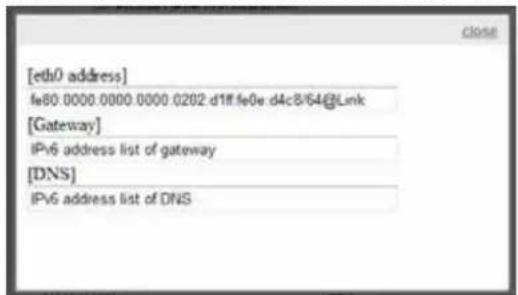
text_image
[eth0 address] fe80.0000.0000.0000.0202 d1ff fe0e d4c8/64@Link [Gateway] IPv6 address list of gateway [DNS] IPv6 address list of DNSIf your IPv6 settings are successful, the IPv6 address list will be listed in the pop-up window. The IPv6 address will be displayed as follows:
Refers to Ethernet
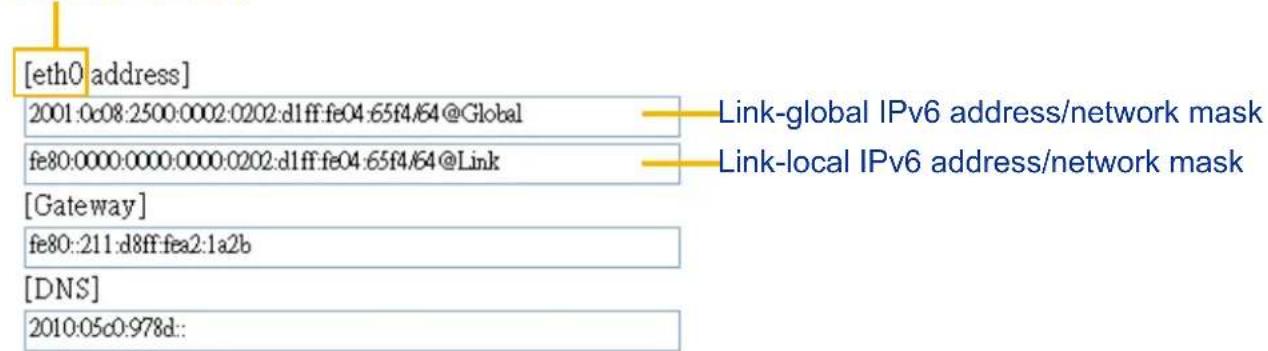
text_image
[eth0 address] 2001:0c08:2500:0002:0202:d1ff:fe04:65f4/64@Global fe80:0000:0000:0000:0202:d1ff:fe04:65f4/64@Link [Gateway] fe80::211:d8ff:fea2:1a2b [DNS] 2010:05c0:978d::Please follow the steps below to link to an IPv6 address:
- Open your web browser.
-
Enter the link-global or link-local IPv6 address in the address bar of your web browser.
-
The format should be:
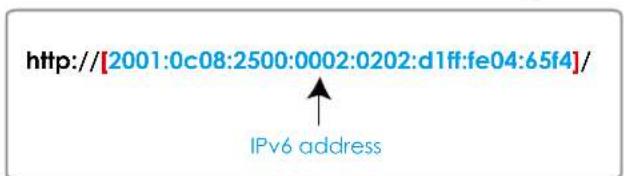
text_image
http://[2001:0c08:2500:0002:0202:d1ff:fe04:65f4]/ IPv6 address- Press Enter on the keyboard or click Refresh button to refresh the webpage. For example:
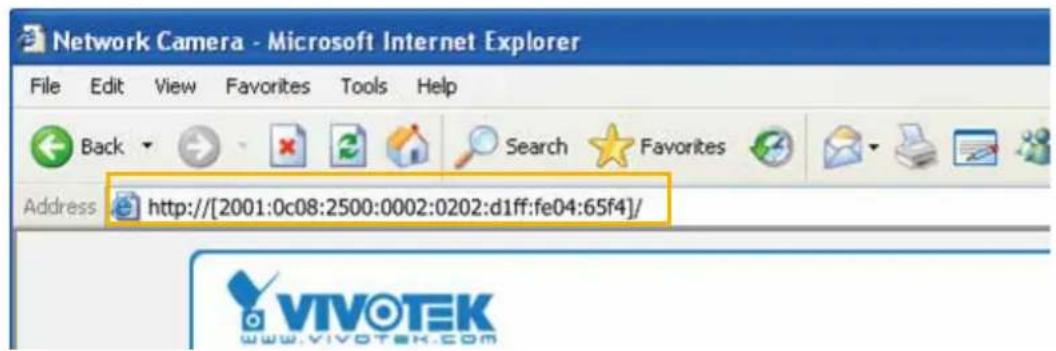
text_image
Network Camera - Microsoft Internet Explorer File Edit View Favorites Tools Help Back Search Favorites Address http://[2001:0c08:2500:0002:0202:d1ff:fe04:65f4]/ VIVOTEK www.vivotek.com
NOTE:
▶ If you have a Secondary HTTP port (the default value is 8080), you can also link to the webpage using the following address format: (Please refer to HTTP streaming on page 94 for detailed information.)
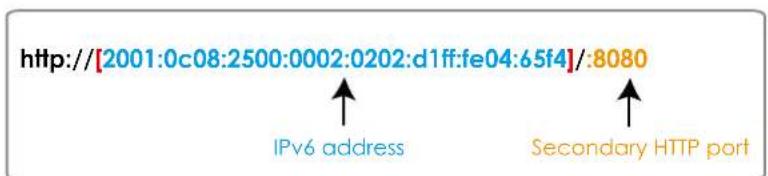
text_image
http://[2001:0c08:2500:0002:0202:d1ff:fe04:65f4]/:8080 IPv6 address Secondary HTTP port▶ If you choose PPPoE as the Network Type, the [PPP0 address] will be displayed in the IPv6 information column as shown below.
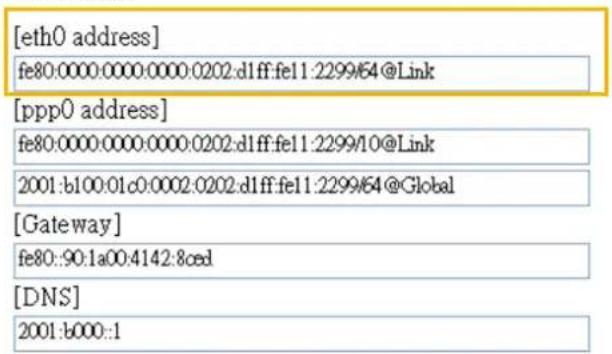
text_image
[eth0 address] fe80:0000:0000:0000:0202:dlff:fe11:2299/64@Link [ppp0 address] fe80:0000:0000:0000:0202:dlff:fe11:2299/10@Link 2001:b100:01c0:0002:0202:dlff:fe11:2299/64@Global [Gateway] fe80::90:1a00:4142:8ced [DNS] 2001:b000::1Manually setup the IP address: Select this option to manually set up IPv6 settings if your network environment does not have DHCPv6 server and router advertisements-enabled routers. If you check this item, the following blanks will be displayed for you to enter the corresponding information:
√ Enable IPv6
IPv6 information
√ Manually setup the IP address
Optional IP address / Prefix length
Optional default router
Optional primary DNS
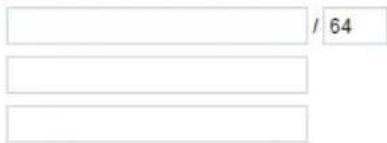
text_image
1/64Network > Streaming protocols
HTTP streaming
To utilize HTTP authentication, make sure that your have set a password for the Network Camera first; please refer to Security > User account on page 105 for details.
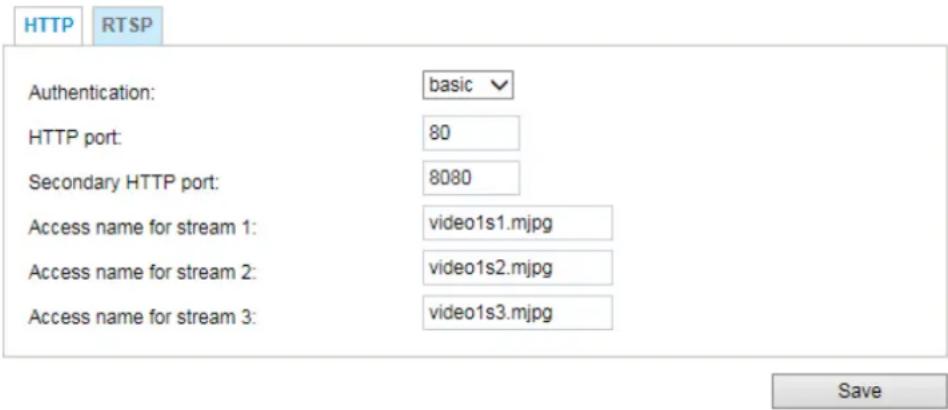
text_image
HTTP RTSP Authentication: basic HTTP port: 80 Secondary HTTP port: 8080 Access name for stream 1: video1s1.mjpg Access name for stream 2: video1s2.mjpg Access name for stream 3: video1s3.mjpg SaveAuthentication: Depending on your network security requirements, the Network Camera provides two types of security settings for an HTTP transaction: basic and digest.
If basic authentication is selected, the password is sent in plain text format and there can be potential risks of being intercepted. If digest authentication is selected, user credentials are encrypted using MD5 algorithm and thus provide better protection against unauthorized accesses.
HTTP port / Secondary HTTP port: By default, the HTTP port is set to 80 and the secondary HTTP port is set to 8080. They can also be assigned to another port number between 1025 and 65535. If the ports are incorrectly assigned, the following warning messages will be displayed:

text_image
Microsoft Internet Explorer HTTP port must be 80 or from 1025 to 65535 OK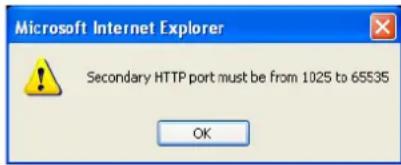
text_image
Microsoft Internet Explorer Secondary HTTP port must be from 1025 to 65535 OKTo access the Network Camera on the LAN, both the HTTP port and secondary HTTP port can be used to access the Network Camera. For example, when the HTTP port is set to 80 and the secondary HTTP port is set to 8080, refer to the list below for the Network Camera's IP address.
| On the LAN |
| http://192.168.4.160 or http://192.168.4.160:8080 |
Access name for stream 1 \~ 3: This Network camera supports multiple streams simultaneously. The access name is used to identify different video streams. Users can click Media > Video > Stream settings to set up the video quality of linked streams. For more information about how to set up the video quality, please refer to Stream settings on page 76.
When using Mozilla Firefox to access the Network Camera and the video mode is set to JPEG, users will receive video comprised of continuous JPEG images. This technology, known as “server push”, allows the Network Camera to feed live pictures to Mozilla Firefox.
URL command -- http://
- Launch Mozilla Firefox or Netscape.
- Type the above URL command in the address bar. Press Enter.
- The JPEG images will be displayed in your web browser.
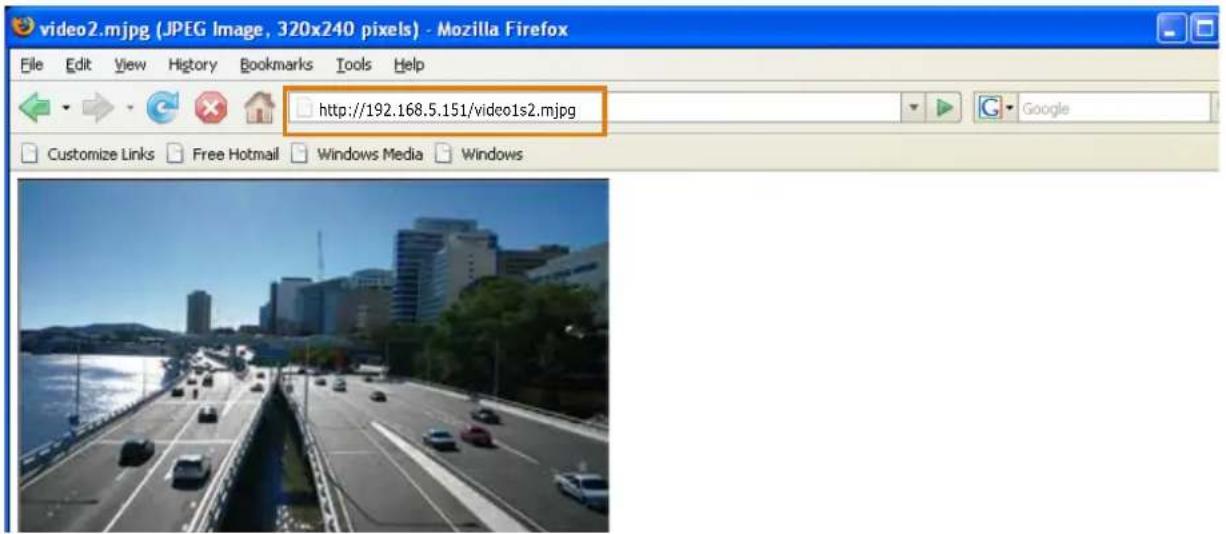
text_image
video2.mjpg (JPEG Image, 320x240 pixels) - Mozilla Firefox File Edit View History Bookmarks Tools Help http://192.168.5.151/video1s2.mjpg Customize Links Free Hotmail Windows Media Windows
NOTE:
▶ Microsoft® Internet Explorer does not support server push technology; therefore, you will not be able to access a video stream using http://
RTSP Streaming
To utilize RTSP streaming authentication, make sure that you have set a password for controlling the access to video stream first. Please refer to Security > User account on page 105 for details.
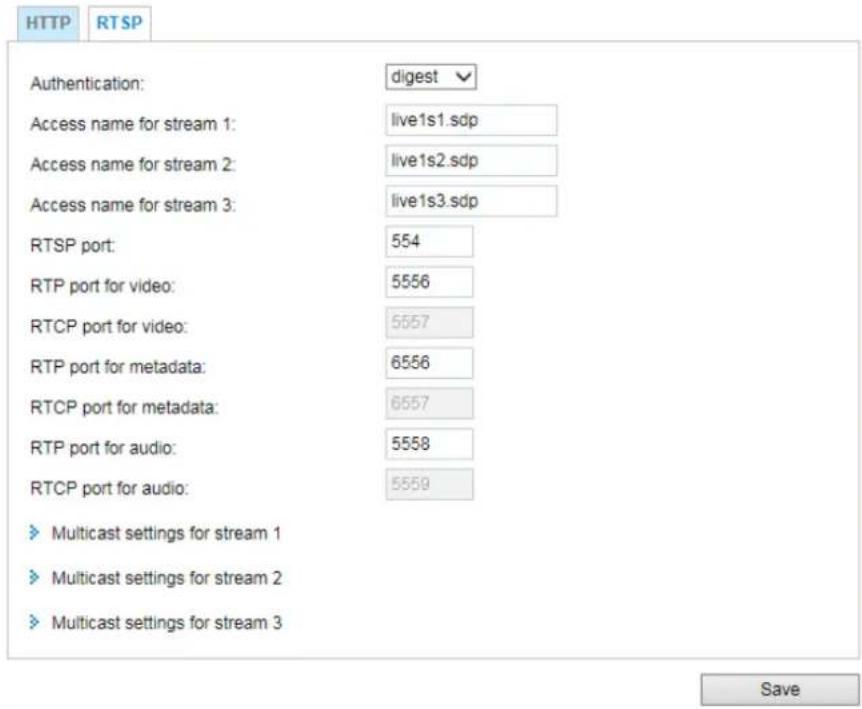
text_image
HTTP RTSP Authentication: digest Access name for stream 1: live1s1.sdp Access name for stream 2: live1s2.sdp Access name for stream 3: live1s3.sdp RTSP port: 554 RTP port for video: 5556 RTCP port for video: 5557 RTP port for metadata: 6556 RTCP port for metadata: 6557 RTP port for audio: 5558 RTCP port for audio: 5559 ► Multicast settings for stream 1 ► Multicast settings for stream 2 ► Multicast settings for stream 3 SaveAuthentication: Depending on your network security requirements, the Network Camera provides three types of security settings for streaming via RTSP protocol: disable, basic, and digest. If basic authentication is selected, the password is sent in plain text format, but there can be potential risks of it being intercepted. If digest authentication is selected, user credentials are encrypted using MD5 algorithm, thus providing better protection against unauthorized access. The availability of the RTSP streaming for the three authentication modes is listed below:
| Quick Time player VLC | ||
| Disable O O | ||
| Basic O O | ||
| Digest O X | ||
Access name for stream 1 \~ 3: This Network camera supports multiple streams simultaneously. The access name is used to differentiate the streaming source. If you want to use an RTSP player to access the Network Camera, you have to set the video mode to H.264 or H.265 and use the following RTSP URL command to request transmission of the streaming data.
rtsp://
For example, when the access name for stream 1 is set to live1s1.sdp:
- Launch an RTSP player.
- Choose File > Open URL. A URL dialog box will pop up.
- Type the above URL command in the text box.
- The live video will be displayed in your player as shown below.
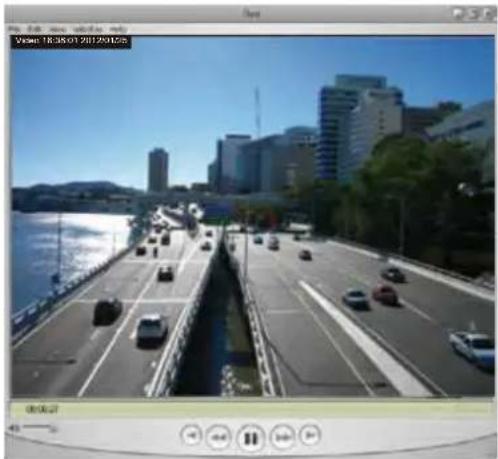
natural_image
River scene with multiple lanes of traffic, modern buildings in background under clear blue sky (no visible text or symbols)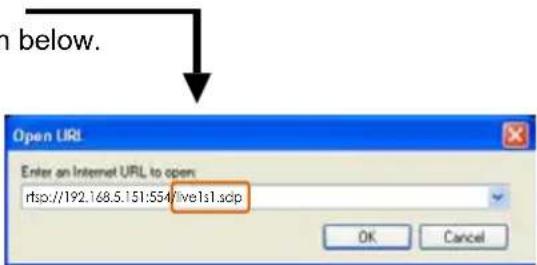
text_image
n below. Open URL Enter an Internet URL to open rtsp://192.168.5.151:554\live1s1.scp OK CancelRTSP port /RTP port for video, audio/ RTCP port for video, audio
■ RTSP (Real-Time Streaming Protocol) controls the delivery of streaming media. By default, the port number is set to 554.
■ The RTP (Real-time Transport Protocol) is used to deliver video and audio data to the clients. By default, the RTP port for video is set to 5556.
■ The RTCP (Real-time Transport Control Protocol) allows the Network Camera to transmit the data by monitoring the Internet traffic volume. By default, the RTCP port for video is set to 5557.
The ports can be changed to values between 1025 and 65535. The RTP port must be an even number and the RTCP port is the RTP port number plus one, and thus is always an odd number. When the RTP port changes, the RTCP port will change accordingly.
If the RTP ports are incorrectly assigned, the following warning message will be displayed:
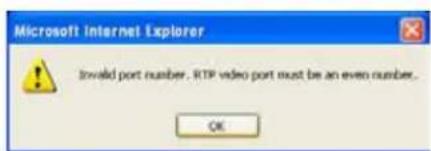
text_image
Microsoft Internet Explorer Invalid port number. RTP video port must be an even number. OKMulticast settings for streams: Click the items to display the detailed configuration information. Select the Always multicast option to enable multicast for video streams.
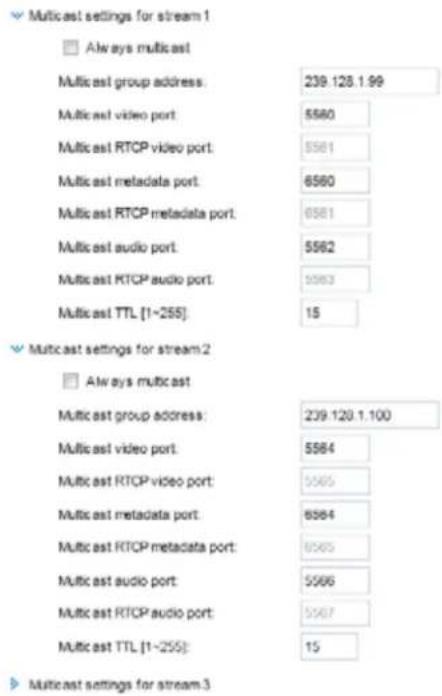
text_image
Multicast settings for stream 1 Always multicast Multicast group address: 239.128.1.99 Multicast video port: 5560 Multicast RTCP video port: 5561 Multicast metadata port: 6560 Multicast RTCP metadata port: 6561 Multicast audio port: 5562 Multicast RTCP audio port: 5563 Multicast TTL [1~255]: 15 Multicast settings for stream 2 Always multicast Multicast group address: 239.129.1.100 Multicast video port: 5564 Multicast RTCP video port: 5565 Multicast metadata port: 6564 Multicast RTCP metadata port: 6565 Multicast audio port: 5566 Multicast RTCP audio port: 5567 Multicast TTL [1~255]: 15 Multicast settings for stream 3Unicast video transmission delivers a stream through point-to-point transmission; multicast, on the other hand, sends a stream to the multicast group address and allows multiple clients to acquire the stream at the same time by requesting a copy from the multicast group address. Therefore, enabling multicast can effectively save Internet bandwidth.
The ports can be changed to values between 1025 and 65535. The multicast RTP port must be an even number and the multicast RTCP port number is the multicast RTP port number plus one, and thus is always odd. When the multicast RTP port changes, the multicast RTCP port will change accordingly.
If the multicast RTP video ports are incorrectly assigned, the following warning message will be displayed:
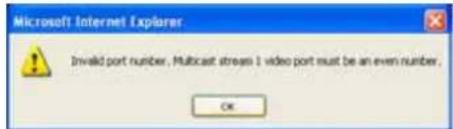
text_image
Microsoft Internet Explorer Invalid port number. Multicast streams 1 video port must be an even number. OKMulticast TTL [1\~255]: The multicast TTL (Time To Live) is the value that tells the router the range a packet can be forwarded.
| Initial TTL Scope | |
| 0 Restricted to the same host | |
| 1 Restricted to the same subnetwork | |
| 32 Restricted to the same site | |
| 64 Restricted to the same region | |
| 128 Restricted to the same continent | |
| 255 Unrestricted in scope | |

IMPORTANT:
The Multicast metadata port is utilized by VIVOTEK VADP modules to transfer video analytics results, PTZ stream, textual data, and event messages between the camera and the client side running and observing the video analysis. If your client side computer is located outside the local network, you may need to open the associated TCP port on routers and firewall.
Network > DDNS
This section explains how to configure the dynamic domain name service for the Network Camera. DDNS is a service that allows your Network Camera, especially when assigned with a dynamic IP address, to have a fixed host and domain name.
Express link
Express Link is a free service provided by VIVOTEK server, which allows users to register a domain name for a network device. One URL can only be mapped to one MAC address. This service will examine if the host name is valid and automatically open a port on your router. If using DDNS, the user has to manually configure UPnP port forwarding. Express Link is more convenient and easier to set up.

text_image
Express link Manual setup Enable express link http:// | .2bthere.net Help Save By Express link, all users need to do is create host name for the camera. It will generate the link to access the camera from internet.Please follow the steps below to enable Express Link:
- Make sure that your router supports UPnP port forwarding and it is activated.
- Check Enable express link.
- Enter a host name for the network device and click Save. If the host name has been used by another device, a warning message will show up. If the host name is valid, it will display a message as shown below.
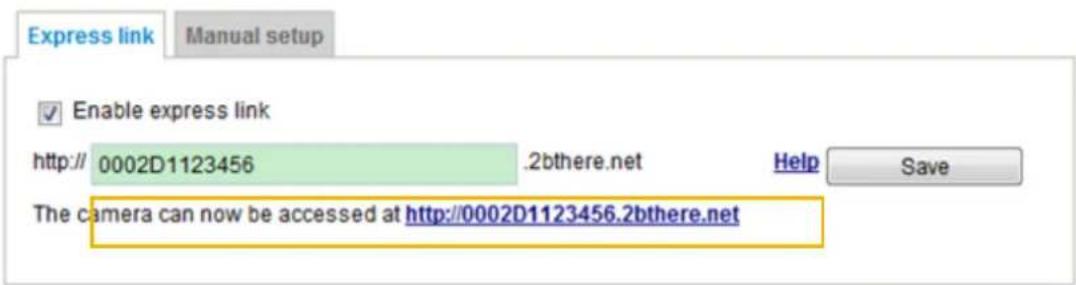
text_image
Express link Manual setup Enable express link http:// 0002D1123456 .2bthere.net Help Save The camera can now be accessed at http://0002D1123456.2bthere.net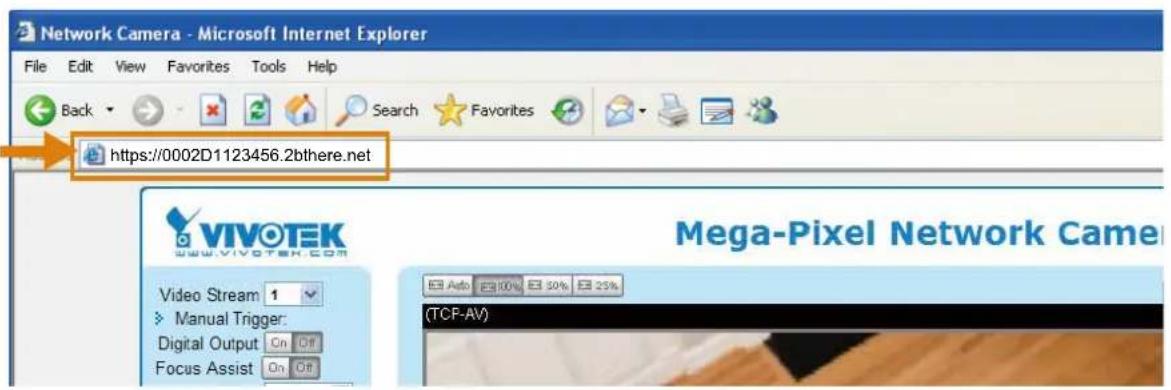
text_image
Network Camera - Microsoft Internet Explorer File Edit View Favorites Tools Help Back Search Favorites https://0002D1123456.2bthere.net VIVOTEK www.vivotek.com Video Stream 1 Manual Trigger: Digital Output On Off Focus Assist On Off Mega-Pixel Network Came (CTP-AV)Manual setup
DDNS: Dynamic domain name service
DDNS: Dynamic domain name service

Enable DDNS:
Provider:
Dyndns.org(Dynamic)
Host name:
User name:
Password:
Enable DDNS: Select this option to enable the DDNS setting.
Provider: Select a DDNS provider from the provider drop-down list.
VIVOTEK offers Safe100.net, a free dynamic domain name service, to VIVOTEK customers. It is recommended that you register Safe100.net to access VIVOTEK's Network Cameras from the Internet. Additionally, we offer other DDNS providers, such as Dyndns.org(Dynamic), Dyndns.org(Custom), TZO.com, DHS.org, CustomSafe100, dyn-interfree.it.
Note that before utilizing this function, please apply for a dynamic domain account first.
■ Safe100.net
- In the DDNS column, select Safe100.net from the drop-down list. Click I accept after reviewing the terms of the Service Agreement.
- In the Register column, fill in the Host name (xxxx.safe100.net), Email, Key, and Confirm Key, and click Register. After a host name has been successfully created, a success message will be displayed in the DDNS Registration Result column.
Register
Host name:
WTK.safe100.net
Email:
wtk@vivotek.com
Key:
...
Confirm key:
...
To apply for a domain name for the camera, or to modify the previously registered information, fill in the following fields and then click "Register".
Register
DDNS Registration Result:
[Register] Successfully Your account information has been mailed to registered e-mail address

Upon successful registration, you can click copy to automatically upload relevant information to the DDNS form or you can manually fill it in. Then, click "Save" to save new settings.
- Click Copy and all the registered information will automatically be uploaded to the corresponding fields in the DDNS column at the top of the page as seen in the picture.
DDNS: Dynamic domain name service
Enable DDNS:
Provider:
Host name:
Email:
Key:
Safe100.net
WTK.safe100.net
wtk@vivotek.com
...

[*.safe100.net]
Save
Register
Host name:
Email:
Key:
Confirm key:
WTK.safe100.net
wtk@vivotek.com
●●●●
...
Forget key
To apply for a domain name for the camera, or to modify the previously registered information, fill in
the following fields and then click "Register".
Register
DDNS Registration Result:
[Register] Successfully Your account information has been mailed to registered e-mail address

Upon successful registration, you can click copy to automatically upload relevant information to the
DDNS form or you can manually fill it in. Then, click "Save" to save new settings.
- Select Enable DDNS and click Save to enable the setting.
■ CustomSafe100
VIVOTEK offers documents to establish a CustomSafe100 DDNS server for distributors and system integrators. You can use CustomSafe100 to register a dynamic domain name if your distributor or system integrators offer such services.
- In the DDNS column, select CustomSafe100 from the drop-down list.
- In the Register column, fill in the Host name, Email, Key, and Confirm Key; then click Register. After a host name has been successfully created, you will see a success message in the DDNS Registration Result column.
- Click Copy and all for the registered information will be uploaded to the corresponding fields in the DDNS column.
- Select Enable DDNS and click Save to enable the setting.
Forget key: Click this button if you have forgotten the key to Safe100.net or CustomSafe100. Your account information will be sent to your email address.
Refer to the following links to apply for a dynamic domain account when selecting other DDNS providers:
■ Dyndns.org(Dynamic) / Dyndns.org(Custom): visit http://www.dyndns.com/
Network > QoS (Quality of Service)
Quality of Service refers to a resource reservation control mechanism, which guarantees a certain quality to different services on the network. Quality of service guarantees are important if the network capacity is insufficient, especially for real-time streaming multimedia applications. Quality can be defined as, for instance, a maintained level of bit rate, low latency, no packet dropping, etc.
The following are the main benefits of a QoS-aware network:
■ The ability to prioritize traffic and guarantee a certain level of performance to the data flow.
■ The ability to control the amount of bandwidth each application may use, and thus provide higher reliability and stability on the network.
Requirements for QoS
To utilize QoS in a network environment, the following requirements must be met:
■ All network switches and routers in the network must include support for QoS.
■ The network video devices used in the network must be QoS-enabled.
QoS models
CoS (the VLAN 802.1p model)
IEEE802.1p defines a QoS model at OSI Layer 2 (Data Link Layer), which is called CoS, Class of Service. It adds a 3-bit value to the VLAN MAC header, which indicates the frame priority level from 0 (lowest) to 7 (highest). The priority is set up on the network switches, which then use different queuing disciplines to forward the packets.
Below is the setting column for CoS. Enter the VLAN ID of your switch (0\~4095) and choose the priority for each application (0\~7).
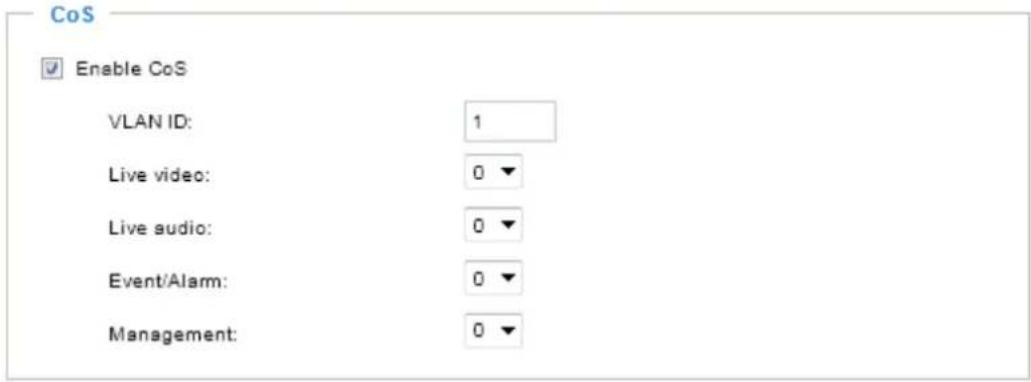
text_image
CoS Enable CoS VLAN ID: 1 Live video: 0 ▼ Live audio: 0 ▼ Event/Alarm: 0 ▼ Management: 0 ▼If you assign Video the highest level, the switch will handle video packets first.

NOTE:
▶ A VLAN Switch (802.1p) is required. Web browsing may fail if the CoS setting is incorrect.
The Class of Service technologies do not guarantee a level of service in terms of bandwidth and delivery time; they offer a "best-effort." Users can think of CoS as "coarsely-grained" traffic control and QoS as "finely-grained" traffic control.
▶ Although CoS is simple to manage, it lacks scalability and does not offer end-to-end guarantees since it is based on L2 protocol.
QoS/DSCP (the DiffServ model)
DSCP-ECN defines QoS at Layer 3 (Network Layer). The Differentiated Services (DiffServ) model is based on packet marking and router queuing disciplines. The marking is done by adding a field to the IP header, called the DSCP (Differentiated Services Codepoint). This is a 6-bit field that provides 64 different class IDs. It gives an indication of how a given packet is to be forwarded, known as the Per Hop Behavior (PHB). The PHB describes a particular service level in terms of bandwidth, queueing theory, and dropping (discarding the packet) decisions. Routers at each network node classify packets according to their DSCP value and give them a particular forwarding treatment; for example, how much bandwidth to reserve for it.
Below are the setting options of DSCP (DiffServ Codepoint). Specify the DSCP value for each application (0\~63).
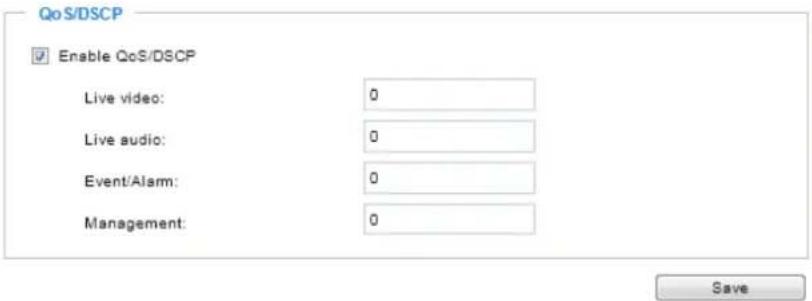
text_image
QoS/DSCP Enable QoS/DSCP Live video: 0 Live audio: 0 Event/Alarm: 0 Management: 0 SaveNote that different vendors of network devices might have different methodologies and unique implementations. Shown below is a sample corresponding information from a Cisco switch. You should enter a DSCP tag value according to the information provided by the network devices.
| DSCP to Queue Table | |||||||
| Ingress DSCP | Output Queue | Ingress DSCP | Output Queue | Ingress DSCP | Output Queue | Ingress DSCP | Output Queue |
| 0(BE) | 1▼ | 16(CS2) | 2▼ | 32(CS4) | 3▼ | 48(CS6) | 3▼ |
| 1 | 1▼ | 17 | 2▼ | 33 | 3▼ | 49 | 3▼ |
| 2 | 1▼ | 18(AF21) | 2▼ | 34(AF41) | 3▼ | 50 | 3▼ |
| 3 | 1▼ | 19 | 2▼ | 35 | 3▼ | 51 | 3▼ |
| 4 | 1▼ | 20(AF22) | 2▼ | 36(AF42) | 3▼ | 52 | 3▼ |
| 5 | 1▼ | 21 | 2▼ | 37 | 3▼ | 53 | 3▼ |
| 6 | 1▼ | 22(AF23) | 2▼ | 38(AF43) | 3▼ | 54 | 3▼ |
| 7 | 1▼ | 23 | 2▼ | 39 | 3▼ | 55 | 3▼ |
| 8(CS1) | 1▼ | 24(CS3) | 3▼ | 40(CS5) | 4▼ | 56(CS7) | 3▼ |
| 9 | 1▼ | 25 | 3▼ | 41 | 4▼ | 57 | 3▼ |
| 10(AF11) | 1▼ | 26(AF31) | 3▼ | 42 | 4▼ | 58 | 3▼ |
| 11 | 1▼ | 27 | 3▼ | 43 | 4▼ | 59 | 3▼ |
| 12(AF12) | 1▼ | ||||||
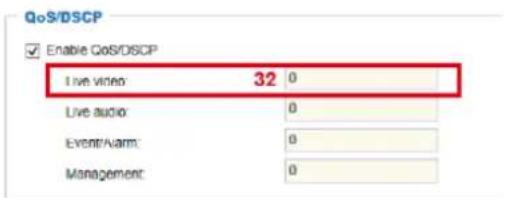
text_image
QoS/DSCP Enable QoS/DSCP Live video: 32 0 Live audio: 0 Event/Warm: 0 Management: 0| QoS Baseline/Technical Marketing Classification and Marking Recommendations | |||||
| Application Layer3 Classification Layer 2 CoS/MPLS EXP | |||||
| IPP PHB DSCP | |||||
| IP Routing 6 CS6 48 6 | |||||
| Voice 5 EF 46 5 | |||||
| Interactive Video 4 AF41 | 34 4 QoS B | ||||
| Streaming-Video 4 CS4 32 4 | |||||
| Locally-defined Mission-Critical Data | 3 - | 25 3 | |||
| Call-signaling | 3 AF31/CS3 | 26/24 | 3 | ||
| Transactional Data | 2 AF21 | 18 2 | |||
| Network Management | 2 CS2 16 2 | ||||
| Bulk Data | 1 AF11 | 10 1 | |||
Network > SNMP (Simple Network Management Protocol)
□□□□□□□□□□□□□□□□□□□□□
This section explains how to use the SNMP on the network camera. The Simple Network Management Protocol is an application layer protocol that facilitates the exchange of management information between network devices. It helps network administrators to remotely manage network devices and find, solve network problems with ease.
■ The SNMP consists of the following three key components:
- Manager: Network-management station (NMS), a server which executes applications that monitor and control managed devices.
- Agent: A network-management software module on a managed device which transfers the status of managed devices to the NMS.
- Managed device: A network node on a managed network. For example: routers, switches, bridges, hubs, computer hosts, printers, IP telephones, network cameras, web server, and database.
Before configuring SNMP settings on the this page, please enable your NMS first.
SNMP Configuration
Enable SNMPv1, SNMPv2c
Select this option and enter the names of Read/Write community and Read Only community according to your NMS settings.
Enable SNMPv1, SNMPv2c
SNMPv1, SNMPv2c Settings
Read/Write community:
Private
Read only community:
Public
Enable SNMPv3
This option contains cryptographic security, a higher security level, which allows you to set the Authentication password and the Encryption password.
■ Security name: According to your NMS settings, choose Read/Write or Read Only and enter the community name.
■ Authentication type: Select MD5 or SHA as the authentication method.
■ Authentication password: Enter the password for authentication (at least 8 characters).
■ Encryption password: Enter a password for encryption (at least 8 characters).
Enable SNMPv3
SNMPv3 Settings
Read/Write Security name:
Private
Authentication Type:
MD5
Authentication Password:
Encryption Password:
Read only Security name:
Public
Authentication Type:
MD5
Authentication Password:
-
Encryption Password:
Network > FTP
The newer firmware disabled the FTP port for security concerns. You can manually enable the FTP server service to enable the FTP function. You can disable the FTP server function when it is not in use.
FTP port: The FTP server allows the user to save recorded video clips. You can utilize VIVOTEK's Shepherd utility to upgrade the firmware via FTP server. By default, the FTP port is set to 21. It can also be assigned to another port number between 1025 and 65535.

Tips:
You can FTP the camera's IP address to download videos recorded in the SD card, or use the "http://ip/cgi-bin/admin/lsctrl.cgi?cmd=search" command to examine the recorded files on your SD card.
Security > User accounts
This section explains how to enable password protection and create multiple accounts.
Account management
Security > User accounts
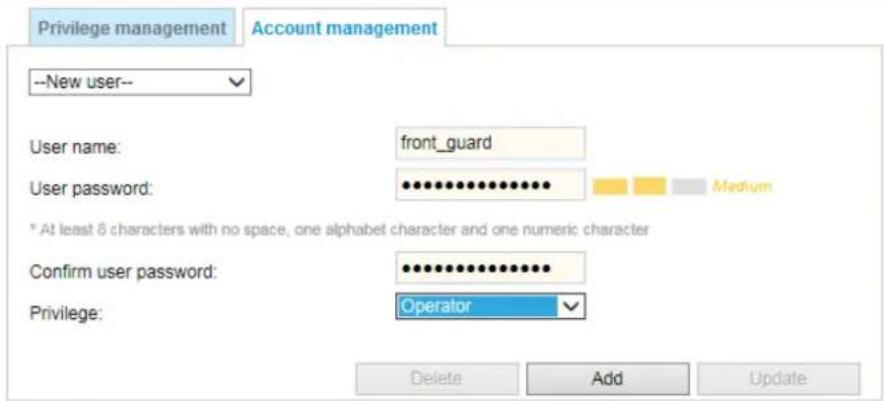
text_image
Privilege management Account management --New user-- User name: front_guard User password: medium * At least 8 characters with no space, one alphabet character and one numeric character Confirm user password: ************ Privilege: Operator Delete Add UpdateThe administrator account name is "root", which is permanent and can not be deleted. If you want to add more accounts in the Account management window, please apply the password for the "root" account first.
The administrator can create up to 20 user accounts.
To create a new user,
- Click to unfold the pull-down menu. Select New user.
- Enter the new user's name and password. Type the password identically in both text boxes.
Some, but not all special ASCII characters are supported: !, \$, %, -, ., @, ^, _, and \~. You can use them in the password combination.
The strength of your password combination is shown on the right, use the combination of alphabetic, numeric, upper case, and lower case characters until the password strength is good enough.
- Select the privilege level for the new user account. Click Add to enable the setting.
The privilege levels are listed below:
| Administrator Full control | |
| Operator Control | DO, white-light illuminator, snapshot, and PTZ; unable to enter the camera Configuration page. |
| Viewer Control | DO, white-light illuminator, view, listen, PTZ, and talk through the camera interface. |
Access rights are sorted by user privilege (Administrator, Operator, and Viewer). Only administrators can access the Configuration page. Although operators cannot access the Configuration page, they can use the URL Commands to get and set the value of parameters. For more information, please refer to URL Commands of the Network Camera on page 156. Viewers can only access the main page for live viewing.
Here you can also change a user's access rights or delete user accounts.
- Select an existing account to modify.
- Make necessary changes and click Update or Delete to enable the setting.
Privilege management
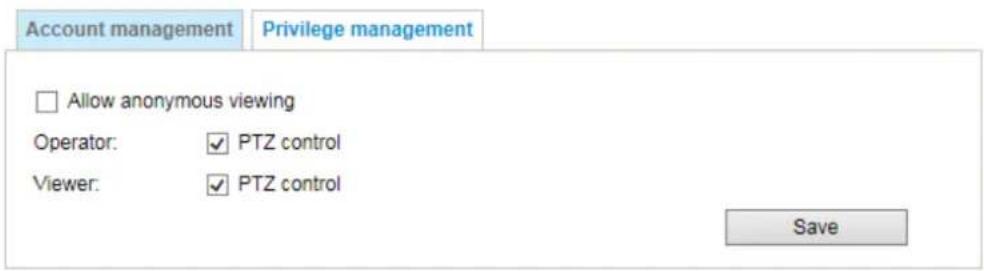
text_image
Account management Privilege management Allow anonymous viewing Operator: ✓ PTZ control Viewer: ✓ PTZ control SaveAllow anonymous viewing: If you select this item, any client can access the live stream without entering a User ID and Password.
Security > HTTPS (Hypertext Transfer Protocol over SSL)
This section explains how to enable authentication and encrypted communication over SSL (Secure Socket Layer). It helps protect streaming data transmission over the Internet on higher security level.
Create and Install Certificate Method
Before using HTTPS for communication with the Network Camera, a Certificate must be created first. There are three ways to create and install a certificate:
Create self-signed certificate
- Select this option from a pull-down menu.
- In the first column, select Enable HTTPS secure connection, then select a connection option: "HTTP & HTTPS" or "HTTPS only".
- Click Create certificate to generate a certificate.
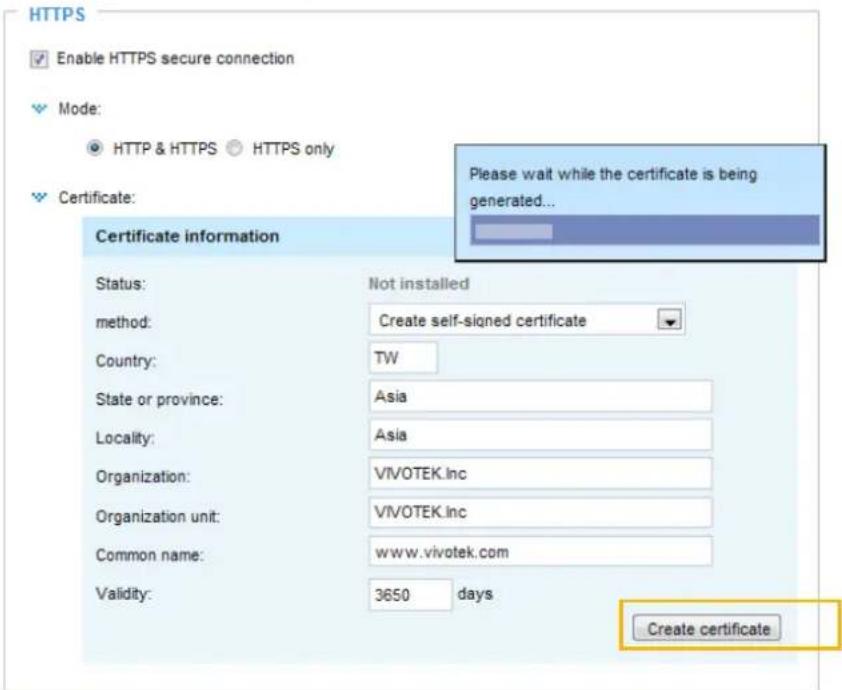
text_image
HTTPS Enable HTTPS secure connection Mode: HTTP & HTTPS HTTPS only Certificate: Please wait while the certificate is being generated... Certificate information Status: Not installed method: Create self-signed certificate Country: TW State or province: Asia Locality: Asia Organization: VIVOTEK.inc Organization unit: VIVOTEK.inc Common name: www.vivotek.com Validity: 3650 days Create certificate- The Certificate Information will automatically be displayed as shown below. You can click Certificate properties to view detailed information about the certificate.
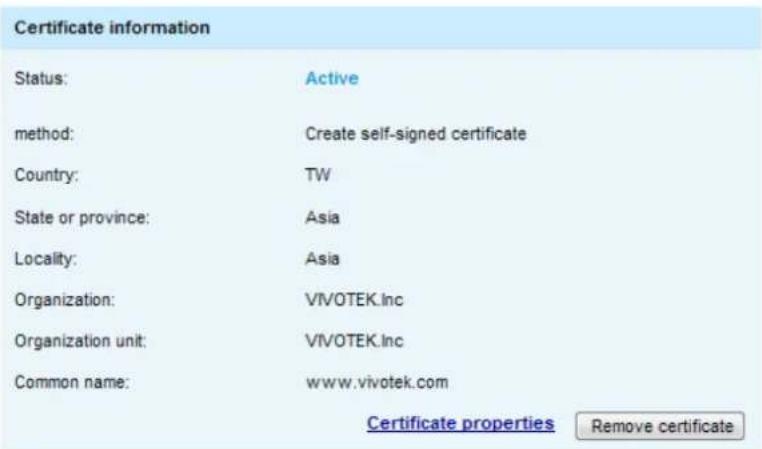
text_image
Certificate information Status: Active method: Create self-signed certificate Country: TW State or province: Asia Locality: Asia Organization: VIVOTEK.Inc Organization unit: VIVOTEK.Inc Common name: www.vivotek.com Certificate properties Remove certificate- Click Save to preserve your configuration, and your current session with the camera will change to the encrypted connection.
- If your web session does not automatically change to an encrypted HTTPS session, click Home to return to the main page. Change the URL address from "http://" to "https://" in the address bar and press Enter on your keyboard. Some Security Alert dialogs will pop up. Click OK or Yes to enable HTTPS.
https://
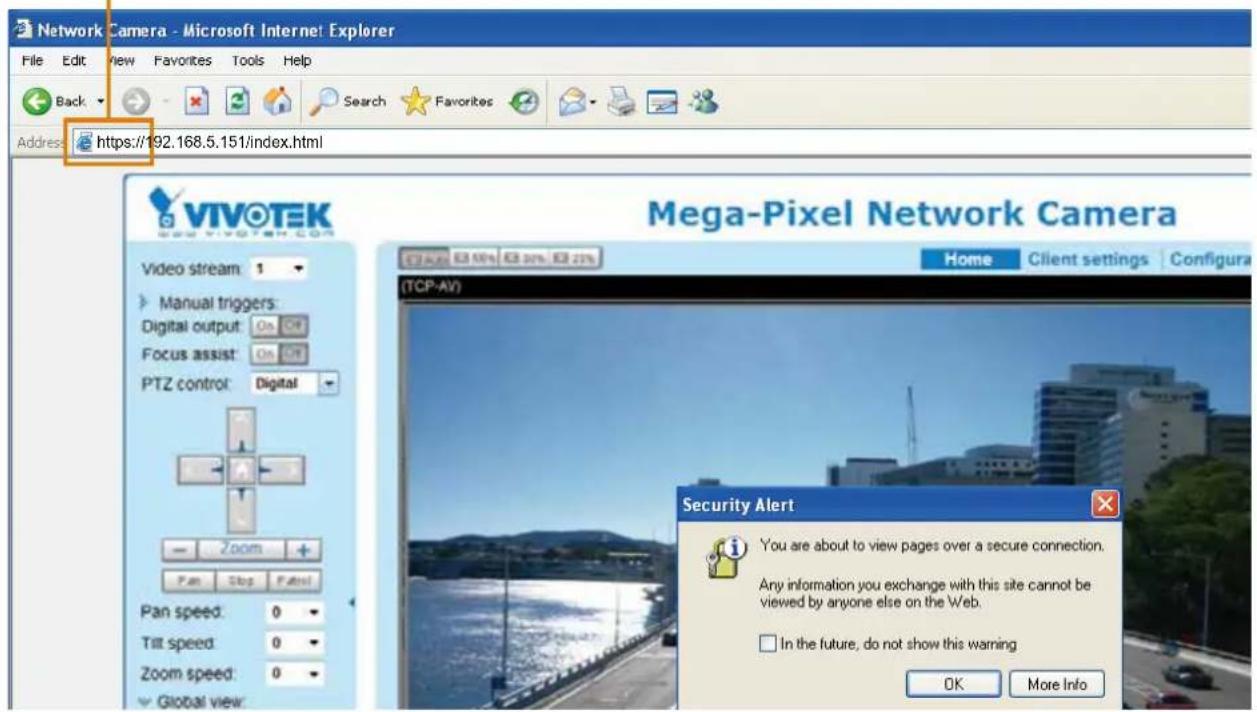
text_image
Network Camera - Microsoft Internet Explorer File Edit View Favorites Tools Help Back Search Favorites Address: https://192.168.5.151/index.html VIVOTEK Video stream: 1 Manual triggers: Digital output: On Focus assist: On PTZ control: Digital Zoom Pan Stop Panel Pan speed: 0 Tilt speed: 0 Zoom speed: 0 Global view: Mega-Pixel Network Camera Home Client settings Configura (TCP-AV) Security Alert You are about to view pages over a secure connection. Any information you exchange with this site cannot be viewed by anyone else on the Web. In the future, do not show this warning OK More Info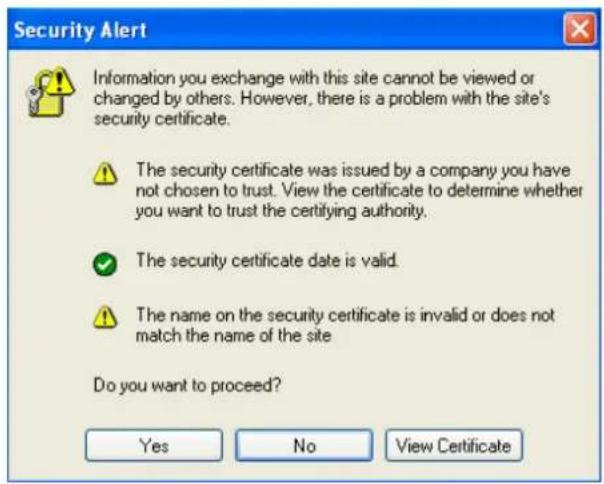
text_image
Security Alert Information you exchange with this site cannot be viewed or changed by others. However, there is a problem with the site's security certificate. The security certificate was issued by a company you have not chosen to trust. View the certificate to determine whether you want to trust the certifying authority. The security certificate date is valid. The name on the security certificate is invalid or does not match the name of the site Do you want to proceed? Yes No View Certificate
text_image
Security Information This page contains both secure and nonsecure items. Do you want to display the nonsecure items? Yes No More InfoCreate certificate request and install
- Select the option from the Method pull-down menu.
- Click Create certificate to proceed.
- The following information will show up in a pop-up window after clicking Create. Then click Save to generate the certificate request.
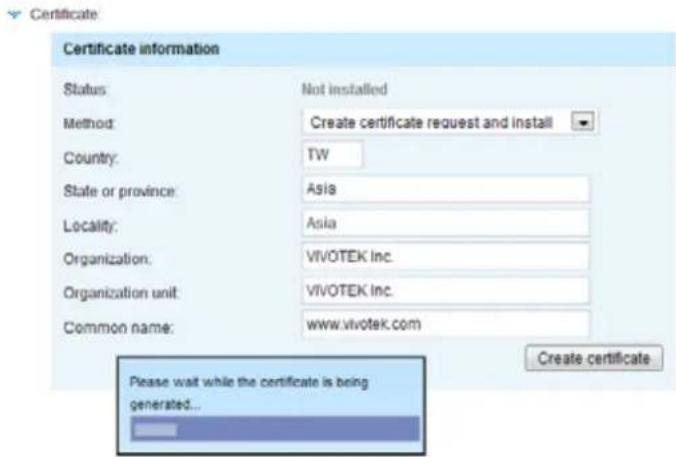
text_image
Certificate information Status: Not installed Method: Create certificate request and install Country: TW State or province: Asia Locality: Asia Organization: VIVOTEK Inc. Organization unit: VIVOTEK Inc. Common name: www.vivotek.com Please wait while the certificate is being generated... Create certificate- The Certificate request window will prompt.
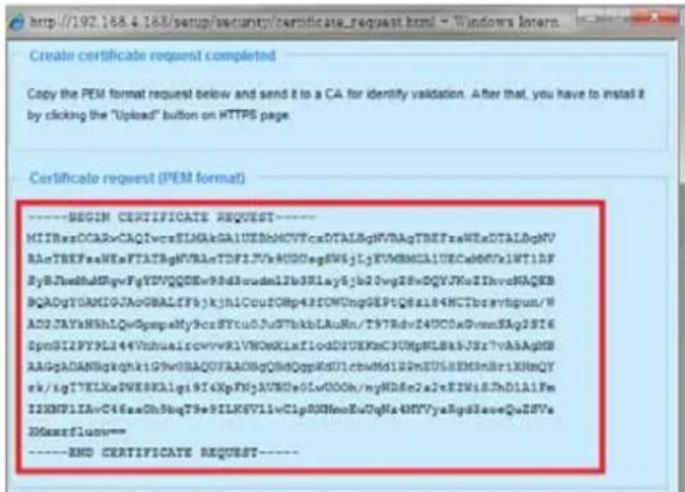
text_image
http://192.168.4.168/setup/security/certificate_request.html - Windows l容器 Create certificate request completed Copy the PEM format request below and send it to a CA for identify validation. After that, you have to install it by clicking the "Upload" button on HTTPS page. Certificate request (PEM format) ----BEGIN CERTIFICATE REQUEST---- MIIRasOCARvCAQIwcrEIMAKsGALUZEDhMCVTVcaDTALBgNVBAqTBEFzseNExDTALBgMV BAnTBEFzseNExFTATBgNVBLxnTDFLJYvA0DcegEMkjLjEVVMBCMLDEcWc007x1NT1DF ByBJedhdMygFpYDVQQDEw9d3rduel12b3Xlay6jb20vgv28wDQYJKuZIhwCNAQEB BQADgYDMIGJAoGBALIF5jkjhLCouOMp43ICMngGEPIQ8a184HCTbravtbpun/W ADJAYkNshLQvdqspcNy9crSTcu0JuSTbkblAuRn/T9TRdv24UC0aDwnmSAg2SIE EpnGI2PYPL444VnhualicowvrRIVNOxKLaflodD2UEKKc3UHpRLBkJSr7vAAAgHS AAGpADANBgqknkiG9vHAQDAQFAADOGqBlqOqpKdUlcbwMsl12PnEUSHEMInBr1KNmQY rk/igT7ELKwPWE8KAlgi9IT4KpFNyAVWDs0LoDOOh/nyHD8n2aJeEINsILJhD1A1Fm ISKNPIIAvC4fssOhShbq7SeSILKNVLIwClpRXNNooEuQgNa4MYVyeRgdSaveQuESVe IDGearsflum--- ----END CERTIFICATE REQUEST----If you see the following Information bar, click OK and click on the Information bar at the top of the page to allow pop-ups.
text_image
HTTPS - Microsoft Internet Explorer File Edit View Favorites Tools Help Back Search Favorites Address http://192.168.5.151/startup/https.html Pop-up blocked. To see this pop-up or additional options click here... VIVOTEK VIVOTEK.COM System Security User account HTTPS Access list IEEE 802.1x Network Home Configuration Language VIVOTEK.COM VIVOTEK.COM VIVOTEK.COM Internet Bar Did you notice the Information Bar? The Information Bar alerts you when Internet Explore blocks a pop-up window or file download that might not be safe. If a Web page does not display properly, look for the Information Bar [new the top of your browser] Do not show this message again. Learn about the Information Bar... OK- Look for a trusted certificate authority, such as Symantec's VeriSign Authentication Services, that issues digital certificates. Sign in and purchase the SSL certification service. Copy the certificate request from your request prompt and paste it in the CA's signing request window. Proceed with the rest of the process as CA's instructions on their webpage.
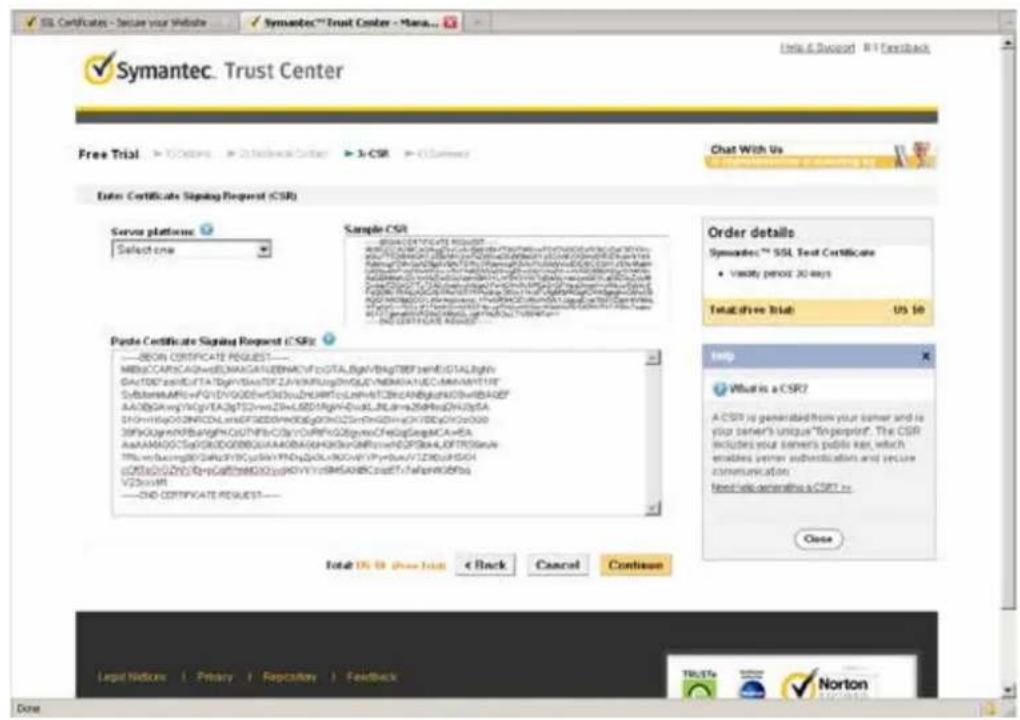
text_image
Symantec. Trust Center Free Trial ▶ 10 Options ▶ 20 Security Center ▶ 3-CSR ▶ (Summary) Chat With Us Date: Certificate Signing Request (CSR) Server platforms: Select one Sample CSR BLOG CERTIFICATE REQUEST BLOG CERTIFICATE REQUEST BLOG CERTIFICATE REQUEST BLOG CERTIFICATE REQUEST BLOG CERTIFICATE REQUEST BLOG CERTIFICATE REQUEST BLOG CERTIFICATE REQUEST BLOG CERTIFICATE REQUEST BLOG CERTIFICATE REQUEST BLOG CERTIFICATE REQUEST BLOG CERTIFICATE REQUEST BLOG CERTIFICATE REQUEST BLOG CERTIFICATE REQUEST BLOG CERTIFICATE REQUEST BLOG CERTIFICATE REQUEST BLOG CERTIFICATE REQUEST BLOG CERTIFICATE REQUEST BLOG. CERTIFICATE SIGNING BLOG. CERTIFICATE SIGNING BLOG. CERTIFICATE SIGNING BLOG. CERTIFICATE SIGNING BLOG. CERTIFICATE SIGNING BLOG. CERTIFICATE SIGNING BLOG. CERTIFICATE SIGNING BLOG. CERTIFICATE SIGNING BLOG. CERTIFICATE SIGNING BLOG. CERTIFICATE SIGNING BLOG. CERTIFICATE SIGNING BLOG. CERTIFICATE SIGNING BLOG. CERTIFICATE SIGNING BLOG. BLOG. CERTIFICATE SIGNING BLOG. CERTIFICATE SIGNING BLOG. CERTIFICATE SIGNING BLOG. CERTIFICATE SIGNING BLOG. CERTIFICATE SIGNING BLOG. CERTIFICATE SIGNING BLOG. CERTIFICATE SIGNING BLOG. CERTIFICATE SIGNING BLOG. CERTIFICATE SIGNING BLOG. CERTIFICATE SIGNING BLOG. CERTIFICATE SIGNING BLOG. CERTIFICATE SIGNING BLOG. Certificates Signaling Request (CSRS) — BEOI CERTIFICATE REQUEST — MBSCCARTCAQAGVDEMAIGATLEEMHACVFQGTA.BgAVBgTBBFSEHEGTALJgNt GdCTDBZcAUCUATDgAVGSASTFZAVVKRUGdNqGVCNEMDA1UECJMMAYNT1IEF SylbemBAFCWqFDYGDGEWdD3DvUDCRAKfCLOMwTCZBCABdGJNCWdHBAGDF AAOBSAWCyFGVTA2gTS2vmsZDHLDSDFAgNvEukLNLrmaZ5dbgQhQfSA DHvHmBaGZNRCDCLWdDTFDDDMHdGQhQfNcZSmHdGnVcXHT8gYcX7000 39PbCQywnbHgFHQGCHFbCfSvCpRFeGQgmeCfejgQeGMeCAeEA AsAAAMAGCCsADGRUDGQHQQAAAKDBAQHQHcQnFNrceWdDFGkLAQFTFDSnMnL TFbCwDcWgRQHQYcWYKHYdQdQLWdYcYYPdNvV1ZD60FISH c0fRsaOuGNDtDpCafthmEaOOyHtYvYcIH5Aa8BCnaffTfafapwCfbfa V22svxttI — CDO CERTIFICATE REQUEST — Total OS IR (Show Init) < Back Cancel Continue Order details Symantec™ SSL Test Certificate • Varsity period 30 days Total five trials: US $0 Help What is a CSR? A CSR is generated from your sender and is your sender's unique "Inperform". The CSR excludes your sender's public mail, which enables version authentication and secure communication based on generating a CSR >> Close- Once completed, your SSL certificate should be delivered to you via an email or other means. Copy the contents of the certificate in the email and paste it in a text/HTML/hex editor/converter, such as IDM Computer Solutions' UltraEdit.
immediately, please dial 866.893.6565 or 650.426.5112 option 3 or send an email to internet-sales@verisign.com
Thank you for your interest in Symantec!
----BEGIN CERTIFICATE----
M1FREDDCA+yqvdAldgPQFClnen/XerHltiNQODlBAaNRpghk10WvORAGYPADCCyksLMGAALDEOHCVVPMxKvAgVngYvNAoTl21cmtAsuOcLsNmWntAaLgVYQGLyEydGlsIgVfVidCDQdXlWcbHlcyBFmacLiAgTm0gYXnDkXhsmHcy4aqSABpIVBzAIV0mLisIgIMNlyZSbBCdBDKBSravovL3dlid5y22Kpcj2lmni5yh2w0V3BeSLrPleCryRySAcVyoeOTSeCsAlDEAdskVysWypI24gVh2PwWgGVZyKsJYPHcZlcIqBOQAeIEcyNKdXTDEYHcWcvAAeNAdwOKdTEyDgvtJtIstTKlYWpvaa4xCza7BpVBAYTALRDQcWvCtTVQGIIeWBc21bQwOvYUQVHFARbcl1ABGVDvYDVVgQyHKcAKSVPEVFLILtyuyakTAiPdBVASoDFcYvrXnROgSWyJtIFHDgSAIOZEcQWvSYtOxMgdYqxSN1SPDT83dy82XpcfImaijsy20VYHbLSJKlcKY9ByseYvwETKMBUGALIGeAcqDsel3aLlDO863815cIqIqWvQfVOLInveRABQRGBdYAMGTSaGBANlIDcr38HdcC-bHAUFVpFGK3Yt5ta?sunRyApldiadeQdGRp/h+jhgtpTQgqsCTTNwBBCEHp/QxIRePcpBGnfQ5020GR/qstmARbIyamkX6R/BNaIDInAvloObCysPtRaDCNHq94500cEraSAduhspqAbkoKbnouqTaqEBdACqggGMIBTTATBQVHEEEEZAgqpblsdcaulDMTcylnbHVbTA8bHYVRNMEAIAAHAGAIADHBesVQEAVTrEcBDBGFBRAEPDAHDnGyJozHHoVoEvVL25YNrQYwArRsTeYJLaTlcmlaAsuIaLeDrBv59TV1ZToohIhEqCyIaDbYBHRpBVFRAEQBRNDSCacHSAGsEHNbMAITaBpgrBgFBFCCKARXjAKRODH64Ly3d3cdmdvYxKpIP24uY29TbLycv9cZNDGYeKDQYD0318FVAYAISYBHQQGAAeGCCsAQTbEMChBDGAlUdeYvQnAFCaEqAqeigklgAIAsVar7aGnENmY71bHQGCGeAQGTbEeERDGpv2JhkBpgrBgFBFCwKWTTaRbcDcvl2kyJaCaudMyaNpKN24dV2tPdHDGCCsAQRTbAACbjHoSEBvOlFdVlJSFPsYWaEvTatYwIHlaLclImaIaAsuIaLeNbVhBHPVTJLTouhIhEqCyIaDeiNcHYBNPhkDvWbQSOFAQAeCATeATPseAeTfAeSxHsHLKSDEpqlqCelwtxkScI29HpSxEHvp6CLPSHeRGyFLLFaEaTrdTRWIsCCKXBRLAqNp12qVhFBqFwM96ThTsdOvDayarnafidStTsub3q2TulpMeABnAB/Dr+Xpo)OEdBtsApFshnucapGnEpytwceCdNMgRppSwrVtrDlnLhsjdukESU6XuSM1CKrsAtGv1RadIf-VqvSTgSpNGmAnAgndkUcTNChNDtWgncUnceIf83ITPK7ccMclpvtbdlgfsy3HcyVTOdoVfYSmBQpBo3LAPRB/gi/Yxnq==----END CERTIFICATE=
- Open a new edit, paste the certificate contents, and press ENTER at the end of the contents to add an empty line.
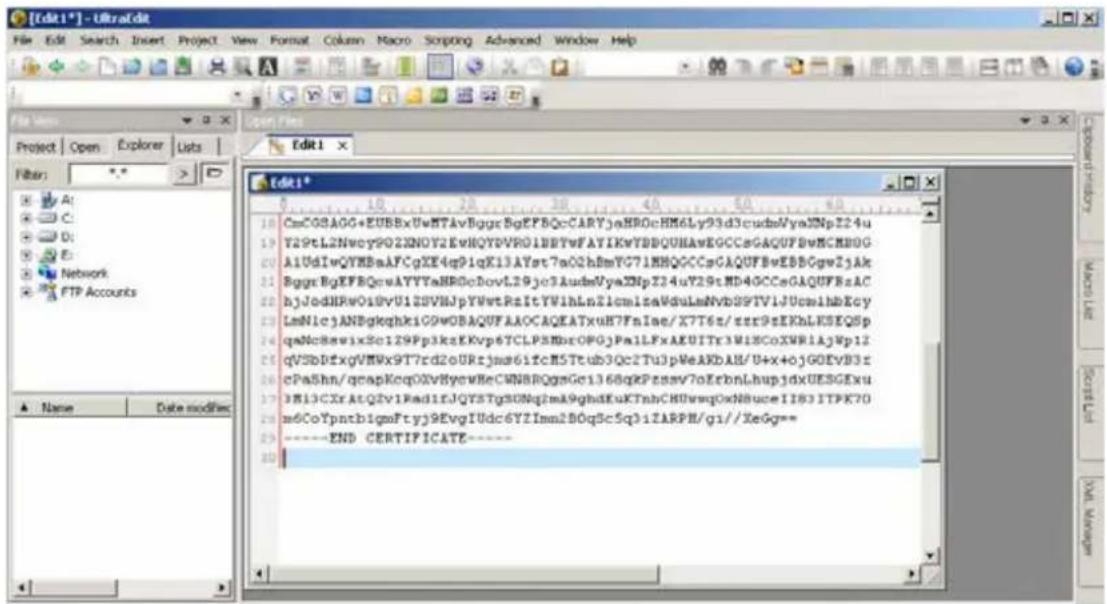
text_image
[Edit1*] - UltraEdit File Edit Search Insert Project View Format Catalog Scripting Advanced Window Help File View Open Explorer Lists Filter: *.* Edit1* CmCGSAGG+EUBBxUwMTAvBgqxBgEF8QcCARYjeHROcHM6Ly93d3cudwVyaJNpZ24u Y29tL2Nvcy902XNOYKEeVKQY6VR01BH7vFAYIKwYBBQUHAwEGCCsGAQUFBwKMB0G A1UdIwQYMBaAFCgXE4q91qK13AYst7a02h8mYG71MHQGCCsGAQUFBwEBBGgwZjAk BgqxBgEF8QcwAYYYaNRDoDovL29jc3AudevVyaZNpZ24uY29tMD40CCsGAQUFBzAC hjJodHRwOiUvU1SSVBJpYWetRsItYV1hLnZlcmIzaVduLmNbB9TV1JUcaIhbEcy LmNlcjANBgkqhkiG9wOBAQUFAAOCAQEATxuH7FnIae/X7T6z/tzr9sEKhLESEQSp qaNc8swixSc129Pp3ksEKvp6TCLPSMbrCOP0jPalLFxAKUITr3MiBCoXWRlAjNp12 qV5bDbfxgVMWx9T7rd2oURtjms61fcM5Ttub3Qc2Tu3pNeAKbAH/U+x4ojGOEvB3t cPaShn/qcapKcq0XvBycWHeCWNBRQgmGci1368qKPzmsv7oErbnLhupjdxUESGExu 3M13CXrAtQ2v1Rad1fJQYSTg3GNq2mA9ghdKuKTnbCHUwwqOxNNruceII83ITPK70 m6CoYpntb1qmFtyj9EvgIUdc6YZImn2BOqSc5q3iZARPH/qi//XeGg=** ----END CERTIFICATE---- Name Date modification- Convert file format from DOS to UNIX. Open File menu > Conversions > DOS to Unix.
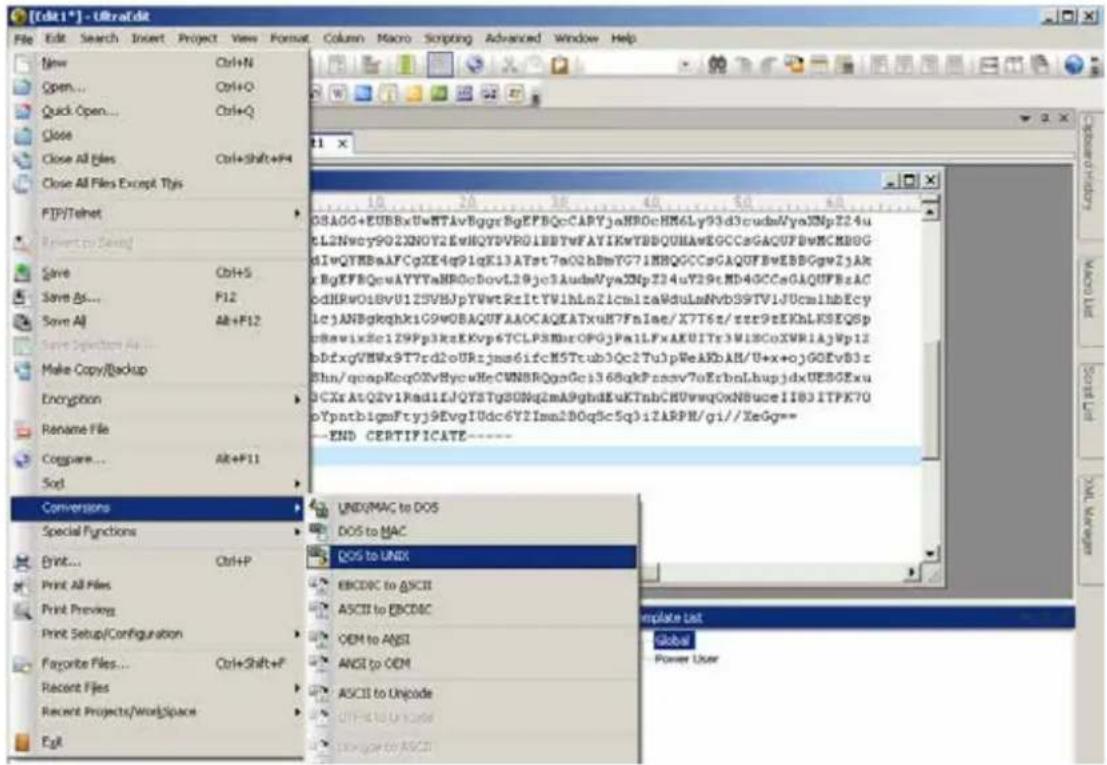
text_image
[Edit1*] - UltraEdit File Edit Search Insert Project View Format Column Macro Scripting Advanced Window Help New Ctrl+N Open... Ctrl+O Quick Open... Ctrl+Q Close Close All Files Ctrl+Shift+F4 Close All Files Except Tlys FIP/Teinet Recent to Save! Save Ctrl+S Save As... F12 Save All Alt+F12 Save Options As... Make Copy/Backup Encryption Rename File Configure... Alt+F11 Sql Conversions Special Functions Print... Ctrl+P Print All Files Print Preview Print Setup/Configuration Favorite Files... Ctrl+Shift+F Recent Files Recent Projects/Workspace EgR OSAGG+EUBBxUwNTAvBggrBgEFBQcCARYjaHROcHM6Ly93d3cudnaVyaXNpZ24uL2Nwcy902XNOY2EvHQYDVRG1BBYwFAYIKwYBBQUHawEGCCsGAQUFBwMCMB8GdIwQYRBbAFCqXE4q91qK13ATst7a02hBmYG71HHQGCCsGAQOFBvEBBGgwZjAkxBgEFBQcwAYYYaHROcDovL20jc3AudmVyaXNpZ24uY29tMD4GCCsGAQUFBzACcdHRwOi8vU1ZSVHJpYWwtRrlItYW1hLnZlcmltaWduLxnNbS9TV1JUcm1hbEcycIc3ANBkgqhklG9wOBAQUFAAOCAQKEATxuH7FnIae/X7T6z/zsr9rEKhLKSEQSpmbewixSc129Pp3kksKKvp6TCLPSMbrOPGjPalLFxAKUITr3MIBCoXWRlAjWp12bDfxgVHWx9T7rd2oURzjms6ifcM5Tcub3Qc2TulpNeAKbAH/U+x+ojGOEvB3cEln-/qoapKcq02vBycWheCUNBRQqnGc1368qkPnssv7oErbnLhupjdxUE8GExuDCXrAtQ2v1Rad1LdJQTSTgSQNq2mA9ghdEuKTnbCHUvwgOxNBuceII83ITPK7OpYpntb1gmFtyj9EvgIUdc6YIZImn2BOqSc5QbiZARPH/gi//XeGg== END CERTIFICATE---- UNIQMAC to DOS DOS to MAC DOS to UNIX EBCDIC to ASCII ASCII to EBCDIC OEM to AIGI ANSI to OEM ASCII to Unicode OFF=0.0000000000000000000000000000000000000000000000000000000000000000000000000000000000000000000000000000- Save the edit using the ".crt" extension, using a file name like "CAcert.crt."
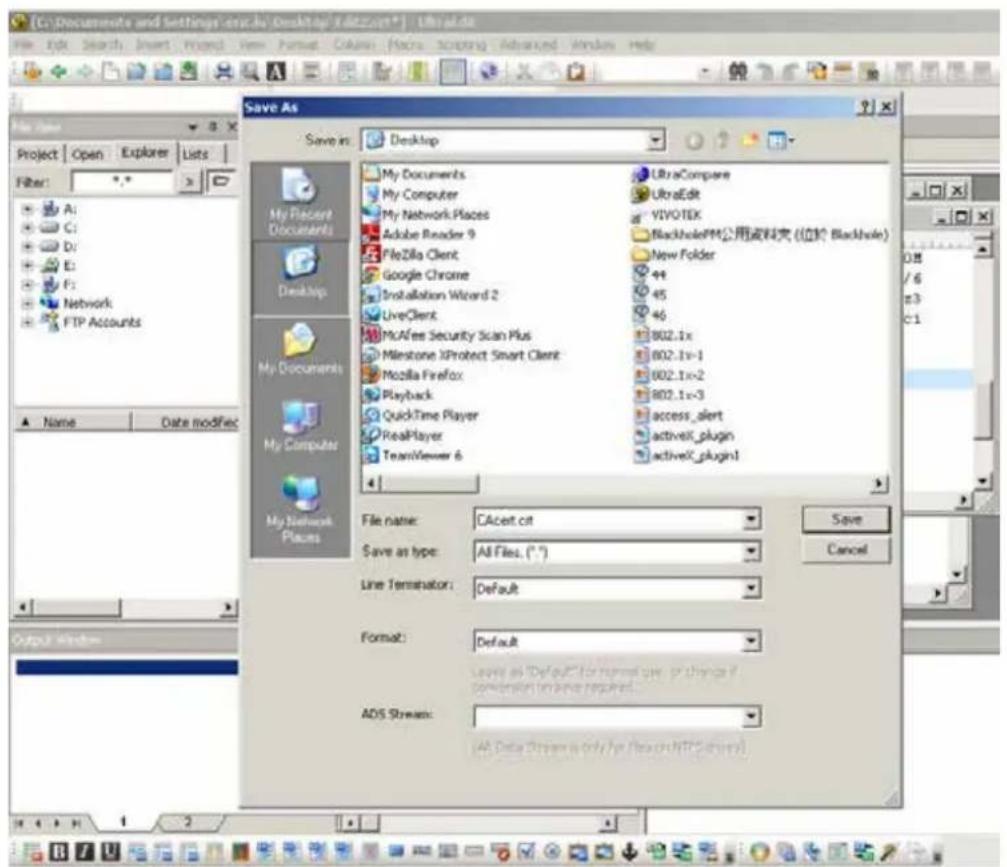
text_image
[C:\Documents and Settings\orscis\Desktop\Edzzcort*] - Libradie File Edit Search Insert Project View Format Columns Scripting Advanced Window Help Save As Save in: Desktop My Documents My Computer My Network Places Adobe Reader 9 FileZilla Client Google Chrome Installation Wizard 2 LiveClient MCAfee Security Scan Plus Milestone xProtect Smart Client Mozilla Firefox Playback QuickTime Player RealPlayer TeamViewer 6 UltraCompare UltraEdit VIVO-TEK BlackholePM公用资料夹 (位於 Blackhole) New Folder 44 45 46 802.1x 802.1x-1 802.1x-2 802.1x-3 access_alert activeX_plugin activeX_plugin1 File name: CAcet.cit Save as type: All Files. (*.*) Line Termination: Default Format: Default ADS Stream: [All Data Stream is only /p/ (Exxon-MPS Engine)] Save Cancel- Return to the original firmware session, use the Browse button to locate the crt certificate file, and click Upload to enable the certification.
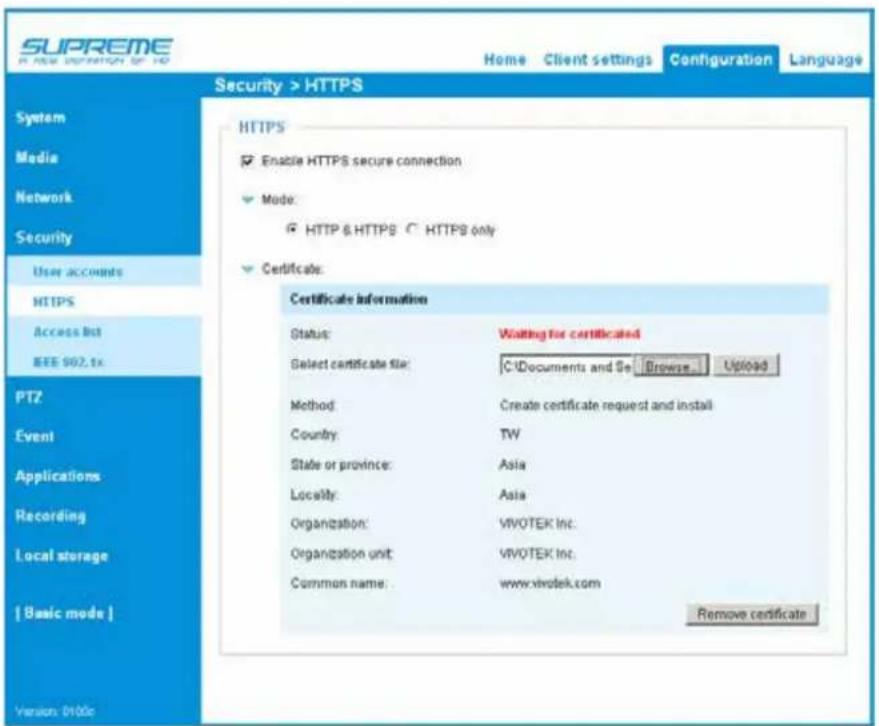
text_image
SUPREME RARE INFORMATION OF TO Home Client settings Configuration Language Security > HTTPS System Media Network Security User accounts HTTPS Access but IEEE 902.1x PTZ Event Applications Recording Local storage Basic mode | Version: 0100c HTTPS Enable HTTPS secure connection Mode: HTTP & HTTPS C HTTPS only Certificate: Certificate Information Status: Waiting for certificated Select certificate file: C:\Documents and Se Browse Upload Method: Create certificate request and install Country: TW State or province: Asia Locality: Asia Organization: VIVOTEK Inc. Organization unit: VIVOTEK Inc. Common name: www.vivletek.com Remove certificate- When the certificate file is successfully loaded, its status will be stated as Active. Note that a certificate must have been created and installed before you can click on the "Save" button for the configuration to take effect.
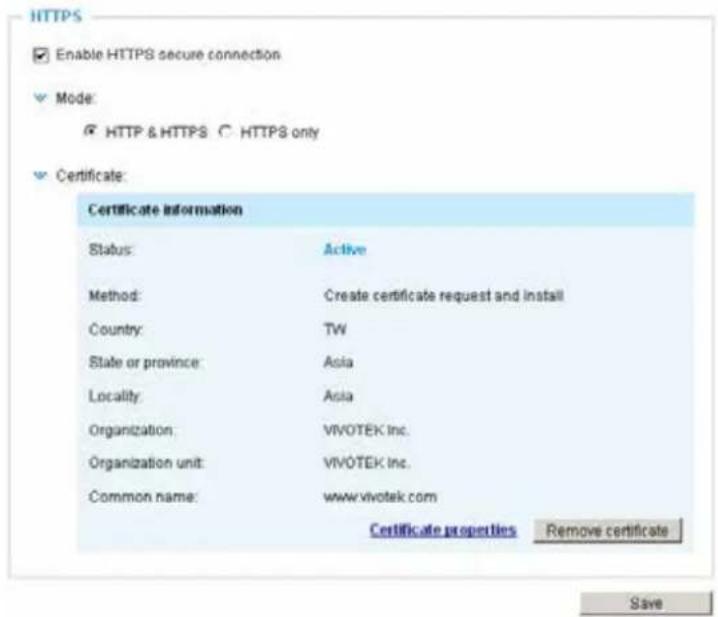
text_image
HTTPS Enable HTTPS secure connection Mode: HTTP & HTTPS ○ HTTPS only Certificate: Certificate Information Status: Active Method: Create certificate request and install Country: TW State or province: Asia Locality: Asia Organization: VIVOTEK Inc. Organization unit: VIVOTEK Inc. Common name: www.vivotek.com Certificate properties Remove certificate Save- To begin an encrypted HTTPS session, click Home to return to the main page. Change the URL address from "http://" to "https://" in the address bar and press Enter on your keyboard. Some Security Alert dialogs will pop up. Click OK or Yes to enable HTTPS.
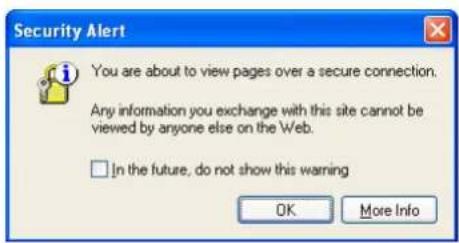
text_image
Security Alert You are about to view pages over a secure connection. Any information you exchange with this site cannot be viewed by anyone else on the Web. □ In the future, do not show this warning OK More Info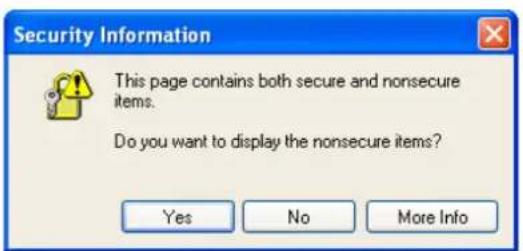
text_image
Security Information This page contains both secure and nonsecure items. Do you want to display the nonsecure items? Yes No More Info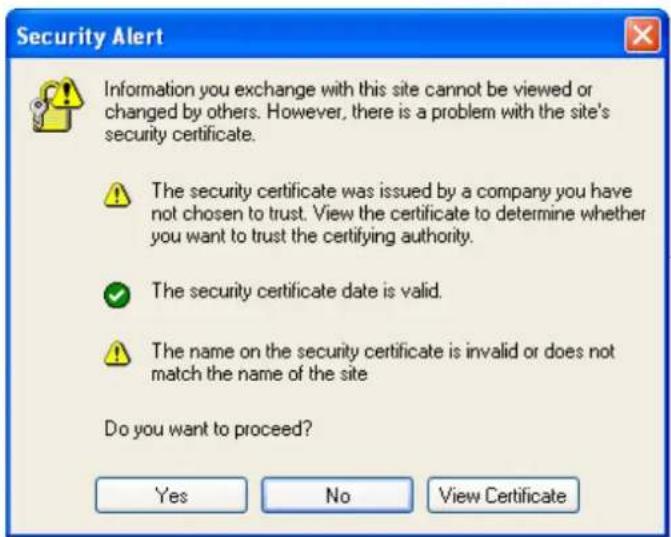
text_image
Security Alert Information you exchange with this site cannot be viewed or changed by others. However, there is a problem with the site's security certificate. The security certificate was issued by a company you have not chosen to trust. View the certificate to determine whether you want to trust the certifying authority. The security certificate date is valid. The name on the security certificate is invalid or does not match the name of the site Do you want to proceed? Yes No View CertificateSecurity > Access List
This section explains how to control access permission by verifying the client PC's IP address.
General Settings

text_image
General settings Maximum number of concurrent streaming: 10 ▼ Connection managementMaximum number of concurrent streaming connection(s) limited to: Simultaneous live viewing for 1\~10 clients (including stream 1 to stream 3). The default value is 10. If you modify the value and click Save, all current connections will be disconnected and automatically attempt to re-link (IE Explorer or Quick Time Player).
View Information: Click this button to display the connection status window showing a list of the current connections. For example:
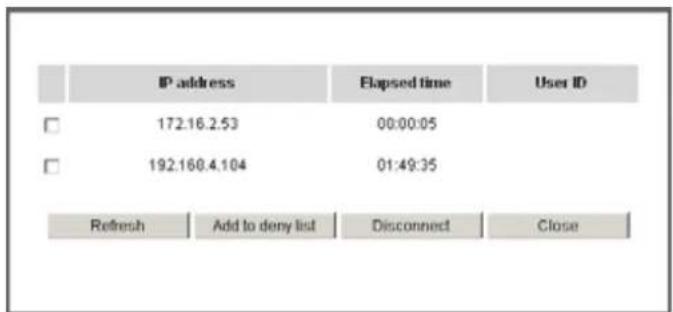
text_image
IP address Elapsed time User ID 172.16.2.53 00:00:05 192.168.4.104 01:49:35 Refresh Add to deny list Disconnect CloseNote that only consoles that are currently displaying live streaming will be listed in the View Information list.
■ IP address: Current connections to the Network Camera.
■ Elapsed time: How much time the client has been at the webpage.
■ User ID: If the administrator has set a password for the webpage, the clients have to enter a user name and password to access the live video. The user name will be displayed in the User ID column. If the administrator allows clients to link to the webpage without a user name and password, the User ID column will be empty.
There are some situations that allow clients access to the live video without a user name and password:
- The administrator does not set up a root password. For more information about how to set up a root password and manage user accounts, please refer to Security > User account on page 105.
- The administrator has set up a root password, but set RTSP Authentication to "disable". For more information about RTSP Authentication, please refer to RTSP Streaming on page 95.
- The administrator has set up a root password, but allows anonymous viewing. For more information about Allow Anonymous Viewing, please refer to page 105.
■ Refresh: Click this button to refresh all current connections.
■ Add to deny list: You can select entries from the Connection Status list and add them to the Deny List to deny access. Please note that those checked connections will only be disconnected temporarily and will automatically try to re-link again (IE Explore or Quick Time Player). If you want to enable the denied list, please check Enable access list filtering and click Save in the first column.
■ Disconnect: If you want to break off the current connections, please select them and click this button. Please note that those checked connections will only be disconnected temporarily and will automatically try to re-link again (IE Explore or Quick Time Player).
Filter
Enable access list filtering: Check this item and click Save if you want to enable the access list filtering function.
Filter type: Select Allow or Deny as the filter type. If you choose Allow Type, only those clients whose IP addresses are on the Access List below can access the Network Camera, and the others cannot. On the contrary, if you choose Deny Type, those clients whose IP addresses are on the Access List below will not be allowed to access the Network Camera, and the others can.
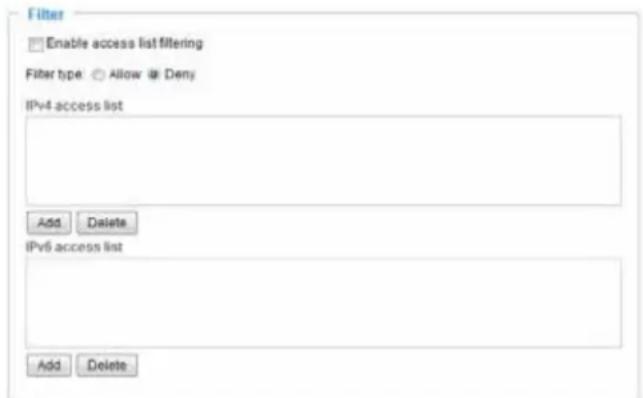
text_image
Filter Enable access list filtering Filter type: Allow @ Deny IPv4 access list Add Delete IPv6 access list Add DeleteThen you can Add a rule to the following Access List. Please note that the IPv6 access list column will not be displayed unless you enable IPv6 on the Network page. For more information about IPv6 Settings, please refer to Network > General settings on page 87 for detailed information.
There are three types of rules:
Single: This rule allows the user to add an IP address to the Allowed/Denied list.
For example:
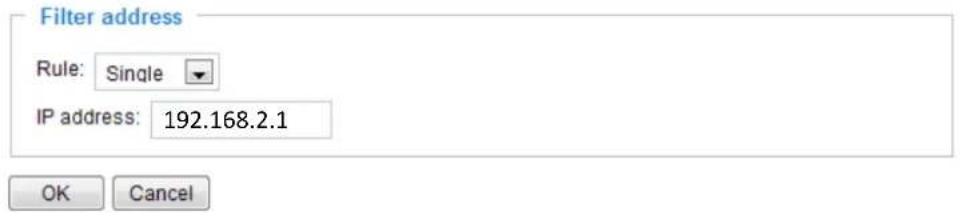
text_image
Filter address Rule: Single IP address: 192.168.2.1 OK CancelNetwork: This rule allows the user to assign a network address and corresponding subnet mask to the Allow/Deny List. The address and network mask are written in CIDR format.
For example:
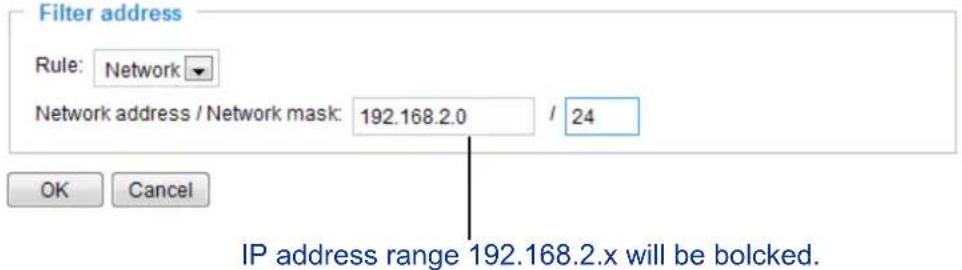
text_image
Filter address Rule: Network Network address / Network mask: 192.168.2.0 / 24 OK Cancel IP address range 192.168.2.x will be bolcked.If IPv6 filter is preferred, you will be prompted by the following window. Enter the IPv6 address and the two-digit prefix length to specify the range of IP addresses in your configuration.
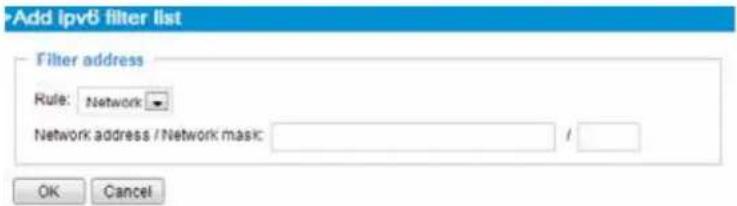
text_image
Add ipv6 filter list Filter address Rule: Network Network address / Network mask: OK CancelRange: This rule allows the user to assign a range of IP addresses to the Allow/Deny List.
Note: This rule only applies to IPv4 addresses.
For example:
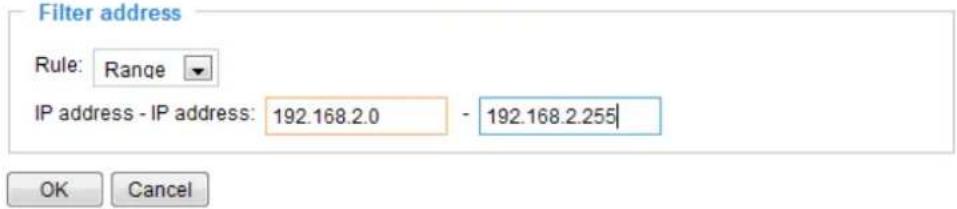
text_image
Filter address Rule: Range IP address - IP address: 192.168.2.0 - 192.168.2.255 OK CancelAdministrator IP address
Always allow the IP address to access this device: You can check this item and add the Administrator's IP address in this field to make sure the Administrator can always connect to the device.

text_image
Administrator IP address □ Always allow the IP address to access this device SaveSecurity > IEEE 802.1X
Enable this function if your network environment uses IEEE 802.1x, which is a port-based network access control. The network devices, intermediary switch/access point/hub, and RADIUS server must support and enable 802.1x settings.
The 802.1x standard is designed to enhance the security of local area networks, which provides authentication to network devices (clients) attached to a network port (wired or wireless). If all certificates between client and server are verified, a point-to-point connection will be enabled; if authentication fails, access on that port will be prohibited. 802.1x utilizes an existing protocol, the Extensible Authentication Protocol (EAP), to facilitate communication.
■ The components of a protected network with 802.1x authentication:
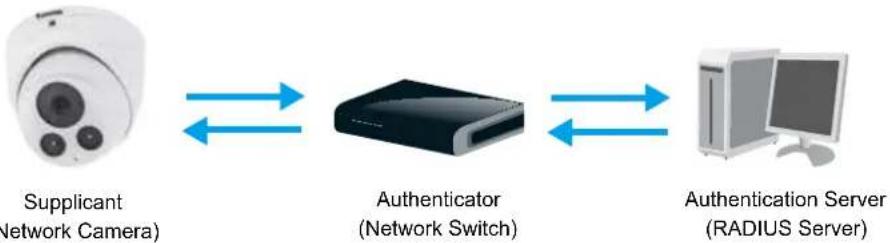
flowchart
graph LR
    A["Supplicant Network Camera"] <--> B["Authenticator (Network Switch)"]
    B <--> C["Authentication Server (RADIUS Server)"]
- Supplicant: A client end user (camera), which requests authentication.
- Authenticator (an access point or a switch): A "go between" which restricts unauthorized end users from communicating with the authentication server.
- Authentication server (usually a RADIUS server): Checks the client certificate and decides whether to accept the end user's access request.
■ VIVOTEK Network Cameras support two types of EAP methods to perform authentication: EAP-PEAP and EAP-TLS.
Please follow the steps below to enable 802.1x settings:
- Before connecting the Network Camera to the protected network with 802.1x, please apply a digital certificate from a Certificate Authority (i.e., your network administrator) which can be validated by a RADIUS server.
- Connect the Network Camera to a PC or notebook outside of the protected LAN. Open the configuration page of the Network Camera as shown below. Select EAP-PEAP or EAP-TLS as the EAP method. In the following blanks, enter your ID and password issued by the CA, then upload related certificate(s).
IEEE 802.1x
Enable IEEE 802.1x
EAP method:
Identity:
Password:
CA certificate:
Status: no file

text_image
EAP-PEAP Browse... Upload RemoveIEEE 802.1x

Enable 802.1x
EAP method:
Identity:
Private key passord:
CA certificate:
Status: no file
client certificate:
Status: no file
Client private key:
Status: no file
EAP-TLS

Browse..
[Non-Text]
Browse..
[Non-Text]
Browse..
[Non-Text]
Upload
广力云
Upload
广力云智慧零售收银系统
Upload
- When all settings are complete, move the Network Camera to the protected LAN by connecting it to an 802.1x enabled switch. The devices will then start the authentication automatically.

NOTE:
▶ The authentication process for 802.1x:
- The Certificate Authority (CA) provides the required signed certificates to the Network Camera (the supplicant) and the RADIUS Server (the authentication server).
- A Network Camera requests access to the protected LAN using 802.1X via a switch (the authenticator). The client offers its identity and client certificate, which is then forwarded by the switch to the RADIUS Server, which uses an algorithm to authenticate the Network Camera and returns an acceptance or rejection back to the switch.
- The switch also forwards the RADIUS Server's certificate to the Network Camera.
- Assuming all certificates are validated, the switch then changes the Network Camera's state to authorized and is allowed access to the protected network via a pre-configured port.
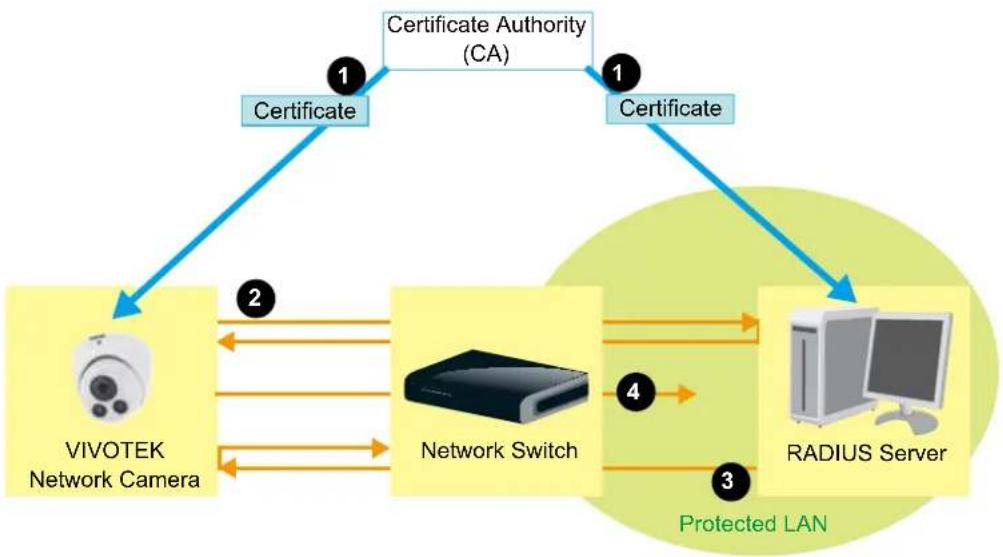
flowchart
graph TD
    A["Certificate"] --> B["VIVOTEK Network Camera"]
    C["Certificate Authority (CA)"] --> D["Network Switch"]
    D --> E["RADIUS Server"]
    F["Certificate"] --> G["Protected LAN"]
    H["Certificate"] --> I["Network Switch"]
    I --> J["RADIUS Server"]
    style A fill:#f9f,stroke:#333
    style C fill:#f9f,stroke:#333
    style F fill:#ccf,stroke:#333
    style H fill:#ccf,stroke:#333
    style I fill:#cfc,stroke:#333
    style J fill:#fcc,stroke:#333
Security > Miscellaneous
The embedded TrendMicro utility provides the protection against Cross-Site Request Forgery. Cross-site request forgery is also known as one-click attack or session riding and is abbreviated as CSRF. CSRF is a type of malicious exploit of a website, in this case, the camera. Unauthorized commands are transmitted from a user that the web application trusts, using the mechanism of forging a trusted user's own request with a request containing his own cookies, etc. Different ways can be used for a malicious website to transmit such commands. They can be specially-crafted image tags, hidden forms, and JavaScript XMLHttpRequests. The malicious attack can occur without users' interaction or even knowing it.
Miscellaneous
√ Enable Cross-Site Request Forgery(CSRF) protection.
We strongly recommend not to disable this protection. Disabling this feature will expose your camera to risks.
Save
PTZ > PTZ settings
This section explains how to control the Network Camera's Pan/Tilt/Zoom operation.
Digital: Control the e-PTZ operation. Within a field of view, it allows users to quickly move the focus to a target area for close-up viewing without physically moving the camera.
Digital PTZ Operation (E-PTZ Operation)
The e-PTZ control settings section will be displayed as shown below:
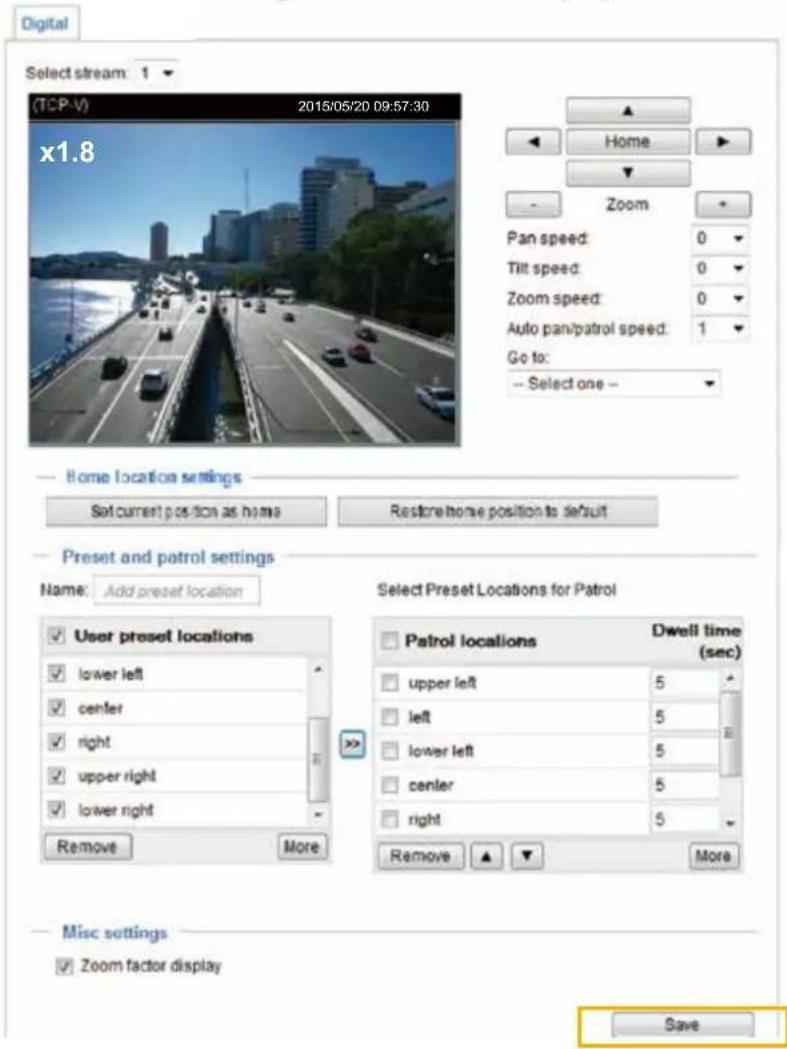
text_image
Digital Select stream 1 (TCP-V) 2015/05/20 09:57:30 x1.8 Home Zoom Pan speed: 0 Tilt speed: 0 Zoom speed: 0 Auto pan/patrol speed: 1 Go to: -- Select one -- Home location settings Set current position as home Restore home position to default Preset and patrol settings Name: Add preset location User preset locations lower left center right upper right lower right Remove More Select Preset Locations for Patrol Patrol locations Dwell time (sec) upper left 5 left 5 lower left 5 center 5 right 5 Remove More Misc settings Zoom factor display SaveFor e-PTZ related details, please refer to page 122.
Auto pan/patrol speed: Select the speed from 1\~5 (slow/fast) to set up the Auto pan/patrol speed control.
Zoom factor display
If you check this item, the zoom indicator will be displayed on the home page when you zoom in/out the live viewing window as the picture shown on the next page.
When completed with the e-PTZ settings, click Save to enable the settings on this page.
Home page in the E-PTZ Mode
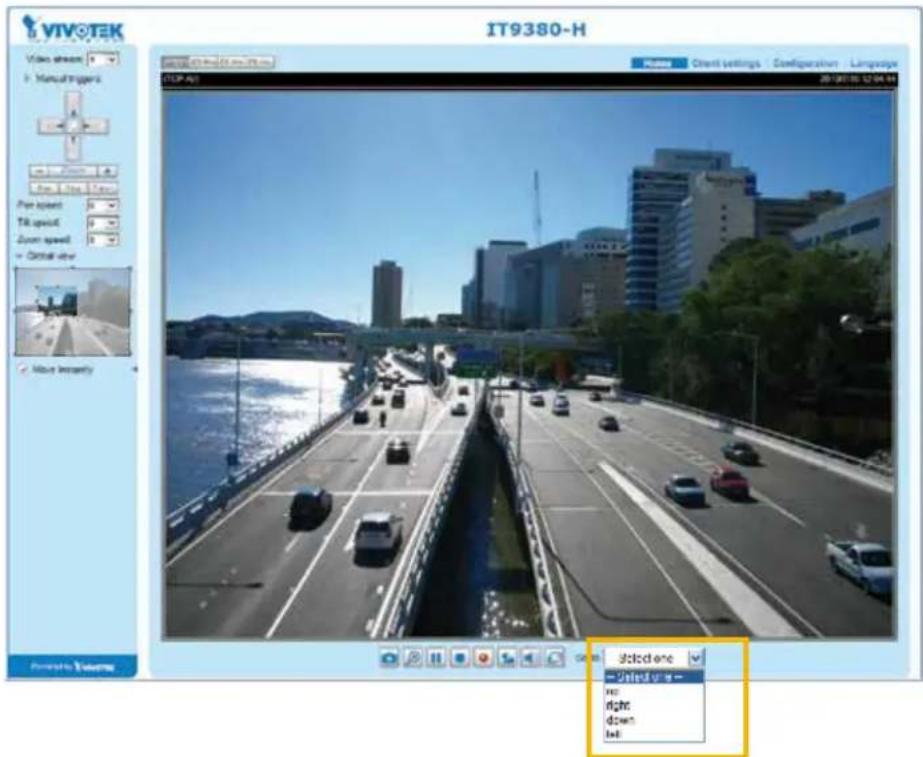
text_image
IT9380-H Video stream: 1 Manualtriggers TIP AG Client settings Configuration Language 20130116: 12:04:44 Pre speed: 0 TR speed: 0 Zoom speed: 0 Control view Move instantly Selected Used up no right down bit■ The e-Preset Positions will also be displayed on the home page. Select one from the drop-down list, and the Network Camera will move to the selected position.
■ If you have set up different preset positions for different streams, you can select one of the video streams to display its separate preset positions.
Global View
In addition to using the e-PTZ control panel, you can also use the mouse to drag or resize the floating frame to pan/tilt/zoom the viewing region. The live view window will also move to the viewing region accordingly.
Moving Instantly
If you check this item, the live view window will switch to the new viewing region instantly after you move the floating frame. If not selected, the process of moving from one position to another will be shown.
Click on Image
The e-PTZ function also supports "Click on Image". When you click on any point of the Global View Window or Live View Window, the viewing region will also move to that point.
Note that the "Click on Image" function only applies when you have configured a smaller "Region of Interest" out of the maximum output frame! e.g., an 800 x 600 region from out of the camera's maximum frame size.
Patrol button: Click this button, then the Network Camera will patrol among the selected preset positions continuously.
Patrol settings
You can select some preset positions for the Network Camera to patrol.
Please follow the steps below to set up a patrol schedule:
- Select the preset locations on the list, and click >>.
- The selected preset locations will be displayed on the Patrol locations list.
-
Set the Dwelling time for the preset location during an auto patrol.
-
If you want to delete a preset location from the Patrol locations list, select it and click Remove.
-
Select a location and click ▲ ▼ to rearrange the patrol order.
-
Select patrol locations you want to save in the list and click Save to enable the patrol settings.
-
To implement the patrol schedule, please go to homepage and click on the Patrol button.
Digital
Select stream: 2 √
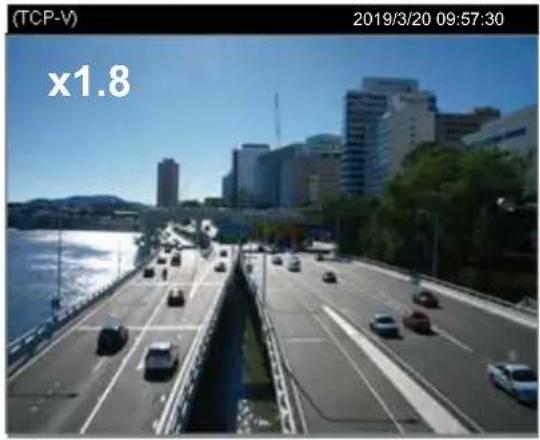
natural_image
River scene with multi-lane road and modern buildings in the background under clear sky (no visible text or symbols)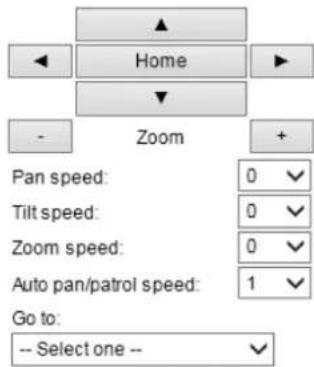
text_image
Home Zoom Pan speed: 0 ✓ Tilt speed: 0 ✓ Zoom speed: 0 ✓ Auto pan/patrol speed: 1 ✓ Go to: -- Select one -- ✓Home location settings
Set current position as home
Restore home position to default
Preset and patrol settings
Name: Add preset location
2
Select Preset Locations for Patrol
3
User preset locations
√ upper left
√ left
lower left
√ center
right
Remove
More
□ Patrol locations
Dwell time (sec)
□ upper left
□ left
□ lower left
□ center
□ right
Remove
▲ ▼
More
4
5
Misc settings
√ Zoom factor display
6


NOTE:
- The Preset Positions will also be displayed on the Home page. Select one from the Go to menu, and the Network Camera will move to the selected preset position.
- Click Patrol: The Network Camera will patrol along the selected positions repeatedly.
Event > Event settings
This section explains how to configure the Network Camera to respond to particular situations (event). A typical application is that when a motion is detected, the Network Camera sends buffered images to an FTP server or e-mail address as notifications. Click on Help, there is an illustration shown in the pop-up window explaining that an event can be triggered by many sources, such as motion detection or external digital input devices. When an event is triggered, you can specify what type of action that will be performed. You can configure the Network Camera to send snapshots or videos to your email address or FTP site.
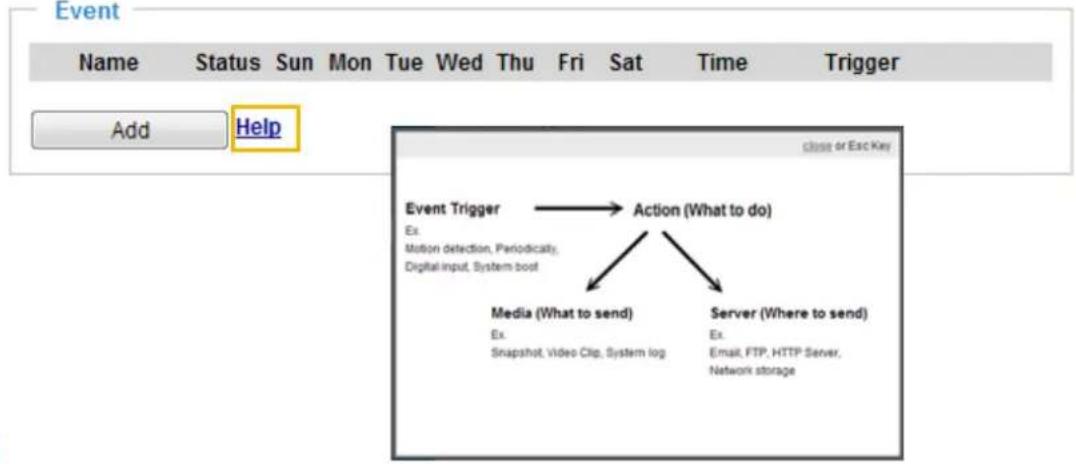
text_image
Event Name Status Sun Mon Tue Wed Thu Fri Sat Time Trigger Add Help Event Trigger → Action (What to do) Ex. Motion detection, Periodically, Digital input, System boot Media (What to send) Server (Where to send) Ex. Snapshot, Video Clip, System log Ex. Email, FTP, HTTP Server, Network storageEvent
To configure an event with reactive measures such as recording video or snapshots, it is necessary to configure the server and media settings so that the Network Camera will know what action to take (such as which server to send the media files to) when a trigger is activated. An event is an action initiated by a user-defined trigger source. In the Event column, click Add to open the event settings window. Here you can arrange three elements -- Schedule, Trigger, and Action to set an event. A total of 3 event settings can be configured.
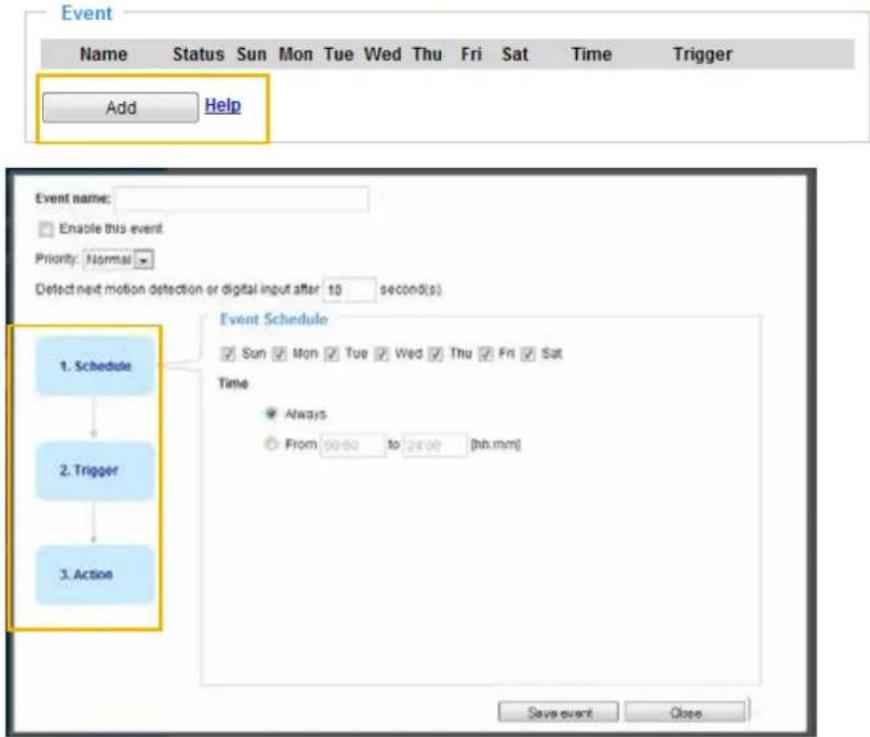
text_image
Event Name Status Sun Mon Tue Wed Thu Fri Sat Time Trigger Add Help Event name: Enable this event Priority Normal Detect next motion detection or digital input after 10 second(s) 1. Schedule 2. Trigger 3. Action Event Schedule Sun Mon Tue Wed Thu Fri Sat Time Always From 00:00 to 24:00 [hh.mm] Save event Close■ Event name: Enter a name for the event setting.
■ Enable this event: Select this checkbox to enable the event setting.
■ Priority: Select the relative importance of this event (High, Normal, or Low). Events with a higher priority setting will be executed first.
■ Detect next motion detection or digital input after □ seconds: Enter the duration in seconds to pause motion detection after a motion is detected. This can prevent event-related actions to take place too frequently.
1. Schedule
Specify the period of time during which the event trigger will take effect. Please select the days of the week and the time in a day (in 24-hr time format) for the event triggering schedule. For example, you may prefer an event to be triggered only during the off-office hours.
2. Trigger
This is the cause or stimulus which defines when to trigger the Network Camera. The trigger source can be configured to use the Network Camera's built-in motion detection mechanism or external digital input devices.
There are several choices of trigger sources as shown on the next page. Select the item to display the detailed configuration options.
■ Video motion detection
This option makes use of the built-in motion detection mechanism as a trigger source. To enable this function, you need to configure a Motion Detection Window first. For more information, please refer to Motion Detection on page 138 for details.

Video motion detection
Normal: □ door
Profile: hallway
Note: Please configure Motion detection first
■ Periodically
This option allows the Network Camera to trigger periodically for every other defined minute. Up to 999 minutes are allowed.

Periodically
Trigger every other 1 minutes
■ System boot
This option triggers the Network Camera when the power to the Network Camera is disconnected and re-connected.
■ Recording notify
This option allows the Network Camera to trigger when the recording disk is full or when recording starts to overwrite older data.
■ Audio detection
A preset threshold can be configured with an external microphone as the trigger to system event. The triggering condition can be an input exceeding or falling below a threshold. Audio detection can take place as a complement to motion detection or as a method to detect activities not covered by the camera's view.
■ Camera tampering detection
This option allows the Network Camera to trigger when the camera detects that is is being tampered with. To enable this function, you need to configure the Tampering Detection option first. Please refer to page 141 for detailed information.
- Camera tampering detection
☑ Tampering detection ☐ Too dark ☐ Too bright ☐ Too blurry
Note: Please configure Camera tampering detection first
■ Manual Triggers
This option allows users to enable event triggers manually by clicking the on/off button on the homepage. Please configure 1 to 3 associated events before using this function.

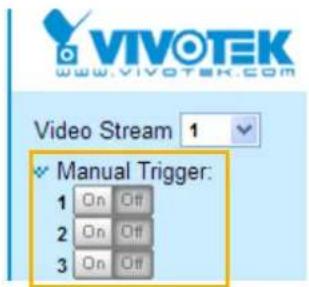
text_image
VIVOTEK www.vivotek.com Video Stream 1 Manual Trigger: 1 On Off 2 On Off 3 On Off■ VADP
It is presumed that you already uploaded and enabled the VADP modules before you can associate VADP triggers with an Event setting.
Click on the Set VADP Trigger button to open the VADP setup menu. The triggering conditions available with 3rd-party software modules known as VADP will be listed. Use the arrow buttons to select these triggers. Users may implant these modules for different purposes such as triggering motion detection, or applications related to video analytics, etc. Please refer to page 144 for the configuration options with VADP modules.
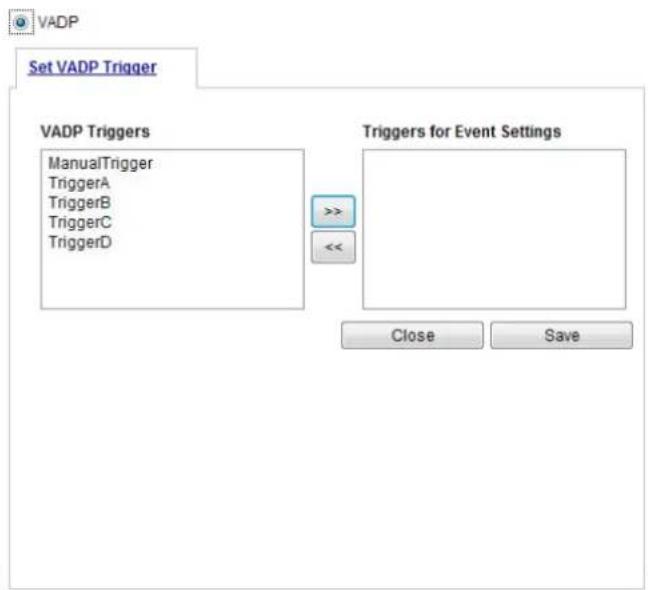
flowchart
graph TD
    A["VADP"] --> B["Set VADP Trigger"]
    B --> C["VADP Triggers"]
    C --> D["ManualTrigger"]
    C --> E["TriggerA"]
    C --> F["TriggerB"]
    C --> G["TriggerC"]
    C --> H["TriggerD"]
    I["Triggers for Event Settings"] --> J["<<"]
    K["Close"] --> L["Save"]
Once the triggers are configured, they will be listed under the VADP option.
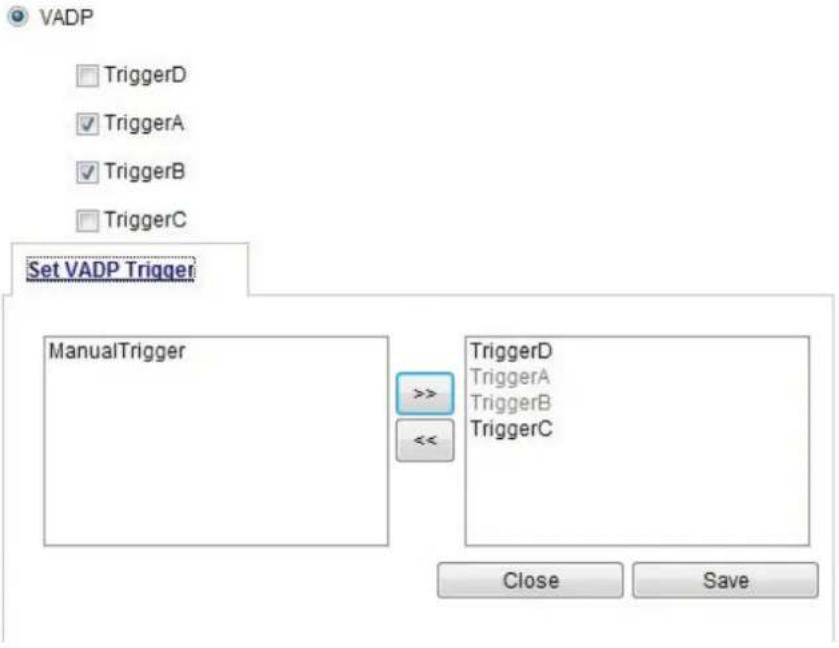
text_image
VADP TriggerD TriggerA TriggerB TriggerC Set VADP Trigger ManualTrigger >> << TriggerD TriggerA TriggerB TriggerC Close Save3. Action
Define the actions to be performed by the Network Camera when a trigger is activated.
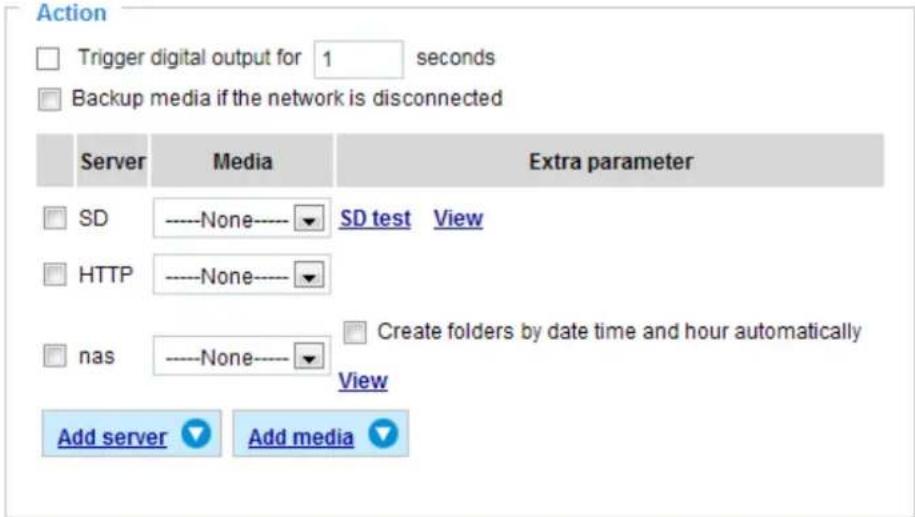
text_image
Action Trigger digital output for 1 seconds Backup media if the network is disconnected Server Media Extra parameter SD ----None---- SD test View HTTP ----None---- nas ----None---- Create folders by date time and hour automatically View Add server Add media■ Backup media if the network is disconnected
Select this option to backup media file on SD card if the network is disconnected. This function will only be displayed after you set up a network storage (NAS). The media to back up can include snapshot images, video, or system logs depending on your event settings.
Add server
It is necessary to configure the server and media settings so that the Network Camera will know what action to take (such as which server to send the media files to) when a trigger is activated. Click Add server to open the server setting window. You can specify where the notification messages are sent to when a trigger is activated. A total of 5 server settings can be configured.
There are four choices of server types available: Email, FTP, HTTP, and Network storage. Select the item to display the detailed configuration options. You can configure either one or all of them.
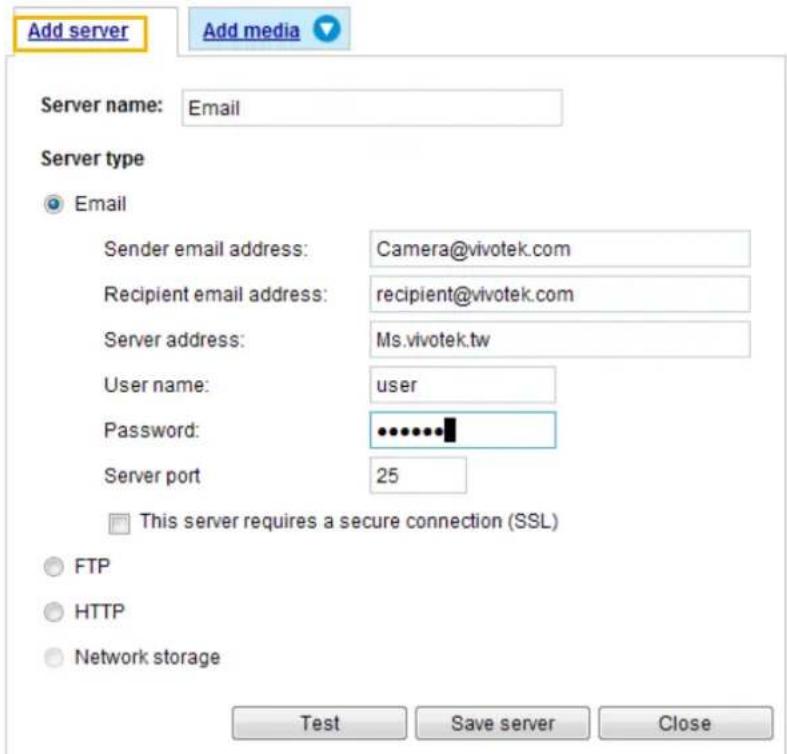
text_image
Add server Add media Server name: Email Server type Email Sender email address: Camera@vivotek.com Recipient email address: recipient@vivotek.com Server address: Ms.vivotek.tw User name: user Password: ********** Server port 25 This server requires a secure connection (SSL) FTP HTTP Network storage Test Save server CloseServer type - Email
Select to send the media files via email when a trigger is activated.
■ Server name: Enter a name for the server setting.
■ Sender email address: Enter the email address of the sender.
■ Recipient email address: Enter the email address of the recipient.
■ Server address: Enter the domain name or IP address of the email server.
■ User name: Enter the user name of the email account if necessary.
■ Password: Enter the password of the email account if necessary.
■ Server port: The default mail server port is set to 25. You can also manually set another port.
If your SMTP server requires a secure connection (SSL), select This server requires a secure connection (SSL).
To verify if the email settings are correctly configured, click Test. The result will be shown in a pop-up window. If successful, you will also receive an email indicating the result.
text_image
The email has been sent successfully.
text_image
Time in sending email.Click Save server to enable the settings.
Note that after you configure the first event server, the new event server will automatically display on the Server list. If you wish to add other server options, click Add server.
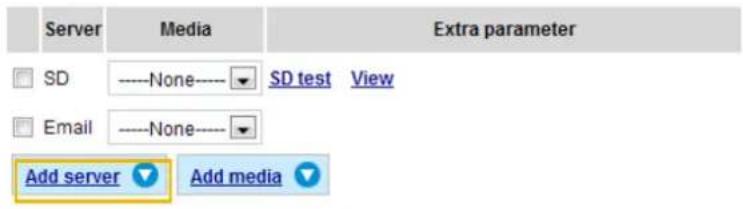
text_image
Server Media Extra parameter SD ----None ----- SD test View Email ----None ----- Add server Add mediaServer type - FTP
Select to send the media files to an FTP server when a trigger is activated.
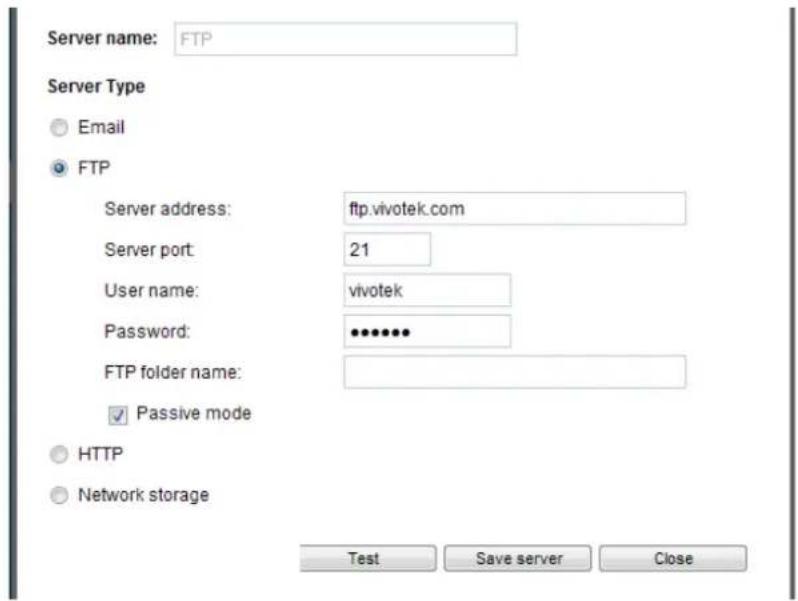
text_image
Server name: FTP Server Type Email FTP Server address: ftp.vivotek.com Server port: 21 User name: vivotek Password: ••••••• FTP folder name: ✓ Passive mode HTTP Network storage Test Save server Close■ Server name: Enter a name for the server setting.
■ Server address: Enter the domain name or IP address of the FTP server.
■ Server port: By default, the FTP server port is set to 21. It can also be assigned to another port number between 1025 and 65535.
■ User name: Enter the login name of the FTP account.
■ Password: Enter the password of the FTP account.
■ FTP folder name
Enter the folder where the media files will be placed. If the folder name does not exist, the Network Camera will automatically create one on the FTP server.
■ Passive mode
Most firewalls do not accept new connections initiated from external requests. If the FTP server supports passive mode, select this option to enable passive mode FTP and allow data transmission to pass through the firewall. The firmware default has the Passive mode checkbox selected.
To verify if the FTP settings are correctly configured, click Test. The result will be shown in a pop-up window as shown below. If successful, you will also receive a test.txt file on the FTP server.
text_image
ftp transmission successfully.
text_image
ftp transmission failed.Click Save server to enable the settings.
Server type - HTTP
Select to send the media files to an HTTP server when a trigger is activated.
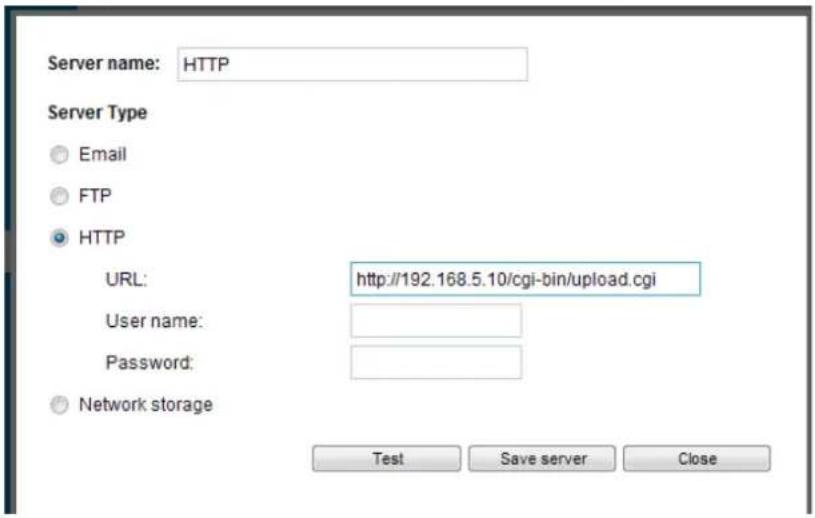
text_image
Server name: HTTP Server Type Email FTP HTTP URL: http://192.168.5.10/cgi-bin/upload.cgi User name: Password: Network storage Test Save server Close■ Server name: Enter a name for the server setting.
■ URL: Enter the URL of the HTTP server.
■ User name: Enter the user name if necessary.
■ Password: Enter the password if necessary.
To verify if the HTTP settings are correctly configured, click Test. The result will be shown in a pop-up window as shown below. If successful, you will receive a test.txt file on the HTTP server.
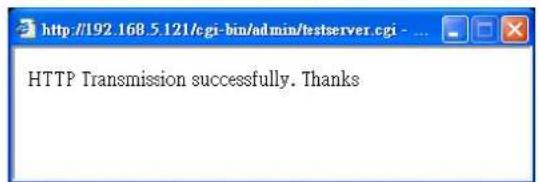
text_image
HTTP Transmission successfully. Thanks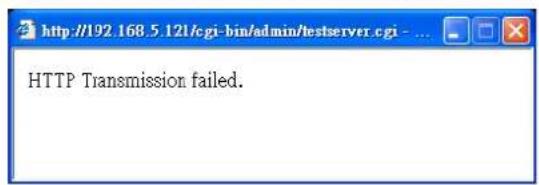
text_image
HTTP Transmission failed.Click Save server to enable the settings.
Network storage:
Select to send the media files to a networked storage when a trigger is activated. Please refer to NAS server on page 150 for details. Note that only one NAS server can be configured.
Click Save server to enable the settings.
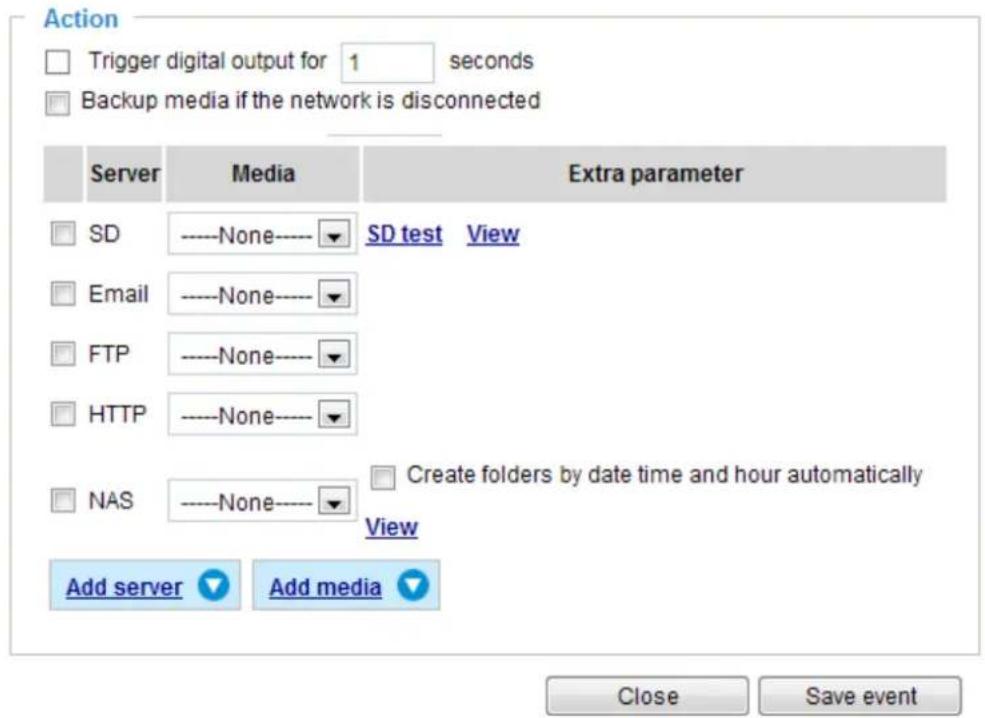
text_image
Action Trigger digital output for 1 seconds Backup media if the network is disconnected Server Media Extra parameter SD ----None ---- SD test View Email ----None ---- FTP ----None ---- HTTP ----None ---- NAS ----None ---- □ Create folders by date time and hour automatically View Add server Add media Close Save event■ SD Test: Click to test your SD card. The system will display a message indicating the result as a success or a failure. If you want to use your SD card for local storage, please format it before use. Please refer to page 133 for detailed information.
■ View: Click this button to open a file list window. This function is only for SD card and Network Storage. If you click the View button for an SD card, a Local storage page will prompt so that you can manage the recorded files on SD card. For more information about Local storage, please refer to page 152. If you click the View button for a Network storage, a file directory window will prompt for you to view recorded data on Network storage. For detailed illustration, please refer to the next page.
■ Create folders by date, time, and hour automatically: If you select this item, the system will automatically create folders by the date when video footages are stored onto the networked storage.
The following is an example of a file destination with video clips:
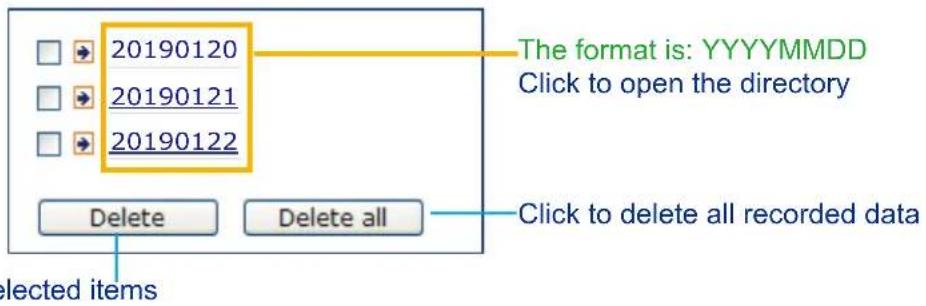
text_image
20190120 20190121 20190122 The format is: YYYYMMDD Click to open the directory Delete Delete all Click to delete all recorded data elected itemsClick 20190120 to open the directory:
The format is: HH (24r)
Click to open the file list for that hour
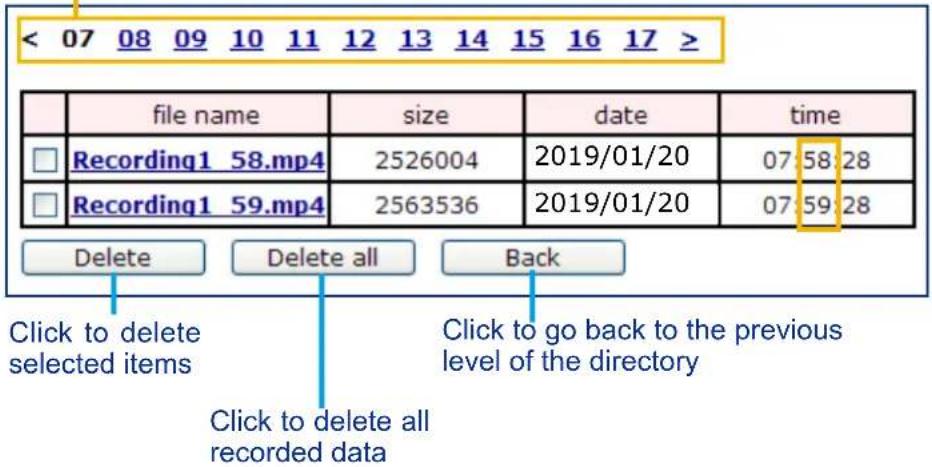
text_image
< 07 08 09 10 11 12 13 14 15 16 17 > file name size date time Recording1 58.mp4 2526004 2019/01/20 07:58:28 Recording1 59.mp4 2563536 2019/01/20 07:59:28 Delete Delete all Back Click to delete selected items Click to go back to the previous level of the directory Click to delete all recorded data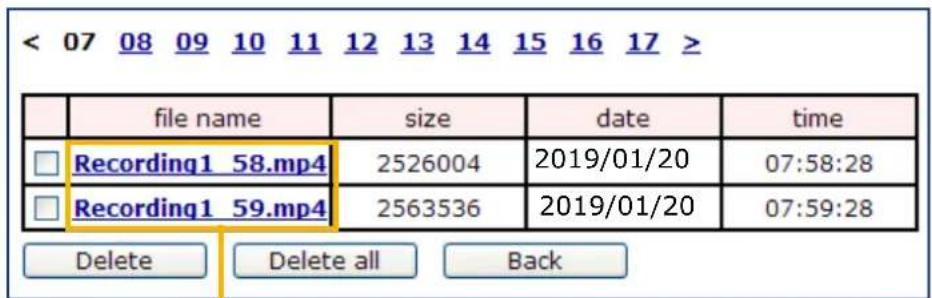
text_image
< 07 08 09 10 11 12 13 14 15 16 17 ≥ file name size date time Recording1 58.mp4 2526004 2019/01/20 07:58:28 Recording1 59.mp4 2563536 2019/01/20 07:59:28 Delete Delete all BackThe format is: File name prefix + Minute (mm)
You can set up the file name prefix on Add media page. Please refer to next page for detailed information.
Add media
Click Add media to open the media setting window. You can specify the type of media that will be sent when a trigger is activated. A total of 5 media settings can be configured. There are three choices of media types available: Snapshot, Video Clip, and System log. Select the item to display the detailed configuration options. You can configure either one or all of them.
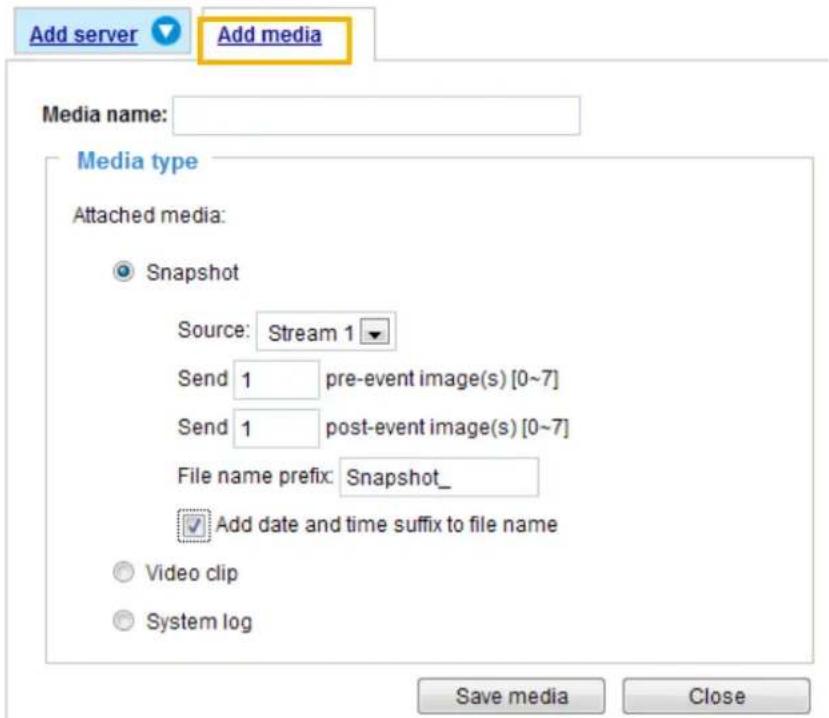
text_image
Add server Add media Media name: Media type Attached media: Snapshot Source: Stream 1 Send 1 pre-event image(s) [0~7] Send 1 post-event image(s) [0~7] File name prefix: Snapshot_ ✓ Add date and time suffix to file name Video clip System log Save media CloseMedia type - Snapshot
Select to send snapshots when a trigger is activated.
■ Media name: Enter a name for the media setting.
■ Source: Select to take snapshots from any of the video streams.
■ Send □ pre-event images
The Network Camera has a buffer to temporarily hold data up to a certain limit. Enter a number to decide how many images to capture before a trigger is activated. Up to 7 images can be generated.
■ Send □ post-event images
Enter a number to decide how many images to capture after a trigger is activated. Up to 7 images can be generated.
For example, if both the Send pre-event images and Send post-event images are set to 7, a total of 15 images can be generated after a trigger is activated.

text_image
1 pic. 2 pic. 3 pic. 4 pic. 5 pic. 6 pic. 7 pic. 8 pic. 9 pic. 10 pic. 11 pic. 10 pic. 12 pic. 13 pic. 14 pic. 15 pic. Trigger Activation■ File name prefix Enter the text that will be appended to the front of the file name.
■ Add date and time suffix to the file name
Select this option to add a date/time suffix to the file name.
For example:
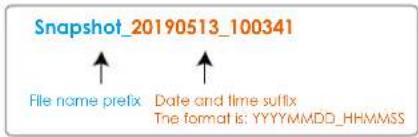
text_image
Snapshot_20190513_100341 File name prefix Date and time suffix The format is: YYYYMMDD_HHMMSSClick Save media to enable the settings.
Note that after you set up the first media server, a new column for media server will automatically display on the Media list. If you wish to add more media options, click Add media.
Media type - Video clip
Select to send video clips when a trigger is activated.
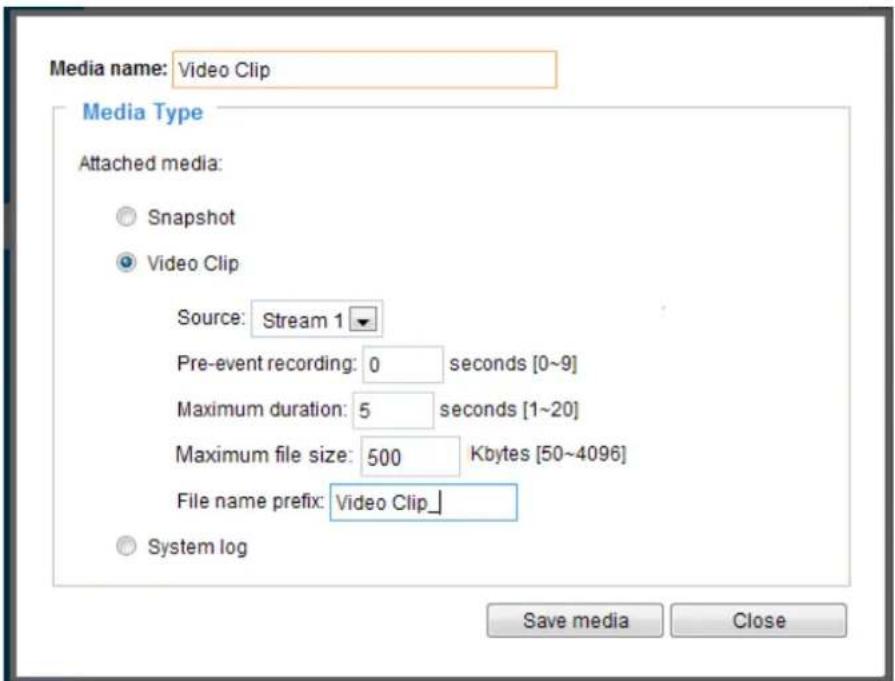
text_image
Media name: Video Clip Media Type Attached media: Snapshot Video Clip Source: Stream 1 Pre-event recording: 0 seconds [0~9] Maximum duration: 5 seconds [1~20] Maximum file size: 500 Kbytes [50~4096] File name prefix: Video Clip_ System log Save media Close■ Media name: Enter a name for the media setting.
■ Source: Select a video stream as the source of video clip.
■ Pre-event recording
The Network Camera has a buffer to temporarily hold data up to a certain limit. Enter a number to decide the duration of recording before a trigger is activated. Up to 9 seconds can be set.
■ Maximum duration
Specify the maximum recording duration in seconds. The duration can be up to 10 seconds.
For example, if pre-event recording is set to five seconds and the maximum duration is set to ten seconds, the Network Camera continues to record for another 4 seconds after a trigger is activated.
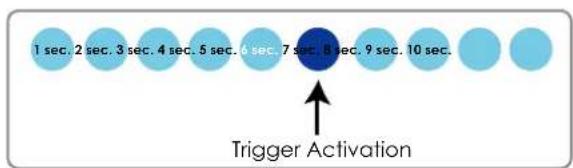
text_image
1 sec. 2 sec. 3 sec. 4 sec. 5 sec. 6 sec. 7 sec. 8 sec. 9 sec. 10 sec. Trigger Activation■ Maximum file size
Specify the maximum file size allowed. Some users may need to stitch the video clips together when searching and packing up forensic evidence.
■ File name prefix
Enter the text that will be appended to the front of the file name.
For example:
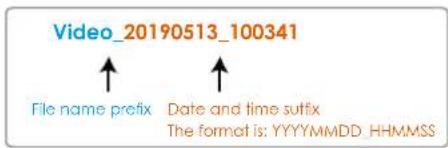
text_image
Video_20190513_100341 File name prefix Date and time suffix The format is: YYYYMMDD HHMMSSClick Save media to enable the settings.
Media type - System log
Select to send a system log when a trigger is activated.
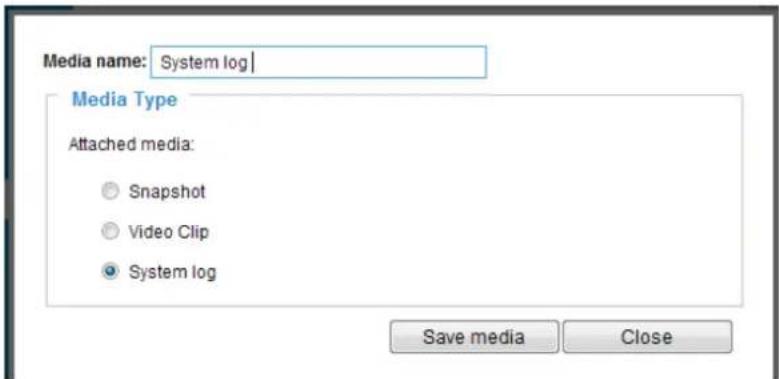
text_image
Media name: System log Media Type Attached media: Snapshot Video Clip System log Save media CloseClick Save media to enable the settings, then click Close to exit the page.
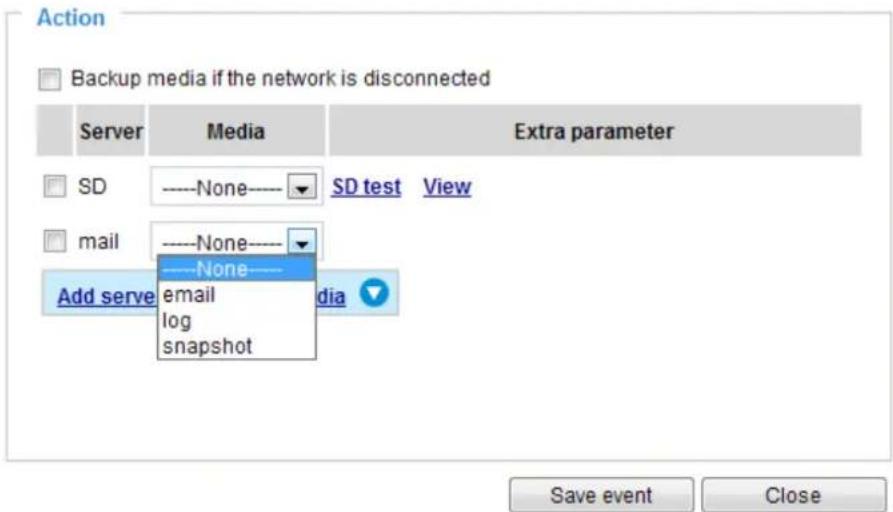
text_image
Action Backup media if the network is disconnected Server Media Extra parameter SD ----None ---- SD test View mail ----None ---- None Add serve email log snapshot Save event CloseIn the Event settings column, the Servers and Medias you configured will be listed; please make sure the Event -> Status is indicated as ON, in order to enable the event triggering action.
When completed, click the Save event button to enable the settings and click Close to exit Event Settings page. The new Event / Server settings / Media will appear in the event drop-down list on the Event setting page.
Please see the example of the Event setting page below:
Event

text_image
Name Status Sun Mon Tue Wed Thu Fri Sat Time Trigger event1 ON V V V V V V V V 00:00~24:00 seq Delete Add HelpServer settings

text_image
Name Type Address/Location HTTP http http://192.168.5.10 Delete AddMedia
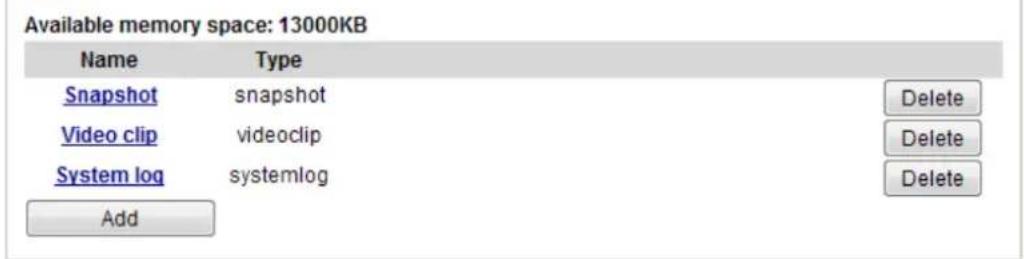
text_image
Available memory space: 13000KB Name Type Snapshot snapshot Delete Video clipvideoclip Delete System log.systemlog Delete AddCustomized script

text_image
Name Date Time AddWhen the Event Status is ON, the event configuration above is triggered by motion detection, the Network Camera will automatically send snapshots via e-mail.
If you want to stop the event trigger, you can click on the ON button to turn it to OFF status or click the Delete button to remove the event setting.
To remove a server setting from the list, select a server name from the drop-down list and click Delete. Note that you can only delete a server setting when it is not applied in an existing event setting.
To remove a media setting from the list, select a media name from the drop-down list and click Delete. Note that you can only delete a media setting when it is not applied in an existing event setting.
Customized Script
This function allows you to upload a sample script (.xml file) to the camera, which will save your time on configuring the settings. Please note that there is a limited number of customized scripts you can upload; if the current amount of customized scripts has reached the limit, an alert message will prompt. If you need more information, please contact VIVOTEK technical support.
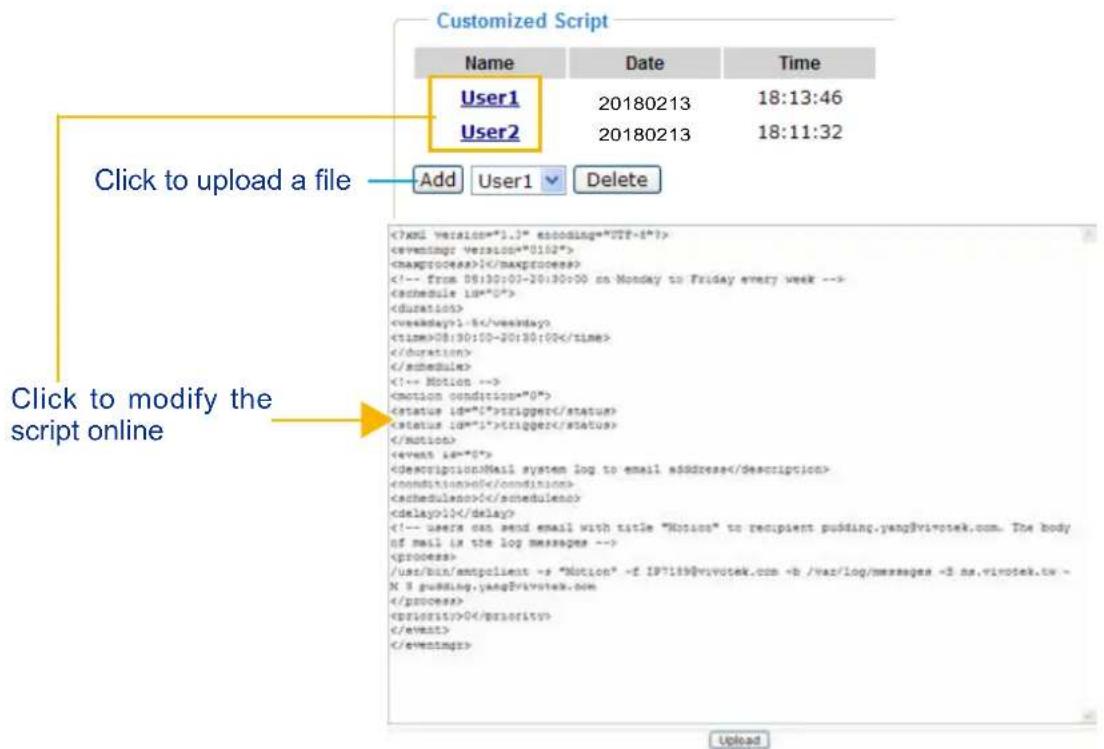
text_image
Customized Script Name Date Time User1 20180213 18:13:46 User2 20180213 18:11:32 Click to upload a file Add User1 DeleteApplications > Motion detection
This section explains how to configure the Network Camera to enable motion detection. A total of 5 motion detection windows can be configured.
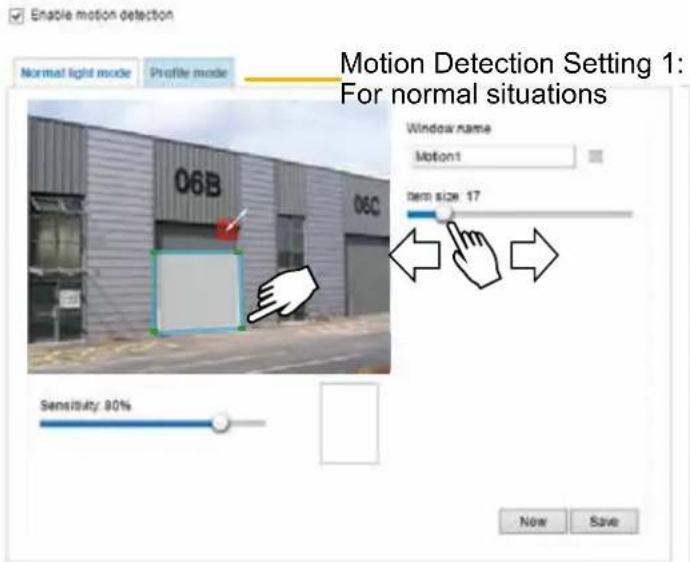
text_image
Enable motion detection Normal light mode Profile mode Motion Detection Setting 1: For normal situations Window name Motion1 dom size: 17 Sensitivity: 80% Now SaveFollow the steps below to enable motion detection:
- Click New to add a new motion detection window.
- In the Window Name text box, enter a name for the motion detection window.
■ Use 4 mouse clicks to designate a detection window. You can change the window shape by dragging the corner marks to a preferred location.
- Drag the item size tab to change the minimum size of item to trigger an alarm. An item size box will appear in the center of screen for your reference (in semi-transparent red). An intruding object must be larger than the Item size to trigger an alarm. Change the item size according to the live view.
■ To delete a window, click the X mark on the right of the window name.
-
Define the sensitivity to moving objects by moving the Sensitivity slide bar. Note that a high sensitivity is prone to produce false alarms such as the fast changes of light (such as day/night mode switch, turning lights on/off). A movement must persist longer than 0.3 second for the motion to be detected.
-
Click Save to enable the settings.
-
Select Enable motion detection to enable this function.
For example:
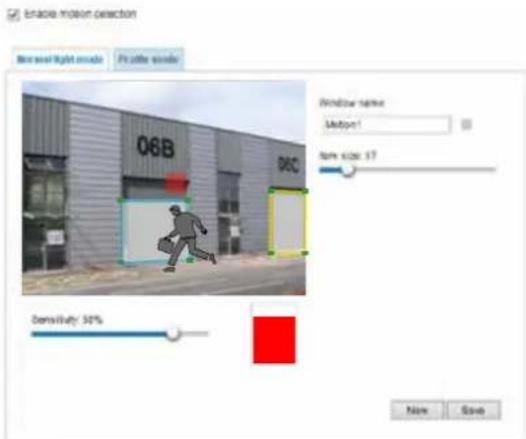
text_image
Brake Motion Detection Bevel light mode Fit size scale 06B 96C Window name: Mason1 Item size: 17 Sensitivity: 50% New SaveThe Percentage Indicator will rise or fall depending on the variation between sequential images. When motions are detected by the Network Camera and are considered to exceed the preset threshold, the red bar rises. Meanwhile, the motion detection window will be outlined in red.
Photos or videos can be captured instantly and configured to be sent to a remote server (via an Email or FTP server). For more information on how to configure an event setting, please refer to Event settings on page 116.
A green bar indicates that even though motions have been detected, the event has not been triggered because the image variations still fall under the preset threshold.
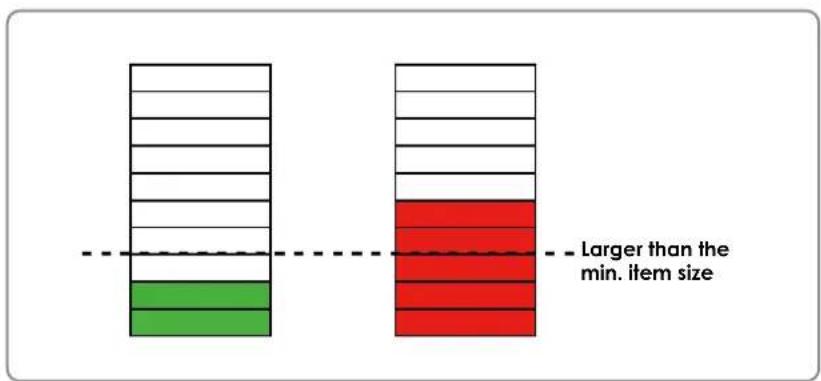
bar
| Category | Value | | -------- | ----- | | Green | Lower | | Red | Higher |If you want to configure other motion detection settings for day/night/schedule mode (e.g., for a different lighting condition), please click Profile to open the Motion Detection Profile Settings page as shown below. Another three motion detection windows can be configured on this page.
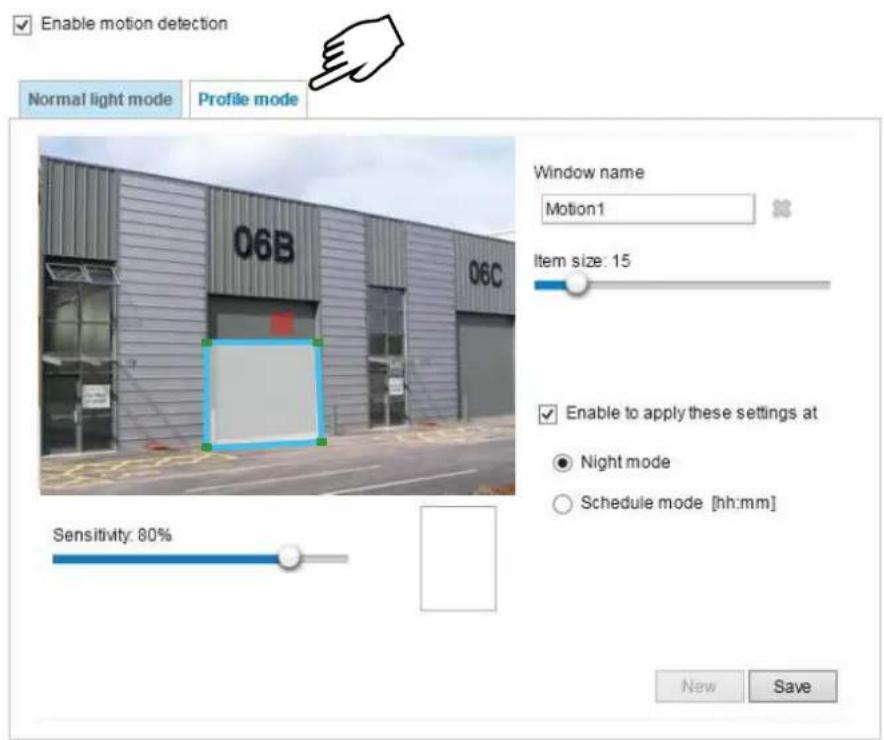
text_image
Enable motion detection Normal light mode Profile mode Window name Motion1 Item size: 15 Enable to apply these settings at ● Night mode ○ Schedule mode [hh:mm] Sensitivity: 80% New SavePlease follow the steps beolw to set up a profile:
- Create a new motion detection window.
- Click the Profile mode tab.
- Select the applicable Schedule mode. Please manually enter a time range.
- Click Save to enable the settings and click Close to exit the page.
This motion detection window will also be displayed on the Event Settings page. You can go to Event > Event settings > Trigger to select it as a trigger source. Please refer to page 125 for detailed information.

NOTE:
▶ How does motion detection work?
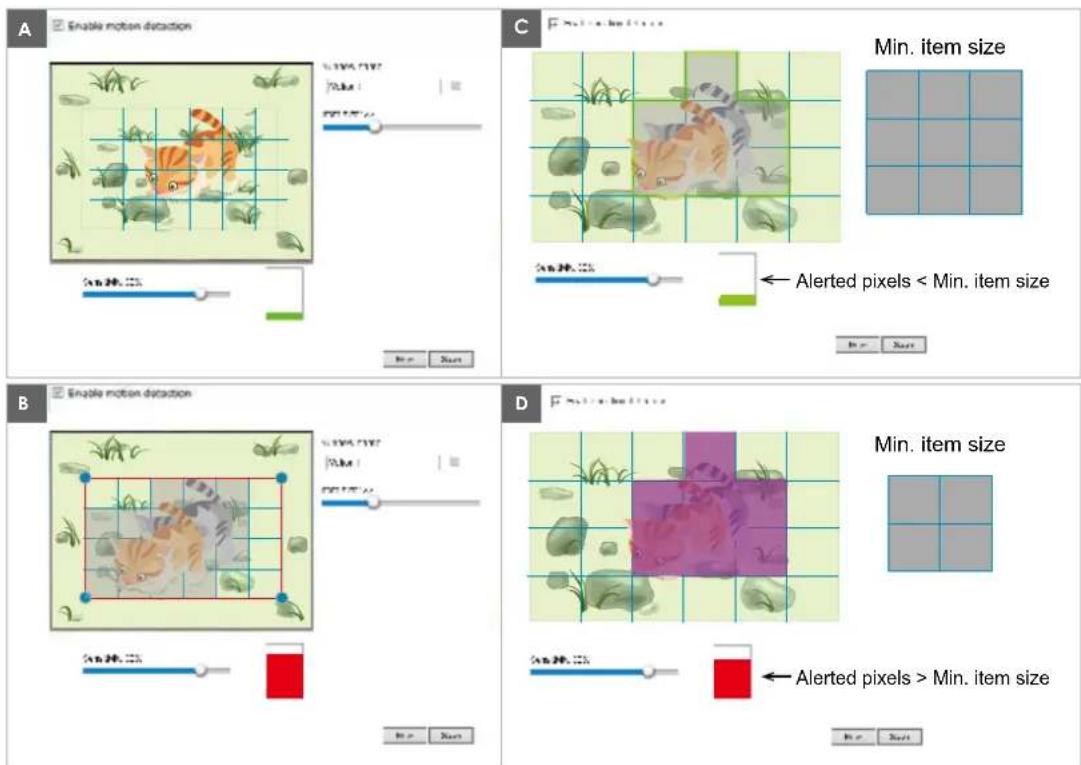
There are two motion detection parameters: Sensitivity and Min. Item Size. As illustrated above, frame A and frame B are two sequential images. Pixel differences between the two frames are detected and highlighted in gray in which the sensitivity setting will take effect. Sensitivity is a value that expresses the sensitivity to moving objects. A higher sensitivity setting allows camera to detect slight movements while a lower sensitivity setting will neglect them.
The minimum item size is a threshold value that determines how many “alerted pixels” can trigger an event. When the size of an intruding object is larger than the minimum size, and its movement persist for 0.3 second, the motion is judged to exceed the defined threshold; and the motion window will be outlined in red. With a large minimum item size, the size of moving object in frame C is considered as smaller than the minimum item size, no motion alarm is triggered. With a smaller minimum item size, the same moving object in frame D triggers the alarm.
For applications that require a high level of security management, it is suggested to use higher sensitivity settings. However, a higher sensitivity level can also produce false alarms due to fast light changes when switching between the day and night modes, AE switch, turning the light on or off, etc.
Applications > Tampering detection
This section explains how to set up camera tamper detection. With tamper detection, the camera is capable of detecting incidents such as redirection, blocking or defocusing, or even spray paint.
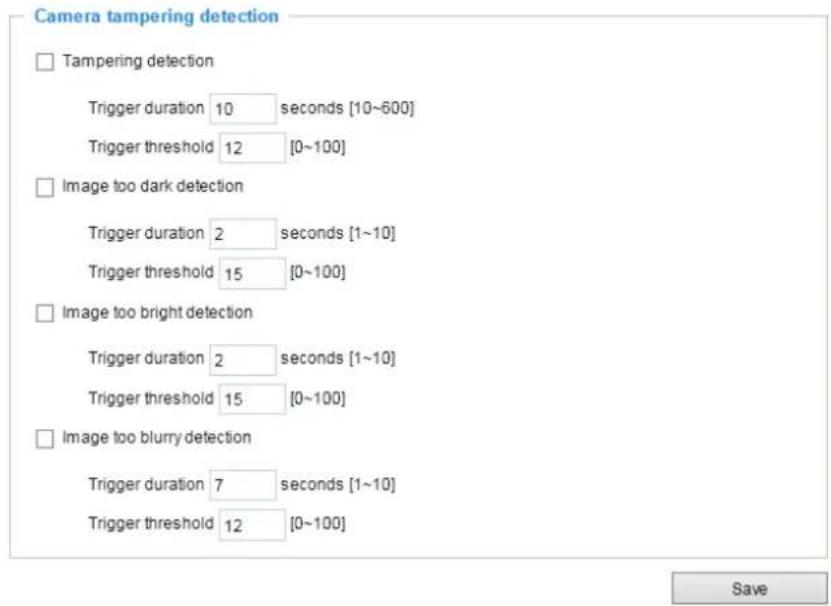
text_image
Camera tampering detection □ Tampering detection Trigger duration 10 seconds [10~600] Trigger threshold 12 [0~100] □ Image too dark detection Trigger duration 2 seconds [1~10] Trigger threshold 15 [0~100] □ Image too bright detection Trigger duration 2 seconds [1~10] Trigger threshold 15 [0~100] □ Image too blurry detection Trigger duration 7 seconds [1~10] Trigger threshold 12 [0~100]Please follow the steps below to set up the camera tamper detection function:
- Click to select the checkbox before tampering conditions: Tampering detection, Image too dark, Image too bright, and Image too blurry. Enter the tamper trigger duration. (10 sec. \~ 10 min.). The duration specifies the set of time before the tampering is considered as a real alarm. This helps avoid false alarms by short-lived changes.
The tamper alarm will be triggered only when the tampering factor (the difference between current frame and pre-saved background) exceeds the trigger threshold. Conditions such as image too dark, too bright, or too blurry (defocused) can also be configured as tampering conditions. The Trigger threshold determines how sensitive your is tamper detection setting. Lower the threshold number, easier to trigger.
Too bright: shining a flash light. The average lighting level of the scene is taken into consideration.
Too dark: covering the objective or spraying paint.
Too blurry: blurry scene can be the result of strong interference on the device, such as EMI interference.
- You can configure Tampering Detection as a trigger element to the proactive event configurations in Event -> Event settings -> Trigger. For example, when the camera is tampered with, camera can be configured to send the pre- and post-event video clips to a networked storage device. Please refer to page 125 for detailed information.
Applications > Audio detection
Audio detection, along with video motion detection, is applicable in the following scenarios:
- Detection of activities not covered by camera view, e.g., a loud input by gun shots or breaking a door/window.
- A usually noisy environment, such as a factory, suddenly becomes quiet due to a breakdown of machines.
- A PTZ camera can be directed to turn to a preset point by the occurrence of audio events.
- Dark environments where video motion detection may not function well.
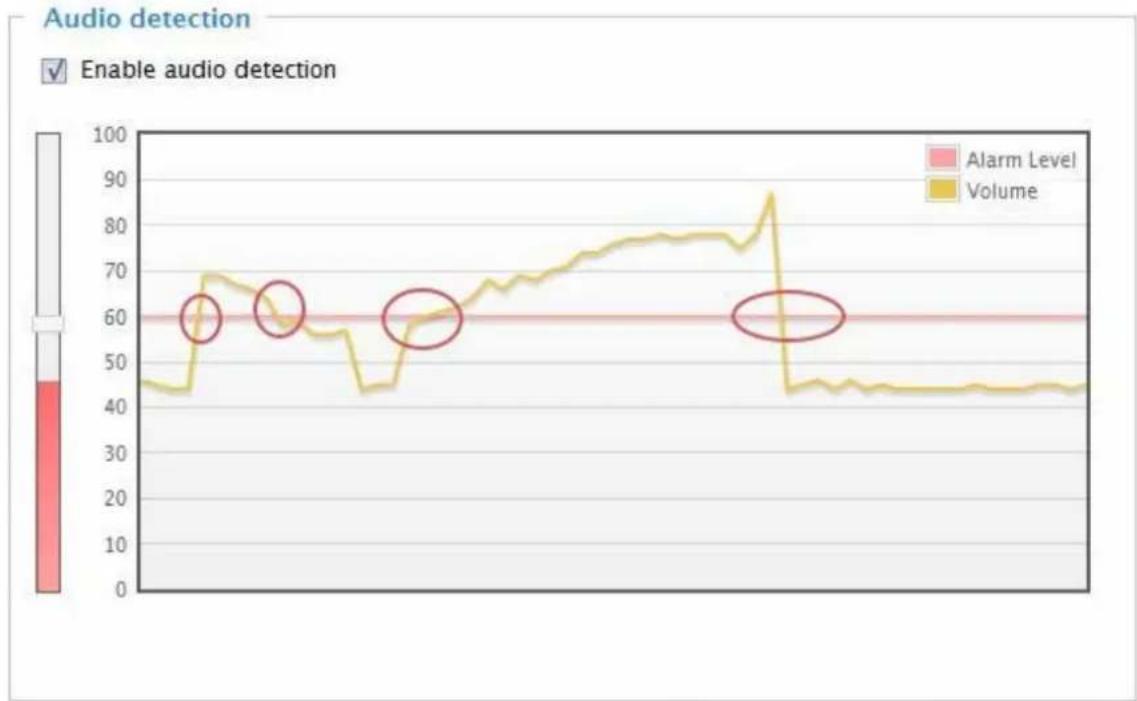
line
| Time Point | Alarm Level | Volume | | ---------- | ----------- | ------ | | 1 | 60 | 45 | | 2 | 60 | 70 | | 3 | 60 | 60 | | 4 | 60 | 55 | | 5 | 60 | 60 | | 6 | 60 | 75 | | 7 | 60 | 80 | | 8 | 60 | 85 | | 9 | 60 | 45 | | 10 | 60 | 45 |
The red circles indicate where the audio alarms can be triggered when breaching or falling below the preset threshold.
How to configure Audio detection:
- Once the Audio detection window is opened, the current sound input will be interactively indicated by a fluctuating yellow wave diagram.
- Use a mouse click to drag the Alarm level tab to a preferred location on the slide bar.
- Select the "Enable audio detection" checkbox and click Save to enable the feature.

NOTE:
- Note that the volume numbers (0\~100) on the side of wave diagram does not represent decibel (dB). Sound intensity level has already been mapped to preset values. You can, however, use the real-world inputs at your installation site that are shown on the wave diagram to configure an alarm level.
- To configure this feature, you must not mute the audio in Configuration > Media > Audio. The default of the camera can be muted due to the lack of an internal microphone. An external microphone is provided by users.
You can use the Profile window to configure a different Audio detection setting. For example, a place can be noisy in the day time and become very quiet in the night.
- Click on the Enable this profile checkbox. Once the Audio detection window is opened, the current sound input will be interactively indicated by a fluctuating yellow wave diagram.
- Use a mouse click to drag the Alarm level tab to a preferred location on the slide bar.
- Select the Day, Night, or Schedule mode check circles. You may also manually configure a period of time during which this profile will take effect.
- Click Save and then click Close to complete your configuration.
>Audio detection profile settings
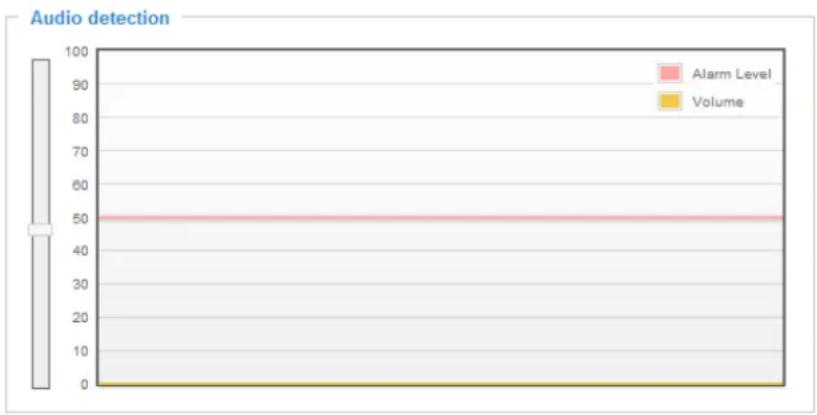
line
| Time | Alarm Level | Volume | |------|-------------|--------| | 0 | 50 | 0 |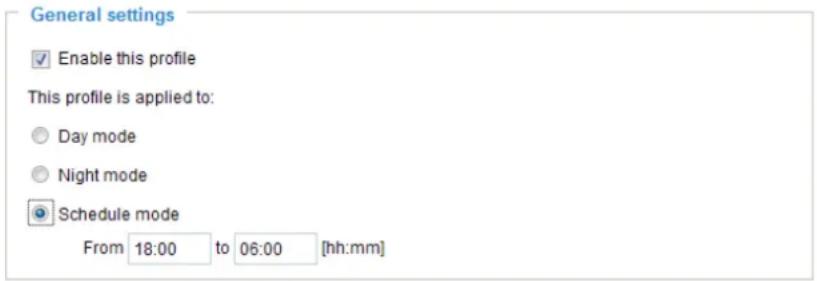
text_image
General settings ✓ Enable this profile This profile is applied to: ○ Day mode ○ Night mode ● Schedule mode From 18:00 to 06:00 [hh:mm]

IMPORTANT:
- If the Alarm level and the received volume are set within a range of 20% on the wave diagram, frequent alarms will be triggered. It is recommended to set the Alarm level farther apart from the detected sound level.
- To configure and enable this feature, you must not configure video stream #1 into Motion JPEG. If an external microphone input is connected and recording of audio stream is preferred, audio stream is transmitted between camera and viewer/recording station along with stream #1.
- Refer to page 86 for Audio settings, and page 78 for video streaming settings.
Applications > Package management - a.k.a., VADP (VIVOTEK Application Development Platform)
The Smart Motion detection, with Human detection and tunable time filter, can eliminate the defects of traditional motion detection and facilitate the configuration at a surveillance site.
To learn more about this feature, download its User Guide in: http://download.vivotek.com/downloadfile/solutions/vadp/smart-motion-detection-manual_en.pdf
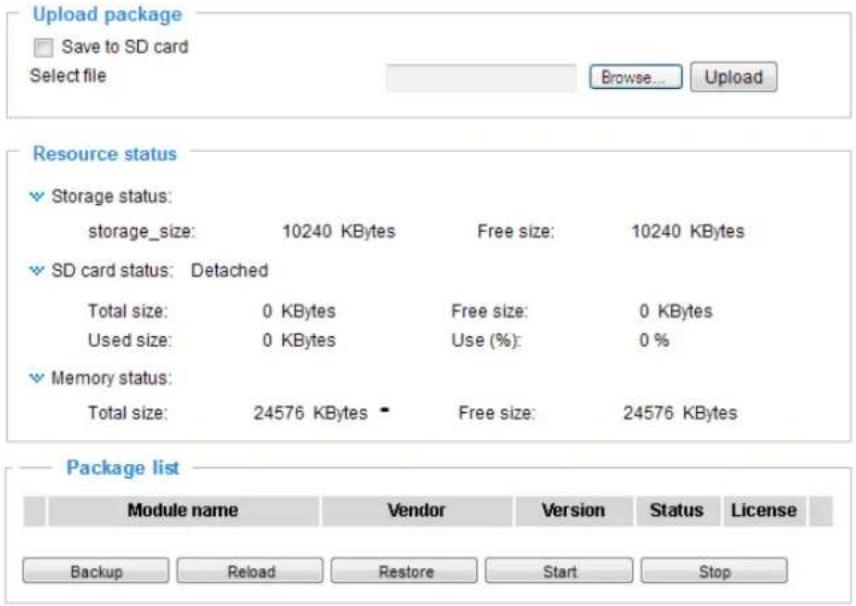
text_image
Upload package Save to SD card Select file Browse... Upload Resource status Storage status: storage_size: 10240 KBytes Free size: 10240 KBytes SD card status: Detached Total size: 0 KBytes Free size: 0 KBytes Used size: 0 KBytes Use (%): 0 % Memory status: Total size: 24576 KBytes Free size: 24576 KBytes Package list Module name Vendor Version Status License Backup Reload Restore Start StopUsers can store and execute VIVOTEK's or 3rd-party software modules onto the camera's flash memory or SD card. These software modules can apply in video analysis for intelligent video applications such as license plate recognition, object counting, or as an agent for edge recording, etc.
- Once the software package is successfully uploaded, the module configuration (vadp.xml) information is displayed. When uploading a module, the camera will examine whether the module fits the predefined VADP requirements. Please contact our technical support or the vendor of your 3rd-party module for the parameters contained within.
- Users can also run VIVOTEK's VADP packages as a means to access updated functionality instead of replacing the entire firmware.
- Note that for some cameras the flash is too small to hold VADP packages. These cameras will have its "Save to SD card" checkbox selected and grayed-out for all time.
- The file system of SD card (FAT32) does not support soft (symbolic) link. It will return failure if your module tries to create soft links on SD card.
To utilize a software module, acquire the software package and click Browse and Upload buttons. The screen message for a successful upload is shown below:
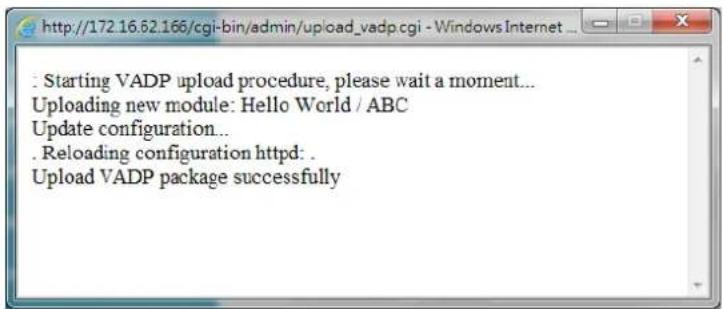
text_image
: Starting VADP upload procedure, please wait a moment... Uploading new module: Hello World / ABC Update configuration... . Reloading configuration httpd: . Upload VADP package successfullyTo start a module, select the checkcircle in front, and click the Start button.
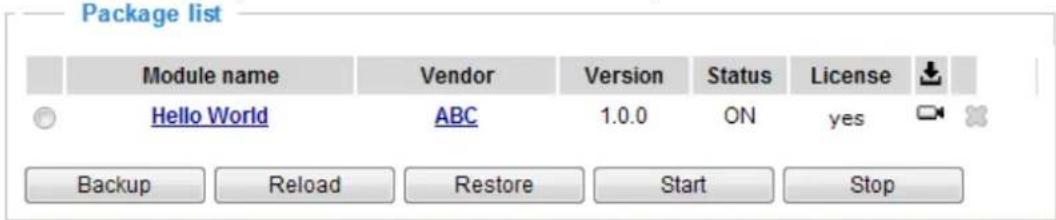
text_image
Package list Module name Vendor Version Status(License Hello World ABC 1.0.0 ON=yes Backup Reload Restore Start StopIf you should need to remove a module, select the checkcircle in front and then click the Stop button. By then the module status will become OFF, and the X button will appear at the end of the row. Click on the X button to remove an existing module.
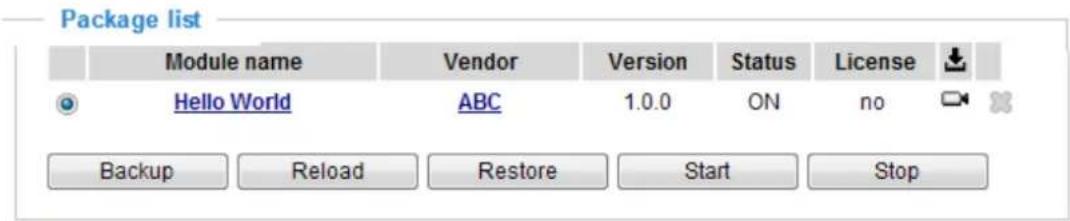
text_image
Package list Module name Vendor Version Status(License Hello World ABC 1.0.0 ON=no Backup Reload Restore Start StopWhen prompted by a confirm message, Click Yes to proceed.
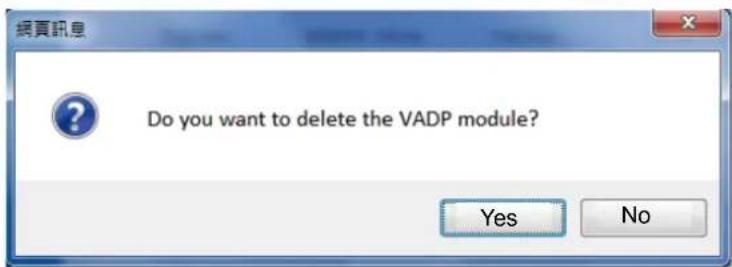
text_image
Do you want to delete the VADP module? Yes NoNote that the actual memory consumed while operating the module will be indicated on the Memory status field. This helps determine whether a running module has consumed too much of system resources.
On the License page, register and activate the license for using VIVOTEK's VADP modules. You should acquire the license key elsewhere, and manually upload to the network camera.
Follow the onscreen instruction on VIVOTEK's website for the registration procedure.
Status
License
Manual License
To receive a license key for VADP application, go to http://www.vivotek.com and join the VWTK member. This device's VADP number is:
BbM79RE=OdGu1PIUEqJRFgc6sacoRs7g4PXI
Select file
Browse...
No file selected.
Upload
Recording > Recording settings
This section explains how to configure the recording settings for the Network Camera.
Recording Settings
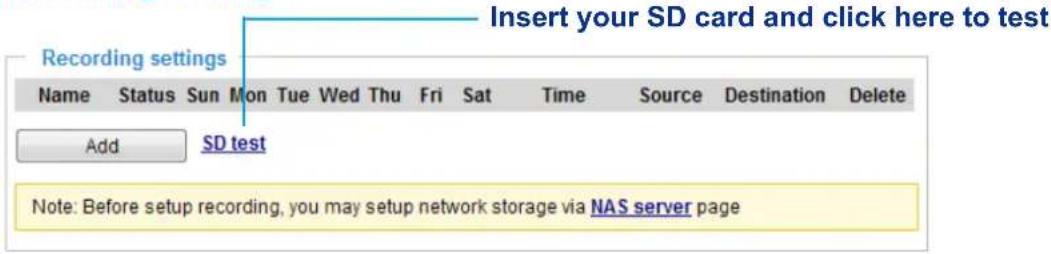
text_image
Insert your SD card and click here to test Recording settings Name Status Sun Mon Tue Wed Thu Fri Sat Time Source Destination Delete Add SD test Note: Before setup recording, you may setup network storage via NAS server page
NOTE:
▶ Please remember to format your SD card via the camera's web console (in the Local storage . SD card management page) when using it for the first time. Please refer to page 152 for detailed information.
Recording Settings
Click Add to open the recording setting window. On this page, you can define the adaptive recording, recording source, recording schedule, and recording capacity. A total of 2 recording settings can be configured.
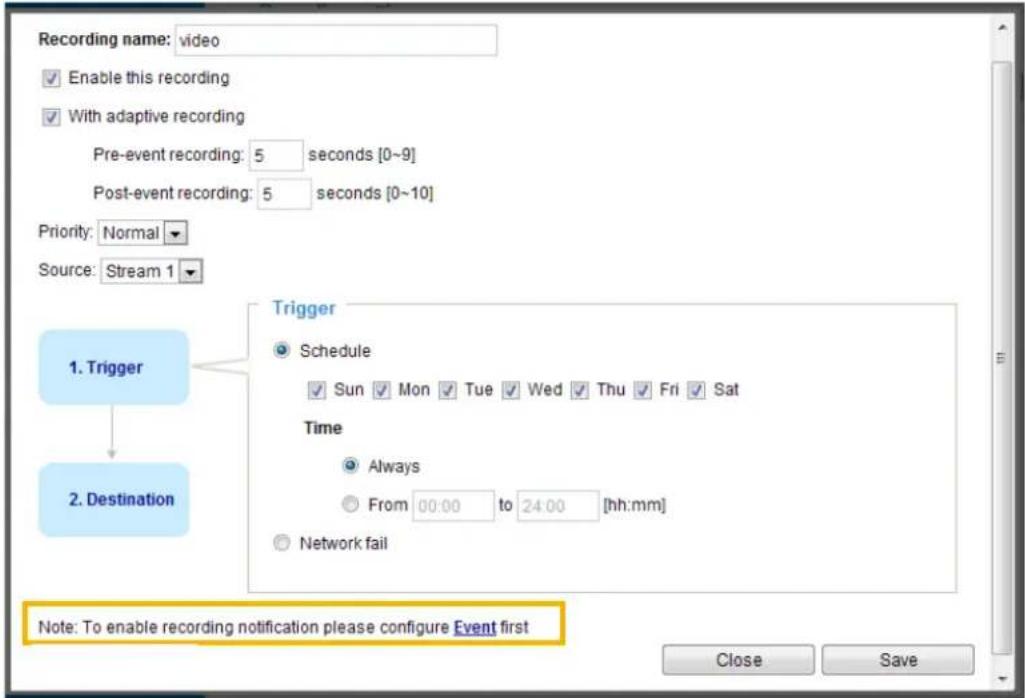
text_image
Recording name: video Enable this recording With adaptive recording Pre-event recording: 5 seconds [0~9] Post-event recording: 5 seconds [0~10] Priority: Normal Source: Stream 1 1. Trigger 2. Destination Trigger Schedule Sun Mon Tue Wed Thu Fri Sat Time Always From 00:00 to 24:00 [hh:mm] Network fail Note: To enable recording notification please configure Event first Close Save■ Recording name: Enter a name for the recording setting.
■ Enable this recording: Select this option to enable video recording.
■ With adaptive recording:
Select this option will activate the frame rate control according to alarm trigger.
The frame control means that when there is a triggered alarm, the frame rate will raise up to the value you've configured on the Video quality page. Please refer to page 79 for more information.
If you enable adaptive recording on a camera, only when an event is triggered on Camera A will the server record the full frame rate streaming data; otherwise, it will only request the I frame data during normal monitoring, thus effectively saves bandwidths and storage space.
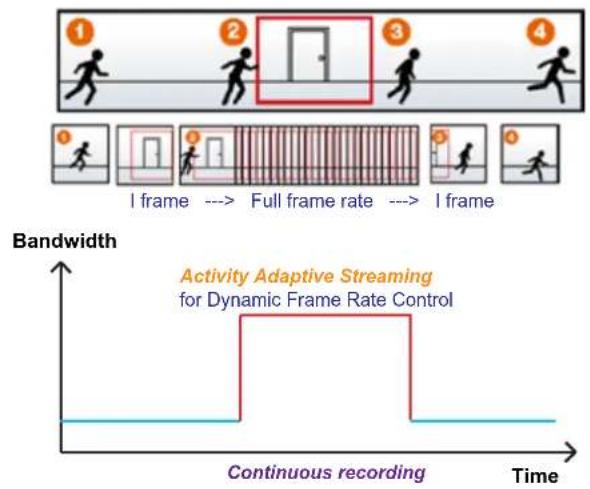
flowchart
graph TD
    A["1: I frame"] --> B["2: Full frame rate"]
    B --> C["3: I frame"]
    C --> D["4: I frame"]
    style A fill:#f9f,stroke:#333
    style B fill:#ccf,stroke:#333
    style C fill:#cfc,stroke:#333
    style D fill:#fcc,stroke:#333
    note right of B "Activity Adaptive Streaming for Dynamic Frame Rate Control"
    note right of B "Bandwidth"
    note right of C "Continuous recording"
    note right of D "Bandwidth"

NOTE:
To enable adaptive recording, please make sure you've set up the trigger source such as Motion Detection, DI Device, or Manual Trigger.
▶ When there is no alarm trigger: - JPEG mode: record 1 frame per second. - H.264 mode: record the I frame only.
▶ When the I frame period is >1s on Video settings page, firmware will force decrease the I frame period to 1s when adaptive recording is enabled.
The alarm trigger includes: motion detection and DI detection. Please refer to Event Settings on page 124.
■ Pre-event recording and post-event recording
The Network Camera has a buffer that temporarily holds data for a period of time. Therefore, when an event occurs, the camera can restore image frames taken several seconds ago. Enter a number to define the duration of recording before and after a trigger is activated.
■ Priority: Select the relative importance of this recording (High, Normal, or Low). Recording with a higher priority setting will be executed first.
■ Source: Select a video stream as the recording source.

NOTE:
▶ To enable recording notification please configure Event settings first. Please refer to page 124.
Please follow the steps below to set up the recording.
1. Trigger
Select a trigger source.
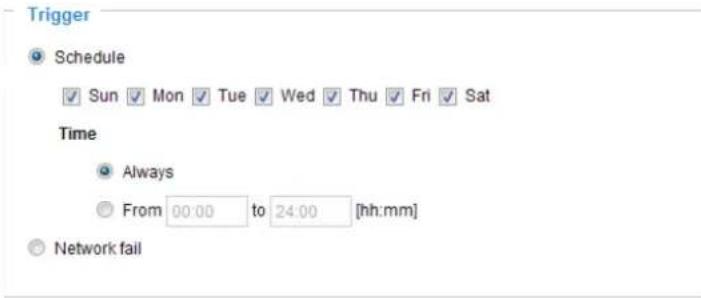
text_image
Trigger Schedule Sun Mon Tue Wed Thu Fri Sat Time Always From 00:00 to 24:00 [hh:mm] Network fail■ Schedule: The server will start to record files on the local storage or network storage (NAS).
■ Network fail: Since network fail, the server will start to record files on the local storage (SD card).
2. Destination
You can select the SD card or network storage (NAS) for the recorded video files. If you have not configured a NAS server, see details in the following.
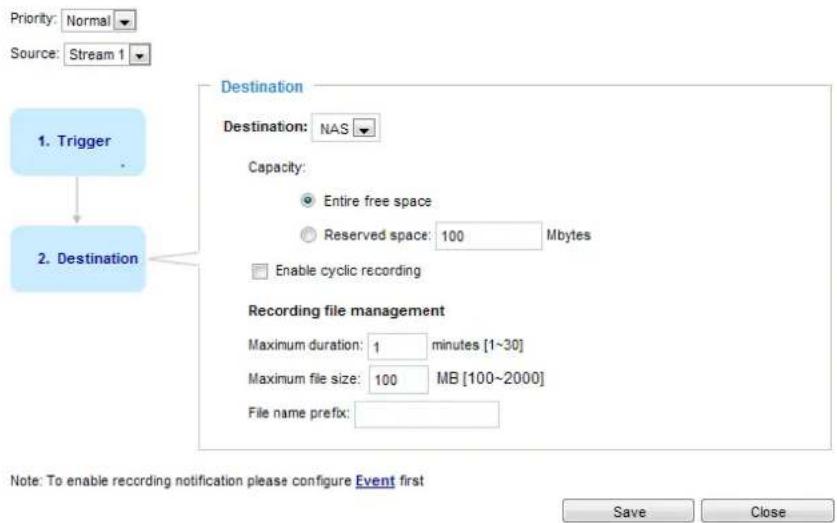
text_image
Priority: Normal Source: Stream 1 1. Trigger Destination Destination: NAS Capacity: Entire free space Reserved space: 100 Mbytes Enable cyclic recording Recording file management Maximum duration: 1 minutes [1~30] Maximum file size: 100 MB [100~2000] File name prefix: Note: To enable recording notification please configure Event first Save CloseNAS server
Click Add NAS server to open the server setting window and follow the steps below to set up:
- Fill in the information for your server.
For example:
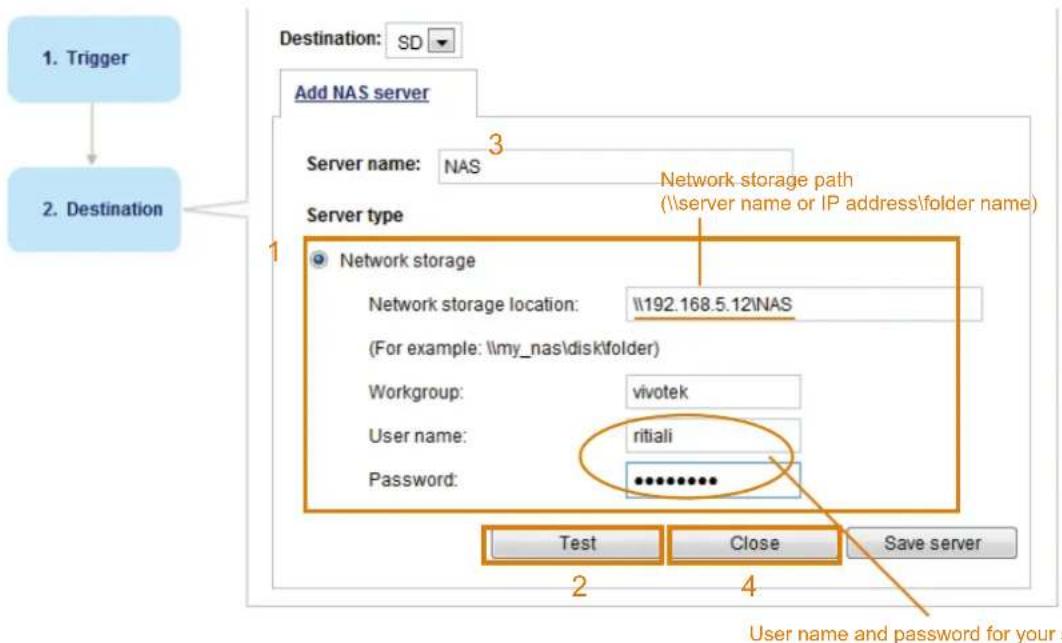
flowchart
graph TD
    A["1. Trigger"] --> B["2. Destination"]
    B --> C["Add NAS server"]
    C --> D["Server name: NAS"]
    D --> E["Server type"]
    E --> F["Network storage"]
    F --> G["Network storage location: \192.168.5.12\NAS"]
    G --> H["(For example: \my_nas\disk\folder)"]
    H --> I["Workgroup: vivotek"]
    I --> J["User name: ritiali"]
    J --> K["Password: ********..."]
    K --> L["Test"]
    K --> M["Close"]
    K --> N["Save server"]
- Click Test to check the setting. The result will be shown in the pop-up window.
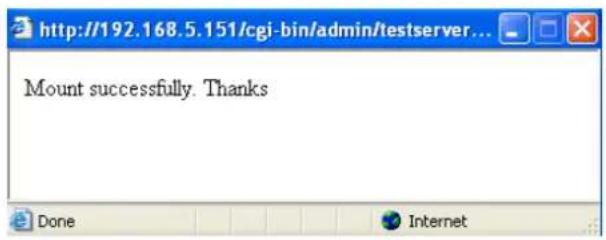
text_image
http://192.168.5.151/cgi-bin/admin/testserver... Mount successfully. Thanks Done Internet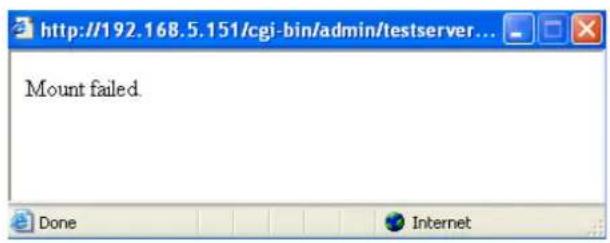
text_image
http://192.168.5.151/cgi-bin/admin/testserver... Mount failed. Done InternetIf successful, you will receive a test.txt file on the networked storage.

text_image
10.22.22.225 [10.22.22.225] Organize Search active directory Network and Sharing Center View remote printers Favorites Desktop Downloads Recent Places Libraries Documents Music Pictures Videos Computer Network derek1 Share Shortcut to test Shantokl EKB test - Notepad File Edit Format View Help [NOTIFICATION]The Result of Server Test of your IP Cameras- Enter a server name.
- Click Save to complete the settings and click Close to exit the page.
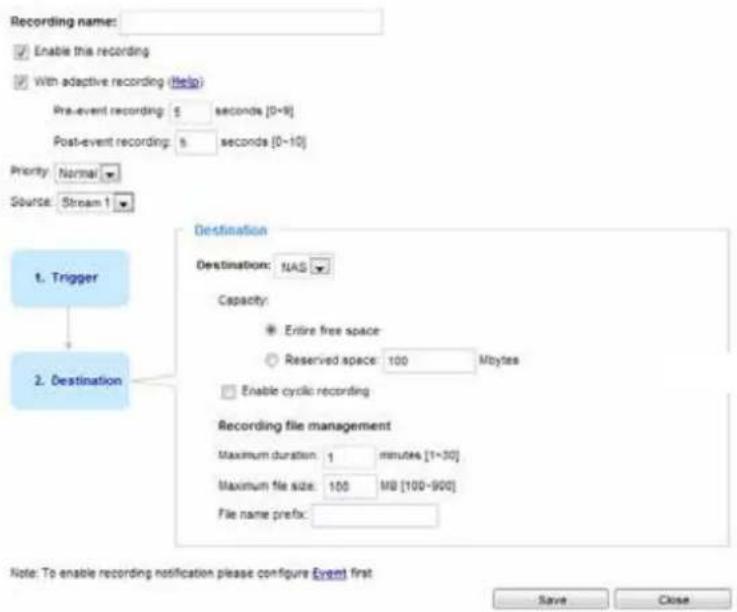
text_image
Recording name: ✓ Enable this recording ✓ With adaptive recording (help) Pre-event recording: 5 seconds [0-9] Post-event recording: 5 seconds [0-10] Priority: Normal Source: Stream 1 1. Trigger Destination Destination: NAS Capacity: ● Entire free space ○ Reserved space: 100 Mbytes □ Enable cyclic recording 2. Destination Recording file management Maximum duration: 1 minutes [1-30] Maximum file size: 100 MB [100-900] File name prefix: Note: To enable recording notification please configure Event first Save Close■ Capacity: You can choose either the entire free space available or limit the reserved space. The recording size limit must be larger than the reserved amount for cyclic recording. The reserved space is a small amount of space used only for the transaction stage when the capacity is about to be used up or recycled.
■ Enable cyclic recording: If you check this item, when the maximum capacity is reached, the oldest file will be overwritten by the latest one. The reserved amount is reserved for the transaction stage when the storage space is about to be full and new data arrives. The minimum for the Reserved space must be larger than 15 MegaBytes.
■ Recording file management: You can manually assign the Maximum duration and the Maximum file size for each recording footage. You may need to stitch individual files together under some circumstances. You may also designate a file name prefix by filling in the responsive text field.
■ File name prefix: Enter the text that will be appended to the front of the file name.
f you want to enable recording notification, please click Event to configure event triggering settings. Please refer to Event > Event settings on page 124 for more details.
When completed, select Enable this recording. Click Save to enable the setting and click Close to exit this page. When the system begins recording, it will send the recorded files to the network storage. The new recording name will appear in the drop-down list on the recording page as shown below.
To remove a recording setting from the list, select a recording name from the drop-down list and click Delete.

text_image
Recording settings Name Status Sun Mon Tue Wed Thu Fri Sat Time Source Destination Delete recording ON V V V V V V V 00:00~24:00 sream1 NAS Delete Add SD test■ Click recording (Name): Opens the Recording Settings page to modify.
■ Click ON (Status): The Status will become OFF and stop recording.
- Click NAS (Destination): Opens the file list of recordings as shown below. For more information about folder naming rules, please refer to page 131 for details.
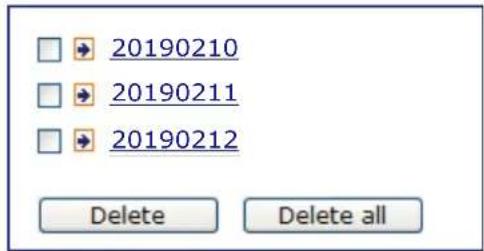
text_image
20190210 20190211 20190212 Delete Delete allLocal storage > SD card management

NOTE:
- It is recommended to turn OFF the recording activity before you remove an SD card from the camera.
- The lifespan of an SD card is limited. Regular replacement of the SD card can be necessary.
- Camera filesystem takes up several megabytes of memory space. The storage space cannot be used for recording.
- Using an SD card that already contains data recorded by another device should not be used in this camera.
- Please do not modify or change the folder names in the SD card. That may result in camera malfunctions.
This section explains how to manage the local storage on the Network Camera. Here you can view SD card status, and implement SD card control.
SD card staus
This column shows the status and reserved space of your SD card. Please remember to format the SD card when using for the first time.
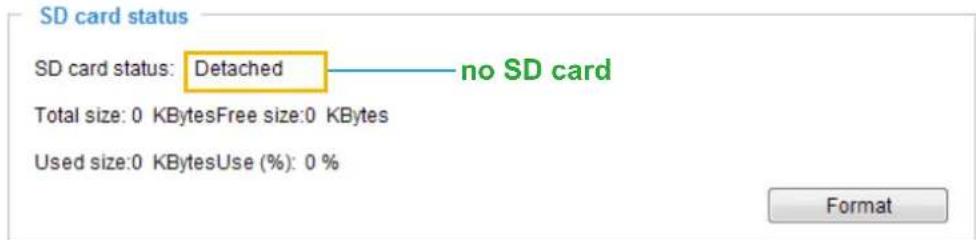
text_image
SD card status SD card status: Detached — no SD card Total size: 0 KBytesFree size:0 KBytes Used size:0 KBytesUse (%): 0 % Format| SD card status | |||
| SD card status: Ready | |||
| File system: FAT32 | |||
| Total size: | 15323496 KBytes | Free size: | 15087976 KBytes |
| Used size: | 235520 KBytes | Use (%): | 1.537 % |
SD card format
The Linux kernel EXT4 file system format applies to SD card larger than 32GB. However, if EXT4 is applied, the computers running Windows will not be able to access the contents on the SD card unless using some 3rd-party software.

text_image
SD card format Ext4 Ext4 FAT32 FormatSD card control
SD card control

Enable cyclic storage

Enable automatic disk cleanup
Maximum duration for keeping files: 7 days

■ Enable cyclic storage: Check this item if you want to enable cyclic recording. When the maximum capacity is reached, the oldest file will be overwritten by the latest one.
■ Enable automatic disk cleanup: Check this item and enter the number of days you wish to retain a file. For example, if you enter "7 days", the recorded files will be stored on the SD card for 7 days.
Click Save to enable your settings.
Local storage > Content management
This section explains how to manage the content of recorded videos on the Network Camera. Here you can search and view the records and view the searched results.
Searching and Viewing the Records
This column allows the user to set up search criteria for recorded data. If you do not select any criteria and click Search button, all recorded data will be listed in the Search Results column.
Search
Trigger type
□ Backup
□ Network fail
□ Tampering detection
□ Audio detection
□ System boot
□ Recording notify
□ VADP
□ Motion
Periodically
□ Manual triggers
Media type
Video clip
○ Snapshot
○ Text
Time
Search for last

minute(s)
hours
days
weeks
From:
to:

/09/25

02
36
PM

/10/02

02
36
PM
Q Search
■ File attributes: Select one or more items as your search criteria.
■ Trigger time: Manually enter the time range you want to search for contents created at a specific point in time.
Click Search and the recorded data corresponding to the search criteria will be listed in Search Results window.
Search Results
The following is an example of search results. There are four columns: Trigger time, Media type, Trigger type, and Locked. Click to sort the search results in either direction.
Numbers of entries displayed on one page
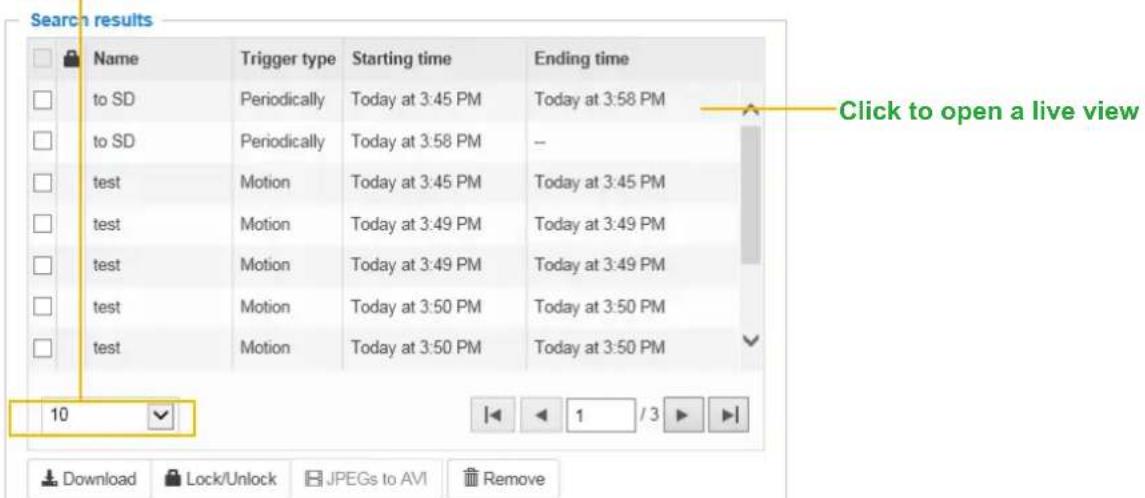
text_image
Search results Name Trigger type Starting time Ending time to SD Periodically Today at 3:45 PM Today at 3:58 PM to SD Periodically Today at 3:58 PM test Motion Today at 3:45 PM Today at 3:45 PM test Motion Today at 3:49 PM Today at 3:49 PM test Motion Today at 3:49 PM Today at 3:49 PM test Motion Today at 3:50 PM Today at 3:50 PM test Motion Today at 3:50 PM Today at 3:50 PM 10 Download Lock/Unlock JPEGs to AVI Remove Click to open a live view■ Play: Click on a search result which will highlight the selected item. A Play window will appear on top for immediate review of the selected file.
For example:
natural_image
River scene with multi-lane highways and vehicles, modern buildings in background under clear blue sky (no visible text or symbols)■ Download: Click on a search result to highlight the selected item in purple as shown above. Then click the Download button and a file download window will pop up for you to save the file.
■ JPEGs to AVI: This functions only applies to "JPEG" format files such as snapshots. You can select several snapshots from the list, then click this button. Those snapshots will be converted into an AVI file.
■ Lock/Unlock: Select the checkbox in front of a desired search result, then click this button. The selected items will become Locked, which will not be deleted during cyclic recording. You can click again to unlock the selections.
For example:
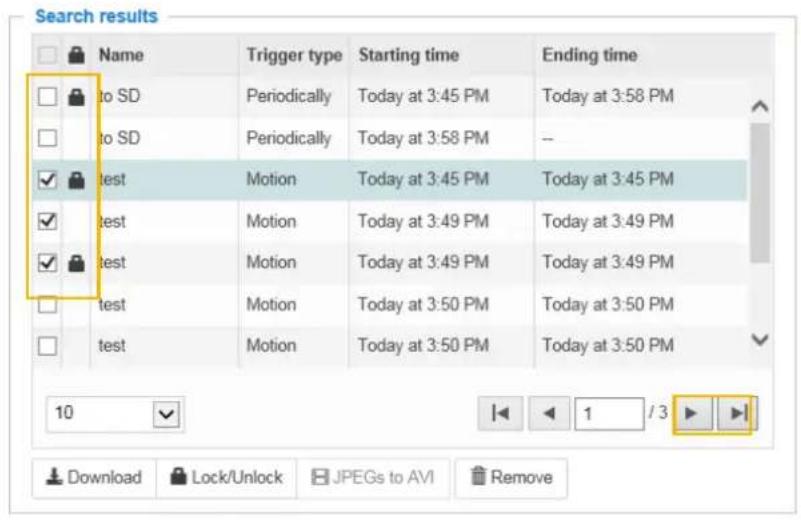
text_image
Search results Name Trigger type Starting time Ending time to SD Periodically Today at 3:45 PM Today at 3:58 PM to SD Periodically Today at 3:58 PM test Motion Today at 3:45 PM Today at 3:45 PM test Motion Today at 3:49 PM Today at 3:49 PM test Motion Today at 3:49 PM Today at 3:49 PM test Motion Today at 3:50 PM Today at 3:50 PM test Motion Today at 3:50 PM Today at 3:50 PM 10 1 /3 Download Lock/Unlock JPEGs to AVI RemoveClick to switch pages
■ Remove: Select the desired search results, then click this button to delete the files.
Appendix
URL Commands for the Network Camera
1. Overview
For some customers who already have their own web site or web control application, the Network Camera/Video Server can be easily integrated through URL syntax. This section specifies the external HTTP-based application programming interface. The HTTP-based camera interface provides the functionality to request a single image, control camera functions (PTZ, output relay etc.), and get and set internal parameter values. The image and CGI-requests are handled by the built-in Web server.
2. Style Convention
In URL syntax and in descriptions of CGI parameters, text within angle brackets denotes content that is to be replaced with either a value or a string. When replacing the text string, the angle brackets should also be replaced. An example of this is the description of the name for the server, denoted with
URL syntax is denoted with the word "Syntax:" written in bold face followed by a box with the referenced syntax as shown below. For example, name of the server is written as
Syntax:
http://<servername>/cgi-bin/viewer/video.jpg
Description of returned data is written with "Return:" in bold face followed by the returned data in a box. All data is returned in HTTP format, i.e., each line is separated with a Carriage Return and Line Feed (CRLF) printed as \r\n.
Return:
HTTP/1.0 <HTTP code> <HTTP text>\r\n
URL syntax examples are written with "Example:" in bold face followed by a short description and a light grey box with the example.
Example: request a single snapshot image
http://mywebserver/cgi-bin/viewer/video.jpg
3. General CGI URL Syntax and Parameters
CGI parameters are written in lower-case and as one word without any underscores or other separators. When the CGI request includes internal camera parameters, these parameters must be written exactly as they are named in the camera or video server. The CGIs are organized in functionally-related directories under the cgi-bin directory. The file extension .cgi is required.
Syntax:
http://<servername>/cgi-bin/<subdir>[/<subdir>...]/<cgi>.<ext>
[?<parameter>=<value>[&<parameter>=<value>...]]
Example: Set digital output #1 to active
http://mywebserver/cgi-bin/dido/setdo.cgi?dol=1
4. Security Level
| SECURITY LEVEL | SUB-DIRECTORY DESCRIPTION | |
| 0 anonymous | Unprotected. | |
| 1 [view] viewer | Can view, listen, and talk to camera. | |
| 4 [operator] operator | Operator access rights can modify most of the camera's parameters except some privileges and network options. | |
| 6 [admin] admin | Administrator access rights can fully control the camera's operations. | |
| 7 | N/A | Internal APIs. Unable to be changed by any external interfaces. |
A viewer account can access all APIs with security level 0 and 1. An operator account can access all APIs with security level 0, 1, or 4. An admin account can access all APIs except internal APIs.
Access management is based on the URL directory structure and is described in following paragraphs.
5. Get Server Parameter Values
Note: The access right depends on the URL directory.
Method: GET/POST
Syntax:
http://<servername>/cgi-bin/anonymous/getparam.cgi?[<parameter>]
[&<parameter>...]

http://<servername>/cgi-bin/viewer/getparam.cgi?[<parameter>]
[&<parameter>...]

http://<servername>/cgi-bin/operator/getparam.cgi?[<parameter>]
[&<parameter>...]

http://<servername>/cgi-bin/admin/getparam.cgi?[<parameter>]
[&<parameter>...]
Where the
When querying parameter values, the current parameter values are returned.
A successful control request returns parameter pairs as follows:
Return:
HTTP/1.0 200 OK\r\n
Content-Type: text/html\r\n
Context-Length: <length>\r\n
\r\n
<parameter pair>
where
[
Example: Request IP address and its response
Request:
http://192.168.0.123/cgi-bin/admin/getparam.cgi?network_ipaddress
Response:
HTTP/1.0 200 OK\r\n
Content-Type: text/html\r\n
Context-Length: 33\r\n
\r\n
network.ipaddress=192.168.0.123\r\n
6. Set Server Parameter Values
Note: The access right depends on the URL directory.
Method: GET/POST
Syntax:
http://<servername>/cgi-bin/anonymous/setparam.cgi? <parameter>=<value>
[&<parameter>=<value>...][&return=<return page>]

http://<servername>/cgi-bin/viewer/setparam.cgi? <parameter>=<value>
[&<parameter>=<value>...][&return=<return page>]

http://<servername>/cgi-bin/operator/setparam.cgi? <parameter>=<value>
[&<parameter>=<value>...][&return=<return page>]

http://<servername>/cgi-bin/admin/setparam.cgi? <parameter>=<value>
[&<parameter>=<value>...][&return=<return page>]
| PARAMETER DESCRIPTION | |
| A full path like: "videoin_c0_s0_h264_resolution", "videoin_c0_s0_h264_maxframe", etc. | |
| The assignedto the. | |
| Redirect to the pageafter theis assigned. Thecan be a full URL path or relative path according to the current path. If you omit this parameter, it will redirect to an empty page.(Note: The return page can be a general HTML file (.htm, .html). It cannot be a CGI command or have any extra parameters. This parameter must be placed at the end of the parameter list. | |
Return:
HTTP/1.0 200 OK\r\n
Content-Type: text/html\r\n
Context-Length: <length>\r\n
\r\n
<parameter pair>
where<parameter pair> is
<parameter>=<value>\r\n
[<parameter pair>]
Only the parameters that you set and are readable will be returned.
Example: Set the IP address of server to 192.168.0.123:
Request:
http://myserver/cgi-bin/admin/setparam.cgi?network_ipaddress=192.168.0.123
Response:
HTTP/1.0 200 OK\r\n
Content-Type: text/html\r\n
Context-Length: 33\r\n
\r\n
network.ipaddress=192.168.0.123\r\n
7. Available parameters on the server
Valid values:
NOTE: The camera should not be restarted when parameters are changed.
| VALID VALUES DESCRIPTION | |
| string[] Text strings shorter than 'n' characters. The characters '',<,>,& are invalid. | |
| string[n~m] Text strings longer than 'n' characters and shorter than 'm' characters. The characters '',<,>,& are invalid. | |
| password[] The same as string but displays'*' instead. | |
| Any single integer number in 32-bits.The range is -2147483648~2147483647. | |
| Any single positive integer number in 32-bits.The range is 1~ 4294967295. | |
| ~ Any number between 'm' and 'n'. | |
| domain name[] A string limited to a domain name shorter than 'n' characters (eg. www.ibm.com). | |
| email address [] | A string limited to an email address shorter than 'n' characters (eg. joe@www.ibm.com). |
| A string limited to an IP address (eg. 192.168.1.1). | |
| A string limited to contain a MAC address without hyphens or colons. | |
| A boolean value of 1 or 0 represents [Yes or No], [True or False], [Enable or Disable]. | |
| , , , , , , ... | |
| blank | A blank string. |
| everything inside <> | A description |
| integer primary key | SQLite data type. A 32-bit signed integer. The value is assigned a unique integer by the server. |
| SQLite data type. The value is a text string, stored using the database encoding (UTF-8, UTF-16BE or UTF-16-LE). | |
| x, y coordinate (eg. 0,0) | |
| window width and height (eg. 800x600) | |
| The format for coordinate in 2D.W is the pixel number of width.H is the pixel number of height.EX: (176,144) | |
| The format for resolution.W is the pixel number of width.H is the pixel number of height.Ex: 1920x1080, 2048x1536 | |
| available The API is listed in product WebAPIs. | |
| non-available The API is not in product WebAPIs. | |
| valid The API is listed in product WebAPIs, and is functional. | |
| non-valid The API is listed in product WebAPIs, but is malfunction in this status. | |
| Any decimal number expressed in 32-bits ranging from 1.18e-38~3.40e+38. | |
7.1system
Group: system
| NAME VALUE SECURITY | (get/set) | DESCRIPTION | |
| hostname string[64] 1/6 Host name of server | (Network Camera, Wireless Network Camera, Video Server, Wireless Video Server). | ||
| ledoff6/6 Turn on (0) or turn off (1) all led indicators. | |||
| date, keep, auto | 6/6 Current date of system. Set to 'keep' to keep date unchanged. Set to 'auto' to use NTP to synchronize date. | ||
| time, keep, auto | 6/6 Current time of the system. Set to 'keep' to keep time unchanged. Set to 'auto' to use NTP to synchronize time. | ||
| datetime | MMDDhhmmYYYY.ss> | 6/6 Another current time format of the system. | |
| ntp, | , | 6/6 NTP server.*Do not use "skip to invoke default server" for default value. | |
| timezoneindex | -489 ~ 529 | 6/6 Indicate timezone and area.-480: GMT-12:00 Eniwetok, Kwajalein-440: GMT-11:00 Midway Island, Samoa-400: GMT-10:00 Hawaii-360: GMT-09:00 Alaska-320: GMT-08:00 Las Vegas, San_Francisco, Vancouver-280: GMT-07:00 Mountain Time, Denver-281: GMT-07:00 Arizona-240: GMT-06:00 Central America, Central Time, Mexico City, Saskatchewan-200: GMT-05:00 Eastern Time, New York, Toronto-201: GMT-05:00 Bogota, Lima, Quito, Indiana-180: GMT-04:30 Caracas-160: GMT-04:00 Atlantic Time, Canada, La | |
| Paz, Santiago-140: GMT-03:30 Newfoundland-120: GMT-03:00 Brasilia, Buenos Aires, Georgetown, Greenland-80: GMT-02:00 Mid-Atlantic-40: GMT-01:00 Azores, Cape_Verde_IS.0: GMT Casablanca, Greenwich Mean Time: Dublin,Edinburgh, Lisbon, London40: GMT 01:00 Amsterdam, Berlin, Rome, Stockholm, Vienna, Madrid, Paris41: GMT 01:00 Warsaw, Budapest, Bern80: GMT 02:00 Athens, Helsinki, Istanbul, Riga81: GMT 02:00 Cairo82: GMT 02:00 Lebanon, Minsk83: GMT 02:00 Israel120: GMT 03:00 Baghdad, Kuwait, Riyadh, Moscow, St. Petersburg, Nairobi121: GMT 03:00 Iraq140: GMT 03:30 Tehran160: GMT 04:00 Abu Dhabi, Muscat, Baku, Tbilisi, Yerevan180: GMT 04:30 Kabul200: GMT 05:00 Ekaterinburg, Islamabad, Karachi, Tashkent220: GMT 05:30 Calcutta, Chennai, Mumbai, New Delhi230: GMT 05:45 Kathmandu240: GMT 06:00 Almaty, Novosibirsk, Astana, Dhaka, Sri Jayawardenepura260: GMT 06:30 Rangoon280: GMT 07:00 Bangkok, Hanoi, Jakarta, Krasnoyarsk320: GMT 08:00 Beijing, Chongging, Hong Kong, Kuala Lumpur, Singapore, Taipei360: GMT 09:00 Osaka, Sapporo, Tokyo, Seoul, Yakutsk380: GMT 09:30 Adelaide, Darwin400: GMT 10:00 Brisbane, Canberra,Melbourne, Sydney, Guam, Vladivostok440: GMT 11:00 Magadan, Solomon Is., New Caledonia480: GMT 12:00 Auckland, Wellington, Fiji, Kamchatka, Marshall Is.520: GMT 13:00 Nuku'Alofa | |||
| daylight_enable | 6/6 Enable automatic | daylight saving time in time zone. | |
| daylight_dstactualmode | 6/7 | Check if current time is under daylight saving time.(Used internally) | |
| daylight_auto_begintime string[19] 6/7 Display the current daylight saving start time. | |||
| daylight_auto_endtime | string[19] | 6/7 | Display the current daylight saving end time. |
| daylight_timezones string | 6/6 List | time zone index which support daylight saving time. | |
| updateinterval | 0,3600,86400,604800,2592000 | 6/6 0 to D | stable automatic time adjustment, otherwise, it indicates the seconds between NTP automatic update intervals. |
| restore | 0, | 7/6 Restore the system parameters to default values afterseconds. | |
| reset | 0, | 7/6 Restart the server afterseconds ifis non-negative. | |
| restoreexceptnet | 0, | 7/6 Restore the system parameters to default values except (ipaddress, subnet, router, dns1, dns2, pppoe).This command can cooperate with other "restoreexceptXYZ" commands. When cooperating with others, the system parameters will be restored to the default value except for a union of the combined results. | |
| restoreexceptdst | 0, | 7/6 Restore the system parameters to default values except all daylight saving time settings.This command can cooperate with other "restoreexceptXYZ" commands. When cooperating with others, the system | |
| parameters will be restored to default values except for a union of combined results. | |||
| restoreexceptlang | 0, | 7/6 Restore the system parameters to default values except the custom language file the user has uploaded.This command can cooperate with other "restoreexceptXYZ" commands. When cooperating with others, the system parameters will be restored to the default value except for a union of the combined results. | |
| restoreexceptvadp | 0, | 7/6 Restore the system parameters to default values except the vadp parameters and VADP modules that stored in the system.This command can cooperate with other "restoreexceptXYZ" commands. When cooperating with others, the system parameters will be restored to the default value except for a union of the combined results. | |
| restoreexceptfocusvalue | 0, | 7/6 Restore the system parameters to default values except zoom and focus value.This command can cooperate with other "restoreexceptXYZ" commands. When cooperating with others, the system parameters will be restored to the default value except for a union of the combined results.* Only available when "capability_image_c<0~(n-1)>_remotefocus" != 0. | |
| restoreexceptlen | 0, | 7/6 Restore the system parameters to default values except lens profile.This command can cooperate with other "restoreexceptXYZ" commands. When cooperating with others, the system parameters will be restored to the default value except for a union of the combined results. | |
| * Only available when "capability_image_c<0~(n-1)>_lensconfiguration_support" != 0. | |||
7.1.1 system.info
Subgroup of system: info (The fields in this group are unchangeable.)
| NAME VALUE SECURITY | (get/set) | DESCRIPTION | |
| modelname string[40] 0/7 | Internal model name | of the server | |
| extendedmodelname string[40] | 0/7 ODM specific | model name | of server (eg.DCS-5610). If it is not an ODM model, this field will be equal to "modelname" |
| serialnumber | 1/7 12 characters | MAC address | (without hyphens). |
| firmwareversion string[40] | 0/7 Firmware version, | including model, company,and version number in the format: | |
| language_count | 0/7 Number of webpage languages available on the server. | ||
| language_i<0~(count-1)> | string[16]language_i0 :Englishlanguage_i1 :Deutschlanguage_i2 :Españolanguage_i3 :Françaislanguage_i4 :Italianolanguage_i5 :日本語language_i6 :Portuguêslanguage_i7 :简体中文language_i8 :繁體中文 | 0/7 Available language lists. | |
| customlanguage_maxcoun | 0,<positive | 0/6 | Maximum number of custom languages |
| t integer> supported on the server. | |||
| customlanguage_count | 0,<positive integer> | 0/6 Number of custom languages which have been uploaded to the server. | |
| customlanguage_i<0~(maxcount-1)> | string 0/6 Custom language name. | ||
7.2status
Group: status
| NAME VALUE SECURITY | (get/set) | DESCRIPTION | |
| di_i<0~(capability_ndi-1)> | 1/7 0 => Inactive, normal1 => Active, triggered(capability_ndi > 0) | ||
| do_i<0~(capability_ndo-1)> | 1/7 0 => Inactive, normal1 => Active, triggered(capability_ndo > 0) | ||
| onlinenum_rtsp | 0,<positive integer> | 6/7 Current number of RTSP connections. | |
| onlinenum_httppush | 0,<positive integer> | 6/7 Current number of HTTP push server connections. | |
| onlinenum_sip | 0,<positive integer> | 6/7 Current number of SIP connections. | |
| eth_i0 <string> 1/7 Get network information from mii-tool. | |||
| vi_i<0~(capability_nvi-1)> | 1/7 Virtual input | 0 => Inactive1 => Active(capability_nvi > 0) | |
7.2.1 status per channel
Group: status_c<0\~(n-1)> for n channel products
n denotes the value of "capability_nvideoin"
| NAME VALUE SECURITY | (get/set) | DESCRIPTION | |
| signal_detect1/7 Indicates whether the video source is connected or not.* Only available whencapability_videooin_type is 0 or 1. | 1/7 Indicates whether the video source is connected or not.* Only available whencapability_videooin_type is 0 or 1. | the actual modulation type. | * Only available whencapability_videooin_type is 0 or 1. |
| signal_type ntsc,pal 1/7 The actual modulation type. |
7.3digital input behavior define
Group: di_i<0(n-1)> for n is the value of "capability_ndi" (capability_capability_ndi > 0)
| NAME VALUE SECURITY | (get/set) | DESCRIPTION | |
| normalstate | high,low | 1/1 Indicates open circuit or closed circuit(inactive status) | |
7.4digital output behavior define
Group: do_i<0\~(n-1)> for n is the value of "capability_ndo" (capability_ndo > 0)
| NAME VALUE SECURITY | (get/set) | DESCRIPTION | |
| normalstate | open, grounded | 1/1 Indicate | open circuit or closed circuit (inactive status) |
7.5security
Group: security
| NAME VALUE SECURITY | (get/set) | DESCRIPTION | |
| privilege_do | view, operator, admin | 1/6 Indicate which privileges and above can control digital output (capability_ndo > 0) | |
| privilege_camctrladmin control PTZ | view, operator, | 1/6 | Indicate which privileges and above can(capability_ptzenabled > 0 or capability_eptz > 0) |
| user_i0_name string[64] | 6/7 User name of root | ||
| user_i<1~20>_name string | [64] 6/7 User name | ||
| user_i0_pass password[64] | 7/6 Root password | ||
| user_i<1~20>_pass password | word[64] 7/6 User password | ||
| user_i0_privilege | view, operator, admin | 6/7 Root privilege | |
| user_i<1~20>_privilege view, operator, admin | 6/6 User privilege | ||
7.6network
Group: network
| NAME VALUE SECURITY | (get/set) | DESCRIPTION | |
| preprocess | 6/6 | An 32-bit integer, each bit can be set separately as follows:Bit 0 => HTTP service;Bit 1=> HTTPS service;Bit 2=> FTP service;Bit 3 => Two way audio and RTSP Streaming service;To stop service before changing its port settings. It'srecommendedto set this parameter when change a service port to the port occupied by another service currently. Otherwise, the service may fail.Stopped service will auto-start after changing port settings.Ex:Change HTTP port from 80 to 5556, and change RTP port for video from 5556 to 20480.Then, set preprocess=9 to stop both service first."/cgi-bin/admin/setparam.cgi?network_preprocess=9&network_http_port=5556& network_rtp_videoport=20480" | |
| type | lan,pppoe | 6/6 Network connection type. | |
| resetip6/6 1 => Get ipaddress, subnet, router, dns1,dns2 from DHCP server at next reboot.0 => Use preset ipaddress, subnet, rounter,dns1, and dns2. | |||
| ipaddress6/6 IP address of server. | |||
| subnet6/6 Subnet mask. | |||
| router6/6 Default gateway. | |||
| dns16/6 Primary DNS server. | |||
| dns26/6 Secondary DNS server. | |||
| wins16/6 Primary WINS server. | |||
| wins26/6 Secondary WINS server. | |||
7.6.1 802.1x
Subgroup of network: ieee8021x (capability_protocol_ieee8021x > 0)
| NAME VALUE SECURITY | (get/set) | DESCRIPTION | |
| enable | 6/6 Enable | /disable IEEE 802.1x | |
| eapmethod | eap-peap, eap-tls | 6/6 Selected | EAP method |
| identity_peap | string[64] | 6/6 PEAP | identity |
| identity_tls | string[64] | 6/6 TLS | identity |
| password | string[200] | 7/6 Password for TLS | |
| privatekeypassword | string[200] | 7/6 Password for PEAP | |
| ca_exist | 6/6 CA installed flag | ||
| ca_time | 0,<positive integer> | 6/7 CA installed time. Represented in EPOCH | |
| ca_size | 0,<positive integer> | 6/7 CA file size (in bytes) | |
| certificate_exist | 6/6 | Certificate installed flag (for TLS) | |
| certificate_time | 0,<positive integer> | 6/7 Certificate installed time. Represented in EPOCH | |
| certificate_size | 0,<positive integer> | 6/7 Certificate file size (in bytes) | |
| privatekey_exist | 6/6 Private key installed flag (for TLS) | ||
| privatekey_time | 0,<positive integer> | 6/7 Private key installed time. Represented in EPOCH | |
| privatekey_size | 0,<positive integer> | 6/7 Private key file size (in bytes) | |
7.6.2 QOS
Subgroup of network: qos_cos (capability_protocol_qos_cos > 0)
| NAME VALUE SECURITY | (get/set) | DESCRIPTION | |
| enable6/6 Enable/disable CoS (IEEE 802.1p) | |||
| vlanid 1~4095 6/6 VLAN ID | |||
| video 0~7 6/6 Video channel for CoS | |||
| audio0~7 6/6 Audio channel for CoS(capability_naudioin >0) | |||
| eventalarm 0~7 6/6 Event/alarm channel for CoS | |||
| management 0~7 6/6 Management channel for CoS | |||
| eventtunnel 0~7 6/6 Event/Control channel for CoS | |||
Subgroup of network: qos_dscp (capability_protocol_qos_dscp > 0)
| NAME VALUE SECURITY | (get/set) | DESCRIPTION | |
| enable6/6 Enable/disable DSCP | |||
| video 0~63 6/6 Video channel for DSCP | |||
| audio | 0~63 6/6 Audio channel for DSCP | (capability_naudioin >0) | |
| eventalarm 0~63 6/6 Event/alarm channel for DSCP | |||
| management 0~63 6/6 Management channel for DSCP | |||
| eventtunnel 0~63 6/6 Event/Control channel for DSCP | |||
7.6.3 IPV6
Subgroup of network: ipv6 (capability_protocol_ipv6 > 0)
| NAME VALUE SECURITY | (get/set) | DESCRIPTION | |
| enable6/6 | Enable IPv6. | ||
| addonipaddress | 6/6 | IPv6 IP address. | |
| addonprefixlen | 0~128 6/6 | IPv6 prefix length. | |
| addonrouter | 6/6 IPv6 router address. | ||
| addondns | 6/6 IPv6 DNS address. | ||
| allowoptional | 6/6 Allow manually setup of IP address setting. | ||
7.6.4 FTP
Subgroup of network: ftp
| NAME VALUE SECURITY | (get/set) | DESCRIPTION | |
| port 21, 1025~65535 6/6 | Local ftp server port. | ||
| enable6/6 Enable ftp. | |||
7.6.5 HTTP
Subgroup of network: http
| NAME VALUE SECURITY | (get/set) | DESCRIPTION | |
| port | 80, 1025 ~ 65535 | 1/6 HTTP port. | |
| alternateport | 1025~65535 | 6/6 Alternate HTTP port. | |
| authmode | basic,digest | 1/6 HTTP authentication mode. | |
| s<0~(capability_nmediastream-1)>_accessname<product dependent><Not recommended to usethis> | string[32] | 1/6 Http server push access name for stream N,N= 1~ capability_nmediastream.(capability_protocol_spush_mjpeg =1 andcapability_nmediastream >0)The value are shown asvideo1s1.mjpg = c0_s0_accessname,(channel1stream1)video1s2.mjpg = c0_s1_accessname,(channel1stream2)video1s3.mjpg = c0_s2_accessname,(channel1stream3)video1s4.mjpg = c0_s3_accessname,(channel1stream4)etc.* We replace this parameter with"network_http_c<0~(capability_nvideoin-1)>_s<0~(capability_nmediastream-1)>_accesname" when the version number (httpversion) is equal or greater than 0311c. | |
| anonymousviewing | 1/6 | Enable anonymous streaming viewing. |
7.6.5.1 HTTP per channel
Subgroup of network: http_c<0\~(n-1)> for n channel products
n denotes the value of "capability_nvideoin"
| NAME VALUE SECURITY | (get/set) | DESCRIPTION | |
| s<0~(capability_nmediastream-1)>_accessnameproduct dependent> | string[32] 1/6 Http | server push | access name for channel Nand stream M, N= 1~ capability_nvideoin,M= 1~ capability_nmediastream.(capability_protocol_spush_mjpeg =1 andcapability_nmediastream > 0)The value are shown asvideo1s1.mjpg = c0_s0_accessname,(channel1stream1)video1s2.mjpg = c0_s1_accessname,(channel1stream2)video2s1.mjpg = c1_s0_accessname,(channel2stream1)video2s2.mjpg = c1_s1_accessname,(channel2stream2)etc.* We support this parameter when theversion number (httpversion) is equal orgreater than 0311c. |
7.6.6 HTTPS port
Subgroup of network: https (capability_protocol_https > 0)
| NAME VALUE SECURITY | (get/set) | DESCRIPTION | |
| port 443, 1025 ~ 65535 1/6 HTTPS port. | |||
7.6.7 RTSP
Subgroup of network: rtsp (capability_protocol_rtsp > 0)
| NAME VALUE SECURITY | (get/set) | DESCRIPTION | |
| port 554, 1025 ~ 65535 1/6 RTSP port. | (capability_protocol_rtsp=1) | ||
| anonymousviewing | 1/6 Enable anonymous streaming viewing. | ||
| authmode | disable,basic,digest | 1/6 RTSP authentication mode.(capability_protocol_rtsp=1) | |
| s<0~(capability_nmediastream*capability_nvideoin)-1>_accessnameproduct dependent> | string[32] 1/6 RTSP | access name | for channel/stream N, N=1~ capability_nmediastream.(capability_protocol_spush_mjpeg =1 andcapability_nmediastream >0)The value are shown aslive1s1.sdp = c0_s0_accessname,(channel1stream1)live1s2.sdp = c0_s1_accessname,(channel1stream2)live1s3.sdp = c0_s2_accessname,(channel1stream3)live1s4.sdp = c0_s3_accessname,(channel1stream4)etc. |
7.6.8 RTSP multicast
Subgroup of network_rtsp_s<0\~(n-1)>_multicast
n denotes the value of "capability_nmediastream * capability_nvideoin"
| NAME VALUE | SECURITY | (get/set) | DESCRIPTION |
| alwaysmulticast | 4/4 Enable | always multicast. | |
| ipaddress | 4/4 Multicast video IP address.* We replace"network_rtsp_s<0~(n-1)>_multicast_ipaddress"with " | ||
| network_rtsp_s<0~(n-1)>_multicast_videoipaddress".* Reserved for compatibility, and suggest don't use this since [httpversion] > 0304a | |||
| videoipaddress | 4/4 Multicast video IP address. | * We support this parameter when the version number (httpversion) is equal or greater than 0304a. | |
| audioipaddress | 4/4 Multicast audio IP address. | * We support this parameter when the version number (httpversion) is equal or greater than 0304a.* Only available when capability_naudioin > 0 | |
| metadataipaddress | 4/4 Multicast metadata IP address. | * We support this parameter when the version number (httpversion) is equal or greater than 0304a. | |
| videoport 1025 ~ 65535 | 4/4 Multicast video port. | ||
| audiport | 1025 ~ 65535 4/4 Multicast audio port. | * Only available when capability_naudioin > 0 | |
| metadataaport 1026~65 | 534 4/4 Multicast metadata port. | ||
| ttl 1 ~ 255 4/4 Multicast time to live value. | |||
7.6.9 SIP port
Subgroup of network: sip (capability_protocol_sip > 0)
| NAME VALUE SECURITY | (get/set) | DESCRIPTION | |
| port 1025 ~ 65535 | 1/6 SIP port. |
7.6.10 RTP port
Subgroup of network: rtp
| NAME VALUE SECURITY | (get/set) | DESCRIPTION | |
| videoport | 1025 ~ 65535 | 6/6 | Video channel port for RTP. |
| audiport | 1025 ~ 65535 | 6/6 | Audio channel port for RTP. |
| metadataaport | 1025 ~ 65535 | 6/6 | Metadata channel port for RTP. |
7.6.11 PPPoE
Subgroup of network: pppoe (capability_protocol_pppoe > 0)
| NAME VALUE SECURITY | (get/set) | DESCRIPTION | |
| user string[128] 6/6 PPPoE account user name. | |||
| pass password[64] 7/6 PPPoE account password. | |||
7.7IP Filter
Group: ipfilter
| NAME VALUE SECURITY | (get/set) | DESCRIPTION | |
| enable6/6 Enable access list filtering. | |||
| admin_enable6/6 Enable administrator IP address. | |||
| admin_ip string[43] | 6/6 Administrator IP address. | ||
| maxconnection | 1~ "capability_protocol _maxconnection" | 6/6 Maximum number of (s). | |
| type 0,1 | 6/6 Ipfilter policy : | 0 => allow1 => deny | |
| ipv4list_i<0~9> | Single address:Network address:Rangeaddress: | 6/6 IPv4 address list. | |
| ipv6list_i<0~9> | string[43] | 6/6 IPv6 address list. | |
7.8Video input
Group: videooin
| NAME VALUE SECURITY | (get/set) | DESCRIPTION | |
| cmosfreq 50, 60 4/4 CMOS frequency. | * Only available whencapability_videoin_type is 2. | ||
| whitebalanceauto,panorama,manual,rbgain,widerange,outdoor,indoor,sodiumauto,etc(Available values are listed in"capability_image_c<0~(n-1)>_wbmode") | 4/4 Modes | of white balance."auto": Auto white balance"panorama": indicates that camera would try to balance the white balance effect of every sensor."rbgain": Use rgain and bgain to set white balance manually."manual": 2 cases:a. if "rbgain" is not supported, this means keep current white balance status.b. if "rbgain" is supported, "rgain" and "bgain" are updated to the current values which is got from white balance module.Then, act as rbgain mode"widerange": Auto Tracing White balance (2000K to 10000K)."outdoor": auto white balance mode specifically for outdoor."indoor": auto white balance mode specifically for indoor."sodiumauto": sodium vapor lamps.* Only available when"capability_image_c<0~(n-1)>_wbmode" != "-" | |
| exposurelevel 0~12 4/4 Exposure level | "0,12": This range takes the concept from DC's exposure tuning options. The definition is:0: EV -2.01: EV -1.7 | ||
| 2: EV -1.33: EV -1.04: EV -0.75: EV -0.36: EV 07: EV +0.38: EV +0.79: EV +1.010: EV +1.311: EV +1.712: EV +2.0* Only available when"capability_image_c<0~(n-1)>_exposure_mode" !=0 | |||
| irismode fixed, indoor, | outdoorindependent> | 4/4 Control | DC-Iris mode."outdoor": Auto-setting DC-Iris to get best quality, but easy to meet rolling or flicker effect in indoor environment."indoor": Avoid rolling and flicker effect first."fixed": Open the iris to maximum.* Only available when"capability_image_c<0~(n-1)>_iristype" = d ciris |
| enableblc | 4/4 Enable backlight compensation.* Not support this parameter anymore when the version number (httpversion) is equal or greater than 0301a.* It's recommended to use"exposurewin_c<0~(n-1)>_mode" to switch on/off BLC. | ||
| color 0, 1 4/4 0 =>monochrome | 1 => color* Only available when "capability_videooin_c<0~(n-1)>_color_support" is 1. | ||
| flip4/4 Flip the image. | |||
| mirror4/4 Mirror the image. | |||
| rotate 0,90,180,270 1/4 | The rotation angle of image.Support only in Rotation mode.* Only available when "capability_videoin_c<0~(n-1)>_rotation"=1 | ||
| ptzstatus0,<positive integer> | 1/7 A 32-bit integer, each bit can be set separately as follows:Bit 0 => Support camera control function;0(not support), 1(support)Bit 1 =>Built-in or external camera; 0 (external), 1(built-in)Bit 2 => Support pan operation; 0(not support), 1(support)Bit 3 => Support tilt operation; 0(not support), 1(support)Bit 4 => Support zoom operation; 0(not support), 1(support)Bit 5 => Support focus operation; 0(not support), 1(support)(SD/PZ/IZ series only) | ||
| text string[64] 1/4 Enclose caption. | |||
| imprinttimestamp4/4 Overlay time stamp on video. | |||
| minexposure<1~32000>,<5~32000>,<1~8000>,<5~8000>,etc.* Available value is listed in "capability_image_c<0~(n-1)>_exposure_minrange" | 4/4 Minimum exposure time1~32000 => 1s ~ 1/32000s5~32000 => 1/5s ~ 1/32000s1~8000 => 1s ~ 1/8000s5~8000 => 1/5s ~ 1/8000setc.* Only available when "capability_image_c<0~(n-1)>_exposure_minrange" != "-"* Only valid when "piris_mode" = manual or "irismode" = fixed* Only available when "capability_image_c<0~(n-1)>_exposure_rangetype" is "twovalues". | ||
| maxexposure<1~32000>,<5~32000>,<1~8000>,<5~8000>, | 4/4 Maximum exposure time1~32000 => 1s ~ 1/32000s5~32000 => 1/5s ~ 1/32000s1~8000 => 1s ~ 1/8000s | ||
| etc.* Available value is listed in "capability_image_c<0~(n-1)>_exposure_maxrange" | 5~8000 => 1/5s ~ 1/8000setc.* This parameter may also restrict image frame rate from sensor due to sensor generates a frame per exposure time. Ex: If this is set to 1/5s ~ 1/8000s and camera takes 1/5s on the night, then sensor only outputs 5 frame/s.* Only available when "capability_image_c<0~(n-1)>_exposure_maxrange" != "-" * Only valid when "piris_mode" = manual or "irismode" = fixed * Only available when "capability_image_c<0~(n-1)>_exposure_r angetype" is "twovalues". | ||
| enablepreview | 1/4 Usage for UI of exposure settings. Preview settings of video profile.* Only available when "capability_image_c<0~(n-1)>_exposure_mode" != 0 | ||
7.8.1 Video input setting per channel
Group: videoin_c<0\~(n-1)> for n channel products, and m is stream number
n denotes the value of "capability_nvideoin", m denotes the value of "capability_nmediastream"
| NAME VALUE SECURITY | (get/set) | DESCRIPTION | |
| cmosfreq 50, 60 | 4/4 CMOS frequency. | * Only available when "capability_videoin_type" is 2 | |
| mode 0 ~ | "capability_videoin_c<0~(n-1)>_nmode"-1 | 4/4 Indicate the video mode on use. | |
| whitebalance | auto,panorama,manual,rbgain,widerange,outdoor,indoor,sodiumauto,etc(Available values are listed in"capability_image_c<0~(n-1)>_wbmode") | 4/4 Modes of white balance."auto": Auto white balance"panorama": indicates that camera would try to balance the white balance effect of every sensor."rbgain": Use rgain and bgain to set white balance manually."manual": 2 cases:a. if "rbgain" is not supported, this means keep current white balance status.b. if "rbgain" is supported, "rgain" and "bgain" are updated to the current values which is got from white balance module. Then, act as rbgain mode"widerange": Auto Tracing White balance (2000K to 10000K)."outdoor": auto white balance mode specifically for outdoor."indoor": auto white balance mode specifically for indoor."sodiumauto": sodium vapor lamps.* Only available when"capability_image_c<0~(n-1)>_wb | |
| mode" != "-" | |||
| rgain 0~100 4/4 | Manual set rgain value of gain control | setting.0: Weak <-> 100: Strong* Only available when "rbgain" is listed in "capability_image_c<0~(n-1)>_wb mode".* Only valid when "videoin_c<0~(n-1)>_whitebalance" != auto* Normalized range. | |
| bgain 0~100 4/4 | Manual set bgain value of gain | control setting.0: Weak <-> 100: Strong* Only available when "rbgain" is listed in "capability_image_c<0~(n-1)>_wb mode".* Only valid when "videoin_c<0~(n-1)>_whitebalance" != auto* Normalized range. | |
| exposurelevel 0~ | 12 4/4 Exposure level | "0,12": This range takes the concept from DC's exposure tuning options.The definition is:0: EV -2.01: EV -1.72: EV -1.33: EV -1.04: EV -0.75: EV -0.36: EV 07: EV +0.38: EV +0.79: EV +1.010: EV +1.311: EV +1.712: EV +2.0* Only available when"capability_image_c<0~(n-1)>_exposure_mode" !=0 | |
| exposuremode | auto,shutterpriority,irispriority,qualitypriority,manual,etc(Available options are list in"capability_image_c<0~(n-1)>_exposure_modetype") | 4/4 Select | exposure mode."auto": Automatically adjust the Iris, Gain and Shutter Speed to fit the exposure level."shutterpriority": Manually adjust with variable Shutter Speed, and keep adjusting Iris, Gain automatically."irispriority": Manually adjust with variable Iris, and keep adjusting Gain and Shutter speed automatically."qualitypriority": Automatically adjust the Iris, Gain and Shutter Speed by VIVOTEK quality algorithm."manual": Manually adjust with variable Shutter, Iris and Gain.* We support this parameter when the version number (httpversion) is equal or greater than 0302a.* Only available when"capability_image_c<0~(n-1)>_exposure_mode" !=0 |
| irismode fixed, indoor, outdoor | door, outdoor | 4/4 Control | DC-Iris mode."outdoor": Auto-setting DC-Iris to get best quality, but easy to meet rolling or flicker effect in indoor environment."indoor": Avoid rolling and flicker effect first."fixed": Open the iris to maximum.* Only available when"capability_image_c<0~(n-1)>_irist type" = dciris |
| piris_mode | manual, indoor, outdoor,- 1/4 Control | P-Iris mode | "outdoor": Auto-setting P-Iris to get best quality, but easy to meet rolling or flicker effect in indoor environment."indoor": Avoid rolling and flicker effect first."manual": Manual set P-Iris by "piris_position"."-": not support. (only available when "capability_image_c<0~(n-1)>_sensortype" is "smartsensor")* Only available when "capability_image_c<0~(n-1)>_iristype" = piris |
| piris_position | 1~100 1/4 Manual set P-Iris. | 1: Open <-> 100: Close* Only valid when "piris_mode" = manual or "capability_image_c<0~(n-1)>_sensortype" is "smartsensor"* Only available when "capability_image_c<0~(n-1)>_iristype" = piris | |
| enableblc | 4/4 Enable backlight compensation | * Not support this parameter anymore when the version number (httpversion) is equal or greater than 0301a.* It's recommended to use "exposurewin_c<0~(n-1)>_mode" to switch on/off BLC. | |
| maxgain 0~100 | 4/4 Maximum gain value. | 0: Low <-> 100: High* Only available when "capability_image_c<0~(n-1)>_agc_maxgain" != "-"* Only valid when"piris_mode" = manual or"irismode" = fixed* Normalized range.* Only available when"capability_image_c<0~(n-1)>_exposure_rangetype" is "twovalues". | |
| mingain 0~100 | 4/4 Minimum gain value. | 0: Low <-> 100: High* Only available when"capability_image_c<0~(n-1)>_agc_mingain" != "-" * Only valid when"piris_mode" = manual or"irismode" = fixed* Normalized range.* Only available when"capability_image_c<0~(n-1)>_exposure_rangetype" is "twovalues". | |
| gainvalue 0~100 | 4/4 Gain value. | 0: Low <-> 100: High* Only available when"capability_image_c<0~(n-1)>_agc_maxgain" != "-" and"capability_image_c<0~(n-1)>_exposure_rangetype" is "onevalue".* Normalized range.* We support this parameter when the version number (httpversion) is equal or greater than 0302a. | |
| color 0, 1 4/4 0 | =>monochrome | 1 => color* Only available when "capability_videoin_c<0~(n-1)>_color_support" is 1. | |
| flip | 4/4 Flip the image. | ||
| mirror | 4/4 Mirror the image. | ||
| rotate 0,90,180,270 1/4 The rotation angle of image. | Support only in Rotation mode(capability_videoin_c<0~(n-1)>_rotation=1) | |
| ptzstatus0,1/7 A 32-bit integer, each bit can be setseparately as follows:Bit 0 => Support camera control function; 0(not support), 1(support)Bit 1 =>Built-in or externalcamera; 0 (external), 1(built-in)Bit 2 => Support pan operation;0(not support), 1(support)Bit 3 => Support tilt operation;0(not support), 1(support)Bit 4 => Support zoom operation;0(not support), 1(support)Bit 5 => Support focus operation;0(not support), 1(support)(SD/PZ/IZ series only) | ||
| text string[64] 1/4 Enclose caption. | ||
| imprinttimestamp | 4/4 Overlay time stamp on video. | |
| textonvideo_position | top, bottom 4/4 Text on video string position | |
| textonvideo_size | 20~40 4/4 Text on video font size | |
| textonvideolontpath | /usr/share/font/Default.ttf,/mnt/flash2/upload.ttf | 4/4 Choose camera default font file(/usr/share/font/Default.ttf) or user uploaded fontfile(/mnt/flash2/upload.ttf). |
| textonvideo_uploadfilename | Depends on the font file name uploaded by user | 1/7 Show the uploaded font file name. |
| minexposure<1~32000>,<5~32000>,<1~8000>,<5~8000>,etc.* Available value is listed in"capability_image_c<0~(n-1)>_expo | 4/4 Minimum exposure time1~32000 => 1s ~ 1/32000s5~32000 => 1/5s ~ 1/32000s1~8000 => 1s ~ 1/8000s5~8000 => 1/5s ~ 1/8000setc.* Only available when | |
| sure_minrange" | "capability_image_c<0~(n-1)>_exposure_minrange" != "-" * Only valid when "piris_mode" = manual or "irismode" = fixed * Only available when "capability_image_c<0~(n-1)>_exposure_rangetype" is "twovalues". | ||
| maxexposure | <1~32000>, <5~32000>, <1~8000>, <5~8000>, etc. * Available value is listed in "capability_image_c<0~(n-1)>_exposure_maxrange" | 4/4 Maximum exposure time 1~32000 => 1s ~ 1/32000s 5~32000 => 1/5s ~ 1/32000s 1~8000 => 1s ~ 1/8000s 5~8000 => 1/5s ~ 1/8000s etc. * This parameter may also restrict image frame rate from sensor due to sensor generates a frame per exposure time. Ex: If this is set to 1/5s ~ 1/8000s and camera takes 1/5s on the night, then sensor only outputs 5 frame/s. * Only available when "capability_image_c<0~(n-1)>_exposure_maxrange" != "-" * Only valid when "piris_mode" = manual or "irismode" = fixed * Only available when "capability_image_c<0~(n-1)>_exposure_rangetype" is "twovalues". | |
| shuttervalue | <1~32000>, <5~32000>, <1~8000>, <5~8000>, etc. * Available value is listed in "capability_image_c<0~(n-1)>_expo | 4/4 Exposure time 1~32000 => 1s ~ 1/32000s 5~32000 => 1/5s ~ 1/32000s 1~8000 => 1s ~ 1/8000s 5~8000 => 1/5s ~ 1/8000s etc. * This parameter may also restrict | |
| sure_maxrange" image frame rate from sensor due to sensor generates a frame per exposure time. Ex: If this is set to 1/5s ~ 1/8000s and camera takes 1/5s on the night, then sensor only outputs 5 frame/s.* Only available when "capability_image_c<0~(n-1)>_exposure_maxrange" != "-" and "capability_image_c<0~(n-1)>_exposure_rangetype" is "onevalue".* We support this parameter when the version number (httpversion) is equal or greater than 0302a. | ||
| enablepreview <boolean> 1/4 Usage for UI of exposure settings. | Preview settings of video profile.* Only available when "capability_image_c<0~(n-1)>_exposure_mode" !=0 | |
| meteringmode | auto,blc,hlc* Available value is listed in "capability_image_c<0~(n-1)>_exposure_meteringmode" | 4/4 |
| crop_position | 1/7 Crop left-top corner coordinate. | |
| crop_size <window size>(WxH) | 1/7 Crop width and height.(width must be 16x or 32x and height must be 8x) | |
| zoomratiodisplay | 1/4 Indicates multiple of zoom in is | "on-screen display" or not. |
| * We support this parameter when the version number (httpversion) is equal or greater than 0302a. | |||
| bracketing_level | 1~100 4/4 ● The total available lists | (capability_image_c<0~(n-1)>_exposure_bracketing_range) will be normalized to 1~100 scale.* For example, the total available list is 7.(2x,3x,4x,5x,6x,7x,8x)1 ~ 14 that correspond with 2x.15 ~ 30 that correspond with 3x.*Only available when"capability_image_c<0~(n-1)>_exposure_bracketing_mode" = 1.* We support this parameter when the version number (httpversion) is equal or greater than 0310a. | |
| s<0~(m-1)>_enableptz | 4/4 Indicate whether stream supprts | eptz or not | |
| s<0~(m-1)>_codectype | Listed at "capability_videoin_codec" Possible values are: mjpeg, h264,h265product dependent> | 1/4 Codec type for this stream | |
| s<0~(m-1)>_resolution | Available options are list in"capability_videoin_c<0~(n-1)>_resolution".Besides, available options is referred to"capability_videoin_c<0~(n-1)>_maxresolution" and"capability_videoin_c<0~(n-1)>_min | 1/4 Video resolution in pixels. | |
| resolution" | |||
| s<0~(m-1)>_smartfps_enable | 4/4 Enable "Smart fps" function. | * Only available when"capability_videoin_c<0~(n-1)>_smartfps_support" is 1.* We support this parameter whenthe version number (httpversion) isequal or greater than 0309a. | |
| s<0~(m-1)>_h264_dintraperiod_enable | 4/4 Enable "Dynamic intra frame period". | * Only available when"capability_videoin_c<0~(n-1)>_dintraperiod_support" is 1.* We support this parameter whenthe version number (httpversion) isequal or greater than 0301c. | |
| s<0~(m-1)>_h264_intraperiod | 250, 500, 1000, 2000, 3000, 4000 4/4 | The time interval between twoI-frames (Intra coded picture).The unit is millisecond (ms). | |
| s<0~(m-1)>_h264_ratecontrol mode | cbr, vbr 4/4 cbr: Constant bit rate mode. | vbr: Fixed quality mode, all framesare encoded in the same quality. | |
| s<0~(m-1)>_h264_quant | 1~5,99, 100 | 4/4 Set the pre-defined quality level:1: Medium2: Standard3: Good4: Detailed5: Excellent100: Use the quality level in"qpercent"99: Use the quality level in "qvalue"* Only valid when"h264_ratecontrolmode" = vbr. | |
| s<0~(m-1)>_h264_qvalue | 0~51 4/4 Manual video quality level input. The | Q value which is used by encodedlibrary directly.* Only valid when"h264_ratecontrolmode" = vbr and | |
| s<0~(m-1)>_h264_quant = 99. | |||
| s<0~(m-1)>_h264_qpercent | 1~100 4/4 Select customized quality | n a | normalized full range.1: Worst quality100: Best quality* Only valid when"h264_ratecontrolmode"= vbr and"quant"= 100. |
| s<0~(m-1)>_h264_maxvbrbitrate | 20000~"capability_videoin_c<0~(n-1)>_h264_maxbitrate" | 4/4 | The maximum allowed bit rate in fixed quality mode.When the bit rate exceeds this value,frames will be dropped to restrict the bit rate.* Only valid when"h264_ratecontrolmode"= vbr |
| s<0~(m-1)>_h264_cbr_quant | 1~5, 100 4/4 Set the pre-defined quality level: | 1: Medium2: Standard3: Good4: Detailed5: Excellent100: Use the quality level in"cbr_qpercent"* Only available when"h264_ratecontrolmode"= cbr.* Only available when"capability_smartstream_version">="2.0" | |
| s<0~(m-1)>_h264_cbr_qpercent | 1~100 4/4 Select customized quality | n a | normalized full range.1: Worst quality100: Best quality* Only valid when"h264_ratecontrolmode"= cbr and"quant"= 100.* Only available when |
| "capability_smartstream_version"> = "2.0" | |||
| s<0~(m-1)>_h 264_bitrate | 20000~"capability_videoin_c<0~(n-1)>_h264_maxbitrate" | 4/4 The target bit rate in constant bit rate mode.* Only valid when "h264_ratecontrolmode" = cbr | |
| s<0~(m-1)>_h 264_prioritypolicy | framerate,imagequality 4/4 Set priority policy | * Only valid when "h264_ratecontrolmode" = cbr | |
| s<0~(m-1)>_h 264_maxframe | 1~"capability_videoin_c<0~(n-1)>_h 264_maxframerate" | 1/4 The maximum frame rates of a H264 stream at different resolutions("capability_videoin_c<0~(n-1)>_resolution") are recorded in "capability_videoin_c<0~(n-1)>_h2 64_maxframerate" | |
| s<0~(m-1)>_h 264_profile | 0~2 1/4 Indicate H264 profiles | 0: baseline1: main profile2: high profile | |
| s<0~(m-1)>_h 264_smartq_enable | 4/4 Enable "Smart Q" function. | * Only available when "capability_videoin_c<0~(n-1)>_smartq_support" is 1.* We support this parameter when the version number (httpversion) is equal or greater than 0309a. | |
| s<0~(m-1)>_h 265_dintraperiod_enable | 4/4 Enable "Dynamic intra frame period". | * Only available when "capability_videoin_c<0~(n-1)>_dintraperiod_support" is 1 and h265 is listed in "capability_videoin_codec".* We support this parameter when the version number (httpversion) is equal or greater than 0301c. | |
| s<0~(m-1)>_h 265_intraperiod | 250, 500, 1000, 2000, 3000, 4000 4/4 The time interval between two I-frames (Intra coded picture).The unit is millisecond (ms). | ||
| * Only available when h265 is listed in "capability_videoin_codec". | |||
| s<0~(m-1)>_h265_ratecontrol mode | cbr, vbr | 4/4 | cbr: Constant bit rate mode.vbr: Fixed quality mode, all frames are encoded in the same quality.* Only available when h265 is listed in "capability_videoin_codec". |
| s<0~(m-1)>_h265_quant | 1~5,99, 100 | 4/4 Set the pre-defined quality level:1: Medium2: Standard3: Good4: Detailed5: Excellent100: Use the quality level in "qpercent"99: Use the quality level in "qvalue"* Only available when h265 is listed in "capability_videoin_codec" and "h265_ratecontrolmode" = vbr. | |
| s<0~(m-1)>_h265_qvalue | 0~51 4/4 Manual video quality level input. The | Q value which is used by encoded library directly.* Only available when h265 is listed in "capability_videoin_codec".* Only valid when "h265_ratecontrolmode" = vbr and s<0~(m-1)>_h265_quant = 99. | |
| s<0~(m-1)>_h265_qpercent | 1~100 4/4 Select customized quality in a | normalized full range.1: Worst quality100: Best quality* Only available when h265 is listed in "capability_videoin_codec".* Only valid when | |
| "h265_ratecontrolmode" = vbr and "quant" = 100. | |||
| s<0~(m-1)>_h265_maxvbrbitrate | 20000~"capability_videoin_c<0~(n-1)>_h265_maxbitrate" | 4/4 The maximum allowed bit rate in fixed quality mode.When the bit rate exceeds this value, frames will be dropped to restrict the bit rate.* Only available when h265 is listed in "capability_videoin_codec".* Only valid when "h265_ratecontrolmode" = vbr | |
| s<0~(m-1)>_h265_cbr_quant | 1~5, 100 4/4 Set the pre-defined quality level: | 1: Medium2: Standard3: Good4: Detailed5: Excellent100: Use the quality level in "cbr_qpercent"* Only available when h265 is listed in "capability_videoin_codec" and "h265_ratecontrolmode" = cbr.* Only available when "capability_smartstream_version" >= "2.0" | |
| s<0~(m-1)>_h265_cbr_qpercent | 1~100 4/4 Select customized quality in a | normalized full range.1: Worst quality100: Best quality* Only available when h265 is listed in "capability_videoin_codec".* Only valid when "h265_ratecontrolmode" = cbr and "quant" = 100.* Only available when "capability_smartstream_version" >= "2.0" | |
| s<0~(m-1)>_h265_bitrate | 20000~"capability_videoin_c<0~(n-1)>_h265_maxbitrate" | 4/4 The target bit rate in constant bit rate mode.* Only available when h265 is listed in "capability_videoin_codec".* Only valid when "h265_ratecontrolmode" = cbr | |
| s<0~(m-1)>_h265_prioritypolicy | framerate,imagequality 4/4 Set priority policy | * Only available when h265 is listed in "capability_videoin_codec".* Only valid when "h265_ratecontrolmode" = cbr | |
| s<0~(m-1)>_h265_maxframe | 1~"capability_videoin_c<0~(n-1)>_h265_maxframerate" | 1/4 The maximum frame rates of a H265 stream at different resolutions("capability_videoin_c<0~(n-1)>_resolution") are recorded in "capability_videoin_c<0~(n-1)>_h265_maxframerate"* Only available when h265 is listed in "capability_videoin_codec". | |
| s<0~(m-1)>_h265_profile | Available values are listed in "capability_videoin_c<0~(n-1)>_h265_profile" | 1/4 Indicate H265 profiles* Only available when h265 is listed in "capability_videoin_codec". | |
| s<0~(m-1)>_h265_smartq_enable | * Only available when h265 is listed in "capability_videoin_codec".* Only available when "capability_videoin_c<0~(n-1)>_smartq_support" is 1.* We support this parameter when the version number (httpversion) is equal or greater than 0309a. | ||
| s<0~(m-1)>_mjpeg_ratecontrolmode | cbr, vbr 4/4 cbr: Constant bit rate mode. | vbr: Fixed quality mode, all frames are encoded in the same quality. | |
| s<0~(m-1)>_m | 1~5, 4/4 * Only valid when | ||
| jpeg_quant 99, | 100 "mjpeg_ratecontrolmode" = vbr. | Set the pre-defined quality level:1: Medium2: Standard3: Good4: Detailed5: Excellent100: Use the quality level in "qpercent"99: Use the quality level in "qvalue" | |
| s<0~(m-1)>_mjpeg_qvalue | 10~200(Only valid when"capability_api_httpversion" format isXXXXX_1 orXXXXX_3 orXXXXX_4ex: 0301a_1 or 0301a_3 or 0301a_4)or 1~99(Only valid when"capability_api_httpversion" format isXXXXX_2,ex: 0301a_2) | 4/4 Manua | video quality level input. The Q value which is used by encoded library directly.* Only valid when "mjpeg_ratecontrolmode" = vbr and s<0~(m-1)>_mjpeg_quant = 99 |
| s<0~(m-1)>_mjpeg_qpercent | 1~100 4/4 Select customized quality | n a | normalized full range.1: Worst quality100: Best quality* Only valid when "mjpeg_ratecontrolmode" = vbr and s<0~(m-1)>_mjpeg_quant = 100. |
| s<0~(m-1)>_mjpeg_maxvbrbit rate | 20000~"capability_videoin_c<0~(n-1)>_mjpeg_maxbitrate" | 4/4 The maximum allowed bit rate in fixed quality mode.When the bit rate exceeds this value, frames will be dropped to restrict the bit rate.* Only valid when "mjpeg_ratecontrolmode" = vbr | |
| s<0~(m-1)>_mjpeg_cbr_quant | 1~5, 100 4/4 Set the pre-defined quality level: | 1: Medium2: Standard | |
| 3: Good4: Detailed5: Excellent100: Use the quality level in "cbr_qpercent"* Only valid when "mjpeg_ratecontrolmode" = cbr.* Only available when "capability_smartstream_version" >= "2.0" | |||
| s<0~(m-1)>_mjpeg_cbr_qpercent | 1~100 4/4 Select customized quality in a | normalized full range.1: Worst quality100: Best quality* Only valid when "mjpeg_ratecontrolmode" = cbr and "quant" = 100.* Only available when "capability_smartstream_version" >= "2.0" | |
| s<0~(m-1)>_mjpeg_bitrate | 20000~"capability_videoin_c<0~(n-1)>_mjpeg_maxbitrate" | 4/4 The target bit rate in constant bit rate mode.* Only valid when "mjpeg_ratecontrolmode" = cbr | |
| s<0~(m-1)>_mjpeg_prioritypolicy | framerate,imagequality 4/4 Set prioritypolicy | * Only valid when "mjpeg_ratecontrolmode" = cbr | |
| s<0~(m-1)>_mjpeg_maxframe | 1~"capability_videoin_c<0~(n-1)>_mjpeg_maxframerate" | 1/4 The maximum frame rates of a mjpeg stream at different resolutions("capability_videoin_c<0~(n-1)>_resolution") are recorded in "capability_videoin_c<0~(n-1)>_mjpeg_maxframerate" | |
| s<0~(m-1)>_ra tiocorrect | 1/4 Change resolution to fit 4:3 ratio. | For PAL:D1/4CIF(720/704x576) -> (768x576) | |
| CIF(352x288)->(384x288)For NTSC:D1/4CIF(720/704x480) ->(640x480)CIF(352x240)->(320x240)* Only available whencapability_videoin_type is 0 or 1. | |||
| wdrpro_mode | 4/4 Enable WDR pro | * Only available when"capability_image_c<0~(n-1)>_wdrpro_mode" > 0 | |
| wdrpro_strength | 1~100 4/4 The strength of WDR Pro. | The bigger value means the strongerstrength of WDR Pro.* Only available when"capability_image_c<0~(n-1)>_wdrpro_strength" is 1 | |
| wdrc_mode | 4/4 Enable WDR enhanced. | * Only available when"capability_image_c<0~(n-1)>_wdrc_mode" is 1 | |
| wdrc_strength | 1~100 4/4 The strength of WDR enhanced. | The bigger value means the strongerstrength of WDR enhanced.* Only available when"capability_image_c<0~(n-1)>_wdrc_mode" is 1 | |
| aespeed_mode | 4/4 Turning AE converge speed on or off. | 0: off1: on* Only available when"capability_image_c<0~(n-1)>_aespeed" is 1 | |
| aespeed_speedlevel | 1~100 4/4 The speed level of AE converge | speed.1~20: level 121~40: level 241~60: level 361~80: level 481~100: level 5Level 1~4(low ~ high)The higher speed level meas shorter AE converged time during AE executing.* Only available when"capability_image_c<0~(n-1)>_aespeed" is 1 | |
| aespeed_sensitivity | 1~100 4/4 The sensitivity of AE converge speed. | 1~20: level 121~40: level 241~60: level 361~80: level 481~100: level 5Level 1~4(low ~ high)The higher sensitivity level meas that it is easy to be trigger while scene changed.* Only available when"capability_image_c<0~(n-1)>_aespeed" is 1 and"capability_image_c<0~(n-1)>_aespeedsupport sensitivity" is 1. | |
| flickerless | 4/4 Turn on(1) or turn off(0) the | flickerless mode* Only available when"capability_image_c<0~(n-1)>_flickerless" is 1. | |
| mounttype ceiling, wall, floor 1/6 Hardware installation. | * Only available when"capability_videoin_c<0~(n-1)>_mounttype" != "-". | ||
| enablewatermark | 0, 1 1/6 0: Not to add watermarks on images | 1: Add watermarks on images* Only available when"capability_fisheye" > 0 | |
| s<0~(m-2)>_fi | '10, 1P, 2P, 1R, 4R' for ceiling/floor | 1/4 | Local dewarp mode. |
| sheyedewarpmode<product dependent> | mount‘10, 1P, 1R, 4R' for wall mount | “10” is original mode (disable).Supported dewarp mode is different by mount type.(videoin_c<0~(n-1)>_mounttype)Supported mode list could be extracted from(capability_videooin_c<0~(n-1)>_localdewarp_typeceilingmount) and(capability_videooin_c<0~(n-1)>_localdewarp_typewallmount)* Only available when"capability_fisheyelocaldewarp_c<0~(capability_nvideoin)-1>" > 0 | |
Group: videoin_c<0\~(n-1)>_s<0\~(m-1)>_h264_smartstream2 (capability_smartstream_support=1 and capability_smartstream_version>=2.0)
Group: videoin_c<0\~(n-1)>_s<0\~(m-1)>_h265_smartstream2 (capability_smartstream_support=1, capability_smartstream_version>=2.0 and h265 is listed in "capability_videoin_codec")
n denotes the value of "capability_nvideoin", m denotes the value of "capability_nmediastream"
| NAME VALUE SECURITY | (get/set) | DESCRIPTION | |
| enable4/4 | Enable or Disable smart codec | function | |
| mode autotracking,manual,hybrid 4/4 Set Smart stream mode | "autotracking": only available when "capability_smartstream_mode_autotracking" is 1. "manual": only available when "capability_smartstream_mode_manual" is 1. "hybrid": only available when "capability_smartstream_mode_hybrid" is 1. | ||
| qualitypriority -5,-4,-3, | -2,-1,1,2,3,4,5 4/4 The differential value of Q between the regions of interest (ROI) and the areas of non-interest (non-ROI) of the display image. | ||
| If the value is a positive number, the video quality of ROI is better than the non-ROI areas. The level is from 1 to 5. Level 5 is the maximum level of the quality difference between the ROI and non-ROI areas.If the value is a negative number, the video quality of non-ROI areas is better than the ROI. The level is from -1 to -5. Level -5 is the maximum level of the quality difference between the ROI and non-ROI areas. | |||
Group: videoin_c<0\~(n-1)>_s<0\~(m-1)>_h264_smartstream2_win_i<0\~(k-1)>
(capability_smartstream_support=1, capability_smartstream_version>=2.0 and
capability_smartstream_mode_manual = 1)
Group: videoin_c<0\~(n-1)>_s<0\~(m-1)>_h265_smartstream2_win_i<0\~(k-1)>
(capability_smartstream_support=1, capability_smartstream_version>=2.0 and h265 is listed in
"capability_videoin_codec" and capability_smartstream_mode_manual = 1)
n denotes the value of "capability_nvideoin", m denotes the value of "capability_nmediastream", k denotes the value of "capability_smartstream_nwindow_manual".
| NAME VALUE SECURITY | (get/set) | DESCRIPTION | |
| enable4/4 Enable or disable the window. | |||
| home 0~320,0~240 4/4 Left-top corner coordinate of the window. | |||
| size 0~320x0~240 4/4 Width and height of the window | |||
7.8.1.1 Alternative video input profiles per channel
In addition to the primary setting of video input, there can be alternative profile video input setting for each channel which might be for different scene of light (daytime or nighttime).
Group: videoin_c<0\~(n-1)>_profile_i<0\~(m-1)> for n channel products and m profile n denotes the value of "capability_nvideoin" and m denotes the value of "capability_nvideoinprofile"
(capability_nvideoinprofile> 0)
| NAME VALUE SECURITY | (get/set) | DESCRIPTION | |
| enable4/4 Enable/disable this profile setting | |||
| policy | night,schedule | 4/4 The mode which the profile is applied to.* Not support "policy=day" anymore when the version number (httpversion) is equal or greater than 0301a. | |
| begintime hh:mm 4/4 Begin time of schedule mode. | |||
| endtime hh:mm 4/4 End time of schedule mode. | |||
| minexposure | <1~32000>,<5~32000>,<1~8000>,<5~8000>,etc.* Available value is listed in "capability_image_c <0~(n-1)>_exposure_minrange" | 4/4 Minimum exposure time1~32000 => 1s ~ 1/32000s5~32000 => 1/5s ~ 1/32000s1~8000 => 1s ~ 1/8000s5~8000 => 1/5s ~ 1/8000setc.* Only available when "capability_image_c<0~(n-1)>_exposure_minrange" != "-" * Only valid when "piris_mode" = manual or "irismode" = fixed* Only available when "capability_image_c<0~(n-1)>_exposure_r angetype" is "twovalues". | |
| maxexposure | <1~32000>,<5~32000>,<1~8000>,<5~8000>,etc. | 4/4 Maximum exposure time1~32000 => 1s ~ 1/32000s5~32000 => 1/5s ~ 1/32000s1~8000 => 1s ~ 1/8000s5~8000 => 1/5s ~ 1/8000setc. | |
| * Available value is listed in "capability_image_c <0~(n-1)>_exposure_maxrange" | * This parameter may also restrict image frame rate from sensor due to sensor generates a frame per exposure time. Ex: If this is set to 1/5s ~ 1/8000s and camera takes 1/5s on the night, then sensor only outputs 5 frame/s.* Only available when "capability_image_c<0~(n-1)>_exposure_maxrange" != "-" * Only valid when "piris_mode" = manual or "irismode" = fixed * Only available when "capability_image_c<0~(n-1)>_exposure_r angetype" is "twovalues". | ||
| shuttervalue | <1~32000>,<5~32000>,<1~8000>,<5~8000>,etc.* Available value is listed in "capability_image_c <0~(n-1)>_exposure_maxrange" | 4/4 Exposure time | 1~32000 => 1s ~ 1/32000s5~32000 => 1/5s ~ 1/32000s1~8000 => 1s ~ 1/8000s5~8000 => 1/5s ~ 1/8000setc.* This parameter may also restrict image frame rate from sensor due to sensor generates a frame per exposure time. Ex: If this is set to 1/5s ~ 1/8000s and camera takes 1/5s on the night, then sensor only outputs 5 frame/s.* Only available when "capability_image_c<0~(n-1)>_exposure_maxrange" != "-" and "capability_image_c<0~(n-1)>_exposure_r angetype" is "onevalue"* We support this parameter when the version number (httpversion) is equal or greater than 0302a. |
| enableblc4/4 | Enable backlight compensation. | ||
| * Not support this parameter anymore when the version number (httpversion) is equal or greater than 0301a.* It's recommended to use "exposurewin_c__mode" to switch on/off BLC. | |||
| exposurelevel 0~12 4/4 Exposure level | "0,12": This range takes the concept from DC's exposure tuning options. The definition is:0: EV -2.01: EV -1.72: EV -1.33: EV -1.04: EV -0.75: EV -0.36: EV 07: EV +0.38: EV +0.79: EV +1.010: EV +1.311: EV +1.712: EV +2.0*Only available when "capability_image_c0_exposure_mode" != 0 | ||
| exposuremode | auto,shutterpriority,irispriority,qualitypriority,manual,etc(Available options are list in "capability_image_c <0~(n-1)>_exposure_modetype") | 4/4 Select | exposure mode."auto": Automatically adjust the Iris, Gain and Shutter Speed to fit the exposure level."shutterpriority": Manually adjust with variable Shutter Speed, and keep adjusting Iris, Gain automatically."irispriority": Manually adjust with variable Iris, and keep adjusting Gain and Shutter speed automatically."qualitypriority": Automatically adjust the Iris, Gain and Shutter Speed by VIVOTEK quality algorithm."manual": Manually adjust with variable Shutter, Iris and Gain.* We support this parameter when the version number (httpversion) is equal or greater than 0302a.*Only available when"capability_image_c0_exposure_mode" != 0 |
| whitebalance<product dependent> | auto,panorama,manual,rbgain,widerange,outdoor,indoor,sodiumauto,etc(Available values are listed in"capability_image_c<0~(n-1)>_wbmode") | 4/4 Modes | of white balance."auto": Auto white balance"panorama": indicates that camera would try to balance the white balance effect of every sensor."rbgain": Use rgain and bgain to set white balance manually."manual": 2 cases:a. if "rbgain" is not supported, this means keep current white balance status.b. if "rbgain" is supported, "rgain" and "bgain" are updated to the current values which is got from white balance module.Then, act as rbgain mode"widerange": Auto Tracing White balance (2000K to 10000K)."outdoor": auto white balance mode specifically for outdoor."indoor": auto white balance mode specifically for indoor."sodiumauto": sodium vapor lamps.* Only available when"capability_image_c<0~(n-1)>_wbmode" != "-" |
| rgain 0~100 4/4 Manual set rgain value of gain control setting. | 0: Weak <-> 100: Strong* Only available when "rbgain" is listed in "capability_image_c<0~(n-1)>_wbmode"* Only valid when"videoin_c<0~(n-1)>_whitebalance" != auto* Normalized range. | ||
| bgain 0~100 4/4 Manual | set bgain value of gain | control | setting.0: Weak <-> 100: Strong* Only available when "rbgain" is listed in "capability_image_c<0~(n-1)>_wbmode".* Only valid when "videoin_c<0~(n-1)>_whitebalance" != auto* Normalized range. |
| maxgain 0~100 4/4 Maxi | mum gain value. | 0: Low <-> 100: High* Only available when "capability_image_c<0~(n-1)>_agc_maxgain" != "-"* Only valid when "piris_mode" = manual or "irismode" = fixed* Normalized range.* Only available when "capability_image_c<0~(n-1)>_exposure_r angetype" is "twovalues". | |
| mingain 0~100 4/4 Minimum gain value. | 0: Low <-> 100: High* Only available when "capability_image_c<0~(n-1)>_agc_mingai n" != "-"* Only valid when "piris_mode" = manual or "irismode" = fixed* Normalized range.* Only available when "capability_image_c<0~(n-1)>_exposure_r angetype" is "twovalues". | ||
| gainvalue 0~100 4/4 Gain value. | 0: Low <-> 100: High* Only available when "capability_image_c<0~(n-1)>_agc_maxga in" != "-" and | ||
| "capability_image_c<0~(n-1)>_exposure_r angetype" is "onevalue".* Normalized range.* We support this parameter when the version number (httpversion) is equal or greater than 0302a. | |||
| meteringmode | auto,blc,hlc* Available value is listed in "capability_image_c <0~(n-1)>_exposure_meteringmode" | 4/4 | "auto": The algorithm chooses the best metering strategy."blc": This metering method increases the weight of dark area."hlc": The metering method can detect strong light and make affected area clear.* We support this parameter when the version number (httpversion) is equal or greater than 0311a. |
| piris_mode | manual, indoor,outdoor,- | 1/4 Control | P-Iris mode."outdoor": Auto-setting P-Iris to get best quality, but easy to meet rolling or flicker effect in indoor environment."indoor": Avoid rolling and flicker effect first."manual": Manual set P-Iris by "piris_position"."-": not support (only available when "capability_image_c<0~(n-1)>_sensortype" is "smartsensor")* Only available when "capability_image_c<0~(n-1)>_iristype"=piris |
| piris_position | 1~100 1/4 Manual set P-Iris. | 1: Open <-> 100: Close* Only valid when "piris_mode" = manual or "capability_image_c<0~(n-1)>_sensortype" is "smartsensor"* Only available when "capability_image_c<0~(n-1)>_iristype" = piris | |
| irismode fixed, indoor, | outdoor | 4/4 Control | DC-Iris mode."outdoor": Auto-setting DC-Iris to get best quality, but easy to meet rolling or flicker effect in indoor environment."indoor": Avoid rolling and flicker effect first."fixed": Open the iris to maximum.* Only available when"capability_image_c<0~(n-1)>_iristype"=dciris |
| wdrpro_mode | 4/4 Enable WDR pro | * Only available when"capability_image_c<0~(n-1)>_wdrpro_mode" > 0 | |
| wdrpro_strength | 1~100 4/4 The strength of WDR | Pro.The bigger value means the stronger strength of WDR Pro.* Only available when"capability_image_c<0~(n-1)>_wdrpro_strength" is 1 | |
| wdrc_mode | 4/4 Enable WDR enhanced. | * Only available when"capability_image_c<0~(n-1)>_wdrc_mode" is 1 | |
| wdrc_strength | 1~100 4/4 The strength of WDR | enhanced.The bigger value means the stronger strength of WDR enhanced.* Only available when"capability_image_c<0~(n-1)>_wdrc_mode" is 1 | |
| aespeed_mode | 4/4 Turning AE converge speed on or off. | 0: off1: on* Only available when"capability_image_c<0~(n-1)>_aespeed" is 1 | |
| aespeed_speedlevel | 1~100 4/4 The speed level of AE | converge speed.1~20: level 1 | |
| 21~40: level 241~60: level 361~80: level 481~100: level 5Level 1~4(low ~ high)The higher speed level meas shorter AE converged time during AE executing.* Only available when"capability_image_c<0~(n-1)>_aespeed" is 1 | |||
| aespeed_sensitivity | 1~100 4/4 The sensitivity of AE | converge speed.1~20: level 121~40: level 241~60: level 361~80: level 481~100: level 5Level 1~4(low ~ high)The higher sensitivity level meas that it is easy to be trigger while scene changed.* Only available when"capability_image_c<0~(n-1)>_aespeed" is 1 and"capability_image_c<0~(n-1)>_aespeedsupportsensitivity" is 1. | |
| flickerless | 4/4 Turn on(1) or turn off(0) the flickerless mode | * Only available when"capability_image_c<0~(n-1)>_flickerless" is 1 | |
7.9Time Shift settings
Group: timeshift for n channel products and m stream
n denotes the value of "capability_nvideoin", m denotes the value of "capability_nmediastream"
(capability_timeshift > 0)
| NAME VALUE SECURITY | (get/set) | DESCRIPTION | |
| enable4/4 Enable time shift streaming. | * We replace this parameter with "timeshift_c<0~(n-1)>_enable"when the version number (httpversion) is equal or greater than 0311c. | ||
| c<0~(n-1)>_enable4/4 Enable time shift streaming. | * We support this parameter when the version number (httpversion) is equal or greater than 0311c. | ||
| c<0~(n-1)>_s<0~(m-1) _allow | 4/4 Enable time shift streaming. | streaming for specific stream. | |
7.10 IR cut control
Group: ircuitcontrol (capability_daynight_c<0\~(n-1)>_support > 0)
n denotes the value of "capability_nvideooin"
| NAME VALUE SECURITY | (get/set) | DESCRIPTION | |
| mode | auto,day,night,di,schedule...etc* Available values are listed in "capability_daynight_c<0~(n-1)>_mode" | 6/6 Set IR | cut control mode* We replace this parameter with "ircutcontrol_c0_mode" when the version number (httpversion) is equal or greater than 0311c. |
| sir6/6 Enable/disable Smart IR | |||
| * Only available when"capability_daynight_c<0~"capability_nvideoin"-1>_smartir" is 1* We replace this parameter with"ircutcontrol_c<0~(n-1)>_sir" when theversion number (httpversion) is equal orgreater than 0311c. | |||
| daymodebegintime | 00:00~23:59 6/6 Day mode begin time | * We replace this parameter with"ircutcontrol_c<0~(n-1)>_daymodebegintime" when the version number (httpversion)is equal or greater than 0311c. | |
| daymodeendtime | 00:00~23:59 6/6 Day mod end time | * We replace this parameter with"ircutcontrol_c<0~(n-1)>_daymodeendtime" when the version number (httpversion) isequal or greater than 0311c. | |
| disableirled | 6/6 Enable/disable built-in IR led | * Only available when"capability_daynight_illuminators_builtin_support > 0" and irled is listed in"capability_daynight_ illuminators_builtin_type"* We replace this parameter with"ircutcontrol_illuminators_builtin_irled_enabled" when the version number (httpversion)is equal or greater than 0311c. | |
| enableextled | 1/6 Enable/disable external IR led | * Only available when"capability_daynight_illuminators_external_support > 0"* We replace this parameter with"ircutcontrol_illuminators_external_do_enabled" when the version number (httpversion)is equal or greater than 0311c. | |
| enablewled | 6/6 Enable/disable built-in White led | * Only available when"capability_daynight_illuminators_builtin_support > 0" and whiteled is listed in"capability_daynight_ illuminators | |
| _builtin_type"* We replace this parameter with "ircutcontrol_illuminators_builtin_whiteled_enabled" when the version number (httpversion) is equal or greater than 0311c. | |||
| bwmode6/6 Switch to B/W in night mode if enabled.* Only available when "capability_daynight_c<0~(n-1)>_blackwhitemode" is 1.* We replace this parameter with ircutcontrol_c<0~(n-1)>_bwmode" when the version number (httpversion) is equal or greater than 0311c. | 6/6 Switch to B/W in night mode if enabled.* Only available when "capability_daynight_c<0~(n-1)>_blackwhitemode" is 1.* We replace this parameter with ircutcontrol_c<0~(n-1)>_bwmode" when the version number (httpversion) is equal or greater than 0311c. | ||
| sensitivitylow,normal,high,1~1006/6 Sensitivity of day/night control.There are two value format:"low,normal,high": if capability_daynight_c<0~(n-1)>_ircutsensitivity_type=options"1~100": if capability_daynight_c<0~(n-1)>_ircutsensitivity_type=normalize* Only available when "capability_daynight_c<0~(n-1)>_ircutsensitivity_type" is not "-".* We replace this parameter with ircutcontrol_c<0~(n-1)>_sensitivity" when the version number (httpversion) is equal or greater than 0311c. | low,normal,high,1~100 | 6/6 Sensitivity of day/night control.There are two value format:"low,normal,high": if capability_daynight_c<0~(n-1)>_ircutsensitivity_type=options"1~100": if capability_daynight_c<0~(n-1)>_ircutsensitivity_type=normalize* Only available when "capability_daynight_c<0~(n-1)>_ircutsensitivity_type" is not "-".* We replace the parameter with ircutcontrol_c<0~(n-1)>_sensitivity" when the version number (httpversion) is equal or greater than 0311c. | |
| spectrum_modevisible,ir,irenhanced,blueenhanced6/6 Set spectrum method.* Only available when "capability_daynight_illuminators_spectrum_support > 0"* We replace this parameter with "ircutcontrol_illuminators_spectrum_mode" when the version number (httpversion) is equal or greater than 0311c. | visible,ir,irenhanced,blueenhanced* Available values are listed in "capability_daynight | 6/6 Set spectrum method.* Only available when "capability_daynight_illuminators_spectrum_support > 0"* We replace this parameter with "ircutcontrol_illuminators_spectrum_mode" when the version number (httpversion) is equal or greater than 0311c. | |
| _illuminators_spectrum_mode". | |||
7.10.1 IR cut control setting per channel
Group: ircutcontrol_c<0(n-1)> for n channel products (capability_daynight_c<0\~(n-1)>_support > 0) n denotes the value of "capability_nvideoin"
| NAME VALUE SECURITY | (get/set) | DESCRIPTION | |
| mode | auto,day,night,di,schedule...etc* Available values are listed in "capability_daynight_c<0~(n-1)>_mode" | 6/6 Set IR | cut control mode* We support this parameter when the version number (httpversion) is equal or greater than 0311c. |
| sir | 6/6 Enable/disable Smart IR | 6/6 Enable/disable Smart IR | * Only available when "capability_daynight_c<0~"capability_nvide oin"-1>_smartir" is 1* We support this parameter when the version number (httpversion) is equal or greater than 0311c. |
| daymodebegintime 00:00~ | 23:59 6/6 Day mode begin time | 23:59 6/6 Day mode begin time | * We support this parameter when the version number (httpversion) is equal or greater than 0311c. |
| daymodeendtime 00:00~23:59 6/6 Day mod end time | 3:59 6/6 Day mod end time | * We support this parameter when the version number (httpversion) is equal or greater than 0311c. | |
| bwmode 6/6 Switch to B/W in night mode if enabled.* Only available when "capability_daynight_c<0~(n-1)>_blackwhitemode" is 1. | Switch to B/W in night mode if enabled.* Only available when "capability_daynight_c<0~(n-1)>_blackwhitemode" is 1. | ||
| * We support this parameter when the version number (httpversion) is equal or greater than 0311c. | |||
| sensitivity | low,normal,high,1~100 | 6/6 Sensitivity of day/night control.There are two value format:"low,normal,high": ifcapability_daynight_c<0~(n-1)>_ircutsensitivity_type=options"1~100": ifcapability_daynight_c<0~(n-1)>_ircutsensitivity_type=normalize* Only available when"capability_daynight_c<0~(n-1)>_ircutsensitivity_type" is not "-".* We support this parameter when the version number (httpversion) is equal or greater than 0311c. | |
7.10.2 IR cut control Illuminators
Group: ircutcontrol_illuminators (capability_daynight_c<0\~(n-1)>_support > 0)
n denotes the value of "capability_nvideoin"
| NAME VALUE SECURITY | (get/set) | DESCRIPTION | |
| builtin_irled_enabled6/6 Enable/disable built-inIR led* Only available when"capability_daynight_illuminators_builtin_support > 0" and "irled" is listed in"capability_daynight_ illuminators _builtin_type"* We support this parameter when the version number (httpversion) is equal or greater than 0311c. | |||
| builtin_whiteled_enabled6/6 Enable/disable built-in white led* Only available when"capability_daynight_illuminators_builtin_support > 0" and "whiteled" is listed in"capability_daynight_ illuminators _builtin_type"* We support this parameter when the version number (httpversion) is equal or greater than 0311c. | |||
| external_do_enabled | 6/6Enable/disable external led mounted on do1* Only available when"capability_daynight_illuminators_external_support > 0" and "do" is listed in"capability_daynight_illuminators_external_interface"* We support this parameter when the version number (httpversion) is equal or greater than 0311c. | ||
| external_do<2~(capability_ndo)>_enabled | 6/6 Enable/disable external led mounted on do<2~(capability_ndo)>* Only available when "capability_ndo > 1"* Only available when"capability_daynight_illuminators_external_support > 0" and "do<2~(capability_ndo)>" | ||
| are listed in"capability_daynight_illuminators_external_interface".* We support this parameter when the version number (httpversion) is equal or greater than 0311c. | |||
| spectrum_mode | visible,ir,irenhanced,blueenhanced* Available values are listed in "capability_daynight_illuminators_spectrum_mode". | 6/6 Set spectrum method .* We support this parameter when the version number (httpversion) is equal or greater than 0311c.* Only available when "capability_daynight_illuminators_spectrum_support > 0". | |
7.11 Image setting per channel
Group: image_c<0\~(n-1)> for n channel products and m profile
n denotes the value of "capability_nvideoin" and m denotes the value of "capability_nvideoinprofile"
| NAME VALUE SECURITY | (get/set) | DESCRIPTION | |
| brightness<Not recommended to use this> | -5~5,100 4/4 | -5: Darker <-> 5: Bright100: Use " image_c< n >_brightnesspercent"* Only available when bit 0 of"capability_image_c<0~(n-1)>_basicsetting"is 1* We replace "brightness" with"brightnesspercent".* This parameter will not be used after theversion number (httpversion) is equal orgreater than 0400a. | |
| contrast<Not recommended to use this> | -5~5,100 4/4 | -5: Less contrast <-> 5: More contrast100: Use "image_c<0~(n-1)>_contrastpercent"* Only available when bit 1 of"capability_image_c<0~(n-1)>_basicsetting"is 1.* We replace "contrast" with "contrastpercent".* This parameter will not be used after theversion number (httpversion) is equal orgreater than 0400a. | |
| saturation<Not recommended to use this> | -5~5,100 4/4 | -5: Less saturation <-> 5: More saturation100: Use " image_c< n >_saturationpercent"* Only available when bit 2 of"capability_image_c<0~(n-1)>_basicsetting"is 1.* We replace "saturation" with | "saturationpercent".* This parameter will not be used after the version number (httpversion) is equal or greater than 0400a. |
| sharpness<Not recommended to use this> | -3~3,100 4/4 | -3: Softer <->3: Sharper100: Use "image_c<0~(n-1)>_sharpnesspercent"* Only available when bit 3 of"capability_image_c<0~(n-1)>_basicsetting"is 1.* We replace "sharpness" with"sharpnesspercent".* This parameter will not be used after the version number (httpversion) is equal or greater than 0400a. | |
| brightnesspercent 0~100 4/4 Set brightness in the normalized range.0: Darker <-> 100: Bright* Only available when bit 0 of"capability_image_c<0~(n-1)>_basicsetting"is 1. | |||
| contrastpercent 0~100 4/4 Set contrast in the normalized range.0: Less contrast <-> 100: More contrast* Only available when bit 1 of"capability_image_c<0~(n-1)>_basicsetting"is 1 | |||
| saturationpercent 0~100 4/4 Set saturation in the normalized range.0: Less saturation <-> 100: More saturation* Only available when bit 2 of"capability_image_c<0~(n-1)>_basicsetting"is 1. | |||
| sharpnesspercent 0~100 4/4 Set sharpness in the normalized range.0: Softer <-> 100: Sharper* Only available when bit 3 of"capability_image_c<0~(n-1)>_basicsetting" | |||
| is 1 | |||
| gammacurve | 0~100 4/4 0: Fine-turned gamma curve by Vivotek. | ||
| 4/4 | Enable/disable low light mode. | ||
| lowlightmode | 4/4 | Enable/disable low light mode. | |
| 4/4 | Enable/disable highlight mask. | ||
| " is 1 | |||
| eis_mode | 4/4 | Electronic image stabilizer0: disable1: enable* Only available when 'eis' is listed in "capability_image_c<0~(n-1)>_is_mode". | |
| eis_strength | 1~100 4/4 Strength of electronic image stabilizer* Only available when 'eis' is listed in "capability_image_c<0~(n-1)>_is_mode". | ||
| dis_mode | 4/4 | Digital image stabilizer0: disable1: enable* Only available when 'dis' is listed in "capability_image_c<0~(n-1)>_is_mode". | |
| dis_strength | 1~100 4/4 Strength of digital image stabilizer* Only available when 'dis' is listed in "capability_image_c<0~(n-1)>_is_mode". | ||
| scene_mode | Available value is listed in "capability_image_c<0~(n-1)>_scenemode_supporttype" | 4/4 Value of scene mode* Only available when "capability_image_c<0~(n-1)>_scenemode_support" is 1 | |
| restoreatwb | 4/4 Restore of adjusting white balance of image according to mode settings | ||
| freeze | 4/4 | Enable/disable Image freeze while patrolling.0: disable1: enable* Only available when "capability_image_c<0~(n-1)>_freeze" is 1 | |
| deinterlace_enable | 4/4 Enable/disable deinterlace function.0: disable1: enable* Only available when "capability_image_c<0~(n-1)>_deinterlace_support" is 1. | ||
| deinterlace_mode spatial,blend | 4/4 Users can choose between two different | ||
| deinterlacing techniques:Spatial mode provides the best image quality,while Blend mode provides better imagequality (than not using the deinterlacefunction at all).* Only available when"capability_image_c<0~(n-1)>_deinterlace_support" is 1. | |||
| xoffset 0~100 4/4 Adjusting the image to proper position horizontally.* Only available when the bit 4 ofcapability_image_c<0~(n-1)>_basicsetting is1. | |||
| yoffset 0~100 4/4 Adjusting the image to proper position vertically.* Only available when the bit 5 ofcapability_image_c<0~(n-1)>_basicsetting is1. | |||
| lens_alignment 0~100 4/4 Stitch the sensors together into focusedposition.* Only available when"capability_image_c<0~(n-1)>_lens_alignment" is 1. | |||
| lens_ldc_mode4/4 | Enable/disable lens distortion correction.* Only available when"capability_image_c<0~(n-1)>_lens_ldc_support" is 1. | ||
| palette_mode Available value | is listed in"capability_image_c<0~(n-1)>_palette_mode" | 1/4 Set color palette option.* Only available when"capability_image_c<0~(n-1)>_palette_support" is 1.* Not support "policy=day" anymore when theversion number (httpversion) is equal orgreater than 0310a. | |
| profile_i<0~(m-1)>_enable | 4/4 | Enable/disable this profile setting | |
| profile_i<0~(m-1)>_policy | night,schedule | 4/4 The mode which the profile is applied to.* Not support "policy=day" anymore when the | |
| version number (httpversion) is equal or greater than 0301a. | |||
| profile_i<0~(m-1)>_begintime hh:mm 4/4 Begin time of schedule mode. | |||
| profile_i<0~(m-1)>_endtime hh:mm 4/4 End time of schedule mode. | |||
| profile_i<0~(m-1)>_brightness<Not recommended to use this> | -5~5,100 4/4 | -5: Darker <-> 5: Bright100: Use "image_c<0~(n-1)>_brightnesspercent"* Only available when bit 0 of"capability_image_c<0~(n-1)>_basicsetting"is 1* We replace "profile_i0_brightness" with"profile_i0_brightnesspercent".* This parameter will not be used after the version number (httpversion) is equal or greater than 0400a. | |
| profile_i<0~(m-1)>_contrast<Not recommended to use this> | -5~5,100 4/4 | -5: Less contrast <-> 5: More contrast100: Use "image_c<0~(n-1)>_contrastpercent"* Only available when bit 1 of"capability_image_c<0~(n-1)>_basicsetting"is 1.* We replace "profile_i0_contrast" with"profile_i0_contrastpercent".* This parameter will not be used after the version number (httpversion) is equal or greater than 0400a. | |
| profile_i<0~(m-1)>_saturation<Not recommended to use this> | -5~5,100 4/4 | -5: Less saturation <-> 5: More saturation100: Use "image_c<0~(n-1)>_saturationpercent"* Only available when bit 2 of"capability_image_c<0~(n-1)>_basicsetting"is 1.* We replace "profile_i0_saturation" with"profile_i0_saturationpercent". | |
| * This parameter will not be used after the version number (httpversion) is equal or greater than 0400a. | |||
| profile_i<0~(m-1)>_sharpness<Not recommended to use this> | -3~3,100 4/4 | -5: Less saturation | uration <-> 5: More saturation100: Use "image_c<0~(n-1)>_saturationpercent"* Only available when bit 2 of"capability_image_c<0~(n-1)>_basicsetting"is 1.* We replace "profile_i0_saturation" with"profile_i0_saturationpercent".* This parameter will not be used after the version number (httpversion) is equal or greater than 0400a. |
| profile_i<0~(m-1)>_brightness percent | 0~100 4/4 Set | brightness in the normalized range.0: Darker <-> 100: Bright* Only available when bit 0 of"capability_image_c<0~(n-1)>_basicsetting"is 1. | |
| profile_i<0~(m-1)>_contrast percent | 0~100 4/4 Set | contrast in the normalized range.0: Less contrast <-> 100: More contrast* Only available when bit 1 of"capability_image_c<0~(n-1)>_basicsetting"is 1 | |
| profile_i<0~(m-1)>_saturation percent | 0~100 4/4 Set | saturation in the normalized range.0: Less saturation <-> 100: More saturation* Only available when bit 2 of"capability_image_c<0~(n-1)>_basicsetting"is 1. | |
| profile_i<0~(m-1)>_sharpness percent | 0~100 4/4 Set | sharpness in the normalized range.0: Softer <-> 100: Sharper* Only available when bit 3 of"capability_image_c<0~(n-1)>_basicsetting"is 1 | |
| profile_i<0~(m-1)>_gammacurve | 0~100 4/4 0: Fine-turned gamma curve by Vivotek.1: Gamma value = 0.012: Gamma value = 0.023: Gamma value = 0.03...100: Gamma value = 1* Note: Although we set gamma value to 100 level, but not all gamma values are valid. Internal module will take the closest valid one. For example, 1~45 may all be mapped to gamma value = 0.45, etc.* Only available when "capability_image_c<0~(n-1)>_gammacurve" is 1 | |
| profile_i<0~(m-1)>_lowlightmode | Enable/disable low light mode.* Only available when "capability_image_c<0~(n-1)>_lowlightmode" is 1 | |
| profile_i<0~(m-1)>_hlm | Enable/disable highlight mask.* Only available when "capability_image_c<0~(n-1)>_hlm" is 1 | |
| profile_i<0~(m-1)>_dnr_mode | 3D noise reduction.0: disable1: enable* Only available when "capability_image_c<0~(n-1)>_dnr" is 1 | |
| profile_i<0~(m-1)>_dnr_strength | Strength of 3DNR* Only available when "capability_image_c<0~(n-1)>_dnr" is 1 | |
| profile_i<0~(m-1) _defog_mode | Enable/disable defog mode.0: disable1: enable* Only available when "capability_image_c<0~(n-1)>_defog_mode" is 1 | |
| profile_i<0~(m-1) _defog_strength | Strength of defog* Only available when "capability_image_c<0~(n-1)>_defog_mode" is 1 | |
| profile_i<0~(m-1)>_eis_mode | Electronic image stabilizer | |
| 0: disable | ||
| 1: enable | ||
| * Only available when 'eis' is listed in "capability_image_c<0~(n-1)>_is_mode". | ||
| profile_i<0~(m-1)>_eis_strength | 1~100 4/4 Strength of electronic image stabilizer | |
| * Only available when 'eis' is listed in "capability_image_c<0~(n-1)>_is_mode". | ||
| profile_i<0~(m-1)>_dis_mode | Digital image stabilizer | |
| 4/4 | 0: disable | |
| 1: enable | ||
| * Only available when 'dis' is listed in "capability_image_c<0~(n-1)>_is_mode". | ||
| profile_i<0~(m-1)>_dis_strength | 1~100 4/4 Strength of digital image stabilizer | |
| * Only available when 'dis' is listed in "capability_image_c<0~(n-1)>_is_mode". | ||
7.12 Exposure window setting per channel
Group: exposurewin_c<0\~(n-1)> for n channel products
n denotes the value of "capability_nvideoin"
(Only available when "capability_image_c<0\~(n-1)>_exposure_mode"=1)
| NAME VALUE | SECURITY | (get/set) | DESCRIPTION |
| mode auto, custom,blc,hlc,center* Available values are listed in "capability_image_c<0~(n-1)>_exposure_winmode" | 4/4 "auto": Use full image view as the only exposure window."custom": Use custom windows."blc": Use BLC(Back Light Compensation), and the only exposure window is located at the center of view."hlc": Use HLC (High Light Compensation), and to perform the masking of bright light area."center": Use Center window as metering area and give the necessary light compensation. | ||
Group: exposurewin_c<0\~(n-1)>_win_i<0\~(k-1)>
n denotes the value of "capability_nvideoin",
k denotes the value of "capability_image_c<0\~(n-1)>_exposure_winnum".
(Only available when "capability_image_c<0\~(n-1)>_exposure_mode" = 1 and when custom is listed in "capability_image_c<0\~(n-1)>_exposure_winmode" and valid when "exposurewin_c<0\~(n-1)>_mode" = custom or "exposurewin_c<0\~(n-1)>_mode" = hlc)
| NAME VALUE | SECURITY | (get/set) | DESCRIPTION |
| enable <boolean> 4/4 Enable or disable the window. | |||
| policy 0~1 | 4/4 0: Indicate exclusive. | 1: Indicate inclusive.* Only available when exclusive is listed in "capability_image_c<0~(n-1)>_exposure_wintype". | |
| home <0~320,0~240> 4/4 Left-top corner coordinate of the window.* Only available when qvga is listed in "capability_image_c<0~(n-1)>_exposure_windomain". | |||
| size <0~320x0~240> 4/4 Width and height of the window.* Only available when qvga is listed in "capability_image_c<0~(n-1)>_exposure_windomain". | |||
| homepx | <0~W,0~H>W: 0~ The current image width -1H: 0~ The current image height -1 | 4/4 Left-top corner coordinate of the window.* Only available when px is listed in "capability_image_c<0~(n-1)>_exposure_windomain". | |
| sizepx <0~Wx0~ H>W: 0~ The current image width -1H: 0~ The current image height -1 | 4/4 Width and height of the window.* Only available when px is listed in "capability_image_c<0~(n-1)>_exposure_windomain". | ||
| homestead | <0~9999,0~9999> | 4/4 | Left-top corner coordinate of the window.* Only available when std is listed in "capability_image_c<0~(n-1)>_exposure_windomain". |
| sizestd | <0~9999x0~9999> | 4/4 | Width and height of the window.* Only available when std is listed in "capability_image_c<0~(n-1)>_exposure_windomain". |
Group: exposurewin_c<0\~(n-1)>_profile_i<0\~(m-1)> for n channel product and m profile,
n denotes the value of "capability_nvideoin", m denotes the value of "capability_nvideoinprofile",
(Only available when "capability_image_c<0\~(n-1)>_exposure_mode"=1)
| NAME VALUE | SECURITY | (get/set) | DESCRIPTION |
| mode auto, custom,blc,hlc,center* Available values are listed in "capability_image_c<0~(n-1)>_exposure_winmode" | 4/4 The mode indicates how to decide the exposure."auto": Use full view as the only one exposure window."custom": Use inclusive and exclusive window."blc": Use BLC(Back Light Compensation), and the only exposure window is located at the center of view."hlc": Use HLC (High Light Compensation), and to perform the masking of bright light area."center": Use Center window as metering area and give the necessary light compensation. | ||
Group: exposurewin_c<0\~(n-1)>_profile_i<0\~(m-1)>_win_i<0\~(k-1)> for m profile and n channel product,
n denotes the value of "capability_nvideoin", m denotes the value of "capability_nvideoinprofile",
k denotes the value of "capability_image_c<0\~(n-1)>_exposure_winnum".
(Only available when "capability_image_c<0\~(n-1)>_exposure_mode"=1 and when custom is listed in
"capability_image_c<0\~(n-1)>_exposure_winmode" and valid when "exposurewin_c<0\~(n-1)>_mode" =custom
or "exposurewin_c<0\~(n-1)>_mode"=hlc)
| NAME VALUE | SECURITY | (get/set) | DESCRIPTION |
| enable | 4/4 Enable or disable the window. | ||
| policy 0~1 | 4/4 0: Indicate exclusive. | 1: Indicate inclusive.* Only available when exclusive is listed in "capability_image_c<0~(n-1)>_exposure_wintype". | |
| home <0~ | 320,0~240> 4/4 Left-top corner coordinate of the | dinate of the | window.* Only available when qvga is listed in "capability_image_c<0~(n-1)>_exposure_ windomain". |
| size <0~3 | 20x0~240> 4/4 Width and height of the window. | * Only available when qvga is listed in "capability_image_c<0~(n-1)>_exposure_ windomain". | |
| homepx | <0~W,0~H>W: 0~ The current image width -1H: 0~ The current image height -1 | 4/4 Left-top corner coordinate of the window.* Only available when px is listed in "capability_image_c<0~(n-1)>_exposure_ windomain". | |
| sizepx <0~Wx0~ H>W: 0~ The current image width -1H: 0~ The current image height -1 | 4/4 Width and height of the window.* Only available when px is listed in "capability_image_c<0~(n-1)>_exposure_ windomain". | ||
| homestead <0~9999,0~9999> 4/4 Left-top corner coordinate of the window.* Only available when std is listed in "capability_image_c<0~(n-1)>_exposure_ windomain". | |||
| sizestd <0~9999x0~9999> 4/4 Width and height of the window.* Only available when std is listed in "capability_image_c<0~(n-1)>_exposure_ windomain". | |||
7.13 Audio input per channel
Group: audioin_c<0\~(n-1)>(capability_naudioin>0)
n denotes the value of "capability_naudioin"
| NAME VALUE SECURITY | (get/set) | DESCRIPTION | |
| source<Not recommended to usethis> | micin, lineinproductdependent> | 4/4 micin => use built-in microphone input.linein => use external microphone input.* Reserved for compatibility, and suggest don't use this since the version number (httpversion) is equal or greater than 0301a.* We replace "source" with "input". More details, please refer the parameter description of "input". | |
| input intmic, extmic | 4/4 intmic: Internal (built-in) microphone.(Only available when capability_audio_intmic = 1)extmic: External microphone input.(Only available whencapability_audio_extmic =1)* Note: If physical microphone switch is showed on product, this value is updated during booting to fit switch status. | ||
| volume_internal 0~100 4/4 Volume when take internal microphone asinput source.0: Minimum100: Maximum* Only available when the channel supports internal microphone (The related bit of "capability_audio_intmic" is equal to 1). | |||
| volume_external 0~100 4/4 Volume when take external microphone asinput source.0: Minimum100: Maximum* Only available when the channel supports | |||
| external microphone (The related bit of "capability_audio_extmic" is equal to 1). | |||
| mute 0, 1 1/4 0: Mute off | 1: Mute on | ||
| gain<Not recommended to usethis> | 0~100 4/4 Gain of input. | (audioin_c<0~(n-1)>_source = linein)* Reserved for compatibility, and suggest don't use this since the version number (httpversion) is equal or greater than 0301a.* We replace "gain" with "volume_internal" and "volume_external". More details, please refer the parameter description of "volume_internal" and "volume_external". | |
| boostmic<Not recommended to usethis> | 0~100 4/4 Enable microphone boost. | Gain of input.(audioin_c<0~(n-1)>_source = micin)* Reserved for compatibility, and suggest don't use this since the version number (httpversion) is equal or greater than 0301a.* We replace "boostmic" with "volume_internal" and "volume_external". More details, please refer the parameter description of "volume_internal" and "volume_external". | |
| s0_codectype aac4, gamr, | g711,g726(Available codec are listed in "capability_audio_codec") | 4/4 Set audio codec type for input.aac4: Advanced Audio Coding (AAC)gamr: Adaptive Multi-Rate (AMR)g711: G.711g726: G.726 | |
| s0_aac4_bitrate 16000, | 32000,48000,64000,96000,128000 | 4/4 Set AAC4 bitrate in bps.* Only available if AAC is supported. | |
| s0_gamr_bitrate | 4750,5150, | 4/4 AMR encoded bitrate in bps. | |
| 5900,6700,7400,7950,10200,12200 | * Only available if AMR is supported. | ||
| s0_g711_mode pcmu, | pcma | 4/4 Set G. | 711 companding algorithm.pcmu: μ-law algorithmpcma: A-law algorithm* Only available if G.711 is supported. |
| s0_g726_bitrate 16000, | 24000,32000,40000 | 4/4 Set G. | 726 encoded bitrate in bps.* Only available if G.726 is supported. |
| s0_g726_bitstreampackingmode | little, big 4/4 Set G. | 726 bit streaming | ming packing mode.little: Little-endian bitstream format.big: Big-endian bitstream format.* Only available if G.726 is supported. |
| s0_g726_vlcmode 0, 1 4/4 | Enable vlcmode for G. | 726. | 0: Standard mode.1: Solve compatibility problem with VLC player.* Only available if G.726 is supported. |
| aec_enable4/4 | Enable acoustic echo cancellation. | * Only available when"capability_audio_aecmode" is "manual".* We support this parameter when theversion number (httpversion) is equal orgreater than 0306b. | |
| alarm_enable | 4/4 Enable audio detection | ||
| alarm_level | 1~100 | 4/4 | Audio detection alarm level |
| profile_i0_enable | 4/4 Enable/disable this profile setting | ||
| profile_i0_policy | night,schedule | 4/4 The mode which the profile is applied to.* Not support "policy=day" anymore whenthe version number (httpversion) is equal or | |
| greater than 0301a. | |||
| profile_i0_begintime hh:mm | 4/4 Begin time of schedule mode. | ||
| profile_i0_endtime hh:mm | 4/4 End time of schedule mode. | ||
| profile_i0_alarm_level 1~10 | 4/4 Audio detection alarm level | ||
7.14 Audio out per channel
Group: audioout_c<0\~(n-1)> for n channel products (capability_audio_audioclip=1)
n denotes the value of "capability_nvideooin"
| NAME VALUE SECURITY | (get/set) | DESCRIPTION | |
| volume | 0~100 | 4/4 | Adjusting audio volume |
7.15 Play an audio clip
Group: audioclip_i<0\~1> (capability_audio_audioclip=1)
| NAME VALUE SECURITY | (get/set) | DESCRIPTION | |
| name | string[40] | 1/4 Specify the audio clip name that can be played when an event occurs. | |
| size | 0,<positive integer> | 1/4 The size of audio clip. | |
| prerecord_seconds 1~10 | 1/4 Indicates the seconds that can be waited before audio clip start to record. | ||
7.16 Motion detection settings
Group: motion_c<0\~(n-1)> for n channel products
n denotes the value of "capability_nvideoin"
| NAME VALUE SECURITY | (get/set) | DESCRIPTION | |
| enable4/4 Enable motion detection. | |||
| win_sensitivity 0 ~ 100 4/4 Sensitivity of all motion detection windows.* The value "0" is reserved for compatibility and will not be used after the version number (httpversion) is equal or greater than 0400a. |
Group: motion_c<0\~(n-1)>_win_i<0\~(k-1)>
n denotes the value of "capability_nvideoin", k denotes the value of "capability_nmotion".
| NAME VALUE SECURITY | (get/set) | DESCRIPTION | |
| enable4/4 Enable motion detection window. | |||
| name string[14] 4/4 Name of motion window. | |||
| polygonstd 0 ~ 9999,0 ~ 9999,0 ~ 9999,0 ~ 9999,0 ~ 9999,0 ~ 9999,0 ~ 9999 | 4/4 Coordinate of polygon window position.(4 points: x0,y0,x1,y1,x2,y2,x3,y3)* Only available when"capability_motion_wintype" = polygon.* Only available when std is listed in"capability_motion_windomain" | ||
| objsize 1 ~ 100 4/4 Percent of motion detection window. | |||
| sensitivity<Not recommended to usethis> | 0 ~ 100 4/4 Sensitivity of motion detection window.* We replace "sensitivity" with "win_sensitivity".* This parameter will not be used after the version number (httpversion) is equal or greater than 0400a. | ||
| polygonpx<Not recommended to usethis> | 0 ~ W,0 ~ H, 0 ~W,0 ~ H, 0 ~ W,0 ~H, 0 ~ W,0 ~ HW: 0~ The current image width -1H: 0~ The current | 4/4 Coordinate of polygon window position.(4 points: x0,y0,x1,y1,x2,y2,x3,y3)* Only available when"capability_motion_wintype" = polygon.* Only available when px is listed in | |
| image height -1 "capability_motion_windomain".* It's recommended to use polygonsd* This parameter will not be used after the version number (httpversion) is equal or greater than 0400a. | ||
| polygon<Not recommended to usethis> | 0 ~ 320,0 ~ 240, 0 ~ 320,0 ~ 240, 0 ~ 320,0 ~ 240, 0 ~ 320,0 ~ 240 | 4/4 Coordinate of polygon window position.(4 points: x0,y0,x1,y1,x2,y2,x3,y3)* Only available when"capability_motion_wintype" = polygon.* Only available when qvga is listed in"capability_motion_windomain"* It's recommended to use polygonsd* This parameter will not be used after the version number (httpversion) is equal or greater than 0400a. |
| left<Not recommended to usethis> | 0 ~ 320 4/4 Left coordinate of window position.* Only available when"capability_motion_wintype" = rectangle.* Only available when qvga is listed in"capability_motion_windomain"* It's recommended to use polygonsd* This parameter will not be used after the version number (httpversion) is equal or greater than 0400a. | |
| top<Not recommended to usethis> | 0 ~ 240 4/4 Top coordinate of window position.* Only available when"capability_motion_wintype" = rectangle.* Only available when qvga is listed in"capability_motion_windomain"* It's recommended to use polygonsd* This parameter will not be used after the version number (httpversion) is equal or greater than 0400a. | |
| width<Not recommended to usethis> | 0 ~ 320 4/4 Width of motion detection window.* Only available when"capability_motion_wintype" = rectangle.* Only available when qvga is listed in"capability_motion_windomain".* It's recommended to use polygonsd* This parameter will not be used after theversion number (httpversion) is equal or greaterthan 0400a. | |
| height<Not recommended to usethis> | 0 ~ 240 4/4 Height of motion detection window.* Only available when"capability_motion_wintype" = rectangle.* Only available when qvga is listed in"capability_motion_windomain".* It's recommended to use polygonsd* This parameter will not be used after theversion number (httpversion) is equal or greaterthan 0400a. | |
Group: motion_c<0\~(n-1)>_profile_i<0\~(m-1)> for m profile and n channel product,
n denotes the value of "capability_nvideoin", m denotes the vaule of "capability_nmotionprofile",
(capability_nmotionprofile > 0)
| NAME VALUE SECURITY | (get/set) | DESCRIPTION | |
| enable4/4 Enable profile 1 ~ (m-1). | |||
| policy | night, schedule | 4/4 The mode which the profile is applied to.* Not support "policy=day" anymore when the version number (httpversion) is equal or greater than 0301a. | |
| begintime hh:mm 4/4 Begin time of schedule mode. | |||
| endtime hh:mm 4/4 End time of schedule mode. | |||
| win_sensitivity 0 ~ 100 4/4 Sensitivity of all motion detection windows.* The value "0" is reserved for compatibility and will not be used after the version number | |||
| (httpversion) is equal or greater than 0400a. | |||
Group: motion_c<0\~(n-1)>_profile_i<0\~(m-1)>_win_i<0\~(k-1)> for m profile and n channel product, n denotes the value of "capability_nvideoin", m denotes the vaule of "capability_nmotionprofile",
k denotes the value of "capability_nmotion".
| NAME VALUE SECURITY | (get/set) | DESCRIPTION | |
| enable4/4 Enable motion detection | window. | ||
| name string[14] 4/4 Name of motion window. | |||
| polygonstd 0 ~ 9999,0 ~ 9999,0 ~ 9999,0 ~ 9999,0 ~ 9999,0 ~ 9999 | 4/4 Coordinate of polygon window position.(4 points: x0,y0,x1,y1,x2,y2,x3,y3)* Only available when"capability_motion_wintype" = polygon.* Only available when std is listed in"capability_motion_windomain | ||
| objsize 1 ~ 100 4/4 Percent of motion detection | window. | ||
| sensitivity<Not recommended to usethis> | 0 ~ 100 4/4 Sensitivity of motion detection window.* We replace "sensitivity" with"win_sensitivity"* This parameter will not be used after the version number (httpversion) is equal or greater than 0400a. | ||
| polygonpx<Not recommended to usethis> | 0 ~ W,0 ~ H, 0 ~W,0 ~ H, 0 ~ W,0 ~ H, 0 ~ W,0 ~ HW: 0~ The current image width -1H: 0~ The current image height -1 | 4/4 Coordinate of polygon window position.(4 points: x0,y0,x1,y1,x2,y2,x3,y3)* Only available when"capability_motion_wintype" = polygon.* Only available when px is listed in"capability_motion_windomain".* It's recommended to use polygonsd* This parameter will not be used after the version number (httpversion) is equal or greater than 0400a. | |
| polygon<Not recommended to use | 0 ~ 320,0 ~ 240, 0 ~ 320,0 ~ 240, 0 ~ | 4/4 Coordinate of polygon window position.(4 points: x0,y0,x1,y1,x2,y2,x3,y3) | |
| this> 320,0 ~ 240, 0 ~ | 320,0 ~ 240 | * Only available when"capability_motion_wintype" = polygon.* Only available when qvga is listed in"capability_motion_windomain".* It's recommended to use polygonsd* This parameter will not be used after theversion number (httpversion) is equal orgreater than 0400a. | |
| left<Not recommended to usethis> | 0 ~ 320 4/4 Left co | ordinate of w | window position.* Only available when"capability_motion_wintype" = rectangle.* Only available when qvga is listed in"capability_motion_windomain"* It's recommended to use polygonsd* This parameter will not be used after theversion number (httpversion) is equal orgreater than 0400a. |
| top<Not recommended to usethis> | 0 ~ 240 4/4 Top co | ordinate of w | window position.* Only available when"capability_motion_wintype" = rectangle.* Only available when qvga is listed in"capability_motion_windomain"* It's recommended to use polygonsd* This parameter will not be used after theversion number (httpversion) is equal orgreater than 0400a. |
| width<Not recommended to usethis> | 0 ~ 320 4/4 Width of motion det | ection window.* Only available when"capability_motion_wintype" = rectangle.* Only available when qvga is listed in"capability_motion_windmain"* It's recommended to use polygonsd | |
| * This parameter will not be used after the version number (httpversion) is equal or greater than 0400a. | |||
| height | 0 ~ 240 4/4 Height of motion detection window. | ||
| * Only available when "capability_motion_wintype" = rectangle. | |||
| * Only available when qvga is listed in "capability_motion_windomain". | |||
| * It's recommended to use polygonsd | |||
| * This parameter will not be used after the version number (httpversion) is equal or greater than 0400a. | |||
7.17 Tampering detection settings
Group: tampering_c<0\~(n-1)> for n channel products (capability_tampering > 0)
n denotes the value of "capability_nvideooin"
| NAME VALUE SECURITY | (get/set) | DESCRIPTION | |
| enable4/4 Enable or disable tamper threshold 0~100 4/4 Threshold of tamper detection. | detection. | ||
| duration 10~600 | 4/4 If tampering | value exceeds the "threshold" for more than "duration" second(s), then tamper detection is triggered. | |
| ignorewidth | 0,<positive integer> | 1/7 | Indicate the width to offset to start to analysis the image. |
| dark_enable4/4 Enable or disable image too dark detection | |||
| dark_threshold | 0~100 4/4 Threshold of image too dark detection | ||
| dark_duration | 1~10 | 4/4 If image too dark value exceeds the "threshold" for more than "duration" second(s), then image too dark detection is triggered. | |
| bright_enable | 4/4 Enable or disable image too bright detection | ||
| bright_threshold | 0~100 4/4 Threshold of image too bright detection | ||
| bright_duration | 1~10 | 4/4 If image too bright value exceeds the "threshold" for more than "duration" second(s), then image too bright detection is | |
| triggered. | |||
| blurry_enable | 4/4 Enable or disable | image too bl | urry detection |
| blurry_threshold 0~100 4/4 | Threshold of image | too blurry det | ection |
| blurry_duration 1~10 4/4 | If image too blurry val | ue exceeds | the"threshold" for more than "duration"second(s), then image too blurry detection is triggered. |
7.18 DDNS
Group: ddns (capability_protocol_ddns > 0)
| NAME VALUE SECURITY | (get/set) | DESCRIPTION | |
| enable6/6 Enable or disable the dynamic DNS. | |||
| provider | DyndnsDynamic, DyndnsCustom, Safe100 | 6/6 Dyndns | Dynamic => dyndns.org (dynamic) DyndnsCustom => dyndns.org Safe100 => safe100.net |
| _hostname string[128] 6/6 Your DDNS hostname. | |||
| _username email | string[64] | 6/6 | Your user name or email to login to the DDNS service provider |
| _passwordkey | string[64] | 7/6 | Your password or key to login to the DDNS service provider. |
7.19 Express link
Group: expresslink
| PARAMETER | VALUE | SECURITY (get/set) | DESCRIPTION |
| enable6/6 Enable or disable express link. | |||
| state | onlycheck, onlyoffline, checkonline, badnetwork | 6/6 Camera | will check the status of network environment and express link URL |
| url | string[64] | 6/6 | The url user define to link to camera |
7.20 UPnP presentation
Group: upnppresentation
| NAME VALUE SECURITY | (get/set) | DESCRIPTION | |
| enable6/6 Enable or disable the UPnP presentation service. | Enable or disable the UPnP presentation service. | P presentation service. | service. |
7.21 UPnP port forwarding
Group: upnpportforwarding
| NAME VALUE SECURITY | (get/set) | DESCRIPTION | |
| enable6/6 Enable or disable the UPnP port forwarding service. | |||
| upnpnatstatus 0~3 6/7 The status of UPnP port forwarding, used internally.0 = OK, 1 = FAIL, 2 = no IGD router, 3 = no need for port forwarding | |||
7.22 System log
Group: syslog
| NAME VALUE SECURITY | (get/set) | DESCRIPTION | |
| enableremotelog6/6 Enable remote log. | |||
| serverip | 6/6 Log server IP address. | ||
| serverport | 514, 1025~65535 | 6/6 Server port used for log. | |
| level | 0~7 | 6/6 Levels | used to distinguish the importance of the information:0: LOG_EMERG1: LOG_ALERT2: LOG_CRIT3: LOG_ERR4: LOG_WARNING5: LOG_NOTICE6: LOG_INFO7: LOG_DEBUG |
| setparamlevel | 0~2 | 6/6 Show log of parameter setting. | |
| 0: disable1: Show log of parameter setting set from external.2. Show log of parameter setting set from external and internal. | |||
7.23 SNMP
Group: snmp (capability_protocol_snmp > 0)
| NAME VALUE SECURITY | (get/set) | DESCRIPTION | |
| v26/6 SNMP | v2 enabled. 0 for disable, 1 for enable | ||
| v36/6 SNMP | v3 enabled. 0 for disable, 1 for enable | ||
| secnamerw string[31] 6/6 | Read/write security name | ||
| secnamero string[31] 6/6 | Read only security name | ||
| authpwrw string[8~128] | 7/6 Read/write authentication password | ||
| authpwro string[8~128] | 7/6 Read only authentication password | ||
| authtyperw MD5,SHA 6/6 | Read/write authentication type | ||
| authtypero MD5,SHA 6/6 | Read only authentication type | ||
| encryptpwrw string[8~128] | 7/6 Read/write password | ||
| encryptpwro | string[8~128] 7/6 Read only password | ||
| encrypttyperw | DES | 6/6 Read/write encryption type | |
| encrypttypero | DES | 6/6 Read only encryption type | |
| rwcommunity | string[31] 6/6 Read/write community | ||
| rocommunity | string[31] 6/6 Read only community | ||
| syslocation | string[128] | 6/6 System location | |
| syscontact | string[128] | 6/6 System contact | |
7.24 Layout configuration
Group: layout
| NAME VALUE SECURITY | (get/set) | DESCRIPTION | |
| logo_default1/6 0 => Custom logo | 1 => Default logo | ||
| logo_link | string[128]http://www.vivotek.com | 1/6 Hyperlink of the logo | |
| logo_powerbyvvtk_hidden | 1/6 | 0 => display the power by vivotek logo1 => hide the power by vivotek logo | |
| custombutton_manualtrigger_show | 1/6 Show or hide manual trigger (VI) button in homepage0 -> Hidden1 -> Visible | ||
| theme_option 1~4 1/6 1~3: One of the default themes. | 4: Custom definition. | ||
| theme_color_font string[7] | 1/6 Font color | ||
| theme_color_configfont | string[7] 1/6 Font color of configuration area. | ||
| theme_color_titlefont string[7] | 1/6 Font color of video title. | ||
| theme_color_controlbackground | string[7] 1/6 Background color of control area. | ||
| theme_color_configbackground | string[7] 1/6 Background color of configuration area. | ||
| theme_color_videobackground | string[7] 1/6 Background color of video area. | ||
| theme_color_case | string[7] 1/6 Frame color |
7.25 Privacy mask
Group: privacymask_c<0\~(n-1)> for n channel products and m privacy mask window.
n denotes the value of "capability_nvideoin" and m denotes the value of
"capability_videoin_c<0\~(n-1)>_nprivacymask"
| NAME VALUE SECURITY | (get/set) | DESCRIPTION | |
| enable4/4 Enable privacy mask. | |||
| win_i<0~(m-1)>_enable4/4 Enable privacy mask window. | |||
| win_i<0~(m-1)>_name string[14] 4/4 Name of the privacy mask window. | |||
| win_i<0~(m-1)>_left 0 ~320 4/4 Left coordinate of window position.* Only available when"capability_image_c<0~(n-1)>_privacymask_wintype" = rectangle. | |||
| win_i<0~(m-1)>_top 0 ~240 4/4 Top coordinate of window position.* Only available when"capability_image_c<0~(n-1)>_privacymask_wintype" = rectangle. | |||
| win_i<0~(m-1)>_width 0 ~320 4/4 Width of privacy mask window.* Only available when"capability_image_c<0~(n-1)>_privacymask_wintype" = rectangle. | |||
| win_i<0~(m-1)>_height 0 ~240 4/4 Height of privacy mask window.* Only available when"capability_image_c<0~(n-1)>_privacymask_wintype" = rectangle. | |||
| win_i<0~(m-1)>_polygon 0 ~320,0 ~240,0 ~320,0 ~240,0 ~320,0 ~240,0 ~320,0 ~240 | 4/4 Coordinate of polygon window position.(4 points: x0,y0,x1,y1,x2,y2,x3,y3)* Only available when"capability_image_c<n>_privacymask_wintype" = polygon.* Only available when qvga is listed in"capability_image_c<0~(n-1)>_privacymask_windomain". | ||
| win_i<0~(m-1)>_polygonpx 0 ~ W,0 ~ H,0 ~ W,0 ~ H,0 ~ W,0 ~ H, | 4/4 Coordinate of polygon window position.(4 points: x0,y0,x1,y1,x2,y2,x3,y3)* Only available when0 ~ W,0 ~ HW: 0~ The current image width -1H: 0~ The current image height -1 | "capability_image_c<0~(n-1)>_privacymask_wintype" = polygon.* Only available when px is listed in "capability_image_c<0~(n-1)>_privacymask_windomain". | |
| win_i<0~(m-1)>_polygonstd | 0 ~ 9999,0 ~ 9999,0 ~ 9999,0 ~ 9999,0 ~ 9999,0 ~ 9999,0 ~ 9999 | 4/4 Coordinate of polygon window position.(4 points: x0,y0,x1,y1,x2,y2,x3,y3)* Only available when "capability_image_c<0~(n-1)>_privacymask_wintype" = polygon.* Only available when std is listed in "capability_image_c<0~(n-1)>_privacymask_windomain". | |
7.26 3D Privacy mask
Group: privacymask3d_c<0\~(n-1)> for n channel products and m privacy mask window.
(capability_image_c<0\~(n-1)>_privacymask_wintype = 3Drectangle)
n denotes the value of "capability_nvideoin" and m denotes the value of
"capability_videoin_c<0\~(n-1)>_nprivacymask"
| NAME VALUE SECURITY | (get/set) | DESCRIPTION | |
| enable4/4 Enable the 3D privacy mask | |||
| color | 0~"capability_image_c<0~(n-1)>_privacymask_ncolor"-1 | 4/4 Privacy mask color | |
| win_i<0~(m-1)>_name string[40] 4/4 Name of the privacy mask window. | |||
| win_i<0~(m-1)>_pan | "capability_ptz_c<0~(n-1)>_minpan" ~"capability_ptz_c<0~(n-1)>_maxpan" | 4/4 Pan position of window position.* Only available when bit0 of "capability_camctrl_c<0~(n-1)>_buildinpt" is "1" | |
| win_i<0~(m-1)>_tilt | "capability_ptz_c<0~(n-1)>_mintilt" ~"capability_ptz_c<0~(n-1)>_maxtilt" | 4/4 Tilt position of window position.* Only available when bit1 of "capability_camctrl_c<0~(n-1)>_buildinpt" is "1" | |
| win_i<0~(m-1)>_zoom | "capability_ptz_c<0~(n-1)>_minzoom" ~ | 4/4 Zoom position of window position. | |
| "capability_ptz_c<0~(n-1)>_maxzoom" | |||
| win_i<0~(m-1)>_fliped | Flip side of window | ow position.0: Non-flip side1: Flip side | |
7.27 Capability
Group: capability
| NAME VALUE SECURITY | (get/set) | DESCRIPTION | ||
| api_httpversion | This number start with 0301a. | 0/7 The version of VIVOTEK WebAPI with 4 integers plus 1 alphabet, There are composed by "major version", "minor version", "revision", "_platform". ex: 0301a_1Major versionIncrease the major version when change, remove the old features/interfaces or the firmware has substantially change in architecture and not able to roll back to previous version. This may cause incompatibility with supporting software.Minor versionIncrease the minor version when add new features/interfaces without change the old features and interfaces.RevisionIncrease the revision when fix bugs without change any features of the output.platformThis is a constant, it is used to distinguish between different platformsAPI version format:MMmmr_kWhere "MM" is the major version, "mm" is the minor version and "r" is the revision.'M' and 'm' and 'k' are decimal digit from 0 to | 1 | |
| 9, while 'r' is an alphabetic.EX: 0302b_1 => Major version = 03, minor version = 02, revision = b, platform = 1The 4 integer numbers are WebAPI version, we use short name: [httpversion] for it in this document.The 5th character is model-based version for API bug-fix and it's default to "a".Ex: If some APIs in a model does not follow the API definition of 0301a_1, we will fix them and change this API value to 0301b_1. | ||||
| bootuptime0/7 Server bootup time. | ||||
| nir0,0/7 Number of IR interfaces.(Recommend to use capability_daynight_c<0~"capability_nvideo in"-1>_builtinir for built-in IR and capability_daynight_c<0~"capability_nvideo in"-1>_externalir for external IR)* Not support this parameter anymore when the version number (httpversion) is equal or greater than 0301a. | 0,0/7 Number of IR interfaces.(Recommend to use capability_daynight_c<0~"capability_nvideo in"-1>_builtinir for built-in IR and capability_daynight_c<0~"capability_nvideo in"-1}_externalir for external IR) * Not support this parameter anymore when the version number (httpversion) is equal or greater than 0301a. | 0,0/7 Number of IR interfaces.(Recommend to use capability_daynight_c<0~"capability_nvideo in"-1}_builtinir for built-in IR and capability_daynight_c<0~"capability_nvideo in"-1}_externalir for external IR) * Not support this parameter anymore when the version number (httpversion) is equal or greater than 0301a. | ||
| npir | 0,0/7 Number of PIRs. | 0,0/7 Number of PIRs. | 0,0/7 Number of PIRs. | |
| ndi | 0,0/7 Number of digital inputs. | 0,0/7 Number of digital inputs. | 0,0/7 Number of digital inputs. | |
| nvi | 0,0/7 Number of virtual inputs (manual trigger) | 0,0/7 Number of virtual inputs (manual trigger) | 0,0/7 Number of virtual inputs (manual trigger) | |
| ndo | 0,0/7 Number of digital outputs. | 0,0/7 Number of digital outputs. | 0,0/7 Number of digital outputs. | |
| naudioin | 0,0/7 The number of audio input channel. 0 means no audio input support. | 0,0/7 The number of audio input channel. 0 means no audio input support. | 0,0/7 The number of audio input channel. 0 means no audio input support. | |
| naudioout | 0,0/7 The number of audio output channel | 0,0/7 The number of audio output channel. | 0,0/7 The number of audio output channel. | |
| nvideoin0/7 Number of video inputs. | ||||
| nvideoout 0,Integer>0/7 Number of video output interface. | ||||
| nvideoinprofile0/7 Number of video input profiles. | ||||
| nmediastream | 0/7 Number of media stream per channels. | |||
| naudiosetting | 0/7 Number of audio settings per channel.* Not support this parameter anymore when the version number (httpversion) is equal or greater than 0301a.* We replace "naudiosetting" with "naudioin". More details, please refer the parameter description of "volume_internal" and "volume_external". | |||
| nuart | 0,<positive integer> | 0/7 Number of UART interfaces. | ||
| nmotion | 0/7 The number of motion window. | |||
| nmotionprofile 0,<positive integer> | 0/7 Number of motion profiles. | |||
| nevent 0,<positive integer> | 0/7 Number of event.* We support this parameter when the version number (httpversion) is equal or greater than 0311c. | |||
| nrecording 0,<positive integer> | 0/7 Number of recording.* We support this parameter when the version number (httpversion) is equal or greater than 0309a. | |||
| ptzenabled 0,<positive integer> | 0/7 An 32-bit integer, each bit can be set separately as follows:Bit 0 => Support camera control function;0(not support), 1(support)Bit 1 => (only available when bit0 is 1)Built-in or external video source;0(external), 1(built-in)Bit 2 => (only available when bit0 is 1)Support pan operation;0(not support), 1(support)Bit 3 => (only available when bit0 is 1)Support tilt operation;0(not support), 1(support)Bit 4 => (only available when bit0 is 1)Support zoom operation;0(not support), 1(support)(only available when RS-485 interface is | |||
| supported or SD/PZ/PT/PD/video server series)Bit 5 => (only available when bit0 is 1)Support focus operation;0(not support), 1(support)(only available when RS-485 interface is supported or SD/PZ/PT/PD/video server series)Bit 6 => (only available when bit0 is 1)Reserved bit; always 0.Bit 7 => (only available when bit0 is 1)External or built-in PT;0(built-in), 1(external) | |||
| windowless0/7 Indicate whether to support windowless plug-in. | |||
| evctrlchannel0/7 Indicate whether to support HTTP tunnel forevent/control transfer. | |||
| joystick0/7 Indicate whether to support joystick control. | |||
| remotefocus0/7 An 4-bit integer, which indicates thesupportive application of remotefocus.If the value of this parameter is larger than 0,it means that the camera supportsremotefocus function.bit 0 => Indicate whether to support bothzoom and focus function.bit 1 => Only support zoom function.bit 2 => Only support focus function.bit 3 => Currently, this is a reserved bit,and the default value is 0.* It's strongly non-recommended to use this.* This is reserved for compatibility and willnot be used after the version number(httpversion) is equal or greater than 0400a.* We replace "capability_remotefocus" with "capability_image_c0_remotefocus". | |||
| npreset 0,integer>0/7 Number of preset locationspresettourdirection0/7 Indicate whether to support preset tour direction function. It means users can choose which direction the preset tour goes.* We support this parameter when the version number (httpversion) is equal or greater than 0307a. | |||
| eptz 0,integer> | 0/7 For "nvideoin" = 1, the definition is as following:A 32-bits integer, each bit can be set separately as follows:Bit 0 => 1st stream supports ePTZ or not.Bit 1 => 2nd stream supports ePTZ or not, and so on.For nvideoin >= 2, the definition is different:First all 32 bits are divided into groups for channel.Ex:nvideoin = 2, bit 0~15 are the 1st group for 1st channel, bit 16~31 are the 2nd group for 2nd channel.nvideoin = 3, bit 0~9 are the 1st group for 1st channel, bit 10~19 are the 2nd group for 2nd channel, bit 20~31 are the 3rd group for 3rd channel.Then, the 1st bit of the group indicates 1st stream of a channel support ePTZ or not. The 2nd bit of the group indicates 2nd stream of a channel support ePTZ or not, and so on.* For most products, the last stream of a channel will not support ePTZ. It is reserved for full view of the channel. For some dual-stream products, both streams support ePTZ. | ||
| nanystream 0,integer> | 0/7 number of any media stream per channel | ||
| iva0/7 Indicate whether to support Intelligent Video analysis | |||
| whitelight0/7 Indicate whether to support white light led. | |||
| * We replace this parameter with "capability_daynight_c<0~(n-1)>_builtinwled" when the version number (httpversion) is equal or greater than 0309d. | |||
| iris0/7 Indicate whether to support iris control. | |||
| supportsd0/7 Indicate whether to support local storage. | |||
| fisheye0/7 The parameter is used to determine whether the product is fisheye or not. | |||
| tampering0/7 Indicate whether to support tampering detection. | |||
| tamperingmode | tamper,toodark,toob right,tooblurry | 0/7 Available tampering mode list.* Only available when "capability_tampering" is 1. | |
| adaptiverecording0/7 Indicate whether to support adaptive recording. | |||
| adaptivestreaming0/7 Indicate whether to support adaptive streaming. | |||
| supporttriggertypes | seq,boot,motion,net workfail,recnotify,tampering,vi,vadp,di, volalarm,temperature,pir, visignal, backup,smartsd, shockalarm,virestore | 0/7 list all the trigger types which are supported in the camera:"seq" = Periodic condition"boot" = System boot"motion" = Video motion detection"networkfail" = network connection failure"recnotify" = Recording notification."tampering" = Tamper detection."vi" = Virtual input (Manual trigger)"vadp" = VADP trigger."di" = Digital input."volalarm" = Audio detection."temperature" = Temperature detection."pir" = PIR detection."visignal" = Video input signal loss."backup" = Backing up recorded files."smartsd" = Lifetime detection of SD card."shockalarm" = Shock detection."virestore" = Video input signal restore.* Only available when [httpversion] >= 0301a | |
| media_num 0,<positive integer> 0/7 Number of media number. | |||
| * We support this parameter when the version number (httpversion) is equal or greater than 0311c. | |||
| storage_dbenabled <boolean> 0/7 Media files are indexed in database. | |||
| protocol_https <boolean> 0/7 Indicate whether to support HTTP over SSL. | |||
| protocol_rtsp <boolean> 0/7 Indicate whether to support RTSP. | |||
| protocol_sip <boolean> 0/7 Indicate whether to support SIP. | |||
| protocol_maxconnection <positive integer> 0/7 The maximum number of allowed simultaneous connections. | |||
| protocol_maxgenconnection <not support anymore> | <positive integer> 0/7 The maximum general streaming connections .* Not support this parameter anymore when the version number (httpversion) is equal or greater than 0311c. | ||
| protocol_rtp_multicast_scalable | <boolean> 0/7 Indicate whether to support scalable multicast. | ||
| protocol_rtp_multicast_backchannel | <boolean> 0/7 Indicate whether to support backchannel multicast. | ||
| protocol_rtp_tcp <boolean> 0/7 Indicate whether to support RTP over TCP. | |||
| protocol_rtp_http <boolean> 0/7 Indicate whether to support RTP over HTTP. | |||
| protocol_spush_mjpeg <boolean> 0/7 Indicate whether to support server push MJPEG. | |||
| protocol_snmp <boolean> 0/7 Indicate whether to support SNMP. | |||
| protocol_ipv6 | <boolean> 0/7 Indicate whether to support IPv6. | ||
| protocol_pppoe | <boolean> 0/7 Indicate whether to support PPPoE. | ||
| protocol_ieee8021x <boolean> 0/7 Indicate whether to support IEEE802.1x. | |||
| protocol_qos_cos | <boolean> 0/7 Indicate whether to support CoS. | ||
| protocol_qos_dscp | <boolean> 0/7 Indicate whether to support QoS/DSCP. | ||
| protocol_ddns | <boolean> 0/7 Indicate whether to support DDNS. | ||
| videoin_type | 0, 1, 2 | 0/7 0 => Interlaced CCD1 => Progressive CCD2 => CMOS | |
| videoin_nresolution | <positive integer> 0/7 This equals "capability_videoin_c0_nresolution". | ||
| * This is kept for compatibility. | |||
| videoin_resolution A list of | 0/7 This equals"capability_ videoin_c0_resolution".* This is kept for compatibility. | ||
| videoin_maxframerate A list of 0/7 This equals"capability_ videoin_c0_maxframerate".* This is kept for compatibility. | |||
| videoin_mjpeg_maxframe rate | A list ofand "-" | 0/7 This equals"capability_ videoin_c0_mjpeg_maxframerate".* This is kept for compatibility. | |
| videoin_h264_maxframerate | A list ofand "-" | 0/7 This equals"capability_ videoin_c0_h264_maxframerate".* This is kept for compatibility. | |
| videoin_codec mjpeg, h264, h265 | 0/7 Available codec of a device, split by comma.The sequence is not limited.EX:FD8183 supports H.264 and MJPEG, then this is "mjpeg,h264".IP9171 supports H.264, MJPEG and H.265, then this is "mjpeg,h264,h265" | ||
| videoin_streamcodec A list of | 0/7 This equals"capability_ videoin_c0_streamcodec".* This is kept for compatibility. | ||
| videoin_flexiblebitrate | 0/7 Indicate whether to support flexible bit rate control. | ||
| videoout_codec A list of the available codec types separated by commas | 0/7 Available codec list."-": not supported | ||
| timeshift0/7 | Indicate whether to support time shift | caching stream. | |
| audio_aec0/7 | Indicate whether to support acoustic cancellation. | ||
| audio_aecmode | auto,manual | 0/7 Indicate the acoustic echo cancellation control mode."auto": control by camera automatically."manual": Manually turn on/off the control mode.*Only available when "capability_audio_aec" is "1"* We support this parameter when the version number (httpversion) is equal or greater than 0306b. | |
| audio_aecaffect | -,maxframerate:fixed:15productdependent> | 0/7 | When acoustic echo cancellation function is enabled, some features may become malfunction or be forced to a given value.The affected functions are list here.The format is "Affect API name":"Policy":"Description""Policy" can be categorized into following groups:- (disabled) : UI turns grey and users can't select it.- (unchanged) : UI keeps the status as before and user can't change it.- (hidden) : UI is hidden.- (fixed) : UI is fixed to one selection or value.- (ranged) : UI is fixed to multiple selections or values.- (enabled) : UI is checked.- (notsupport) : the affected function is not available."Affect API name" can be described in hierarchy, such as"exposurewin.mode.blc:disabled:" which means blc exposure window is disabled. API name can be one word as well, such as "exposurelevel:fixed:6" which means exposurelevel is fixed to level 6."Description" can be a nonnegative integer or string or NULL.For example:"maxframerate:fixed:15" which means the max frame rate is 15fps when acoustic echo cancellation function is enabled."-" means no feature is affected.* Only available when "capability_audio_aec" is "1"* We support this parameter when the version number (httpversion) is equal or greater than 0306b. |
| audio_mic | <boolean> 0/7 Indicate whether to support built-in microphone input.* Not support this parameter anymore when the version number (httpversion) is equal or greater than 0301a.* We replace "audio_mic" with "audio_intmic". | ||
| audio_intmic | <0~Positive Integer> | 0/7 Internal (Built-in) Microphone.0: Not support1: SupportBit 0 for CH0, bit 1 for CH1, and so on. | |
| audio_extmic | <0~Positive Integer> | 0/7 External Microphone.0: Not support1: SupportBit 0 for CH0, bit 1 for CH1, and so on. | |
| audio_alarm | <0~Positive Integer> | 0/7 0: Not support audio alarm.1: Support audio alarm.Bit 0 for CH0, bit 1 for CH1, and so on. | |
| audio_linein | <boolean> 0/7 Indicate whether to support external line input.* Not support this parameter anymore when | ||
| the version number (httpversion) is equal or greater than 0301a.* It will be replaced by audio_intmic and audio_extmic. | |||
| audio_lineout | 0/7 Indicate whether to support line output. | ||
| audio_michardwareswitch | 0/7 Indicate whether the hardware supports built-in/external mic switch | ||
| audio_headphoneout | 0/7 Indicate whether to support headphone output.* Not support this parameter anymore when the version number (httpversion) is equal or greater than 0301a. | ||
| audio_audioclip | 0/7 Indicate whether to support audio clip function.* We support this parameter when the version number (httpversion) is equal or greater than 0309a. | ||
| audioin_codec aac4, gamr, | g711,g726, - | 0/7 Available audio codec. We take comma to split codec without any space."aac4": Advanced Audio Coding (AAC)"gamr": Adaptive Multi-Rate (AMR)"g711": G.711"g726": G.726"-": Not supported. | |
| audioout_codec g711, - | 0/7 Available codec list for SIP."-": Not supported. | ||
| motion_wintype rectangle, | polygon,- 0/7 The supported motion window type."polygon": The window is a 2D polygon shape."rectangle": The window is a 2D rectangle shape."-": Not supported. | ||
| motion_windomain qvga, | px, std, - 0/7 The domain to set an | motion window."qvga": a 320x240 range to represent the whole image. | |
| "px": Locate a window in the image with pixels."std": A normalized 0~9999 range."-": Not supported. | |||
| smartstream_support <boolean> 0/7 Indicate whether smart stream is supported. | |||
| smartstream_version <integer> 0/7 Number of smart stream version.* Only available when"capability_smartstream_support" is 1 | |||
| smartstream_nstream <positive integer> 0/7 Number of stream that support smart stream.* Only available when"capability_smartstream_support" is 1 | |||
| smartstream_windomain qvga, px, std, - 0/7 The domain to set an focus window."qvga": a 320x240 range to represent the whole image."px": Locate a window in the image with pixels."std": A normalized 0~9999 range."-": Not supported.* Only available when"capability_smartstream_support" is 1 | |||
| smartstream_mode_autotracking | <boolean> 0/7 Indicate whether autotracking smart stream is supported.* Only available when"capability_smartstream_support" is 1 | ||
| smartstream_mode_manual | <boolean> 0/7 Indicate whether manual smart stream is supported.* Only available when"capability_smartstream_support" is 1 | ||
| smartstream_mode_hybrid | <boolean> 0/7 Indicate whether hybrid(autotracking+manual) smart stream is supported.* Only available when"capability_smartstream_support" is 1 | ||
| smartstream_nwindow_autotracking | <positive integer> 0/7 Maximum number of tracking window of autotracking.* Only available when"capability_smartstream_support" is 1 | ||
| smartstream_nwindow_manual | <positive integer> 0/7 Maximum number of tracking window of manual. | ||
| * Only available when "capability_smartstream_support" is 1 | |||
| smartstream_nwindow_hybrid_autotracking | 0/7 Maximum | number of tracking window of autotracking in hybrid mode.* Only available when "capability_smartstream_support" is 1 | |
| smartstream_nwindow_hybrid_manual | 0/7 Maximum | number of tracking window of manual in hybrid mode.* Only available when "capability_smartstream_support" is 1 | |
| vadp_supportfeature | 0/7 An | 32-bit integer | , each bit can be set separately as follows:Bit 0 => VADP interfaceBit 1 => Capture video raw dataBit 2 => Support encode jpegBit 3 => Capture audio raw dataBit 4 => Support event triggerBit 5 => Support license registrationBit 6 => Support shared memory APIBit 7 => Support digital signature of packageBit 8 => Support snapshot |
| vadp_npackage | 0/7 Indicate | the maximum | number of VADP package that can be uploaded to the device. |
| camctrl_httptunnel | 0/7 Indicate whether | to support httptunnel.* Not support this parameter anymore when the version number (httpversion) is equal or greater than 0301b.* It will be replaced by capability_camctrl_ptztunnel. | |
| camctrl_ptztunnel | 0/7 Indicate whether to support | ptztunnel.* We support this parameter when the version number (httpversion) is equal or greater than 0301b.This equals "capability_camctrl_c0_ptztunnel".* This is kept for compatibility. | |
| camctrl_privilege | 0/7 Indicate whether to support | "Manage Privilege" of PTZ control in the security page.1: support both /cgi-bin/camctrl/camctrl.cgi | |
| and /cgi-bin/viewer/camctrl.cgi0: support only /cgi-bin/viewer/camctrl.cgiThis is equivalentto"capability_camctrl_c0_privilege".* This is kept for compatibility. | |||
| uart_httptunnel | 0/7 Indicate whether to support | HTTP tunnel forUART transfer. | |
| transmission_mode | Tx,Rx,Both | 0/7 Indicate transmission mode of the machine:TX = server, Rx = receiver box, Both = DVR. | |
| network_wire | 0/7 Indicate whether to support Ethernet. | ||
| network_wireless | 0/7 Indicate whether to support wireless. | ||
| network_dualmode | 0/7 Indicate whether network dual mode issupported.* Only available when"capability_network_wireless" is "1"* We support this parameter when theversion number (httpversion) is equal orgreater than 0305a. | ||
| wireless_s802dot11b | 0/7 Indicate whether to support wireless802.11b+. | ||
| wireless_s802dot11g | 0/7 Indicate whether to support wireless802.11g. | ||
| wireless_s802dot11n | 0/7 Indicate whether to support wireless802.11n. | ||
| wireless_beginchannel 1 ~ | 14 0/7 Indicate the begin channel of wirelessnetwork | ||
| wireless_endchannel 1 ~ 14 | 0/7 Indicate the end channel of wireless network | ||
| wireless_encrypt_wep | 0/7 | Indicate whether to support wireless WEP. | |
| wireless_encrypt_wpa | 0/7 | Indicate whether to support wireless WPA. | |
| wireless_encrypt_wpa2 | 0/7 | Indicate whether to support wireless WPA2. | |
| wireless_apmode_enable | 0/7 Indicate whether wireless AP mode issupported.* Only available when"capability_network_wireless" is "1". | ||
| * We support this parameter when the version number (httpversion) is equal or greater than 0305a. | |||
| wireless_apmode_ssidprefix | the prefix of | broadcasted SSID when camera is in wireless AP mode.* Only available when "capability_wireless_apmode_enable" is "1".* We support this parameter when the version number (httpversion) is equal or greater than 0305a. | |
| derivative_brand | 0/7 Indicate whether to support the upgrade function for the derivative brand. For example, if the value is true, the VVTK product can be upgraded to VVXX.(TCVV<->TCXX is excepted) | ||
| test_ac | 0/7 Indicate whether to support test ac key. | ||
| version_onvifdaemon | 0/7 Indicate ONVIF daemon version | ||
| version_onviftesttool | 0/7 Indicate ONVIF test tool version | ||
| media Totalspace | 0/7 Available memory space (KB) for media. | ||
| media_snapshot_maxpre event | 0/7 Maximum | snapshot number before event occurred. | |
| media_snapshot_maxpost event | 0/7 Maximum | snapshot number after event occurred. | |
| media_snapshot_maxsize | 0/7 Maximum size (KB) of a snapshot. | ||
| media_videoclip_maxsize | 0/7 Maximum size (KB) of a videoclip. | ||
| media_videoclip_maxlength | 0/7 Maximum | length (second) of a videoclip. | |
| media_videoclip_maxpree vent | 0/7 Maximum | duration (second) after event occurred in a videoclip. | |
| image_iristype | 0/7 Indicate iris type. | "piris": P-Iris"dciris": DC-Iris"-": No Iris control support* When "capability_iris" = 0, this value must be "-".* Note: For some box-type cameras, this | |
| value may be varied depending on mounted lens.* We replace "capability_image_iristype" with "capability_image_c0_iristype".* Reserved for compatibility, and suggest don't use this since [httpversion] > 0301a | |||
| image_focusassist<Not recommended to usethis> | <boolean> 0/7 Indicate whether | to support focus assist.* We replace "capability_image_ focusassist" with "capability_image_c0_ focusassist".* Reserved for compatibility, and suggest don't use this since [httpversion] > 0301a | |
| localstorage_manageable | 0/7 | Indicate whether manageable local storage is supported.* Only available when "capability_supportsd" is 1 or "capability_storage_dbenabled" is 1. | |
| localstorage_seamless 0, | 0/7 Indicate | whether seamless recording is supported.One bit represents one channel.Ex: "3" means channel 0 and channel1 support seamless recording .* Only available when "capability_supportsd" is 1 or "capability_storage_dbenabled" is 1. | |
| localstorage_modnum 0, | 0/7 The max | maximum MOD connection numbers.* Only available when "capability_supportsd" is 1 or "capability_storage_dbenabled" is 1. | |
| localstorage_modversion | <string> 0/7 Indicate | MOD daemon | version.* Only available when "capability_supportsd" is 1 or "capability_storage_dbenabled" is 1. |
| localstorage_stormgrversion | <string> 0/7 Indicate | storage ma | manager daemon version.* Only available when "capability_supportsd" is 1 or "capability_storage_dbenabled" is 1. |
| localstorage_supportededge | 0,<positive integer> | 0/7 An 32- | bit integer, which indicates the supportive application of edge storage.If the value of this parameter is larger than 0, it means that the camera supports edge recording function.bit 0 : It supports to record directly to an on-board SD-Card.bit 1~: Currently, they are reserved bit, andthe default value is 0.* Only available when "capability_supportsd" is 1 or "capability_storage_dbenabled" is 1. |
| localstorage_slconnum | 0, | 0/7 | The maximum seamless connection number for each channel.* Only available when "capability_supportsd" is 1 or "capability_storage_dbenabled" is 1. |
| localstorage_smartsd | 0/7 The "Lifetime and Log SD Card" feature allows users to obtain the card's remaining lifetime information.0: Non-support this feature1: Support this feature* Only Sony SD card can support this function now.* Only available when "capability_supportsd" is 1 or "capability_storage_dbenabled" is 1. | ||
| remotecamctrl_master 0, | 0/7 Indicate whether to support remote auxiliary camera (master side), this value means supporting max number of auxiliary camera. | ||
| remotecamctrl_slave | 0/7 Indicate whether to support remote camera control (slave side). | ||
| fisheyelocaldewarp_c<0~(capability_nvideoin)-1> | 0, | 0/7 Indicate the supported streams of local dewarp. One bit represents one supported stream. The LSB indicates stream 0.Ex: "3" means stream 0 and stream 1 support local dewarp.* Only available when "capability_fisheye">0 | |
| shockalarm_support | 0/7 Indicate whether to support the shock detection.* We support this parameter when the version number (httpversion) is equal or greater than 0306e. | ||
| layout_redirection | 0/7 Indicate which function with the vadp package path."-": Not supported.* We support this parameter when the version number (httpversion) is equal or greater than 0309a. | ||
ll be redirecte
Group: capability_camctrl_c<0\~(n-1)> n denotes the value of "capability_nvideoin"
(capability_ptzenabled > 0)
* We support this group when the version number (httpversion) is equal or greater than 0303b.
| PARAMETER VALUE SECURITY | (get/set) | DESCRIPTION | |
| ptztunnel0/7 | Indicate whether to support ptztunnel in this video input. | ||
| privilege0/7 | Indicate whether to support "Manage P" of PTZ control in the security page in this video input.1: support both /cgi-bin/camctrl/camctrl.cgi and /cgi-bin/viewer/camctrl.cgi0: support only /cgi-bin/viewer/camctrl.cgi | ||
| rs4850/7 An 32-bit integer, each bit can be set | separately as follows:Bit 0 => support rs485-inBit 1 => support rs485-out | ||
| buildinpt0/7 An 32-bit integer, each bit can be set | separately as follows:Bit 0 => support build-in panBit 1 => support build-in tilt | ||
| zoommodule0/7 Indicate whether to support zoom lens. In our product, only SD series and IZ series use the zoom lens.* Both varifocal and zoom lenses are built with movable elements that permit changing the effective focal length. And the key difference between a varifocal and a zoom lens can be explained by thinking about a lens that has been focused on an object at any focal length.A varifocal will need to be refocused whenever the focal length is adjusted; the zoom will stay in focus when the focal length is adjusted. | |||
| focusmode | auto,onetimeauto,spotlight,manual | 0/7 Focus mode selection: "auto": Camera will automatically adjust the focus position full time to adapt a clear picture. "onetimeauto": Camera will automatically adjust the focus position one time, which follows any PTZ control. "spotlight": Camera will automatically adjust the focus position full time, and to consider a spotlight avoidance situation. "manual": Turn off the automatically focus function. For user to control the focus position manually as their purpose. * Only available when "capability_camctrl_c<0~(n-1)_zoommodule" is 1. * We support this parameter when the version number (httpversion) is equal or greater than 0304a. |
Group: capability_ptz_c<0\~(n-1)> n denotes the value of "capability_nvideoin"
(capability_ptzenabled > 0 and capability_camctrl_c<0\~(n-1)>_zoommodule !=0)
* We support this group when the version number (httpversion) is equal or greater than 0303b.
| PARAMETER VALUE SECURITY | (get/set) | DESCRIPTION | |
| panspeedlv 0,0/7 The maximum speed level of pan motion.*Only available when bit0 of"capability_camctrl_c<0~(n-1)>_buildinpt" is"1" | 0/7 The maximum speed level of pan motion.*Only available when bit0 of"capability_camctrl_c<0~(n-1)>_buildinpt" is"1" | ||
| minpan 0,0/7 The lower limit for pan position.*Only available when bit0 of"capability_camctrl_c<0~(n-1)>_buildinpt" is"1" | 0/7 The lower limit for pan position.*Only available when bit0 of"capability_camctrl_c<0~(n-1)>_buildinpt" is"1" | ||
| maxpan 0,0/7 The upper limit for pan position.*Only available when bit0 of"capability_camctrl_c<0~(n-1)>_buildinpt" is"1" | 0/7 The upper limit for pan position.*Only available when bit0 of"capability_camctrl_c<0~(n-1)>_buildinpt" is"1" | ||
| minpanangle0/7 The lower limit for pan angle.*Only available when bit0 of"capability_camctrl_c<0~(n-1)>_buildinpt" is"1" | 0/7 The lower limit for pan angle.*Only available when bit0 of"capability_camctrl_c<0~(n-1)>_buildinpt" is"1" | ||
| maxpanangle0/7 The upper limit for pan angle. | *Only available when bit0 of "capability_camctrl_c<0~(n-1)>_buildinpt" is "1" | ||
| tiltspeedlv 0,0/7 The maximum speed level of tilt motion.*Only available when bit1 of "capability_camctrl_c<0~(n-1)>_buildinpt" is "1" | |||
| mintilt 0,0/7 The lower limit for tilt position.*Only available when bit1 of "capability_camctrl_c<0~(n-1)>_buildinpt" is "1" | |||
| maxtilt 0,0/7 The upper limit for tilt position.*Only available when bit1 of "capability_camctrl_c<0~(n-1)>_buildinpt" is "1" | |||
| mintiltangle0/7 The lower limit for tilt angle.*Only available when bit1 of "capability_camctrl_c<0~(n-1)>_buildinpt" is "1" | |||
| maxtiltangle0/7 The upper limit for tilt angle.*Only available when bit1 of "capability_camctrl_c<0~(n-1)>_buildinpt" is "1" | |||
| zoomspeedlv 0,0/7 The maximum speed level of zoom motion.*Only available when the value of "capability_camctrl_c<0~(n-1)>_zoommodule" is "1" | |||
| minzoom 0,0/7 The lower limit for zoom position.*Only available when the value of "capability_camctrl_c<0~(n-1)>_zoommodule" is "1" | |||
| maxzoom 0,0/7 The upper limit for zoom position.*Only available when the value of "capability_camctrl_c<0~(n-1)>_zoommodule" is "1" | |||
| maxdzoom 0,0/7 The upper limit for digital zoom position.*Only available when the value of "capability_camctrl_c<0~(n-1)>_zoommodule" is "1" | |||
| focusspeedlv 0, | 0/7 The maximum speed level of focus motion.*Only available when the value of"capability_camctrl_c<0~(n-1)>_zoommodule" is "1" | ||
| minfocus 0, | 0/7 The lower limit for focus position.*Only available when the value of"capability_camctrl_c<0~(n-1)>_zoommodule" is "1" | ||
| maxfocus 0, | 0/7 The upper limit for focus position.*Only available when the value of"capability_camctrl_c<0~(n-1)>_zoommodule" is "1" | ||
Group: capability_daynight_c<0\~(n-1)> n denotes the value of "capability_nvideoin"
| PARAMETER VALUE SECURITY | (get/set) | DESCRIPTION | |
| support0/7 Indicate whether the camera supportsday/night mode switch | |||
| builtinir0/7 Indicate whether to support built-in IR led.* We replace this parameter with "capability_daynight_illuminators_builtin_support" and irled is listed in "capability_daynight_illuminators _builtin_type" when the version number (httpversion) is equal or greater than 0311c. | |||
| builtinwled0/7 Indicate whether to support built-in white led.* We replace this parameter with "capability_daynight_illuminators_builtin_support" and whiteled is listed in "capability_daynight_illuminators _builtin_type" when the version number (httpversion) is equal or greater than 0311c. | |||
| externalir0/7 Indicate whether to support external IR led.* We replace this parameter with "capability_daynight_illuminators_external_support" when the version number (httpversion) is equal or greater than 0311c. | |||
| optimizedir | Indicate whether to support optimized IR control technology.* We replace this parameter with "capability_daynight_illuminators_optimizedir "when the version number (httpversion) is equal or greater than 0311c. | |
| smartir 0/7 Indicate whether to support smart IR. | ||
| ircutfilter 0/7 Indicate whether to support IR cut. | ||
| lightsensor 0/7 Indicate whether to support light sensor. | ||
| blackwhitemode 0/7 Indicate whether to support automatically switch to Black & White display during the night mode.* We support this parameter when the version number (httpversion) is equal or greater than 0302a. | ||
| ircutsensitivity_type 0/7 Indicate the cgi interface of "ircutcontrol_sensitivity"."options": the value of "ircutcontrol_sensitivity" parameter is "low, normal,high"."normalize": the value of "ircutcontrol_sensitivity" parameter is "1~100"-": not support* Only available when "capability_daynight_c<0~(n-1)>_support" is 1.* We support this parameter when the version number (httpversion) is equal or greater than 0302a. | ||
| ircutsensitivity_supportlevel | 0, | 0/7 The value indicate the support strength level ofircutsensitivity.* Only available when"capability_daynight_c<0~(n-1)>_support" is 1 and"capability_daynight_c<0~(n-1)>_ircutsensitivity_type" is not "-"* We support this parameter when the version number (httpversion) is equal or greater than 0302a. |
| extled_interfacedo0/7 The device interface of external IR led:"do": digital output* Only available when"capability_daynight_c<0~(n-1)>_externalir" is 1* We replace this parameter with "capability_daynight_illuminators_external_interface" when the version number (httpversion) is equal or greater than 0311c. | do | 0/7 The device interface of external IR led:"do": digital output* Only available when"capability_daynight_c<0~(n-1)>_externalir" is 1* We replace this parameter with "capability_daynight_illuminators_external_interface" when the version number (httpversion) is equal or greater than 0311c. |
| spectrum_support0/7 Indicate whether to support proposed a brightness enhancement method based on CCM(Color Correction Matrix) model to improve the brightness effect of the images if the IR and blue light exists.* Only available when"capability_daynight_c<0~(n-1)>_support" is 1* We replace this parameter with "capability_daynight_illuminators_spectrum_support" when the version number (httpversion) is equal or greater than 0311c. | 0/7 Indicate whether to support proposed a brightness enhancement method based on CCM(Color Correction Matrix) model to improve the brightness effect of the images if the IR and blue light exists.* Only available when"capability_daynight_c<0~(n-1)>_support" is 1* We replace this parameter with "capability_daynight_illuminators_spectrum_support" when the version number (httpversion) is equal or greater than 0311c. | 0 / 7 Indicate whether to support proposed a brightness enhancement method based on CCM(Color Correction Matrix) model to improve the brightness effect of the images if the IR and blue light exists.* Only available when"capability_daynight_c<0~(n-1)>_support" is 1* We replace this parameter with "capability_daynight_illuminators_spectrum_support" when the version number (httpversion) is equal or greater than 0311c. |
| spectrum_mode | visible,ir,irenhanced,b lueenhanced | 0/7 Indicate | the spectrum mode. |
| "visible": The ideal default setting for visible light."ir": The ideal default setting for IR light."irenhanced": This CCM model increases the brightness effect of IR light."blueenhanced": This CCM model increases the brightness effect of blue light.*Only available when "capability_daynight_c<0~(n-1)>_support" is 1 and "capability_daynight_c<0~(n-1)>_spectrum_support" is 1* We replace this parameter with "capability_daynight_illuminators_spectrum_mode" when the version number (httpversion) is equal or greater than 0311c. |
| mode | auto,daynight,di,di2,di3,di4,schedule,- | 0/7 Indicate the day / night switch mode."auto": The Camera automatically judges the current operation mode by the level of ambient light detected."daynight": support day mode and night mode. In day mode, the camera streams color video. In night mode, the camera streams black and white video in low light environments."di": the camera automatically switches the current mode when a ditigal input 1 is triggered."di2": the camera automatically switches the current mode when a ditigal input 2 is triggered."di3": the camera automatically switches the current mode when a ditigal input 3 is triggered."di4": the camera automatically switches the current mode when a ditigal input 4 is triggered."schedule": The Camera switches between day mode and night mode based on a specified schedule."-": not support* We support this parameter when the version number (httpversion) is equal or greater than 0309d. |
Group: capability_daynight_illuminators
| PARAMETER VALUE SECURITY | (get/set) | DESCRIPTION | |
| optimizedir0/7 | Indicate whether to support optimized IR control technology.* We support this parameter when the version number (httpversion) is equal or greater than 0311c. | ||
| builtin_support | 0/7 Indicate whether to support built-in led.* We support this parameter when the version number (httpversion) is equal or greater than 0311c. | ||
| builtin_type | irled,whiteled,- | 0/7 Indicate whether to support built-in led type."irled": IR led"whiteled": white led"-": not support* We support this parameter when the version number (httpversion) is equal or greater than 0311c. | |
| external_support | 0/7 Indicate whether to support external led.* We support this parameter when the version number (httpversion) is equal or greater than 0311c. | ||
| external_interface | do,do2,do3,do4 | 0/7 The device interface of external led:"do": digital output 1"do2": digital output 2"do3": digital output 3"do4": digital output 4* We support this parameter when the version number (httpversion) is equal or greater than 0311c. | |
| spectrum_support | 0/7 Indicate whether to support proposed a brightness enhancement method based on CCM(Color Correction Matrix) model to improve the brightness effect of the images if the IR and blue light exists.* Only available when "capability_daynight_c<0~(n-1)>_support" is 1* We support this parameter when the version number (httpversion) is equal or greater than 0311c. | ||
| spectrum_mode | visible,ir,irenhanced,b lueenhanced | 0/7 Indicate the spectrum mode."visible": The ideal default setting for visible light."ir": The ideal default setting for IR light."irenhanced": This CCM model increases the brightness effect of IR light."blueenhanced": This CCM model increases the brightness effect of blue light.*Only available when"capability_daynight_c<0~(n-1)>_support" is 1 and"capability_daynight_illuminators_spectrum_support " is 1* We support this parameter when the version number (httpversion) is equal or greater than 0311c. | |
Group: capability_videoin_c<0\~(n-1)> n denotes the value of "capability_nvideoin"
| PARAMETER VALUE SECURITY | (get/set) | DESCRIPTION | |
| lens_type fisheye, fixed, | varifocal, changeable,motor, ics,- | 0/7 | The lens type of this channel."fisheye": Fisheye lens"fixed": Build-in fixed-focus lens."varifocal": Build-in varifocal lens."changeable": changeable lens. Like box-type camera, users can install any C-Mount or CS-Mount lens as they wish."motor": Lens with motor to support zoom, focus, etc."ics": An i-CS lens is an intelligent CS-mount lens that contains information about, among other things, its own geometrical distortion and the exact position of its zoom, focus, and iris opening."-": N/A* Only available when [httpversion] >= 0301a |
| color_support0/7 1 : camera can select to display color or black/white video streams.0: camera do not support this feature.* We support this parameter when the version number (httpversion) is equal or greater than 0310a. | |||
| eptz zoom ratio | 0/7 ● Indicate the support zoom ratio of eptz."-": not support ePTZ* We support this parameter when the version number (httpversion) is equal or greater than 0310a. | ||
| rotation0/7 Indicate current mode w hether support videorotation | |||
| rotationaffect | - | 0/7 When rotation is enabled, some features may become malfunction or be forced to a given value. The affected functions are list here.The format is "Affect API name":"Policy":"Description""Policy" can be categorized into following groups:- (disabled) : UI turns grey and users can't select it.- (unchanged) : UI keeps the status as before and user can't change it.- (hidden) : UI is hidden.- (fixed) : UI is fixed to one selection or value.- (ranged) : UI is fixed to multiple selections or values.- (enabled) : UI is checked.- (notsupport) : the affected function is not available."Affect API name" can be described in hierarchy, such as "exposurewin.mode.blc:disabled:" which means blc exposure window is disabled. API name can be one word as well, such as "exposurelevel:fixed:6" which means exposurelevel is fixed to level 6."Description" can be a nonnegative integer or string or NULL."-" means no feature is affected.* When "rotation"=0, this value must be "-"* We support this parameter when the version number (httpversion) is equal or greater than 0304b. |
| rotationangle0/7 | The different angles which camera supports for rotation.* Only avaliable when "capability_videoin_c<0~(n-1)>_rotation" is 1.* We support this parameter when the version number (httpversion) is equal or greater than 0309b. | ||
| orientation | flip,mirror,rotation0/7 Indicates the camera supports flip, mirror or rotation.* We support this parameter when the version number (httpversion) is equal or greater than 0309b. | ||
| streamcodec0/7 Represent supported codec types of each stream.This contains a list of positive integers, split by comma. Each one stands for a stream, and the definition is as following:Bit 0: Support MPEG4.Bit 1: Support MJPEGBit 2: Support H.264Bit 3: Support H.265 | |||
| mode 0,0/7 Indicate current video mode. | |||
| nmode0/7 Indicate how many video modes supported by this channel. | |||
| maxsize0/7 The maximum resolution of all modes in this channel, the unit is pixel. | |||
| nprivacymask 0,0/7 Number of privacy mask per channel | |||
| nresolution0/7 The maximum resolution options (listed in "resolution") in current video mode. | |||
| resolutionA list of0/7 Resolution options in current video mode.These options are the possible options for "videoin_cs__resolution".The last one is the maximum resolution in current mode. | |||
| maxresolutionA list of0/7 Represent supported maximum resolution of each stream in current video mode.* The element number is defined as "capability_nmediastream". | |||
| minresolution A list of0/7 Represent supported minimum resolution of each stream in current video mode.* The element number is defined as "capability_nmediastream"* We support this parameter when the version number (httpversion) is equal or greater than 0304b. | |||
| maxframerate A list of0/7 Indicate frame rate that the video source outputs in current video mode.One to one mapping to the resolution in "resolution".* The element number is defined as "nresolution" in this group.* This parameter may be changed when "videoin_c<ncmosfreq"=50 or "videoin_c<ncmodulation"=pal.Ex: 30 fps is changed to 25 fps, 60 fps is changed to 50 fps, and so on. | |||
| mjpeg_maxframerate A list ofand "-"0/7 Maximum fps that the device can encoded with MJPEG on resolutions in current video mode."-" means not support.* One to one mapping to the resolution in "resolution".* The element number is defined as "nresolution" in this group.* This parameter may be changed when "videoin_c<ncmosfreq"=50 or "videoin_c<ncmodulation"=pal.Ex: 30 fps is changed to 25 fps, 60 fps is changed to 50 fps, and so on.* Only available when 'mjpeg' is listed in "capability_videoin_codec". | |||
| mjpeg_maxbitrate, - 0/7 Maximum bitrates of MJPEG.The unit is bps."-" means MJPEG does not support bit rate control.* Only available when 'mjpeg' is listed in "capability_videoin_codec". | |||
| h264_maxframerate A list ofand "-" | 0/7 Maximum fps that the device can encoded with H.264 on resolutions in current video mode."-" means not support.* One to one mapping to the resolution in "resolution"* The element number is defined as "nresolution" in this group.* This parameter may be changed when "videoin_c<ncmosfreq" =50 or "videoin_c<ncmodulation" =pal.Ex: 30 fps is changed to 25 fps, 60 fps is changed to 50 fps, and so on.* Only available when 'h264' is listed in "capability_videoin_codec". | ||
| h264_maxbitrate 0/7 Maximum bitrates of H.264.The unit is bps.* Only available when 'h264' is listed in "capability_videoin_codec". | |||
| h264_profile baseline,main,high 0/7 Indicate H264 profiles | * Only available when 'h264' is listed in "capability_videoin_codec"* We support this parameter when the version number (httpversion) is equal or greater than 0309a. | ||
| h265_maxframerate A list ofand "-" | 0/7 Maximum fps that the device can encoded with H.265 on resolutions in current video mode."-" means not support.* One to one mapping to the resolution in "resolution".* The element number is defined as "nresolution" in this group.* This parameter may be changed when "videoin_ccmosfreq" = 50 or "videoin_cmodulation" = pal.Ex: 30 fps is changed to 25 fps, 60 fps is changed to 50 fps, and so on.* Only available when 'h265' is listed in "capability_videoin_codec". | ||
| h265_maxbitrate 0/7 Maximum bitrates of H.265.The unit is bps.* Only available when 'h265' is listed in "capability_videoin_codec". | |||
| h265_profile main,main100/7 Indicate H265 profiles* Only available when 'h265' is listed in "capability_videoin_codec".* We support this parameter when the version number (httpversion) is equal or greater than 0309a. | |||
| fisheye_mounttype ceiling, wall, floor0/7 Indicate the supported type.wall mount: 180° panoramic viewceiling mount: 360° surround view without blind spotsfloor mount: 360° surround view without blind spots* Only available when "capability_fisheye" > 0* It's recommended to use"capability_videoin_c<0~(n-1)>_mounttype". | |||
| mounttype ceiling, wall, floor,-* Available values are listed in "capability_videooin_c<0~(n-1)>_mounttype" | 0/7 Indicate the supported mount type."-": not support* We support this parameter when the version number (httpversion) is equal or greater than 0309c. | |
| dintraperiod_support0/7 0: Non-support "Dynamc intra frame period"1: Support "Dynamic intra frame period""Dynamic intra frame period" can be used to reduce bitrate by reducing the number of I-frame.* We support this parameter when the version number (httpversion) is equal or greater than 0301c. | ||
| cameraunit_nameCU8131,CU8171,CU8161-H,CU8162-H,CU8163-H,CU8361-H,...,- | 0/7 A "camera unit" name of a split-type camera system, which the camera unit and the video core are separated.-: If the camera is not a split-type camera system, the value of this parameter is "-".* We support this parameter when the version number (httpversion) is equal or greater than 0302b. | |
| cmosfreq_support0/7 0: The power line frequency(50/60Hz) is detected by camera automatically.1: The power line frequency(50/60Hz) can be set by user.* We support this parameter when the version number (httpversion) is equal or greater than 0308a. | ||
| smartfps_support0/7 Indicate whether to support Smart fps function.* We support this parameter when the version number (httpversion) is equal or greater than 0309a. |
| smartq_support | 0/7 Indicate whether to support $mart Q function.* We support this parameter when the version number (httpversion) is equal or greater than 0309a. |
Group: capability_videooin_c<0\~(n-1)>_localdewarp
(capability_fisheyelocaldewarp_c<0\~(capability_nvideoin)-1>>0)
n denotes the value of "capability_nvideooin"
| PARAMETER VALUE SECURITY | (get/set) | DESCRIPTION | |
| typeceilingmount 1O, 1P, 2P, 1R, 4R 0/7 Available dewarp types of ceiling and floor mount. | |||
| typewallmount 1O, 1P, 1R, 4R 0/7 Available dewarp types of wall mount. | |||
| resolutionC1P A list of0/7 Available resolutions of 1P mode of ceiling and floor mount. | |||
| resolutionC2P A list of0/7 Available resolutions of 2P mode of ceiling and floor mount. | |||
| resolutionC1R A list of0/7 Available resolutions of 1R mode of ceiling and floor mount. | |||
| resolutionC4R A list of0/7 Available resolutions of 4R mode of ceiling and floor mount. | |||
| resolutionW1P | A list of0/7 Available resolutions of 1P mode of wall mount. | ||
| resolutionW1R | A list of0/7 Available resolutions of 1R mode of wall mount. | ||
| resolutionW4R | A list of0/7 Available resolutions of 4R mode of wall mount. | ||
Group: capability_videoin_c<0\~(n-1)>_mode<0\~(m-1)> n denotes the value of "capability_nvideoin", m denotes the value of "capability_videoin_c<0\~(n-1)>_nmode"
| PARAMETER VALUE SECURITY | (get/set) | DESCRIPTION | |
| rotation | 0/7 Indicate this mode whether support video rotation | ||
| eptz 0, | 0/7 Indicate this mode | whether support eptz.For "nvideoin" = 1, the definition is as following:A 32-bits integer, each bit can be set separately as follows:Bit 0 => 1st stream supports ePTZ or not.Bit 1 => 2nd stream supports ePTZ or not, and so on.For nvideoin >= 2, the definition is different:First all 32 bits are divided into groups for channel.Ex:nvideoin = 2, bit 0~15 are the 1st group for 1st channel, bit 16~31 are the 2nd group for 2nd channel.nvideoin = 3, bit 0~9 are the 1st group for 1st channel, bit 10~19 are the 2nd group for 2nd channel, bit 20~31 are the 3rd group for 3rd channel.Then, the 1st bit of the group indicates 1st stream of a channel support ePTZ or not. The 2nd bit of the group indicates 2nd stream of a channel support ePTZ or not, and so on.* We support this parameter when the version number (httpversion) is equal or greater than 0304b. |
| wdrpro 0, 1, 2 0/7 Indicate this mode whether support WDR pro.0: Non-support WDR Pro1: Support WDR Pro2: Support WDR Pro and WDR Pro II* We support this parameter when the version number (httpversion) is equal or greater than 0304b. | ||
| effectivepixel0/7 | The visible area of full | scene in this | videomode.The unit is pixel in source.* If"effectivepixel"< "capability_videooin_c<0~(n-1)>_maxsize", then the visible area is located at the center of full scene. |
| outputsize0/7 The output size of source, equal to the captured size by device, in this video mode.The unit is pixel.This value is used as a basic coordinate system for many features, like ePTZ, privacy mask, motion, etc.* Source (most for image sensor) may perform scale or binning, etc on image data, and output data with smaller size. This parameter is designed to represent this. | |||
| binning 0, 1, 3 0/7 Indicate binning is used or not in this videomode.0: No binning1: 2x2 binning3: 3x3 binning* Binning is a technology to increase light sensitivity by combining multiple pixels to one. The drawback is reduced resolution. We design this parameter to disclose this information. | |||
| nresolution0/7 How many resolution options in this videomode. | |||
| resolution A list of0/7 Resolution options in this video mode.The last one is the maximum resolution in this video mode.* The element number is defined as "nresolution" in this group. | |||
| maxresolution A list of | 0/7 Represent | supported m | maximum resolution of each stream in current video mode.* The element number is defined as "capability_nmediastream". |
| minresolution A list of | 0/7 Represent | supported m | minimum resolution of each stream in current video mode.* The element number is defined as "capability_nmediastream"* We support this parameter when the version number (httpversion) is equal or greater than 0304b. |
| maxframerate A list of | PositiveInteger> | 0/7 Indicates | frame rate that the video source outputs in this video mode.* One to one mapping to the resolution in "resolution".* The element number is defined as "nresolution" in this group.* This parameter records the frame rate when "videoin_c<0~(n-1)>_cmosfreq"=60 or "videoin_c<0~(n-1)>_modulation"=ntsc |
| maxfps_mjpeg A list of | PositiveInteger> and "-" | 0/7 Maximum fps which the device can encoded with MJPEG on resolutions in this video mode."-" means not support.* One to one mapping to the resolution in "resolution".* The element number is defined as "nresolution" in this group.* This parameter records the frame rate when "videoin_c<0~(n-1)>_cmosfreq"=60 or "videoin_c<0~(n-1)>_modulation"=ntsc* Only available when 'mjpeg' is listed in "capability_videoin_codec". | |
| maxfps_h264 A list of | itiveInteger> and "-" | 0/7 Maximum fps which the device can encoded with H.264 on resolutions in this video mode."-" means not support.* One to one mapping to the resolution in "resolution".* The element number is defined as "nresolution" in this group.* This parameter records the frame rate when "videoin_c<0~(n-1)>_cmosfreq"=60 or "videoin_c<0~(n-1)>_modulation"=ntsc* Only available when 'h264' is listed in "capability_videoin_codec". | |
| maxfps_h265 A list of | itiveInteger> and "-" | 0/7 Maximum fps which the device can encoded with H.265 on resolutions in this video mode."-" means not support.* One to one mapping to the resolution in "resolution".* The element number is defined as "nresolution" in this group.* This parameter records the frame rate when "videoin_c<0~(n-1)>_cmosfreq"=60 or "videoin_c<0~(n-1)>_modulation"=ntsc* Only available when 'h265' is listed in "capability_videoin_codec". | |
| description | 0/7 Description about | this mode. | |
Group: capability_image_c<0\~(n-1)> n denotes the value of "capability_nvideoin"
| NAME VALUE SECURITY | (get/set) | DESCRIPTION | |
| basicsetting | 0, | 0/7 | A 32-bits integer, each bit can be set separately as follows:Bit 0 => Supports Brightness or not.Bit 1 => Supports Contrast or not.Bit 2 => Supports Saturation or not.Bit 3 => Supports Sharpness or not.Bit 4 => Supports adjusting the image to proper position horizontally or not.Bit 5 => Supports adjusting the image to proper position vertically or not. |
| hlm0/7 | Hightlight Mask: The function will strengthen the image contrast and mask the specified zone of image if any strong spot-light exists.* We support this parameter when the version number (httpversion) is equal or greater than 0311a. | ||
| wdrpro_mode | 0, 1, 2 | 0/7 | 0: Non-support WDR Pro1: Support WDR Pro2: Support WDR Pro and WDR Pro II |
| wdrpro_strength | 0, 1 | 0/7 | 0: Non-support tuning strength of WDR Pro1: Support tuning strength of WDR Pro* If"capability_image_c<0~(n-1)>_wdr pro"=1, this may be either 0 or 1. |
| wdrpro_supportlevel | 0, | 0/7 | This contains a list of positive integers, split by comma.If "wdrpro_mode" =1, then the value indicate the support strength level of WDR Pro.If "wdrpro_mode" =2, then the first number indicate the support strength level of WDR Pro, and the second number indicate the support strength level of WDR Pro II. |
| wdrpro_affect -, | exposurewin.mode:fixed:auto,exposurewin.mode.blc:disabled:,aespeed:disabled:,exposurelevel:hidden:,exposurelevel:fixed:,exposurelevel:fixed:/,exposurelevel:ranged:-,exposuremode:fixed:auto:: nonnegative integer | 0/7 When | WDR Pro is enabled, some features may become malfunction or be forced to a given value. The affected functions are list here.The format is "Affect API name":"Policy":"Description""Policy" can be categorized into following groups:- (disabled) : UI turns grey and users can't select it.- (unchanged) : UI keeps the status as before and user can't change it.- (hidden) : UI is hidden.- (fixed) : UI is fixed to one selection or value.- (ranged) : UI is fixed to multiple selections or values.- (enabled) : UI is checked.- (notsupport) : the affected function is not available."Affect API name" can be described in hierarchy, such as "exposurewin.mode.blc:disabled:" which means blc exposure window is disabled. API name can be one word as well, such as "exposurelevel:fixed:6" which means exposurelevel is fixed to level 6."Description" can be a nonnegative integer or string or NULL.For example:"exposurelevel:fixed:6/8/12" which means exposurelevel is fixed to level 6, level 8 and level 12."-" means no feature is affected.* When "wdrpro"=0, this value must be "-" |
| wdrpro_description | 0/7 | Description about WDR Pro mode.* Only available when "capability_image_c<0~(n-1)>_wdr pro_mode" > 0 | |
| wdrc_mode | 0, 1 | 0/7 | 0: Non-support WDR Enhanced1: Support WDR Enhanced |
| wdrc_supportlevel | 0, | 0/7 | Indicate the support strength level of WDR Enhanced. |
| wdrc_affect -, | exposurewin.mode:fixed:auto,exposurewin.mode.blc:disabled:,aespeed:disabled:,exposurelevel:hidden:,exposurelevel:fixed:,exposurelevel:fixed:/,exposurelevel:ranged:-,exposuremode:fixed:auto:x>: nonnegative integer | 0/7 When | WDR Enhanced is enabled, some features may become malfunction or be forced to a given value. The affected functions are list here.The format is "Affect API name":"Policy":"Description""Policy" can be categorized into following groups:- (disabled) : UI turns grey and users can't select it.- (unchanged) : UI keeps the status as before and user can't change it.- (hidden) : UI is hidden.- (fixed) : UI is fixed to one selection or value.- (ranged) : UI is fixed to multiple selections or values.- (enabled) : UI is checked.- (notsupport) : the affected function is not available."Affect API name" can be described in hierarchy, such as "exposurewin.mode.blc:disabled:" which means blc exposure window is disabled. API name can be one word as well, such as "exposurelevel:fixed:6" which means exposurelevel is fixed to level 6."Description" can be a nonnegative integer or string or NULL.For example:"exposurelevel:fixed:6/8/12" whichmeans exposurelevel is fixed to level 6, level 8 and level 12."-" means no feature is affected.* When "wdrc" = 0, this value must be "-" |
| dnr | 0,1 | 0/7 | 0: Non-support 3D digital noise reduction1: Support 3D digital noise reduction |
| dnrstrength | 0/7 | Indicate the support strength level of 3D digital noise reduction.* Only available when "capability_image_c<0~(n-1)>_dnr">0.* We support this parameter when the version number (httpversion) is equal or greater than 0306d. | |
| dnrtype 2d,3d 0/7 Description about DNR type. | * Only available when "capability_image_c<0~(n-1)>_dnr">0.* We support this parameter when the version number (httpversion) is equal or greater than 0308a. | ||
| eis 0,1 0/7 0: Non-support electronic image | stabilizer1: Support electronic image stabilizer | ||
| is_mode eis, | dis,- | 0/7 Indicate the image stabilizer mode."eis": electronic image stabilizer"dis": digital image stabilizer"-": not support* We support this parameter when the version number (httpversion) is equal or greater than 0302a. | |
| is_strength | 0/7 | 0: Non-support tuning strength ofimage stabilizer mode.1: Support tuning strength of image stabilizer mode.* Only available when "capability_image_c<0~(n-1)>_is_mode" is not "-".* We support this parameter when the version number (httpversion) is equal or greater than 0302a. | |
| is_supportlevel | 0, | 0/7 | Indicate the support strength level of image stabilizer mode.* Only available when "capability_image_c<0~(n-1)>_is_mode" is not "-".* We support this parameter when the version number (httpversion) is equal or greater than 0302a. |
| is_affect -, | minexposure:hidden:,mingain:hidden:,wdrpro:unchanged:,3dnr:unchanged:,or others:x>: nonnegative integerproduct dependent> | 0/7 When Is mode is not "-", some features may become malfunction or be forced to a given value. The affected functions are list here.The format is "Affect API name":"Policy":"Description""Policy" can be categorized into following groups:- (disabled) : UI turns grey and users can't select it.- (unchanged) : UI keeps the status as before and user can't change it.- (hidden) : UI is hidden.- (fixed) : UI is fixed to one selection or value.- (ranged) : UI is fixed to multiple | |
| selections or values.-(enabled) : UI is checked.-(notsupport) : the affected function is not available."Affect API name" can be described in hierarchy, such as "exposurewin.mode.blc:disabled:" which means blc exposure window is disabled. API name can be one word as well, such as "exposurelevel:fixed:6" which means exposurelevel is fixed to level 6."Description" can be a nonnegative integer or string or NULL."-" means no feature is affected.* Only available when "capability_image_c<0~(n-1)>_is_mode" is not "-".* We support this parameter when the version number (httpversion) is equal or greater than 0302a. | |||
| scenemode_support 0,1 0/7 0: Non-support scene mode | 1: Support scene mode | ||
| scenemode_supporttype | visibility, noiseless, lpcparkinglot, lpcstreet, lpchighway, auto, deblur, lpcfreeway | 0/7 list all | the scene mode which are supported in the camera.* Only available when "capability_image_c<0~(n-1)>_scenemode_support" is 1 |
| wbmode auto, | panorama, manual, rbgain, | 0/7 Available white balance mode."-" means white balance is not supported. | |
| widerange, outdoor, indoor, sodiumauto, - | |||
| iristype piris, | dciris, - | 0/7 Indicate iris type."piris": P-Iris"dciris": DC-Iris"-": No Iris control support* Note: For some cameras, this value may be varied depending on mounted lens. | |
| sensortype rawsensor, | smartsensor, thermalsensor, - | 0/7 Indicate sensor type."rawsensor": Raw sensor"smartsensor": Smart sensor"thermalsensor": Thermal sensor"-": N/A* We support this parameter when the version number (httpversion) is equal or greater than 0302a. | |
| exposure_mode | 0,1 | 0/7 | 0: Non-support exposure control.1: Support exposure control. |
| exposure_modetype auto, | shutterpriority, irispriority, manual | 0/7 Available mode of exposure setting.* Only available when "capability_image_c<0~(n-1)>_exposure_mode" is 1.* We support this parameter when the version number (httpversion) is equal or greater than 0302a. | |
| exposure_rangetype onevalue, twovalues | 0/7 Support interface of exposure range."onevalue": The parameter is a constant value."twovalues": Need two parameters to indicate the exposure range.* Only available when "capability_image_c<0~(n-1)>_exposure_mode" is 1. | ||
| * We support this parameter when the version number (httpversion) is equal or greater than 0302a. | |||
| exposure_shuttervaluetype | fixed, maximum, - | 0/7 * One | to one mapping to the mode type in "exposure_modetype". "fixed": The shutter value is the assigned value (videoin_c<0~(n-1)>_shuttervalue). "maximum": The shutter value can be up to the assigned value (videoin_c<0~(n-1)>_shuttervalue). "-" : not support.* Only available when "capability_image_c<0~(n-1)>_exposure_mode" is 1 and "capability_image_c<0~(n-1)>_exposure_rangetype" is "onevalue". * We support this parameter when the version number (httpversion) is equal or greater than 0302a. |
| exposure_gainvaluetype | fixed, maximum, - | 0/7 * One | to one mapping to the mode type in "exposure_modetype". "fixed": The shutter value is the assigned value (videoin_c<0~(n-1)>_gainvalue). "maximum": The shutter value can be up to the assigned value (videoin_c<0~(n-1)>_gainvalue)"-": not support.* Only available when "capability_image_c<0~(n-1)>_exposure_mode" is 1 and "capability_image_c<0~(n-1)>_exposure_rangetype" is "onevalue". * We support this parameter when the version number (httpversion) isequal or greater than 0302a. |
| exposure_automode_ affect | -,exposurewin.mode.blc:hidden:,defog:disabled:,wdrpro:disabled:,exposurelevel:hidden:,or others:x>: nonnegative integerproduct dependent> | 0/7 When | exposure auto mode is enabled, some features may become malfunction or be forced to a given value. The affected functions are list here.The format is "Affect API name":"Policy":"Description""Policy" can be categorized into following groups:- (disabled) : UI turns grey and users can't select it.- (unchanged) : UI keeps the status as before and user can't change it.- (hidden) : UI is hidden.- (fixed) : UI is fixed to one selection or value.- (ranged) : UI is fixed to multiple selections or values.- (enabled) : UI is checked.- (notsupport) : the affected function is not available."Affect API name" can be described in hierarchy, such as "exposurewin.mode.blc:disabled:" which means blc exposure window is disabled. API name can be one word as well, such as "exposurelevel:fixed:6" which means exposurelevel is fixed to level 6."Description" can be a nonnegative integer or string or NULL."-" means no feature is affected.* Only available when auto is listed in "capability_image_c<0~(n-1)>_exposure_modetype" and "capability_image_c<0~(n-1)>_exposure_mode" is 1.* We support this parameter when the version number (httpversion) is equal or greater than 0302a. |
| exposure_shutterpriority mode_affect | -,exposurewin.mode.blc:hidden:,defog:disabled:,wdrpro:disabled:,exposurelevel:hidden:,or others:x>: nonnegative integerproduct dependent> | 0/7 When exposure shutter priority mode is enabled, some features may become malfunction or be forced to a given value. The affected functions are list here.The format is "Affect API name":"Policy":"Description""Policy" can be categorized into following groups:- (disabled) : UI turns grey and users can't select it.- (unchanged) : UI keeps the status as before and user can't change it.- (hidden) : UI is hidden.- (fixed) : UI is fixed to one selection or value.- (ranged) : UI is fixed to multiple selections or values.- (enabled) : UI is checked.- (notsupport) : the affected function is not available."Affect API name" can be described in hierarchy, such as "exposurewin.mode.blc:disabled:" which means blc exposure window is disabled. API name can be one word as well, such as "exposurelevel:fixed:6" which | |
| means exposurelevel is fixed to level 6."Description" can be a nonnegative integer or string or NULL."-" means no feature is affected.* Only available when shutterpriority is listed in "capability_image_c<0~(n-1)>_exposure_modetype" and "capability_image_c<0~(n-1)>_exposure_mode" is 1.* We support this parameter when the version number (httpversion) is equal or greater than 0302a. | |||
| exposure_irisprioritymode_affect | -,exposurewin.mode.blc:hidden:,defog:disabled:,wdrpro:disabled:,exposurelevel:hidden:,or others:x>: nonnegative integerproduct dependent> | 0/7 Whenexposure iris priority mode is enabled, some features may become malfunction or be forced to a given value. The affected functions are list here.The format is "Affect API name":"Policy":"Description""Policy" can be categorized into following groups:- (disabled) : UI turns grey and users can't select it.- (unchanged) : UI keeps the status as before and user can't change it.- (hidden) : UI is hidden.- (fixed) : UI is fixed to one selection or value.- (ranged) : UI is fixed to multiple selections or values.- (enabled) : UI is checked.- (notsupport) : the affected function is not available. | |
| "Affect API name" can be described in hierarchy, such as "exposurewin.mode.blc:disabled:" which means blc exposure window is disabled. API name can be one word as well, such as "exposurelevel:fixed:6" which means exposurelevel is fixed to level 6."Description" can be a nonnegative integer or string or NULL."-" means no feature is affected.* Only available when irispriority is listed in "capability_image_c<0~(n-1)>_exposure_modetype" and "capability_image_c<0~(n-1)>_exposure_mode" is 1.* We support this parameter when the version number (httpversion) is equal or greater than 0302a. | |||
| exposure_qualitypriority mode_affect | -,exposurewin.mode.blc:hidden:,defog:disabled:,wdrpro:disabled:,exposurelevel:hidden:,or others:x>: nonnegative integerproduct dependent> | 0/7 When exposure quality priority mode is enabled, some features may become malfunction or be forced to a given value. The affected functions are list here.The format is "Affect API name":"Policy":"Description""Policy" can be categorized into following groups:- (disabled) : UI turns grey and users can't select it.- (unchanged) : UI keeps the status as before and user can't change it. | |
| - (hidden) : UI is hidden. - (fixed) : UI is fixed to one selection or value. - (ranged) : UI is fixed to multiple selections or values. - (enabled) : UI is checked. - (notsupport) : the affected function is not available."Affect API name" can be described in hierarchy, such as "exposurewin.mode.blc:disabled:" which means blc exposure window is disabled. API name can be one word as well, such as "exposurelevel:fixed:6" which means exposurelevel is fixed to level 6."Description" can be a nonnegative integer or string or NULL."-" means no feature is affected.* Only available when qualitypriority is listed in "capability_image_c<0~(n-1)>_exposure_modetype" and "capability_image_c<0~(n-1)>_exposure_mode" is 1.* We support this parameter when the version number (httpversion) is equal or greater than 0305a. | |||
| exposure_manualmode_affect | -,exposurewin.mode.blc:hidden:,defog:disabled:,wdrpro:disabled:,exposurelevel:hidden:,or others | 0/7 When exposure manual mode is enabled, some features may become malfunction or be forced to a given value. The affected functions are list here.The format is "Affect API name":"Policy":"Description" | |
| :x>: nonnegative integer"Policy" can be categorized intofollowing groups:- (disabled) : UI turns grey and users can't select it.- (unchanged) : UI keeps the status as before and user can't change it.- (hidden) : UI is hidden.- (fixed) : UI is fixed to one selection or value.- (ranged) : UI is fixed to multiple selections or values.- (enabled) : UI is checked.- (notsupport) : the affected function is not available."Affect API name" can be described in hierarchy, such as "exposurewin.mode.blc:disabled:" which means blc exposure window is disabled. API name can be one word as well, such as "exposurelevel:fixed:6" which means exposurelevel is fixed to level 6."Description" can be a nonnegative integer or string or NULL."-" means no feature is affected.* Only available when manual is listed in "capability_image_c<0~(n-1)>_exposure_modetype" and "capability_image_c<0~(n-1)>_exposure_mode" is 1.* We support this parameter when the version number (httpversion) is equal or greater than 0302a. |
| exposure_levelrange -, | "0,12" | 0/7 Available range for"videoin_c<0~(n-1)>_exposurelevel"* When "exposure_mode"=0, this value must be set to "-".* Only available when"capability_image_c<0~(n-1)>_exposure_mode" is 1. |
| exposure_winmode auto, | custom,blc,hlc,center,- | 0/7 Available options for"exposurewin_c<0~(n-1)>_mode"* "-" means group: exposurewin is not supported.* When exposure_mode="0", this value must be set to "-".* Only available when"capability_image_c<0~(n-1)>_exposure_mode" is 1. |
| exposure_meteringmode auto, | auto,blc,hlc | 0/7 Available options for"videoin_c<0~(n-1)>_meteringmode"* Only available when"capability_image_c<0~(n-1)>_exposure_mode" is 1. |
| exposure_hlcmode_supportwindow | 0/7 Indicate whether to support | 0/7 When hlc mode is enabled, some features may become malfunction or be forced to a given value. The affected functions are list here.The format is "Affect API |
| exposure_hlcmode_affect -,or others:x>: nonnegative integerproduct dependent> | 0/7 When hlc mode is enabled, some features may become malfunction or be forced to a given value. The affected functions are list here. |
| name":"Policy":"Description" "Policy" can be categorized into following groups: - (disabled) : UI turns grey and users can't select it. - (unchanged) : UI keeps the status as before and user can't change it. - (hidden) : UI is hidden. - (fixed) : UI is fixed to one selection or value. - (ranged) : UI is fixed to multiple selections or values. - (enabled) : UI is checked. - (notsupport) : the affected function is not available."Affect API name" can be described in hierarchy, such as "exposurewin.mode.blc:disabled:" which means blc exposure window is disabled. API name can be one word as well, such as "exposurelevel:fixed:6" which means exposurelevel is fixed to level 6."Description" can be a nonnegative integer or string or NULL."-" means no feature is affected.* Only available when "capability_image_c<0~(n-1)>_exposure_mode" is 1 and hlc is listed in "capability_image_c<0~(n-1)>_exposure_winmode".* We support this parameter when the version number (httpversion) is equal or greater than 0304a. |
| exposure_wintype inclusive, exclusive, - | 0/7 The supported exposure window type."inclusive": The image inside a window is the target area of exposure control."exclusive": The image inside a window is omitted by exposure control."-": Not supported.* Only available when "capability_image_c<0~(n-1)>_exposure_mode" is 1. | |
| exposure_windomain | qvga, px, std, - | 0/7 The domain to set an exposure window."qvga": a 320x240 range to represent the whole image."px": Locate a window in the image with pixels."std": A normalized 0~9999 range."-": Not supported.* Only available when "capability_image_c<0~(n-1)>_exposure_mode" is 1. |
| exposure_winnum | 0, <Positive Integer> | 0/7 Indicate the number of custom exposure windows.* If no "custom" is listed in "exposure_winmode", this should be 0.* Only available when "capability_image_c<0~(n-1)>_exposure_mode" is 1. |
| exposure_ntsc_totalrange | A list of <Positive Integer> | 0/7 Available total range for NTSC analog output.* Only available when "capability_image_c<0~(n-1)>_exposure_mode" is 1.* We support this parameter when the version number (httpversion) is |
| equal or greater than 0301a. | |||
| exposure_pal_totalrange | A list of | 0/7 Available total range for PAL analog output.* Only available when "capability_image_c<0~(n-1)>_exposure_mode" is 1.* We support this parameter when the version number (httpversion) is equal or greater than 0301a. | |
| exposure_maxrange "1,32000","1,8000",-,or others | 0/7 Available range for "videoin_cmaxexposure" "1,32000" => 1s ~ 1/32000s "1,8000" => 1s ~ 1/8000s etc."-" means maximum exposure time is not available.* When "exposure_mode" = 0, this value must be set to "-*. * Only available when "capability_image_c<0~(n-1)>_exposure_mode" is 1. | ||
| exposure_minrange "1,32000","1,8000",-,or others | 0/7 Available range for "videoin_cminexposure" "1,32000" => 1s ~ 1/32000s "1,8000" => 1s ~ 1/8000s etc."-" means minimum exposure time is not available.* When "exposure_mode" = 0, this value must be set to "-*. * Only available when "capability_image_c<0~(n-1)>_exposure_mode" is 1. | ||
| exposure_bracketing_mode | 0/7 | ● 0: Non-support Auto Exposure Bracketing (AEB)● 1: Support AutoExposure Bracketing (AEB)Auto Exposure Bracketing (AEB) is a term that is used to signify a process where the camera automatically takes two or more exposures but with different exposure values.* Only available when "capability_image_c<0~(n-1)>_exposure_mode" is 1.* We support this parameter when the version number (httpversion) is equal or greater than 0310a. | |
| exposure_bracketing_range | A list of ratioFor example: 2x,3x,4x | 0/7 The input parameter decides how much ratio of exposure compensation will be expanded on the next stream, which is based on the original exposure time (first stream).* Only available when "capability_image_c<0~(n-1)>_exposure_bracketing_mode" is 1.* We support this parameter when the version number (httpversion) is equal or greater than 0310a. | |
| privacymask_wintype rectangle | polygon,3Drectangle | 0/7 The supported mask window type."polygon": The window is a 2D polygon shape."rectangle": The window is a 2D rectangle shape."3Drectangle": The window is a 3D rectangle shape. | |
| privacymask_windomain | qvga,px,std,- | 0/7 | The domain to set an window."qvga": a 320x240 range to represent the whole image."px": Locate a window in the imagewith pixels."std": A normalized 0~9999 range."-": Not supported. |
| privacymask_ncolor | 0/7 Available total color numbers of privacy mask. | ||
| agc_maxgain "0,100", | "-" | 0/7 Available range for"videoin_c__maxgain""0,100" => 0~100 percent "-" means "videoin_c__maxgain" is not available. | |
| agc_mingain "0,100", | "-" | 0/7 Available range for"videoin_c__mingain""0,100" => 0~100 percent "-" means "videoin_c__mingain" is not available. | |
| flickerless | 0,1 | 0/7 | 0: Non-support flickerless1: Support flickerless |
| flickerlessaffect -, | minexposure:hidden:,mingain:hidden:,or others:x>: nonnegative integerproduct dependent> | 0/7 When flickerless is enabled, some features may become malfunction or be forced to a given value. The affected functions are list here.The format is "Affect API name":"Policy":"Description""Policy" can be categorized into following groups:- (disabled) : UI turns grey and users can't select it.- (unchanged) : UI keeps the status as before and user can't change it.- (hidden) : UI is hidden.- (fixed) : UI is fixed to one selection or value.- (ranged) : UI is fixed to multiple selections or values.- (enabled) : UI is checked.- (notsupport) : the affected function is not available. | |
| "Affect API name" can be described in hierarchy, such as "exposurewin.mode.blc:disabled:" which means blc exposure window is disabled. API name can be one word as well, such as "exposurelevel:fixed:6" which means exposurelevel is fixed to level 6."Description" can be a nonnegative integer or string or NULL."-" means no feature is affected.* When "flickerless" = 0, this value must be "-" | |||
| defog_mode 0,1 0/7 0: Non-support defog | 1: Support defog | ||
| defog_strength | 0, 1 | 0/7 | 0: Non-support tuning strength of defog1: Support tuning strength of defog* If "capability_image_c<0~(n-1)>_def og_mode"=1, this may be either 0 or 1. |
| defog_supportlevel | 0, | 0/7 | The value indicate the support strength level of defog. |
| defog_affect -, | wdrpro:unchanged:, or others:x>: nonnegative integerproduct dependent> | 0/7 When defog is enabled, some features may become malfunction or be forced to a given value. The affected functions are list here.The format is "Affect API name":"Policy":"Description""Policy" can be categorized into following groups:- (disabled) : UI turns grey and users | |
| can't select it.-(unchanged) : UI keeps the status as before and user can't change it.-(hidden) : UI is hidden.-(fixed) : UI is fixed to one selection or value.-(ranged) : UI is fixed to multiple selections or values.-(enabled) : UI is checked.-(notsupport) : the affected function is not available."Affect API name" can be described in hierarchy, such as "exposurewin.mode.blc:disabled:" which means blc exposure window is disabled. API name can be one word as well, such as "exposurelevel:fixed:6" which means exposurelevel is fixed to level 6."Description" can be a nonnegative integer or string or NULL."-" means no feature is affected.* When "defog" = 0, this value must be "-" | |||
| aespeed 0,1 0/7 0: Non-support AE speed | 1: Support AE speed | ||
| aespeedsupportlevel | 0/7 | The value indicate the support strength level of aespeed.* Only available when "capability_image_c<0~(n-1)>_aespeed" is 1. | |
| aespeedsupportssensitivity | 0,1 | 0/7 | 0: Non-support tuning the sensitivity of AE converge speed.1: Support tuning the sensitivity of AE converge speed.* Only available when "capability_image_c<0~(n-1)>_aespeed" is 1. |
| gammacurve | 0,1 | 0/7 | 0: Non-support tuning Gamma curve1: Support tuning Gamma curve |
| lowlightmode | -,0,1 | 0/7 | -: Internal parameter, must not open to user.0: Non-support low light mode1: Support low light mode |
| focusassist | 0,1 | 0/7 | 0: Non-support focus assist1: Support focus assist |
| remotefocus | 0, | 0/7 | An 4-bit integer, which indicates the supportive application of remotefocus in this channel.If the value of this parameter is larger than 0, it means that the camera supports remotefocus function in this channel.bit 0 => Indicate whether to support both zoom and focus function.bit 1 => Only support zoom function.bit 2 => Only support focus function.bit 3 => Currently, this is a reserved bit, and the default value is 0. |
| focuswindomain | qvga, px, std, - | 0/7 | The domain to set a focus window."qvga": a 320x240 range to represent the whole image."px": Locate a window in the image with pixels."std": A normalized 0~9999 range."-": Not supported. |
| focuswindow_nwindow | 0, | 0/7 | Number of focus window |
| focuswindow_range | 0/7 Available range for focuswindow.* We support this parameter when the version number (httpversion) is | ||
| equal or greater than 0305d.*-: Not supported. | |||
| lensconfiguration_support | 0,1 | 0/7 | Indicate whether to support different image library configuration files for specific exchangeable lens. |
| freeze | 0/7 | 0: Non-support image freeze feature1: Support image freeze feature* We support this parameter when the version number (httpversion) is equal or greater than 0302a. | |
| autotrack_support | 0/7 | 0: Non-support auto tracking feature1: Support auto tracking feature* We support this parameter when the version number (httpversion) is equal or greater than 0302a. | |
| smartsensor_iristotalrange | A list of iris value 0/7 Available total step | for iris value.* We support this parameter when the version number (httpversion) is equal or greater than 0302a.* Only available when "capability_image_c<0~(n-1)>_sensortype" is "smartsensor" | |
| deinterlace_support | 0/7 | Indicate whether to support deinterlace function.* We support this parameter when the version number (httpversion) is equal or greater than 0308a. | |
| deinterlace_mode | spatial, blend | 0/7 | Spatial mode provides the best image quality, while Blend mode provides better image quality (than not using the deinterlace function at all).* Only available when capability_image_c<0~(n-1)>_deinterlace_support is 1 |
| lens_alignment | 0/7 | Indicate whether to support lens alignment function.* We support this parameter when the version number (httpversion) is equal or greater than 0309b. | |
| lens_alignmentlevel | 0/7 | The value indicate the support level of alignment.* Only available when "capability_image_c<0~(n-1)>_lens _alignment" is 1. | |
| lens_ldc_support | 0/7 | Indicate whether to support lens distortion correction function.* We support this parameter when the version number (httpversion) is equal or greater than 0309d. | |
| palette_support | 0/7 | Indicate support color palettes or not.Thermal cameras provide a choice of color palettes on the camera, that help quickly distinguish thermal variations and patterns in an image.The color tones correspond to the apparent surface temperatures of the target.* We support this parameter when the version number (httpversion) is equal or greater than 0310a. | |
| palette_mode | A list of palette options | 0/7 | Palette options used in thermal surveillance.*Only available when "capability_image_c<0~(n-1)>_pa lette_support"=1.* We support this parameter when the version number (httpversion) is equal or greater than 0310a. |
Group: capability_peripheral_c<0\~(n-1)> n denotes the value of "capability_nvideoin"
| PARAMETER VALUE SECURITY | (get/set) | DESCRIPTION |
| devicecontrol0/7 Indicate whether to support the peripheral device control.* We support this parameter when the version number (httpversion) is equal or greater than 0305c. |
7.28 Customized event script
Group: event_customtaskfile_i<0\~2>
| PARAMETER VALUE SECURITY | (get/set) | DESCRIPTION | |
| name string[40] 6/6 Custom script identification of this entry. | |||
| date string[4~20] 6/6 Date of custom script. | |||
| time string[4~20] 6/6 Time of custom script. | |||
7.29 Event setting
Group: event_i<0\~(n-1)> n denotes the value of "capability_nevent"
(capability_nevent > 0)
| PARAMETER VALUE SECURITY | (get/set) | DESCRIPTION | |
| name string[40] 6/6 Identification of this entry. | |||
| enable 0, 1 6/6 Enable or disable this event. | |||
| priority 0, 1, 2 | 6/6 Indicate the priority of this event:"0" = low priority"1" = normal priority"2" = high priority | ||
| delay | 1~999 | 6/6 Delay | in seconds before detecting the next event. |
| trigger | boot,di,pir,motion,seq,recnotify,tampering,vi,volalarm,visignal,vadp,smartsd | 6/6 Indicate the trigger condition:"boot" = System boot."di" = Digital input."pir" = PIR detection."motion" = Video motion detection."seq" = Periodic condition."visignal" = Video input signal loss."recnotify" = Recording notification."tampering" = Tamper detection."vi" = Virtual input (Manual trigger)."volalarm" = Audio detection."smartsd" = Lifetime detection of SD card."shockalarm" = Shock detection."virestore" = Video input signal restore."vadp" = VADP trigger.* "smartsd" is only valid when smart SD card is inserted |
| triggerstatus string[40] 6/6 The status for event trigger | ||
| di 0,<positive integer> 6/6 | Indicate the source id of di trigger. | This field is required when trigger condition is "di".One bit represents one digital input. The LSB indicates DI 0.* Only available when "capability_ndi" > 0 |
| mdwin 0,<positive integer> | 6/6 Indicate the source window id of motion detection.This field is required when trigger condition is "md".One bit represents one window.The LSB indicates the 1^st window.For example, to detect the 1^st and 3^rd windows, set mdwin as 5. | |
| mdwin0 0,<positive integer> | 6/6 Similar to mdwin. The parameter takes effectwhen profile 1 of motion detection is enabled. | |
| vi 0,<positive integer> 6/6 | Indicate the source id of vi trigger. | This field is required when trigger condition is "vi".One bit represents one digital input. The LSB indicates VI 0. |
| vadpproduct dependent> | 0,6/5 Indicate the source id of vadp event notification.Each bit corresponds to one vadp source, and the LSB indicates source id 0.For example, to detect event from any one of source id 0, 1 and 3, set vadp to 11.* Only available when vadp is listed in "capability_supporttriggertypes" | |
| valevel 0,1 6/6 Select audio detection event. | 0: not select1: select | |
| valevel0 0,1 6/6 Select audio detection profile event. | 0: not select1: select | |
| inter 1~999 6/6 Interval of snapshots in minutes. | This field is used when trigger condition is "seq". | |
| weekday 0~127 6/6 Indicate which weekday is scheduled. | One bit represents one weekday.bit0 (LSB) = Saturdaybit1 = Fridaybit2 = Thursdaybit3 = Wednesdaybit4 = Tuesdaybit5 = Mondaybit6 = SundayFor example, to detect events on Friday and Sunday, set weekday as 66. | |
| begintime hh:mm 6/6 Begin time of the weekly schedule. | ||
| endtime hh:mm 6/6 End time of the weekly schedule. | (00:00 ~ 24:00 sets schedule as always on) | |
| lowlightconditionproduct dependent> | 0, 1 6/6 Switch on white light LED in low light condition0 => Do action at all times1 => Do action in low-light conditions | |
| action_do_i<0~(ndo-1)>_enable | 6/6 Enable or disable trigger digital output.* Only available when "capability_ndo" > 0 | |
| action_do_i<0~(ndo-1)>_duration | 1~999 6/6 Duration of | the digital | output trigger in seconds.* Only available when "capability_ndo" > 0 |
| action_cf_enable | 6/6 Enable or disable | sending m | media to SD card.* Only available when "capability_supportsd"> 0 |
| action_cf_folder string[128] | 6/6 Path to store media. | * Only available when "capability_supportsd"> 0 | |
| action_cf_media NULL, 0~4 | 101 6/6 Index of the attached media. | 101 means "Recording Notify"* Only available when "capability_supportsd"> 0 | |
| action_cf_datefolder | 6/6 | Enable this to create folders by date, time, and hour automatically.* Only available when "capability_supportsd"> 0 | |
| action_cf_backup | 6/6 Enable or disable | the function | that send mediato SD card for backup if network is disconnected.* Only available when "capability_supportsd"> 0 |
| action_server_i<0~4>_enable | 6/6 Enable | or disable this server action. | |
| action_server_i<0~4>_media | NULL, 0~4,101 6/6 Index of the attached media. | attached media.101 means "Recording Notify" | |
| action_server_i<0~4>_datefolder | 6/6 Enable this to create folders by date, time, and hour automatically. | folders by date, time, and hour automatically. | |
| action_goto_enable | 6/6 Enable | /disable ptz goto preset position onevent triggered.* Only available when "capability_ptzenabled"> 0. | |
| action_goto_name | string[40] | 6/6 Specify | the preset name that ptz goto on event triggered.* Only available when "capability_ptzenabled"> 0. |
| action_goto_sync | 6/6 Capture media after moving to the location.* Only avaliable when the bit4 of capability_ptzenabled is 1 and the bit7 of capability_ptzenabled is 0, or capability_camctrl_c0_Zoommodule > 0 | |
| action_autotrack_enable | 6/6 Enable/disable auto tracking on event triggerd.* Only avaliable when the bit4 of capability_ptzenabled is 1 and the bit7 of capability_ptzenabled is 0 | |
| action_audioclip_enable | 6/6 Enable/disable the function the play an audio clip when an event is triggered.* Only avaliable when "capability_audio_audioclip" is 1. | |
| action_audioclip_media | 0,6/6Indicate the source id of tampering detection.* Only avaliable when "capability_audio_audioclip" is 1. | |
| tampering 0,6/6 Indicate the source channel id of tampering detection.A 4-bit integer, each bit represents each channel.bit 0 => tampering detection for first channel.bit 1 => tampering detection for second channel.bit 2 => tampering detection for third channel.bit 3 => tampering detection for fourth channel. | ||
7.30 Server setting for event action
Group: server_i<0\~4>
| PARAMETER VALUE SECURITY | (get/set) | DESCRIPTION | |
| name string[40] 6/6 Identification of this entry | |||
| type | email,ftp,http,ns | 6/6 Indicate the server type:"email" = email server"ftp" = FTP server"http" = HTTP server"ns" = network storage | |
| http_url string[128] 6/6 URL of the HTTP server to upload. | |||
| http_username string[64] 6/6 Username to log in to the server. | |||
| http_passwd string[64] 7/6 Password of the user. | |||
| ftp_address string[128] 6/6 FTP server address. | |||
| ftp_username string[64] 6/6 Username to log in to the server. | |||
| ftp_passwd string[64] 7/6 Password of the user. | |||
| ftp_port 0~65535 6/6 Port to connect to the server. | |||
| ftp_location string[128] 6/6 Location to upload or store the media. | |||
| ftp_passive | 6/6 Enable or disable passive mode.0 = disable passive mode1 = enable passive mode | ||
| email_address string[128] 6/6 Email server address. | |||
| email_sslmode | 6/6 Enable support SSL. | ||
| email_port 0~65535 6/6 Port to connect to the server. | |||
| email_username string[64] 6/6 Username to log in to the server. | |||
| email_passwd string[64] 7/6 Password of the user. | |||
| email_senderemail string[128] 6/6 Email address of the sender. | |||
| email_recipientemail string[640] 6/6 Email address of the recipient. | |||
| ns_location string[128] 6/6 Location to upload or store the media. | |||
| ns_username string[64] 6/6 Username to log in to the server. | |||
| ns_passwd string[64] 7/6 Password of the user. | |||
| ns_workgroup string[64] 6/6 Workgroup for network storage. | |||
7.31 Media setting for event action
Group: media_i<0\~(n-1)> n denotes the value of "capability_media_num"
(capability_media_num > 0)
| PARAMETER VALUE SECURITY | (get/set) | DESCRIPTION | |
| Name string[40] 6/6 Identification of this entry | |||
| Type | snapshot,systemlog,videoclip,recordmsg | 6/6 Media | type to send to the server orstore on the server. |
| snapshot_channel 0~"capability_nvideoin"-1 6/6 Indicate the source of media channel. | |||
| snapshot_source 0~"capability_nmediastream"-1 6/6 Indicate the source of media stream. | |||
| snapshot_prefix string[16] 6/6 Indicate the prefix of the filename. | media_i0=> Snapshot1_media_i1=> Snapshot2_media_i2=> Snapshot3_media_i3=> Snapshot4_media_i4=> Snapshot5_ | ||
| snapshot_datesuffix | 0, 1 | 6/6 | Add date and time suffix to filename:1 = Add date and time suffix.0 = Do not add. |
| snapshot_preevent | 0~"capability_media_snapshot_maxpreevent" | 6/6 Indicates the number of pre-eventimages. | |
| snapshot_postevent | 0~"capability_media_snapshot_maxpostevent" | 6/6 Indicates the number of post-eventimages. | |
| videoclip_channel 0~"capability_nvideoin"-1 6/6 Indicate the source of media channel.0 means the first channel.1 means the second channel.2 means the third channel.3 means the fourth channel.* We support this parameter when the version number (httpversion) is equal or greater than 0311c. | ||
| videoclip_source 0~"capability_nmediastream"-1 6/6 Indicate the source of media stream.0 means the first stream.1 means the second stream and etc.2 means the third stream and etc.3 means the fourth stream and etc. | ||
| videoclip_prefix string[16] 6/6 Indicate the prefix of the filename. | ||
| videoclip_preevent 0 ~ "capability_media_videoclip_maxpre event" | 6/6 Indicates the time for pre-event recording in seconds. | |
| videoclip_maxduration 1 ~ "capability_media_videoclip_maxlen gth" | 6/6 Maximum duration of one video clip in seconds. | |
| videoclip_maxsize 50 ~ "capability_media_videoclip_maxsize" | 6/6 Maximum size of one video clip file in Kbytes. | |
7.32 Recording
Group: recording_i<0\~(n-1)> n denotes the value of "capability_nrecording"
(capability_nrecording > 0)
| PARAMETER VALUE | SECURITY | (get/set) | DESCRIPTION |
| name string[40] 6/6 | Identification of this entry. | ||
| trigger | schedule,networkfail | 6/6 The event trigger typeschedule: The event is triggered by schedule networkfail: The event is triggered by the failure of network connection. | |
| enable6/6 Enable or disable this recording. | |||
| priority 0, 1, 2 6/6 | Indicate the priority of this recording: | "0" indicates low priority."1" indicates normal priority."2" indicates high priority. | |
| channel 0~"capability_nvideoin"-1 6/6 Indicate the source of recording channel. | 0 means the first channel.1 means the second channel.2 means the third channel.3 means the fourth channel.* We support this parameter when the version number (httpversion) is equal or greater than 0311c. | ||
| source | 0~"capability_nmediastream"-1 | 6/6 | Indicate the source of media stream.0 means the first stream.1 means the second stream and so on. |
| maxretentiontime | 6/6 To specify the expired time for automatic clean up, and it only takes effect for video clip generated by recording_i <0~1>. Format is ""P[Y]Y[MM]M[DDD]DT[hh]H[mm]M[ss]S', similar with ISO8601 with symbols P Ex. P7D, it means 7 days. P1DT10H, it means 1 days and 10 hours.The parameter takes effect when autocleanup_maxretentiontime_recording_enabled is enabled. | |
| limitsize | 6/6 0: Entire free space mechanism | 1: Limit recording size mechanism |
| cyclic | 6/6 0: Disable cyclic recording | 1: Enable cyclic recording |
| notify | 6/6 0: Disable recording notification | 1: Enable recording notification |
| notifyserver 0~31 | 6/6 Indicate which notification server is scheduled.One bit represents one application server (server_i0~i4).bit0 (LSB) = server_i0.bit1 = server_i1.bit2 = server_i2.bit3 = server_i3.bit4 = server_i4.For example, enable server_i0, server_i2, and server_i4 as notification servers; the notifyserver value is 21. | |
| weekday 0~127 6/6 | Indicate which weekday is scheduled. | One bit represents one weekday.bit0 (LSB) = Saturdaybit1 = Fridaybit2 = Thursdaybit3 = Wednesdaybit4 = Tuesdaybit5 = Mondaybit6 = SundayFor example, to detect events on Friday and Sunday, set weekday as 66. | |
| begintime hh:mm 6/6 | Start time of the weekly schedule. | ||
| endtime hh:mm 6/6 | End time of the weekly schedule. | (00:00~24:00 indicates schedule always on) | |
| prefix string[16] 6/6 | Indicate the prefix of the filename. | ||
| cyclesize 100~ 6/6 | The maximum size for cycle recording in | Kbytes when choosing to limit recording size. | |
| reserveamount | 0~15000000 6/6 The reserved amount in Mbytes when choosing cyclic recording mechanism. | ||
| dest | cf,0~4 | 6/6 The destination to store the recorded data."cf" means local storage (CF or SD card)."0" means the index of the network storage. | |
| cffder string[128] | 6/6 Folder name. | ||
| maxsize 100~2000 | 6/6 Unit: Mega bytes. | When this condition is reached, recording file is truncated. | |
| maxduration | 60~3600 | 6/6 | Unit: SecondWhen this condition is reached, recording file is truncated. |
| adaptive_enable | 6/6 | Indicate whether the adaptive recording is enabled | |
| adaptive_preevent | 0~9 | 6/6 | Indicate when is the adaptive recording started before the event trigger point (seconds) |
| adaptive_postevent | 0~10 | 6/6 | Indicate when is the adaptive recording stopped after the event trigger point (seconds) |
7.33 HTTPS
Group: https (capability_protocol_https > 0)
| NAME VALUE SECURITY | (get/set) | DESCRIPTION | |
| enable6/6 To enable or disable secure HTTP. | |||
| policy6/6 If the value is 1, it will force HTTP connection redirect to HTTPS connection | |||
| method | auto, manual, install | 6/6 auto => | Create self-signed certificate automatically. manual =>Create self-signed certificate manually. install =>Create certificate request and install. |
| status -3 ~ 1 6/6 Specify the https status. | -3= Certificate not installed-2 = Invalid public key-1 = Waiting for certificate0= Not installed1 = Active | ||
| countryname string[2] 6/6 Country name in the certificate information. | |||
| stateorprovincename string[128] 6/6 State or province name in the certificate information. | |||
| localityname | string[128] | 6/6 | The locality name in thecertificate information. |
| organizationname | string[64] VIVOTEK Inc. | 6/6 Organization name in the certificate information. | |
| unit | string[64] VIVOTEK Inc. | 6/6 Organizational unit name in thecertificate information. | |
| commonname | string[64] www.vivotek.com | 6/6 | Common name in the certificate information. |
| validdays | 0 ~ 3650 | 6/6 Valid period for the certification. | |
7.34 Storage management setting
Group: disk_i<0\~(n-1)> n is the total number of storage devices. (capability_storage_dbenabled > 0)
Currently it's only for local storage (SD, CF card), so n is equal to 1.
| PARAMETER VALUE SECURITY | (get/set) | DESCRIPTION | |
| cyclic_enabled | 6/6 Enable cyclic storage method. | ||
| autocleanup_enabled | 6/6 Enable automatic clean up method.Expired and not locked media files will be deleted.* For forward compatibility reservations, but only group disk_i0_autocleanup is effective.* Not recommended to use this. Please refers "autocleanup" group.* This parameter will not be used after the version number (httpversion) is equal or greater than 0400a. | ||
| autocleanup_maxage | 6/6 | To specify the expired days for automatic cleanup.* For forward compatibility reservations, but only group disk_i0_autocleanup is effective.* Not recommended to use this. Please refers "autocleanup" group.* This parameter will not be used after the version number (httpversion) is equal or greater than 0400a. | |
Group: autocleanup (capability_localstorage_supportedge > 0)
| PARAMETER VALUE SECURITY | (get/set) | DESCRIPTION | |
| enabled6/6 Enable automatic clean up method.Expired and not locked media files will be deleted. | Enable automatic clean up | method. | |
| maxretentiontime_recording_enabled | 6/6 Enable | automatic | clean up method for video clip generated by recording task.The parameter takes effect when autocleanup_enabled is enabled. |
| maxretentiontime_recording_i<0~1>_maxage | 6/6 | To specify the expired time for automatic clean up, and it only takes effect for video clip generated by recording_i <0~1>.Format is“P[Y]Y[MM]M[DDD]DT[hh]H[mm]M[ss]S”, similar with ISO8601 with symbols PEx. P7D, it means 7 days. P1DT10H, it means 1 days and 10 hours.The parameter takes effect when autocleanup_maxretentiontime_recording_enabled is enabled. | |
| maxretentiontime_others_enabled | 6/6 Enable | automatic clean up method for all media files except media files generated by recording task.The parameter takes effect when autocleanup_enabled is enabled. | |
| maxretentiontime_others_maxage | 6/6 | To specify the expired time for automatic clean up, and it takes effect for all media files except media files generated by recording task.Format is“P[Y]Y[MM]M[DDD]DT[hh]H[mm]M[ss]S”, similar with ISO8601 with symbols PEx. P7D, it means 7 days. P1DT10H, it means 1 days and 10 hours.The parameter takes effect when autocleanup_maxretentiontime_others_enabled is enabled. |
7.35 Region of interest
Group: roi_c<0\~(n-1)> for n channel product and m is the index of video stream which support ePTZ.
(capability_eptz > 0 or capability_fisheye = 1)
| PARAMETER VALUE SECURITY | (get/set) | DESCRIPTION | |
| s<0~(m-1)>_home | 1/6 ROI left-top corner coordinate.* If the minimal window size is 64x64, then the "win_i0_home"=(0~resolution_W-64, 0~resolution_H-64), which the resolution is the value in current stream.* If the stream doesn't support ePTZ, the permissions of this parameter must be set as 1/7. | ||
| s<0~(m-1)>_size | 1/6 ROI width and height. The width value must be multiples of 16 and the height value must be multiples of 8* The minimal window size is 64x64, and then resolution_W, resolution_H is the value in current stream.* If the stream doesn't support ePTZ, the permissions of this parameter must be set as 1/7. | ||
7.36 ePTZ setting
Group: eptz_c<0\~(n-1)> for n channel product. (capability_eptz > 0 or capability_fisheye = 1)
| PARAMETER VALUE SECURITY | (get/set) | DESCRIPTION | |
| osdzoom | 1/4 Indicates multiple | of zoom in is "on-screen display" or not.* Reserved for compatibility, and suggest don't use this since [httpversion] > 0302a* We replace "eptz_c<0~(n-1)>_osdzoom" with "videoin_c<0~(n-1)>_zoomratiodisplay". | |
| smooth 1/4 Enable the ePTZ "move smoothly" feature | |||
| tiltspeed -5 ~ 5 1/4 Tilt speed | * Only available when "capability_fisheye" is 1 | ||
| 1/7 Tilt speed(It should be set by eCamCtrl.cgi rather than by setparam.cgi.) | |||
| panspeed -5 ~ 5 1/4 Pan speed | * Only available when "capability_fisheye" is 1 | ||
| 1/7 Pan speed(It should be set by eCamCtrl.cgi rather than by setparam.cgi.) | |||
| zoomspeed -5 ~ 5 1/4 Zoom speed | * Only available when "capability_fisheye" is 1 | ||
| 1/7 Zoom speed(It should be set by eCamCtrl.cgi rather than by setparam.cgi.) | |||
| autospeed 1 ~ 5 1/4 Auto pan/patrol speed | * Only available when "capability_fisheye" is 1 | ||
| 1/7 Auto pan/patrol speed(It should be set by eCamCtrl.cgi rather than by setparam.cgi.) | |||
| rotatespeed 1 ~ 5 1/4 Rotate speed (only for Fisheye series) | * Only available when "capability_fisheye" is 1 and"capability_fisheyelocaldewarp_c<0~(n-1)>''is 0 | ||
Group: eptz_c<0\~(n-1)>_s<0\~(m-1)> for n channel product and m is the index of video stream which support ePTZ if capability_eptz > 0; m is the index of stream number if capability_fisheye = 1. (capability_eptz > 0 or capability_fisheye = 1)
| PARAMETER VALUE SECURITY | (get/set) | DESCRIPTION | |
| patrolseq string[120] 1/4 | The patrol sequence of ePTZ. All the patrol position indexes will be separated by "," | ||
| patroldwelling | string[160] | The 4dwelling time (unit: second) of each patrol point, separated by ",". | |
| preset_i<0~19>_name string[40] 1/4 Name of ePTZ preset.* Only available when "capability_fisheye" is 1 | TZ preset. | * Only available when "capability_fisheye" is 1 | |
| 1/7 Name of ePTZ preset.(It should be set by ePreset.cgi rather than by setparam.cgi.) | |||
| preset_i<0~19>_pos | 1/4 Left-top corner coordinate of the preset.* Only available when "capability_fisheye" is 1 | ||
| 1/7 Left-top corner coordinate of the preset.(It should be set by ePreset.cgi rather than by setparam.cgi.) | |||
| preset_i<0~19>_size | 1/4 Width and height of the preset.* Only available when "capability_fisheye" is 1 | ||
| 1/7 Width and height of the preset.(It should be set by ePreset.cgi rather than by setparam.cgi.) | |||
7.37 Focus Window setting
Group: focuswindow_c<0\~(n-1)> for n channel products n denotes the value of "capability_nvideoin".
(capability_image_c<0\~(n-1)>focuswindow_nwindow>0)
| PARAMETER VALUE SECURITY | (get/set) | DESCRIPTION | |
| win_i0_enable | 4/4 Enable or disable the window. | ||
| win_i0_home | 4/4 Left-top corner coordinate of the window.* If the minimal window size is 192x144, then the "win_i0_home"=(0~resolution_W-192, 0~resolution_H-144), resolution_W and resolution_H based on "capability_image_c<0~(n-1)>_focuswindow_range". | ||
| win_i0_size | 4/4 Width and height of the window.* The minimal window size is 192x144, and resolution_W and resolution_H is based on "capability_image_c<0~(n-1)>_focuswindow_range". | ||
7.38 Seamless recording setting
Group: seamlessrecording
(capability_localstorage_seamless> 0)
| PARAMETER VALUE SECURITY | (get/set) | DESCRIPTION | |
| diskmode<Not recommended to usethis> | seamless,manageable | 1/6 "seamless" indicates enable seamless recording."manageable" indicates disable seamless recording.* We replace this parameter with "seamlessrecording_c<0~(n-1)>_diskmode" when the version number (httpversion) is equal or greater than 0311c. | |
| maxconnection<Not recommended to usethis> | 3 1/7 Maximum number of connected seamless streaming.* We replace this parameter with "seamlessrecording_c<0~(n-1)>_maxconnection"when the version number (httpversion) is equal or greater than 0311c. | ||
| enable<Not recommended to usethis> | 1/7 Indicate whether seamless recording is recording to local storage or not at present.(Read only)* We replace this parameter with "seamlessrecording_c<0~(n-1)>_triggerrecord" when the version number (httpversion) is equal or greater than 0311c. | ||
| guid<0~2>_id<Not recommended to usethis> | string[127] 1/7 The connected seamless streaming ID.(Read only)* We replace this parameter with "seamlessrecording_c<0~(n-1)>_guid<0~(k-1)>_id"when the version number (httpversion) is equal or greater than 0311c | ||
| guid<0~2>_number<Not recommended to usethis> | 0~3 1/7 Number of connected seamless streaming withguid<0~(k-1)>_id.(Read only)* We replace this parameter with "seamlessrecording_c<0~(n-1) context"when the version number (httpversion) is equal or greater than 0311c. | ||
7.38.1 Seamless recording setting per channel
Group: seamlessrecording_c<0\~(n-1)> for n channel products
n denotes the value of "capability_nvideoin".
(capability_localstorage_seamless> 0)
| PARAMETER VALUE SECURITY | (get/set) | DESCRIPTION | |
| diskmode | seamless, manageable | 1/6 "seamless" indicates enable seamless recording. "manageable" indicates disable seamless recording. | |
| maxconnection 3 1/7 Max | mum number of connected seamless streaming. | ||
| triggerrecord | 1/7 Indicate whether seamless recording is recording to local storage or not at present. (Read only) | ||
| guid<0~(k-1)>_id string[127] 1/7 The connected seamless streaming ID. (Read only) * k denotes the value of "seamlessrecording_c<0~(n-1)>_maxconnection" | |||
| guid<0~(k-1)>_number 0~3 1/7 Number of connected seamless streaming with guid<0~(k-1)>_id. (Read only) * k denotes the value of "seamlessrecording_c<0~(n-1)>_maxconnection" | |||
7.39 VIVOTEK Application Development Platformsetting
Group: vadp
| NAME VALUE SECURITY | (get/set) | DESCRIPTION | |
| version6/7 Indicate the VADP version. | |||
| resource_total_memory | 0, | 6/7 | Indicate total available memory size for VADP modules. |
| resource_total_storage | 0, | 6/7 | Indicate total size of the internal storage space for storing VADP modules. |
| resource_free_memory 0,6/7 Indicate free memory size for VADP modules. | 6/7 | Indicate free memory size for VADP modules. | |
| resource_free_storage 0,6/7 Indicate current free storage size for uploading VADP modules. | 6/7 | Indicate current free storage size for uploading VADP modules. | |
| module_number 0,6/7 Record the total module number that already stored in the system. | 6/7 Record | the total module number that already stored in the system. | |
| module_order | string[40] | 6/6 | The execution order of the enabled modules. |
| module_save2sd | 6/6 | Indicate if the module should be saved to SD card when user want to upload it.If the value is false, save module to the internal storage space and it will occupy storage size. | |
| number | string[128] | 6/7 | This number is used to register license key for VADP application. |
Group: vadp_module_i<0\~(n-1)> for n VADP package number (capability_vadp_npackage > 0)
n denotes the value of "capability_vadp_npackage".
| NAME VALUE | SECURITY | (get/set) | DESCRIPTION |
| enable | 6/6 | Indicate if the module is enabled or not. If yes, also add the index of this module to the module_order. | |
| name | string[40] | 6/6 | Module name |
| extendedname | string[40] | 6/6 | Extended module name. If this value is not blank, it will be shown on the VADP UI first instead of vadp_module_i<nae. |
| url | string[120] | 6/6 | Define the URL string after the IP address if the module provides it own web page. |
| vendor string[40] 6/6 The provider of the module. | ||
| vendorurl string[120] 6/6 URL of the vendor. | ||
| version string[40] 6/6 Version of the module. | ||
| license string[40] 6/6 Indicate the license status of the module. | ||
| licmsg string[128] 6/6 Indicate the message that will be show on license status when mouse over. | ||
| path string[40] 6/6 Record the storage path of the module. | ||
| initscr string[40] 6/6 The script that will handle operation commands from the system. | ||
| status string[40] 6/6 Indicate the running status of the module. | ||
| statmsg string[128] 6/6 Indicate the message that will be show on the running status when mouse over. | ||
| vvtklicensemec string[40] 6/7 Indicate the module use VIVO TEK license mechanism | ||
Group: vadp_schedule_i<0\~(n-1)> for n VADP package number
n denotes the value of "capability_vadp_npackage".
(Only available when "capability_vadp_npackage" > 0 and the version number of "vadp_version" >= "1.3.2.0")
| NAME | VALUE | SECURITY (get/set) | DESCRIPTION |
| enable | 6/6 | Enable or disable the schedule mode to control the execution of the VADP package | |
| begintime | hh:mm | 6/6 | Begin time of the schedule |
| endtime | hh:mm | 6/6 | End time of the schedule |
Group: vadp_event
| NAME | VALUE | SECURITY (get/set) | DESCRIPTION |
| ntrigger | 0, | 6/7 | Indicate the number of topics to be transferred to event manager for trigger. |
| triggerlist_i<0~(n-1)>_topic | string[256] 6/6 | Indicate the event notification with this topic will be transferred to event manager as trigger.n is equal to ntrigger above. | |
7.40 camera PTZ control
Group: camctrl (capability_camctrl_ptztunnel > 0)
| NAME VALUE SECURITY | (get/set) | DESCRIPTION | |
| enableptztunnel | 1/4 Enable PTZ tunnel for camera control. | ||
Group: camctrl_c<0\~(n-1)> for n channel products (capability_ptzenabled > 0)
n denotes the value of "capability_nvideoin" and k denotes the value of "capability_npreset"
| NAME VALUE SECURITY | (get/set) | DESCRIPTION | |
| panspeed -5 ~ 5 1/4 Pan speed | |||
| tiltspeed -5 ~ 5 1/4 Tilt speed | |||
| zoomspeed -5 ~ 5 1/4 Zoom speed | |||
| focusspeed -5 ~ 5 1/4 Auto focus speed | |||
| patrolseq string[120] 1/4 | (For external device) | The indexes of patrol points, separated by ", " | |
| patroldwelling | string[160] 1/4 (For external device) | The dwelling time of each patrol point, separated by ", " | |
| preset_i<0~(k-1)>_name | string[40] | 1/4 | Name of the preset location. |
| preset_i<0~(k-1)>_dwelling | 0 ~ 999 | 1/4 The dwelling time of each preset location | |
| uart | 0 ~ "capability_nuart"-1 | 1/4 Select corresponding uart(capability_nuart>0). | |
| cameraid | 0~255 1/4 Camera ID controlling external PTZ camera. | ||
| isptz | 0 ~ 2 1/4 0: disable PTZ commands. | 1: enable PTZ commands with PTZ driver.2: enable PTZ commands with UART tunnel.* Only available when bit7 of capability_ptzenabled is 1 | |
| disablemdonptz | 1/4 | Disable motion detection on PTZ operation. | |
7.41 camera PTZ control (IZ series)
Group: camctrl_c<0\~(n-1)> for n channel products (capability_camctrl_c0_Zoommodule = 1 and capability_camctrl_c0_buildinpt = 0)
n denotes the value of "capability_nvideoin" and k denotes the value of "capability_npreset"
| NAME VALUE SECURITY | (get/set) | DESCRIPTION | |
| ccdtype string[16] 6/7 | (Internal used, read only) | ||
| motortype string[16] 6/7 | (Internal used, read only) | ||
| cameraid 0 ~ 255 1/4 Camera ID controlling external PTZ | camera.Note:Please set your speed dome to the appropriate baud rate, and Camera ID, e.g. 2400bps, camera ID 1,2,3,,,etc.All Camera IDs on the same controlling system (NVR or rs485 keyboard) have to be distinct.Therefore, once you send a controlling signal, each camera will only accept the inputs with the corresponding ID. | ||
| panspeed -5 ~ 5 1/4 Pan speed | |||
| tiltspeed -5 ~ 5 1/4 Tilt speed | |||
| zoomspeed | -5 ~ 5 1/4 Zoom speed | ||
| autospeed -5 ~ 5 1/4 Auto pan speed | |||
| focusspeed | -5 ~ 5 1/4 Auto focus speed | ||
| focusmode | auto,onetimeauto,spotlight,manual* Available values are listed in"capability_camctrl_c<0~(n-1)>_focusmode" | 1/4 Indicate the focus control mode. | |
| uart | 0 ~ "capability_nuart"-1 | 1/4 | Select corresponding uart(capability_nuart>0). |
| isptz | 0 ~ 2 | 1/4 0: disable PTZ commands.1: enable PTZ commands with PTZ driver.2: enable PTZ commands with UART tunnel.* Only available when bit7 of | |
| capability_ptzenabled is 1 | |||
| preset_i<0~(k-1)>_name | string[40] 1/4 Name of the | preset location. | |
| preset_i<0~(k-1)>_zoom | capability_ptz_c<0~(n-1)>_minzoom ~capability_ptz_c<0~(n-1)>_maxzoom | 1/4 Zoom | position at each preset location. |
| preset_i<0~(k-1)>_focus | capability_ptz_c<0~(n-1)>_minfocus ~capability_ptz_c<0~(n-1)>_maxfocus | 1/4 Focus | position at each preset location. |
| preset_i<0~(k-1)>_dwelling | 0 ~ 999 1/4 The dwelling | time of each | preset location |
| preset_i<0~(k-1)>_focus setting | sync,fixcurrent | 1/4 The focus mode of each preset, which is essential and should be grouped with "preset_i<0~(k-1)>_name."* We support this parameter when the version number (httpversion) is equal or greater than 0305b. | |
| patrolseq string[120] 1/4 | (For external device) | The indexes of patrol points, separated by ", " | |
| patroldwelling string[160] | 1/4 (For external device) | The dwelling time of each patrol point, separated by ", " | |
| disablemdonptz | 1/4 Disable motion detection on PTZ | operation. | |
| defaulthome 1/4 This field tells system to use default home position or not. | |||
| axisz | capability_ptz_c<0~(n-1)>_minzoom ~capability_ptz_c<0~(n-1)>_maxzoom | 1/4 Custom | home zoom position. |
| axisf | capability_ptz_c<0~(n-1)>_minfocus ~capability_ptz_c<0~(n-1)>_maxfocus | 1/4 Custom | home focus position. |
| digitalzoom 1/4 Enable/disable digital zoom | |||
| zoomenhance | 1/4 Enable /disable zoom enhancement | ||
| returnhome | 1/4 Enable/disable return home while idle. | ||
| returnhomeinterval | 1~999 | 1/4 | While idle over this time interval, idleaction will be taken. |
| idleaction_enable <boolean> 1/4 Enable/disable idle action while idle | |||
| idleaction_type home 1/4 | This field tells what kind of action should | be taken while idle. | |
| idleaction_interval 1~999 | 1/4 While idle over this time | interval, idle | action will be taken. |
7.42 camera PTZ control (SD series)
Group: camctrl_c<0\~(n-1)> for n channel products (the bit7 of capability_ptzenabled is 0 and the bit4 of capability_ptzenabled is 1)
n denotes the value of "capability_nvideoin" and k denotes the value of "capability_npreset"
| NAME VALUE SECURITY | (get/set) | DESCRIPTION | |
| ccdtype string[16] 6/7 (Internal used, read only) | |||
| motortype string[16] | 6/7 (Internal used, read only) | ||
| cameraid | 1 ~ 255 | 1/4 Camera ID controlling external PTZ camera. Note: Please set your speed dome to the appropriate baud rate, and Camera ID, e.g. 2400bps, camera ID 1,2,3,,,etc. All Camera IDs on the same controlling system (NVR or rs485 keyboard) have to be distinct. Therefore, once you send a controlling signal, each camera will only accept the inputs with the corresponding ID. | |
| panspeed | -5 ~ 5 1/4 Pan speed | ||
| tiltspeed | -5 ~ 5 1/4 Tilt speed | ||
| zoomspeed | -5 ~ 5 1/4 Zoom speed | ||
| autospeed -5 ~ 5 1/4 Auto pan speed | |||
| focusspeed | -5 ~ 5 1/4 Auto focus speed | ||
| focusmode | auto,onetimeauto,spotlight,manual* Available values are listed in "capability_camctrl_c<0~(n-1)>_focusmode" | 1/4 Indicate the focus control mode. | |
| preset_i<0~(k-1)>_name | string[40] | 1/4 | Name of the preset location. |
| preset_i<0~(k-1)>_pan | capability_ptz_c<0~(n-1)>_minpan ~capability_ptz_c<0~(n-1)>_maxpan | 1/4 Pan position at each preset location. |
| preset_i<0~(k-1)>_tilt | capability_ptz_c<0~(n-1)>_mintilt ~capability_ptz_c<0~(n-1)>_maxtilt | 1/4 Tilt position at each preset location. |
| preset_i<0~(k-1)>_zoom | capability_ptz_c<0~(n-1)>_minzoom ~capability_ptz_c<0~(n-1)>_maxzoom | 1/4 Zoom position at each preset location. |
| preset_i<0~(k-1)>_focus | capability_ptz_c<0~(n-1)>_minfocus ~capability_ptz_c<0~(n-1)>_maxfocus | 1/4 Focus position at each preset location. |
| preset_i<0~(k-1)>_focus setting | sync,fixcurrent | 1/4 The focus mode of each preset, which is essential and should be grouped with "preset_i<0~(k-1)>_name."* We support this parameter when the version number (httpversion) is equal or greater than 0305b. |
| preset_i<0~(k-1)>_fliped | 1/4 Flip side at each preset location. | |
| patrol_i<0~39>_name string[40] 1/4 (For internal device) | The name of patrol location | |
| patrol_i<0~39>_dwelling | 0 ~ 999 1/4 (For internal device) | The dwelling time of each patrol location |
| disablemdonptz | 1/4 Disable motion detection on PTZ | operation. |
| defaulthome 1/4 This field tells system to use default home position or not. | ||
| axisx | capability_ptz_c<0~(n-1)>_minpan ~capability_ptz_c<0~(n-1)>_maxpan | 1/4 Custom home pan position. |
| axisy | capability_ptz_c<0~(n-1)>_mintilt ~capability_ptz_c<0~(n-1)>_maxtilt | 1/4 Custom home tilt position. |
| axisz capability_ptz_c<0~(n-1) 1/4 Custom home zoom position. | ||
| >_minzoom ~capability_ptz_c<0~(n-1)>_maxzoom | |||
| axisf | capability_ptz_c<0~(n-1)>_minfocus ~capability_ptz_c<0~(n-1)>_maxfocus | 1/4 Custom | home focus position. |
| axisflip | boolean> 1/4 Custom home flip side. | ||
| returnhome <boolean> 1/4 Enable/disable return home while idle. | |||
| returnhomeinterval 1~999 | 1/4 While idle over this time interval, idle action will be taken. | ||
| digitalzoom <boolean> 1/4 Enable/disable digital zoom | |||
| idleaction_enable <boolean> 1/4 Enable/disable idle action while idle | |||
| idleaction_type | pan,patrol,tour,home,objtr ack,prev | 1/4 This field tells what kind of action should be taken while idle. | |
| idleaction_interval 1~999 | 1/4 While idle over this time interval, idle action will be taken. | ||
| zoomenhance <boolean> | 1/4 Enable /disable zoom enhancement | ||
| tour_index | -1, 0~19 | 1/4 | Index of the enabled tour group, from 0 to 19.Set -1 to disable all the tour groups. |
| tour_i<0~19>_name | string[40] | 1/4 Name of the tour. | |
| tour_i<0~19>_type | 1/4 0 = Recorded tour | 1 = Preset tour | |
| tour_i<0~19>_speed | -5 ~ 5 | 1/4 | Preset tour: pan and tilt speed when moving between presets.Recorded tour: unnecessary. |
| tour_i<0~19>_direction | forward,backward,random | 1/4 | User can choose which direction the preset tour goes."forward": preset tour goes in forward order."backward": preset tour goes in backward order."random": the presets of the tour will be recalled randomly.* Only available when "capability_presettourdirection" is 1.* We support this parameter when the version number (httpversion) is equal or greater than 0307a. |
| tour_i<0~19>_checklist | string[512] 1/4 | The | indexes of preset positions, separated by ", " |
| tour_i<0~19>_dwelltime | string[512] 1/4 Preset tour: time to wait be | before moving to the next preset position, separated by ", " Recorded tour: number of seconds to wait before continuing a loop tour. | |
7.43 UART control
Group: uart (capability_nuart > 0 and capability_fisheye = 0)
| NAME VALUE SECURITY | (get/set) | DESCRIPTION | |
| ptzdrivers_i<0~19, 127>_name | string[40] 1/4 Name of the PTZ driver. | ||
| ptzdrivers_i<0~19, 127>_location | string[128] | 1/4 Full path of the PTZ driver. | |
| enablehttptunnel | 1/4 | Enable HTTP tunnel channel to control UART. | |
Group: uart_i<0\~(n-1)> n is uart port count (capability_nuart > 0 and capability_fisheye = 0)
| NAME VALUE SECURITY | (get/set) | DESCRIPTION | |
| baudrate | 300,600,1200,2400,4800,9600,19200,38400,57600,115200 | 4/4 Set baud rate of COM port. | |
| databit | 5,6,7,8 | 4/4 Data bits in a character frame. | |
| paritybit | none,odd,even | 4/4 For error checking. | |
| stopbit | 1,2 | 4/4 | "1": One stop bit is transmitted to indicate the end of a byte."2": Two stop bits are transmitted to indicate the end of a byte.If you want to transfer the stopbit for 150% of the normal time used to transfer one bit,the uart_i<0~(n-1)>_stopbit should be set as 2 and the uart_i<0~(n-1)>_databit set as 5 as well. |
| uartmode | rs485, 4/4 RS485 orrs232 | RS232. | |
| customdrvcmd_i<0~9> string[128] 1/4 PTZ command for custom camera. | |||
| speedlink_i<0~4>_name string[40] 1/4 Additional PTZ command name. | |||
| speedlink_i<0~4>_cmd string[40] 1/4 Additional PTZ command list. | |||
| ptzdriver | 0~19,127 (custom),128 (no driver) | 1/4 The PTZ driver is used by this COM port. | |
7.44 UART control (SD series)
Group: uart_i<0\~(n-1)> n is uart port count (capability_nuart > 0 and the bit7 of capability_ptzenabled is 0, the bit4 of capability_ptzenabled is 1)
| NAME VALUE SECURITY | (get/set) | DESCRIPTION | |
| cameraid 1~255 4/4 Camera ID controlling external PTZ camera. | |||
| baudrate | 2400,4800,9600,19200,38400,57600,115200 | 4/4 Set baud rate of COM port. | |
| databit | 5,6,7,8 | 4/4 Data bits in a character frame. | |
| paritybit | none,odd,even | 4/4 For error checking. | |
| stopbit | 1,2 | 4/4 | "1": One stop bit is transmitted to indicate the end of a byte."2": Two stop bits are transmitted to indicate the end of a byte.If you want to transfer the stopbit for 150% of the normal time used to transfer one bit,the uart_i<0~(n-1)>_stopbit should be set as 2 and the uart_i<0~(n-1)>_databit set as 5 as well. |
| uartmode rs485 4/7 RS485 mode. | |||
7.45 Lens configuration
Group: lens for n channel products
n denotes the value of "capability_nvideoin"
(capability_image_c<0\~(n-1)>_lensconfiguration_support = 1)
| NAME VALUE SECURITY | (get/set) | DESCRIPTION | |
| selected6/7 Current selected lens profile. | e.g. lens_selected=lens_default_i0, it means choosen lens configuration is i0 lens of default group. | ||
Group: lens_default
| NAME VALUE SECURITY | (get/set) | DESCRIPTION | |
| totalnumbers 0,<positive integer>6/7 Totoal support number of the default lens profiles | 6/7 | Totoal support number of the default lens profiles | of the default lens profiles |
Group: lens_user
| NAME VALUE | SECURITY | (get/set) | DESCRIPTION |
| totalnumbers | 0, | 6/7 | Totoal support number of the user lens profiles |
Group: lens_default_i<0\~(n-1)>
n denotes the value of "lens_default_totalnumbers"
| NAME | VALUE | SECURITY (get/set) | DESCRIPTION |
| name | 6/7 Default lens name | ||
Group: lens_user_i<0\~(n-1)>
n denotes the value of "lens_user_totalnumbers"
| NAME | VALUE | SECURITY (get/set) | DESCRIPTION |
| name6/7 User-defined lens name |
7.46 Fisheye info
Group: fisheyeinfo (capability_fisheye > 0)
| NAME VALUE SECURITY | (get/set) | DESCRIPTION | |
| revisedcenteraxis6/7 The actual center axis coordinate | |||
| radius 0,integer> | 6/7 The actual center radius | ||
7.47 Fisheye local dewarp setting
Group: fisheyedewarp_c<0\~(n-1)> (capability_fisheyelocaldewarp_c<0\~(n-1)> > 0)
n denotes the value of "capability_nvideoin", m denotes the value of "capability_nmediastream"
| NAME VALUE SECURITY | (get/set) | DESCRIPTION | |
| panspeed -5 ~ 5 | 1/4 Pan speed of regional view | ||
| tiltspeed -5 ~ 5 | 1/4 Tilt speed of regional view | ||
| zoomspeed -5 ~ 5 | 1/4 Zoom speed of regional | ||
| s<0~(m-2)>_panorama_panstart | 0~359 | 1/4 Initial pan position of panorama view.(only available for 1P and 2P mode at ceiling or floor mount) | |
| s<0~(m-2)>_region_pan | -90~359 | 1/4 Pan home angle of regional viewPan range of ceiling/floor mount is [0~359].Pan range of wall mount is [-90~90]. | |
| s<0~(m-2)>_region_tilt | -90~90 | 1/4 Tilt home angle of regional viewTilt range of ceiling/floor mount is [0~90].Tilt range of wall mount is [-90~90]. | |
| s<0~(m-2)>_region_zoo m | 100~300 | 1/4 Zoom home ratio of regional view | |
7.48 PIR behavior define
Group: pir (capability_npir > 0)
| NAME VALUE SECURITY | (get/set) | DESCRIPTION | |
| enable <boolean> 1/1 Enable/disable PIR |
7.49 Auto tracking setting
Group: autotrack_c<0\~(n-1)>(capability_image_c<0\~(n-1)>_autotrack_support>0)
n denotes the value of "capability_nvideoin"
| PARAMETER VALUE SECURITY | (get/set) | DESCRIPTION | |
| objsize_type -1~2 1/4 Type of object size. | -1:customized width and height0:object size = 30 x 301:object size = 10 x 202:object size = 10 x 10 | ||
| objsize_customized_width | 10~320 1/4 | The | minimum width of tracking target. |
| objsize_customized_height | 10~240 | 1/4 | The minimum height of tracking target. |
| sensitivity | 0~2 | 1/4 Tracking sensitivity.0:Low1:Medium2:High | |
7.50 Wireless
Group: wireless (capability_network_wireless > 0)
| PARAMETER VALUE SECURITY | (get/set) | DESCRIPTION | |
| ssid | string[32] | 6/6 SSID for wireless lan settings. | |
| wlmode | Infra,Adhoc | 6/6 Wireless mode. Infra: Infrastructure | |
| channel 1~11 or | 1~13 or10~11 or10~13 or1~14 | 6/6 A list of W | LAN channels.Countries apply their own regulations to the allowable channels.1~11: USA and Canada1~13: Europe10~11: Spain10~13: France1~14: Japan* Only valid when "wireless_wlmode" is "Adhoc" |
| encrypt | none,wep,wpa,wpa2 | 6/6 Encryption | method:none: NONE,wep: WEP,wpa: WPA,wpa2: WPA2PSK |
| authmode OPEN, SHARED 6 | 6 Authentication mode. | * Only valid when "wireless_encrypt" is "wep" | |
| keylength 64, 128 6/6 Key | length in bits. | * Only valid when "wireless_encrypt" is "wep" | |
| keyformat HEX, ASCII 6/6 | Key1 ~ key4 presentation format. | * Only valid when "wireless_encrypt" is "wep" | |
| keyselect 1 ~ 4 6/6 Default | key number. | * Only valid when "wireless_encrypt" is "wep" | |
| key1 password [26] 6/6 | WEP key1 for encryption. | * Only valid when "wireless_encrypt" is "wep" | |
| key2 password [26] 6/6 | WEP key2 for encryption. | * Only valid when "wireless_encrypt" is "wep" | |
| key3 password [26] 6/6 | WEP key3 for encryption. | * Only valid when "wireless_encrypt" is "wep" | |
| key4 password [26] 6/6 | WEP key4 for encryption. | * Only valid when "wireless_encrypt" is "wep" | |
| algorithm | AES, TKIP | 6/6 Algorithm | * Only valid when "wireless_encrypt" is "wpa" or "wpa2" |
| presharedkey | password [64] | 6/6 | WPA/WPA2PSK mode pre-shared key.* Only valid when "wireless_encrypt" is "wpa" or "wpa2" |
7.51 Shock detection
Group: shock_c<0\~(n-1)> for n channel products
n denotes the value of "capability_nvideoin" (capability_shockalarm_support > 0)
| PARAMETER VALUE SECURITY | (get/set) | DESCRIPTION | |
| alarm_enable4/4 Enable shock detection's alarm. | |||
| alarm_level 1~100 4/4 The value indicate the support strength level of shock detection's alarm. |
8. Useful Functions
8.1 Drive the Digital Output (capability\_ndo > 0)
Note: This request requires Viewer privileges.
Method: GET/POST
Syntax:
http://<servername>/cgi-bin/dido/setdo.cgi?do1=<state>[&do2=<state>]
[&do3=<state>][&do4=<state>]
Where state is 0 or 1; "0" means inactive or normal state, while "1" means active or triggered state.
| PARAMETER VALUE DESCRIPTION | ||
| do<num> 0, 1 0 | - Inactive, normal state | |
| 1 - Active, triggered state | ||
Example: Drive the digital output 1 to triggered state and redirect to an empty page.
http://myserver/cgi-bin/dido/setdo.cgi?do1=1
8.2 Query Status of the Digital Input(capability\_ndi > 0)
Note: This request requires Viewer privileges
Method: GET/POST
Syntax:
http://<servername>/cgi-bin/dido/getdi.cgi?[di0][&di1][&di2][&di3]
If no parameter is specified, all of the digital input statuses will be returned.
Return:
HTTP/1.0 200 OK\r\n
Content-Type: text/plain\r\n
Content-Length: <length>\r\n
\r\n
[di0=<state>]\r\n
[di1=<state>]\r\n
[di2=<state>]\r\n
[di3=<state>]\r\n
where
Example: Query the status of digital input 1.
Request:
http://myserver/cgi-bin/dido/getdi.cgi?di1
Response:
HTTP/1.0 200 OK\r\n
Content-Type: text/plain\r\n
Content-Length: 7\r\n
\r\n
di1=1\r\n
8.3 Query Status of the Digital Output (capability\_ndo > 0)
Note: This request requires Viewer privileges
Method: GET/POST
Syntax:
http://<servername>/cgi-bin/dido/getdo.cgi?[do0][&do1][&do2][&do3]
If no parameter is specified, all the digital output statuses will be returned.
Return:
HTTP/1.0 200 OK\r\n
Content-Type: text/plain\r\n
Content-Length: <length>\r\n
\r\n
[do0=<state>]\r\n
[do1=<state>]\r\n
[do2=<state>]\r\n
[do3=<state>]\r\n
where
Example: Query the status of digital output 1.
Request:
http://myserver/cgi-bin/dido/getdo.cgi?do1
Response:
HTTP/1.0 200 OK\r\n
Content-Type: text/plain\r\n
Content-Length: 7\r\n
\r\n
do1=1\r\n
8.4 Capture Single Snapshot
Note: This request requires Normal User privileges.
Method: GET/POST
Syntax:
http://<servername>/cgi-bin/viewer/video.jpg?[channel=<value>]&resolution=<value>]&quality=<value>]&streamid=<value>
If the user requests a size larger than all stream settings on the server, this request will fail.
| PARAMETER | VALUE DESCRIPTION | |
| channel 0~(capability_nvideoin -1) The channel number of the video source. | ||
| resolution Available options are list in "capability_videooin_c<0~(n-1)>_resolution". Besides, available options is referred to "capability_videooin_c<0~(n-1)>_maxresolution" and "capability_videooin_c<0~(n-1)>_minresolution" | The resolution of the image. | |
| quality 1~5 The quality of the image. | ||
| streamid 0~(capability_nmediastream -1) The stream number. | ||
The server will return the most up-to-date snapshot of the selected channel and stream in JPEG format. The size and quality of the image will be set according to the video settings on the server.
Return:
HTTP/1.0 200 OK\r\n
Content-Type: image/jpeg\r\n
[Content-Length: <image size>\r\n]
<binary JPEG image data>
8.5 Account Management
Note: This request requires Administrator privileges.
Method: POST
Syntax:
http://<servername>/cgi-bin/admin/editaccount.cgi? method=<value>&username=<name>[&userpass=<value>][&privilege=<value>][&privilege=<value>][&return=<return page>]
| PARAMETER VALUE | DESCRIPTION | |
| method add Add | an account to the server. | When using this method,the"username" field is necessary. It will use the default value of other fields if not specified. |
| delete Remove an account from the server. When using this method,the "username" field is necessary, and others are ignored. | ||
| edit Modify the account | password and privilege. When using this method, the"username" field is necessary, and other fields are optional. If not specified, it will keep the original settings. | |
| username | The name of the user | to add, delete, or edit. |
| userpass | The password of the new user to add or that of the old user to modify. The default value is an empty string. | |
| privilege | view | The privilege of the user to add or to modify."view": Viewer privilege."operator": Operator privilege."admin": Administrator privilege. |
| operator | ||
| admin | ||
| return | Redirect to the pageafter the parameter is assigned. Theshould be the relative path according to the root of camera. If you omit this parameter, it will redirect to an empty page.* If theis invalid path, it will ignore this parameter. | |
8.6 System Logs
Note: This request require Administrator privileges.
Method: GET/POST
Syntax:
http://<servername>/cgi-bin/admin/syslog.cgi
Server will return the most up-to-date system log.
Return:
HTTP/1.0 200 OK\r\n
Content-Type: text/plain\r\n
Content-Length: <syslog length>\r\n
\r\n
<system log information>\r\n
8.7 Upgrade Firmware
Note: This request requires Administrator privileges.
Method: POST
Syntax:
http://<servername>/cgi-bin/admin/upgrade.cgi
Post data:
fimage=<file name>[&return=<return page>]\r\n\r\n<multipart encoded form data>
Server will accept the file named
8.8 ePTZ Camera Control (capability\_eptz > 0 and
capability\_fisheye = 0)
Note: This request requires camctrl privileges.
Method: GET/POST
Syntax:
http://<servername>/cgi-bin/camctrl/eCamCtrl.cgi?channel=&stream=<value>
[&move=<value>] - Move home, up, down, left, right
[&auto=<value>] - Auto pan, patrol
[&zoom=<value>] -Zoom in, out
[&zooming=<value>&zs=<value>] -Zoom without stopping, used for joystick
[&x=<value>&y=<value>&w=<value>&h=<value>&resolution=<value>] - Zoom in, out on a specific area
[&vx=<value>&vy=<value>&vs=<value>] - Shift without stopping, used for joystick
[&x=<value>&y=<value>&videosize=<value>&resolution=<value>&stretch=<value>] -Click on image
(Move the center of image to the coordination (x,y) based on resolution or videosize.)
[ [&speedpan=<value>][&speedtilt=<value>][&speedzoom=<value>][&speedapp=<value>] ] - Set speeds
[&return=<return page>]
Example:
http://myserver/cgi-bin/camctrl/eCamCtrl.cgi?channel=0&stream=0&move=right
http://myserver/cgi-bin/camctrl/eCamCtrl.cgi?channel=0&stream=1&vx=2&vy=2&vz=2
http://myserver/cgi-bin/camctrl/eCamCtrl.cgi?channel=0&stream=1&x=100&y=100&videosize=640x480&resolution=640x480&stretch=0
In zoom operation, there are two ways to control it, scale zoom and area zoom.
- [Scale zoom]: contains two control method, relative movement and continuous movement
a. relative movement -
If you trigger a relative movement, it will only zoom certain ratio and stop by itself.
http://IPAddr/cgi-bin/camctrl/eCamCtrl.cgi?stream=0&zoom=tele
http://IPAddr/cgi-bin/camctrl/eCamCtrl.cgi?stream=0&zoom=wide
The zoom ratio to move by relative movement is according to the setting of speedzoom [-5\~5].
http://IPAddr/cgi-bin/camctrl/eCamCtrl.cgi?stream=0&speedzoom=5
b. continuous movement -
If you trigger a continuous movement, you have to handle the stop time by yourself.
A continuous movement is convenient to integrate a joystick control.
http://IPAddr/cgi-bin/camctrl/eCamCtrl.cgi?stream=0&zooming=tele&zs=1
http://IPAddr/cgi-bin/camctrl/eCamCtrl.cgi?stream=0&zooming=wide&zs=5
zooming is used to indicate the moving direction, and zs is used to indicate the speed.
To stop a continuous movement, you have to use the command as below:
http://IPAddr/cgi-bin/camctrl/eCamCtrl.cgi?stream=0&zoom=stop&zs=0
- [Area zoom]: it means to zoom in on a specific area, here is an example for a directly moving
[x, y] is the desired coordinate, and it will be the center after movement
[w, h] is the scaled area size
[resolution] is the base range of this coordinate system
The example shows [w, h] = [864, 488] , which means to zoom in to ratio x2.2 based on [1920 × 1080] .
Pay attention to that [x, y, w, h] are essential parameters in an area zoom case, and the stream index is counted from 0 as the first stream.
http://IPAddr/cgi-bin/camctrl/eCamCtrl.cgi?channel=0&stream=0&x=912&y=297&w=864&h=488&resolution=1920x1080
| PARAMETER VALUE | DESCRIPTION | |
| channel <0~(n-1) | > Channel of video source. | |
| stream | <0~(m-1)> | Stream. |
| move home Move | to home ROI. | |
| up Move up. | ||
| down Move down. | ||
| left Move left. | ||
| right Move right. | ||
| auto pan | Auto pan. | |
| patrol | Auto patrol. | |
| stop | Stop auto pan/patrol. | |
| zoom | wide | Zoom larger view with current speed. |
| tele | Zoom further with current speed. | |
| zooming | wide or tele | Zoom without stopping for larger view or further view with zs speed, used for joystick control. |
| zs | 0 ~ 6 Set the speed of | zooming, "0" means stop. |
| x | The desired coordinate, and it will be the center after movement | |
| y | ||
| w | The scaled area size | |
| h | ||
| resolution | The resolution of streaming. | |
| vx | direction of movement, | used for joystick control. |
| vy | ||
| vs 0 ~ 7 Set the speed of movement, "0" means stop. | ||
| x | x-coordinate clicked by user. | It will be the x-coordinate of center after movement. |
| y | y-coordinate clicked by user. | It will be the y-coordinate of center after movement. |
| videosize | The size of plug-in (ActiveX)window in web page | |
| resolution | The resolution of streaming. | |
| stretch | 0 indicates that it usesresolution(streaming size) as the range of the coordinate system.1 indicates that it usesvideosize(plug-in size) as the range of the coordinate system. | |
| speedpan -5 ~ 5 | Set the pan speed. | |
| speedtilt -5 ~ 5 | Set the tilt speed. | |
| speedzoom -5 ~ 5 | Set the zoom speed. | |
| speedapp 1 ~ 5 | Set the auto pan/patrol speed. | |
| return | Redirect to the pageafter the parameter is assigned. Theshould be the relative path according to the root of camera. If you omit this parameter, it will redirect to an empty page.* If theis invalid path, it will ignore this parameter. | |
8.9 ePTZ Recall (capability\_eptz > 0 and capability\_fisheye = 0)
Note: This request requires camctrl privileges.
Method: GET/POST
Syntax:
| http:///cgi-bin/camctrl/eRecall.cgi?channel=&stream=&recall=[&return=] |
| PARAMETER VALUE | DESCRIPTION | |
| channel <0~(n-1)> | Channel of the video | source. |
| stream | <0~(m-1)> | Stream. |
| recall Text string less than 40 characters | One of the present positions to recall. | |
| returnRedirect to the pageafter the parameter is assigned. Theshould be the relative path according to the root of camera. If you omit this parameter, it will redirect to an empty page.* If theis invalid path, it will ignore this parameter. | after the parameter is assigned. Theshould be the relative path according to the root of camera. If you omit this parameter, it will redirect to an empty page.* If theis invalid path, it will ignore this parameter. | |
8.10 ePTZ Preset Locations(capability\_eptz > 0 and
capability_fisheye = 0)
Note: This request requires Operator privileges.
Method: GET/POST
Syntax:
| http:///cgi-bin/operator/ePreset.cgi?channel=&stream=[&addpos=][&delpos=][&return=] |
| PARAMETER VALUE DESCRIPTION | ||
| channel <0~(n-1)> | Channel of the video | source. |
| stream | <0~(m-1)> | Stream. |
| addpos | Add one preset location to the preset list. | |
| delpos | less than40 characters> | Delete preset location from the preset list. |
| return | Redirect to the page | after the parameter is assigned. Theshould be the relative path according to the root of camera. If you omit this parameter, it will redirect to an empty page.* If theis invalid path, it will ignore this parameter. |
8.11 IP Filtering for ONVIF
Syntax:
| http://cgi-bin/admin/ipfilter.cgi?type[=]http://cgi-bin/admin/ipfilter.cgi?method=add&ip=[&index=&return=]http://cgi-bin/admin/ipfilter.cgi?method=del&index=[&return=] | ||
| PARAMETER VALUE DESCRIPTION | ||
| type NULL Get IP filter type | ||
| method addv4 Add IPv4 address into access list. | ||
| ip | Single address:Network address:Range address: | |
| index | The start position to add or to delete. | |
8.12 UART HTTP Tunnel Channel (capability\_nuart > 0)
Note: This request requires Operator privileges.
Method: GET and POST
Syntax:
http://
GET /cgi-bin/operator/uartchannel.cgi?[channel=
x-sessioncookie: string[22]
accept: application/x-vvtk-tunnelled
pragma: no-cache
cache-control: no-cache
POST /cgi-bin/operator/uartchannel.cgi
x-sessioncookie: string[22]
content-type: application/x-vvtk-tunnelled
pragma : no-cache
cache-control : no-cache
content-length: 32767
expires: Sun, 9 Jam 1972 00:00:00 GMT
User must use GET and POST to establish two channels for downstream and upstream. The x-sessioncookie in GET and POST should be the same to be recognized as a pair for one session. The contents of upstream should be base64 encoded to be able to pass through a proxy server.
This channel will help to transfer the raw data of UART over the network.
Please see UART tunnel spec for detail information
PARAMETER VALUE DESCRIPTION
channel 0 \~ (n-1) The channel number of UART.
8.13 Event/Control HTTP Tunnel Channel (capability\_ evctrlchannel > 0)
Note: This request requires Administrator privileges.
Method: GET and POST
Syntax:
http://<servername>/cgi-bin/admin/ctrlevent.cgi
----
GET /cgi-bin/admin/ctrlevent.cgi
x-sessioncookie: string[22]
accept: application/x-vvtk-tunnelled
pragma: no-cache
cache-control: no-cache

----
POST /cgi-bin/admin/ ctrlevent.cgi
x-sessioncookie: string[22]
content-type: application/x-vvtk-tunnelled
pragma : no-cache
cache-control : no-cache
content-length: 32767
expires: Sun, 9 Jam 1972 00:00:00 GMT
User must use GET and POST to establish two channels for downstream and upstream. The x-sessioncookie in GET and POST should be the same to be recognized as a pair for one session. The contents of upstream should be base64 encoded to be able to pass through the proxy server.
This channel will help perform real-time event subscription and notification as well as camera control more efficiently. The event and control formats are described in another document.
See Event/control tunnel spec for detail information
8.14 Get SDP of Streams
Note: This request requires Viewer access privileges.
Method: GET/POST
Syntax:
http://<servername>/<network_rtsp_s<0~m-1>_accessname>
"m" is the stream number.
"network_accessname_<0\~(m-1)>” is the accessname for stream "1" to stream "m". Please refer to the "subgroup of network: rtsp" for setting the accessname of SDP.
You can get the SDP by HTTP GET.
When using scalable multicast, Get SDP file which contains the multicast information via HTTP.
8.15 Open the Network Stream
Note: This request requires Viewer access privileges.
Syntax:
For HTTP push server (MJPEG):
http://<servername>/<network_http_s<0~m-1>_accessname>
For RTSP (MP4), the user needs to input theURL below into an RTSP compatible player.
|rtsp://<servername>/<network_rtsp_s<0~m-1>_accessname>
“m” is the stream number.
For details on streaming protocol, please refer to the "control signaling" and "data format" documents.
8.16 Senddata (capability\_nuart > 0)
Note: This request requires Viewer privileges.
Method: GET/POST
Syntax:
http://<servername>/cgi-bin/viewer/senddata.cgi?
[com=<value>][&data=<value>][&flush=<value>] [&wait=<value>] [&read=<value>]
| PARAMETER VALUE | DESCRIPTION | |
| com 1 ~ | com port number> | The target COM/RS485 port number. |
| data | [,] | Theis a series of digits from 0 ~ 9, A ~ F. Each comma separates the commands by 200 milliseconds. |
| flush yes,no yes: | Receive data buffer of the | COM port will be cleared before read.no: Do not clear the receive data buffer. |
| wait | 1 ~ 65535 | Wait time in milliseconds before read data. |
| read | 1 ~ 128 | The data length in bytes to read. The read data will be in the return page. |
Return:
HTTP/1.0 200 OK\r\n
Content-Type: text/plain\r\n
Content-Length: <system information length>\r\n
\r\n
<hex decimal data>\r\n
Where hexadecimal data is digits from 0 \~ 9, A \~ F.
8.17 Storage managements (capability\_storage.dbenabled > 0)
Note: This request requires administrator privileges.
Method: GET and POST
Syntax:
http://<servername>/cgi-bin/admin/lsctrl.cgi?cmd=<cmd_type>[&<parameter>=<value>...]
The commands usage and their input arguments are as follows.
| PARAMETER VALUE | DESCRIPTION | |
| cmd_type | Required.Command to be executed, including search, insert, delete, update, and queryStatus. |
Command: search
| PARAMETER VALUE | DESCRIPTION | |
| label | Optional. | The integer primary key column will automatically be assigned a unique integer. |
| triggerType | Optional.Indicate the event trigger type.Please embrace your input value with single quotes.Ex. mediaType='motion'Support trigger types are product dependent. | |
| mediaType | Optional.Indicate the file media type.Please embrace your input value with single quotes.Ex. mediaType='videoclip'Support trigger types are product dependent. | |
| destPath | Optional.Indicate the file location in camera.Please embrace your input value with single quotes.Ex. destPath='/mnt/auto/CF/NCMF/abc.mp4' | |
| resolution | Optional.Indicate the media file resolution.Please embrace your input value with single quotes.Ex. resolution='800x600' | |
| isLocked | Optional.Indicate if the file is locked or not.0: file is not locked.1: file is locked.A locked file would not be removed from UI or cyclic storage. | |
| triggerTime | Optional.Indicate the event trigger time. (not the file created time)Format is "YYYY-MM-DD HH:MM:SS"Please embrace your input value with single quotes.Ex. triggerTime='2008-01-01 00:00:00'If you want to search for a time period, please apply "TO" operation.Ex. triggerTime='2008-01-01 00:00:00'+TO+'2008-01-01 23:59:59' is to search for records from the start of Jan 1^st 2008to the end of Jan 1^st 2008. | |
| limit | Optional. | Limit the maximum number of returned search records. |
| offset | Optional. | Specifies how many rows to skip at the beginning of the matched records.Note that the offset keyword is used after limit keyword. |
To increase the flexibility of search command, you may use "OR" connectors for logical "OR" search operations. Moreover, to search for a specific time period, you can use "TO" connector.
Ex. To search records triggered by motion or di or sequential and also triggered between 2008-01-01 00:00:00 and 2008-01-01 23:59:59.
http://<servername>/cgi-bin/admin/lsctrl.cgi?cmd=search&triggerType='motion'+OR+'di'+OR+'seq'&triggerTime='2008-01-01 00:00:00'+TO+'2008-01-01 23:59:59'
Command: delete
| PARAMETER VALUE | DESCRIPTION | |
| label <integer primary key> Required. | Identify the designated record.Ex. label=1 | |
Ex. Delete records whose key numbers are 1, 4, and 8.
http://<servername>/cgi-bin/admin/lsctrl.cgi?cmd=delete&label=1&label=4&label=8
Command: update
| PARAMETER VALUE | DESCRIPTION | |
| labelRequired.Identify the designated record.Ex. label=1 | Required. | Identify the designated record.Ex. label=1 |
| isLocked | Required.Indicate if the file is locked or not. |
Ex. Update records whose key numbers are 1 and 5 to be locked status.
http://<servername>/cgi-bin/admin/lsctrl.cgi?cmd=update&isLocked=1&label=1&label=5
Ex. Update records whose key numbers are 2 and 3 to be unlocked status.
http://<servername>/cgi-bin/admin/lsctrl.cgi?cmd=update&isLocked=0&label=2&label=3
Command: queryStatus
| PARAMETER VALUE | DESCRIPTION | |
| retType xml or java | script Optional. | Ex. retype=javascriptThe default return message is in XML format. |
Ex. Query local storage status and call for javascript format return message.
http://<servername>/cgi-bin/admin/lsctrl.cgi?cmd=queryStatus&retType=javascript
8.18 Virtual input (capability\_nvi > 0)
Note: Change virtual input (manual trigger) status.
Method: GET
Syntax:
| http://<servername>/cgi-bin/admin/setvi.cgi?vi0=<value>[&vi1=<value>][&vi2=<value>][&return=<return page>] |
| PARAMETER | VALUE | DESCRIPTION |
| vi | state[(duration)nstate]Where "state" is 0, 1. "0" means inactive or normal state while "1" means active or triggered state.Where "nstate" is next state after duration. | Ex: vi0=1Setting virtual input 0 to trigger state |
| Ex: vi0=0(200)1Setting virtual input 0 to normal state, waiting 200 milliseconds, setting it to trigger state.Note that when the virtual input is waiting for next state, it cannot accept new requests. | ||
| return | Redirect to the pageafter the parameter is assigned. Theshould be the relative path according to the root of camera. If you omit this parameter, it will redirect to an empty page.* If theis invalid path, it will ignore this parameter. |
| Return Code Description | |
| 200 The request is successfully executed. | |
| 400 The request cannot be assigned, ex. incorrect parameters.Examples:setvi.cgi?vi0=0(10000)1(15000)0(20000)1No multiple duration.setvi.cgi?vi3=0VI index is out of range.setvi.cgi?vi=1No VI index is specified. | |
| 503 The resource is unavailable, ex. Virtual input is waiting for next state.Examples:setvi.cgi?vi0=0(15000)1setvi.cgi?vi0=1 |
Request 2 will not be accepted during the execution time(15 seconds).
8.19 Open Timeshift Stream (capability\_timeshift > 0, timeshift\_enable=1, timeshift\_c\_s\_allow=1)
Note: This request requires Viewer access privileges.
Syntax:
For HTTP push server (MJPEG):
http://<servername>/<network_http_s<m>_accessname>?maxsft=<value>[&tsmode=<value>&reftime=<value>&forcechk&minsft=<value>]
For RTSP (MP4 and H264), the user needs to input theURL below into an RTSP compatible player.
rtsp://<servername>/<network_rtsp_s<m>_accessname>?maxsft=<value>[&tsmode=<value>&reftime=<value>&forcechk&minsft=<value>]
“n” is the channel index.
“m” is the timeshift stream index.
For details on timeshift stream, please refer to the "TimeshiftCaching" documents.
| PARAMETER | VALUE | DEFAULT | DESCRIPTION |
| maxsft | 0 Request cached stream at most how many seconds ago.The value must be a positive integer. (>0) | ||
| tsmode | normal,adaptive | normal Streaming mode:normal => Full FPS all the time.adaptive => Default send only I-frame for MP4 and H.264, and send 1 FPS for MJPEG. If DI or motion window are triggered, the streaming is changed to send full FPS for 10 seconds.(*Note: this parameter also works on non-timeshift streams.)tsmode must exactly match well-defined wording (normal, adaptive), unknown parameters are always ignored. | |
| reftime mm:ss | The time | camera receives the request. | Reference time for maxsft and minsft.(This provides more precise time control to eliminate the inaccuracy due to network latency.)Ex: Request the streaming from 12:20rtsp://10.0.0.1/live.sdp?maxsft=10&reftime=12:30 |
| forcechk N/A | N/A Check if the | requested stream | enables timeshift, featureand if minsft is achievable.If false, return "415 Unsupported Media Type". |
| minsft | 0 How many seconds of cached stream client can accept at least.(Used by forcechk)The value must be a positive integer. (>0) | ||
| Return Code Description | |
| 400 Bad Request Request is rejected because some parameter values are illegal. | |
| 415 Unsupported Media Type Returned, if forcechk appears,when minsft is not achievable or the timeshift feature of the target stream is not enabled. | |
8.20 RemoteFocus
(capability\_image\_c<0\~(n-1)>\_remotefocus=1)
Note: This request requires Administrator privileges.
Method: GET/POST
Syntax:
http://<servername>/cgi-bin/admin/remotefocus.cgi?function=<value>[&direction=<value>]
[&position=<value>][&steps=<value>][&iris]
PARAMETER VALUE DESCRIPTION
| function | zoom, focus, auto, scan, stop, positioning, irisopen, irisenable, getstatus | Function typezoom- Move focus motorfocus- Move focus motorauto- Perform auto focusscan- Perform focus scanstop- Stop current operationpositioning- Position the motorsirisopen- Fully open iris. It will maintain fully open iris status until sending function=irisenable cgi.irisenable- return back to user setting status of iris.getstatus-Information of motors, return value as below:remote_focus_zoom_motor_max: Maximum steps of zoom motorremote_focus_focus_motor_max: Maximum steps of focus motorremote_focus_zoom_motor_start: Start point of zoom motorremote_focus_zoom_motor_end: End point of zoom motorremote_focus_focus_motor_start: Start point of effective focal lengthremote_focus_focus_motor_end: End point of effective focal lengthremote_focus_zoom_motor: Current position of zoom motorremote_focus_focus_motor: Current position of focus motorremote_focus_zoom_enable: Current function of zoom motorremote_focus_focus_enable: Current function of focus motorremote_focus_iris_open: The current status of iris. 0: irisenable, 1: irisopenCurrent function of zoom/focus motor, return value as below: 0: no service1: zooming2. focusing3: auto focus4: focus scan5: positioning (both zoom motor and focus motor)12: reset focus |
| directionposition 0~ | direct, forward, backwardMotor's position. | Motor's moving direction.It works only if function=zoom or function=focus.It works only if function=zoom or function= focus and direction=direct.is refer to remote_focus_focus_motor_max or remote_focus_zoom_motor_max which replied from "function=getstatus" |
| steps 1 ~ | Motor's moving steps. | It works only if function=zoom or function= focus and direction=forward and direction=backward.is refer to remote_focus_focus_motor_max or remote_focus_zoom_motor_max which replied from "function=getstatus"* This parameter is for additional fine-tune, the value is from 1 to 30. |
| iris N/A Open iris or not. | It works only if function=auto or function=scan. | |
8.21 BackFocus (capability\_image\_c<0\~(n-1)>\_remotefocus=4)
Note: This request requires Administrator privileges.
Method: GET/POST
Syntax:
http://<servername>/cgi-bin/admin/remotefocus.cgi?function=<value>[&direction=<value>][&position=<value>][&steps=<value>][&iris]
PARAMETER VALUE DESCRIPTION
| function | focus,auto,scan,stop,positioning,irisopen,irisenable,resetfocus,getstatus | Function typefocus- Move focus motorauto- Perform auto focusscan- Perform focus scanstop- Stop current operationpositioning- Position the motorsresetfocus- reset focus position to defaultirisopen- Fully open iris. It will maintain fully open iris status until sending function=irisenable cgi.irisenable- return back to user setting status of iris.getstatus-Information of motors, return value as below:remote_focus_focus_motor_max: Maximum steps of focus motorremote_focus_focus_motor_start: Start point of effective focal lengthremote_focus_focus_motor_end: End point of effective focal lengthremote_focus_focus_motor: Current position of focus motorremote_focus_focus_enable: Current function of focus motorremote_focus_iris_open: The current status of iris. 0: irisenable, 1: irisopenCurrent function of zoom/focus motor, return value as below:0: no service1: zooming2. focusing3: auto focus4: focus scan5: positioning (both zoom motor and focus motor)12: reset focus |
| direction | direct,forward,backward | Motor's moving direction.It works only if function= focus. |
| position 0~<motor_max> Motor's position | It works only if function= focus and direction= direct.is refer to remote_focus_focus_motor_max which replied from "function=getstatus" | |
| steps 1 ~ | Motor's moving steps. It works only if function=focus and direction=forward or direction=backward.is refer to remote_focus_focus_motor_max which replied from "function=getstatus"* This parameter is for additional fine-tune, the value is from 1 to 30. | |
| iris N/A Open iris or not. | It works only if function=auto or function=scan. | |
8.22 Export Files
Note: This request requires Administrator privileges.
Method: GET
Syntax:
For daylight saving time configuration file:
http://<servername>/cgi-bin/admin/exportDst.cgi
For language file:
http://<servername>/cgi-bin/admin/export_language.cgi?currentlanguage=<value>
| PARAMETER VALUE DESCRIPTION | ||
| currentlanguage 0~20 Available language lists.Please refer to:system_info_language_i0 ~ system_info_language_i19. | ||
For setting backup file:
http://<servername>/cgi-bin/admin/export_backup.cgi?backup
8.23 Upload Files
Note: This request requires Administrator privileges.
Method: POST
Syntax:
For daylight saving time configuration file:
http://<servername>/cgi-bin/admin/upload_dst.cgi
Post data:
filename = <file name> \r\n
\r\n
<multipart encoded form data>
For language file:
http://<servername>/cgi-bin/admin/upload_lan.cgi
Post data:
filename = <file name> \r\n
\r\n
<multipart encoded form data>
For setting backup file:
http://<servername>/cgi-bin/admin/upload_backup.cgi
Post data:
filename = <file name> \r\n
\r\n
<multipart encoded form data>
Server will accept the file named
8.24 Update Lens Configuration
(capability\_image\_c<0\~(n-1)>\_lensconfiguration\_support>0)
Note: This request requires Administrator privileges.
Method: GET
Syntax:
For list a name of lens currently used:
http://<servername>/cgi-bin/admin/update_lens.cgi?get_currentlens
For list all names of lens installed in camera:
http://<servername>/cgi-bin/admin/update_lens.cgi?list_lens
For choose selected lens configuration:
http://<servername>/cgi-bin/admin/update_lens.cgi?choose_lens=<value>
You need to reboot manually after you choose another lens configuration.
For choose selected lens configuration and reboot camera:
http://<servername>/cgi-bin/admin/update_lens.cgi?choose_reboot_lens=<value>
The camera will reboot after using this cgi.
For delete selected lens configuration:
http://<servername>/cgi-bin/admin/update_lens.cgi?delete_lens=<value>
| PARAMETER VALUE DESCRIPTION | ||
| valueAvailable lens name. | Please refer to: lens_default_i<0~(n-1)>_name lens_user_i<0~(n-1)>_name is a positive integer. | |
Method: POST
Syntax:
For upload user-defined lens configuration:
http://<servername>/cgi-bin/admin/update_lens.cgi?upload_lens
Post data:
upload_lens_profile_input = <file name>\r\n\r\n<multipart encoded form data>
Server will accept the file named
8.25 Media on demand (capability\_localstorage.modnum > 0)
Media on demand allows users to select and receive/watch/listen to metadata/video/audio contents on demand.
Note: This request requires Viewer access privileges.
Syntax:
rtsp://<servername>/mod.sdp?[&stime=<value>][&etime=<value>][&length=<value>][&loctime=<value>][&file=<value>][&tsmode=<value>]
| PARAMETER | VALUE | DEFAULT | DESCRIPTION |
| stime | N/A | Start time. | |
| etime | N/A | End time. | |
| length | N/A The length of | media of interest. | |
| loctime | 0 Specify if start/end time is local time | format. | |
| 1 for local time, 0 for UTC+0 | |||
| file | N/A The media file to be | played. | |
| tsmode | N/A Timeshift mode, the | unit is second. | |
Ex.
| stime | etime | length | file | Description |
| V | V | X | X | Play recordings between stime and etimersp://10.10.1.2/mod.sdp?stime=20110312_040400.000&etime=2011_0312_040510.000 |
| V | X | V | X | Play recordings for length seconds which start from stimersp://10.10.1.2/mod.sdp?stime=20110312_040400.000&length=120 |
| X | V | V | X | Play recordings for length seconds which ends at etimersp://10.10.1.2/mod.sdp?etime=20110312_040400.000&length=120 |
| X | X | X | V | Play file filertsp://10.10.1.2/mod.sdp?filename=/mnt/link0/ |
8.26 Fisheye local dewarp camera control (capability\_fisheye > 0 and capability\_fisheyelocaldewarp.c0 > 0, only support in 1R mode)
Note: This request requires camctrl privileges.
Method: GET/POST
Syntax:
http://<servername>/cgi-bin/camctrl/fdCamCtrl.cgi?channel=<value>&stream=<value>
[&move=<value>] - Move home, up, down, left, right
[&zoom=<value>] - Zoom wide, tele
[[&speedpan=<value>][&speedtilt=<value>][&speedzoom=<value>]] - Set speeds
[&zooming=<value>&zs=<value>] - Zoom without stopping, used for joystick
[&vx=<value>&vy=<value>&vs=<value>] - Shift without stopping, used for joystick
[&x=<value>&y=<value>&videosize=<value>&resolution=<value>&stretch=<value>] - Click on image
(Move the center of image to the coordination (x,y) based on resolution or videosize of 10 mode.)
[&return=<return page>]
Example:
http://myserver/cgi-bin/camctrl/fdCamCtrl.cgi?channel=0&stream=0&move=right
http://myserver/cgi-bin/camctrl/fdCamCtrl.cgi?channel=0&stream=0&zoom=tele
http://myserver/cgi-bin/camctrl/fdCamCtrl.cgi?channel=0&stream=0&move=top&speedtilt=-1
http://myserver/cgi-bin/camctrl/fdCamCtrl.cgi?channel=0&stream=0&zooming=tele&zs=2
http://myserver/cgi-bin/camctrl/fdCamCtrl.cgi?channel=0&stream=0&vx=5&vy=3&vs=2
http://myserver/cgi-bin/camctrl/fdCamCtrl.cgi?channel=0&stream=0&x=700&y=700&videosize=1920x1920&resolution=1920x1920&stretch=1
| PARAMETER VALUE | DESCRIPTION | |
| channel <0~(n-1)> | Channel of video source. | |
| stream | <0~(m-1)> | Stream. |
| move home Move | to home position. | |
| up Move up. | ||
| down Move down. | ||
| left Move left. | ||
| right Move right. | ||
| zoom wide Zoom | larger view with current | speed. |
| tele Zoom further with | current speed. | |
| speedpan -5 ~ 5 | Set the pan speed of current | rent command. |
| speedtilt -5 ~ 5 | Set the tilt speed of current | rent command. |
| speedzoom -5 ~ 5 | Set the zoom speed of | current command. |
| zooming wide or tele | Zoom without stopping | ng for larger view or further view with zs speed, used for joystick control. |
| zs 0 ~ 6 Set the speed of zooming, "0" means stop. | ||
| vx -6 ~ 6 The direction of movement, used for joystick control. | ||
| vy -6 ~ 6 | ||
| vs 0 ~ 7 Set the speed of movement, "0" means stop. | ||
| x | x-coordinate clicked by user. It will be the x-coordinate of center after movement. | |
| y | y-coordinate clicked by user. It will be the y-coordinate of center after movement. | |
| videosize | The size of plug-in (ActiveX) window in web page of 10 content. | |
| resolution | The resolution of streaming of 10 content. | |
| stretch | 0 indicates that it usesresolution(streaming size) as the range of the coordinate system. 1 indicates that it usesvideosize(plug-in size) as the range of the coordinate system. | |
| return | Redirect to the pageafter the parameter is assigned. Theshould be the relative path according to the root of camera. If you omit this parameter, it will redirect to an empty page.* If theis invalid path, it will ignore this parameter. | |
8.27 3D Privacy Mask
(capability_image_c<0\~(n-1)>_privacymask_wintype =
3Drectangle) n denotes the value of "capability_nvideoin"
Note: This request requires admin user privilege
Method: GET/POST
Syntax:
http://
| PARAMETER VALUE | DESCRIPTION | |
| method add Add | a 3D privacy mask at current location | |
| delete Delete a 3D privacy mask | ||
| edit Edit a 3D privacy mask | ||
| maskname string[40] | 3D privacy mask name | |
| maskheight integer | 3D privacy mask height | |
| maskwidth integer | 3D privacy mask width | |
| videosize | Optimal. | The size of plug-in (ActiveX) window in web page is the size of the privacy window size. This field is not necessary, it will use the default value if not specified. 320x180 for 16:9 resolution and 320x240 for 4:3 resolution. |
| return | Redirect to the pageafter the parameter is assigned. Theshould be the relative path according to the root of camera. If you omit this parameter, it will redirect to an empty page.* If theis invalid path, it will ignore this parameter. | |
8.28 Camera Control
(capability\_camctrl\_c<0\~(n-1)>\_zoommodule=1)
Note: This request requires Viewer privileges.
Method: GET/POST
Syntax: (for control API)
http://<servername>/cgi-bin/camctrl/camctrl.cgi?[channel=<value>][&camid=<value>]
[&move=<value>] - Move home, up, down, left, right
[&focus=<value>] - Focus operation
[&zoom=<value>] - Zoom in, out
[&zooming=<value>&zs=<value>] - Zoom without stopping, used for joystick
[&vx=<value>&vy=<value>&vs=<value>] - Shift without stopping, used for joystick
[&x=<value>&y=<value>&videosize=<value>&resolution=<value>&stretch=<value>] - Click on image
(Move the center of image to the coordination (x,y) based on resolution or videosize.)
[ [&speedpan=<value>][&speedtilt=<value>][&speedzoom=<value>][&speedapp=<value>][&speedlink=<value>] - Set speeds
[&return=<return page>]
Example:
http://myserver/cgi-bin/camctrl/camctrl.cgi?channel=0&camid=1&move=right
http://myserver/cgi-bin/camctrl/camctrl.cgi?channel=0&camid=1&zoom=tele
http://myserver/cgi-bin/camctrl/camctrl.cgi?channel=0&camid=1&x=300&y=200&resolution=704x480&videosize=704x480&strech=1
Example: (set the ptz preset with focus mode)
* We support this function when the version number of the PTZ control module is equal or greater than 5.0.0.20.
http://myserver/cgi-bin/camctrl/camctrl.cgi?name=xxx&focussetting=sync&cam=getsetpreset
| PARAMETER VALUE | DESCRIPTION | |
| channel <0~(n-1)> | Channel of video source. | |
| camid 0,<positive> | integer> Camera ID. | |
| move home Move | to camera to home position. | |
| up Move camera up. | ||
| down Move camera down. | ||
| left Move camera left. | ||
| right | Move camera right. | |
| speedpan -5 ~ 5 | Set the pan speed. | |
| speedtilt -5 ~ 5 | Set the tilt speed. | |
| speedzoom -5 ~ 5 | Set the zoom speed. | |
| speedfocus -5 ~ 5 | Set the focus speed. | |
| speedapp -5 ~ 5 | Set the auto pan/patrol | speed. |
| auto pan Auto pan. | ||
| patrol Auto patrol. | ||
| stop Stop camera. | ||
| zoom wide Zoom | larger view with current | speed. |
| tele Zoom further with | current speed. | |
| stop Stop zoom. | ||
| zooming wide or tele | Zoom without stopping for larger view or further view with zs speed, used for joystick control. | |
| zs | 0 ~ 8 | Set the speed of zooming, "0" means stop. |
| vx | The slope of movement = vy/vx, used for joystick control. | |
| vy | ||
| vs | 0 ~ 127 | Set the speed of movement, "0" means stop. |
| x | x-coordinate clicked by user.It will be the x-coordinate of center after movement. | |
| y | y-coordinate clicked by user.It will be the y-coordinate of center after movement. | |
| videosize | The size of plug-in (ActiveX) window in web page | |
| resolution | The resolution of streaming. | |
| stretch | 0 indicates that it usesresolution(streaming size) as the range of the coordinate system.1 indicates that it usesvideosize(plug-in size) as the range of the coordinate system. | |
| focus | auto | Auto focus. |
| far | Focus on further distance. | |
| near | Focus on closer distance. | |
| focusseting sync | Applies the selected focus mode in camctrl_c<0~(n-1)>_focusmode to this preset. | |
| fixcurrent | Applies the current focus position to this preset. | |
| * We support this function when the version number of the PTZ control module is equal or greater than 5.0.0.20. | ||
| cam getsetpreset | Adds a named preset at | current position, and return the preset index.* We support this function when the version number of the PTZ control module is equal or greater than 5.0.0.20. |
Syntax: (for querying API)
http://<servername>/cgi-bin/camctrl/camctrl.cgi?[<parameter>] [&<parameter>...]
Example:
http://myserver/cgi-bin/camctrl/camctrl.cgi?getpan
Response:
HTTP/1.0 200 OK\r\n
Cache-control: no-cache\r\n
Pragma: no-cache\r\n
\r\n
pan=4117\r\n
| PARAMETER VALUE | DESCRIPTION | |
| getversionGet the version of the PTZ control module. | ||
| getaction | idle,autopan,tracking,tour,patrol, | Get the current status of the camera.* We support this parameter when the version number (getversion) is equal or greater than 5.0.0.12 |
| getpan 0,Get the current pan position.*Only available when bit0 of "capability_camctrl_c<0~(n-1)>_buildinpt" is "1" | ||
| getpanangleGet the current pan angle.*Only available when bit0 of "capability_camctrl_c<0~(n-1)>_buildinpt" is "1" | ||
| gettilt 0,Get the current tilt position.*Only available when bit1 of "capability_camctrl_c<0~(n-1)>_buildinpt" is "1" | ||
| gettiltangleGet the current tilt angle.*Only available when bit1 of "capability_camctrl_c<0~(n-1)>_buildinpt" is "1" | ||
| getzoom | 0,Get the current zoom position. | |
| getratio | Get the current zoom | ratio. |
| getfocus 0, | Get the current focus position. | |
| getminspeedlv 0, | Get the minimum speed level of the PTZ control. Normally, the speed level is '0,' which denotes halting a continuous movement. | |
| getmaxptspeedlv | Get the maximum speed level of pan/tilt moving.*Only available when "capability_camctrl_c<0~(n-1)>_buildinpt" >0 | |
| getmaxzspeedlv 0, | Get the maximum speed level of zoom moving. | |
| getmaxfspeedlv 0, | Get the maximum speed level of focus moving. | |
| getminpan 0, | Get the lower limit for pan position.*Only available when bit0 of "capability_camctrl_c<0~(n-1)>_buildinpt" is "1" | |
| getmaxpan 0, | Get the upper limit for pan position.*Only available when bit0 of "capability_camctrl_c<0~(n-1)>_buildinpt" is "1" | |
| getminpanangle | Get the lower limit for pan angle.*Only available when bit0 of "capability_camctrl_c<0~(n-1)>_buildinpt" is "1" | |
| getmaxpanangle | Get the upper limit for pan angle.*Only available when bit0 of "capability_camctrl_c<0~(n-1)>_buildinpt" is "1" | |
| getmintilt 0, | Get the lower limit for tilt position.*Only available when bit1 of "capability_camctrl_c<0~(n-1)>_buildinpt" is "1" | |
| getmaxtilt | Get the upper limit for tilt position.*Only available when bit1 of "capability_camctrl_c<0~(n-1)>_buildinpt" is "1" | |
| getmintiltangle | Get the lower limit for tilt angle.*Only available when bit1 of "capability_camctrl_c<0~(n-1)>_buildinpt" is "1" | |
| getmaxtiltangle | Get the upper limit for tilt angle.*Only available when bit1 of "capability_camctrl_c<0~(n-1)>_buildinpt" is "1" | |
| getminzoom | Get the lower limit for zoom position. | |
| getmaxzoom | Get the upper limit for zoom position. | |
| getmaxdzoom | Get the upper limit for digital zoom position. | |
| getmaxratio | Get the maximum ratio of optical zoom.* We support this parameter when the version number (getversion) is equal or greater than 5.0.0.14 | |
| getmaxdratio | Get the maximum ratio of digital zoom.* We support this parameter when the version number (getversion) is equal or greater than 5.0.0.14 | |
| getminfocus 0, | Get the lower limit for focus position. | |
| getmaxfocus 0, | Get the upper limit for focus position. | |
8.29 Recall (capability\_camctrl\_c<0\~(n-1)>\_zoommodule = 1)
Note: This request requires Viewer privileges.
Method: GET
Syntax:
http://<servername>/cgi-bin/viewer/recall.cgi?
recall=<value>[&channel=<value>][&return=<return page>]
| PARAMETER VALUE DESCRIPTION | ||
| recall string[30] | One of the present positions to recall. | |
| channel | 0~"capability_nvideoin"-1 | Channel of the video source. |
8.30 Preset Locations
(capability_camctrl_c<0\~(n-1)>_zoommodule=1)
Note: This request requires Operator privileges.
Method: GET/POST
Syntax:
http://<servername>/cgi-bin/operator/preset.cgi?[channel=<value>][&addpos=<value>][&delpos=<value>][&return=<return page>]
| PARAMETER VALUE DESCRIPTION | ||
| addpos | string[30] | Add one preset location to the preset list. |
| channel | 0~"capability_nvideoin"-1 | Channel of the video source. |
| delpos string[30] | Delete preset location from preset list. |
| returnRedirect to the pageafter the parameter is assigned. Theshould be the relative path according to the root of camera. If you omit this parameter, it will redirect to an empty page.* If theis invalid path, it will ignore this parameter. | after the parameter is assigned. Theshould be the relative path according to the root of camera. If you omit this parameter, it will redirect to an empty page.* If theis invalid path, it will ignore this parameter. |
8.31 SmartSD (capability\_localstorage\_smartsd > 0)
Note: This request requires Administrator privileges.
Method: GET/POST
Syntax:
http://<servername>/cgi-bin/admin/smartsd.cgi?function=<value>
PARAMETER VALUE DESCRIPTION
| function | getstatus | Function typegetstauts : Information of smartSD internal status return value as below:smartsd_lifetime_num:Accumulated amount of data that has been writtensmartsd_lifetime_den:Card-guaranteed amount of data that can be writtensmartsd_lifetime_rate:The ratio of smartsd_lifetime_num to smartsd_lifetime_den.It means the accumulated percentage amount of flash block has been written. The range is from 0 to 100 (unit: %). The SD card is recommended to be replaced if the percentage reaches above 90%.smartsd_spare_block_rate:Usage rate of spare blocks.It means the usage percentage of total spare block. The range is from 0 to 100 (unit: %). The SD card is recommended to be replaced if the percentage reaches above 90%.smartsd_data_size_per_unit EcuadorSize (in sectors) of data to be written when Life Information1 is updated.smartsd_num_of_sudden_power_failure:Indicates how many times power disconnection occurred during write/erase operationssmartsd_operation_mode:Enables/disables power-off detection and write error notificationsmartsd_attached:Indicate the smartSD is attached or not. |
8.32 Connect to AP (capability\_network\_wireless > 0)
Note: This request requires Administrator privileges.
Method: GET/POST
Syntax:
| http:// |
| PARAMETER VALUE | DESCRIPTION | |
| N/A N/A Apply the | wireless settings and connect to AP. | |
8.33 Get wireless information (capability\_network\_wireless > 0)
Note: This request requires Administrator privileges.
Method: GET/POST
Syntax:
| http://<servername>/cgi-bin/admin/getwirelessinfo.cgi |
| PARAMETER VALUE DESCRIPTION | ||
| N/A N/A Get wireless information. Camera will return following information.1. Wireless channel2. Link quality3. Signal level4. Noise level5. SNR6. TX Rate7. RX Rate | ||
8.34 Get wireless signal strength (capability\_network\_wireless > 0)
Note: This request requires Administrator privileges.
Method: GET/POST
Syntax:
| http://<servername>/cgi-bin/admin/getw|signalstrength.cgi |
| PARAMETER VALUE DESCRIPTION | |
| N/A N/A Get wireless signal strength. |
8.35 WPS transaction (capability\_network\_wireless > 0)
Note: This request requires Administrator privileges.
Method: GET/POST
Syntax:
http://<servername>/cgi-bin/admin/start_wps.cgi
| PARAMETER VALUE DESCRIPTION | |
| N/A N/A Start WPS transaction. |
8.36 Peripheral control (capability\_peripheral\_c<0\~(n-1)>\_devicecontrol > 0)
Note: This request requires Administrator privileges.
Method: GET/POST
Syntax: (for control API)
http://<servername>/cgi-bin/admin/peripheral.cgi?channel=<value>&operation=set
[&washer_mode=<value>] - Set washer mode
[&washer_status=<value>] - Set washer status
[&washer_dwelltime=<value>] - Set washer clean time
[&heater_status=<value>] - Set heater status
Example:
http://myserver/cgi-bin/admin/peripheral.cgi?channel=0&operation=set&washer_mode=wiper&washer_status=on
Response:
HTTP/1.0 200 OK\r\n
Cache-control: no-cache\r\n
Pragma: no-cache\r\n
\r\n
| PARAMETER VALUE DESCRIPTION | ||
| channel | 0~"capability_nvideoin"-1 | Channel of the video source. |
| washer_mode wiper Apply the wiper to the mode of washer control system.*Only available whencapability_peripheral_c<0~(n-1)>_washer_support=1 | ||
| washer status | on | Enable the functionality of washer control system.*Only available whencapability_peripheral_c<0~(n-1)>_washer_support=1 |
| off Disable the functionality of washer control system.*Only available whencapability_peripheral_c<0~(n-1)>_washer_support=1 | ||
| washer_dwelltime 15~9 | 99 Apply washer washer control system operation time (including the time when spraying and wiper actions take place).*Only available whencapability_peripheral_c<0~(n-1)>_washer_support=1 | |
| heater_status | auto | automatic control the heater component to keep the device in a workable environment.*Only available whencapability_peripheral_c<0~(n-1)>_heater_support=1 |
| trigger heater component is work in force heater once.*Only available whencapability_peripheral_c<0~(n-1)>_heater_support=1 | ||
Syntax: (for querying API)
| http://<servername>/cgi-bin/admin/peripheral.cgi?channel=&operation=get[&supportdevice] -Get support peripheral device[&washer_supportmode] - Get washer support modes[&washer_mode] - Get washer mode[&washer_status] - Get washer status |
[&washer_dwelltime] - Get washer clean time
[&heater_supportstatus] - Get heater support control status
[&heater_status] - Get heater status
Example:
http://myserver/cgi-bin/admin/peripheral.cgi?channel=0&operation=get&supportdevice&washer_status
Response:
HTTP/1.0 200 OK\r\n
Cache-control: no-cache\r\n
Pragma: no-cache\r\n
\r\n
supportdevice=washer,heater\r\n
| PARAMETER VALUE DESCRIPTION | ||
| channel | 0~"capability_nvideoin"-1 | Channel of the video source. |
| supportdevice N/A Get support peripheral device. | ||
| washer_supportmode | N/A | Get the support mode of washer control system, its value is the same with "capability_peripheral_c<0~(n-1)>_washer_mode".*Only available when capability_peripheral_c<0~(n-1)>_washer_support=1 |
| washer_mode | N/A | Get the current mode of washer control system. It return the value of "washer_mode"* Available values are listed in "capability_peripheral_c<0~(n-1)>_washer_mode" |
| washer_status | N/A | Get the current status of washer control module. The status is 'off' as default, which means the washer is stopped; and the status 'on' means the washer is running.*Only available when capability_peripheral_c<0~(n-1)>_washer_support=1 |
| washer_dwelltime | N/A | Get the current washer clean period of washer control system.*Only available when capability_peripheral_c<0~(n-1)>_washer_support=1ort=1 |
| heater_supportstatus | N/A | Get the support status of heater control system.*Only available whencapability_peripheral_c<0~(n-1)>_heater_support=1 |
| heater_status N/A Get the current heater status. | Normally it will be 'auto', it means the heater device is control by internal algorithm to keep in a suitable environment; Otherwise is 'trigger', it means the heater device is force enable to heat to an internal condition.'trigger' status will be transfer to 'auto' after reach the internal condition.*Only available whencapability_peripheral_c<0~(n-1)>_heater_support=1 | |
8.37 Optimized IR control
(capability\_daynight\_c<0\~(n-1)>\_optimizedir > 0)
Note: This request requires Administrator privileges.
Method: GET/POST
Syntax:
| http://<servername>/cgi-bin/admin/optimizedir.cgi?function=<value>[&channel=<value>] |
| PARAMETER VALUE DESCRIPTION | ||
| channel | 0~"capability_nvideoin"-1 | Channel of the video source. |
| function | getstatus, onetimeauto | "onetimeauto": Camera will automatically adjust the IR zone one time only."getstatus": Information of optimized IR control status and return value as below:optimizedir_c<0~(n-1)>_irmode:Indicate the IR current mode, available value is "auto" and "manual" mode.optimizedir_c<0~(n-1)>_irnum:The number of IR that camera supports.optimizedir_c<0~(n-1)>_irstrength:Only available when irmode is set as manual. It's a set of integers, which indicate the strength of each IR LED (e.g. 23,45,100,100).optimizedir_c<0~(n-1)>_irstatus:Current IR status, normal / adjusting:"normal": the IR LED strength has been fixed."adjusting": the IR LED strength is adjusting. |
Example:
http://myserver/cgi-bin/admin/optimizedir.cgi?function=getstatus
Response:
HTTP/1.0 200 OK\r\n
Cache-control: no-cache\r\n
Pragma: no-cache\r\n
\r\n
"optimizedir_c0_irmode='auto'"
"optimizedir_c0_irnum='5'"
"optimizedir_c0_irstrength='1,97,100,100,100'"
"optimizedir_c0_irstatus='normal'"
Syntax: (for control API)
| http://<servername>/cgi-bin/admin/optimizedir.cgi?channel=<value>&operation=<value>&irmode=manual[&strength=<value>] - Set IR strength |
| PARAMETER VALUE | DESCRIPTION | |
| channel | 0~"capability_nvideoin"-1 | Channel of the video source. |
| operation set, | settoall | "set": set the strength of each IR LED separately"settoall": use fixed strength for all IR LED |
| irmode auto, | manual | Irmode needs to be set as manual for adjusting IR LED strength. |
| strength | 1~100 | If the operation is set as "set", the number of strength values need to be the same as it of irnum. However, it needs only one value for strength when the operation is set as "settoall". |
Example:
http://myserver/cgi-bin/admin/optimizedir.cgi?channel=0&operation=set&irmode=manual&strength=50,70,50,50,50
Response:
HTTP/1.0 200 OK\r\n
Cache-control: no-cache\r\n
Pragma: no-cache\r\n
\r\n
"optimizedir_c0_irstrength='50,70,50,50,50'"
"optimizedir_c0_irmode='manual'"
Example:
http://myserver/cgi-bin/admin/optimizedir.cgi?channel=0&operation=settoall&irmode=manual&strength=100
Response:
HTTP/1.0 200 OK\r\n
Cache-control: no-cache\r\n
Pragma: no-cache\r\n
\r\n
"optimizedir_c0_irstrength='100,100,100,100,100'"
"optimizedir_c0_irmode='manual'"
Example:
http://myserver/cgi-bin/admin/optimizedir.cgi?channel=0&operation=set&irmode=auto&strength=50,70,50,50,50
Response:
HTTP/1.0 200 OK\r\n
Cache-control: no-cache\r\n
Pragma: no-cache\r\n
\r\n
ERROR: Parameter "irmode" must be set as "manual"!
Example:
http://myserver/cgi-bin/admin/optimizedir.cgi?channel=0&operation=set&strength=50,70,50,50,50
Response:
HTTP/1.0 200 OK\r\n
Cache-control: no-cache\r\n
Pragma: no-cache\r\n
\r\n
ERROR: Must have the "irmode=manual" argument!
Syntax: (for querying API)
http://<servername>/cgi-bin/admin/optimizedir.cgi?channel=<value>&operation=get
[&support_irmode] - list all adjustment mode that IR supports
[&irmode] - Get current IR mode
[&irnum] - Get the number of IR zone
| PARAMETER VALUE DESCRIPTION | ||
| channel | 0~"capability_nvideoin"-1 | Channel of the video source. |
| support_irmode N/A List | all adjustment mode that IR | supports |
| irmode N/A Get the current IR control mode. | ||
| irnum N/A Get the number of IR that camera supports. | ||
Example:
http://myserver/cgi-bin/admin/optimizedir.cgi?channel=0&operation=get&irmode
Response:
HTTP/1.0 200 OK\r\n
Cache-control: no-cache\r\n
Pragma: no-cache\r\n
\r\n
"optimizedir_c0_irmode='auto'"
Technology License Notice
AMR-NB Standard
THIS PRODUCT IS LICENSED UNDER THE AMR-NB STANDARD PATENT LICENSE AGREEMENT. WITH RESPECT TO THE USE OF THIS PRODUCT, THE FOLLOWING LICENSORS' PATENTS MAY APPLY:
TELEFONAKIEBOLAGET ERICSSON AB: US PAT. 6192335; 6275798; 6029125; 6424938; 6058359. NOKIA CORPORATION: US PAT. 5946651; 6199035. VOICEAGE CORPORATION: AT PAT. 0516621; BE PAT. 0516621; CA PAT. 2010830; CH PAT. 0516621; DE PAT. 0516621; DK PAT. 0516621; ES PAT. 0516621; FR PAT. 0516621; GB PAT. 0516621; GR PAT. 0516621; IT PAT. 0516621; LI PAT. 0516621; LU PAT. 0516621; NL PAT. 0516621; SE PAT 0516621; US PAT 5444816; AT PAT. 819303/AT E 198805T1; AU PAT. 697256; BE PAT. 819303; BR PAT. 9604838-7; CA PAT. 2216315; CH PAT. 819303; CN PAT. ZL96193827.7; DE PAT. 819303/DE69611607T2; DK PAT. 819303; ES PAT. 819303; EP PAT. 819303; FR PAT. 819303; GB PAT. 819303; IT PAT. 819303; JP PAT. APP. 8-529817; NL PAT. 819303; SE PAT. 819303; US PAT. 5664053. THE LIST MAY BE UPDATED FROM TIME TO TIME BY LICENSORS AND A CURRENT VERSION OF WHICH IS AVAILABLE ON LICENSOR'S WEBSITE AT HTTP://WWW.VOICEAGE.COM.

HEVC Advance™
Covered by Patents at patentlist.hevcadvance.com
Notices from HEVC Advance:
THIS PRODUCT IS SOLD WITH A LIMITED LICENSE AND IS AUTHORIZED TO BE USED ONLY IN CONNECTION WITH HEVC CONTENT THAT MEETS EACH OF THE THREE FOLLOWING QUALIFICATIONS: (1) HEVC CONTENT ONLY FOR PERSONAL USE; (2) HEVC CONTENT THAT IS NOT OFFERED FOR SALE; AND (3) HEVC CONTENT THAT IS CREATED BY THE OWNER OF THE PRODUCT. THIS PRODUCT MAY NOT BE USED IN CONNECTION WITH HEVC ENCODED CONTENT CREATED BY A THIRD PARTY, WHICH THE USER HAS ORDERED OR PURCHASED FROM A THIRD PARTY, UNLESS THE USER IS SEPARATELY GRANTED RIGHTS TO USE THE PRODUCT WITH SUCH CONTENT BY A LICENSED SELLER OF THE CONTENT. YOUR USE OF THIS PRODUCT IN CONNECTION WITH HEVC ENCODED CONTENT IS DEEMED ACCEPTANCE OF THE LIMITED AUTHORITY TO USE AS NOTED ABOVE.
H.264
THIS PRODUCT IS LICENSED UNDER THE AVC PATENT PORTFOLIO LICENSE FOR THE PERSONAL AND NON-COMMERCIAL USE OF A CONSUMER TO (i) ENCODE VIDEO IN COMPLIANCE WITH THE AVC STANDARD ("AVC VIDEO") AND/OR (ii) DECODE AVC VIDEO THAT WAS ENCODED BY A CONSUMER ENGAGED IN A PERSONAL AND NON-COMMERCIAL ACTIVITY AND/OR WAS OBTAINED FROM A VIDEO PROVIDER LICENSED TO PROVIDE AVC VIDEO. NO LICENSE IS GRANTED OR SHALL BE IMPLIED FOR ANY OTHER USE. ADDITIONAL INFORMATION MAY BE OBTAINED FROM MPEG LA, L.L.C. SEE HTTP://WWW.MPEGLA.COM
Electromagnetic Compatibility (EMC)
FCC Statement
This device compiles with FCC Rules Part 15. Operation is subject to the following two conditions.
■ This device may not cause harmful interference, and
■ This device must accept any interference received, including interference that may cause undesired operation.
This equipment has been tested and found to comply with the limits for a Class B digital device, pursuant to Part 15 of the FCC Rules. These limits are designed to provide reasonable protection against harmful interference in a residential installation. This equipment generates, uses and can radiate radio frequency energy and, if not installed and used in accordance with the instructions, may cause harmful interference to radio communications. However, there is no guarantee that interference will not occur in a partial installation. If this equipment does cause harmful interference to radio or television reception, which can be determined by turning the equipment off and on, the user is encouraged to try to correct the interference by one or more of the following measures:
■ Reorient or relocate the receiving antenna.
■ Increase the separation between the equipment and receiver.
■ Connect the equipment into an outlet on a circuit different from that to which the receiver is connected.
■ Consult the dealer or an experienced radio/TV technician for help.
Shielded interface cables must be used in order to comply with emission limits.
CE Mark Warning
This is a Class B product. In a domestic environment, this product may cause radio interference, in which case the user may be required to take adequate measures.
VCCI Warning
VIVOTEK Inc. cannot be held responsible for any technical or typographical errors and reserves the right to make changes to the product and manuals without prior notice. VIVOTEK Inc. makes no warranty of any kind with regard to the material contained within this document, including, but not limited to, the implied warranties of merchantability and fitness for any particular purpose.