Target GV-EDR1100 - Security Camera Geovision - Free user manual and instructions
Find the device manual for free Target GV-EDR1100 Geovision in PDF.


User questions about Target GV-EDR1100 Geovision
0 question about this device. Answer the ones you know or ask your own.
Ask a new question about this device
Download the instructions for your Security Camera in PDF format for free! Find your manual Target GV-EDR1100 - Geovision and take your electronic device back in hand. On this page are published all the documents necessary for the use of your device. Target GV-EDR1100 by Geovision.
USER MANUAL Target GV-EDR1100 Geovision
natural_image
Collection of security cameras and surveillance cameras arranged in a circular pattern (no text or symbols visible)
GeoVision
© 2015 GeoVision, Inc. All rights reserved.
Under the copyright laws, this manual may not be copied, in whole or in part, without the written consent of GeoVision.
Every effort has been made to ensure that the information in this manual is accurate. GeoVision, Inc. makes no expressed or implied warranty of any kind and assumes no responsibility for errors or omissions. No liability is assumed for incidental or consequential damages arising from the use of the information or products contained herein. Features and specifications are subject to change without notice. Note that memory card slot (local storage) is not supported for Argentina.
GeoVision, Inc.
9F, No. 246, Sec. 1, Neihu Rd.,
Neihu District, Taipei, Taiwan
Trademarks used in this manual: GeoVision, the GeoVision logo and GV series products are trademarks of GeoVision, Inc. Windows and Windows XP are registered trademarks of Microsoft Corporation.
September 2015
Safety Notice
UL Certification for GV-MFD120 / 130 / 320
The GV-IPCAM H.264 uses a 3.0V CR2032 Lithium battery as the power supply for its internal real-time clock (RTC). The battery should not be replaced unless required!
If the battery does need replacing, please observe the following:
- Danger of Explosion if battery is incorrectly replaced
- Replace only with the same or equivalent battery, as recommended by the manufacturer
- Dispose of used batteries according to the manufacturer's instructions
Contents
Safety Notice ....i
Contents ......ii
Introduction ......viii
Options ...... xxii
Note for Connecting to GV-System / GV-VMS ......xxiv
Note for Recording....xxv
Note for GV-BX2600....xxvi
Note for Adjusting Focus and Zoom ......xxvii
Note for Installing Camera Outdoor ......xxviii
Note for Closing the Bullet Camera Cover.....xxx
Note for Bullet Camera Waterproof ....xxxi
Note for USB Storage and WiFi Adapter ......xxxii
1.3 Accessory Installation....7
1.3.1 C-Mount Lenses....7
1.3.2 Infrared Illuminators (Optional) 8
1.4 Connecting the Camera....9
GV-BX120D / 130D Series / 140DW / 220D Series / 320D
Series / 520D ......9
GV-BX1200 Series / 1300 Series / 1500 Series / 2400 Series /
2500 Series / 2600 / 3400 Series / 5300 Series/ 12201......11
2. Ultra Box Camera....13
2.1 Packing List....13
2.2 Overview ......14
2.3 Installation....15
2.4 Connecting the Camera....17
3. Target Box Camera ....18
3.1 Packing List....18
3.2 Overview ......19
3.3 Installation....20
3.4 Connecting the Camera....22
4. IR Arctic Box Camera ....23
4.1 Packing List....23
4.2 Overview ......25
4.3 Installation....27
4.4 Connecting the Camera....32
5. Mini Fixed Dome & Mini Fixed Rugged Dome ....36
5.1 Packing List....36
5.2 Overview ......38
GV-MFD120 / 130 / 320....38
GV-MFD1501 Series / 2401 Series / 2501 Series / 3401 Series
/ 5301 Series....40
GV-MDR 42
5.3 Installation....45
GV-MFD Series....45
GV-MDR Series 47
5.4 Connecting the Camera....51
5.4.1 Wire Definition....51
5.4.2 Power and Network Connection ....52
5.4.3 Vehicle Installation 53
6. Target Mini Fixed Dome....54
6.1 Packing List....54
6.2 Overview ....55
6.3 Installation....56
6.4 Connecting the Camera....58
7. Target Mini Fixed Rugged Dome .....59
7.1 Packing List....59
7.2 Overview ......61
7.3 Installation....62
7.4 Connecting the Camera....68
8. Bullet Camera (Part I)....69
8.1 Packing List....69
8.2 Overview 70
8.3 Installation....71
8.3.1 Adjusting the Angles .....73
8.3.2 Adjusting Lens and Inserting a Memory Card .....76
8.3.3 Inserting the Sun-Shield Cover....79
8.4 Connecting the Camera....80
8.4.1 Wire Definition....80
8.4.2 Connecting the Power Cable....82
9. Bullet Camera (Part II)....83
9.1 Packing List....83
9.2 Overview 84
9.3 Installation....86
9.4 Connecting the Camera....93
10. Ultra Bullet Camera....95
10.1 Packing List....95
10.2 Overview 96
10.3 Installation 98
10.4 Connecting the Camera....102
10.4.1 Waterproofing the Cable 102
10.4.2 Wire Definition....104
10.4.3 Power Connection....105
11. Target Bullet Camera....106
11.1 Packing List....106
11.2 Overview....107
11.3 Installation....109
11.4 Connecting the Camera....112
11.4.1 Wire Definition....112
11.4.2 Power Connection....113
12. Vandal Proof IP Dome (Part I) ......114
12.1 Packing List....114
12.2 Overview ...... 116
12.3 Installation....118
12.3.1 Hard-Ceiling Mount 119
12.3.2 In-Ceiling Mount....124
12.4 Connecting the Camera....127
12.4.1 Wire Definition....127
12.4.2 Connecting the Power Cable....129
13. Vandal Proof IP Dome (Part II) 130
13.1 Packing List....130
13.2 Overview ...... 133
13.3 Installation....135
13.4 Connecting the Camera....146
13.4.1 Connecting the Power Cable....146
13.4.2 Connecting the I/O Device....147
14. Target Vandal Proof IP Dome......148
14.1 Packing List....148
14.2 Overview 151
14.3 Installation....153
14.4 Connecting the Camera....162
15. Fixed IP Dome 163
15.1 Packing List....163
15.1.1 Packing List for Hard-Ceiling Mount 163
15.1.2 Packing List for In-Ceiling Mount....164
15.2 Overview 165
15.3 Installation....167
15.3.1 Hard-Ceiling Mount 167
15.3.2 In-Ceiling Mount....171
15.3.3 Wall-Surface Mount....175
15.4 Connecting the Camera....177
16. Target Fixed IP Dome 178
16.1 Packing List....178
16.2 Overview 179
16.3 Installation....181
16.4 Connecting the Camera....183
17. Cube Camera....184
17.1 Packing List....184
17.2 Overview....185
17.3 Installation....186
17.4 Connecting the Camera....188
18. Advanced Cube Camera....189
18.1 Packing List....189
18.2 Overview....190
18.3 Installation....192
18.4 Connecting the Camera....194
19. PT Camera ....195
19.1 Packing List....195
19.2 Overview 197
19.3 Installation....199
19.3.1 Ceiling Mount....199
19.3.2 L-Shaped Wall Mount....201
19.4 Connecting the Camera....204
20. Pinhole Camera....205
20.1 Packing List....205
20.2 Overview ......207
20.3 Installation....209
20.4 Connecting the Camera....213
21. Accessing the Camera....214
21.1 System Requirement....214
21.2 Accessing the Live View 215
21.2.1 Checking the Dynamic IP Address .....216
21.2.2 Configuring the IP Address.....218
21.2.3 Configuring the Wireless Connection.....220
21.3 Adjusting Image Clarity....224
21.3.1 Using Focus Adjustment Cap 227
-
The Web Interface ......228
-
Upgrading System Firmware....231
24. Restoring to Default Settings......233
24.1 Using the Web Interface 233
24.2 Directly on the Camera....234
Box Camera....234
Ultra Box Camera and Target Box Camera....235
Mini Fixed Dome....236
Mini Fixed Rugged Dome....237
IR Arctic Box Camera....237
Target Mini Fixed Target Mini Fixed Rugged Dome .....238
Bullet Camera....239
Ultra Bullet Camera....240
Target Bullet Camera....240
Vandal Proof IP Dome 241
Target Vandal Proof IP Dome 242
Fixed IP Dome 243
Target Fixed IP Dome....244
Cube Camera 245
Advanced Cube Camera....245
PT Camera 246
Pinhole Camera....247
Introduction
Welcome to the GV-IPCam H.264 Quick Start Guide. In this quick guide, you will find information on the installation and basic configurations of the GV-IPCam H.264 series.
| Camera | Model No. Lens Description | ||
| Box Camera | GV-BX120D Varifocal 1.3 MP, Low Lux, Auto Iris | ||
| GV-BX130D-0 | Varifocal | 1.3 MP, Auto Iris | |
| GV-BX130D-1 Fixed 1.3 MP, Fixed Iris | |||
| GV-BX140DW 1 MP, WDR Pro, Varifocal | Fixed Iris | ||
| GV-BX220D-2 | |||
| GV-BX220D-3 | |||
| Camera | Model No. | Lens | Description |
| Box Camera | GV-BX320D-0GV-BX320D-1 | Varifocal | 3 MP, Auto Iris |
| GV-BX520D | 5 MP, Manual Iris | ||
| GV-BX1200-0FGV-BX1300-0F | Fixed | 1.3 MP Low Lux / 1.3 MP, D/N, Fixed Iris | |
| GV-BX1200-1FGV-BX1300-1FGV-BX1500-1FGV-BX2500-1F | 1.3 MP Low Lux / 1.3 MP / 1.3 MP Super Low Lux / 2 MP WDR Pro / 2 MP Super Low Lux, Fixed Iris | ||
| GV-BX1200-2FGV-BX1300-2FGV-BX1500-2FGV-BX2500-2F | 1.3 MP Low Lux / 1.3 MP / 1.3 MP Super Low Lux / 2 MP Super Low Lux, Fixed Iris | ||
| GV-BX2400-1FGV-BX3400-1F | Varifocal | 2 MP / 3 MP, WDR Pro, Fixed Iris | |
| Box Camera | GV-BX2400-2FGV-BX3400-2F | VarifocalMP, WDR Pro | 2 MP / 3 MP, WDR Pro, Fixed Iris |
| GV-BX1200-3VGV-BX1300-3VGV-BX1500-3VGV-BX2500-3V | 1.3 MP Low Lux / 1.3 MP / 1.3 MP Super Low Lux / 2 MP Super Low Lux, Auto Iris | ||
| GV-BX2600 | 2 MP, Super Low Lux, WDR Pro, Auto Iris | ||
| GV-BX3400-5V 3 | Pro, Auto Iris | ||
| GV-BX5300-6V | 5 MP, Manual Iris | ||
| GV-BX1500-8FGV-BX2500-8FGV-BX3400-8FGV-BX5300-8F | Fixed | 1.3 MP Super Low Lux / 2 MP Super Low Lux / 3 MP WDR Pro / 5 MP, Fixed Iris | |
| Box Camera (Coming) | GV-BX1500-3VGV-BX2500-3VGV-BX3400-3V | Varifocal | 1.3 MP Low Lux / 2 MP Super Low Lux / 3 MP WDR Pro, P-Iris |
| GV-BX5300-6V | 5 MP, P-Iris | ||
| Box Camera | GV-BX12201 | Varifocal | 12 MP, Auto |
Iris
| Camera | Model No. | Lens | Description |
| Target Box Camera | GV-EBX1100-0F | Fixed | 1.3 MP, Low Lux, Fixed Iris |
| GV-EBX1100-2F | 1.3 MP, Low Lux, Fixed Iris | ||
| Ultra Box Camera | GV-UBX1301-0FGV-UBX1301-1FGV-UBX1301-2F | Fixed | 1.3 MP, Fixed Iris |
| GV-UBX2301-0FGV-UBX2301-1FGV-UBX2301-2F | 2 MP, Fixed Iris | ||
| GV-UBX3301-0FGV-UBX3301-1FGV-UBX3301-2F | 3 MP, D/N, Fixed Iris | ||
| IR Arctic Box Camera | GV-BX120D-E | Varifocal, Auto Iris | 1.3 MP, Low Lux, Auto Iris |
| GV-BX220D-E 2 MP | |||
| GV-BX320D-E | 3 MP, Auto Iris | ||
| GV-BX520D-E | Varifocal | 5 MP, | |
| GV-BX1500-E | 1.3 MP, Super Low Lux, Auto Iris | ||
| GV-BX2400-EGV-BX3400-E | 2 MP / 3 MP, WDR Pro, Auto Iris | ||
| GV-BX5300-E | 5 MP, | ||
| GV-BX2510-E | 2 MP Super Low Lux, P-Iris | ||
| GV-BX5310-E | 5 MP, P-Iris | ||
| Mini Fixed Rugged Dome | GV-MDR220GV-MDR320GV-MDR520 | Fixed | 2 MP / 3 MP / 5 MP, Color, Fixed Iris |
| GV-MDR1500-1FGV-MDR3400-1FGV-MDR5300-1F | Fixed | 1.3 MP Super Low Lux / 3 MP WDR Pro, Color, Fixed Iris | |
| GV-MDR1500-2FGV-MDR3400-2FGV-MDR5300-2F | 1.3 MP Super Low Lux / 3 MP WDR Pro / 5 MP, Color, Fixed Iris | ||
| Mini Fixed Dome | GV-MFD120 | Fixed | 1.3 MP Low Lux, Color, Fixed Iris |
| GV-MFD130GV-MFD320 | 1.3 MP / 3 MP, Color, Fixed Iris | ||
| GV-MFD1501-0FGV-MFD2401-0FGV-MFD2501-0FGV-MFD3401-0FGV-MFD5301-0F | 1.3 MP Super Low Lux / 2 MP WDR Pro / 2 MP Super Low Lux / 3 MP WDR Pro / 5 MP, Color, Fixed Iris | ||
| GV-MFD1501-1FGV-MFD2501-1F | 1.3 MP Super Low Lux / 2 MP WDR Pro / 2 MP Super Low Lux / 3 MP WDR Pro / 5 MP, Color, Fixed Iris | ||
| Mini Fixed Dome | GV-MFD1501-2FGV-MFD2401-2FGV-MFD2501-2FGV-MFD3401-2FGV-MFD5301-2F | Fixed | 1.3 MP Super Low Lux / 2MP WDR Pro / 2 MP SuperLow Lux / 3 MP WDR Pro / 5MP, Color, Fixed Iris |
| GV-MFD1501-3FGV-MFD2401-3FGV-MFD2501-3FGV-MFD3401-3FGV-MFD5301-3F | 1.3 MP Super Low Lux / 2MP WDR Pro / 2 MP SuperLow Lux / 3 MP WDR Pro / 5MP, Color, Fixed Iris | ||
| GV-MFD1501-4FGV-MFD2401-4F | 1.3 MP Super Low Lux / 2MP WDR Pro, Color, FixedIris | ||
| GV-MFD1501-5FGV-MFD2401-5FGV-MFD2501-5FGV-MFD3401-5FGV-MFD5301-5F | 1.3 MP Super Low Lux / 2MP WDR Pro / 5 MP SuperLow Lux, Color, Fixed Iris | ||
| GV-MFD2501-6FGV-MFD3401-6F | 2 MP Super Low Lux / 3 MPWDR Pro, Color, Fixed Iris | ||
| Target Mini Fixed Dome | GV-EFD1100-0FGV-EFD2100-0F | Fixed | 1.3 MP / 2 MP, Low Lux,Fixed Iris |
| GV-EFD1100-2FGV-EFD2100-2F | 1.3 MP / 2 MP, Low Lux,Fixed Iris | ||
| Target Mini Fixed Rugged Dome | GV-EDR1100-0F GV-EDR2100-0F | Fixed | 1.3 MP Low Lux / 2 MP Low Lux, Fixed Iris |
| GV-EDR1100-2F GV-EDR2100-2F | 1.3 MP Low Lux / 2 MP Low Lux, Fixed Iris | ||
| Bullet Camera | GV-BL120D GV-BL130D GV-BL220D GV-BL320D | Varifocal | 1.3 MP Low Lux / 1.3 MP / 2 MP / 3 MP, Auto Iris |
| GV-BL1500 GV-BL2400 GV-BL2500 GV-BL3400 | 1.3 MP Super Low Lux / 2 MP WDR Pro / 2 MP Super Low Lux / 3 MP WDR Pro, Auto Iris | ||
| GV-BL1210 GV-BL2410 GV-BL3410 | Motorized Varifocal | 1.3 MP Low Lux / 2 MP WDR Pro / 3 MP WDR Pro, Auto Iris, 3X Optical Zoom | |
| Bullet Camera | GV-BL5310 | Motorized Varifocal | 5 MP, D/N, Auto Iris, 2X Optical Zoom |
| GV-BL1501 | Varifocal | 1.3 MP Super Low Lux / 2 MP Super Low Lux / 3 MP WDR Pro, P-Iris | |
| GV-BL2501 | |||
| GV-BL3401 | |||
| GV-BL1511 | Motorized varifocal | 1.3 MP Super Low Lux / 2 MP Super Low Lux / 3 MP WDR Pro, P-Iris, 3X Optical Zoom | |
| GV-BL2511 | |||
| GV-BL3411 | |||
| GV-BL5311 | 5 MP, D/N, P-Iris, 2X Optical Zoom | ||
| IR Arctic Bullet Camera | GV-BL2511-E | Motorized Varifocal | 2 MP Super Low Lux, P-Iris, 3X Optical Zoom |
| GV-BL5311-E | 5 MP, D/N, P-Iris, 2X Optical Zoom | ||
| Target Bullet Camera | GV-EBL1100-1F GV-EBL2100-1F | Fixed | 1.3 MP / 2 MP, Low Lux, Fixed Iris |
| GV-EBL1100-2F GV-EBL2100-2F | 1.3 MP Low Lux, Fixed Iris | ||
| Ultra Bullet Camera | GV-UBL1211 GV-UBL1511 GV-UBL2411 GV-UBL2511 GV-UBL3411 | Motorized Varifocal | 1.3 MP Low Lux / 1.3 MP Super Low Lux / 2 MP WDR Pro / 2 MP Super Low Lux / 3 MP WDR Pro, Auto Iris, 3X Optical Zoom |
| GV-UBL1301-0F GV-UBL1301-1F GV-UBL1301-2F GV-UBL1301-3F | Fixed | 1.3 MP, Fixed Iris | |
| GV-UBL2401-0F GV-UBL2401-1F GV-UBL2401-2F GV-UBL2401-3F | 2 MP, WDR Pro, Fixed Iris | ||
| Ultra Bullet Camera | GV-UBL3401-0F | Fixed | 3 MP, Fixed Iris, WDR Pro |
| GV-UBL3401-1F GV-UBL3401-2F GV-UBL3401-3F | 3 MP, Fixed Iris, WDR Pro | ||
| Fixed IP Dome | GV-FD220D GV-FD320D | Varifocal | 2 MP / 3 MP, Auto Iris |
| GV-FD1200 GV-FD2400 | 1.3 MP Low Lux / 2 MP WDR Pro, Auto Iris | ||
| GV-FD1500 GV-FD2500 GV-FD3400 | 1.3 MP Super Low Lux / 2 MP Super Low Lux / 3 MP WDR Pro, Auto Iris | ||
| GV-FD1210 GV-FD2410 | Motorized Varifocal | 1.3 MP Low Lux / 2 MP WDR Pro, Auto Iris, 3x Optical Zoom | |
| Fixed IP Dome | GV-FD1510GV-FD2510GV-FD3410 | Motorized Varifocal | 1.3 MP Super Low Lux / 2MP Super Low Lux / 3 MPWDR Pro, Auto Iris, 3xOptical Zoom |
| Fixed IP Dome | GV-FD1500GV-FD2500GV-FD3400 | Varifocal | 1.3 MP Super Low Lux / 2MP Super Low Lux / 3 MPWDR Pro, P-Iris |
| GV-FD1510GV-FD2510GV-FD3410 | Motorized Varifocal | 1.3 MP Super Low Lux / 2MP Super Low Lux / 3 MPWDR Pro, P-Iris, 3xOptical Zoom | |
| Target Fixed IP Dome | GV-EFD2101 | Varifocal | 2MP Super Low Lux,WDR, P-iris |
| GV-EFD3101 | 3MP Super Low Lux,WDR Pro, P-Iris | ||
| Advanced Cube Camera | GV-CA120GV-CA220 | Fixed | 1.3 MP / 2 MP, Fixed Iris |
| GV-CAW120GV-CAW220 | 1.3 MP / 2 MP, Wireless,Fixed Iris | ||
| Cube Camera | GV-CB120GV-CB220 | Fixed 1.3 MP / 2 MP, Fixed Iris | |
| PT Camera | GV-PT130DGV-PT220DGV-PT320D | Fixed | 1.3 MP / 2 MP / 3 MP,Fixed Iris |
| Vandal Proof IP Dome | GV-VD120D (IK10+, Transparent Cover) GV-VD121D (IK10+, Smoked Cover) GV-VD122D (IK7, Transparent Cover) GV-VD123D (IK7, Smoked Cover) | Varifocal | 1.3 MP, Low Lux, Auto Iris |
| GV-VD220D (IK10+, Transparent Cover) GV-VD221D (IK10+, Smoked Cover) GV-VD222D (IK7, Transparent Cover) GV-VD223D (IK7, Smoked Cover) | 2 MP, Auto Iris | ||
| GV-VD320D (IK10+, Transparent Cover) GV-VD321D (IK10+, Smoked Cover) GV-VD322D (IK7, Transparent Cover) GV-VD323D (IK7, Smoked Cover) | 3 MP, Auto Iris | ||
| GV-VD1500 (IK10+, Transparent Cover) GV-VD2400 (IK10+, Transparent Cover) GV-VD2500 (IK10+, Transparent Cover) GV-VD3400 (IK10+, Transparent Cover) | 1.3 MP Super Low Lux / 2 MP WDR Pro / 2 MP Super Low Lux / 3 MP WDR Pro, Auto Iris | ||
| Vandal Proof IP Dome | GV-VD1530GV-VD2430GV-VD2530GV-VD3430 | High Power IR LEDs, Varifocal | 1.3 MP Super Low Lux / 2 MP WDR Pro / 2 MPSuper Low Lux / 3 MPWDR Pro, Auto Iris |
| GV-VD1540GV-VD2440GV-VD2540GV-VD3440 | High Power IR LEDs, Motorized Varifocal | 1.3 MP Super Low Lux / 2 MP WDR Pro / 2 MPSuper Low Lux / 3 MPWDR Pro, Auto Iris, 3X Optical Zoom | |
| GV-VD5340 | 5 MP, Auto Iris, 3X Optical Zoom | ||
| GV-VD2540-E | High Power IR LEDs, Motorized Varifocal Lens, Extreme Temperature Tolerance | 2 MP Super Low Lux, Auto Iris, 3X Optical Zoom | |
| GV-VD5340-E | 5 MP, Auto Iris, 3X Optical Zoom | ||
| Target Vandal Proof IP Dome | GV-EVD2100 | Varifocal | 2MP Super Low Lux, WDR, P-Iris |
| GV-EVD3100 | 3MP Super Low Lux, WDR Pro, P-Iris | ||
| Pinhole Camera | GV-UNP2500 | Fixed | 2 MP Super Low Lux, Fixed Iris |
For detailed manuals, see GV-IPCAM H.264 Firmware Manual and GV-IPCAM H.264 Hardware Manual on the Software DVD.
Options
Optional devices can expand your camera's capabilities and versatility. Contact your dealer for more information.
| Accessory Description | |
| Power Adapter | The power adapter is available for all GV-IP Camera (except for IR Arctic Cameras, Mini Fixed Rugged Dome and GV-BL2510-E / 5310-E). Contact your sales representative for the countries and areas supported. |
| GV-PA191 PoE Adapter | The GV-PA191 PoE adapter is designed to provide power and network connection to the cameras over a single Ethernet cable. |
| GV-PA481 PoE Adapter | The GV-PA481 PoE adapter is designed to provide power and network connection to GV-BX1200-E / 2400-E / 3400-E / 5300-E over a single Ethernet cable. |
| GV-PA482 PoE Adapter | The GV-PA482 PoE adapter is designed to provide power and network connection to GV-BX2510-E / 5310-E over a single Ethernet cable. |
| GV-POE Switch | The GV-POE Switch is designed to provide power along with network connection for IP devices. The GV-POE Switch is available in various models with different numbers and types of ports. |
| GV-Mount Accessories | The GV-Mount Accessories provide a comprehensive lineup of accessories for installation on ceiling, wall corner and pole. For details, see GV-Mount Accessories Installation Guide on the Software DVD. |
| GV-WiFi Adapter | The GV-WiFi Adapter is a plug-and-play device designed to connect GV-BX1200 Series / 1300 series / 1500 series / 2400 series / 2500 series / 3400 series / 5300 series and GV-MFD1501 series / 2401 series / 2501 series / 3401 series / 5301 series to wireless network. This product complies with IEEE 802.11 b/g/n (Draft 3.0) standards for wireless networking. |
| GV-Relay V2 | The GV-Relay V2 is designed to expand the voltage load of GV IP devices. It provides 4 relay outputs, and each can be set as normally open (NO) or normally closed (NC) independently as per your requirement. |
| Smoked Cover | The smoked cover is an IK7, tinted camera cover designed for GV-Fixed IP Dome to conceal the direction of the camera lens. |
| Plastic PG21 Conduit Connector | The plastic PG21 conduit connector is used for running the wires of Target Mini Fixed Rugged Dome through a 1/2" conduit pipe. |
| Metal PG21 Conduit Connector | The metal PG21 conduit connector is used for running the wires of GV-VD1530 / 2430 / 2530 / 3430, GV-VD1540 / 2440 / 2540 / 3440 / 5340 and GV-VD2540-E / 5340-E through a 3/4" conduit pipe. |
Note for Connecting to GV-System / GV-VMS
The GV-IPCAM H.264 is designed to work with GV-System / GV-VMS, a hybrid or digital video management system. Note the following when GV-IPCAM H.264 is connected to GV-System / GV-VMS:
-
By default, the images are recorded to the memory card inserted to the GV-IP Camera H.264 (except GV-IR Arctic Camera and Target Series, which are not equipped with a memory card slot).
-
Once the camera is connected to GV-System / GV-VMS, the resolution set on GV-System / GV-VMS will override the resolution set on the camera's Web interface. You can only change the resolution settings through the Web interface when the connection to GV-System / GV-VMS is interrupted.
Note for Recording
-
By default, the images are recorded to the memory card inserted to the GV-IP Camera H.264 (except GV-IR Arctic Camera and Target Series, which are not equipped with a memory card slot). Make sure the Write recording data into local storage option is enabled. If this option is disabled, the camera will stop recording to the memory card while the live view is accessed through Web browsers or other applications. For details, see Video Settings, Administrator Chapter, GV-IPCAM H.264 Firmware Manual on the Software DVD).
-
Mind the following when using a memory card for recording:
-
Recorded data on the memory card can be damaged or lost if the data are accessed while the camera is under physical shock, power interruption, memory card detachment or when the memory card reaches the end of its lifespan. No guarantee is provided for such causes.
- The stored data can be lost if the memory card is not accessed for a long period of time. Back up your data periodically if you seldom access the memory card.
- Memory cards are expendable and their durability varies according to the conditions of the installed site and how they are used. Back up your data regularly and replace the memory card annually.
-
Replace the memory card when its read/write speed is lower than 6 MB/s or when the memory card is frequently undetected by the camera.
-
It is recommended to use memory cards of the following setting and specifications:
- Apply a battery backup (UPS) to avoid power outage.
- Use Micro SD card of MLC NAND flash, Class 10 for better performance.
Note for GV-BX2600
Frame Rate
Mind the following restrictions, without regard to the resolution of the camera images, when the GV-BX2600 camera is set to 60 frames per second (fps):
1 The codec MJPEG is not available in the main stream.
2 Dual streaming is not supported.
3 Video analysis functions, including motion detection, are not supported.
4 TV-out is not supported.
5 The frame rate will be dropped to 30 fps during live streaming and recording when the camera starts monitoring.
6 WDR Pro function is not supported.
7 1 or 2 fps will be dropped on the point of obtaining snapshots in JPEG format with the CGI command.
Browser
For the users of Microsoft Internet Explorer, version 11 or later is required to perform the GV-IPCAM H.264 operations through Web browser.
Recording
When GV-BX2600 uses Micro SD card or USB HDD for recording, the camera must not have more than one connection to GeoVision or third-party software.
Note for Adjusting Focus and Zoom
When adjusting the Focus and Zoom Screws (on Box Camera, IR Arctic Box Camera, Mini Fixed Dome, Bullet Camera, Vandal Proof IP Dome and Fixed IP Dome), please do not over tighten the Focus and Zoom screws. The screws only need to be as tight as your finger can do it; don't bother using any tools to get them tighter. Doing so can damage the structure of lens.
For example,
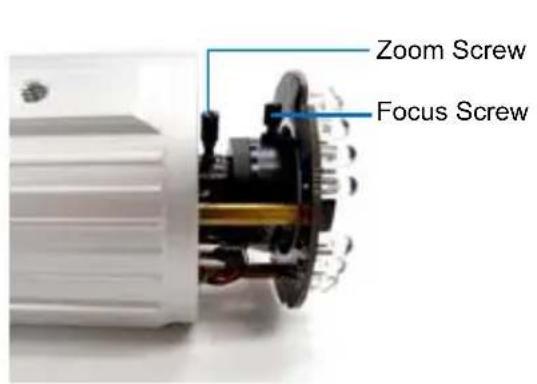
text_image
Zoom Screw Focus ScrewBullet Camera
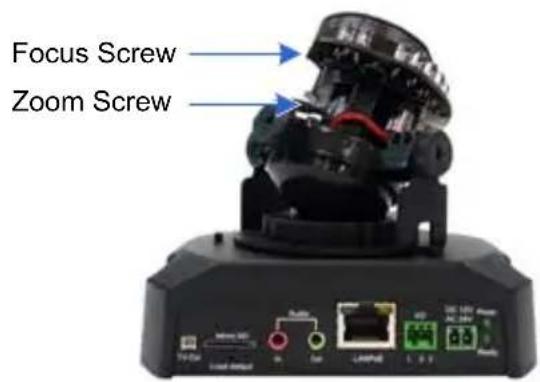
text_image
Focus Screw Zoom ScrewFixed IP Dome
The maximum torque value for all the zoom and focus screws is 0.049 N.m
Note for Installing Camera Outdoor
When installing the IR Arctic Box Camera, Bullet Camera, Ultra Bullet Camera, Target Bullet Camera, Vandal Proof IP Dome, Mini Fixed Rugged Dome or Target Mini Fixed Rugged Dome outdoor, be sure that:
- The camera is set up above the junction box to prevent water from entering the camera along the cables.
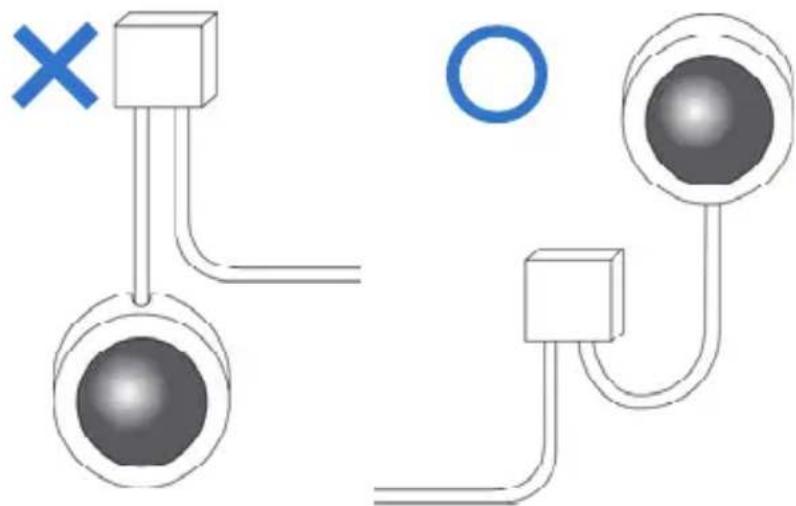
natural_image
Diagram showing two connected components with a cross mark and a circle, no text or symbols present- Any PoE, power, audio and I/O cables are waterproofed using waterproof silicon rubber or the like.
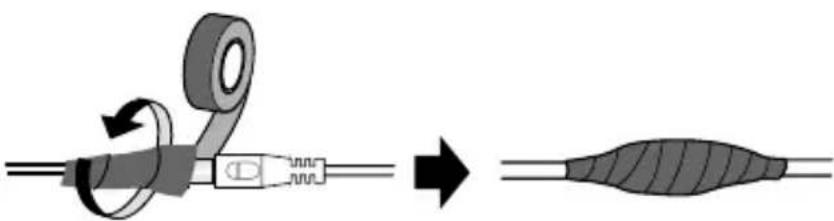
natural_image
Diagram showing a cable being twisted with a tape, resulting in a striped object (no text or symbols present)- A fter opening the camera cover, ensure the screws are tightened and the cover is in place.
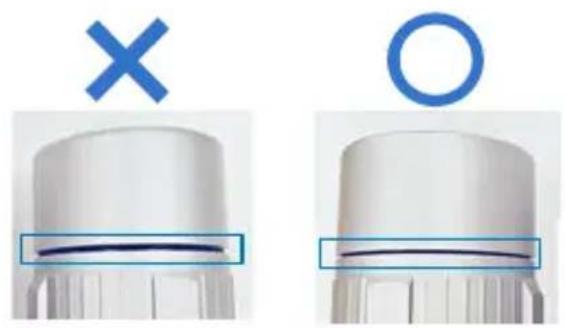
natural_image
Two identical white plastic components with a blue X and O symbols, one showing a dark horizontal line inside a box, the other empty (no text or labels)- The silica gel bag loses it effectiveness when the dry camera is opened. To prevent the lens from fogging up, replace the silica gel bag every time you open the camera, and conceal the gel bag in camera within 2 minutes of exposing to open air.
Note for Closing the Bullet Camera Cover
To ensure that the camera performs its full capacity against water and dust, tightly close and lock the camera cover as indicated below.
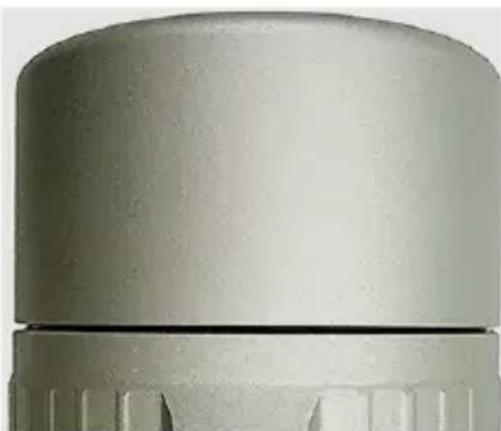
natural_image
Close-up of a metallic cylindrical component with fluted ends and a flat top (no visible text or symbols)Note for Bullet Camera Waterproof
To avoid waterproofing failures, do not open the screw on the camera body.
- The screw on Ultra Bullet Camera
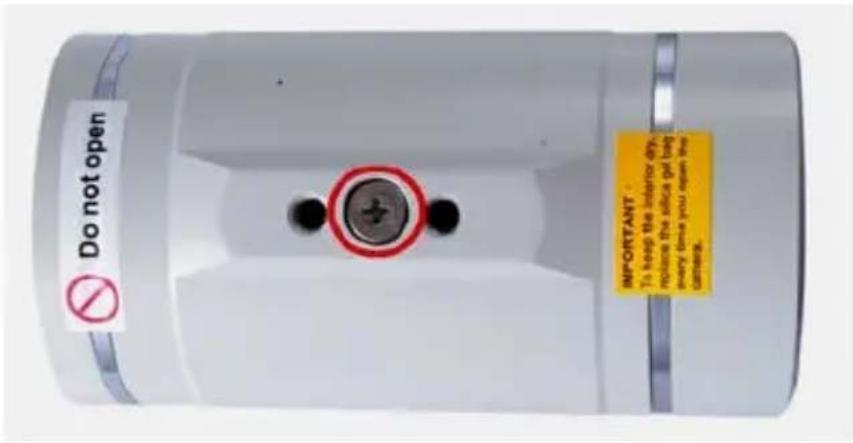
text_image
Do not open IMPORTANT To keep the interior dry replace the silica gel bar many times you open the camera.- The screw on Target Bullet Camera
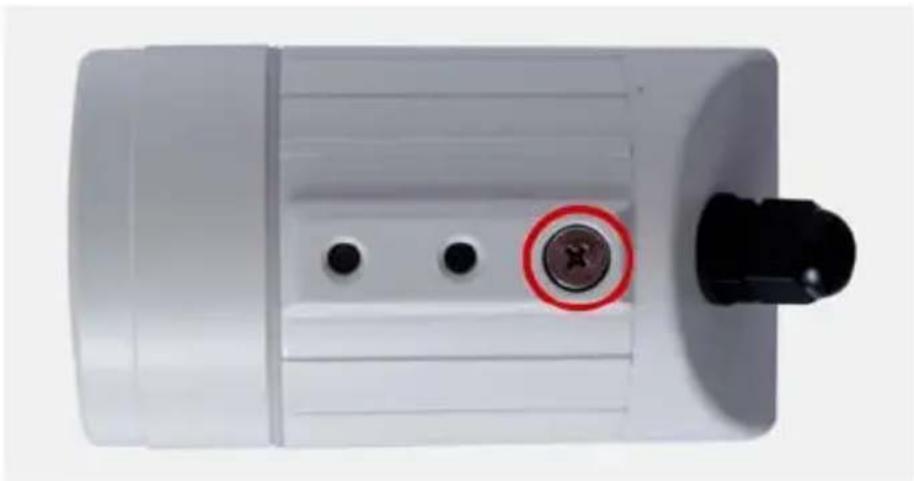
natural_image
Close-up of a white electronic device with three circular buttons and a black handle (no visible text or symbols)Note for USB Storage and WiFi Adapter
Mind the following limitations and requirements for using USB storage and GV-WiFi Adapter:
- The USB hard drive must be of 2.5" or 3.5", version 2.0 or above.
- The USB hard drive's storage capacity must not exceed 2TB.
- USB flash drives and USB hubs are not supported.
- External power supply is required for the USB hard drive.
- To connect a GV-WiFi Adapter, make sure it is connected before the camera is powered on.
1. Box Camera
1.1 Packing List
- Box Camera
- Terminal Block
- Fixed Focal or Varifocal Megapixel Lens
- Six Lens Rings
• One Lens Ring (for GV-BX140DW only) - Video Out Wire
- Camera Holder
- Power Adapter
• GV-IPCAM H.264 Software DVD
• GV-NVR Software DVD - Warranty Card
Note: The power adapter can be excluded upon request.
1.2 Overview
GV-BX120D / 130D Series / 140DW / 220D Series / 320D Series / 520D
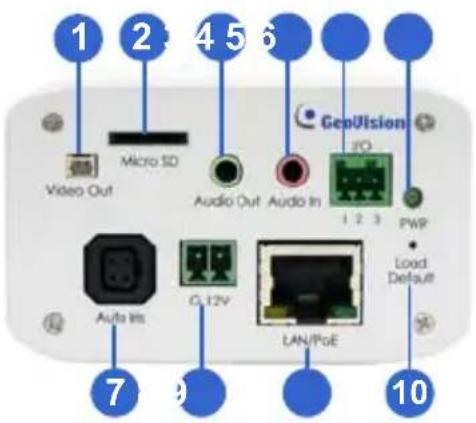
text_image
1 2 4 5 6 Video Out Micro SD Audio Out Audio In GenVision IO 1 2 3 PWP Load Default Auto Ins CL12V LAN/PoE 7 9 10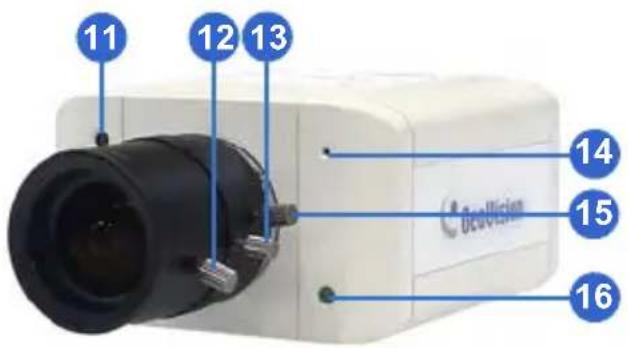
text_image
11 12 13 14 15 16Note:
- The Auto Iris Connector (No. 7) is only functional in GV-BX120D, GV-BX130D-0, GV-BX220D and GV-BX320D.
- The Light Sensor (No. 11) is only available in GV-BX140DW. Keep the Light sensor unobscured for accurate light detection.
- The Iris Screw (No. 13) is only available for GV-BX520D.
- The Zoom Screw (No. 15) is not available for GV-BX130D-1.
| No. | Name | Description | |
| 1 | Video | Out | Connects to a portable monitor for setting the focus and angle of Box Camera during initial installation. |
| 2 | Memory | Card | Receives a micro SD card (SD/SDHC, Section 2.0, Class 10) to store recording data. |
| 3 | Audio Out | Connects a speaker for audio output. | |
| 4 | Audio In | Connects a microphone for audio input. | |
| 5 | I/O | Terminal | Connects I/O devices. For details, see I/OTerminal Block, Box Camera Chapter,BlockGV-IPCAM H.264 Hardware Manual on the Software DVD. |
| 6 | Power | LED | Indicates the power is supplied. For detail,see the table below. |
| 7 | Auto Iris Connector | Plug the iris control cable to the connector. | |
| 8 | DC 12V Port | Connects to power. | |
| 9 | LAN / PoE | Connects to a 10/100 Ethernet or PoE. | |
| 10 | Default | Resets all configurations to factory default.See 24. Restoring to Default Settings later inthe Quick Start Guide. | |
| 11 | Light Sensor | Detects light to switch between day andnight mode. | |
| 12 | Focus Screw | Adjusts the focus of the camera. | |
| 13 | Iris Screw | Adjusts the iris of the camera | |
| 14 | Microphone | Records the sounds. | |
| 15 | Zoom Screw | Adjusts the zoom of the camera | |
| 16 | Status | LED | Turns on when the unit is ready for use. For detail, see the table below. |
| LED | Description |
| Power LED turns green | The system powers on and succeeds to boot up. |
| Status LED turns green | The system is ready for use. |
GV-BX1200 Series / 1300 Series / 1500 Series / 2400 Series / 2500 Series / 2600 / 3400 Series / 5300 Series / 12201
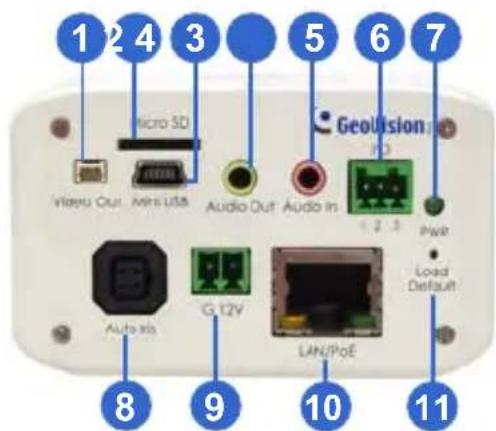
text_image
1 2 4 3 Micro SD Video Out Mini UTA Audio Out Audio in GeoVision G 12V LAN/PoE PWR Load Default Auto In 8 9 10 11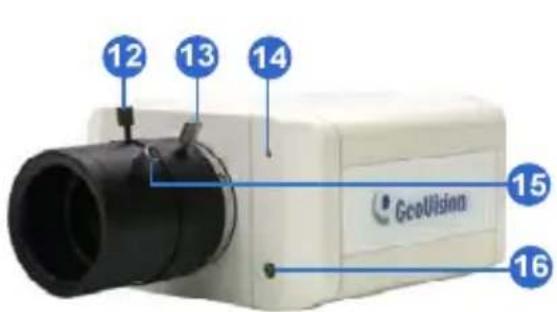
text_image
12 13 14 GcoUltsinn 15 16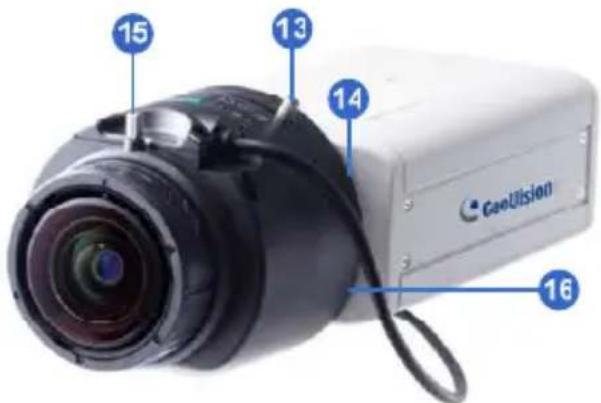
text_image
15 13 14 CeeVision 16GV-BX1200 Series / 1300 Series /
GV-BX12201
1500 Series / 2400 Series / 2500
Series / 2600 / 3400 Series / 5300
Series
Note:
- The Auto Iris Connector (No. 8) is only functional for varifocal models of GV-BX1200 / 1300 / 1500 / 2400 / 2500 / 2600 / 3400.
- The Iris Screw (No. 12) is only available for GV-BX5300-6V.
- The Zoom Screw (No. 13) is only available for varifocal models of GV-BX1200 / 1300 / 1500 / 2400 / 2500 / 2600 / 3400 / 5300 / 12201
- Built-in microphone is not available for GV-BX2600.
- The Memory Card Slot (No. 2) is currently not supported for GV-BX12201.
- Mini USB Slot (No. 3) connected to USB hard drive is currently not supported for GV-BX12201.
| No. | Name | Description | |
| 1 | Video | Out | Connects to a portable monitor for setting the focus and angle of Box Camera during initial installation. |
| 2 | Memory Card Slot | Receives a micro SD card (SD/SDHC, version 2.0 only, Class 10) to store recording data. | |
| 3 | Mini | USB | Connects to a GV-WiFi Adapter or a USB hard Slot drive. |
| 4 | Audio Out | Connects a speaker for audio output. | |
| 5 | Audio In | Connects a microphone for audio input. | |
| 6 | I/O Terminal Block | Connects I/O devices. For details, see I/O Terminal Block, Box Camera Chapter, GV-IPCAM H.264 Hardware Manual on the Software DVD. | |
| 7 | Power | LED | Indicates the power is supplied. For detail, see the table below. |
| 8 | Auto Iris Connector | Plug the iris control cable to the connector. | |
| No. | Name | Description |
| 9 | DC 12V Port | Connects to power. |
| 10 | LAN / PoE | Connects to a 10/100 Ethernet or PoE. |
| 11 | Default | Resets all configurations of the GV-IPCAM H.264 to the default factory settings. See 24. Restoring to Default Settings later in the Quick Start Guide. |
| 12 | Iris Screw | Adjusts the iris of the camera. |
| 13 | Zoom Screw | Adjusts the zoom of the camera. |
| 14 | Microphone | Records the sounds. |
| 15 | Focus Screw | Adjusts the focus of the camera. |
| 16 | Status | LED Turns on when the unit is ready for use. For detail, see the table below. |
| LED Description | |
| Power LED turns green | The system powers on and succeeds to boot up. |
| Status LED turns green | The system is ready for use. |
1.3 Accessory Installation
1.3.1 C-Mount Lenses
When you use a C-mount lens, it requires a certain distance from the camera's imaging chip to focus the lens. Mount the supplied C-mount lens adapter / lens ring to the camera, and then attach the lens onto the camera body.
Box Camera
Three types of lens rings are provided for Box Camera:
- 0.188 mm (transparent color) x 2
- 0.125 mm (black color with a glossy surface) x 2
- 0.254 mm (black color with a matt surface) x 2
For GV-BX140DW, a 0.125 mm lens ring is provided.
Note: These lens rings are specially designed for varifocal models of Box Camera. Besides the supplied lens rings, each varifocal model has already been installed with the necessary lens ring.
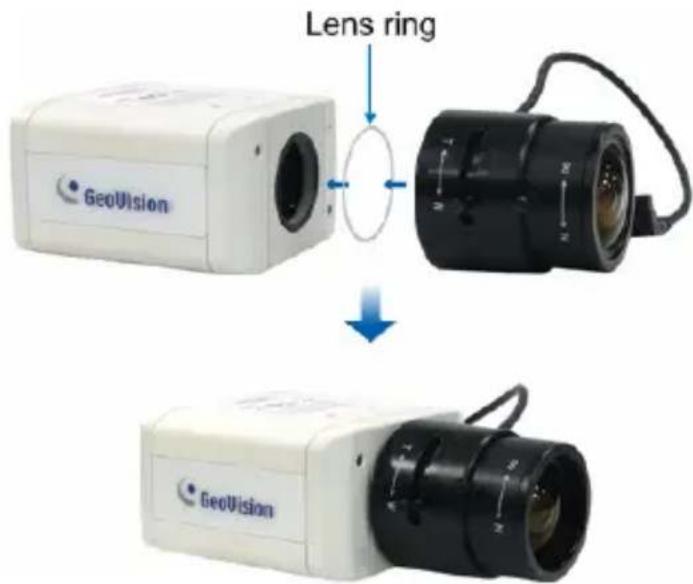
text_image
Lens ring GeoVision GeoVision1.3.2 Infrared Illuminators (Optional)
- Connect the infrared illuminator to the terminal block on the camera. See I/O Terminal Block, Box Camera Chapter, GV-IPCAM H.264 Hardware Manual on the Software DVD.
- Access the Web interface of the camera.
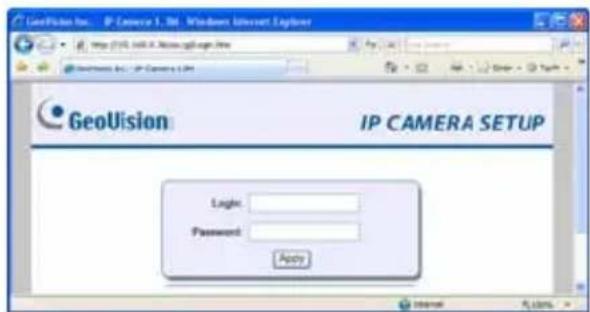
text_image
GeoVision Inc. IP Camera 3. Ltd. Windows Internet Explorer http://10.108.108.com/10.108.com GeoVision IP CAMERA SETUP Light: Password: Apply- Select Video and Motion, select Video Settings, select Streaming 1 and set the IR Check Function setting to Trigger by Input.
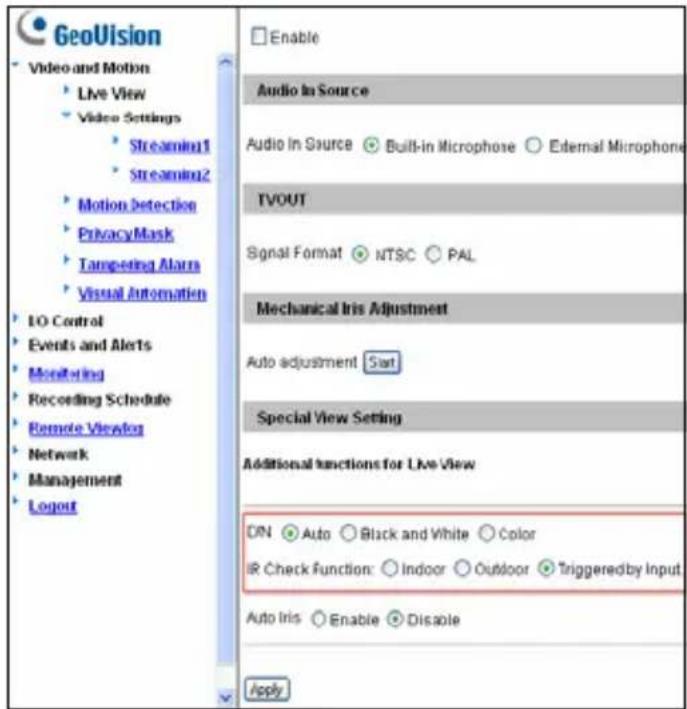
text_image
GeoVision Video and Motion Live View Video Settings Streamin1 Streamin2 Motion detection Privacy Mask Targeting Alarm Visual Automation LO Control Events and Alerts Monitoring Recording Schedule Remote Viewer Network Management Logout Enable Audio In Source Audio In Source Built-in Microphone External Microphone TVOUT Signal Format NTSC PAL Mechanical Iris Adjustment Auto adjustment Start Special View Setting Additional functions for Live View DIN Auto Black and White Color IR Check Function: Indoor Outdoor Triggered by Input Auto Iris Enable Disable Apply- Click Apply.
For details on the Trigger by Input function, see the Video Settings section, Administrator Mode Chapter in the GV-IPCAM H.264 Firmware Manual in the Software DVD.
1.4 Connecting the Camera
The Box Camera is designed for indoor use. Please make sure the installing site is shielded from rain and moisture.
GV-BX120D / 130D Series / 140DW / 220D Series / 320D Series / 520D
text_image
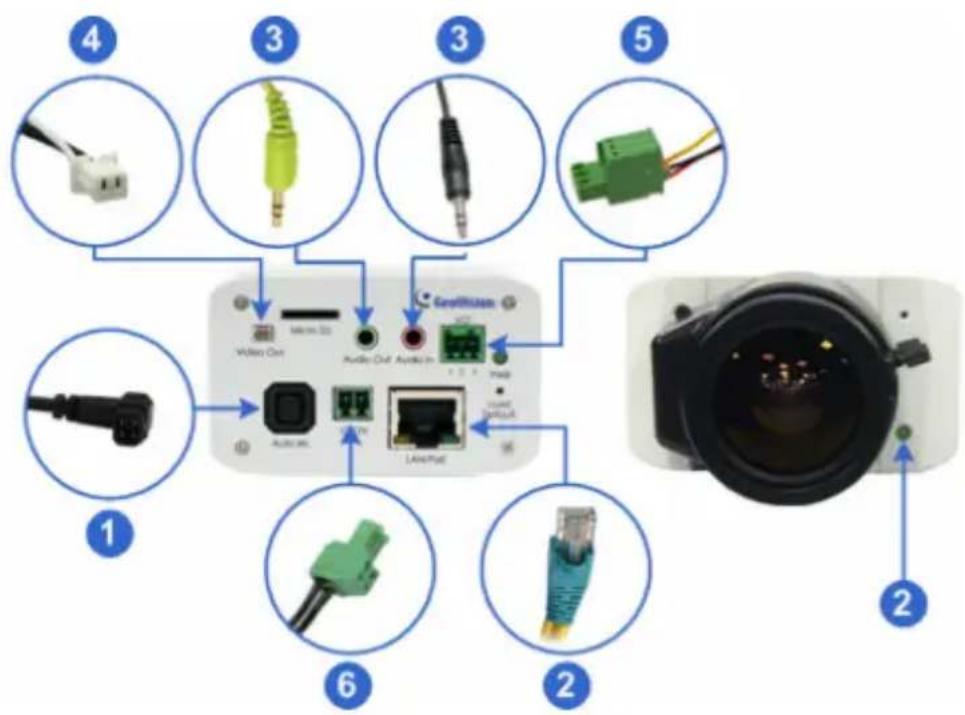
1 2 3 4 5 6 Audio jack Audio Cuff Audio Pin LaserPin Genellus Video Bus Micro-SS Audio Ins. Audio Cuff Audio Pin LaserPin Photo Control Camera- If you are using an auto iris model, plug the iris control cable to the Auto Iris Connector on the camera.
- Use a standard network cable to connect the camera to your network.
- Optionally connect a speaker and an external microphone.
- Optionally connect a monitor using a Video Out wire. Enable this function by selecting the signal format at the TV Out field on the Web interface. See TV Out setting, in the Video Settings section, Administrator Mode Chapter, GV-IPCAM H.264 Firmware Manual on the Software DVD.
GeoVision
-
Opt ionally connect to input / output devices or an infrared illuminator. For details, see Infrared Illuminator and I/O Terminal Block, Box Camera Chapter, GV-IPCAM H.264 Hardware Manual on the Software DVD.
-
Connect power using one of the following methods:
-
Plug the power adapter to the power port.
-
Use the Power over Ethernet (PoE) function and the power will be provided over the network cable.
-
The status LED of the camera will be on.
-
You are ready to access the live view and adjust the image clarity. See 21. Accessing the Camera in the Quick Start Guide.
GV-BX1200 Series / 1300 Series / 1500 Series / 2400 Series / 2500 Series / 2600 / 3400 Series / 5300 Series/ 12201
text_image
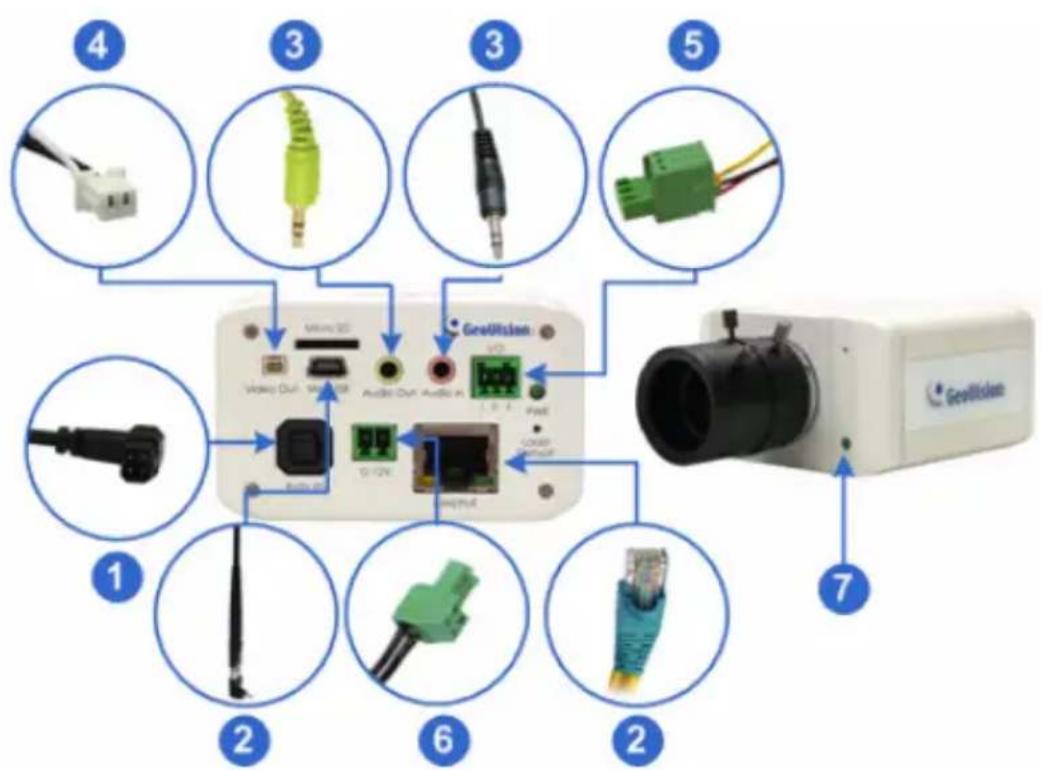
4 3 3 5 1 2 6 2 7 GeoVision GeoVision- If you are using an auto iris model, plug the iris control cable to the Auto Iris Connector on the camera.
- Connect to network using one of the following methods:
- Wired Connection: Use a standard network cable to connect the camera to your network and optionally connect a USB hard drive to the mini USB port.
- Wireless Connection: Optionally purchase and connect the GV-WiFi Adapter.
-
Optionally connect a speaker and an external microphone.
-
Optionally connect a monitor using a Video Out wire. Enable this function by selecting your signal format at the TV Out field on the Web interface. See TV Out setting, in the Video Settings section, Administrator Mode Chapter, GV-IPCAM H.264 Firmware Manual on the Software DVD.
- Optionally connect to input / output devices or an infrared illuminator. For details, see Infrared Illuminator and I/O Terminal Block, Box Camera Chapter, GV-IPCAM H.264 Firmware Manual on the Software DVD.
-
Connect power using one of the following methods:
-
Plug the power adapter to the power port.
-
Use the Power over Ethernet (PoE) function and the power will be provided over the network cable.
-
The status LED of the camera will be on.
- You are ready to access the live view and adjust the image clarity. See 21. Accessing the Camera in the Quick Start Guide.
Note: For details on limitations and requirements of the mini USB port, refer to Note for USB Storage and WiFi Adapter at the beginning of this quick guide.
2. Ultra Box Camera
2.1 Packing List
- Ultra Box Camera
• Supporting rack - Screw x 3
- Screw anchor x 3
- Power Adapter
• GV-IPCAM H.264 Software DVD
• GV-NVR Software DVD - Warranty Card
Note: The power adapter can be excluded upon request.
2.2 Overview
text_image
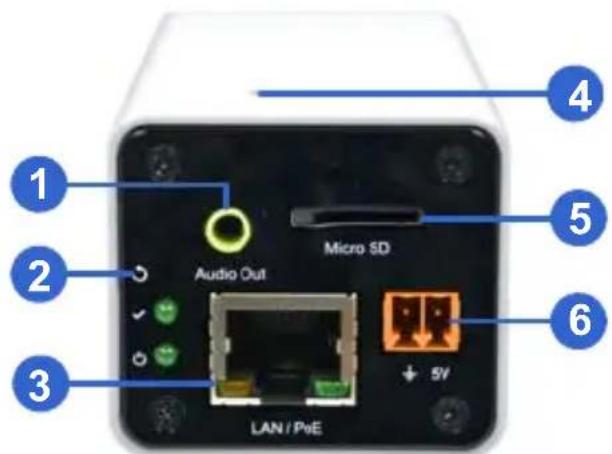
1 2 3 Audio Out Micro SD LAN / PvE 4 5 6No. Name Description
| 1 | Audio Out | Connects a speaker for audio output. | |
| 2 | Default | Resets the camera to factory defaults. See 24 Restoring to Factory Default Settings in the Quick Start Guide. | |
| 3 | LAN / PoE | Connects to a 10/100 Ethernet or PoE. | |
| 4 | Microphone | Records | sounds. |
| 5 | Memory Card Slot | Receives a micro SD card (SD/SDHC, version 2.0 only, Class 10) to store recording data. | |
| 6 | DC 5V Terminal Block | Connects to power. | |
LED Indicator Description
 | Status LED | The status LED turns on (green) when the system is ready for use. |
 | Power LED | The power LED turns on (green) when power is supplied to the camera. |
2.3 Installation
You can stand the Ultra Box Camera on a plain surface or install it to wall and ceiling. Follow the steps below to install, connect and adjust your Ultra Box Camera.
- To install the device on the wall/ceiling, put the supporting rack on the desired location and make marks for screw anchors.
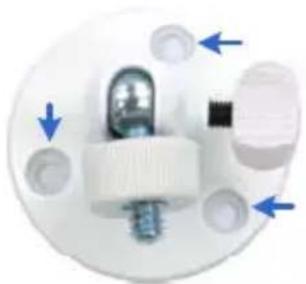
natural_image
Close-up of a white mechanical component with blue directional arrows indicating movement or force (no text or symbols)-
Drill the marks and insert the screw anchors.
-
Secure the supporting rack onto the wall/ceiling using the supplied screws.
-
Secure the camera onto the supporting rack and fasten the indicated screw.
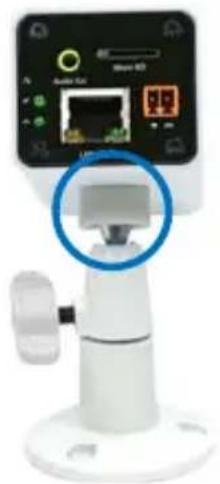
natural_image
Close-up of a white robotic device with a close-up of its internal component, no visible text or symbols.-
Connect the network and power cables to the camera. See 2.4 Connecting the Camera in the Quick Start Guide.
-
Access the live view. See 21.2 Accessing the Live View in the Quick Start Guide.
-
Adjust the angle of the camera based on live view and fasten the indicated screw.
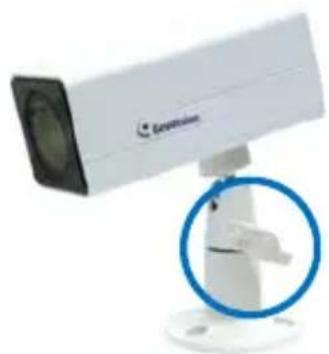
natural_image
Exterior view of a white surveillance camera mounted on a base with a blue circular inset highlighting a component (no text or symbols visible)2.4 Connecting the Camera
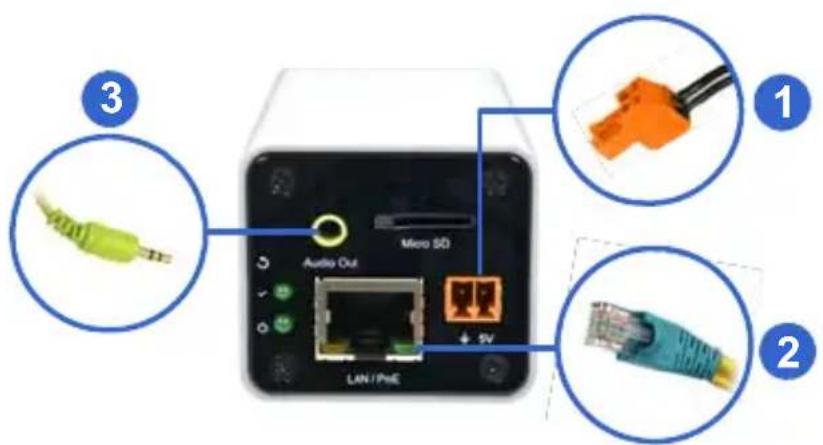
text_image
3 Audio Out Micro SD LAN/PHE 1 2-
Connect power using one of the following methods:
-
Plug the power adapter to the 5V terminal block.
- Use the Power over Ethernet (PoE) function and the power will be provided over the network cable.
The power and status LEDs shall turn on (green).
- Use a standard network cable to connect the camera to your network.
- Optionally connect a speaker.
- Insert a micro SD card (SD/SDHC, version 2.0 only, Class 10).
- You are ready to access the live view, adjust the image clarity and configure the basics. See 21. Accessing the Camera in the Quick Start Guide.
3. Target Box Camera
3.1 Packing List
- Target Box Camera
• Supporting Rack - Screw x 3
- Screw Anchor x 3
• GV-IPCAM H.264 Software DVD
• GV-NVR Software DVD - Warranty Card
Note: Power adapter can be purchased upon request.
3.2 Overview
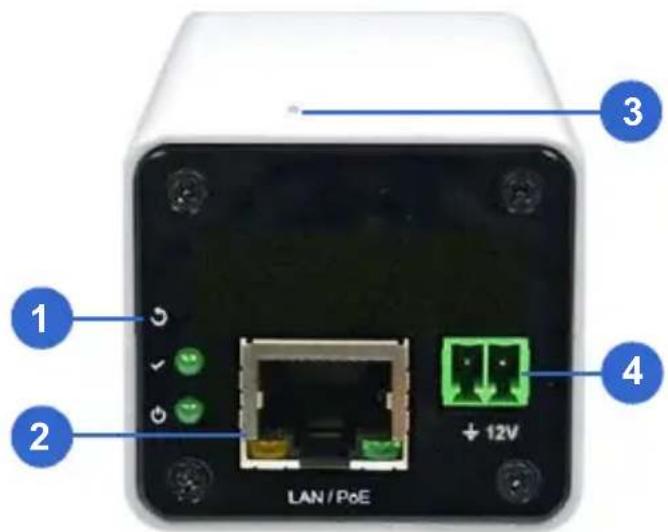
text_image
LAN / PoE 1 2 3 4| No. | Name | Description |
| 1 | Default | Resets the camera to factory defaults. See 24 Restoring to Factory Default Settings in the Quick Start Guide. |
| 2 | LAN / PoE | Connects to a 10/100 Ethernet or PoE. |
| 3 | Microphone | Records sounds. |
| 4 | DC 12V Terminal Block | Connects to power. |
| LED Indicator Description | |
| Status LED | The status LED turns on (green) when the system is ready for use. |
| Power LED | The power LED turns on (green) when power is supplied to the camera. |
3.3 Installation
You can stand the Target Box Camera on a plain surface or install it to wall and ceiling. Follow the steps below to install, connect and adjust your Target Box Camera.
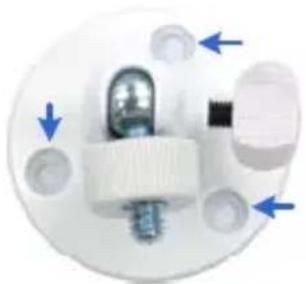
- To install the device on the wall/ceiling, put the supporting rack on the desired location and make marks for screw anchors.
natural_image
Close-up of a white mechanical component with blue directional arrows indicating movement or force (no text or symbols)-
Drill the marks and insert the screw anchors.
-
Secure the supporting rack onto the wall/ceiling using the supplied screws.
-
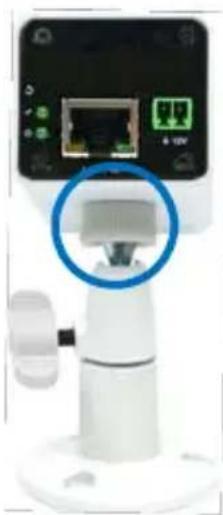
Secure the camera onto the supporting rack and fasten the indicated screw.
natural_image
Close-up of a white robotic device with a digital display showing network ports and a blue circle highlighting a component (no readable text or symbols)-
Connect the network and power cables to the camera. See 3.4 Connecting the Camera in the Quick Start Guide.
-
Access the live view. See 21.2 Accessing the Live View in the Quick Start Guide.
-
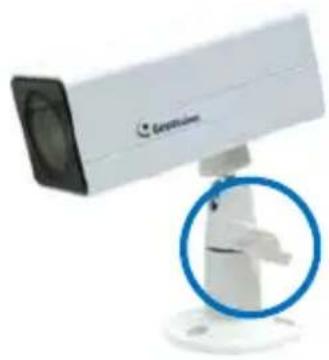
Adjust the angle of the camera based on live view and fasten the indicated screw.
natural_image
Exterior view of a white surveillance camera with a blue circular overlay highlighting a mechanical component (no text or symbols visible)3.4 Connecting the Camera

text_image
LAN / PoE 1 2- Connect power using one of the following methods:
- Plug the power adapter to the 12V terminal block. The power adapter is an optional device. For detail, see Options in the GV-IPCAM H.264 Hardware Manual for Target Box Camera on the Software DVD. - Use the Power over Ethernet (PoE) function and the power will be provided over the network cable. The power and status LEDs shall turn on (green).
- Use a standard network cable to connect the camera to your network.
- You are ready to access the live view, adjust the image clarity and configure the basics. See 21. Accessing the Camera in the Quick Start Guide.
4. IR Arctic Box Camera
4.1 Packing List
For GV-BX120D-E / 220D-E / 320D-E / 520D-E / 1500-E / 2400-E / 3400-E / 5300-E
- IR Arctic Box Camera
- Screw Anchor x 4
- Screw x 4
- Washer x 4
- 4 mm Torx Wrench
- 5 mm Torx Wrench
- Silica Gel Bag x 2
- Adhesive Tape x 2
• GV-IPCAM H.264 Software DVD
• GV-NVR Software DVD - Warranty Card
Note: Optionally purchase a GV-PA481 PoE Adapter for GV-BX1500-E / 2400-E / 3400-E / 5300-E.
For GV-BX2510-E / 5310-E
- IR Arctic Box Camera
- Screw Anchor x 4
- Screw x 4
- Washer x 4
- 5 mm Torx Wrench
- Silica Gel Bag
- Adhesive Tape
• Power Adapter (DC 48V, 2.5A, 120 W max.)
• GV-IPCAM H.264 Software DVD
• GV-NVR Software DVD - Warranty Card
Note: Optionally purchase a GV-PA482 PoE Adapter for GV-BX2510-E / 5310-E.
4.2 Overview
For GV-BX120D-E / 220D-E / 320D-E / 520D-E / 1500-E / 2400-E / 3400-E / 5300-E
text_image
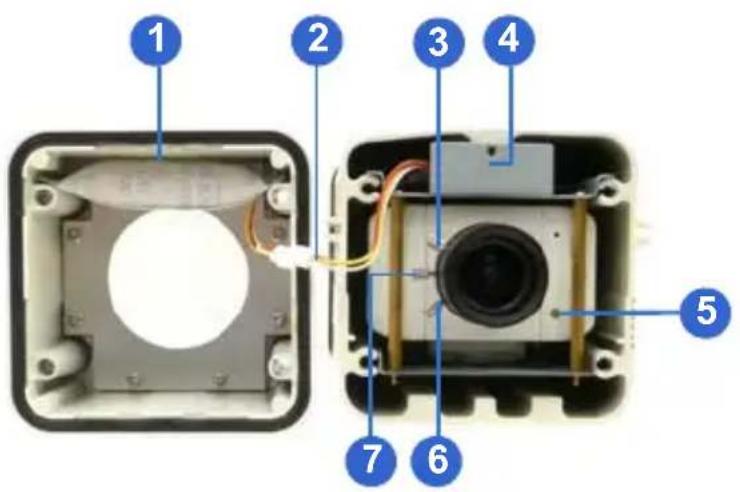
Exploded view diagram of an electronic device showing labeled components from inner casing to outer casingNote: The Iris Screw (no. 7) is only available in GV-BX520D-E / 5300-E.
No. Name Description
1 Silica gel bag Desiccant that keeps the camera housing dry.
2 IR power plug Supplies power to the built-in IR LEDs.
3 Focus Screw Adjusts the focus of the camera.
4 Module screw Holds the module in place.
5 Status LED Turns on when the camera is ready for use.
6 Zoom Screw Adjusts the zoom of the camera.
7 Iris Screw Adjusts the iris of the camera.
For GV-BX2510-E / 5310-E
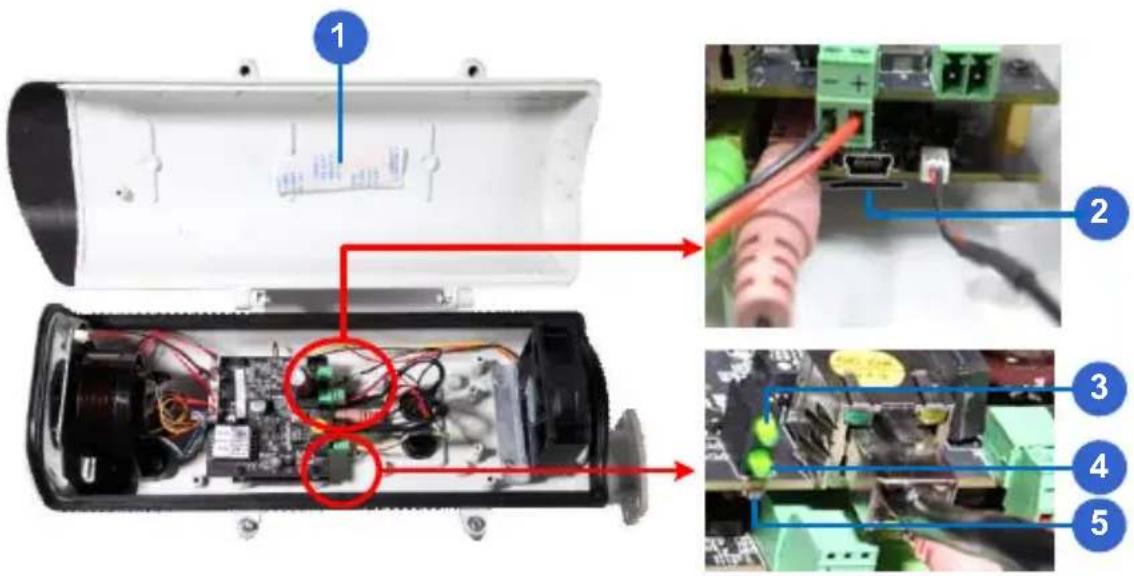
text_image
Labeled diagram of an electronic device showing internal components and wiring connections, with numbered annotations pointing to specific parts.No. Name Description
| 1. Silica gel bag Desiccant that keeps the camera housing dry. | |||
| 2. | Memory Card Slot | Inserts a micro SD card (SD/SDHC, version 2.0, Class 10) to store recording data. | |
| 3. | Power | LED | Turns on when the camera is supplied with power. |
| 4. Status LED Turns on when the camera is ready for use. | |||
| 5. | Default | Resets all configurations to factory default.See 24. Restoring to Default Settings later in the Quick Start Guide. | |
4.3 Installation
The IR Arctic Box Camera is designed for outdoor use. Follow the steps below to install your camera.
IMPORTANT: The gel bag loses its effectiveness when the dry camera is opened. To prevent the lens from fogging up, you must replace the silica gel bag every time you open the camera and conceal the silica gel bag in the camera within 2 minutes of exposing to open air.
- Mark the installation site and drill four holes for screw anchors.
- Insert the supplied screw anchors.
- Secure the camera to the wall using the supplied washers and screws.
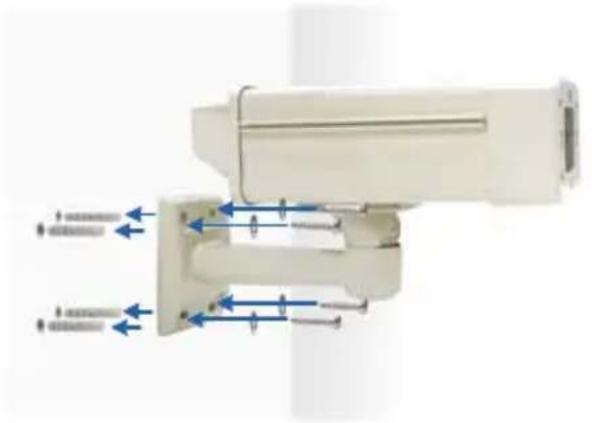
natural_image
Mechanical device with blue directional arrows indicating force or movement (no text or symbols visible)-
Connect the camera with wires and cables. See 4.4 Connecting the Camera in the Quick Start Guide.
-
Access the live view. See 21.2 Accessing the Live View in the Quick Start Guide.
-
B ased on the live view, adjust the angle of the camera. Loosen the indicated screw with the supplied big torx wrench and adjust the joint.
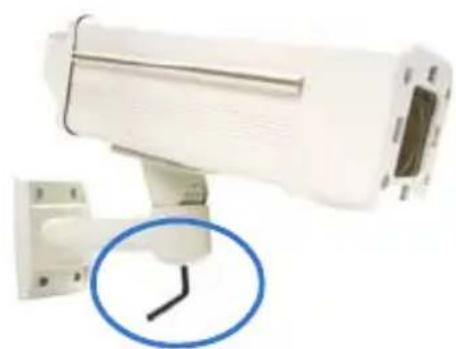
natural_image
White surveillance camera mounted on a wall, with a blue circular annotation highlighting a black line (no text or symbols present)Tilt Adjustment
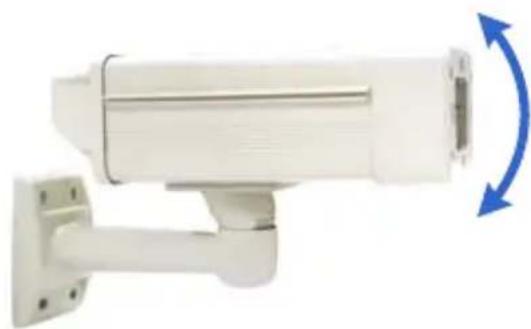
natural_image
White surveillance camera mounted on a wall with blue directional arrows indicating rotation (no text or symbols)Pan Adjustment
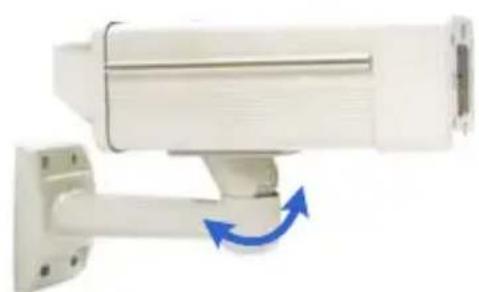
natural_image
White surveillance camera mounted on a wall-mounted unit, with blue directional arrows indicating rotation (no text or symbols visible)- For GV -BX120D-E / 220D-E / 320D-E / 520D-E / 1500-E / 2400-E / 3400-E / 5300-E, adjust for image clarity based on the live view.
A. Unscrew the cover with the supplied 4 mm torx wrench.
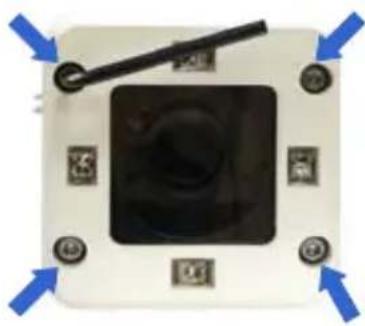
natural_image
Close-up of a white electronic device with a central black square and four blue directional arrows pointing outward (no text or symbols visible)B. Hold and unplug the connector.
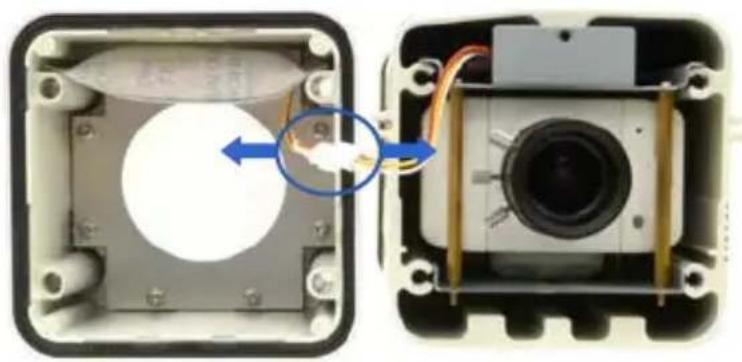
natural_image
Two views of an electronic device showing internal components and wiring, no text or symbols visible.IMPORTANT: Unscrew and remove the cover carefully. Pulling the cover off may cause damages to the inner wiring of the camera.
C. A djust the focus, zoom and iris screws. For a more precise focus, use GV-IP Device Utility. For details, see 21.3 Adjusting Image Clarity in the Quick Start Guide.
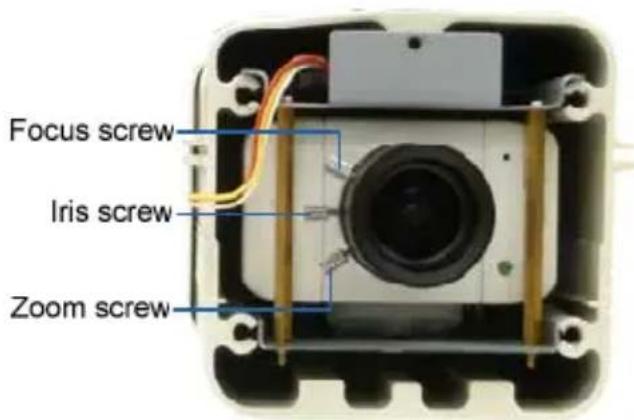
text_image
Focus screw Iris screw Zoom screwNote: Only GV-BX520D-E and GV-BX5300-E contain an iris screw.
D. Replace the silica gel bag. Paste the sticker to the front side of the silica gel bag. Press the sticker several times to make sure it adheres properly and paste the silica gel bag to the indicated place.
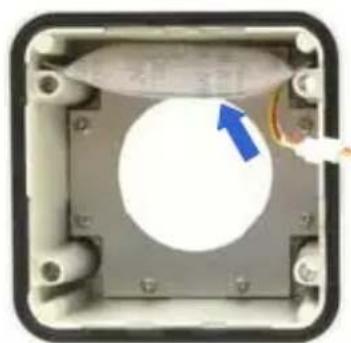
natural_image
Close-up of a mechanical component with a circular hole and a blue arrow pointing to it (no visible text or symbols)E. Follow steps 7B and 7A to plug the connectors back and close the camera cover.
- For GV -BX2510-E / 5310-E, optionally insert a memory card.
A. Open the camera cover using the supplied torx wrench.
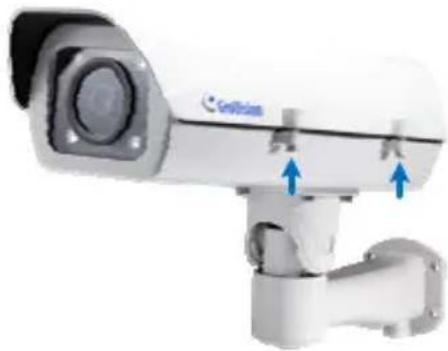
natural_image
Close-up of a security camera with blue directional arrows indicating sensor positions (no text or symbols visible)B. Insert a memory card to the card slot.
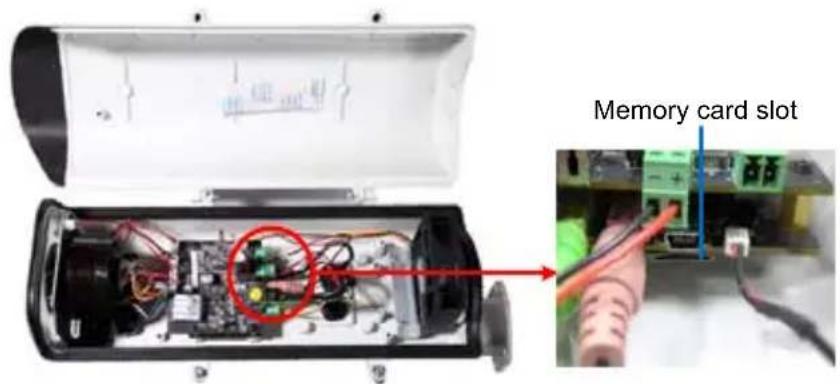
text_image
Memory card slotC. Replace the silica gel bag. Paste the sticker to the silica gel bag. Press the silica gel bag several times onto the camera cover to make sure it adheres properly.
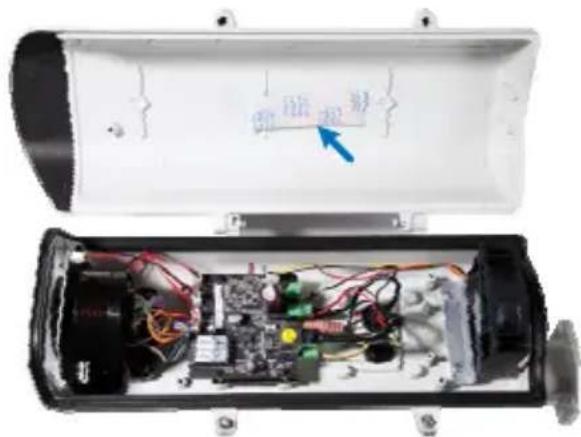
text_image
测量 测量D. Follow step 8A to close the camera cover.
4.4 Connecting the Camera
For GV-BX120D-E / 220D-E / 320D-E / 520D-E / 1500-E / 2400-E / 3400-E / 5300-E
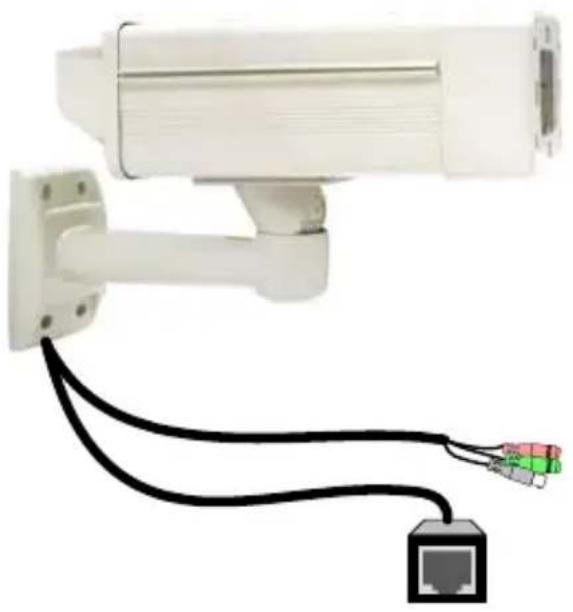
natural_image
White surveillance camera mounted on a wall with black cables and a small network icon at the bottom (no text or symbols visible)No. Wire Definition
| 1 | RJ-45 | PoE | |||
| 2 | Black | BNC | t | TV | ou |
| 3 | Green RCA | Audio Out | |||
| 4 | Pink | RCA | Audio | In |
Follow steps@behcamera:
- Optionally connect a speaker (green) and an external microphone (pink).
-
Optionally connect a monitor using a Video Out wire. Enable this function by selecting your signal format at the TV Out field on the Web interface. See Video Settings section, Administrator Mode Chapter, GV-IPCAM H.264 Firmware Manual on the Software DVD.
-
Connec t the camera to a GV-PA481 PoE adapter as illustrated to supply power and network access.
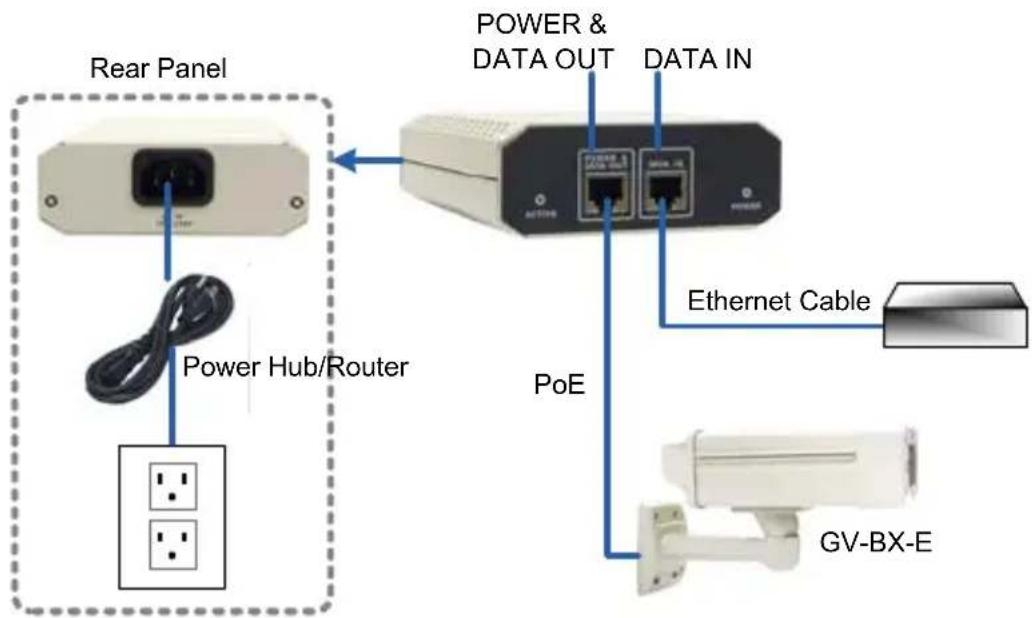
text_image
Rear Panel Power Hub/Router POWER & DATA OUT DATA IN PoE Ethernet Cable GV-BX-E- The status LED of the camera will be on.
- You are ready to access the live view.
Note: For using the IR Arctic Box Camera, ensure that you:
- enable the IR LED function on the Web interface after loading the default settings.
- disable the status LED to reduce reflection when a green light spot appears on the live view.
For details, see Notice for Using the IR Arctic Box Camera section, IR Arctic Box Camera Chapter, GV-IPCAM H.264 Firmware Manual on the Software DVD.
For GV-BX2510-E / 5310-E
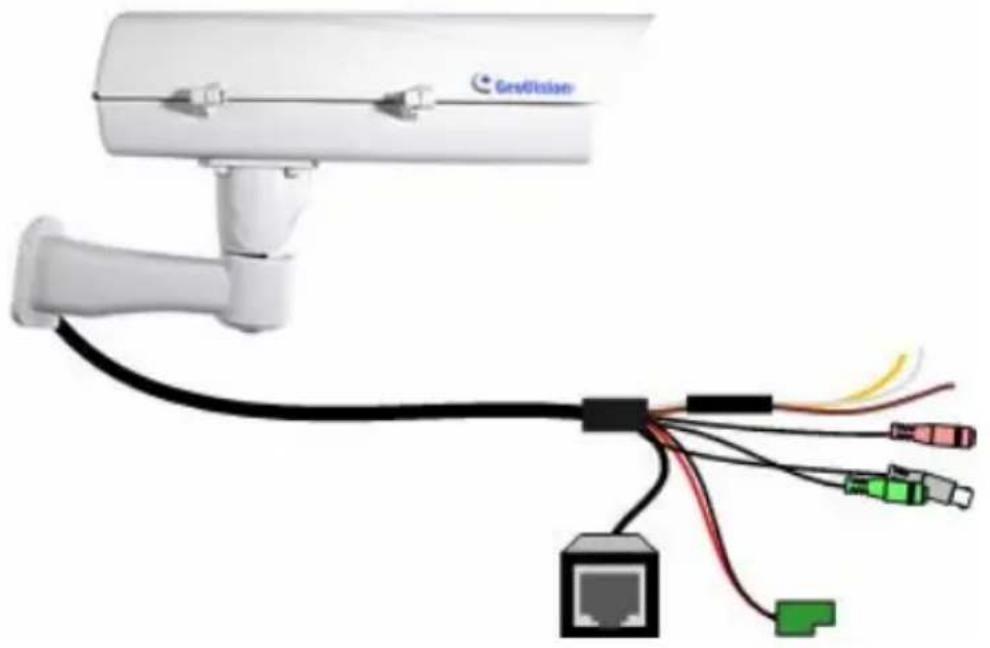
natural_image
Wireless sensor device with network connections, showing a wall-mounted camera and multiple Ethernet ports (no text or symbols visible)No. Wire Definition
| 1. Green RCA Audio Out | ||||
| 2. | Pink | RCA | Audio | In |
| 3. | Brown | wire | Digital | Output |
| 4. | Yellow | wire | Digital | Input |
| 5. | White | wire | GND | |
| 6. Terminal Block DC 48V / AC24V | ||||
| 7. | BNC | TV | Out | |
| 8. | RJ-45 | Ethernet/PoE++ | ||
- Optionally connect the audio out (green), audio in (pink), digital output (brown), digital input (yellow), and GND.
-
Optionally connect a monitor using a Video Out wire. Enable this function by selecting your signal format at the TV Out field on the Web interface. See Video Settings section, Administrator Mode Chapter, GV-IPCAM H.264 Firmware Manual on the Software DVD.
-
Supply the camera with power and network access using one of the following methods:
- Use a GV-PA482 Power over Ethernet adapter to connect the camera to power and network as illustrated below. GV-PA482 PoE adapter is an optional accessory. For detail, see Options in the Quick Start Guide.
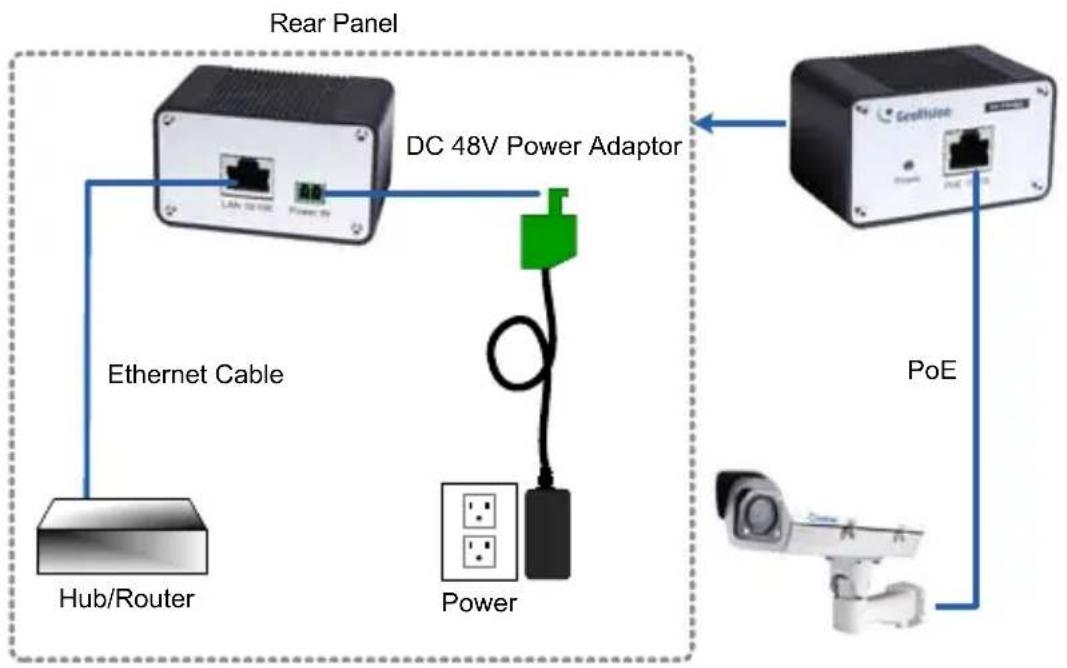
flowchart
graph TD
    A["Near Panel"] --> B["DC 48V Power Adaptor"]
    B --> C["PoE Sensor"]
    C --> D["Internet Cable"]
    D --> E["Hub/Router"]
    B --> F["Power"]
    F --> G["Wireless Connection"]
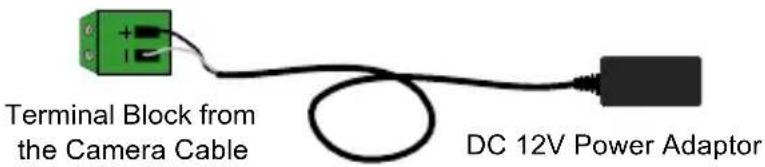
- Use the supplied power adapter. Connect the black wire of the power adaptor to the plus (+) port and the white wire to the negative (-) port. Connect the camera to network with a network cable.
text_image
Terminal Block from the Camera Cable DC 12V Power Adaptor- You are ready to access the live view.
5. Mini Fixed Dome & Mini Fixed Rugged Dome
5.1 Packing List
GV-MFD
- Mini Fixed Dome
- Torx Wrench
- Self Tapping Screw x 2
- Screw Anchor x 2
- Cable stopper
• 2-pin terminal block (for GV-MFD120 / 130 / 320) - Short-Body RJ-45 Plug (for GV-MFD1501 series / 2401 series / 2501 series / 3401 series / 5301 series)
- USB / Audio Y-cable (for GV-MFD1501 series / 2401 series / 2501 series / 3401 series / 5301 series)
- Power Adapter
• GV-IPCAM H.264 Software DVD
• GV-NVR Software DVD - Warranty Card
Note: The power adapter can be excluded upon request.
GV-MDR
- Mini Fixed Rugged Dome
- Torx Wrench
- Self Tapping Screw x 2
- Screw Anchor x 2
- Cable stopper
- Cable Connector
• Installation sticker - Silica gel bag x 2
- Adhesive Tape x 2
- Ferrite core for vehicle installation
• GV-IPCAM H.264 Software DVD
• GV-NVR Software DVD - Warranty Card
Note:
- The power adapter can be excluded upon request.
- When purchasing GV-MDR1500 / 3400 / 5300, choose one of the two LAN connector types (for motor vehicles or for general use). For details, see LAN Connector, 5.2 Overview in the Quick Start Guide.
5.2 Overview
GV-MFD120 / 130 / 320
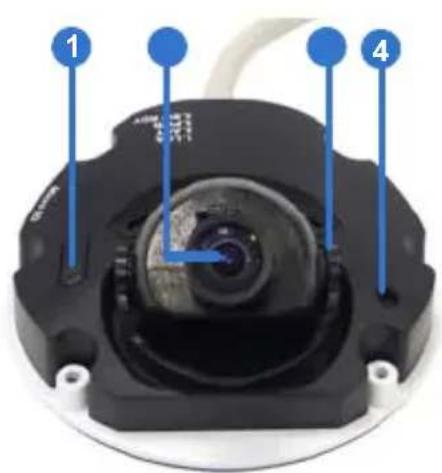
text_image
1 2 4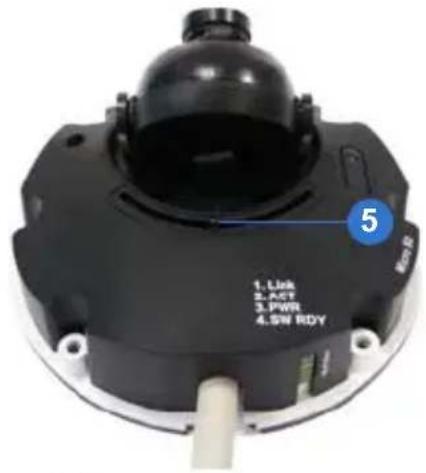
text_image
1. Link 2. ACT 3. PWR 4. SW RDY 5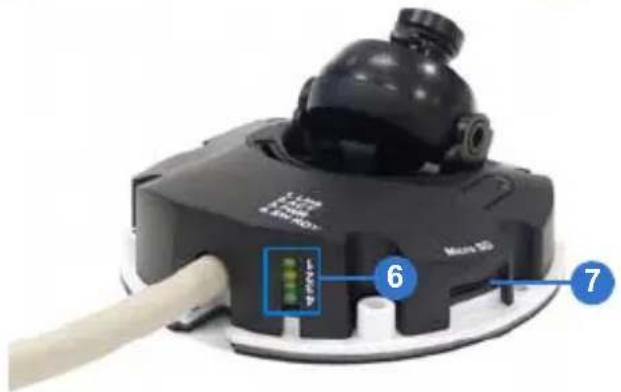
text_image
Micro 10 6 7| No. | Name | Description | ||
| 1 | Default | Button | Resets the camera to factory default. See 24. Restoring to Default Settings later in the Quick Start Guide. | |
| 2 | Lens | Receives image inputs. | ||
| 3 | Tilt Screw | Loosens the screw to adjust tilt angle. | ||
| 4 | Built-In Microphone Provides one-way audio. | |||
| 5 | Pan Screw | Loosens the screw to pan. | ||
| 6 | LED | Indicators | See | LED Indicators below. |
| No. | Name | Description | |
| 7 | Memory | Card | Receives a micro SD card (SD/SDHC, version 2.0 only, Class 10) to store recording data. |
LED Indicator
| LED Name Description |
| 1. Link Turns only when the network is connected. |
| 2. ACT Turns on when data are being transmitted. |
| 3. PWR Turns on when power is on. |
| 4. SW RDY (Status) Turns on when the system is ready. |
GV-MFD1501 Series / 2401 Series / 2501 Series / 3401 Series / 5301 Series
text_image
Labeled diagram of a mechanical device with numbered parts for identification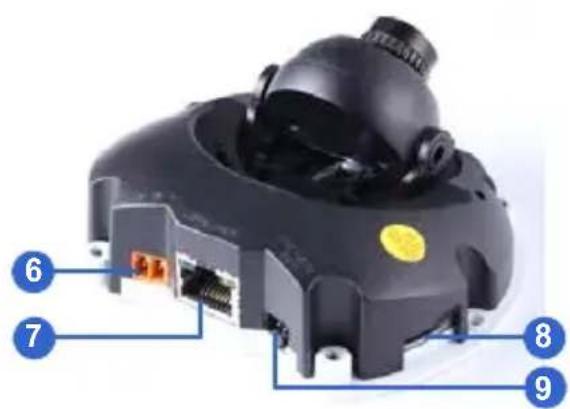
text_image
Labeled diagram of a device showing numbered components including a camera, ports, and connectorsNo. Name Description
| 1 | Microphone | Receives | sound. |
| 2 | Pan Screw Loosens the screw to pan. | ||
| 3 | Lens Receives image inputs. | ||
| 4 | Tilt Screw Loosens the screw to adjust tilt angle. | ||
| 5 | Default Button | Resets the camera to factory default. See 24. Restoring to Factory Default Settings. | |
| 6 | DC 5V Power Port Connects to power. | ||
| 7 | LAN / PoE Connects to a 10/100 Ethernet or PoE. | ||
| 8 | Memory Card | Inserts a micro SD card (SD/SDHC, version 2.0, Class 10) to store recording data. | |
| 9 | USB and Audio Out | Connects to an external hard disk drive and a speaker through the supplied Y cable. | |
Note: For details on limitations and requirements of the USB port, refer to Note for USB Storage and WiFi Adapter at the beginning of the Quick Guide.
text_image
Diagram of a satellite communication device with labeled ports and connectorsLED Name Description
-
Link Turns on (green) when the network is connected.
-
ACT Turns on (orange) when data are being transmitted.
-
Status Turns on (red) when the system is ready.
-
Power Turns on (green) when power is on.
GV-MDR
natural_image
Close-up of a device interior showing internal wiring and components, labeled with numbers 1 and 2 (no text or symbols beyond labels)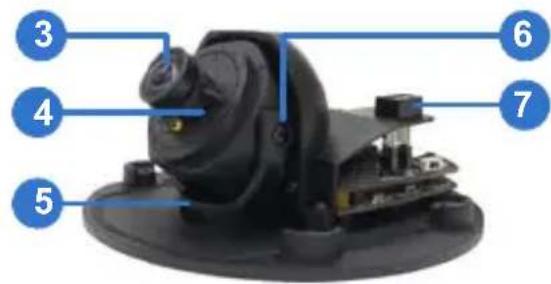
text_image
Labeled diagram of a mechanical device with numbered parts from 3 to 7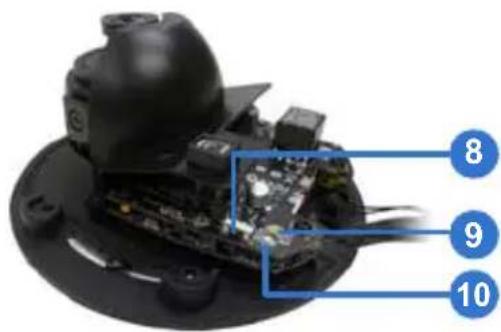
text_image
8 9 10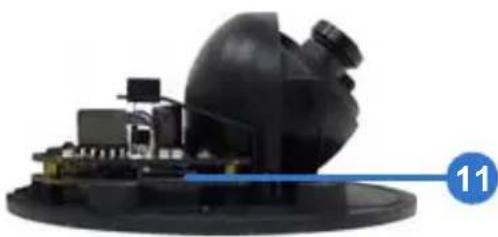
natural_image
Close-up of a black spherical scientific instrument with a blue horizontal line and number 11 label (no readable text or symbols on the device itself)No. Name Description
| 1 | Silica gel bag | Absorbs the moisture inside the camera. | |
| 2 | Conceal | paper | Prevents water or moisture from entering the camera. |
| 3 | Lens | Receives image inputs. | |
| 4 | Rotation Disc | Rotates the camera lens. | |
| 5 | Pan Disc | Pans the camera lens. | |
| 6 | Tilt Screw | Loosens to tilt the camera. | |
| 7 | Built-In Microphone Provides one-way audio. | ||
| 8 | Default | Button | Resets the camera to factory default. See 24. Restoring to Default Settings later in the Quick Start Guide. |
| No. | Name | Description | |
| 9 | Power and status LED | Turns red when the power is on. Flashes orange light twice when the system is ready. | |
| 10 | LAN LED | Turns on when the network is connected. | |
| 11 | Memory | Card | Receives a micro SD card (SD/SDHC, Session 2.0 only, Class 10) to store recording data. |
IMPORTANT: In case of damage and possible condensation inside the camera housing, be sure not to touch or remove the conceal paper.
LAN Connector
Two types of LAN connector are available for GV-MDR1500 series / 3400 series / 5300 series. Select an option based on your installation environment.
1. Waterproof M12 4-Pin Female Connector
The M12 connector is used for motor vehicles.
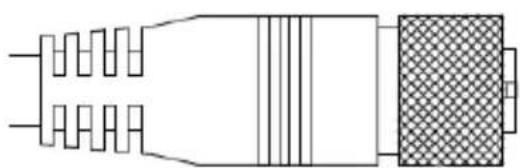
natural_image
Pure electrical connector diagram without any text, numbers, or symbols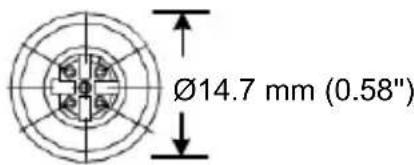
text_image
Ø14.7 mm (0.58"2. Small Waterproof Connector
For this connector type, see GV-MDR, 5.3 Installation to install the supplied cable connector.
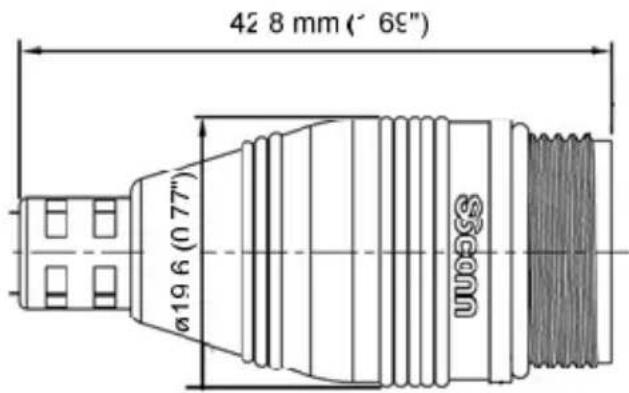
text_image
42 8 mm (° 65") Ø19.6 (0.77" WUBG SOM5.3 Installation
To install a Mini Fixed Dome, make sure the installing site is shielded from rain and moisture.
GV-MFD Series
- Unscrew the housing cover using the supplied torx wrench.
- Put the camera on the desired location and make 2 marks on the ceiling for screw anchors. If you want to run the cables inside the ceiling, make a round mark with a diameter of 2.5 ~cm .
- Drill the marks and insert the screw anchors.
- Secure the Mini Fixed Dome to the ceiling with the self-tapping screws.
- Connect the camera to network and power. For details, see 5.4 Connecting the Camera in the Quick Start Guide.
- Access the live view. See 21.2 Accessing the Live View in the Quick Start Guide.
- Adjust the angles based on the live view.
Pan Adjustment
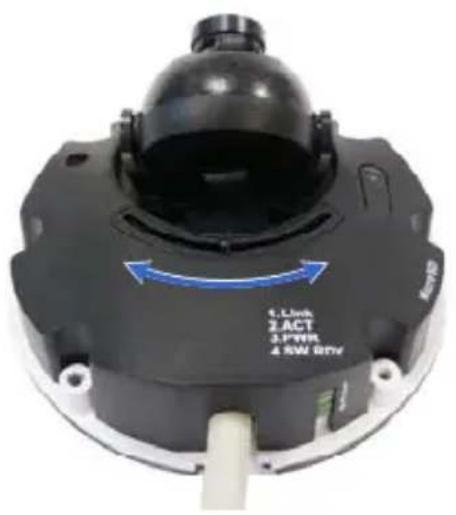
natural_image
Close-up of a black industrial device with blue directional arrow and power rating label (no readable text beyond labels)Tilt Adjustment
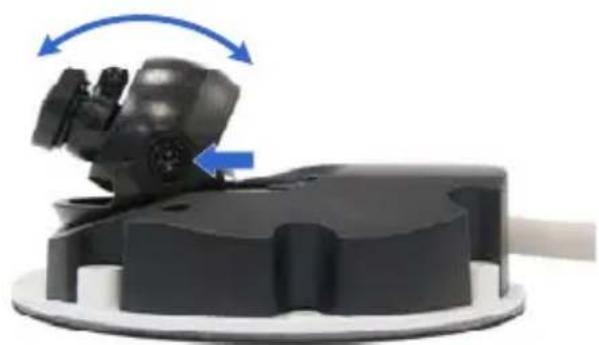
natural_image
Mechanical component with blue directional arrows indicating motion or rotation (no text or symbols)- Insert a memory card (SD/SDHC, version 2.0 only, Class 10) into the memory card slot.
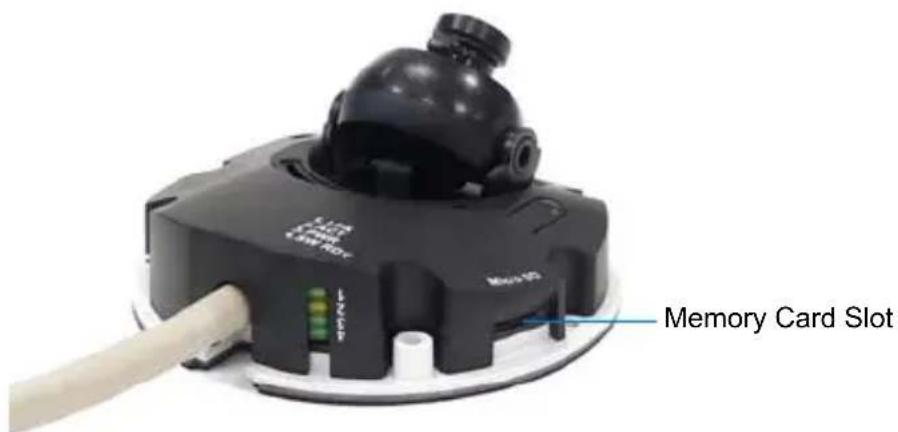
text_image
LED 3.0V 2.0V Memory Card Slot- Adjust image clarity using the GV-IP Device Utility program. For details, see 21.3 Adjusting Image Clarity in the Quick Start Guide.
- Secure the housing cover using the supplied torx wrench.
- Optionally conceal the cable opening with the supplied cable stopper.
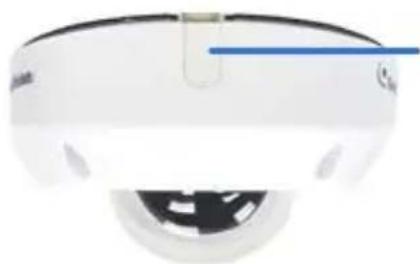
natural_image
Close-up of a white spherical object with a blue horizontal line and circular features, no visible text or symbols.Cable stopper
GV-MDR Series
-
Paste the installation sticker on the desired location. The arrow should point toward the direction that the camera faces.
-
Drill one hole on each of the two curves for screw anchors. Drill the circle (30 mm in diameter) if you want to run the cable into the ceiling.
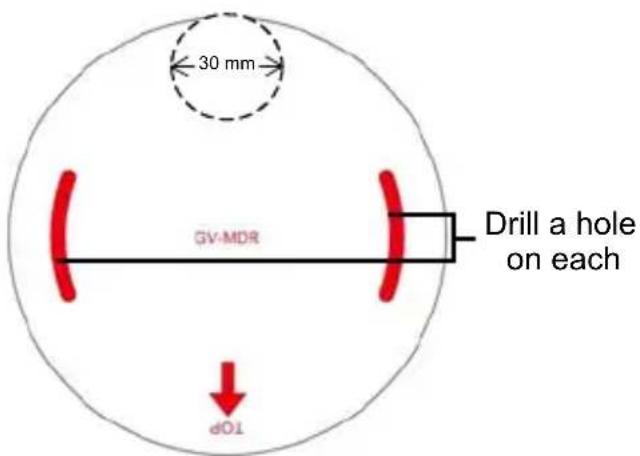
text_image
30 mm GV-MDR Drill a hole on each TOP-
Insert the screw anchors.
-
Unscrew the housing cover using the supplied torx wrench.
-
Secure the camera body to the ceiling with the self-tapping screws.
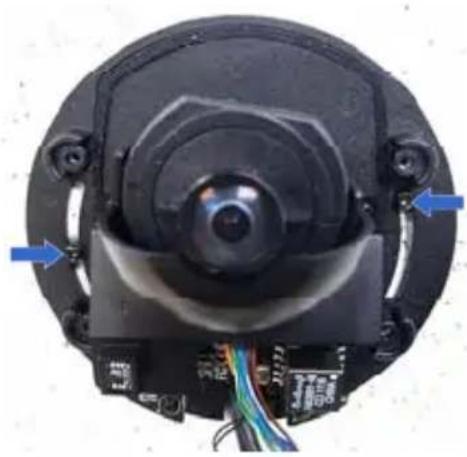
natural_image
Close-up of a black circular optical lens with visible components and wiring, no text or symbols present.- I install the cable connector to waterproof the cable. You should have 5 parts:
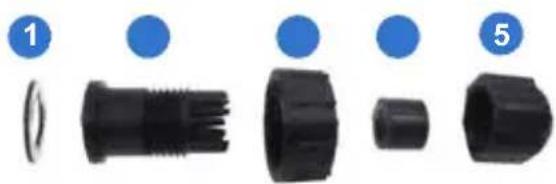
natural_image
Five black plastic connectors with blue circular indicators labeled 1, 5, and others (no text or symbols on the connectors themselves)A. Prepare an Ethernet cable with the RJ-45 connector on one end only.
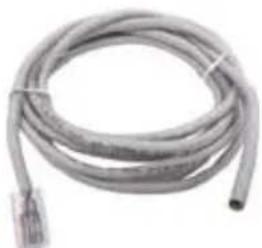
natural_image
Coiled metal cable with a connector, no visible text or symbolsB. Connect the Ethernet cable to the camera cable.
C. Paste the sticker to the camera cable and slide in all the components as shown below.

natural_image
Close-up of a black electrical plug with coiled cable and connectors (no text or symbols visible)D. Move all the components toward the RJ-45 connector, fit item 4 to item 2, secure item 3 to the camera cable and finally secure item 5 to item 2 tightly.
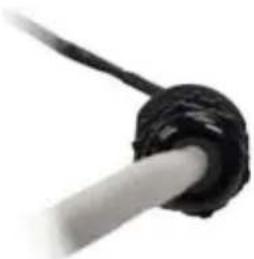
natural_image
Close-up of a black cable with a white cable inserted, no visible text or symbolsIMPORTANT: Item 5 must be secured tightly to waterproof the cable.
- Access the live view. See 21.2 Accessing the Live View in the Quick Start Guide.
- Adjust the angles based on the live view.
Pan Adjustment
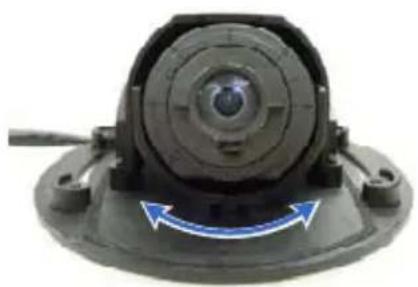
natural_image
Close-up of a black mechanical component with blue directional arrows indicating rotational motion (no text or symbols)Tilt Adjustment
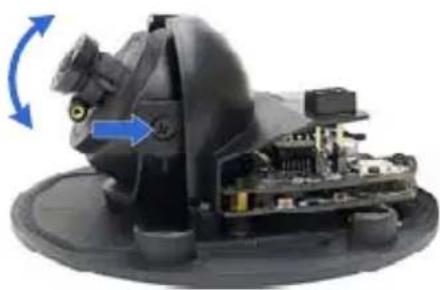
natural_image
Close-up of a mechanical device with blue directional arrows indicating rotation or movement (no visible text or symbols)Rotational Adjustment
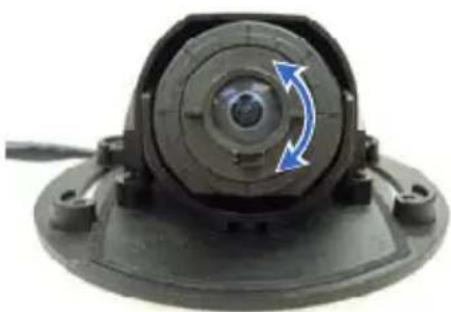
natural_image
Close-up of a mechanical component with blue circular arrows indicating rotational motion (no text or symbols)- A adjust image clarity using the GV-IP Device Utility program. For details, see 21.3 Adjusting Image Clarity in the Quick Start Guide.
- Insert a memory card (SD/SDHC, version 2.0 only, Class 10) into the memory card slot.
- Replace the silica gel bag.
IMPORTANT:
- The silica gel bag loses it effectiveness when the dry camera is opened. To prevent the lens from fogging up, replace the silica gel bag every time you open the camera, and conceal the gel bag in camera within 2 minutes of exposing to open air.
-
For each newly replaced silica gel bag, allow it to absorb moisture for at least 5 hours before operating the camera.
-
Secure the housing cover using the supplied torx wrench.
- Optionally conceal the cable opening with the supplied cable stopper.
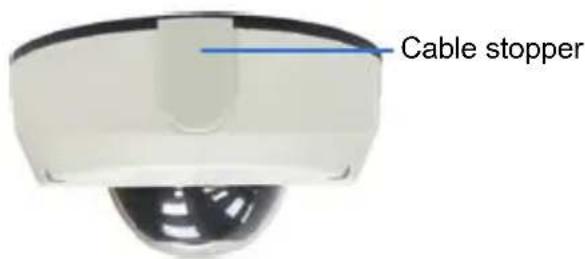
text_image
Cable stopper5.4 Connecting the Camera
Refer to the wire definition and illustrations below to connect the power and network.
5.4.1 Wire Definition
GV-MFD120 / 130 / 320
The data cable provides connections for power and network access. The wires are illustrated and defined below:
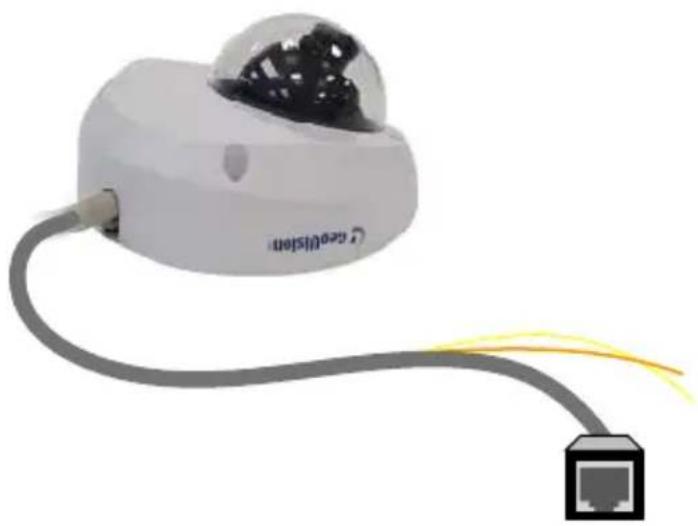
natural_image
White medical device with a spherical sensor and connecting cable, connected to a network icon (no text or symbols visible)| No. | Wire Color | Definition | |
| 1 | Yellow | DC | 12V+ |
| 2 | Orange | GND | |
| 3 | Gray | PoE, | Ethernet |
GV-MDR Series
Power and network connectivity is provided through a PoE cable.
| Wire Color Definition | ||
| Gray | PoE, | Ethernet |
5.4.2 Power and Network Connection
Use one of the following methods to power on and connect your camera to network:
- Wired connection with PoE: Use a Power over Ethernet (PoE) adapter to connect the camera to the network, and the power will be provided at the same time.
- Wired connection with network cable (GV-MFD Series only): Connect the camera with a standard network cable and use the power adapter to supply power. See Powering On the Camera below to assemble the terminal block with power adapter.
- Wireless connection (GV-MFD1501 Series / 2401 Series / 2501 Series / 3401 Series / 5301 Series only): Connect the camera with a GV-WiFi Adapter (optional accessory) and use the power adapter to supply power.
Powering On the GV-MFD120 / 130 / 320
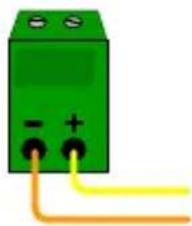
- Insert the orange wire of the camera to the left pin (-) and the yellow wire to the right pin (+) of the terminal block.
natural_image
Green electrical component with two terminals and a yellow wire connecting it (no text or symbols visible)- Connect the power adapter to the terminal block.

text_image
Terminal Block DC 12V Power Adaptor- Connect the camera to network using a network cable.
5.4.3 Vehicle Installation
To install the Mini Fixed Rugged Dome on a vehicle, clip the ferrite core to the camera cable. The ferrite core must be attached as close as possible to the camera with the maximum distance of 15 cm.
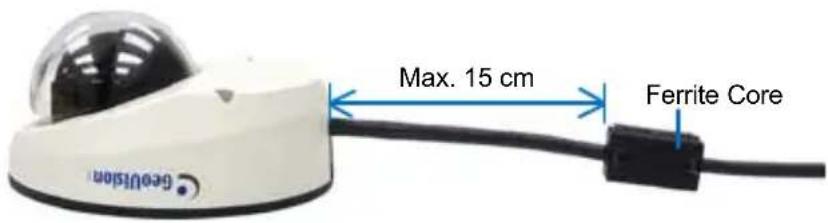
text_image
Geovision Max. 15 cm Ferrite Core6. Target Mini Fixed Dome
6.1 Packing List
• Target Mini Fixed Dome
- Screw x 2
- Screw Anchor x 2
• Focus Adjustment Clip or Ring
• GV-IPCAM H.264 Software DVD
• GV-NVR Software DVD
- Warranty Card
Note: The power adapter can be purchased upon request.
6.2 Overview
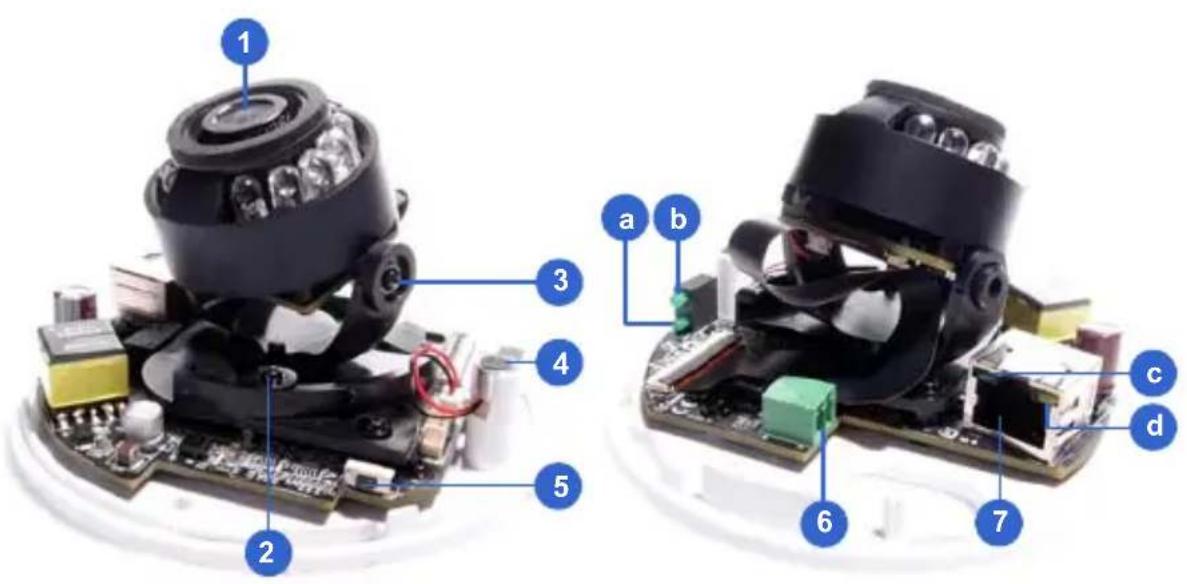
text_image
Labeled diagram of a mechanical assembly showing numbered components for assembly or maintenance.No. Name Description
| 1 Lens Receives image inputs. | ||
| 2 Pan Screw Loosens the screw to adjust pan angle. | ||
| 3 Tilt Screw Loosens the screw to adjust tilt angle. | ||
| 4 Microphone Receives sound. | ||
| 5 Default Button Resets the camera to factory default. See 24.Restoring to Factory Default Settings. | ||
| 6 DC 12V Port Connects to power. | ||
| 7 LAN / PoE Connects to a 10/100 Ethernet or PoE. | ||
| a Status Turns on (green) when the system is ready. | ||
| b Power Turns on (green) when power is on. | ||
| c Link | Turns on (green) when the network is connected. | |
| d ACT | Turns on (orange) when data are being transmitted. | |
6.3 Installation
The Target Mini Fixed Dome can be installed on the wall or the ceiling. Before installing the camera, make sure the installing site is shielded from rain and moisture.
- Open the housing cover by turning.
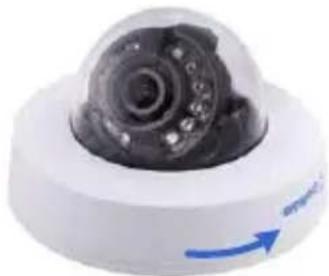
natural_image
Close-up of a white spherical security camera with a black lens and blue directional arrow (no text or symbols visible)- Place the camera where you want to install it and make 2 marks on the ceiling or the wall for screw anchors. If you want to run the cables inside the ceiling or the wall, make a round mark with a diameter of 2.5 cm.
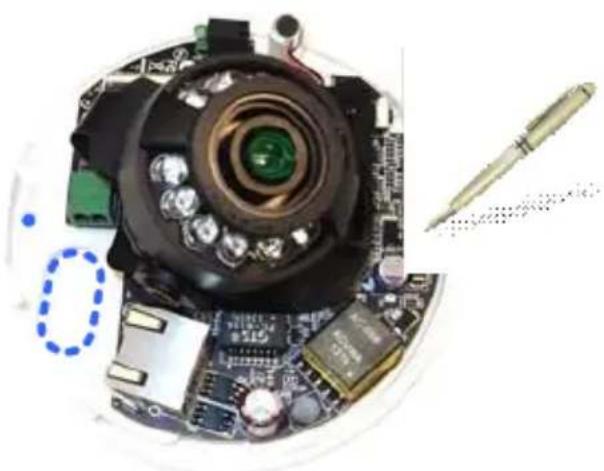
natural_image
Close-up of a computer monitor with visible circuit board and soldering tip, no text or symbols present-
Drill the marks and insert the screw anchors.
-
Thread the power and / or network cable(s) through the oval-shaped hole or the cable opening on the side, and connect the camera to network and power. For details, see 6.4 Connecting the Camera.
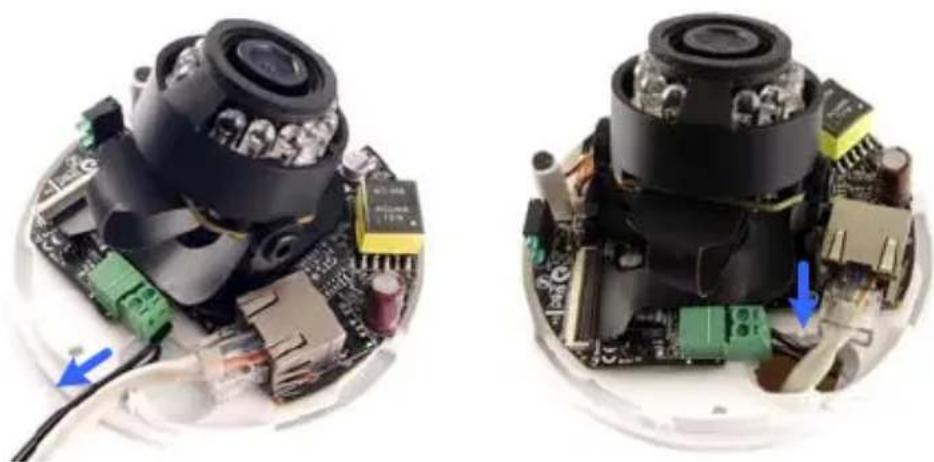
natural_image
Two views of a mechanical device with visible components and wiring, no text or symbols present.- Secure the Target Mini Fixed Dome to the ceiling or the wall with the self-tapping screws.
- Access the live view. For details, see 21.2 Accessing the Live View in the Quick Start Guide.
- Loosen the tile screw and pan screw, adjust the angles based on the live view as needed, and tighten the screws again.
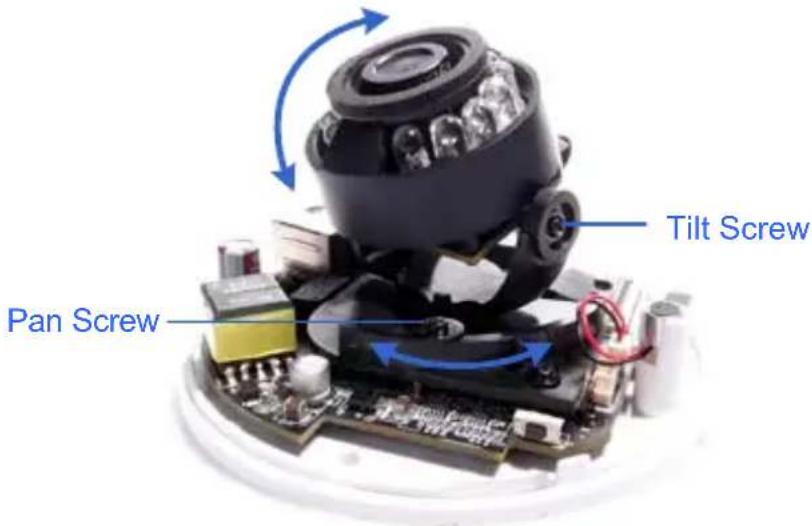
text_image
Pan Screw Tilt Screw- Adjust image clarity using the GV-IP Device Utility program. For details, see 21.3 Adjusting Image Clarity in the Quick Start Guide.
- Place the housing cover back and turn to secure it.
6.4 Connecting the Camera
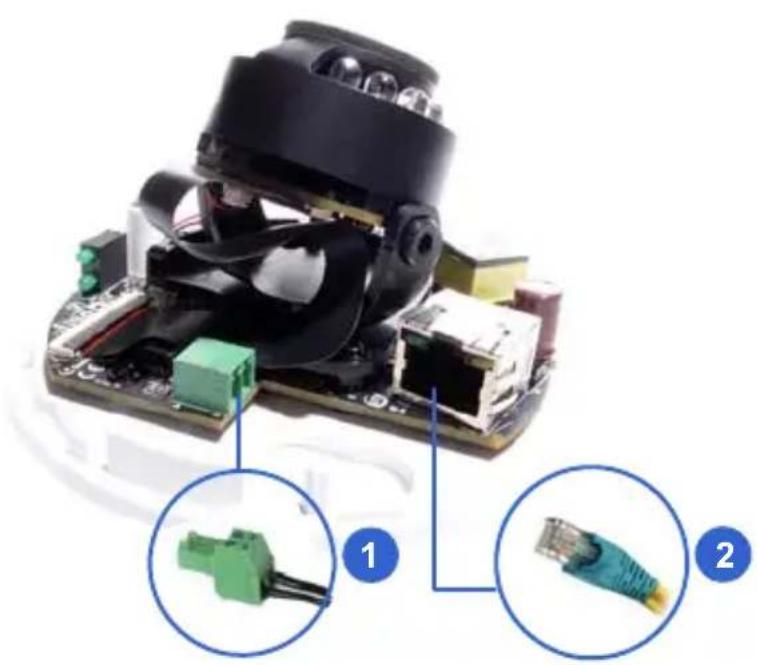
natural_image
Close-up of an electronic circuit board with labeled connectors (1 and 2), showing internal components and wiring (no text or symbols beyond labels)- Connect power using one of the following methods:
- Plug the power adapter to the 12V terminal block. The power adapter is an optional device. For detail, see Options in the GV-IPCAM H.264 Hardware Manual for Target Mini Fixed Dome on the Software DVD. - Use the Power over Ethernet (PoE) function and the power will be provided over the network cable.
The power and status LEDs shall turn on (green).
- Use a standard network cable to connect the camera to your network.
- You are ready to access the live view, adjust the image clarity and configure the basics. See 21. Accessing the Camera in the Quick Start Guide.
7. Target Mini Fixed Rugged Dome
7.1 Packing List
• Target Mini Fixed Rugged Dome
- Screw x 2
- Screw Anchor x 2
- Focus Adjustment Ring
• Installation Sticker
- Conduit Converter
- RJ-45 Connector
• Waterproof Rubber Set (for RJ45 and DC12V)
- Torx Wrench
- Silica Gel Bag x 2
- Adhesive Tape x 2
• Concave Hexagon Wrench
- Ruler
- Screw for Conduit Converter x 2
• GV-IPCAM H.264 Software DVD
• GV-NVR Software DVD
- Warranty Card
Note:
- Power adapter can be purchased upon request.
- You can choose to run the wires through a conduit pipe. After you have threaded all the wires, install the supplied conduit converter with a PG21 conduit connector and a self-prepared conduit pipe (of 1/2", 3/4" or 1") to the camera. Do not use a 1/2" pipe if you use the power adapter for power supply because the adapter cannot be threaded through. A plastic PG21 conduit connector for 1/2" pipe can be purchased upon request.
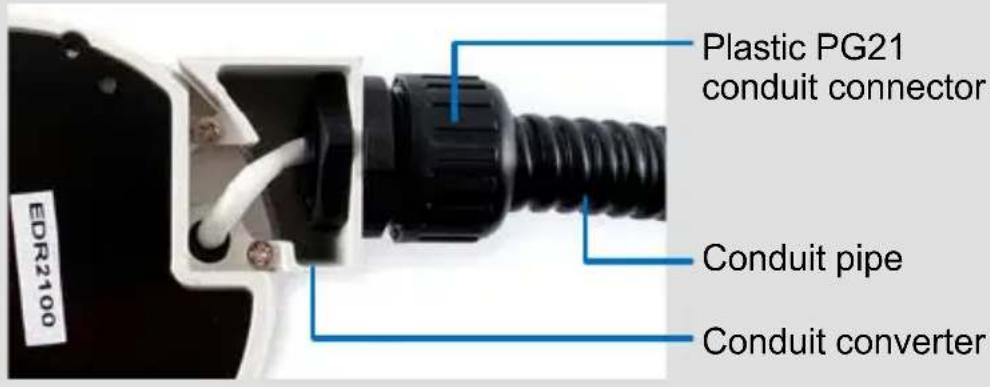
text_image
Plastic PG21 conduit connector Conduit pipe Conduit converter EDR21007.2 Overview
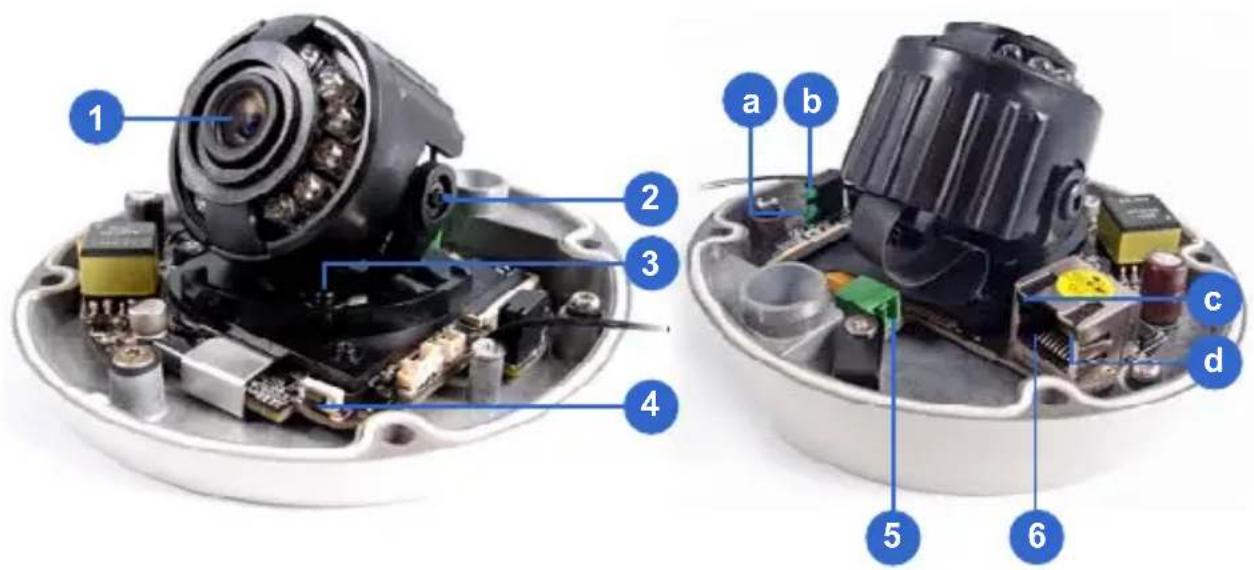
text_image
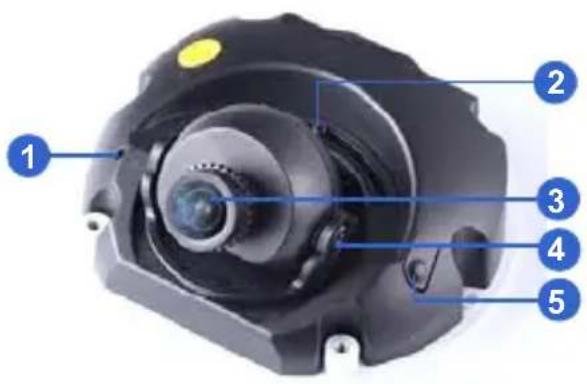
Labeled diagram of an electronic device showing internal components and parts with numbered annotationsNo. Name Description
| 1 Lens Receives image inputs. | ||
| 2 Pan Screw Loosens the screw to adjust pan angle. | ||
| 3 Tilt Screw Loosens the screw to adjust tilt angle. | ||
| 4 Default Button Resets the camera to factory default. See 24.Restoring to Factory Default Settings. | ||
| 5 DC 12V Port Connects to power. | ||
| 6 LAN / PoE Connects to a 10/100 Ethernet or PoE. | ||
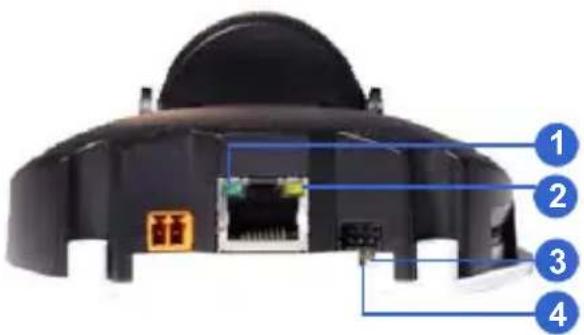
| a Status Turns on (green) when the system is ready. | ||
| b Power Turns on (green) when power is on. | ||
| c Link | Turns on (green) when the network is connected. | |
| d ACT | Turns on (orange) when data are being transmitted. | |
7.3 Installation
The Target Mini Fixed Rugged Dome can be installed on the wall or ceiling. You must use the supplied waterproof rubber set to waterproof the cable.
- Paste the installation sticker where you want to install, and drill two holes that are at a diagonal. To run the cables inside the wall or ceiling, drill a larger opening as shown below.
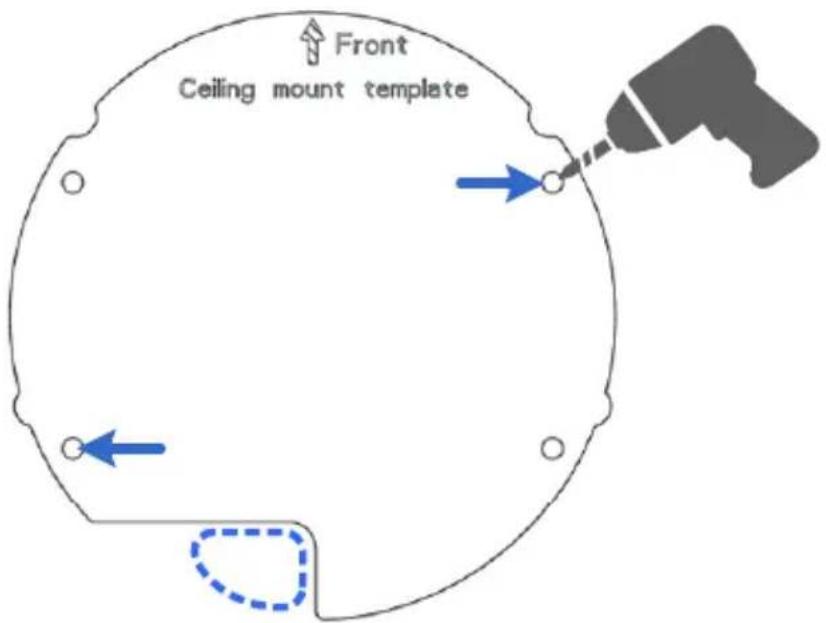
text_image
Front Ceiling mount template- Insert the supplied screw anchors into the two drilled holes.
- Open the camera's housing cover using the supplied torx wrench.
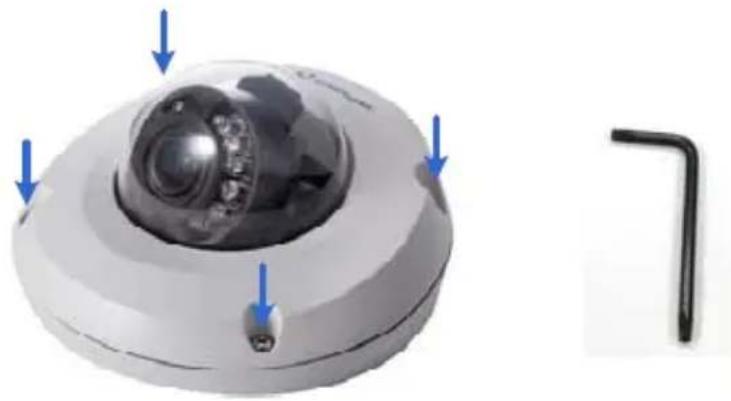
natural_image
Close-up of a white surveillance camera with blue arrows pointing to the lens and a separate black L-shaped tool (no text or symbols visible)- Unscrew the three screws as indicated below. A back plate can be separated from the bottom.
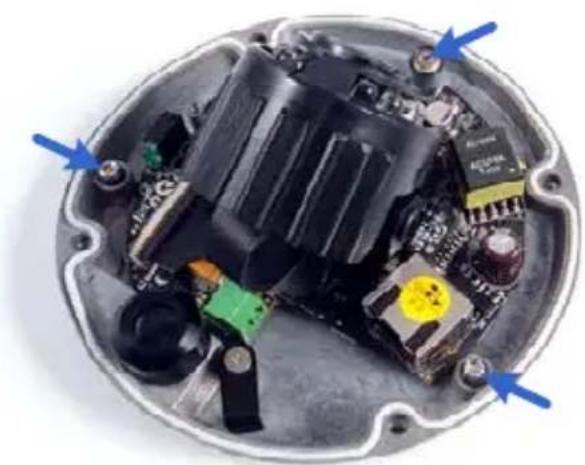
natural_image
Interior view of an electronic device casing with visible circuit boards and components (no text or symbols)- Use the 2 supplied screws to secure the back plate onto the ceiling or the wall where the screw anchors were inserted.
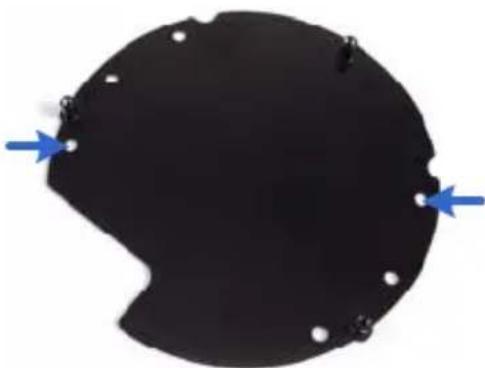
natural_image
Black circular object with two blue arrows pointing to small white holes on its surface (no text or symbols)- Prepare an Ethernet cable with the RJ-45 connector on one end only.
- Remove the waterproof cap from the cable opening and thread the power and / or network cable(s) through the opening.
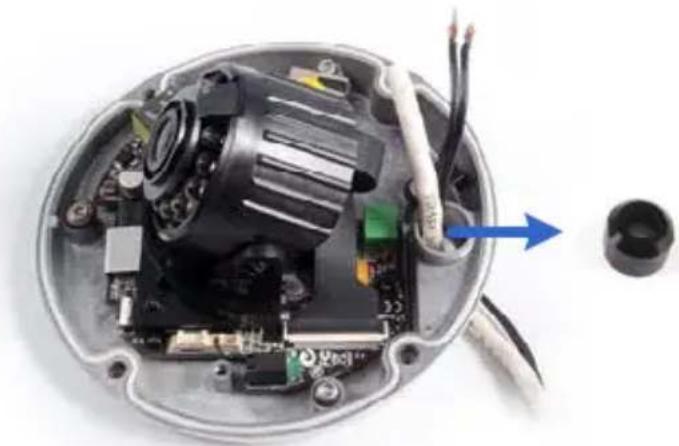
natural_image
Interior view of an open electric motor with visible circuitry and wiring, no text or symbols present- I install the supplied waterproof rubber set onto the cable(s). The rubber set has two parts. Item 1 comes in two types.
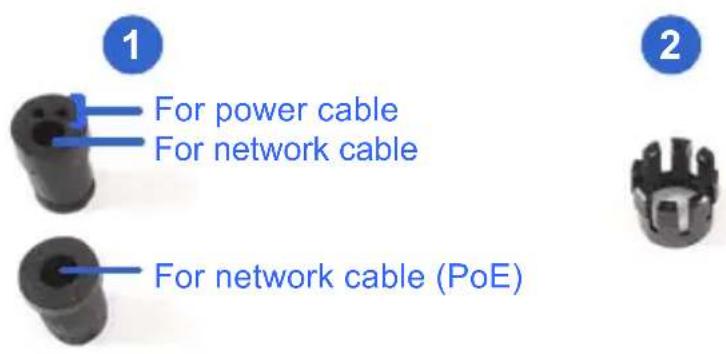
text_image
1 For power cable For network cable 2 For network cable (PoE)A. Slide the waterproof rubber set, and the waterproof cap you previously removed through the cable(s) as shown below.
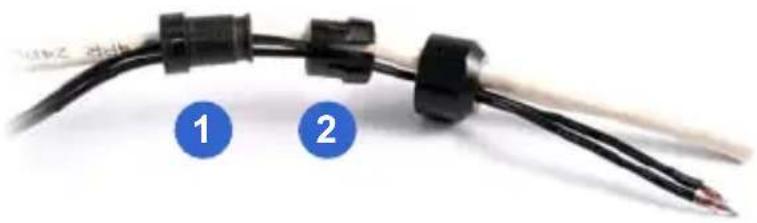
natural_image
Close-up of a black electrical connector with two labeled points (1 and 2) indicating connection details (no text or symbols on the main subject)B. Connect the supplied RJ-45 connector to the Ethernet cable.
C. If you are using a power adapter, insert the striped wire to the left pin (+) and the other wire to the right pin (-).
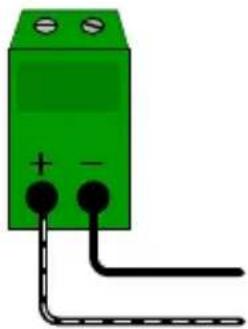
natural_image
Green electrical component with two terminals and a black terminal line (no text or symbols)D. Fit item 1 to item 2, and insert them in the cable opening. Use the supplied ruler to make sure the length of the cable(s) from the bottom of the opening to the end of the cable is under 10 ~cm .
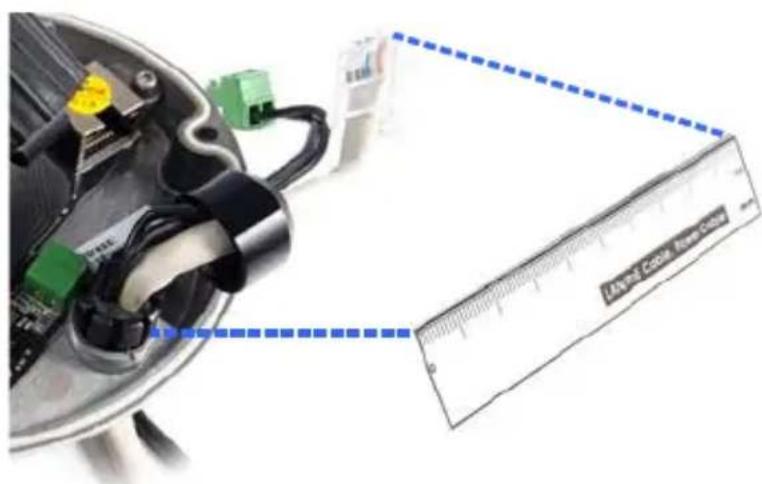
text_image
LSTM Color Filter/CrossE. Cap the cable opening with the waterproof cap. Use the supplied concave hexagon wrench to tighten.
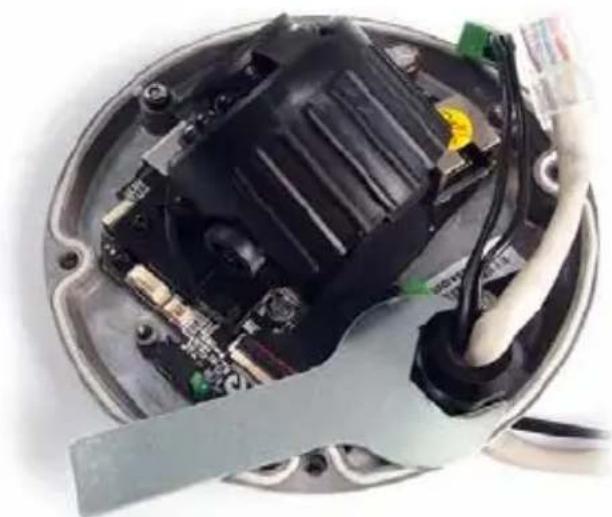
natural_image
Interior view of an electronic device showing exposed circuit board and wiring (no text or symbols visible)- Thread the cable(s) under the black cable holder. You can loosen the screw on the cable holder if needed.
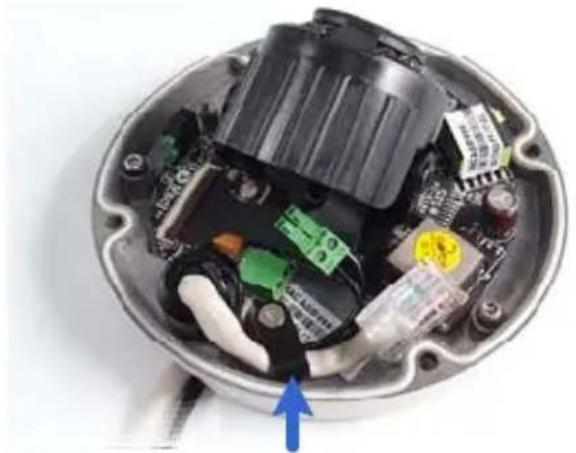
natural_image
Interior view of an electronic device showing internal components and wiring (no visible text or symbols)- Connect the camera to network and power. For details, see 7.4 Connecting the Camera.
- Secure the camera to the back plate by tightening the three screws as shown in Step 4.
- Access the live view. For details, see 21.2 Accessing the Live View.
- Adjust image clarity using the GV-IP Device Utility program. For details, see 21.3 Adjusting Image Clarity.
- Loosen the tile screw and pan screw, adjust the angles based on the live view as needed, and tighten the screws again.
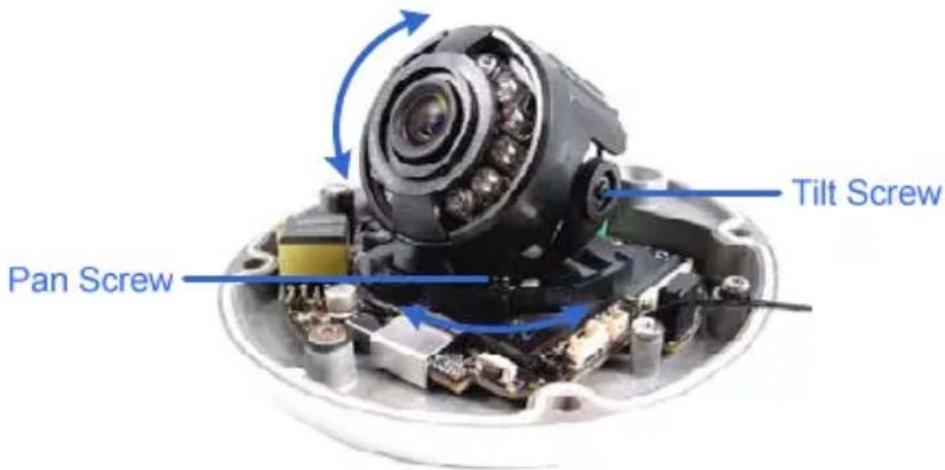
text_image
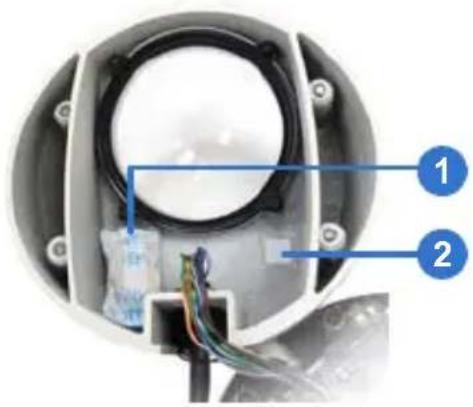
Pan Screw Tilt Screw- Attach the silica gel bag to the place indicated below, and secure the housing cover using the torx wrench.
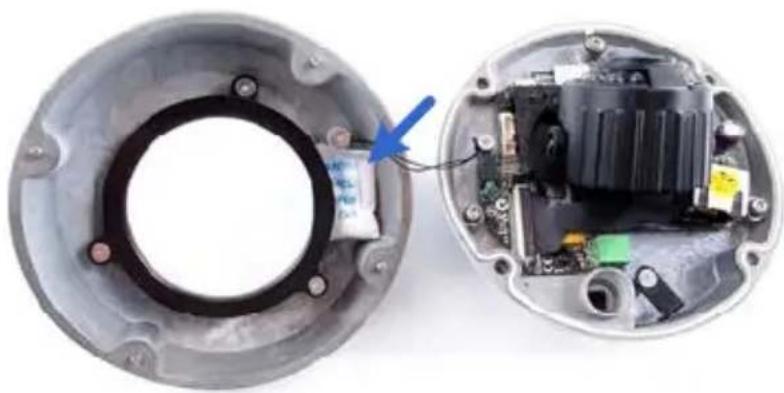
natural_image
Interior view of an electric motor showing a battery pack and internal circuit board (no text or symbols visible)IMPORTANT:
- The gel bag loses its effectiveness when the dry camera is opened. To prevent the lens from fogging up, replace the silica gel bag every time you open the camera and conceal the silica gel bag within 2 minutes of exposing to open air.
- For each newly replaced silica gel bag, allow it to absorb moisture for at least 5 hours before operating the camera.
- Make sure the housing cover is properly secured to prevent water from entering and damaging the inner housing.
7.4 Connecting the Camera
natural_image
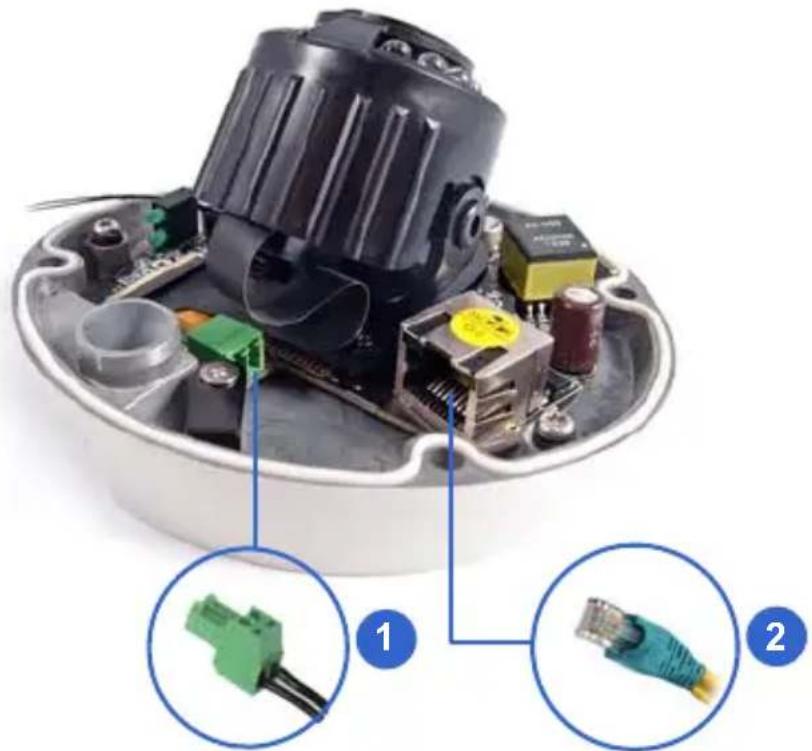
Interior view of an electric motor with labeled components and connectors (no text or symbols present)- Connect power using one of the following methods:
- Plug the power adapter to the 12V terminal block. The power adapter is an optional device. For detail, see Options, GV-IPCAM H.264 Hardware Manual for Target Mini Fixed Rugged Dome on the Software DVD. - Use the Power over Ethernet (PoE) function and the power will be provided over the network cable.
The power and status LEDs shall turn on (green).
- Use a standard network cable to connect the camera to your network.
- You are ready to access the live view, adjust the image clarity and configure the basics. See 21. Accessing the Camera in the Quick Start Guide.
8. Bullet Camera (Part I)
8.1 Packing List
- Bullet Camera
- Self Tapping Screw x 3
- Plastic Screw Anchor x 3
- Torx Wrench x 2
- Sun-Shield Cover Kit (Sun-Shield Cover, Philips Head Screws x 2, Plastic Screw Spacer x 2 and Hexagon Screw x 2)
- Silica Gel Bag x 2
- 2-Pin Terminal Block
- Power Adapter
• GV-IPCAM H.264 Software DVD
• GV-NVR Software DVD - Warranty Card
Note: The power adapter can be excluded upon request.
8.2 Overview
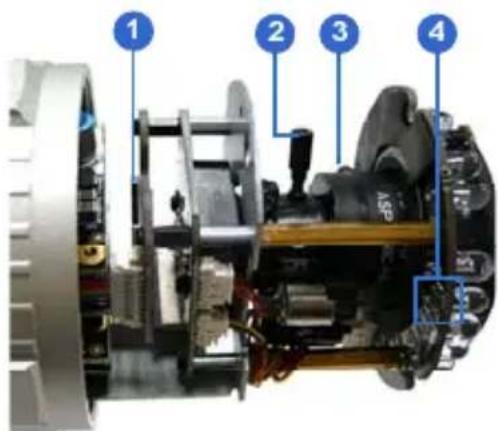
text_image
Technical diagram of a mechanical assembly with numbered components labeled 1 to 4| No. | Name | Description | |
| 1 | Memory | Card | Receives a micro SD card (SD/SDHC, Slot version 2.0 only, Class 10). |
| 2 | Zoom Screw | Holds the zoom lens in place. | |
| 3 | Focus Screw | Holds the focus lens in place | |
| 4 | Default | Button | Resets all configurations to factory default.See 24. Restoring to Default Settings later in the Quick Start Guide. |
8.3 Installation
The Bullet Camera is designed for outdoor use and can be mounted on ceiling and wall.
- Slide the cable clamp to the camera base.
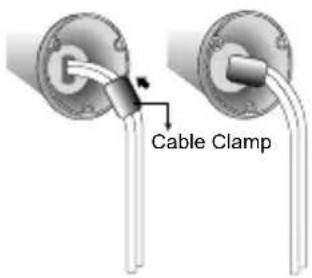
text_image
Cable Clamp- Install the Bullet Camera to the wall / ceiling.
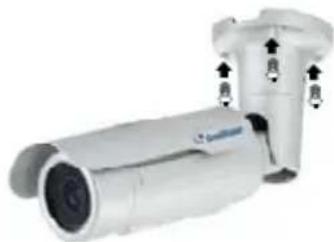
natural_image
Exterior view of a surveillance camera with dual-mounted ports and control panel (no visible text or symbols)-
Remove the protection sticker from the camera's cover.
-
Connect the power, network and other cables to the camera. See 8.4 Connecting the Camera in the Quick Start Guide.
-
Access the live view. See 21.2 Accessing the Live View in the Quick Start Guide.
-
Adjust the angles of the camera body based on the live view. Three shafts can be adjusted. For details, see 8.3.1 Adjusting the Angles in the Quick Start Guide.
-
Loosen the camera's cover, adjust the lens and focus, and insert a micro SD card (SD/SDHC, version 2.0 only, Class 10) into the memory card slot. See 8.3.2 Adjusting Lens and Inserting a Memory Card in the Quick Start Guide.
- Fasten the camera's cover.
- Install the sun-shield cover to the Bullet Camera. For details, see 8.3.3 Installing the Sun-Shield Cover in the Quick Start Guide.
8.3.1 Adjusting the Angles
The Bullet Camera is designed to be adjustable in three shafts.
Tip: The three shafts are designed to offer easy and flexible ceiling / wall mount installation.
First Shaft
You can adjust the camera body by 360 degrees to the right or the left.
- Unscrew the panning lock screw with the torx wrench.
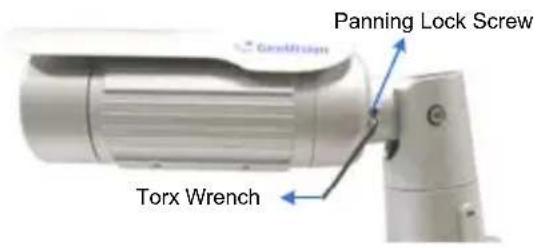
text_image
Panning Lock Screw Torx Wrench- Adjust the angle of camera body to the right or the left, and fasten the panning lock screw.
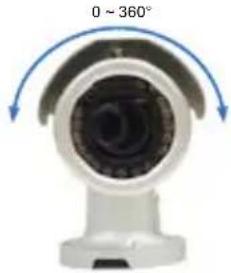
natural_image
Close-up of a white surveillance camera with a blue directional arrow indicating 0–360° angle (no text or symbols on the device itself)Second Shaft
You can adjust the camera body up and down by 90, 112.5, 135, 157.5 or 180 degrees by using the gears inside the camera body and the camera base.
- Unscrew the tilting lock screw with the torx wrench.
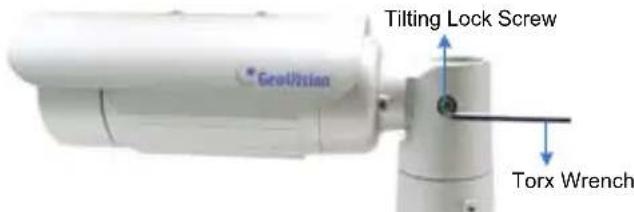
text_image
Geovision Tilting Lock Screw Torx Wrench- Hold the camera body, and move the camera base to the right to separate the camera gears.
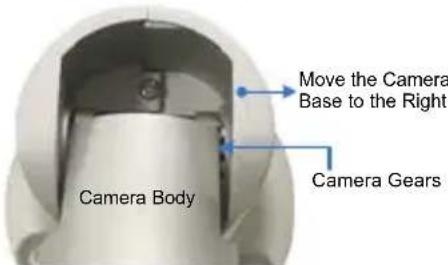
text_image
Move the Camera Base to the Right Camera Body Camera Gears- Adjust the angle of camera body to 90, 112.5, 135, 157.5 or 180 degrees. Then move the camera base to the left to combine the gears.
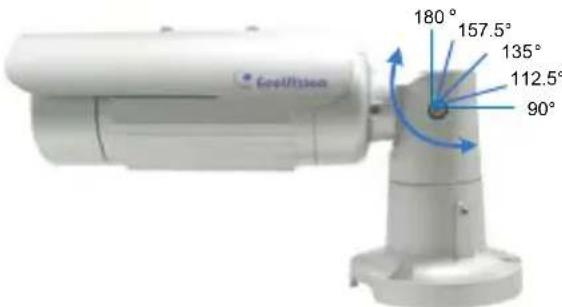
text_image
Capellision 180° 157.5° 135° 112.5° 90°- Fasten the tilting lock screw.
Third Shaft
You can adjust the camera base by 360 degrees.
- Unscrew the base fixing screw with the torx wrench.
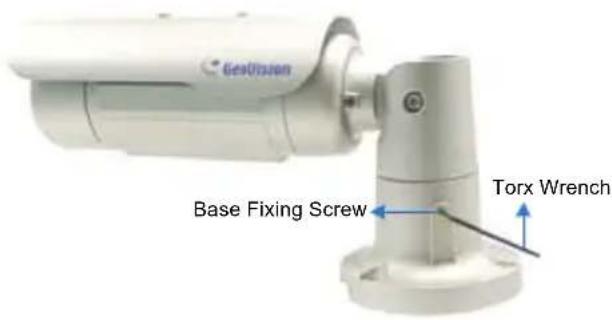
text_image
Base Fixing Screw Torx Wrench- Adjust the angle of camera base, and fasten the base fixing screw.
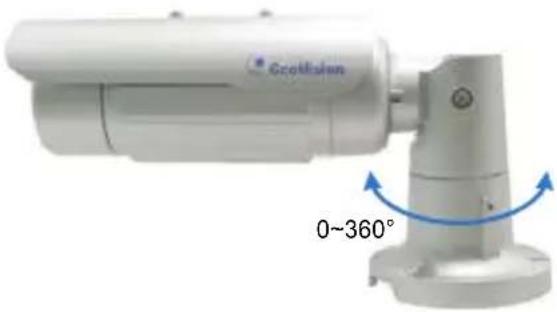
natural_image
Close-up of a white GCotlsian camera with angular measurement annotation (0~360°) on the base, no readable text or symbols beyond the label.8.3.2 Adjusting Lens and Inserting a Memory Card
To adjust the camera's lens to produce a clear image and insert a micro SD card (SD/SDHC, version 2.0 only, Class 10) into the memory card slot, follow the steps below.
- Loosen the camera's cover. For GV-BL2510-E / 5310-E, loosen the camera's cover and the screw as indicated below.
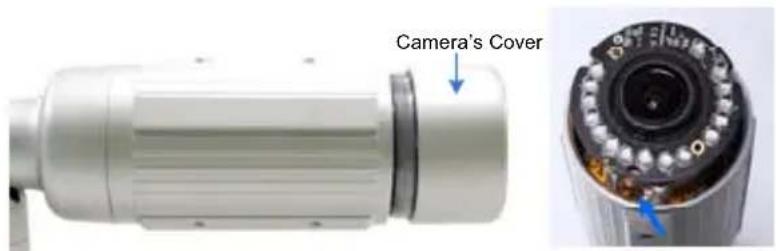
text_image
Camera's Cover- To adjust for image clarity, follow the steps below.
- For models with zoom and focus screws, pull out the camera and remove the silica gel bag to access its focus and zoom screws. Use GV-IP Device Utility to help you. For details, see 21.3 Adjusting Image Clarity in the Quick Start Guide.
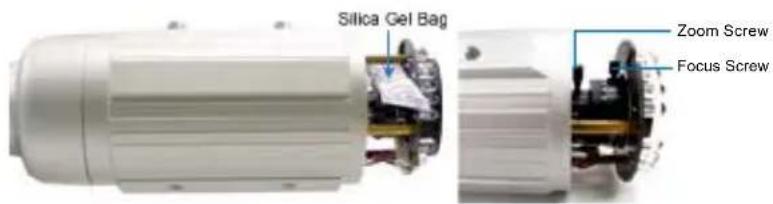
text_image
Silica Gel Bag Zoom Screw Focus Screw- For motorized varifocal lens models, adjust for image clarity through the Web interface. For details, see Zoom, Focus Change, and Focus Mode settings, The Control Panel of the Live View Window, Accessing the Camera Chapter, GV-IPCAM H.264 Firmware Manual on Software DVD.
- T o insert a memory card, follow the steps below.
A. Loosen the fixing screw.
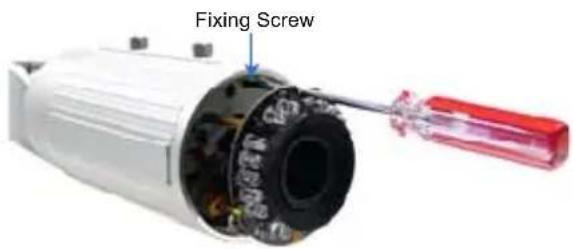
text_image
Fixing ScrewB. Slightly pull out the camera module.
C. Insert a micro SD card (SD/SDHC, version 2.0 only, Class 10) into the memory card slot.
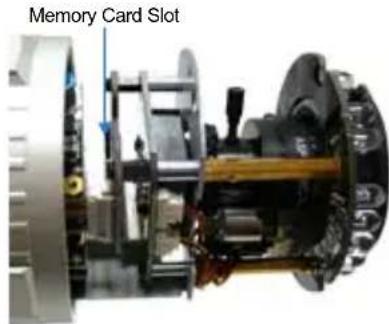
text_image
Memory Card SlotD. Push the camera module back and fasten the fixing screw.
- I insert a new silica gel bag to the camera module.
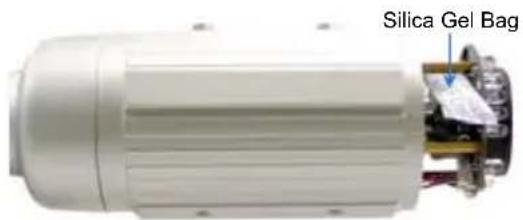
text_image
Silica Gel BagAll Bullet Camera except GV-BL2510-E/5310-E
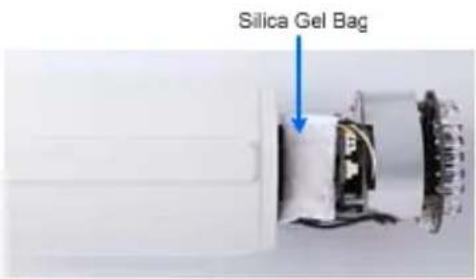
text_image
Silica Gel BagGV-BL2510-E/5310-E
IMPORTANT: The silica gel bag loses it effectiveness when the dry camera is opened. To prevent the lens from fogging up, replace the silica gel bag every time you open the camera, and conceal the gel bag in camera within 2 minutes of exposing to open air.
8.3.3 Inserting the Sun-Shield Cover
After setting up the Bullet Camera, now you can install the sun-shield cover to the camera.
- Fasten the hexagon screws either on top or below the camera.
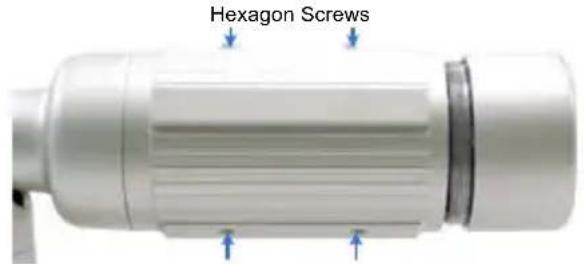
text_image
Hexagon Screws- Put the sun-shield cover on top of hexagon screws. Make sure to aim the rear hexagon screw at the edge of the sun-shield cover's aperture for optimal sun-shield performance.
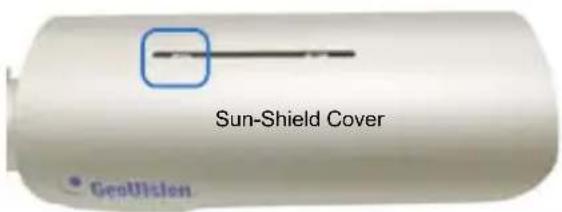
text_image
Sun-Shield Cover GeoVision- Fasten the Philips head screws with the plastic screw spacers.
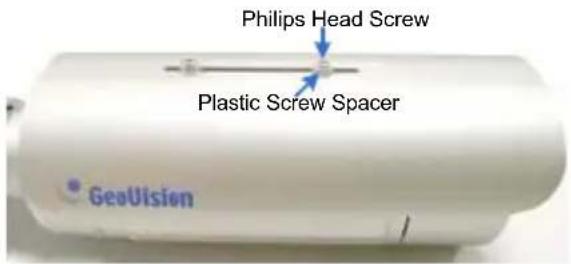
text_image
Philips Head Screw Plastic Screw Spacer GeoVision8.4 Connecting the Camera
Connect your Bullet Camera to power, network and the cables needed.
8.4.1 Wire Definition
The cable of the Bullet Camera is illustrated and defined below:
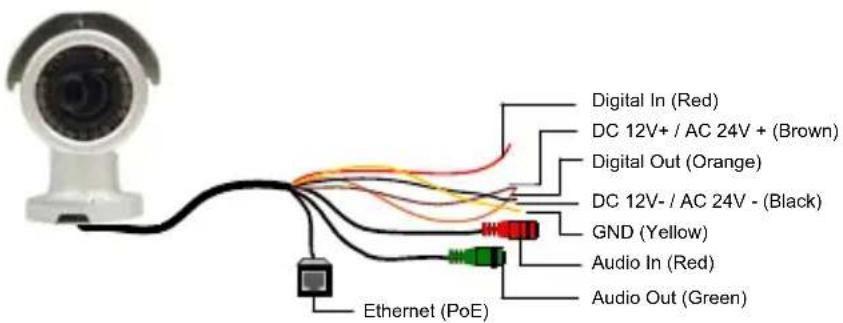
text_image
Digital In (Red) DC 12V+ / AC 24V + (Brown) Digital Out (Orange) DC 12V- / AC 24V - (Black) GND (Yellow) Audio In (Red) Audio Out (Green) Ethernet (PoE)No. Wire Color Definition
| 1 | Red | Digital | In | |
| 2 | Brown DC 12V+ / AC 24V+ | |||
| 3 | Orange | Digital | Out | |
| 4 | Black DC 12V- / AC 24V- | |||
| 5 | Yellow | Ground | ||
| 6 | Red | RCA | Audio | in |
| 7 | Green RCA | Audio out | ||
Note that the Audio In and Out connectors may also come as terminal blocks:
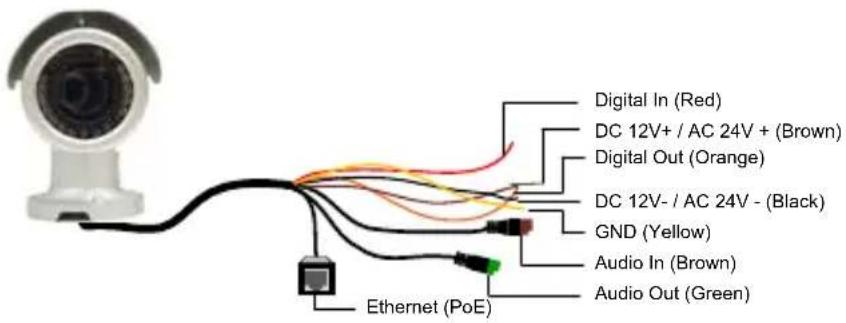
text_image
Digital In (Red) DC 12V+ / AC 24V + (Brown) Digital Out (Orange) DC 12V- / AC 24V - (Black) GND (Yellow) Audio In (Brown) Audio Out (Green) Ethernet (PoE)No. Wire Color Definition
| 1 | Red | Digital | In |
| 2 | Brown DC 12V+ / AC 24V+ | ||
| 3 | Orange | Digital | Out |
| 4 | Black DC 12V- / AC 24V- | ||
| 5 | Yellow | Ground | |
| 6 | Brown terminal block | Audio in | |
| 7 | Green terminal block | Audio out | |
8.4.2 Connecting the Power Cable
Use one of the following methods to supply power to the camera. Note that GV-BL2510-E / 5310-E do not support PoE.
- Use a Power over Ethernet (PoE) adapter to connect the camera to the network, and the power will be provided at the same time.
-
Plug the power adaptor to the terminal block as shown below.
-
Insert the black wire of the Bullet Camera to the left pin (+) and the brown wire to the right pin (-).
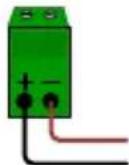
- Connect the DC 12V Power Adapter to the Terminal Block.

text_image
Terminal Block DC 12V Power Adaptor9. Bullet Camera (Part II)
9.1 Packing List
- Bullet Camera
- Self Tapping Screw x 3
- Plastic Screw Anchor x 3
- Torx Wrench x 3
- Sun-Shield Cover Kit (Sun-Shield Cover, Philips Head Screw x 2, Plastic Screw Spacer x 2, and Hexagon Screw x 2)
- Silica Gel Bag x 2
- 2-Pin Terminal Block
- 3-Pin Terminal Block
- Power Adapter
• Installation Sticker - Ruler
- Stand Kit (Conduit Converter, PG21 Conduit Connector, RJ-45 Connector, M3 Screw x 2, Cable Tie)
- Mounting Kit (M4 Screw x 3, Nut x 3, Plate x 3)
• GV-IPCAM H.264 Software DVD
• GV-NVR Software DVD - Warranty Card
Note:
- The power adapter can be excluded upon request.
- The Mounting Kit is used for wall corner and pole installations using GV-Mount300 / 310 / 400 / 410 (optional). For details, see GV-Mount Accessories Installation Guide on the Software DVD.
9.2 Overview
Twist off the camera cover to access the following:
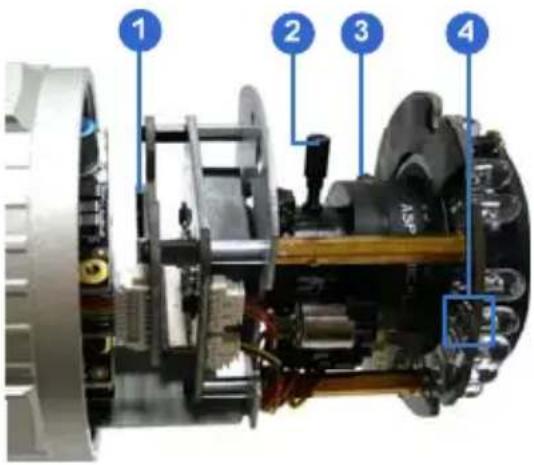
text_image
Technical diagram of a mechanical assembly with numbered components labeled 1 to 4| No. | Name | Description | |
| 1 | Memory | Card | Receives a micro SD card (SD/SDHC, Slot version 2.0 only, Class 10). |
| 2 | Zoom Screw | Holds the zoom lens in place. | |
| 3 | Focus Screw | Holds the focus lens in place | |
| 4 | Default | Button | Resets all configurations to factory default.See 24. Restoring to Default Settings later in the Quick Start Guide. |
To access the following interface, remove the camera base using the supplied torx wrench.
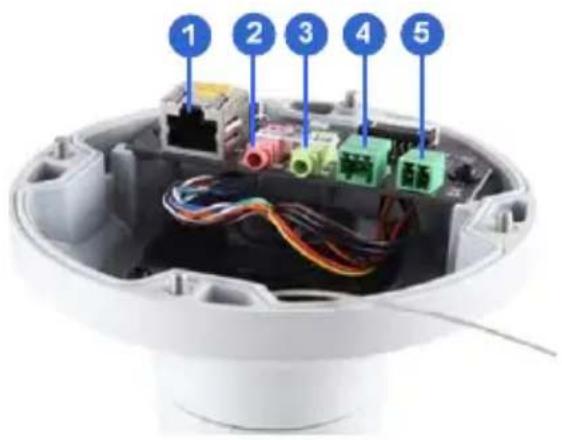
text_image
1 2 3 4 5| No. | Name | Description |
| 1 | LAN / PoE | Connects to a 10/100 Ethernet or PoE. |
| 2 | Audio In | Connects a microphone for audio input. |
| 3 | Audio Out | Connects a speaker for audio output. |
| 4 | I/O Terminal Block | Connects to I/O devices. For details, see I/O Terminal, 9.5 Connecting the Camera. |
| 5 | DC 12V Port | Connects to power. |
9.3 Installation
Follow the steps below to install the Bullet Camera.
- Paste the supplied sticker to the ceiling/wall. For wall installations, make sure the arrow on the sticker points toward the ceiling.
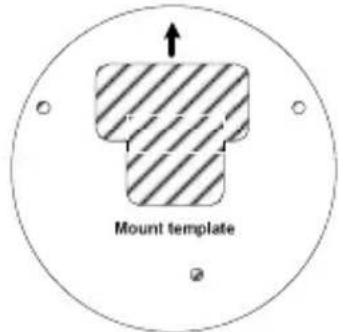
text_image
Mount template- Drill the shaded area, and insert the screw anchor into the three holes.
- Loosen the indicated screws with the supplied torx wrench to remove the base.
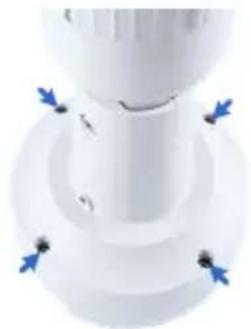
natural_image
Close-up of a white plastic component with blue directional arrows indicating movement or force (no text or symbols)- Lo osen the indicated screws and remove the back plate.
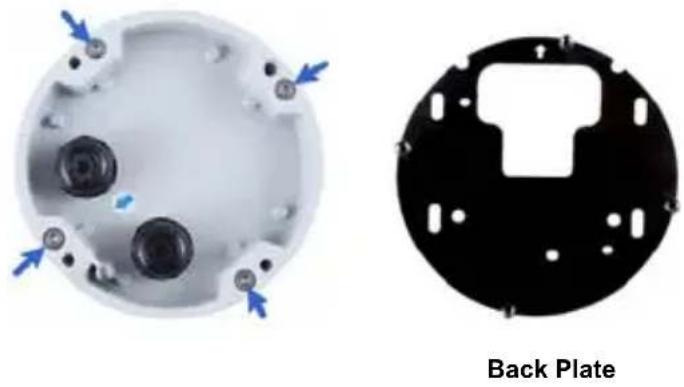
- Align and secure the black plate to the wall/ceiling with the supplied self-tapping screws.
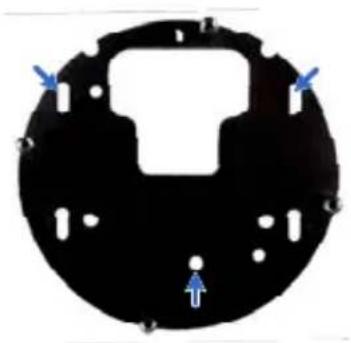
natural_image
Circular black object with white cutouts and blue arrows pointing to features, no visible text or symbols- T o use a pipe (optional), install the conduit converter using the supplied M3 screws.
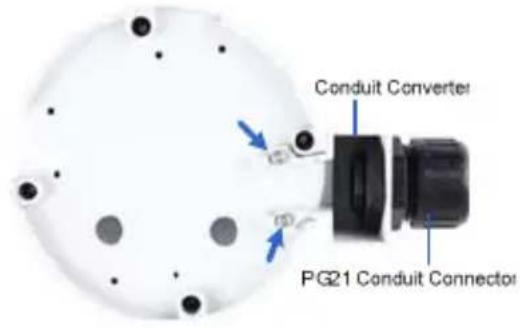
text_image
Conduit Converter PG21 Conduit ConnectorIMPORTANT: For GV-BL2511-E / 5311-E connected with a power adapter, only install the conduit converter to the indicated exit.
- Install the Ethernet cable.
A. Twist off and remove the cable seal and the conduit connector.
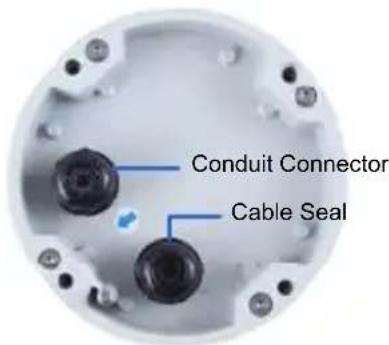
text_image
Conduit Connector Cable SealB. T thread an Ethernet cable (with no RJ-45 connector on one end) from the back panel through the conduit converter (optionally installed at step 6) and then through the cable seal.
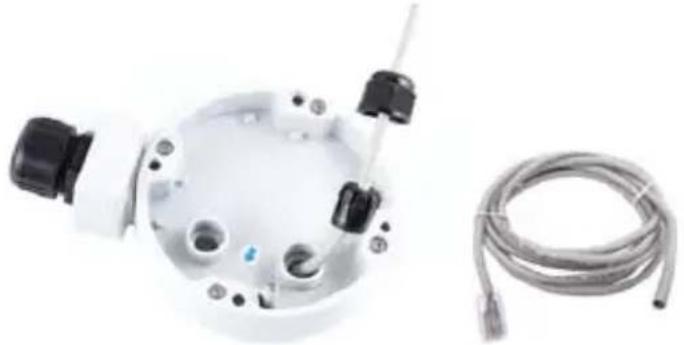
natural_image
Close-up of a white industrial sensor device with black connectors and a coiled metallic cable (no text or symbols visible)IMPORTANT: Use the supplied ruler and leave about 10 cm of the Ethernet cable between the connector and the cable seal.
C. Re-install the cable seal. Make sure it is installed tightly to waterproof the camera.
- Thread wires into the camera.
A. Disintegrate the removed conduit connector. You should have 4 parts:
1
2
3
4
B. Remove the terminal block from the supplied power adapter.
C. O ptonally thread audio wires, adapter wires, and I/O wires through the conduit converter and then through part 1, 2, 3, and 4 of the conduit connector.
Tip: To make the threading easier, it is advised to thread the wires in the order described here.
For part 2, there are 8 holes each labeled with its diameter. Remove the plugs and push the wires to the corresponding hole listed below:
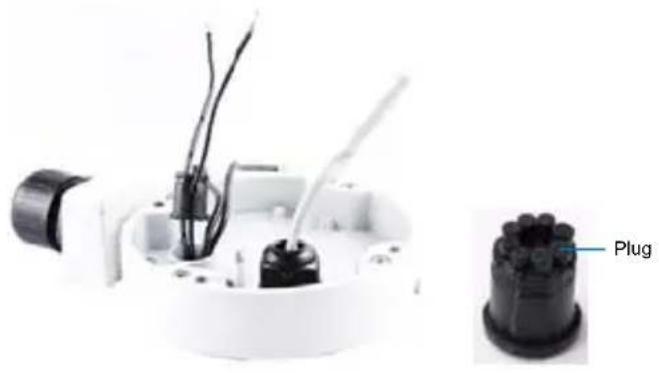
natural_image
Close-up of a white industrial electrical plug with visible wiring and a labeled plug component (no text or symbols on the plug itself)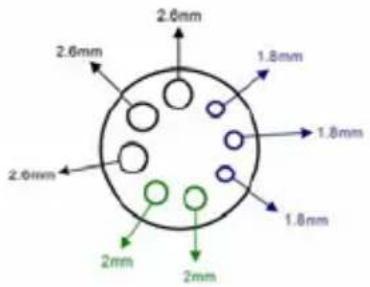
text_image
2.6mm 2.6mm 1.8mm 1.8mm 2.0mm 2.0mm 2mm 2mm 1.8mm2.6 mm: Audio
2 mm: DC12V / AC24V
1.8 mm: DIDO
IMPORTANT:
- Use the supplied ruler and leave about 10 cm of audio, power, and I/O wires between their connectors and the cable seal.
- The plugs are used to prevent water from entering the camera housing. Keep the unused holes plugged and save the removed plugs for future use.
-
Only thread the wires through their designated holes on the conduit connector to make sure the wires are properly sealed.
-
Install the base to the back plate on the wall.
-
Connect the wires to the camera.
A. Install the terminal blocks to the power adapter and I/O devices. See Power Connection and I/O Device Connections in 9.5 Connecting the Camera.
B. Install the supplied RJ-45 connector to the Ethernet cable.
C. Plug all the connectors to the camera panel.
- Tie the wires with the supplied cable tie and re-install the base to the camera. You may need to rotate the base for the wires to fit.
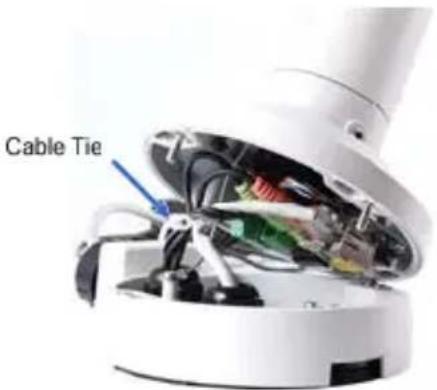
text_image
Cable Tie- Access the live view. For details, see 21.2 Accessing the Live View in the Quick Start Guide.
- Adjust the angles of the camera based on the live view. Three shafts can be adjusted. See 8.3.1 Adjusting the Angles.
- To adjust the focus and insert a micro SD card (SD/SDHC, version 2.0, Class 10), see 8.3.2 Adjusting Lens and Inserting a Memory Card.
- Install the sun-shield cover. For details, see 8.3.3 Installing the Sun-Shield Cover.
9.4 Connecting the Camera
Power Connection
Use one of the following methods to supply power to the camera. Note that GV-BL2511-E / 5311-E do not support PoE.
- Use a Power over Ethernet (PoE) adapter to connect the camera to the network, and the power will be provided at the same time.
- Plug the power adaptor to the terminal block as shown below. For all models (except GV-BL2511-E / 5311-E), insert the striped wire to the left pin (+); for GV-BL2511-E / 5311-E, insert the striped wire to the right pin (-).
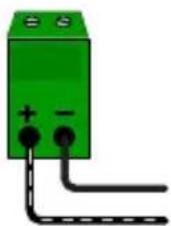
All Models except GV-BL2511-E / 5311-E
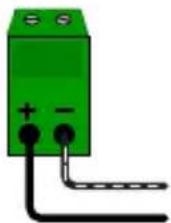
GV-BL2511-E / 5311-E
I/O Device Connection
The camera supports one digital input and one digital output of dry contact.
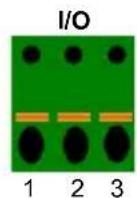
| Pin | Function |
| 1 | Digital Output |
| 2 | GND |
| 3 | Digital Input |
For details on how to enable an installed I/O device, see I/O Settings, Administrator Mode Chapter, GV-IPCAM H.264 Firmware Manual on the Software DVD.
10. Ultra Bullet Camera
10.1 Packing List
- Ultra Bullet Camera (with Waterproof or Non-Waterproof LAN connector)
- Camera Stand
- Black Rubber
- Self Tapping Screw x 3
- Plastic Screw Anchor x 3
- Torx Wrench
- Sun-Shield Cover Kit (Sun-Shield Cover, Philips Head Screw x 2, Plastic Screw Spacer x 2 and Hexagon Screw x 2)
- Cable connector (for waterproof LAN connector only)
- Silica Gel Bag x 2
- 2-Pin Terminal Block
- Data cable
- Power Adapter
• GV-IPCAM H.264 Software DVD
• GV-NVR Software DVD - Warranty Card
Note: The power adapter can be excluded upon request.
10.2 Overview
Panel
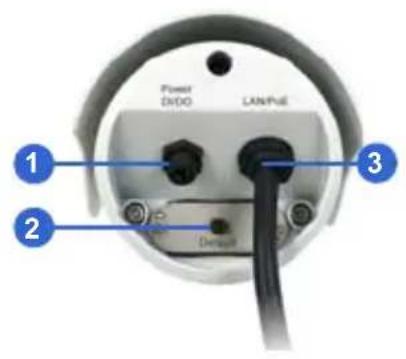
text_image
Power ENDO LAMPGE 1 2 3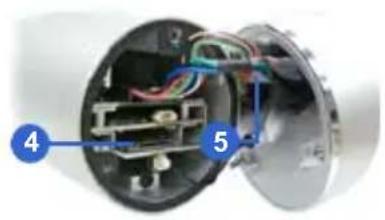
natural_image
Cross-sectional view of a mechanical device showing internal components and wiring (no text or symbols visible)| No. | Name | Description | |
| 1 | Power & I/O Connector | Connects to the data cable. For details, see 10.4 Connecting the Camera in the Quick Start Guide. | |
| 2 | Default | Button | Resets all configurations to factory default. See 24. Restoring to Default Settings in the Quick Start Guide. |
| 3 | LAN / PoE Cable | Connects to a 10/100 Ethernet or PoE. | |
| 4 | Memory Card Slot | Receives a micro SD card (SD/SDHC, version 2.0 only, Class 10). | |
| 5 | Silica gel bag | Desiccant that keeps the camera housing dry. | |
LAN Connector
The Ultra Bullet Camera provides two connector types. Select an option based on your installation environment.
- Option 1 (Waterproof)
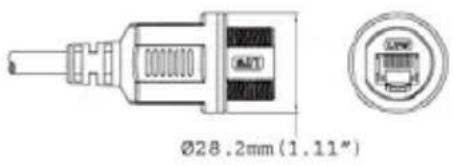
text_image
Ø28.2mm(1.11")To waterproof the cable, install the supplied cable connector. See 10.4.1 Waterproofing the Cable in the Quick Start Guide.
- Option 2 (Smaller and non-waterproof)
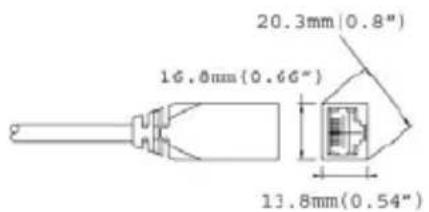
text_image
20.3mm(0.8") 16.0mm(0.6G°) 13.8mm(0.54")10.3 Installation
You can install the camera to the ceiling or wall. Follow the steps below.
- Optionally insert a micro SD card to the camera.
A. Unscrew and open the back panel with the supplied torx wrench.
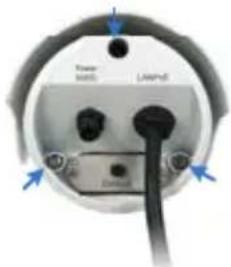
text_image
Power unit inductorB. Insert a micro SD card (SD/SDHC, version 2.0 only, Class 10) into the card slot and replace the silica gel bag.
IMPORTANT:
-
The silica gel loses its effectiveness when the dry camera is opened. To keep the interior dry, replace the silica gel bag every time you open the camera and conceal the gel bag in the camera within two minutes of exposing to the open air.
-
Make sure the I/O connector is firmly plugged.
C. Secure the back cover with the supplied torx wrench.
- Install the sun-shield cover to the camera.
A. Fasten the hexagon screws on the top of the camera. A. Fasten the hexagon screws on the top of the camera.
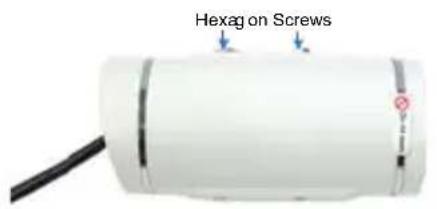
text_image
Hexagon ScrewsIMPORTANT:
To avoid waterproofing failures, do not open the front cover of the camera and the screw on the camera body (see Note for Waterproofing Failures).
B. Put the sun-shield cover on the top of the camera. For optimal sun-shield performance, make sure the rear hexagon screw is at the end of the opening.
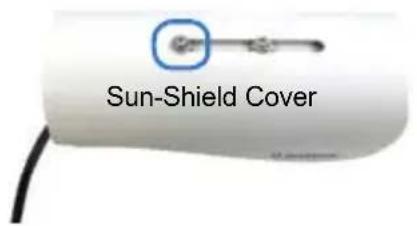
text_image
Sun-Shield CoverIMPORTANT: The GeoVision logo on the sun-shield cover should be closer to the front of the camera.
C. Fasten the Philips head screws with the plastic screw spacers to mount the sun-shield cover onto the camera. Mount the sun-shield cover onto the camera.
- Ceiling Mount: Fasten one Philips head screw to the top of the camera.
- Wall Mount: Fasten two Philips head screws to the top of the camera.
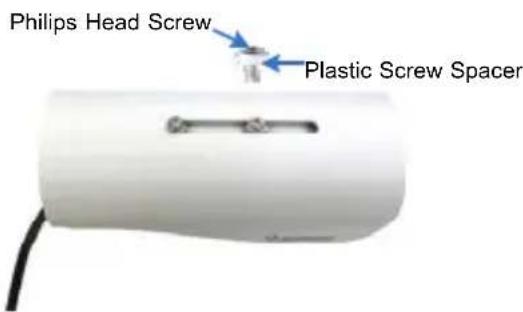
text_image
Philips Head Screw Plastic Screw Spacer註解 [C1]:
- Install the camera to the wall or ceiling.
A. Ceiling Mount: Secure the black rubber and the camera stand to the other screw hole on the top.
B. W all Mount: Secure the black rubber and the camera stand to one of the screw holes on the bottom.
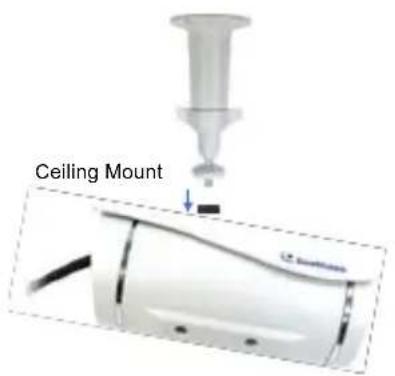
text_image
Ceiling Mount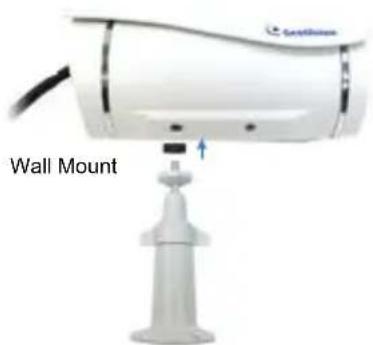
text_image
Condition Wall Mount註解 [C2]:
- Use the screw anchors and self-tapping screws to secure the camera to the wall.
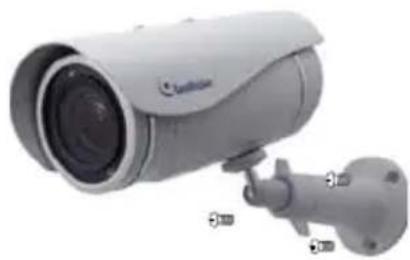
natural_image
Exterior view of a surveillance camera with mounted lens and wall-mounted port (no visible text or symbols)-
Rem ove the protection sticker from the camera's cover.
-
Connect the wires and cable connector to the camera. See 10.4.1 Waterproofing the Cable and 10.4.2 Connecting the Camera.
-
Access the live view. For details, see 2.1 Accessing the Live View, GV-IPCam H.264 Firmware Manual.
-
Adjust angles of the camera body based on the live view.
-
For varifocal models (GV-UBL1211 / 1511 / 2411 / 2511 / 3411), adjust the focus. For details, see 3.2.2 The Control Panel of the Live View Window, GV-IPCam H.264 Firmware Manual.
10.4 Connecting the Camera
10.4.1 Waterproofing the Cable
Waterproof the option 1 LAN / PoE cable (see 10.2 Overview) using the supplied cable connector. The cable connector can be dissembled into 5 parts:
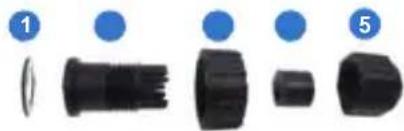
natural_image
Five black plastic components with blue circular markers, labeled 1, 5, and 5 (no text or symbols on parts)- Cut off the RJ-45 connector on one end of the Ethernet cable.
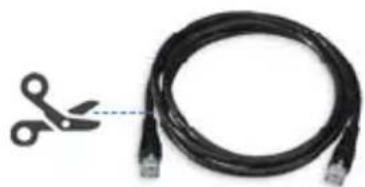
natural_image
Coiled black cable with two connectors and a pair of scissors cutting out the wire (no text or symbols visible)-
Connect the Ethernet cable to the LAN / PoE connector.
-
Slide the components through the Ethernet cable as shown below.

text_image
A 1 2 3 4 5-
Paste the item 1 sticker to item 2.
-
M ove all the components toward the LAN / PoE connector, fit item 4 to item 2, secure item 3 to the LAN / PoE connector (Item A) and finally secure item 5 to item 2 tightly.
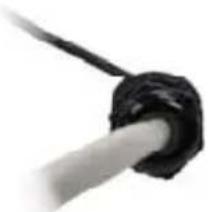
natural_image
Close-up of a black mechanical component with a rod inserted (no visible text or symbols)IMPORTANT: Item 5 must be secured tightly to waterproof the LAN / PoE connector.
- Prepare an RJ-45 connector, reconnect the RJ-45 connector to the cable, and then connect the camera to network.
10.4.2 Wire Definition
The supplied 4-pin data cable provides connections for power, ground, 1 sensor input and 1 alarm output. The wires are defined below:
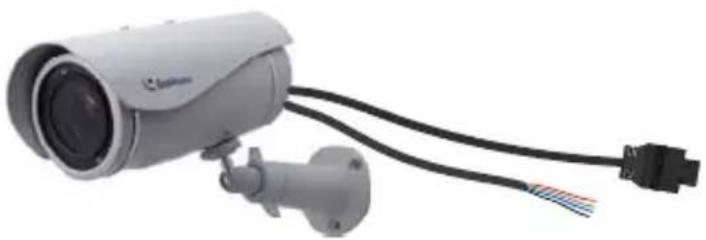
natural_image
Exterior view of a security camera with attached cable and connector (no text or symbols visible)| No. | Wire Color | Definition | |
| 1 | Red | DC | 5V |
| 2 | Green | Digital | In |
| 3 | Blue | Digital | Out |
| 4 | Black | Ground | |
10.4.3 Power Connection
Connect the camera to power using one of the following methods:
- Use a Power over Ethernet (PoE) adapter to connect the camera to the network, and the power will be provided at the same time.
-
Plug the power adaptor to the terminal block as shown below.
-
Insert the black wire of the data cable to the left pin (-) and the red wire to the right pin (+).
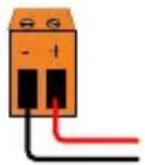
- Connect the DC 5V power adapter to the terminal block.

text_image
Terminal Block DC 5V Power Adaptor11. Target Bullet Camera
11.1 Packing List
• Target Bullet Camera
- Sun-Shield Cover
- Silica Gel Tape x 2
• Supporting Rack
- Screw for supporting rack x 3
- Screw Anchor x 3
- Screw for sun-shield cover
- Washer
- Terminal Block
• GV-IPCAM H.264 Software DVD
• GV-NVR Software DVD
- Warranty Card
Note: Power adapter can be purchased upon request.
11.2 Overview
Panel
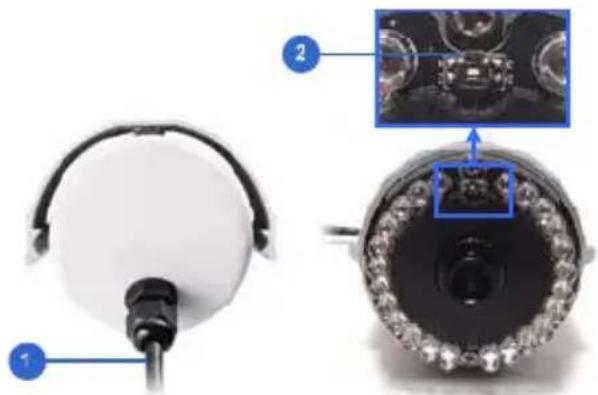
natural_image
Close-up of a mechanical component with labeled parts, showing front and side views (no text or symbols visible)| No. | Name | Description |
| 1 | Power Connector | |
| 2 | Default | Button Resets all configurations to factory default. See 24. Restoring to Factory Default Settings in the Quick Start Guide. |
IMPORTANT: The silica gel loses its effectiveness when the camera is opened. If you open the camera to access the load default button, replace the silica gel tape by taping the new silica gel tape to the inside of the camera cover. Make sure you conceal the silica gel tape in the camera within two minutes of exposing to the open air.
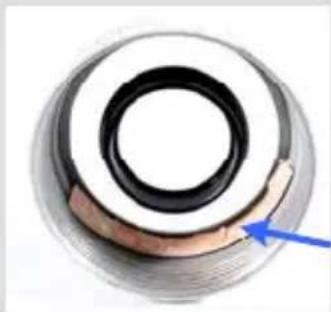
natural_image
Close-up of a mechanical ring component with a blue arrow pointing to it (no text or symbols visible)11.3 Installation
You can install the camera to the ceiling or wall. Follow the steps below.
IMPORTANT: To avoid foggy live view, please replace Silica Gel Tape prior to installation and use waterproof tape to seal the RJ45 connector.
- Slide the sun-shield cover onto the top of the camera.
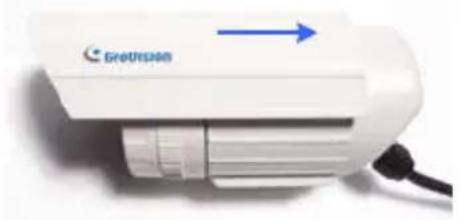
natural_image
White electronic device labeled 'GreUpsilon' with a blue arrow pointing right, connected to a black cable (no readable text beyond brand name)Note: The GeoVision logo on the sun-shield cover should be closer to the front of the camera.
- Line up the screw hole on the camera with the opening on the sun-shield cover.
natural_image
White electronic device with a small circular button and 'GeoUtilice' branding on its body (no other text or symbols visible)3. Ceiling Mount:
Secure the supporting rack to the opening on the sun-shield cover
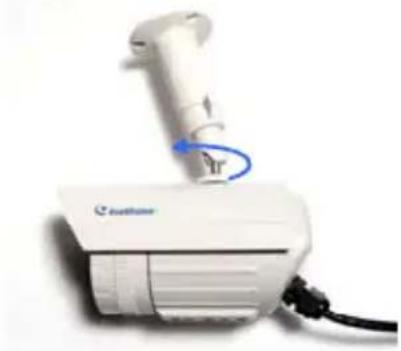
natural_image
White medical device with a blue circular arrow pointing to a small component, no visible text or symbols on the device itself.4. Wall Mount:
A. Insert and tighten the supplied screw on the sun-shield cover.
B. Secure the supporting rack to the bottom.
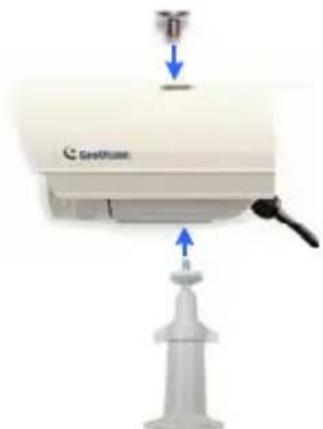
natural_image
Diagram of a medical device with a labeled component and directional arrows, no readable text or symbols present.IMPORTANT: To avoid waterproofing failures, do not open the screw on the camera body (see Note for Waterproofing Failures).
- I install the camera to the wall or ceiling using the screw anchors and self-tapping screws. You can also stand the camera on a plain surface.
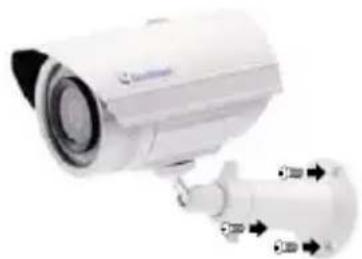
natural_image
Exterior view of a white surveillance camera with attached sensor port (no visible text or symbols)-
Remove the protection sticker from the camera's cover.
-
Connect the wires and cable connector to the camera. See 11.4 Connecting the Camera in the Quick Start Guide.
-
Access the live view. For details, see 21.2. Accessing the Live View.
-
Adjust angles of the camera body based on the live view.
11.4 Connecting the Camera
11.4.1 Wire Definition
The data cable provides connections for power, ground and network access. The wires are defined below:
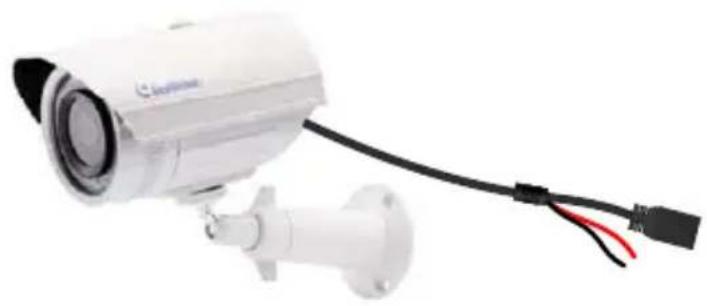
natural_image
Exterior view of a security camera with attached cable and red connector (no text or symbols visible)| No. | Wire Color Definition | |
| 1 | Red DC 12V | |
| 2 | Black Ground | |
| 3 B | ack (thick) PoE, Ethernet |
11.4.2 Power Connection
There are two ways to supply power to the camera:
- Use a Power over Ethernet (PoE) adapter to connect the camera to the network, and the power will be provided at the same time.
-
Plug the power adaptor to the terminal block as shown below. The power adapter is an optional device. For detail, see Options in the GV-IPCAM H.264 Hardware Manual for Target Bullet Camera on the Software DVD.
-
Insert the black wire of the data cable to the left pin (-) and the red wire to the right pin (+).
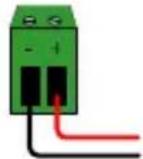
- Connect the DC 12V power adapter to the terminal block.

text_image
Terminal Block DC 12V Power Adaptor12. Vandal Proof IP Dome (Part I)
The information in this chapter applies to GV-VD120D / 121D / 122D / 123D / 220D / 221D / 222D / 223D / 320D / 321D / 322D / 323D / 1500 / 2400 / 3400.
12.1 Packing List
• Vandal Proof IP Dome • Silica Gel Bag x 2
- Screw Anchor x 4
natural_image
Four identical gray cylindrical architectural elements arranged horizontally (no text or symbols visible)- Ceiling Screw x 4
natural_image
Four identical screwdrivers arranged horizontally (no text or markings visible)- Torx Wrench
- Blue Screw x 3
natural_image
Three identical cylindrical objects with blue and gold bands, arranged horizontally (no text or symbols visible)- T-Cap Screw x 3
- T-Cap x 3

- Focus Adjustment Cap
natural_image
Simple line drawing of a circular object with a handle, resembling a lid or pan (no text or symbols)- Small Screw Cap x 3
- Plastic Clip x 3

• 2-Pin Terminal Block
- GV-IPCam H.264 Software DVD
- Power Adapter
• GV-NVR Software DVD - Warranty Card
Note:
- Focus Adjustment Cap is only needed and supplied for IK10+ models.
- The power adapter can be excluded upon request.
12.2 Overview
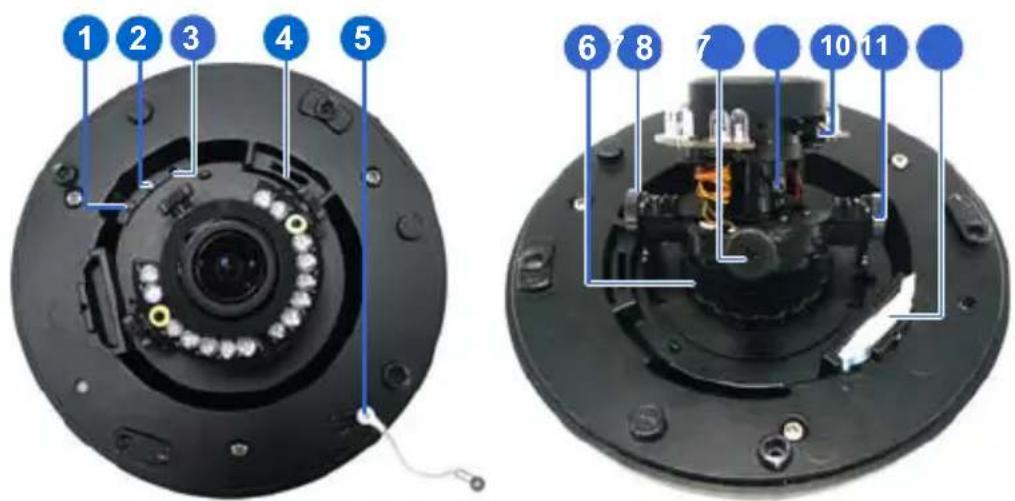
text_image
1 2 3 4 5 6 7 8 7 10 11| No. | Name | Description | |
| 1 | Power | LED | Turns on (green) when the power is on and turns off when there is no power supply. |
| 2 | Status | LED | Turns on (green) when the system operates normally and turns off when system error occurs. |
| 3 | Default Button | Resets to factory default. For details, see 24. Restoring to Default Settings in the Quick Start Guide. | |
| 4 | Memory Card Slot | Receives a micro SD card (SD/SDHC, version 2.0 only, Class 10) to store recording data. | |
| 5 | Thread | Lock | Locks the housing cover to the camera body to prevent the cover from falling. |
| 6 | Pan Disc | Loosens to pan the camera. | |
| 7 | Tilt Screw | Loosen the screw to tilt the camera. | |
| 8 | Rotational Screw | Loosens to adjust the camera angle. | |
No. Name Description
9 Zoom Screw Adjusts the zoom of the camera.
10 Focus Screw Adjusts the focus of the camera.
11 Silica Gel Bag Absorbs moisture in the camera body.
12.3 Installation
The Vandal Proof IP Dome is designed for outdoors. With the standard package, there are two ways to install the Vandal Proof IP Dome: hard-ceiling mount and in-ceiling mount.
Note: You can also install the camera:
- on a power box (of the 4" square and double gang type) using the standard package
- to ceilings, wall corners (concave or convex), and poles using optional mounting kits
For details on these installations, see GV-Mount Accessories Installation Guide on the Software DVD.
12.3.1 Hard-Ceiling Mount
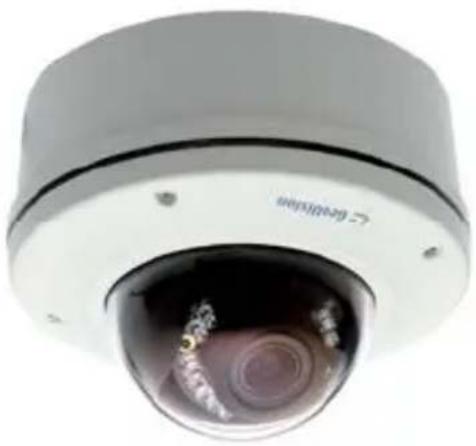
natural_image
Close-up of a security camera lens with visible lens and control buttons (no text or symbols)- Unpack the camera package and take out the camera body.
Unscrew the housing cover
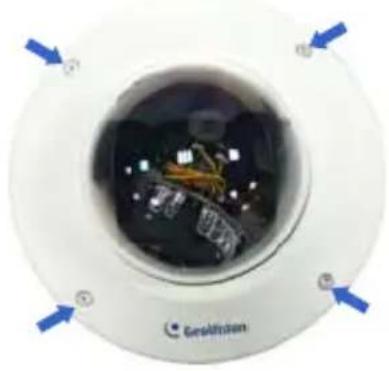
natural_image
Top-down view of a circular electronic device with internal components and blue directional arrows (no readable text or symbols)Unscrew thread lock
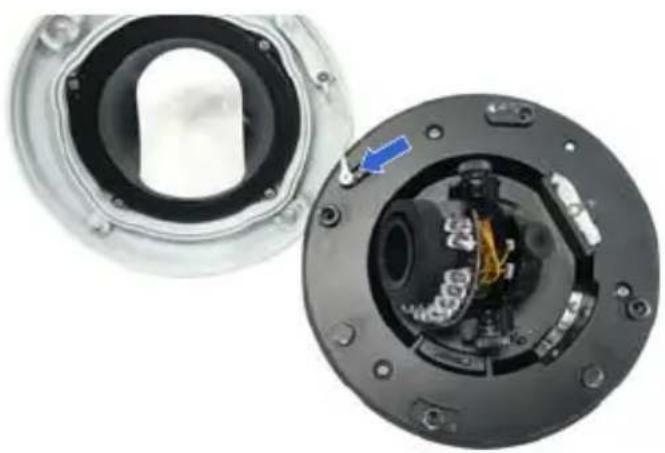
natural_image
Close-up of a mechanical component with internal wiring and mounting holes, shown from two views (no text or symbols visible)Unscrew the inner housing

natural_image
Close-up of a camera lens assembly with blue arrows indicating mounting points (no text or symbols visible)Take out the camera body
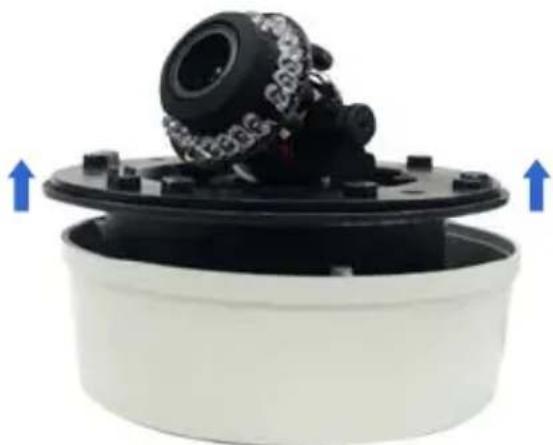
natural_image
Close-up of a mechanical component with a black housing and blue directional arrows indicating movement (no text or symbols visible)- Mark the position of four screw holes on the desired installation location, and drill holes in the marked locations. Drill the ellipse part if you wish to put the wires through it.
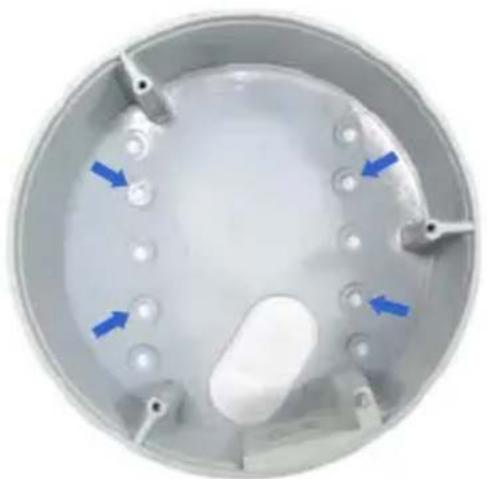
natural_image
Top-down view of a circular metallic component with internal features and blue arrows indicating points of interest (no text or symbols)- In sert the screw anchors to the 4 holes on the ceiling.
- Secure the back cover to the ceiling with 4 ceiling screws.
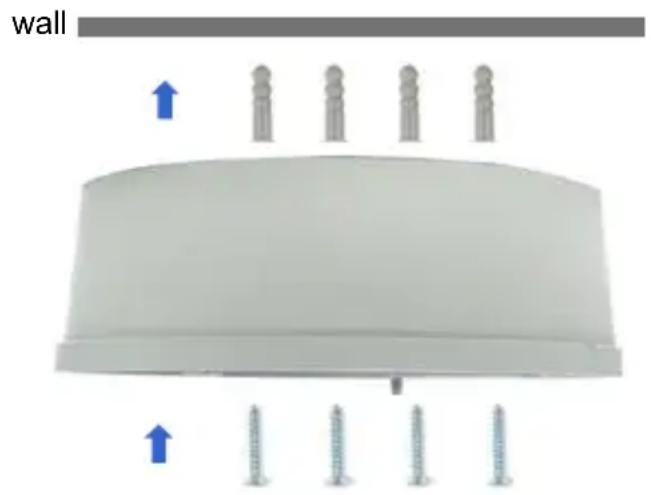
natural_image
3D diagram of a wall-mounted device with four screw holes and blue directional arrows indicating flow or movement (no text or symbols)- Refer to step 1 to secure the camera body with inner housing.
- Thread the cable through the conduit entry at the side of the back cover. Alternatively pass the wires through the ellipse hole at the bottom of the back cover.
- Connect the network and power cables to the camera. See 12.4 Connecting the Camera in the Quick Start Guide.
- Access the live view. See 21.2 Accessing the Live View in the Quick Start Guide.
- Adjust the camera to a desired angle as illustrated below.
Tip: The 3-axis mechanism offers flexible and easy installation.
Pan Adjustment
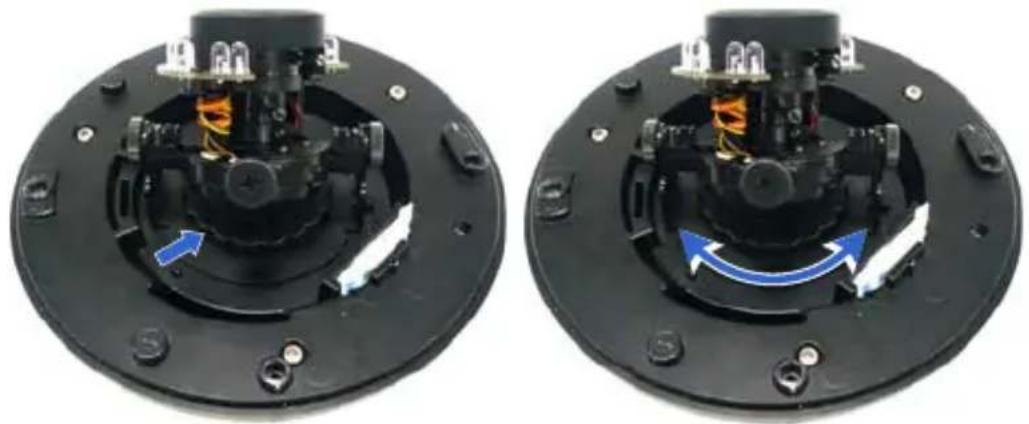
natural_image
Two views of a mechanical device showing internal components with blue directional arrows indicating motion (no text or symbols)Tilt Adjustment
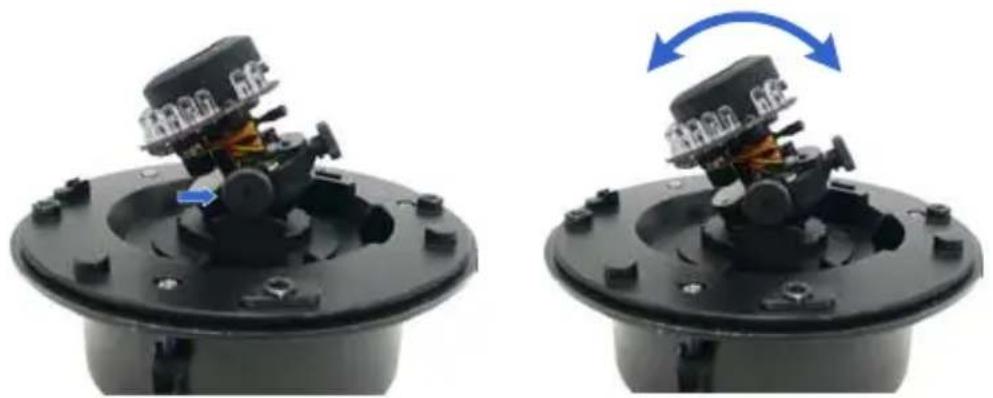
natural_image
Two black mechanical components with mounting holes and a blue directional arrow indicating rotation (no text or symbols)Rotational Adjustment
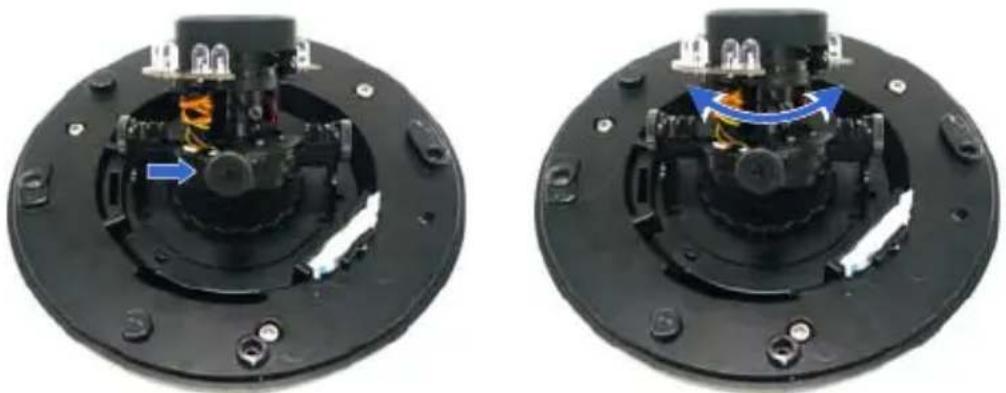
natural_image
Two views of a mechanical device showing internal components and a blue arrow indicating a directional change (no text or symbols present)- Hold the focus adjustment cap on top of the camera view and adjust for image clarity using the GV-IP Device Utility program. For details, see 21.3 Adjusting Image Clarity in the Quick Start Guide.
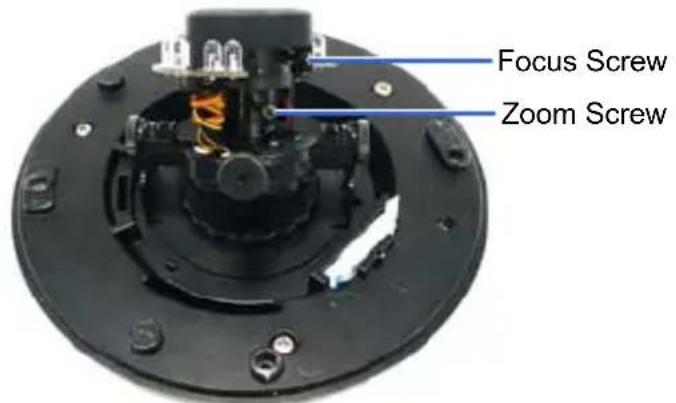
text_image
Focus Screw Zoom Screw- Screw on the thread lock as shown in step 1.
- Replace the silica gel bag.
Note: Adjust the black mask inside the housing cover to make sure the camera view is not obscured.
IMPORTANT:
- The gel bag loses its effectiveness when the dry camera is opened. To prevent the lens from fogging up, replace the silica gel bag every time you open the camera and conceal the silica gel bag to the camera within 2 minutes of exposing to open air.
- Make sure the housing cover is properly secured to prevent water from entering and damaging the inner housing.
12.3.2 In-Ceiling Mount
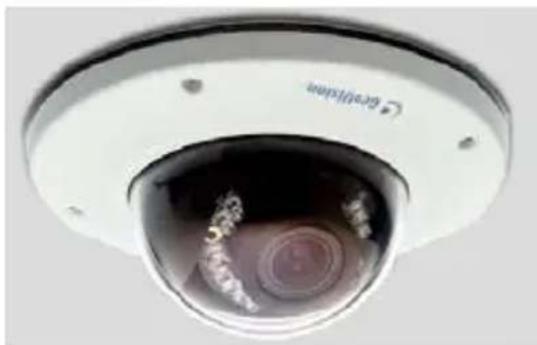
natural_image
Close-up of a white surveillance camera lens with visible lens and control buttons (no text or symbols)- Follow step 1 in the Hard-Ceiling Mount section to remove the housing cover, thread lock and back cover, and take out the camera body.
- Cut out a circle with a diameter of 142 mm on the ceiling.
- Insert a blue screw to the indicated holes on the camera body.
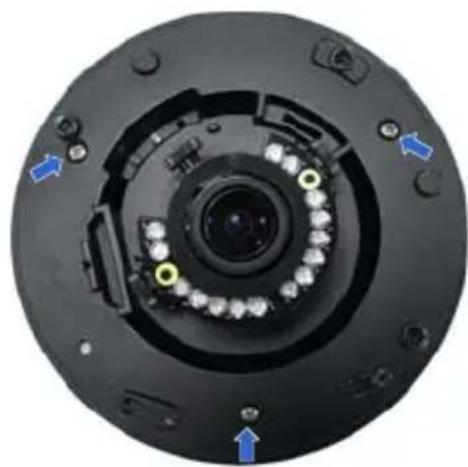
natural_image
Close-up of a black circular device interior with internal components and blue directional arrows indicating flow or movement (no text or symbols)- S crew in a plastic clip to the blue screw, hold it with one hand and use a screw driver to rotate the blue screw until the plastic clip moves half way down.
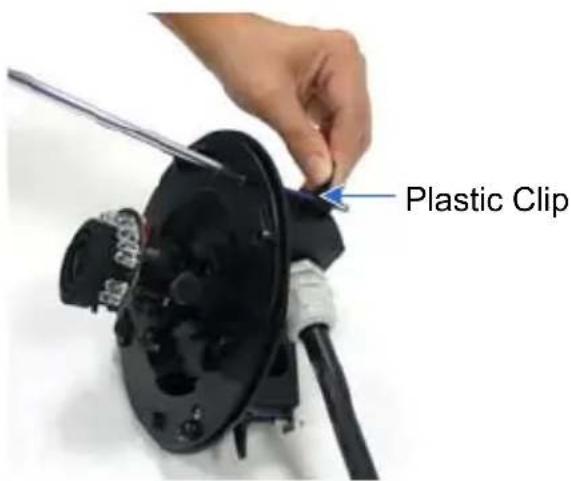
text_image
Plastic Clip- Secure a T-cap on top of the blue screw with a small screw cap and a T-cap screw. Do not tighten the small screw cap so that the plastic clip can move down freely.
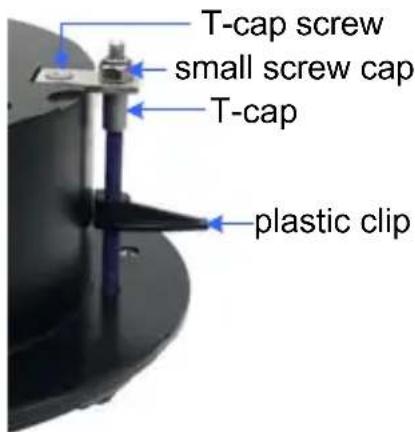
text_image
T-cap screw small screw cap T-cap plastic clip-
Repeat steps 4 and 5 for the other two blue screws.
-
In sert the camera to the ceiling with the plastic screws moved inward.
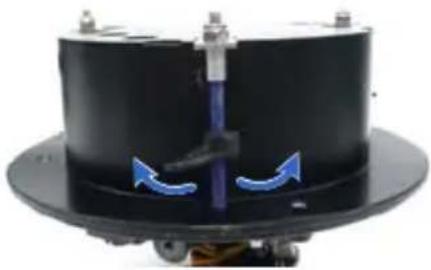
natural_image
Close-up of a black cylindrical mechanical component with blue directional arrows indicating motion or flow, mounted on a circular base (no text or symbols visible)- Move the blue screws out and rotate the blue screw with a screw driver until the plastic clip and the bottom of the camera body clamps the ceiling tightly.
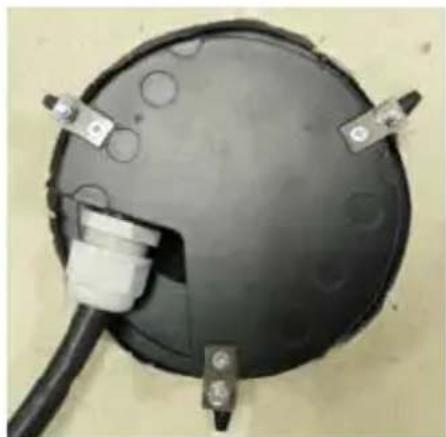
natural_image
Close-up of a black circular electronic component with metal connectors and a white connector inserted, mounted on a cable (no visible text or symbols)-
Connect the network and power cables to the camera. See 12.4 Connecting the Camera in the Quick Start Guide.
-
Access the live view. See 21.2 Accessing the Live View in the Quick Start Guide.
-
Follow steps 9 and 10 in the Hard-Ceiling Mount section to adjust the angle, focus and zoom of the camera.
-
Follow steps 11 and 12 in the Hard-Ceiling Mount section to secure the thread lock, replace the silica gel bag and secure the housing cover.
12.4 Connecting the Camera
Connect your Vandal Proof IP Dome to power, network and other cables.
12.4.1 Wire Definition
The cables for Vandal Proof IP Dome are illustrated and defined below.
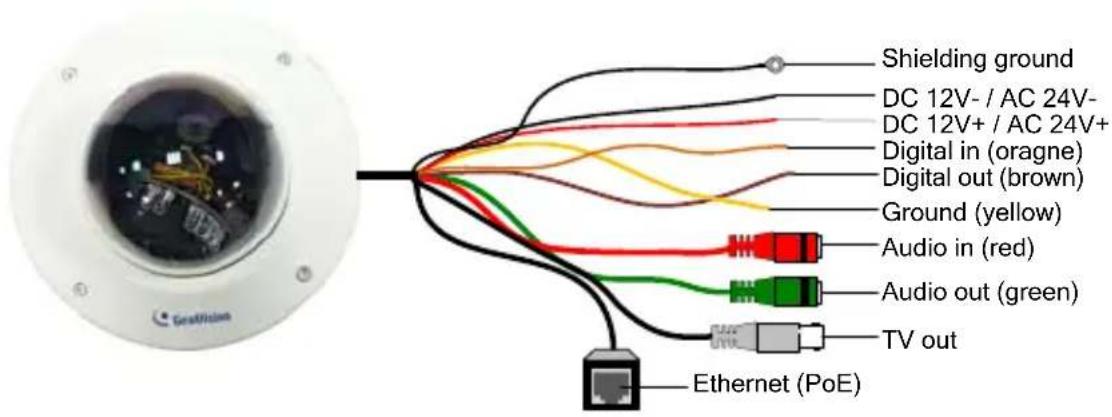
text_image
Shielding ground DC 12V- / AC 24V- DC 12V+ / AC 24V+ Digital in (oragne) Digital out (brown) Ground (yellow) Audio in (red) Audio out (green) TV out Ethernet (PoE)No. Wire Color Definition
| 1 Black (thick) Shielding Ground | ||||
| 2 Black (thin) DC 12V- / AC 24V- | ||||
| 3 Red DC 12V+ / AC 24V+ | ||||
| 4 Orange Digital In | ||||
| 5 Brown Digital out | ||||
| 6 Yellow Ground | ||||
| 7 Red RCA Audio in | ||||
| 8 Green RCA Audio out | ||||
| 9 Black BNC TV out |
Note: To use the TV out function, connect the black BNC connector to a monitor and select your signal format (NTSC or PAL) at the TV Out field on the Web interface. For details, see Video Settings, Administrator Mode Chapter, GV-IPCam H.264 Firmware Manual on the Software DVD.
12.4.2 Connecting the Power Cable
There are two ways to supply power to the camera:
- Use a Power over Ethernet (PoE) adapter to connect the camera to the network, and the power will be provided at the same time.
-
Plug the power adaptor to the terminal block as shown below.
-
Insert the thin black wire of the Vandal Proof IP Dome to the left pin (-) and the red wire to the right pin (+).
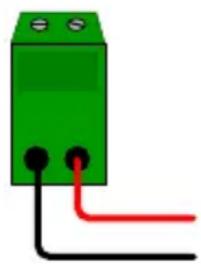
natural_image
Green electrical component with black and red wires, no text or symbols visible- Connect the DC 12V Power Adapter to the Terminal Block.

text_image
Terminal Block DC 12V Power Adaptor13. Vandal Proof IP Dome (Part II)
The information in this chapter applies to GV-VD1530 / 1540 / 2430 / 2440 / 2530 / 2540 / 2540-E / 3430 / 3440 / 5340 / 5340-E.
13.1 Packing List
• Vandal Proof IP Dome • Torx Wrench
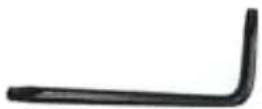
• 3-Pin Terminal Block
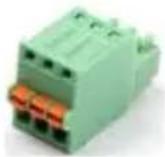
- Audio wires
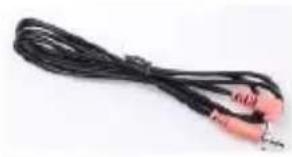
natural_image
Coiled black audio/video cable with red connectors (no text or symbols visible)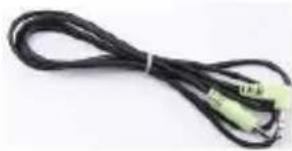
natural_image
Coiled black cable with two green connectors (no text or symbols visible)- Power Adapter
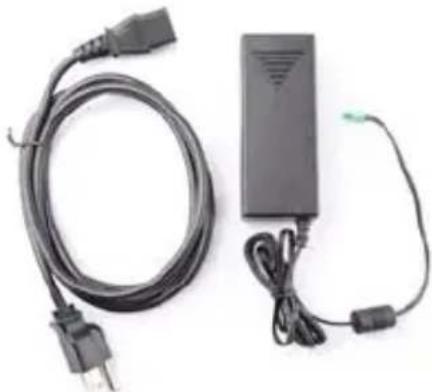
natural_image
Two electronic devices: a black cable with power plug and a black rectangular charger connected to a terminal block (no visible text or symbols)- TV out wire
- Focus Adjustment Cap (for GV-VD1530 / 2430 / 2530 / 3430 only)
natural_image
Simple illustration of a transparent dome-shaped object with a handle, resembling a filter or cover (no text or symbols)- RJ-45 Connector x 2
- Installation sticker
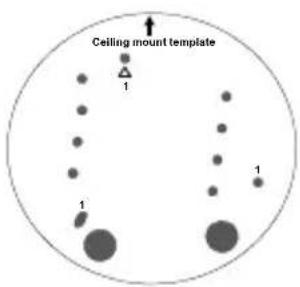
text_image
Ceiling mount template 1 1 1- Long Screw x 4
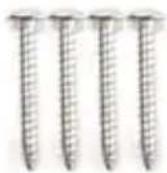
- Short Screw x 2

• Sticker (for Silica Gel Bag)
- Conduit Converter
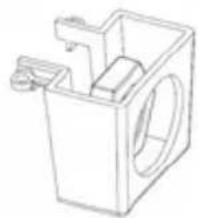
natural_image
Technical line drawing of a mechanical bracket or housing (no text or symbols)- Back Plate
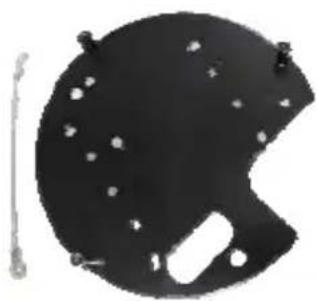
natural_image
Black circular object with white holes and a small metallic rod beside it (no text or symbols visible)- Screw Anchor x 4
- Flat Screw

- Silica Gel Bag
- Ruler
- Plastic PG21 conduit connector
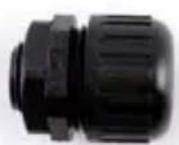
- Power Adapter
• GV-Vandal Proof IP Dome Hardware Installation Guide - Warranty Card
- GV-IPCAM H.264 Software DVD
• GV-NVR Software DVD
Note:
- You can choose to run the wires through a conduit pipe. After you have threaded all the wires, install the supplied conduit converter and plastic PG21 conduit connector with a self-prepared 1/2" conduit pipe to the camera. Power will have to be supplied through a PoE adapter, because the power adapter wire does not fit in a 1/2" pipe. You will have to purchase your own PG21 conduit connector if you want to use 3/4" or 1" pipe.
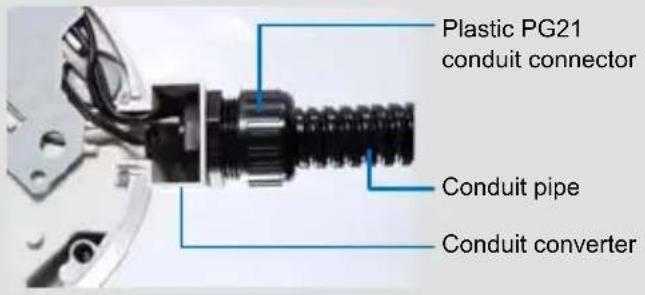
A metal PG21 conduit connector can be purchased upon request. The metal PG21 conduit connector can be connected with a 3/4" pipe.
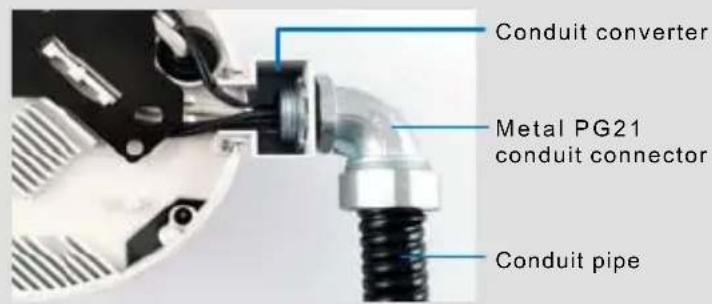
- The power adapter can be excluded upon request.
13.2 Overview
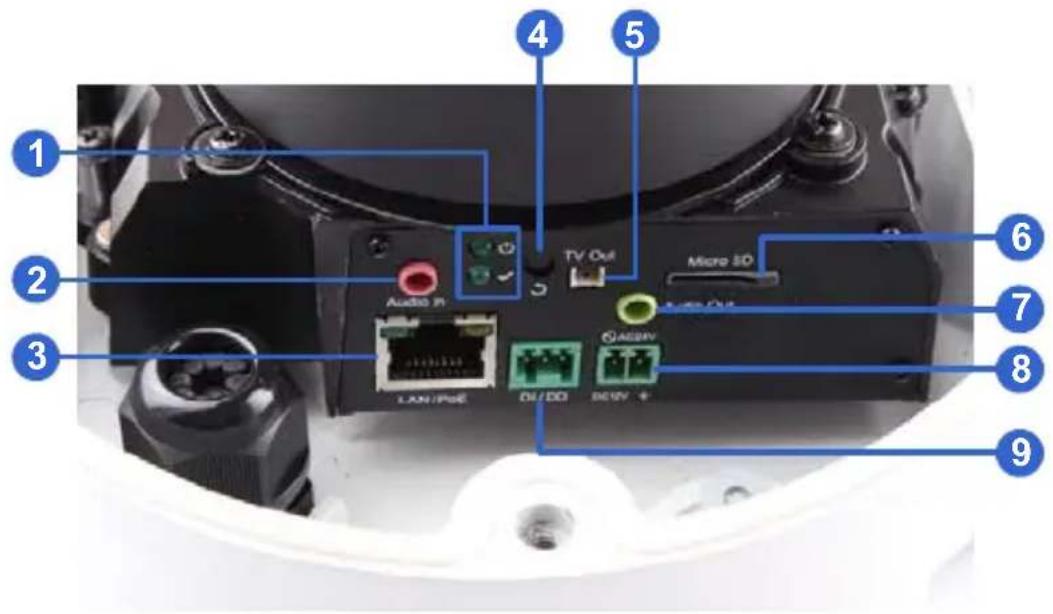
text_image
1 2 3 4 5 6 7 8 9 Audio 1P TV Out Micro 3D LAN/PaE DI/DD DAEV + ACENV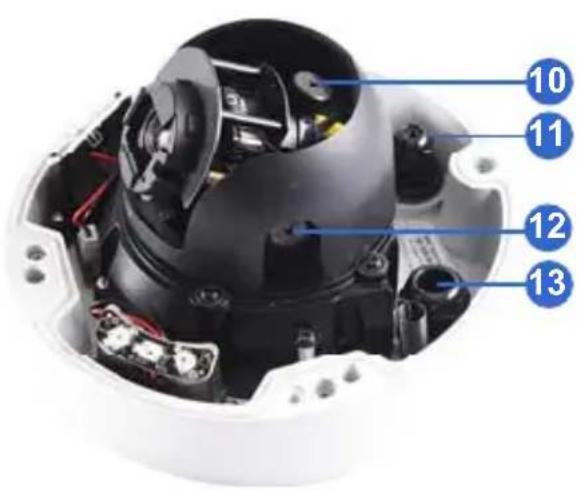
text_image
Labeled diagram of a device interior with numbered parts for identification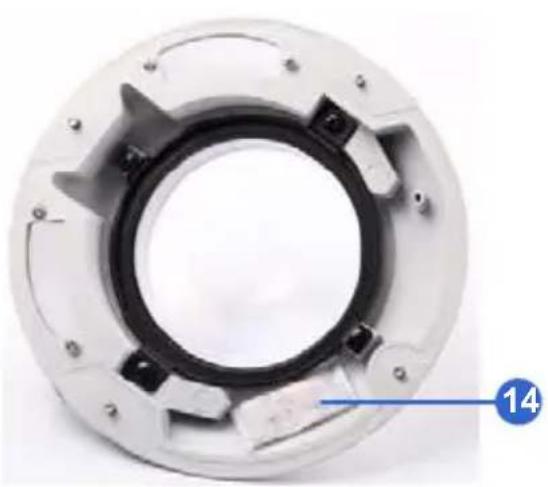
natural_image
Close-up of a mechanical component with a central circular ring and multiple mounting holes (no visible text or symbols)| No. | Name | Description |
| 1 | LED Indicators | The power LED (top) turns on (green) when the power is on and turns off when there is no power supply. The status LED (bottom) turns on (green) when the system operates normally and turns off when system error occurs. |
| 2 | Audio In | Connects to a microphone for audio output. |
| 3 | LAN / PoE | Connects to a 10/100 Ethernet or PoE. |
| 4 | Default Button | Resets to factory default. For details, see 24. Restoring to Default Settings in the Quick Start Guide. |
| 5 | Video Out | Connects to a portable monitor for setting the focus and angle of the camera during initial setup. |
| 6 | Memory Card Slot Inserts | a micro SD card (SD/SDHC, version 2.0 only, Class 10) to store recording data. |
| 7 | Audio Out | Connects to a speaker for audio output. |
| 8 | DC 12V / AC 24V | Connects to power. |
| 9 | I/O | Terminal Block Connects to an I/O device. |
| 10 | Rotational Screw | Loosens to rotate the camera. |
| 11 | Cable seal | Waterproofs the Ethernet cable. |
| 12 | Tilt Screw | Loosen the screw to tilt the camera. |
| 13 | Conduit Connector | Waterproofs the audio, TV out, power adapter and I/O wires. |
| 14 | Silica Gel Bag | Absorbs moisture in the camera body. |
13.3 Installation
The Vandal Proof IP Dome is designed for outdoors. With the standard package, you can install the camera on the ceiling.
Note: You can also install the camera:
- on a power box (of the 4" square and double gang type) using the standard package
- to ceilings, wall corners (concave or convex), and poles using optional mounting kits
For details on these installations, see GV-Mount Accessories Installation Guide on the Software DVD.
IMPORTANT: When installing the Vandal Proof IP Dome near the corner, maintain at least 25 cm away from the walls to avoid reflection problems.
- Remove the housing cover with the supplied torx wrench.
- Thread wires into the camera.
A. Unscrew the conduit connector from the back.
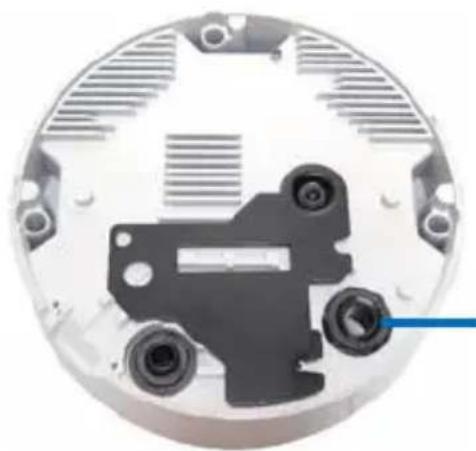
natural_image
Close-up of a mechanical component with visible gears and mounting holes (no text or symbols)Conduit Connector
B. Unplug the conduit connector inside the housing and disintegrate the connector. You should have 4 parts:
1
2
3
4
C. Remove the terminal block from the power adapter.
D. Thread the audio wires (optional), TV out wire (optional), adapter wires and I/O wires (optional) through the conduit entry and then through part 1, 2, 3 and 4 of the conduit connector.
Tip:
-
To make the threading easier, it is advised to thread the wires in the order described here.
-
Use a pair of pliers to help you pull the wires through the camera.
For part 2, there are 8 holes each labeled with its diameter. Remove the plugs and push the wires to the corresponding hole listed below:
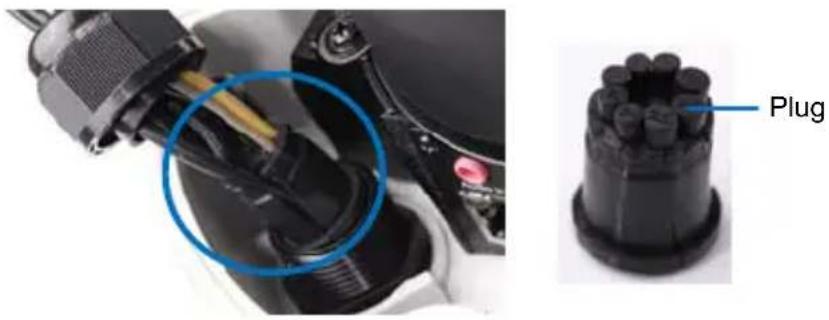
text_image
Plug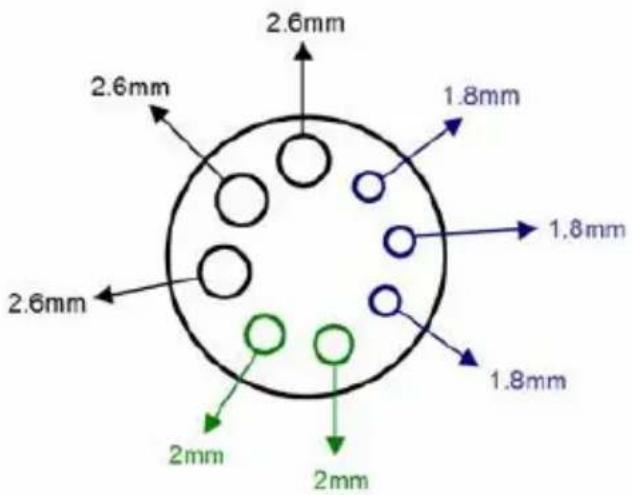
text_image
2.6mm 2.6mm 1.8mm 1.8mm 2.6mm 1.8mm 2mm 2mm2.6 mm: Audio, BNC
2 mm: DC12V / AC24V
1.8 mm: DIDO
IMPORTANT:
- Use the supplied ruler and leave about 10 cm of power and I/O wires between their connectors and the cable seal; leave at least 11 cm of audio/TV-out wires between their connectors and the cable seal.
- The plugs are used to prevent water from entering the camera housing. Keep the unused holes plugged and save the removed plugs for future use.
-
Only thread the wires through their designated holes on the conduit connector to make sure the wires are properly sealed.
-
I install the Ethernet cable.
A. Rotate to remove the indicated cap and the plug inside.
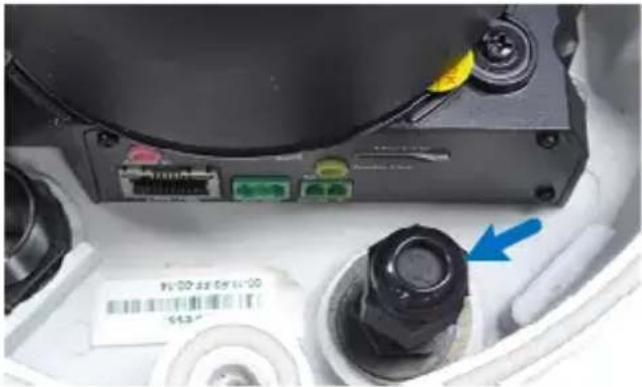
natural_image
Close-up of a computer interface showing a device rear panel with ports, connectors, and a blue arrow pointing to a mechanical component (no readable text or symbols)B. Thread an Ethernet cable (the end with no RJ-45 connector) from the back panel through the cable seal.
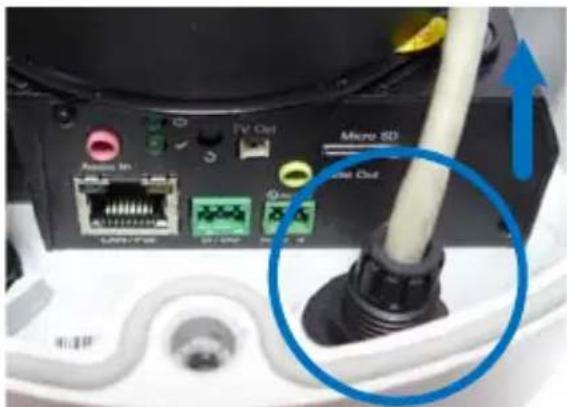
text_image
Micro SD Amm. In S/100/100 S/100/100 S/100/100 Micro SD Micro SD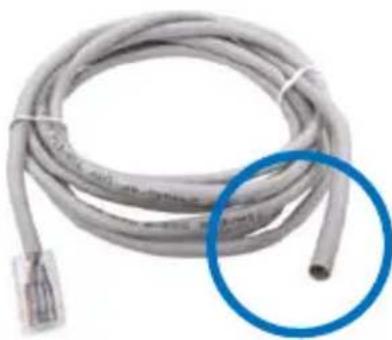
natural_image
Coiled gray cable with connector, showing internal structure and a blue circle highlighting a specific component (no text or symbols visible)IMPORTANT: Use the supplied ruler and leave about 11 cm of the Ethernet cable between the connector and the cable seal.
C. Re-install the cap. Make sure the cap is installed tightly to waterproof the camera.
- Connec t the wires to the camera.
A. Install the terminal blocks to the power adapter and I/O devices. See 13.4 Connecting the Camera in the Quick Start Guide.
B. Install the supplied RJ-45 connector to the Ethernet cable.
C. Plug all the connectors to the camera panel.
Tip: Unscrew the indicated screws and lift the camera to help you connect the wires.
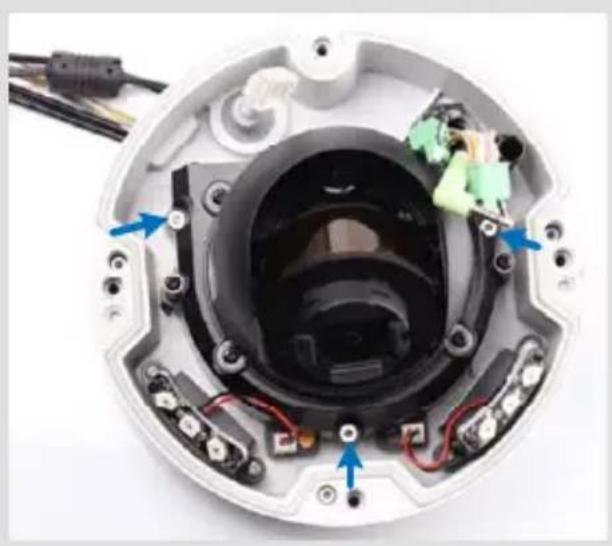
natural_image
Interior view of a camera lens assembly with visible wiring and components (no text or symbols)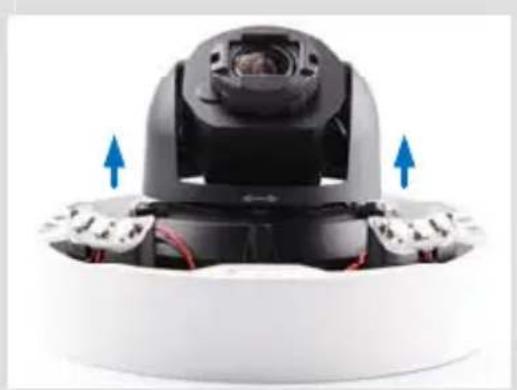
natural_image
Close-up of a robotic device with blue directional arrows indicating movement or force (no text or symbols visible)D. Arrange the wires in the conduit connector and re-install it to the camera.
- S ort out the wires at the back. You can have the wires come out from position A, B or both. The instructions here describe sorting wires for position A.
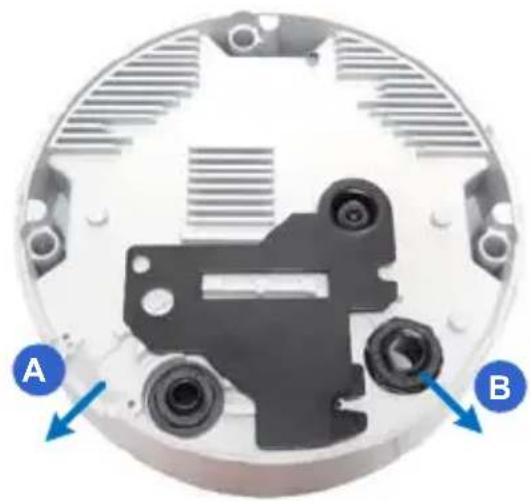
natural_image
Close-up of a mechanical component with labeled parts A and B, showing internal components and mounting holes (no text or symbols beyond labels)From the back of the camera housing, unscrew and rotate the plate to one side, sort out the wires and secure the plate back.
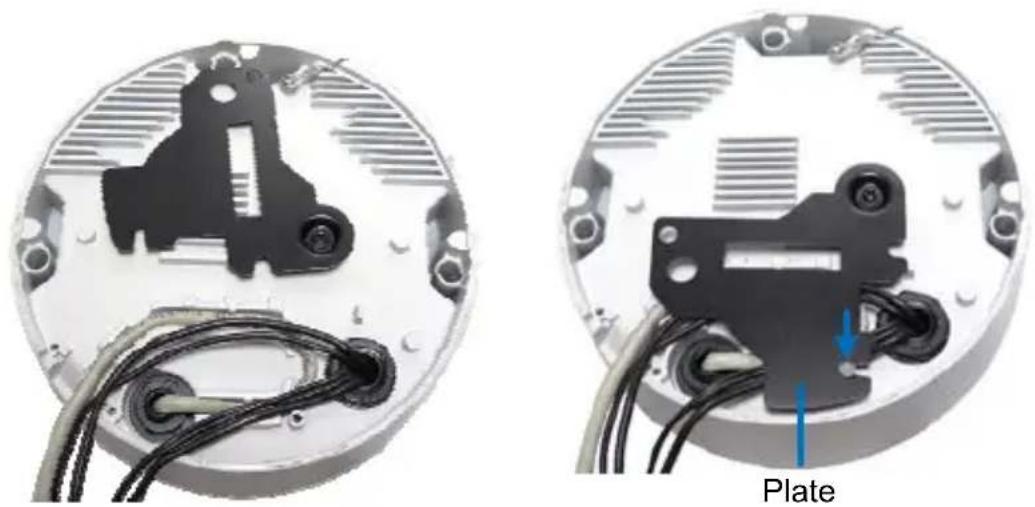
natural_image
Two circular electronic components with visible wiring and a labeled plate, no text or symbols present.- Se cure the back plate to the ceiling.
A. Paste the sticker to the ceiling. The arrow on the sticker indicates the direction that the camera faces.
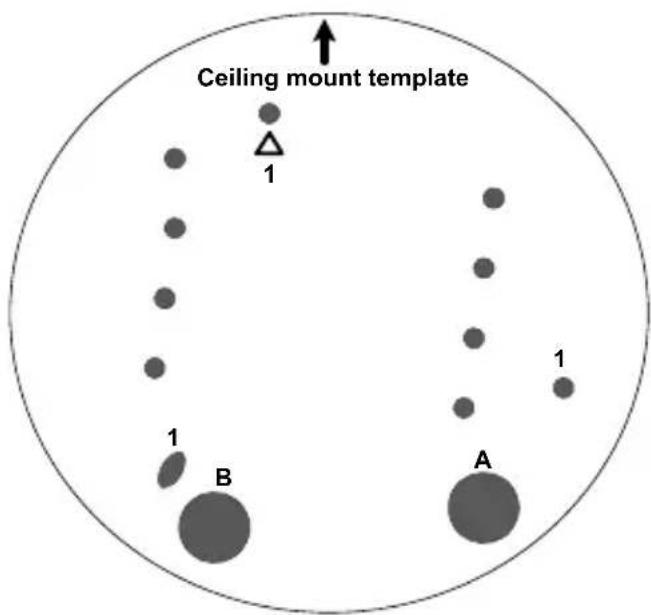
text_image
Ceiling mount template 1 1 B A 1B. Drill 3 holes for screws. The recommended ones are indicated as '1'.
C. Insert the screw anchors to the 3 holes.
D. Depending on how you want to run the wires (see step 5). Drill the right hole (on the installation sticker) for position A and the left for position B or both if required.
E. Secure the back plate to the ceiling with long screws.
- Secure the camera to the ceiling.
A. Secure the safety lock to the camera using a short screw. Use flat screw for number 1 and small screw for number 2.
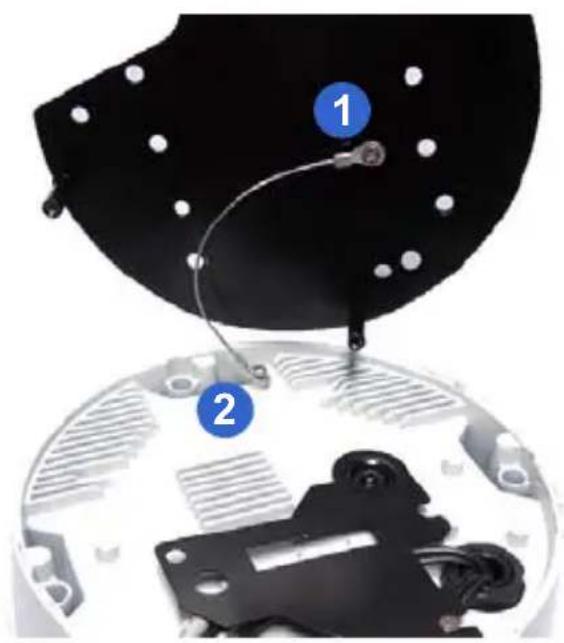
natural_image
Close-up of a mechanical component with numbered parts, showing internal components and mounting holes (no text or symbols visible)B. Thread all the wires into the ceiling and connect them.
Note: To use the TV out function, connect the black BNC connector to a monitor and select your signal format (NTSC or PAL) at the TV Out field on the Web interface. For details, see Video Settings, Administrator Mode Chapter, GV-IPCAM H.264 Firmware Manual on the Software DVD.
C. Secure the camera using the torx wrench
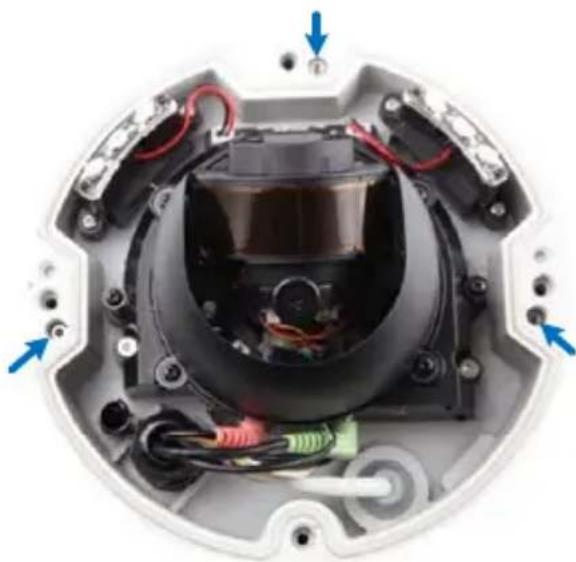
natural_image
Internal view of a device housing with visible wiring and components (no text or symbols)-
Access the live view. See 21.2 Accessing the Live View in the Quick Start Guide.
-
Adjust the camera's angle, focus and zoom of the camera.
Pan Adjustment
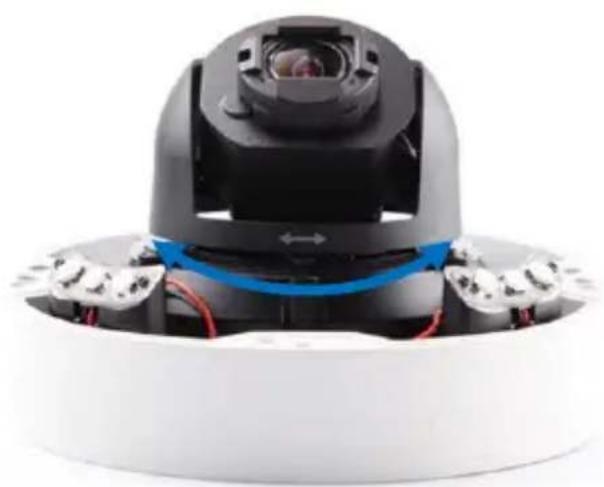
natural_image
Close-up of a black spherical device with red wires and a blue directional arrow, mounted on a white circular base (no visible text or symbols)Tilt Adjustment
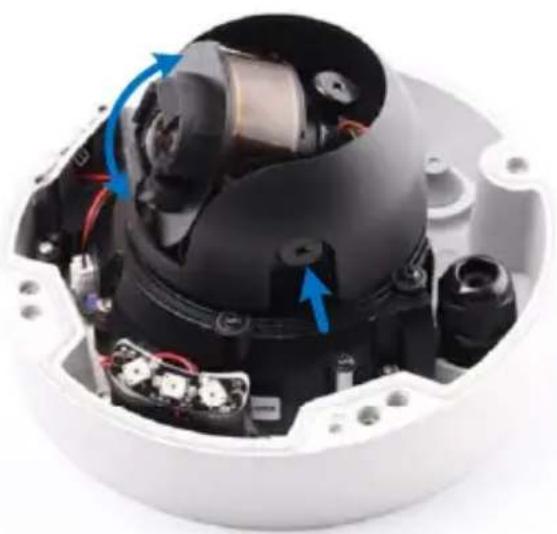
natural_image
Interior view of a mechanical device with visible components and blue directional arrows indicating motion (no text or symbols)Rotational Adjustment
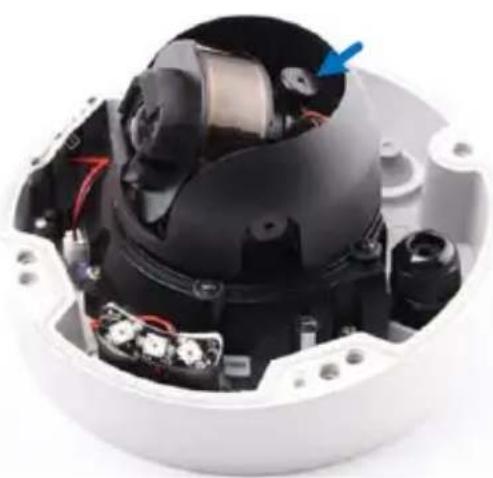
natural_image
Interior view of a mechanical device with exposed internal components and a blue arrow pointing to a component (no text or symbols visible)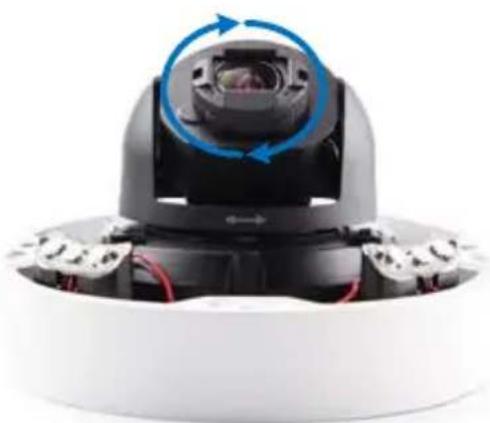
natural_image
Close-up of a smart camera module with blue circular arrows indicating rotation, no visible text or symbols- Replace the silica gel bag and secure the camera cover using the torx wrench.
IMPORTANT:
- The gel bag loses its effectiveness when the dry camera is opened. To prevent the lens from fogging up, replace the silica gel bag every time you open the camera and conceal the silica gel bag within 2 minutes of exposing to open air.
- Make sure the housing cover is properly secured to prevent water from entering and damaging the inner housing.
- If the center of the camera view is less than 25^ to the ceiling, or lower than the grey line (as illustrated below), disassemble the indicated ring so the view is not obstructed. However, with the ring disassembled, slight reflections may occur.
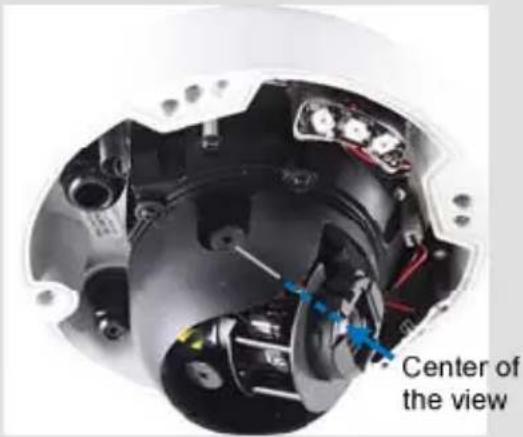
text_image
Center of the view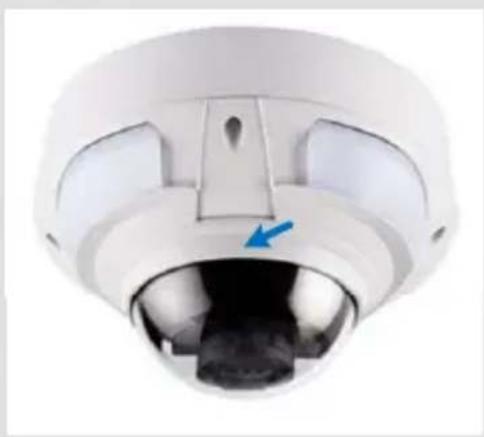
natural_image
Close-up of a white spherical security camera with a blue arrow pointing to the lens (no text or symbols visible)13.4 Connecting the Camera
Connect your Vandal Proof IP Dome to power, network and other wires needed.
13.4.1 Connecting the Power Cable
There are two ways to supply power to the camera:
- Use a Power over Ethernet (PoE) adapter to connect the camera to the network, and the power will be provided at the same time.
- Plug the power adapter to the terminal block by inserting the striped wire to the right pin (-) and the black wire to the left pin (+).
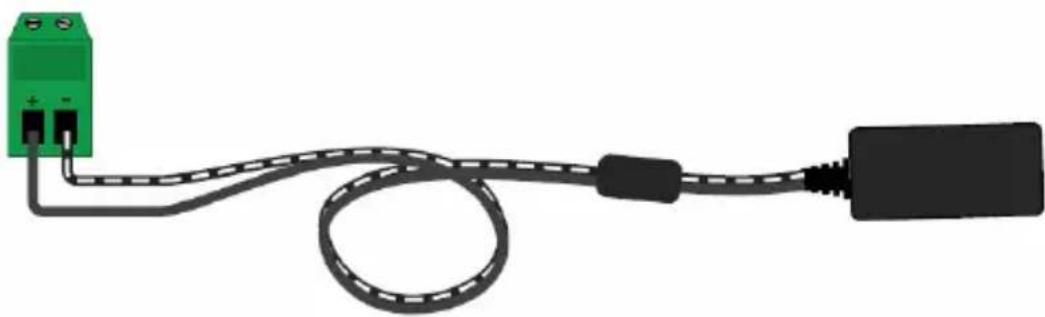
natural_image
Pure electrical circuit lines without any symbols13.4.2 Connecting the I/O Device
The camera support one digital input and one digital output of dry contact.
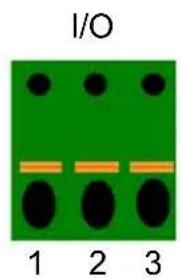
text_image
I/O 1 2 3| Pin Function | ||
| 1 | Digital | Output |
| 2 | GND | |
| 3 | Digital | Input |
For details on how to enable an installed I/O device, see I/O Settings, Administrator Mode Chapter, GV-IPCAM H.264 Firmware Manual on the Software DVD.
14. Target Vandal Proof IP Dome
14.1 Packing List
• Target Vandal Proof IP Dome
- Screw x 4
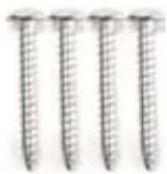
- TV-Out Wire
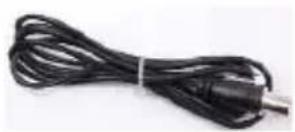
- Installation sticker
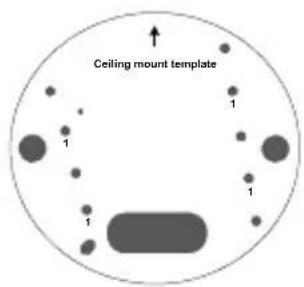
text_image
Ceiling mount template 1 1 1 1- Torx Wrench
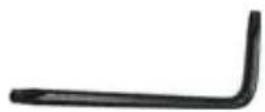
- Screw Anchor x 4
- Audio Wires x 2
natural_image
Coiled black audio/video cable with a red connector (no text or symbols visible)
natural_image
Coiled black cable with two green connectors (no text or symbols visible)- RJ-45 Connector
- Conduit Converter
natural_image
Technical line drawing of a mechanical bracket or housing (no text or symbols)- Big Concave hexagon Wrench
- Silica Gel Bag
• GV-IPCAM H.264 Software DVD
• GV-NVR Software DVD
• Water proof rubber set (for RJ-45 and DC12V)
- Small Concave hexagon Wrench
- Sticker (for Silica Gel Bag)
- Ruler
- Warranty Card
Note:
- Power adapter can be purchased upon request.
- With the supplied Conduit Converter, you can choose to run the wires through a conduit pipe. The installation of conduit converter and conduit pipe is illustrated as below. You may optionally purchase a plastic or metal PG21 conduit connector for a 1/2" or 3/4" pipe respectively. When you use a 1/2" pipe, power will have to be supplied through a PoE adapter because the power adapter wire does not fit in a 1/2" pipe.
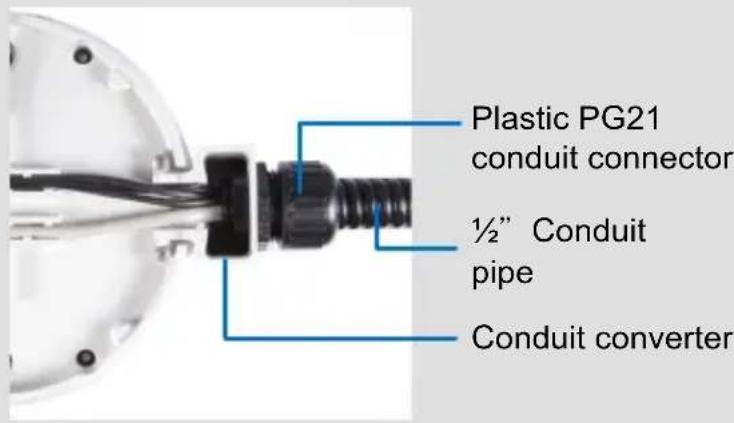
text_image
Plastic PG21 conduit connector ½" Conduit pipe Conduit converter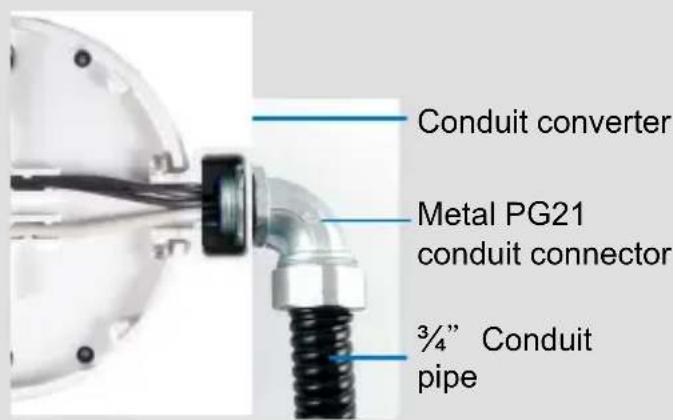
| No. | Name | Description | |
| 1 | LED | Indicators | The power LED (top) turns on (green) when the power is on and turns off when there is no power supply. The status LED (bottom) turns on (green) when the system operates normally and turns off when system error occurs. |
| 2 | Audio Out | Connects to a | speaker for audio output. |
| 3 | Audio In | Connects to a | microphone for audio input. |
| 4 | LAN / PoE | Connects to a | 10/100 Ethernet or PoE. |
| 5 | DC | 12V Connects to power. | |
| 6 | Default | Button | Resets the camera to factory default. For details, see 24. Restoring to Default Settings in the Quick Start Guide. |
| 7 | Rotational Screw | Loosens to rotate the camera. | |
| 8 | Cable seal | Waterproofs the Ethernet cable. | |
| 9 | Tilt | Screw Loosens the screw to tilt the camera. | |
| 10 | TV-Out | Provides video input (D1 resolution) for a monitor. | |
| 11 | Silica Gel Bag | Absorbs | moisture in the camera body. |
| 12 | Zoom Screw | Adjusts the zoom of the camera. | |
| 13 | Focus Screw | Adjusts the focus of the camera. | |
| 14 | Conduit Connector | Waterproofs the audio wires. | |
Note: To use the TV out function, connect the supplied black BNC wire to a monitor and select your signal format (NTSC or PAL) at the TV Out field on the Web interface. The default signal format is NTSC. For details, see 4.1.1 Video Settings, GV-IPCam H.264 Firmware Manual. The TV-out wire must be removed before you secure the housing cover.
14.3 Installation
The Target Vandal Proof IP Dome is designed for outdoors. With the standard package, you can install the camera on the ceiling.
Note: You can also install the camera to ceilings, wall corners (concave or convex), and poles using optional mounting kits.
For details on these installations, see GV-Mount Accessories Installation Guide on the Software DVD.
- Remove the housing cover with the supplied torx wrench.
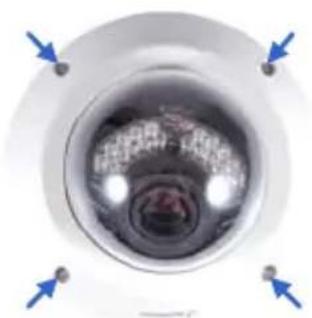
natural_image
Close-up of a circular mechanical component with blue arrows pointing to features (no visible text or symbols)- Remove the back plate with the supplied torx wrench and remove the safety lock with a Philips screwdriver. Keep the removed screw for later use.
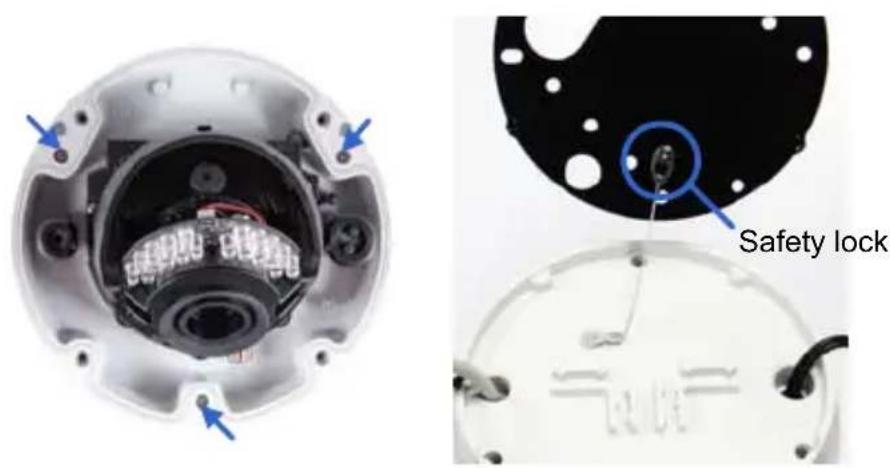
text_image
Safety lock- Thread an E thernet cable and/or the adapter wire into the camera.
A. Rotate to remove the indicated cap.
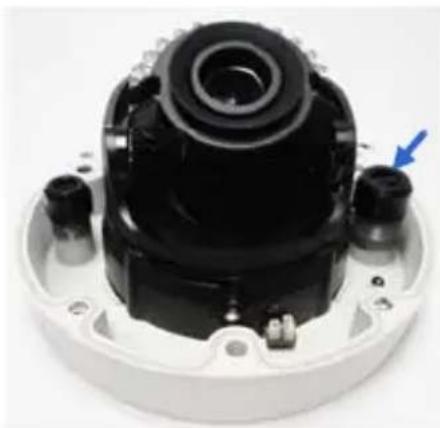
natural_image
Close-up of a mechanical component with black housing and blue arrow indicator (no visible text or symbols)B. Take out and disintegrate the connector. You should have 3 parts:
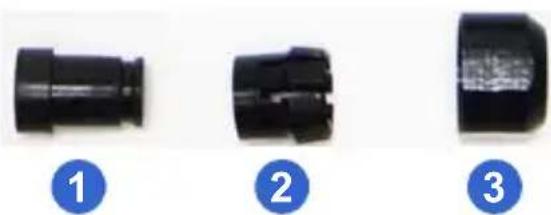
natural_image
Three black plastic connector parts labeled 1, 2, and 3, shown side by side (no text or symbols on the components themselves)C. Thread an Ethernet cable (the end without RJ-45 connector) and/or the adapter wire from the back panel.
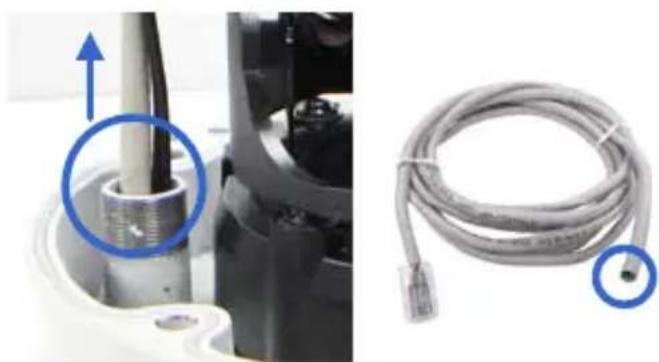
natural_image
Close-up of a mechanical component with a threaded fitting and a coiled cable, both shown without any text or symbols.D. If you are using PoE, thread an Ethernet cable through part 1 of the connector..
E. If you are using DC 12V, change the connector to the supplied Waterproof rubber set. Remove the terminal block from the power adapter and thread the adapter wire through the rubber.
For adapter wire
For Ethernet cable
For Ethernet cable (PoE)
F. Thread the Ethernet cable and/or the adapter wire through part 2 and 3 of the connector.

natural_image
Close-up of black cable connectors with wire ties, no visible text or symbolsIMPORTANT: Use the supplied ruler and leave about 14 cm of the Ethernet cable and 10 cm of the adapter wire between the connector and the cable seal.
G. Re-install the cap (part 3) with the supplied big concave hexagon wrench. Make sure the cap is installed tightly to waterproof the camera.
- Thread audi o wires (optional) into the camera.
A. Rotate to remove the cap of the conduit connector.
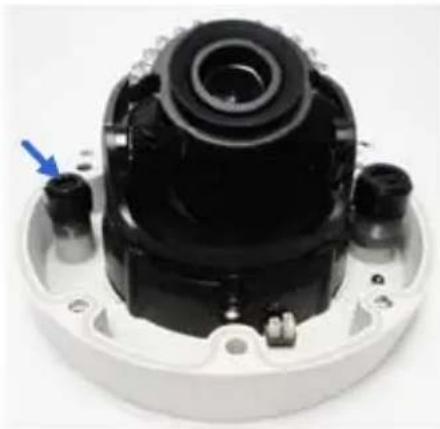
natural_image
Close-up of a mechanical component with a blue arrow pointing to a specific part (no visible text or symbols)B. Take out and disintegrate the connector. You should have 3 parts too.
C. Thread the audio wires from the back panel, remove the plugs of part 1 and thread through the 3 parts of the connector.
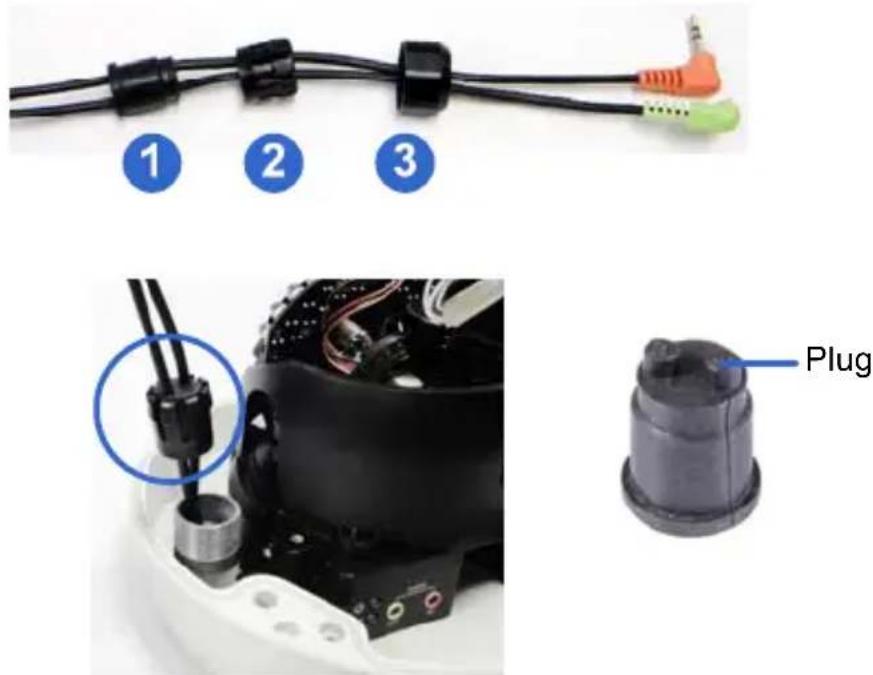
text_image
1 2 3 PlugD. Re-install the cap (part 3) with the supplied small concave hexagon wrench. Make sure the cap is installed tightly to waterproof the camera.
Tip: Use a pair of pliers to help you pull the wires through the camera.
IMPORTANT:
-
Use the supplied ruler and leave about 10 cm of the audio wires between the connectors and the cable seal.
-
The plugs are used to prevent water from entering the camera housing. Keep the unused holes plugged and save the removed plugs for future use.
-
Connect the wires to the camera.
A. Install the terminal block to the power adapter. See 14.4 Connection the camera.
B. Install the supplied RJ-45 connector to the Ethernet cable.
C. Plug all the connectors to the camera panel.
Tip: Unscrew the indicated screws and lift the camera to help you connect the wires.
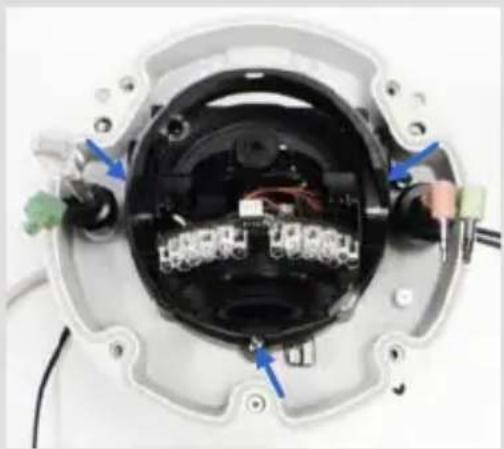
natural_image
Interior view of a mechanical device showing internal components and wiring (no visible text or symbols)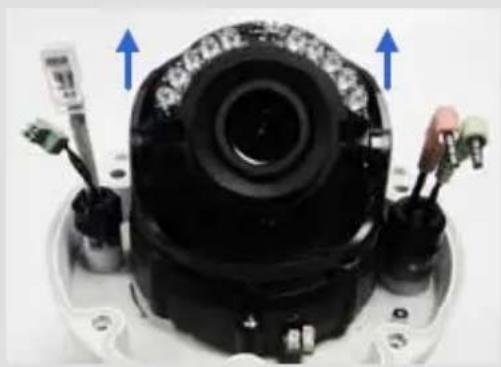
natural_image
Close-up of a black mechanical component with two blue arrows pointing upward, surrounded by small accessories (no visible text or symbols)- Sort out the wires at the back. You can have the wires come out from both positions A and B, or from C.
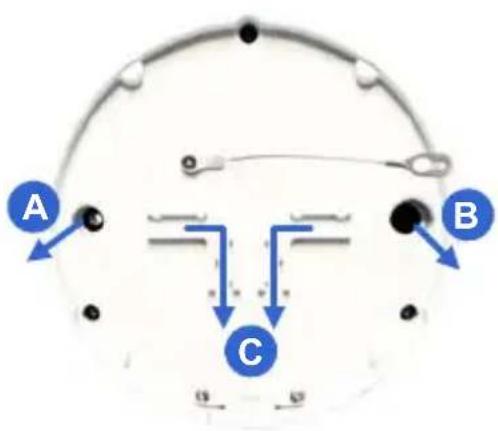
text_image
A B C- Secure the back plate to the ceiling.
A. Paste the sticker to the ceiling. The arrow on the sticker indicates the direction that the camera faces.
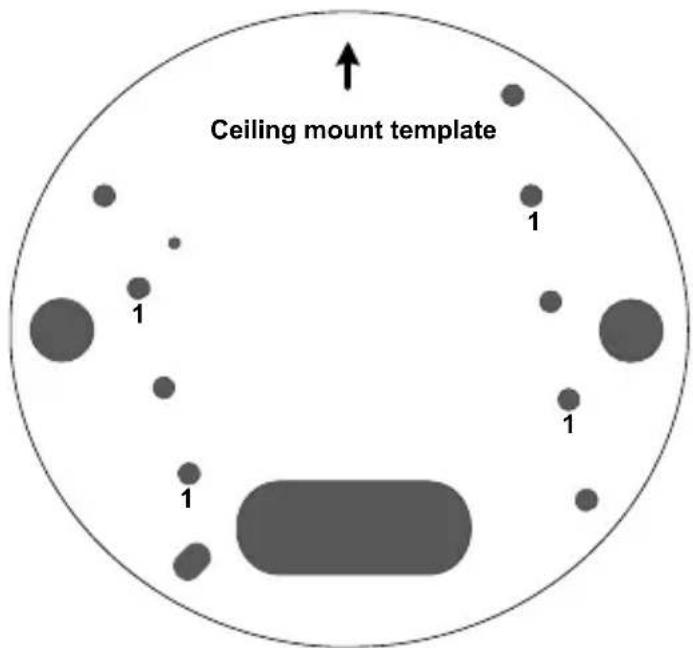
text_image
Ceiling mount template 1 1 1 1B. Drill 4 holes for screws. The recommended ones are indicated as '1'.
C. Insert the screw anchors to the 4 holes.
D. D rill A & B holes or only C hole for sorting out the wires according to Figure 5-11.
E. Secure the back plate to the ceiling with the supplied screws.
- Secure the camera to the ceiling.
A. Secure the safety lock to the camera with the screw you removed from the back plate in step 2.
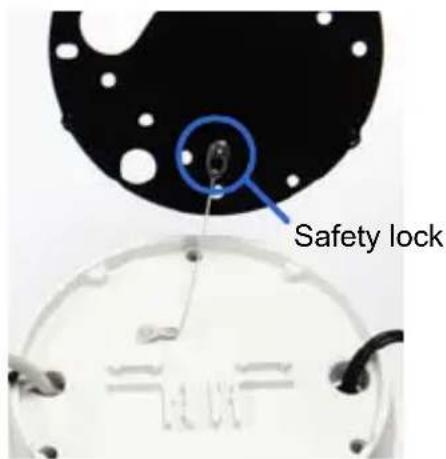
text_image
Safety lockB. Thread all the wires into the ceiling and connect them.
C. Secure the camera with the torx wrench.
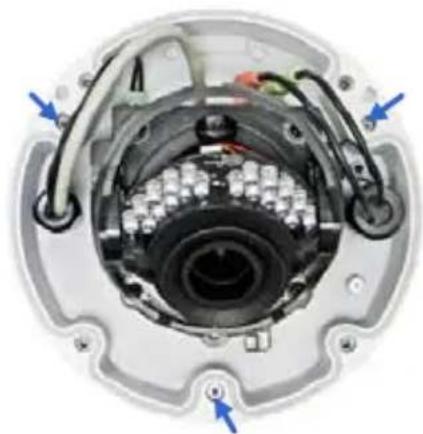
natural_image
Internal view of a mechanical device with visible components and blue arrows indicating directional flow (no text or symbols)- A ccess the live view. See 21.2 Accessing the Live View in the Quick Start Guide.
Note: The TV-out function can only be used during installation to adjust the focus of the camera. To use the TV out function, connect the supplied black BNC wire to a monitor and select your signal format (NTSC or PAL) at the TV Out field on the Web interface. The default signal format is NTSC. For details, see 4.1.1 Video Settings, GV-IPCam H.264 Firmware Manual. The TV-out wire must be removed before you secure the housing cover.
- Adjust the camera's angle, focus and zoom of the camera.
Pan Adjustment
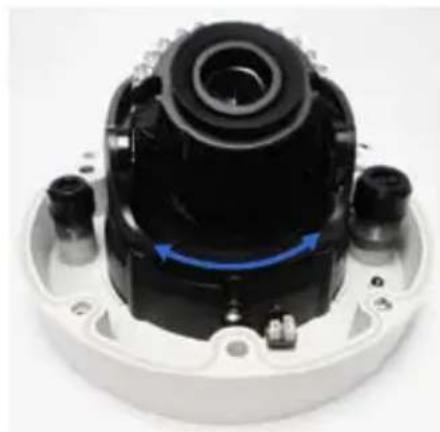
natural_image
Close-up of a mechanical component with blue directional arrows indicating rotation or movement (no visible text or symbols)Tilt Adjustment
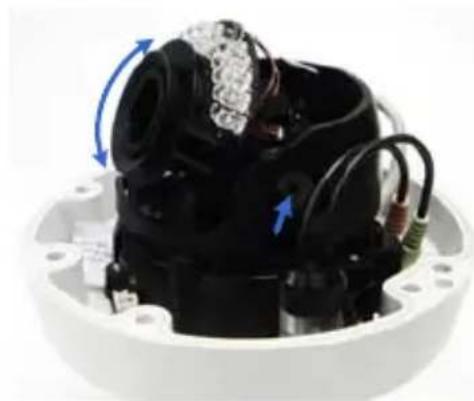
natural_image
Close-up of a mechanical device with visible wiring and blue directional arrows indicating motion (no text or symbols)Rotational Adjustment
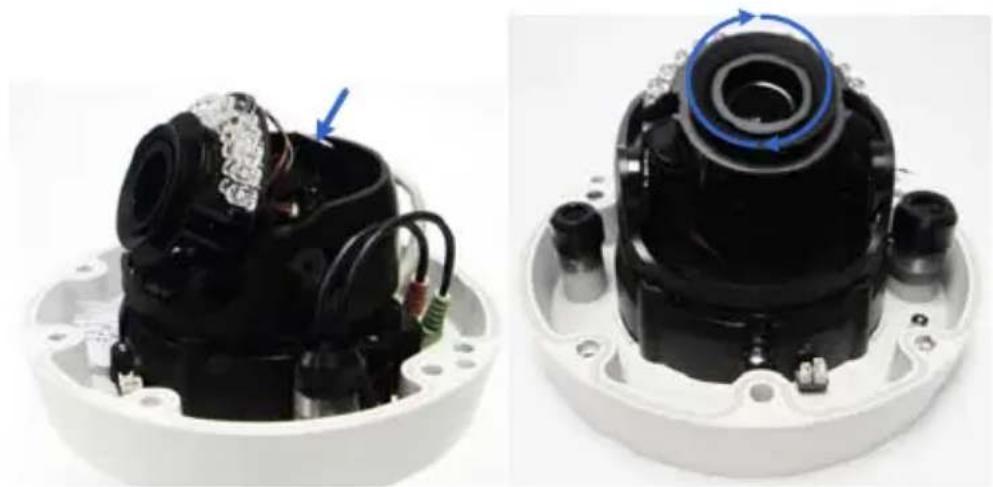
natural_image
Two views of a mechanical device showing internal components and wiring, with no visible text or symbols.- Replace the silica gel bag, press all the wires and cables into the notch and secure the camera cover with the torx wrench.
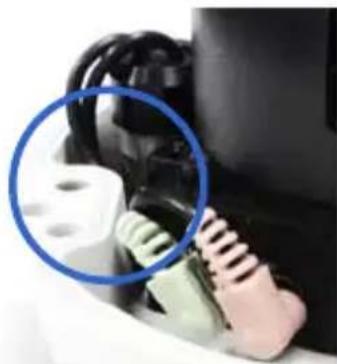
natural_image
Close-up of a medical or electronic device with a blue circle highlighting a component (no visible text or symbols)IMPORTANT:
- The gel bag loses its effectiveness when the dry camera is opened. To prevent the lens from fogging up, replace the silica gel bag every time you open the camera and conceal the silica gel bag within 2 minutes of exposing to open air.
- Make sure the housing cover is properly secured to prevent water from entering and damaging the inner housing.
14.4 Connecting the Camera
There are two ways to supply power to the camera:
- Use a Power over Ethernet (PoE) adapter to connect the camera to the network, and the power will be provided at the same time.
- Plug the power adapter to the terminal block by inserting the striped wire to the right pin (-) and the black wire to the left pin (+).
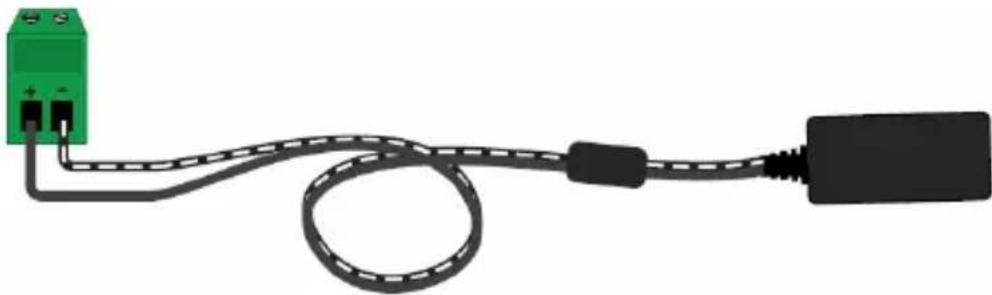
natural_image
Pure electrical circuit lines without any symbols15. Fixed IP Dome
15.1 Packing List
15.1.1 Packing List for Hard-Ceiling Mount
- Fixed IP Dome
- Torx Wrench
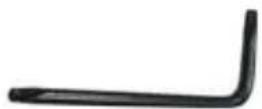
- Mounting Plate
- Short Screw Anchor x 3
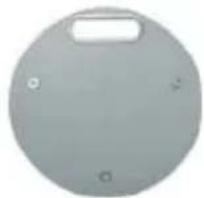
natural_image
Circular gray object with a rectangular cutout and four small circular holes, no text or symbols visible.
- Ceiling Screw x 3
- Plate Screw x 3
natural_image
Three parallel metallic rods with threaded ends, arranged horizontally (no text or symbols visible)
- TV-out Wire
- Sticker

• GV-IPCam H.264 Software DVD
- Power Adapter
• GV-NVR Software DVD
Note: The power adapter can be excluded upon request.
15.1.2 Packing List for In-Ceiling Mount
• In-Ceiling Housing Cover
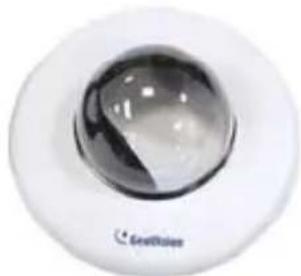
natural_image
Close-up of a spherical glass display with 'Geolitius' branding, no other text or symbols visible.- Mounting Bracket x 3
natural_image
Three identical metallic mechanical clamps with blue and black components, arranged horizontally (no text or symbols visible)• Copper Pillar Screw x 6
natural_image
Six identical metallic screw-shaped components arranged in a 2x2 grid (no text or symbols visible)- Thread Lock Screw

- Sticker (In-Ceiling Mount)
- Mounting Plate
natural_image
Circular mechanical component with mounting holes and a central hole, no visible text or symbols- Copper Pillar x 3
natural_image
Three golden cylindrical objects arranged horizontally (no text or symbols visible)- Bracket Screw x 3
• Housing Cover Thread
15.2 Overview
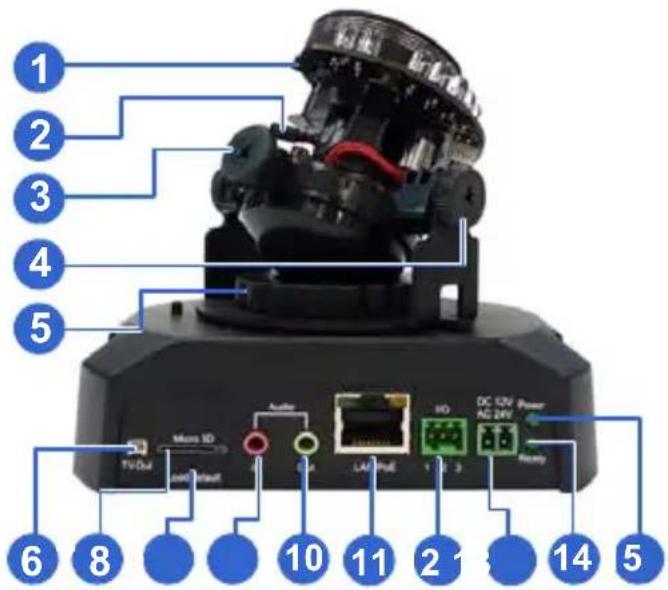
text_image
1 2 3 4 5 6 8 10 11 2 14 5| No. | Name | Description |
| 1 | Focus Screw | Adjusts the focus of the camera. |
| 2 | Zoom Screw | Adjusts the zoom of the camera. |
| 3 | Rotational Screw | Loosens to adjust the camera angle. |
| 4 | Tilt Screw | Loosens the screw to tilt the camera. |
| 5 | Pan Disc | Loosens to pan the camera. |
| 6 | Video Out | Connects to a portable monitor for setting the focus and angle of Fixed IP Dome during initial installation. |
| 7 | Memory Card Slot | Receives a micro SD card (SD/SDHC, version 2.0 only, Class 10) to store recording data. |
| 8 | Default Button | Resets to factory default. For details, see 24. Restoring to Default Settings in the Quick Start Guide. |
| 9 | Audio In | Connects a microphone for audio input. |
| No. | Name | Description | |
| 10 | Audio Out | Connects a speaker for audio output. | |
| 11 | LAN / PoE | Connects to a 10/100 Ethernet or PoE. | |
| 12 | I/O Terminal Block | Connects to I/O devices. For details, see Fixed IP Dome Chapter in the GV-IPCAM H.264 Firmware Manual on the Software DVD. | |
| 13 | DC 12V Port | Connects to power. | |
| 14 | Status | LED | Turns on (green) when the system operates normally and turns off when system error occurs. |
| 15 | Power | LED | Turns on (green) when the power is on and turns off when there is no power supply. |
15.3 Installation
The Fixed IP Dome is designed for indoors. With the standard packing, there are three ways to install the Fixed IP Dome: hard-ceiling mount, in-ceiling mount and wall-surface mount.
Note: You may also install the camera to ceilings, wall corners (concave or convex), and poles using the optional mounting kits. For details, see GV-Mount Accessories Installation Guide on the Software DVD.
15.3.1 Hard-Ceiling Mount
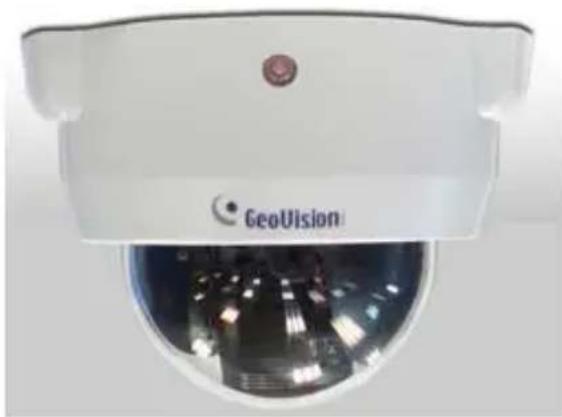
natural_image
Close-up of a white GeoVision surveillance camera with visible lens and control panel (no text or symbols on the device itself)- Paste the supplied sticker onto a desired location on the ceiling. Drill the three red dots and the ellipse mark only if you wish to run the wires into the ceiling.
- Unpack the camera package and take out the camera body.
Use the torx wrench to loosen the housing cover at the front and the back
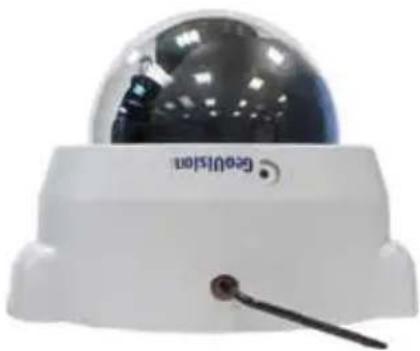
natural_image
White surveillance camera with a spherical dome and a black handle, no visible text or symbols on the device itself.Take out the camera body
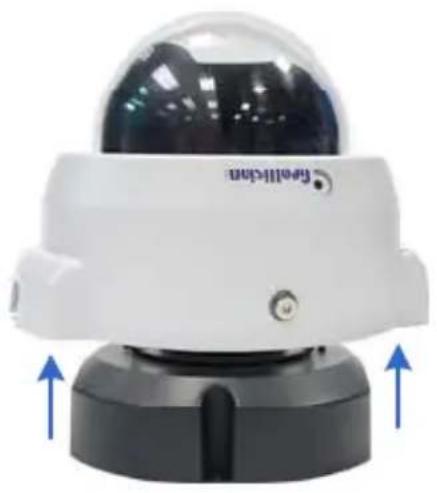
natural_image
Close-up of a white surveillance camera with blue directional arrows indicating upward movement (no text or symbols on the device itself)- Secure the camera body and the mounting plate to the ceiling with the three ceiling screws.
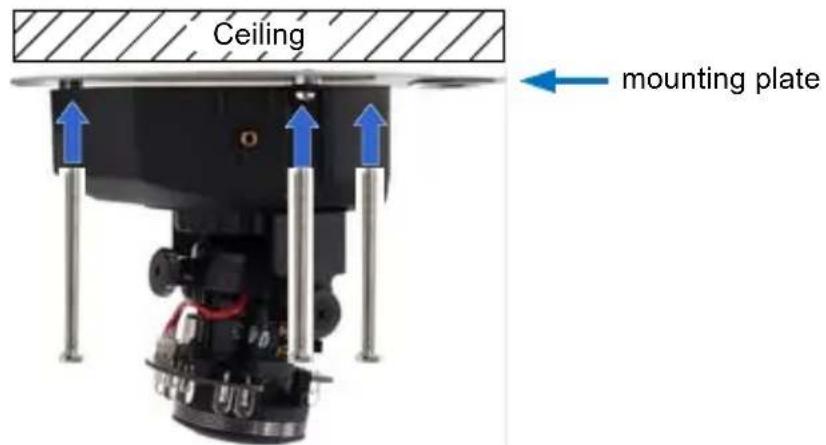
text_image
Ceiling mounting plate- Connect the network and power cables to the camera. See 14.4 Connecting the Camera in the Quick Start Guide.
- Access the live view. See 21.2 Accessing the Live View in the Quick Start Guide.
- Adjust the camera to a desired angle as illustrated below.
Tip: The 3-axis mechanism offers flexible and easy ceiling / wall installation.
Pan Adjustment
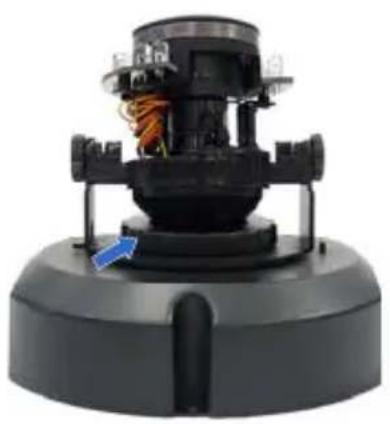
natural_image
Close-up of a black industrial device with visible internal components and a blue arrow pointing to a component (no text or symbols)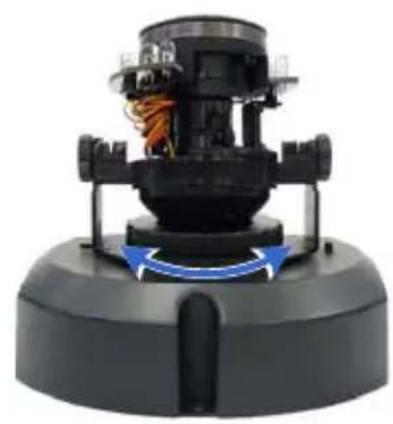
natural_image
Close-up of a black industrial machine with blue directional arrows indicating rotational flow (no text or symbols visible)Tilt Adjustment
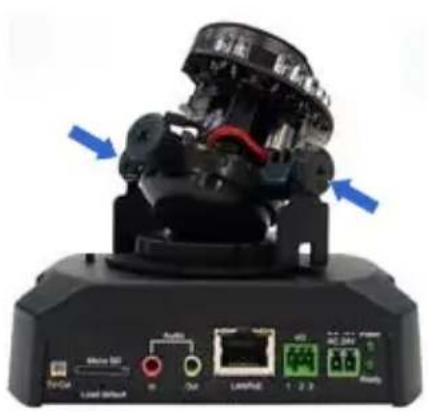
natural_image
Close-up of a black robotic device with labeled ports and connectors, showing no readable text or symbols.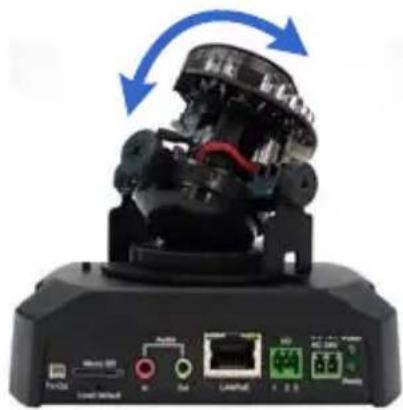
natural_image
Close-up of a black industrial machine with red wiring and ports, showing blue directional arrows indicating rotation or movement (no text or symbols visible)Rotational Adjustment
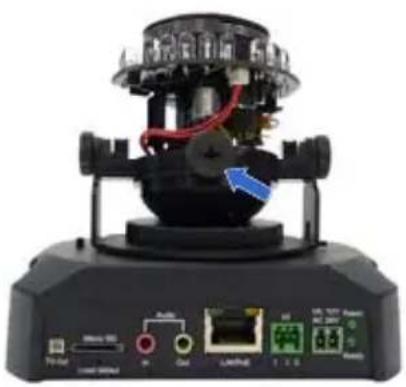
natural_image
Close-up of a black industrial device with visible ports and wiring, no readable text or symbols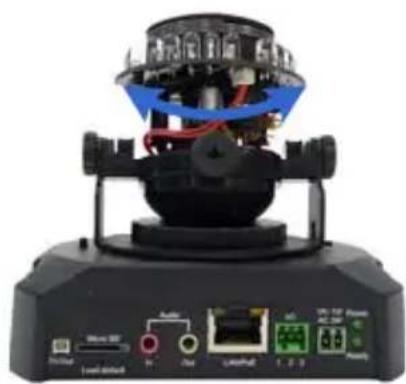
natural_image
Close-up of a black industrial radar or optical instrument with visible components and wiring, mounted on a base (no readable text or symbols)- A djust for image clarity using the GV-IP Device Utility program. For details, see 21.3 Adjusting Image Clarity in the Quick Start Guide.
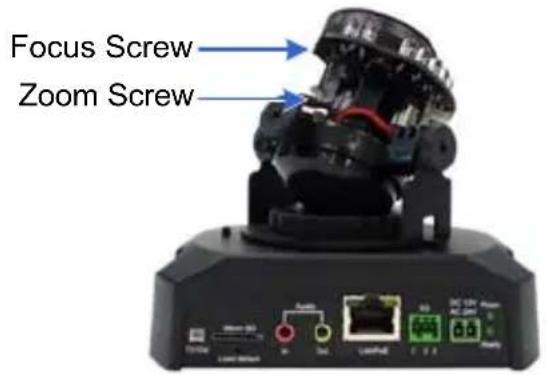
text_image
Focus Screw Zoom Screw- Secure the housing cover as shown in step 2. Remove the indicated part when necessary.
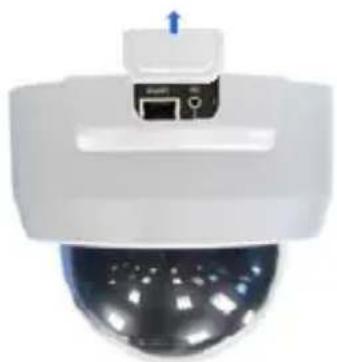
natural_image
Close-up of a white security camera with a spherical dome and mounted sensor (no visible text or symbols)Note: Adjust the black mask inside the housing cover to make sure the camera view is not obscured.
15.3.2 In-Ceiling Mount
natural_image
Close-up of a white surveillance camera with black lens and circular head (no visible text or symbols)- Follow step 2 in the Hard-Ceiling Mount section to remove the housing cover and take out the camera body.
- Paste the supplied sticker onto a desired location on the ceiling and cut a circle on the ceiling along the edge of the sticker.
- On the mounting plate, locate the 3 holes labeled as 1 and insert the 3 copper pillars from the back side.
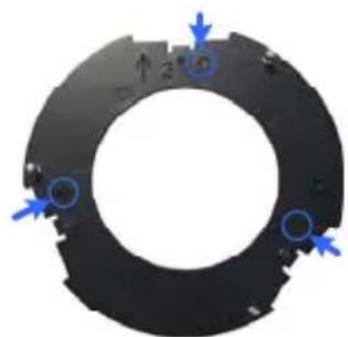
natural_image
Circular mechanical component with blue arrows pointing to features, no visible text or symbols
natural_image
Circular mechanical component with four metallic pins, no visible text or symbols- From the side with the numbering, secure the copper pillars with 3 copper pillar screws.
natural_image
Mechanical component with blue arrows indicating direction, no visible text or symbols- P lace the 3 mounting brackets at the indent next to the copper pillars (labeled as 2 on the mounting plate) and secure them using the 3 bracket screws.
natural_image
Circular mechanical component with four protruding components and mounting holes (no visible text or symbols)
natural_image
Mechanical device with a circular base and lever mechanism (no visible text or symbols)- Place the mounting plate on the camera body with the copper pillars inserted in the locations indicated below. The arrow on the mounting plate should be pointing toward the front of the camera.
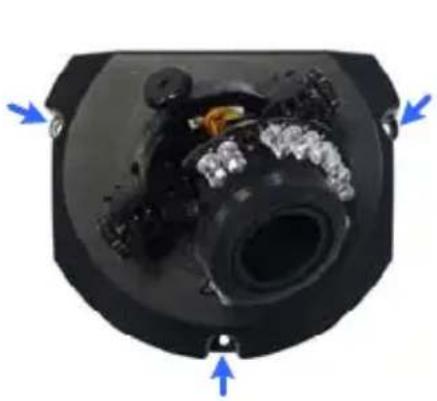
natural_image
Interior view of a mechanical device with blue directional arrows indicating orientation (no text or symbols)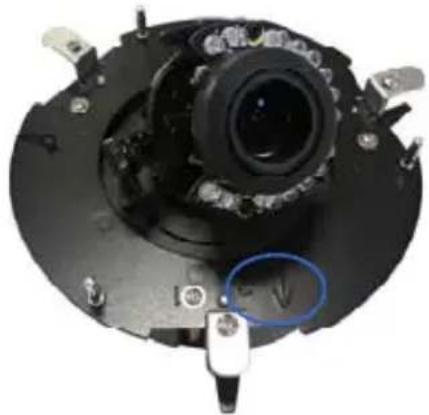
natural_image
Close-up of a mechanical component with a central lens and mounting brackets (no visible text or symbols)- From the bottom of the camera, secure the copper pillars using the 3 copper pillar screws.
-
Place the camera into the ceiling opening.
-
On t he back side, make sure the black plastic clips are slightly above the ceiling board and pointing outward.
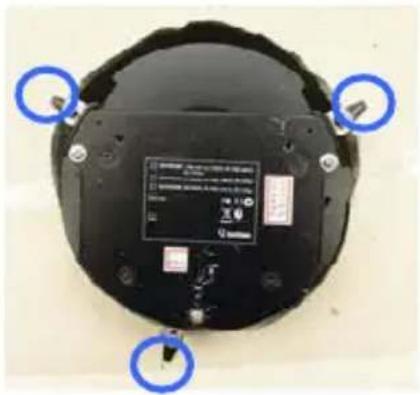
natural_image
Top-down view of a black robotic device with three blue circular annotations pointing to its sides (no readable text or symbols on the device itself)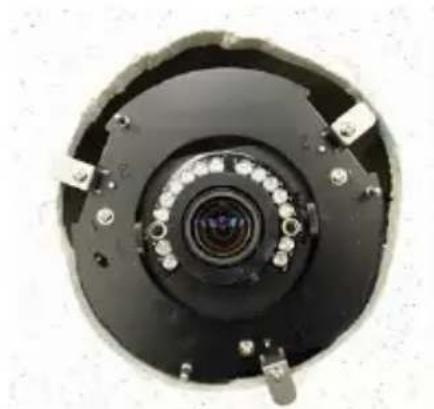
natural_image
Close-up of a camera lens assembly with concentric rings and mounting holes (no text or symbols visible)Back Side Front Side
- Tighten the bracket screws from the front side of the camera.
- Connect the network and power cables to the camera. See 15.4 Connecting the Camera in the Quick Start Guide.
- Access the live view. See 21.2 Accessing the Live View in the Quick Start Guide.
- Follow steps 6 and 7 in the Hard-Ceiling Mount section to adjust the angle, focus and zoom of the camera.
- Use the housing cover thread and the thread lock screw to attach the housing cover to the camera body.
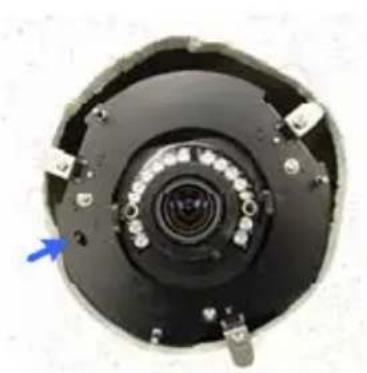
natural_image
Close-up of a camera lens assembly with a blue arrow pointing to the center (no text or symbols visible)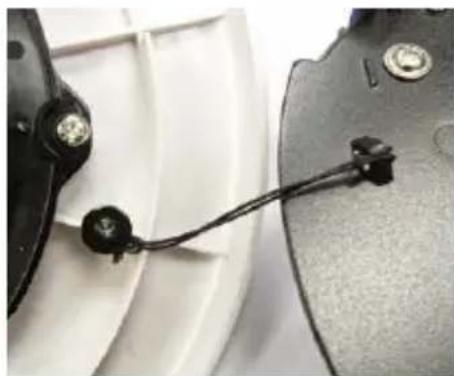
natural_image
Close-up of a black cable with a small connector attached to a white surface, next to a dark mechanical component (no visible text or symbols)- Place the housing cover on the camera body with the GeoVision logo pointing toward the front of the camera.
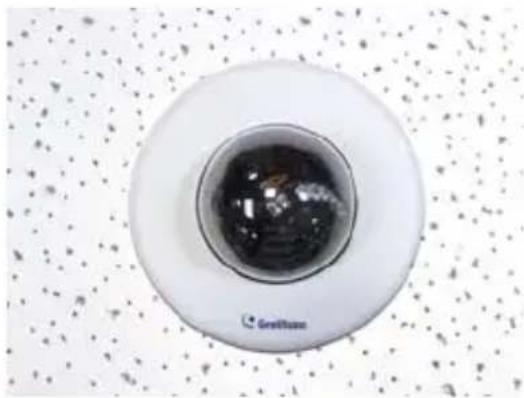
natural_image
Top-down view of a white ceiling-mounted air conditioner unit with a dark spherical lens and 'Greithum' logo, set against a speckled background (no text or symbols on the device itself)15.3.3 Wall-Surface Mount
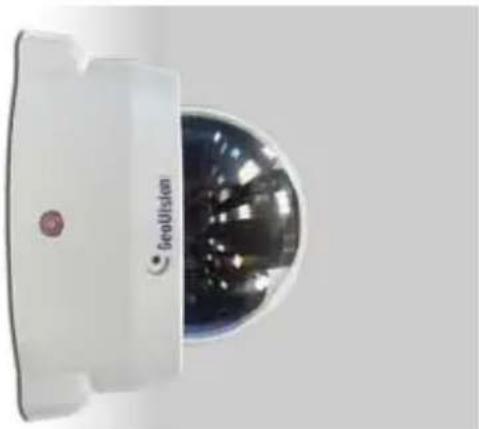
natural_image
Close-up of a white surveillance camera with a spherical lens showing internal reflection (no text or symbols visible)-
Follow step 2 in the Hard-Ceiling Mount section to remove the housing cover and take out the camera body.
-
Paste the supplied sticker onto a desired location on the wall. Drill the three red dots, and the ellipse mark only if you wish to run the wires into the wall.
-
Insert the short screw anchors and secure the camera and the mounting plate with three plate screws.
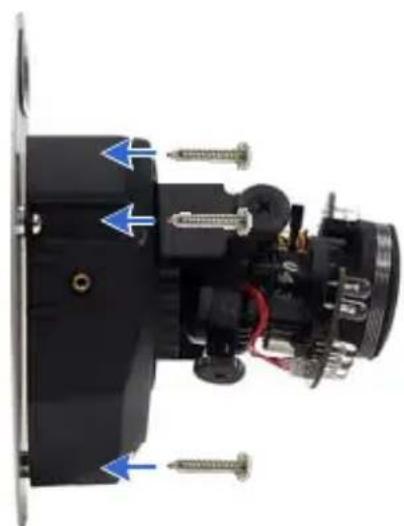
natural_image
Close-up of a mechanical device with screws and screw holes, no visible text or symbols-
Connect the network and power cables to the camera. See 15.4 Connecting the Camera in the Quick Start Guide.
-
Access the live view. See 21.2 Accessing the Live View in the Quick Start Guide.
GeoVision
- Fol low steps 6 and 7 in the Hard-Ceiling Mount section to adjust the angle, focus and zoom of the camera.
- Follow step 8 in the Hard-Ceiling Mount section to secure the housing cover.
15.4 Connecting the Camera

text_image
Diagram of a camera or radar device with labeled components including connectors, cables, and ports- Use a standard network cable to connect the camera to your network.
- Optionally connect a speaker and an external microphone.
- Optionally connect a monitor using a Video Out wire. Enable the function by selecting the signal format in the TV Out field in the Web interface. See TV Out setting, in the Video Settings section, Administrator Mode Chapter, GV-IPCAM H.264 Firmware Manual on the Software DVD.
- Optionally connect to input / output devices. For details, see I/O Terminal Block, Fixed IP Dome Chapter, GV-IPCAM H.264 Firmware Manual on the Software DVD.
- Connect power using one of the following methods:
- plugging the power adapter to the power port.
- using the Power over Ethernet (PoE) function and the power will be provided over the network cable.
- The status LED of the camera will be on.
16. Target Fixed IP Dome
16.1 Packing List
• Target Fixed IP Dome
- Screw x 3
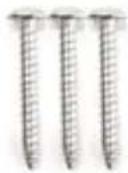
- TV-Out Wire
- Torx Wrench
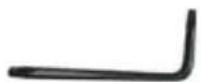
- Screw Anchor x 3
- Installation sticker
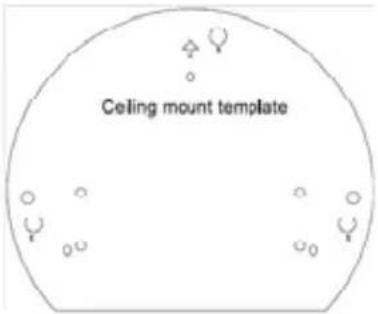
text_image
Ceiling mount template• GV-IPCam H.264 Software DVD • Warranty Card
• GV-NVR Software DVD
Note: The power adapter can be purchased upon request.
16.2 Overview
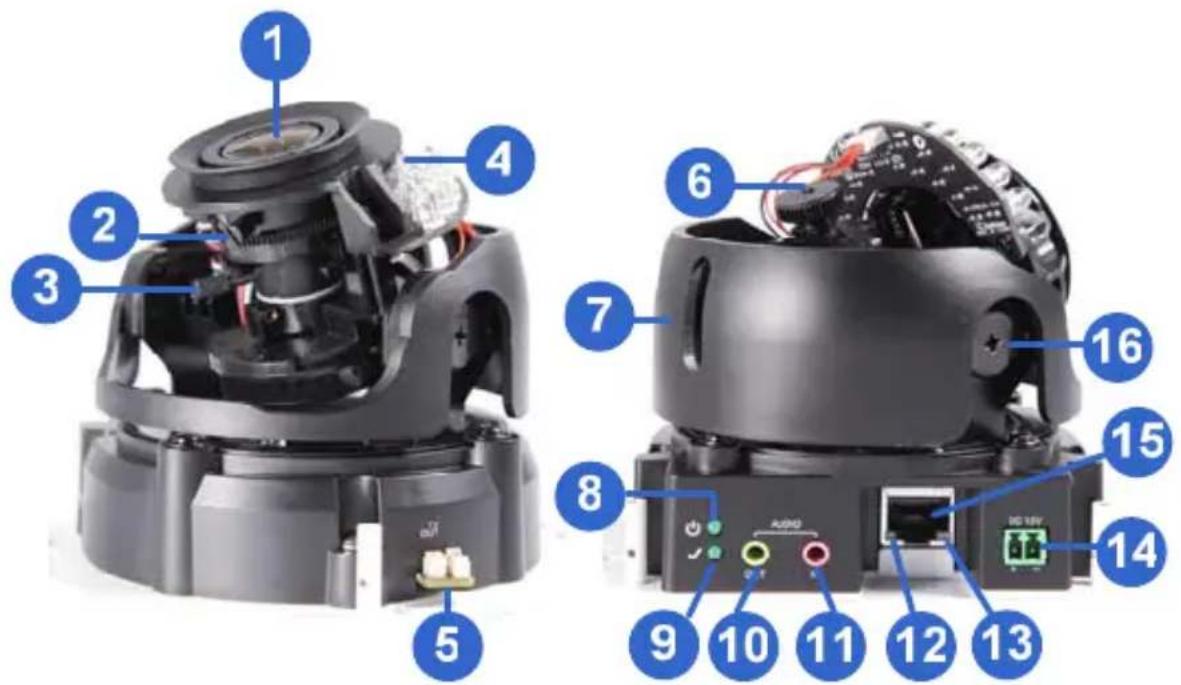
text_image
Technical diagram of a mechanical device with numbered components and labeled parts, including audio and port connections.| No. | Name | Description |
| 1 | Lens | Receives image inputs. |
| 2 | Focus Screw | Adjusts the focus of the camera. |
| 3 | Zoom Screw | Adjusts the zoom of the camera. |
| 4 | Default Button | Resets the camera to factory default. For details, see 24. Restoring to Default Settings. |
| 5 | TV-Out Provides video inputs (D1 resolution). | |
| 6 | Rotational Screw | Loosens to adjust the camera angle. |
| 7 | Pan Disc Loosens to pan the camera. | |
| 8 | Power Turns on (green) when power is on. | |
| 9 | Status Turns on (green) when the system is ready. | |
| 10 | Audio Out Connects a speaker for audio output. | |
| 11 | Audio In Connects a microphone for audio input. | |
| 12 | Link Turns on (green) when the network is connected. | |
| 13 | ACT | Turns on (orange) when data are being transmitted. |
| 14 | DC | 12V Port Connects to power. |
| 15 | LAN / PoE | Connects to a 10/100 Ethernet or PoE. |
| 16 | Tilt Screw | Loosens the screw to adjust tilt angle. |
Note: The TV-out function can only be used during installation to adjust the focus of the camera. To use the TV out function, connect the supplied black BNC wire to a monitor and select your signal format (NTSC or PAL) at the TV Out field on the Web interface. The default signal format is NTSC. For details, see 4.1.1 Video Settings, GV-IPCam H.264 Firmware Manual. The TV-out wire must be removed before you secure the housing cover.
16.3 Installation
The Target Fixed Dome can be installed on the wall or the ceiling. Before installing the camera, make sure the installing site is shielded from rain and moisture.
- Use the supplied torx wrench to loosen three screws on the housing cover, and take out the camera body.
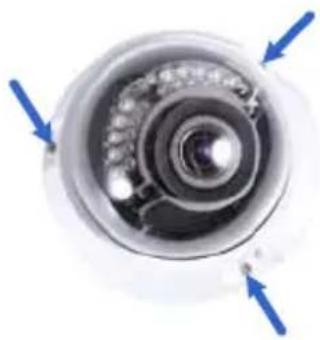
natural_image
Close-up of a mechanical component with blue arrows indicating direction (no text or symbols)- Place the installation sticker where you want to install it, and make 3 marks on the ceiling or the wall for screw anchors.
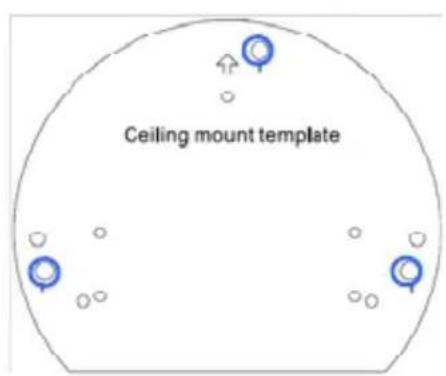
text_image
Ceiling mount template- Drill the marks and insert the screw anchors.
- Connect the camera to network and power. For details, see 16.4 Connecting the Camera.
- Secure the camera to the ceiling or the wall with the supplied screws.
- Access the live view. For details, see 21.2 Accessing the Live View in the Quick Start Guide.
Note: The TV-out function can only be used during installation to adjust the focus of the camera. To use the TV out function, connect the supplied black BNC wire to a monitor and select your signal format (NTSC or PAL) at the TV Out field on the Web interface. The default signal format is NTSC. For details, see 4.1.1 Video Settings, GV-IPCam H.264 Firmware Manual. The TV-out wire must be removed before you secure the housing cover.
- Adjust image clarity using the GV-IP Device Utility program. For details, see 21.3 Adjusting Image Clarity in the Quick Start Guide.
- Loosen the tile screw, pan screw or rotational screw. Adjust the angles based on the live view as needed, and tighten the screws again.
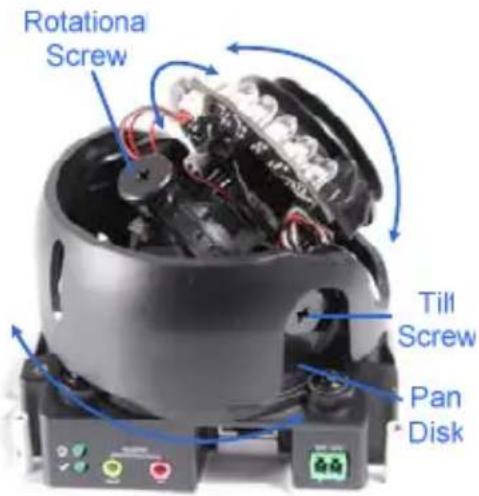
text_image
Rotational Screw Till Screw Pan Disk- Place the housing cover back and tighten the three screws to secure it. Remove the indicated part when necessary.
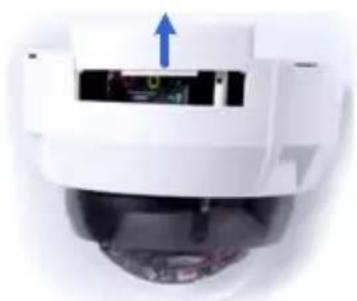
natural_image
Close-up of a white surveillance camera with a blue upward arrow pointing to the lens (no visible text or symbols)16.4 Connecting the Camera
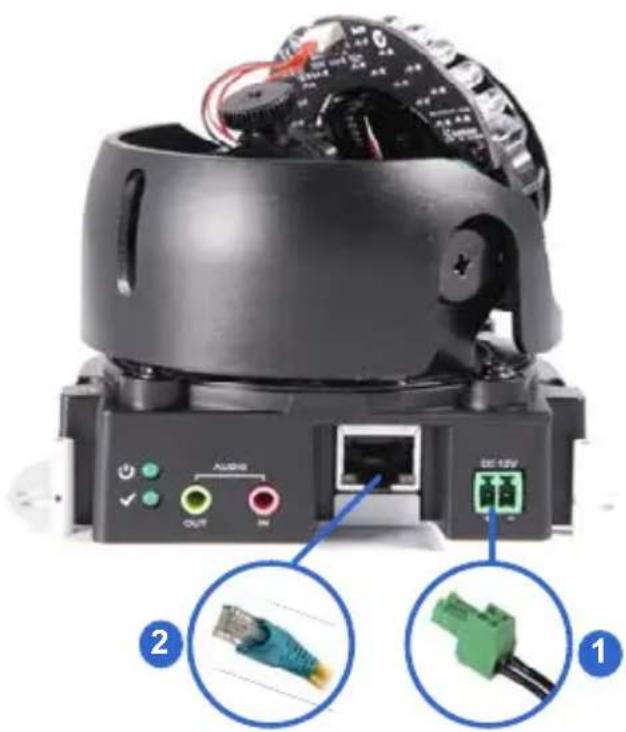
natural_image
Close-up of a black electronic device with labeled ports and connectors, showing internal wiring and connections (no readable text or symbols)-
Connect power using one of the following methods:
-
Plug the power adapter to the 12V terminal block. The power adapter is an optional device. For detail, see Options in the manual.
- Use the Power over Ethernet (PoE) function and the power will be provided over the network cable.
The power and status LEDs shall turn on (green).
- Use a standard network cable to connect the camera to your network.
- You are ready to access the live view, adjust the image clarity and configure the basics. See Getting Started, Chapter 2, GV-IPCam H.264 Firmware Manual.
17. Cube Camera
17.1 Packing List
- Cube Camera
• Supporting Rack
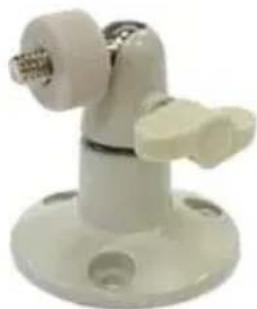
natural_image
White plastic electrical connector with mounting base and three pins (no text or symbols visible)- Screw x 3
- Screw Anchor x 3
natural_image
Three identical gray, textured, cylindrical objects with no visible text or symbols• GV-IPCam H.264 Software DVD
- Power Adapter
• GV-NVR Software DVD
- Warranty Card
Note: The power adapter can be excluded upon request.
17.2 Overview
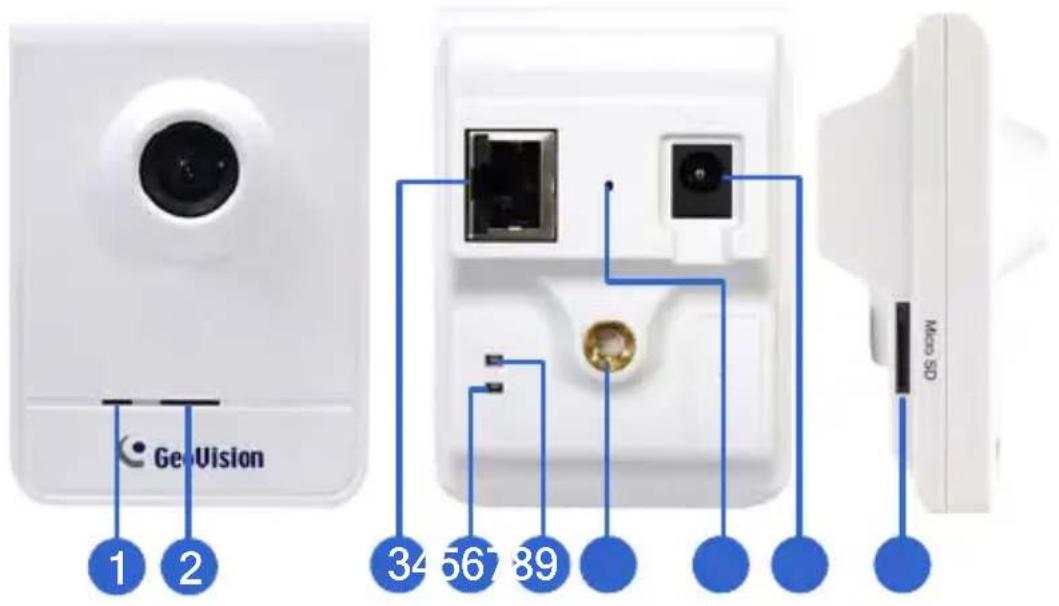
text_image
GE-Vision 1 2 34 56 7 89 MDC 50| No. | Name | Description | ||
| 1 | Microphone | Receives | sounds. | |
| 2 | Speaker | Plays | sounds. | |
| 3 | LAN | Connects to a 10/100 Ethernet. | ||
| 4 | Status | LED | Turns red when the system powers on. Turns orange when the system is ready. | |
| 5 | LAN | LED | Turns green when the camera is connected to the Internet. | |
| 6 | Stand screw | Connects to the Supporting Rack. | ||
| 7 | Default Button | Resets to factory default. For details, see 24. Restoring to Default Settings in the Quick Start Guide. | ||
| 8 | Power Port | Connects to the power adapter. | ||
| 9 | Memory Card Slot | Receives a micro SD card (SD/SDHC, version 2.0 only, Class 10) to store recording data. | ||
17.3 Installation
Follow the steps below to install, connect to and adjust your Cube Camera.
- Put the supporting rack on the desired location and make marks for screw anchors.
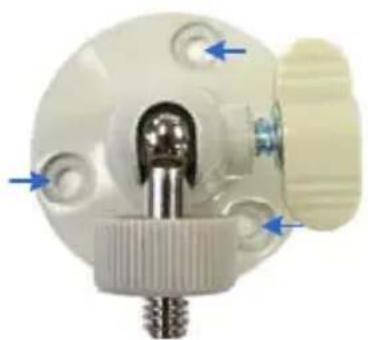
natural_image
Close-up of a mechanical component with blue arrows indicating features, no visible text or symbols- Drill the marks and insert the screw anchors.
- Secure the supporting rack onto the wall using the supplied screws.
- Screw the camera onto the supporting rack and fasten the indicated screw.
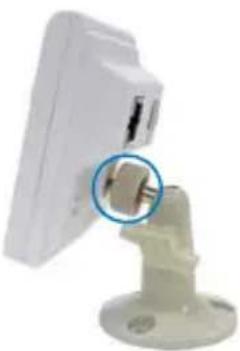
natural_image
Close-up of a white electronic device with a small connector and a green base mount (no visible text or symbols)-
Connect the network and power cables to the camera. See 17.4 Connecting the Camera in the Quick Start Guide.
-
Access the live view. See 21.2 Assigning the Live View in the Quick Start Guide.
-
A adjust the angles of the camera based on live view and fasten the indicated screw.
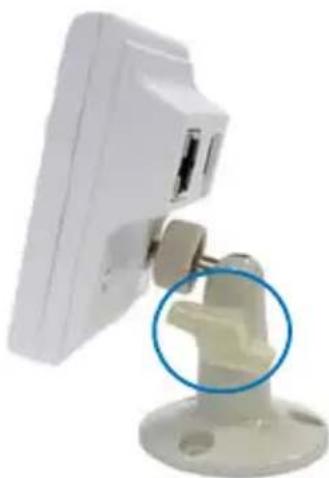
natural_image
Close-up of a white electronic device with a blue circle highlighting a mechanical component (no text or symbols visible)17.4 Connecting the Camera
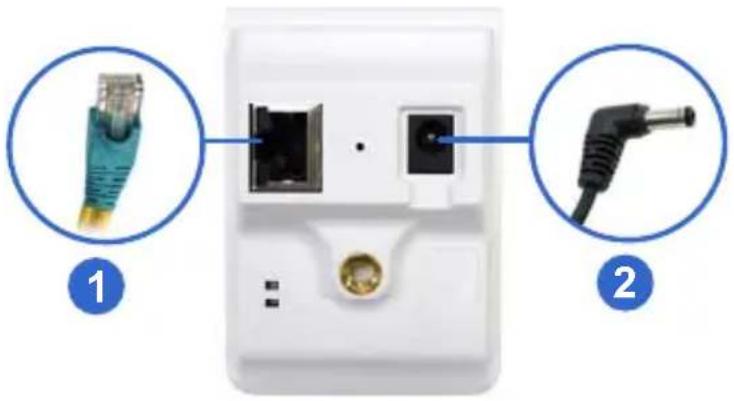
natural_image
Close-up of a white electronic device showing two labeled connectors: one with a green cable and the other with a black plug (no text or symbols visible)- Use a standard network cable to connect the camera to your network.
- Power on using the power adapter.
- The status LED of the camera will be orange. Then you can set the IP address for the unit. See 21. Accessing the Camera in the Quick Start Guide.
IMPORTANT: Be sure to use the GeoVision power adapter to power up the camera. To use your own power cable, make sure you look up the power source value indicated at the camera's back panel.
18. Advanced Cube Camera
18.1 Packing List
- Cube Camera
• Supporting Rack
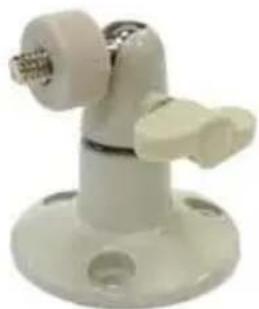
natural_image
White plastic mechanical component with a flanged base and protruding knob (no text or symbols visible)- Screw x 3
- Screw Anchor x 3
natural_image
Three identical gray textured objects with serrated edges, arranged horizontally (no text or symbols)• GV-IPCam H.264 Software DVD
- Power Adapter
• GV-NVR Software DVD
- Warranty Card
Note: The power adapter can be excluded upon request.
18.2 Overview
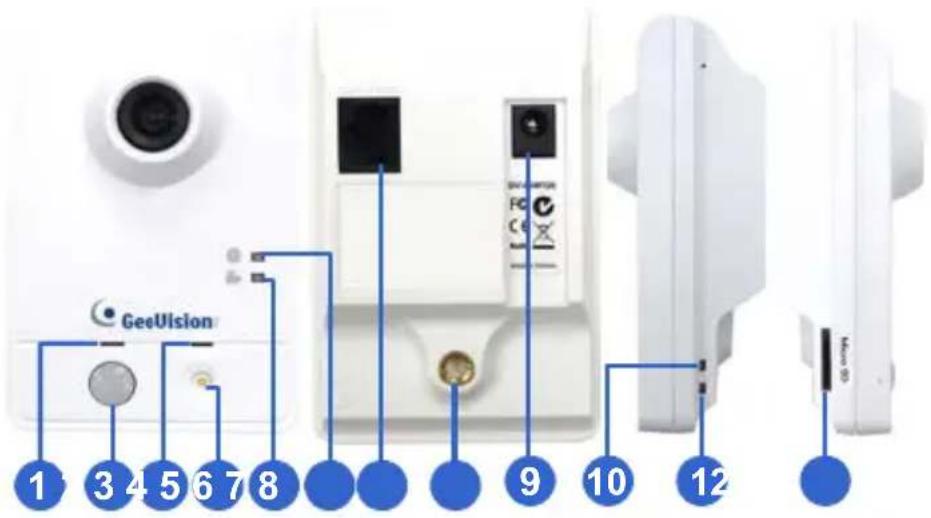
text_image
GeeUlsion 1 3 4 5 6 7 8 9 10 12| No. | Name | Description | |||
| 1 | Speaker | Plays sounds for tampering and motion alarm, and listens to the audio around the camera. To set up alarm sound, see Speaker section, Administrator Mode Chapter, GV-IPCAM H.264 Firmware Manual on the Software DVD. | |||
| 2 | PIR | sensor | Passive | infrared | sensor. |
| 3 | Microphone | Receives | sounds. | ||
| 4 | White Illumination LED | When the PIR sensor detects the movement, the white illumination LED lights up in a low light scene. To set up the LED, see Video Settings section, Administrator Mode Chapter, GV-IPCAM H.264 Firmware Manual on the Software DVD. | |||
| 5 | Monitoring LED | Reflects monitoring status of the camera. See the below table. | |||
| 6 | Live View LED | Reflects live view status of the camera. See the below table. | |||
| 7 | LAN / PoE | Connects to a 10/100 Ethernet or PoE. | |||
| No. | Name | Description | |||
| 8 | Stand screw | Connects to the Supporting Rack. | |||
| 9 | Power port | Connects to the power adapter. | |||
| 10 | Ready | LED | Reflects system status of the camera. See the below table. | ||
| 11 | LAN | LED | Reflects LAN status of the camera. See the below table. | ||
| 12 | Memory Card Slot | Receives a micro SD card (SD/SDHC, version 2.0 only, Class 10) to store recording data. | |||
IMPORTANT: The White Illumination LED can reach high temperatures. Be sure not to touch the LED with bare hand.
| LED Status Description | |||
| Live View |  |  | Turns on orange light when you see the live view. |
| Monitoring |  |  | Turns on red light when you start monitoring. |
| Ready |  | [THZH] | Turns on green light when the system is ready.Flashes green light when you load default value. |
| LAN |  |  | Turns on green light when you connect the LAN Network.Turns on blue light when you connect the Wi-Fi Network (for GV-CAW120 / 220 only). |
18.3 Installation
Follow the steps below to install, connect to and adjust your Advanced Cube Camera.
- Put the supporting rack on the desired location and make marks for screw anchors.
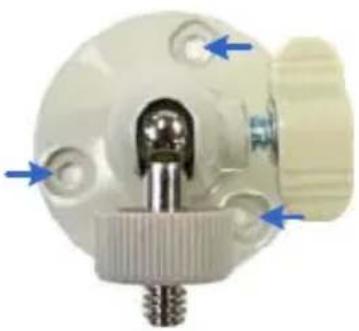
natural_image
Close-up of a mechanical component with blue arrows indicating direction (no text or symbols visible)- Drill the marks and insert the screw anchors.
- Secure the supporting rack onto the wall using the supplied screws.
- Screw the camera onto the supporting rack and fasten the indicated screw.
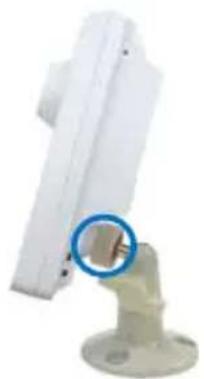
natural_image
White cylindrical device mounted on a stand with a blue circular highlight (no text or symbols visible)-
Connect the network and power cables to the camera. See 18.4 Connecting the Camera in the Quick Start Guide.
-
Access the live view. See 21.2 Accessing the Live View in the Quick Start Guide.
-
Adjust the angle of the camera based on live view and fasten the indicated screw.
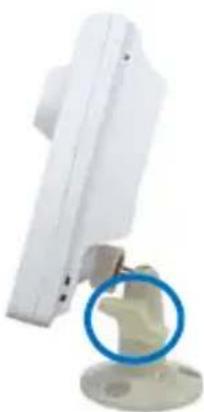
natural_image
White electronic device with a blue circular button on a stand (no visible text or symbols)- For GV-CAW120/220, to connect to the Internet through wireless service, follow the steps in 21.2.3 Configuring the Wireless Connection in the Quick Start Guide.
18.4 Connecting the Camera
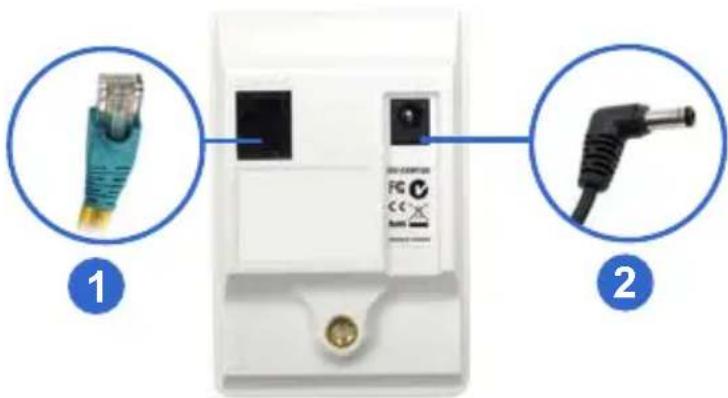
text_image
Diagram showing two labeled components of an electronic device with connectors and a close-up view of the connector (1).- Use a standard network cable to connect the camera to your network.
-
Connect power using one of the following methods:
-
Plug the power adapter to the power port.
-
Use the Power over Ethernet (PoE) function and the power will be provided over the network cable.
-
When the ready LED of the camera shines green, the camera is ready for use.
Note: PoE function is only supported for GV-CA120 and GV-CA220.
19. PT Camera
19.1 Packing List
• GV-PT130D/220D/320D
- Mounting Cover
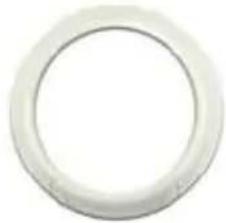
natural_image
Circular white ring with a flat top, no text or symbols visible- Screw Anchor x 3
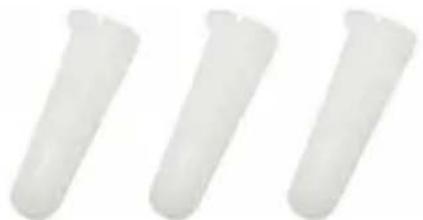
natural_image
Three white plastic test tubes arranged horizontally (no text or symbols visible)- Short Screw x 3
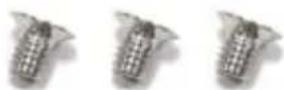
- Mounting Base
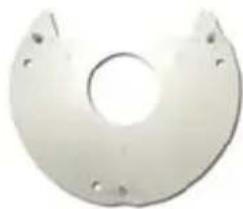
natural_image
White plastic mechanical part with a central hole and four corner holes (no text or symbols)- Wall Mount Bracket
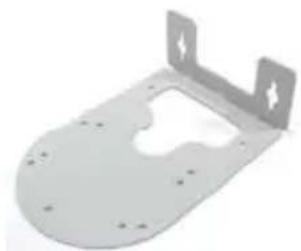
natural_image
Metallic metal bracket with mounting holes and a cutout (no text or symbols)- Long Screw x 3
natural_image
Three identical metal screw fasteners arranged horizontally (no text or symbols visible)- Round Screw x 3
- Terminal Block
- Power Adapter
• GV-NVR Software DVD
- Washer x 3


• GV-IPCAM H.264 Software DVD
- Warranty Card
Note: The power adapter can be excluded upon request.
19.2 Overview
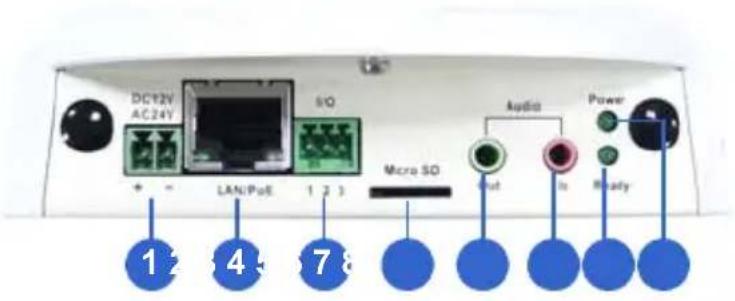
text_image
DC12V AC24Y LAN/PoE 1 2 3 Micro SO Audio Is Ready 1 2 3 4 5 7 8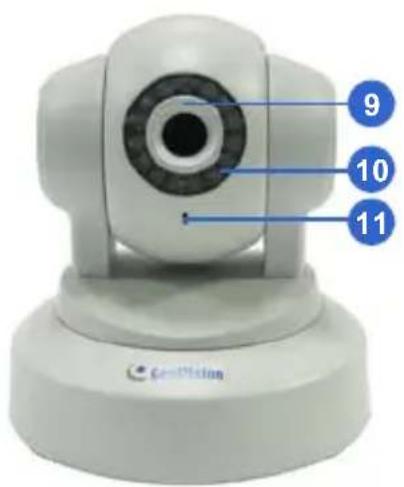
text_image
9 10 11 CertVision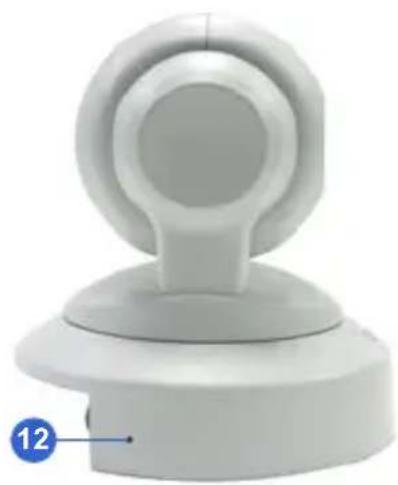
natural_image
White 3D-rendered device with a circular top and base, labeled with number 12 (no text or symbols on the device itself)| No. | Name | Description | |
| 1 | DC 12V / AC 24VTerminal Block | Connects to a DV 12V or AC 24V Power Adapter. | |
| 2 | LAN / PoE | Connects to a 10/100 Ethernet or PoE. | |
| 3 | I/O | Terminal | Connects to I/O terminal device. For details, see I/O Terminal Block, PTZ BlockCamera Chapter, GV-IPCAM H.264Firmware Manual on the Software DVD. |
| 4 | Memory | Card | Receives a micro SD card (SD/SDHC, version 2.0 only, Class 10) to store recording data. |
| 5 | Audio Out | Connects a speaker for audio output. | |
| 6 | Audio In | Connects a microphone for audio input. | |
| 7 | Status | LED | Turns green when the system operates normally and turns off when system error occurs. |
| 8 | Power | LED | Turns green when the power is on and turns off when the power is off. |
| 9 | Focus | Ring | Manually rotates this ring left or right to adjust focus. |
| 10 | IR | Turns on to automatically illuminate a surveillance area by infrared light to produce clearer images during the night. | |
| 11 | Microphone | Records the sounds. | |
| 12 | Default | Resets to system default settings. For details, see 24. Restoring to Default Settings in the Quick Start Guide. | |
19.3 Installation
The GV-PT series is designed for indoor usage. Make sure that the installing location is shielded from rain and moisture. There are two ways to install the camera: Ceiling Mount and L-Shaped Wall Mount.
19.3.1 Ceiling Mount
- Use the mounting base to make 3 marks on the wall for screw anchors.
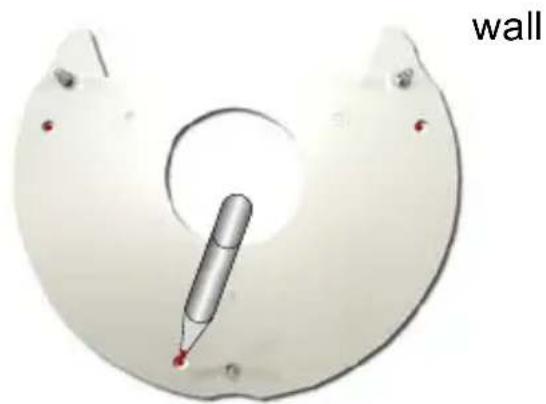
natural_image
3D rendered mechanical part with a cylindrical tool inserted into a circular opening, labeled 'wall' in the corner (no other text or symbols)- Drill the marks and insert 3 screw anchors.
- Attach the mounting base with the PT Camera with 3 short screws.
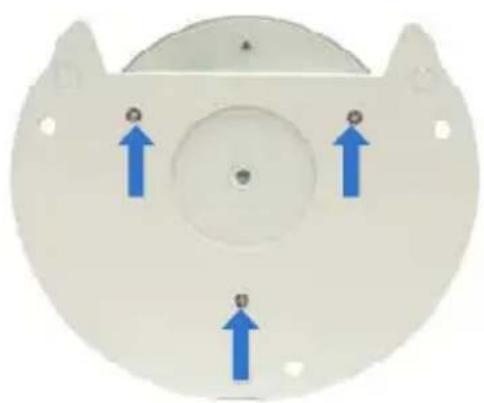
natural_image
Top-down view of a white plastic component with three blue upward arrows indicating directional flow or movement (no text or symbols)- Fix the mounting base (now with the PT Camera attached) to the wall with 3 long screws.
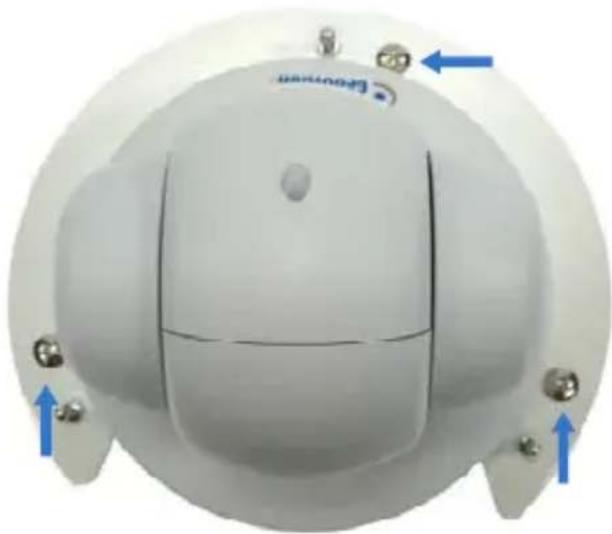
natural_image
3D rendered white object with internal structure and blue directional arrows indicating movement or force (no readable text or symbols)- Put on the mounting cover. To fit the installation environment, you can cut the parts indicated by arrows to make an opening for wires and cables.
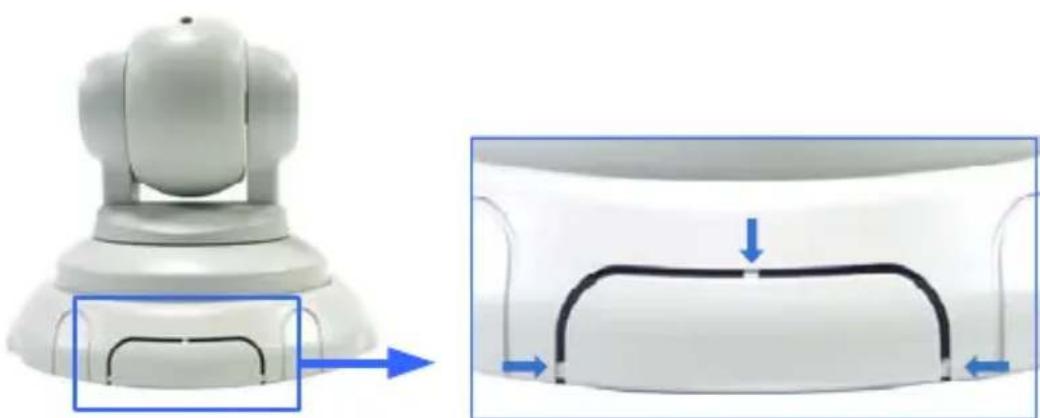
natural_image
3D rendering of a robotic arm component before and after assembly, showing internal structure with blue arrows indicating motion (no text or symbols)19.3.2 L-Shaped Wall Mount
You may wall-mount the GV-PT series with or without the mounting cover.
- Take the wall mount bracket and make 2 marks on the wall for screw anchors.
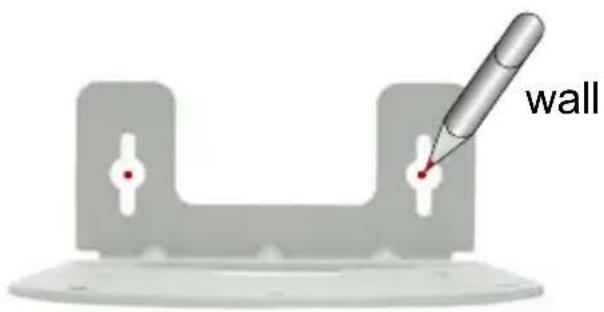
text_image
wall- Drill the marks and insert 2 screw anchors.
- Insert the long screws and leave enough distance (approximately 2 mm) to hang the wall mount bracket later.
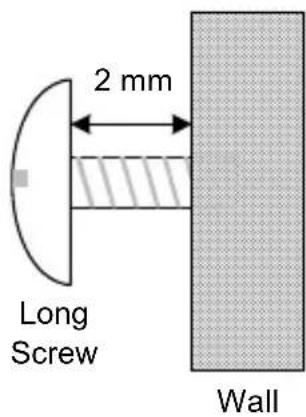
text_image
2 mm Long Screw Wall- Hang t he wall mount bracket on the screws and push the wall mount bracket downward. Make sure the long screws are tightened.
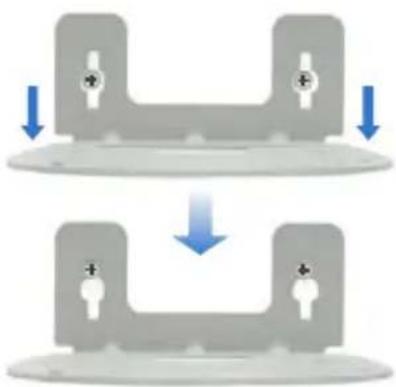
natural_image
Two-step diagram showing a mechanical component with downward arrows indicating motion or assembly (no text or symbols)- Without Mounting Cover
Attach the wall mount bracket with the PT Camera using 3 washers and 3 round screws.
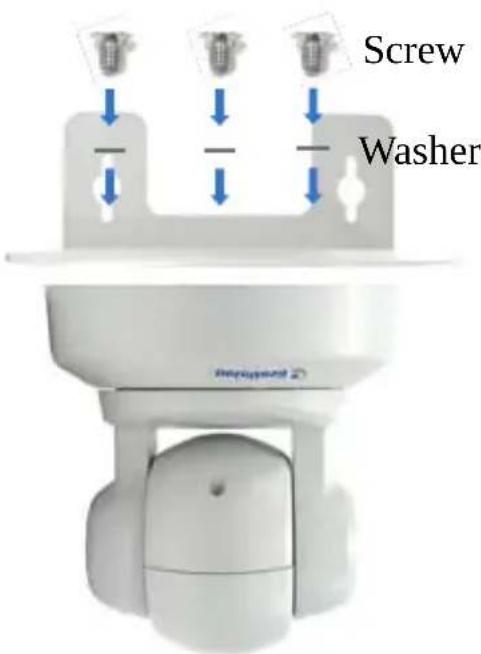
text_image
Screw WasherWith Mounting Cover
- To install the mounting cover, attach the mounting base to the camera and then put on the mounting cover. See steps 3 and 5 in 19.3.1 Ceiling Mount.
- Attach the wall mount bracket with the PT Camera using 3 round screws.
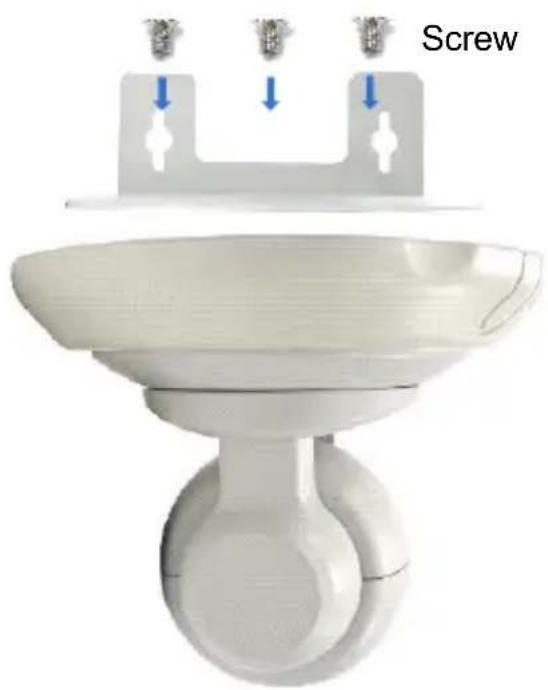
natural_image
3D rendering of a white toilet with a screw and three blue arrows indicating force or movement (no text or symbols on the object itself)19.4 Connecting the Camera
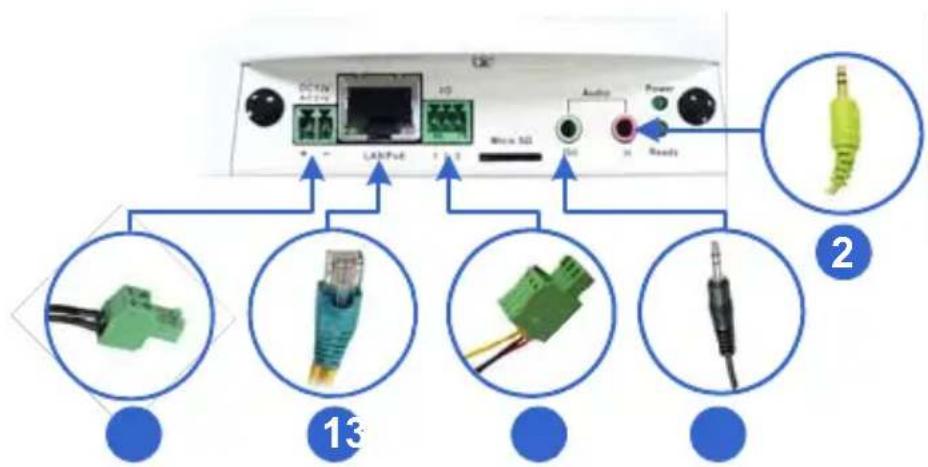
text_image
DC DC+123 LAMP4 USB 5G Audio Power Reads 13 2- Use a standard network cable to connect the camera to your network.
- Optionally connect a speaker and an external microphone.
-
Connect power using one of the following methods:
-
plugging the power adapter to the power port.
-
using the Power over Ethernet (PoE) function to provide power over the network cable.
-
Optionally connect to an input / output device. For details, see I/O Terminal Block, PTZ Camera Chapter, GV-IPCAM H.264 Firmware Manual on the Software DVD.
- The status LED of the camera will be on.
- Access the camera See 21. Accessing the Camera in the Quick Start Guide.
- Adjust for image clarity using GV-IP Device Utility. For details, see 21.3 Adjusting Image Clarity in the Quick Start Guide.
20. Pinhole Camera
20.1 Packing List
- Pinhole Camera
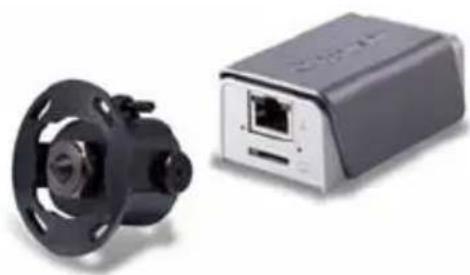
natural_image
Two electronic devices: a black mechanical component and a gray rectangular device with ports (no visible text or symbols)- Camera Adhesive Tape x 2
natural_image
Two identical circular ring designs with pink markings, no text or symbols present.- Main Body Mount
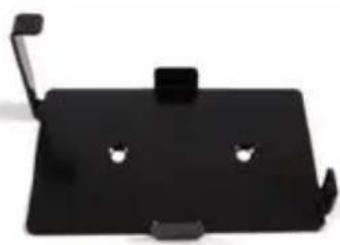
natural_image
Black rectangular electronic device with two small white cat windows and a scroll wheel (no text or symbols visible)• 1 m (3.28 ft) RJ-12 Cable
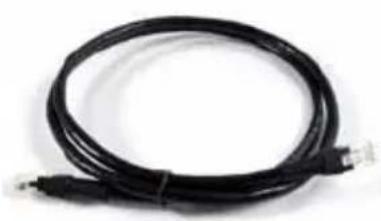
natural_image
Coiled black cable with connectors, no visible text or symbols• Installation Sticker
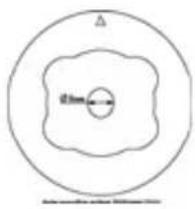
text_image
△ d=5mm- Main Body Adhesive Tape
text_image
-III -III A VBE 3M V 3M VBB™ -III -III A VBE 3M V 3M VBB™ -III -III A VBE- M3 Screw x 2
M2 Screw
- GV-IPCAM H.264 Software DVD
• GV-NVR Software DVD
- Warranty Card
20.2 Overview
Camera Lens
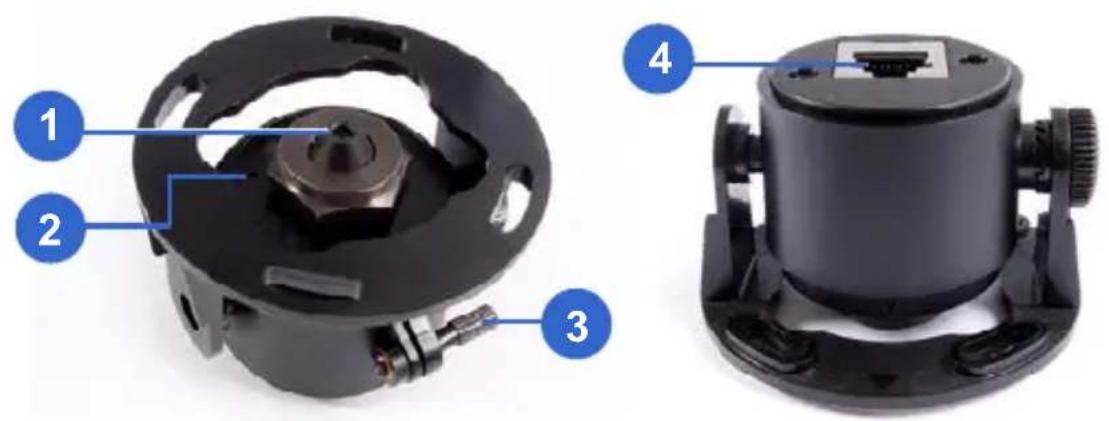
Main Body
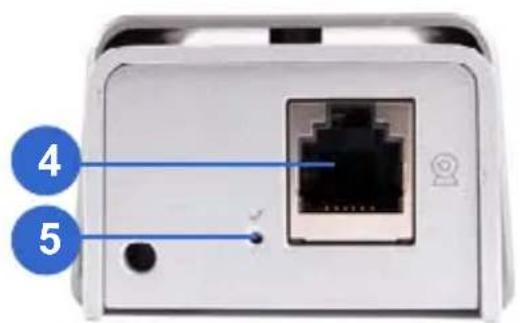
text_image
4 5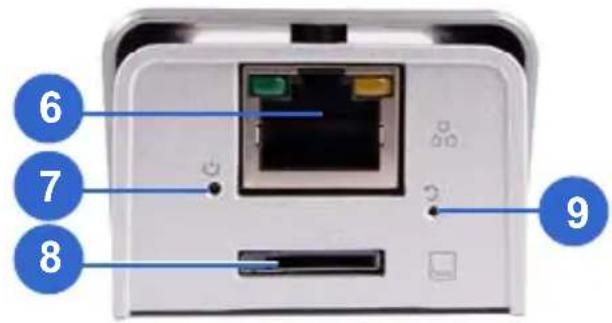
text_image
6 7 8 9| No. | Name | Description | |
| 1 | Lens | Receives | images. |
| 2 | Microphone | Receives | sounds. |
| 3 | Lens Screw | Loosens to adjust the camera lens. | |
| 4 | RJ12 Port | Use the supplied RJ12 cable to connect the camera lens and main body. | |
| 5 | RJ12 Status LED | Turns on (green) when the camera lens and main body are connected. | |
| 6 | PoE Connects to a PoE adapter. | ||
| 7 | Status LED | Turns on (green) when the system is ready. | |
| 8 | Memory Card Slot | Inserts a micro SD card (SD/SDHC, version 2.0, Class 10) to store recording data. | |
| 9 | Default Button | Resets to system default settings. For details, see 24. Restoring to Default Settings in the Quick Start Guide. | |
20.3 Installation
The Pinhole Camera is designed for indoors. You can install the camera lens behind a wall or the ceiling board. Note that the thickness of the wall or ceiling board must be less than 4 mm.
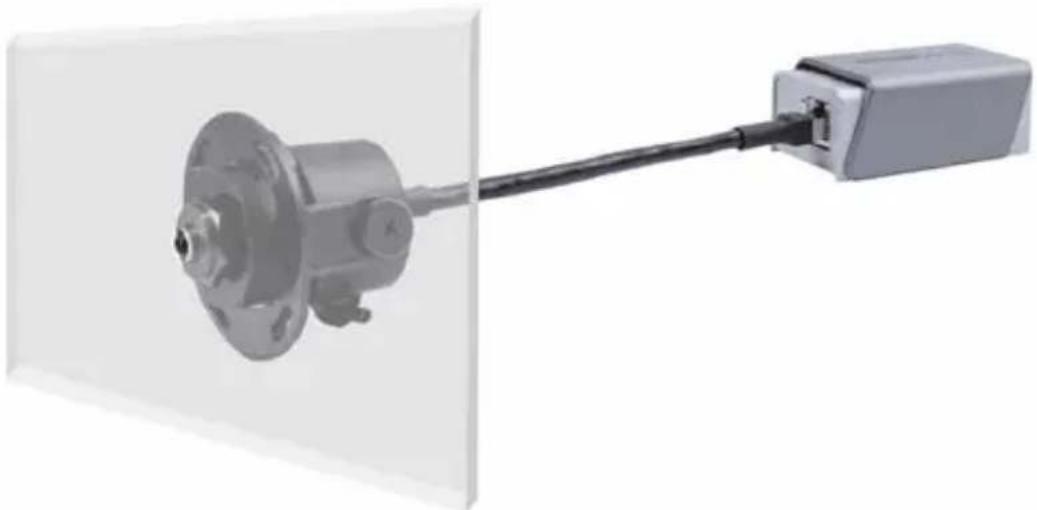
natural_image
Mechanical assembly diagram showing a motor connected to a cable, with no visible text or symbols.- Paste the installation sticker on the ceiling or the wall where you want to install the camera lens.
- Drill a hole 9 mm in diameter. Be sure to remove the sticker after you finish drilling.
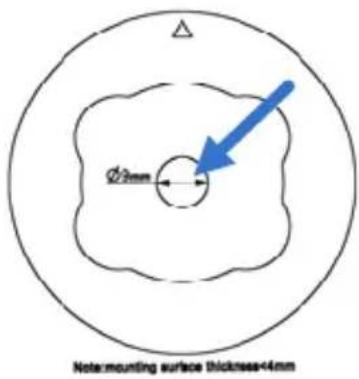
text_image
φ2mm Not mounting surface thickness=4mm- Paste one of the supplied camera adhesive tapes onto the camera lens.
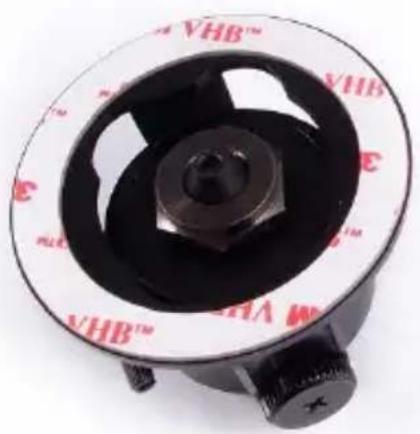
natural_image
Close-up of a black industrial rotary knob with red and white markings (no readable text or symbols)- Remove the backing paper on the other side of the adhesive tape and attach the camera lens onto the wall or ceiling. The arrows on the camera lens point toward the top of the camera view.
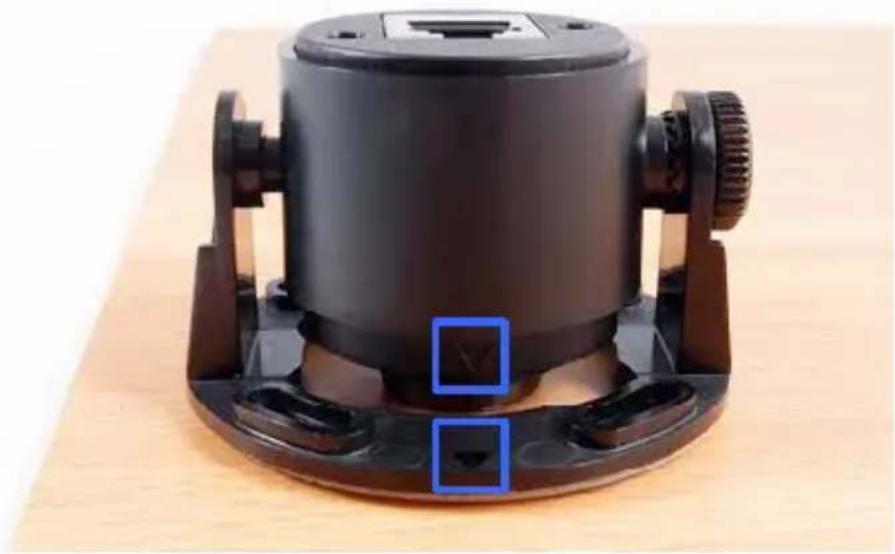
natural_image
Close-up of a black cylindrical device mounted on a wooden base, with two blue square highlights highlighting the bottom section (no text or symbols visible)- Loosen the lens screw and adjust the position of the lens so that the metal ring is pressing against the wall or ceiling.
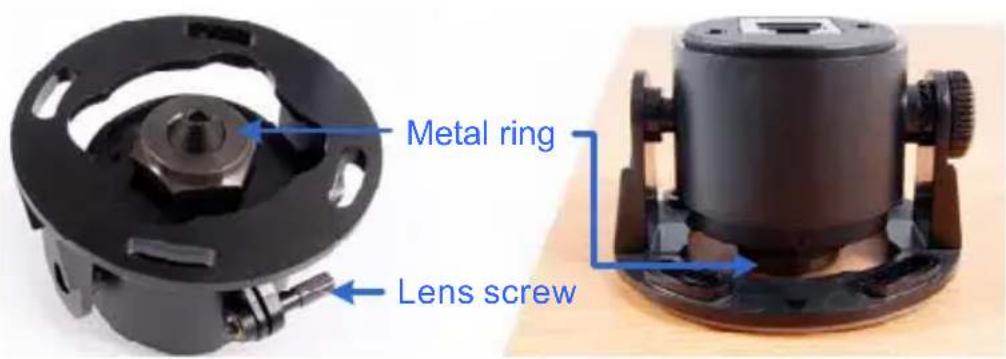
text_image
Metal ring Lens screw- Place the main body mount where you want to install it, and secure the mount using one of the methods below.
- Insert and tighten the two supplied M3 screws.
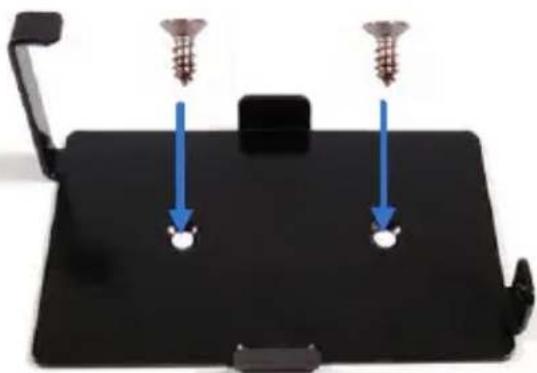
natural_image
Black electronic device with two screws and a central button, showing alignment of screw positions (no text or symbols)- Paste the main body adhesive tape on the bottom side of the main body mount.
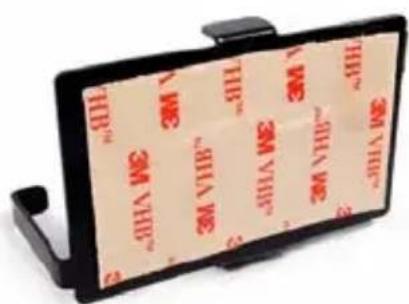
text_image
3M V180 3M V182 3M V180 3M V182 3M V180 3M V182 3M V180 3M V182 3M V180 3M V182 3M V180 3M V182 3M V180 3M V182 3M V180 3M V182 3N 3N 3N 3N 3N 3N 3N 3N 3N 3N 3N 3N 3N 3N 3N 3N 3N 3N 3N 3N 3N 3N 3N 3N 3N 3N 3N 3N 3N 3N 3N 3N 3N 3N 0.5- A lign the main body with the mount as shown below and secure with the supplied M2 screw.
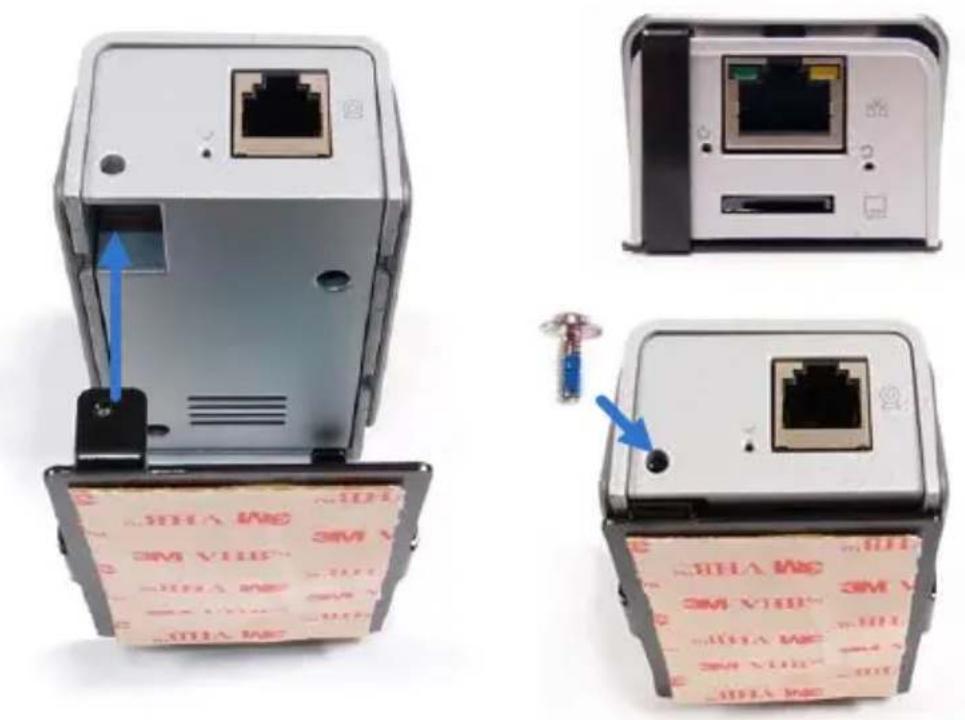
- Connect the camera lens and the main body using the RJ-12 cable.
- Connect the main body to the network and supply power via the PoE cable. See 21.4 Connecting the Camera in the Quick Start Guide.
- Access the live view. See 21.2 Accessing the Live View in the Quick Start Guide.
20.4 Connecting the Camera
- Use the supplied RJ12 cable to connect the camera lens and the main body.
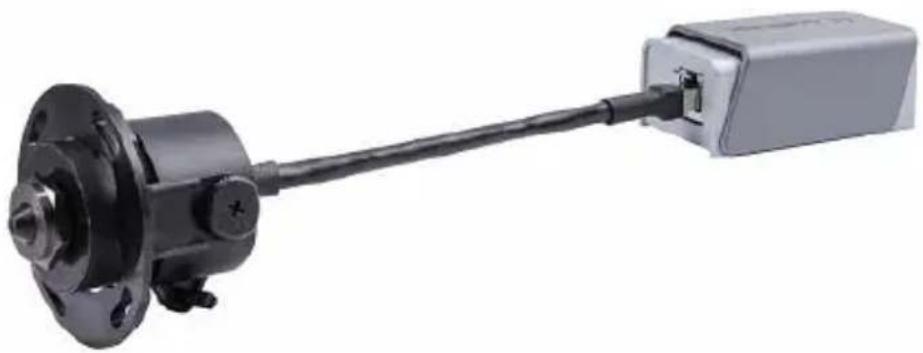
natural_image
Mechanical component with black flange and connected cable, no visible text or symbols- Use a Power over Ethernet (PoE) adapter to connect the camera to the network, and the power will be provided over the network cable.
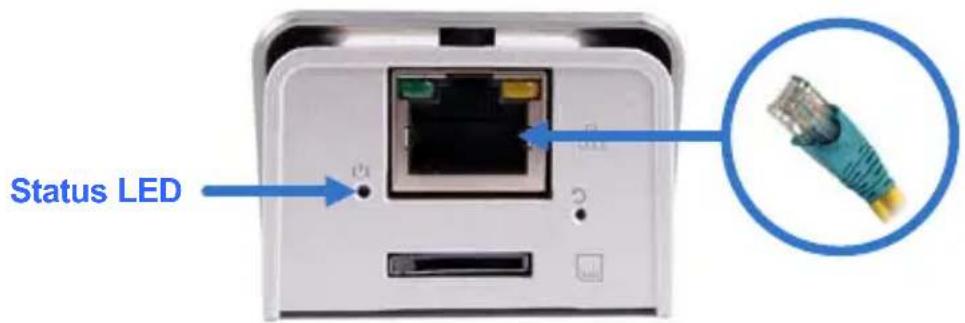
text_image
Status LEDThe status LED of the camera will be on.
21. Accessing the Camera
21.1 System Requirement
To access the GV-IP Camera through the Web browser, ensure your PC connects to the network properly and meets this system requirement:
- Microsoft Internet Explorer 7.x or later
Note:
-
For the users of Internet Explorer 8, additional settings are required. For details, see Appendix A in GV-IPCAM H.264 Firmware Manual on the Software DVD.
-
For GV-BX2600, Microsoft Internet Explorer 11 or later is required.
21.2 Accessing the Live View
Access or configure your camera according to the camera type and its firmware version:
| Camera Type & Firmware Version | Default Connection Type |
| GV-IPCAM H.264 with firmware V1.07 or later (except GV-PT110D and GV-PTZ010D)Target Series | DHCPAn unused IP address is automatically assigned by the DHCP server to the camera when the camera is connected to the network. Refer to 21.2.1 Checking the Dynamic IP Address to look up the IP address.However, if the camera is installed in a LAN without DHCP server, access the camera by its default IP address192.168.0.10 and see 21.2.2 Configuring the IP Address in the Quick Start Guide for more detail. |
Note: By default, GV-PTZ010D is assigned with the fixed IP address 192.168.0.10.
21.2.1 Checking the Dynamic IP Address
Follow the steps below to look up the IP address and access the Web interface.
- Install the GV-IP Device Utility program included on the GV-IPCAM H.264 software DVD.
Note: The PC installed with GV-IP Device Utility must be under the same LAN with the GV-IPCAM H.264 you wish to configure.
- On the GV-IP Utility window, click the button to search for the IP devices connected in the same LAN. Click the Name or Mac Address column to sort.
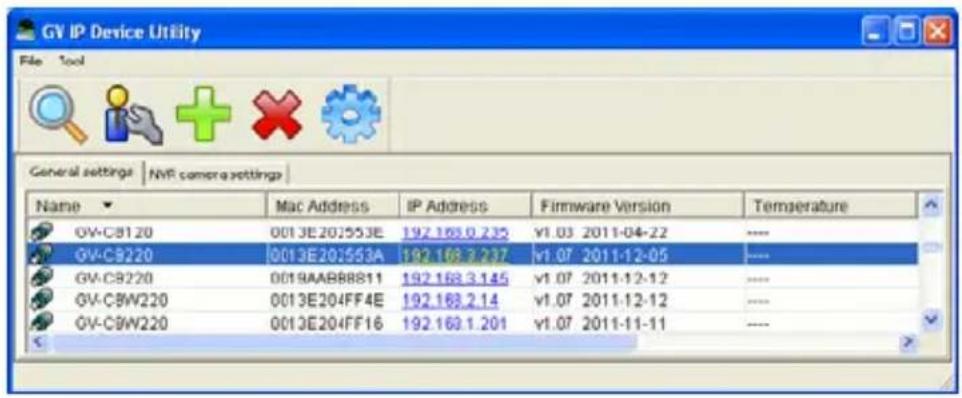
text_image
GV IP Device Utility File Tool General settings | NVP camera settings | Name Mac Address IP Address Firmware Version Temperature GV-C8120 0013E202553E 192.163.0.235 v1.03 2011-04-22 ---- GV-C8220 0013E202553A 192.163.2.237 v1.07 2011-12-05 ---- GV-C8220 0018AABB88811 192.163.3.145 v1.07 2011-12-12 ---- GV-C8W220 0013E204FF4E 192.163.2.14 v1.07 2011-12-12 ---- GV-C8W220 0013E204FF16 192.163.1.201 v1.07 2011-11-11 ----- Find the camera with its Mac Address, click on its IP address and select Web Page.
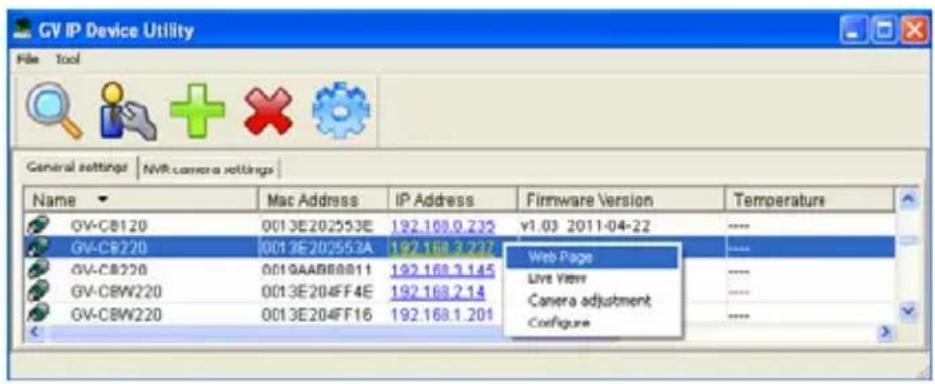
text_image
GV IP Device Utility File Tool General settings | NVR-camera settings | Name Mac Address IP Address Firmware Version Temperature GV-CB120 0013E202553E 192.168.0.235 y1.03 2011-04-22 GV-CB220 0013E202553A 192.168.3.237 Web Page GV-CB220 0019AABBBB11 192.168.3.145 Live View GV-CBW220 0013E204FF4E 192.168.2.14 Camera adjustment GV-CBW220 0013E204FF16 192.168.1.201 Configure- The login page appears.
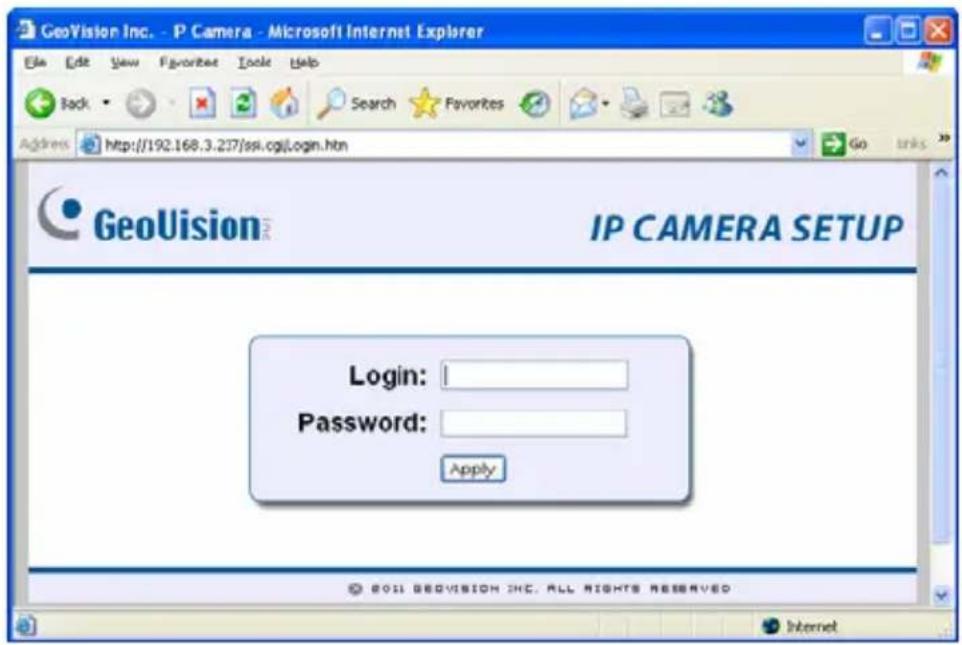
text_image
GeoVision Inc. - P Camera - Microsoft Internet Explorer File Edit View Favorites Tools Help Back Search Favorites Go links Address http://192.168.3.237/ssi.cgi?Login.htm GeoVision™ IP CAMERA SETUP Login: Password: Apply BOII GEOVISION INC. ALL RIGHTS RESERVED Internet- Type the default ID and password admin and click Apply to log in.
21.2.2 Configuring the IP Address
Follow the steps below to configure the IP address.
- Open your Web browser, and type the default IP address http://192.168.0.10.
- I n both Login and Password fields, type the default value admin. Click Apply.
- In the left menu, select Network and then LAN to begin the network settings.
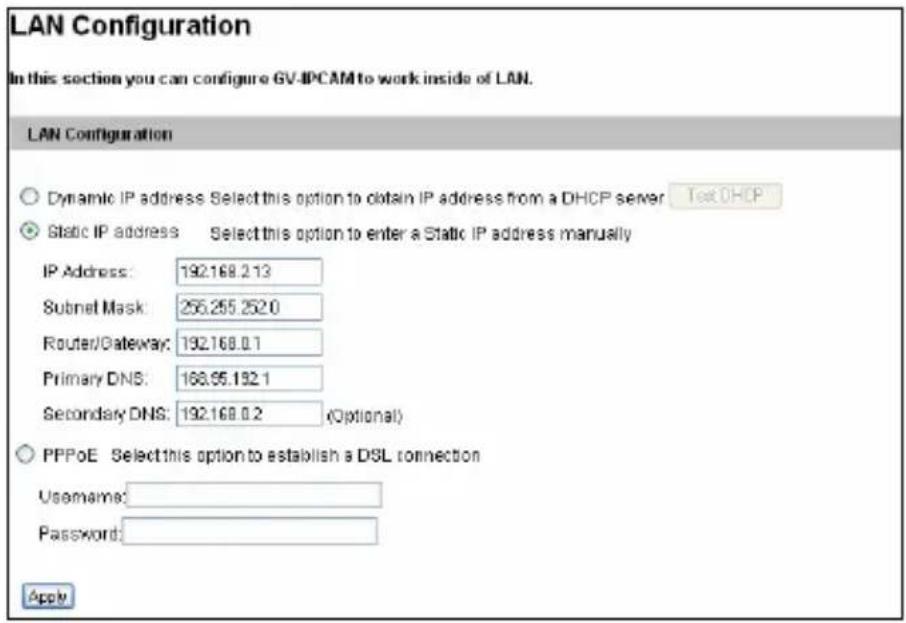
text_image
LAN Configuration In this section you can configure GV-IPCAM to work inside of LAN. LAN Configuration Dynamic IP address Select this option to obtain IP address from a DHCP server Test DHCP Static IP address Select this option to enter a Static IP address manually IP Address: 192.168.2.13 Subnet Mask: 255.255.252.0 Router/Gateway: 192.168.0.1 Primary DNS: 168.95.132.1 Secondary DNS: 192.168.0.2 (Optional) PPPoE Select this option to establish a DSL connection Username: Password: Apply-
Select Static IP address, Dynamic IP address or PPPoE and type the required network information.
-
Click Apply. The camera is now accessible by entering the assigned IP address on the Web browser.
-
To enable the updating of images in Microsoft Internet Explorer, you must set your browser to allow ActiveX Controls and perform a one-time installation of GeoVision's ActiveX component onto your computer.
IMPORTANT:
-
If Dynamic IP Address or PPPoE is enabled, you need to know which IP address the camera will get from DHCP server or ISP to log in. If your camera is installed in the LAN, use the GV-IP Device Utility to look up its current dynamic IP address. See 21.2.1 Checking the Dynamic IP Address in the Quick Start Guide. If your camera uses a public dynamic IP address via PPPoE, use the dynamic DNS Service to obtain a domain name that is linked to the camera's changing IP address first. For details, see LAN Configuration and Advanced TCP/IP sections, Administrator Mode Chapter in the GV-IPCAM H.264 Firmware Manual on the Software DVD.
-
If Dynamic IP Address or PPPoE is enabled and you cannot access the camera, you may have to reset the camera to its factory default and then perform the network settings again. To restore factory settings, see 24. Restoring to Default Settings in the Quick Start Guide.
21.2.3 Configuring the Wireless Connection
You may create wireless connection to the Internet for GV-BX1200 series / 1300 series / 1500 series / 2400 series / 3400 series / 5300, GV-MFD1501 Series / 2401 series / 3401 series / 5301 series, and GV-CAW120/220.
- To set up the wireless LAN for the first time, power on and connect a standard network cable to the camera.
- An IP address will be automatically assigned to the camera. Use GV IP Device Utility to search for the device. For details, see 21.2.1 Checking the Dynamic IP Address in the Quick Start Guide.
- Configure the wireless settings.
A. On the Web interface, select Network, select Wireless and Client Mode. This dialog box appears.
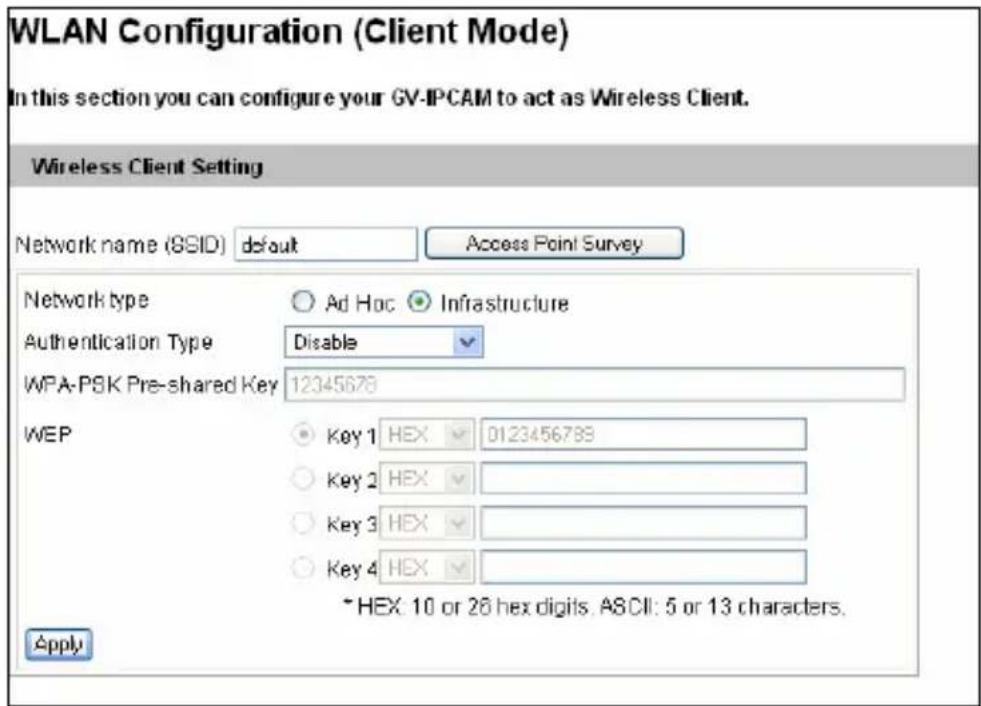
text_image
WLAN Configuration (Client Mode) In this section you can configure your GV-IPCAM to act as Wireless Client. Wireless Client Setting Network name (SSID) default Access Point Survey Network type Ad Hoc Infrastructure Authentication Type Disable WPA-PSK Pre-shared Key 12345678 WEP Key 1 HEX 0123456789 Key 2 HEX Key 3 HEX Key 4 HEX *HEX: 10 or 26 hex digits. ASCII: 5 or 13 characters. ApplyB. Type the Network Name (SSID) or click the Access Point Survey button to search and select for the available Access Points/wireless stations.
C. Select Ad-Hoc or Infrastructure for the Network type.
D. Select the Authentication Type using the drop-down list. You can also obtain this information by clicking the Access Point Survey button.
E. Type the WPA-PSK Pre-shared Key or WEP depending on the encryption setting for the Access Point.
F. Click Apply to save the configuration.
Note:
- Your encryption settings must match those used by the Access Points or wireless stations with which you want to associate.
- When Ad Hoc is used, only WEP encryption is supported.
- When you lose the wireless access, you can still access the unit by connecting it to a LAN and using the GV IP Device Utility to search for the device.
4. E nable wireless LAN.
A. On the Web interface, select Network and LAN. This page appears.
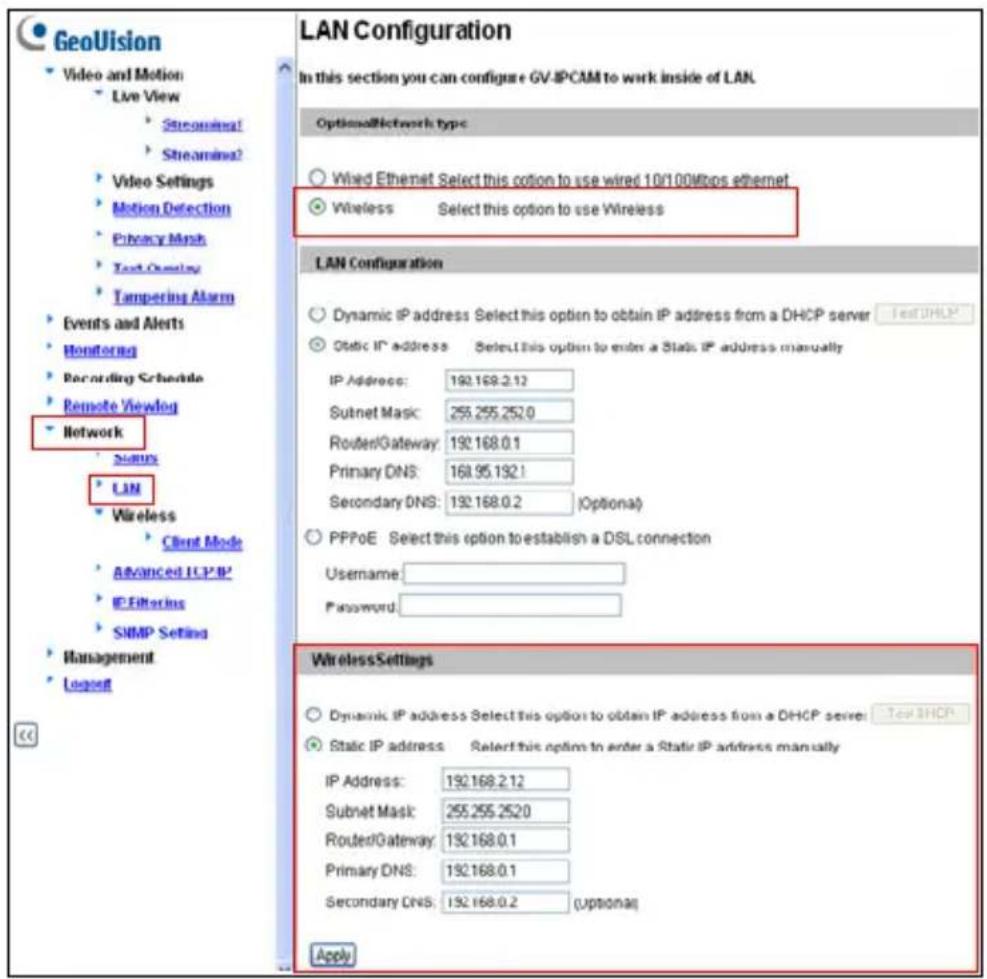
text_image
GeoVision Video and Motion Live View Streamina1 Streamina2 Video Settings Motion Detection Privacy Mesh Text Overlay Tampering Alarm Events and Alerts Monitoring Recording Schedule Remote Viewlog Network Status LAN Wireless Client Mode Advanced TCP/IP IP Filtering SNMP Setting Management Logout LAN Configuration In this section you can configure GV-IPCAM to work inside of LAN. OptionalNetwork type Wired Ethernet Select this option to use wired 10/1.00Mbps ethernet Wireless Select this option to use Wireless LAN Configuration Dynamic IP address Select this option to obtain IP address from a DHCP server Test/DHP Optic IP address Select this option to enter a Static IP address manually IP Address: 192.168.2.12 Subnet Mask: 255.255.252.0 Router/Gateway: 192.168.0.1 Primary DNS: 168.95.192.1 Secondary DNS: 192.168.0.2 (Optional) PPPoE Select this option to establish a DSL connection Username: Password: WirelessSettings Dynamic IP address Select this option to obtain IP address from a DHCP server Test/DHP Static IP address Select this option to enter a Static IP address manually IP Address: 192.168.2.12 Subnet Mask: 255.255.252.0 Router/Gateway: 192.168.0.1 Primary DNS: 192.168.0.1 Secondary DNS: 192.168.0.2 (Optional) ApplyB. Select Wireless for Optional Network Type.
C. To use a dynamic IP address assigned by the DHCP server, select Dynamic IP address. To use a fixed IP address, select Static IP address and type the IP address information.
- Click Apply. The camera will start creating a wireless connection to the access point.
Note: For GV-CAW120/220, the LAN LED turns blue when the connection is established.
- Unpl ug the Ethernet cable.
21.3 Adjusting Image Clarity
You can adjust the image clarity using the GV-IP Device Utility. Make sure that you have connected your GV-IPCAM H.264 to the network and install the GV-IP Device Utility program under the same LAN.
Note: This feature is only supported by Box Camera, IR Arctic Box Camera, Bullet Camera, Mini Fixed Dome, Mini Fixed Rugged Dome, Target Mini Fixed Dome, Target Mini Fixed Rugged Dome, Vandal Proof IP Dome, and Fixed IP Dome.
- Make sure you have installed the GV-IP Device Utility program included on the GV-IPCAM H.264 software DVD.
- On the GV-IP Utility window, click the button to search for the IP devices connected in the same LAN. Click the IP Address of the camera you desire. A drop-down list appears.
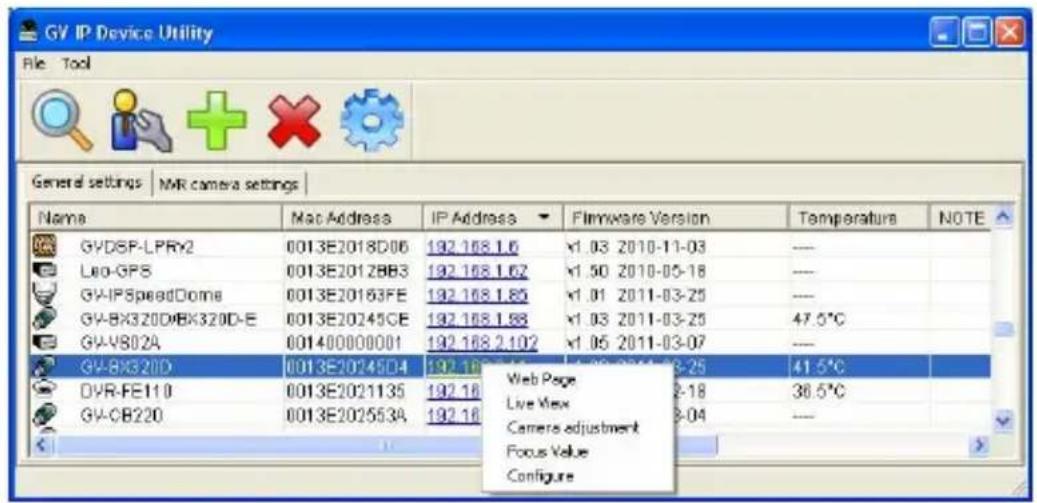
text_image
GV IP Device Utility File Tool General settings | NMR camera settings | Name Mac Address IP Address Firmware Version Temperature NOTE GYDSP-LPRX2 0013E2018D06 192.168.1.6 ¥1.03 2010-11-03 --- Loo-GPS 0013E2012BB3 192.168.1.62 ¥1.50 2010-05-18 --- GY-IPSpeedDome 0013E20163FE 192.168.1.85 ¥1.01 2011-03-25 --- GY-BX320DBX320D-E 0013E20245GE 192.168.1.88 ¥1.03 2011-03-25 47.5°C GY-VB02A 001400000001 192.168.2.102 ¥1.05 2011-03-07 --- GY-BX320D 0013E20245D4 192.16 Web Page 41.5°C DVR-FE110 0013E2021135 192.16 Live Max 36.5°C GY-CB220 0013E202553A 192.16 Camera adjustment Focus Value --- Configure- Select Focus Value. The Login dialog box appears.
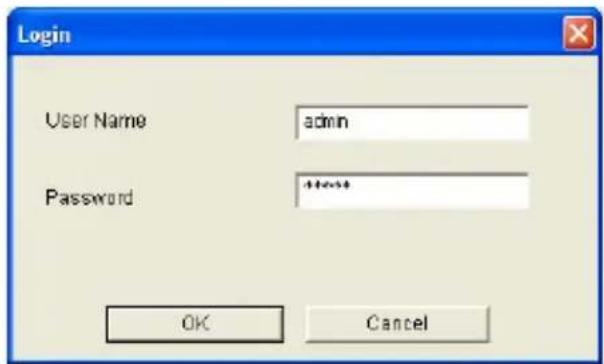
text_image
Login User Name admin Password Text OK Cancel- Type the user name and password of the camera selected. The default is admin for both user name and password. This window appears.
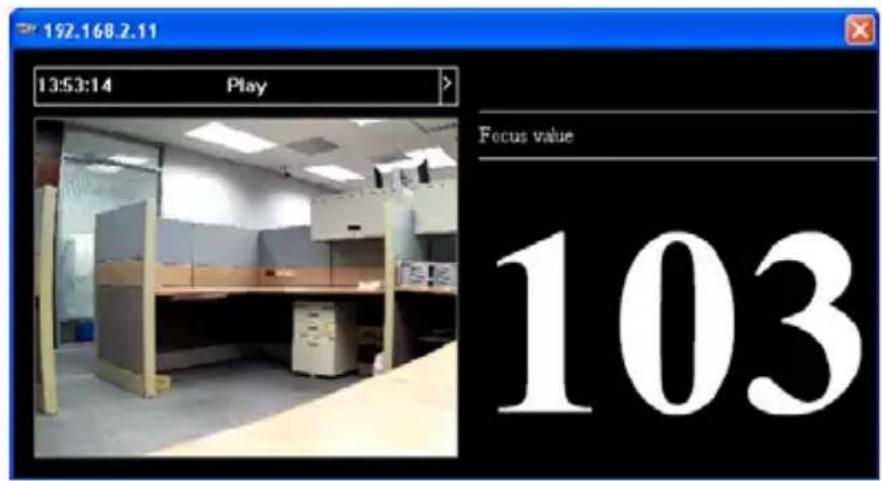
text_image
192.168.2.11 13:53:14 Play Focus value 103-
For IK10+ models (GV-VD120D / 121D / 220D / 221D / 320D / 321D / 1500 / 2400 / 3400 / 1530 / 2430 / 2530 / 3430), hold the supplied Focus Adjustment Cap over the camera view. For details, see 19.3.1 Using Focus Adjustment Cap in the Quick Start Guide for details.
-
For Target Mini Fixed Dome and Target Mini Fixed Rugged Dome, hold the camera cover close to the lens and use the supplied focus adjustment tool for precise focus adjustment.
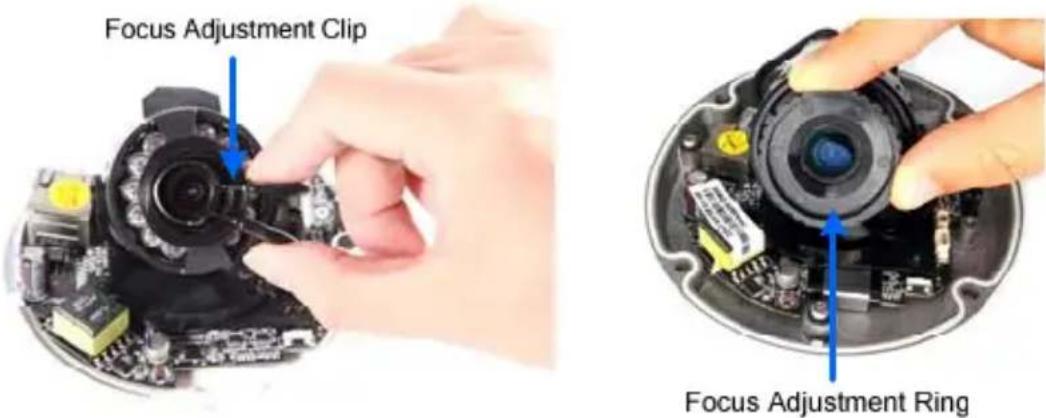
text_image
Focus Adjustment Clip Focus Adjustment Ring-
For Mini Fixed Dome and Mini Fixed Rugged Dome, hold the camera cover close to the lens for precise focus adjustment.
-
Adjust the Zoom Screw and the Focus Screw of the camera slowly until the focus value reaches the maximum.
Note:
- For locations of adjustment screws and rings in each model, see Locations of Adjustment Screws, section, Getting Started Chapter, GV-IPCAM H.264 Firmware Manual on the Software DVD.
- Do not over tighten the screws. The screws only need to be as tight as your fingers can get them to be. Do not bother using any tool to get them tighter. Doing so can damage the structure of lens.
- The maximum focus value may vary when the environment changes.
21.3.1 Using Focus Adjustment Cap
There are two types of Focus Adjustment Caps for GV-VD120D / 121D / 220D / 221D / 320D / 321D / 1500 / 2400 / 3400 / 1530 / 2430 / 2530 / 3430.
Focus Adjustment Cap Type I:
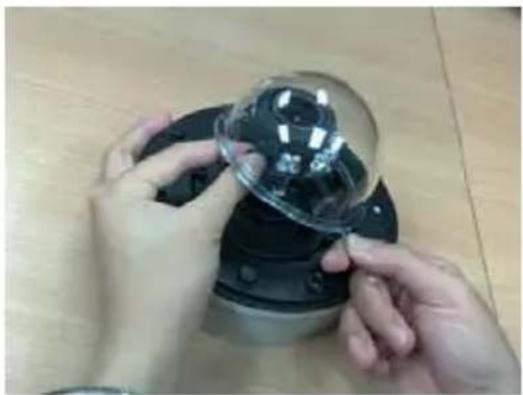
natural_image
Close-up of hands assembling a transparent dome-shaped object on a wooden surface (no text or symbols visible)Hold the Focus Adjustment Cap on top of the camera view, keep it close to the lens and slightly tilt to one side to adjust the image.
Focus Adjustment Cap Type II:
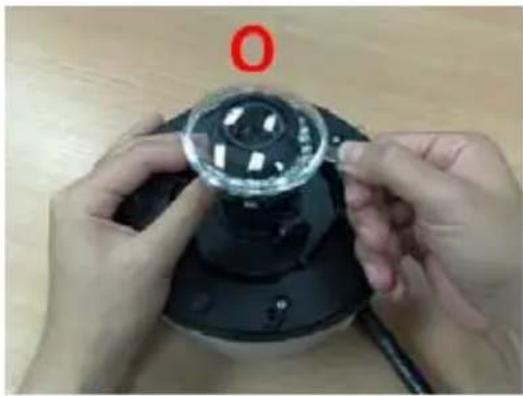
natural_image
Close-up of hands adjusting a small circular object on a black device (no visible text or symbols)Hold the Focus Adjustment Cap on top of the camera view and keep it close to the camera.
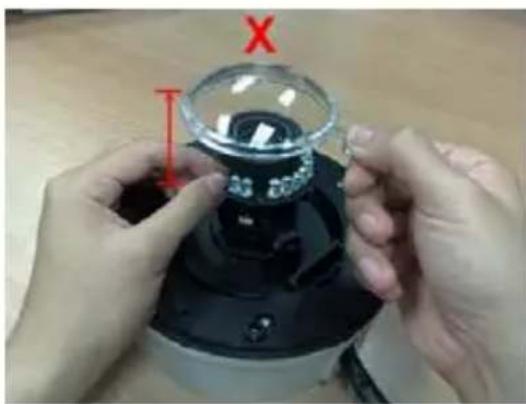
text_image
Close-up photo of hands assembling a small electronic device with labeled component X and red measurement arrowDo not leave a distance between the Focus Adjustment Cap and the camera.
22. The Web Interface
Live View
In this section you can see and configure the default camera view.
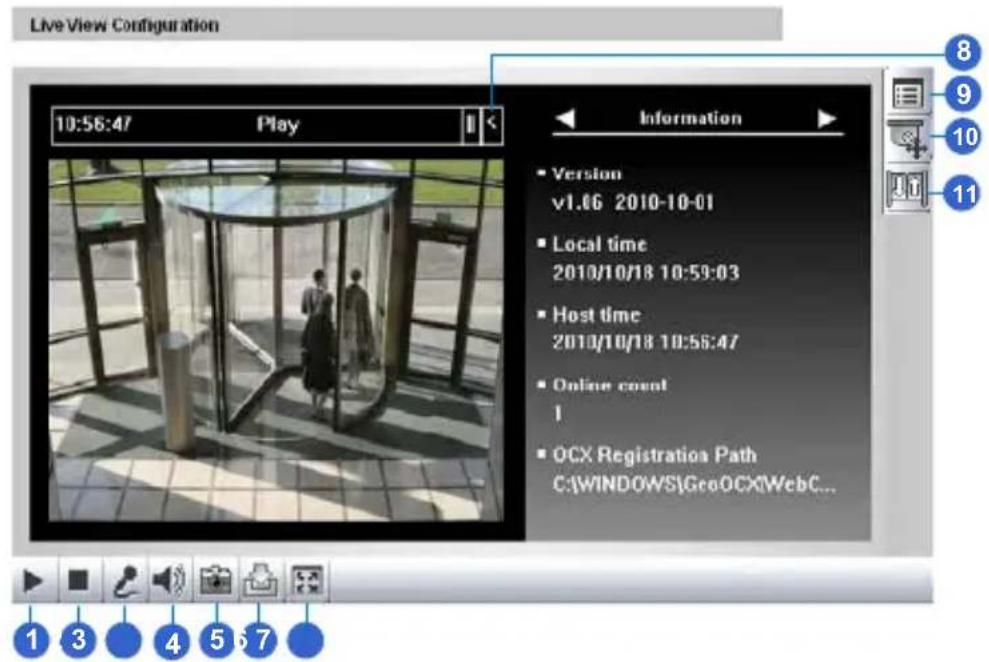
text_image
Live View Configuration 10:56:4/ Play Information ■ Version v1.66 2010-10-01 ■ Local time 2010/10/18 10:59:03 ■ Host time 2010/10/18 10:56:47 ■ Online count 1 ■ OCX Registration Path C:\WINDOWS\GeoOCX\WebC... 1 3 4 5 6 7Live View
In this section you can see and configure the default camera view.
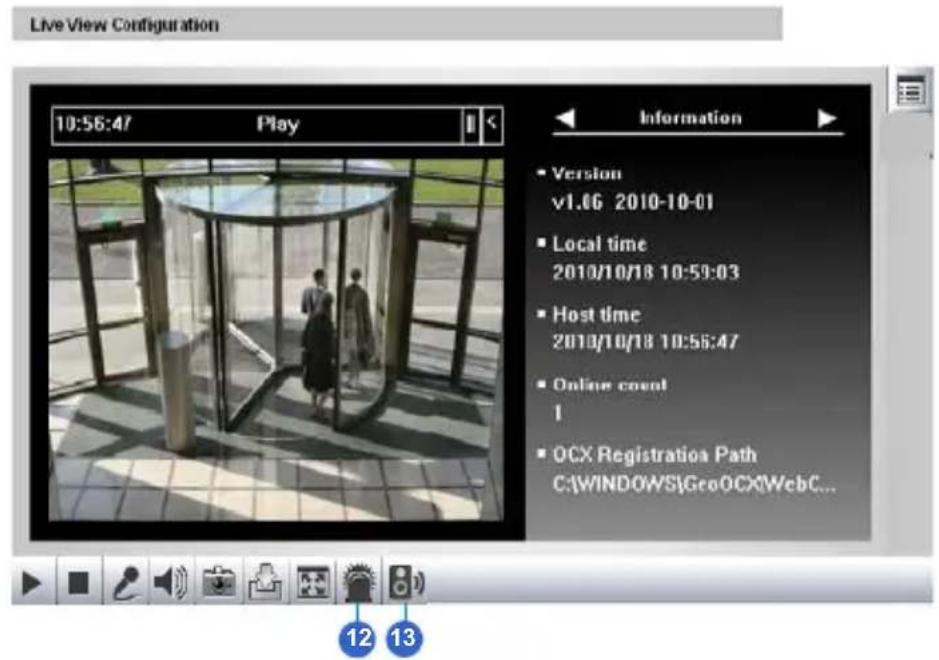
text_image
Live View Configuration 10:56:47 Play Information • Version v1.06 2010-10-01 • Local time 2010/10/18 10:50:03 • Host time 2010/10/18 10:56:47 • Online count 1 • OCX Registration Path C:\WINDOWS\GeoOCX\WebC...No. Name Function
| 1 Play Plays live video. | ||
| 2 Stop Stops playing video. | ||
| 3 Microphone | Broadcasts to the surveillance site from a remote PC. Note this function is not available for Ultra Bullet Camera and Target Series. For Cube Camera and Advanced Cube Camera, click the Push to talk button (from the pop-up menu) for the camera to switch between audio transmission and reception, where only one party can speak at a time. | |
| 4 Speaker | Transfers sounds of the surveillance site to a remote PC. Note this function is not available for GV-MFD120D / 130D / 320D, Mini Fixed Rugged Dome, Ultra Bullet Camera, Target Bullet Camera, and Target Mini Fixed Rugged Dome. | |
| 5 Snapshot Takes a snapshot of live video. | ||
| 6 File Save Records live video to the local computer. | ||
| 7 Full Screen | Switches to full screen view. Right-click the image to see additional options. | |
| 8 Control | Displays the camera information, video settings, audio data rate, I/O device status, images captured upon alarm, and GPS location of the camera. Also allows you to adjust image quality and install the program from the hard drive. | |
| 9 Show System Menu | Brings up these functions: Alarm Notify, Video and Audio Configuration, Remote Config, Show Camera Name and Image Enhance. | |
| No. | Name | Function | |
| 10 | PTZ Control Panel | Enables the PTZ Control Panel or the Visual PTZ. Note this function is supported by PTZ Camera and PT Camera, and only partially supported by GV-IP Cameras with motorized varifocal lens. | |
| 11 | I/O | Control | Enables the I/O Control Panel and Visual Automation. Note this function is not available in Mini Fixed Dome, Mini Fixed Rugged Dome, Cube Camera, Advanced Cube Camera and Target Series. |
| 12 | LED | Control | Click to turn the Alarm LED on and/or adjust the brightness sensitivity. Note this function is only available for Advanced Cube Camera. |
| 13 | Alarm Speaker | Click to sound the alarm and/or adjust its volume. To sound the alarm upon motion or tampering events, see Speaker section, Administrator Mode Chapter, GV-IPCAM H.264 Firmware Manual on the Software DVD. Note this function is only available for Advanced Cube Camera. | |
23. Upgrading System Firmware
GeoVision periodically releases updated firmware on the website. The new firmware can be simply loaded into the GV-IPCAM H.264 by using the Web interface or IP Device Utility included in the software DVD.
IMPORTANT:
- To update the camera firmware from versions earlier than V2.07 to the latest version, back up the files in the storage device to another device before the upgrade.
- While the firmware is being updated,
A) the power supply must not be interrupted, and
B) do not unplug the Ethernet cable if the cable is the source of power supply (Power over Ethernet or PoE supported).
- Do not turn the power off within 10 minutes after the firmware is updated.
- If you use the IP Device Utility for firmware upgrade, the computer used to upgrade firmware must be under the same network of the camera.
- Since the firmware adopts different storage format from V2.07 onward, be sure to re-format the storage device after firmware upgrade. If you have not done so, this warning message appears when you view the Monitoring or Storage Settings' Web interface:
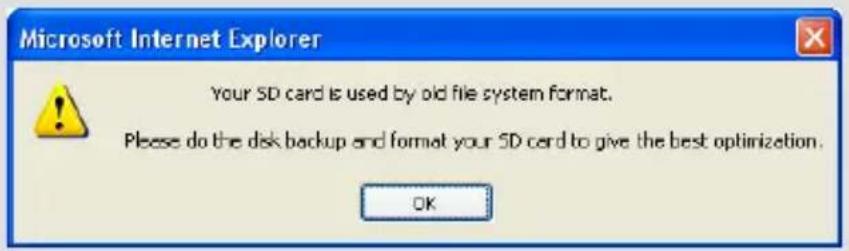
text_image
Microsoft Internet Explorer Your SD card is used by old file system format. Please do the disk backup and format your SD card to give the best optimization. OK-
Stop these operations: monitoring of IPCam H.264, connection to GV-System and remote connections to Center V2, Vital Sign Monitor, ViewLog Server and 3GPP/RTSP.
-
In the Live View window, click the Show System Menu button and select Remote Config. This dialog box appears.
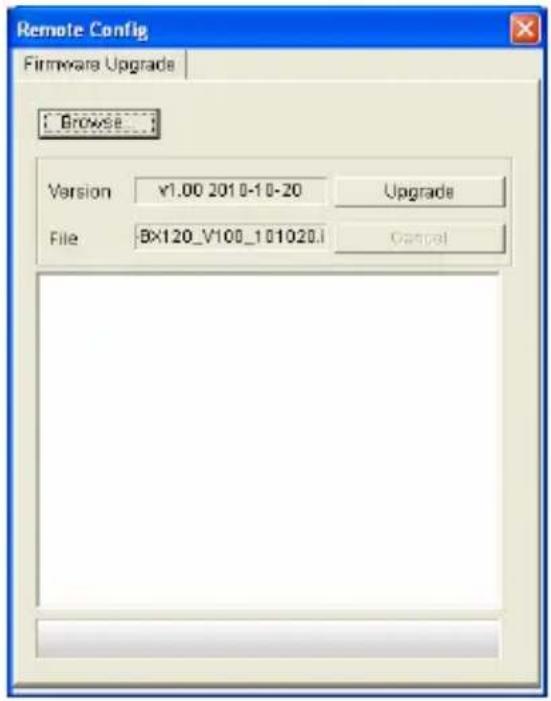
text_image
Remote Config Firmware Upgrade Browse... Version ¥1.00 2010-10-20 Upgrade File BX120_V100_101020.I Cancel-
Click the Browse button to locate the firmware file (.img) saved at your local computer.
-
Click the Upgrade button to start the upgrade.
WARNING: The interruption of power supply during updating causes not only update failures but also damages to the camera. In this case, please contact your sales representative and send your device back to GeoVision for repair.
24. Restoring to Default Settings
GeoVision periodically releases updated firmware on the website. You can restore factory default settings through the Web interface or directly on the camera.
24.1 Using the Web Interface
- On the left menu of Web interface, select Management and select Tools. The Additional Tools dialog box appears.
- Click the Load Default button in the System Settings section.
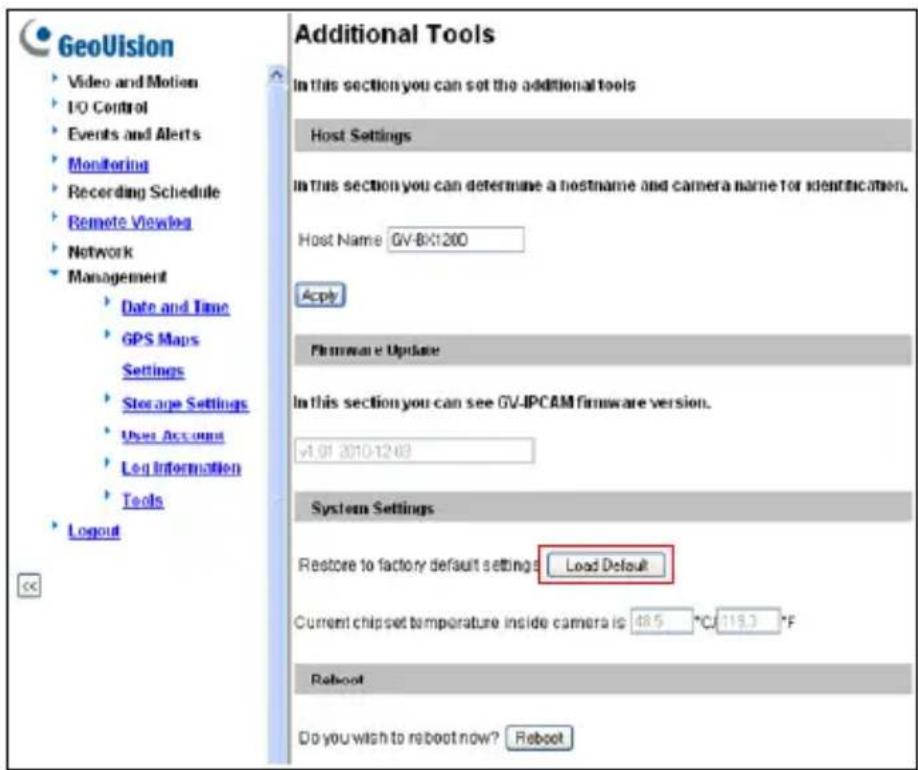
text_image
GeoVision Video and Motion IO Control Events and Alerts Monitoring Recording Schedule Remote Viewlog Network Management Date and Time GPS Maps Settings Storage Settings User Accounts Leg Information Tools Logout Additional Tools In this section you can set the additional tools Host Settings In this section you can determine a hostname and camera name for identification. Host Name GV-BX1200 Apply Fluware Update In this section you can see GV-IPCAM firmware version. v1.01 2010-12-03 System Settings Restore to factory default settings Load Default Current chipset temperature inside camera is 48.5 °C/119.3 °F Reboot Do you wish to reboot now? Reboot24.2 Directly on the Camera
Box Camera
- Keep the power and network cables connected to the camera.
- Use a pin to press and hold the default button on the back panel of the camera.
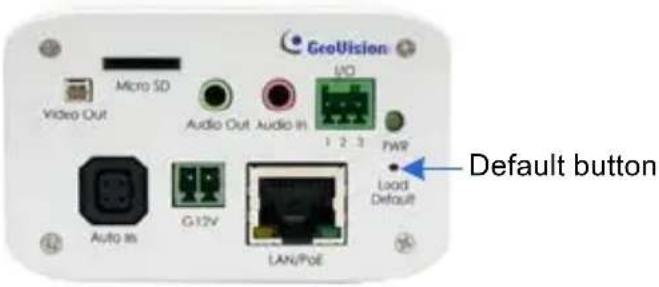
text_image
GeoVision Micro SD Video Out Audio Out Audio In 1 2 3 FWR Default button Auto In G12V LAN/PoE- Release the default button when the status LED blinks. This shall take about 8 seconds.
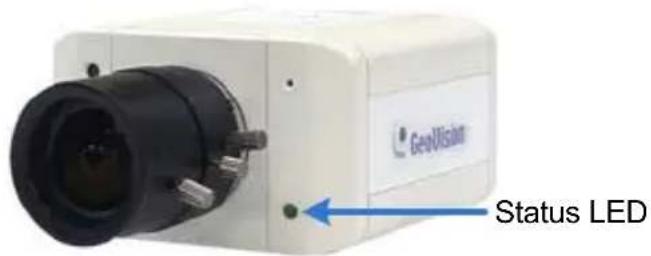
text_image
Geolisis Status LED- When the status LED fades, the process of loading default settings is completed and the camera reboots automatically.
Ultra Box Camera and Target Box Camera
- Keep the power and network cables connected to the camera.
- Use a pin to press and hold the default button on the back panel of the camera.
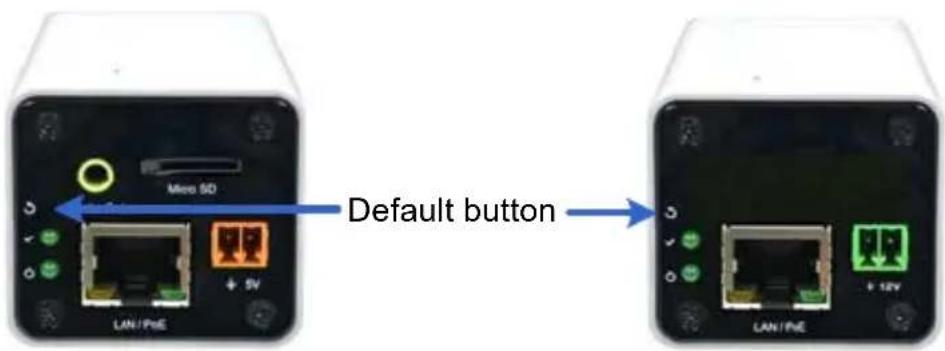
text_image
Micro SD LAN/PHE Default button LAN/PHE + 12V- Release the default button when the status LED blinks. This shall take about 8 seconds.
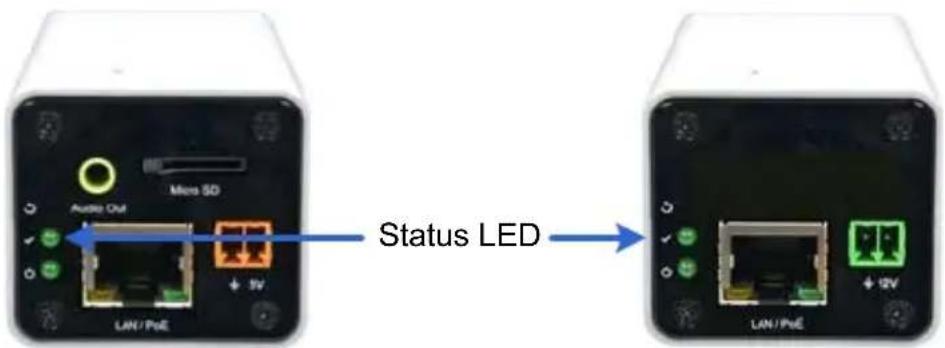
text_image
Micro SD Audio OM + 5V LIN/PeE Status LED LIN/PeE- When the status LED fades, the process of loading default settings is completed and the camera reboots automatically. When the status LED turns on (green), the camera is ready for use.
Mini Fixed Dome
- Keep the power and network cables (or PoE) connected to the camera.
- Press and hold the default button.
• GV-MFD120 / 130 / 320
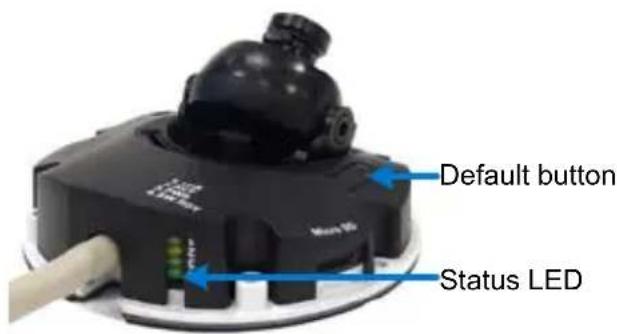
text_image
Default button Status LED• GV-MFD1501 Series / 2401 Series / 3401 Series / 5301 Series
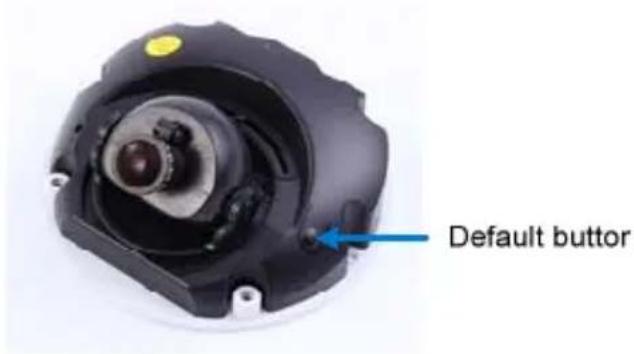
text_image
Default button- Release the default button when the status LED blinks. This shall take about 8 seconds.
- When the status LED fades, the process of loading default settings is completed and the camera reboots automatically.
Mini Fixed Rugged Dome
- Keep the power and network cables connected to the camera.
- Press and hold the default button.
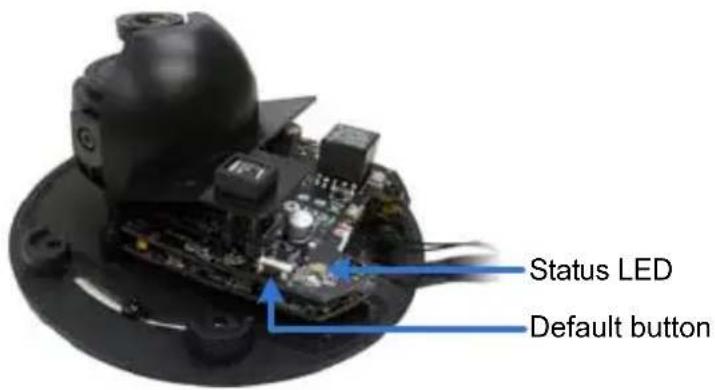
text_image
Status LED Default button- Release the default button when the status LED blinks. This shall take about 8 seconds.
- When the status LED fades, the process of loading default settings is completed and the camera reboots automatically.
IR Arctic Box Camera
Note the following procedure is only applicable to GV-BX2510-E / 5310-E. To restore default settings of other IR Arctic Box Cameras, access the load default function from its Web interface. For details, see Tools, Administrator Mode, Chapter 4, GV-IPCam H.264 Firmware Manual.
- Keep the power and network cables (or PoE) connected to the camera.
- Press and hold the default button.
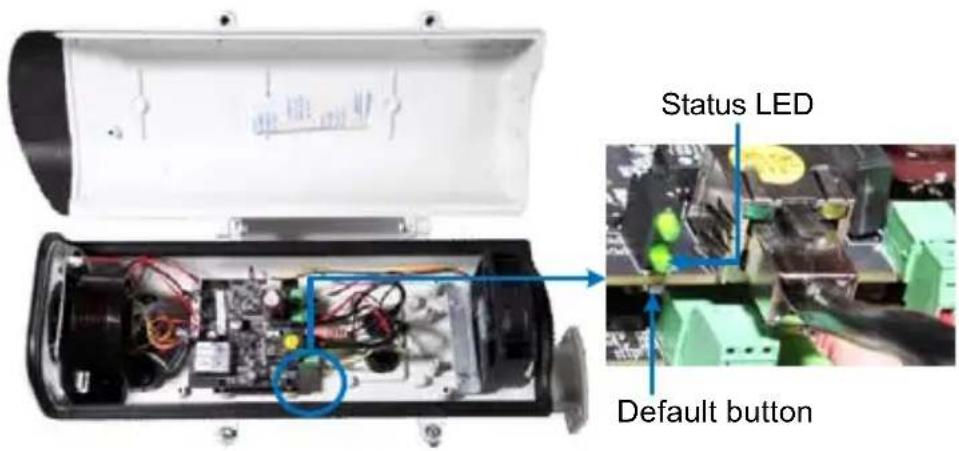
text_image
Status LED Default button- Release the default button when the status LED blinks. This shall take about 8 seconds.
- When the status LED fades, the process of loading default settings is completed and the camera reboots automatically.
Target Mini Fixed Target Mini Fixed Rugged Dome
- Keep the PoE cable connected to the camera.
- Press and hold the default button for about 8 seconds.
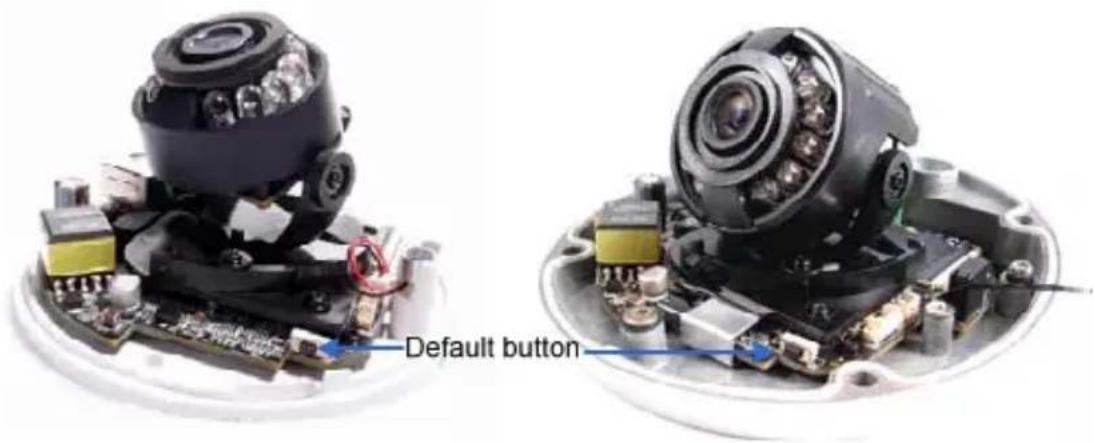
text_image
Default button- Release the default button when the status LED blinks.
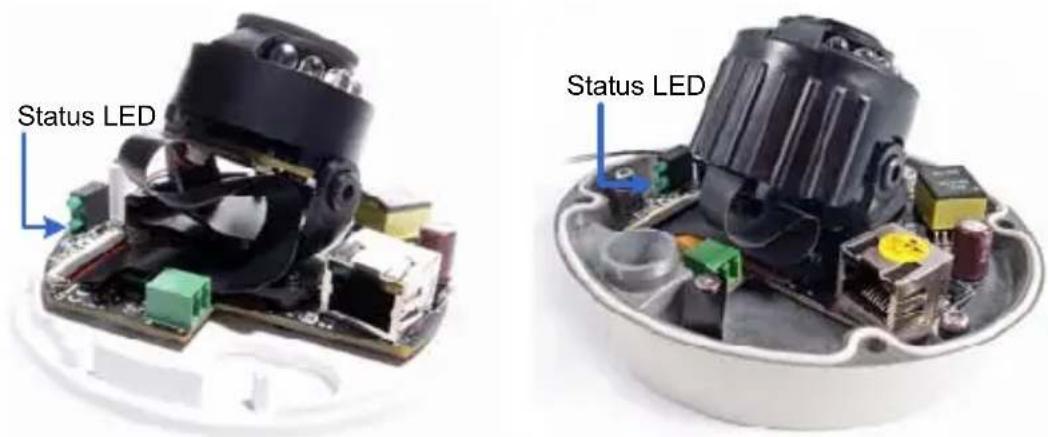
text_image
Status LED Status LED- When the status LED fades, the process of loading default settings is completed and the camera reboots automatically.
Bullet Camera
- Keep the power and network cables connected to the camera.
- Loosen the camera's cover and remove the Silica Gel Bag.
- Press and hold the default button for 8 seconds.
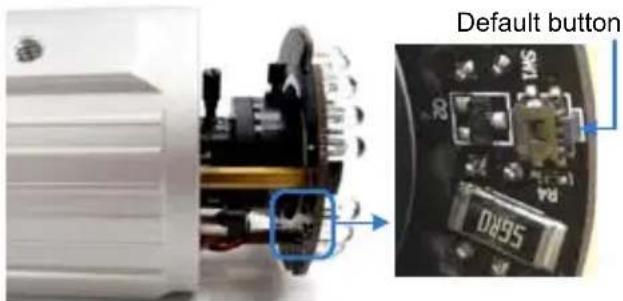
text_image
Default button D895-
Release the default button. When the process of loading default settings is completed, the camera reboots automatically.
-
Insert a new Silica Gel Bag and fasten the camera's cover immediately.
Ultra Bullet Camera
- Keep the power and network cables (or PoE) connected to the camera.
- Press and hold the default button.
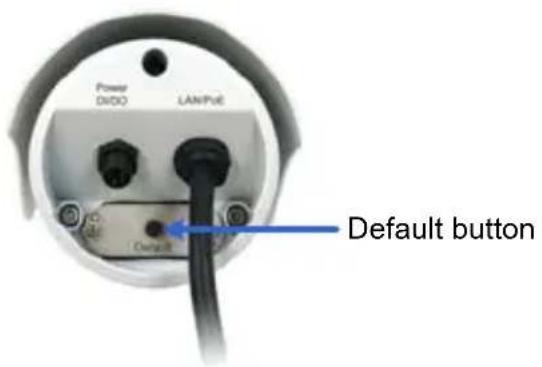
text_image
Power DVD LANPU6 Default button-
Release the default button when the status LED blinks. This shall take about 8 seconds.
-
When the status LED fades, the process of loading default settings is completed and the camera reboots automatically.
Target Bullet Camera
- Keep the power and network cables (or PoE) connected to the camera.
- Loosen the camera's cover.
- Press and hold the default button for about 8 seconds.
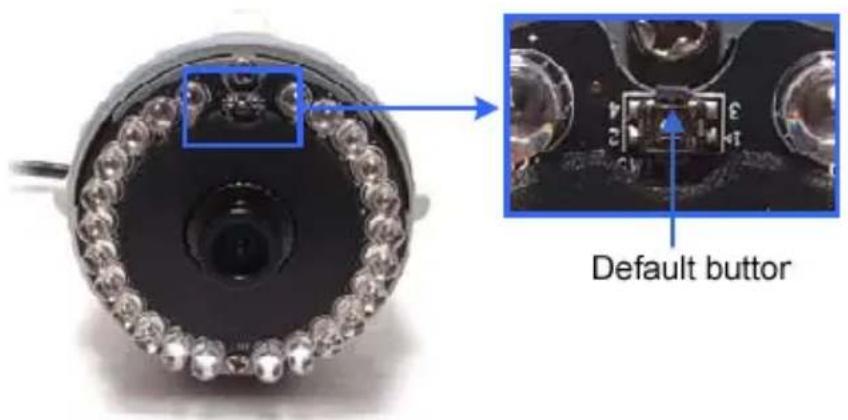
text_image
Default button- Release the default button. When the process of loading default settings is completed, the camera reboots automatically.
- Replace the Silica Gel Tape inside the camera cover and fasten the camera's cover immediately.
Vandal Proof IP Dome
- Keep the power and network cables (or PoE) connected to the camera.
- Use a pin to press and hold the default button on the inner housing.
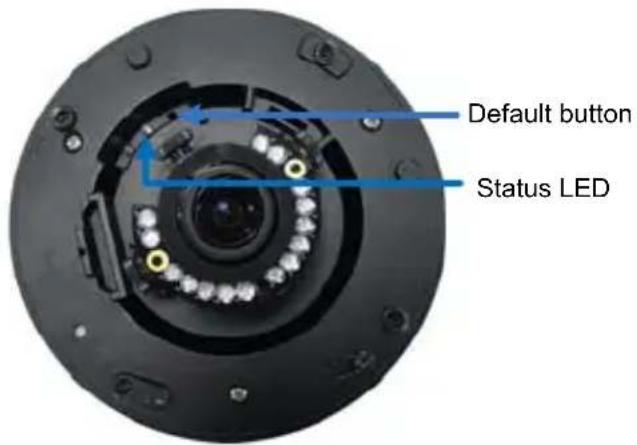
text_image
Default button Status LED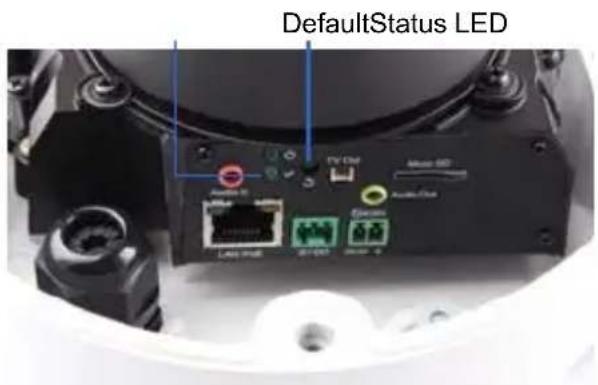
text_image
DefaultStatus LED LAN 1200 WiFi 1200 Audio Unit Audio Unit Epicom LAN 1200 WiFi 1200 Audio Unit- Release the default button when the status LED blinks. This shall take about 8 seconds.
- When the status LED fades, the process of loading default settings is completed and the camera reboots automatically.
Target Vandal Proof IP Dome
- Keep the power and network cables (or PoE) connected to the camera.
- Press and hold the default button for about 8 seconds.
- Release the default button when the status LED blinks.
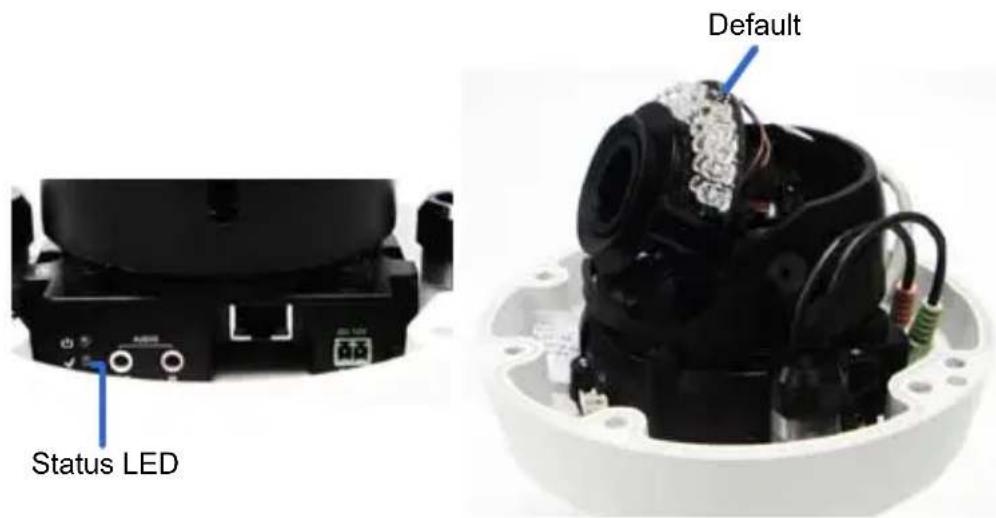
text_image
Status LED Default- When the status LED fades, the process of loading default settings is completed and the camera reboots automatically.
Fixed IP Dome
-
Keep the power and network cables (or PoE) connected to the camera.
-
Use a pin to press and hold the default button on the panel.
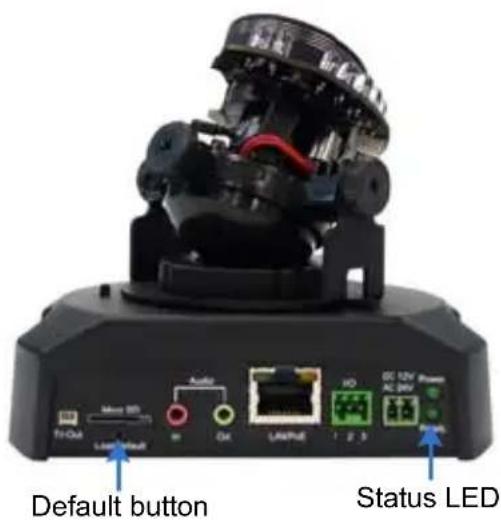
text_image
Default button Status LED-
Release the default button when the status LED blinks. This shall take about 8 seconds.
-
When the status LED fades, the process of loading default settings is completed and the camera reboots automatically.
Target Fixed IP Dome
- Keep the power and network cables (or PoE) connected to the camera.
- Press and hold the default button for about 8 seconds.
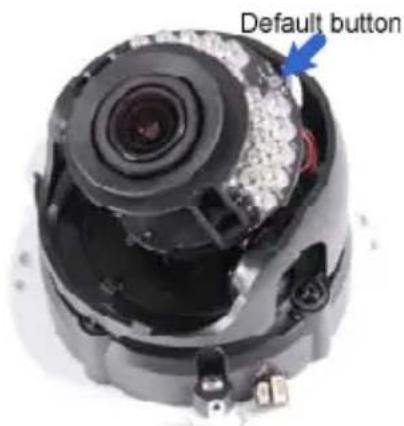
text_image
Default button- Release the default button when the status LED blinks.
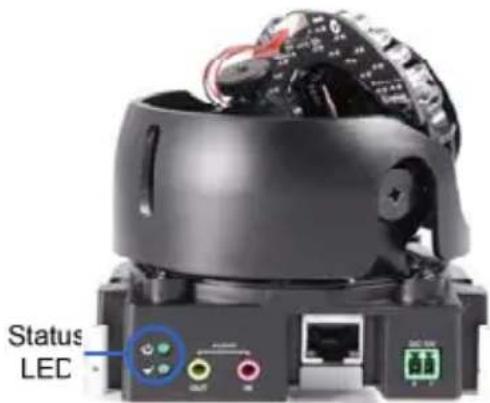
text_image
Status LEC- When the status LED fades, the process of loading default settings is completed and the camera reboots automatically
Cube Camera
-
Keep the power and network cables connected to the camera.
-
Use a pin to press and hold the default button on the panel.
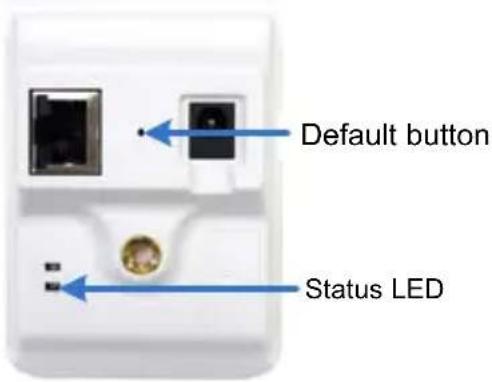
text_image
Default button Status LED-
Release the default button when the status LED blinks. This shall take about 8 seconds.
-
When the status LED turns orange, the process of loading default settings is completed and the camera is ready for use.
Advanced Cube Camera
-
Keep the power and network cables connected to the camera.
-
Use a pin to press and hold the default button on the panel.
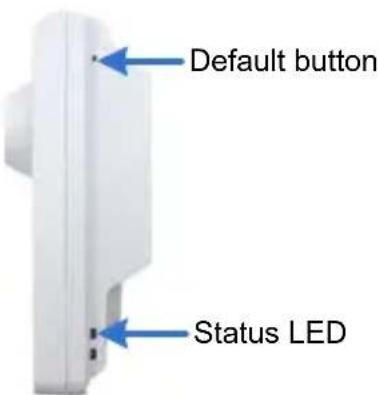
text_image
Default button Status LED-
Release the default button when the status LED blinks. This shall take about 8 seconds.
-
When the status LED turns green, the process of loading default settings is completed and the camera is ready for use.
PT Camera
- Keep the power and network cables connected to the camera.
- Use a pin to press and hold the default button on the panel.
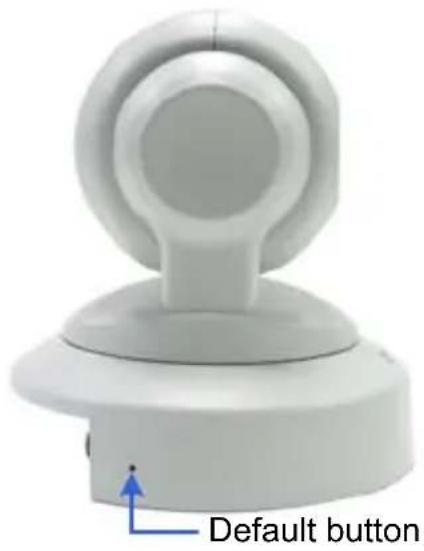
text_image
Default button- Release the default button when the status LED blinks. This shall take about 8 seconds.
- When the status LED turns orange, the process of loading default settings is completed and the camera is ready for use.
Pinhole Camera
- Keep the PoE cable connected to the main body.
- Use a pin to press and hold the Load default button on the panel.
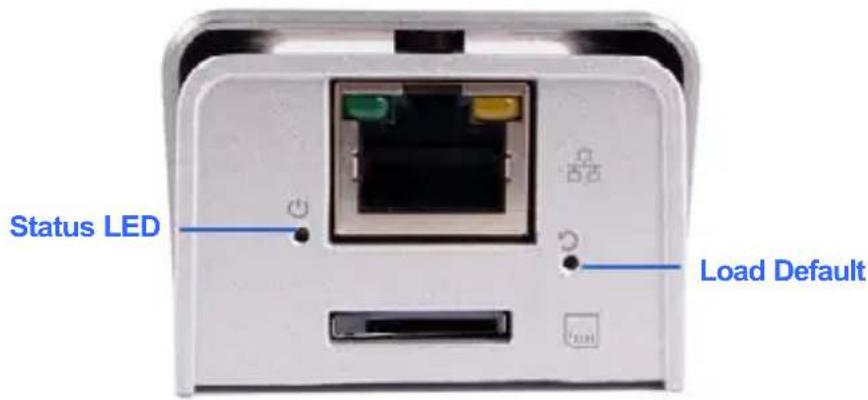
text_image
Status LED Load Default- Release the default button when the status LED blinks. This shall take about 8 seconds.
- When the status LED fades, the process of loading default settings is completed and the camera reboots automatically.