
555RXTT - Tiller HUSQVARNA - Free user manual and instructions
Find the device manual for free 555RXTT HUSQVARNA in PDF.


| Product Type | Brushcutter / Trimmer |
| Model | 555RXTT (also 555RXT, 555FX, 555FXT, 555FRM) |
| Engine Displacement | 53.3 cm³ (3.25 cu.in) |
| Max. Engine Output | 2.8 kW at 9000 rpm (ISO 8893) |
| Idle Speed | 2800 rpm |
| Recommended Max. Speed | 12000-13000 rpm (depending on model) |
| Output Shaft Speed | 10500 rpm |
| Fuel Tank Capacity | 1.1 L (2.3 US pint) |
| Weight (without fuel, cutting attachment, guard) | 8.9-9.2 kg (19.6-20.3 lbs) |
| Fuel Mixture | 2% (1:50) HUSQVARNA two-stroke oil with unleaded gasoline (min 87 octane) |
| Ignition System | Spark plug NGK BPMR 7A, electrode gap 0.5 mm |
| Cutting Attachments | Grass blade, saw blade, shredder blade, trimmer head (compatible with various models) |
| Safety Features | Throttle lockout, stop switch, cutting attachment guard, vibration damping system, quick release harness |
| Harness | Adjustable with quick release, supports Balance XT |
| Noise Level (at user's ear) | 101-108 dB(A) depending on attachment |
| Vibration Level (handles) | 1.5-2.3 m/s² depending on attachment and model |
| Maintenance | Regular cleaning of air filter, cooling system, spark plug, and lubrication of drive shaft every 3 months |
| Warranty | 2 years emission control system warranty (EPA) |
| Intended Use | Trimming grass, grass clearing, forestry clearing |
Frequently Asked Questions - 555RXTT HUSQVARNA
User questions about 555RXTT HUSQVARNA
0 question about this device. Answer the ones you know or ask your own.
Ask a new question about this device
Download the instructions for your Tiller in PDF format for free! Find your manual 555RXTT - HUSQVARNA and take your electronic device back in hand. On this page are published all the documents necessary for the use of your device. 555RXTT by HUSQVARNA.
USER MANUAL 555RXTT HUSQVARNA
Please read the operator's manual carefully and make sure you understand the instructions
before using the machine.

natural_image
Simple line drawing of an open book enclosed in a circle (no text or symbols)English
KEY TO SYMBOLS
Symbols
WARNING! Clearing saws, brushcutters and trimmers can be dangerous! Careless or incorrect use can result in serious or fatal injury to the operator or others. It is extremely important that you read and understand the contents of the operator's manual.
Please read the operator's manual carefully and make sure you understand the instructions before using the machine.
Always wear:
• A protective helmet where there is a risk of falling objects
• Approved hearing protection
• Approved eye protection
Max. speed of output shaft, rpm
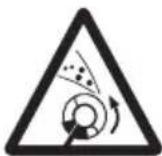
Watch out for thrown objects and ricochets.
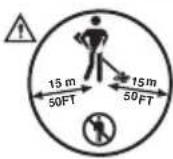
The operator of the machine must ensure, while working, that no persons or animals come closer than 15 metres.
Machines fitted with saw blades or grass blades can be thrown violently to the side when the blade comes into contact with a fixed object. This is called blade thrust. The blade is capable of amputating an arm or leg.
Always keep people and animals at least 15 metres from the machine.
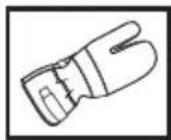
Always wear approved protective gloves.
Wear sturdy, non-slip boots.






Only use non-metallic, flexible cutting attachments, i.e. trimmer heads with trimmer cord.
Other symbols/decals on the machine refer to special certification requirements for certain markets.
Switch off the engine by moving the stop switch to the STOP position before carrying out any checks or maintenance.
Always wear approved protective gloves.
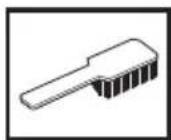
Regular cleaning is required.
Visual check.
Approved eye protection must always be used.




CONTENTS
Contents
KEY TO SYMBOLS
Symbols 2
CONTENTS
Contents 3
Note the following before starting: 3
INTRODUCTION
Dear customer! 4
WHAT IS WHAT?
What is what on the brush cutter? 5
What is what on the brush cutter? 6
What is what on the brush cutter? 7
GENERAL SAFETY PRECAUTIONS
Important 8
Personal protective equipment 8
Machine's safety equipment 9
Cutting equipment 12
ASSEMBLY
Assembling the handlebar and throttle 15
Transport position, handlebar 15
Assembling the cutting equipment 16
Fitting the blade guard/combination guard, grass blade and ball-bearing-mounted support cup ..... 16
Fitting the blade guard and saw blade 17
Fitting the shredder blade and the shredder blade guard (555FRM) 17
Fitting other guards and cutting attachments ..... 18
Adjusting the harness and brush cutter 19
Balance XT 19
FUEL HANDLING
Fuel safety 21
Fuel 21
Fueling 22
STARTING AND STOPPING
Check before starting 23
Starting and stopping 23
WORKING TECHNIQUES
General working instructions 25
MAINTENANCE
Carburetor 30
Muffler 31
Cooling system 31
Air filter 31
Bevel gear 32
Drive shaft 32
Spark plug 32
Winter use 32
Maintenance schedule 34
TECHNICAL DATA
Technical data 35
FEDERAL EMISSION CONTROL WARRANTY STATEMENT
YOUR WARRANTY RIGHTS AND OBLIGATIONS 38
Note the following before starting:
- Please read the operator's manual carefully.
Maintenance, replacement, or repair of the emission control devices and system may be performed by any nonroad engine repair establishment or individual.

WARNING! Long-term exposure to noise can result in permanent hearing impairment. So always use approved hearing protection.

WARNING! Under no circumstances may the design of the machine be modified without the permission of the manufacturer. Always use genuine accessories. Non-authorized modifications and/or accessories can result in serious personal injury or the death of the operator or others.
Your warranty may not cover damage or liability caused by the use of non-authorized accessories or replacement parts.

WARNING! A clearing saw, brushcutter or trimmer can be dangerous if used incorrectly or carelessly, and can cause serious or fatal injury to the operator or others. It is extremely important that you read and understand the contents of this operator's manual.
Husqvarna
HUSQVARNA AB HUSKVARNA SWEDEN IMPORTANT ENGINE INFORMATION
THIS ENGINE CONFORMS TO U.S. EPA PH1 FOR SMALL NON-ROAD ENGINES. REFER TO OPERATOR'S MANUAL FOR
MAINTENANCE SPECIFICATIONS AND ADJUSTMENTS.
This label certify that the product has been certified in accordance with American exhaust requirements EPA 1.

WARNING
The engine exhaust from this product contains chemicals known to the State of California to cause cancer, birth defects or other reproductive harm.
INTRODUCTION
Dear customer!
Congratulations on your choice to buy a Husqvarna product! Husqvarna is based on a tradition that dates back to 1689, when the Swedish King Karl XI ordered the construction of a factory on the banks of the Huskvarna River, for production of muskets. The location was logical, since water power was harnessed from the Huskvarna River to create the water-powered plant. During over 300 years of continuous operation, the Husqvarna factory has produced a lot of different products, from wood stoves to modern kitchen appliances, sewing machines, bicycles, motorcycles etc. In 1956, the first motor driven lawn mowers appeared, followed by chain saws in 1959, and it is within this area Husqvarna is working today.
Today Husqvarna is one of the leading manufacturers in the world of forest and garden products, with quality as our highest priority. We develop, manufacture and market high quality motor driven products for forestry and gardening as well as for building and construction industry.
Your purchase gives you access to professional help with repairs and service whenever this may be necessary. If the retailer who sells your machine is not one of our authorized dealers, ask for the address of your nearest servicing dealer.
It is our wish that you will be satisfied with your product and that it will be your companion for a long time. Think of this operator's manual as a valuable document. By following its content (using, service, maintenance etc) the life span and the second-hand value of the machine can be extended. If you ever lend or sell this machine, make sure that the borrower or buyer gets the operator's manual, so they will also know how to properly maintain and use it.
Thank you for using a Husqvarna product.
Husqvarna AB has a policy of continuous product development and therefore reserves the right to modify the design and appearance of products without prior notice.
For customer assistance, contact us at our website: www.usa.husqvarna.com
WHAT IS WHAT?
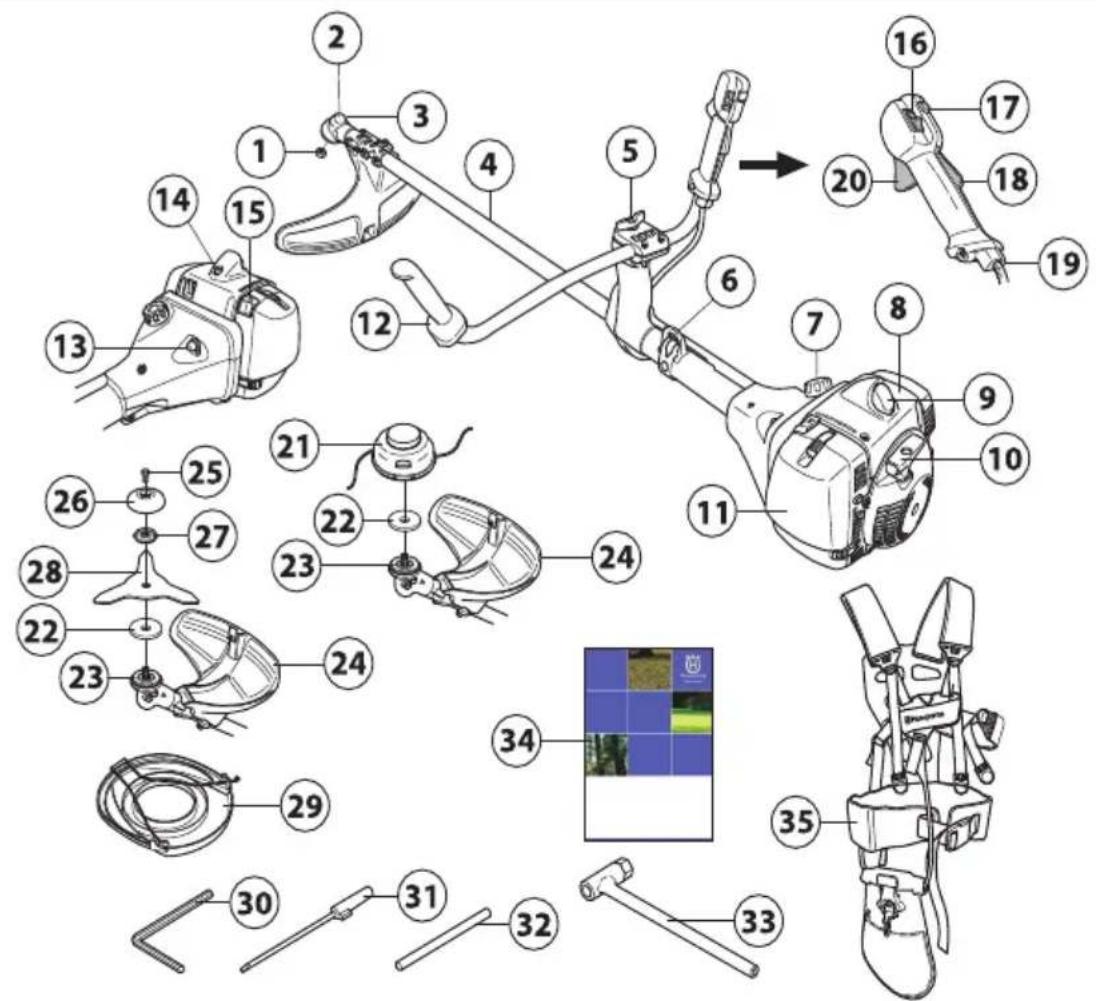
What is what on the brush cutter? (555RXT)
1 Locking nut
2 Bevel gear
3 Grease filler cap, bevel gear
4 Shaft
5 Handle adjustment
6 Support eyes for harness
7 Fuel tank
8 Cylinder cover
9 Spark plug cap and spark plug
10 Starter handle
11 Air filter cover
12 Handlebar
13 Air purge
14 Decompression valve
15 Choke control
16 Stop switch
17 Start throttle button
18 Throttle lockout
19 Adjusting the throttle wire
20 Throttle control
21 Trimmer head
22 Metal cup
23 Drive disc
24 Cutting attachment guard
25 Locking screw
26 Support cup
27 Support flange
28 Grass blade
29 Transport guard
30 Allen key
31 Carburettor screwdriver
32 Locking pin
33 Socket spanner
34 Operator's manual
35 Harness
WHAT IS WHAT?
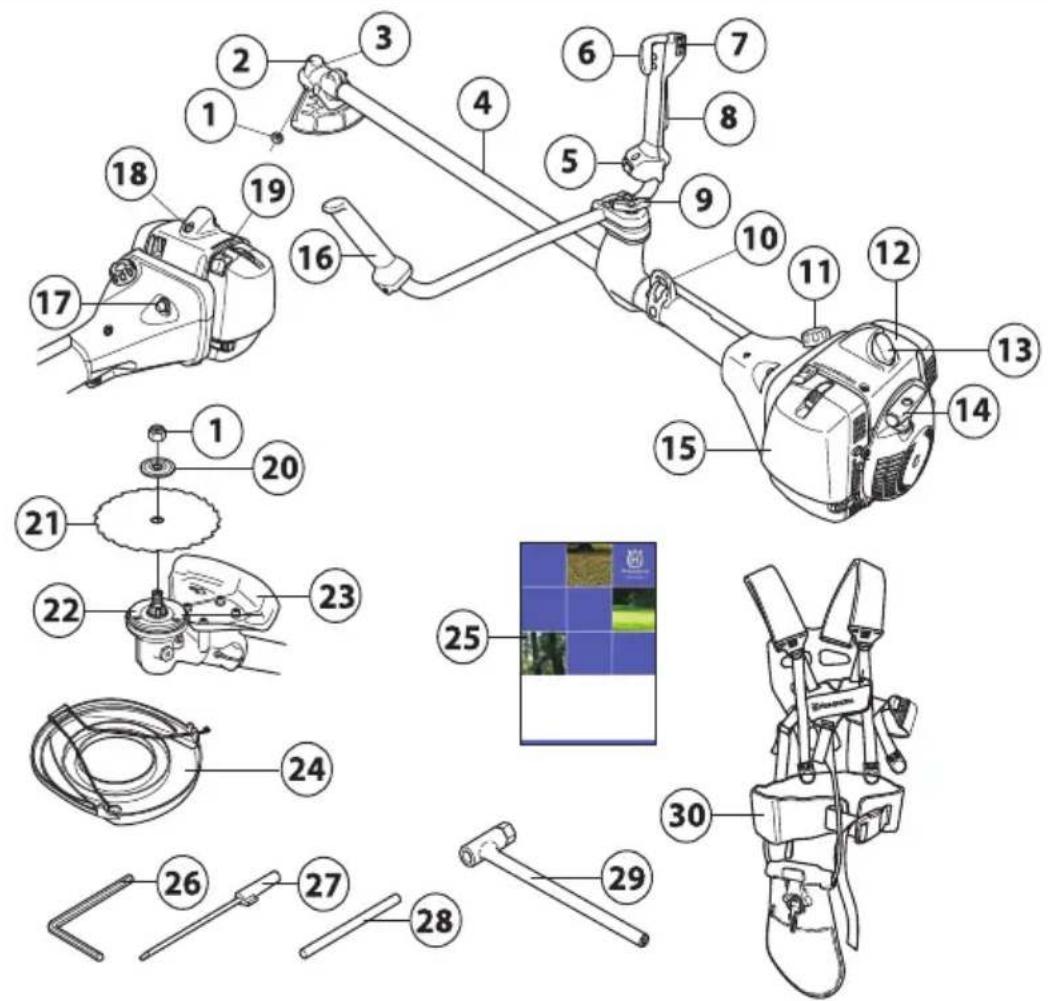
What is what on the brush cutter? (555FX, 555FXT)
1 Locking nut
2 Bevel gear
3 Grease filler cap, bevel gear
4 Shaft
5 Switch for heated handle (555FXT)
6 Throttle control
7 Stop switch
8 Throttle lockout
9 Handle adjustment
10 Support eyes for harness
11 Fuel tank
12 Cylinder cover
13 Spark plug cap and spark plug
14 Starter handle
15 Air filter cover
16 Handlebar
17 Air purge
18 Decompression valve
19 Choke control
20 Support flange
21 Saw blade
22 Drive disc
23 Cutting attachment guard
24 Transport guard
25 Operator's manual
26 Allen key
27 Carburettor screwdriver
28 Locking pin
29 Socket spanner
30 Harness
WHAT IS WHAT?
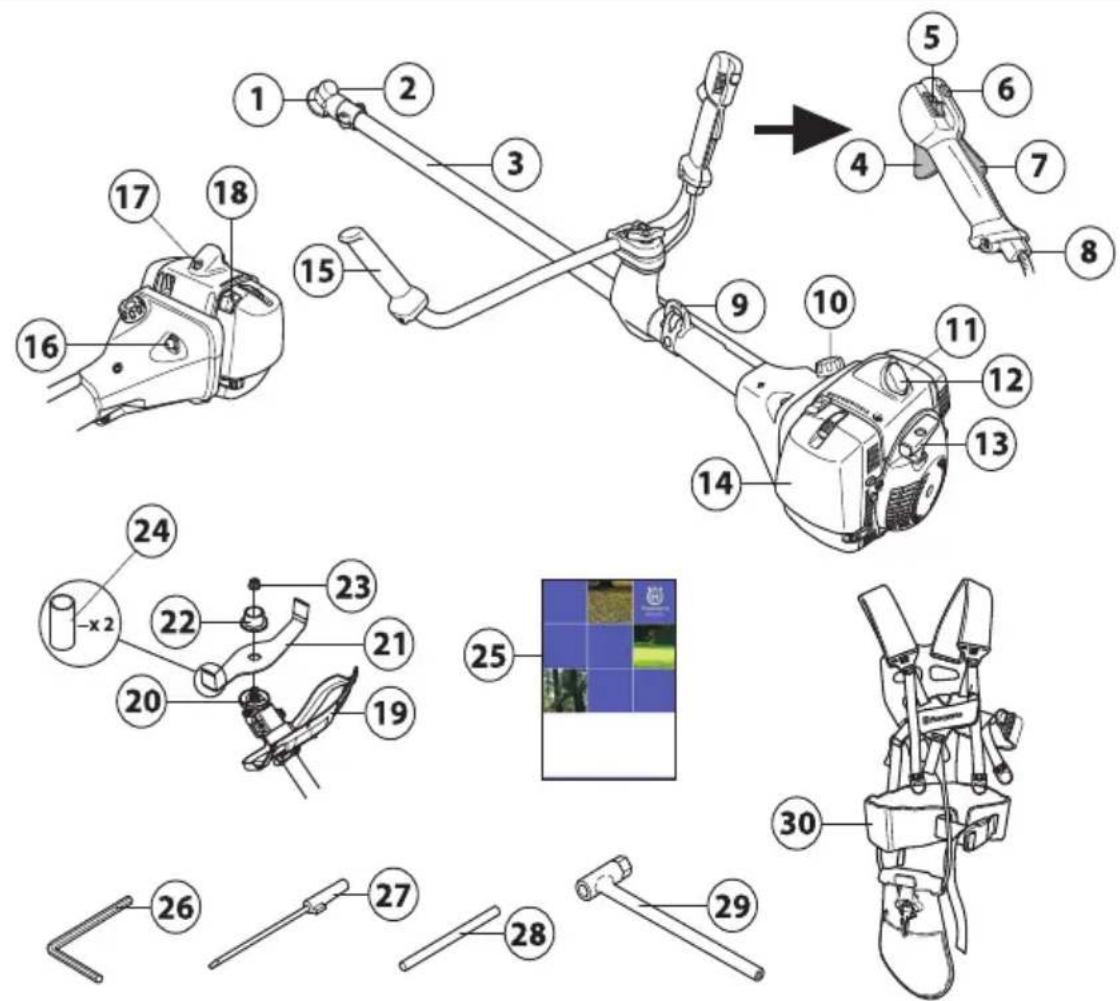
What is what on the brush cutter? (555FRM)
1 Bevel gear
2 Grease filler cap, bevel gear
3 Shaft
4 Throttle control
5 Stop switch
6 Start throttle button
7 Throttle lockout
8 Adjusting the throttle wire
9 Support eyes for harness
10 Fuel tank
11 Cylinder cover
12 Spark plug cap and spark plug
13 Starter handle
14 Air filter cover
15 Handlebar
16 Air purge
17 Decompression valve
18 Choke control
19 Cutting attachment guard
20 Drive disc
21 Shredder blade
22 Support flange
23 Locking nut
24 Transport guard
25 Operator's manual
26 Allen key
27 Carburettor screwdriver
28 Locking pin
29 Socket spanner
30 Harness
Important Personal protective equipment
IMPORTANT!
The machine is only designed for trimming grass, grass clearing and/or forestry clearing.
The only accessories you can operate with this engine unit are the cutting attachments we recommend in the chapter on Technical data.
Never use the machine if you are tired, if you have drunk alcohol, or if you are taking medication that could affect your vision, your judgement or your co-ordination.
Wear personal protective equipment. See instructions under the heading "Personal protective equipment".
Never use a machine that has been modified in any way from its original specification.
Never use a machine that is faulty. Carry out the checks, maintenance and service instructions described in this manual. Some maintenance and service measures must be carried out by trained and qualified specialists. See instructions under the heading Maintenance.
All covers, guards and handles must be fitted before starting. Ensure that the spark plug cap and ignition lead are undamaged to avoid the risk of electric shock.
The machine operator must ensure that no people or animals come closer than 15 metres while working. When several operators are working in the same area the safety distance should be at least twice the tree height and no less than 15 metres.

WARNING! This machine produces an electromagnetic field during operation. This field may under some circumstances interfere with active or passive medical implants. To reduce the risk of serious or fatal injury, we recommend persons with medical implants to consult their physician and the medical implant manufacturer before operating this machine.

WARNING! Running an engine in a confined or badly ventilated area can result in death due to asphyxiation or carbon monoxide poisoning.
IMPORTANT!
A clearing saw, brushcutter or trimmer can be dangerous if used incorrectly or carelessly, and can cause serious or fatal injury to the operator or others. It is extremely important that you read and understand the contents of this operator's manual.
You must use approved personal protective equipment whenever you use the machine. Personal protective equipment cannot eliminate the risk of injury but it will reduce the degree of injury if an accident does happen. Ask your dealer for help in choosing the right equipment.

WARNING! Listen out for warning signals or shouts when you are wearing hearing protection. Always remove your hearing protection as soon as the engine stops.
HELMET
A helmet should be worn if the trees being cleared are taller than 2 m.

natural_image
Line drawing of a helmet with a visor and a triangular cap (no text or symbols)HEARING PROTECTION
Wear hearing protection that provides adequate noise reduction.

EYE PROTECTION
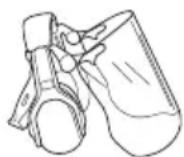
Always wear approved eye protection. If you use a visor then you must also wear approved protective goggles. Approved protective goggles must comply with standard ANSI Z87.1 in the USA or EN 166 in EU countries.

GLOVES
Gloves should be worn when necessary, e.g., when fitting cutting attachments.

GENERAL SAFETY PRECAUTIONS
BOOTS
Wear boots with steel toe-caps and non-slip sole.

CLOTHING
Wear clothes made of a strong fabric and avoid loose clothing that can catch on twigs and branches. Always wear heavy, long pants. Do not wear jewellery, shorts sandals or go barefoot. Secure hair so it is above shoulder level.
FIRST AID KIT
Always have a first aid kit nearby.

Machine's safety equipment
This section describes the machine's safety equipment, its purpose, and how checks and maintenance should be carried out to ensure that it operates correctly. See the "What is what?" section to locate where this equipment is positioned on your machine.
The life span of the machine can be reduced and the risk of accidents can increase if machine maintenance is not carried out correctly and if service and/or repairs are not carried out professionally. If you need further information please contact your nearest servicing dealer.
IMPORTANT!
All servicing and repair work on the machine requires special training. This is especially true of the machine's safety equipment. If your machine fails any of the checks described below you must contact your service agent. When you buy any of our products we guarantee the availability of professional repairs and service. If the retailer who sells your machine is not a servicing dealer, ask him for the address of your nearest service agent.

WARNING! Never use a machine with faulty safety equipment. The machine's safety equipment must be checked and maintained as described in this section. If your machine fails any of these checks contact your service agent to get it repaired.
Throttle lockout
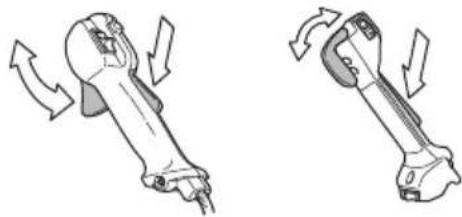
The throttle lockout is designed to prevent accidental operation of the throttle control. When you press the lock (A) (i.e. when you grasp the handle) it releases the throttle
control (B). When you release the handle the throttle control and the throttle lockout both move back to their original positions. This movement is controlled by two independent return springs. This arrangement means that the throttle control is automatically locked at the idle setting.

natural_image
Two mechanical components labeled A and B, showing directional arrows indicating movement or force (no text or symbols beyond labels)Make sure the throttle control is locked at the idle setting when the throttle lockout is released.

natural_image
Two mechanical robotic arms shown in side and top views, with arrows indicating motion direction (no text or symbols)Press the throttle lockout and make sure it returns to its original position when you release it.

natural_image
Two mechanical tools with arrows indicating motion or movement, no visible text or symbolsCheck that the throttle control and throttle lockout move freely and that the return springs work properly.
natural_image
Two mechanical components with directional arrows indicating motion, no text or symbols presentSee instructions under the heading Start. Start the machine and apply full throttle. Release the throttle and check that the cutting attachment stops and remains at a standstill. If the cutting attachment rotates with the throttle in the idle position then the carburettor idle setting must
GENERAL SAFETY PRECAUTIONS
be checked. See instructions under the heading Maintenance.

Stop switch
Use the stop switch to switch off the engine.

Start the engine and make sure the engine stops when you move the stop switch to the stop setting.
Cutting attachment guard

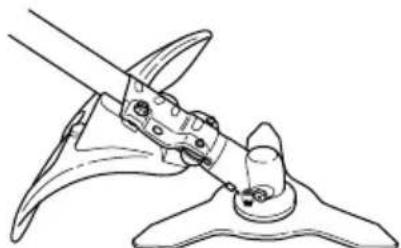
This guard is intended to prevent loose objects from being thrown towards the operator. The guard also protects the operator from accidental contact with the cutting attachment.
natural_image
Line drawing of a mechanical tool interacting with a base component (no text or symbols)Check that the guard is undamaged and not cracked. Replace the guard if it has been exposed to impact or is cracked.
Always use the recommended guard for the cutting attachment you are using. See chapter on Technical data.

WARNING! Never use a cutting attachment without an approved guard. See the chapter on Technical data. If an incorrect or faulty guard is fitted this can cause serious personal injury.
Vibration damping system

Your machine is equipped with a vibration damping system that is designed to reduce vibration and make operation easier.

natural_image
Mechanical assembly diagram showing a lever mechanism with two upward-pointing arrows indicating motion (no text or labels)Use of incorrectly wound cord or an incorrect cutting attachment increases the level of vibration. See instructions under the heading Cutting equipment.
The machine's vibration damping system reduces the transfer of vibration between the engine unit/cutting equipment and the machine's handle unit.

natural_image
Technical line drawing of a cylindrical mechanical component with internal cavities and mounting holes (no text or symbols)Regularly check the vibration damping units for cracks or deformation. Check that the vibration damping element is undamaged and securely attached.

WARNING! Overexposure to vibration can lead to circulatory damage or nerve damage in people who have impaired circulation. Contact your doctor if you experience symptoms of overexposure to vibration. Such symptoms include numbness, loss of feeling, tingling, pricking, pain, loss of strength, changes in skin colour or condition. These symptoms normally appear in the fingers, hands or wrists. The risk increases at low temperatures.
Quick release
There is an easily accessible, quick release fitted at the front as a safety precaution in case the engine catches fire, or in any other situation that requires you to free yourself from the machine and harness. See instructions under the heading Adjusting the harness and brush
GENERAL SAFETY PRECAUTIONS
cutter. Certain harnesses also have a quick release fitted to the support hook.

natural_image
Illustration showing two different methods of adjusting a seatbelt: one using a buckle, the other using a cable to adjust the seatbelt (no text or symbols present)Check that the harness straps are correctly positioned. Once the harness and machine have been adjusted, check that the harness quick release works correctly.
Muffler

The muffler is designed to keep noise levels to a minimum and to direct exhaust fumes away from the user. A muffler fitted with a catalytic converter is also designed to reduce harmful exhaust gases.

In countries that have a warm and dry climate there is a significant risk of fire. We therefore fit certain mufflers with a spark arrestor screen. Check whether the muffler on your machine is fitted with this kind of screen.

natural_image
Two identical line drawings of a portable device emitting steam, with no text or symbols present.For mufflers it is very important that you follow the instructions on checking, maintaining and servicing your machine. See instructions under the heading Checking, maintaining and servicing the machine's safety equipment.
Never use a machine that has a faulty muffler.

Regularly check that the muffler is securely attached to the machine.
If the muffler on your machine is fitted with a spark arrestor screen this must be cleaned regularly. A blocked screen will cause the engine to overheat and may lead to serious damage.

natural_image
Line drawing of a handheld electronic device with a scroll wheel (no text or symbols)
WARNING! Mufflers fitted with catalytic converters get very hot during use and remain so for some time after stopping. This also applies at idle speed. Contact can result in burns to the skin. Remember the risk of fire!

WARNING! The inside of the muffler contain chemicals that may be carcinogenic. Avoid contact with these elements in the event of a damaged muffler.

WARNING! Bear in mind that: The exhaust fumes from the engine are hot and may contain sparks which can start a fire. Never start the machine indoors or near combustible material!
Locking nut

A locking nut is used to secure some types of cutting attachment.

natural_image
Mechanical diagram showing a gear assembly with a bolt and nut, no text or symbols presentWhen fitting, tighten the nut in the opposite direction to the direction of rotation of the cutting attachment. To remove it, undo the nut in the same direction as the cutting attachment rotates. (CAUTION! The nut has a left-hand thread.) When loosening and tightening the saw blade nut, there is a risk of injury from the teeth of the saw blade. You should therefore always ensure that your hand is shielded by the blade guard when doing this. Always use a socket spanner with a shaft that is long enough to allow this. The arrow in the diagram shows the area where you
GENERAL SAFETY PRECAUTIONS
should operate the socket spanner when loosening or tightening the nut.

natural_image
Technical line drawing showing two mechanical components: a hand holding a wheel and a fan blade with a central hub (no text or symbols)The nylon lining inside the locking nut must not be so worn that you can turn it by hand. The lining should offer a resistance of at least 1.5 Nm. The nut should be replaced after it has been put on approx. 10 times.
Locking screw

The lock screw must be tightened securely for ball-bearing-mounted support cups.

natural_image
Technical line drawing of a mechanical component with an arrow indicating direction (no text or symbols)Cutting equipment
This section describes how to choose and maintain your cutting equipment in order to:
- Reduce the risk of blade thrust.
- Obtain maximum cutting performance.
- Extend the life of cutting equipment.
IMPORTANT!
Only use cutting attachments with the guards we recommend! See the chapter on Technical data.
Refer to the instructions for the cutting attachment to check the correct way to load the cord and the correct cord diameter.
Keep the teeth of the blade correctly sharpened! Follow our recommendations. Also refer to the instructions on the blade packaging.
Maintain the correct blade setting! Follow our instructions and use the recommended file gauge.

WARNING! Always stop the engine before doing any work on the cutting attachment. This continues to rotate even after the throttle has been released. Ensure that the cutting attachment has stopped completely and disconnect the HT lead from the spark plug before you start to work on it.

WARNING! Using an incorrect cutting attachment or an incorrectly sharpened blade increases the risk of blade thrust.
Cutting equipment
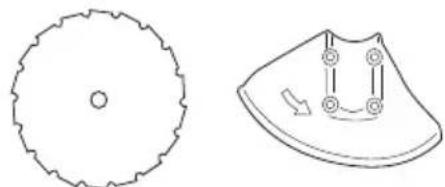
Saw blades are intended for cutting fibrous types of wood.
natural_image
Two technical line drawings: a gear-like circular component and a curved mechanical part with internal components (no text or symbols)Grass blades and grass cutters are intended for cutting coarse grass.

natural_image
Three abstract geometric shapes with no text or symbols: a star-like polygon, a triangular prism with a central dot, and a curved rectangular base (no text or symbols)Shredder blades are intended for cutting coarse grass and bushes.

natural_image
Technical line drawings of two mechanical parts: a handle and a housing (no text or symbols)A trimmer head is intended for trimming grass.

natural_image
Technical line drawing of a mechanical component with a flanged base and curved arms (no text or symbols)General rules

Only use cutting attachments with the guards we recommend! See the chapter on Technical data.

natural_image
Four abstract line drawings: a circular fan, a star-like shape with a dot, a triangular prism, and a cylindrical wire (no text or symbols)Keep the teeth of the blade correctly sharpened! Follow our instructions and use the recommended file gauge. An
GENERAL SAFETY PRECAUTIONS
incorrectly sharpened or damaged blade increases the risk of accidents.

natural_image
Simple line drawing of a tool interacting with a shield-like object (no text or symbols)Keep the correct setting on the saw blade! Follow our instructions and use the recommended setting tool. An incorrectly set saw blade increases the risk of jamming and blade thrust, and damage to the saw blade.

natural_image
Illustration showing a tool and a hand holding a tool with an arrow indicating rotation (no text or symbols)Check the cutting attachment for damage or cracks. A damaged cutting attachment should always be replaced.

flowchart
graph TD
    A["Recyclable waste"] --> B["Recyclable waste plate"]
    B --> C["Recyclable waste bin icon with arrow"]
    C --> D["Recyclable waste bin icon with arrow"]
Sharpening grass cutters and grass blades
• See the cutting attachment packaging for correct sharpening instructions. Sharpen blades and cutters using a single-cut flat file.
- Sharpen all edges equally to maintain the balance of the blade.

natural_image
Two diagrams showing a tool interacting with a shield-like object, one with an arrow indicating direction (no text or symbols)
WARNING! Always discard a blade that is bent, twisted, cracked, broken or damaged in any other way. Never attempt to straighten a twisted blade so that it can be reused. Only use original blades of the specified type.
Sharpening the saw blade

• See the cutting attachment packaging for correct sharpening instructions.
A correctly sharpened blade is essential for working efficiently and to avoid unnecessary wear to the blade and brush cutter.

natural_image
Illustration of a worker in safety gear handling a tool, with an inset showing magnified teeth structure (no text or symbols)- Make sure that the blade is well supported when you file it. Use a 5.5 mm round file with a file holder.

- The filing angle is 15^ . File alternate teeth to the right and those in between to the left. If the blade has been heavily pitted by stones it may be necessary to dress the top edges of the teeth with a flat file, in exceptional cases. If so, this should be done before filing with a round file. The top edges must be filed down by the same amount for all the teeth.

Adjust the blade setting. This should be 1 mm.

natural_image
Diagram showing two mechanical components with curved arrows indicating motion or force direction (no text or symbols)Trimmer head
IMPORTANT!
Always ensure the trimmer cord is wound tightly and evenly around the drum, otherwise the machine will generate harmful vibration.
- Only use the recommended trimmer heads and trimmer cords. These have been tested by the manufacturer to suit a particular engine size. This is especially important when a fully automatic trimmer head is used. Only use the recommended cutting attachment. See the chapter on Technical data.

natural_image
Three line drawings of household appliances: a circular fan, a washing machine, and a cylindrical device (no text or symbols)- Smaller machines generally require small trimmer heads and vice versa. This is because when clearing using a cord the engine must throw out the cord radially from the trimmer head and overcome the resistance of the grass being cleared.
- The length of the cord is also important. A longer cord requires greater engine power than a shorter cord of the same diameter.
- Make sure that the cutter on the trimmer guard is intact. This is used to cut the cord to the correct length.
• To increase the life of the cord it can be soaked in water for a couple of days. This will make the line tougher so that it lasts longer.
ASSEMBLY
Assembling the handlebar and throttle
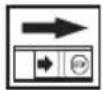
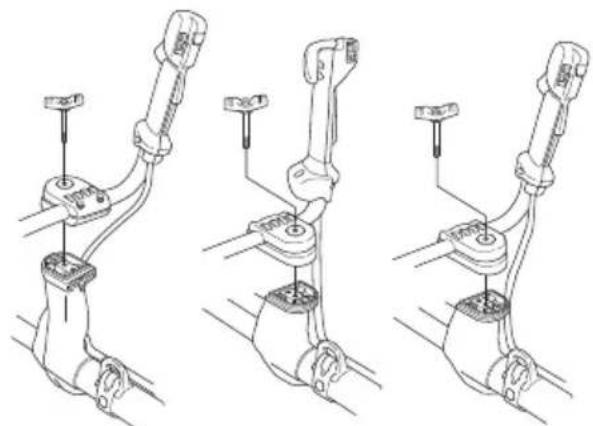
CAUTION! Some models have the throttle handle fitted at the factory.
- Remove the screw at the rear of the throttle handle.
- Slide the throttle handle onto the right side of the handlebar, (see diagram).

natural_image
Technical line drawing of two mechanical tools with no visible text or symbols- Align the screw hole in the throttle handle with the hole in the handlebar.
- Refit the screw in the hole in the rear of the throttle handle.
- Screw the screw through the handle and handlebar. Tighten it.
- Unscrew the knob from the handlebar mounting.
- Position the handlebar as shown. Fit the mounting components and tighten the knob lightly.
natural_image
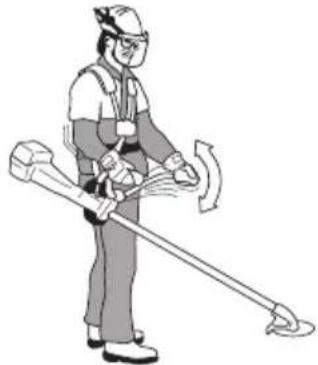
Three technical line drawings of a mechanical device with no visible text or symbols- Put on the harness and hang the machine from the support hook. Now make a final adjustment so that
the machine is in a comfortable working position when it hangs from the harness.
natural_image
Illustration of a person in protective gear using a long-handled tool (no text or symbols)- Tighten the knob.
Transport position, handlebar

- The handlebar can easily be turned to fit along the shaft for easier transportation and storage.
- Loosen the knob. Turn the handlebar clockwise so that the throttle handle rests against the engine.
- Now twist the handlebar around the shaft. Tighten the knob.

natural_image
Diagram of a mechanical device with rotating arms and a base, showing motion direction (no text or symbols)- Fit the transport guard to the cutting attachment.
ASSEMBLY
Assembling the cutting equipment

WARNING!
When fitting the cutting attachment it is extremely important that the raised section on the drive disc/support flange engages correctly in the centre hole of the cutting attachment. If the cutting attachment is fitted incorrectly it can result in serious and/or fatal personal injury.

natural_image
Technical line drawing of a mechanical component with cross-sectional views (no text or symbols)
WARNING! Never use a cutting attachment without an approved guard. See the chapter on Technical data. If an incorrect or faulty guard is fitted this can cause serious personal injury.
IMPORTANT! If a saw blade or grass blade are to be used the machine must be equipped with the correct handlebar, blade guard and harness.
Fitting the blade guard/ combination guard, grass blade and ball-bearing-mounted support cup

- Hang the trimmer guard/combination guard (A) on the two hooks on the plate holder (M). Bend the guard around the shaft and tighten it with the bolt (L) on the opposite side of the shaft. Use the locking pin (C). Place the locking pin in the groove on the screw head and tighten. See diagram.

- CAUTION! Always use the recommended guard for the cutting attachment you are using. See chapter on Technical data.
- Fit the drive disc (B) on the angle gear's output shaft.
- Centre the metal cup (P) on the drive disc's blade guide.
- Turn the output shaft until one of the holes in the drive disk aligns with the corresponding hole in the gear housing.
- Insert the locking pin (C) in the hole to lock the shaft.
- Position the blade (D) with the drive disk (B). Make sure that the blade is centered by fitting it to the guide on the drive disk.
- Fit the support flange (F) on the output shaft so that it rests against the blade.
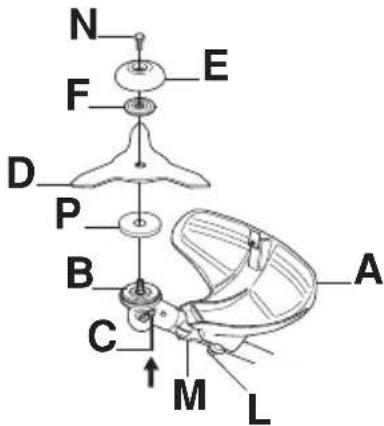
- Screw the support cup (E) onto the output shaft threads (CAUTION! Left-hand thread). Tighten to a torque of 35-50 Nm (3.5-5.0 kpm). Use the socket spanner in the tool kit. Note that the locking pin (C) must remain inside the gear housing to lock the drive disk. Hold the shaft of the socket spanner as close to the blade guard/combination guard as possible.

natural_image
Diagram of a propeller with rotating arm and base, showing mechanical assembly (no text or symbols)
WARNING! Tighten the lock screw (N) in the center hole of the support cup. Tighten to a torque of 35-50 Nm (3.5-5.0 kpm), CAUTION! Left-hand thread. If the lock screw is not fitted in the support cup, there is a risk that the support cup will come unscrewed. This means that the blade will also come loose, which could result in serious or fatal injury to the operator or others.
ASSEMBLY
Fitting the blade guard and saw blade

CAUTION! Always use the recommended guard for the cutting attachment you are using. See chapter on Technical data.
555FX, 555FXT
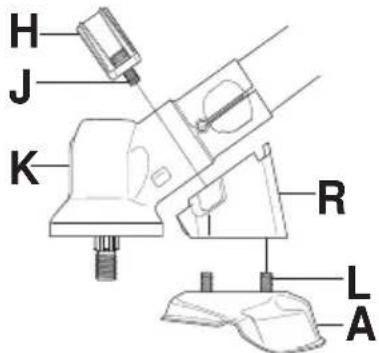
- The blade guard (A) is fitted using 4 screws (L) as shown.

555RXT
- Fit the holder (R) and bracket (J) with 2 bolts (H) on the gear housing.
- Then fasten the blade guard (A) with 4 bolts (L) in the holder (N).
- Fit the drive disc (B) on the output shaft.
- Turn the blade shaft until one of the holes in the drive disc aligns with the corresponding hole in the gear housing.
- Insert the locking pin (C) in the hole to lock the shaft.
- Place the blade (D) and support flange (F) on the output shaft.

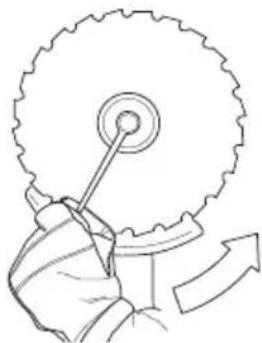
- Fit the nut (G). The nut must be tightened to a torque of 35-50 Nm (3.5-5 kpm). Use the socket spanner in the tool kit. Hold the shaft of the spanner as close to the blade guard as possible. To tighten the nut, turn the spanner in the opposite direction to the direction of rotation (Caution! left-hand thread).

natural_image
Mechanical gear assembly diagram showing a wheel and shaft mechanism (no text or labels)When loosening and tightening the saw blade nut, there is a risk of injury from the teeth of the saw blade. You should therefore always ensure that your hand is shielded by the blade guard when doing this. Always use a socket spanner with a shaft that is long enough to allow this. The arrow in the diagram shows the area where you should operate the socket spanner when loosening or tightening the nut.
natural_image
Line drawing of a hand operating a gear with a rotating wheel (no text or symbols)Fitting the shredder blade and the shredder blade guard (555FRM)

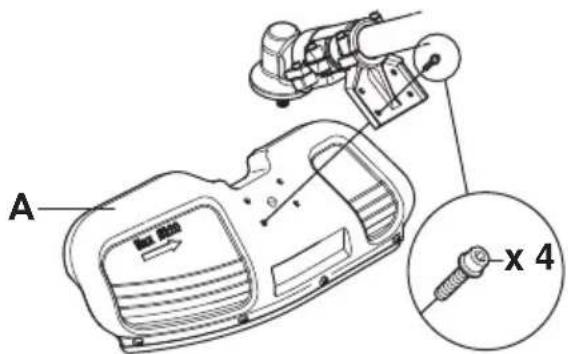
- Fit the holder (K) and bracket (J) with 4 bolts (H) on the gear housing.

ASSEMBLY
- Then fasten the shredder blade guard (A) with 4 bolts in the holder as shown.
- Fit the drive disc (B) on the output shaft.

- Turn the blade shaft until one of the holes in the drive disc aligns with the corresponding hole in the gear housing.
- Insert the locking pin (C) in the hole to lock the shaft.
- Place the shredder blade (D) and support flange (F) on the output shaft.
- Fit the nut (G). The nut must be tightened to a torque of 35-50 Nm (3.5-5 kpm). Use the socket spanner in the tool kit. Hold the shaft of the spanner as close to the shredder blade guard as possible.
Fitting other guards and cutting attachments

- Fit the trimmer guard/combination guard (A) intended for use with the trimmer head/plastic blades. Hang the trimmer guard/combination guard (A) on the two hooks on the plate holder (M). Bend the guard around the shaft and tighten it with the bolt (L) on the opposite side of the shaft. Use the locking pin (C). Place the locking pin in the groove on the screw head and tighten. See diagram.

- Fit the drive disc (B) on the output shaft.
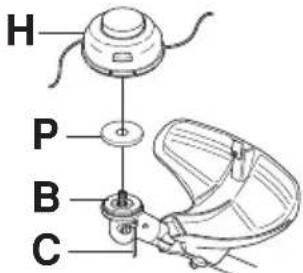
- Centre the metal cup (P) on the drive disc's blade guide.
- Turn the blade shaft until one of the holes in the drive disc aligns with the corresponding hole in the gear housing.
- Insert the locking pin (C) in the hole to lock the shaft.
- Screw on the trimmer head/plastic blades (H) in the opposite direction to the direction of rotation.

natural_image
Technical diagram of a mechanical component with labeled part 'H' and directional arrow (no text or symbols beyond label)
natural_image
Technical line drawing of a mechanical component with labeled part H and directional arrow (no text or symbols beyond basic labels)- To dismantle, follow the instructions in the reverse order.
ASSEMBLY
Adjusting the harness and brush cutter

WARNING! When using a brush cutter it must always be hooked securely to the harness. Otherwise you will be unable to control the brush cutter safely and this can result in injury to yourself or others. Never use a harness with a defective quick release.
Balance XT
natural_image
Line drawing of a person wearing a full-body safety harness (no text or symbols)
natural_image
Technical line drawing of a mechanical component with no visible text or symbolsSafety release
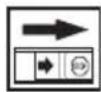
Push down the red release lever to release the machine from the harness.

natural_image
Diagram of a hand holding a tool with arrows indicating motion or force direction (no text or symbols)Adjusting the harness
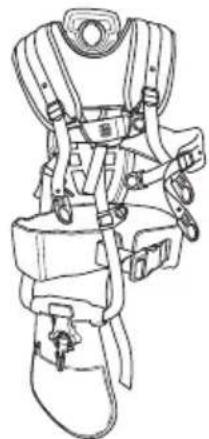
1 Adjust the harness to suit the person's height. Move the shoulder strap attachment to a suitable hole in the back plate by pressing in the spring-loaded lock and twisting the shoulder strap attachment.

natural_image
Line drawing of a mechanical component with no visible text or symbols1 Move the strap for the support hook to the upper or the lower hole depending on if you are going to clear a forest or trim grass.
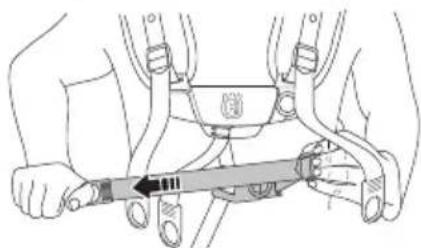
2 Tighten the hip strap so that it sits securely.

natural_image
Illustration of two hands holding a belt buckle (no text or symbols)3 The hip belt should hang roughly in line with the hip bone.
4 Press the breast plate together.

natural_image
Illustration of a person wearing a vest with straps and holding a small object, no text or symbols present5 Attach the side belt to the breast plate.

6 To relieve pressure on the rib cage, it is possible to connect the side belt with a belt to the hip pad. (Suitable for females).
7 Adjust the shoulder strap to distribute the load evenly across your shoulders. Press downwards on the suspension hook to load the harness.

natural_image
Line drawing of a person wearing a full-body safety harness (no text or symbols)8 Adjust the side belts to fit around the rib cage until the breast plate is centred on the chest.
natural_image
Illustration of a person using a tool to adjust or install a mechanical component (no text or symbols visible)ASSEMBLY
9 Adjust the height of the hanging ring as per the instructions. (For forest clearing, the suspension should hang approx. 10 cm below your hip bone.)
10 If you need to lower the suspension hook, for trimming for example, move the suspension strap (A) to the lower mounting point on the backplate. The front belt that is attached to the breast plate can also be adjusted if necessary.
11 The elastic strap (B) can be tightened to transfer more load from the shoulder straps to the hip strap.

Correct height
1 Forestry clearing
The machine should be supported in a harness when forestry clearing so that the cutting equipment is angled slightly forwards in relation to the ground. Adjust the height using the strap on the harness for the support hook.

natural_image
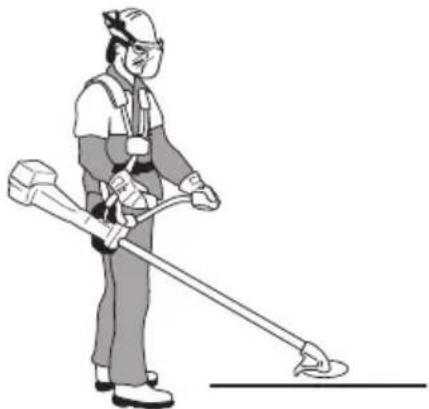
Illustration of two workers using a manual power tool, no text or symbols present2 Grass clearing
The machine should be supported in a harness when grass clearing so that the cutting equipment is parallel to the ground.
natural_image
Illustration of a person wearing safety gear and using a long-handled tool (no text or symbols present)Correct balance
1 Forestry clearing
The machine is balanced by moving the suspension ring on the machine forwards or backwards. On some models the suspension ring is fixed, however, this will then have a number of holes for the support hook. The machine is correctly balanced when it freely hangs horizontally from the support hook. In this way the risk of hitting stones is reduced if you need to release the handlebar.

natural_image
Illustration of a person using a long tool to interact with a mechanical device (no text or symbols present)2 Grass clearing
Let the blade balance at a comfortable cutting height, i.e. close to the ground.

natural_image
Illustration of a person wearing safety gear and holding a long tool (no text or symbols visible)Fuel safety
Never start the machine:
1 If you have spilled fuel on it. Wipe off the spillage and allow remaining fuel to evaporate.
2 If you have spilled fuel on yourself or your clothes, change your clothes. Wash any part of your body that has come in contact with fuel. Use soap and water.
3 If the machine is leaking fuel. Check regularly for leaks from the fuel cap and fuel lines.
Transport and storage
- Store and transport the machine and fuel so that there is no risk of any leakage or fumes coming into contact with sparks or naked flames, for example, from electrical machinery, electric motors, electrical relays/ switches or boilers.
- When storing and transporting fuel always use approved containers intended for this purpose.
- When storing the machine for long periods the fuel tank must be emptied. Contact your local gas station to find out where to dispose of excess fuel.
- Ensure the machine is cleaned and that a complete service is carried out before long-term storage.
- The transport guard must always be fitted to the cutting attachment when the machine is being transported or in storage.
- Secure the machine during transport.

WARNING! Take care when handling fuel. Bear in mind the risk of fire, explosion and inhaling fumes.
Fuel
CAUTION! The machine is equipped with a two-stroke engine and must always been run using a mixture of gasoline and two-stroke engine oil. It is important to accurately measure the amount of oil to be mixed to ensure that the correct mixture is obtained. When mixing small amounts of fuel, even small inaccuracies can drastically affect the ratio of the mixture.

WARNING! Fuel and fuel fumes are highly inflammable and can cause serious injury when inhaled or allowed to come in contact with the skin. For this reason observe caution when handling fuel and make sure there is adequate ventilation.
Gasoline
CAUTION! Always use a quality gasoline/oil mixture with an octane rating of at least 87 octane ((RON+MON)/2). If your machine is equipped with a catalytic converter (see chapter on Technical data) always use a good quality unleaded gasoline/oil mixture. Leaded gasoline will destroy the catalytic converter.
Use low-emission gasoline, also known as alkylate gasoline, if it is available.
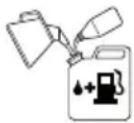
This engine is certified to operate on unleaded gasoline.
- The lowest recommended octane grade is 87 ((RON+MON)/2). If you run the engine on a lower octane grade than 87 so-called knocking can occur. This gives rise to a high engine temperature and increased bearing load, which can result in serious engine damage.
- When working at continuous high revs a higher octane rating is recommended.
Two-stroke oil
- For best results and performance use HUSQVARNA two-stroke engine oil, which is specially formulated for our air-cooled two stroke-engines.
- Never use two-stroke oil intended for water-cooled engines, sometimes referred to as outboard oil (rated TCW).
- Never use oil intended for four-stroke engines.
- Mixing ratio 1:50 (2%) with HUSQVARNA two-stroke oil.
| Gasoline, litre T | Two-stroke oil, litre |
| 2% (1:50) | |
| 5 0,10 | |
| 10 0,20 | |
| 15 0,30 | |
| 20 0,40 | |
| US gallon US fl. oz. | |
| 1 2 1/2 | |
| 2 1/2 6 1/2 | |
| 5 12 7/8 | |
FUEL HANDLING
Mixing
• Always mix the gasoline and oil in a clean container intended for fuel.
• Always start by filling half the amount of the gasoline to be used. Then add the entire amount of oil. Mix (shake) the fuel mixture. Add the remaining amount of gasoline.
- Mix (shake) the fuel mixture thoroughly before filling the machine's fuel tank.

- Do not mix more than one month's supply of fuel at a time.
- If the machine is not used for some time the fuel tank should be emptied and cleaned.

WARNING! The catalytic converter muffler gets very hot during and after use. This also applies during idling. Be aware of the fire hazard, especially when working near flammable substances and/or vapours.
Fueling


WARNING! Taking the following precautions, will lessen the risk of fire:
Do not smoke or place hot objects near fuel.
Always shut off the engine before refuelling.
Always stop the engine and let it cool for a few minutes before refuelling.
When refuelling, open the fuel cap slowly so that any excess pressure is released gently.
Tighten the fuel cap carefully after refuelling.
Always move the machine away from the refuelling area before starting.
- Clean the area around the fuel cap. Contamination in the tank can cause operating problems.
- Ensure that the fuel is well mixed by shaking the container before filling the tank.

STARTING AND STOPPING
Check before starting


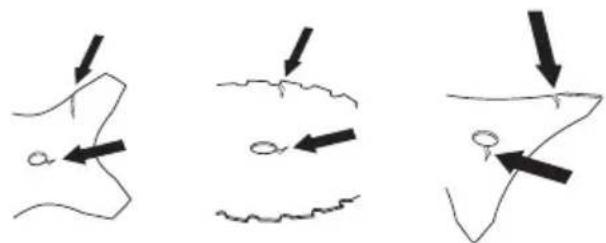
- Check the blade to ensure that no cracks have formed at the bottom of the teeth or by the centre hole. The most common reason why cracks are formed is that sharp corners have been formed at the bottom of the teeth while sharpening or that the blade has been used with dull teeth. Discard a blade if cracks are found.
natural_image
Three hand-drawn diagrams showing a curved surface with arrows indicating direction, no text or symbols present.- Check that the support flange is not cracked due to fatigue or due to being tightened too much. Discard the support flange if it is cracked.

natural_image
Simple line drawing of a circular ring with a downward arrow pointing to its center (no text or symbols)- Ensure the locking nut has not lost its captive force. The nut lock should have a locking force of at least 1.5 Nm. The tightening torque of the locking nut should be 35-50 Nm.

- Check that the blade guard is not damaged or cracked. Replace the blade guard if it is exposed to impact or is cracked.
Check that the trimmer head and trimmer guard are not damaged or cracked. Replace the trimmer head or trimmer guard if they have been exposed to impact or are cracked.

natural_image
Line drawing of a hand using a power tool to adjust or install a component (no text or symbols present)- Never use the machine without a guard nor with a defective guard.
- All covers must be correctly fitted and undamaged before you start the machine.
Starting and stopping


WARNING! The complete clutch cover and shaft must be fitted before the machine is started, otherwise the clutch can come loose and cause personal injury.
Always move the machine away from the refuelling area before starting. Place the machine on a flat surface. Ensure the cutting attachment cannot come into contact with any object.
Make sure no unauthorised persons are in the working area, otherwise there is a risk of serious personal injury. The safety distance is 15 metres.
Cold engine
Ignition: Set the stop switch to the start position.
Choke: Set the choke control (A) in the choke position.
Primer bulb: Press the air purge diaphragm (B) repeatedly until fuel begins to fill the diaphragm. The diaphragm need not be completely filled.
Decompression valve (C): Press the valve to reduce the pressure in the cylinder and make starting easier. You should always use the decompression valve when starting the machine. Once the machine has started the valve will automatically return to its original setting.

Warm engine
Use the same starting procedure as for a cold engine but without setting the choke control in the choke position.
Start throttle: (555FX, 555FXT, 555RXT, 555FRM)
Set the throttle to the start position by moving the choke control to the choke position and then returning it to its original position.
Start throttle: (555RXT, 555FRM)
Set the throttle to the start position by first pressing the throttle lockout and the throttle trigger, then pressing the start throttle button (A). Then release the throttle lockout
STARTING AND STOPPING
and the throttle trigger, followed by the start throttle button. The throttle function is now activated. To return the engine to idle, press the throttle lockout and throttle trigger again.

natural_image
Line drawing of a mechanical tool or device with an arrow labeled 'A' pointing to a circular component (no text or symbols beyond label)Starting

WARNING! When the engine is started with the choke in either the choke or start throttle positions the cutting attachment will start to rotate immediately.
Hold the body of the machine on the ground using your left hand (CAUTION! Not with your foot!). Grip the starter handle, slowly pull out the cord with your right hand until you feel some resistance (the starter pawls grip), now quickly and powerfully pull the cord. Never wrap the starter cord around your hand
Repeat pulling the cord until the engine starts. When the engine starts, return choke control to run position and apply full throttle; the throttle will automatically disengage from the start setting.
CAUTION! Do not pull the starter cord all the way out and do not let go of the starter handle when the cord is fully extended. This can damage the machine.


natural_image
Illustration of a worker in safety gear handling a box (no text or symbols visible)Stopping
Stop the engine by switching off the ignition.
555RXT, 555FRM

natural_image
Line drawing of a mechanical component with a pointed arrow indicating a specific feature (no text or symbols present)555FX, 555FXT

Heated handles
555FXT
Models equipped with heating elements in the handles have an on/off switch on the throttle handle to control the heat. Both the left and right handles have heating elements that automatically maintain a temperature of roughly 70° when the heat is turned on.

natural_image
Line drawing of a person using a handheld device to interact with a device, showing no text or symbols.WORKING TECHNIQUES
General working instructions
IMPORTANT!
This section describes the basic safety precautions for working with brush cutters and trimmers.
If you encounter a situation where you are uncertain how to proceed you should ask an expert. Contact your dealer or your service workshop.
Avoid all usage which you consider to be beyond your capability.
You must understand the difference between forestry clearing, grass clearing and grass trimming before use.
Basic safety rules


1 Look around you:
• To ensure that people, animals or other things cannot affect your control of the machine.
• To ensure that people, animals, etc., do not come into contact with the cutting attachment or loose objects that are thrown out by the cutting attachment.
- CAUTION! Do not use the machine unless you are able to call for help in the event of an accident.
2 Inspect the working area. Remove all loose objects, such as stones, broken glass, nails, steel wire, string, etc. that could be thrown out or become wrapped around the cutting attachment.
3 Do not use the machine in bad weather, such as dense fog, heavy rain, strong wind, intense cold, etc. Working in bad weather is tiring and often brings added risks, such as icy ground, unpredictable felling direction, etc.
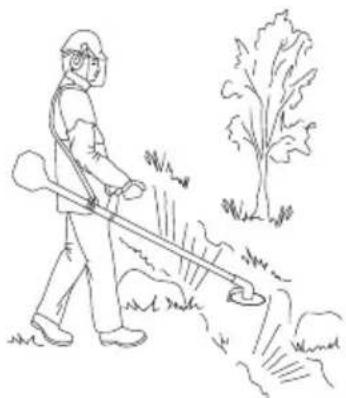
4 Make sure you can move and stand safely. Check the area around you for possible obstacles (roots, rocks, branches, ditches, etc.) in case you have to move suddenly. Take great care when working on sloping ground.
natural_image
Line drawing of a person using a power tool to walk near grass and a tree (no text or symbols)5 Take great care when cutting a tree that is under tension. A tree that is under tension may spring back to its normal position before or after being cut. If you
position yourself incorrectly or make the cut in the wrong place the tree may hit you or the machine and cause you to lose control. Both situations can cause serious personal injury.

natural_image
Simple line drawing of a tree branch with leaves and a rock, no text or symbols present6 Keep a good balance and a firm foothold.
7 Always hold the machine with both hands. Hold the machine on the right side of your body.

natural_image
Line drawing of a person wearing a full gear and holding a metal detector (no text or symbols)8 Keep the cutting attachment below waist level.
9 Switch off the engine before moving to another area. Fit the transport guard before carrying or transporting the equipment any distance.
10 Never put the machine down with the engine running unless you have it in clear sight.
The ABC of clearing
• Always use the correct equipment.
- Make sure the equipment is well adjusted.
- Follow the safety precautions.
- Organise your work carefully.
• Always use full throttle when starting to cut with the blade.
• Always use sharp blades.
- Avoid stones.
- Control the felling direction (take advantage of the wind).
WORKING TECHNIQUES

WARNING! Neither the operator of the machine nor anyone else may attempt to remove the cut material while the engine is running or the cutting equipment is rotating, as this can result in serious injury.
Stop the engine and cutting equipment before you remove material that has wound around the blade shaft as otherwise there is a risk of injury. The bevel gear can get hot during use and may remain so for a while afterwards. You could get burnt if you touch it.

WARNING! Watch out for thrown objects. Always wear approved eye protection. Never lean over the cutting attachment guard. Stones, rubbish, etc. can be thrown up into the eyes causing blindness or serious injury.
Keep unauthorised persons at a distance. Children, animals, onlookers and helpers should be kept outside the safety zone of 15 m. Stop the machine immediately if anyone approaches. Never swing the machine around without first checking behind you to make sure no-one is within the safety zone.

WARNING! Sometimes branches or grass get caught between the guard and cutting attachment. Always stop the engine before cleaning.
Working methods

WARNING! Machines fitted with saw blades or grass blades can be thrown violently to the side when the blade comes into contact with a fixed object. This is called blade thrust. A blade thrust can be violent enough to cause the machine and/or operator to be propelled in any direction, and possibly lose control of the machine. Blade thrust can occur without warning if the machine snags, stalls or binds. Blade thrust is more likely to occur in areas where it is difficult to see the material being cut.
Avoid cutting with the area of the blade between the 12 o'clock and 3 o'clock positions. Because of the speed of rotation of the blade, blade thrust can occur if you attempt to cut thick stems with this area of the blade.
- Before you start clearing, check the clearing area, the type of terrain, the slope of the ground, whether there are stones, hollows etc.
- Start at whichever end of the area is easiest, and clear an open space from which to work.
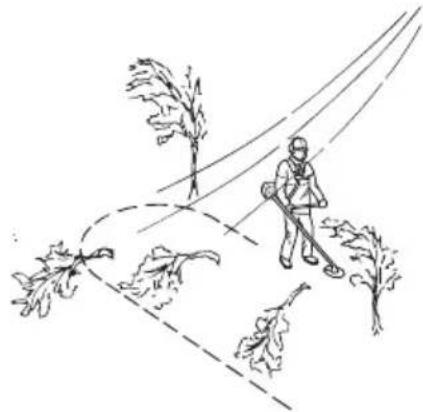
• Work systematically to and fro across the area, clearing a width of around 4-5 m on each pass. This exploits the full reach of the machine in both directions and gives the operator a convenient and varied working area to work in.
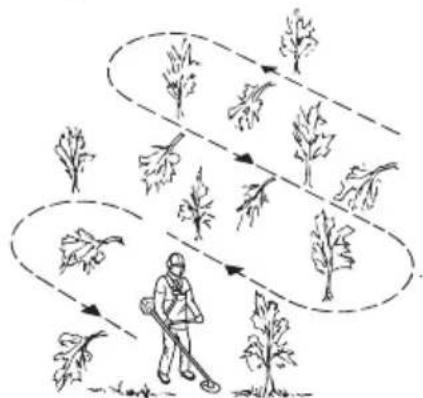
flowchart
graph TD
    A["Start"] --> B["Step 1"]
    B --> C["Step 2"]
    C --> D["Step 3"]
    D --> E["Step 4"]
    E --> F["Step 5"]
    F --> G["Step 6"]
    G --> H["Step 7"]
    H --> I["Step 8"]
    I --> J["Step 9"]
    J --> K["Step 10"]
    K --> L["End"]
- Clear a strip around 75 m long. Move your fuel can as work progresses.
- On sloping ground you should work along the slope. It is much easier to work along a slope than it is to work up and down it.
- You should plan the strip so that you avoid going over ditches or other obstacles on the ground. You should also orient the strip to take advantage of wind conditions, so that cleared stems fall in the cleared area of the stand.
natural_image
Simple line drawing of a person walking through a field with trees and pathways (no text or symbols)Forestry clearing using a saw blade


- The risk of blade thrust increases with increasing stem size. You should therefore avoid cutting with the area of the blade between 12 o'clock and 3 o'clock.

WORKING TECHNIQUES
- To fell to the left, the bottom of the tree should be pushed to the right. Tilt the blade and bring it diagonally down to the right, exerting firm pressure. At the same time push the stem using the blade guard. Cut with the area of the blade between 3 o'clock and 5 o'clock. Apply full throttle before advancing the blade.

natural_image
Illustration showing a tree with a stick and a person holding a tree with a gear (no text or symbols)- To fell to the right, the bottom of the tree should be pushed to the left. Tilt the blade and bring it diagonally up to the right. Cut with the area of the blade between 3 o'clock and 5 o'clock so that the direction of rotation of the blade pushes the bottom of the tree to the left.

natural_image
Illustration showing a manual tree pruning with a shovet and a person carrying a large tree (no text or symbols)- To fell a tree forwards, the bottom of the tree should be pulled backwards. Pull the blade backwards with a quick, firm movement.

natural_image
Simple line drawing of a person with a circular object and a downward arrow, no text or symbols present.• Large stems must be cut from two sides. First determine which direction the stem will fall. Make the first cut on the felling side. Then finish cutting the stem from the other side. Adjust the cutting pressure to match the size of the stem and the hardness of the
wood. Small stems require more pressure, while large stems require less pressure.

- If the stems are tightly packed, adapt your walking pace to suit.
- If the blade jams in a stem, never jerk the machine free. If you do this the blade, bevel gear, shaft or handlebar may be damaged. Release the handles, grip the shaft with both hands and gently pull the machine free.
Brush cutting with a saw blade

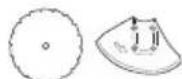
- Thin stems and brush are mown down. Work with a sawing movement, swinging sideways.
- Try to cut several stems in a single sawing movement.
- With groups of hardwood stems, first clear around the group. Start by cutting the stems high up around the outside of the group to avoid jamming. Then cut the stems to the required height. Now try to reach in with the blade and cut from the centre of the group. If it is still difficult to gain access, cut the stems high up and let them fall. This will reduce the risk of jamming.

natural_image
Illustration of a person using a tool to spread leafy plants around a central plant (no text or symbols)WORKING TECHNIQUES
Grass clearing using a grass blade


- Grass blades and grass cutters must not be used on woody stems.
- A grass blade is used for all types of tall or coarse grass.
- The grass is cut down with a sideways, swinging movement, where the movement from right-to-left is the clearing stroke and the movement from left-to-right is the return stroke. Let the left-hand side of the blade (between 8 and 12 o'clock) do the cutting.

natural_image
Illustration of a person using a pulley system to measure a tree (no text or symbols)- If the blade is angled to the left when clearing grass, the grass will collect in a line, which makes it easier to collect, e.g. by raking.
- Try to work rhythmically. Stand firmly with your feet apart. Move forward after the return stroke and stand firmly again.
- Let the support cup rest lightly against the ground. It is used to protect the blade from hitting the ground.
- Reduce the risk of material wrapping around the blade by following these instructions:
1 Always work at full throttle.
2Avoid the previously cut material during the return stroke.
- Stop the engine, unclip the harness and place the machine on the ground before you start to collect the cut material.
Grass trimming with a trimmer head


Trimming
- Hold the trimmer head just above the ground at an angle. It is the end of the cord that does the work. Let the cord work at its own pace. Never press the cord into the area to be cut.

- The cord can easily remove grass and weeds up against walls, fences, trees and borders, however it
can also damage sensitive bark on trees and bushes, and damage fence posts.
- Reduce the risk of damaging plants by shortening the cord to 10-12 cm and reducing the engine speed.
Clearing
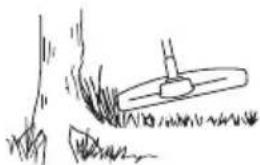
- The clearing technique removes all unwanted vegetation. Keep the trimmer head just above the ground and tilt it. Let the end of the cord strike the ground around trees, posts, statues and the like. CAUTION! This technique increases the wear on the cord.
natural_image
Simple line drawing of a grassy field with a small tool near the tree (no text or symbols)- The cord wears quicker and must be fed forward more often when working against stones, brick, concrete, metal fences, etc., than when coming into contact with trees and wooden fences.
- When trimming and clearing you should use less than full throttle so that the cord lasts longer and to reduce the wear on the trimmer head.
Cutting
- The trimmer is ideal for cutting grass that is difficult to reach using a normal lawn mower. Keep the cord parallel to the ground when cutting. Avoid pressing the trimmer head against the ground as this can ruin the lawn and damage the tool.

- Do not allow the trimmer head to constantly come into contact with the ground during normal cutting. Constant contact of this type can cause damage and wear to the trimmer head.
Sweeping
- The fan effect of the rotating cord can be used for quick and easy clearing up. Hold the cord parallel to and above the area to be swept and move the tool to and fro.

natural_image
Diagram of a hand using a pulley system to measure a wheel, showing motion direction (no text or labels)- When cutting and sweeping you should use full throttle to obtain the best results.
Shredding dense vegetation with a shredder blade
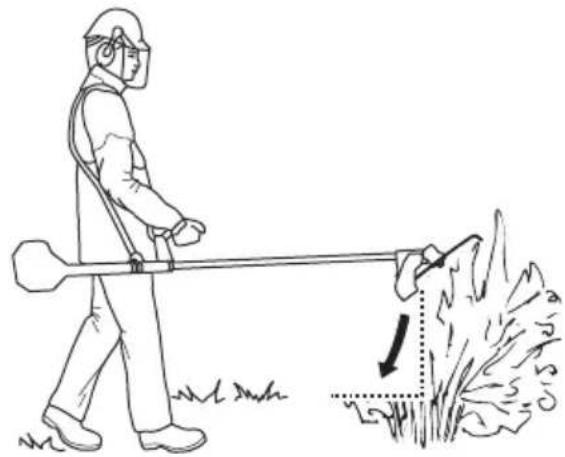
- The brush cutter is used to "shred" vegetation, i.e. by woking it up and down through dense grass and brush.
natural_image
Line drawing of a person spraying water with a lever, showing a downward arrow and ground level (no text or symbols)- The shredder blade must not be used on vegetation with a stem diameter larger than 2 cm.
MAINTENANCE
Carburetor
Your Husqvarna product has been designed and manufactured to specifications that reduce harmful emissions. After the engine has used 8-10 tanks of fuel the engine will be run-in. To ensure that it continues to run at peak performance and to minimise harmful exhaust emissions after the running-in period, ask your dealer/service workshop (who will have a rev counter at their disposal) to adjust your carburettor.
Function
- The carburetor governs the engine's speed via the throttle control. Air and fuel are mixed in the carburetor. The air/fuel mixture is adjustable. Correct adjustment is essential to get the best performance from the machine.
- The setting of the carburetor means that the engine is adapted to local conditions, for example, the climate, altitude, fuel and the type of 2-stroke oil.
• The carburetor has three adjustment controls:
L = Low speed jet
H = High speed jet
T = Idle adjustment screw
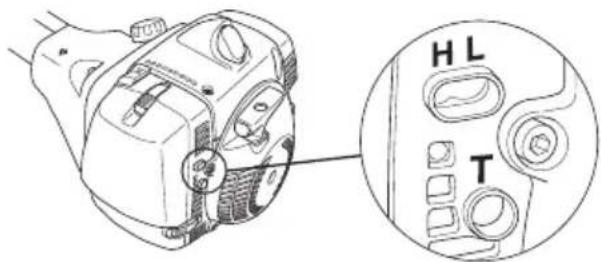
- The L and H-jets are used to adjust the supply of fuel to match the rate that air is admitted, which is controlled with the throttle. If they are screwed clockwise the air/fuel ratio becomes leaner (less fuel) and if they are turned anti-clockwise the ratio becomes richer (more fuel). A lean mixture gives a higher engine speed and a rich mixture gives a lower engine speed.
- The T-screw regulates the throttle setting at idle speed. If the T-screw is turned clockwise this gives a higher idle speed; turning it anti-clockwise gives a lower idle speed.
Basic setting
- The basic carburetor settings are adjusted during testing at the factory. The basic setting is richer than the optimal setting and should be maintained for the first few hours the machine is in use. The carburettor should then be finely adjusted. Fine adjustment should be carried out by a skilled technician.
CAUTION! If the cutting attachment rotates when the engine is idling the idle adjustment screw T should be turned anti-clockwise until the cutting attachment stops.
Adjustment of the idle speed
Before any adjustments are made, make sure that the air filter is clean and the air filter cover is fitted.
Adjust the idle speed using the idle adjustment screw T, if it is necessary to readjust. First turn the idle adjustment screw T clockwise until the cutting attachment starts to rotate. Then turn the screw anticlockwise until the cutting attachment stops. The idle speed is correctly adjusted when the engine will run smoothly in every position. The idle speed should also be well below the speed at which the cutting attachment starts to rotate.

Rec. idle speed: See the Technical data section.

WARNING! If the idle speed cannot be adjusted so that the cutting attachment stops, contact your dealer/service workshop. Do not use the machine until it has been correctly adjusted or repaired.
Adjusting the start throttle speed (555RX, 555FRM)
The correct start throttle speed is set by means of an adjuster on the rear of the handle next to the cable. Use this screw (5 mm Allen screw) to increase or decrease the start throttle speed.

Proceed as follows:
1 Run the machine at idle.
2 Press the start throttle lock as described under the heading Starting and stopping.
MAINTENANCE
3 If the start throttle speed is too low (below 4000 rpm), turn the adjuster screw A clockwise until the cutting attachment starts to rotate. Then turn A clockwise a further 1/2 turn.
4 If the start throttle speed is too high (above 6500 rpm), turn the adjuster screw A anti-clockwise until the cutting attachment stops. Then turn adjuster screw A clockwise a further 1/2 turn.
Muffler

CAUTION! Some mufflers are fitted with a catalytic converter. See chapter on Technical data to see whether your machine is fitted with a catalytic converter.
The muffler is designed to reduce the noise level and to direct the exhaust gases away from the operator. The exhaust gases are hot and can contain sparks, which may cause fire if directed against dry and combustible material.
Some mufflers are equipped with a special spark arrestor screen. If your machine has this type of muffler, you should clean the screen at least once a week. This is best done with a wire brush.
On mufflers without a catalytic converter the screen should be cleaned weekly, or replaced if necessary. On mufflers fitted with a catalytic converter the screen should be checked, and if necessary cleaned, monthly. If the screen is damaged it should be replaced.
If the screen is frequently blocked, this can be a sign that the performance of the catalytic converter is impaired.
Contact your dealer to inspect the muffler. A blocked screen will cause the machine to overheat and result in damage to the cylinder and piston.

natural_image
Line drawing of a portable electronic device with a cable inserted (no text or symbols)CAUTION! Never use a machine with a defective muffler.

WARNING! Mufflers fitted with catalytic converters get very hot during use and remain so for some time after stopping. This also applies at idle speed. Contact can result in burns to the skin. Remember the risk of fire!
Cooling system

To keep the working temperature as low as possible the machine is equipped with a cooling system.
The cooling system consists of:

1 Air intake on the starter.
2 Fins on the flywheel.
3 Cooling fins on the cylinder.
4 Cylinder cover (directs cold air over the cylinder).
Clean the cooling system with a brush once a week, more often in demanding conditions. A dirty or blocked cooling system results in the machine overheating which causes damage to the piston and cylinder.
Air filter

The air filter must be regularly cleaned to remove dust and dirt in order to avoid:
• Carburettor malfunctions
- Starting problems
- Loss of engine power
- Unnecessary wear to engine parts
• Excessive fuel consumption.
Clean the filter every 25 hours, or more regularly if conditions are exceptionally dusty.
Cleaning the air filter (555FX, 555FXT)
Remove the air filter cover and take out the filter. Wash it clean in warm, soapy water.

natural_image
Technical line drawing of a mechanical device with internal components and a separate housing (no text or symbols)MAINTENANCE
Cleaning the air filter (555RX, 555FRM)
Remove the air filter cover and take out the filter. Wash it clean in warm, soapy water.

natural_image
Technical line drawing of a mechanical device with exploded view showing internal components (no text or symbols)Ensure that the filter is dry before refitting it.
An air filter that has been in use for a long time cannot be cleaned completely. The filter must therefore be replaced with a new one at regular intervals. A damaged air filter must always be replaced.
If the machine is used in dusty conditions the air filter should be soaked in oil. See instructions under the heading Oiling the air filter.
Oiling the air filter

Always use HUSQVARNA filter oil, art. no. 531 00 92-48. The filter oil contains a solvent to make it spread evenly through the filter. You should therefore avoid skin contact.
Put the filter in a plastic bag and pour the filter oil over it. Knead the plastic bag to distribute the oil. Squeeze the excess oil out of the filter inside the plastic bag and pour off the excess before fitting the filter to the machine. Never use common engine oil. This would drain through the filter quite quickly and collect in the bottom.

natural_image
Illustration showing three different methods of cleaning or cleaning: hand using a tool, pouring liquid into a bag, and handling a container (no text or symbols present)Bevel gear

The bevel gear is filled with the right quantity of grease at the factory. However, before using the machine you should check that the bevel gear is filled three-quarters full with grease. Use HUSQVARNA special grease.
The grease in the bevel gear does not normally need to be changed except if repairs are carried out.

natural_image
Line drawing of a mechanical component with a knob and adjustment knob (no text or symbols)Drive shaft

The drive shaft must be greased every three months during full-time use. Contact your dealer if you are uncertain about the procedure.
Spark plug

The spark plug condition is influenced by:
- Incorrect carburetor adjustment.
- An incorrect fuel mixture (too much or incorrect type of oil).
- A dirty air filter.
These factors cause deposits on the spark plug electrodes, which may result in operating problems and starting difficulties.
If the machine is low on power, difficult to start or runs poorly at idle speed: always check the spark plug first before taking any further action. If the spark plug is dirty, clean it and check that the electrode gap is 0.020 inch (0.5 mm). The spark plug should be replaced after about a month in operation or earlier if necessary.

CAUTION! Always use the recommended spark plug type! Use of the wrong spark plug can damage the piston/cylinder. Check that the spark plug is fitted with a suppressor.
Winter use
Running problems can occur when using the machine in the cold and snowy conditions caused by:
- Too low engine temperature.
MAINTENANCE
- Icing of the air filter and carburetor.
Special measures are therefore often required: - Partly mask the air inlet on the starter to increase the working temperature of the engine.
- Preheat the intake air to the carburettor by utilising the heat from the engine.
There is a special winter kit available when using the machine in cold and/or snowy conditions, this includes the following:

• a special air filter cover without air intake (A)
• a cover for the filter holder (B)
• a cover for the starter housing (C)
- a special wear guard with an air duct (D) that routes the hot air from the muffler to the carburettor
- a special air filter with a coarser mesh size (E)
Temperature 0°C (32°F) or colder:
Fit the covers for the starter housing and air filter holder using the three screws provided as shown in the figure.

natural_image
Technical line drawing of a mechanical device with internal components and mounting holes (no text or symbols)Remove the air filter and air filter cover from the machine. Fit the air filter and air filter cover supplied with the winter kit.

natural_image
Technical line drawing of a DSLR camera with visible lens and control buttons (no text or symbols)Temperature -5°C (23°F) or colder:
Dismantle the machine's wear guard, and fit the wear guard from the winter kit as shown in the figure. Pay particular attention that the opening on the air duct is positioned in the centre of the hole in the air filter holder.

natural_image
Technical line drawing of a mechanical assembly with a bracket and housing (no text or symbols)IMPORTANT! If the temperature rises above -5^ ( 23^ ) or 0^ ( 32^ ) respectively the machine MUST be restored to its normal set-up. Otherwise there is a risk of overheating, which can cause severe engine damage.
IMPORTANT! Any maintenance other than that described in this manual must be carried out by your servicing dealer (retailer).
IMPORTANT! Use only HUSQVARNA replacement parts. Use of other brands of replacement parts can cause damage to your unit or injury to the operator or others. Your warranty does not cover damage or liability caused by the use of accessories and/or attachments not specifically recommended by HUSQVARNA.
MAINTENANCE
Maintenance schedule
The following is a list of the maintenance that must be performed on the machine. Most of the items are described in the Maintenance section. The user must only carry out the maintenance and service work described in this manual. More extensive work must be carried out by an authorized service workshop.
| Maintenance | Daily maintenance | Weekly maintenance | Monthly maintenance |
| Clean the outside of the machine. X | |||
| Check that the harness is not damaged. X | |||
| Make sure the throttle trigger lock and the throttle function correctly from a safety point of view. | X | ||
| Check that the handle and handlebar are undamaged and secured correctly. | X | ||
| Check that the stop switch works correctly. X | |||
| Check that the cutting attachment does not rotate at idle. X | |||
| Clean the air filter. Replace if necessary. X | |||
| Check that the guard is undamaged and not cracked. Replace the guard if it has been exposed to impact or is cracked. | X | ||
| Check that the blade is correctly centred, is sharp, and is not cracked. An off-centre blade will cause vibration that could result in damage to the machine. | X | ||
| Check that the trimmer head is undamaged and not cracked. Replace the trimmer head if necessary. | X | ||
| Check that the locking nut of the cutting equipment is tighten correctly. X | |||
| Check that the locking screw is tightened when using a support cup with bearings. | X | ||
| Check that the transport guard for the blade is intact and that it can be secured correctly. | X | ||
| Check that nuts and screws are tight. X | |||
| Check that there are no fuel leaks from the engine, tank or fuel lines. X | |||
| Check the starter and starter cord. X | |||
| Check that the vibration damping elements are not damaged. X | |||
| Clean the outside of the spark plug. Remove it and check the electrode gap. Adjust the gap to 0.5 mm (.20"), or replace the spark plug. Check that the spark plug is fitted with a suppressor. | X | ||
| Clean the machine's cooling system. X | |||
| Clean or replace the spark arrestor screen on the muffler (only applies to mufflers without a catalytic converter). | X | ||
| Clean the outside of the carburettor and the space around it. X | |||
| Check that the bevel gear is filled three-quarters full with lubricant. Fill if necessary using special grease. | X | ||
| Check that the safety release on the harness is not damaged and works. | X | ||
| Check the fuel filter from contamination and the fuel hose from cracks or other defects. Replace if necessary. | X | ||
| Check all cables and connections. | X | ||
| Check the clutch, clutch springs and the clutch drum for wear. Replace if necessary by an autorized service workshop. | X | ||
| Replace the spark plug. Check that the spark plug is fitted with a suppressor. | X | ||
| Check and clean the spark arrestor screen on the muffler (only applies to mufflers fitted with a catalytic converter). | X | ||
| Lubricate the drive shaft with the special grease. | Do this every three months. | ||
| Replace the vibration damping elements after each season, however, at least once a year. | |||
TECHNICAL DATA
Technical data
555FX 555FXT 555RXT 555FRM
| Motor | ||||
| Cylinder displacement, cu.in/cm3 | 3,25/53,3 | 3,25/53,3 | 3,25/53,3 | 3,25/53,3 |
| Cylinder bore, inch/mm 1,77/45 1,77/45 1,77/45 1,77/45 | ||||
| Stroke, inch/mm 1,32/33,5 | 1,32/33,5 | 1,32/33,5 | 1,32/33,5 | 1,32/33,5 |
| Idle speed, rpm 2800 2800 2800 | ||||
| Recommended max. speed, rpm 13000 13000 12000 12000 | ||||
| Speed of output shaft, rpm 10500 10500 10500 10500 | ||||
| Max. engine output, acc. to ISO 8893, kW/ rpm | 2,8/9000 | 2,8/9000 | 2,8/9000 | 2,8/9000 |
| Catalytic converter muffler | No | No | No | No |
| Ignition system | ||||
| Spark plug | NGK BPMR 7A | NGK BPMR 7A | NGK BPMR 7A | NGK BPMR 7A |
| Electrode gap, inch/mm | 0,02/0,5 | 0,02/0,5 | 0,02/0,5 | 0,02/0,5 |
| Fuel and lubrication system | ||||
| Fuel tank capacity, US pint/litre | 2,3/1,1 | 2,3/1,1 | 2,3/1,1 | 2,3/1,1 |
| Weight | ||||
| Weight without fuel, cutting attachment and guard,Lbs/kg | 19,6/8,9 | 20,1/9,1 | 20,3/9,2 | 20,3/9,2 |
| Sound levels(see note 1) | ||||
| Equivalent sound pressure level at the user's ear,measured according to ANSI B175.3-2003, dB(A),min/max: | ||||
| Equipped with trimmer head (original) | - | - | 108 | - |
| Equipped with grass blade (original) | - | - | 101 | - |
| Equipped with saw blade (original) | 103 | 103 | - | - |
| Equipped with shredder blade (original) | - | - | - | 103 |
| Vibration levels(see note 2) | ||||
| Equivalent vibration levels ( a_hv,eq ) at handles,measured according to EN ISO 11806 and ISO22867, m/s2 | ||||
| Equipped with trimmer head (original), left/right | - | - | 1,7/2,0 | - |
| Equipped with grass blade (original), left/right | - | - | 1,5/1,6 | - |
| Equipped with saw blade (original), left/right | 2,1/2,3 | 2,1/2,3 | - | - |
| Equipped with shredder blade (original), left/right | - | - | - | 2,0/1,5 |
NOTE! This spark ignition system complies with the Canadian standard ICES-002.
Note 1: Reported data for equivalent sound pressure level for the machine has a typical statistical dispersion (standard deviation) of 1 dB (A).
Note 2: Reported data for equivalent vibration level has a typical statistical dispersion (standard deviation) of 1 m/s^2 .
TECHNICAL DATA
| 555FX, 555FXT | ||
| Approved accessories Type Cutting | attachment guard, Art. no. | |
| Centre hole in blades/cutters, ∅ 25,4 mm | Output shaft thread M12 | |
| Grass blade/grass cutter | Multi 275-4 (∅ 275 4 teeth) Set 502 46 | 49-01 |
| Multi 300-3 (∅ 300 3 teeth) Set 502 46 | 49-01 | |
| Multi 350-3 (∅ 350 3 teeth) Set 502 46 | 49-01 | |
| Saw blade | Maxi 225-24 (∅ 225 24 teeth) 544 01 | 65-01 |
| Scarlet 200-22 (∅ 200 22 teeth) 537 21 | 71-01 | |
| Scarlet 225-24 (∅ 225 24 teeth) 544 01 | 65-01 | |
| Trimmer head | Trimmy S II (∅ 2.4 - 3.3 mm cord) Set | 502 46 50-01 |
| Auto 55 (∅ 2.7 - 3.3 mm cord) Set 502 | 46 50-01 | |
| T45x (∅ 2.7 - 3.3 mm cord) Set 502 46 | 50-01 | |
| T55x (∅ 2.7 - 3.3 mm cord) Set 502 46 | 50-01 | |
| F55 (∅ 2.7 - 3.5 mm cord) Set 502 46 | 50-01 | |
| Support cup | Fixed | |
| With ball bearing |
| 555RXT | ||
| Approved accessories Type Cutting | attachment guard, Art. no. | |
| Centre hole in blades/cutters, ∅ 25,4 mm | Output shaft thread M12 | |
| Grass blade/grass cutter | Multi 275-4 (∅ 275 4 teeth) 544 16 03-01 | |
| Multi 300-3 (∅ 300 3 teeth) 544 16 03-01 | ||
| Multi 350-3 (∅ 350 3 teeth) 544 16 03-01 | ||
| Saw blade | Maxi 225-24 (∅ 225 24 teeth) 544 01 65-01 | |
| Scarlet 200-22 (∅ 200 22 teeth) 537 21 71-01 | ||
| Scarlet 225-24 (∅ 225 24 teeth) 544 01 65-01 | ||
| Trimmer head | Trimmy S II (∅ 2.4 - 3.3 mm cord) 544 10 74-01 | |
| Auto 55 (∅ 2.7 - 3.3 mm cord) 544 10 74-01 | ||
| T45x (∅ 2.7 - 3.3 mm cord) 544 10 74-01 | ||
| T55x (∅ 2.7 - 3.3 mm cord) 544 10 74-01 | ||
| Support cup | Fixed | |
| With ball bearing | ||
TECHNICAL DATA
| 555FRM | ||
| Approved accessories Type Cutting | attachment guard, Art. no. | |
| Centre hole in blades/cutters, ∅ 25,4 mm | Output shaft thread M12 | |
| Grass blade/grass cutter | Multi 275-4 (∅ 275 4 teeth) 544 16 03-01 | |
| Multi 300-3 (∅ 300 3 teeth) 544 16 03-01 | ||
| Multi 350-3 (∅ 350 3 teeth) 544 16 03-01 | ||
| Saw blade | Maxi 225-24 (∅ 225 24 teeth) 544 01 65-01 | |
| Scarlet 200-22 (∅ 200 22 teeth) 537 21 71-01 | ||
| Scarlet 225-24 (∅ 225 24 teeth) 544 01 65-01 | ||
| Trimmer head | Trimmy S II (∅ 2.4 - 3.3 mm cord) 544 10 74-01 | |
| Auto 55 (∅ 2.7 - 3.3 mm cord) 544 10 74-01 | ||
| T45x (∅ 2.7 - 3.3 mm cord) 544 10 74-01 | ||
| T55x (∅ 2.7 - 3.3 mm cord) 544 10 74-01 | ||
| Shredder blade - 544 02 65-02 | ||
| Support cup | Fixed | |
| With ball bearing | ||
YOUR WARRANTY RIGHTS AND OBLIGATIONS
The EPA (The US Environmental Protection Agency), Environment Canada and Husqvarna Forest & Garden are pleased to explain the emissions control system warranty on your 2001 and later small nonroad engine. In U.S. and Canada, new small nonroad engines must be designed, built and equipped to meet the federal stringent anti-smog standards. Husqvarna Forest & Garden must warrant the emission control system on your small nonroad engine for the period of time listed below provided there has been no abuse, neglect or improper maintenance of your unit. Your emission control system includes Parts such as the carburetor and the ignition system. Where a warrantable condition exists, Husqvarna Forest & Garden will repair your small nonroad engine at no cost to you. Expenses covered under warranty include diagnosis, parts and labor.
MANUFACTURER'S WARRANTY COVERAGE
The 2001 and later small nonroad engines are warranted for two years. If any emission related part on you engine (as listed above) is defective, the part will be repaired or replaced by Husqvarna Forest & Garden.
OWNER'S WARRANTY RESPONSIBILITIES
As the small nonroad engine owner, you are responsible for the performance of the required maintenance listed in your Operator's Manual. Husqvarna Forest & Garden recommends that you retain all receipts covering maintenance on your small nonroad engine, but Husqvarna Forest & Garden cannot deny warranty solely for the lack of receipts or for your failure to ensure the performance of all scheduled maintenance. As the small nonroad engine owner, you should, however, be aware that Husqvarna Forest & Garden may deny you warranty coverage if your small nonroad engine or a part of it has failed due to abuse, neglect, improper maintenance, unapproved modifications or the use of parts not made or approved by the original equipment manufacturer. You are responsible for presenting your small nonroad engine to a Husqvarna Forest & Garden authorized servicing dealer as soon as a problem exists. The warranty repairs should be completed in a reasonable amount of time, not to exceed 30 days. If you have any questions regarding your warranty rights and responsibilities, you should contact your nearest authorized servicing dealer or call Husqvarna Forest & Garden at 1-800-487-5963.
WARRANTY COMMENCEMENT DATE
The warranty period begins on the date small nonroad engine is delivered.
LENGTH OF COVERAGE
Husqvarna Forest & Garden warrants to the initial owner and each subsequent purchaser that the engine is free from defects in materials and workmanship which cause the failure of a warranted part for a period of two years.
WHAT IS COVERED
REPAIR OR REPLACEMENT OF PARTS Repair or replacement of any warranted part will be performed at no charge to the owner at an approved Husqvarna Forest & Garden servicing dealer. If you have any questions
regarding your warranty rights and responsibilities, you should contact your nearest authorized servicing dealer or call Husqvarna Forest & Garden at 1-800-487-5963.
WARRANTY PERIOD Any warranted part which is not scheduled for replacement as required maintenance, or which is scheduled only for regular inspection to the effect of "repair or replace as necessary" shall be warranted for 2 years. Any warranted part which is scheduled for replacement as required maintenance shall be warranted for the period of time up to the first scheduled replacement point for that part.
DIAGNOSIS The owner shall not be charged for diagnostic labor which leads to the determination that a warranted part is defective, if the diagnostic work is performed at an approved Husqvarna Forest & Garden servicing dealer.
CONSEQUENTIAL DAMAGES Husqvarna Forest & Garden may be liable for damages to other engine components caused by the failure of a warranted part still under warranty.
WHAT IS NOT COVERED
All failures caused by abuse, neglect or improper maintenance are not covered.
ADD -ON OR MODIFIED PARTS
The use of add-on or modified parts can be grounds for disallowing a warranty claim. Husqvarna Forest & Garden is not liable to cover failures of warranted parts caused by the use of add-on or modified parts.
HOW TO FILE A CLAIM
If you have any questions regarding your warranty rights and responsibilities, you should contact your nearest authorized servicing dealer or call Husqvarna Forest & Garden at 1-800-487-5963.
WHERE TO GET WARRANTY SERVICE
Warranty services or repairs shall be provided at all Husqvarna Forest & Garden authorized servicing dealers.
MAINTENANCE, REPLACEMENT AND REPAIR OF EMISSION-RELATED PARTS
Any Husqvarna Forest & Garden approved replacement part used in the performance of any warranty maintenance or repairs on emission-related parts, will be provided without charge to the owner if the part is under warranty.
EMISSION CONTROL WARRANTY PARTS LIST
1 Carburetor and internal parts
2 Intake pipe, airfilter holder and carburetor bolts.
3 Airfilter and fuelfilter covered up to maintenance schedule.
4 Ignition System 1 Spark Plug, covered up to maintenance schedule 2 Ignition Module
5 Muffler with catalytic converter
MAINTENANCE STATEMENT
The owner is responsible for the performance of all required maintenance, as defined in the operator's manual.
| Trimmy SII | |||
1 |  | 2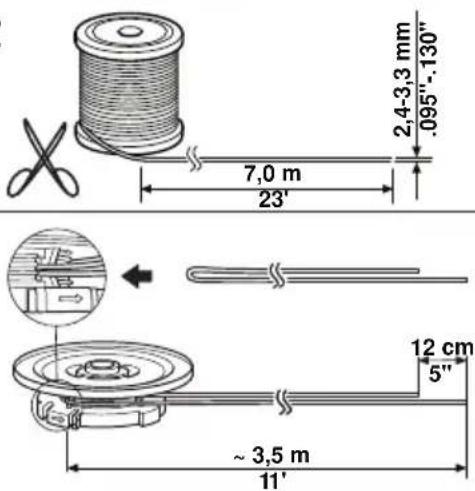 | |
3 | 4 → →  | ||
5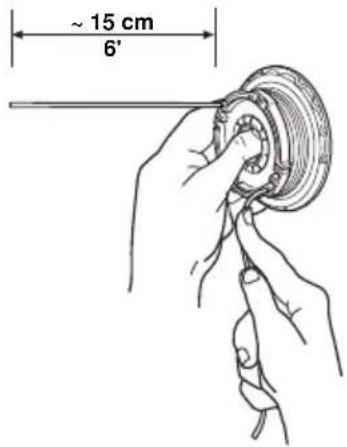 | 6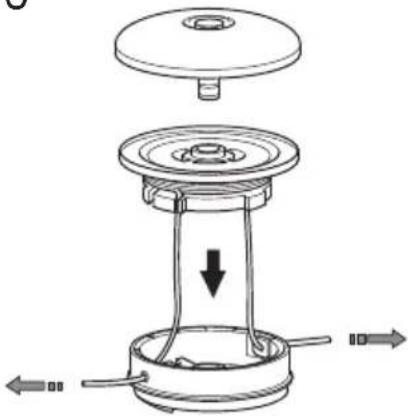 | 7 | |
8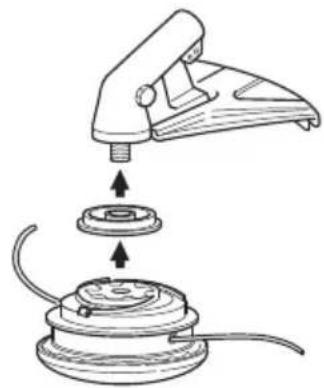 | 9 | ||
 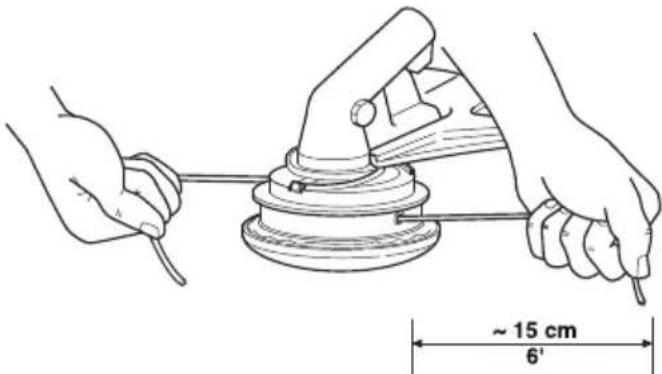 | |||
1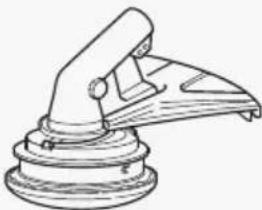 |  | 3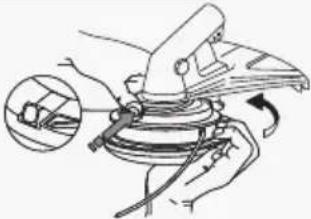 | |
4 | |||
| Auto 55 | |||
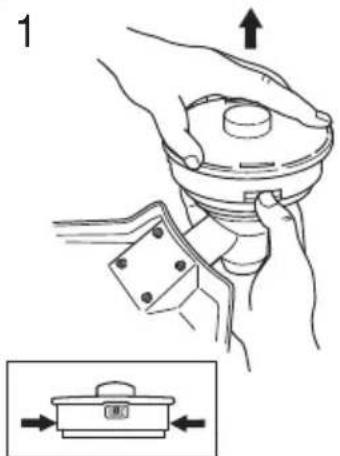 |  |  | |
 |  | ||
 |  |  | |
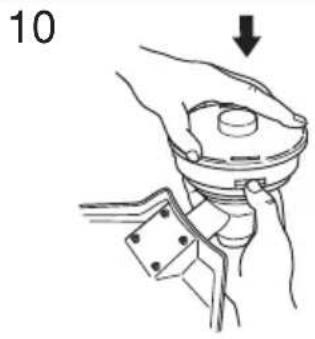 | 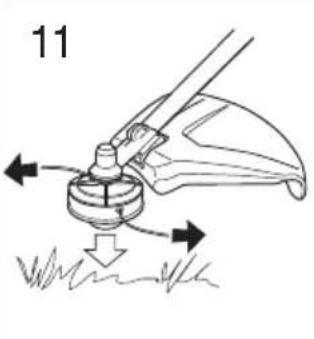 |  | |
| T45, T45x | |||
1 | 2[PHY4] | 3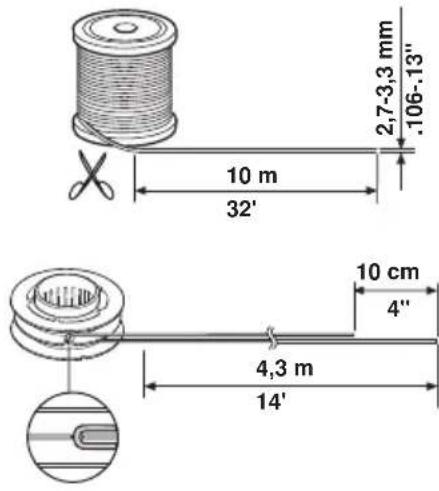 | |
4 | 5 | ||
6 | 7 | 8 | |
9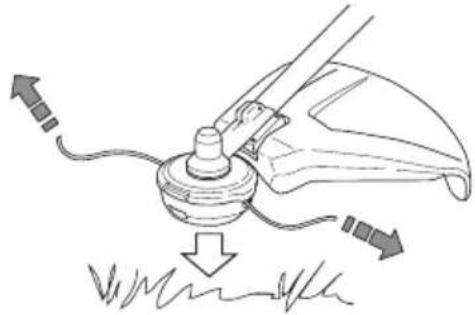 | |||
| T55x | |||
1 | 2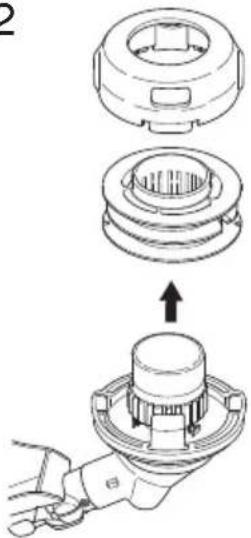 | 3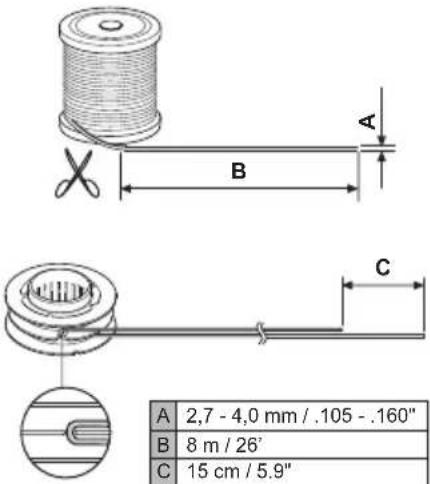 | |
4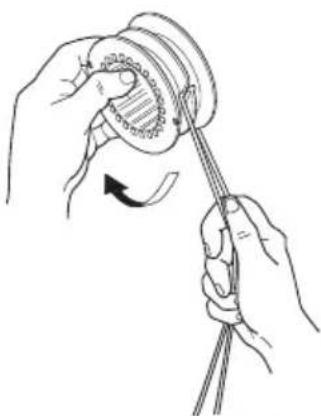 | 5 | ||
6 |  | 8 | |
9 | |||
Original instructions
1153960-95

2012-08-14

- KEY TO SYMBOLS
- Symbols
- Always wear:
- CONTENTS
- INTRODUCTION
- WHAT IS WHAT?
- GENERAL SAFETY PRECAUTIONS
- ASSEMBLY
- FUEL HANDLING
- STARTING AND STOPPING
- WORKING TECHNIQUES
- MAINTENANCE
- TECHNICAL DATA
- FEDERAL EMISSION CONTROL WARRANTY STATEMENT
- Note the following before starting:
- Husqvarna
- WARNING
- Dear customer!
- What is what on the brush cutter? (555RXT)
- What is what on the brush cutter? (555FX, 555FXT)
- What is what on the brush cutter? (555FRM)
- Important Personal protective equipment
- IMPORTANT!
- HELMET
- HEARING PROTECTION
- EYE PROTECTION
- GLOVES
- BOOTS
- CLOTHING
- FIRST AID KIT
- Machine's safety equipment
- Throttle lockout
- Stop switch
- Cutting attachment guard
- Vibration damping system
- Quick release
- Muffler
- Locking nut
- Locking screw
- Cutting equipment
- General rules
- Sharpening grass cutters and grass blades
- Sharpening the saw blade
- Trimmer head
- Assembling the handlebar and throttle
- Transport position, handlebar
- Assembling the cutting equipment
- WARNING!
- Fitting the blade guard/ combination guard, grass blade and ball-bearing-mounted support cup
- Fitting the blade guard and saw blade
- 555FX, 555FXT
- 555RXT
- Fitting the shredder blade and the shredder blade guard (555FRM)
- Fitting other guards and cutting attachments
- Adjusting the harness and brush cutter
- Balance XT
- Safety release
- Adjusting the harness
- Correct height
- Forestry clearing
- Grass clearing
- Correct balance
- Fuel safety
- Transport and storage
- Fuel
- Gasoline
- This engine is certified to operate on unleaded gasoline.
- Two-stroke oil
- Mixing
- Fueling
- Check before starting
- Cold engine
- Warm engine
- Starting
- Stopping
- Heated handles
- 555FXT
- General working instructions
- Basic safety rules
- The ABC of clearing
- Working methods
- Forestry clearing using a saw blade
- Brush cutting with a saw blade
- Grass clearing using a grass blade
- Grass trimming with a trimmer head
- Trimming
- Clearing
- Cutting
- Sweeping
- Shredding dense vegetation with a shredder blade
- Carburetor
- Function
- Basic setting
- Adjustment of the idle speed
- Adjusting the start throttle speed (555RX, 555FRM)
- Cooling system
- Air filter
- Cleaning the air filter (555FX, 555FXT)
- Cleaning the air filter (555RX, 555FRM)
- Oiling the air filter
- Bevel gear
- Drive shaft
- Spark plug
- Winter use
- Temperature 0°C (32°F) or colder:
- Temperature -5°C (23°F) or colder:
- Maintenance schedule
- NOTE! This spark ignition system complies with the Canadian standard ICES-002.
- YOUR WARRANTY RIGHTS AND OBLIGATIONS
- MANUFACTURER'S WARRANTY COVERAGE
- OWNER'S WARRANTY RESPONSIBILITIES
- WARRANTY COMMENCEMENT DATE
- LENGTH OF COVERAGE
- WHAT IS COVERED
- WHAT IS NOT COVERED
- ADD -ON OR MODIFIED PARTS
- HOW TO FILE A CLAIM
- WHERE TO GET WARRANTY SERVICE
- MAINTENANCE, REPLACEMENT AND REPAIR OF EMISSION-RELATED PARTS
- EMISSION CONTROL WARRANTY PARTS LIST
- MAINTENANCE STATEMENT
Brand : HUSQVARNA
Model : 555RXTT
Category : Tiller