4K - Camcorder Zorki - Free user manual and instructions
Find the device manual for free 4K Zorki in PDF.


User questions about 4K Zorki
0 question about this device. Answer the ones you know or ask your own.
Ask a new question about this device
Download the instructions for your Camcorder in PDF format for free! Find your manual 4K - Zorki and take your electronic device back in hand. On this page are published all the documents necessary for the use of your device. 4K by Zorki.
USER MANUAL 4K Zorki
ZORKI-4K is a single-lens rangefinder camera intended for taking various amateur and professional pictures on black-and-white film.
The camera is provided with a shutter setting lever and a self-timer and is "M" and "X" synchronized.
The viewfinder and the rangefinder of the camera have a common field of view and the camera eyepiece is provided with a device for adjusting it according to a particular eyesight. Such a design of the viewfinder ensures perfect focusing at the moment of picture taking.
The lens is focused by turning its focusing ring. In so doing the range-finder operates automatically irrespective of the focal length of an interchangeable lens.
The camera uses a new type of a take-up spool to simplify the camera loading.
The camera accepts standard cassettes with invariable slit.
The camera is delivered in two variants: with INDUSTAR-50 or JUPITER-8 lens.
2 SPECIFICATIONS
Frame size, mm . . . . . . . . . . . 24×36
Perforated film width, mm . . . . . . . .35
Number of frames for one loading . . . . 36
Focal plane shutter speeds . . . . . . 1 to 1/1000 s (automatic), "B" (by band) and slow shutter speed
Mechanical back focal distance, mm . . . 28.9
Viewfinder eyepiece magnification, times . 1.15
Eyepiece adjustment, diopters ±2.5
Thread of shutter button for cable release . KΦ 3.5×0.5
Tripod bush thread, inch 1/4
| Lens | INDUSTAR-50 or JUPITER-8 | |
| Nominal focal length, mm | 50 | 50 |
| Relative aperture range | f/3.5 to f/16 | f/2 to f/22 |
| Focusing range, m | 1 to “∞” | 1 to “∞” |
| Field of view, grades | 45 | 45 |
| Lens seating thread | M39×1 | M39×1 |
| Lens mount thread for light filters | CnM 35.5×0.5 | CnM 40.5×0.5 |
| Seat for sun shade, mm | ∅37 | ∅42 |
| Overall dimensions of camera without case, mm | 143×88×94 | |
| Mass of camera without case, kg | 0.6 | 0.7 |
3 GENERAL INSTRUCTIONS
The present Manual contains brief description and main rules of using the ZORKI-4K camera, but it should not be regarded as a handbook on photography.
Before starting to use the camera thoroughly study the operating procedure according to the given Manual.
The camera is a complicated optical mechanical device which should be handled carefully, kept clean and protected from b'ows, moisture and sharp changes in temperature.
Load and unload the camera in diffused light trying to avoid direct sun rays. When removing the camera cover see to it that the cassette would not fall out.
Set shutter speeds only with the shutter cocked. Do not turn the shutter speed dial over the interval between figures "30" and "1".
Always set the shutter till stop to avoid blank frames during exposing. If the shutter fails to set, check the position of the shutter release button and the shutter disengaging bush. Before setting the shutter they should be turned in the clockwise direction till stop.
Do not point the lens at the bright sun to prevent curtains from burning through.
Do not touch surfaces of optical details with hands since this is likely to damage their coating. Clean the coated optical details only from outside with a clean soft piece of fabric or cotton wool slightly moistened with rectified alcohol, ether (petroleum or sulphuric), or, if these means are absent, with toilet eau-de-Cologne.
To close the case with the camera in it check that:
a) the case tripod screw would be tightened up;
b) the lens would be set at mark "∞" of the distance scale;
c) the shutter speed dial would be set at any shutter speed except for those from 1/60 to 1 second.
When using the camera in frosty weather (below —10°C), keep it under your street-clothes, taking it out only for the moment of photographing.
If the camera is brought from cold in a warm room, do not take it out of its case for 2—3 hours to let it take the temperature of ambient air.
Keep the camera in a closed carrying case. In so doing the lens should be capped and the shutter and self-timer should be released.
• 4 MAIN UNITS AND DETAILS
text_image
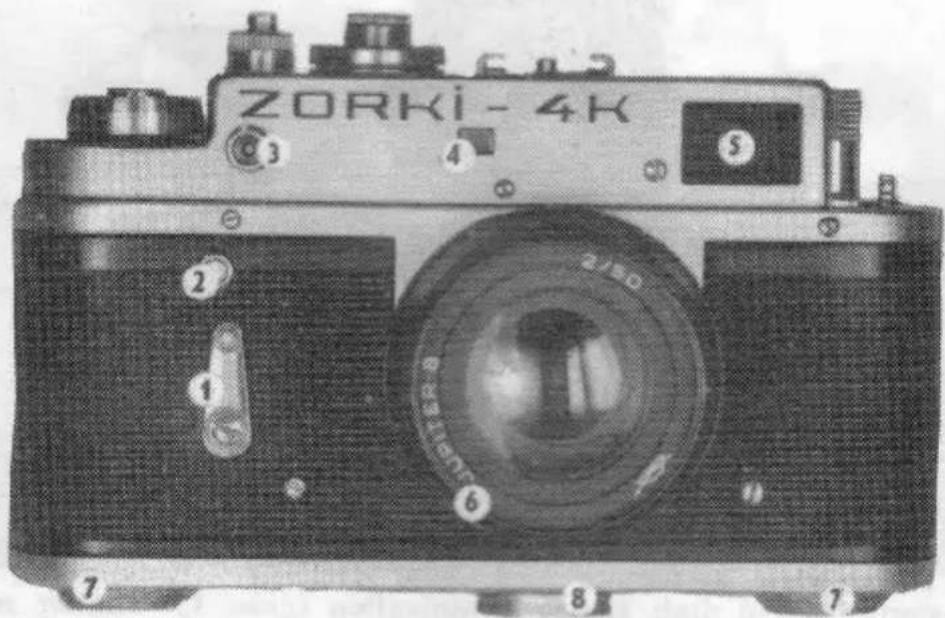
ZORKI-4K 2150 6 7 8 9 10 11 12 13 14 15 16 17 18 19 20 21 22 23 24 25 26 27 28 29 30 31 32 33 34 35 36 37 38 39 40 41 42 43 44 45 46 47 48 49 50 51 52 53 54 55 56 57 58 59 60 61 62 63 64 65 66 67 68 69 70 71 72 73 74 75 76 77 78 79 80Fig. 1. Front view. 1—self-timer lever; 2—self-timer release button; 3—flash lamp socket; 4—rangefinder window; 5—range-viewfinder window; 6—lens; 7—detachable cover locks; 8—tripod nut
www.orphancameras.com
text_image
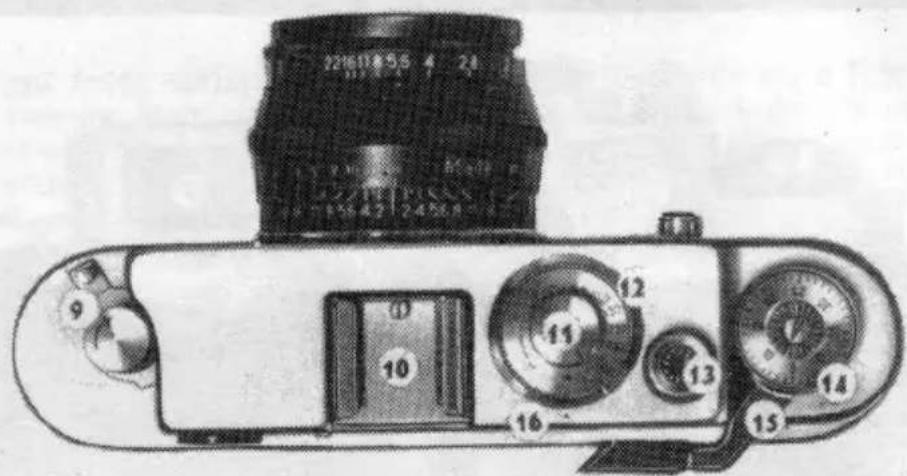
221611855 4 24 10 11 12 13 14 15 9 16 24 25 26 27 28 29 30 31 32 33 34 35 36 37 38 39 40 41 42 43 44 45 46 47 48 49 50 51 52 53 54 55 56 57 58 59 60Fig. 2. Top view. 9—diopter adjustment lever; 10—attachment groove; 11—shutter speed dial; 12—synchronization scale; 13—shutter release button; 14—exposure counter dial; 15—shutter setting lever; 16—syn-chronization scale index mark
text_image
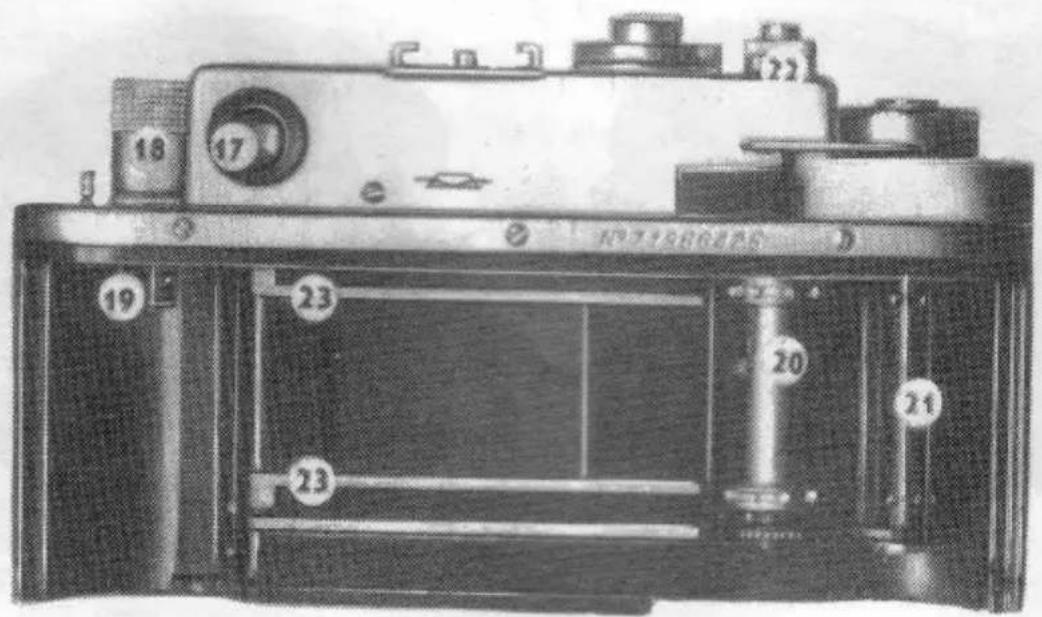
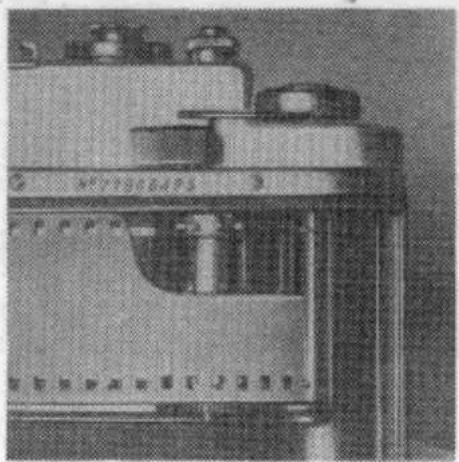
18 17 22 23 20 21 23 23 N°719862P6Fig. 3. Rear view of camera with cover removed. 17—range-viewfinder eyepiece; 18—film rewind knob; 19—cassette spool guide; 20—sprocket; 21—take-up spool; 22—shutter disengaging bush; 23—film track slide
www.orphancameras.com
text_image
22 16 11 9 5.6 4 2.8 2 23 1.9 1.7 2 2.5 5 4 7 22 18 11 8 5.6 4 2.6 24 53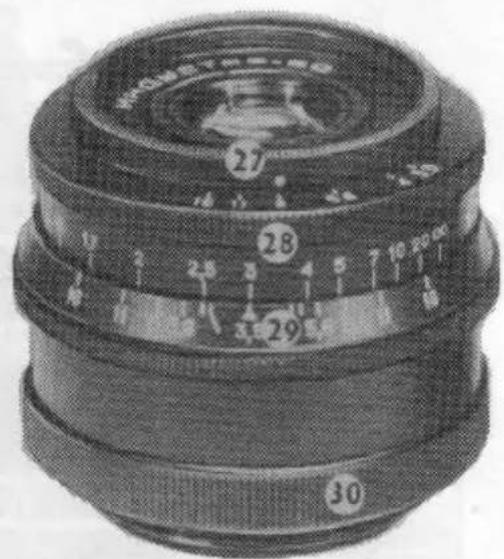
text_image
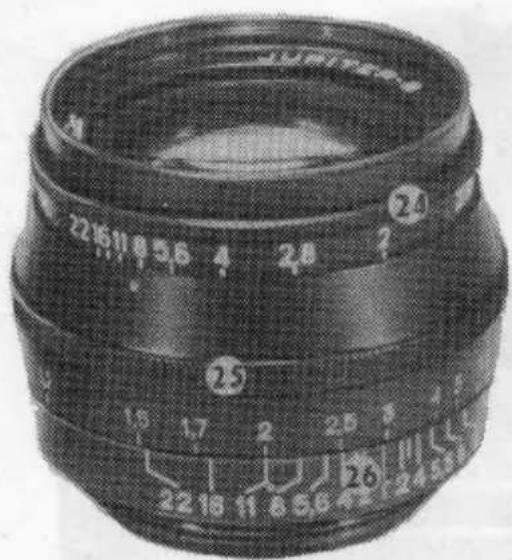
WALOESTAR-200 27 19 28 23 5 10 20 29 30Fig. 4. JUPITER-8 and INDUSTAR-50 lenses. 24—ring with aperture scale; 25—focusing ring with distance scale and index mark of aperture scale; 26—depth-of-field scale; 27—aperture setting ring with index mark; 28—focusing ring with aperture scale and distance scale; 29—depth-of-field scale; 30—lens mounting ring
5 PREPARING FOR PICTURE TAKING, PICTURE TAKING
5.1. CAMERA LOADING
Turn off the screw on the case bottom and remove the camera from the case.
Raise two locking clips on the camera base plate and turn them as far as they will go; move the cover along its grooves and take it off the camera. Place the cassette with film in the seat and put it on the cassette spool guide.
Pull the film end out of the cassette as long as to the camera edge, insert it in the take-up spool slot. See that a sprocket tooth would enter a perforation hole.
Insert the detachable cover into the camera guide grooves and move it as far as it will go. Give the locking clips half a turn till stop and then sink them into their recesses.
Set the shutter, press the release button. On setting the shutter the film moves by one frame. To advance unexposed part of film to the film gate set and release the shutter two times.
natural_image
Close-up of a mechanical device with no visible text or symbolswww.orphancameras.com
text_image
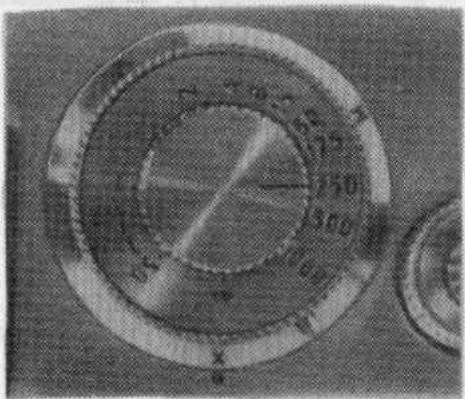
Close-up of a circular gauge or dial with measurement markings and a pointer, showing values from 0 to 100.Before releasing the shutter after the second setting set figure "0" of the exposure counter dial against the index mark on the shutter setting lever.
If the film is wound tightly in the cassette, the film rewind knob will rotate when the shutter is being set. Should the film be wound loose in the cassette, the knob will fail to rotate at the initial frames.
Now you can put the camera into its case. Do not forget to tighten up the tripod screw in the case bottom.
5.2. SHUTTER SPEED SETTING
Shutter speeds may be set only with the shutter set. Pull up the shutter speed dial and turn it till a required shutter speed value is set against the index mark. Release the dial in such a way that it would be fixed without pressing.
Figures on the shutter speed dial denote corresponding fractions of a second and letter "B" — hand-controlled shutter speed.
To obtain an exposure longer than 1 second, set the dial index mark against letter "B". In this case the shutter stays open till the release button is pressed.
To obtain a still longer exposure the release button can be fixed in this position by turning it counterclockwise as far as it will go. The exposing over, return the button into the initial position.
To avoid mechanism disengaging, do not rotate the button without need. It should be remembered that to set the shutter speeds of 1, 1/2, 1/4, 1/8, 1/15, 1/60 of a second, an additional effort is required to wind an additional delayed-action mechanism spring. When the shutter speed dial is being reset for a shorter exposure time, the delayed-action mechanism is heard operating.
Besides it, when shutter speeds of 1; 1/2; 1/4; 1/8; 1/15 and 1/60th of a second are used, the shutter speed dial is fixed somewhat higher as compared to other shutter speed settings.
5.3. LENS APERTURE SETTING
Match a selected aperture value with the index mark (dot) by rotating the ring with an aperture scale of JUPITER-8 lens (or the ring with the index mark of INDUSTAR-50 lens).
For convenience each of the indicated lenses has two equivalent aperture scales and two corresponding index marks.
natural_image
Two white swans floating in water, no text or symbols visible
natural_image
Black-and-white photo of a swan swimming in water (no text or symbols visible)www.orphancameras.com
5.4. FOCUSING
Objects having sharp contours should be selected for focusing.
Watching through the range-viewfinder eyepiece, turn the diopter adjustment lever to obtain the sharpest image of an object in the eyepiece.
In the centre of the viewfinder field of view there can be seen a yellowish rectangle with a double image of the object being viewed in it. Turn the lens focusing ring to match the two images of the same object. Keep in mind that the image should be focused in the centre of the yellowish field.
The image can be focused by the lens distance scale calibrated in metres as well. In such a case the distance to the object being photographed should be known beforehand.
The viewfinder enables to see the limits of picture. For correct framing bring your eye as close to the eyepiece as possible; in so doing the yellowish rectangle should be placed in the centre of the viewfinder field of view. If the above rules are not followed, framing is likely to be wrong i. e. the limits
of image seen in the viewfinder would fail to correspond to the frame limits on the negative.
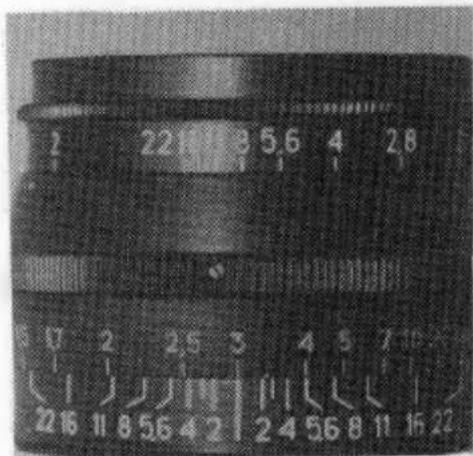
To take a picture of several objects placed at different distances from the camera, use should be made of a depth-of-field scale. The scale consists of the aperture numbers repeated on both sides of the main index mark. When the aperture is set and the lens is focused, the limits of depth of field can be read against these number pairs on the distance scale.
For example, with the lens focused for 3 m and aperture of f/8, two figures 2.2 m and 4.8 m on the distance scale will be set against divisions 8 of the depth-of-field scale.
These distances are called the near and far limits of depth of field. Objects placed nearer than 2.2 m or farther than 4.8 m, will be blurred in the picture. The far limit of the depth of field may coincide with the infinity mark “∞” or even come beyond the distance scale. In such a case all the objects placed between the near limit of depth of field and infinity will be sharp on film.
It should be kept in mind that the larger the aperture, the smaller is the depth of field and vice versa.
text_image
2 22 3 5 6 4 2 8 1 2 2 5 3 4 5 7 10 1 1 1 1 1 1 1 1 1 2 6 11 8 5 6 4 2 2 4 5 6 8 11 15 22www.orphancameras.com
natural_image
Black-and-white portrait of a woman holding a vintage camera (no visible text or symbols)5.5. PHOTOGRAPHING
To take a picture do the following:
a) load the camera;
b) take the cap off the lens;
c) set the lens aperture (if required put a light filter or a sun shade on the lens);
d) set the shutter;
e) set a required shutter speed;
f) watching through the eyepiece of the range-view-finder, point the camera at the object, adjust the eyepiece according to your eye and focus the lens; g) smoothly press the shutter release button.
NOTE. When using shutter speeds slower than 1/30 s it is recommended to mount the camera on a tripod and to screw a cable release into of the release button bush.
5.6. CAMERA UNLOADING
When the exposure counter shows figure 36 rewind the film into the cassette. For this aim:
a) remove the case;
b) turn the shutter disengaging bush in the clockwise direction as far as it will go;
c) pull the film rewind knob upwards and rotate it in the arrow direction till the feel of the applied force indicates that the film end has left the take-up spool;
d) take the cover off the camera and remove the cassette;
e) turn the shutter disengaging bush counterclockwise as far as it will go.
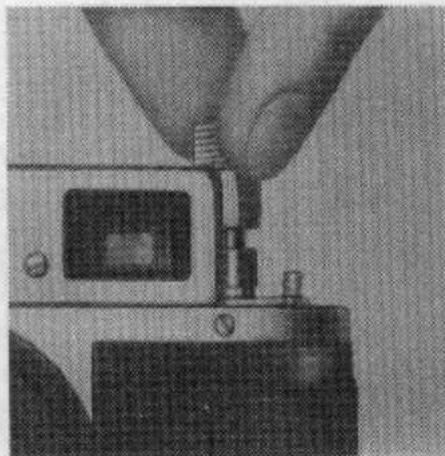
If the shutter setting lever fails to set in action the shutter mechanism after rewinding the film, turn the release button clockwise as far as it will go or turn the shutter setting lever simultaneously holding the sprocket. Set the shutter and release it to check the mechanism operation.
Mount the cover on the camera or load the camera with another cassette with film according to paragraph 5.1. "Camera loading".
natural_image
Close-up of hands using a sewing machine to adjust or install a component (no visible text or symbols)6 SELF-TIMER, SYNCHRO SOCKET, LENS CHANGING
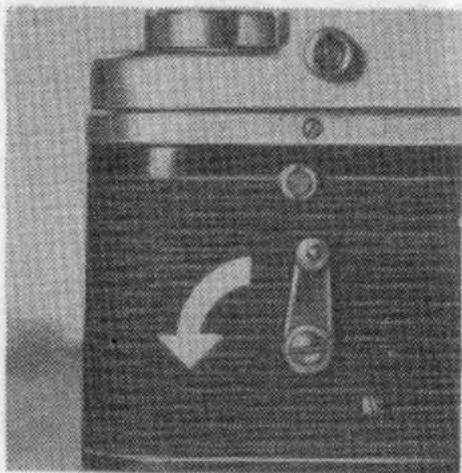
natural_image
Close-up of a container with a curved arrow indicating rotation or movement, no visible text or symbols6.1. SELF-TIMER OPERATING
The self-timer is used when one wishes to photograph oneself. For this aim do the following: mount the camera on a tripod, set the shutter and set the self-timer by turning the self-timer lever downwards as far as it will go.
Set a required aperture and shutter speed; select an object and focus the lens.
Press the self-timer release button and take your place in front of the lens. The shutter operates in no less than 9 seconds after pressing the button.
The ZORKI-4K camera allows to use flash lamps when taking picture with the help of the self-timer.
6.2. PHOTOGRAPHING WITH FLASH LAMPS
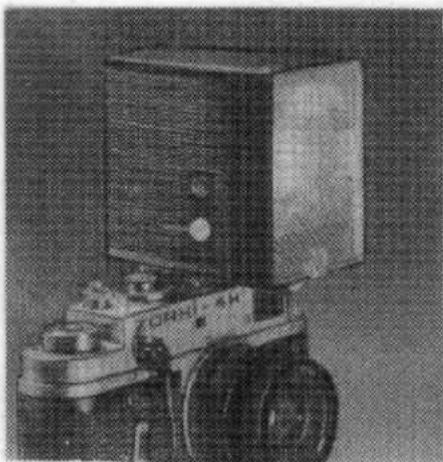
To take pictures in conditions of poor illumination flash lamps are used. For this aim plug a tip of a flash lamp connecting cord into the camera socket. To use a flash bulb set letter "M" of the synchronization scale against the dot on the camera plate. When an electronic flash is to be used, letter "X" should be set against the index dot of the synchronization scale.
The shutter speed of 1/30 is better to use when photographing with flash lamps, i. e. when gating is full. Hand-controlled exposure "B" is not desirable when using flash lamps, since a considerable amount of stray light gets into the camera and may result in a blurred image.
NOTE. When photographing without flash lamps, the synchronization scale position may be free.
natural_image
Exterior view of a mechanical device with wheels and a transparent casing (no visible text or symbols)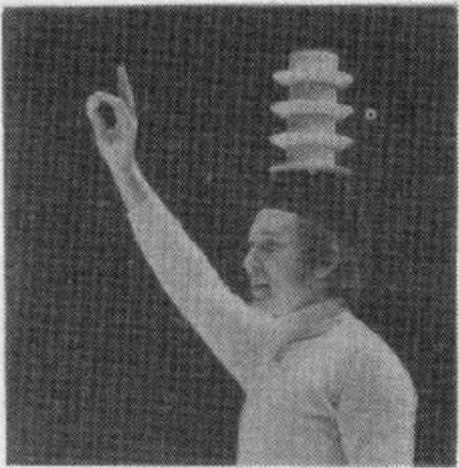
natural_image
Person raising one arm with a large insulator above their head (no visible text or symbols)The picture is taken with a 135 mm lens.
www.orphancameras.com
6.3. LENS CHANGING
The ZORKI-4K accepts all the interchangeable lenses intended for ZORKI type of cameras.
To change a lens set the shortest distance by the distance scale and screw the lens out of the camera by turning it counter-clockwise.
When screwing in an interchangeable lens, be sure to set it at the shortest distance as well.
To take pictures with interchangeable lenses viewing should be performed with the help of a universal or individual viewfinder which should be set in the camera attachment groove.
Interchangeable lenses are focused in the same way as the main (standard) one.
However, it should be kept in mind that any changing of the main (standard) lens for another one requires additional adjusting of this lens to the camera.
REFERENCE TABLE
of sensitivity units of different sensitometric systems for photographic materials of normal contrast ( =0.8-1.0 )
ГОСТ-ASA 16 20 25 32 40 50 65 80 100 130 160 200 250 320 400 500
DIN 13 14 15 16 17 18 19 20 21 22 23 24 25 26 27 28
Vneshtorgizdat No. 5159M
Ord. 383