
MV5 - Camcorder CANON - Free user manual and instructions
Find the device manual for free MV5 CANON in PDF.


User questions about MV5 CANON
0 question about this device. Answer the ones you know or ask your own.
Ask a new question about this device
Download the instructions for your Camcorder in PDF format for free! Find your manual MV5 - CANON and take your electronic device back in hand. On this page are published all the documents necessary for the use of your device. MV5 by CANON.
USER MANUAL MV5 CANON
natural_image
Illustration of a Canon digital camera with lens and control panel (no text or symbols)Canon
Mini Digital Video Cassette
MV5/MV5i/MV5i MC
This instruction book explains the use of the MV5, MV5i and MV5i MC camcorders. There are two main differences between these models. The models with an 'i' include DV Recording and Analog Line-in function. The MV5i MC has an additional Memory Card function. Please note that illustrations and explanations in this instruction book refer mainly to the MV5i MC model.
PAL
Important Usage Instructions
WARNING:

TO REDUCE THE RISK OF ELECTRIC SHOCK, DO NOT REMOVE COVER (OR BACK). NO USER SERVICEABLE PARTS INSIDE. REFER SERVICING TO QUALIFIED SERVICE PERSONNEL.
WARNING:

TO REDUCE THE RISK OF FIRE OR ELECTRIC SHOCK, DO NOT EXPOSE THIS PRODUCT TO RAIN OR MOISTURE.
CAUTION:
TO REDUCE THE RISK OF ELECTRIC SHOCK AND TO REDUCE ANNOYING INTERFERENCE, USE THE RECOMMENDED ACCESSORIES ONLY.
CAUTION:
DISCONNECT THE MAINS PLUG FROM THE SUPPLY SOCKET WHEN NOT IN USE.
For Users in the UK
When replacing the fuse only a correctly rated approved type should be used and be sure to re-fit the fuse cover.
CAUTION:
CUSTOMERS IN THE U.K. SHOULD READ THIS BEFORE USING THIS PRODUCT.
CHANGING THE FUSE
THE MAINS LEAD ON THIS PRODUCT IS FITTED WITH A NON-REWIREABLE (MOULDED) PLUG, INCORPORATING A 3 AMP FUSE. SHOULD THE FUSE NEED TO BE REPLACED AN ASTA OR BSI APPROVED BS1362 FUSE OF THE SAME RATING MUST BE USED.
ALWAYS REFIT THE FUSE COVER AFTER REPLACING THE FUSE. NEVER USE THE PLUG WITH THE FUSE COVER OMITTED.
CHANGING THE PLUG
IF THE FITTED PLUG IS NOT SUITABLE FOR YOUR SOCKET OUTLETS, IT SHOULD BE CUT OFF AND AN APPROPRIATE PLUG FITTED IN ITS PLACE. IF POSSIBLE FIT AN APPROPRIATE 3 AMP FUSE. IF THE NEW PLUG HAS NO FUSE, THEN FIT A 5 AMP FUSE AT THE DISTRIBUTION BOARD.
AC POWER CORD CONNECTION
The wires in the mains lead of this apparatus are coloured in accordance with the following cord.
(IMPORTANT)

text_image
Mains Lead BLUE ...... BROWN. ...... NEUTRAL LIVEAs the colours of the wires in the mains lead may not correspond with the coloured markings identifying the terminals in your plug, proceed as follows: The wire which is coloured BLUE must be connected to the terminal which is marked with the letter N or coloured black. The wire which is coloured BROWN must be connected to the terminal which is marked with the letter L or coloured red. Neither Blue wire or Brown wire is to be connected to the Earth pin of a 3 pin plug.
THE SEVERED PLUG MUST BE DESTROYED IMMEDIATELY TO AVOID ANY POSSIBLE ELECTRIC SHOCK HAZARD.
CA-PS 700 identification plate is located on the bottom.
- Use of CV-150F/CV-250F DV cable is necessary to comply with the technical requirement of EMC Directive.
MV5i MC Operating Steps and Reference Guide
Your camcorder is supplied with two manuals: the “Digital Video Camcorder MV5i MC Instruction Manual” and the “Digital Video Solution Disk Instruction Manual”.
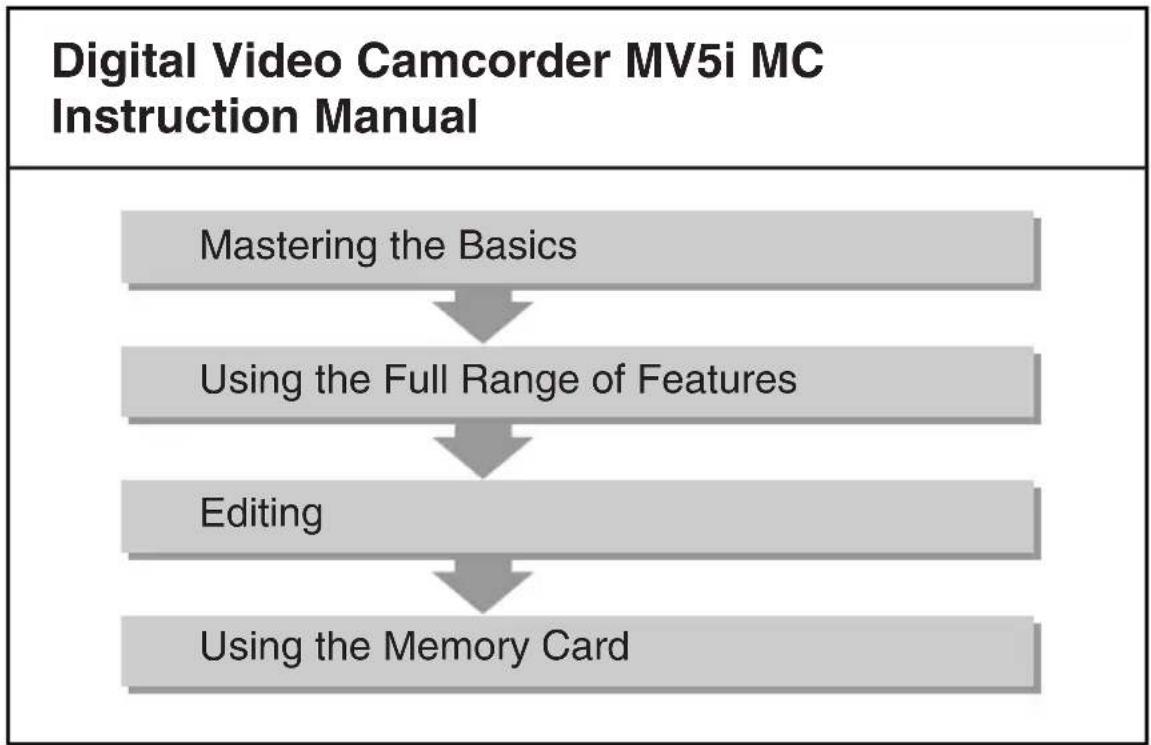
flowchart
graph TD
    A["Mastering the Basics"] --> B["Using the Full Range of Features"]
    B --> C["Editing"]
    C --> D["Using the Memory Card"]
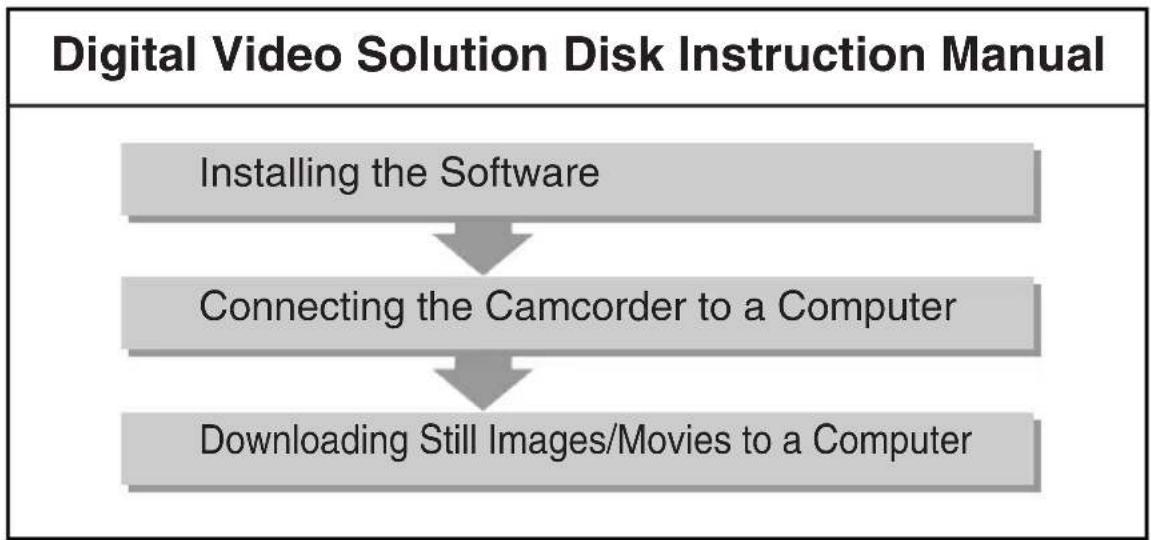
flowchart
graph TD
    A["Installing the Software"] --> B["Connecting the Camcorder to a Computer"]
    B --> C["Downloading Still Images/Movies to a Computer"]
Contents
Introduction
Important Usage Instructions ......2
Operating Steps and Reference Guide .....3
Thank you for Choosing a Canon ......7
Introducing the MV5/MV5i/MV5i MC ....8
Mastering the Basics
Finding Your Way Around the MV5/MV5i/MV5i MC....9
\~ Preparations \~
Powering Your Camcorder ......12
Loading a Cassette ....16
\~ Basic Recording \~
Recording Movies onto a Tape .....18
Zooming 23
Using the LCD Screen 25
\~ Basic Playback \~
Playing Back a Tape 28
Connections for Playback on a TV Screen....32
Tips for Making Better Videos ....36
Using the Full Range of Features
\~ General ... \~
Searching and Reviewing While Recording ....38
Using the Menus ....39
Using the Wireless Controller ....48
\~ For Recording ... \~
Setting the Date and Time ....51
Recording Still Images onto a Tape .....54
Turning the Image Stabilizer Off ....56
Using the Various Recording Programs ..57
Using Digital Effects......61
Using the Multi-Image Screen ......67
Audio Recording 69
Setting the Self-Timer ....71
\~ When Making Manual Adjustments ... \~
Adjusting AE Shift 73
Setting the Shutter Speed ....74
Adjusting Focus Manually .....76
Setting the White Balance .....77
\~ For Playback ... \~
Enlarging the Image during Playback.....79
Displaying Date, Time and Camcorder Data (Data Code)......80
Searching the Tape (Photo Search/Date Search) ....83
Returning to a Pre-Marked Position .....84
Editing
Editing to a VCR 85
Dubbing to/from a Tape with Digital Video Equipment ....86
MV5i/MV5i MC Recording from a VCR, TV or Analog Camcorder (Analog Line-in)....90
MV5i/MV5i MC Digitally Outputting Analog Video and Audio Signals (Analog-Digital Converter)....92
MV5i/MV5i MC Recording Over Existing Scenes (AV Insert Editing)....94
Audio Dubbing 97
Setting the Audio Mix ....103
Connecting to a PC Using a DV Cable..105
MV5i/MV5i MC Using a Memory Card
Memory Card Introduction .....106
Recording Still Images onto a Memory Card ....112
Recording Still Images from a Tape .....114
Recording Still Images from Other Devices (VCR, TV or Other Digital Camcorders)....115
Recording Movies onto a Memory Card ....117
Recording Movies from a Tape ......118
Recording Movies from Other Devices (VCR, TV or Other Digital Camcorders)....119
Recording Panoramic Images (Stitch Assist)....120
Playing Back a Memory Card......122
Settings of Still Images/Movies ......125
Preventing Accidental Erasure (Protect) 128
Marking a Still Image for Printing (Print Mark) 129
Erasing Still Images/Movies ......131
Using the Card Photo Printer CP-10 (Optional) 133
Combining Images and Recording Them to a Cassette (Card Mix) .....140
Copying Still Images from Tape to Memory Card ....143
Copying Still Images from Memory Card to Tape ....144
Formatting a Memory Card....145
Utilizing Memory Card Still Images/ Movies on a PC ....146
Other Information and Precautions .....147
Additional Information
Preparing the Camcorder....150
Notes on Using the Batteries......151
Maintenance 154
Troubleshooting....158
The MV5/MV5i/MV5i MC System Diagram ....162
Optional Accessories ....163
Screen Displays ....165
Specifications ....173
Index 175
Menu at a Glance 178
Symbols used in this instruction manual
: Reference page numbers
☐: Functions that can be operated from the body of the camcorder
: Functions that can be operated from the wireless controller
: Supplementary notes for camcorder operation
♪: Operation confirmation beeps (22)
- Capital letters are used to refer to settings displayed in the menus and buttons labelled on the camcorder itself, e.g. Press the MENU button.
Switch Positions by Operating Modes
| Operating Mode POWER switch TAPE/CARD | MV5i MCswitch | |
| CAMERA CAMERA TAPE | ||
| PLAY (VCR) PLAY (VCR) TAPE | ||
| MV5i MC CARD CAMERA CAMERA CARD | ||
| MV5i MC CARD PLAY (VCR) PLAY (VCR) CARD | ||
* Available functions vary depending on the operating mode. It is indicated as follows:
CAMERA
: Function can be used in this mode.
CAMERA
: Function cannot be used in this mode.
Thank you for Choosing a Canon
First, we'd like to thank you for purchasing this Canon camcorder. Its advanced technology makes it very easy to use — you will soon be making high-quality videos which will give you pleasure for years to come.
To get the most out of your new camcorder, we recommend that you read this manual thoroughly — there are many sophisticated features which will add to your recording enjoyment.
Getting started
To get started we suggest that you master the basic operations of the camcorder first, before moving on to use its full range of features.
- When connecting the camcorder to your personal computer, use the optional CV-150F or CV-250F DV cable.
MV51MC When connecting the camcorder to your PC equipped with a USB terminal, use the supplied IFC-300PCU USB cable.
* Required when you wish to use your PC to work on still images/movies recorded on a memory card with the camcorder.
Your camcorder is supplied with the following accessories:
MV5 MV5i WL-D74MV5i MC WL-D77WireCon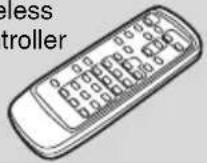 | Two AA batteries |
NB-2LBattery Pack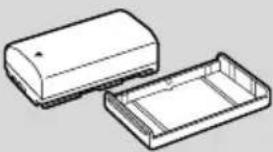 | Lens cap and lens cap cord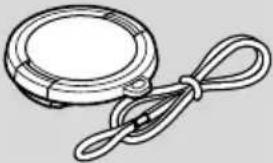 |
Lithium button batteryCR1616 | CA-PS700 Compact Power Adapter(including AC power cable)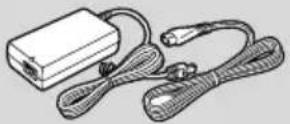 |
PC-A10 SCARTAdapter (Europe, Asia)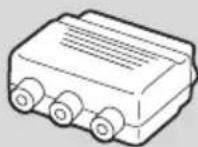 | STV-250N Stereo Video Cable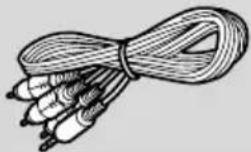 |
S-150 S-video Cable CB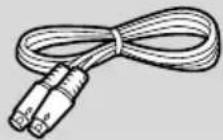 | 2LTE Battery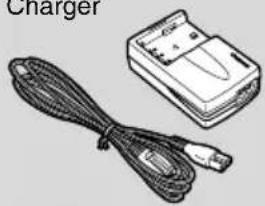 |
MV5i MC Soft Casefor SD Memory Card | MV5i MC SDC-8M SD Memory Card (with pre-recorded sample images)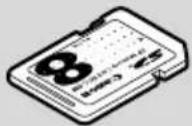 |
MV5i MC IFC-300PCU USB Cable*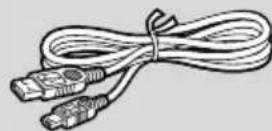 | MV5i MC Software CD-ROMDigital Video Solution Disk*ArcSoft Camera Suite CD |
Introducing the MV5/MV5i/MV5i MC
10× Optical Zoom (200× Digital Zoom)
This zoom range will more than take care of all your picture-taking needs, from wide-angle shots to close-ups at full telephoto (MV5i MC al zoom and 30×digital zoom when using a memory card).
Image Stabilizer

Corrects camcorder shake so even hand-held shots at full telephoto are smooth and steady.
Night Mode
Allows you to record bright colorful images even in dark places. The camcorder automatically adjusts to the optimum shutter speed based on the brightness of the subject.
Still Images

You can record still images like photographs only by pressing the photo button.
MV5i MC Memory Card
You can record still images and movies onto a SD Memory Card or MultiMediaCard. Still images from the memory can be combined with other recordings. The memory card also enables easy transfer of still images/movies to a PC. Use the supplied software to edit or attach still images/movies to your e-mail.
MV5i MC XGA-Size Still Images
High-definition, XGA-size still images through processing with a 680,000 pixels CCD.
MV5i MC Panoramic Images
You can merge separate images into one large panoramic scene using the supplied software (PhotoStitch) on a PC.
MV5i MC USB Terminal
Allows high-speed transfer of memory card data to a PC with a built-in USB port. You can organize and edit still images/movies on your PC using the supplied software.
IEEE 1394 DV Terminal

The DV terminal allows high-quality transfer with virtually no deterioration in quality of images. You can edit and process images by connecting the camcorder to a PC with the IEEE 1394 terminal.
MV5i/MV5i MC Analog Line-in Recording
An analog video signal from a television, VCR, or another camcorder can be sent into the camcorder to record images digitally onto a Mini DV cassette.
Digital Effects

Show your creativity by using the special effects and digital faders. These digital effects and faders can add visual appeal and greater imaging variety. The multi-image screen captures moving subjects in 4, 9 or 16 sequences of still images with the Image Capture feature and displays them at one time.
Finding Your Way Around the MV5/MV5i/MV5i MC
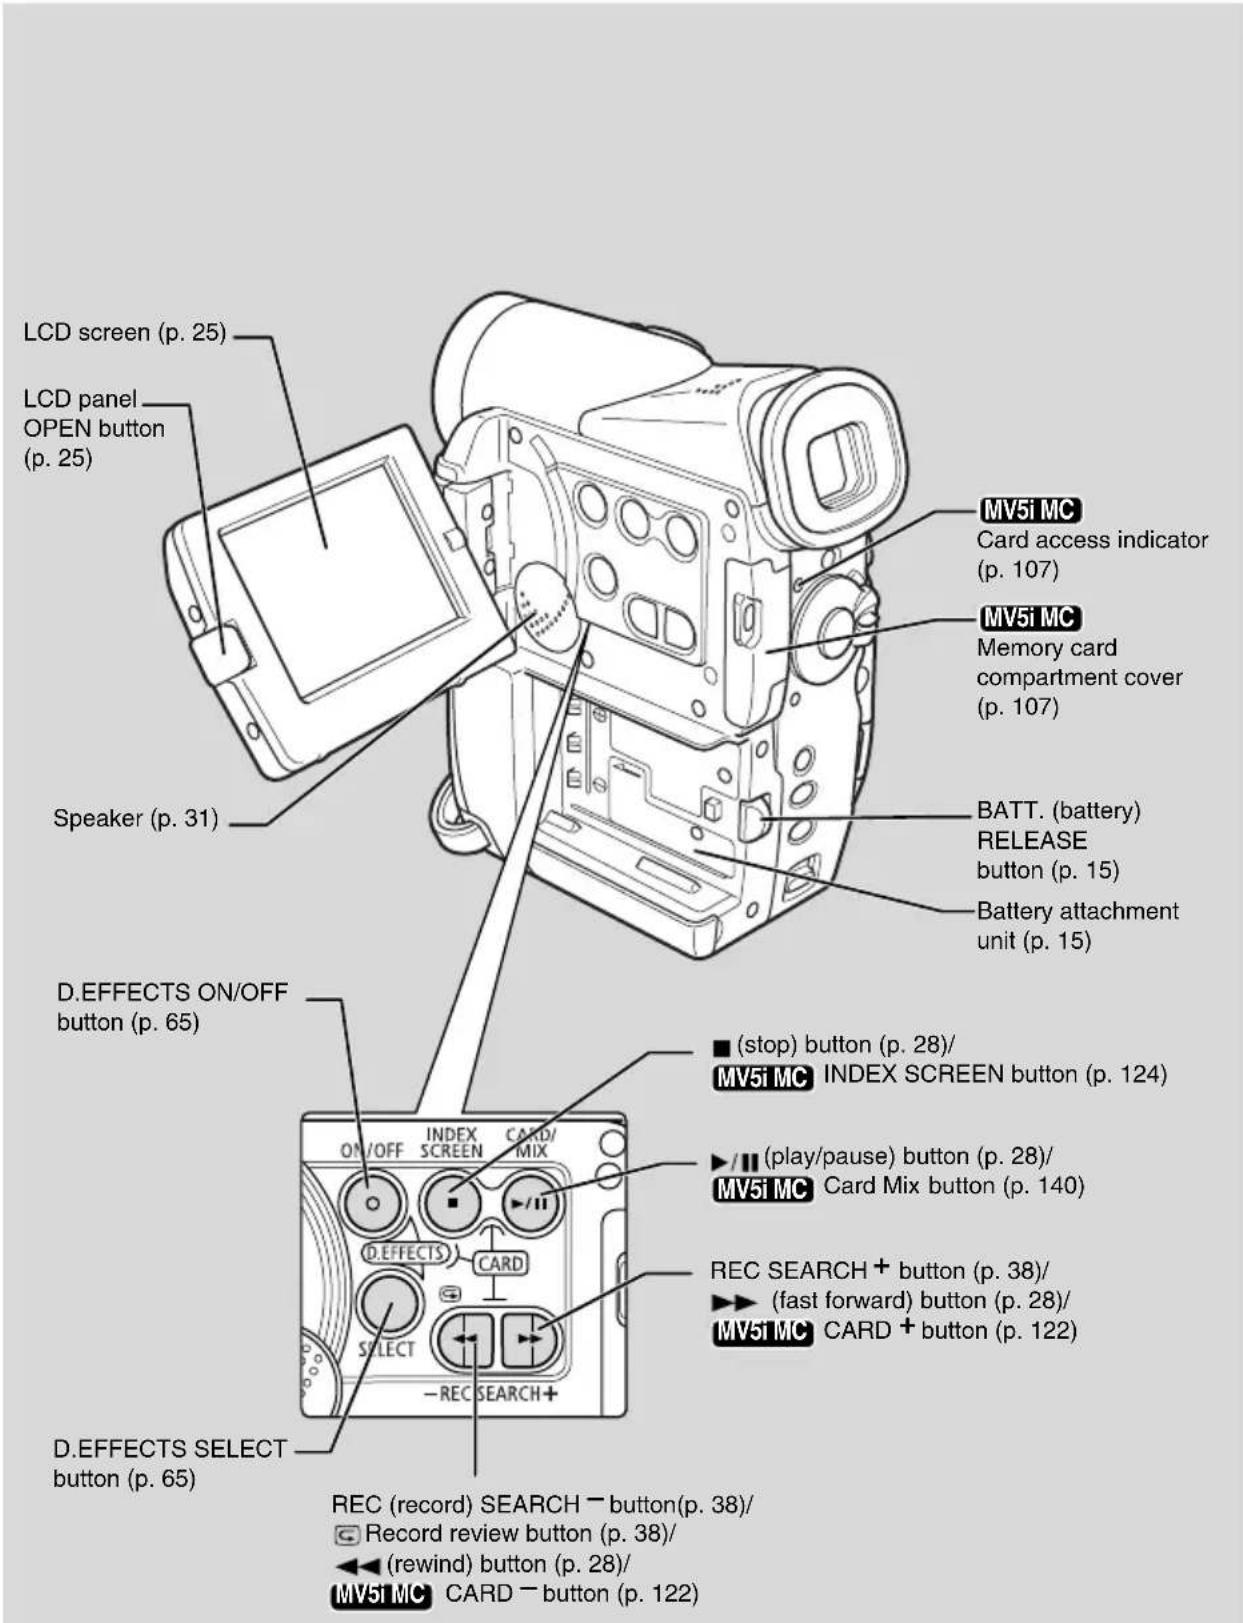
text_image
LCD screen (p. 25) LCD panel OPEN button (p. 25) Speaker (p. 31) D.EFFECTS ON/OFF button (p. 65) ■ (stop) button (p. 28)/ MV5i MC INDEX SCREEN button (p. 124) ►/II (play/pause) button (p. 28)/ MV5i MC Card Mix button (p. 140) REC SEARCH + button (p. 38)/ ►/ (fast forward) button (p. 28)/ MV5i MC CARD + button (p. 122) D.EFFECTS SELECT button (p. 65) REC (record) SEARCH - button(p. 38)/ Record review button (p. 38)/ ◀(rewind) button (p. 28)/ MV5i MC CARD - button (p. 122)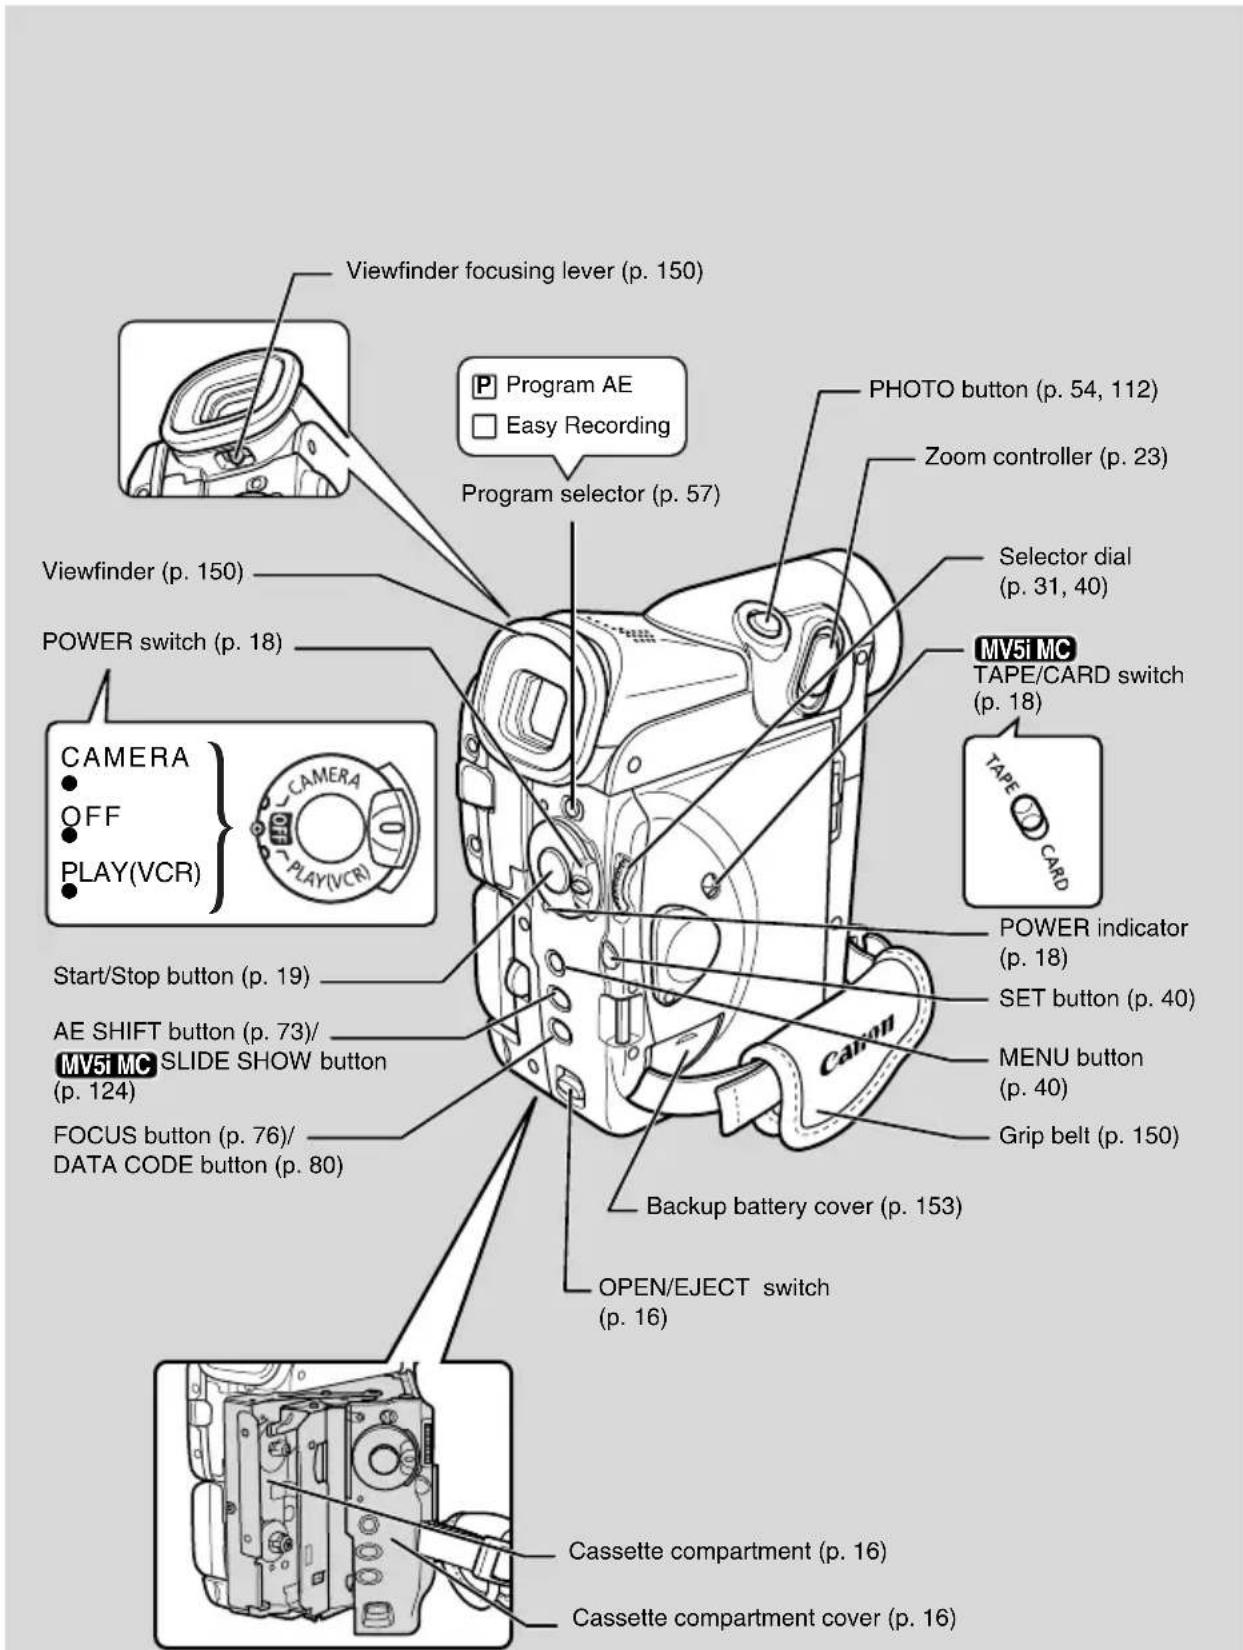
text_image
Viewfinder focusing lever (p. 150) Program AE Easy Recording Program selector (p. 57) PHOTO button (p. 54, 112) Zoom controller (p. 23) Viewfinder (p. 150) Selector dial (p. 31, 40) POWER switch (p. 18) MV5i MC TAPE/CARD switch (p. 18) CAMERA OFF PLAY(VCR) CAMERA PLAY(VCR) Start/Stop button (p. 19) AE SHIFT button (p. 73)/ MV5i MC SLIDE SHOW button (p. 124) FOCUS button (p. 76)/ DATA CODE button (p. 80) BACKUP battery cover (p. 153) OPEN/EJECT switch (p. 16) SET button (p. 40) MENU button (p. 40) Grip belt (p. 150) Cassette compartment (p. 16) Cassette compartment cover (p. 16)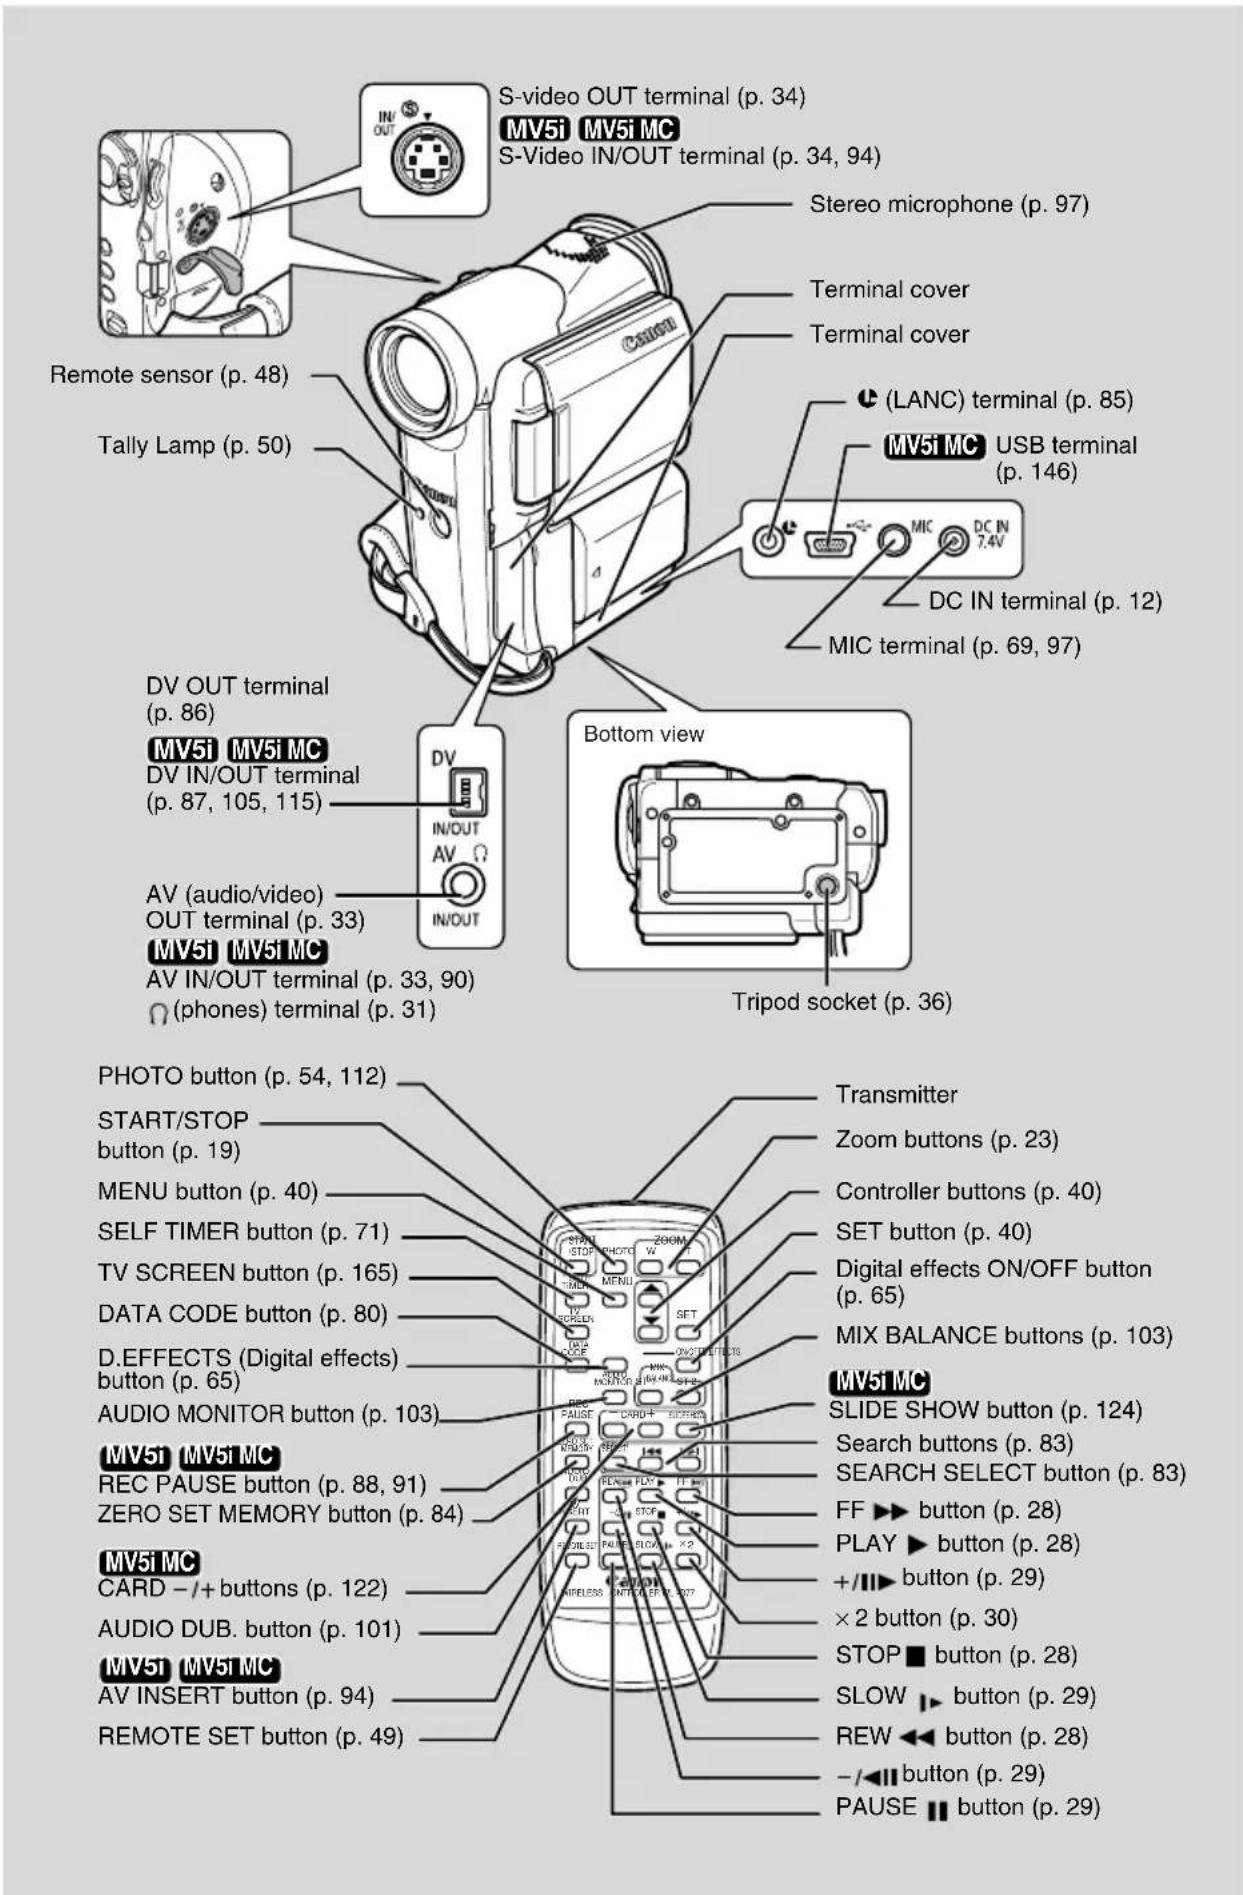
text_image
S-video OUT terminal (p. 34) MV51 MV51 MC S-Video IN/OUT terminal (p. 34, 94) Remote sensor (p. 48) Tally Lamp (p. 50) DV OUT terminal (p. 86) MV51 MV51 MC DV IN/OUT terminal (p. 87, 105, 115) AV (audio/video) OUT terminal (p. 33) MV51 MV51 MC AV IN/OUT terminal (p. 33, 90) (phones) terminal (p. 31) Bottom view DV IN/OUT AV IN/OUT Tripod socket (p. 36) Photoper button (p. 54, 112) START/STOP button (p. 19) MENU button (p. 40) SELF TIMER button (p. 71) TV SCREEN button (p. 165) DATA CODE button (p. 80) D.EFFECTS (Digital effects) button (p. 65) AUDIO MONITOR button (p. 103) MV51 MV51 MC REC PAUSE button (p. 88, 91) ZERO SET MEMORY button (p. 84) MV51 MC CARD -/+ buttons (p. 122) AUDIO DUB. button (p. 101) MV51 MV51 MC AV INSERT button (p. 94) REMOTE SET button (p. 49) Transmitter Zoom buttons (p. 23) Controller buttons (p. 40) SET button (p. 40) Digital effects ON/OFF button (p. 65) MIX BALANCE buttons (p. 103) MV51 MC SLIDE SHOW button (p. 124) Search buttons (p. 83) SEARCH SELECT button (p. 83) FF ▶ button (p. 28) PLAY ▶ button (p. 28) +/- button (p. 29) ×2 button (p. 30) STOP ■ button (p. 28) SLOW ▶ button (p. 29) REW ◀ button (p. 28) -/- button (p. 29) PAUSE ■ button (p. 29)Powering Your Camcorder
Before operating your camcorder, you will need to use the power adapter to:
Provide power from a household power socket
or
Charge a battery pack

Notes:
- The power adapter converts current from a household power socket (100–240 V AC, 50/60 Hz) to the DC current used by your camcorder.
- If the adapter is used next to a TV, it may cause bars to appear on the TV — move the adapter away from the TV or the aerial cable.
- Do not connect an unspecified product to the camcorder's DC terminal. Likewise, do not connect the power adapter to an unspecified product.
Connecting the camcorder to a household power socket
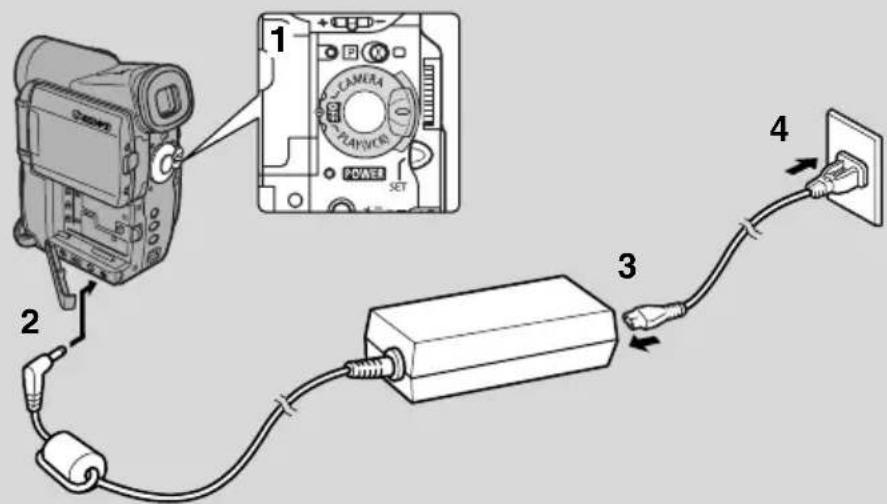
text_image
Diagram showing connections between a camera, a power switch, and an electrical outlet with labeled components.Use the power adapter to provide your camcorder with instant power from a household power socket. Always turn the camcorder off before connecting/removing the power source.
- Set the POWER switch to OFF.
- Connect the power adapter to the camcorder's DC IN terminal.
- Connect the power cable to the power adapter.
- Plug the power cable into a household power socket.
- Disconnect the power adapter from the camcorder after use. Unplug the power cable from the household power socket, then disconnect it from the adapter.
CA-PS700 Compact Power Adapter
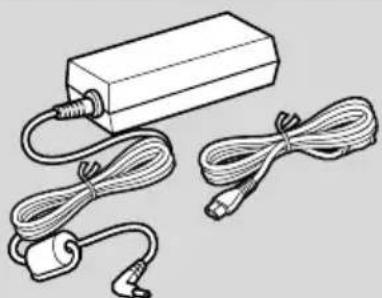
natural_image
Line drawing of a rectangular electronic device with coiled cables and connectors (no text or symbols)Specifications
| Power supply 100–240 V AC, 50/60 Hz 0.32A | |
| Rated output 7.4 V DC, 2.0 A | |
| Operating temperature range 0°C - 40°C (32°F- 104°F) | |
| Dimensions | 112 × 29 × 45mm (4 3/8 × 1 1/8 × 1 3/4 in) |
| Weight 186g (6) | 1/2 oz) (without power cable) |
Weight and dimensions are approximate.
Errors and omissions excepted.
Subject to change without notice.
Charging the battery pack
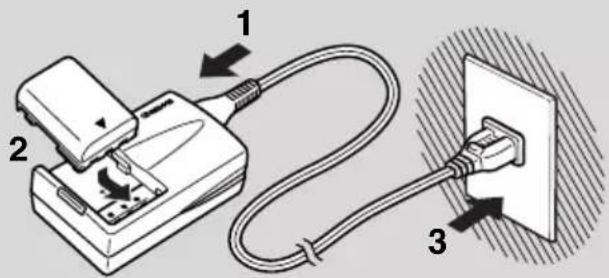
text_image
Diagram showing cable installation and connection to a power plug, labeled with components 1, 2, and 3.Your battery pack has been partially charged before it left the factory. It should have enough power for you to check that your camcorder is working properly. Charge the battery pack fully using the Battery Charger CB-2LTE if you want it to power the camcorder for more than a few minutes.
Always turn the camcorder off before attaching/removing the battery pack.
- Connect the power cable to the charger.
- Attach the battery pack to the charger.
- Align the front end of the battery pack with the guides on the charger, then press and slide the battery pack into the charger to set it in place.
- Plug the AC plug into a household power socket.
• The charge indicator lights in red and charging starts.
- The indicator light changes to green when the battery pack is fully charged.
-
Unplug the charger from the household power socket.
-
Remove the battery pack by sliding it out.
- Disconnect the power cable form the charger.
Note:
- You can find details on using the battery pack in the “Notes on Using the Battery Pack” (151). These notes include charging and recording times and how to install the backup battery.
Attaching the battery pack
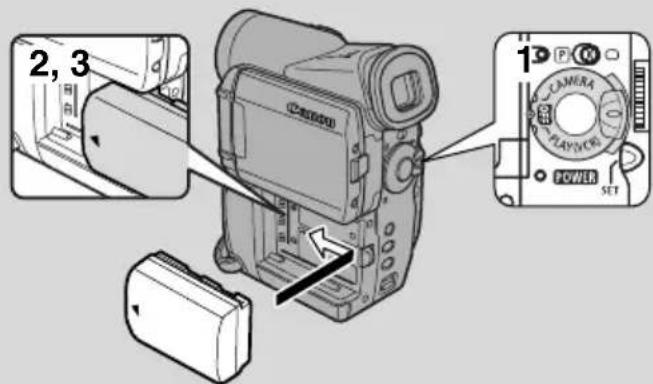
text_image
2, 3 1 P CAMERA PLAYMORE POWER SET- Turn the POWER switch to OFF.
- Align the front end of the battery pack with the line on the camcorder, press lightly and slide the battery until it clicks into place.
- Remove the battery pack after use.
Press the BATT. RELEASE button and remove the battery.
CB-2LTE Battery Charger
Specifications
| Power supply 100 – 240 V AC, 50/60Hz,0.17A (100V) – 0.10A (240V) | |
| Rated output 8.4V DC, 0.5A | |
| Operating temperature range 0°C - 40°C (32°F- 104°F) | |
| Dimensions | 91 × 29.5 × 56 mm(3 5/8 × 1 1/8 × 2 1/4 in) |
| Weight 82 g (2 | 7/8 oz) (without power cable) |
Weight and dimensions are approximate.
Errors and omissions excepted.
Subject to change without notice.
Loading a Cassette
text_image
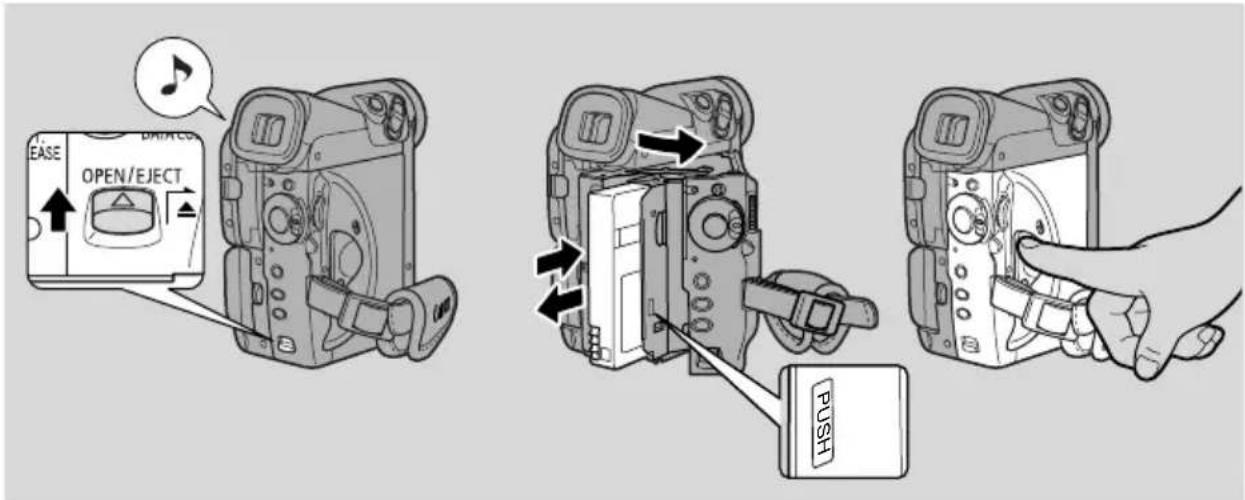
EASE OPEN/EJECT PUSHOnly use videocassettes marked with the Mini D V logo.*
Loading and unloading
- Make sure that you have attached a power source.
-
Slide the OPEN / EJECT ▲switch to release the cassette compartment cover.
-
Pull the cover fully open (while holding the button) and wait a couple of seconds for the cassette compartment to open automatically.
-
The confirmation beep sounds when the cassette cover fully opens.
-
Load or unload the cassette.
-
Insert the cassette gently with the window facing outward, and the REC/SAVE tab to the bottom.
-
Remove the cassette by pulling it straight out.
-
Press the PUSH mark on the compartment until it clicks, and wait for it to close.
-
Click the cover back into place.
* Mini D is a trade mark.

Notes:
- Do not interfere with the cassette compartment while it is opening or closing automatically, and do not attempt to close the cover until the cassette compartment has fully retracted.
• After loading a cassette, use record search (38) to find the point where you want to start recording. - Be careful not to get your fingers caught in the cassette compartment cover.
- Do not leave the cassette in the camcorder after use — return it to its case and store it in a cool, clean, dry place.
- When you turn the camcorder's power on, flashes in the display until you load a cassette.
- With some types of tapes, the remaining tape display may not give an accurate reading (166).
Protecting tapes from accidental erasure
flowchart
graph TD
    A["Device 1"] -->|REC SAVE| B["Processing Block"]
    C["Device 2"] -->|REC SAVE| B
    B --> D["Output"]
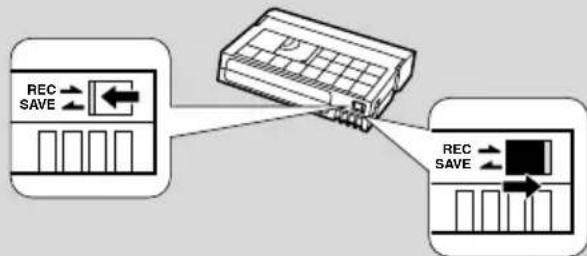
To protect your recording from accidental erasure, slide the tab on the cassette so that it exposes the hole. (This switch position is usually labelled SAVE or ERASE OFF.)
If you load a protected cassette, "THE TAPE IS SET FOR ERASURE
PREVENTION" is displayed for approx. 4 seconds and then the 🔔 mark flashes in the display.
If you want to record on the cassette again, slide the tab back so the hole is closed.
Handling cassettes
• To protect the tape heads, transfer cassettes directly from the tape case to the camcorder — do not open the tape protect cover or touch the tape itself.
- Do not use cassettes where the tape has been damaged or spliced — they may damage the camcorder.
- Do not insert anything into the small holes on the cassette or cover them with cellophane tape.
- Handle cassettes with care — dropping them or exposing them to external shocks may cause internal damage.
- Store cassettes in the provided case, first rewinding them to the start of the tape and then storing them upright.
- A cassette with metal plated terminals may become dirty with use, affecting information transfer. Therefore, after using a tape about 10 times, be sure to clean the terminals with a cotton bud.
Cassette memory
You are unable to use the cassette memory function with this camcorder.
text_image
1 CAMERA PLAY(CK) POWER SET 3 + P P P P P P 4, 5 CAMERA VCR POWER SET 3 + P P P P P Tape CARD CanonBefore you start recording
Have you completed the following steps?
- Attaching a power source (12).
- Removing the lens cap (150).
- Fastening the grip belt (50).
- Choosing the display: viewfinder (150) or LCD screen (25).

Note:
- When you're using the viewfinder, fully close the LCD or rotate the LCD so that it faces the same direction as the lens (25).
You may also want to install the backup battery (153) in order to set the date and time display (51).
Recording
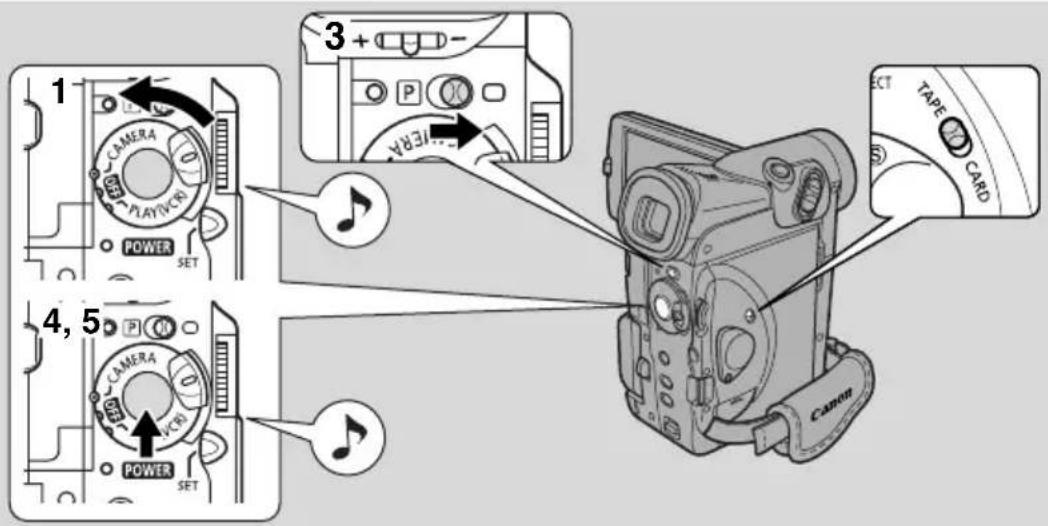
1. Press and hold the small button on the POWER switch and turn the POWER switch to CAMERA. (MV51MC) e sure the TAPE/CARD switch is set to TAPE.)
- The camcorder automatically sets to record pause mode. PAUSE appears in the display.
- If you haven't set the date and time display, SET THE TIME ZONE, DATE AND TIME appears in the display. For setting the time zone, see p. 51. For setting the date and time, see p. 53.
• The camcorder power indicator lights up.
• The confirmation beep sounds. - The camcorder will turn itself off if you leave it in record pause mode for more than about 5 minutes. To return to record pause mode, turn the POWER switch to OFF and then back to CAMERA.
-
RMV5i MCing still images onto a memory card (112), recording movies onto a memory card (117).
-
Load a cassette (16).
- Slide the program selector to □.
- This selects the camcorder's Easy Recording program. It allows you to simply point and shoot without making any manual adjustments (57).
-
Press and release the start/stop button once to begin recording.
-
For still image recording to a tape, see p. 54.
-
The tally lamp flashes rapidly and REC appears in the display.
-
Press and release the start/stop button again to pause recording.
-
The camcorder returns to record pause mode and PAUSE reappears in the display.
- You can stop and restart recording as often as you like by pressing the start/stop button.

Note:
• After loading a cassette, start recording when the tape counter has stopped.
When you have finished recording
- Replace the lens cap.
- Return the LCD screen flush to the camcorder body.
- Unload the cassette.
- Turn the POWER switch to OFF.
- Disconnect the power source.

Notes:
- To check that the camcorder is recording correctly, make a test recording first.
- Before making important recordings, clean the video heads using a Canon DVM-CL Digital Video Head Cleaning Cassette or a commercially available digital video head cleaning cassette.
- You cannot monitor the sound from the speaker when recording.
- For tips on how to make better videos, see p. 36.
- For extra recording time, set REC MODE to LP mode (20).
Changing the Recording Mode

You can choose between SP (standard play) and LP (long play). LP extends the tape usage by 1.5 times.
It is not possible to dub audio or insert images (MV5i in MV5i MC) a tape that has been recorded in LP mode.
MENU
(39)
▶ VCR SET UP
REC MODE....SP
CAMERA
PLAY (VCR)
MV5i MC
CARD CAMERA
MV5i MC
CARD PLAY (VCR)
To change to LP mode, open the menu, select VCR SET UP, REC MODE and set it to LP.

Notes:
- Depending on the nature and usage condition of the tape, recording/playback in LP mode may cause image or sound distortion. We recommend using the SP mode for important recordings.
- If you record in both modes on the same tape, the image may become distorted during playback and the time code may not be written correctly.
- If you playback a tape recorded on another digital equipment on this camcorder, or vice versa, image and sound may become distorted.
16:9 (Wide screen TV recording)
Produces images in the 16:9 format for playback on wide screen TVs.

natural_image
Illustration of a girl playing badminton with racket and star-patterned ball (no text or symbols)CAMERA
PLAY (VCR)
MV5i MC CARD CAMERA
MV5i MC CARD PLAY (VCR)
MENU
(39)
▶ CAM.SET UP
▶ 16:9···OFF
To switch 16:9 to ON, open the menu and select CAM.SET UP. Then select 16:9, set it to ON and close the menu.

Notes:
- “16:9” is shown in the display when you switch the 16:9 mode on.
- You cannot use the 16:9 mode with the Easy Recording program.
- You cannot use the multi-image screen when setting the 16:9 mode on.
- If you play back a recording made for 16:9 on a normal TV screen, the image will appear to be vertically “squashed” (compressed).
Confirmation/Warning beeps

The camcorder's short operation confirmation beeps are indicated by ♪ in the illustrations. Beeps sound upon certain camcorder operations such as when you turn the camcorder on, during the self-timer countdown, right before the camcorder's automatic shut-off, and also upon any unusual condition of the camcorder. Beeps are not recorded on the tape.

text_image
CAMERA PLAY (VCR) MV5i MC CARD CAMERA MV5i MC CARD PLAY (VCR) MENU (39) ► SYSTEM ► BEEP · · · · · · · ONTo turn the beep off, open the menu and select SYSTEM. Then select BEEP, set it to OFF and close the menu.
Demonstration mode

You can see a demonstration of the camcorder's main features. To see the demonstration, do either of the following:
- With no cassette or memory card inserted, turn the DEMO MODE on in the TAPE CAMERA menu or CARD CAMERA menu and close the menu.
- Leave the camcorder with no cassette or memory card inserted for five minutes after turning it on.

flowchart
graph LR
    A["CAMERA"] --> B["PLAY (VCR)"]
    B --> C["MV5i MC CARD CAMERA"]
    C --> D["MV5i MC CARD PLAY (VCR)"]
    E["MENU (39)"] --> F["▶DISP.SET UP"]
    F --> G["▶DEMO MODE...ON"]
To turn the demonstration mode off, open the menu and select DISP. SET UP. Then select DEMO MODE, set it to OFF and close the menu.

Note:
- To cancel the demo mode once it has begun: push any button, turn off the power, load a cassette or insert a memory card.
text_image
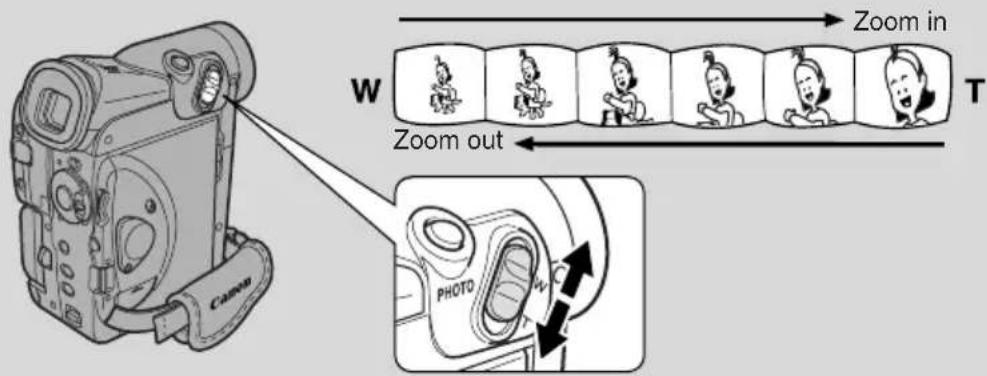
Zoom in W Zoom out PHOTO10× optical zoom (MV5i MC card 7×)
The camcorder's zoom lens allows you to choose the best picture angle for each scene:
- Move the zoom control towards W to zoom out to wide-angle.
- Move it towards T to zoom in to telephoto.
You can also control the speed of zooming:
- Move the control slightly to zoom slowly.
- Move it farther to zoom more quickly. (The farther you move the zoom control, the faster the zoom speed.)
The T and W buttons on the wireless controller adjust the picture angle, but not the zoom speed.
40×/200× digital zoom (MV5iMC card 30×)
Magnifies the camcorder's zoom range by up to 20× in TAPE CAMERA mode. The zoom control continues to work as usual. You can freely zoom in and out between 1× and 200× magnification — the camcorder automatically switches between optical zooming (up to 10×) and digital zooming (10× to 40× or 10× to 200×).
CAMERA
PLAY (VCR)
MV5i MC CARD CAMERA
MV51 MC CARD PLAY (VCR)
MENU
(39)
▶ CAM.SET UP
D.ZOOM·····40×
To change the digital zoom, open the menu and select CAM.SET UP. Then select D.ZOOM, set it to OFF or 200× and close the menu.

Notes:
- When zooming, as a rule, keep at least 1 ~m (3 ft 3^3/8 in) between you and your subject. However when the zoom is at the wide-angle position, you can focus on a subject as close as 1 ~cm ( ^3/8 in).
- Image resolution is slightly lower when the magnification is greater than 10 × .
- You cannot use digital zoom in the Night recording program.
- You cannot use digital zoom when the multi-image screen is set. The display becomes “--”.
- The zoom indicator appears for 4 seconds. When the digital zoom is set to 40 × , the zoom indicator extends (light blue). When the digital zoom is set to 200 × zoom, the zoom indicator extends again (a darker blue).
Using the LCD Screen
Opening and closing the LCD screen
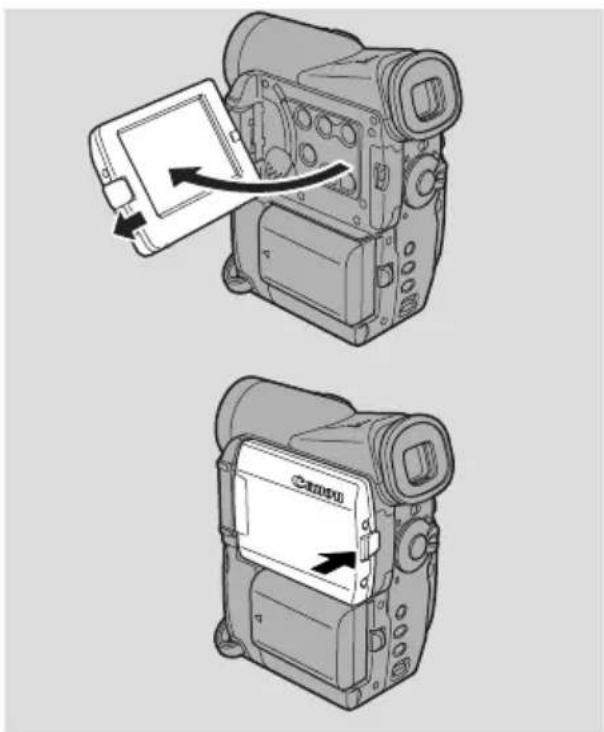
Slide the LCD panel OPEN button and open the panel by pulling it away from the camcorder. This automatically switches the LCD screen on and the viewfinder off. Close the LCD panel until it clicks securely closed. When you close the LCD panel, the LCD screen automatically switches off and the viewfinder switches back on.
natural_image
Two grayscale illustrations of a digital camera with an open screen and directional arrows indicating motion (no text or symbols)Changing the angle of the LCD screen
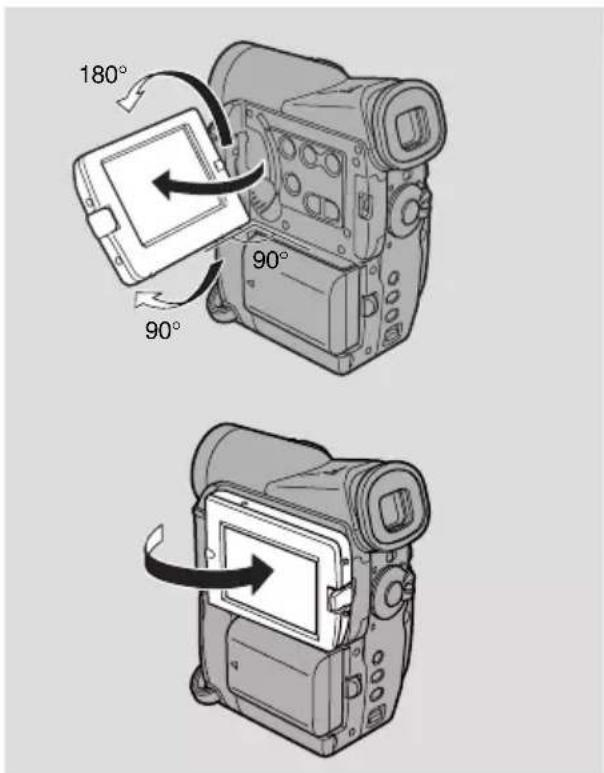
You can choose the angle of the screen that suits you best by opening and rotating the screen, also you can rotate the LCD screen so that faces in the direction of the lens (27).
You can also push the panel flat against the camcorder until it is flush with the side, with the screen facing outwards.
text_image
180° 90° 90°
Notes:
- Avoid touching the LCD screen when moving the LCD panel.
- Do not hold the camcorder by the LCD panel or the viewfinder.
-
Make sure you open the LCD panel at 90^ , before attempting to rotate it.
-
Always rotate the LCD panel vertically into place, before closing it or pushing it flat against the side of the camcorder.
- Always fully close the LCD panel until it clicks securely.
- Be careful not to leave the LCD, viewfinder or lens exposed to direct sunlight outdoors or in a window. Doing so could cause damage.
- Bright light falling on the LCD screen may cause glare that makes it difficult for you to view the image. In this case, switch to using the viewfinder. You are also able to adjust the brightness of the screen (see “Adjusting the LCD screen” below).
Adjusting the LCD screen

You can adjust the brightness of the LCD screen.

text_image
CAMERA PLAY (VCR) MV5i MC CARD CAMERA MV5i MC CARD PLAY (VCR) MENU (39) ▶ DISP.SET UP ▶ BRIGHTNESS • • +Open the menu and select DISP.SET UP from the menu. Then select BRIGHTNESS, adjust the level with the selector dial and close the menu.
A bar showing the level appears in the display.
- Turn the selector dial up to make the display brighter.
- Turn the selector dial down to make the display darker.

Notes:
- The camcorder will remember your brightness setting even after you turn it off.
- The brightness of the LCD does not affect that of the recorded images or the viewfinder.
About the LCD Screen
The LCD screen built into this camcorder is a high precision product. However, small black dots or bright points of light (red, blue or green) may appear constantly on the LCD screen. This is not a malfunction of the LCD screen and they are not recorded on the tape. (Effective dots: more than 99.99%)
Allowing the subject to monitor recording
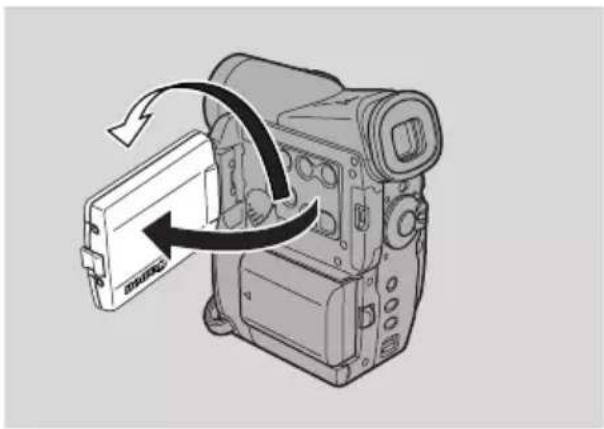
When you turn the LCD panel so that it faces the same direction as the lens, you can watch yourself during recording or let your subject monitor recording. The viewfinder is also activated when the panel is in this position. (Adjust the viewfinder, 150)
- You can choose the display style, reversed (mirror on) or not (mirror off). The recording itself is unaffected regardless of which one you choose.
natural_image
Diagram of a DSLR camera with an open flash unit and directional arrow indicating rotation (no text or symbols)
text_image
CAMERA PLAY (VCR) MV5i MC CARD CAMERA MV5i MC CARD PLAY (VCR)
text_image
MENU (39) ▶ DISP.SET UP ▶ LCD MIRROR·ONTo turn the mirror mode off, open the menu and select DISP.SET UP. Then select LCD MIRROR, set it to OFF and close the menu.
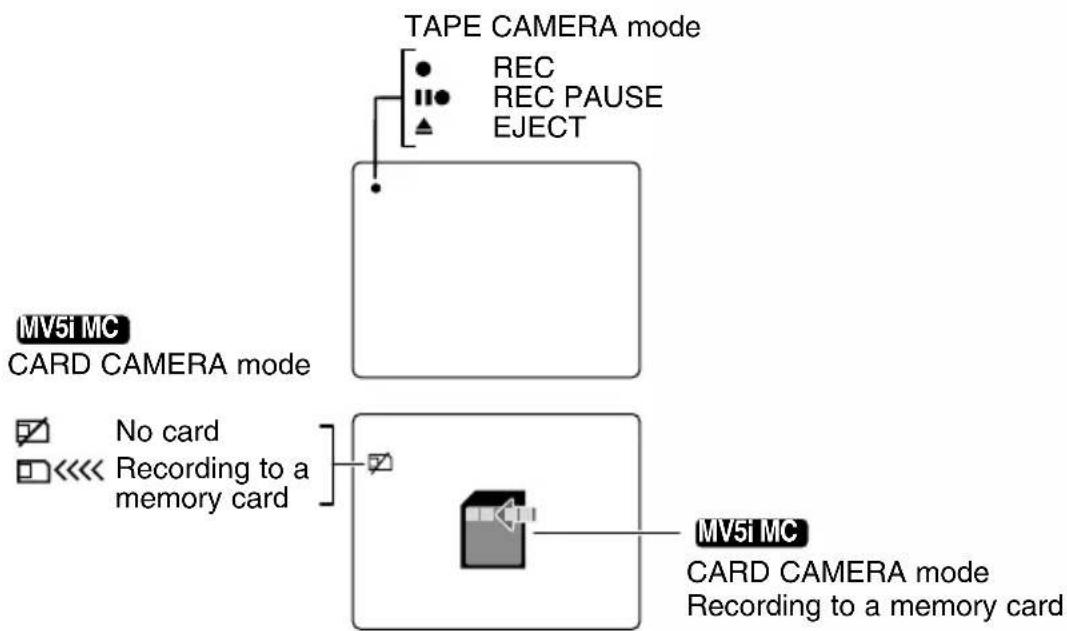
The indicators that appear in the LCD display when LCD MIRROR is turned on:
flowchart
graph TD
    A["TAPE CAMERA mode"] --> B["No card"]
    A --> C["Recording to a memory card"]
    D["MV5i MC CARD CAMERA mode"] --> E["No card"]
    D --> F["Recording to a memory card"]
    G["MV5i MC CARD CAMERA mode"] --> H["No card"]
    G --> I["Recording to a memory card"]
text_image
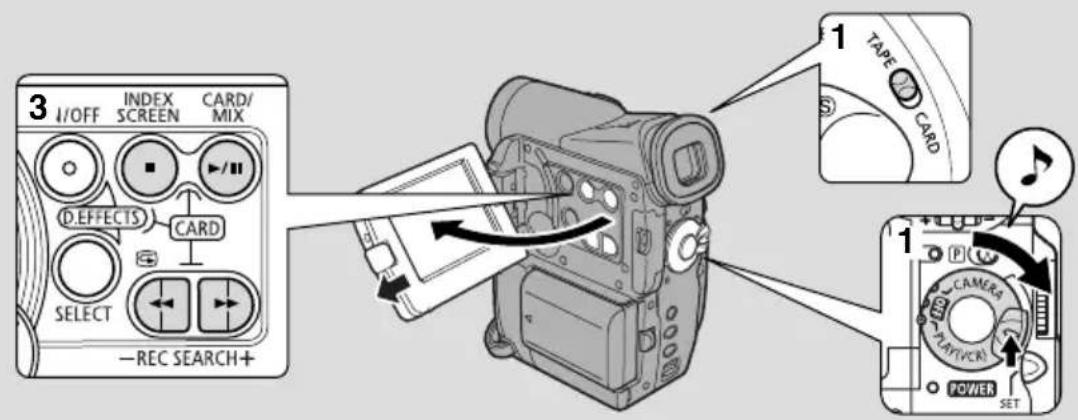
3 I/OFF INDEX CARD/ SCREEN MIX (D.EFFECTS) CARD SELECT - REC SEARCH+ 1 TAPE CARD 1 P CAMELA PLAY(VER) POWER SETYou can use the LCD screen for instant, on-the-spot playback. The camcorder also plays back the sound track via the built-in speaker (31).
- When you play back a tape, you can also close the LCD panel with its screen side facing up.
- When you're using the viewfinder to view playback, close the LCD panel.
For playing back your recordings on a TV, see p. 32.
For using the wireless controller, see p. 48.

Note:
- To avoid accidental recording, make sure that you slide the tab on the cassette so that it exposes the hole (the switch position is usually labelled SAVE or ERASE OFF).
1. Attach a power source and turn the POWER switch to PLAY (VCR). (MV51MC) e sure the TAPE/CARD switch is set to TAPE.)
• The power indicator lights up.
2. Load the cassette.
3. Press the ▶(play) button to start playback.
- To end playback, press the ▪(stop) button.
- To wind the tape forwards, stop playback and press the ▶▶(fast forward) button.
- To wind the tape backwards, stop playback and press the ◀◀(rewind) button.
- If the playback picture is rough (mosaic-like noise), clean the video heads using a Canon DVM-CL Digital Video Head Cleaning Cassette or a commercially available digital video head cleaning cassette.
Other playback modes
Playback pause
Press the III(pause) button. To resume normal playback, press it again, or press the ▶ (play) button. The camcorder automatically goes into stop mode after about 5 minutes' playback pause.
Fast forward playback
To play back the recording at about 11.5 times normal speed, press and hold the ▶▶ (fast forward) button during normal playback or press and hold the ▶▶ (fast forward) button during normal fast forward.
Rewind playback
For reverse playback at about 11.5 times normal speed, press and hold the ◀◀ (rewind) button during normal playback or press and hold the ◀◀ (rewind) button during normal rewind.
Special playback

Frame Advance
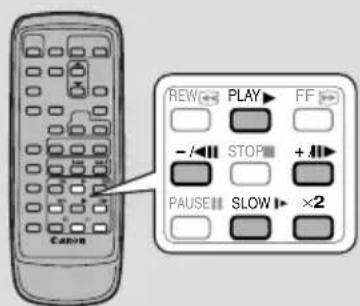
To play back frame by frame, press the +/- ▶ button repeatedly during playback pause.
Press and hold to play back continuous frame advance.
Frame Reverse
To play back in reverse frame by frame, press the -/◀◀ button repeatedly during playback pause.
Press and hold to play back continuous frame reverse.
text_image
Canon REW PLAY FF - / STOP + PAUSE SLOW ×2Slow Forward Playback
To play back at about 1/3 normal speed, press the SLOW ▶ button during normal playback.
Press the PLAY ▶ button to return to normal playback.
Slow Reverse Playback
To play back in reverse at about 1/3 normal speed, press the -/◀◀ button and then the SLOW▶button during normal playback.
Press the PLAY ▶ button to return to normal playback.
Reverse Playback
To play back in reverse at normal speed, press the -/◄◄ button during normal forward playback.
Press the PLAY ▶ button to return to normal forward playback.
Forward ×2 Playback
Press the ×2 button during normal playback.
Press the PLAY ▶ button to return to normal playback.
Reverse ×2 Playback
Press the -/◄◄ button and then the ×2 button during normal playback.
Press the PLAY ▶ button to return to normal playback.

Notes:
- Mosaic-like noise appears on the screen during some of the special playback modes.
- There's no audio during special playback.
Built-in speaker

The camcorder has a built-in speaker so you can review the sound track alongside the picture when you're using the LCD screen to play back. The built-in speaker is monaural.
text_image
D.EFFECT SELECT CAMERACAMERA
PLAY (VCR)
MV51 MC CARD CAMERA
MV5i MC CARD PLAY (VCR)
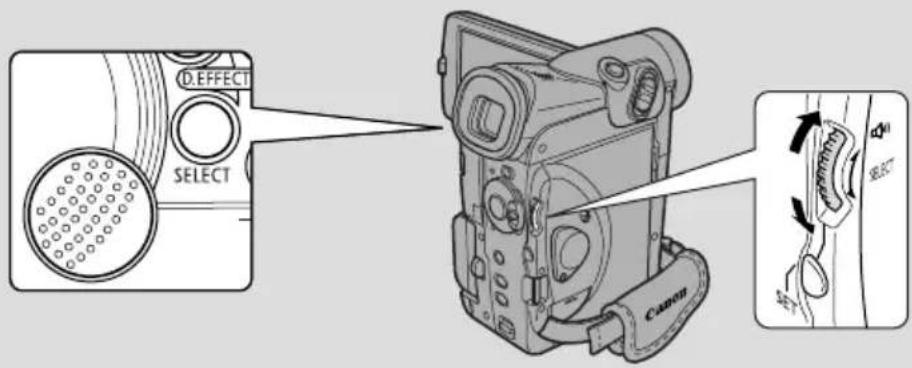
Adjust the speaker volume by turning the selector dial.
- Turn the selector dial up to increase the volume, and down to lower the volume.
- A bar appears in the display to indicate the current volume. It disappears in 4 seconds.
- You can turn off the volume completely by turning the selector dial down until OFF appears.

Notes:
- Sometimes audio may sound distorted when the volume is turned up high. If this happens, turn down the volume.
- The speaker does not sound if PHONES is displayed. Set AV/headphones to AV (33).
Using the headphones
- You can also use the headphones to monitor the sound track. Change the setting of the AV/headphones terminal through the menu (32).
- You can adjust the headphone volume separately from the built-in speaker.
- The levels you adjust for the built-in speaker and headphones are memorized separately. The camcorder remembers your levels even if you turn the camcorder off and back on again.
• The speaker turns off when you use headphones.
Connections for Playback on a TV Screen
You can connect the camcorder to a TV or VCR in order to play back your recordings. You will need to attach a power source to the camcorder (12). Power off all devices before starting the connections.
See your TV or VCR instruction manual for further details.
Switching the AV/headphone terminal

text_image
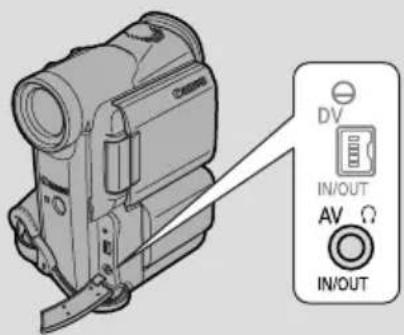
DV IN/OUT AV Ω IN/OUTThrough the menu, the camcorder's AV/headphone terminal can be switched to function as either the AV terminal or the headphone terminal.
CAMERA
PLAY (VCR)
MV5i MC
CARD CAMERA
MV5i MC
CARD PLAY (VCR)
MENU
(39)
▶ VCR SET UP

AV / PHONES...AV
Open the menu and select VCR SET UP. Then select AV/PHONES and set it to AV or PHONES and close the menu.
- When the terminal is switched to PHONES, PHONES appears in the display.
Using the headphones
- Make sure you switch the AV/headphones terminal to PHONES before using headphones. If the AV/headphones terminal is not switched to PHONES before you use the headphones, noise will come out from the headphones.
If your TV (or VCR) has a SCART terminal (without S (S1)-video)
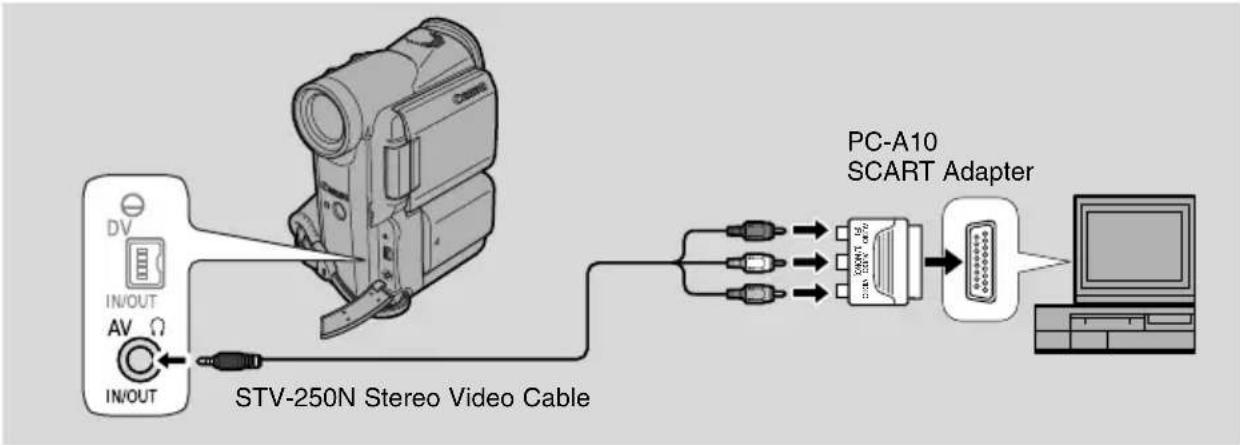
flowchart
graph LR
    A["STV-250N Stereo Video Cable"] --> B["PC-A10 SCART Adapter"]
    B --> C["Computer"]
- Connect the PC-A10 SCART adapter to the TV or VCR's SCART terminal.
- Connect the camcorder to the adapter. Connect the camcorder using the STV-250N Stereo Video Cable. Connect the white plug to the white audio terminal L (left). Connect the red plug to the red audio terminal R (right). Connect the yellow plug to the yellow video terminal VIDEO.
- If you are connecting the camcorder to a TV, set the TV/VIDEO selector on the television to VIDEO.
- If you are connecting the camcorder to a VCR, set the input selector on the VCR to LINE.
If your TV (or VCR) has an S (S1) -video input terminal
For higher picture quality, we recommend playing back recordings on a TV with an S (S1) terminal.
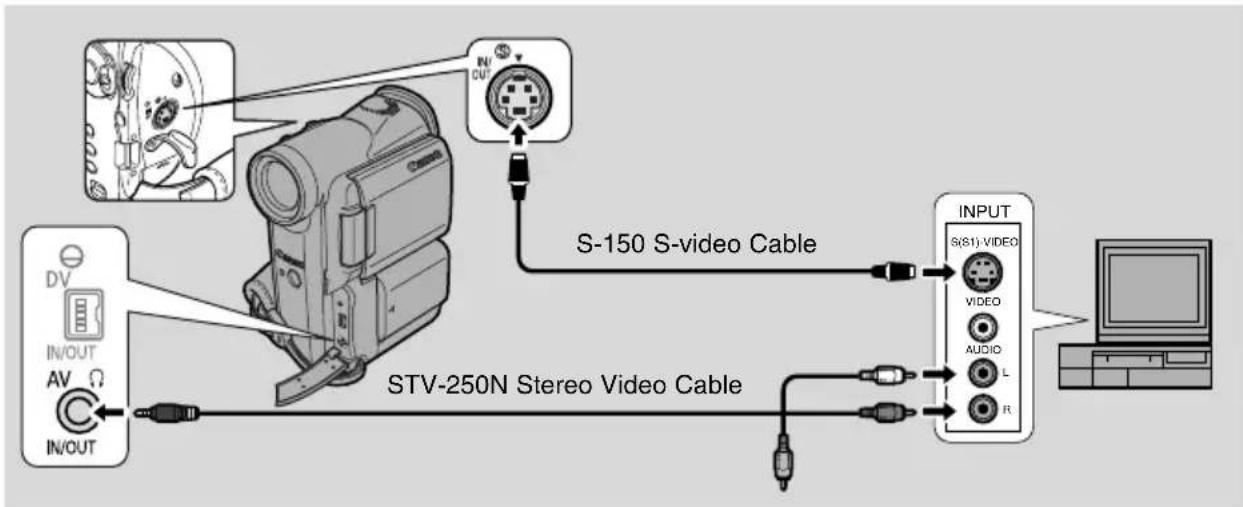
flowchart
graph TD
    A["Input"] --> B["S-150 S-video Cable"]
    B --> C["STV-250N Stereo Video Cable"]
    C --> D["Video"]
    C --> E["Audio"]
    C --> F["L"]
    C --> G["R"]
- Use the S-150 S-video Cable to connect the S-video terminals. Use the STV-250N Stereo Video Cable to connect the AUDIO terminals. Connect the white plug to the white AUDIO terminal L (left). Connect the red plug to the red AUDIO terminal R (right). Do not connect the yellow plug.
- If you are connecting the camcorder to a TV, set the TV/VIDEO selector on the television to VIDEO.
- If you are connecting the camcorder to a VCR, set the input selector on the VCR to LINE.
If your TV (or VCR) has audio/video input terminals
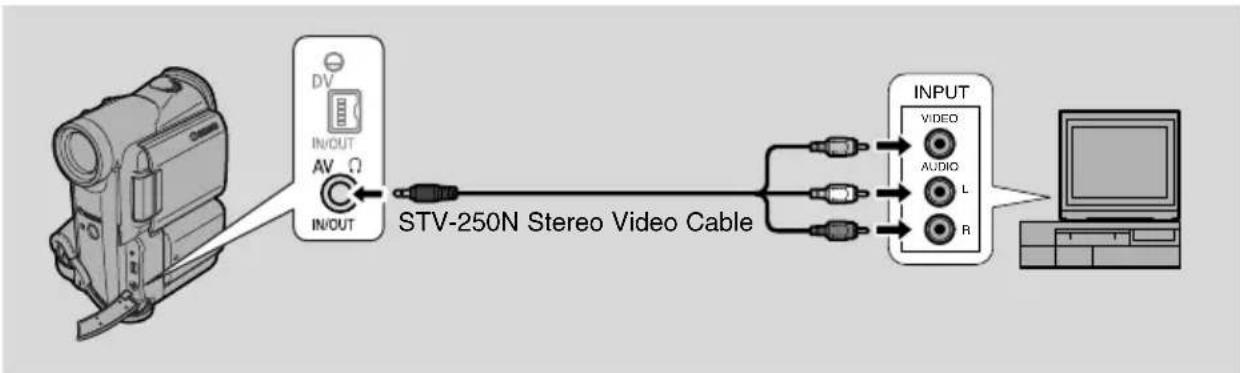
flowchart
graph LR
    A["STV-250N Stereo Video Cable"] --> B["Video"]
    A --> C["Audio"]
    A --> D["L"]
    A --> E["R"]
    B --> F["Computer"]
    C --> F
    D --> F
    E --> F
- Connect the camcorder using the STV-250N Stereo Video Cable. Connect the white plug to the white audio terminal L (left). Connect the red plug to the red audio terminal R (right). Connect the yellow plug to the yellow video terminal VIDEO.
- If you are connecting the camcorder to a TV, set the TV/VIDEO selector on the television to VIDEO.
- If you are connecting the camcorder to a VCR, set the input selector on the VCR to LINE.

Note:
- If you are going to use the TV as a monitor while you are shooting, remember to keep the TV volume turned down as long as the camcorder's audio terminals are connected. If the sound from the TV speakers is picked up by the microphone, an unpleasant high-pitched squeal, called feedback, may be produced.
Tips for Making Better Videos
Holding the camcorder
For maximum stability, grip the camcorder in your right hand and keep your right elbow pressed against your body. If necessary support the camcorder with your left hand. With practice, you will be able to operate the controls by touch, without taking your eye off the action.

natural_image
Cartoon illustration of a person holding a smartphone (no text or symbols present)Using a tripod
To prevent any unwanted movement, you can mount the camcorder on a tripod, (or any flat surface at a suitable height) and operate it with the wireless controller.
- When you are using a tripod, be careful not to leave the viewfinder exposed to bright sunlight as it may melt. (The light is concentrated by the viewfinder lens.)
- Make sure that the fastening screw of the tripod is no longer than 5.5 ~mm (^1/4 inch) , as it will damage the camcorder.

natural_image
Illustration of a person using a surveying instrument on a tripod (no text or symbols)Composition
The most important element in the scene does not have to be in the centre. For a more interesting picture, try to position your subject so it is slightly to one side. Leave some space on the side of the frame that the subject is facing or moving towards.
Don't cut off the top of the subject's head, and don't cut people off at the neck, hips or knees (move a little bit above or below).
Watch out for distracting objects in the background.

natural_image
Cartoon illustration of a person sitting at a desk with a cup (no text or symbols)
natural_image
Simple line drawing of a girl standing on a beach with clouds and sky in the background (no text or symbols)
natural_image
Cartoon illustration of a smiling child holding up a striped object with a ruler, standing on a plain surface (no text or symbols)Picture angle
Instead of zooming while recording, try to choose your picture angle before you begin. A good way to tell a story with video is to begin with a long shot that establishes the situation, and then move in with medium shots and close-ups to show the details. Remember to change your viewpoint for each shot.
Remember that any camcorder movement or change in picture angle should have a definite purpose. Avoid unnecessary or half-hearted movements.

Long shot

Medium shot

Close-up
Camcorder moves
Use pans to record a landscape or follow a moving subject. Decide the area you want to cover and stand facing the end of your panning angle. Without moving your feet, turn your waist to the starting position. Start recording, and after a few seconds begin to turn slowly from the waist. Hold the final image for a few seconds before you stop recording.
Tilt the camcorder up to exaggerate the height of the subject. Tilt down from the top of a building, for example, as an introduction to subjects at the bottom.
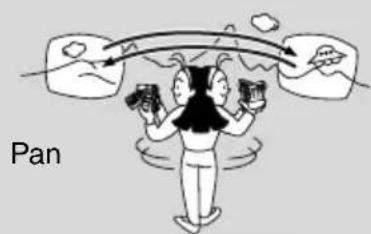
text_image
PanTilt
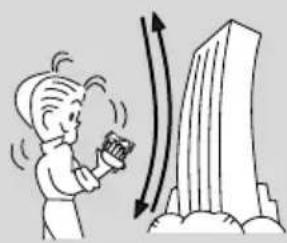
natural_image
Illustration of a person holding a phone with a curved arrow indicating motion, next to a tall building (no text or symbols)Searching and Reviewing While Recording
Record search

When the camcorder is in record pause mode, you can use record search to play the tape forwards or backwards to find the point where you want to start or resume recording. This is useful when you want to add a new scene to a previously used cassette. By using record search, you can ensure a smooth, noise-free join between the new scene and the old one.
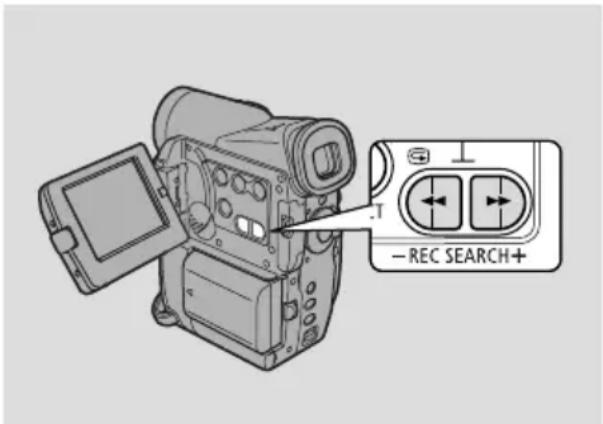
text_image
REC SEARCH+CAMERA
PLAY (VCR)
MV5i MC CARD CAMERA
MV5i MC CARD PLAY (VCR)
- Press and hold the REC SEARCH + or - button on the camcorder while you check the picture in the display.
- The + button plays the recording forwards and the – button plays it backwards.
- Release the button when you find the point where you want to start recording.
- The camcorder returns to record pause mode.
Record review

When the camcorder is in record pause mode, you can use record review to play back the last few seconds of your recording and then return automatically to record pause mode. You can quickly make sure that a scene has been recorded properly and then go on to shoot the next scene, without producing any noise in the picture.
CAMERA
PLAY (VCR)
MV5i MC CARD CAMERA
MV5i MC CARD PLAY (VCR)
- Press and release the ⏻ (record review) button while you check the picture in the display.
- The camcorder rewinds the tape, plays back the last few seconds, and returns to record pause mode.

Note:
- Noise may appear on the screen when you play the tape backwards.
Many of the camcorder's advanced functions are selected from menus which appear in the display.
There are 2 main menus:
CAM. MENU Camera Menu (41)

PLAY MENU (42)

( MV5iR MV5i MC )
The MV5i MC has 2 additional menus:
C.CAM. MENU Card Camera Menu (44)

C.PLAY MENU Card Play Menu (45)

●CAM.MENU
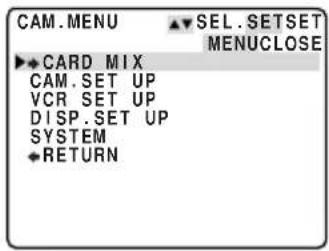
text_image
CAM.MENU SEL.SETSET MENUCLOSE CARD MIX CAM.SET UP VCR SET UP DISP.SET UP SYSTEM RETURN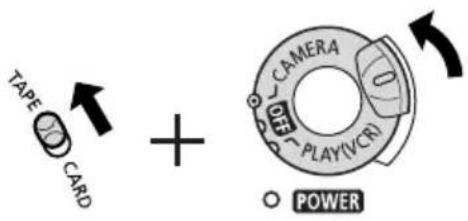
text_image
TAPE CARD + CAMERA PLAY(IVCR) POWER●PLAY (VCR)
(MV5iR MV5iMC U)
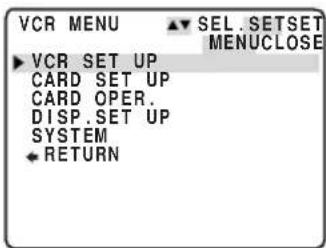
text_image
VCR MENU SEL.SETSET MENUCLOSE ▶ VCR SET UP CARD SET UP CARD OPER. DISP.SET UP SYSTEM ← RETURN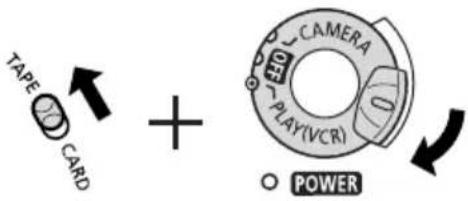
text_image
TAPE CARD + CAMERA PLAY(VCR) POWER●C MV5i MC CARD CAMERA MENU
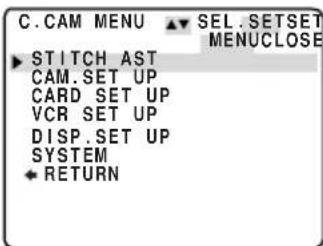
text_image
C.CAM MENU SEL.SETSET MENUCLOSE ▶ STITCH AST CAM.SET UP CARD SET UP VCR SET UP DISP.SET UP SYSTEM ← RETURN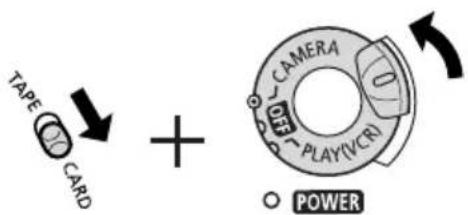
text_image
TAPE CARD + CAMERA OFF PLAY(IVCR) POWER●C MV5I MC CARD PLAY (VCR) MENU
text_image
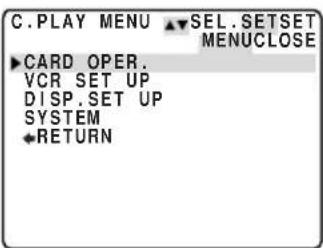
C.PLAY MENU ▼SEL.SETSET MENUCLOSE ►CARD OPER. VCR SET UP DISP.SET UP SYSTEM ◆RETURN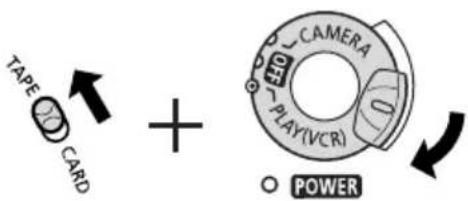
text_image
TAPE CARD + CAMERA PLAY(VCR) POWER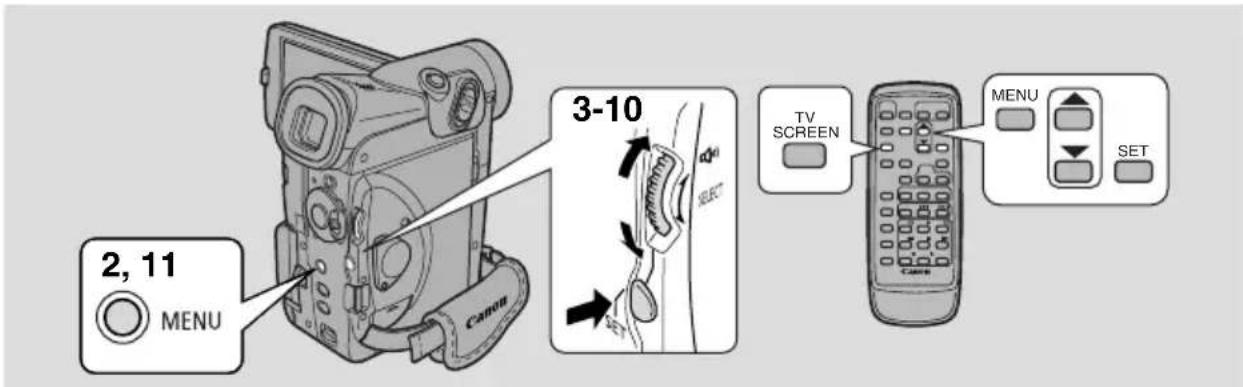
text_image
2, 11 MENU 3-10 TV SCREEN MENU SET- Turn the POWER switch (MV51MC the TAPE/CARD switch) to the desired settings.
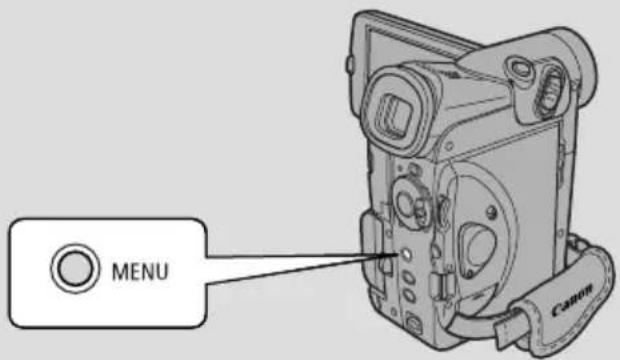
- Press the MENU button to open the menu.
- Turn the selector dial and move the arrow to the desired submenu.
- Press the SET button to select.
• The submenu appears.
- Turn the selector dial and move the arrow to the desired function.
- Press the SET button to select.
• The function and its settings only appear.
- Turn the selector dial and move the arrow to the desired setting.
- If you are setting a function other than the white balance or shutter speed, the function will be set if you skip to step 11.
- Press the SET button to select.
- The function is set and you return to the submenu.
-
Turn the selector dial and move the arrow to ← RETURN.
-
Press the SET button to select.
- You return to the main menu.
- Press the MENU button.
• The main menu disappears.
Notes:
- Pressing the MENU button at any time closes the menu.
- Selecting RETURN takes you back one menu, or closes the main menu.
- Items that are unavailable, due to the tape or card situation or the settings of other menu items, appear in purple.
-
You may often find it convenient to use the wireless controller to move around the menus. Press its MENU button to open/close the menu and use the arrow keys in place of turning the selector dial. Push the SET button to select.
-
Pressing the start/stop button or the PHOTO button will close the menu and start recording.
- You can display the menus on a connected TV screen by turning TV SCREEN (165) on through the menu or using the wireless controller's TV SCREEN button. See p. 32 for TV connecting instructions.
List of Menus

Turn to appropriate page for a detailed explanation of each function.
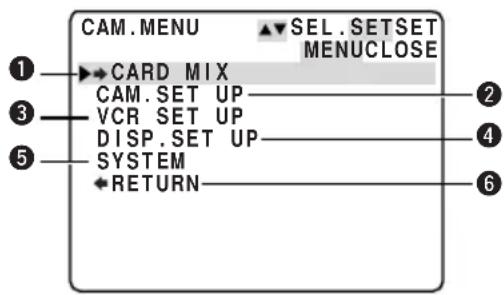
●CAM. MENU
CAMERA
1 MV5i MC mix submenu
② To camera set up submenu
③ To VCR set up submenu
4 To display set up submenu
⑤ To system menu
6 Close main menu
text_image
CAM.MENU SEL.SETSET MENUCLOSE CARD MIX CAM.SET UP VCR SET UP DISP.SET UP SYSTEM RETURN1 MV5i MC ix submenu
①Mix type.... 141
②Mix level.... 141
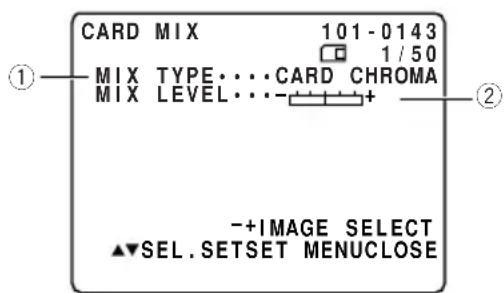
text_image
CARD MIX 101-0143 MIX TYPE....CARD CHROMA MIX LEVEL...- + + -+IMAGE SELECT ▲▼SEL.SETSET MENUCLOSE② Camera set up submenu
③Shutter speed....74
④Digital zoom 23
⑤Image stabilizer.... 56
⑥16:9 effect 21
⑦White balance 77
⑧Self-Timer....71
⑨Return
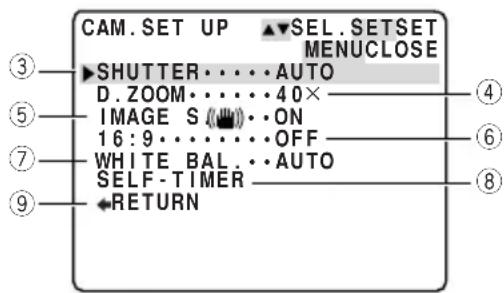
text_image
CAM. SET UP ▲SEL. SETSET MENUCLOSE SHUTTER....AUTO D. ZOOM....40× IMAGE S (ON) 16:9....OFF WHITE BAL..AUTO SELF-TIMER RETURN③ VCR set up submenu
⑩Recording mode.... 20
⑪Wind screen 70
⑫Audio mode 69
⑬AV or headphones...... 32
⑭Return
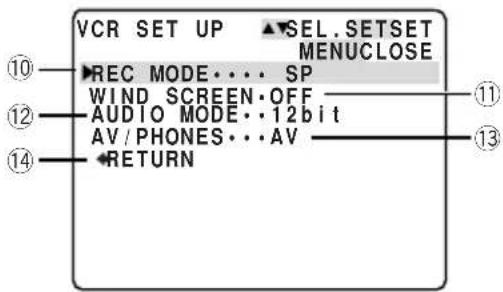
text_image
VCR SET UP ▲SEL.SETSET MENUCLOSE ⑩ —▶REC MODE.... SP ⑫ —WIND SCREEN.OFF ———— ⑫ —AUDIO MODE..12bit ⑫ —AV/PHONES...AV ———— ⑭ —RETURN ———— ⑬ ———— ⑬ ———— ⑭ ————④ Display set up submenu
⑮Brightness 26
⑯LCD Mirror mode...... 27□
⑰TV screen.... 165
⑱Date/time display.... 53
⑲ MV5i MC Card access display .. 109
⑳Demo mode.... 22
②1Return
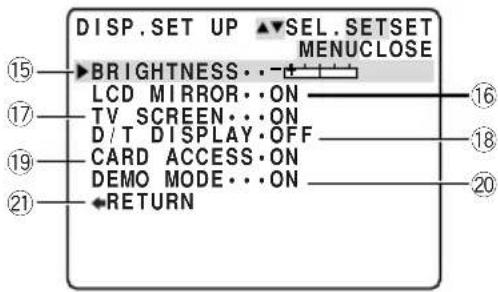
text_image
DISP.SET UP ▲SEL.SETSET MENUCLOSE BRIGHTNESS... LCD MIRROR...ON TV SCREEN...ON D/T DISPLAY.OFF CARD ACCESS...ON DEMO MODE...ON RETURN⑤ System submenu
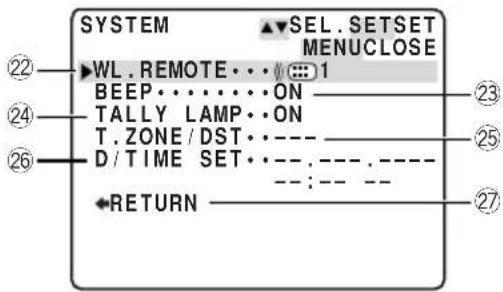
②Wireless controller.... 48
②3Beep 22
②4Tally Lamp.... 19
⑲Time zone/
Daylight saving time...... 51
②6Date/time set 53
⑳Return
text_image
SYSTEM ▲SEL. SETSET MENU CLOSE 22 ►WL REMOTE··· 1 BEEP······ON TALLY LAMP··· T.ZONE/DST··· D/TIME SET···. ——:—— -- ←RETURN 23 24 25 26 27●PLAY MENU PLAY (VCR)
(MV5i FMV5iMCU)
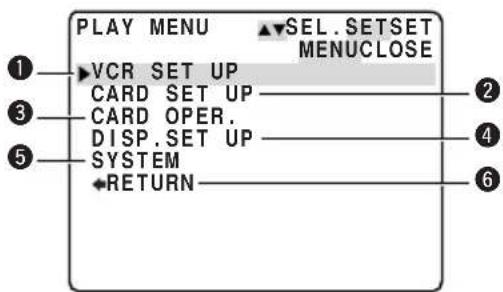
① To VCR set up submenu
2 TMV5i MC set up submenu
③ TMV5i MC operations submenu
4 To display set up submenu
⑤ To system submenu
6 Close main menu
text_image
PLAY MENU SEL.SETSET MENUCLOSE VCR SET UP CARD SET UP CARD OPER. DISP.SET UP SYSTEM RETURNPLAY MENU, cont.
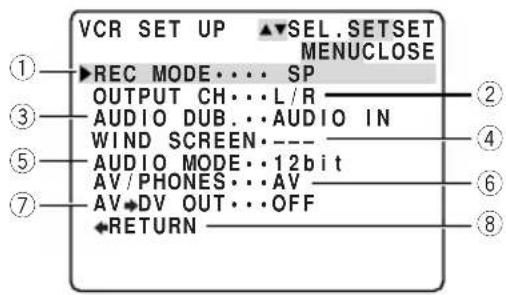
① VCR set up submenu
① Recording mode......20
② Output channel.....104
③ MV5i/MV5i MC Audio dubbing 101
④ Wind screen .....70
⑤ Audio mode ...... 69
⑥ AV or headphones......32
⑦ MV5i/MV5i MC tal converter 92
⑧ Return
② Card set up submenu MV5i MC
⑨ Still image quality......108
⑩ Movie Size......108
⑪ File numbers ......110
⑫ Return
text_image
VCR SET UP ▲SEL.SETSET MENUCLOSE ▶REC MODE.... SP OUTPUT CH...L/R AUDIO DUB...AUDIO IN WIND SCREEN.---- AUDIO MODE...12bit AV/PHONES...AV AV+DV OUT...OFF +RETURN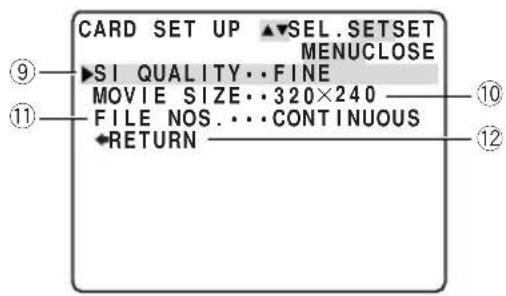
text_image
CARD SET UP ▲SEL.SETSET MENUCLOSE SI QUALITY..FINE MOVIE SIZE..320×240 FILE NOS.···CONTINUOUS RETURN③ Card operations submenu MV51MC
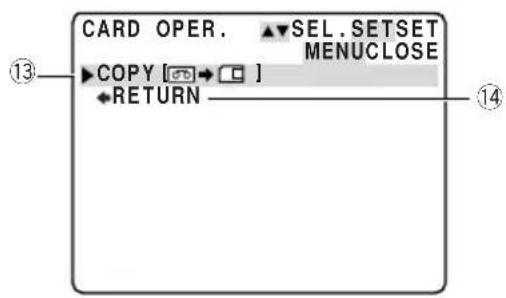
⑬ Copy from tape to card.....143
⑭ Return
text_image
CARD OPER. ▲SEL.SETSET MENUCLOSE COPY [→] RETURN④ Display set up submenu
⑮ Brightness ...... 27
⑯ Displays ....165
⑰ 6-second auto date .....82
⑱ Data code 81
⑲ 19 Date/time select ....80
⑳ MV51MC Card access display ... 104
②1 Return
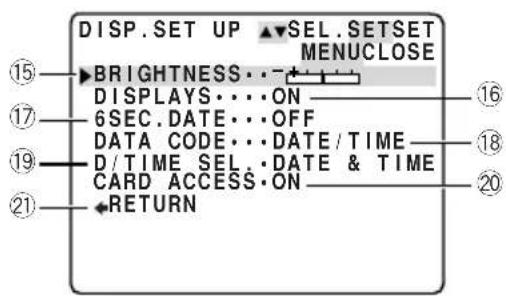
text_image
DISP.SET UP ▼SEL.SETSET MENUCLOSE BRIGHTNESS... DISPLAYS...ON 6SEC.DATE...OFF DATA CODE...DATE/TIME D/TIME_SEL..DATE & TIME CARD ACCESS.ON RETURN⑤ System submenu
②2Wireless controller.... 49
②3Tally Lamp.... 19
②4Beep 22
②5Time zone/
Daylight saving time...... 51
②6Date/time set 53
⑳Return
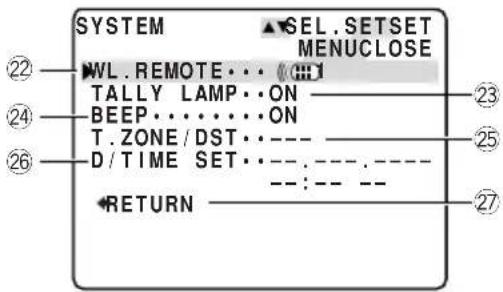
text_image
SYSTEM SEL.SETSET MENUCLOSE 22 WVL.REMOTE... (...) TALLY LAMP... ON BEEP... ON T.ZONE/DST... D/TIME SET... RETURN 23 24 25 26 27●C. CAM MENU
MV5I MC CARD CAMERA
① To stitch assist mode
② To camera set up submenu
③ To card set up submenu
4 To VCR set up submenu
⑤ To display set up submenu
⑥ To system submenu
⑦ Close main menu
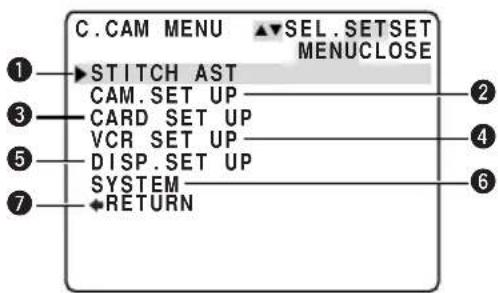
text_image
C.CAM MENU ▲SEL.SETSET MENUCLOSE 1 →STITCH AST 2 CAM.SET UP 3 CARD SET UP 4 VCR SET UP 5 DISP.SET UP 6 SYSTEM 7 ←RETURN② Camera set up submenu
①Shutter speed....74
②Digital zoom 23
③White balance 70
④Self-timer 71
⑤Return
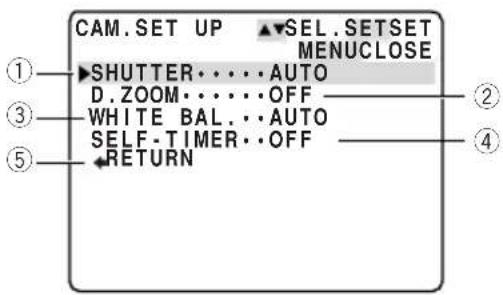
text_image
CAM.SET UP ▲SEL.SETSET MENUCLOSE SHUTTER....AUTO D.ZOOM....OFF WHITE BAL....AUTO SELF-TIMER..OFF RETURN③ Card set up submenu
⑥Still image quality.... 108
⑦Still image size 108
⑧Movie size.... 108
⑨File numbers ..... 110
⑩Shutter sound 111
⑪Return
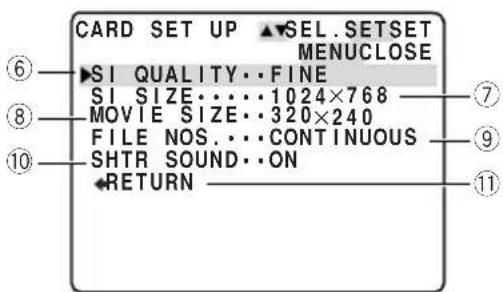
text_image
CARD SET UP ▲SEL.SETSET MENUCLOSE SI QUALITY..FINE SI SIZE....1024×768 MOVIE SIZE..320×240 FILE NOS....CONTINUOUS SHTR SOUND..ON RETURNC. CAM MENU, cont.
③ VCR set up submenu
⑫AV or headphones...... 32
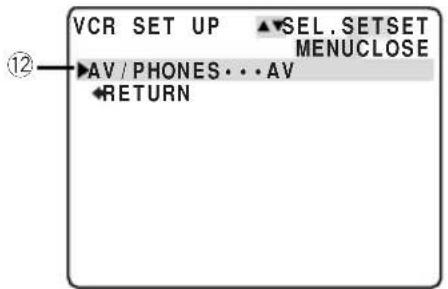
text_image
VCR SET UP ▲SEL.SETSET MENUCLOSE ⑫ AV / PHONES • • AV RETURN④ Display set up submenu
⑬Brightness 26
⑭LCD Mirror mode.... 27
⑮TV screen.... 165
⑯Date/time display.... 53
⑰Card access display...... 109
⑱Demo mode.... 22
⑲Return
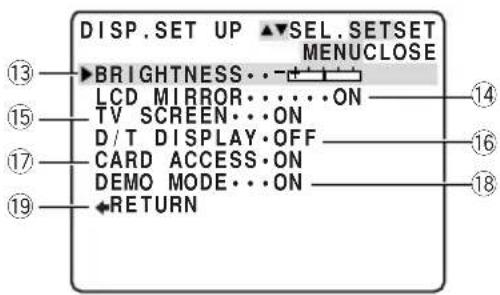
text_image
DISP.SET UP ▲SEL.SETSET MENUCLOSE 13►BRIGHTNESS···+ 15LCD MIRROR·····ON 17TV SCREEN···ON 17D/T DISPLAY·OFF 19CARD ACCESS·ON 19DEMO MODE···ON 14 16 18←RETURN⑤ System submenu
① To card operations submenu
② To VCR set up submenu
③ To display set up submenu
4 To system submenu
⑤ Close main menu
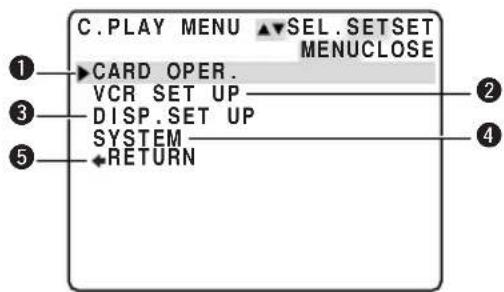
text_image
C.PLAY MENU ▼SEL.SETSET MENUCLOSE CARD OPER. VCR SET UP DISP.SET UP SYSTEM RETURN1-1 Card operations submenu (when playing back a single image)
① Copy from card to tape...... 144
②Erase all print marks...... 130
③Image erase .... 131
④Format.... 145
⑤Return
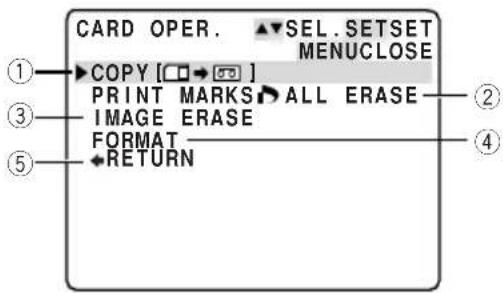
text_image
CARD OPER. ▲SEL.SETSET MENUCLOSE COPY [□→□] PRINT MARKS ➕ ALL ERASE IMAGE ERASE FORMAT RETURN①-2 Card operations submenu (when displaying an index screen)
⑥To image protect .... 128
⑦To print mark ..... 129
⑧Return
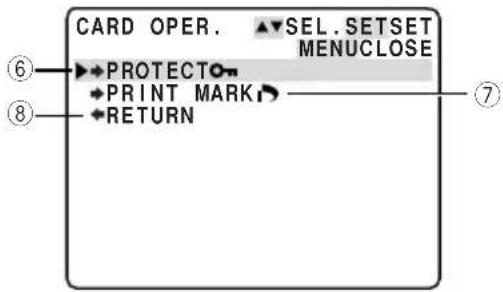
text_image
CARD OPER. ▲SEL.SETSET MENUCLOSE ⑥→PROTECT→ ⑧→PRINT MARK→ RETURN② VCR set up submenu
⑨Recording mode.... 20
⑩AV or headphones...... 32
⑪Return
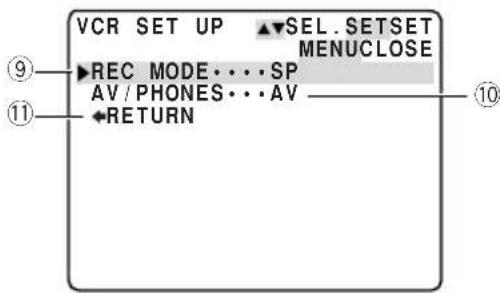
text_image
VCR SET UP ▲SEL.SETSET MENUCLOSE ⑨▶REC MODE...SP AV/PHONES...AV ◀RETURN ⑪③ Display set up submenu
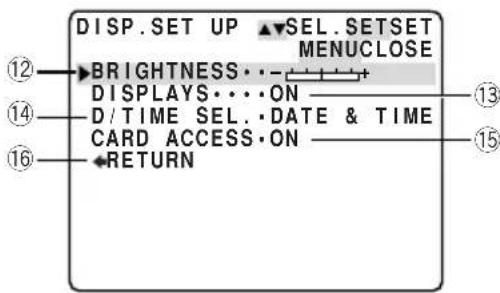
⑫Brightness 26
⑬Displays 165
⑭Date/time select 80
⑮Card access display...... 109
⑯Return
text_image
DISP.SET UP ▲SEL.SETSET MENUCLOSE BRIGHTNESS···——+ DISPLAYS···ON D/TIME SEL.·DATE & TIME CARD ACCESS.ON RETURNC. PLAY MENU, cont.
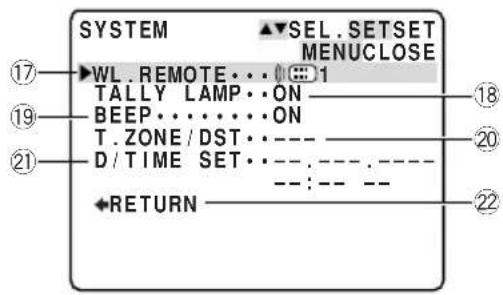
④ System submenu
⑰Wireless controller...... 49
⑱Tally Lamp.... 19
⑲Beep 22
⑳Time zone/
Daylight saving time...... 51
②1Date/time set 53
②Return
⑤ Direct Printing Mode (Card Photo Printer CP-10)
text_image
SYSTEM SEL. SETSET MENUCLOSE ⑰ WL REMOTE... 1 TALLY LAMP ON ⑲ BEEP....ON T.ZONE / DST. D/TIME SET. RETURN ⑳ :--- -- ⑴ 20 ⑫ 22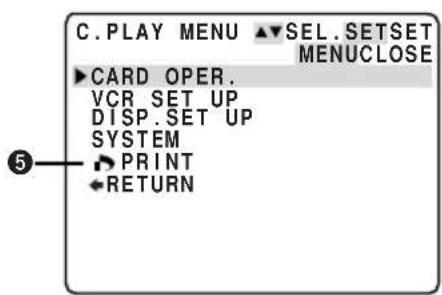
text_image
C.PLAY MENU ▼SEL.SETSET MENUCLOSE ▶CARD OPER. VCR SET UP DISP.SET UP SYSTEM ▶PRINT ◆RETURN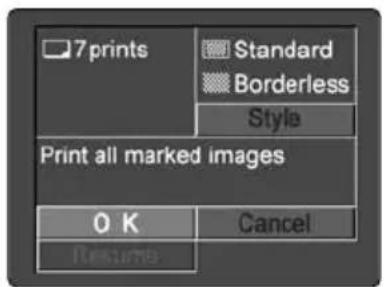
text_image
7 prints Standard Borderless Style Print all marked images OK Cancel ResumeUsing the Wireless Controller
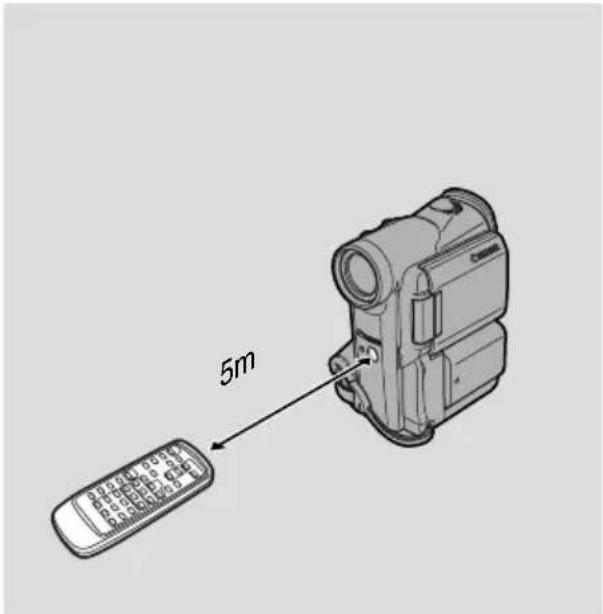
The supplied wireless controller can operate the camcorder from a distance of up to 5 m (16 feet). Point it at the camcorder's remote sensor while you press the buttons.
The tally lamp lights up to let you know that the camcorder is in range and responding to your commands.
There are some functions that cannot be operated without the wireless controller:
• Special playback (29)
• Photo/date search (83)
• Zero set memory (84)
- Audio mix (103)
• DMV5i/MV5i MC in a digital video equipment (86)
- AMV5i/MV5i MC In (90)
- AV insert (94)
• Audio dubbing (97)
text_image
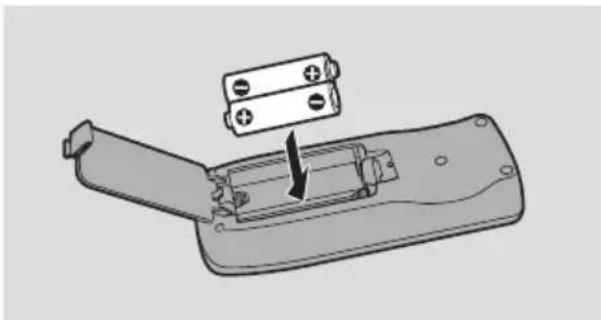
5mInserting batteries
Insert two AA batteries, following the and markings. Be careful not to reverse the polarity of the batteries.
natural_image
Diagram of a remote control device with battery pack and switch, showing internal components (no text or symbols)
Notes:
- When using the wireless controller in brightly lit places or outdoors, the effective range will be less.
- The camcorder may have difficulty picking up the remote control signals at extremely close range.
- Do not leave the controller exposed to direct sunlight, or in hot or humid places.
- When the batteries run out, replace them both together.
- If the wireless controller doesn't work, see p. 50.
When Operating 2 Canon DV Camcorders (Remote Sensor Mode)


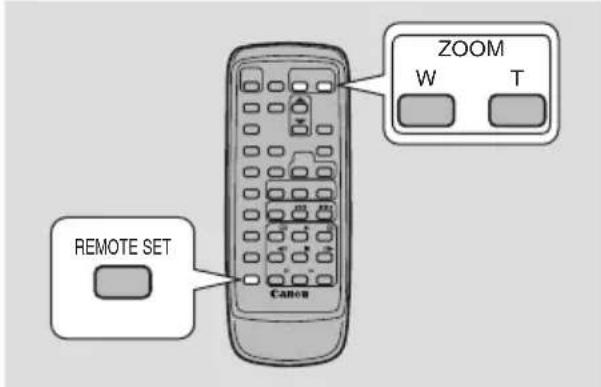
To prevent interference from other Canon wireless controllers being used nearby, there are 2 remote sensor modes and an off setting. The wireless controller and the camcorder have to be set to the same mode in order to be compatible.
text_image
REMOTE SET Canon ZOOM W TThe wireless controller and the camcorder have been preset to mode 1. If you change the mode on the camcorder, be sure to change the mode on the wireless controller to the same mode.

text_image
CAMERA PLAY (VCR) MV5i MC CARD CAMERA MV5i MC CARD PLAY (VCR) MENU (39) ► SYSTEM ► WL REMOTE · · · ◎1 (○) 1 : Mode 1 (○) 2 : Mode 2 OFF(○): Sensor offTo turn the remote sensor off:
Open the menu and select SYSTEM. Then select WL.REMOTE, set it to OFF(( ) and close the menu.
- N appears in the display.
To change the mode...
...on the camcorder:
Open the menu and select SYSTEM. Then select WL.REMOTE, set it to 1 or 2 and close the menu.
- The selected mode will appear on the display for 4 seconds.
...on the wireless controller:
Press and hold the REMOTE SET button on the wireless controller. Simultaneously press the ZOOM W button for mode 1 or the ZOOM T button for mode 2. Continue to press simultaneously for over 2 seconds.
- Be sure to set the wireless controller to the same mode as the camcorder.
E
If your wireless controller isn't working:
Make sure the camcorder and the wireless controller are both set to the same mode. Check the mode the camcorder is set to by pushing any button other than the REMOTE SET button on the wireless controller. The camcorder's mode appears in purple for about 4 seconds. Set the wireless controller's mode accordingly by pressing the aforementioned button combinations. If the wireless controller still doesn't work, change the batteries.

Notes:
- The mode the camcorder is set to also appears for 4 seconds when you turn the power on.
- When you replace the batteries, the wireless controller returns to mode 1. Change the mode again if necessary.
Turning off the tally lamp

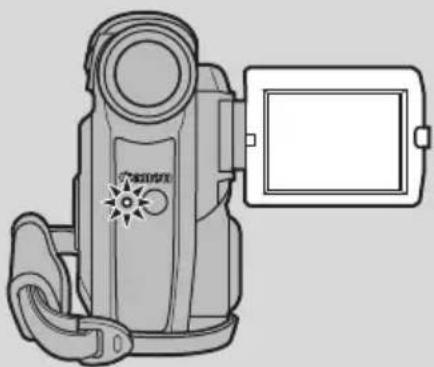
The tally lamp lets you know that the camera is recording, receiving signals from the wireless controller or counting down for the self-timer. However, its flashing may be reflected into the lens during close-up recording, or when recording through glass.
You may therefore decide to turn it off.
natural_image
Line drawing of a vintage digital camera with a screen and handle (no text or symbols)CAMERA
PLAY (VCR)
MV5i MC
CARD CAMERA
MV5i MC
CARD PLAY (VCR)
MENU
(39)
▶ SYSTEM
▶ TALLY LAMP··ON
To turn the tally lamp off, open the menu and select SYSTEM. Then select TALLY LAMP, set it to OFF and close the menu.
- The tally lamp no longer flashes during recording, but it will still light up when the camera receives a signal from the wireless controller and during the self-timer countdown.
Setting the Date and Time
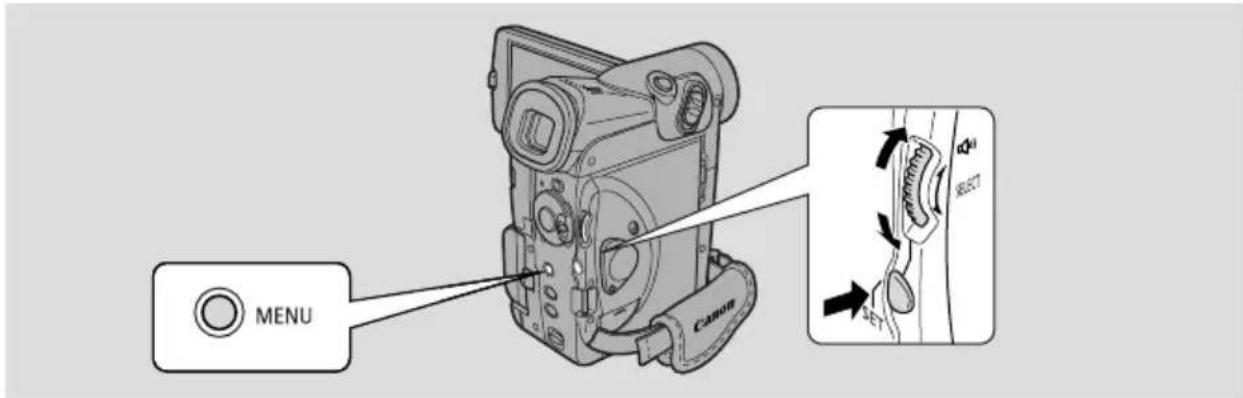
text_image
MENU Canon SETThe date and/or time display forms part of the data code. You can choose to display or hide it during playback (80).
Set the date and time display when you first start using your camcorder. Install the backup battery before you begin (153).
- Before you start setting the date and time, select your home time zone from the menu.
Setting the time zone/daylight saving time

CAMERA
PLAY (VCR)
MV5i MC CARD CAMERA
MV5i MC CARD PLAY (VCR)
MENU
(39)
▶ SYSTEM

▶T.ZONE/DST·PARIS
-
Open the menu and select SYSTEM and press the SET button.
-
Select T.ZONE/DST and press the SET button.
-
The time zone display appears on the screen.
-
Your camcorder's time zone is factory-preset to Paris. If you are at another time zone, select your time zone first and daylight saving time (DST) setting if necessary.
-
Move up or down the list of time zones with the selector dial. Select the option that represents your time zone and press the SET button.
- If you are now in daylight saving time, select the time zone with the daylight saving time mark ⚙ next to the area.
- Close the menu.
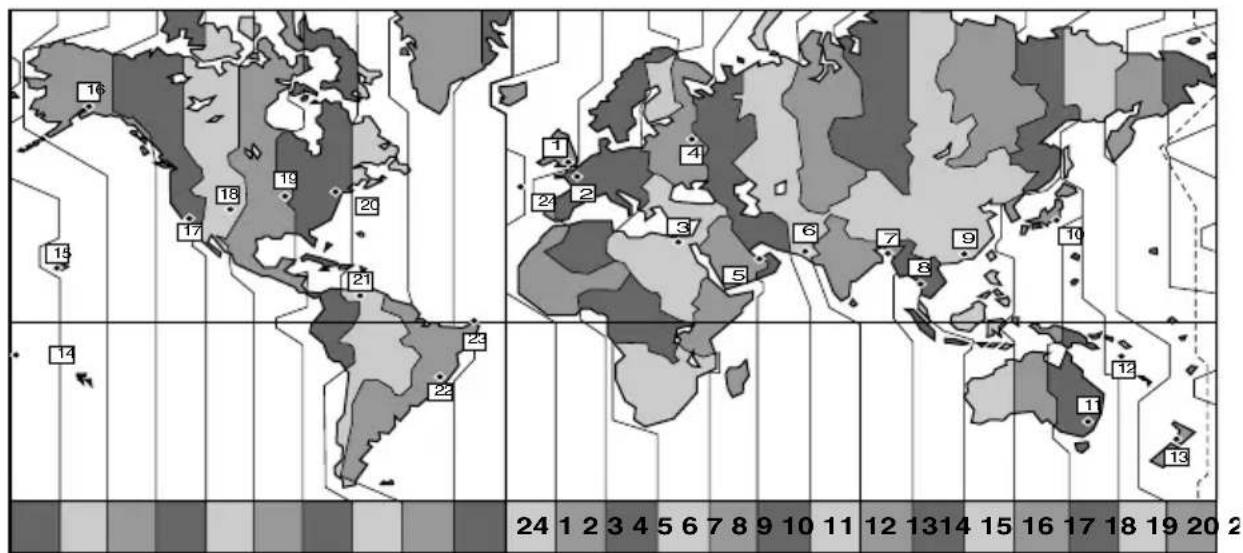
geo
| Region | Value | |--------|-------| | 1 | 1 | | 2 | 2 | | 3 | 3 | | 4 | 4 | | 5 | 5 | | 6 | 6 | | 7 | 7 | | 8 | 8 | | 9 | 9 | | 10 | 10 | | 11 | 11 | | 12 | 12 | | 13 | 13 | | 14 | 14 | | 15 | 15 | | 16 | 16 | | 17 | 17 | | 18 | 18 | | 19 | 19 | | 20 | 20 | | 21 | 21 | | 22 | 22 | | 23 | 23 | | 24 | 24 || No. | Time zone | No. | Time zone |
| 1 | LONDON | 13 | WELLGTN (Wellington) |
| 2 | PARIS | 14 | SAMOA |
| 3 | CAIRO | 15 | HONOLU. (Honolulu) |
| 4 | MOSCOW | 16 | ANCHOR. (Anchorage) |
| 5 | DUBAI | 17 | L.A. (Los Angeles) |
| 6 | KARACHI | 18 | DENVER |
| 7 | DACCA | 19 | CHICAGO |
| 8 | BANGKOK | 20 | N.Y. (New York) |
| 9 | H. KONG (Hong Kong) | 21 | CARACAS |
| 10 | TOKYO | 22 | RIO (Rio de Janeiro) |
| 11 | SYDNEY | 23 | FERNAN. (Fernando de Noronha) |
| 12 | SOLOMON | 24 | AZORES |

Notes:
- After you have selected your time zone and set the date and time, when you travel to another time zone, there is no need to reset the date and time. Just set the time zone to your destination and the camcorder's clock will automatically change to display the correct time for your destination.
- The camcorder automatically accounts for the number of days in a month and leap year.
After you set the date and time, the date/time and home time zone will be displayed for about 4 seconds each time you turn the power on.

flowchart
graph LR
    A["CAMERA"] --> B["PLAY (VCR)"]
    B --> C["MV5i MC CARD CAMERA"]
    C --> D["MV5i MC CARD PLAY (VCR)"]
    E["MENU (39)"] --> F["SYSTEM"]
    F --> G["D/TIME SET: 1.JAN.2002 12:00 AM"]
- Open the menu and select SYSTEM.
- Select D/TIME SET and the press the SET button.
• The year display starts to flash.
- Turn the selector dial up and down to change the year. Press the SET button to move to another part of the display.
- Once you move from the year, the next part of the display starts flashing.
- Set the month, day, hours, and minutes in the same way.
- Press the MENU button when finished, and to start the clock.
Notes:
- To make a change to part of the date and time, press the SET button at step 3 to move to the part to be changed. Turn the dial to make the change, then close the menu.
- The date can be set to any year between 2002 and 2030.
- If you press the MENU button in the middle of setting the date and time, you leave the menu, and the clock starts.
- If you press the SET button after setting the minutes you can set the date and time again from the start.
Date and time display

You can choose to display or hide the date and time display during recording. When the date and time display is set to ON, date and time are shown in the lower left-hand corner of the display but the time zone disappears in about 4 seconds. The large, 4-second display will no longer appear when you turn on the power. It is not automatically superimposed on your recordings.

flowchart
graph LR
    A["CAMERA"] --> B["PLAY (VCR)"]
    B --> C["MV5i MC CARD CAMERA"]
    C --> D["MV5i MC CARD PLAY (VCR)"]
    E["MENU (49)"] --> F["DISP.SET UP"]
    F --> G["D/T DISPLAY-OFF"]
To turn it on, open the menu and select DISP.SET UP. Then select D/T DISPLAY, set it to ON and close the menu.
Recording Still Images onto a Tape

MV5i MC : To take still images on a memory card, see p. 108.
text_image
Diagram of a DSLR camera with labeled parts and directional arrows indicating assembly or adjustment.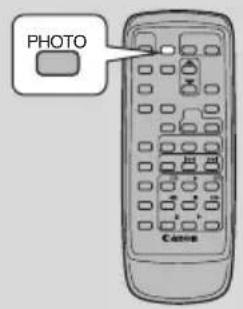
text_image
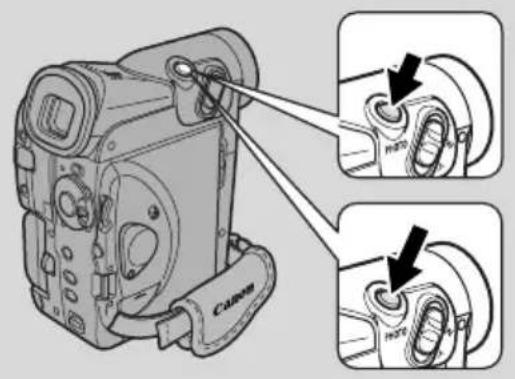
PHOTO CameraYou can record still images like photographs. The camcorder records the picture and sound to tape for several seconds. The exposure is automatically adjusted.
MV5i MC : Copy still images automatically to a memory card (143) for transfer to a PC for image enhancement and printout. Also, starting your shooting with a still image makes it easy to find the beginning again later with the Photo Search function(83).
You can take a still image at any time during regular video recording, or you can put the camcorder into record pause mode first, then take a still image.
CAMERA
PLAY (VCR)
MV5i MC CARD CAMERA
MV5i MC CARD PLAY (VCR)
During record mode
Press the PHOTO button fully down and the still image will be taken immediately.
- The camcorder takes the image immediately, and then records the “photo” to the tape for approximately 6 seconds. During this time the camcorder also records the sound, and the display shows the still image.
- A counter display appears, and counts up as the camcorder records the image.
- The camcorder returns to record pause mode.
During record pause mode
1. Press the PHOTO button halfway down and hold it:
- “PHOTO” flashes at the bottom right of display.
- Exposure is locked.
-
During autofocus ● flashes white in the display as the camcorder adjusts the focus and it is displayed continuously as a green mark when the camcorder is ready to take the still image.
-
If the subject is unsuitable for autofocus (159), the camcorder may not be able to focus, and ● may continue to flash white in the display. Continue to hold the PHOTO button halfway down, then adjust the focus manually with the selector dial.
- If you are using manual focus (76), the green mark. Focus with the selector dial.
2. Press the PHOTO button fully down to take the still image.
- The camcorder takes the image immediately, and then records the “photo” to the tape for approximately 6 seconds. During this time the camcorder also records the sound, and the display shows the still image.
- A counter display appears, and counts up as the camcorder records the still image. ● disappears from the display.
- The camcorder returns to record pause mode.

Notes:
- The camcorder automatically returns to record pause mode after recording a still image for approximately 6 seconds. If you turn the POWER switch to OFF during that time, the camcorder will respond only after recording is complete.
- The wireless controller's PHOTO button has no half-way setting. Press the button fully and the camcorder immediately takes the “photo”.
- Only take “photos” where it is bright enough to see the image in the display.
Turning the Image Stabilizer Off

text_image
MENU CanonWith most camcorders, even the slightest hand movements will be noticeable during telephoto recording. However, the MV5/MV5i/MV5i MC's image stabilizer allows you to obtain steady recordings even at high magnification.
- TMV51MCges stabilizer cannot be used in CARD CAMERA mode.
CAMERA
PLAY (VCR)
MV51MC
CARD CAMERA
MV51MC
CARD PLAY (VCR)
MENU
(39)
▶CAM.SET UP

▶ IMAGE S.03 · · ON
To turn the image stabilizer off, open the menu and select CAM.SET UP. Then select IMAGE S.(( ), set it to OFF and close the menu.
- The (☐) mark disappears from the display when the stabilizer is off.
- The image stabilizer cannot be turned off when the program selector is set to the (Easy Recording) position.

Notes:
- Keep the image stabilizer turned off when the camcorder is mounted on a tripod.
- The image stabilizer is designed to deal with a normal degree of camcorder shake.
- The image stabilizer is not as effective as usual during the Low Light and Night mode.
text_image
CNVLRQ CanonThe camcorder provides you with a choice of 8 recording programs. They use different combinations of camcorder settings in order to adjust the exposure and other functions to match the recording situation.
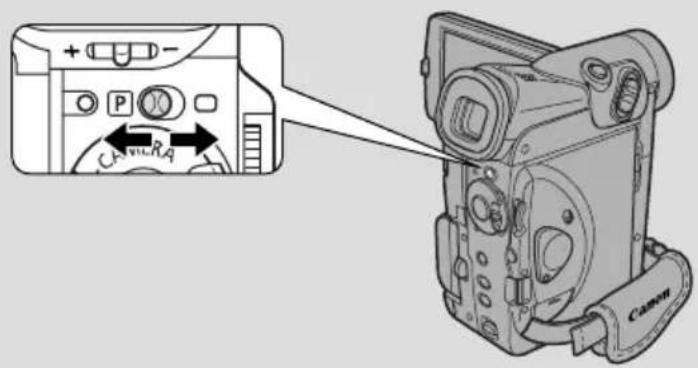
- For simple point-and-shoot operation, select the Easy Recording program. Slide the program selector to the □ position.
- For normal shooting conditions, slide the program selector to ☐ (program AE) mode. Open the program menu and select AUTO (58).
- For various other recording conditions, the camcorder has 6 more specialised AE (auto exposure) programs.
Availability of functions in each recording program
| Position of program selector |  |  | ||||||
| Recording Program | ☐(Easy Recording) | Auto Sports | Sports Portrait | Trait | Spotlight | Sand & Snow | Low Light | Night |
| Digital Zoom | ○ | ○ | × | |||||
| Shutter speed | A | ○ | A | |||||
| Focus | ○ | |||||||
| White balance | ○ | |||||||
| AE shift | ○ | × | ○ | × | ||||
| Image stabilizer (ON/OFF) | ON | ○ | ||||||
| Digital effects | × | ○ | ○* | |||||
| 16:9 | × | ○ | ||||||
| Card mix** | × | ○ | ||||||
○ : Available ✗ : Not available A : Automatic function only
* You cannot use the multi-image screen in the Night recording program.
** MV5i MC
Setting the program AE mode

CAMERA
PLAY (VCR)
MV5i MC CARD CAMERA
MV5i MC CARD PLAY (VCR)
- Slide the program selector to P(program AE) mode.
- Press the SET button to display the program menu.
- Turn the selector dial to move the arrow up or down the display.
- Press the SET button to select the desired program.
- The program will appear in the display.

Notes:
- The name of your selected recording program appears constantly on the left of the display, with the exception of Auto, which is displayed and then disappears after 4 seconds.
- Avoid changing programs during recording as the brightness of the image may change suddenly.
- If you switch the camcorder from the □ program to the P program, the camcorder returns to the Auto mode.
- When recording in dark places a bright light in the scene may cause a vertical light bar (“smear”) to appear. This is a normal feature of camcorders.
natural_image
Illustration of a medical procedure with three individuals (no text or symbols present)Easy Recording
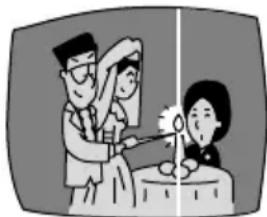
The simplest way to use the camcorder is with the program selector set to the □position. The camcorder will take care of focus, exposure and other adjustments, leaving you free to point and shoot.

natural_image
Black-and-white photo of three people standing on a balcony overlooking the sea, with hills in the background (no visible text or symbols)Auto
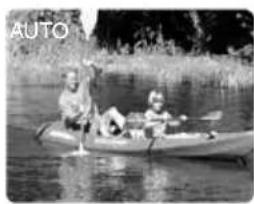
This is the same as the Easy Recording program, except that you now have the option of using any of the camcorder's manual functions.
natural_image
Black-and-white photo of two people kayaking in a lake, no visible text or symbolsSports
This program is useful for recording high-speed sports scenes in brightly lit conditions. Normal playback will be slightly jerky, but you will get clear images which can be analysed frame by frame during slow or paused playback.

natural_image
Person riding a motorcycle in a forested area (no visible text or symbols)Portrait
Use this program outdoors to make subjects stand out from a softened foreground and background. It works well for still-lives and close-ups. The effect is most noticeable when the zoom position is between the middle range and the telephoto end. Focus manually for maximum accuracy, and be careful when recording action scenes, as this program may cause fast moving objects to shudder.

text_image
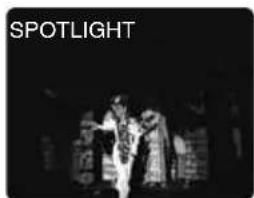
PORTRAITSpotlight
This program is designed for recording spotlit scenes, such as on a stage. The exposure is automatically adjusted for glare-free recordings of subjects lit by a concentrated light source.
text_image
SPOTLIGHTSand & Snow
Use this program in places where the background is so bright that the subject appears underexposed in the display — a sunny beach or ski resort, for example. You may notice some shudder when recording moving subjects.

text_image
SAND&SNOWLow Light
This program allows you to record in dimly lit places. The shutter speed is fixed at a slow speed. It is generally best used for close-ups of slow or stationary subjects, as moving subjects may leave a trailing after-image. However, you can take advantage of this to create special effects, by rapid zooming or by panning along with a moving subject. Image quality will not be as good as in normal lighting conditions, and autofocus may not work as good as in other modes.

text_image
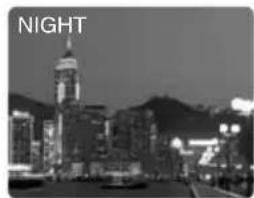
LOW LIGHTNight
This program automatically adjusts the shutter speed according to the brightness of the subject even in dark places (night time, etc.) to shoot subjects brightly in colour. It is useful when you record in locations with dark and light places (such as in amusement parks). When you record in very dark places:
- Moving subjects may leave a trailing after-image.
- Though subjects can be shot brightly, picture quality may not be as good as in normal lighting.
- White points may appear in the display.
- Autofocus may not work as well as usual (in this case, adjust the focus manually).
natural_image
Night cityscape with illuminated skyscrapers and mountainous background (no visible text or symbols)MV5TMC : You cannot use the Night recording program in CARD CAMERA mode.
Using Digital Effects
Use the camcorder's digital effects for more interesting productions.
Faders: Start or end scenes on a tape with a fade to or from black
(62). Fade Trigger, Wipe, Corner, Jump, Flip, Puzzle, Zigzag, Beam, Tide
Effects: Add flavour to your recordings (64).

Art, Black and White, Sepia, Mosaic, Ball, Cube, Wave, Color Mask, Mirror
Multi-image Screen: Divides the display to show 4, 9 or 16 still images. Has 4 transition speed options: fast, moderate, slow and manual (67).
MV5i MC : Only Black and White can be used in CARD CAMERA mode.
Availability of digital effects by mode
| CAMERA | PHOTO | PLAY (VCR) | MV5i MC CARD CAMERA | MV5i MC CARD PLAY (VCR) | |
| Faders | ○ | × | ○ | × | × |
| Effects | ○ | ○ | ○ | ○* | × |
| Multi-image Screen | ○ | ○ | ○ | × | × |
○ : Available ✗ : Not available * : Black and White only
- The types of digital effects you are able to use depends on the setting of the TAPE/CARD switch, the POWER switch and the recording program.

Notes:
- When you do not want to use digital effects, press the D.EFFECTS SELECT button and select D.EFFECT OFF from the digital effects menu. Press the D.EFFECTS SELECT button to close the menu.
- The camcorder remembers your chosen digital effect setting until you change it.
- Digital effects can be selected but not operated on a blank blue screen (appears in TAPE PLAY (VCR) mode). The display continues to flash.
- Digital effects operated during TAPE PLAY (VCR) mode are not recorded onto the original tape.
- Digital effects can be added to another tape when dubbing using the AV out terminal (TAPE PLAY (VCR) mode), but not the DV out terminal.
- You cannot operate digital effects while photo/date searching.
- If you slide the program selector to □ (Easy Recording) while the digital effect display is flashing, it will disappear from the display and reappear when you return to P(program AE) mode.
- The digital effect display will flash for 2 seconds after setting, even if DISPLAYS is set to OFF in the menu.
Faders
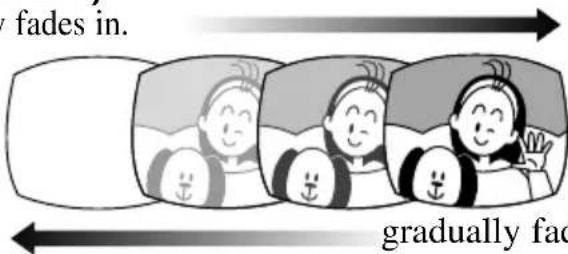
Fade Trigger (FADE-T)
The image gradually fades in.
text_image
fades in. gradually facThe image es out.
Wipe (WIPE)
The image begins as a thin vertical
line in the centre of the screen and expands sideways until it fills the whole screen.
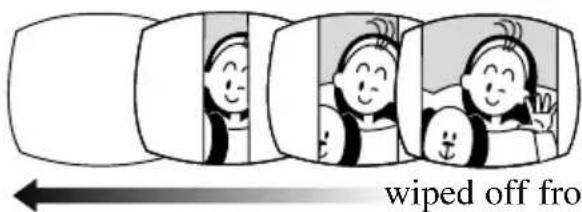
text_image
wiped off froThe image is
wiped off from both sides of the screen.
Corner Wipe (CORNER)
The image appears from the corners until it fills the whole screen.
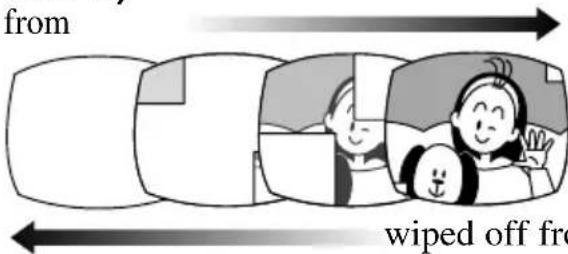
text_image
from wiped off fromThe image is
wiped off from the corners
Jump (JUMP)
A small image appears from the left, jumps into
the centre and enlarges until it fills the whole screen.
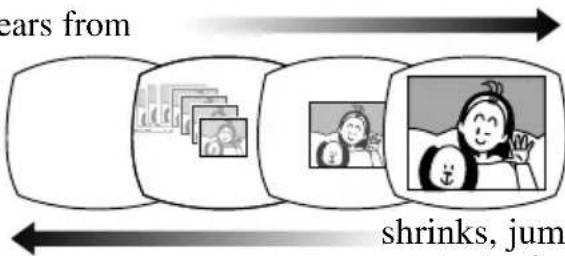
text_image
ears from shrinks, jumpThe image
shrinks, jumps from the centre to the left and disappears.
Flip (FLIP)
The image flips into the screen.
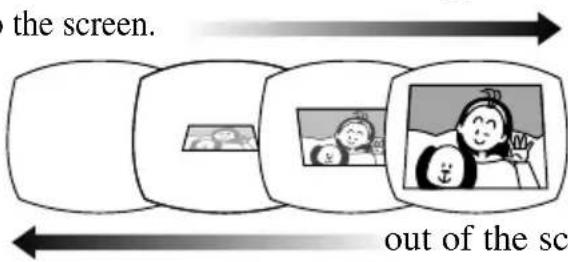
text_image
the screen. out of the scThe image flips
out of the screen.
Faders
Puzzle (PUZZLE)
The image appears in 16 pieces.
The pieces move around until the puzzle is solved.
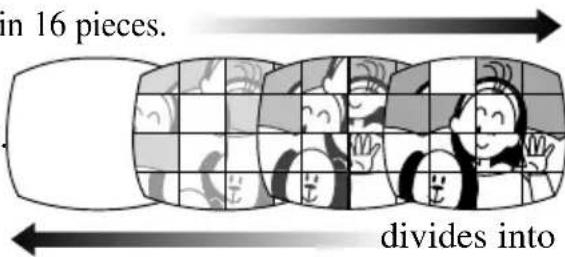
text_image
in 16 pieces. divides intoThe image
divides into 16 pieces. The pieces move around and disappear.
Zigzag (ZIGZAG)
The image appears in zigzag from the top of the screen.
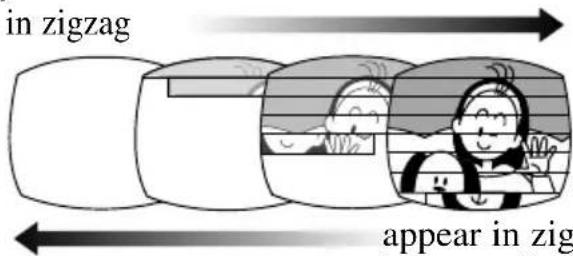
text_image
in zigzag appear in zigWhite stripes
appear in zigzag from the bottom of the screen until they cover the whole image.
Beam (BEAM)
The screen turns yellow, forms a beam and the full image appears.
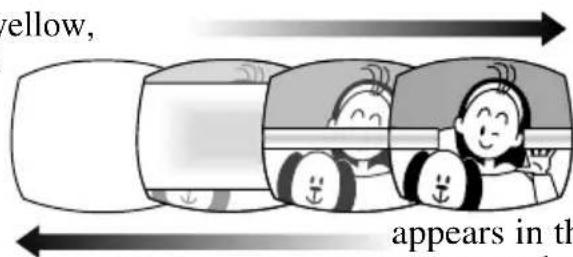
text_image
yellow, appears in thA yellow beam
appears in the middle of the screen and expands until it covers the whole image.
Tide (TIDE)
The image appears from both sides like tides.
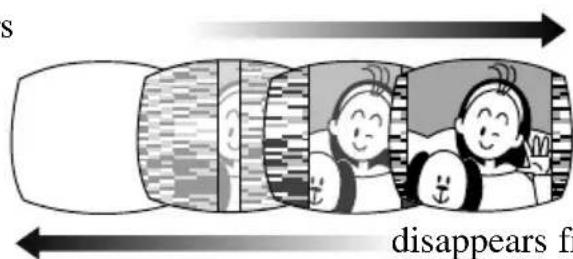
text_image
disappears fromThe image
disappears from both sides like tides.
Effects
MV5i MC : In CARD CAMERA mode, only Black and White can be selected.
Mirror
Creates a symmetrical image as if there would be a mirror in the middle of the screen.
Colour Masking (COLOR M.)
The image becomes a rhombus through a masking frame that changes the colours.
Wave (WAVE)
Both ends of the image sway in waves.



Cube (CUBE)
The image becomes a cube and rotates.


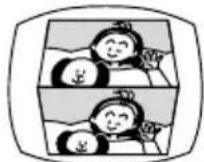

Art (ART)
The image becomes like a paint (solarization).

Black and White (BLK & WHT)
The image becomes black and white.

Sepia (SEPIA)
The image becomes monochrome with a brownish tint.
Ball (BALL)
The image becomes a ball.
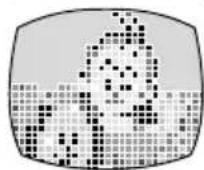
Mosaic (MOSAIC)
The image is blurred through enlarging the size of some pixels.
Digital effects can be set with the controls on the body of the camcorder or the wireless controller.
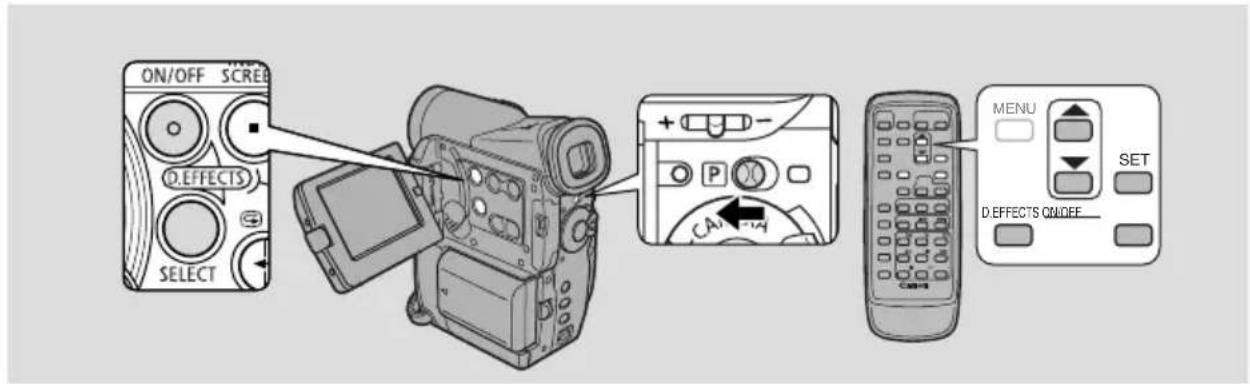
text_image
ON/OFF SCREEN D.EFFECTS SELECT + - P CA MENU SET D.EFFECTS ON/OFFOperating faders

Sound and image fade together.
When operating faders in TAPE CAMERA mode, make sure the program selector is set to ☐.

text_image
CAMERA PLAY (VCR) MV5i MC CARD CAMERA MV5i MC CARD PLAY (VCR)Select fader
- Press the D.EFFECTS SELECT button to open the digital effects menu.
• D.EFFECT OFF, FADER, EFFECT and MULTI-S appear.
- Select FADER.
- The settings appear. Select the setting by turning the selector dial.
- Select the desired setting.
- You return to the digital effects menu.
- Press the D.EFFECTS SELECT button to close the menu.
- The name of your selected fader flashes in the display.
Fader on/off
- Press the D.EFFECTS ON/OFF button.
• The name of your selection stops flashing.
• Each time you press the ON/OFF button, the chosen fader is activated (display lights continuously) or deactivated (display flashes).
- If you're in TAPE CAMERA mode:
Fade in- Press the start/stop button.
Fade out- Press the start/stop button.
If you're in TAPE PLAY (VCR) mode:
Fade in- Press the ▶(play) button.
Fade out- Press the Ⅱ(pause) button.
Operating effects


Sound records/plays back normally.
*
CAMERA PLAY
(VCR)
MV5i MC
CARD CAMERA
MV5i MC
CARD PLAY (VCR)
* Make sure the program selector is set to P.
Select effect
- Press the D.EFFECTS SELECT button to open the digital effects menu.
• D.EFFECT OFF, FADER, EFFECT and MULTI-S appear.
- Select EFFECT.
- The settings appear. Select the setting by turning the selector dial.
- Select the desired setting.
- You return to the digital effects menu.
- Press the D.EFFECTS SELECT button to close the menu.
- The menu disappears and the name of your selected setting flashes in the display.
Effect on/off
-
If you're in TAPE PLAY (VCR) mode, press the ▶ (play) button.
-
Press the D.EFFECTS ON/OFF button.
-
The name of your selection stops flashing and takes effect on the display.
• Each time you press the D.EFFECTS ON/OFF button, the chosen effect is activated or deactivated.
CAMERA
PLAY (VCR)
MV5i MC
CARD CAMERA
MV5i MC
CARD PLAY (VCR)
- Press the D.EFFECTS SELECT button.
- BLK&WHT flashes in the display.
- Press the D.EFFECTS ON/OFF button.
- The effect is activated and the image appears in black and white.
Using the Multi-Image Screen
Divides your display image into 4, 9 or 16 smaller images with the Image Capture feature. With this feature, the camcorder captures the current scene being shot or replayed. Choose the transition speed — manual, fast (every 4 frames), moderate (every 6 frames*) or slow (every 8 frames*) — at which to capture a moving subject, such as a person playing tennis or golf. Sound is recorded normally.
* In Low Light mode: moderate (every 8 frames), slow (every 12 frames)
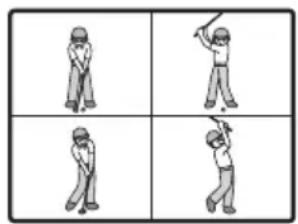
text_image
Four-panel image showing a person in different positions of a golfing, likely illustrating stroke or movement techniques.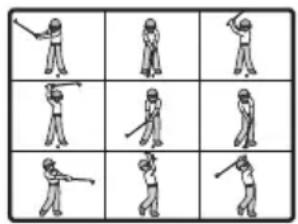
text_image
Grid of 16 identical illustrations showing a person performing various strokes, possibly playing badminton or gymnastics.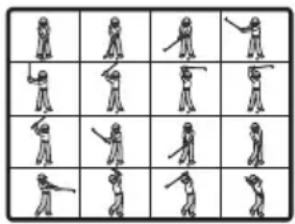
text_image
Grid of 16 identical illustrations of a warrior holding a sword, arranged in 3 rows and 4 columns.4 images 9 images 16 images
Operating the multi-image screen


In TAPE PLAY (VCR) mode, you can only operate the multi-image screen in the following playback modes:
When M.S.SPEED is set to MANUAL: Still image playback, slow forward/reverse playback
When M.S.SPEED is set to FAST, MODERATE or SLOW: Still image playback
*
CAMERA PLAY
(VCR)
MV5i MC CARD CAMERA
MV5i MC CARD PLAY (VCR)
* Make sure the program selector is set to ☐ and any program other than the Night recording program.
Select multi-image screen
- Press the D.EFFECTS SELECT button to open the digital effects menu.
• D.EFFECT OFF, FADER, EFFECT and MULTI-S appear.
- Select MULTI-S.
• M.S. SPEED and M.S. SPLIT settings appear.
- Select M.S. SPEED.
- MANUAL, FAST, MODERATE and SLOW settings appear.
- Select the desired setting.
- You return to the digital effects menu.
- Select MULTI-S again.
• M.S. SPEED and M.S. SPLIT settings appear.
- Select M.S.SPLIT.
• 4, 9, 16 settings appear.
7. Select the desired setting.
- You return to the digital effects menu.
8. Press the D.EFFECTS SELECT button to close the menu.
- The digital effects menu disappears.
- MULTI-S flashes in the display.
Multi-image screen on/off
9. Press the D.EFFECTS ON/OFF button.
- MULTI-S stops flashing.
- Manual: As you press the D.EFFECTS ON/OFF button, scenes will be captured one after another in the indicated number of times. If you push and hold the D.EFFECTS ON/OFF button for more than a second, the last image captured will be erased.
- The image currently being recorded is framed in blue. The frame disappears after the last image is captured.
- Automatic: The camcorder will capture the indicated number of images at the indicated speed.
10. Press the start/stop button to begin recording.
- The multi-image screen is recorded to the tape.

Notes:
- You can operate the multi-image screen from record or record pause mode.
- After all the images have been captured, press the D.EFFECTS ON/OFF button quickly to cancel the multi-image screen.
- If you are operating the multi-image screen in TAPE PLAY (VCR) mode and you stop or pause the tape, or press any other playback button or the date/photo search button, the multi-image screen will be cancelled.
- You cannot use digital zoom or the 16:9 mode when the multi-image screen is set. The display becomes “--”.
Audio Recording
Selecting the audio mode

The comcorder can record sound in two audio modes — 16-bit and 12-bit. The 16-bit mode produces the higher sound quality (slightly superior to CD) while the 12-bit mode records on 2 channels (stereo 1), leaving 2 channels free (stereo 2) for you to add new sound at a later time.

text_image
CAMERA MV5i/MV5i MC PLAY (VCR) MV5i MC CARD CAMERA MV5i MC CARD PLAY (VCR) MENU (39) ► VCR SET UP ► AUDIO MODE · · 12bitTo switch to the 16-bit mode, open the menu and select VCR SET UP. Then select AUDIO MODE, set it to “16 bit” and close the menu.
- “16 bit” is shown in the display for approximately 4 seconds.

Notes:
- For details on adding new sound, see p. 97.
- For details of playing back a tape that has new sound on stereo 2, see p. 103.
- VMV5i/MV5i MC cord to the MV5i/MV5i MC from a camcorder with DV terminal outputs, the audio mode becomes automatically set to 12 bit.
- In TAPE PLAY (VCR) mode, the audio mode takes effect when doing analog line-in recording or AV insert. When you do DV in recording, the setting automatically changes to that of the digital device connected to the camcorder.
External microphone

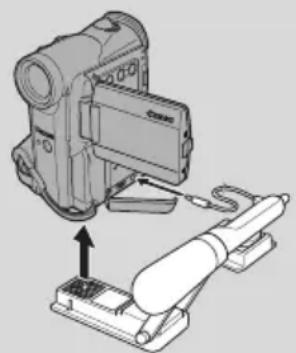
natural_image
Technical illustration of a mechanical device with a lever and base, showing no text or symbols.For greater creative control over audio recording, you can connect an external microphone to the camcorder via the MIC terminal. When using the MIC terminal, use a microphone with a built-in power supply (condenser microphone). It is possible to connect almost any stereo microphone with a plug diameter of 3.5 mm ( ^1/_8 in), however, their audio levels will be different from that of the built-in microphone.
Attach the microphone to the optional SA-1 Adapter Bracket.

Note:
- When using an external microphone, use a microphone cable not longer than 3 meters to avoid electromagnetic interference.
Wind screen


The camcorder has an automatic wind screen to prevent wind noise from interfering with the sound track. Make sure it's off when you want the microphone to be as sensitive as possible. Use the wind screen when recording in windy places such as the beach or near buildings.
CAMERA PLAY
(VCR)
MV5i MC
CARD CAMERA
MV5i MC
CARD PLAY (VCR)
MENU
(39)
▶ VCR SET UP

WIND SCREEN · OFF
To turn it on, open the menu and select VCR SET UP. Then select WIND SCREEN, set it to ON and close the menu.
- WS ON is shown in the display when you turn the wind screen on.

Notes:
- The wind screen can be used for audio dubbing with the built-in microphone in TAPE PLAY (VCR) mode as well as recording (when AUDIO DUB. is set to MIC. IN in VCR SET UP submenu).
- The wind screen does not operate when an external microphone is connected to the MIC terminal.
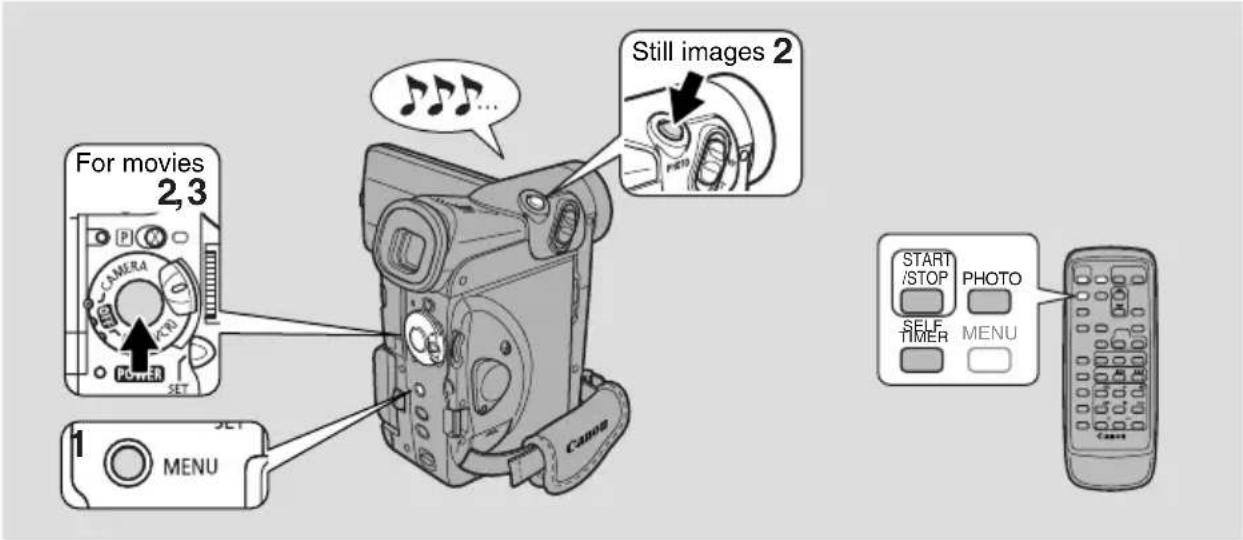
text_image
For movies 2,3 1 MENU Still images 2 START /STOP PHOTO SELF TIMER MENU CassosThis is useful when you want to include yourself in the picture when recording movies or still images to a tape or memory card.

text_image
CAMERA PLAY (VCR) MV5i MC CARD CAMERA MV5i MC CARD PLAY (VCR) MENU ( 39) ► CAM. SET UP ► SELF-TIMER·OFF- Open the menu, select VCR SET UP and set the SELF-TIMER to ON
or
press the SELF TIMER button on the wireless controller.
- SELF-T appears in the display.
• To have the subject monitor recording, rotate the LCD panel 180^ (27).
For movies
-
Press the start/stop button.
-
The camcorder starts to record after a 10-second countdown period (or after 2 seconds when you use the wireless controller). The time remaining counts down in the display (e.g. “5 SEC”).
-
SELF-T disappears from the display when recording begins.
• The tally lamp starts flashing. -
Press the start/stop button to end recording.
For still images
- Press a PHOTO button on the camcorder body or the wireless controller.
- The camcorder automatically adjusts the focus 2 seconds before the countdown is complete. The ⬤ mark flashes white then turns green after the focus and exposure are set. If you are using the wireless controller, the ⬤ mark starts flashing immediately after you press the PHOTO button.

- The camcorder takes the still image for approximately 6 seconds.
- If you're in TAPE CAMERA mode, the camcorder returns to record pause mode after recording to a tape. MV5i MC e in CARD CAMERA mode, the image that has been recorded appears after recording onto a memory card.

Notes:
- To cancel the self-timer setting, set the SELF-TIMER to OFF through the menu, or press the SELF-TIMER button on the wireless controller.
- To cancel the countdown of the self-timer, press the START/STOP button (when recording a movie) or PHOTO button (when recording a still image).
Adjusting AE Shift

By controlling the level of the automatic exposure (AE) function, you can lighten or darken the image slightly. This allows you to compensate for backlit, overexposed scenes.
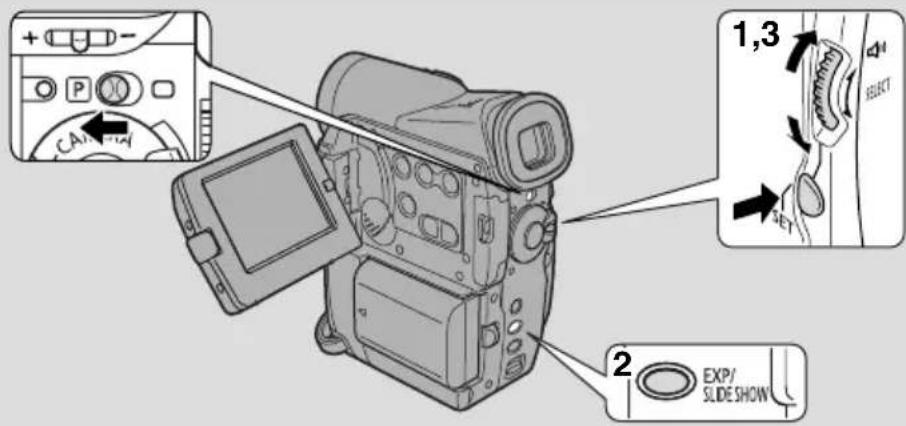
text_image
1,3 SELECT 2 EXP/ SLIDE SHOWCAMERA
PLAY (VCR)
MV5i MC CARD CAMERA
MV5i MC CARD PLAY (VCR)
Make sure the program selector is set to P.
-
Press the SET button and select any recording program other than Spotlight, Sand & Snow or Night from the program menu.
-
Press the EXP button.
- AE ±0 appears light blue.
-
Turn the selector dial to choose your desired level.
-
Levels are from -2 to +2 , in 0.25 intervals (excluding -1.75 and +1.75 ).
• The higher the setting, the brighter the image.

Notes:
- You cannot adjust the exposure without the ▶ mark before AE in the display. Press the EXP button so that ▶ appears before AE. Then you can adjust the exposure manually.
- You cannot adjust the AE Shift when the camcorder is set to □ (Easy Recording), the Spotlight, the Sand & Snow or Night recording program.
- To cancel AE shift, set it to ± and press the EXP button.

Setting the Shutter Speed

Set the shutter speed manually to take stable shots of quickly moving subjects.

text_image
CAMERA PLAY (VCR) MV5i MC CARD CAMERA MV5i MC CARD PLAY (VCR) MENU (39) SHUTTER...AUTOCAM.SET UP- Make sure the camcorder is set to the ☐ (program AE) mode.
- Press the SET button and choose AUTO from the program menu.
- Open the menu and select CAM.SET UP.
- Select SHUTTER.
- Press the SET button to select the desired shutter speed.
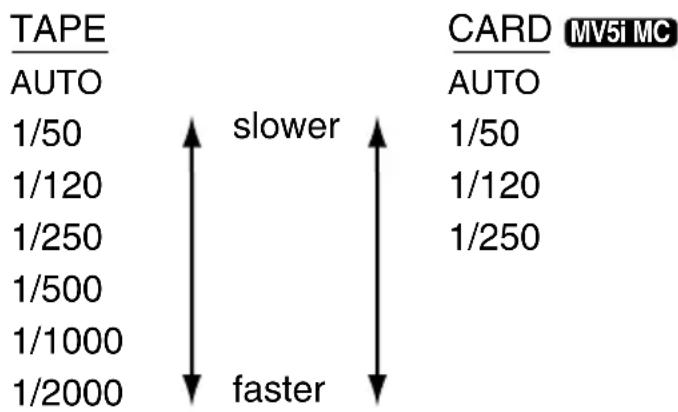
- CMV51MC tter speeds up to 1/250 are available when using a memory card.
- Close the menu.
Guidelines for shooting using high shutter speeds
- When shooting with a shutter speed of 1/1000 or higher, do not shoot the sun directly.
Recommended shutter speeds when shooting:
• People doing outdoor sports such as golf or tennis
- Moving cars or trains or other rapidly moving vehicles such as roller coasters
• People doing indoor sports such as basketball

1/2000

1/1000, 1/500 or 1/250

1/120

Notes:
- You are unable to set the shutter speed in any recording program other than AUTO.
- The image may not appear smooth when a high shutter speed is set.
- The camcorder returns to the auto shutter setting when you slide the program selector to □(Easy Recording), or change the recording program.
- I MV51MC t the shutter speed to 1/500 or above in TAPE CAMERA mode and then switch the camcorder to CARD CAMERA mode, the shutter speed will automatically change to 1/250.
Adjusting Focus Manually

The camcorder focuses automatically. All you have to do is point and the subject in the centre of the screen will usually be in sharp focus. It may happen that a subject is not suitable for autofocus. Use the manual focusing function to adjust the focus.
1. Press the FOCUS button to turn the autofocus off.
- The focus remains locked at the point set by autofocus.
2. Use the selector dial to set the focus.
- Turn the selector dial downward to move the focus farther away.
- Turn the selector dial upwards to bring the focus nearer.
- If you zoom in on your subject after turning off the autofocus, it may not stay in focus. It is generally best to adjust the zoom first and then the focus.

Notes:
- If the ▶ icon is shown before AE the focus cannot be adjusted manually. Press the focus button again to bring the ▶ icon before M.FOCUS.
- The camcorder will return to autofocus when selecting the □ (Easy Recording) program.
- Autofocus can not be turned off in □(Easy Recording) program.
- See “Troubleshooting” on p. 158 for a list of subjects that may not be suitable for autofocus.
Infinity Focus
Use this function when you wish to focus on faraway subjects such as mountains or fireworks.
Press the focus button more than 3 seconds in step 2 above to record in infinity focus mode. The MF∞icon will appear on the display.
∞will disappear when you operate the zoom or the selector dial and the camcorder will change to manual focus.
Setting the White Balance
The camcorder's auto white balance system compensates for a wide range of lighting conditions. Although slight variations are unavoidable, colours will appear natural in virtually every situation.
In some cases, you will get better results by setting the white balance yourself, or using one of the two preset modes:
Indoor Mode
• Under halogen or studio/video lighting
- Subject is of one dominant colour
- Close-ups
Outdoor mode
• In daylight, especially for close-ups and where the subject is of one dominant colour
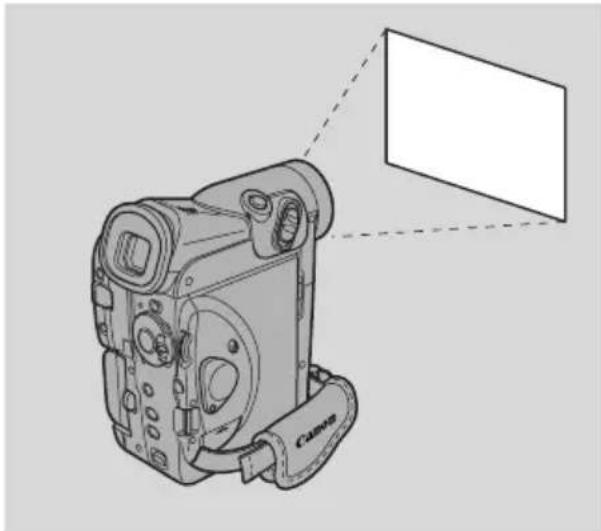
natural_image
Diagram of a Canon digital camera with a blank screen, shown in 3D perspective (no text or symbols on device)CAMERA
PLAY (VCR)
MV5i MC CARD CAMERA
MV5i MC CARD PLAY (VCR)
MENU
(39)

flowchart
graph LR
    A["Start"] --> B["WHITE BAL...AUTO CAM.SET UP"]
- Make sure the camcorder is set to the P(program AE) mode.
- Open the menu and select CAM.SET UP.
- Select WHITE BAL.
- a) For the indoor, outdoor or auto settings, press the SET button to choose the setting.
- 🐘/💡 appears in the display when you set the white balance to indoor/outdoor mode.
b) To set the white balance yourself, point the camcorder at a white object (such as a sheet of paper) and zoom in until it fills the display. Then press the SET button to select SET ☐.
- Make sure to continue pointing the camcorder at the white object until you have finished setting the white balance.
- The ▲ display flashes then remains lit.
-
Depending on the light source, the flashing may at times continue. The result will remain better than with the auto setting and you can continue recording.
-
Close the menu.
E
Setting the white balance manually will probably work better than auto white balance when shooting:
Subjects with one dominant colour, such as sky, sea or forest

Close-ups

In rapidly changing lighting conditions

In places lit by certain types of fluorescent or mercury vapour lights

Notes:
- Turn the digital zoom off (if necessary) to set a more accurate white balance.
- If you have set the white balance and lighting conditions change, reset the white balance.
- Try to record with light from a single source. Correct white balance cannot be obtained for two types of lighting at once.
- You cannot set the white balance or choose the indoor/outdoor mode when the program selector is set to the □(Easy Recording) program.
- The white balance returns to the AUTO setting when you slide the program selector to □(Easy Recording).
- When you turn the camcorder on, the white balance returns to AUTO. If you then switch the white balance to SET, the camcorder will remember your last setting.
- During normal outdoor shooting, setting to AUTO may provide better results.
Enlarging the Image during Playback
You can enlarge the image by 2 times during TAPE PLAY (VCR) mode (MV51MC): and CARD PLAY (VCR) mode). You can also move the image up, down, to the right or left.
- MV5i MC played back from a memory card cannot be enlarged.
CAMERA
PLAY (VCR)
MV5i MC CARD CAMERA
MV5i MC CARD PLAY (VCR)
During Playback
1. Move the zoom lever toward T.
• The image is magnified by 2 times.
2. Move the image to the right and left.
- Turn the selector dial up to move the image to the left, down to move the image to the right.
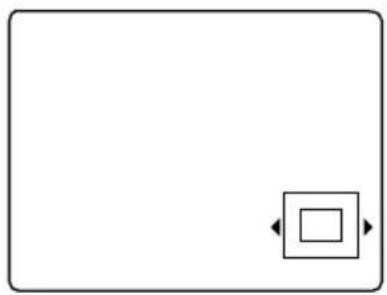
natural_image
Empty rectangular frame with a small square containing two arrows pointing inward (no text or symbols)3. Move the image up and down
- Press the SET button first. Turn the selector dial up to move the image up, and down to move the image down.
- Pressing the SET button will switch the direction between right and left, up and down.
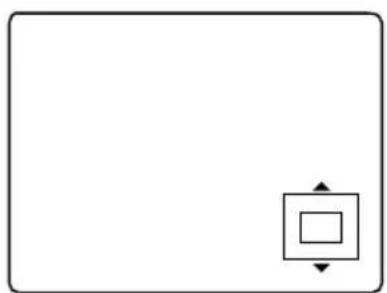
natural_image
Simple geometric diagram with a rectangle and two nested squares, no text or symbols present.4. To cancel, move the zoom lever toward W.
Displaying Date, Time and Camcorder Data (Data Code)
A data code, containing the date and time the recording was made and other camcorder data (shutter speed and exposure settings) is automatically recorded on a special data section of the tape.
- CMV5i MC date and time appear in the data code when using a memory card.
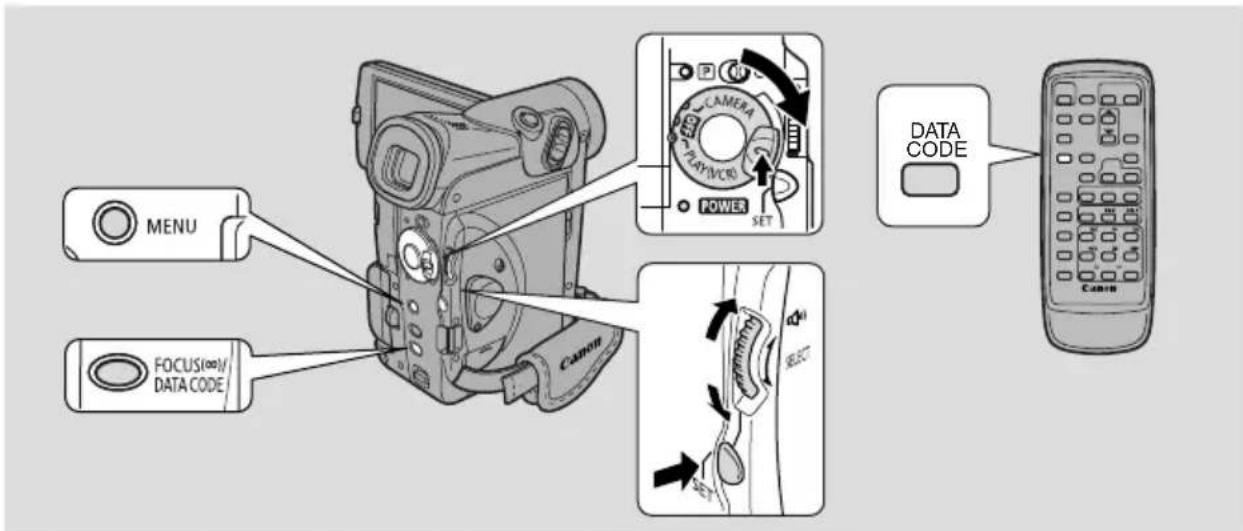
text_image
MENU FOCUS(∞)/DATA CODE CAMERA PLAY/CRS POWER SET DATA CODE CanonDuring TAPE PLAY (VCR) mode, the data code can be displayed or hidden while the camcorder is in play, slow or still mode.
Camcorder data may be displayed as “--” during fast forward, rewind, reverse playback, forward and reverse ×2 playback.
Press the DATA CODE button. When using a cassette, press it while the camcorder is in play, slow or still mode.
- Press it once to display, once more to hide it.
Selecting date/time


Select whether you want the date, the time, or both to show up on your data code display.

flowchart
graph LR
    A["CAMERA"] --> B["PLAY (VCR)"]
    B --> C["MV5i MC CARD CAMERA"]
    C --> D["MV5i MC CARD PLAY (VCR)"]
    E["MENU (39)"] --> F["▶ DISP.SET UP"]
    F --> G["▶ D/TIME SEL.·DATE & TIME"]
To change the date and time combination, open the menu and select DISP.SET UP. Then select D/TIME SEL, set it to DATE, TIME or DATE & TIME and close the menu.
You can also choose to display camcorder data (shutter speed and exposure settings) in the data code.

text_image
CAMERA PLAY (VCR) MV5i MC CARD CAMERA MV5i MC CARD PLAY (VCR)MENU
(39)
▶ DISP.SET UP
DATA CODE···DATE/TIME
To change, open the menu and select DISP.SET UP. Then select DATA CODE, set it to DATE/TIME, CAMERA DATA or CAM. & D/T and close the menu.
Possible data code combinations for tapes:
| DATA CODE(tape only)D/TIME SEL. | Date/Time Camera data | Date/Time & Camera data | |
| Date | 1.JAN.2002 | F111/250 | F111/2501.JAN.2002 |
| Time | 12:00:00 AM | F111/250 | F111/25012:00:00 AM |
| Date & Time | 12:00 AM1.JAN.2002 | F111/250 | F111/25012:00 AM1.JAN.2002 |

Notes:
- The data code will read “--” in the following situations:
– During playback of a blank section of tape.
- If the tape was recorded before entering the date and time in the camcorder's memory.
- If the tape was recorded on a camcorder without a data code function.
- If noise or tape damage prevents the data code from being read.
- If a recording made on MV5/MV5i/MV5i MC is played back on a different DV camcorder, the data code may not be displayed correctly.
- The data code will appear in the display even if DISPLAYS (165) has been set to OFF through the menu.
Six-second auto date


The 6-second auto date appears for 6 seconds to mark the changeover of a day if the tape was being recorded at 12:00 midnight. It also appears for 6 seconds when you start playback and have the data code turned off. The 6-second auto date will adjust for any time zone changes you have indicated.

flowchart
graph LR
    A["CAMERA"] --> B["PLAY (VCR)"]
    B --> C["MV5i MC CARD CAMERA"]
    C --> D["MV5i MC CARD PLAY (VCR)"]
    E["MENU (39)"] --> F["▶ DISP.SET UP"]
    F --> G["▶ 6SEC. DATE...OFF"]
To turn the 6-second auto date on, open the menu and select DISP.SET UP. Then select 6SEC. DATE, set it to ON and close the menu.

Note:
- When 6SEC.DATE is turned on but DISPLAYS (165) is turned off, the six-second auto date will still appear for 6 seconds.
Searching the Tape (Photo Search/Date Search)

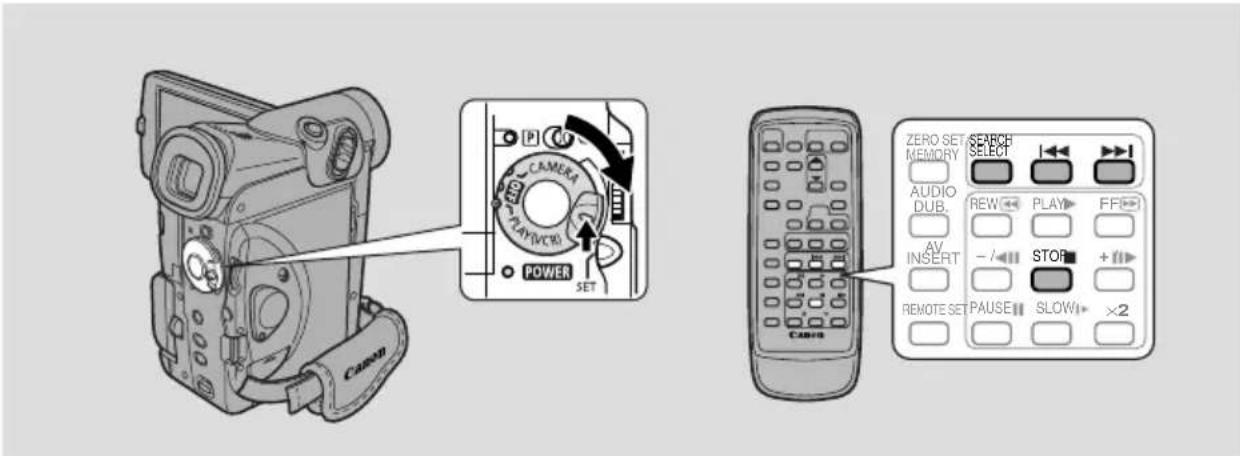
text_image
CAMERA POWER SET P CAMERA PLAY/WR SET ZERO SET SEARCH MEMORY SELECT AUDIO DUB. REW PLAY FF AV INSERT - / STOP + REMOTE SET PAUSE SLOW ×2 CANSThis allows you to move quickly through still images recorded anywhere on a tape (photo search) or between different days or areas of recording (date search) on a tape.

text_image
CAMERA PLAY (VCR) MV5i MC CARD CAMERA MV5i MC CARD PLAY (VCR)- Press the SEARCH SELECT button to choose between photo/date search.
- PHOTO SEARCH or DATE SEARCH is shown in the display for 4 seconds.
- Press the ◀◀◀ and ▶▶▶ buttons to move backwards or forwards through the still images or between different days of recording.
- Press once to move to the start of the previous/next still image or day on the tape.
- You can press more than once to move to the corresponding still image or day (up to a maximum of 10 times), e.g. press the ▶▶ button 5 times to move forward 5 still images or days.
- PHOTO SEARCH/DATE SEARCH appears in the middle of the display alongside the ◀◀ or ▶▶ mark and number to search through. You can change direction easily by pressing the button for the opposite direction.

Notes:
- Press ■(stop) to stop mid-search.
- If you begin a search very close to the start of a recorded still image during photo search, the camcorder may skip straight past it.
- When you have set the area for the World Clock, date search also looks for the change in date based on the adjusted time.
- A date/area cannot be identified if the total recording time on that day/area was less than 1 minute.
- Date search playback may start just before or after the beginning of the located section.
- If the data code is not displayed correctly you will not be able to operate the date search correctly.
Returning to a Pre-Marked Position

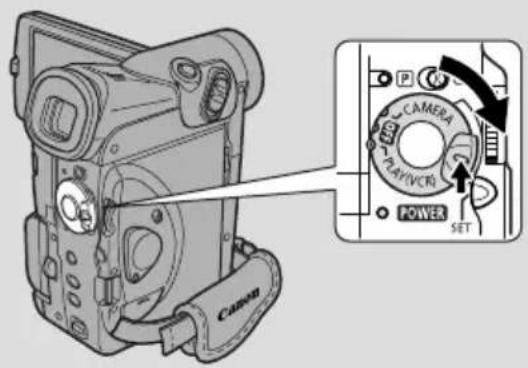
text_image
CAMERA PLAYVCTR POWER SET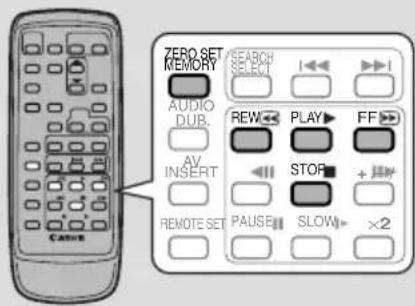
text_image
ZERO SET MEMORY AUDIO DUB. AV INSERT REMOTE SET SEARCH SELECT REW PLAY FF STOP PAUSE SLOW ×2Use the wireless controller to mark a point on a tape that you want to return to following playback.
CAMERA PLAY
(VCR)
MV5i MC
CARD CAMERA
MV51MC
CARD PLAY (VCR)
-
Press the ZERO SET MEMORY button on the wireless controller during playback at a point you want to return to later.
-
The time code is replaced by a tape counter that is set to zero with the indication.
-
Press the ZERO SET MEMORY button once more to cancel the zero set memory.
-
When you have finished playback, fast forward or rewind the tape. The tape stops automatically when it reaches the zero set position.
-
RTN▶▶ or ◀◀RTN appears in the display.
- The tape counter with M indication disappears from the display and the time code reappears.

Notes:
- The zero set memory may not function correctly where there is a break between recordings on the tape.
- You can also use zero set memory to mark a position on a tape in TAPE CAMERA mode. When you then play back the tape, pressing rewind will take you back to the pre-marked position.
- If you remove the tape while the zero set memory is set, the memory is cancelled and the tape counter reverts to time code.
- The camcorder remembers your setting even if you turn it off and back on again or move the program selector.
Editing to a VCR
By connecting the camcorder to a VCR, you can edit your recordings in order to remove unwanted scenes — or combine different shots to create your own video productions.
Preparations
- Connect the camcorder to the VCR.
- See “Connections for Playback on a TV Screen” on p. 32.
-
Prepare the TV and VCR.
-
Turn on the TV and set the TV/VIDEO selector to VIDEO.
-
Turn on the VCR, and set its input selector to LINE. Load a blank cassette, and put the VCR in record pause mode.
• See your TV and VCR instruction manuals for details. -
Turn the camcorder's POWER switch to PLAY (VCR) (MV51MC) move the camcorder's TAPE/CARD switch to TAPE).
- Make sure the AV/headphone terminal is set to AV through the menu (32). If PHONES appears in the display, switch the terminal.
- Load your recorded cassette.
Editing

- Find a point on your recorded cassette slightly before the section you want to copy.
- Start to play it back while you monitor the picture on the TV.
- Start recording on the VCR as soon as the section you want to copy appears on the screen.
- Pause the VCR at the end of the section you want to copy, then stop playback on the camcorder.
- Repeat steps 1 to 4 until your edited recording is complete.
Note:
- The quality of the edited tape will be slightly lower than that of the original.
(LANC) terminal
The ⬆ terminal allows you to connect the camcorder to equipment. Some buttons on editing equipment may operate differently from those on the camcorder.
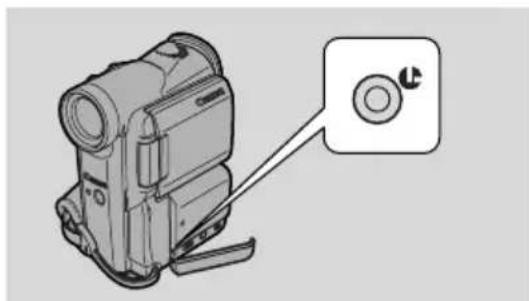
natural_image
Illustration of a vintage camera with a circular button labeled 'L' pointing to it (no text or symbols on the device itself)Notes:
• (LANC) is a trademark. It stands for Local Application Control Bus System.
- We cannot guarantee the results when connecting to equipment not bearing the LANC ⊕ symbol.
Dubbing to/from a Tape with Digital Video Equipment
E
MV 5
Dubbing from a Cassette with Digital Video Equipment
Digital video equipment fitted with the DV terminal allows you to edit, copy and transfer data digitally, with virtually no loss in image and sound quality.
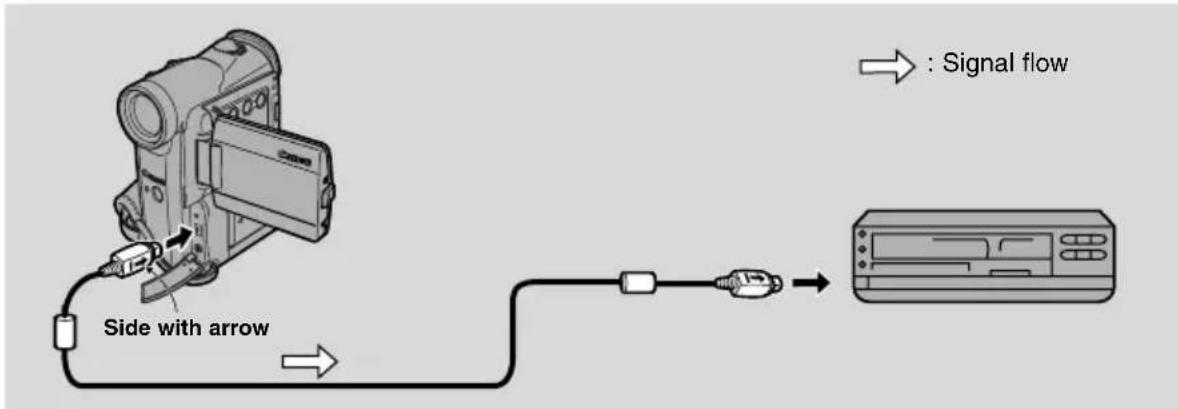
text_image
Side with arrow Signal flowPreparations
- Connect the camcorder and the other digital device.
- Connect the CV-150F DV cable (optional) with the sides of the plugs marked with the arrows facing as shown above.
- Prepare the other device.
- Turn on the power and load a blank cassette.
- Turn the camcorder's POWER switch to PLAY (VCR) and load a recorded cassette.
Dubbing

-
Find a point on your recorded tape slightly before the section you want to dub.
-
Press the camcorder's PLAY button.
- Playback starts.
-
Start recording on the other device as the section you want to copy appears on the screen.
-
When you get to the point where you want to stop dubbing, press the STOP button or the PAUSE button.

Notes:
- Blanks between recordings on the playback tape are recorded as anomalous images on the tape that is being recorded to.
- It is not possible to add digital effects during DV dubbing.
MV5i / MV5i MC
Dubbing to/from a Tape with Digital Video Equipment
The MV5i and MV5i MC are equipped with the DV recording function. The MV5i and MV5i MC are only available in certain areas.
Digital video equipment fitted with the DV terminal lets you edit, copy and transfer data digitally, with virtually no generation loss in image and sound quality. The DV terminal is for both line-in and line-out, since a single DV cable can handle data in both directions.
- If a digital VCR is connected and an anomalous signal is sent from the VCR, the images recorded on the tape may also be anomalous (although it may not appear so on the TV image), or not recorded at all.
- You are unable to dub tapes recorded with the copyright protective signal.
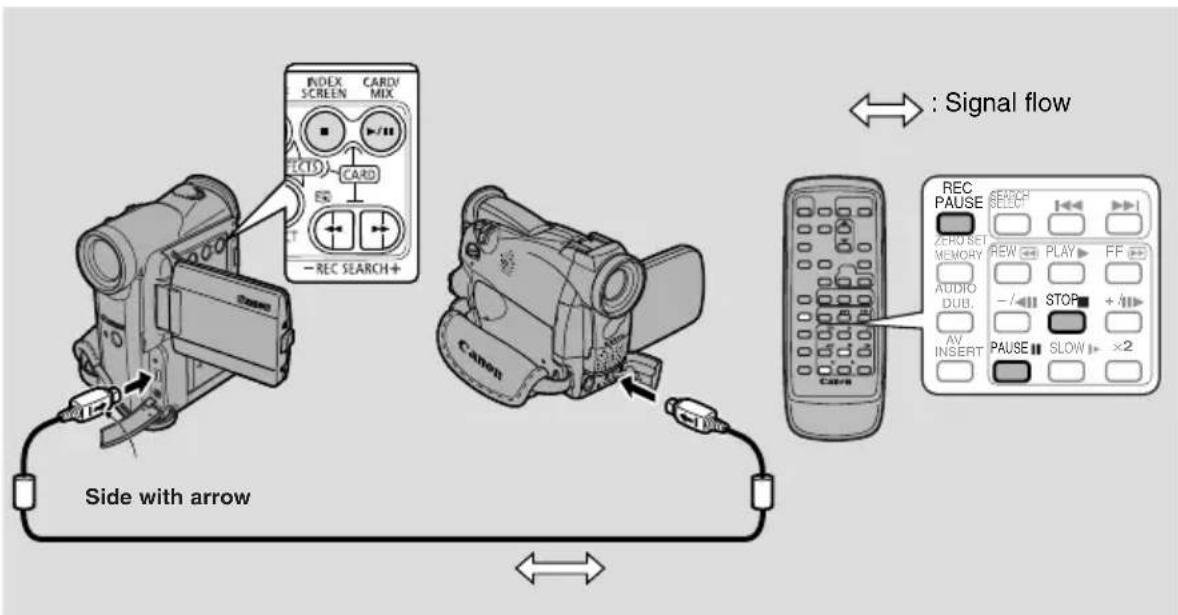
text_image
INDEX CARD SCREEN MIX F(CTS) CARD - REC SEARCH+ Side with arrow Canon REC PAUSE SEATR SELECT ZERO SET REM PLAY FF MEMORY AUDIO - STOP + DUB. AV INSERT PAUSE SLOW + ×2 CablePreparations
Example dubbing to the camcorder
- Connect the camcorder and the other digital device.
- Connect the Canon CV-150F DV cable (optional) with the sides of the plugs marked with the arrows facing as shown above.
- Prepare the other device.
- Turn on the power and load a recorded cassette.
- Turn the camcorder's POWER switch to PLAY (VCR) (MV51MC and move the camcorder's TAPE/CARD switch to TAPE).
• DV IN appears in the display.
- Load a blank cassette.
Dubbing

- Find a point on your recorded tape slightly before the section you want to copy and set it to playback pause mode.
- Press the REC PAUSE button on the wireless controller.
- The camcorder enters record pause mode.
- Start playback on the other digital device while you monitor the picture.
- Press the pause button.
- Recording starts.
- When you get to the point where you want to stop recording, press the stop button or the pause button.
- Recording stops.
- Stop playback on the other device.

Notes:
- Blanks between recordings on the playback tape are recorded as anomalous images on the tape that is being recorded to.
- When dubbing to a Cassette with digital video equipment, be sure to set AV
→ DV OUT to OFF in the menu.
Concerning copyrighting
Copyright precaution
Certain pre-recorded video tapes, films and other materials, as well as some television programmes are copyrighted. Unauthorized recording of these materials may violate copyright protection laws.
Copyright signals
When playing back:
If you try to play back a tape that contains copyright control signals for the protection of software, “COPYRIGHT PROTECTED PLAYBACK IS RESTRICTED” appears in the display for a few seconds and then the camcorder displays a blank blue screen; you cannot view the contents of the tape.
When recording:
If you try to record from software that contains copyright control signals for the protection of software, “COPYRIGHT PROTECTED DUBBING RESTRICTED” appears in the display; you cannot record the contents of the software.
You cannot record copyright protection signals to a tape using this camcorder.
MV5i/MV5i MC Recording from a VCR, TV or Analog Camcorder (Analog Line-in)
You can record a video played on your VCR or analog camcorder (for digital camcorders, see p. 86) or a TV program onto a tape in the MV5i/MV5i MC, if the TV or other device has audio/video outputs.
- If an anomalous signal is sent from the TV or VCR, the images recorded on the tape may also be anomalous (although it may not appear so on the TV image), not recorded at all, or COPYRIGHT PROTECTED DUBBING RESTRICTED may appear in the display.
- You are unable to dub tapes recorded with the copyright protective signal.
- For higher picture quality, we recommend using the S-150 S-video cable when doing analog line-in recording.
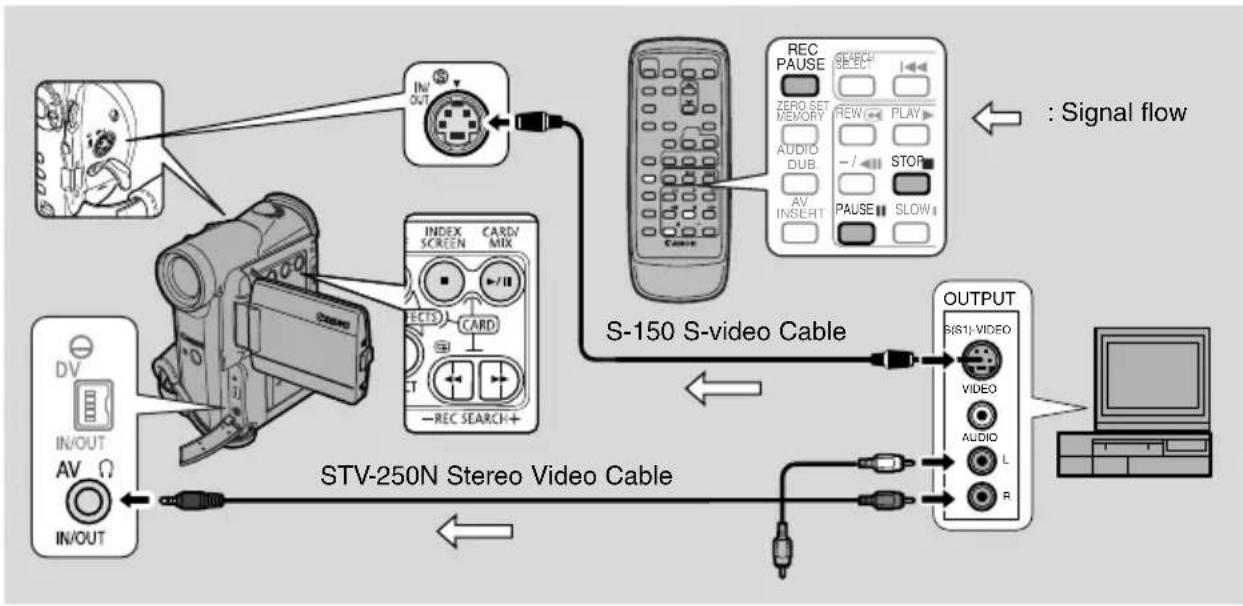
flowchart
graph TD
    A["Input: In/OUT, AV, IN/OUT"] --> B["STV-250N Stereo Video Cable"]
    B --> C["S-150 S-video Cable"]
    C --> D["OUTPUT: R(S1)-VIDEO, VIDEO, AUDIO, L, R"]
    D --> E["Signal flow"]
    B --> F["INDEX SCREEN CARD MIX"]
    F --> G["CAREX"]
    G --> H["S-150 S-video Cable"]
    H --> I["REC PAUSE ZERO SET MEMORY REW PLAY AUDIO DUB - / STOP AV INSERT PAUSE SLOW"]
You cannot use headphones while doing analog line-in recording. If you have the AV/headphones terminal set to headphones, it will automatically switch to AV for analog line-in recording. PHONES disappears from the display.
Preparations
Example recording from a VCR
1. Connect the camcorder to the VCR.
2. Prepare the device.
- Set the TV/Video selector on the television to Video. For further details, see "Connections for Playback on a TV Screen" on p. 33.
- Turn on the VCR. Load your recorded cassette, and put the VCR in playback pause mode.
• See your TV and VCR instruction manuals for details.
3. Turn the camcorder's POWER switch to PLAY(VCR) (MV5iMC move the camcorder's TAPE/CARD switch to TAPE).
4. Load a blank cassette.
Dubbing

- Find a point on your recorded tape slightly before the section you want to copy and set it to playback pause mode.
-
Press the REC PAUSE button on the wireless controller.
-
S-video and AV IN/OUT terminals work as input terminals.
-
The camcorder enters record pause mode.
-
Start playback on the other device or turn on the TV to see the desired program while you monitor the picture.
- Press the pause button.
- Recording starts.
- When you get to the point where you want to stop recording, press the stop button or the pause button.
- Recording stops.
- Stop playback on the other device.

Note:
- You can monitor the picture in the viewfinder or LCD screen.
MV5i/MV5i MC Digitally Outputting Analog Video and Audio Signals (Analog-Digital Converter)
Connecting the camcorder to your VCR or 8 mm video camera allows conversion of recorded analog video and audio signals to digital signals in an instant. The digital signals can be output to the other equipment with a DV terminal. The camcorder's DV terminal works exclusively as an output terminal.
- There may be cases where analog-digital conversion cannot be done properly, depending on the signals output from the connected equipment.
For example: Signals that include the copyright protective signal, or anomalous signals such as ones that include ghost signals, etc. - You cannot use your headphones during digital conversion. Even if the AV/headphone terminal is set to “PHONES” through the menu, it will automatically be set to “AV”, and “PHONES” will disappear from the display.
- You are recommended to use power from a household power socket with the power adapter.
- Do not operate with a cassette inserted to the camcorder.
- Turn off the power of all equipment before performing connections.
- Refer also to the instruction manuals of the other equipment connected.
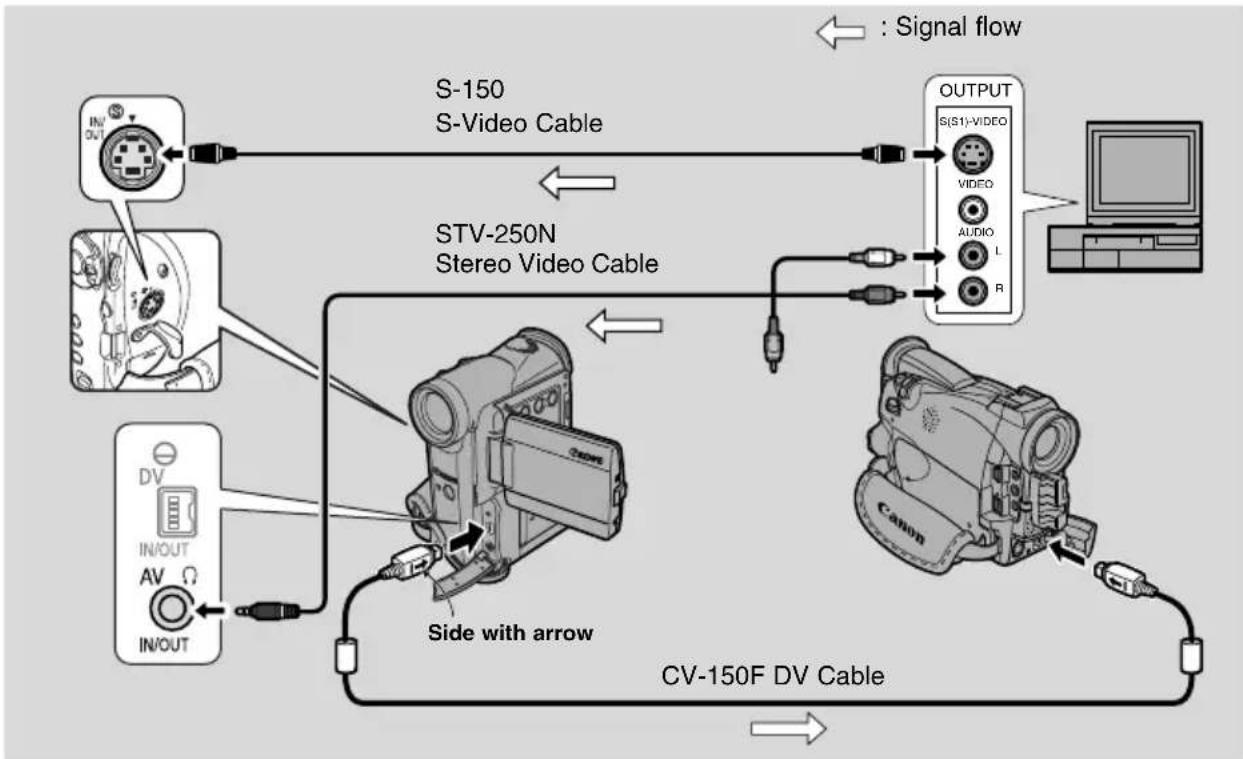
flowchart
graph TD
    A["S-150 S-Video Cable"] --> B["OUTPUT S(S1)-VIDEO"]
    C["STV-250N Stereo Video Cable"] --> D["CV-150F DV Cable"]
    E["DV IN/OUT AV IN/OUT"] --> F["Side with arrow"]
    G["Computer"] --> H["Output"]
    I["Radio"] --> J["Audio L R"]
    K["Signal flow"] --> A
    K --> C
    style A fill:#f9f,stroke:#333
    style C fill:#ccf,stroke:#333
    style E fill:#cfc,stroke:#333
    style G fill:#fcc,stroke:#333
    style I fill:#ffc,stroke:#333
    style K fill:#fcc,stroke:#333
Above illustration shows the connection using a S-video cable. You can also connect to the VIDEO terminal instead (34).
Turning the analog-digital converter on
CAMERA
PLAY (VCR)
MV5i MC
CARD CAMERA
MV5i MC
CARD PLAY (VCR)

MENU

▶ VCR.SET UP
▶AV → DV OUT···OFF
To turn the analog-digital converter on, open the menu and select VCR SET UP. Then select AV → DV OUT, set it to ON and close the menu.
Cautions:
- For normal use, set AV DV OUT to OFF through the menu. If it is set to ON, you cannot input digital signals through the camcorder's DV terminal.
- When connecting to a PC equipped with a DV terminal, you may not be able to transfer converted signals to your PC, depending on the software you are using, and the specifications of your PC and its settings.
E
MV5i/MV5i MC Recording Over Existing Scenes (AV Insert Editing)
You can insert new scenes from your VCR or another camcorder onto your pre-recorded tape using the MV5i/MV5i MC's analog line-in or DV in terminals. Original video and audio will be replaced with the new video and audio.
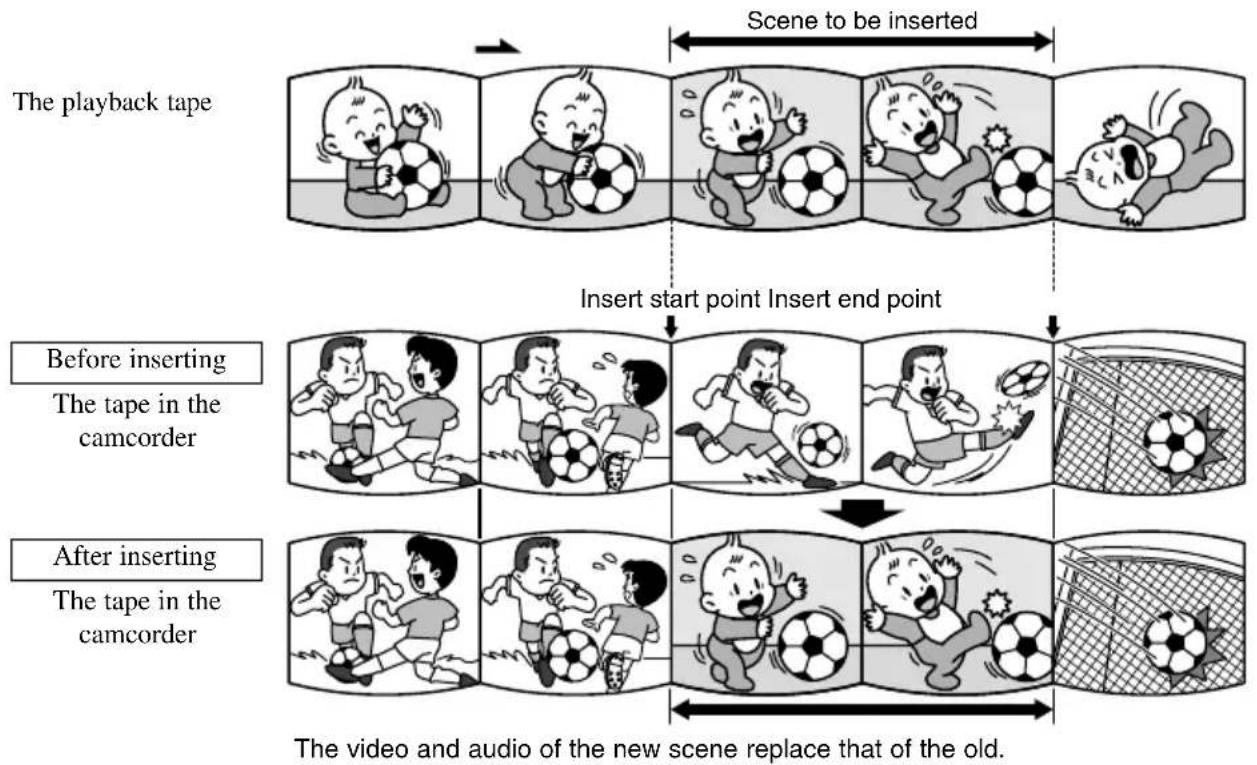
flowchart
graph TD
    A["The playback tape"] --> B["Insert start point"]
    B --> C["Insert end point"]
    C --> D["After inserting the camcorder tape"]
    D --> E["Video and audio of the new scene replace that of the old."]
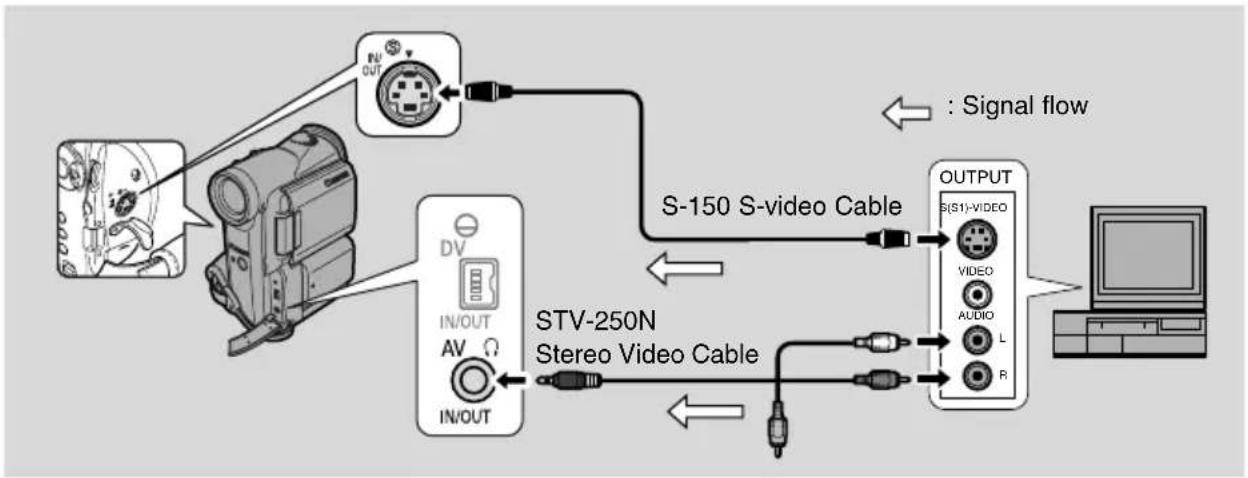
flowchart
graph TD
    A["Input Device"] --> B["DU OUT"]
    B --> C["S-150 S-video Cable"]
    C --> D["OUTPUT S(S1)-VIDEO"]
    D --> E["STV-250N Stereo Video Cable"]
    E --> F["Output Display"]
    style A fill:#f9f,stroke:#333
    style D fill:#ccf,stroke:#333
    style E fill:#cfc,stroke:#333
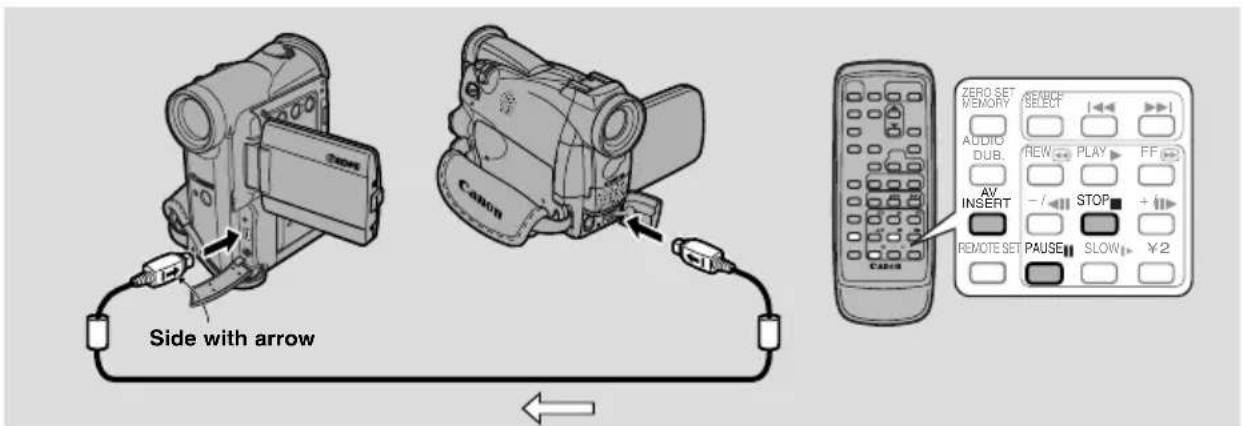
text_image
Side with arrow Canon Canon ZERO SET MEMORY /SENCIF SELECT AUDIO DUB. REW PLAY FF AV INSERT -/ STOP + REMOTE SET PAUSE SLOW ¥2Preparations
The tape in the MV5i/MV5i MC:
When using the MV5i/MV5i MC's AV insert function, only record to tapes recorded in SP mode.
If there are non-recorded portions or portions recorded in LP mode on the tape, recording will stop.
The playback tape:
Use only tapes without non-recorded portions.
If there are non-recorded portions or changes in the recording mode, you may not be able to insert AV correctly.
You cannot insert AV in the following cases:
- The playback tape has been poorly recorded.
- During special playback: fast forward playback, rewind playback or slow playback etc. (analog only).
TV:
You cannot insert AV from a TV program with anomalous synchronized signals, such as when the program itself received poor signals.
Example recording from a VCR
1. Connect the camcorder to the VCR.
2. Prepare the VCR and TV.
- Set the TV/Video selector on the television to Video. For further details, see “Connections for Playback on a TV Screen” on p. 33.
- Turn on the VCR and load a recorded cassette.
• See TV and VCR instruction manuals for details.
3. Turn the camcorder's POWER switch to PLAY (VCR) and load a recorded cassette. (MV51MC the camcorder's TAPE/CARD switch to TAPE.)
- Make sure the REC/SAVE tab on the cassette has been slid to REC (closed position).
Editing

- On the VCR, locate a point 3 seconds before the scene to be inserted. Set the VCR to playback pause mode.
- On the camcorder, press PLAY and locate the recording start point. Set the camcorder to playback pause mode.
- You can use the playback buttons on the body of the camcorder or the special playback functions on the wireless controller in the same way as in playback mode.
-
Press the AV INSERT button.
-
AV INSERT and ●■appear in the display.
- Play back the tape in the VCR.
- To start inserting, press the PAUSE button on the camcorder.
- ●llchanges to ●.
-
To stop inserting, press the STOP button on the camcorder.
-
Inserting stops and AV INSERT disappears from the display. The camcorder returns to stop mode.
- If instead of pressing STOP you press PAUSE, the camcorder returns to the AV insert pause mode.
-
If you set the zero set memory at the position on the tape where you want to stop inserting, every time you return to that point, the camcorder will cancel its AV inserting and enter stop mode.
-
Stop playback on the VCR.
Audio Dubbing
MV 5
You can add sound to the original sound on a pre-recorded tape with the internal or an external microphone. The original sound will not be erased. For best results, add sound to tapes that have been recorded with this camcorder in SP mode with 12-bit sound. Dubbing will stop if there are non-recorded portions on the tape, portions recorded in a mode other than SP mode, with 16-bit or 12-bit 4-channel sound. It is not possible to dub audio onto a tape recorded with 12-bit and 16-bit sound intermingled.
To connect an external microphone:
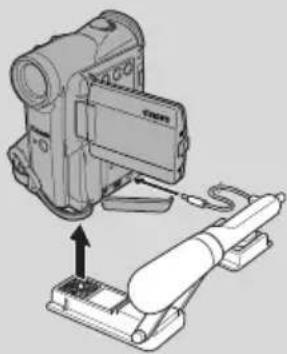
natural_image
Technical illustration of a mechanical device with a mounted component and a cable, showing no text or symbols.
Notes:
- When you add sound using the built-in microphone, make sure not to connect any cables to the MIC terminal.
- To use your TV to monitor video, connect the S-video terminal (34) or the AV terminal (use only the video plug) to your TV. You can monitor the sound with headphones (32).
Preparations
Turn the camcorder's POWER switch to PLAY (VCR) and load a recorded cassette.
- Make sure the REC/SAVE tab on the cassette has been slid to REC (closed position).
Dubbing

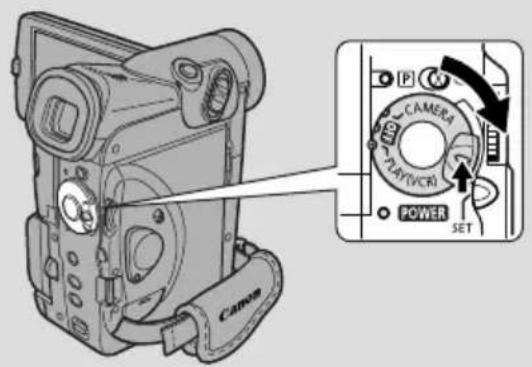
text_image
P CAMERA TURTYVCR1 POWER SET Canon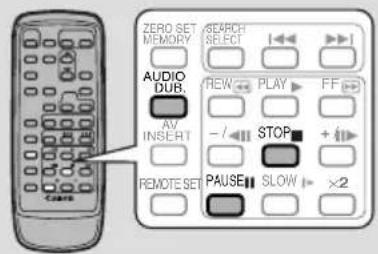
text_image
ZERO SET MEMORY SEARCH SELECT AUDIO DUB. REW PLAY FF AV INSERT - STOP + REMOTE SET PAUSE SLOW ×2Do not connect/disconnect any cables to/from the camcorder when dubbing audio or preparing to dub audio.
-
Locate the point where you want to start audio dubbing, then press the PAUSE button.
-
You can use the playback buttons on the body of the camcorder or the special playback functions on the wireless controller in the same way as in playback mode.
-
The camcorder becomes set to playback pause mode.
-
Press the AUDIO DUB. button.
• AUDIO DUB. and appear on the display.
- Press the PAUSE button.
• Audio dubbing starts.
- Direct your voice into the microphone.
- changes to .
- When you get to the point where you want to stop dubbing, press the STOP button.
• Audio dubbing stops and AUDIO DUB. disappears from the display.
• The camcorder returns to stop mode.
- You can also set the zero set memory (84) at the place you want to stop audio dubbing, then every time you return to that position, audio dubbing will stop.
- If instead of pressing STOP you press PAUSE, the camcorder will return to the playback pause mode.

Notes:
- You cannot use the DV terminal while adding sound.
- You might want to adjust the audio mix (103) when playing back a tape with added sound.
- There may be a loss of sound quality if you add sound to a tape recorded on a camcorder other than the MV5.
- After adding sound for 3 or more times to the same place on the tape, there may be some loss in sound quality.

MV5i/MV5i MC
You can add sound to the original sound on a pre-recorded tape from audio products (AUDIO IN) or with the internal or external microphone (MIC. IN). The original sound will not be erased. For best results, add sound to tapes that have been recorded with this camcorder in SP mode with 12-bit sound. If there are non-recorded portions on the tape, or portions recorded in a mode other than SP mode, or with 16-bit or 12-bit, 4-channel sound, dubbing will stop. If your tape hasn't been recorded in SP mode with 12-bit sound, we recommend dubbing your original tape onto a blank tape using the MV5i/MV5i MC's analog line-in function, then dubbing audio onto the new tape. Make absolutely sure to set the audio mode of the new tape to 12-bit and the recording mode to SP.
To connect other audio equipment:
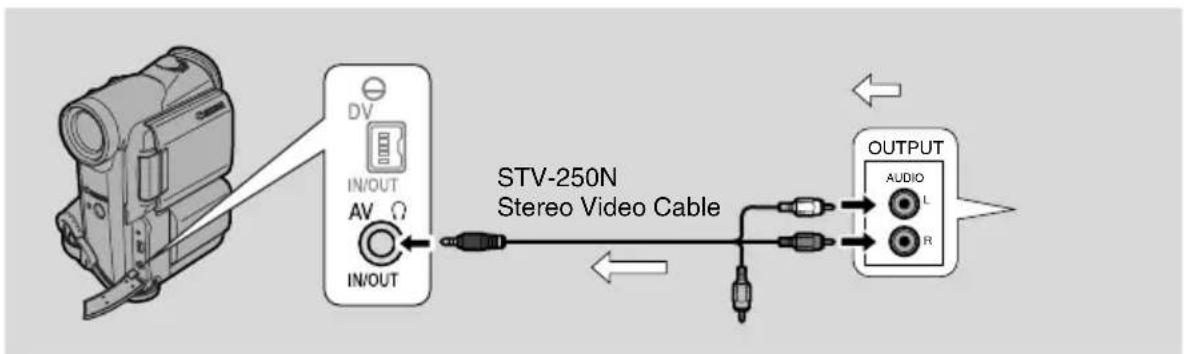
flowchart
graph LR
    A["Image with camera"] --> B["STV-250N Stereo Video Cable"]
    B --> C["OUTPUT"]
    C --> D["AUDIO L"]
    C --> E["R"]
    B --> F["IN/OUT AV IN/OUT"]
    F --> G["In/OUT"]

Notes:
- Do not use the yellow video terminal.
- The AV terminal doesn't put out any video, so connect the S-video terminals and check your TV, or check the LCD or the viewfinder as you add new sound. Always check the new sound with the speaker.
To connect an external microphone:

natural_image
Technical illustration of a mechanical device with a clamping mechanism (no text or symbols)
Notes:
- When you add sound using the built-in microphone make sure not to connect any cables to the MIC terminal.
- To use your TV to monitor video, connect the S-video terminal (34) or the AV terminal (use only the video plug) to your TV. You can monitor the sound with headphones only when using the S-video terminal (32).
Preparations
Turn the camcorder's POWER switch to PLAY (VCR) (MV5iMCove the camcorder's TAPE/CARD switch to TAPE). Load a recorded cassette.
- Make sure the REC/SAVE tab on the cassette has been slid to REC (closed position).
Dubbing

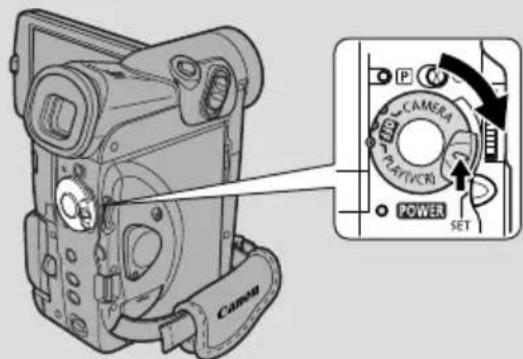
text_image
P CAMERA PLAYER POWER SET Canon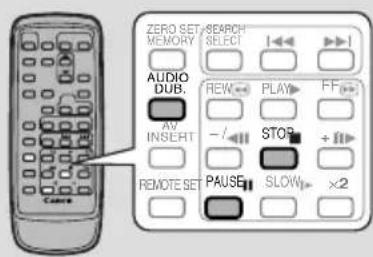
text_image
ZERO SET MEMORY SEARCH SELECT AUDIO DUB. REW PLAY FF AV INSERT STOP + REMOTE SET PAUSE SLOW ×2Do not connect/disconnect any cables to/from the camcorder when dubbing audio or preparing to dub audio.
CAMERA
PLAY (VCR)
MV5i MC
CARD CAMERA
MV5i MC
CARD PLAY (VCR)
MENU
(39)
▶AUDIO DUB...AUDIO IN
VCR SET UP
- Open the menu and select VCR SET UP.
- Select AUDIO DUB.
- Select AUDIO IN or MIC. IN and close the menu.
- Locate the point where you want to start audio dubbing, then press the PAUSE button.
- You can use the playback buttons on the body of the camcorder or the special playback functions on the wireless controller in the same way as in playback mode.
- The camcorder becomes set to playback pause mode.
- Press the AUDIO DUB. button.
• AUDIO DUB. and appear on the display.
- Press the PAUSE button (and start play on the other audio device if AUDIO IN).
• Audio dubbing starts.
- Direct your voice into the microphone.
- changes to .
-
When you get to the point where you want to stop dubbing, press the STOP button (and then stop play on the other audio device if AUDIO IN).
-
Audio dubbing stops and AUDIO DUB. disappears from the display.
- The camcorder returns to stop mode.
- You can also set zero set memory (84) at the place you want to stop audio dubbing, then every time you return to that position, audio dubbing will stop.
- If instead of pressing STOP you press PAUSE, the camcorder will return to the playback pause mode.

Notes:
- You cannot use the DV terminal while adding sound.
- You might want to adjust the audio mix (103) when playing back a tape with added sound.
- There may be a loss of sound quality if you add sound to a tape recorded on a camcorder other than the MV5i/MV5i MC.
- After adding sound 3 or more times to the same place on a tape, there may be some loss in sound quality.
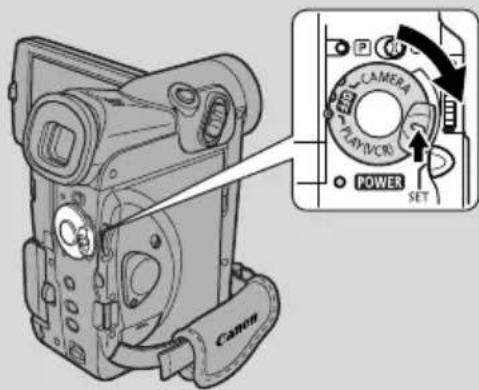
text_image
CAMERA PLAY/CREI POWER SET Canon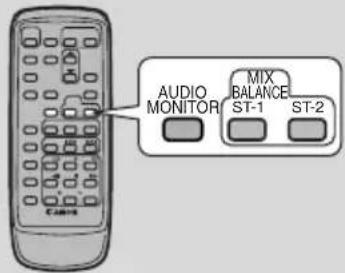
text_image
AUDIO MONITOR MIX BALANCE ST-1 ST-2When you play back a tape that was recorded in 12-bit mode, you can set the audio output to play: stereo 1 (the original sound), stereo 2 (any new sound, dubbed to the tape after recording), or mix the balance between the two.
- Audio from the 16-bit mode only contains stereo 1 sound and so you cannot/do not need to select the audio mix. The same is true for the 12-bit stereo 1 mode, unless new sound has been added post-recording.
CAMERA
PLAY (VCR)
MV5i MC CARD CAMERA
MV5i MC CARD PLAY (VCR)
1. Choose the output.
- Press AUDIO MONITOR on the wireless controller.
- Starting with the last selected setting, 4 settings appear as you push the button:
- STEREO1 for just stereo 1.
- STEREO2 for just stereo 2.
- MIX/FIXED for an equal mix of stereo 1 and 2.
- MIX/VARI. (mix variable) for when you want to mix the balance between stereo 1 and 2.
- To simply choose STEREO1, STEREO2 or MIX/FIXED, make sure your choice appears on the display.
- If you choose MIX/VARI., you can go on to mix the balance.
- Use the ST-1/ST-2 keys to mix the balance. A bar showing the mix appears on the screen for 4 seconds.
Note:
- When you have chosen the output, STEREO1, STEREO2, MIX/FIXED or MIX/VARI. is shown in the top left of the display for a few seconds. If you turn the power off the output is set to STEREO1.

Selecting audio output channels


When you play back a tape whose audio has been recorded on multiple channels, you can change the output channels of that sound.

text_image
CAMERA PLAY (VCR) MV5i MC CARD CAMERA MV5i MC CARD PLAY (VCR) MENU (39) OUTPUT CH...L/RVCR SET UP- Load a tape recorded with multiple-channel audio.
- Open the menu and select VCR SET UP. Then select OUTPUT CH, set it to the desired setting and close the menu.
• Refer to the following list.
| OUTPUT CH setting | Playback sound | |
| Tape recorded with stereo sound | Tape recorded on multiple channels | |
| L+R channels main + subL/R | ||
| L/L L channel only main only | ||
| R/R R channel only sub only | ||
Connecting to a PC Using a DV Cable
By using a DV cable and connecting the camcorder to a PC equipped with a DV terminal conforming to IEEE 1394/DV compatible capture board, you can transfer images taken with the camcorder to your PC.
- While connected, it is recommended that you power your camcorder from a household power socket using the power adapter.
- Turn off the power of both the camcorder and the PC before connecting.
- Optional software necessary.
- FMV5i MC ferring still images and movies from a memory card to your PC using a USB cable, see p. 146.
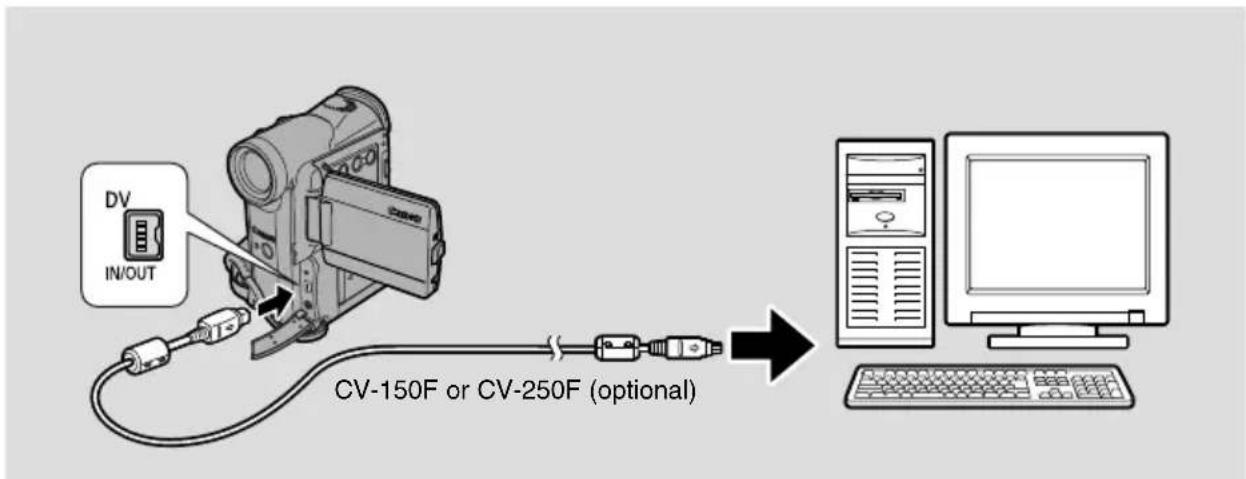
text_image
DV IN/OUT CV-150F or CV-250F (optional)
Notes:
- Operation may not work correctly, depending on the software you are using, and the specifications of your PC and its settings.
• See your PC instruction manual for details.
Caution:
Do not disconnect the DV cable while data is being transferred to the PC (while is displayed).
MV5i MC Memory Card Introduction
The camcorder can record, store and manage still images/movies on 2 types of memory cards: the SD Memory Card (supplied with the camcorder) or the MultiMediaCard (commercially available). The SD Memory Card has the protect switch to protect your recordings from accidental erasure. The SD Memory Card and the MultiMediaCard fit into the same slot.
You can find the explanations in the following order:
Preparations (107-109)
- Inserting the card, selecting image quality and image size, card access display)
Recording Still Images to a Memory Card (112-116)
- Recording from the camcorder, from a tape or other devices
Recording Movies to a Memory Card (7-119)
- Recording from the camcorder, from a tape or other devices
Recording panoramic Images (120-121)
Playing Back a Memory Card (122-124)
- Single image, card search, slide show, index screen
Settings of Still Images/Movies (125-127)
Preventing Accidental Erasure (Protect) (128)
Marking a Still Image for Printing (Print Mark) (129)
Erasing Still Images/Movies (131)
Using the Card Photo Printer CP-10 (Optional) (133-139)
Combining Images and Recording Them to a Tape (Card Mix) (140-142)
Copying Still Images to and from a Tape (143, 144)
Formatting a Memory Card (145)
Utilizing Memory Card Still Images/Movies on a PC (146)
SD Memory Card SDC-8M
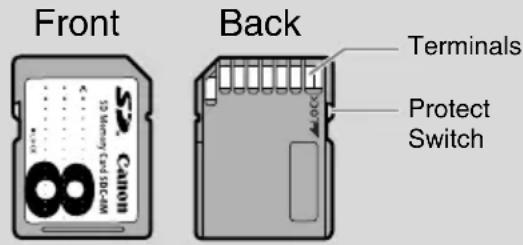
text_image
Front Back Terminals Protect SwitchYou can use most of the camcorder's functions when recording to a memory card, such as the various recording programs (57), self-timer (71) shutter speed (74), white balance (77) and other manual adjustments. Available functions
are marked with a the or OAMERA
MV5i MC CARD PLAY (VCR)
- If you use memory cards other than the supplied one, make sure to format them with the camcorder (145).
Important
- Inserting or removing the memory card without first setting the POWER switch to OFF can result in data damage.
- This camcorder uses only SD Memory Cards ( *) or MultiMediaCards. You cannot use any other types of memory cards.
Inserting and removing the memory card
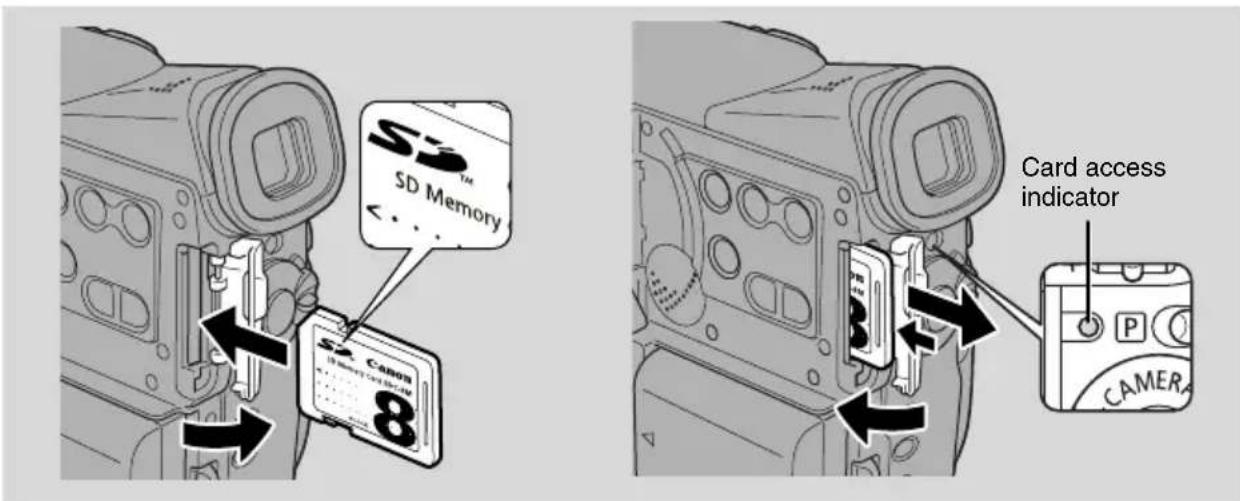
text_image
SD Memory 8 Card access indicator- Turn the POWER switch to OFF.
- When removing the memory card, make sure the card access indicator is off.
-
Open the memory card compartment cover in the direction of the arrow.
-
Insert or remove the memory card.
-
Push the memory card all the way in.
- Remove the memory card by pushing the card in and letting it spring out.
Do not attempt to pull the memory card out without first pushing it in.
- Close the cover.
- When inserting the memory card, do not attempt to close the cover forcefully without the memory card properly inserted.

Notes:
- When you set the camcorder to CARD PLAY (VCR) mode, the last image recorded appears. If there are no images recorded on the memory card, NO IMAGES appears in the display.
- Do not touch the memory card terminals.
Selecting the Still Image Quality


Still image Quality: Superfine, Fine, Standard
CAMERA
PLAY (VCR)
MV5i MC
CARD CAMERA
MV5i MC
CARD PLAY (VCR)
MENU
( 39)
▶ CARD SET UP
▶ SI QUALITY · · FINE
To change the image quality, open the menu and select CARD SET UP. Then select SI QUALITY, set it to FINE or STANDARD, and close the menu.
- The image quality may not differ between the settings depending on the still image.
Selecting the Image Size of Still Images and Movies


Image Size: Still image: 1024 × 768 pixels/ 640 × 480 pixels
Movie: 320 × 240 pixels/160 × 120 pixels
CAMERA
PLAY (VCR)
MV5i MC
CARD CAMERA
MV5i MC
CARD PLAY (VCR)
Still Image
MENU
( 39)
▶ CARD. SET UP
▶ SI SIZE....640×480
To change the image size of a still image, open the menu and select CARD SET UP. Then select SI SIZE, set it to “640 × 480” and close the menu.
- “640” appears in the display.
Movie
MENU
( 39)
▶ CARD. SET UP
▶ MOVIE SIZE · · 160×120
To change the image size of a movie, open the menu and select CARD SET UP. Then select MOVIE SIZE, set it to “160 × 120” and close the menu.
- “160” appears in the display.
Maximum Number of Still Images on an 8 MB Memory Card and Their File Sizes
| Image SizeImage Quality | 1024 ×768 640 ×480 | |||
| No of Images File | Size per Image No of Images File Size per Image | |||
| Superfine Approx. | 14 images 440 KB | Approx. 35 images 175 KB | ||
| Fine Approx. 20 | images 300 KB | Approx. 52 images 120 KB | ||
| Standard Approx. | 39 images 160 KB | Approx. 86 images | 65 KB | |
Maximum Recording Time of Movies on an 8 MB Memory Card and Their File Sizes
| Image Size Max. | Recording Time Total File Size File Size per Second | ||
| 320 × 240 | 10 seconds | 1.4 MB | 140 KB/sec |
| 160 × 120 | 30 seconds | 2.3 MB | 77 KB/sec |
* The actual number varies on the shooting conditions and subjects. Sample images already recorded on the supplied SD Memory Card are to be included in the total number.

Notes:
- Still images are compressed and recorded in the JPEG (Joint Photographic Experts Group) format, and movies in the Motion JPEG format.
• Refer to p. 149 for memory card display. - The remaining number of images that can be recorded on the memory card may sometimes decrease by 2 images at once.
Card access display


The operating states of the memory card are shown in the middle of the display.
CAMERA
PLAY (VCR)
MV5i MC
CARD CAMERA
MV5i MC
CARD PLAY (VCR)
MENU
(39)
▶ DISP.SET UP
▶ CARD ACCESS·ON
To turn the card access display off, open the menu and select DISP. SET UP. Then select CARD ACCESS, set it to OFF and close the menu.
File numbers

The Still images/movies you take are automatically assigned file numbers from 0101-9900 and stored in folders of 100 images each. Each folder is numbered from 101 to 998 and recorded on the memory card. Sample images have been pre-recorded on the supplied SD Memory Card, entering folder number 100 (folder name is “100canon”).
Set the image file numbers so that they reset each time a new memory card is inserted, or so that they count up continuously.
①CONTINUOUS
Numbering is continuous between cards, so that the first file number assigned on a new memory card is 1 more than the last file number assigned on the previous memory card. When the file numbers are set to CONTINUOUS, each image taken is assigned a different number, avoiding duplication of numbers. This is convenient when you want to manage your images on a PC. We recommend keeping the file numbers set to CONTINUOUS.
Three images are recorded on the card.
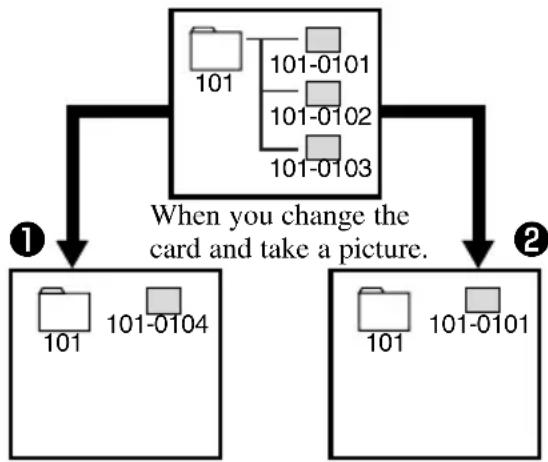
flowchart
graph TD
    A["101"] --> B["When you change the card and take a picture."]
    C["101-0101"] --> B
    D["101-0102"] --> B
    E["101-0103"] --> B
    F["101"] --> G["Two separate boxes labeled 101 and 101-0104"]
    H["101"] --> I["Two separate boxes labeled 101 and 101-0101"]
②RESET
Each time you insert a new memory card, the file number resets to its default value (101-0101). If the card already contains files, the next available number is assigned.
CAMERA
PLAY (VCR)
MV5i MC
CARD CAMERA
MV5i MC
CARD PLAY (VCR)

text_image
MENU (39) ►CARD SET UP ►FILE NOS.…CONTINUOUSTo change the file numbering, open the menu and select CARD SET UP. Then select FILE NOS., set it to RESET and close the menu.
Turning off the shutter sound
Makes the sound of a shutter being released when a still image is recorded to a memory card.

text_image
CAMERA PLAY (VCR) MV5i MC CARD CAMERA MV5i MC CARD PLAY (VCR) MENU ( 39 ) SHTR SOUND · · ONCARD SET UPTo turn the shutter sound off, open the menu and select CARD SET UP. Then select SHTR SOUND, set it to OFF and close the menu.
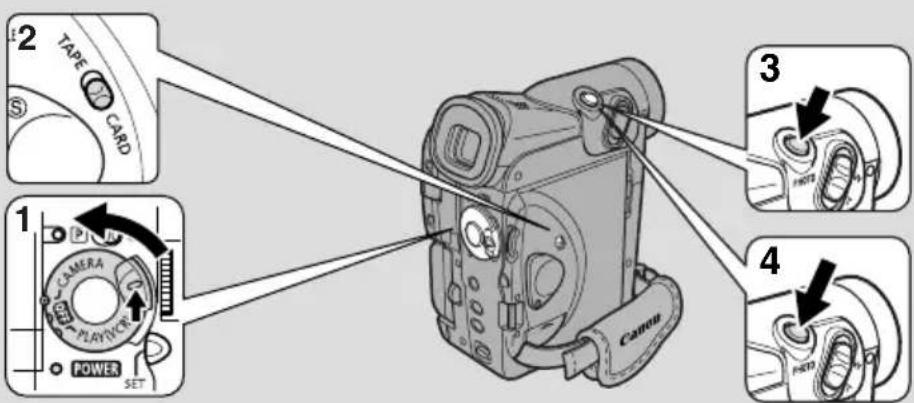
text_image
2 TAPE CARD 1 CAMERA PLAYER POWER SET 3 4 CanonYou can record still images onto a memory card. In addition to the still images you record directly onto the memory card, you can record images from a tape in the camcorder, or images input via the DV terminal or AV terminal onto the memory card.
- When you are using an SD Memory Card, make sure the protect switch is set to allow recording.
- Make sure a memory card with enough memory available is inserted into the camcorder.
- While the card access indicator flashes, do not disconnect the power source or remove the memory card. Doing so could result in data damage.
1. Press and hold the small button on the POWER switch and turn the POWER switch to CAMERA.
2. Move the TAPE/CARD switch to CARD.
- The number of images that can still be recorded on the memory card, and other information appear in the display.
- The camcorder will turn itself off if you are using a battery and do not operate the camcorder for more than 5 minutes. Set the POWER switch to OFF and then back to CAMERA.
3. Press the PHOTO button halfway and hold it.
- Exposure is locked.
- During autofocus ● flashes white in the display as the camcorder adjust the focus and it is displayed continuously as a green mark when the camcorder is ready to take the still image.
4. Press the PHOTO button fully down to record the still image.
- disappears from the display. The shutter sound sounds and simultaneously the display appears to close for an instant as if it were a shutter releasing.
- The card access indicator flashes and the card access display appears in the display (See “The indicators that appear in the LCD display when LCD MIRROR is turned on” on page 28).

Notes:
- To use the self-timer (☐71), set the self-timer before step 3, and then press the PHOTO button fully down.
- The wireless controller's PHOTO button has no half-way setting. Press the button fully and the camcorder immediately takes the image.
The indicators that appear in the display when recording to a memory card:
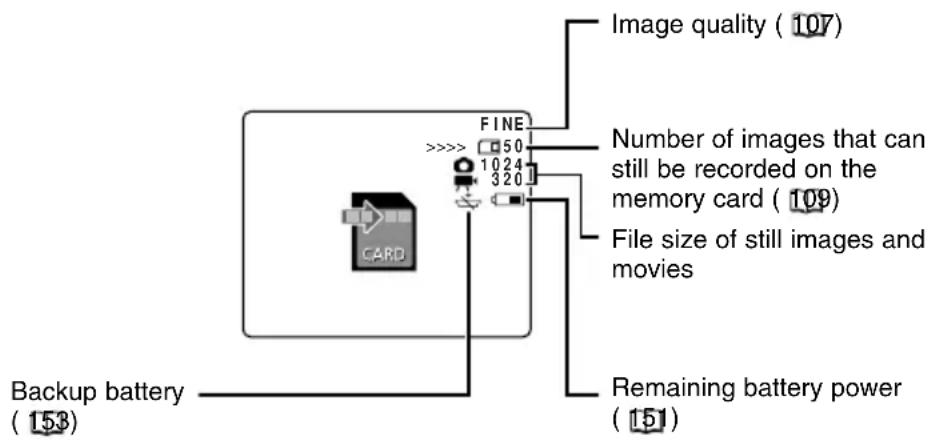
text_image
Image quality (107) FINE Number of images that can still be recorded on the memory card (109) File size of still images and movies Remaining battery power Backup battery (153)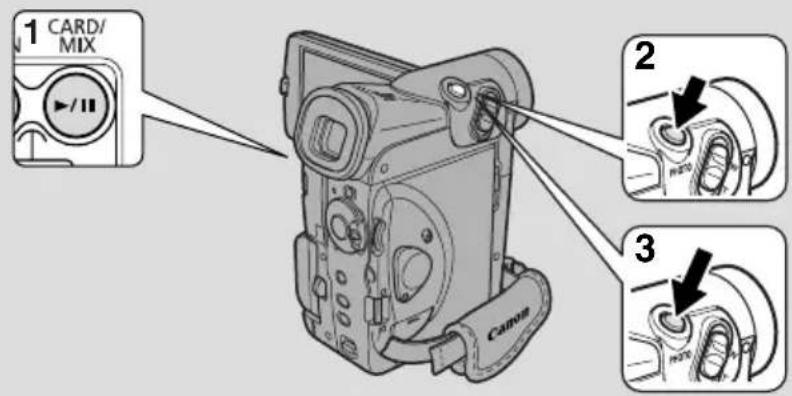
text_image
1 CARD/ MIX 2 3Record an image from a tape onto a memory card as still images. To automatically record multiple still images from a tape to a memory card, refer to "Copying Still Images from Tape to Memory Card" (143).
- The still image's data code will reflect the date and time it has been recorded to the memory card.
- The image size of a still image recorded from tape onto a memory card will be 640 × 480 .
Tape
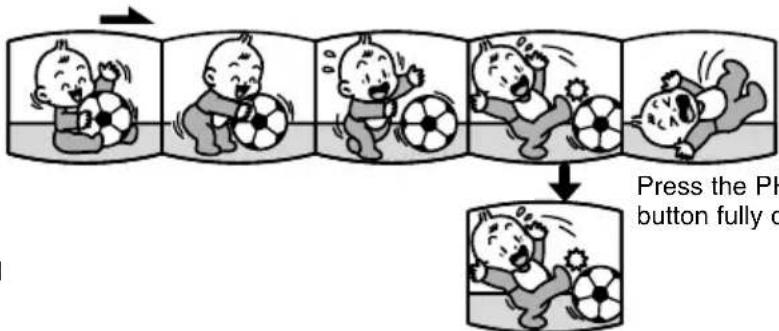
text_image
Press the PH button fully oPress the PHOTO button fully down
Memory card

CAMERA
PLAY (VCR)
MV5i MC CARD CAMERA
MV5i MC CARD PLAY (VCR)
- Play back the tape.
- When the image you want to record appears in the display, press the PHOTO button halfway down and hold it.
- The tape is set to playback pause mode and the number of images that can still be recorded on the memory card appears in the display.
- Press the PHOTO button fully down to record the still image to the memory card.
• The card access indicator flashes.

Notes:
- You can also set the tape to playback pause mode in step 1 and record the image with only 1 full press of PHOTO button.
- If you record an image onto a memory card that was originally recorded in the 16:9 mode for wide screen TV's, the image will appear to be vertically “squashed” (compressed).
- The shutter sound doesn't sound in TAPE PLAY (VCR) mode.
Recording Still Images from Other Devices (VCR, TV or Other Digital Camcorders)
You can record images from a VCR or TV connected through the S-terminal or AV terminal (analog line-in), as well as images from other digital camcorders connected through the DV terminal onto the memory card as still images. Refer to p. 86 for connecting instructions.
- The data code of the still image will reflect the date and time it has been recorded onto the memory card.
- The image size of a still image recorded from analog or digital devices onto a memory card will be 640 × 480 .
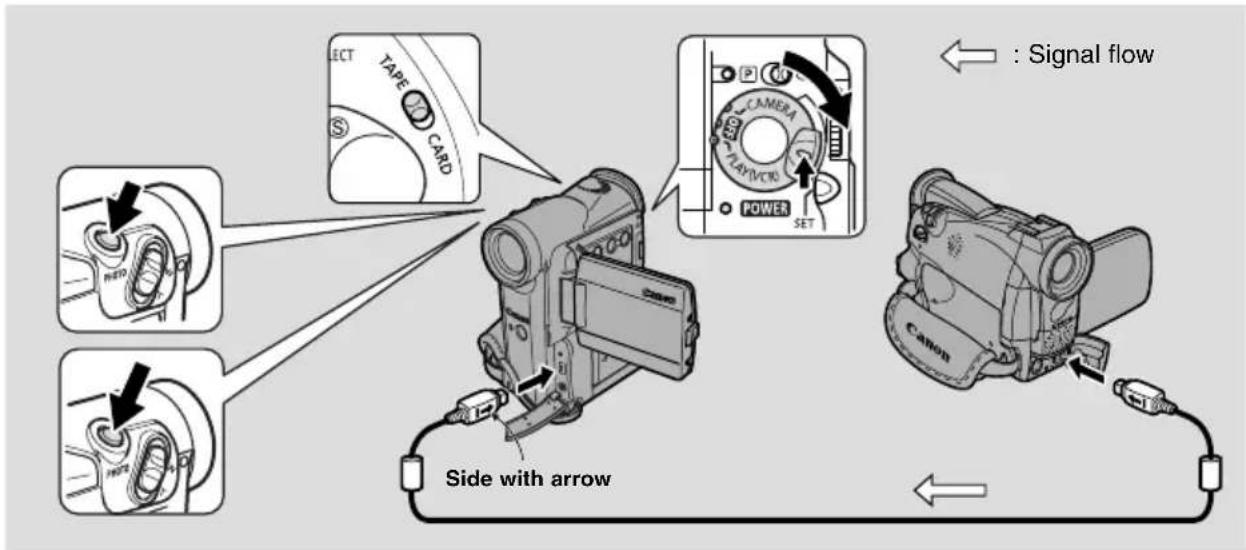
text_image
SELECT TAPE CARD CAMERA PLAY/CTR POWER SET Side with arrow ← : Signal flow CARONPreparations
CAMERA
PLAY (VCR)
MV5i MC CARD CAMERA
MV5i MC CARD PLAY (VCR)
- Connect the camcorder to the other device.
- Prepare the other device.
- Load a memory into the camcorder.
- Turn the camcorder's POWER switch to PLAY (VCR) and the TAPE/CARD switch to TAPE.
• DV IN appears in the display.
- There is no need to load a cassette if you only record still images onto a memory card. If a cassette is inserted, make sure the cassette is in stop mode.

Recording

- Start playback on the other device.
- When the image you want to record appears in the display, press the PHOTO button halfway down and hold it.
- The image appears as a still image in the display.
- The number of images that can still be recorded on the memory card appears in the display.
- Press the PHOTO button fully down to record the image to the memory card.
- The card access indicator flashes.

Notes:
- When dubbing to a tape via the DV terminal, make sure that AV→DV is not displayed on the screen. If so, set AV→DV OUT to OFF in the menu ( 90).
- If you record an image onto a memory card that was originally recorded in the 16:9 mode for wide screen TV's, the image will appear to be vertically “squashed” (compressed).
- The shutter sound doesn't sound in TAPE PLAY(VCR) mode.
Recording Movies onto a Memory Card

You can record movies onto a memory card. Transferring the movie to a PC allows you to view it on the PC or to attach it to your e-mail (please refer to the CANON DIGITAL VIDEO SOLUTION DISK for detailed instructions). In addition to the movie you record directly onto the memory card, you can record movies from a tape or input via the AV terminal (analog line-in) or the DV terminal onto the memory card.
The sound of the movie recorded to a memory card will be monaural. The sampling sequence will be 16kHz.
- Make sure a memory card with enough memory available is inserted into the camcorder.
- When you are using an SD Memory Card, make sure the protect switch is set to allow recording.
- While the card access indicator flashes, do not disconnect the power source. Doing so could result in data damage.
CAMERA PLAY (VCR) MV5i MC CARD CAMERA MV5i MC CARD PLAY (VCR)
1. Turn the POWER switch to CAMERA and the TAPE/CARD switch to CARD.
2. Press the START/STOP button.
- You can record up to 10 seconds in 320 × 240 and 30 seconds in 160 × 120 .
- Press the START/STOP to end recording.
- The camcorder starts to write the movie to the memory card when recording is finished.

Notes:
- For using the self-timer (☐71), set the self-timer before step 3, and then press the START/STOP button.
- Do not load/unload a tape during recording. Sound will not be recording during this operation.

Recording Movies from a Tape

You can record a movie from a tape to a memory card.
- The data code of the movie will reflect the date and time it has been recorded to the memory card.
CAMERA
PLAY (VCR)
MV5i MC
CARD CAMERA
MV5i MC
CARD PLAY (VCR)
- Turn the POWER switch to PLAY (VCR).
- Move the TAPE/CARD switch to TAPE.
- Play back the cassette.
-
When the image you want to record appears in the display, press the START/STOP button.
-
You can record up to 10 seconds in 320 × 240 and 30 seconds in 160 × 120 .
- Press the START/STOP to end recording.
- The camcorder starts to write the movie to the memory card when recording is finished.
- You can also start recording during record pause mode by pressing the Start/Stop button.

Note:
- If you record a movie to a memory card that was originally recorded in the 16:9 mode for wide screen TVs, the image will appear to be vertically “squashed” (compressed).
Recording Movies from Other Devices (VCR, TV or Other Digital Camcorders)
You can record images from a VCR or TV connected through the S-terminal or AV terminal (analog line-in), as well as images from other digital camcorders connected through the DV terminal onto the memory card as movies. Refer to p. 32, 86 for connecting instructions.
- The data code of the movie will reflect the date and time it has been recorded onto the memory card.
Preparations
CAMERA
PLAY (VCR)
MV5i MC
CARD CAMERA
MV5i MC
CARD PLAY (VCR)
- Connect the camcorder to the other device.
- Prepare the device.
- Insert a memory card into the camcorder.
- Turn the camcorder's POWER switch to PLAY (VCR) and the TAPE/CARD switch to TAPE.
- There is no need to load a cassette if you only record a movie onto the memory card. If a cassette is inserted, make sure the cassette is in stop mode.
Recording
- Start playback on the other device.
-
When the image you want to record appears in the display, press the START/STOP button.
-
You can record up to 10 seconds in 320 × 240 and 30 seconds in 160 × 120 .
- Press the START/STOP to end recording.
- The camcorder starts to write the movie to the memory card when recording is finished.
- You can also start recording during record pause mode by pressing the Start/Stop button.
Note:
- When dubbing to a tape via the DV terminal, make sure that AV→DV is not displayed on the screen. If so, set AV→DV OUT to OFF in the menu (☐90).
- If you record a movie to a memory card that was originally recorded in the 16:9 mode for wide screen TVs, the image will appear to be vertically “squashed” (compressed).
E
Recording Panoramic Images (Stitch Assist)


You can merge separate images into one large panoramic scene using the supplied software (PhotoStitch) on a PC. You can shoot a subject that won't fit into a single frame, such as a landscape, and stitch it together later.
Recording
Photo Stitch detects the overlapping portions of adjoining images and merges them. When recording, try to include a distinctive item (landmark, etc.) in the overlapping portions.
CAMERA
PLAY (VCR)
MV5i MC
CARD CAMERA
MV51MC
CARD PLAY (VCR)
MENU
(39)
▶ STITCH AST
-
Turn the POWER switch to CAMERA and the TAPE/CARD switch to CARD.
-
Open the menu and select STITCH AST.
- Select the direction with the CARD +/- button and press the SET button. Press the CARD + button to move clockwise, press the CARD - button to move counter-clockwise.
-
Set the recording program and zoom on the subject.
-
If necessary, set the focus manually and AE shift.
• After the first image, recording program, zoom, and AE shift cannot be changed. -
Press the PHOTO button to record the first image.
- Direction and number of recorded images will be shown on the display.
- Orient the camcorder so that the second frame overlaps a small portion of the first image and press the PHOTO button to take the next image.
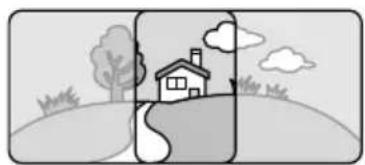
natural_image
Simple line drawing of a house on a hillside with trees and clouds, no text or symbols present- Do not worry about minor discrepancies in the overlapped area because the computer software can compensate for them when the images are merged.
- You can retake images by pressing the CARD – button to return to the previous image.
• A maximum of 26 images may be recorded. -
Follow the same steps to shoot subsequent images in the sequence.
-
Finish the sequence by pressing the MENU button after the last image has been recorded.
- Refer to the Software Instruction Manual for instructions on how to stitch them together.

Notes:
- The overlapped area should be set between 30 to 50% of the frame.
Discrepancies above and below the frame can be automatically compensated if within 10%. - Make sure that no moving subject is included in the overlapping area.
- Do not try to stitch images that include both distant and close items. Objects may appear warped or doubled up.

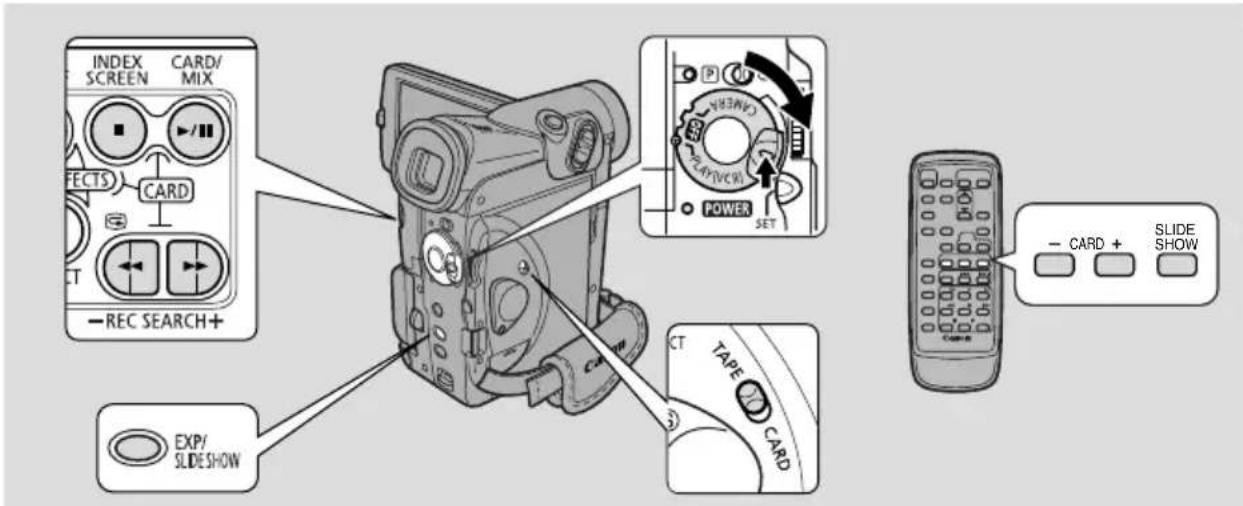
text_image
INDEX SCREEN CARD/ MIX - /+/# FECTS CARD T -REC SEARCH+ EXP/ SLIDESHOW POWER SET - CARD + SLIDE SHOW CT TAPE CARDPlay back and view still images/movies recorded on a memory card. (For details on connecting to a TV, see “Connections for Playback on a TV Screen” on p. 32.) You can also enlarge the still images by 2 times while viewing (79).
- The camcorder may not be able to copy or play, etc., still images/movies recorded on a non-Canon camcorder.
Caution:
- You may not be able to play back the following still images/movies correctly on this camcorder:
- Still images/movies that have not been recorded with this camcorder but downloaded from a PC (excluding the sample images on p. 148-149)
- Still images/movies that have been recorded with this camcorder but have subsequently been enhanced on a PC
- Still images/movies whose image file names have been changed on a PC
There are 3 ways to view still images/movies:
- Single still images/movies
- Slide show: One after the other automatically in order of recording
- Index screen: Six still images/movies at once
When the camcorder is in playback pause mode, you can use the card search function to move quickly through still images/movies recorded anywhere on a memory card to find a still image/movie you want to view (Card Search function).
Make sure a memory card that has still images/movies recorded on it is inserted into the camcorder.
While the card access indicator flashes, do not disconnect the power source.
Doing so could result in data damage.
●Single Image
CAMERA
PLAY (VCR)
MV5i MC
CARD CAMERA
MV5i MC
CARD PLAY (VCR)

1. Turn the POWER switch to PLAY (VCR).
2. Move the TAPE/CARD switch to CARD.
- The last still image/movie recorded appears in the display.
- Movies will be displayed with the first scene as a still image.
3. Search for the desired still image/movie by pressing the CARD +/- buttons.
- Press + to view the next still image/movie and – to view the previous still image/movie.
- Pressing + at the last still image/movie will take you to the first still image/movie. Pressing – at the first still image/movie will take you to the last still image/movie.
Movies: Pressing ▶/■ plays back the movie and will show the last scene as a still image when playback ends. Pressing ▶/■ during playback will stop the movie and the scene is shown as a still image. Pressing ▶/■ again will restart the playback.
●Card Search Function
- You can quickly search for still images/movies while viewing thumbnails (small images).
CAMERA
PLAY (VCR)
MV5i MC
CARD CAMERA
MV5i MC
CARD PLAY (VCR)
With a still image/movie in the display, press and hold the CARD +/- button.
- Press the + button to search forwards and press the – button to search backwards.
- When you release the button, the thumbnail displays as full size still image/movie.
- The image size is not displayed during the search.
●Slide Show
CAMERA
PLAY (VCR)
MV5i MC
CARD CAMERA
MV5i MC
CARD PLAY (VCR)
With an still image/movie in the display, press the SLIDE SHOW button.
- Still images are automatically played back one after another.
• Movies are played back normally.
To stop the slide show, press the SLIDE SHOW button.
- The slide show starts or stops each time you press the SLIDE SHOW button.
●Index Screen
Up to 6 still images/movies appear at once, allowing you to search quickly through the still images/movies. Movies will be displayed with the first scene as a still image, indicated by a movie frame.
CAMERA
PLAY (VCR)
MV5i MC
CARD CAMERA
MV5i MC
CARD PLAY (VCR)
1. With an still image/movie in the display, press the INDEX SCREEN button.
- Up to 6 images appear in the display.
2. Move the frame to the still image/movie you want to view.
- Turn the selector dial downwards to go to the previous still image/movie and upwards to go to the next still image/movie.
- Turning the dial upwards at the last still image/movie will take you to the next index screen. Turning the dial downwards at the first still image/movie will take you to the previous index screen.
- Jump to the next/previous index screen with the CARD +/- buttons.
3. Press the INDEX SCREEN button.
- The still image/movie you have marked fills the whole display.
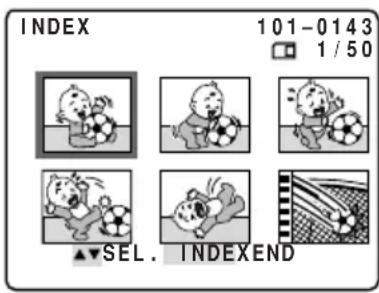
text_image
INDEX 101-0143 1 / 50 SEL. INDEXEND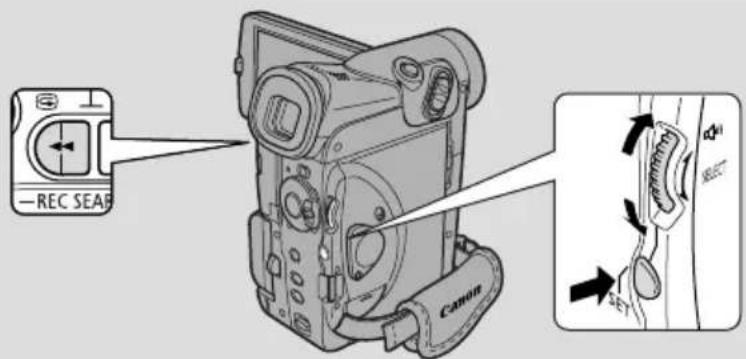
text_image
REC SEAR CanonYou can easily erase unwanted still images/movies recorded to the memory card while viewing them, protect them from accidental erasure, or mark a still image for printing. (File Operation)
Movies will be displayed with the first scene as a still image, indicated by a movie frame.
- File Operation is set in CARD PLAY (VCR) mode.
● Preventing accidental erasure (Protect ⬅n
Select important still images/movies and protect them from accidental erasure.
- If a memory card is formatted, however, all still images/movies, including protected still images/movies, will be permanently erased.
• Movies can only be protected when the first or last scene is displayed as a still image. They cannot be protected during playback pause.
- The pre-recorded sample images provided on the supplied SD Memory Card are already protected.
There are 2 ways to protect still images/movies (including the ways to cancel the setting).
- MV5i MC CARD PLAY (VCR) Operation menu (127)

- MVSI MC Card PLAY (VCR) Operations submenu (128)

● Marking a still image for printing (Print Mark)
A still image on a memory card must be marked before it can be printed. The camcorder supports the DPOF (Digital Print Order Format) print format. Still images can be automatically printed on a DPOF-supporting Canon Printer. Up to 99 images per memory card can be print marked.
• Movies cannot be marked for printing.
There are 3 ways to mark a still image for printing (including the ways to cancel the setting).
To mark a still image for printing or erase print marks one at a time
- MV5i MC CARD PLAY (VCR) Operation menu (127)

- MVST MC CARD PLAY (VCR) Operations submenu (129)

To erase all print marks
- MV51 MC CARD PLAY (VCR) Operations submenu (130)


● Erasing still images/movies
Erase still images/movies singly or all at once.
- You cannot erase protected still images/movies. Cancel image protection first in order to erase an image.
- Erase still images/movies with caution. Once a still image/movie has been erased, it cannot be restored.
There are 2 ways to erase a single still image/movie.
To erase still images/movies one at a time
- MV5I MC CARD PLAY (VCR) Operation menu (127)

To erase still images/movies one at a time or erase all still images/movies on the memory card at once
- MV51 MC CARD PLAY (VCR) Operations submenu (131)

☐ SINGLE: When playing back still images/movies in CARD PLAY (VCR) mode ☐ INDEX: When displaying an index screen in CARD PLAY (VCR) mode
1. With a still image/movie in the display, press the SET button to open the FILE OPER. menu.
- PROTECT, PRINT MARK, and IMAGE ERASE settings appear.
- If you select RETURN, the menu disappears from the display.
To protect a still image/movie
2. Select PROTECT and press the SET button.
- The protect mark appears on the still image/movie.
- Now you are unable to erase this still image/movie.
- Press the SET button again to cancel it.
- If you select RETURN, the menu disappears from the display.
- To cancel image protection, select PROTECT and press the SET button.
On disappears and now you can erase this still images/movies.
To mark a still image for printing (Print Mark)
2. Select PRINT MARK, set the number of prints with the selector dial and press the SET button.
- The print mark appears on the still image.
- If you select RETURN, the menu disappears from the display.
- To cancel a print mark, select PRINT MARK set the number of prints to 0 (Zero) with the selector dial and press the SET button. Disappears.
To erase a still image/movie
2. Select IMAGE ERASE and press the SET button.
- ERASE THIS IMAGE? NO YES appears in the display.
- If you select RETURN, the menu disappears from the display.
3. Select YES and press the SET button.
- The still image/movie is erased.
- One still image/movie before the erased still image/movie appears.
Preventing Accidental Erasure (Protect)

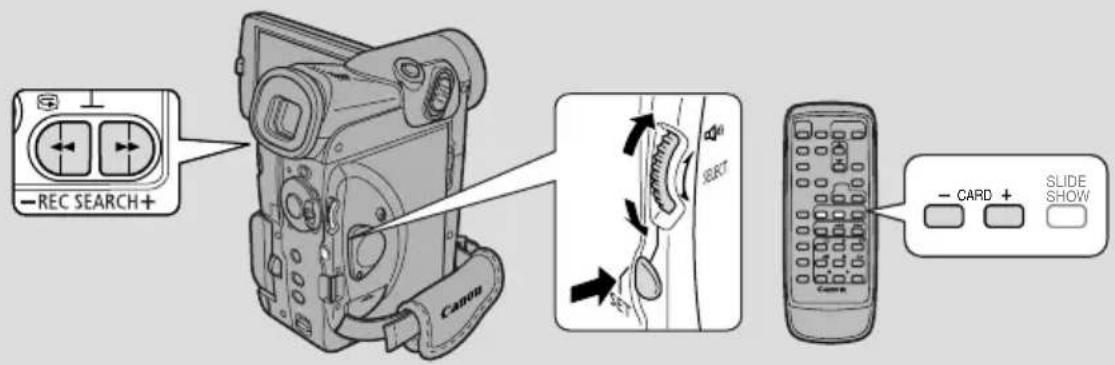
text_image
REC SEARCH+ Canon - CARD + SLIDE SHOWThis section describes how to protect the still image/movie from the Card Operation submenu when displaying an index screen in CARD PLAY (VCR) mode (including the way to cancel the setting).
You can also protect a still image/movie through File Operation menu (127).
Protecting a still image/movie while viewing an index screen
CAMERA
PLAY (VCR)
MV5i MC
CARD CAMERA
MV5i MC
CARD PLAY (VCR)
MENU
(39)
▶ CARD OPER.
PROTECT
Make sure a memory card that has still images/movies recorded on it is inserted into the camcorder.
-
With a still image/movie in the display, press the INDEX SCREEN button.
-
Up to 6 still images/movies appear in the display.
-
Move the frame to the still image/movie that you want to protect (Index Screen 124)
-
Open the menu and select CARD OPER.
- Select → PROTECT ON
- Press the SET button.
• The protect mark appears on the still image/movie.
- Now you are unable to erase this still image/movie.
- Press the SET button again to cancel it.
- Close the menu.

Note:
- To cancel image protection, move the frame to the protected still image/movie and press the SET button in step 3. The protect mark disappears.
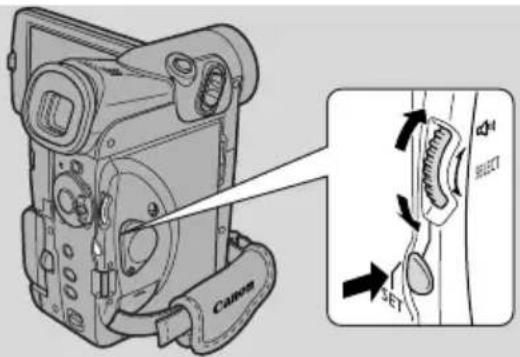
text_image
Diagram of a Canon camera with labeled parts and directional arrows indicating motion or movement, including a zoomed-in view of the camera's side panel.This section describes how to mark the still image for printing from Card operation submenu in CARD PLAY (VCR) mode (including the way to cancel the setting).
- When displaying an index screen, you can mark the still image for printing.
- When playing back a single still image, you can erase all print marks.
• Movies cannot be marked for printing. The frame on the index screen will turn purple, indicating that the movie cannot be selected for print mark.
You can also mark a still image for printing through File Operation menu (127).
Marking an a still image for printing while viewing an index screen

flowchart
graph LR
    A["CAMERA"] --> B["PLAY (VCR)"]
    B --> C["MV5i MC CARD CAMERA"]
    C --> D["MV5i MC CARD PLAY (VCR)"]
    E["MENU (39)"] --> F["CARD OPER."]
    F --> G["PRINT MARK"]
Make sure a memory card that has a still image recorded on it has been inserted into the camcorder.
-
With a still image in the display, press the INDEX SCREEN button.
-
Up to 6 images appear in the display.
-
Move the frame to the still image that you want to mark a still image for printing (Index Screen 124).
-
Open the menu and select CARD OPER.
-
Select PRINT MARK and set the number of prints with the selector dial.
-
Press the SET button.
• The print mark appears next to the still image.
- Close the menu.

Notes:
- To cancel a print mark, move the frame to the print-marked a still image, set the number of prints to 0 (Zero) with the selector dial and press the SET button. The ▶ print mark disappears.
- If there are a large number of images recorded on the memory card, it may take time for a print mark to appear on a still image.
Erasing all print marks
CAMERA
PLAY (VCR)
MV5i MC
CARD CAMERA
MV5i MC
CARD PLAY (VCR)
MENU
(39)
▶ CARD OPER.
▶ PRINT MARKS> ALL ERASE
Make sure a memory card that has a still image recorded on it has been inserted into the camcorder.
- With a still image in the display, open the menu and select CARD OPER.
- Select PRINT MARKS ALL ERASE.
- ERASE ALL PRINT MARKS ?YES NO appears in the display.
- Select YES and press the SET button.
- The print mark disappears from the still image.
- Close the menu.
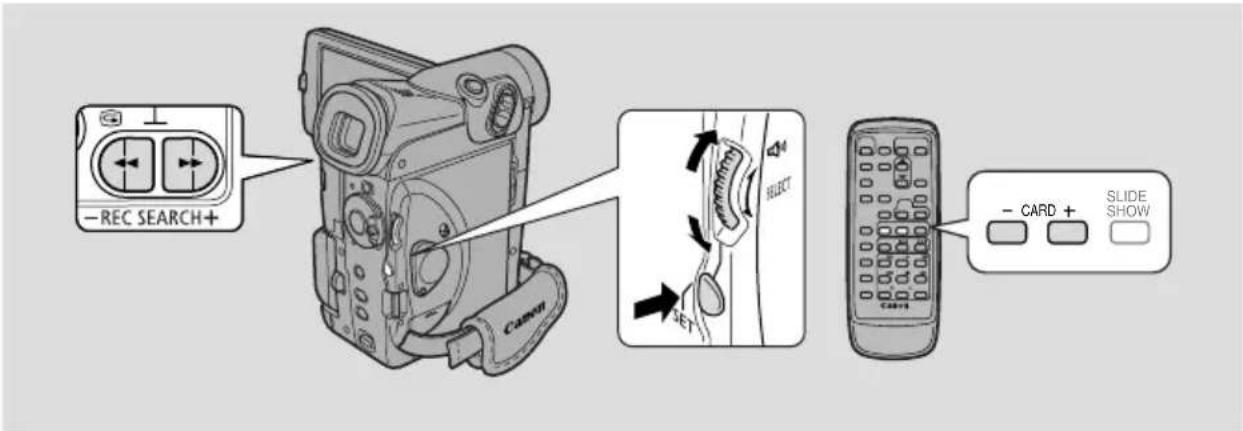
text_image
-REC SEARCH+ Canon SELECT CARD + SLIDE SHOWThis section describes how to erase the still image/movie from the Card Operation submenu when playing back a single still image/movie in CARD PLAY (VCR) mode. (SINGLE or ALL)
You can also erase a still image/movie through File Operation menu (127).

text_image
CAMERA PLAY (VCR) MV5i MC CARD CAMERA MV5i MC CARD PLAY (VCR)
flowchart
graph LR
    A["CARD OPER."] --> B["IMAGE ERASE"]
Make sure a memory card that has still images/movies recorded on it is inserted into the camcorder.
To erase still images/movies one at a time
-
Select the still image/movie you want to erase.
-
Use the index screen (124) or card search function (123) if necessary and make sure the still image/movie you want to erase fills the display.
-
If you use the index screen, press the INDEX SCREEN button after selecting the still image/movie. The still image/movie you selected fills the whole display.
-
Open the menu and select CARD OPER.
-
Select IMAGE ERASE.
-
CANCEL, SINGLE and ALL settings appear.
-
To cancel erasing, select CANCEL and close the menu.
-
Select SINGLE.
- ERASE THIS IMAGE? NO YES appears in the display.
5. Select YES and press the SET button.
- The still image/movie erases and the previous still image/movie appears for erasing.
- To erase another single still image/movie, move to that still image/movie with the CARD +/- buttons, and select YES.
- If the still image/movie you are trying to erase is a protected still image/movie, YES appears in purple and is unselectable.
- If you select NO, you return to step 4.
6. Close the menu.
To erase all still images/movies on the memory card at once
1. Open the menu and select CARD OPER.
2. Select IMAGE ERASE.
- CANCEL, SINGLE and ALL settings appear.
- To cancel erasing, select CANCEL and close the menu.
3. Select ALL.
- ERASE ALL IMAGES? [EXCEPT FOR IMAGES] NO YES appears in the display.
4. Select YES and press the SET button.
- All still images/movies except the protected ones are erased.
- If you select NO, you return to step 2.
5. Close the menu.
Using the Card Photo Printer CP-10 (Optional)
You can print out still images recorded to the memory card by connecting the Card Photo Printer CP-10 (optional) directly to the camcorder without using a PC. It can also be used with the print mark settings (129).
- Two direct interface cables are supplied with the Card Photo Printer CP-10. Use the cable with the USB logo on the connector (DIF-100).
- We recommend that you use a household power source to power the camcorder when it is connected to the printer.
- Also refer to the instruction manual of the Card Photo Printer CP-10 for further details.
- Number of copies that can be printed with the CP-10: Up to 99 copies per print mark can be selected on the camcorder (125). The total number of copies that can be printed from one memory card is limited to 250. All prints exceeding the total number of 250 will not be printed.
Connecting the Card Photo Printer to the camcorder
- Turn the POWER switch of the camcorder to OFF.
- Attach the printer's AC adapter to the printer and the power cable to the printer's AC adapter.
- Plug the power cable into a household power socket.
- Connect the printer to the camcorder using the interface cable.
- Turn the POWER switch on the camcorder to PLAY (VCR) and the TAPE/CARD switch to CARD.
- “Print Set” when the printer is correctly connected to the camcorder.
Printing
You can select the number of copies (135), the style (standard/multiple (136), bordered/borderless (136)) or the printing area (137).
CAMERA
PLAY (VCR)
MV5i MC
CARD CAMERA
MV5i MC
CARD PLAY (VCR)
During Playback (Single Image)
- Select the still image you wish to print.

2. Press the SET button.
• The print dialog appears.
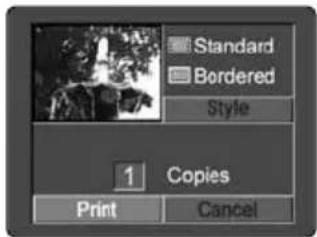
text_image
Standard Bordered Style 1 Copies Print Cancel3. Make sure that [Print] is selected and press the SET button.
![CANON MV5 - Make sure that [Print] is selected and press the SET button. - 1](/content/2026/05/761256/images/856597086cfc2d0b4247a59cb1019545532fe3235547f44a11dbcd020bc33fea.jpg)
text_image
Standard Bordered Now printing(1/1)- Printing starts and, when it is completely finished, the display will return to playback mode.
- If you wish to continue printing, select the next still image with the CARD+ or CARD- button.
Printing Errors
- If an error occurs during printing, error messages such as “NO INK”, “PAPER JAM” or “NO PAPER” will display. Select [Stop] or [Restart] with the selector dial and press the SET button. The [Restart] setting may not appear with some error messages. In that case, select [Stop].
You can set the number of copies to a maximum of 9 prints.
- Turn the selector dial so that [SET] appears next to [Copies] and press the SET button.
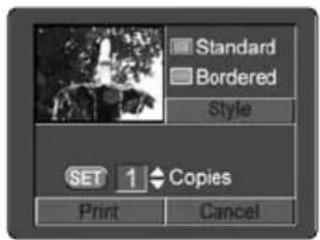
text_image
Standard Bordered Style SET 1 Copies Print Cancel- Turn the selector dial and specify the number of copies.
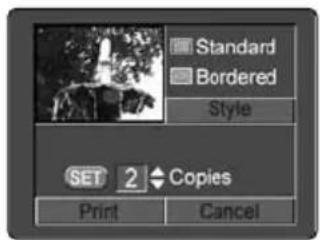
text_image
Standard Bordered Style SET 2 Copies Print Cancel- Press the SET button.
Setting the print style
| Image Standard Prints 1 still image per page. | |
| Multiple Prints 8 copies of the same still image on one page. | |
| Borders Bordered Prints with a border. | |
| Borderless Prints right to the edges of the page. |
- On the print dialog, turn the selector dial, select [Style] and press the SET button.
• The dialog for selecting the style appears.
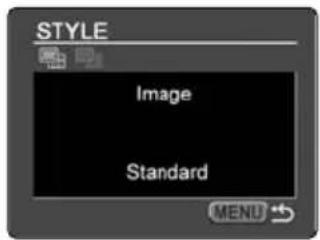
text_image
STYLE Image Standard MENUSelecting the Image Style (Standard/Multiple)
2. Press the SET button.
- The dialog for selecting the image style appears.
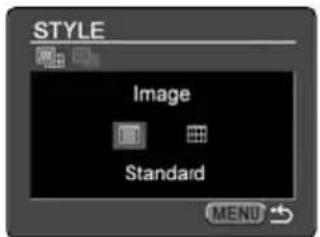
text_image
STYLE Image Standard MENU3. Turn the selector dial, select [Multiple] and press the SET button.
![CANON MV5 - Turn the selector dial, select [Multiple] and press the SET button. - 1](/content/2026/05/761256/images/087618330daa84de876c2a5890494461acea6133085e8c136c4c428e041b5c16.jpg)
text_image
STYLE Image Multiple MENU4. Press the Menu button.
Selecting the Borders (Bordered/Borderless)
[Borders] can only be selected when the image style is set to [Standard]. [Bordered] cannot be selected when you have set the [Printing Area].
2. Turn the selector dial.
• The dialog for selecting the [Borders] appears.
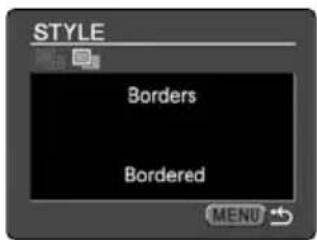
text_image
STYLE Borders Bordered MENU3. Press the SET button.
- [Bordered] and [Borderless] settings appear.
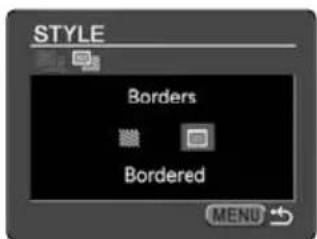
text_image
STYLE Borders Bordered MENU- Select [Borderless] and press the SET button.
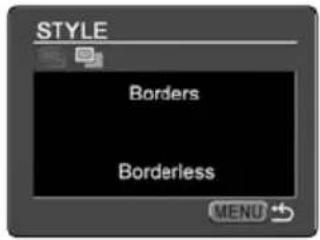
text_image
STYLE Borders Borderless MENU- Press the Menu button.
Setting the Printing Area
[Printing Area] cannot be selected when the still image is set to [Bordered].
- On the print dialog, select [Printing Area] and press the SET button.
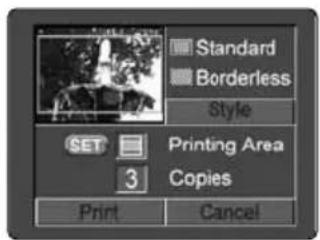
text_image
Standard Borderless Style SET Printing Area Copies 3 Print Cancel- Turn the selector dial and select the printing area.
- The printing area is for standard images and for multiple images.
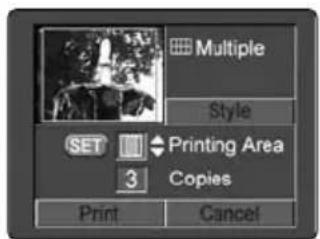
text_image
Multiple Style SET Print Area 3 Copies Print Cancel- Press the SET button.
Notes:
- Printing area setting is cancelled with the following operations:
- When you set the printing area for another still image.
- When you turn off the camcorder or detach the DIF-100 direct interface cable from the camcorder.

Cancel Printing
Press the SET button while the [Now printing] dialog is displayed. A confirmation dialog displays. Make sure that [OK] is selected and press the SET button.
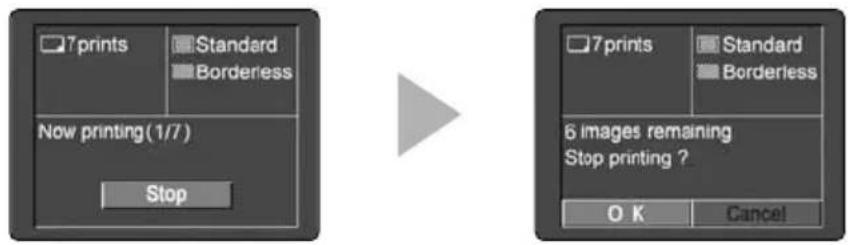
text_image
7 prints Standard Borderless Now printing(1/7) Stop 6 images remaining Stop printing ? OK Cancel- A print in progress cannot be stopped. Printing of the next still images will be cancelled and the display will return to playback mode.
Printing still images marked for printing
You can print still images marked for printing automatically with the Card Photo Printer CP-10.
If you wish to print more than 1 copy of a still image, set the number of copies when you mark it for printing.
- You cannot select the area setting with still images marked for printing. You can select only the style (Standard/Multiple, Bordered/Borderless).
- Printing is executed from the C. PLAY MENU.
- If you connect the Card Photo Printer and select PRINT without having marked a still image for printing, [Set print mark] will be displayed.
CAMERA
PLAY (VCR)
MV5i MC CARD CAMERA
MV5i MC CARD PLAY (VCR)
MENU
(39)
- Press the MENU button.
• C. PLAY MENU settings appear.
- Turn the selector dial and select PRINT and press the SET button.
• The print dialog appears.
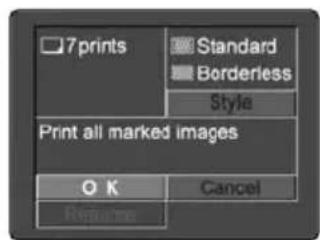
text_image
7 prints Standard Borderless Style Print all marked images OK Cancel Return3. If you wish to print without changing the style settings, make sure [OK] is selected and press the SET button.
- Printing starts and, when it is completely finished, the display will return to playback mode.
If you wish to change the style settings, select [Style] and press the SET button. Select [Image] or [Borders], select the desired setting and press the SET button.
Cancel Printing
Press the SET button while the [Now printing] dialog is displayed. A confirmation dialog displays. Make sure that [OK] is selected and press the SET button.
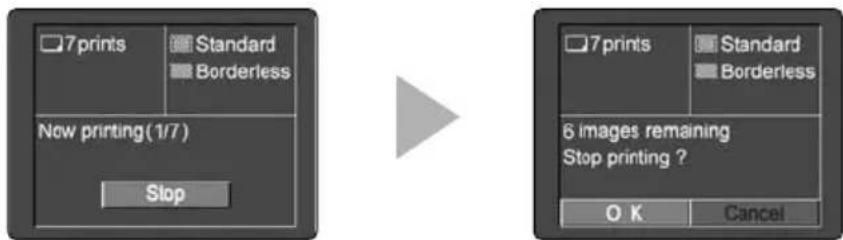
text_image
7 prints Standard Borderless New printing(1/7) Stop 7 prints Standard Borderless 6 images remaining Stop printing ? OK Cancel- A print in progress cannot be stopped. Printing of the next still images will be cancelled and the display will return to playback mode.
Restarting Printing
- To restart printing, select [Restart] on the print dialog display and press the SET button. The remaining still images will be printed. If you select [OK] on the print dialog, printing will start from the 1st still image.
- Printing cannot be restarted in the following circumstances:
- When you have changed the print mark settings.
- If you have deleted a still image marked for printing.
Printing Errors
- If an error occurs during printing, error messages such as “NO INK”, “PAPER JAM” or “NO PAPER” will display. Select [Stop] or [Restart] with the selector dial and press the SET button. The [Restart] setting may not appear with some error messages. In that case, select [Stop].
E
Combining Images and Recording Them to a Cassette (Card Mix)


Enhance the appearance of your recordings by combining still images from the memory card with camcorder recordings. You may select from pre-recorded cartoon-like frames, or create personal frames and titles that can be layered over movies or still images.
Select from 3 types of Card Mix effects:
CARD CHROMA (Card chroma key)
Combine the image you are recording with a still image as a frame. The image will be shown instead of the blue area of the still image. When recording your own “frame”, make sure that the area you wish the other image to appear is blue. Adjustment of the MIX LEVEL: blue area of the still image.

text_image
Image being recorded by the camcorder + Still image News NewsCARD LUMI. (Card luminance key)
Combine the image you are recording with illustrations or titles. The image will be shown instead of the light area of the still image. Create your own title or illustration by drawing or writing on a white paper and recording it to the memory card.
Adjustment of the MIX LEVEL: light area of the still image

text_image
Image being recorded by the camcorder + Still image →CAM. CHROMA (Camera chroma key)
Combine the image you are recording with a still image as the background. Shoot the subject in front of a blue background, such as a blue curtain, and the subjects not blue will be superimposed on the still image.
Adjustment of the MIX LEVEL: blue area of the image you are recording

text_image
Image being recorded by the camcorder + Still image →Mix level
The mix level bar appears. Adjust the mix level using the - and + at the ends of the bar as guides.
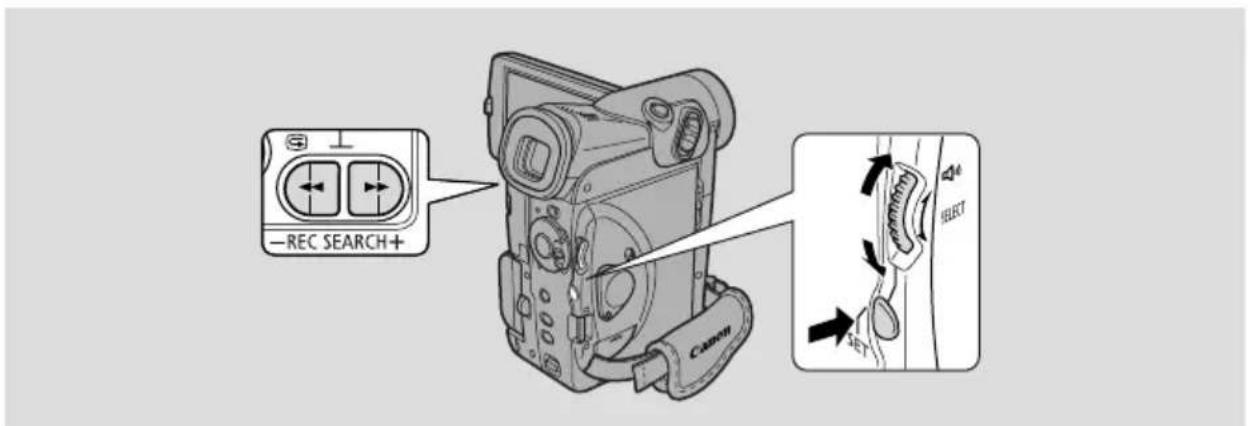
text_image
REC SEARCH+ Canon SELECT SET
text_image
CAMERA PLAY (VCR) MV5i MC CARD CAMERA MV5i MC CARD PLAY (VCR)
flowchart
graph LR
    A["MENU (39)"] --> B["CARD MIX"]
    B --> C["MIX TYPE...CARD CHROMA"]
    C --> D["MIX LEVEL..."]
Make sure a memory card that has images recorded on it and a cassette have been inserted into the camcorder.
Select
- Make sure the camcorder is set to the (program AE) mode.
- You cannot use Card Mix in the Night recording program.
- Open the menu and select → CARD MIX.
- Press the CARD +/- buttons to select the still image to be combined.
4. Select MIX TYPE.
- CARD CHROMA, CARD LUMI., CAM. CHROMA settings appear.
5. Select the desired setting.
- Your currently recording image is combined with the pre-recorded still image.
6. Select MIX LEVEL and press the SET button.
7. Adjust the mix level.
- Turning the selector dial upwards adjusts to the right and turning downwards adjusts to the left.
8. Close the menu.
• CARD MIX flashes in the display.
On/Off
9. Press the CARD MIX button.
• CARD MIX stops flashing.
- Your currently recording image is combined with the pre-recorded still image.
• Each time you press the card MIX button, your selection is activated (display lights continuously) or deactivated (display flashes).
For movies
1. Press the start/stop button to start and stop recording.
- The combined images are recorded onto the tape.
For stills
1. Press the PHOTO button halfway down and hold it.
- ● flashes white in the display as the camcorder adjusts the focus and it is displayed continuously as a green mark when the camcorder is ready to take the image.
2. Press the PHOTO button fully down to record the image to the tape.
• disappears from the display.
- The combined images are recorded onto the tape for approximately 6 seconds.

Notes:
- If you change the position of the POWER switch, select your still image for Card Mix again.
- When setting Card Mix, you must carry out steps 1 to 5.
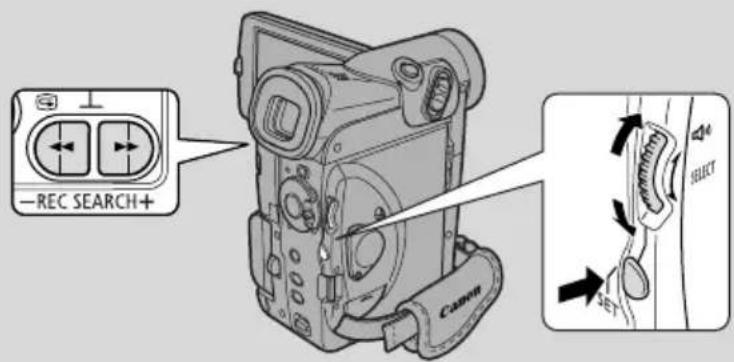
text_image
REC SEARCH+ Canon SELECTCopies multiple still images from a tape to the memory card, using the Photo Search function.
- The still images' data codes will reflect the date and time the copies are made.
- The image size of a still image copied from tape to memory card will be 640 × 480 .

text_image
CAMERA PLAY (VCR) MV5i MC CARD CAMERA MV5i MC CARD PLAY (VCR)
text_image
MENU (39) ► CARD OPER. ► COPY[→] [ ]Make sure a memory card that has enough memory available and a recorded tape have been inserted into the camcorder.
-
Locate the first still image on the tape that you want to copy and stop the tape at a point before that image.
-
All the still images on the tape after that point will be copied onto the memory card.
-
If you want to copy all the images on a tape, rewind the cassette to the beginning.
-
Open the menu and select CARD OPER.
-
Select COPY .[→]
- CANCEL and EXECUTE settings appear.
-
Select EXECUTE and press the SET button.
-
Select CANCEL to stop copying.
- Tape and card information appear in the display and copying starts.
- NOW COPYING appears in the display.
- The camcorder automatically performs the Photo Search function to locate still images and copying starts. The currently copying image appears in the display.
-
Copying stops when the tape is finished or the memory card is full. When the memory card is full, CARD FULL will appear in the display.
-
Press the stop button when your desired images have finished copying.
Copying Still Images from Memory Card to Tape


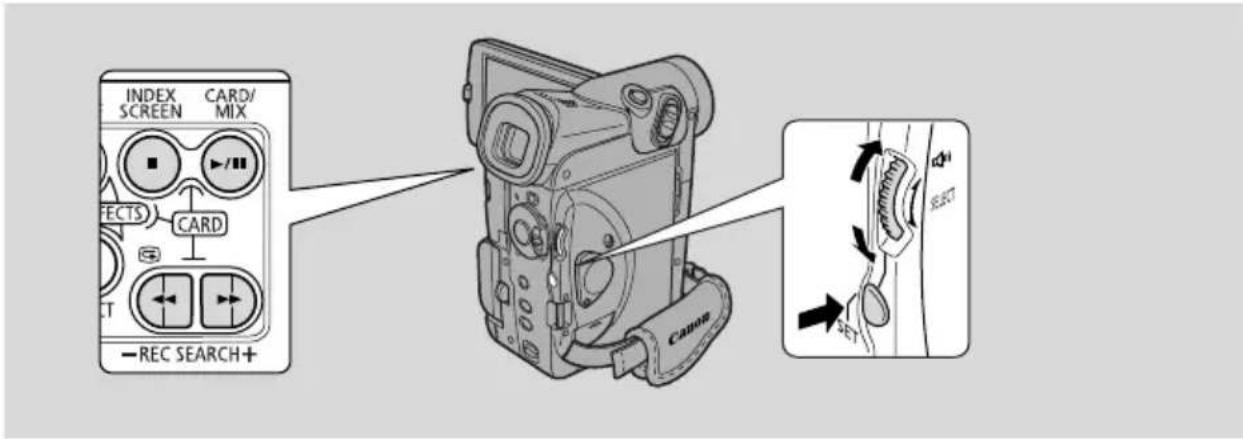
text_image
INDEX SCREEN CARD/ MIX FECTS CARD REC SEARCH+ CamiaCopies multiple still images from the memory card to a tape.
- The still images' data codes will reflect the date and time the copies are made.
MENU
(39)

flowchart
graph LR
    A["▶ CARD OPER."] --> B["▶ COPY [□→□□"] ]
Make sure a memory card that has images recorded on it and a cassette that has enough recordable space have been inserted into the camcorder.
CAMERA
PLAY (VCR)
MV51MC
CARD CAMERA
MV51MC
CARD PLAY (VCR)
- Locate the point on the cassette where you want to start copying and set it to stop.
CAMERA
PLAY (VCR)
MV51MC
CARD CAMERA
MV5i MC
CARD PLAY (VCR)
-
Select the first image you want to copy by using the CARD +/- buttons.
-
Still images on the memory card including and after that image will be copied onto the tape.
-
If you want to copy all the still images on the memory card, select the first image.
-
Open the menu and select CARD OPER.
-
Select COPY and press the SET button.
- CANCEL and EXECUTE settings appear.
-
Select EXECUTE and press the SET button.
-
Select CANCEL to stop copying.
- Tape and card information appear in the display and copying starts.
- NOW COPYING appears in the display.
• Each image is copied for about 6 seconds on the tape. -
Copying stops when all the images have been copied or the tape is full.
-
Press the ■ button when your desired images have finished copying.
text_image
Diagram of a Canon car with labeled components and directional arrows indicating motion or movementFormat new memory cards, if you get the message CARD ERROR, or to permanently and quickly erase all the still images/movies on a memory card, including protected still images/movies (this includes the pre-recorded card mix sample images).
The SD Memory Card supplied with this camcorder has already been formatted for you.
- Be cautious when formatting recorded memory cards. All still images/movies will be permanently erased.
- If you use memory cards other than the supplied one, make sure to format them with the camcorder, not a PC or other device.
CAMERA
PLAY (VCR)
MV5i MC
CARD CAMERA
MV5i MC
CARD PLAY (VCR)
MENU
(39)

flowchart
graph LR
    A["▶ CARD OPER."] --> B["▶ FORMAT"]
Make sure a memory card is inserted into the camcorder.
-
Open the menu and select CARD OPER.
-
Select FORMAT and press the SET button.
- CANCEL and EXECUTE settings appear.
-
Select EXECUTE and press the SET button.
-
Select CANCEL to cancel formatting.
• FORMAT THIS CARD? NO YES appears to confirm. -
Select YES and press the SET button.
-
Formatting starts.
-
If you select NO, you return to step 3.
-
Close the menu.
E
Utilizing Memory Card Still Images/Movies on a PC
You can download still images/movies from a memory card to a PC connected via the USB interface. By using the provided software, you can organize and store still images/movies and print out still images with added titles or frames. Use the USB cable and the Canon Digital Video Solution Disk/ArcSoft Camera Suite CD with the camcorder.
- For details on how to connect the camcorder to a PC and install and operate the software, refer to the Canon Digital Video Solution Disk instruction manual.
• Refer also to your PC manual. - Power the camcorder from a household power source while connecting it to the PC.
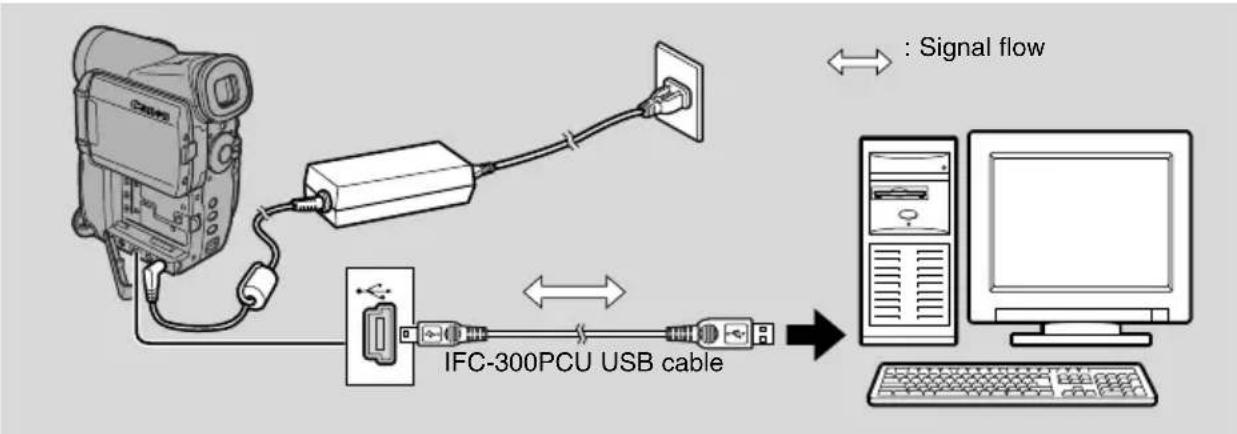
flowchart
graph LR
    A["Camera"] --> B["USB Cable"]
    B --> C["IFC-300PCU USB cable"]
    C <--> D["Computer"]
    style A fill:#f9f,stroke:#333
    style B fill:#ccf,stroke:#333
    style C fill:#cfc,stroke:#333
    style D fill:#fcc,stroke:#333
    note right of D: Signal flow
- Install the software.
- Connect the camcorder and the PC with an USB cable.
- Turn the camcorder's POWER switch to PLAY (VCR) and move the TAPE/CARD switch to CARD.
- “PC CONNECT [USB]” appears in the display to indicate that USB connection is being performed.
- Start the software and download still images/movies from the memory card to the computer.
Cautions:
- Do not disconnect the USB cable while data is being transferred (while the camcorder's card access indicator is flashing). Doing so may damage the memory card data.
- The connection may not work properly depending on the specifications and settings of the software and PC.
- The image files on your memory card and the image files you have stored (downloaded) to the hard disk drive of your computer are your valuable, original data files. If you wish to use image files on your computer, be sure to make copies of them first, and use the copied file, retaining the original.

Note:
- The buttons on the camcorder (except for the POWER switch and TAPE/CARD switch) do not operate during USB connection.
Other Information and Precautions
The camcorder formats memory cards in DCF (Design rule for Camera File system).
Still images/movies recorded on a memory card with this camcorder can also be transferred to a PC with the use of the following products made for SD Memory Cards or MultiMediaCards:
PC Card Adapter: Holds a memory card then inserts into the PC card slot found on most types of laptop PCs.
FD Adapter: Holds a memory card then inserts into a PC's floppy disk drive.
Memory Cards confirmed to operate with this camcorder (as of January 2002)
SD Memory Card—
Panasonic: 8 MB, 16 MB, 32 MB, 64 MB
SanDisk: 8 MB, 16 MB, 32 MB, 64 MB
MultiMediaCard—
SanDisk: 8 MB, 16 MB, 32 MB, 64 MB
- However, we cannot guarantee that all of these memory cards work properly.
If you mistakenly erase the card mix sample images provided on the SD Memory Card, they can be downloaded from the following home pages:*
http://www.canon-europa.com/products/products.html
http://www.canon-asia.com/
http://www.canon.com.au
*If you are unable to connect the camcorder to a PC using a USB cable, you will need a PC Card Adapter or USB Card Reader to be able to download to a memory card.
Memory card operating precautions
- If you purchase additional memory cards, format them with the camcorder, not a PC or other device. There have been cases where memory cards formatted with a PC or other device do not function properly.
- We recommend saving backups of memory card images on your PC's hard drive or other external memory device. Image data may be damaged or lost due to a defect in a memory card, or if a memory card is exposed to static electricity. Contents of a memory card cannot be compensated for should data become damaged or lost.
- Do not remove the power source or the memory card while the card access indicator flashes.
E
- Do not use memory cards in places subject to strong magnetic fields.
- Do not disassemble memory cards.
- Do not bend or drop memory cards, or expose them to strong vibrations or external shocks.
- Do not get memory cards wet.
- Do not remove the memory card's label or affix other labels. Affix labels to the memory card's case.
- Do not leave memory cards in places subject to high temperature or high humidity.
- Moving a memory card rapidly between hot and cold temperatures may cause condensation to form on it, leading to malfunctions. Avoid this problem by placing the memory card in a plastic bag and letting it slowly adjust to temperature changes before removing it from the bag. If condensation should occur, maintain the memory card at a constant temperature and let the moisture evaporate naturally.
- Do not touch the memory card's terminals or let dust or dirt come in contact with the terminals. Store and carry memory cards in their case to protect the terminal area.
- There is only one correct way to insert memory cards into the camcorder. Do not forcefully insert the memory cards backwards or upside down. This could damage the memory card or the camcorder.
Sample images
- The following are the sample images that have been pre-recorded on the supplied SD Memory Card. There are a total of 15 images: 8 Card chroma key images, 5 Card luminance key images and 2 Camera chroma key images.
Card chroma key
natural_image
Simple illustration of a night sky with stars and moonlight (no text or symbols)
natural_image
Abstract grayscale illustration of a symmetrical, flower-like shape with curved lines and dots (no text or symbols)
natural_image
Cartoon-style illustration of a spiky, flame-like shape with cloud-like protrusions around it (no text or symbols)
natural_image
Illustration of a trumpet and piano keyboard (no text or symbols)
natural_image
Simple line drawing of a hanging pendant with a circular head (no text or symbols)
text_image
News
natural_image
Blank gray rectangular image with a white border (no text or symbols)
natural_image
Decorative square frame with ornate border and central blank space (no text or symbols)Card luminance key

natural_image
Simple line drawing of a heart shape with a flowing ribbon underneath (no text or symbols)
natural_image
Two groups of stylized lightbulbs with glowing stems, no text or symbols present
natural_image
Abstract white rectangular shape on gray background (no text or symbols)
natural_image
Simple line drawing of a rectangular frame with leaf-like border (no text or symbols)
natural_image
Blank educational paper frame with airplane, airplane, ship, and train (no text or symbols)Camera chroma key
natural_image
Black and white photo of a rocky cliffside with water spray and scattered debris (no text or symbols)
natural_image
Aerial view of clouds with no visible text or symbols- The pre-recorded sample images on the supplied SD Memory Card are intended solely for the personal enjoyment gained from combining them with personal videos taken with this camcorder. Do not use the pre-recorded sample images for any other purpose.
SD Memory Card SDC-8M Specifications
| Capacity 8 MB | |
| Interface SD Memory Card standard | |
| Operating temperature range 0°C–40°C (32°F–140°F) | |
| Dimensions | 32 × 24 × 2.1 mm (1 ^1 /4 × 1 × 1 ^1 /8) |
| Weight 2 g ( | ^1/_8 oz) |
Weight and dimensions are approximate.
Errors and omissions excepted.
Subject to change without notice.
PhotoEssentials - Royalty Free Stock Photography
The PhotoEssentials suite of royalty-free images on CD-ROM features premium quality assignment photography and is ideally suited for use in advertising, brochures, reports, multimedia, websites, books, packaging and more.
For more information, please visit their website www.photoessentials.com
Preparing the Camcorder
Adjusting the viewfinder
- Set the camcorder to TAPE CAMERA mode. Adjust the viewfinder focusing lever to suit your eyesight.
• To view with the viewfinder, make sure the LCD panel is either turned so that the subject can monitor viewing, or totally closed with the screen facing inwards.
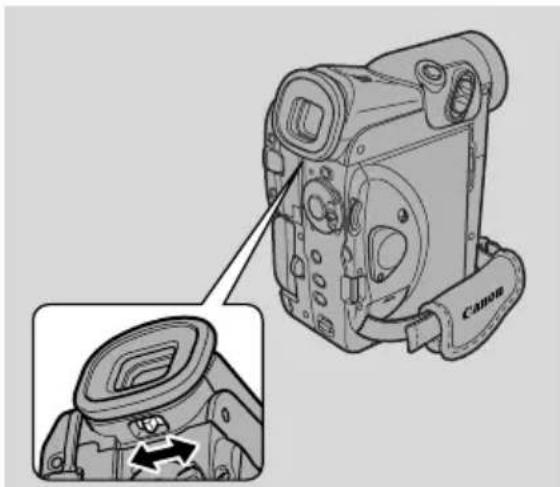
natural_image
Diagram of a Canon camera showing the internal components and an inset view of the lens (no text or symbols present)- Be careful not to leave the viewfinder exposed to bright sunlight, or it will melt. (The light is concentrated by the viewfinder lens.) Do not direct the viewfinder to the sun.
Preparing the lens cap
- Attach the cord to the lens cap, and pass the grip belt through the loop on the cord.
- Hook the lens cap on to the grip belt while you are recording, and place it over the lens when you have finished.
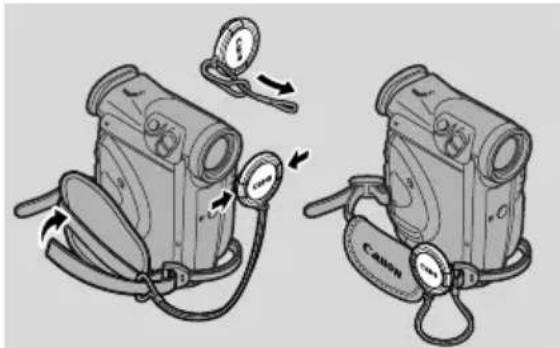
text_image
Diagram showing two cameras with labeled parts and directional arrows indicating motion or movement.Fastening the grip belt
- Release the Velcro fastening and hold the camcorder with your right hand while you adjust the belt with your left. Your index finger should reach the zoom control and photo button, and your thumb should reach the start/stop button comfortably.
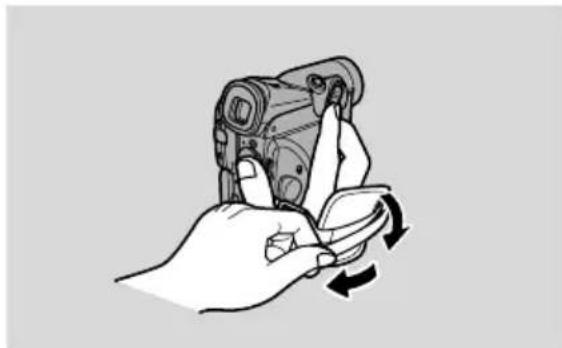
natural_image
Illustration of a hand holding a camera with a scroll wheel, showing rotational motion (no text or symbols)Notes on Using the Batteries
Charging and recording times
• These times vary — the safest policy is always to have 2 or 3 times as many battery packs as you think you will need.
- You will get more recording time if you turn the camcorder off between shots, instead of leaving it in record pause mode.
- Charge the battery pack in temperatures between 10^ and 30^ (50°F and 86°F).
- The charging time varies depending on the charging conditions. (At 0 degrees, charging will take about 2 times longer as usual.)
| Time needed for full rechargeBattery Pack | |
| NB-2L 1 hr. 20 min. | |
| BP-2L12 (optional) | 2 hr. 30 min. |
| Battery Pack | Max. Recording Time | Typical Recording Time* | ||
| Using the Viewfinder | Using the LCD Screen | Using the Viewfinder | Using the LCD Screen | |
| NB-2L 1 hr | 15 min. 55 min. | 35 min. 30 min. | ||
| BP-2L12 2 hr | 40 min. 2 hr. | 80 min. 1 hr | 5 min. | |
* Typical Recording Time: Approximate times for recording with repeated operations such as start/stop, zooming and power on/off. The actual time may be shorter.
- You can use the battery pack between 0^ and 40^ C ( 32^ to 104^ F), but it works best between 10^ and 30^ C ( 50^ to 86^ F). Operating time will be shorter than usual at low temperatures like a ski ground. For better operating results, the battery pack can be warmed in your pocket or someplace and then used.
- If the battery pack starts to give you much less operating time than usual (at normal temperatures), it has reached the end of its life and must be replaced.
- These figures show how long you can view playback with the LCD, after attaching a fully-charged battery pack. Playback time will be shortened at low temperatures.
| Playback time (using the LCD screen) | Battery pack | |
| NB-2L 55 min. | ||
| BP-2L12 (optional) | 2 hr. |
How much power is left?
The indicator in the display shows you approximately how much charge the battery pack has left:

Notes:
- When the power is completely exhausted, "CHANGE THE BATTERY PACK" appears in the display for 4 seconds and the empty battery mark starts to flash. The power indicator light also flashes.
- The indicator is not constant — different levels will be shown when you subject the battery pack and camcorder to different conditions.
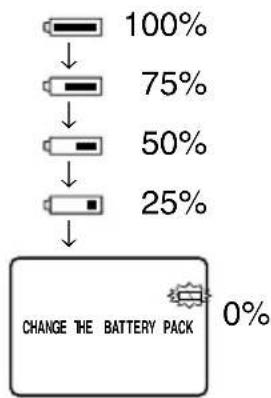
text_image
100% 75% 50% 25% CHANGE THE BATTERY PACK 0%When to recharge
You can recharge a lithium ion battery pack whenever it is convenient. Unlike a conventional battery pack, it does not have to be fully discharged first. However, as the battery pack will naturally discharge itself over time, it is best to charge it the same day you plan to use it, or the day before.
Taking care of the battery pack
Always attach the terminal cover.
- Do not allow any metal objects to touch the terminals, as this can cause a short circuit and damage the battery pack. Attach the terminal cover whenever the battery pack is not being used.
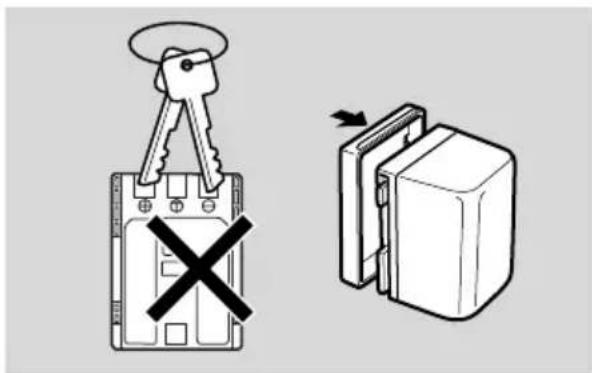
text_image
Diagram showing a key inserted into a device with a cross symbol, and a switch being removed from the device.Keep the terminals clean.
- The camcorder, adapter or battery pack will not work properly if the terminals are dirty. Attach the terminal cover whenever the battery pack is not being used.
Storing the battery pack.
- Storing a charged battery pack for long periods of time (about 1 year) can shorten its lifecycle or affect performance. We recommend to discharge the battery pack in the camcorder fully and to store it in a dry place. If you do not use the battery pack for long periods of time, charge it fully and discharge it fully in the camcorder at least once a year before returning it to storage.
Installing the backup battery
Press the small button with a pen and pull out the battery holder. Insert the battery into the battery holder so that the + side of the battery faces the + sign on the battery holder. Insert the battery holder back into place.
This backup battery allows the camcorder to remember the date and time and other settings when main power source is removed. It has a life span of about a year.
When it needs replacing (or if it has not been installed), the ✝ mark flashes in the display.
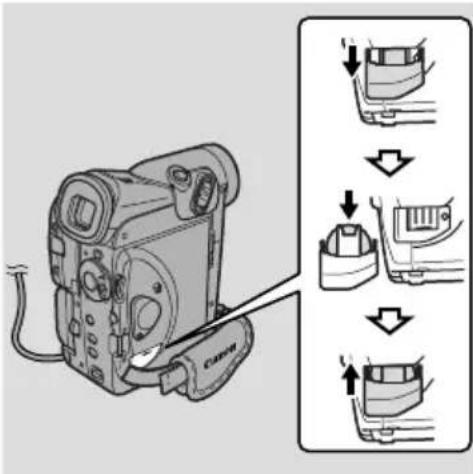
text_image
Diagram showing a camera with a cable being inserted, illustrating the step-by-step assembly of the device.Remove the old battery by pushing up then releasing and lifting out. Make sure to attach a power source to the camcorder first, so it will remember your chosen settings when you change the battery.
DANGER!
Treat the battery pack with care.
- Keep it away from fire (or it might explode).
- Do not expose the battery pack to temperatures greater than 60^ (140°F). Do not leave it near a heater, or inside a car in hot weather, for example.
- Do not try to disassemble or modify it.
- Do not drop or knock it.
- Do not get it wet.
WARNING!
- The battery used in this device may present a fire or chemical burn hazard if mistreated. Do not recharge, disassemble, heat above 100°C (212°F) or incinerate.
- Replace the battery with a CR1616 made by one of the following companies: Panasonic, Hitachi Maxell, Sony, Toshiba, Varta, Renata. Use of other batteries may present a risk of fire or explosion.
- The used battery should be returned to the supplier for safe disposal.
Cautions:
- Do not pick up the battery using tweezers or other metal tools — this will cause a short circuit.
- Wipe the battery with a clean, dry cloth to ensure proper contact.
- Keep the battery pack out of reach of children — if it is swallowed, contact a physician immediately, as the battery case may break down and the battery fluids damage the stomach and intestines.
- Do not disassemble, heat or immerse the battery in water, to avoid the risk of explosion.
Maintenance

Cautions
Avoid high temperatures and high humidity.
- Do not leave the camcorder inside a car in hot weather, for example.
- Be careful of heat radiating from video lighting equipment.
- Do not take the camcorder into a humid room.
Avoid sudden changes in temperature.
- If you take the camcorder from a cold place to a warm place, condensation may form on the lens and internal parts (157).
Do not point the lens or viewfinder at strong light sources.
- Never point it at the sun, and do not leave it aimed at a bright subject.
- Be especially careful when leaving the camcorder on a tripod.
Avoid magnetic or electric fields.
- Do not use the camcorder close to TV transmitters, portable communication devices or other sources of electric or magnetic radiation. They may cause picture interference, or permanently damage the camcorder.
Do not expose the camcorder to water.
- Cover the camcorder when you are recording in rain or mist.
- There is a risk of electric shock if water gets inside the camcorder — contact qualified service personnel as soon as possible.
Protect the lens.
- Sand and dust can damage the lens — be especially careful on windy days.
Handle the camcorder gently.
• Vibration or shock can cause damage.
- Do not use the viewfinder or LCD panel as a carrying handle.
Do not disassemble the camcorder.
- This is very dangerous as there is a risk of electric shock — if the camcorder does not function properly, take it to qualified service personnel.
Storage
If you do not intend to use the camcorder for some time, store it in an area which is free of dust and moisture, and where the temperature is no higher than 30^ C ( 86^ F). After storage, check each part and function of your camcorder to make sure everything is still working properly.

Note:
• These cautions also apply to accessories such as battery packs and cassettes.
Maintenance
LCD
- Clean the LCD screen using a commercially available cleaning cloth for glasses.
- Where there is a big change in temperature, moisture may form on the surface of the screen. Wipe clean with a soft, dry cloth.
- At low temperatures the display may appear to be much darker than usual. This is not a fault, and as the screen warms up the display will return to normal.
Camcorder body and lens
- Use a soft, dry cloth to clean the camcorder body or lens. Never use chemically treated cloth or volatile solvents such as paint thinner.
Video heads
- When mosaic-like noise appears on the playback picture, the video heads may be dirty. When the video heads are badly contaminated, the camcorder may show a blank blue screen or a warning.
natural_image
Black and white photo of a garden with blooming flowers and leaves (no text or symbols visible)- For the best picture possible, after using the camcorder for approximately 20 hours, clean the video heads using Canon's DVM-CL Digital Video Head Cleaning Cassette. If the “noise” remains, repeat the cleaning (up to maximum of 5 times).
- Do not use a wet-type cleaning cassette, as this can cause damage.

Using the camcorder abroad
Power sources
- You can use the compact power adapter and battery charger to operate your camcorder and charge battery packs in any country where the electricity supply is between 100 and 240 V AC, 50/60 Hz. Contact your Canon dealer for information about plug adapters for overseas use.
TV playback
- Although you can always play back your recordings on the LCD screen, your camcorder can only be connected to TVs which use its PAL system. This TV system is used in the following countries: Algeria, Australia, Austria, Bangladesh, Belgium, Brunei, China, Denmark, Finland, Germany, Hong Kong, Iceland, India, Indonesia, Ireland, Italy, Jordan, Kenya, Kuwait, Liberia, Malaysia, Malta, Mozambique, the Netherlands, New Zealand, North Korea, Norway, Oman, Pakistan, Portugal, Qatar, Sierra Leone, Singapore, South Africa, Spain, Sri Lanka, Swaziland, Sweden, Switzerland, Tanzania, Thailand, Turkey, Uganda, United Arab Emirates, United Kingdom, Yemen, former Yugoslavia, Zambia.
Condensation
Condensation may form on the camcorder when it is moved from a cold place to a warm place. Using the camcorder while condensation is present can damage both the tape and the camcorder.
Condensation may become a problem:

natural_image
Illustration showing a snowman, a moving camera, and a sad house with a bandage (no text or symbols)When you take the camcorder from a cold place to a warm room

text_image
Illustration showing a cold spiral with a thermometer and a moving device, ending with a sad, angry-looking spiral.When a cold room is heated rapidly
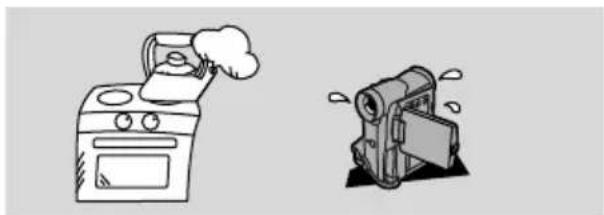
natural_image
Illustration of a kitchen oven and a portable device with steam rising (no text or symbols)When the camcorder is left in a humid room
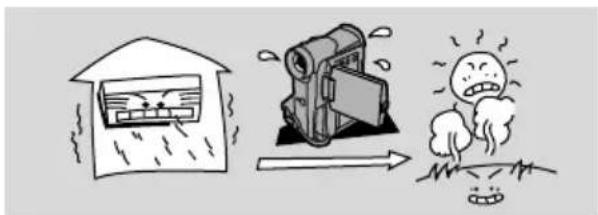
natural_image
Illustration showing a house with rain, a campfire, and a smiling sun on grass (no text or symbols)When the camcorder is taken from an air-conditioned room to a warm, humid place
Protecting the camcorder from condensation
- Before you take the camcorder to a warm or humid place where condensation is likely to be a problem, unload the cassette and put the camcorder in a plastic bag. Wait until the camcorder reaches room temperature before you take it out of the bag.
What happens when condensation is detected
- “CONDENSATION HAS BEEN DETECTED” is displayed for approximately four seconds. Then, the power indicator flashes and the ▲ mark flashes in the display. If there is a cassette in the camcorder, it stops automatically and “REMOVE THE CASSETTE” is displayed for approximately 4 seconds and then ◎ flashes in the display. If you have the beep turned on, it will sound.
- The camcorder may not detect the condensation immediately — the condensation warning may not start flashing for 10 to 15 minutes.
- You cannot load a cassette when condensation is detected.
What you should do
- Remove the cassette, leave the cassette compartment open, and turn the camcorder off.
- Leave it in a dry place until the condensation evaporates. After the condensation warning stops flashing, wait at least another hour before trying to use the camcorder.
Troubleshooting
Refer to this checklist first if you have any problems with your camcorder.
Possible explanations are given for each problem on the list — turn to the page numbers in parentheses for more information.
Make sure that the camcorder is properly connected if you are using it with a TV or VCR. Consult your dealer or service outlet if problems persist.
Recording/Playback
| Problem | Cause and/or what to do about it |
| ?Nothing happens when I press the buttons. | The camcorder is not set to the appropriate mode (18, 28).The cassette is not loaded or is set for erasure prevention (16-17).The cassette has reached the end.The power source is not properly connected, or the battery pack is exhausted or not properly attached (12-15, 151).The function cannot be used in that recording program (57). |
| ?The camcorder turned itself off. | The camcorder was in record pause mode for more than about 5 minutes (18, 112, 170).The battery pack is exhausted (14-15, 151). |
| ?The cassette compartment stopped mid-operation while loading/unloading a cassette. | The battery pack's power is exhausted. Recharge or change to a new battery pack (14-15). |
| ?The start/stop button doesn't work. | The cassette is not loaded or is set for erasure prevention (16-17).The cassette has reached the end. |
| ?There's no picture in the display. | The camcorder is not set to the appropriate mode (18, 28). |
| ?There's a blank blue screen in the display. | You are attempting to play back or record copyright protected material (89).The video heads are badly contaminated (155). |
? The camcorder won't focus.
• The camcorder is on manual focus (76).
- The viewfinder lens needs adjusting (150).
• The lens is dirty (155).
Note:
- Some subjects are not suitable for autofocus. In these situations, you will often get better results using manual focus (76). Focus on something which is about the same distance away, lock the focus, and then point the camcorder at your original, hard-to-focus subject.
Horizontal stripes Many subjects at different distances


Reflective surfaces (e.g. shiny car surfaces)

Fast moving objects

Behind glass Without much contrast (e.g. a white wall)


Dark subjects Night scenes
Recording/Playback (Cont.)
Problem
? Some/all of the digital effects don't work.
? The ▶ (play) button doesn't work.
? There's a bright stripe on the screen.
natural_image
Illustration of a medical procedure with a doctor examining a patient's ear (no text or symbols present)? The playback picture is rough (with mosaic-like noise).
Cause and/or what to do about it
- There are a number of restrictions on using the digital effects (61-66).
- The camcorder is not set to TAPE PLAY (VCR) mode (28).
• The cassette is not loaded (16).
• The cassette has reached the end. - When recording in dark places a bright light in the scene may cause a vertical light bar (“smear”) to appear. This is a normal feature of camcorders.
• The video heads need cleaning (155).
?There's no picture on the TV screen.
?There's no picture on the TV screen, even though the tape is moving.
?There's no sound coming from the speaker during playback.
- AV/PHONES is not set to AV in the menu. - A V DV OUT (Analog-digital converter) is not set to OFF in the menu.
- The video heads need cleaning (155).
- The TV/VIDEO selector on the TV isn't set to VIDEO (33-35).
- The speaker has been turned off with the selector dial (31).
• Headphones are being used.
MV5i MC Memory card operations
Problem
?The memory card will not insert.
?The mark flashes red in the display even though a memory card has been inserted.
?Nothing happens when I press the buttons.
Cause and/or what to do about it
- It is not turned the right way (107). Turn it the right way and try inserting again.
- Turn the camcorder's power off and back on again and remove and reinsert the card. If the mark continues to flash, format the memory card.
- The camcorder is not set to CARD CAMERA or CARD PLAY (VCR) (112, 122) mode.
- The memory card is not inserted (107).
- You are using an SD Memory Card and it is set for erasure prevention. Change the position of the protect switch.
- The memory card is full. Erase images (126) or insert a new memory card.
- The power source is not properly connected, or the battery pack is exhausted or not properly attached (12-15, 151).
- The function cannot be used in that recording program (57).
?The PHOTO button doesn't work.
- The memory card is not loaded (107).
- You are using an SD Memory Card and it is set for erasure prevention. Change the position of the protect switch.
- The memory card is full. Erase images (126) or insert a new memory card.
- You have reached the maximum file number. Set the file numbering to RESET through the menu (110) and insert a new memory card.
- You are using an unformatted memory card. Format the card (145).
?The image cannot be erased.
• The image is protected (125).
- You are using an SD Memory Card and it is set for erasure prevention. Change the position of the protect switch.
Miscellaneous
Problem
?The wireless controller doesn't work.
?The power indicator is flashing.
?The camcorder malfunctions.
?The DV cable is connected correctly, but there's nothing in the display.
?The camcorder becomes warm during use.
Cause and/or what to do about it
- The remote sensor mode is set to OFF(☐) in the menu (49).
- The remote sensor modes of the wireless controller and the camcorder itself are different (49).
- The batteries are dead or not inserted.
- Check the screen displays (165).
- External interference may cause the camcorder's microprocessor to malfunction temporarily. If random letters appear in the display or if normal operation is interrupted, remove and then replace the power source.
- Remove the cable and then reconnect it or turn the power off and back on again.
• This is not a malfunction.
The MV5/MV5i/MV5i MC System Diagram (Availability differs from area to area)

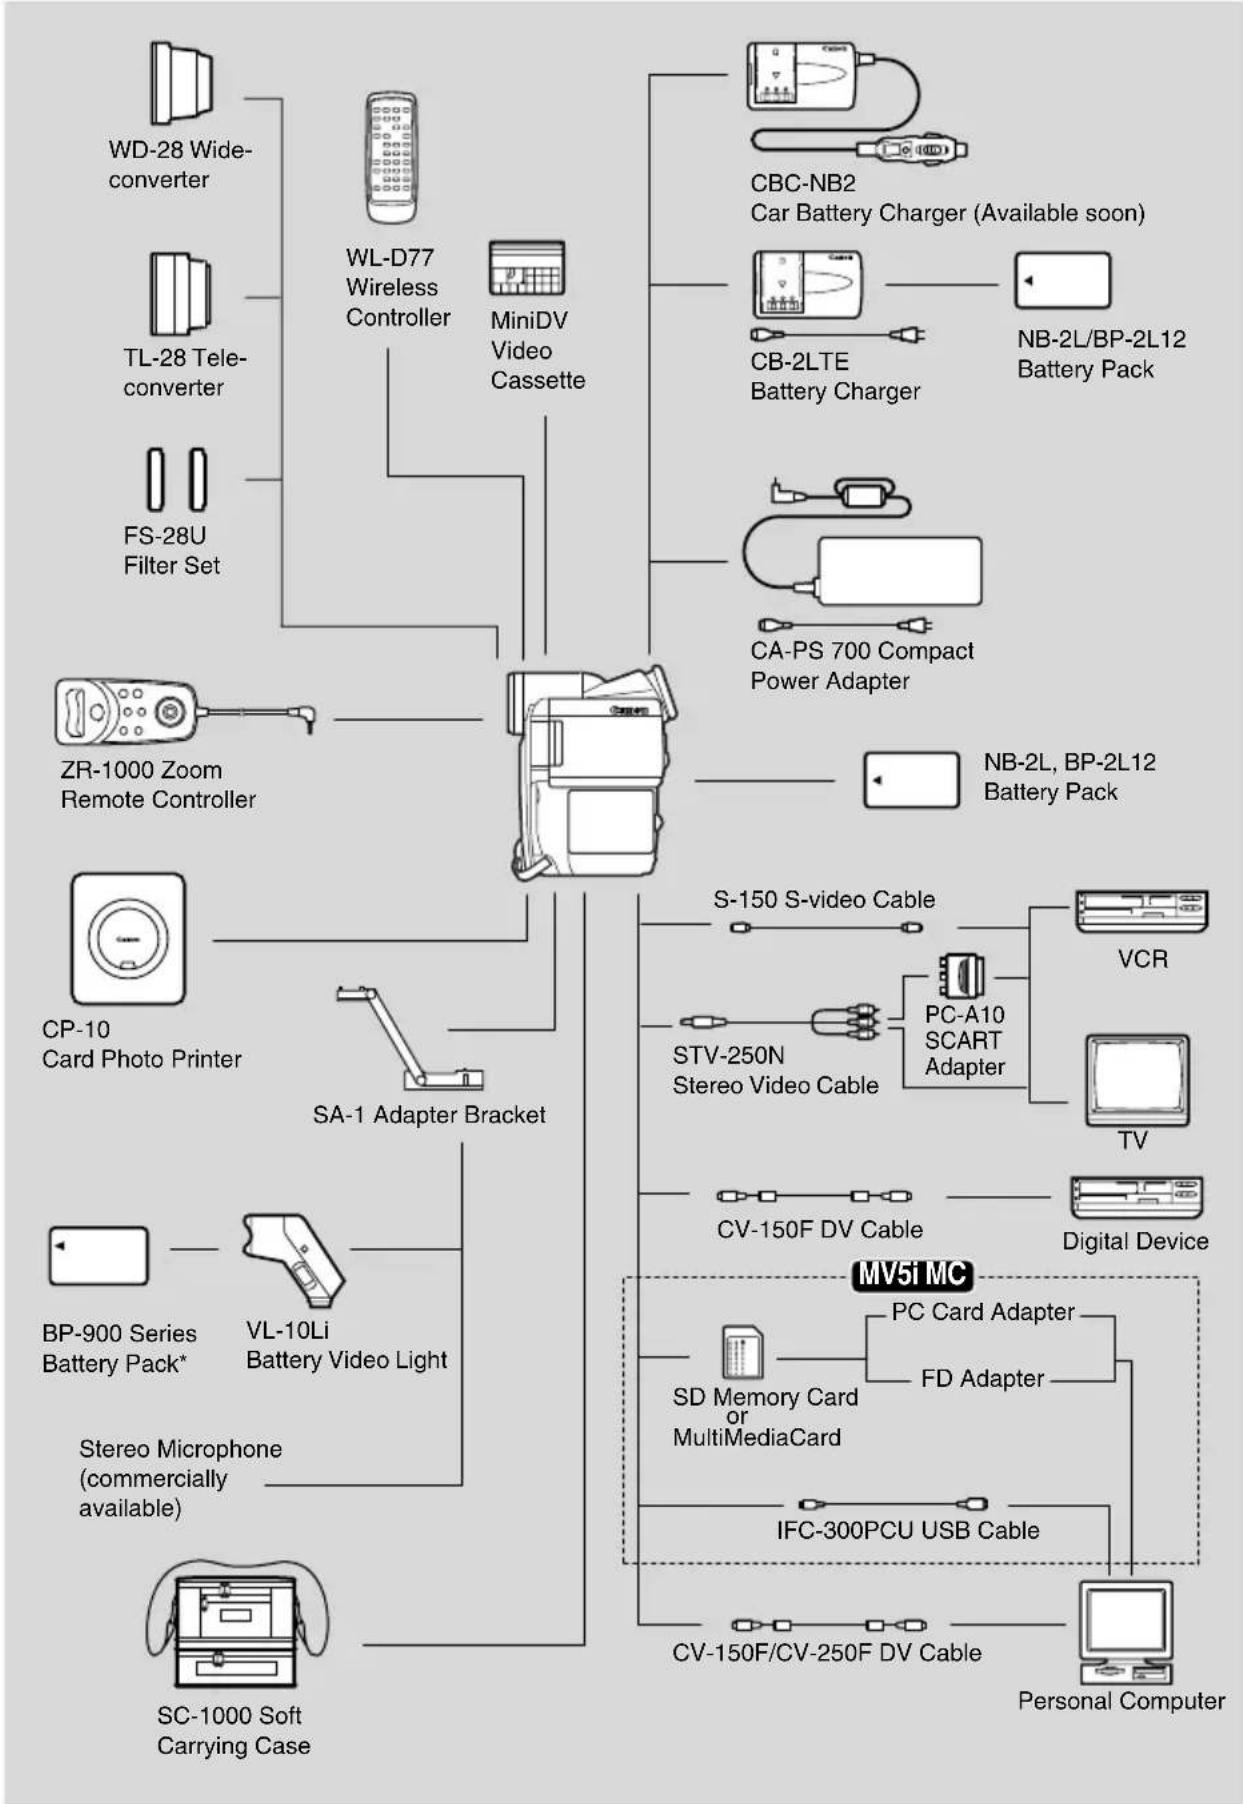
flowchart
graph TD
    A["WD-28 Wide-converter"] --> B["WL-D77 Wireless Controller"]
    C["TL-28 Tele-converter"] --> B
    D["FS-28U Filter Set"] --> B
    E["ZR-1000 Zoom Remote Controller"] --> F["MiniDV Video Cassette"]
    G["CP-10 Card Photo Printer"] --> H["SA-1 Adapter Bracket"]
    I["BP-900 Series Battery Pack*"] --> J["VL-10Li Battery Video Light"]
    K["SC-1000 Soft Carrying Case"] --> L["S-150 S-video Cable"]
    M["CP-10"] --> N["STV-250N Stereo Video Cable"]
    O["CP-10"] --> P["CV-150F DV Cable"]
    Q["CP-10"] --> R["Digital Device"]
    S["CP-10"] --> T["MV5t MC"]
    U["CP-10"] --> V["SD Memory Card or MultiMediaCard"]
    W["CP-10"] --> X["IFC-300PCU USB Cable"]
    Y["CP-10"] --> Z["Personal Computer"]
    AA["CBC-NB2 Car Battery Charger (Available soon)"] --> AB["CB-2LTE Battery Charger"]
    AC["CA-PS 700 Compact Power Adapter"] --> AD["NB-2L/BP-2L12 Battery Pack"]
    AE["NB-2L, BP-2L12 Battery Pack"] --> AF["NB-2L, BP-2L12 Battery Pack"]
* Charging with the CA-910 Compact Power Adapter or CH-910 Dual Battery Charger/Holder (with optional)
Optional Accessories
Battery Packs
The Battery Pack BP-2L12 can also be used with the MV5/MV5i/MV5i MC.
CBC-NB2 Car Battery Charger
Connect the car battery cable to recharge battery packs on the move. The car battery cable plugs into your car's cigarette lighter socket and runs off a 12-24 V DC negative ground battery.
TL-28 Tele-converter
This tele-converter lens increases the focal length of the camcorder lens by a factor of 1.9.
- The image stabilizer is not as effective as usual when the tele-converter is attached.
WD-28 Wide-converter
This lens decreases focal length by a factor of 0.7, giving you a wide perspective for indoor shots or panoramic views.
FS-28U Filter Set
Neutral density and MC protector filters to help you take control of difficult lighting conditions.
VL-10Li Battery Video Light
This compact yet powerful video light can be used for both indoor and outdoor shooting.
- Use the BP-900 Series battery packs to power the light. Approximate usage times are as follows:
- Charge the BP-900 Series battery packs with the CA-910 Compact Power Adapter (optional).
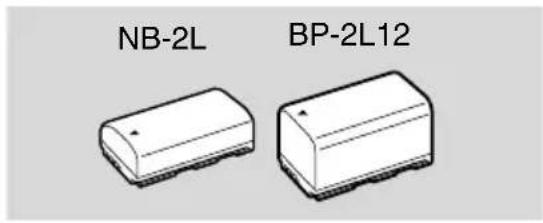
text_image
NB-2L BP-2L12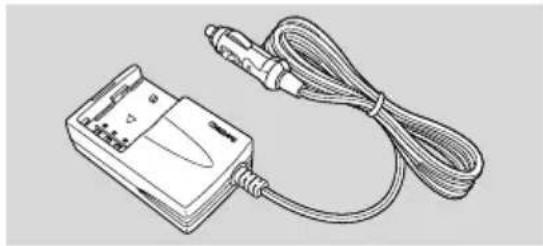
natural_image
Line drawing of a handheld electronic device with a coiled cable (no text or symbols visible)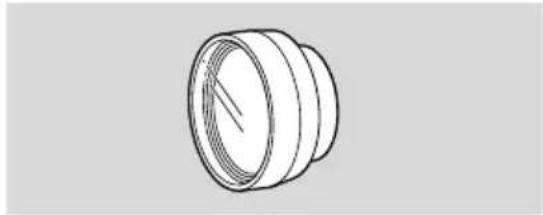
natural_image
Technical line drawing of a mechanical component with concentric rings and a central slot (no text or symbols)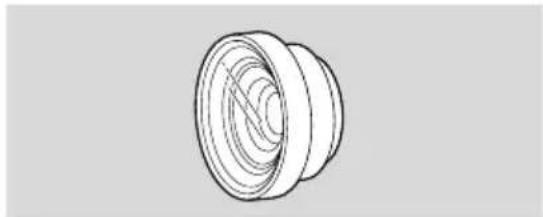
natural_image
Technical line drawing of a mechanical component with concentric circular features (no text or symbols)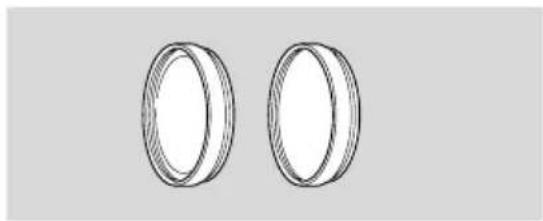
natural_image
Two identical cylindrical rings, one plain and one with hatching, shown against a plain background (no text or symbols)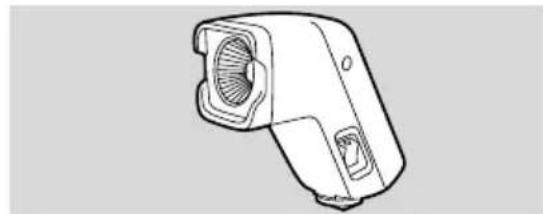
natural_image
Line drawing of a mechanical device with no visible text or symbols
Zoom Remote Controller ZR-1000
When this product is plugged into the LANC terminal of a Canon camcorder, it is possible to control functions such as the start and stop of recording and the zoom and focusing functions while the camcorder is mounted on a tripod, without touching the camcorder body itself.
SA-1 Adapter Bracket
Attaches a video light or microphone securely to the camera
SC-1000 Soft Carrying Case
A handy camcorder bag with padded compartments and plenty of space for accessories.
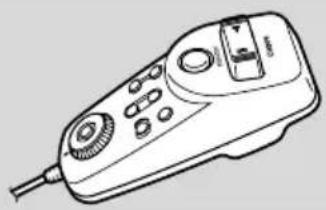
natural_image
Line drawing of a handheld electronic device with ports and a cable (no text or symbols)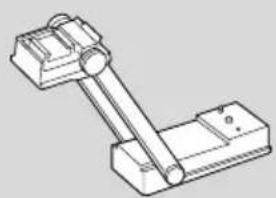
natural_image
Technical line drawing of a mechanical bracket or clamp assembly (no text or symbols)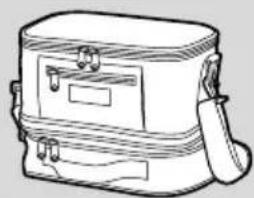
natural_image
Line drawing of a two-tiered box device with straps and handle (no text or symbols)
This mark identifies genuine Canon video accessories. When you use Canon video equipment, we recommend Canon-brand accessories or products bearing the same mark.
Screen Displays
To display the date and time, press the DATA CODE button. See also p. 80.
Press the wireless controller's TV SCREEN button or turn TV SCREEN on through the menu to see the other displays on the TV screen. (The displays appear white on-screen.) They will not be added to any recordings you make with the camcorder.
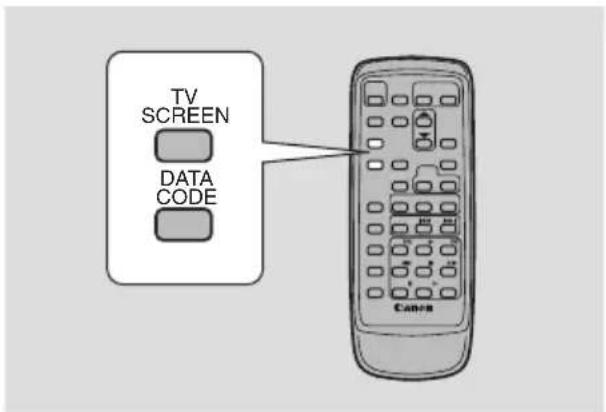
text_image
TV SCREEN DATA CODE Canon
flowchart
graph LR
    A["CAMERA"] --> B["PLAY (VCR)"]
    B --> C["MV5i MC CARD CAMERA"]
    C --> D["MV5i MC CARD PLAY (VCR)"]
    E["MENU (40)"] --> F["▶ DISP. SET UP"]
    F --> G["▶ TV SCREEN...ON"]
To turn TV SCREEN off, open the menu and select DISP. SET UP. Then select TV SCREEN, set it to OFF and close the menu.
For instructions on how to hook the camcorder up to your TV, see p. 32.
Turning off the LCD screen displays
You can turn off the displays to give you a clear screen for playback.

text_image
CAMERA PLAY(VCR) MV5i MC CARD CAMERA MV5i MC CARD PLAY (VCR)
flowchart
graph LR
    A["39 MENU"] --> B["▶ DISP.SET UP"]
    B --> C["▶ DISPLAYS...ON"]
To turn the display off, open the menu and select DISP. SET UP. Then select DISPLAYS, set it to OFF
- If you turn the displays off, the LCD screen will be completely blank (including connected TV screen), but the camcorder will continue to show warning/caution displays when necessary, and the data code appears in the display if it is set to ON.
- When operating the camcorder, the displays appear for 2 seconds. However, the displays do not disappear when displaying an index screen.

indicates a flashing display.
Record pause mode ( [8]
Recording (19)
The backup battery is not properly installed, or needs replacing (153).
natural_image
Simple gray rectangular shape with a small starburst symbol in the center (no text or symbols)
Shows how much battery power remains (151).
The battery pack is exhausted (151).
No cassette is loaded, or it is set for erasure prevention (16 17).
Remaining tape (Green: more than five minutes. Yellow: less than five minutes. Red: final few seconds.)
...finally, it tells you when you have completely run out of tape.
The camcorder is ejecting the tape (16).
The safety mechanism is activated. Unload the cassette and turn the camcorder off. Turn it on again and reload the cassette.
Recording mode (20)
Playback is stopped (28).
Normal playback (28)
Fast forward (28)
natural_image
Blank white image with a small gray icon in the bottom right corner (no text or symbols)
natural_image
Blank gray rectangular area with a small decorative border and a small circular emblem in the top-right corner (no text or symbols)
text_image
5min
text_image
EJECT


Rewind (28)
Fast forward playback (28)
Rewind playback (28)
Frame advance playback (29)
Frame reverse playback (29)
Playback pause (forward and reverse) (29)
Slow playback (forward and reverse) (29)
×2 playback (forward and reverse) (30)
×1 playback (forward and reverse) (29)
Photo Search (83)
Date Search (83)
Zero set memory (forward and reverse) (84)
MV5/MV5/MC
AV Insert Editing (94)
Audio Dubbing (101)





text_image
PHOTO SEARCH DATE SEARCH

Zoom display (23): Optical zoom
Optical plus 40× digital zoom
Optical plus 200× digital zoom
Zoom in
Zoom out
The image stabilizer is turned on (56).
CAM. MENU (41)
PLAY MENU (MV5i/MV5i MC) (42)
MV5i MC C.CAM. MENU ( 44 )
MV5i MC C.PLAY MENU (45)
MV5i MC FILE OPER. MENU (127)
The remote sensor is turned off (49).


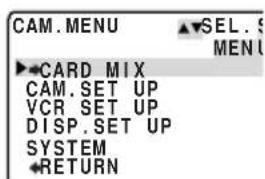
Self-timer countdown (71)
Zero set memory (84)
Audio mode (69)
Data code (80)
Photo mode (54)
- Setting the AF/AE. ● mark flashes white
• AF/AE locked. ● mark lights up green
- Timer
Recording programs (57).
AE Shift (73)
Manual focus is selected (76).
Shutter speed (74)
White balance is (77)
Set
Indoor
Outdoor
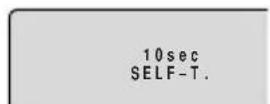

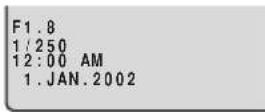




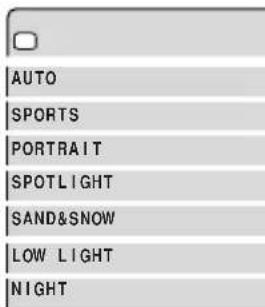
The 16:9 mode: the display flashes when the effect is being selected, and appears steadily when it is activated (21).
Digital effects. The display flashes when the function is being selected and appears steadily when it is activated (62).
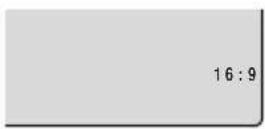
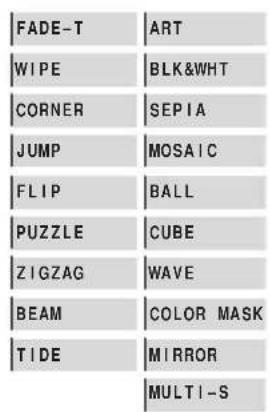
text_image
FADE-T WIPE CORNER JUMP FLIP PUZZLE ZIGZAG BEAM TIDE ART BLK&WHT SEPIA MOSAIC BALL CUBE WAVE COLOR MASK MIRROR MULTI-SThe wind screen is turned on (70).
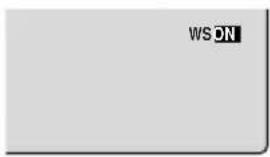
text_image
WSONVolume level (31): Speaker
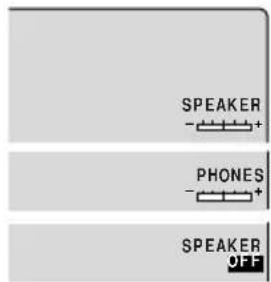
text_image
SPEAKER - + PHONES - + SPEAKER OFFHeadphones
The AV/headphones terminal is switched to headphones (32).
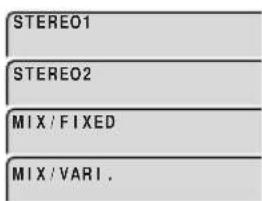
text_image
STEREO1 STEREO2 MIX / FIXED MIX / VARI .Audio output (103)
Mix balance (103)
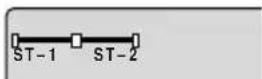
MV5i/MV5i MC
Audio input and Microphone input (100)
MV5i/MV5i MC
Audio input
Microphone input
text_image
AUDIO IN MIC.INMV5i/MV5i MC
DV input (86, 115)
Analog-digital converter (92)
Condensation warning (157)
text_image
DV IN AV DV
natural_image
Blank gray rectangular area with a small icon in the center (no text or symbols)MV5i MC Memory Card Displays
No memory card is inserted (107)

Still Image Size (113)
Movie Size(113)

Image quality(107) Standard
Fine

Super Fine

Folder number-File number (110)
Slide show in progress (124)
Recording to a memory card (113)
text_image
>>>9.9 CARDThe number of still images that can still be recorded on the memory card ( 109)

(Green: 6 or more images. Yellow: 1-5 images Red: No more images)
Accessing a memory card (122)
text_image
<<< 9 / 99 CARDCurrent still
image/Total number of still images on the memory card (122)
Protect mark (125)
Card mix (140)
Print mark (125)
Data code (80)
Formatting a memory card (145).
Erasing still images (131).
Connecting to a PC (146).



natural_image
Generic card icon with no text or symbols on a document background
text_image
数据
natural_image
Simple icon of a laptop computer with a screen and tower (no text or symbols)

Time Code
text_image
0:12:34:12This records counter information, including hour, minute, second, and frame number on a special data code area on the tape itself. It is reset automatically when a new tape is loaded. In TAPE CAMERA mode, the frame number doesn't appear in the display.
Recording reminder
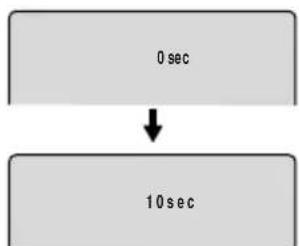
flowchart
graph TD
    A["0 sec"] --> B["10 sec"]
When you start recording, the camcorder counts from 0 sec to 10 sec. Shots which are shorter than ten seconds may be difficult to edit later. On the other hand, if you are not planning to edit the recording, remember that a shot which does not contain action should generally last no longer than 10 seconds.
"AUTO POWER OFF"
text_image
AUTO POWER OFF- The camcorder will turn itself off if you leave it in record pause mode for more than about 5 minutes. This display appears 20 seconds (approx.) before the camcorder turns off.
Caution phrases
The camcorder displays various caution phrases — they appear for 4 seconds before disappearing.
Appears each time you turn the power on, until you set the time zone, date and time (51).
SET THE TIME ZONE, DATE AND TIME
Appears when the battery pack is exhausted (15).
Appears when the tape has reached the end.
TAPE END
Refer to p.17
THE TAPE IS SET FOR ERASURE PREVENTION
Appears when, during DV dubbing, the DV cable is disconnected or the power of the digital equipment connected to the camcorder is turned off.
CHECK THE DV INPUT
Refer to p.157
CONDENSATION HAS BEEN DETECTED
Appears as a warning to protect the tape and also when condensation is detected. Remove the tape as soon as possible after the camcorder has displayed the caution.
REMOVE THE CASSETTE
Refer to p.89
COPYRIGHT PROTECTED PLAYBACK IS RESTRICTED
Refer to p.89, p.90 or p.92
COPYRIGHT PROTECTED DUBBING RESTRICTED
MV5i/MV5i MC
Appears when you try to do audio dubbing or AV insert on a tape recorded in any mode other than SP mode (94 97).
CHECK THE CASSETTE [REC MODE]
Appears when you try to do audio dubbing on a tape recorded in 16-bit audio or 12-bit, 4-channel mode (97).
CHECK THE CASSETTE [ AUDIO MODE]
MV5/MV5/MC
Appears when the camcorder detects a blank section of a tape during audio dubbing or AV insert (94 97).
CHECK THE CASSETTE [BLANK]
Appears immediately after you start recording, and the video heads are badly contaminated. Make sure to clean the video heads when this caution appears. (155)
HEADS DIRTY, USE CLEANING CASSETTE
MV5i MC Memory card caution phrases
An error has occurred with the memory card. The camcorder can not record or play back. A temporary card error is also possible. If CARD ERROR disappears and flashes red, turn to power off and back on and reinsert the card. Is recording or playing by
CARD ERROR
There is no more remaining memory on the memory card. Change the card or erase images.
CARD FULL
You have reached the maximum file or folder number. (110)
NAMING ERROR
The image has been recorded in an incompatible JPEG format or other format that the camcorder can not play back, or the image data has been damaged.
UNIDENTIFIABLE IMAGE
Appears if you have tried to mark 100 or more images for printing, or if a mark file cannot be edited. (125)
No memory card is inserted in the camcorder. (107)
There are no images recorded on the memory card.
You are using an SD Memory Card and it is set for erasure prevention. Change the position of the protect switch.
Depending on the signal, some analogue images cannot be recorded on the memory card as still image.
PRINT MARK ERROR
NO CARD
NO IMAGES
THE CARD IS SET FOR ERASURE PREVENTION
THIS IMAGE CANNOT BE RECORDED
MV5/MV5i/MV5i MC
Power Supply (rated): 7.4 V DC
Power Consumption (while recording with the AF turned on):
3.4 W (Using viewfinder),
4.4 W (Using LCD screen)
Television system:
CCIR standard (625 lines, 50 fields)
PAL colour signal
Video recording system:
2 rotary heads, helical scanning DV system (Consumer digital VCR SD system)
Digital component recording
Audio recording system:
PCM digital sound: 16 bit (48 kHz/
2 ch), 12 bit (32 kHz/ 4 ch)
Image sensor:
1/6" CCD (charge coupled device), approx. 800,000 pixels (card: 740,000
effective pixels, tape: 400,000 effective pixels)
Tape format:
Videocassettes bearing the Mini Dmark.
Tape speed:
SP: 3/4 ips (18.83 mm/s),
LP: 1/2 ips (12.57 mm/s)
Maximum recording time
(with an 80 min. cassette):
SP: 80 min., LP: 120 min.,
Fast forward/ rewind time:
Approx. 2 min. 20 sec.
(with a 60 min. cassette)
Lens:
F/1.8-2.3, 10× power zoom, f=2.5-25
mm ( MV5i MC <power zoom,
f=3.5 - 25 mm)
Focusing system:
TTL autofocus, manual focusing possible
Minimum focusing distance:
1 m (3ft 3 ^3 /8 in) 1 cm (3/8 in) on
maximum wide angle)
Maximum shutter speed:1/2,000 sec.
(MV51MC)ec. when using a
memory card)
Minimum illumination:
2.4 lx (using the Night program in
TAPE CAMERA mode)
Recommended illumination:
More than 100 lx
Filter diameter: 28 mm
Viewfinder:
0.5 in, TFT colour LCD,
approx. 113,000 pixels
LCD screen:
2 in measured diagonally,
TFT colour, approx. 130,000 pixels
Microphone:
Stereo electret condenser microphone
Recording media:
SD Memory Card, MultiMediaCard
Number of recording pixels:
Still image: 1024 × 768, 640 × 480 pixels
Movie: 320 ×240 pixels (approx. 10
sec.)*, 160 × 120 pixels (approx. 30 sec.)*
* The figures in brackets represent the maximum length of one movie clip.
Image format:
Design rule for Camera File system (DCF), Exif 2.2 compliant*
Digital Print Order Format (DPOF) compliant (only images marked for printing)
* This camcorder supports Exif 2.2 (also called “Exif Print”). Exif Print is a standard for enhancing the communication between camcorders and printers. By connecting to an Exif Print-compliant printer, the camcorder's image data at the time of shooting is used and optimized, yielding extremely high quality prints.
File format: Still Image: JPEG
(compression mode: Superfine, Fine, Standard)
Movie: Motion JPEG
Estimated SD Memory Card SDC-8M capacities (approx.):
1024 ×768: Superfine 14 images/Fine 20 images/Standard 39 images 640 ×480: Superfine 35 images/Fine 52 images/ Standard 86 images
- The actual number you can record varies depending on the images. Remember that the sample images recorded on the supplied SD Memory Card are included in the total number.
USB terminal\*: mini-B
* USB2.0 compliant
DV Terminal ^1) :
Special 4-pin connector (conforms to IEEE1394)
AV/headphones terminal:
∅ 3.5 mm minijack
Audio input 2): -10 dBV/at least 40
kohms, (L, R), unbalanced
output: -10 dBV (47 kohm load)/less than 3 kohms, unbalanced
Video: 1 Vp-p/75 ohms unbalanced
MIC terminal input: 3.5 mm stereo minijack, -57 dBV (with 600 ohm mic)/ at least 5 kohms
LANC ⊕ terminal: ∅ 2.5 mm mini minijack
Operating temperature range: 0^-40^ ( 32^-104^ )
Dimensions: 55 × 111 × 89 mm (2 × 4^3/8 × 3^1/2 in)
Weight: 380 g (13 38 oz)
NB-2L Battery Pack
Battery type:
Rechargeable lithium ion battery
Rated voltage: 7.4 V DC
Operating temperature:
0^-40^ (32^-104^)
Battery capacity:
570 mAh
Dimensions: 33.3 × 45.2 × 16.2 mm
(1^1/4 × 1^3/4 × ^5/8in)
Weight:
40 g (1 3/8 oz)
1) MV5: Output only
MV5i/Mv5i MC: Input/output
2) MV5i/MV5i MC only
Weight and dimensions are approximate.
Errors and omissions excepted.
Subject to change without notice.
Index
16:9, 21
A
Abroad, Using the Camcorder, 156
Accessories, 7, 163
AE Programs, 57
AE Shift, 73
Analog line-in**, 90
Analog-digital converter, 92
Audio Dubbing, 97
Audio Mix, 103
Audio Mode, 69
Audio Output, 103
Audio/Video Terminal, 32
Auto, 59
Autofocus, 76
AV Insert**, 94
B
Backup Battery, 153
Battery Charger, 14
Battery Pack, 14-15, 151
Beep, 22
Brightness, 26
C
Charging the Battery Pack, 14-15, 151
Cleaning the Camcorder, 155
Combining Images*, 140
Condensation, 157
Connecting to a PC, 105, 146
Connection to TV or VCR, 32
Copying from Memory Card to Tape*, 144
Copying from Tape to Memory Card*, 143
D
Data Code, 80
Date and Time, 53
Date Search, 83
Demo mode, 22
Digital Effects, 61
Digital Zoom, 23
DV Dubbing, 86
E
Easy Recording, 59
Editing to a VCR, 85
Effects, 64
Erasing Still Images*, 126, 131
External Microphone, 69, 97
F
Faders, 62
Fast Forward, 28
File Numbers*, 110
Focusing, 76
Formatting a Memory Card*, 145
H
Head Cleaning, 155
Headphones, 32
I
Image Quality*, 108
Image Stabilizer, 56
Index Screen*, 124
L
LANC, 85
LCD Screen, 25
Lens Cap, 150
Loading Cassettes, 16
Low Light, 60
LP Mode, 20
M
Maintenance, 154
Making Better Videos, 36
Manual Focus, 76
Memory Card Introduction*, 106
Menus, 39
Microphone, 69, 97
Multi-Image Screen, 67
N
Night, 60
* MV5i MC only
** MV5i/MV5i MC only
O
Optional Accessories, 163
P
Pause, Record, 18
PC Connection, 105, 146
Photo Search, 83
Playback Connection, 32
Playback Pause, 29
Playing Back a Tape, 28
Playing Back Memory Card, 122
Portrait, 59
Power Adapter, 12-14
Powering Your Camcorder, 12
Pre-Marked Position, 84
Preparing the Camcorder, 150
Preventing Accidental Erasure ^* , 125, 128
Print Mark*, 125, 129
Problems, 158
Protect*, 125, 128
R
Record Pause Mode, 18
Record Review, 38
Record Search, 38
Recording Movies from a Tape, 118
Recording Movies from Other Devices**, 119
Recording Movies onto a Memory Card*, 117
Recording Movies onto a Tape, 18
Recording Programs, 57
Recording Still Image from a Tape, 114
Recording Still Images from Other Devices**, 115
Recording Still Images onto a Memory Card*, 112
Recording Still Images onto a Tape, 54
Remote Control, 48
Remote Sensor, 48-49
Rewind, 28
S
S1 video terminal, 34
Sample images*, 148
Sand & Snow, 60
Screen Displays, 165
SD Memory Card*, 106, 112, 147
Self-Timer, 71
Shutter Sound*, 111
Shutter Speed, 74
Slide Show*, 124
SP Mode, 20
Speaker, 31
Sports, 59
Spotlight, 59
Still Images, 54, 112
Storage, 155
S-video, 34
System Diagram, 162
T
Tape Protection, 17
Telephoto, 23
Time Code, 170
Time Zone, 51
Tips for Making Better Videos, 36
Tripod, 36
Troubleshooting, 158
TV, 32, 165
V
VCR, 32
Video Heads, 155
Videocassettes, 16
Viewfinder, 150
W
White Balance, 77
Wide screen TV, 21
Wide-angle, 23
Wind Screen, 70
Wireless Controller, 48
* MV5i MC only
** MV5i/MV5i MC only
Z
Zero Set Memory, 84
Zooming, 23
E
* MV5i MC only
** MV5i/MV5i MC only
Menu at a Glance
Use the list below to quickly navigate the camcorder's menu. Functions are listed alphabetically.
| Function | First make sure the camera is set to... | Then select it from this submenu and set. | |||
| CAMERA | PLAY (VCR) | MV5i MC CARD CAMERA | MV5i MC CARD PLAY (VCR) | ||
| 16:9 effect | ○ | CAM.SET UP | |||
| 6-sec. Date | ○ | DISP.SET UP | |||
| Audio dub | MV5i/ MV5i MC | VCR SET UP | |||
| Audio mode | ○ | ○ | VCR SET UP | ||
| AV/headphones | ○ | ○ | MV5i MC | V5i MC | VCR SET UP |
| AV → DV out | ○ | VCR SET UP | |||
| Beep | ○ | ○ | MV5i MC | V5i MC | SYSTEM |
| Brightness | ○ | ○ | MV5i MC | V5i MC | DISP.SET UP |
| Card access display | MV5i MC | MV5i MC | MV5i MC | MV5i MC | DISP.SET UP |
| Card mix | MV5i MC | CARD MIX | |||
| Copy - card to cassette | MV5i MC | CARD OPER. | |||
| Copy - cassette to card | MV5i MC | CARD OPER. | |||
| Data code | ○ | MV5i MC | DISP.SET UP | ||
| Date/time display | ○ | MV5i MC | DISP.SET UP | ||
| Date/time select | ○ | MV5i MC | DISP.SET UP | ||
| Date/time set | ○ | ○ | MV5i MC | V5i MC | SYSTEM |
| Demo mode | ○ | MV5i MC | DISP.SET UP | ||
| Digital zoom | ○ | MV5i MC | CAM.SET UP | ||
| Displays | ○ | MV5i MC | DISP.SET UP | ||
* Only the date and time appear in the data code when using a memory card.
| Function | First make sure the camera is set to... | Then select it from this submenu and set. | |||
| CAMERA | PLAY (VCR) | MV5i MC CARD CAMERA | MV5i MC CARD PLAY (VCR) | ||
| Erase | MV5i MC | CARD OPER. | |||
| Erase all print marks | MV5i MC | CARD OPER. | |||
| File numbers | MV5i MC | MV5i MC | CARD SET UP | ||
| Format | MV5i MC | CARD OPER. | |||
| Image stabilizer | ○ | CAM.SET UP | |||
| LCD Mirror mode | ○ | MV5i MC | DISP.SET UP | ||
| Mix level | MV5i MC | → CARD MIX | |||
| Mix type | MV5i MC | → CARD MIX | |||
| Movie Size | ○ | MV5i MC | CARD SET UP | ||
| Output channel | ○ | VCR SET UP | |||
| Print mark | MV5i MC | CARD OPER. | |||
| Protect | MV5i MC | CARD OPER. | |||
| Record mode | ○ | MV5i/ MV5i MC | MV5i MC | VCR SET UP | |
| Remote sensor mode | ○ | ○ | MV5i MC | SYSTEM | |
| Self-Timer | ○ | MV5i MC | CAM.SET UP | ||
| Shutter sound | MV5i MC | CARD SET UP | |||
| Shutter speed | ○ | MV5i MC | CAM.SET UP | ||
| Still Image Quality | ○ | MV5i MC | CARD SET UP | ||
| Still Image Size | MV5i MC | CARD SET UP | |||
| Stitch assist | MV5i MC | → STITCH AST | |||
| Tally lamp | ○ | ○ | MV5i MC | V5i MC | SYSTEM |
| Time zone/DST | ○ | MV5i MC | SYSTEM | ||
| TV screen | ○ | MV5i MC | DISP.SET UP | ||
| White balance | ○ | MV5i MC | CAM.SET UP | ||
| Wind screen | ○ | ○ | VCR SET UP | ||
Canon
CANON INC.
Canon Europa N.V.
P.O. Box 2262, 1180 EG Amstelveen, the Netherlands
Canon UK Ltd.
Ribcon Way
Luton Bedfordshire LU4 9UR
Telephone 0870-241-2161
Canon Australia Pty. Ltd
1 Thomas Holt Drive, North Ryde, N.S.W. 2113, Australia
Telephone 805-2000, Fax 887-4484
Canon New Zealand Ltd
Fred Thomas Drive, Takapuna, P.O. Box 33-336, Auckland, New Zealand
Telephone 486-1570, Fax 486-6420
Canon Singapore Pte. Ltd
79 Anson Road #09-01/06, Singapore 079906
Telephone (65)-532-4400, Fax (65)-221-2939
Canon Hongkong Company Ltd
9/F, The Hong Kong Club Building, 3A Chater Road, Central, Hong Kong
Canon Latin America, Inc.
Sales & Enquiries: 703 Waterford Way Suite 400 Miami, FL 33126 USA

Printed on 100% reused paper.