
MV630i - Camcorder CANON - Free user manual and instructions
Find the device manual for free MV630i CANON in PDF.


User questions about MV630i CANON
0 question about this device. Answer the ones you know or ask your own.
Ask a new question about this device
Download the instructions for your Camcorder in PDF format for free! Find your manual MV630i - CANON and take your electronic device back in hand. On this page are published all the documents necessary for the use of your device. MV630i by CANON.
USER MANUAL MV630i CANON
MV650i/MV630i/MV600i/MV600
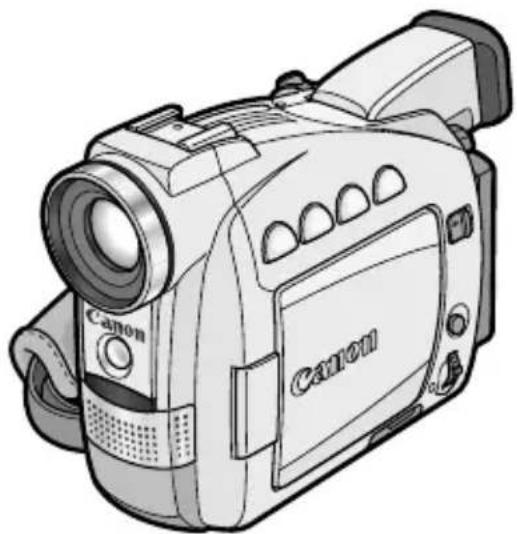
natural_image
Line drawing of a Canon digital camera with lens and control panel (no text or symbols)Introduction
Mastering
the Basics
Using the
Full Range
of Features
Editing
Mini

Digital
Video
Cassette

BUBBLE JET
DIRECT
This instruction manual covers the MV650i, MV630i, MV600i and MV600. Please note that illustrations and explanation in this manual are based on the MV650i.
MV650i
MV630i
Using a
Memory Card
Additional
Information
Important Usage Instructions
WARNING:

TO REDUCE THE RISK OF ELECTRIC SHOCK, DO NOT REMOVE COVER (OR BACK). NO USER SERVICEABLE PARTS INSIDE. REFER SERVICING TO QUALIFIED SERVICE PERSONNEL.
WARNING:

TO REDUCE THE RISK OF FIRE OR ELECTRIC SHOCK, DO NOT EXPOSE THIS PRODUCT TO RAIN OR MOISTURE.
CAUTION:
TO REDUCE THE RISK OF ELECTRIC SHOCK AND TO REDUCE ANNOYING INTERFERENCE, USE THE RECOMMENDED ACCESSORIES ONLY.
CAUTION:
DISCONNECT THE MAINS PLUG FROM THE SUPPLY SOCKET WHEN NOT IN USE.
CA-570 identification plate is located on the bottom.
- Use of CV-150F/CV-250F DV cable is necessary to comply with the technical requirement of EMC Directive.
The following manuals are supplied with the camcorder:
Digital Video Camcorder MV650i/MV630i/MV600i/MV600 Instruction Manual This manual explains the camcorder operations from basic video recording to the use of the full range of features.
○Windows XP Users Only DV NETWORK SOLUTION DISK Software Instruction Manual
This manual explains how to download/upload images from/to the memory card using a DV (IEEE1394) cable. You can also perform videoconference and file transfer over the Internet using the provided software. Available functions depend upon the camcorder model and networking environment.
○ MV650i MV630i
DIGITAL VIDEO SOLUTION DISK Software Instruction Manual
This manual explains how to download images from the memory card to a computer using the supplied USB cable. You can add sample images for Card Mix and My Camera settings from the supplied DIGITAL VIDEO SOLUTION DISK.
Trademark Acknowledgements
- Canon is a registered trademark of Canon Inc.
- MiniDV is a trademark.
- logo is a trademark.
• Macintosh is a trademark of Apple Computer Inc., registered in the United States and other countries. - Windows® is either a registered trademark or trademark of Microsoft Corporation in the United States and/or other countries.
- Other names and products not mentioned above may be registered trademarks or trademarks of their respective companies.
Table of Contents
Introduction
Reference Guide....3
Thank You for Choosing a Canon ....7
Introducing the MV650i/MV630i/MV600i/MV600 8
Components Guide 9
Mastering the Basics
Preparations
Using a Household Power Source ....13
Attaching and Charging the Battery Pack 14
Installing the Backup Battery ....17
Preparing the Camcorder 18
Loading a Cassette....20
Using the Wireless Controller....22
Setting the Time Zone, Date and Time 23
Basic Recording
Recording Movies on a Tape 26
Zooming 28
Using the LCD Screen....30
Searching and Reviewing when Recording ....33
Tips for Making Better Videos ....34
Basic Playback
Playing Back a Tape 35
Playing Back on a TV Screen....39
Using the Full Range of Features
General
Menus and Settings ....43
Changing the Remote Sensor Mode ....48
Customizing the Camcorder 49
MV650i Setting the Light-up Buttons 50
Other Camcorder Settings ....51
Recording
Changing the Recording Mode (SP/LP) 53
Recording Still Images on a Tape....54
Using the Recording Programs....56
Using Digital Effects....60
Using the Multi-Image Screen 66
Turning Off the Image Stabilizer 68
Recording With the Self-Timer....69
Audio Recording 70
MV650i Using the VL-3 Video Light (Optional) 72
MV650i Using the DM-50 Microphone (Optional)....73
Manual Adjustments
Adjusting the Focus Manually ....74
Adjusting the AE Shift....76
Setting the Shutter Speed....77
Setting the White Balance ....79
Playback
Magnifying the Image....81
Displaying the Data Code 82
Photo Search/Date Search....84
Returning to a Pre-marked Position 85
Editing
Recording to a VCR or Digital Video Device 86
MV650i MV630i MV600i Recording from Analog Video Devices (VCR, TV or Camcorder)....88
MV650i MV630i MV600i Recording from Digital Video Devices (DV Dubbing) .....89
MV650i MV630i MV600i Converting Analog Signals into Digital Signals (Analog-Digital Converter) 91
MV650i MV630i MV600i Replacing Existing Scenes (AV Insert) 93
Audio Dubbing....95
Connecting to a Computer Using a DV (IEEE1394) Cable 98
MV650i MV630i Using a Memory Card
Inserting and Removing the Memory Card 99
Selecting the Image Quality/Size 100
Recording Still Images on a Memory Card....103
Recording Panoramic Images (Stitch Assist Mode) 106
MV650i Recording Motion JPEG Movies on a Memory Card....108
Playing Back a Memory Card 110
Protecting Images 113
Erasing Images 114
Selecting Still Images for Printing (Print Order) 115
Printing with the Direct Print Function....117
Combining Images (Card Mix) 121
Copying Still Images....125
Formatting a Memory Card ....127
Connecting to a Computer Using a USB Cable 128
Creating a Start-up Image ....129
Memory Card Information ....130
Additional Information
Screen Displays ....133
List of Messages ....137
Maintenance....140
Troubleshooting 144
System Diagram 147
Optional Accessories 148
Specifications 151
Index 153
Conventions Used in This Manual
Operating Modes
| Operating Mode | Position of the POWER Switch | Position of the TAPE/CARD Switch |
| CAMERA CAMERA TAPE | ||
| PLAY (VCR) PLAY (VCR) TAPE | ||
| CARD CAMERA CAMERA CARD | ||
| CARD PLAY (VCR) PLAY (VCR) CARD |
Shaded area : MV650i and MV630i only.
Available functions depend upon the operating mode. It is indicated as follows:
CAMERA
: Function can be used in this mode.
CAMERA
: Function cannot be used in this mode.
Other Symbols and References
O: Reference page number.
O: Functions to be operated on the body of the camcorder.
O: functions to be operated on the wireless controller.
O: Additional topics that complement the basic operating procedures.
O: 10 cautions related to the camcorder operation.
○Capital letters are used to refer to buttons on the camcorder or the wireless controller.
O[ ] are used to refer to menu items displayed on the screen.
○"Screen" refers to the LCD and the viewfinder.
Thank You for Choosing a Canon
The Canon MV650i/MV630i/MV600i/MV600 provides a full range of options and functions. We recommend reading this manual thoroughly before you use the camcorder. It will help you to become more familiar with your camcorder, and learn how to operate it properly.
We suggest that you master the basic operations of the camcorder first, before moving on to its full range of features.
Checking Supplied Accessories
MV650i MV630iWL-D79 Wireless Controller,MV600i MV600WL-D80 Wireless Controller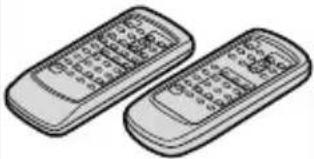 | Two AA Batteries Lens | Cap and LensCap Cord | SS-800 Shoulder Strap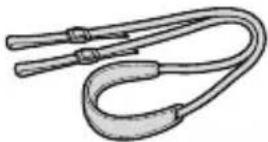 |
Lithium ButtonBattery CR1616 | MV650iBP-512 Battery Pack,MV630i MV600i MV600BP-508 Battery Pack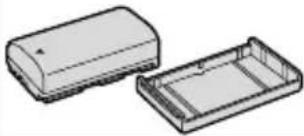 | CA-570 CompactPower Adapter (incl.power cord)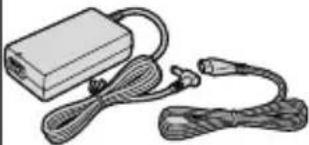 | MV650i WA-30.5Wide Attachment |
STV-250N StereoVideo Cable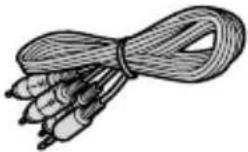 | PC-A10 SCARTAdapter(Europe, Asia)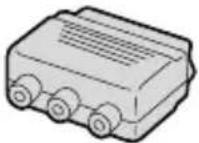 | MV650i MV630iIFC-300PCU USB Cable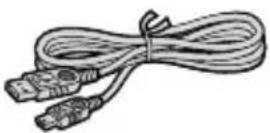 | MV650i MV630iSDC-8M SD MemoryCard (containingsample images)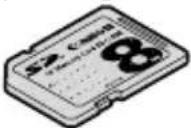 |
MV650i MV630i HardCase for SD Memory Card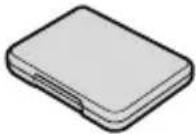 | DV NETWORKSOLUTION DISKMV650i MV630iDIGITAL VIDEOSOLUTION DISK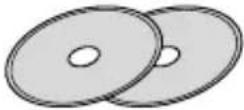 | ||
Introducing the MV650i/MV630i/MV600i/MV600
E
22×Optical and 440×Digital Zoom (MV650i)
20×Optical and 400×Digital Zoom (MV630i)
18×Optical and 360×Digital Zoom (MV600i/MV600)
Image Stabilizer
Stabilises your recordings even in long telephoto shots (in CAMERA mode).
Night Mode
Allows recording even in dark places. The Night mode adjusts automatically to the optimum shutter speed.
Super Night Mode and Low Light Plus Mode (MV650i)
With the MV650i's Super Night mode (in CAMERA mode) and Low Light Plus mode (in CARD CAMERA mode), you can keep on shooting without turning the lights on. The assist lamp (White LED) lights up to illuminate the subject.
Still Images
Just press the photo button to capture still images like photographs.
My Camera Settings
You can personalise your camcorder by customizing the start-up image and camcorder sounds.
Analog Line-in Recording/AV Insert Editing (MV650i/MV630i/MV600i), Audio Dubbing
Advanced Accessory Shoe (MV650i)
Simply slide Canon's DM-50 Directional Stereo Microphone or VL-3 Video Light into the accessory shoe; the camcorder will automatically provide power and connections.
Digital Effects
Show your creativity by using the special effects and faders. The multi-image screen captures moving subjects in 4, 9 or 16 sequences of still images.
Memory Card (MV650i/MV630i)
You can record images on a SD Memory Card or MultiMediaCard. Images recorded in Stitch Assist mode can be merged into one panoramic scene with the supplied software.
Direct Print (MV650i/MV630i)
You can print still images by connecting to a Canon Bubble Jet Printer with Direct Print function.
USB Terminal (MV650i/MV630i)
Allows transfer of memory card data to a computer with built-in USB port. You can organise and edit images on your computer using the supplied software.
IEEE1394 DV Terminal
The DV terminal allows high-quality transfer with virtually no deterioration in quality of images. You can edit images by connecting the camcorder to a PC with IEEE1394 terminal. Windows XP Users can use the supplied software to perform videoconference and file transfer over the Internet.
text_image
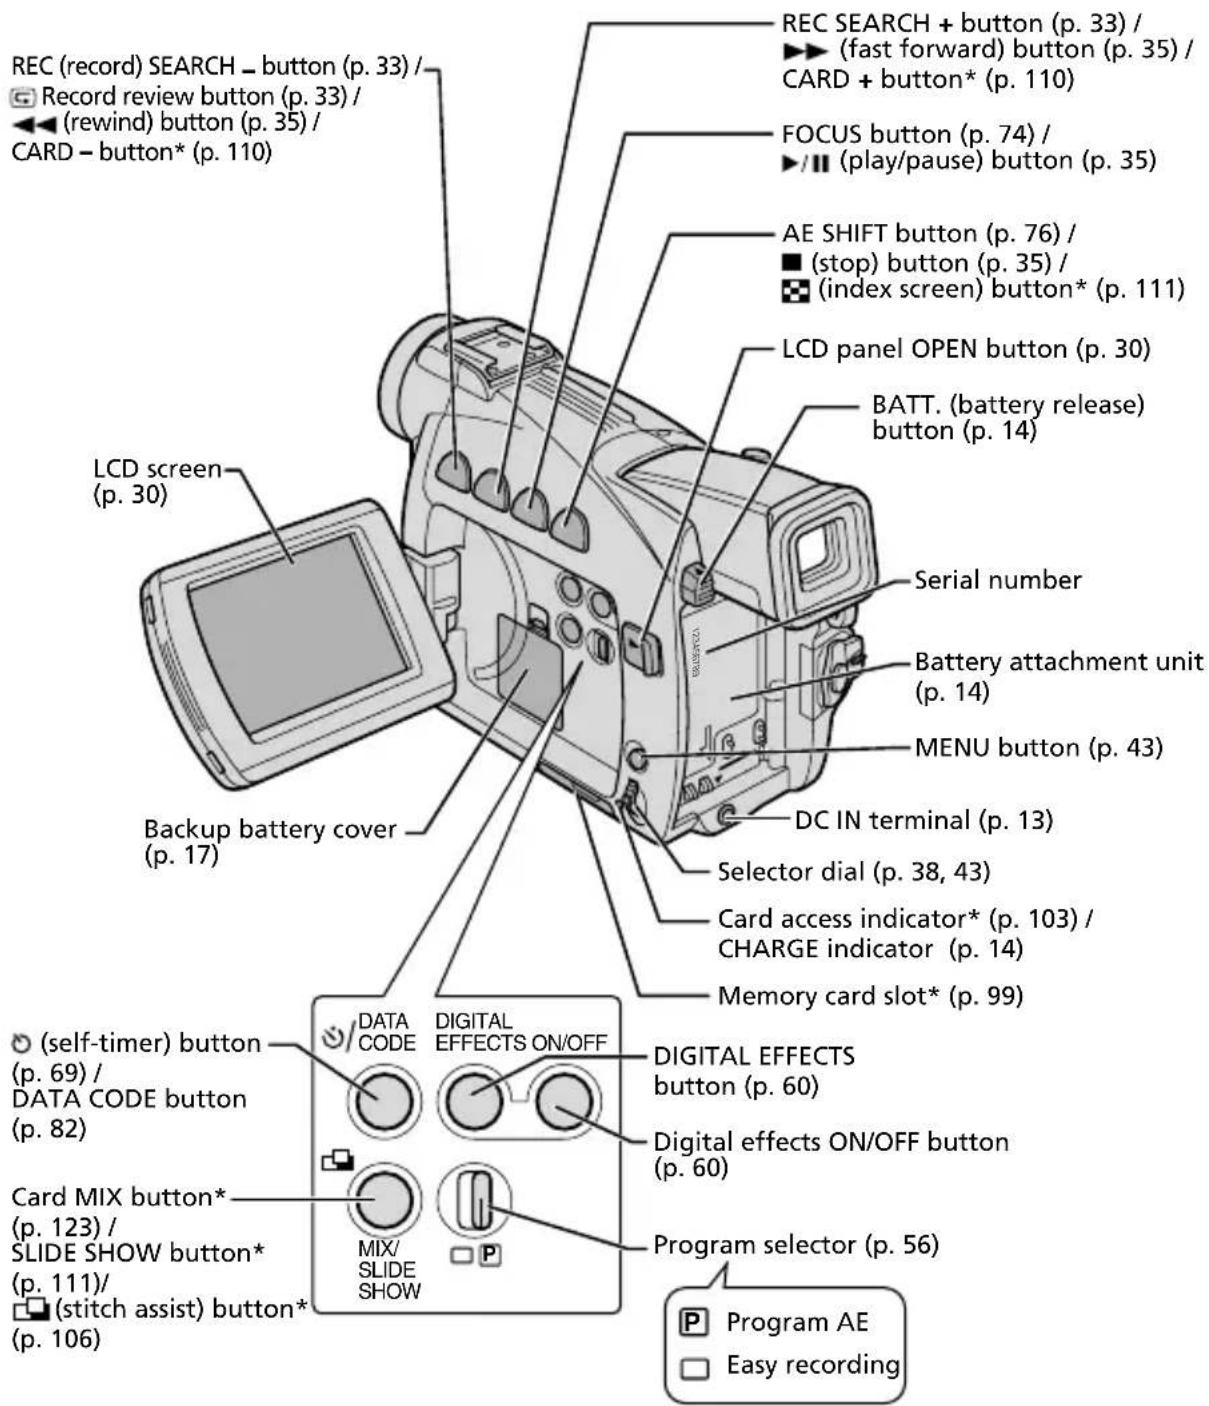
REC (record) SEARCH - button (p. 33) / Record review button (p. 33) / (rewind) button (p. 35) / CARD - button* (p. 110) LCD screen (p. 30) Backup battery cover (p. 17) REC SEARCH + button (p. 33) / ▶▶▶ (fast forward) button (p. 35) / CARD + button* (p. 110) FOCUS button (p. 74) / ▶/■ (play/pause) button (p. 35) AE SHIFT button (p. 76) / ■ (stop) button (p. 35) / (index screen) button* (p. 111) LCD panel OPEN button (p. 30) BATT. (battery release) button (p. 14) Serial number Battery attachment unit (p. 14) MENU button (p. 43) DC IN terminal (p. 13) Selector dial (p. 38, 43) Card access indicator* (p. 103) / CHARGE indicator (p. 14) Memory card slot* (p. 99) (self-timer) button (p. 69) / DATA CODE button (p. 82) Digital EFFECTS button (p. 60) Digital effects ON/OFF button (p. 60) Card MIX button* (p. 123) / SLIDE SHOW button* (p. 111)/ (stitch assist) button* (p. 106) MIX/ SLIDE SHOW Program selector (p. 56) Program AE Easy recording* MV650i and MV630i only.
text_image
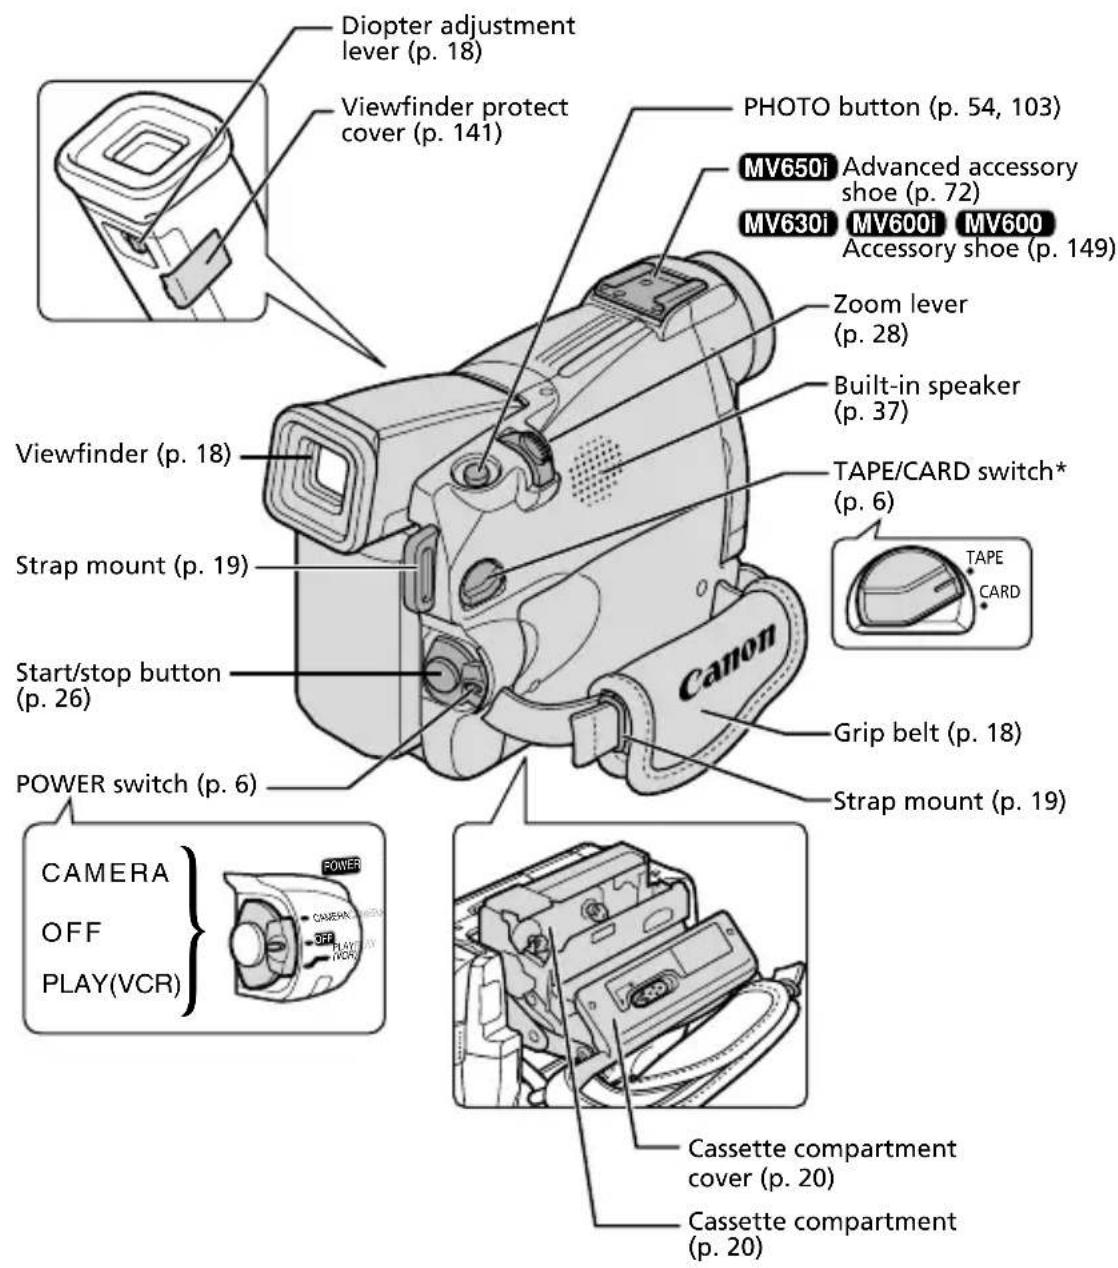
Diopter adjustment lever (p. 18) Viewfinder protect cover (p. 141) PHOTO button (p. 54, 103) MV650i Advanced accessory shoe (p. 72) MV630i MV600i MV600 Accessory shoe (p. 149) Zoom lever (p. 28) Built-in speaker (p. 37) TAPE/CARD switch* (p. 6) VIEWFINDER (p. 18) Strap mount (p. 19) Start/stop button (p. 26) POWER switch (p. 6) Grip belt (p. 18) Strap mount (p. 19) CAMERA OFF PLAY(VCR) POWER Cassette compartment cover (p. 20) Cassette compartment (p. 20)* MV650i and MV630i only.
text_image
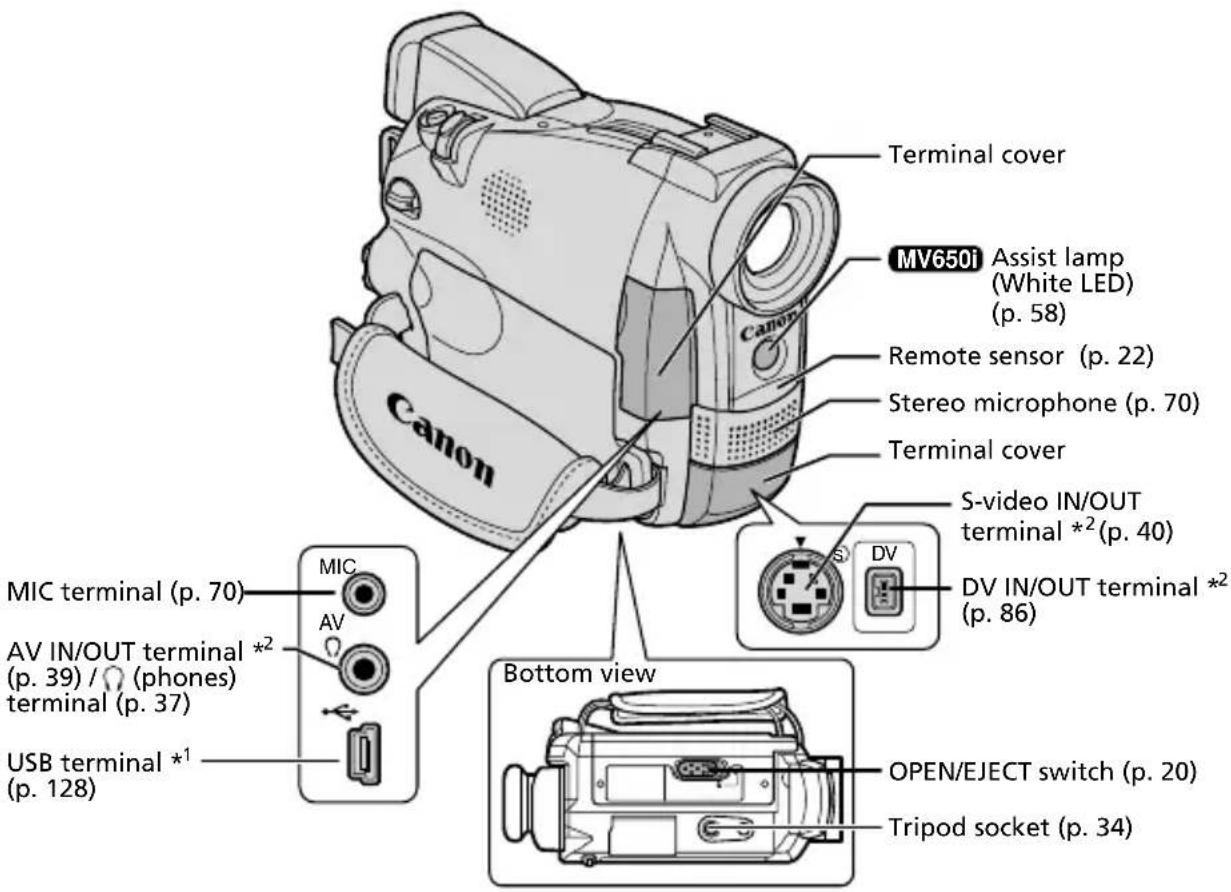
Terminal cover MV650i Assist lamp (White LED) (p. 58) Remote sensor (p. 22) Stereo microphone (p. 70) Terminal cover S-video IN/OUT terminal *² (p. 40) DV IN/OUT terminal *² (p. 86) Bottom view OPEN/EJECT switch (p. 20) Tripod socket (p. 34) CANON MIC terminal (p. 70) AV AV IN/OUT terminal *² (p. 39) / ☉ (phones) terminal (p. 37) USB terminal *¹ (p. 128)MV650i MV630i WL-D79 WL-D80
text_image
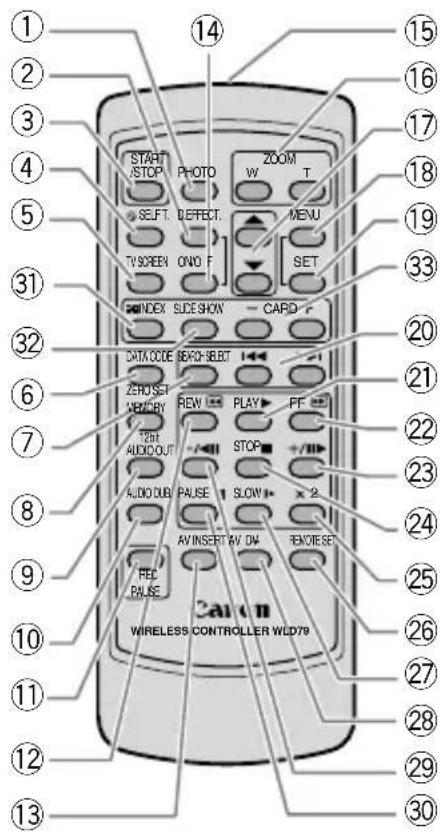
START STOP PHOTO ZOOM W T SELECT DEFFECT. MENU TV SCREEN ON/O F SET INDEX SLIDE SHON CARD DATA CODE BEACH SELECT ZERO SET VEGETY REW PLAY FF 2bit AUDIO OUT STOP AUDIO DUB PAUSE SLOW 2 AV INSERT AV DW BENOTESE FEC PULSE 24n 25 26 27 28 29 30 WIRELESS CONTROLLER WLD79MV600i MV600
text_image
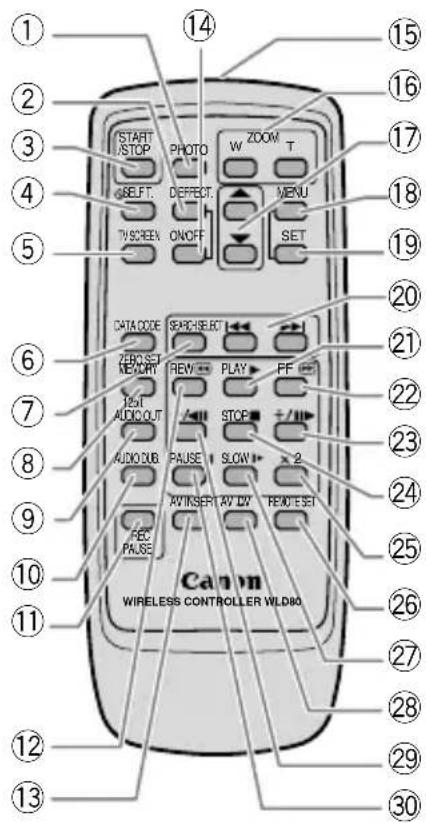
1 2 3 4 5 START /STOP PHOTO W ZOOM T SELF. DEFECT. MENU TV SCREEN ON/OFF SET DATA CODE SHIRCHSLRFT ZERO SET REVIEW PLAY FF AUTO AUDIO OUT STOP AUDIO DUB PAUSE SLOW 2 AV INSERT AV DY REND SEE FEC PAUSE Canon WIRELESS CONTROLLER WLD80① PHOTO button (p. 54, 103)
② D. EFFECTS (Digital effects) button (p. 60)
③ START/STOP button (p. 26)
④ ⚙ SELF T. button (p. 69)
⑤ TV SCREEN button (p. 133)
⑥ DATA CODE button (p. 82)
⑦ SEARCH SELECT button (p. 84)
⑧ ZERO SET MEMORY button (p. 85)
⑨ 12bit AUDIO OUT button (p. 97)
⑩ AUDIO DUB. button (p. 96)
⑪ REC PAUSE button *2 (p. 88)
⑫ REW◀◀ button (p. 35)
⑬ AV INSERT button *2 (p. 94)
⑭ Digital effects ON/OFF button (p. 60)
⑮ Transmitter
⑯ Zoom buttons (p. 28)
⑰ Controller buttons (p. 43)
⑱ MENU button (p. 43)
⑲ SET button (p. 43)
⑳ Search buttons (p. 84)
②1 PLAY ▶ button (p. 35)
②2 FF▶ button (p. 35)
②3 +/▶ button (p. 36)
②4 STOP■ button (p. 35)
②5 × 2 button (p. 36)
②6 REMOTE SET button (p. 48)
⑳ SLOW ▶ button (p. 36)
②8 AV→DV button *2 (p. 92)
⑲ -/◄◄ button (p. 36)
③0 PAUSE■ button (p. 36)
③1 INDEX button *1 (p. 111)
③2 SLIDE SHOW button *1 (p. 111)
③3 CARD -/+ buttons *1 (p. 110)
*1 MV650i and MV630i only.
*2 Not available with the MV600.
Using a Household Power Source
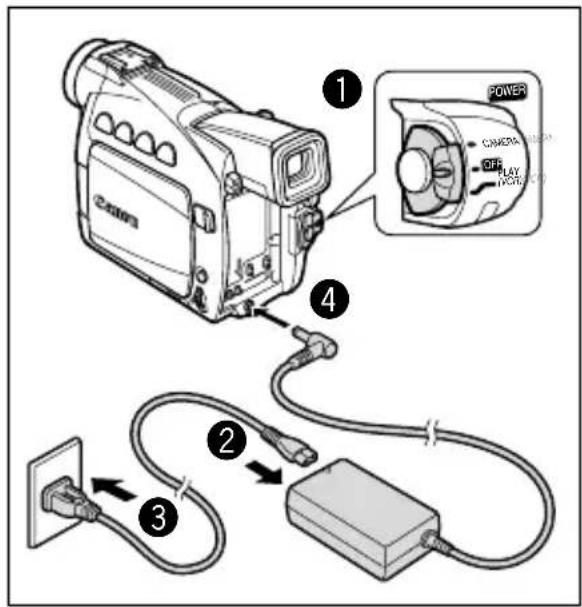
You can operate the camcorder from a household power source using the supplied power adapter. The power adapter converts current from a power outlet (100-240 V AC, 50/60 Hz) to the DC current used by the camcorder.
- Turn the POWER switch to OFF.
- Connect the power cord to the power adapter.
- Plug the power cord into a power outlet.
- Connect the power adapter to the camcorder's DC IN terminal.
text_image
① ② ③ ④ POWER CAMERA OFF PLAY HOLD- After use, disconnect the power adapter from the camcorder. Unplug the power cord from the power outlet and disconnect it from the adapter.

- Turn off the camcorder before connecting or disconnecting the power adapter.
Of the adapter is used close to a TV, it may cause picture interference. Move the adapter away from the TV or the antenna cable.
Do not connect any products that are not expressly recommended to the camcorder's DC IN terminal or to the power adapter.
- You may hear some noise from the power adapter during use. This is not a malfunction.
Attaching and Charging the Battery Pack
E
Charge the battery pack with the supplied power adapter before you use the camcorder for the first time and subsequently when the message "CHANGE THE BATTERY PACK" appears.
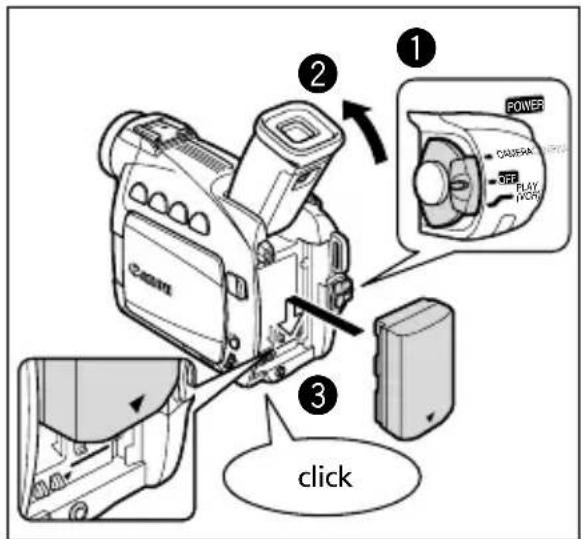
- Turn the POWER switch to OFF.
- Move the viewfinder upward.
-
Attach the battery pack to the camcorder.
-
Remove the terminal cover of the battery pack.
-
Align the end of the battery pack with the line on the camcorder, press lightly and slide it in the direction of the arrow until it clicks.
-
Connect the power cord to the adapter.
- Plug the power cord into a power outlet.
- Connect the power adapter to the camcorder's DC IN terminal.
- When charging is complete, disconnect the power adapter from the camcorder. Unplug the power cord from the power outlet and disconnect it from the adapter.
- Remove the battery pack after use.
Press the BATT. button to remove the battery.
text_image
① POWER CAERA PLAY PICK ② ③ click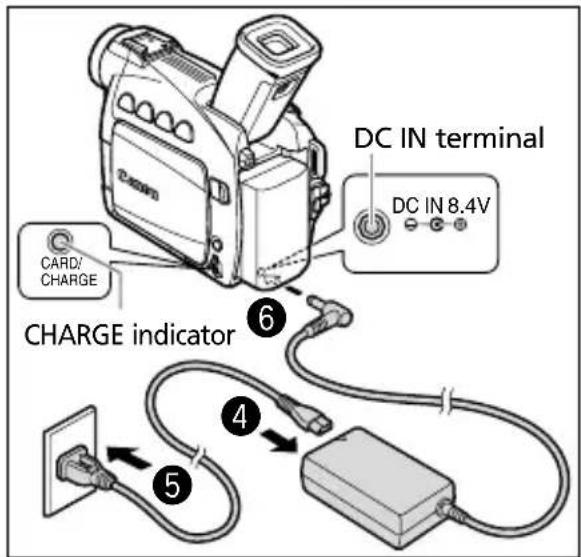
text_image
DC IN terminal DC IN 8.4V CARD/ CHARGE CHARGE indicator ⑥ ④ ⑤
The battery pack may be defective when the CHARGE indicator flashes rapidly.
The CHARGE indicator informs you about the charge status.
0-50%: Flashes once every second More than 50%: Flashes twice every second 100%: Glows steadily
Do not disconnect and reconnect the power cord while charging a battery pack. The battery pack may not be charged correctly even if the CHARGE indicator glows steady. The battery pack may also not be charged correctly when a power outage occurs during charging. Remove the battery pack and attach it back to the camcorder.
Charging, Recording and Playback Time
Below times are approximate and vary according to the charging, recording or playback conditions.
Charging Time
| Battery Pack Charging Time | |
| BP-508 (MV630i/MV600i/MV600) | 110 min. |
| BP-512 (MV650i/optional) 120 min. | |
| BP-511 (Optional) 120 min. | |
| BP-522 (Optional) 210 min. | |
| BP-535 (Optional) 310 min. |
- Charge the battery pack in temperatures between 5^ C and 40^ C .
- A lithium ion battery pack can be charged at any charge state. Unlike conventional battery packs, you do not need to completely use or discharge it before charging.
Recording Time
| Battery Pack Maximum | um Recording Time Typical Recording Time* | |||
| Using the Viewfinder | Using the LCD | Using the Viewfinder | Using the LCD | |
| BP-508(MV630i/MV600i/MV600) | 100 min. 75 | min. 55 min. 40 min. | ||
| BP-512(MV650i/Optional) | 180 min. 140 | min. 95 min. 75 | min. | |
| BP-511 (Optional) 180 | min. 140 min. 95 | min. 75 min. | ||
| BP-522 (Optional) 370 | min. 295 min. | 195 min. | 155 min. | |
| BP-535 (Optional) | 590 min. | 470 min. | 315 min. | 250 min. |
* Approximate times for recording with repeated operations such as start/stop, zooming, power on/off. Actual time may be shorter.
- We recommend that you prepare battery packs 2 to 3 times longer than you think you might need.
- To conserve battery charge, turn off the camcorder instead of leaving it in record pause mode.
Playback Time
| Battery Pack | Playback Time |
| Using the LCD | |
| BP-508 (MV630i/MV600i/MV600) | 70 min. |
| BP-512 (MV650i/optional) | 125 min. |
| BP-511 (Optional) | 125 min. |
| BP-522 (Optional) | 250 min. |
| BP-535 (Optional) | 400 min. |
How much power is left?
The battery symbols indicate the charge status of the battery pack.
When the battery pack is empty, "CHANGE THE BATTERY PACK" appears for 4 seconds and starts flashing.
The battery charge indicators are not constant – they vary according to the condition under which battery pack and camcorder are used.
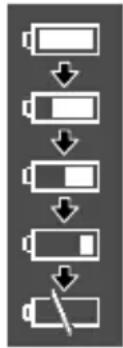
flowchart
graph TD
    A["Start"] --> B["Charge 1"]
    B --> C["Charge 2"]
    C --> D["Charge 3"]
    D --> E["Charge 4"]
    E --> F["Charge 5"]
Battery Pack Handling Precautions
DANGER!
Treat the battery pack with care.
- Keep it away from fire (or it might explode).
- Do not expose the battery pack to temperature higher than 60^ C. Do not leave it near a heater or inside a car in hot weather.
- Do not try to disassemble or modify it.
- Do not drop or knock it.
- Do not get it wet.
○Charged battery packs continue to discharge naturally. Therefore, charge them on the day of use, or the day before, to ensure a full charge.
○Attach the terminal cover whenever a battery pack is not in use. Contact to metallic objects may cause a short circuit and damage the battery pack.
○Dirty terminals may cause a poor contact between the battery pack and the camcorder. Wipe the terminals with a soft cloth.
○Since storing a charged battery pack for a long time (about 1 year) can shorten its lifecycle or affect performance, we recommend to discharge the battery pack fully and to store it in a dry place at temperatures no higher than 30^ C. If you do not use the battery pack for long periods, charge and discharge it fully at least once a year. If you have more than 1 battery pack, perform these precautions at the same time for all battery packs.
Although the battery pack's operating temperature range is from 0^ to 40^ , the optimal range is from 10^ to 30^ . At cold temperatures, performance will temporarily decline. Warm it in your pocket before use.
○ Replace the battery pack if the usable time after full charge diminishes substantially at normal temperatures.
Installing the Backup Battery
The backup battery allows the camcorder to retain date, time and other camcorder settings while the power source is disconnected. Power the camcorder from a household power source or with a battery pack when replacing the backup battery.
- Open the backup battery cover.
- Insert the lithium battery with the + side facing outward.
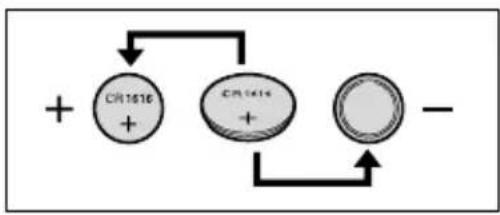
flowchart
graph TD
    A["CR1616"] --> B["+"]
    C["CR1614"] --> D["+"]
    E["-"] --> F["+"]
    B --> F
    D --> F
- Close the cover.
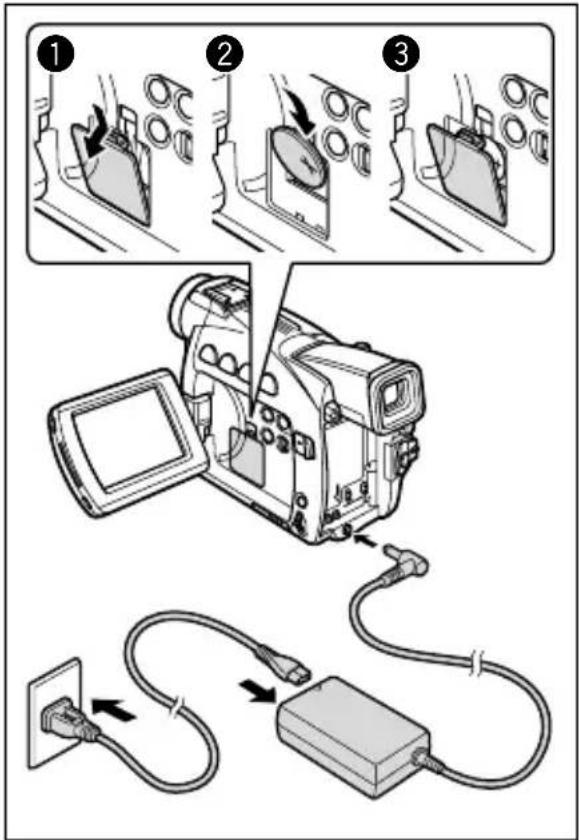
text_image
Diagram illustrating a cable installation procedure with labeled steps: adding cable to a device, adding cable to a case, and adding cable to a power outlet.WARNING!
- The battery used in this device may present a fire or chemical burn hazard if mistreated. Do not recharge, disassemble, heat above 100^ C or incinerate the battery.
- Replace the battery with a CR1616 made by Panasonic, Hitachi Maxell, Sony, Toshiba, Varta or Renata. Use of other batteries may present a risk of fire or explosion.
- The used battery should be returned to the supplier for safe disposal.

Do not pick up the battery using tweezers or other metal tools as this will cause a short circuit.
OWipe the battery with a clean dry cloth to ensure proper contact.
Keep the battery out of reach of children. If it is swallowed, seek medical assistance immediately. The battery case may break and the battery fluids may damage stomach and intestines.
Do not disassemble, heat or immerse the battery in water, to avoid the risk of explosion.

The backup battery has a life span of about a year. ✉ flashes to inform you that it needs to be replaced.
Preparing the Camcorder
E
Adjusting the Viewfinder (Diopter Adjustment)
-
Turn on the camcorder and keep the LCD panel closed to adjust the viewfinder.
-
Adjust the diopter adjustment lever.
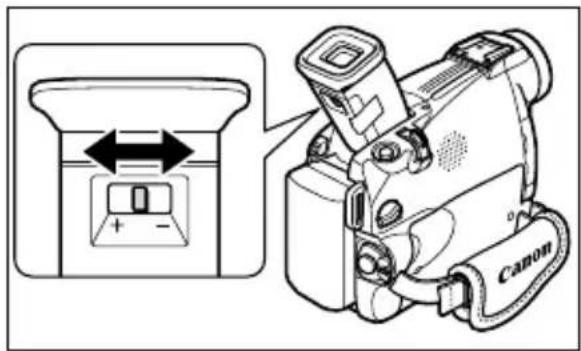
text_image
Diagram showing a Canon camera with bidirectional control panel and its internal components, alongside a close-up of the device's left-side dial.
Do not leave the viewfinder exposed to direct sunlight as it may melt (due to concentration of light by the lens). Adjust the angle of the viewfinder to prevent sunlight from entering.
Attaching the Lens Cap
-
Attach the cord to the lens cap.
-
Pass the grip belt through the loop on the cord.
Press the buttons on the lens cap when attaching/removing it. Hook the lens cap on the grip belt while you are recording, and place it over the lens when you have finished.
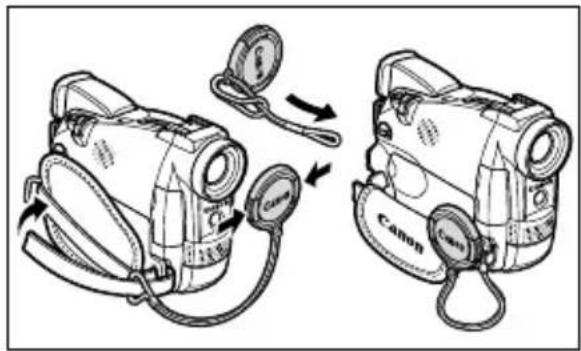
natural_image
Illustration of two Canon cameras with attached cable and adjustment knobs, showing mechanical components (no text or symbols)Fastening the Grip Belt
Hold the camcorder with your right hand and adjust the belt with your left.
Adjust the grip belt so that you can reach the zoom lever and photo button with your index finger, and the start/stop button with your thumb.
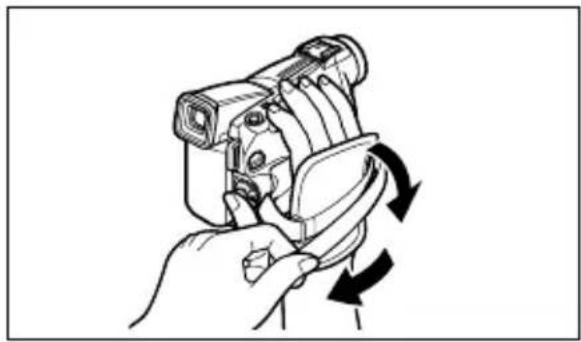
natural_image
Illustration of a hand holding a camera with a curved arrow indicating rotation (no text or symbols)Attaching the Shoulder Strap
For extra security and portability, attach the shoulder strap before using the camcorder.
Pass the ends through the strap mount and adjust the length of the strap.
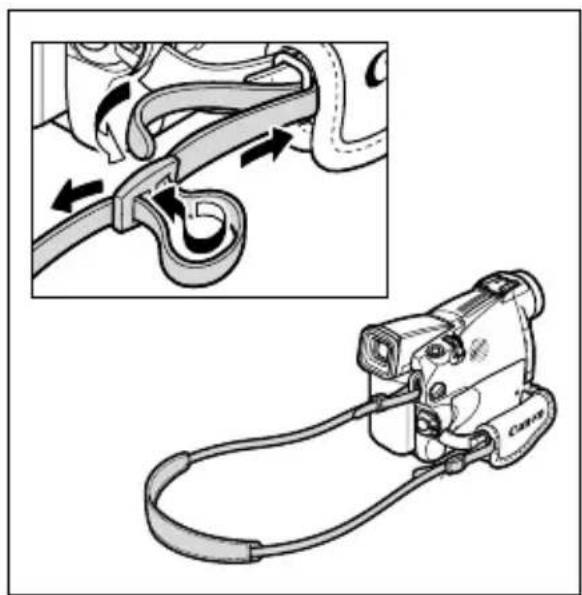
natural_image
Technical illustration of a mechanical device with a close-up view showing internal components and directional arrows (no text or symbols)MV650i Mounting the Wide Attachment
The WA-30.5 Wide Attachment gives you a wide perspective for indoor shots or panoramic views (0.6×). The wide attachment is for use at maximum wide-angle.
Screw the wide attachment fully into the lens filter thread.
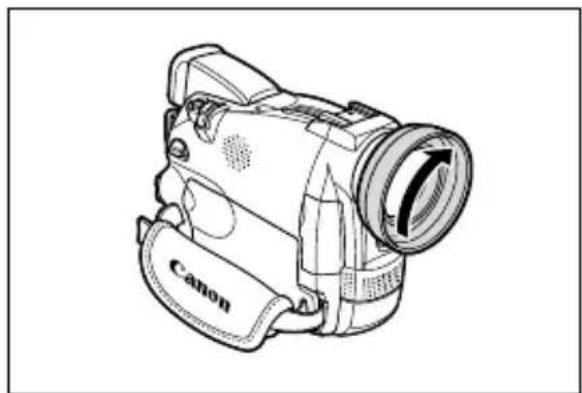
natural_image
Line drawing of a Canon digital camera with lens and strap (no text or symbols on body)
○If you zoom to telephoto, the picture will not be in focus.
Do not look directly at the sun or other strong light sources through the wide attachment. It could damage your eyesight.
When recording in wide angle with the wide attachment, the outer periphery of the image may become curved.
○Filters cannot be used with the wide attachment.
If dust accumulates on the wide attachment or on the camcorder lens, clean both lenses gently with a blower brush.
The wide attachment may obstruct the remote sensor (the range of the wireless controller narrows), or may cause a shadow to appear on the picture when recording with a video light or the assist lamp (White LED).
ODO not touch the lens to avoid smudges and fingerprints.
Do not store the wide attachment in a humid place as it may mold.
E
Use only video cassettes marked with the Mini D ^v logo.
Loading and Unloading
1. Slide and hold the OPEN/EJECT switch and open the cassette compartment cover.
The cassette compartment opens automatically.
2. Load/unload the cassette.
- Load the cassette with the window facing the grip belt and the REC/SAVE tab facing upward. - Unload the cassette by pulling it straight out.
3. Press the PUSH mark on the cassette compartment until it clicks.
Wait for the cassette compartment to retract automatically.
4. Close the cassette compartment cover.
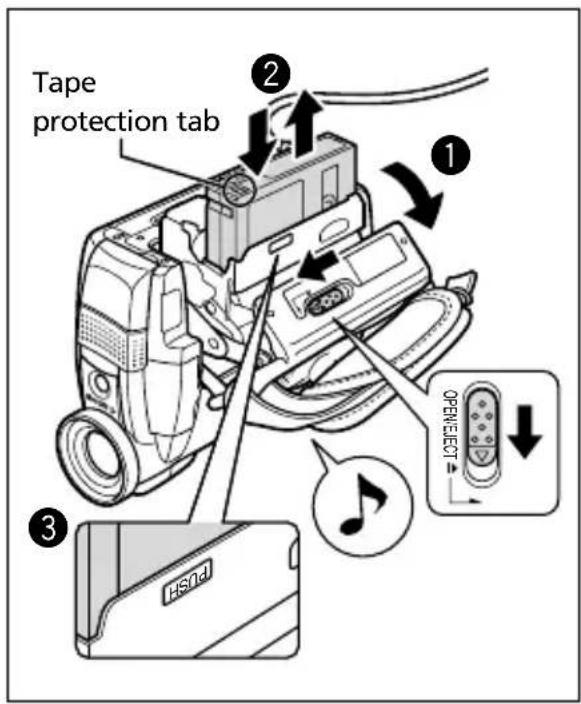
text_image
Tape protection tab ② ① OPENELECT ③ HS4d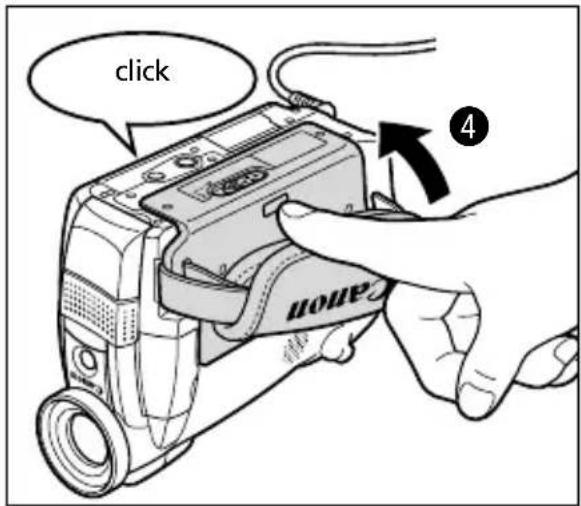
text_image
click 4
Do not interfere with the cassette compartment while it is opening or closing automatically or attempt to close the cover until the cassette compartment has fully retracted.
○Be careful not to get your fingers caught in the cassette compartment cover.

If the camcorder is connected to a power source, cassettes can be loaded/unloaded even if the POWER switch is set to OFF.
○ flashes if no cassette is inserted when turning on the power (in CAMERA and PLAY (VCR) mode).
With some types of tapes, the remaining tape display may not be accurate.
Protecting Tapes from Accidental Erasure
To protect your recordings from accidental erasure, slide the tab on the cassette to the left. (This switch position is usually labelled SAVE or ERASE OFF.)
If you load a protected cassette in CAMERA mode, the message "THE TAPE IS SET FOR ERASURE PREVENTION" appears for approx. 4 seconds and 📄starts flashing. If you wish to record on that cassette, slide the tab back to the right.
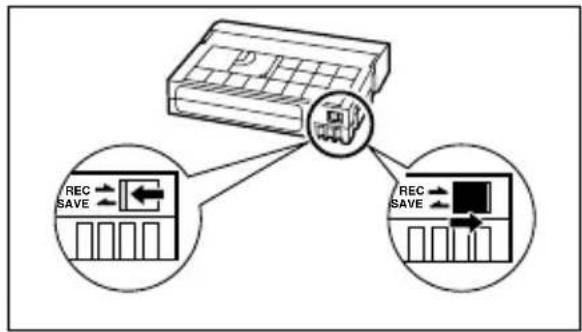
flowchart
graph TD
    A["Device"] --> B["Memory Unit 1"]
    A --> C["Memory Unit 2"]
    B --> D["Rec SAVE Button"]
    C --> E["Rec SAVE Button"]
Cassette Handling Precautions
○Rewind tapes after use. If the tape becomes slack and damaged, it may cause picture and sound distortion.
- Return cassettes in the case and store them upright.
○Do not leave the cassette in the camcorder after use.
- Do not use cassettes with spliced tapes or nonstandard cassettes as they may damage the camcorder.
Do not insert anything into the small holes of the cassette, or cover them with cellophane tape.
○Handle cassettes with care. Do not drop or subject them to severe impact as this may damage the cassettes.
○Rewind tapes from time to time if they are stored for a long time.
With cassettes equipped with a memory function, metal plated terminals may become dirty with use and the cassette's memory function may not work properly. Clean the terminals with a cotton swab after about 10 times of loading/unloading.
Using the Wireless Controller
E
You can operate the camcorder with the supplied wireless controller from a distance of up to 5 m. Point it at the camcorder's remote sensor when you press the buttons.
Following functions cannot be operated without the wireless controller:
• Some special playback modes (36)
• Photo/date search (84)
- Zero set memory (85)
• MV650i MV630i (MV600i)
- MV650i, MV630i: MV600i
• MV650i: MV630i MV600i
• Audio dubbing (95)

The wireless controller may not work properly in bright places, such as outdoors under direct sunlight, or when used too close to the camcorder.
The operable range of the wireless controller may shorten when the camcorder's remote sensor is exposed to strong light.
When the batteries run out, replace both at the same time.
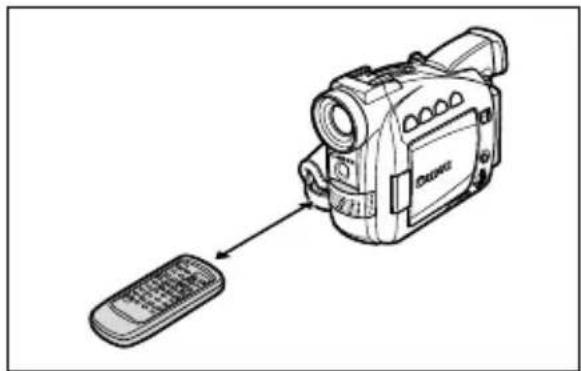
natural_image
Line drawing of a video camera with a remote control, showing no text or symbols on the device itself.Inserting Batteries
The wireless controller operates with two AA batteries.
MV650i MV630i
WL-D79
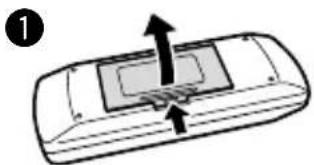
natural_image
Diagram of a vehicle's rearview panel with arrows indicating movement or force (no text or symbols)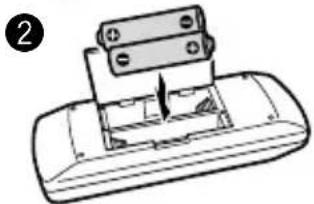
natural_image
Diagram of a device with a rectangular component inserted into a tray, showing no text or symbols.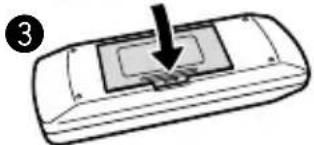
natural_image
Diagram of a car's rear window with a black arrow pointing to the top panel (no text or symbols)MV600i MV600
WL-D80
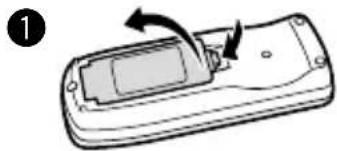
natural_image
Diagram of a mobile phone casing with an arrow indicating rotation (no text or symbols)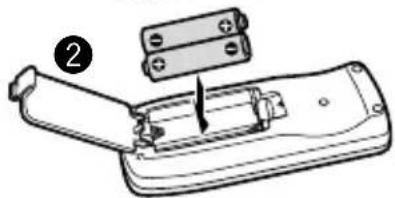
natural_image
Diagram of a handheld device with an open lid and a separate rectangular component, no text or symbols present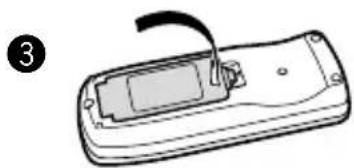
natural_image
Line drawing of a remote control device with a cable inserted (no text or symbols)- Open the battery cover.
- Insert the batteries following the + and - markings.
- Close the battery cover.
Setting the Time Zone, Date and Time
Set the time zone, date and time when you first start using your camcorder. Install the backup battery before you begin (17).
Setting the Time Zone/Daylight Saving Time

flowchart
graph LR
    A["PLAY (VCR)CAM R"] --> B["CARD CAMERA"]
    B --> C["CARD PLAY (VCR)"]
    D["MENU (43)"] --> E["T.ZONE/DST...PARIS SYSTEM"]
- Press the MENU button to open the menu.

text_image
MENU- Turn the selector dial to select [SYSTEM] and press the selector dial.
text_image
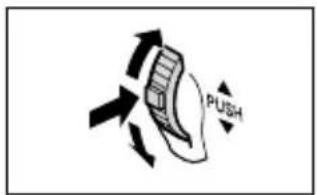
PUSH- Turn the selector dial to select [T.ZONE/DST] and press the selector dial.
• The time zone setting appears.
- The default setting is Paris. Select your time zone and daylight saving time (DST) setting if necessary.
- Turn the selector dial to select the setting option that represents your time zone.
To adjust for daylight saving time, select the time zone with the ⚙ next to the area.
- Press the MENU button to close the menu.

text_image
MENU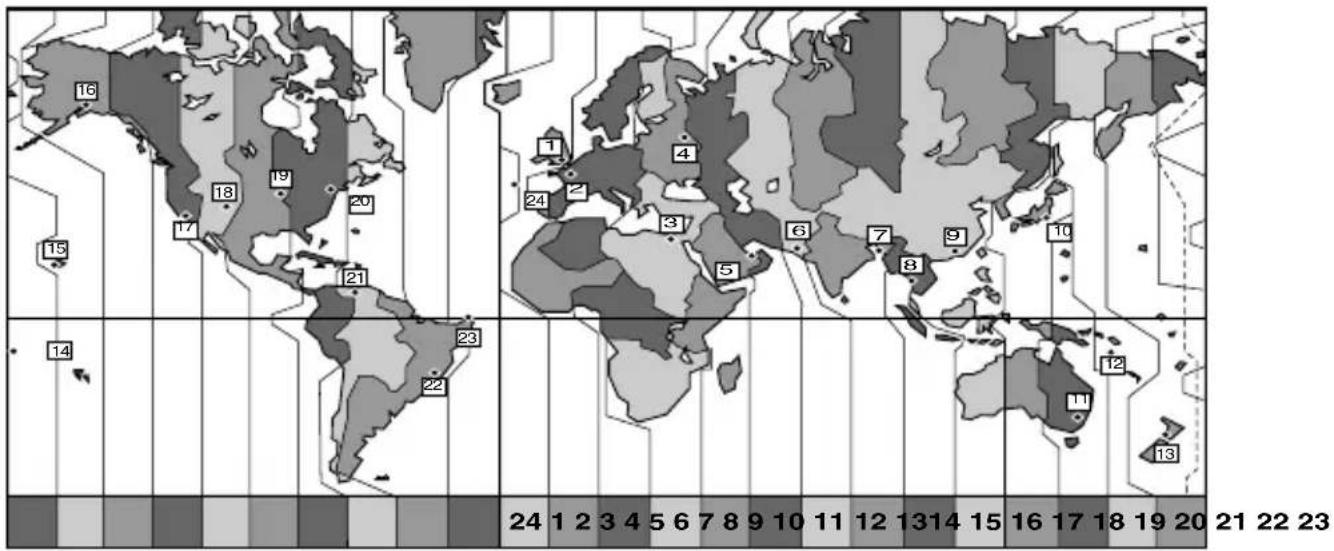
geo
| Region | Value | |---|---| | North America | 16 | | Europe | 18 | | Asia | 19 | | South America | 20 | | Africa | 21 | | Australia | 22 | | Central America | 23 | | Middle East | 24 | | Southeast Asia | 2 | | Eastern Europe | 24 | | Southern Europe | 3 | | Western Europe | 5 | | North America | 6 | | Europe | 7 | | South America | 8 | | Central America | 9 | | Southeast Asia | 10 | | Middle East | 11 | | Eastern Europe | 12 | | Southern Europe | 13 | | Western Europe | 14 | | North America | 15 | | Europe | 16 | | South America | 17 | | Central America | 18 | | Southeast Asia | 19 | | Middle East | 20 | | Eastern Europe | 21 | | Southern Europe | 22 | | Western Europe | 23 || No. | Time zone | No. | Time zone |
| 1 | LONDON | 13 | WELLGTN (Wellington) |
| 2 | PARIS | 14 | SAMOA |
| 3 | CAIRO | 15 | HONOLU. (Honolulu) |
| 4 | MOSCOW | 16 | ANCHOR. (Anchorage) |
| 5 | DUBAI | 17 | L.A. (Los Angeles) |
| 6 | KARACHI | 18 | DENVER |
| 7 | DACCA | 19 | CHICAGO |
| 8 | BANGKOK | 20 | N.Y. (New York) |
| 9 | H. KONG (Hong Kong) | 21 | CARACAS |
| 10 | TOKYO | 22 | RIO (Rio de Janeiro) |
| 11 | SYDNEY | 23 | FERNAN. (Fernando de Noronha) |
| 12 | SOLOMON | 24 | AZORES |

Once you have set time zone, date and time, you do not need to reset the clock each time you travel to another time zone. Just set the time zone to the one of your destination, and the camcorder automatically adjusts the clock.
ODays per month and leap years will be automatically adjusted.
Setting the Date and Time

flowchart
graph LR
    A["PLAY (VCR)CAM"] --> B["CARD CAMERA"]
    B --> C["CARD PLAY (VCR)"]
    D["MENU (43)"] --> E["SYSTEM"]
    E --> F["D/TIME SET... 1.JAN.2003 12:00 PM"]
- Press the MENU button to open the menu.
text_image
MENU-
Turn the selector dial to select [SYSTEM] and press the selector dial.
-
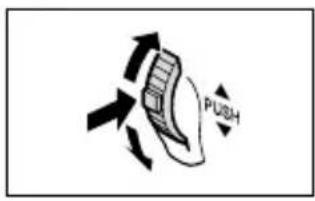
Turn the selector dial to select [D/TIME SET] and press the selector dial.
The year display starts to flash.
text_image
PUSH-
Turn the selector dial to select the year, and press the selector dial.
-
The next part of the display starts flashing.
-
Set the month, day, hours and minutes in the same way.
-
Press the MENU button to close the menu and to start the clock.
Time zone, date and time appear for 4 seconds each time you turn the power on.
text_image
MENU
To change a part of the date or time, press the selector dial at step 4, and move to the part you wish to change.
The date can be set to any year between 2003 and 2030.
Displaying Date and Time during Recording
You can display time zone, date and time in the lower left corner of the screen (the time zone disappears after 4 seconds). The 4-second display will no longer appear when you turn the power on. The date and time display will not be superimposed on your recordings.

flowchart
graph LR
    A["CAMERA"] --> B["PLAY (VCR)"]
    B --> C["CARD CAMERA"]
    C --> D["CARD PLAY (VCR)"]
    E["MENU (43)"] --> F["D/T DISPLAY··OFFDISPLAY SET UP"]
- Press the MENU button to open the menu.

text_image
MENU- Turn the selector dial to select [DISPLAY SET UP] and press the selector dial.
text_image
PUSH-
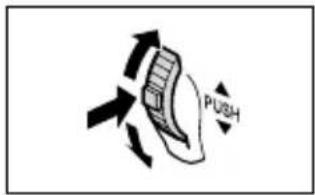
Turn the selector dial to select [D/T DISPLAY] and press the selector dial.
-
Turn the selector dial to select [ON].
-
Press the MENU button to close the menu.

text_image
MENUYou can use the LCD screen or the viewfinder when recording.
Before You Begin Recording
Make a test recording first to check if the camcorder operates correctly. Before you make important recordings, clean the video heads (141).
Preparations
Connect a power source. Load a cassette.
Recording
- Remove the lens cap.
- Set the camcorder to CAMERA mode.
If you have not set the time zone, date and time, "SET THE TIME ZONE, DATE AND TIME" appears. See Setting the Time Zone, Date and Time (23).
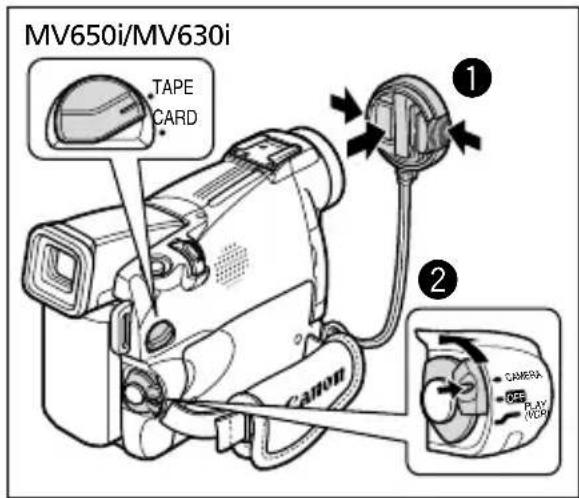
text_image
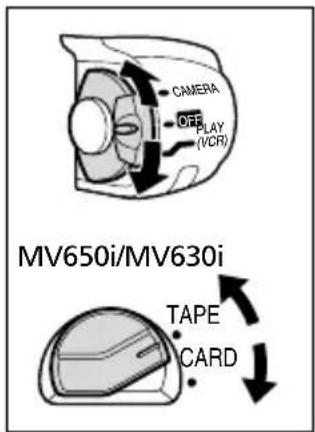
MV650i/MV630i TAPE CARD ① ② CAMERA OFF NO.1-
Open the LCD panel (30).
To use the viewfinder, keep the LCD panel closed or rotate it so that the screen faces in the same direction of the lens (31). -
Press the start/stop button to begin recording.
Wait until the tape counter came to a complete stop before you begin recording.
- Press the start/stop button again to pause recording.

text_image
Diagram of a digital camera with labeled parts and an inset showing the internal components including camera, tray, and motor.Restart recording by pressing the start/stop button.
- Turn the POWER switch to OFF.
- Close the LCD panel.
- Replace the lens cap.
- Unload the cassette.
- Disconnect the power source.

When recording outdoors or through a window, do not leave LCD screen, viewfinder or lens exposed to direct sunlight as it may cause damage.

OTurn the power off if you do not intend to use the camcorder for a longer time.
The camcorder will shut off after 5 minutes when left in record pause mode to protect tape and video heads. To continue recording, turn the POWER switch to OFF and then back to CAMERA.
☐ For when to use the ☐ (Easy Recording) or ☐ (program AE) mode, see Using the Recording Programs (56).
When you do not remove the cassette, you can record the next scene without producing any noise or blank sections between the recordings even if you turn the camcorder off.
About the built-in microphone: When recording near loud sounds (such as fireworks, drums or concerts), sound may become distorted or may be recorded not in the actual sound level.
○ For extra recording time, see Changing the Recording Mode (☐ 53).
E
The camcorder's zoom lens allows you to choose the best picture angle for your recordings.
The camcorder automatically switches between optical zooming and digital zooming. Image resolution is slightly lower with the digital zoom.
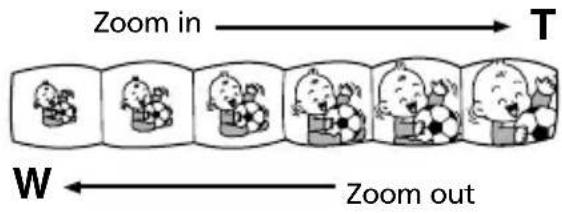
flowchart
graph LR
    A["Zoom in"] --> B["T"]
    C["W"] --> D["Zoom out"]
Optical Zoom
| MV650i | MV630i | MV600 |
| 22× optical zoom | 20× optical zoom | 18× optical zoom |
Move the zoom lever toward W to zoom out (wide-angle). Move it toward T to zoom in (telephoto).
- Press the zoom lever slightly for a slow zoom. Press harder for a faster zoom.
- You can also use the T and W buttons on the wireless controller. However, you cannot control the zoom speed.
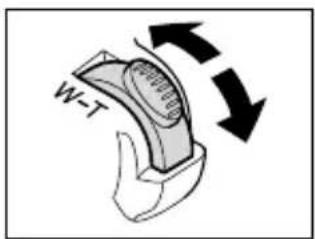
text_image
W-TDigital Zoom
| MV650i | MV630i | MV600 |
| 88×/440× digital zoom | 80×/400× digital zoom | 72×/360× digital zoom |
CAMERA
PLAY (VCR)
CARD CAMERA
CARD PLAY (VCR)
MENU
(43)
CAMERA SET UP

D.ZOOM····88×
- Press the MENU button to open the menu.
text_image
MENU- Turn the selector dial to select [CAMERA SET UP] and press the selector dial.
- Select [D.ZOOM] and press the selector dial.
- Select a setting option.
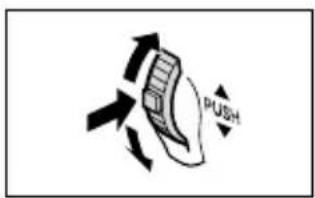
text_image
PUSH5. Press the MENU button to close the menu.

text_image
MENUE

Keep at least 1m to the subject. At wide-angle, you can focus on a subject as close as 1cm.
Digital zoom cannot be used in the Night mode and Super Night (MV650i) mode.
- Digital zoom cannot be used when the multi-image screen is selected.
OA zoom indicator appears for 4 seconds. It extends in light blue when the digital zoom is set to 88×/80×/72×, and extends further in dark blue when set to 440×/400×/360×.
OBMV650i t MV630je stabilizer cannot be used in CARD
CAMERA mode, we recommend mounting the camcorder on a tripod at large magnifications.
Using the LCD Screen
E
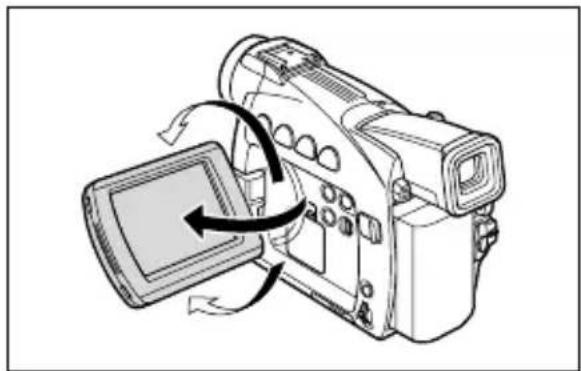
- Push the OPEN button at the LCD panel and open the LCD panel.
The LCD screen switches on and the viewfinder switches off.
- Rotate the LCD panel and choose the angle of the screen.
You can rotate the LCD panel so that the screen faces in the same direction as the lens (31), or push it flat against the camcorder with the screen facing outward.
natural_image
Diagram of a digital camera with an open screen and directional arrows indicating motion (no text or symbols)-
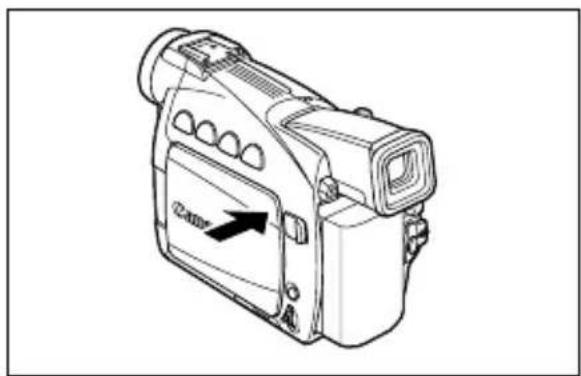
Close the LCD panel after use.
-
Close the LCD panel firmly until it clicks.
- The LCD screen switches off and the viewfinder switches on.
natural_image
Line drawing of a digital camera with an arrow indicating the right side (no text or symbols present)
○Make sure to open the LCD panel at 90 degrees before rotating it.
○Rotate the LCD panel in the vertical position before closing the LCD panel.
When recording outdoors or through a window, do not leave the LCD screen, viewfinder or lens exposed to direct sunlight as it may cause damage.
○Do not hold the camcorder by the LCD panel or the viewfinder.

About the LCD Screen: The LCD screen is produced with extremely high-precision manufacturing techniques, with more than 99.99% of the pixels operating to specification. Less than 0.01% of the pixels may occasionally misfire or appear as black or green dots. This has no effect on the recorded image and does not constitute a malfunction.
Bright light or reflected light may cause a vertical light bar to appear on the screen. This is not a malfunction.
Bright light may make it difficult to use the LCD screen. In such case, use the viewfinder instead.
Adjusting the Brightness of the LCD Screen
CAMERA
PLAY (VCR)
CARD CAMERA
CARD PLAY (VCR)
MENU
(43)

BRIGHTNESS··DISPLAY SET UP
- Press the MENU button to open the menu.

text_image
MENU-
Turn the selector dial to select [DISPLAY SET UP] and press the selector dial.
-
Turn the selector dial to select [BRIGHTNESS] and press the selector dial.
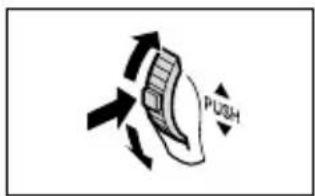
text_image
PUSH- Turn the selector dial and adjust the level.
Turn the selector dial up to make the screen brighter and down to make it darker.
- Press the MENU button to close the menu.
text_image
MENU
Changing the brightness of the LCD screen does not affect that of the viewfinder or the recordings.
Allowing the Subject to Monitor the LCD Screen
You can rotate the LCD panel so that the screen faces in the same direction as the lens. The viewfinder switches on allowing you to use the viewfinder while the subject can monitor the screen.
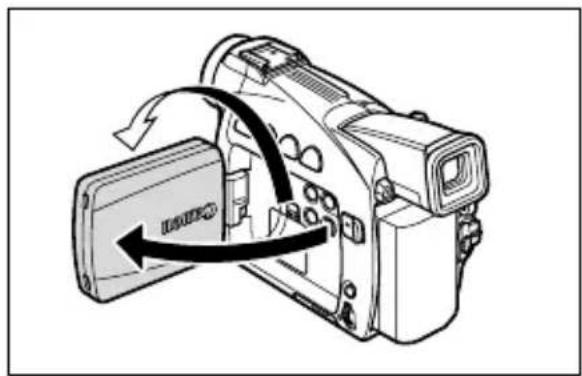
natural_image
Diagram of a digital camera with an arrow indicating rotation or movement, showing no text or symbols.When you rotate the screen so that the screen faces in the same direction as the lens, the image appears mirror reversed (LCD MIRROR ON). However, you can choose to display the image as it is being recorded (LCD MIRROR OFF).
E
CAMERA
PLAY (VCR)
CARD CAMERA
CARD PLAY (VCR)
MENU
(43)
LCD MIRROR · ONDISPLAY
SET UP
- Press the MENU button to open the menu.
- Turn the selector dial to select [DISPLAY SET UP] and press the selector dial.
- Turn the selector dial to select [LCD MIRROR] and press the selector dial.
- Turn the selector dial to select [OFF].
- Press the MENU button to close the menu.

When [LCD MIRROR] is set to [ON], most screen displays appear mirror reversed.
Searching and Reviewing when Recording
REC (record) SEARCH - button/
Record review button
REC SEARCH + button
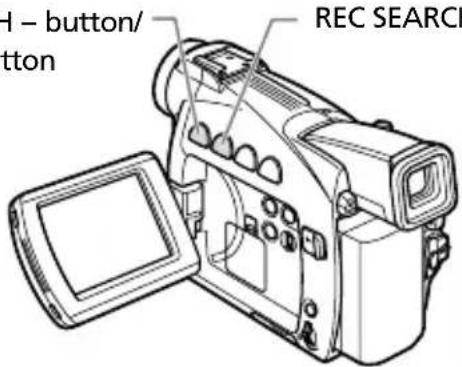
text_image
H - button/ button REC SEARCHRecord Review
CAMERA
CARD CAMERAPLAY (CARD) PLAY (VCR)
In record pause mode, this function allows you to review the last few seconds of your recording to check if it has been recorded properly.
Press and release the ⏻(record review) button.
The camcorder rewinds the tape, plays back the last few seconds, and returns to record pause mode.

Record Search
CAMERA
PLAY (VCR)
CARD CAMERA
CARD PLAY (VCR)
In record pause mode, this function allows you to play back the tape (forward or reverse) to locate the point where you wish to begin recording.
Press and hold the REC SEARCH + button (forward) or - button (reverse).
- Release the button at the point you wish to begin recording.
- The camcorder returns to record pause mode.
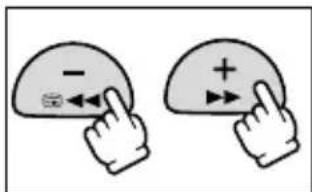
text_image
Two hand-drawn diagrams showing finger positions on a curved surface with symbols: minus sign, plus sign, and double-headed arrow.
ONoise may appear on the screen when you play back the tape in reverse.
- There will be no sound during Record Review and Record Search.
Tips for Making Better Videos
E
Holding the Camcorder
For maximum stability, grip the camcorder in your right hand and keep your right elbow pressed against your body. If necessary, support the camcorder with your left hand. Be careful that your fingers do not touch the microphone or lens.
Low-angle RecordingHigh-angle Rec



For More Stability
Lean against a wall Put the camcorder on a table
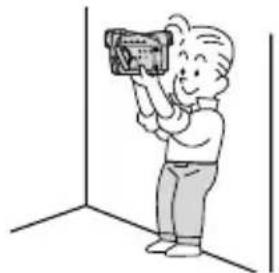
natural_image
Cartoon illustration of a person holding a camera, standing in a corner (no text or symbols)
natural_image
Cartoon illustration of a child sitting at a table with a dog, no text or symbols presentLie on your elbow Use a tripod
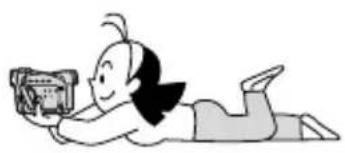
natural_image
Cartoon illustration of a person lying on the ground holding a small object (no text or symbols present)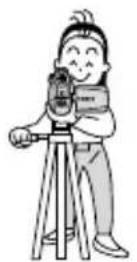
Lighting
When recording outdoors, we recommend recording with the sun at your back.
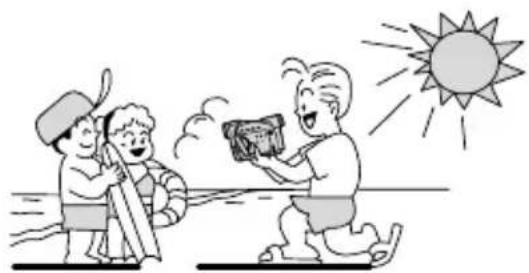
natural_image
Illustration of two children playing outdoors under a sun, one holding a rock, no text or symbols present
When using a tripod, do not leave the viewfinder exposed to direct sunlight as it may melt (due to concentration of the light by the lens).
Do not use tripods with fastening screws longer than 5.5 mm as it may damage the camcorder.
When you use the LCD screen for playback, the camcorder plays back the sound via built-in speaker. The built-in speaker is monaural. Use headphones for stereo sound or when using the viewfinder for playback.
Preparations
Connect a power source. Load a cassette.
Playback
- Set the camcorder to PLAY (VCR) mode.
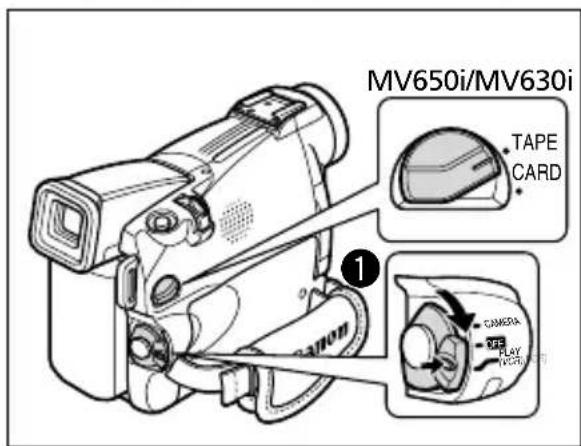
text_image
MV650i/MV630i TAPE CARD CAMERA PLAY NOTURRY- Open the LCD panel.
You can also close the LCD panel with the screen facing outward.
- Press the ◀◀button to rewind the tape.
To fast forward the tape, press the ▶ button. To stop playback, press the ■ button.
-
Press the ▶/■button to begin playback.
-
Press the ■button to stop playback.
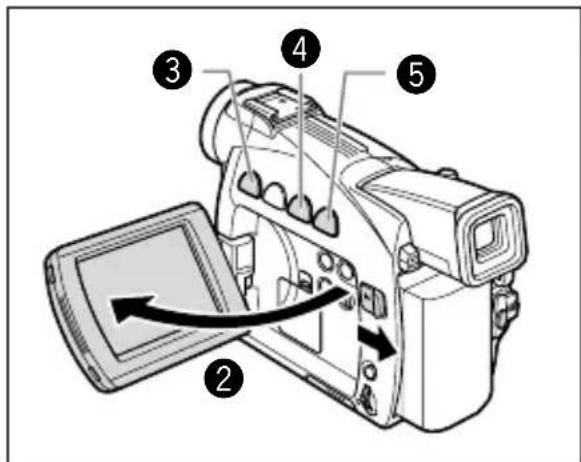
text_image
Diagram of a digital camera with numbered parts and an arrow indicating motion or operation on the screen
If the playback picture is distorted, clean the video heads using a Canon Head Cleaning Cassette or a commercially available digital video head-cleaning cassette.
To use the viewfinder, close the LCD panel. The built-in speaker does not sound. Use headphones when using the viewfinder (37).
○ For displaying the date and time during playback, see Displaying the Data Code (82).
Special Playback Modes
Special playback modes (except of playback pause and fast/rewind playback) can only be operated with the wireless controller.
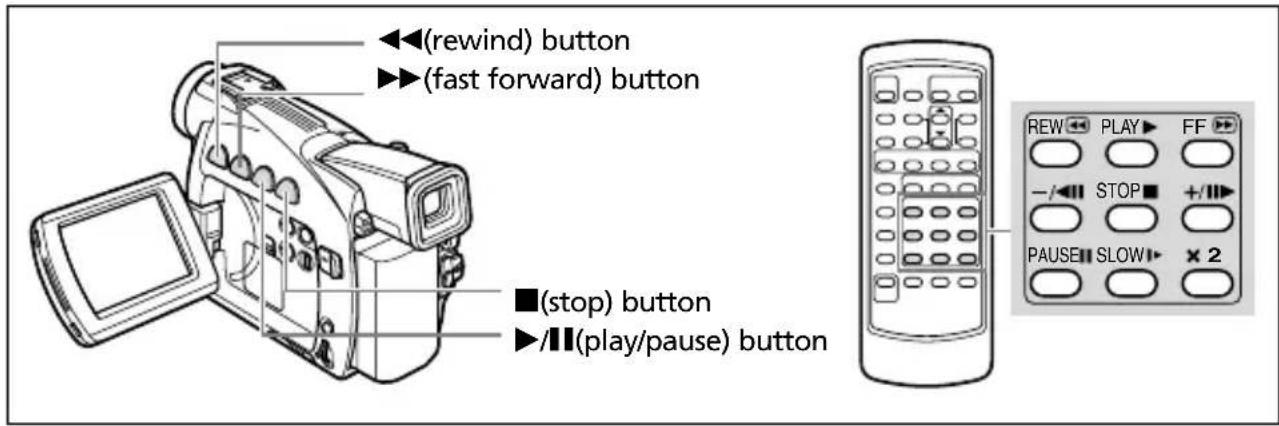
text_image
(rewind) button ▶▶(fast forward) button ■(stop) button ▶▶/■(play/pause) button REW ▶ PLAY ▶ FF ▶ - /◀ STOP ■ +/▶ PAUSE ■ SLOW ▶ × 2▶/II(Playback Pause)
To pause playback, press the ▶/■ button. Press the ▶/■ button to resume playback. The camcorder goes into stop mode after 5 minutes in playback pause mode.
▶▶(Fast Forward Playback) / ◀◀(Rewind Playback)
Plays back the tape at 11.5 times normal speed (forward or reverse). Press and hold the button during normal playback or fast forward.
+/| |►(Frame Advance) / -/◄| |(Frame Reverse)
Plays back frame-by-frame. Press the button repeatedly during playback pause. Press and hold it to play back continuous frame advance/frame reverse.
SLOW ▶(Slow Forward)/(Slow Reverse)
Plays back at about 1/3 normal speed. For slow forward playback, press the SLOW ▶ button. For slow reverse playback, press the -/◀■ button followed by the SLOW ▶ button. Press the ▶ (play) button to return to normal playback.
-/◀◀(Reverse Playback)
Plays back in reverse at normal speed. Press the button during normal playback. Press the ▶ (play) button return to normal playback. The camcorder goes into stop mode after 5 minutes in reverse playback pause.
× 2 (Forward× 2 Playback)/(Reverse 2× Playback)
Plays back at 2 times normal speed. Press the button during normal or reverse playback. Press the ▶(play) button return to normal playback.

○There is no sound during special playback.
The picture may become distorted during some special playback modes.
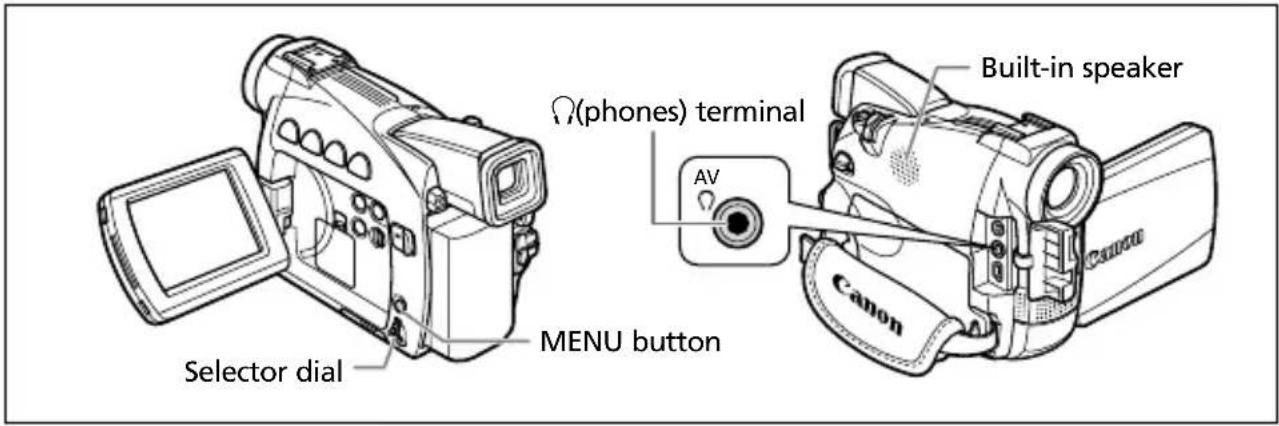
text_image
Selector dial MENU button Ω(phones) terminal AV Built-in speaker Canon
When using the built-in speaker, make sure that "☐" is not displayed on the screen. When using the headphones, make sure that "☐" is displayed. Change the setting as necessary following the procedure below.
Switching the AV/Headphones Terminal

text_image
PLAY (VCR)CAM R CARD CAMERA CARD PLAY (VCR) MENU (43) AV / PHONES • • AVVCR SET UP- Press the MENU button to open the menu.
- Turn the selector dial to select [VCR SET UP] and press the selector dial.
- Turn the selector dial to select [AV/PHONES] and press the selector dial.
- Turn the selector dial to select [AV] or [PHONES ☐].
- Press the MENU button to close the menu.
text_image
MENU
text_image
PUSH
text_image
MENU
○ The built-in speaker does not sound when "☐" is displayed.
○ Do not connect headphones unless “☐” is displayed as it produces noise.
The built-in speaker is monaural. Use headphones for stereo sound.
The built-in speaker turns off when the camcorder is set to a mode other than the PLAY (VCR) mode or when you use the headphones.
CAMERA*
PLAY (VCR)
CARD CAMERA*
CARD PLAY (VCR)
*Headphone volume only.
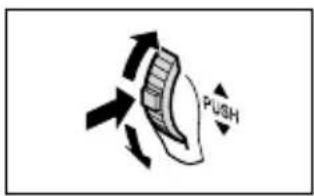
Turn the selector dial up to increase the volume, and down to lower the volume.
- A volume bar appears for 4 seconds.
- You can turn off the volume completely by turning the selector
text_image
PUSHdial down until OFF appears. Turn the selector dial up to increase the volume again.

○Sound may become distorted when the volume is turned up too high.
The headphone volume can be adjusted in all operating modes.
The camcorder retains the setting even if you turn it off (separately for headphones and built-in speaker).
Playing Back on a TV Screen
You can connect the camcorder to a TV or VCR to play back your recordings on a TV screen.

○ Make sure that "☐" is not displayed on the screen. If "☐" is displayed on the screen, change the setting (37).
When you use the TV as a monitor during recording, keep the TV volume turned down as long as the camcorder's audio terminals are connected. An unpleasant high-pitched squeal, called feedback, may be produced if sound from the TV speakers is picked up by the microphone.

For high picture quality, we recommend using a TV with an S (S1) terminal.
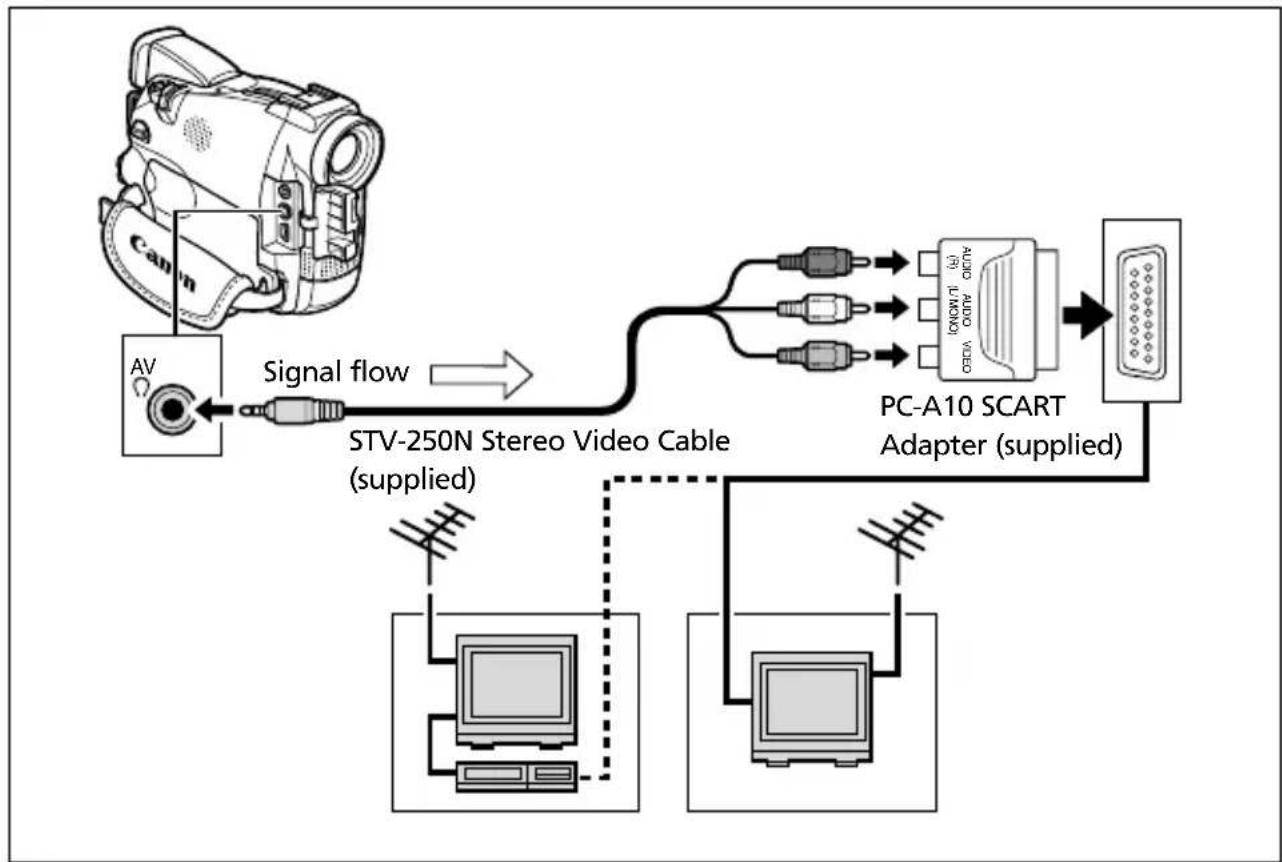
TVs with SCART Terminal
Refer also to the TV or VCR instruction manual.
flowchart
graph LR
    A["Canon"] -->|Signal flow| B["STV-250N Stereo Video Cable (supplied)"]
    B --> C["PC-A10 SCART Adapter (supplied)"]
    C --> D["Computer"]
    C --> E["Computer"]
    C --> F["Computer"]
    C --> G["Computer"]
    C --> H["Computer"]
    C --> I["Computer"]
    C --> J["Computer"]
    C --> K["Computer"]
    C --> L["Computer"]
    C --> M["Computer"]
- Turn off all devices before starting the connections.
- Connect the PC-A10 SCART adapter to the TV or VCR's SCART terminal.
- Connect the STV-250N Video Cable to the camcorder's AV terminal and the audio/video terminals on the SCART adapter.
Connect the white plug to the white AUDIO terminal L (left), the red plug to the red AUDIO terminal R (right) and the yellow plug to the yellow VIDEO terminal.
- If connecting to a TV, set the input selector to VIDEO. If connecting to a VCR, set the input selector to LINE.
E

The SCART Adapter PC-A10 is for output only. For analog line-in recording or analog-digital conversion, please use a SCART adapter with input capability (commercially available).
TVs with S (S1)-Video Input Terminal
Refer also to the TV or VCR instruction manual.
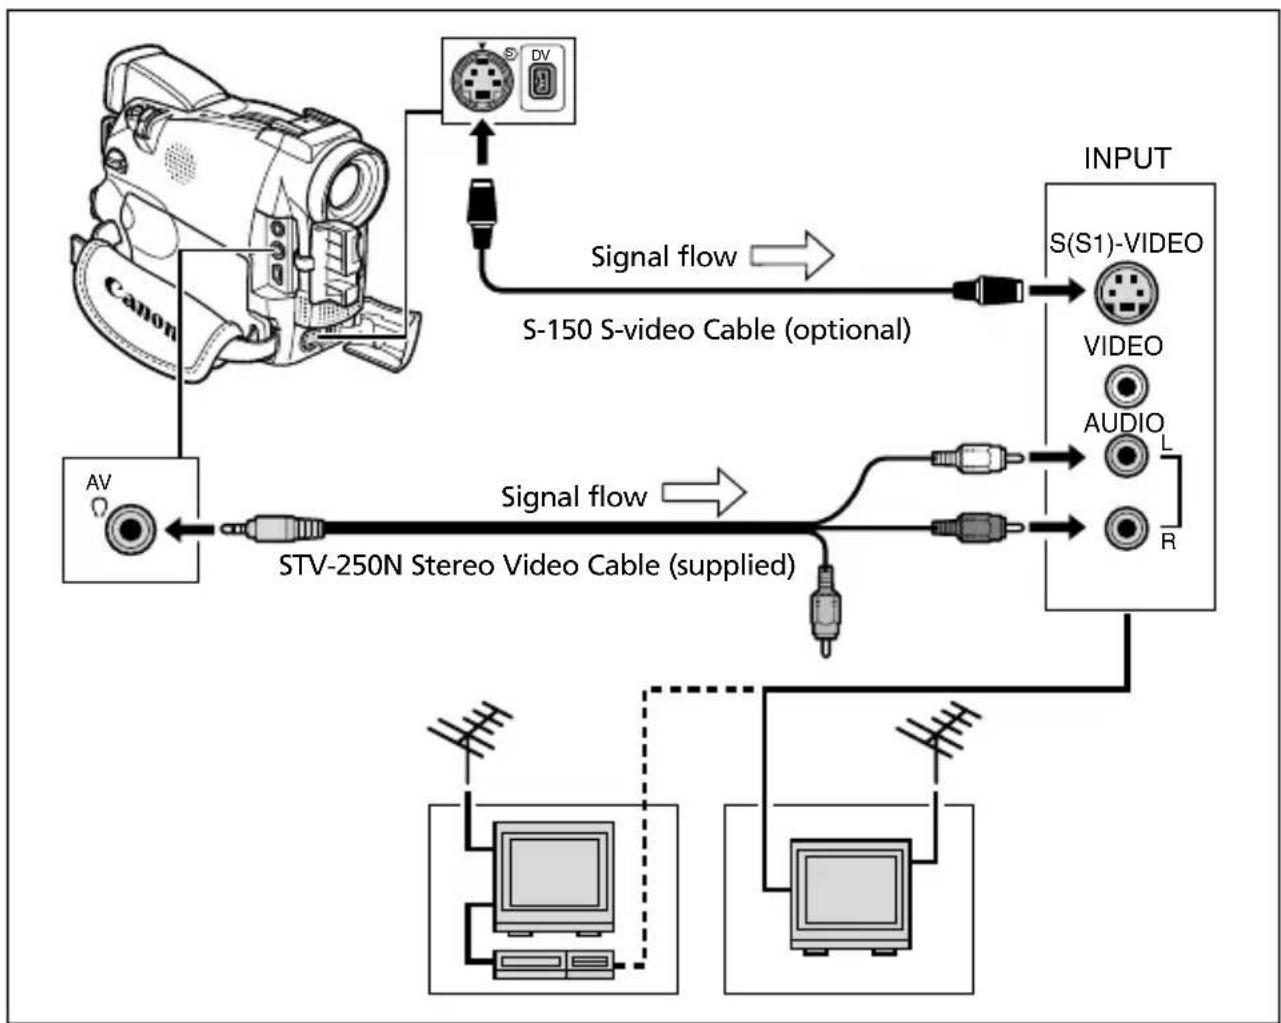
flowchart
graph TD
    A["Canon"] -->|Signal flow| B["S-150 S-video Cable (optional)"]
    B --> C["INPUT"]
    C --> D["S(S1)-VIDEO"]
    C --> E["VIDEO"]
    C --> F["AUDIO"]
    C --> G["R"]
    H["STV-250N Stereo Video Cable (supplied)"] --> I["AV"]
    I --> J["Switch"]
    J --> K["Computer"]
    J --> L["Computer"]
    style A fill:#f9f,stroke:#333
    style H fill:#ccf,stroke:#333
    style B fill:#cfc,stroke:#333
    style C fill:#fcc,stroke:#333
    style D fill:#cff,stroke:#333
    style E fill:#ffc,stroke:#333
    style F fill:#ffc,stroke:#333
    style G fill:#cfc,stroke:#333
    style L fill:#cfc,stroke:#333
- Turn off all devices before starting the connections.
- Connect the S-150 S-video Cable (optional) to the S-video terminals.
- Connect the STV-250N Stereo Video Cable to the camcorder's AV terminal and the audio terminals of the TV/VCR.
Connect the white plug to the white AUDIO terminal L (left), and the red plug to the red AUDIO terminal R (right). Do not connect the yellow plug.
- If connecting to a TV, set the input selector to VIDEO. If connecting to a VCR, set the input selector to LINE.
TVs with Audio/Video Terminals
Refer also to the TV or VCR instruction manual.
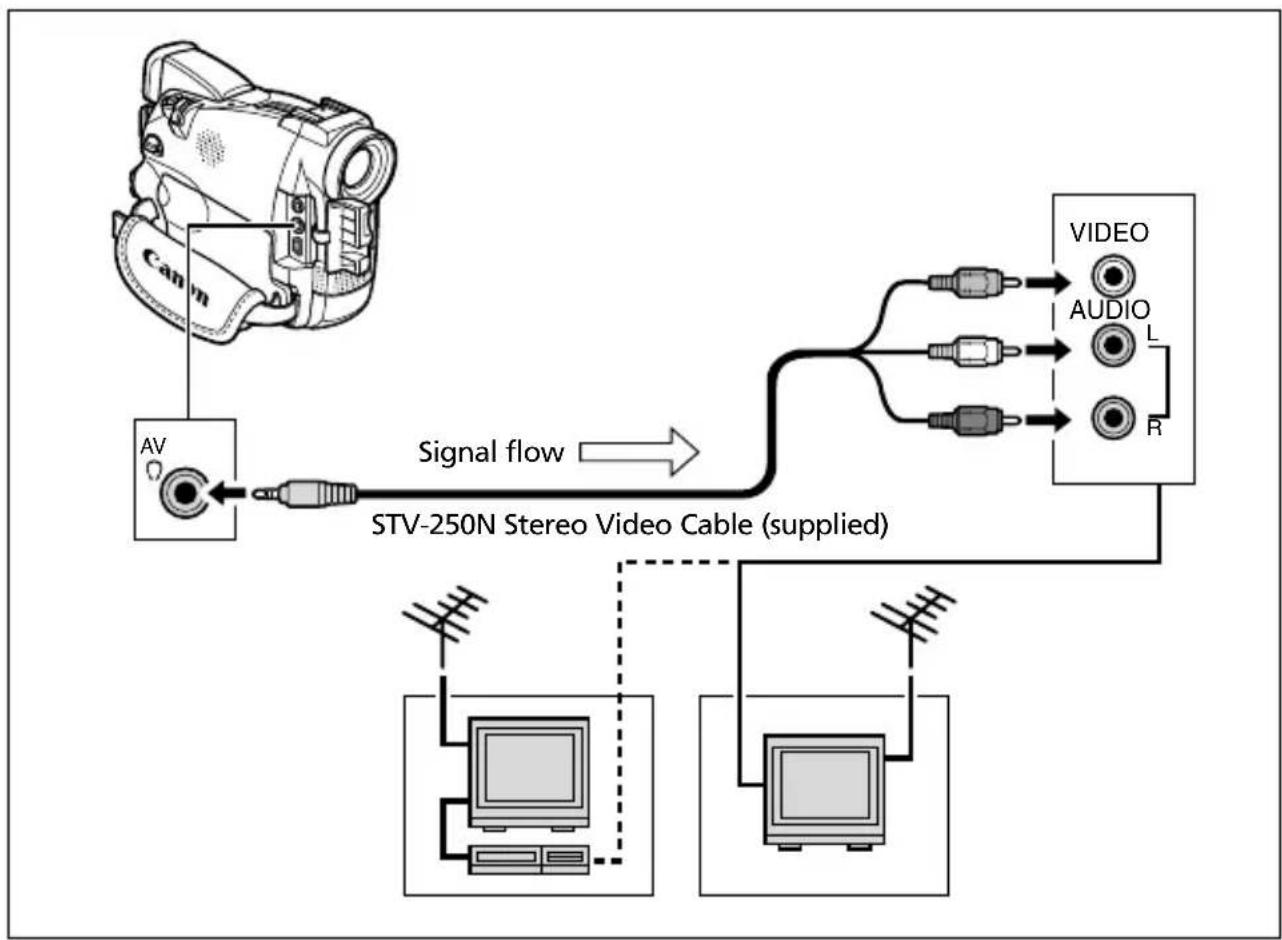
flowchart
graph TD
    A["Canon Cam"] -->|Signal flow| B["STV-250N Stereo Video Cable (supplied)"]
    B --> C["VIDEO"]
    B --> D["AUDIO"]
    B --> E["L"]
    B --> F["R"]
    C --> G["Computer"]
    D --> H["Computer"]
    E --> I["Computer"]
    F --> J["Computer"]
-
Turn off all devices before starting the connections.
-
Connect the STV-250N Stereo Video Cable to the camcorder's AV terminal and the audio/video terminals on the TV/VCR.
Connect the white plug to the white audio terminal L (left), the red plug to the red audio terminal R (right) and the yellow plug to the yellow video terminal VIDEO.
- If connecting to a TV, set the input selector to VIDEO. If connecting to a VCR, set the input selector to LINE.
Selecting the Audio Output Channel
You can select the output channels when playing back a tape with audio recorded on two channels.

text_image
CAMERA PLAY (VCR) CARD CAMERA CARD PLAY (VCR) MENU (43) OUTPUT CH...L/RAUDIO SET UP- Press the MENU button to open the menu.

text_image
MENU-
Turn the selector dial to select [AUDIO SET UP] and press the selector dial.
-
Turn the selector dial to select [OUTPUT CH] and press the selector dial.
text_image
PUSH- Turn the selector dial to select a setting option.
• L/R: Stereo: L+R channels, Bilingual: Main+Sub.
• L/L: Stereo: L channel, Bilingual: Main.
• R/R:Stereo: R channel, Bilingual: Sub.
- Press the MENU button to close the menu.
text_image
MENU
The setting resets to the L/R setting when you turn the camcorder off.
Many of the camcorder's advanced functions are selected from menus that appear on the screen.
Selecting Menus and Settings
- Set the camcorder to the correct operating mode.
text_image
CAMERA PLAY (VCR) MV650i/MV630i TAPE CARD- Press the MENU button to open the menu.

text_image
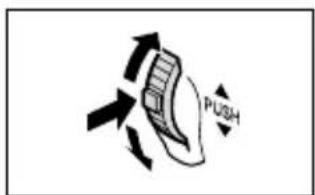
MENU- Turn the selector dial to select a submenu and press the selector dial.
text_image
PUSH-
Turn the selector dial to select a menu item and press the selector dial.
-
Turn the selector dial to select a setting option.
-
Press the MENU button to close the menu.
When setting the white balance or shutter speed, press the selector dial first before pressing the MENU button.

text_image
MENU
○Pressing the MENU button at any time closes the menu.
○ Selecting [← RETURN] takes you back one level.
OItems that are not available appear in purple.
- You may find it more convenient to use the wireless controller to operate the menu. Press the MENU button on the wireless controller to open or close the menu. Use the arrow keys in place of the selector dial and press the SET button in place of pressing the selector dial.
Menu and Default Settings
Default settings are shown in boldface.
*1 MV650i, *2 MV650i MV630i, *3 MV600i MV600, *4 Does not appear with the MV600.
of Features
| Submenu Menu Item Setting Options | |||
| CAMERA SET UP | SHUTTER AUTO, 1/50, 1/ | 120, 1/250 77 | |
| WHITE BAL. | AUTO, SET □, INDOOR ⚙, OUTDOOR ✪ | 79 | |
| CARD SET UP SI Q | QUALITY SUPER FINE, FINE, NORMAL 100 | ||
| SI SIZE 1024 × 768, 640 × 480 100 | |||
| MOVIE SIZE *1 | 320 × 240, 160 × 120 101 | ||
| FILE NOS. | RESET, CONTINUOUS | 102 | |
| VCR SET UP | AV/PHONES | AV, PHONES Ⓡ | 37 |
| AUDIO SET UP *1 | WIND SCREEN | ON, OFF | 70 |
| DISPLAY SET UP | BRIGHTNESS | 31 | |
| LCD MIRROR | ON, OFF | 32 | |
| TV SCREEN | ON, OFF | 133 | |
| D/T DISPLAY | ON, OFF | 25 | |
| DEMO MODE | ON, OFF | 52 | |
| SYSTEM | BUTTONLIGHT *1 | ON, PUSH ON, OFF | 50 |
| LIGHT COLOR *1 | GREEN, ORANGE, BLUE, YELLOW, TURQUOISE, PURPLE | 50 | |
| WL. REMOTE | 1, 2, OFF | 48 | |
| BEEP | ON, OFF | 51 | |
| T.ZONE/DST See list of time zones 23 | |||
| D/TIME SET | 24 | ||
| MY CAMERA | SHTR SOUND | PATTERN1, PATTERN2, PATTERN3 | 49 |
| S-UP SOUND | PATTERN1, PATTERN2, PATTERN3 | 49 | |
| S/STOP SOUND | PATTERN1, PATTERN2, PATTERN3 | 49 | |
| SELF-T SOUND | PATTERN1, PATTERN2, PATTERN3 | 49 | |
*1 MV650i
| Submenu Menu Item Setting Options | ☐ | ||
| CARD COPY OPERATIONS (Single Image Display) | →CANCEL, EXECUTE 126 | ||
| PRINT ORDERS YES, NO 1 ALL ERASE | 16 | ||
| IMAGE ERASE CANCEL, | SINGLE, ALL 114 | ||
| FORMAT CANCEL, EXECUTE 127 | |||
| CARD OPERATIONS (Index Screen) | →PROTECT ☐B | ||
| →PRINT ORDER 115 | |||
| VCR SET UP | REC MODE | SP, LP | 53 |
| AV/PHONES | AV, PHONES ☐ | 37 | |
| DISPLAY SET UP | BRIGHTNESS | 31 | |
| DISPLAYS | ON, OFF | 133 | |
| D/TIME SEL. | DATE, TIME, DATE & TIME | 83 | |
| SYSTEM | BUTTONLIGHT *1 | ON, PUSH ON, OFF | 50 |
| LIGHT COLOR *1 | GREEN, ORANGE, BLUE, YELLOW, TURQUOISE, PURPLE | 50 | |
| WL. REMOTE | ☐☐☐1, ☐☐☐2, OFF ☐☐☐ | 48 | |
| BEEP | ON, OFF | 51 | |
| T.ZONE/DST | See list of time zones | 23 | |
| D/TIME SET | 24 | ||
| MY CAMERA | CREATE START-UP IMAGE | 129 | |
| SEL. S-UP IMG NO IMAGE, CANON LOGO, MY IMAGE 49 | |||
| SHTR SOUND | PATTERN1, PATTERN2, PATTERN3 49 | ||
| S-UP SOUND | PATTERN1, PATTERN2, PATTERN3 49 | ||
| S/STOP SOUND | PATTERN1, PATTERN2, PATTERN3 49 | ||
| SELF-T SOUND | PATTERN1, PATTERN2, PATTERN3 49 | ||
| Appears when connecting a printer with direct print function. | 117 | ||
*1 MV650i
of Features
Using the Full Range
E
Two remote sensor modes and an off setting are available to prevent interference from other Canon wireless controllers being used nearby.
Turning the Remote Sensor Off
CAMERA
CARD PLAY (VCR)C
MENU


WL.REMOTE...1SYSTEM
Open the menu and select [SYSTEM]. Select [WL. REMOTE], set it to [OFF (☐)] and close the menu.
" ( ) " appears.
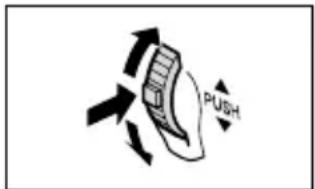
text_image
PUSHChanging the Remote Sensor Mode
CAMERA
PLAY (VCR)
CARD CAMERA
CARD PLAY (VCR)
MENU


WL.REMOTE...1SYSTEM
- On the camcorder, open the menu and select [SYSTEM]. Select [WL. REMOTE], set it to [((☐)2] and close the menu.
The selected mode appears for 4 seconds.
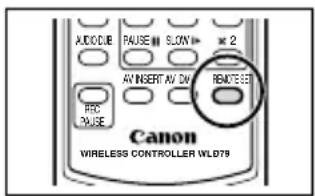
- On the wireless controller, press and hold the REMOTE SET button. Set the mode to the same of the camcorder. Press the ZOOM T button for mode 2. Keep the button pressed for over 2 seconds.
If you have set the camcorder to mode 1, press the ZOOM W button for mode 1.

text_image
PUSH
text_image
AUDIO RAUSE SLON 2 AV INSERT AV DN REMOLED PROC PAUSE Canon WIRELESS CONTROLLER WLD79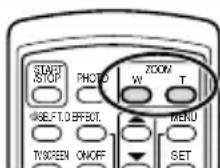

- The wireless controller returns to mode 1 when you replace the batteries. Change the mode if necessary.
- Make sure that camcorder and wireless controller are set to the same mode. Display the camcorder's mode by pressing any button on the wireless controller (except of the REMOTE SET button) and set the wireless controller's mode to the same mode. Change the batteries if the wireless controller still does not work.
Customizing the Camcorder
You can personalise your camcorder by customizing the start-up image and the sound it makes for start-up, shutter*, start/stop and self-timer (collectively called the My Camera settings).
* MV650i and MV630i only. With the MV650i and MV630i, you can also create your own start-up image. See Creating a Start-up Image (129).
Changing the My Camera Settings
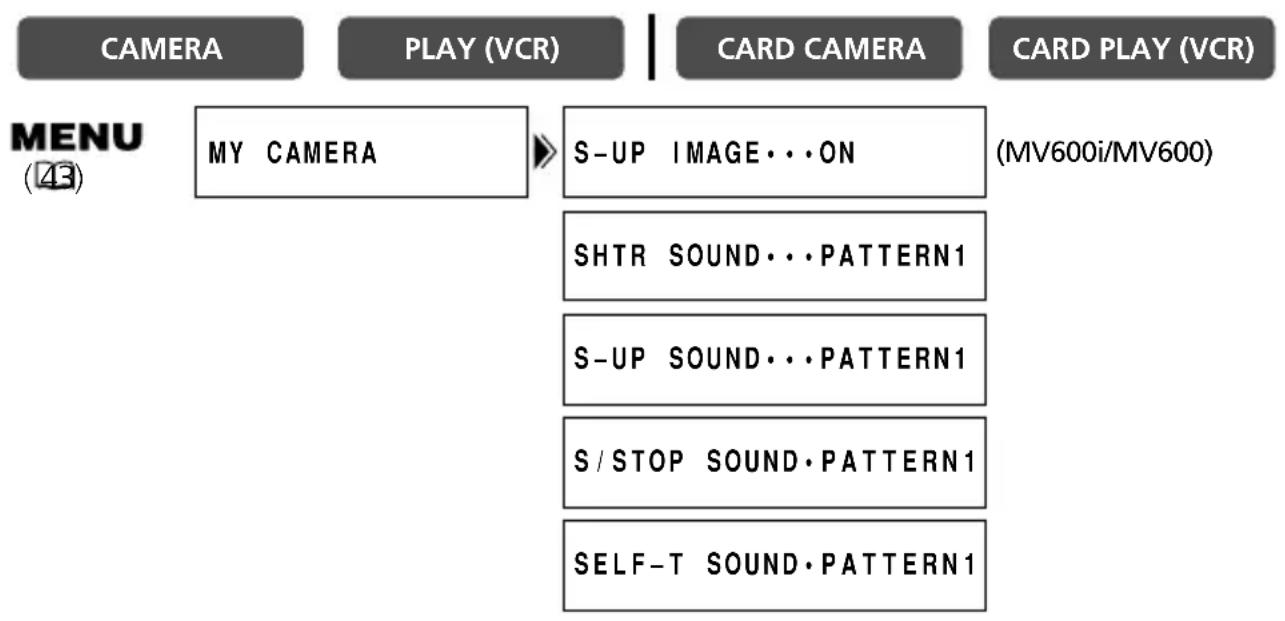
flowchart
graph LR
    A["CAMERA"] --> B["MY CAMERA"]
    C["PLAY (VCR)"] --> D["S-UP IMAGE...ON"]
    E["CARD CAMERA"] --> F["(MV600i/MV600)"]
    G["CARD PLAY (VCR)"] --> H["SHTR SOUND...PATTERN1"]
    G --> I["S-UP SOUND...PATTERN1"]
    G --> J["S/STOP SOUND.PATTERN1"]
    G --> K["SELF-T SOUND.PATTERN1"]
- Open the menu and select [MY CAMERA].
-
Select the menu item you wish to change.
-
MV650i e MV630i a start-up image (only in CARD PLAY (VCR) mode): [NO IMAGE], [CANON LOGO] and [MY IMAGE] appears.
- MV600i MV600 a start-up image: [OFF] and [ON] appears.
-
When selecting a sound: [PATTERN1], [PATTERN2] and [PATTERN3] appear.
-
Select a setting option and close the menu.
E
The buttons above the LCD panel light up when the camcorder's power is on, or when you press a button. This is helpful if, for example, you wish to play back a tape in dark places.
You can select the colour of the light-up buttons from green, orange, blue, yellow, turquoise and purple.
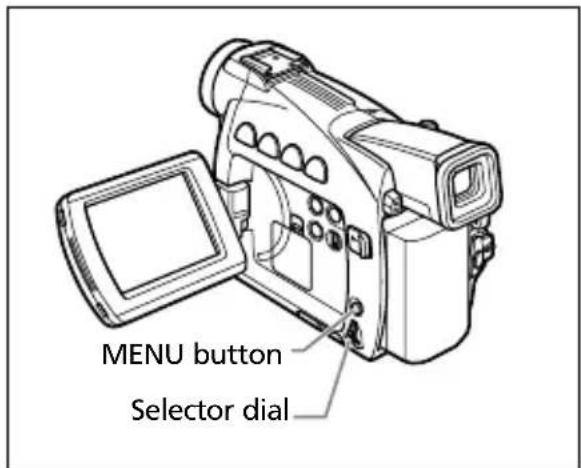
text_image
MENU button Selector dialSelecting the Light-up Setting

flowchart
graph LR
    A["CAMERA"] --> B["CARD PLAY (VCR)"]
    C["MENU (43)"] --> D["SYSTEM"] --> E["BUTTONLIGHT·ON"]
Open the menu and select [SYSTEM]. Select [BUTTONLIGHT], set it to [PUSH ON] or [OFF] and close the menu.
- ON: The buttons light up while the camcorder is turned on. The colour changes when you press a button and turns back when you release the button.
- PUSH ON: The buttons light up when you press a button and turn off when you release the button.
• OFF: Buttons do not light up.
Selecting the Colour of the Buttons

flowchart
graph LR
    A["CAMERA"] --> B["PLAY (VCR)"]
    B --> C["CARD CAMERA"]
    C --> D["CARD PLAY (VCR)"]
    E["MENU (23)"] --> F["LIGHT COLOR·TURQUOISESYSTEM"]
Open the menu and select [SYSTEM]. Select [LIGHT COLOR], set it to the desired colour and close the menu.

You cannot change the colour of the buttons when [BUTTONLIGHT] is set to [OFF].
Beep
You will hear a beep upon camcorder operations such as power on/off, start/stop, self-timer countdown, automatic shut-off, and unusual conditions of the camcorder. The beep will not be recorded.
If you turn off the beep, all camcorder sounds including the ones of the My Camera settings will be turned off.

flowchart
graph LR
    A["CAMERA"] --> B["MENU (43)"]
    B --> C["SYSTEM"]
    C --> D["BEEP . . . . . . . ON"]
    E["CARD PLAY (VCR)C"] --> D
To turn the beep off, open the menu and select [SYSTEM]. Select [BEEP], set it to [OFF] and close the menu.
Recording in 16:9 (Wide Screen TV Recording)
You can record in the 16:9 format for playback on wide screen TVs.

text_image
CAMERA PLAY (VCR) CARD CAMERA CARD PLAY (VCR) MENU (43) 16:9......OFFCAMERA SET UPTo switch 16:9 on, open the menu and select [CAMERA SET UP]. Select [16:9], set it to [ON] and close the menu.
"16:9" appears.

The 16:9 mode cannot be selected in the Easy Recording mode.
The multi-image screen cannot be used when the 16:9 format is selected.
If you play back a 16:9 recording on a normal TV, the image appears vertically "squashed" (compressed).
Demonstration Mode
The demonstration mode displays the camcorder's main features. It starts automatically when you leave the camcorder turned on without loading a cassette (MV650i/MV630i: and without inserting a memory card) for more than 5 minutes. You can also start the demonstration mode through the menu.

text_image
CAMERA PLAY (VCR) CARD CAMERA CARD PLAY (VCR) MENU (43) DISPLAY SET UP DEMO MODE...ONWith no cassette (MV650i/MV630i: and memory card) inserted, open the menu and select [DISPLAY SET UP]. Select [DEMO MODE], set it to [OFF] and close the menu.
To cancel the demo mode, press any button, turn off the camcorder, load a cassette (MV650i/MV630i: or insert a memory card).
Changing the Recording Mode (SP/LP)
You can choose from SP (standard play) and LP (long play). LP extends the tape usage by 1.5 times.

O Tapes recorded in LP mode cannot be used for audio dubbing (95) or AV insert (93).
○Depending on the nature and usage condition of the tape, picture and sound recorded in LP mode may be distorted. We recommend using the SP mode for important recordings.
We recommend recording in SP mode if you plan to transfer the images to a computer.
If you record in both SP and LP modes on the same tape, the playback picture may become distorted and the time code may not be written correctly.
If you play back a tape that has been recorded in LP mode with another digital device on this camcorder, or vice versa, picture and sound may become distorted.
CAMERA
PLAY (VCR)*
CARD CAMERA
CARD PLAY (VCR)
* MV650i/MV630i/MV600i only.


flowchart
graph LR
    A[" "] --> B[" REC MODE···SPVCR SET UP "]
To change to LP mode, open the menu and select [VCR SET UP]. Select [REC MODE], set it to [LP] and close the menu.
E
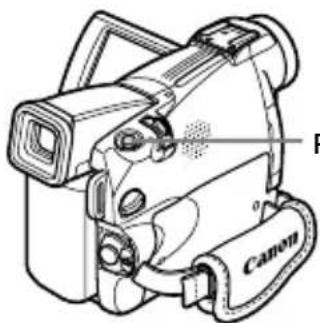
You can record still images on the tape. Starting your recording with a still image allows you to easily locate the beginning of the recording with the Photo Search function (84).
text_image
CanonPHOTO button
natural_image
Line drawing of a remote control with keypad and buttons (no text or symbols)CAMERA
PLAY (VCR)
CARD CAMERA
CARD PLAY (VCR)
In Record Pause Mode
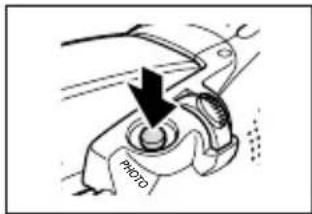
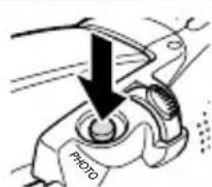
1. Press the PHOTO button halfway.
- Autofocus: ●flashes in white and turns green when focus is adjusted.
- Manual focus: ● flashes in green. Adjust the focus with the selector dial.
- Exposure is locked.
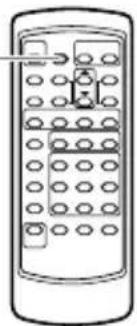
- When you press the PHOTO button on the wireless controller, recording starts immediately.
2. Press the PHOTO button fully.
- disappears.
- The camcorder records the still image for approx. 6 seconds. During this time, the camcorder displays the still image and keeps recording the sound.
- The camcorder returns to record pause mode.
text_image
PHOTO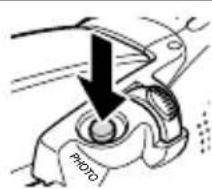
natural_image
Hand holding a camera with a black arrow pointing to the button (no text or symbols visible)During Recording
1. Press the PHOTO button fully.
- The camcorder records the still image for approx. 6 seconds. During this time, the camcorder displays the still image and keeps recording the sound.
- The camcorder returns to record pause mode.
text_image
PHOTO
When you turn the POWER switch to OFF while the camcorder is recording the still image, it will not turn off until recording is complete.
- Record still images under sufficient lighting condition (in which you can identify the subject on the screen).
○ If a subject is unsuitable for autofocus, ● continues to flash. Keep the PHOTO button pressed halfway and adjust the focus with the selector dial.
E
E
The camcorder is equipped with the Easy Recording program and several program AE modes. The availability of functions differs depending on the selected mode.
Availability of Functions in Each Mode:
| Position of the Program Selector | ☐ | P | |||||||||
| Recording Program | ☐ |  |  |  |  |  |  |  |  |  | *1 |
| Digital Zoom ☐ | ○ | × | |||||||||
| Shutter Speed ☐A | A | ||||||||||
| Focus | ○ | ||||||||||
| White Balance ☐ | |||||||||||
| AE Shift ☐ | |||||||||||
| Image Stabilizer*2 | ON ☐x | ||||||||||
| Digital Effects x○* | 3 | ||||||||||
| 16:9 x○ | |||||||||||
| Card Mix*4 | x○x | ||||||||||
A: Auto setting ○: Available ×: Not available
*1 MV650i only.
*2 The image stabilizer cannot be used in CARD CAMERA mode.
*3 Available effects depend upon the program AE mode.
*4 MV650i and MV630i only.
Easy Recording Program
The camcorder adjusts focus, exposure and other settings automatically, allowing you to just point and shoot.
natural_image
Black-and-white photo of two people standing outdoors near a railing, with hills in the background (no visible text or symbols)Program AE Modes
Auto
The camcorder adjusts focus, exposure and other settings automatically. However, you have the option of adjusting the settings manually.

natural_image
Black-and-white photo of a person sitting on a small boat in a lake, surrounded by trees (no visible text or symbols)
Sports
Use this mode to record sports scenes (such as tennis or golf), moving objects (such as roller coasters) or when recording from a moving car.
natural_image
Black-and-white photo of two people standing in a forested area (no visible text or symbols)- This mode is set at a high shutter speed and should therefore be used in sufficient light.
- This mode is mainly intended for frame-by-frame or slow playback. The picture may not appear smooth when played back in normal speed.

Portrait
Use this mode to give accent to your subject by blurring the background or foreground.
natural_image
Black-and-white portrait of a woman with short hair, wearing a patterned top (no visible text or symbols)The blur effect increases the more you zoom to telephoto.
- This mode is set at a higher shutter speed. The picture may not appear smooth when played back.

Spotlight
Use this mode to record spotlit scenes such as shows, recitals or fireworks.
natural_image
Black and white photo of a person standing in front of a building (no visible text or symbols)
Sand & Snow
Use this mode in bright places such as a sunny beach or ski resort. It prevents the subject from being underexposed.
natural_image
Black and white photo of two children sitting on a beach, no visible text or symbolsThe subject may become overexposed in dark surroundings. Check the image on the screen.
- This mode is set at a higher shutter speed. The picture may not appear smooth when played back.

Low Light
Use this mode to record in dimly lit places. The shutter is fixed at a slow shutter speed.
natural_image
Black-and-white photo of a group of people seated at a table with food and drinks (no visible text or symbols)○Moving subjects may leave a trailing afterimage.
○Picture quality may not be as good as in other modes.
The camcorder may have difficulty to focus automatically.

Night
Use this mode to record in dark places. The shutter speed is adjusted automatically. It is useful when recording in places with changing light conditions (such as in amusement parks).
natural_image
Black-and-white cityscape at dusk with illuminated buildings and a tower (no visible text or symbols)ONight device must be used in CARD CAMERA mode.
○Moving subjects may leave a trailing afterimage.
○Picture quality may not be as good as in other modes.
○White points may appear on the screen.
○ Autofocus may not work as well as in other modes. In such case, adjust the focus manually.
MV650i

Super Night (CAMERA mode)
In CAMERA mode, use this mode to record in very dark places. The shutter speed is adjusted automatically. The White LED lights up automatically illuminating the subject in the centre of the screen, allowing you to record brightly in colour.
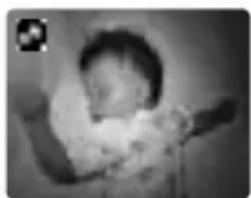
natural_image
Black-and-white photo of a baby holding flowers, no visible text or symbols
Low Light Plus (CARD CAMERA mode)
In CARD CAMERA mode, use this mode to record in dark places. The shutter is fixed at a slow shutter speed. The White LED lights up illuminating the subject in the centre of the screen, allowing you to record brightly in colour.
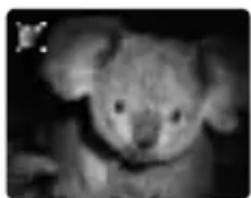
natural_image
Close-up of a small animal bear in grayscale (no visible text or symbols)The range of the White LED is limited. Check the image on the screen when recording.
○Use this mode for recordings at close range (up to 2m).
○Moving subjects may leave a trailing afterimage.
○Picture quality may not be as good as in other modes.
○White points may appear on the screen.
○ Autofocus may not work as well as in other modes. In such case, adjust the focus manually.
Selecting the Program AE Mode
CAMERA
PLAY (VCR)
CARD CAMERA
CARD PLAY (VCR)
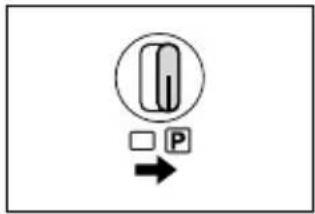
1. Slide the program selector to ☐ (program AE).
2. Press the selector dial.
A list of the program AE modes appears.
3. Select a mode and press the selector dial.
The symbol of the mode appears on the upper left corner of the screen. (Auto) disappears after 4 seconds.
text_image
Diagram showing a parking meter with a circular icon and directional arrow, indicating parking or payment process.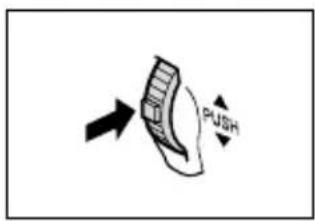
text_image
PUSH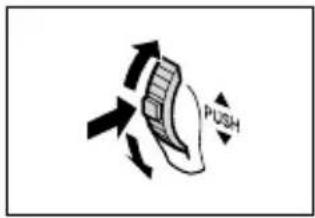
text_image
PUSH
Do not change the mode during recording as the brightness of the image may change abruptly.
○The setting resets to the Auto mode when you switch the program selector to □.
Bright light in a dark scene may cause a vertical light bar to appear. This is not a malfunction.
E
You can use the digital effects during recording and playback.
Faders (61): Begin or end scenes with a fade to or from black.
Effects (64): Add flavor to your recordings.
Multi-image screen (66)
Availability of Digital Effects by Operating Modes:
| CAMERA | PLAY (VCR) | MV650i/MV630i: CARD CAMERA | MV650i/MV630i: CARD PLAY (VCR) | ||
| Movies | Still Images | ||||
| Faders ○ | × | ○ | × | × | |
| Effects ○ | ○ | ○ | ○ 1 | * × | |
| Multi-image screen | ○*2 | ○*2 | ○ | × | × |
○: Available ✗: Not available
*1: Black and White only.
*2: Cannot be used in Night and Super Night (MV650i) mode.

OTurn off the digital effect when you do not use it.
Press the DIGITAL EFFECTS button to open the menu. Select [D.EFFECTS OFF] and press the ON/OFF button.
The camcorder retains the setting even if you turn it off or change the program AE mode.
○ The digital effect turns off if you switch the program selector to □.
- Digital effects can be selected but not activated on a blank blue screen (appears in PLAY (VCR) mode).
- Digital effects activated during playback do not change the recording.
- Digital effects cannot be used during DV dubbing and photo/date search.
- Digital effects can also be set with the wireless controller.
Faders
Fade Trigger (FADE-T)
The image gradually fades in.
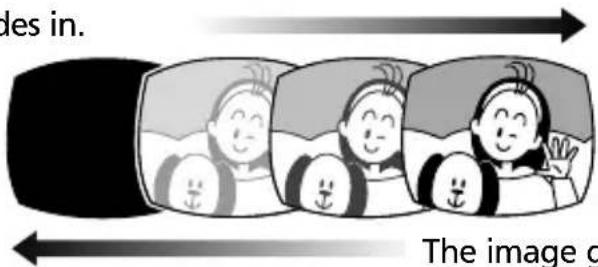
text_image
des in. The image gThe image gradually fades out.
Wipe (WIPE)
The image begins as a vertical
line in the centre and expands sideways until it fills the whole screen.
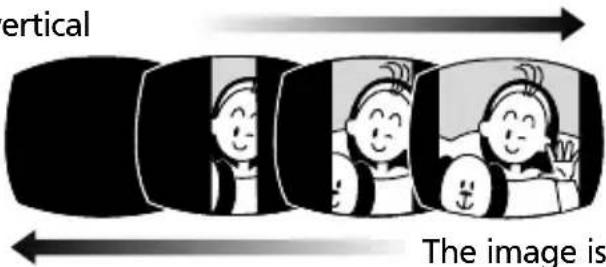
text_image
vertical The image isThe image is wiped off from the sides of the screen.
Corner Wipe (CORNER)
The image appears from the corners until it fills the whole screen.
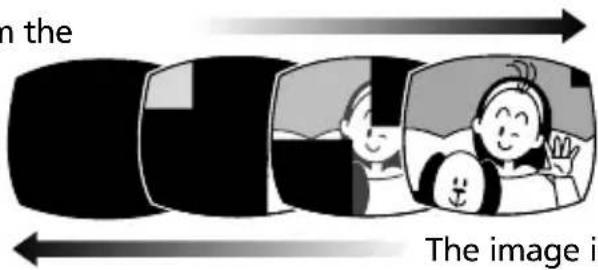
text_image
in the The image isThe image is wiped off from the corners.
Jump (JUMP)
A small image appears from
the left, jumps into the centre and enlarges until it fills the whole screen.
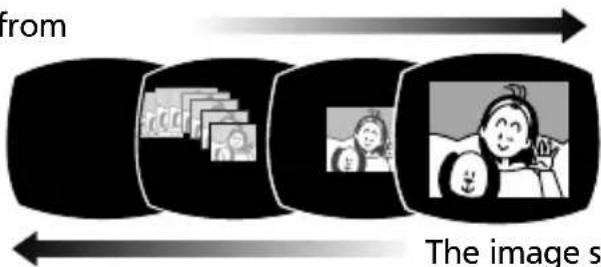
text_image
from The image sThe image shrinks, jumps from the centre to the left and disappears.
Flip (FLIP)
The image flips into the screen.
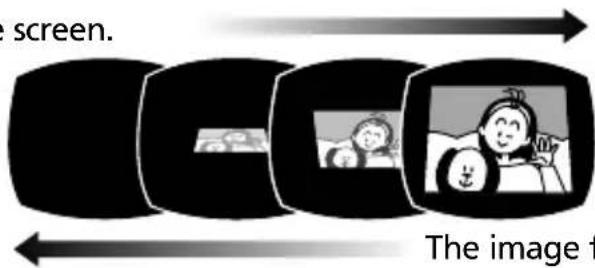
text_image
screen. The image fThe image flips out of the screen.
Puzzle (PUZZLE)
E
The image appears in 16 pieces.
The pieces move around until the puzzle is solved.
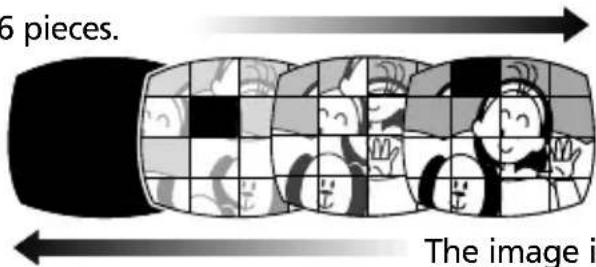
text_image
5 pieces. The image iThe image is divided into 16 pieces. The pieces move around and disappear.
Zigzag (ZIGZAG)
The image appears in zigzag from the top of the screen.
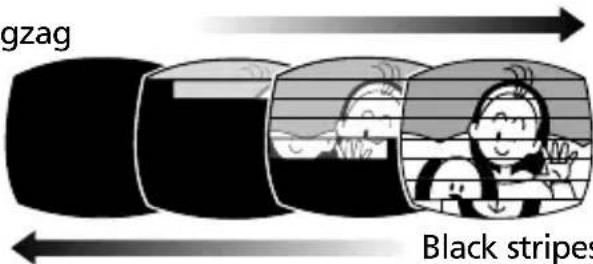
text_image
gzag Black stripesBlack stripes appear in zigzag from the bottom of the screen until they cover the whole image.
Beam (BEAM)
The screen turns yellow, forms a beam that becomes thinner and the image appears.
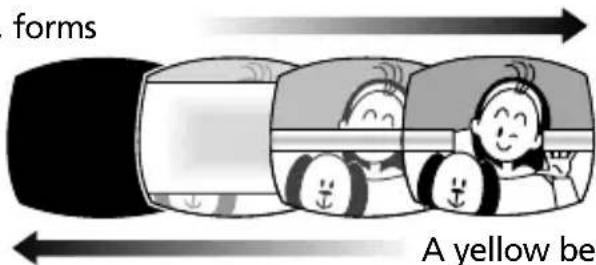
text_image
forms A yellow beA yellow beam appears in the centre of the screen and expands until it covers the whole image.
Tide (TIDE)
The image appears from both sides like tides.
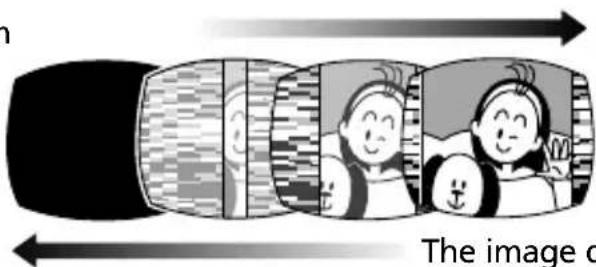
text_image
The image cThe image disappears from both sides like tides.
CAMERA
PLAY (VCR)
CARD CAMERA
CARD PLAY (VCR)
-
In CAMERA mode, set the program selector to ☐.
-
Press the DIGITAL EFFECTS button.
[D.EFFECTS OFF], [FADER], [EFFECT] and [MULTI-S] appear.
-
Select [FADER].
-
Select the fader option.
-
Press the DIGITAL EFFECTS button.
The name of the selected fader flashes.
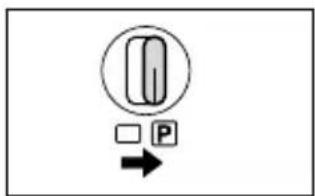
text_image
Diagram showing a parking meter icon with a circular label and an arrow pointing to it, indicating parking or payment process.




text_image
DIGITAL EFFECTS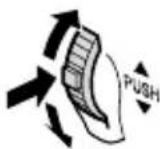
CAMERA mode:
- Fade in: In record pause mode, press the ON/OFF button and begin recording by pressing the start/stop button.
Fade out: During recording, press the ON/OFF button and pause recording by pressing the start/stop button.
The fader can be activated/deactivated by pressing the ON/OFF button.

text_image
ON/OFF
PLAY (VCR) mode:
- Fade in: In playback pause mode, press the ON/OFF button and begin playback by pressing the ▶/■ button.
Fade out: During playback, press the ON/OFF button and pause playback by pressing the ▶/■ button.
The fader can be activated/deactivated by pressing the ON/OFF button.
text_image
ON/OFF

MV650i MV630i Faders cannot be selected when Card Mix is activated.
Effects
Art (ART)
The image becomes like a paint (solarization).
Black and White (BLK & WHT)
The image becomes black and white.
Sepia (SEPIA)
The image becomes monochrome with a brownish tint.
Mosaic (MOSAIC)
The image is blurred through enlarging the size of some pixels.
Ball (BALL)
The image becomes like a ball.
Cube (CUBE)
The image becomes a cube and rotates.
Wave (WAVE)
Both ends of the image sway in waves.
Colour Masking (COLOR M.)
The image becomes a rhombus surrounded by a masking frame that changes the colours.
Mirror (MIRROR)
Creates a symmetrical image as if there would be a mirror in the centre of the screen.
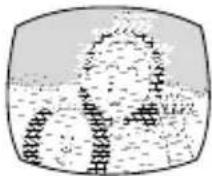


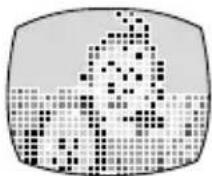

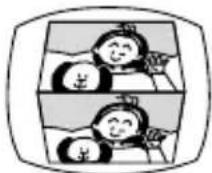


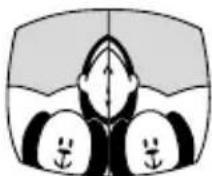
CAMERA
PLAY (VCR)
CARD PLAY (VCR) CARD CAME
E
1. Press the DIGITAL EFFECTS button.
[D.EFFECTS OFF], [FADER], [EFFECT] and [MULTI-S] appear.
-
Select [EFFECT].
-
Select the effect.
4. Press the DIGITAL EFFECTS button.
The name of the selected effect flashes.
5. Press the ON/OFF button.
- The name of the selected effect stops flashing.
- The effect can be activated/deactivated by pressing the ON/OFF button.
DIGITAL EFFECTS

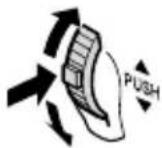
DIGITAL EFFECTS

ON/OFF

MV630i Selecting an Effect in CARD CAMERA Mode
PLAY (VCR) CAMERA CARD CAMERA
CARD PLAY (VCR)
1. Press the DIGITAL EFFECTS button.
"BLK&WHT" flashes.
2. Press the ON/OFF button.
- "BLK&WHT" stops flashing.
- The effect can be activated/deactivated by pressing the ON/OFF button.
DIGITAL EFFECTS

ON/OFF

E
The multi-image screen captures moving subjects in 4, 9 or 16 sequences of still images with the Image Capture feature and displays them at one time. Sound will be recorded normally. This feature can be used in CAMERA and PLAY (VCR) mode.
You can choose the transition speed at which to capture the subject from manual, fast (every 4 frames), moderate (every 6 frames*) or slow (every 8 frames*).
* In Low Light mode: moderate (every 8 frames), slow (every 12 frames).
Selecting the Multi-Image Screen
CAMERA
PLAY (VCR)
CARD CAMERA
CARD PLAY (VCR)
-
Set the program selector to ☐.
-
Press the DIGITAL EFFECTS button.
[D.EFFECTS OFF], [FADER], [EFFECT] and [MULTI-S] appear.
- Select [MULTI-S].
[S.SPEED] and [S.SPLIT] appears.
- Select [S.SPEED].
[MANUAL], [FAST], [MOD.] and [SLOW] appear.
-
Select the transition speed.
-
Select [MULTI-S] again.
[S.SPEED] and [S.SPLIT] appears.
- Select [S.SPLIT].
[4], [9], [16] settings appear.
-
Select the number of sequences.
-
Press the DIGITAL EFFECTS button.
[MULTI-S] flashes.
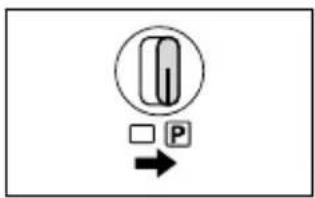
text_image
Diagram showing a circular symbol with an 'O' inside, followed by a square with a letter 'P' and a right-pointing arrow.DIGITAL EFFECTS


DIGITAL EFFECTS

Capturing
10. Press the ON/OFF button.
- MANUAL: Images will be captured each time you press the ON/OFF button. The blue frame indicating the next sequence disappears after the last image. To cancel the last captured image, press and hold the ON/OFF button. To cancel the multi-image screen, press and release the ON/OFF button.
- FAST, MODERATE, SLOW: The set number of images will be captured at the set speed. To cancel the multi-image screen, press the ON/OFF button.
11. Press the start/stop button begin recording.
The multi-image screen is recorded on the tape.

The multi-image screen cannot be operated in Night and Super Night (MV650i) mode.
OYou can operate the multi-image screen only in the following playback modes:
- When [S.SPEED] is set to [MANUAL]: Playback pause, slow forward/reverse playback
- When [S.SPEED] is set to [FAST], [MOD.] or [SLOW]: Playback pause
The multi-image screen can be operated in record or record pause mode.
OTMV650i i-MV630i screen cannot be selected when Card Mix is activated.
In PLAY (VCR) mode: Pressing any tape operation button (such as play or pause), or performing date/photo search cancels the multi-image screen.
E
The image stabilizer allows you to obtain steady recordings even at telephoto. There is no need to turn off the image stabilizer during normal recording. However, the camcorder tries to compensate for horizontal movements and you may therefore decide to turn it off during panning. The image stabilizer cannot be turned off when the program selector is set to □.
CAMERA
PLAY (VCR)
CARD CAMERA
CARD PLAY (VCR)
MENU

CAMERA SET UP

IMAGE S. ( ) · · ON
Open the menu and select [CAMERA SET UP]. Select [IMAGE S. (☐)], set it to [OFF] and close the menu.
(())))disappears.

We recommend turning off the image stabilizer when you mount the camcorder on a tripod.
The image stabilizer is designed to compensate a normal degree of camcorder shake.
OTMV650i j MV630i ter cannot be used in CARD CAMERA mode.
The image stabilizer might not be as effective in Low Light, Night and Super Night (MV650i) mode.
CAMERA
PLAY (VCR)
CARD CAMERA
CARD PLAY (VCR)
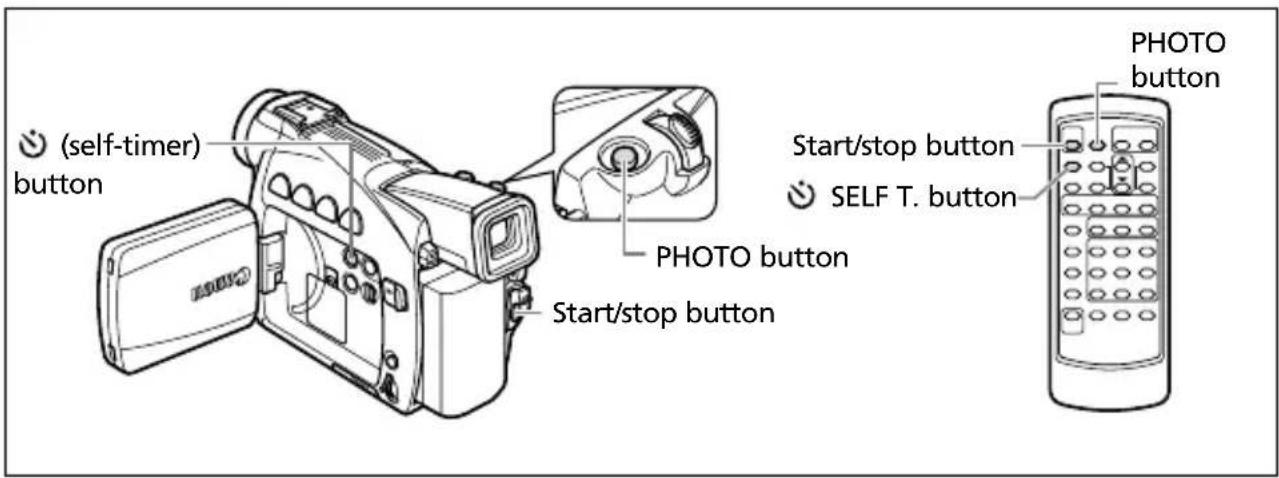
text_image
(self-timer) button PHOTO button Start/stop button START/stop button PHOTO button Start/stop button SELF T. button PHOTO button1. Press the (self-timer) button.
“ 🔍 appears.
text_image
DATA CODEWhen recording movies
2. Press the start/stop button.
The camcorder starts recording after a 10-second countdown (2 seconds when using the wireless controller). The count down appears on the screen.
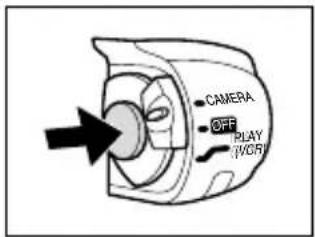
text_image
CAMERA OFF PLAY VORI3. Press the start/stop button to stop recording.
The camcorder returns to record pause mode.
When recording still images
2. Press the PHOTO button.
- The camcorder adjusts the focus 2 seconds before recording begins. ●flashes in white and turns green when focus and exposure are adjusted.
- The camcorder records the still image for approx. 6 seconds and returns to record pause mode (MV650i/MV630i: In CARD CAMERA mode, it displays the still image when recording is complete).

To cancel the self-timer, press the (self-timer) button, start/stop button (when recording movies) or PHOTO button (when recording still images).
The self-timer will be canceled when you turn off the camcorder.
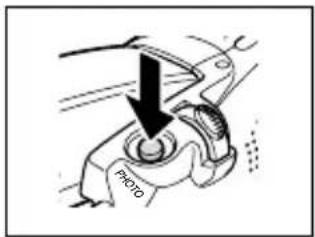
text_image
PHOTOE
Changing the Audio Mode
You can record sound in two audio modes—16-bit and 12-bit. The 12-bit mode records sound on two channels (stereo 1), leaving 2 channels free (stereo 2) for adding new sound later. Select the 16-bit mode for higher sound quality.
CAMERA
PLAY (VCR)\*
CARD CAMERA
CARD PLAY (VCR)
* MV650i/MV630i/MV600i only.
MENU

AUDIO SET UP

AUDIO MODE··12bit
Open the menu and select [AUDIO SET UP]. Select [AUDIO MODE], set it to [16bit] and close the menu.
"16 bit" appears for approximately 4 seconds.

For adding new sound, see Audio Dubbing (95).
Recording with an External Microphone
You can use an external microphone for recording. Almost all stereo microphones with a plug diameter of 3.5 mm can be connected to the MIC terminal. Use a microphone with a built-in power supply (condenser microphone).
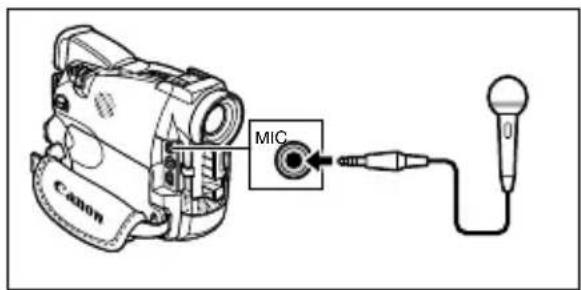
text_image
MIC Canon
The audio level differs from that of the built-in microphone.
○Be careful with long microphones as they may appear in the picture.
○ MV650i See also Using the DM-50 Microphone (☐ 73).
Do not use a microphone cable longer than 3 m to avoid electromagnetic interference.
Wind Screen
You can reduce the wind noise when recording in windy places.

text_image
CAMERA PLAY (VCR) CARD CAMERA CARD PLAY (VCR)
text_image
MENU (43) WIND SCREEN·OFFAUDIO SET UPOpen the menu and select [AUDIO SET UP]. Select [WIND SCREEN], set it to [ON] and close the menu.
"WS ON" appears when you turn the wind screen on.

- Low sound may be reduced together with the wind noise. We recommend turning off the wind screen for normal recordings.
- The wind screen function cannot be turned on/off during recording.
OTMV650i MV630i MV600i can also be used for audio dubbing (when [AUDIO DUB.] is set to [MIC. IN] in the [AUDIO SET UP] submenu).
The wind screen function cannot be used when an external microphone is connected to the MIC terminal (MV650i: or when the DM-50 Microphone is attached to the advanced accessory shoe).
MV650i Using the VL-3 Video Light (Optional)
E
This video light enables you to record brightly in colour even in dark places. This VL-3 Video Light attaches to the camcorder's "S" advanced accessory shoe for cable-free operation and is powered by the camcorder's power supply.
Refer also to the VL-3 Video Light instruction manual.

○Always turn off the camcorder before attaching/removing the video light.
Do not touch or place flammable material or plastic close to the lamp or the surrounding parts during or immediately after use; they become very hot.
Do not look directly at the lamp while the video light is on.
Do not carry the camcorder by the video light.
-
Slide the video light into the accessory shoe until it clicks.
-
Tighten the fastening screw.
Be careful that the video light does not come off when tightening the screw.
-
Set the camcorder to CAMERA or CARD CAMERA mode.
-
Turn the video light's power switch to AUTO or ON.
- (Connection) appears.
• ON: The video light stays on.
- AUTO: The video light turns on and off automatically.
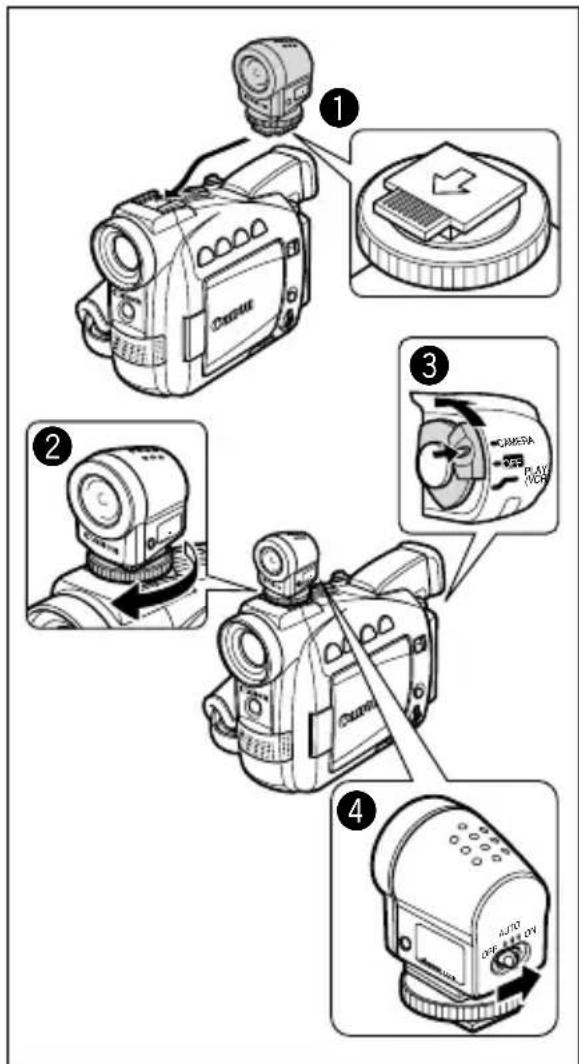
text_image
Diagram showing four steps of a DSLR camera setup with labeled parts including lens, flip, and control buttons.MV650i Using the DM-50 Microphone (Optional)
The high sensitive Directional Stereo Microphone DM-50 attaches to the .S advanced accessory shoe for cable-free operation and is powered by the camcorder's power supply. Use it for recording or dubbing audio.
Refer also to the DM-50 Microphone instruction manual.

○Always turn the camcorder off before attaching/removing the microphone.
Do not connect any microphone to the MIC terminal when the DM-50 Microphone is connected.
Do not carry the camcorder by the microphone.
-
Slide the microphone into the accessory shoe until it clicks.
-
Tighten the fastening screw.
Be careful that the microphone does not come off when tightening the screw.
- Set the camcorder to CAMERA or CARD CAMERA mode.
C (Connection) appears.
- Set the microphone's directivity switch.
- SHOTGUN: For recording clear sound from the front (monaural).
• STEREO 1: For recording sound from the front and surrounding area.
• STEREO 2: For recording surrounding sound in a wider range than in STEREO 1.
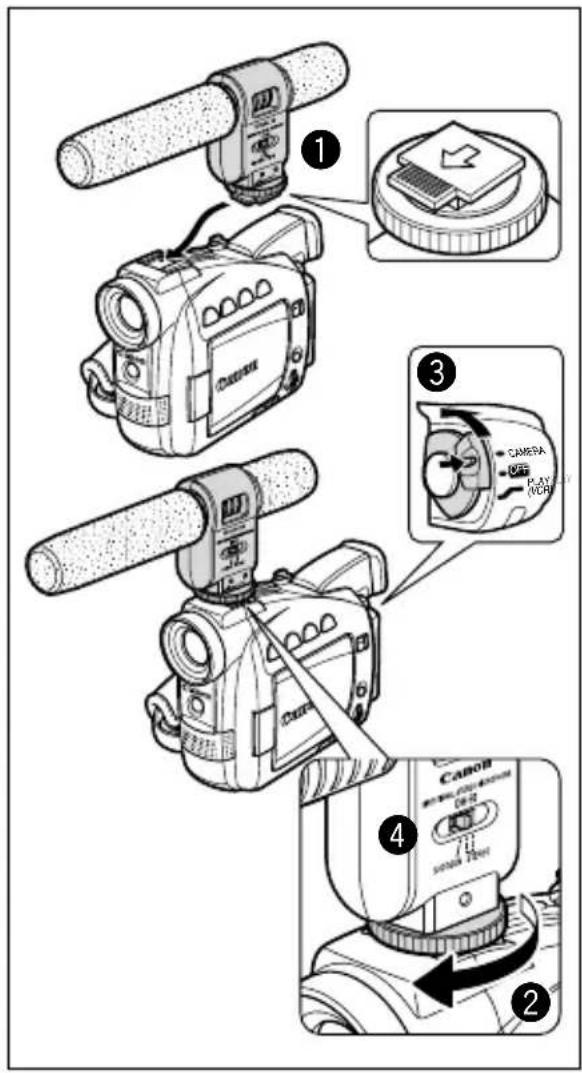
text_image
Diagram showing four steps of a Canon camera setup with labeled parts and instructions in Chinese.E
Some subjects may not be suitable for autofocus. In such case, focus manually.
Autofocus may not work well on the following subjects:
Subjects with Reflective surfaces low contrast Fast Moving Subjects Horizontal Stripes (e.g. White Wall)

natural_image
Cartoon illustration of a car with motion lines indicating speed or impact (no text or symbols)Through dirty or wet windows

natural_image
Cartoon illustration of a car speeding with motion lines (no text or symbols)
Different Distances Dark Subjects Night Scenes



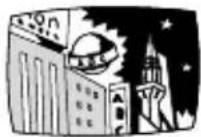
CAMERA
PLAY (VCR)
CARD CAMERA
CARD PLAY (VCR)
-
Set the program selector to P.
-
Adjust the zoom.
When you operate the zoom after adjusting the focus, the subject may not stay in focus. Adjust the zoom before the focus.
- Press the FOCUS button.
"MF" appears in light blue.
-
Turn the selector dial to adjust the focus.
-
Turn the selector dial up or down until the image appears focused.
- If "AE ±0" appears in light blue, focus cannot be adjusted. Press the FOCUS button again to display "MF" in light blue.
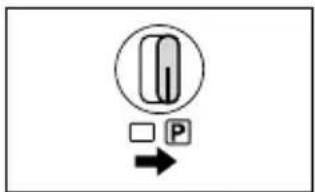
text_image
Diagram showing a parking meter with a circular icon and directional arrow, indicating parking or payment process.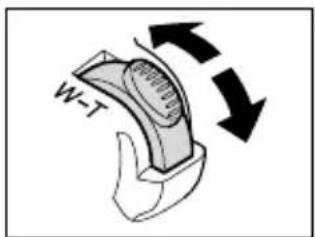
text_image
W-T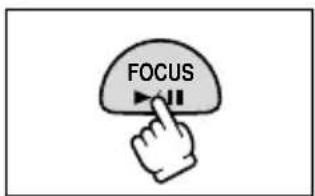
text_image
FOCUS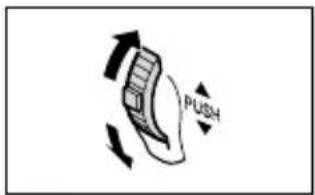
text_image
PUSH- Press the FOCUS button to return to autofocus.
text_image
FOCUSE

The setting resets to autofocus when you switch the program selector to □.
Infinity Focus
Use this function when you wish to focus on faraway subjects such as mountains or fireworks.
Press the focus button more than 3 seconds in step 3.
"MF ∞" appears. When you operate the zoom or turn the selector dial when "MF ∞" is displayed in light blue, "∞" disappears and the camcorder changes to manual focus.
E
You can adjust the AE (auto exposure) function to lighten or darken the image. This allows you to compensate for backlit or overexposed scenes. Available Levels: -2 to +2, in 0.25 intervals (excluding -1.75 and +1.75).
CAMERA
PLAY (VCR)
CARD CAMERA
CARD PLAY (VCR)
- Set the program selector to ☐.
text_image
Diagram showing a parking meter with a circular icon and directional arrow, indicating parking or payment process.- Set the program AE mode to Auto, Sports, Portrait, Low Light or Low Light Plus (MV650i) mode.

- Press the AE SHIFT button.
"AE ±0" appears in light blue.
text_image
AE SHIFT- Turn the selector dial to adjust the AE shift level.
- Turn the selector dial up to lighten the image and down to darken the image.
- If "MF" is displayed in light blue, AE shift cannot be adjusted. Press the AE SHIFT button again to display "AE ±0" in light blue.
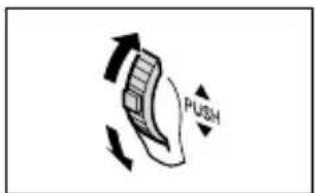
text_image
PUSH
The camcorder retains the setting even if you turn it off or change the program AE mode.
○The camcorder resets to the auto setting when you switch the program selector to □.
In the Auto mode, you can adjust the shutter speed manually to make stable shots of fast moving subjects.

text_image
CAMERA PLAY (VCR) CARD CAMERA CARD PLAY (VCR) MENU (43) SHUTTER...AUTOCAMERA SET UP- Set the program selector to P.
- Set the program AE mode to the Auto mode.
- Open the menu and select [CAMERA SET UP].
-
Select [SHUTTER].
-
Select the shutter speed and press the selector dial.
| CAMERA Mode | MV630iI CARD CAMERA Mode |
| AUTO AUTO | |
| 1/50 1/50 | |
| 1/120 1/120 | |
| 1/250 1/250 | |
| 1/500 | |
| 1/1000 | |
| 1/2000 |
6. Close the menu.

Do not point the camcorder directly at the sun when the shutter speed is set to 1/1000 or higher.
- The image may flicker when recording with high shutter speeds. - The setting resets to the auto setting when you switch the program selector to □, or change the program AE mode.
Oh MV650i in MV630i ed is set to 1/500 or higher in CAMERA mode and you switch to CARD CAMERA mode, it automatically changes to 1/250.
OGuidelines for Recording with High Shutter Speeds:
- Outdoor sports such as golf or tennis: 1/2000
- Moving objects such as cars or roller coasters: 1/1000, 1/500 or 1/250
- Indoor sports such as basketball: 1/120


The camcorder's auto white balance system adjusts the colours to appear natural for different lighting conditions. However, you can use the preset modes to reproduce colours more accurately, or set a custom white balance to obtain the optimal setting.
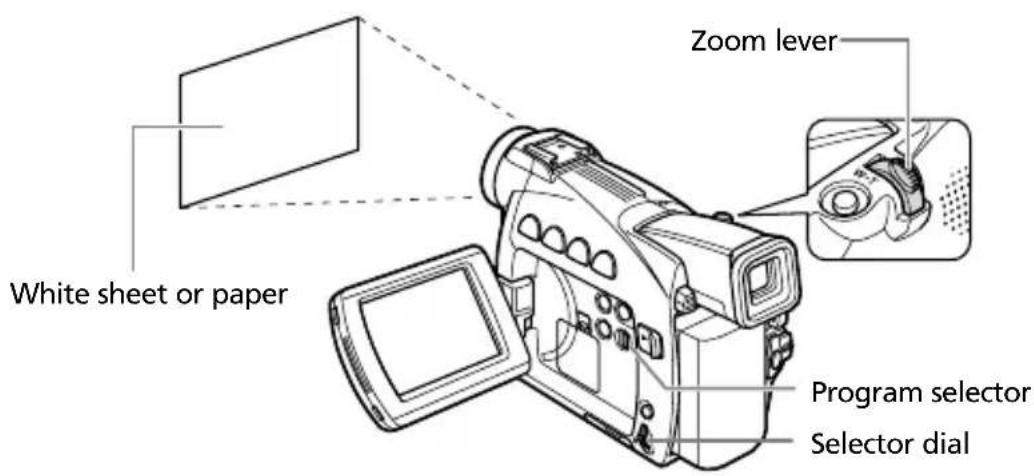
text_image
Zoom lever White sheet or paper Program selector Selector dial
When the program selector is set to □, white balance is preset to [AUTO]. Indoor, outdoor and custom white balance cannot be selected.
The camcorder retains the setting even if you turn it off.
When you have set the custom white balance:
- Reset the white balance when the lighting condition changes.
- Turn off the digital zoom.
○Setting the white balance manually may provide better results in the following cases:
- Changing lighting conditions
- Close-ups
- Subjects in a single colour (sky, sea or forest)
- Under mercury lamps or certain types of fluorescent lights
○ Use the ⚙ Indoor or ⚙ Outdoor mode in the following cases:
Indoor:
- Changing lighting condition
- Under video light
- Under sodium lamps
Outdoor:
- For night scenes or fireworks
- Sunrise or sunset
* Use the auto setting for normal outdoor scenes.
E
MENU (43)

text_image
WHITE BAL...AUTO CAMERA SET UPFor ⚙ (Indoor) or ⚙ (Outdoor) Setting:
- Set the program selector to ☐.
- Open the menu and select [CAMERA SET UP].
- Select [WHITE BAL.].
- Select ⚙(indoor) or ⚙(outdoor).
or appears.
- Close the menu.
For Custom White Balance:
- Set the program selector to ☐.
- Open the menu and select [CAMERA SET UP].
- Select [WHITE BAL].
-
Point the camcorder at a white object (such as a sheet of paper), zoom in until it fills the whole screen and select [SET ☐].
-
■ flashes and stops flashing when settings is complete.
-
Depending on the light source, ▶ may keep flashing. The result will still be better than with the auto setting.
-
Close the menu.
The playback image can be magnified by 2 times.
CAMERA
PLAY (VCR)
CARD CAMERA
CARD PLAY (VCR)
1. Move the zoom lever toward T.
• The image is magnified by 2 times.
- A frame appears indicating the position of the enlarged part.
2. Move the image.
- Turn the selector dial to move the image to the right and left, or up and down. Pressing the selector dial switches between the directions.
- To cancel the magnification, move the zoom lever toward W.
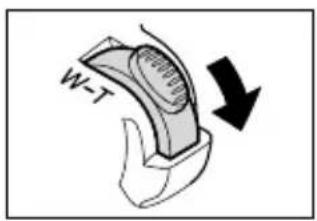
text_image
W-T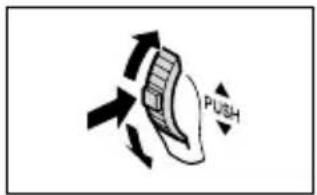
text_image
PUSH
MV650i Movies played back from a memory card cannot be magnified.
E
Once date and time are set, the camcorder maintains a data code containing recording date and time and other camera data such as shutter speed and exposure (f-stop). (MV650i/MV630i: Only date and time appear when playing back a memory card).
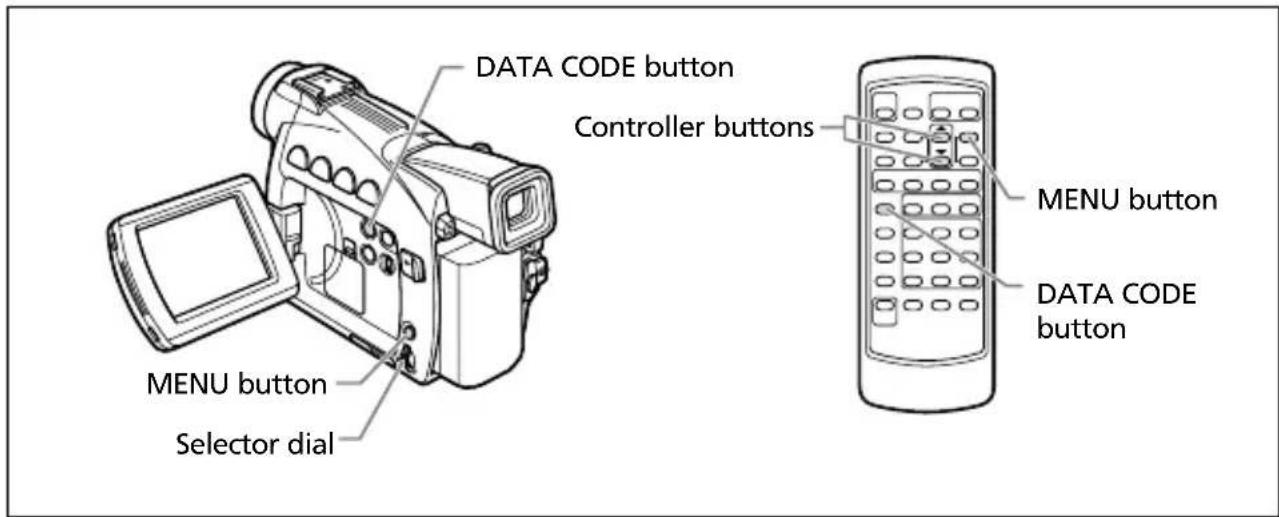
text_image
DATA CODE button Controller buttons MENU button Selector dial MENU button DATA CODE button
The data code display turns off when you turn the camcorder off.
The data code may not be displayed if a recording made with this camcorder is played back on a different digital camcorder.
The data code cannot be displayed in frame advance/reverse playback. Camera data may not appear in some special playback modes.
When the TV screen displays are hidden (13B), the displays still appear on the LCD screen. If you turn on the data code, displays other than the data code will disappear from the LCD screen.
Available Data Code Combinations (in PLAY (VCR) mode):
| DATA CODE (tape only) D/TIME SEL. | Date/Time Camera data | Date/Time & Camera data | |
| Date | 1.JAN.2003 | F1.81/250 | F1.81/2501.JAN.2003 |
| Time | 12:00:00 PM | F1.81/250 | F1.81/25012:00:00 PM |
| Date & Time | 12:00 PM1.JAN.2003 | F1.81/250 | F1.81/25012:00 PM1.JAN.2003 |
Selecting the Date/Time Display Combination

text_image
CAMERA PLAY (VCR) CARD CAMERA CARD PLAY (VCR) MENU (43) D / TIME SEL. • DATE & TIMEDISPLAY SET UPOpen the menu and select [DISPLAY SET UP]. Select [D/TIME SEL.], set it to [DATE] or [TIME] and close the menu.
Selecting the Data Code Display Combination

text_image
CAMERA PLAY (VCR) CARD PLAY (VCR) CARD CAME MENU (43) DATA CODE...DATE/TIMEDISPLAY SET UPOpen the menu and select [DISPLAY SET UP]. Select [DATA CODE], set it to [DATE/TIME], [CAMERA DATA] or [CAM. & D/T] and close the menu.
Displaying the Data Code

text_image
CAMERA PLAY (VCR) CARD CAMERA CARD PLAY (VCR)Press the DATA CODE button.
Only date and time appear in CARD PLAY (VCR) mode.
Six-Second Auto Date
Date and time appear for 6 seconds when you begin playback, or to indicate that date or time zone has changed.

text_image
CAMERA PLAY (VCR) CARD CAMERA CARD PLAY (VCR) MENU (43) 6 SEC. DATE ... OFFDISPLAY SET UPOpen the menu and select [DISPLAY SET UP]. Select [6SEC.DATE], set it to [ON] and close the menu.
E
You can search for a still image recorded anywhere on the tape with the photo search function, or locate the change of the date/time zone with the date search function.
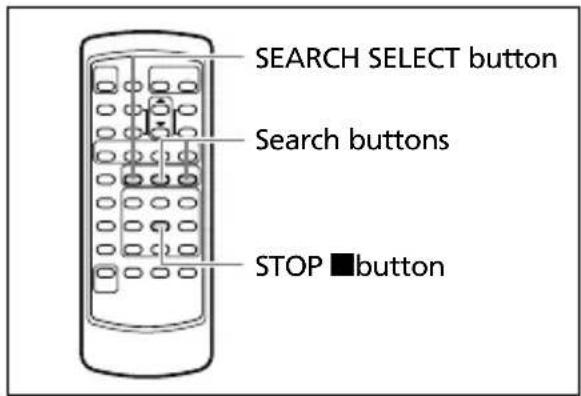
text_image
SEARCH SELECT button Search buttons STOP ■buttonCAMERA
PLAY (VCR)
CARD CAMERA
CARD PLAY (VCR)
1. Press the SEARCH SELECT button to choose between photo search and date search.
"PHOTO SEARCH" or "DATE SEARCH" appears.
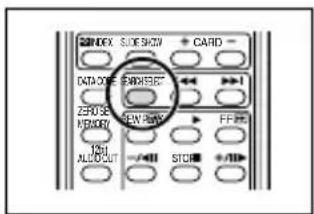
text_image
SARWSET SIDE SHOW CARD DATA/2016 SARWSET ZERO SE SARW SET FR 2016 ALI/OCT -/-/411 STC 30 +/-/302. Press the ▶▶ or ◀◀ button to begin searching.
- Press the ▶▶ button to search forward and the ◀◀ button to search backward.
- Press more than once to search for further still images or date changes (up to 10 times).
- Press the ▶▶ or ◀◀ button to change the search direction.
- Press the ■ (stop) button stop searching.
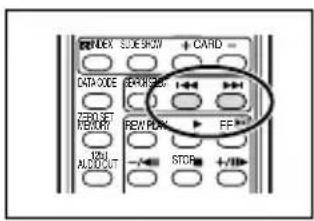
text_image
NEXT SLICE SHOW + CARD - DATA CODE REMARKS 1-40 TENET REMARKS NEW PLANS FF OFF ALGORITHM STOP +/-
○Photo search: A still image recorded very close to the point you start the search may not be detected.
○Date search: A recording of longer than a minute per date/area is required.
○Date search: Playback may start slightly before or after the date change.
○Date search may not function if the data code is not correctly displayed.
Returning to a Pre-marked Position
If you wish to return to a particular scene later, mark the point with the zero set memory and the tape will stop at that point when you rewind/fast forward the tape.
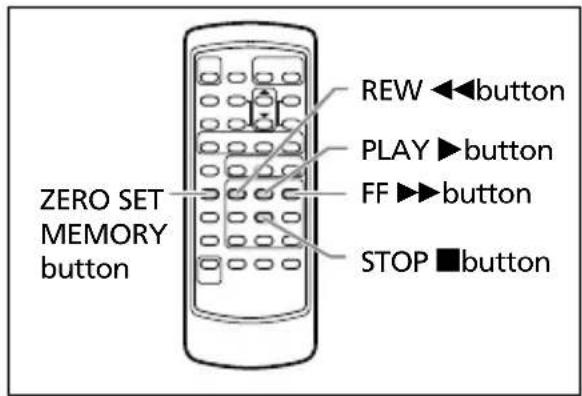
text_image
ZERO SET MEMORY button REW ◀◀button PLAY ►button FF ►button STOP ■buttonPLAY (VCR)CAM
CARD CAMERA
CARD PLAY (VCR)
1. Press the ZERO SET MEMORY button at the point you wish to return to later.
- "0:00:00 M" appears.
- To cancel, press the ZERO SET MEMORY button again.
2. When you have finished playback, fast forward or rewind the tape.
• RTN ▶▶ or ◀◀ RTN appears.
- The tape stops automatically at "0:00:00".
• The tape counter changes to time code.
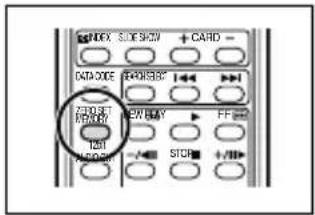
text_image
SNDX SIDE SHOW + CARD - DATA CODE 240058C 7300 120 NEW BAY FF 120 +/- STOP +/- AUCOON
○Time code and tape counter display may not match accurately.
The zero set memory may not function correctly when blank sections exist on the tape.
If you remove the tape, the zero set memory is cancelled and the counter display shows the time code.
You can copy your recordings by connecting the camcorder to a VCR or a digital video device. If you connect a digital video device, you can copy recordings with virtually no generation loss in image and sound quality.

When connecting a VCR:
○ Make sure that “☐” is not displayed on the screen. If “☐” is displayed, change the setting (37).
○The quality of the edited tape will be slightly lower than that of the original.
When connecting a digital video device:
- You can connect only one device to the camcorder with the DV cable.
○Blank sections may be recorded as anomalous picture.
- If the picture does not appear, reconnect the DV cable or turn the camcorder off and back on again.
Example: Recording to a VCR
CAMERA
PLAY (VCR)
CARD CAMERA
CARD CAMERA
- Connect the camcorder to the VCR.
See Playing Back on a TV Screen (39).
- Set the camcorder to PLAY (VCR) mode and load a recorded cassette.
- Connected device: Load a blank cassette and set the device to record pause mode.
- Locate the scene you wish to copy and pause playback shortly before the scene.
- Play back the tape.
- Connected device: Begin recording when the scene you wish to copy appears. Stop recording when copying is complete.
- Stop playback.
Connecting a Digital Video Device
Refer also to the instruction manual of the digital video device.
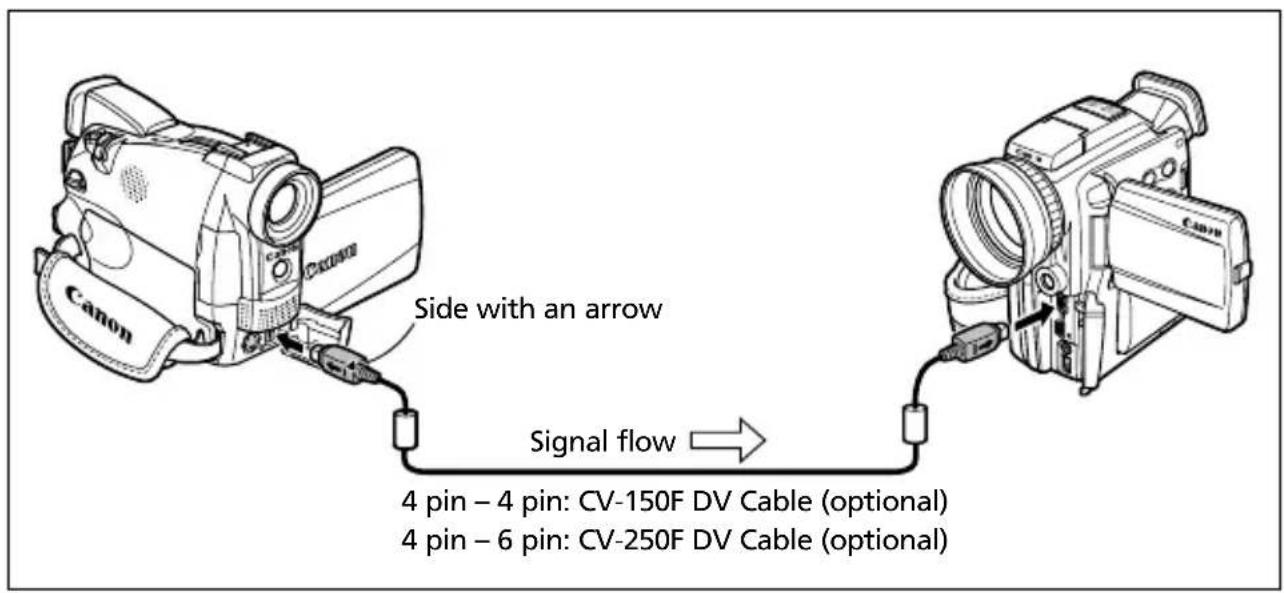
text_image
Canon Side with an arrow Signal flow → 4 pin – 4 pin: CV-150F DV Cable (optional) 4 pin – 6 pin: CV-250F DV Cable (optional)E
Recording from Analog Video Devices (VCR, TV or Camcorder)
You can record videos or TV programs from a VCR or analog camcorder on the tape in the camcorder.

○Anomalous signals sent from the connected device may be recorded as anomalous picture (although it may not appear so on the screen), or it may not be recorded at all.
- You cannot record from tapes with copyright protective signals.
○Headphones cannot be used during analog line-in recording. If the AV/headphones terminal set to [PHONES ☐], it will automatically switch to [AV].
When connecting to a TV/video with SCART terminal, use a SCART adapter with input capability (commercially available). The SCART Adapter PC-A10 is for output only.
CAMERA
PLAY (VCR)
CARD CAMERA
CARD CAMERA
- Connect the camcorder to the analog video device.
See Playing Back on a TV Screen (39).
- Set the camcorder to PLAY (VCR) mode and load a blank cassette.
- Connected device: Load the recorded cassette.
- Press the REC PAUSE button on the wireless controller.
In record pause mode and during recording, you can check the picture on the screen.
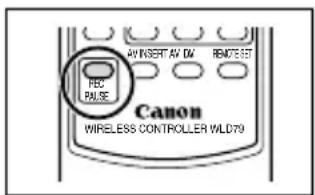
text_image
AV INSERT AV DN REMOEST REC PULSE Canon WIRELESS CONTROLLER WLD79-
Connected device: Play back the tape.
-
Press the PAUSE ▪ button on the wireless controller when the scene you wish to record appears.
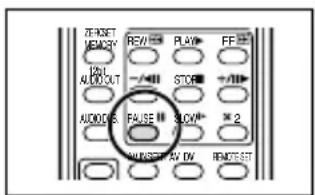
text_image
T-POST MEMORY 201 ALDOOUT AUDIO PULSE RUNS AV DV REMOSET-
Press the STOP ■button on the wireless controller to stop recording.
-
Press the PAUSE ▪ button on the wireless controller to pause recording.
- Press the PAUSE ▪ button again to restart recording.
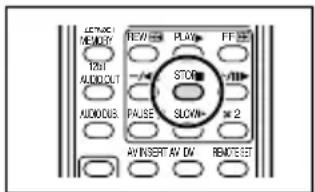
text_image
LEFT NEW 1201 AUDIO AUDIOUS AV INSERT AV DW REMOEST REV PLAY FF -/- STOP -/- PAUSE SLOWN 2 AV INSERT AV DW REMOEST- Connected device: Stop playback.
Recording from Digital Video Devices (DV Dubbing)
You can record from other digital video devices equipped with a DV terminal with virtually no loss in picture and sound quality.

When recording from digital video devices, make sure that "AV DV" is not displayed on the screen. If "AV DV" is displayed, change the setting (92).
○Anomalous signals sent from the connected device may be recorded as anomalous picture (although it may not appear so on the screen), or it may not be recorded at all.
○Copyright protected signals cannot be recorded.
○Blank sections may be recorded as anomalous picture.
Of the picture does not appear, reconnect the DV cable or turn the camcorder off and back on again.

OYou can connect only one device with the DV cable.
- You can use the camcorder for playback and recording without reconnecting the DV cable.
CAMERA
PLAY (VCR)
CARD CAMERA
CARD CAMERA
- Connect the camcorder to the digital video device.
See Connecting a Digital Video Device (87).
- Set the camcorder to PLAY (VCR) mode and load a blank cassette.
"DV IN" appears.
- Connected device: Load the recorded cassette.
- Press the REC PAUSE button on the wireless controller.
In record pause mode and during recording, you can check the picture on the screen.
- Connected Device: Play back the tape.
-
Press the PAUSE ▪button on the wireless controller when the scene you wish to record appears.
-
Press the STOP ■button on the wireless controller to stop recording.
-
Press the PAUSE ■ button on the wireless controller to pause recording.
-
Press the PAUSE ▪ button again to restart recording.
-
Connected Device: Stop playback.
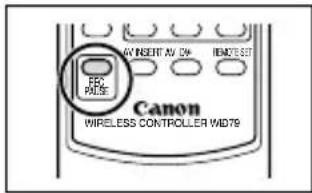
text_image
AV INSERT AV ON RENT/SST FCC PATE Canon WIRELESS CONTROLLER WIDTH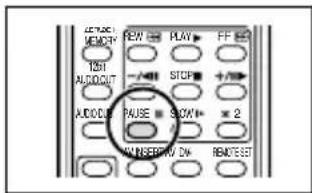
text_image
C:\201\MEMS T2H AUDIO AUDIO PAUSE RUNFERRWD DM RENTTEST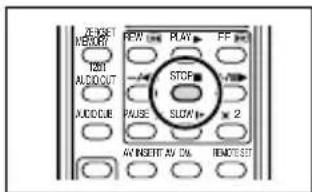
text_image
TAXS MINTON 120 ALDOOUT ACDCUE PULSE AV INSERT AU ON REMODEST FRW PLAY FF STOP SLOW 2Concerning Copyright
Copyright Precaution
Certain pre-recorded video tapes, films and other materials, as well as some television programmes are copyrighted. Unauthorised recording of these materials may violate copyright protection laws.
Copyright Signals
During playback: If you try to play back a tape that contains copyright control signals for protection of software, "COPYRIGHT PROTECTED PLAYBACK IS RESTRICTED" appears for a few seconds and the camcorder displays a blank blue screen. You cannot playback the contents of the tape.
During recording: If you try to record from software that contains copyright control signals for protection of software, "COPYRIGHT PROTECTED DUBBING RESTRICTED" appears. You cannot record the contents of the software.
You cannot record copyright protection signals to a tape using this camcorder.
Converting Analog Signals into Digital Signals (Analog-Digital Converter)
By connecting the camcorder to a VCR or 8mm video camcorder, you can convert analog video/audio signals to digital signals and output the digital signals via the DV terminal. The DV terminal serves as output terminal only.

OHeadphones cannot be used during analog-digital conversion.
○Unload the tape from the camcorder.
○Turn off all devices before starting the connections.
○Depending on the signal sent from the connected device, the conversion from analog to digital signals might not work properly (e.g., signals that include copyright protective signals or anomalous signals such as ghost signals, etc.)
When connecting to a TV/video with SCART terminal, use a SCART adapter with input capability (commercially available). The SCART Adapter PC-A10 is for output only.

We recommend powering the camcorder from a household power source.
Connecting the Devices
This illustration shows how to connect using a S-video cable. You can also connect the yellow plug of the stereo video cable to the VIDEO terminal. Refer also to the instruction manual of the connected device.
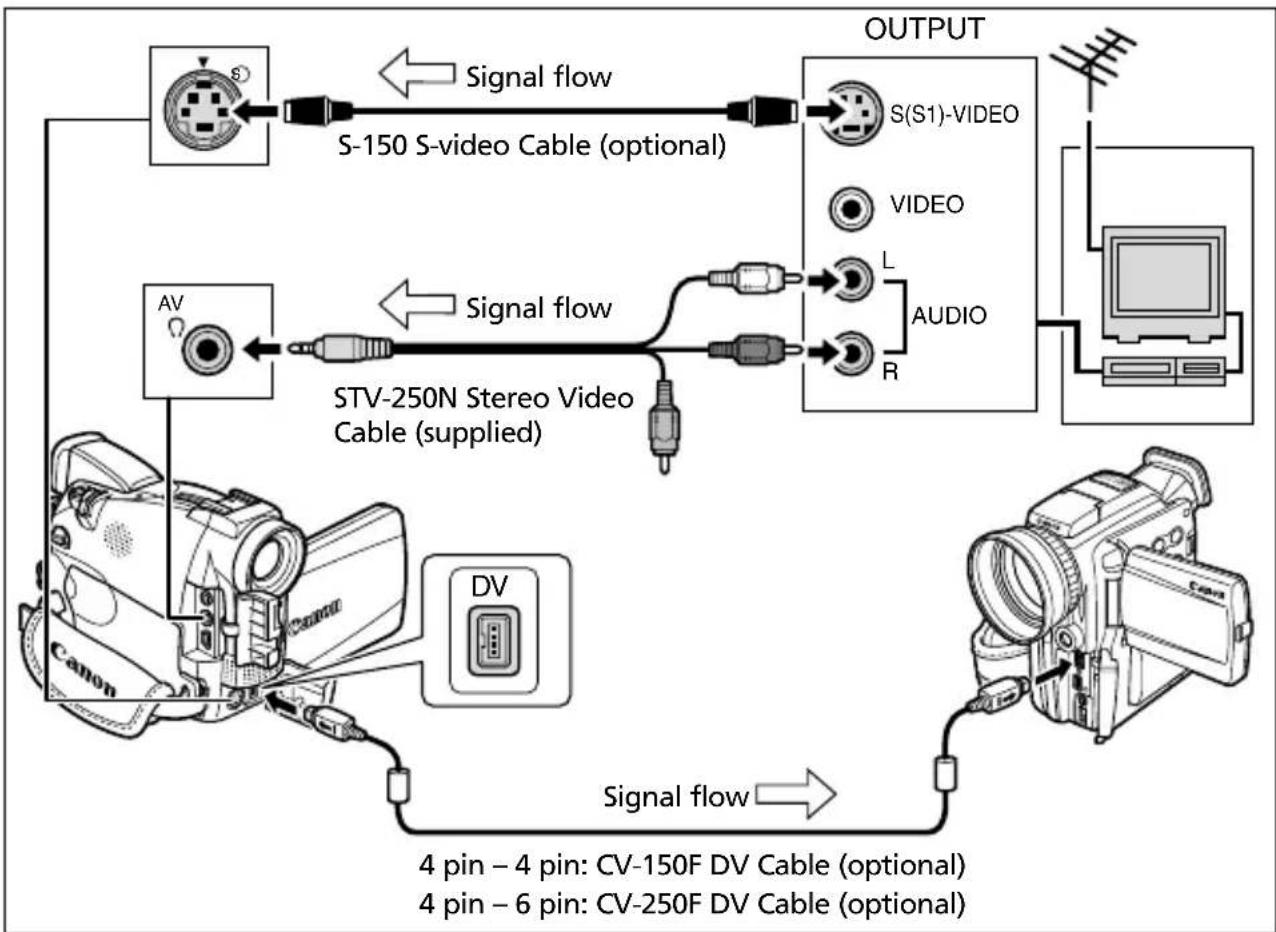
flowchart
graph TD
    A["S-150 S-video Cable (optional)"] -->|Signal flow| B["OUTPUT"]
    C["STV-250N Stereo Video Cable (supplied)"] -->|Signal flow| D["OUTPUT"]
    E["DV Cable"] -->|Signal flow| F["OUTPUT"]
    G["Canon"] --> H["4 pin - 4 pin: CV-150F DV Cable (optional)"]
    I["DV Cable"] --> J["4 pin - 6 pin: CV-250F DV Cable (optional)"]
Turning On the Analog-Digital Converter
CAMERA
PLAY (VCR)
CARD CAMERA
CARD CAMERA
Press the AV→DV button on the wireless controller.
OR
MENU
(44)
VCR SET UP
AV → DV OUT · · OFF
Open the menu and select [VCR SET UP]. Select [AV → DV OUT], set it to [ON] and close the menu.

For normal use, set [AV → DV OUT] to [OFF] (so that "AV → DV" does not appear on the screen). If it is set to [ON], digital signals cannot be input via the camcorder's DV terminal.
○Depending on the software and the specifications of your computer, you may not be able to transfer converted signals via the DV terminal.
Replacing Existing Scenes (AV Insert)
You can insert and replace images/audio on the tape of the camcorder with images/audio from other video devices connected via AV terminal or DV terminal.
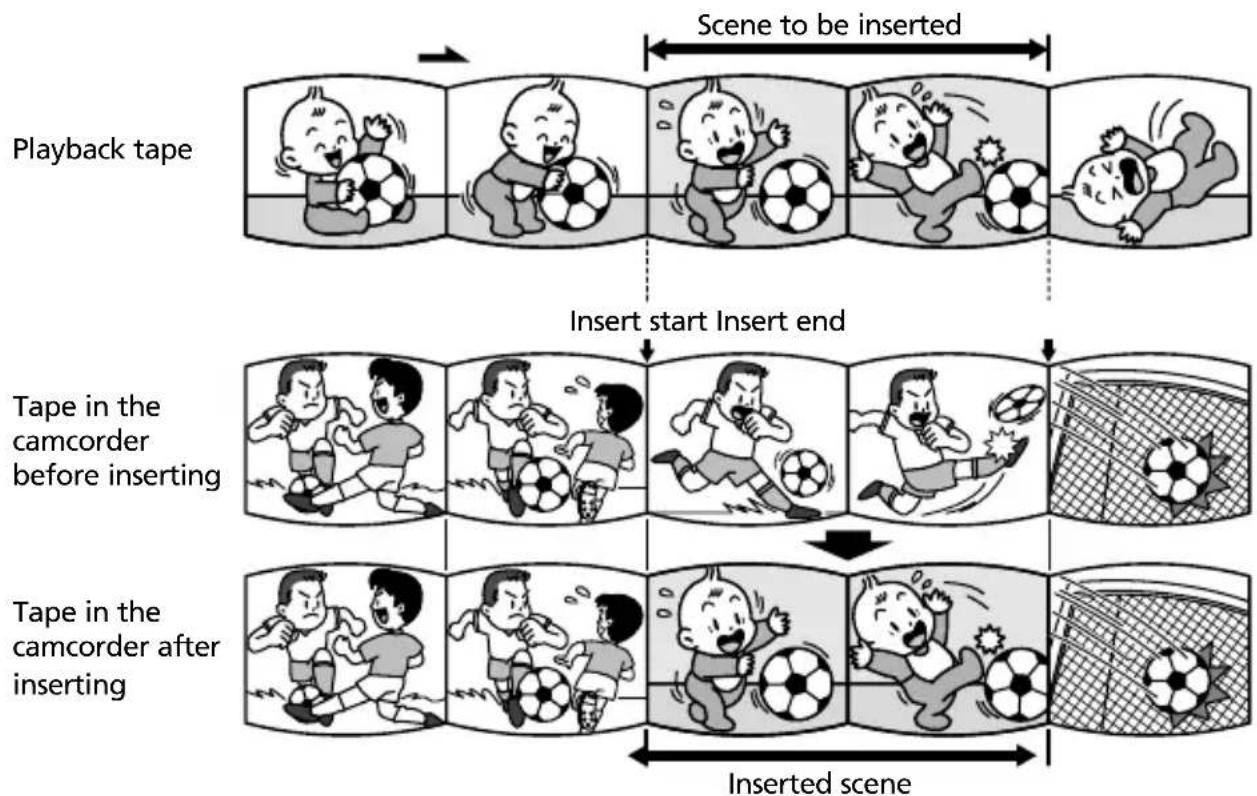
flowchart
graph TD
    A["Playback tape"] --> B["Insert start Insert end"]
    B --> C["Tape in the camcorder before inserting"]
    C --> D["Inserted scene"]
    D --> E["Tape in the camcorder after inserting"]

○ Make sure that "☐" is not displayed on the screen. If "☐" is displayed, change the setting (37).
☐You cannot insert from a TV program when the synchronised signals are distorted.
Camcorder:
○Use only tapes recorded in SP mode.
OAV insert will stop if the camcorder detects a blank section or a section not recorded in SP mode on the tape.
Connected device:
○Use only tapes without blank sections.
OAV insert may not work correctly if the tape has a blank section or changes in the recording mode.
OAV insert cannot be performed when the quality of the recording is poor, or during special playback such as fast forward, rewind, playback pause, slow playback etc.
CAMERA
PLAY (VCR)
CARD CAMERA
CARD CAMERA
- Connect the camcorder to the VCR.
See Playing Back on a TV Screen (39).
-
VCR: Load a recorded cassette. Locate the scene you wish to insert and pause playback shortly before the scene.
-
Set the camcorder to PLAY (VCR) mode and load a recorded cassette.
Make sure the tape-protect switch is set to allow recording.
- Locate the scene you wish to replace and pause playback shortly before the scene.
You can use the playback buttons on the camcorder or the special playback buttons on the wireless controller.
- Press the AV INSERT button on the wireless controller.
"AV INSERT" and "●II" appear.
-
VCR: Play back the tape.
-
Press the PAUSE ▪button on the wireless controller when the scene you wish to insert appears.
-
Press the STOP ■button on the wireless controller to stop inserting.
Press the PAUSE ■ button on the wireless controller to pause inserting.
- VCR: Stop playback.
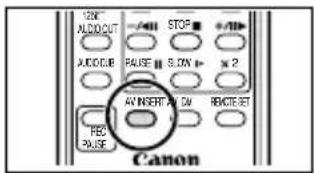
text_image
ALDOOUT AUCO.B PULSE AV INSERT ON FEB PULSE STOP S.DN X 2 REMOSET Canon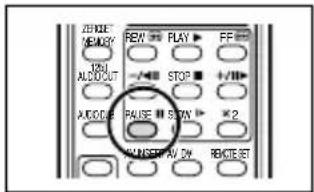
text_image
ZUBE NEW 120L ALDOOUT +/- STOP +/HP ALDOOUT PAUSE SOWN ×2 RANGE RAV 5V RECOSET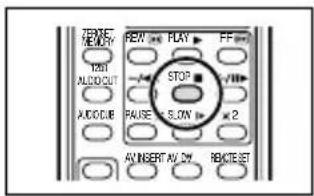
text_image
TATE FRY 1201 ALDOOUT AUDIO REACH PLAY STOP SLON 2 AIN INSERT AV. ON RESET SET
Set the zero set memory at the end of the scene you wish to replace. The camcorder will automatically stop AV insert at that point.
You can add sound from audio devices (AUDIO IN) or with the built-in or an external microphone (MIC. IN). With the MV600, audio dubbing can only be performed with the built-in or an external microphone (MIC. IN).

Use only tapes recorded in SP mode 12-bit audio sound with this camcorder. Audio dubbing will stop if the tape has a blank section or a section recorded in LP mode, 16-bit or 12-bit 4-channel sound. In above case, create a copy in SP mode 12-bit audio sound using the analog line-in function.
Do not connect/disconnect any cable to/from the camcorder while dubbing.
○You cannot use the DV terminal for audio dubbing.
If you add sound to a tape not recorded with this camcorder, sound quality may decrease.
○Sound quality may decrease when you add sound to the same scene for more than 3 times.
MV650i MV630i MV600i Connecting an Audio Device
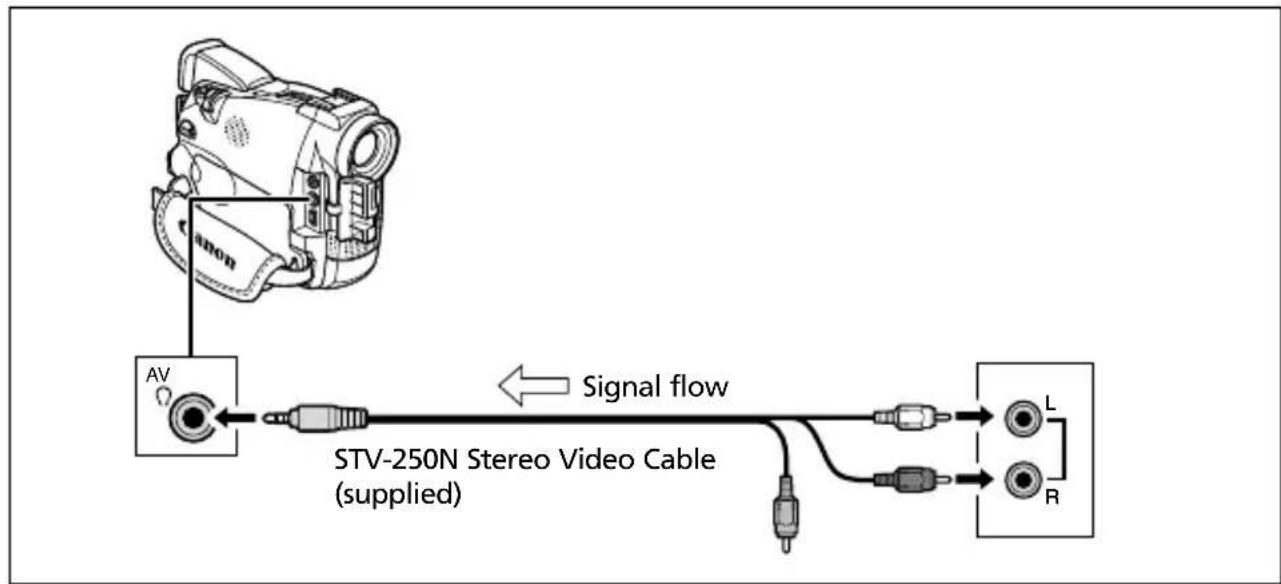
flowchart
graph LR
    A["Camera"] --> B["AV"]
    B --> C["STV-250N Stereo Video Cable (supplied)"]
    C --> D["L"]
    C --> E["R"]
    C --> F["Signal flow"]
    style A fill:#f9f,stroke:#333
    style B fill:#ccf,stroke:#333
    style C fill:#cfc,stroke:#333
    style D fill:#fcc,stroke:#333
    style E fill:#fcc,stroke:#333
    style F fill:#fcc,stroke:#333

○ Make sure that "☐" is not displayed on the screen. If "☐" is displayed, change the setting (37).
OYou can monitor the picture on the LCD screen or a TV connected via the S-video terminal, and check the sound with the built-in speaker.
Using a Microphone
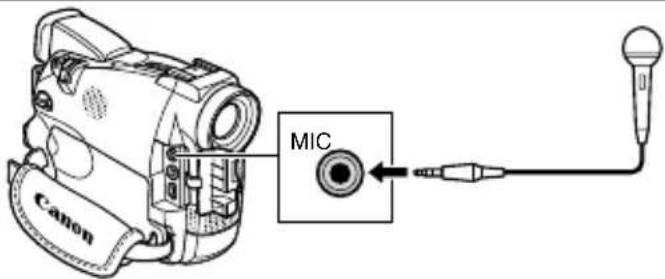
text_image
Canon MIC
When using the built-in microphone: do not connect any cables to the microphone terminal or the accessory shoe.
When using an external microphone: Connect it to the microphone terminal.
OV MV650i ing the DM-50 Microphone: Do not connect any cables to the microphone terminal.
When you connect a TV via the S-video terminal, you can check the picture on the TV screen and the sound with headphones connected to the camcorder. When you connect a TV via the AV terminal, you can check the picture on the TV screen but you cannot check the sound with headphones.
Dubbing
CAMERA
PLAY (VCR)
CARD CAMERA
CARD CAMERA
-
Set the camcorder to PLAY (VCR) mode and load a recorded cassette.
-
MV650i MV630i MV600i select
[AUDIO SET UP]. Select [AUDIO DUB.], set it to [AUDIO IN] or [MIC. IN] and close the menu.
-
Locate the scene you wish audio dubbing to start.
-
Press the PAUSE ▪button on the wireless controller.
-
Press the AUDIO DUB. button on the wireless controller.
• "AUDIO DUB." and appear.
- IMV650i tional DM-50 microphone is attached, (Connection) appears.

- Press the PAUSE II button on the wireless controller to begin dubbing.
• MV650i e MV630i g MV600i ack.
- Microphone: Direct your voice to the microphone.
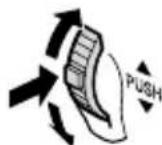
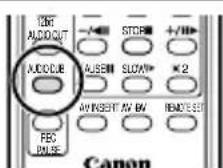
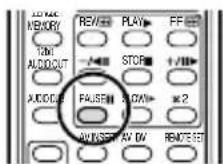
7. Press the STOP ■ button on the wireless controller to stop dubbing.

MV600ii Audio device: Stop playback.
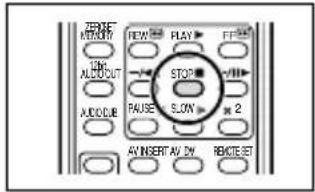
text_image
NEW PLAY FT STOP LAUCOUT RAUSE SLON 2 AV INSERT AV ON RESET SETE

Set the zero set memory at the end of the scene you wish to dub audio. The camcorder will automatically stop audio dubbing at that point.
Playing Back the Added Sound

You can select to play back Stereo 1 (original sound), Stereo 2 (added sound), or adjust the balance of both sounds.
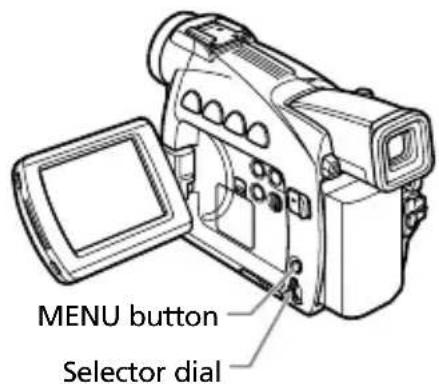
text_image
MENU button Selector dial12bit AUDIO OUT button
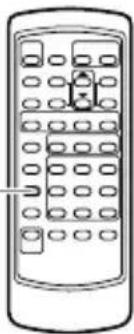
natural_image
Line drawing of a remote control with keypad and buttons (no text or symbols)CAMERA
PLAY (VCR)
CARD CAMERA
CARD CAMERA
MENU
(43)
12bit AUDIO·STEREO1
AUDIO SET UP
1. Open the menu and select [AUDIO SET UP], select a setting and close the menu.
• STEREO 1: Plays back the original sound.
• STEREO 2: Plays back the added sound.
- MIX/FIXED: Plays back stereo 1 and stereo 2 in the same level.
- MIX/VARI.: Plays back stereo 1 and stereo 2. The mix balance can be adjusted.
2. If you have selected [MIX/VARI.], adjust the mix level: Open the menu and select [AUDIO SET UP]. Select [MIX BALANCE], adjust the balance with the selector dial and close the menu.
Turn the selector dial down to increase the volume of Stereo 1 and up to increase the volume of Stereo 2.
![CANON MV630i - If you have selected [MIX/VARI.], adjust the mix level: Open the menu and select [AUDIO SET UP]. Select [MIX BALANCE], adjust the balance with the selector dial and close the menu. - 1](/content/2026/05/761248/images/c83a77eaa7edb4711f1f1fee2be82ed1ba94c9c7b629d2b025c32cca443cfad7.jpg)
The camcorder resets to [STEREO 1] when you turn the camcorder off. However, the mix balance is memorised by the camcorder.
OYou can also press the 12bit AUDIO OUT button on the wireless controller to select the audio output. However, the mix balance can only be adjusted in the menu.
Connecting to a Computer Using a DV (IEEE1394) Cable
E
You can transfer recordings to a computer equipped with a DV (IEEE1394) terminal or IEEE1394 capture board (optional software required).
Use the optional CV-150F (4 pin–4 pin) or CV-250F (4 pin–6 pin) DV Cable.
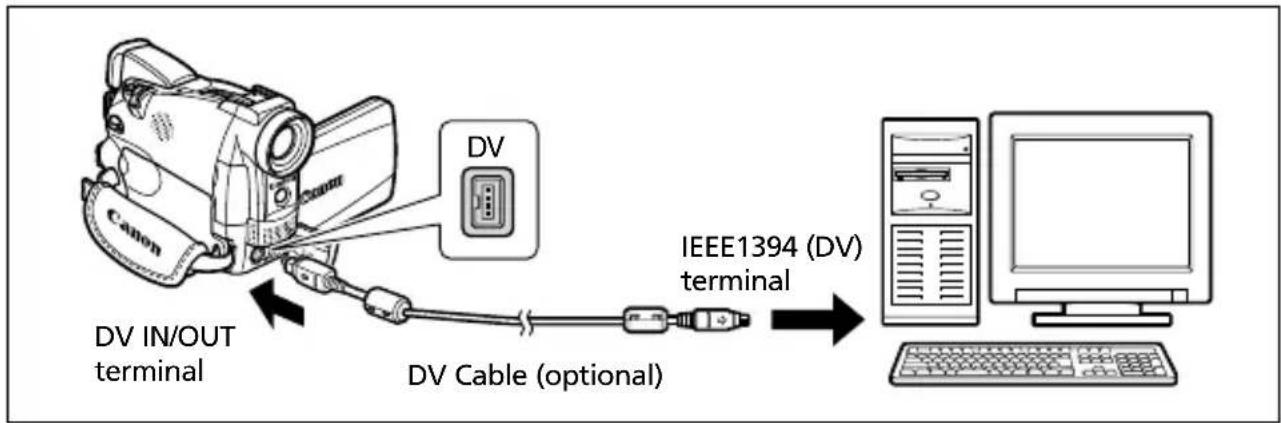
flowchart
graph LR
    A["Canon"] -->|DV IN/OUT terminal| B["DV Cable (optional)"]
    B --> C["IEEE1394 (DV) terminal"]
    C --> D["Computer"]

Do not disconnect the DV cable, or turn off the camcorder or computer while data is being transferred to the computer.
Operation may not work correctly depending on the software and the specifications/settings of your computer.

We recommend powering the camcorder from a household power source while it is connected to the computer.
○Refer also to the instruction manual of the computer. Optional software required. Refer also to the instruction manual of the software.
OF MV650i if MV630i recordings from a memory card to the computer using a USB cable, see p. 128.
DV NETWORK SOLUTION DISK (Windows XP Users)
Windows XP users can use the software on the supplied DV NETWORK SOLUTION DISK to perform videoconference and file transfer over the Internet, or upload files from the computer to the memory card and use the camcorder as card reader/writer. The available functions depend upon the camcorder model and the networking environment. For details, refer to the DV NETWORK SOLUTION DISK Software Instruction Manual.

MV650i MV630i
Do not disconnect the DV cable, remove the memory card or turn off the camcorder or computer while data is being transferred to the computer (while the camcorder's card access indicator is flashing). Doing so may damage the memory card's data.
The image files on your memory card and the image files saved on the hard disk drive of your computer are your valuable, original data files. If you wish to use image files on your computer, be sure to make copies of them first, retaining the original.
Inserting and Removing the Memory Card
The chapter Using a Memory Card (99 - 132) refers to functions of the MV650i and MV630i only.
You can use SD Memory Cards or a commercially available MultiMediaCards with this camcorder. The SD Memory Card has a protect switch for prevent accidental erasure.
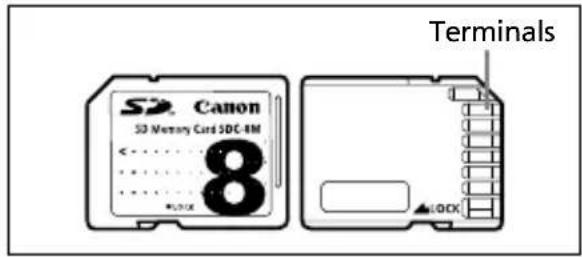
text_image
Canon S3 Memory Card SDC-4M 8 *0.01E Terminals LOGX
- This camcorder is compatible with SD Memory Cards or MultiMediaCards only. Do not use any other types of memory cards.
- Turn off the camcorder before inserting or removing the memory card. Otherwise it may result in data damage.
○Do not touch the memory card terminals.
Of you use memory cards other than the supplied one, make sure to format them with the camcorder (127).
For instructions on how to connect the camcorder to the computer, see Connecting to a Computer using a USB Cable (128).
Inserting the Card
-
Turn off the camcorder.
-
Open the cover.
-
Insert the memory card all the way into the memory card slot.
-
Close the cover.
Do not close the cover forcefully without having the card correctly inserted.
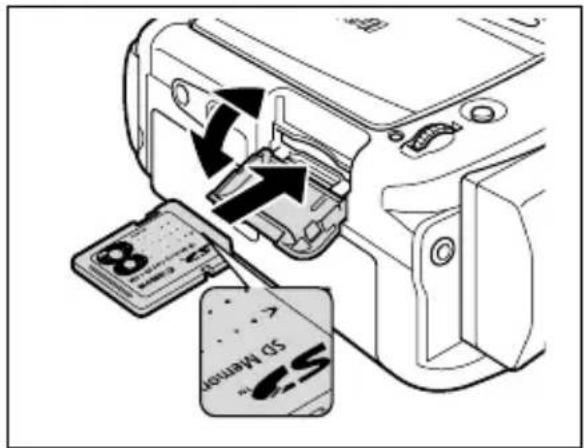
text_image
3D Memory 3D MemoryRemoving the Card
Do not forcefully remove the memory card without first pushing it in.
- Turn off the camcorder.
Make sure that the card access indicator is not flashing.
-
Open the cover.
-
Push the memory card to release it. Remove the memory card.
-
Close the cover.
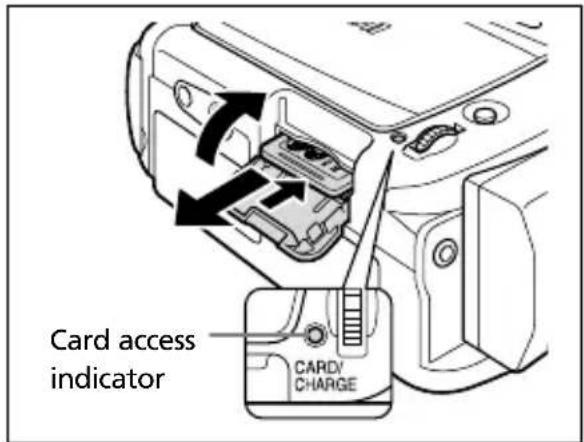
text_image
Card access indicator CARD/ CHARGEE
Changing the Still Image Quality
You can choose between Superfine, Fine and Normal.
CAMERA
CARD CAMERAPL
CARD PLAY (VCR)
MENU

CARD SET UP

SI QUALITY··FINE
Open the menu and select [CARD SET UP]. Select [SI QUALITY], set it to [SUPER FINE] or [NORMAL] and close the menu.
Changing the Still Image Size
You can choose between 1024 × 768 pixels and 640 × 480 pixels.
PLAY (VCR) CAMERA CARD CAMERA
CARD PLAY (VCR)
MENU

CARD SET UP

SIZE···1024×768
Open the menu and select [CARD SET UP]. Select [SI SIZE], set it to [640 × 480] and close the menu.

- Still images recorded in 1024 × 768 pixels may not be displayed correctly in a camcorder not supporting this size.
- Still images are compressed and recorded in the JPEG (Joint Photographic Experts Group) format.
○Depending on subject and recording condition, changing the image quality may not show a significant difference.
○Estimated Capacity of a 8 MB Memory Card and File Size per Image:
| Image SizeImage Quality | 1024 × 768 | 640 × 480 | ||
| No. of Images | File Size per Image | No. of Images | File Size per Image | |
| Superfine 14 images | 440 KB 35 images | 175 KB | ||
| Fine 20 images 300 | KB 52 images | 120 KB | ||
| Normal 39 images 1 | 60 KB 86 images | 65 KB | ||
These figures are approximate. They vary according to the recording condition and the subject. Sample images already recorded on the supplied SD Memory Card are to be included in the total number.
○Remaining Image Capacity:
flashingin red: No card
in green: 6 or more images
☐ in yellow: 1 to 5 images
in red: No more images
The indication may not decrease even though a recording has been made, or may decrease by 2 images at once.
OAll indicators are displayed in green when a memory card is played back.
OTMV650iaining image capacity indicates the number of still images, even when movies are recorded.
MV650i Changing the Movie Size
You can choose between 320 × 240 pixels and 160 × 120 pixels.
CAMERA
PLAY (VCR)
CARD CAMERA
CARD PLAY (VCR)
MENU
(43)
CARD SET UP
○Movies are recorded in the Motion JPEG format.
○Maximum continuous recording time:
| Image Size | Max. Continuous Recording Time | Total File Size | File Size per Second |
| 320 × 240 10 sec. | 2.7 MB 270 KB/sec. | ||
| 160 × 120 30 sec. | 2.7 MB 90 KB/sec. |
File Numbers
Images are automatically assigned file numbers from 0101 to 9900 and stored in folders containing up to 100 images. Folders are assigned numbers from 101 to 998. (The sample images on the supplied memory card are saved in the [100canon] folder.)
You can choose to use consecutive file numbers (CONTINUOUS) or to reset the file number each time a different memory card is inserted (RESET). We recommend setting the file numbers to CONTINUOUS.
CONTINUOUS
The camcorder memorises the file number of the last image and assigns the consecutive file number to the next image, even when a new memory card is inserted. (If a higher file number already exists on the memory card, the consecutive number will be assigned.) There will be no duplication of file numbers. This is useful for organizing images on a computer.
RESET
The file number will be reset each time a new memory card is inserted, starting with 101-0101. If the memory card already contains image files, the consecutive file number will be assigned.
E
When you record 3 images on the supplied memory card.
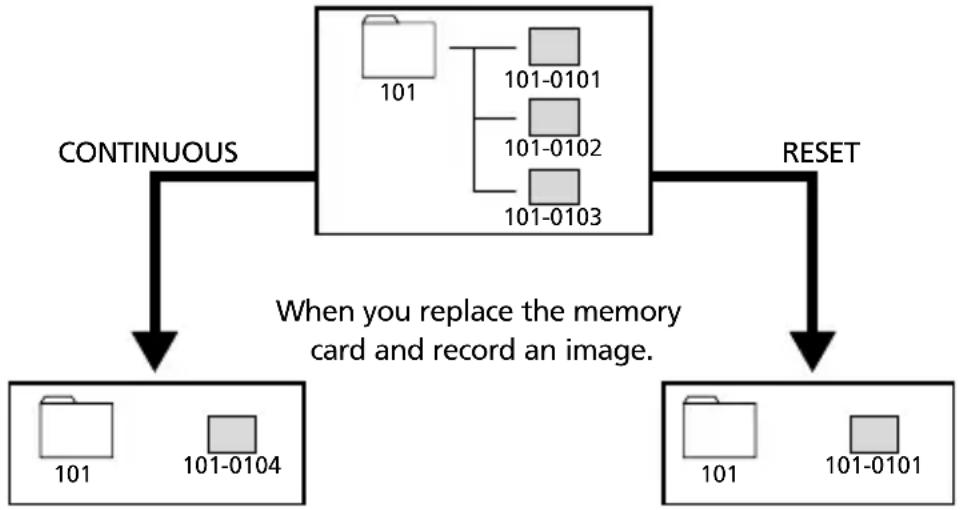
flowchart
graph TD
    A["101"] --> B["101-0101"]
    A --> C["101-0102"]
    A --> D["101-0103"]
    E["101"] --> F["101-0104"]
    G["101"] --> H["101-0101"]
    I["101"] --> J["101-0103"]
    K["When you replace the memory card and record an image."] --> L["CONTINUOUS"]
    M["RESET"] --> N["RET"]

text_image
CAMERA PLAY (VCR) CARD CAMERA CARD PLAY (VCR) MENU (43) CARD SET UP FILE NOS. . . . CONTINUOUSTo change the setting, open the menu and select [CARD SET UP]. Select [FILE NOS.], set it to [RESET] and close the menu.
Recording Still Images on a Memory Card
You can record still images with the camcorder, from a tape in the camcorder (104), or from devices connected via the DV terminal or AV terminal (105).
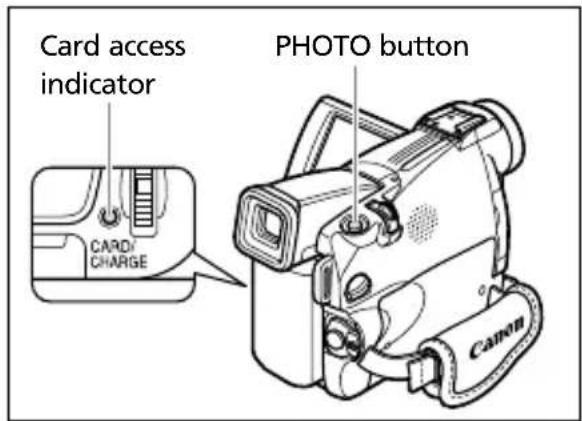
text_image
Card access indicator CARD/ CHARGE PHOTO button Canon
Do not turn off the camcorder, disconnect the power source or remove the memory card while the card access display (<< or >>>) in the upper right corner of the screen or the card access indicator is flashing. Doing so could result in data damage.
When you are using a SD Memory Card, make sure that the protect switch is set to allow recording.

Make sure to insert a memory card with enough remaining capacity.
Recording with the Camcorder

flowchart
graph LR
    A["PLAY (VCR)CAMERA"] --> B["CARD CAMERA"]
    B --> C["CARD PLAY (VCR)"]
1. Set the camcorder to CARD CAMERA mode.
The remaining image capacity and other information appear.
2. Press the PHOTO button halfway.
- ● flashes in white and turns green when focus is adjusted.
- Exposure is locked.
- When you press the PHOTO button on the wireless controller, recording starts immediately.
3. Press the PHOTO button fully.
- You hear a shutter sound, and the screen appears as if a shutter has been released.
• The card access indicator flashes.
- The still image shown on the screen will be recorded on the memory card.
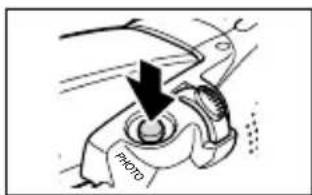
text_image
PHOTO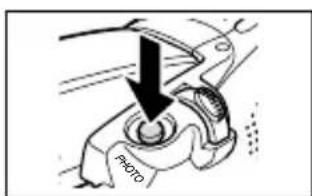
text_image
PHOTO
To use the self-timer (69), press the (sel&timer) button before step 2 and press the PHOTO button fully.
Recording from a Tape in the Camcorder
You can record images from a tape in the camcorder as still images on a memory card.
E
CAMERA
PLAY (VCR)
CARD CAMERA
CARD PLAY (VCR)
- Set the camcorder to PLAY (VCR) mode.
- Play back the tape.
-
Press the PHOTO button halfway when the scene you wish to record appears.
-
The camcorder pauses playback. The remaining image capacity and other information appear.
-
When you press the PHOTO button on the wireless controller, recording starts immediately.
-
Press the PHOTO button fully.
-
The card access indicator flashes.
- The still image shown on the screen will be recorded on the memory card.
- You can also record a still image by pressing the PHOTO button fully when the tape is in playback pause mode.

OA still image recorded from an image in 16:9 format will be vertically compressed.
The data code of the still image will reflect the date and time it has been recorded on the memory card.
- There will be no shutter sound in PLAY (VCR) mode.
The image size of a still image recorded from a tape in the camcorder will be 640 ×480.
Recording from Other Video Devices
You can record images from devices connected via the S-video terminal or AV terminal (analog line-in function), or via the DV terminal as still images on a memory card.

When recording via the AV terminal, make sure that "AV →DV" is displayed on the screen. When recording via the DV terminal, make sure that "AV →DV" is not displayed. Change the setting as necessary (92).
CAMERA
PLAY (VCR)
CARD CAMERA
CARD PLAY (VCR)
1. Connect the camcorder to the video device.
- S-video/AV terminal: See Playing Back on a TV Screen (☐ 39).
- DV terminal: See Connecting a Digital Video Device (☐ 87).
2. Set the camcorder to PLAY (VCR) mode.
If a cassette is loaded, make sure the tape is stopped.
3. Connected device: Load a recorded cassette and play back the tape.
4. Press the PHOTO button halfway when the scene you wish to record appears.
- The still image, remaining image capacity and other information appear.
- When you press the PHOTO button on the wireless controller, recording starts immediately.
5. Press the PHOTO button fully.
- The card access indicator flashes.
- The still image shown on the screen will be recorded on the memory card.

OA still image recorded from an image in 16:9 format will be vertically compressed.
The data code of the still image will reflect the date and time it has been recorded on the memory card.
○There will be no shutter sound in PLAY (VCR) mode.
- The image size of a still image recorded from other video devices will be 640 ×480.
Recording Panoramic Images (Stitch Assist Mode)

E
You can shoot a series of overlapping images and merge them into one large panoramic scene using the supplied software (PhotoStitch) on a computer.
When Recording in Stitch Assist Mode:
PhotoStitch detects the overlapping portion of adjoining images and merges them. Try to include a distinctive item (landmark, etc.) in the overlapping portion.

text_image
Mathematical diagram showing addition of two house icons to a single house, followed by a transformation arrow.
flowchart
graph LR
    A["PLAY (VCR)CAMERA"] --> B["CARD CAMERA"]
    B --> C["CARD PLAY (VCR)"]
- Set the camcorder to CARD CAMERA mode.
- Press the button.
text_image
MIX/ SLIDE SHOW- Select the direction with the CARD +/- button.
CARD + button: clockwise. CARD - button: anticlockwise.
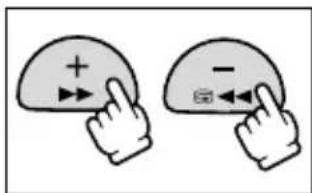
text_image
Diagram showing two hand gestures pointing to a curved surface with plus and minus signs, indicating directional movement or navigation.- Select the program AE mode and zoom on the subject.
Adjust focus and AE shift manually as necessary. Once the sequence has started, you cannot change the program AE mode, AE shift, zoom or focus.
- Press the PHOTO button to record the first image.
Direction and number of recorded images appear.
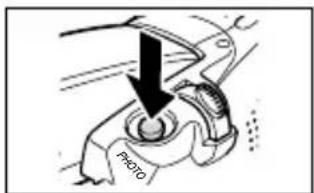
text_image
PATO-
Record the second image so that it overlaps a portion of the first image.
-
Minor discrepancies in the overlapped area can be corrected with the software.
- You can retake an image by pressing the CARD – button to return to the previous image.
-
A maximum of 26 images can be recorded.
-
Press the button after the last image.
For details on how to merge these images, refer to the DIGITAL VIDEO SOLUTION DISK Software Instruction Manual.
text_image
MIX/ SLIDE SHOW
○Compose each image so that it overlaps 30 to 50% of the adjoining image. Try to keep the vertical misalignment within 10%.
Do not include moving subject in the overlapping portion.
Do not try to stitch images that include both distant and close subjects. They may appear warped or doubled up.
E
E
You can record Motion JPEG movies with the camcorder, from a tape in the camcorder (109), or from devices connected via the AV terminal (analog line-in) or the DV terminal (109).

Do not turn off the camcorder, disconnect the power source or remove the memory card while the card access display (<< or >>>) in the upper right corner of the screen or the card access indicator is flashing. Doing so could result in data damage.
When you are using a SD Memory Card, make sure that the protect switch is set to allow recording.
Do not load/unload a cassette during recording.

OMake sure to insert a memory card with enough remaining capacity.
The sound of a movie recorded on a memory card will be monaural.
Recording with the Camcorder
PLAY (VCR) CAMERA CARD CAMERA
CARD PLAY (VCR)
- Set the camcorder to CARD CAMERA mode.
- Press the start/stop button to begin recording.
You can record up to 10 seconds in 320 × 240 and up to 30 seconds in 160 × 120 .
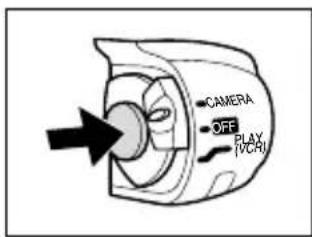
text_image
CAMERA OFF PLAY (VCRI)- Press the start/stop button to stop recording.
The camcorder starts writing the movie on the memory card.

To use the self-timer, press the (self-timer) button before step 2 (69) and press the start/stop button.
Recording from a Tape in the Camcorder
You can record movies from a tape in the camcorder on a memory card.
CAMERA
PLAY (VCR)
CARD PLAY (VCR)CAR
EAME
- Set the camcorder to PLAY (VCR) mode.
- Play back the tape.
- Press the start/stop button when the scene you wish to record appears.
You can record up to 10 seconds in 320 × 240 and up to 30 seconds in 160 × 120 .
- Press the start/stop to stop recording.

OA movie recorded from an image in 16:9 format will be vertically compressed.
- The data code of the movie will reflect the date and time it has been recorded on the memory card.
Recording from Other Video Devices
You can record movies from devices connected via the S-video terminal or AV terminal (analog line-in function), or via the DV terminal on a memory card.
CAMERA
PLAY (VCR)
CARD CAMERA
CARD PLAY (VCR)
-
Connect the camcorder to the video device.
-
S-video/AV terminal: See Playing Back on a TV Screen (☐ 40).
-
DV terminal: See Connecting a Digital Video Device (87).
-
Set the camcorder to PLAY (VCR) mode.
If a cassette is loaded, make sure the tape is stopped.
-
Connected device: Load a recorded cassette and play back the tape.
-
Press the start/stop button when the scene you wish to record appears.
You can record up to 10 seconds in 320 × 240 and up to 30 seconds in 160 × 120 .
- Press the start/stop button to stop recording.

OA movie recorded from an image in 16:9 format will be vertically compressed.
- The data code of the movie will reflect the date and time it has been recorded on the memory card.
E
You can play back memory card images on the LCD screen, viewfinder screen, or on a connected TV screen (see Playing Back on a TV Screen (☐ 39)).
You can display a single image (single image display 110), 6 at one time (index screen 111), or one after another (slide show 111). Use the Card Jump function to quickly locate an image without displaying them one by one (112).

Images not recorded with this camcorder, uploaded from a computer (except the sample images 131), edited on a computer and images whose file names have been changed may not be played back correctly.
- Still images not recorded with this camcorder may not be printed correctly on a Bubble Jet Printer with the direct print function.
Do not turn off the camcorder, disconnect the power source or remove the memory card while the card access display (<<) in the upper right corner of the screen or the card access indicator is flashing. Doing so could result in data damage.

OMake sure to insert a memory card that contains images.
○Only date and time will be displayed when pressing the DATA CODE button.
OYou can enlarge still images by 2 times during playback (81).
Single Image Display
PLAY (VCR) CAMERA CARD CAMERA
CARD PLAY (VCR)
- Set the camcorder to CARD PLAY (VCR) mode.
• The last recorded image appears.
- MV650i Movies are displayed with the first scene as a still image indicated by "▶/II".
- Press the CARD+/- button to move between images.
Press the CARD + button to display the next image and the CARD - button to display the previous image.
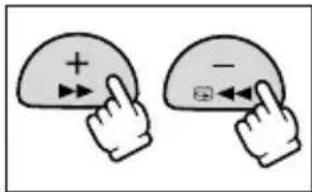
text_image
Two hand-drawn diagrams showing finger positions on a circular object with plus and minus signs, likely illustrating a basic math or logic concept.- MV650i To play back a movie, press the ▶/|| button.
The last scene appears as a still image when playback is complete.
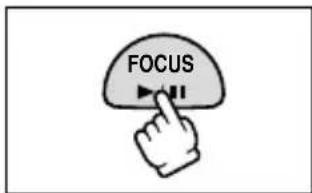
text_image
FOCUS
text_image
CARD CAMERAPLAY (CARD) Cramer (VCR)-
In single image display, press the index screen) button.
-
Up to 6 images appear.
-
IMV650i are displayed with the first scene as a still image indicated by "
-
Press the CARD +/- button to change the image selection.
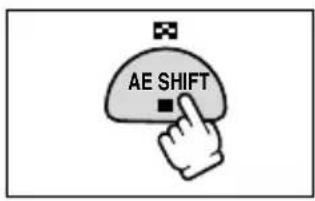
text_image
AE SHIFT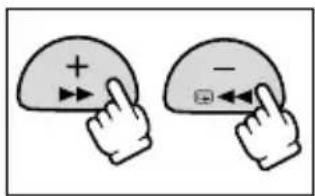
text_image
Diagram showing two hand gestures pointing at a circular diagram with plus and minus signs, indicating directional movement or navigation.-
Move the mark to the image you wish to view.
-
Turn the selector dial up to move to the next image and down to move to the previous image.
- Turning the selector dial up on the last image displays the next index screen. Turning the selector dial down on the first image displays the previous index screen.
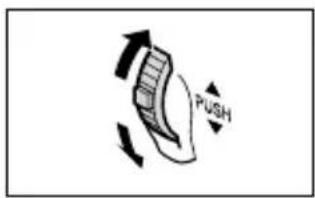
text_image
PUSH- Press the index screen) button.
The index screen is cancelled and the selected image appears in single image display.
text_image
AE SHIFTSlide Show

text_image
PLAY (VCR)CAMERA CARD CAMERA CARD PLAY (VCR)- In single image display, press the SLIDE SHOW button.
Images are played back one after another.
text_image
MIX/ SLIDE SHOW- Press the SLIDE SHOW button to stop the slide show.
Card Jump Function
You can locate still images/movies without displaying them one by one. The number in the upper right of the screen indicates the image number of the current image by the total number of images.
PLAY (VCR) CAMERA CARD CAMERA
CARD PLAY (VCR)
In single image display, press and hold the CARD + or CARD - button.
- Press the CARD + button to jump forward and the CARD – button to jump backward.
- When you release the button, the still image/movie of the displayed image number appears.

text_image
Two hand-drawn diagrams showing finger positions on a circular object with plus and minus signs, likely illustrating visual or instructional elements.You can protect important images from accidental erasure during single image display or index screen display.

If a memory card is formatted, all images, even protected ones, will be erased permanently.

- The sample images recorded on the supplied SD Memory Card are already protected.
ONMV650i an only be protected when the first or last scene is displayed as a still image. They cannot be protected during playback pause.
○Make sure to insert a memory card that contains images.
Protecting during Single Image Display

text_image
CARD CAMERAPLAY (CARD) CREAM (VCR)- Select the image you wish to protect.
- Press the selector dial to open the FILE OPERATION menu.
-
Select [PROTECT _m
-
" 🔍 appears and now the image cannot be erased.
-
To cancel the protection, press the selector dial.
-
Select [←RETURN] to close the menu.
Protecting during Index Screen Display

flowchart
graph LR
    A["PLAY (VCR) CAMERA"] --> B["CARD CAMERA"]
    B --> C["CARD PLAY (VCR)"]
    D["MENU (43)"] --> E["CARD OPERATIONS"]
    E --> F["PROTECT ON"]
- In single image display, press the index screen) button.
Up to 6 images appear.
- Open the menu and select [CARD OPERATIONS].
- Select [→PROTECT ○].
-
Select the image you wish to protect and press the selector dial.
-
"O" appears on the image.
- Repeat this step to protect more images.
-
To cancel the protection, press the selector dial.
-
Press the MENU button.

To cancel the protection, press the selector dial in step 4. "O" disappears and the image can now be erased.
You can erase images singly or all at once.

Be careful when erasing images. Erased images cannot be recovered.

○Protected images cannot be erased.
ON MV650i an only be erased when the first or last scene is displayed as a still image. They cannot be erased in playback pause mode.
○Make sure to insert a memory card that contains images.
Erasing a Single Image

text_image
CARD CAMERAPLAY (CARD) CAMERA CARD PLAY (VCR)- Select the image you wish to erase.
- Press the selector dial to open the FILE OPERATION menu.
-
Select [IMAGE ERASE].
-
"ERASE THIS IMAGE?", [NO] and [YES] appears.
-
If an image is protected, [YES] appears in purple.
-
Select [YES].
The image is erased and the previous image appears.
- Select [←RETURN] to close the menu.
Erasing a Single Image/All Images

flowchart
graph LR
    A[" "] --> B["PLAY (VCR)CAMERA"]
    B --> C["CARD CAMERA"]
    C --> D["CARD PLAY (VCR)"]
MENU
(43)

flowchart
graph LR
    A[" "] --> B["IMAGE ERASECARD OPERATIONS"]
- Open the menu and select [CARD OPERATIONS].
- Select [IMAGE ERASE].
-
Select [SINGLE] or [ALL].
-
When erasing a single image: "ERASE THIS IMAGE?" [NO] and [YES] appears. If an image is protected, [YES] appears in purple.
-
When erasing all images: "ERASE ALL IMAGES? [EXCEPT FOR IMAGES]", [NO] and [YES] appears.
-
Select [YES] and close the menu.
-
When erasing a single image: The image is erased and the previous image appears. To erase another image, select the image with the CARD +/- button and select [YES].
- When erasing all images: All images with exception of the protected images are erased.
Selecting Still Images for Printing (Print Order)
You can select still images for printing and set the number of copies. These print order settings are compatible with the Digital Print Order Format (DPOF) standards.

○Make sure to insert a memory card that contains images.
OA maximum of 200 still images can be selected.
ON MV650i cannot be printed.
Selecting in Single Image Display

text_image
CARD CAMERAPLAY (CARD) CAMERA CARD PLAY (VCR)- Select the still image you wish to print.
- Press the selector dial to open the FILE OPERATION menu.
- Select [PRINT ORDER].
- Select the number of copies.
- “” appears on the image.
- To cancel the print order, set the number of copies to 0.
- Select [←RETURN] to close the menu.
Selecting in Index Screen Display

flowchart
graph LR
    A["PLAY (VCR)CAMERA"] --> B["CARD CAMERA"]
    B --> C["CARD PLAY (VCR)"]

flowchart
graph LR
    A["MENU (43)"] --> B["PRINT ORDERCARD OPERATIONS"]
- In single image display, press the index screen) button.
Up to 6 images appear.
- Open the menu and select [CARD OPERATIONS].
- Select [→PRINT ORDER].
- Select the still image you wish to print and press the selector dial.
- Set the number of copies with the selector dial and close the menu.
- “” appears on the image.
- To cancel the print order, set the number of copies to 0.
- Repeat steps 4 and 5 to continue the print order setting.
Erasing All Print Orders
PLAY (VCR) CAMERA CARD CAMERA
CARD PLAY (VCR)
MENU
(43)
CARD OPERATIONS

PRINT ORDERS ALL ERASE
- In single image display, open the menu and select [CARD OPERATIONS].
- Select [PRINT ORDERS ALL ERASE].
"ERASE ALL PRINT ORDERS?", [NO] and [YES] appears.
- Select [YES].
All "disappear.
- Select [←RETURN] to close the menu.
Printing with the Direct Print Function
You can print still images by connecting the camcorder to a Canon Bubble Jet Printer with Direct Print function. The Direct Print function can also be used with the print order settings (115).

Observe the following precautions during printing, otherwise printing may not be performed correctly.
- Do not turn off the camcorder or the printer.
- Do not change the position of the TAPE/CARD switch.
- Do not detach the cable.
- Do not remove the memory card.

○Canon Bubble Jet Printers with Direct Print function (as of January 2003): S830D, S820D, S530D.
We recommend powering the camcorder from a household power source.
○Refer also to the instruction manual of the respective printer.
Connecting the Printer to the Camcorder
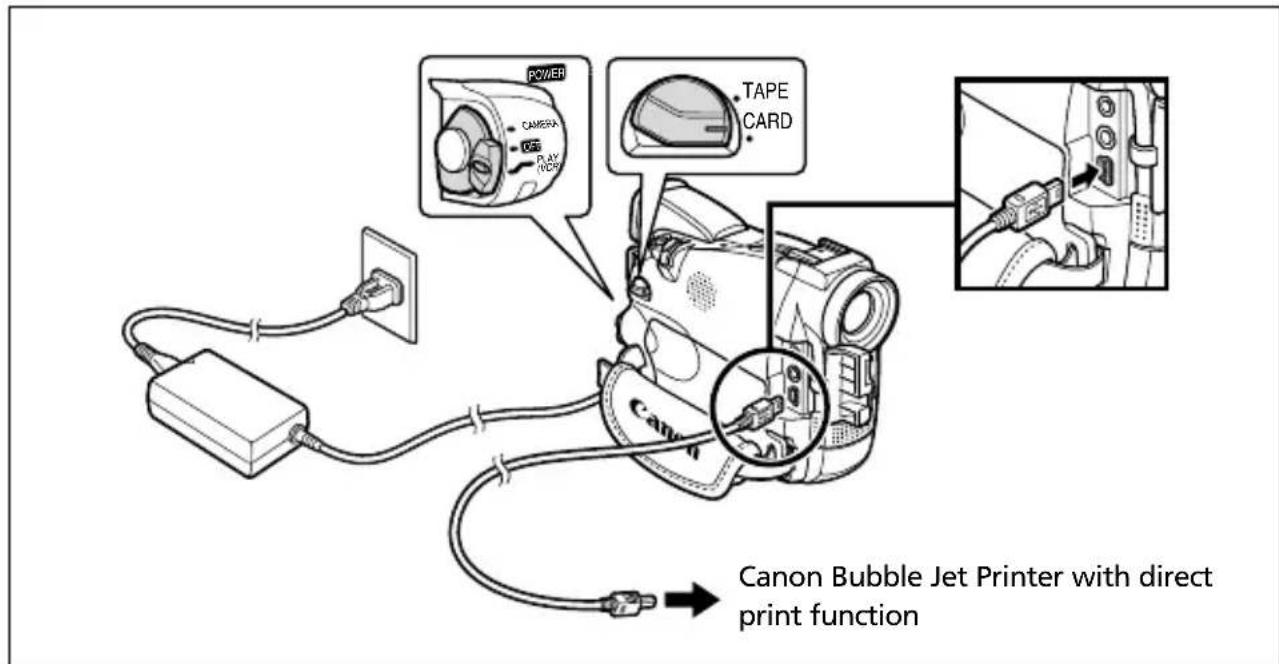
text_image
POWER CAMERA PLAY (VDS) TAPE CARD Canon Bubble Jet Printer with direct print function-
Turn off the camcorder and insert a memory card that contains images.
-
Connect a power source to the printer and turn on the printer.
-
Set the camcorder to CARD PLAY (VCR) mode.
Wait until the card access indicator stops flashing.
- Connect the camcorder to the printer using the cable.
Print 3 T appears when the printer is properly connected to the camcorder. (Does not appear with movies, or still images that cannot be played back with the camcorder.)
Printing
PLAY (VCR) CAMERA CARD CAMERA
CARD PLAY (VCR)
- In single image display, select the still image you wish to print and press the selector dial.
The print setting menu appears.
-
Set the number of copies and the print style.
-
Selecting the Number of Copies.
-
Setting the Print Style.
-
Select [Print] and press the selector dial.
Printing starts. The print setting menu disappears when printing is complete.
text_image
Current Forward Preview
text_image
Cerom Dorsano How do you'll
If an error message appears, see Printing Errors (120) and Direct Print Related Messages (139).
Selecting the Number of Copies
A maximum of 9 copies can be selected for one still image.
- In the print setting menu, turn the selector dial so that appears next to [Copies] and press the selector dial.
text_image
Forward Down Paste Cancel- Turn the selector dial to select the number of copies and press the selector dial.
Setting the Print Style
| Paper Size Card #1*, Card #2*, Card #3*,LTR, A4For details on paper type, refer to the Bubble Jet Printer User Guide. | |
| Borders B | Borderless Prints right to the edges of the page |
| Bordered Prints with a border | |
* Recommended paper size
Selecting the paper size:
- In the print setting menu, turn the selector dial to select [Style] and press the selector dial.
text_image
STYLE Paper CopyE
- Make sure that is selected and press the selector dial.
text_image
TITLE 按钮 确定-
Turn the selector dial to select the paper size and press the selector dial.
-
Press the MENU button.
You return to the print setting menu.
Selecting the Borders:
- In the print setting menu, turn the selector dial to select [Style] and press the selector dial.
text_image
STYLE Standard Baseline- Select and press the selector dial.
text_image
STAYL Borders OK OK-
Select a setting option and press the selector dial.
-
Press the MENU button.
You return to the print setting menu.

☐ Bordered: The image area remains relatively unchanged from the recorded image when it is printed.
- Borderless: The centre portion of the recorded image is printed at an enlarged size. The image's top, bottom and sides may be cropped slightly.
Printing with Print Order Settings
You can print still images you have selected with the Print Order function. If you wish to print more than 1 copy, set the number of copies in the print order (115).
PLAY (VCR) CAMERA CARD CAMERA
CARD PLAY (VCR)
MENU
(43)
- Connect the printer to the camcorder (117).
- Press the MENU button.
-
Select [→PRINT].
-
The print setting menu appears.
- "Set print order" appears, when you connect a printer with direct print function and select [→PRINT] without having set the print order.
-
The total number of prints set in the print order is displayed on the upper left of the screen.
-
Set the print style.
Setting the Print Style (118).
- In the print setting menu, select [OK] and press the selector dial.
Printing starts. The print setting menu disappears when printing is complete.

○Cancel Printing
Press the selector dial while "Now Printing" is displayed. A confirmation dialog appears. Select [OK] and press the selector dial. Printing stops even if it is incomplete and the paper is fed through.
○Restarting Printing (with printer order only)
Open the CARD PLAY (VCR) menu and select [→ PRINT]. Select [Restart] in the print setting menu and press the selector dial. The remaining images will be printed.
Printing cannot be restarted in the following cases:
- When you change the print order settings.
- When you delete a still image with print order settings.
○Printing Errors
If an error occurs during the printing process, an error message appears (139). With most errors, printing resumes automatically after you correct the error. If the error persists, press the selector dial to cancel printing.
○Follow below procedure when disconnecting the interface cable:
- Disconnect the cable from the camcorder and printer.
- Turn off the camcorder.
You can produce effects not possible with just a tape with the Card Mix function. Choose one of the sample images provided on the supplied SD Memory Card (such as picture frames, backgrounds and animations) and combine it with the live video recording.

○Card Mix cannot be used in the Night and Super Night (MV650i) mode.
ONMV650i recorded on a memory card cannot be combined with camcorder recordings.

○Make sure to load a cassette and to insert a memory card that contains card mix images.
○Additional sample images are provided on the supplied DIGITAL VIDEO SOLUTION DISK. For instructions on how to upload them to the memory card, refer to Adding Still Images from Your Computer to the Memory Card in the DIGITAL VIDEO SOLUTION DISK Software Instruction Manual.
○Reselect the card mix image when you have turned off the camcorder or changed the position of the program selector.
Card Mix Effects
You can select from the following 4 types of Card Mix effects:
Card Chroma Key (CARD CHROMA)
Combines frames with your recordings. The live video recording will appear in place of the blue area of the card mix image. If you create your own frame, make sure that the area the live recording should appear is blue.
Mix level adjustment: blue area of the still image.
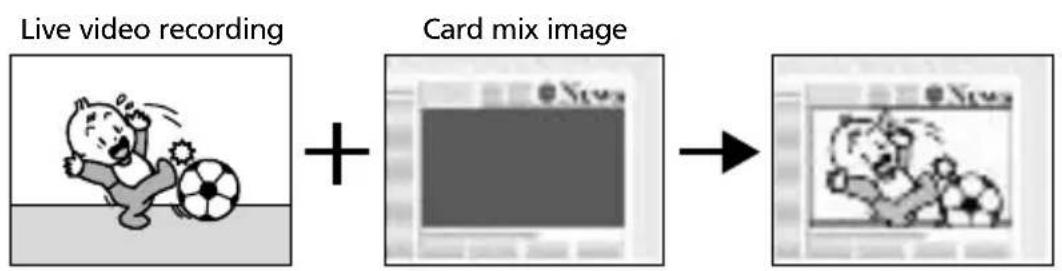
flowchart
graph LR
    A["Live video recording"] --> B["Card mix image"]
    B --> C["Final Display with cartoon characters"]
Card Luminance Key (CARD LUMI.)
Combines illustrations or title with your recordings. The live video recording will appear in place of the light area of the card mix image. You can create your own title or illustration by drawing on a white paper and recording it to the memory card.
Mix level adjustment: light area of the still image.
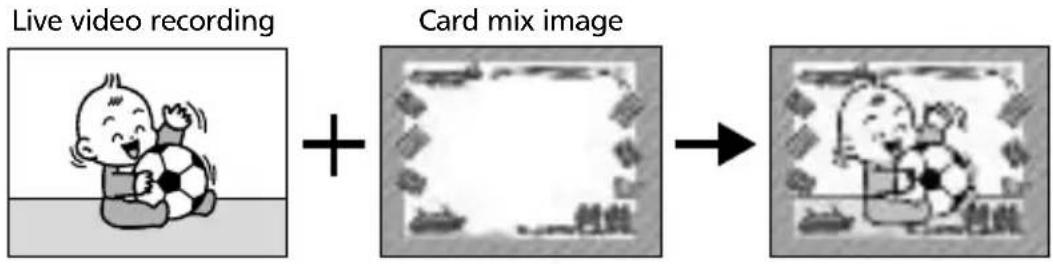
flowchart
graph LR
    A["Live video recording"] --> B["Card mix image"]
    B --> C["Output"]
Camera Chroma Key (CAM. CHROMA)
Combines backgrounds with your recordings. Record your subject in front of a blue curtain, and the subject not blue will be superimposed on the card mix image.
Mix level adjustment: blue area of the live video recording.

text_image
Live video recording + Card mix image →Card Animation (C. ANIMATION)
Combines animations with your recordings. You can choose from 3 types of card animation effects.
Corner: Animation appears on the upper left and the lower right corner of the screen.
Straight: Animation appears on the top and bottom of the screen and moves to the right and left.
Random: Animation moves randomly in the display.
Mix level adjustment: blue area of the card animation image.

flowchart
graph LR
    A["Live video recording"] --> B["Card mix image"]
    B --> C["Product image"]
Selecting the Card Mix Effect

flowchart
graph LR
    A["CAMERA"] --> B["PLAY (VCR)"]
    B --> C["CARD CAMERA"]
    C --> D["CARD PLAY (VCR)"]
    E["MENU (43)"] --> F["CARD MIX"]
    F --> G["MIX TYPE...CARD CHROMA"]
    G --> H["MIX LEVEL..."]
- Set the program selector to P.
text_image
Diagram showing a circular icon with an 'G' and a square with a letter 'P' pointing to it, indicating a parking-related symbol.- Open the menu and select [→ CARD MIX].
The card mix menu appears.
- Select the image you wish to combine with the CARD +/- button.
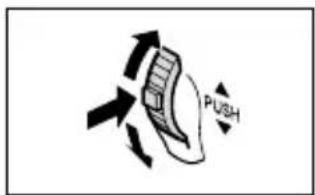
text_image
PUSH- Select [MIX TYPE].
[CARD CHROMA], [CARD LUMI.], [CAM. CHROMA] and [C. ANIMATION] appears.
- Select the mix type matching the image you have selected (131).
• The screen shows the combined image.
- When you have selected [C. ANIMATION], select [ANIMAT. TYPE] and select between [CORNER], [STRAIGHT] and [RANDOM].
-
To adjust the mix level, select [MIX LEVEL] and adjust it with the selector dial.
-
Close the menu.
"CARD MIX" flashes.

text_image
MENUActivating the Card Mix Effect
- Press the CARD MIX button.
- "CARD MIX" stops flashing.
• The combined image appears.
- You can activate and deactivate the card mix effect by pressing the CARD MIX button.
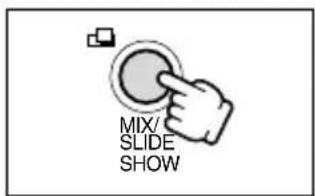
text_image
MIX/ SLIDE SHOWRecording with the Card Mix Effect
Movie:
- Press the start/stop button to begin recording.
The combined image is recorded on the tape.
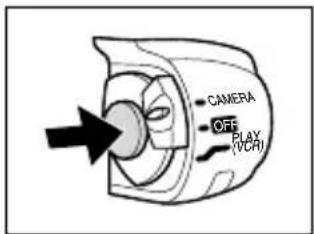
text_image
CAMERA OFF PLAY PLAY- Press the start/stop button to end recording.
Still Image:
- Press the PHOTO button halfway.
●flashes in white and turns green when focus is adjusted.
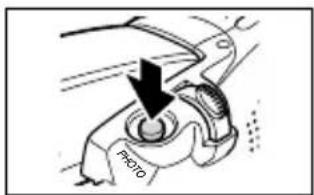
text_image
PHOTO- Press the PHOTO button fully.
- The camcorder records the still image on the tape for approx. 6 seconds. During this time, the camcorder displays the still image and keeps recording the sound.
- The camcorder returns to record pause mode.
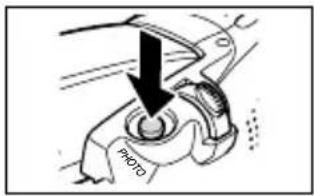
text_image
PHOTOYou can copy still images from tape to memory card, or from memory card to tape.

OAll still images from the selected still image onward will be copied.
- The image size of a still image copied from tape to memory card will be 640 × 480.
The data code of the still image reflects the date and time it has been copied.
Copying Still Images from Tape to Memory Card
Insert a memory card with enough remaining capacity, and load a recorded cassette.

text_image
CAMERA PLAY (VCR) CARD CAMERA CARD PLAY (VCR)
flowchart
graph LR
    A["MENU (43)"] --> B["→ COPY CARD → OPERATIONS"]
-
Locate the still image you wish to copy on the tape and stop the tape shortly before the still image.
-
You can also use the photo search function to easily locate the still image.
- To copy all still images from the tape, rewind the tape to the beginning.
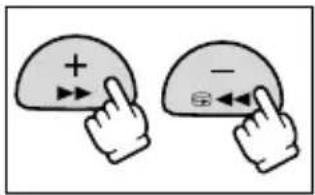
text_image
Illustration showing two hands pointing at a curved surface with plus and minus signs, indicating directional movement or movement.- Open the menu and select [CARD OPERATIONS].
- Select [COPY [→]].
[CANCEL] and [EXECUTE] appears.
-
Select [EXECUTE].
-
"NOW COPYING" appears.
- The still image being copied is shown on the screen.
-
Copying stops when the tape reaches the end or the memory card is full ("CARD FULL" appears).
-
Press the ■ (stop) button to end copying.
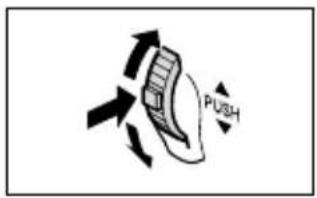
text_image
PUSH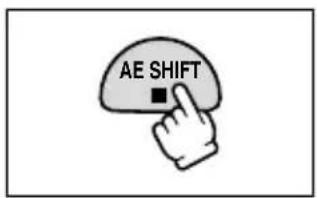
text_image
AE SHIFTCopying Still Images from Memory Card to Tape
Load a cassette with enough free space, and insert a recorded memory card. Make sure that the protect tab on the cassette is set to allow recording.

flowchart
graph LR
    A["PLAY (VCR) CAMERA"] --> B["CARD CAMERA"]
    B --> C["CARD PLAY (VCR)"]
    D["MENU (43)"] --> E["CARD OPERATIONS"]
    E --> F["COPY [ "]]
- Select the first still image you wish to copy with the CARD +/- buttons.
To copy all still images from the memory card, select the first still image.
-
Open the menu and select [CARD OPERATIONS].
-
Select [COPY [☐ → ☐] ].
[CANCEL] and [EXECUTE] appears.
-
Select [EXECUTE].
-
"NOW COPYING" appears.
- It takes about 6 seconds per still image to be copied to the tape.
- Copying stops when all still images are copied or the tape is full.
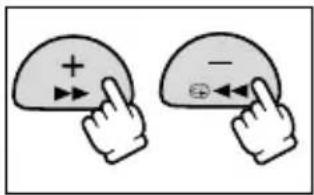
text_image
Two hand-drawn diagrams showing finger pressing on a dome-shaped object with plus and minus signs, likely illustrating a basic concept or logic puzzle.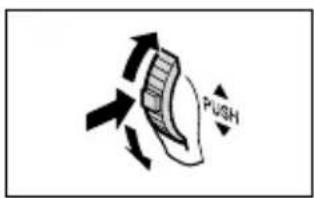
text_image
PUSH- Press the ■ (stop) button to end copying.
text_image
AE SHIFTFormat new memory cards, or when you get the message "CARD ERROR". You can also format a memory card to erase all images recorded on it.
The camcorder formats memory cards in the Design rule for Camera File system (DCF) standard.

○Formatting a memory card erases all data, including protected images.
○Images erased by formatting cannot be recovered.
If you use a memory card other than the supplied one, format it with the camcorder.
○Makes sure to insert the memory card you wish to format into the camcorder.

PLAY (VCR) CAMERA CARD CAMERA
CARD PLAY (VCR)
MENU
(43)

FORMATCARD OPERATIONS
- Open the menu and select [CARD OPERATIONS].
- Select [FORMAT].
[CANCEL] and [EXECUTE] appears.
- Select [EXECUTE].
[FORMAT THIS CARD?], [NO] and [YES] appears.
-
Select [YES] and close the menu.
-
Formatting starts.
- Selecting [NO] brings you back to step 3.
Connecting to a Computer Using a USB Cable
E
You can download images from the memory card to a computer using the supplied USB cable. With the supplied software, you can easily download, browse and archive images, and arrange still images for printout.
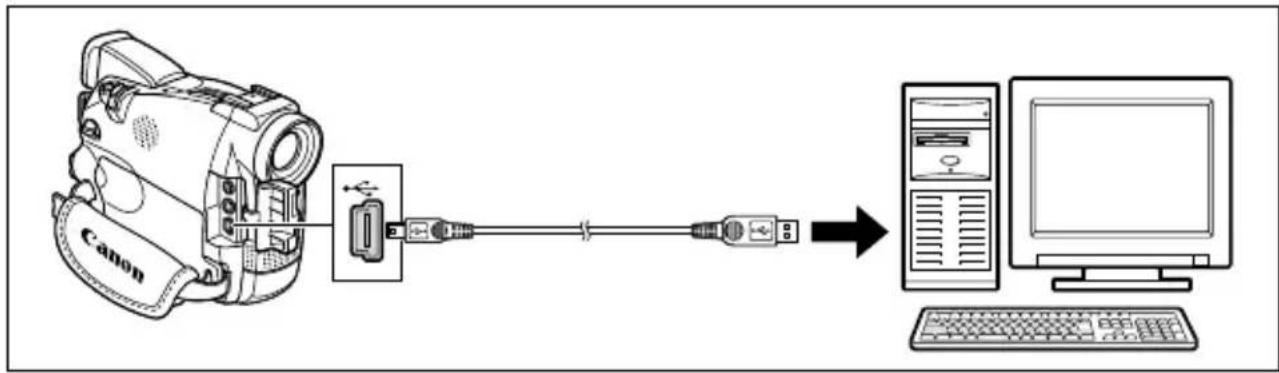
flowchart
graph LR
    A["Canon"] --> B["USB cable"]
    B --> C["Computer"]
For instructions on how to connect the camcorder to the computer, and install and operate the software, refer to the DIGITAL VIDEO SOLUTION DISK Software Instruction Manual.
- Refer also to the computer instruction manual.
- "PC CONNECT 🔍 appears to indicate that the camcorder is connected to the computer via USB cable.
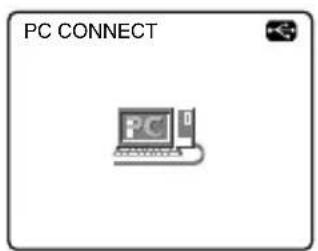
text_image
PC CONNECT
Do not disconnect the USB cable, remove the memory card, change the position of the POWER switch or turn off the camcorder and computer while data is being transferred to the computer (while the camcorder's card access indicator is flashing). Doing so may damage the memory card's data.
Operation may not work correctly depending on the software and the specifications/settings of your computer.
The image file on your memory card and the image files saved on the hard disk drive of your computer are valuable, original data files. If you wish to use image files on your computer, make copies of them first, and use the copied file, retaining the original.

We recommend powering the camcorder from a household power source while it is connected to the computer.
OTMV650i-up buttons turn off during USB connection.
☐For transferring recordings from to a computer using a DV cable, see p. 98.
- Still images/movies recorded on a tape cannot be transferred to a computer via USB interface.
You can create a start-up image using a still image on the memory card or a sample start-up image provided on the DIGITAL VIDEO SOLUTION DISK and save it as [MY IMAGE].

○Make sure to insert a memory card with enough remaining capacity.
Before you create a start-up image, you need to record a still image on the memory card.
- Retain the original data of the still image you have set as the start-up image on your computer or removable disk.
Preparations
Record a still image on the memory card.
OR
Upload a still image from your computer to the memory card using the software in the DIGITAL VIDEO SOLUTION DISK.
For instruction on how to upload a still image to the memory card, refer to Adding Still Images from Your Computer to the Memory Card in the DIGITAL VIDEO SOLUTION DISK Software Instruction Manual.
Setting the Still Image as Start-up Image

flowchart
graph LR
    A["PLAY (VCR) CAMERA"] --> B["CARD CAMERA"]
    B --> C["CARD PLAY (VCR)"]
    D["MENU (43)"] --> E["CREATE START-UP IMAGEMY CAMERA"]
- Open the menu.
- Select [MY CAMERA].
- Select [CREATE START-UP IMAGE].
[SET THIS AS START-UP IMAGE?], [YES] and [NO] appears.
- Select a still image with the CARD +/- buttons and select [YES].
[OVERWRITE MY IMAGE?], [YES] and [NO] appears.
- Select [YES].
The still image will be saved, and the image that was saved to [MY IMAGE] is erased.
E
Images recorded on a memory card with this camcorder can be transferred to a computer using the following products for SD Memory Cards or MultiMediaCards:
PC Card Adapter: An adapter to insert a memory card into the card slot on the computer.
USB Reader/Writer: Connects to the USB port of a computer for direct access to the memory card.
FD Adapter: An adapter to insert a memory card into the floppy disk drive on the computer.
Memory Cards that are confirmed to operate with this camcorder (as of January 2003):
SD Memory Card: Panasonic: 16 MB, 32 MB, 64 MB, 128 MB, 256 MB, 512 MB SanDisk: 16 MB, 32 MB, 64 MB
MultiMediaCard: SanDisk: 16 MB, 32 MB, 64 MB
However, we cannot guarantee that all of these memory cards work properly.
Memory Card Handling Precautions
○Format new memory cards with the camcorder. Memory cards formatted with other devices such as a computer may not operate correctly.
We recommend saving backups of memory card images on your computer's hard drive or other external memory device. Image data may be corrupted or lost due to memory card defects or exposure to static electricity. Canon Inc. makes no warranties for corrupted or lost data.
- Do not turn off the camcorder, disconnect the power source or remove the memory card while the card access indicator is flashing.
○Do not use memory cards in places subject to strong magnetic fields.
Do not leave memory cards in places subject to high humidity and high temperature.
○Do not disassemble memory cards.
Do not bend, drop, or subject memory cards to shocks and do not expose them to water.
○Moving a memory card rapidly between hot and cold temperatures may cause condensation to form on its external and internal surfaces. If condensation forms on the card, put it aside until the droplets have evaporated completely.
○Do not touch or expose the terminals to dust or dirt.
○Store and carry memory cards in the supplied case to protect the terminals.
○Check the direction before inserting the memory card. Forcing a memory card backwards into the slot may damage the memory card or the camcorder.
Do not remove the label from the memory card, or affix other labels on the memory card. If you wish to add labels, affix them to the case.
Sample Images
27 sample images are pre-recorded on the supplied SD Memory Card: 8 card chroma key images, 5 card luminance key images, 2 camera chroma key images and 12 card animation images.
Card Chroma Key
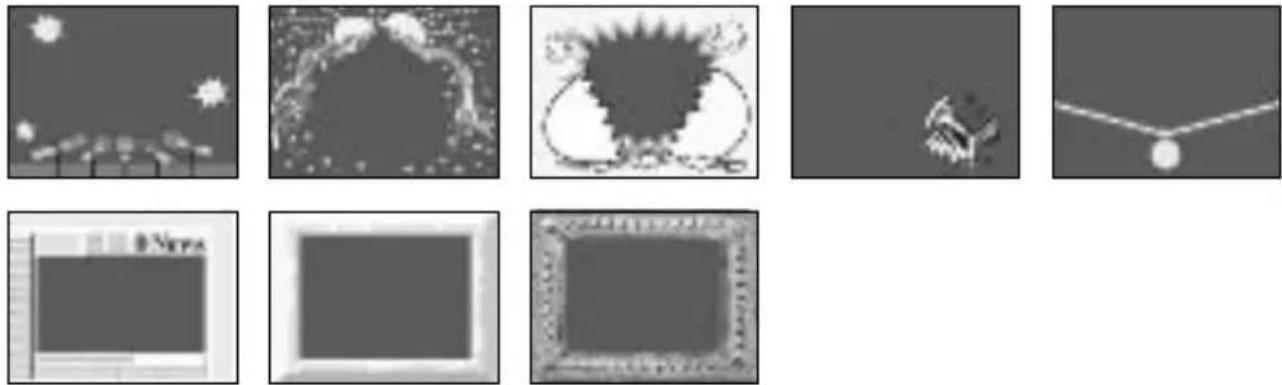
Card Luminance Key

Camera Chroma Key
natural_image
Two grayscale aerial or satellite views of a landscape with cloud formations (no text or symbols visible)Card Animation
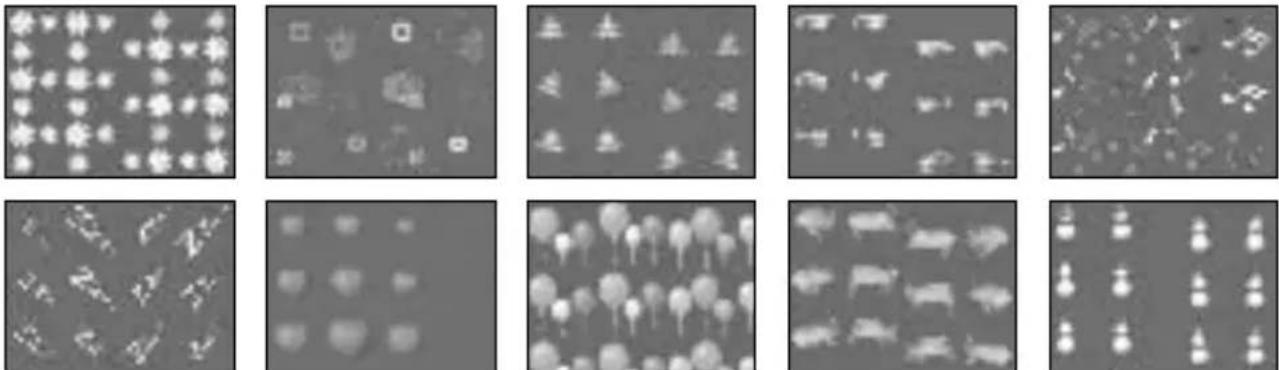
natural_image
Abstract pattern of white butterfly-like shapes on a dark background (no text or symbols)Using a Memory Card
MVB650! MVB630!


The sample images recorded on the supplied SD Memory Card are intended only for the personal use with this camcorder. Do not use these sample images for other purposes.

If you have mistakenly erased the Card Mix sample images on the supplied SD Memory Card, they can be downloaded from the following homepages:
http://www.canon-europa.com/products/products.html
http://www.canon-asia.com/
http://www.canon.com.au
For details on how to add the downloaded images to the memory card, refer to Adding Still Images from Your Computer to the Memory Card in the DIGITAL VIDEO SOLUTION DISK Software Instruction Manual.
If you cannot use the USB cable to connect the camcorder to a computer, you will need a PC Card Adapter to upload the images to a memory card.
PhotoEssentials – Royalty Free Stock Photography
The PhotoEssentials suite of royalty-free images on CD-ROM features premium quality assignment photography and is ideally suited for use in advertising, brochures, reports, multimedia, websites, books, packaging and more.
For more information, please visit their website www.photoessentials.com
LCD Screen Displays
You can hide the displays on the LCD screen to have a clear screen for playback.

flowchart
graph LR
    A["CAMERA"] --> B["PLAY (VCR)"]
    B --> C["CARD CAMERA"]
    C --> D["CARD PLAY (VCR)"]
    E["MENU (43)"] --> F["DISPLAY...ONDISPLAY SET UP"]
Open the menu and select [DISPLAY SET UP]. Select [DISPLAYS], set it to [OFF ] and close the menu.
- The LCD screen will become completely blank (also the TV screen if connected).
- Warning messages still appear, and the data code appears if turned on.
- Tape operation displays appear for 2 seconds.
- [MV650i] (MV630i) e hidden on the index screen.
TV Screen Displays
When you connect a TV for recording/playback, you can hide the displays on the TV screen. For connecting instructions, see Playing Back on a TV Screen (☐ 39).

text_image
CAMERA CARD PLAY (VCR)CPress the TV SCREEN button on the wireless controller.
- When the POWER switch is set to CAMERA: The displays disappear from the TV screen and appear when you press the button again.
- When the POWER switch is set to PLAY (VCR): The displays appear on the connected TV screen and disappear when you press the button again. The setting resets to the OFF setting when you turn the camcorder off.
When the TV screen displays are hidden, the displays still appear on the LCD screen. If you turn on the data code, displays other than the data code will disappear from the LCD screen.
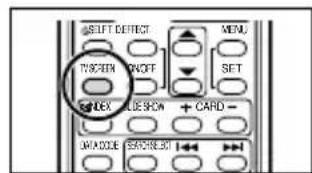
text_image
SHIFT DEFECT TYPICAL PACIFIC SET ON LUX CLESH ON + CARD - ON LUX CLESH ON + ON LUX CLESH ONYou can also change the setting in the menu during recording:

text_image
CAMERA PLAY (VCR) CARD CAMERA CARD PLAY (VCR)
text_image
MENU (43) TV SCREEN...ONDISPLAY SET UPOpen the menu and select [DISPLAY SET UP]. Select [TV SCREEN], set it to [OFF] and close the menu.
Screen Displays during Basic Recording/Playback

indicates flashing.
E
CAMERA mode (battery pack attached):
- Remote sensor mode and audio mode disappear after 4 seconds.
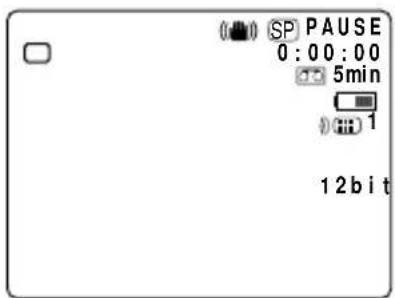
text_image
SP PAUSE 0:00:00 5min 1 12 bitPLAY (VCR) mode:
- Remote sensor mode and volume bar disappear after 4 seconds.
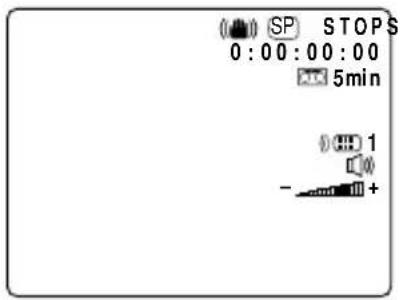
text_image
SP STOPS 0:00:00:00 5min 1 - +| REC | / | : Fast forward playback/rewind playback (36) | RTN ▶/ ◀RTN: Zero set memory (forward and reverse) (85) |
| PAUSE | |||
| STOP | ×2 ▶ / ◀×2 | : ×2 playback(forward and reverse) (36) | |
| EJECT | ×1 ▶ / ◀×1 | : ×1 playback(forward and reverse) (36) | ●/ ● || : AV insert editing (93)* |
| FF▶▶ | ●/ ● || : Audio dubbing (95) | ||
| ◀◀REW | ▶/ ◀ | : Slow playback(forward and reverse) (36) | |
| || ▶ / ◀ || | : Frame advance playback/frame reverse playback (36) | ||
| ▶ || / || ◀ | : Playback pause(forward and reverse) (36) | ||
| ▶▶ / ◀◀ | : Date search/photo search (84) | * Not available with the MV600. |
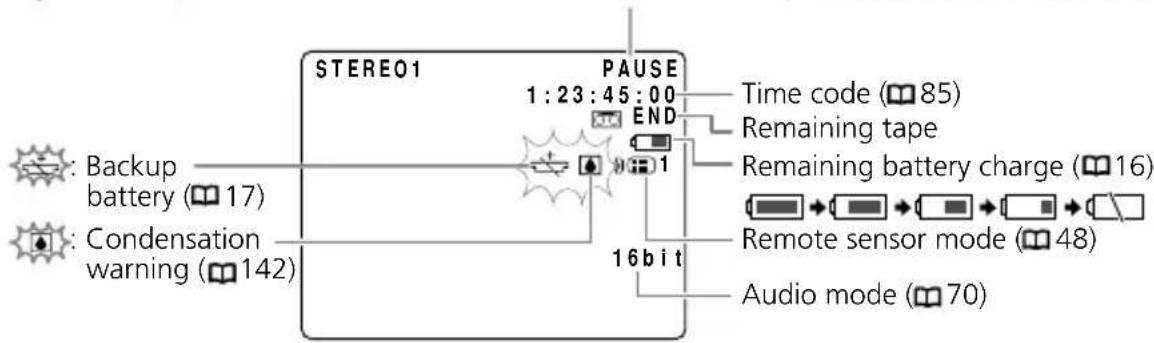
flowchart
graph TD
    A["STEREO1"] --> B["BACKUP battery (17)"]
    A --> C["CONDENSATION warning (142)"]
    A --> D["PAUSE 1:23:45:00"]
    D --> E["END"]
    E --> F["TIME code (85)"]
    E --> G["Remaining tape"]
    E --> H["Remaining battery charge (16)"]
    A --> I["16 bit"]
    A --> J["Audio mode (70)"]
Screen Displays during Advanced Recording/Playback
CAMERA Mode
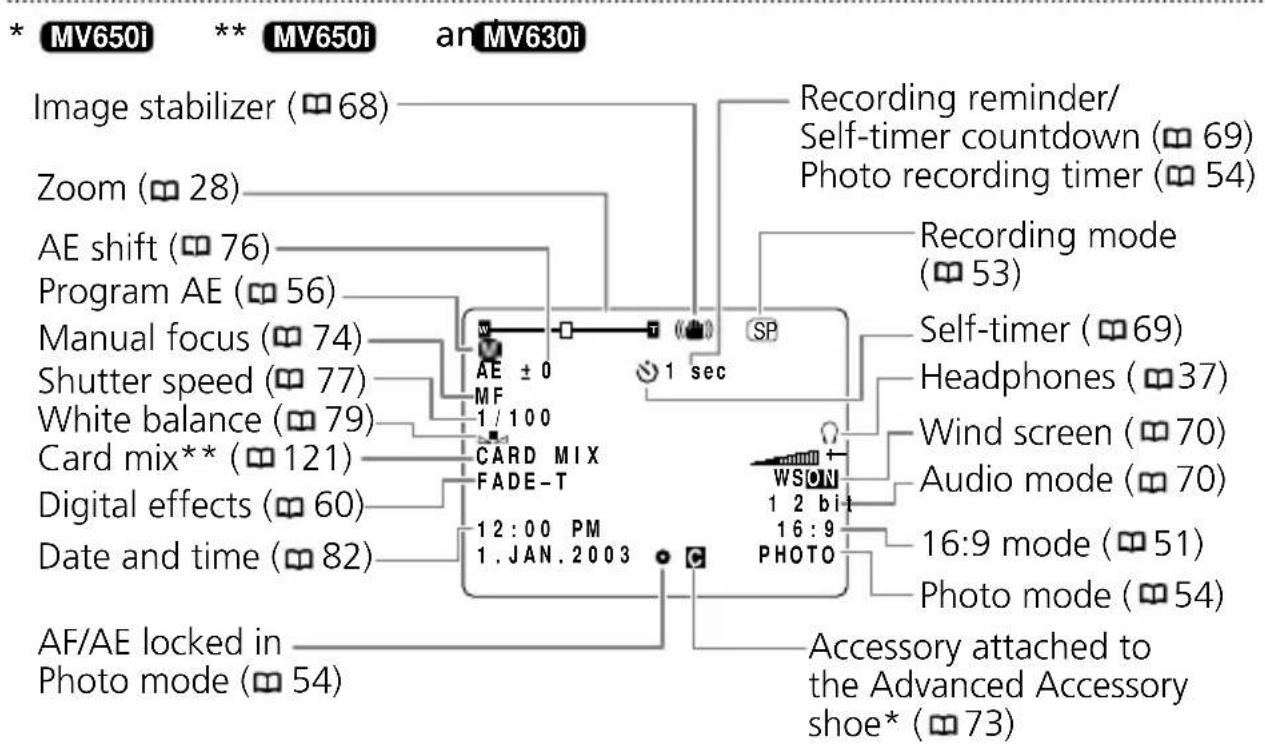
flowchart
graph TD
    A["Image stabilizer (68)"] --> B["Recording reminder/ Self-timer countdown (69)"]
    C["Zoom (28)"] --> B
    D["AE shift (76)"] --> E["Photo recording timer (54)"]
    F["Program AE (56)"] --> E
    G["Manual focus (74)"] --> H["AE ± 0"]
    I["Shutter speed (77)"] --> H
    J["White balance (79)"] --> K["1 / 100"]
    L["Card mix** (121)"] --> M["CARD MIX"]
    N["Digital effects (60)"] --> O["FADE-T"]
    P["Date and time (82)"] --> Q["12:00 PM"]
    R["AF/AE locked in Photo mode (54)"] --> S["1. JAN. 2003"]
    T["Sp"] --> U["Self-timer (69)"]
    V["Headphones (37)"] --> W["WSON 1 2 bit"]
    X["Wind screen (70)"] --> Y["Audio mode (70)"]
    Z["16:9 mode (51)"] --> AA["Photo mode (54)"]
    AB["Accessory attached to the Advanced Accessory shoe* (73)"] --> AC["Photely placed"]
PLAY (VCR) Mode
* Not available with the MV600.
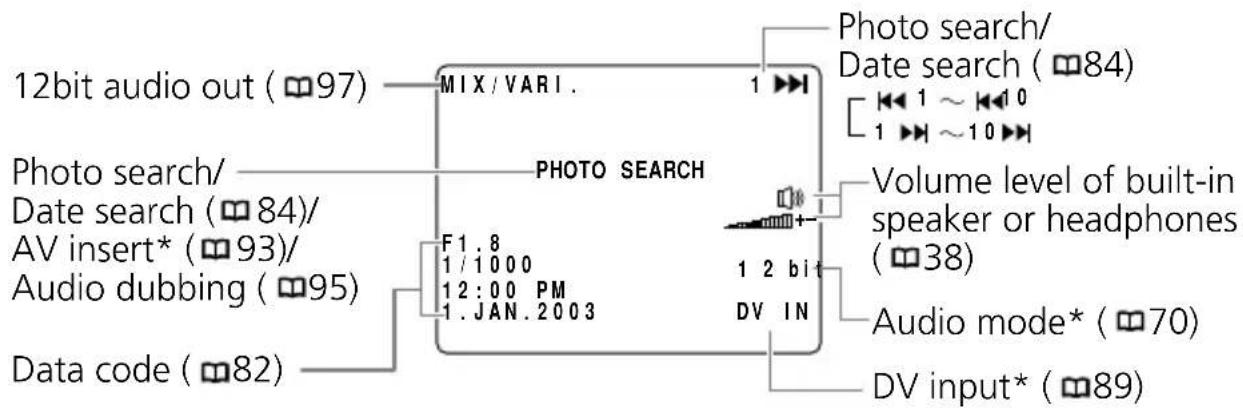
flowchart
graph TD
    A["12bit audio out (97)"] --> B["MIX / VARI."]
    C["Photo search/Date search (84)/AV insert* (93)/Audio dubbing (95)"] --> D["PHOTO SEARCH"]
    E["Data code (82)"] --> F["F 1 : 8\n1 / 1000\n12 : 00 PM\n1 .JAN .2003"]
    B --> G["1"]
    D --> H["1 2 bit"]
    H --> I["DV IN"]
    J["Photo search/Date search (84)"] --> K["1 ~ 10\n1 ~ 10"]
    L["Volume level of built-in speaker or headphones (38)"] --> M["DV IN"]
    N["Audio mode* (70)"] --> O["DV input* (89)"]
\* MV650i
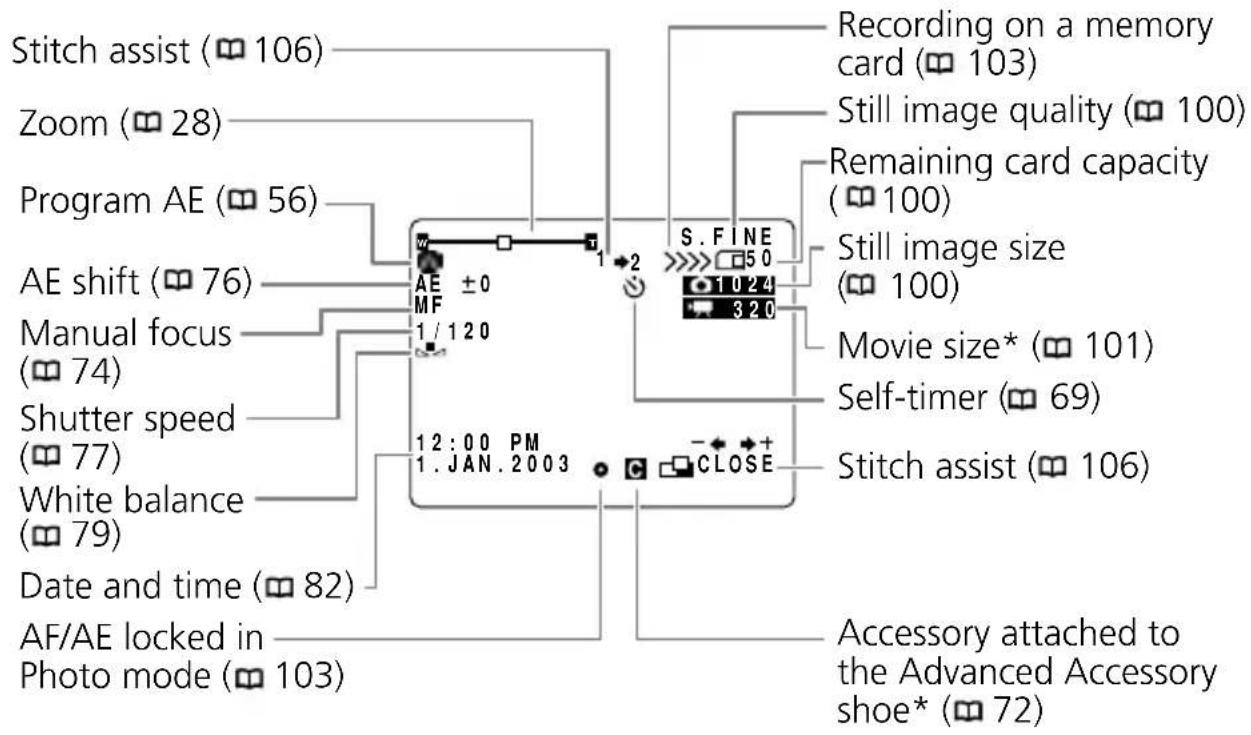
text_image
Stitch assist (106) Zoom (28) Program AE (56) AE shift (76) Manual focus (74) Shutter speed (77) White balance (79) Date and time (82) AF/AE locked in Photo mode (103) Recording on a memory card (103) Still image quality (100) Remaining card capacity (100) Still image size (100) Movie size* (101) Self-timer (69) Stitch assist (106) Accessory attached to the Advanced Accessory shoe* (72) 1 / 120 12:00 PM 1. JAN. 2003 S. FINE 50 1 U 24 3 20 CLOSEMV650i MV630i CARD PLAY (VCR) Mode
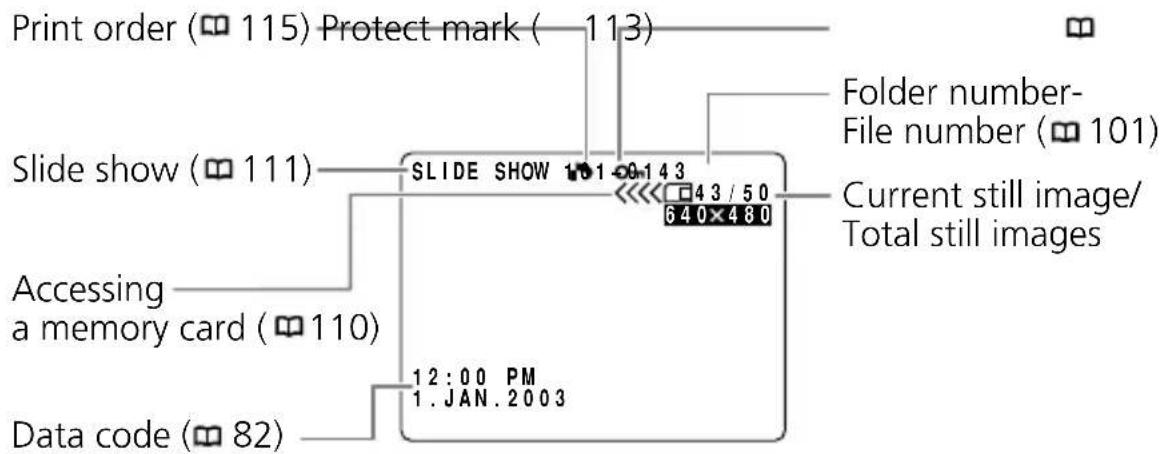
flowchart
graph TD
    A["Print order (115) Protect mark (113)"] --> B["Slide show (111)"]
    B --> C["SLIDE SHOW 101-00-143"]
    C --> D["Folder number-File number (101)"]
    D --> E["Current still image/Total still images"]
    F["Accessing a memory card (110)"] --> C
    G["Data code (82)"] --> C
    C --> H["640×480"]
    H --> I["12:00 PM\n1.JAN.2003"]
| Message Explanation | ☐ | |
| SET THE TIME ZONE, DATE AND TIME | You have not set the time zone, date and time. This message appears each time you turn the power on until you set the time zone, date and time. | 23 |
| CHANGE THE BATTERY PACK | Battery pack is exhausted. Replace or charge the battery pack. | 14 |
| THE TAPE IS SET FOR ERASURE PREVENTION | Cassette is protected. Replace the cassette or change the position of the protect switch. | 21 |
| REMOVE THE CASSETTE | Camcorder stopped operating to protect the tape. Unload and reload the cassette. | 20 |
| CHECK THE DV INPUT | DV cable is not connected, or the connected digital device is turned off. | 89 |
| CONDENSATION HAS BEEN DETECTED | Condensation has been detected in the camcorder. | 142 |
| TAPE END | Tape reached the end. Rewind the tape or replace the cassette. | 20 |
| CHECK THE CASSETTE [REC MODE] | You attempted to perform audio dubbing or AV insert on a tape recorded in a mode other than the SP mode. | 53 |
| CHECK THE CASSETTE [AUDIO MODE] | You attempted to perform audio dubbing on a tape recorded in 16-bit or 12-bit 4-channel sound. | 95 |
| CHECK THE CASSETTE [BLANK] | You attempted to perform audio dubbing or AV insert on a tape with a blank section. | 93 |
| COPYRIGHT PROTECTED PLAYBACK IS RESTRICTED | You attempted to play back a copyright protected tape. | 90 |
| COPYRIGHT PROTECTED DUBBING RESTRICTED | You attempted to dub a copyright protected tape. May also appear when an anomalous signal is received during analog line-in recording, or during analog-digital conversion of a copyright protected tape. | 90 |
MV650i MV630i Memory Card Related Messages
E
| Message Explanation | ||
| NO CARD | Memory card not is inserted into the camcorder. | 99 |
| THE TAPE IS SET FOR ERASURE PREVENTION | SD Memory Card is set for erasure prevention. Replace the card or change the position of the protect switch. | 99 |
| NO IMAGES | No images are recorded on the memory card. | 110 |
| CARD ERROR | A memory card error occurred. The camcorder cannot record or play back the image.The error may be temporary. If the message disappears after 4 seconds andflashes red, turn the camcorder off, remove the card and reinsert the card. Ifchanges to green, you can continue recording/playback. | 99 |
| CARD FULL | No remaining capacity on the memory card. Replace with another card or erase images. | 114 |
| NAMING ERROR | File or folder number has reached the maximum value. | 101 |
| UNIDENTIFIABLE IMAGE | Image is recorded in a not compatible JPEG format or another format not compatible with the camcorder, or the image file is corrupted. | 110 |
| PRINT ORDER ERROR | You attempted to set more than 200 still images in the print order. | 115 |
| THIS IMAGE CANNOT BE RECORDED | Some analog images cannot be recorded on the memory card depending on the signal. | 105 |
| Message Explanation | |
| No Paper | Paper cassette is not correctly inserted or is out of paper. |
| Paper Jam | The paper jammed during printing. |
| No Ink | The ink cartridge is not inserted or is out of ink. |
| Communication Error | The printer is experiencing a data transmission error. |
| Could not print X images | You attempted to use the print order settings to print X images that were made with another camcorder, have a different format or were edited on a computer. |
| Cannot Print! | You attempted to print an image that was made with another camcorder, has a different format, or was edited on a computer. |
| Set print order | You attempted to print an image from the CARD PLAY (VCR) menu [→→ PRINT] without having set the print order. |
| Printer in use | The printer is printing from a computer or a memory card inserted into the printer. It automatically starts printing from the camcorder when current prints are complete. |
| Printer warming up | Printer is warming up. The printer automatically starts printing when it is ready. |
| No printhead | No print head is installed in the printer. |
| Printer cover open | Printer cover is open. Close the printer cover securely. |
| Media type error | Wrong paper. Cancel printing and set the paper you chose in the print settings menu. |
| Paper lever error | Paper lever error occurred. Adjust the paper selection lever to the proper position. |
| Low ink level | The ink tank needs to be replaced soon. Prepare a new ink tank. If you select [Continue] in the error screen, you can restart printing. |
| Waste tank full | Waste tank is full. You can restart printing by pressing the RESUME/CANCEL button on the Bubble Jet Printer. Request replacement of the waste tank at the shop where you purchased the printer or the nearest Canon customer support centre listed in the Bubble Jet Quick Start Guide. |
| Printer error | Turn off the printer and turn it back on. If the error persists, consult the nearest Canon customer support centre listed in the Bubble Jet Quick Start Guide. |
E
Camcorder Handling Precautions
○Do not carry the camcorder by the LCD panel or viewfinder.
Do not leave the camcorder in places subject to high temperatures, such as a sun-heated car, and high humidity.
Do not use the camcorder in places subject to magnetic or electric fields such as near the TV transmitters or portable communication devices.
Do not point the lens or viewfinder at strong light sources. Do not leave the camcorder pointed at a bright subject.
Do not use the camcorder in dusty or sandy places. Dust or sand getting inside the cassette or camcorder may cause damage. Dust and sand can also damage the lens. Attach the lens cap after use.
- The camcorder is not waterproof. Water, mud or salt getting inside the cassette or camcorder may cause damage.
○Be careful of heat generated by lighting equipment.
Do not disassemble the camcorder. If the camcorder does not function properly, consult qualified service personnel.
○Handle the camcorder with care. Do not subject the camcorder to shocks or vibration as this may cause damage.
○Avoid sudden changes in temperature. Moving the camcorder rapidly between hot and cold temperatures may cause condensation to form on its internal surfaces (142).
Storage
☐ If you do not intend to use the camcorder for a long time, store it in a place free of dust, in low humidity, and at temperatures not higher than 86^ F ( 30^ C).
○After storage, check the functions of your camcorder to make sure that the camcorder is still working properly.
Cleaning
Camcorder Body and Lens
Use a soft, dry cloth to clean the camcorder body and lens. Never use chemically treated cloth or volatile solvents such as paint thinner.
LCD Screen
○Clean the LCD screen using a commercially available cleaning cloth for glasses.
○Condensation may form on the surface of the screen when the temperature changes suddenly. Wipe it with a soft dry cloth.
○At cold temperatures, the screen may be darker than usual. This is not a malfunction. The screen returns to normal when the camcorder warms up.
Viewfinder
○Rotate the viewfinder upward. Remove the protect cover and clean the glass with a cotton swab. Reattach the protect cover when finished.
○Be careful not to scratch the glass when cleaning.
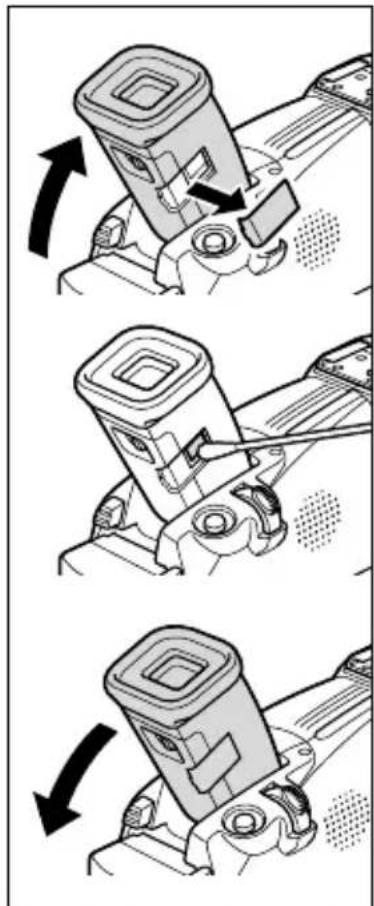
natural_image
Three-step diagram showing mechanical assembly steps with arrows indicating motion (no text or symbols)Video Heads
When the playback picture becomes distorted, the video heads need to be cleaned.
To maintain the best picture quality, we recommend cleaning the video heads frequently with the Canon DVM-CL Digital Video Head Cleaning Cassette or a commercially available dry cleaning cassette.
○Do not use wet type cleaning cassettes as this may damage the camcorder.
E
Condensation
Moving the camcorder rapidly between hot and cold temperature may cause condensation (water droplets) to form on its internal surfaces. Stop using the camcorder if condensation is detected. Continued use may damage the camcorder.
Condensation may form in the following cases:
When the camcorder is moved from an air-conditioned room to a warm, humid place
When the camcorder is moved from a cold place to a warm room
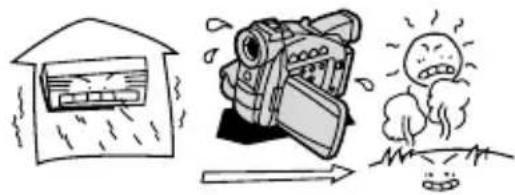
natural_image
Illustration showing a house with raindrops, a camera, and a smog on grass (no text or symbols)When the camcorder is left in a humid room

natural_image
Illustration of a snowman, a vintage film camera, and a small house with motion lines (no text or symbols)When a cold room is heated rapidly
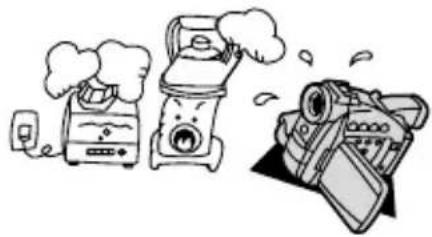
natural_image
Illustration of three cartoon kitchen appliances: a toaster, a blender, and a digital camera (no text or symbols)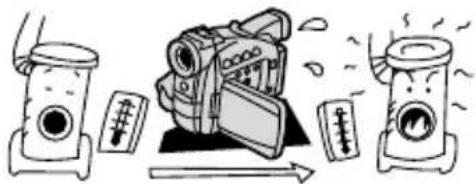
natural_image
Illustration of a portable radio emitting steam from a fan, with no text or symbols present.How to avoid condensation:
○Unload the cassette, place the camcorder in an airtight plastic bag and let it adjust to temperature changes slowly before removing it from the bag.
When condensation is detected:
The camcorder stops operating and the warning message "CONDENSATION HAS BEEN DETECTED" appears for approx. 4 seconds and starts flashing.
○ If a cassette is loaded, the warning message "REMOVE THE CASSETTE" appears and starts flashing. Remove the cassette immediately and leave the cassette compartment open. Leaving the cassette in the camcorder may damage the tape.
OA cassette cannot be loaded when condensation is detected.
Resuming use:
It takes about 1 hour until the water droplets evaporate. After the condensation warning stops flashing, wait for 1 more hour before resuming use.
Using the Camcorder Abroad
Power Sources
You can use the compact power adapter to operate the camcorder and to charge battery packs in any country with power supply between 100 and 240 V AC, 50/60 Hz. Consult the Canon Service Centre for information on plug adapters for overseas use.
Playback on a TV Screen
You can only play back your recordings on TVs with PAL system. The PAL system is used in the following countries/areas:
Algeria, Australia, Austria, Bangladesh, Belgium, Brunei, China, Denmark, Finland, Germany, Hong Kong Special Administrative Region, Iceland, India, Indonesia, Ireland, Italy, Jordan, Kenya, Kuwait, Liberia, Malaysia, Malta, Mozambique, the Netherlands, New Zealand, North Korea, Norway, Oman, Pakistan, Portugal, Qatar, Sierra Leone, Singapore, South Africa, Spain, Sri Lanka, Swaziland, Sweden, Switzerland, Tanzania, Thailand, Turkey, Uganda, United Arab Emirates, United Kingdom, Yemen, former Yugoslavia, Zambia.
Troubleshooting
E
If you have a problem with your camcorder, refer to this checklist. Consult your dealer or a Canon Service Centre if the problem persists.
Power Source
| Problem Cause Solution | |||
| Camcorder will not turn on. | Battery pack is exhausted. | Replace or charge the battery pack. | 14 |
| Battery pack is not correctly attached. | Attach the battery pack correctly. | 14 | |
| The camcorder switches off by itself. | Battery pack is exhausted. | Replace or charge the battery pack. | 14 |
| Power save function has been activated. | Turn on the camcorder. | 26 | |
| Cassette compartment will not open. | Battery pack is exhausted. | Replace or charge the battery pack. | 14 |
| Cassette compartment cover is not fully open. | Open the cassette compartment cover fully. | 20 | |
| Cassette compartment stopped during loading/unloading. | Battery pack is exhausted. | Replace or charge the battery pack. | 14 |
| The camcorder malfunctions. | Consult a Canon Service Centre. | - | |
| LCD/viewfinder switches on and off. | Battery pack is exhausted. | Replace or charge the battery pack. | 14 |
Recording/Playback
| Buttons will not work. | Camcorder is not turned on. | Turn on the camcorder. | 26 |
| Cassette is not loaded. | Load a cassette. | 20 | |
| flashes on the screen. | Battery pack is exhausted. | Replace or charge the battery pack. | 14 |
| flashes on the screen. | Condensation is detected. | See reference page. | 142 |
| "Remove the cassette" appears on the screen. | Camcorder stopped operating to protect the tape. | Unload and reload the cassette. | 20 |
| The wireless controller will not work. | Camcorder and wireless controller are not set to the same remote sensor mode. | Change the remote sensor modes. | 48 |
| Batteries of the wireless controller are exhausted. | Replace the batteries. | 22 |
Recording
| Problem Cause Solution | ☐ | ||
| Image will not appear on the screen. | Camcorder is not set to CAMERA mode. | Set the camcorder to CAMERA mode. | 26 |
| “Set the time zone, date and time” appears on the screen. | Time zone, date and time are not set, or the backup battery is exhausted. | Set the time zone, date and time, or replace the backup battery and reset the date and time. | 23 |
| Pressing the start/stop button will not start recording. | Camcorder is turned off. | Turn on the power. | 26 |
| Cassette is not loaded. | Load a cassette. | 20 | |
| Tape reached the end (END flashes on the screen). | Rewind the tape or replace the cassette. | 20 | |
| Cassette is protected (flashes on the screen). | Replace the tape or change the position of the protect switch. | 21 | |
| Camcorder is set to a mode other than the CAMERA mode. | Set the camcorder to CAMERA mode. | 26 | |
| Camcorder will not focus. | Autofocus does not work on that subject. | Focus manually. | 74 |
| Viewfinder is not adjusted. | Adjust the viewfinder with the diopter adjustment lever. | 18 | |
| Lens is dirty. | Clean the lens. | 140 | |
| A vertical light bar appears on the screen. | Bright light in a dark scene may cause a vertical light bar (smear) to appear. This is not a malfunction. | --- | - |
| Sound is distorted or recorded in a lower volume than the actual volume. | When recording near loud sound (such as fireworks, drums or concerts), sound may become distorted or may not be recorded in the actual sound level. This is not a malfunction. | --- | - |
| Viewfinder picture is blurred. | Viewfinder is not adjusted. | Adjust the viewfinder with the diopter adjustment lever. | 18 |
Playback
| Pressing the playback button does not start playback. | Camcorder is turned off, or is not set to PLAY (VCR) mode. | Set the camcorder to PLAY (VCR) mode. | 35 |
| Cassette is not loaded. | Load a cassette. | 20 | |
| Tape reached the end ( End flashes on the screen). | Rewind the tape. | 35 | |
| Image will not appear on the TV screen. | [AV/PHONES] is set to [PHONES] in the menu. | Set [AV/PHONES] to [AV] in the menu. | 37 |
| [AV → DV OUT] is set to [ON]. | Set [AV → DV OUT] to [OFF]. | 92 | |
| Tape is running, but image will not appear on the TV screen. | TV/VIDEO selector on the TV is not set to VIDEO. | Set the selector to VIDEO. | 41 |
| Video heads are dirty. | Clean the video heads. | 141 | |
| You attempted to play back or dub copyright protected tape. | Stop playback/dubbing. | 90 | |
| No sound from the built-in speaker. | Speaker volume is turned off. | Adjust the volume with the selector dial. | 38 |
MV650i MV630i Memory Card Operation
E
| Problem Cause Solution | ☐ | ||
| Memory card cannot be inserted. | Memory card was not facing the correct direction. | Turn the memory card over and reinsert it. | 99 |
| Memory card cannot be recorded. | Memory card is full. | Replace the memory card or erase images. | 114 |
| Memory card is not formatted. | Format the memory card. | 127 | |
| Memory card is not inserted. | Insert a memory card. | 99 | |
| File number reached maximum value. | Set [FILE NUMBERS] to [RESET] and insert a new memory card. | 101 | |
| SD Memory Card is protected. | Change the position of the protect switch. | 99 | |
| Memory card cannot be played back. | Camcorder is not set to CARD PLAY (VCR) mode. | Set the camcorder to CARD PLAY (VCR) mode. | 110 |
| Memory card is not inserted. | Insert a memory card. | 99 | |
| Image cannot be erased. | Image is protected. | Cancel the protection. | 113 |
| SD memory card is protected. | Change the position of the protect switch. | 99 | |
| ☒ flashes red. | Card error occurred. | Turn off the camcorder. Remove and reinsert the memory card. Format the memory card if flashing persists. | 127 |
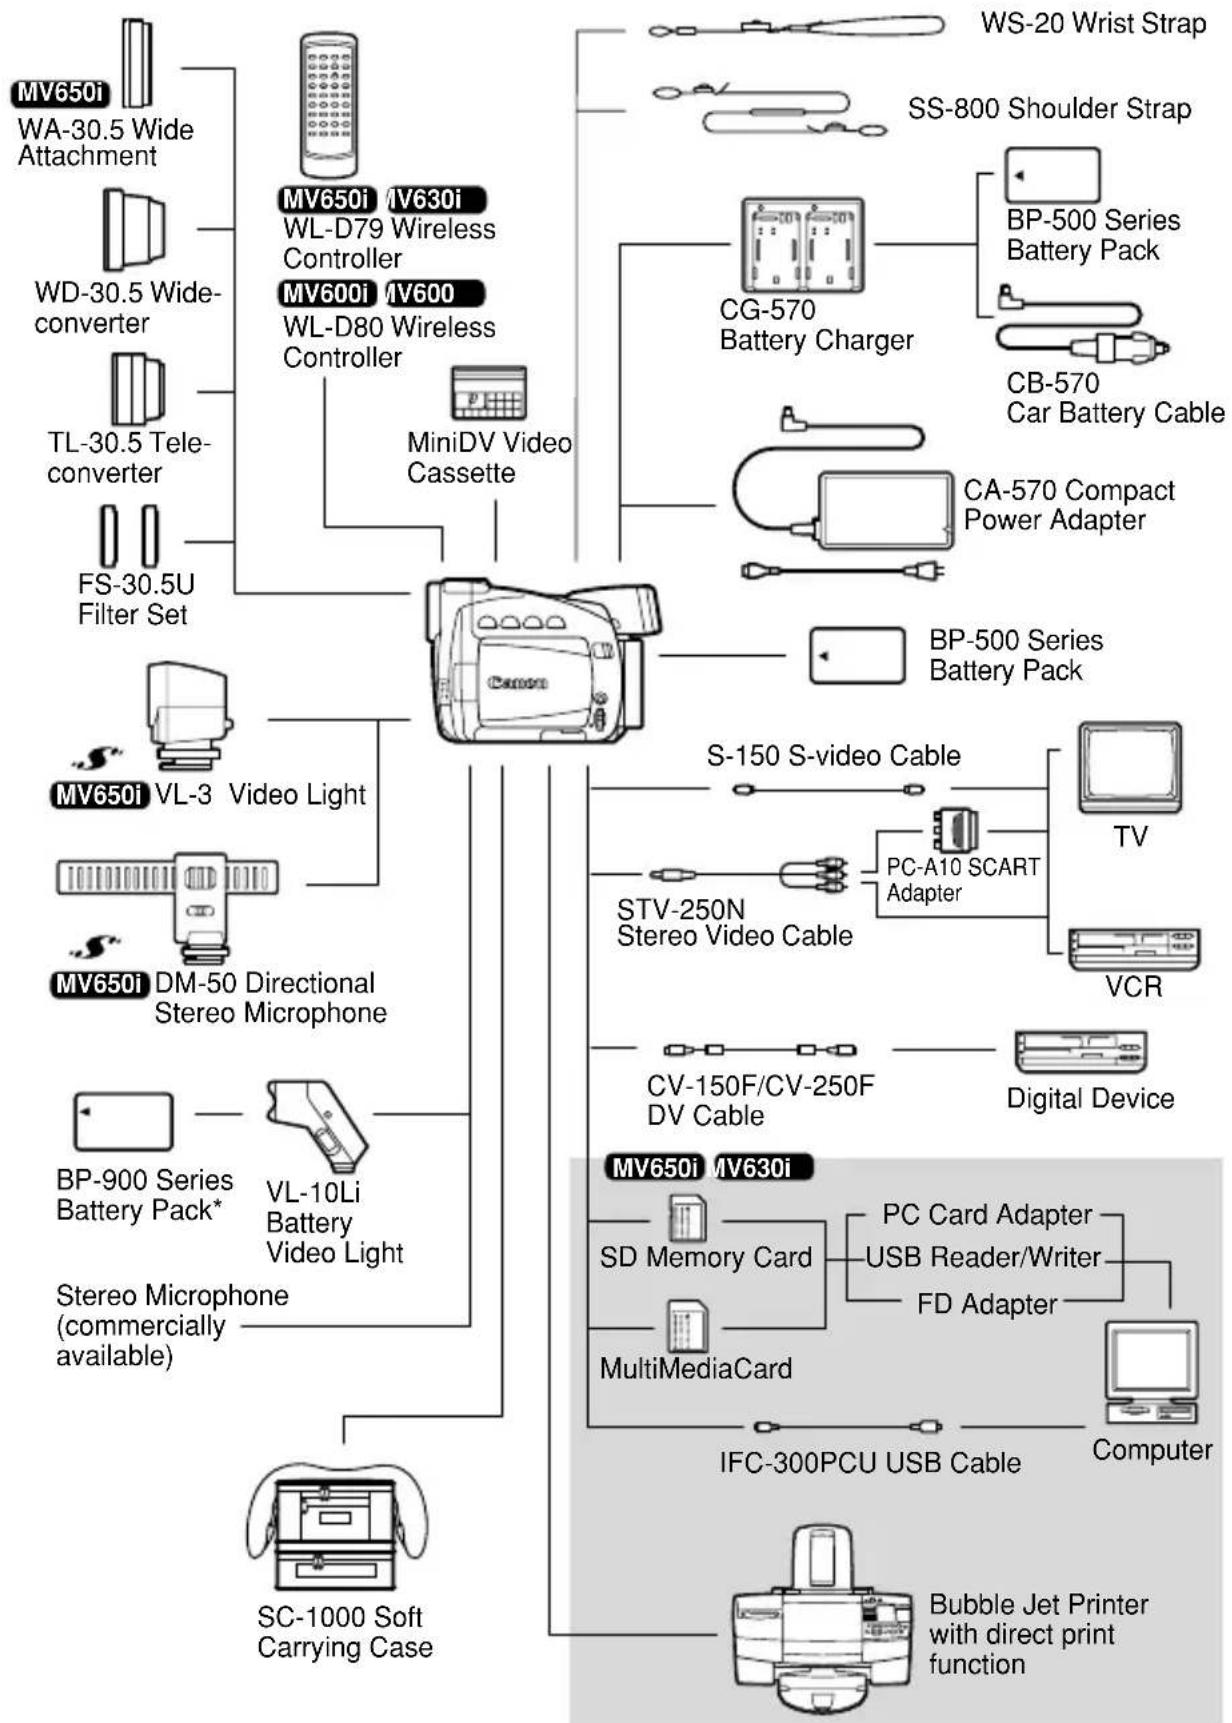
flowchart
graph TD
    A["Camera"] --> B["MiniDV Video Cassette"]
    A --> C["BP-500 Series Battery Pack"]
    A --> D["S-150 S-video Cable"]
    A --> E["STV-250N Stereo Video Cable"]
    A --> F["CV-150F/CV-250F DV Cable"]
    A --> G["Digital Device"]
    A --> H["MultiMediaCard"]
    A --> I["PC Card Adapter"]
    A --> J["USB Reader/Writer"]
    A --> K["FD Adapter"]
    A --> L["SD Memory Card"]
    A --> M["IFC-300PCU USB Cable"]
    A --> N["Computer"]
    A --> O["Bubble Jet Printer with direct print function"]
    P["MSV650i"] --> Q["VA-30.5 Wide Attachment"]
    P --> R["VD-30.5 Wide-converter"]
    P --> S["TL-30.5 Tele-converter"]
    P --> T["FS-30.5U Filter Set"]
    U["MSV650i"] --> V["VL-3 Video Light"]
    U --> W["DM-50 Directional Stereo Microphone"]
    X["MSV650i"] --> Y["BP-900 Series Battery Pack*"]
    X --> Z["VL-10Li Battery Video Light"]
    AA["SC-1000 Soft Carrying Case"] --> AB["Stereo Microphone (commercially available)"]
    AC["WS-20 Wrist Strap"] --> AD["SS-800 Shoulder Strap"]
    AE["CP-570 Battery Charger"] --> AF["BP-500 Series Battery Pack"]
    AE --> AG["CB-570 Car Battery Cable"]
    AE --> AH["CA-570 Compact Power Adapter"]
* Charging with the CA-920 Compact Power Adapter or CH-910 Dual Battery Charger/Holder (both optional)
Optional Accessories
E
Call or visit your local retailer/dealer for genuine Canon video accessories.
BP-500 Series Battery Packs
When you need extra battery packs, select from the following: BP-511, BP-512, BP-522 or BP-535.
BP-512 BP-522 BP-535
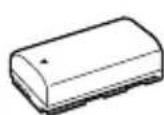
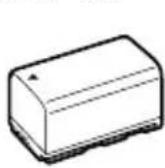
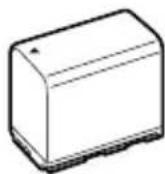
CG-570 Battery Charger
The battery charger can be used with the supplied CA-570 Compact Power Adapter or the optional CB-570 Car Battery Cable to charge BP-500 series battery packs.
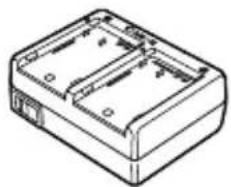
natural_image
Line drawing of a rectangular electronic device housing with internal compartments (no text or symbols)| Battery Pack Charging Time | |
| BP-508 (MV630i/MV600i/MV600) | 55 min. |
| BP-512 (MV650i/optional) 95 min. | |
| BP-511 (Optional) 95 min. | |
| BP-522 (Optional) 140 min. | |
| BP-535 (Optional) 205 min. |
CB-570 Car Battery Cable
Use the car battery cable with the CG-570 Battery Charger to charge battery packs on the move. The car battery cable plugs into your car's cigarette lighter and runs off a 12-24 V DC negative ground battery.
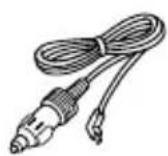
TL-30.5 Tele-converter
This tele-converter lens increases the focal length of the camcorder lens by a factor of 1.9.
- The image stabilizer is not as effective when the tele-converter is attached.
- The image quality may be degraded at the telephoto side.
- The minimum focusing distance with the Tele-converter is 4 m; 4 cm on maximum wide angle.
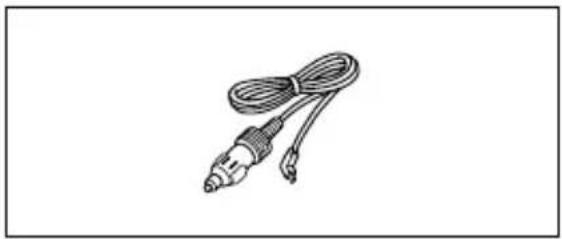
natural_image
Line drawing of a cable with two connectors (no text or symbols)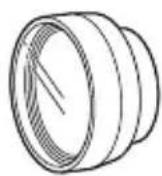
WD-30.5 Wide-converter
This lens decreases focal length by a factor of 0.7, giving you a wide perspective for indoor shots or panoramic views.
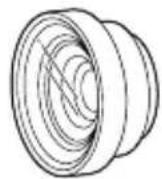
FS-30.5U Filter Set
Neutral density and MC protector filters help you to control difficult lighting conditions.
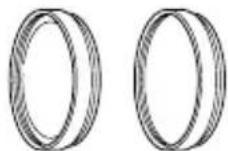
VL-10Li Battery Video Light
This compact yet powerful video light can be used for both indoor and outdoor shooting. The video light is powered by BP-900 series battery packs.
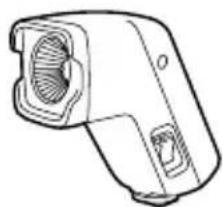
natural_image
Line drawing of a mechanical device with no visible text or symbols- Approximate usage time: BP-915: 60 min., BP-930: 120 min., BP-945: 170 min.
- BP-900 series battery packs are charged with the CA-920 Compact Power Adapter.
MV650i VL-3 Video Light
This video light enables you to record brightly in colour even in dark places. It attaches to the camcorder's advanced accessory shoe for cable-free operation.
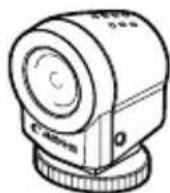
MV6501 DM-50 Directional Stereo Microphone
This highly sensitive, super-directional microphone attaches to the camcorder's advanced accessory shoe. It can be used as directional microphone (monaural) or stereo microphone.
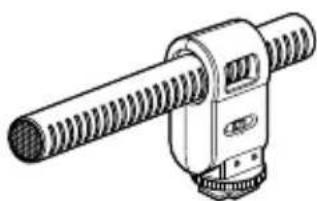
natural_image
Technical line drawing of a mechanical component with threaded shaft and mounting base (no text or symbols)WS-20 Wrist Strap
Use this for extra additional protection for active shooting.
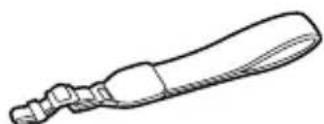
natural_image
Line drawing of a mechanical tool or connector (no text or symbols)E
SC-1000 Soft Carrying Case
A handy camcorder bag with padded compartments and plenty of space for accessories.
natural_image
Line drawing of a two-wheeled box with handle and side panels (no text or symbols)This mark identifies genuine Canon video accessories. When you use Canon video equipment, we recommend Canon-brand accessories or products bearing the same mark.

MV650i/MV630i/MV600i/MV600
| Power supply (rated): | 7.4 V DC |
| Power consumption (AF turned on): | 2.9 W (Using viewfinder), 3.8 W (Using LCD screen) |
| Television system: | CCIR standard (625 lines, 50 fields) PAL colour signal |
| Video recording system: | 2 rotary heads, helical scanning DV system (Consumer digital VCR SD system); Digital component recording |
| Audio recording system: | PCM digital sound: 16 bit (48 kHz/2 ch); 12 bit (32 kHz/4 ch) |
| Image sensor: | 1/6" CCD (charge coupled device), approx. 800,000 pixels (Effective pixels: tape: approx. 400,000 pixels, card*1: approx. 528,000 pixels) |
| Tape format: | Video cassettes bearing the "MiniDV" mark. |
| Tape speed: | SP: 18.83 mm/s, LP: 12.57 mm/s |
| Maximum recording time (80 min. cassette): | SP: 80 min., LP: 120 min. |
| Fast forward/rewind time: | Approx. 2 min. 20 sec. (with a 60 min. cassette) |
| Lens: | MV650i: F1.6-3.6, 22x power zoom, f=2.8-61.6 mm; MV630i: F1.6-3.2, 20x power zoom, f=2.8-56 mm; MV600i/MV600: F1.6-2.9, 18x power zoom, f=2.8-50.4 mm |
| Focusing system: | TTL autofocus, manual focusing possible |
| Minimum focusing distance: | 1 m, 1 cm on maximum wide angle |
| Maximum shutter speed: | 1/2,000 sec. (1/250 sec. when using a memory card) |
| Minimum illumination: | 1.6 lx (using the Night mode in CAMERA mode) |
| Recommended illumination: | More than 100 lx |
| Filter diameter: | 30.5 mm |
| Viewfinder: | 0.33 in., TFT colour LCD, approx. 113,000 pixels |
| LCD screen: | 2.5 in., TFT colour, approx. 112,000 pixels |
| Microphone: | Stereo electret condenser microphone |
| Recording media*1: | SD Memory Card, MultiMediaCard |
| Number of recording pixels*1: | Still image: 1024 x 768, 640 x 480 pixelsMovie *2: 320 x 240 pixels (approx. 10 sec.), 160 x 120 pixels (approx. 30 sec.), 12.5 frames/sec.The figures in brackets represent the maximum length of one movie clip. |
| Estimated SD Memory Card SDC-8M capacities*1: | 1024 x 768: Superfine: 14 images/Fine: 20 images/Normal 39 images;640 x 480: Superfine: 35 images/Fine 52 images/Normal 86 images |
| The actual number varies according to the images. Sample images recorded on the supplied SD Memory Card are to be included in the total number. | |
| File format*1: | Design rule for Camera File system (DCF), Exif 2.2 compliant, Digital Print Order Format (DPOF) compliant (still images only) |
| This camcorder supports Exif 2.2 (also called "Exif Print"). Exif Print is a standard for enhancing the communication between camcorders and printers. By connecting to an Exif Print-compliant printer, the camcorder's image data at the time of shooting is used and optimised, yielding extremely high quality prints. | |
| Image format*1: | Still image: JPEG (Compression mode: Superfine, Fine, Normal), Movie: Motion JPEG |
*1 MV650i/MV630i only *2 MV650i only
| USB terminal*1: | mini-B |
| DV terminal input/output*2: | Special 4-pin connector (IEEE 1394 compliant) |
| AV terminal input/output*2: | ø3.5 mm minijackAudio input: -10 dBV/40 kohms or moreAudio output: -10 dBV (47 kohm load)/3 kohms or lessVideo: 1 Vp-p/75 ohms unbalanced |
| S-video terminal input/output*2: | 1 Vp-p/75 ohms (Y signal), 0.3 Vp-p/75 ohms (C signal) |
| MIC terminal input: | ø3.5 mm stereo mini-jack-57 dBV (with 600 ohm mic)/5 kohms or more |
| Headphone terminal: | ø3.5 mm stereo minijack |
| Operating temperatures: | 0 – 40°C |
| Dimensions: | 103 × 58 × 147 mm |
| Weight: | MV650i: 525 g, MV630i/MV600i/MV600: 520 g |
| *1 MV650i/MV630i only * | 2 MV650i/MV630i/MV600i only |
CA-570 Compact Power Adapter
| Power supply: | 100 – 240 V AC, 50/60 Hz |
| Power consumption: | 17 W |
| Rated output: | 8.4 V DC, 1.5 A |
| Operating temperature: | 0 – 40°C |
| Dimensions: | 52 × 90 × 29 mm |
| Weight: | 135 g |
BP-512/BP-508 Battery Pack
| Battery type: | Rechargeable Lithium Ion Battery |
| Rated voltage: | 7.4 V DC |
| Operating temperature: | 0 – 40°C |
| Battery capacity: | BP-512: 1100 mAh, BP-508: 800 mAh |
| Dimensions: | 38 × 21 × 55 mm |
| Weight: | BP-512: 70 g, BP-508: 65 g |
SDC-8M SD Memory Card
| Capacity: | 8 MB |
| Interface: | SD Memory Card standard |
| Operating temperature: | 0 – 40°C |
| Dimensions: | 32 × 24 × 2.1 mm |
| Weight: | 2 g |
Weight and dimensions are approximate. Errors and omissions excepted. Subject to change without notice.
12bit audio ..... 97
16:9 wide screen ..... 51
6-second auto date 83
A
Abroad, using the camcorder . . . 143
Accessories. 7, 148
Accessory shoe 149
Advanced accessory shoe *1 ..... 72
Analog line-in *3....88
Analog-digital converter *3 ..... 91
Assist lamp ^*1 58
Audio dubbing 95
Audio mode 70
Auto 56
Autofocus 74
AV insert *3 93
AV→DV *3....91
AV/headphones terminal .... 37, 69
B
Backup battery ..... 17
Battery charger 148
Battery pack 14
Beep 51
Brightness 31
C
Card animation *^2 ..... 122
Card mix *2 121
Computer 98, 128
Condensation 142
Connections - TV 39
Connections - VCR. 39
Copyright signals. 90
Copying still images ^*2 ..... 125
D
Data code 82
Date and time 23
Date search 84
Demo mode 52
Digital effects 60
Digital zoom 28
Direct print function *^2 .....117
DV dubbing *3 89
DV terminal 87, 98
E
Easy recording....56
Effects 64
Erasing still images *2....114
Exposure 76
F
Faders 61
Fast forward 35
File numbers *^2 ..... 102
Focusing 74
Formatting *2 127
G
Grip belt 18
H
Headphones 37
U
Image quality *2 100
Image stabilizer....68
Index screen *2 111
L
LCD mirror mode ..... 31
LCD screen....30
Lens cap 18
Light-up buttons *1....50
Low light mode. 57
Low light plus mode *^1 .....58
LP mode 53
M
Magnifying the image ..... 81
Maintenance 140
Manual focus 74
Memory card *2 100
Menus 43
Microphone....70
E
MIC terminal 70
Movie size *1.... 101
MultiMediaCard *2 ..... 100
Multi-image screen 66
My Camera settings ..... 49
N
Night mode 58
0
Output channel....42
P
Photo search 84
Playback - Memory card *2 ..... 110
Playback - Tape 35
Playback pause 37
Portrait mode ..... 57
Power adapter 13
Print order *2 115
Protect *2 113
R
Recording to a VCR 86
Record pause mode ..... 27
Record review .... 33
Record search 33
Recording Movies (tape) ..... 26
Recording Movies (memory card)*1....108
Recording Still Images (tape) .... 54
Recording Still Images (memory card)*2....103
Recording programs ..... 56
Remote sensor....22
Rewind 35
S
S1 video terminal ..... 40
Sample images *2 ..... 131
Sand & Snow mode. 57
Screen displays 133
SD Memory Card *2....100
Search select 84
Self-timer 69
*1
MV650i, *2 MV650i MV630i
Shutter sound *2....104
Shutter speed 77
Slide show *^2 ..... 111
SP mode 53
Speaker 37
Sports mode 57
Spotlight mode 57
Still image quality *2....100
Still image size *2 .... 100
Stitch Assist mode *2.....106
Super Night mode *1 ..... 58
S-video/S1-video 40
T
Tape protection....21
Telephoto 28
Time code 85
Time zone 23
Tripod 34
Troubleshooting ..... 144
TV Screen. 39, 133
U
USB terminal *^2 ..... 128
V
Video....39
Video heads.....141
Video light. 72, 149
Videocassettes. 20
Viewfinder 18
W
White balance 79
Wide screen....51
Wireless controller ..... 22
Z
Zero set memory 85
Zooming 28
Canon
CANON INC.
Canon Europa N.V.
P.O. Box 2262, 1180 EG Amstelveen, the Netherlands
Canon UK Ltd.
Ribcon Way
Luton Bedfordshire LU4 9UR
Telephone 0870-241-2161
Canon Australia Pty. Ltd
1 Thomas Holt Drive, North Ryde, N.S.W. 2113, Australia
Telephone 805-2000, Fax 887-4484
Canon New Zealand Ltd
Akoranga Business Park, Akoranga Drive, Northcote, Auckland, New Zealand
Telephone: 489-0300, Fax: 489-0380
Canon Singapore Pte. Ltd
79 Anson Road #09-01/06, Singapore 079906
Telephone (65)-532-4400, Fax (65)-221-2939
Canon Hongkong Company Ltd
9/F, The Hong Kong Club Building, 3A Chater Road, Central, Hong Kong
Canon Latin America, Inc.
Sales & Enquiries: 703 Waterford Way Suite 400 Miami, FL 33126 USA

Printed on 100% reused paper.