
XSW-D - Guitar SENNHEISER - Free user manual and instructions
Find the device manual for free XSW-D SENNHEISER in PDF.

| Product Type | Digital Wireless Guitar System |
| Brand | Sennheiser |
| Model | XSW-D |
| Category | Guitar |
| Connectivity | 6.3 mm jack (transmitter and receiver) |
| Frequency Range | 2.4 GHz |
| Transmission Range | Up to 75 meters (line of sight) |
| Audio Frequency Response | 10 Hz – 20 kHz |
| Signal-to-Noise Ratio | > 105 dB |
| Battery Type | Lithium-ion (built-in) |
| Battery Life | Approximately 5 hours |
| Charging Time | Approximately 3 hours |
| Charging Port | USB-C |
| Material | ABS plastic and metal connectors |
| Color | Black |
| Weight (transmitter) | Approx. 95 g |
| Weight (receiver) | Approx. 95 g |
| Dimensions (transmitter) | Approx. 100 x 30 x 25 mm |
| Dimensions (receiver) | Approx. 100 x 30 x 25 mm |
| Included Accessories | Transmitter, receiver, charging cable (USB-A to USB-C), extension cable (6.3 mm), belt clip, stickers |
| Operating Temperature | -10 °C to 55 °C |
| Certifications | CE, FCC |
| Warranty | 2 years |
| Maintenance | Clean with dry cloth; avoid moisture and extreme temperatures |
Frequently Asked Questions - XSW-D SENNHEISER
User questions about XSW-D SENNHEISER
0 question about this device. Answer the ones you know or ask your own.
Ask a new question about this device
Download the instructions for your Guitar in PDF format for free! Find your manual XSW-D - SENNHEISER and take your electronic device back in hand. On this page are published all the documents necessary for the use of your device. XSW-D by SENNHEISER.
USER MANUAL XSW-D SENNHEISER
Additional information ▼
1 Belt clip for the transmitter
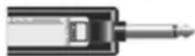
2 XSW Digital TX 63: transmitter (6.3 mm jack plug) for connecting to an instrument with a jack socket (6.3 mm) or to the extension cable

3 XSW Digital RX 63: receiver (6.3 mm jack plug) for connecting to an amplifier
4 Charging cable (USB-A to USB-C) for charging the transmitter and receiver
5 Extension cable (jack socket to jack plug, 6.3 mm)
6 Stickers for labeling transmission paths
Operation
Connecting the transmitter to an instrument ▼
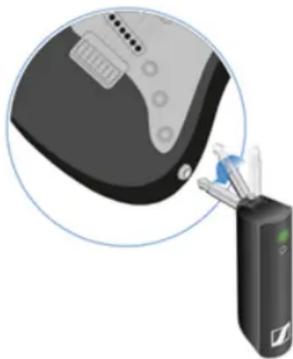
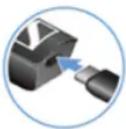
You can connect the transmitter either directly to your instrument or using the extension cable and the belt clip.
natural_image
Illustration of a medical device with a magnified view of its internal components (no text or symbols visible)Direct connection
▷ Plug the transmitter into the jack socket on your instrument.
▷ Align the transmitter so that you can easily see the status LED.
Connection with extension cable
Plug the extension cable into the jack socket on your instrument.
▷ Plug the transmitter into the jack socket on the extension cable.
▷ Insert the transmitter into the belt clip.
▷ Fasten the belt clip to the guitar strap or your clothes, for example on your belt or waistband.
Connecting the receiver to an amplifier
Plug the receiver's jack plug into the input socket on your amplifier.
▶ Briefly press the button on the transmitter and the button on the receiver.
The status LEDs indicate the charge level for four seconds.
During these four seconds, check that the transmitter and receiver are sufficiently charged.
75%
5% - 75%
< 5%
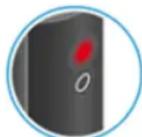
If the status LED remains red, you should charge the rechargeable battery first. If the status LED flashes red, the charge level is too low. You have to charge the rechargeable battery first (see "Charging the rechargeable battery").
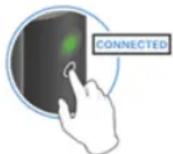
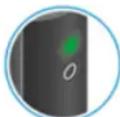
After four seconds, the status LED starts flashing green. The flashing indicates that a wireless connection is being established.
The status LEDs remain green once the transmitter and receiver are connected. If the status LEDs do not remain green, either the charge level is below 15% (see „Checking the charge level during use“) or the transmitter and receiver are not paired (see „Pairing“).
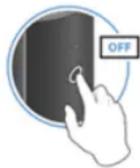
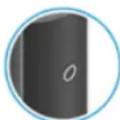
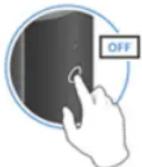
Switching off the transmitter and receiver ▼

▷ Press the button on the transmitter and the button on the receiver until the status LEDs switch off.
Muting the audio signal ▼
When using a set, you can mute the audio signal. The audio signal can then be unmuted.
To mute the audio signal: Briefly press the button on the transmitter or receiver.
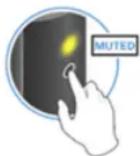
To unmute the audio signal: Briefly press the button on the transmitter or receiver.
Checking the charge level during use
The status LED remains green during use as long as the rechargeable battery has sufficient charge. The status LED begins flashing red and green in alternation when the charge level falls below 15%. Once the charge level falls below 5%, the status LED flashes only red. In addition to the local charge level, the status LED on a transmitter or receiver also provides information about the charge level of the connected transmitter or receiver. This allows you to check the charge levels at any time.
The charge level is below 15%.
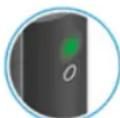
The charge level of the connected transmitter/receiver is below 15%.
The charge level is below 5%.

The charge level of the connected transmitter/receiver is below 5%.
Charging the rechargeable battery ▼
To minimize charging time and monitor the charging status the transmitter or receiver should be switched off before you charge the battery. However the transmitter or receiver can be charged while in operation.
Plug the small end of the USB charging cable into the USB port on the transmitter or receiver.
Plug the large end of the USB charging cable into the USB port on a conventional USB power supply unit.
▶ Plug the USB power supply unit into the wall socket.
The status LED indicates the charge level.
< 5%
5% - 75%
75%
100%
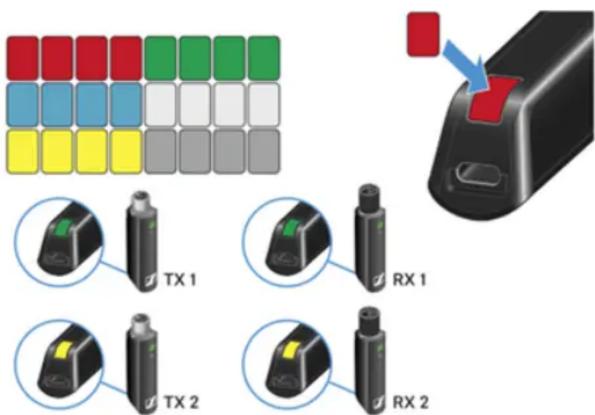
Using stickers to label transmission paths
You can use the colored stickers to show which transmitter belongs to which receiver.
Pairing ▼
The transmitter and the receiver of a set are pre-paired at the factory and therefore ready for immediate use. The wireless connection is established once the transmitter and receiver are switched on and within range of each other.
You can pair up to four transmitters to the receiver.
Please note that you can only use one transmitter at a time. The other paired transmitters must be switched off in the meantime.
▷ Make sure that both the transmitter and receiver are switched off.
Press the button on the transmitter and the button on the receiver until the status LEDs start flashing green and red in alternation. The status LEDs will remain green once the transmitter and receiver are paired and connected. If the status LEDs do not remain green, the charge level is below 15% (see "Checking the charge level during use").
Out-of-range monitoring ▼
The status LEDs begin flashing red when the transmitter and receiver are almost out of range.
Correcting faults ▼
If the status LED remains red, a fault has occurred.
▷ Unplug any connected USB cables from the UBS port.
▷ Switch the transmitter and receiver off and on again.
▷ Perform pairing, if necessary.
▷ If this does not correct the fault, please contact Sennheiser customer service: www.sennheiser.com/service-support

- Additional information ▼
- Operation
- Connecting the receiver to an amplifier
- Switching off the transmitter and receiver ▼
- Muting the audio signal ▼
- Checking the charge level during use
- Charging the rechargeable battery ▼
- Using stickers to label transmission paths
- Pairing ▼
- Out-of-range monitoring ▼
- Correcting faults ▼
Brand : SENNHEISER
Model : XSW-D
Category : Guitar