
Mecablitz M360 - Flash METZ - Free user manual and instructions
Find the device manual for free Mecablitz M360 METZ in PDF.


| Product Type | External flash unit for digital cameras |
| Model | Metz Mecablitz M360 |
| Compatible Camera Systems | Canon EOS/PowerShot (E-TTL II), Nikon (i-TTL), Sony (pre-flash TTL), Olympus/Panasonic/Leica (FourThirds TTL), Fujifilm (TTL) |
| Guide Number (ISO 100, 105 mm) | 36 (metric), 118 (feet) |
| Flash Modes | TTL, Manual, Program, Auto fill-in, Second curtain sync, Slow sync |
| Zoom Range (Auto) | 24 mm – 105 mm (135 format); with wide-angle diffuser: 14 mm |
| Swivel Reflector | Vertical: -7° to 90°; Horizontal: 270° (60°, 90°, 120° clockwise; 60°, 90°, 120°, 150°, 180° anticlockwise) |
| Power Supply | 2x AA batteries (alkaline or NiMH rechargeable) |
| Recycling Time (full output) | Approx. 3–4 seconds |
| Number of Flashes (full output) | ~130 with alkaline, ~160 with NiMH (2100 mAh) |
| AF Assist Light | Range approx. 2.5–4 m (with 50 mm f/1.7 lens) |
| Flash Sync Speed Control | Automatic with compatible cameras; supports normal, rear curtain, and slow sync |
| Exposure Correction | Manual TTL flash exposure correction (set on camera) |
| Flash Exposure Memory (FE) | Supported with Nikon (i-TTL) and Canon (E-TTL II) |
| Dimensions (W x H x D) | Approx. 64 x 100 x 80 mm |
| Weight | Approx. 190 g (without batteries) |
| Firmware Update | Via USB port (micro USB) |
| Included Accessories | Mecabounce diffuser, soft bag, quick guide, safety sheet |
| Flash Capacitor Forming | Switch on for approx. 10 min at least once every 3 months if not used |
| Auto OFF / Standby | After approx. 2 min of inactivity; auto shut-off after approx. 1 hour |
Frequently Asked Questions - Mecablitz M360 METZ
User questions about Mecablitz M360 METZ
0 question about this device. Answer the ones you know or ask your own.
Ask a new question about this device
Download the instructions for your Flash in PDF format for free! Find your manual Mecablitz M360 - METZ and take your electronic device back in hand. On this page are published all the documents necessary for the use of your device. Mecablitz M360 by METZ.
USER MANUAL Mecablitz M360 METZ
natural_image
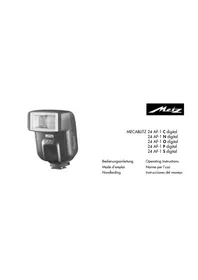
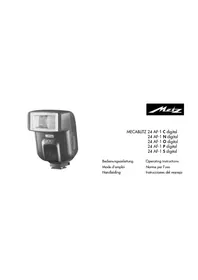
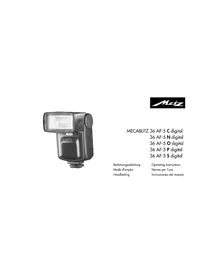
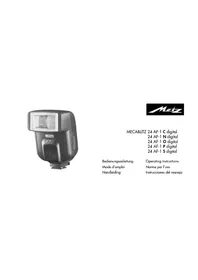
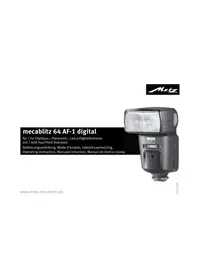
Exterior view of a black Motz brand flash unit (no text or symbols visible on body)English instruction manual
12/2018
Table of contents:
Introduction....4
Proper Use....4
1 Safety instructions.... 5
2 Description of the mecablitz M360....7
2 Dedicated flash functions....8
4 Preparing the flash unit for use 9
4.1 Power supply....9
Suitable batteries/ rechargeable batteries.... 9
Replacing the batteries....9
4.2 Mounting the flash unit ....10
Removing the flash unit from the camera....10
4.3 Switching the flash unit ON and OFF 10
4.4 Automatic unit shut-off / Auto OFF....11
4.5 Wake-Up Function....11
5 Test button....11
5.1 Multifunctional LED signals....11
5.1.1 Flash readiness signal .... 11
5.1.2 Standby signal....12
5.2 Fire a testing flash....12
6 TTL flash modes....12
6.1 Digital TTL flash modes ....12
6.2 Automatic TTL fill-in flash mode....12
6.3 Manual flash exposure correction in TTL flash mode ....13
6.4 TTL Flash exposure memory FE....13
7 Swivel reflector....14
7.1 Auto zoom....14
7.2 Wide-angle diffuser....15
7.3 Mecabounce diffuser....15
8 Flash techniques....15
8.1 Bounce flash....15
8.2 Bounce flash with a reflector card....16
9 Program flash mode 16
10 Automatic AF auxiliary light....16
11 Flash synchronisation....17
11.1 Automatic flash sync-speed control .... 17
11.2 Normal synchronisation....17
11.3 Second curtain synchronisation (REAR) 17
11.4 Slow synchronisation (SLOW)....18
12 Triggering control (auto-flash)....18
13 Pre-flash function for red-eye reduction....18
14 Care and maintenance .... 19
14.1 Firmware updates ....19
14.2 Flash capacitor forming .... 19
15 Troubleshooting....19
16 Technical data....21
Battery disposal 22
17 Appendix....23
Table 1: Guide numbers at maximum light output level .....23
Table 2: Maximum distance range in meters at reflector zoom position 35 mm....24
Table 3: Multiplicators for the max. distance range at other reflector zoom positions.....24
Warranty conditions Federal Republic of Germany 25
Contact for service requests 26
Introduction
Thank you for choosing a Metz mecatech product.
We are delighted to welcome you as a customer.
You will of course be impatient to start using the flash unit.
However, it is worthwhile reading the operating instructions and learning how to use the unit correctly.
Proper Use
This flash unit is intended solely for taking pictures of motifs in the photo-graphic field. It may be operated only with the accessories described in this instruction manual or the accessories approved by Metz mecatech.
The flash unit may not be used for any purpose other than that described above.

Declaration
Tip, note

Attention - Extremely important safety information!
The M360 flash unit is built in five different versions and accordingly suitable for:
• Digital Canon cameras (EOS and PowerShot) with E-TTL-II –flash metering.
• Digital Nikon cameras with i-TTL flash control.
- Digital Olympus and Panasonic cameras with FourThirds TTL respectively Micro FourThirds TTL flash control, as well as the compatible digital cameras from Leica.
• Digital Sony cameras with preflash TTL flash control.
• Digital FUJIFILM cameras with TTL flash control.
The flash unit is not suitable for use with other brands of cameras!
A subsequent system change (e.g. Canon to Nikon) is not possible, even with an additional adapter.
1 Safety instructions
The flash unit may in no event be activated in the vicinity of inflammable gases or liquids (petroleum, solvents etc.).
RISK OF EXPLOSIONS!
Do not flash directly into eyes from a close distance! Direct flashing into the eyes of persons or animals can cause damage to the retina and severe disruption of the vision up to and including permanent blindness!
Never use a flash unit to photograph car, bus, bicycle, motorbike or train drivers while they are driving. Blinding the driver can lead to an accident!
If the housing has been damaged in such a way that internal components are exposed, the flash unit may no longer be used. Remove the batteries! Do not touch any internal components.
HIGH VOLTAGE!
After repeated flashing, do not touch the diffuser. Risk of burns!
Do not dismantle the flash unit! HIGH VOLTAGE!
Repairs should only be performed by authorised service personnel.
- The flash unit is exclusively designed and authorised for use in photographic applications.
• Only use the power sources designated and authorised in the operating manual!
• Do not open the batteries or short them! - In no event the batteries be exposed to high temperatures like direct sunlight, fire or similar!
• Never throw flat/dead batteries onto a fire!
• Do not use any damaged batteries or defective rechargeable batteries! - Remove the used batteries immediately from the device! Chemicals can escape from used batteries (social device leaks") resulting in damage to the
• Batteries may not be recharged!
• Do not expose the flash unit to water drops and splashes! - Protect your flash unit from heat and high air humidity! Do not keep it in the glove compartment of your car!
- Rapid changes in temperature may lead to condensation. If this occurs, allow time for the unit to become acclimatized!
-
When you activate the flash, there should be no opaque material directly in front of or on the reflector cover (flash window). The intense energy emissions can otherwise lead to scorching or spotting of the material and/or the reflector cover.
• After a series of flashes with full power and short intervals, a pause of at least 3 minutes must be observed after each series of 20 flashes! -
When taking a series of flash shots at full light output and with rapid recycling times, and with zoom positions of 35 mm and less, the diffuser heats up, due to the high level of thermal energy.
- This flash unit may be used in combination with a camera-integrated flash only if the flash can be folded out completely.
2 Description of the mecablitz M360

1 Reflector card (recessed)
2 Wide angle diffuser (recessed)
3 Swivel reflector (vertical -7°/+90°, horizontal 270°)
4 AF auxiliary light (not available with Olympus/Panasonic version)
5 Knurled nut
6 Connection foot
7 Battery compartment lid
8 Battery compartment
9 ON/OFF button
10 USB socket (micro)
11 Release button with multifunctional signal LED
2 Dedicated flash functions
Dedicated flash functions are flash functions that have been specially adapted to a given camera system. Depending on the type of camera, different dedicated flash functions are supported.
| M360 / Canon | M360 / Fujifilm | M360 / Nikon | M360 / MFT | M360 / Sony | vide chapter | |
| Canon E-TTL II | ● | ⊗ | ⊗ | ⊗ | ⊗ | 6.1 |
| Fujifilm TTL | ⊗ | ● | ⊗ | ⊗ | ⊗ | 6.1 |
| Nikon i-TTL | ⊗ | ⊗ | ● | ⊗ | ⊗ | 6.1 |
| Olympus / Panasonic / Leica MFT-TTL | ⊗ | ⊗ | ⊗ | ● | ⊗ | 6.1 |
| Sony pre-flash TTL | ⊗ | ⊗ | ⊗ | ⊗ | ● | 6.1 |
| Automatic TTL fill-in flash control | ● | ● | ● | ● | ● | 6.2 |
| Manual flash exposure correction for TTL | ◆ | ◆ | ◆ | ◆ | ◆ | 6.3 |
| Flash exposure storage with TTL (FE) | ◆ | ⊗ | ◆ | ⊗ | ⊗ | 6.4 |
| Flash ready indication in camera viewfinder/ display | ● | ● | ● | ● | ● | 5.1 |
| Automatic motor zoom control | ● | ● | ● | ● | ● | 7.1 |
| Program flash mode | ● | ● | ● | ● | ● | 9 |
| Automatic AF auxiliary light control | ● | ● | ● | ⊗ | ● | 10 |
| Automatic flash sync speed control | ● | ⊗ | ● | ● | ● | 11.1 |
| 1st or 2nd curtain synchronisation (REAR) | ◆ | ◆ | ◆ | ◆ | ◆ | 11.3 |
| Triggering control / auto flash | ◆ | ◆ | ◆ | ◆ | ◆ | 12 |
| Pre-flash for red-eye reduction | ⊗ | ◆ | ◆ | ◆ | ◆ | 13 |
| Wake-Up- function for the flash unit | ● | ● | ● | ● | ● | 4.5 |
Explanation:
| ● | |
| ◆ | |
| ∅ | |
Dedicated flash function is supported
Setting at the camera (as far as available)
Function not offered by the camera system / not available
Function not offered by the flash unit / not available
[NO TEXT]
It is impossible to describe all camera types and their individual dedicated flash functions within the scope of these instructions. Therefore, please refer to the flash mode description in your case which's operating instructions to find functions are supported and which ones have to be set manually on the camera. Using lenses not equipped with a CPU (i.e., lenses without auto focus mode), results in certain functional limitation.
4 Preparing the flash unit for use
4.1 Power supply
Suitable batteries/rechargeable batteries
The flash unit can be operated with any of the following batteries:
• 2 nickel-metal-hydride batteries 1.2V, type IEC HR6 (size AA)
• 2 alkaline-manganese dry cell batteries 1.5V, type IEC LR6 (size AA). Maintenance-free power source for moderate power requirements.
Please only use the power sources given above. If other power sources are used, there is a risk of damaging the flash unit.
If your flash unit is not going to be used for an extended period of time, remove the batteries.
Replacing the batteries
The rechargeable batteries/batteries are empty or flat when the flash delay exceeds 60 seconds (interval between triggering a full output flash and when the flash readiness indicator is relit).
- Switch off the flash unit by pressing the button ⑨ ON / OFF until all LED lights are off.
- Remove the flash device from the camera and slide the battery compartment lid ⑦ downwards.
- Insert the new batteries and slide the battery compartment lid ⑦ back into place to lock it.

natural_image
Interior view of a battery pack with two charging terminals and one battery, showing no visible text or symbols.
Please ensure the batteries/rechargeable batteries are inserted correctly by checking against the symbols in the battery compartment. Incorrect insertion can terminally damage the unit. Risk of explosion in event of improper use of batteries. Always replace all batteries with the same high-quality brand batteries of the same capacity. Used batteries and rechargeable batteries should not be disposed of with domestic waste. Do your bit for the environment and dispose of used batteries/rechargeable batteries at designated collections points.
4.2 Mounting the flash unit
Mounting the flash unit on the camera
Turn off the camera and flash before mounting or removing.
- Turn the knurled nut ⑤ towards the flash unit housing as far as it will go. The locking pin in the connection foot ⑥ is now fully retracted into the case.
- Slide the flash unit connection foot ⑥ completely into the camera accessory shoe.
- Turn the knurled nut ⑤ towards the camera housing as far as it will go, clamping the flash unit in place. If the camera does not have a locking hole, the spring-loaded locking pin retracts into the connection foot case so as not to damage the surface.
In the case of the mecablitz M360 / Sony, the contacts in its multi-interface connection foot are covered by a protective cap and thus protected. Before mounting in the camera's hot shoe, this protective cap has to be removed from the connection foot of the flash unit.
Removing the flash unit from the camera
Turn off the camera and flash before mounting or removing.
- Turn the knurled nut ⑤ towards the flash unit housing as far as it will go.
- Remove the flash unit from the camera's accessory shoe
With the mecablitz M360 / Sony, the protective cap for the contacts in the multi-interface connection foot has to be pushed back onto the connection foot to protect the contacts for transport and storage.
4.3 Switching the flash unit ON and OFF
- Switch on the flash unit by pressing the button ON / OFF ⑨.
The multifunctional LED ⑪ blinks green and signals the process of charging the main flash capacitor.
As soon as the main flash capacitor is fully charged the multifunctional LED ⑪ lights constantly green and signals that the flash unit is ready for the next shoot.
Running in the energy saving standby mode the multifunctional LED ⑪ blinks slowly red. See also 5.1 Multifunctional LED signals, please.
- Switch off the flash unit by pressing the button ON / OFF ⑨ until all LED lights are off.
In the event that the flash unit will not be required for a longer period of time, we recommend switching the unit off by pressing the button ON / OFF ⑨ and removing the power supply (batteries, rechargeable batteries).
4.4 Automatic unit shut-off / Auto OFF
The flash unit is configured so that approx. 2 minutes after -
- switching on,
- triggering the flash,
• lightly depressing the camera shutter release,
• switching off the camera flash metering system...
...it switches to standby mode (Auto OFF) in order to both save energy and avoid any unintentional draining of the power source.
The test button / multifunctional display LED ⑪ flashes slowly red during standby mode.
The flash unit shuts off completely approx. 1 hour after last use.
4.5 Wake-Up Function
To use the wake up function, simply press any button for approx. 1 second or lightly depress the camera shutter.
The flash unit should always be turned off using the main switch if it is not going to be used for an extended period.
5 Test button
The Test button ⑪ offers you the possibility to fire a short test flash. Additionally the various multifunctional LED signals of it will inform you for the current status mode of the flash unit.
5.1 Multifunctional LED signals
Depending on the current operating status of the flash unit the multifunctional LED ⑪ will signal the working status of the flash unit:
5.1.1 Flash readiness signal
After switching ON the flash unit the multifunctional LED ⑪ will blink green until the flash capacitor is fully charged and the flash unit is ready for the next shoot.
The Test button ⑪ illumination will light up constantly green when the flash capacitor is loaded and shows that the flash is ready to fire.
This means that the flash can be used for the next shot. Flash readiness is relayed to the camera where a corresponding message appears in the viewfinder (so far the camera offers such a function; see camera's manual, please).
If the photo is taken before the flash readiness message appears in the camera viewfinder, the flash unit will not be triggered and your photo maybe be incorrectly lit in the event that the camera has already activated flash sync control shutter speed.
5.1.2 Standby signal
On a prolonged operation break for more than approximately 2 minutes the flash unit will enable the energy saving standby operation mode. While the standby operation mode the multifunctional LED ⑪ blinks slowly red.
5.2 Fire a testing flash
As soon as the multifunctional LED ⑪ lights up constantly green and signals flash readiness. To fire a testing flash can be released by pressing the Test button ⑪ in order to check the basic function of flash unit.
6 TTL flash modes
6.1 Digital TTL flash modes
Depending on the camera system and the version of flash unit there are various digital TTL flash control systems available:
Canon E-TTL II ; Nikon i-TTL ; Sony pre-flash TTL ; Olympus/ Panasonic FourThirds- and Micro-Four-Thirds TTL ; Fujifilm TTL.
In the digital TTL flash modes you can easily achieve very good results in flash photography. The flash unit uses TTL measuring pre-flash technology:
When shooting, one or two TTL pre-flashes will be fired first by the flash unit.
The light of the TTL pre-flashes does not contribute to the exposure of the image.
The flashlight of the TTL pre-flashes reflected by the subject is taken care of by a sensor in the camera. It measures reflected light through the lens (TTL).
In TTL modes, excellent flash exposure is straight-forward. In TTL mode, flash metering is taken care of by a sensor in the camera. It measures reflected light through the lens (TTL).
The benefit of TTL flash modes is that all factors which could influence the exposure (filters, changes to aperture and focal length for zoom objectives, extensions for close-ups etc.) are automatically taken into account through flash light adjustment.
6.2 Automatic TTL fill-in flash mode
For most camera types, automatic TTL fill-in flash is activated in programmed auto mode "P" and variable or subject programs in daylight conditions (see camera operating instructions). With fill-in flash you can remove annoying shadows, and in back-lit shots a balanced exposure can be achieved between subject and background. A computer-controlled measuring system on the camera ensures appropriate combinations of shutter speed, working aperture and flash output.
Ensure that the backlight source is not shining directly into the lens. This will interfere with the camera's TTL metering.
There is no adjustment or display for automatic TTL fill-in flash on the flash unit in this instance.
6.3 Manual flash exposure correction in TTL flash mode
This function has to be configured on the camera, see camera operating instructions.
The automatic flash in most cameras is set to 25% reflectance (average reflectance of flash subject).
A dark background which absorbs a lot of light or a light background which is heavily reflective (e.g. backlit shots) can cause the subject to be over or underexposed.
To compensate for the above effect, the flash output can be adjusted manually with the correction value of the shot.
The correction value is based on the contrast between the subject and the background.
Hint:
A dark subject in front of a light background = positive correction value.
A light subject in front of a dark background = negative correction value.
Exposure correction through alteration of the lens aperture is not possible, as the camera's automatic exposure views the altered aperture as the normal working one.
Manual flash exposure correction in TTL flash modes can only take place if thecamera supports this feature (see camera's manual).
Don't forget to delete the TTL exposure correction on the camera after the shot.
Highly reflective objects in the intended shot can disturb the camera's automatic exposure. This results in underexposure. Remove reflective objects or set a positive correction value.
6.4 TTL Flash exposure memory FE
Several Nikon and Canon cameras have a flash exposure memory (FV memory). This is supported by the flash unit in the Nikon i-TTL or in the Canon E-TTL II flash modes.
It can be used to define and store the exposure level for the subsequent shot before the shot is actually taken.
This can be useful when, for example, the flash exposure has to be adjusted to specific details that may not be necessarily be identical with the main subject.
The function is activated on the camera, in some instances as an individual function. The subject detail to which the flash exposure is to be adjusted is sighted and brought into focus with the AF sensor/metering window in the camera.
Pressing the camera's AE-L/ AF-L button (Nikon) or FE button (Canon - the description may vary from camera to camera; see camera operating manual) causes the flash unit to fire a test flash. The stored metering value, for example "EL" or "FEL", is then displayed in the camera viewfinder.
The camera uses the reflected light of the test flash to determine the light output required for the subsequent exposure.
The actual main subject can then be bAFsertsiort/metersing with the camera's
window. When the shutter release is pressed, the picture will be exposed with the previously defined light output of the flash unit!
In Canon cameras the flash exposure memory FE is not supported during the green fully-automatic programme, the Vari programme and the subject programmes!
For more detailed information on adjustments and handling, refer to the camera's operating instructions!
7 Swivel reflector
Flash unit's motor zoom swivel reflector ③ can illuminate lens focal lengths from 24 mm and up (135 format).
By using the integrated wide-angle diffuser ② this value is extended to 14 mm.
7.1 Auto zoom
The zoom position of the swivel reflector is automatically adjusted to the lens focal length when the flash unit is used with a camera that transmits the data related to the lens focal length.
Automatic adjustment does not occur when the wide-angle diffuser is extended.
7.2 Wide-angle diffuser
With the integrated wide-angle diffuser, focal lengths from 14 mm can be exposed (135 format).
Flip the wide-angle diffuser out of the swivel reflector as far as it goes and let go. It will fold down automatically.
The main reflector will be guided to the required wide-angle position automatically.

natural_image
Diagram of a folding or lifting mechanism with arrows indicating direction (no text or symbols)Automatic adjustment of the motor zoom main reflector does not occur when the wide-angle diffuser is in use.
To set the wide-angle diffuser to 90° flip it up and slide it in completely.
7.3 Mecabounce diffuser
The mecabounce diffuser (included in the box) can be attached to the front of the motor zoom main reflector.
With this diffuser, soft lighting can be achieved in a very simple manner. It gives your pictures a marvellous soft appearance. Skin tones are captured more faithfully. The maximum working range is reduced by about half in conformity with the loss of light.
8 Flash techniques
8.1 Bounce flash
Bounce flash illuminates the subject more softly and reduces dense shadows. It also reduces the drop in light from foreground to background that occurs for physical reasons.
The swivel reflector ③ of the flash unit can be swiveled horizontally and tilted vertically for bounce flash.
To avoid colour cast in your shots, the reflective surface should be colour-neutral or white.
When tilting the swivel reflector vertically, make sure that it is turned through an angle that is wide enough to prevent direct light from falling on the subject. For this reason the reflector should be tilted at least as far as the 60^ lock-in position.
8.2 Bounce flash with a reflector card
The use of bounce flash with the integrated reflector card ① can bring out highlights in the eyes of human subjects:
• Tilt the reflector head upwards by 90°.
- Pull the reflector card ① together with the wide-angle diffuser ② from above out of the reflector head and forwards.
- Hold the reflector card ① and push the wide-angle diffuser ② back into the reflector head.

natural_image
Diagram of a device with arrows indicating movement or force, no visible text or symbols9 Program flash mode
In the Program flash mode, some cameras mix the ambient light with the flashlight and – depending on the camera programming – determine whether the flash is to be used as the main light source or for fill-in light purposes. The camera automatically selects the appropriate shutter speed/aperture combination and controls the flash in TTL mode.
Select Program „P“ or a Vari Program (e.g. portraits, depth of field, landscape, sports etc.) on the camera.
10 Automatic AF auxiliary light
The automatic AF auxiliary light ④ is activated in the flash unit by the camera when the ambient lighting conditions become inadequate for automatic focusing.
A bright light is projected onto the subject, which the camera can use to focus. Depending on the camera's activated AF sensor, the AF assist light has a range of approximately 2.5 m to 4 m (with a standard 1.7/50 mm lens).
Parallax error between lens and AF auxiliary light limits the close-up range with the AF measuring beam to approximately 0.6 m to 1 m.
To activate the automatic AF auxiliary light the camera has to be set to the „Single-AF (S)“ or „ONE SHOT“ autofocus mode and the flash unit must indicate flash readiness. Various camera models support only the ca auxiliary's internal AF light. In this case, the automatic AF auxiliary light of the flash unit is not activated (as in the case of mirrorless cameras, measured by compact cameras; see the camera's Low-speed zoom lenses can significantly curtail the range of the AF auxiliary light!
Various cameras support the AF auxiliary light in the flash unit only with the camera's central AF sensor. If a peripheral AF sensor is selected, then the AF auxiliary light beam will not be activated in the flash unit!
11 Flash synchronisation
11.1 Automatic flash sync-speed control
Depending on the camera model and camera mode, the shutter speed is switched to flash sync-speed when flash readiness is reached (see the camera's operating instructions).
Shutter speeds cannot be set faster than the flash sync-speed, or they are switched automatically to the flash sync-speed. Various cameras have a sync-speed range, for example from 1/60 sec to 1/250 sec (see the camera's manual). The sync-speed set by the camera depends on the camera mode, the ambient light, and the focal length of the lens used.
Shutter speeds slower than the flash sync-speed can be set according to the camera mode and the selected flash synchronisation (see 11.3 and 11.4).
[NO TEXT]
If a camera with a between-the-lens shutter (see 11.3) is used, flash sync-speed is not controlled automatically.
As a result, the flash can be used at all shutter speeds. If you need the full light output of the flash unit, you should not select a shutter speed that is any faster than 1/125 sec.
11.2 Normal synchronisation
In normal synchronisation the flash unit is triggered at the beginning of the shutter time (first curtain synchronisation).
Normal synchronisation is the standard mode on all cameras. It is suitable for most flash shots.
The camera, depending on the mode being used, is switched to the flash sync speed. Speeds between 1/30 sec. and 1/125 sec. are customary (see the cameral).

natural_image
Black-and-white photo of a car at night with street lights and city lights in the background (no visible text or symbols)11.3 Second curtain synchronisation (REAR)
Various cameras offer the option of second-curtain synchronisation (REAR), in which the flash unit is not triggered until the end of the exposure time.
This is particularly advantageous when used with lower shutter speeds (slower than 1/30 sec.) and moving subjects that have their own source of light. With second-curtain synchronisation, a moving light source will trail a light streak instead of building one up ahead itself, as it does when the flash is synchronized with the first shutter curtain.

natural_image
Black-and-white photo of a car on a road at night with blurred city lights and streetlights (no visible text or symbols)In this way a "more natural" image of the photographic situation is produced! Depending on its operating mode, the camera sets shutter speeds slower than its sync speed.
On various cameras the REAR function is not possible in certain operating modes (e.g., in
certain vari- or subject programs, or with red eye reduction). In these cases, the REAR mode cannot be selected and/or is automatically cancelled or ignored (see camera's manual).
The REAR mode is set on the camera (see camera's manual).
11.4 Slow synchronisation (SLOW)
A slow exposure (SLOW) gives added prominence to the image background at lower ambient light levels. This is achieved by adjusting the shutter speed to the ambient light. Accordingly, shutter speeds that are slower than the flash sync speed (e.g., shutter speeds up to 30 sec.) are automatically adjusted by the camera. Slow synchronisation is activated automatically on some camera models in connection with certain camera programs (e.g., a night shot program, etc.), or it can be set on the camera (see the camera's manual). No settings are necessary on the flash unit, nor is there any display for this mode.
Slow synchronisation SLOW is set on the camera (see camera's manual)! Use a tripod when shooting with slow shutter speeds to avoid blurred images!
12 Triggering control (auto-flash)
On various cameras the flash will not be fired when the prevailing light is sufficient for an exposure. When the camera shutter release is depressed, no flash exposure is triggered.
In various cameras the triggering control only works in the full program mode or "P" program or must be activated on the camera (see camera's manual).
13 Pre-flash function for red-eye reduction
The red-eye effect occurs when the person being photographed is looking for more or less straight into the camera, the ambient lighting is poor, and the flash unit is mounted close to the camera. The flash unit then illuminates the interior of the subject's eyes through the pupils. Some camera models have a pre-flash function for reducing the red-eye effect.
One or more pre-flashes induce the pupils to contract more, thereby reducing the red-eye effect.
On various cameras, the pre- flash function supports only the camera's internal flash unit or an illuminator incorporated in the camera body. The pre- flash function is set on the camera (see the camera's Second curtain synchronisation (REAR) is not possible when the pre-flash function is used.
14 Care and maintenance
Remove dust and grime with a soft dry cloth or silicon-treated cloth. Do not use cleaning agents as these may damage the plastic parts.
14.1 Firmware updates
Flash unit firmware can be updated via the USB port and, within the technical framework, adapted to the functionality of future cameras.
Further information can be found on the Metz website: www.metz-mecatech.de
14.2 Flash capacitor forming
The flash capacitor built into the flash unit undergoes physical change if the unit is not switched on for a prolonged period. For this reason it is necessary to switch the unit on for approximately 10 minutes at least once every three months. The power supplied by the batteries must be sufficient to cause the flash readiness indicator to light up no more than one minute after the flash unit is switched on.
15 Troubleshooting
If the flash unit does not function as it should, switch it off for approx. 10 seconds via the button ON/OFF ⑨ . Check the camera settings and that the flash unit connection foot ⑥ is fitted correctly in camera's accessory shoe.
- Clean the visible electrical contacts in camera's hot shoe carefully with a soft cloth, moistened with pure alcohol (e.g. pure ethanol or pure isopropanol).
- Replace the batteries with new batteries or freshly charged rechargeable batteries. The flash unit should function normally again once it is switched back on. If this is not the case, contact your local dealer.
Below is a list of some of the problems that may occur when the flash unit is used. For each item, possible causes and remedies for the problem are listed.
• The AF auxiliary light ④ of the flash unit is not activated.
The flash unit is not ready for firing.
The camera is not in "Single-AF (S)" or "ONE SHOT" mode.
The camera supports only its own internal AF auxiliary light, e.g. mostly with mirrorless cameras, compact cameras and bridge cameras.
Various cameras support the AF auxiliary light ④ in the flash unit only by the camera's central AF sensor. If a peripheral AF sensor is selected, then the AF auxiliary light ④ will not be activated in the flash unit.
Activate camera's central AF sensor, please.
- The reflector position is not automatically adjusted to the current zoom position of the lens.
The camera is not transmitting any digital data to the flash unit.
There is no exchange of data between the flash unit and the camera! Tap the camera's shutter release.
The camera is equipped with a lens without CPU.
The built-in wide-angle diffuser ② is placed in front of the reflector.
• Automatic switching to the flash sync-speed fails to occur.
The camera has a between-the-lens shutter (as do most compact cameras). Switching to flash sync-speed is therefore unnecessary.
The camera operates with shutter speeds that are slower than the flash sync-speed. Depending on the camera mode, there is no switch to flash sync-speed (see the camera's operating instructions).
Fujifilm cameras do not support this function.
• The shots have shadows in the bottom of the image.
Because of parallax error between lens and flash unit, close-up shots may not, depending on the focal length at the bottom of the image, be fully illuminated. Turn the built-in wide-angle diffuser ② in front of the reflector.
• The shots are too dark.
The subject is beyond the maximum distance range of the flash unit.
Note: Using bounce flash reduces the maximum distance range of the flash unit.
The subject contains very bright or highly reflective areas. The metering system of the camera or flash unit is deceived as a result.
Set a positive manual flash exposure correction, e.g., +1 EV at the camera.
• The shots are too bright.
When taking close-ups, make sure to preserve specific minimum illumination ranges to avoid overexposure. The minimum distance from the subject should represent at least 10% of the maximum range.
Maximum distance range = guide number (see table 1) ÷ aperture
Minimum distance to the motive = 0.1 x [guide number (see table 1) ÷ aperture]
16 Technical data
Max. guide numbers at ISO 100/21°, zoom 105 mm:
In the metric system: 36
In the imperial / feet system: 118
Flash modes:
- Canon: E-TTL II
- Fujifilm: Fujifilm TTL
- Nikon: i-TTL,
- Olympus / Panasonic / Leica: Micro FourThirds TTL
- Sony: Pre-flash TTL
Colour temperature:
Ca. 5.600 K
Synchronisation:
Low-voltage IGBT ignition
Flash numbers:
approx. 130 with high-performance alkali-manganese batteries
approx. 160 with NiMH rechargeable batteries (2100 mAh)
(each with full light output)
Flash delay, with full light output:
approx. 3-4 seconds.
Motor zoom main reflector illumination:
from 24mm and up (135 format 24 x 36).
from 14mm and up with integrated wide-angle diffuser (135 format 24 x 36).
Reflector head pivot range and holding positions:
- Vertical:
-7° 0° 45° 60° 75° 90°
- Horizontal anti-clockwise:
60^ 90^ 120^ 150^ 180^
- Horizontal clockwise:
60^ 90^ 120^
Dimensions W x H x D:
approx. 64 x 100 x 80 mm
Weight:
approx. 190 g without power supply.
Scope of delivery / what you will find in the box:
Flash unit with integrated wide-angle diffuser and reflector card, mecabounce diffuser, soft bag, quick reference guide (Quick Guide), safety sheet.
Battery disposal
Batteries must not be disposed of in household waste! Please dispose of used batteries through a battery return system.
Only return dead batteries.
Generally, batteries are dead when the device no longer functions properly after prolonged use of the batteries.
The battery poles should be covered with an adhesive strip to protect against short - circuiting.
Germany: As a consumer you are legally obliged to return used batteries. You can dispose of your old batteries wherever they were purchased. Alternatively you can also dispose of them at the public collection points in your city or area.
These symbols can be found on batteries containing harmful substances:

Pb = battery contains lead
Cd = battery contains cadmium
Hg = battery contains quicksilver
Li = battery contains lithium
17 Appendix
| ISO / DIN | Reflector Zoom Position | |||||||
| 14* | 24 | 28 | 35 | 50 | 70 | 80 | 105 | |
| 6/9° | 3.3 | 4.3 | 4.6 | 5.2 | 6.2 | 7.3 | 7.9 | 9.0 |
| 8/10° | 3.7 | 4.9 | 5.3 | 5.9 | 7.0 | 8.3 | 8.9 | 10 |
| 10/11° | 4.2 | 5.4 | 5.9 | 6.6 | 7.9 | 9.3 | 9.9 | 11 |
| 12/12° | 4.6 | 6.1 | 6.6 | 7.3 | 8.8 | 10 | 11 | 13 |
| 16/13° | 5.3 | 6.9 | 7.4 | 8.3 | 9.9 | 12 | 13 | 14 |
| 20/14° | 5.9 | 7.7 | 8.3 | 9.3 | 11 | 13 | 14 | 16 |
| 25/15° | 6.6 | 8.6 | 9.3 | 10 | 12 | 15 | 16 | 18 |
| 32/16° | 7.4 | 9.7 | 10 | 12 | 14 | 17 | 18 | 20 |
| 40/17° | 8.3 | 11 | 12 | 13 | 16 | 16 | 20 | 23 |
| 50/18° | 9.3 | 12 | 13 | 15 | 18 | 21 | 22 | 25 |
| 64/19° | 10 | 14 | 15 | 17 | 20 | 23 | 25 | 29 |
| 80/20° | 12 | 15 | 17 | 19 | 22 | 26 | 28 | 32 |
| 100/21° | 13 | 17 | 19 | 21 | 25 | 29 | 31 | 36 |
| 125/22° | 15 | 19 | 21 | 23 | 28 | 33 | 35 | 40 |
| 160/23° | 17 | 22 | 23 | 26 | 31 | 37 | 40 | 45 |
| 200/24° | 19 | 24 | 26 | 29 | 35 | 42 | 44 | 51 |
| 250/25° | 21 | 27 | 29 | 33 | 39 | 46 | 50 | 57 |
| 320/26° | 23 | 31 | 33 | 37 | 44 | 53 | 56 | 64 |
| 400/27° | 26 | 34 | 37 | 42 | 50 | 59 | 63 | 72 |
| 500/28° | 29 | 38 | 42 | 46 | 55 | 66 | 70 | 80 |
| 650/29° | 33 | 44 | 47 | 53 | 63 | 75 | 80 | 92 |
| 800/30° | 37 | 49 | 53 | 59 | 70 | 83 | 89 | 102 |
| 1000/31° | 42 | 54 | 59 | 66 | 79 | 93 | 99 | 114 |
| 1250/32° | 46 | 61 | 66 | 73 | 88 | 104 | 111 | 127 |
| 1600/33° | 53 | 69 | 74 | 83 | 99 | 118 | 126 | 144 |
| 2000/34° | 59 | 77 | 83 | 93 | 111 | 131 | 140 | 161 |
| 2500/35° | 66 | 86 | 93 | 104 | 124 | 147 | 157 | 180 |
| 3200/36° | 74 | 97 | 105 | 118 | 140 | 166 | 178 | 204 |
| 4000/37° | 83 | 109 | 118 | 131 | 157 | 186 | 199 | 228 |
| 5000/38° | 93 | 122 | 131 | 147 | 176 | 208 | 222 | 255 |
| 6400/39° | 105 | 138 | 149 | 166 | 199 | 235 | 251 | 288 |
Table 1: Guide numbers at maximum light output level
* With built-in wide angle diffuser
| Aperture / F-stop | ||||||||||
| ISO | 1 | 1.4 | 2 | 2.8 | 4 | 5.6 | 8 | 11 | 16 | 22 |
| 100 | 21 | 15 | 10 | 7.5 | 5.3 | 3.8 | 2.6 | 1.9 | 1.3 | 1.0 |
| 200 | 30 | 21 | 15 | 11 | 7.4 | 5.3 | 3.7 | 2.7 | 1.9 | 1.3 |
| 400 | 42 | 30 | 21 | 15 | 10 | 7.5 | 5.3 | 3.8 | 2.6 | 1.9 |
| 800 | 59 | 42 | 30 | 21 | 15 | 11 | 7.4 | 5.4 | 3.7 | 2.7 |
| 1600 | 84 | 60 | 42 | 30 | 21 | 15 | 10 | 7.6 | 5.3 | 3.8 |
| 3200 | 120 | 85 | 59 | 42 | 30 | 21 | 15 | 11 | 7.4 | 5.4 |
| 6400 | 170 | 120 | 84 | 60 | 42 | 30 | 21 | 15 | 10 | 7,6 |
| 12500 | 240 | 170 | 120 | 85 | 59 | 42 | 30 | 22 | 15 | 11 |
Table 2: Maximum distance range in meters at reflector zoom position 35 mm
Maximum distance range with the various reflector zoom positions
| Reflector position | 14 mm* | 24mm | 28mm | 35 mm | 50 mm | 70 mm | 80 mm | 105mm |
| Multiplicator | x 0.6 | x 0.8 | x 0.9 | x 1 | x 1.2 | x 1.4 | x 1.5 | x 1.7 |
Table 3: Multiplicators for the max. distance range at other reflector zoom positions
* With built-in wide angle diffuser
Warranty conditions Federal Republic of Germany
1 The warranty conditions solely apply to purchases made in the Federal Republic of Germany.
2 In other countries, the warranty regulations of the respective country or warranty regulations of the seller shall apply.
3 The following conditions are only valid for private use.
4 The warranty period -24 months begins upon the conclusion of the purchase contract or the day on which the device is delivered to the buyer (end customer).
5 Warranty claims can only be asserted when accompanied by proof of purchase date in the form of the original sales receipt issued automatically by the seller.
6 We ask you to return defective devices together with the purchase receipt either via the specialist dealer or directly to the company Metz mecatech GmbH, Central Customer Services, Ohmstraße 55, D-90513 Zirndorf, Germany in a safe and secure manner with a detailed description of the complaint. Outward and return shipping is at the risk of the buyer.
7 The warranty is based on devices which become defective due to a recognized error in fabrication or the materials used and which are subsequently repaired or replaced, should repairing the device entail disproportionate expense. Further liability, particularly for damage which did not arise on the basis of the device itself, is excluded. This shall not apply in the case of intentional acts or gross negligence for which the assumption of liability is mandatory. Warranty services do not extend the warranty period and replaced or improved parts do not establish a new warranty period.
8 Improper handling and interventions by the buyer or third parties cause warranty obligations and all other claims to expire. The warranty furthermore excludes damage or faults caused by non - compliance with the instruction manual, mechanical damage, expended batteries, force majeure or water/lightning etc. Furthermore, the warranty does not cover wear, consumption or excessive use. This particularly affects the following parts: Flash tube, contacts, connecting cables.
9 These warranty conditions do not affect the buyer's warranty claims against the seller.
Metz mecatech GmbH


Your Metz product was developed and manufactured with high-quality materials and components which can be recycled and/or reused.
This symbol indicates that electrical and electronic equipment must be disposed of separately from normal garbage at the end of its operational lifetime.
Please dispose of this product by bringing it to your local collection point or recycling centre for such equipment.
This will help to protect the environment in which we all live.
CE Note:

Within the framework of the CE approval symbol, correct exposure was evaluated in the course of the electromagnetic compatibility test.
Do not touch the contacts!
In exceptional cases the unit can be damaged if these contacts are touched.
Contact for service requests
Should any problems arise when using the product, contact your dealer or the manufacturer immediately:
Metz mecatech GmbH
Ohmstraße 55
D-90513 Zirndorf
Tel.: +49-911-9706-0
E-Mail: info@metz-mecatech.de
Website: www.metz-mecatech.de
Metz mecatech hereby declares that this device is in compliance with the essential requirements and other relevant provisions of directive 1999/5/EC. In accordance with the R&TTE directive 1999/5/EC, the conformity declaration can be found at:
www.metz-mecatech.de
Errors excepted. Subject to changes!
- Table of contents:
- Introduction
- Proper Use
- Declaration
- Safety instructions
- Dedicated flash functions
- Explanation:
- Preparing the flash unit for use
- Power supply
- Suitable batteries/rechargeable batteries
- Replacing the batteries
- Mounting the flash unit
- Mounting the flash unit on the camera
- Removing the flash unit from the camera
- Switching the flash unit ON and OFF
- Automatic unit shut-off / Auto OFF
- Wake-Up Function
- Test button
- Multifunctional LED signals
- Flash readiness signal
- Standby signal
- Fire a testing flash
- TTL flash modes
- Digital TTL flash modes
- Automatic TTL fill-in flash mode
- Manual flash exposure correction in TTL flash mode
- TTL Flash exposure memory FE
- Swivel reflector
- Auto zoom
- Wide-angle diffuser
- Mecabounce diffuser
- Flash techniques
- Bounce flash
- Bounce flash with a reflector card
- Program flash mode
- Automatic AF auxiliary light
- Flash synchronisation
- Automatic flash sync-speed control
- Normal synchronisation
- Second curtain synchronisation (REAR)
- Slow synchronisation (SLOW)
- Triggering control (auto-flash)
- Pre-flash function for red-eye reduction
- Care and maintenance
- Firmware updates
- Flash capacitor forming
- Troubleshooting
- Technical data
- Flash modes:
- Battery disposal
- Warranty conditions Federal Republic of Germany
- CE Note:
- Contact for service requests
Brand : METZ
Model : Mecablitz M360
Category : Flash