BE Free5 - Headphones NuForce - Free user manual and instructions
Find the device manual for free BE Free5 NuForce in PDF.


User questions about BE Free5 NuForce
0 question about this device. Answer the ones you know or ask your own.
Ask a new question about this device
Download the instructions for your Headphones in PDF format for free! Find your manual BE Free5 - NuForce and take your electronic device back in hand. On this page are published all the documents necessary for the use of your device. BE Free5 by NuForce.
USER MANUAL BE Free5 NuForce
natural_image
Line drawing of two electronic devices with no visible text or symbolsContents
WHAT'S IN THE BOX
• BE Free5 EARPHONES
- THE BASICS
Charging your BE Free5
Baery Low Alarm and Baery Status
Bluetooth pairing
Power On/ Power O
Wearing your BE Free5
Handling phone calls and Siri/Google Assistant
Listening to music
- MISCELLANEOUS
Restoring factory sengs
Voice prompts list
Disclaimer
FCC Interference statement
CE
Specicaon
WHAT'S IN THE BOX
| Item | ||
| BE Free5 earphones | 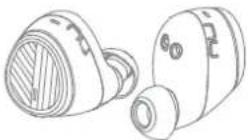 | |
| Silicon psCP350 (in L/M/S), CP100Z (in SS), Total of 4 pairs ear ps |    (another pair on the BE Free5) (another pair on the BE Free5) | |
| Wings (in L/M/S), Total 3 pairs | 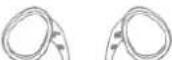 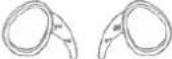 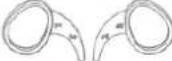 | |
| Charging case | 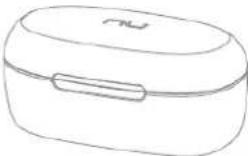 | |
| Charging cable(Micro-USB) | 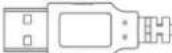 | |
| Basic user's manual |  | |
| Safety Instrucon |  | |
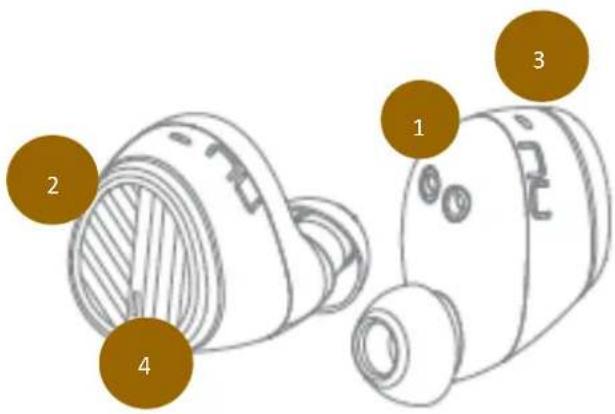
BE Free5 EARPHONES
text_image
Technical diagram of a mechanical component with numbered parts labeled 1, 2, 3, and 4- Charging pins
- Mulfuncon buon (MFB)
- Microphone (on the R earpiece)
- LED indicator
The BASICS
Charging Your BE Free5
Although your BE Free5 earphones come with a parally charged baery, it is recommended that you fully charge your BE Free5 and the charging case before rst use.
Note: Please remove the lm between charging pins and the earpieces in the case before you charge.
-
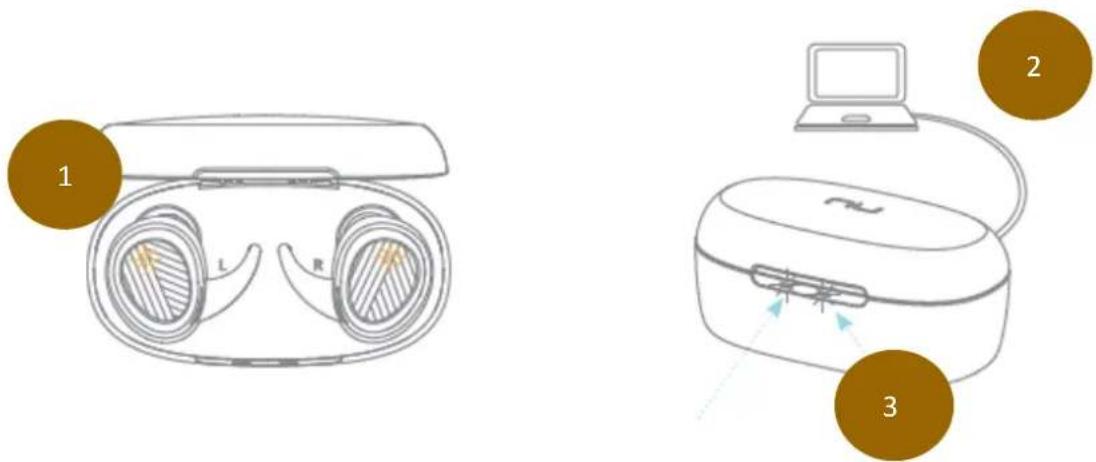
Put your BE Free5 into the charging case (1). The USB charge cable should be connected to the charge port on the charging case (2) and to either a PC or a dedicated USB charger.
-
When charging, the LED indicator(s) on the earpieces and the right LED indicator on charging case (3) will ash orange.
-
Once charging is complete the LED Indicator on the earpieces' will turn o and charging case LED indicator will be solid white.
text_image
Diagram showing two types of smartwatches with labeled parts: one with lenses and a closed lid, the other with a connected device and a mouse.NOTE:
A. It takes up to one and a half hours to fully charge the le/right earpieces, and charging case.
B. To maintain the best performance of the baery, we recommend that the baery in both the earpieces and charging case are charged regularly. Do not deplete the baery of the earpieces and charging case before charging.
C. To check baery level of the charging case:
Open the top cover, check le LED.
If the le LED indicator is white, the baery is more than 25% capacity,
If the le LED indicator is orange, the baery is less than 25% capacity.
It is strongly recommended that you charge the charging case immediately when the LED indicator turns orange.
Please note, low baery of the charging case might cause abnormal funconality such as auto on and auto o.
Baery Low Alarm and Baery Status
When the battery level of the earphones are low, you will hear the voice prompt “Battery Low” from your BE Free5 every 2 minutes. The esmated baery reserve remaining me is less than 15 minutes.
Users with iOS devices and some Android models will be able to view the baery status on their device's display.
Bluetooth Pairing
flowchart
graph TD
    A["1: Smartphone with Bluetooth"] --> B["2s Timer"]
    B --> C["3: Bluetooth & BE Fees5 Interface"]
    C --> D["4: Smartphone with BE Fees5 Interface"]
Using your BE Free5 for the rst me
Pairing BE Free5 Right earpiece with source device
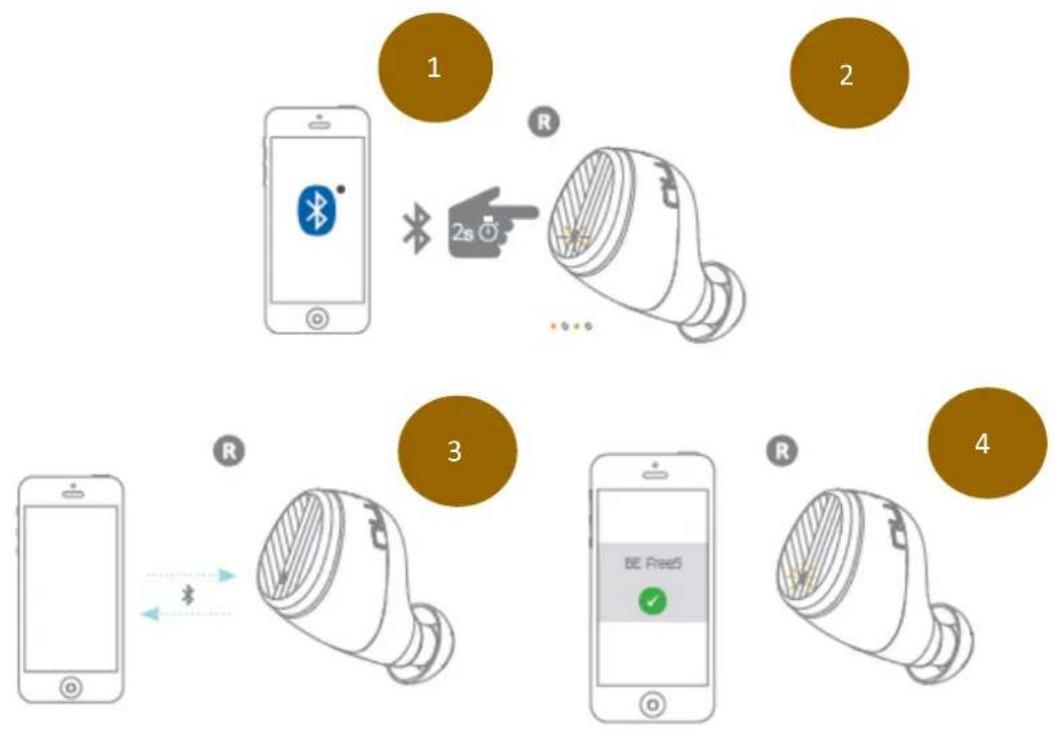
- When pick up the Right earpiece from the charging case, press and hold the BE Free5's Power/Funcon button for 2 seconds until the LED indicator light ashes orange and white or you hear voice prompt "Pairing mode acvated". Your BE Free5 is now in pairing mode.
- Turn on Bluetooth® on your source device, then select "BE Free5" once it appears on the device list.
- Once successfully paired, the LED indicator will ash white and you hear "Device connected" from your BE Free5.
NOTE:
Consult your source device's user manual for instrucons on acvang Bluetooth.
Pairing additional devices with your BE Free5
To pair additional devices to your BE Free5 ensure that your BE Free5 is not connected to any device then repeat the steps 1,2,3 outlined above.
Note:
If your BE Free5 have already been paired with eight devices and a ninth device is paired, the stored informaon for the very rst device will be deleted.
Pairing BE Free5 Right earpiece with Le earpiece
Turns on both earpieces and insert them in your ear, both earpieces will automacally connected. You will hear voice prompt “Paired”.
Each unit of BE Free5 are paired in the factory. However, when pairing informaon is lost, you can follow procedure to restore the pairing informaon:
-
When the right earpiece is in pairing mode, tap the MFB connuously three mes. The LED should ash orange/white slowly.
-
Then press on le earpieces MFB for 10 seconds from power-o state. The LED will also ash orange/white. Wait for few seconds to allow both earpieces to pair. Once pairing is complete the LED on both earpieces' will ash in white.
NOTE:
A. If the earpiece is le inacve in pairing mode, your BE Free5 will automacally power o aer 10 minutes.
B. Your BE Free5 can store pairing informaon for up to eight devices.
Power On/Power O
text_image
Diagram illustrating the step-by-step installation of a wireless earbuds with power and time controls, showing device states and operation sequence.There are two ways to turn on your BE Free5
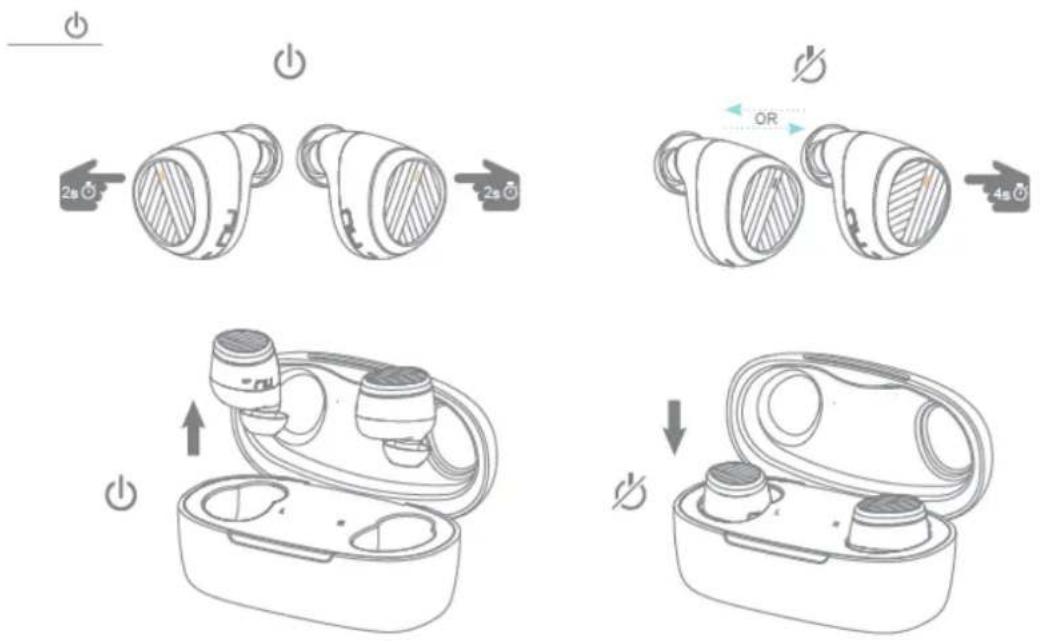
1) Pick up the earpieces from the charging case, they will automacally power on.
2) When your BE Free5 are not in the charging case and are O, press Power/Funcon buon for about 2 seconds unl the LED indicator ashes white and you hear the voice prompt “Power on” on both earpieces.
NOTE:
Once you have successfully paired the BE Free5 to a Bluetooth-enabled device, the BE Free5 will automatically connect with that device once it is powered on again. For more informaon check “Bluetooth Pairing” secon.
There are two ways to turn O your BE Free5
To turn o the BE Free5, either place each earpieces back into the charging case, or to press the Power/Funcon buon on either the le or right earpiece for about 4 seconds unl the LED indicator turns orange and you hear the voice prompt “Power o”.
Wearing Your BE Free5
natural_image
Diagram showing three stages of a device with labeled ports (R) and an arrow indicating transformation (no text or symbols present)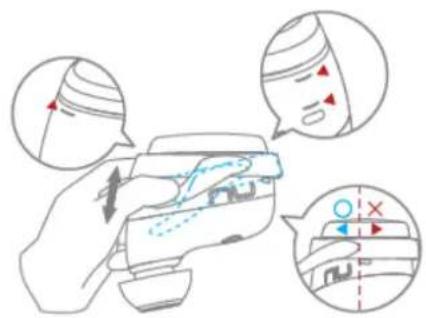
text_image
Diagram illustrating a hand holding a device with three circular annotations showing different states of action: speech bubble, face, and hand gesture.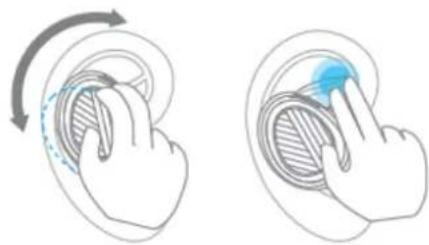
natural_image
Illustration of two hand gestures with curved arrows indicating motion (no text or symbols)To ensure a secure and comfortable t when wearing your BE Free5:
- Select right size of ear ps and install ps on BE Free5*, rotate the SpinFit ps CP350 (if wearing this type).
- Place the BE Free5 into each ear and rotate the earpiece to well t so that they are posioned comfortably.
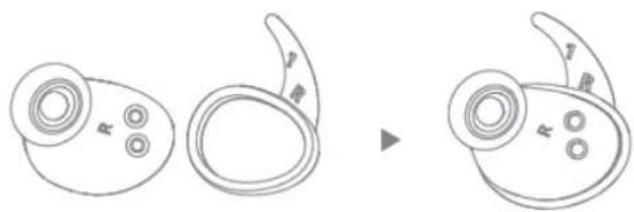
- You can also add additional support by ng the one of the three available wing sizes to the BE Free5.
NOTE:
- *There are 4 pairs of silicone ear ps provided. These come in a range of sizes provide comfortable secure t.
- Improper posioning of ear wings might have conict with charging case and cause without charging when you place earpieces back to the charging case.
Handling Phone Calls and Siri/Google Assistant
When your BE Free5 are connected to a Bluetooth-enabled smartphone, you can handle your phone calls directly using MFB on right earpiece.
NOTE:
When on a call the right earpiece handles audio
The following funcons are available for calls:
| Call opon | Status | Acon |
| Answer a call | Incoming call | Tap the Power/Funcon buon on right earpiece |
| End a call | In a call/outgoing call | Tap the Power/Funcon buon on right earpiece |
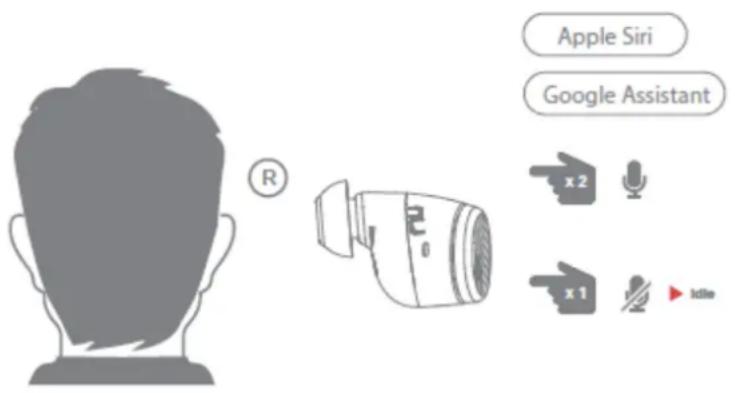
| Acvate Siri (iOS) or Google Assistant (Android) | Standby/Connected | Double click the Power/Funcon buon on right earpieceTo stop it, by clicking on Power/funcon buon |
To acvate Siri and Google Assistant from listening music or in idle:
text_image
Apple Siri Google Assistant x 2 x 1 idleListening to Music
You can enjoy and control audio through Power/Funcon buon on your BE Free5.
| Audio opon | Acon |
| Play or pause audio | Tap the Power/ Funcon buon on either right or le earpiece |
| Volume up | Press the Power/ Funcon buon on right earpiece for 2 seconds* |
| Volume down | Press the Power/ Funcon buon on le earpiece for 2 seconds* |
| Skip to next track | Double click on the Power/ Funcon buon of le earpiece |
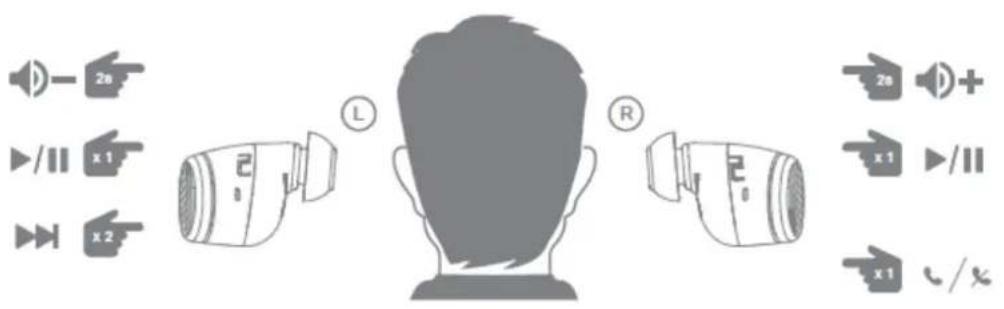
text_image
28 x1 x2 L R 28 + x1 x1 x1 /×NOTE:* Press the Power/Funcon button for 4 seconds will power o the earpieces.
MISCELLANEOUS
Restore Factory Sengs
When you restore the BE Free5 to its factory sengs, the paired devices stored will be deleted.
To restore factory sengs:
1 Ensure that your BE Free5 are not connected to any device.
2 Put the BE Free5 in pairing mode.
3 Double click on the Power/Funcon buon on the right earpiece until the LED indicator ashes in orange/white two mes, and you hear short tones from the BE Free5.
Voice Prompts list
The BE Free5 are pre-loaded with English voice prompts
"Power On"
"Power O"
"Baery Low"
"Device connected"
"Pairing Mode Acvated"
"Paired"
Disclaimer
The BE Free5 is equipped with the latest technology however funconality may vary by device.
Federal Communicaon Commission Interference
Statement
This equipment has been tested and found to comply with the limits for a Class B digital device, pursuant to two dierent Part 15 rules seconds of the FCC. These limits are designed to provide reasonable protecon against harmful interference in a residential installaon.
This equipment generates, uses and can radiate radio frequency energy and, if not installed and used in accordance with the instrucons, may cause harmful interference to radio communicaons. However, there is no guarantee that interference will not occur in a particular installaon. If this equipment does cause harmful interference to radio or television recepon, which can be determined by turning the equipment o and on, the user is encouraged to try to correct the interference by one of the following measures:
. Reorient or relocate the receiving antenna.
. Increase the separaon between the equipment and receiver.
. Connect the equipment into an outlet on a circuit dierent from that to which the receiver is connected.
. Consult the dealer or an experienced radio/TV technician for help.
FCC Cauon: To assure connued compliance, any changes or modicaons not expressly approved by the party responsible for compliance could void the user's authority to operate this equipment. (Example - use only shielded interface cables when connecng to computer or peripheral devices).
FCC Radiaon Exposure Statement
This equipment complies with FCC RF radiaon exposure limits set forth for an uncontrolled environment. This equipment should be installed and operated with a minimum distance of 0.5 cenmeters (.20 of an Inch) between the radiator and your body.
This transmier must not be co-located or operang in conjuncon with any other antenna or transmier.
The antennas used for this transmier must be installed to provide a separaon distance of at least 0.5 cenmeters (.20 of an Inch) from all persons and must not be co-located or operang in conjuncon with any other antenna or transmier.
This device complies with two dierent Part 15 rules seconds of the FCC. Operaon is subject to the following two conditions:
(1) This device may not cause harmful interference, and (2) This device must accept any interference received, including interference that may cause undesired operaon.
CE
EU Regulatory Conformance Hereby, Optoma Corporaon declares that this device is in compliance with the essenal requirements and other relevant provisions of Direcve 2014/53/EU.
Noce: Observe the naonal local regulaons in the locaon where the device is to be used.
Specicaon
| Connection type | Bluetooth 2.4Ghz |
| Bluetooth type | V4.2 |
| Bluetooth profile | HSP v1.2, HFP v1.6, A2DP v1.3, AVRCP v1.6, |
| Codec | SBC, AAC |
| Driver Type | Dynamic |
| Driver size | 5.6mm, Graphene diaphragm |
| Impedance | 16 Ohm |
| Battery life (estimated) | Up to 4 hours (for the earpieces) |
| Lithium-ion battery, Typical 3.7V/ | |
| Battery type | (Earpieces) 55mAh, (Charging case) |
| 500mAh | |
| Microphone sensitivity | -42 +/-3 dB |
| Frequency response | 20Hz - 20kHz |
| Sensitivity | 95dB +/-3dB at 1KHz |
| Range | Up to 10m (33ft) |
| Weight | A pair of earphones (incl.CP350 ps) 12.6g, Charging case 56g |