A&norma SR15 - Media player Astell&Kern - Free user manual and instructions
Find the device manual for free A&norma SR15 Astell&Kern in PDF.


User questions about A&norma SR15 Astell&Kern
0 question about this device. Answer the ones you know or ask your own.
Ask a new question about this device
Download the instructions for your Media player in PDF format for free! Find your manual A&norma SR15 - Astell&Kern and take your electronic device back in hand. On this page are published all the documents necessary for the use of your device. A&norma SR15 by Astell&Kern.
USER MANUAL A&norma SR15 Astell&Kern
Getting Started \_01
Package Contents 02
Product Overview 03
Power Management 05
Charging 06
Connections 07
Firmware Updates 12
Using the Device ^02
Basic operations 13
Home Screen 17
Notification Panel 19
Music Store 21
AK Connect 22
Listening to Music 27
Playlist Management 30
USB DAC Installation 33
How to Use USB Audio 34
CD Ripping 36
Settings 38
Connecting to Wi-Fi 44
Using Bluetooth 45
Equalizer Setup 47
Miscellaneous \_03
Safety Pre-Cautions 50
Troubleshooting 52
Copyright 53
Certifications 54
Registered Trademarks 54
Disclaimers 54
Specifications 55
Package Contents
Components may be changed without prior notice to improve the performance or quality of the product.
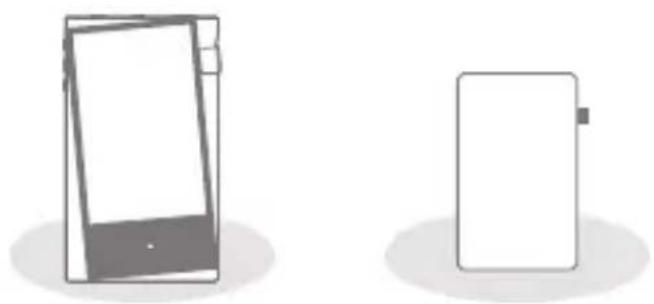
Protective FilmSR15
natural_image
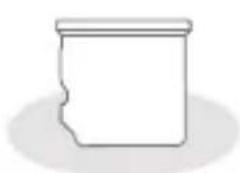
Simple line drawing of a cylindrical object with a wavy top edge and a shadow (no text or symbols)microSD Card Slot Cover
natural_image
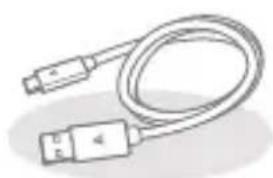
Illustration of a USB cable with two connectors (no text or symbols)5-Pin Micro USB Cable
natural_image
Stacked document icons with letter 'A' on top (no text or symbols beyond the icon)Quick Start Guide & Warranty Card
Protective Film: Protects the product's screen.
microSD Card Slot Cover: The cover is used to protect the microSD card slot when not in use. It is installed in the product by default.
5-Pin Micro USB Cable: For charging and data transfer.
Quick Start Guide: Basic overview of device functionality.
Warranty Card: Provides warranty details for your device. Maintain a copy of this card since it may be required for future technical support requests.
User Guide: The User Guide can be downloaded from the Astell&Kern website: [http://www.astellnkern.com Support > Download].
Product Overview
The appearance of the product, as well as the printed and engraved information, may vary depending on the model.
text_image
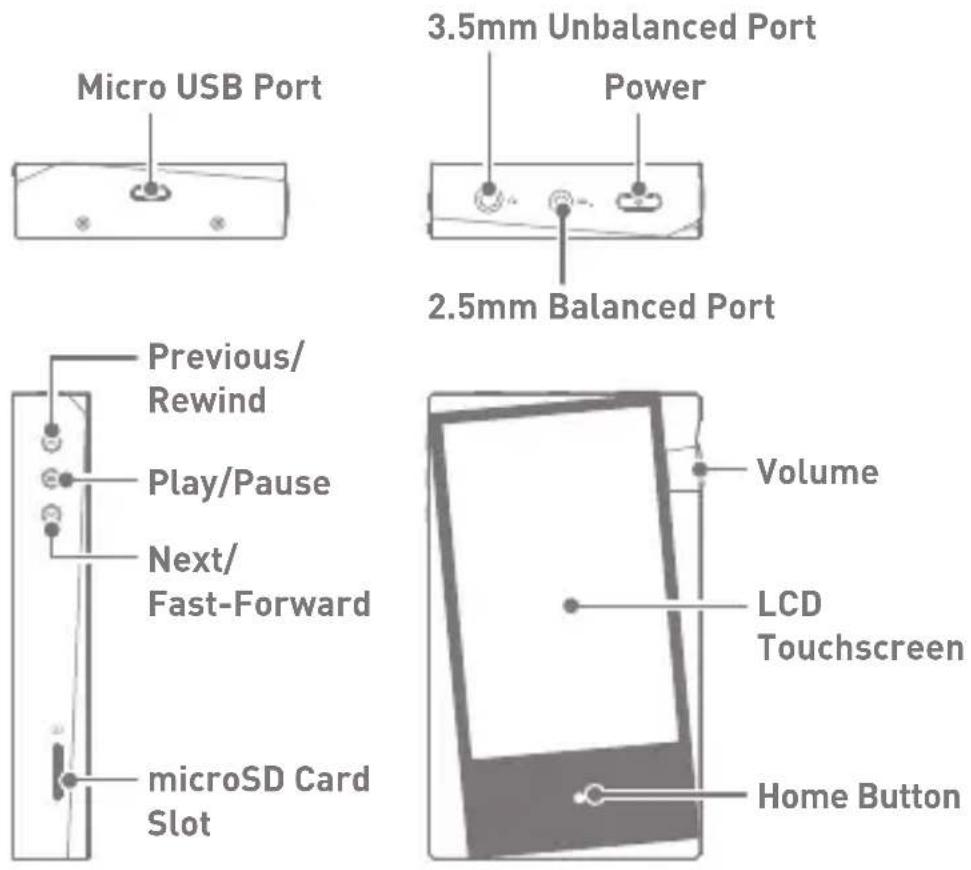
Micro USB Port 3.5mm Unbalanced Port Power 2.5mm Balanced Port Previous/ Rewind Play/Pause Next/ Fast-Forward microSD Card Slot Volume LCD Touchscreen Home ButtonMicro USB Port: 5V=2A - DC Power symbol.
For charging and data transfer.
3.5mm Unbalanced Port: 📞 - 3.5mm Unbalanced Port symbol.
For audio output, connect earphones or headphones that utilize a 3.5mm jack.
2.5mm Balanced Port: BAL. - 2.5mm Balanced Port symbol.
For audio output, connect earphones or headphones that utilize a 2.5mm jack.
Power: ⏻ - Power symbol.
Press - Turns the screen on and off.
Press and Hold - Turns the device on or off.
Previous/Rewind:
Short press - Play the previous song or restart the current song.
Press and hold - Rewind the current song.
Play/Pause: Play or pause the current song.
Next/Fast-Forward:
Short press - Play the next song.
Press and hold - Fast-forward the current song.
microSD Card Slot: - microSD Card Slot symbol.
Insert a microSD card to access its files.
Volume: Turn the wheel to adjust the playback output volume level.
LCD Touchscreen: Display screen with touch control features.
Home Button: Press to return to the Home Screen.
Power Management
Powering the Device On/Off
- Press and hold the [Power ☐] button to turn on the device.
- While the device is on, press and hold the [Power ☐] button to shut down the device. A confirmation message will appear.
- Press [OK] to turn off the device.

This device has an automatic shutdown feature to save battery power. The device will turn off if there is no user input during the period defined in [Menu - Settings - Timer Settings - Auto Power Off]. (See Page 41)
Turning the Screen On/Off
- While the screen is on, press the [Power ☐] button to turn off the screen.
- Press [Power ☐] button again to turn it on.

This device has an automatic timeout feature to save battery power. The screen will turn off if there is no user input during the period defined in [Menu - Settings - Timer Settings - Screen Off]. (See Page 41)
Reset Function
- In cases of unexpected device failure or freeze, press and hold [Power ☐] for 7 seconds to force a shutdown. The device can then be restarted after the shutdown is complete.

Resetting the device will not affect stored data or time settings. Do not use the reset function while the product is in use. Doing so may corrupt the data on the device
Charging
Charging Via Computer Connection
- The device will charge automatically when connected to a computer via the 5-Pin Micro USB cable.
Charging Time: up to 8 hours (fully discharge, power off) When charging via computer connection, the charging time may vary depending on whether the device is turned on or off. Depending on computer specifications, the device may charge only when the computers is turned on. Some computers in power-saving mode may not charge the device. The built-in battery will gradually lose capacity over time with repeated charging/discharging. Do not use a cable other than the 5-Pin Micro USB cable supplied with the device. Doing so may cause malfunctions.
Charging Via USB Wall Adapter
- Commercially available 5V 2A output adapters may be used for charging.
Charging Time: Up to 4 hours 30 minutes (Fully discharged, power off).
Maximum rated output adapter recommended is 5V 2A. Using a higher rated or fast-charge adapter that supports varying voltages (5V, 9V and 12V) is not recommended, may not charge the device and may cause malfunctions
Connec- tions
3.5mm Unbalanced Port
- Connect earphones or headphones to the 3.5mm unbalanced port.
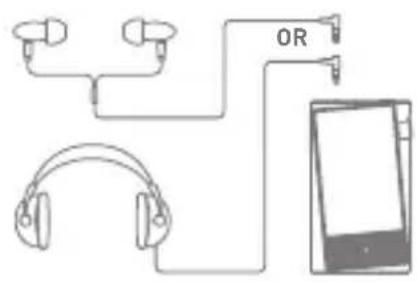
text_image
OR2.5mm Unbalanced Port
- Connect earphones or headphones to the 2.5mm Balanced port.
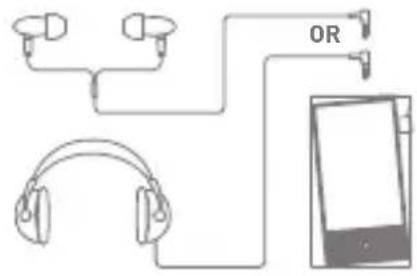
text_image
ORConnecting to Balanced Audio Device
- Connect to an external audio device by using the 3.5mm unbalanced port and 2.5mm balanced port.
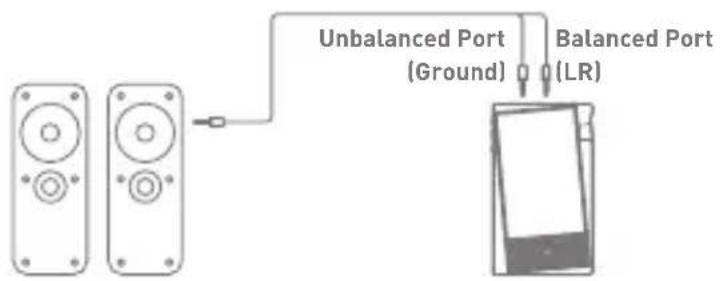
text_image
Unbalanced Port (Ground) Balanced Port (LR)Connecting to a Computer
- Turn on the device and your computer.
- Use the 5-Pin Micro USB cable to connect the device to a computer in accordance with settings in [Menu - Settings - USB Mode].
[Default] Media Device (USB Drive): Transfer files from a computer to the device.
DAC Input: Listen to music on a connected computer through the device. (See Pages 33-35)
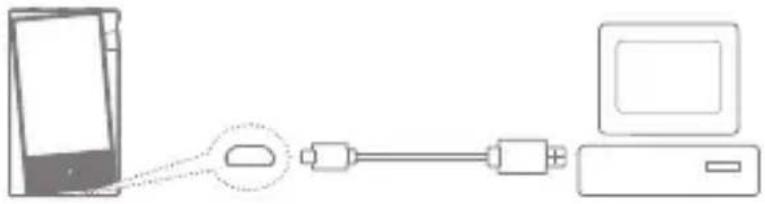
natural_image
Diagram showing connection between a smartphone, USB cable, and computer monitor (no text or symbols)
For an optimal connection, quit any unnecessary programs before connecting the device to the computer.
Do not use cables other than the 5-Pin Micro USB cable provided with the device. Doing so may cause malfunctions.
Mac users need to download and install Android File Transfer from the Astell&Kern website. [http://www.astellnkern.com > Support > Download]
For both Windows and MAC, the device only works with USB 2.0.
Disconnecting from the Computer
- Disconnect the 5-Pin Micro USB cable after the transfer between the device and computer is complete.

Disconnecting the device from the computer during an operation (e.g., file transfer) may corrupt data on the device.
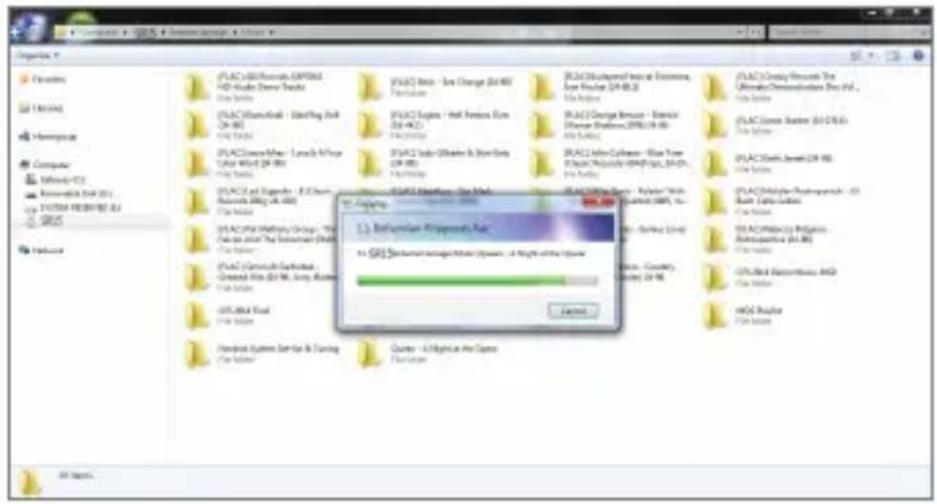
Copy Files (or Folders) to the Device
- To copy files/folders from your computer, select the desired files/folders and drag & drop them into the device folder.
text_image
File Set 1.000000000000000000000000000000000000000000000000000000000000000000000000000000000000000000000 FCA2 3D Software, DPT964 HD Studio Server Tools FCA2 3D Software - Starting Oil CN 88 FCA2 3D Software - Lungs-Officer Cable Wind CN 88 FCA2 3D Software - Lungs-Officer Cable Wind CN 88 FCA2 3D Software - Lungs-Officer Cable Wind CN 88 FCA2 3D Software - Lungs-Officer Cable Wind CN 88 FCA2 3D Software - Lungs-Officer Cable Wind CN 88 FCA2 3D Software FCA2 3D Software - Lungs-Officer Cable Wind CN 88 FCA2 3D Software - Lungs-Officer Cable Wind CN 88 FCA2 3D Software - Lungs-Officer Cable Wind CN 88 FCA2 3D Software - Lungs-Officer Cable Wind CN 88 FCA2 3D Software - Lungs-Lungs-Officer Cable Wind CN 88 FCA2 3D Software - Lungs-Lungs-Officer Cable Wind CN 88 FCA2 3D Software - Lungs-Lungs-Officer Cable Wind CN 88 FCA2 3D Software - Lungs-Lungs-Officer Cable Wind CN 88 FCA2 3D Software - Lungs-Lungs-Offizer Cable Wind CN 88 FCA2 3D Software - Lungs-Lungs-Offizer Cable Wind CN 88 FCA2 3D Software - Lungs-Lungs-Offizer Cable Wind CN 88 FCA2 3D Software - Lungs-Lungs-Offizer Cable Wind CN 88 FCA2 3D Software - Lungs-Lungs-Offizer Cable Wire FCA2 3D Software - Lungs-Lungs-Offizer Cable Wire CN 88 FCA2 3D Software - Lungs-Lungs-Offizer Cable Wire CN 88 FCA2 3D Software - Lungs-Lungs-Offizer Cable Wire CN 88 FCA2 3D Software - Lungs-Lungs-Offizer Cable Wire CN 88 FCA2 3D Software - Lungs-Lungs-Offizer Cable Wire CN 88 FCA7 3D Software - Lungs-Lungs-Officer Cable Wire CN 88 FCA7 3D Software - Lungs-Lungs-Officer Cable Wire CN 88 FCA7 3D Software - Lungs-Lungs-Officer Cable Wire CN 88 FCA7 3D Software - Lungs-Lungs-Officer Cable Wire CN 88 FCA7 3D Software - Lungs-Lungs-Officer Cable Wires FCA7 3D Software - Lungs-Lungs-Officer Cable Wires CN 88 FCA7 3D Software - Lungs-Lungs-Officer Cable Wires CN 88 FCA7 3D Software - Lungs-Lungs-Officer Cable Wires CN 88 FCA7 3D Software - Lungs-Lungs-Officer Cable Wires CN 88 FCA7 3D Software - Lungs-Lungs-Officer Cable Wires CN 86 FCA7 3D Software - Lungs-Lungs-Officer Cable Wires CN 86 FCA7 3D Software - Lungs-Lungs-Officer Cable Wires CN 86 FCA7 3D Software - Lungs-Lungs-Officer Cable Wires CN 86 FCA7 3D Software - Lungs-Lungs-Officer Cable Wires CN 85 FCA7 3D Software - Lungs-Lungs-Officer Cable Wires CN 85 FCA7 3D Software - Lungs-Lungs-Officer Cable Wires CN 85 FCA7 3D Software - Lungs-Lungs-Officer Cable Wires CN 85 FCA7 3D Software - Lungs-Lungs-Officer Cable Wires CN 84 FCA7 3D Software - Lungs-Lungs-Officer Cable Wires CN 84 FCA7 3D Software - Lungs-Lungs-Officer Cable Wires CN 84 FCA7 3D Software - Lungs-Lungs-Officer Cable Wires CN 84 FCA7 3D Software - Lungs-Lungs-Officer Cable Wires CN 83 FCA7 3D Software - Lungs-Lungs-Officer Cable Wires CN 83 FCA7 3D Software - Lungs-Lungs-Officer Cable Wires CN 82 FCA7 3D Software - Lungs-Lungs-Officer Cable Wires CN 82 FCA7 3D Software - Lungs-Lungs-Officer Cable Wires CN 81 FCA7 3D Software - Lungs-Lungs-Officer Cable Wires CN 81 FCA7 3D Software - Lungs-Lungs-Officer Cable Wires CN 80 FCA7 3D Software - Lungs-Lungs-Officer Cable Wires CN 79 FCA7 3D Software - Lungs-Lungs-Officer Cable Wires CN 79 FCA7 3D Software - Lungs-Lungs-Officer Cable Wires CN 78 FCA7 3D Software - Lungs-Lungs-Officer Cable Wires CN 77 FCA7 3D Software - Lungs-Lungs-Officer Cable Wires CN 76 FCA7 3D Software - Lungs-Lungs-Officer Cable Wires CN 75 FCA7 3D Software - Lungs-Lungs-Officer Cable Wires CN 74 FCA7 3D Software - Lungs-Lungs-Officer Cable Wires CN 73 FCA7 3D Software - Lungs-Lungs-Officer Cable Wires CN 72 FCA7 3D Software - Lungs-Lungs-Officer Cable Wires CN 71 FCA7 3D Software - Lungs-Lungs-Officer Cable Wires CN 70 FCA7 3D Software - Lungs-Lungs-Officer
Ensure the 5-Pin Micro USB cable is properly connected. Turning off the device, computer or disconnecting the 5-Pin Micro USB cable while copying or moving files/folders may corrupt files or device memory. File transfer speeds may be affected by the computer and/or the OS environment.
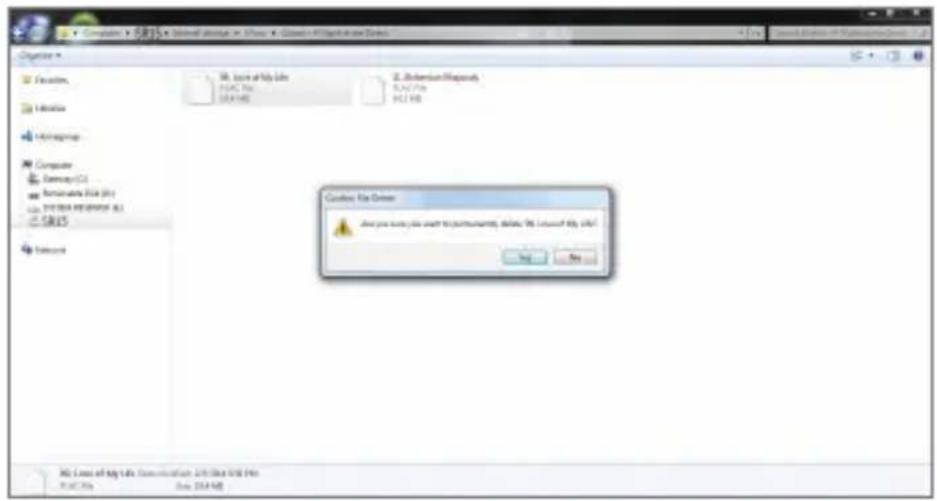
Delete Files (or Folders) from the Device
- Select the file/folder to delete, right-click the mouse, and select [Delete].
- Select [Yes] in the [Confirm File/Folder Deletion] window to delete the selected files/folders.
text_image
Computer - 2015 Normal Abstract in Windows - Clean Files in the Windows Organize File Edit View Insert Help F:\Program Files\Microsoft Office\ C:\Program Files\Microsoft Office\ C:\Program Files\Microsoft Office\ C:\Program Files\Microsoft Office\ C:\Program Files\Microsoft Office\ C:\Program Files\Microsoft Office\ C:\Program Files\Microsoft Office\ C:\Program Files\Microsoft Office\ C:\Program Files\Microsoft Office\ C:\Program Files\Microsoft Office\ C:\Program Files\Microsoft Office\ C:\Program Files\Microsoft Office\ C:\Program Files\Microsoft Office\ C:\Program Files\Cas: C\$4.49 Custom File Driver Are you have you used to communicate, please click your website at http://www.cas/4.49/ No Use No Use 36. Loss of My Life Communication (36.000x USB Pro F:\Program Files\Microsoft Office\ C:\Program Files\Microsoft Office\ C:\Program Files\Microsoft Office\ C:\Program Files\Microsoft Office\ C:\Program Files\Microsoft Office\ C:\Program Files\Microsoft Office\ C:\Program Files\Microsoft Office\ C:\Program Files\Microsoft Office\ C:\Program Files\Microsoft Office\ C:\Program Files\Microsoft Office\ C:\Program Files\Microsoft Office\ C:\Program Files\Microsoft Office\ C:\Primer\Primer\Primer C:\Primer\Primer\Primer C:\Primer\Primer\Primer C:\Primer\Primer\Primer C:\Primer\Primer\Primer C:\Primer\Primer\Primer C:\Primer\Primer\Primer C:\Primer\Primer\Primer C:\Primer\Primer\Primer C:\Primer\Primer\Primer D: 100% D: 100% D: 100% D: 100% D: 100% D: 100% D: 100% D: 100% D: 100% D: 100% D: 100% D: 100% D: 100% D: 100% D: 100% D: D: D:Insert/Remove a microSD Card
- Refer to the diagram and gently insert a microSD card into the microSD Card Slot.
- To safely remove a microSD card, on the Home Screen, select [Safely remove SD card] from the Notification Bar or select [Unmount SD card] from [Menu - Settings - System Information].
- Gently press the microSD card in to unlock and release it from the slot.
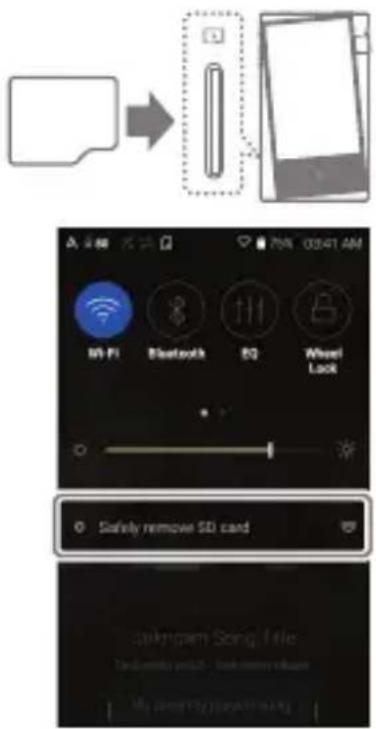
text_image
Mobile app interface screenshot showing wireless device connection and status message for safety removing SD cardRecommended microSD Cards
SanDisk, Transcend

Maximum Capacity: 400GB
Notes on Inserting a microSD Card
- Do not force the microSD card into the slot. Doing so may cause malfunction of the product and damage to the card.
- Do not repeatedly insert/remove the microSD card.
- If not inserted properly, the microSD card may cause product malfunctions and may become lodged in the product.
Notes on Removing a microSD Card
- Be sure to safely remove the microSD card from the device.
Not following the proper procedure may corrupt data and cause serious damage to the both the card and device. - Do not remove the microSD card during use. Doing so may cause malfunction, delete data and damage the microSD card.
Notes on Using a microSD Card
- If the microSD card is not recognized or functions improperly, format the card, preferably in the FAT32 system.
- Using cards other than the recommended microSD card types may cause malfunctions.
- A microSD card is not included in the product package. Please purchase separately.
Firmware Updates
Wi-Fi Update / OTA (Over-the-Air)
- Connect to a wireless network.
- When a new firmware version is available, the screen will display a Firmware Update Guide window.
- Select [Update].
- Follow the on-screen instructions to to proceed with the firmware update.

For Wi-Fi connections, see Page 44.
The firmware update may not start if the battery level is too low. (A minimum battery level of 20% is required.)
Moving to another screen during a file download will cancel the download.
Do not disconnect from the wireless network while downloading the update file. Doing so may cause data corruption and/or damage to the system.
If an error occurs or the notice in the Notification Bar disappears during an upgrade, download the firmware update again through [Menu - Settings - Update - System].
Basic operations
LCD Touchscreen
- This device features an LCD touchscreen that allows you to perform operations by touch.
Use the touchscreen to access various features on the device.

To prevent damage to the screen, do not use a sharp object or excessive force.
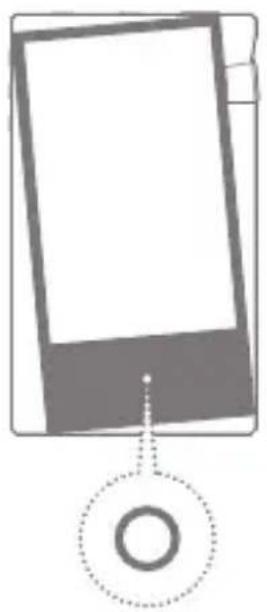
Return to the Home Screen
- Press [ ] at any time to return to the Home Screen.
natural_image
Simple line drawing of a smartphone with a circular button at the bottom (no text or symbols)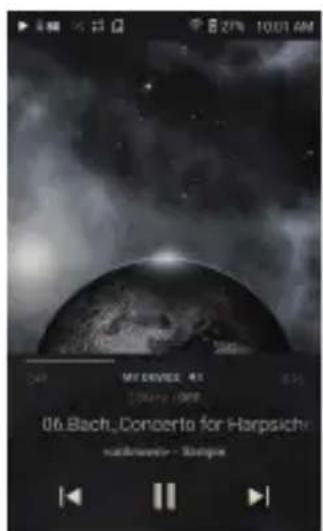
text_image
06.Bach, Concerto for Harpsiche radiversity - EuropeHome Screen
From the Home Screen, swipe your finger to the left, right, up or down from any edge of the touchscreen to access display menus. Each side of the Home Screen will activate a different display menu.
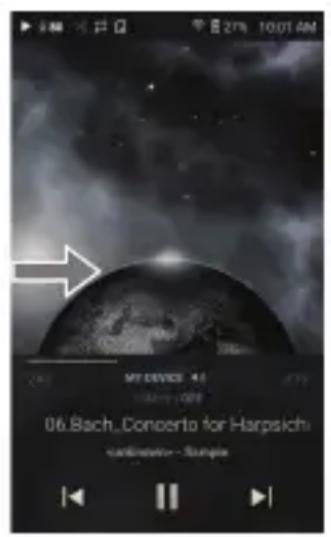
Main Menu
- From the left edge of the touchscreen, swipe your finger right to display the Main Menu.
text_image
MY DEVICE 06.Bach_Concerto for Harpsich continuato - Sample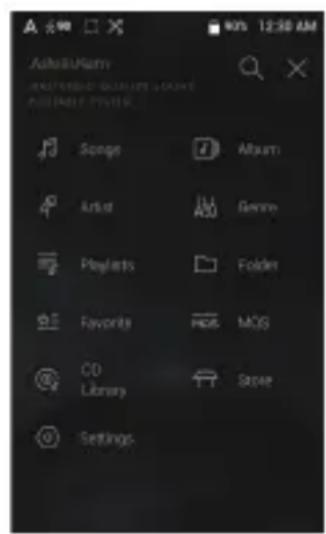
text_image
Adobe User ADAMSUNG 12:30 AM Songs Album Artist AVG Genre Playlists Folder Favorite HOS MOS CD Library Store Settings
Music files extracted using the AK CD-Ripper accessory that are stored in the Ripping folder of the internal memory will be displayed in the CD library menu.
Notification Bar
- From the top edge of the touchscreen, swipe your finger down to display the Notification Bar.
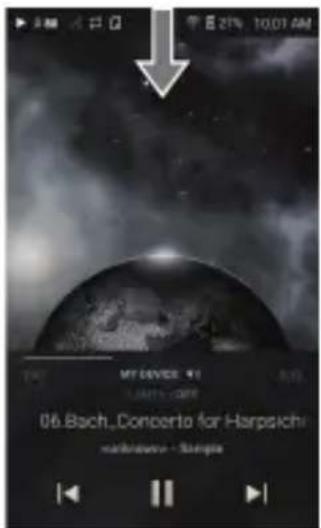
text_image
MY DEVICE: 91 LANTY - OFF 06.Bach.Concerto for Harpsicher marikawore - Stangie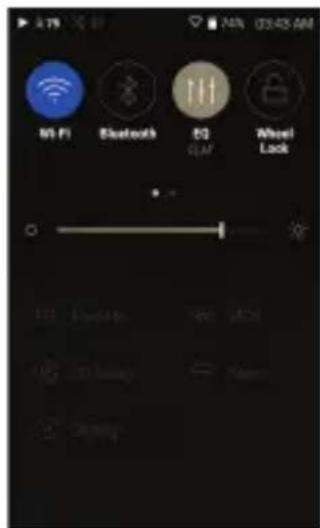
text_image
Wi-Fi Bluetooth 3D GLM Wheel LockView Current Playlist
- From the right edge of the touchscreen, swipe your finger left to display the Now Playing menu.
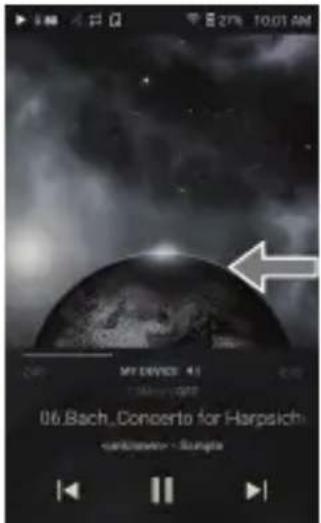
text_image
MY DEVICE: 41 06.Bach. Concerto for Harpsichtext_image
Now Playing Message: Cavalleria Rusticans Mouse Cards My Romance Ran Entrance Olde London Audiophila Reference IV Over The Rainbow Israel Commelament Ofic Never An Abstraction 200 MHz (19:30 AM)View Play History
1. From the bottom edge of the touchscreen, swipe your finger up to display the Play History menu. text_image
MY DEVEE 4.0 06 Bach.,Concerta for Harpsichtext_image
Play History Spanish Harlem Roberta Polyclan 10 Joofted by Tango, Five Wings Domications - Anxiety 95 the mimics album, Allergia's usual which PR-SPPO? 85 Standard, Sonata in C major, R. 420 Allegia 87 Vivalek Concerto in D'intercapes 4 mo B - Allegia 86 Beach Concerto for Harpsichard Flare and Violin Rev'd 18:40 - AllegiaMoving Up/Down on a List
1. Scroll through a list by dragging your finger up or down. text_image
Songs Black Orfaro E. Caryllice, Act 4 - Us Perbu Isten Earyllice (Orfalo) Video Guide Hotel California Enrico Kyrie (Vide Burguda) Alloquille La boite a joujour: Prelude St. Pierre-Marle Let It Rain Diana Rinal Lapan Schweigen (Die l'affige White) Vinachlava Chincholas LiaoHome Screen
text_image
1 2 3 4 5 6 7 8 9 10 MY DEVICE 2.8MHz / DFF 06.Bach_Concerto for Harpsich| 1 | Album Cover | Displays album cover of current song. Press [Album Art] to see Additional Information and Additional Settings menu. |
| 2 | Playback Progress Bar | Shows the current track playback progress. Drag the Playback Progress Bar to move to the desired track time. |
| 3 | Song Progress | Indicates song duration. |
| 4 | Details | Displays current song information. |
| 5 | Previous/ Rewind | Short press: Play the previous song or restart the current song. Press and hold: Rewind the current song. |
| 6 | AK Connect Speaker Output | Shows the selected output speaker when AK Connect is in use. |
| 7 | Song Duration | Indicates the song's total duration. Press to switch from elapsed time to remaining time. |
| 8 | Title | Song title information. File name is displayed when the title is unavailable. |
| 9 | Play/Pause | Play or pause the current song. |
| 10 | Next/FF | Short press: Play the next song. Press and hold: Fast-forward the current song. |
Notification Bar
text_image
1 2 3 4 5 6 7 8 Wi-Fi Bluetooth EQ Wheel Lock 9 10 Safely remove SD card Unknown Song Title Unknown artist - Unknown album No recently played song.| 1 | Wi-Fi | Press [ ] to turn Wi-Fi on/off. |
| 2 | Bluetooth | Press [ ] to turn Bluetooth on/off. |
| 3 | ††† | EQ | Press [ ††† ] to turn the EQ on/off.The most recent EQ settings are applied by default. |
| 4 | Wheel Lock | Press [ [ ] to turn the Wheel Lock on/off. The volume wheel is disabled when the screen is locked. | |
| 5 | Gapless Playback | Press [ [ ] to turn Gapless Playback on/off. | |
| 6 | Line Out | Press [ [ ] to turn Line Out on/off. | |
| 7 | DISK | Computer Connection Mode | Select the mode to use when connected to a computer.DAC: Listen to music on a connected computer through the device.[Default] DISK: Enables transfer of media files. |
| 8 | USB Audio | After connecting the device to a portable USB DAC, press [ [ ] to connect or disconnect the device. | |
| 9 | Brightness | Use the adjustment bar to control the display brightness. | |
| 10 | Notifications Display | Device notifications are displayed in this area. |
Music Store
Listen to streaming services or purchase music from the Store when connected to a wireless network. (Streaming services and ability to purchase music vary by country. Not all services are available in all countries.)Streaming or Purchasing Music
1. Connect to a wireless network. 2. Select [Store] from the menu. 3. Select from the list of service options available. 4. Check the user guide or help menu within each store for detailed information. Select [Menu > User Guide] within the Groovers Store for detailed instructions. text_image
Show Menu Ray LaMontagne Part Of The Light NOS 24/30 Today's Update Draft F50 * Samotion User Guide HOME Login Cart Music History Membership History Coupon Settings Enter Guide * SamotionAK CONNECT
Access and play back music files stored on a computer on the same network, as well as output sound through compatible speakers with AK Connect.MQS Streaming Server for your Computer
1. Visit the Astell&Kern website and download the MQS Streaming Server installer that corresponds to your operating system. [http://www.astellnkern.com > Support > Download] 2. Run the downloaded installer and follow the on-screen instructions. 3. Check the User Guide within the program for detailed information on using the MQS Streaming Server.  Please refer to the following computer minimum system requirements. Minimum Computer Requirements • OS: Windows 7/8/10 (32 & 64-bit) Mac Requirements • OS X 10.7 (Lion) or laterUsing AK Connect to Link Music Libraries/Speakers
1. Turn on the music library device and/or speaker and AK player. Run the MQS streaming server on your computer. 2. Connect all devices to the same Wi-Fi network. 3. Turn on the AK CONNECT feature by pressing and holding [ ] in the Notification Bar or selecting [Menu-Settings-AK CONNECT] text_image
AK CONNECT MY BOOK Songs Album Artist Genre Playlists Folder Favorite HOS MOS CD Library Store Settingstext_image
AK CONNECT LIBRARY MY DEVICE AK300 SPEAKER MY DEVICE AK300text_image
Add Booklet Add Booklet to the website Add Booklet to the website AK CONNECT by device Songs Album Artist Dewer Playlists Folder Favorite RBS MOS CD Library Store SettingsStreaming Music from Your Library
1. Select a category from the library menu to see your list of music. 2. Select a song to begin streaming. text_image
B 27% 10:01 AM 06.Bach..Concerto for HarpsichDownloading Music from Your Library
1. Select a category from the library menu to see your list of music. 2. Press [ ] button at the upper-right corner of the music list. 3. Select the desired music and press [ ↓] to initiate the download. A message on the Notification Bar will indicate when the download is complete. text_image
Will You Still Love Me Tomorrow Wing, Song, And... Winter's Waltztext_image
LIBRARY AK T1SR15flowchart
graph LR
    A["AK500N LIBRARY"] -->|Music| B["REMO"]
    B -->|Music| C["AK T1SR15"]
flowchart
graph LR
    A["NOTE & LIBRARY"] --> B["→"]
    B --> C["AK500NSR15 SPEAKER"]
flowchart
graph LR
    A["LIBRARY"] -->|Music| B["AK500N REMOTE"]
    B -->|Music| C["AK T1SR15"]
flowchart
graph LR
    A["SR15 LIBRARY"] -->|or| B["AK Connect APP REMOTE"]
    C["AK500N LIBRARY"] -->|or| B
    B -->|in'→| D["AK T1 SPEAKER"]
Listening to Music
Selecting Music
1. Select a category from the menu to display the corresponding music list. 2. Select a song from the list to begin playback.  Select [Folder] to search music by folder. Continuous Playing Time: Approximately 10 hours (Music: FLAC, 16-bit, 44.1 kHz, unbalanced output, volume 80, EQ off, LCD off) Supported Formats: PCM [8-192kHz(8/16/24bit)], DSD [2.8/5.6MHz]Listening to Music
- Turn the [Volume] wheel to adjust the volume. - Press [ ] during playback to pause and [ ] to resume playback. - Press [ ◀ ▶ ] during playback for the previous/next track. - Press and hold [ ◀ ▶] to rewind/fast-forward the track. - Drag the indicator on the Playback Progress Bar to a desired location of a track during playback. - Press [ ] to go to Home Screen. - Press [ ×] at the top of the menu list to hide the menu list. - To search, press [ 🔒] on the menu list and enter the title. The search result will be displayed. - After selecting the [MQS] category, press [ ↓≡/ ↓] at the top to sort the music list in order of high quality / alphabetical order. - In the [MQS] category, the MQS tab shows PCM files of 24 bits or more, and the DSD tab shows DSD files. - MQS: PCM[8-192kHz(16/24bit)] DSD: DSD [2.8/5.6MHz] - Select the [Folder] category to check the internal / external memory capacity and number of files / folders, and copy / move music. - After Selecting [Album] or [CD Library] category, press [ ] : 3 at the top to sort by different viewing options. - Press [ → on the music list to add all music to the current playlist. - At the top of the Play History menu, press [ ↓/ ↓] to sort the music list in order of most recently played/most played. - Press [Album Art] to see Additional Information and Additional Settings menu. A: Displays Main Menu. Displays Now Playing Menu. ☆ Add the current song to the Favorites category. <: Go to the last displayed music list. +: Add the current song to the playlist. Set the repeat mode. Repeat the entire list of music that is now playing. Repeat the current song. - Repeat mode off. ✗ Set track sequence for playback. × Shuffle mode on. - Shuffle mode off. \- Press [ ] on top of the music list to view the options: Select / deselect entire list Add the selected list at the top / bottom / after the current song of Now Playing Add selected list to a playlist Delete selected list X: Exit Playlist Screen text_image
Songs Gluck: Orphee Et Eurydice, Act 4 - "JAI Perdu Mon Eurydice" (Orfeo) Maria Callas Hotel California Eagles Kyrie (Vidala-Baguala) Mercedes Sosa La boite a joujoux: Prelude Sir Simon Rattle Let It Rain Diana Krall Lippen Schweigen (Die lustige Witwe) Bruckner Orchester Linz| 1 | Previous | Return to the previous screen. |
| 2 | Playlist | Displays the current playlist. |
| 3 | Edit mode | Display the editing options for the music list. |
| 4 | Play All | Play all songs in the current list. |
Playlist Manage- ment
Creating a Playlist
1. Press [Playlists] on the menu to view the playlists. 2. Select [ + ] in the upper right corner of the screen. 3. Enter a name for the playlist, and then press [Add] to create a new playlist. text_image
Playlist Most Played 8 songs Recently Added 137 wampstext_image
Add New Playlist Playback1 CANCEL ADD qwertyuiop asofghjkiAdding a Song to a Playlist
1. Press [Playlists] to display the list of playlists. 2. Select a playlist and press [+ Add Song] to display a list of songs by album. 3. Select a song and press [Add] to add the song to the selected playlist. text_image
Playlist1 Add SongRemove a song from a Playlist
1. Press [Playlists] to display the list of playlists. 2. Select the playlist to edit. 3. Press[ ] at the top, then select the song you want to delete from the playlist. 4. Press [ ] on top of the screen. 5. Press [DELETE] to remove the song from the selected playlist. text_image
Delete Are you sure you want to delete? CANCEL DELETEPlaying a Playlist
1. Select the desired playlist for playback. 2. Press [ ] at the top right of the screen to play the entire playlist. 3. To playback part of the playlist or add it to a current Now Playing playlist, press [ ▷] at the top of the playlist, select the music you want to play and press [ ≡] to add the selected list to the top / bottom / after the current song of Now Playing. text_image
Add to Now Playing Top Bottoms After the current song □ Do not show again Change song backgrounds in Settings menu CANCEL OK Add songRenaming a Playlist
1. Press [Playlists] to view the playlists, and press [ ] 2. Select a playlist to be renamed. 3. Press [RENAME] at the top of the screen to display the RENAME window. 4. Enter a name for the playlist and then press [RENAME] to confirm the change. text_image
RENAME Player1 CANCEL RENAME qwertyuiop asdfghjkl zxcvbnm 133 EnglishDeleting a Playlist
1. Press [Playlists] to view the playlists, and press [ ] 2. Select the playlist to be deleted. 3. Press [ ] at the top of the screen. 4. Press [DELETE] to delete the selected playlist. text_image
Delete Are you sure you want to delete? CANCEL DELETEUSB DAC Installation
The USB DAC function allows the device to be recognized as a sound card on a computer. Music from the computer is played through the device's headphone port for an enhanced listening experience.USB DAC Specifications
• Supported OS Windows 7(32bit/64bit) / Windows 8(32bit/64bit) / Windows 10(32bit/64bit) OS X 10.7 (Lion) or later •USB DAC Support Specifications Supported Formats: WAV, FLAC, WMA, MP3, OGG, APE (Normal, High, Fast), AAC, ALAC, AIFF, DFF, DSF Sample Rate: 44.1 kHz – 96 kHz Bit Rate: 16-bit/24-bit Playback is unavailable when settings exceed the supported formats. The Previous, Play, and Next buttons are unavailable when connected as a USB DAC. Playback may stutter when computer performance is slow or the USB connection is experiencing heavy usage. There may be issues with audio-to-video synchronization during video playback depending on the sound quality and operating environment. Volume cannot be adjusted via the Windows volume control. The volume wheel on the product or volume control on the appropriate program must be used to adjust the volume.How to Use USB Audio
Connect the device to a portable amp or DAC using USB Audio Out.How to Connect a Portable USB DAC
1. Connect the portable USB DAC to the AK device's 5-Pin Micro USB port with a dedicated cable. 2. Press [ ] in the Notification Bar. 3. Once [ ] is activated, you can enjoy music on the device through the connected portable USB DAC.  The 5-Pin Micro USB cable that comes packaged with the device is only to be used for computer data transfer or to charge the device. The type of dedicated cable needed to connect to the portable DAC varies; please refer to USB DAC manufacturer instructions for correct cable type. A USB DAC cable is not included with the device and must be purchased separately. Depending on the OTG cable used, the connection may be unstable.How to Change USB Audio DSD Output Type
You can change the type of DSD data that is outputted through the USB audio out. 1. Select a DSD output type on [Menu - Settings - USB Audio]. PCM: DSD audio is converted into PCM before being outputted through the USB audio out. DoP : DSD audio is converted into DoP before being outputted through the USB audio out. The portable USB DAC must be able to receive digital input through the micro-USB's OTG. Audio output may vary widely depending on the digital input specs of the portable USB DAC used. This is not a defect in the device output and not a reason for exchange or refund. When using DoP as a DSD output type, no sound may be outputted except noise depending on the portable USB DAC.CD Ripping
CDs can be ripped directly to the device using the AK CD-Ripper (sold separately).Connecting the AK CD-RIPPER
1. Connect the AK CD-RIPPER to 5-Pin Micro USB port of the device using the proper cable. 2. In the Notification Bar press [ ] to link the devices and activate the CD Ripping Menu. 3. When ripping is complete, before disconnecting, press [💡] on the Notification Bar to unlink/disconnect the devices.  The 5-Pin Micro USB cable provided with the device is to be used to connect to the computer or to charge the product. Depending on the OTG cable used, the connection may be unstable.Automatic CD Ripping
1. In [Menu-Settings-CD Ripping], turn on automatic CD ripping function. 2. Connect the AK CD-RIPPER to the device and insert a CD. 3. Metadata (ID3 tags) for the inserted CD will be retrieved via Gracenote if Wi-Fi is turned on. 4. CD ripping will begin automatically after the metadata has been downloaded. 5. When finished, press [OK] when prompted to complete the automatic CD ripping process.Manual CD Ripping
1. In [Menu-Settings-CD Ripping], turn off automatic CD ripping function. 2. Connect AK CD-RIPPER and insert CD to display the [CD Ripping] notification at the bottom of the Notification Bar. 3. Press [CD Ripping] and select from the file format options of FLAC or WAV. 4. If Wi-Fi is turned on the Gracenote database will be searched for matching CD metadata after the file format is selected. 5. When the database search is complete, press [Start] to begin CD ripping.CD Ripping Results
- ●: Indicates that CD ripping is complete, or that CD ripping was successfully completed after correcting an error via error correction. - : Indicates that the song currently being ripped can be canceled by user. - Indicates that CD ripping failed due to an error that can't be corrected, such as a scratched CD, or that CD ripping was canceled by user.  To search the Gracenote database, the device must be connected to Wi-Fi. Database access time may vary depending on the network environment. Please note that metadata for certain CDs may not be available on the Gracenote database. You cannot access the Home Screen while CD ripping is in progress. The AK Connect service will be disabled during CD ripping. The service will automatically restart when CD ripping is completed. Music playback is disabled during ripping. You can set the desired file format and ripping speed from the [Menu - Settings - CD Ripping] menu. Several attempts at correction will be made for data with errors when the feature is enabled under [Menu - Settings - CD Ripping - Error Correction]. Please note that the CD ripping speed will be affected when this feature is enabled.Settings
The settings menu allows users to customize the device. The settings menu may vary depending on the firmware version.Setup
1. Select [Main Menu - Settings] or select [ ◎ ] from the Notification Bar menu. 2. Select the feature to view setting options.Wi-Fi
\- Change wireless network settings and turn Wi-Fi on/off.  See page 44 of the manual for more information on setting Wi-Fi.Bluetooth
\- Connect a Bluetooth device to listen to music wirelessly.  See pages 45-46 for more information on setting Bluetooth.AK Connect
\- Turn AK Connect on/off and set AK Connect options.Equalizer
\- Set the equalizer according to the user's preferences. - USER EQ: Adjust the frequencies according to the user's preferences.  Supported Formats for EQ: PCM [8 - 192kHz (8/16/24bit)] Using the equalizer may negatively affect device performance. See pages 47 - 49 for more information on using the equalizer.Gapless Playback
\- Play the next song without any interruptions. - Gapless playback is only supported between two files with identical bit depths, sample rates, and channels.Line Out
\- Set the voltage value generated when Line Out is activated.  Do not use earphones with the Line Out feature enabled. Doing so may cause permanent hearing loss.Left-Right Balance
\- Adjust the left-right balance for earphones/headphones.Playback Settings
\- Set how to add a song to Now Playing when a song is selected from a music list.Notification Panel
\- Drag and drop the button icons to add or change the order of the quick settings buttons.CD Ripping
\- Set the automatic CD ripping function as well as the file format and ripping speed.USB mode
\- Media Device (USB Drive): When connected to a computer, device appears as a removable drive. \- DAC Input: Output sound from a connected computer to the device.USB Audio
\- Select the type of DSD sound being outputted through USB Audio Out to a connected portable DAC.Screen Brightness
\- Adjust screen brightness settings.Date & Time
\- Set the current date and time.Device Name
\- Set the name of the device. \- The maximum name length is 50 characters.Language
\- Select the language for the device. Supported languages are English, Korean, Japanese, Chinese (Simplified/Traditional), French, Russian, German, and Spanish.Keyboard
\- Select a language for the keyboard. Supported languages are English, Korean, Japanese, Chinese (Simplified/Traditional), French, Russian, German, and Spanish.  Supported languages may vary depending on your location.Timer Settings
\- Auto Power Off: The device will automatically power off after the selected amount of time of no user and device activity. \- Screen Off: The screen will turn off after the selected amount of time of no user activity. \- Screen Timer: Music playback will stop and the device will turn off after the selected amount of time.Downloads
\- Select a folder for downloaded files to be saved by default.  When using AK Connect to download music, if the [Default folder] is selected in settings, downloading will automatically begin to the pre-set Downloads folder. When [Select Folder] is selected, the user is prompted to choose a download folder each time a file is downloaded.Update
- System Update: Update the device when a new firmware version is available. - Application Update: Update the default applications (including the Store) when new versions are available.System Information
- Device Information: View model number, firmware version, MAC address, and memory usage information. The microSD card can be mounted/dismounted, and data can be deleted. - Legal information: Check open source licenses and regulations.  Formatting the microSD card will delete all data on the memory card. Be sure to backup any important files before formatting. When formatting the microSD card on a computer, use of the FAT32 system is recommended.System Reset
\- Initialize Media Scan: Resets and rescans the internal database. Database initialization time may vary depending on the number of files stored on the device. \- Settings Reset: Resets all user settings back to the default setting. \- Factory Data Reset: Deletes all user data and resets all user settings back to the default setting.Connecting to Wi-Fi
Connecting to a Wi-Fi Network
1. Press and hold [ ] from the Notification Bar or select [Menu - Settings - Wi-Fi] to display a list of available Wi-Fi networks. text_image
Wi-Fi Wi-Fi inverguest5G pub_guest bluegames2.4GHz bluogames1 bluegames3/iMas rec:normal MILK90A 2016text_image
Wi-Fi inverguest3G pub_guest bluegames2.43Hz bluegames1 bluegames2 iMac REC_normalUsing Bluetooth
Connect a Bluetooth device to listen to music wirelessly.Turning Bluetooth On/Off
A Bluetooth device must be paired with the device prior to use. Refer to the Bluetooth device's instruction manual for details. 1. Select [✗] from the Notification Bar menu or select [On/Off] from [Menu - Settings - Bluetooth]. text_image
Bluetooth Bluetooth SPRSD Sound LinkBluetooth Pairing
1. In the Settings Menu, select the appropriate Bluetooth device from the list of available devices.Disconnect a Bluetooth Device
1. Press the connected Bluetooth device and confirm the message prompt to disconnect the device. text_image
Disconnect Bluetooth Disconnect? Sound Unlell be disconnected. CANCEL OKRemoving a Bluetooth Pairing
1. Press [ ⓘ ] to the right of the paired device to go to settings. 2. Select [Remove] to complete the process. text_image
Connected Bluetooth devices Rename Audio Link Remove Profile Media audio Converted to media audioEqualizer Setup
Equalizer Setup
1. Press and hold [↑↑↑] on the Notification Bar or turn on [Menu - Settings - Equalizer]. text_image
Equalizer PRO EQ After turning on ECL change gain or G value at much frequencytext_image
Equalizer PRO EQ + PRO EQ PRO EQ cannot be modifiedtext_image
Equalizer Add User EQ 01 CANCEL SAVE qwertyuiop asdfghjkl zxcvbnmtext_image
Equalizer USER EQ 01 Male Advanced GAIN 1.5 1.0 1.7 1.8 1.9text_image
Equalizer USER EQ 01 Max Advanced FREQ 0 7.8 7.9 3.8 9.4 5.3 GAIN 17 19 1.8 0.8 -2.4Deleting a Custom Equalizer Setting
1. Press on the drop-down menu at the upper-left corner of the screen to display the list of the saved EQ settings. 2. Press [ ] next to the EQ name to be deleted. 3. Press [OK] to delete the selected EQ setting. text_image
Equalizer USER EQ 01 + PRO EQ User EQ 01text_image
Equalizer USER EQ 01 Remove EQ Are you sure you want to delete User EQ 01 ? CANCEL OKRenaming a Custom Equalizer Setting
1. Press on the drop-down menu at the upper-left corner of the screen to display the list of the saved EQ settings. 2. Press [ ] next to the EQ setting name you wish to change and enter a new name for the selected EQ. 3. Press [CHANGE] to save. text_image
Equalizer Rename EQ User EQ 01 CANCEL CHANGE qwertyuiop asdfghjkl zxcvbnm 123Safety Pre- Cautions
Device
- When a plug is inserted into the earphones, 2.5mm balanced, or USB port, do not apply any force or impact to the plug. - Do not insert any metal (coins, hairpins, etc.) objects or flammable debris into the device. - Do not put heavy objects on the product. - If the device gets wet (rain, water, chemicals, medicine, cosmetics, sweat, moisture, etc.), allow the device to dry thoroughly before powering on. Contact the nearest IRIVER Customer Support Center for service. (Damage may not be repairable, however if deemed repairable, any damage due to liquid exposure will be repaired for an additional fee even if the device is under warranty.) \- Avoid exposing the device to direct sunlight or extreme temperatures (-10°C \~ 50°C; 14°F \~ 122°F) such as a car interior during the summer. \- Do not store or use in hot and humid places such as saunas. \- Avoid places with excessive dust, or smoke. \- Do not use for an extended period on blankets, electric blankets, or carpet. \- Do not place near a fire or in a microwave. \- Never disassemble, repair or alter the product. \- Do not store for extended periods in a confined space with the power on. \- Do not place the device near magnetic objects (magnets, televisions, monitors, speakers, etc.). \- Do not let chemicals or detergents come in contact with the product since they may damage the surface and paint. \- Do not drop or expose the product to strong impacts (places where there is strong vibration. etc.). \- Do not press multiple buttons simultaneously. \- Do not disconnect the 5-Pin Micro USB cable during data transfer. - When connecting the device to a computer with the 5-Pin Micro USB cable, use a USB port on the back of the computer for best results. Connecting the cable to a defective or damaged USB port on a computer may damage the device. - Displaying one image for an extended period may cause screen burn-in (afterimage). - Using poor quality protective films or adhesive stickers on the screen may cause damage. - Do not insert any foreign objects into the device ports. - The device may become warm while playing and charging, so handle it carefully.Other
- Do not use earphones/headphones or use the product while operating any type of vehicle. It is not only dangerous but may be a violation of the law in certain regions. - Do not use the product during physical activities (driving, walking, hiking, etc.). • Always use in a safe environment to avoid the risk of an accident. - When using the device while moving, make sure the area is free of obstacles. - Avoid using the device during thunderstorms to reduce the possibility of electric shock. - If there is a ringing in the ears, reduce the volume or stop using the device. - Do not listen to music at excessive volumes for extended periods. - Do not use the earphones/headphones at excessive volume. • Make sure that the headphone/earphone does not get stuck in another object or get caught between other objects. - Do not sleep with earphones in your ears or leave them in for extended periods.Trouble-shooting
Solutions to Common Issues
1. The device won't turn on. The battery may need to be recharged. Charge the device for at least one hour and try again. Reset the device and try again. (See Page 5) 2. The device will not charge when connected to a computer via 5-Pin Micro USB cable. Use a USB port on the back of the computer, and check that the USB port is functioning properly. Check if the 5-Pin Micro USB cable is connected correctly. (Connect the device to a USB wall adapter using the provided 5-Pin Micro USB cable to charge directly from a wall outlet.) 3. The computer won't recognize the device or an error occurs when connected. Use a USB port on the back of the computer. Check if the 5-Pin Micro USB cable is connected correctly. - Check if the device connects properly on a different computer. For Mac, check to ensure the MTP program is installed properly. 4. The screen turns off repeatedly. The screen turns off automatically after a defined period to reduce battery consumption. Set the time at [Menu - Settings - Timer Settings - Screen Off]. 5. The screen does not display images properly. Check the screen for debris. 6. There is no sound, or there is static/interference. Check that the volume setting is above [0]. Check that the earphones are plugged in properly and make sure debris isn't obstructing the port connection. Verify that the music file is not corrupt. Verify that the audio settings have been set properly. (Balanced out, line out, etc.) 7. A file does not play, or the product becomes unstable when a certain file is played. File may be damaged or corrupt if the following occurs: Playback stops or freezes. Device may act erratically or freeze. File may sound different on another device. There may be a difference in the performance of playback or other functions. There may be differences in the file specs. Converting the file to a different format or use of a different file is recommended.Copyright
Copyright IRIVER Limited retains the rights to patents, trademarks, copyrights, and other intellectual property rights related to this manual. No contents of this user manual may be duplicated or reproduced in any format or by any means without the prior approval of IRIVER. Using or reproducing, in whole or part, the contents of this document is subject to penalties. Software, audio, video, and any other copyrighted contents are protected in accordance with relevant copyright laws. The user accepts all legal responsibility for the unauthorized reproduction or distribution of the copyrighted contents from this product. Companies, organizations, products, people, and events used in the examples are fictional. IRIVER has no intention to be associated with any company, institution, product, person or incident through this instruction book, and no such inference should be made. It is the responsibility of the user to comply with applicable copyright laws. ©1999-2018 IRIVER Limited. All rights reserved. The SR15 was designed and audio-tuned under the advisement of MSD.Certifications
KC / FCC / CE / TELEC Class B Device (Communication equipment for residential use): This is a Class B Device and is registered for EMC requirements for residential use. This product can be used in residential and all other areas.  FFC ID: QDMPPS11 This device complies with Part 15 of the FCC Rules. Operation is subject to the following two conditions: (1) this device may not cause harmful interference, and (2) this device must accept any interference received, including interference that may cause undesired operation.Registered Trademarks
Windows 7, Windows 8, Windows 10, and Windows Media Player are trademarks of Microsoft Corp.Disclaimers
The manufacturer, importer, and distributor shall not be liable for damages including accidental and personal injury due to the improper use or operation of this product. The information in this user manual was written based on current product specifications. The manufacturer, IRIVER Limited., regularly adds new features and will continue to apply new technologies in the future. Product specifications may be changed without prior notice. There is no warranty against data loss due to the use of this product. The device must be used a minimum of 5mm away from the human (body) in normal use conditions.Specifications
General Specifications| Model | SR15 |
| Body Color | Dark Gray |
| Body Material | Aluminum |
| Display | 3.3inch 480 x 800 touch display |
| Supported Audio Formats | WAV, FLAC, WMA, MP3, OGG, APE, AAC, ALAC, AIFF,DFF, DSF |
| Sampling Rate | PCM: 8kHz-192kHz (8/16/24bits per Sample) /DSD Native: DSD64(1bit 2.8MHz), StereoDSD(DSD to PCM) DSD128(1bit 5.6MHz), Stereo |
| CPU | Quad-core |
| DAC | CS43198 Dual DAC |
| Output level | Unbalanced 2.0Vrms / Balanced 4.0Vrms (Condition No Load) |
| Decoding | Support up to 24bit / 192kHz Bit-to-Bit playback |
| Input | USB Micro-B input (for charging & data transfer (PC & MAC)) |
| Outputs | PHONES (3.5mm) / Balanced Out (2.5mm, only 4-pole supported) |
| Wi-Fi | 802.11 b/g/n (2.4GHz) |
| Bluetooth | V4.1 (A2DP, AVRCP, aptXTM HD) |
| Dimensions | 2.26" [57.5mm][W] x 3.92" (99.7mm)[H] x 0.63" (16.1mm)[D] |
| Weight | about 5.6oz(159g) |
| Feature Enhancements | Firmware update supported (OTA) |
| Audio Specifications | |
| Frequency Response | ±0.030dB (Condition: 20 Hz~20 kHz) Unbalanced /±0.024dB (Condition: 20Hz~20kHz) Balanced, |
| S/N | 122dB @ 1kHz, Unbalanced / 122dB @ 1kHz, Balanced |
| Crosstalk | 137dB @ 1kHz, Unbalanced / 131dB @ 1kHz, Balanced |
| THD+N | 0.0008% @ 1kHz, Unbalanced / 0.0009% @ 1kHz, Balanced |
| IMD SMPTE | 0.0004% 800Hz 10kHz(4:1) Unbalanced /0.0004% 800Hz 10kHz(4:1) Balanced |
| Clock Jitter | 70ps |
| Memory | |
| Built-in Memory | 64GB[NAND] |
| External Memory | microSD (Max 400GB) x1 |
| Battery | |
| Capacity | 3,150mAh 3.7V Li-Polymer |
| Supported OS | |
| Supported OS | Windows 7, 8, 10 (32/64bit) /MAC OS X 10.7. |