
CFD-455 - Hi-Fi SONY - Free user manual and instructions
Find the device manual for free CFD-455 SONY in PDF.


User questions about CFD-455 SONY
0 question about this device. Answer the ones you know or ask your own.
Ask a new question about this device
Download the instructions for your Hi-Fi in PDF format for free! Find your manual CFD-455 - SONY and take your electronic device back in hand. On this page are published all the documents necessary for the use of your device. CFD-455 by SONY.
USER MANUAL CFD-455 SONY
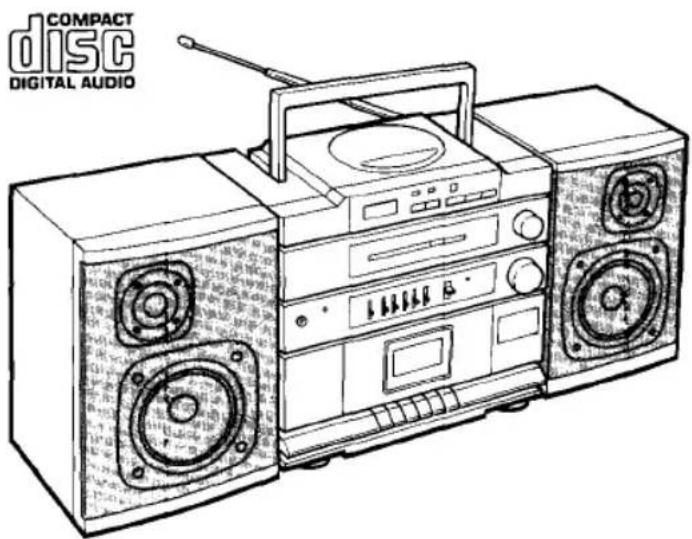
CD Radio Cassette-Corder
CFD-455/454
Operating Instructions
Before operating the unit, please read this manual thoroughly and retain it for future reference.
Owner's Record
The model and serial numbers are located on the bottom exterior. Record the serial number in the space provided below. Refer to these numbers whenever you call upon your Sony dealer regarding this product.
Model No. CFD-455/454
Serial No.
text_image
COMPACT disc DIGITAL AUDIOWARNING
To prevent fire or shock hazard, do not expose the unit to rain or moisture.
CAUTION
RISK OF ELECTRIC SHOCK DO NOT OPEN
CAUTION: TO REDUCE THE RISK OF ELECTRIC SHOCK,
DO NOT REMOVE COVER (OR BACK).
NO USER-SERVICEABLE PARTS INSIDE.
REFER SERVICING TO QUALIFIED SERVICE PERSONNEL.
This symbol is intended to alert the user to the presence of uninsulated "dangerous voltage" within the product's enclosure that may be of sufficient magnitude to constitute a risk of electric shock to persons.
This symbol is intended to alert the user to the presence of important operating and maintenance (servicing) instructions in the literature accompanying the appliance.
CAUTION
The use of optical instruments with this product will increase eye hazard.
Information
This equipment generates and uses radio frequency energy and if not installed and used properly, that is, in strict accordance with the manufacturer's instructions, may cause interference to radio and television reception. It has been type tested and found to comply with the limits for a Class B computing device in accordance with the specifications in Subpart J of Part 15 of FCC Rules, which are designed to provide reasonable protection against such interference in a residential installation. However, there is no guarantee that interference will not occur in a particular installation. If this equipment does cause interference to radio or television reception, which can be determined by turning the equipment off and on, the user is encouraged to try to correct the interference by one or more of the following measures:
Reorient the receiving antenna
Relocate the equipment with respect to the receiver
Move the equipment away from the receiver
Plug the equipment into a different outlet so that equipment and receiver are on different branch circuits.
If necessary, the user should consult the dealer or an experienced radio/television technician for additional suggestions. The user may find the following booklet prepared by the Federal Communications Commission helpful:
"How to Identify and Resolve Radio-TV Interference Problems". This booklet is available from the U.S. Government Printing Office, Washington, DC 20402, Stock No. 004-000-00345-4.
For the customers in Canada
This apparatus complies with the Class B limits for radio noise emissions set out in Radio Interference Regulations.
Table of Contents
Before use
Features 3
Precautions 3
Parts identification 4
Power sources 6
Attaching and connecting speakers 6
Operation
Receiving radio programs 7
Playing discs 8
To locate the beginning of a desired selection (AMS) 10
To search for a particular point in a selection (SEARCH) 10
Various disc playing modes 11
Playing back tapes 12
Adjusting the sound 13
Recording CD sound 14
Recording radio/microphone sound 16
Listening to a CD through an audio system .....18
To keep your system running well
Maintenance 18
General

Specifications 19
Troubleshooting guide back cover
Features
CFD-455/454 are CD radio cassette-corders equipped with a tuner, CD player and 2-way separate speakers. CFD-455 is supplied with a remote commander as well.
CD player section
- An 8 cm (3-inch) CD can be played without using adaptors.
- Repeat function for playing either the entire disc or a desired selection.
- Repeat shuffle function for playing selections repeatedly in random order.
Cassette deck section
- Synchronized CD recording starting system.
General
- A 5-band graphic equalizer to adjust the tone quality to your preference.
- Easy tuning and volume control with large dials.
Precautions
On safety
- Operate the unit only on 120V AC or 12V DC.
For AC operation, use the supplied AC power cord; do not use any other type.
For battery operation, use eight size D (R20) batteries.
- Unplug the unit from the wall outlet when it is not to be used for an extended period of time.
- When the internal batteries are not to be used, remove them to avoid damage caused by battery leakage and corrosion.
- As the laser beam used in the CD player section is harmful to the eyes, do not attempt to disassemble the casing. Refer servicing to qualified personnel only.
- Should any solid object or liquid fall into the unit, unplug the unit, and have it checked by qualified personnel before operating it any further.
On installation
- Do not leave the unit in a location near heat sources, or in a place subject to direct sunlight, excessive dust, or mechanical shock.
- Do not place anything within 10 mm of the side of the cabinet. The ventilation holes must be unobstructed for the proper operation of the unit and to prolong the life of its components.
- If the unit is left in a car parked in the sun, be sure to choose a location in the car where the unit will not be subject to the direct rays of the sun.
- Since a strong magnet is used for the speakers, keep personal credit cards using magnetic coding or spring-wound watches away from the unit to prevent possible damage from the magnet.
On operation
- If the unit is brought directly from a cold to a warm location, or is placed in a very damp room, moisture may condense on the lenses inside the CD player section. Should this occur, the player will not operate properly. In this case, remove the disc and wait about an hour for the moisture to evaporate.
- If the unit has not been used for a long time, set it in the playback mode to warm it up for a few minutes before inserting a cassette.
- The use of cassettes longer than 90 minutes is not recommended except for long continuous recording or playback.
If you have any question or problem concerning your unit, please consult the nearest Sony dealer.
Parts Identification
Refer to the pages indicated in ● for details.
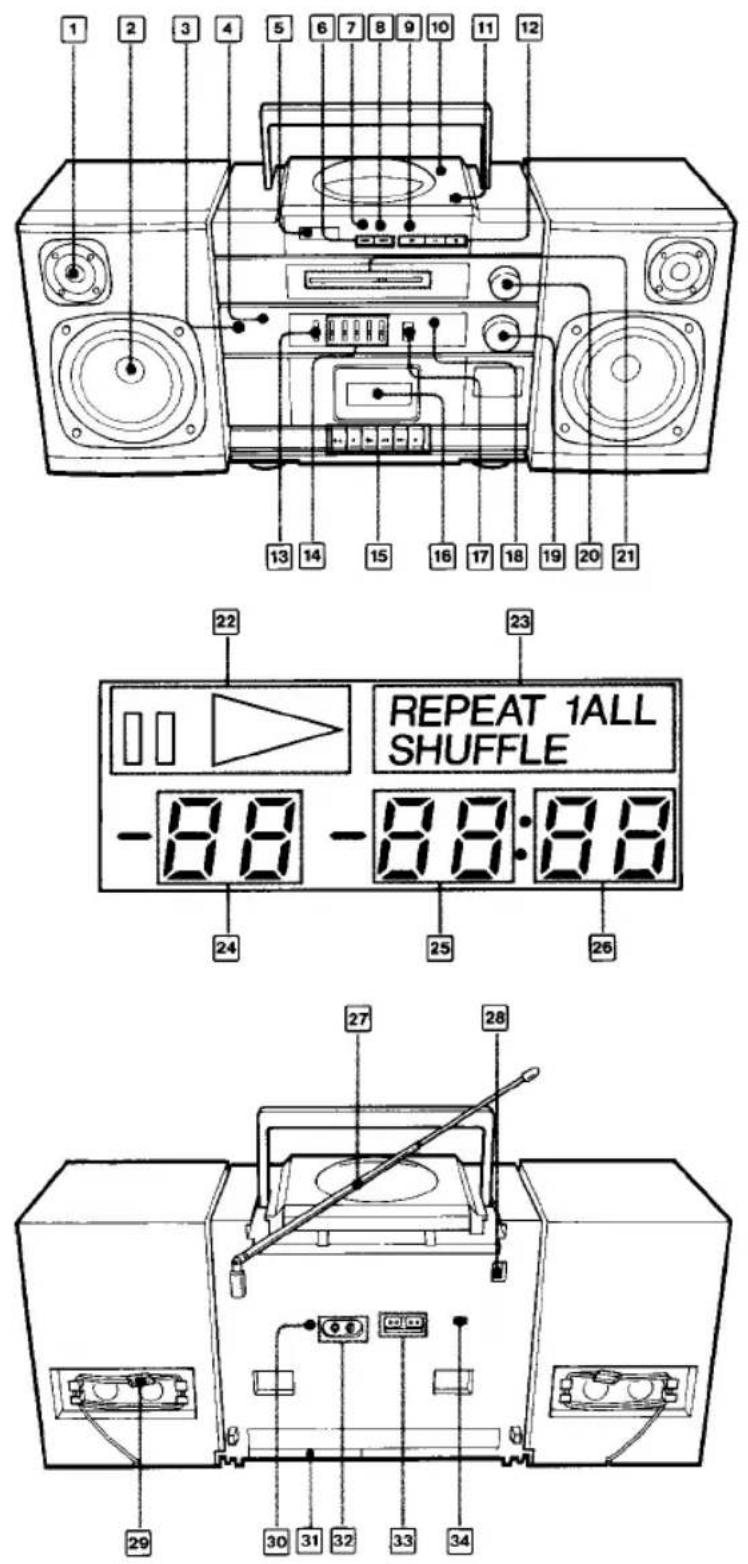
1 Tweeter
2 Woofer
3 PHONES (headphones) jack (stereo minijack)
4 OPR/BATT (operation/battery) indicator
s CD display window
6 AMS/SEARCH buttons
7 PLAY MODE (CD operation mode) selector
REPEAT 1: To repeat one of the selections.
REPEAT ALL: To repeat all of the selections.
REPEAT SHUFFLE: To play the selections repeatedly in a random order.
8 REMAIN selector 8
9 REMOTE SENSOR (CFD-455 only)
10 Disc cover
11 PUSH OPEN/CLOSE button
12 CD operation buttons
▶(play) ▪(pause) ■(stop)
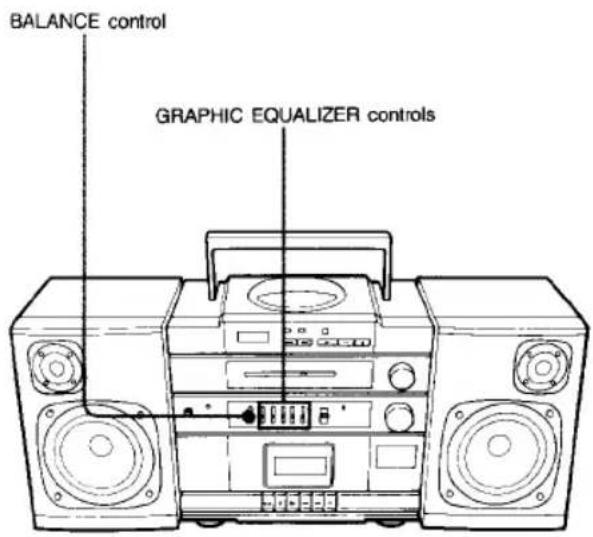
13 BALANCE control
14 GRAPHIC EQUALIZER controls (for listening only)
15 Tape operation buttons
■△(stop/eject) ●(record) ▶( playback) ◀◀◀(rewind)
▶▶(fast forward) Ⅱ(pause)
16 Cassette holder
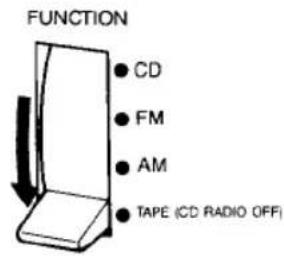
17 FUNCTION selector
CD: To listen to/record CD sound.
FM: To listen to/record FM radio programs.
AM: To listen to/record AM radio programs.
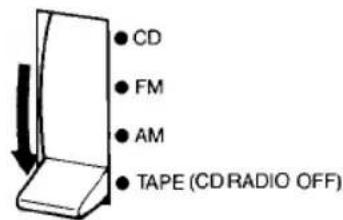
TAPE (CD RADIO OFF): To listen to tapes. (To turn off the CD player or the radio.)
18 FM ST (FM stereo) indicator 7
19 VOLUME control
20 Tuning control 7
21 Dial scale and pointer
22 PAUSE/PLAY indicators
23 PLAY MODE indicators
REPEAT 1 REPEAT ALL REPEAT SHUFFLE
24 TRACK indicator 8-9
25 MIN (minute) indicator 8\~9
26 SEC (second) indicator 8\~9
27 Telescopic antenna
28 AC IN (AC power input) socket
29 Speaker cord 6
30 EXT MIC (external microphone input) jack (minijack)
31 Battery compartment (bottom)
32 CD OUT (CD output) jacks (phono jacks)
33 SPEAKER terminals
34 ISS (interference suppress switch)


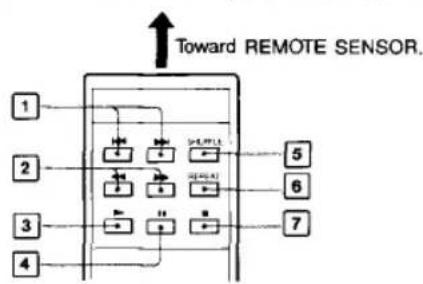
Remote commander (for CFD-455 only)
This remote commander works only for the CD section.
flowchart
graph TD
    A["1"] --> B["2"]
    B --> C["3"]
    C --> D["4"]
    D --> E["5"]
    E --> F["6"]
    F --> G["7"]
    G --> H["Toward REMOTE SENSOR."]
    style A fill:#f9f,stroke:#333
    style B fill:#ccf,stroke:#333
    style C fill:#cfc,stroke:#333
    style D fill:#fcc,stroke:#333
    style E fill:#ffc,stroke:#333
    style F fill:#fcc,stroke:#333
    style G fill:#fcc,stroke:#333
    style H fill:#fff,stroke:#333
1 |←|→| AMS buttons
2 ◀◀/▶▶ SEARCH buttons
3 ▶ (play) button
4 II (pause) button
5 SHUFFLE (repeat shuffle) button
6 REPEAT (repeat 1/all) button
7 ■ (stop) button
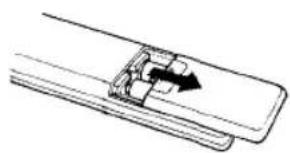
Battery installation
1
natural_image
Pure mechanical assembly diagram showing a lever mechanism (no text or symbols)2 Two size AA (R6) batteries
with correct polarity.
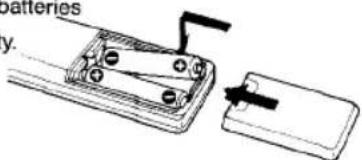
text_image
Batteries y.Notes on the remote commander
- Keep the commander away from extremely hot or humid places.
- To avoid malfunction, do not simultaneously depress two or more buttons.
- When the battery is exhausted, the commander will not operate the CFD-455. In this case, replace the batteries with new ones. In normal operation, battery life is up to half a year.
Power Sources
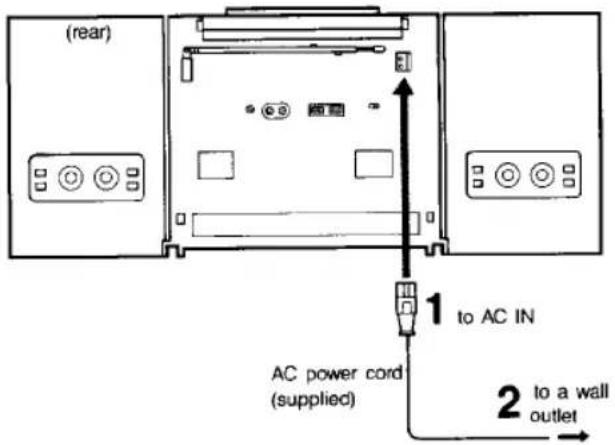
House Current
text_image
(rear) 1 to AC IN AC power cord (supplied) 2 to a wall outletNote
The unit cannot be operated on the internal batteries when the AC power cord is connected to the unit.
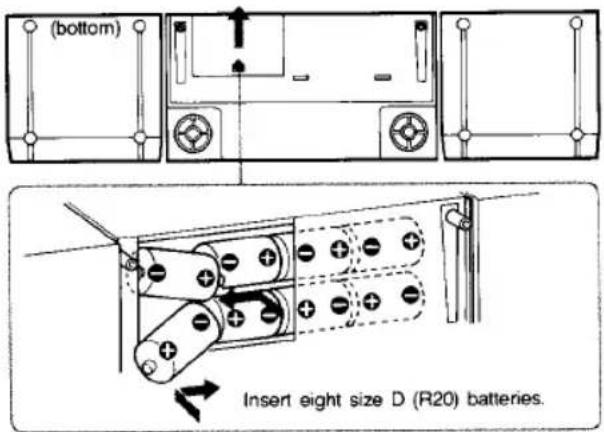
Batteries
text_image
(bottom) Insert eight size D (R20) batteries.Battery replacement
The OPR/BATT indicator lights up during operation. If the batteries become weak, the indicator will glow faintly. In this case, replace all the batteries with new ones. For information on battery life, see "Specifications" on page19.
For critical recordings or disc playing
Operating the unit using the AC power cord is recommended.
Attaching and Connecting Speakers
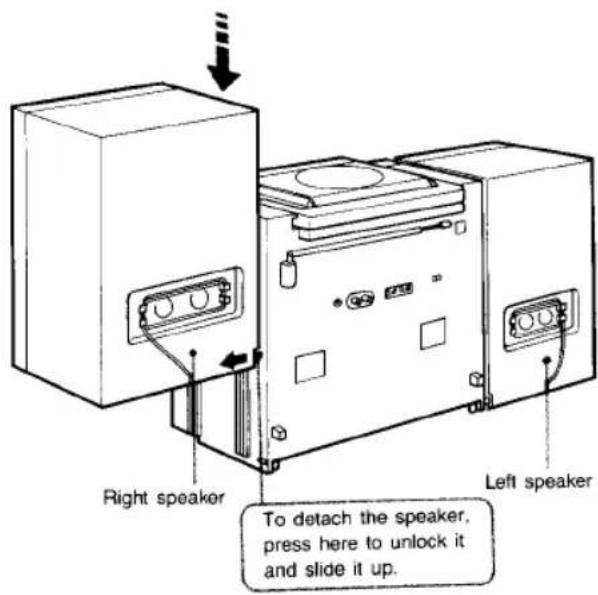
Attaching the Speakers
text_image
Right speaker Left speaker To detach the speaker, press here to unlock it and slide it up.Connecting the Speakers
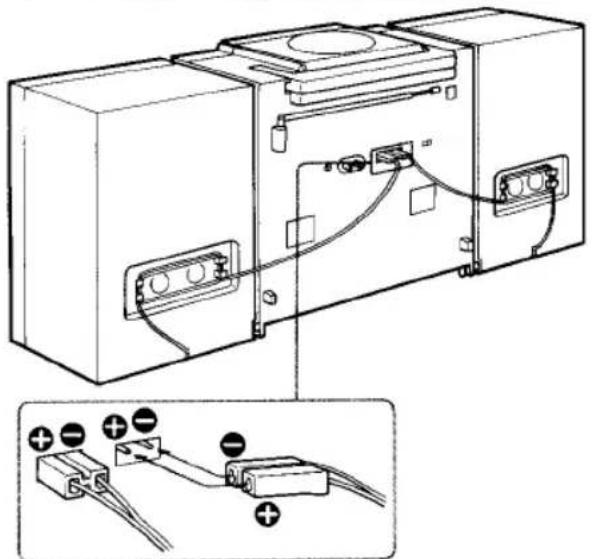
natural_image
Technical line drawing of a device with labeled components and wiring, showing internal wiring connections (no text or symbols present)Notes on connection
- Turn off the power before connecting or disconnecting the speaker cords.
- Connect the speaker cord of the right speaker to the R connectors and left speaker to the L connectors.
Receiving Radio Programs
CFD-455/454 have no power switches.
Set FUNCTION selector to CD or FM/AM, and the CD
player or the radio is turned on. To turn off the power, set
FUNCTION to CD RADIO OFF.
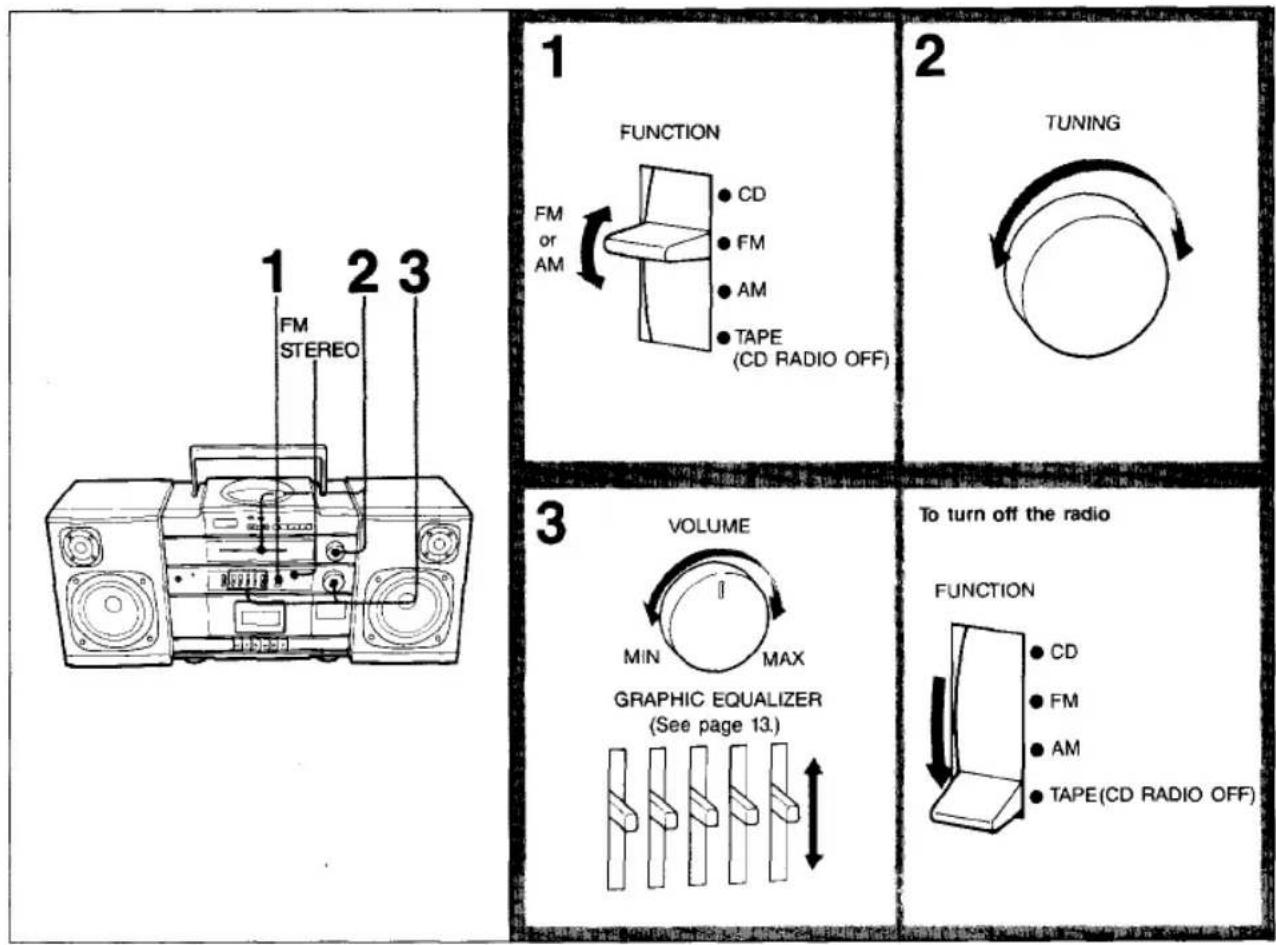
To improve receiving condition
FM
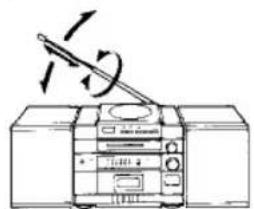
natural_image
Diagram of a device with a tool interacting with it, showing motion arrows (no text or symbols)AM
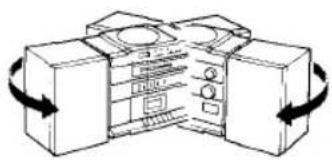
natural_image
Diagram of a mechanical device with rotating components and directional arrows indicating rotation (no text or symbols)When an FM stereo program is tuned in
FM ST indicator lights up.
If the received FM stereo is too weak
The reception becomes monaural, and the FM ST indicator will go off.
Playing Discs
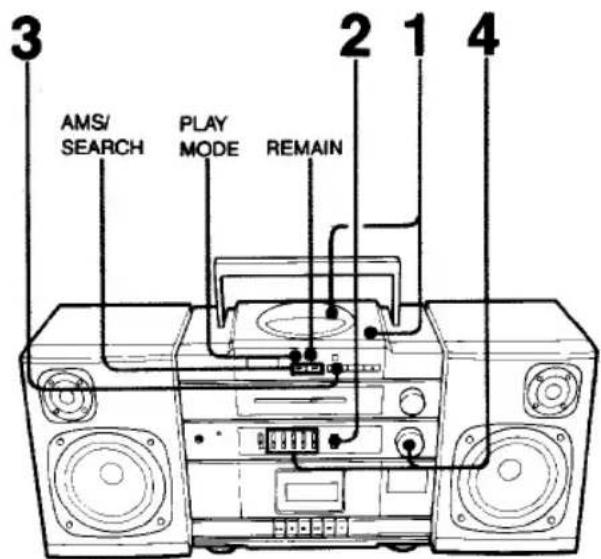
text_image
3 AMS/ SEARCH PLAY MODE REMAIN 2 1 41
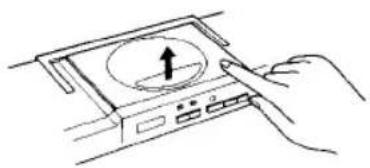
natural_image
Line drawing of a hand pressing a button on a computer monitor (no text or symbols)3

text_image
Track number 0:1 00:0:1 Time counterHow to switch the display
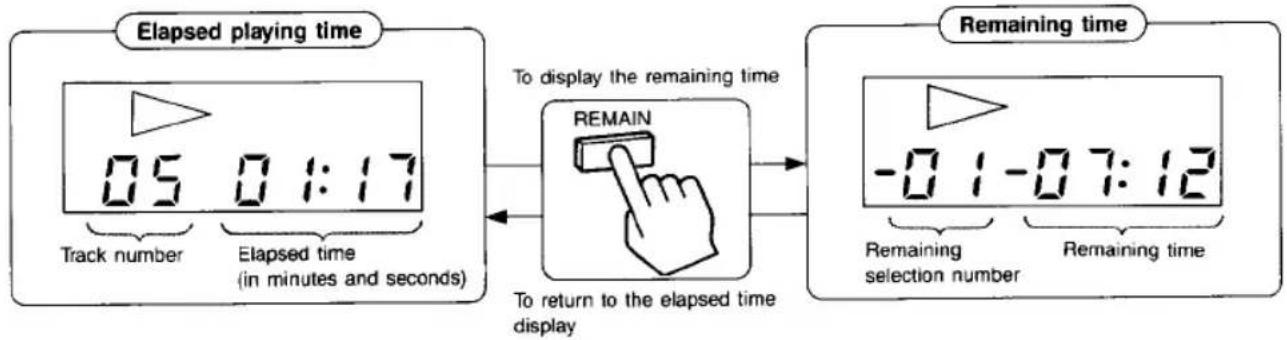
flowchart
graph LR
    A["Elapsed playing time"] --> B["To display the remaining time"]
    B --> C["Remaining time"]
    D["Track number 05 0:17"] --> E["To return to the elapsed time display REMAIN"]
    E --> F["-0:1 -07:12"]
text_image
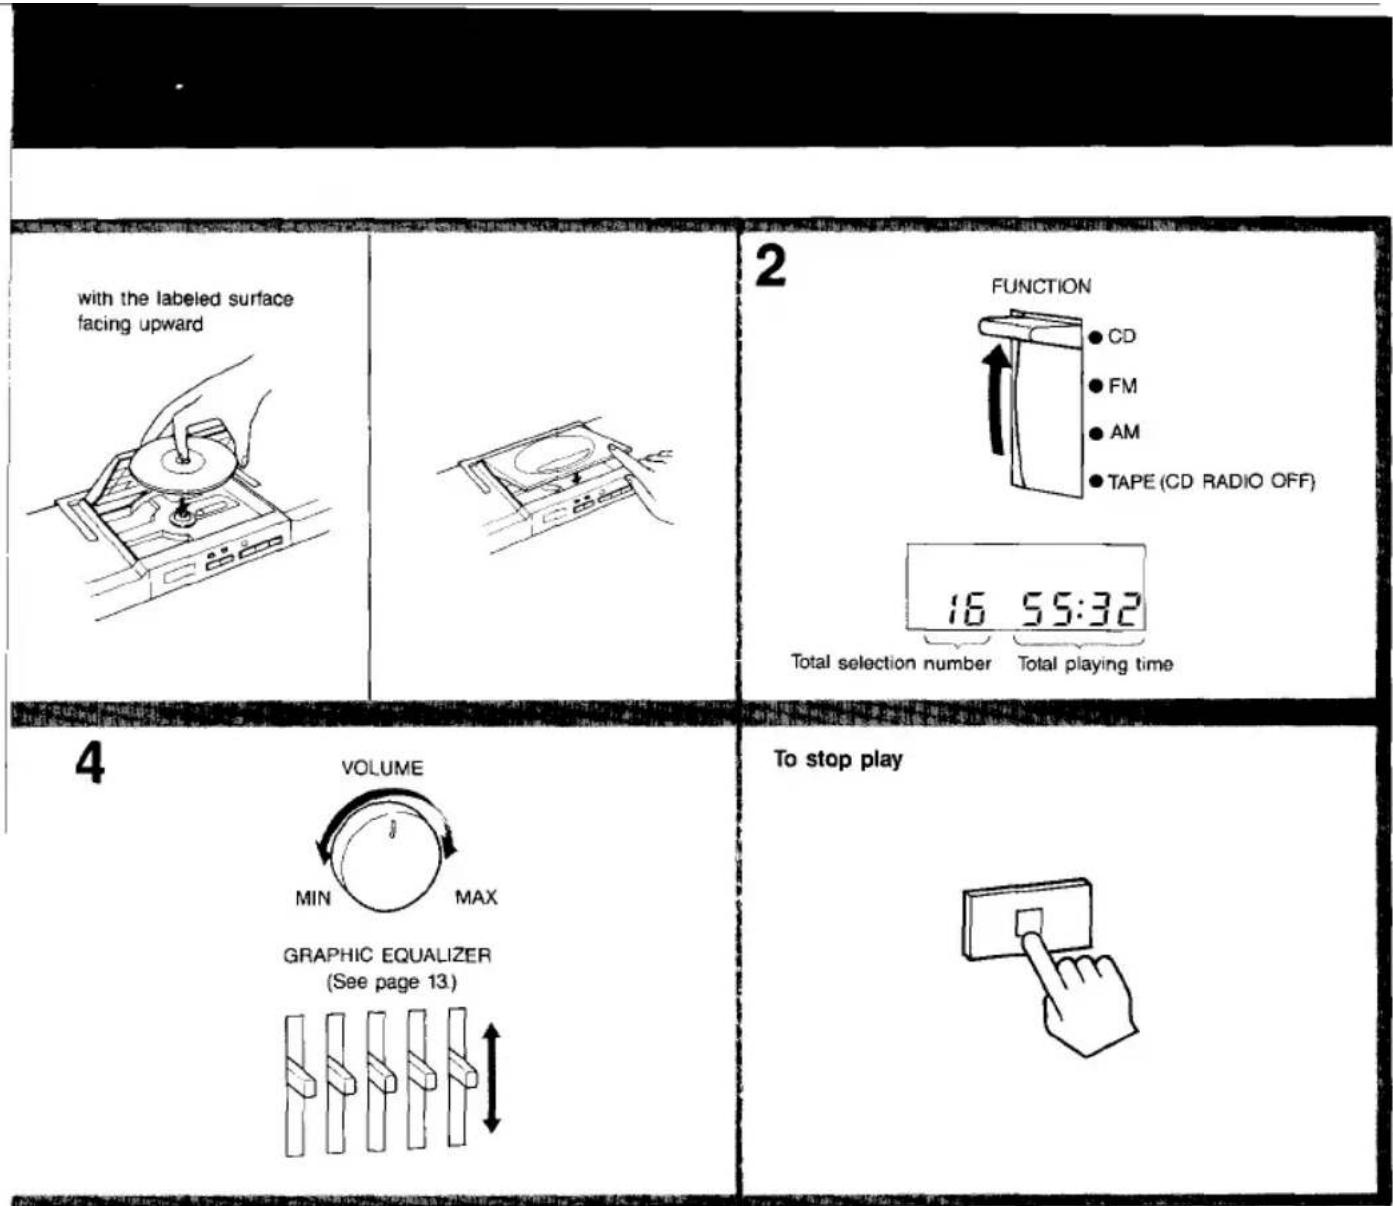
with the labeled surface facing upward FUNCTION CD FM AM TAPE (CD RADIO OFF) 16 55:32 Total selection number Total playing time 4 VOLUME MIN MAX GRAPHIC EQUALIZER (See page 13) To stop playTo stop play
| To pause | Press ||. |
| To resume play | Press || again. |
| To stop play | Press ■. |
| After use | Set FUNCTION to CD RADIO OFF. |
| To remove the disc | Push PUSH OPEN/CLOSE. |
To Locate the Beginning of a Desired Selection (AMS)
To Search for a Particular Point in a Selection (SEARCH)
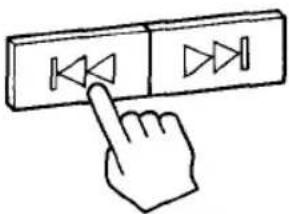
Press the ◀◀ or ▶▶ button during play or pause.
text_image
Hand icon showing a hand pressing a button with triangular play symbols, likely indicating a button or interface control.Keep pressing |◀◀ or ▶▶| button during play or pause.
text_image
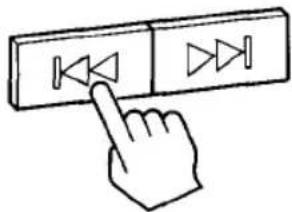
Hand icon showing a hand pressing a button on a two-part panel with triangular icons, indicating navigation or control.To locate a previous selection
Press the ◀◀ button once to locate the beginning of the selection being played.
Press repeatedly to locate a previous selection.
To locate a selection ahead
Press the ▶ button once to locate the next selection.
Press repeatedly to locate a selection ahead.
In pause mode
The player pauses at the beginning of each selection. To start palying, press the Ⅱ button.
To review disc playing, keep pressing the |◀◀ button To advance disc playing, keep pressing the ▶▶| button.
Release the button at the desired point, located by either monitoring the high-speed sound (during play) or observing the time counter.
Notes on compact discs
text_image
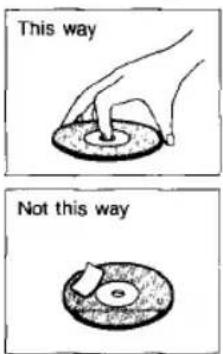
This way Not this wayHandle the disc by its edge, and to keep the disc clean, do not touch the surface.
Do not stick paper or tape or write anything on the labeled surface.
natural_image
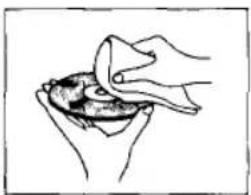
Line drawing of a hand cleaning a small object on a surface (no text or symbols)Before playing, clean the disc with the optional CD cleaner. Wipe the disc from the center out.
Do not use solvents such as benzine, thinner, commercially available cleaners or anti-static spray intended for analog discs.
After playing, store the disc in its case.
Do not expose the disc to direct sunlight or heat sources such as hot air ducts, or leave it in a car parked in direct sunlight where there can be a considerable rise in the temperature.
Various Disc Playing Modes
To select repeat mode
Press the PLAY MODE selector. Each time it is pressed, the repeat mode changes in sequence as indicated in the display window: REPEAT 1→REPEAT ALL→REPEAT SHUFFLE→normal play (no indicator).
To Repeat Only One Selection—REPEAT 1 Play
Press the selector while playing the selection you want to repeat.
PLAY MODE
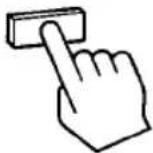
Press once.

REPEAT 1
When the selection being played reaches its end, it is played from the beginning again.*
To Repeat the Entire Disc—REPEAT ALL Play
Press the selector while playing the disc you want to repeat.
PLAY MODE
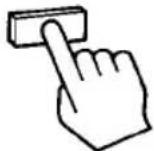
Press twice.

REPEAT ALL
When the last selection on the disc being played reaches its end, all the selections are played from the beginning of the disc again.*
To Repeat the Shuffle Play—REPEAT SHUFFLE Play
Press the selector while playing the disc you want to repeat in random order.
PLAY MODE
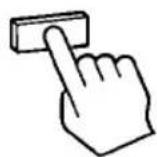
Press three times.

REPEAT
SHUFFLE
After all the selections on the disc have been played in random order, the selections are reshuffled and played continuously in a different order each time.*
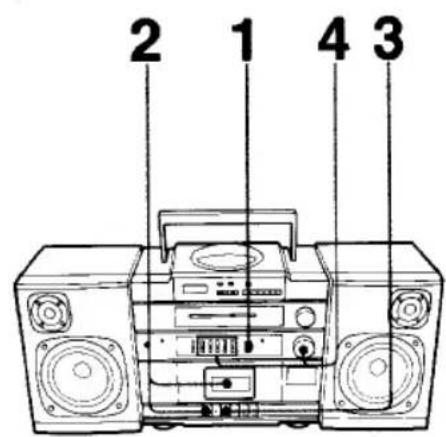
Playing Back Tapes
text_image
2 1 4 31
text_image
FUNCTION • CD • FM • AM • TAPE (CD RADIO OFF)2
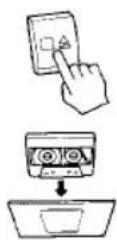
Use only TYPE I (normal) tapes.
3
natural_image
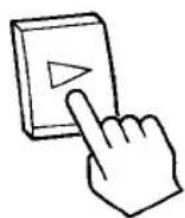
Hand pointing at a button with a triangular play symbol (no text or labels)4
text_image
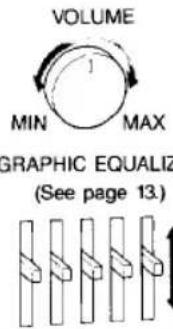
VOLUME MIN MAX GRAPHIC EQUALIZ (See page 13.)To stop play
natural_image
Hand pointing at a digital interface with icons (no text or symbols)To stop play
| To pause | Press ||. |
| To resume playback | Press || again. |
| To stop the tape | Press ■▲. |
| To remove the tape | Press ■▲ again. |
To skip over or repeat a certain portion during playback
Press ▶ or ◀ during playback, and release it at the desired point. The unit starts playback again. To search for the desired portion, make use of the high-speed monitoring sound.
The deck shuts off automatically
When playback of the front side ends, the cassette deck shuts off automatically.
Adjusting the Sound
text_image
BALANCE control GRAPHIC EQUALIZER controlsTo Equalize the Reproduced Sound
text_image
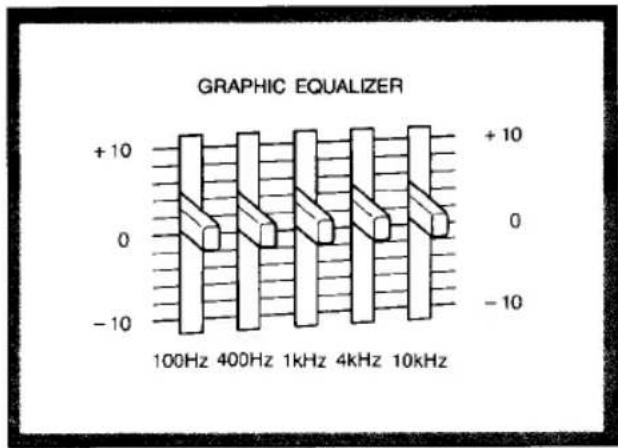
GRAPHIC EQUALIZER +10 0 -10 100Hz 400Hz 1kHz 4kHz 10kHz +10 0 -10To Adjust the Balance of the Left and Right Channel Output Levels
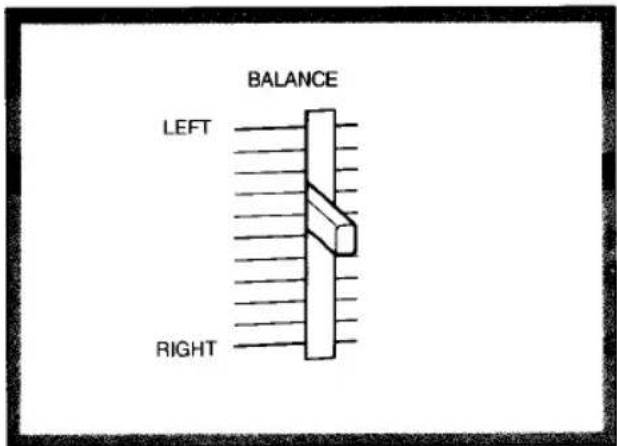
text_image
BALANCE LEFT RIGHTFrequency coverage of each equalizer control
100 Hz: Boost or cut heavy bass.
400 Hz: Adjust the power, spaciousness and warmth of the sound.
1 kHz: Provide more presence for vocals.
4 kHz: Boost a brighter sound or reduce stridency.
10 kHz: Adjust the brightness of the sound or reduce tape hiss.
Use to adjust stereo imaging, especially when speakers are not symmetrically placed.
Recording CD Sound
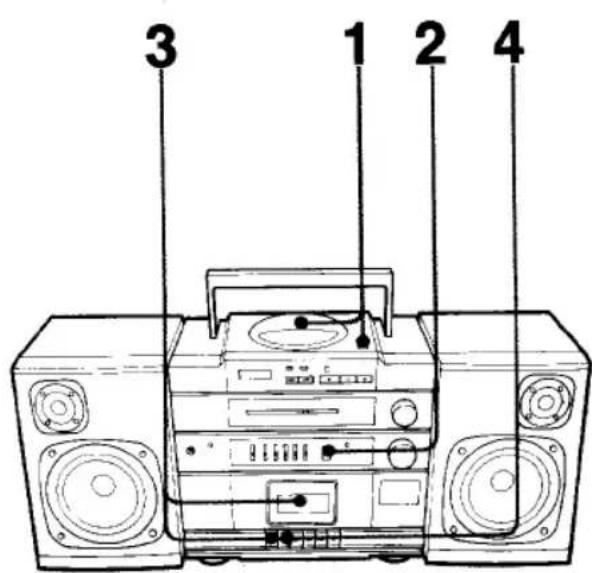
text_image
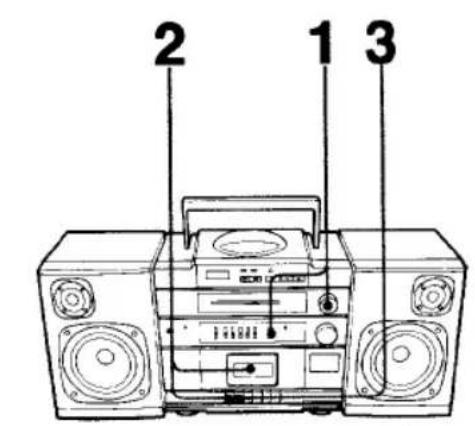
3 1 2 41
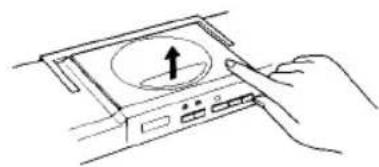
Insert a disc.
(See page 8\~9.)
natural_image
Hand inserting a CD into a drive slot (no text or symbols visible)3
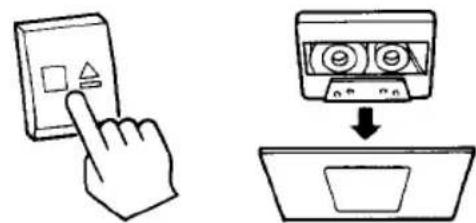
Insert a cassette.
text_image
Diagram showing a hand interacting with a device and a tape measure, illustrating the process of moving or changing.Use only TYPE I (normal) tapes.
To record REPEAT 1/ALL, REPEAT SHUFFLE Play
1 Set FUNCTION to CD.
2 Press PLAY MODE to select the desired playing mode. (See page 11.)
3 Press ● of the cassette deck.
The disc play begins and recording starts automatically at the same time after a few seconds.
Important
- Advance the leader tape before recording to prevent missing the beginning part of the recording.
- When recording on the front side of the cassette is finished, the cassette deck shuts off automatically. The disc, however, continues to play.
Recording level
— is automatically adjusted
— is not affected by the setting of the VOLUME or GRAPHIC EQUALIZER controls.
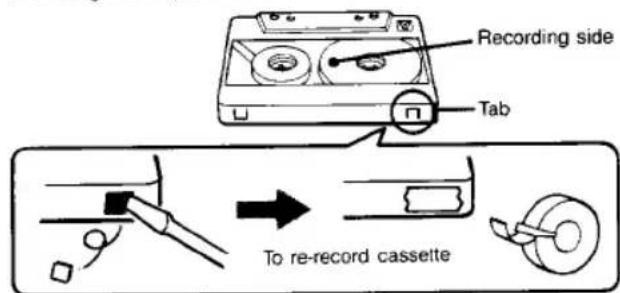
To prevent accidental erasure
Break off the tab corresponding to side which has been recorded. Recording will be protected.
text_image
Recording side Tab To re-record cassette
natural_image
Completely black image with no visible content or text.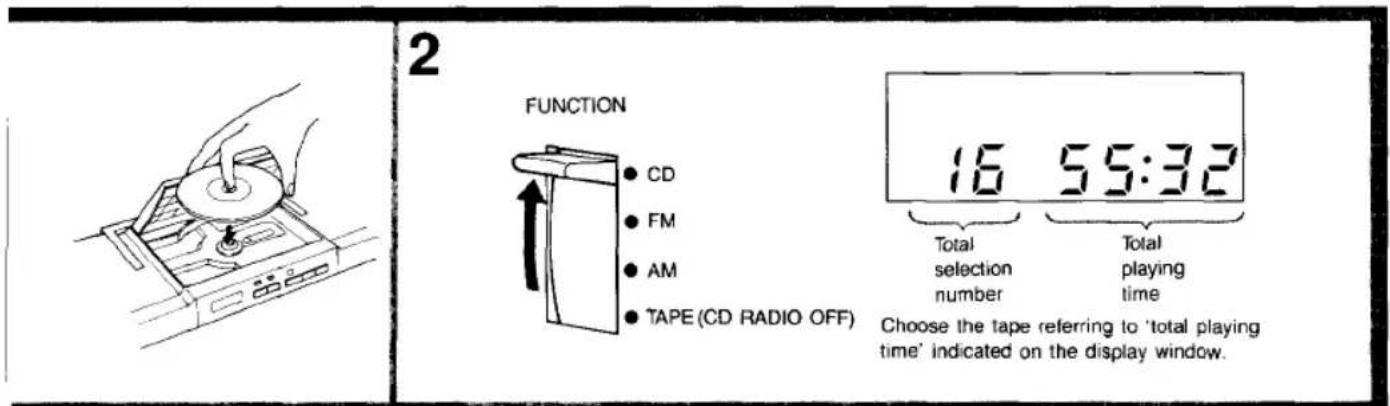
text_image
2 FUNCTION CD FM AM TAPE (CD RADIO OFF) 16 55:32 Total selection number Total playing time Choose the tape referring to 'total playing time' indicated on the display window.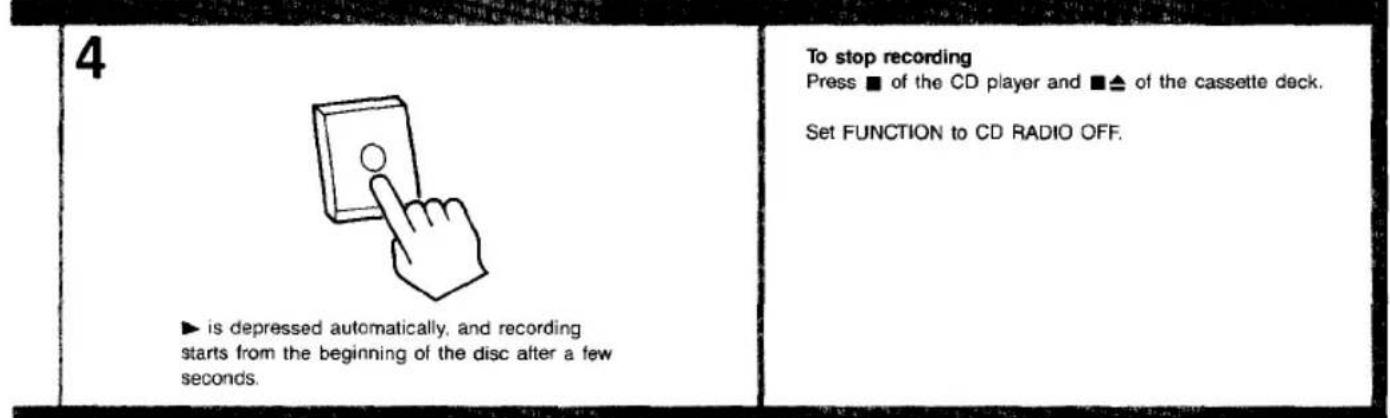
text_image
4 ► is depressed automatically, and recording starts from the beginning of the disc after a few seconds. To stop recording Press ■ of the CD player and ■▲ of the cassette deck. Set FUNCTION to CD RADIO OFF.Important
Press ● of the cassette deck after confirming that 'total selection number' and 'total playing time' are indicated on the display window of the CD player.
Recording Radio/Microphone Sound
text_image
2 1 3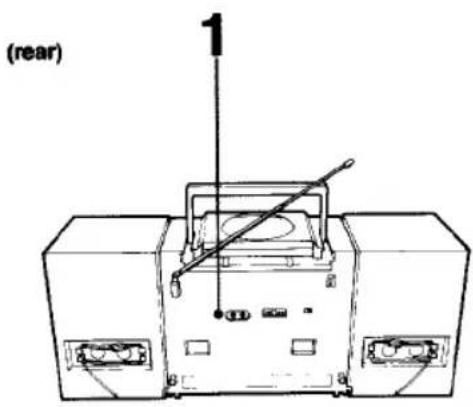
text_image
(rear) 1From radio
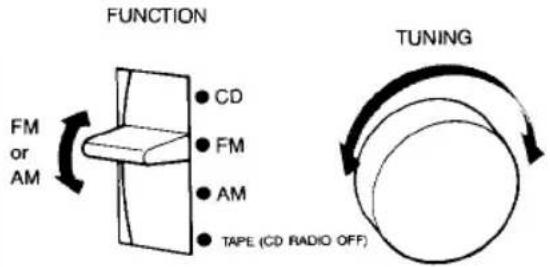
text_image
FUNCTION FM or AM CD FM AM TAPE (CD RADIO OFF) TUNING1
From external microphone
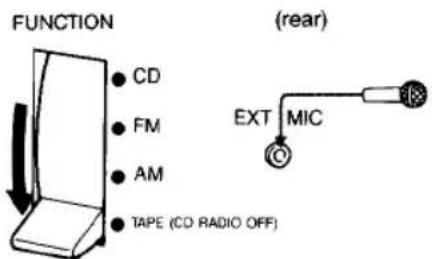
text_image
FUNCTION (Crear) CD FM AM TAPE (CD RADIO OFF) EXT MICIf a whistling noise is heard during recording AM programs Set the ISS switch (on the rear) to the position which reduces the noise best.
2
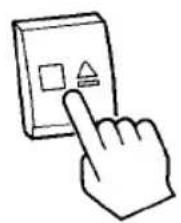
natural_image
Hand pointing at a control panel with square and triangle symbols (no text or labels)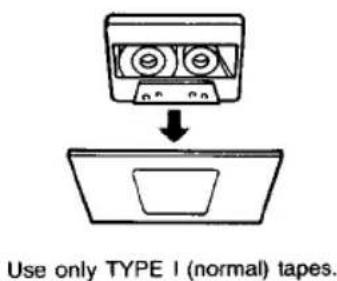
text_image
Use only TYPE I (normal) tapes.3
natural_image
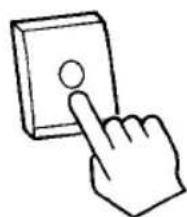
Hand pressing a button on a light switch (no text or symbols)▶ is depressed automatically, and recording starts.
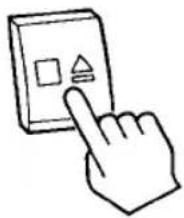
To stop recording
natural_image
Hand icon showing a finger pressing a button on a digital device (no text or symbols)FUNCTION
text_image
CD FM AM TAPE (CD RADIO OFF)Listening to a CD through an Audio System
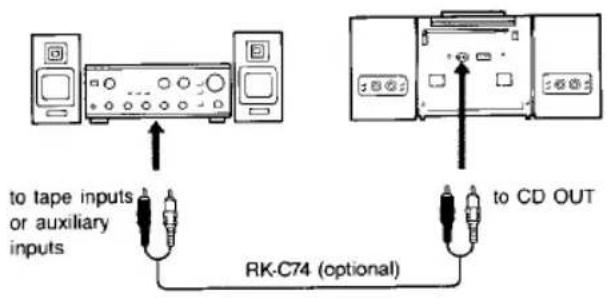
text_image
to tape inputs or auxiliary inputs RK-C74 (optional) to CD OUTImportant
Since the CD system offers a wide dynamic range, the peaks of high level inputs are recorded with high fidelity, and the noise level is very low. Do not turn up the volume while listening to a portion with no audio signals or very low level inputs. If you do, the speakers may be damaged when a peak level portion is played.
Notes on making connections
- Before making connections, be sure to turn off the power.
• The connecting cords should be fully inserted into the jacks. - Note that the red plug of the connecting cord is for the R (right)-channel and the white plug for the L (left)-channel.
Maintenance
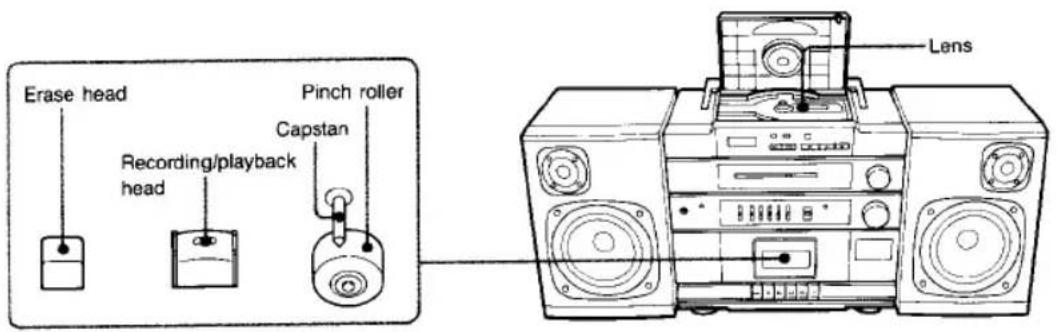
text_image
Erase head Recording/playback head Pinch roller Capstan LensCleaning the heads and tape path
We recommend cleaning after every 10 hours of operation. To make the best possible recordings, however, you should clean all surfaces over which the tape travels before making each recording.
Wipe the heads, the pinch roller and the capstan with a cleaning tip slightly moistened with cleaning fluid or alcohol.
After cleaning the heads and tape path, insert a cassette when the areas cleaned are completely dry.
Demagnetizing heads
After 20 to 30 hours of use, enough residual magnetism will have built up on the heads to begin to cause loss of high frequencies and hiss. At this time you should demagnetize the heads and all metal parts in the tape path with a commercially available head demagnetizer. Be sure that the cassette-corder is turned off while you demagnetize.
Cleaning the lens
If you have accidentally touched the lens of the CD player section with dirty fingers or the dust has accumulated on the lens, the unit will not operate properly. In such cases clean the lens with lens cleaning kit (optional).
Cleaning the cabinet
Clean the cabinet, panel and controls with a soft cloth slightly moistened with a mild detergent solution. Do not use any type of abrasive pad, scouring powder or solvent such as alcohol or benzine.
Specifications
Audio power specifications
With 3.2-ohm loads, both channels driven from 150–10,000 Hz: rated 4W, per channel minimum RMS power, with no more than 10% total harmonic distortion in AC operation.
Other specifications
| CD player section | |
| System | Compact disc digital audio system |
| Laser diode properties | Material: GaAlAsWavelength: 780nmEmission duration: ContinuousLaser output power: less than 44.6μW*This output is the value measured at a distance of 200 mm from the objective lens surface on the optical pick-up block. |
| Spindle speed | 12 cm CD: Approx. 200 r.p.m. to 500 r.p.m. (CLV)8 cm CD: Approx. 300 to 500 r.p.m (CLV) |
| Error correction | Sony Super Strategy Cross Interleave Read Solomon Code |
| Number of channels | 2 |
| Frequency response | 20-20,000 Hz: ± 12 dB |
| Wow and flutter | Below measurable limit |
| Radio section | |
| Frequency range | FM: 87.6-108 MHzAM: 530-1,710 kHz |
| Antennas | FM: Telescopic antennaAM: Built-in ferrite bar antenna |
Tape recorder section and general
| Recording system | 4-track 2-channel stereo |
| Fast winding time | Approx. 2 min. with Sony cassette C60 |
| Frequency response | With TYPE I (NORMAL) cassette: 80~10,000 Hz |
| Speakers | Woofer: 12 cm dia., cone typeTweeter: 2 cm dia. |
| Power output | Model for Canada:4.3W + 4.3W (at 3.2 ohms, 315 Hz, 10% harmonic distortion) |
| Inputs | External microphone input jack (minijack)Sensitivity 0.78 mVFor low impedance microphone |
| Batteries | Sony SUM-1 (NS) | Sony Alkaline AM1 |
| FM recording | Approx. 15 hrs | Approx. 35 hrs |
| Disc playing | Approx. 6 hrs | Approx. 16 hrs |
| Dimensions | 677 x 292 x 194 mm (w/h/d)(26 5/8 x 11 4/8 x 7 5/8 inches)incl. projecting parts and controls | |
| Weight | 6.7 kg (14 lb 12 oz)incl. batteries | |
| Supplied accessory | AC power cord (1)Remote commander (for CFD-455) (1) | |
Optional accessories
Stereo headphones Sony MDR Headphone Series
Connecting cord RK-C74 (Two phono plugs ↔ two phono plugs)
Head demagnetizer HE-5C
Head cleaning kit KK-4, KK-31
CD lens cleaning kit KK-9
CD disc cleaner XP-CD1, XP-CD3
Microphone Sony Dynamic Microphone Series
Troubleshooting Guide
| The unit does not operate. | The AC power cord is not connected (for AC operation).Incorrect polarity of batteries (See page 6.)Weak batteries (See page 6.) |
| No audio | Slide the VOLUME control toward MAX.Check the FUNCTION selector setting.The headphones are plugged in. |
| No audio from one channel or unbalanced left and right volume | Adjust the BALANCE control (See page 13.) |
| CD Player Operation | |
| Disc play does not begin. | Insert the disc with the labeled surface facing upward.Dusty or defective disc (See page 10.)Dirty or dusty lens (See page 18.)The disc compartment lid is not closed.Moisture condensation (See page 3.)When the CD operation buttons cannot be activated, turn off the unit and begin again.Improper setting of the FUNCTION selector |
| Skipping of sound | Dusty or defective disc (See page 10.)Dirty lens (See page 18.)Strong vibrations |
| Cassette-Corder Operation | |
| Tape does not move. | The cassette is being inserted improperly.The tape is slack.The cassette compartment lid is not closed. |
| The ● button cannot be activated. | No cassette in the cassette holder.The tab is removed from the cassette. (See page 14.) |
| Recording or playback cannot be made or there is a decrease in sound level. | Dirty heads (See page 18).Improper setting of the FUNCTION selector |
| Unsatisfactory erasing | Dirty erase head (See page 18.) |
| Excessive wow or flutter, or sound drop-out | Contamination of the capstan or pinch roller (See page 18.)Magnetic contamination of the head (See page 18.)Weak batteries (See page 6.) |