
EUR66662 - Remote control TECHNICS - Free user manual and instructions
Find the device manual for free EUR66662 TECHNICS in PDF.


| Type of product | Remote control |
| Brand | Technics |
| Model | EUR66662 |
| Dimensions (approx.) | 5.5 x 1.8 x 0.9 inches (140 x 46 x 23 mm) |
| Weight (with batteries) | 200 g (0.44 lbs) |
| Power source | 2 x AAA batteries (1.5 V each) |
| Battery life | Approximately 6 months with normal use |
| Display type | Backlit LCD |
| Learning function | Yes, can learn IR codes from other remotes (up to 99 functions) |
| Pre-programmed for | Panasonic AV units (TV, video, etc.) |
| Control functions | Playback, stop, pause, open/close tray, volume, muting, timer, direct play, mode change, input selection |
| Volume adjustment | Rotary knob, displayed in dB |
| Number of buttons | Over 30 |
| Interference protection | Automatic shut-off after 5 minutes if interference detected |
| Cleaning and maintenance | Wipe with a soft, dry cloth; avoid liquids and abrasives |
| Safety precautions | Insert batteries with correct polarity; do not expose to extreme temperatures or moisture |
| Spare parts available | Batteries (standard AAA) |
| Repairability | Batteries user-replaceable; other repairs by authorized service center only |
| Compatibility | Technics main units; Panasonic AV units with IR |
| Operating range | Up to 7 meters (23 feet) with direct line of sight |
| Manual languages | English (default), available in multiple languages on request |
Frequently Asked Questions - EUR66662 TECHNICS
User questions about EUR66662 TECHNICS
0 question about this device. Answer the ones you know or ask your own.
Ask a new question about this device
Download the instructions for your Remote control in PDF format for free! Find your manual EUR66662 - TECHNICS and take your electronic device back in hand. On this page are published all the documents necessary for the use of your device. EUR66662 by TECHNICS.
USER MANUAL EUR66662 TECHNICS
When the display is different
-
The display will become correct when the main unit switches to the next operation, or within 1 minute.
-
If the interfering object is still causing interference, the remote control transmitter will automatically turn "OFF" after 5 minutes.
Note:
When the remote control transmitter has turned "OFF", if the interfering object is removed and the OFF/ON button is pressed, the display will return to normal after approximately 5 seconds.
When using the stop/open/close button (☐/☐) on the remote control transmitter
- This button combines the functions of stopping playback and opening and closing of the trays.
Therefore, if this button is operated when the remote control transmitter and main unit displays are different, a mis-operation could result.
- When the remote control transmitter is used to open the tray, take care that there is no obstruction (such as the glass door of the audio rack) in front of the stereo system.
When operating the AV units
This remote control transmitter is pre-programmed with the remote control codes to enable operation of Panasonic AV units.
Some TV and video units cannot be operated by this remote control transmitter. In this case, carry out the learning function operation on page 55. After learning is completed, the AV units can be operated with this remote control transmitter.
When this button is pressed, the display is illuminated for approximately 5 seconds.
② OFF/ON switch (OFF/ON)
This button is used to turn the remote control transmitter ON/OFF. It can also be used to turn the main units ON and to the standby condition.
③ Function call button (FUNCTION)
This button is used to display functions other than the basic functions such as playback and stop on the remote control transmitter display.
④ Function select buttons (SELECT ▼/SELECT ▲)
These buttons are used to select the function contents selected using the function call button.
⑤ Display
Bar display that appears at the lower edge of the display:

In order to facilitate operation of the function select buttons and the function enter button, the bars illuminate when operation of the respective buttons is possible.
⑧ Function enter button (ENTER)
This button is used to enter the function contents selected using the function call button and function select buttons.
⑦ Timer button (TIMER)
This button is used when setting the time and programming the timer.
⑧ Learning operation buttons (LEARNING)
These buttons are used to program the remote functions of the remote control transmitter for your other units into this remote control transmitter.
② interruptor principal (OFF/ON)
This button is used to select direct play mode for enjoying tape or CD playback at the touch of a single button.
⑩ Operation mode changeover button (CHANGE MODE)
During playback (or recording) of the desired source, this button is used to operate another source by remote control transmitter without changing the tuner amplifier input.
⑪ AV button (AV)
This button is not used in this system.
⑫ Input selectors
These buttons are used to select the AV unit which will be operated by this remote control transmitter.
Note:
The DAT button is not used in this system.
⑬ Volume control (VOLUME)
This knob is used to adjust the volume to the desired level.
When the knob is stopped, the volume at that time is displayed in decibels (dB).
Note:
When adjusting the volume level, slowly turn the knob while listening to the sound.
⑭ Muting button (MUTING)
This button is used to temporarily reduce the volume level.
The volume level is attenuated by 20dB (approx. 1/10).
Press once again to return to the previous volume level.
⑮ Playback control buttons
These buttons are used to control the playback functions of the unit selected by the input selectors.
Open the tray and insert a cassette tape.
| TYPE |
To briefly interrupt play
Press the pause button.
| 17025 | 19.42 |
| > |
| To temporarily stop recording | Para parar la grabación temporariamente | Pour arréter momentanément l'enregistrement | |
 | Press the pause button.To resume recording, press the playback button corresponding to the side of the tape being recorded upon.TAPE PEC PAUSE | Oprimir el botón de pausa.Para continuar la grabación, oprimir el botón de reproducción correspondiente al lado de la cinta que se estaba grabando.TAPE PEC PAUSE | Appuyer sur la touche de pause.Pour reprendre l'enregistrement, ap-puyer sur la touche lecture correspon-dant à la face de la cassette en cours.TAPE PEC PAUSE |
| To stop recording | Para parar la grabación | Pour arréter l'enregistrement | |
 | Press the stop/open/close button.TAPE | Oprimir el botón de parada/abertura/clerre.TAPE | Appuyer sur la touche d'arrêt/ouverture/fermeture.TAPE |
| To cancel change mode | Para cancelar el modo de cambio | Pour annuler le mode de changement | |
 | Press the TUNER button.TUNER FM BB IO MH2 CH 5 | Oprimir el botón TUNER.TUNER FM BB IO MH2 CH 5 | Appuyer sur la touche TUNER.TUNER FM BB IO MH2 CH 5 |

| To record CD's | Para grabar un disco compacto | Pour enregistrer un disque compact | ||
| Turn the auto level button of the cassette deck to ON. | Oprimir el botón de nivel automático de la platina de casetes a la posición ON. | Mettre le bouton de niveau automatique de la platine-cassette sur ON. | ||
| Example:To record a CD with 7 tracks and a total playing time of 46 minutes 8 seconds | Ejemplo:Para grabar un disco compacto con 7 pistas y un tiempo total de reproducción de 46 minutos y 8 segundos | Exemple:Enregistrement d'un disque compact avec 7 programmes et une durée totale de lecture de 46 minutes et 8 secondes. | ||
| 1 |  | Press the TAPE button. | Oprimir el botón TAPE. | Appuyer sur la touche TAPE. |
| 2 | 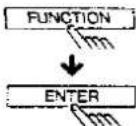 | Set the cassette deck to recording standby mode. | Colocar la platina de casetes en el modo de espera de grabación. | Régler la platine-cassette en mode d'enregistrement en atente. |
| 3 |  | Press the CD button. | Oprimir el botón CD. Numero de pista Numero de pista | Appuyer sur la touche CD.Numéro de piste |
| 4 |  | Start recording.Synchronized recording will start automatically.Playing track number | Comenzar la grabación.La grabación sincronizada comenzará automáticamente. Reproduciendo el número de pista Reproduciendo el número de pista | Début de l'enregistrement.L'enregistrement synchronisé com-mence automatiquement.Numéro de piste en cours de lecture |
Note: If no cassette tape has been inserted or if the accidental erasure prevention tab has been removed, the cassette tray will open when "EDIT" mode is selected. In this case, insert a tape that can be recorded, and then repeat the procedure from step 1.
To change the program contents
Complete programming
Press to select the desired track number.
- Up to the 19th track can be selected.
- If a track number which is not on the disc is selected, playback cannot be performed.
Press the appropriate button of the other remote control transmitter to learn the function.

Other remote control transmitter
-
Press the button until "OK" is displayed.
-
If "ERROR" is displayed, repeat from step 3.
| VCP 2 | LCPB: 0 |
| VCP 2 | LCPB: 0 |
Before requesting service for this unit, check the chart below for a possible cause of the problem you are experiencing. Some simple checks or a minor adjustment on your part may eliminate the problem and restore proper operation. If you are in doubt about some of the check points, or if the remedies indicated in the chart do not solve the problem, refer to the directory of Authorized Service Centers (enclosed with this unit) to locate a convenient service center, or consult your Technics dealer for instructions.
Remote-control transmitter does not function.
| Probable cause(s) ➕Suggested remedy | |
| Batteries are incorrectly installed. | • Insert the batteries so that the positive (+) and negative (−) polarities are correct. |
| The batteries are drained. | • Replace them with new batteries. |
| The remote-control transmitter is not correctly facing the IR transceiver. | • Face the remote-control transmitter correctly toward the IR transceiver. |
| The "USE" mode is not selected. | • Select the "USE" mode by the USE button of the learning operation buttons. |
Matsushita Electric Industrial Co., Ltd.
Central P.O. Box 288, Osaka 530-91, Japan
Printed in Japan
Imprimé au Japon
RQT1227-G
H069!C1061

- When the display is different
- Note:
- When using the stop/open/close button (☐/☐) on the remote control transmitter
- When operating the AV units
- ⑩ Operation mode changeover button (CHANGE MODE)
- ⑪ AV button (AV)
- ⑫ Input selectors
- ⑬ Volume control (VOLUME)
- ⑭ Muting button (MUTING)
- ⑮ Playback control buttons
- Open the tray and insert a cassette tape.
- To briefly interrupt play
- Press the pause button.
- To change the program contents
- Complete programming
- Press to select the desired track number.
Brand : TECHNICS
Model : EUR66662
Category : Remote control