Z1 - Drone Syma - Free user manual and instructions
Find the device manual for free Z1 Syma in PDF.


User questions about Z1 Syma
0 question about this device. Answer the ones you know or ask your own.
Ask a new question about this device
Download the instructions for your Drone in PDF format for free! Find your manual Z1 - Syma and take your electronic device back in hand. On this page are published all the documents necessary for the use of your device. Z1 by Syma.
USER MANUAL Z1 Syma
natural_image
Line drawing of a quadcopter drone with propellers and control panels (no text or symbols)
USER MANUAL
MAIN FEATURES
- Special 4-axis structure - fast and agile. Suitable for flying in spacious indoor and outdoor areas.
• Built-in 6-axis gyroscope ensures accurate position hold. - Modular design for easy upgrades and maintenance.
- New optical flow sensor for accurate position hold.
- Headless mode for easy recall of the drone.
- Improved height hold stability.
- Improved auto take-off/landing function.
- Enjoy aerial photography with high definition wireless real time video transmission.
Notice: The company will not be held responsibly for any printing inconsistencies and may or not inform end users regarding any new potential updates. For further information, please visit the syma website.
Safety Guide
- Please, keep the small drone accessories out of reach of children.
- This drone is very powerful. When flying for the first time, avoid sudden movements of the throttle. When ascending push the throttle stick slowly up to avoid unintended damages or injuries.
- After flying, turn off the transmitter before turning off the drone.
- Do not keep the batteries in high temperatures areas or near heat sources.
- It is strongly recommended to operate the drone at 2-3 meters away from a pilot and other people or animals. Crashes may cause unintended injuries. When landing the drone, avoid crashing it into other people.
- Adult or experienced RC pilot's supervision is recommended for children.
- Non-rechargeable batteries should not be recharged; Batteries should be inserted with a correct polarity; Different types of batteries, new or used batteries should not be mixing.
- Turn off the drone/transmitter and remove the batteries when not in use.
- The supply terminals should not be short-circuited.
- When not in use for more than 10 days, take measures to pro-long the drone's battery life by reducing the drone battery level to 40% - 50% of its capacity(fully charge the battery then fly the drone for half of ifs flying time).
- Keep away from the rotating blades (rotating blades my cause bodily injuries, or damage to property).
- To avoid interfering with air traffic control signals avoid flying a drone within 5000 meters of an airport. Avoid operating RC equipment during the periods set by the local authority.
- Only use the included charger.
- Liquids can be used to clean the product. Turn off the equipment and unplug the charger from the power source before cleaning the drone. Perform routine inspection of the charger (check: port, shell and other parts) on a regular basis. If any abnormalities are found, immediately stop using the equipment until it is fixed.
- Attention: Drone assembly under adult supervision.
- Do not look directly into the LED lights of the drone as it can damage your eyes.
- Open the battery cover of the toy with screwdriver.
- The packing has to be kept since it contains important information.
Repair and Maintenance
- Use clean and soft cloth to clean the product.
- Keep away the product from heat sources.
- Avoid water exposure to this product. Moisture may cause damages of the aircraft electronic parts.
- Charger used with the drone should be examined regularly, such as the cord, plug, enclosures and other parts. In case of any damages is found, please stop using it unless it is repaired or replaced.
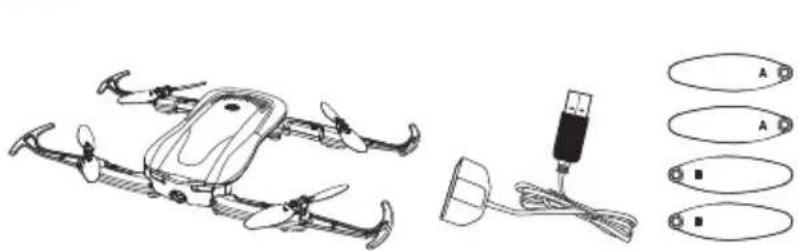
Box Contents
Items included:
- Drone
- User Manual
- Blades X4
- USB Charger
natural_image
Illustration of a quadcopter drone with attached cable and sensor components (no text or symbols)
text_image
Z1 LIFE NO START GROUP USER MANUAL INJUNCTIONS • 2000-2005 (ISO 8.0) • 2006-2010 (ISO 8.0) • 2013-2017 (ISO 8.0) • 2018-2021 (ISO 8.0) • 2022-2024 (ISO 8.0) • 2025-2027 (ISO 8.0) • 2028-2030 (ISO 8.0) • 2031-2033 (ISO 8.0) • 2034-2036 (ISO 8.0) • 2037-2039 (ISO 8.0) • 2040-2043 (ISO 8.0) • 2043-2046 (ISO 8.0) • 2046-2049 (ISO 8.0) • 2049-2051 (ISO 8.0) • 2052-2054 (ISO 8.0) • 2055-2057 (ISO 8.0) • 2058-2060 (ISO 8.0) • 2061-2063 (ISO 8.0) • 2064-2066 (ISO 8.0) • 2067-2069 (ISO 8.0) • 2070-2073 (ISO 8.0) • 2073-2076 (ISO 8.0) • 2076-2079 (ISO 8.0) • 2079-2081 (ISO 8.0) • 2082-2084 (ISO 8.0) • 2085-2087 (ISO 8.0) • 2088-2090 (ISO 8.0) • 2101-2113 (ISO 8.0) • 2114-2126 (ISO 8.0) • 2127-2139 (ISO 8.0) • 2141-2151 (ISO 8.0) • 2154-2163 (ISO 8.0) • 2167-2175 (ISO 8.0) • 2181-2196 (ISO 8.0) • 2194-2199 (ISO 8.0) • 2211-2233 (ISO 8.0) • 2234-2246 (ISO 8.0) • 2259-2279 (ISO 8.0) • 2314-2331 (ISO 8.0) • 2349-2363 (ISO 8.0) • 2374-2386 (ISO 8.0) • 2411-2439 (ISO 8.0) • 2446-2471 (ISO 8.0) • 2479-2494 (ISO 8.0) • 2514-2537 (ISO 8.0) • 2549-2569 (ISO 8.0) • 2594-2611 (ISO 8.0) • 2639-2644 (ISO 8.0) • 2674-2667 (ISO 8.0) • 2719-2731 (ISO 8.0) • 2754-2755 (ISO 8.0) • 2799-2811 (ISO 8.0) • 2834-2836 (ISO 8.0) • 2879-2891 (ISO 8.0) • 3145-3157 (ISO 8.0)Smart Phone Application
1. Android/IOS Phone Software Download Instructions
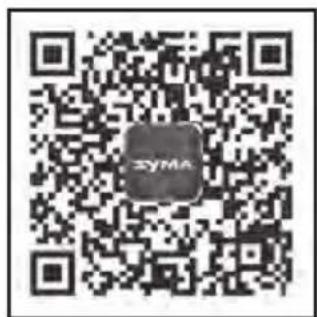
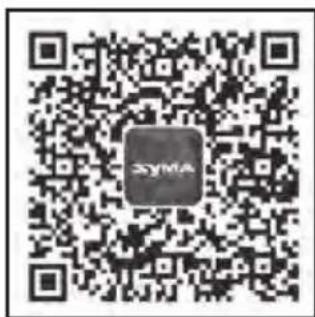
Android: Please download and install the software SYMA FLY from www.symatoys.net or scan the QR code.
IOS: Please download and install the software SYMA FLY from the App Store, or scan the QR code.
Tips: QR codes can be found on the packaging box or at the last page of the user manual. Newest SYMA FLY app version can be found at www.symatoys.net or APP STORE.
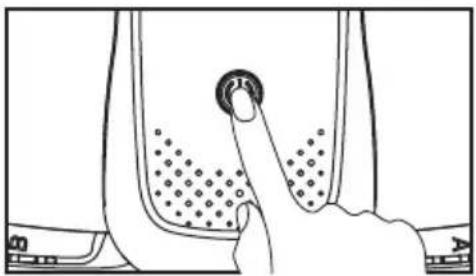
2. Turn the drone on.
natural_image
Line drawing of a hand pressing down on a button with dots inside a container (no text or symbols)3. For more connection instructions, please refer to the App.
Folding/Unfolding the Drone's Arms
natural_image
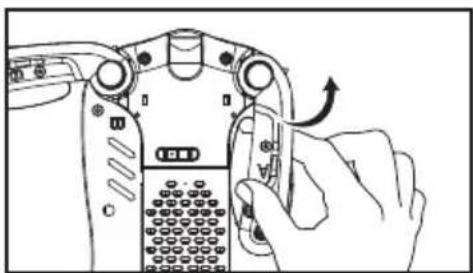
Hand holding a camera module with a scroll wheel, showing the right-hand rule for adjusting the button (no text or symbols present)- Unfold the arms of the drone as shown by the arrows in the picture. Make sure the arms are fully unfolded.
natural_image
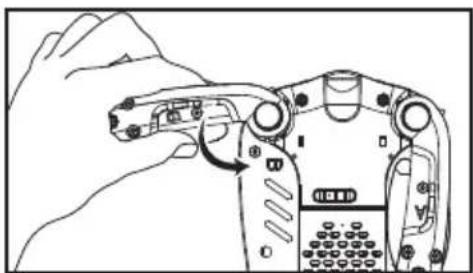
Line drawing of a hand holding a camera module with adjustment knob (no text or symbols)- Fold the arms of the drone as shown by the arrows in the picture. Make sure the arms are fully folded.
Installing the Guards
natural_image
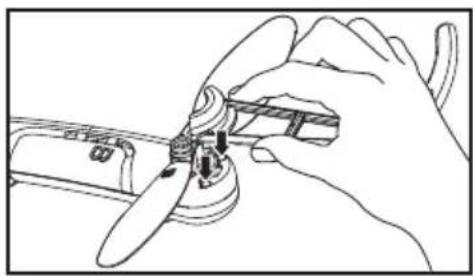
Line drawing of a hand using a propeller to adjust a mechanical component (no text or symbols)Locate the guards as shown by arrows in the picture by placing them into the slots near the motors.
Changing and Charging the Drone's Batteries
natural_image
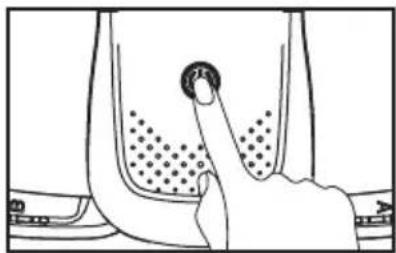
Line drawing of a hand pressing down on a surface with a circular button (no text or symbols)- Gently press the on/off button to turn off the drone.
natural_image
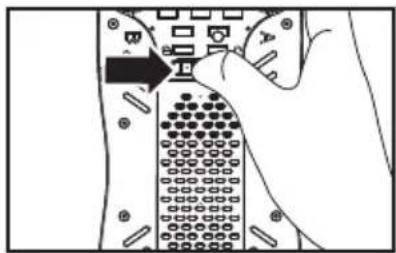
Diagram of a hand inserting a component into a device panel with a black arrow pointing to the component (no text or symbols present)- To remove the battery, slide the lock at the bottom of the drone as shown by arrows in the picture. Make sure it is fully unlocked and after remove the battery.
text_image
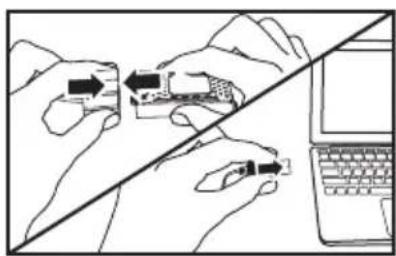
Diagram showing hands using a device to interact with a laptop, with arrows indicating movement and text labels visible.- Connect the USB charging cable to the battery. Insert the charging cable into computer USB (when charging the light will be on; unplug the charger when the light goes off; charging time about 130 minutes).
natural_image
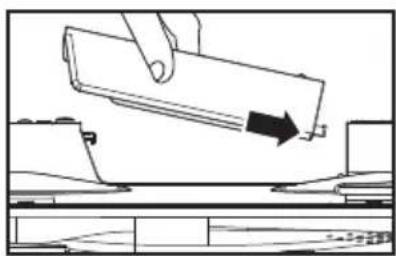
Illustration of a hand holding a cylindrical object with an arrow pointing to it, placed on a surface with no visible text or symbols.- Once charging is completed, install the battery into the drone as shown by arrows on the picture.
text_image
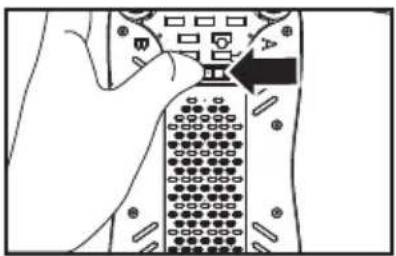
Diagram showing a hand holding a device with a control panel and an arrow pointing to it, indicating a process or operation.- Slide the lock at the bottom of the drone as shown by arrows in the picture. Make sure it is fully locked.
Charging time is about 130 minutes. Drone hover time is about 7 minutes.
Important: battery charging information
- Do not keep the battery in high temperature areas, such as fire or heat sources. Otherwise, it may damage the battery or even trigger an explosion.
- Do not put the battery into water. Store the battery in a cool and dry environment.
- Avoid dismantling the batteries.
- During the charging of battery, avoid leaving the charging place.
- Rechargeable batteries should be removed from the toy before being charged.
- Rechargeable battetries should only be charged under the supervision of adults.
- Exhausted batteries should be removed from the aircraft.
- Caution: Risk of explosion if battery is replaced with incorrect ones. Please dispose the batteries according to the instructions.

- During the battery installation, it must be ensured that the polarities of the batteries are matched with that of the battery box. No battery shall be installed with the opposite polarity.
- Please do not use new and old batteries together.
- Please do not use different types of batteries together.
- Do not use rechargeable batteries.
Re-installing the Blades
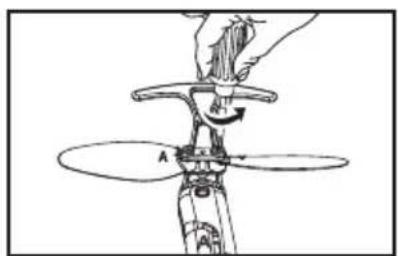
natural_image
Diagram of a hand operating a propeller with labeled parts A and B, showing no text or symbols beyond labels- Remove the screws before re-installing the blades.
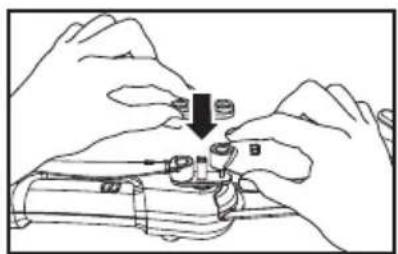
natural_image
Line drawing of hands assembling or adjusting a mechanical component (no text or symbols)- A labeled blades fit on the A labeled motors, B labeled blades fit on the B labeled motors. Use the screws to tighten the blades. Refer to the image.
Warning: Changes or modifications to this unit not expressly approved by the party responsible for compliance could void the user's authority to operate the equipment.
NOTE: This equipment has been tested and found to comply with the limits for a Class B digital device, pursuant to Part 15 of the FCC Rules. These limits are designed to provide reasonable protection against harmful interference in a residential installation. This equipment generates, uses and can radiate radio frequency energy and, if not installed and used in accordance with the instructions, may cause harmful interference to radio communications.
However, there is no guarantee that interference will not occur in a particular installation. If this equipment does cause harmful interference to radio or television reception, which can be determined by turning the equipment off and on, the user is encouraged to try to correct the interference by one or more of the following measures:
●Reorient or relocate the receiving antenna.
- Increase the separation between the equipment and receiver.
- Connect the equipment into an outlet on a circuit different from that to which the receiver is connected.
- Consult the dealer or an experienced radio/TV technician for help.
"This device complies with FCC radiation exposure limits set forth for general population (uncontrolled exposure).
This device must not be collocated or operating in conjunction with any other antenna or transmitter."
Decoration of Conformity Inserts:
"Hereby, GuangDong Syma model drone Industrial co.,ltd, declares that this drone is in compliance with the essential requirements and other relevant provisions of Directive 2014/53/EU."
A copy of the full DoC is attached.
Accessories/Parts (Optional)
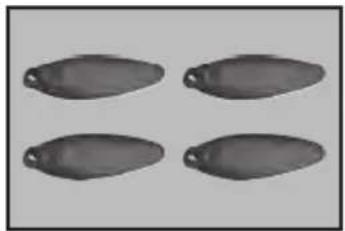
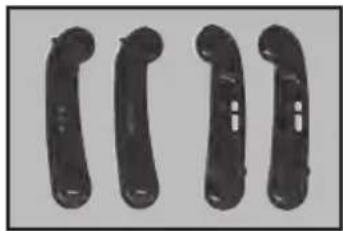
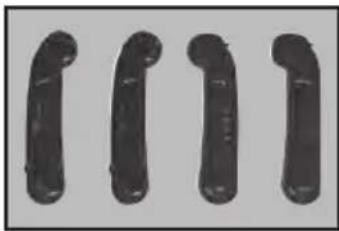
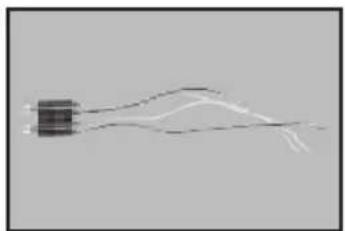
Please, look through the parts below. For your convenience, we have specified every part and accessory. The parts and accessories can be purchased through local distributors. Please specify desired colours at the time of purchase.
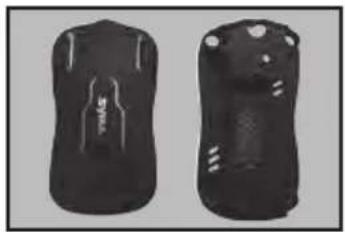
natural_image
Two black athletic shoes with white stitching and visible logos (no text or symbols)Body
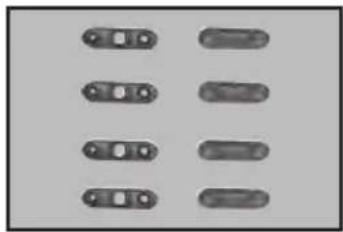
natural_image
Six identical oval-shaped objects arranged in two rows, each with a central square cutout (no text or symbols visible)Blade Clip
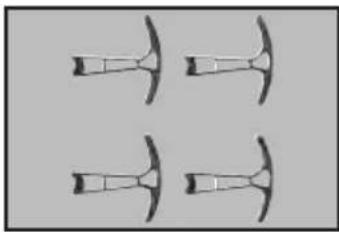
natural_image
Four identical mechanical components arranged in a 2x2 grid, no text or symbols visible.Protective Gear
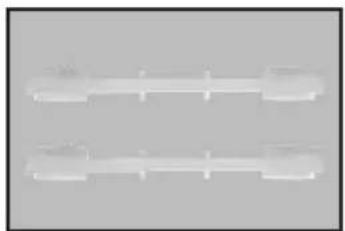
natural_image
Two horizontal rectangular objects with crosshairs, no visible text or symbolsLight Protective Cover
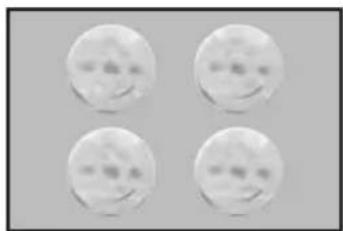
natural_image
Four identical circular frames with smiling faces, no text or symbols presentSpinning Shell
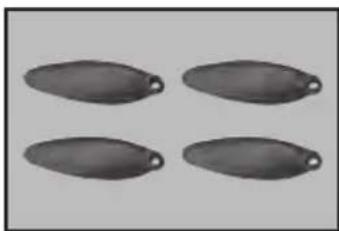
natural_image
Four oval-shaped objects with small protrusions, arranged in a 2x2 grid (no text or symbols)Blade A
natural_image
Four identical gray oval-shaped objects with small protrusions, arranged horizontally on a plain background (no text or symbols)Blade B
natural_image
Four black plastic mechanical parts arranged in a row (no text or symbols visible)Arm A
natural_image
Four black cylindrical objects arranged in a row (no text or symbols visible)Arm B
natural_image
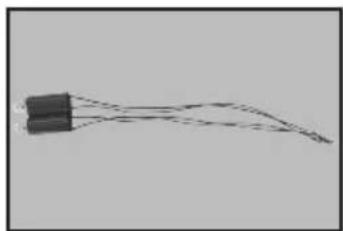
Simple line drawing of a rectangular object with a curved line extending from it, no text or symbols present.Motor A
natural_image
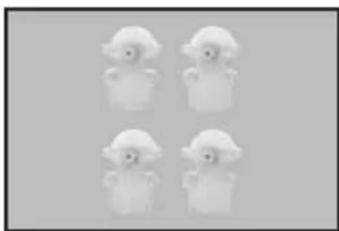
Simple line drawing of a rectangular object with three curved lines extending outward (no text or symbols)Motor B
natural_image
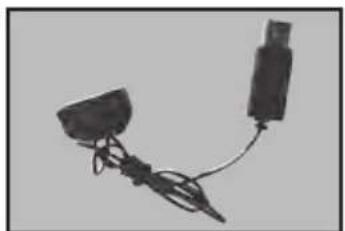
Four identical white cartoon duck figures arranged in a 2x2 grid (no text or symbols)Storehouse Components
natural_image
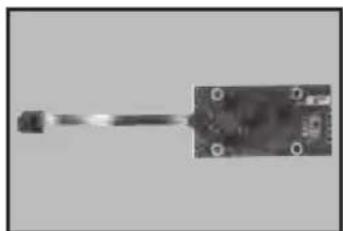
Simple line drawing of a device with wires and connectors (no text or symbols)USB Charger
natural_image
Close-up of a metallic tool tip with a rectangular electronic component (no visible text or symbols)Receiver
natural_image
Simple line drawing of a mechanical device with a curved arm and two separate components (no text or symbols)Camera Components
natural_image
Black rectangular electronic component with mounting holes (no visible text or symbols)
natural_image
Abstract line pattern with diagonal lines and no text or symbolsBattery Elements Light Board
Product Main Parts and Components
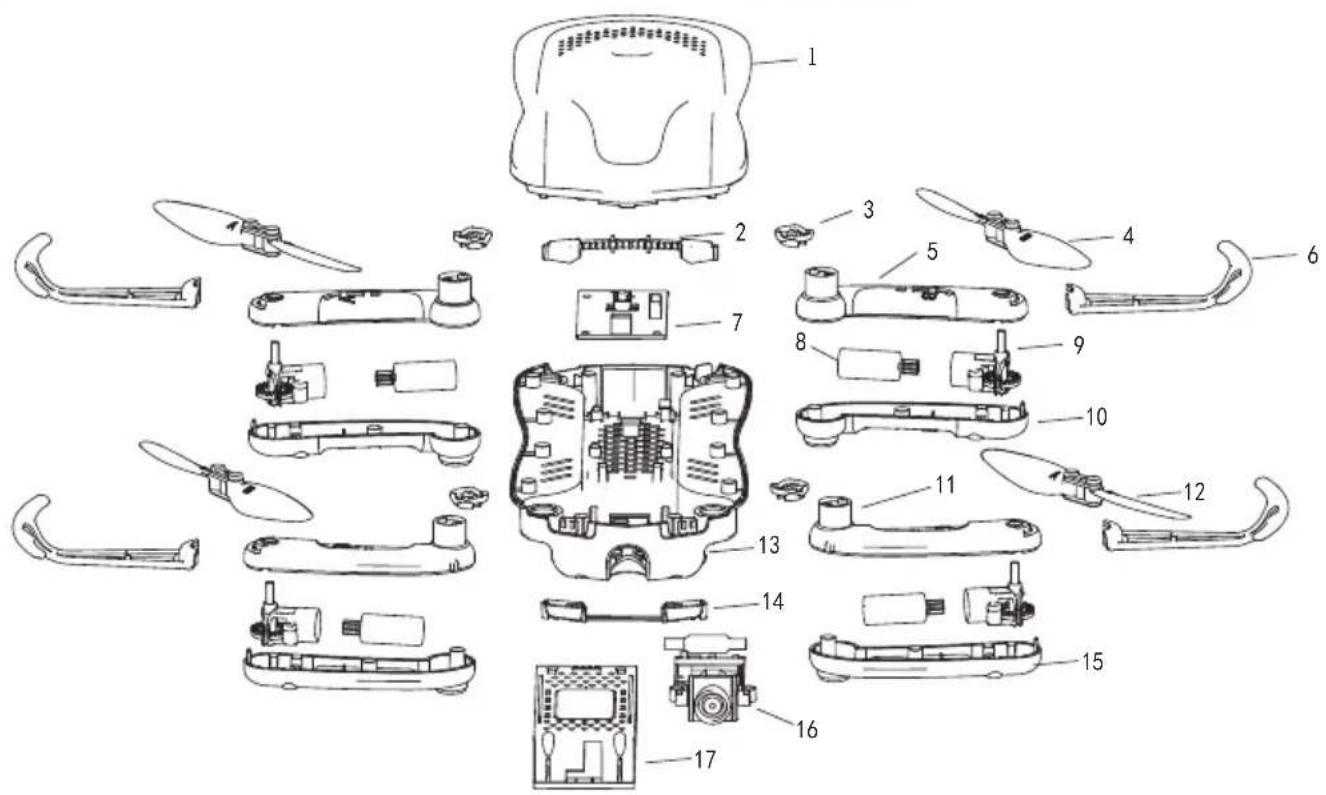
text_image
Exploded view diagram of a drone's internal components with numbered parts for identification| Serial number | Component/Part Name | Quantity | Serial number | Component/Part Name | Quantity |
| 01 | Top Main Body | 1 | 10 | Arm B Bottom Cover | 2 |
| 02 | Rear light Protective Cover | 2 | 11 | Arm A Top Cover | 2 |
| 03 | Spinning Shell | 1 | 12 | Blade A | 2 |
| 04 | Blade B | 2 | 13 | Bottom Main Body | 1 |
| 05 | Arm B Top Cover | 2 | 14 | Front Light Protective Cover | 2 |
| 06 | Protective Guard | 4 | 15 | Arm A Bottom Cover | 2 |
| 07 | Receiver | 1 | 16 | Camera Components | 1 |
| 08 | Battery Elements | 4 | 17 | Battery Elements | 1 |
| 09 | Storehouse Components | 1 |
Main Specifications
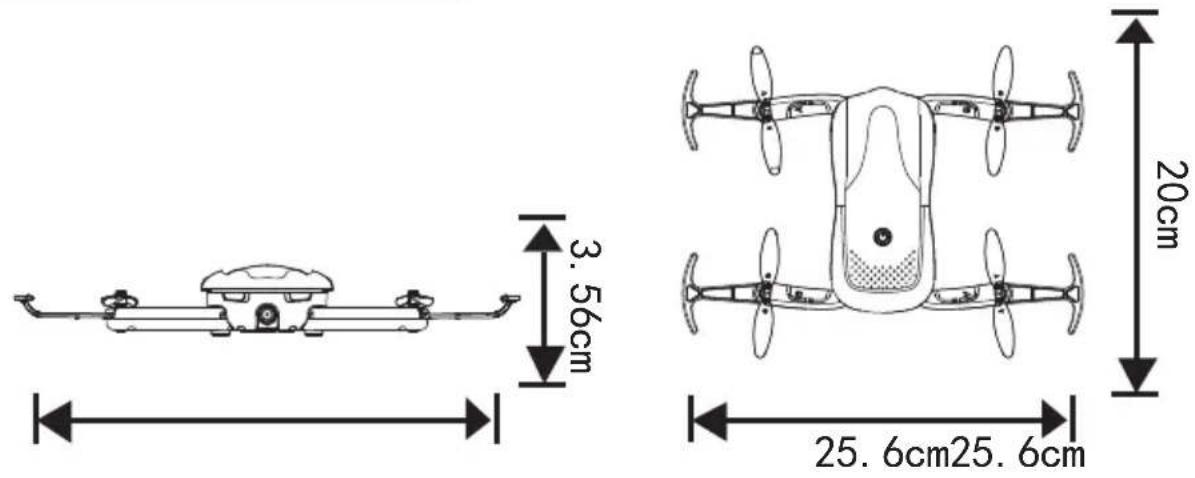
| Problem Reason Solution | ||
| The drone does not respond. | The drone has activated low voltage battery protection. | Recharge the drone's battery. |
| The transmitter sticks are not sensitive. | Out of flying control range. | Fly the drone within the range of the transmitter's transmission signal. |
| The drone is unstable when hovering or quickly drifts in one direction. | Balance calibration is needed. | Perform balance calibration, refer to the APP (balance calibration tool). |
| When in headless mode the forward direction deviates. | Numerous crashes. | Re-set forward direction, refer to the APP (headless mode tool). |
| The drone does not hold the set altitude. | 1. Balance calibration is needed.2. Flying the drone in severe weather.3. Heavy crash impacts gyroscope calculations. | 1. Perform balance calibration, refer to the APP (balance calibration tool).2. Avoid flying the drone in severe weather conditions (strong wind, rain, snow, fog, thunder etc).3. Perform balance calibration, refer to the APP (balance calibration tool). |
text_image
QR code with central logo containing 'SYMA' textAndroid APP iOS APP
text_image
QR code with central logo containing 'SYMA' textManufacturer:
Guangdong Syma Model Aircraft Industrial Co., Ltd.
Address: No 2 West Xingye Road, intersection of North Xingye Road,
Laimei Industrial Park, Chenghai District, Shantou City, Guangdong
Province, China. Postal Code: 515800
Sales department: +86 0754 86980668 After-sales service: +86 0754 86395095
Fax: +86 0754 86395098
Website: www.symatoys.net
Email: syma@symatoys.com
The company has the right of final interpretation of this user manual.