
NexImage Burst Color - Camera CELESTRON - Free user manual and instructions
Find the device manual for free NexImage Burst Color CELESTRON in PDF.


User questions about NexImage Burst Color CELESTRON
0 question about this device. Answer the ones you know or ask your own.
Ask a new question about this device
Download the instructions for your Camera in PDF format for free! Find your manual NexImage Burst Color - CELESTRON and take your electronic device back in hand. On this page are published all the documents necessary for the use of your device. NexImage Burst Color by CELESTRON.
USER MANUAL NexImage Burst Color CELESTRON
natural_image
Close-up of a black camera lens with a red square lens and golden frame, against a starry background (no text or symbols visible)NexImage
USER'S MANUAL
Model #93708, #93711
95518, #95519
ENGLISH
Congratulations on your purchase of the Celestron NexImage Solar System imaging camera.
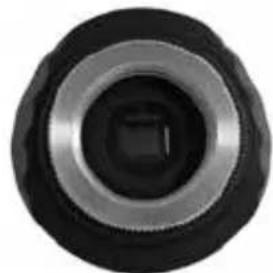
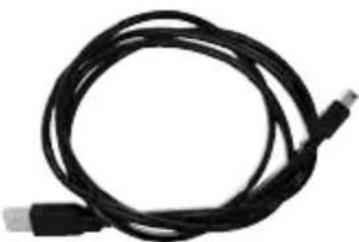
Your NexImage camera comes with the following:
- NexImage Camera
- 1.25" nose piece
- CD including NexImage iCap and RegiStax processing software
- USB Cable
Fig 1
natural_image
Close-up of a black circular mechanical component with concentric rings and central hole (no text or symbols visible)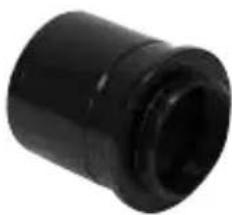
natural_image
Close-up of a black cylindrical mechanical component (no visible text or markings)1.25" Nose Piece
natural_image
Coiled black cable with two connectors, no visible text or symbols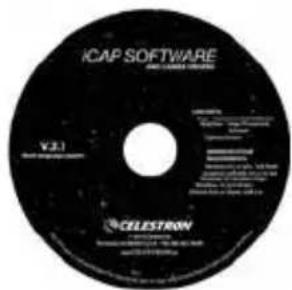
text_image
ICAP SOFTWARE AND ILLINOIS SYSTEMS V.2.1 CELESTRONUSB CableNexImage Camera NexImage iCap and Registax processing software
Recommended Minimum System requirements:
- Pentium IV, 2.0 GHz, 1GB RAM
- Graphics card with 24 or 32 bit
- Windows XP, Windows Vista, Windows 7 (32 & 64 bit)
- DirectX 9.0c or higher
Quick Start
- Place the CD into your computer's CD-ROM drive.
- Install both the NexImage iCap and RegiStax software onto your computer.
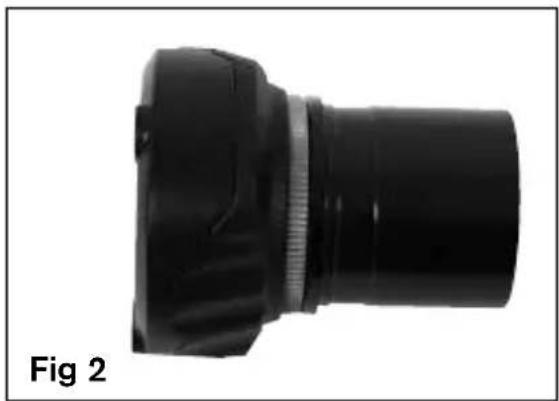
- Thread the 1.25" nose piece into the body of the NexImage camera. See Fig 2.
- Slide the 1.25" nose piece of the camera into the eyepiece barrel of your telescope. See Fig 3.
- Plug the small end of the USB cable into the port on the back of the camera.
- Plug the other end of the USB cable into a USB port on your computer. Once connected, the Found New Hardware message will appear. Follow the Installation Wizard until the device has been successfully installed.
natural_image
Close-up of a black cylindrical lens component with a flanged rim, labeled 'Fig 2' (no other text or symbols visible)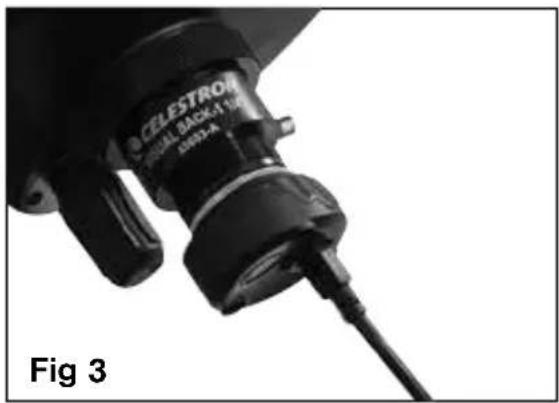
natural_image
Close-up of a CELESTROV industrial drill bit with a cable, labeled as Fig 3 (no text on the drill bit itself)Capturing Images
- Double-click the NexImage iCap icon on your computer's desktop to start the program. See Fig 4.
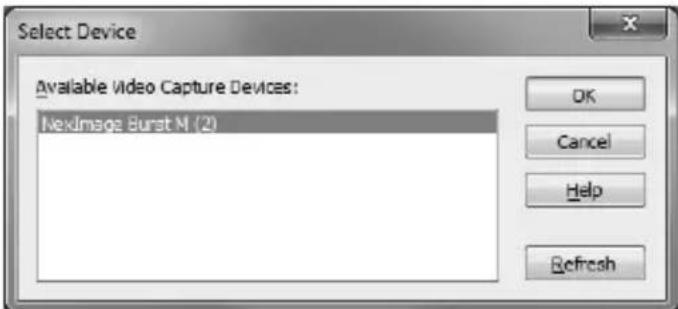
- If the NexImage camera is not already detected, select the camera and press OK. See Fig 5.
- Select an easy target like the Moon to begin with. Center and focus your telescope on the specific feature you wish to image.
- You should be able to see light displayed in the Preview window of the iCap software.
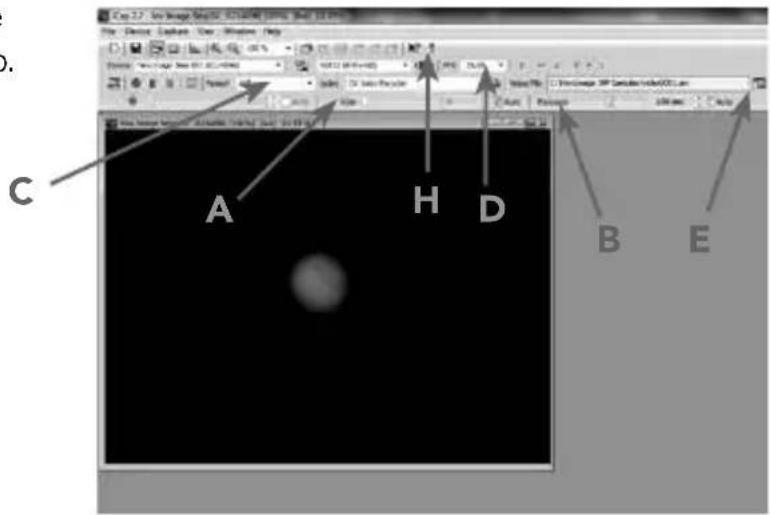
- Use the telescopes focuser to focus the image until the object is visible and sharp. See Fig 6.

Fig 4
text_image
Select Device Available Video Capture Devices: NextImage Burst N (2) OK Cancel Help RefreshFig 5
text_image
C A H D B EFig 6
- Use the Gain (A) and Exposure (B) settings to make sure that the image is not underexposed or overexposed.
- Select the video format (C). For the highest resolution, select 1280x960.
- Select the frames per second (FPS) for your video. The FPS box (D) will always display the maximum frames per second for the selected resolution setting.
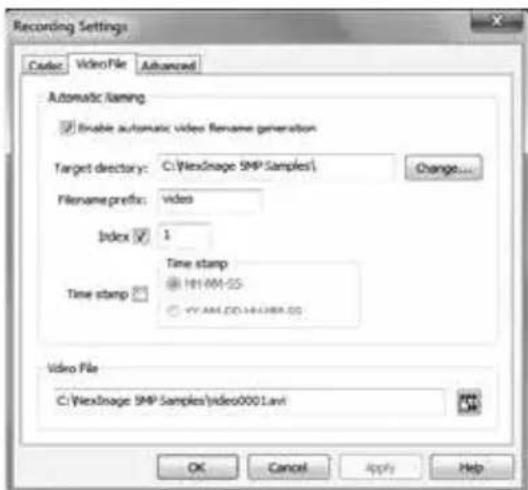
- Press the Video File button (E) to bring up the Recording Setting box. See Fig 7 & 8.
ROI Subframing
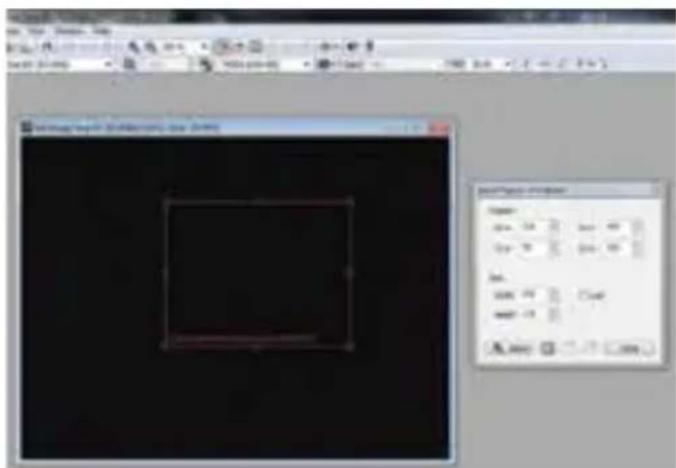
If the object you are imaging does not consume most of the field of view, you can select an ROI (region of interest) to increase the framerate and save disk space. Go to the Device menu and select ROI – Specify, or click on the ROI icon. Draw the ROI with your mouse, then click inside the red box to set the ROI. The ROI can be reset any time by clicking the reset icon or going back to the Device menu.

Fig 7
text_image
Recording Settings Shader: Video File Advanced Automatic naming Enable automatic video rename generation Target directory: C:\WexImage SMP Samples\ Change... Filename prefix: video Index ✓ 1 Time stamp Time stamp HHMM-SS YYAM-CC-HKUBA-SS Video File C:\WexImage SMP Samples\video0001.avi OK Cancel Apply HelpFig 8
text_image
图层1 - 图层2 - 图层3 - 图层4 - 图层5 - 图层6 - 图层7 - 图层8 - 图层9 - 图层10 - 图层11 - 图层12 - 图层13 - 图层14 - 图层15 - 图层16 - 图层17 - 图层18 - 图层19 - 图层20 - 图层21 - 图层22 - 图层23 - 图层24 - 图层25 - 图层26 - 图层27 - 图层28 - 图层29 - 图层30 - 图层31 - 图层32 - 图层33 - 图层34 - 图层35 - 图层36 - 图层37 - 图层38 - 图层39 - 图层40 - 图层41 - 图层42 - 图层43 - 图层44 - 图层45 - 图层46 - 图层47 - 图层48 - 图层49 - 图层50 - 图层51 - 图层52 - 图层53 - 图层54 - 图层55 - 图层56 - 图层57 - 图层58 - 图层59 - 图层60 - 图层61 - 图层62 - 图层63 - 图层64 - 图层65 - 图层66 - 图层67 - 图层68 - 图层69 - 图层70 - 图层71 - 图层72 - 图层73 - 图层74 - 图层75 - 图层76 - 图层77 - 图层78 - 图层79 - 图层80 - 图层81 - 图层82 - 图层83 - 图层84 - 图层85 - 图层86 - 图层87 - 图层88 - 图层89 - 图层90 - 图层91 - 图层92 - 图层93 - 图层94 - 图层95 - 图层96 - 图层97 - 图层98 - 图层99 - 图层100 图层100: 0.00 图层101: 0.00 图层102: 0.00 图层103: 0.00 图层104: 0.00 图层105: 0.00 图层106: 0.00 图层107: 0.00 图层108: 0.00 图层109: 0.00 图层110: 0.00 图层111: 0.00 图层112: 0.00 图层113: 0.00 图层114: 0.00 图层115: 0.00 图层116: 0.00 图层117: 0.00 图层118: 0.00 图层119: 0.00 图层120: 0.00 图层121: 0.00 图层122: 0.00 图层123: 0.00 图层124: 0.00 图层125: 0.00 图层126: 0.00 图层127: 0.00 图层128: 0.00 图层129: 0.00 图层130: 0.00 图层131: 0.00 图层132: 0.00 图层133: 0.00 图层134: 0.00 图层135: 0.00 图层136: 0.00 图层137: 0.00 图层138: 0.00 图层139: 0.00 图层140: 0.00 图层141: 0.00 图层142: 0.00 图层143: 0.00 图层144: 0.00 图层145: 0.00 图层146: 0.00 图层147: 0.00 图层148: 0.00 图层149: 0.00 图层150: 0.00 图层151: 0.00 图层152: 0.00 图层153: 0.00 图层154: 0.00 图层155: 0.00 图层156: 0.00 图层157: 0.00 图层158: 0.00 图层159: 0.00 图层160: 0.00 图层161: 0.00 图层162: 0.00 图层163: 0.00 图层164: 0.00 图层165: 0.00 图层166: 0.00 图层167: 0.00 图层168: 0.00 图层169: 0.00 图层170: 0.00 图层171: 0.00 图层172: 0.00 图层173: 0.00 图层174: 0.00 图层175: 0.00 图层176: 0.00 图层177: 0.0- Press the Video File (E) to select the destination location for your video.
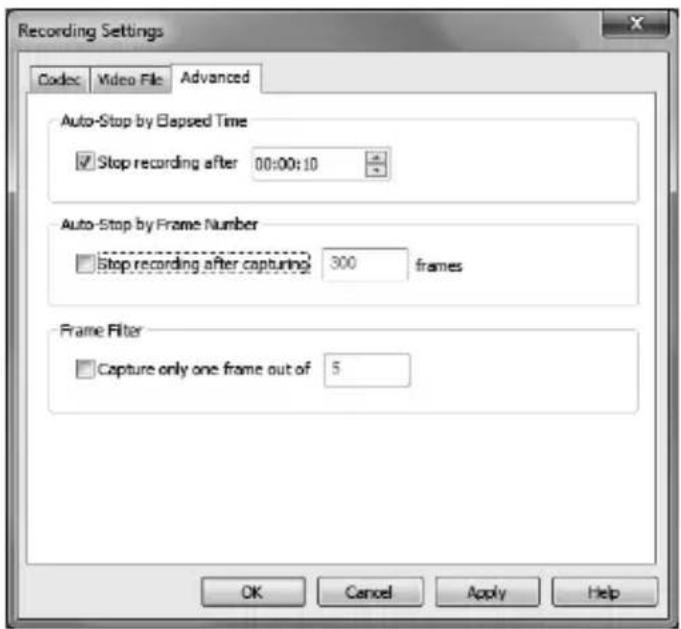
- Click on the Advanced tab. You can either select the amount of time or number of frames you wish to record. See Fig 9.
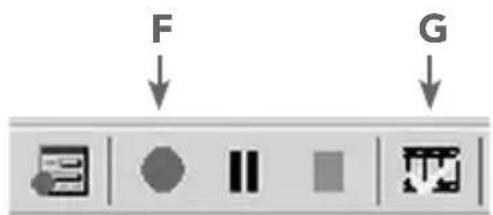
- Press the Record button (F) when ready to begin recording video. See Fig 10.
- Once recording is complete, press the check video button (G) to view the capture image.
text_image
Recording Settings Codes Video File Advanced Auto-Stop by Elapsed Time ✓ Stop recording after 00:00:10 Auto-Stop by Frame Number ✓ Stop recording after capturing 300 frames Frame Filter ✓ Capture only one frame out of 5 OK Cancel Apply HelpFig 9
text_image
F GFig 10
See the Help file (H) to learn more about the advanced features of iCap software. Now that your video is captured, you are ready to process it into one high-resolution image.
Processing Images
- Double-click the RegiStax icon on your computer's desktop to start the program. See Fig 11.
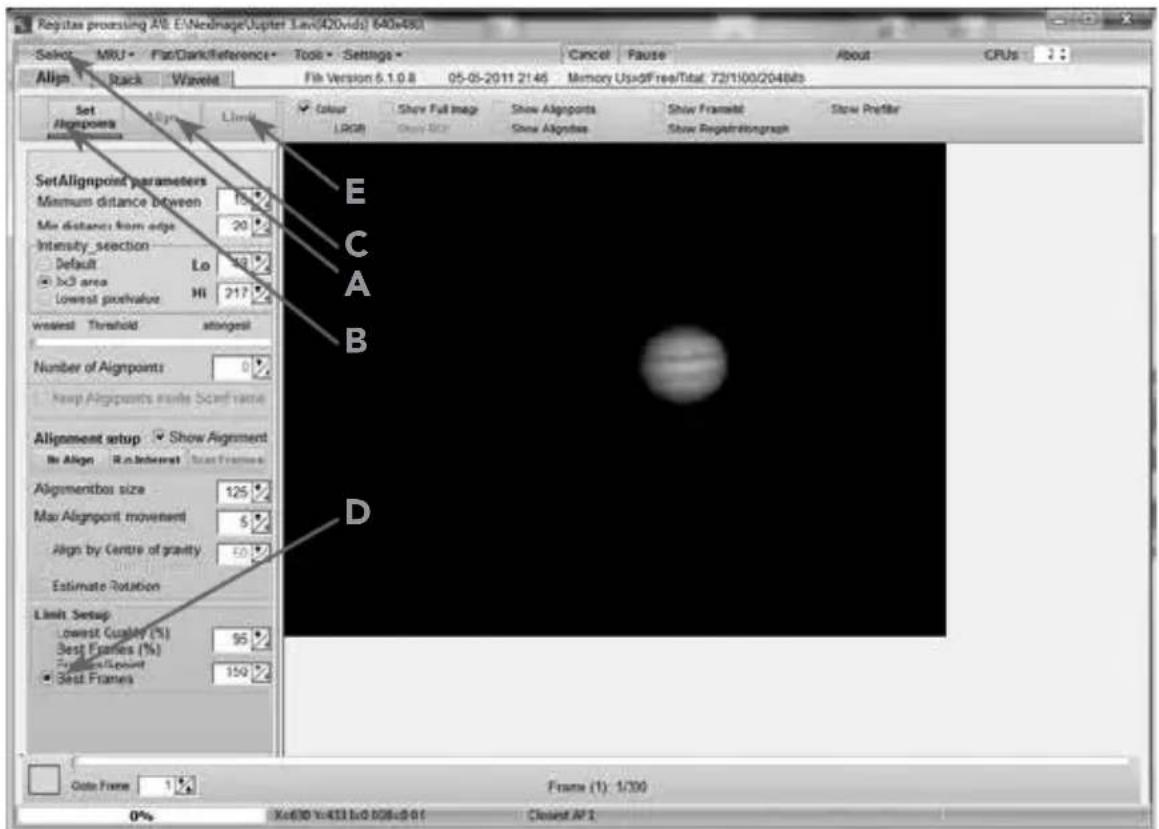
- Press the Select button (A) and select the video that was just recorded. See Fig 12.
-
Press the Set Alignment Points button (B) to have RegiStax automatically select the alignment positions over your image.
-
Press the Align button (C) to begin the alignment process.
- Select the Best Frame option under the Limit Setup box (D) and enter a number that represents one-half of the number of image frames that were captured, i.e. if 300 frames were captured then enter 150. Press the Limit button (E).

Fig 11
text_image
Regitas processing AIE E:\Nedimage\ Jupiter Law(420vids) 640x450 Select MRU Flat/Dark/Reference Tools Settings Cancel Pause About CPUs Align Track Wavelet Fil Version 6.1.0.8 05-05-2011 21:46 Memory Usv3Free/Tital: 72/1100/20480b Set Alignpoints Align Limit Colour Show Full Image Show Alignports Show Framelet Show Profile SetAlignpoint parameters Minimum distance between 10 Max distance from edge 20 Intensity_selection Default Lo Max area Hi 217 Lowest prevalue Wesest Threshold elongated Number of Alignpoints 0 New Alignpoints move Sconf name Alignment setup Show Alignment No Align R.E.internat Test Frames Alignments box size 125 Max Alignpoint movement 6 Align by Centre of gravity 50 Estimate Rotation Limit Setup Lowest Quality (%) 96 Best Frames (%) Test frames 150 Data Frame Frame (1): 1/30 0% Xe630 Y=433 b=2 b=8 b=9 b1 Closest AP 1Fig 12
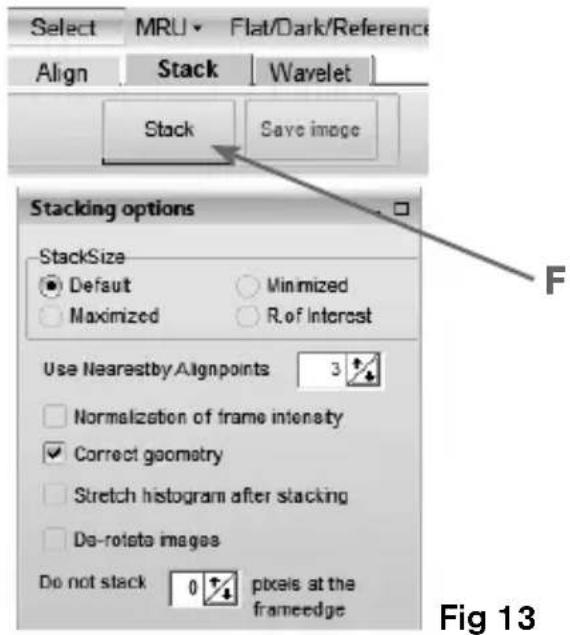
- You will automatically advance to the Stack screen. Accept the default settings and press the Stack button (F). See Fig 13.
text_image
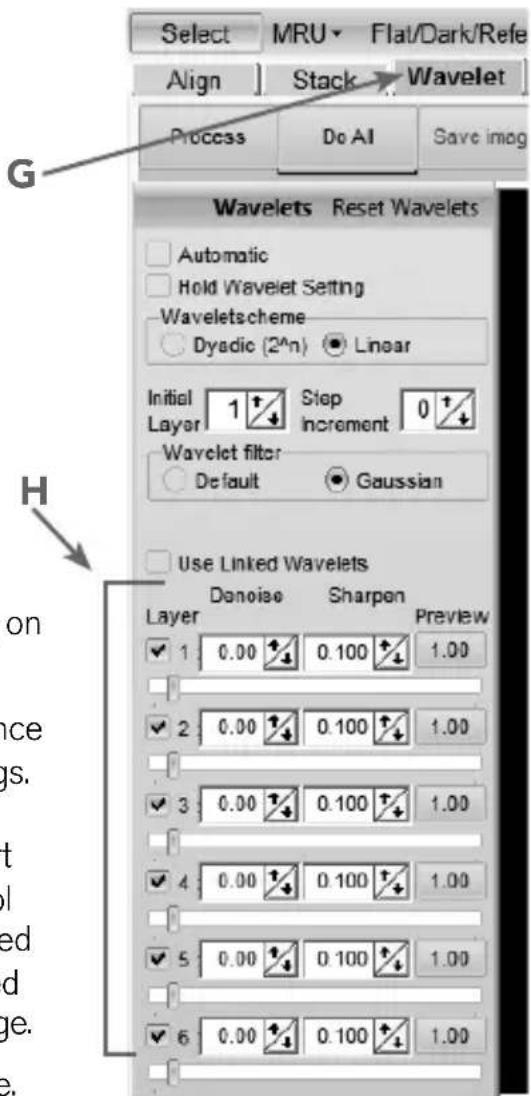
Select MRU Flat/Dark/Reference Align Stack Wavelet Stack Save image Stacking options StackSize Default Minimized Maximized R.of interest Use Nearestby Alignpoints 3 Normalization of frame intensity Correct geometry Stretch histogram after stacking Do-rotate images Do not stack 0 pixels at the frameedge Fig 13- Next, move to the wavelet processing screen by clicking on the Wavelet tab (G). See Fig 14.
- On the wavelet page, use the wavelet-sliders (H) to enhance the image. The power of RegiStax lies in the Wavelets settings. This is a special filtering technique that is very good for enhancing details in images. Each wavelet layer carries part of the image within it. The lower numbered wavelets control the fine detail stored in the image, while the larger numbered wavelets control the coarse detail. Each layer can be adjusted individually to reveal the desired amount of detail for your image.
- Finally, press the Save Image button to save the final image.
text_image
Select MRU Flat/Dark/Refe Align Stack Wavelet Process Do AI Save imag G Wavelets Reset Wavelets Automatic Hold Wavelet Setting Waveletscheme Dyadic (2^n) Linear Initial 1 Step 0 Layer Increment Wavelet filter Default Gaussian Use Linked Wavelets Layer Danoise Sharpen Preview 1 0.00 0.100 1.00 2 0.00 0.100 1.00 3 0.00 0.100 1.00 4 0.00 0.100 1.00 5 0.00 0.100 1.00 6 0.00 0.100 1.00Fig 14
To explore the many other features of RegiStax and view helpful tutorials, visit the RegiStax homepage at: http://www.astronomie.be/registax/index.html
How NexImage Works
NexImage uses a light-sensitive imaging sensor to capture streaming video of any Solar System object. Using the included software, you can separate the video into hundreds of individual images (frames) and digitally stack them to significantly reduce the electric “noise” inherent in video chips and bring out the unseen fine detail (signal) hidden within your image. The NexImage camera takes advantage of the fact that the signal-to-noise ratio of your stacked composite image is proportional to the square root of the number of frames combined. This means that stacking as few as 16 frames will reduce the grainy noise of the composite image by 4 times. While stacking as many 900 frames will improve the image by 30 times! However, stacking the individual frames is only half the power of the NexImage imager. With the included software package, each individual frame is analyzed for quality to filter out those frames most affected (blurred) by poor atmospheric “seeing.” This form of after-the-fact adaptive optics leaves only the sharpest, clearest frames to be stacked and aligned into a high-quality image. Finally, powerful processing features automatically break the image up into individual unsharp mask layers that can be used to bring out tremendous detail and reveal final images that will rival those taken with astronomical CCD cameras costing thousands of dollars.
The Basics
Focusing
As with all astrophotography, sharp focus is essential for high-quality results. Although there are many techniques and devices for focusing your telescope, the human eye still remains one of the best detectors of subtle changes in detail. One advantage that video imaging has over imaging with more sophisticated (and expensive) CCD cameras is the speed with which it can display an image. Focusing NexImage is more like focusing an eyepiece than focusing a CCD camera. Unlike long-exposure cameras, you don't have to wait many seconds to see the effect of a focus change using NexImage.
Focusing Tips
To achieve best focus, concentrate on a high contrast feature of the object you are imaging. Focusing on small features such as a moon's shadow on Jupiter or Cassini's division in the rings of Saturn will guarantee best focus across the entire image.
Once the frames of your video are stacked, the overall brightness of the composite (stacked) image is usually brighter than its individual component frames. For this reason, it is best to keep the brightness of the video image seen on the screen dimmer than you would normally desire. It is important that no part of the image is overexposed to assure the maximum amount of detail in the final composite image.
Collimation
No matter what type of telescope you image with, poor collimation (alignment of the optics) will ruin your chances for a good image. Before you begin imaging, always check the collimation of your instrument and make adjustments if necessary. Refer to your telescope's owner's manual for instruction in collimating the optics.
Finding Objects
At first it can be difficult to locate individual planets due to their relative brightness. To make it easier to initially find your object in the imaging window, increase the brightness and gain controls on the Exposure toolbar. This will allow you to better see the object as it passes through the imaging window. Once you have located and centered the object, you can adjust the setting until the object is at the desired brightness and contrast.
How long to take Streaming Video
At first you may think that the more frames you record, the better. However, there are some limitation to the duration of video and the amount of frames you can acquire. Resolution and file size can both limit the length of time of your video.
Since the NexImage will combine as many sharp frames as possible to achieve one high-quality image, you don't want to take so many images that you start to detect the rotation of the planet, especially on Jupiter which makes one complete rotation in under 10 hours!
Individual frames of a high-resolution video can have large file sizes. Hundreds of these frames can quickly consume an entire hard drive. We recommend saving your video data onto a CD-ROM. This way, you can have a library of files stored for processing without consuming hard disk space.
Autoguiding
Your NexImage can be used as an autoguiding camera when used in conjunction with an off-axis guider or piggyback guidescope. NexImage is compatible with many autoguiding software such as MetaGuide (www.astrogeeks.com/Bliss/MetaGuide), and a guider port interface such as GPUSB from Shoestring Astronomy (www.store.shoestringastronomy.com).
| NexImage Burst NexImage 5 NexImage 10 | |||
| SENSOR 1/3-inch format AptinaAR0132AT CMOS | MT9P031 1/2.5”format CMOS | MT9J003 1/2.3”format CMOS | |
| CAMERA RESOLUTION 1.2MP (1280 x 960) 5MP (2592x1944) 10.7MP (3856 x 2764) | |||
| SENSOR SIZE 4.8 mm x 3.6 mm 5.7 mm x 4.28 mm | (7 mm diagonal) | 6.4 mm x 4.6 mm(7.9 mm diagonal) | |
| PIXEL SIZE 3.75 μm square 2.2 μm square 1.67μm square | |||
| SENSITIVITY 5.48 V/lux-sec (@550 nm) 1.4 V/lux-sec (@550 nm) 0.31 V/lux-sec | |||
| USB CABLE | High-speed USB 2.0 cable | High-speed USB 2.0 cable | Super-Speed USB 3.0,High-speed USB 2.0 cable |
| BACK FOCUS WITHNOSE PIECE | 13.1mm | 13.1mm | 13.1mm |
| BACK FOCUS FROMTHREADS | 10.6 mm | 10.6 mm | 10.6 mmENGLISH |

CELESTRON, LLC. 2835 Columbia Street
Torrance, CA • 90503 U.S.A.
Telephone: 800.421.9649 • www.celestron.com
FCC Note: This equipment has been tested and found to comply with the limits for a Class B digital device, pursuant to part 15 of the FCC Rules. These limits are designed to provide reasonable protection against harmful interference in a residential installation. This equipment generates, uses, and can radiate radio frequency energy and, if not installed and used in accordance with the instructions, may cause harmful interference to radio communications. However, there is no guarantee that interference will not occur in a particular installation. If this equipment does cause harmful interference to radio or television reception, which can be determined by turning the equipment off and on, the user is encouraged to try to correct the interference by one or more of the following measures:
- Reorient or relocate the receiving antenna.
- Increase the separation between the equipment and receiver.
- Connect the equipment into an outlet on a circuit different from that to which the receiver is connected.
- Consult the dealer or an experienced radio/TV technician for help.
This product is designed and intended for use by those 14 years of age and older.
©2016 Celestron. Celestron and Symbol are trademarks of Celestron, LLC. All rights reserved.