
SMT240HD - TV SAMSUNG - Free user manual and instructions
Find the device manual for free SMT240HD SAMSUNG in PDF.


User questions about SMT240HD SAMSUNG
0 question about this device. Answer the ones you know or ask your own.
Ask a new question about this device
Download the instructions for your TV in PDF format for free! Find your manual SMT240HD - SAMSUNG and take your electronic device back in hand. On this page are published all the documents necessary for the use of your device. SMT240HD by SAMSUNG.
USER MANUAL SMT240HD SAMSUNG
These safety instructions must be followed to ensure your safety and prevent property damage.
Make sure to read the instructions carefully and use the product in the correct manner.

Warning / Caution

Otherwise, it may result in death or personal injury.
Otherwise, it may result in personal injury or property damage.

Notational Conventions

Prohibited

Important to read and understand at all times

Do not disassemble

Disconnect the plug from the outlet

Do not touch

Ground to prevent an electric shock
Power

When not used for extended period of time, set your computer to DPM.
If using screen saver, set it to active screen mode.
Shortcut to Anti-Afterimage Instructions

Note
The images here are for reference only, and are not applicable in all cases (or countries).
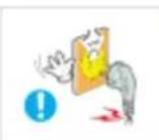
Do not use a damaged power cord or plug or a damaged or loose power outlet.
- Otherwise, this may result in electric shock or fire.
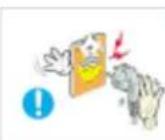
Do not touch the power plug with wet hands when removing or plugging the plug into the outlet.
• Otherwise, this may result in electric shock.

Make sure to connect the power cord to a grounded power outlet.
• Otherwise, it may result in electric shock or personal injury.
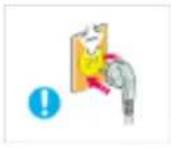
▶ Ensure that the power plug is plugged into the power outlet firmly and correctly.
• Otherwise, this may result in fire.
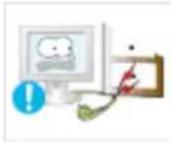
Do not forcefully bend or pull the power plug and do not place any heavy material on it.
• Otherwise, this may result in fire.
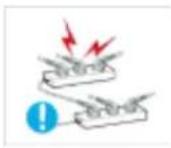
Do not connect multiple appliances to the same power outlet.
- Otherwise, this may cause fire due to overheating.
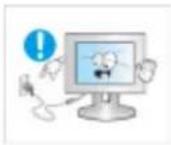
Do not disconnect the power cord while using the product.
- Otherwise, this may result in damage to the product due to electric shock.
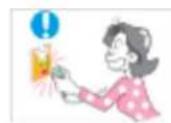
To disconnect the apparatus from the mains, the plug must be pulled out from the mains socket, therefore the mains plug shall be readily operable.
• This may cause electric shock or fire.
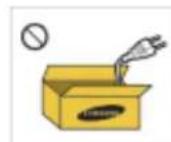
Use only the power cord provided by our company. Do not use the provided power cord of another product.
• Otherwise, this may result in fire or electric shock.
Installation

Be sure to contact an authorized Service Center when installing your monitor in a location with heavy dust, high or low temperatures, high humidity, and exposed to chemical substances and where it operates for 24 hours such as at airports, train stations etc.
Failure to do so may cause serious damage to your monitor.
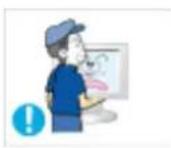
Do not drop the monitor when moving it.
- This may cause damage to the product or the person carrying it.
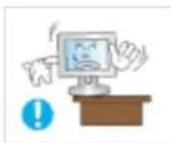
When installing the product in a cabinet or rack, make sure that the front end of the bottom of the product does not project out.
- Otherwise, it may fall or cause personal injury.
- Use a cabinet or rack of a size appropriate to the product.
Do not place candles, mosquito repellant, cigarettes and any heating appliances near the product.
• Otherwise, this may result in fire.
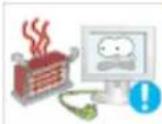
Keep heating appliances as far away from the power cord or the product as possible.
• Otherwise, this may result in electric shock or fire.
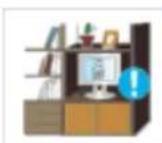
Do not install it in a badly ventilated location such as a bookcase or closet.
- Otherwise, this may result in fire due to an increase in the internal temperature.
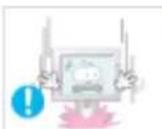
Put down the monitor carefully.
• Failing to do so may damage the monitor.
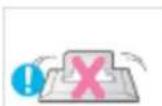
Do not place the front of the product on the floor.
- Otherwise, this may result in damage to the screen display.
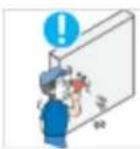
▶ Ensure that an authorized installation company installs the wall mount.
• Otherwise, it may fall and cause personal injury.
- Make sure to install the specified wall mount.
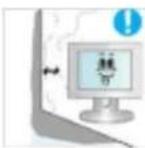
Install your product in a well ventilated location. Ensure that there is a clearance of more than 10 cm from the wall.
- Otherwise, it may result in fire due to an increase in the internal temperature.
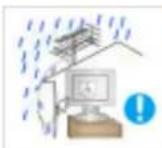
Bend the outdoor antenna cable downwards at the location where it goes in so that rainwater does not flow in.
- If rainwater enters the product, it may result in electric shock or fire.
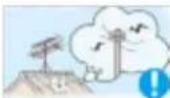
Install the antenna far away from any high voltage cables.
- If the antenna touches or falls onto a high voltage cable, it may result in electric shock or fire.
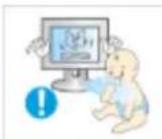
Ensure that the packaging vinyl is kept away from children.
- Otherwise, it may result in serious harm (suffocation) if children play with it.
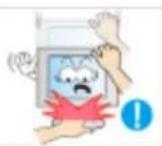
If the height of your monitor is adjustable, do not place any object or part of your body on the stand when lowering it.
- This may cause damage to the product or the person carrying it.
Clean

When cleaning the monitor case or the surface of the TFT-LCD screen, wipe with a slightly moistened, soft fabric.
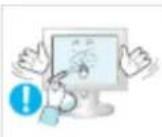
Do not spray cleaner directly onto the surface of the product.
- Otherwise, this may result in the discoloration and distortion of the structure and the screen surface may peel off.
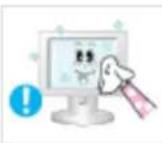
Clean the product using a soft cloth with a monitor cleaner only. If you must use a cleaner other than the monitor cleaner, dilute it with water at a ratio of 1:10.
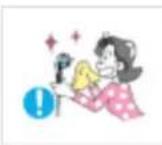
When cleaning the power plug pins or dusting the power outlet, clean it with a dry cloth.
- Otherwise, it may result in fire.
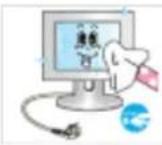
When cleaning the product, make sure to disconnect the power cord.
• Otherwise, it may result in electric shock or fire.
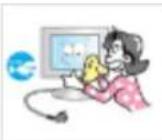
When cleaning the product, disconnect the power cord and clean it softly with a dry cloth.
- (Do not use chemicals such as wax, benzene, alcohol, thinner, mosquito repellant, lubricant, or cleaner.) These may change the appearance of the product surface and peel off the indication labels on the product.
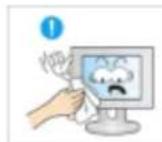
Since the product housing is easily scratched, make sure to use the specified cloth only.
- Use the specified cloth adding only a little water. As the product may be scratched if there is any foreign material on the cloth, make sure to shake it thoroughly before using it.
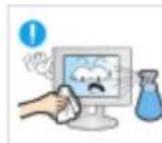
When cleaning the product, do not spray water directly onto the main body of the product.
- Ensure that water does not enter the product and that it is not wet.
- Otherwise, this may result in electric shock, fire or a malfunction.
Others
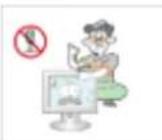
The product is a high voltage product. Ensure that users do not disassemble, repair or modify the product themselves.
- Otherwise, this may result in electric shock or fire. If the product needs to be repaired, contact a Service Center.
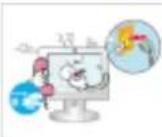
If there is a strange smell or a strange sound or smoke is coming from the product, disconnect the power plug immediately and contact a Service Center.
- Otherwise, this may result in electric shock or fire.
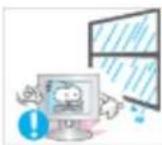
Do not place this product in a location exposed to moisture, dust, smoke, water, or in a car.
• Otherwise, this may result in electric shock or fire.
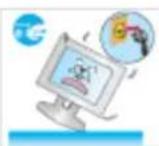
When you drop the product or the case is broken, turn the power off and disconnect the power cord. Contact a Service Center.
- Otherwise, this may result in electric shock or fire.
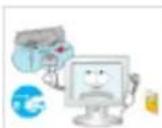
If thunder or lightening is occurring, do not touch the power cord or antenna cable.
- Otherwise, this may result in electric shock or fire.
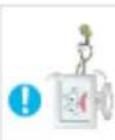
Do not try to move the monitor by pulling only the wire or the signal cable.
- Otherwise, it may fall and result in electric shock, damage to the product or fire due to damage to the cable.
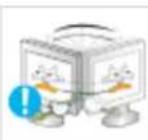
Do not lift or move the product back and forwards or right and left while only holding the power cord or signal cables.
- Otherwise, it may fall and result in electric shock, damage to the product or fire due to damage to the cable.
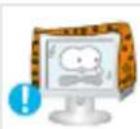
Make sure that the ventilating opening is not blocked by a table or curtain.
- Otherwise, it may result in fire due to an increase in the internal temperature.
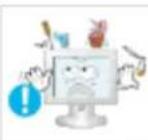
Do not place any containers containing water, vases, flower-pots, medicines as well as any metal on the product.
- If water or a foreign material enters the product, disconnect the power cord and contact a Service Center.
• This may result in a product malfunction, electric shock, or fire.
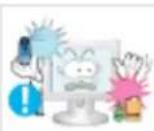
Do not use or keep combustible spray or flammable material near the product.
• Otherwise, this may result in an explosion or fire.
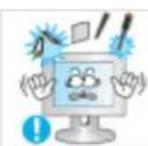
Do not insert any metal, such as chopsticks, coins, pins and steel, or flammable objects, such as matches or paper, inside the product (through the ventilating openings, input and output terminals, etc).
- If water or foreign material enters the product, disconnect the power cord and contact a Service Center.
- Otherwise, this may result in electric shock or fire.
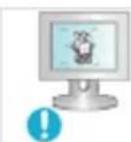
When using a fixed screen for a long time, an afterimage or stain may occur.
- If you are not using your product for a long period of time, put it into sleep mode or use a moving screen saver.
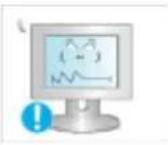
Set a resolution and frequency appropriate to the product.
• Otherwise, your eyesight may be damaged.
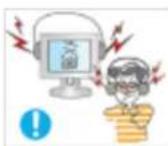
When using headphones or earphones, do not turn the volume too high.
• Having the sound too loud may damage your hearing.
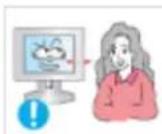
If you continually move closer to the product screen, your eyesight may be failing.
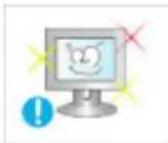
To ease eye strain, take at least a five-minute break after every hour of using the monitor.
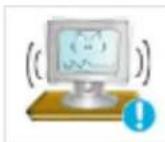
Do not install it in an unstable location such as an unstable rack or uneven surface or a location exposed to vibrations.
- Otherwise, it may fall and cause personal injury and/or damage the product.
- If you use the product in a location exposed to vibrations, it may damage the product and result in fire.
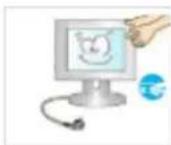
When moving the product, turn the power off and disconnect the power plug, antenna cable, and all the cables connected to the product.
- Otherwise, it may result in electric shock or fire.
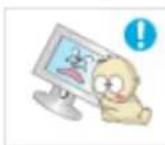
▶ Ensure that children do not hang onto the product or climb up onto the product.
• The product may fall and cause personal injury or death.
If you do not use the product for a long period of time, disconnect the power cord from the power outlet.
- Otherwise, this may result in overheating or fire due to dust, and may result in fire due to electric shock or leakage.
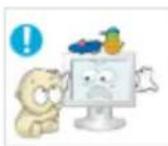
Do not place any heavy items or toys or confectionery, such as cookies etc. that may attract the attention of children and to the product.
- Your children may hang onto the product causing it to fall and this may result in personal injury or death.
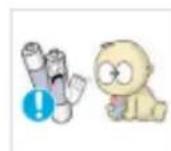
Be careful that children do not place the battery in their mouths when removed from the remote control. Place the battery in a location that children or infants cannot reach.
- If children have had the battery in their mouths, consult your doctor immediately.
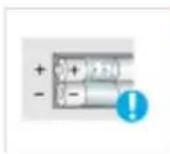
When replacing the battery, insert it with right polarity (+, -).
- Otherwise, the battery may become damaged or it may cause fire, personal injury or damage due to leakage of the internal liquid.
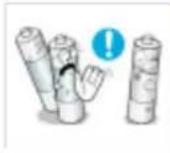
Use only specified standard batteries. Do not use new and used batteries together.
- This may cause a battery to break or leak and may cause fire, injury, or contamination (damage).
The batteries (and rechargeable batteries) are not ordinary refuse and must be returned for recycling purposes. The customer is responsible for returning the used or rechargeable batteries for recycling.
- The customer can return used or rechargeable batteries to a nearby public recycling center or to a store selling the same type of the battery or rechargeable battery.
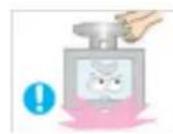
Do not turn the product upside down or move it while holding only the stand.
- Otherwise, it may fall and result in personal injury and/or damage to the product.
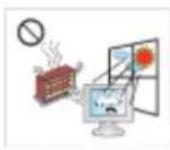
Do not place the product in a location exposed to direct sunlight or near any heat such as a fire or heater.
- This may reduce the lifetime of the product, and may result in fire.
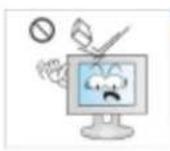
Do not drop any objects onto the product or cause any impact to the product.
• Otherwise, this may result in electric shock or fire.
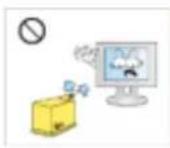
Do not use a humidifier or kitchen table near the product.
• Otherwise, this may result in electric shock or fire.

When there is a gas leak, do not touch the product or the power plug but ventilate immediately.
• If a spark occurs, it may cause an explosion or fire.
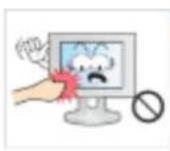
If the product has been turned on for a long time, the display panel becomes hot. Do not touch it.
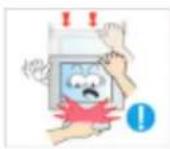
Be careful when adjusting the angle of the product or the height of the stand.
- This may result in personal injury as your hand or fingers may become caught.
- Also, if you tilt the product too far, it may fall and cause personal injury.
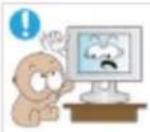
Do not install the product in a location low enough for children to reach.
• Otherwise, it may fall and result in personal injury.
- Since the front part of the product is heavy, install the product on a level and stable surface.
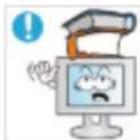
Do not put any heavy objects on the product.
- This may result in personal injury and/or damage to the product.
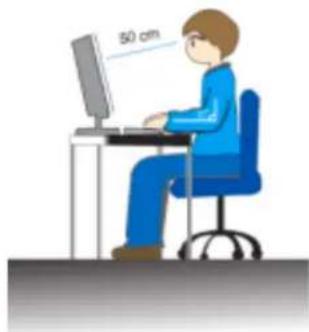
Good Postures When Using the Monitor
natural_image
Illustration of a person sitting at a desk using a computer, with a 50 cm measurement annotation on the wall (no other text or symbols)When using the product, use it in the correct position.
- Keep your back straight while looking at the product.
- The distance between your eyes and the screen should be between 45 to 50~cm . Look at the screen from a slightly higher location than the height of the screen.
- When using the product, use it in the correct position.
- Adjust the angle so that light is not reflected on the screen.
- Place your arms perpendicular to your sides and allow your arms to be level with the back of the hand.
- Keep your elbow at 90 degrees.
- Keep your knees at greater than 90 degrees, and keep your heels firmly on the floor. Keep your arms lower than your heart.
Introduction
Package Contents

Note
Please make sure the following items are included with your monitor.
If any items are missing, contact your dealer.
Contact a local dealer to buy optional items.
Unpacking
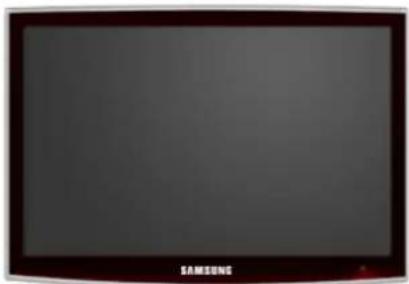
Without stand With stand
natural_image
Front view of a Samsung TV studio monitor with a dark screen and red frame (no visible text or symbols on the screen)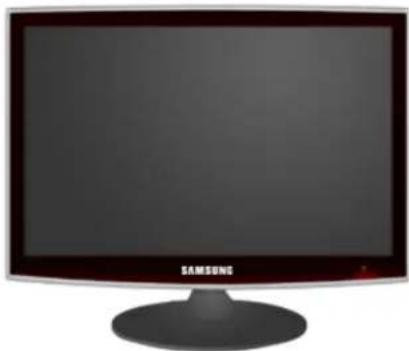
natural_image
Front view of a Samsung TV computer monitor with a black frame and stand (no visible text or symbols on the screen)Monitor Monitor
Manuals



User's Guide
Quick Setup Guide Warranty Card
(Not available in all locations)
Cables
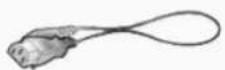
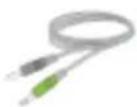
D-Sub Cable Power Cord Stereo Cable
Others
text_image
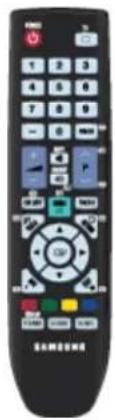
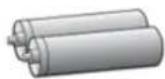
Black remote control with labeled buttons and function keys, showing navigation and function iconsRemote Control Batteries (AAA X 2)
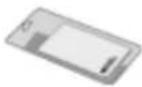
Cleaning Cloth
(Not available in all loca-
tions)
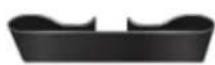
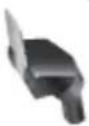
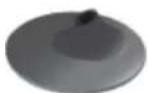
Cable holding ring Stand Body Stand Base

Note
Cleaning Cloth is only provided for highly polished black products as a product feature.

Note
The Wall Mount of this model is only supported as below.
- WMT1900T for 20" \~ 22"
- WMB2400T for 24" \~ 25.5"
If you want to purchase this Wall Mount, contact an authorized dealer.
Sold separately
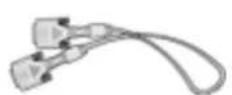
DVI Cable HDMI Cable Headphones
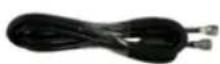

USB Cable TV Antenna Cable
(Coaxial Cable)
Component(P R , P B , Y) Cable
Sold separately
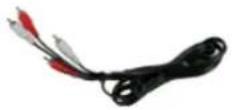
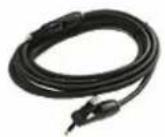
Audio cable Digital audio optic output cable
Your Monitor
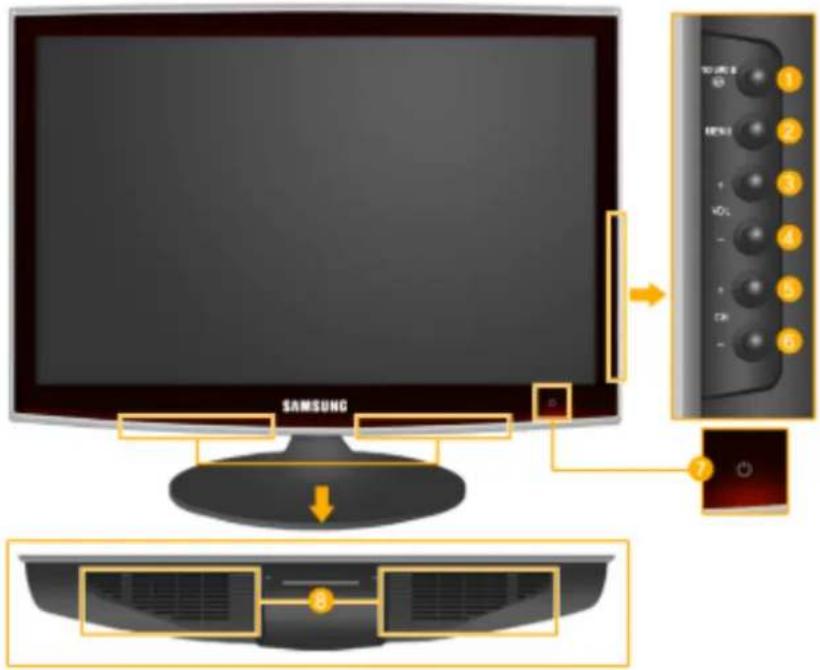
Front
text_image
SAMSUNG 1 2 3 4 5 61 SOURCE
Activates a highlighted menu item.
Push the "", button to change the input signal source.
Changing the source is only allowed for external devices connected to the product at the time.
To switch Screen modes:
$$ [ P C ] \rightarrow [ T V ] \rightarrow [ E x t. ] \rightarrow [ D V I ] \rightarrow [ C o m p o n e n t ] \rightarrow [ H D M I 1 ] \rightarrow [ H D M I 2 ] $$
2 MENU
Use this button to open the on-screen menu and to exit from the on-screen menu or to close the screen adjustment menu.
4 - VOL+
Moves from one menu item to another horizontally or adjusts selected menu values. Adjusts the audio volume.
6 - CH +
Moves from one menu item to another vertically or adjusts selected menu values. Press to change the channel.

Power button [ ]
Use this button for turning the product on and off.
![SAMSUNG SMT240HD - Power button [ ] - 1](/content/2026/05/758949/images/8685f8c2b07530495c3140e1acc3d89d0a5dca6e58d944e1644d25ffa215163e.jpg)
Note
The button to the right of the monitor are touch-sensitive buttons.
Touch a button lightly with your finger.
Power indicator
This light is lit when operating normally, and blinks once when your adjustments are saved.

Note
See PowerSaver described in the manual for further information regarding power saving functions. For energy conservation, turn your monitor OFF when it is not needed or when leaving it unattended for long periods.

Speaker
Rear

Note
The configuration at the back of the product may vary from product to product.
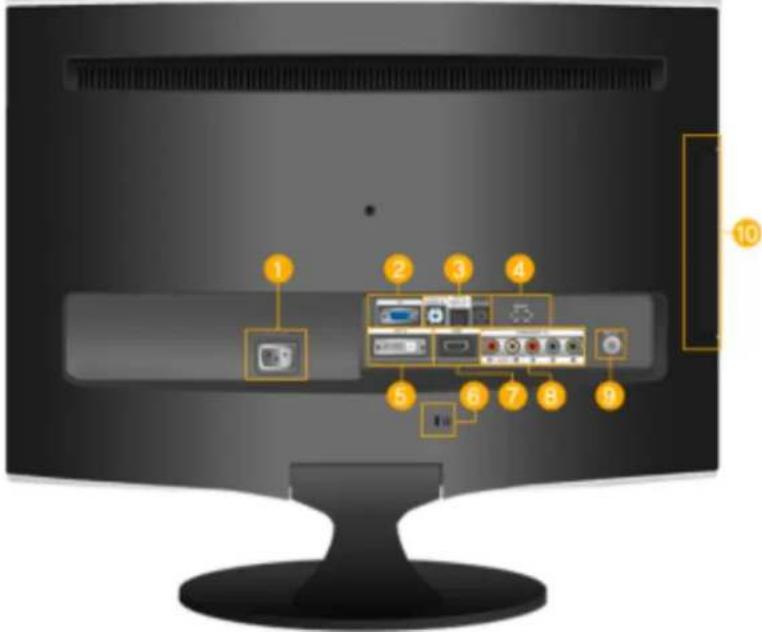
text_image
Diagram of a computer monitor with numbered UI components, highlighting key areas for display and navigation.
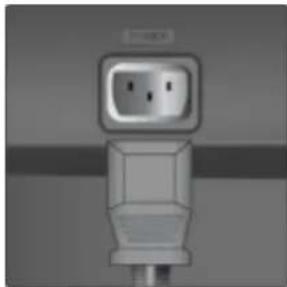
POWER
natural_image
Close-up of a wall-mounted electrical plug with two socket slots (no visible text or symbols)POWER
Connect the power cord for your monitor to the POWER port on the back of the product.
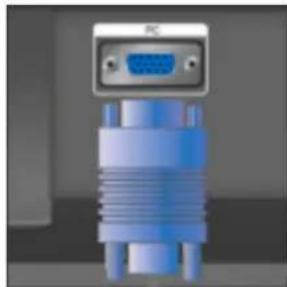
? PC
natural_image
Blue 3D model of a V12A D-sub connector with a white top (no text or symbols visible)PC
Connect the PC terminal at the back of your monitor to your computer.
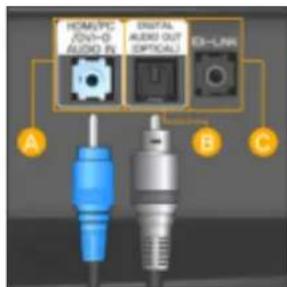
HDMI/DVI-D AUDIO IN / DIGITAL AUDIO OUT(OP-TICAL) / EX-LINK
text_image
HDMI/PCI USB/O AUDIO IN DIGITAL AUDIO OUT OPTICAL EDI-LINK A B CA HDMI/PC/DVI-D AUDIO IN
Connect the [HDMI/PC/DVI-D AUDIO IN] terminal at the back of your product to your computer's sound card.
B DIGITAL AUDIO OUT(OPTICAL)
Connect the [DIGITAL AUDIO OUT(OPTICAL)] terminal of your product to the digital sound output or standard sound output terminal of the DVD home theater (or amplifier) using a digital audio optical output cable.
EX-LINK
This is a reserved terminal used for servicing.
EXT(RGB)
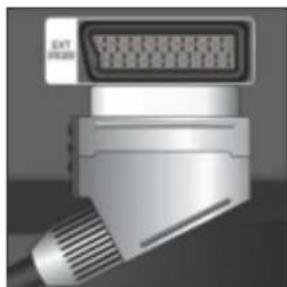
Connect the EXT(RGB) port of the monitor to the DVD Player using a SCART jack.
As for EXT(RGB) port of the monitor, it makes TV or Video signal input and output.
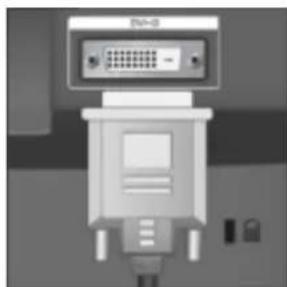
DVI-D
natural_image
Illustration of a DTA-3218 connector device (no text or symbols visible)DVI-D
Connect the DVI cable to the DVI-D port on the back of your product.


Kensington Lock
natural_image
Simple icon showing a black rectangle and a gray lock symbol on a plain background (no text or labels)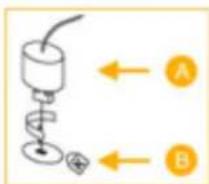
The Kensington Lock is a device used to physically fix the system when using it in a public place. The locking device has to be purchased separately. The appearance and locking method may differ from the illustration depending on the manufacturer. Refer to the manual provided with the Kensington Lock for proper use. The locking device has to be purchased separately.

Note
The location of the Kensington Lock may be different depending on its model.
Using the Anti-Theft Kensington Lock
- Insert the locking device into the Kensington slot on the Monitor (B) and turn it in the locking direction (A).
- Connect the Kensington Lock cable.
- Fix the Kensington Lock to a desk or a heavy stationary object.

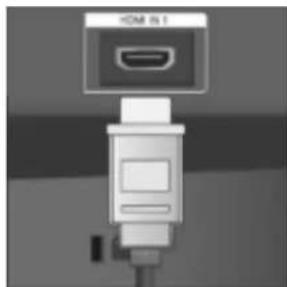
HDMI IN 1
natural_image
Close-up of a HDMI cable connector (no text or symbols visible)
HDMI IN 1
Connect the [HDMI IN 1] terminal at the back of your monitor to the HDMI terminal of your digital output device using a HDMI cable.

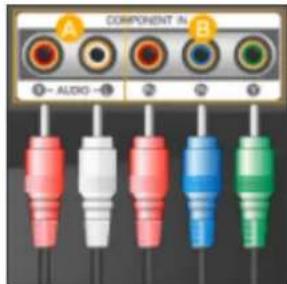
COMPONENT IN
text_image
A COMPONENT IN ① AUDIO ② ③ ④A R - AUDIO - L
Connect the port of the DVD, VCR (DVD / DTV Set-Top Box) to the [R - AUDIO - L] port of the product.
B P_R, P_B, Y
Connect the VIDEO OUT port of the DVD / DTV Set-Top Box to the [P_R, P_B, Y] input ports using a component video cable ( P_R, P_B, Y ).
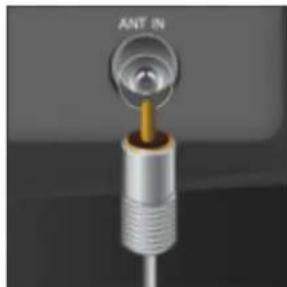
ANT IN
text_image
ANT INConnect the CATV cable or TV antenna cable to the "ANT IN" port on the rear side of the product. Make sure to use a TV antenna cable (sold separately) as the antenna cable.
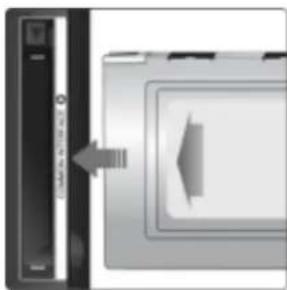
COMMON INTERFACE
natural_image
Close-up of a device with a left-pointing arrow indicating left motion (no text or symbols visible)This contains information on CAM inserted in the CI slot and displays it.
The Application Info inserting is about the CI CARD.
You can install the CAM anytime whether the TV is ON or OFF.
HDMI IN 21
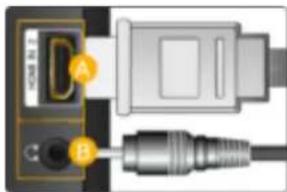
natural_image
Close-up of a USB cable connector with labeled ports (no text or symbols visible)A HDMI IN 2
Connect the [HDMI IN 2] terminal at the back of your product to the HDMI terminal of your digital output device using a HDMI cable.
B
Connect your headphones to the Headphone connection terminal.
Note
See Connecting to PC for further information regarding cable connections.
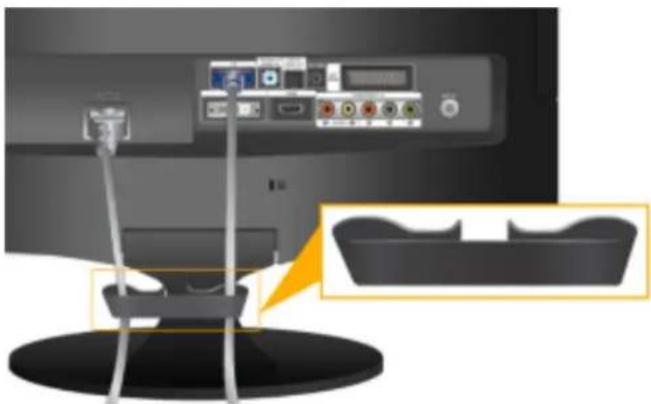
natural_image
Illustration of a desktop monitor setup with connected cables and a separate sofa view (no text or symbols visible)Cable holding ring
- Fix the cables using the holding ring, as shown in the figure.
Remote Control
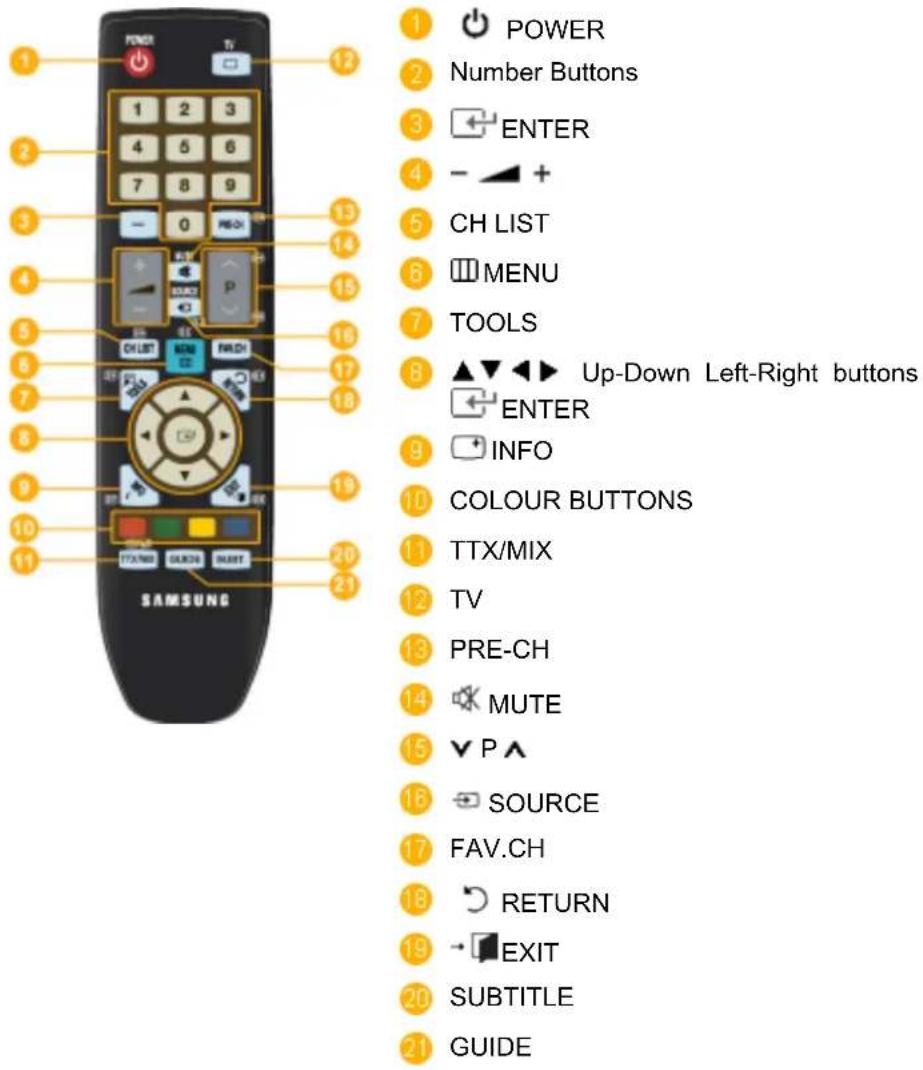
text_image
POWER Number Buttons ENTER CH LIST MENU TOOLS ▲▼▲ Up-Down Left-Right buttons ENTER INFO COLOUR BUTTONS TTX/MIX TV PRE-CH MUTE ▼ P ▲ SOURCE FAV.CH RETURN EXIT SUBTITLE GUIDE-
⏻ POWER
-
Number buttons
Turns the product On/Off.
Press to change the channel.
3. ENTER
Activates a highlighted menu item.
-
Adjusts the audio volume.
-
CH LIST It displays "Channel List" on the screen.
-
☐ MENU Opens
the on-screen menu and exits from the menu or closes the adjustment menu.
-
TOOLS Use to quickly select frequently used functions.
-
▲▼◀▶ Up-Down Left-Right buttons
Moves from one menu item to another horizontally, vertically or adjusts selected menu values.
9. INFO
Current picture information is displayed on the upper left corner of the screen.
-
COLOR BUTTON Press to add or delete channels and to store channels to the favorite channel list in the "Channel List" menu.
-
TTX/MIX TV channels provide written information services via tele-text.
- Teletext Buttons

For more information > TTX / MIX
-
TV Selects the TV mode directly.
-
PRE-CH This button is used to return to the immediately previous channel.
14. MUTE
Adjusts the audio volume.
- VP In TV mode, selects TV channels.
16. SOURCE
Press the button to change the input signal SOURCE.
Changing the SOURCE is only allowed for external devices that are connected to the monitor at the time.
17. FAV.CH
Press to switch to your favourites channels.
18. RETURN
Returns to the previous menu.
19. → EXIT
Exits from the menu screen.
20. SUBTITLE
Digital subtitle display
21. GUIDE
Electronic Program Guide (EPG) display.
Installing Batteries in the Remote Control
- Lift the cover at the back of the remote control upward as shown in the figure.
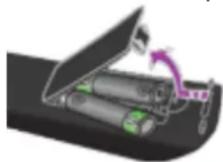
- Install two AAA size batteries.

Note
Make sure to match the +and - ends of the batteries with the diagram inside the compartment.
- Close the cover.

Note
Remove the batteries and store them in a cool, dry place if you won't be using the remote control for a long time.
If the remote control doesn't work, check the following :
- Is the TV power on?
- Are the plus and minus ends of the batteries reversed?
- Are the batteries drained?
- Is there a power outage or is the power cord unplugged?
- Is there a special fluorescent light or neon sign nearby?
Connections
Connecting to PC
Connecting to a Computer
text_image
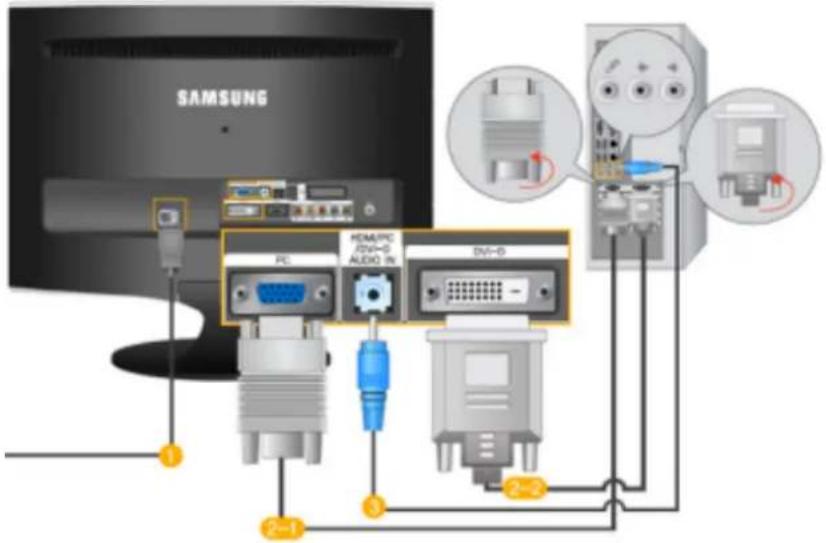
SAMSUNG PC HCM/PC /DVI-0 AUDIO IN DVI-0 C=1 C=21 Connect the power cord for your monitor to the POWER port on the back of the monitor.
Plug the power cord for the monitor into a nearby outlet.
2 Use a connection appropriate for your computer.
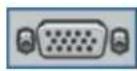
2-1 Using the D-sub (Analog) connector on the video card.
- Connect the signal cable to the [PC] port on the back of your monitor.
[PC]
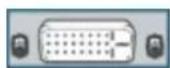
2-2 Using the DVI (Digital) connector on the video card.
- Connect the DVI Cable to the [DVI-D] Port on the back of your Monitor.
[DVI-D]
3 Connect the [HDMI / PC / DVI-D AUDIO IN] port on the rear side of the monitor to the sound card of the PC.
Note
- You may enjoy clear and quality sound from the computer sound card using the monitor speakers. (You don't need to install any separate speakers for your computer.)
- You may get a blank screen depending on the type of video card you are using, if you connect simultaneously both the D-sub and DVI cables to one computer.
- If you connect properly your monitor using the DVI connector but get a blank or fuzzy screen, check to see if the monitor status is set to analogue. Press 'SOURCE [F]' button to have the monitor double-check the input signal source.
Connecting an Antenna

Note
You may view television programs on the monitor if it is connected to an antenna or CATV cable without installing any separate TV reception hardware or software on your computer.
text_image
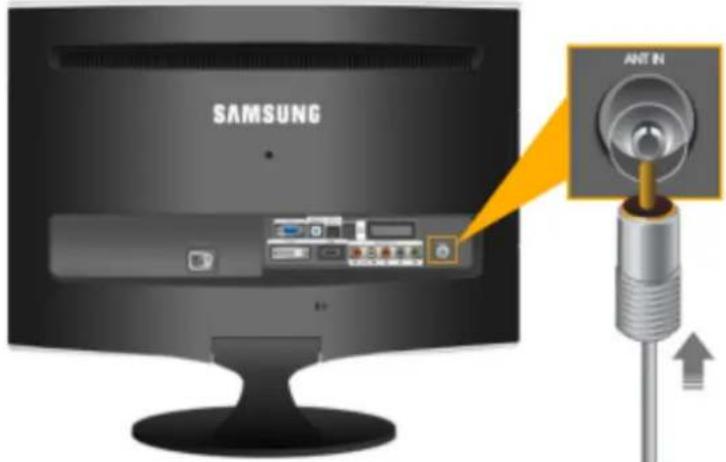
SAMSUNG ANTIN- Connect the CATV cable or TV antenna cable to the "ANT IN" port on the rear side of the monitor.
Make sure to use a TV antenna cable (sold separately) as the antenna cable.
- Turn on the monitor.

Note
Is weak signal causing poor reception?
Purchase and install a signal amplifier for better reception.
Plug & Play Feature
When the TV is initially powered on, basic settings proceed automatically and subsequently.
- Press the POWER button on the remote control.

Note
You can also use the POWER button on the TV.
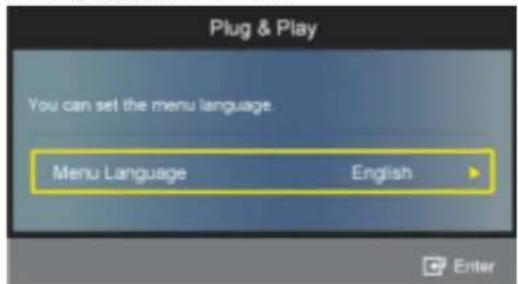
text_image
Plug & Play You can set the menu language. Menu Language English Enter-
The message You can set the menu Language. is displayed.
-
Select the appropriate language by pressing the button. Press the ENTER button to confirm your choice
- Press the ◀ or ▶ button to select Store Demo or Home Use, then the ENTER ← button.

Note
We recommend setting the TV to Home Use mode for the best picture in your home environment.
Store Demo mode is only intended for use in retail environments.
If the unit is accidentally set to Store Demo mode and you want to return to Home Use (Standard): Press the volume button on the TV. When the volume OSD is displayed, press and hold the MENU button on the TV for 5 seconds
- Press the ENTER button. Select the appropriate country by pressing the ▲ or ▼ button. Press the ENTER button to confirm your choice.
- Press the ▲ or ▼ button to select Air or Cable, then press the ENTER ← button.
• Air : Air antenna signal.
- Cable : Cable antenna signal.
- Press the ▲ or ▼button to select the channel source to memorize. Press the ENTER button to select Start.

Note
When setting the antenna source to Cable, a step appears allowing you to set a value for the digital channel search. For more information, refer to Channel → Auto Store.
• Digital & Analogue : Digital and Analogue channels.
• Digital : Digital channels.
• Analogue : Analogue channels.
The channel search will start and end automatically.
Press the ENTER button at any time to interrupt the memorization process.
After all the available channels are stored, the message set the Clock Mode is displayed.
- Press the ENTER button. Press the ▲ or ▼ button to select Auto, then Press the ENTER button.

Note
If you select Manual, Set current date and time is displayed.
If you have received a digital signal, the time will be set automatically. If not, select Manual to set the clock.
-
The description for the connection method providing the best HD screen quality is displayed. Check the description and press the ENTER button.
-
The message "Enjoy your TV." is displayed. When you have finished, press the ENTER button.
Connecting to other devices

Note
- This monitor allows the user to connect it to such input devices as a DVD player, a VCR or camcorder or a DTV or TV without disconnecting the PC.
- The configuration at the back of the monitor may vary from product to product.
Connecting a HDMI cable

Note
You can connect digital output devices to your monitor.
You can enjoy better screen and sound quality.
- Connecting Using a HDMI Cable
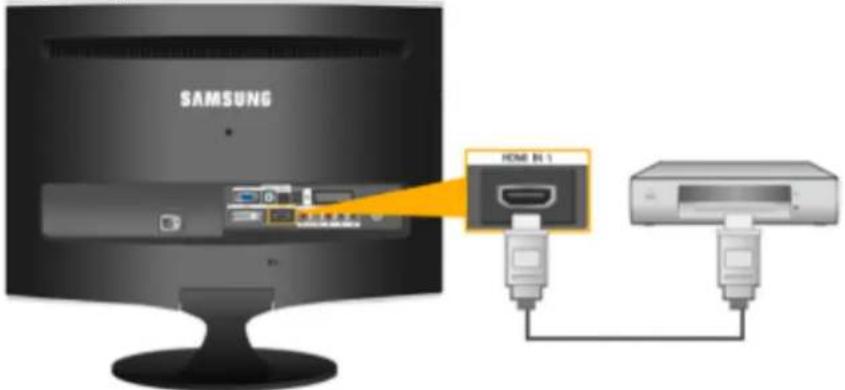
text_image
SAMSUNG HOME IN 1a. Input devices such as digital DVD are connected to the HDMI IN terminal of the monitor using the HDMI cable. When all the connections are completed, connect the power cords for the monitor and DVD(or the device connected to the digital output terminal).
Select HDMI using the 'SOURCE []' button.
- Connecting Using a DVI to HDMI Cable
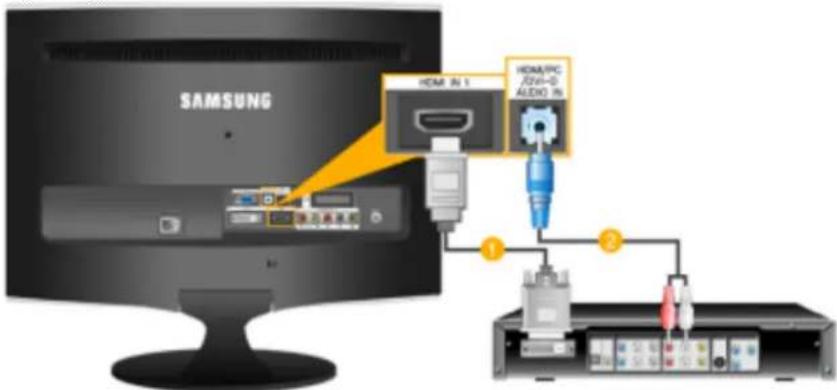
text_image
SAMSUNG HDMI IN 1 HDMI/PC J204-0 AUDIO IN ① ②1 Connect the DVI output terminal of a digital output device to the [HDMI IN] terminal of the monitor using a DVI to HDMI cable.
2 Connect the red and white jacks of an RCA to stereo (for PC) cable to the same colored audio output terminals of the digital output device, and connect the opposite jack to the [HDMI/PC/DVI-D AUDIO IN]terminal of the monitor.
- When all the connections are completed, connect the power cords for the monitor and DVD (or the device connected to the digital output terminal).
- Select "HDMI" using the 'SOURCE [ ] button.

If you just connect using the DVI to HDMI cable without connecting to the sound source, you cannot hear sound.
Connecting the audio output terminal of a digital device to the [R-AUDIO-L] of [COMPONENT IN] of the monitor using an audio cable will not give you sound. Make sure to connect to the [HDMI / PC/DVI-D AUDIO IN] terminal of the monitor.
Connecting a Component cable

Connect to the DVD / DTV Set Top Box input if the device has a [COMPONENT IN] connector. You can watch Component simply by hooking up the Component with the monitor as long as the power is on.

text_image
SAMSUNG COMPONENT IN AUDIO 1 2 3 4 5 6 7 8 9 10 11 12 13 14 15 16 17 18 19 20 21 22 23 24 25 26 27 28 29 30 31 32 33 34 35 36 37 38 39 40 41 42 43 44 45 46 47 48 49 50 51 52 53 54 55 56 57 58 59 60 61 62 63 64 65 66 67 68 69 70 71 72 73 74 75 76 77 78 79 801 Connect the port of the DVD, VCR (DVD / DTV Set-Top Box) to the [R-AUDIO-L] port of the monitor.
2 Connect the VIDEO OUT port of the DVD / DTV Set-Top Box to the [P_R, P_B, Y] input ports using a component video cable ( P_R, P_B, Y ).
Select "Component" using the 'SOURCE []
If you connect the P_R , P_B , and Y component cables to the incorrect terminals, the screen will be displayed in red or blue.
For single-family houses, install an UHF antenna to receive digital broadcasting.
Connecting a Scart cable
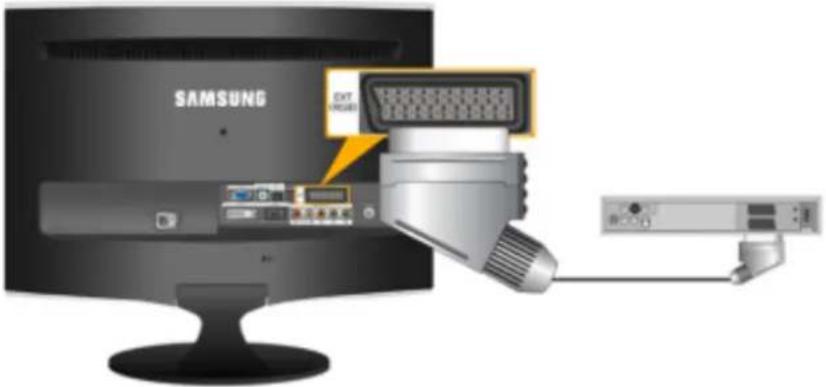
text_image
SAMSUNG EXT PROJECT SAMSUNG
Note
Connect to the DVD Devices input if the device has a EXT (RGB) jack. You can watch DVD simply by hooking up the DVD player with the monitor as long as the power is on.
- Connect the EXT (RGB) port of the monitor to the DVD Player using a SCART jack.
- When a Scart device is connected to your monitor, the Source automatically changes to Ext.
Connecting to Amplifier

Note
You can connect the digital sound input (optical) or standard sound input terminal of your amplifier to your monitor using the correct cable.
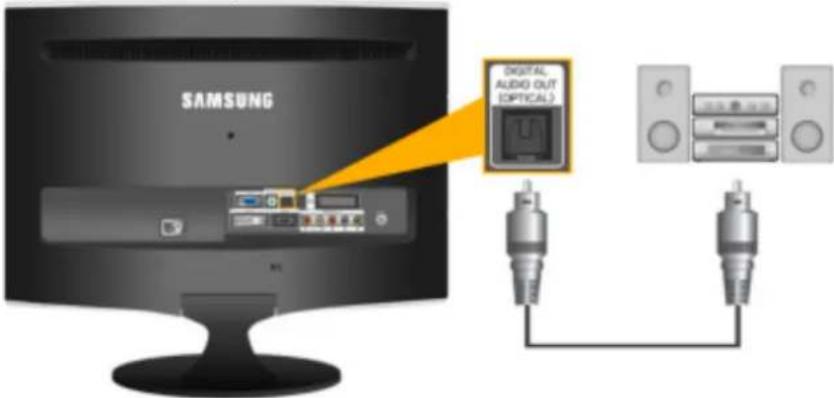
text_image
SAMSUNG DIGITAL AUDIO OUT OPTICAL 液晶系统- Connect the [DIGITAL AUDIO OUT (OPTICAL)] terminal of your monitor to the digital sound input terminal of your digital amplifier using an optical cable.
- Set the Internal Mute On in the Sound menu using the MENU button.
- Adjust the sound volume using the Volume button of your amplifier.
- If the connections are set up, power up your monitor and amplifier.

Note
- If no sound is emitted from the monitor, you need to use an amplifier.
- For information on how to connect a speaker and amplifier, refer to the respective user manuals provided by their manufacturers.
Connecting COMMON INTERFACE

Note
You can install the CAM anytime whether the TV is ON or OFF.
Purchase the CI CAM module by visiting your nearest dealer or by phone.
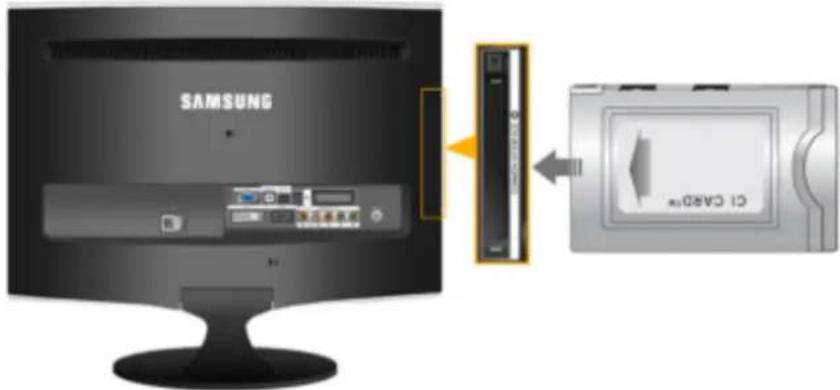
text_image
SAMSUNG CD-ROM-
Insert the CI CARD into the CAM in the direction of the arrow until it fits.
-
Insert the CAM with the CI CARD installed into the common interface slot.
(Insert the CAM in the direction of the arrow, right up to the end so that it is parallel with the slot.)
- Check if you can see a picture on a scrambled signal channel.
Connecting Headphone

Note
You may connect your headphones to the monitor.
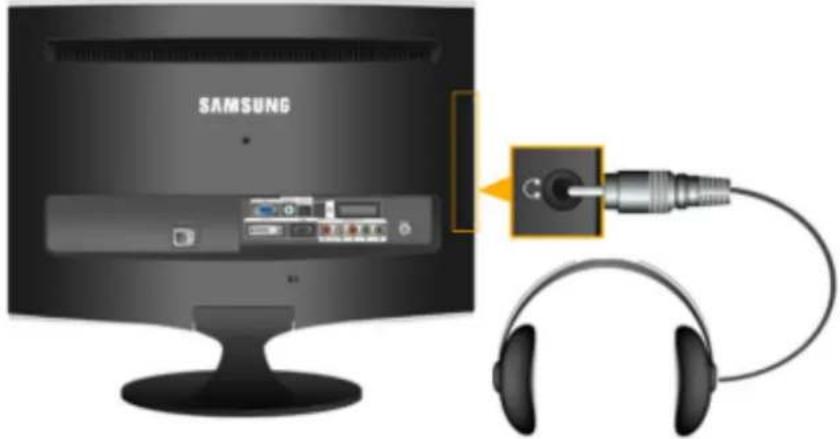
text_image
SAMSUNG- Connect your headphones to the Headphone connection terminal.
Using the Stand
Monitor Assembly
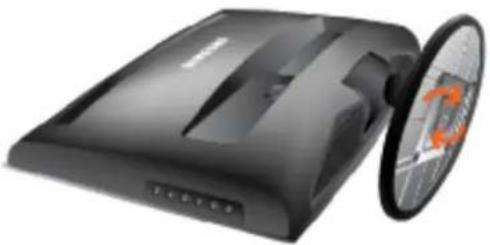
natural_image
Black rectangular electronic device with a circular inset showing a rotary button (no visible text or symbols)Monitor and Bottom
Tilt angle
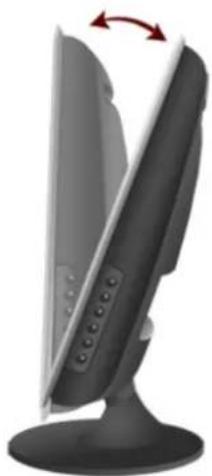
natural_image
Illustration of a computer monitor with a curved arrow indicating rotation (no text or symbols)You can adjust the tilt angle within a range of - 1 ° forward to 21 ° backward for the most comfortable viewing angle.
Using the Software
Monitor Driver

Note
When prompted by the operating system for the monitor driver, insert the CD-ROM included with this monitor. Driver installation is slightly different from one operating system to another. Follow the directions appropriate for the operating system you have.
Prepare a blank disk and download the driver program file at the Internet web site shown here.
Internet web site :
http://www.samsung.com/ (Worldwide)
Installing the Monitor Driver (Automatic)
- Insert CD into the CD-ROM drive.
-
Click "Windows".
-
Choose your monitor model in the model list, then click the "OK" button.
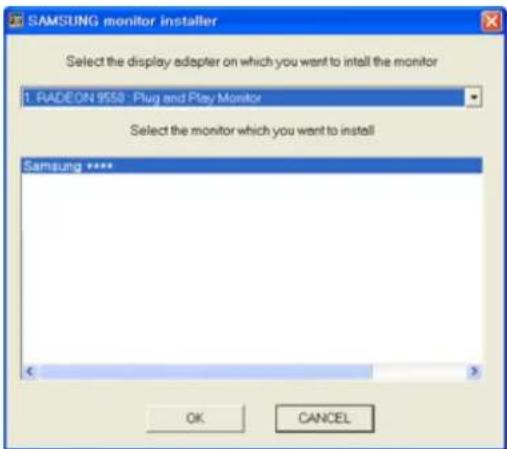
text_image
SAMSUNG monitor installer Select the display adapter on which you want to install the monitor 1. RADEON 9553 : Plug and Play Monitor Select the monitor which you want to install Samsung **** OK CANCEL- If you can see following message window, then click the "Continue Anyway" button. Then click "OK" button (Microsoft® Windows® XP/2000 Operating System).
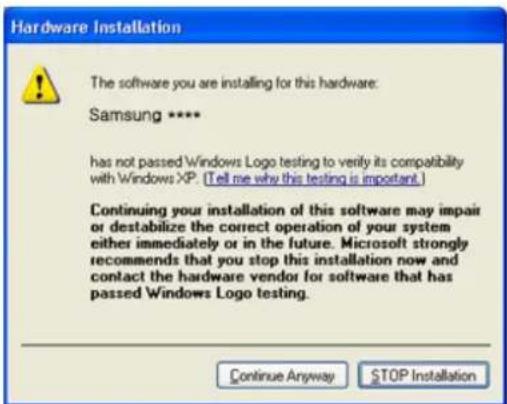
text_image
Hardware Installation The software you are installing for this hardware: Samsung **** has not passed Windows Logo testing to verify its compatibility with Windows XP. (Tell me why this testing is important.) Continuing your installation of this software may impair or destabilize the correct operation of your system either immediately or in the future. Microsoft strongly recommends that you stop this installation now and contact the hardware vendor for software that has passed Windows Logo testing. Continue Anyway STOP Installation
Note
This monitor driver is under certifying MS logo, and this installation doesn't damage your system.
The certified driver will be posted on Samsung Monitor homepage.
http://www.samsung.com/
Installing the Monitor Driver (Manual)
Microsoft ^® Windows Vista ^TM , Operating System
-
Insert your Manual CD into your CD-ROM drive.
-
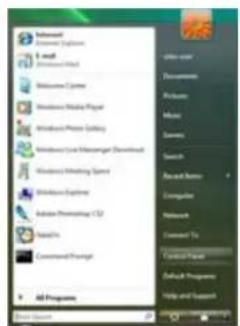
Click 📄(Start) and "Control Panel". Then, double-click on "Appearance and Personalization".
text_image
Download Download Options 1. All Download Active Microsoft Windows Microsoft Mobile Player Windows Phone Editing Windows Live Music Manager Download Windows Marketing System Windows Explorer Adobe Photoshop CS2 Flash4 Command Prompt All Programs Other options Documents Packages Music Search Search Items Computation Network Connect To Fixed Panel Default Programs Help and Support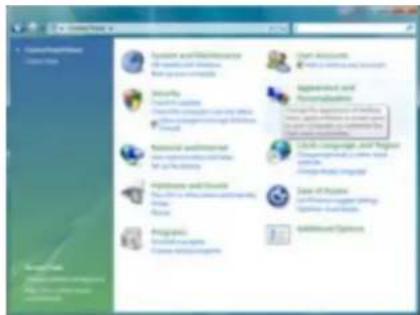
text_image
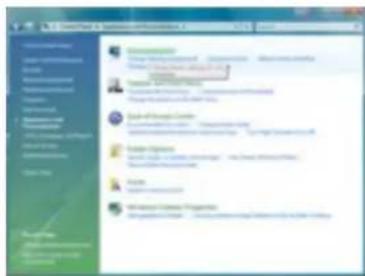
Systematic Advanced Software Current AI/ML/ML/ML/ML/ML/ML/ML/ML/ML/ML/ML/ML/ML/ML/ML/ML/ML/ML/ML/ML/ML/ML/ML/ML/ML/ML/ML/ML/ML/ML/ML/ML/ML/ML/ML/ML/ML/ML/ML/ML/ML/ML/ML/ML/ML/ML/ML/ML/ML/ML/MS Systematic Advanced Software Current AI/ML/ML/ML/ML/ML/ML/ML/ML/ML/ML/ML/ML/ML/ML/ML/ML/ML/ML/ML/ML/ML/ML/ML/ML/ML/ML/ML/ML/ML/ML/ML/ML/ML/ML/ML/ML/ML/ML/ML/ML/ML/ML/ML/ML/ML/ML / ML / ML / ML / ML / ML / ML / ML / ML / ML / ML / ML / ML / ML / ML / ML / ML / ML / ML / ML / ML / ML / ML / ML / ML / ML / ML / ML / ML / ML / ML / ML / ML / ML / ML / ML / ML / ML / ML / ML / ML / ML / ML / ML / ML / ML / ML / ML / ML / ML / ML / ALM Systematic Advanced Software Current AI/ML/ML/ML/ML/ML/ML/ML/ML/ML/ML/ML/ML/ML/ML/ML/ML/ML/ML/ML/ML/ML/ML/ML/ML/ML/ML/ML/ML/ML/ML/ML/ML/ML/ML/ML/ML/ML/ML/ML/ML/ML/ML/ML/ML/ML: 1.0 Systematic Advanced Software Current AI/ML/ML/ML/ML/ML/MS Current AI, ML, and ML (with MS) in the Internet of Windows (Windows NTFS). Additional features include: Windows NTFS, Windows Mobile, Windows Mobile, Windows Mobile, Windows Mobile, Windows Mobile, Windows Mobile, Windows Mobile, Windows Mobile, Windows Mobile, Windows Mobile, Windows Mobile, Windows Mobile, Windows Mobile, Windows Mobile, Windows Mobile, Windows Mobile, Windows Mobile, Windows Mobile, Windows Mobile, Windows Mobile, Windows Mobile, Windows Mobile, Windows Mobile, Windows Mobile, Windows Mobile, Windows Mobile, Windows Mobile, Windows Mobile, Windows Mobile, Windows Mobile, Windows Mobile, Windows Mobile, Windows Mobile, Windows Mobile- Click "Personalization" and then "Display Settings".
text_image
Screenshot of a software interface showing a list of categorized items with highlighted entries, likely from an older software development or configuration tool.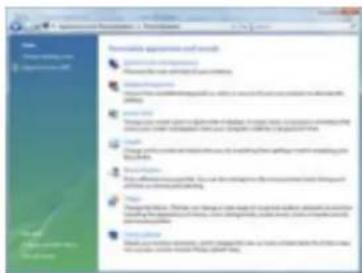
text_image
Reversibly Apparatus and Model Reversibly Apparatus and Model Reversibly Apparatus and Model Reversibly Apparatus and Model Reversibly Apparatus and Model Reversibly Apparatus and Model Reversibly Apparatus and Model Reversibly Apparatus and Model Reversibly Apparatus and Model Reversibly Apparatus and Model Reversibly Apparatus and Model Reversibly Apparatus and Model Rear Rear Rear Rear Rear Rear Rear Rear Rear Rear Rear Rear Rear Rear Rear Rear Rear Rear Rear Rear Rear Rear Rear Rear Rear Rear Rear Rear Rear Rear Rear Rear Rear Rear- Click "Advanced Settings...".
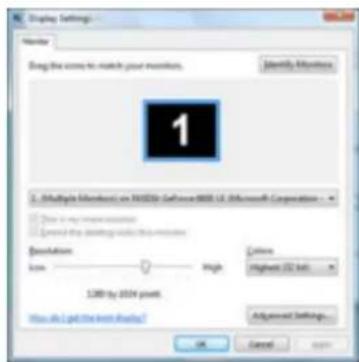
text_image
Display Settings Name: Drag the name to match your records. Identify Monitors 1 S. Multiple Monitors on NVIDIA Software 908.12 (Microsoft Corporation) Show in any more recent Show in any meaning about this time Resolution: low High Colors: Highest: 32 bits 1.0KB by 6504 pixels. How do I get the next display? Advanced Settings... OK Cancel OK- Click "Properties" in the "Monitor" tab. If the "Properties" button is deactivated, it means the configuration for your monitor is completed. The monitor can be used as is.
If the message "Windows needs..." is displayed, as shown in the figure below, click "Continue".
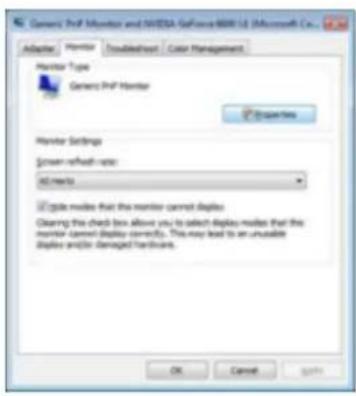
text_image
Generic PhF Monitor and NVIDIA GeForce 8001.12 (Microsoft Cx... Adapter Monitor Troubledout Color Management Monitor Type Generic PhF Monitor Explorer Monitor Settings Screen refresh-up: All rights Cycle modes that the monitor cannot display Clearing the check box allow you to select displays modes that the monitor cannot display currently. This may lead to an unusable display and/or damaged hardware. OK Cancel Apply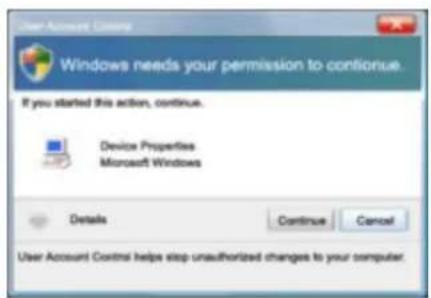
text_image
User Account Control Windows needs your permission to continue. If you started this action, continue. Device Properties Microsoft Windows Details Continue Cancel User Account Control helps stop unauthorized changes to your computer.Note
This monitor driver is under certifying MS logo, and this installation doesn't damage your system.
The certified driver will be posted on Samsung Monitor homepage.
- Click "Update Driver..." in the "Driver" tab.
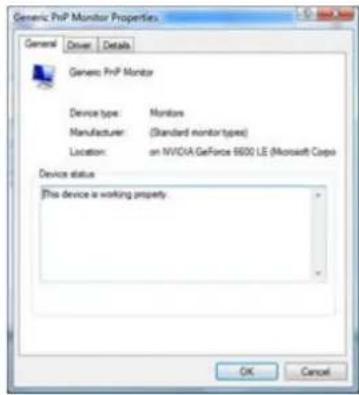
text_image
Generic PrGP Monitor Properties General Driver Details Generic PrGP Monitor Device type: Monions Manufacturer: (Standard monitor types) Location: on NVIDIA GeForce 9600 LE (Microsoft Caps Device status This device is working property OK Cancel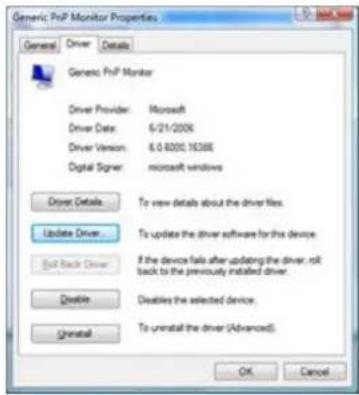
text_image
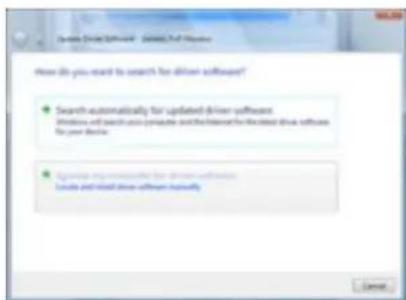
Generic PrGP Monitor Properties General Driver Details Generic PrGP Monitor Driver Provider: Microsoft Driver Date: 6/21/2006 Driver Version: 6.0.6000.16366 Digital Signor: microsoft windows Driver Details To view details about the driver files. Update Driver To update the driver software for this device. Exit Back Driver If the device fails after updating the driver, roll back to the previously installed driver. Delete Disables the selected device. Uninstall To uninstall the driver (Advanced). OK Cancel- Check the "Browse my computer for driver software" checkbox and click "Let me pick from a list of device drivers on my computer".
text_image
Open Drive Software - 2000/10/2000 How do you want to search for driver software? Search automatically for updated driver software Windows will search any appropriate and/or interest for the drive software for your device. Browse my recommended for drive software local and local drive software currently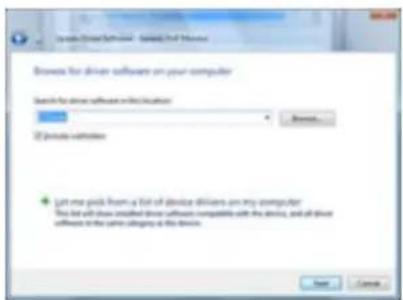
text_image
Browse for drive software on your computer Search for drive software in this location Device preferences + Let one pick from a list of device drivers on my computer. This list will also install drive software compatible with the device, and all drive software in the same category as the device.- Click "Have Disk..." and select the folder (for example, D:\Drive) where the driver setup file is located, and click "OK".
text_image
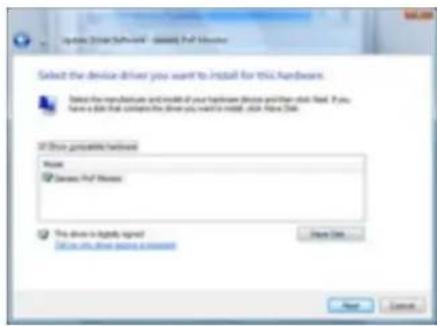
Update Drive Software - Security Perf Monitor Select the device driver you want to install for this hardware. Select the manufacture and model of your hardware device you have a disk find. If you have a disk find, please press the drive you want to install, click files (File) If drive portable hardcover Name: Device Perf Monitor This drive is highly signed Click us this drive using a remote Save As... Next Cancel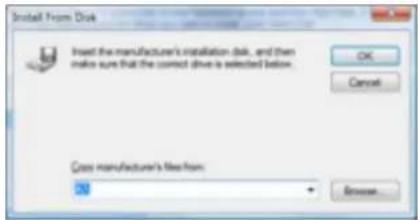
text_image
Install From Disk Insert the manufacturer's installation disk, and then makes sure that the contact drive is selected below. OK Cancel Cross manufacturer's file from: Browse- Select the model that matches your monitor from the list of monitor models on the screen, and click "Next".
text_image
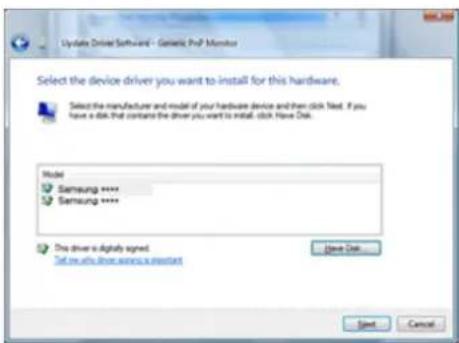
Update Driver Software - Genetic PDF Monitor Select the device driver you want to install for this hardware. Select the manufacturer and model of your hardware device and then click Next. If you have a disk that contains the driver you want to install. click Next Disk. Model Samsung **** Samsung **** This driver is digitally signed. Set me why drive service is important Save Disk... Start Cancel- Click "Close" → "Close" → "OK" → "OK" on the following screens displayed in sequence.
text_image
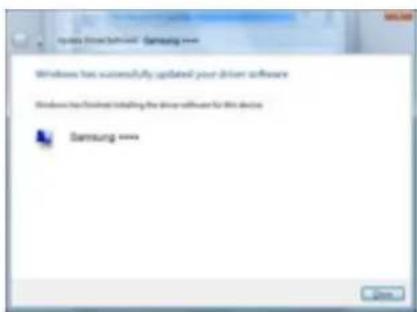
Windows has successfully updated your drive software Windows has found installing the drive software for this device Samsung ****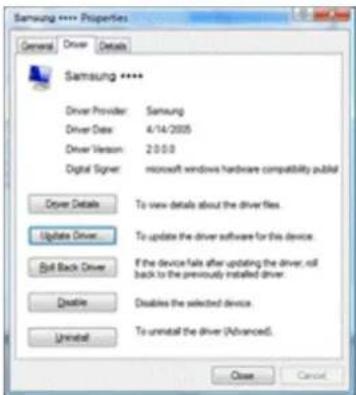
text_image
Samsung **** Properties General Driver Details Samsung **** Driver Provider: Samsung Driver Data: 4/14/2005 Driver Version: 2.0.0.0 Digital Signer: microsoft windows hardware compatibility publicl Driver Details To view details about the driver files. Update Driver: To update the driver software for this device. Roll Back Driver If the device fails after updating the driver, roll back to the previously installed driver. Delete Disables the selected device. Unreal To uninstall the driver (Advanced). Close Cancel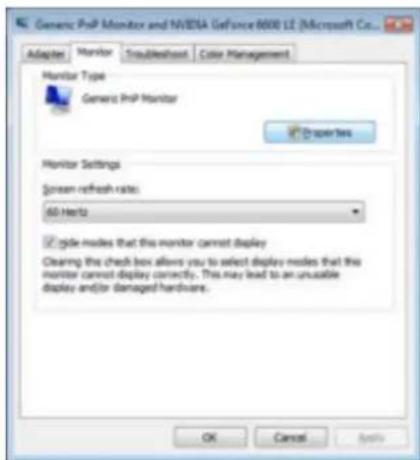
text_image
Generic Play Monitor and NVIDIA GeForce 600 LE (Microsoft Co... Adapter Monitor Troubleshoot Color Management Monitor Type Generic Play Monitor Properties Monitor Settings Green refresh rate: 60 Hertz cycle modes that this monitor cannot display Clearing the check box allows you to select displays modes that this monitor cannot display correctly. This may lead to an unstable display and/or damaged hardware. OK Cancel Help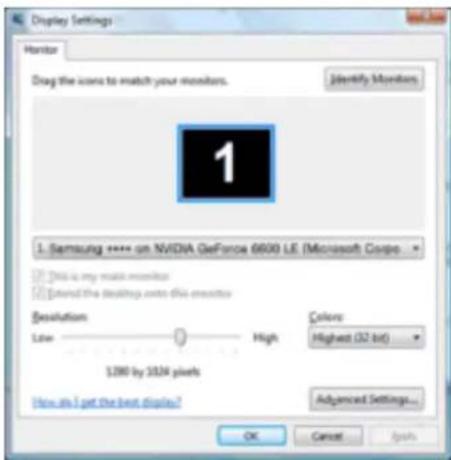
text_image
Display Settings Monitor Drag the icons to match your monitors. Identify Monitors 1 Samsung **** on NVIDIA GeForce 6600 LE (Microsoft Corp) This is my main monitor Stored the desktops onto this monitor Resolution Low High Colors: Highest (32 bit) 1280 by 1024 pixels How do I get the best display? Advanced Settings... OK Cancel Apply-
Insert CD into the CD-ROM drive.
-
Click "Start" → "Control Panel" then click the "Appearance and Themes" icon.
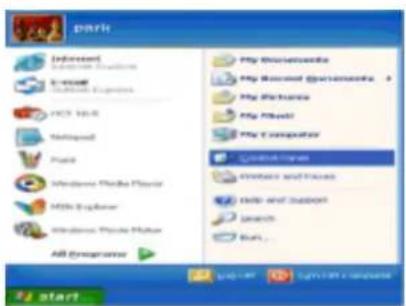
text_image
part Internet My Computer My Watcher My Computer My Computer My Watcher My Computer My Computer My Watcher My Computer My Computer My Watcher My Computer My Computer My Watcher My Computer My Computer My Watcher My Computer My Computer My Watcher My Computer My Computer My Watcher My Computer My Computer My Watcher My Computer My Computer My Watcher My Computer My Computer My Watcher My computer My computer My watchers My watchers My watchers My watchers My watchers My watchers My watchers My watchers My watchers My watchers My watchers My watchers My watchers My watchers My watchers My watchers My watchers My watchers My watchers My watchers My watchers My watchers My watchers My watchers My watchers My watches My watches My watches My watches My watches My watches My watches My watches My watches My watches My watches My watches My watches My watches My watches My watches My watches My watches My watches My watches My watches My watches My watches My watches My watches My watche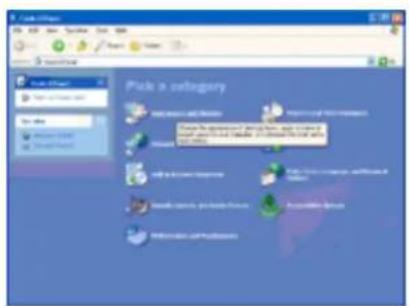
text_image
Pick a category Importing and Transfer Importing and Transfer Save as an important file or tool, which is used to create a new file with a similar scope. All other categories are available.- Click "Display" icon and choose the "Settings" tab then click "Advanced...".
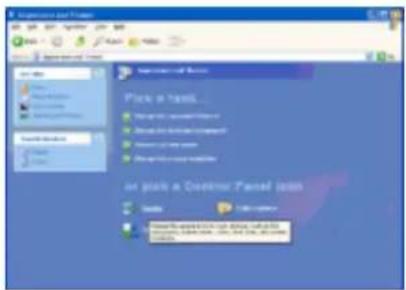
text_image
Insertion of New Place a text... New in the context of New in the context of New in the context of New in the context of In place a Continue Panel item New New in the context of New in the context of New in the context of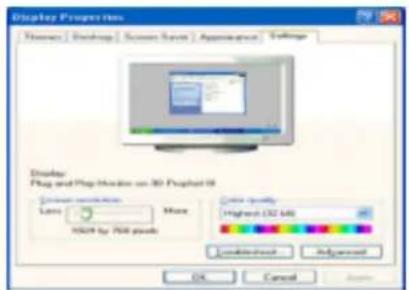
text_image
Display Properties Windows | Desktop | Screen Layout | Application | Settings Display Plug and Plug Mode on 3D Proshot 10 Current settings: Loss More High: (32 MB) HKEY by 704 pixels Color quality: Low Advanced OK Cancel Name- Click the "Properties" button on the "Monitor" tab and select "Driver" tab.
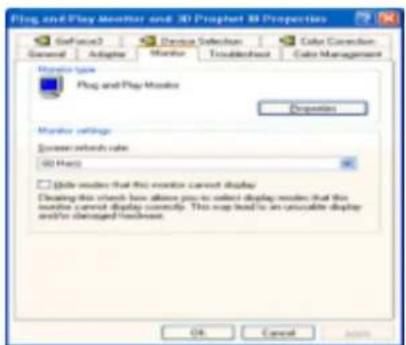
text_image
Plug and Play Monitor and 3D Prophet 80 Proportions General Adopter Monitor Troubstruct Cake Correction Cake Management Monitor type Plug and Play Monitor Properties Monitor settings Screen settings color 50 Hz □ Blue shades that the monitor cannot display Clearing this chart has allows you to select display modes that the monitor cannot display currently. This map tends to be an accessible display and/or changed touchset OK Cancel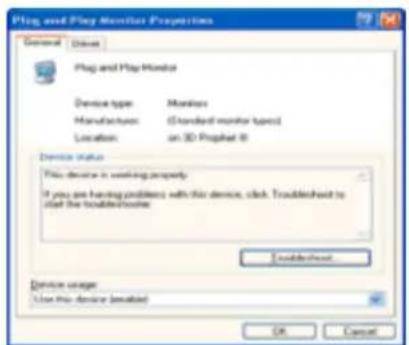
text_image
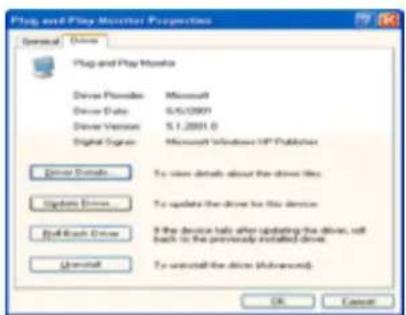
Plug and Play Monitor Properties General Drive Plug and Play Monitor Device type Monions Manufacturer (Standard monitor types) Location:on 3D Prophet 8 Device status This device is working properly. If you are having problems with this device, click Troubleshoot to start the troublebox. Established. Device usage Use this device (enabled) OK Cancel- Click "Update Driver..." and select "Install from a list or..." then click "Next" button.
text_image
Plug and Play Monitor Properties General Drive Plug and Play Monitor Driver Provider Microsoft Driver Data 0.5/10901 Driver Version 5.1.2001.0 Digital Signor Microsoft Windows 10F Publisher Driver Details To view details about the drive line: Update Drive To update the drive for this device. Build Back Drive If the device fails after updating the drive, will back to the previously installed drive. Internet To install the drive (Sub<text_image
Hardware Update Wizard Welcome to the Hardware Update Wizard This wizard helps you install software for Plug and Play Monitor If your hardware came with an installation CD or Happy disk, insert it soon. What do you want the wizard to do? ○ install the software automatically (Recommended) (If this file is set or specific location allowed) Click Next to continue. Start Canceltext_image
Hardware Update Wizard Please choose your search and installation options. Search for the best drive in these locations. Use the check based below to find or impact the default search, which includes local links and retrovisible media. The best drive found is installed. ✓ Search results with specific details (e.g. 12.000s) ✓ Remove the options to the next drive. ✓ Get search. I will choose the drive to install. Choose this option to select the device drive into a list. Windows does not guarantee that the drive you choose will be the best search for your hardware. - Back Next > Canceltext_image
PlayDevice Update: MyLab A Select the device drive you want to install for this hardware. Select the manufacture and model of your hardware device and then click next. If you have a link, this contains the drive you want to install. Also Have Disc. Use compatible hardcover Model Plug and PlayMonitor This drive is digitally signed Tell us how drive names is important Save Disc + Back Next > Canceltext_image
Install From Disk Insert the manufacture's installation disk, and then make sure that the correct drive is selected below. OK Cancel Copy manufacturer's files from: Browse...text_image
Hardware Update Wizard Select the device driver you want to install for this hardware. Select the manufacturer and model of your hardware device and then click Next. If you have been set, then contains the drive you want to install, which is not used. Model: Bursuing: new This drive is not digitally signed! Full non-Drive drive access is required Save Disk + Back Next > Canceltext_image
Hardware Installation The software you are installing for this hardware Samsung **** Has not passed Windows Logo testing to verify its compatibility with Windows XP. (To file any this version is important.) Continuing your installation of this software may impair or destabilize the correct operation of your system either immediately or in the future. Microsoft strongly recommends that you stop this installation now and contact the hardware vendor for software that has passed Windows logo testing. Continue Angrup STOP InstallationNote
This monitor driver is under certifying MS logo, and this installation doesn't damage your system. The certified driver will be posted on Samsung Monitor homepage. http://www.samsung.com/ 9. Click the "Close" button then click "OK" button continually. text_image
Hardware Update Wizard Completing the Hardware Update Wizard The wizard has finished installing the software for Samsung **** Disk Finish to close the nexttext_image
Samsung **** General / DOS Samsung **** Driver Provider: Samsung Driver Date: 3/11/2008 Driver Version: 1.0.0.0 Digital Signer: Not digitally signed Drive Details... Update Drive... Build Back Drive... Loaded... To save details about the drive files. To update the drive by this device. If the device fails, after updating the drive, will look up to the previously installed drive. To install the drive (Unadvanced) Close Canceltext_image
Play and Play Monitor and 40 Proport All Properties Software Adaptive Display Solution Cate Connection Database Software Cate Management Income type Play and Play Monitor Options Monitor settings System return rate All More Data server that this monitor cannot display Drawing the check box allows you to select display mode that this monitor Current Display controls. This may load to an oscillator display monitor managed function OK Cancel HelpNote
If there is no Mode at All Display Modes, select the level of resolution and vertical frequency by referring to the Preset Timing Modes in the user guide. Linux Operating System To execute X-Window, you need to make the X86Config file, which is a type of system setting file. 1. Press "Enter" at the first and the second screen after executing the X86Config file. 2. The third screen is for setting your mouse. 3. Set a mouse for your computer. 4. The next screen is for selecting a keyboard. 5. Set a Keyboard for your computer. 6. The next screen is for setting your monitor. 7. First of all, set a horizontal frequency for your monitor. (You can enter the frequency directly.) 8. Set a vertical frequency for your monitor. (You can enter the frequency directly.) 9. Enter the model name of your monitor. This information will not affect the actual execution of X-Window. 10. You have finished setting up your monitor. Execute X-Window after setting other requested hardware.Natural Color
Natural Color Software Program
text_image
SAMSUNG ELECTRONICS Natural Color Pro color management system Monitor Cal. & Profiling Color Preference Copyright© 2003 Samsung Electronics Co., LtdHow to install the Natural Color software
Insert the CD included with the Samsung monitor into the CD-ROM Drive. Then, the initial screen of the program Natural Color will be executed. Click Natural Color on the initial screen to install the Natural Color software. To install the program manually, insert the CD included with the Samsung monitor into the CD-ROM Drive, click the [Start] button of Windows and then select [Run...]. Enter D:\color\NCProSetup.exe and then press the [Enter] key. (If the drive where the CD is inserted is not D:\, enter the applicable drive.)How to delete the Natural Color software program
Select "Setting/Control Panel" on the "Start" menu and then double-click "Add/Delete a program". Select Natural Color from the list and then click the "Add/Delete" button.MultiScreen
MultiScreen
Installation
1. Insert the installation CD into the CD-ROM drive. 2. Click the MultiScreen installation file.  If the popup window to install the software for the main screen is not displayed, proceed with the installation using the MultiScreen executable file on the CD. 3. When the Installation Shield Wizard window appears, click "Next". 4. Select "I agree to the terms of the license agreement" to accept the terms of use. 5. Choose a folder to install the MultiScreen, program. 6. Click "Install". 7. The "Installation Status" window appears. 8. Click "Finish". 9. When the installation is complete, the Multiscreen executable icon appears on your desktop. Double-click the icon to start the program. Multiscreen execution icon may not appear depending on specification of computer system or monitor. If that happens, press F5 Key.Installation Problems
The installation of MultiScreen can be affected by such factors as the video card, motherboard and the network environment.System Requirements
OS
- Windows 2000 • Windows XP Home Edition • Windows XP Professional - Windows Vista™ It is recommended using MultiScreen in Windows ^® 2000 or later.Hardware
• 32 MB Memory above - 60 MB Hard disk space aboveUninstall
The Multiscreen program can be removed only by using the "Add or Remove Programs" option of the Windows® Control Panel. Perform the following steps remove Multiscreen. Select "Setting/Control Panel" on the "Start" menu and then double-click "Add/Delete a program". Select Multiscreen from the list and then click the "Add/Delete" button.Adjusting the LCD Display
Viewing the Menus text_image
MENU III CH LIST MENU III FAV.CH TOOLS TOOLS RETURN ENTER ▲▼◀▶ EXIT→F| Button Description | |
| MENU Opens | the on-screen menu and exits from the menu or closes the adjustment menu. |
 | Up-Down Left-Right buttons - Moves from one menu item to another horizontally, vertically or adjusts selected menu values. |
| ENTER Activates a highlighted menu item. | |
| RETURN | Returns to the previous menu. |
| EXIT | Exits from the menu screen. |
| TOOLS | Use to quickly select frequently used functions. |
text_image
MagicBright : Custom Backlight 5 Contrast 99 Brightness 45 Sharpness 50 Auto Adjustment ScreenContrast / Brightness / Sharpness
(Not available when MagicBright is Dynamic Contrast.) text_image
MagicBright : Custom Backlight : 5 Contrast : 99 Brightness : 45 Sharpness : 50 Auto Adjustment Screen Advanced Settings Picture OptionsAuto Adjustment
text_image
Brightness 45 Sharpness 50 Auto Adjustment Screen Advanced Settings Picture Options Picture ResetScreen
(Available in PC mode only) text_image
Sharpness : 50 Auto Adjustment Screen Advanced Settings Picture Options Picture ResetPicture Options
text_image
Screen Advanced Settings Picture Options Picture ResetPicture Reset
text_image
Picture Picture Options Picture ResetInput Mode : TV, DTV, Ext., Component or HDMI
Mode
text_image
Mode : Standard Backlight : 5 Contrast : 99 Brightness : 45 Sharpness : 50 Colour : 50 Tint (G/R) : G50/R50Backlight / Contrast / Brightness / Sharpness / Colour / Tint(G/R)
text_image
Backlight : 5 Contrast : 99 Brightness : 45 Sharpness : 50 Colour : 50 Toll(G/R) : G50/R50 Advanced SettingsAdvanced Settings
Samsung's new TVs allow you to make even more precise picture settings than previous models. See below to adjust detailed picture settings. (Advanced Settings is available in Standard or Movie.) text_image
Colour : 50 Tint(G/R) G50/R50 Picture Advanced Settings Picture Option Picture ResetBlack Tone
You can select the black level on the screen to adjust the screen depth. • Off / Dark / Darker / DarkestDynamic Contrast
You can adjust the screen contrast so that the optimal contrast is provided. • Off / Low / Medium / HighGamma
You can adjust the Primary Colour (Red, Green, Blue) Intensity.Colour Space
Colour Space is a colour matrix composed of red, green and blue colours. Select your favourite Colour Space to experience the most natural colour. - Auto : Auto Colour Space automatically adjusts to the most natural colour tone based on programme sources. • Native : Native Colour Space offers deep and rich colour toneWhite Balance
You can adjust the colour temperature for more natural picture colours. - R-Offset: Adjusts the red colour darkness. - G-Offset : Adjusts the green colour darkness. • B-Offset : Adjusts the blue colour darkness. • R-Gain : Adjusts the red colour brightness. • G-Gain : Adjusts the green colour brightness. • B-Gain : Adjusts the blue colour brightness. \- Reset: The previously adjusted white balance will be reset to the factory defaults.Flesh Tone
You can emphasize the pink Flesh Tone in the picture.  Note Changing the adjustment value will refresh the adjusted screen.Edge Enhancement
You can emphasize object boundaries in the picture. \- Off / OnPicture Option
text_image
Tint(G/R) G50/R50 Advanced Settings Picture Option Picture ResetColour Tone
The tone of the color can be changed. • Cool / Normal / Warm1 / Warm2  Note "Warm1" or "Warm2" is only activated when the picture mode is "Movie". Settings can be adjusted and stored for each external device you have connected to an input of the TV.Size
You can switch the Size. Press the TOOLS button to display the Tools menu. You can also set the size by selecting Tools → Picture Size. • Auto Wide - Automatically adjusts the picture size to the "16:9" aspect ratio. - Wide - A full screen is displayed regardless of the screen aspect ratio of the input signals. • 16:9 - Adjusts the picture size to 16:9 appropriate for DVDs or wide broadcasting. - Wide Zoom - Magnify the size of the picture more than 4:3. - Zoom - Magnifies the 16:9 wide picture (in the vertical direction) to fit the screen size. - 4:3 - Sets the picture to 4:3 normal mode. - Screen Fit - Use the function to see the full image without any cut off when HDMI (720P / 1080i / 1080p), Component (1080i / 1080p) signals are input. Note
Wide Zoom : Press the ▶ button to Select Position, then press the ENTER button. Press the ▲ or ▼ button to move the picture up / down. Then press the ENTER button. Zoom : Press the ▶ button to Select Position, then press the ENTER button. Press the ▲ or ▼ button to move the picture up and down. Then press the ENTER button. Press the ▶ button to Select Size, then press the ENTER button. Press the ▲ or ▼ button to magnify or reduce the picture size in the vertical direction. Then press the ENTER button. After selecting Screen Fit in HDMI (1080i / 1080p) or Component (1080i / 1080p) mode: Select Position by pressing the ▶ or ▶ button. Use the ▶ or ▶ button to move the picture. \- Reset : Press the ◀ or ▶ button to select Reset, then press the ENTER ➕ button. You can initialize the setting. Depending on the input source, the picture size options may vary. Settings can be adjusted and stored for each external device you have connected to an input of the TV. Temporary image retention may occur when viewing a static image on the set for more than two hours.Screen Mode
Only when setting the picture size to Auto Wide can the user determine the Screen mode. Each individual European country requires a different picture size so this function is intended to help users to select it. - Wide: A full screen is displayed regardless of the screen aspect ratio of the input signals • 16:9: Sets the picture to 16:9 wide mode. - Wide Zoom : Magnify the size of the picture more than 4:3. - Zoom : Magnify the size of the picture vertically. - 4:3 : Sets the picture to 4:3 normal mode. Note
Picture Size is available in Auto Wide mode This function is not available in PC or Component, Ext., HDMI mode.Digital NR
Digital Noise Reduction. If the broadcast signal received by your TV is weak, you can activate the Digital Noise Reduction feature to help reduce any static and ghosting that may appear on the screen. - Off : Turns the screen noise reduction function off. - Low : Reduces screen noise at a low level. • Medium : Reduces screen noise at a medium level. • High : Reduces screen noise at a high level. - Auto :Automatically recognizes and reduces screen noise. Note
When the signal is weak, select one of the other options until the best picture is displayed.HDMI Black Level
You can directly select the black level on the screen to adjust the screen depth. \- Normal / Low Note
This function is active only when the external input connects to HDMI (RGB signals).Film Mode
The TV can be set to automatically sense and process film signals from all sources and adjust the picture for optimum qualityd. \- Off / Auto Note
Film Mode is supported in TV, AV, COMPONENT(480i / 1080i) and HDMI(480i / 1080i).Picture Reset
text_image
Advanced Settings Picture Option Picture ResetSound
 The default setting may be different depending on the selected Input Mode (input signal source selected in External Input List) and the selected resolution.Mode
text_image
Sound Mode : Custom Equalizer SRS Trusurround XT : Off Audio Language : — Audio Format : — Auto Description : — Auto Volume : OffEqualizer
text_image
Mode : Custom Equalizer SRS Trusurround XT : Off Audio Language : — Audio Format : — Audio Descriptions : — Auto Volume : Off Speaker Select : TV SpeakerMode
Selects the sound mode among the predefined settings.Balance
Adjusts the balance between the right and left speaker. 100Hz / 300Hz / 1kHz / 3kHz / 10kHz To adjust the level of different bandwidth frequencies.Reset
Resets the equalizer settings to the default values.SRS TruSurround XT
text_image
Mode : Custom Equalizer SRS Trusurround XT : Off Audio Language Audio Format Audio Description Auto Volume : Off Speaker Select : TV Speaker Sound ResetAudio Language
text_image
Equalizer SRS Trusurround XT : Off Audio Language : ---- Audio Format : ---- Audio Description Auto Volume : Off Speaker Select : TV Speaker Sound ResetAudio Format
text_image
SRS Trusurround XT Audio Language : ---- Audio Format : ---- Audio Description Auto Volume : Off Speaker Select : TV Speaker Sound ResetAudio Description
text_image
Audio Language Audio Format Audio Description Auto Volume Speaker Select Sound Reset Off TV SpeakerAudio Description
Turn the audio description function on or off.Volume
You can adjust the audio description volume.  Note Volume is active when Audio Description is set to On. While viewing a Digital channel, this function can be selected.Auto Volume
text_image
Audio Format Audio Deserption Sound Auto Volume : Off Speaker Select : TV Speaker Sound ResetSpeaker Select
text_image
Audio Description Auto Volume : Off Speaker Select : TV Speaker Sound ResetSound Reset
text_image
Sound Auto Volume : Off Speaker Select : TV Speaker Sound ResetSelecting the Sound Mode
You can set the sound mode in the Tools menu. When you set to Dual I II, the current sound mode is displayed on the screen Audio Type Dual 1 / 2 Dual 1 / 2 A2 Stereo Mono MONO Automatic change Audio Type Dual 1 / 2 Dual 1 / 2 Stereo STEREO MONO Automatic change Dual DUAL 1 DUAL 2 DUAL 1 Mono MONO Automatic change NICAM Stereo Stereo MONO STEREO Automatic change Dual MONO DUAL 1  DUAL 1 Note
If the stereo signal is weak and an automatic switching occurs, then switch to the mono. This function is only activated in stereo sound signal. It is deactivated in mono sound signal. This function is only available in TV mode.Channel
Note
The default setting may be different depending on the selected Input Mode (input signal source selected in External Input List) and the selected resolution.Country
text_image
Country Auto Store Manual Store Cable Search Option Now & Next Guide Full Guide Default Guide : Full GuideAnalogue Channel
You can change the country for analogue channels.Digital Channel
You can change the country for digital channels. Note
The PIN number input screen appears. Enter your 4 digit PIN number.Auto Store
text_image
Country Auto Store Manual Store Cable Search Option Now & Next Guide Full Guide Default Guide : Full Guide Channel ListNote
If a channel is locked using the Child Lock function, the PIN input window appears.Air / Cable
Antenna source to memorize. • Digital & Analogue : Digital and Analogue channels. • Digital : Digital channels. • Analogue : Digital channels. When selecting Cable → Digital & Analogue or Cable → Digital : Provide a value to scan for cable channels. • Search Mode : Full / Network / Quick Note
Scans for all channels with active broadcast stations and stores them in the TV's memory.Quick
• Network ID : Displays the network identification code. - Frequency : Displays the frequency for the channel. (Differs in each country) - Modulation: Displays available modulation values. - Symbol Rate : Displays available symbol rates.Manual Store
text_image
Country Auto Store Channel Manual Store Cable Search Option Now & Next Guide Full Guide Default Guide : Full Guide Channel List Channel ModeDigital Channel
Manual store for digital channels. - Channel : Set the Channel number using the ▲, ▼or number (0\~9) buttons - Frequency: Set the frequency using the number buttons. - Bandwidth: Set the bandwidth using the ,▲ornumber (0\~9) buttons. Note
Digital Channel is only available in DTV mode. When it has finished, channels are updated in the channel list.Analogue Channel
Manual store for analogue channel. \- Programme (Programme number to be assigned to a channel) Inputting the appropriate program number on the screen. Sets the programme number using the ▲, ▼or number (0\~9) buttons \- Colour System Adjusts repeatedly until the colour is of the best quality. Sets the colour system value using the ▲ or ▼button. (Auto / PAL / SECAM / NTSC4.43) \- Sound System Adjusts repeatedly until the sound is of the best quality. Sets the sound system value using the ▲ or ▼button. (BG / DK / I / L) \- Channel (When you know the number of the channel to be stored) You can store television channels, including those received via cable networks. When storing channels manually, you can choose: Whether or not to store each of the channels found. The Programme number of each stored channel which you wish to identify - C (Air channel mode): You can select a channel by entering the assigned number to each air broadcasting station in this mode. - S (Cable channel mode): You can select a channel by entering the assigned number for each cable channel in this mode. \- Search (When you do not know the channel numbers) Press the ▲ or ▼button to start the search. The tuner scans the frequency range until the first channel or the channel that you selected is received on your screen. \- Store (When you store the channel and associated programme number) It's used to restore the number user inputs. Set to OK by pressing the ENTER button.Cable Search Option
text_image
Auto Store Manual Store Cable Search Option Now & Next Guide Full Guide Default Guide : Full Guide Channel List Channel Mode Fine TuneNow & Next Guide / Full Guide / Default Guide
text_image
Manual Store Cable Search Option Now & Next Guide Full Guide Default Guide : Full Guide Channel List Channel Mode Fine TuneNote
You can also display the guide menu simply by pressing the GUIDE button. (To configure the Default Guide, refer to the descriptions.).Now & Next Guide
text_image
Now & Next Guide DTV Cable 2019 is Freshmen Op Campus 2:10 Tue 1 Jam 2:00 - 2:30 No Detailed Information Now Next 5:00 Fail Freservine O. Spider Hips. No Information 5:01 FTV/Play Win Evans 5:02 Staramp Loaded No Information 5:03 Kiss 40 with Dynamite BC Excovery 5:04 answerer The Disclosure No Information ▼ $05 Hot JANUARY 19DEC 18THday Watch Full Guide ExitFull Guide
text_image
Full Guide DTV Cable 500 Ft Freshmen On Campus 2:10 Tue 1 Jun 2:00 - 2:30 No Detailed Information Today 18:00-19:00 19:00-20:00 9:00 Fri Freshman O... Street Hiph. No Information 9:11 ITVPlay Mim Exua 9:2 Kayand Loaded No Information 9:2 Kiss 40 with Dynamics MC Kastony 9:3 Kisword The DidiBary No Information ▼ 9:5 His Swinsh Nt? Sunday Watch Now & Next +24 Hours ExitTo... Then...
Watch a programme in the EPG list. Select a programme by pressing the ▲▼,◀,▶button.Press the ENTER button.
If the next programme is selected, it is scheduled with the clock icon displayed. If the ENTER button is pressed again, the scheduling is cancelled with the clock icon gone. For details about scheduling programmes, refer to the next page. View programme information Select a programme of your choice by pressing the ▲, ▼, ▶ button. Press the INFO button when the programme of your choice is highlighted.To... Then...
Toggle between the Now & Next Guide Press the red button repeatedly. or Full Guide Scrolls backwards quickly (24 hours) Press the green button repeatedly. Scrolls forward quickly (24 hours) Press the yellow button repeatedly. Exit the guide Press the EXIT button. Note
The programme title is on the upper part of the screen center. Please click on INFO button for the detailed information. Channel Number, Running Time, Status Bar, Parental Level, Video Quality Information(HD/SD), Sound Modes, Subtitle or Teletext, Languages of Subtitle or Teletext, and brief summary of the highlighted programme are included on the detailed information. “...” will be appeared if the summary is long. Six channels are displayed. To scroll between channels, move to a channel using the ▲ or ▼ button. To display page by page, use the P, or button.Default Guide
You can decide whether to display either the Now & Next Guide or the Full Guide when the GUIDE button on the remote control is pressed. \- Now & Next / Full GuideChannel List
text_image
Full Guide Default Guide : Full Guide Channel List Channel Mode Fine TuneAll Channels
Shows all currently available channels. text_image
All Channels A 1 C -- A 2 C -- A 3 C -- A 4 C -- A 5 C -- A 6 C -- A 7 C -- All Channel Type Select Zoom ToolsAdded Channels
Shows all added channels.Favourites
Shows all favourite channels.  Note To select the favourites channels you have set up, press the FAV.CH button on the remote control. When it has finished, channels are updated in the channel listProgrammed
Shows all current reserved programmes.  Note Select a channel in the All Channels, Added Channels or Favourites screen by pressing the ▲, ▼buttons, and pressing the ENTER button. Then you can watch the selected channel. Using the Colour buttons with the Channel List. • Red (Channel Type) : Toggle between your TV, Radio, Data / Other and All. \- Green (Zoom) : Enlarges or shrinks a channel number. \- Yellow (Select) : Selects multiple channel lists. You can perform the add/delete or add to favourites/delete from favourites function for multiple channels at the same time. Select the required channels and press the yellow button to set all the selected channels at the same time. The √ mark appears to the left of the selected channels. \- TOOLS (Tools) : Displays the Delete (or Add), Add to Favourite (or Delete from Favourite), Lock (or Unlock), Timer Viewing, Edit Channel Name, Edit Channel Number, Sort, Select All, Deselect All or Auto Store menu. (The Options menus may differ depending on the situation.) Channel Status Display Icons • A :An Analogue channel. • √: A channel selected by pressing the yellow button. • ♥: A channel set as a Favourite. • ☐: A programme currently being broadcast. • 🔒: A locked channel. • Ⓤ: A reserved programme. Channel List Option Menu (in All Channels / Added Channels / Favourites) text_image
Added Channels A 1 C -- A 2 C -- A 3 C -- A 4 C -- A 5 C -- A 6 C -- A 7 C -- All Channel Type Select Zoom Tools Delete Add to Favourite Timer Viewing Edit Channel Name Sort LockAdd / Delete
You can delete or add a channel to display the channels you want.  Note All deleted channels will be shown on All Channels menu. A gray-coloured channel indicates the channel has been deleted. The Add menu only appears for deleted channels. You can also delete a channel to the Added Channels or Favourites menu in the same manner.Add to Favourite / Delete from Favourite
You can set channels you watch frequently as favourites.  Press the TOOLS button to display the Tools menu. You can also set the add to (or delete n) Favourite by selecting Tools → Add to Favourite (or Delete from Favourite)  Note The icon symbol will be displayed and the channel will be set as a favourite. All favourite channels will be shown on Favourites menu.Lock / Unlock
You can lock a channel so that the channel cannot be selected and viewed.  Note This function is available only when the Child Lock is set to On. The PIN number input screen appears. Enter your 4 digit PIN number. The default PIN number of a new TV set is 0-0-0-0. You can change the PIN, by selecting Change PIN from the menu. The Icon symbol will be displayed and the channel will be locked.Timer Viewing
If you reserve a programme you want to watch, the channel is automatically switched to the reserved channel in the Channel List; even when you are watching another channel. To reserve a programme, set the current time first. Note
Only memorized channels can be reserved. You can set the channel, day, month, year, hour and minute directly by pressing the number buttons on the remote control. Reserving a programme will be shown in the Programmed menu. Digital Programme Guide and Viewing Reservation - When a digital channel is selected, and you press the ▶ button, the Programme Guide for the channel appears. You can reserve a programme according to the procedures described above.Edit Channel Name (analogue channels only)
Channels can labelled so that their call letters appear whenever the channel is selected. Note
The names of digital broadcasting channels are automatically assigned and cannot be labelled.Edit Channel Number (digital channels only)
You can also edit the channel number by pressing the number buttons on the remote control.Sort (analogue channels only)
This operation allows you to change the programme numbers of the stored channels. This operation may be necessary after using the auto store.Select All / Deselect All
Channels can labelled so that their call letters appear whenever the channel is selected. \- Select All: You can select all the channels in the channel list. \- Deselect All: You can deselect all the selected channels. Note
You can only select Deselect All when there is a selected channel.Auto Store
Note
For detailed procedures on setting up options, refer to the Channel Menu instructions. If a channel is locked using the Child Lock function, the PIN input window appears.Channel List Option Menu (in Programmed)
You can view, modify or delete a reservation Note
Press the TOOLS button to use the option menu. text_image
1 / 1 2009 13:59 5 TV1 18:59 2 TV3 20:59 2 TV3 21:59 2 TV3 Change Info Cancel Schedules Information Select All All Select Zoom Tools InformationChange Info
Select to change a viewing reservation.Cancel Schedules
Select to cancel a viewing reservation.Information
Select to view a viewing reservation. (You can also change the reservation information.)Select All
Select all reserved programmes.Channel Mode
When press the VP button, Channels will be switched within the selected channel list. text_image
Default Guide : Full Guide Channel List Channel Mode Fine TuneFine Tune
text_image
Channel List Channel Mode Channel Fine TuneNote
Fine tuned channels that have been saved are marked with an asterisk “\*” on the right-hand side of the channel number in the channel banner. To reset the fine-tuning, select Reset by pressing the ▲ or ▼button and then press the ENTER button. Only Analogue TV channels can be fine tuned.Setup
Note
The default setting may be different depending on the selected Input Mode (input signal source selected in External Input List) and the selected resolution.Plug & Play
text_image
Plug & Play Language : English Time Game Mode : Off Child Lock : On Change PIN Parental LockLanguage
text_image
Plug & Play Language : English Time Game Mode : Off Child Lock : On Change PIN Parental Lock Subtitle : —Time
text_image
Time Clock : --- -- Sleep Timer : Off Timer 1 : Inactivated Timer 2 : Inactivated Timer 3 : InactivatedClock
Setting the clock is necessary in order to use the various timer features of the TV. The current time will appear every time you press the INFO button. If you disconnect the power cord, you have to set the clock again.Clock Mode
You can set up the current time manually or automatically. \- Auto : Set the current time automatically using the time from the digital broadcast. \- Manual: Set the current time to a manually specified time. Note
Depending on the broadcast station and signal, the auto time may not be set correctly. If this occurs, set the time manually. The antenna or cable must be connected in order to set the time automatically.Clock Set
You can set the current time manually. Note
This function is only available when Clock Mode is set to manual. You can set the day, month, year, hour and minute directly by pressing the number buttons on the remote control.Sleep Timer
Use to set the Monitor to be turned off automatically in certain minutes. Press the TOOLS button to display the Tools menu. You can also set the sleep timer by selecting Tools → Sleep Timer. • Off, 30 min, 60 min, 90 min, 120 min, 150 min, 180 min Note
To cancel the Sleep Timer function, select Off.Timer1 / Timer2 / Timer3
You can have the monitor turned on or off automatically at a specified time. \- On time Set to the hour, minute and "activate"/" inactivate". (To activate timer with the setting you've chosen, set to 'activate') \- Off time Set to the hour, minute and "activate"/" inactivate". (To activate timer with the setting you've chosen, set to 'activate') • Volume Select the required volume level. \- Antenna Select ATV or DTV. \- Channel Select the desired channel. \- Repeat Select "Once", "Everyday", "Mon\~Fri", "Mon\~Sat" or "Sat\~Sun" or Manual. When Manual is selected, press the ▶ button to select the desired day of the week. Press the ENTER button over the desired day and the mark will appear. Note
You can set the hour, minute and channel by pressing the number buttons on the remote control.Auto Power Off
\- When you set the timer On, the television will eventually turn off, if no controls are operated for 3 hours after the TV was turned on by the timer. This function is only available in timer On mode and prevents overheating, which may occur if a TV is on for too long timeGame Mode
text_image
Language : English Time Game Mode : Off Child Lock : On Change PIN Parental Lock Subtitle Teletext Language PreferenceChild Lock
text_image
Time Game Mode Off Child Lock : On Change PIN Parental Lock Subtitle Taletext Language Preference Digital Text : EnableChange PIN
You can change your personal ID number that is required to set up the TV. Note Before the setup screen appears, the PIN number input screen appears. Enter your 4-digit PIN number. The default PIN number of a new TV set is 0-0-0-0. If you forget the PIN code, press the remote control buttons in the following sequence, which resets the PIN to 0-0-0-0: POWER (Off) → MUTE → 8 → 2 → 4 → POWER (On).Parental Lock
text_image
Child Lock : On Change PIN Parental Lock Subtitle Teletext Language : ---- Preference Digital Text : Enable Light Level : 3 Melody : MediumNote
Before the setup screen appears, the PIN number input screen appears. Enter your 4 digit PIN number. The default PIN number of a new TV set is 0-0-0-0. You can change the PIN by selecting Change PIN from the menu. When the parental ratings are set, the 🔒 symbol is displayed.Subtitle
text_image
Change PIN Parental Lock Subtitle Teletext Language Preference Digital Text : Enable Light Level : 3 Melody : Medium Energy Saving : OffSubtitle
Switches subtitles on or off.Mode
Sets the subtitle mode. • Normal / Hard of hearingSubtitle Language
Set the subtitle language. Note
If the programme you are watching does not support the Hard of hearing function, Normal automatically activates even though Hard of hearing mode is selected. English is the default in cases where the selected language is unavailable in the broadcast. You can select these options simply by pressing the SUBT. button on the remote control.Teletext Language
text_image
Parental Lock Subtitle Teletext Language : --- > Preference Digital Text : Enable Light Level : 3 Melody : Medium Energy Saving : LowPreference
text_image
Subtitle Teletext Language Setup Preference Digital Text : Enable Light Level : 3 Melody : Medium Energy Saving : Low Common InterfacePrimary Audio Language/ Secondary Audio Language / Primary Subtitle Language /Secondary Subti
Using this feature, users can select one of the languages. The language selected here is the default when the user selects a channel. If you change the language setting, the Subtitle Language, Audio Language, and the Teletext Language of the Language menu are automatically changed to the selected language. The Subtitle Language, Audio Language, and the Teletext Language of the Language menu show a list of languages supported by the current channel and the selection is highlighted. If you change this language setting, the new selection is only valid for the current channel. The changed setting does not change the setting of the Primary Subtitle Language, Primary Audio Language, or the Primary Teletext Language of the Preference menu.Digital Text
text_image
Setup TextText Language Preference Digital Text : Enable Light Level : 3 Melody : Medium Energy Saving : Low Common InterfaceLight Level
text_image
Preference Digital Text : Enable Light Level : 3 Melody : Medium Energy Saving : Low Common InterfaceMelody
text_image
Digital Text : Enable Light Level : 3 Melody : Medium Energy Saving : Low Common InterfaceNote
The Melody does not play - When no sound is output from the TV because the MUTE button has been pressed. - When no sound is output from the TV because the volume has been reduced to minimum with the volum (-) button. - When the TV is turned off by Sleep Timer function.Energy Saving
text_image
Light Level : 3 Melody : Medium Energy Saving : Low Common InterfaceCommon Interface
text_image
Melody Energy Saving Medium Low Common InterfaceCI Menu
This enables the user to select from the CAM-provided menu. Select the CI Menu based on the menu PC Card.Application Info.
This contains information on CAM inserted in the CI slot and displays it. The Application Info inserting is about the CI CARD. You can install the CAM anytime whether the TV is ON or OFF.Input
 Note The default setting may be different depending on the selected Input Mode (input signal source selected in External Input List) and the selected resolution.Source List
text_image
Source List Edit NameNote
You can choose only those external devices that are connected to the TV. In the Source List, connected inputs will be highlighted and sorted to the top. Inputs that are not connected will be sorted to the bottom. Using the colour buttons on the remote with the Source List. \- Red (Refresh) : Refreshes the connecting external devices. • TOOLS (Tools) : Displays the Edit Name and Information menus.Edit Name
text_image
Source List Edit NameAnynet+ (HDMI-CEC)
What is Anynet+?
Anynet+ is a function that enables you to control all connected Samsung devices that support Anynet+ with your Samsung TV's remote. The Anynet+ system can be used only with Samsung devices that have the Anynet+ feature. To be sure your Samsung device has this feature, check if there is an Anynet+ logo on it.Connecting Anynet+ Devices
text_image
Optical Cable Home Theatre Anynet+ 1 HDMI 1.3 Cable Anynet+ 2 HDMI 1.3 Cable HDMI 1.3 CableNote
Connect the Optical cable between the DIGITAL AUDIO OUT (OPTICAL) jack on your TV and the Digital Audio Input on the Home Theatre. When following the connection above, the Optical jack only outputs 2 channel audio. You will only hear sound from the Home Theatre's Front Left and Right speakers and the subwoofer. If you want to hear 5.1 channel audio, connect the DIGITAL AUDIO OUT (OPTICAL) jack on the DVD / Satellite Box (ie Anynet Device 1 or 2) directly to the Amplifier or Home Theatre, not the TV. Connect only one Home Theatre. You can connect an Anynet+ device using the HDMI 1.3 cable. Some HDMI cables may not support Anynet+ functions. Anynet+ works when the AV device supporting Anynet+ is in the Standby or On status. Anynet+ supports up to 10 AV devices in total. Note that you can connect up to 3 devices of the same type.Setting Up Anynet+
text_image
Application Anynet+ (HDMI-CEC)Setup
text_image
Setup Anynet+ (HDMI-CEC) : On Auto Turn Off : Yes Move Enter ReturnAnynet+ (HDMI-CEC)
To use the Anynet+ Function, Anynet+ (HDMI-CEC) must be set to On.  Note When the Anynet+ (HDMI-CEC) function is disabled, all the Anynet+ related operations are deactivated.Auto Turn Off
Setting an Anynet+ Device to turn Off automatically when the TV is Turned Off and setting a TV to turn off automatically when a HDMI-CEC device requests tv to turn off.  Note The active source on the TV remote must be set to TV to use the Anynet+ function. If you set Auto Turn Off to Yes, connected external devices are also turned off when the TV is turned off. If an external device is still recording, it may or may not turn off.Device List
text_image
Device List No Device Refresh Enter ReturnSupport
Self Diagnosis
text_image
Self Diagnosis Software Upgrade HD Connection Guide Contact SamsungPicture Test
If you think you have a picture problem, perform the picture test. Check the colour pattern on the screen to see if the problem still exists. - Yes: If the test pattern does not appear or there is noise in the test pattern, select Yes. There may be a problem with the TV. Contact Samsung's call centre for assistance. - No : If the test pattern is properly displayed, select No. There may be a problem with your external equipment. Please check your connections. If the problem still persists, refer to the external device's user manual.Sound Test
If you think you have a sound problem, please perform the sound test. You can check the sound by playing a built-in melody sound through the TV. - Yes: If during the sound test you can hear sound only from one speaker or not at all, select Yes. There may be a problem with the TV. Contact Samsung's call centre for assistance. - No: If you can hear sound from the speakers, select No. There may be a problem with your external equipment. Please check your connections. If the problem still persists, refer to the external device's user manual. Note
If you hear no sound from the TV's speakers, before performing the sound test, make sure Speaker Select is set to TV speaker in the Sound menu. The melody will be heard during the test even if Speaker Select is set to External Speaker or the sound is muted by pressing the MUTE button.Signal Information (digital channels only)
Unlike analogue channels, which can vary in reception quality from snowy to clear, digital (HDTV) channels have either perfect reception quality or you will not receive them at all. So, unlike analogue channels, you cannot fine tune a digital channel. You can, however, adjust your antenna to improve the reception of available digital channels. Note
If the signal strength meter indicates that the signal is weak, physically adjust your antenna to increase the signal strength. Continue to adjust the antenna until you find the best position with the strongest signal.Software Upgrade
text_image
Self Diagnosis Software Upgrade HD Connection Guide Contact SamsungBY Channel
Upgrades the software using the broadcasting signal.Standby Mode Upgrade
To continue software upgrade with master power on, select on by pressing the ▲ or ▼button. 45 minutes after entering standby mode, a manual upgrade is automatically conducted. Since the power of the unit is turned on internally, the screen may be on slightly for the LCD product. This phenomenon may continue for more than 1 hour until the software upgrade is completed.Alternative Software
If Alternative Software is existing, this menu will be activated. You can change the software to previous version. Note
If software was changed, existing software is displayed. You can change current software to alternative software by \`Alternative Software\`. Software is represented as 'Year / Month / Day\_Version'. The later the date, the newer the software version. Installing the latest version is.HD Connection Guide
This menu presents the connection method that provides the optimal quality for the HDTV. Refer to this information when connecting external devices to the TV.Contact Samsung
View this information when your TV does not work properly or when you want to upgrade the software. You can view the information regarding the call centre, product and software file download method. newer the software version. Installing the latest version is.Troubleshooting
Self-Test Feature Check
Note
- Check the following items yourself before calling for service. Contact the service center for problems that you cannot solve by yourself. - Your monitor provides a self test feature that allows you to check whether your monitor is functioning properly.Self-Test Feature Check
1. Turn off both your computer and the monitor. 2. Unplug the video cable from the back of the computer. 3. Turn on the monitor. The figure shown below ("Check Signal Cable") appears on a black background when the monitor is in its normal working condition though it does not sense any video signal: While in the Self-Test mode, the LED power indicator remains green and the figure moves around on the screen. Check signal cable. 4. Turn off your monitor and reconnect the video cable; then turn on both your computer and the monitor. If your monitor screen remains blank after using the previous procedure, check your video controller and computer system; your monitor is functioning properly.Not Optimum Mode
If the vertical resolution is not optimum mode, you can still see the display but the warning message below appears and disappears after one minute. The user must adjust the frequency within that one minute. Mode Not Supported. Note
Refer to Specifications > Preset Timing Modes for the resolutions or frequencies that are supported by the monitor.Maintenance and Cleaning
1. Maintaining the Monitor Case. Clean with a soft cloth after disconnecting the power cord. natural_image
Cartoon illustration of a computer monitor displaying a smiling face with tongue out, next to a hand holding a toothbrush (no text or symbols)Symptoms and Recommended Actions
Note
A monitor recreates visual signals received from the computer. Therefore, if there is trouble with the computer or the video card, this can cause the monitor to become blank, have poor coloring, noise, Video mode not supported, etc. In this case, first check the SOURCE of the problem, and then contact a service center or your dealer. 1. Check if the power cord and the video cables are properly connected to the computer. 2. Check if the computer beeps more than 3 times when booting. (If it does, request an after-service for the main board of the computer.) 3. If you installed a new video card or if you assembled the PC, check if you installed the adapter(video) driver and the monitor driver. 4. Check if the scanning ratio of the video screen is set at 56 Hz \~ 75 Hz. (Do not exceed 60 Hz when using the maximum resolution.) 5. If you have problems in installing the adapter (video) driver, boot the computer in Safe Mode, remove the Display Adapter at the "Control Panel, System, Device Administrator" and then reboot the computer to reinstall the adapter (video) driver.Check List
Note
Before calling for assistance, check the information in this section to see if you can remedy any problems yourself. If you do need assistance, please call the phone number on the Information section or contact your dealer.1. Problems related to Installation
Note
Problems related to the monitor installation and their solutions are listed.PC Mode
Q: It appears the PC does not function normally. A: Check if the Display Adapter Driver (VGA Driver) is properly installed. (Refer to Installing Driver) Q: The monitor screen flickers. A: Check if the signal cable between the computer and the monitor is securely connected and tightened.(Refer to Connecting the monitor)TV Mode
Q: TV screen is blurred or shows noise signals. A: Check if the TV antenna connector is securely connected to the external antenna.(Refer to Connecting TV)2. Problems related to Screen
Note
Problems related to the monitor screen and their solutions are listed. Q: Screen is blank and power indicator is off A: Ensure that the power cord is firmly connected and the LCD monitor is on.(Refer to the Connecting the monitor) Q: "Check Signal Cable" message A: Ensure that the signal cable is firmly connected to the PC or video SOURCEs.(Refer to the Connecting the monitor) A: Ensure that the PC or video SOURCEs are turned on. Q: "Not Optimum Mode" message A: Check the maximum resolution and the frequency of the video adapter. A: Compare these values with the data in the Preset Timing Modes Chart. Q: Picture rolls vertically. A: Check if the signal cable is securely connected. Connect it again securely. (Refer to Connecting the monitor) Q: Image is not clear. Picture is blurred. A: Run Frequency Coarse and Fine tuning. A: Turn on again after removing all accessories(video extension cable, etc.) A: Set resolution and frequency to the recommended ranges. Q: Picture image is unstable and vibrates. Ghost images are shown in the picture. A: Check if the resolution and frequency set for the computer video card falls in the range supported by the monitor. If not, reset them referring to the current Information under the monitor menu and Preset Timing Modes. Q: The image is too light or too dark A: Adjusts the Brightness and Contrast. Q: The Power Indicator blinks. A: The monitor is currently saving the changes made in the settings to the OSD memory. Q: The screen is blank and the power indicator light blinks every 0.5 or 1 seconds. A: The monitor is using its power management system. Press any key on the keyboard. Q: The screen is blank and is blinking. A: If you see the "TEST GOOD" message on the screen when you press the MENU button, check the cable connection between the monitor and the computer to ensure that the connector is properly connected.3. Problems related to Audio
Note
Problems related to audio signals and their solutions are listed below. Q: No sound A: Ensure that the audio cable is firmly connected to both the audio-in port on your monitor and the audio-out port on your sound card.(Refer to the Connecting the monitor) A: Check the volume level. Q: The sound level is too low. A: Check the volume level. A: If the volume is still too low after turning the control to its maximum, check the volume control on the computer sound card or software program.4. Problems related to Remote Control
Note
Problems related to the remote control and their solutions are listed. Q: The remote control buttons do not respond. A: Check the battery polarities (+/-). A: Check if the batteries have been exhausted. A: Check if the power is on. A: Check if the power cord is securely connected. A: Check if a special fluorescent or neon lamp is on in the vicinity5. You may see small particles if you look closely at the edge of the bezel surrounding the screen.
This is part of the product's design and is not a defect.Q & A
Q: How can I change the frequency? A: The frequency can be changed by reconfiguring the video card. A: Note that video card support can vary, depending on the version of the driver used. (Refer to the computer or the video card manual for details.) Q: How can I adjusts the resolution? A: Windows XP: Set the resolution in the Control Panel → Appearance and Themes → Display → Settings. A: Windows ME/2000: Set the resolution in the Control Panel → Display → Settings. \* Contact the video card manufacturer for details. Q: How can I set the Power Saving function? A: Windows XP: Set the resolution in the Control Panel → Appearance and Themes → Display → Screen Saver. Set the function in the BIOS-SETUP of the computer. (Refer to the Windows / Computer Manual). A: Windows ME/2000: Set the resolution at the Control Panel → Display → Screen Saver. Set the function in the BIOS-SETUP of the computer. (Refer to the Windows / Computer Manual). Q: How can I clean the outer case/LCD Panel? A: Disconnect the power cord and then clean the monitor with a soft cloth, using either a cleaning solution or plain water. Do not leave any detergent or scratches on the case. Do not let any water enter the monitor. Q: What are the benefits of digital broadcasting? A: Digital TV broadcasting generates less noise and provides clearer visuals and sound than analog TV broadcasting does. As services develop, you can also enjoy various information services because various kinds of data besides video and audio can be sent. A: For example, while watching a sports game, you can view various data on your favorite player or you can view all or selected screens which have been captured from different angles for a specific scene. In addition, you can receive information on a previous story or drama or you can buy home shopping products such as an accessory currently on TV. Digital TV broadcasting allows you to easily access various information services in your home creating a more information-oriented home. Q: Can I watch digital TV broadcasting with an analog TV? A: No. A: The analog TV cannot interpret digital signals. Therefore, a digital TV is required to watch digital TV broadcasting. Q: Can I use my present antenna to receive digital broadcasting? A: As for existing analog TV, digital TV is designed so that digital broadcasting signals are received via both indoor and outdoor antennas. A: If signal reception is very good in your environment, you can watch digital broadcasts with your existing indoor antenna. If not, it is better to install an outdoor UHF antenna. Q: How do I connect an antenna for an apartment or tenement house? A: Consult the superintendent's office or broadcasting facility administrator for your apartment or tenement house to check whether UHF reception is available. A: Even if digital TV broadcasting is available in your area, if you cannot watch it because the superintendent's office or common broadcasting facility does not rebroadcast the signal, you have to install an indoor or outdoor antenna. A: Alternatively, your local cable broadcasting company provides a digital TV service, and you can subscribe to it. A: If a cable broadcasting company is sharing a common broadcasting facility for your apartment or tenement house, it has to adjust and send digital TV signals so that they are compatible to shared viewing which is the original purpose of the common broadcasting facility.Specifications
General| Model Name | SyncMaster T200HD / SyncMaster T220HD / SyncMaster T240HD / SyncMaster T260HD |
| T200HD | LCD Panel |
| Size 20 inch (51 cm) | |
| Display area 433.44 mm (H) x 270.90 mm (V) | |
| Pixel Pitch 0.258 mm (H) x 0.258 mm (V) | |
| Display Color | |
| 16.7M | |
| Maximum Pixel Clock | |
| 146.250 MHz (Analog, Digital) | |
| Resolution | |
| Optimum resolution 1680 x 1050 @ 60 Hz | |
| Maximum resolution 1680 x 1050 @ 60 Hz | |
| Dimensions (W x H x D) / Weight | |
| 486 x 350 x 75 mm / 19.1 x 13.8 x 3.4 inch (Without Stand) | |
| 486 x 417.5 x 215 mm / 19.1 x 16.4 x 8.5 inch (With Stand) / 5.6 kg / 12.3 lbs | |
| T220HD | LCD Panel |
| Size 22 inch (55 cm) | |
| Display area 473.76 mm (H) x 296.1 mm (V) | |
| Pixel Pitch 0.282 mm (H) x 0.282 mm (V) | |
| Display Color | |
| 16.7M | |
| Maximum Pixel Clock | |
| 146.250 MHz (Analog, Digital) | |
| Resolution | |
| Optimum resolution 1680 x 1050 @ 60 Hz | |
| Maximum resolution 1680 x 1050 @ 60 Hz | |
| Dimensions(W x H x D) / Weight | |
| 520 x 373.5 x 86.5 mm / 20.5 x 14.7 x 3.4 inch (Without Stand) | |
| 520 x 441.5 x 215 mm / 20.5 x 17.4 x 8.5 inch (With Stand) / 5.8 kg / 12.8 lbs | |
| T240HD | LCD Panel |
| Size 24 inch (61 cm) | |
| Display area 518.4 mm (H) x 324.0 mm (V) | |
| Pixel Pitch 0.270 mm (H) x 0.270 mm (V) | |
| Display Color | |
| 16.7M | |
| Maximum Pixel Clock | |
| 162.000 MHz (Analog, Digital) | |
| Resolution | |
| Optimum resolution 1920 x 1200 @ 60 Hz | |
| Maximum resolution 1920 x 1200 @ 60 Hz | |
| Dimensions (W x H x D) / Weight | |
| 573 x 409 x 87 mm / 22.6 x 16.1 x 3.4 inch (Without Stand) | |
| 573 x 477 x 245 mm / 22.6 x 18.8 x 9.6 inch (With Stand) / 7.3 kg / 16.1 lbs | |
| T260HD | LCD Panel |
| Size 25.5 inch (64 cm) | |
| Display area 550.08 mm (H) x 343.8 mm (V) | |
| Pixel Pitch 0.2865 mm (H) x 0.2865 mm (V) | |
| Display Color | |
| 16.7M | |
| Maximum Pixel Clock | |
| 162.000 MHz (Analog, Digital) | |
| Resolution | |
| Optimum resolution 1920 x 1200 @ 60 Hz | |
| Maximum resolution 1920 x 1200 @ 60 Hz | |
| Dimensions (W x H x D) / Weight | |
| 610 x 435 x 86.5 mm / 24.0 x 17.1 x 3.4 inch (Without Stand) | |
| 610 x 502.5 x 245 mm / 24.0 x 19.8 x 9.6 inch (With Stand) / 8.6 kg / 19.0 lbs |
Synchronization
Horizontal 30 \~ 81 kHz Vertical 56 \~ 75 HzInput Signal, Terminated
RGB Analog, DVI(Digital Visual Interface) 0.7 Vp-p ±5 % separate H/V sync, Composite TTL level (V high ≥ 2.0 V, V low ≤ 0.8 V)Power Supply
AC 100 - 240 V\~ (+/- 10 %), 50/60 Hz ± 3 HzSignal Cable
15pin - to - 15pin D-sub cable, Detachable DVI-D to DVI-D connector, DetachableEnvironmental considerations
Operating Temperature : 50 °F \~ 104 °F (10 °C \~ 40 °C) Humidity : 10 % \~ 80 %, non-condensing Storage Temperature: -4 °F \~ 113 °F (-20 °C \~ 45 °C) Humidity : 5 % \~ 95 %, non-condensingPlug and Play Capability
This monitor can be installed on any Plug & Play compatible system. The interaction of the monitor and the computer systems will provide the best operating conditions and monitor settings. In most cases, the monitor installation will proceed automatically, unless the user wishes to select alternate settings.Dot Acceptable
TFT-LCD panels manufactured by using advanced semiconductor technology with precision of 1ppm (one millionth) above are used for this product. But the pixels of RED, GREEN, BLUE and WHITE color appear to be bright sometimes or some black pixels may be seen. This is not from bad quality and you can use it without any problems. For example, the number of TFT-LCD sub pixels contained in this product are 5,292,000. (T200HD, T220HD) For example, the number of TFT-LCD sub pixels contained in this product are 6,912,000. (T240HD, T260HD) Note
Design and specifications are subject to change without prior notice.  Class B Equipment (Information Communication equipment for residential use) This product complies with the Electromagnetic Compatibility Directives for residential use and can be used in all areas including common residential areas. (Class B equipment emits less electromagnetic waves than Class A equipment.)PowerSaver
This monitor has a built-in power management system called PowerSaver. This system saves energy by switching your monitor to low-power mode when it has not been used for a certain amount of time. The monitor automatically returns to normal operation when you press a key on the keyboard. For energy conservation, turn your monitor OFF when it is not needed, or when leaving it unattended for long periods. The PowerSaver system operates with a VESA DPM compliant video card installed in your computer. Use the software utility installed on your computer to set up this feature. T200HD| State | Normal Operation Power saving mode | Power off (Power button) EPA/ENERGY 2000 |
| Power Indicator On Blinking Off | ||
| Power Consumption | 45 watts Less than 2 watts Less than 1 watts | |
| State Normal Operation Power saving mode | Power off (Power button)EPA/ENERGY 2000 | |
| Power Indicator On Blinking Off | ||
| Power Consumption | 50 watts Less than 2 watts Less than 1 watts | |
| State Normal Operation Power saving mode | Power off (Power button)EPA/ENERGY 2000 | |
| Power Indicator On Blinking Off | ||
| Power Consumption | 55 watts Less than 2 watts Less than 1 watts | |
| State | Normal Operation Power saving mode | Power off (Power button) EPA/ENERGY 2000 |
| Power Indicator On Blinking Off | ||
| Power Consumption | 57 watts Less than 2 watts Less than 1 watts | |
Preset Timing Modes
If the signal transferred from the computer is the same as the following Preset Timing Modes, the screen will be adjusted automatically. However, if the signal differs, the screen may go blank while the power LED is on. Refer to the video card manual and adjusts the screen as follows. T200HD, T220HD| Display Mode | Horizontal Frequency (kHz) | Vertical Frequency (Hz) | Pixel Clock (MHz) | Sync Polarity (H/V) |
| IBM, 640 x 350 31.469 | 70.086 | 25.175 | +/- | |
| IBM, 640 x 480 31.469 | 59.940 | 25.175 | -/- | |
| IBM, 720 x 400 31.469 | 70.087 | 28.322 | -/+ | |
| MAC, 640 x 480 | 35.000 | 66.667 | 30.240 | -/- |
| MAC, 832 x 624 | 49.726 | 74.551 | 57.284 | -/- |
| MAC, 1152 x 870 | 68.681 | 75.062 | 100.000 | -/- |
| VESA, 640 x 480 | 37.861 | 72.809 | 31.500 | -/- |
| VESA, 640 x 480 | 37.500 | 75.000 | 31.500 | -/- |
| VESA, 800 x 600 | 35.156 | 56.250 | 36.000 | +/+ |
| Display Mode Horizontal Frequency (kHz) | Vertical Frequency (Hz) | Pixel Clock (MHz) | Sync Polarity (H/V) |
| VESA, 800 x 600 37.879 60.317 40.000 +/+ | |||
| VESA, 800 x 600 48.077 72.188 50.000 +/+ | |||
| VESA, 800 x 600 46.875 75.000 49.500 +/+ | |||
| VESA, 1024 x 768 48.363 60.004 65.000 -/- | |||
| VESA, 1024 x 768 56.476 70.069 75.000 -/- | |||
| VESA, 1024 x 768 60.023 75.029 78.750 +/+ | |||
| VESA, 1152 x 864 67.500 75.000 108.000 +/+ | |||
| VESA, 1280 x 960 60.000 60.000 108.000 +/+ | |||
| VESA, 1280 x 1024 63.981 60.020 108.000 +/+ | |||
| VESA, 1280 x 1024 79.976 75.025 135.000 +/+ | |||
| VESA, 1680 x 1050 65.290 59.954 146.250 -/+ |
| Display Mode Horizontal Frequency (kHz) | Vertical Frequency (Hz) | Pixel Clock (MHz) | Sync Polarity (H/V) |
| IBM, 640 x 350 31.469 70.086 25.175 +/- | |||
| IBM, 640 x 480 31.469 59.940 25.175 -/- | |||
| IBM, 720 x 400 31.469 70.087 28.322 -/+ | |||
| MAC, 640 x 480 35.000 66.667 30.240 -/- | |||
| MAC, 832 x 624 49.726 74.551 57.284 -/- | |||
| MAC, 1152 x 870 68.681 75.062 100.000 -/- | |||
| VESA, 640 x 480 37.861 72.809 31.500 -/- | |||
| VESA, 640 x 480 37.500 75.000 31.500 -/- | |||
| VESA, 800 x 600 35.156 56.250 36.000 +/+ | |||
| VESA, 800 x 600 37.879 60.317 40.000 +/+ | |||
| VESA, 800 x 600 48.077 72.188 50.000 +/+ | |||
| VESA, 800 x 600 46.875 75.000 49.500 +/+ | |||
| VESA, 1024 x 768 48.363 60.004 65.000 -/- | |||
| VESA, 1024 x 768 56.476 70.069 75.000 -/- | |||
| VESA, 1024 x 768 60.023 75.029 78.750 +/+ | |||
| VESA, 1152 x 864 67.500 75.000 108.000 +/+ | |||
| VESA, 1280 x 960 60.000 60.000 108.000 +/+ | |||
| VESA, 1280 x 1024 63.981 60.020 108.000 +/+ | |||
| VESA, 1280 x 1024 79.976 75.025 135.000 +/+ | |||
| VESA, 1600 x 1200 75.976 60.000 162.000 +/+ | |||
| VESA, 1920 x 1200 74.038 59.950 154.000 +/- |
natural_image
Cartoon illustration of an open book with a rising graph and question marks above it, set against a blue upward arrow (no text or symbols)Horizontal Frequency
The time to scan one line connecting the right edge to the left edge of the screen horizontally is called the Horizontal Cycle and the inverse number of the Horizontal Cycle is called the Horizontal Frequency. Unit: kHzVertical Frequency
Like a fluorescent lamp, the screen has to repeat the same image many times per second to display an image to the user. The frequency of this repetition is called the Vertical Frequency or Refresh Rate. Unit: HzInformation
For Better Display
Adjust the computer resolution and screen injection rate (refresh rate) on the computer as described below to enjoy the best picture quality. You can have an uneven picture quality on screen if the best picture quality is not provided for TFT-LCD. \- Resolution: 1680 x 1050 (T200HD, T220HD), 1920 x 1200 (T240HD, T260HD) • Vertical frequency (refresh rate): 60 Hz TFT-LCD panels manufactured by using advanced semiconductor technology with a precision of 1ppm (one millionth) and above is used for this product. But the pixels of RED, GREEN, BLUE and WHITE color seem to be bright sometimes or some of black pixels could be seen. This is not from bad quality and you can use it without any problems. \- For example, the number of TFT-LCD sub pixels contained in this product are 5,292,000. (T200HD, T220HD) \- For example, the number of TFT-LCD sub pixels contained in this product are 6,912,000. (T240HD, T260HD) When cleaning the monitor and the panel outside, please apply the recommended small amount of cleaner by using a soft cloth to polish. Do not force the LCD area but rub softly. If excessive force is applied, you may stain it. If you are not satisfied with the picture quality, you can get better quality of picture by performing the "Auto Adjustment function" in display screen that is appeared as window termination button is pressed. If there's still noise after the automatic adjustment, use the Fine/Coarse adjustment function. When viewing a fixed screen for an extended period of time, a residual image or blurriness may appear. Change the mode to energy save or set a screensaver to move the picture when you need to be away from the monitor for an extended period of time. Do not display a still image( such as on a video game or when hooking up a DVD to this LCD\_TV ) on the Color TFT-LCD ( Thin Film Transister Liquid Crystal Display) panel for a long time as it can cause screen image retention. This image retention is also known as "screen burn". To avoid such image retention, reduce the degree of brightness and contrast of this screen when displaying a still image.PRODUCT INFORMATION (Image Retention Free)
LCD Monitors and TVs may have image retention when switching from one image to another especially after displaying a stationary image for a long time. This guide is to demonstrate correct usage of LCD products in order to protect them from Image retention.Warranty
Warranty does not cover any damage caused by image retention. Burn-in is not covered by the warranty.What is Image retention?
During normal operation of a LCD panel, pixel image retention doesn't occur. However, if the same image is displayed for a long time, a slight difference in electric charge accumulates between the two electrodes which encase the liquid crystal. This may cause the liquid crystal to build up in a certain areas of the display. Thus, the previous image is retained when switching to a new video image. All display products, including LCD, are subject to image retention. This is not a product defect. Please follow the suggestions below to protect your LCD from image retention.Power Off, Screen Saver, or Power Save Mode
Ex)
\- Turn the power off when using a stationary pattern. - Turn the power off for 4 hours after 20 hours in use - Turn the power off for 2 hours after 12 hours in use \- Use a Screen saver if possible \- Screen saver in one color or a moving image is recommended. \- Set the Monitor to power off with the PC Display Properties Power Scheme.Suggestions for specific applications
Ex) Airports, Transit Stations, Stock Markets, Banks, and Controlling Systems We recommend that you follow set up of your display system program as below:Display Information together with Logo or Moving image cycle.
Ex) Cycle : Display Information for 1 hour followed by a Display Logo or moving image for 1 minute.Change the Color Information periodically (Use 2 different colors).
Ex) Rotate the Color Information with 2 colors every 30 minutes. text_image
Type 1 FLIGHT TIME OZ348 20:30 UA102 21:10 Type 1 FLIGHT TIME OZ348 20:30 UA102 21:10text_image
SYSTEM : 245 STATUS : NG SYSTEM : 245 STATUS : NGtext_image
SYSTEM : 245 STATUS : OK SYSTEM : 245 STATUS : OK SYSTEM : 245 STATUS : OK SYSTEM : 245 STATUS : OKtext_image
1 KA1710 12:00 UA0110 13:30 2 AA0002 14:00 KA1710 12:00 FA7777 14:15 UA0110 13:30 3 AA0002 14:00 FA7777 14:15text_image
Black Matrix Common Electrode (ITO) Color-Filter Source Drain C1c Data Bus-Line TFT Gate Pixel Electrode (ITO) Storage Capacitor (Cs) +++Appendix
Contact SAMSUNG WORLDWIDE
 Note If you have any questions or comments relating to Samsung products, please contact the SAMSUNG customer care center.North America
U.S.A 1-800-SAMSUNG(726-7864) http://www.samsung.com/us CANADA 1-800-SAMSUNG(726-7864) http://www.samsung.com/ca MEXICO 01-800-SAMSUNG http://www.samsung.com/mx (726-7864)Latin America
ARGENTINE 0800-333-3733 http://www.samsung.com/ar BRAZIL 0800-124-421 http://www.samsung.com/br 4004-0000 CHILE 800-SAMSUNG(726-7864) http://www.samsung.com/cl COLOMBIA 01-8000112112 http://www.samsung.com/co COSTA RICA 0-800-507-7267 http://www.samsung.com/lat- in ECUADOR 1-800-10-7267 http://www.samsung.com/lat- in EL SALVADOR 800-6225 http://www.samsung.com/lat- in GUATEMALA 1-800-299-0013 http://www.samsung.com/lat- in HONDURAS 800-7919267 http://www.samsung.com/lat- in JAMAICA 1-800-234-7267 http://www.samsung.com/lat- in NICARAGUA 00-1800-5077267 http://www.samsung.com/lat- in PANAMA 800-7267 http://www.samsung.com/lat- in PUERTO RICO 1-800-682-3180 http://www.samsung.com/lat- in REP. DOMINICA 1-800-751-2676 http://www.samsung.com/lat- in TRINIDAD & TO-1-800-SAMSUNG(726-7864) http://www.samsung.com/lat- in BAGO VENEZUELA 0-800-100-5303 http://www.samsung.com/lat- inEurope
AUSTRIA 0810 - SAMSUNG (7267864, http://www.samsung.com/at € 0.07/min) Europe| BELGIUM 02 201 2418 http://www.samsung.com/be(Dutch) | |
| http://www.samsung.com/be_fr (French) | |
| CZECH REPUBLIC 800 - SAMSUNG(800-726786) | http://www.samsung.com/cz |
| GERMANY 01805 - SAMSUNG(7267864, € 0.14/Min) | http://www.samsung.de |
| LUXEMBURG | 02 261 03 710 | http://www.samsung.com/lu |
| NETHERLANDS | 0900-SAMSUNG(0900-7267864) (€ 0,10/Min) | http://www.samsung.com/nl |
| POLAND 0 801 1SAMSUNG (172678) | http://www.samsung.com/pl |
| 022 - 607 - 93 - 33 |
| PORTUGAL | 808 | 20 | - | SAMSUNG http://www.samsung.com/pt(7267864) |
| ESTONIA | 800-7267 | http://www.samsung.com/ee |
| LATVIA | 8000-7267 | http://www.samsung.com/lv |
| LITHUANIA | 8-800-77777 | http://www.samsung.com/lt |
| KAZAKHSTAN | 8-10-800-500-55-500 http://www.samsung.com/kz_ru | |