
EF 24-105mm 1:4L IS USM - Lens CANON - Free user manual and instructions
Find the device manual for free EF 24-105mm 1:4L IS USM CANON in PDF.


User questions about EF 24-105mm 1:4L IS USM CANON
0 question about this device. Answer the ones you know or ask your own.
Ask a new question about this device
Download the instructions for your Lens in PDF format for free! Find your manual EF 24-105mm 1:4L IS USM - CANON and take your electronic device back in hand. On this page are published all the documents necessary for the use of your device. EF 24-105mm 1:4L IS USM by CANON.
USER MANUAL EF 24-105mm 1:4L IS USM CANON
Thank you for purchasing a Canon product.
The Canon EF24-105mm f/4L IS USM lens is a high-performance standard zoom lens developed for EOS cameras. It is equipped with an Image Stabilizer, and covers a wide range of focal lengths from wide angle to mid-telephoto.
- "IS" stands for Image Stabilizer.
- "USM" stands for Ultrasonic Motor.
Conventions used in this instruction

Warning to prevent lens or camera malfunction or damage.

Supplementary notes on using the lens and taking pictures.
Features
- The Image Stabilizer gives the equivalent effect of a shutter speed three stops faster.*
- Aspheric and super UD lens elements for excellent imaging performance.
- Ultrasonic motor (USM) for quick and quiet autofocusing.
- Manual focusing is available after the subject comes into focus in autofocus mode (ONE SHOT AF).
- A truly round aperture hole results in a nicer background blur.
- Tight seal structure ensures excellent dust-proof and drip-proof performance.
* Based on [1/focal length] second. Generally, it requires a shutter speed [1/focal length] second or faster to prevent camera shake.
a Safety Precautions
a Safety Precautions
- Do not look at the sun or a bright light source through the lens or camera. Doing so could result in loss of vision. Looking at the sun directly through the lens is especially hazardous.
- Whether it is attached to the camera or not, do not leave the lens under the sun without the lens cap attached. This is to prevent the lens from concentrating the sun's rays, which could cause a fire.
Handling Cautions
- If the lens is taken from a cold environment into a warm one, condensation may develop on the lens surface and internal parts. To prevent condensation in this case, first put the lens into an airtight plastic bag before taking it from a cold to warm environment. Then take out the lens after it has warmed gradually. Do the same when taking the lens from a warm environment into a cold one.
- Do not leave the lens in excessive heat such as in a car in direct sunlight. High temperatures can cause the lens to malfunction.
This device complies with Part 15 of the FCC Rules. Operation is subject to the following two conditions: (1) This device may not cause harmful interference, and (2) this device must accept any interference received, including interference that may cause undesired operation.
Do not make any changes or modifications to the equipment unless otherwise specified in the instructions. If such changes or modifications should be made, you could be required to stop operation of the equipment.
This equipment has been tested and found to comply with the limits for a class B digital device, pursuant to part 15 of the FCC Rules. These limits are designed to provide reasonable protection against harmful interference in a residential installation. This equipment generates, uses and can radiate radio frequency energy and, if not installed and used in accordance with the instructions, may cause harmful interference to radio communications.
However, there is no guarantee that interference will not occur in a particular installation. If this equipment does cause harmful interference to radio or television reception, which can be determined by turning the equipment off and on, the user is encouraged to try to correct the interference by one or more of the following measures:
- Reorient or relocate the receiving antenna.
- Increase the separation between the equipment and receiver.
- Consult the dealer or an experienced radio/TV technician for help.
This Class B digital apparatus complies with Canadian ICES-003.
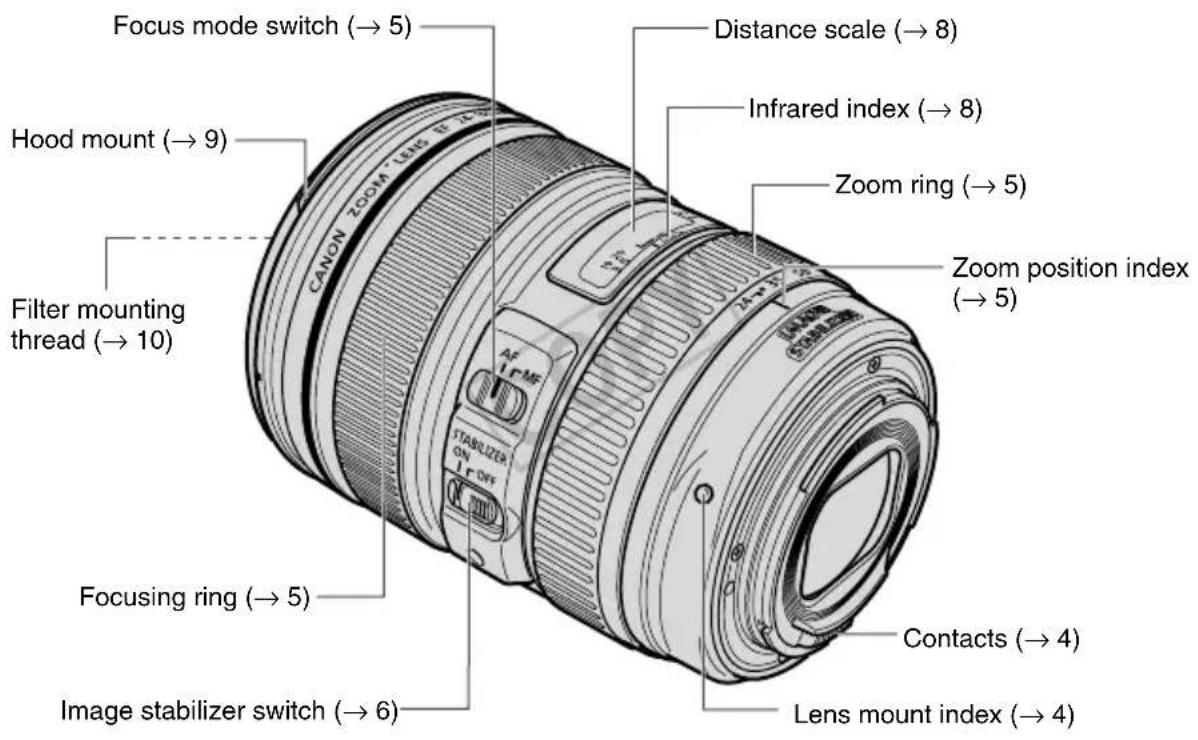
Nomenclature
text_image
Focus mode switch (→ 5) Hood mount (→ 9) Filter mounting thread (→ 10) CANON ZOOM LINS R Distance scale (→ 8) Infrared index (→ 8) Zoom ring (→ 5) Zoom position index (→ 5) STABILIZER ON OFF Focusing ring (→ 5) Image stabilizer switch (→ 6) Contacts (→ 4) Lens mount index (→ 4)For detailed information, reference page numbers are provided in parentheses ( **).
ENG-3
1. Mounting and Detaching the Lens
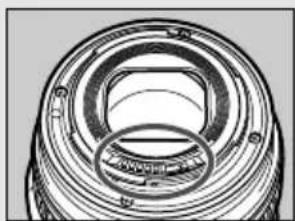
See your camera's instructions for details on mounting and detaching the lens.
0
natural_image
Cross-sectional illustration of a mechanical bearing or clamping device (no text or symbols visible)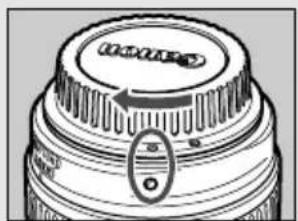
natural_image
Close-up of a camera lens with no visible text or symbols- After detaching the lens, place the lens with the rear end up to prevent the lens surface and electrical contacts from getting scratched.
- If the contacts get soiled, scratched, or have fingerprints on them, corrosion or faulty connections can result. The camera and lens may not operate properly.
- If the contacts get soiled or have fingerprints on them, clean them with a soft cloth.
- If you remove the lens, cover it with the dust cap. To attach it properly, align the lens mount index and the index of the dust cap as shown in the diagram, and turn clockwise. To remove it, reverse the order.
0
The lens mount has a rubber ring for enhanced water- and dust-resistance. The rubber ring may cause slight abrasions around the camera's lens mount, but this will not cause any problems. If the rubber ring becomes worn, it is replaceable by a Canon Service Center at cost.
2. Setting the Focus Mode
text_image
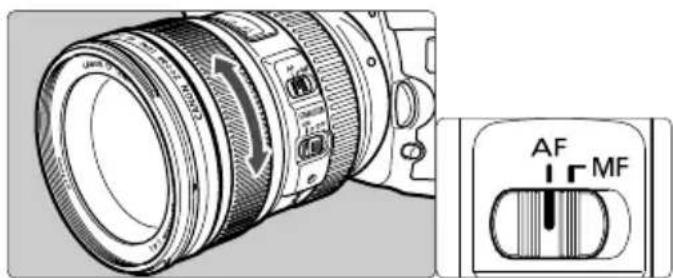
Technical diagram of a DSLR camera with directional arrows and labeled control buttons (AF, MF)To shoot in autofocus (AF) mode, set the focus mode switch to AF.
To use only manual focusing (MF), set the focus mode switch to MF, and focus by turning the focusing ring. The focusing ring always works, regardless of the focus mode.

After autofocusing in ONE SHOT AF mode, focus manually by pressing the shutter button halfway and turning the focusing ring. (Full-time manual focus)
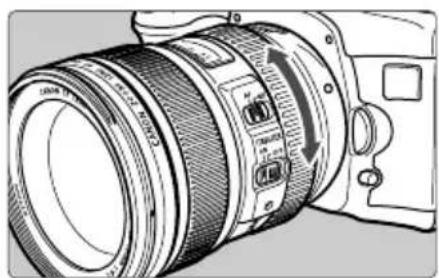
3. Zooming
natural_image
Line drawing of a DSLR camera with lens and adjustment knobs (no text or symbols)To zoom, turn the lens' zoom ring.

Be sure to finish zooming before focusing. Changing the zoom ring after focusing can affect the focus.
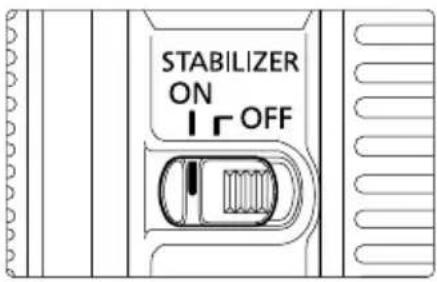
4. Image Stabilizer
You can use the image stabilizer in AF or MF mode.
text_image
STABILIZER ON OFF1 Set the STABILIZER switch to ON
- If you are not going to use the image stabilizer function, set the switch to OFF.
natural_image
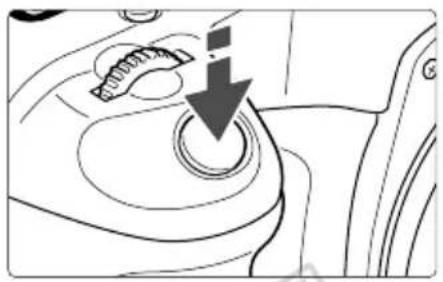
Diagram of a car interior showing a hand operating a circular button with a downward arrow indicating motion (no text or symbols present)2 When you press the shutter button halfway, the Image Stabilizer will start operating.
- Make sure the image in the viewfinder is stable, then press the shutter button the rest of the way down to take the picture.
text_image
WAIKKI 96815 soutique ON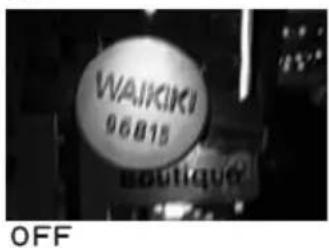
text_image
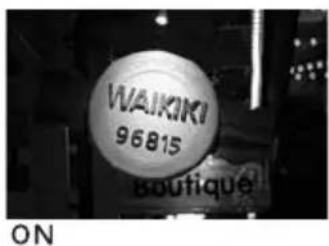
WAIKKI 96B15 boutique OFFThe image stabilizer in this lens is effective for hand-held shots under the following conditions.
- In semi-darkened areas such as indoors or outdoors at night.
- In locations where flash photography is prohibited, such as art museums and theater stages.
- In situations where your footing is uncertain.
- In situations where fast shutter settings cannot be used.
ENG-6
Image Stabilizer

- The Image Stabilizer cannot compensate for a blurred shot caused by a subject that moved.
- Set the STABILIZER switch to when you are taking pictures using the Bulb setting (long exposures). If the STABILIZER switch is set to the image stabilizer function may introduce errors.
- The Image Stabilizer might not be fully effective in the following cases:
- You move the camera for a panned shot.
- You shoot while riding on a bumpy road.
- The Image Stabilizer consumes more power than normal shooting, so fewer shots can be taken if you use the function.
- The image stabilizer operates for about two seconds even when your finger is off the shutter button. Do not remove the lens while the stabilizer is in operation. This will cause a malfunction.

- With the EOS-1V/HS, 3, 30/33/Elan7/7E, 30V/33V/Elan7N/7NE, Elan II/Elan II E/50/50 E, 300/Rebel2000, IX, and D30, the Image Stabilizer will not work during self-timer operation.

- When you use a tripod, the Image Stabilizer should be turned off to save battery power.
- The stabilizer is equally effective for handheld photography and photography with a monopod.
- The image stabilizer function also operates when the lens is used with an Extension Tube EF12 II or EF25 II.
● Pictures may look distorted after being taken depending on the camera, but this doesn't affect shooting. - If you set the camera's Custom Function to change the assigned button to operate the AF, the Image Stabilizer will operate when you press the newly assigned AF button.
5. Infinity Compensation Mark
text_image
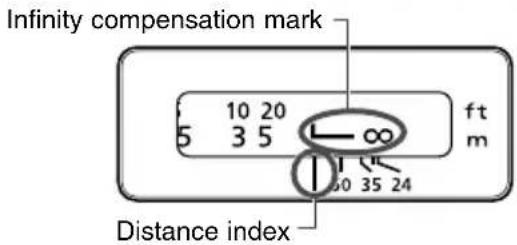
Infinity compensation mark 10 20 5 3 5 ft m Distance indexTo compensate for shifting of the infinity focus point that results from changes in temperature. The infinity position at normal temperature is the point at which the vertical line of the L mark is aligned with the distance indicator on the distance scale.

For accurate manual focusing on subjects at infinity distance, look through the viewfinder while rotating the focusing ring.
6. Infrared Index
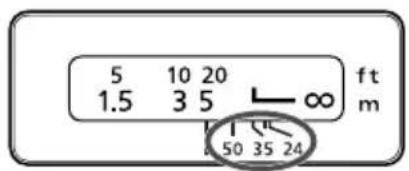
The infrared index corrects the focus setting when using monochrome infrared film. Focus on the subject manually, then adjust the distance setting by moving the focusing ring to the corresponding infrared index mark.

Some EOS cameras cannot use infrared film. See the instructions for your EOS camera.

- The infrared index position is based on a wavelength of 800 nm.
- The compensation amount differs depending on the focal length. Use the indicated focal length as a guide when setting the compensation amount.
- Be sure to observe the manufacturer's instructions when using infrared film.
- Use a red filter also when you take the picture.
ENG-8
7. Hood
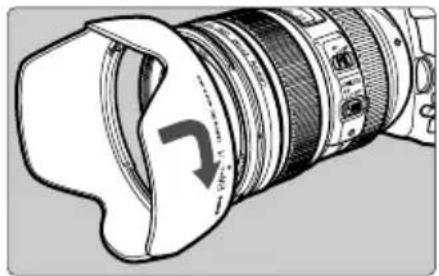
The EW-83H hood can keep unwanted light out of the lens, and also protects the lens from rain, snow, and dust.
natural_image
Technical line drawing of a camera lens with no visible text or symbols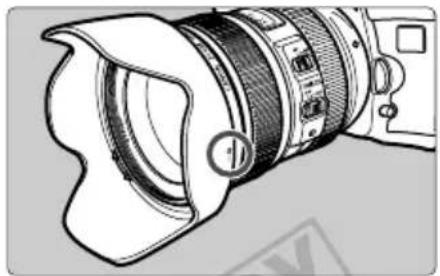
natural_image
Line drawing of a camera lens with no text or symbols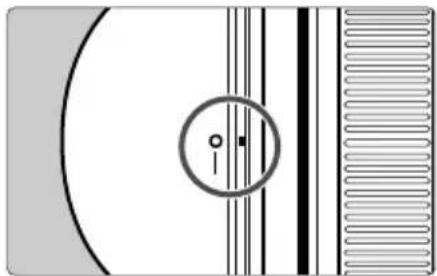
natural_image
Abstract diagram with concentric circles and horizontal stripes, no text or symbols presentTo attach the hood, align the hood's attachment position mark with the red dot on the front of the lens, then turn the hood as shown by the arrow until the lens' red dot is aligned with the hood's stop position mark.
The hood can be reverse-mounted on the lens for storage.

- Part of the picture may be blocked if the hood is not attached properly.
- When attaching or detaching the hood, grasp the base of the hood to turn it. To prevent deformation, do not grasp the rim of the hood to turn it.
8. Filters (Sold separately)
You can attach filters to the filter mounting thread on the front of the lens.

- Only one filter may be attached.
- If you need a polarizing filter, use the Canon Circular Polarizing Filter (77mm).
- To adjust the polarizing filter, first remove the lens hood.
9. Extension Tubes (Sold separately)
You can attach Extension Tube EF12 II or EF25 II for magnified shots. The shooting distance and magnification are shown below.
| Camera-to-Subject Distance (mm) | Magnification | ||||
| Near Far | Near Far | Far | |||
| EF12 II | 24mm | 177 187 | 0.60×0.50× | ||
| 105mm | 326 1022 | 0.40×0.12× | |||
| EF25 II | 24mm | incompatible | |||
| 105mm | 280 574 | 0.61×0.27× | |||

Manual focusing is recommended for accurate focusing.
10. Close-up Lenses (Sold separately)
Attaching a 500D (77mm) Close-up Lens enables close-up photography.
Magnification will be 0.34 × -0.05 × .

- Close-up Lens 250D cannot be attached because there is no size that fits the lens.
- Manual focusing is recommended for accurate focusing.
Specifications
| Focal Length/Aperture 24-105 mm f/4 | |
| Lens Construction 13 groups, | 18 elements |
| Minimum Aperture f/22 | |
| Angle of View | Diagonal: 84° - 23° 20' Vertical: 53° - 13° Horizontal: 74° - 19° 20' |
| Min. Focusing Distance 0.45 m/1.5 ft. | |
| Max. Magnification | 0.23 × (at 105 mm) |
| Field of View | approx. 345 × 535 mm - 106 × 158 mm/13.6 × 21.1 inch - 4.2 × 6.2 inch (at 0.45 m) |
| Filter Diameter 77 mm/3.0 inch | |
| Max. Diameter and Length | 83.5 × 107 mm/3.3 × 4.2 inch |
| Weight | 670 g/23.6 oz |
| Hood | EW-83H |
| Lens Cap | E-77U |
| Case | LP1219 |
- The lens length is measured from the mount surface to the front end of the lens. Add 21.5 mm when including the lens cap and dust cap.
- The size and weight listed are for the lens only, except as indicated.
- The EF1.4X II/EF2X II extenders cannot be used with this lens.
- Aperture settings are specified on the camera.
- All data listed is measured according to Canon standards.
● Product specifications and appearance are subject to change without notice.
ENG-12
Canon
© CANON INC. 2005 2009.7CT1-7561-008