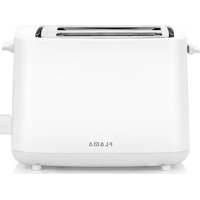
901FL - Toaster Flama - Free user manual and instructions
Find the device manual for free 901FL Flama in PDF.


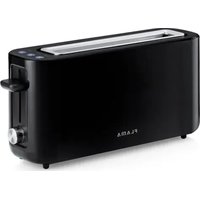
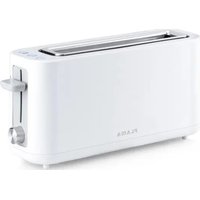
| Product type | Toaster |
| Brand | Flama |
| Model | 901FL |
| Number of slots | 2 |
| Adjustable thermostat | Yes |
| Cancel function | Yes |
| Pastry warming rack | Yes |
| Removable crumb tray | Yes |
| Auto shut-off | Yes |
| Cord storage compartment | Yes |
| Cleaning | Damp cloth and mild detergent, do not immerse |
| Safety | Do not cover, do not use unsupervised, keep out of reach of children |
| Repairability | Flama approved technical service only |
| Warranty | 36 months |
| Compliance | EC directives (electromagnetic compatibility and low voltage) |
Frequently Asked Questions - 901FL Flama
User questions about 901FL Flama
0 question about this device. Answer the ones you know or ask your own.
Ask a new question about this device
Download the instructions for your Toaster in PDF format for free! Find your manual 901FL - Flama and take your electronic device back in hand. On this page are published all the documents necessary for the use of your device. 901FL by Flama.
USER MANUAL 901FL Flama
natural_image
White FLAMA-style toaster with black tray and control knob (no visible text or symbols on body)901FL
PT TORRADEIRA 1
ES TOSTADORA 5
EN TOASTER 9
FR GRILLE-PAIN 13

TORRADEIRA
INSTRUÇÕES DE SEGURANÇA
natural_image
Symbol of a trash bin with crossed lines and a blank rectangular base (no text or labels)natural_image
Symbol of a trash bin with crossed lines and a horizontal bar below (no text or labels)Please read these instructions carefully before using the appliance for the first time and keep them for future reference.
FLAMA shall not be liable for any use that is not in accordance with the instructions.
Please check that the supply voltage of your home electrical system corresponds to the voltage on the appliance's rating plate.
This appliance must be connected to an earthed socket.
This appliance may be used by children aged 8 and over and by persons with limited physical, sensory or mental abilities or lack of experience and knowledge, if they are supervised or have received instructions concerning the safe use of the appliance and understand the risks involved.
Children must not play with the appliance.
Cleaning and maintenance must not be carried out by children unless they are over 8 years old and supervised.
Keep the appliance and its power cord out of the reach of children under the age of 8.
Place the appliance on a stable, flat surface away from hot surfaces or heat sources.
Never leave the toaster unattended.
Do not cover the toaster while it is switched on.
The toaster should only be used for toasting bread or similar food products. Using it for other purposes may cause irreparable damage.
The toaster is not intended to be operated using an external timer or a separate remote control system.
Never place food with toppings, butter, oil, wrapped or packaged in the toaster, as they can damage it.
Bread can burn, so you should not use the toaster near or under flammable or combustible materials, such as curtains.
Temperatures of accessible surfaces may be high when the appliance is switched on
Please disconnect the appliance from the power supply by removing the plug from the fixed power socket after each use and when cleaning.
Please allow the appliance to cool down before carrying out with any cleaning or storage operations.
Do not immerse the appliance in water or any other liquid. It must be cleaned as indicated in the Cleaning and Maintenance instructions.
To remove bread crumbs, pull out the crumb tray.
Do not remove the plug from the socket by pulling the power cord.
Do not use the appliance if it is not working properly, or if it is in any way damaged. Any intervention other than cleaning must be carried out by an Authorized FLAMA Technical Assistance Service.
Do not use the appliance if the power cord or plug are damaged. If the power cord is damaged, have it replaced at an Authorized Flama Technical Assistance Service in order to avoid a hazard.
This product complies with the Low-Voltage and Electromagnetic Compatibility Directives.
This instruction manual is also available in PDF format at www.flama.pt.
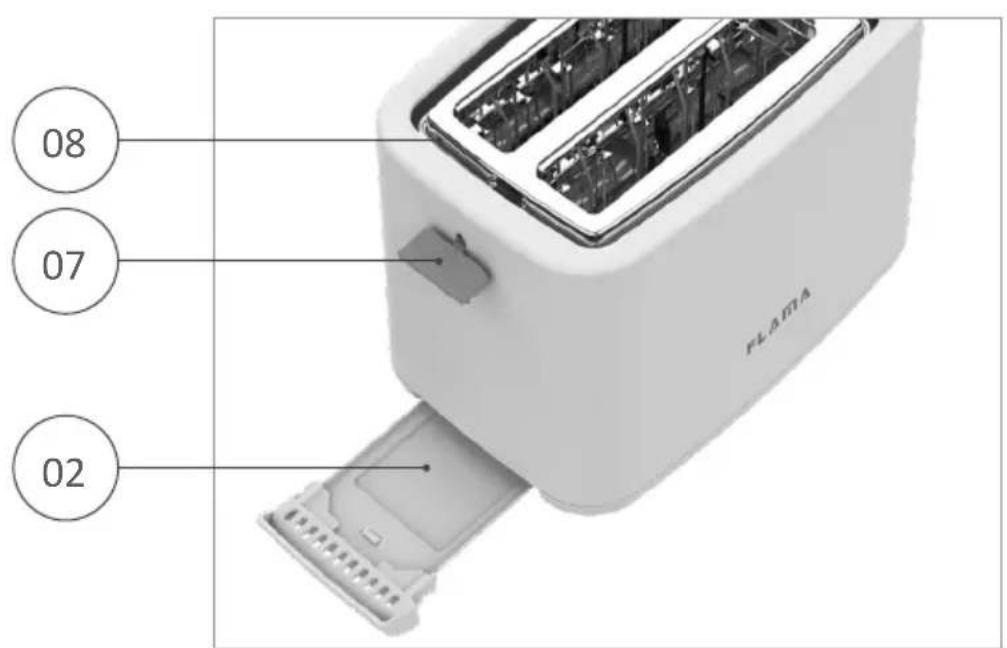
DESCRIPTION
- Body
- Crumb tray
- Bread slots
- Sliding lever
- Browning control
- Cancel button
- Bun warmer handle
- Bun warmer rack
OPERATING INSTRUCTIONS
Before first use
Make sure you have removed all packaging material from the product.
It is not recommended to put bread in the appliance the first time it is used (turned on). During first use, the appliance may release some odours and smoke due to the slight lubrication of some of the parts during the manufacturing process. This is normal and does not interfere with the performance of the appliance.
Use
Completely unwind the cable before plugging it into the socket.
Connect the device to the wall outlet.
Insert the bread slice(s) into the slot(s).
Use the browning control to select the desired level of browning.
Slide the sliding lever down until you hear a “click.” The bread will be toasted evenly.
Once the time for the selected browning level has passed, the appliance will automatically turn off.
To remove the toast, push the sliding lever up.
Cancel button (CANCEL)
The cancel function allows the appliance operation to be interrupted. To do so, press the corresponding button. The bread will be ejected immediately.
Bun Warmer Rack
The bun warmer rack is designed to warm buns, croissants, and other baked goods.
Press the bun warmer handle to raise the rack. Place the buns or croissants on the rack, adjust the browning control to the desired level, and press the sliding lever to start the warming process.
Bun Warmer Handle
The bun warmer handle raises the bun warmer rack.
Press the bun warmer handle to raise the rack. Place the buns or croissants on the rack and adjust the browning control as needed.
When Finished Using the Appliance
After use, unplug the appliance from the wall outlet and allow it to cool down before cleaning or storing it.
Crumb tray
The appliance has a tray to collect bread crumbs that may fall inside the appliance.
Remove the crumb tray.
Empty the contents.
Gently tap the appliance to remove other bread crumbs from the interior.
Return the crumb tray to its position in the appliance.
CLEANING AND MAINTENANCE
Unplug the appliance from the wall outlet and let it cool down before beginning any cleaning operation.
Clean the appliance with a damp cloth and a few drops of detergent, drying it immediately afterward with a dry, soft cloth.
Do not use solvents, products with acidic or basic pH (such as bleach), or abrasive products to clean the appliance.
Do not submerge the appliance in water or any other liquid and do not place it under running water.
It is recommended to clean the appliance regularly and remove all food residue.
If the appliance is not maintained in a good state of cleanliness, its surface may degrade and irreparably affect its useful life and lead to a dangerous situation.
Storing the power cord
There is a storage compartment for the power cord located underneath the appliance. After use, you can neatly store the power cord in this compartment to keep it organized and avoid any damage.
ANOMALIES AND REPAIR
In case of malfunction, please take the appliance to an authorized Technical Assistance Service. Do not attempt to disassemble or repair the appliance, as this may be dangerous.
PROTECTING THE ENVIRONMENT
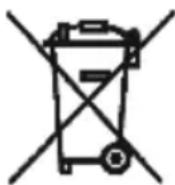
This symbol indicates the separate collection of electrical and electronic equipment.
The main objective of the separate collection of this waste is to reduce the
quantity to be disposed of, promote re-use, recycling and other forms of recovery in order to reduce its negative effects on the environment.
When it is no longer in use, this appliance must not be disposed of together with other unsorted municipal waste.
The user is responsible for delivering it free of charge to the selective collection facilities available for that purpose.
Pieces of equipment that are no longer in use can also be taken back at points of sale, by purchasing new pieces of equipment that are equivalent and have the same functions.
For more detailed information on collection points, please contact your City Council or a point of sale for this equipment.
GRILLE-PAIN
CONSIGNES DE SÉCURITÉ
DYSFONCTIONNEMENTS ET RÉPARATIONS
natural_image
Symbol of a trash bin with crossed lines indicating no waste or discharge (no text or labels)This page has been deliberately left blank
- Keep the proof of purchase (receipt) for this product carefully. When a repair is made under these conditions, the technician will require proof of purchase. This assistance can only be provided once you have proven, with the proof of purchase, that your appliance is within the warranty period.
- The warranty period for this appliance is defined by the respective EU Directive in force on the date of purchase/delivery.
- Within the guarantee period, we will repair or replace, free of charge, any parts which, during the normal use of the appliance, have deteriorated as a result of a proven material or manufacturing defect.
- This warranty does not cover consumable items, light bulbs, easily breakable parts made of glass or plastic, or any other defects that do not impair its proper functioning.
- We accept no liability for damage caused by incorrect or careless use of the appliance, by its connection to an electrical current other than that indicated on the appliance's rating plate, by faulty electrical installation, or by atmospheric, chemical or electrochemical causes. Other claims or demands for compensation relating to objects which are not an integral part of the appliance will be denied.
- The provision of assistance under warranty does not extend the warranty period. Only within this period will assistance be provided under warranty. The right to assistance is only granted to the first purchaser of the device and cannot be transferred to a third party.
- The warranty expires when unauthorized persons have attempted to repair, modify or replace parts of the appliance.
- All expenses and risks of transportation to our factory or vice versa will always be borne by the buyer.
WARRANTY CONDITIONS
To benefit from the Technical Assistance service during the 36-month warranty period after the date of purchase, you will need to:
Present the Invoice/Proof of Purchase, stating the model and the manufacturing number of the product (whenever possible).
Note: Failure to present the aforementioned documents will be grounds for not providing services under warranty.
CONDITIONS DE GARANTIE
CONDITIONS DE GARANTIE

- TORRADEIRA
- INSTRUÇÕES DE SEGURANÇA
- DESCRIPTION
- OPERATING INSTRUCTIONS
- Before first use
- Use
- Cancel button (CANCEL)
- Bun Warmer Rack
- Bun Warmer Handle
- When Finished Using the Appliance
- Crumb tray
- CLEANING AND MAINTENANCE
- Storing the power cord
- ANOMALIES AND REPAIR
- PROTECTING THE ENVIRONMENT
- GRILLE-PAIN
- CONSIGNES DE SÉCURITÉ
- DYSFONCTIONNEMENTS ET RÉPARATIONS
- WARRANTY CONDITIONS
- CONDITIONS DE GARANTIE
Brand : Flama
Model : 901FL
Category : Toaster