
MCOTV950E4MO-BK - Oven MIDEA - Free user manual and instructions
Find the device manual for free MCOTV950E4MO-BK MIDEA in PDF.

| Product type | Built-in combination microwave oven |
| Brand | Midea |
| Model | MCOTV950E4MO-BK |
| Dimensions (H x W x D) | 454 x 595 x 568 mm |
| Power supply | 230 V, 50 Hz, 16 A |
| Microwave power | 5 levels: P10 (100%), P08 (80%), P05 (50%), P03 (30%), P01 (10%) |
| Cooking modes | Microwave, Grill (8 modes), Convection, Combi modes (Microwave+Convection, Microwave+Double Grill+Fan, Microwave+Pizza) |
| Automatic menus | 12 menus (fresh vegetables, potatoes, chicken, cake, frozen pizza, etc.) |
| Defrost | Automatic by weight for meat, poultry, fish, bakery |
| Connectivity | Built-in Wi-Fi (wireless connection via Midea SmartHome app) |
| Child lock | Yes, activation by pressing and holding for 3 seconds |
| Preheating | Yes, available for grill and combi modes |
| Supplied accessories | Grill rack, enamel tray, glass tray, ceramic clips, side rails |
| Cleaning | Exterior surface and cavity with soapy water; do not use abrasive cleaners or metal scrapers |
| Safety | Automatic shutdown after inactivity, child lock, overheat protection |
| Repairability | Repairs reserved for a qualified agent; spare parts available via after-sales service |
| Standby power consumption | 0.8 W |
| Environmental standards | Compliant with WEEE, RoHS, recyclable packaging |
Frequently Asked Questions - MCOTV950E4MO-BK MIDEA
User questions about MCOTV950E4MO-BK MIDEA
0 question about this device. Answer the ones you know or ask your own.
Ask a new question about this device
Download the instructions for your Oven in PDF format for free! Find your manual MCOTV950E4MO-BK - MIDEA and take your electronic device back in hand. On this page are published all the documents necessary for the use of your device. MCOTV950E4MO-BK by MIDEA.
USER MANUAL MCOTV950E4MO-BK MIDEA
natural_image
Simple line drawing of a kitchen oven with a handle and top panel (no text or symbols)BUILT-IN OVEN
WITH HOT AIR AND MICROWAVE

SmartHome

Download the app & activate product
USER MANUAL
MCOTV950E4MO-BK
LANGUAGES
EN English
IT Italian
ES Spanish
FR French
GR Greek
THANK YOU LETTER
Thank you for choosing Midea! Before using your new Midea product, please read this manual thoroughly to ensure that you know how to operate the features and functions that your new appliance offers in a safe way.
CONTENTS
THANK YOU LETTER 01
SAFETY INSTRUCTIONS----02
SPECIFICATION----09
PRODUCT INSTALLATION 10
PRODUCT OVERVIEW 18
OPERATION INSTRUCTIONS 19
CLEANING AND MAINTENANCE 25
TROUBLE SHOOTING 27
TRADEMARKS, COPYRIGHTS AND LEGAL STATEMENT ---29
DISPOSAL AND RECYCLING----30
DATA PROTECTION NOTICE----31
SAFETY INSTRUCTIONS
Intended Use
The following safety guidelines are intended to prevent unforeseen risks or damage from unsafe or incorrect operation of the appliance. Please check the packaging and appliance on arrival to make sure everything is intact to ensure safe operation. If you find any damage, please contact the retailer or dealer. Please note modifications or alterations to the appliance are not allowed for your safety concern. Unintended use may cause hazards and loss of warranty claims.
Explanation of Symbols
 | DangerThis symbol indicates that there are dangers to the life and health of persons due to extremely flammable gas. |
 | Warning of electrical voltageThis symbol indicates that there is a danger to life and health of persons due to voltage. |
 | WarningThe signal word indicates a hazard with a medium level of risk which, if not avoided, may result in death or serious injury. |
 | CautionThe signal word indicates a hazard with a low degree of risk which, if not avoided, may result in minor or moderate injury. |
 | AttentionThe signal word indicates important information (e.g. damage to property), but not danger. |
 | Observe instructionsThis symbol indicates that a service technician should only operate and maintain this appliance in accordance with the operating instructions. |
Read these operating instructions carefully and attentively before using/commissioning the unit and keep them in the immediate vicinity of the installation site or unit for later use!
IMPORTANT SAFETY INSTRUCTIONS
IMPORTANT SAFETY INSTRUCTIONS WARNING
To reduce the risk of fire, electric shock, persons or exposure to energy when injury to excessive microwave oven using your appliance, follow basic precautions, including the following:
- This appliance can be used by children aged from 8 years and above and persons with reduced physical, sensory or mental capabilities or lack of experience and knowledge if they have been given supervision or instruction concerning use of the appliance in a safe way and understand the hazards involved. Children shall not play with the appliance. Cleaning and user maintenance shall not be made by children without supervision.
- Read and follow the specific:"PRE-CAUTIONS TO AVOID POSSIBLE EXPOSURE TO EXCESSIVE MICRO-WAVE ENERGY".
- Keep the appliance and its cord out of reach of children less than 8 years.
- If the supply cord is damaged, it must be replaced by the manufacturer, its service agent or similarly qualified person in order to avoid a hazard.(For appliance with type Y attachment)
- WARNING: It is hazardous for anyone other than a competent person to carry out any service or repair operation that involves the removal of a cover which gives protection against exposure to microwave energy.
- WARNING: Liquids and other foods must not be heated in sealed containers since they are liable to explode.
- This appliance can be used by children aged from 8 years and above and persons with reduced physical, sensory or instruction concerning use of the appliance in a safe way and understand the hazards involved. Child ren shall not play with the appliance. Cleaning and user maintenance shall not be made by children without supervision unless they are aged from 8 years and above and supervised.
- When heating food in plastic or paper containers, keep an eye on the oven due to the possibility of ignition.
- Only use utensils that are suitable for use in microwave ovens.
- If smoke is emitted, switch off or unplug the appliance and keep the door closed in order to stifle any flames.
- Microwave heating of beverages can result in delayed eruptive boiling, therefore care must be taken when handling the container.
- The contents of feeding bottles and baby food jars shall be stirred or shaken and the temperature checked before consumption, in order to avoid burns.
- Eggs in their shell and whole hard-boiled eggs should not be heated in microwave ovens since they may explode, even after microwave heating has ended.
- The oven should be cleaned regularly and any food deposits removed.
- Failure to maintain the oven in a clean condition could lead to deterioration of the surface that could adversely affect the life of the appliance and possibly result in a hazardous situation.
- Only use the temperature probe recommended for this oven.(for ovens provided with a facility to use a temperature-sensing probe.)
- The microwave oven must be operated with the decorative door open. (for ovens with a decorative door.)
- This appliance is intended to be used in household and similar applications such as:
-staff kitchen areas in shops, offices and other working environments;
-by clients in hotels, motels and other residential type environments;
-farm houses;
-bed and breakfast type environments.
- Care should be taken not to displace the turntable when removing containers from the appliance.
(For fixed appliances and built-in appliances being used equal or higher than 900mm above the floor and having detachable turntables. But this is not applicable for appliances with horizonal bottom hinged door.)
- The appliance shall not be cleaned with a steam cleaner.
- WARNING: Ensure that the appliance is switched off before replacing the lamp to avoid the possibility of electric shock.
- WARNING: Accessible parts may become hot during use. Young children should be kept away.
- Steam cleaner is not to be used.
- The microwave oven is intended for heating food and beverages. Drying of food or clothing and heating of warming pads, slippers, sponges, damp cloth and similar may lead to risk of injury, ignition or fire.
-
Surface of a storage drawer can get hot.
-
WARNING: The appliance and its accessible parts become hot during use. Care should be taken to avoid touching heating elements. Children less than 8 years of age shall be kept away unless continuously supervised.
- During use the appliance becomes hot. Care should be taken to avoid touching heating elements inside the oven.
- Metallic containers for food and beverages are not allowed during microwave cooking.
- Do not use harsh abrasive cleaners or sharp metal scrapers to clean the oven door glas s since they can scratch the surface, which may result in shattering of the glass.
- The appliance is intended to be used built-in.
- The appliance must not be installed behind a decorative door in order to avoid overheating. (This is not appliances with decorative door.)
- WARNING: When the appliance is operated in the combination mode, children should only use the oven under adult supervision due to the temperatures generated.
READ CAREFULLY AND KEEP FOR FUTURE REFERENCE
CAUTION
- Creation of sparks: Metal e.g. a spoon in a glass must be kept at least 2 cm from the oven walls and the inside of the door. Sparks could irreparably damage the glass on the inside of the door.
- Water in the hot cooking compartment: Never pour water into the hot cooking compartment. This will cause steam. The temperature change can cause damage.
- Moist food: Do not store moist food in the closed cooking compartment for long periods.
Do not use the appliance to store food. This can lead to corrosion.
EN
- Cooling with the appliance door open: Only leave the cooking compartment to cool with the door closed. Do not trap anything in the appliance door. Even if the door is only slightly ajar, the fronts of adjacent units may be damaged over time.
- Heavily soiled seal: If the seal is very dirty, the appliance door will no longer close properly during operation. The fronts of adjacent units could be damaged. Always keep the seal clean.
- Operating the microwave without food: Operating the appliance without food in the cooking compartment may lead to overloading. Never switch on the appliance unless there is food in the cooking compartment. An exception to this rule is a short crockery test (see the section "Microwave, suitable crockery").
- Using the appliance door for standing on or placing objects on: Do not stand or place anything on the open appliance door. Do not place ovenware or accessories on the appliance door.
- Transporting the appliance: Do not carry or hold the appliance by the door handle. The door handle cannot support the weight of the appliance and could break.
- Microwave popcorn: Never set the microwave power too high. Use a power setting no higher than 600 watts. Always place the popcorn bag on a glass plate. The disc may jump if overloaded.
- Liquid that has boiled over must not be allowed to run through the turntable drive into the interior of the appliance. Monitor the cooking process. Choose a shorter cooking time initially, and increase the cooking time as required.
- The oven should be cleaned regularly and any food deposits removed since they may explode, even after microwave heating has ended.
- Failure to maintain the oven in a clean condition could lead to deterioration of the surface that could adversely affect the life of the appliance and possibly result in a hazardous situation.
SPECIFICATION
MODEL MCOTV950E4MO-BK
RATED VOLTAGE 230 V\~
RATED FREQUENCY 50 Hz
MAX. INPUT 3000 W
RATED INPUT(Microwave) 1650 W
RATED INPUT(Grill) 2200 W
RATED INPUT(CONVECTION): 1700 W
RATED OUTPUT(Microwave) 900 W
EN
ENERGY CONSUMPTION
Product information for power consumption and maximum time to reach applicable low power mode.
Standby mode 0.8 W
The maximum time needed for the microwave oven to automatically reach the applicable low power mode or condition.
20 minutes
PRODUCT INSTALLATION
Fitted Units
- This appliance is only intended to be fully fitted in a kitchen.
- This appliance is not designed to be used as a tabletop appliance or inside a cupboard.
- The fitted cupboard must not have a back wall behind the appliance.
- A gap of at least 45 mm must be maintained between the wall and the base or back panel of the unit above.
- The fitted cupboard must have a ventilation opening of 250 cm ^2 on the front. To achieve this, cut back the base panel or fit a ventilation grille.
- Ventilation slots and intakes must not be covered.
- The safe operation of this appliance can only be guaranteed if it has been installed in accordance with these installation instructions.
- The fitter is liable for any damage resulting from incorrect installation.
- The units into which the appliance is fitted must be heat-resistant up 90°C.
• Installation height not less than 850mm. - Don't use under the work surface and that it must not be subject to spillage from containers onto surfaces under which the appliance is installed.
Installation Dimensions
Ventilation openings
behind, min. 250 cm ^4
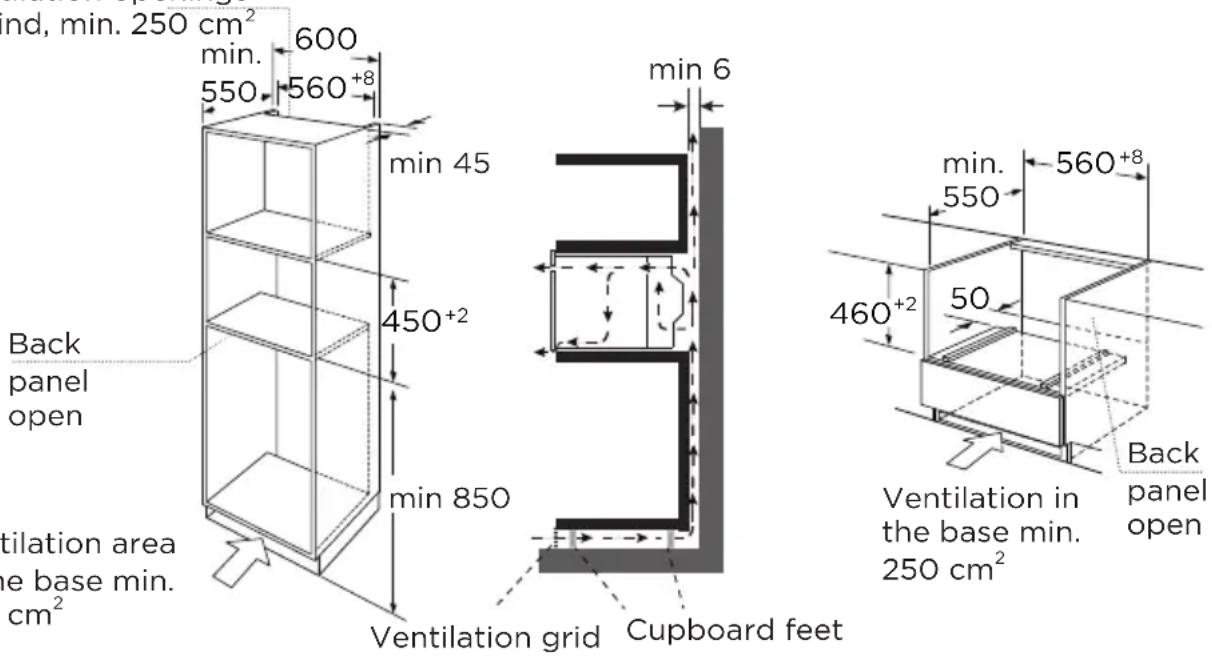
Ventilation area in the base min. 250 cm ^4

NOTE
There should be gap above the oven.
Building In
- Do not hold or carry the appliance by the door handle. The door handle cannot hold the weight of the appliance and may break off.
- Carefully push the oven into the box, making sure that it is in the centre.
- Open the door and fasten the oven with the screws that were supplied.
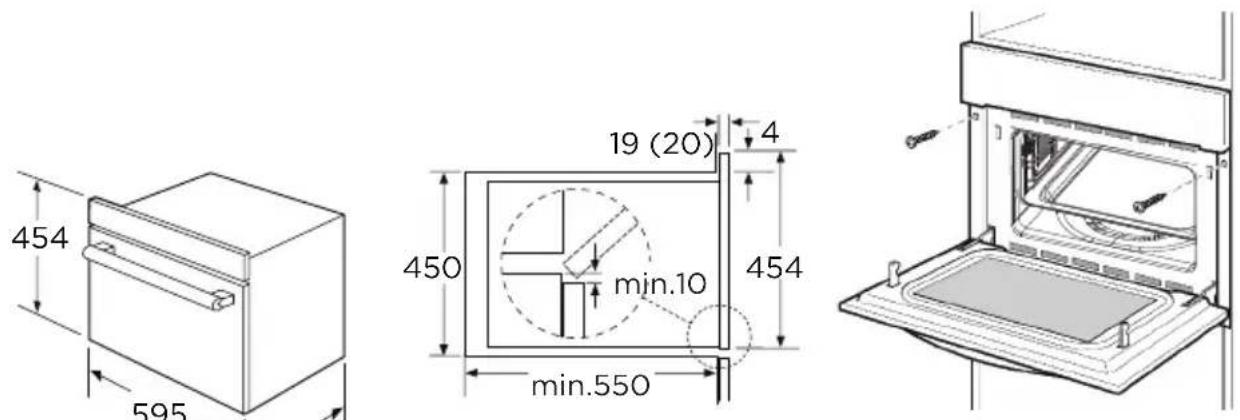
*20 mm for metal fascias
EN
• Fully insert the appliance and centre it.
- Do not kink the connecting cable.
- Screw the appliance into place.
- The gap between the worktop and the appliance must not be closed by additional battens.
Important Information
- The appliance is designed to be permanently installed with a three-pin power cord and may only be connected by a licensed expert in accordance with the connection diagram.
- Only a qualified electrician who takes the relevant regulations into account may replace the power cord.
- Do not use multiple plugs, power strips or extensions. Overloading causes a risk of fire.
- If the connection is no longer accessible following installation, an all-pin isolating switch with a contact gap of at least 3 mm must be provided.
Connect The Wires Of The Mains Power Cord In Accordance With The Following Colour Coding:
Green and yellow Earth wire (E) Neutral
Blue Neutral wire (N)
Brown Live (L)
Great Britain And Australia:
Do not connect the appliance using a 13 A plug or protect it with a 13 A fuse. The appliance must be protected using a fuse that is rated 16 A or higher. The appliance must be disconnected from the power supply during all installation work. When the appliance is installed, protection must be provided against accidental contact in the future.
Cooling fan
Your appliance has a cooling fan. The cooling fan switches on during operation. The hot air escapes above the door.
The cooling fan continues to run for a certain time after operation.

CAUTION
Do not cover the ventilation slots. Otherwise, the appliance will overheat.

NOTE
- The appliance remains cool during microwave operation. The cooling fan will still switch on. The fan may run on even when microwave operation has ended.
- Condensation may appear on the door window, interior walls and floor. This is normal and does not adversely affect microwave operation. Wipe away the condensation after cooking.
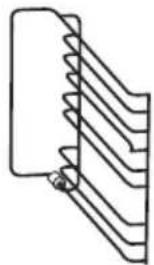
Accessories

NOTE
Type and quantity of accessories is subject to actual demand.
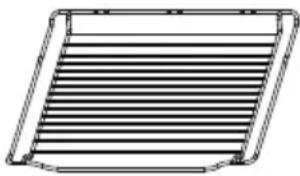
Grill rack
- For grilling, e.g. steaks, sausages and for toasting bread.
natural_image
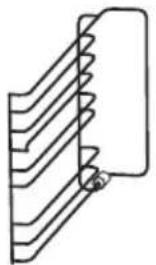
Simple line drawing of a rectangular tray with horizontal lines and rounded corners (no text or symbols)Baking tray
- For safety reasons, the baking tray should be placed on the side hanger instead of being placed directly on the bottom board of the cavity.
Baking tray-Enamel tray
- For making cake roll, roasting whole chickens.
- When cooking with microwave function, the use of enamel tray is prohibited.
natural_image
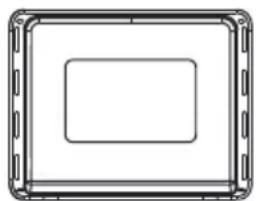
Pure technical diagram of a rectangular frame with rounded corners and a central square (no text or symbols)Baking tray-Glass tray
- When cooking with microwave function, please use the glass tray.
• Used for catching liquids, such as water and grease when food is baked. - In order to ensure the best cooking effect, the glass tray should be placed in the bottom of the side hanger, as shown in the figures below, the glass tray should be pushed along the lowest guide rails of the side hanger in place.
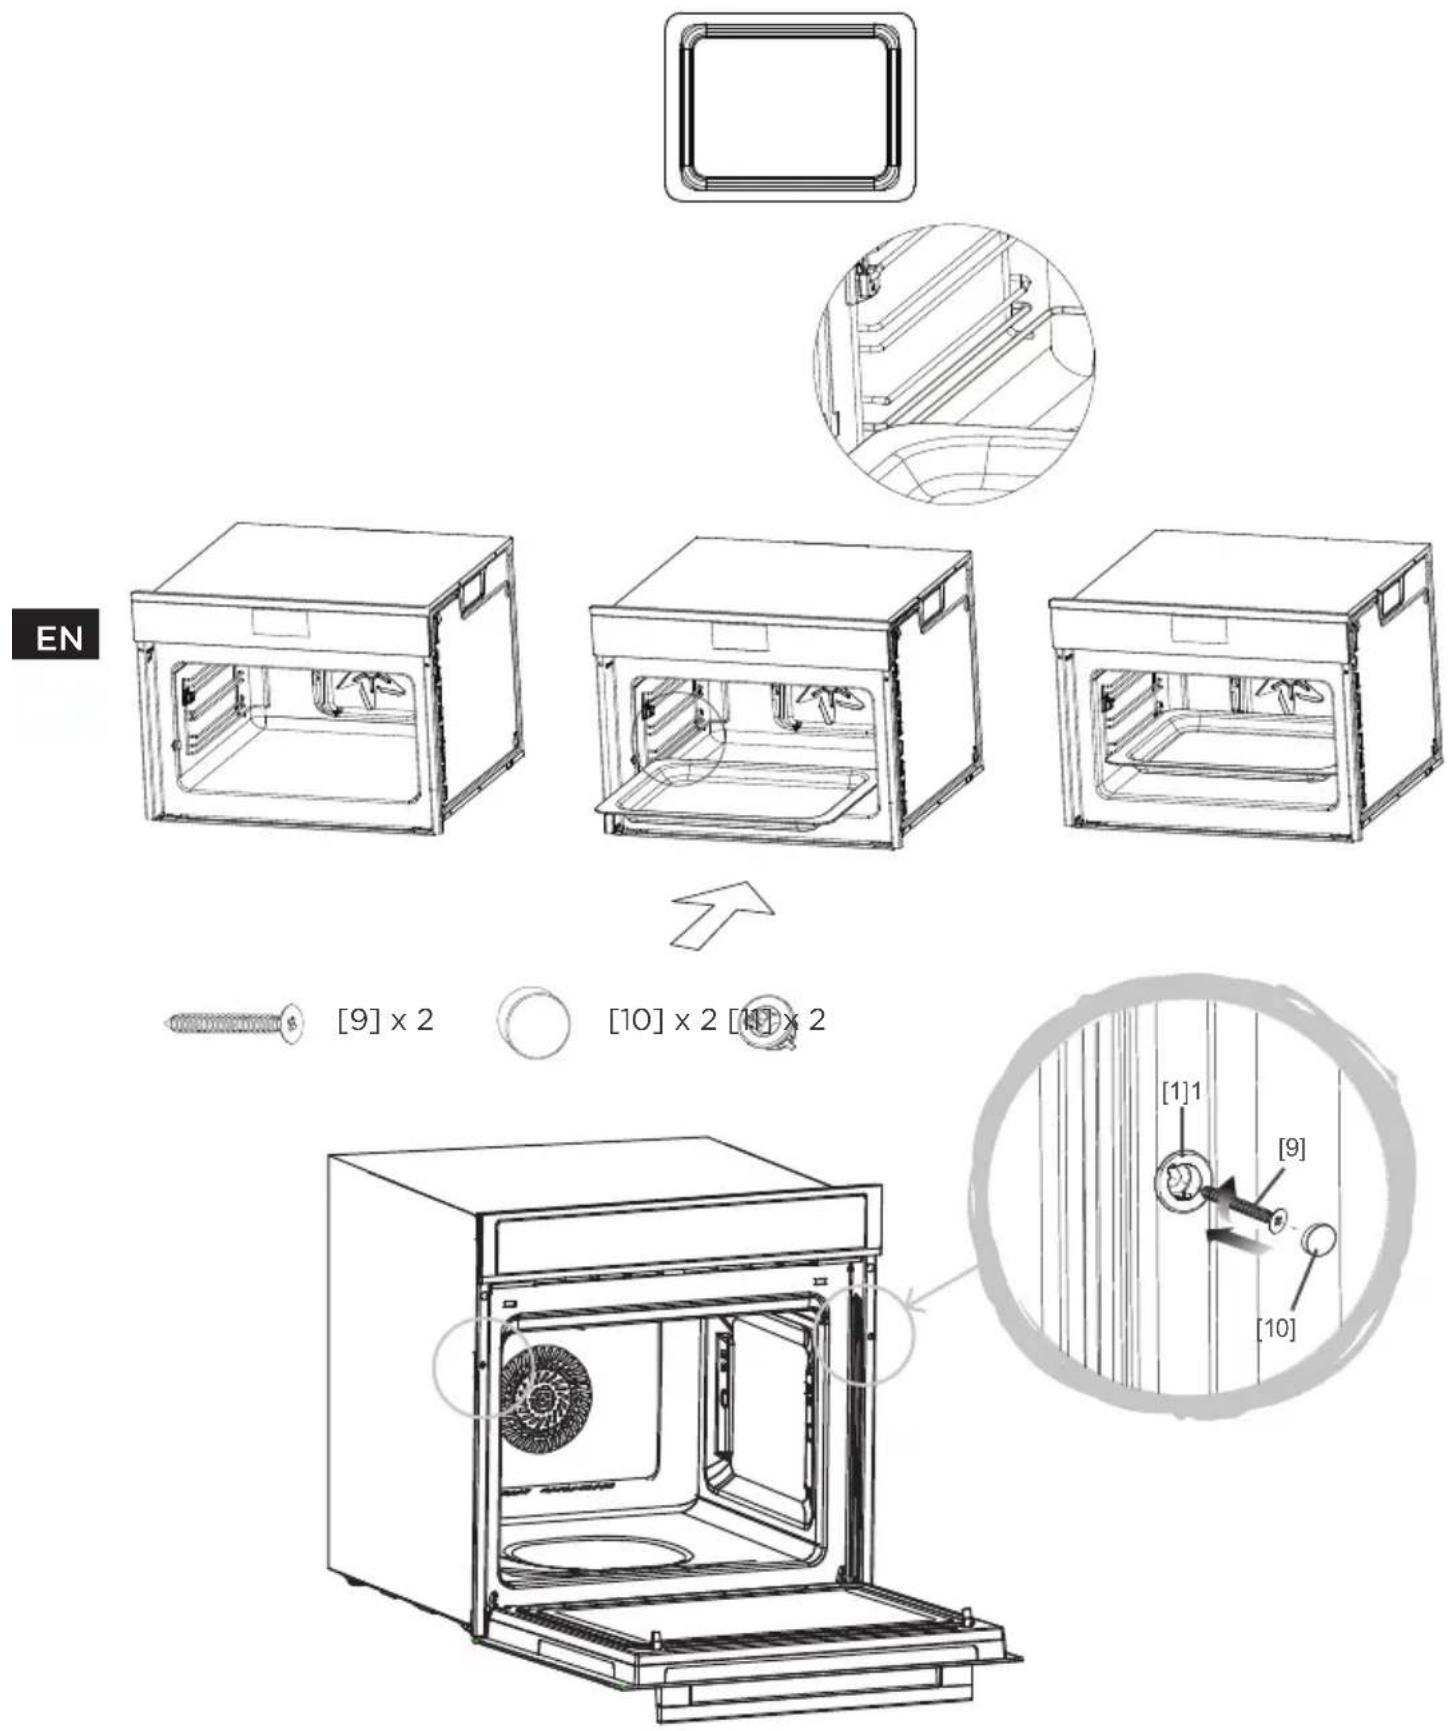
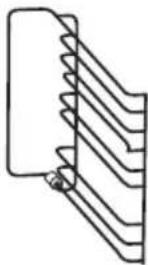
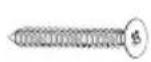
Once the oven has been lifted into place inside the appliance housing, locate the two holes in the casing of the oven and x it into place using [08], [09] and [10].

CAUTION
Do not over tighten the screws [08] to avoid damage to the oven or appliance housing - use a screwdriver only!
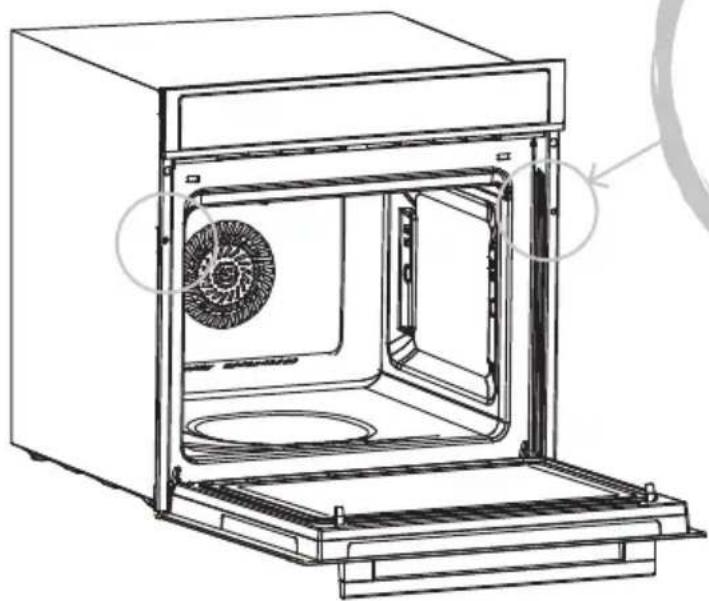
Installation of the ceramic clips and side rails
[03] × 2
[04] × 2
![[04] x 2 [03] 1 2 3 [04] 1 2 3](/content/2026/05/753710/images/80d52546994b1a5aed20af819b0bccefb1b6591e5c1bb70dc5bc0a2f4dc70b38.jpg)
Left side rail installation [05]
natural_image
Pure mechanical component diagram without any text, numbers, or symbols[05] × 1
natural_image
Pure line drawing of a mechanical component with layered structure (no text or symbols)[06] × 1
![[04] [03] [05]](/content/2026/05/753710/images/1fbdb45117ae7143e8aa9aabdca5e56e61e5babf72fc7d37ebbd2537b91e6d48.jpg)
EN
![[04] [03] [05]](/content/2026/05/753710/images/052af850156b662af262c7da311162419e9ad61615145ae34e896ca6afa2f1e2.jpg)
![[04] [05] [03]](/content/2026/05/753710/images/2a789a3dacfe34409f04155fd6d63f43a5187d175d5d440566be3998e62a41bf.jpg)
Right side rail installation [06]
![[O3] [O6] [O4]](/content/2026/05/753710/images/8cf9d1e8a76f963c4166e9d844371c41da17e41e5650f0a4be1d23c2e60d0442.jpg)
![[O3] [O4]](/content/2026/05/753710/images/59a413cda23f58eac2af8ab50f084ed2d752c9fdda3003d6abd6ab9acdeb94e9.jpg)
![[06] [04][03]](/content/2026/05/753710/images/221e52c907635cd7f6e307a671a7212e950dc0ac28d8abbc06797a07e023cb16.jpg)
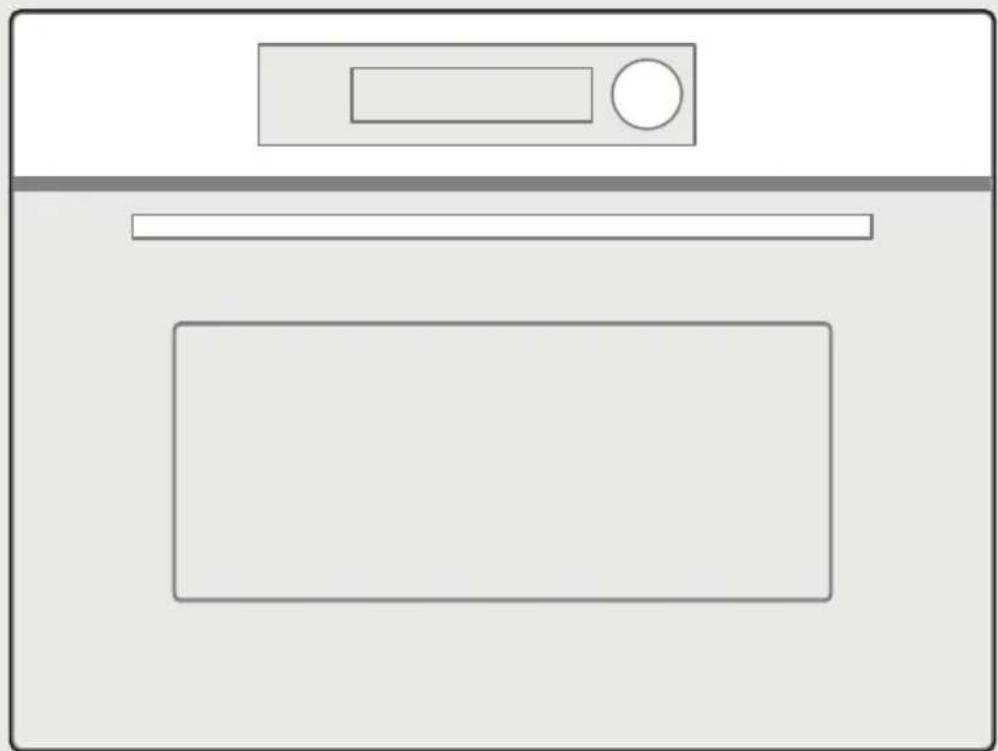
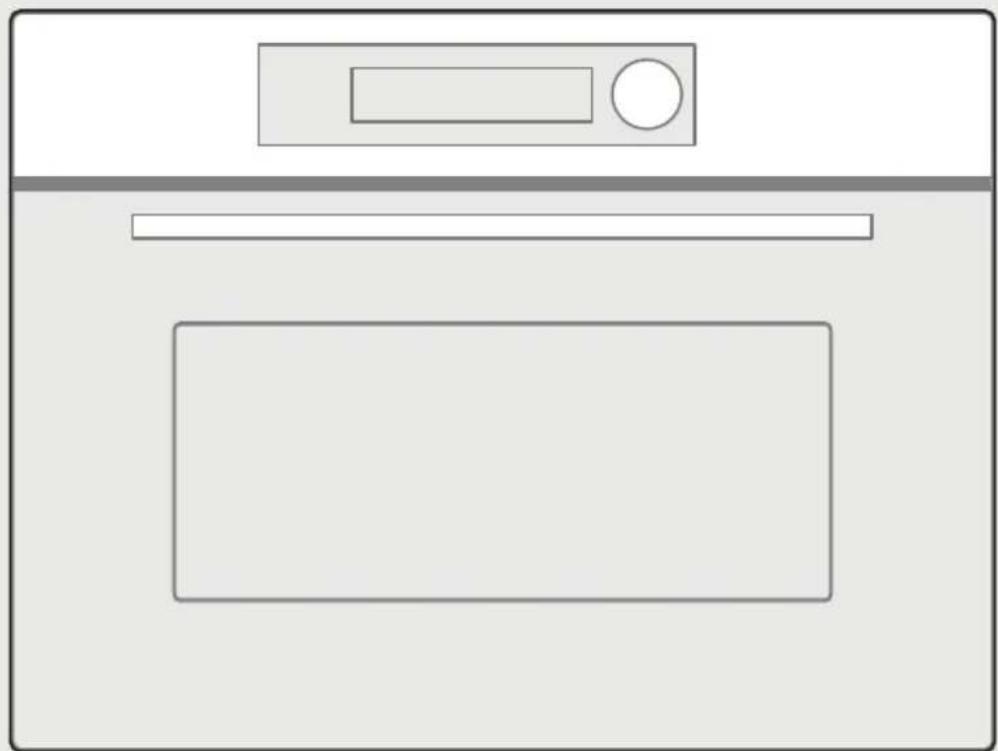
PRODUCT OVERVIEW
Control Panel


Cancel Wireless Light (press once) / Lock
Function for Children (press and hold for 3 seconds)


Reheat Microwave Auto Menu


Temperature/Clock Start/Pause
OPERATION INSTRUCTIONS
Setting The Clock
- In standby mode, turn the knob once, then press and hold for three seconds, "00h00m" will display.
- Turn the knob to set the hour figuers. The time should be within 0-23.
- Press 📁 or ▷ to confirm.
- Turn the knob to set the minute figuers. The time should be within 0-59.
- Press 📁 or ▷ to confirm.

NOTE
- The clock is a 24-hour display. If the clock is not set, it would not work when powered.
- To reset the clock, please repeat step 1 to step 5.
- During the process of setting, if ⏻ is pressed or if there is no operation with 5 minutes, the setting is invalid.
Microwave Cooking
5 power levels are available.
| Power Level 100% 80% 50% 30% 10% | |||||
| Display | P10 | P08 | P05 | P03 | P01 |
- In standby mode, turn the knob once to enter the setting and then press ≈ once, "P10" and "01m00s" will display.
- Press 📁 or ▷ to confirm.
- Turn the knob to adjust the power level, 5 power levels are available.
- Press 📁 or ▷ to confirm.
- Turn the knob to set the cooking time. The maximum time value is "01h30m" (If "P10" is chosen, the maximum time value is "30m00s").
- Press ▷ || to start cooking.

NOTE
- Opening the oven door or pressing ▷|| during operation will interrupt the current mode. Press ▷|| again to continue cooking.
- The power level and cooking time can be changed during operation. Press once, the current power level will flash, and then turn the knob to adjust the power level. Press again, the current cooking time will flash, and then turn the knob to adjust the cooking time. The oven will work with the selected power and cooking time if there is no operation within 6 seconds.
Grill Function(with Preheat & without Preheat)
- In standby mode, turn the knob to choose the grill mode you need, 8 grill modes are available.
- Press 🖼 or ▷ to confirm the grill mode.
- Turn the knob to set the temperature.
- Press 🔒 to confirm.
- Turn the knob to set the cooking time. The maximum time value is "09h00m".
- Press once, and then press to start preheating.
When preheating is completed, the oven will beep. Open the door and place food in the oven. And then close the oven door (If you want to cook without preheating, please skip this step).
- Press ▷|| to start cooking.
Grill modes chart
| Mode Display Default Temp. The Range Of Temp. Use | |||
| Conventional | — | 180°C 100-235°C | The top and bottom elements work together to provide conventional cooking. The oven needs to be pre-heated to the required temperature: ideal for slow cooking dishes such as casseroles and stews. |
| Convection | 160°C 50°C, 100-250°C | For baking on several levels(e.g. baking trays of chocolate chip cookies). | |
| Conventional + Fan | 160°C 50°C, 100-235°C | Convenient and time savings, up to 4 dishes can be cooked simultaneously on different shelves without mixing of taste or smell. | |
| Radiant Grilling | 180°C 100-235°C | Best results can be obtained from using the top shelf for small items and lower shelves for larger items. | |
| Double Grill+Fan | 180°C 100-250°C | For gratin dishes and finishing roasted vegetables. | |
| Double Grilling | 180°C 100-235°C | The inside radiant elements and outside top element work simultaneously giving a rapid and even grilling heat, therefore effectively browning the top surface of the food. | |
| Mode Display Default Temp. The Range Of Temp. Use | ||||
| Pizza |  | 180°C 50°C, 100-250°C | Pizza is perfectly cooked with extra heat from both bottom and sides of the oven, guaranteeing pizza bases are crispy. | |
| Lower Heater Element | — | 170°C 50°C, 100-235°C | This is ideal for slow cooking dishes such as casseroles, stews. | |

NOTE
- If you do not need to set the cooking time, please skip the step (4) and (5). And the default cooking time is "09h00m".
- Opening the oven door or pressing ▷|| during operation will interrupt the current mode. Press ▷|| again to continue cooking.
- The temperature and cooking time can be changed during cooking(except preheating). Press once, the current temperature will flash, and then turn the knob to adjust the temperature. Press again, the current cooking time will flash, and then turn the knob to adjust the cooking time. The oven will work with the selected temperature and cooking time if there is no operation within 6 seconds.
- For cooking below 100°C, the preheating function cannot be set.
- After 15 minutes of continuous preheating, the preheating temperature has not reached, "E-03" will display for 3 seconds, and then the oven will return to standby mode.
- After preheating is completed, if there is no operation within 2 hours, the oven will beep once and return to standby mode.
Combination Cooking(with preheat&without preheat)
- In standby mode, turn the knob once to enter the setting and then press once, "P10" and "01m00s" will display.
- Turn the knob to choose the combination mode you need, 3 combination modes are available.
- Press 🔊 or ▷ to confirm.
- Turn the knob to set the temperature. The default temperature is 180°C.
- Press 🔊 or ▷b confirm.
- Turn the knob to set the microwave power level. The default power level is P03.
- Press 📄 or ▷b confirm.
- Turn the knob to set the cooking time. The maximum time value is "01h30m".
- Press once, and then press to start preheating.
When preheating is completed, the oven will beep. Open the door and place food in the oven. And then close the oven door (If you want to cook without preheating, please skip this step).
- Press ▷ || to start cooking.
Combination modes chart
| Mode Temp. Power Use | ||||
 | Microwave +Convection | 50°C, 100-220°C P01, P03 | For reducing large portions' cooking time with browning finish. | |
| [KWZS] | Microwave+ Double Grill +Fan | 100-220°C P01, P03 | This function is suitable where quick browning is required; will cook the ingredients down to the core. | |
 | Microwave +Pizza | 50°C, 100-220°C P01, P03 | This function is suitable where quick under browning is required; will cook the ingredients down to the core. | |

NOTE
- Opening the oven door or pressing ▷|| during operation will interrupt the current mode. Press ▷|| again to continue cooking.
- The temperature, power level and cooking time can be changed during cooking (except preheating). Press once, the current temperature will flash, turn the knob to adjust the temperature. And then press again, the current power level will flash, turn the knob to adjust the power level. After setting the power level, press again, the current cooking time will flash, and then turn the knob to adjust the cooking time. The oven will work with the selected temperature, power level and cooking time if there is no operation within 6 seconds.
- For cooking below 100^ C, the preheating function cannot be set.
- After 15 minutes of continuous preheating, the preheating temperature has not reached, "E-03" will display for 3 seconds, and then the oven will return to standby mode.
- After preheating is completed, if there is no operation within 2 hours, the oven will beep once and return to standby mode.
Defrost By Weight
- In standby mode, turn the knob once to enter the setting and then press twice, "100g" and "dF1" will display.
- Turn the knob to choose the food you need, 4 types of food are available.
- Press 📊 or ▷ to confirm.
- Turn the knob to set the weight of food.
- Press ▷ || to start defrosting.
Defrosting chart
| Food Display Weight | |
| Meat dF1 100-1500g | |
| Poultry dF2 100-1500g | |
| Fish dF3 100-800g | |
| Bakry, Fruit, Cake dF4 100-500g |

NOTE
The buzzer will sound to remind you to turn the food over during defrosting.
If no operation, the oven will continue working.
Auto menu
- In standby mode, turn the knob once to enter the setting and then press ▲once, "A01" will display.
- Turn the knob to choose the menu you need. 12 auto menus are available.
- Press 📊 or ▷ to confirm.
- Turn the knob to set the weight of food.
- Press ▷ || to start cooking.

NOTE
For menu "A04, A06, A12", please skip the step (3) and (4).
Grill modes chart
| Mode | Display | Weight | Power | Preheat |
| A01Fresh vegetable | 200g400g600g | 200g400g600g | P10 | No |
| A02Potatoes-peeled/cooked | 240g480g720g | 240g480g720g | P10 | No |
| A03Potatoes-roast | 450g1000g | 450g1000g | P10+Convection 230°C | No |
| A04Chicken pieces/Fish pieces | 450g | 450g | P05+Double Grill+Fan 220°C | No |
| A05Bakery-cake | 400g500g600g | 400g500g600g | Convection 160°C | Yes |
| A06Bakery-quiche | 1000g | 1000g | Pizza 200°C | Yes |
| Mode Display Weight Power Preheat | ||||
| A07 | 200g | 200g | ||
| Reheat-drink/soup | 400g600g | 400g600g | P08 No | |
| A08 | 250g | 250g | P10 No | |
| Reheat-plated meal | 350g | 350g | ||
| A09 | 100g | 100g | ||
| Reheat-sauce/stew/dish | 200g300g | 200g300g | P10 No | |
| A10 | 200g | 200g | ||
| Frozen pizza | 400g600g | 400g600g | Convection 220°C No | |
| A11 | 300g | 300g | ||
| Oven chips | 400g500g | 400g500g | Pizza 200°C Yes | |
| A12Lasagne | 1600g 1600g | P10+Convection 200°C | No | |
Lock Function for Children
You can use this function to prevent children from accidentally turning the oven on. To activate the lock:
Press and hold 🔗 for three seconds. And then the locked icon will display.
To deactivate the lock:
In locked state, press and hold ⚙ for three seconds.
Wireless Connection
Wireless Connection
Press and hold "☐" for 3 seconds, till a beep sounds, "AP" and wireless icon will display. If it fails, "n0\~n5" will display, and the oven will return to standby mode after 30 seconds.
Disconnect from the network
Press and hold "☐" for 8 seconds, till a beep sounds, "--" flashes for few seconds. If the link has been removed successfully, the screen will display "8888" and then return to standby mode after 3 seconds. If it fails, "FFFF" will display, and the oven will return to standby after 3 seconds.
CLEANING AND MAINTENANCE
With careful care and cleaning your compact oven will retain its looks and remain good order. We will explain here how you should care for and clean your appliance correctly.

Risk of electric shock!
Penetrating moisture may cause an electric shock. Do not use any high-pressure cleaners or steam cleaners.

Risk of burns!
Never clean the appliance immediately after switching off. Let the appliance cool down.

Risk of serious damage to health!
Microwave energy may escape if the cooking compartment door or the door seal is damaged. Never use the appliance if the cooking compartment door or the door seal is damaged. Contact the after-sales service.

NOTE
- Slight differences in colour on the front of the appliance are caused by the use of different materials, such as glass, plastic and metal.
- Shadows on the door panel which look like streaks, are caused by reflections made by the oven light.
- Unpleasant odours, e.g. after fish has been prepared, can be removed very easily. Add a few drops of lemon juice to a cup of water. Place a spoon into the container as well, to prevent delayed boiling. Heat the water for 1 to 2 minutes at maximum microwave power.
Cleaning Agents
To ensure that the different surfaces are not damaged by using the wrong cleaning agent, observe the information in the table. Do not use
- Sharp or abrasive cleaning agents,
- Metal or glass scrapers to clean the glass in the appliance door.
• Metal or glass scrapers to clean the door seal, - Hard scouring pads and sponges,
- Cleaning agents with high concentrations of alcohol.
Wash new sponge cloths thoroughly before use.
Allow all surfaces to dry thoroughly before using the appliance again.
| Area Cleaning agents | |
| Appliance front | Hot soapy water: Clean with a dish cloth and dry with a soft cloth. Do not use glass cleaners or metal or glass scrapers for cleaning. |
| Appliance front with stainless steel | Hot soapy water: Clean with a dish cloth and dry with a soft cloth. Remove flecks of limescale, grease, starch and albumin (e.g. egg white) immediately. Corrosion can form under such residues. Special stainless steel cleaning agents can be obtained from the after-sales service or from specialist shops. Do not use glass cleaners or metal or glass scrapers for cleaning. |
| Cooking compartment | Hot soapy water or a vinegar solution: Clean with a dish cloth and dry with a soft cloth. If the oven is very dirty: Do not use oven spray or other aggressive oven cleaners or abrasive materials. Scouring pads, rough sponges and pan cleaners are also unsuitable. These items scratch the surface. Allow the interior surfaces to dry thoroughly. |
| Recess in cooking compartment | Damp cloth: Ensure that no water seeps through the turntable drive into the appliance interior. |
| Wire racks | Hot soapy water: Clean using stainless steel cleaning agent or in the dishwasher. |
| Door panels | Glass cleaner: Clean with a dish cloth. Do not use a glass scraper. |
| Seal | Hot soapy water: Clean with a dish cloth, do not scour. Do not use a metal or glass scraper for cleaning. |
TROUBLE SHOOTING
Malfunctions often have simple explanations. Please refer to the malfunction table before calling the after-sales service.
If a meal does not turn out exactly as you wanted, refer to the Expert Cooking Guide section, where you will find plenty of cooking tips and tricks.

Risk of electric shock!
Incorrect repairs are dangerous. Repairs may only be carried out by one of our trained after-sales engineers.
Malfunction Table
| Problem Possible cause Remedy/information | ||
| The appliance does not work. | ·Faulty circuit breaker. | ·Look in the fuse box and check that the circuit breaker for the appliance is in working order. |
| ·Plug not plugged in. ·Plug in the plug. | ||
| ·Power cut | ·Check whether the kitchen light works. | |
| The appliance does not work. 🔒 appears in the display panel. | ·Childproof lock is active. | ·Deactivate the childproof lock (see section: Childproof lock). |
| The microwave does not switch on. | ·Door not fully closed. | ·Check whether food residue or debris is trapped in the door. |
| It takes longer than before for the food to heat up in the microwave | ·The selected microwave power level is too low. | ·Select a higher power level. |
| ·A larger amount than usual has been placed in the appliance. | ·Double the amount = almost double the cooking time. | |
| ·The food was colder than usual. | ·Stir or turn the food during cooking. | |
| A particular operating mode or power level cannot be set. | ·The temperature, power level or combined setting is not possible for this operating mode. | ·Choose permitted settings. |
Acrylamide In Foodstuffs
Which foods are affected?
Acrylamide is mainly produced in grain and potato products that are heated to high temperatures, such as potato crisps, chips, toast, bread rolls, bread, fine baked goods (biscuits, gingerbread, cookies).
| Tips for keeping acrylamide to a minimum when preparing food | |
| General | ·Keep cooking times to a minimum. Cook meals until they are golden brown, but not too dark. Large, thick pieces of food contain less acrylamide. |
| Baking biscuits Oven chips | ·Max. 200 °C in Top/bottom heating or max. 180 °C in 3D hot air or hot air mode. Max. 190°C in Top/bottom heating or max. 170 °C in 3D hot air or hot air mode. Egg white and egg yolk reduce the formation of acrylamide. Distribute thinly and evenly over the baking tray. Cook at least 400 g at once on a baking tray so that the chips do not dry out. |
Heating food

Risk of electric shock!
There is a possibility of delayed boiling when a liquid is heated. This means that the liquid reaches boiling temperature without the usual steam bubbles rising to the surface. Even if the container only moves a little, the hot liquid can suddenly boil over and spatter. When heating liquids, always place a spoon in the container. This will prevent delayed boiling.

natural_image
Two glass cups: one with a spoon inside, the other with a black X symbol crossed out (no text or symbols present)TRADEMARKS, COPYRIGHTS AND LEGAL STATEMENT
Midea logo, word marks, trade name, trade dress and all versions thereof are valuable assets of Midea Group and/or its affiliates (“Midea”), to which Midea owns trademarks, copyrights and other intellectual property rights, and all goodwill derived from using any part of an Midea trademark. Use of Midea trademark for commercial purposes without the prior written consent of Midea may constitute trademark infringement or unfair competition in violation of relevant laws.
This manual is created by Midea and Midea reserves all copyrights thereof. No entity or individual may use, duplicate, modify, distribute in whole or in part this manual, or bundle or sell with other products without the prior written consent of Midea.
All the described functions and instructions were up to date at the time of printing this manual. However, the actual product may vary due to improved functions and designs.
EN
DISPOSAL AND RECYCLING
Important Instructions For Environment
Compliance with the WEEE Directive and Disposing of the Waster Product:
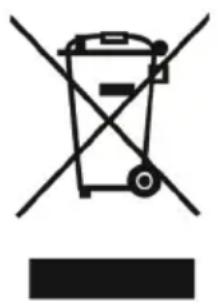
This product complies with EU WEEE Directive (2012/19/EU). This product be ars a classification symbol for waster electrical and electronic equipment (WEEE).
This symbol indicates that this product shall not be disposed with other household wastes at the end of its service life. Used device must be returned to official collection point for recycling of electrical electronic devices. To find these collection systems please contact to your local authorities or retailer where the product was purchased. Each household performs important role in recovering and recycling of old appliance. Appropriate disposal of used appliance helps prevent potential negative consequences for the environment and human health.
natural_image
Symbol of a trash bin crossed with no text or numbers, representing waste sorting or disposal (no text present)Compliance With Rohs Directive
The product you have purchased complies with EU RoHS Directive (2011/65/EU). It does not contain harmful and prohibited materials specified in the Directive.
Package Information
Packaging materials of the product are manufactured from recyclable materials in accordance with our National Environment Regulations. Do not dispose of the packaging materials together with the domestic or other wastes. Take them to the packaging material collection points designated by the local authorities.

natural_image
Recycling symbol icon with three chasing arrows forming a triangle (no text or labels)DATA PROTECTION NOTICE
For the provision of the services agreed with the customer,
we agree to comply without restriction with all stipulations of applicable data protection law, in line with agreed countries within which services to the customer will be delivered, as well as, where applicable, the EU General Data Protection Regulation (GDPR).
Generally, our data processing is to fulfil our obligation under contract with you and for product safety reasons, to safeguard your rights in connection with warranty and product registration questions. In some cases, but only if appropriate data protection is ensured, personal data might be transferred to recipients located outside of the European Economic Area.
Further information are provided on request. You can contact our Data Protection Officer via MideaDPO@midea.com. To exercise your rights such as right to object your personal date being processed for direct marketing purposes, please contact us via MideaDPO@midea.com. To find further information, please follow the QR Code.
EN

make yourself at home

natural_image
Simple line drawing of a kitchen oven with a handle and top panel (no text or symbols)FORNO DA INCASSO
AD ARIA CALDA E A MICROONDE

MODELLO MCOTV950E4MO-BK
TENSIONE NOMINALE 230V\~
FREQUENZA NOMINALE 50 Hz
MAX. INGRESSO 3000 W
INGRESSO NOMINALE (Microonde) 1650W
INGRESSO NOMINALE (Griglia) 2200W
INGRESSO NOMINALE (CONVEZIONE): 1700W
USCITA NOMINALE (Microonde) 900 W
CONSUMI ENERGETICI
natural_image
Pure technical line drawing of a rectangular plate with horizontal slats (no text or symbols)Teglia
natural_image
Simple line drawing of a rectangular frame with rounded corners and a central rectangle (no text or symbols)natural_image
Pure mechanical component diagram without any text, numbers, or symbols[05] × 1

natural_image
Pure line drawing of a mechanical component with layered structure (no text or symbols)[06] × 1
![[04] [03] [05]](/content/2026/05/753710/images/d1edebf972dc02131b64f59eeb7e4aeb258aa2f0de009ef05c778d81edce21da.jpg)
IT
![[04] [03] [05]](/content/2026/05/753710/images/168ec482d24b71f3495fd186945735e76a81689450445199a4a40c5587ea532b.jpg)
![[04] [05] [03]](/content/2026/05/753710/images/a9c81e0134938c8dcdb2b3d99cfd30077f0552314de9fd02bd54ff0c5e29bdca.jpg)
![[O3] [O4]](/content/2026/05/753710/images/9d4b3f8e93234688f922b030990e050d6f4bbc18acc1e89d7d5ec3990520a268.jpg)
![[06] [04][03]](/content/2026/05/753710/images/98da6b083df2a0500019ad024bcda712a28cf316ec969a822ad6948e86e65a22.jpg)
PANORAMICA DEL PRODOTTO
natural_image
Two glassware illustrations: one with a spoon inside, the other with a black X symbol crossed out (no text or symbols present)MARCHI, COPYRIGHT E DICHIARAZIONI LEGALI
natural_image
Symbol of a trash bin crossed with diagonal lines, no text or numbers presentnatural_image
Recycling symbol with three chasing arrows forming a triangle (no text or labels)make yourself at home

natural_image
Simple line drawing of a kitchen oven with a handle and top panel (no text or symbols)HORNO INTEGRADO
CON AIRE CALIENTE Y MICROONDAS

SmartHome
MODELO MCOTV950E4MO-BK
Azul Cable neutro (N)
Marrón Fase (L)
natural_image
Pure technical line drawing of a rectangular plate with horizontal slats (no text or symbols)Bandeja de cocción
natural_image
Simple line drawing of a rectangular frame with a central rectangle and side borders (no text or symbols)natural_image
Pure mechanical component diagram without any text, numbers, or symbols[05] × 1
natural_image
Pure line drawing of a mechanical component with no text or symbols[06] × 1
![[04] [03] [05]](/content/2026/05/753710/images/9565f988c8958afc63ea37c4a0697e1a166ac900838d9f04a4099d0a5e676358.jpg)
ES
![[04] [03] [05]](/content/2026/05/753710/images/71b4d8322f77a6817ad2978d0dd315b76325e54aa70ab42f308386032913e1cc.jpg)
![[04] [05] [03]](/content/2026/05/753710/images/0343bd1630f63aaf673d29d32e53244ac15590fe55b8e6350c80476556fc6ef4.jpg)
![[O3] [O4]](/content/2026/05/753710/images/72e5ef6c7f7133e8618f5ce8eaa5ea2b8010bee9a77addd3449323f37ae5534d.jpg)
ES
![[06] [04][03]](/content/2026/05/753710/images/954af8cc50150d0c87581fcad7b8fa87c90789808602979653f05cd54087792b.jpg)
VISTA GENERAL DEL PRODUCTO
Panel de control


natural_image
Two glassware illustrations: a spoon inside and an X-shaped crossed-out cup, both without any text or symbols.natural_image
Symbol of a trash bin crossed with diagonal lines, no text or numbers presentnatural_image
Recycling symbol icon with three chasing arrows forming a triangle (no text or labels)make yourself at home


natural_image
Simple line drawing of a kitchen oven with a handle and top panel (no text or symbols)FOUR ENCASTRABLE
AVEC AIR CHAUD ET MICRO-ONDES

INSTALLATION DU PRODUIT 10
APERÇU DU PRODUIT 18
CONSIGNES D'UTILISATION 19
NETTOYAGE ET ENTRETIEN 25
DÉPANNAGE 27
MARQUES, DROITS D'AUTEUR ET DÉCLARATION LÉGALE 29
MISE AU REBUT ET RECYCLAGE 30
AVIS DE PROTECTION DES DONNÉES 31
CONSIGNES DE SÉCURITÉ
Utilisation prévue
MODÈLE MCOTV950E4MO-BK
TENSION NOMINALE 230 V\~
FRÉQUENCE NOMINALE 50 Hz
MAX. ENTRÉE 3000 W
ENTRÉE NOMINALE (micro-ondes) 1650 W
ENTRÉE NOMINALE (gril) 2200 W
ENTRÉE NOMINALE (CONVECTION) : 1700 W
SORTIE NOMINALE (micro-ondes) 900 W
CONSOMMATION D'ÉNERGIE
INSTALLATION DU PRODUIT
Unités ajustées
natural_image
Pure technical line drawing of a rectangular plate with horizontal slats (no text or symbols)Plateau de cuisson
natural_image
Simple line drawing of a rectangular frame with rounded corners and a central rectangle (no text or symbols)natural_image
Pure mechanical component diagram without any text, numbers, or symbols[05] × 1

natural_image
Pure line drawing of a mechanical component with no text or symbols[06] × 1
![[04] [03] [05]](/content/2026/05/753710/images/fdae2b0551b14d0063e9fffd1dda788ae66780812392995c3f24bf81d114c86b.jpg)
FR
![[04] [03] [05]](/content/2026/05/753710/images/59ac65e0285726c6cffa96d4b0a387c4134e635283298dc01784c7f7ac7c5c71.jpg)
![[04] [05] [03]](/content/2026/05/753710/images/46fc0028037d579893b153d2ad3e496f54a0ac7542fb6c37e5b183a2efb75bfc.jpg)
FR
![[06] [04][03]](/content/2026/05/753710/images/ae9868e0ceaf99549fdb7a3b884d58ae58d89dea872d5101c4a82d30b3802000.jpg)
APERÇU DU PRODUIT
Panneau de commande


Annuler Sans fil Lumière (appuyez

natural_image
Two glass cups: one with a spoon inside, the other with a black X symbol crossed out (no text or symbols present)MARQUES, DROITS D'AUTEUR ET DÉCLARATION LÉGALE
natural_image
Symbol of a trash bin crossed with no text or numbers, representing waste sorting or disposal (no text present)natural_image
Recycling symbol icon with three chasing arrows forming a triangle (no text or labels)AVIS DE PROTECTION DES DONNÉES
make yourself at home

natural_image
Simple line drawing of a kitchen oven with a handle and top panel (no text or symbols)MONTELO MCOTV950E4MO-BK
natural_image
Simple line drawing of a rectangular container with horizontal slats (no text or symbols)Ταψί ψησίματος
natural_image
Simple line drawing of a rectangular frame with rounded corners and a central rectangle (no text or symbols)natural_image
Simple geometric diagram of a square frame with rounded corners (no text or symbols)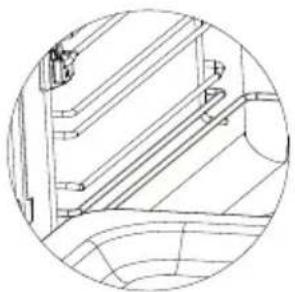
natural_image
Technical line drawing of a mechanical assembly or bracket (no text or symbols)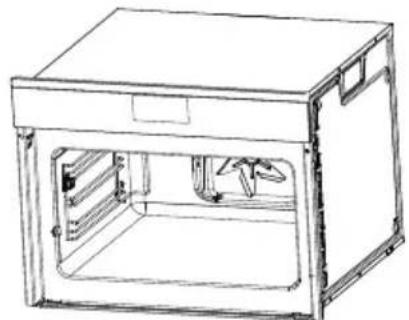
natural_image
Line drawing of a rectangular industrial machine or enclosure with internal compartments and mounting brackets (no text or symbols)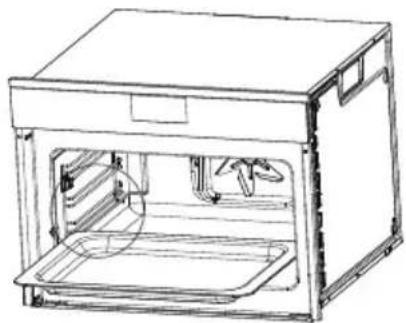
natural_image
Line drawing of an open kitchen appliance with a tray and side panel (no text or symbols)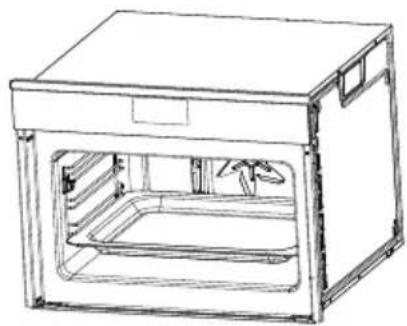
natural_image
Line drawing of a simple oven or oven unit with internal compartments and a handle (no text or symbols)
GR
[9] × 2

[10] × 2 [11] × 2
natural_image
Line drawing of an open oven with a fan inside, showing internal structure and ventilation slots (no text or symbols)![[1]1 [9] [10]](/content/2026/05/753710/images/1e13c6992eff2530f70485d9f907c7a2541aba5e7a3d06ef04265c3a9be8ec55.jpg)
natural_image
Pure mechanical component diagram without any text, numbers, or symbols[05] × 1

natural_image
Pure mechanical component diagram without any text, numbers, or symbols[06] × 1
![[04] [03] [05]](/content/2026/05/753710/images/beb06778cbf5a742dd3ed9e501a016c676321328235e43e9de08a4d7cc5776de.jpg)
GR
![[04] [03] [05]](/content/2026/05/753710/images/96e2bd6b4fa9716647a79e9042cbbc7f411a79f53d0149e1c757b421c5e0d505.jpg)
![[04] [05] [03]](/content/2026/05/753710/images/4bf866bb6a2d57c2e0f85ff411c270eb2996dde65f535fc23cea853f9ae950f8.jpg)
natural_image
Two glassware illustrations: a spoon inside and an X-shaped crossed-out cup, both without any text or symbols.natural_image
Symbol of a trash bin crossed with diagonal lines, no text or numbers presentGR
natural_image
Recycling symbol with three chasing arrows forming a triangle (no text or labels)make yourself at home