
MV012W - Musical instrument Vevor - Free user manual and instructions
Find the device manual for free MV012W Vevor in PDF.
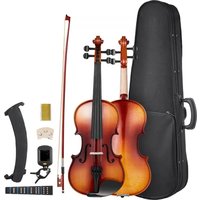


| Product type | Acoustic violin for beginners |
| Model | MV012W |
| Brand | Vevor |
| Violin dimensions (body) | Approximately 35-36 cm length |
| Total length | Approximately 57-60 cm |
| Weight | Approximately 400-500 g (without case) |
| Material | Wood (top, back, ribs), ebony or hardwood for fingerboard |
| Strings | 4 steel or synthetic strings, tuned G-D-A-E |
| Included accessories | Bow, rosin, case, chinrest, shoulder rest (depending on version) |
| Power supply | None (acoustic instrument) |
| Main functions | Play notes by rubbing strings with bow |
| Maintenance and cleaning | Wipe rosin dust with a soft cloth after each use; avoid excessive humidity; clean strings and fingerboard separately |
| Storage | In its case, at constant temperature and moderate humidity, away from sunlight and drafts |
| Safety | Do not force the instrument into the case; avoid impacts and sharp objects; keep out of reach of young children |
| Spare parts and repairability | Strings, bridge, pegs, bow, rosin available; soundpost may fall → take to a repairer |
| Manufacturer | Shanghai Muxinmuyeyouxiangongsi, Baoshan, Shanghai, China |
| Importer (Australia) | SIHAO PTY LTD, Astwood NSW |
| Importer (United States) | Sanven Technology Ltd., Anaheim, California |
Frequently Asked Questions - MV012W Vevor
User questions about MV012W Vevor
0 question about this device. Answer the ones you know or ask your own.
Ask a new question about this device
Download the instructions for your Musical instrument in PDF format for free! Find your manual MV012W - Vevor and take your electronic device back in hand. On this page are published all the documents necessary for the use of your device. MV012W by Vevor.
USER MANUAL MV012W Vevor
VIOLIN OWNER'S MANUAL
MODEL: MV012L / MV012W / MV014W
Technical Support and E-Warranty Certificate
www.vevor.com/support
Model: MV012L / MV012W / MV014W
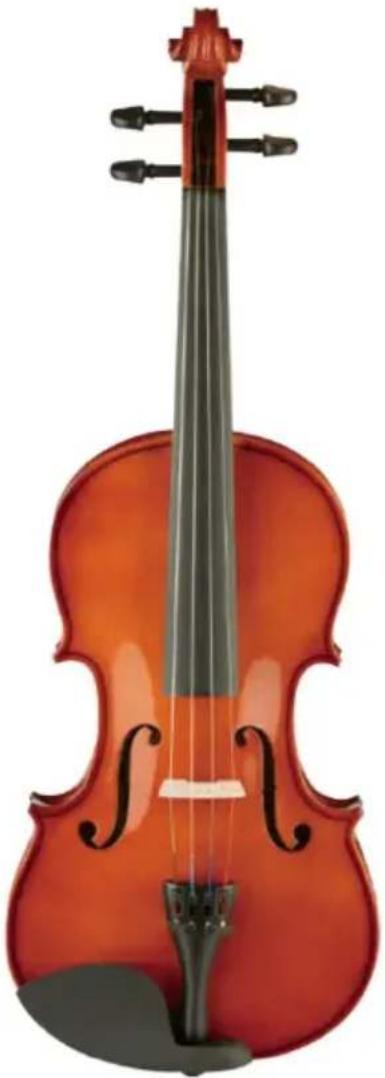
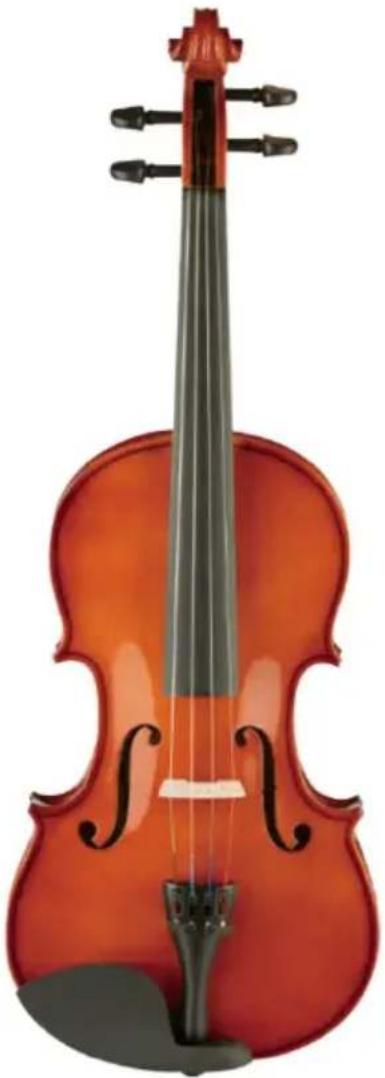
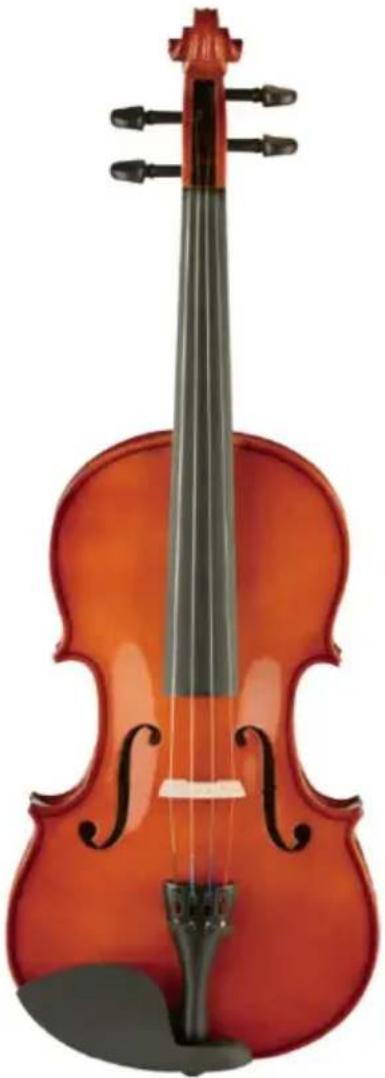
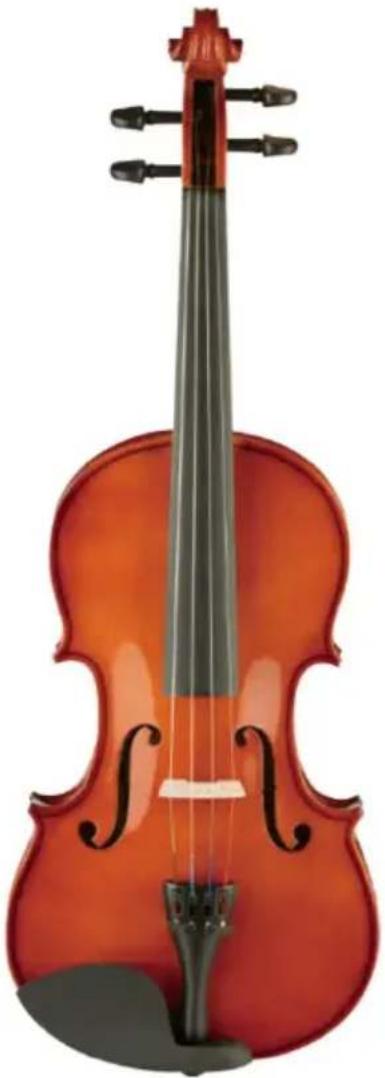
(The picture is for reference only, please refer to the actual object.)
This is the original instruction. Please read all manual instructions carefully before operating. VEVOR reserves a clear interpretation of the user manual. The appearance of the product shall be subject to the product you received. Please forgive us that we won't inform you again if there are any technology or software updates on our product.
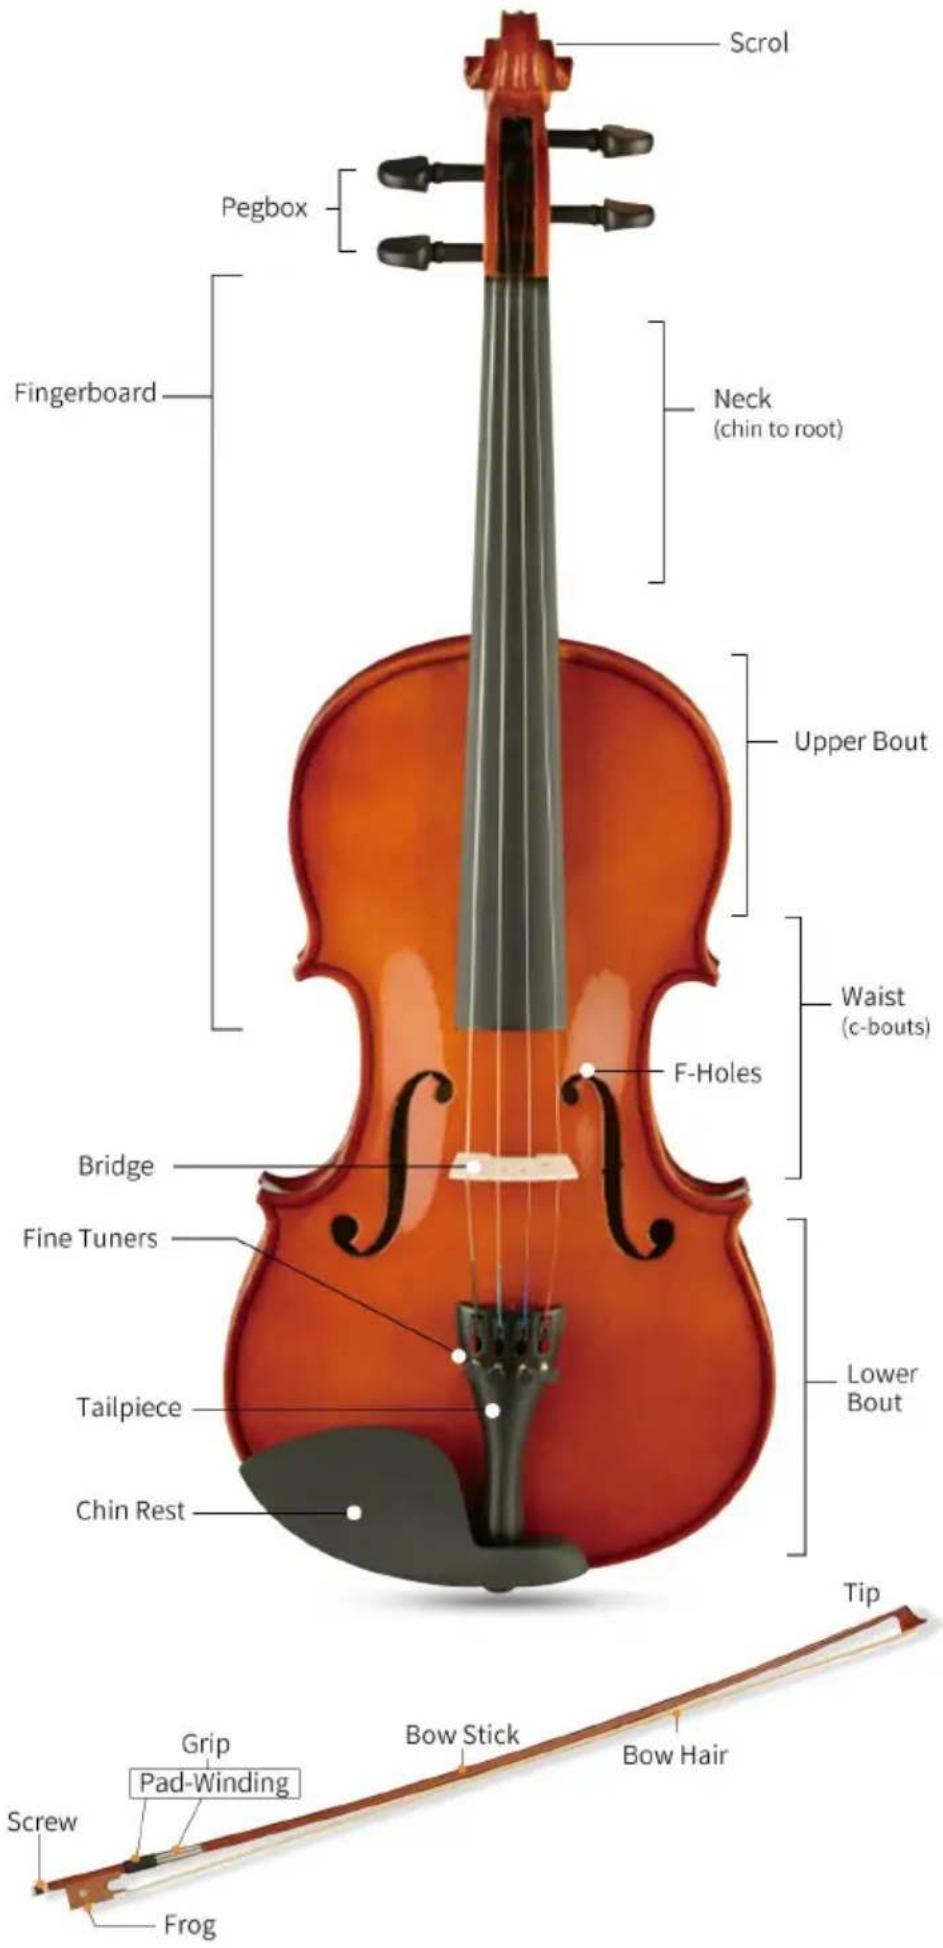
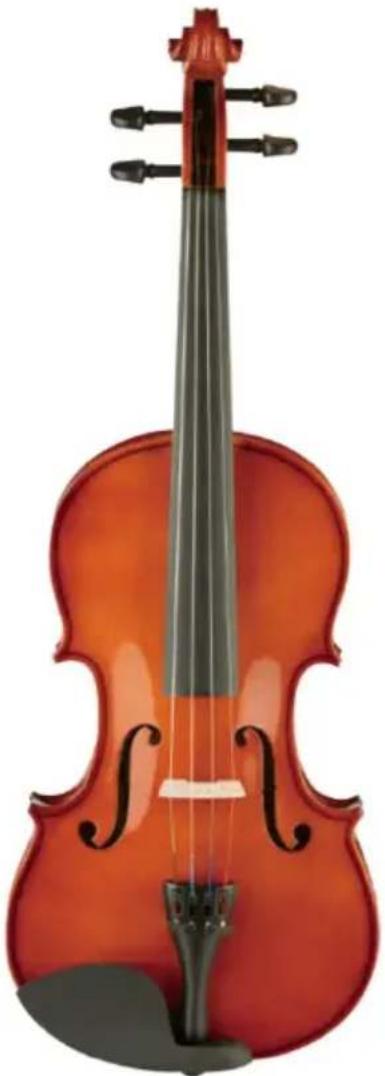
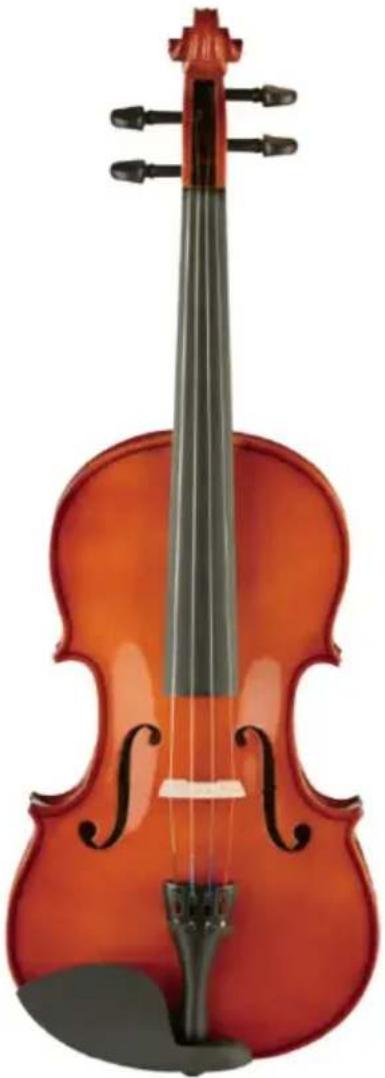
SET THE BRIDGE
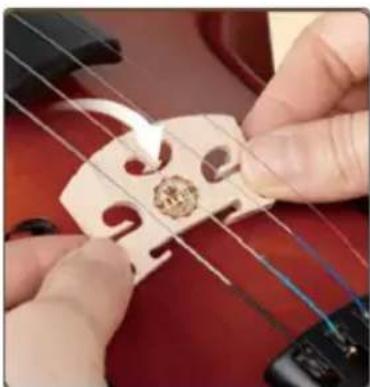
A violin bridge is a small piece of wood. The bottom of the bridge is usually a straight line, while the top is arched slightly. When you're examining your bridge, you'll notice one side of the arch is slightly higher than the other. The lower side is the E-string side, and the taller side is the G-string side. When you put the bridge in place, make sure the E-string comes over the E-string side, and the G-string comes over the G-string side. If you don't know which strings are which, when the violin's head is facing your body, the G-string will be the string farthest to the left. The E-string will be the string farthest to the right.
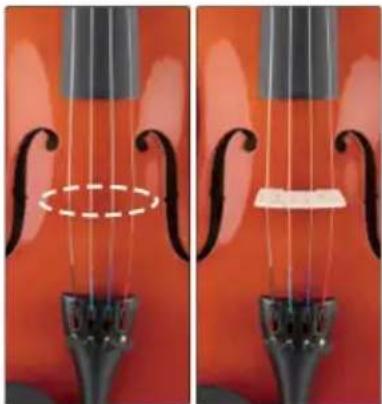
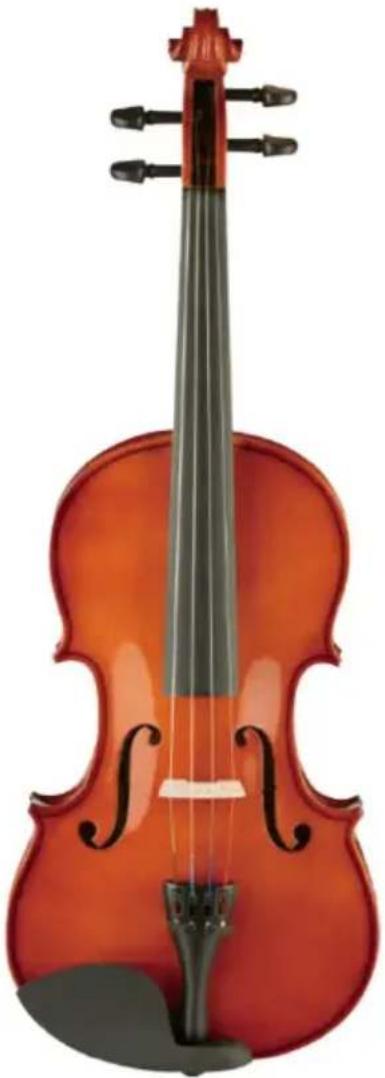
Place the bridge between the F-holes.
The F-holes are two f-shaped holes found near the middle of the violin's top. When you slide the bridge under the strings, make sure it's between the two F-holes. The bridge should be placed at roughly the midway point of the F-holes.
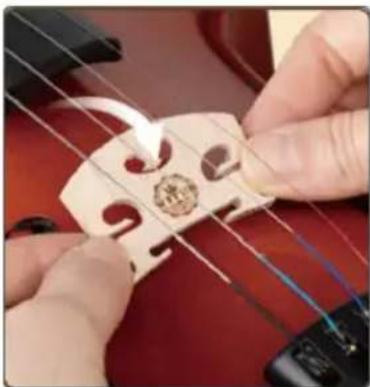
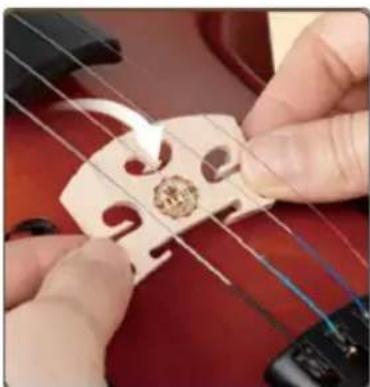
Put the violin strings in the knobs of the bridge. The violin bridge has four small knobs running along the top.
The four violin strings fit into these knobs, keeping the bridge and the strings in place. Gently feed one string at a time into the knobs on the bridge.
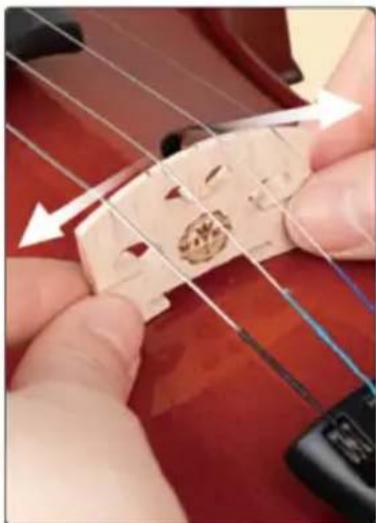
Tighten the strings.
Now you can retighten your strings to keep the bridge in place. Gently turn each peg on the head of the violin. It's a good idea to use one hand to hold the bridge in place while tightening the strings, to prevent it from falling over. Tighten the strings until they are secure enough to keep the bridge in place while still having a very slight amount of slack.
Check that the bridge is in the center of the violin and make sure it is aligned with the f-holes.
Bridges often fall out of place during first tuning. To prevent this from happening, make sure you hold your bridge in place with one hand when tuning.
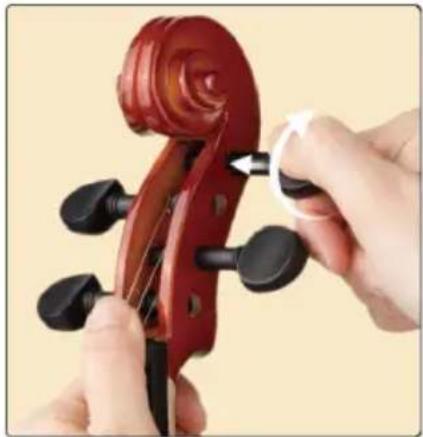
Check the peg, make sure the peg is not too loose or too tight.
Take the peg and push it back into its proper place in the peg box. Rotate the peg in a circle to spread compound around the edges of the hole, which will make it easier to spin and adjust your tuning.
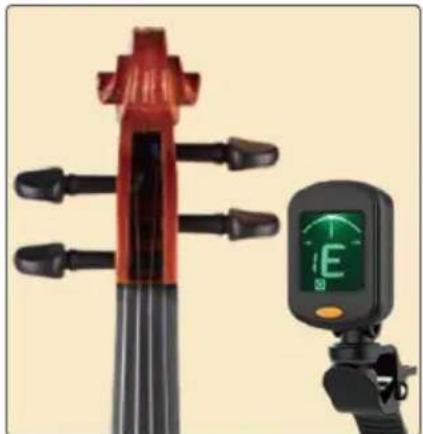
Pluck a note on the "A" string.
Use your fingers to pick at the string, striking a note. The tuner dial will move up and down to show you where the note is. Make sure the note says the correct pitch when you pluck the string. If it doesn't, you'll need to make a lot of adjustments.
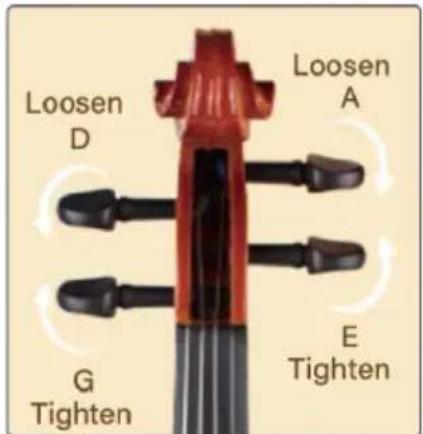
Turn the pegs to make larger adjustments.
Find the corresponding peg for the string. For the A string, it's the one that's at the top right if you are holding the violin facing you with the pegs at the top. Move clockwise to make it higher or counterclockwise to make the note lower. Make small adjustments of less than 0.25 inches (0.64 cm) at a time to adjust the pitch.
The strings are typically tuned to G-D-A-E from left to right. Push the peg in securely while turning the peg firmly.
ATTACH THE SHOULDER REST
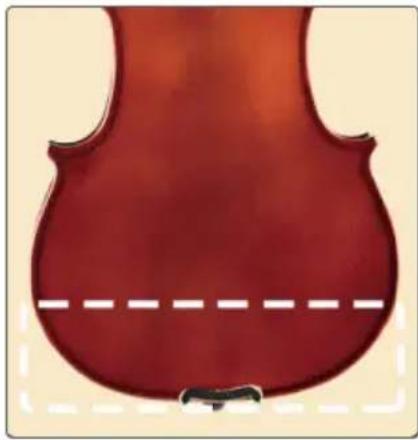
Hold the violin between your legs.
Take your violin with both hands and place it between your legs. With the back facing you and the sound post pointing to the floor. The body of the violin will be pointing toward the ceiling.
Your legs should fit nicely in the rib area of the violin. Squeeze your legs ever so slightly to hold the violin in place.
Attach the feet of the shoulder rest to the violin. Take the shoulder rest. Place the wider part onto the same side as the chin rest as mentioned above.
Make sure that the rim of the violin fits nicely into the C shape of the rest. Slide the feet of this wider side to a 9 o'clock position. Slide the other side to the outside of the violin, stopping at the 3 o'clock position.
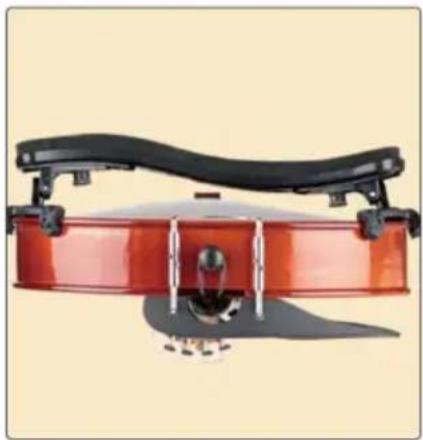
Adjust the placement of the feet of the shoulder rest.
Adjust it by sliding the feet to an angle that fits your shoulder. Make sure it is secure.
If your shoulders are narrow, move the feet closer to the end pin. If you have wider shoulders, place the shoulder rest further away from the end pin, in the middle of the lower body of the violin.
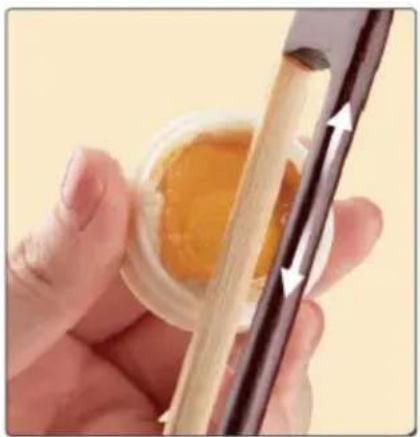
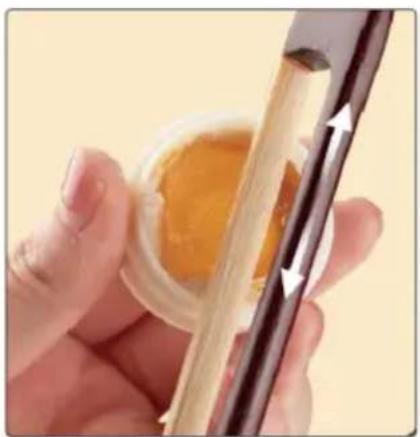
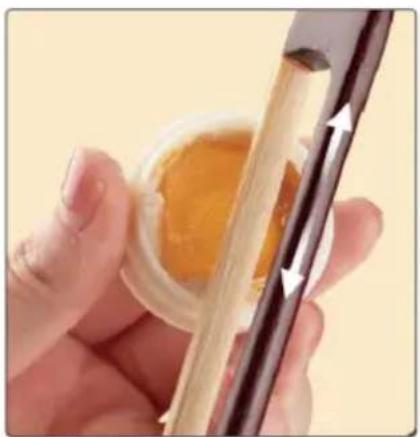
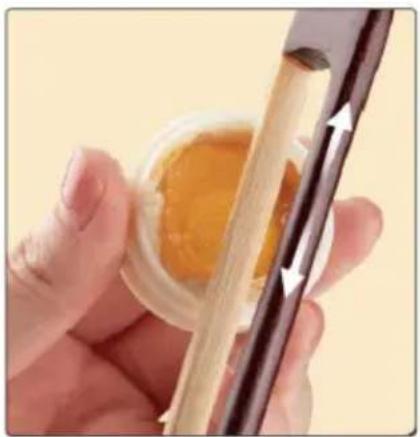
ROSIN YOUR BOW
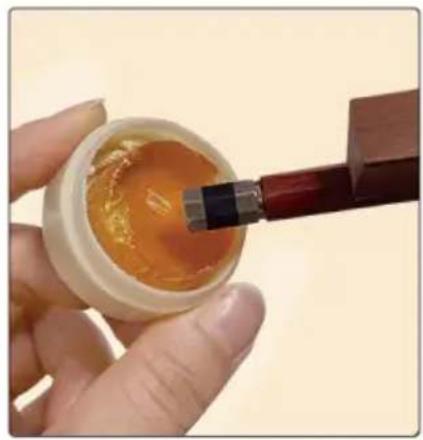
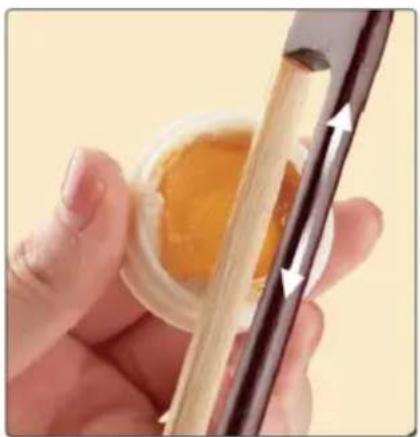
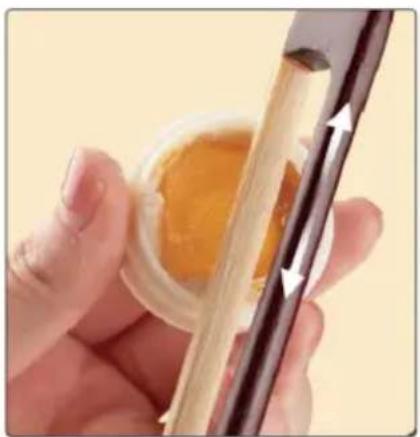
Grab your rosin block and scratch it to bring powder to the top.
Scratch the rosin by using the screw of the bow or a nail file on the surface of the rosin.
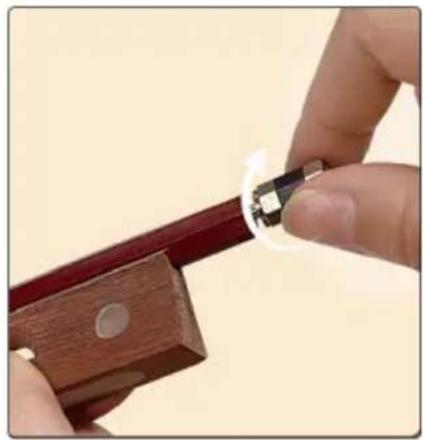
Tighten your bow and start putting rosin on the hair. Tighten the bow until you see the middle part of the bow is slightly curved, like a smile. Otherwise, you will determine that the violin bow is over-tightened when the wood has lost its curve in the middle part of the bow and went completely straight.


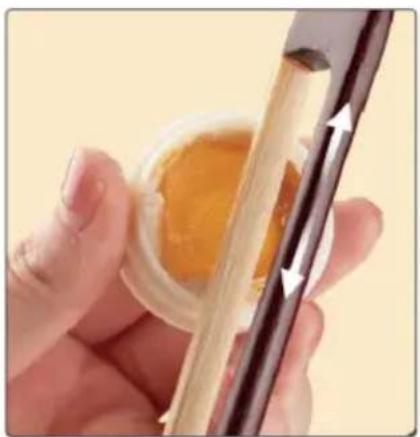
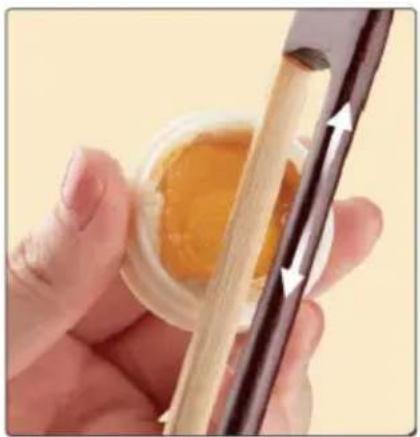
"Play" the rosin back and forth.
Run the bow along the rosin from the tip down to the frog (the part you hold with your hand), and then stroke it back again. Grasp the bow gently and press down just hard enough that the bow hairs produce some dust and feel the bow gripping and not slipping.
CARE AND MAINTENANCE OF A VIOLIN
Store a violin: As a rule, the safest place to keep a violin is in its case. The temperature of the room should be constant and the humidity moderate. During the heating season it may be advisable to use a humidifier to prevent damage to the gluing or, even worse, cracks in the wood.
A violin should be kept in a place free of drafts and away from direct sunlight. Make sure that the violin case is neither "in the way" where it can get knocked in passing, nor kept on a shelf or in a closet where it can fall down when items are retrieved.
When placing the violin in its violin case, make sure that no sharp or pointed objects can damage the varnish.
Caution: the violin should never be put under pressure or forced into its case.
Clean a violin: Rosin dust can damage the instrument varnish if it is not wiped away after each playing session. It should also always be wiped off the strings and fingerboard. For this purpose, it is best to use a soft cloth. Avoid using the same cloth to clean the rest of the body, as any rough flakes of rosin sticking to the cloth could scratch the varnish, and a fine layer of rosin dust from the cloth would be distributed all over the instrument, eventually dulling the varnish.
OTHER INSTRUCTIONS
- When using brand new strings, as the tension changes, the sound may be unstable, such as a decrease in tone and a decentralized sound. Keep the string tension and continue playing, and it will tend to become normal and stable after about one week of adaptation.
- Please play your violin more often. This will help the vibration of the plates and will improve the sound quality as playing time increases.
- The violin's sound post could fall during great fluctuations in humidity, and the back may swell when it is warm and humid, causing the sound post to become too loose and fall. Please take the instrument to your repair person.
- If you have any other questions or difficulties during use, please contact WITEK, and we will be pleased to answer your questions.
Loose strings after violin tuning can be caused by several reasons:
Analysis of causes
- Loose string shaft:
- String spindle lubrication: The spindle of a new violin or string may slide because it is well lubricated, leading to loose strings after tuning.
- Shaft wear: If the shaft is worn out, it can also lead to loose strings after tuning.
- String problems:
- New strings: New strings need time to stretch and stabilize when first used, and they may come loose soon after tuning.
- Aging strings: Strings that have been used for a long time will gradually lose their elasticity, resulting in loose strings after tuning.
- Bridge and tailpiece problems:
- Improper bridge position: Incorrect bridge position or poor contact between the bridge foot and the body will affect the string tension, resulting in loose string tuning.
- Temperature and humidity changes:
- Temperature changes: An increase in temperature will cause the strings to expand and the tension to drop, resulting in loose strings after tuning.
- Changes in humidity: Increased humidity will cause the body and strings to absorb water, resulting in decreased string tension and loose strings after tuning.
Solutions
- Check the string axle:
- Replace the string spindle: If the string spindle is badly worn, consider replacing it with a new one.
- Apply string glue: Apply an appropriate amount of string glue to the string to increase friction and prevent the string spindle from slipping.
- Replace the strings:
- Use high quality strings: Choosing good quality strings will reduce the chance of loose strings after tuning.
- Adjusting to new strings: New strings need some time to stretch and stabilize; tune the strings a few times to get used to them.
- Adjust the bridge and tailpiece:
- Adjust the bridge position: Make sure the bridge is correctly positioned and the bridge feet are in close contact with the body.
- Check the tailpiece: Make sure the tailpiece is firmly installed and not loose.
- Control environmental conditions:
- Maintain constant temperature and humidity: Try to store your violin in an environment where the temperature and humidity are relatively constant, avoiding drastic changes in temperature and humidity.
- Use moisture-proofing agents: Place moisture-proofing agents in the case to keep the inside of the case dry. By using the above methods, you can effectively reduce the looseness of violin strings after tuning, and maintain the stability and intonation of violin strings.
Manufacturer: Shanghai Muxin Wood Industry Co., Ltd.
Address: Room 1602A-1609, No. 11, Lane 803, Shuangcheng Road, Baoshan District, Shanghai 200000, China.
Imported to AUS: SIHAO PTY LTD. 1 ROKEVA STREET, EASTWOOD NSW 2122, Australia
Imported to USA: Sanven Technology Ltd. Suite 250, 9166 Anaheim Place, Rancho Cucamonga, CA 91730
| UK | REP |
YH CONSULTING LIMITED. C/O YH Consulting
Limited Office 147, Centurion House, London
Road, Staines-upon-Thames, Surrey, TW18 4AX
| EC | REP |
E-CrossStu GmbH
Mainzer Landstr. 69,
60329 Frankfurt am Main.

Warning: To reduce the risk of injury, the user must read the manual carefully.

Technical Support and E-Warranty Certificate www.vevor.com/support
VEVOR
VIOLIN OWNER'S MANUAL
MODEL: MV012L / MV012W / MV014W
VIOLIN
SET THE BRIDGE
Tighten the strings.

YH CONSULTING LIMITED. C/O YH Consulting
Limited Office 147, Centurion House, London
Road, Staines-upon-Thames, Surrey, TW18 4AX
| EC | REP |
E-CrossStu GmbH
Mainzer Landstr.69,
60329 Frankfurt am Main.

www.vevor.com/support
Model: MV012L / MV012W / MV014W
SET THE BRIDGE

YH CONSULTING LIMITED. C/O YH Consulting
Limited Office 147, Centurion House, London
Road, Staines-upon-Thames, Surrey, TW18 4AX
| EC | REP |
E-CrossStu GmbH
Mainzer Landstr.69,
60329 Frankfurt am Main.

Affordable. Reliable. Home Improvement.
VIOLIN USER MANUAL
MODEL: MV012L / MV012W / MV014W
www.vevor.com/support
Model: MV012L / Model MV012W / Model MV014W
SET THE BRIDGE
Tighten the strings.

YH CONSULTING LIMITED. C/O YH Consulting
Limited Office 147, Centurion House, London Road, Staines-upon-Thames, Surrey, TW18 4AX
| EC | REP |
E-CrossStu GmbH
Mainzer Landstr.69,
60329 Frankfurt am Main.

Affordable. Reliable. Home Improvement.
VIOLIN OWNER'S MANUAL
MODEL: MV012L / MV012W / MV014W
www.vevor.com/support
Model: MV012L / MV012W / MV014W
SET THE BRIDGE
Check the peg, make sure the peg is

YH CONSULTING LIMITED. C/O YH Consulting
Limited Office 147, Centurion House, London Road, Staines-upon-Thames, Surrey, TW18 4AX
| EC | REP |
E-CrossStu GmbH
Mainzer Landstr.69,
60329 Frankfurt am Main.

Affordable. Reliable. Home Improvement.
INSTRUCTION MANUAL FOR VIOLIN
MODELS: MV012L / MV012W / MV014W
www.vevor.com/support
Model: MV012L / MV012W / MV014W
SET THE BRIDGE
Tighten the strings.

YH CONSULTING LIMITED. C/O YH Consulting
Limited Office 147, Centurion House, London Road, Staines-upon-Thames, Surrey, TW18 4AX
| EC | REP |
E-CrossStu GmbH
Mainzer Landstr.69,
60329 Frankfurt am Main.

Affordable. Reliable. Home Improvement.
MANUAL FOR VIOLIN OWNERS
MODEL: MV012L / MV012W / MV014W
www.vevor.com/support
Model: MV012L / MV012W / MV014W
SET THE BRIDGE
Tighten the strings.

YH CONSULTING LIMITED. C/O YH Consulting Limited Office 147, Centurion House, London Road, Staines-upon-Thames, Surrey, TW18 4AX
| EC | REP |
Affordable. Reliable. Home Improvement.
INSTRUCTION MANUAL FOR VIOLIN
MODEL: MV012L / MV012W / MV014W
www.vevor.com/support
Model: MV012L / MV012W / MV014W
SET THE BRIDGE
Place the bridge between the F-holes.
Tighten the strings.
Pick a note on the "A" string.

YH CONSULTING LIMITED. C/O YH Consulting
Limited Office 147, Centurion House, London
Road, Staines-upon-Thames, Surrey, TW18 4AX
| EC | REP |
E-CrossStu GmbH
Mainzer Landstr.69,
60329 Frankfurt am Main.





- VIOLIN OWNER'S MANUAL
- SET THE BRIDGE
- PLACE THE BRIDGE BETWEEN THE F-HOLES
- TIGHTEN THE STRINGS
- ATTACH THE SHOULDER REST
- HOLD THE VIOLIN BETWEEN YOUR LEGS
- ADJUST THE PLACEMENT OF THE FEET OF THE SHOULDER REST
- ROSIN YOUR BOW
- CARE AND MAINTENANCE OF A VIOLIN
- OTHER INSTRUCTIONS
- LOOSE STRINGS AFTER VIOLIN TUNING CAN BE CAUSED BY SEVERAL REASONS
- ANALYSIS OF CAUSES
- SOLUTIONS
- VEVOR
- VIOLIN USER MANUAL
- INSTRUCTION MANUAL FOR VIOLIN
- MANUAL FOR VIOLIN OWNERS
Brand : Vevor
Model : MV012W
Category : Musical instrument