USER MANUAL AQ-913F-UV 25W Vevor
Technical Support and E-Warranty Certificate www.vevor.com/support
SERIES: AQ-A F-UV_B W
TIPS: A IS 901 / 903 / 905 / 907 / 911 / 913
B IS 10 / 11 / 12 / 15 / 20 / 25
We continue to be committed to provide you tools with competitive price. "Save Half", "Half Price" or any other similar expressions used by us only represent estimate of savings you might benefit from buying certain tools with us compared to top brands and does not necessarily mean to cover all categories of tools offered. We kindly remind you to verify carefully when you are placing an order with us that you are actually saving half in comparison with the top major brands.
VEVOR®
TOUGH TOOLS, HALF PRICE
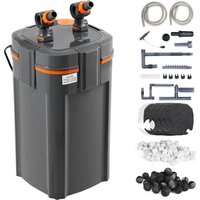
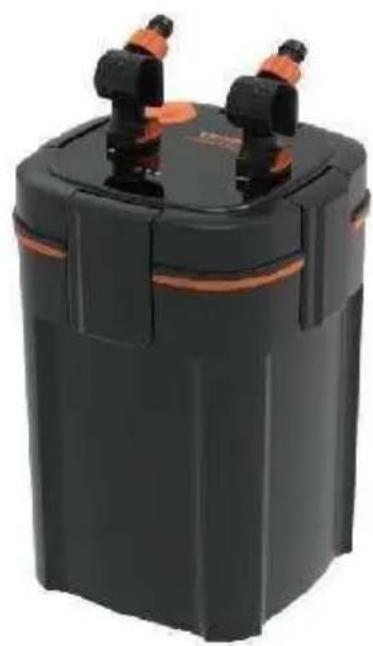
AQUARIUM FILTER
SERIES: AQ-A F-UV_B W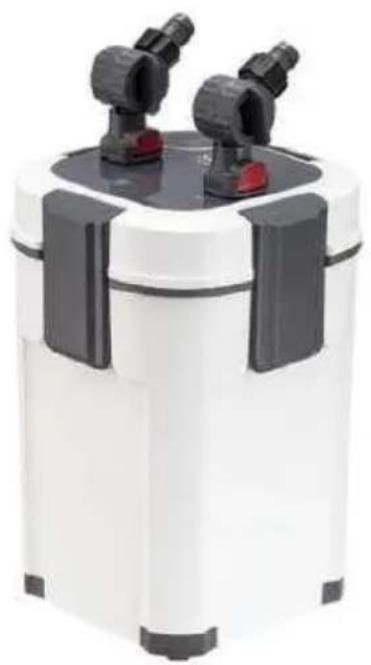
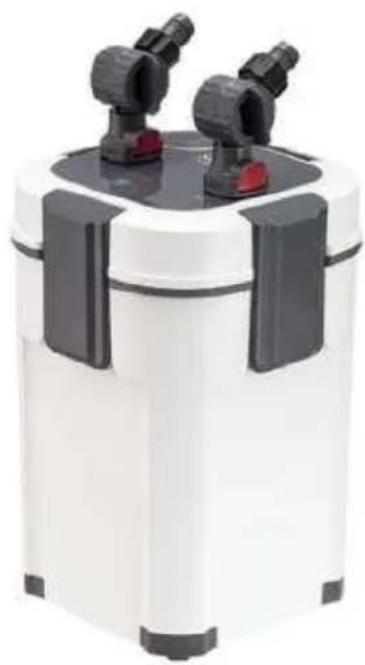
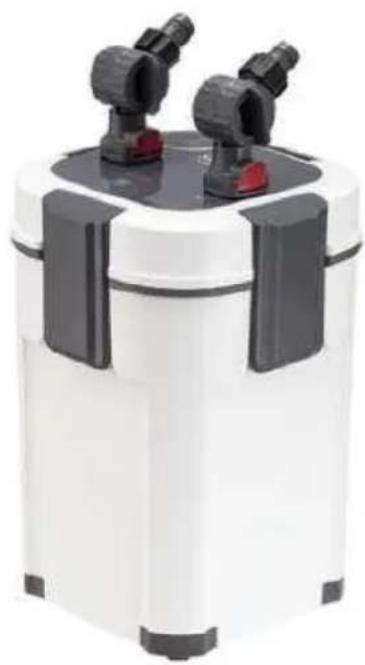
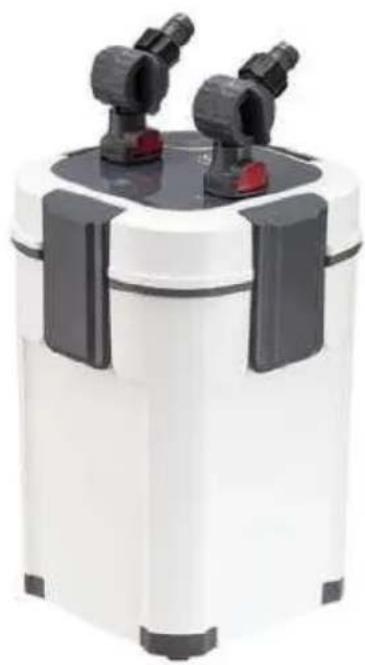
White
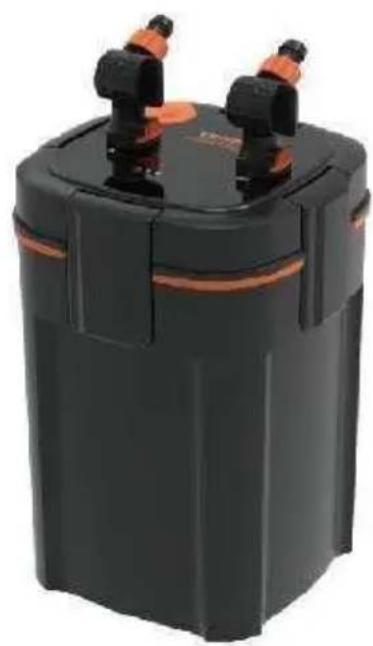
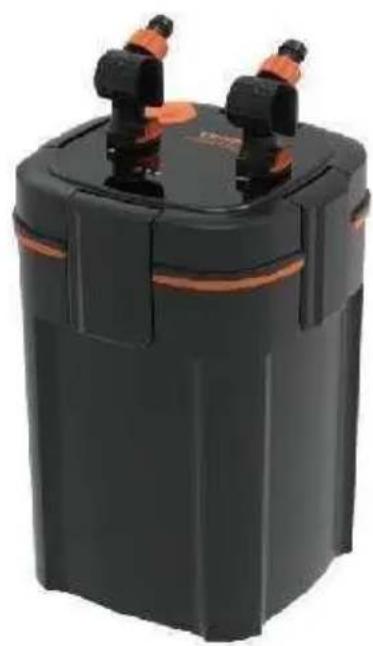
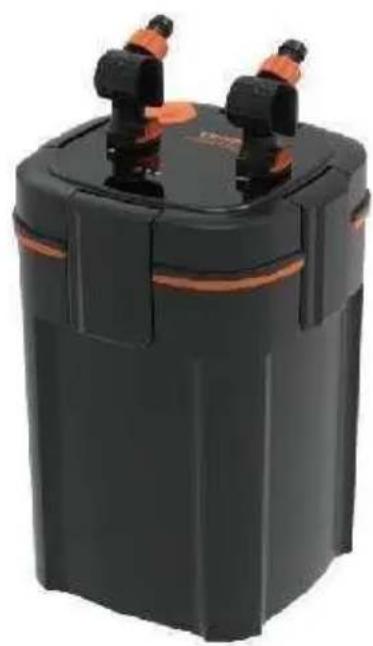
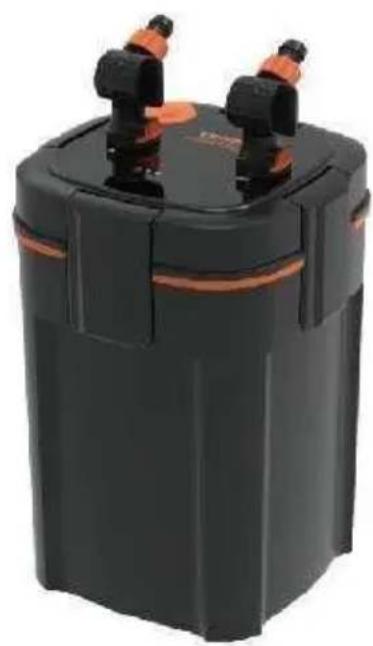
Black
Have product questions? Need technical support? Please feel free to contact us:
Technical Support and E-Warranty Certificate
www.vevor.com/support
This is the original instruction. Please read all manual instructions carefully before operating. VEVOR reserves the right to interpret the user manual. The appearance of the product shall be subject to the product you received. Please forgive us that we won't inform you if there are any technology or software updates on our product.
 | Warning-To reduce the risk of injury, user must re instructions manual carefully. |
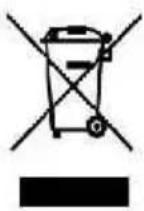 | This product is subject to the provision of European D 2012/19/EC. The symbol showing a wheelie bin cros through indicates that the product requires separate re collection in the European Union. This applies to the and all accessories marked with this symbol. Products as such may not be discarded with normal domestic w must be taken to a collection point for recycling electr electronic devices |
READ AND FOLLOW ALL SAFETY INSTRUCTIONS.
DANGER - To avoid possible electric shock, special care should be taken since water is employed in the use of aquarium equipment. For each of the following situations, do not attempt repairs by yourself; return the appliance to an authorized service facility for service or discard the appliance.
- This appliance can be used by children aged from 8 years and above and persons with reduced physical, sensory or mental capabilities or lack of experience and knowledge if they have been given supervision or instruction concerning use of the appliance in a safe way and understand the hazards involved. Children shall not play with the appliance. Cleaning and user maintenance shall not be made by children without supervision.
- The supply cord cannot be replaced. If the cord is damaged, the appliance should be scrapped.
- The maximum inlet water pressure, in pascals: 0.03 MPa
- The minimum inlet water pressure, in pascals: 0.01 MPa, if this is necessary for the correct operation of the appliance.
- The supply cord cannot be replaced; if the cord is damaged, the appliance should be scrapped.
WARNING - This appliance contains a UV emitter. Do not stare at the source.
Hereby we sincerely thank you for purchasing our product. To operate the product safely, please read this manual carefully.
Warning:
- Before using the product, please check if there is any damage on the power cord. If yes, please do not use the product.
- To avoid default, please use the product under the regulated voltage frequency.
- Please do not plug or pull the power cord if your hands are wet.
- When maintaining or moving the product or when there is any abnormal situation, please turn off the power first.
- Please make sure the plug and socket are protected away from water.
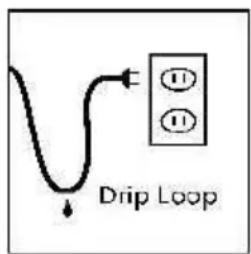
- Please do not pull the power cord straightly when using. Please keep...
Power cord to be "U" shape (see picture below) to prevent water from going inside the socket along the power cord.
- Please do not use the product near flammable materials.
- Please use a professional technician for maintenance.
- Please do not reinstall the product to avoid any damage.
Notice:
- After purchasing, please check if there is any damage or missing parts to the product.
- Please operate the product underneath the waterline of the tank.
- Please install the product on a flat surface.
- When moving the product, please do not take it by holding the valve; that way may cause breakage on the valve and further cause water leakage.
- It is suggested to clean the impeller and propeller once per month; dirt will affect the lifetime of the impeller.
- Impeller is an easily worn out item; it is suggested to replace once per year.
- To reach the best UV effect, it is suggested to replace the UV light per half year.
- This product should work with water.
- Please periodically (15-20 days) clean the filter material to remove the
dirty stuff which will result in low water flow.
- If used in marine water, periodically remove salt from the product or power cord to avoid electric leakage.
SAVE THESE INSTRUCTIONS
| Model | AQ-901F-UV10W | AQ-903F-UV11W | AQ-905F-UV12W | AQ-907F-UV15W | AQ-911F-UV20W | AQ-913F-UV25W |
| Voltage | AC110-120 V 60 Hz or AC220-240V 50/60Hz |
| Pump Power | 10 W | 11 W | 12 W | 15 W | 20 W | 25 W |
| UV Power | 11 W |
| Flow Max | 850 L/H | 1000L/H | 1200L/H | 1500L/H | 2000L/H | 2500L/H |
| Noise | <50dB | <50dB | <50dB | <50dB | <50dB | <50dB |
| Filter Number | 2 | 3 | 4 | 4 | 5 | 5 |
| Use To Water Tank | 55 gal | 75 gal | 100 gal | 120 gal | 200 gal | 235 gal |
INSTRUCTIONS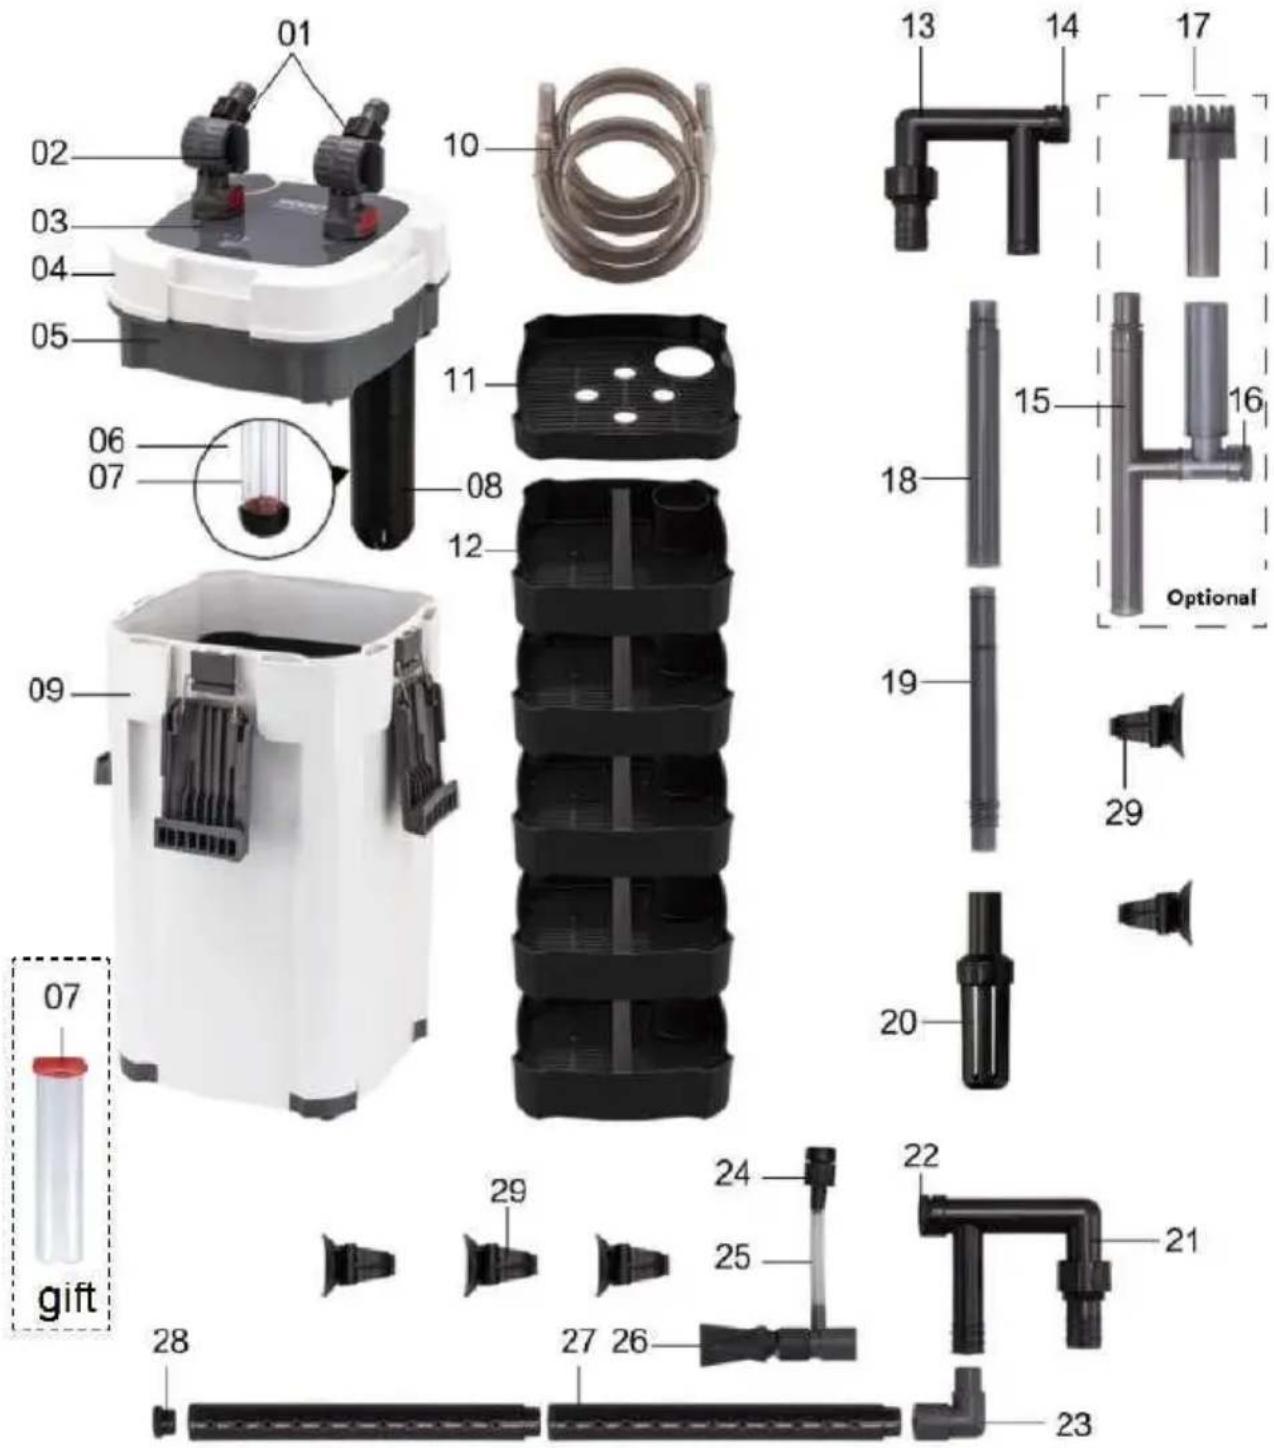
| 01 | Input & output discreteness | 08 | UV light sleeve | 15 | Surface clear | 22 | Water outlet adjustment switch |
| 02 | Pumping handle | 09 | Barrel body | 16 | Degreasing film adjustment switch | 23 | Bend pipe |
| 03 | UV timer switch | 10 | PVC Water pipe | 17 | Floating head | 24 | Air volume regulator |
| 04 | Barrel head | 11 | Basket head | 18 | Extension tube | 25 | Air tube |
| 05 | Water pump | 12 | Filter basket | 19 | Flexible tube | 26 | Outlet |
| 06 | Quartz glass tube | 13 | Water inlet tube | 20 | Fleur bouquet | 27 | Rain pipe |
| 07 | UV light | 14 | Water inlet adjustment switch | 21 | discharging tube | 28 | Spray bar cover |
| 29 | Sucker |
INSTALLATION INSTRUCTIONS
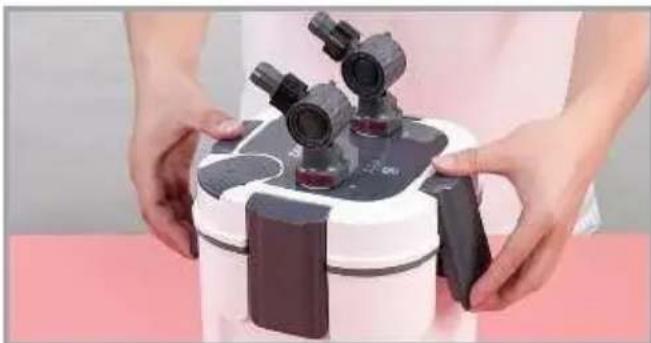
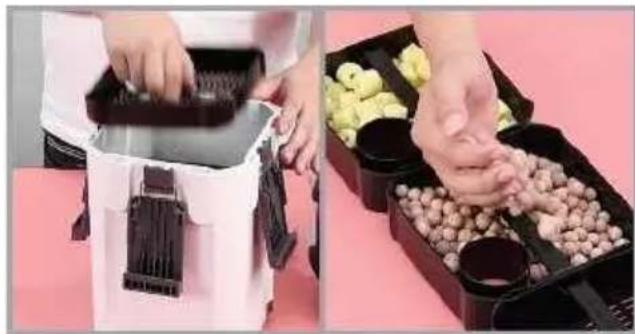
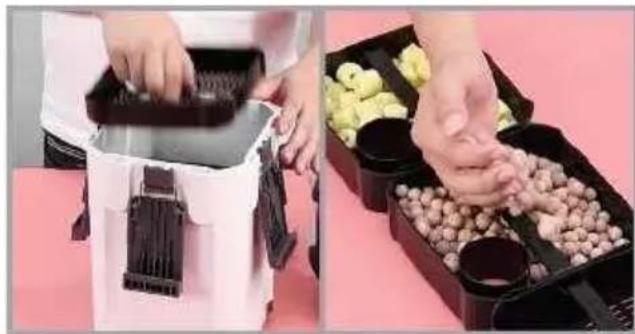
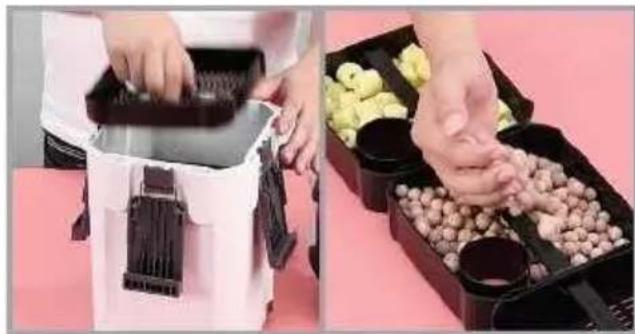
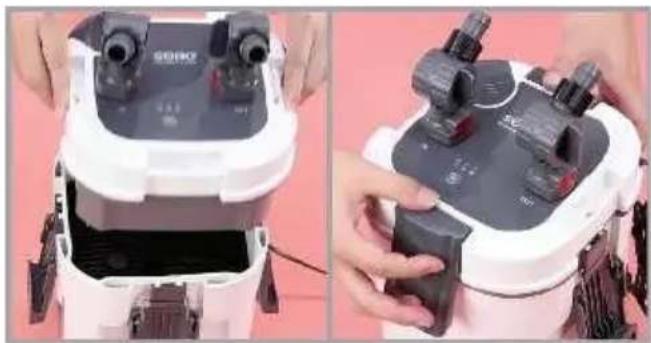
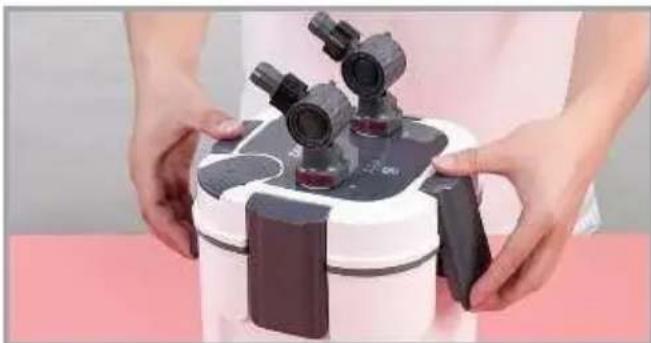
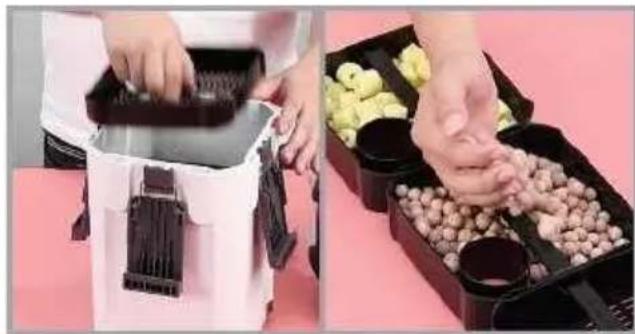
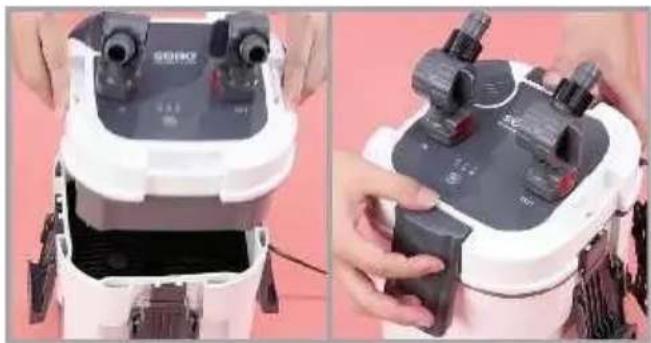
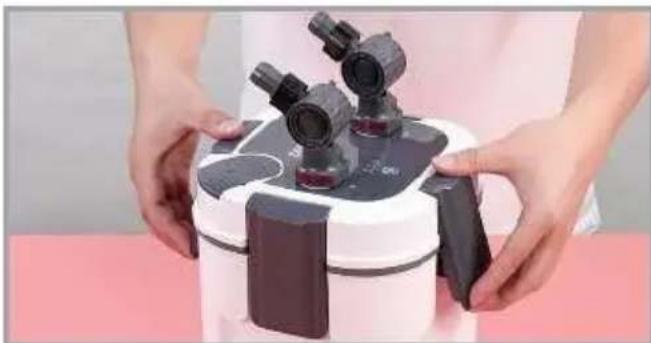
- Open the fixing buckle of the bucket cover, take out the filter basket and pick up the cleaned filter.
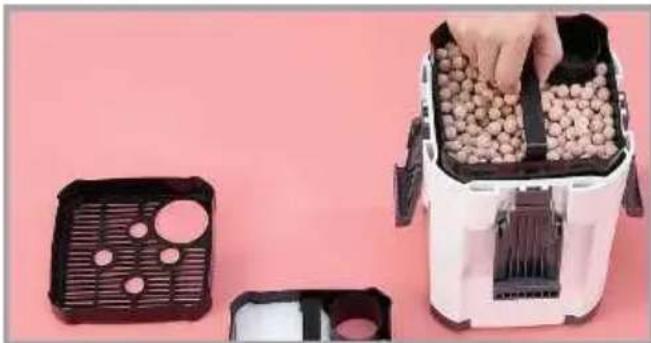
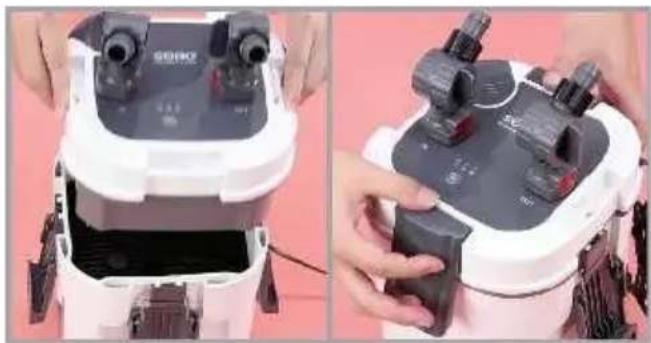
- Put back the filter basket.
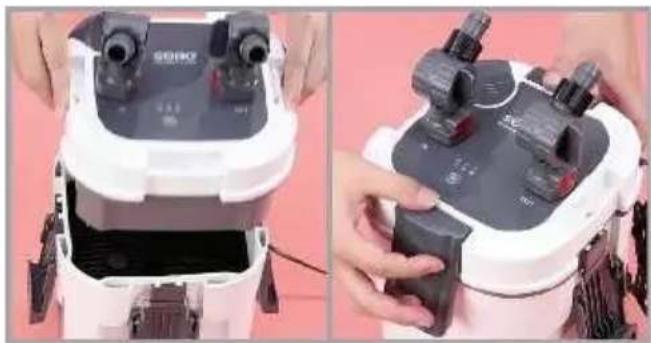
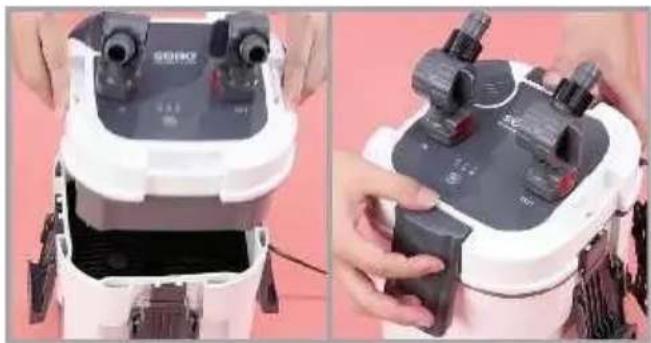
- Close the lid and fasten the fixing buckle.
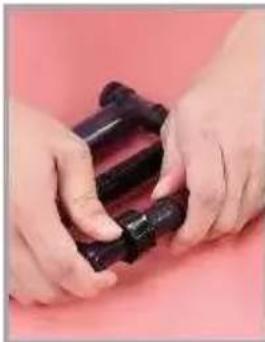
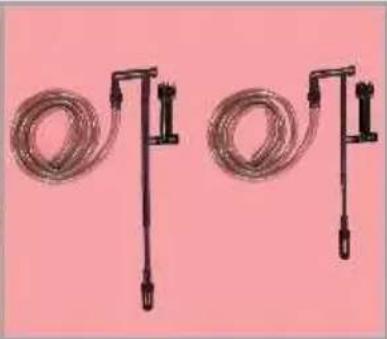
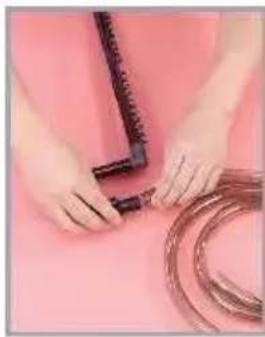
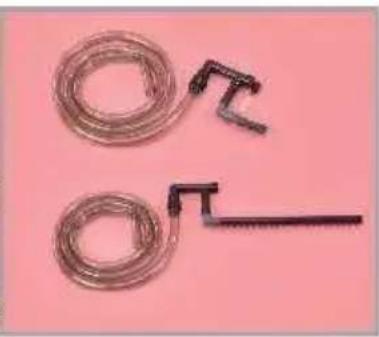
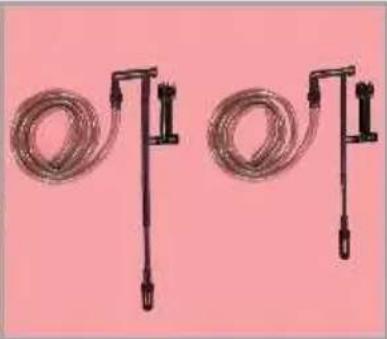
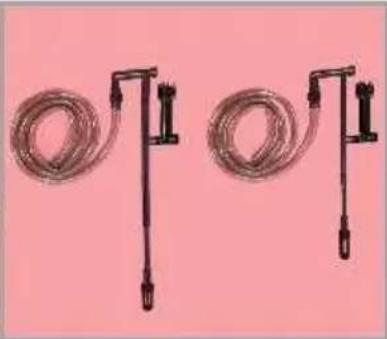
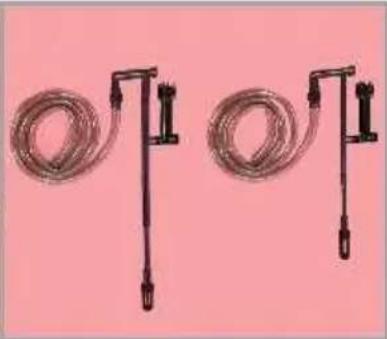
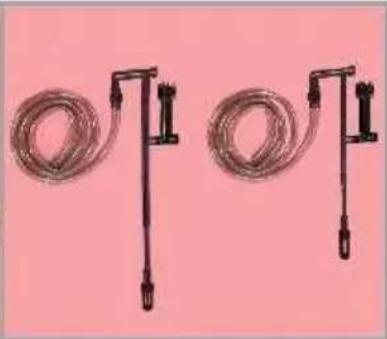
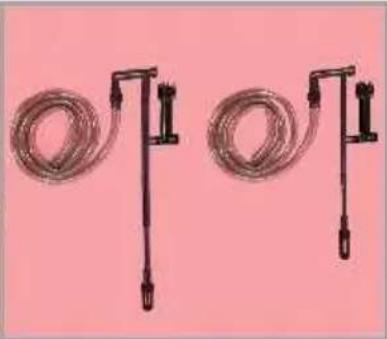
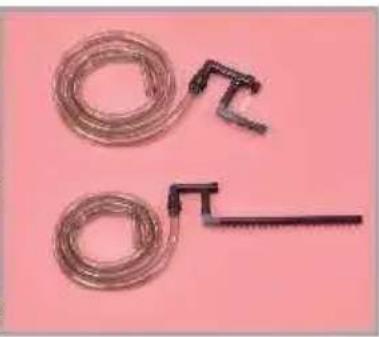
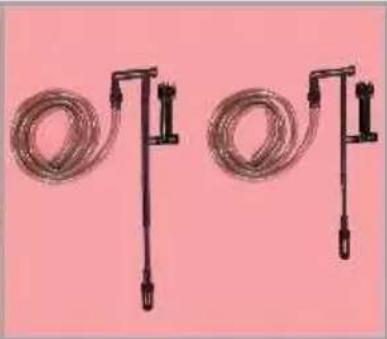
- Connect the water inlet pipe hose and fix it in the fish tank.
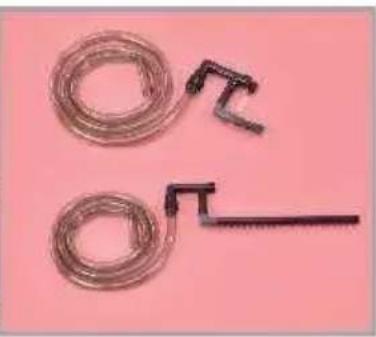
- Connect the outlet pipe and hose and fix it in the fish tank.
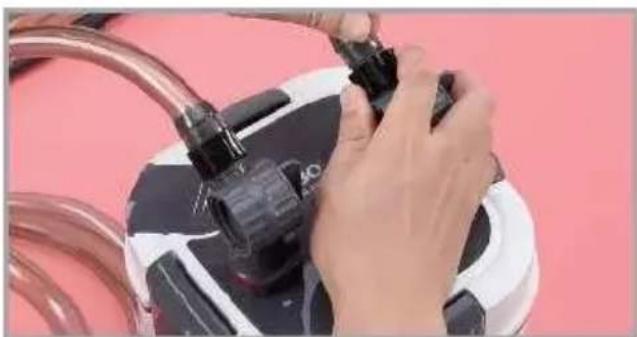
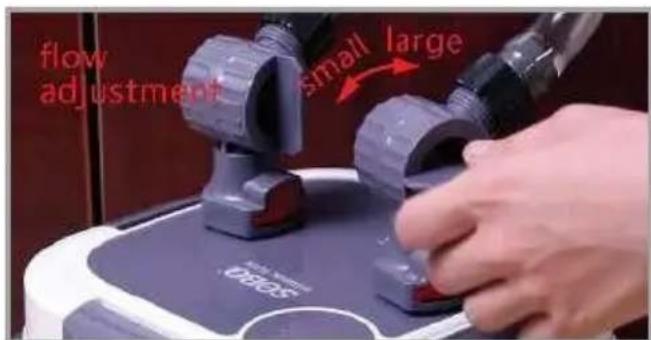
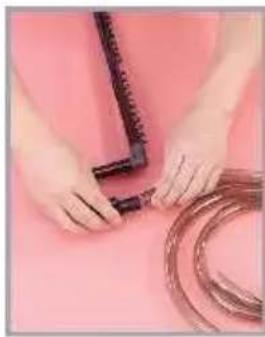
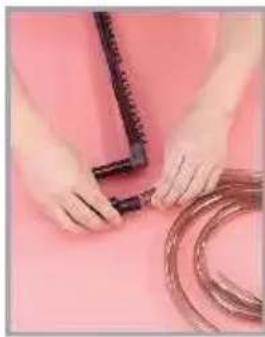
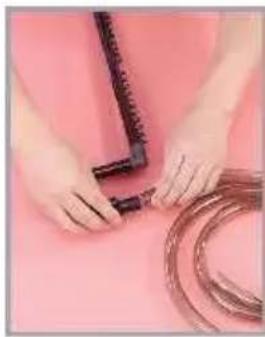
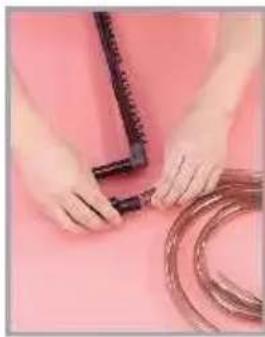
- The other end of the hose is connected to the water inlet and water outlet on the barrel respectively, and the nut is screwed to fix it.
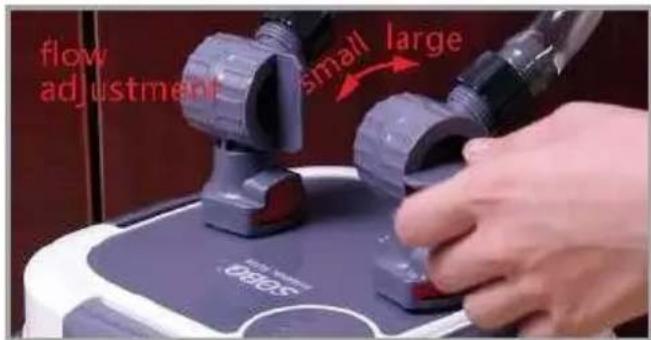
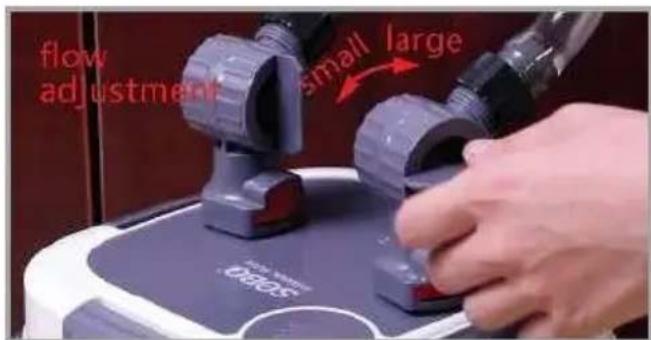
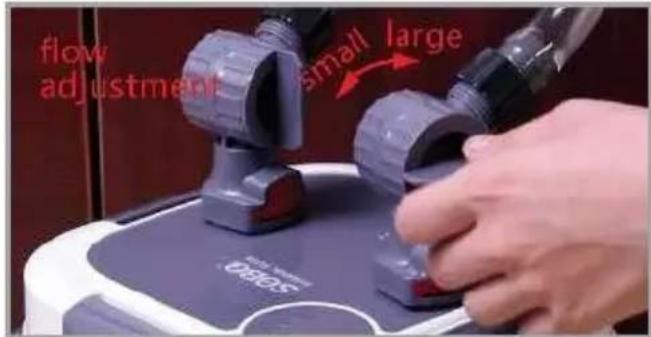
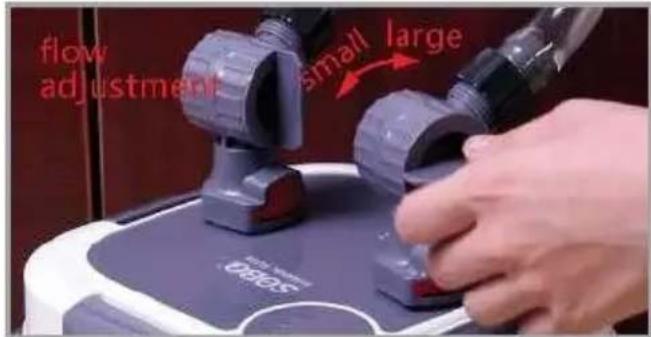
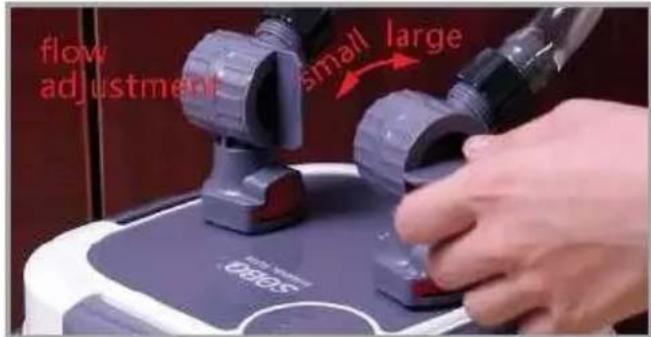
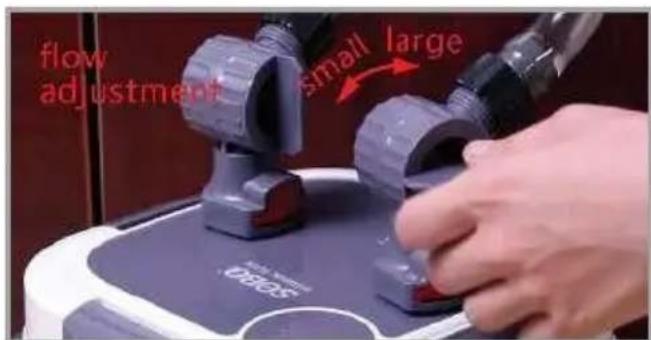
- Make sure that the flow adjustment is turned on to the maximum. Fill the fish tank with water, and ensure the water surface is more than 12cm from the edge of the tank.
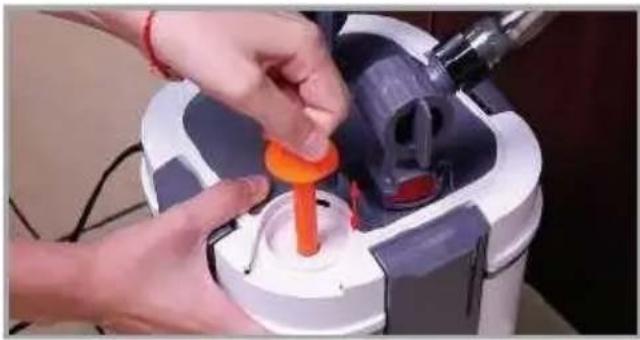
- Pull the pump handle up and down 2 to 4 times to suck the water into the bucket.
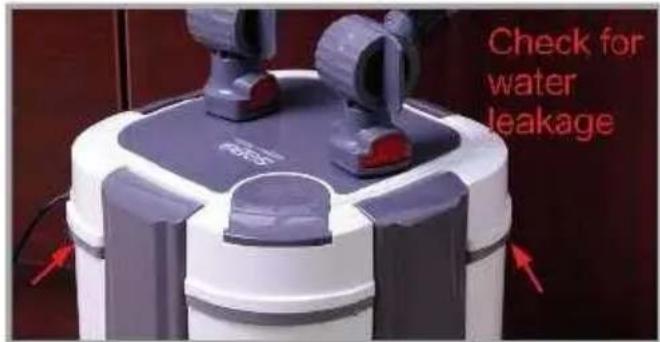
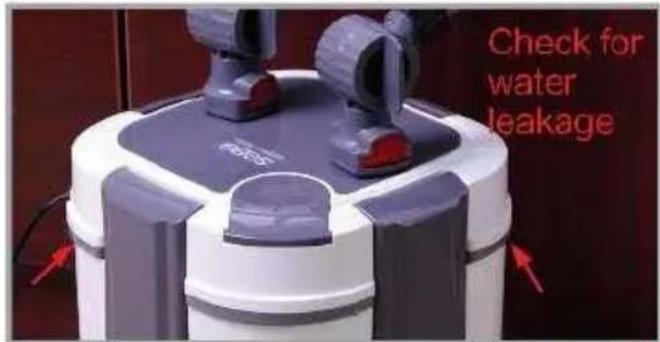
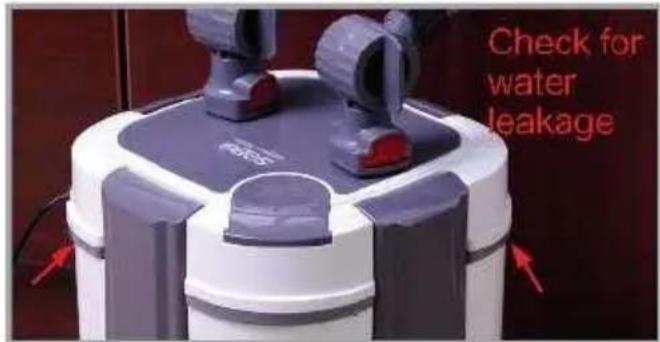
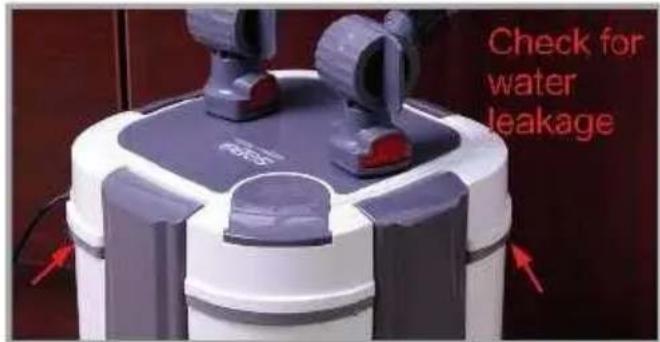
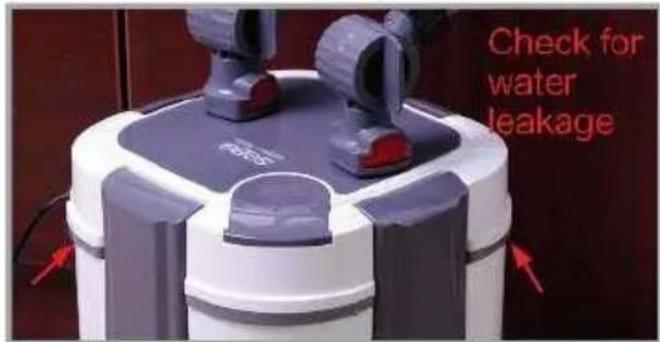
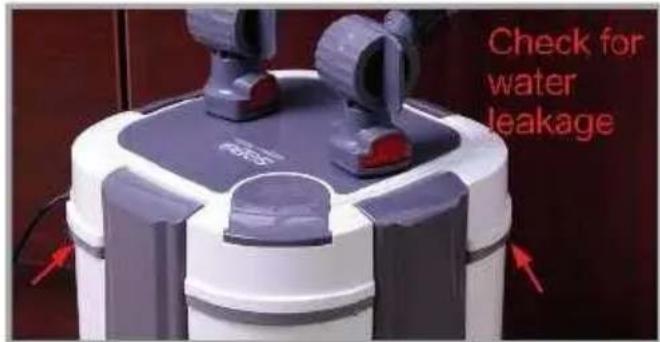
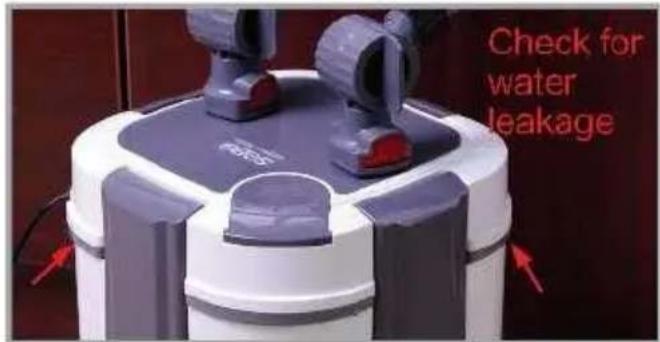
- After connecting to the power supply, check whether there is water leakage around the filter barrel. After 30 to 60 minutes of normal startup, check again for water leakage. If there is no problem, it can be used normally.
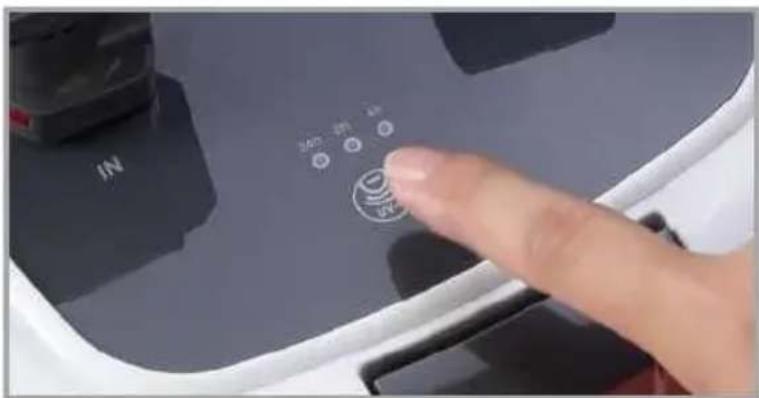
- Touch the UV button to turn on the UV germicidal lamp, and touch it again to set the timer to turn on the germicidal lamp.
1st gear: 24h light on, normally open but not close. 2nd gear: 8h light on, 8 on and off 16 hours cycle. 3rd gear: 4h light on, 4 hours on and off 20 hours cycle. 4th gear: the light is off, normal off.
TIP:
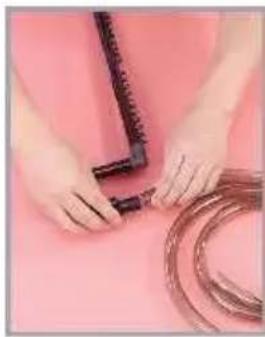
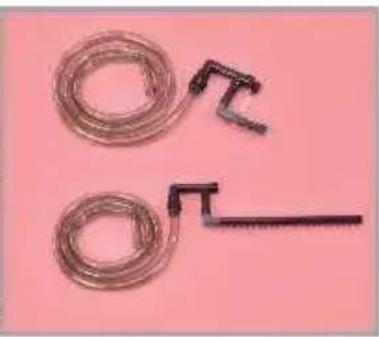
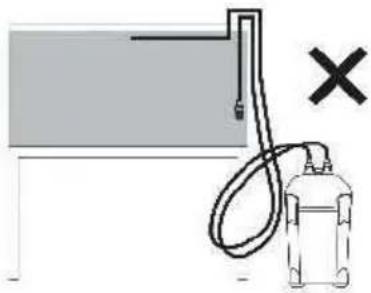
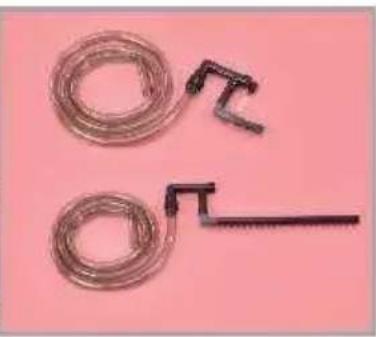
When connecting PVC tubing, please make sure
the flexible tube is not twisted.
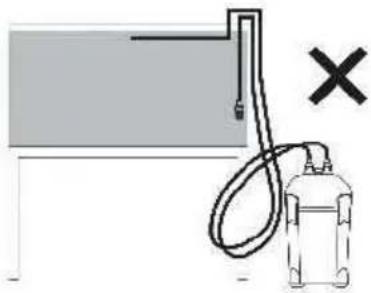
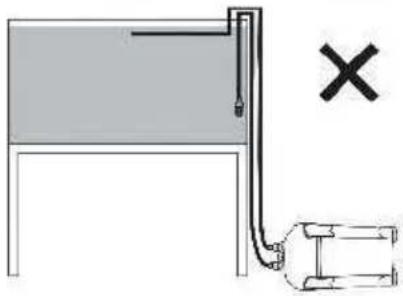
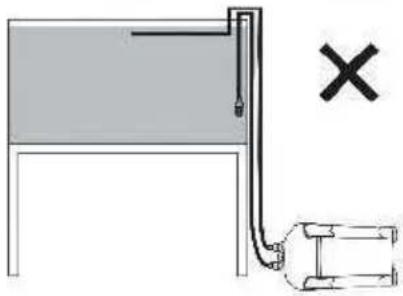
Position the canister filter on a flat place, do not slope or turn upside down.
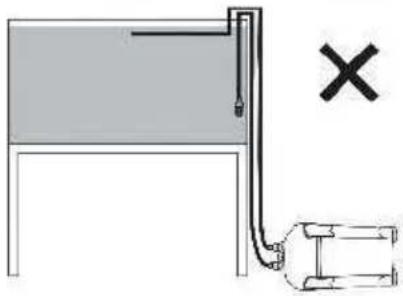
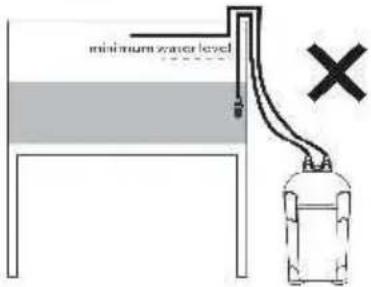
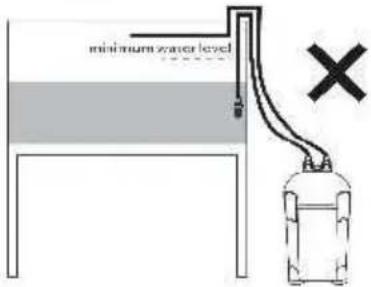
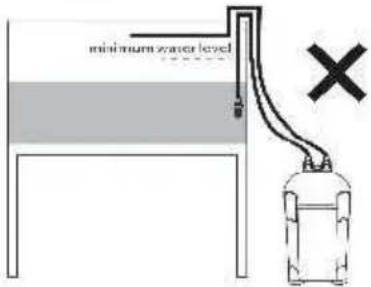
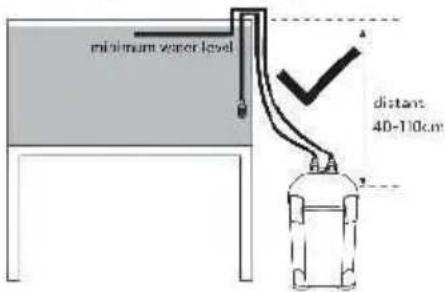
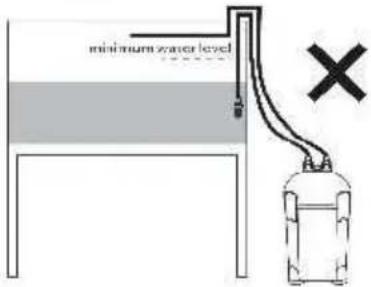
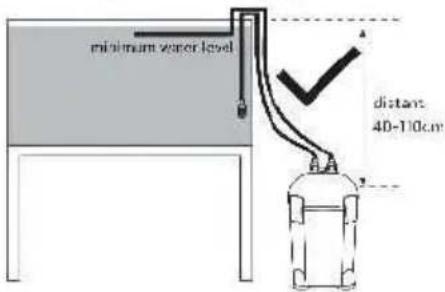
When assembling the inlet pipe, please make sure the water in the tank is
above the minimum water level.
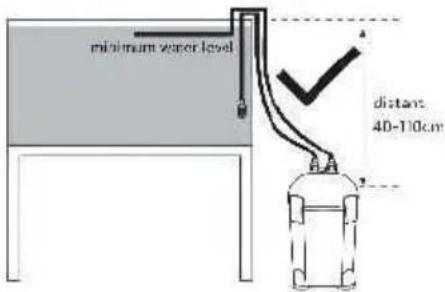
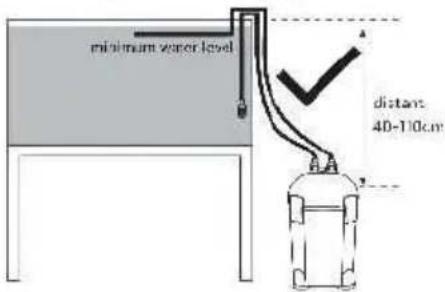
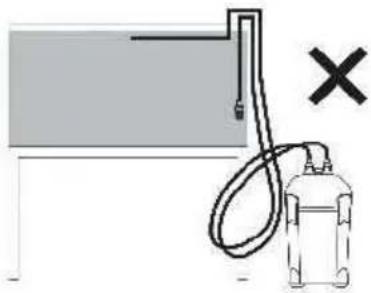
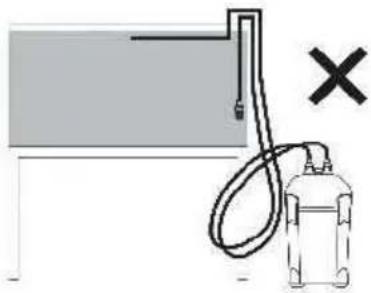
Canister filter must be placed on flat ground,
40~110cm below the water level.
CLEANING AND REPLACEMENT INSTRUCTION
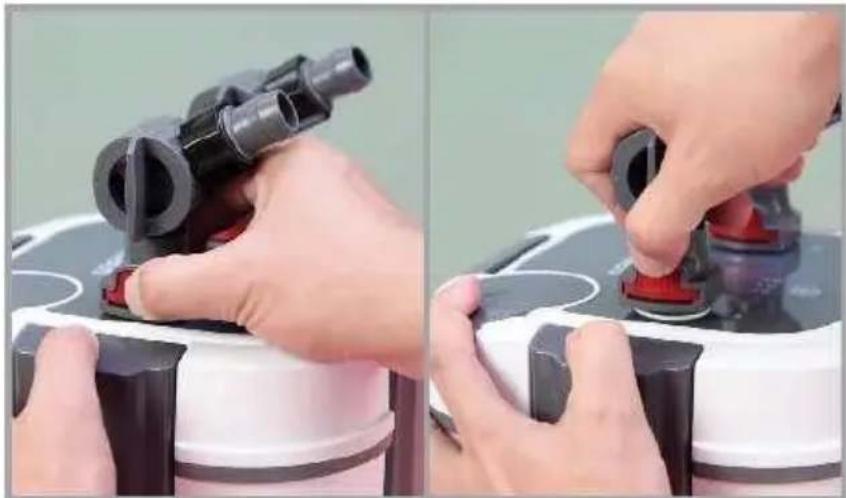
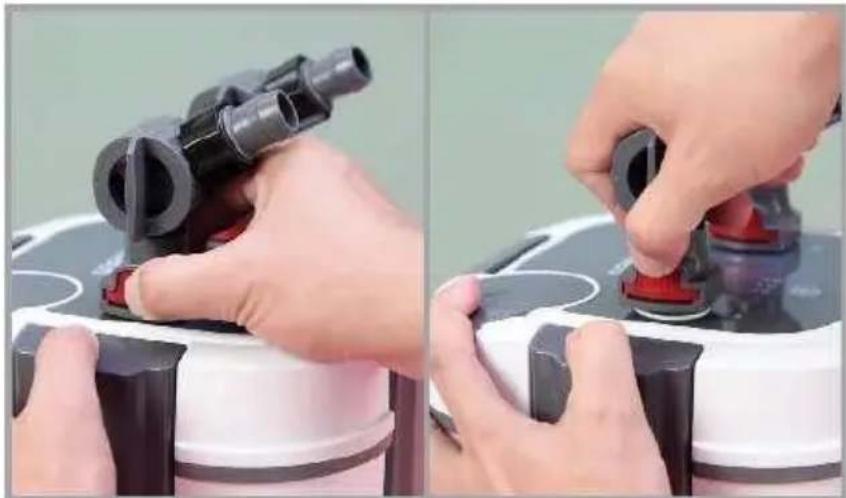
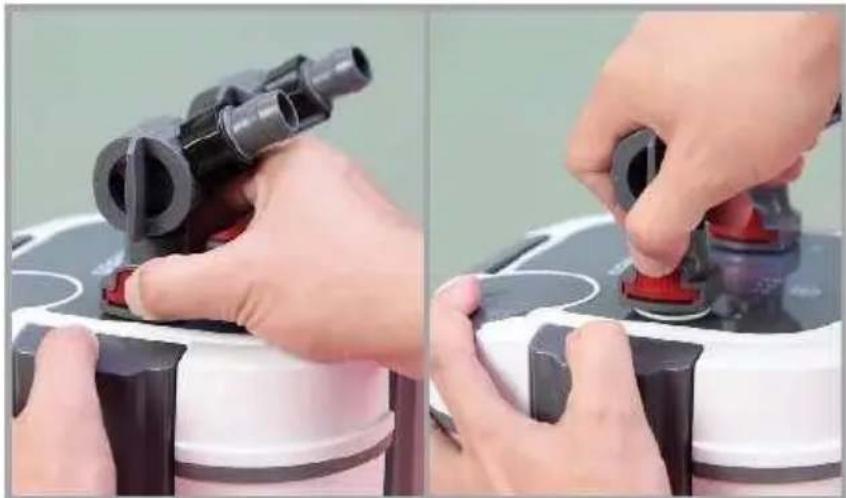
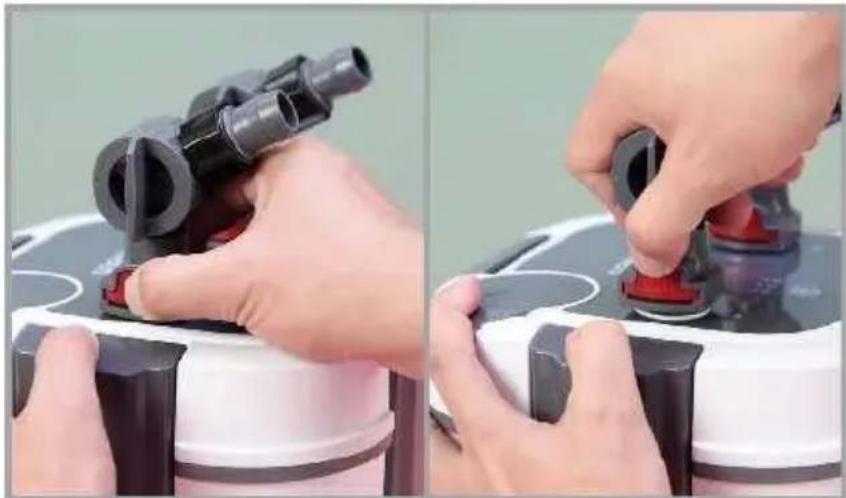
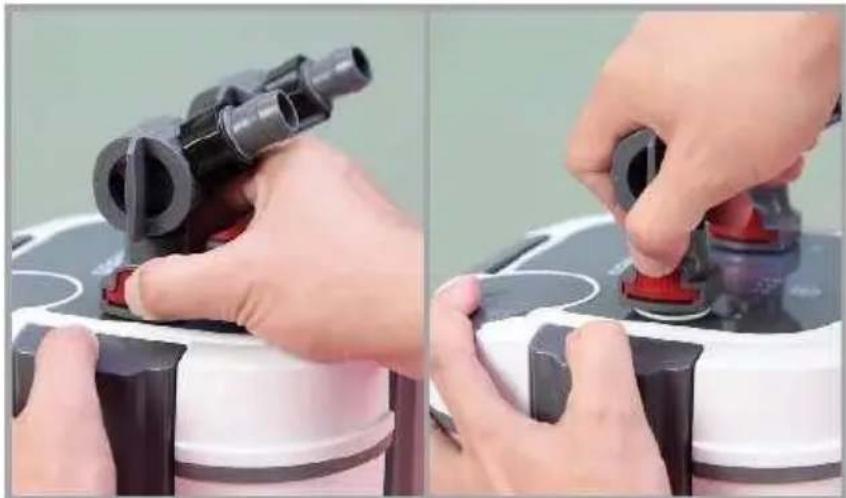
- Press the buttons on both ends of the water inlet and outlet to pull out the water inlet and outlet for cleaning.
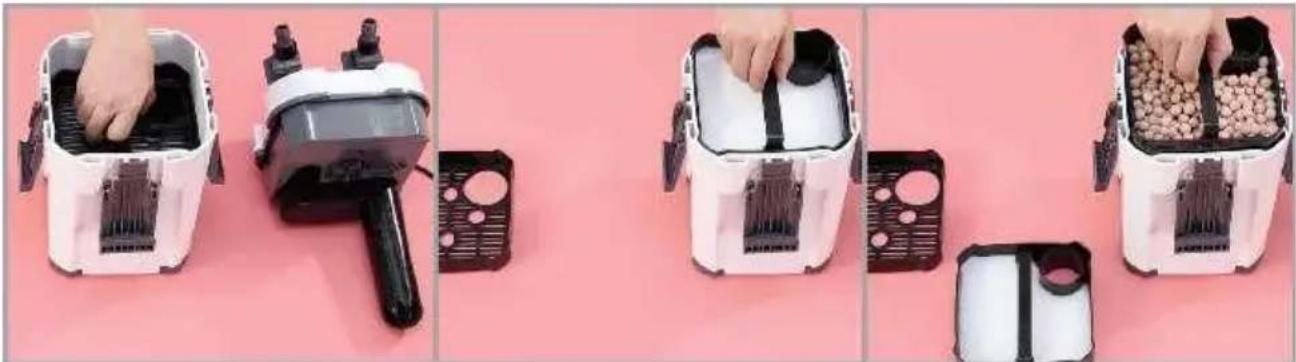
- Open the barrel cover and take out the filter material for cleaning or replacement.
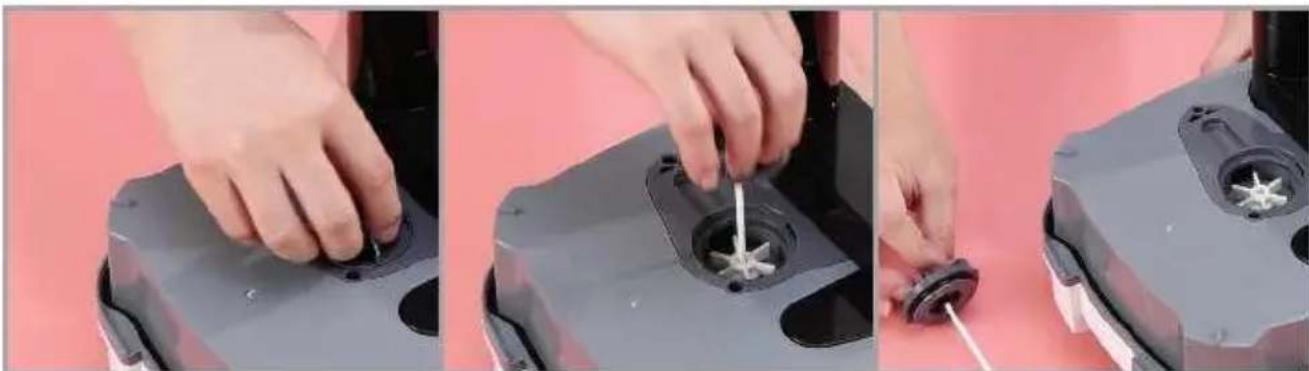
- Rotate the water drum cover to open the buckle, take out the clean or replace the new rotor as required. The rotor holes can be cleaned with a brush.
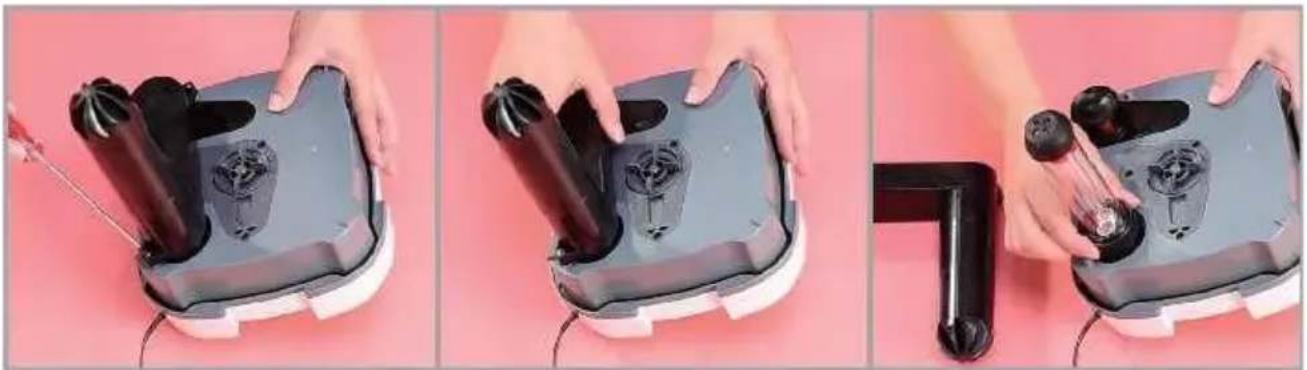
- Unscrew the screw with a Phillips screwdriver and remove the cover for cleaning. After removing the germicidal lamp cover, wipe the quartz tube with a damp towel or clean water. Do not immerse the quartz tube when cleaning, to prevent water from flowing into the head line and causing a short circuit.
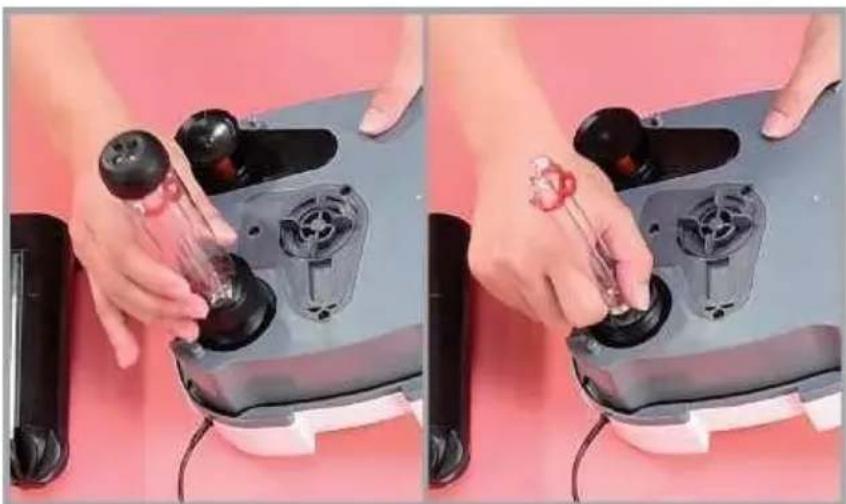
- If you need to replace the UV lamp, you can twist off the fastening nut, remove the quartz sleeve, and remove the UV lamp for replacement.
TROUBLESHOOTING
| Probable Situations | Reasons | Treatment method |
| Cannot start | Power supply is unplugPump head damage.The impeller stuck by foreign matters.The impeller is not fixe well. | Connect to power supplyChange a new pump hTake out the foreign matters.Fix impeller well. |
| Water leaking | Water valve tap is damaged.Water valve o-ring is damaged or with foreign matter.Power head o-ring is damaged or with foreign matters.Power head and caniste not locked well.PVC tubing and water valve is not connected weImpeller cover o-ring is damaged or with foreign matters. | Change new water valve tapsChange a new water va o-ring or remove foreign matters.Change a new power ho-ring or remove foreign matters.Re-fix well.Re-fix well.Change a new impeller cover o-ring or remove foreign matters. |
| Noisy | Impeller is damaged.The impeller stuck by foreign matters or not fixe correctly.Inlet tap is closed.Air exists in canister filt | Change a new impeller.Remove foreign matters re-fix impeller.Open inlet valve taps.Shake canister filter bod and let air out completely. |
| Abnormal start | The canister is not fille with water.The water in aquarium too low.Water valve taps are n open. | Fully fill canister filter casing with water.The water in aquarium must be above the min. water level.Open water valve taps. |
| Little water output | Inlet and outlet valve a notfully open.Inlet and outlet pipes a too dirty.PVC tubing is too dirty. | Open Inlet and outlet va fully.Clean the inlet and outl pipes.Clean the PVC tubing. |
Address: Baoshanqu Shuangchenglu 803long 11hao 1602A-1609shi Shanghai
Imported to AUS: SIHAO PTY LTD. 1 ROKEVA STREETEASTWOOD NSW 2122 Australia
Imported to USA: Sanven Technology Ltd. Suite 250, 9166 Anaheim Place, Rancho Cucamonga, CA 91730
Pooledas Group Ltd
Unit 5 Albert Edward House, The Pavilion Preston, United Kingdom
SHUNSHUN GmbH
Römeräcker 9 Z2021, 76351
Technical Support and E-Warranty Certificate
www.vevor.com/support
VEVOR®
NOTES: A CORRESPONDS TO 901/903/905/907/911/913
B IS 10/11/12/15/20/25
We continue to be committed to provide you tools with competitive price. "Save Half", "Half Price" or any other similar expressions used by us only represent of savings you might benefit from buying certain tools with us compared top brands and does not necessarily mean to cover all categories of tools offered are kindly reminded to verify carefully when you are placing an order with us actually saving half in comparison with the top major brands.
VEVOR®
TOUGH TOOLS, HALF PRICE
AQUARIUM FILTER
SERIES: AQ- A F-UV B W
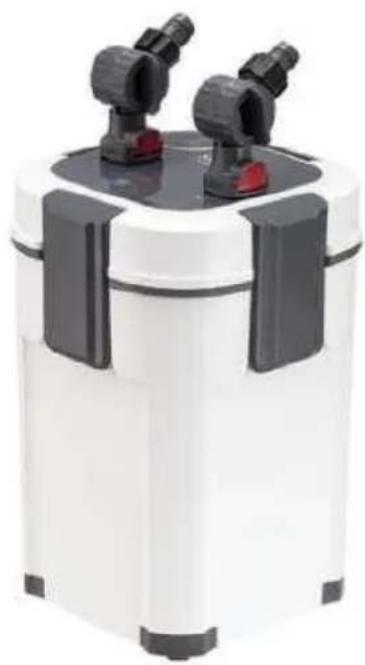
White
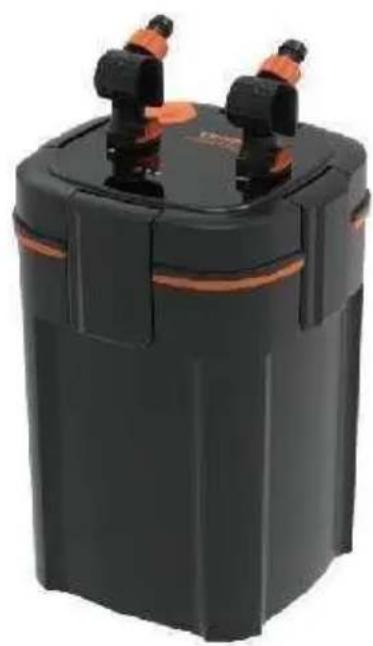
Black
Have product questions? Need technical support? Please feel free to contact us:
Technical Support and E-Warranty Certificate
www.vevor.com/support
This is the original instruction. Please read all manual instructions carefully before operating. VEVOR reserves a clear interpretation of the user manual. The appearance of the product shall be subject to the product you received. Please forgive us that we won't inform you of any technology or software updates on our product.
Note:
| 01 | Input & output discreteness | 08 | UV light sleeve | 15 | Surface clear | 22 | Water outlet adjustment switch |
| 02 | Pumping handle | 09 | Barrel body | 16 | Degreasing film adjustment switch | 23 | Bend pipe |
| 03 | UV timer switch | 10 | PVC Water pipe | 17 | Floating head | 24 | Air volume regulator |
| 04 | Barrel head | 11 | Basket head | 18 | Extension tube | 25 | Air tube |
| 05 | Water pump | 12 | Filter basket | 19 | Flexible tube | 26 | Outlet |
| 06 | Quartz glass tube | 13 | Water inlet tube | 20 | Fleur bouquet | 27 | Rain pipe |
| 07 | UV light | 14 | Water inlet adjustment switch | 21 | discharging tube | 28 | Spray bar cover |
| 29 | Sucker |
INSTALLATION INSTRUCTIONS
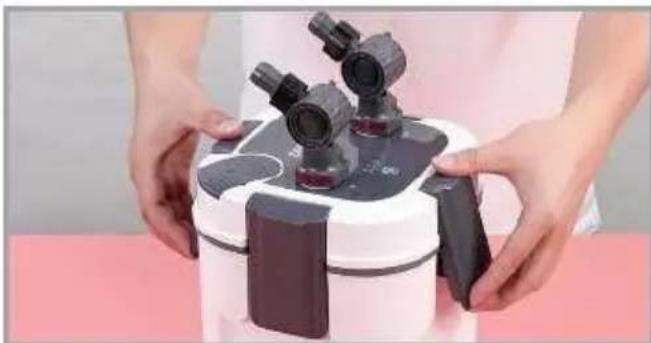
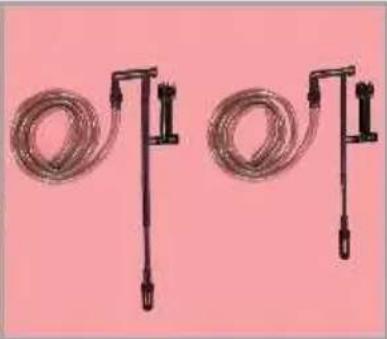
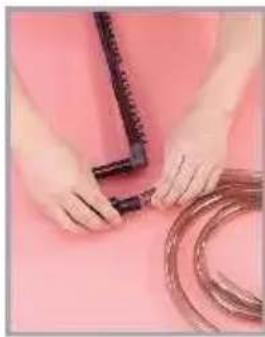
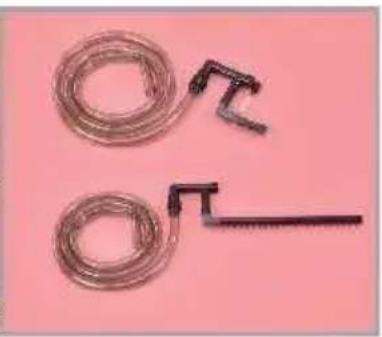
When connecting PVC tubing, please make sure
the flexible tube is not twisted.
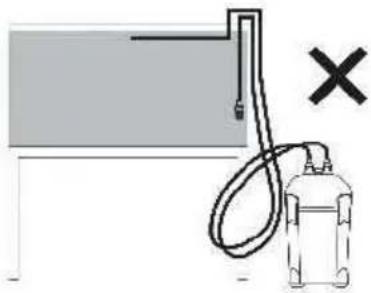
Position canister filter on a flat place, do not slope or upside down.
When assembling the inlet pipe, please make sure the water in the tank is
above the minimum water level.
Canister filter must be placed on flat ground,
40~110cm below the water level.
CLEANING AND REPLACEMENT INSTRUCTIONS
Unit 5 Albert Edward House, The Pavilion
Preston, United Kingdom
SHUNSHUN GmbH
Römeräcker 9 Z2021, 76351
www.vevor.com/support
VEVOR®
We continue to be committed to provide you with tools at competitive prices. "Save Half", "Half Price" or any other similar expressions used by us only represent an estimate of savings you might benefit from buying certain tools with us compared to top brands, and does not necessarily mean to cover all categories of tools offered. We kindly remind you to verify carefully when placing an order with us that you are actually saving half in comparison with the top major brands.
VEVOR®
TOUGH TOOLS, HALF PRICE
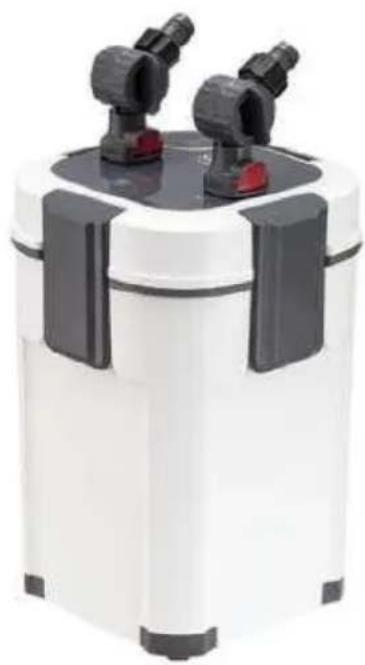
AQUARIUM FILTER
SERIE: AQ-A F-UV B W
White
Black
Have product questions? Need technical support? Please feel free to contact us:
Technical Support and E-Warranty Certificate
www.vevor.com/support
This is the original instruction. Please read all manual instructions carefully before operating. VEVOR reserves a clear interpretation of the user manual. The appearance of the product shall be subject to the product you received. Please forgive us that we won't inform you if there are any technology or software updates on our product.
Note:
| 01 | Input & output discreteness | 08 | UV light sleeve | 15 | Surface clear | 22 | Water outlet adjustment switch |
| 02 | Pumping handle | 09 | Barrel body | 16 | Degreasing film adjustment switch | 23 | Bend pipe |
| 03 | UV timer switch | 10 | PVC Water pipe | 17 | Floating head | 24 | Air volume regulator |
| 04 | Barrel head | 11 | Basket head | 18 | Extension tube | 25 | Air tube |
| 05 | Water pump | 12 | Filter basket | 19 | Flexible tube | 26 | Outlet |
| 06 | Quartz glass tube | 13 | Water inlet tube | 20 | Fleur bouquet | 27 | Rain pipe |
| 07 | UV light | 14 | Water inlet adjustment switch | 21 | discharging tube | 28 | Spray bar cover |
| 29 | Sucker |
- Open the
When connecting PVC tubing, please make sure
the flexible tube is not twisted.
Position the canister filter on a flat surface; do not slope or place upside down.
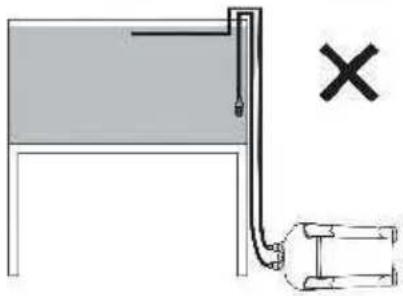
When assembling the inlet pipe, please make sure the water in the tank is
above the minimum water level.
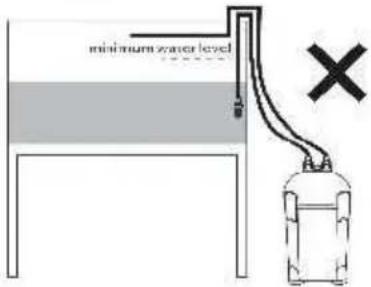
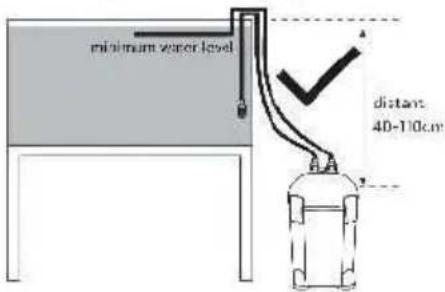
The canister filter must be placed on flat ground,
40~110 cm below the water level.
Unit 5 Albert Edward House, The Pavilion
Preston, United Kingdom
SHUNSHUN GmbH
Römeräcker 9 Z2021, 76351
www.vevor.com/support
VEVOR®
We continue to be committed to providing you tools at competitive prices. "Save Half", "Half Price", or any other similar expressions used by us only represent an estimate of savings you might benefit from buying certain tools with us compared to top brands, and does not necessarily mean that all categories of tools offered will actually save you half in comparison with the top major brands. Please verify carefully when placing an order with us.
VEVOR®
TOUGH TOOLS, HALF PRICE
AQUARIUM FILTER
SERIES: AQ-A F-UV B W
White
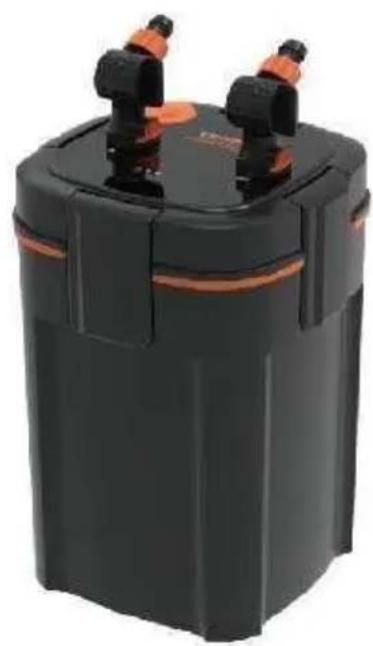
Black
Have product questions? Need technical support? Please feel free to contact us:
Technical Support and E-Warranty Certificate
www.vevor.com/support
This is the original instruction. Please read all manual instructions carefully before operating. VEVOR reserves the right to interpret the user manual. The appearance of the product shall be subject to the product you received. Please forgive us that we won't inform you of any technology or software updates on our product.
| 01 | Input & output discreteness | 08 | UV light sleeve | 15 | Surface clear | 22 | Water outlet adjustment switch |
| 02 | Pumping handle | 09 | Barrel body | 16 | Degreasing film adjustment switch | 23 | Bend pipe |
| 03 | UV timer switch | 10 | PVC Water pipe | 17 | Floating head | 24 | Air volume regulator |
| 04 | Barrel head | 11 | Basket head | 18 | Extension tube | 25 | Air tube |
| 05 | Water pump | 12 | Filter basket | 19 | Flexible tube | 26 | Outlet |
| 06 | Quartz glass tube | 13 | Water inlet tube | 20 | Fleur bouquet | 27 | Rain pipe |
| 07 | UV light | 14 | Water inlet adjustment switch | 21 | discharging tube | 28 | Spray bar cover |
| 29 | Sucker |
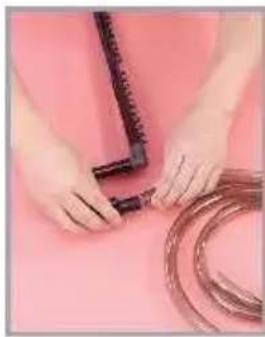
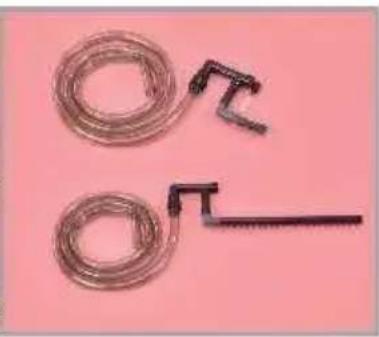
When connecting PVC tubing, please make sure
the flexible tube is not twisted.
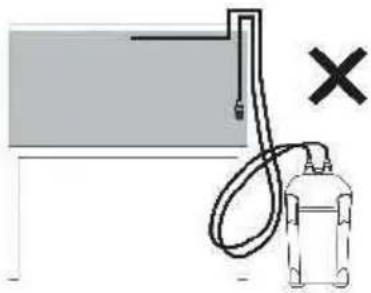
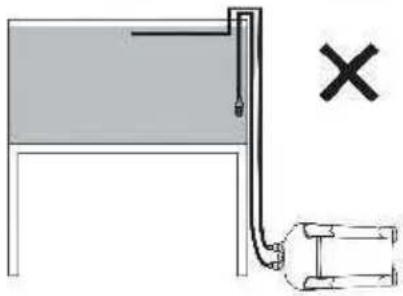
Position canister filter on a flat place, do not slope or turn upside down.
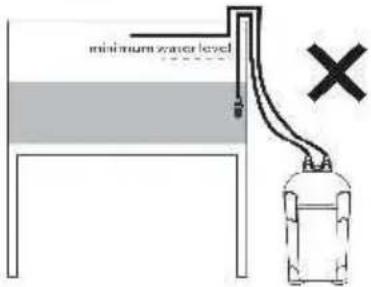
When assembling the inlet pipe, please make sure the water in the tank is
above the minimum water level.
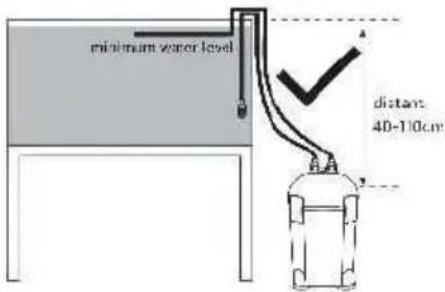
The canister filter must be placed on flat ground,
40~110 cm below the water level.
INSTRUCTIONS FOR CLEANING AND REPLACEMENT
Imported in AUS: SIHAO PTY LTD. 1 ROKEVA STREET EASTWOOD NSW 2122 Australia
Unit 5 Albert Edward House, The Pavilion
Preston, United Kingdom
SHUNSHUN GmbH
Römeräcker 9 Z2021, 76351
www.vevor.com/support
VEVOR®
We continue to be committed to providing you with tools at competitive prices. "Save Half", "Half Price", or any other similar expressions used by us only represent an estimate of savings you might benefit from buying certain tools with us compared to top brands and do not necessarily mean to cover all categories of tools offered. We kindly remind you to verify carefully when placing an order with us that you are actually saving half in comparison with the top major brands.
VEVOR®
TOUGH TOOLS, HALF PRICE
AQUARIUM FILTER
SERIES: AQ-AF-UV-BW
White
Black
Have product questions? Need technical support? Please feel free to contact us:
Technical Support and E-Warranty Certificate
www.vevor.com/support
This is the original instruction. Please read all manual instructions carefully before operating. VEVOR reserves the right to interpret the user manual. The appearance of the product shall be subject to the product you received. Please forgive us that we won't inform you of any technology or software updates on our product.
| 01 | Input & output discreteness | 08 | UV light sleeve | 15 | Surface clear | 22 | Water outlet adjustment switch |
| 02 | Pumping handle | 09 | Barrel body | 16 | Degreasing film adjustment switch | 23 | Bend pipe |
| 03 | UV timer switch | 10 | PVC Water pipe | 17 | Floating head | 24 | Air volume regulator |
| 04 | Barrel head | 11 | Basket head | 18 | Extension tube | 25 | Air tube |
| 05 | Water pump | 12 | Filter basket | 19 | Flexible tube | 26 | Outlet |
| 06 | Quartz glass tube | 13 | Water inlet tube | 20 | Fleur bouquet | 27 | Rain pipe |
| 07 | UV light | 14 | Water inlet adjustment switch | 21 | discharging tube | 28 | Spray bar cover |
| 29 | Sucker |
When connecting PVC tubing, please make sure
the flexible tube is not twisted.
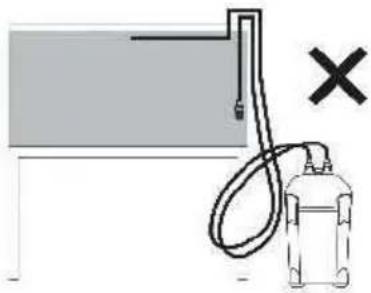
Position canister filter on a flat place, do not slope or turn upside down.

When assembling the inlet pipe, please make sure the water in the tank is
above the minimum water level.
Canister filter must be placed on flat ground.
40~110cm below the water level.
Unit 5 Albert Edward House, The Pavilion
Preston, United Kingdom
SHUNSHUN GmbH
Römeräcker 9 Z2021, 76351
www.vevor.com/support
VEVOR®
We continue to be committed to provide you tools with competitive price. "Save Half", "Half Price" or any other similar expressions used by us only represent estimate of savings you might benefit from buying certain tools with us compared top brands and does not necessarily mean to cover all categories of tools offered are kindly reminded to verify carefully when you are placing an order with us actually saving half in comparison with the top major brands.
VEVOR®
TOUGH TOOLS, HALF PRICE
AQUARIUM FILTER
SERIA : AQ- A F-UV B W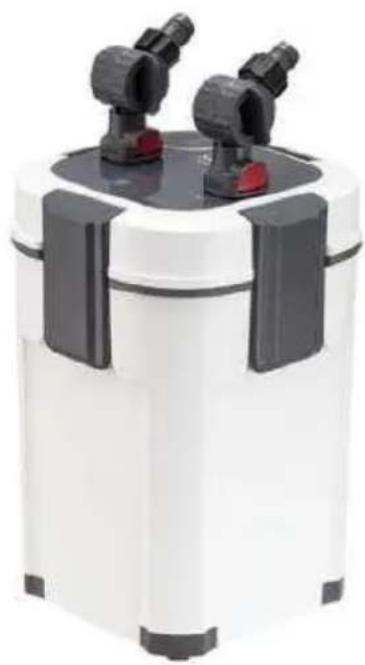
White
Black
Have product questions? Need technical support? Please feel free to contact us:
Technical Support and E-Warranty Certificate
www.vevor.com/support
This is the original instruction, please read all manual instructions carefully before operating. VEVOR reserves a clear interpretation of the user manual. The appearance of the product shall be subject to the product you received. Please forgive us that we won't inform you if there are any technology or software updates on our product.
| 01 | Input & output discreteness | 08 | UV light sleeve | 15 | Surface clear | 22 | Water outlet adjustment switch |
| 02 | Pumping handle | 09 | Barrel body | 16 | Degreasing film adjustment switch | 23 | Bend pipe |
| 03 | UV timer switch | 10 | PVC Water pipe | 17 | Floating head | 24 | Air volume regulator |
| 04 | Barrel head | 11 | Basket head | 18 | Extension tube | 25 | Air tube |
| 05 | Water pump | 12 | Filter basket | 19 | Flexible tube | 26 | Outlet |
| 06 | Quartz glass tube | 13 | Water inlet tube | 20 | Fleur bouquet | 27 | Rain pipe |
| 07 | UV light | 14 | Water inlet adjustment switch | 21 | discharging tube | 28 | Spray bar cover |
| 29 | Sucker |
INSTALLATION INSTRUCTIONS
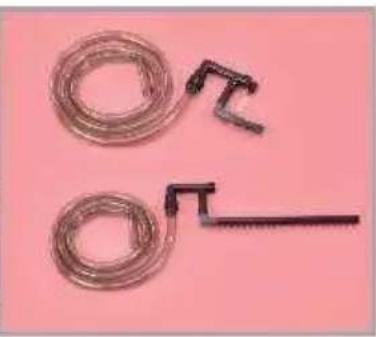
When connecting PVC tubing, please make sure
the flexible tube is not twisted.
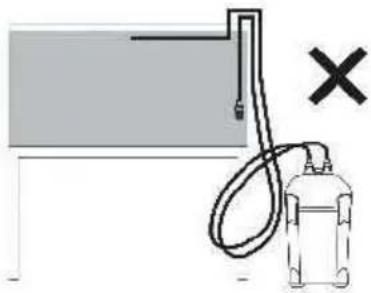
Position canister filter on a flat place, do not slope or upside down.
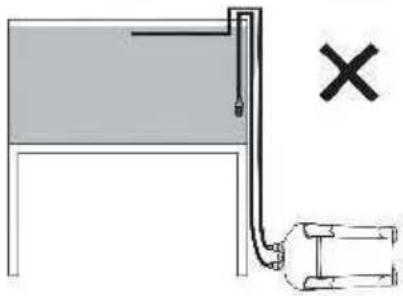
When assembling the inlet pipe, please make sure the water in the tank is
above the minimum water level.
Canister filter must be placed on flat ground,
40~110cm below the water level.
CLEANING AND REPLACEMENT INSTRUCTIONS
Unit 5 Albert Edward House, The Pavilion
Preston, United Kingdom
SHUNSHUN GmbH
Römeräcker 9 Z2021, 76351
www.vevor.com/support
VEVOR®
Technical Support and e-warranty certificate www.vevor.com/support
SERIES: AQ- A F-UV B W
TIPS: A IS 901 / 903 / 905 / 907 / 911 / 913
B IS 10 / 11 / 12 / 15 / 20 / 25
We continue to be committed to provide you tools with competitive price. "Save Half", "Half Price" or any other similar expressions used by us only represent estimate of savings you might benefit from buying certain tools with us compared to top brands and does not necessarily mean to cover all categories of tools offered. We kindly remind you to verify carefully when you are placing an order with us that you are actually saving half in comparison with the top major brands.
VEVOR®
TOUGH TOOLS, HALF PRICE
AQUARIUM FILTER
SERIES: AQ- A F-UV B W
White
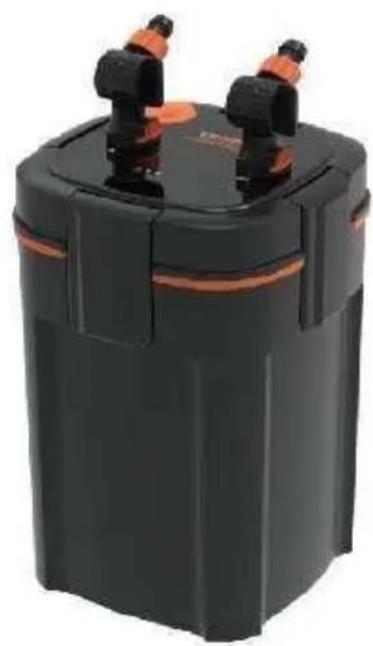
Black
Have product questions? Need technical support? Please feel free to contact us:
Technical Support and E-Warranty Certificate
www.vevor.com/support
This is the original instruction, please read all manual instructions carefully before operating. VEVOR reserves a clear interpretation of the user manual. The appearance of the product shall be subject to the product you received. Please forgive us that we won't inform you if there are any technology or software updates on our product.
| 01 | Input & output discreteness | 08 | UV light sleeve | 15 | Surface clear | 22 | Water outlet adjustment switch |
| 02 | Pumping handle | 09 | Barrel body | 16 | Degreasing film adjustment switch | 23 | Bend pipe |
| 03 | UV timer switch | 10 | PVC Water pipe | 17 | Floating head | 24 | Air volume regulator |
| 04 | Barrel head | 11 | Basket head | 18 | Extension tube | 25 | Air tube |
| 05 | Water pump | 12 | Filter basket | 19 | Flexible tube | 26 | Outlet |
| 06 | Quartz glass tube | 13 | Water inlet tube | 20 | Fleur bouquet | 27 | Rain pipe |
| 07 | UV light | 14 | Water inlet adjustment switch | 21 | discharging tube | 28 | Spray bar cover |
| 29 | Sucker |
INSTALLATION INSTRUCTIONS
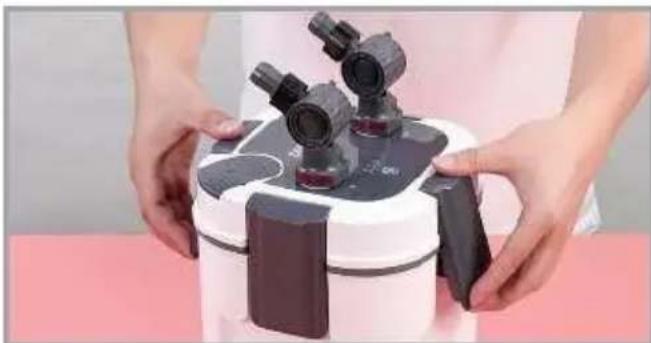
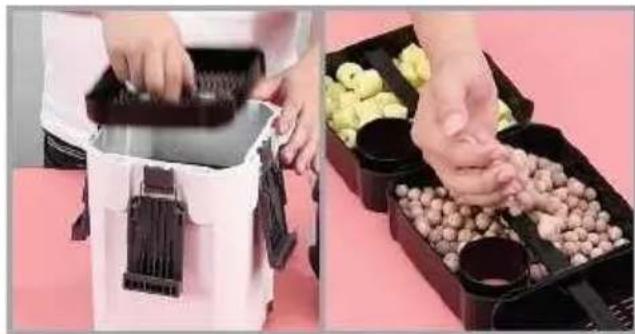
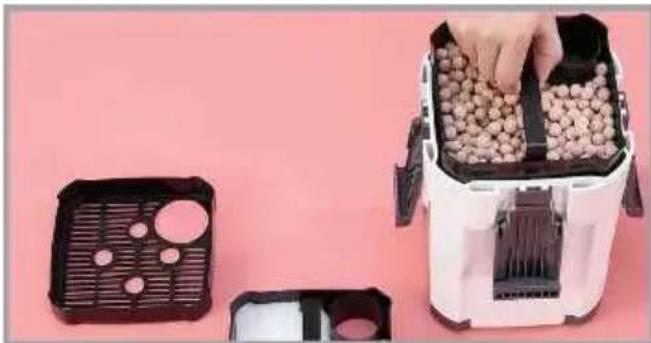
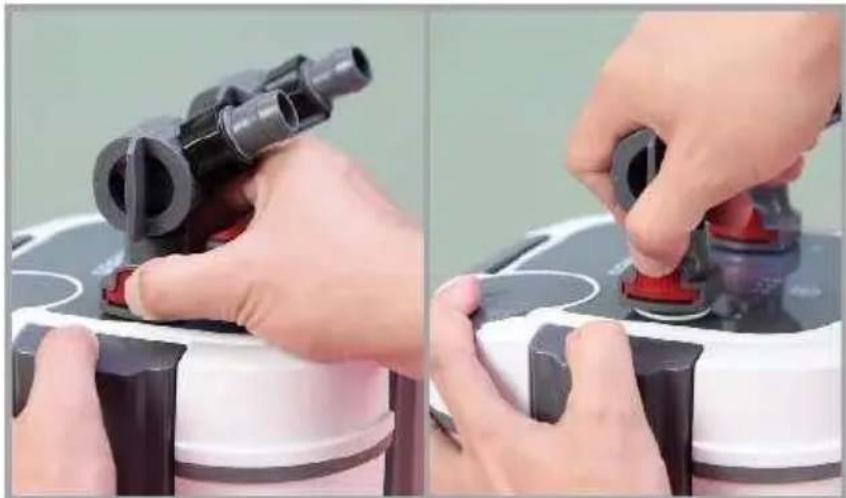
- Open the fastening buckle. 2. Remove the filter basket and cover the bucket, then pack the cleaned filter. Cover the bucket.
When connecting PVC tubing, please make sure
the flexible tube is not twisted.
Position canister filter on flat place, do not slope or upside down.
When assembling inlet pipe, please make sure the water in tank is
above min.
water level.
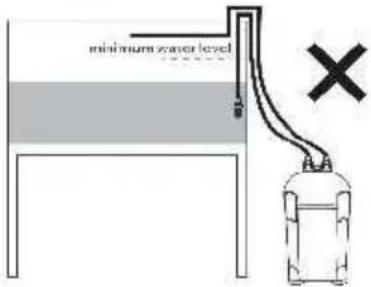
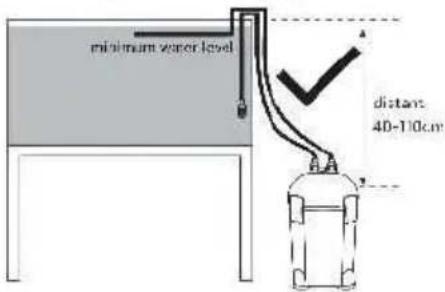
Canister filter must be placed on flat ground,
40~110cm below the water level.
CLEANING AND REPLACEMENT INSTRUCTIONS
Unit 5 Albert Edward House, The Pavilion
Preston, United Kingdom
SHUNSHUN GmbH
Römeräcker 9 Z2021, 76351
www.vevor.com/support
VEVOR®
We continue to be committed to provide you tools with competitive price. "Save Half", "Half Price" or any other similar expressions used by us only represent estimate of savings you might benefit from buying certain tools with us compared to top brands and does not necessarily mean to cover all categories of tools offered. We kindly remind you to verify carefully when you are placing an order with us that you are actually saving half in comparison with the top major brands.
VEVOR®
TOUGH TOOLS, HALF PRICE
AQUARIUM FILTER
SERIE : AQ- A F-UV B W
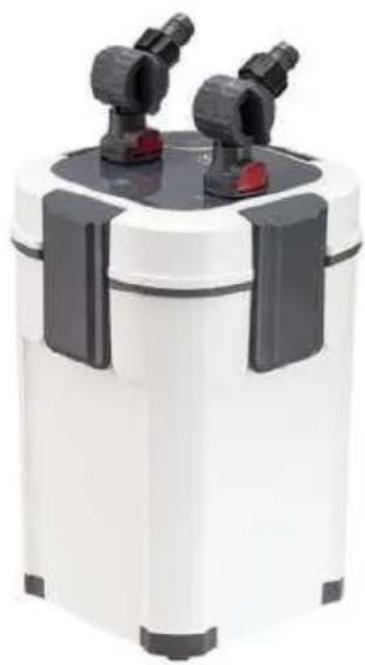
White
Black
Have product questions? Need technical support? Please feel free to contact us:
Technical Support and E-Warranty Certificate
www.vevor.com/support
This is the original instruction. Please read all manual instructions carefully before operating. VEVOR reserves a clear interpretation of the user manual. The appearance of the product shall be subject to the product you received. Please forgive us that we won't inform you of any technology or software updates on our product.
Note:
| 01 | Input & output discreteness | 08 | UV light sleeve | 15 | Surface clear | 22 | Water outlet adjustment switch |
| 02 | Pumping handle | 09 | Barrel body | 16 | Degreasing film adjustment switch | 23 | Bend pipe |
| 03 | UV timer switch | 10 | PVC Water pipe | 17 | Floating head | 24 | Air volume regulator |
| 04 | Barrel head | 11 | Basket head | 18 | Extension tube | 25 | Air tube |
| 05 | Water pump | 12 | Filter basket | 19 | Flexible tube | 26 | Outlet |
| 06 | Quartz glass tube | 13 | Water inlet tube | 20 | Fleur bouquet | 27 | Rain pipe |
| 07 | UV light | 14 | Water inlet adjustment switch | 21 | discharging tube | 28 | Spray bar cover |
| 29 | Sucker |
INSTALLATION INSTRUCTIONS
When connecting PVC tubing, please make sure
the flexible tube is not twisted.
Position canister filter on a flat place, do not slope or turn upside down.
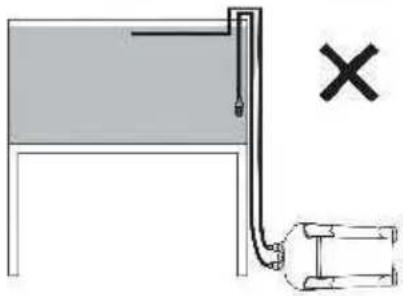
When assembling the inlet pipe, please make sure the water in the tank is
above the minimum water level.
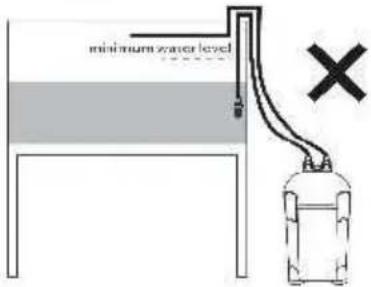
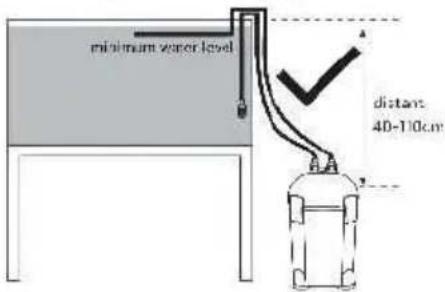
Canister filter must be placed on flat ground,
40~110cm below the water level.
CLEANING AND REPLACEMENT INSTRUCTIONS
Unit 5 Albert Edward House, The Pavilion
Preston, United Kingdom
SHUNSHUN GmbH
Römeräcker 9 Z2021, 76351
www.vevor.com/support