
PFFSTGMS12 - Screen Vevor - Free user manual and instructions
Find the device manual for free PFFSTGMS12 Vevor in PDF.
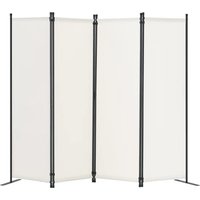


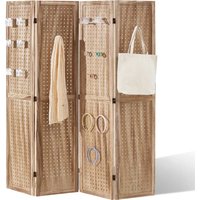
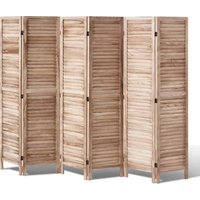
| Product Type | Screen / Fabric Room Divider |
| Brand | Vevor |
| Model | PFFSTGMS12 |
| Number of Panels | 4 |
| Dimensions (W x D x H) | 2280 x 450 x 1725 mm |
| Available Colors | Black, Gray, White |
| Frame Material | Metal (Steel) |
| Screen Material | Fabric |
| Main Functions | Space separation, decoration, privacy |
| Maximum Supported Weight | Not specified, do not sit or stand on it |
| Mounting Type | Freestanding, screw assembly |
| Care and Cleaning | Clean with a soft dry cloth. Iron the fabric at low temperature if necessary. |
| Safety Instructions | Do not sit, do not stand, use on a flat and stable surface, do not exceed recommended load, keep out of reach of children. |
| Spare Parts and Repairability | Replacement screws available on request. Repair possible with standard tools. |
| Technical Support | www.vevor.com/support |
Frequently Asked Questions - PFFSTGMS12 Vevor
User questions about PFFSTGMS12 Vevor
0 question about this device. Answer the ones you know or ask your own.
Ask a new question about this device
Download the instructions for your Screen in PDF format for free! Find your manual PFFSTGMS12 - Vevor and take your electronic device back in hand. On this page are published all the documents necessary for the use of your device. PFFSTGMS12 by Vevor.
USER MANUAL PFFSTGMS12 Vevor
Technical Support and E-Warranty Certificate
www.vevor.com/support
FABRIC ROOM DIVIDER
USER MANUAL
PFFSTGHS010
PFFSTGSH11
PFFSTGMS12
We continue to be committed to providing you with tools at competitive prices. "Save Half", "Half Price", or any other similar expressions used by us only represent an estimate of savings you might benefit from buying certain tools with us compared to the major top brands and do not necessarily mean to cover all categories of tools offered by us. You are kindly reminded to verify carefully when placing an order with us if you are actually saving half in comparison with the top major brands.
PFFSTGHS010 PFFSTGSH11 PFFSTGMS12
NEED HELP? CONTACT US!
Have product questions? Need technical support? Please feel free to contact us:
Technical Support and E-Warranty Certificate
www.vevor.com/support
This is the original instruction. Please read all manual instructions carefully before operating. VEVOR reserves a clear interpretation of the user manual. The appearance of the product shall be subject to the product you received. Please forgive us that we won't inform you again if there are any technology or software updates on our product.
WARNING:
Read this material before using this product. Failure to do so can result in serious injury.
Assembly precautions
- Assemble only according to these instructions. Improper assembly can create hazards.
- Wear ANSI-approved safety goggles and heavy-duty work gloves during assembly.
- Keep the assembly area clean and well-lit.
- Keep bystanders out of the area during assembly.
- Do not assemble if tired or when under the influence of alcohol, drugs, or medication.
- The product capabilities apply to properly and completely assembled products only.
- Assemble on a flat, level, hard, and smooth surface capable of safely supporting the Fabric Room Divider.
- For additional information regarding the parts listed in the following pages, please refer to the Assembly Diagram of this manual. Unwrap and separate all parts in a clean work area.
Use precautions
- DO NOT SIT OR STAND ON THIS ITEM.
- This product is not a toy. Do not allow children to play with or in this item.
- Do not exceed specified weight capacities.
- Use only on a flat, level, hard, and smooth surface that can safely support a fully loaded Fabric Room Divider.
- Use as intended only.
- Inspect before every use; do not use if parts are loose or damaged.
SAVE THIS MANUAL
PARTS LIST
| A+B | A*B B*G | 6 |
| C | 8 | |
| D | 2 | |
| E | 9 | |
| F | 16+2 | |
| G | 1 | |
| H | 4 | |
| A+I | A*2 I*2 | 2 |
| J | X2 | 2 |
| NOTE: H is the fabric of the screen, pay attention not to go when installing. | ||
STEP 1
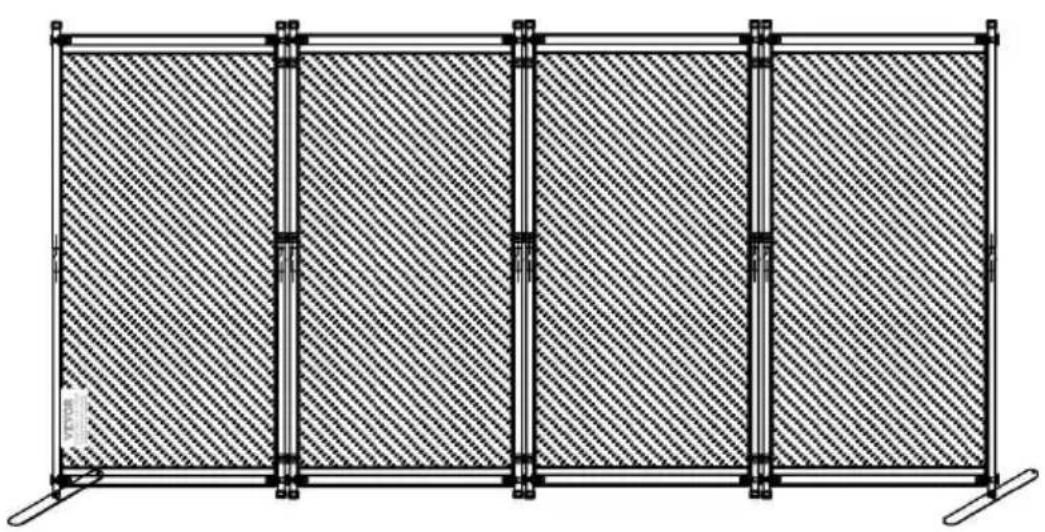
Connect material I and Material A (as shown in the figure) together.
Total 2 groups
STEP 2
Connect material B and Material A (as shown in the figure) together.
Total 6 groups
STEP 3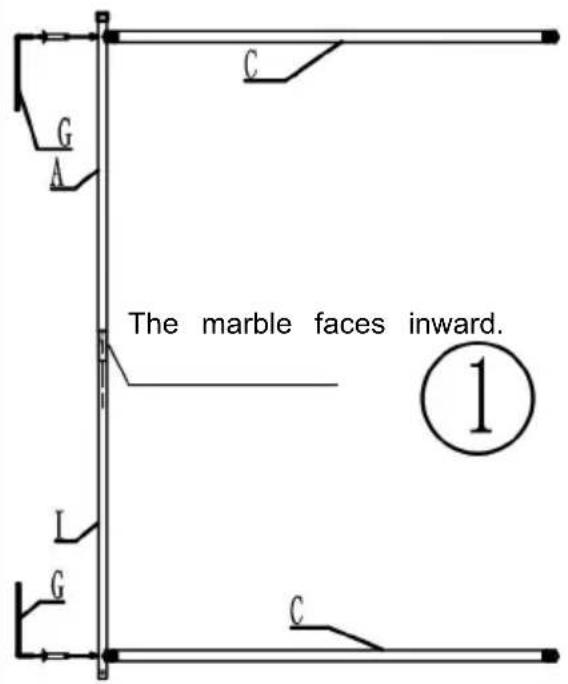
Take 1 piece of material from step 1 and 2 pieces of material C, connect them through long screws F (as shown in the figure), pay attention to the position of the marble when combining them (as shown in the figure), and then tighten them with tool G. This group is No.1.
STEP 4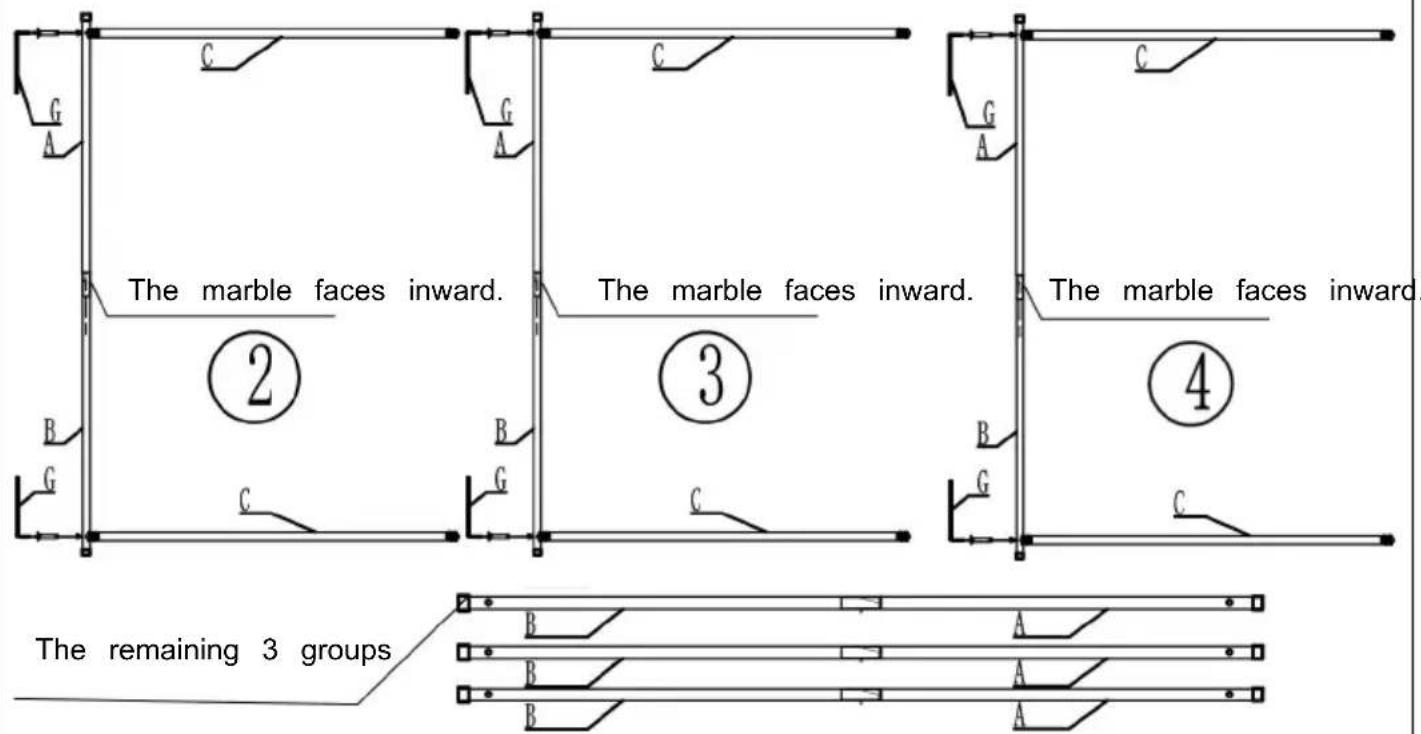
Take 1 piece of material from step 2 and 2 pieces of material C, connect them through long screws F (as shown in the figure), pay attention to the position of the marble when combining them (as shown in the figure), and then tighten them with tool G. This group is No.2.
Follow the same steps to assemble 2 more groups. They are No.3-No.4.
STEP 5
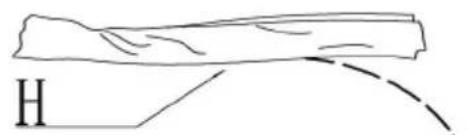
H Material is screen fabric, pay attention to keep clean during installation
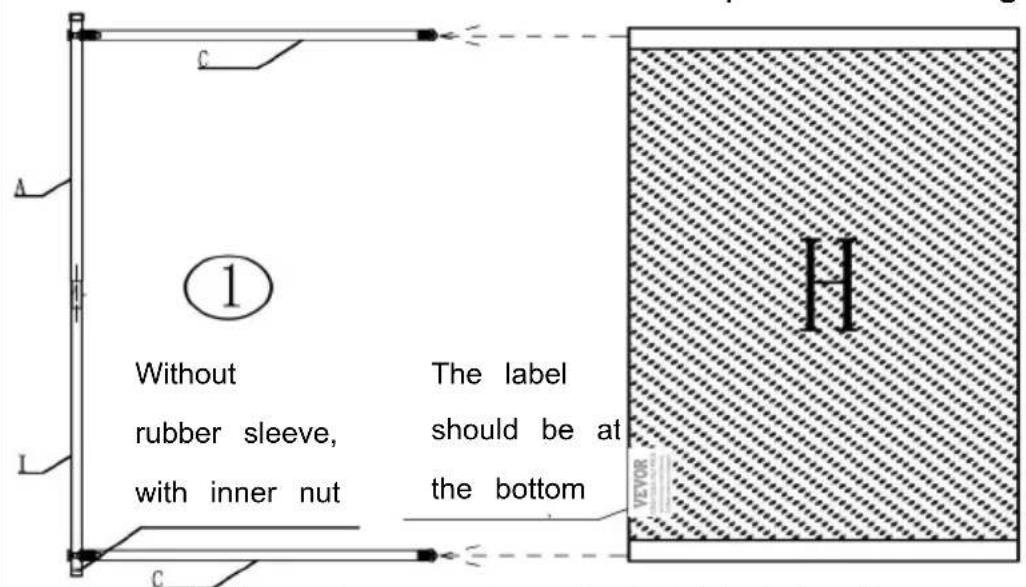
Insert the sleeve of material H into the upper and lower crossbars
STEP 6
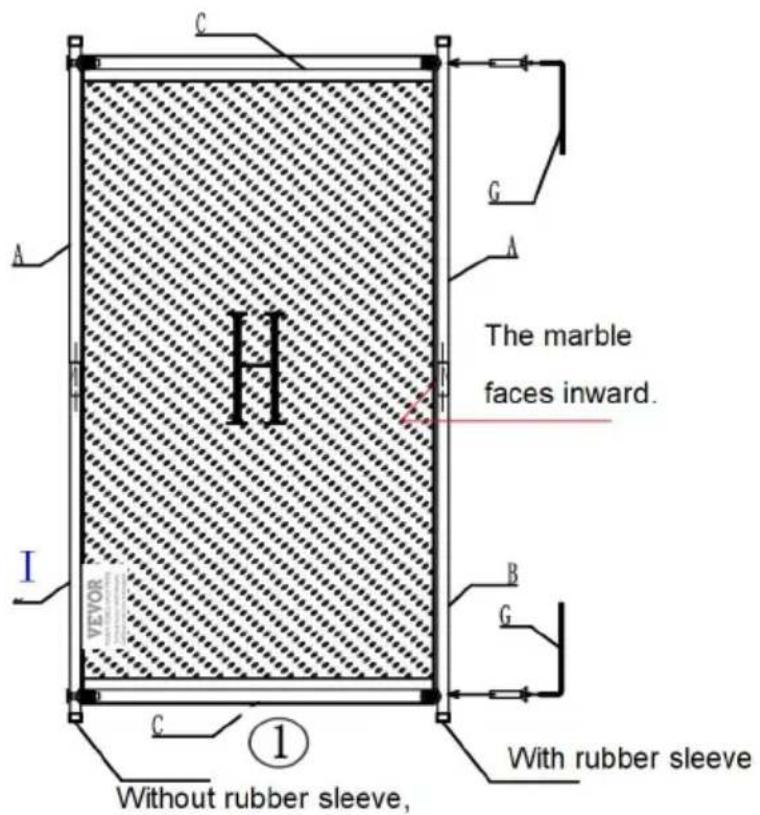
In the pipe of Step 2, take sets, and then tighten with G tool, paying attention to the position of the marble
with inner nut
STEP 7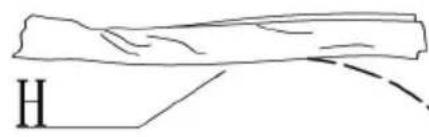
H Material is screen fabric, pay attention to keep clean during installation
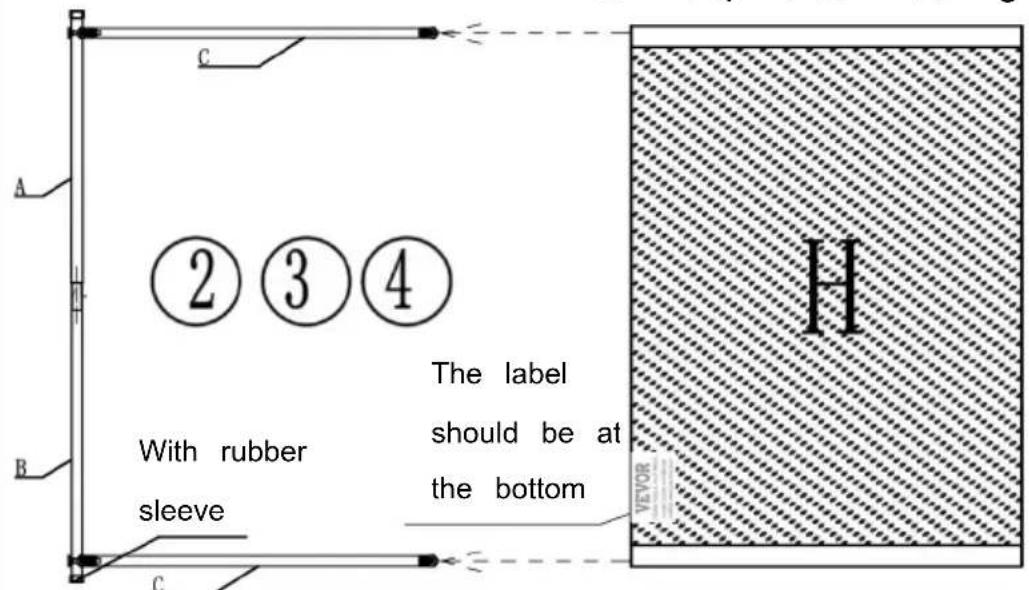
Insert the sleeve of material H into the upper and lower crossbars
STEP 8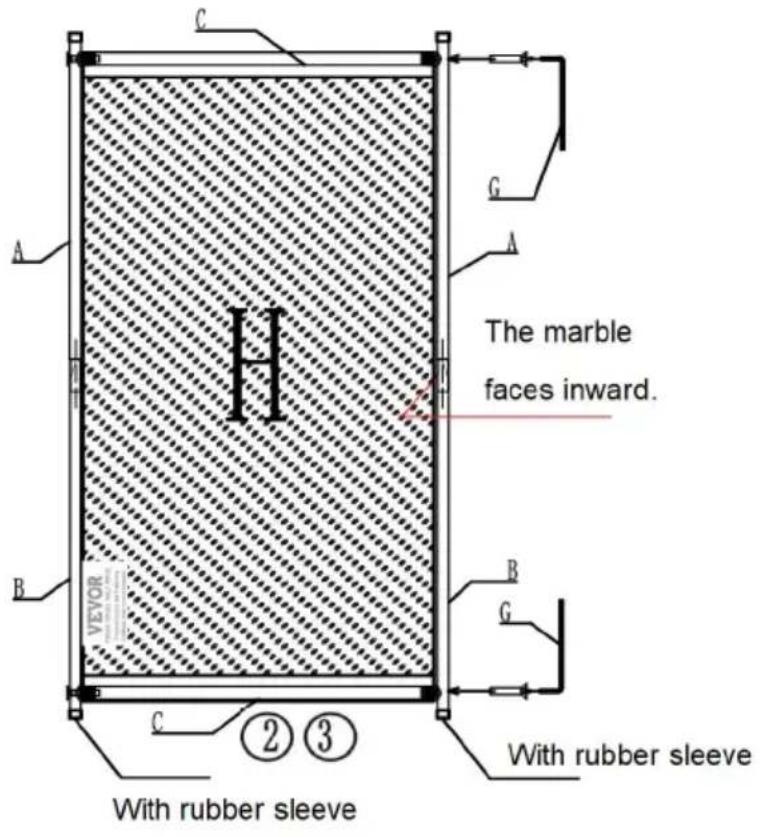
In the pipe of Step 2, take sets, and then tighten with G tool, paying attention to the position of the marble
STEP 9 With rubber sleeve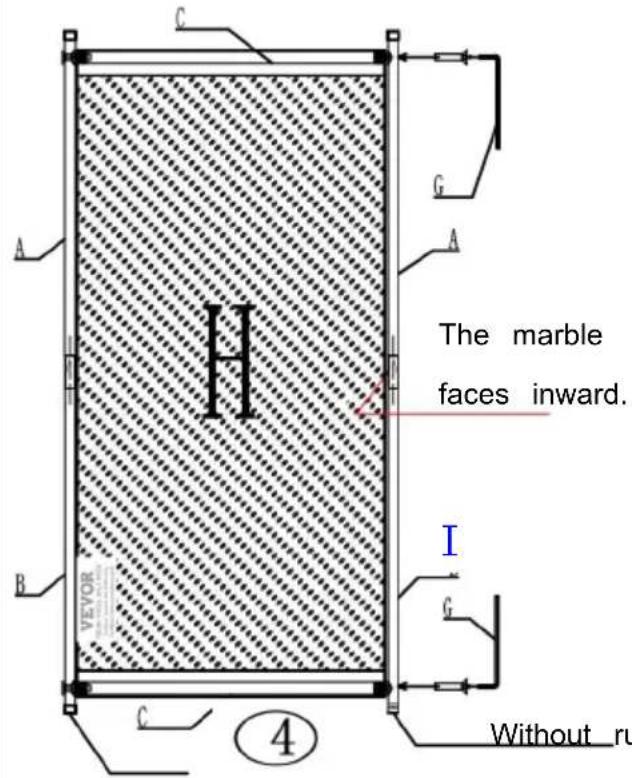
Take 1 set of pipes from Step and match with No. 4 in step connect them with long screw and then tighten them with G tool, paying attention to the position of marbles.
Without rubber sleeve, with inner nut
STEP 10 Arrange the assembled shelves in order.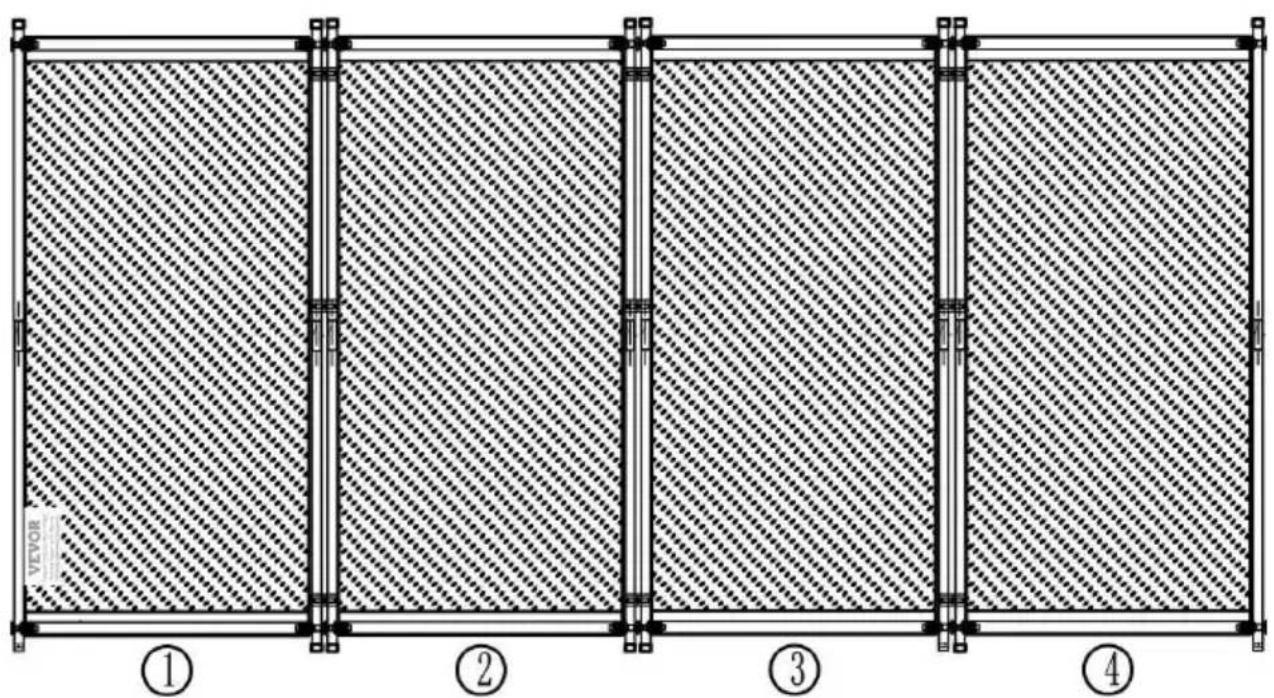
STEP 11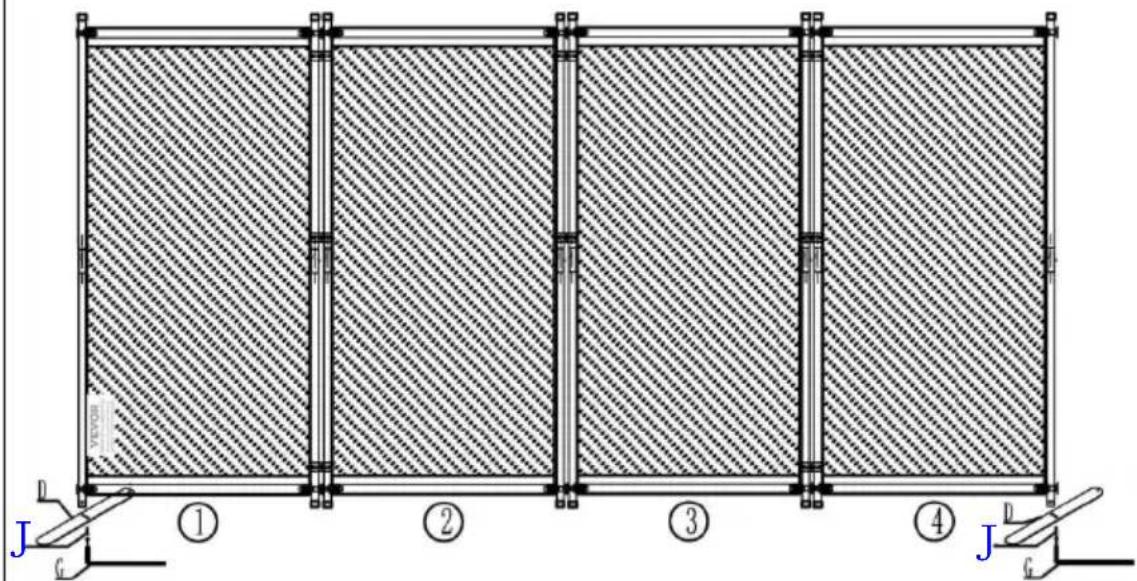
Combine material D with step 10, connect with short screw F, tighten with tool G.
STEP 12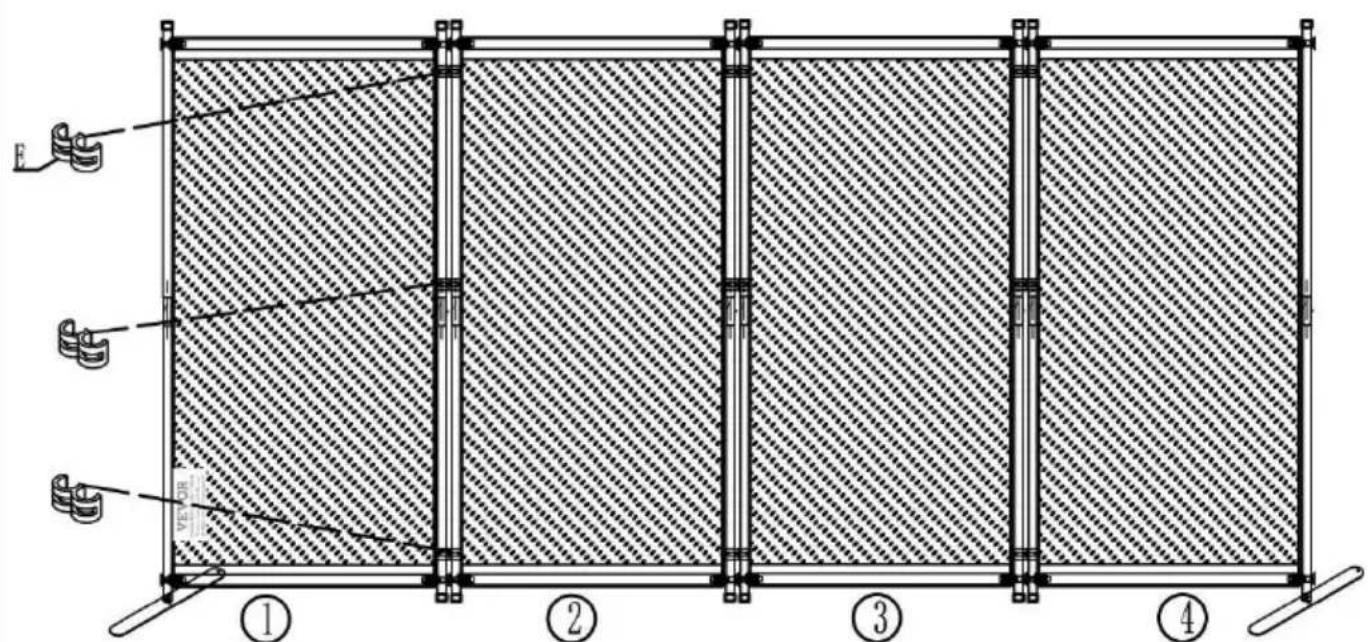
It is fixed and connected through material E. When connecting groups of shelves, try to ensure that material E is in the same line. The middle of the two groups are connected with material
STEP 13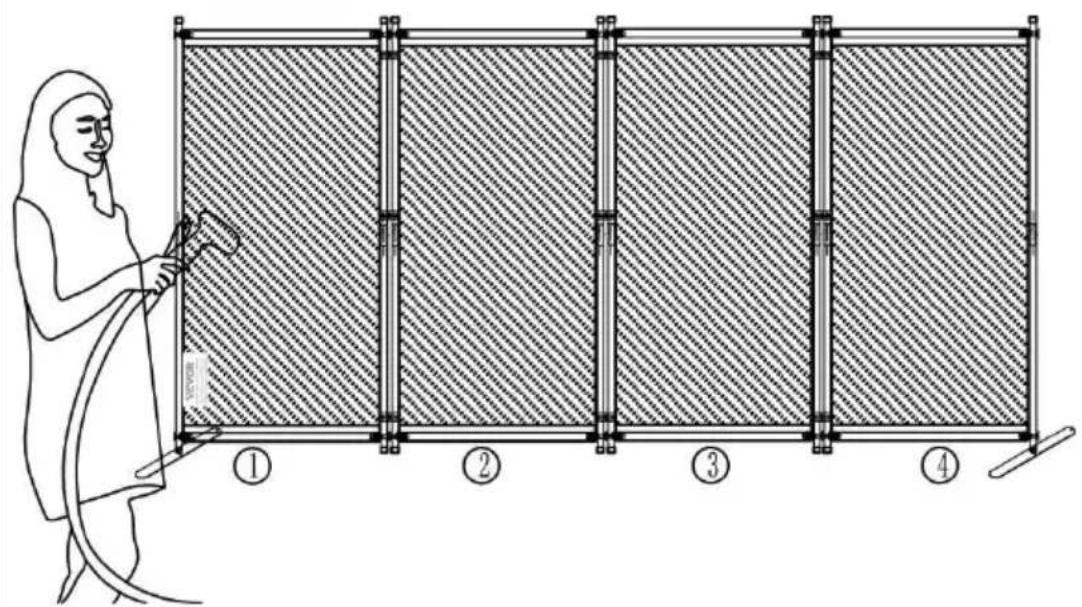
After the installation is completed, arrange the fabric to ensure that the fabric is smooth. If the fabric has wrinkles, you can use a household hanging press to iron it.
STEP 14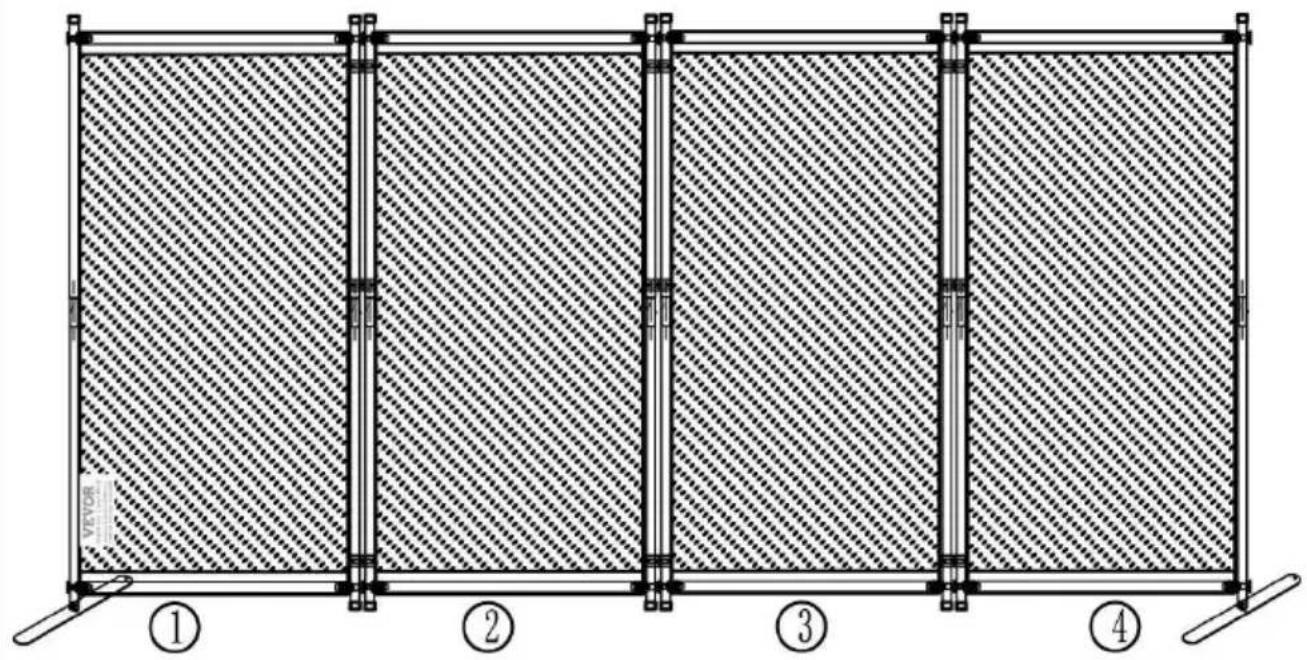
PRODUCT PARAMETER
| Model | PFFSTGHS010 | PFFSTGSH11 | PFFSTGMS12 |
| Colour | Black | Gray | White |
| Number of panels | 4 | ||
| Product Size | 2280*450*1725mm | ||
Manufacturer: Shanghaiuxinmuyeyouxianggsi
Address: Shuangchenglu 803nong11hao1602A-1609shi, baoshanqu, shanghai 200000 CN.
Imported to AUS: SIHAO PTY LTD. 1 ROKEVA STREETEASTWOOD NSW 2122 Australia
Imported to USA: Sanven Technology Ltd. Suite 250, 9166 Anaheim Place, Rancho Cucamonga, CA 91730
| UK | REP |
YH CONSULTING LIMITED. C/O YH Consulting
Limited Office 147, Centurion House, London
Road, Staines-upon-Thames, Surrey, TW18 4AX
| EC | REP |
E-CrossStu GmbH
Mainzer Landstr.69,
60329 Frankfurt am Main.
VEVOR
TOUGH TOOLS, HALF PRICE
Technical Support and E-Warranty Certificate
www.vevor.com/support
VEVOR
TOUGH TOOLS, HALF PRICE
YH CONSULTING LIMITED. C/O YH Consulting
Limited Bureau 147, Centurion House, London
Road, Staines-upon-Thames, Surrey, TW18 4AX
E-CrossStu GmbH
Mainzer Landstr.69,
www.vevor.com/support
Fabric Room Divider
USER MANUAL
PFFSTGHS010
PFFSTGSH11
PFFSTGMS12
YH CONSULTING LIMITED. C/O YH Consulting
Limited Office 147, Centurion House, London
Road, Staines-upon-Thames, Surrey, TW18 4AX
E-CrossStu GmbH
Mainzer Landstr.69,
60329 Frankfurt am Main.
VEVOR
TOUGH TOOLS, HALF PRICE
electronics www.vevor.com/support
FABRIC ROOM DIVIDER
USER MANUAL
PFSTGHS010
PFFSTGSH11
PFSTGMS12
PASSO 8 With rubber sleeve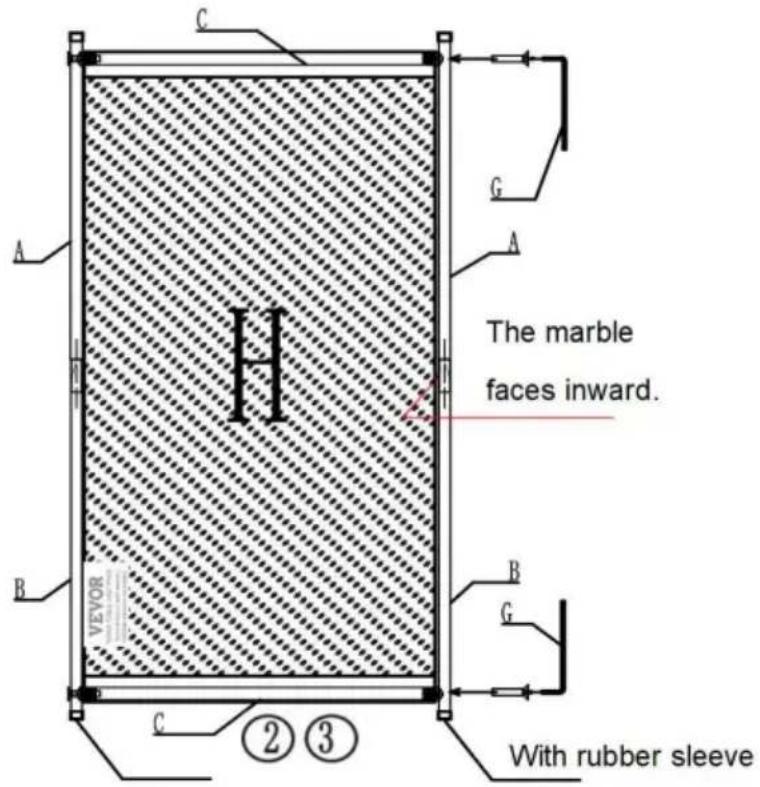
Imported in AUS: SIHAO PTY LTD. 1 ROKEVA STREET EASTWOOD NSW 2122 Australia
Imported in USA: Sanven Technology Ltd. Suite 250, 9166 Anaheim Place, Rancho Cucamonga, CA 91730
YH CONSULTING LIMITED. C/O YH Consulting
Limited Office 147, Centurion House, London
Road, Staines-upon-Thames, Surrey, TW18 4AX
E-CrossStu GmbH
Mainz Landstr. 69,
60329 Frankfurt am Main.
VEVOR
TOUGH TOOLS, HALF PRICE
electronics www.vevor.com/support
VEVOR
TOUGH TOOLS, HALF PRICE
Technical support and warranty certificate
electronics www.vevor.com/support
STEP 8 With rubber sleeve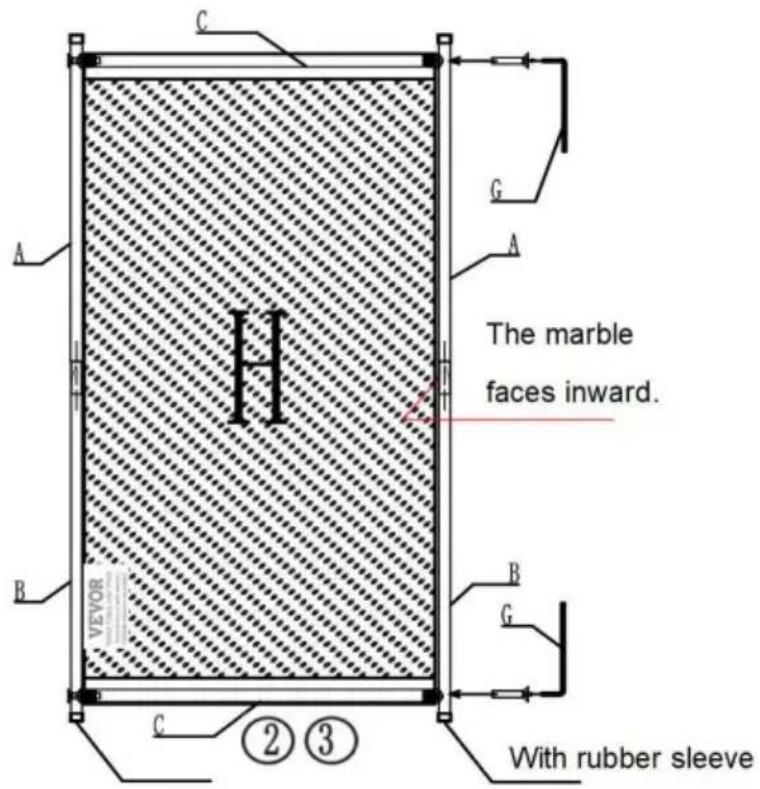
From the pipe of step 2, take 2
Road, Staines-upon-Thames, Surrey, TW18 4AX
E-CrossStu GmbH
YH CONSULTING LIMITED. C/O YH Consulting Limited Office 147, Centurion House, London Road, Staines-upon-Thames, Surrey, TW18 4AX
| Przedstawciel UE |
E-CrossStu GmbH
Mainzer Landstr.69,
60329 Frankfurt am Main.
VEVOR®
TOUGH TOOLS, HALF PRICE
NEED HELP? CONTACT US!
YH CONSULTING LIMITED. C/O YH Consulting
Limited Office 147, Centurion House, London
Road, Staines-upon-Thames, Surrey, TW18 4AX
E-CrossStu GmbH
Mainzer Landstr.69,
STEP 8 With rubber sleeve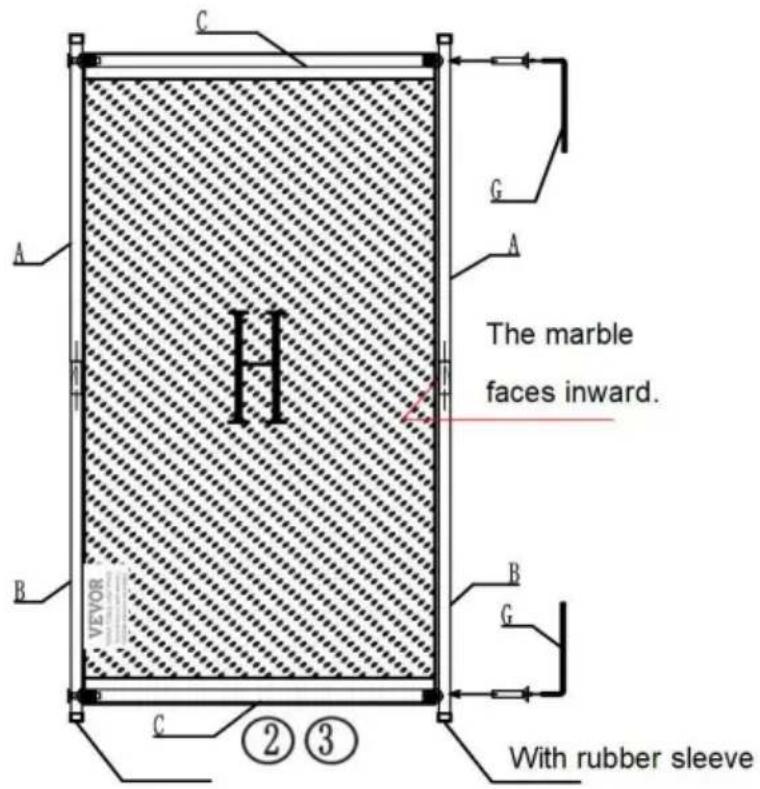
The marmorns position.
STEP 9 With rubber sleeve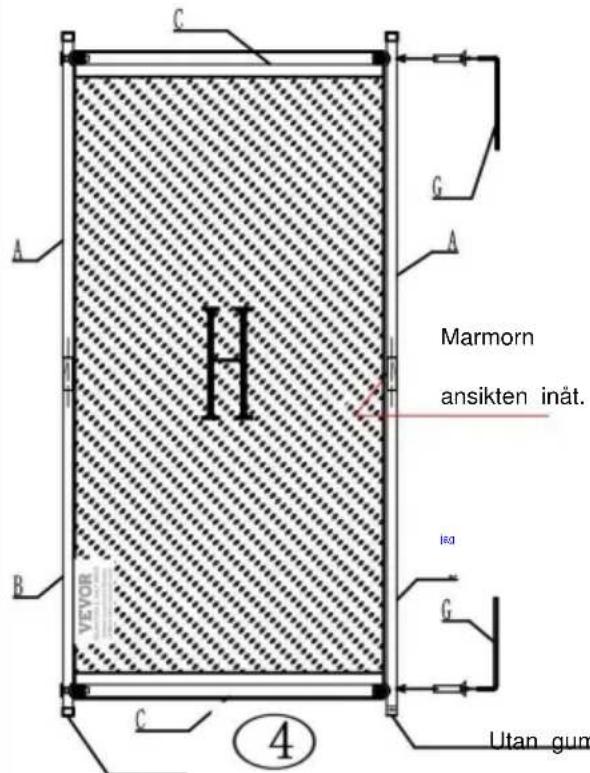
YH CONSULTING LIMITED. C/O YH Consulting
Limited Office 147, Centurion House, London
Road, Staines-upon-Thames, Surrey, TW18 4AX

E-CrossStu GmbH
Mainzer Landstr.69,
60329 Frankfurt am Main.
VEVOR
TOUGH TOOLS, HALF PRICE
www.vevor.com/support
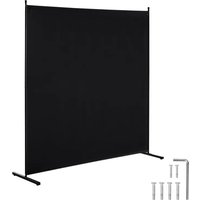
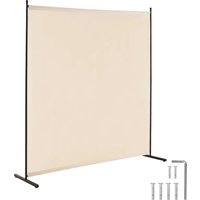
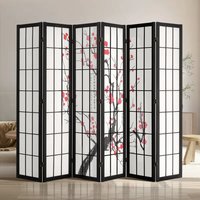
Brand : Vevor
Model : PFFSTGMS12
Category : Screen