Blender Uno LM2205 - Blender MOULINEX - Free user manual and instructions
Find the device manual for free Blender Uno LM2205 MOULINEX in PDF.

| Product type | Blender |
| Brand | Moulinex |
| Model | Uno LM2205 |
| Bowl capacity | 1 L |
| Bowl material | Graduated plastic |
| Blade material | Stainless steel |
| Main functions | Blend, pulse, grind, grate, chop (depending on model) |
| Control type | On/off/pulse button |
| Safety | Locking of bowl and accessories; only works if correctly positioned |
| Care and cleaning | Bowl and accessories dishwasher safe (top rack, ECO program); motor unit wipe with a damp cloth |
| Included accessories | Blender bowl, lid, measuring cap, blade unit; accessories depending on model: spice mill, grater, herb mill, additional bowl |
| Spare parts and repairability | Accessories available from dealer or authorized center; parts: blender bowl, blade unit, accessories |
| Power supply | Mains (220-240 V, frequency not specified) |
| General information | Manufactured by SEB Group; read instructions before use; domestic use |
Frequently Asked Questions - Blender Uno LM2205 MOULINEX
User questions about Blender Uno LM2205 MOULINEX
0 question about this device. Answer the ones you know or ask your own.
Ask a new question about this device
Download the instructions for your Blender in PDF format for free! Find your manual Blender Uno LM2205 - MOULINEX and take your electronic device back in hand. On this page are published all the documents necessary for the use of your device. Blender Uno LM2205 by MOULINEX.
USER MANUAL Blender Uno LM2205 MOULINEX
natural_image
Line drawing of a kitchen blender with handle and side panel (no text or symbols)FR
EN
DE
NL
ES
PT
IT
TR
EL
DA
FI
NO
SV
AR
FA
CAUTION: the safety precautions are part of the appliance. Read them carefully before using your new appliance for the first time. Keep them in a place where you can find and refer to them later on.
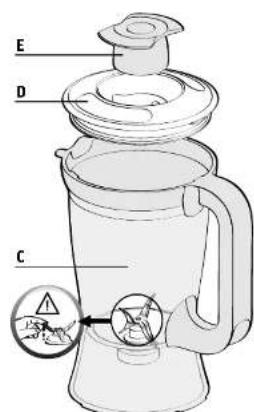
DESCRIPTION
A Motor unit
B On/off/pulse button
C Graduated blender jug
D Lid
E Measuring cap
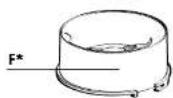
F Spice grinder blade unit
(*depending on model)
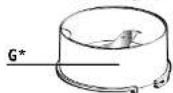
G Grater unit
(*depending on model)
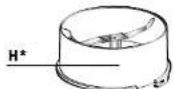
H Herb grinder blade unit
(*depending on model)
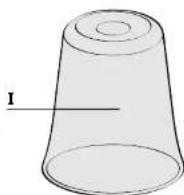
I Grater, spice grinder and herb
grinder bowl
(*depending on model)
The accessories contained in the model you have bought are represented on the label located on the top of the packaging.
USING FOR THE FIRST TIME
- Before using your appliance for the first time, clean all the accessories (C), (D), (E), (F), (G), (H)(I), in warm water and washing-up liquid except for the motor unit (A).
CAUTION: The blades are extremely sharp; handle them with caution when using or cleaning the appliance and when emptying the jug.
• Make sure all the packaging has
been removed before operating the appliance.
- Important note: Turn the speed selector (B) to "0" before placing the blender jug or accessories on the motor unit.
- The appliance starts only if the jug or accessory is correctly locked on its body.
- Do not operate the blender if the lid (D) is not in place.
USING YOUR APPLIANCE
- Place all the ingredients to be mixed in the jug (C) after dicing them. Do not exceed the maximum level indicated on the jug (1 L), for thick mixtures. Start preferably with liquids. You can add ingredients when the appliance is running through the hole in the lid when you remove the measuring cap (E).
- Pour the ingredients into the jug (C)
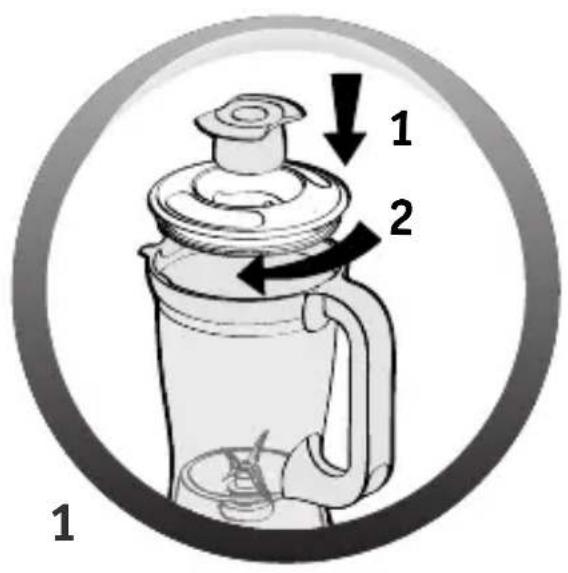
- Lock the lid (D) and place the measuring cap (E) in its recess on the lid (fig 1).
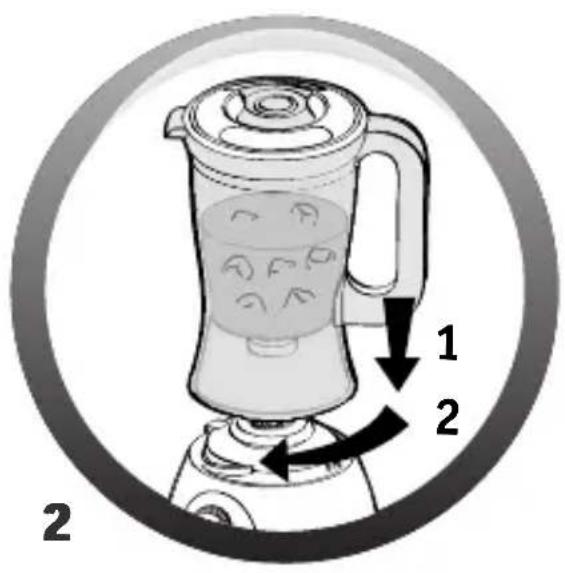
- Place the assembly (C+D+E) on the
motor unit (A). The jug can be placed in two positions: handle on the right or left of the motor unit. Then rotate the jug through a quarter turn to the left (fig 2).
- With the spice grinder (F) *, you can grind different spices in a few seconds: coriander seeds, peppercorns, etc. Do not use this grinder for liquid preparations (fruit juices, etc.)
- With the grater (G)* you can powder coconut, nutmeg, etc.
- With the herb grinder (H)*, you can chop ingredients like onions, garlic, meat (cut into pieces) and dry fruits in a few seconds and make crumbs (rusk) by using the pulse function. Do not use the herb grinder for liquid preparations (fruit juices, etc.)
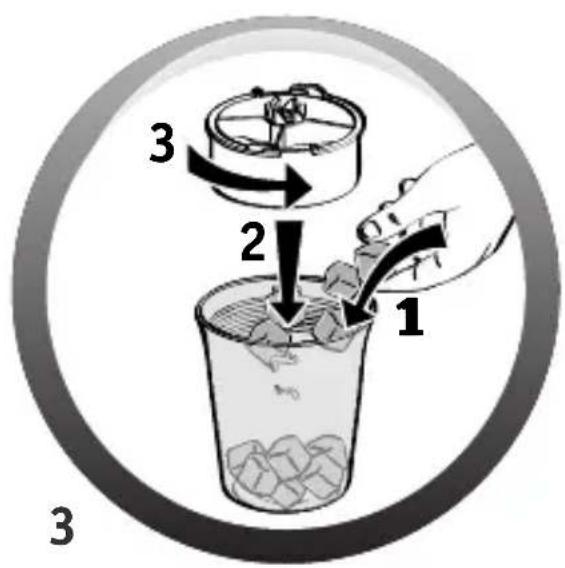
- These accessories are equipped with a bowl (I)* that prevents access to the blades during use.
1- Invert the bowl (l)* and place the ingredients into it.
2- Position the blade unit by aligning the slots on the blade unit with the tabs on the bowl (I) (fig 3). Lock the accessory by rotating the blade unit through a quarter turn in the anticlockwise direction (fig 3).
Caution: leaks can occur if the accessory is not locked correctly.
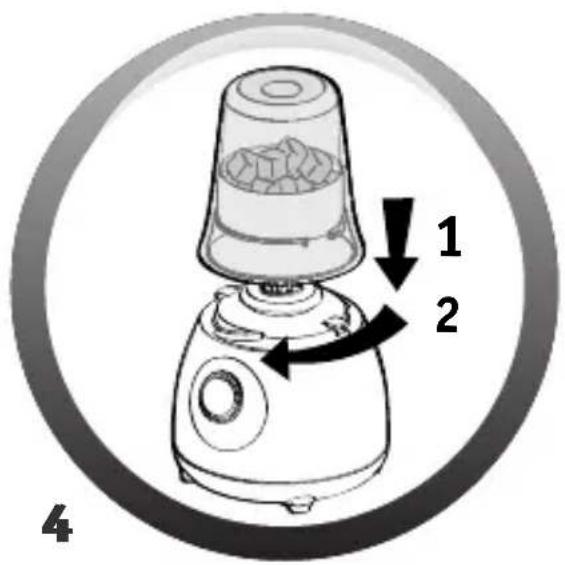
3- Rotate the assembly accessory (F)*, (G)* or (H)* and position it on the motor unit (A).
4- Then turn the assembled accessory (F) ^ , (G) ^ or (H) ^* through a quarter turn to the left (fig 4) to lock onto the motor unit (A)..
5- Plug in the appliance and turn the On/Off button (B) to position "1" or apply a few pulses on the "pulse" position. Hold the bowl (I)* when the appliance is running. To stop the blender, turn the On/Off button (B) to "0".
6- Unlock the accessory by rotating it through a quarter turn in the anticlockwise direction. Remove the assembled accessory (F)*, (G)* or (H)* from the motor unit. Turn it over on the worktop before unlocking the blade unit (F)*, (G)* or (H)* from the bowl (I)* in the reverse order of the assembly. You can then empty the preparation in the bowl.
The colour of the bowl may change after blending certain very hard ingredients (cloves, cinnamon, etc.).
*depending on model
| Ingredients | Quantity (max.) | Operating time | Accessory |
| Soup | 1 L | 3 min | C |
| Dried apricots | 60g | 3sec | H* |
| Onions cut into pieces | 60g | 5 to 10 sec In pulses | H* |
| Shelled almonds / hazelnuts | 60g | 40 to 60 sec In pulses | H* |
| Peppercorns | 60g | 45 to 60 sec | F* |
| Coriander seeds | 40g | 45 to 60 sec | F* |
| Nutmeg | 1 to3 | 15 to 20 sec In pulses | G* |
| Coconut shelled | 40g | 15 to 20 sec In pulses | G* |
CLEANING YOUR APPLIANCE
- Unplug the appliance and remove the accessories.
- The blades of the accessories are very sharp. Handle them with caution.
- Remove the jug (C) and rinse it and its lid (D) under running water.
-
To clean the motor unit (A), use a moist cloth. Dry it carefully.
-
Never immerse the motor unit (A) in running water.
- The jug (C), accessories (F, G, H) and the bowl (I) can be cleaned with hot soapy water or in the dishwasher in the top basket with the "ECO" or "LIGHTLY SOILED" programme.
WHAT TO DO IF YOUR APPLIANCE DOES NOT WORK
| PROBLEMS CAUSES SOLUTIONS | ||
| Product does not work | The plug is not connected | Connect the appliance to a socket with the same voltage |
| The blender jug or assembled accessory is not correctly positioned or locked on the motor unit. | Check that the jug or accessories are correctly positioned and locked on the motor unit as shown in Fig. 2 or 4 | |
| Excessive vibrations | The product is not placed on a flat surface | Place the product on a flat surface |
| Volume of ingredients is too high | Reduce the quantity of ingredients processed | |
| Leak from the lid of the bowl | Volume of ingredients is too high | Reduce the quantity of ingredients processed |
| The lid is not correctly positioned | Lock the lid correctly on the blender jug | |
| Leak from the base of the accessories | The blade unit (F or G or H) * is not locked correctly in the bowl (1) * | Check that the blade unit is locked correctly on the bowl (fig. 3) |
| The blade does not turn easily | Pieces of food too large or too hard | Reduce the size or quantity of ingredients processed Add liquid if appropriate |
\*depending on model YOUR BLENDER STILL DOES NOT WORK?
Contact an approved service centre (see list in service booklet).
HELPLINE: UK and ROI
0845 602 1454 - UK
(01) 677 4003 - ROI
or consult our web site:
www.moulinex.co.uk
You can customise your blender and obtain the following accessories from your usual dealer or from an approved service centre: spice grinder (F), grater (G), herb grinder (H) or an additional blender jug (C).