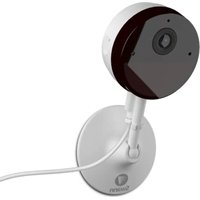
SWIFI-2KICAM - Surveillance Camera SWANN - Free user manual and instructions
Find the device manual for free SWIFI-2KICAM SWANN in PDF.


| Product Type | Indoor Surveillance Camera |
| Resolution | 2K (2560 x 1440 pixels) |
| Night Vision | Yes (infrared LEDs) |
| Motion Detection | Yes (PIR sensor) |
| Wi-Fi Connection | Yes, 2.4 GHz band |
| Power Supply | USB-C (5V power adapter included) |
| Storage | microSD card up to 128 GB (FAT32, not included) |
| Audio | Built-in microphone and speaker |
| Installation | Tabletop or wall mount via included magnetic plate |
| Mobile Compatibility | iOS and Android (Swann Security app) |
| LED Indicator | Yes (connection status, pairing, update) |
| Firmware Update | Yes via the app |
| Certifications | IC, ICES-003 (Canada) |
| Child Safety | Keep camera and cable more than 1 meter away from children |
| Maintenance and Cleaning | Clean the lens with a soft, non-abrasive cloth |
| Included Accessories | USB-C adapter, metal mounting plate, screws and wall plugs |
| Spare Parts and Repairability | No user-serviceable parts (except microSD card) |
| Main Features | Live streaming, event recording, push alerts, night vision |
Frequently Asked Questions - SWIFI-2KICAM SWANN
User questions about SWIFI-2KICAM SWANN
0 question about this device. Answer the ones you know or ask your own.
Ask a new question about this device
Download the instructions for your Surveillance Camera in PDF format for free! Find your manual SWIFI-2KICAM - SWANN and take your electronic device back in hand. On this page are published all the documents necessary for the use of your device. SWIFI-2KICAM by SWANN.
USER MANUAL SWIFI-2KICAM SWANN
CONNECT THE CAMERA
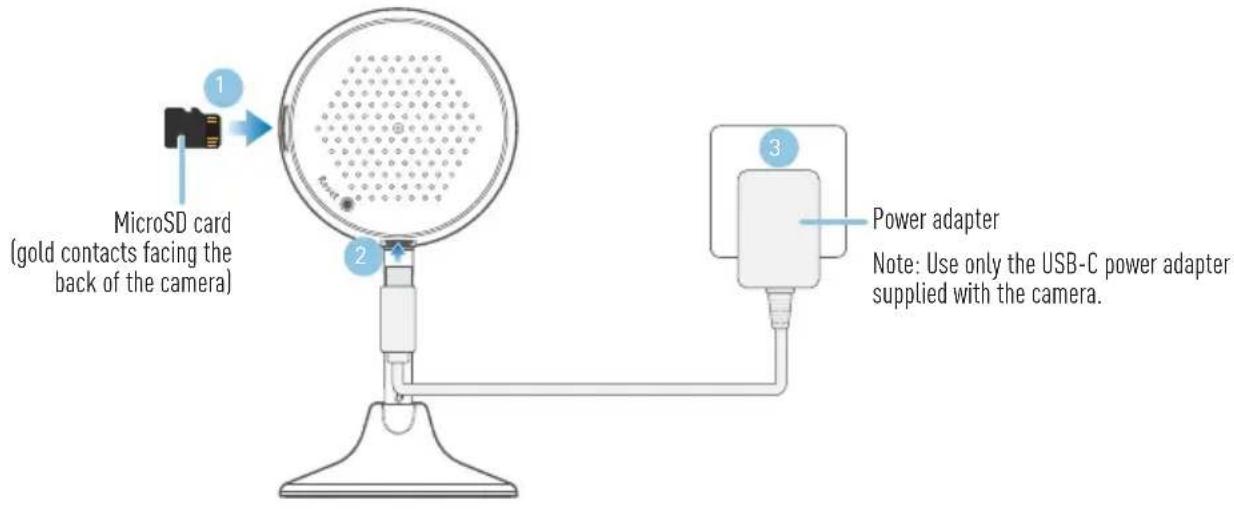
1 Insert a microSD card (up to 128GB card supported, FAT32 file format) with gold contacts facing the back of the camera into the camera's microSD card slot. A microSD card is required for the camera to record motion events and perform firmware updates.
Note: It is recommended to format any microSD card that you are using for the first time in the camera. You can format the microSD card within the Swann Security app later after the camera has been set up. Go to Device Settings > [select your camera] > Advanced Settings and tap Format.
2 Insert the USB-C plug of the supplied power adapter into the USB-C port on the back of the camera.
3 Connect the power adapter to a wall outlet. Make sure the camera is within range of the Wi-Fi network to which you want to connect.
GET THE SWANN SECURITY APP
1 Download the latest version of the Swann Security app from the Apple App Store® or Google Play™ Store on your iOS or Android device. Simply search for "Swann Security".
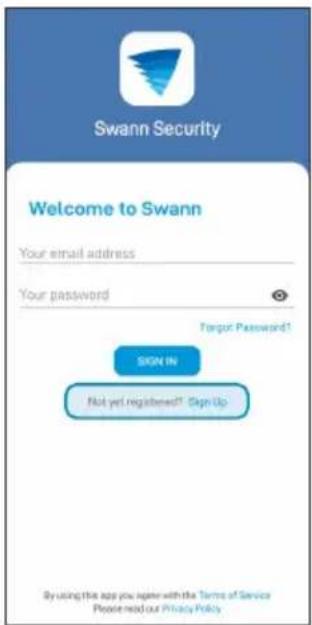
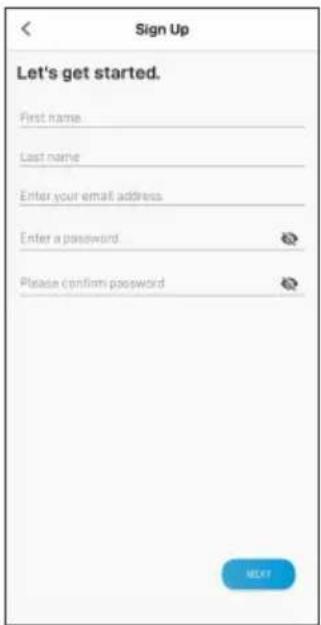
2 Open the app and create your Swann Security account by tapping "Not yet registered? Sign Up" on the screen. Then, activate your Swann Security account by confirming the verification email that is sent to the registered email address.
SET UP THE CAMERA
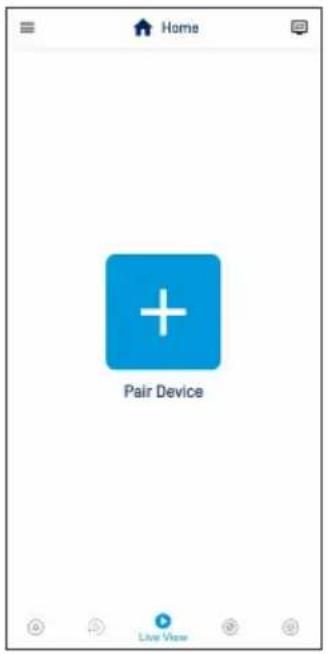
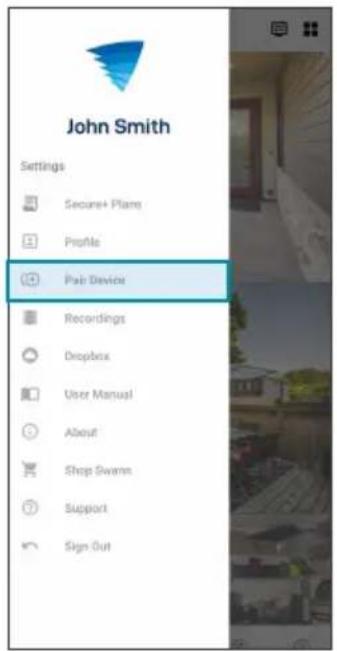
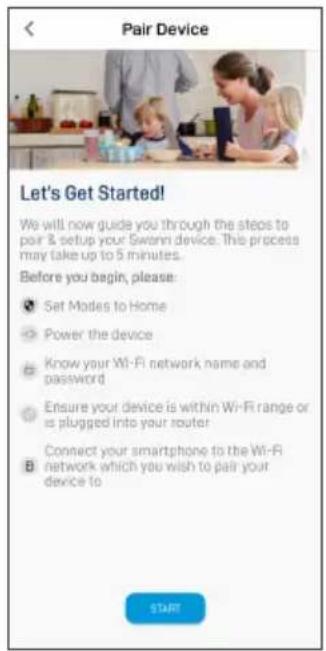
Launch the Swann Security app and sign in. Tap the Pair Device button on the screen (or tap the menu icon ≡ in the top left and select "Pair Device"). The app will now guide you through the pairing process to set up the camera with your Wi-Fi network.
Before you begin, have the camera powered close to your router and get your Wi-Fi network password ready. Please note that the camera is only compatible with the 2.4GHz network. If your router is using the 5GHz band, please ensure it is operating in mixed mode.
CAMERA PLACEMENT
- The camera can be conveniently placed on a table or shelf, or mounted on a flat surface using the included round metal plate which attaches to the magnetic base of the camera.
- Choose a location with strong, reliable Wi-Fi reception to ensure best video streaming performance. The easiest way to check is to use your smartphone. Connect your smartphone to your Wi-Fi network at the spot you have chosen and see if you get 2 bars of Wi-Fi signal or more.
- As a general rule, the nearer the camera is to your router, the better the wireless connection quality. If you're finding the Wi-Fi signal to be weak or out of range at the location where you intend to place the camera, consider installing a Wi-Fi range extender to boost the Wi-Fi coverage of your existing network.
Mounting the round metal plate (optional)
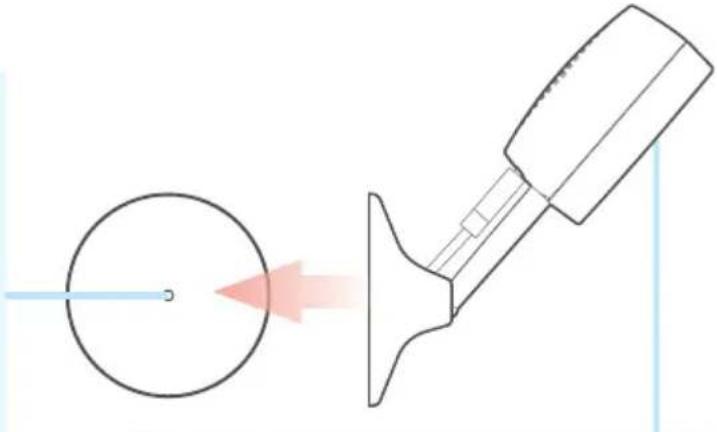
1a If mounting to a wooden surface, screw the metal plate directly to the surface.
1b If mounting to a masonry surface (brick, concrete), mark and drill a hole, insert the wall plug, and screw the metal plate to the surface.
2 Attach the camera to the metal plate which will provide a strong and secure hold.
natural_image
Diagram showing a droplet being pointed at a tip with a magnifying glass, no text or symbols presentAfter installation, make sure to remove the protective film covering the camera lens.
HELP AND RESOURCES
Optimizing motion detection
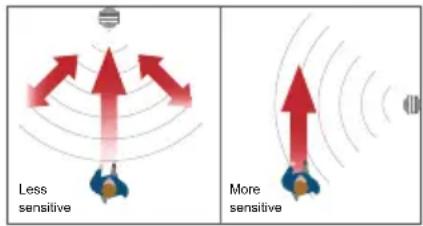
The camera's PIR motion sensor detects heat signatures of moving objects. You'll generally get good detection results by pointing the camera downwards at an angle where people will be moving across the coverage area before heading directly towards the camera. The camera's motion detection sensitivity settings can also be adjusted in the Swann Security app. As every home environment is unique, we recommend experimenting with the motion detection sensitivity levels to find out which works best for yours.
LED status guide
The LED light on the front of the camera tells you what is happening with the device connection.
| Slow Blinking Blue Wi-Fi Pairing mode | Solid Red Live streaming / Motion recording |
| Fast Blinking Blue Connecting to Wi-Fi | Infrared LEDs Blinking Firmware update in progress |
Accessing the Swann Security app manual
To better understand the Swann Security App's interface and features, download the app manual via Menu ≡ > User Manual. You can learn about navigating the various app screens to view live camera stream, playback and download motion event recordings, adjust camera settings, and more.
Have questions?
Visit our Support Center at support.swann.com. You can register your product for dedicated technical support, find troubleshooting articles, participate in the community forums, and more. You can also email us at: tech@swann.com
natural_image
Diagram showing a droplet being pointed at a tip with a magnifying glass, no text or symbols presentGuide du statut DEL
natural_image
Diagram showing a droplet being pointed at a tip with a magnifying glass, illustrating the process (no text or symbols present)This equipment has been tested and found to comply with the limits for Class B digital device, pursuant to part 15 of the FCC Rules. These limits are designed to provide reasonable protection against harmful interference in a residential installation. This equipment generates, uses and can radiate radio frequency energy and, if not installed and used in accordance with the instructions, may cause harmful interference to radio communications. However, there is no guarantee that interference will not occur in a particular installation. If this equipment does cause harmful interference to radio or television reception, which can be determined by turning the equipment off and on, the user is encouraged to try to correct the interference by one or more of the following measures: • Reorient or relocate the receiving antenna • Increase the separation between the equipment and the receiver • Connect the equipment into an outlet on a circuit different from that to which the receiver is connected • Consult the dealer or an experienced radio/TV technician for help.
This device complies with Part 15 of the FCC Rules. Operation is subject to the following two conditions: (1) this device may not cause harmful interference, and (2) this device must accept any interference received, including interference that may cause undesired operation.
FCC RF Radiation Exposure Statement Caution: To maintain compliance with the FCC's RF exposure guidelines, place the product at least 20cm from nearby persons.
WARNING: Modifications not approved by the party responsible for compliance could void user's authority to operate the equipment.
IC STATEMENT
This device complies with Industry Canada license-exempt RSS standard(s). Operation is subject to the following two conditions: (1) this device may not cause interference, and (2) this device must accept any interference, including interference that may cause undesired operation of the device.
The device is compliance with RF field strength limits, users can obtain Canadian information on RF exposure and compliance.
This Class B digital apparatus complies with Canadian ICLS-003. This equipment complies with IC radiation exposure limits set forth for an uncontrolled environment. This equipment should be installed and operated with minimum distance 20cm between the radiator & your body.
UK DECLARATION OF CONFORMITY
Hereby, Swann Communications declares that this product is in compliance with the requirements for UKCA marking. The Declaration of Conformity can be obtained at uk.swann.com/compliance
IMPORTANT SAFETY WARNING — For pluggable equipment, the socket-outlet shall be installed near the equipment and shall be easily accessible.
CHILD SAFETY WARNING Strangulation Hazard — If product is used to monitor infants or small children, keep camera and USB power cable more than 1 metre (3ft) away out of their reach. Do not place camera or cord within a cot, playpen or near a bed.
© Swann Communications 2022
- CONNECT THE CAMERA
- GET THE SWANN SECURITY APP
- SET UP THE CAMERA
- CAMERA PLACEMENT
- Mounting the round metal plate (optional)
- HELP AND RESOURCES
- Optimizing motion detection
- LED status guide
- Accessing the Swann Security app manual
- Have questions?
- Guide du statut DEL
- IC STATEMENT
- UK DECLARATION OF CONFORMITY
Brand : SWANN
Model : SWIFI-2KICAM
Category : Surveillance Camera