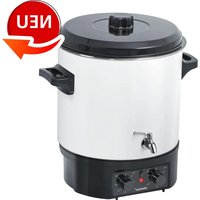
ER 1 PRO - Electric cooking appliance STEBA - Free user manual and instructions
Find the device manual for free ER 1 PRO STEBA in PDF.


| Product type | Electric cooking appliance |
| Brand | Steba |
| Model | ER 1 PRO |
| Power supply | 220-240 V ~ 50/60 Hz |
| Power | 1000 W |
| Temperature range | 30°C to 99°C (continuous adjustment) |
| Timer | 120 minutes (depending on model: art-no 051200, 051100) |
| Capacity | 5 L |
| Material of the pot | Stainless steel |
| Dimensions (L x W x H) | 30 x 30 x 30 cm |
| Weight | 2.5 kg |
| Functions | Cooking, keep warm, sterilizing, mulled wine preparation, sous-vide cooking, canning |
| Safety | Overheat protection, safety thermostat, fuse cut-off |
| Included accessories | Canning rack, cup warming lid, tap (depending on model) |
| Cleaning and maintenance | Clean the pot and lid with hot water and dish soap; descale with vinegar; do not immerse the appliance |
| Repairability | Repairs reserved for an authorized after-sales service |
| Warranty | 2 years |
| Country of manufacture | China |
Frequently Asked Questions - ER 1 PRO STEBA
User questions about ER 1 PRO STEBA
0 question about this device. Answer the ones you know or ask your own.
Ask a new question about this device
Download the instructions for your Electric cooking appliance in PDF format for free! Find your manual ER 1 PRO - STEBA and take your electronic device back in hand. On this page are published all the documents necessary for the use of your device. ER 1 PRO by STEBA.
USER MANUAL ER 1 PRO STEBA
Instructions for use 7
Mode d'emploi 12
Einkochen
This appliance is for private and indoor use only and must not be used commercially. Please read the instruction manual carefully and keep it at a safe place. When the appliance is given to another person the instruction manual should be passed to that person, too.
Only use the appliance as described in the instruction manual and pay attention to the safety information. No liability for damages or accidents will be accepted, which are caused by not paying attention to the instruction manual.
Safety information
- Connect the appliance to an earded wall socket and operate it only in accordance with the specifications on the rating plate.
- Do not use if the cord or appliance is damaged. Always check before using the appliance!
This appliance is not intended for use by persons (including children) with reduced physical, sensory, or mental capacities, or lack of experience and knowledge, unless they have been given supervision or instruction concerning use of the appliance by a person responsible for their safety
- Children should be supervised to ensure that they do not play with the appliance or the packaging.
- The appliance is not intended to be operated by means of an external timer or separate remote control system.
- After using the appliance or if the appliance malfunctions, always pull out the plug.
- Never pull at the cord set. Do not chafe it over edges or squeeze it.
- Keep the power supply cord away from hot parts.
- Never leave the appliance unattended when operating.
- Do not put anything on the appliance.
- Do not leave the appliance outdoors or in a damp area.
- Never immerse the appliance in water.
- Do not operate the appliance if it is damaged (for example if it felt down).
- Never use the appliance following a malfunction, e.g. if it has been dropped or damaged in any other way.
- Particularly with the enamelled version, this can cause flaking on the pan, which can then end up in the food.
- The manufacturer is not liable for damage occurred by using the appliance in another way than described or if a mistake in operating has been made.
- To prevent injury, repairs such as replacing a damaged power-cord, should only be carried out by customer service.

The appliance becomes very hot. Do not move the appliance until it has cooled down! The sides of the appliance become hot. Do not touch during the usage.
- Beware of steam during cooking and when opening the lid. Allow the appliance to cool down before transporting it. Be aware that the appliance can be extremely heavy during transport. Drain the hot liquid when transporting the appliance! Danger of burns!
Cleaning and care
• Always disconnect from the power supply before cleaning.
- Allow apparatus to cool to room temperature.
- Attention: Do not immerse the appliance in water.
- The pan and the lid can be cleaned with warm water using normal commercial washing-up liquid. Afterwards, dry the parts and check that there is no water in the lid.
- Do not use any scratchy or scouring cleaning agents.
- In order to avoid control inaccuracies, scale on the bottom of the pan must be removed using diluted vinegar or descaler. Then rinse thoroughly!
Working area:
Important: Never place the appliance on or next to a hot surface (e.g. stove). Always use it on a stable, flat and temperature resisting surface. Always take care that no inflammable objects are near to the appliance.
Before initial use:
- The device should be given a thorough cleaning before pouring in liquid.
- Give container and rack a thorough cleaning with hot water and a little washing up liquid, rinse and dry.
- To clean the drain tap, boil some water in the appliance and drain it through the tap.
- Attention: Do not immerse the appliance in water!
- Wipe inside of lid with a damp cloth and dry off.
- Unwind the complete powercord.
Usage:
The power cord can be found at the bottom of the appliance. Unwind before the use. Put the power cord in the guidance to have a stable stand.
The appliance has 2 safety controls:
• Infinitely variable capillary thermostat
This controls from 30° C to 99° C. The thermostat is set to the required temperature, the lamp illuminates and the appliance heats the liquid. If you would like to cook continuously, set the thermostat to max. Keep the lid closed at all times.
- Overtemperature protection
This is activated if the appliance is operated without liquid or the liquid has boiled dry. In this case the fusible safety plug will activate. The appliance must then be sent to our customer service department.
120 minute timer (only with art. no.: 051200 and 051100)
The appliance is set using the timer. When the timer elapses the appliance turns itself off. The appliance can be set to continuous operation by setting the control knob to ON.

Attention! In this case there must be sufficient liquid in the pot, and the appliance must be monitored.
Drain valve
(only with art. no.: 051200 and 051100)
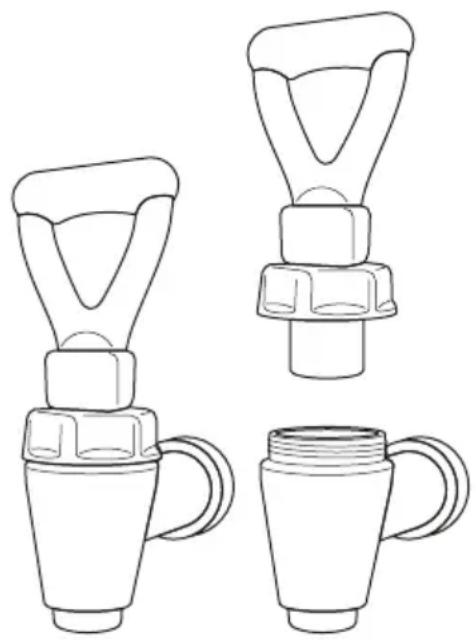
This is suitable for liquids with low viscosity (e.g. mulled wine). Viscous liquids will block the valve. Regular cleaning is required. To do this, unscrew the upper section above the drain and rinse it with hot water. Tighten upper section finger-tight when assembling. Ensure that the valve is sealed.
Lid
Always close the device with the lid. If you put the lid upside down on the device, you can use it as a heated storage tray for mussled wine.
Preserving
- The preserving jars must be hygienically clean and
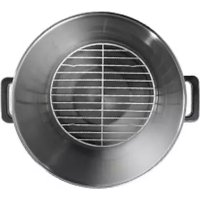
undamaged. The rubber rings must not be porous or overstretched. Fill the glasses to 80% of capacity with food and ensure that the edge of the glass is clean. Fit the damp rubber ring. Seal the jars with a lid and the lever arm. - Place the rack into the pan and stack the jars. Two jars can be placed on top of each other. Ensure that the jars do not touch at the sides so that the temperature will be evenly distributed.
- Then pour in water until the jars are 3/4 submerged. Fill to maximum of 7 cm beneath edge of pan so that the appliance does not boil over.
- Set temperature value (e.g. 85° C for fruit).
- Set timer to max., and appliance will beep when the set temperature is reached. Then set the timer to the required preserving time (e.g. 30 minutes).
- When the timer elapses the appliance turns itself off.
- The clamps must remain on the jars until they have cooled down completely.
- Then the clamps can be removed and it can be checked whether the jars are vacuum sealed by lifting the lid slightly.
Thermostat setting
- Select the required temperature (e.g. 65°C ).
- The lamp illuminates and the appliance heats up.
- After reaching the temperature, the device beeps and the lamp goes off. The thermostat cycles, and the beep can be switched off using the switch.
- If the appliance is used as a mulled wine heater, i.e. warm liquid is continuously removed and replaced with cold liquid, the beeper indicates when the temperature has been reached again.
Temperature and timer guideline values for
Fruit 85°C 25 - 30 minutes*
Vegetables max. 90 - 120 minutes*
Meat max 120 minutes*
(* Times only apply after reaching the set temperature)
Practical tips for frying
Dry the food carefully before putting it into the fat, tap superfluous flour, press the breading firmly. Food containing much protein such as fish, poultry, meat and seafood can be fried in the raw if they are well dried. Food containing little protein such as vegetables and fruit should be coated with breadcrumbs or with batter, hereby the pores close quickly. The crust is also ideal for frying meat, poultry, fish and seafood.
Disposal:
Packaging disposal:
Do not throw away the package materials. Please put it in the recycling bin.

PS

PP

PE
Gift box: Paper, should be put to the old paper collection point.
Plastic packaging material and foils should be collected in the special collection containers.
Correct Disposal of this product
This marking indicates that this product should not be disposed with other household wastes throughout the EU. To prevent possible harm to the environment or human health from uncontrolled waste disposal, recycle it responsibly to promote the sustainable reuse of material resources. To return your used device, please use the return and collection systems or contact the retailer where the product was purchased. They can take this product for environmental safe recycling.
Service and Repair:
If the appliance must be repaired, plaese get in touch with your trader or with the manufacturer:
Coperchio
Крышка


- EINKOCHEN
- SAFETY INFORMATION
- CLEANING AND CARE
- WORKING AREA
- BEFORE INITIAL USE
- USAGE
- THE APPLIANCE HAS 2 SAFETY CONTROLS
- 120 MINUTE TIMER (ONLY WITH ART. NO.: 051200 AND 051100)
- DRAIN VALVE
- (ONLY WITH ART. NO.: 051200 AND 051100)
- LID
- PRESERVING
- THERMOSTAT SETTING
- TEMPERATURE AND TIMER GUIDELINE VALUES FOR
- PRACTICAL TIPS FOR FRYING
- DISPOSAL
- CORRECT DISPOSAL OF THIS PRODUCT
- SERVICE AND REPAIR
- COPERCHIO
- КРЫШКА
Brand : STEBA
Model : ER 1 PRO
Category : Electric cooking appliance